



Cornrow hairstyles have a way of making a whole look feel finished before you’ve even picked out earrings. The lines sit close to the scalp, the parting gives the style its shape, and the end result lands somewhere between sharp and ceremonial. That’s why cornrows keep showing up when someone wants a polished cultural look that feels deliberate instead of fussy.
What I love about a good cornrow set is how much work the pattern does on its own. A clean center part can make the face look longer. A side sweep can soften strong angles. Tiny rows can turn a simple ponytail into something with real presence. And when the braids are done with even tension and crisp sectioning, they hold a kind of quiet authority that loose styles rarely match.
The catch is that cornrows reward precision. Sloppy parts show immediately. Uneven row sizes show even faster. Too much gel can turn the roots stiff and flaky, and braiding too tight around the hairline is a fast way to ruin an otherwise elegant look. The styles below lean into the structure that makes cornrows so distinctive, while keeping the finish clean enough to wear to work, a formal dinner, or anywhere you want your hair to look intentional.
Why These Cornrow Styles Feel So Polished
-
Sharp parting: Cornrows look cleaner when the parts are narrow, straight, and evenly spaced, because the scalp pattern becomes part of the style instead of disappearing under it.
-
Built-in shape: The braid direction gives your hair an outline, which is why a side sweep, crown curve, or ponytail feed-in changes the whole mood without extra volume.
-
Flexible finish: Some sets read dressed up with beads or cuffs, while others stay plain and structured; both can look refined if the braid sizes stay consistent.
-
Protective by design: When installed with enough care, cornrows keep the ends tucked away and reduce daily tangling, which is why they’re such a practical style for active weeks.
-
Easy to personalize: A center part, triangle parting, zigzags, or curved rows can shift the style from classic to expressive without losing that close-to-the-scalp finish.
-
Works with different lengths: Short hair, stretched natural hair, and added braiding hair can all live in the same family of styles, which makes cornrows one of the most adaptable braid patterns around.
1. Classic Straight-Back Cornrows
Straight-back cornrows are the blueprint. Everything else borrows from them. The rows run from the hairline to the nape in clean, even lines, and that forward-to-back direction gives the style a no-nonsense finish that still feels rooted and elegant.
I like this version when the goal is pure structure. If the parting is neat and the braid size stays the same from front to back, the whole head looks balanced without needing extra decoration. Keep the first inch off the hairline gentle, though. That tiny bit of slack saves your edges and keeps the style from looking pulled tight.
Why It Works
The straight route gives the eye something easy to read. No curves to track. No extra angles to distract from the face. It also works on a wide range of lengths, from closely cropped hair to stretched natural hair with added braid hair.
Good for
- Work settings
- School or everyday wear
- Anyone who wants the cleanest possible silhouette
A plain set of straight-backs can still look formal if the parts are sharp enough. That’s the trick. Not more hair. Better lines.
2. Center-Part Feed-In Cornrows
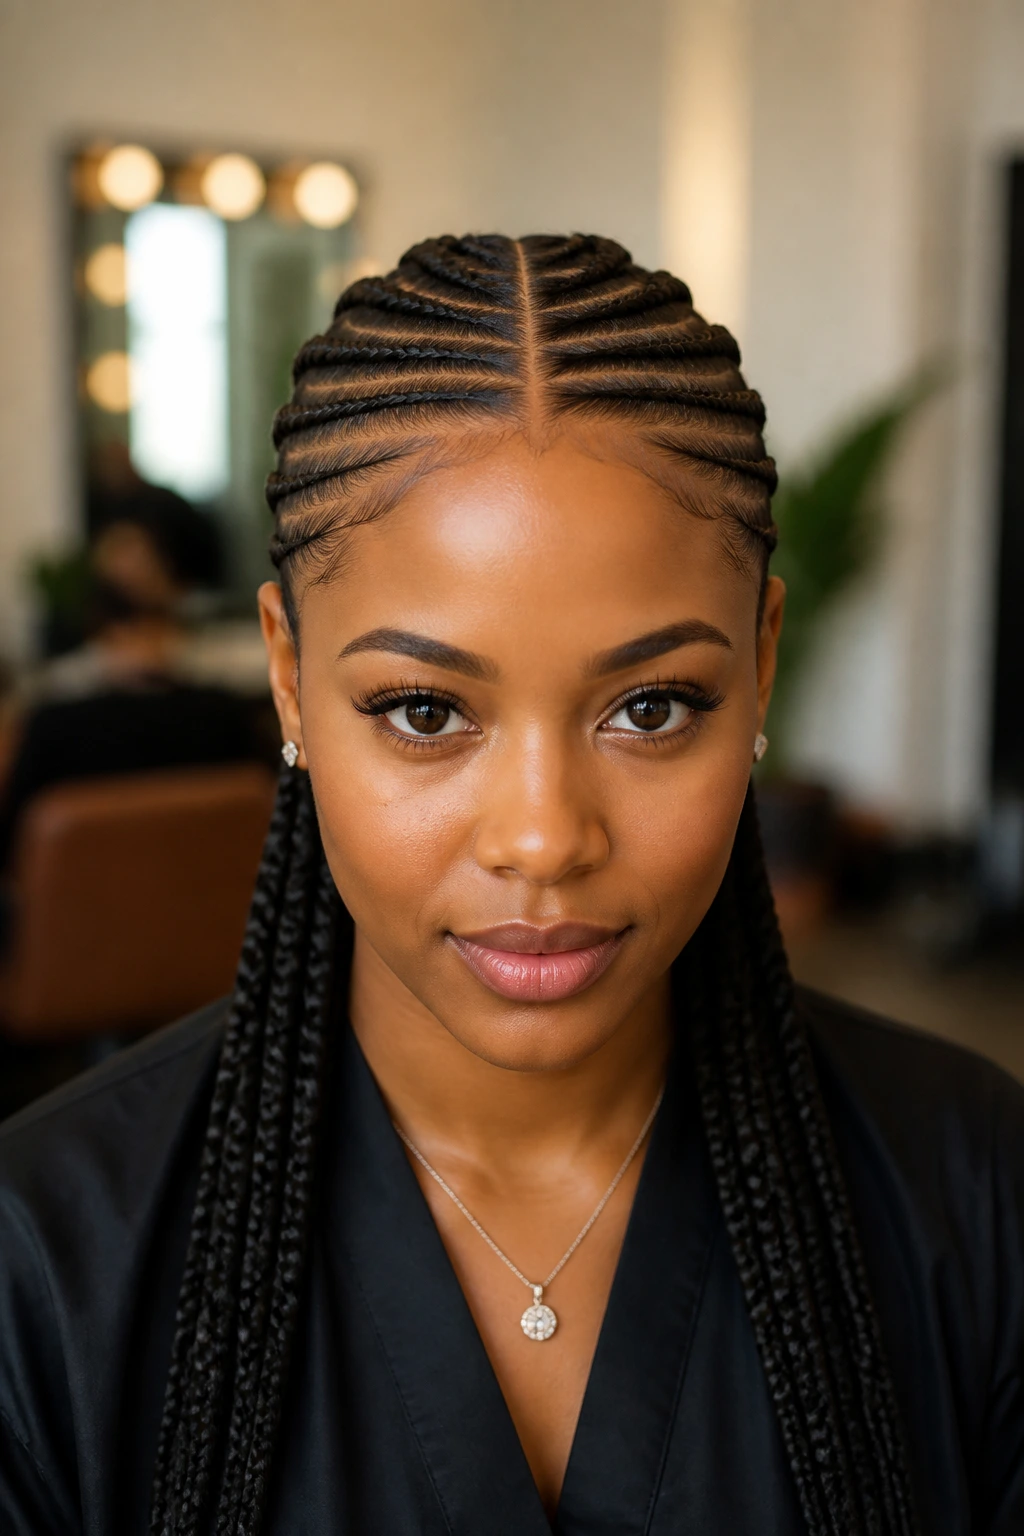
A center-part feed-in set has a softer root than old-school bulky braids, and that change matters more than people think. The hair starts small at the hairline and builds gradually as you add braid hair, so the base sits flatter and the braid looks more fluid.
The center part gives the style a calm, symmetrical frame. It draws the eye down the face instead of across it, which is one reason this look photographs cleanly and wears well with hoops, a blazer, or a sharp neckline. Feed in the added hair in small sections. If you add too much at once, the braid gets chunky right where you wanted it to look sleek.
What to watch
- Keep the parting exact from forehead to crown
- Feed in hair slowly so the base doesn’t bulge
- Use pre-stretched braiding hair for a cleaner taper
The neatness comes from restraint. That’s the whole point.
3. Side-Swept Cornrows
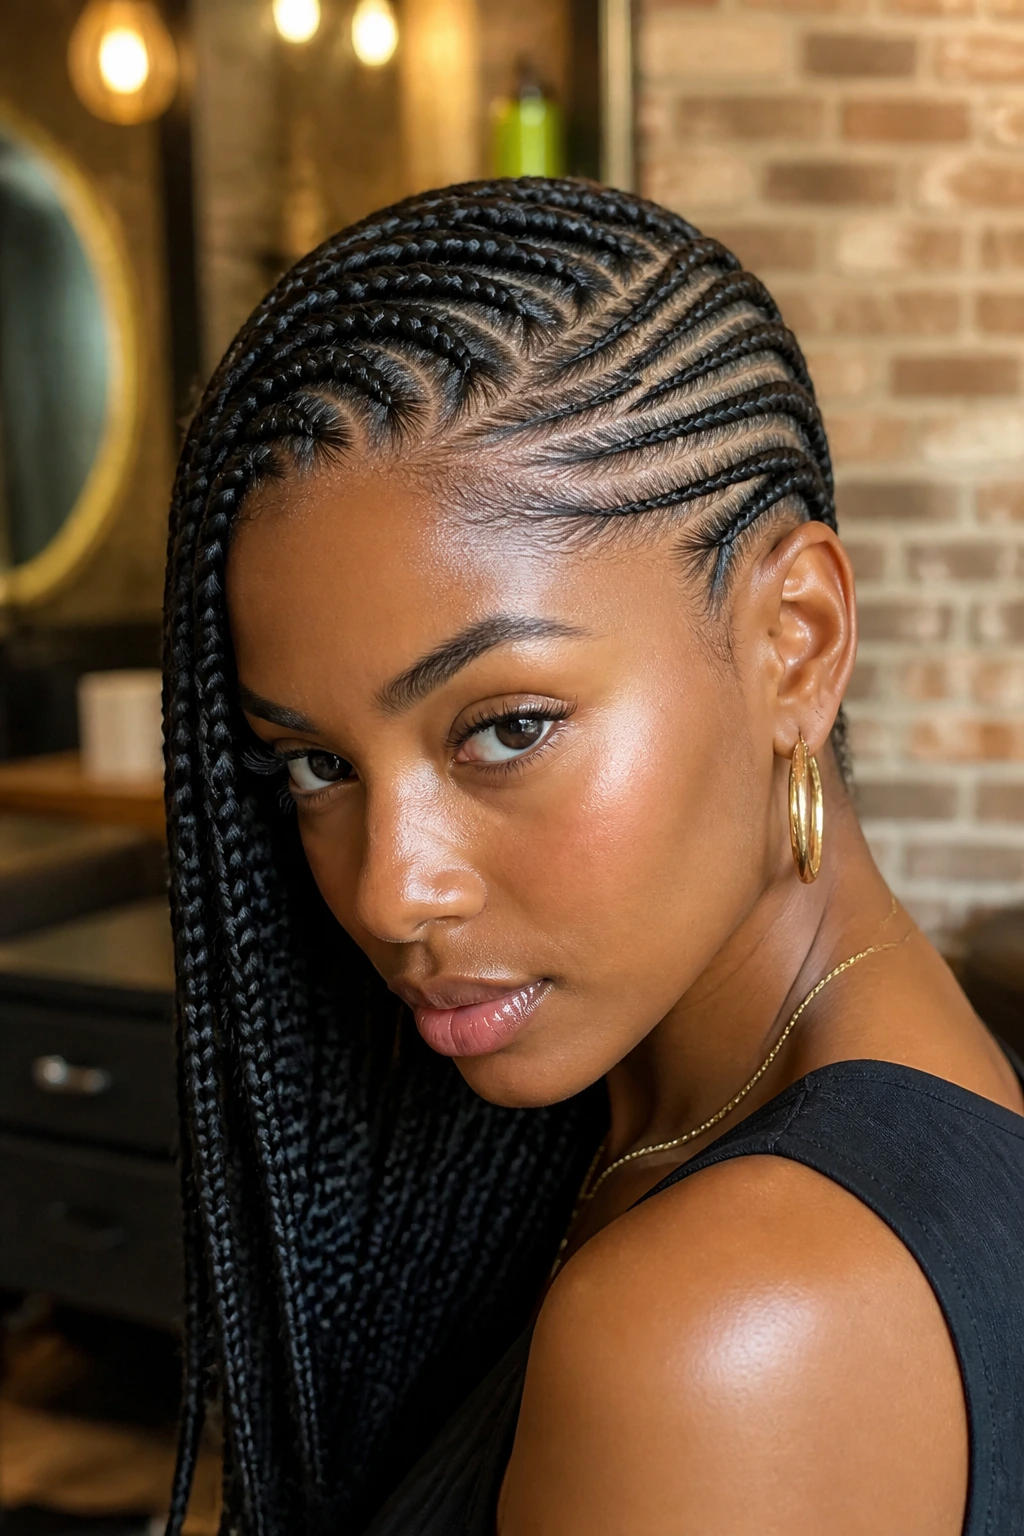
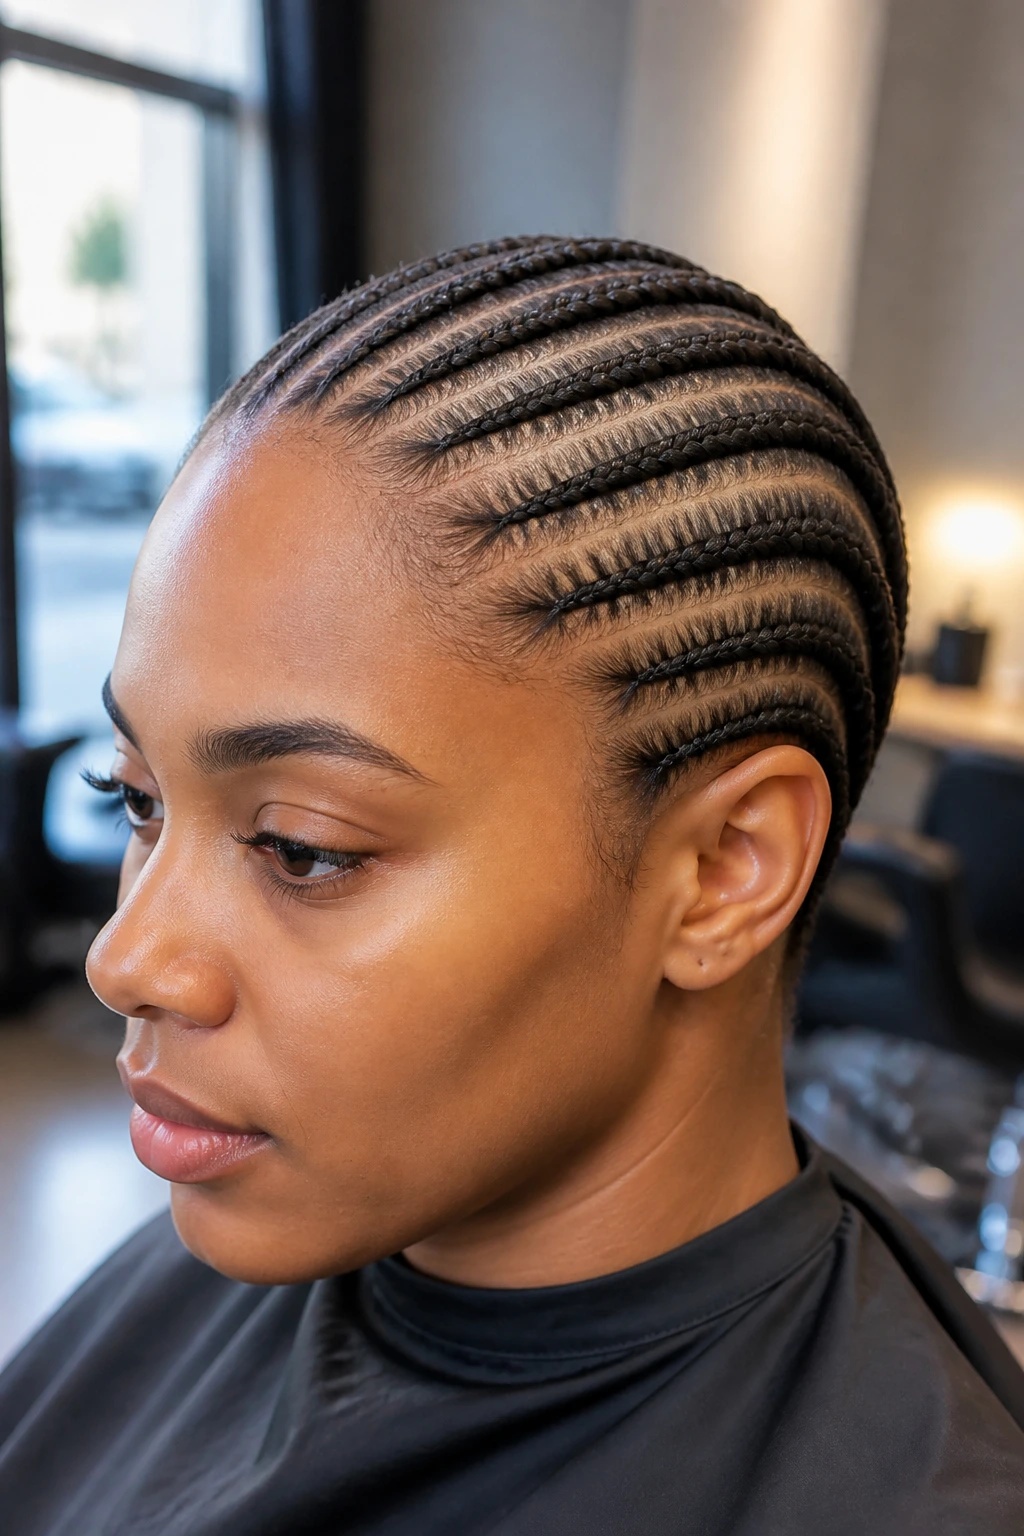
Side-swept cornrows have motion built into the pattern. Instead of running straight back, the rows angle across the scalp toward one side, and that diagonal line makes the whole style feel a little more dramatic without becoming loud.
This is one of my favorite shapes for round or heart-shaped faces because the sweep creates length and pulls attention toward the cheekbones. It also plays nicely with one-shoulder tops and structured collars. Keep the side part high enough to be visible, but not so high that it feels like it’s sliding off the head. A braid pattern that lands neatly at the nape looks intentional; one that drifts unevenly looks rushed.
Best when you want
- A softer frame around the face
- Earrings to stand out
- A style that moves well from day to night
Side-swept cornrows are proof that direction changes everything.
4. Zigzag-Part Cornrows
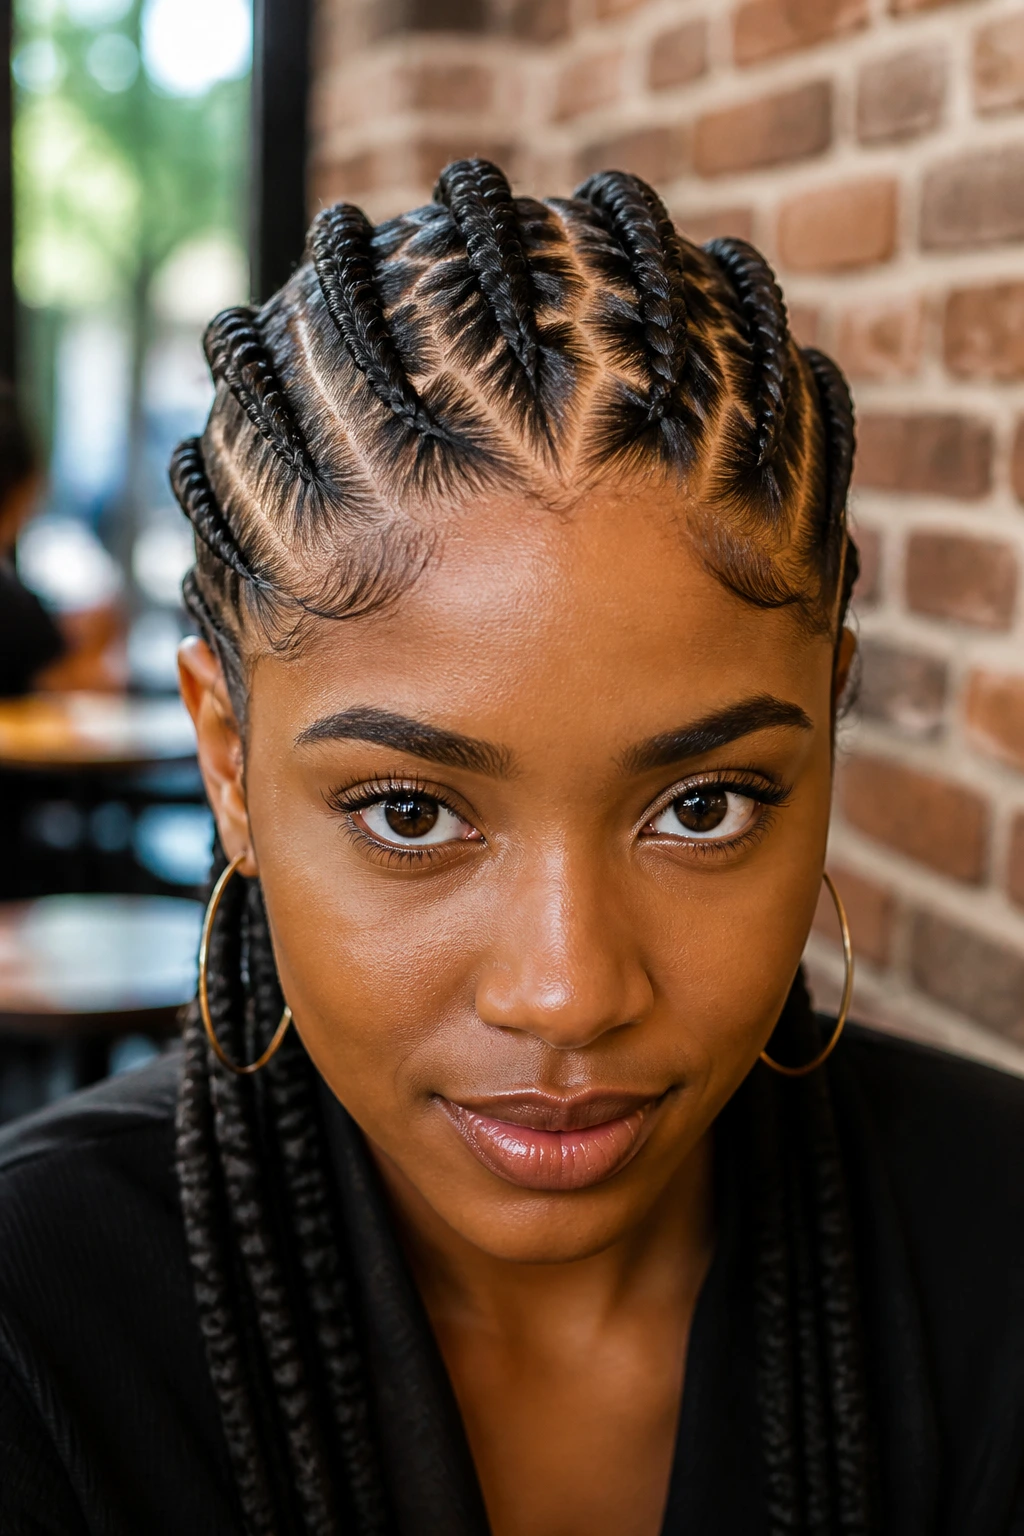
If you want the parting to do more than separate sections, zigzags are the move. The braid pattern can stay simple while the scalp lines bring all the visual interest, which is a smart way to keep the look polished instead of overloaded.
The key is making the zigzags broad enough to read. Tiny, cramped angles can blur into a messy line once the braids are installed. I prefer this style when I want a set that feels more graphic than classic, especially with medium-width rows and a plain finish at the ends. The pattern itself becomes the decoration.
Quick note
- Use a rat-tail comb with a fine tip
- Clip each finished section before moving on
- Keep both sides of the zigzag roughly balanced
It’s a detail-heavy style, but not a fussy one. That’s rare.
5. Cornrow Ponytail With Wrapped Base
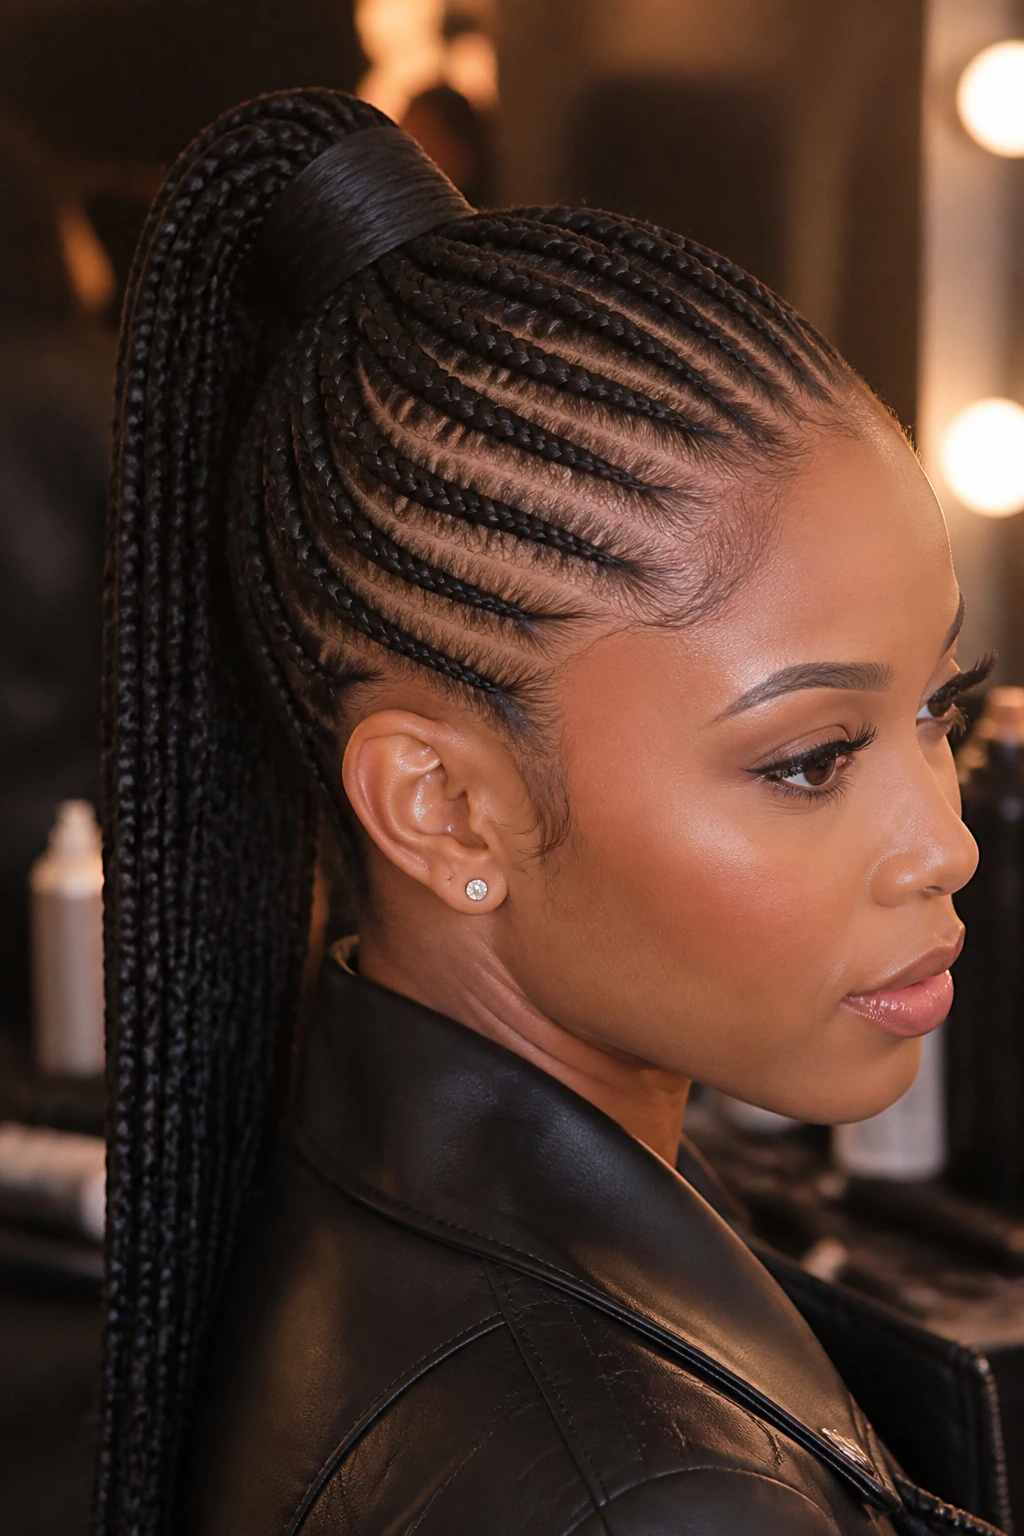
This one is all about clean direction. The braids pull up and back into a ponytail, and the base gets wrapped so the transition looks smooth instead of abrupt. The result is sporty, sharp, and tidy enough for formal wear if the finish is tight.
What makes this style polished is the crown. If the braids lift too high too soon, the top can puff out in a way that fights the whole shape. Keep the ponytail centered and low enough that the scalp lines stay visible. I like a wrapped base because it hides elastics and gives the style a more finished edge.
Why people keep coming back to it
- It keeps the face open
- It works with long extension hair or your own length
- It’s practical without looking casual
A wrapped ponytail base fixes a lot of visual clutter. Small move. Big difference.
6. Low Bun Cornrows
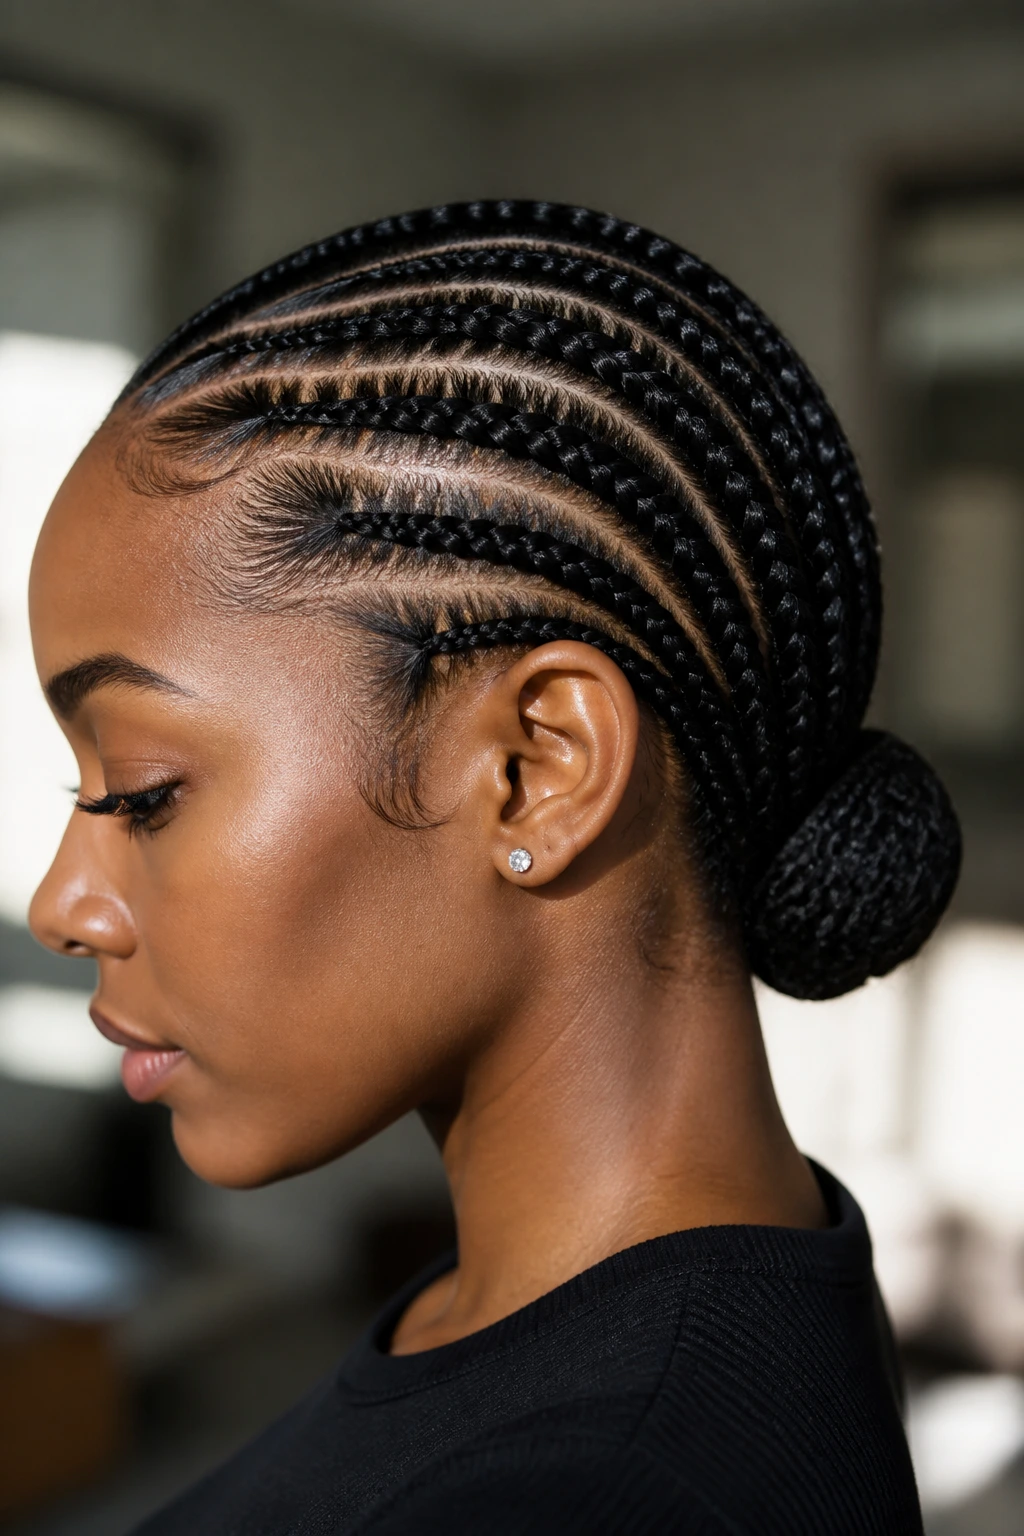
Low bun cornrows have a neat, almost architectural feel. The rows flow toward the nape, then gather into a bun that sits just above the collar line. Nothing feels accidental here. The style is controlled all the way through.
This version is especially good when you want the neck exposed or the outfit has a strong collar. It also works well for more formal settings because it keeps the silhouette compact. The bun should stay small and smooth; if it balloons out too much, the shape starts to fight the clean lines of the cornrows themselves.
Tip I’d keep
Use a few bobby pins in a crisscross pattern under the bun instead of loading the base with one giant elastic. It holds better and keeps the shape flatter.
7. Halo Crown Cornrows
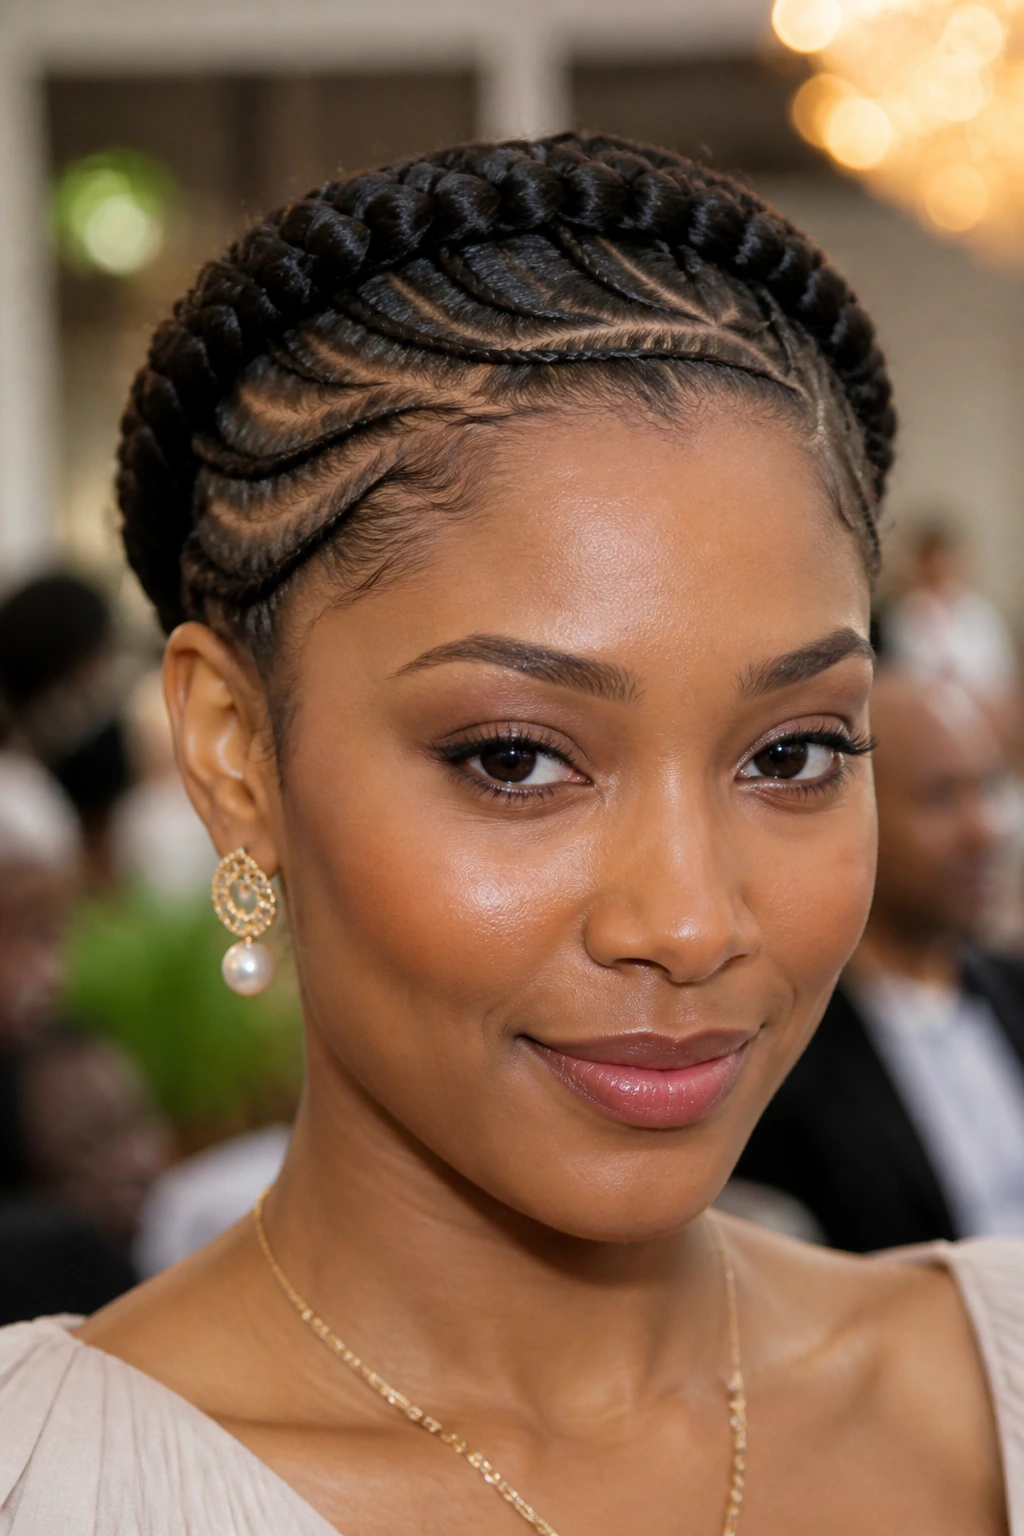
Halo crown cornrows curve around the head like a frame, and that circular motion makes them feel special without needing a lot of extra decoration. The hairline is still the focus, but the rows arc around the scalp so the whole style reads as one complete shape.
This is the kind of look I reach for when I want a braid set to feel ceremonial. It’s a strong choice for weddings, graduations, or any event where you want the hair to look like part of the outfit. Keep the front edges smooth and the curve even. A lopsided halo loses its grace fast.
What helps the most
- Even braid thickness around the circle
- Soft, controlled edges
- A light mousse finish to tame flyaways
The best halo sets look balanced from every angle, not just the front.
8. Lemonade-Style Side Cornrows
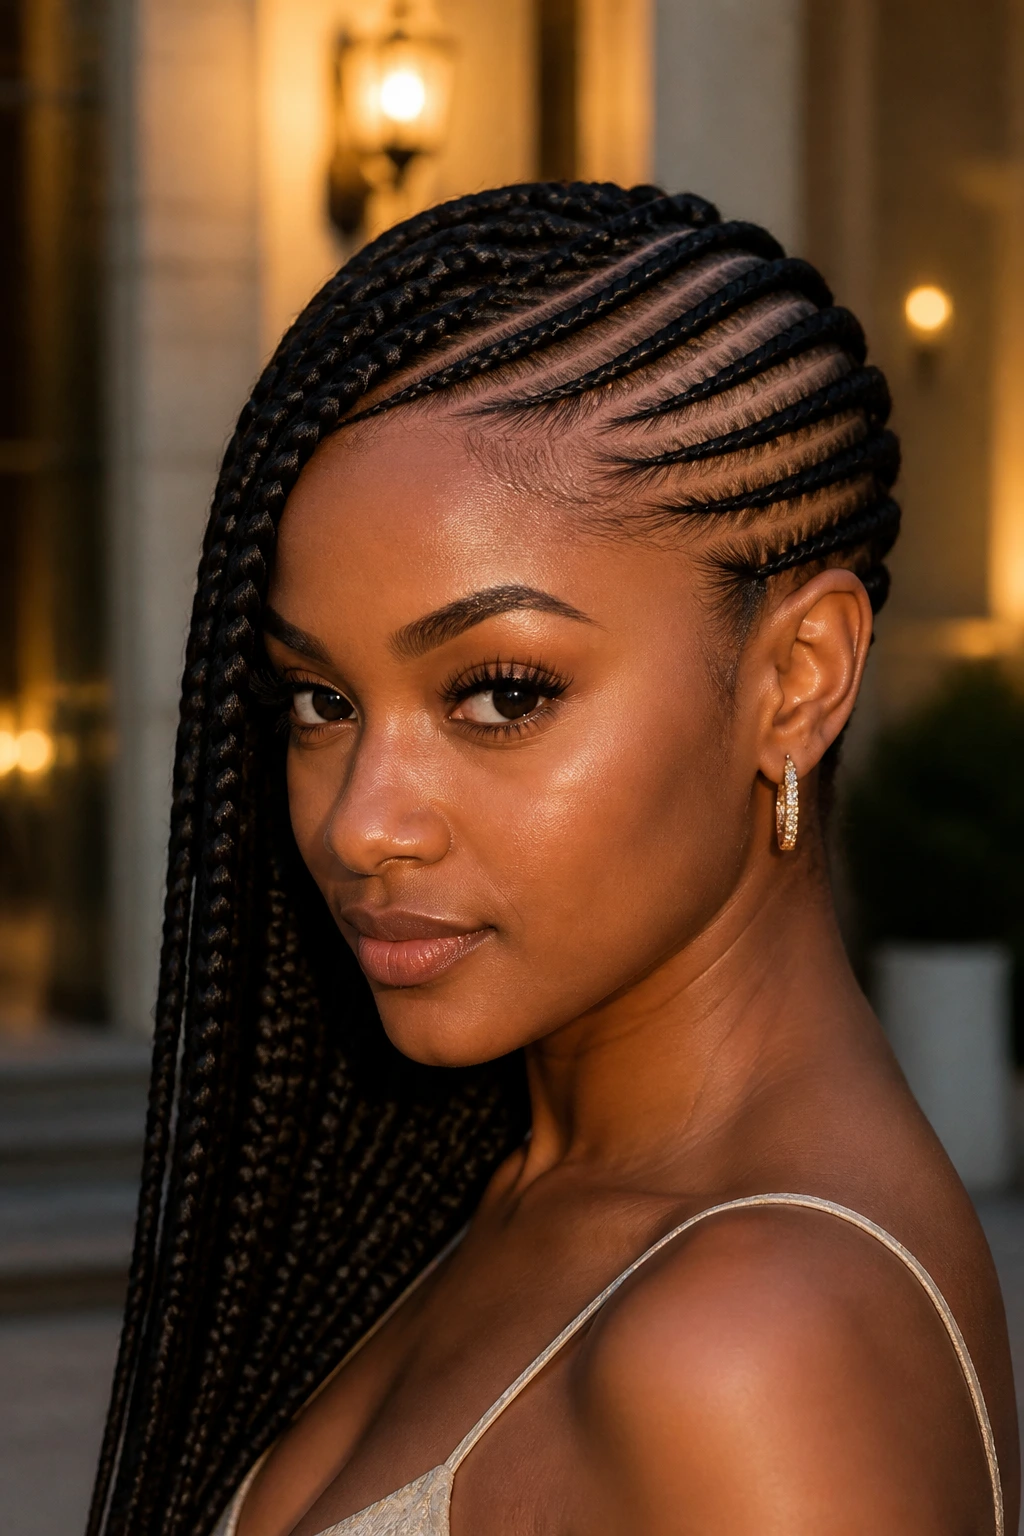
Lemonade-style cornrows sweep hard to one side, and that asymmetry gives them edge. The look is bold, yes, but the polish comes from how cleanly the rows are lined up. The direction should feel chosen, not random.
This style is especially good when you want one side of the face to stay open for earrings or makeup. It also gives longer braid lengths a chance to fall over the shoulder in a neat line, which looks sharper than a lot of people expect. Keep the rows parallel as they move across the scalp. If they start drifting apart, the style loses that crisp side-swept rhythm.
Where it shines
- Evening wear
- Statement jewelry
- Longer extensions with a smooth fall
It’s dramatic, but the drama comes from shape, not clutter.
9. Stitch Braids With Crisp Parting
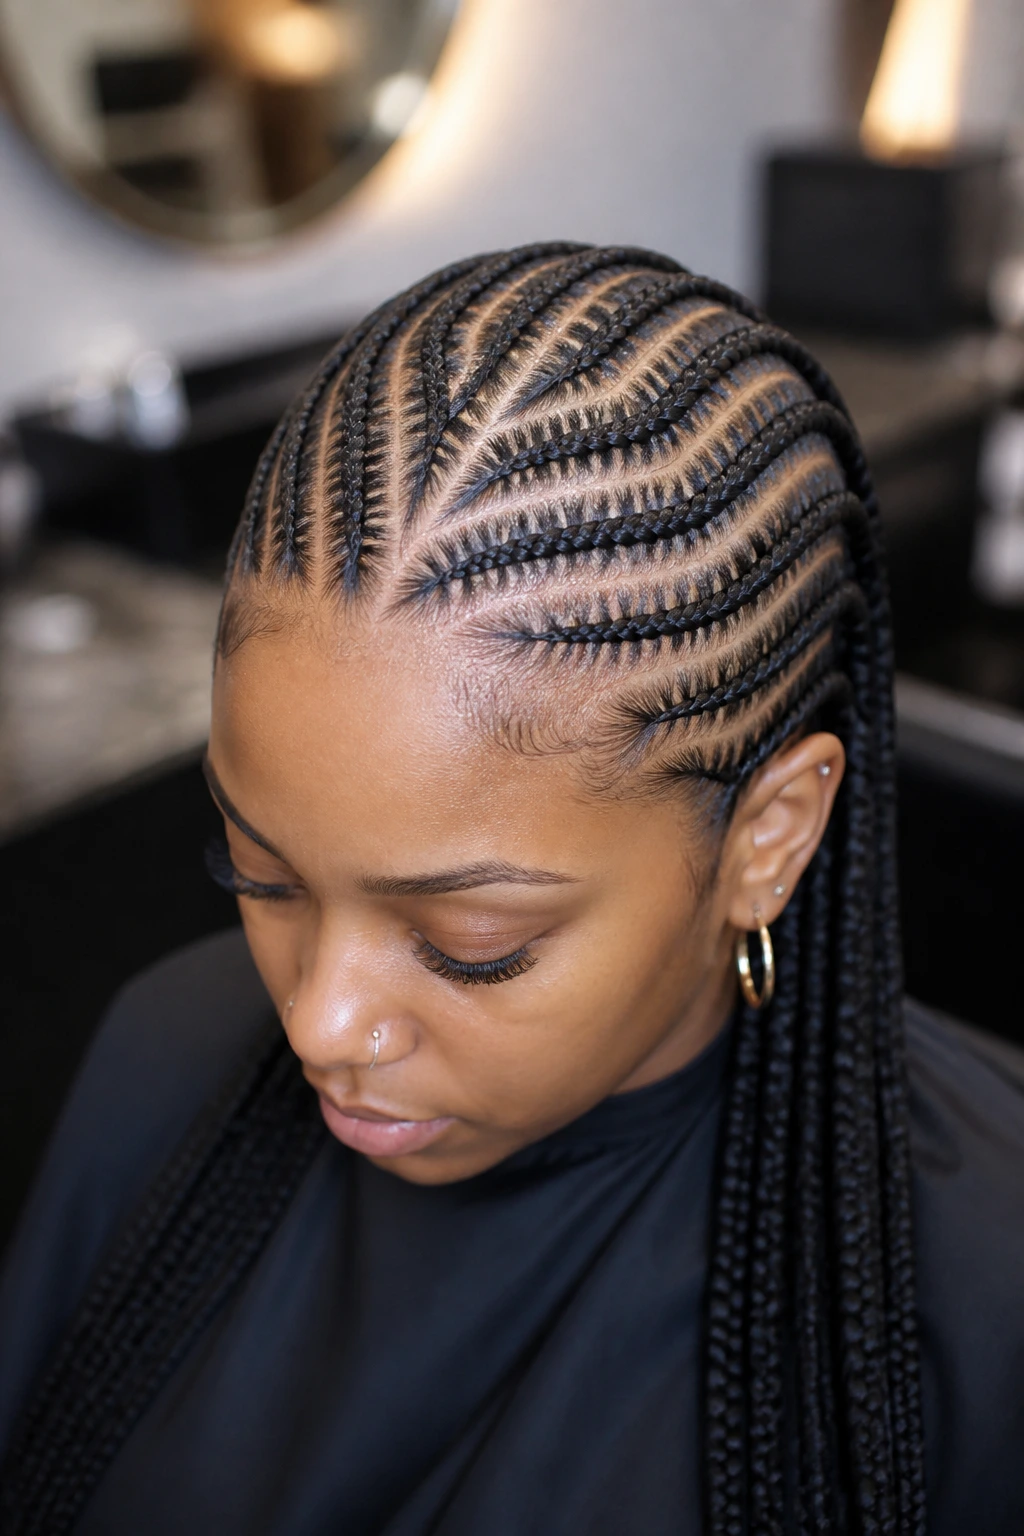
Stitch braids are all about the parting line. The sections are marked in small, straight “stitches,” which creates a raised, detailed look at the root. When the parting is clean, the style feels precise in a way that ordinary rows can’t quite match.
I like stitch braids for anyone who wants the scalp pattern to be part of the design. They do take patience, and the cleanest versions often need a comb with a very fine tail. The braids themselves can stay medium or large; the real show is in the root work. Don’t drown the hair in gel. A thin line of product is enough. Too much and you get flakes, not polish.
A useful rule
If the stitch pattern looks neat from three feet away, it’s probably balanced. If you have to squint, the sections are too small or too busy.
10. Curved Cornrow Rows
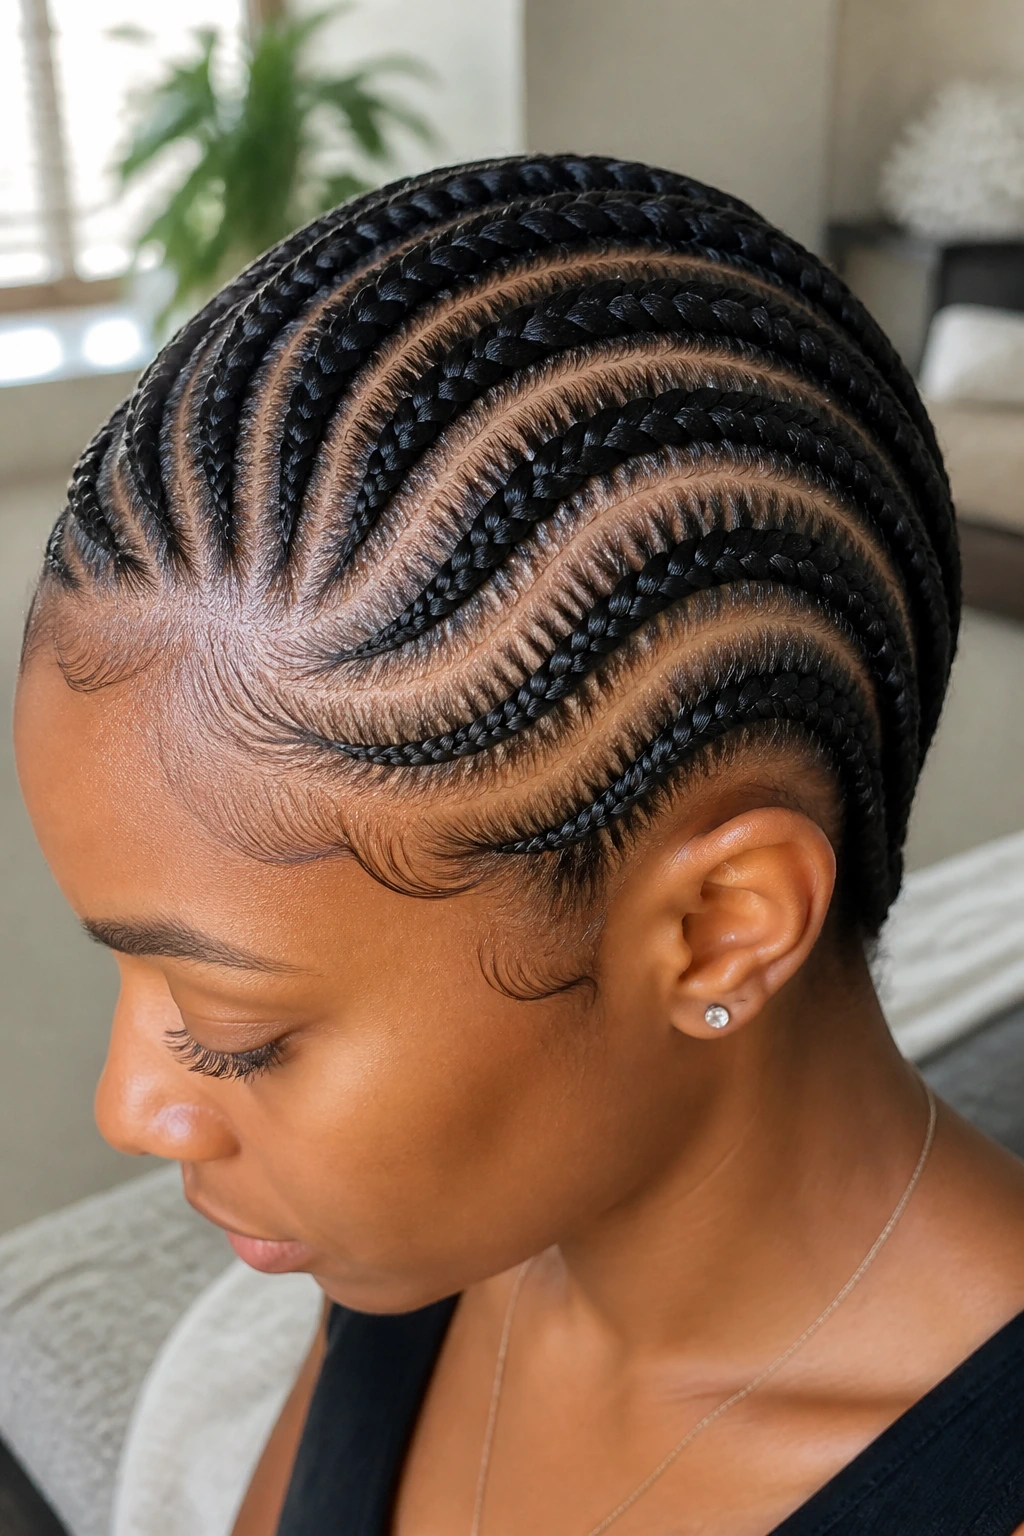
Curved cornrows bring softness to a style that’s usually known for hard lines. Instead of going straight back, the rows bend gently around the head, which can make the shape feel more tailored to the wearer’s actual scalp instead of a one-size-fits-all braid map.
This is one of those styles that looks subtle at first and then starts revealing its structure the longer you look at it. The curve can follow the hairline, wrap around the crown, or arc toward the nape. I prefer it for people who want movement without leaving the close-to-scalp look behind. Keep the curve smooth. A kink in the part line looks accidental, and there’s no hiding that once the braids are finished.
11. Two-Layer Cornrow Design
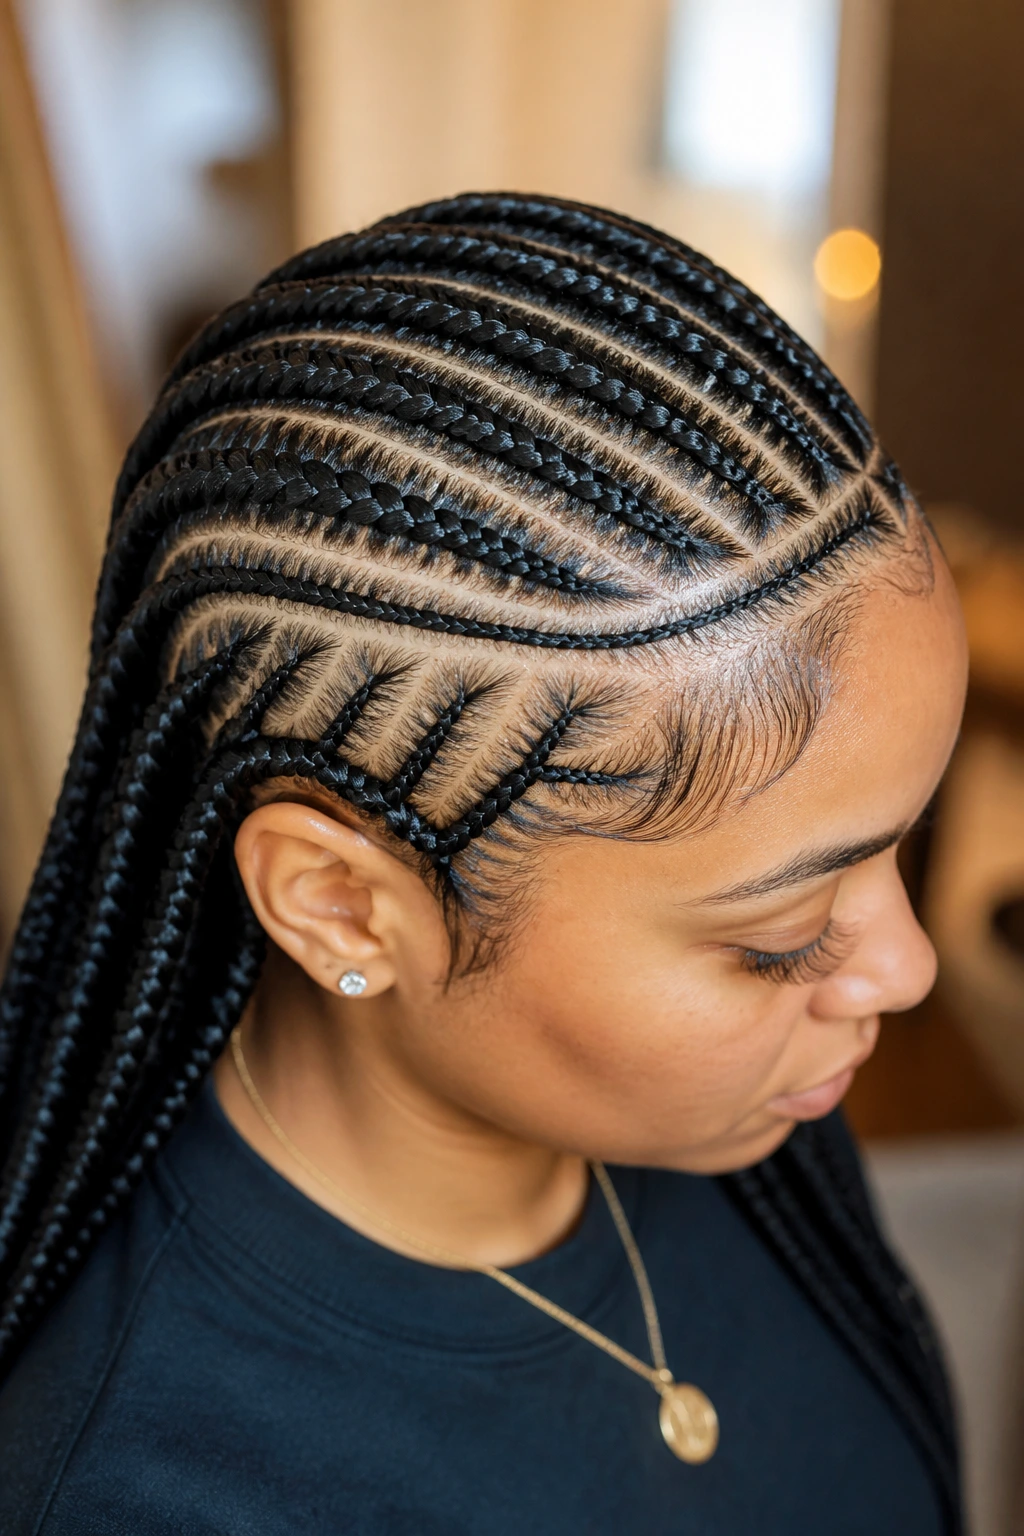
A two-layer design gives you depth without forcing the whole head into one crowded pattern. The upper rows sit one direction, the lower rows another, and the overlap creates a layered finish that reads polished when the spacing is right.
This style works best when the top layer is slightly smaller than the bottom. That keeps the crown from looking heavy. I also like it for medium-density hair because it allows the style to feel full without packing every inch of the scalp with tiny braids. The contrast between layers should be easy to see, not muddy. If both layers fight for attention, the structure gets lost.
Best detail to remember
Separate the layers with a clean horizontal part before you start. Guessing your way through the second layer is how the shape falls apart.
12. Cornrow Bob With Tucked Ends
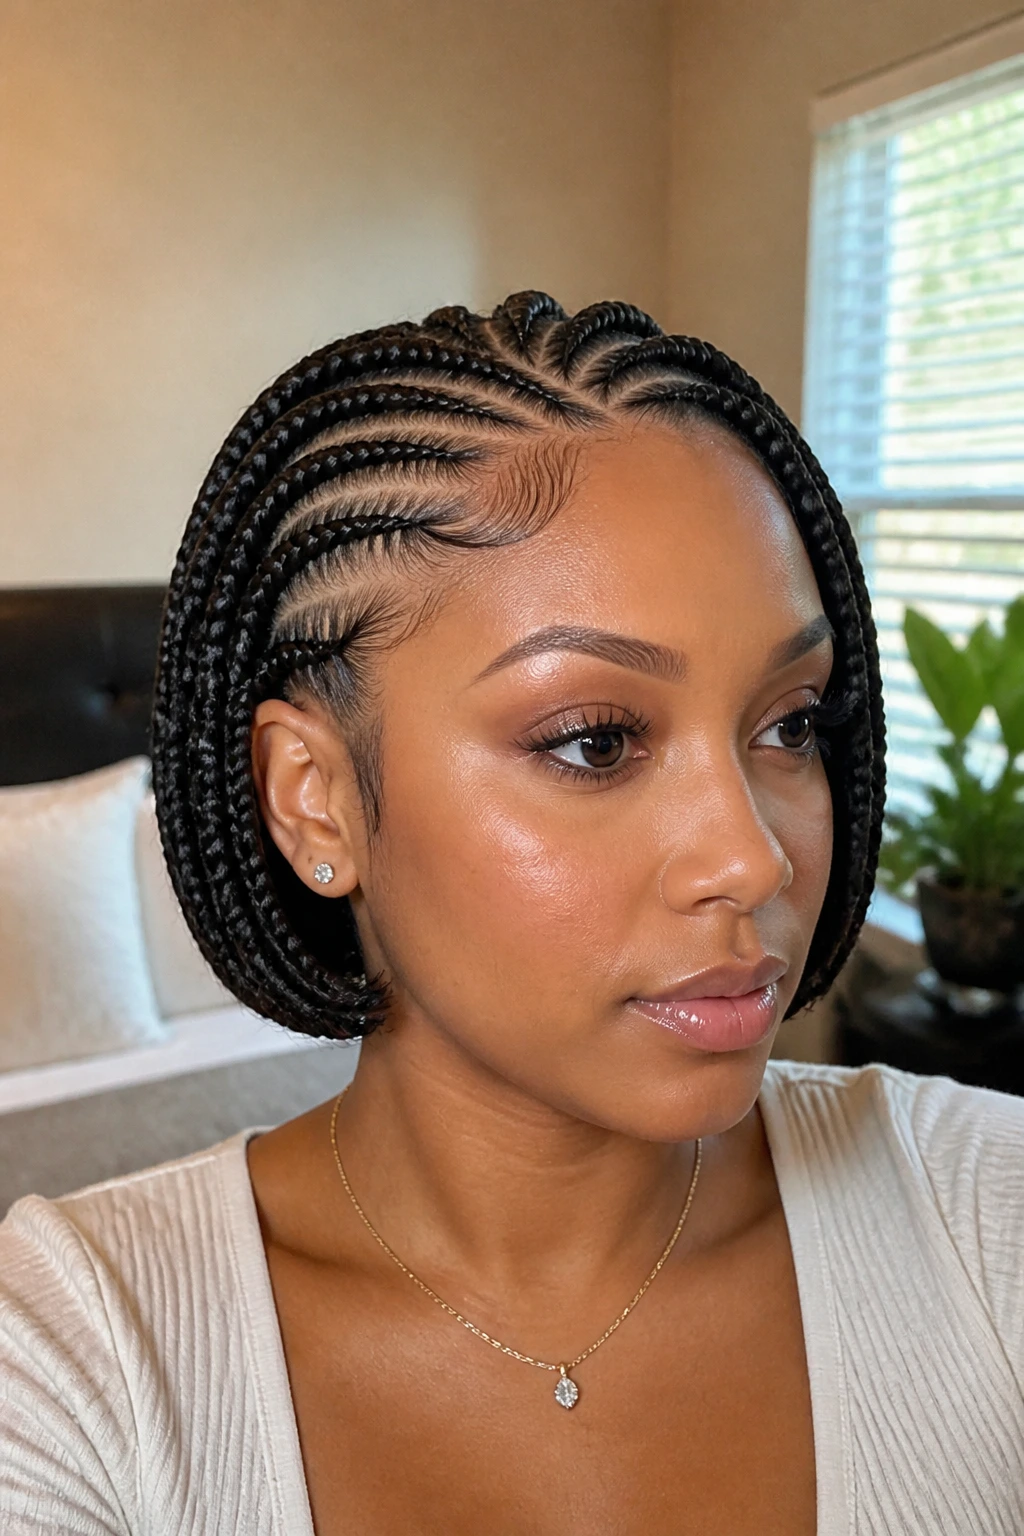
A cornrow bob is one of the smartest ways to make braids feel fresh without a lot of length. The rows finish around the jawline or tuck under to create the shape of a bob, which gives you a neat outline and less weight on the neck.
This is a strong choice if you want something that looks intentional and doesn’t drag on your shoulders all day. It also tends to photograph well because the cut line is obvious. Use lighter extension hair if you add length, and don’t make the ends too blunt. A little taper keeps the bob from looking boxy.
What it gives you
- Less bulk
- A clean jawline frame
- Easier sleeping and faster drying
Simple doesn’t mean plain. A good braided bob has enough shape to stand on its own.
13. Mohawk Cornrows
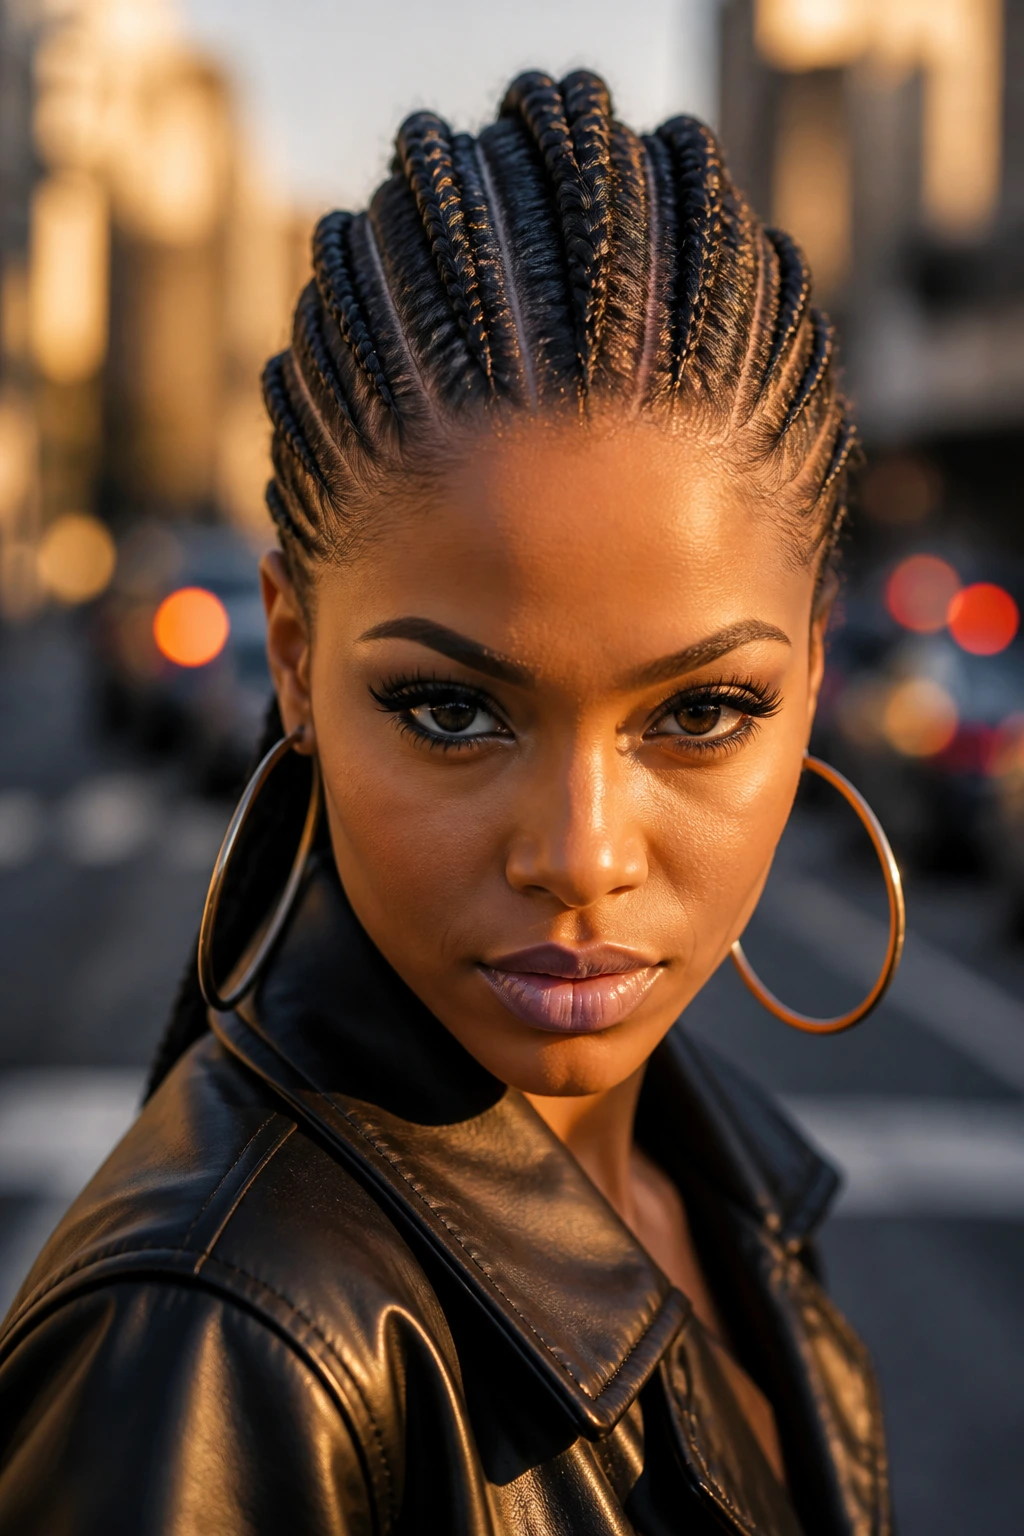
Mohawk cornrows push the drama down the center of the head and keep the sides close. The effect is strong, clean, and a little bit rebellious, which is exactly why it works so well when the goal is a polished look with attitude.
The center ridge should stay consistent from front to back. If the middle grows too thick in one section and thin in another, the whole shape starts to wobble. I like this style when I want height without a full updo. The sides stay sleek, the middle carries the volume, and the face gets a very clear frame.
Practical note
This style looks best when the braids on the sides are laid close but not flattened to the point of strain. Tight is not the same thing as neat.
14. Crisscross Cornrow Grid
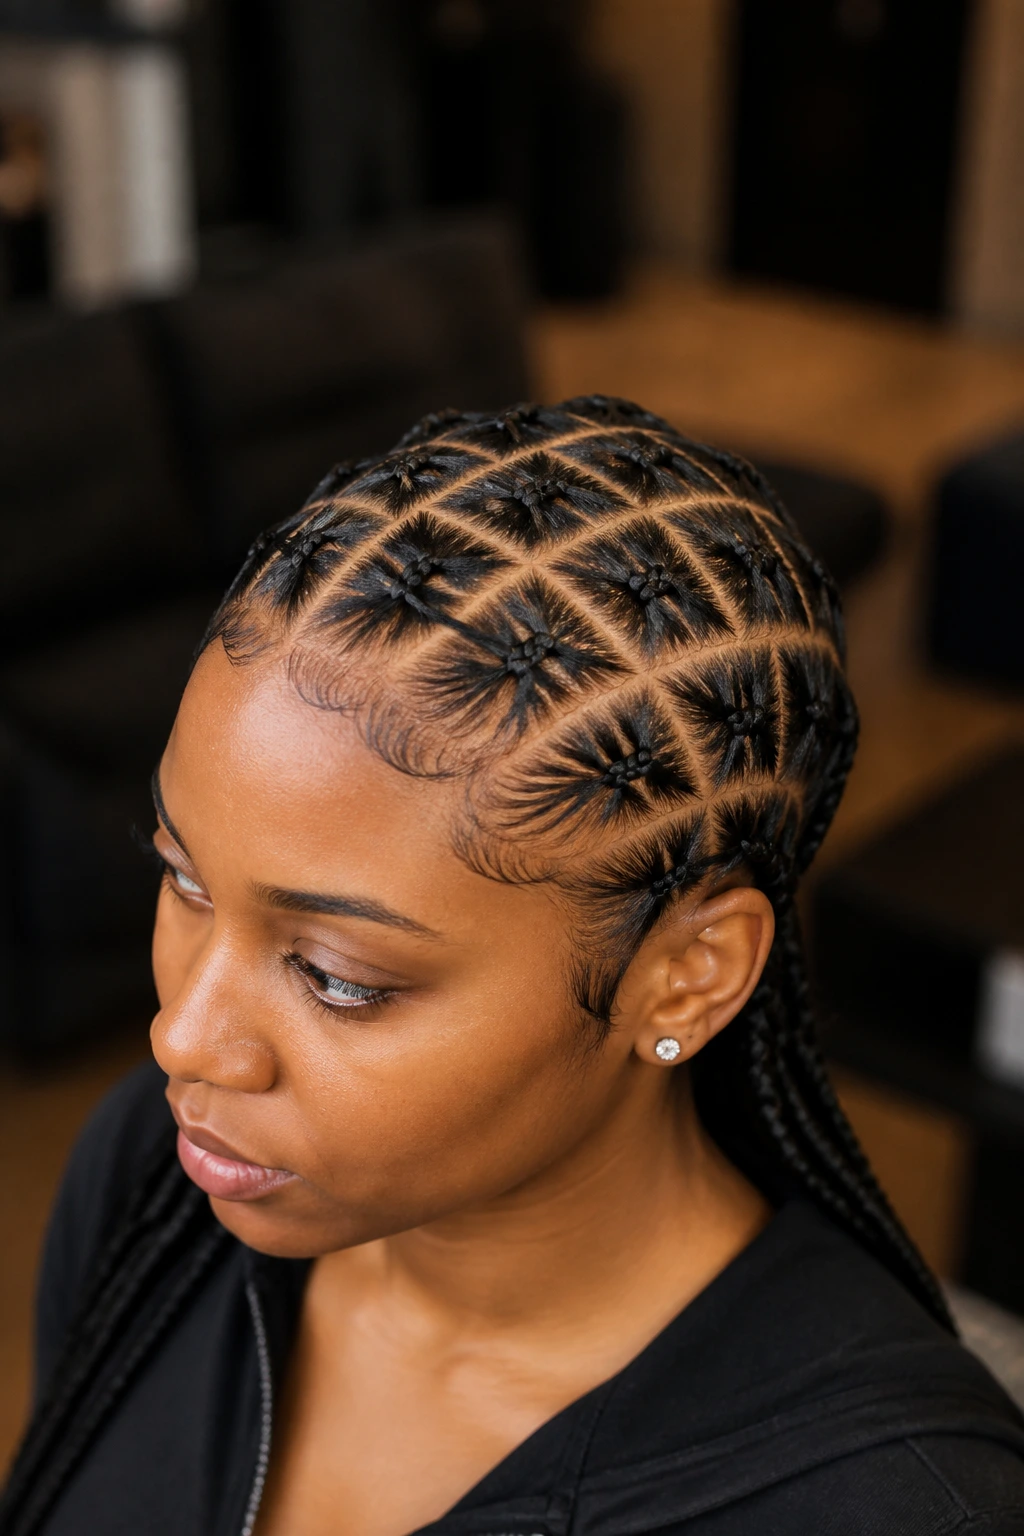
Crisscross cornrows turn the scalp into part of the design. The rows intersect in a grid-like pattern that feels architectural, and if the lines are clean, the finished look has real presence.
This one takes time. There’s no shortcut around that. Each crossing has to land in the right place, or the whole pattern starts to look tangled instead of deliberate. I’d use this for a special event or for a client who likes a braid set with serious visual texture. Keep the braids themselves fairly simple; the pattern already brings enough detail.
What keeps it from looking messy
- Measure the parting before you braid
- Keep the crossings symmetrical
- Stop and check the head shape from both sides
When the grid is right, it looks like it was drawn onto the scalp.
15. Triangle-Part Cornrows
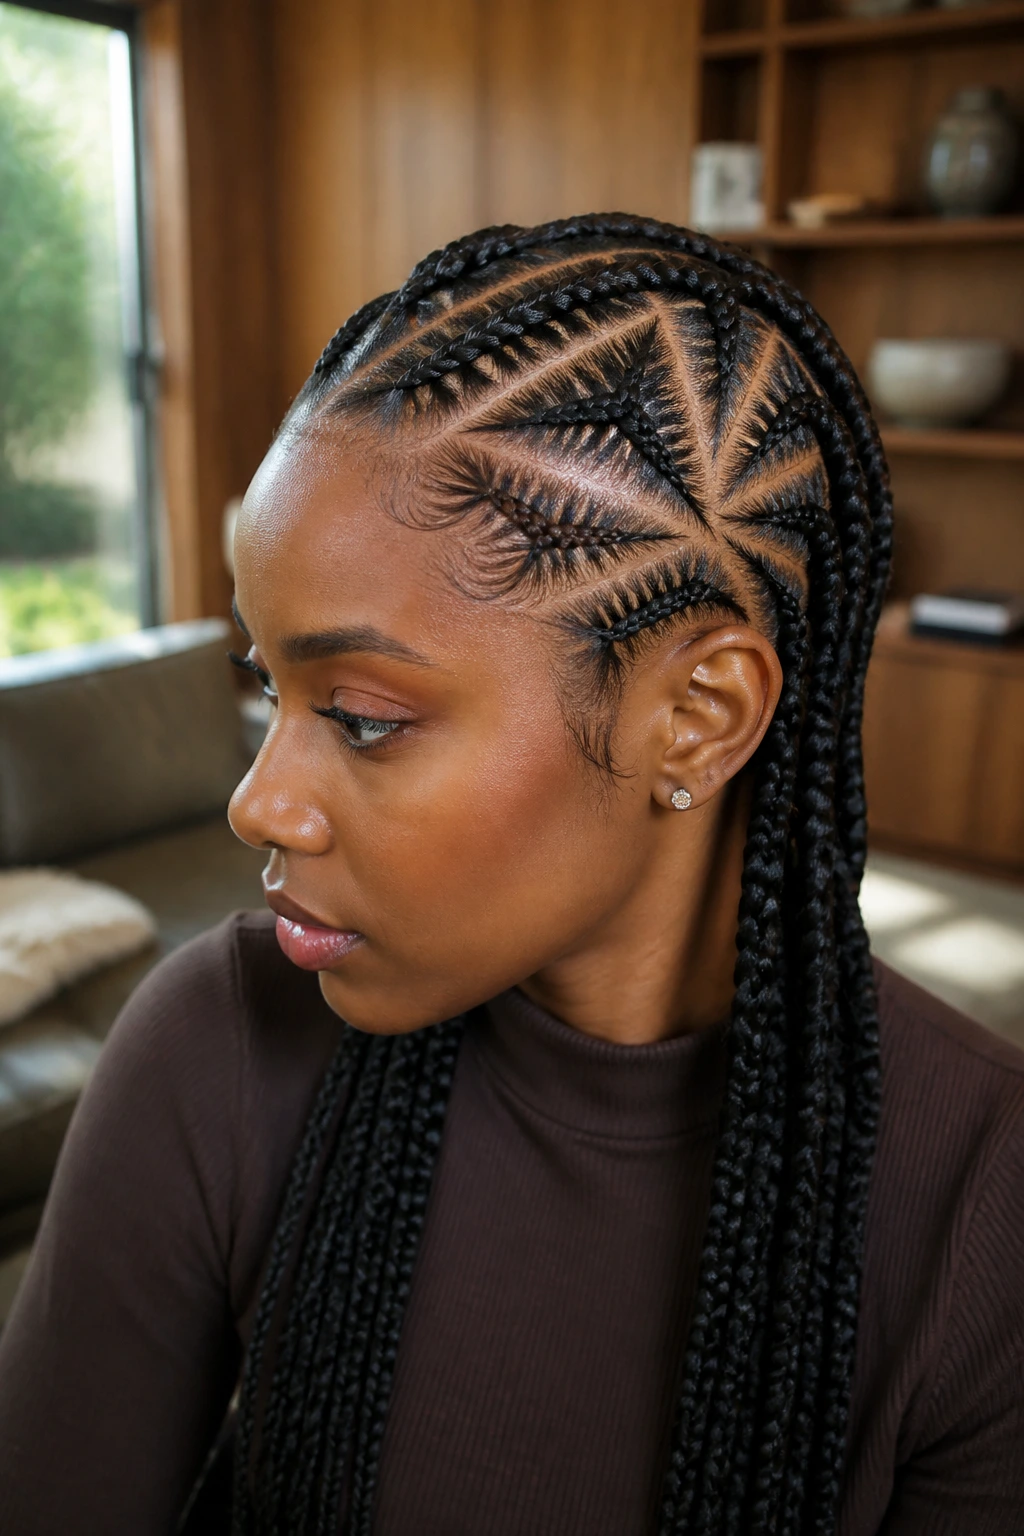
Triangle parts change the mood immediately. Instead of the usual boxes, the sections form angular triangles, which gives the style a sharper, more dynamic look even when the braid direction stays classic.
This is a good choice if you’re bored with square parting but still want something clean. The angles create rhythm without making the style loud. I’ve always liked triangle parts for medium or small cornrows because the shape stays readable even when the rows are tight. They do require careful sectioning, though. A sloppy triangle part looks like a mistake. A neat one looks deliberate and stylish.
Tiny detail that matters
Keep the triangle points consistent. If some are long and some are stubby, the whole head starts to feel uneven.
16. Freestyle Swirl Cornrows
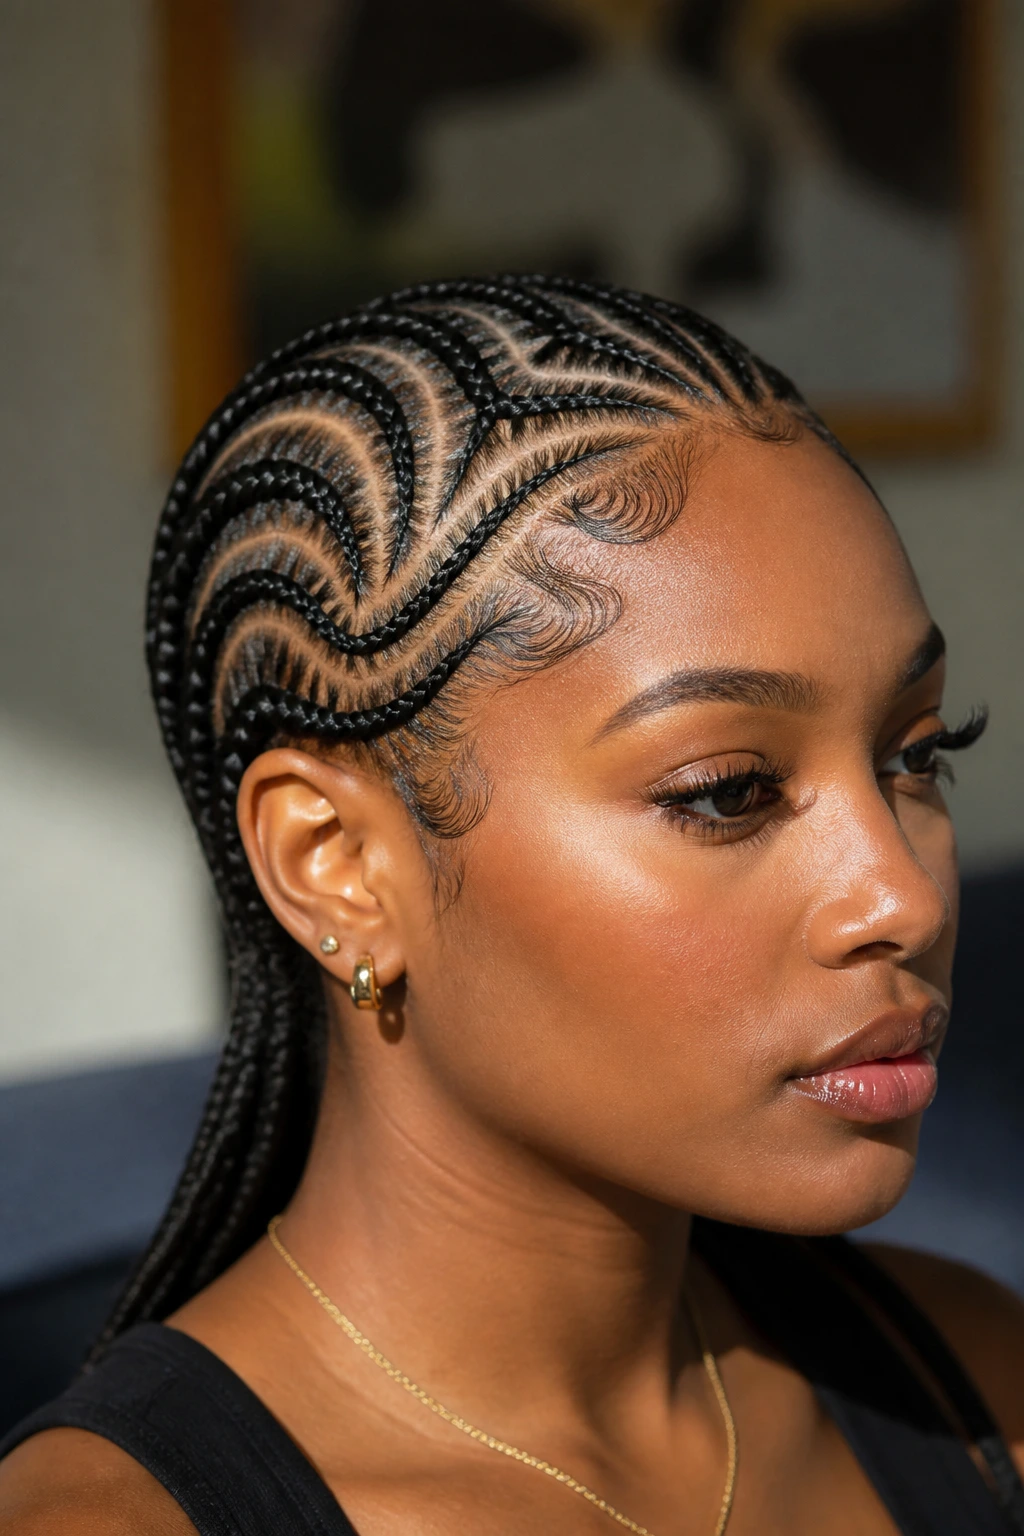
Freestyle swirl cornrows follow the shape of the head instead of forcing the head to follow the pattern. The parting curves, loops, and swirls move around the scalp in a way that can feel soft, sculptural, and very personal.
This is a style for someone who wants a set that doesn’t look stamped out. The best versions still have a clear plan, though. Random swirls are not the same thing as freestyle design. The curve should echo the crown and hairline, not fight them. If you can trace the movement with your eye without getting lost, the pattern is doing its job.
I’d choose it when
- You want something less rigid than straight-backs
- The hairline has natural curves you want to follow
- You like patterns that feel custom rather than standard
It’s one of the more artistic looks in the whole set.
17. Half-Up, Half-Down Cornrows
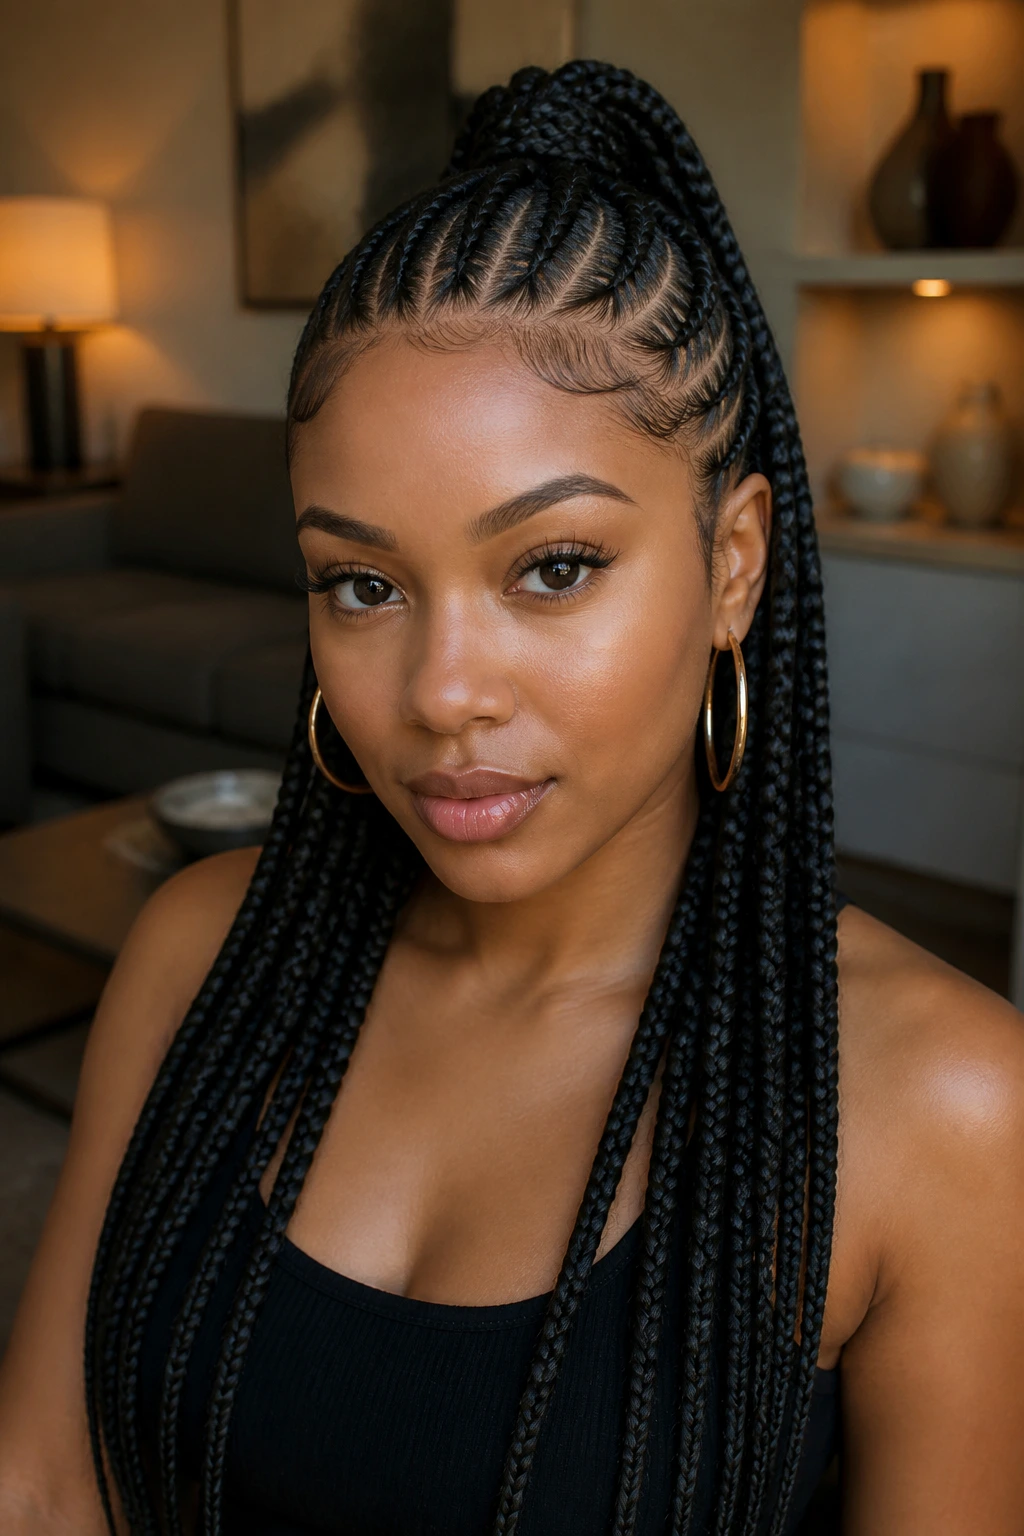
Half-up, half-down cornrows give you the best of both worlds. The top section gets gathered or braided upward, while the lower braids hang free, which keeps the shape open and layered instead of fully pinned in.
The style works especially well when you want length on display but still need the front and crown neat. I like this one for days when a full updo feels too formal and a full-down set feels too loose. The trick is making sure the top section has enough structure to look intentional. A limp top layer ruins the contrast.
Small styling note
A wrapped top knot or a braided crown at the top makes this feel finished. A simple elastic sometimes looks too plain for the rest of the set.
18. Cornrows With Beads at the Ends
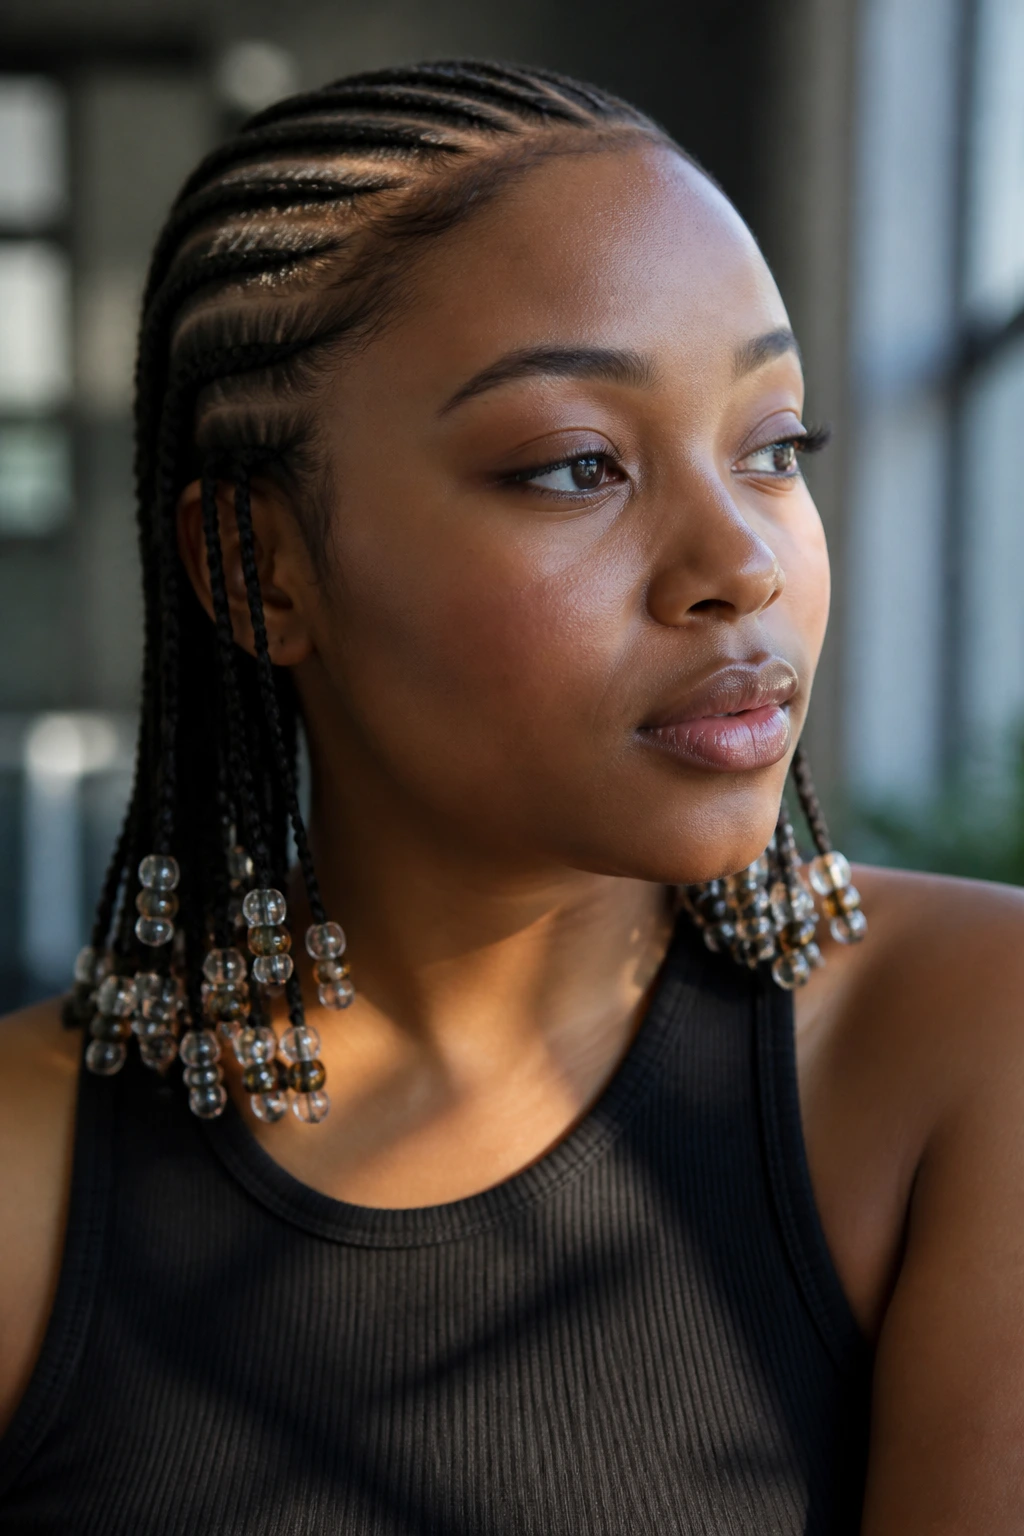
Beads can change the energy fast. A plain row is clean; a row with beads has movement, sound, and a little bit of sparkle when the light hits it. The style still reads polished if the bead placement is controlled and the braid sizes are even.
I prefer beads on medium or smaller braids because the proportions feel better. Heavy beads on jumbo rows can pull the ends down in a way that looks awkward. Light wood, clear acrylic, or metal cuffs all work, depending on the mood you want. Don’t overload every braid. A few accents often look more refined than a full head of noise.
What to remember
If the beads squeak or swing wildly, they’re probably too heavy for the braid size.
19. Jumbo Feed-In Cornrows
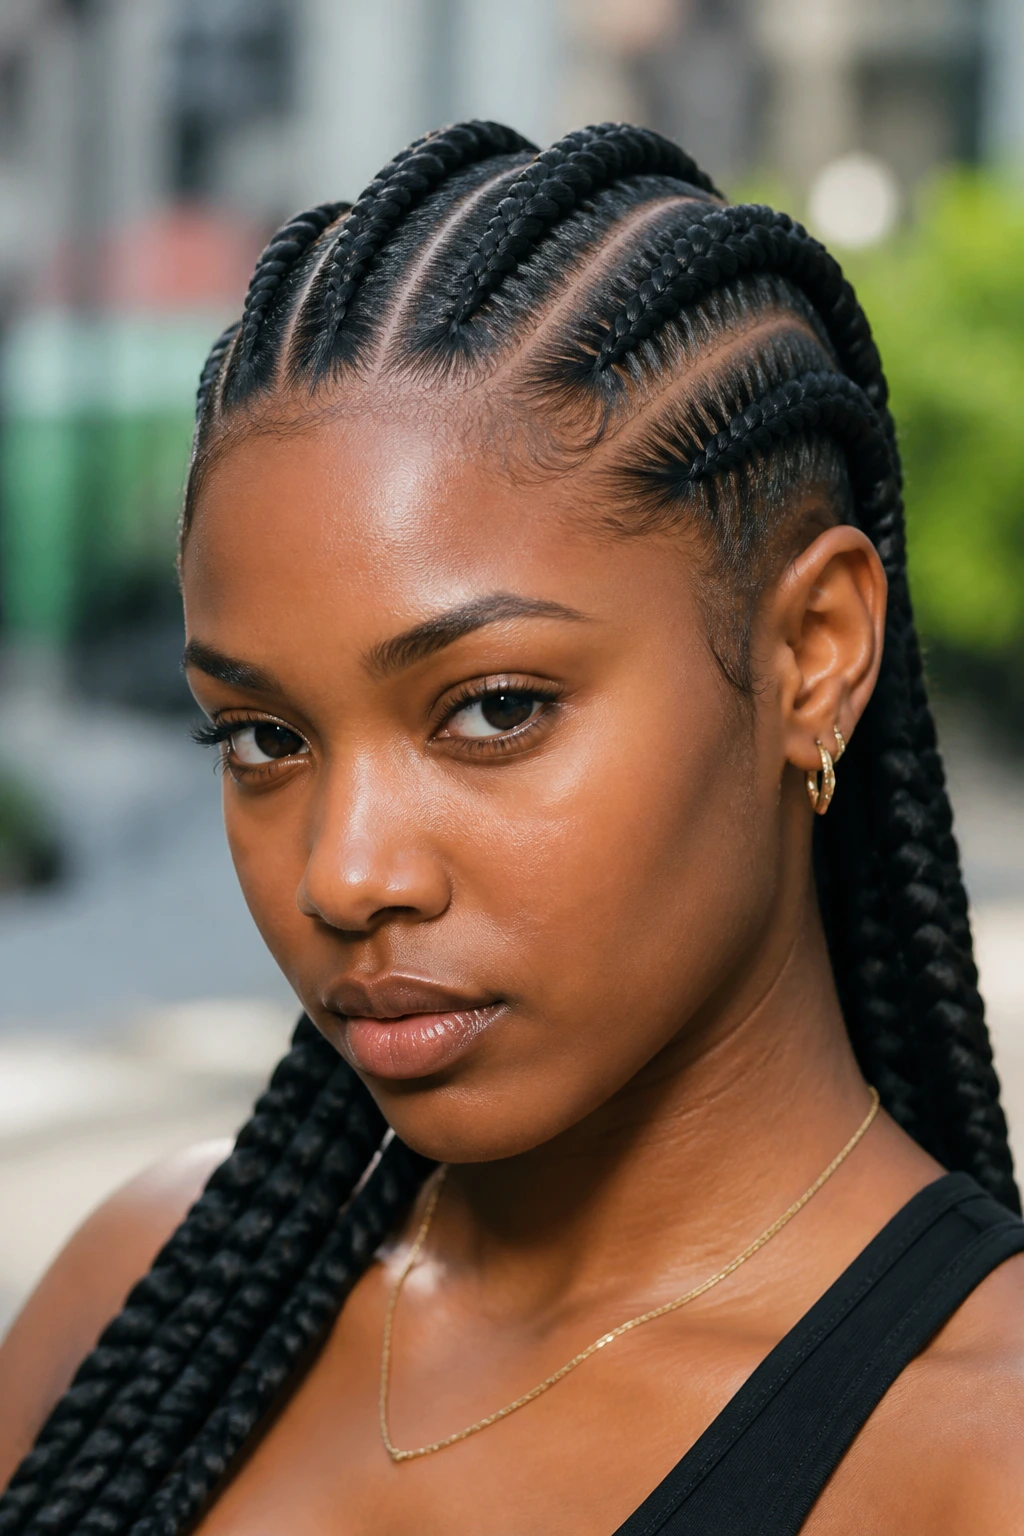
Jumbo feed-in cornrows give you a bold shape without a million tiny rows. They install faster than micro patterns, and the thick lines make a strong statement while still keeping the hair close and organized.
The polished part comes from the roots. Because the braids are bigger, any uneven parting shows fast, so the sectioning has to be cleaner than people expect. Keep the feed-in gradual and don’t overload the base. A chunky root with a jumbo braid looks heavy. A smooth root with a jumbo braid looks deliberate.
Good fit for
- Thicker hair
- Faster installs
- Anyone who wants a bolder braid profile
The size is the point here. Just keep the shape clean enough to earn it.
20. Small Micro Cornrows
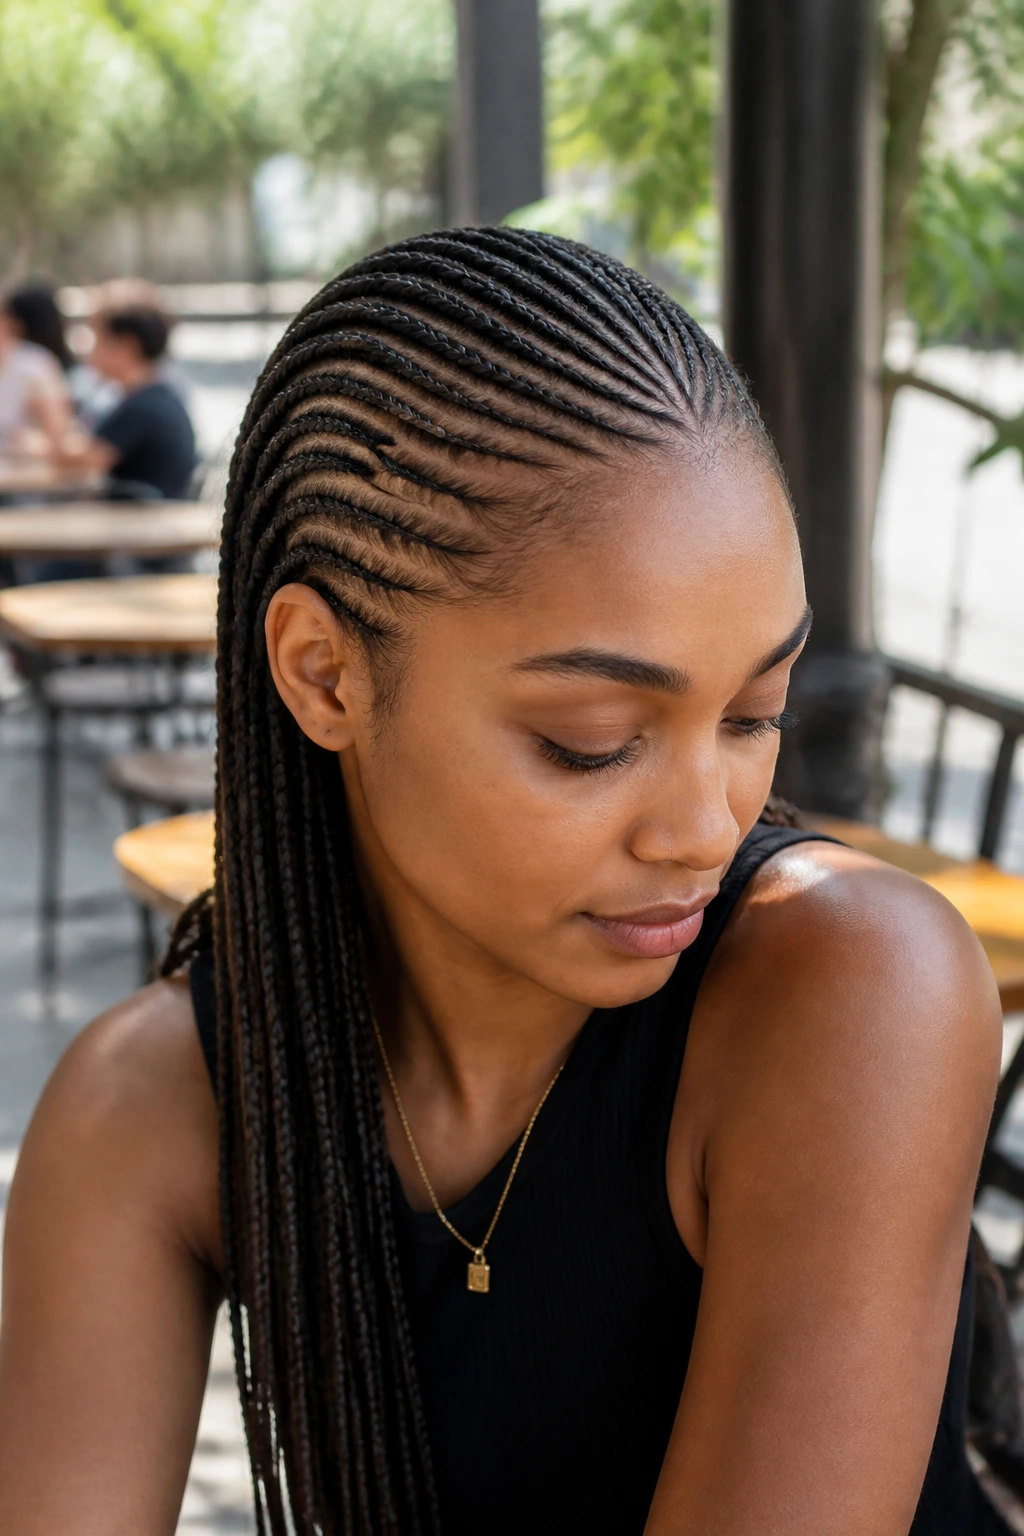
Micro cornrows are the detail lovers’ version of the style. The rows are tiny, close together, and capable of creating intricate patterns that can last well when cared for properly. They take time, though. Plenty of it.
What makes them polished is the repetition. Each small braid needs the same tension and the same width, or the whole surface starts to look patchy. I’d only choose this look if the person is committed to maintenance, because smaller braids mean more surface area to keep neat. They also let you build very detailed parting maps, which is where the style really earns its keep.
Be honest about this one
Tiny rows are beautiful, but they’re not a casual afternoon project. If the scalp is tender, go bigger.
21. Cornrows Into a High Puff
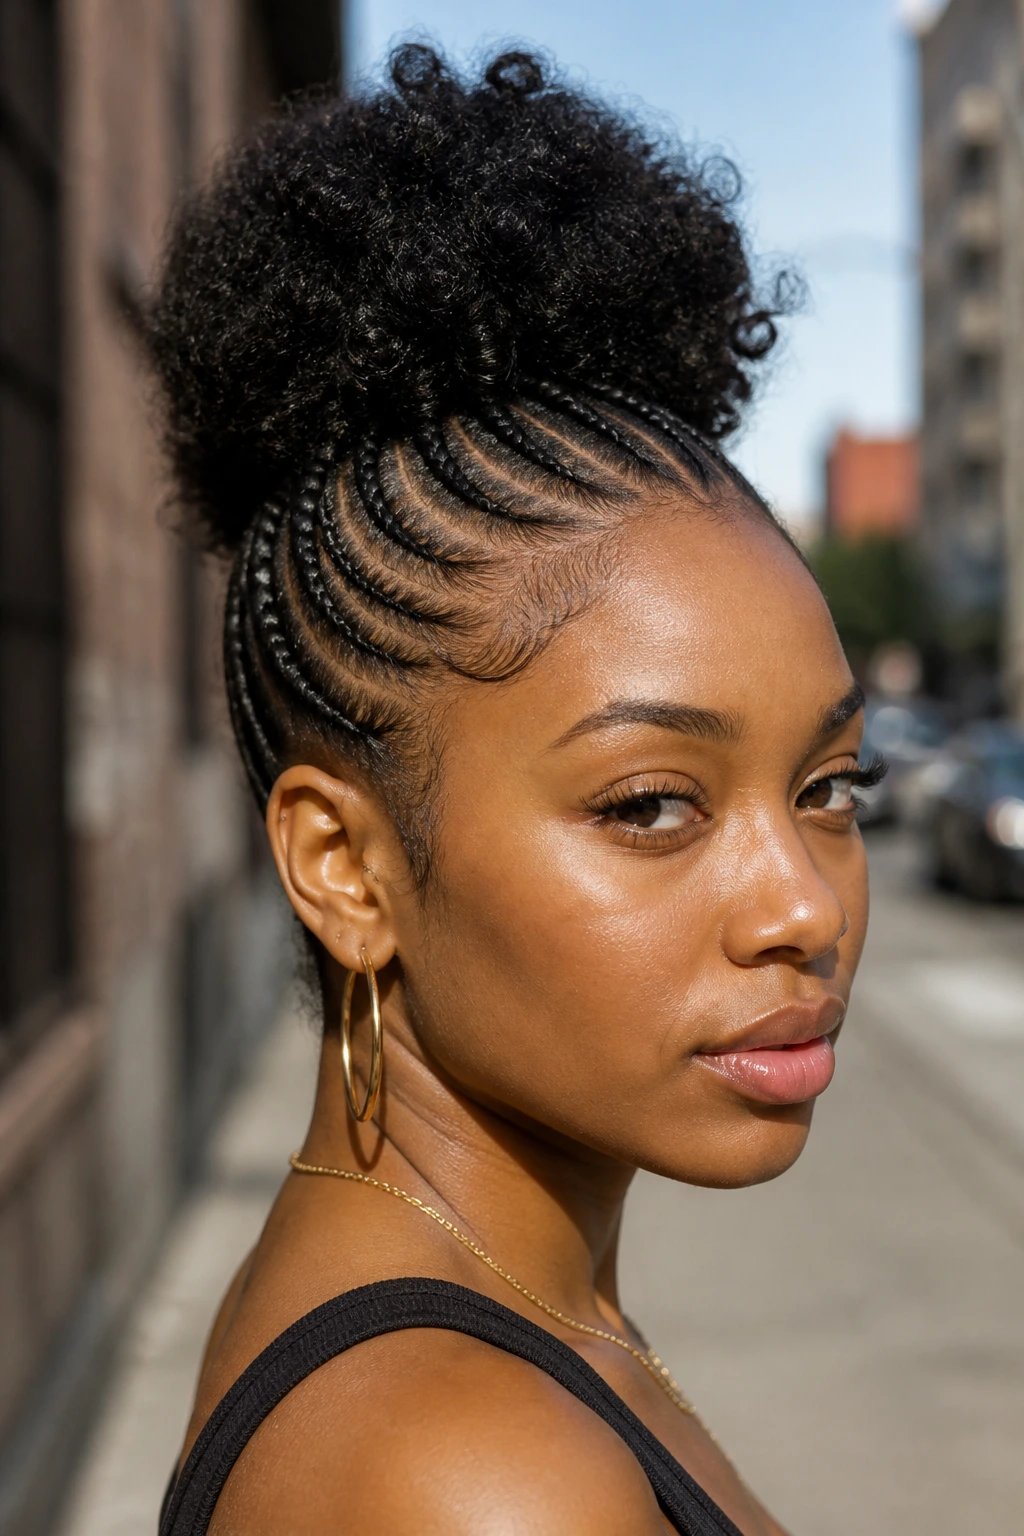
This style keeps the front and sides sleek while letting the crown burst into a puff, and that contrast is what makes it work. The cornrows guide the eye upward, then the puff adds texture and height without losing the clean base.
I like this one on natural hair because it respects shrinkage instead of fighting it. The sides stay controlled, the top keeps volume, and the silhouette feels balanced. Make sure the puff sits securely without being flattened. If you over-strap the base, you lose the whole point. It should look airy, not squashed.
Best detail
Use a soft, wide tie for the puff so the roots don’t get bent into a hard crease.
22. Braided Bun With Sleek Sides
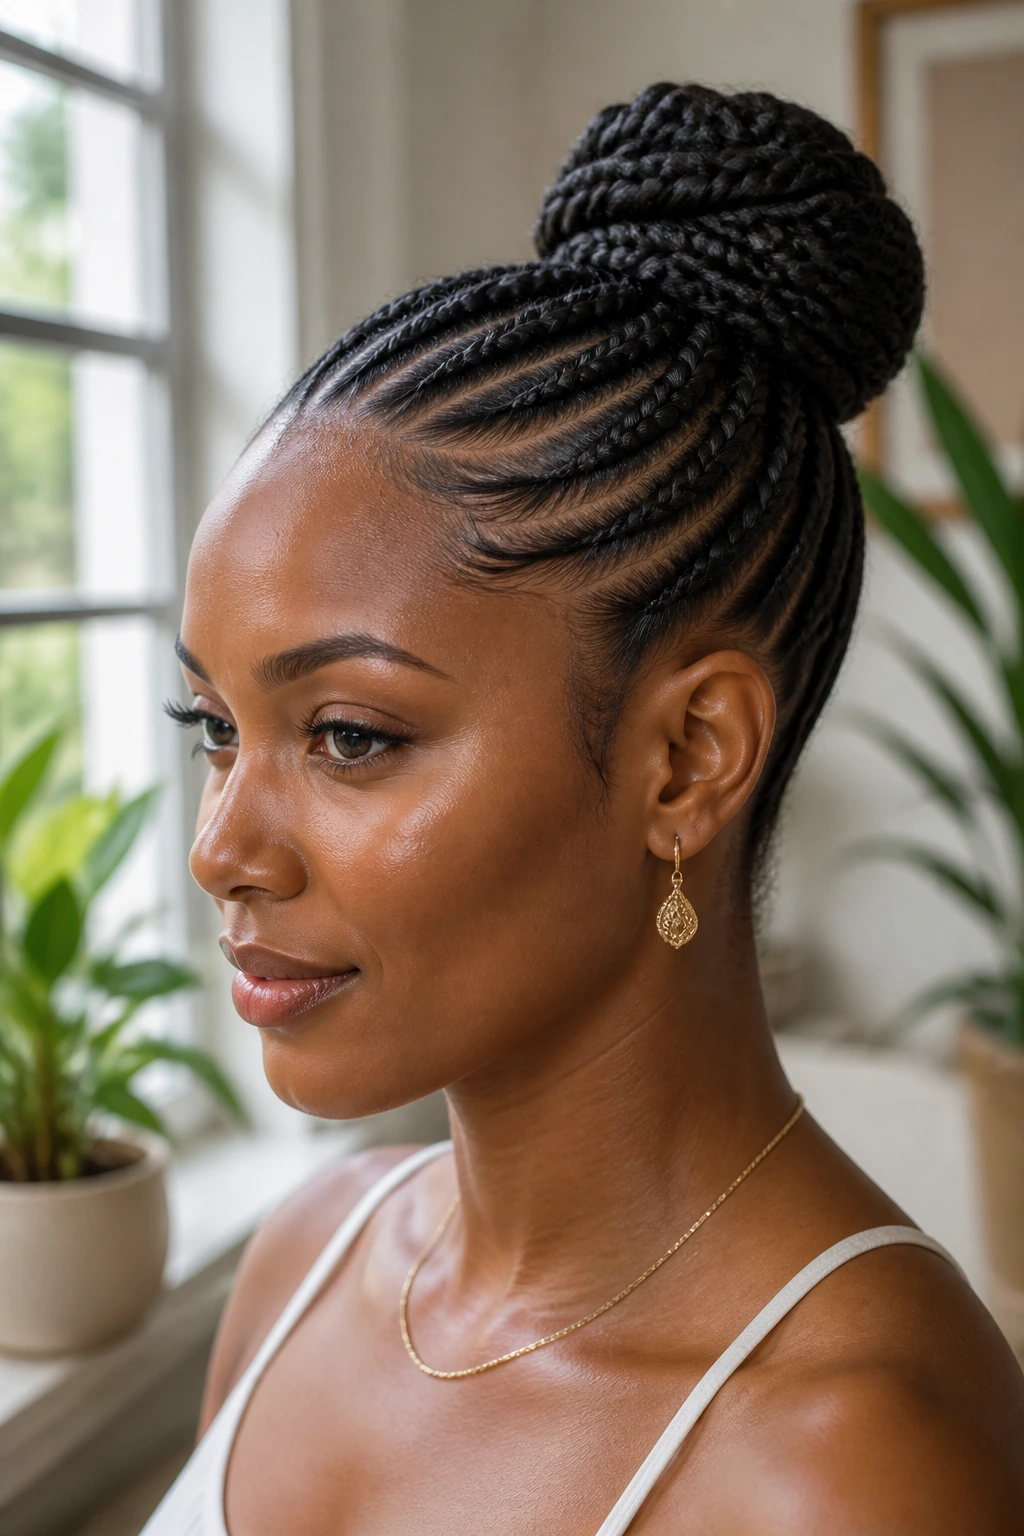
A braided bun with sleek sides is the kind of style that makes the neckline look deliberate. The cornrows stay tight to the scalp and feed into a bun that sits high or mid-level, depending on how formal you want the finish.
This is one of the easiest ways to make cornrows read elegant. The bun can be wrapped, twisted, or braided before it’s pinned, but it should always look compact. A sprawling bun fights the neatness of the rows. I also like this for events where hair needs to stay put for hours. The shape is stable, and the profile stays tidy even if the day gets long.
Tiny fix that helps
Use pins in different directions instead of one heavy elastic. The bun holds better and looks flatter.
23. Fulani-Inspired Cornrows
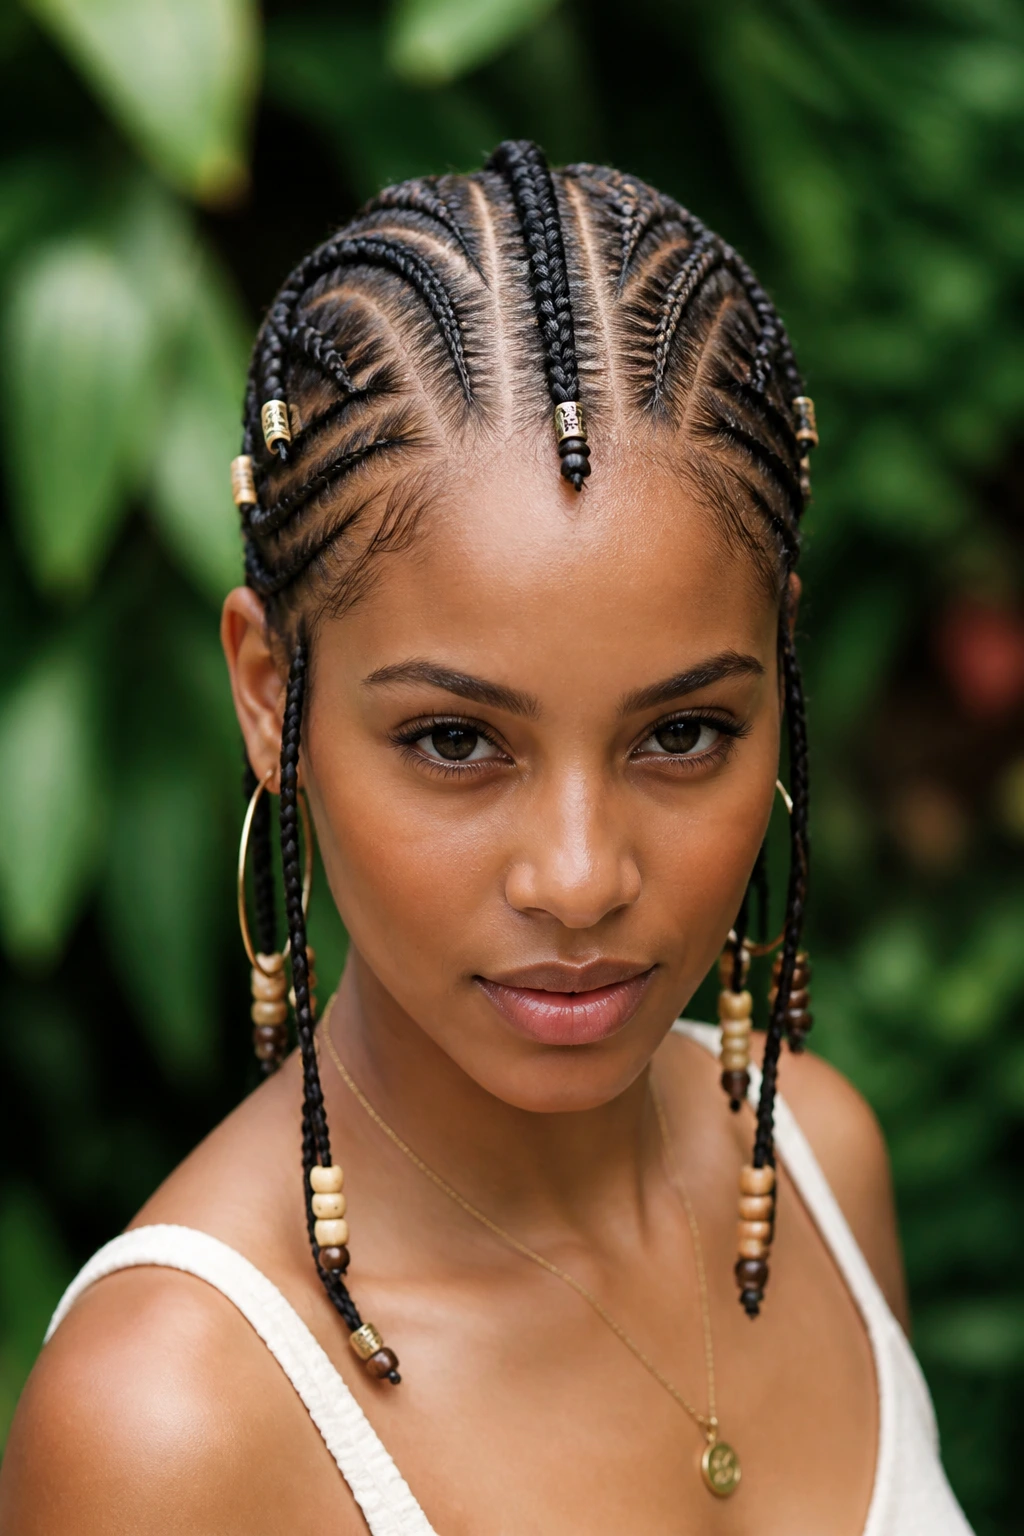
Fulani-inspired cornrows bring a face-framing rhythm that feels deeply rooted and unmistakably polished when the details are done right. A center braid, side accents, and a few beads or cuffs can create a look that’s expressive without crowding the face.
The danger with this style is overdoing it. Too many accessories, too many extra braids, or parts that aren’t clean can turn a strong silhouette into noise. Keep the accent pieces intentional. One central braid, a pair of side lines, and carefully spaced ornaments often say more than a whole basket of extras.
What makes it work
- Clean center or crown braid placement
- Thin face-framing sections
- Accessories used like punctuation, not decoration overload
When it’s right, the style carries both presence and restraint.
24. Asymmetrical Shoulder Sweep
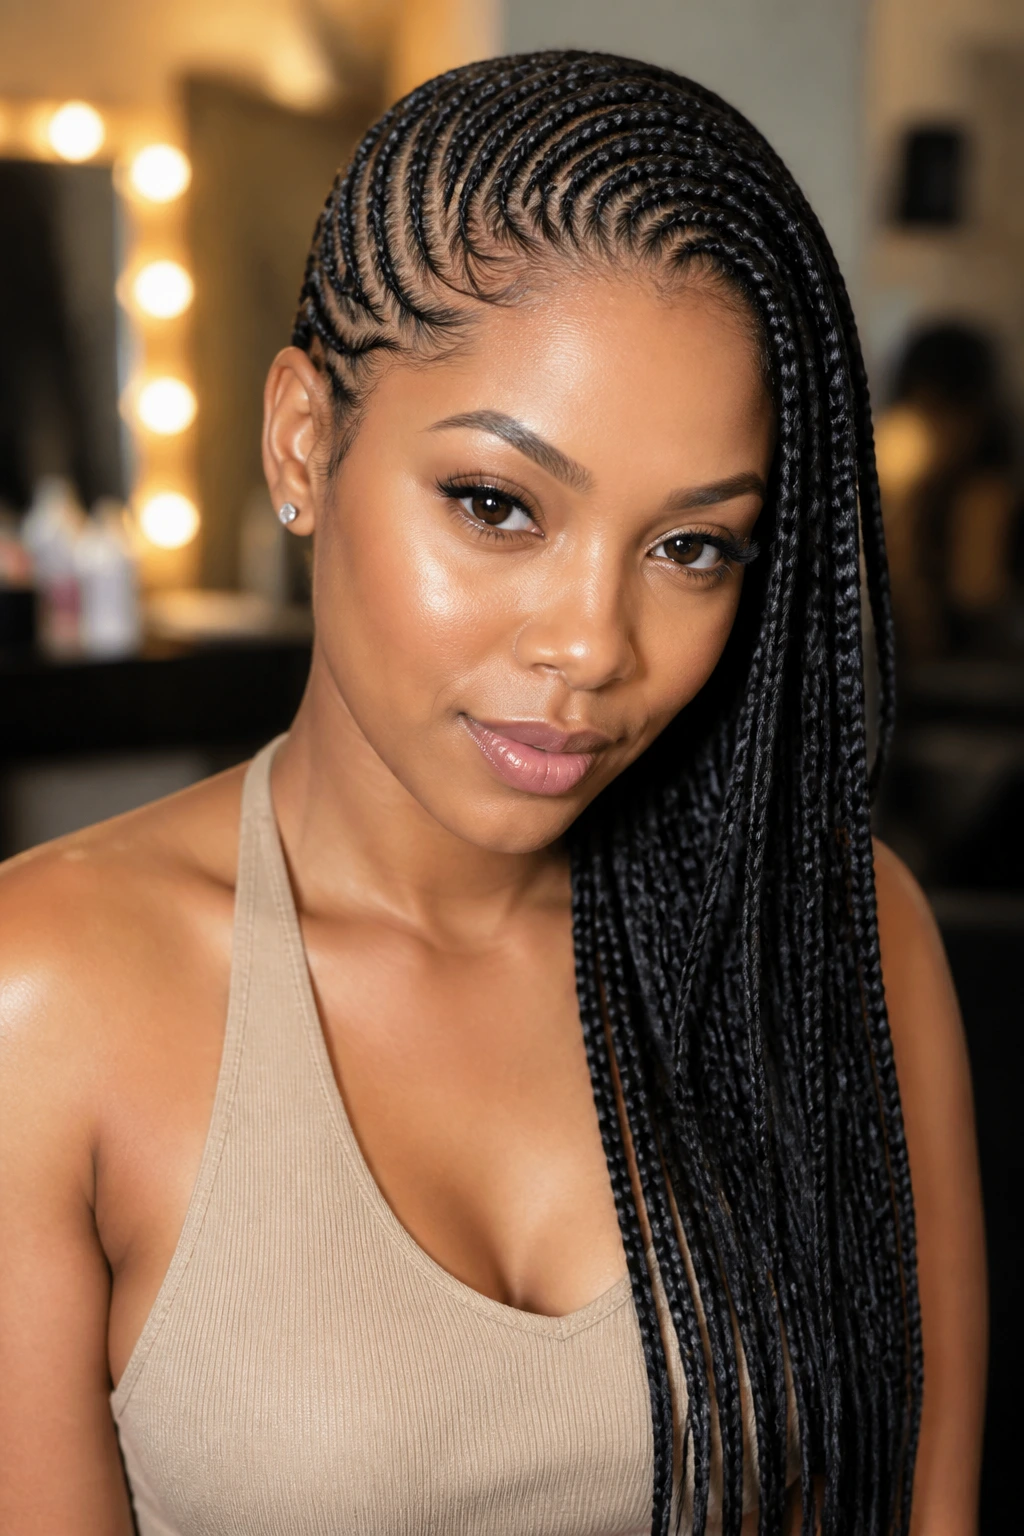
An asymmetrical shoulder sweep feels modern without losing the close-to-scalp structure that makes cornrows so steady. The rows move to one side, the lengths fall over one shoulder, and the whole look leans into imbalance in a very deliberate way.
I like this for outfits with a strong neckline or one exposed shoulder. It gives the hair a place to land without hiding the work in the braid pattern. The parting should be strong enough to justify the sweep. If the asymmetry looks accidental, the whole style falls flat. If it looks chosen, it feels sharp.
Good match for
- Evening wear
- Long braid lengths
- Styles that need movement on one side only
It’s a neat way to keep the structure and still let the hair move.
25. Sculpted Cornrow Updo
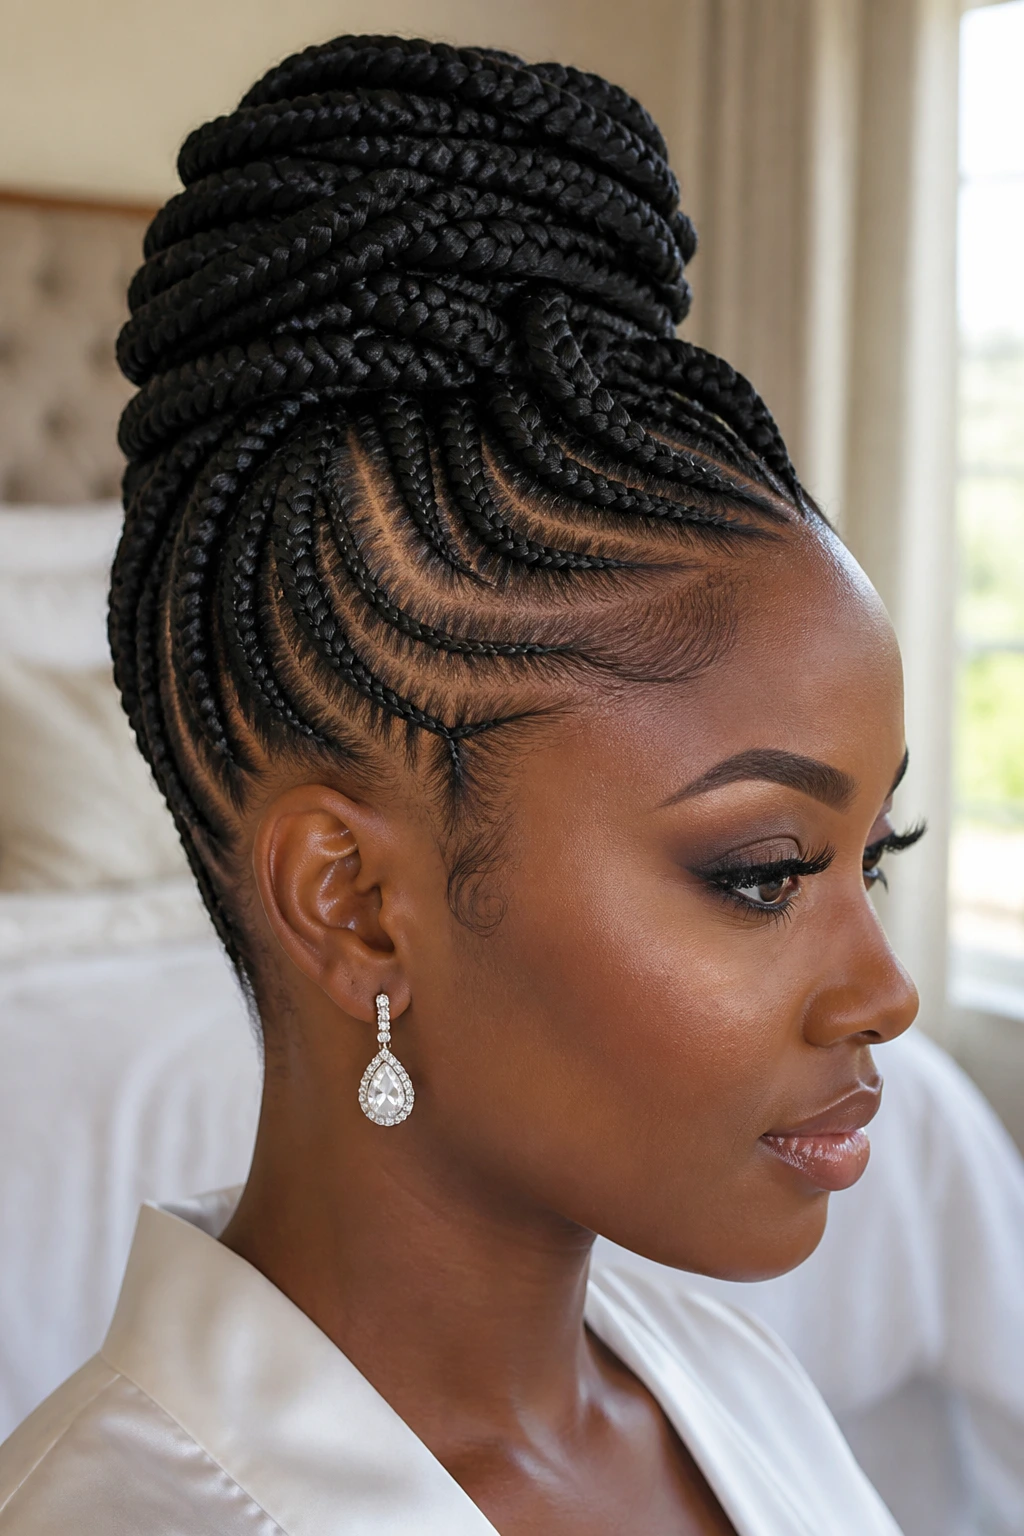
A sculpted cornrow updo is where the braid pattern becomes architecture. Rows can loop, wrap, stack, or fold into a shaped finish that sits high on the head or gathers at the back like a carved knot.
This is the most formal option in the bunch, and I mean formal in the best sense. It can hold a room if the lines are clean and the shape is balanced. The updo should never look stuffed. It should look built. I’d use this for weddings, graduations, or any moment that deserves a little ceremony. The front must stay smooth, the lift must be even, and the pins need to disappear.
One honest note
If the foundation cornrows are weak, the whole updo shows it. This style is only as good as the base underneath.
What Gives Cornrows That Clean, Finished Shape
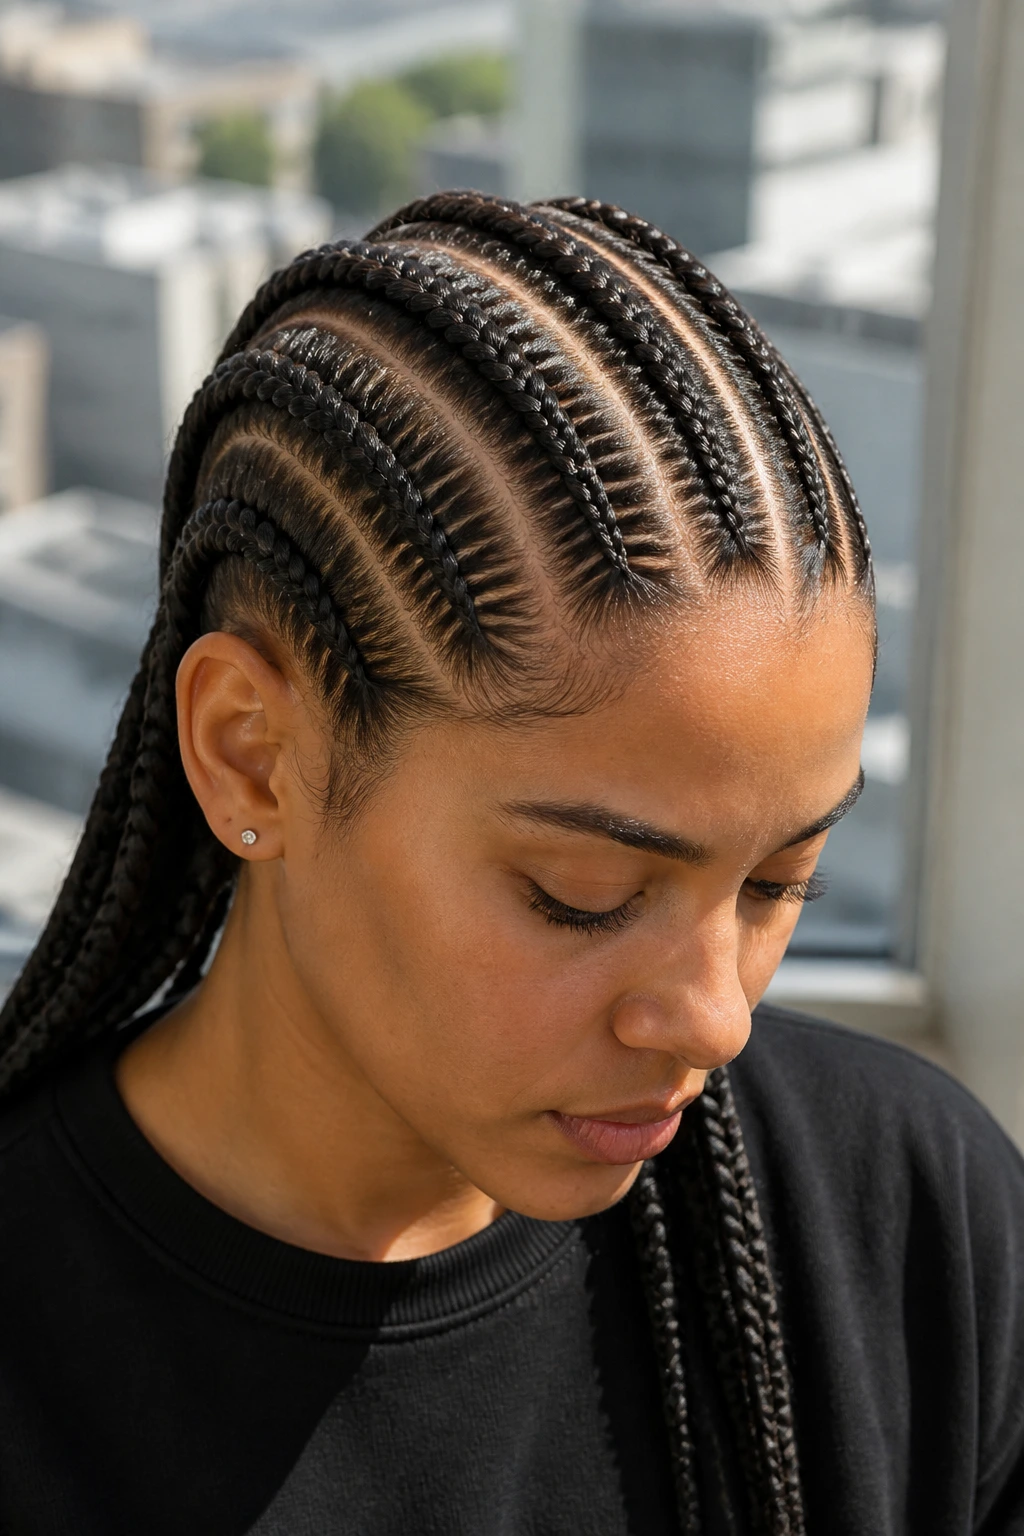
The difference between a braid set that looks polished and one that looks merely done comes down to three things: sectioning, tension, and finish. That’s the boring answer. It’s also the right one.
Sectioning decides the geometry. If the parts are wandering, the style will feel off no matter how neat the braiding is. Tension decides how the rows sit on the scalp. Too loose, and the style puffs up before it has a chance to settle. Too tight, and the whole hairline starts shouting for help. Finish decides the final read. A light mousse pass, a controlled edge line, and a clean tuck at the ends can move a style from everyday to sharp in minutes.
I’m also a big believer in matching braid size to head shape. Tiny rows on a very small face can overwhelm the frame. Jumbo rows on very fine hair can look disconnected. The best cornrow hairstyles don’t fight the head they’re sitting on. They follow it.
And that’s why so many of these styles work. Not because they’re complicated. Because they’re disciplined.
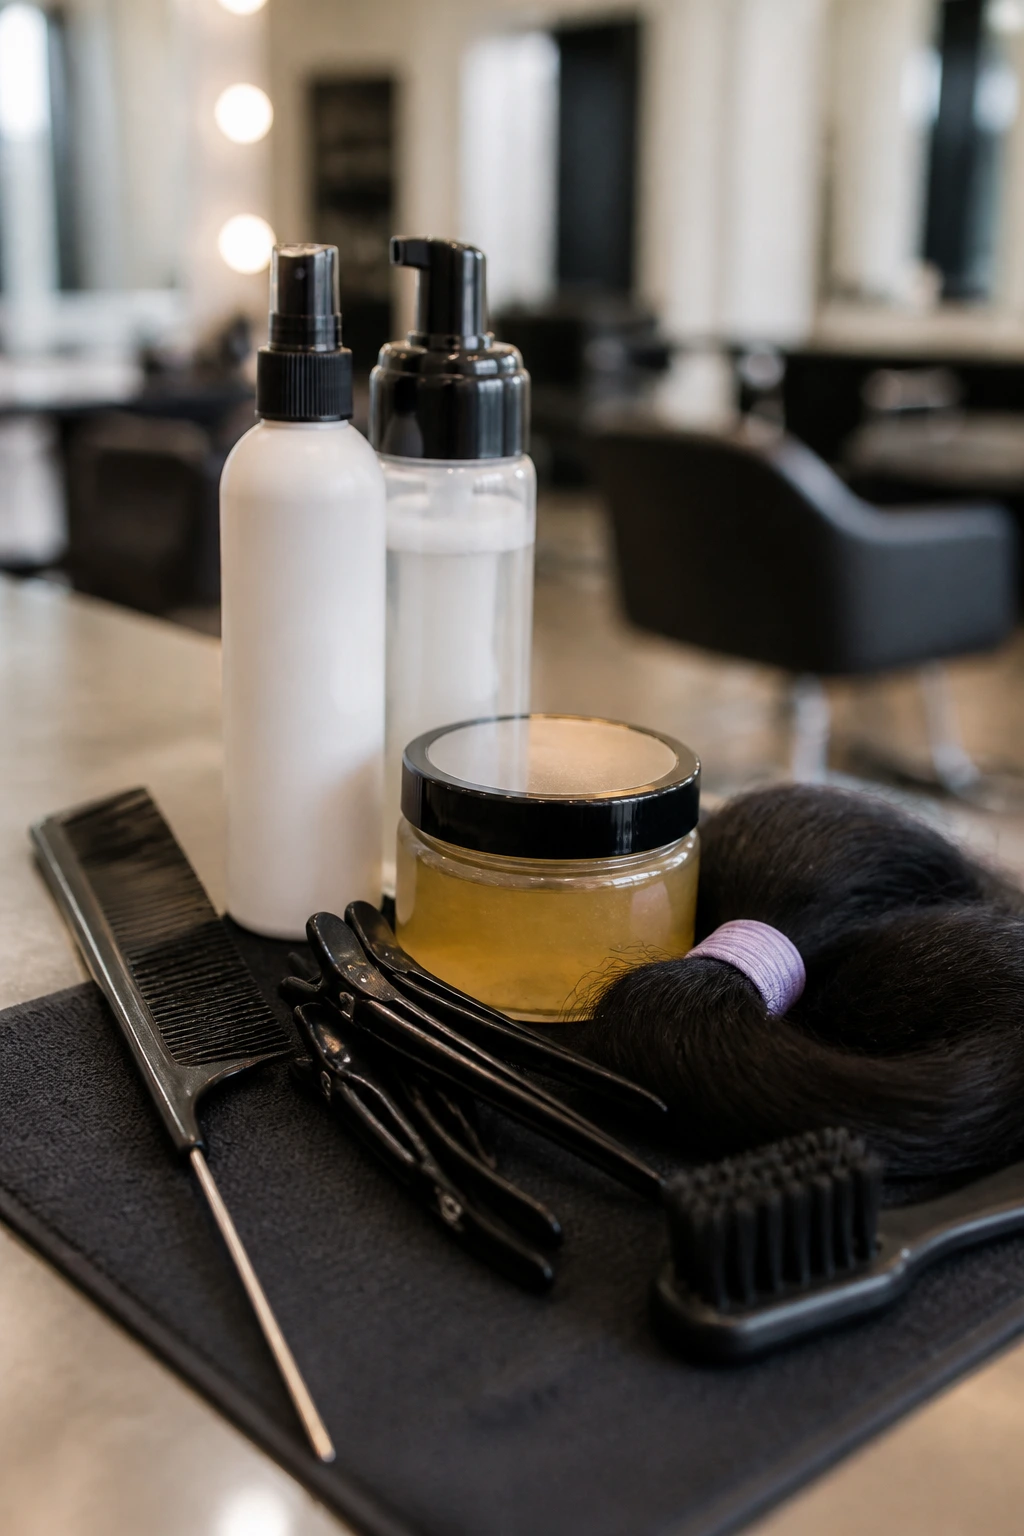
Essential Tools for Clean Cornrow Partings
-
Rat-tail comb: The fine tip is what makes crisp parts possible, especially for zigzags, stitch braids, and triangle sections.
-
Sectioning clips: These keep finished parts out of the way so the braid pattern doesn’t collapse while you work.
-
Light leave-in conditioner: Use a small amount on stretched, detangled hair so the sections stay soft without getting slippery.
-
Braiding gel or edge control: A thin layer helps the roots lay flat; too much leaves flakes and hard clumps.
-
Braid mousse: Handy for smoothing the finished style and softening flyaways once the braids are done.
-
Pre-stretched braiding hair: Useful for feed-ins, ponytails, buns, and longer sets because the taper looks cleaner and saves time.
-
Soft bristle brush or edge brush: Good for smoothing the hairline without shredding the parting.
-
Hand mirror: Helps you check the back rows and catch crooked part lines before they become permanent.
-
Satin scarf or bonnet: Keeps friction down at night and helps the braids stay neat longer.
-
Blow dryer with comb attachment, optional: Helpful for stretching natural hair before braiding so the parts sit flatter.
Choosing Hair, Gel, and Accessories Without a Mess
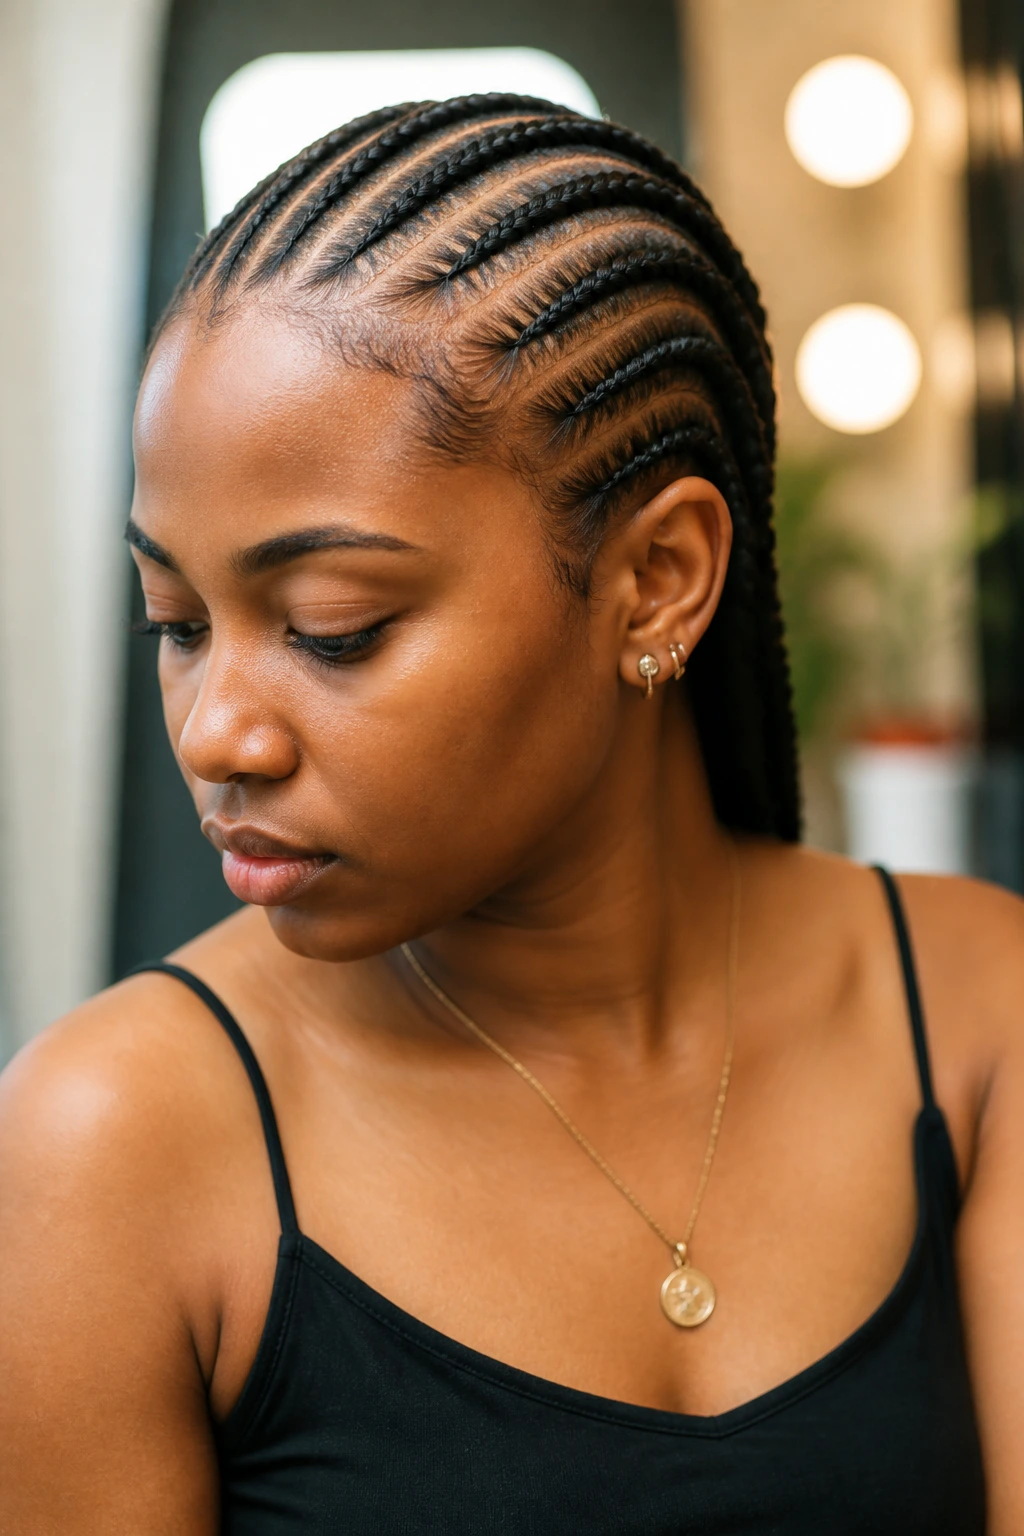
The right products make cornrows look crisp; the wrong ones make them heavy, sticky, or dull. For extension hair, pre-stretched braiding hair is usually the easiest choice because the ends taper naturally and the braid doesn’t have to fight that blunt factory edge. If the hair feels coated or itchy, a quick rinse and dry before install can help. That small step saves a lot of scalp annoyance later.
For your natural hair, a light leave-in is usually enough if the hair has already been stretched and detangled. Heavy creams sound comforting, but they can make the sections slide apart and force the braids to loosen sooner. Edge control and braiding gel are useful in moderation. Thin layers. That’s the rule. If you can see white buildup before the style is even finished, there’s too much product on the hair.
Accessories should match the braid size. Tiny beads can get lost on jumbo rows. Huge cuffs can swamp micro braids. Gold, wood, clear acrylic, and matte black all work well because they don’t fight the braid pattern. If you want the look to stay polished, pick one or two accent materials and repeat them instead of using every ornament in the drawer.
How to Wear Cornrows With Different Face Shapes and Necklines
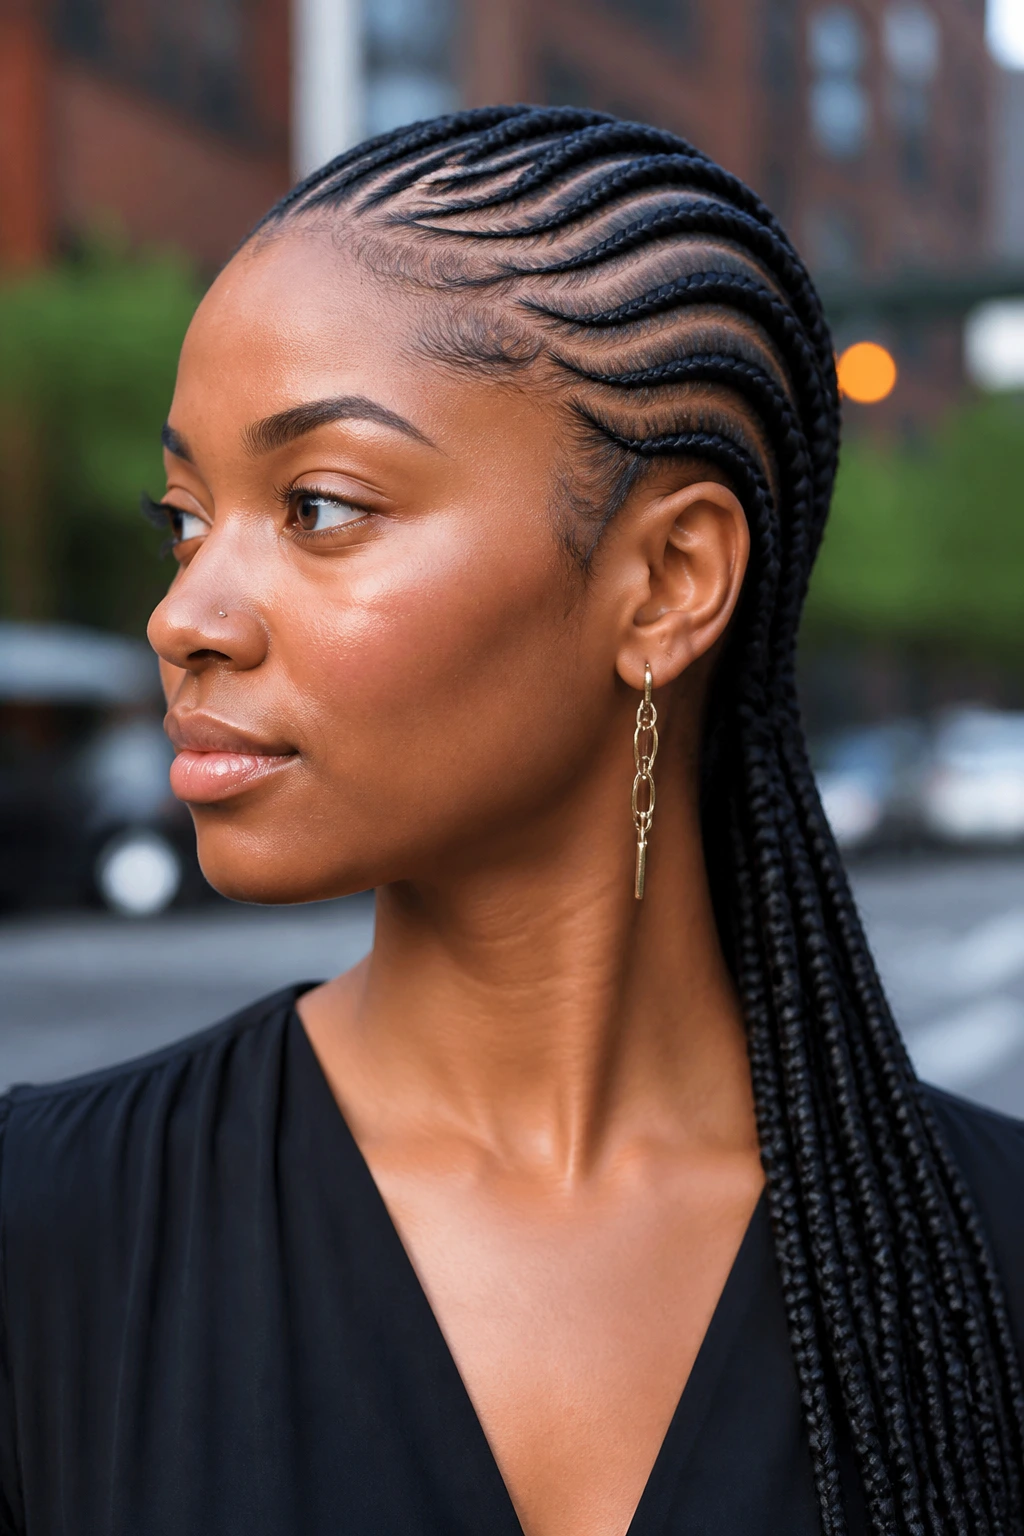
Presentation: A center part gives a steadier, more symmetrical frame, while a side sweep adds motion and softens angles. If the face is round, a diagonal or vertical line can help lengthen the look. If the face is long, a wider braid pattern or curved rows can keep the style from stretching it too much.
Accompaniments: Cornrows look strongest next to clean neckline shapes—crew necks, turtlenecks, collared shirts, off-shoulder tops, and simple hoop earrings. I’d skip overly busy jewelry if the braid pattern is already detailed. Let one thing lead.
Length: The number of rows should match the density of the hair and the size of the head. Six to eight cleaner rows can look sharp on a minimal style, while ten to fourteen smaller rows create more texture and a denser finish. More rows are not automatically better. Sometimes they just make the scalp pattern too crowded.
Occasion: Low buns and halo crowns lean formal. Ponytails and side sweeps land more casual. Beaded ends and crisscross patterns feel expressive. The nice part is that the same braid family can move between all four with only a shift in shape.
Extra Touches That Make Cornrows Stand Out
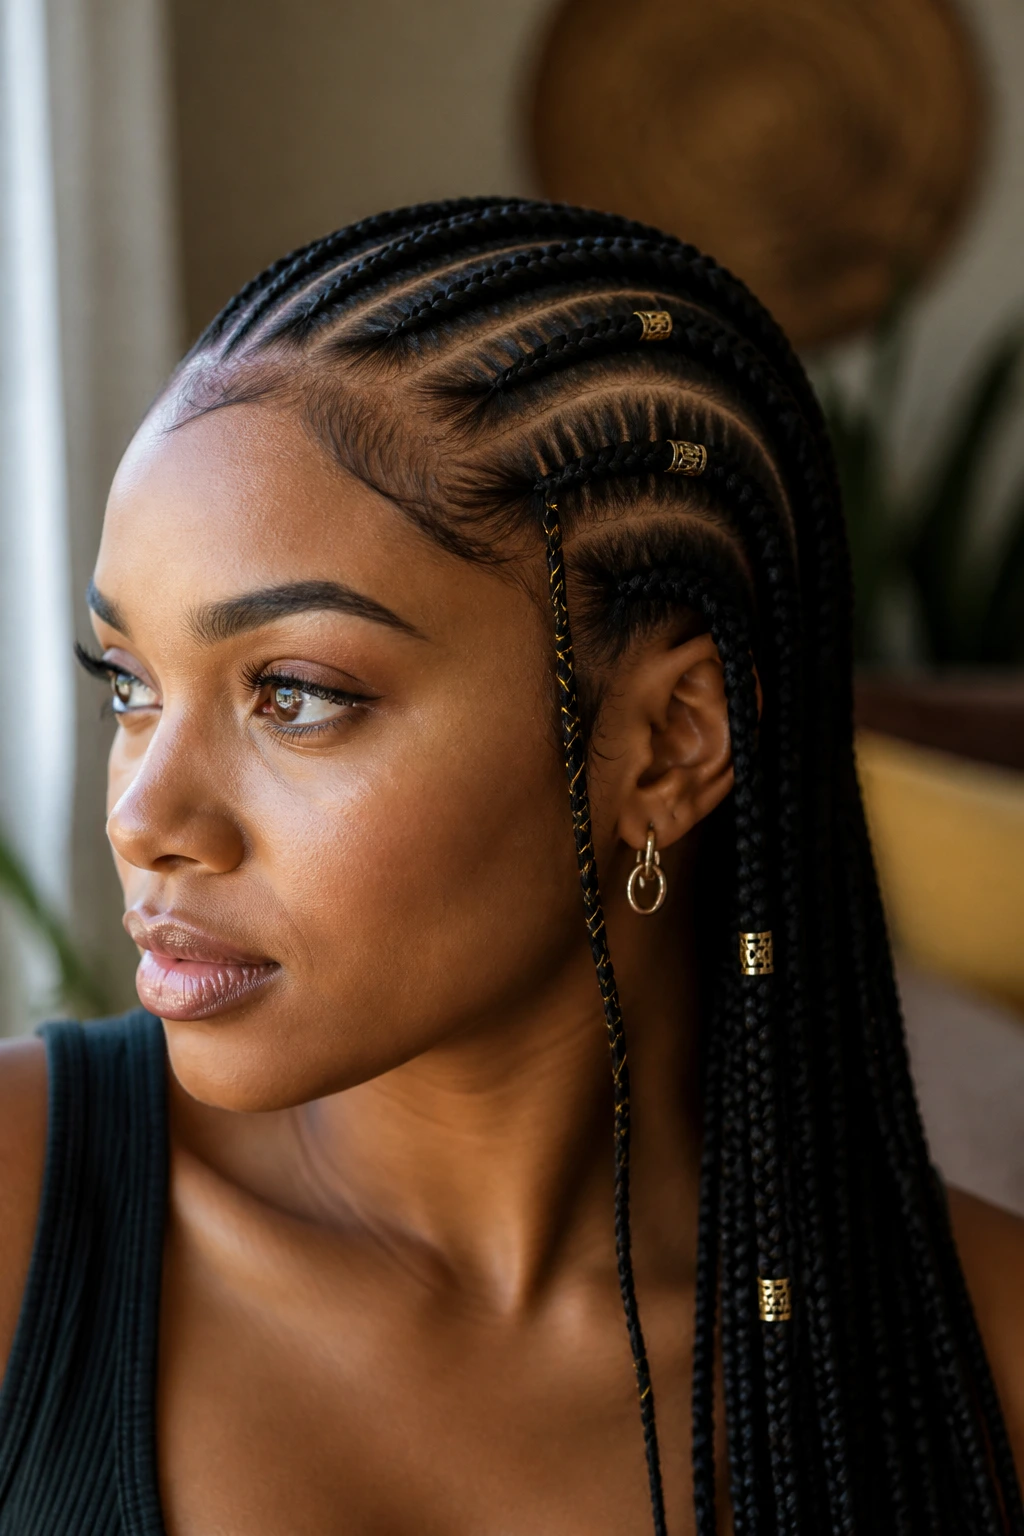
Shine Boost: A light mousse pass at the end gives the braids a smoother surface, and a drop of oil on the exposed scalp lines adds sheen without making the roots greasy. Avoid drenching the hairline. It breaks the hold.
Customization: One accent braid, one different part shape, or a few carefully placed cuffs can change the whole mood. You do not need to decorate every row. In fact, the style often looks better when one detail gets to speak.
Serving Suggestions: If you want the set to read even cleaner, tuck the ends, wrap the base, or pin the loose braid lengths so they don’t scatter across the shoulders. A neat braid set plus a tidy neckline is hard to beat.
Make-It-Yours: For fine hair, keep the rows smaller and the accessories lighter. For thick hair, larger feed-ins and a bun or ponytail help manage volume. If the hair is very short, focus on straight-back rows or curved patterns that don’t demand a lot of length at the end.
Keeping Cornrows Neat Between Washes
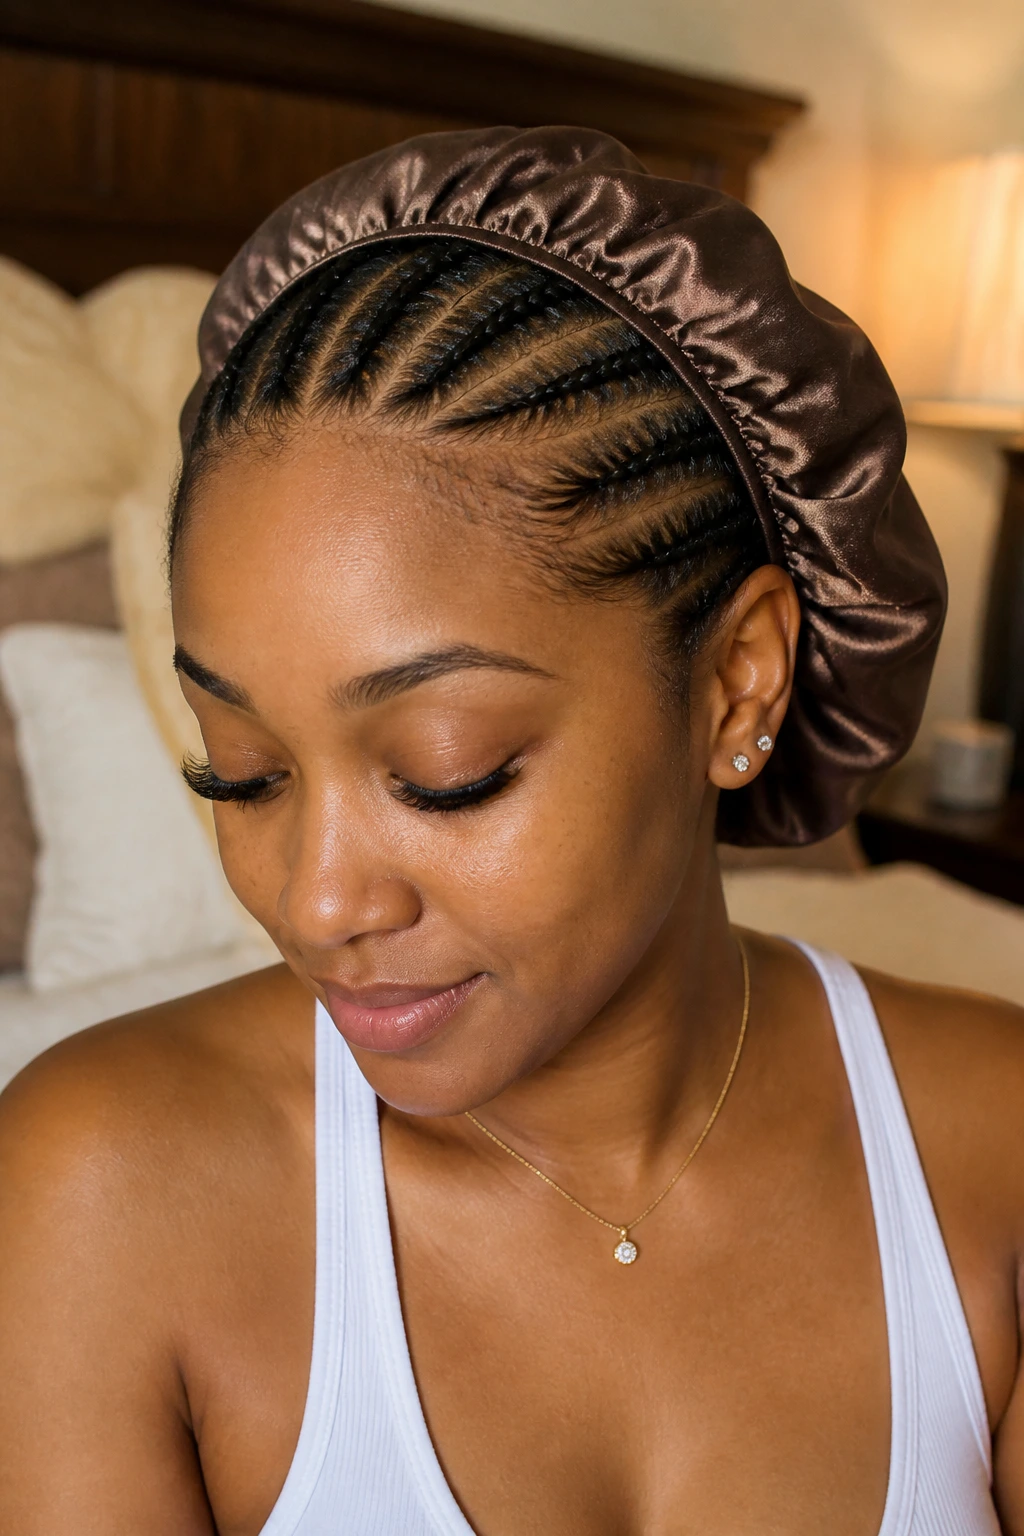
Cornrows stay polished longer when they’re treated like a set, not a throwaway style. At night, wrap the hair with a satin scarf or use a bonnet that actually covers the hairline and the ends. If the ends rub on cotton pillowcases, they fuzz up fast. That frizz usually starts at the back, then creeps forward.
Scalp care matters, too. A little braid spray or diluted leave-in on the scalp every few days can keep the head from feeling tight and dry, but don’t soak the roots. Too much liquid under braids leads to buildup and a faint damp smell that no amount of perfume can hide. If you wash the style, keep the water pressure gentle and dry the braids thoroughly afterward. Damp braids tucked away under a scarf are a bad idea.
Most cornrow styles look best for roughly 2 to 6 weeks, depending on size, hair growth, and how much tension the install had at the start. Smaller braids tend to last longer. Jumbo styles loosen sooner. If the hairline starts itching hard, the roots are lifting, or the scalp feels sore, that’s your cue to take them down sooner rather than later.
Common Mistakes That Flatten the Whole Look
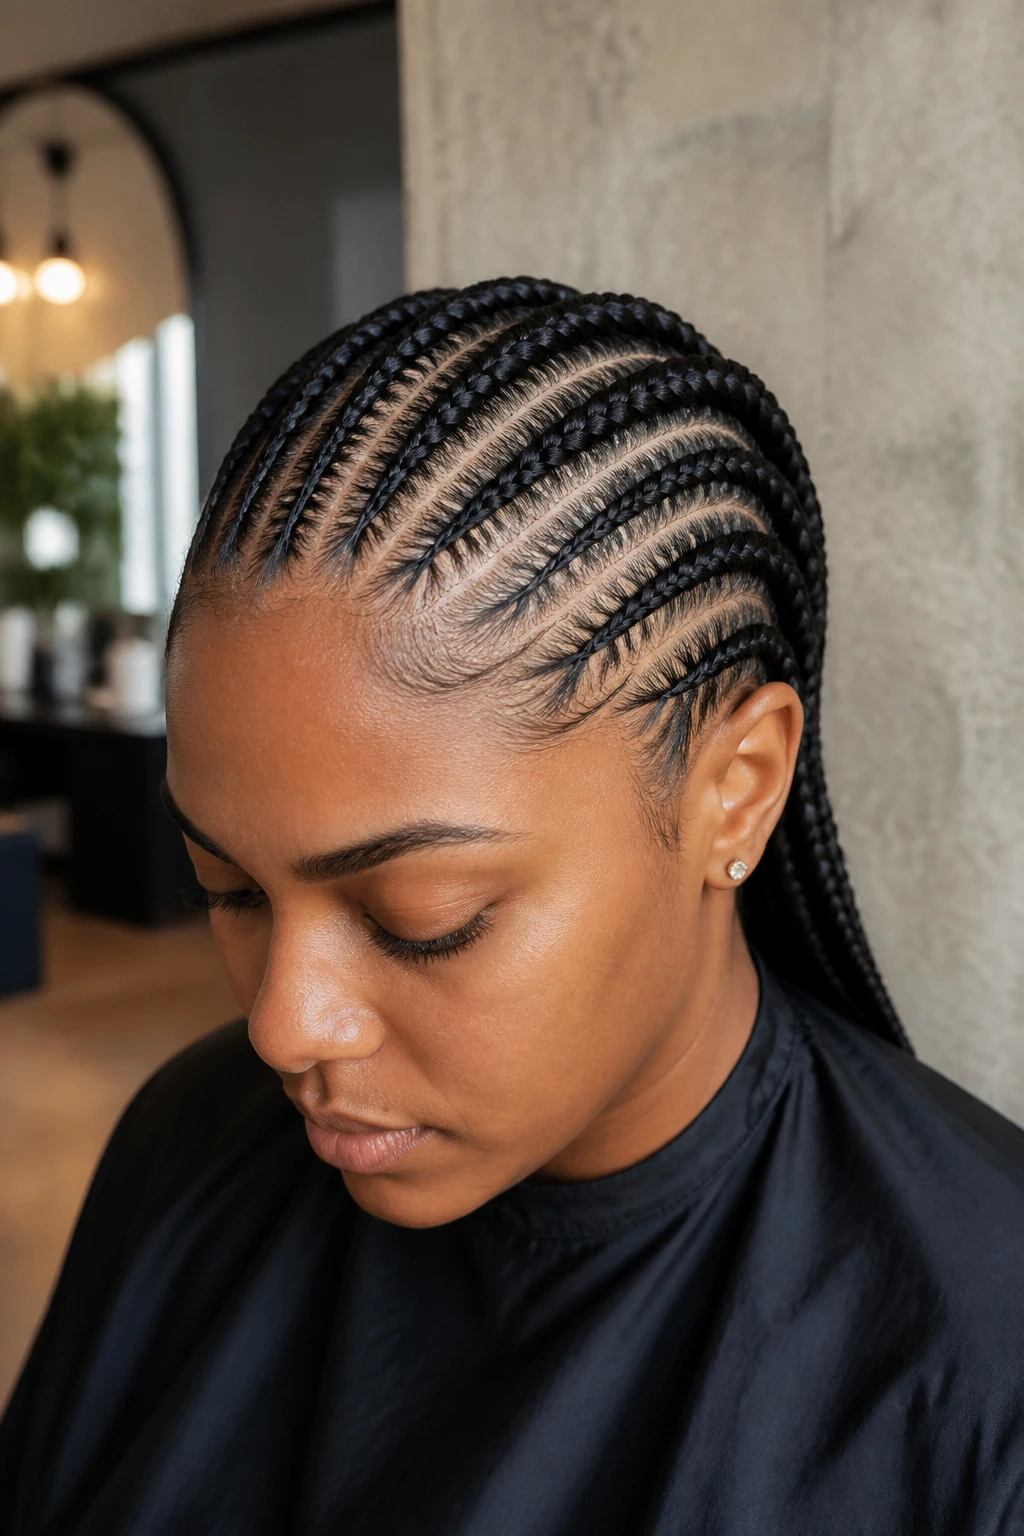
The first mistake is braiding too tight at the hairline. The symptom is immediate: tenderness, headaches, and little bumps where the rows start. The fix is simple, though not always easy to insist on—leave the first section soft and controlled, then let the tension build a little farther back.
Another big one is uneven section size. The style may look fine from the front, then one side gets wider or thicker than the other and the whole pattern looks lopsided. Part the whole head before you braid, and keep checking both sides in a mirror instead of trusting your memory.
Too much product is another classic problem. Thick gel at the roots can flake, crust, or make the braids feel sticky instead of sleek. Use less than you think you need, then smooth the finished style with mousse rather than piling more gel on top.
Then there’s skipping detangling or stretching. Cornrows do not forgive knots well. If the hair is tangled, the braid will snag and the part lines won’t sit flat. A clean, stretched base makes the style smoother and helps it last longer.
Finally, leaving the style in too long turns polished into tired. Frizz at the roots is normal. Little fuzz is normal. A matted base, sore scalp, and visible buildup are not. Take them down before the hair starts pushing back hard.
Variations and Adaptations to Try
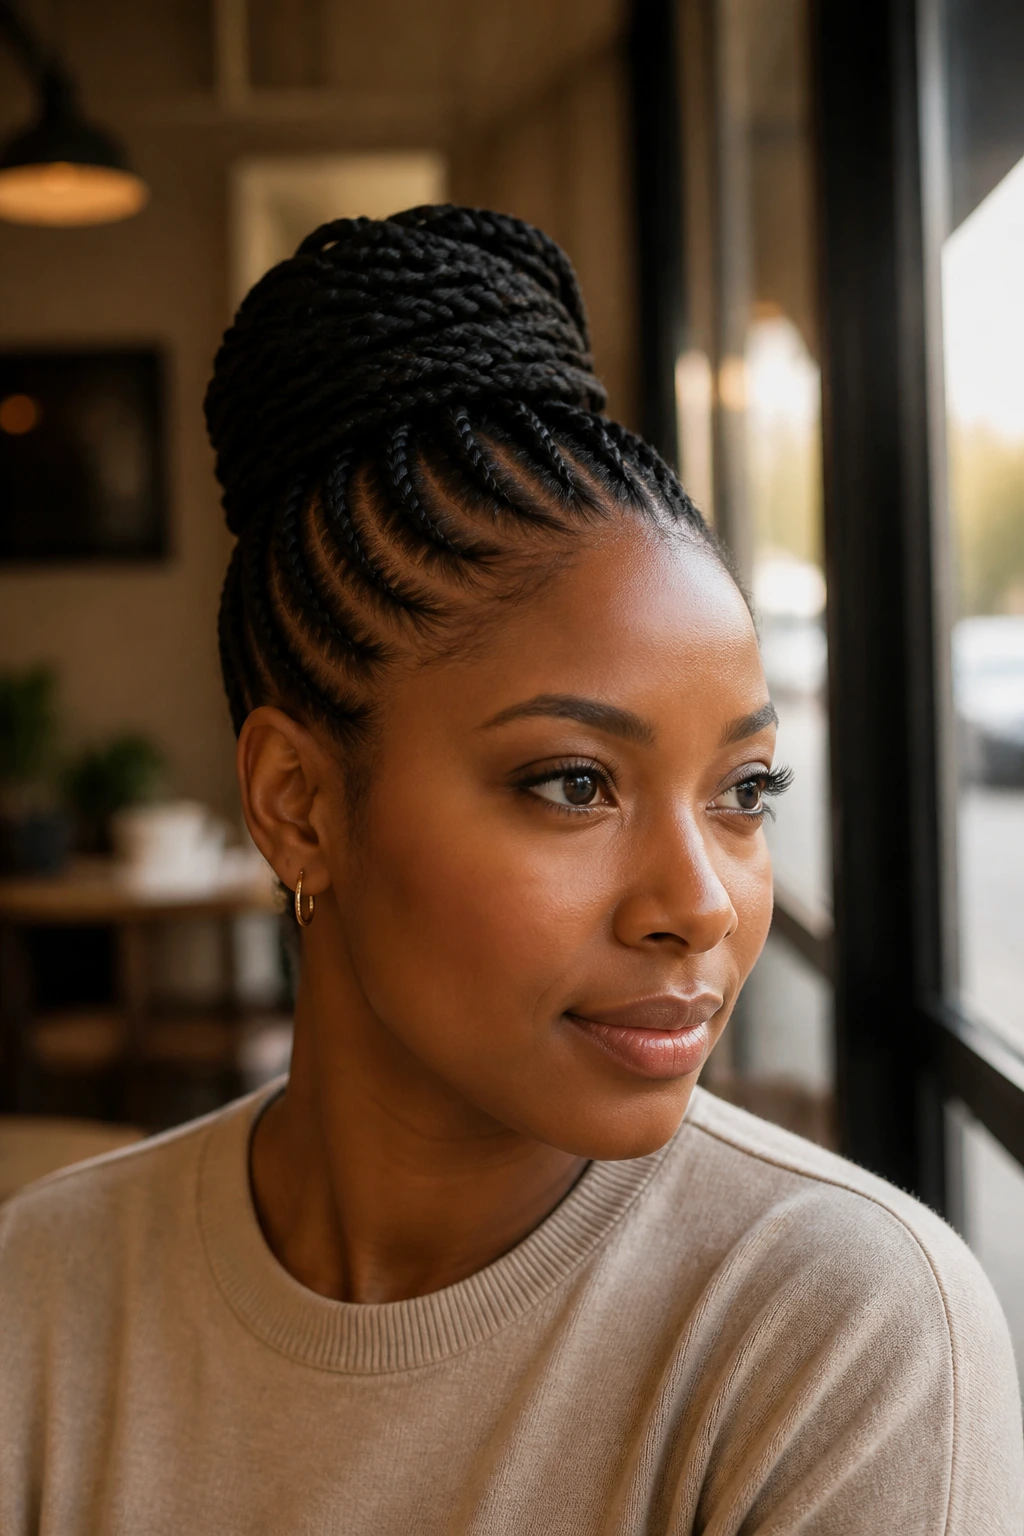
The Low-Tension Everyday Set: Ask for slightly larger rows, soft roots, and no overly tight edges. This version is kinder to sensitive hairlines and still gives you the clean cornrow shape without the strain that can come from tiny sections.
The Formal Event Finish: Add a low bun, halo crown, or sculpted updo, then keep the accessories minimal—maybe one set of cuffs or a single accent braid. This version reads refined because the shape is doing the work, not the extras.
The Short-Hair Version: Use tighter parting and smaller sections that can grip the hair without needing much added length. Short hair can do beautifully in straight-backs, curved rows, or triangle parts as long as the base is stretched and the tension is controlled.
The Beaded Cultural Accent: Keep the braid pattern plain and let the beads, cuffs, or wrapped ends carry the personality. This works well when you want a clear cultural nod without crowding the scalp with too many competing details.
The High-Volume Look: Build the braids into a puff, ponytail, or top bun so the crown keeps height. This version is useful when you want to balance a wider face shape or create more movement through the top half of the style.
The Minimalist Clean Set: Choose straight-backs or a center-part feed-in and skip all accessories. The lines stay sharp, the finish stays quiet, and the whole look leans on precision instead of ornament.
Frequently Asked Questions
How long do cornrow hairstyles usually last?
Most cornrow sets stay neat for about 2 to 6 weeks, depending on braid size, hair growth, and how carefully the style was installed. Smaller rows often hold longer, while jumbo styles usually loosen sooner at the roots.
Can you do cornrows on short natural hair?
Yes, as long as the hair is long enough to grip and has been stretched or detangled first. Very short hair usually works best with smaller rows, cleaner parting, and a gentle hand at the hairline.
Are feed-in cornrows better than regular cornrows?
Feed-ins are better if you want a flatter root and a smoother transition into added hair. Regular cornrows are fine when you want a simpler install or a style that stays close to the scalp without a gradual taper.
How tight should cornrows feel?
They should feel secure, not painful. A little snugness at the start is normal, but soreness, pulling, or a tight headache means the tension is too strong and the install needs to be eased.
Can you wash your scalp with cornrows in?
Yes. Use diluted shampoo or a gentle scalp cleanser and let the water run through without rough scrubbing. Dry the braids fully afterward so moisture doesn’t hide in the base and create buildup.
What type of hair works best for cornrow extensions?
Pre-stretched synthetic braiding hair is usually the easiest choice because it tapers cleanly and keeps the style from feeling bulky at the ends. If your scalp is sensitive, rinse the hair first to reduce coating residue.
How do you keep cornrows from frizzing at the roots?
Sleep with a satin scarf or bonnet, avoid piling on heavy products, and smooth the roots lightly with mousse instead of constant gel. A little fuzz is normal; a rough, swollen root usually means the style needs better nighttime care.
What’s the safest way to take cornrows down?
Start at the ends, not the roots. Use a rat-tail comb gently, unravel one braid at a time, and add a little oil if the hair feels dry or tangled. Rushing the takedown is how breakage happens.
The Shape That Stays Sharp
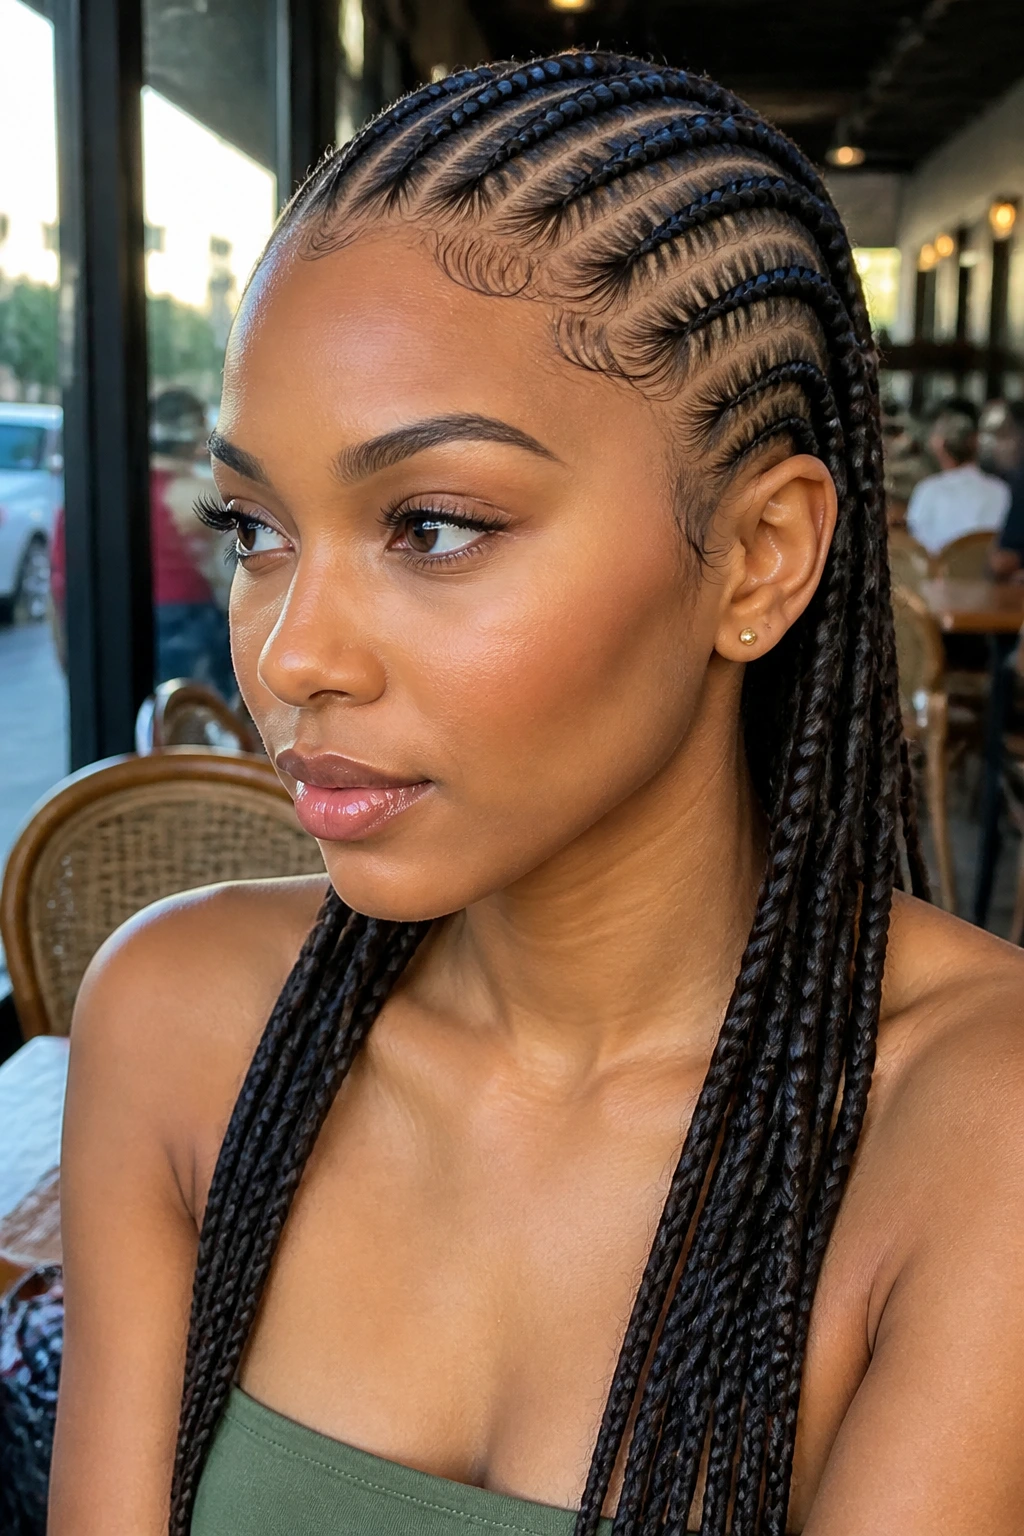
Cornrow hairstyles earn their polish from order, not excess. Clean parting, smart braid direction, and a finish that respects the hairline do more for the final look than any pile of accessories ever could. When the structure is right, the style feels rooted, intentional, and ready for whatever the day asks of it.
That’s why cornrows keep working across so many settings. They can be plain, ornate, formal, sporty, or quietly regal, and the difference usually comes down to the line you draw at the scalp. Pick the pattern that suits the face, keep the tension honest, and let the shape do its job.
