



The best beach braid hairstyles for summer don’t look polished for long. That’s the point. Wind, salt spray, sunscreen, sweat, a crossbody strap rubbing the same spot for three hours — all of that has a way of exposing a hairstyle that only works in a mirror. A good braid keeps moving without falling apart, and it still feels like hair, not a helmet.
There’s also a sweet spot here that a lot of people miss. The braid should hold its shape, yes, but it should not feel like your scalp is being pulled into a contest it never agreed to enter. The styles worth wearing near water have a little give at the crown, a little softness at the edges, and enough grip to survive a damp walk back from the shore.
Beach braid hairstyles for summer work because they solve the same annoyances in different ways: face-framing pieces that won’t stick to sunscreen, lengths that won’t tangle the second you lean back on a towel, and ends that stay controlled even when the air turns heavy. The only real trick is matching the braid to your hair’s texture, length, and patience level. Some styles want a smooth blowout. Others look better on second-day curls. A few are built for braided hair, not against it. That difference matters.
Why You’ll Love This Collection
- Wind-Resistant Shape: These braids stay readable when the breeze gets pushy, which matters more at the shoreline than anywhere else.
- Heat-Friendly Updos: Several styles lift hair off the neck and shoulders, so you’re not stuck peeling damp strands off your skin.
- Texture-Friendly Options: Some looks are made for curly hair, some for straight hair, and a few work better when the hair has a little grit from day-two wear.
- Easy to Dress Up: The same braid can look casual with a tank top and oversized sunglasses or cleaner with hoops, gloss, and a linen dress.
- Protective Choices Included: If you want your ends tucked away, there are styles here that keep handling, tangling, and friction to a minimum.
- Accessory Room: Scarves, cuffs, beads, clips, and pins all have a place here without making the style look crowded.
1. Loose Side Dutch Braid
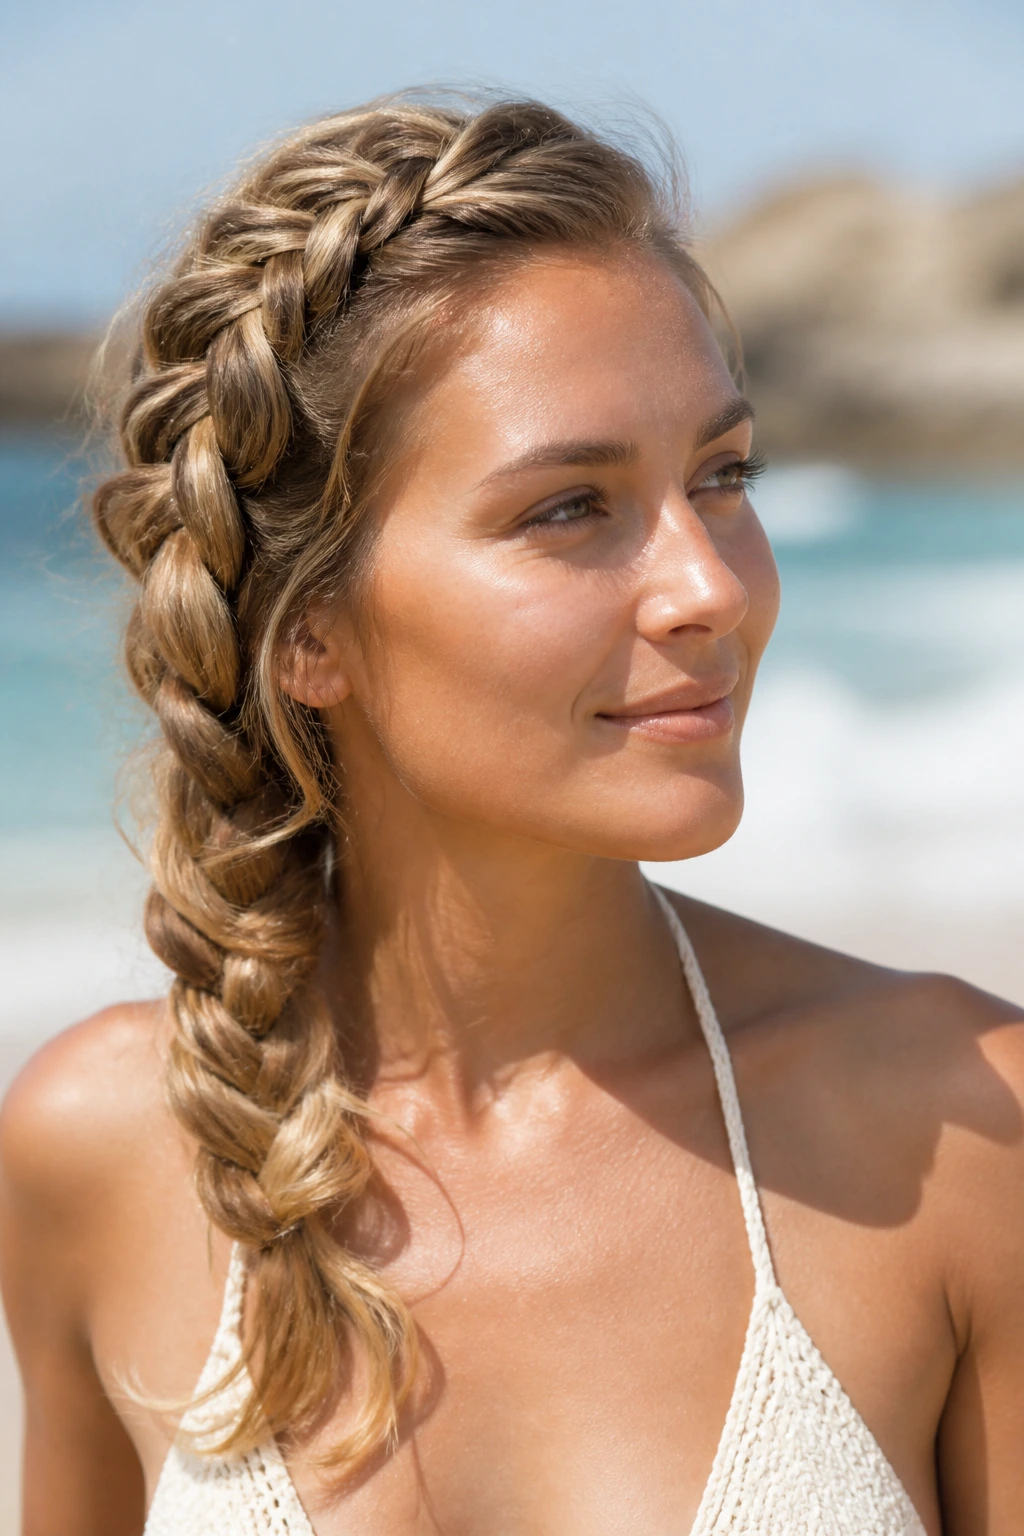
A loose side Dutch braid is one of those styles that looks relaxed without falling into sloppy. Start with a deep side part, braid close to the scalp for a few passes, then let the plait drift over one shoulder. The raised braid line gives it enough structure to survive wind, while the soft finish keeps it from looking overworked.
This style is especially good when your hair has a little texture already. Day-two hair grabs better than freshly washed strands, and a small bit of mousse at the roots helps the braid stay put. I like this one when I want hair off one side of my face but still want movement. If you’re wearing sunglasses, tuck the braid behind the opposite shoulder and let the front sit a little looser around the temple.
2. Fishtail Braid Over One Shoulder
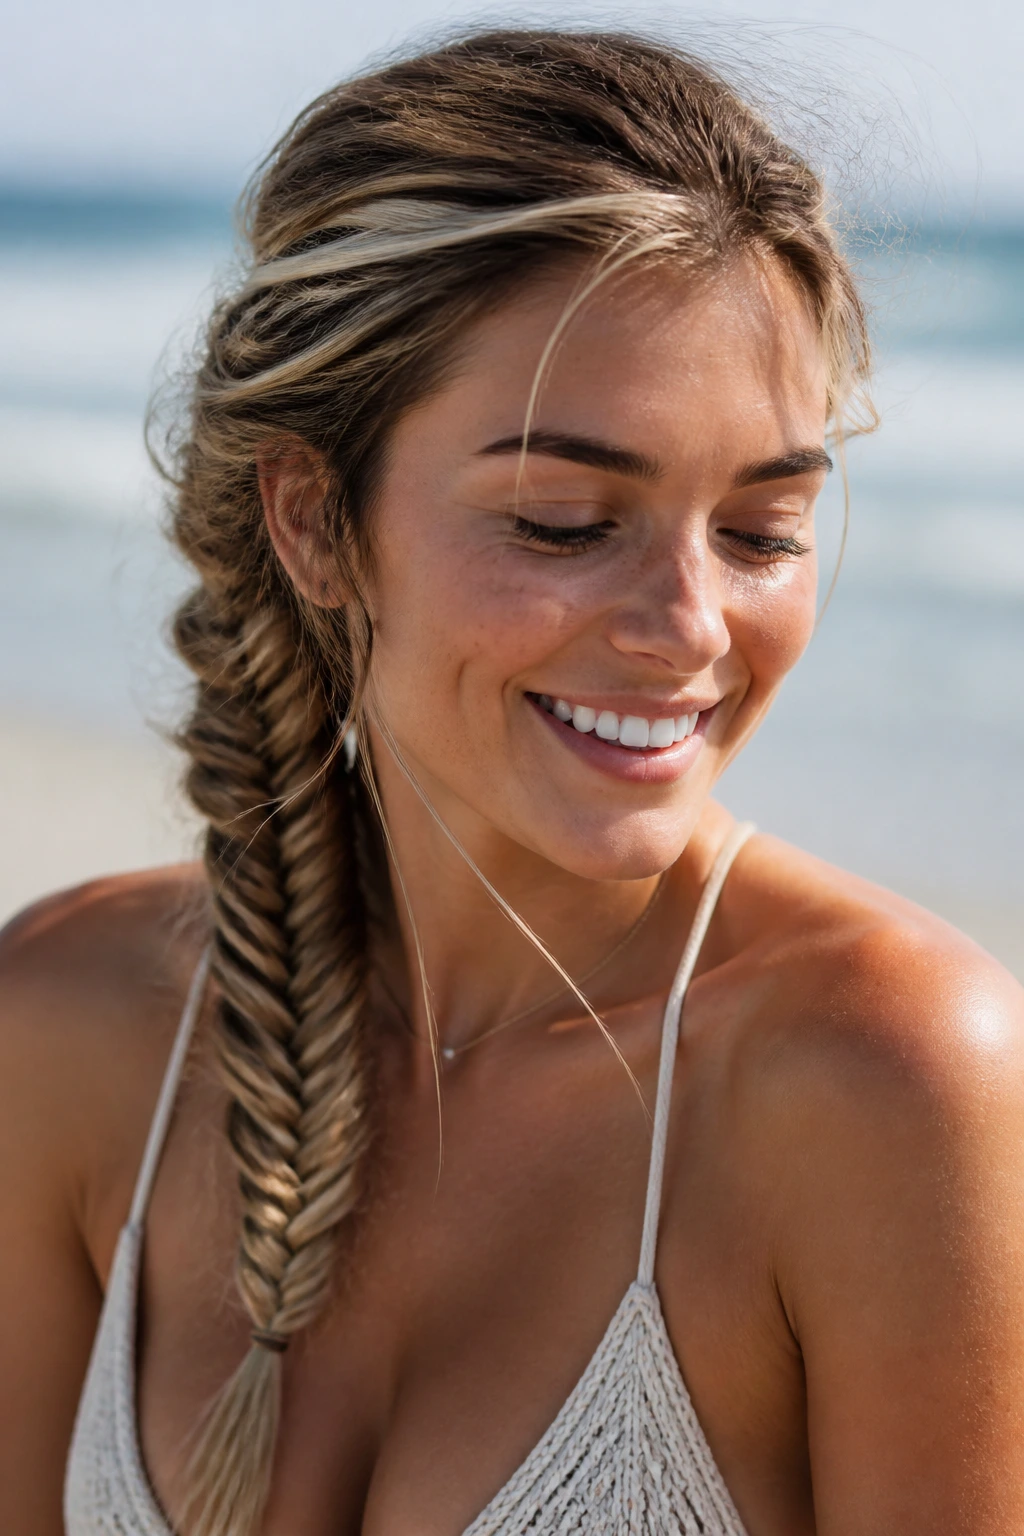
A fishtail braid over one shoulder has that fine, woven look that feels beachy without needing a pile of product. It works best when the sections are kept small and the braid is pulled apart a little after tying it off. That soft “pancaked” finish gives it width, which is useful if your hair is layered or naturally fine.
The braid itself can be simple; the finish is what makes it land. A touch of texturizing spray before you start helps the strands grip each other instead of slipping like satin. I also prefer this braid on hair that isn’t freshly conditioned to the point of silkiness. Too much slip, and the weave looks thin. A little grit, and it gets that loose, ropey shape people keep trying to fake with tools.
3. Half-Up Crown Braid
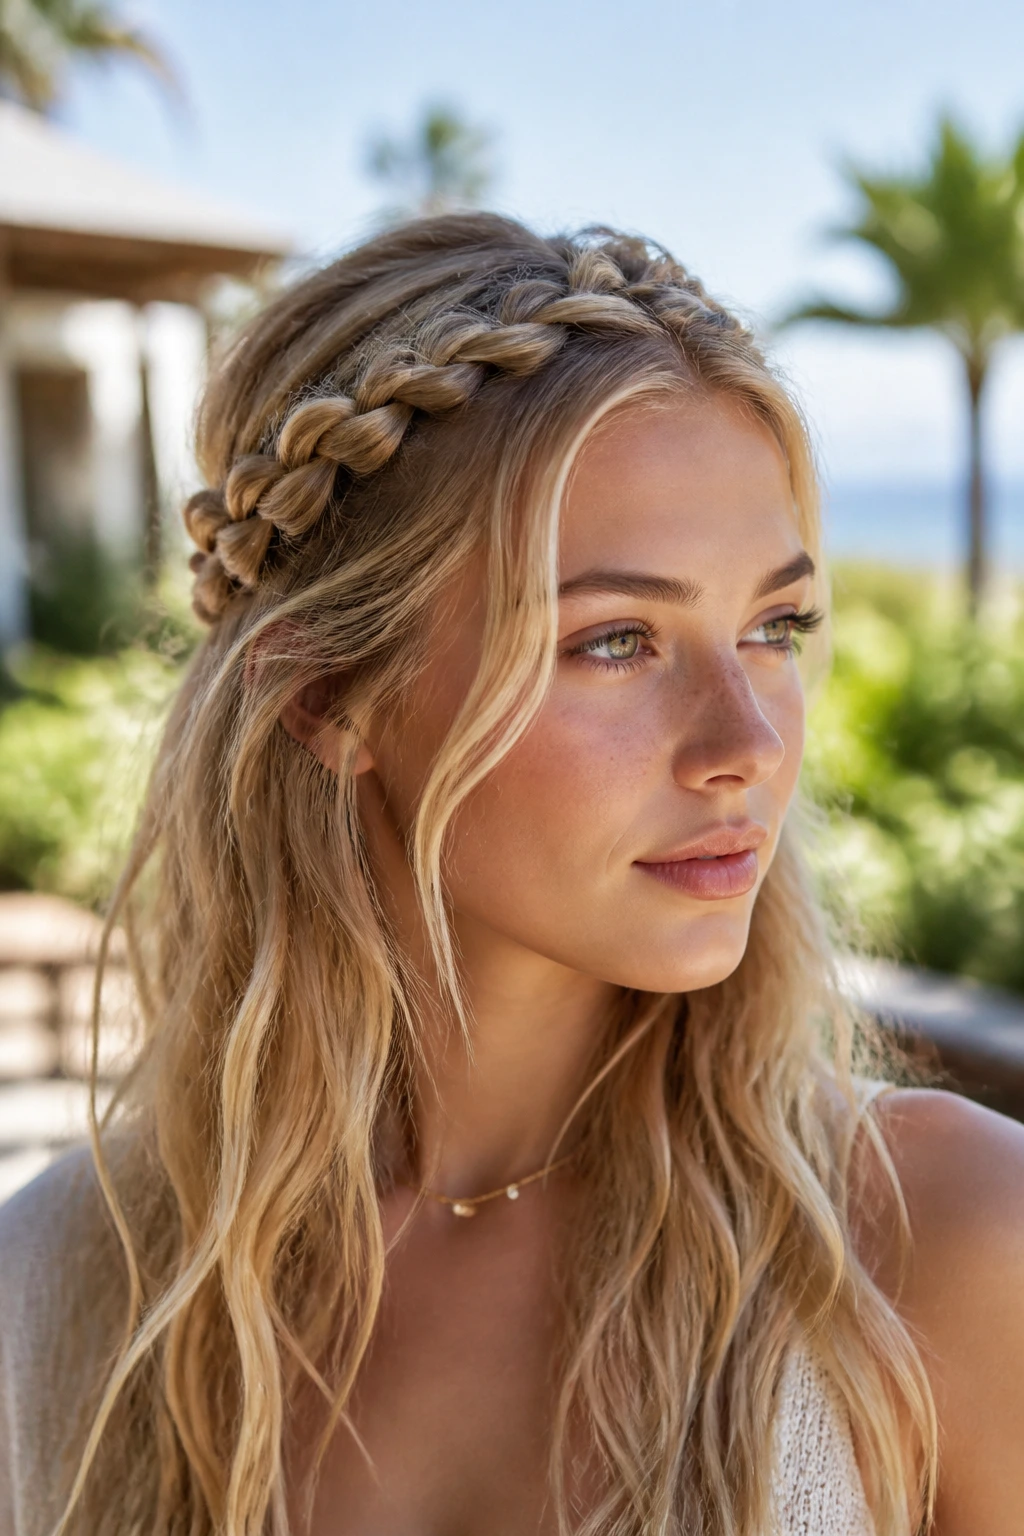
Why does the half-up crown braid keep showing up in summer hair roundups? Because it does a lot with very little. The braid holds the top section away from the face and scalp, while the rest of the hair stays loose enough to move and cool down. That split makes it a smart choice when you want some shape around the head without committing to a full updo.
It’s also forgiving if your ends are a little dry. The crown section can be neat and controlled while the lengths stay soft or wavy below. I like this one for long afternoons outside, especially when the humidity is high enough to make fully loose hair feel heavy. Leave a few thin pieces near the temples if you want it softer; skip them if you want the braid to read cleaner.
4. Milkmaid Braid With Face-Framing Pieces
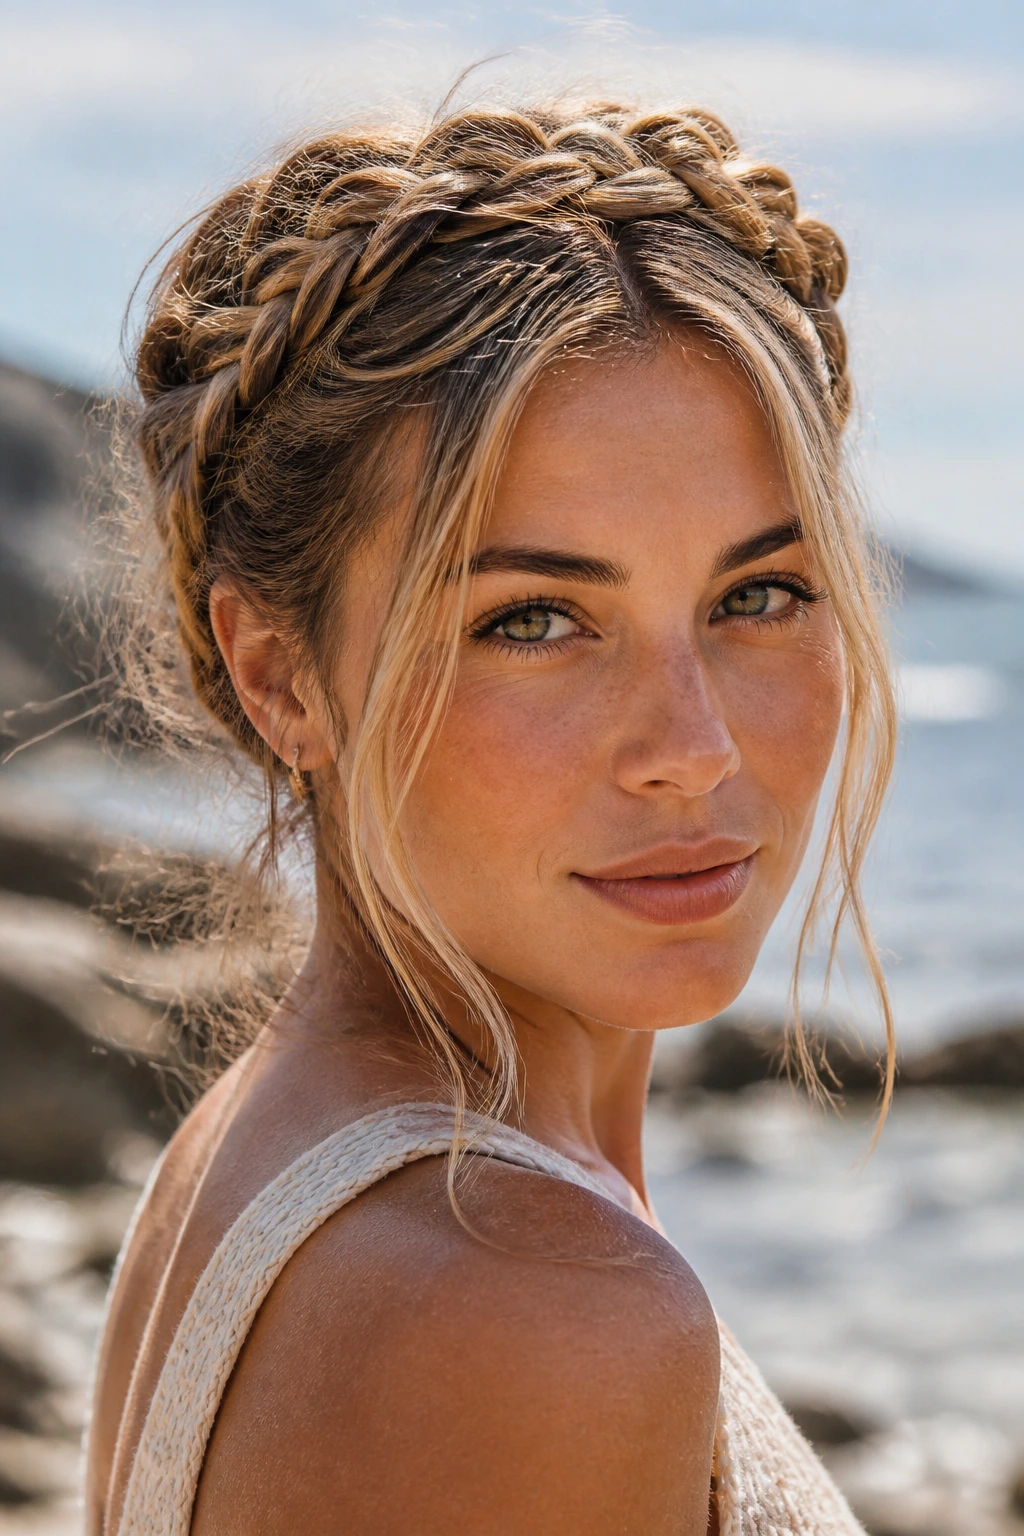
Milkmaid braids sit beautifully when the weather is warm because they lift the hairline off the face and pin the length close to the head. Two braids wrap across the crown and meet at the top, which gives the style a built-in shape that doesn’t collapse fast. The face-framing pieces keep it from looking too formal.
This one wants medium to long hair, though you can fake the fullness with a bit of backcombing at the braid base if your hair is fine. Don’t pull the braids too tight around the ears; that’s where the style starts to feel less charming and more like a mistake. A few loose strands near the cheeks soften the whole thing. Nice trick, small payoff. Works every time.
5. Boxer Braids With Soft Ends
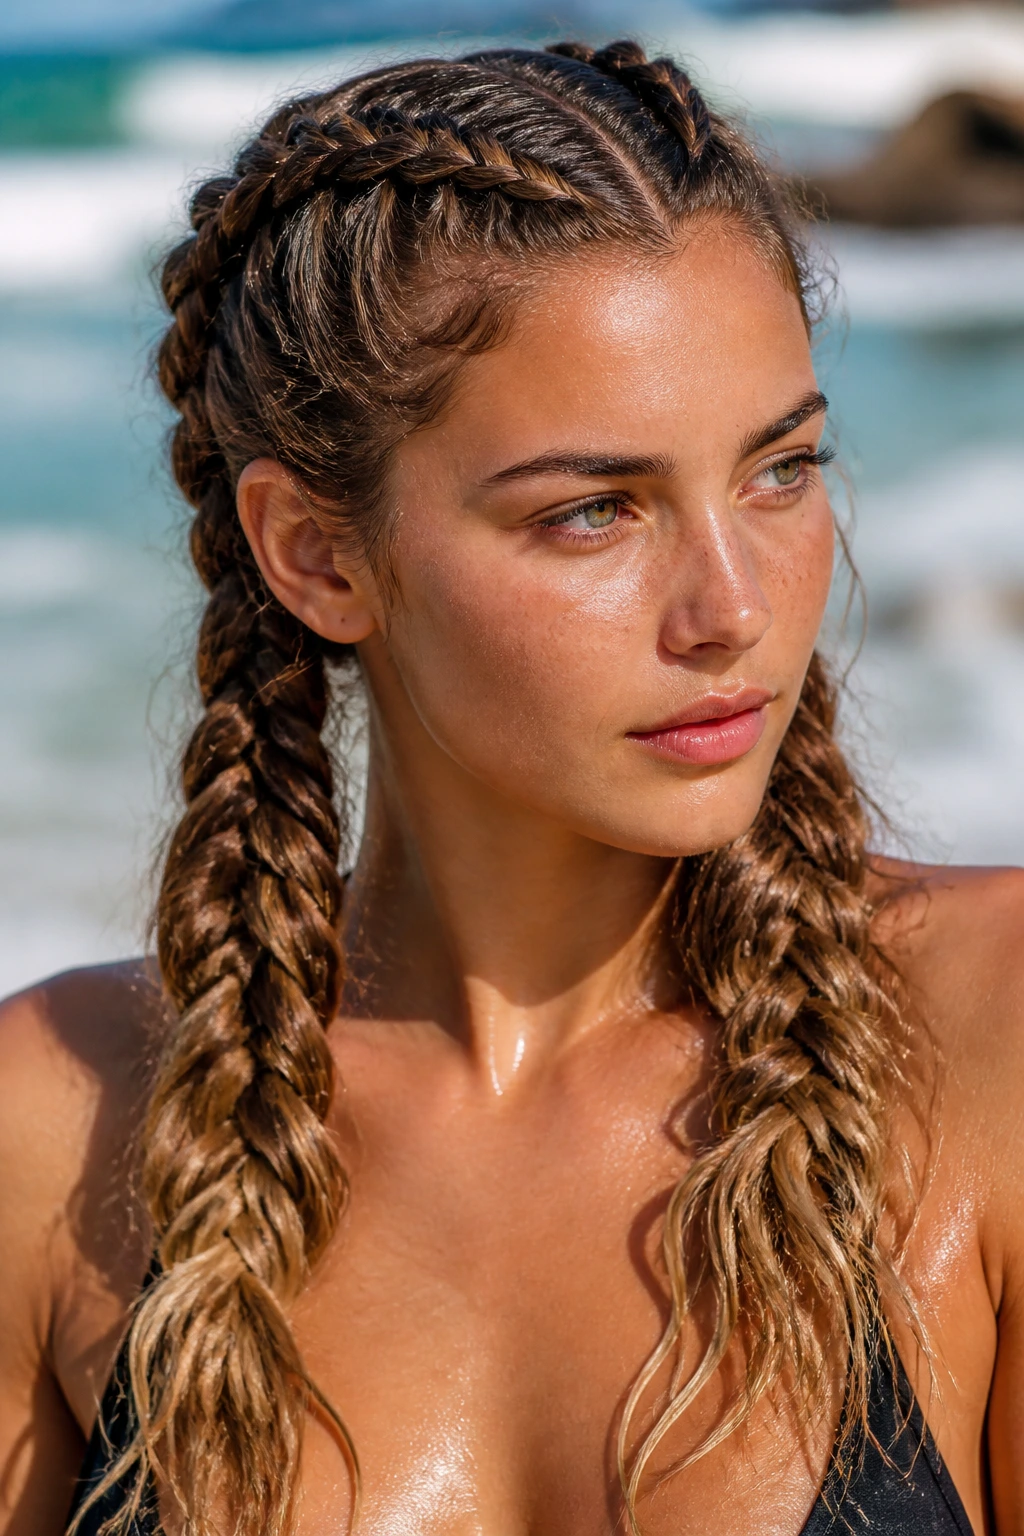
Boxer braids have a reputation for looking sporty, but they can read a lot softer when you leave the ends loose and slightly waved. The two Dutch braids keep the scalp tidy and the front sections off the face, which is handy when you’re dealing with wind, sunscreen, and the general chaos of a long day outside.
The key is not to braid them so snugly that they feel sharp at the hairline. Start controlled, then ease off toward the mid-lengths so the tail keeps some movement. A mousse or foam product helps with that soft grip. If your hair is straight, bend the ends with a curling iron or let them air-dry in loose bends before you braid. If it’s curly, just keep the braid line neat and let the texture do the rest.
6. Rope Braid Low Ponytail
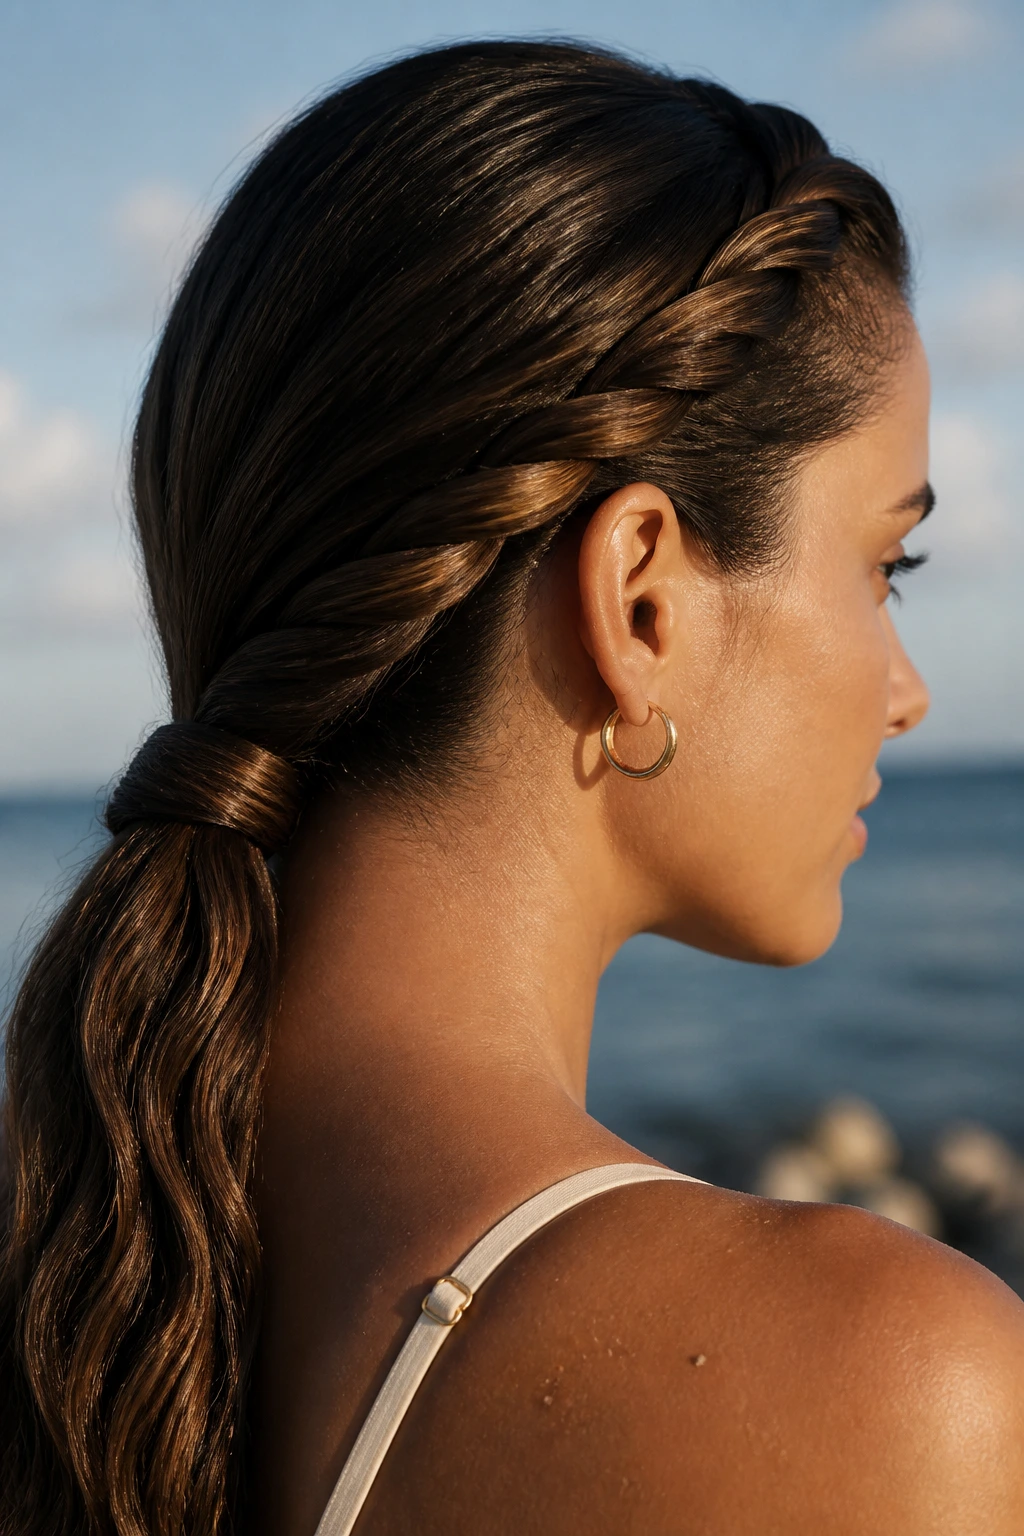
A rope braid low ponytail looks simple until you realize how much better it behaves than a regular three-strand braid in humid air. Because it’s built by twisting two sections around each other, it lays smooth and sleek against the back of the head. That makes it a nice choice when your hair is thick, heavy, or a little frizz-prone.
I reach for this style when I want something quick that still feels deliberate. A low ponytail at the nape keeps the weight down, and the rope twist adds enough detail that it doesn’t read as an afterthought. If the strands are slippery, spray the lengths lightly with dry shampoo or texturizer first. The twist holds better when the hair has a bit of grip instead of slide.
7. Pull-Through Braid for Thick Hair
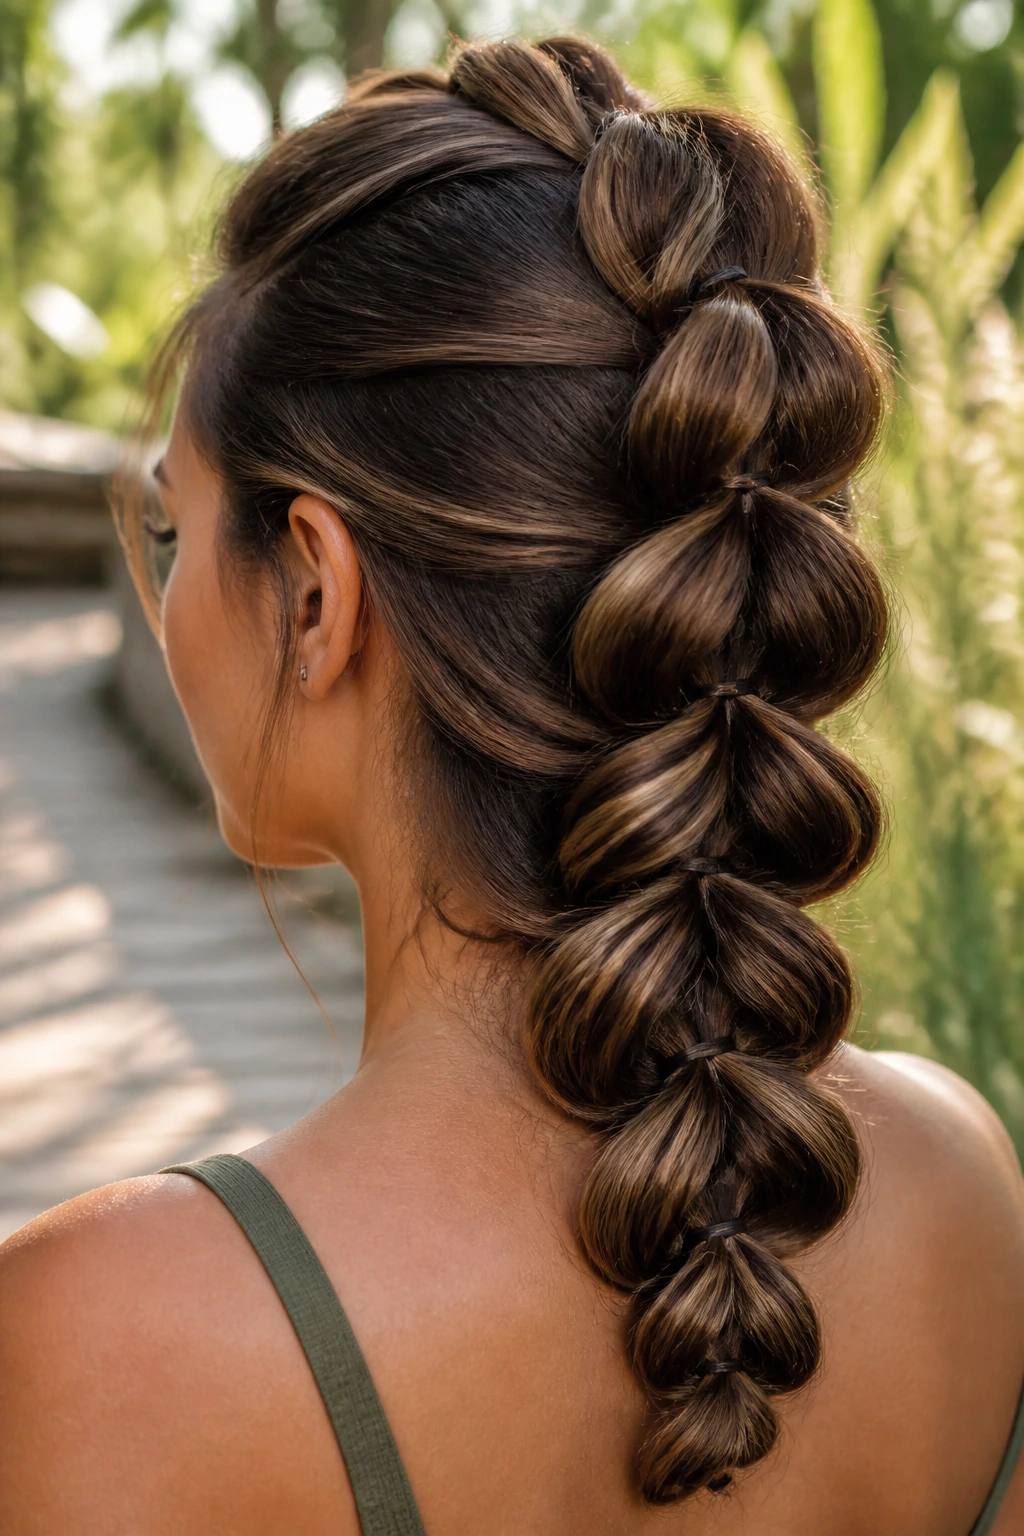
The pull-through braid is a cheat in the best sense. It gives you that oversized braided look without asking your fingers to do all the work of a traditional plait. Clear elastics create the “sections,” and each loop gets gently spread apart until the braid looks full and almost woven by hand.
This style shines on thick or long hair because it holds shape even when the tail gets heavy. It also makes layered hair look more controlled, since each tied section contains the shorter pieces. Keep the elastics evenly spaced, usually every 2 to 3 inches, and puff each loop the same amount so the braid doesn’t list to one side. The trick is rhythm. Not perfection. Just enough symmetry to keep it from looking improvised.
8. Waterfall Braid on Loose Waves
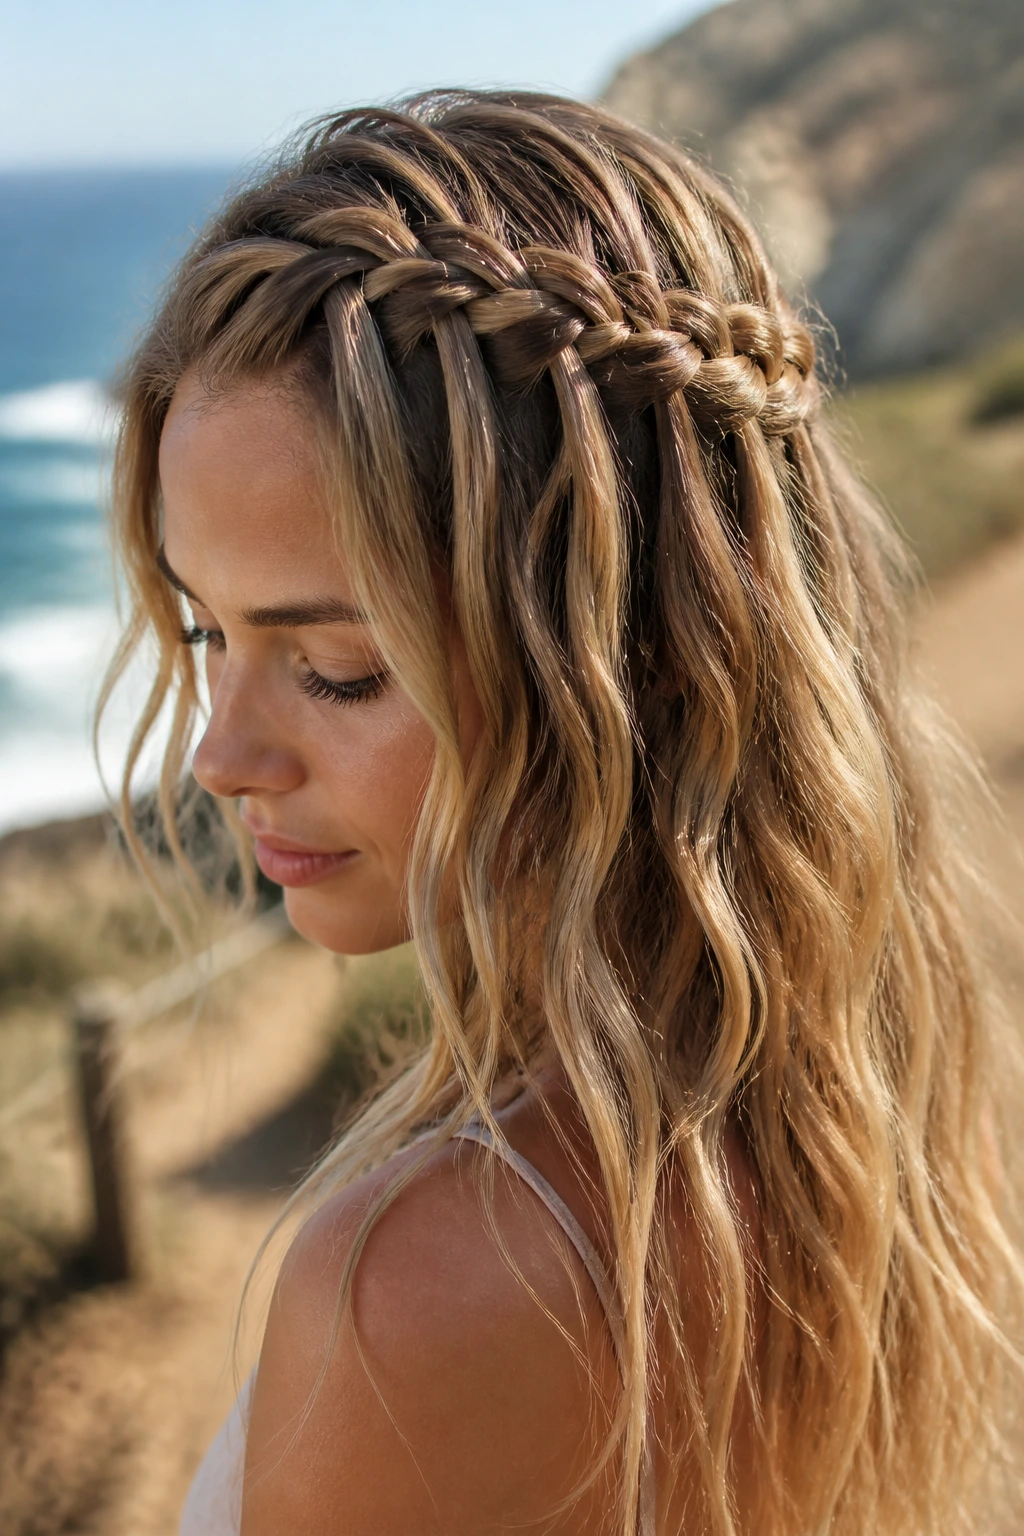
A waterfall braid is the opposite of severe. It leaves strands dropping through the braid like small ribbons, which is why it looks so pretty over soft waves or loose curls. The braid itself is only partial, so the style keeps air and movement instead of locking everything down.
That said, it needs some texture to behave. Freshly clarified hair can be too slick, and then the dropped sections won’t sit where they should. A light mist of sea-salt spray or a few scrunches with mousse can fix that. I like this braid when the hair is shoulder-length or longer, because the contrast between the woven top and the loose lower sections gives the style enough shape to stand up in photos and in real life.
9. Braided Low Bun
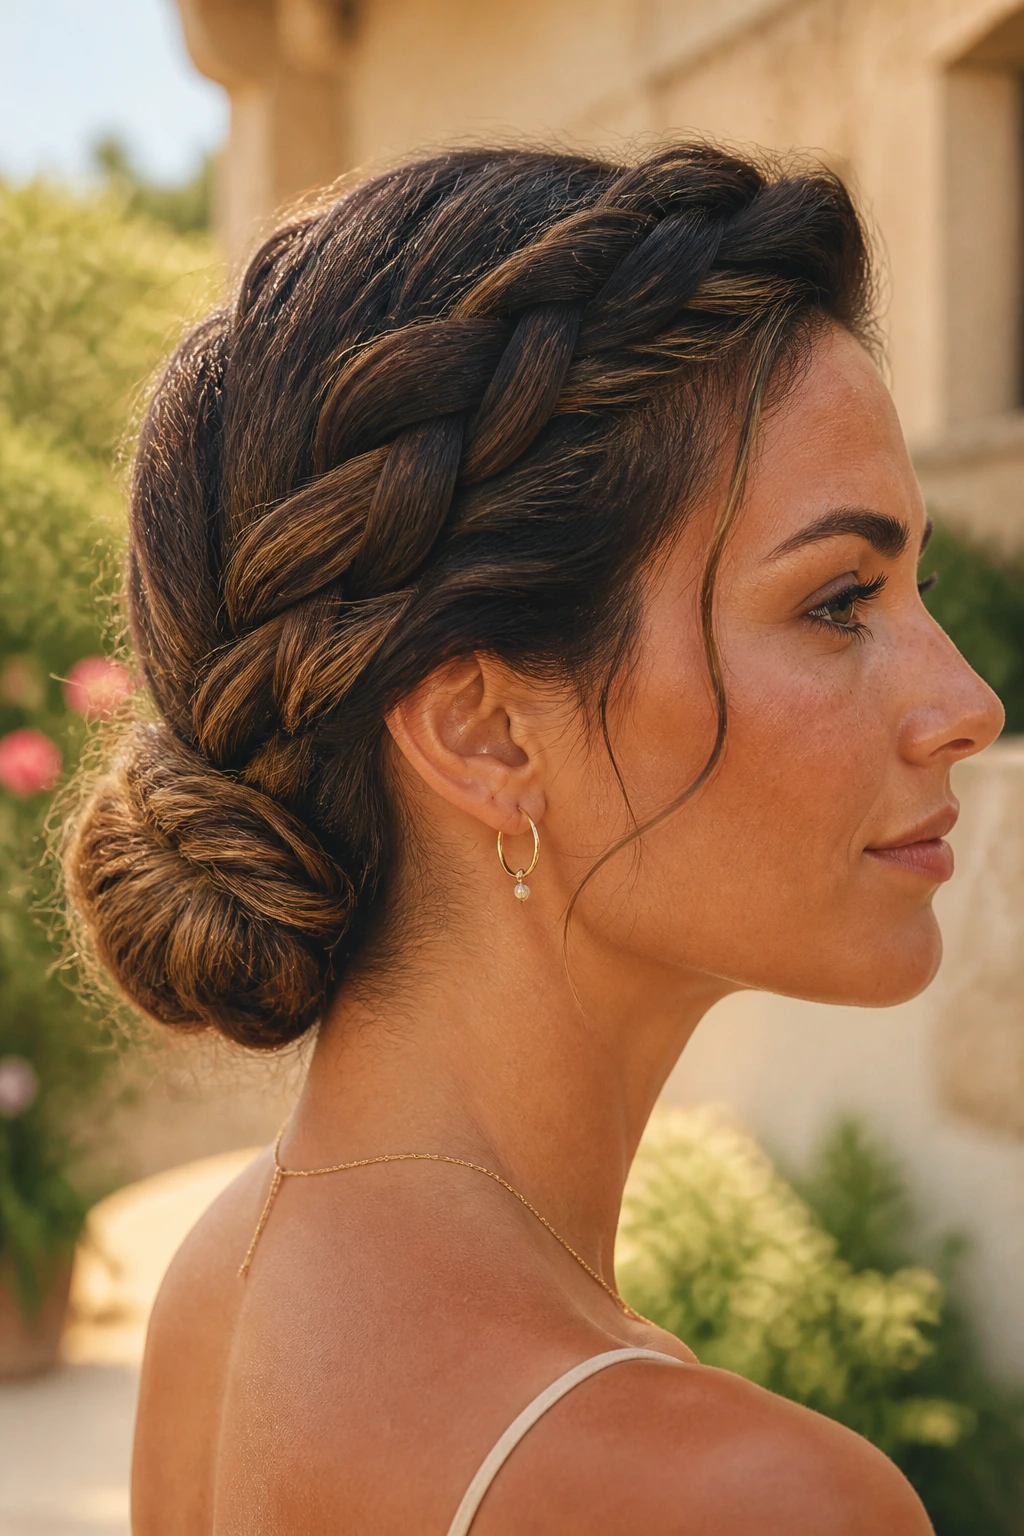
A braided low bun is one of the easiest ways to keep your neck clear without looking like you gave up on the rest of the style. Braid the length first, then coil it at the nape and pin it flat. The braid gives the bun more grip than a simple twist, which means fewer pieces slip out when the wind picks up.
It’s a good choice for hair that sits somewhere between polished and messy. You can keep the crown smooth or let it stay a little undone. I prefer this version with a middle part and a couple of softer pieces around the temples. If your hair is heavy, secure the bun with two pins crossed through the center rather than one big pin that slowly loosens. Small fix. Big difference.
10. Messy French Braid Down the Back
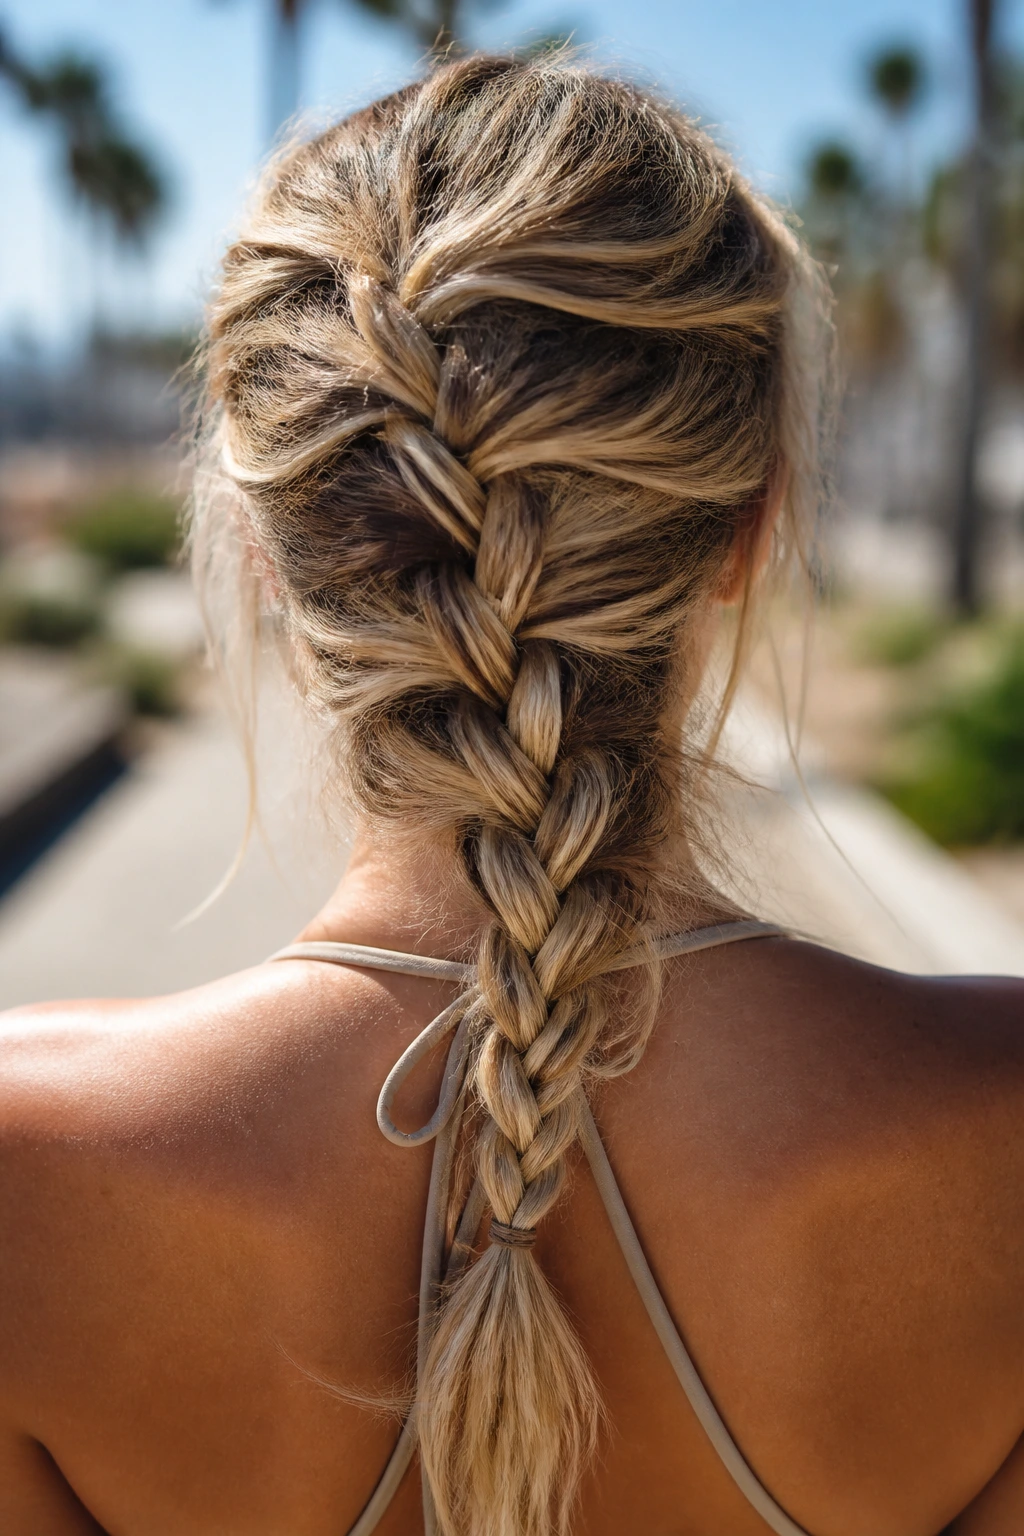
A messy French braid down the back is the classic for a reason: it stays attached to the head and gives you more control than loose braids without looking stiff. The braid starts at the crown, collects hair as it moves down, and keeps everything in one clean lane. That makes it reliable on long, windy days when you don’t want hair whipping into your mouth.
The “messy” part should happen after the braid is secured, not during the braiding itself. Build the braid neatly, then pull the outer edges apart with your fingers so it widens and softens. That keeps the center stable while the outside looks lived-in. I like this one best when the hair has already got some bend or wave. Straight, freshly washed hair can look too neat unless you rough it up first.
11. Twin Braids With Scrunched Ends
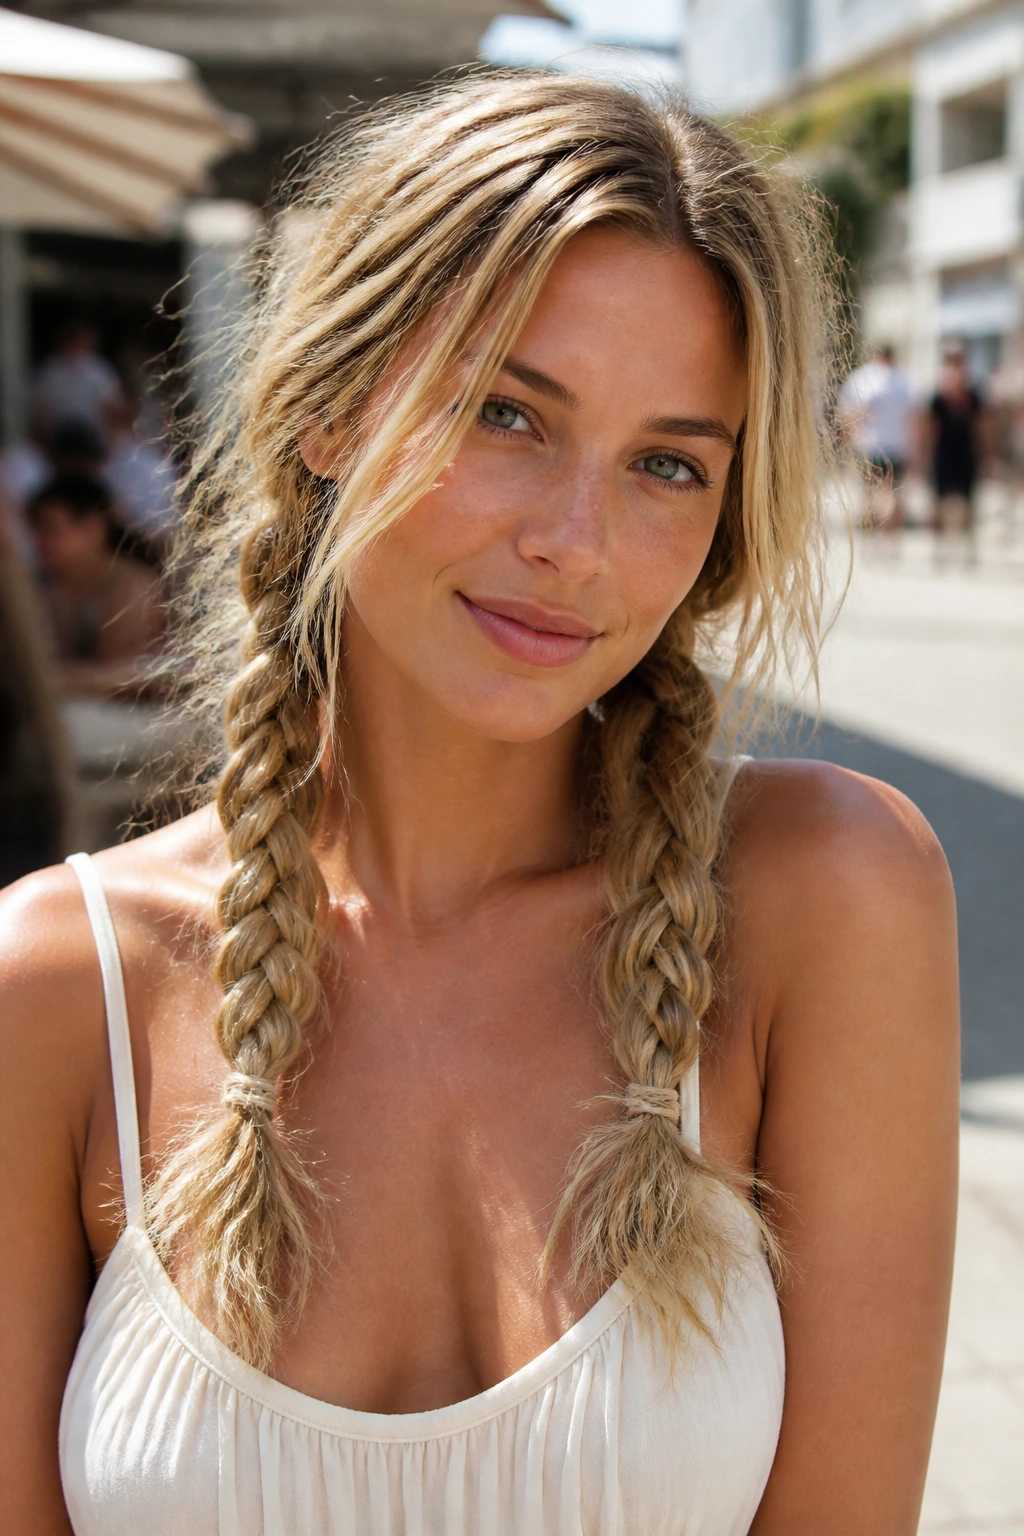
Two loose braids with scrunched ends land somewhere between playful and practical. They’re breezier than a single heavy plait, and they keep the weight split so your scalp doesn’t feel dragged down. The scrunched ends make them look less school-uniform and more like a deliberate summer style.
A little mousse goes a long way here. Work it through damp hair, braid each side loosely, and let the tails air-dry or diffuse until they hold a bend. If you want the ends to stay textured, don’t brush them out after they dry. Finger-separate only. That keeps the finish soft. This is one of the few styles where a slightly imperfect part line looks better than a laser-straight one.
12. Braided Top Knot
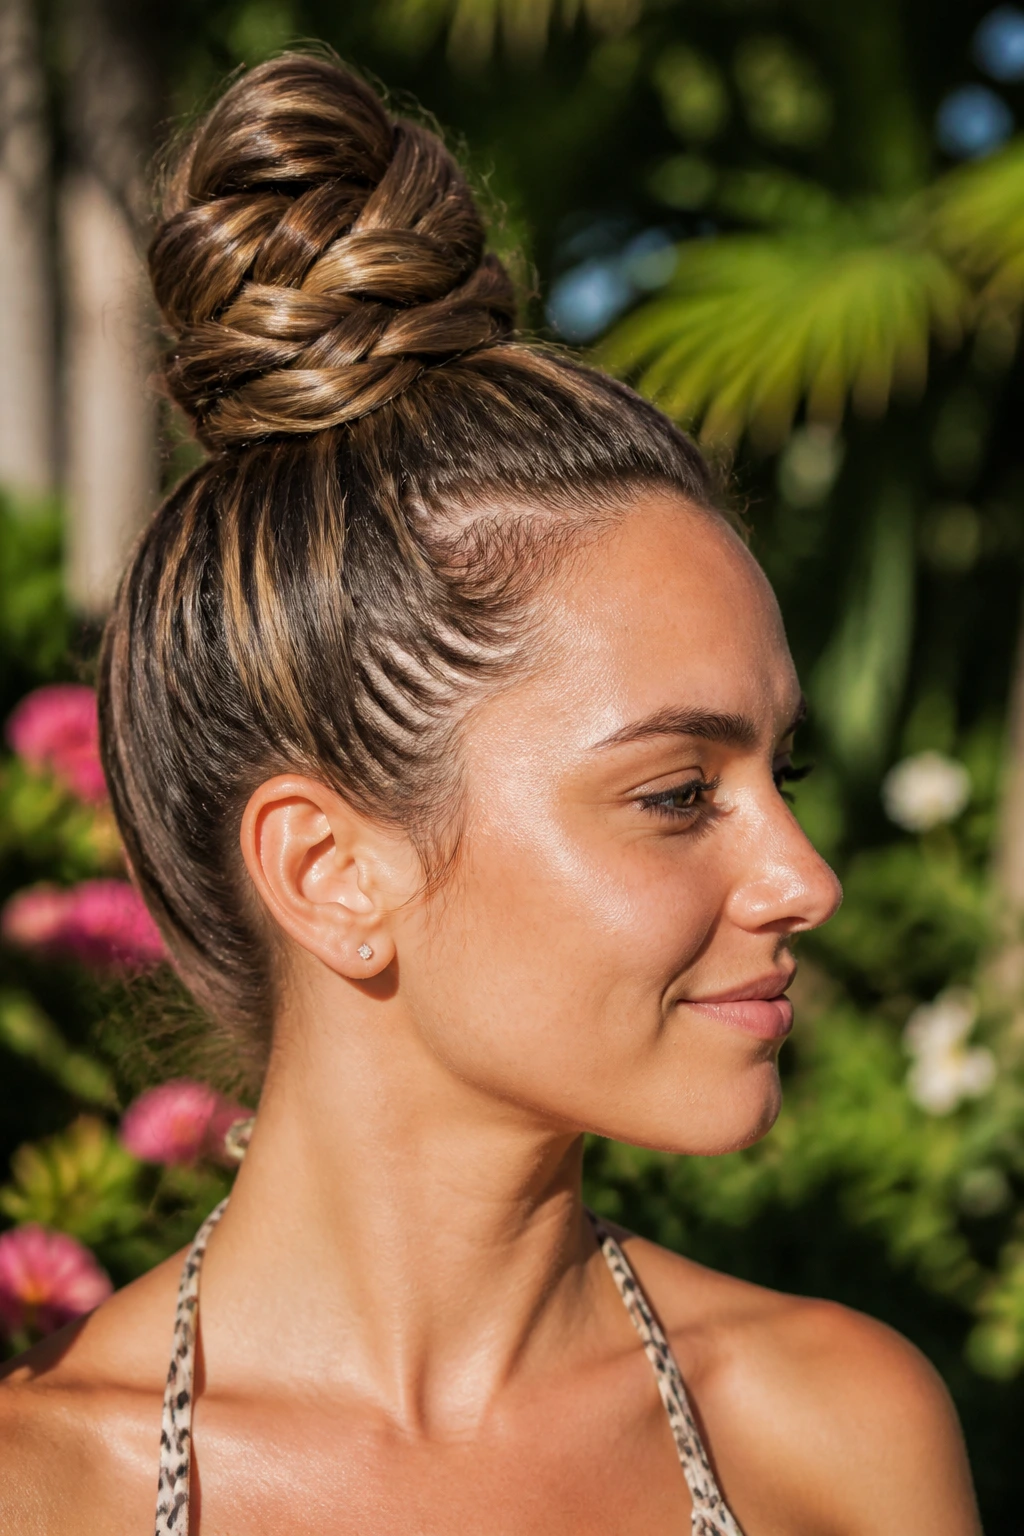
A braided top knot keeps the entire length up and away from the neck, which is exactly what you want when the air feels sticky and the day is long. Start with a braid — a simple three-strand or Dutch braid both work — then wrap it into a knot high on the head and pin it down.
It’s not the smoothest style in the collection, and that’s part of the appeal. The braid gives the knot enough texture to hold, so you’re not constantly redoing it. If your hair is layered, tuck the shorter pieces under the base with a couple of small pins and don’t chase every flyaway. A little movement is better than a helmet finish. For a cleaner look, smooth the crown with a light gel and a brush before you braid.
13. Bubble Braid With Woven Sections
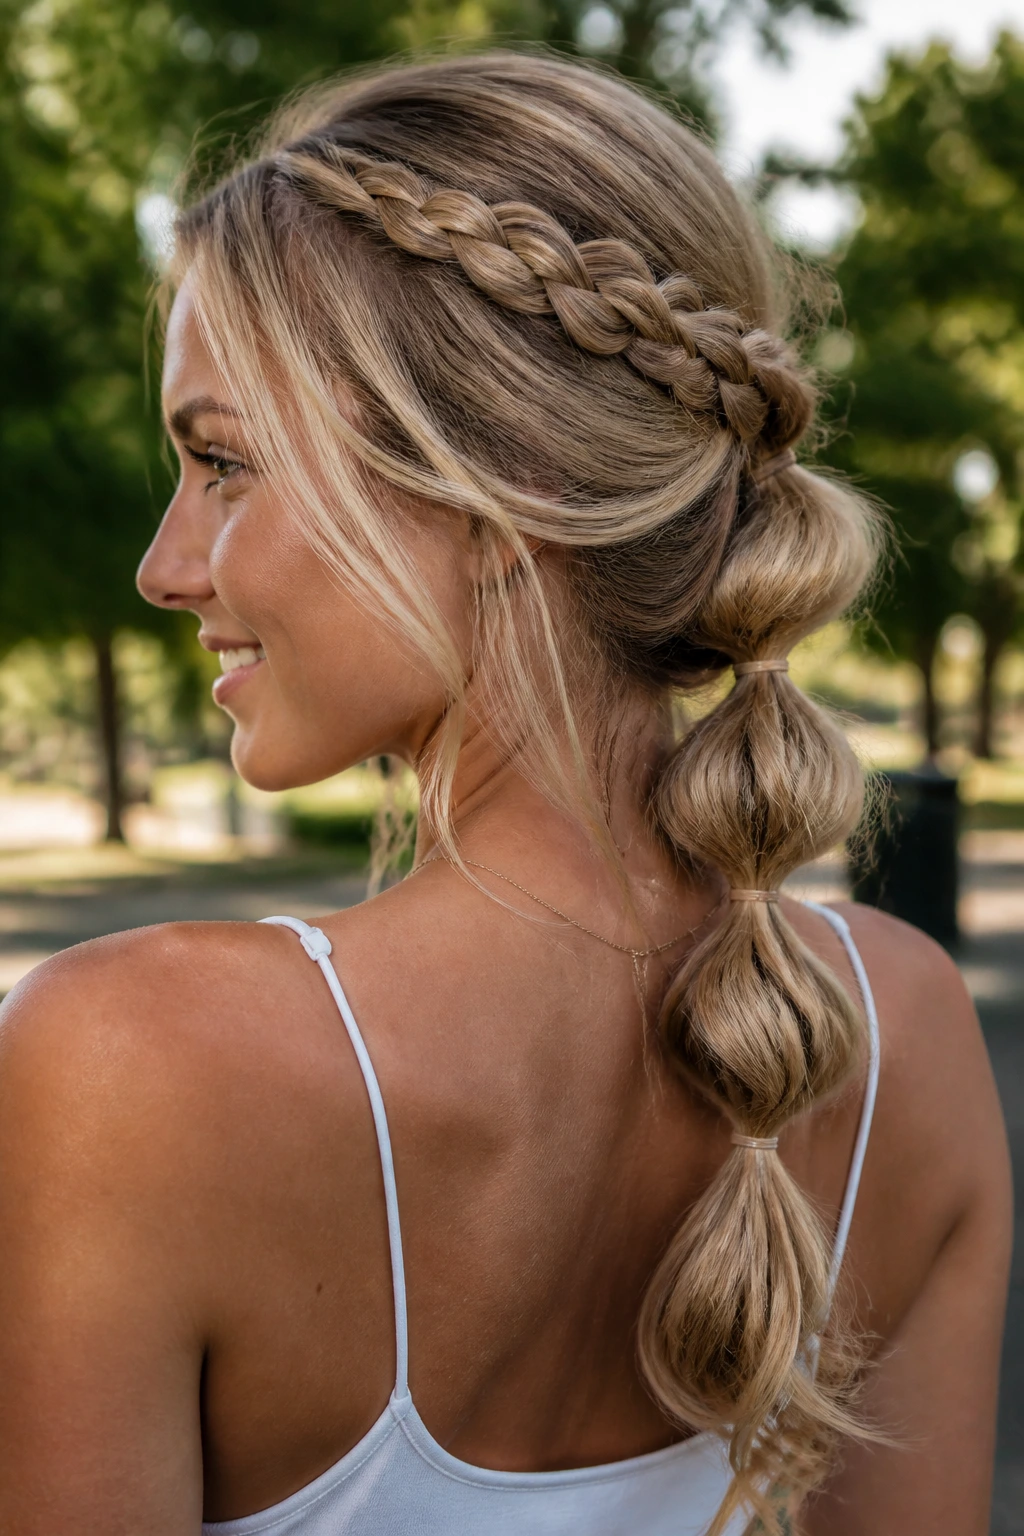
A bubble braid with woven sections looks playful in a way that still feels grown-up. Clear elastics create the bubbles, and tiny braided pieces can be wrapped or laced through the larger sections so the style doesn’t feel flat. It’s a strong choice for longer hair because length gives the bubbles room to inflate.
What I like about this style is the way it keeps volume without asking for a perfect plait. If your hair is thick, space the elastics farther apart; if it’s fine, bring them a little closer so the bubbles read more clearly. A few softly pulled pieces at the crown make it feel less rigid. The woven section is where the personality lives, though. That’s the part people notice first.
14. Cornrow Accent Braids Into a Bun
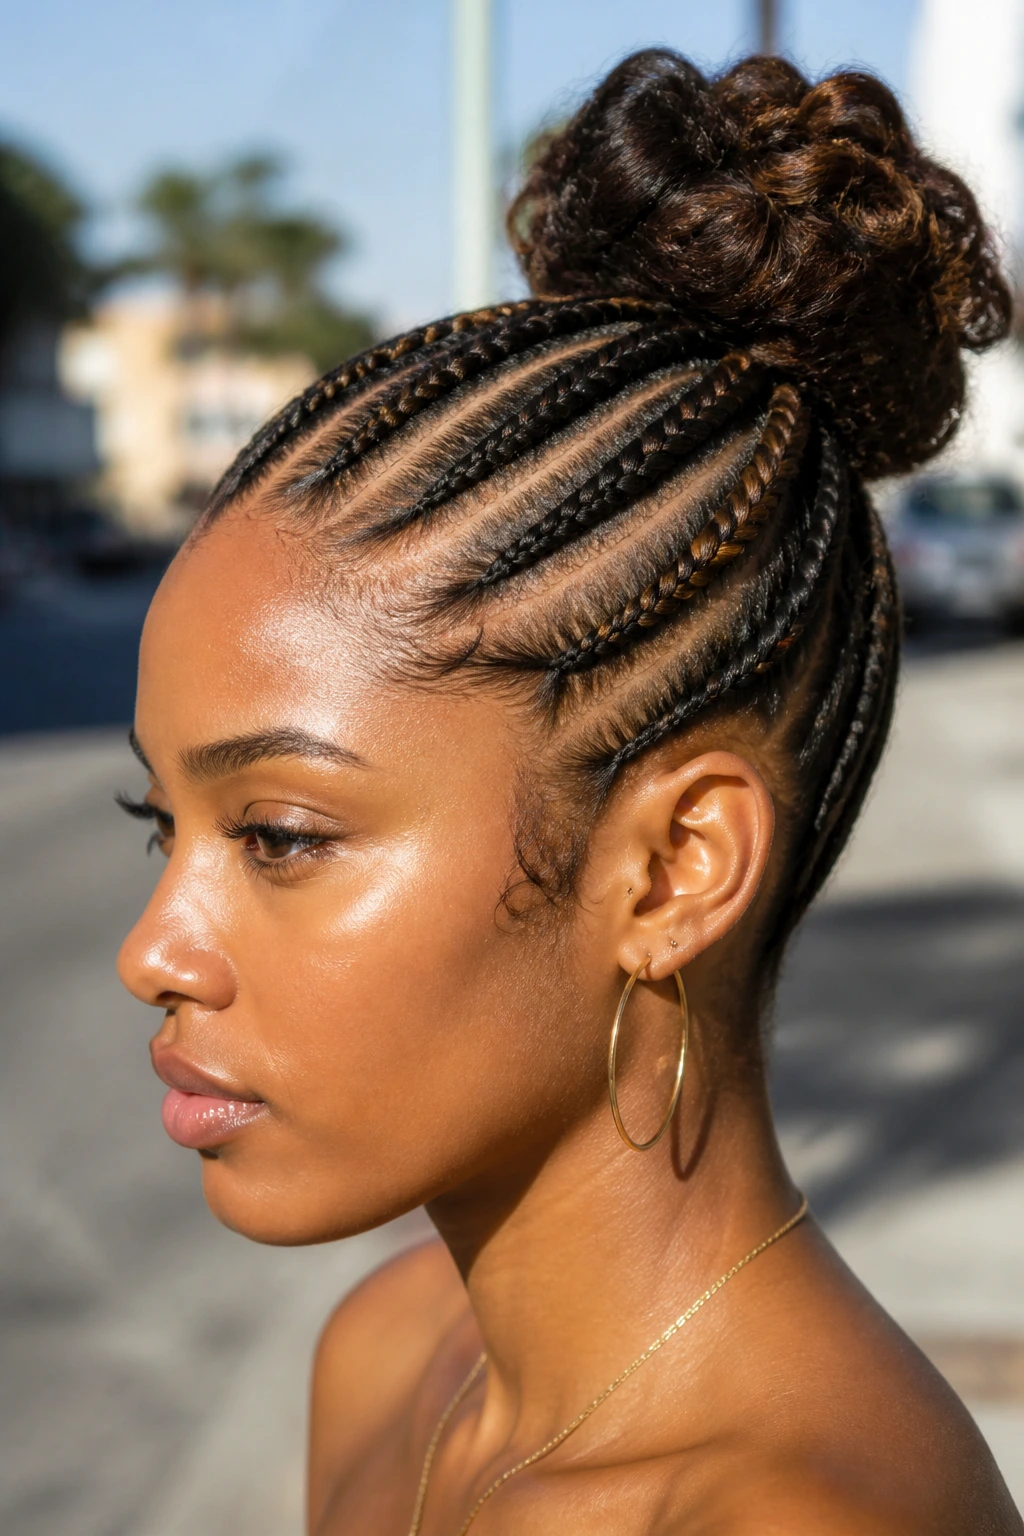
Cornrow accent braids into a bun are a smart middle ground if you want structure near the hairline and freedom at the back. The tight, narrow braids keep the front neat, while the gathered bun at the nape or crown gives you some lift. It’s a great style for hot, active days because the front stays under control even when the rest of the hair moves.
This style does ask for clean sectioning. A rattail comb and a good clip are not optional if you want the rows to stay even. Keep the braids close to the scalp, but not so tight that the skin feels pulled. That tension difference matters more than people admit. If the front is sore after ten minutes, it’s too tight. Simple test. Easy fix. Start over if you need to.
15. Boho Knotless Braids With Curly Ends
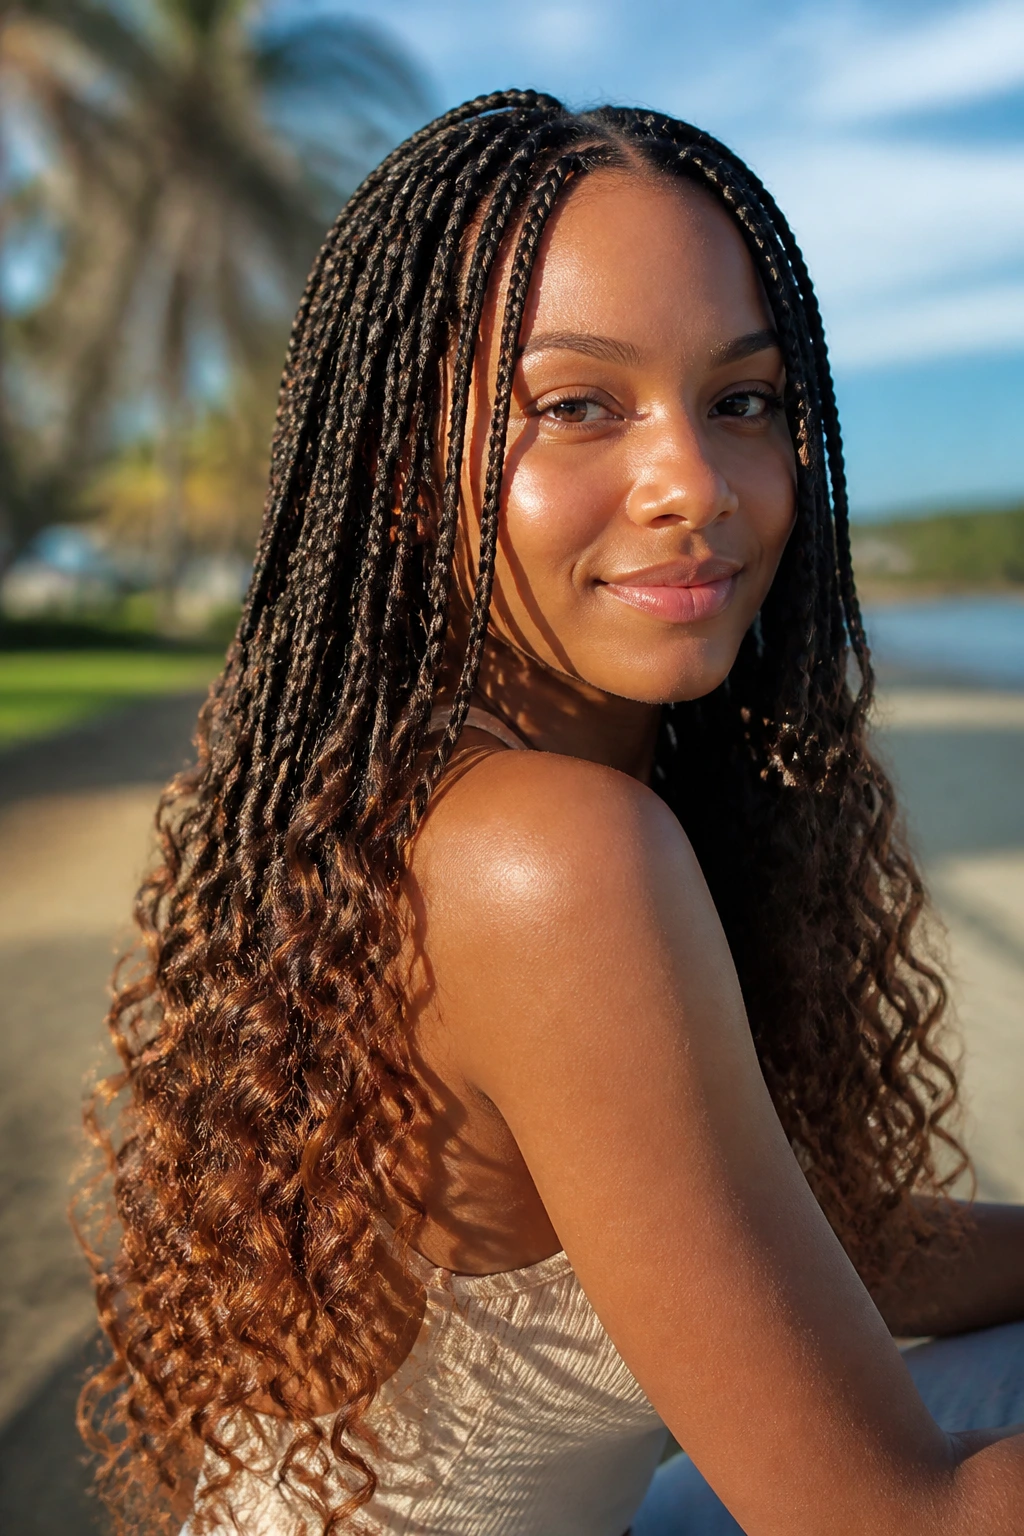
Boho knotless braids with curly ends are one of the best protective beach styles because they give you length, movement, and tucked-away ends without the stiff feel of old-school box braids. The knotless base starts softly at the scalp, which cuts down on that obvious bump right at the root. Curly ends keep the style from looking too heavy or rigid.
This is the kind of style that rewards patience and a light hand. The installation matters, and so does the aftercare. If the braids are too tight at the front, they’ll itch before the day is done. If the curls at the ends are overhandled, they frizz fast. I like this look for long trips, not just one afternoon, because it can hold up for days when wrapped at night and refreshed with a little mousse at the lengths. You still need to respect your scalp. Protective does not mean pressure-free.
16. Micro Braids With Beachy Texture
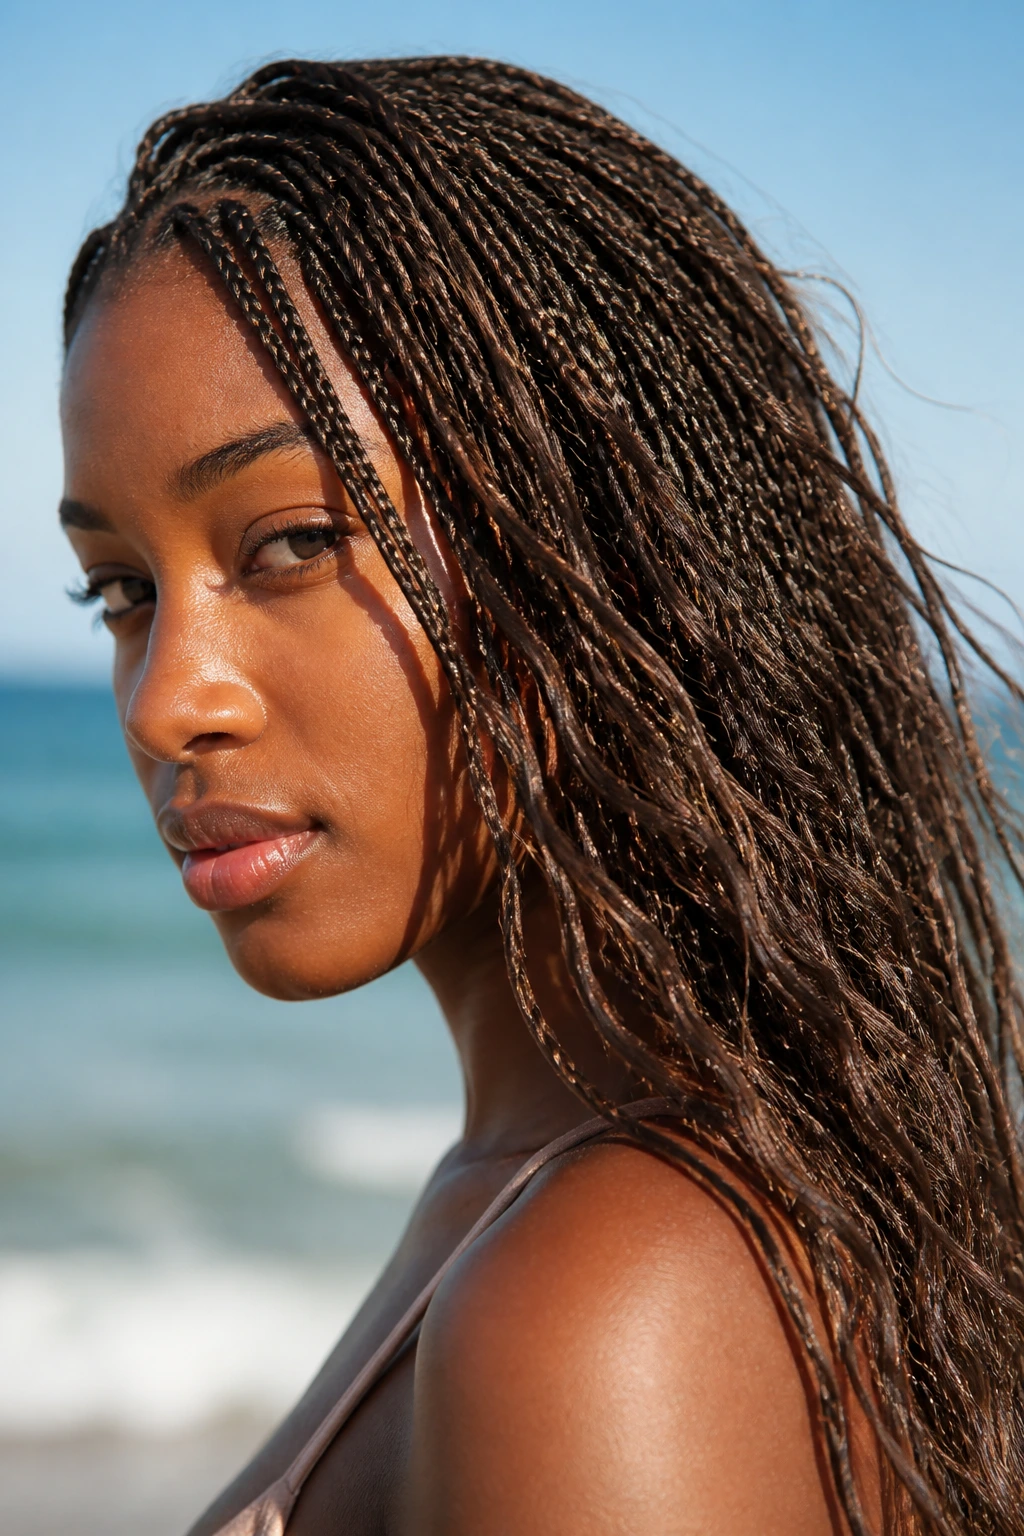
Micro braids can look delicate from a distance, but up close they carry a lot of movement. Because each braid is tiny, the style falls softly instead of clumping into one big shape. That makes it a good fit if you want texture that behaves in humidity rather than fighting it.
The tradeoff is time. Micro braids take longer to install, and they need a careful touch at the roots so the scalp does not feel stressed. Once they’re in, though, they work beautifully with a little wind and a little salt air. They don’t puff up the way larger braids can, and the thin sections keep the style neat around the face. If you want more looseness, separate a few braids near the front and let them fall forward. Tiny shift, big change in the silhouette.
17. Stitch Braids With Slicked Parts
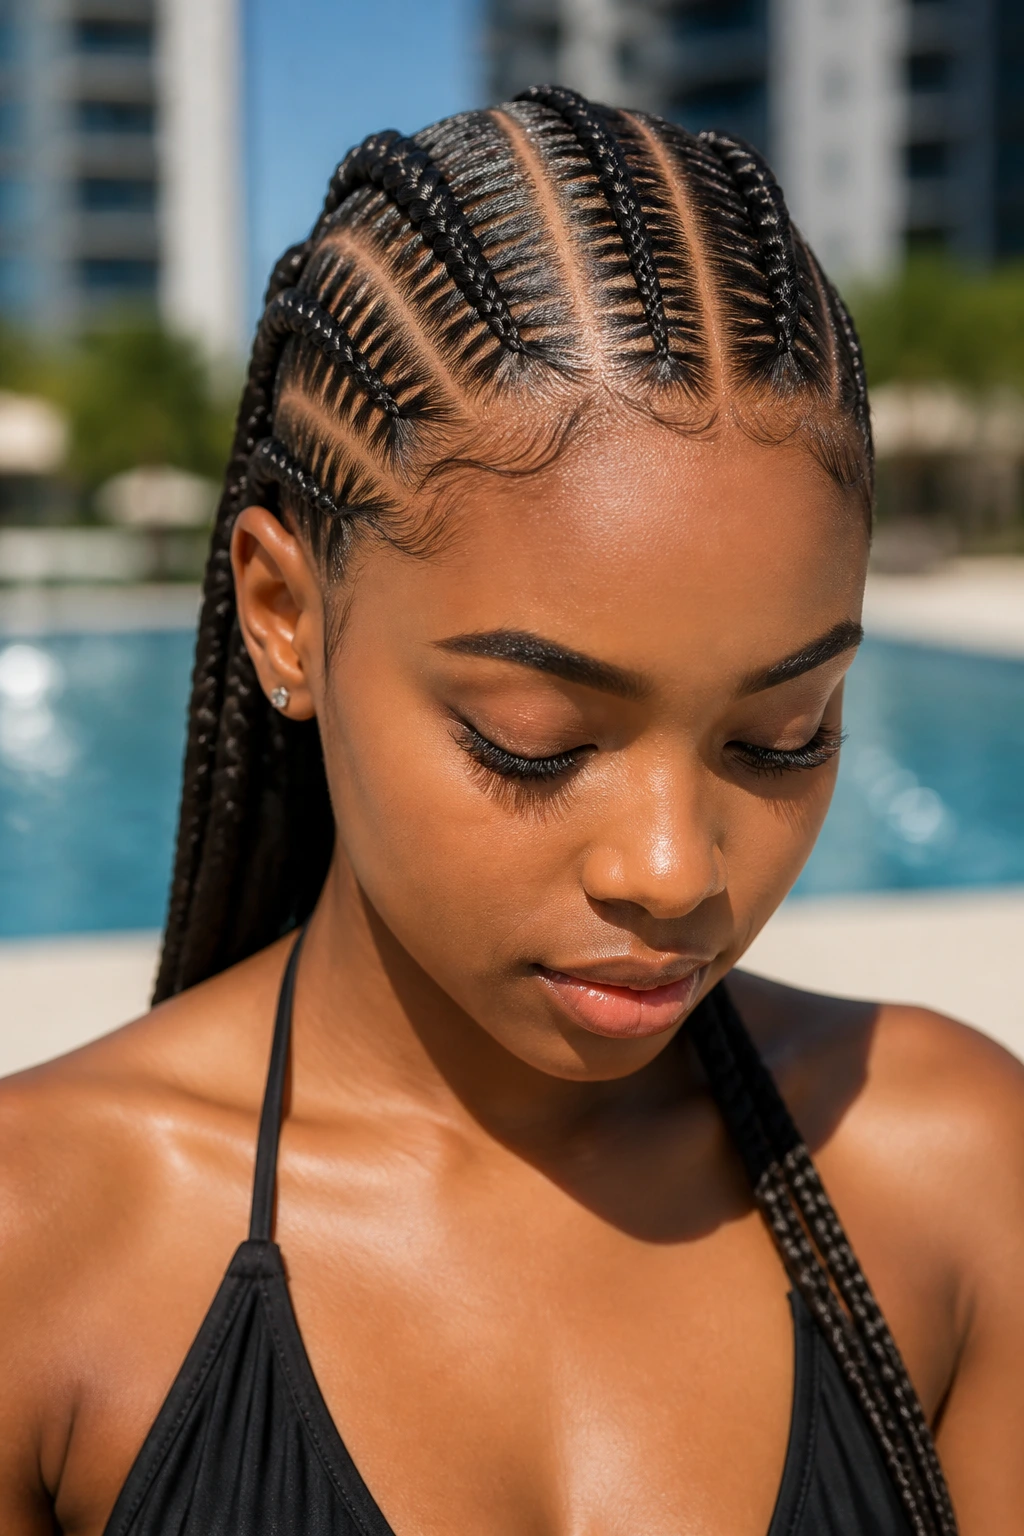
Why do stitch braids look so sharp near the water? Because the parts are doing half the work. Those clean, narrow rows create a graphic pattern across the scalp, and when the hair is smoothed down properly, the style holds its shape for a long stretch. It’s a strong choice when you want the hair to look finished, not floppy.
The slick part matters, though. Use a light gel or edge control only where the braid line needs it; dumping product everywhere will make the roots stiff and flaky. A tail comb helps keep the sections even, and a firm hand helps the rows stay crisp. If you wear this style high into a ponytail or bun, the whole thing feels even cleaner. It’s not a casual braid. It’s a deliberate one.
18. Goddess Braids Pinned Up
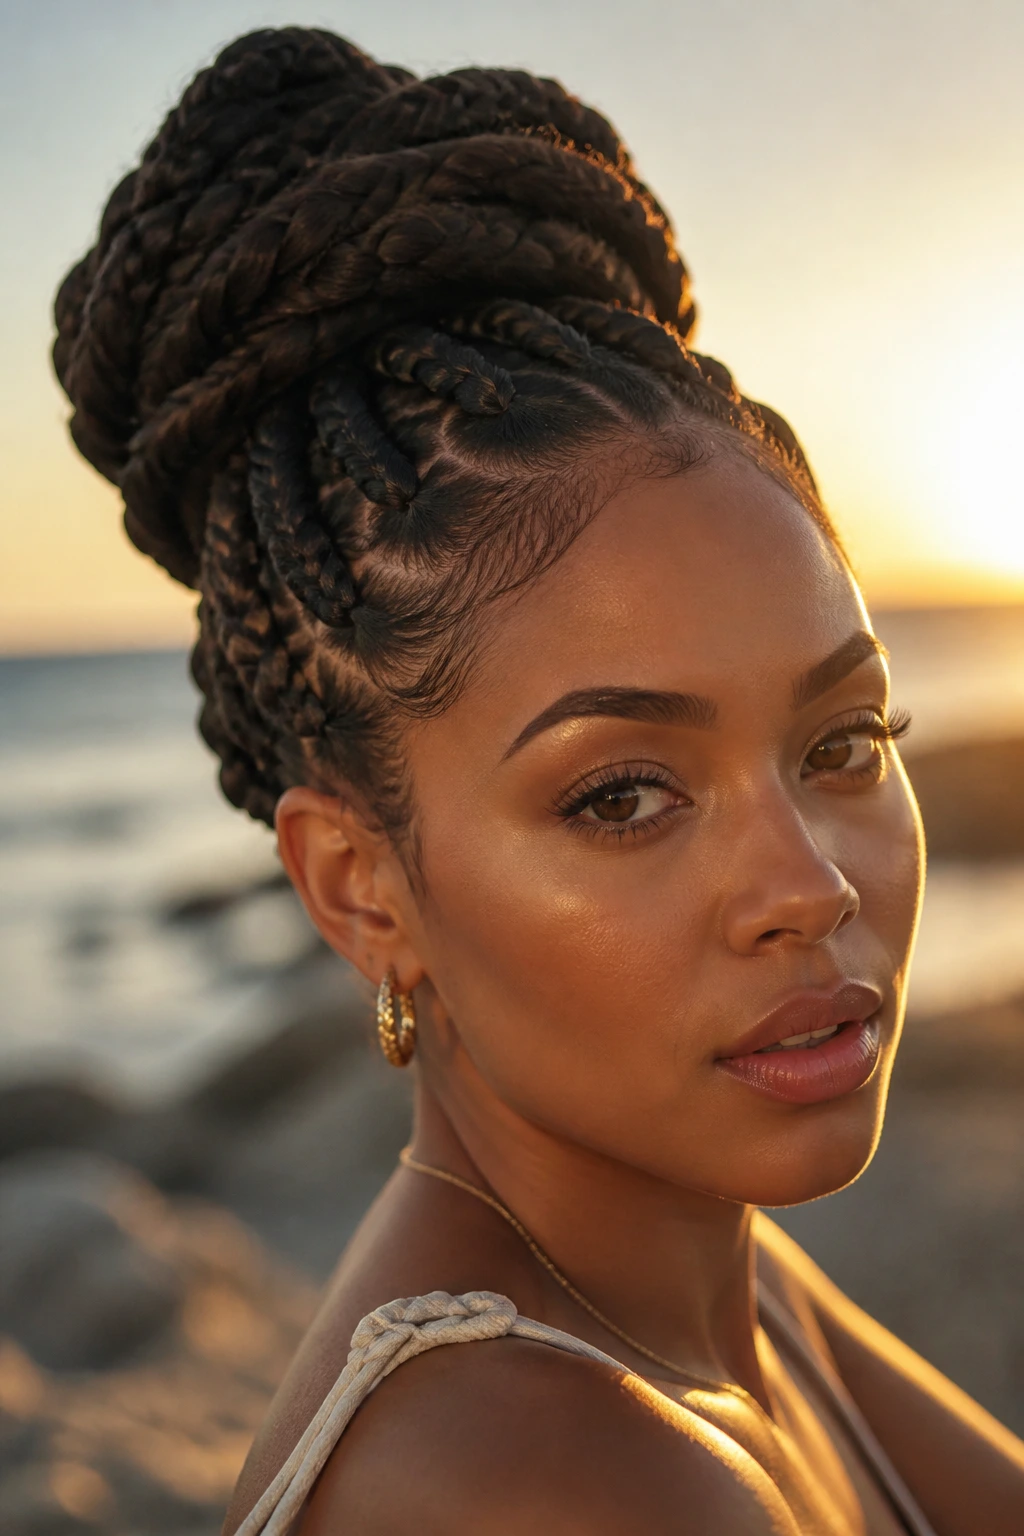
Goddess braids pinned up give you the volume of large braids with the lift of an updo. The thicker braid pattern frames the head in a way that feels elegant without becoming fragile. Add a few loose curls or soft pieces near the face, and the style turns warmer and less rigid.
This is one of my favorite choices for an evening after a beach day because it still reads polished after a few hours outside. The pinned-up shape keeps the weight off the neck, which is a relief when the temperature stays high. Use pins that match your hair color if you can, or hide them under the braid line. The little details matter here. If the pins show, the style starts looking rushed. If they disappear, the braid gets all the credit.
19. Halo Braid With Sun-Kissed Volume
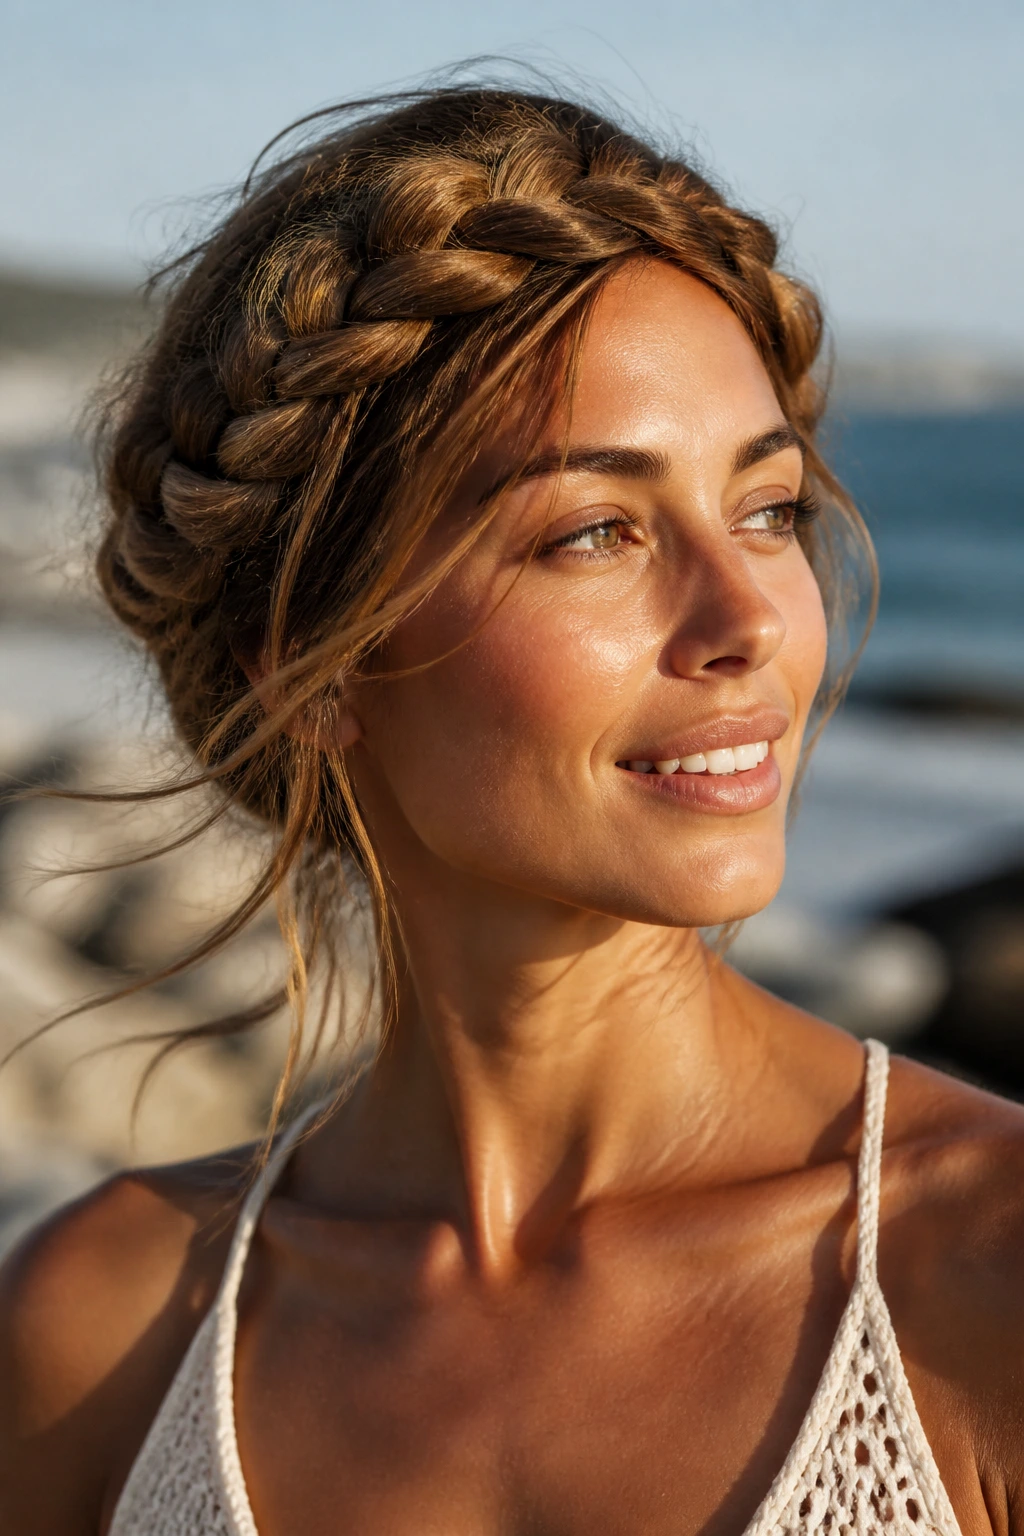
A halo braid wraps the head like a crown, and that shape does something useful: it keeps the length off your shoulders while drawing attention to the face. The sun-kissed volume comes from gently loosening the braid after it’s pinned, not from cramming in extra hair. That softness keeps the style from looking too formal for a day outdoors.
If your hair is layered, you may need a few discreet pins under the braid to keep shorter pieces tucked away. Don’t fight the small flyaways too hard; a halo braid can handle a little texture at the edges. In fact, that slight irregularity helps it look more natural in bright light. It’s a good choice when you want something a little romantic but still practical enough to survive a warm walk and an hour in a café afterward.
20. Braided Ponytail With Wrapped Base
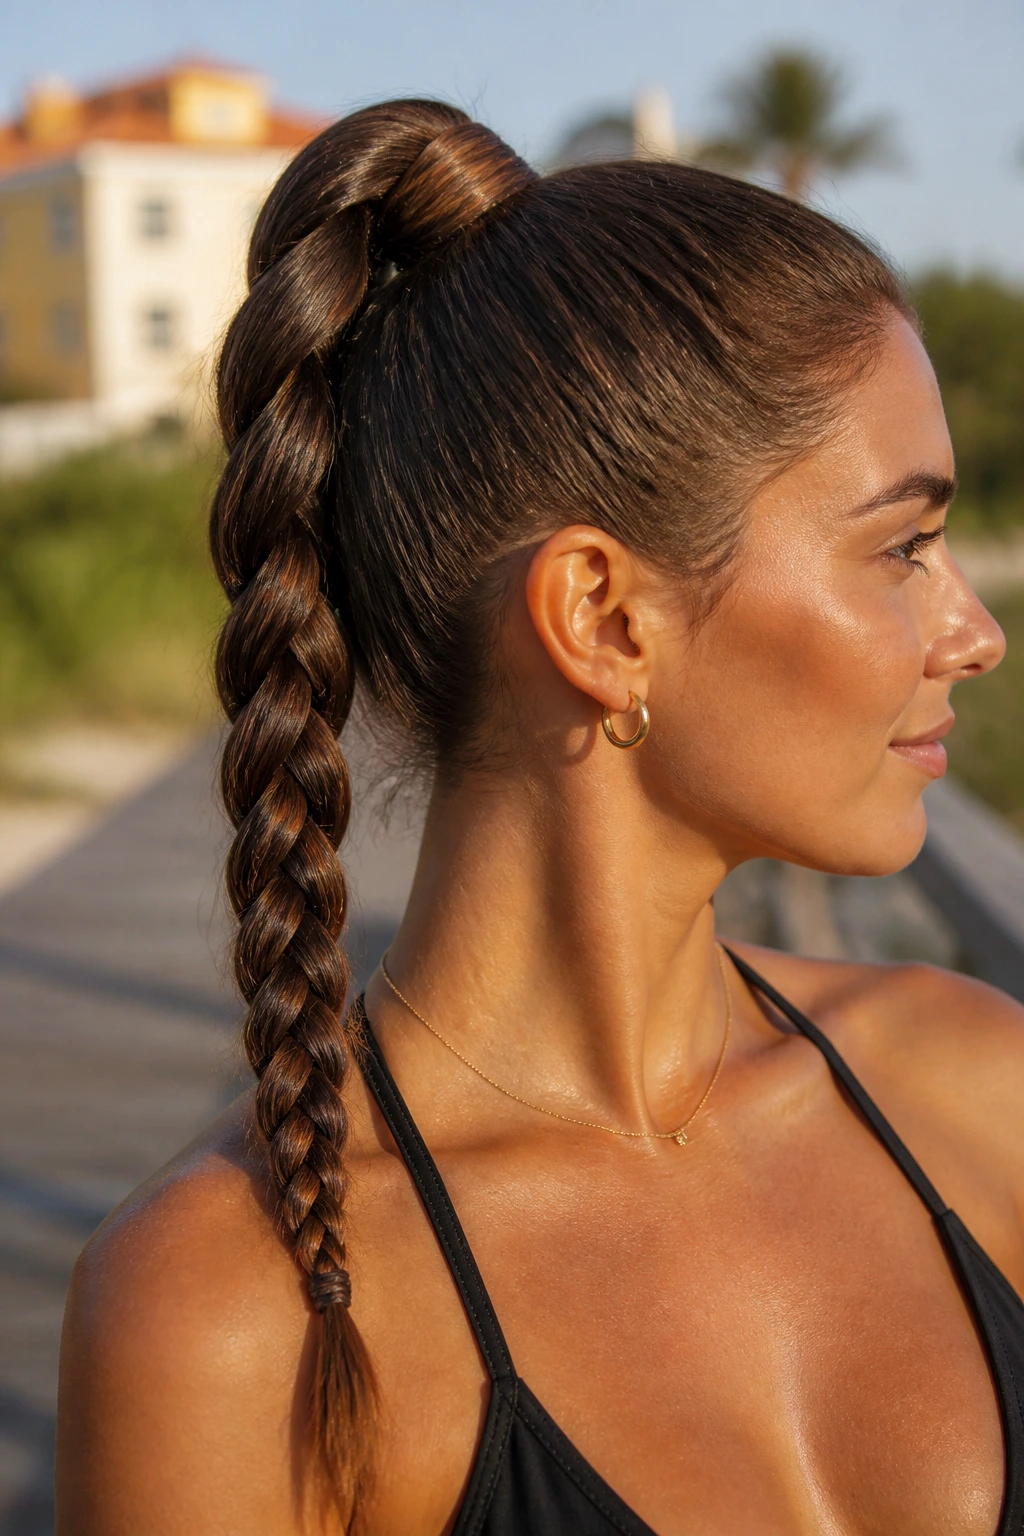
A braided ponytail with a wrapped base is one of the cleanest ways to keep hair contained without making the style feel severe. The ponytail stays high or mid-height, the braid keeps the tail from fraying, and a wrapped section hides the elastic so the finish looks more intentional. It’s neat, direct, and easy to wear.
I like this style when I need hair out of the way fast. If the ponytail sits too low, the braid can drag on the neck and feel heavy; if it sits too high, the shape starts to get playful in a good way. A small strip of hair wrapped around the base gives it a polished line, and a little oil on the ends keeps the braid from looking dry. Keep the wrap snug. If it spins loose, the whole style loses its structure.
21. Side-Swept Fishtail Bun
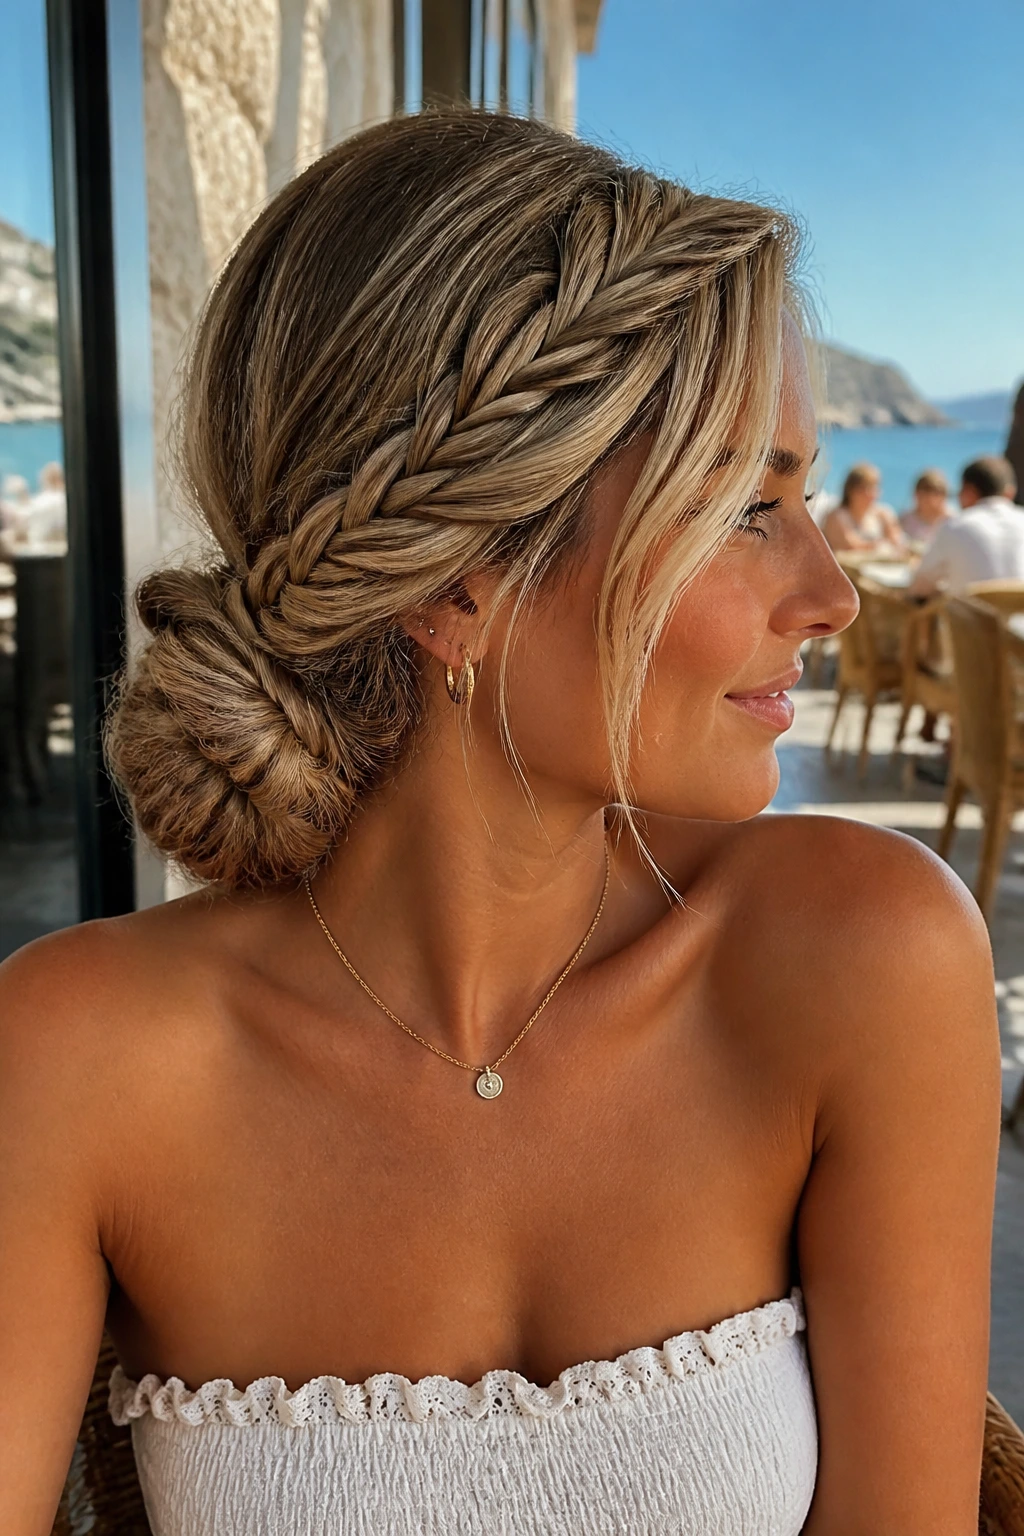
A side-swept fishtail bun has a little more drama than a plain bun, but it still behaves in heat. The braid begins off-center, travels toward one side, then gets coiled into a bun low near the ear or at the nape. That side sweep softens the face and gives the style a nice angle.
This is a good one when you want your hair to feel styled without looking high-maintenance. The fishtail texture adds enough detail that you don’t need accessories to make it interesting. If you do add one, keep it small — a pin, a cuff, or one thin ribbon. Anything louder starts fighting the braid. I reach for this style when the outfit is simple and the hair needs to do a little more.
22. Two Braids Into One Long Plait
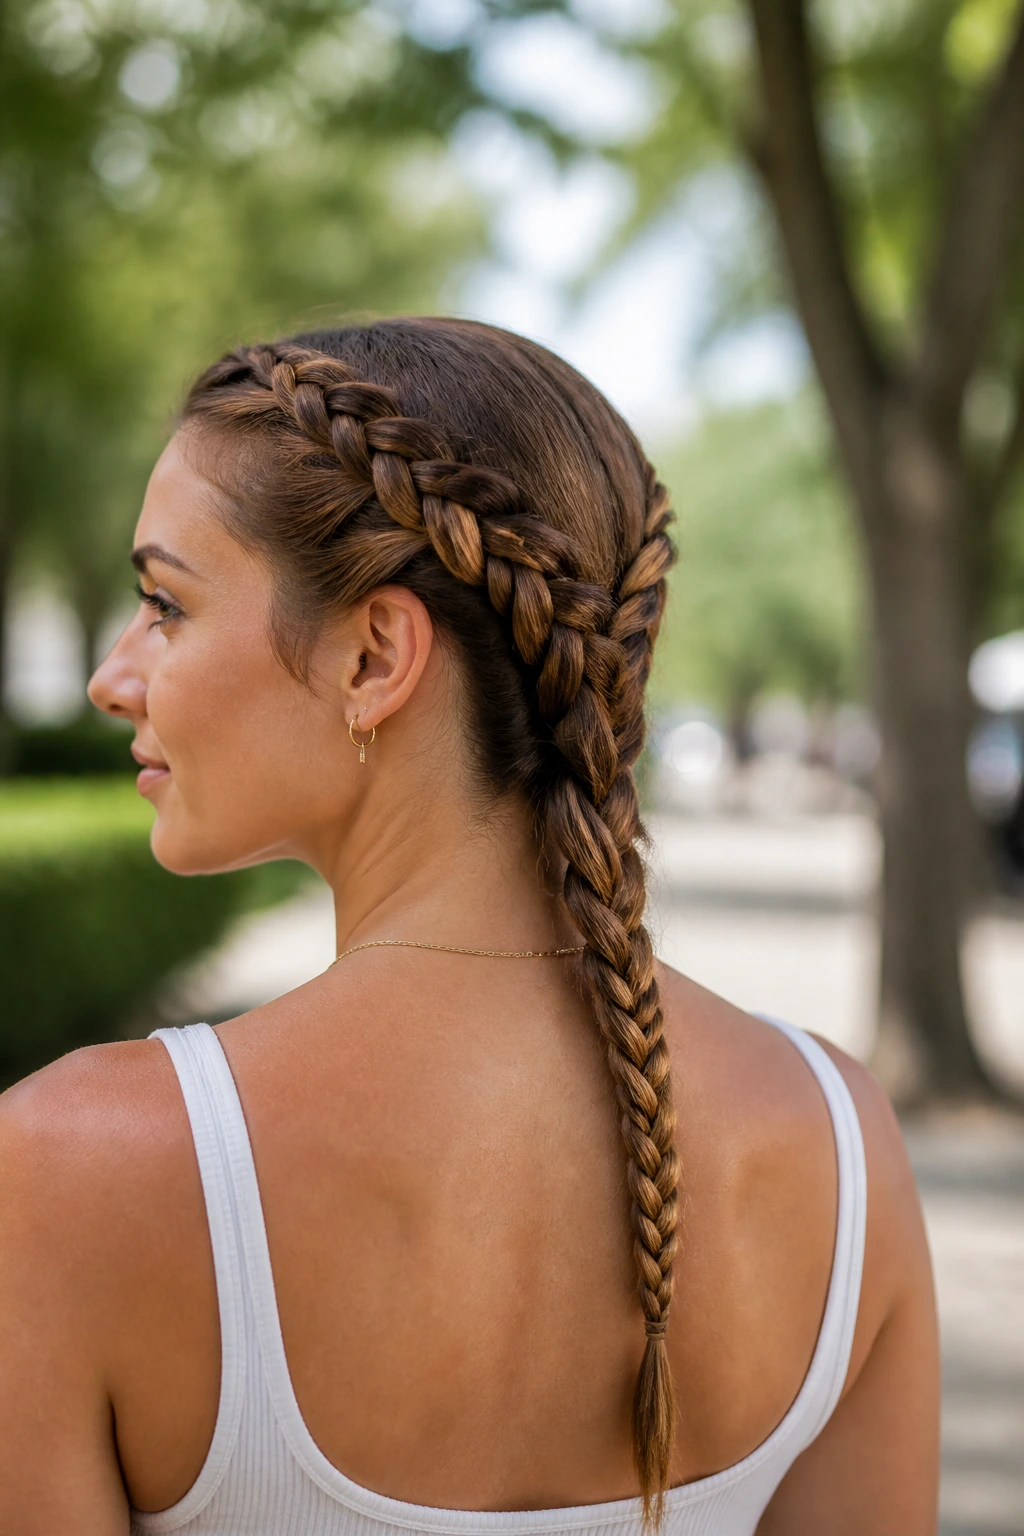
Two braids into one long plait gives you the control of twin braids with the payoff of a single statement tail. Start with two braids from the front or sides, then join them at the back and continue as one. It looks more involved than it is, which is always a bonus when the weather has already made you impatient.
The join point is where people get sloppy. Keep the transition tight enough that the braids merge cleanly, but not so tight that you create a hard bump at the back of the head. A small elastic hides the join if the hair won’t cooperate. This is a great style for medium to long hair that needs a little structure but not a full updo. It moves, but it doesn’t unravel at the first gust.
23. Scarf-Woven Braid
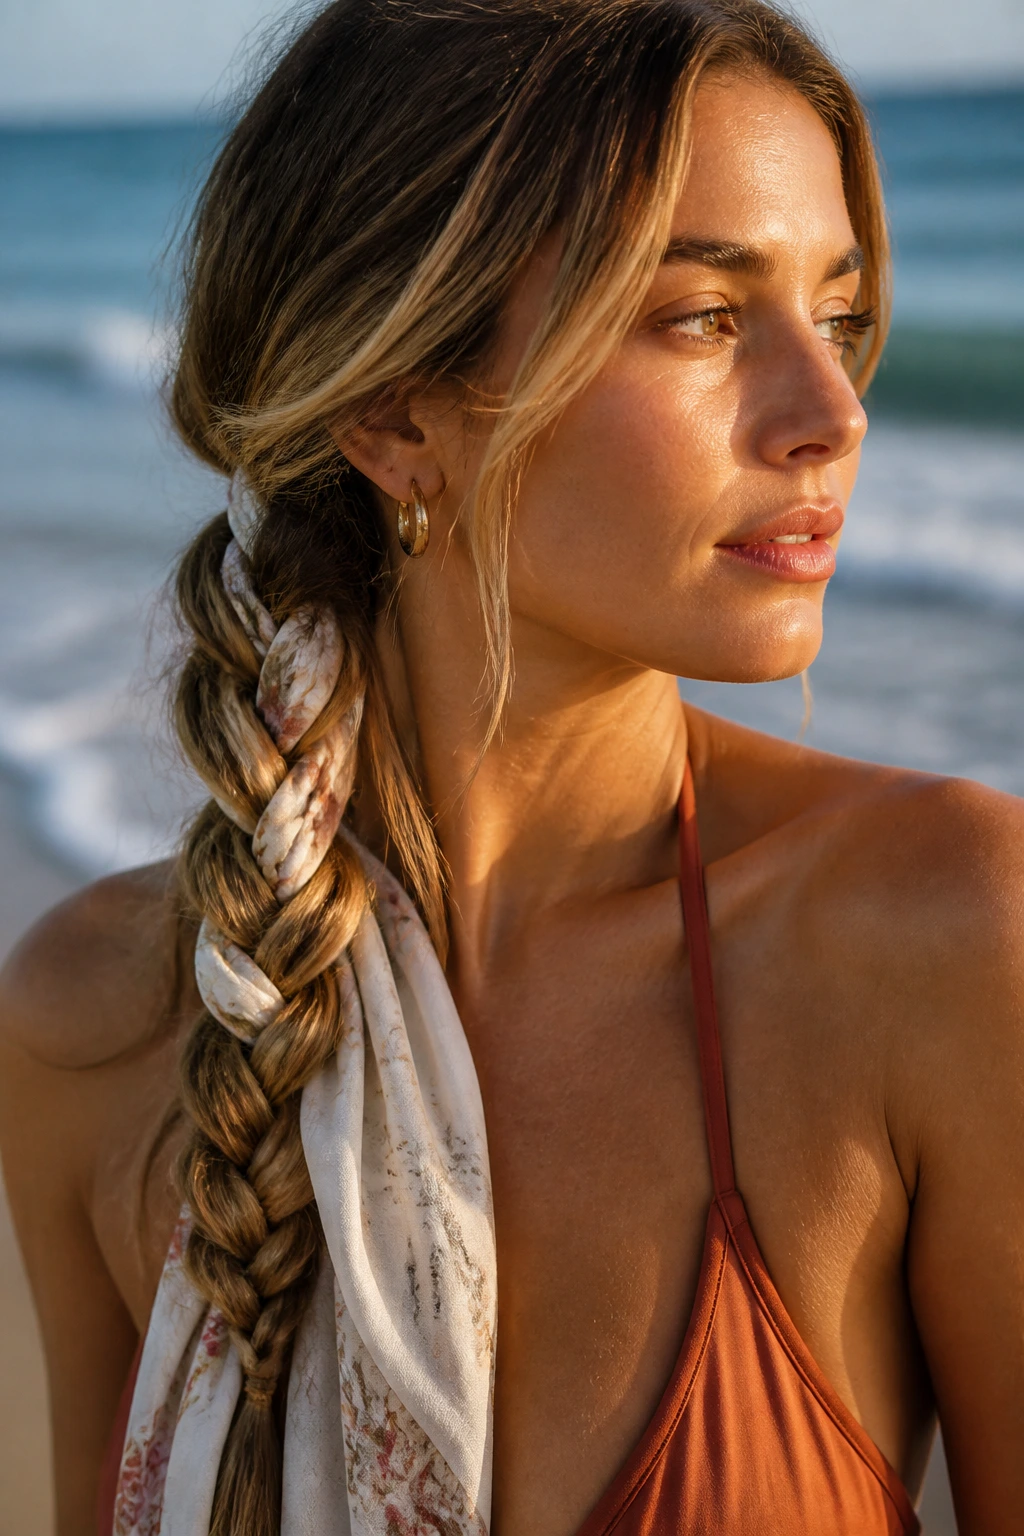
A scarf-woven braid is one of the easiest ways to add color without touching a hot tool. Thread a scarf into one section of the braid or tie it at the base and let the tails run alongside the plait. Either way, the fabric changes the whole mood of the style. Suddenly it feels less like a quick braid and more like an accessory.
The scarf should be light enough to move but not so silky that it slips out while you’re walking. Cotton or a soft woven fabric usually behaves better than something glossy. Keep the braid itself simple so the scarf stays the focal point. I especially like this one with plain shirts, swimsuits, or linen pieces because the fabric gives the hair one clean shot of color and leaves the rest alone.
24. Braided Space Buns
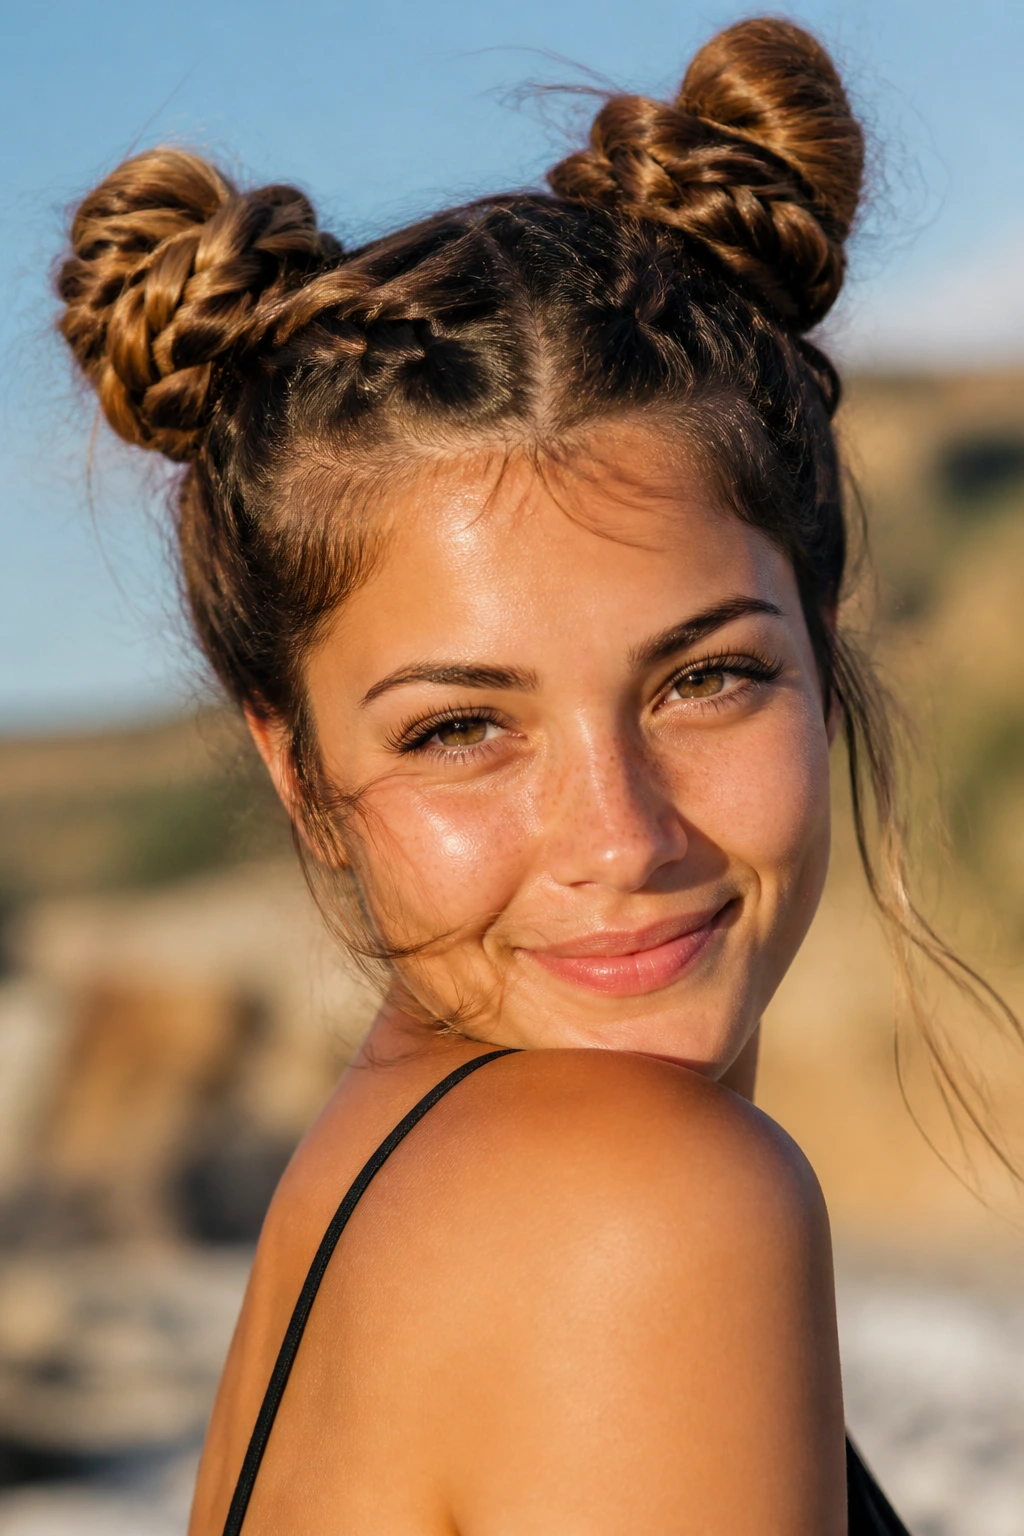
Braided space buns are playful, but they’re also practical when the air gets warm. Two braids feed into high buns, so the ends stay off the neck and the shape sits secure at the top of the head. It’s a style that makes sense if you’re moving around, dancing, or packing a lot into one day.
The spacing matters. If the buns are too close together, they blur into one shape; too far apart, and the balance gets weird fast. I usually keep them just wider than the outer corners of the eyes. The braid adds enough structure that the buns do not need to be huge to look intentional. Keep the bases tight, but leave the outer loops a little soft if you want the style to feel less costume-y.
25. Feed-In Braids Pulled Into a High Ponytail
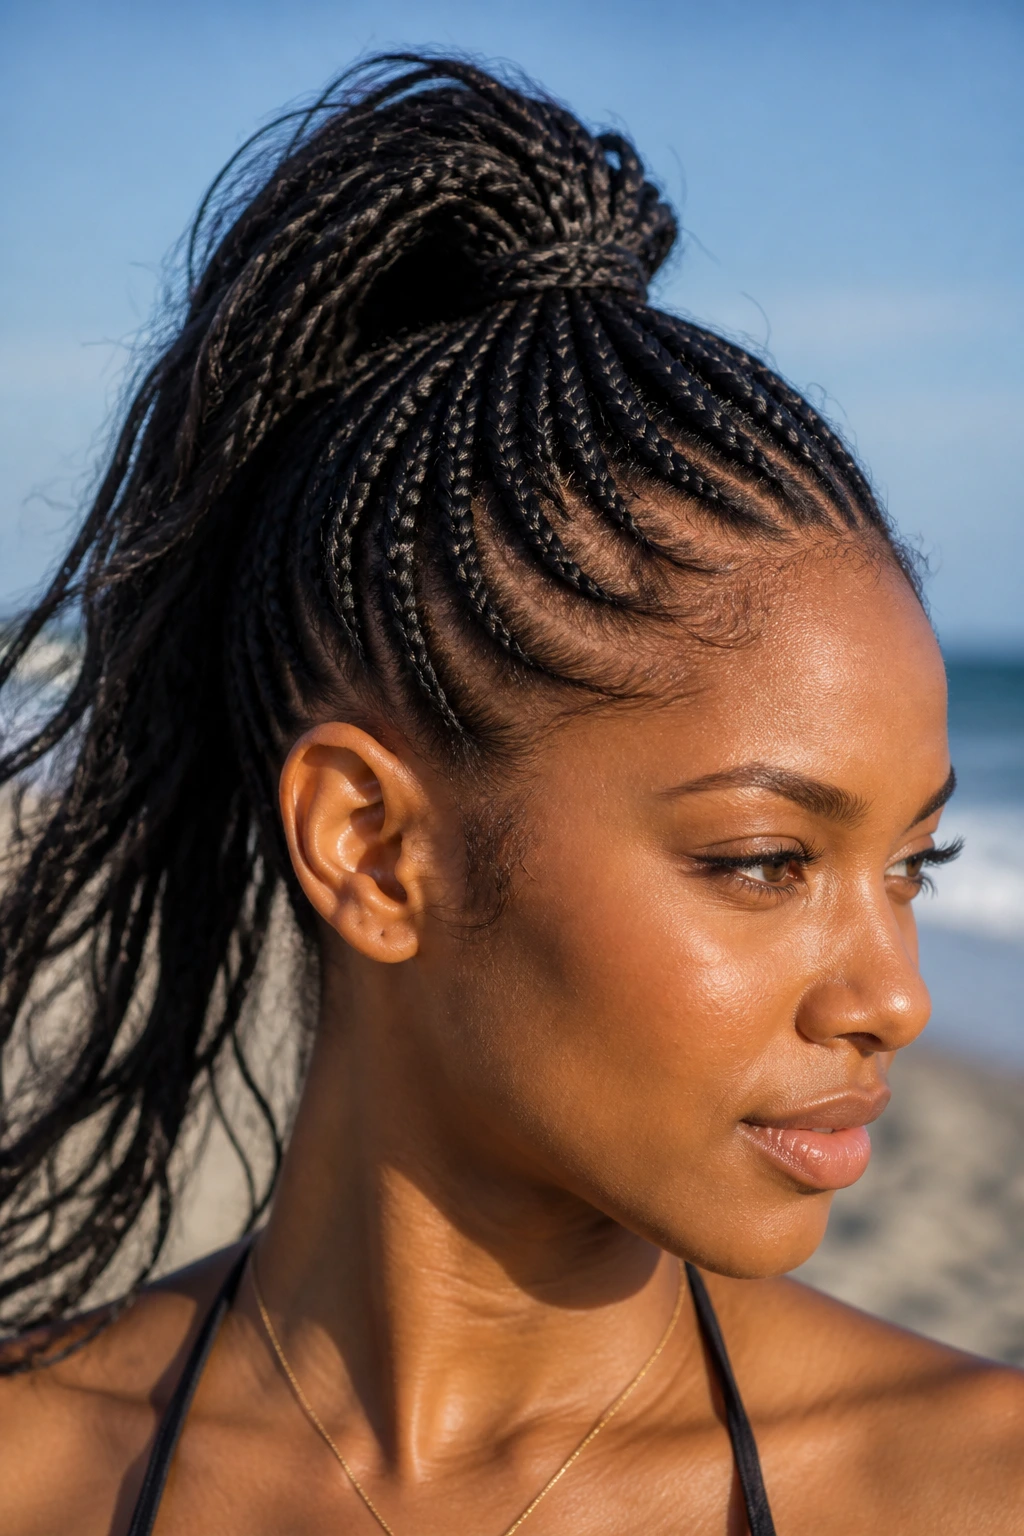
Feed-in braids pulled into a high ponytail give you sleek rows at the scalp and a lifted finish at the crown. The feed-in method makes the braids start small and build smoothly, which keeps the root area looking clean rather than bulky. Once the braids meet in the ponytail, the whole style feels sharp and athletic.
This is a strong choice when you want something that can handle heat, movement, and a little sweat without falling apart. The high ponytail gives the face room, and the braids themselves help the style last longer than a plain pulled-back look. If you add braiding hair, match the texture closely so the transition doesn’t show. I like this one because it’s practical without looking plain. There’s a difference.
26. Braid-Out Lob With Tiny Accent Braids
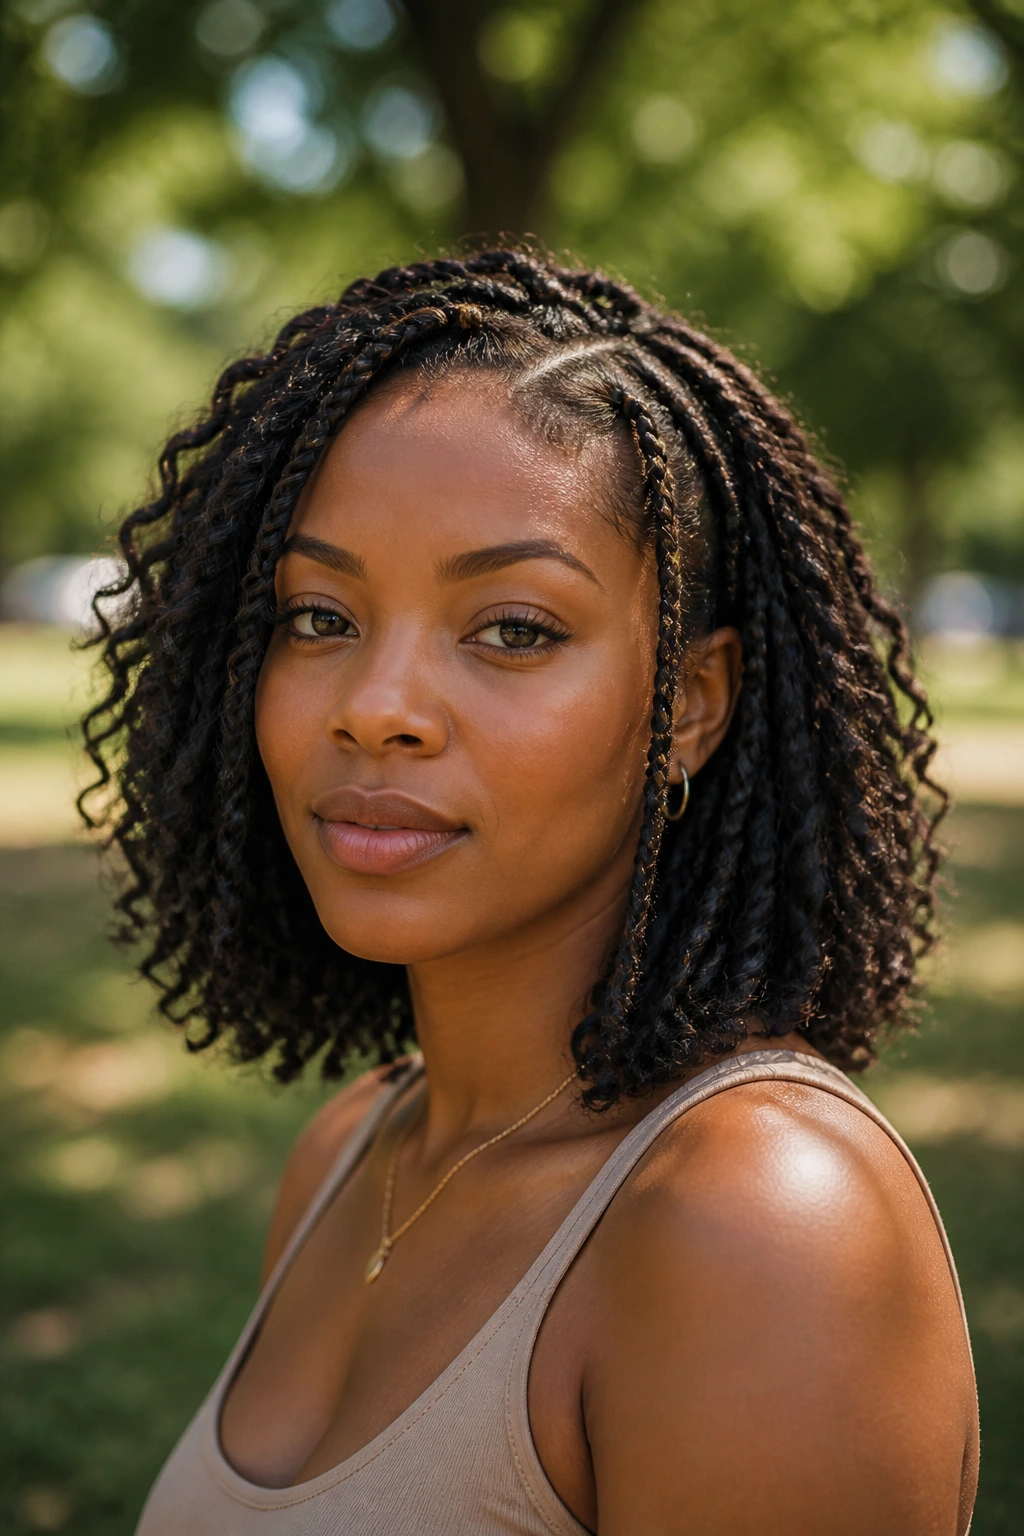
A braid-out lob with tiny accent braids is a smart move if your hair sits at collarbone length and you want texture without bulk. The larger braid-out gives the hair a soft wave pattern, while the small accent braids add detail near the front or at one side. It’s casual, but not boring.
This works especially well on curly or coily textures that have been stretched just enough to braid cleanly. Unbraid it after it’s fully dry, not while it still feels cool at the center. That’s how you avoid fuzz where you wanted definition. A dab of light cream on the ends helps the braid-out stay separated. The accent braids are there for shape, not noise, so keep them narrow and let the texture do the rest.
27. Infinity Braid on Medium Hair
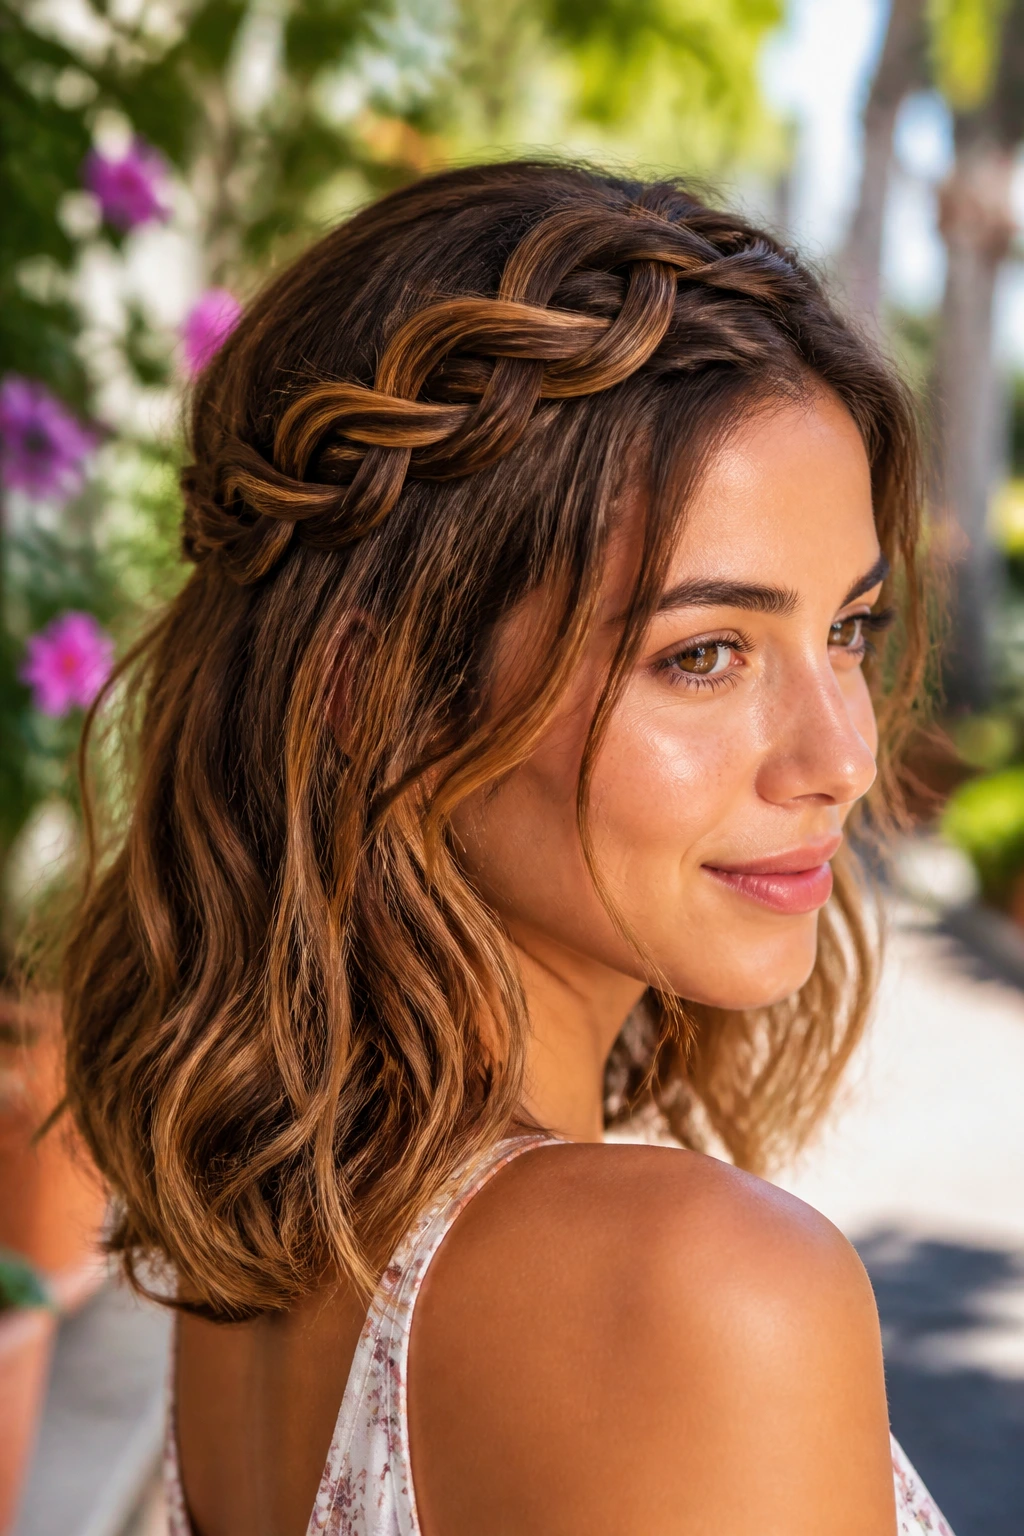
An infinity braid looks fancier than it is, which makes it a nice trick for medium-length hair that needs one strong detail. The weaving pattern loops around the center strand, creating a braided line with a little visual rhythm. It works best when the hair has enough length to show the pattern, but not so much that the braid turns heavy.
This style reads well on hair that’s slightly textured, because the loops grip each other more easily. If the hair is too silky, the braid can feel slippery and fall flat near the ends. A little dry shampoo at the roots helps, and so does a small elastic at the base if your sections keep separating. It’s not the fastest braid on this list. It is one of the more satisfying ones when you want something a little different.
28. Dutch Braid Headband
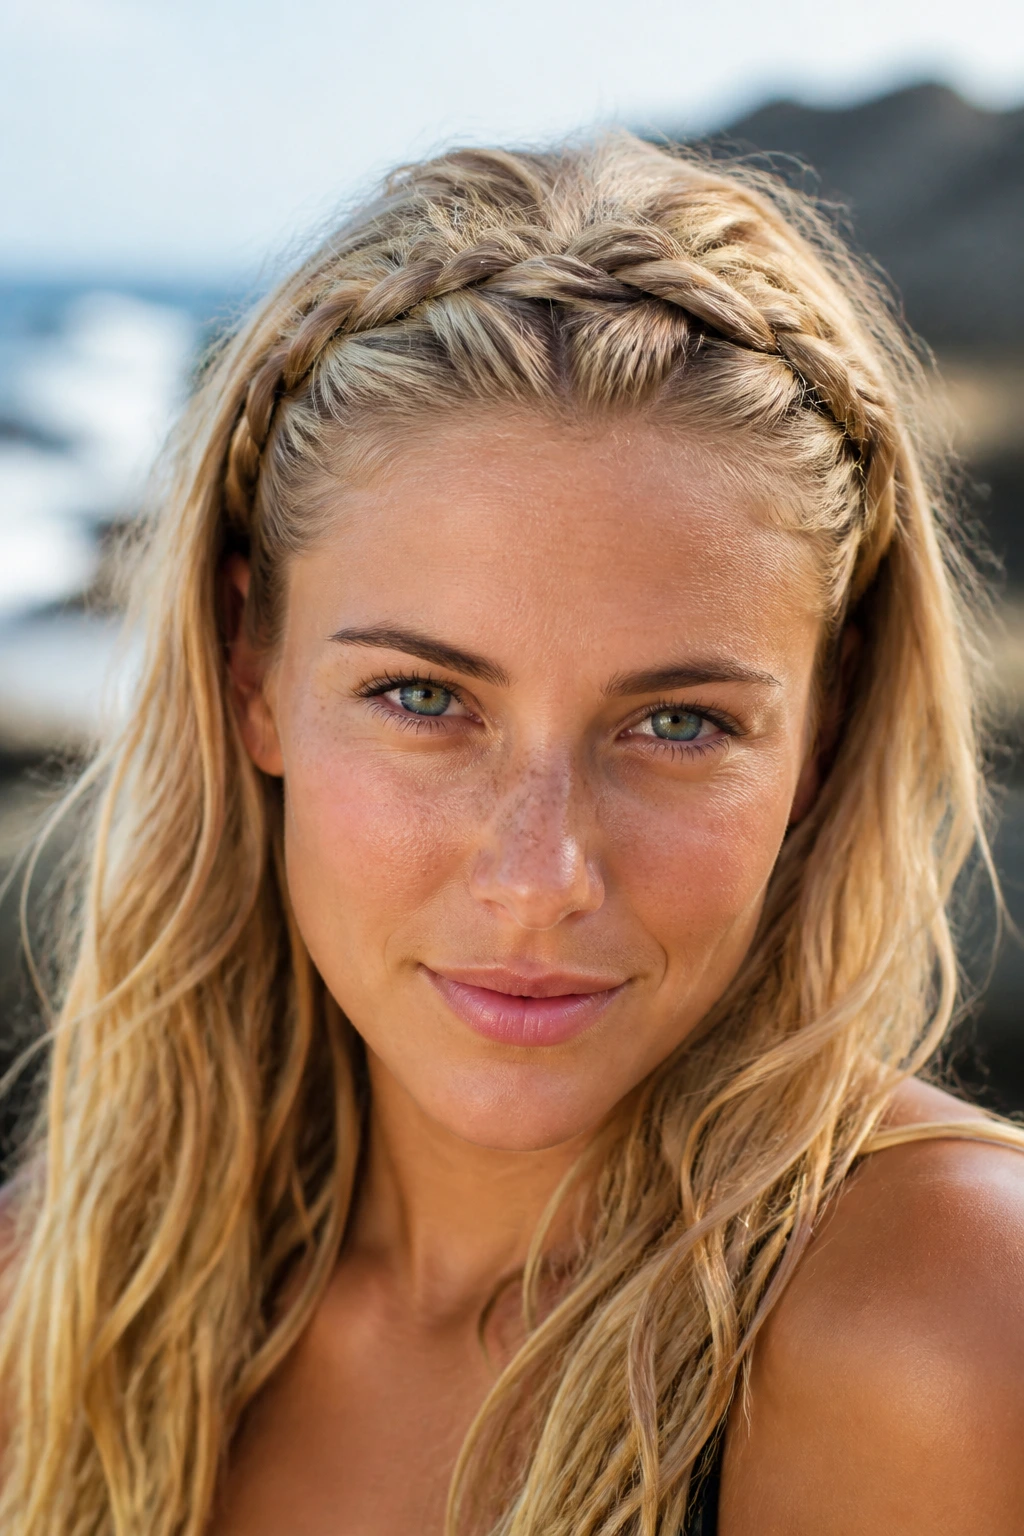
A Dutch braid headband keeps the front of the hair under control while leaving the rest loose, which is useful if you want the look of a braid without committing to the whole head. It runs along the hairline like a built-in accessory, and that placement makes it easy to wear with loose waves, curls, or straight lengths.
The best part is how little it asks from the rest of your hair. If the ends are frizzy, nobody notices as much because the braid line does the visual work up front. This style is also friendly to shorter hair, since the braid only needs to travel from one temple to the other. A few hidden pins behind the ears keep it from drifting during the day. Small style, big payoff.
29. Laced Braid With Clipped Ends
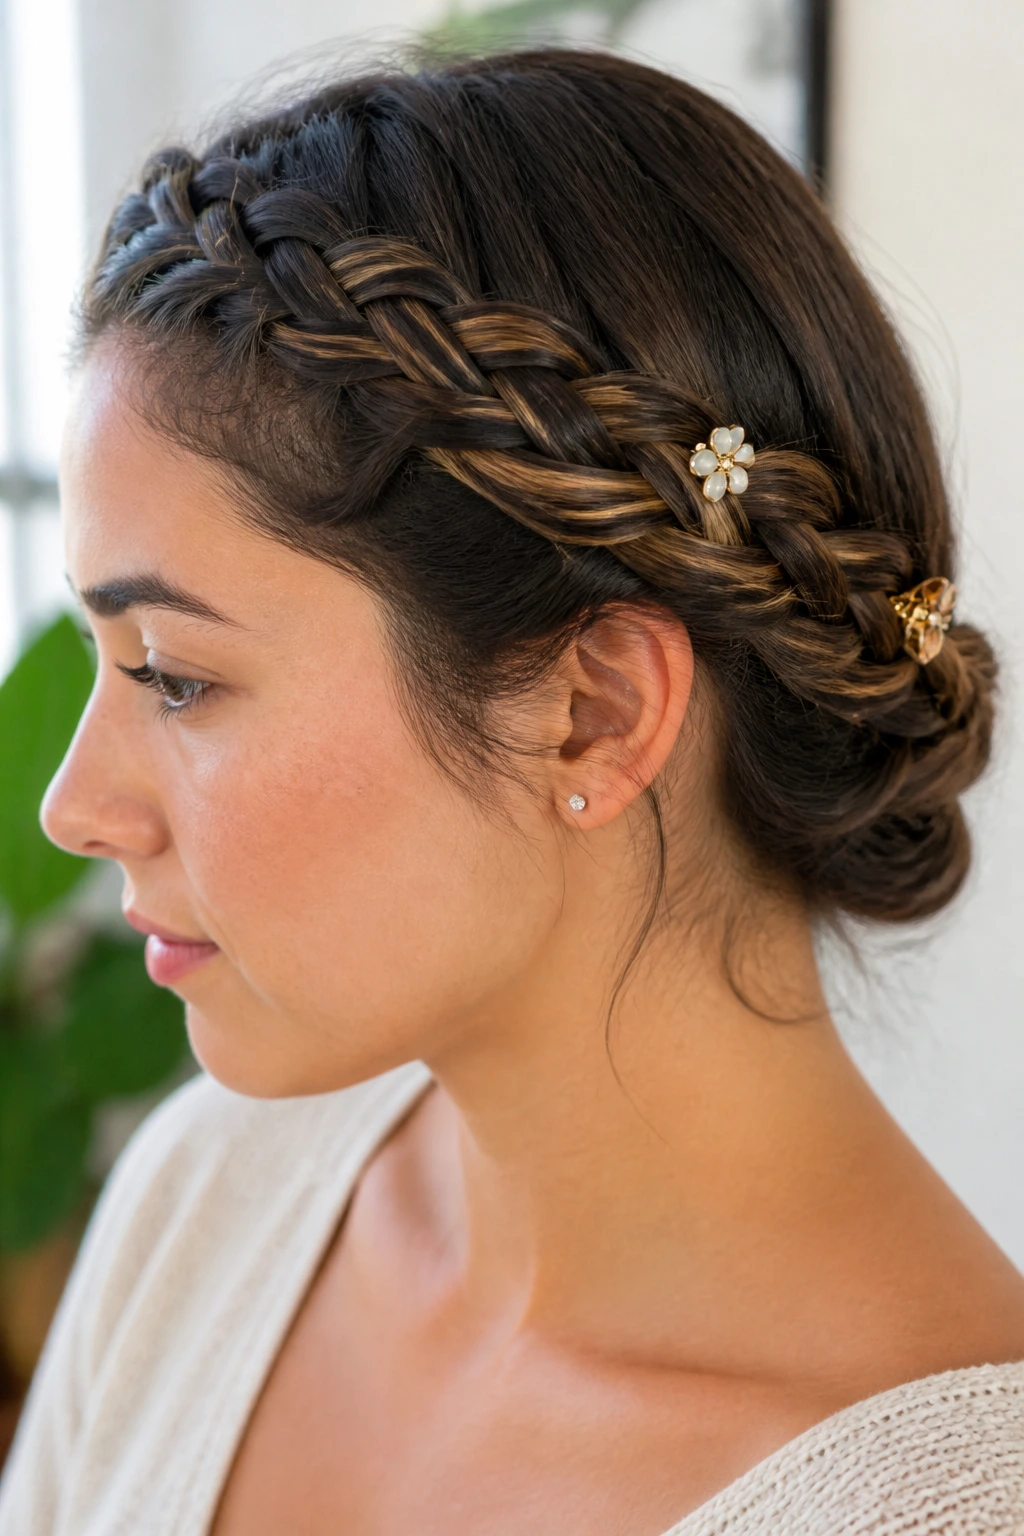
A laced braid has that woven, slightly intricate feel that makes hair look more styled than it really is. By lacing strands over and under the center section, you get a flatter braid line with a lot of pattern. Clip the ends with a decorative barrette or two, and the style suddenly looks finished instead of improvised.
It’s a nice option when you want detail but not volume. The braid sits close enough to the head that it won’t fly apart in wind, yet the pattern gives it interest up close. I’d wear this one with a plain neckline or a simple tank so the hair can be the thing people notice. Keep the clipped ends light. Heavy clips drag the braid down and make the whole thing tilt.
30. Braided Claw-Clip Updo
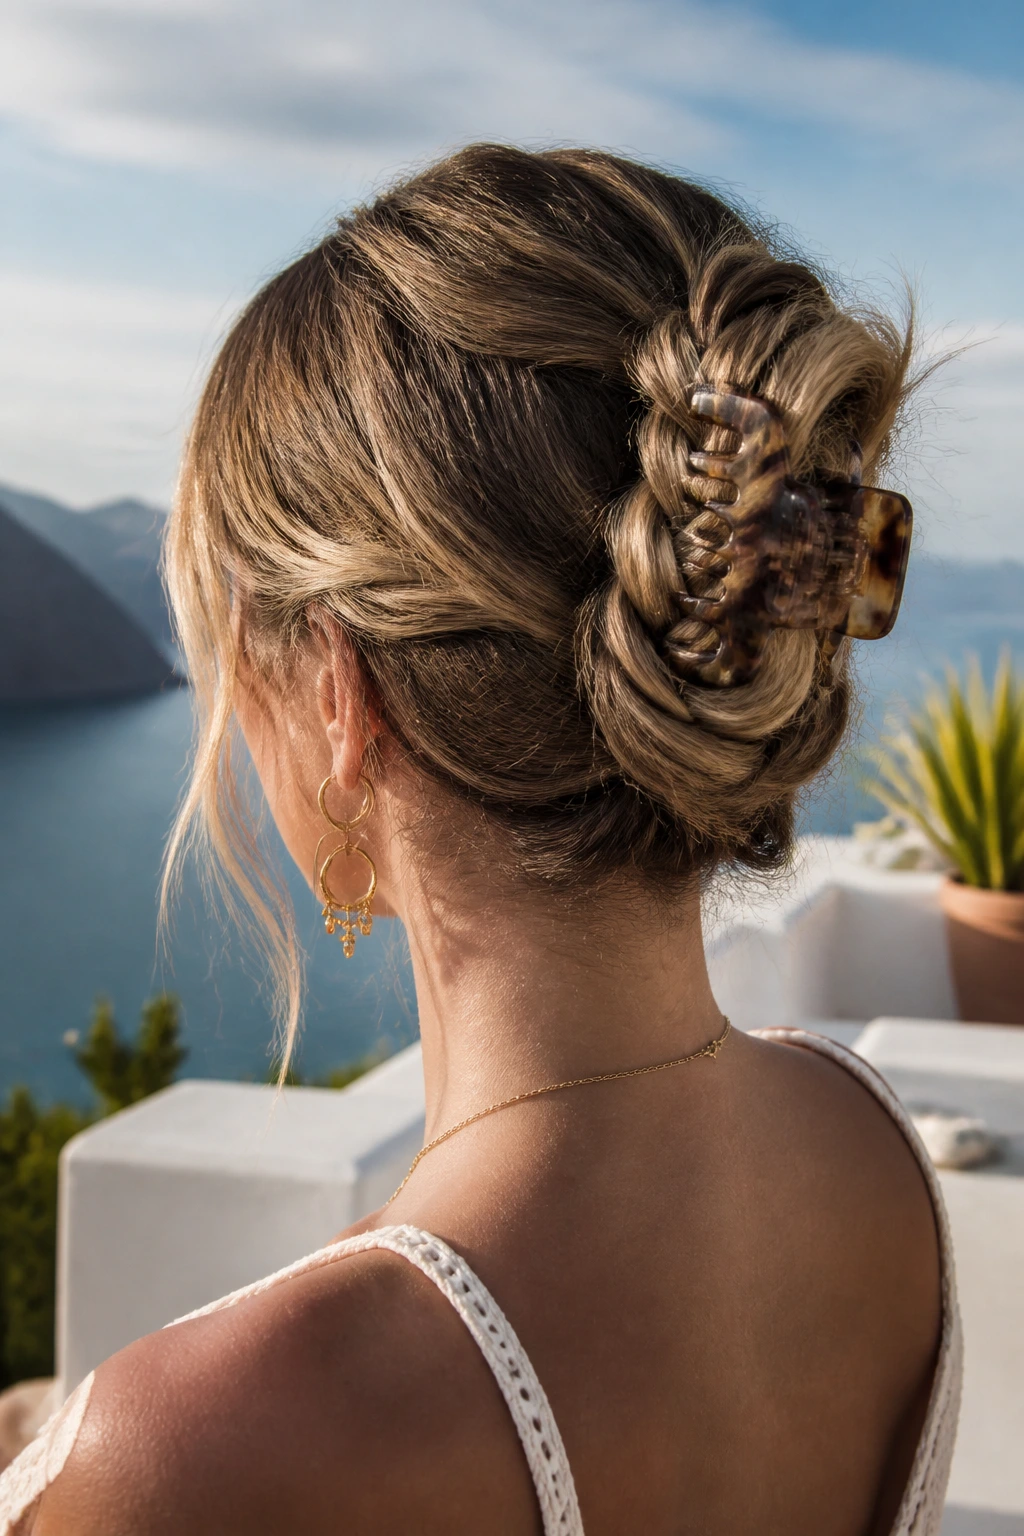
A braided claw-clip updo is the hairstyle equivalent of a good fallback plan that ends up looking intentional. Braid the hair first, twist or fold it upward, then secure it with a strong claw clip. The braid gives the clip something to bite into, which helps the style stay put even when the hair is a little slippery.
This one is ideal for beach days that turn into errands or dinner without warning. You don’t need a perfect part or a dozen bobby pins. A few loose pieces around the face make it look softer, while the clip keeps the back lifted and cool. If your hair is thick, pick a larger clip with teeth that actually grip. Decorative clips are cute until they slide. Use the stronger one.
31. Knot-Twist Braided Crown
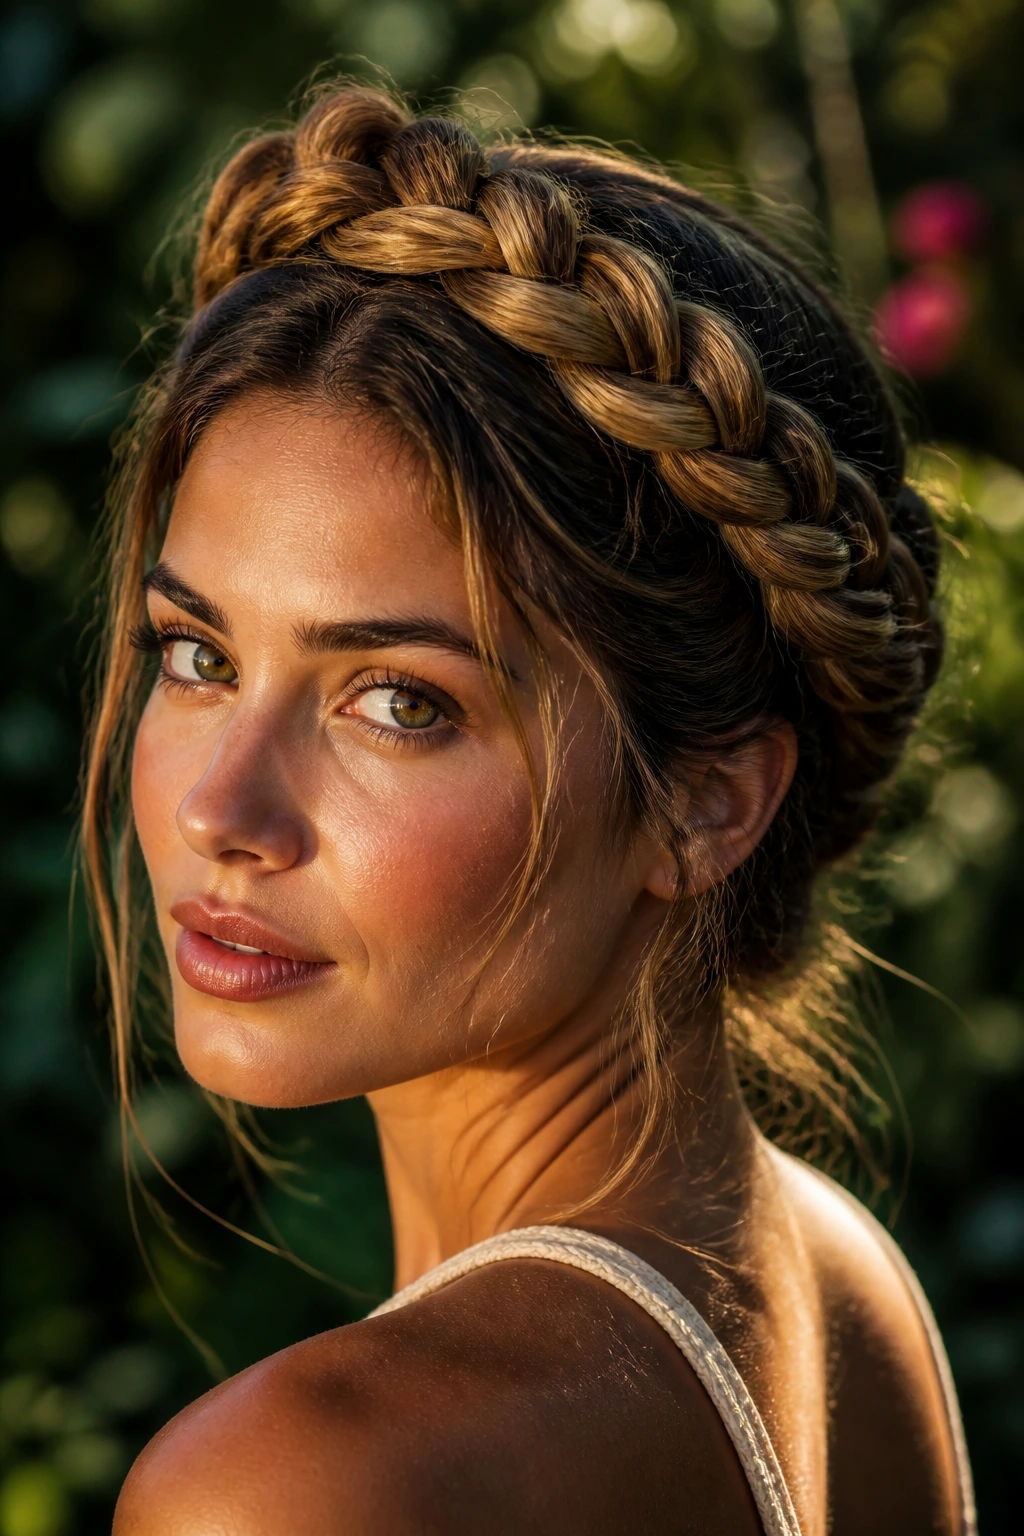
A knot-twist braided crown has more texture than a plain halo braid because it mixes twist movement with braid structure. That combination gives the crown a softer, less uniform look, which suits hair that has natural volume or curl. The braid wraps around the head and keeps the front tidy, but the twist sections add a little lift.
This style works well when you want something that feels handmade rather than precise. It can hold up in humidity because the twist pattern grips differently than a basic braid, especially if the hair has a bit of product and some stretch. I like it for textured hair where a single braid might feel too flat around the head. The crown effect is there, but it has some warmth to it too.
32. Mermaid Braid With Pancaked Sections
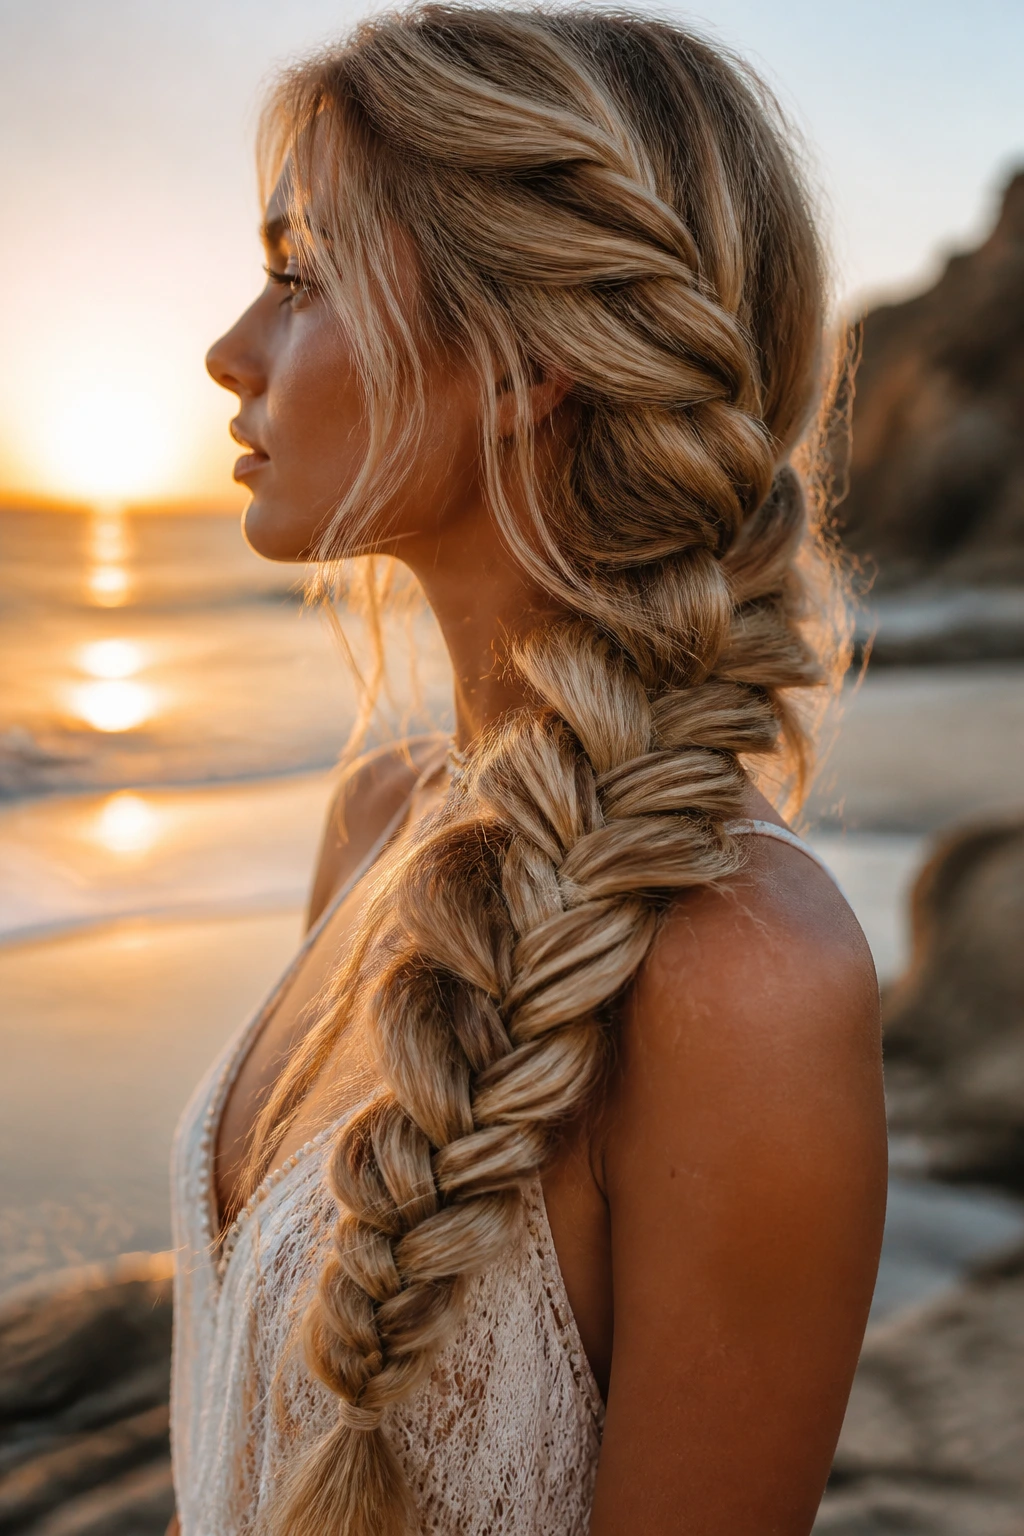
A mermaid braid is basically the dramatic cousin of a regular plait. It uses larger sections, then gets widened by gently pulling the edges apart so the braid looks thick and rope-like. The “pancaked” finish is what gives it that wide, flowing shape that reads so well in warm light and breezy conditions.
This style needs length, or at least the appearance of length through extensions. Without that, the braid can lose its shape and look stunted. A touch of texture spray before braiding helps the sections stay separated, and the loosened finish makes the braid look fuller than it really is. That’s useful if your hair is fine and you want something bigger without piling on product. Big braid. Soft edges. Easy sell.
33. Crisscross Cornrow Pattern
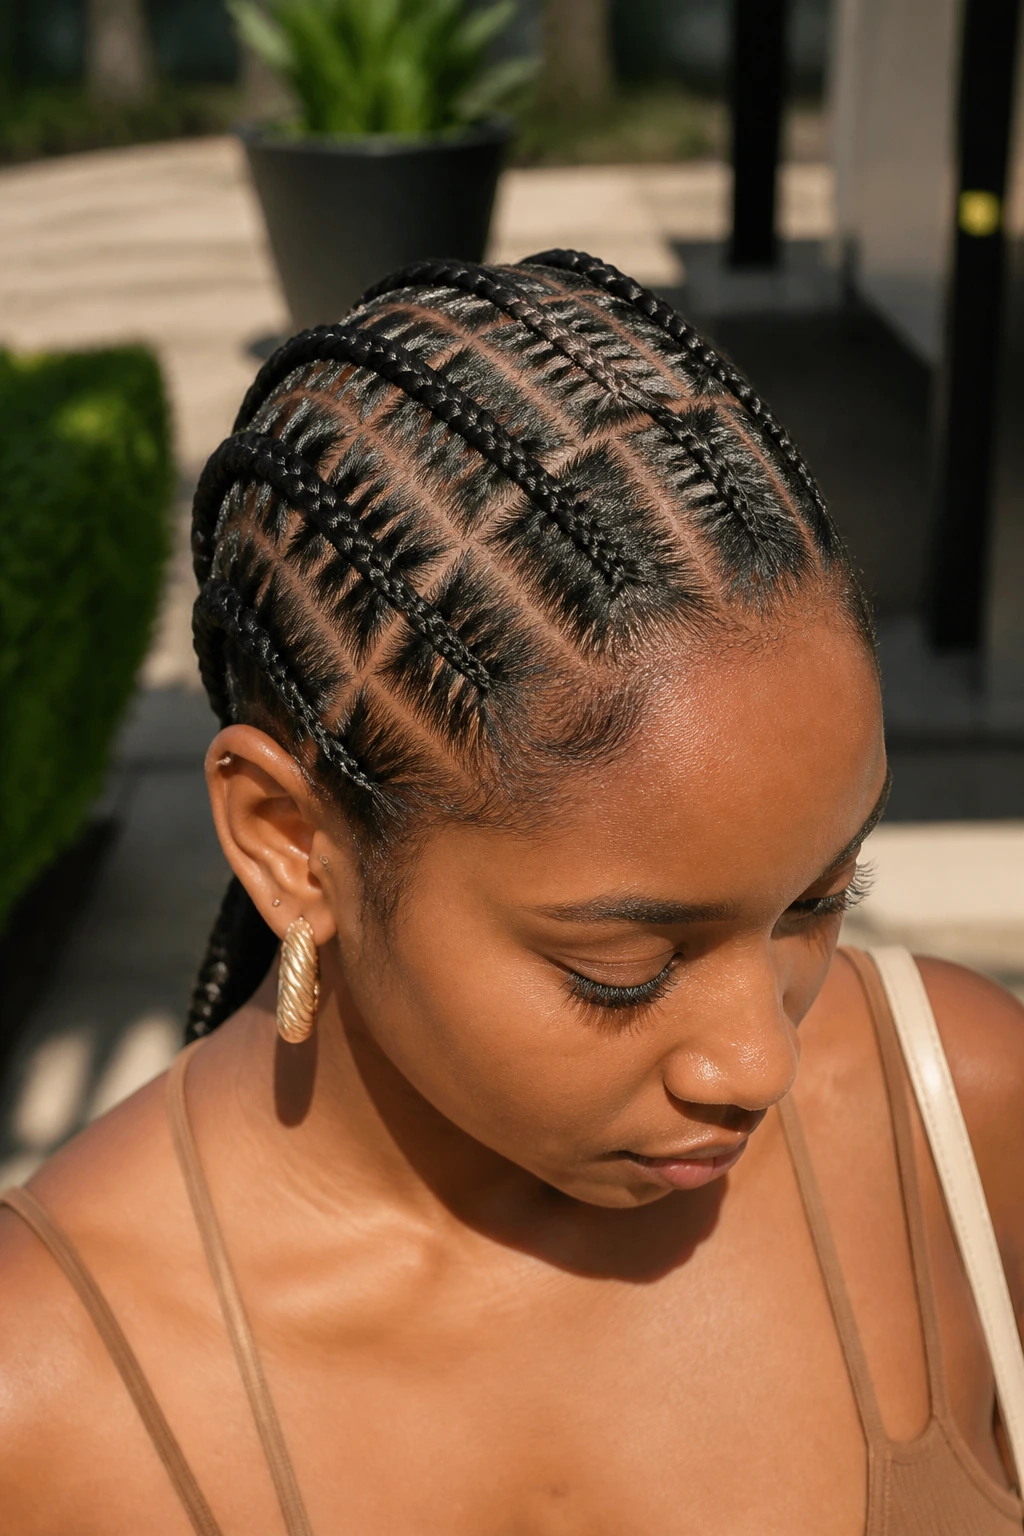
Crisscross cornrow patterns bring a graphic edge that holds up far better than loose styles in heat and water. The design sits close to the scalp, and the intersecting rows make the whole style look deliberate from every angle. It’s especially good if you like a look that stays neat for more than a single afternoon.
This is not a style to rush. The parting needs to be clean, and the sections need to stay consistent so the crisscross lines show properly. A tail comb and a little patience do more here than any fancy product. If you’re adding braiding hair, keep the added pieces lightweight so the pattern doesn’t feel bulky. This is one of the most protective-looking options on the list, and also one of the most striking when the parts are sharp.
34. Low Braided Chignon
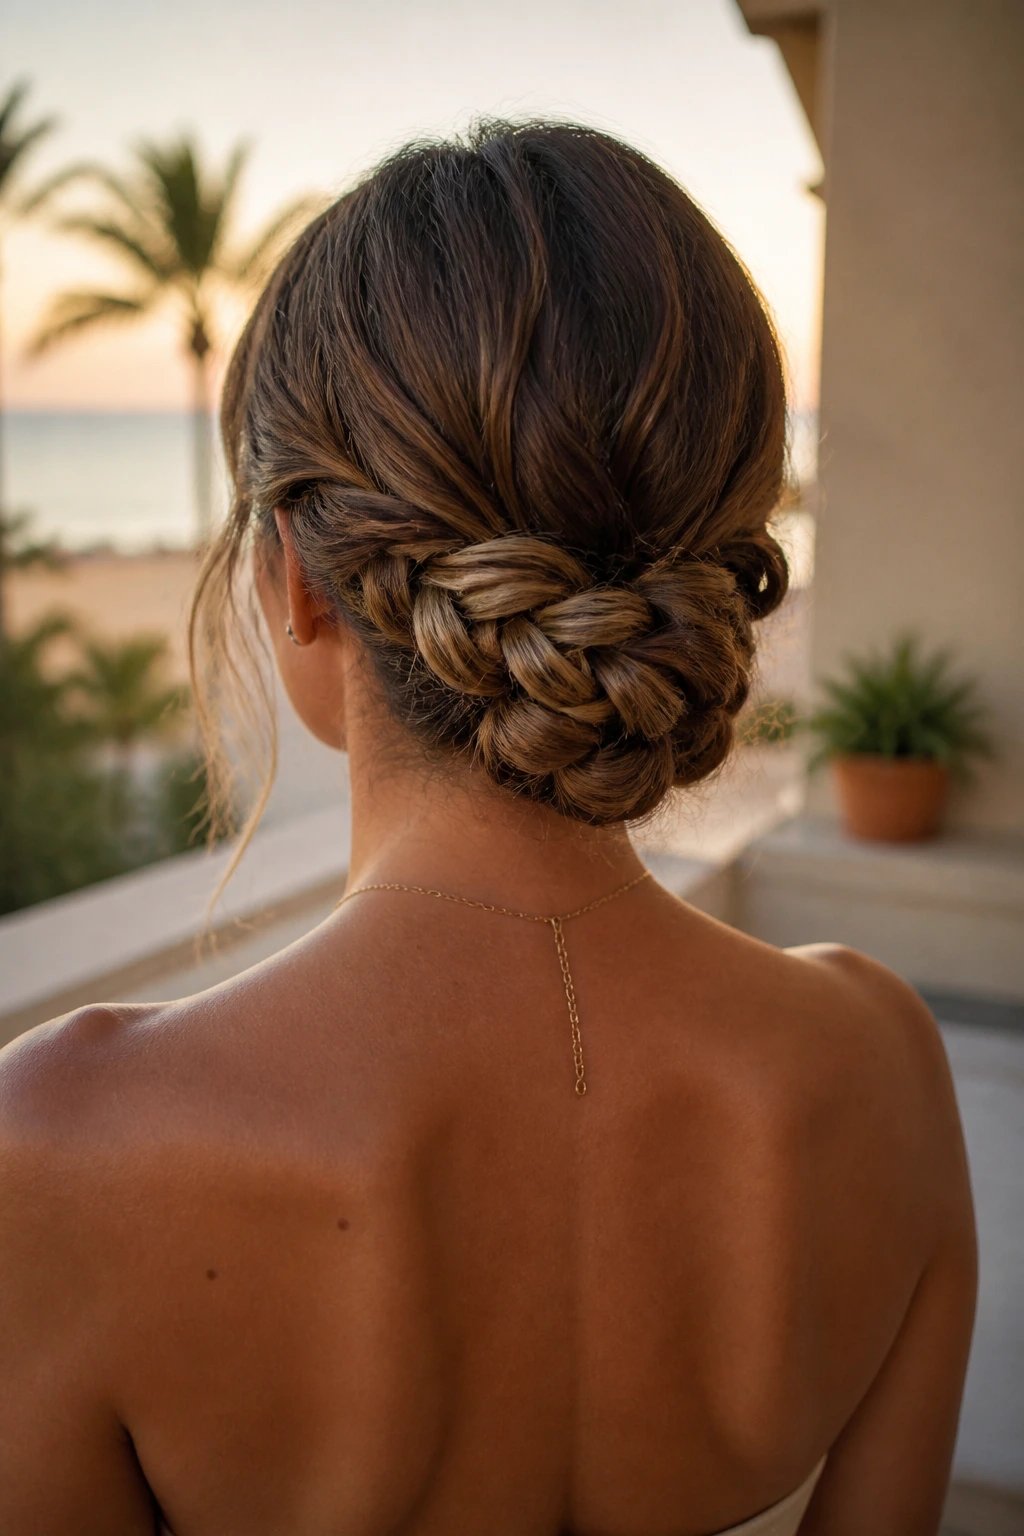
A low braided chignon keeps the shape tight at the nape, which makes it a natural fit for warm weather and long events. The braid wraps into a compact bun, so the ends stay tucked away and the silhouette stays clean. It’s a little more polished than a loose bun, but it still feels relaxed enough for daytime.
The trick is to keep the bun low and slightly soft at the edges. If it sits too high, it starts competing with the rest of the look. If it’s too tight, the style looks formal in a way that doesn’t suit beach air. I like this one when I want a neckline clear for earrings or a swimsuit strap but still want something more finished than a quick twist. The braid does the heavy lifting. The bun just lands it.
35. Beachy Twist-Braid Hybrid
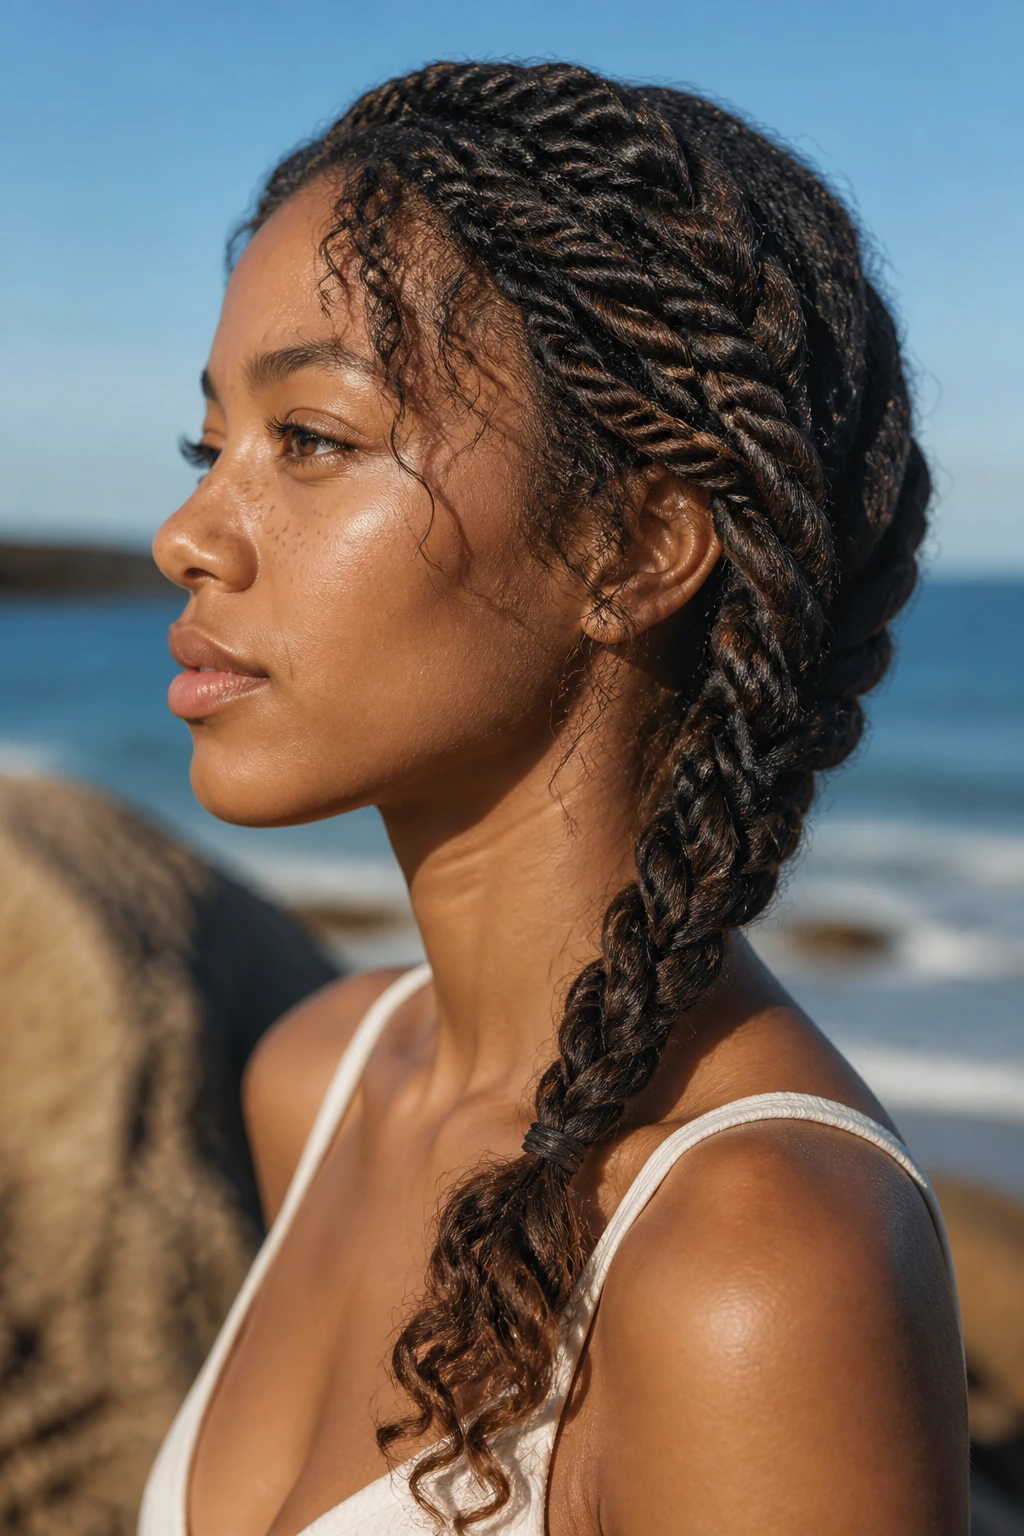
A twist-braid hybrid is a good answer for hair that likes to frizz a little but doesn’t want to be fully locked down. Start with a two-strand twist, then transition into a braid near the ends, or do the reverse. The mixed texture makes the style look more relaxed and gives curls or waves room to show through.
This is one of the better choices for coily or curly hair because twists can be gentler at the root than a tight braid all the way down. The braid section at the ends keeps the style from unraveling too quickly. I like the contrast. The top can stay soft and stretchy, while the bottom reads a little more structured. It’s a small design change, but it changes how the whole style sits.
36. Three-Strand Braid With Beads
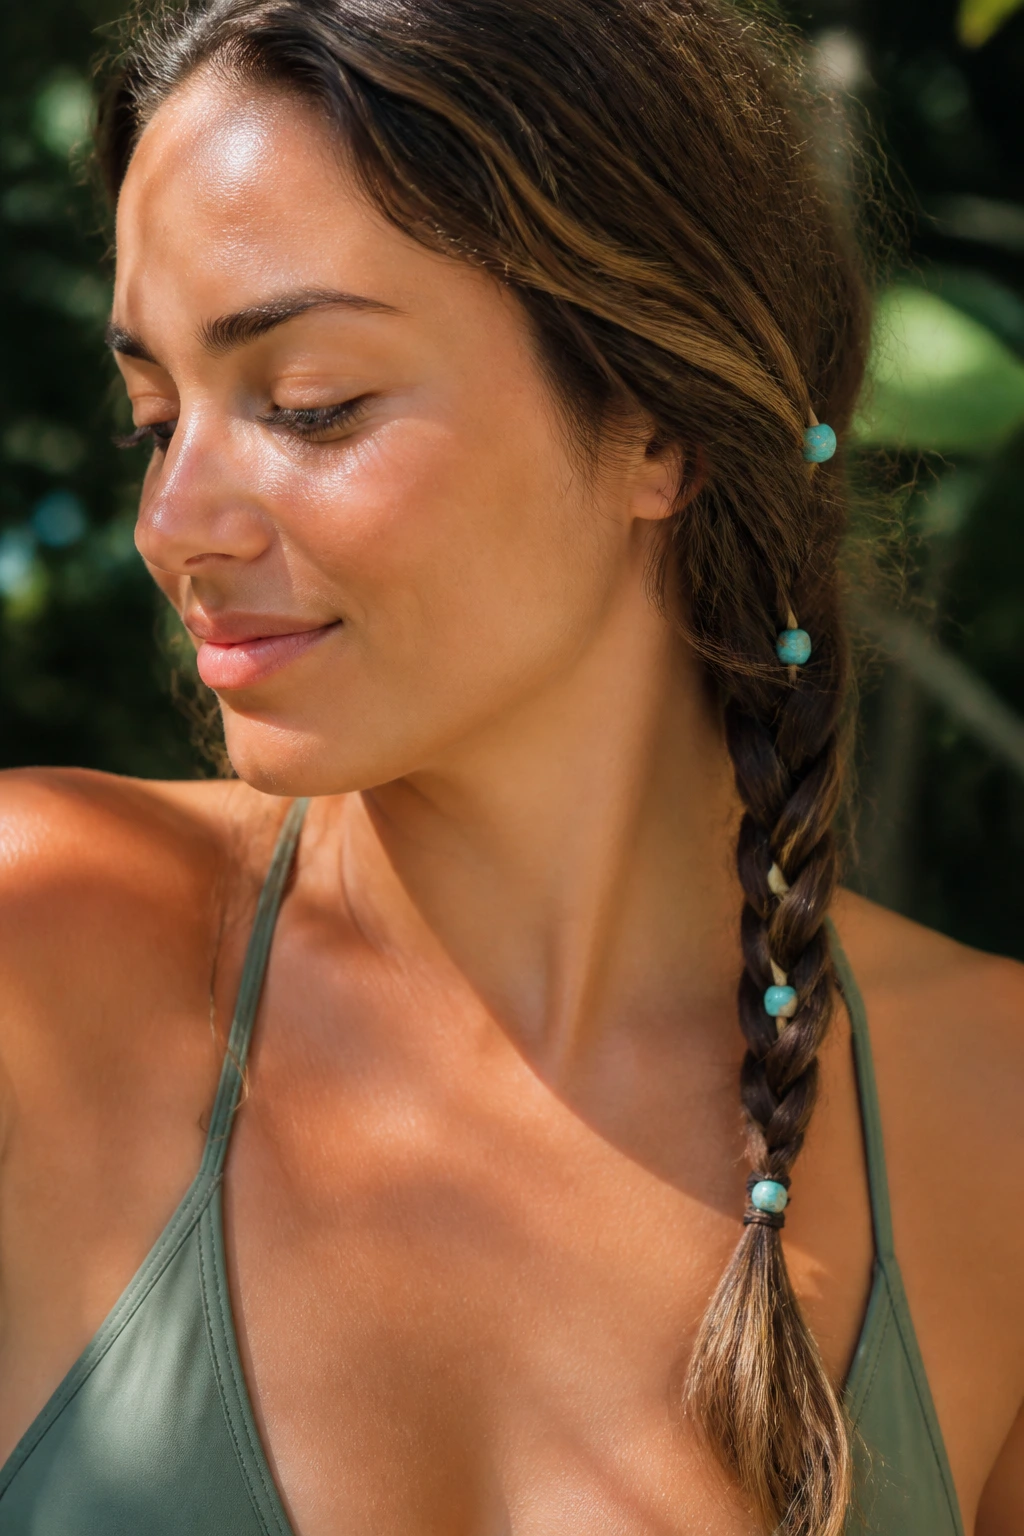
A three-strand braid with beads is a classic that still feels fresh when the bead choice is clean and deliberate. The braid itself can stay simple; the beads add rhythm and a little sound, which is half the charm. Shells, wood beads, or lightweight decorative ends all work if they don’t pull too hard on the braid.
The key is restraint. One or two bead clusters usually look better than covering every inch. Too many, and the braid starts jangling against itself and losing movement. I like this style when the outfit is simple and the hair needs a small focal point. It can also help the end of the braid feel finished, especially on longer lengths that might otherwise fray a little near the elastic.
37. Faux Locs Styled Like Braids
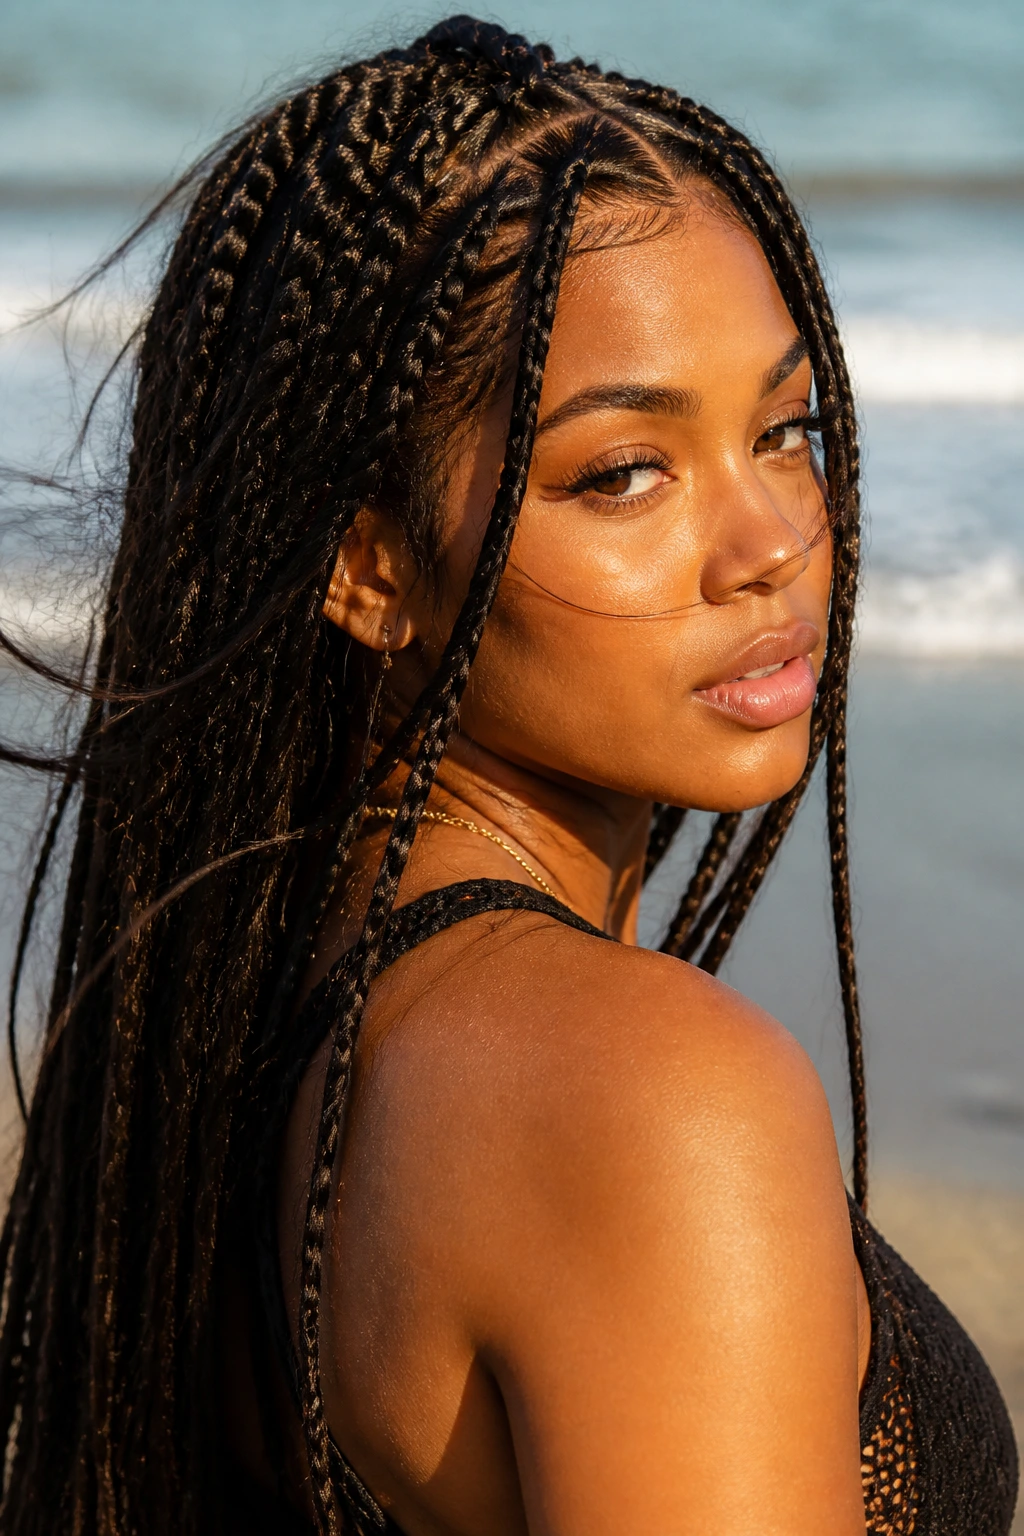
Faux locs styled like braids give you the look of a braid with the heft and protection of wrapped lengths. Depending on how they’re installed, they can be twisted, braided, or pinned into shape for a day at the beach. That makes them useful if you want a style that can stay put through wind without needing daily restyling.
They’re also a good choice when you want to reduce handling. Once installed, there’s less detangling, less breakage from repeated combing, and less drama when the air turns damp. Keep the roots clean and the scalp comfortable. That part matters. If the base feels sore, the style is too tight or has been worn too long. Protective styles should protect. That sounds obvious until you’ve seen how often people ignore it.
38. Braided Mohawk With Loose Curls
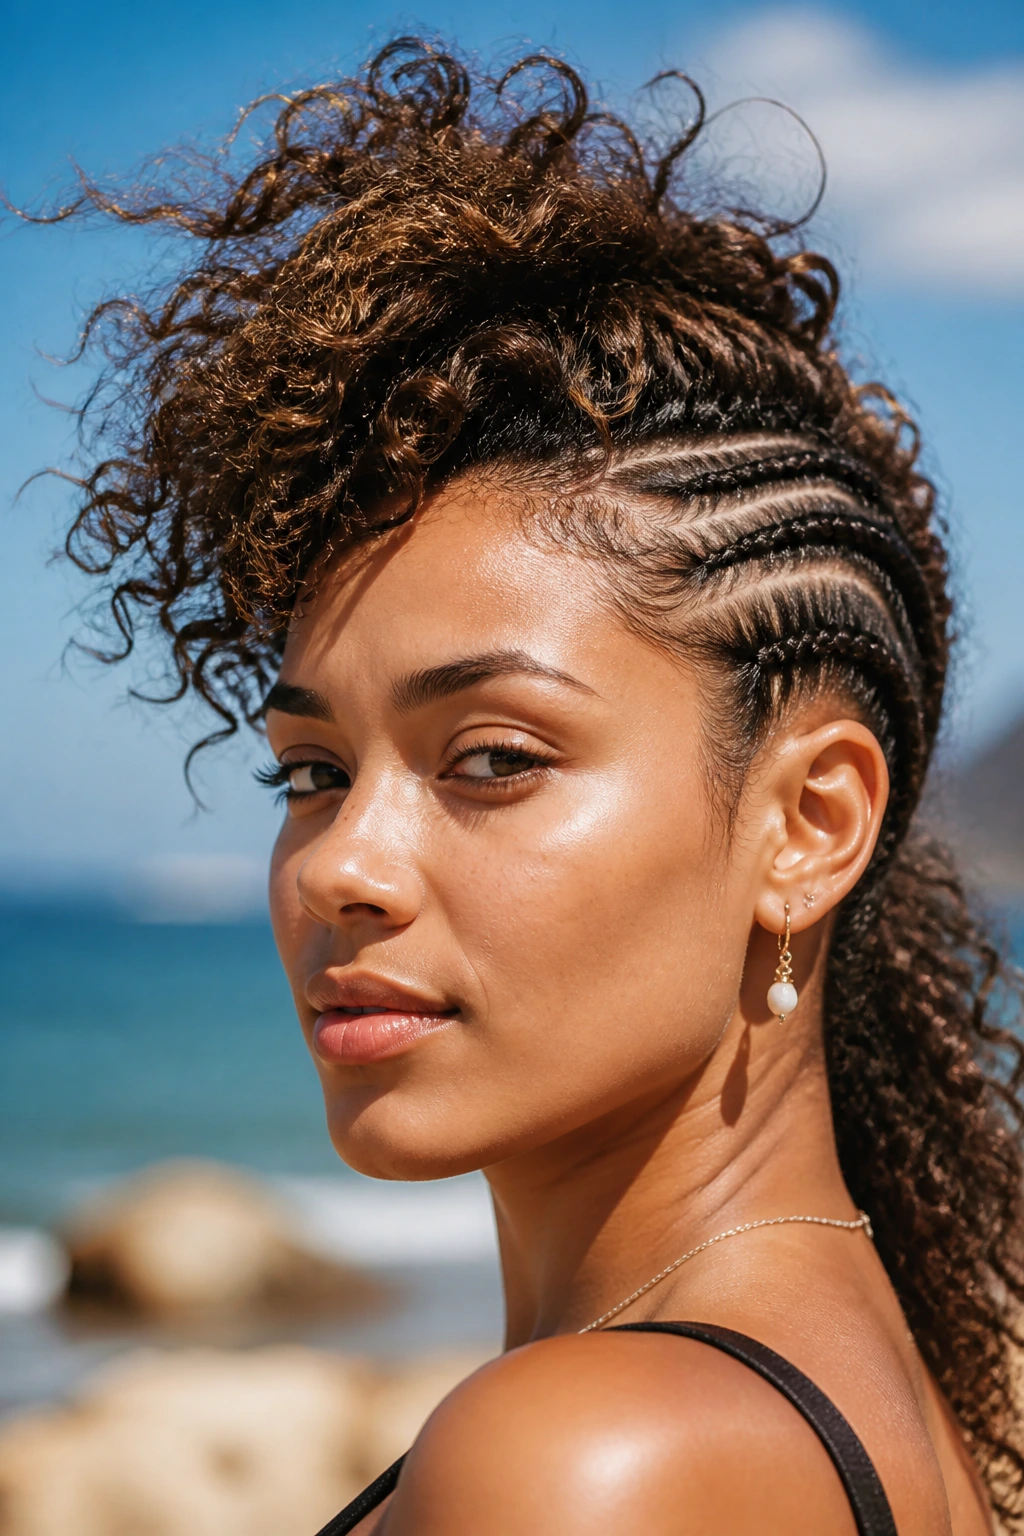
A braided mohawk with loose curls gives you the strongest contrast in the whole collection: tight sides, soft center, and a shape that doesn’t wilt when the day gets loud. The braided sides keep the outline controlled, while the curly middle section moves enough to keep it from feeling hard. It’s a bold look, but not a fussy one.
This style works best when the middle section has some body. If your curls are flat, a quick set with foam or a curling wand can bring them back to life. The side braids should stay close to the scalp, but not tight enough to leave marks. That’s where the style succeeds or fails. It looks better with a little edge and a lot of shape. If you want one braid style that can hold its own against wind and still feel styled, this is it.
Why These Braids Hold Up When the Air Gets Heavy
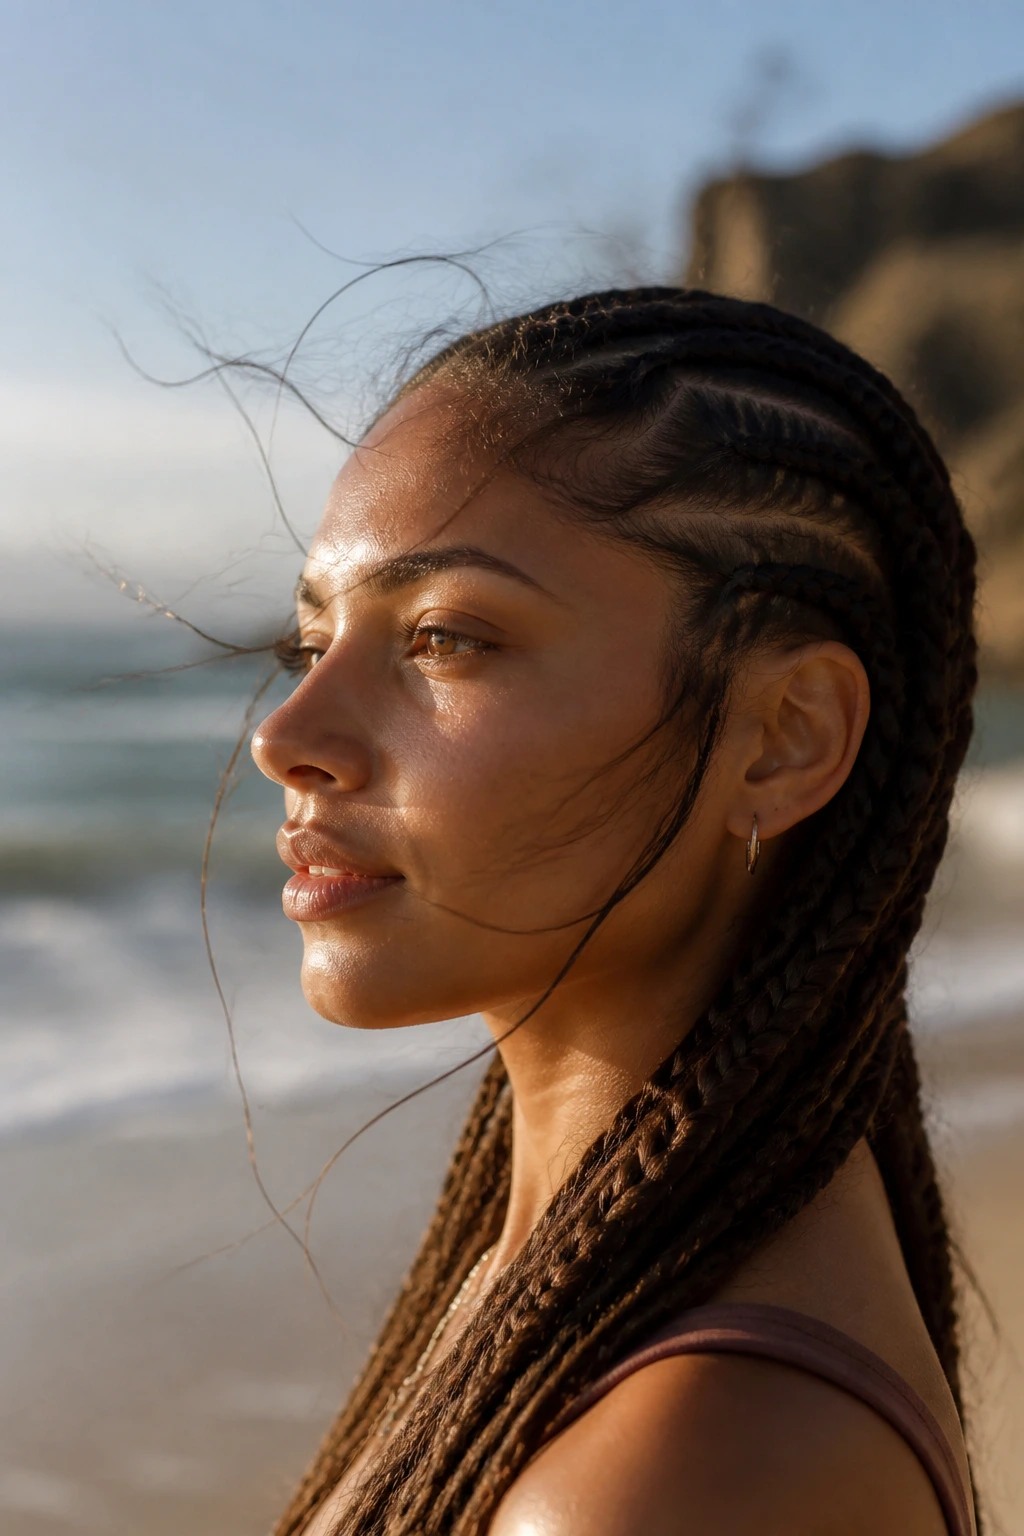
Braids survive beach weather because they reduce the number of loose ends the wind can grab. That sounds simple, but it changes everything. A braid takes a head of hair with dozens or hundreds of moving pieces and bundles it into one controlled shape. Salt air still reaches it. Sunscreen still touches the hairline. The difference is that the damage happens slower, and usually in smaller places.
Less Friction, Less Puff
Loose hair rubs against itself, your shoulders, your clothes, and whatever you keep carrying under one arm. Braids cut down on that constant friction. The result is less matting near the nape and fewer flyaways along the outer layer. I’m not pretending braids eliminate frizz. They don’t. They just keep the frizz from spreading everywhere at once.
Day-Two Hair Often Wins
Freshly washed hair can be too smooth for many braids, especially the softer ones. Day-two hair has a little grip, which helps the sections stay in place. A little dry shampoo at the root or texturizing spray through the lengths can give straight or fine hair the same bite without turning it gritty.
The Hairline Still Does the Heavy Lifting
Tight braids at the root are the fastest way to make a style miserable. Wind will not fix that, and neither will good lighting. Keep the front firm enough to hold shape, soft enough to move when you tug at it with one finger. That balance is what makes a beach braid feel wearable instead of punishing.
Essential Tools for These Braided Looks
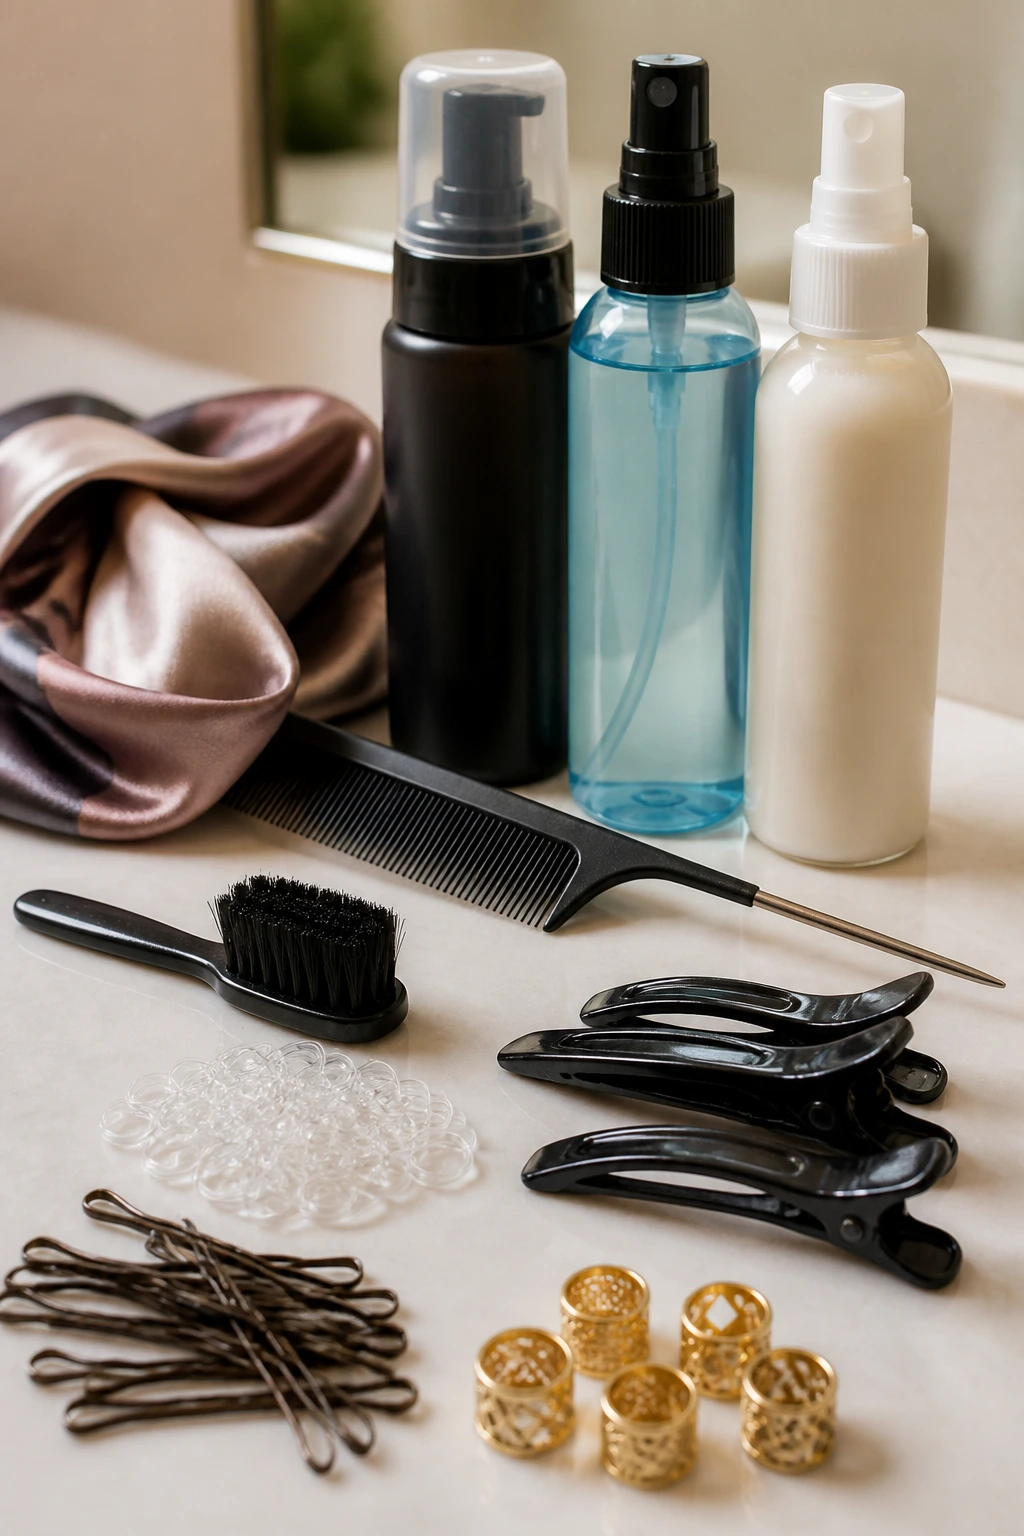
- Rattail comb: Clean parts make every braid look more intentional, especially on styles like cornrows, stitch braids, and crown braids.
- Edge brush or small toothbrush: Useful for smoothing the hairline with a thin layer of gel instead of smearing product everywhere.
- Mini clear elastics: These keep ends secure on pull-through braids, bubble braids, and any style with a wrapped finish.
- Duckbill clips: Helpful for separating sections while you braid and for keeping the top half out of your face.
- Light mousse or foam: Adds grip and controls frizz without making the hair stiff.
- Texturizing spray or dry shampoo: Best for fine, slippery hair that needs a little friction before braiding.
- Leave-in conditioner: Use a small amount on the mid-lengths and ends so the braid stays soft, not crunchy.
- Satin scarf or bonnet: Keeps braids from fuzzing overnight and protects them from pillow friction.
- Bobby pins: Small, color-matched pins are better than oversized ones for crown styles, buns, and halo braids.
- Decorative cuffs, beads, or ribbon: Optional, but useful when you want the braid to feel finished without adding heat or extra structure.
How to Prep Hair So the Braid Holds Its Shape
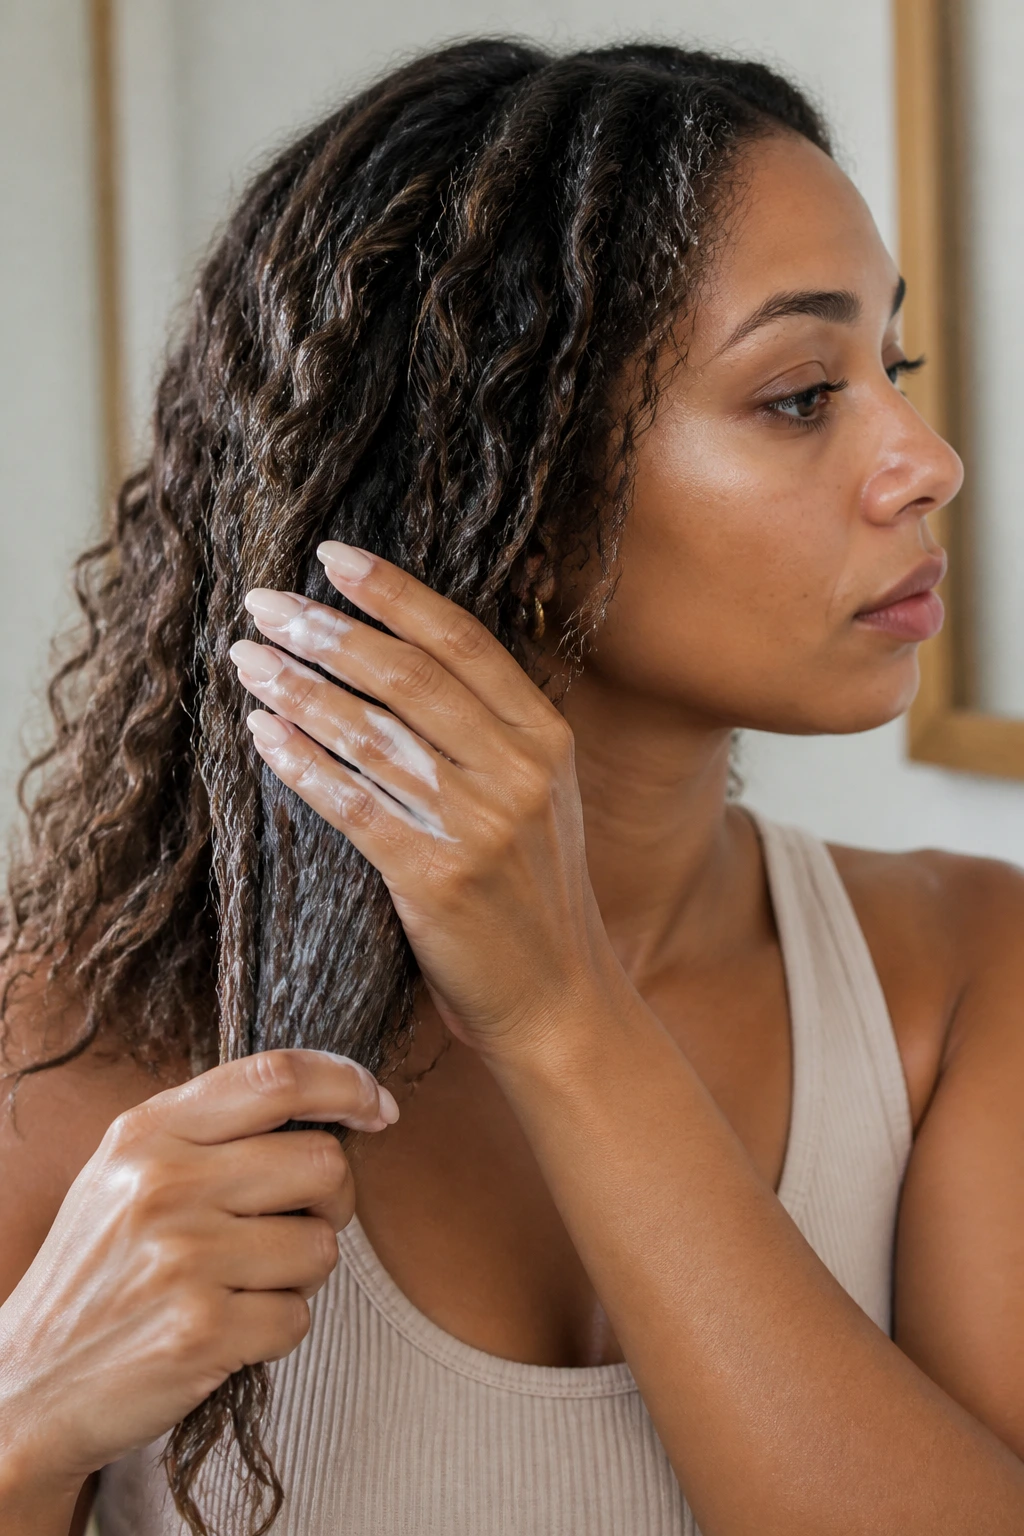
The braid starts before the first section is crossed over. If the hair is too clean and too slippery, the style will slide. If it’s tangled or overloaded with product, it will puff in all the wrong places and make sectioning a pain. The sweet spot is hair that’s detangled, lightly textured, and dry enough to grip.
Clean, But Not Squeaky
Hair that was washed the night before often works better than hair washed that morning. There’s a small amount of natural grip left in it, and that helps. If the hair is freshly washed, rough-dry the roots with a blow dryer or let them air-dry until they’re fully dry before you start braiding.
Put Product Where It Helps
A leave-in conditioner should live on the mid-lengths and ends, not the scalp. A little mousse or foam at the root can keep flyaways in line, but heavy cream near the part line usually makes braids slip. Fine hair often needs dry shampoo or texturizing spray first. Curly hair often needs a bit more stretching so the braid doesn’t shrink up and lose its shape.
Part With the End Style in Mind
A center part changes the whole mood of boxer braids, headband braids, and crown styles. A deep side part works better for loose side braids and swept buns. If you’re doing a style with multiple braids, clip the sections before you start so you’re not wrestling with loose hair and a comb at the same time. That tiny bit of prep saves a lot of time later.
How to Wear These Braids on Real Days
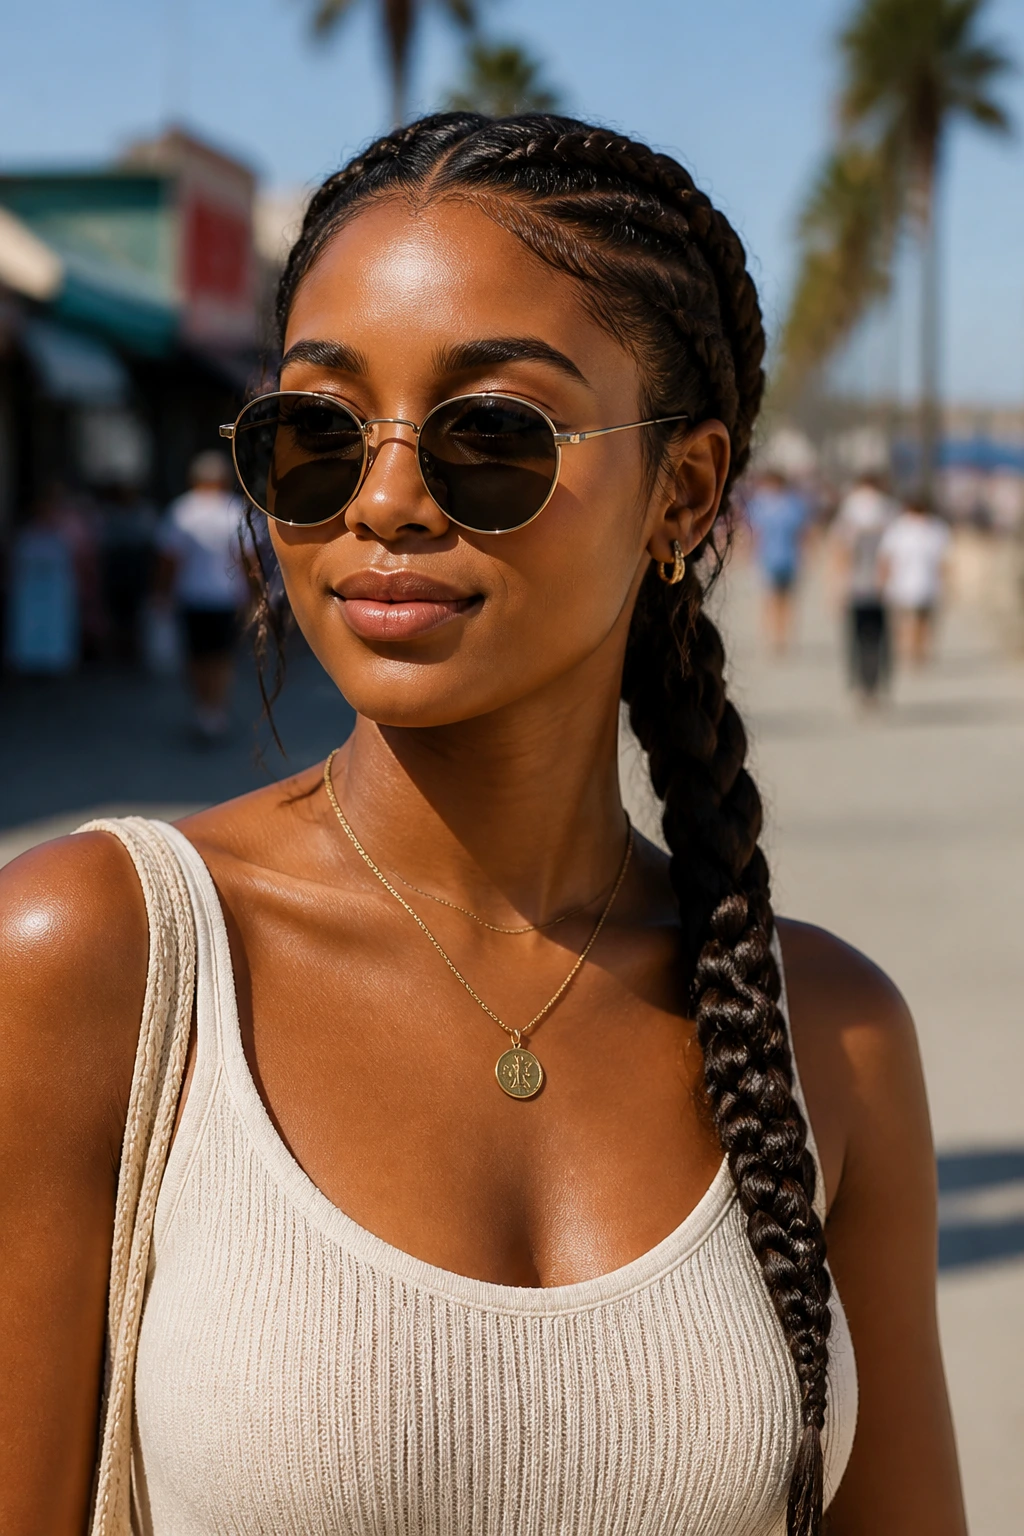
Presentation: Keep the braid line neat where people will see it first — around the face, along the crown, or across one shoulder — then loosen the less visible sections if you want the style to feel softer. A clean part and a slightly relaxed finish usually beat a perfectly polished braid that looks stiff under bright sun.
Outfits: These styles sit nicely with swimsuits, linen shirts, ribbed tanks, off-the-shoulder tops, and anything with an open neckline. A braid with a clear shape gives you room for earrings and sunglasses without crowding the face. If the outfit is loud, keep the braid simple. If the clothes are plain, a scarf, bead, or cuff can carry the look.
Face Shape: Off-center braids soften round faces. Crown styles widen narrow faces a little. High braids and pulled-up ponytails open up the jawline and neck, which helps when the weather is muggy and you want the whole look to feel lighter.
Best Settings: These braids make sense for beach walks, boat days, outdoor lunches, road trips, and late dinners when you do not want to restyle from scratch. The most useful styles are the ones that can go from sand to street without needing a blow dryer and a complete reset.
Styling Tips That Add Polish Without Extra Fuss
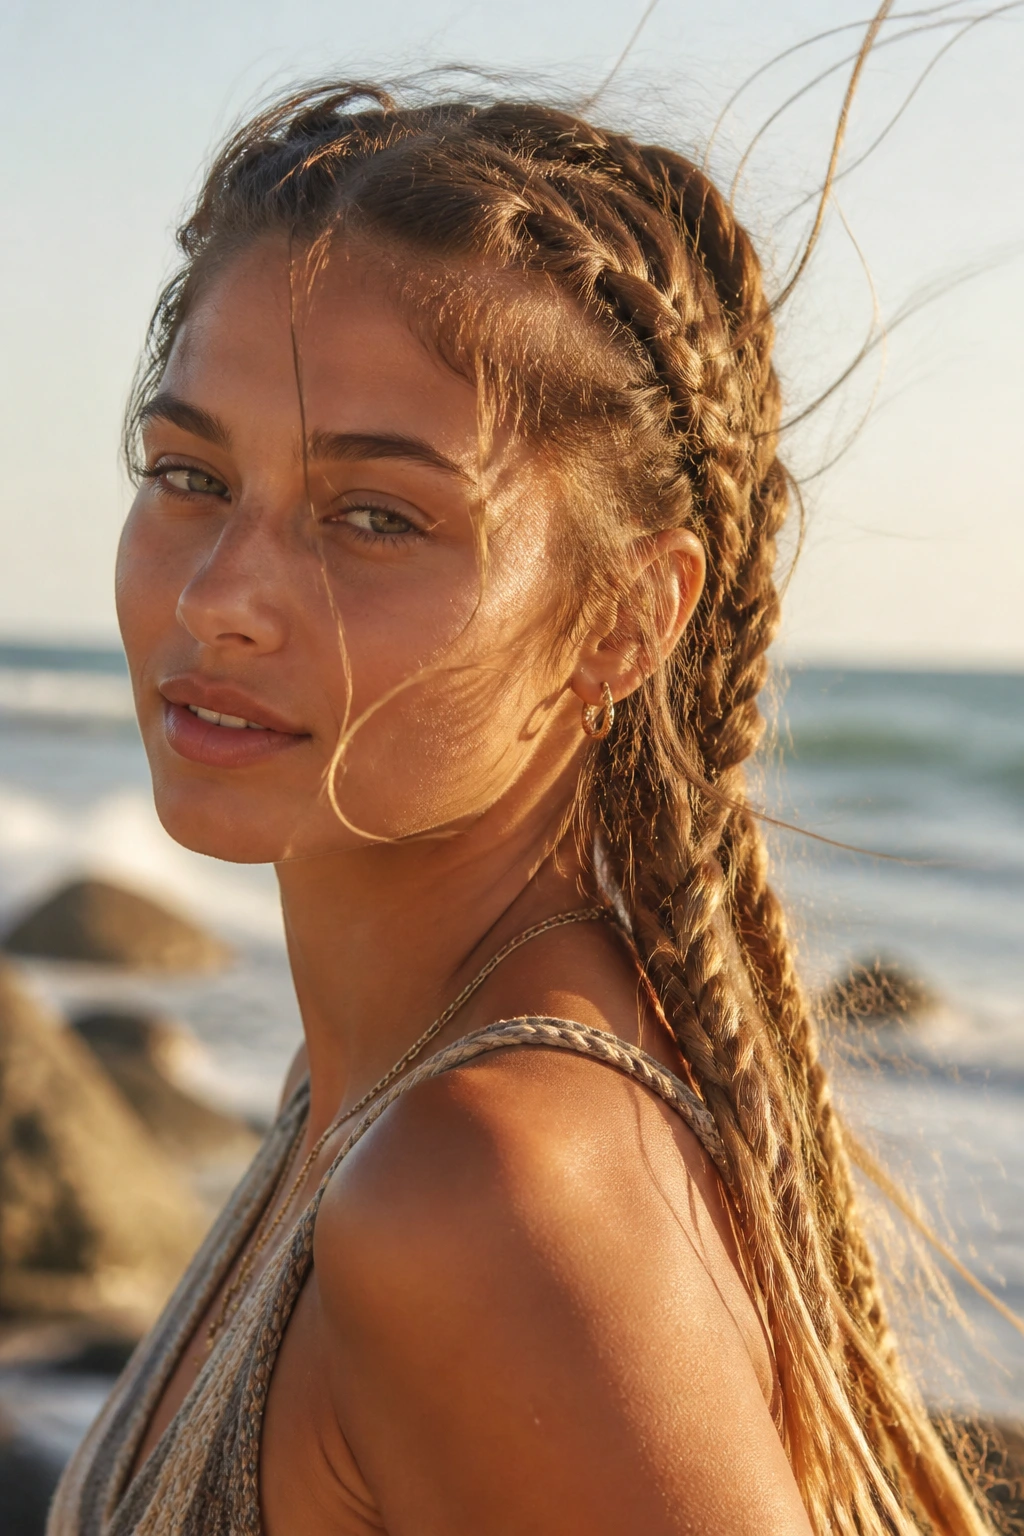
Texture Boost: A few sprays of sea-salt mist or texturizing spray on the mid-lengths before braiding can give fine or straight hair the grip it needs. Use a light hand. Too much product turns the braid gritty and dull.
Customization: Scarves, shell pins, small beads, braid cuffs, and slim clips all work here. Pick one detail and stop there. One accessory gives the braid personality; three accessories start fighting each other.
Finish: Smooth the crown with a pea-sized amount of gel on an edge brush or even your fingertips. Save oil for the ends. If you put shine near the roots, the braid often slips faster, and the part line can look greasy by midday.
Make-It-Yours: Fine hair usually benefits from wider braids that get gently pulled apart at the edges. Curly hair often looks best when a few pieces are left out on purpose, not by accident. Shorter hair usually needs half-up styles, headband braids, or tucked buns rather than full-length plaits. That’s not a limitation. It’s just the shape the hair already wants to make.
Common Mistakes That Make Braids Fail Early
- Braiding soaking-wet hair and leaving it that way: Wet roots can smell damp and collapse under the braid’s weight. Dry the scalp fully before you go anywhere near a pillow or a hat.
- Pulling the hairline too tight: If the braid leaves a red line or gives you a headache, it’s too tight. Back off at the front and let the tension sit lower in the braid.
- Using too much oil near the roots: Heavy oil makes sections slide and turns the braid shiny in the wrong way. Keep oil on the ends or use only a tiny bit at the hairline.
- Trying a style that doesn’t match the texture: A slippery, freshly washed braid on fine hair will not hold the same way a textured braid on day-two curls will. Match the style to the hair you actually have.
- Ignoring the ends: Frizzy tails make even a clean braid look unfinished. Secure them with a small elastic, a bit of cream, or a wrapped finish so the shape holds from top to bottom.
Variations and Adaptations to Try
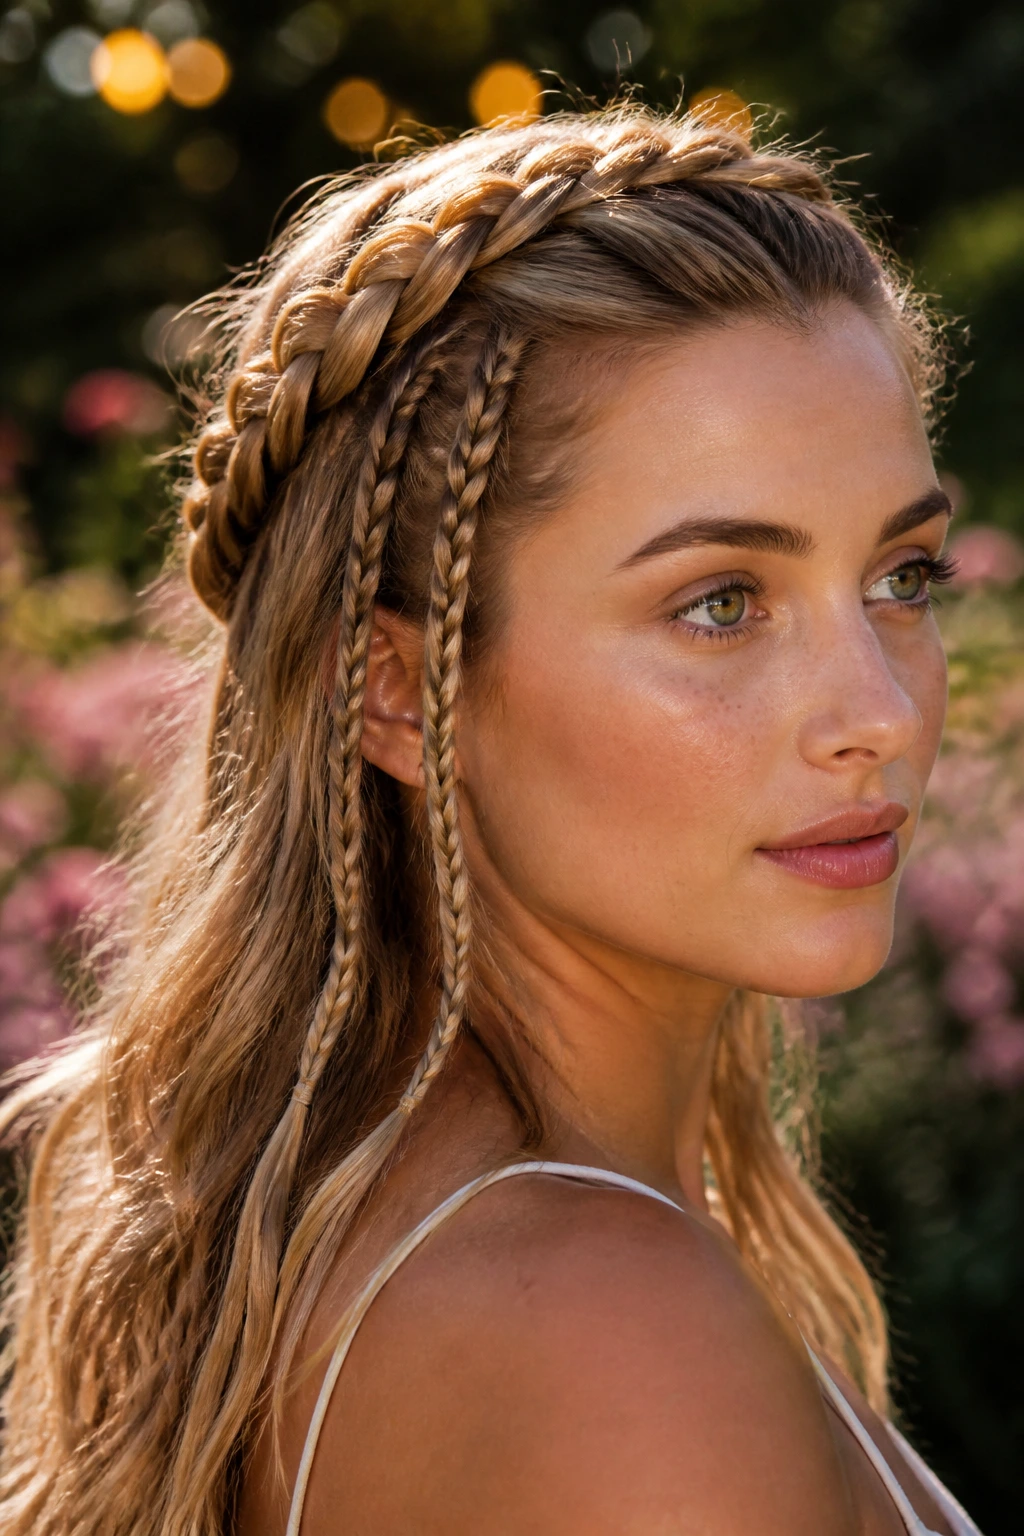
Fine-Hair Lift: If your hair is thin or slips easily, lean on styles with structure — Dutch braids, crown braids, and pull-through braids. Add dry shampoo at the roots and gently widen the braid at the end so it looks fuller without adding weight.
Curly-Texture Version: Curly and coily hair often looks best when it’s braided on stretched hair or after a light blow-dry at the roots. Leave a few ends curly if you want the style to keep its shape and show off the texture instead of hiding it.
Short-Hair Workaround: Lob-length hair does not need full-length braids to look good. Try a Dutch braid headband, a half-up crown braid, or tiny side braids pinned into a clipped style. Those shapes give the same beachy feel without asking for extra inches.
Protective Vacation Mode: For styles you want to keep longer than a day, choose knotless braids, feed-ins, cornrow accents, or faux locs. Keep tension low, wrap at night, and rinse salt and sunscreen out of the hairline when you get back. Pretty styles are nice. Healthy hair is better.
Dress-Up Upgrade: A braid gets a different mood the second you add ribbon, cuffs, or slim beads. Keep the braid simple and let one accessory do the talking. That keeps the style from feeling overloaded and makes it easier to wear with earrings or a printed outfit.
Care, Refresh, and Overnight Maintenance
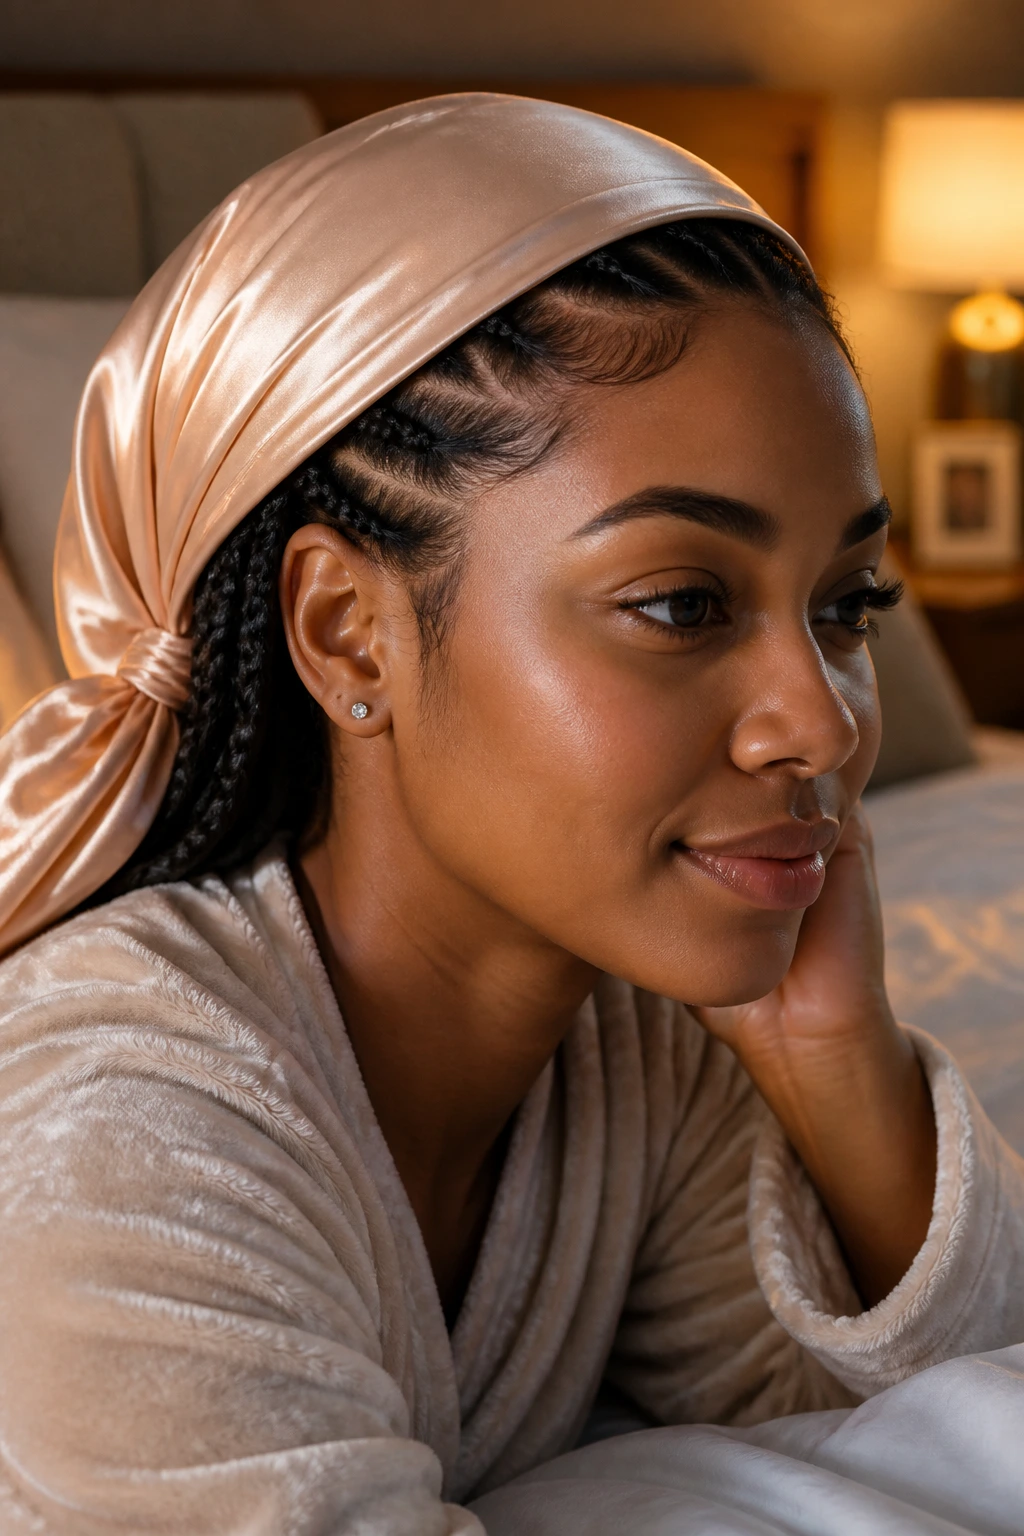
Loose beach braids usually look their best on the day you wear them and still feel fine the next morning if you protect them overnight. A satin scarf or bonnet cuts down on friction and keeps the outer layer from puffing up. If a braid starts looking flat, mist your hands with water, smooth the surface lightly, and add a touch of leave-in to the ends.
Protective styles live longer, but they need more attention at the scalp. Rinse out saltwater the same day if you’ve been swimming, and dry the roots fully before bed. A damp braid tucked under a scarf is not a good idea. For knotless, feed-in, or cornrow styles, many people get a few weeks of wear, but if the scalp starts itching, the roots feel sore, or the part lines look fuzzy enough to bother you, it’s time to refresh or take them down.
For braids you plan to keep through repeated beach days, keep a small travel kit: a satin scarf, mini elastics, a tiny bottle of leave-in, and a comb. That’s enough to reset most styles without starting over from scratch. If the ends are curly, refresh them with a little foam and finger-scrunching. If the roots are flat, change the part or add one accessory and see how much the shape changes.
Frequently Asked Questions
Which beach braid holds best in wind?
Cornrow-based styles, stitch braids, feed-in braids, and low braided buns hold the strongest because they stay closer to the scalp. If you want a loose style, a Dutch braid or rope braid will usually stay put longer than a soft three-strand braid.
Can I do these styles on freshly washed hair?
You can, but many braids hold better on hair that has a little grip. If your hair is very clean and slippery, use mousse, dry shampoo, or a light texturizing spray first so the sections do not slide apart.
What’s the best braid for fine hair?
Pull-through braids, Dutch braids, and half-up crown braids usually give fine hair more shape. Pancake the braid gently after tying it off so it looks fuller without needing a lot of product.
How do I keep braids from frizzing in humidity?
Start with a small amount of mousse or foam, then keep the crown smooth and the ends controlled. A satin scarf at night helps more than people expect. So does not touching the braid every ten minutes.
Can I swim with these braids?
Loose braids can handle a swim, but they need care afterward. Rinse salt or chlorinated water out the same day, squeeze out excess water with a microfiber towel or soft T-shirt, and dry the roots before bed.
How tight should the braid feel?
Firm enough to hold, loose enough that your scalp does not feel pulled. If the first braid pass hurts or leaves a dent, it is too tight. A braid should stay in place without making you think about it every five minutes.
What if my braid falls apart halfway through the day?
Usually the sections were too slippery, too large, or both. Add a little texturizing spray, tighten the base near the crown, and use a small elastic or pin where the braid starts to loosen. Sometimes one hidden bobby pin saves the whole style.
Do I need heat to make these looks work?
No. Heat is optional, not required. Some styles look cleaner on blown-out hair, but many of the best beach braids actually work better on natural texture, second-day hair, or slightly stretched curls.
Braids That Keep Up With the Wind
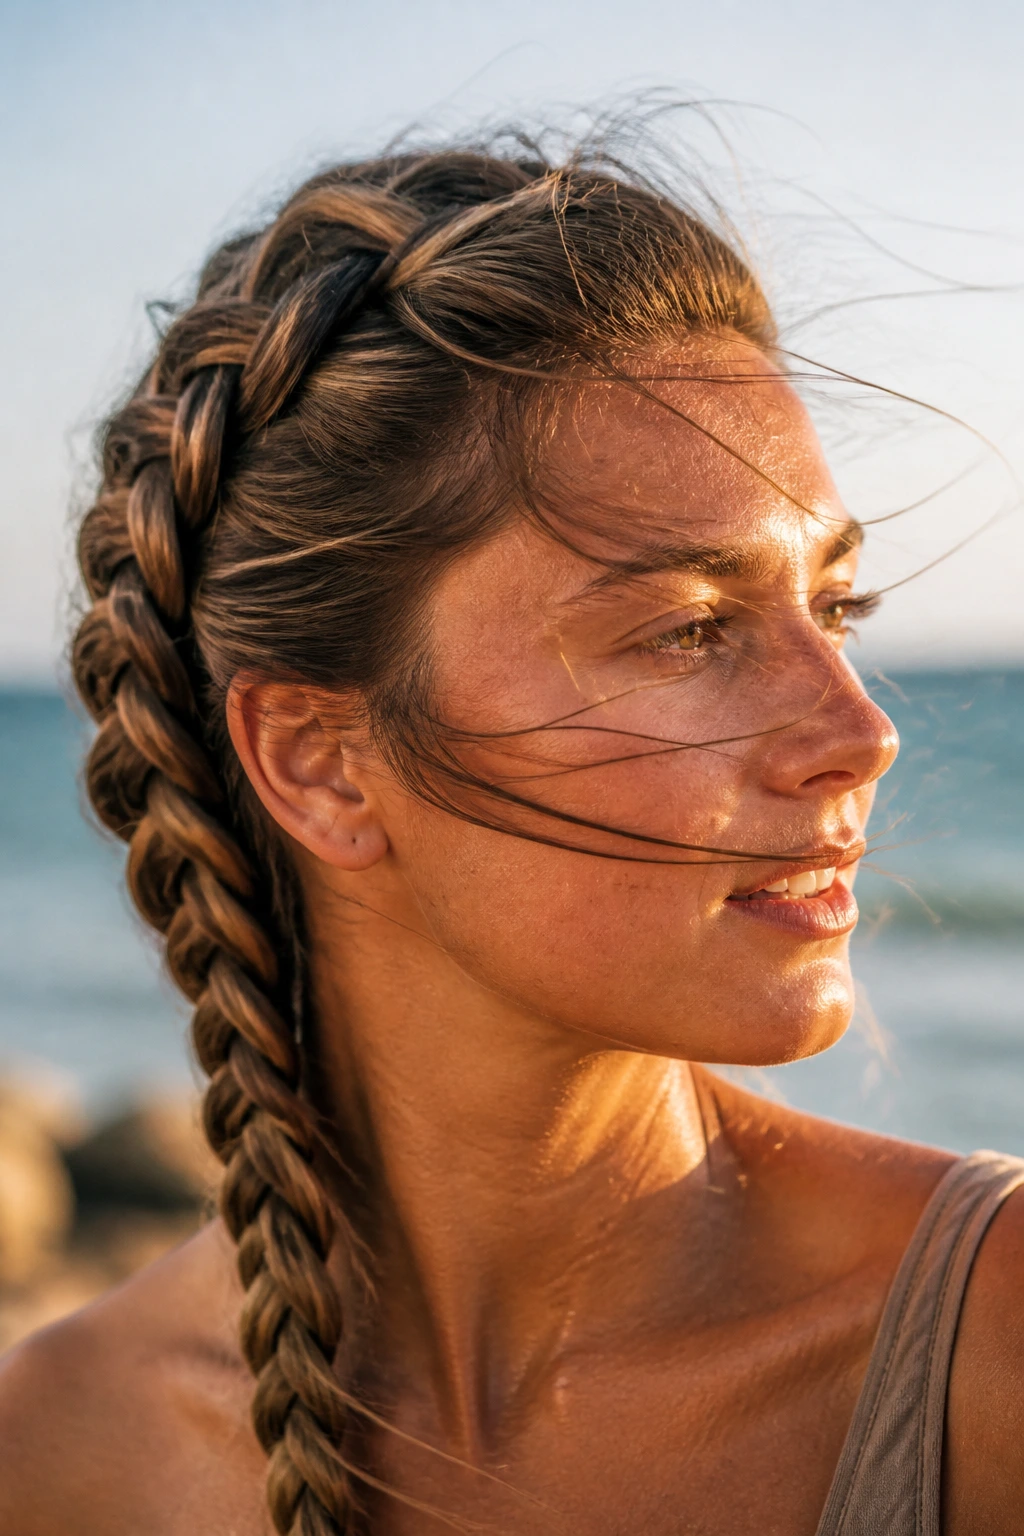
The best braid styles for warm, breezy days are the ones that understand the assignment: hold the shape, keep the face clear, and still move a little when the air shifts. That can mean a sleek feed-in ponytail, a messy French braid, or a scarf-woven plait that feels more personal than polished. The exact choice matters less than the fit between the braid, the texture, and the day you’re having.
Pick the style that matches your hair’s real behavior, not the version you wish it had. A braid that survives salt air, straps, sunscreen, and a long afternoon outside is the one worth repeating. Once you know which shape your hair likes best, the rest gets much easier — and a lot more fun.
