



Wavy hair and 1970s long hairstyles for wavy hair are a cleaner match than most people give them credit for. The decade loved motion: feathered cheekbone layers, side parts that opened the face, brushed-out bends, and ends that flick instead of sitting there like dead rope.
The mistake is trying to make wavy hair too neat. Too much curl, too much polish, too much weight at the bottom, and the whole thing loses the looseness that makes the style work. The good versions feel airy around the face and full where the eye lands first.
That is the magic. Not stiffness. Not perfect symmetry. Shape.
When the haircut and the wave pattern are working together, long hair suddenly looks lighter, more deliberate, and a lot less like it spent all morning being wrestled into place. Start with the cuts that know how to move, then choose the styling level you want, and the rest gets much easier.
Why These 25 Shapes Feel Right on Wavy Hair
-
The wave pattern does half the styling: Wavy hair already bends on its own, so the right cut only has to guide that movement instead of inventing it from scratch.
-
They soften long hair without making it limp: Feathering around the face removes the heavy, sheet-like effect that one-length cuts can get past the shoulders.
-
A little imperfection helps them: A brushed-out wave, a piece that flips the wrong way, or a side part that isn’t ruler-straight often makes the style look more authentic.
-
They suit heat styling or air-drying: You can get into the 70s mood with a round brush and rollers, or let the hair dry naturally and just refine the front pieces.
-
They work with ordinary tools: A tail comb, a 1-inch or 1.25-inch barrel, clips, a round brush, and a light spray are enough for most of them.
-
They age better than stiff retro looks: These shapes feel like a reference, not a costume, which is why they still make sense on real hair.
How to Pick the Right 70s Shape for Your Wave Pattern
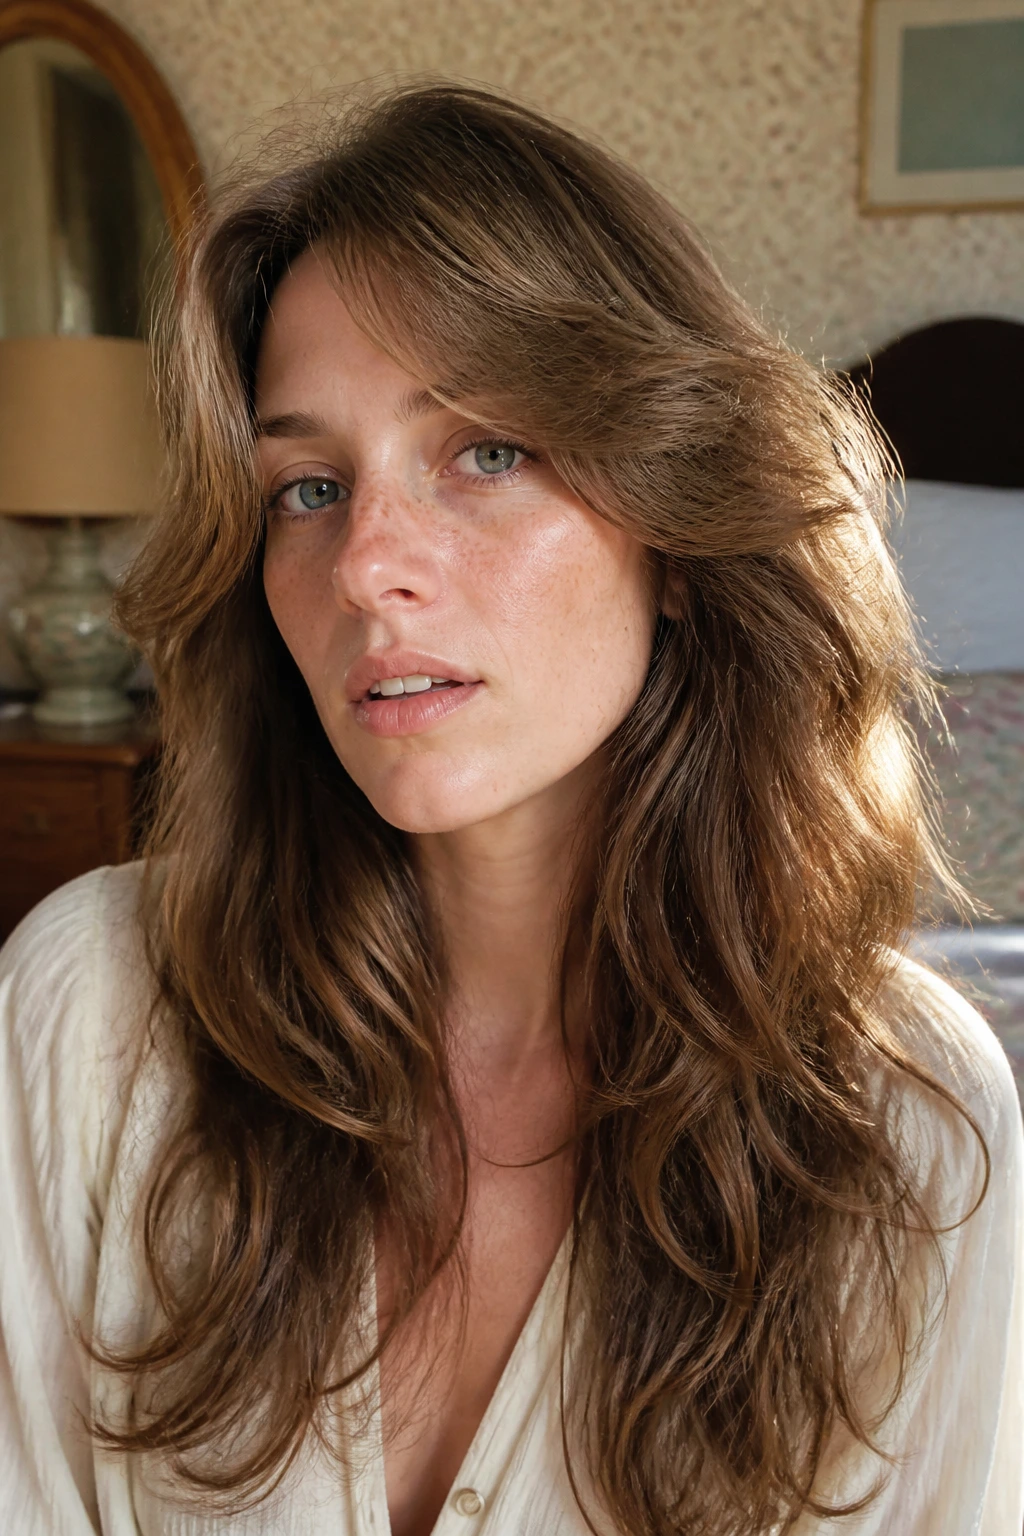
Not every 70s look asks the same thing from your hair. Loose 2A waves can carry more layering at the front and still sit nicely. 2B and 2C waves usually need a little more length left in the perimeter so the shape does not puff out at the sides.
Fine wavy hair likes longer layers that begin below the chin. That keeps the ends from looking thin while still giving the crown a bit of lift. Thick wavy hair usually needs internal weight removal, not a bunch of choppy short pieces all over the head. Too many short layers on thick hair and you get a triangle. Nobody needs that.
Face shape matters too, even when the internet pretends it doesn’t. Rounder faces usually look sharper with a side part or curtain fringe that drops below the cheekbone. Longer faces tend to like width at the sides and a little lift at the crown. If your waves collapse at the roots but swell at the ends, ask for a cut that keeps the longest face-framing pieces near the collarbone instead of up around the jaw.
One last thing. If you do not like heat styling, choose the shag, the boho center part, or the long feathered blowout with softer layers. If you do style with heat, almost any of these can be pushed farther into 70s territory with a roller set or a brush-out. The haircut matters more than people think. The tool just decides how loud it gets.
1. Farrah Feather Layers That Float From the Cheekbones
These are the reference point for a reason. The layers start high enough to move, but not so high that the hair turns puffy, and the front pieces curve away from the face with that unmistakable winged shape.
Why It Works
Feathering takes weight out of the front without chopping the length off. On wavy hair, that matters because the bends already add body; what you want is direction, not more bulk. A 1.25-inch round brush or a medium roller at the cheekbone area gives the pieces that outward flip. If your hair is thick, ask for internal debulking under the top layer so the ends do not balloon.
- Best on: medium to thick waves.
- Ask for: layers that begin around the cheekbone and soften into the length.
- Finish with: a light mist of flexible-hold spray, then finger-comb once.
One detail that matters: direct the front pieces away from the face while they cool, or the whole shape collapses into a tired bend.
2. Curtain Bangs with Long Swooping Layers
The middle part does half the styling for you here. Curtain bangs give the face movement right at the eyes and cheekbones, while the long layers keep the rest of the length from feeling heavy.
What I like about this shape is that it behaves. You can wear it brushed smooth with a small bend, or let the waves come through more loosely and it still reads as intentional. Blow-dry the fringe forward first, then bend each side away from the face with a 1-inch iron or a round brush, not a tight curl. If the pieces sit at cheekbone level, they connect to the rest of the cut instead of reading like a separate haircut.
This one is especially good if your wave pattern gets bulky around the jaw. The curtain fringe breaks that block up fast.
3. Center-Parted Disco Waves with Brushed-Out Shine
Why do brushed-out waves feel more 70s than tight curls? Because the decade liked motion that moved in a clean sheet, not little ringlets acting precious.
Set three-inch sections with a 1.25-inch iron, let them cool completely, then brush them out with a boar-bristle brush until the lines blur. A drop of shine serum on the ends keeps the finish glossy instead of dry. If your waves are loose, this version can be done with mousse and large rollers alone. If they are tighter, skip the top layer of heat on the crown and let the natural wave do the heavy lifting.
How to Wear It
The center part should stay crisp, but the waves themselves should not. If you can still see separate curls from six feet away, brush a little longer. If the hair goes flat, stop and shake it out with your fingers. That tiny line between brushed and blasted is where the style lives.
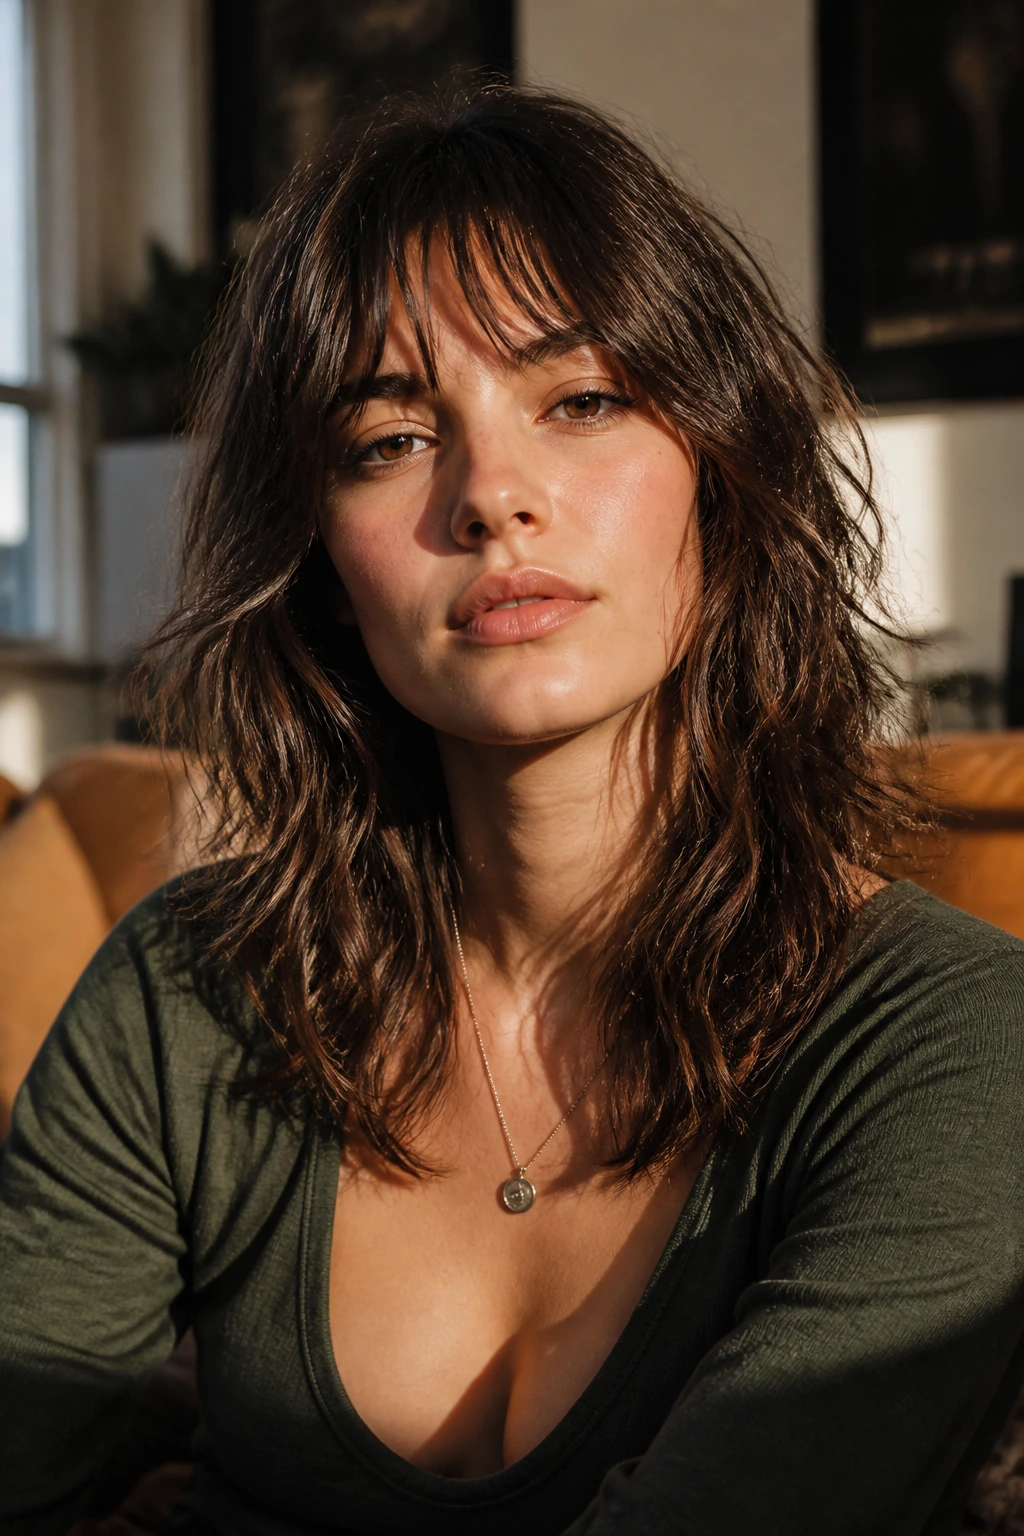
4. The Classic Long Shag with Wispy Fringe
If your hair gets puffy by noon, the long shag is usually the cut that saves it. The fringe gives the front some attitude, and the shag layers remove enough weight that the wave can sit instead of sprawling outward.
Keep the layers low and deliberate. If they start too high, the whole silhouette balloons. Ask for the shortest pieces to live around the chin, with the bulk of the movement at collarbone and below. That keeps the shape shaggy rather than triangular. Air-dry with a curl cream the size of a walnut, or diffuse only the roots if you want the fringe to stay soft.
A long shag on wavy hair should look slightly lived-in even on a good hair day. If it feels too neat, the cut probably needs more texture around the face.
5. Deep Side-Part Glam Waves
A deep side part changes everything fast. It builds instant height on one side, drops the hair over the other cheek, and gives long waves that old Studio 54 sweep without needing a lot of extra curling.
This works especially well if your waves collapse at the crown. Shift the part while the hair is wet or freshly misted, clip the heavy side back for ten minutes, and lift the roots with a round brush at the base. Then bend the lengths in large sections away from the face. The result should look plush, not stiff. If the end of the part line is neat but the waves underneath stay a little messy, that is the right balance.
I like this shape on heavier hair because it stops the front from feeling too broad. The side sweep pulls everything into a cleaner line.
6. Flip-Out Ends That Fling the Hair Back
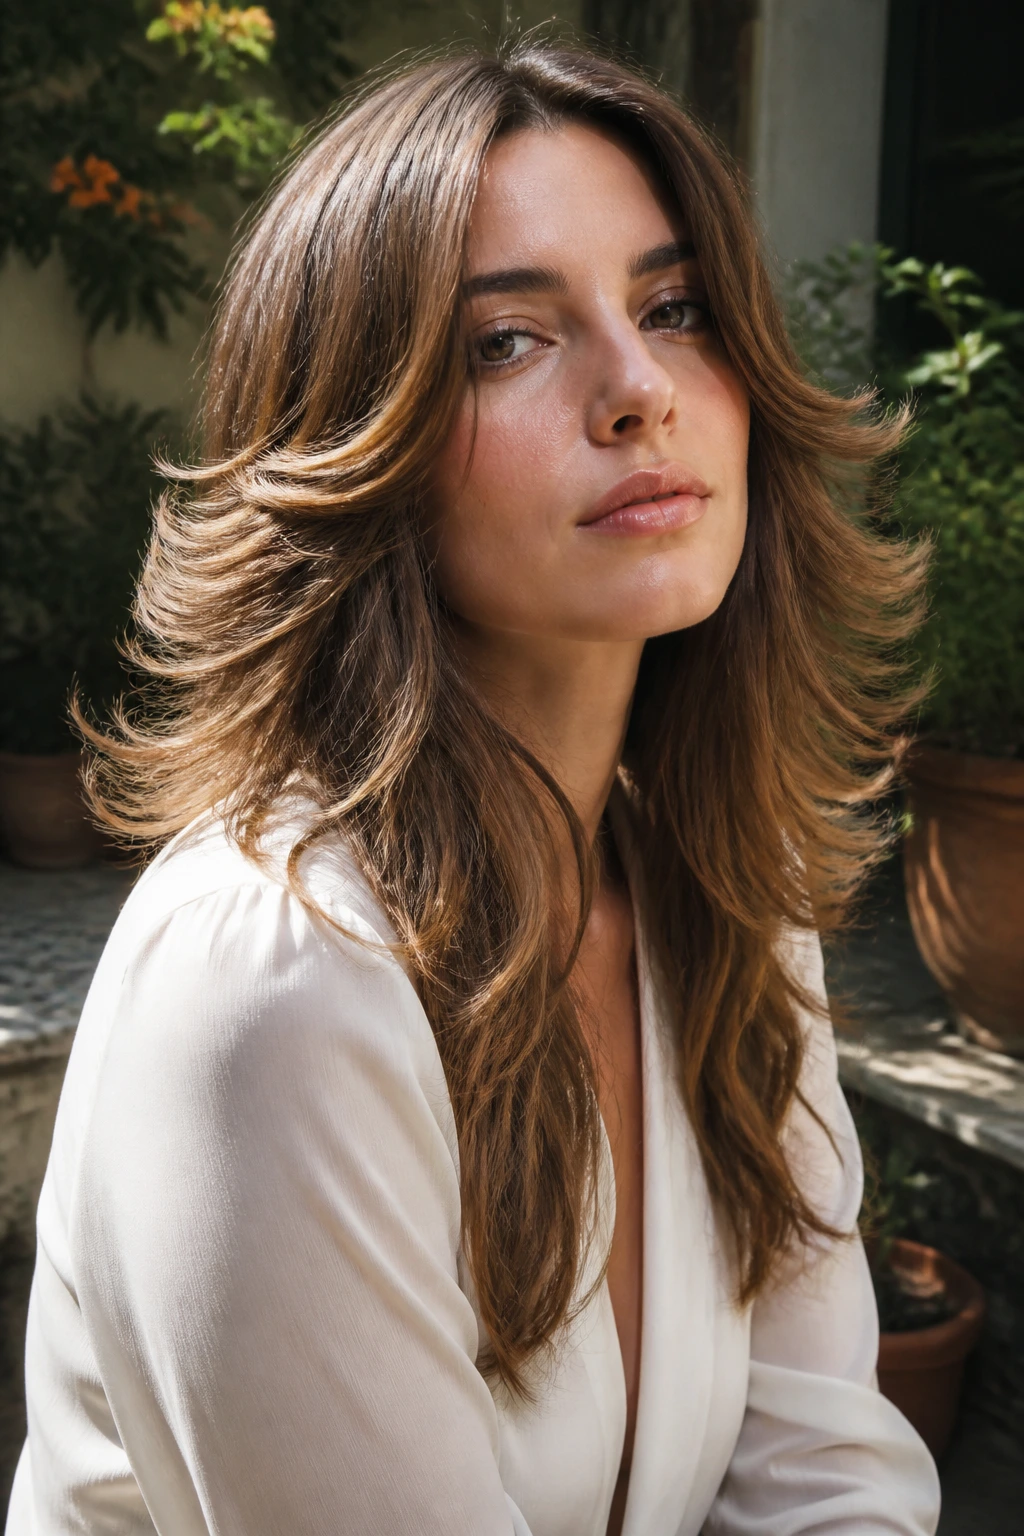
Some styles whisper 70s. This one says it out loud.
The flip-out at the ends gives long hair a playful edge, and on wavy hair it feels even better because the natural bend helps the shape hold. Smooth the mid-lengths, then turn the last two to three inches of hair outward with a round brush or flat iron. Keep the flip consistent on both sides or it will look accidental.
On very thick hair, use smaller sections and let each one cool in your hand for a second before releasing it. That tiny pause matters. It keeps the ends from falling straight the moment you blink.
7. Brushed-Out Spiral Waves
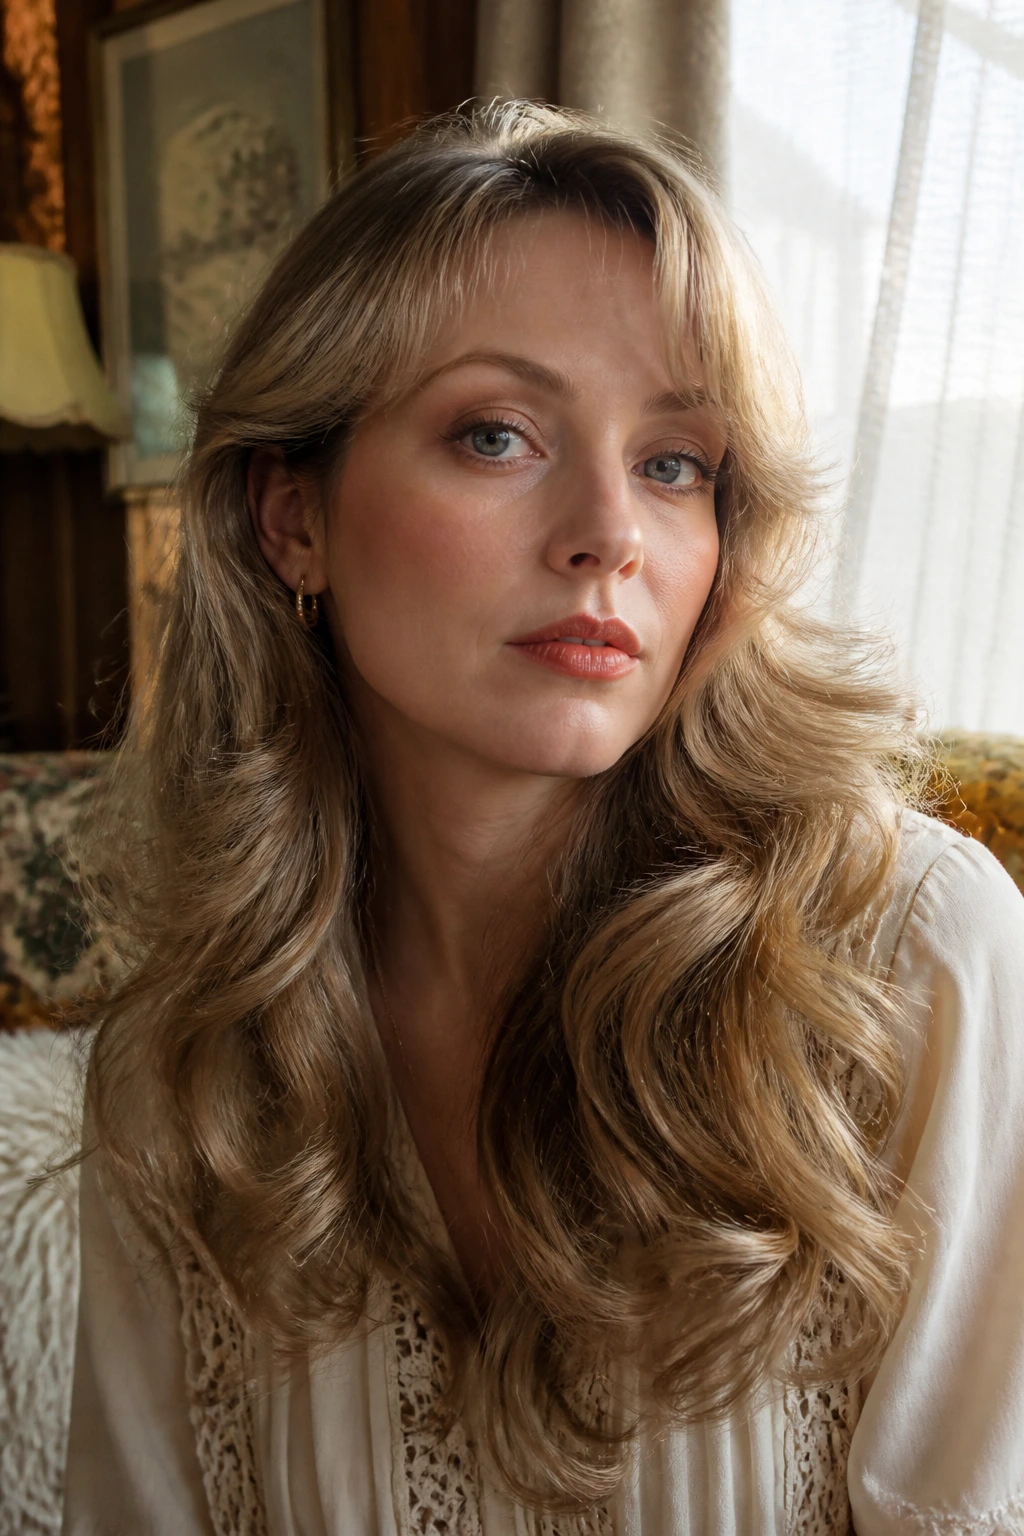
Why does this look hold such a strong place in seventies hair? Because it takes a curl and turns it into a soft wave that sways instead of bouncing in little springs.
Set the hair with a 1-inch iron or medium hot rollers, then brush through with a vent brush until the spirals open into wide ribbons. The whole point is to keep the shape loose at the ends and full through the middle. If you want more of a Stevie Nicks feel, leave the face frame a touch undone and tuck one side behind the ear. If you want cleaner polish, pin the crown while the curls cool.
What Makes It Different
This version likes hair that already has some bend. Straight hair can do it, but it needs more set time and more product. Wavy hair gets there faster, and the finish usually looks softer because the natural texture breaks up the pattern.
8. Crown-Lift Waves with a Deep Side Sweep
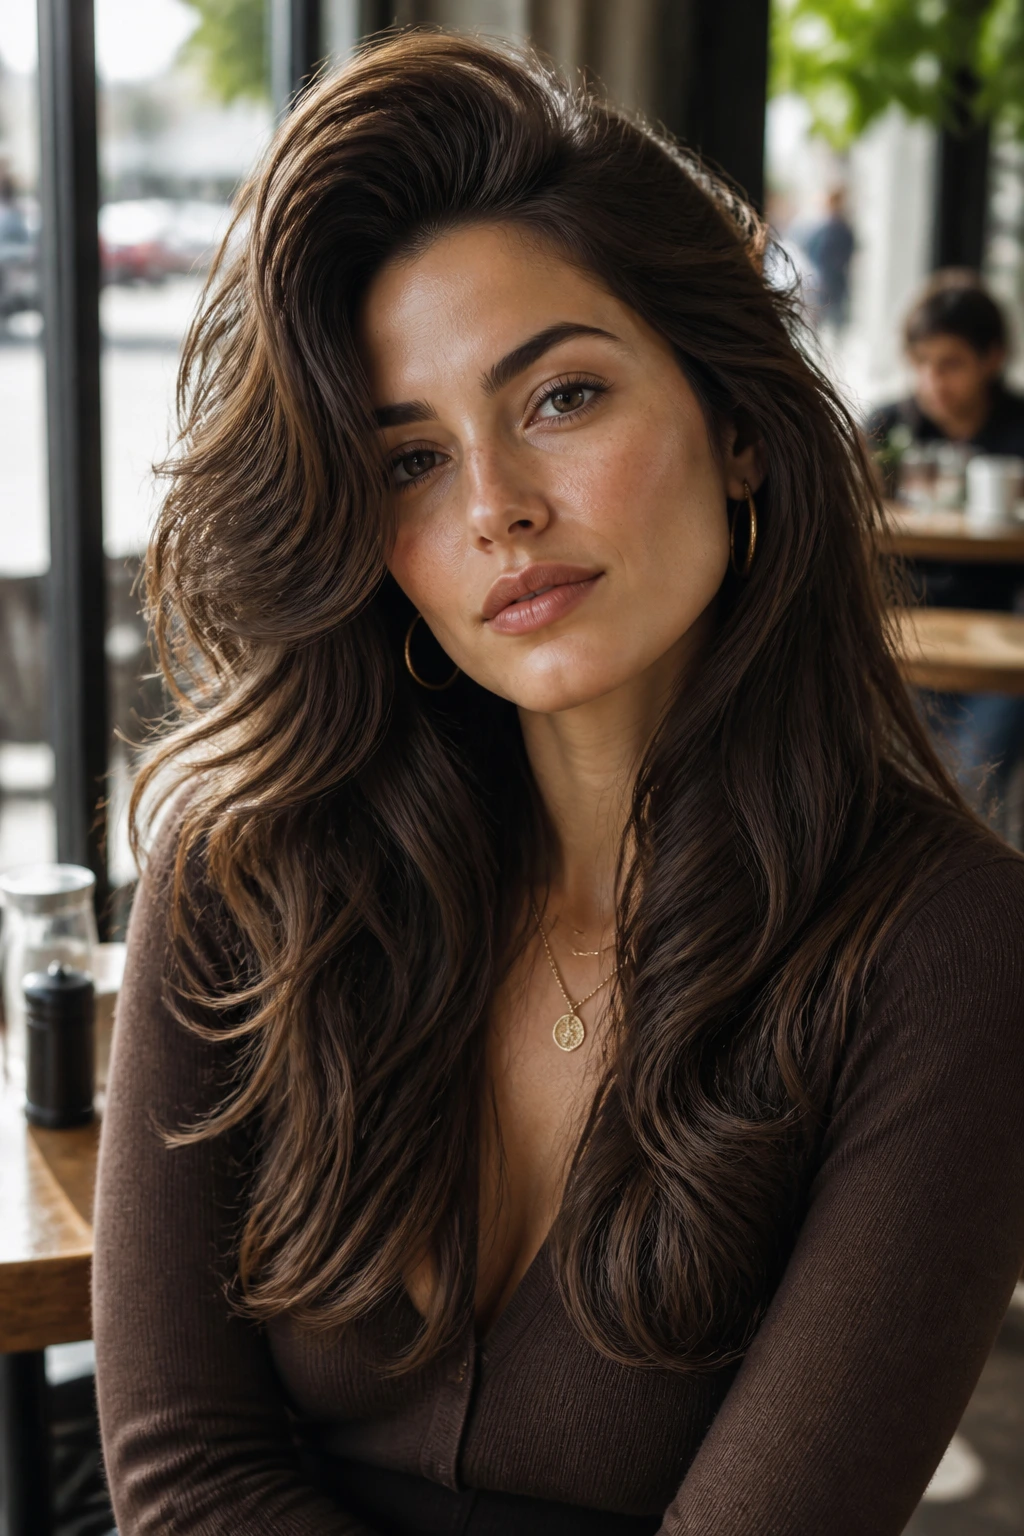
Flat roots ruin this style in five minutes. The crown needs lift first, then the side sweep can do its job.
Clip the top section up while you dry the roots, rolling the brush back and slightly over the crown. Once it cools, sweep the heavy side across the forehead and let the ends land around the collarbone. I like this look on hair that is medium-thick and has a wave pattern that starts low, because the volume sits where the eye wants it. If the hair is fine, use a root spray before blow-drying. If it is coarse, work in smaller sections so the root stays smooth.
This is one of the easiest ways to make long hair look more expensive without turning it into a full glam set.
9. Wide Feather Fringe and Long Lengths
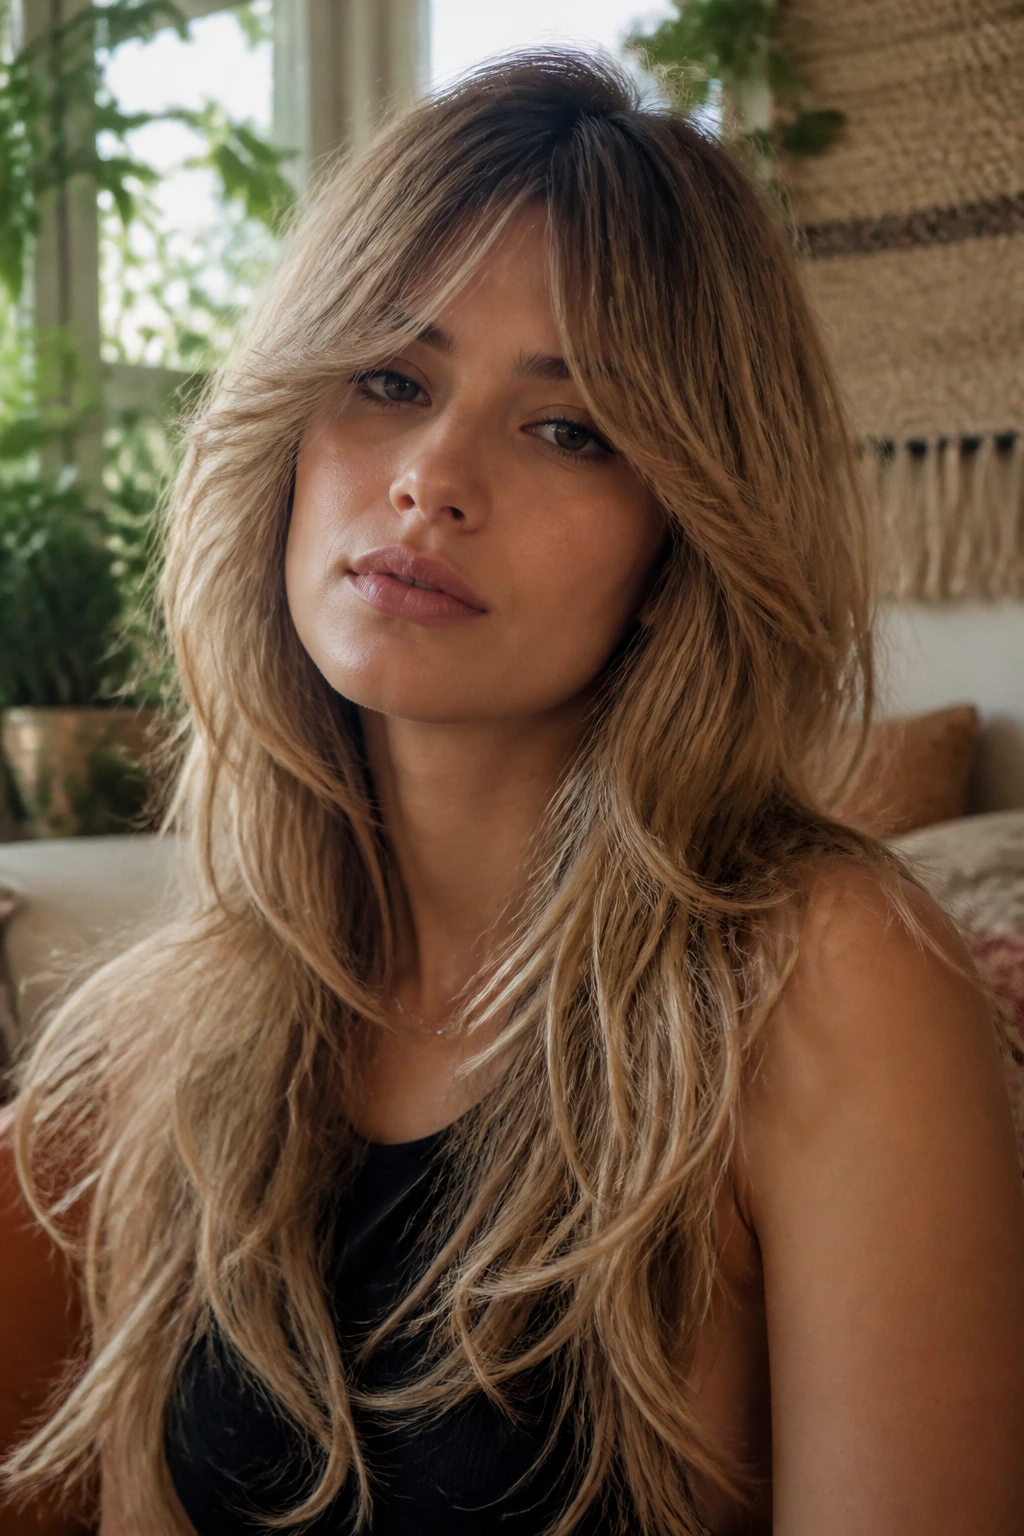
The fringe is the headline here, not an afterthought. A wider feathered bang softens the forehead and gives the rest of the length a reason to feel airy instead of heavy.
The key is not cutting the fringe too blunt. Ask for texture through the ends of the bang and long, sliding layers that blend into the sides. Then blow the fringe forward first, roll it off the face, and let it cool on a roller or clip. That little set is what stops the bangs from splitting into two stubborn chunks. On wavy hair, the fringe should look like it belongs to the cut, not like a separate haircut sitting on top.
If your forehead is the place where hair usually falls apart, this is one of the smarter answers. The fringe does the softening for you.
10. Half-Up Volume with Loose Lengths
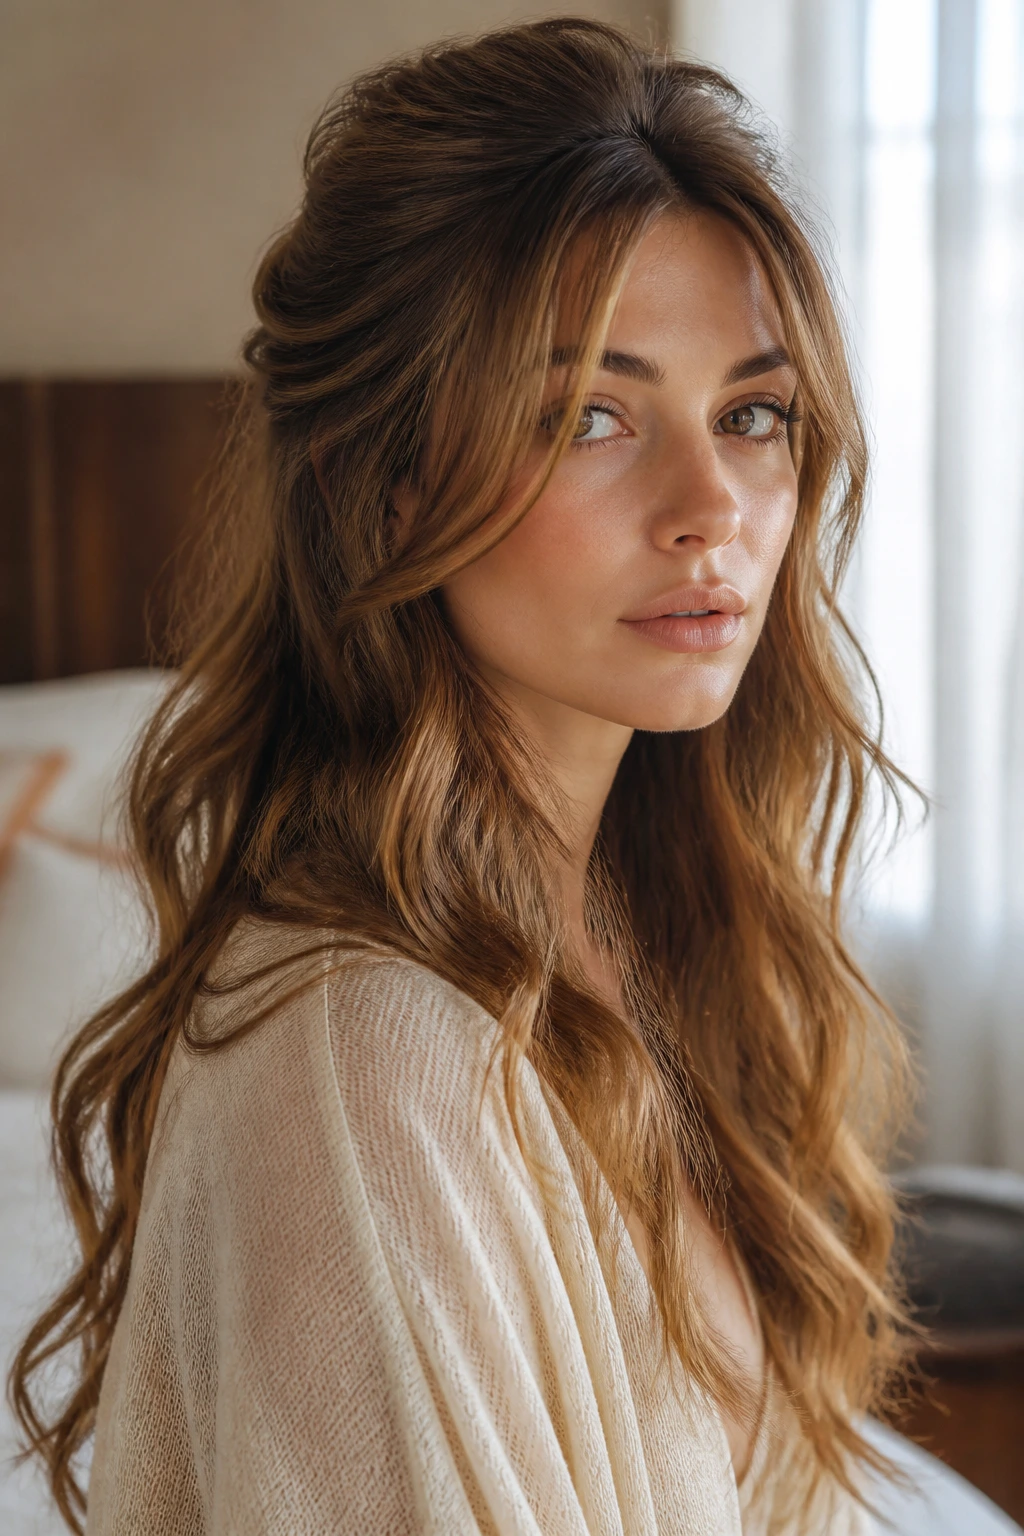
This is the style for days when you want the crown to have a little drama and the rest of the hair to keep moving. Pull the top third of the hair back, puff it up slightly at the crown, and leave the lower lengths soft and brushed out.
A teasing comb works, but do not overdo it. Two or three backcombed passes under the top layer are enough. Secure the half-up section with a flat clip or a wrapped elastic so the shape stays clean. This looks especially good when the front pieces are waved away from the face and the bottom lengths skim the chest. It has real 70s energy without asking every strand to behave.
One small trick: pinch the crown with your fingers after it’s clipped. If it feels too smooth, the style will read modern in the wrong way.
11. Boho Center-Part Waves and Soft Pieces
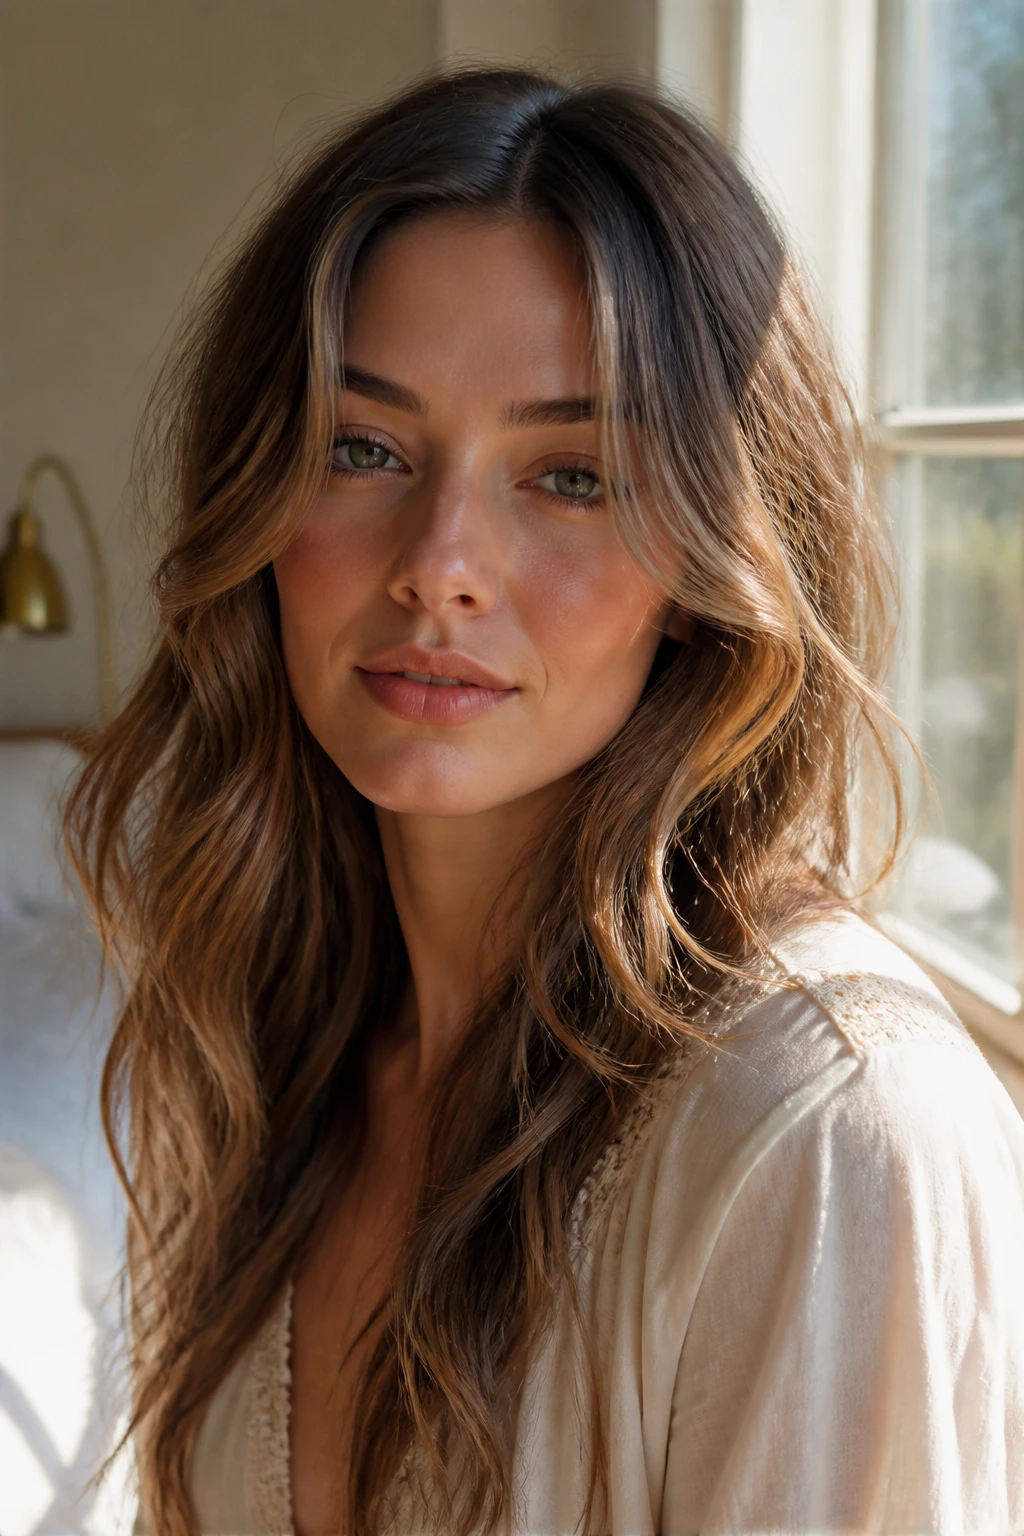
This is the looser, airier side of the decade. The center part stays straight, but the lengths are soft, piecey, and a little undone around the temples.
The style works because it lets wavy hair stay wavy. No hard curl pattern. No over-brushed frizz cloud. A little sea salt spray on damp hair, a few twists while drying, and a bit of cream through the ends are enough if your wave pattern is already there. If the hair is very layered, this can become too separated, so keep the product light. You want movement, not stringiness.
This is the version I reach for when the day calls for jeans and a button-down instead of anything fussy. It keeps the decade in the silhouette without turning the whole head into a project.
12. V-Cut Lengths with Feathered Sides
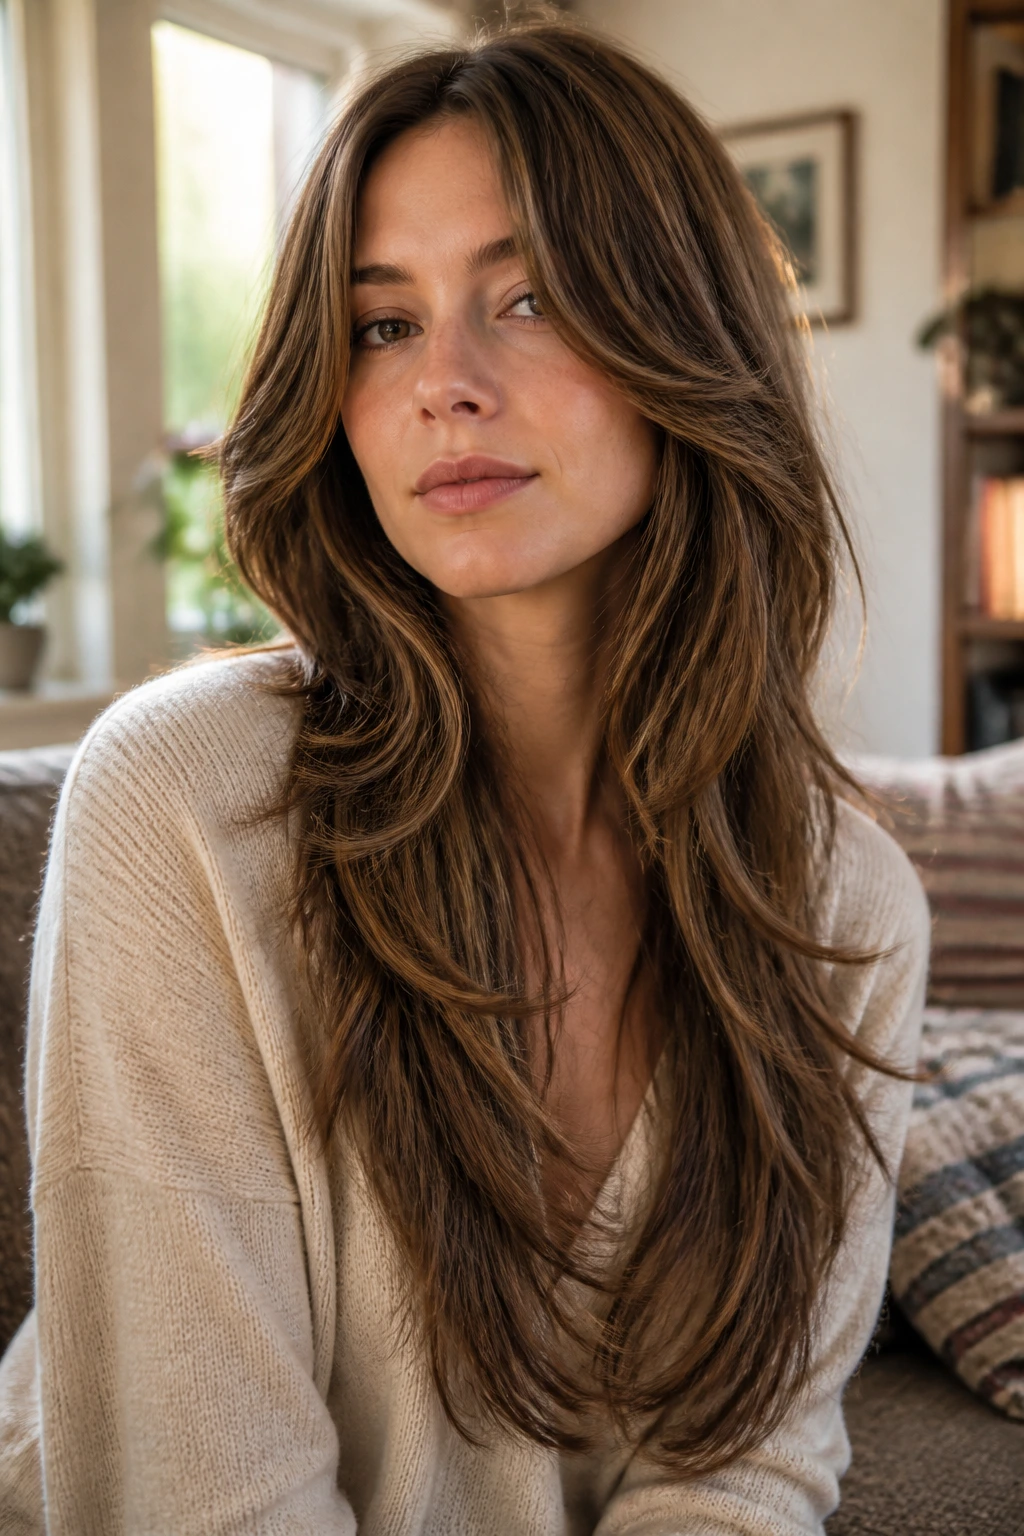
A V-cut gives the back a point and the sides a long slide, which is useful when you want length without losing shape. On wavy hair, it keeps the bottom from looking like one blunt block.
Ask for the point of the V to stay soft, not sharp. Then feather the front sections starting below the cheekbones so the sides melt into the back length. This cut likes a center part or a slightly off-center part, and it looks especially good when the ends are bent under just a touch with a round brush. If your hair is thick, the V shape can remove some of the visual weight without making the top too poofy.
The whole effect is long and lean, but not flat. That is a nice place to be.
13. Roller-Set Bounce from Roots to Ends
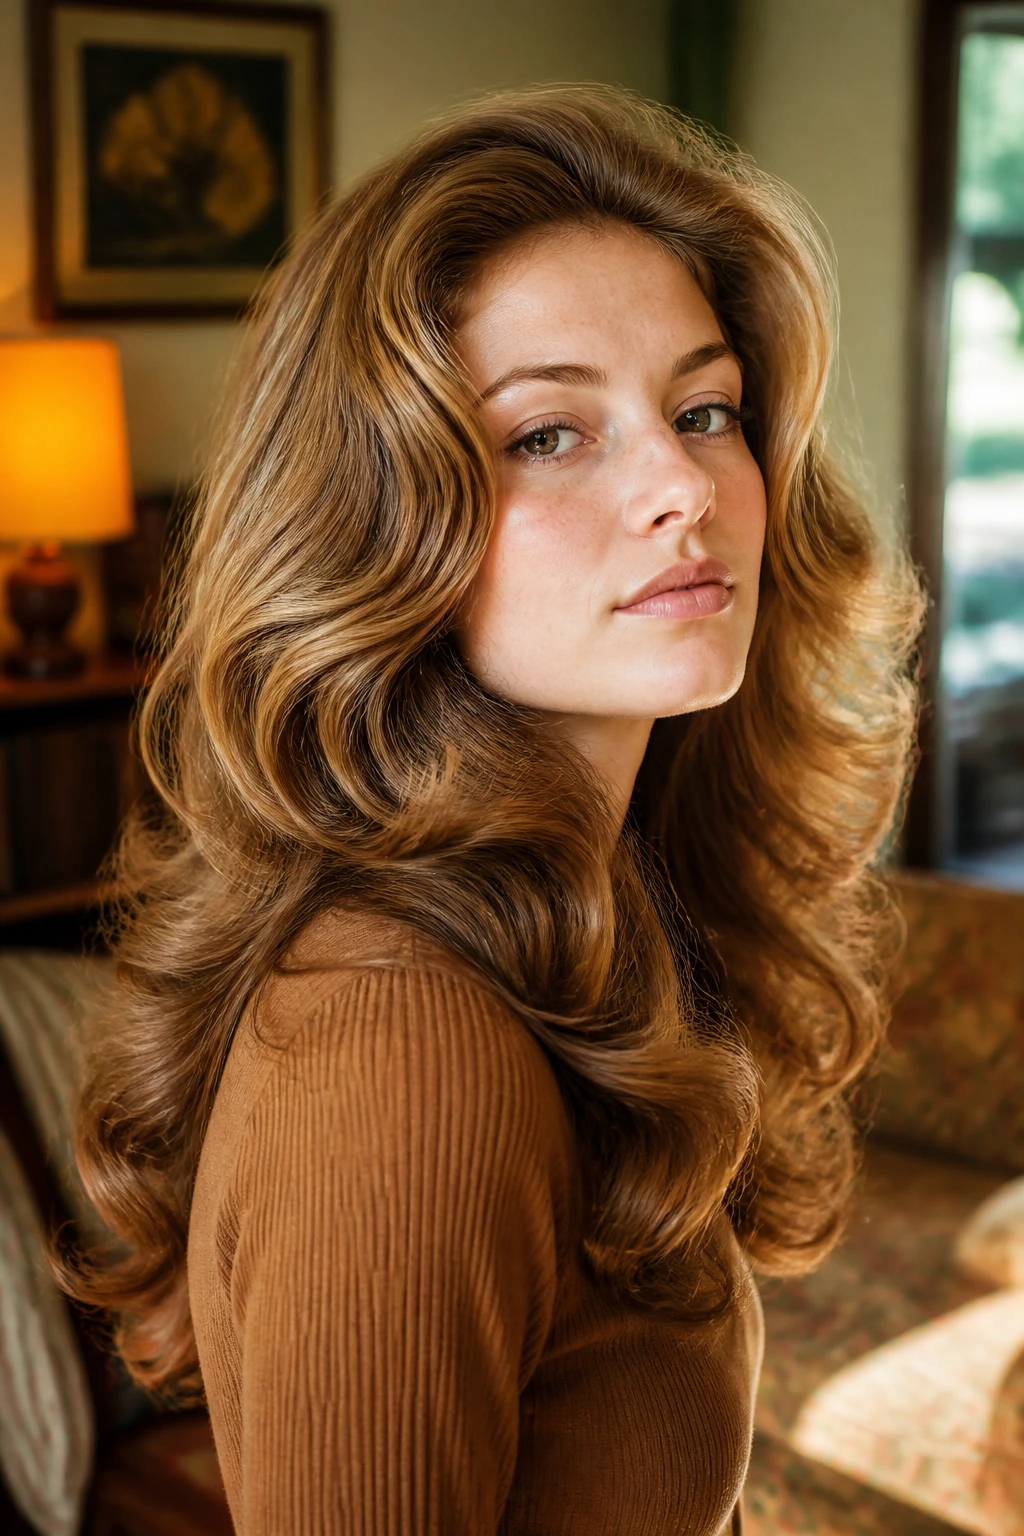
Hot rollers or Velcro rollers make this whole family of styles easier, and I wish more people used them. They create lift at the root and a soft bend that brush-outs can turn into real seventies volume.
The Set Matters
Set the front pieces away from the face, roll the crown upward, and keep the sections about 1½ inches wide so the set dries evenly. Leave the rollers in until the hair is fully cool; warm hair drops fast and the shape disappears. This one suits wavy hair that loses steam at the root. The rollers create the architecture the wave never quite had on its own.
If you want a softer version, use large Velcro rollers and brush only once. If you want more glam, use heated rollers and let the set cool completely before touching it.
14. Razored Rock Shag with Soft Edges
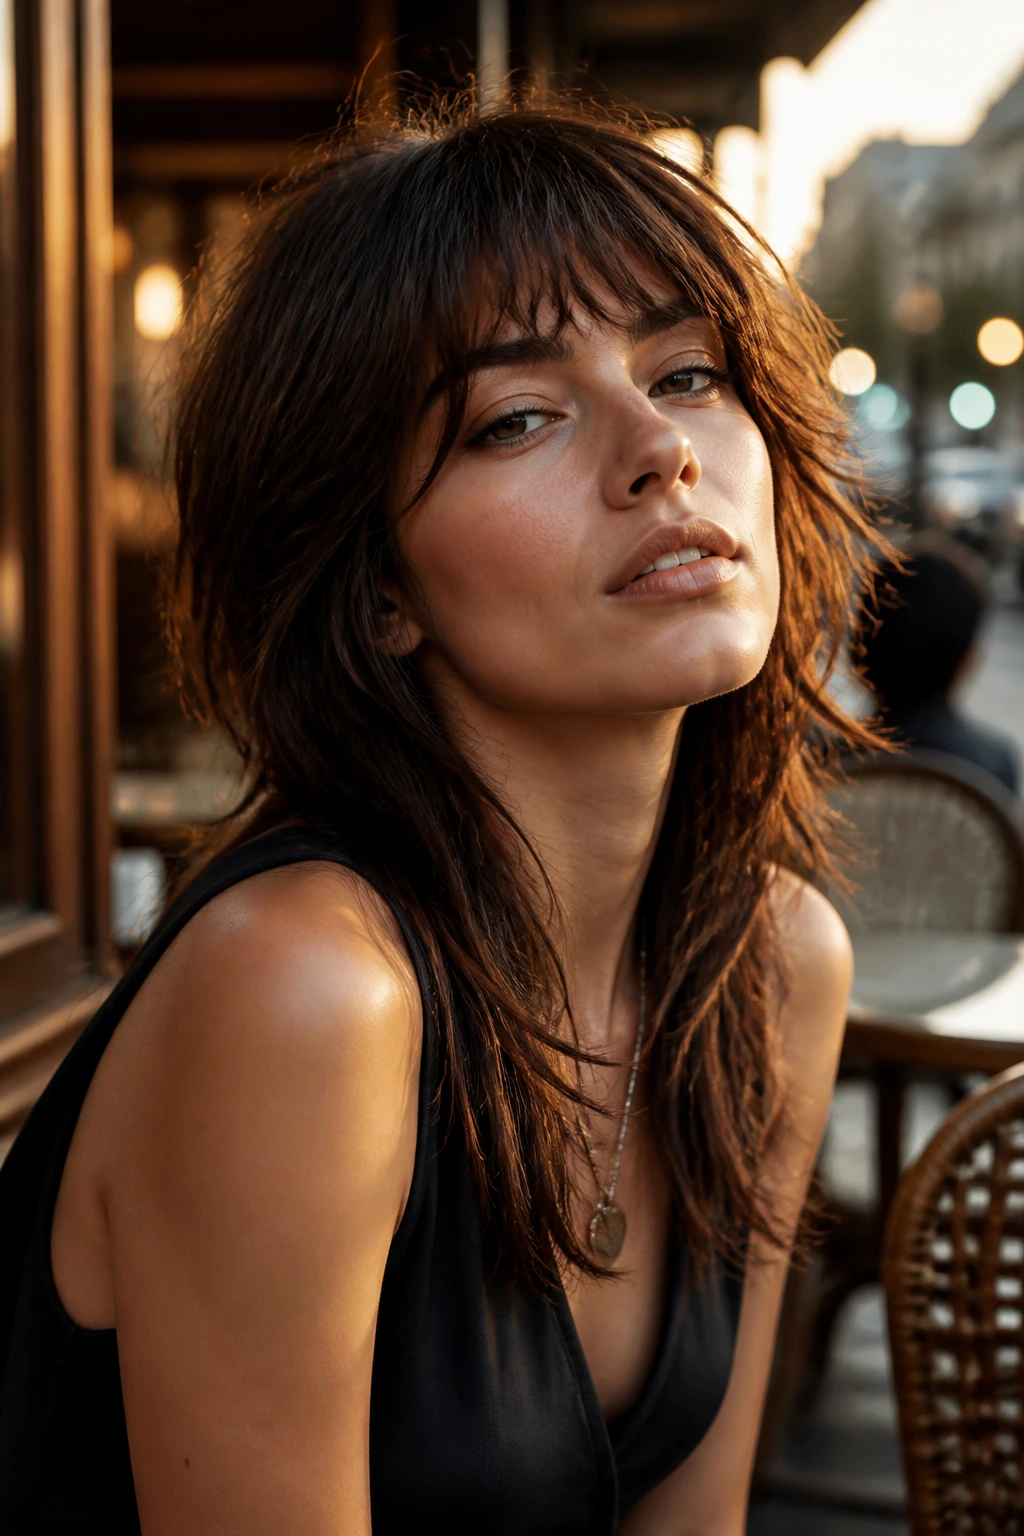
A razor cut can go wrong fast, but when it is controlled, the result is sharp in a good way. The ends look airy, the layers move, and the whole cut has a little rock-star grit without turning into a mullet.
This is the shag for someone who wants edge and softness in the same head of hair. Tell the stylist you want movement, not gaps. If the razor goes too deep into the lengths, the ends fray and the wave starts to look dry. Pair it with a light cream or leave-in, and finger-style it after scrunching. It should read lived-in, not broken.
- Do not: ask for a heavy razor pass through the whole length.
- Do: keep the perimeter long so the style still feels rich.
- Finish with: a small amount of texture spray at the mid-lengths.
15. Braided Accent Waves for Long Hair
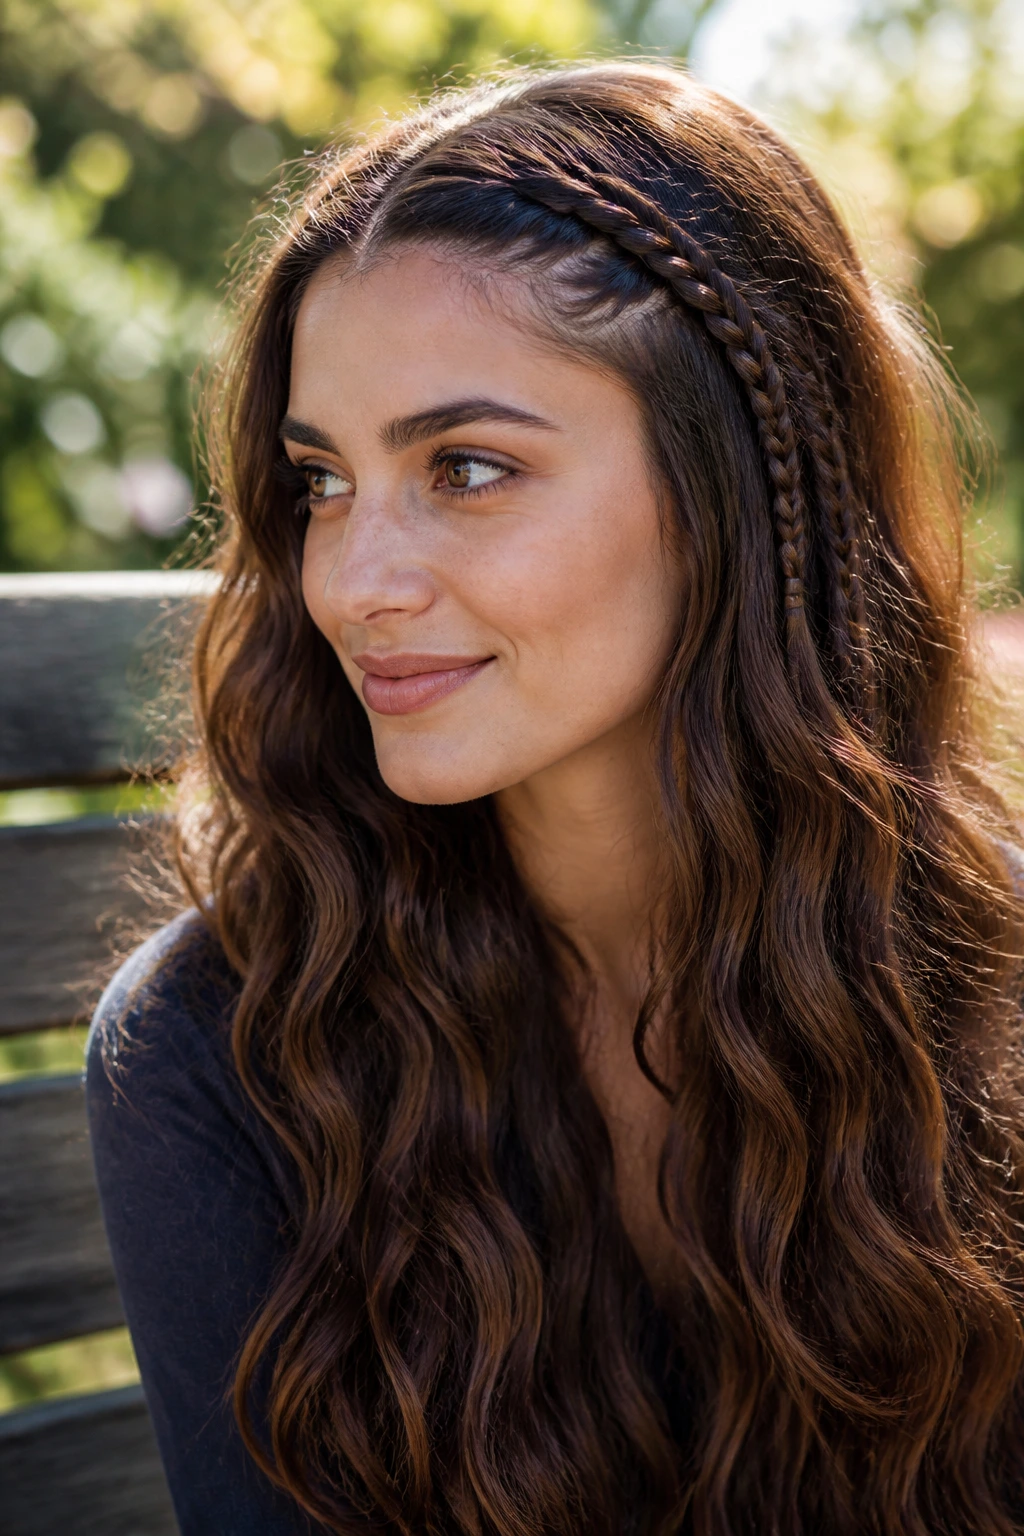
Need some hair out of your face but do not want to lose the seventies feel? A small braid along the hairline or a single side braid does the job.
Leave the rest of the hair in loose waves and keep the braid narrow so it reads like an accent, not the whole story. This works with a center part, a side sweep, or a half-up shape. I like it when the braid starts near the temple and disappears behind the ear, because it keeps the look soft. A little texturizing spray at the roots helps the braid hold without turning crunchy.
The braid should support the wave pattern, not pin it down. That is the whole game.
16. Smooth Blowout with Bent Ends
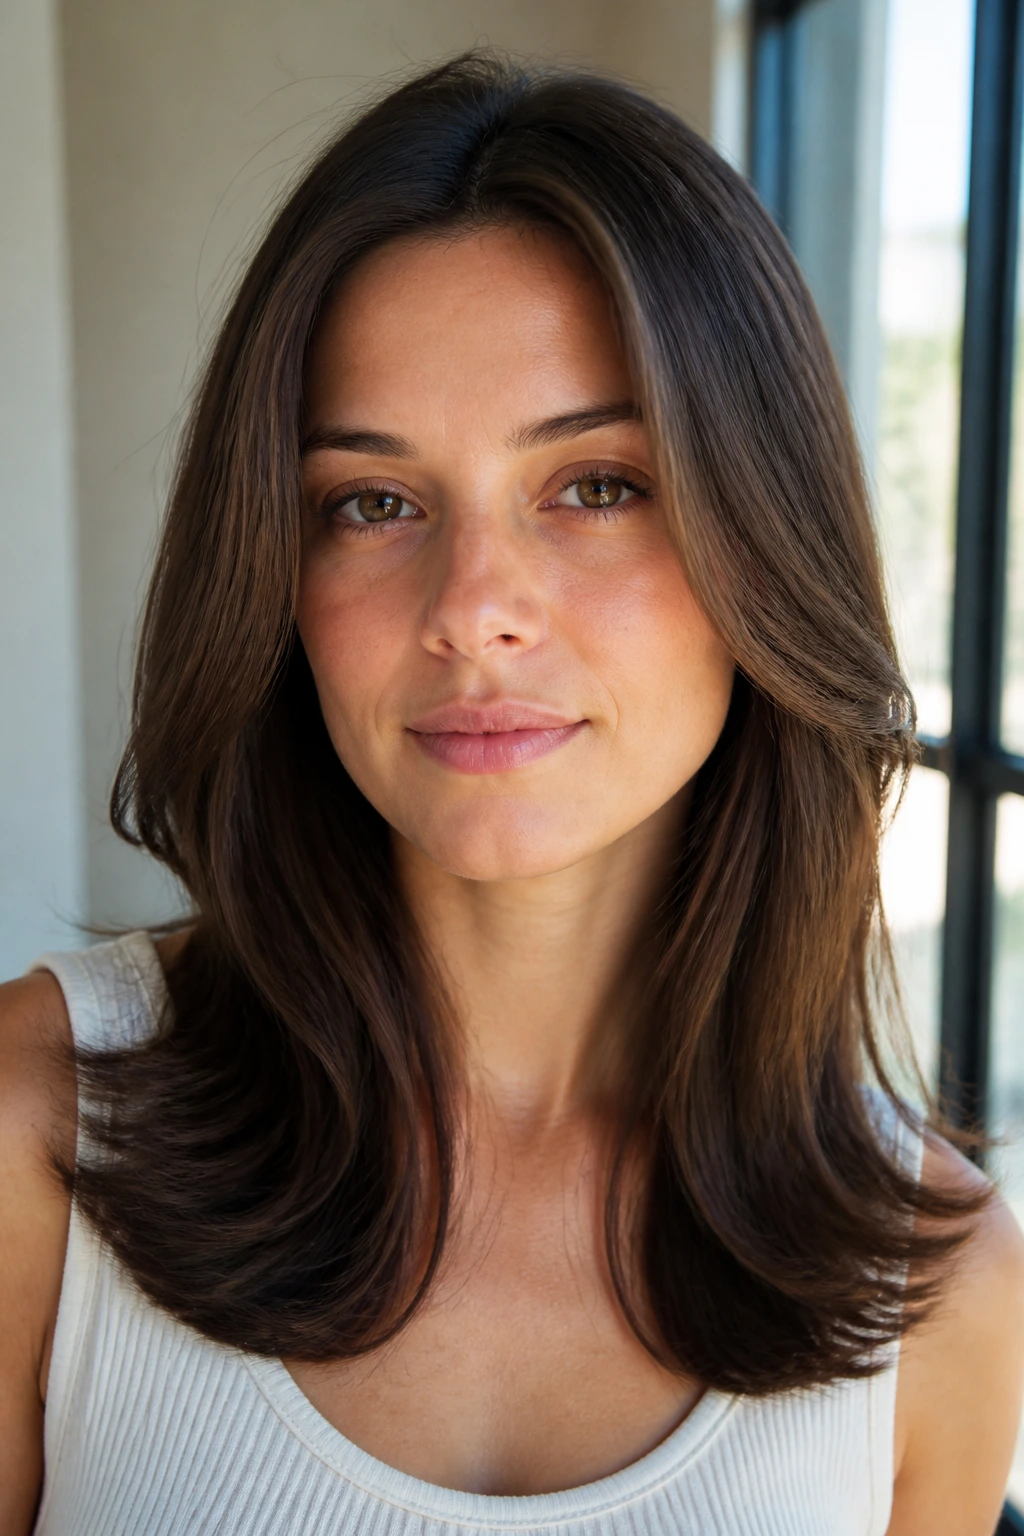
This is the polished cousin of the feathered look. The hair is smoother through the mid-lengths, but the ends still curve away from the shoulders so the silhouette keeps some attitude.
Use a concentrator nozzle and a medium round brush, drying the hair in thin sections from root to tip. Roll the ends under and then flick them out slightly at the last inch. That small bend is what makes it seventies instead of generic blowout. If your hair is prone to frizz, work with smaller sections and let each one cool in the brush before dropping it. That one habit saves the finish.
This style is a good bridge between retro and clean. It feels lifted, but not loud.
17. Winged Face-Framing Layers
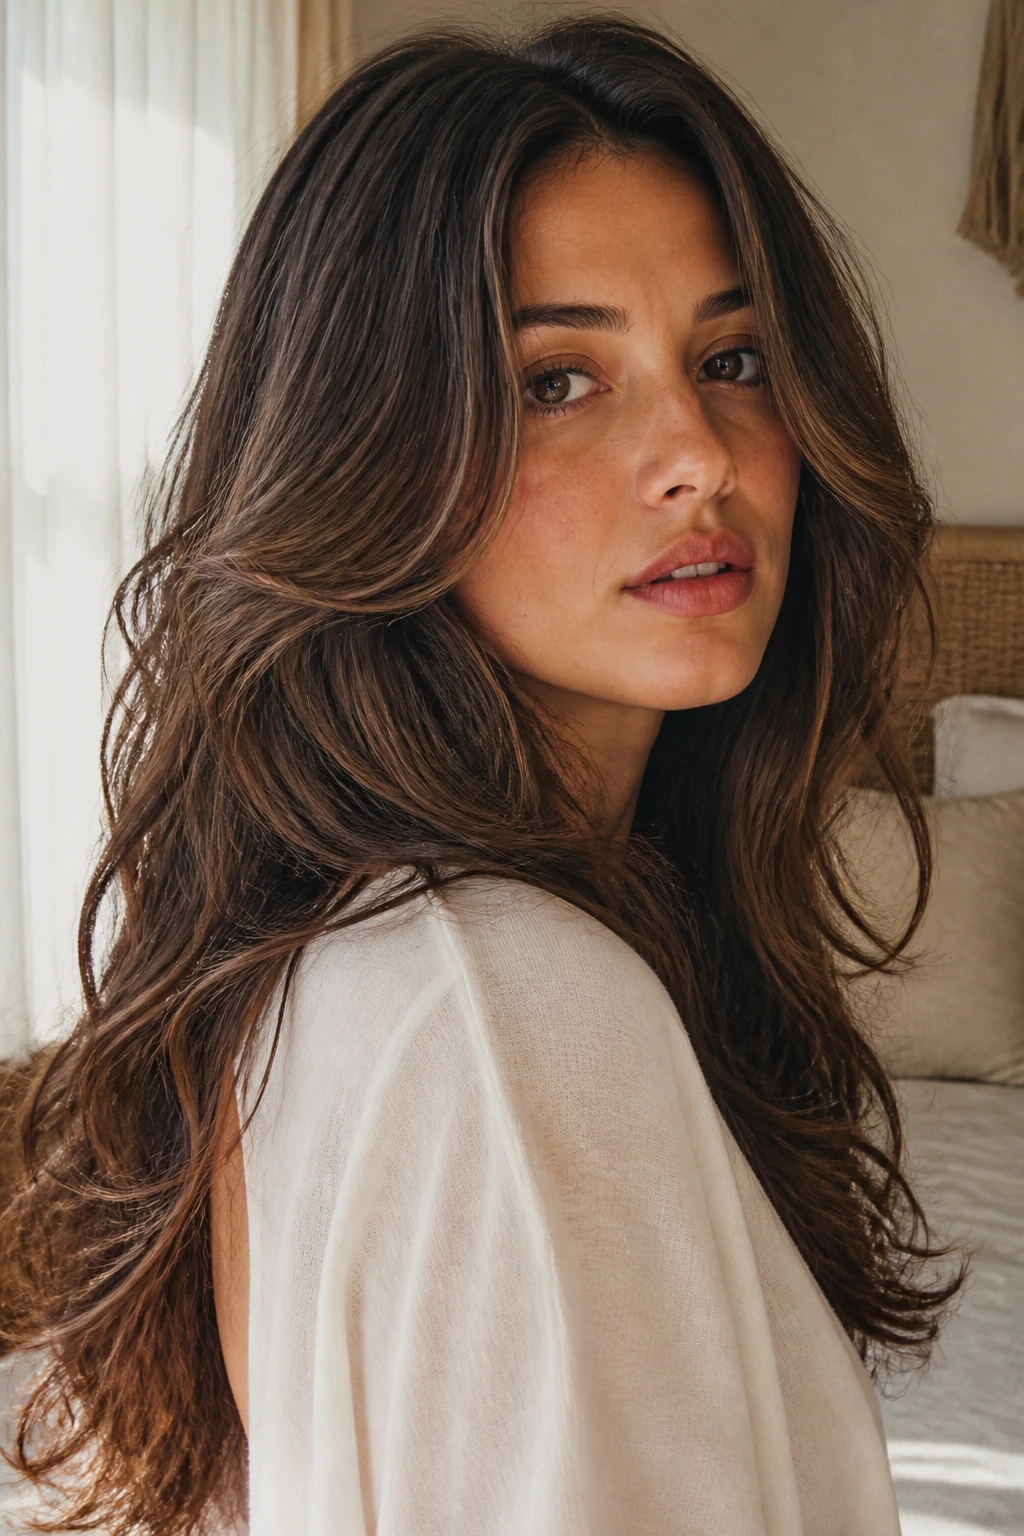
The name says it all. These are the pieces that sweep outward from the cheekbones and jaw like soft wings, which is why the style opens the face so nicely on long hair.
The haircut needs a clear direction. Ask for face-framing pieces that start at the chin or just below it, then angle away toward the collarbone. On wavy hair, that shape gives you movement even when the rest of the style is wearing down a bit. If you prefer a more dramatic read, use a larger barrel iron on just the front sections and brush them out once they cool. That single detail can change the whole mood.
My rule: if the front pieces do not move, the style is not doing enough. The wings are the point.
18. Low Ponytail with Loose Front Pieces
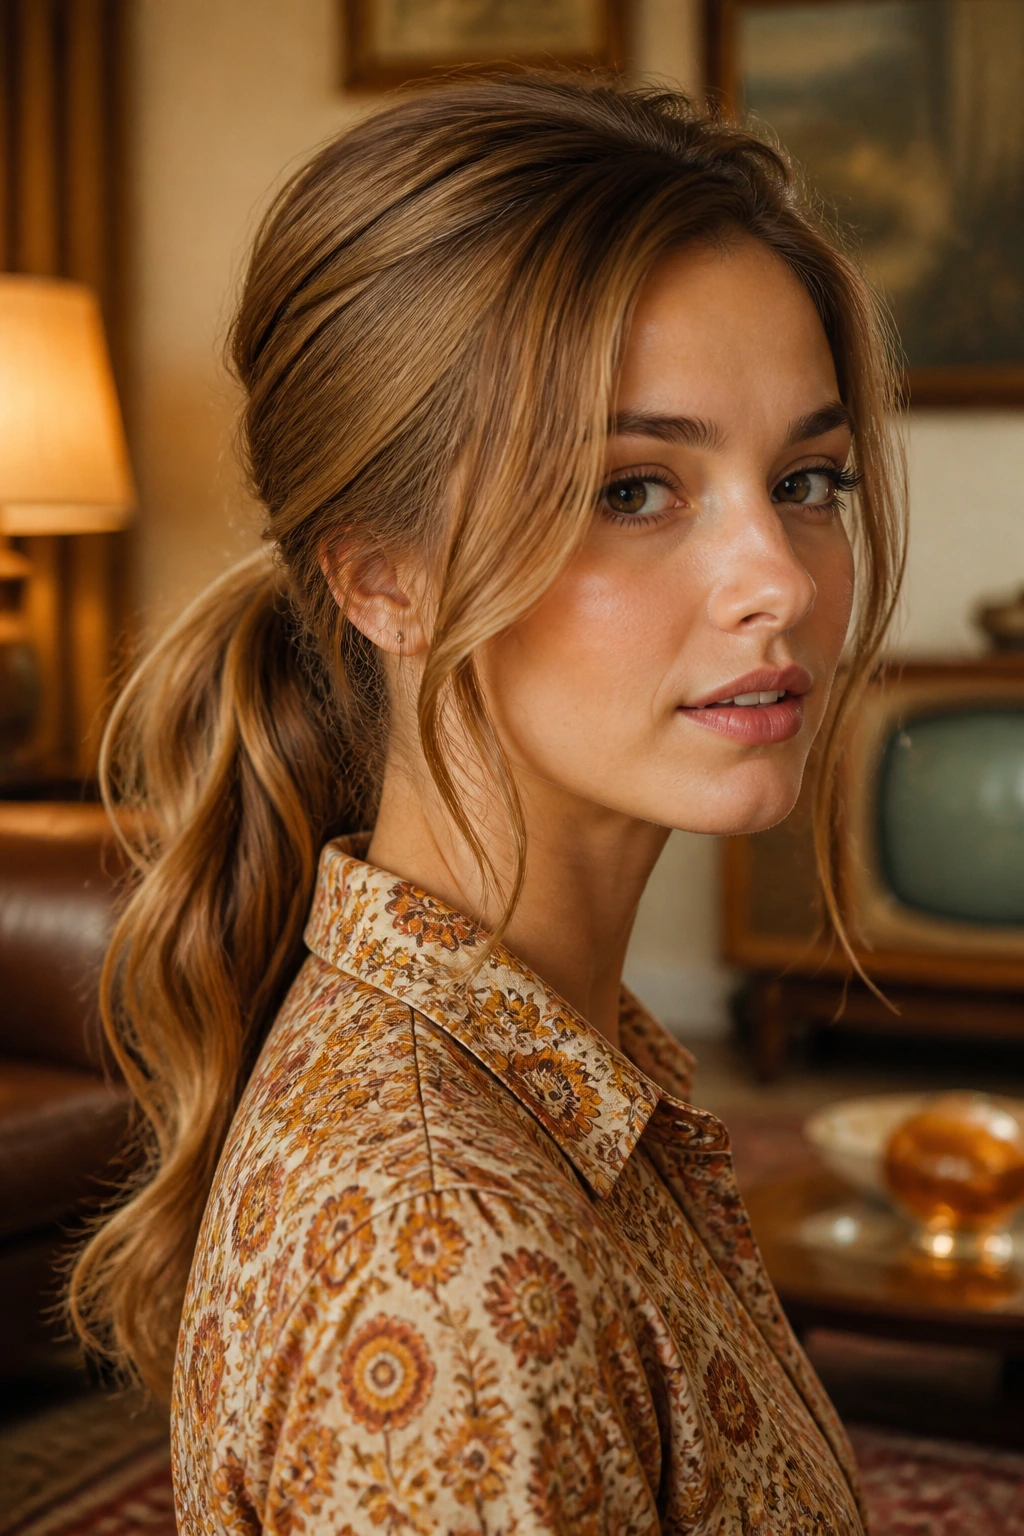
A low pony does not sound flashy, but the seventies version is all about the front: a lifted crown, a soft part, and pieces left out to skim the cheeks.
Tease the top slightly or clip it up while drying so the pony does not sit flat. Then wrap a small strand around the elastic if you want a cleaner finish. Keep the loose front pieces wavy and bent away from the face; if they hang straight, the style loses its shape. This is the easiest way to make long hair feel intentional on a busy day.
The ponytail should sit low enough to feel relaxed, but not so low that it drags the whole profile down.
19. Tucked-Behind-Ears with Crown Volume
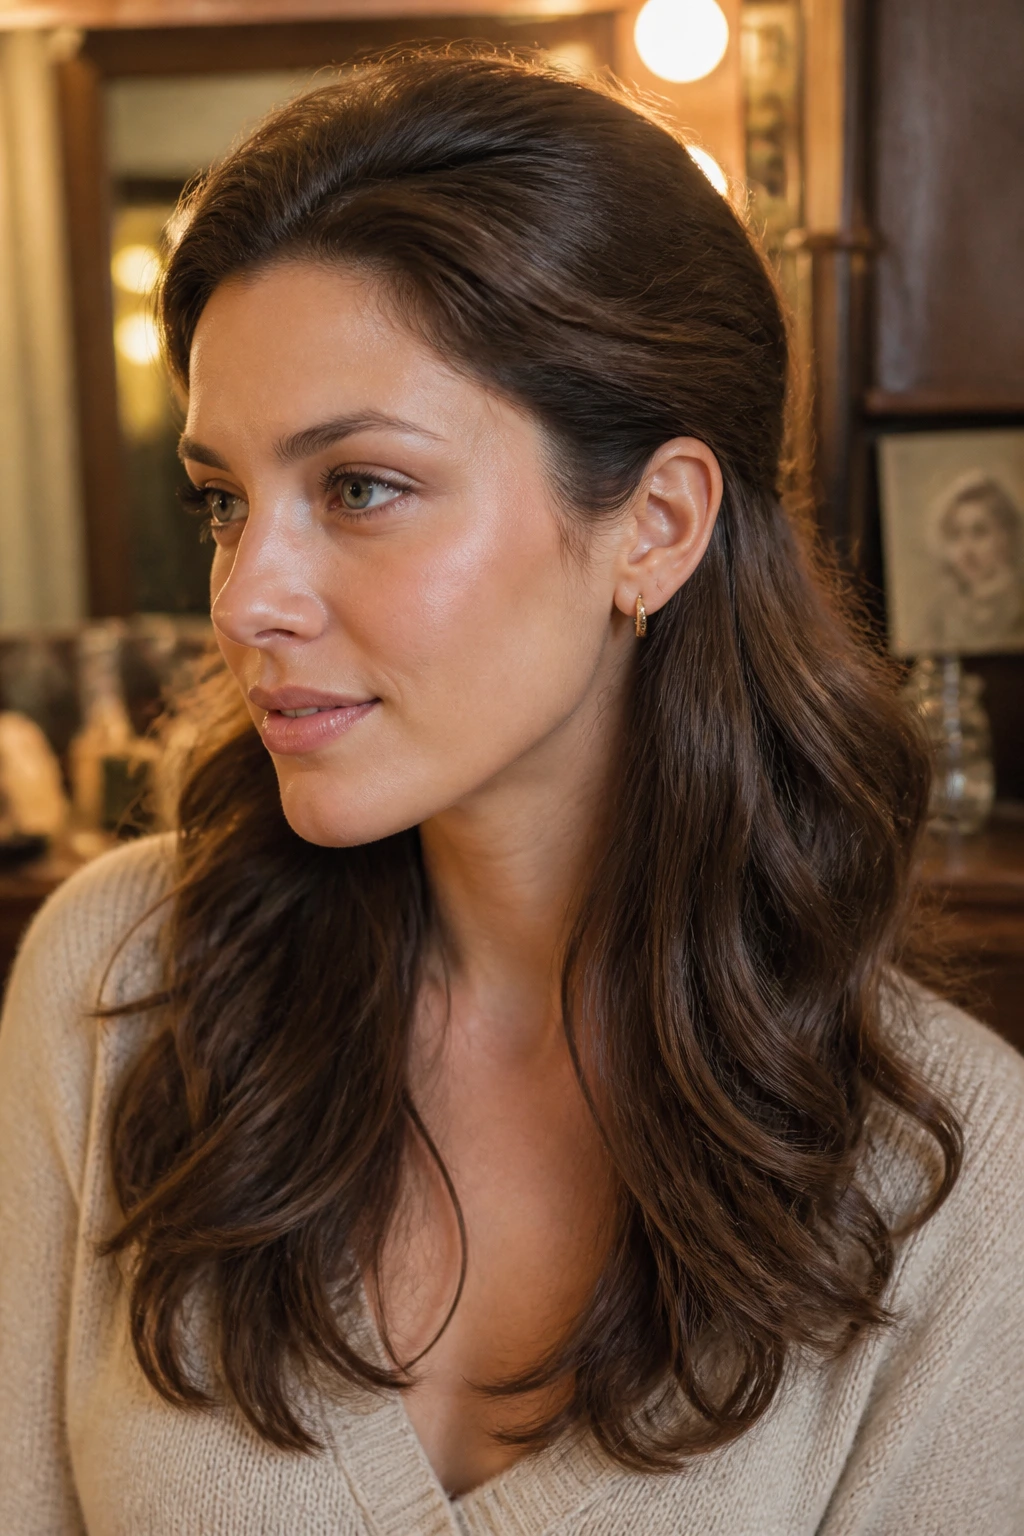
Here the movement happens in the contrast. The crown is full, the sides are tucked, and the face stays open.
This works when you do not want all your hair in front of you. Lift the roots at the crown with a round brush or clips, then tuck both sides behind the ears while leaving the ends loose and soft. The tucked detail shows off earrings and collarbones, which is part of the appeal. On heavy wavy hair, use a tiny bit of cream only on the ends so the sides stay smooth enough to stay back.
It is a simple idea, and that is why it works. Nothing feels overbuilt.
20. Heavy Crown Volume and Soft, Long Ends
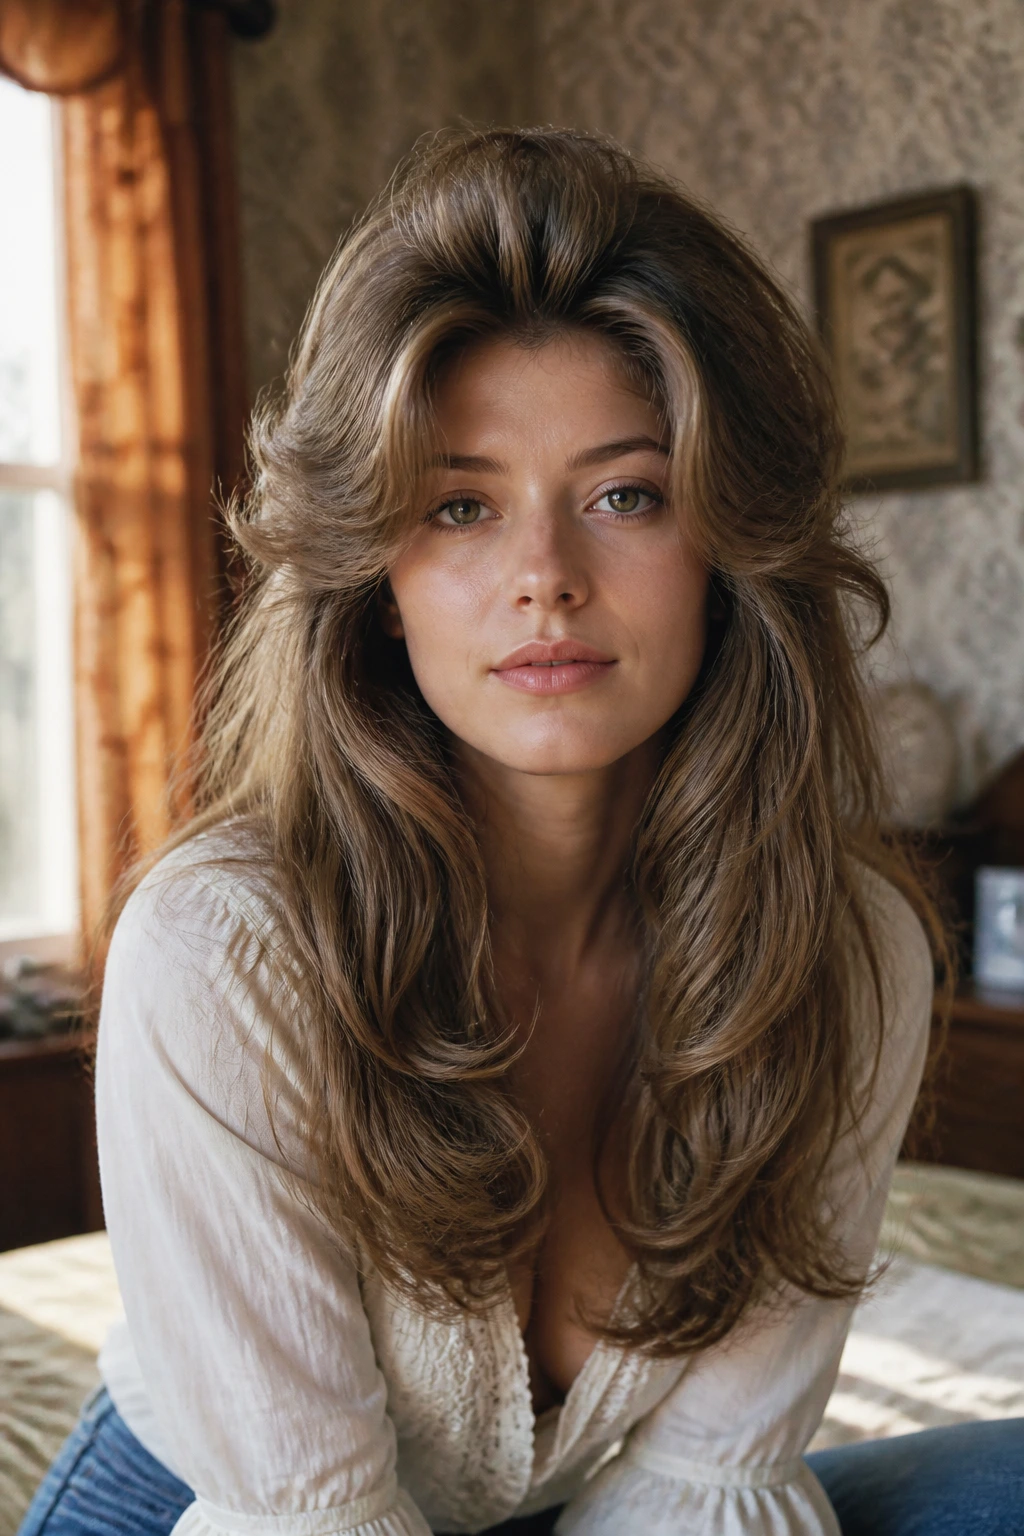
Some seventies hair looked huge at the top and almost lazy at the bottom. That contrast is the point here.
Focus the volume at the roots and through the upper third of the hair, then let the lengths stay softer and looser. Roll the crown up and back while drying, and do not over-curl the ends. If the mid-lengths are already wavy, you may only need a few face-framing pieces set away from the face. The style lands because the top has lift and the bottom does not fight it.
It is a little dramatic, yes. That is part of the fun.
21. Pin-Curled Side Sweep
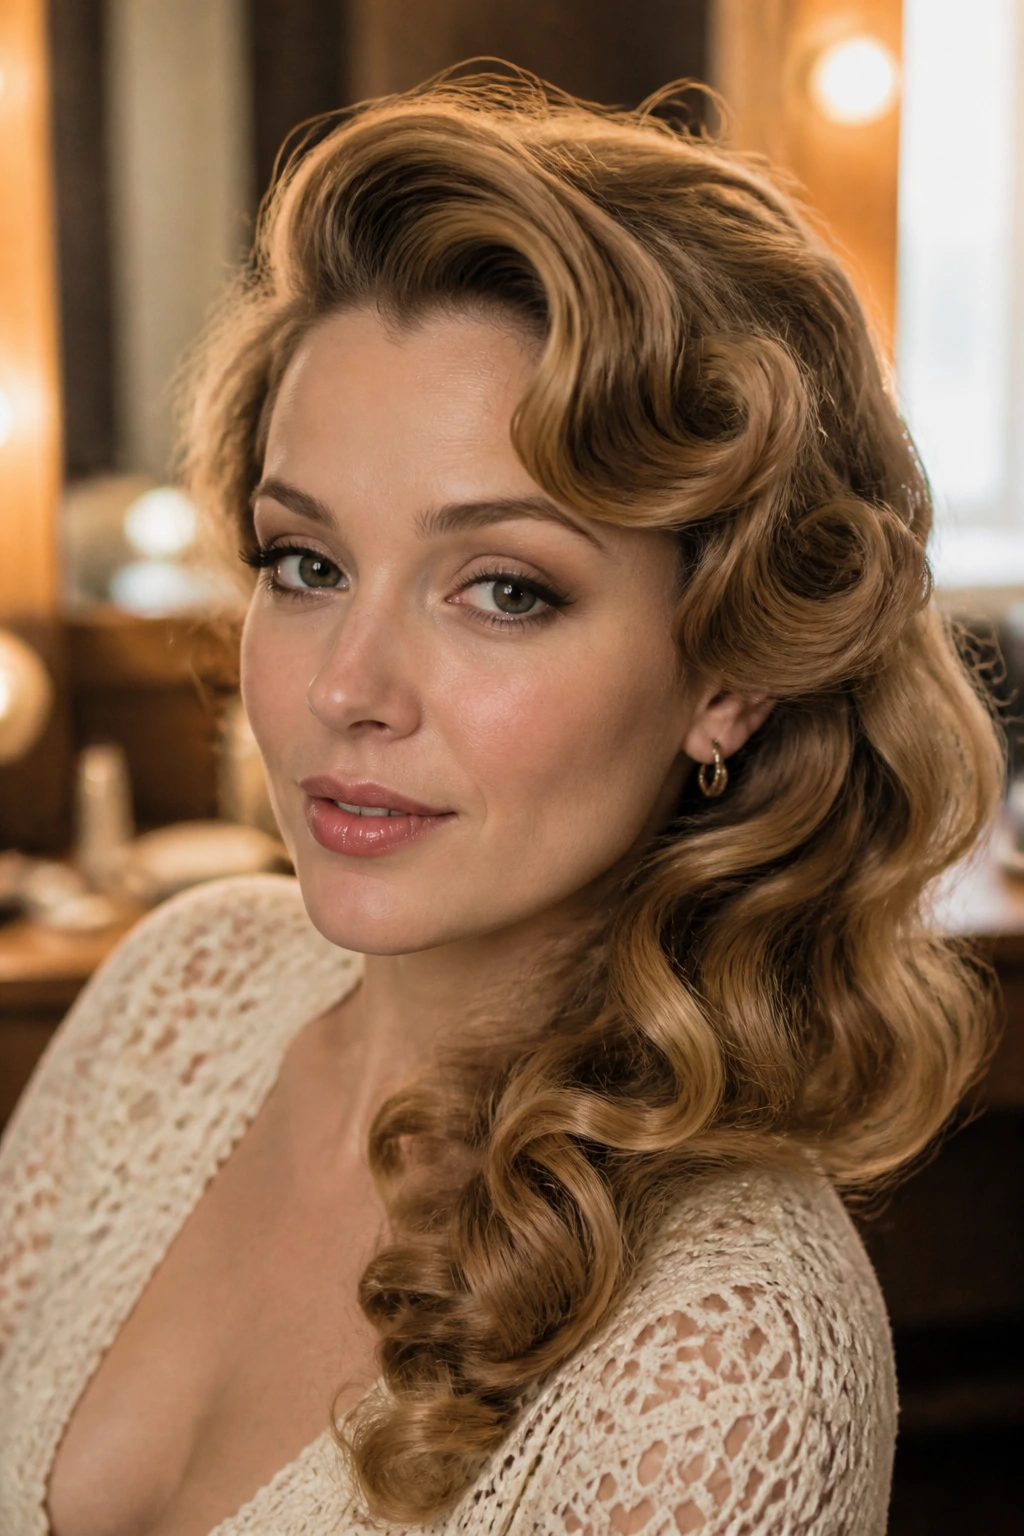
Pin curls can look fussy if you leave them too neat, but brushed into a side sweep they become one of the easiest ways to get old-school wave depth.
How to Keep It Soft
Set the front and top sections into loose curls, pin them flat while they cool, and then brush them toward one side with a wide brush. The result is soft, curved, and a little theatrical. It is one of the better choices if your waves need help holding shape past lunch. Just keep the curls loose; tight pin curls can make the finish feel too formal for long hair.
If the sweep starts to feel helmet-like, break it up with your fingers at the roots instead of adding more spray. The looseness is doing the work here.
22. Headband Waves with Soft Lift
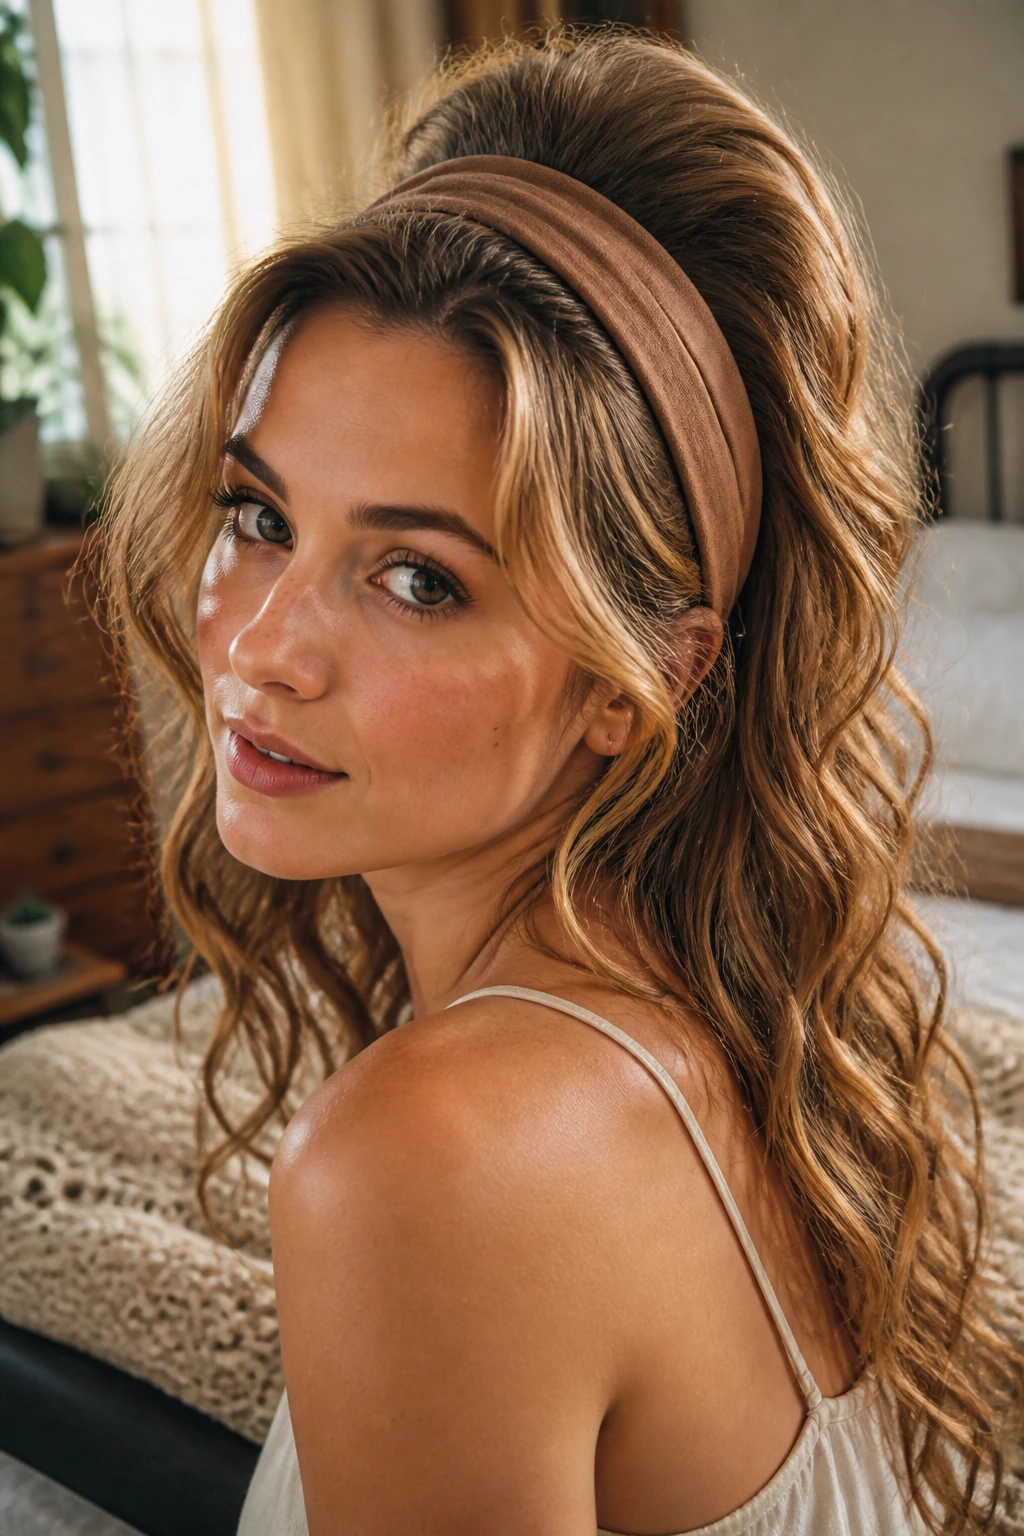
A headband changes the silhouette faster than another round of curling ever will. It pushes the hair back at the crown, shows off the wave pattern, and gives the look a relaxed seventies feel.
Choose a fabric band with some width so it does not bite into the roots. Place it just behind the hairline, then pull a few front pieces loose if you want softness around the face. This works especially well when the wave pattern is strongest from the ears down. Keep the crown fluffy, not slick. A flat headband on flat hair is a wasted effort.
This is one of those styles that looks casual until you notice how carefully the shape was handled.
23. Sleek Roots and Full Mid-Lengths
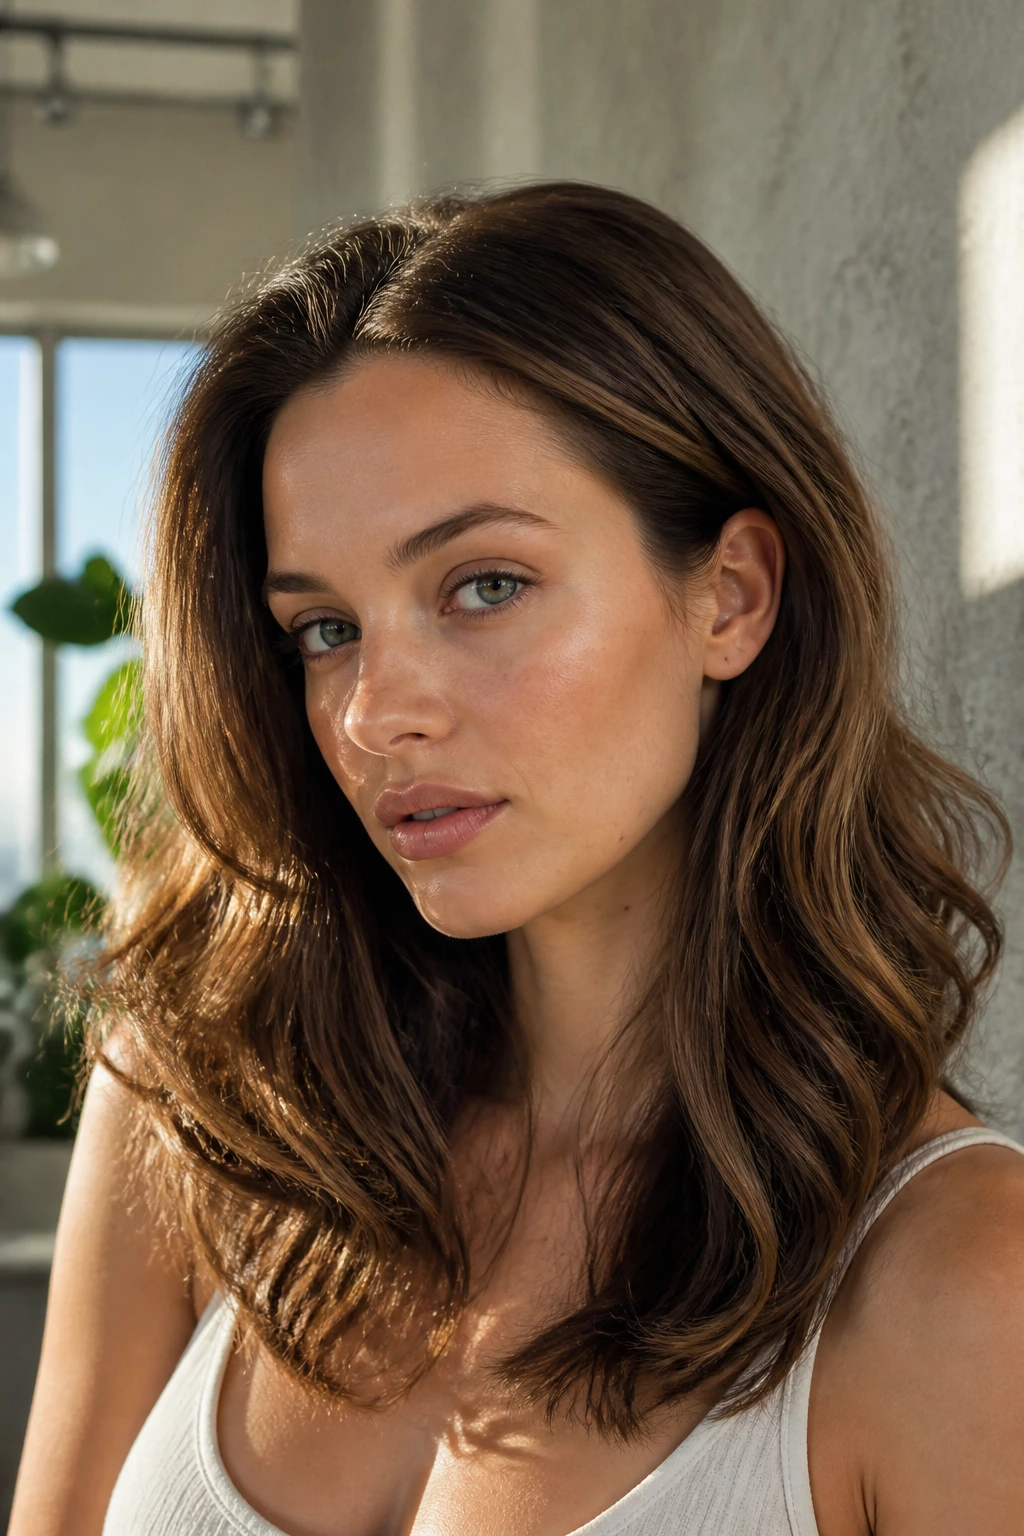
This one is a little more controlled than most of the group, and that is why it works. Smooth roots make the shape look modern enough to wear anywhere, while the mid-lengths and ends still carry the 70s movement.
Blow the roots straight with a nozzle, then add bend only from the cheekbones down. If the top is too wavy, the profile can balloon; if the bottom is too straight, the style loses its period feel. The sweet spot is a polished crown with visible body below it. I reach for this when I want the reference without the costume feeling.
The contrast is what sells it. Clean on top. Soft below.
24. Braided Crown with Loose Lengths
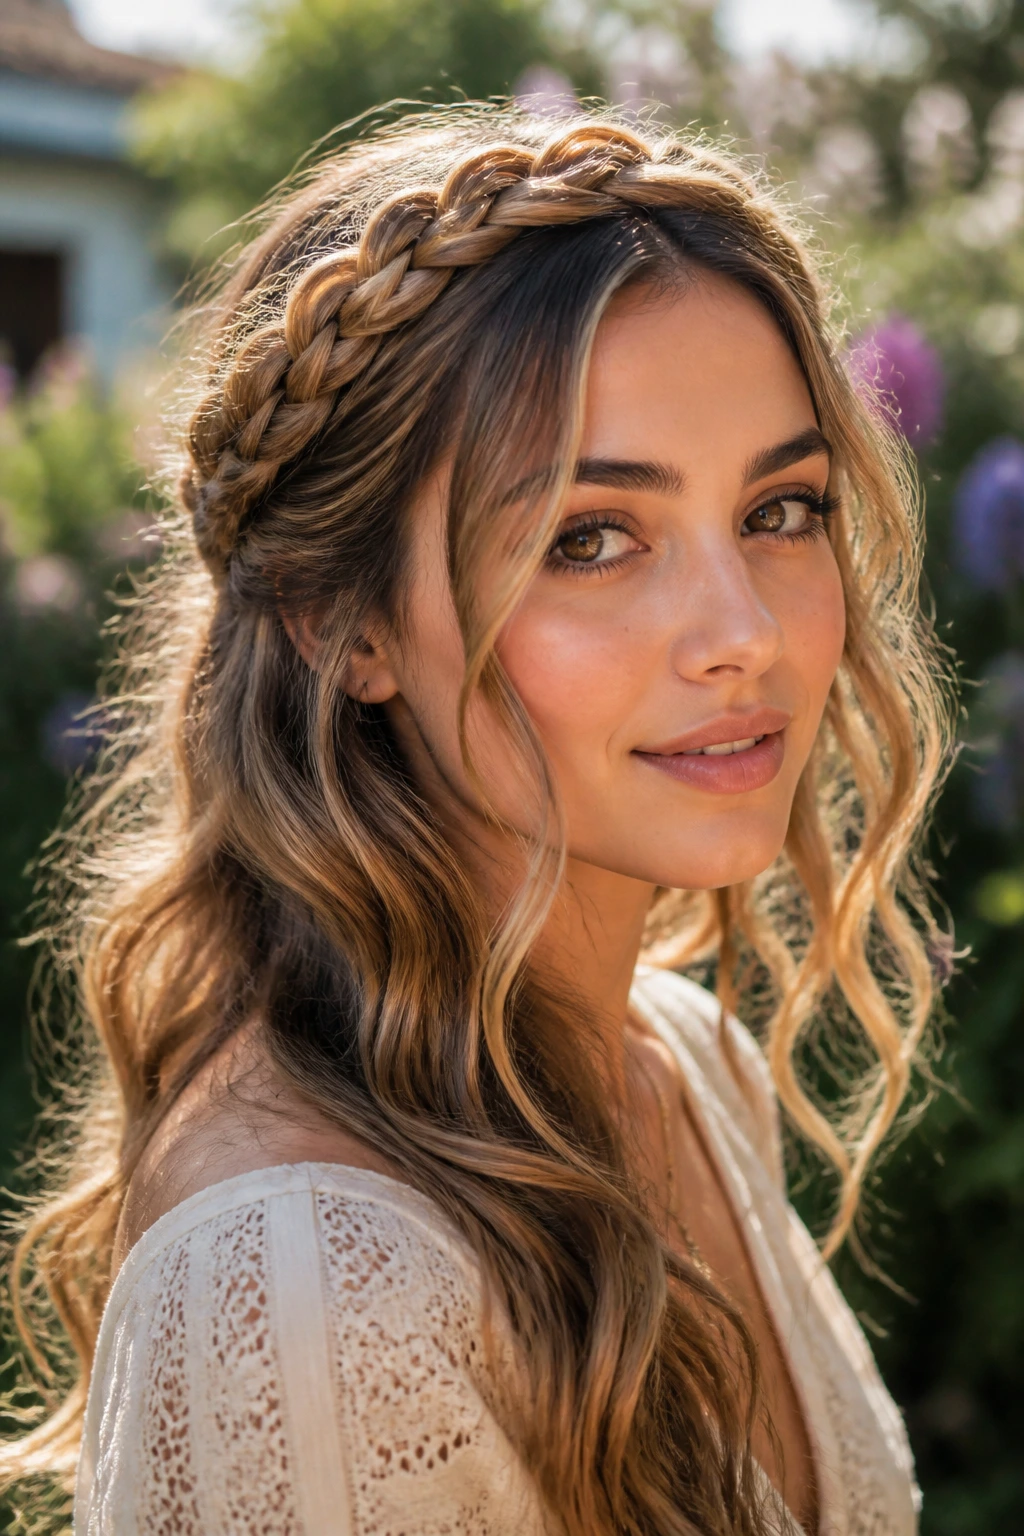
The braid becomes a frame, not the whole haircut. A loose crown braid or a braid that starts at the temple keeps the front controlled while the lengths hang in wavy layers.
This is a good option for long hair that needs some order but not a full updo. Keep the braid wide and a little imperfect; a tight braid makes the look too neat and steals the softness from the rest of the hair. Let a few face pieces escape and curl them away from the cheeks. That messiness is not a flaw here. It is the point.
It also works well if your hair has a little more frizz than you want to wear loose. The braid gives the eye a clean line to follow.
25. Polished Feathered Blowout with a Soft Finish
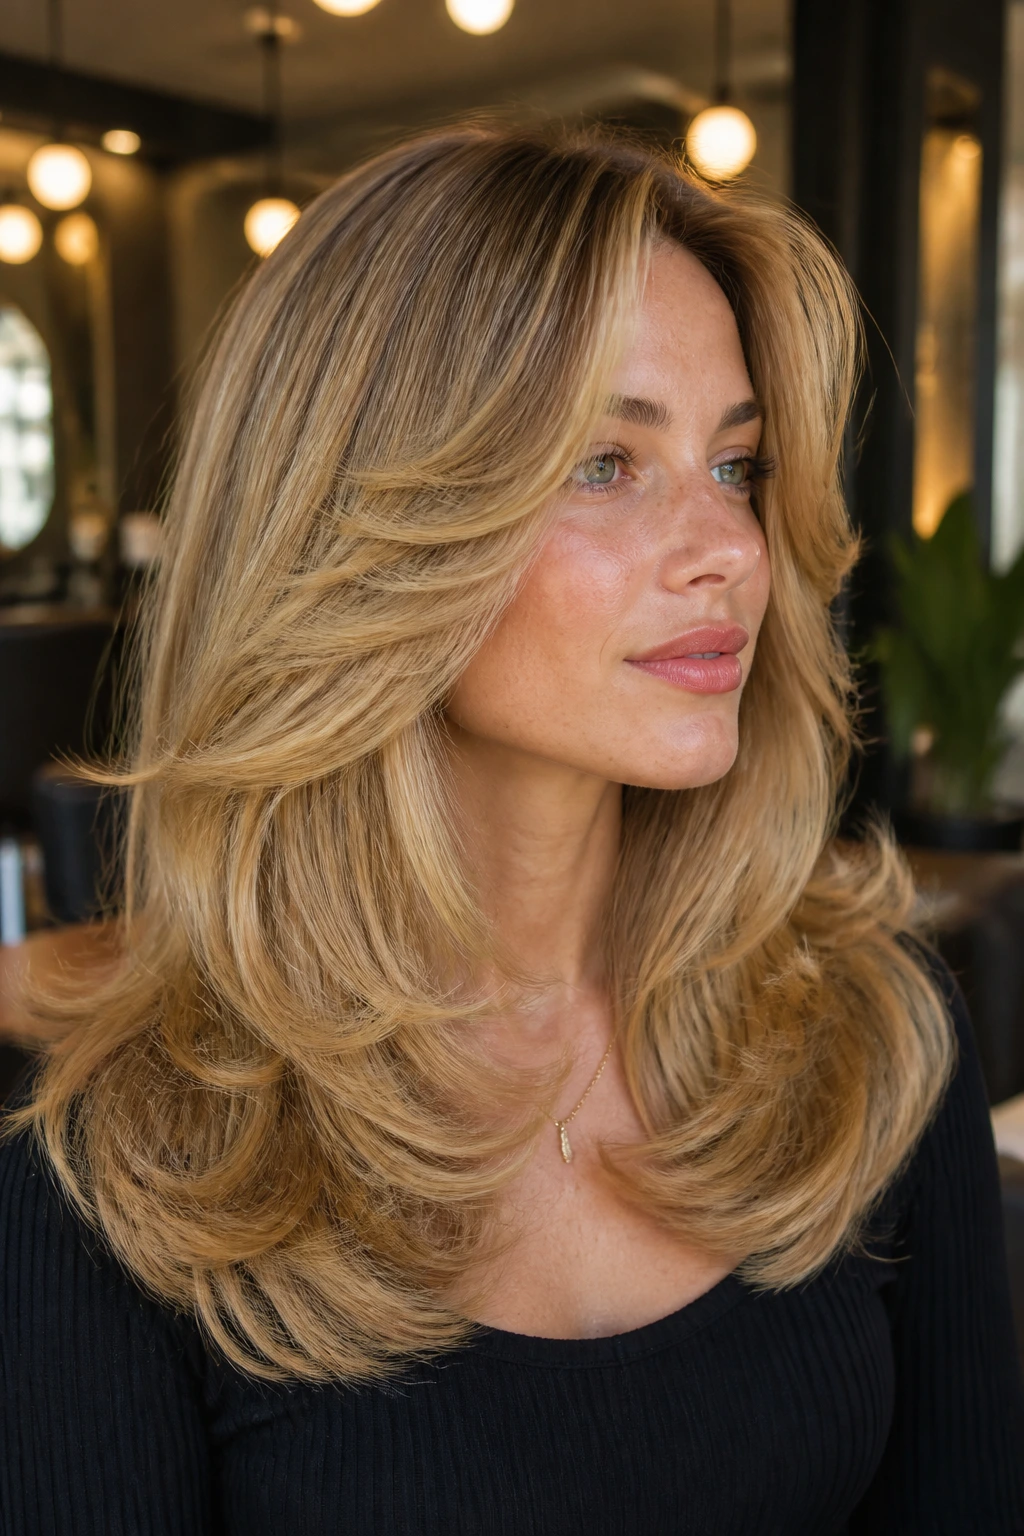
This is the style that closes the circle. The layers are feathered, the blowout is smooth, and the final finish still feels touchable instead of sprayed into place.
Blow-dry with a round brush, directing the front sections away from the face and keeping the crown lifted with clips until it cools. Then brush through once, stop, and let the hair settle. If you keep the ends beveled and the surface glossy, the cut does all the work. It is the cleanest version of the whole family, and honestly, the one I reach for when the outfit needs the hair to look expensive without acting fussy.
This is the proof that retro does not have to mean rigid.
Why Feathering and Layering Do the Heavy Lifting
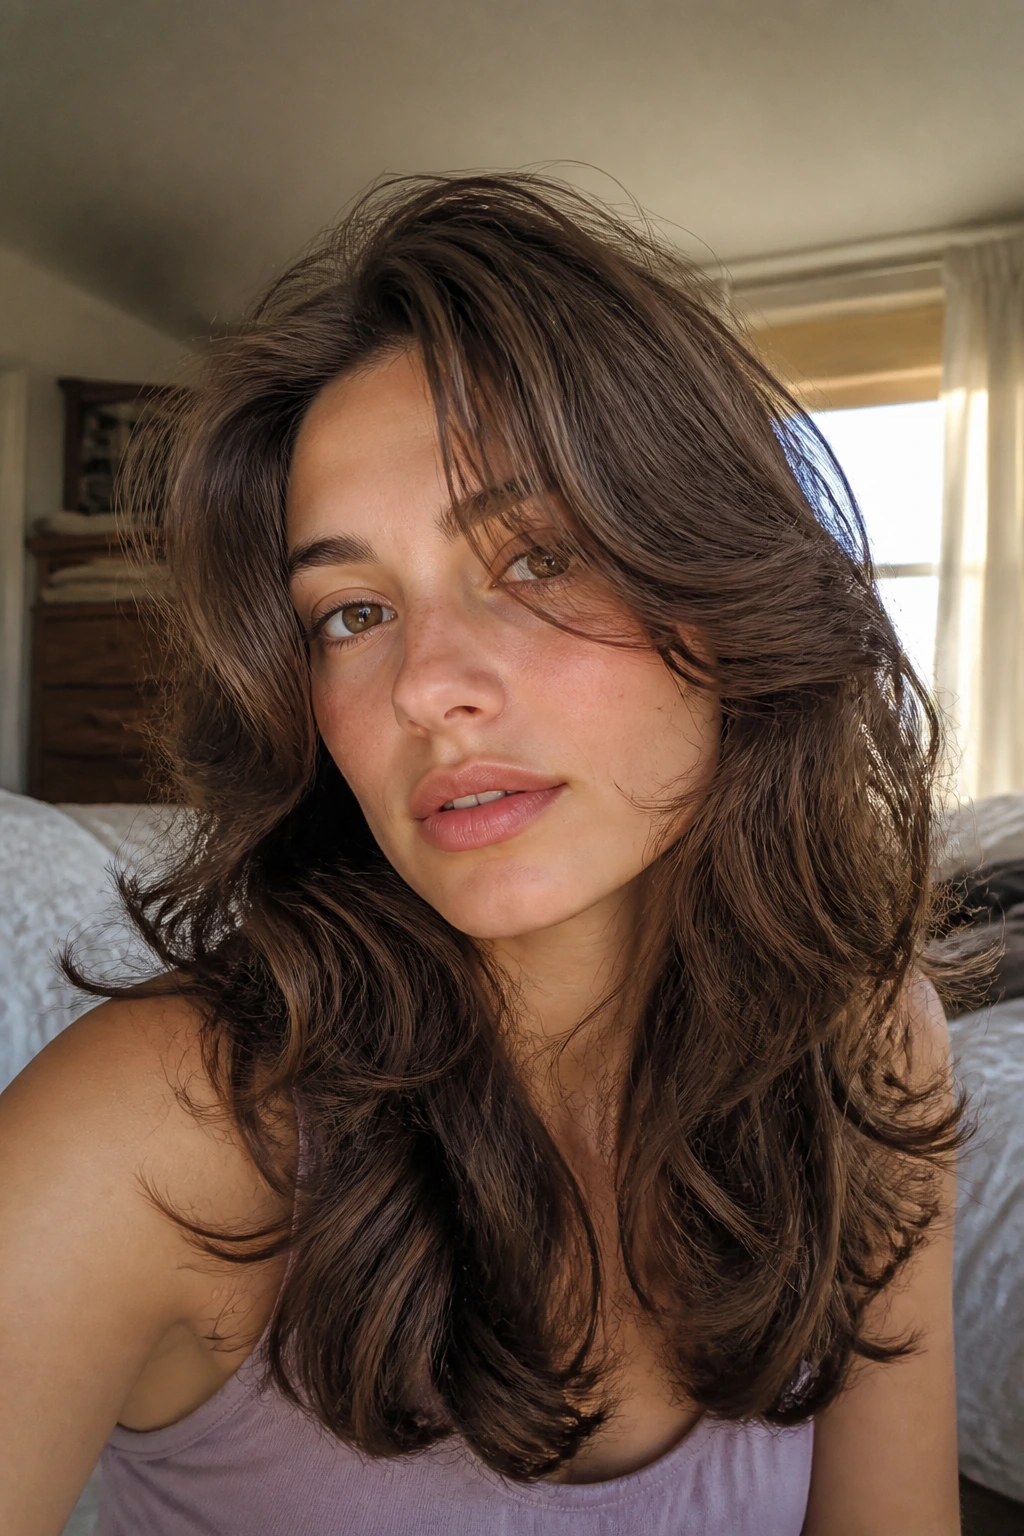
Feathering is not decorative fluff. It is weight placement.
Long wavy hair gets heavy fast. One blunt line at the bottom can drag the whole shape downward, while too many short layers can send the sides out like wings on a box. The seventies answer was to feather the front, keep the perimeter long, and let the movement happen where the eye actually lands. That is why these cuts still make sense: they work with the way hair falls, not against it.
A good 70s shape has a lifted crown, a face frame with direction, and enough length left at the ends to keep the style feeling rich. If you cut too much off the bottom, you lose the drama. If you keep everything the same length, you lose the swing. There is a narrow lane here, and the best cuts stay in it.
I also like that these styles are forgiving on day two. A brushed-out bend, a soft clip at the crown, and a little dry shampoo can bring the shape back without a full reset. That is not an accident. The original shapes were built for movement, not precision, so they age better than styles that depend on every strand sitting in the exact same spot.
Essential Equipment for These Styles
-
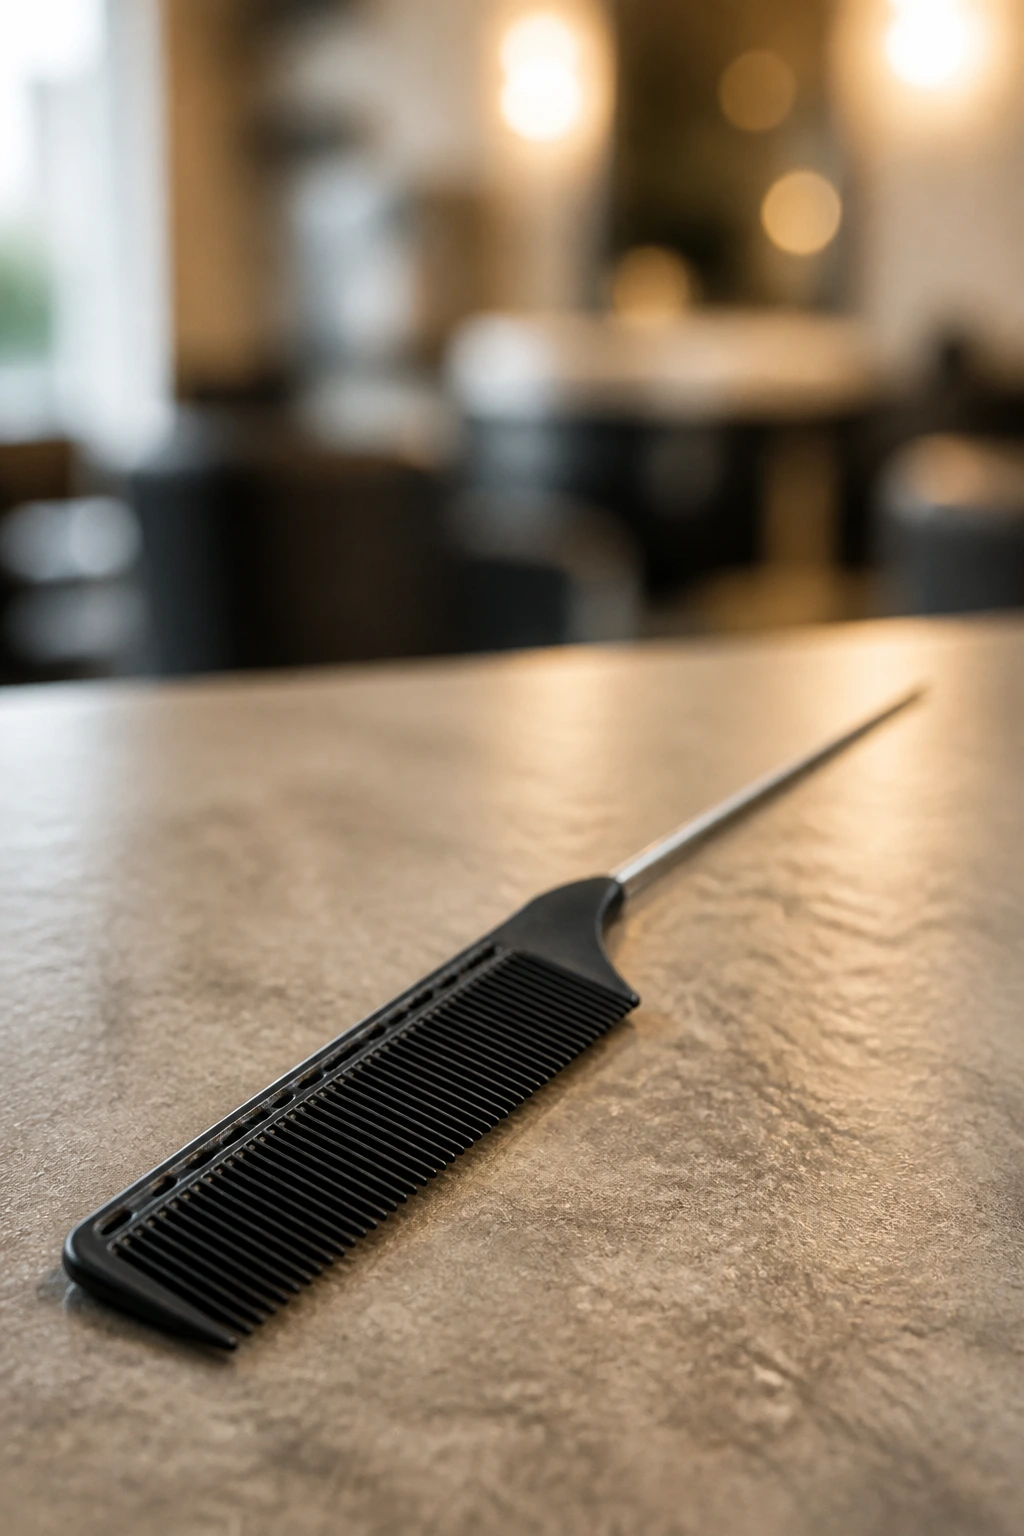
Tail comb: The cleanest way to place a center part, side part, or crown section without wrecking the wave pattern.
-
Blow dryer with a concentrator nozzle: Directs airflow where you want lift and keeps the cuticle smoother than drying with an open nozzle.
-
1-inch curling iron or wand: Best for tighter bends, face-framing pieces, and brush-out waves that need a little more hold.
-
1.25- to 1.5-inch curling iron or wand: Better for soft disco waves and the looser, brushed-out shapes.
-
1.5- to 2-inch round brush: Useful for feathered ends, crown lift, and flipped-out layers.
-
Sectioning clips: Keep the crown and front pieces out of the way while you set the rest.
-
Velcro rollers or large setting rollers: Great for volume at the roots and soft bends around the face.
-
Duckbill clips: Handy for pinning the front away from the face while it cools.
-
Heat protectant spray: Needed any time a hot tool touches the hair.
-
Light mousse or volumizing foam: Gives wavy hair enough grip to hold a 70s shape without getting crunchy.
-
Flexible-hold hairspray: Holds the finish while still letting the brush move through it.
-
Dry shampoo: Helps day-two roots keep their lift instead of collapsing into the scalp.
Choosing Products That Keep the Shape Soft
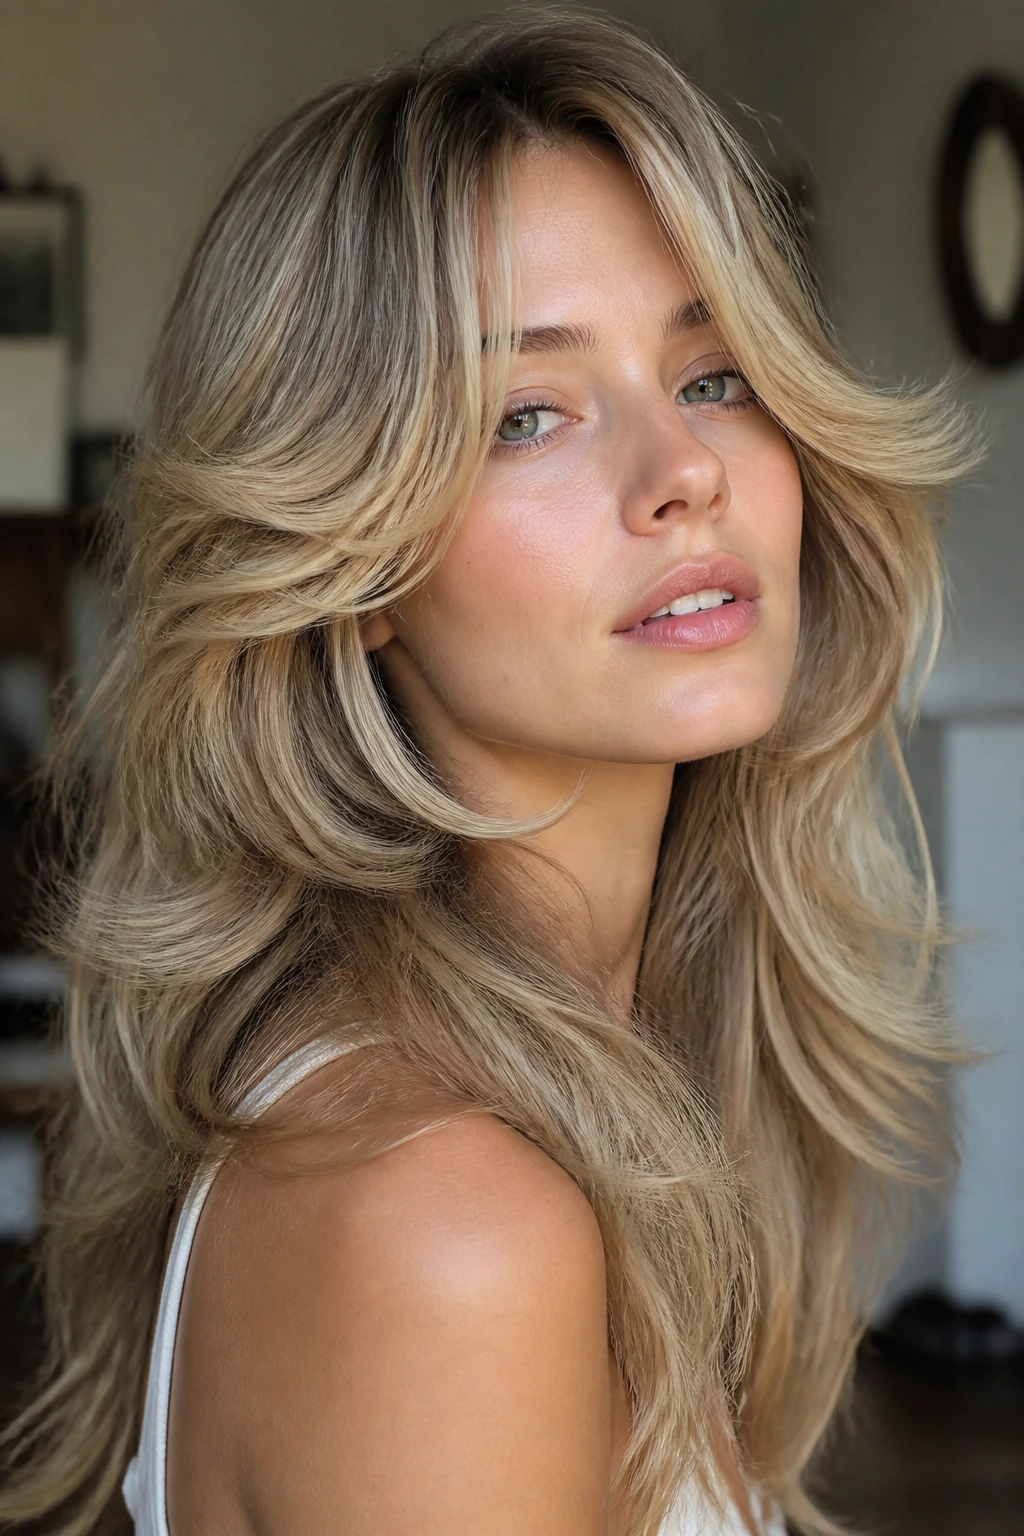
The products matter, but not in the heavy-handed way a lot of people assume. Long wavy hair needs enough control to keep the shape, yet not so much that the hair turns stiff or dull. That balance is what makes these styles feel swingy instead of sprayed solid.
Mousse or foam should be light enough to disappear into damp hair. If it leaves your hands tacky before you even dry, it is probably too sticky for these cuts. Root-lift spray belongs at the scalp only, especially on fine hair that falls flat by midday. For thicker waves, a little leave-in cream through the mid-lengths can stop the ends from puffing, but keep it away from the crown unless you want the top to go limp.
Heat protectant is non-negotiable if you use a brush, iron, or rollers. Look for a fine mist, not a wet spray that soaks the section and makes it harder to shape. Flexible hairspray is the last step, not the whole style. If the can locks the hair into a hard shell, it works against the brushed-out movement that makes these looks read as seventies.
One small opinion: skip heavy oil before styling unless your hair is extremely coarse and dry. Oil can kill lift at the root faster than people think. Save the shine for the ends, and use the smallest amount you can get away with.
How to Wear These Styles
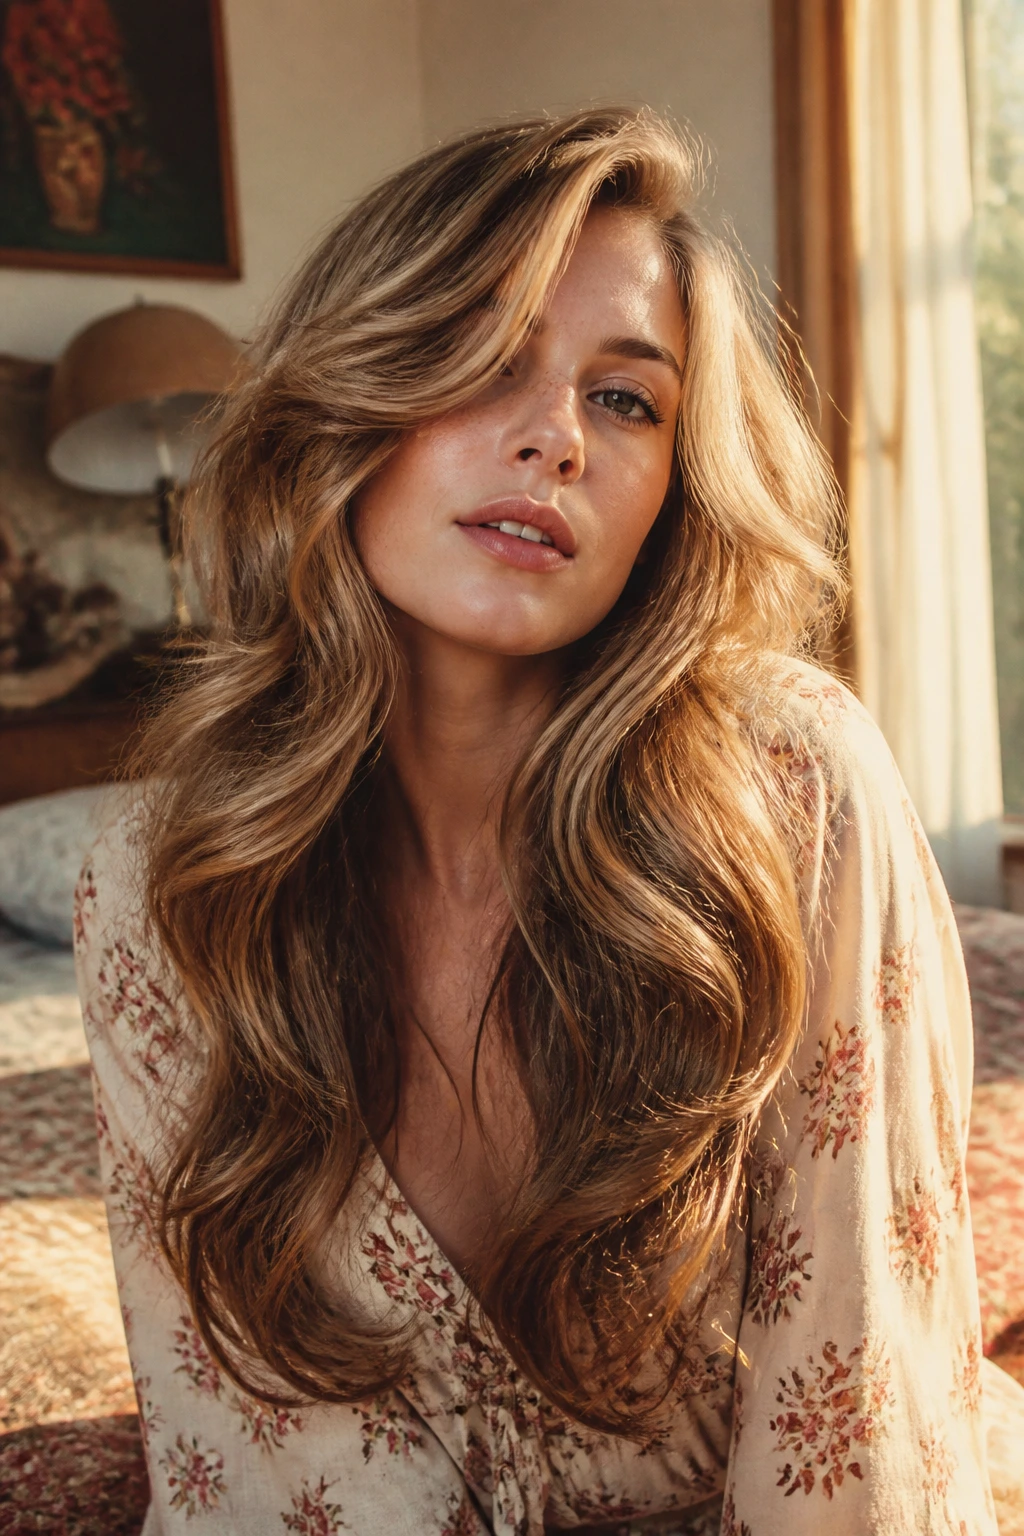
Presentation: Let the part and the front pieces do the first job. These looks read most clearly when the crown has lift, the face frame bends away from the cheeks, and the ends stay soft instead of pinched.
Accompaniments: Hoop earrings, collarbones, scoop necks, and wide collars all sit nicely with the volume. Thick turtlenecks can fight the shape. Sunglasses and scarves work too, but keep them from flattening the crown.
Scaling: For daytime, keep the root lift moderate and the ends lightly brushed. For evening, add a roller set or a deeper side part so the silhouette feels bigger and a little more deliberate.
Pairing: Soft blush, warm bronzer, and a satin lip suit these styles better than very sharp contour or matte-heavy makeup. The hair already has enough shape; the face can stay a touch softer.
Extra Styling Moves Worth Trying
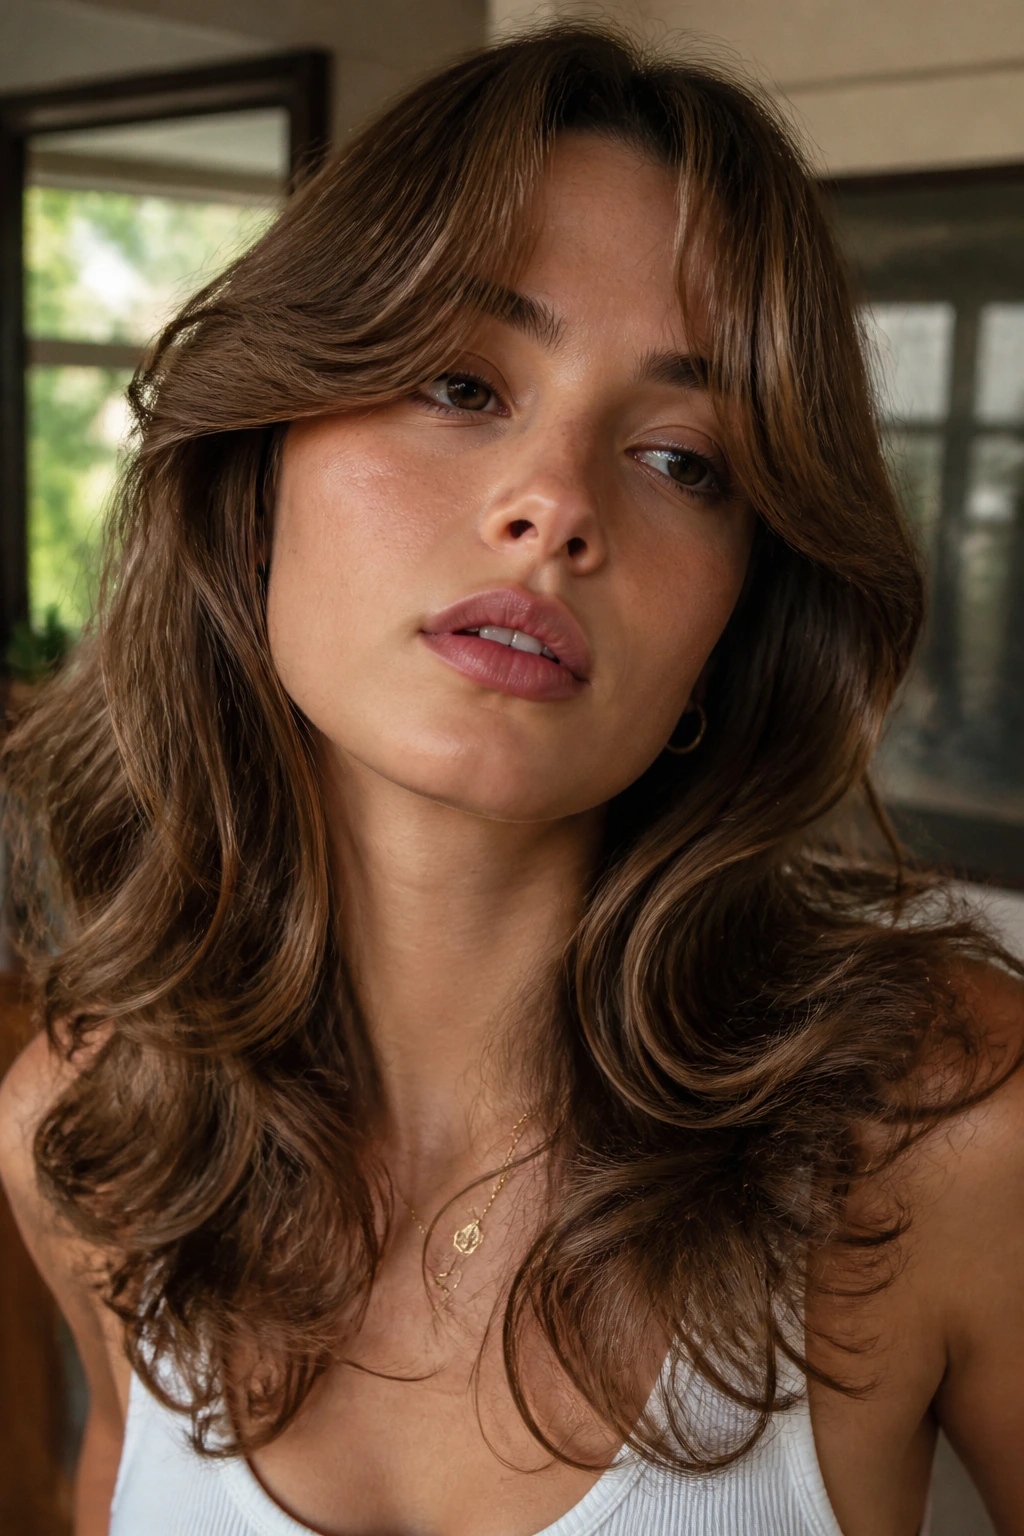
Texture Boost: Mist a little water and mousse onto the front pieces before blow-drying. That gives the face frame enough memory to keep its bend after brushing.
Time-Saver: Set the crown with clips or rollers while you do makeup. Ten minutes of cooling makes more difference than five more passes with a brush.
Pro Move: Blow-dry the crown first, then the lengths. If you save the root until last, it tends to collapse under its own weight.
Budget Fix: Foam rollers and a satin scarf do a lot of the same work as pricier hot tools. The finish is softer, but the lift is there.
Make-It-Yours: If your waves are fine, use less product and more lift. If your waves are thick, use less heat and more sectioning. If your hair is very straight, the feathered and brushed-out looks need more set time, not more product.
Common Mistakes to Avoid
-
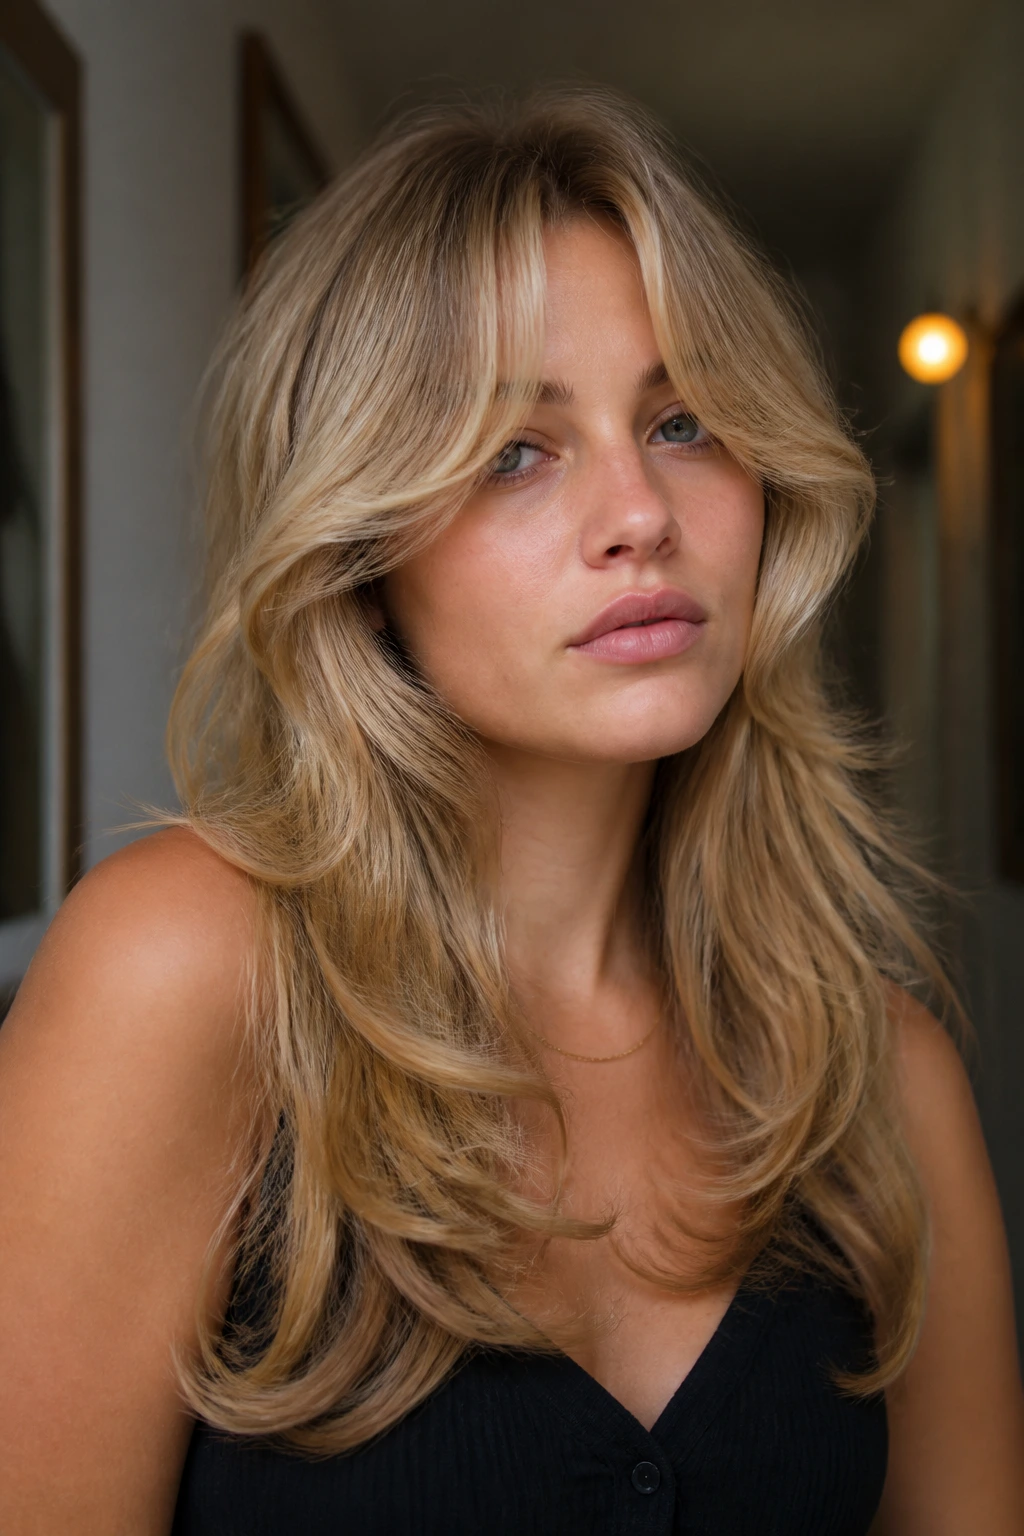
Cutting the layers too high: The symptom is a triangle shape or a halo of bulk around the sides. The fix is to keep the shortest pieces around the chin or cheekbone, not right at the temples.
-
Curling every section in the same direction: That makes the hair look too uniform and can push it into pageant territory. Alternate directions or brush the curls out once they cool.
-
Brushing before the hair cools: Warm hair falls flat almost immediately. Let each section cool fully before you touch it.
-
Using too much serum near the roots: The crown goes limp, and the style loses its lift. Put shine products only on the final inch or two.
-
Forgetting the crown: A flat top kills the 70s shape faster than anything else. Use clips, rollers, or root spray to keep it from sitting down.
-
Locking it all in with stiff hairspray: The hair stops moving, which defeats the point. Use flexible hold and stop spraying once the shape is set.
Variations and Adaptations to Try
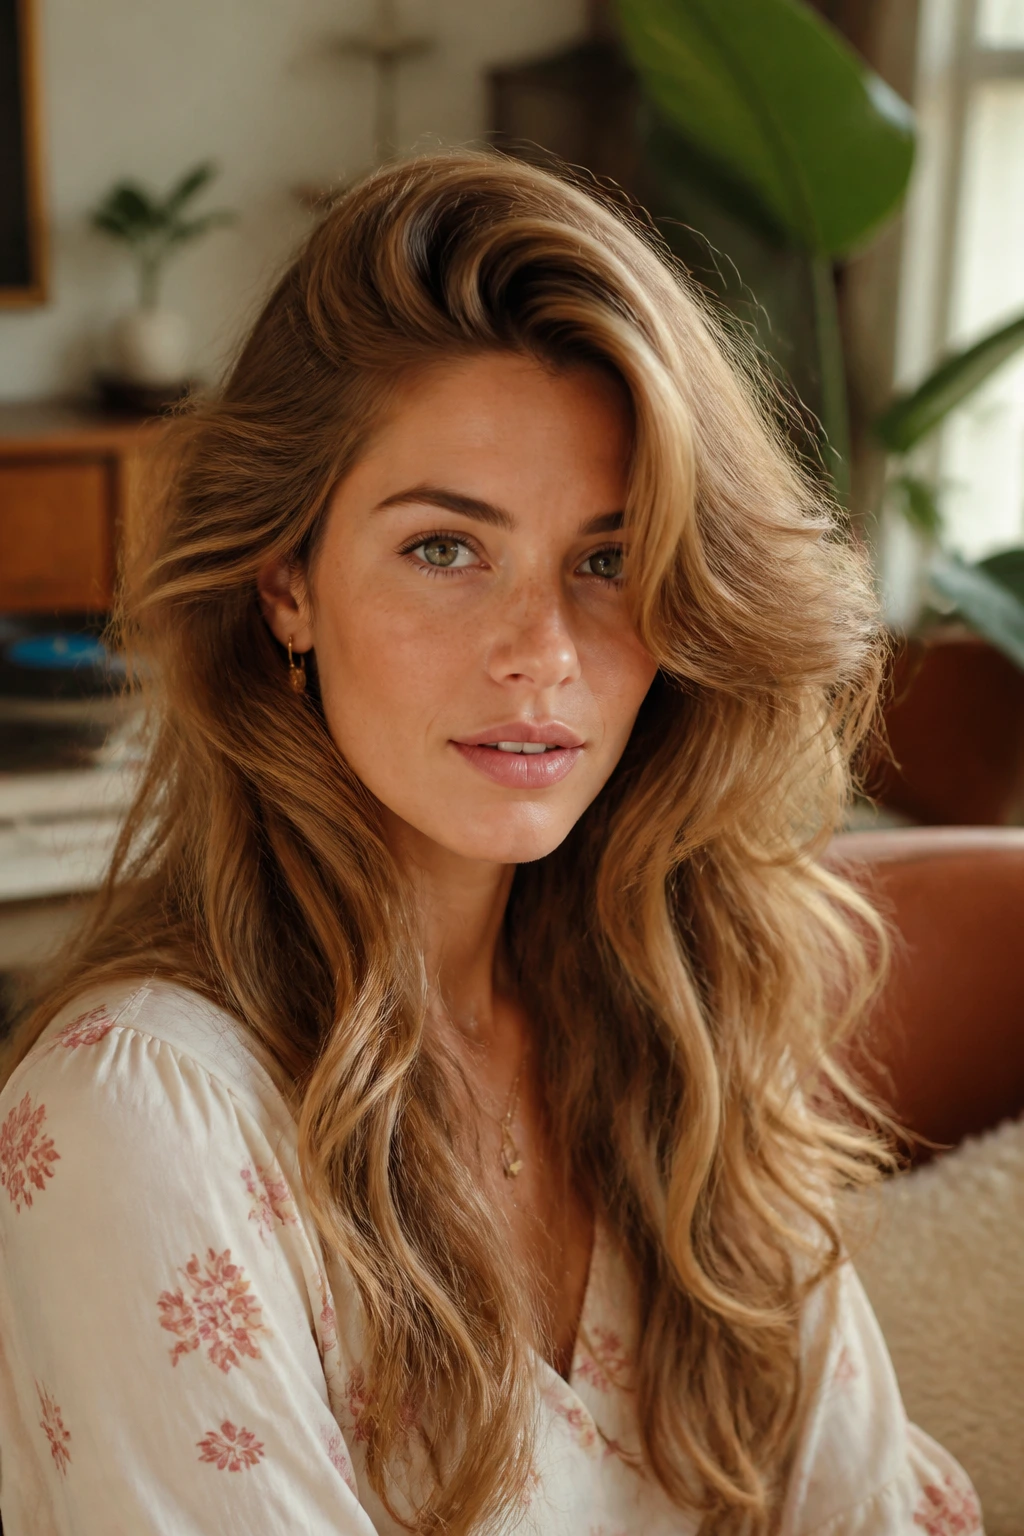
Heatless Roller Crown: Set damp hair in large rollers or foam rollers, leave them in until fully dry, and brush lightly. This is a good choice if you want the shape without daily hot-tool use. The finish is softer and a little more lived-in.
Fine-Hair Feathering: Keep the layers long and the product light, then add root spray only at the crown. Fine waves can disappear fast if the cut is too choppy, so this version stays cleaner through the ends.
Thick-Hair Disco Lift: Ask for internal weight removal and use bigger sections when styling. Thick hair holds volume well, but it also swallows shapes if the layers are not controlled.
Workday Soft Sweep: Keep the crown moderate, the side part gentle, and the face frame soft. It still reads 70s, just quieter. Good for days when you want the reference without the drama.
Night-Out Side Surge: Go deeper on the side part, set the front pieces away from the face, and brush the waves out a little more. The hair gets bigger, the cheekbone shape gets clearer, and the whole look feels more formal without changing the cut.
Keeping the Shape Fresh Between Washes
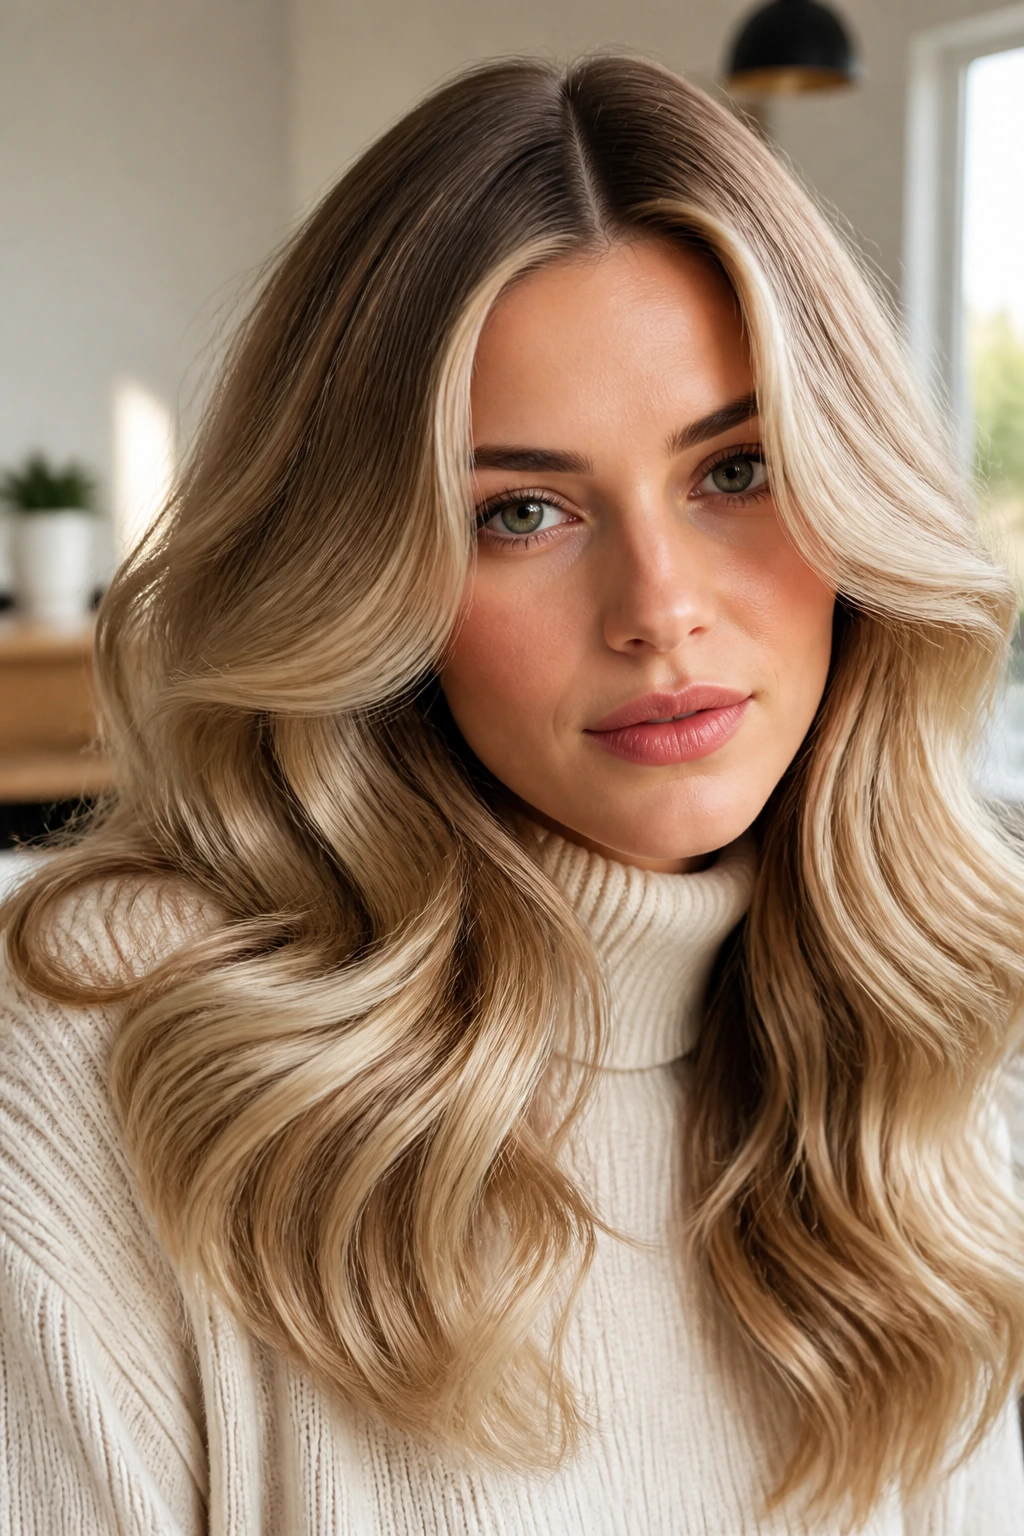
Day one is about setting the style so it can survive. Day two is about keeping the roots from falling in on themselves. Day three is where most long wavy styles either still look good or start looking tired, and the difference usually comes down to a few small habits.
Sleep on a satin pillowcase if you can. It cuts down on friction, which means less frizz and fewer crushed bends around the face. If the style relies on crown lift, clip the top section loosely before bed instead of stuffing it under the pillow. That keeps the root from getting flattened into a crease. In the morning, use dry shampoo at the roots, let it sit for a minute, then brush it through with your fingers before adding more product.
If the front pieces need help, mist them lightly with water and a tiny bit of mousse, then rewrap them around your fingers or a large roller for a few minutes while you get dressed. You do not need to restyle the whole head. Usually, just the top and the face frame need attention. That is the part people forget.
Trims matter too. Feathered and layered long hair starts to lose shape when the ends get ragged. If you want the silhouette to stay crisp, a trim every 8 to 10 weeks is a good rhythm. If you are growing the hair longer, you can stretch that a bit, but the face framing will still need cleanup so it does not drift into shapeless territory.
Frequently Asked Questions
Which of these styles works best on fine wavy hair?
The feathered blowout, curtain bangs with long layers, and crown-lift side sweep usually behave well on fine waves. Keep the layers longer and the product lighter so the hair does not collapse at the top.
Can I do these looks without hot tools?
Yes, but you need a little patience. Roller sets, foam rollers, braids, and a good blow-dry with clips can get you close. The result will be softer and less polished, which is not a bad thing here.
What barrel size gives the most 70s-looking wave?
A 1-inch barrel gives you more bend and brush-out texture, while a 1.25- or 1.5-inch barrel gives you softer disco waves. If the hair is long, larger barrels usually keep the ends from getting too tight.
How do I stop my waves from frizzing when I brush them out?
Let the curls cool completely first, then use a boar-bristle brush or a wide brush with slow strokes. A tiny bit of shine serum on the ends helps, but too much product will separate the hair in a greasy way.
Are curtain bangs a bad idea with wavy hair?
Not at all. They just need to be cut with enough softness at the ends so they blend into the side layers. If the bangs are too blunt, they fight the rest of the style.
How often should I trim the layers?
About every 8 to 10 weeks if you want the feathering to stay clean. If you let it go too long, the ends start to thicken and the shape loses its swing.
What if my hair goes flat at the crown every time?
Start with root spray at the scalp, dry the crown first, and clip the top while it cools. If that still does not hold, the cut may need less weight at the top or a longer layered shape.
Which style is easiest for a busy morning?
The low ponytail with loose front pieces and the tucked-behind-ears shape are the least demanding. They give you the 70s silhouette without asking for a full brush-out.
The Shape That Keeps Moving
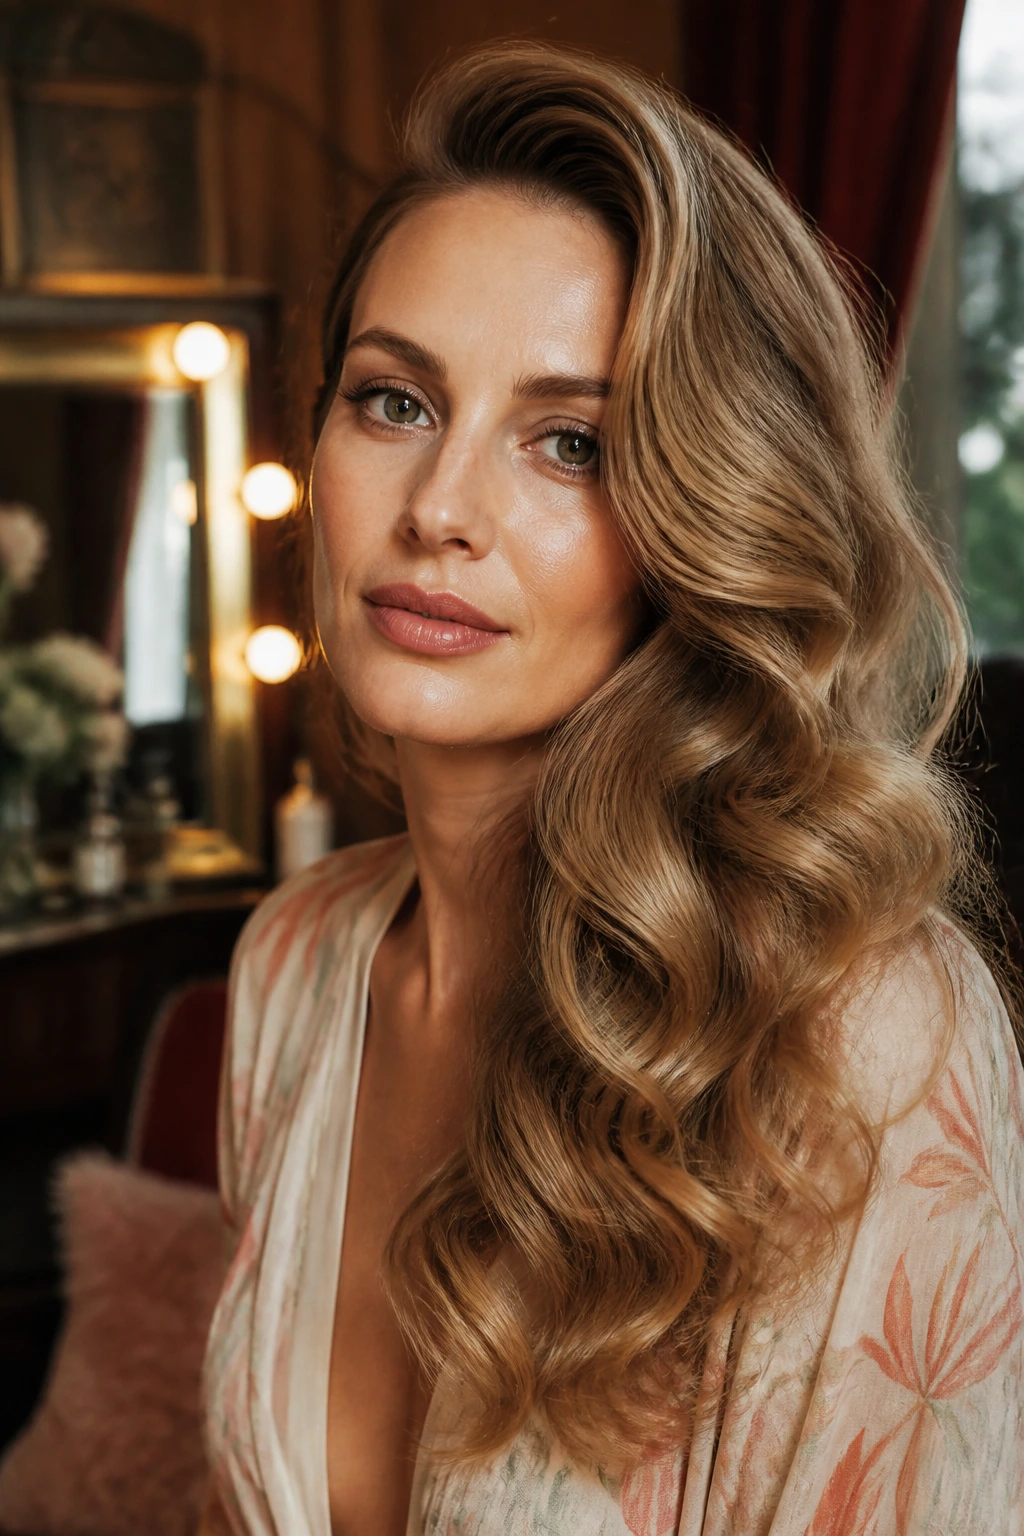
The reason these looks still matter is simple: they let long wavy hair behave like itself and still look finished. That is harder to pull off than it sounds. A good 70s shape keeps the crown alive, the face frame soft, and the length moving, which is a much better use of waves than flattening them into submission.
Pick the version that matches your texture, not the fantasy version you saw on a perfect head of hair somewhere online. The right one will look good when you leave the house and still look like hair, not a helmet, by lunch. That is the real test.
