



A goddess braid does not need glitter to look expensive. It needs clean parting, even tension, and a little restraint at the finish — the kind that lets the braid pattern speak before the accessories do. When those things line up, the style reads polished in a way that feels deliberate, not overworked.
That polished cultural look comes from structure. Thick braids, close-to-scalp foundations, curved part lines, and soft curly ends can turn a simple protective style into something that looks sculpted. And because these looks sit in Black hair tradition with real history behind them, they land best when they’re worn with care, not as a costume or a quick aesthetic borrow.
The details matter more than people think. A neat hairline, a crisp middle part, a foam wrap before bed, and curl pieces that are set instead of left to fend for themselves — those small choices change the entire mood. The difference between “braids I rushed through” and “braids that look like they belong at a wedding, a photoshoot, or a board meeting” is often just one calm, careful evening.
Why These Goddess Braids Earn the Polished Look
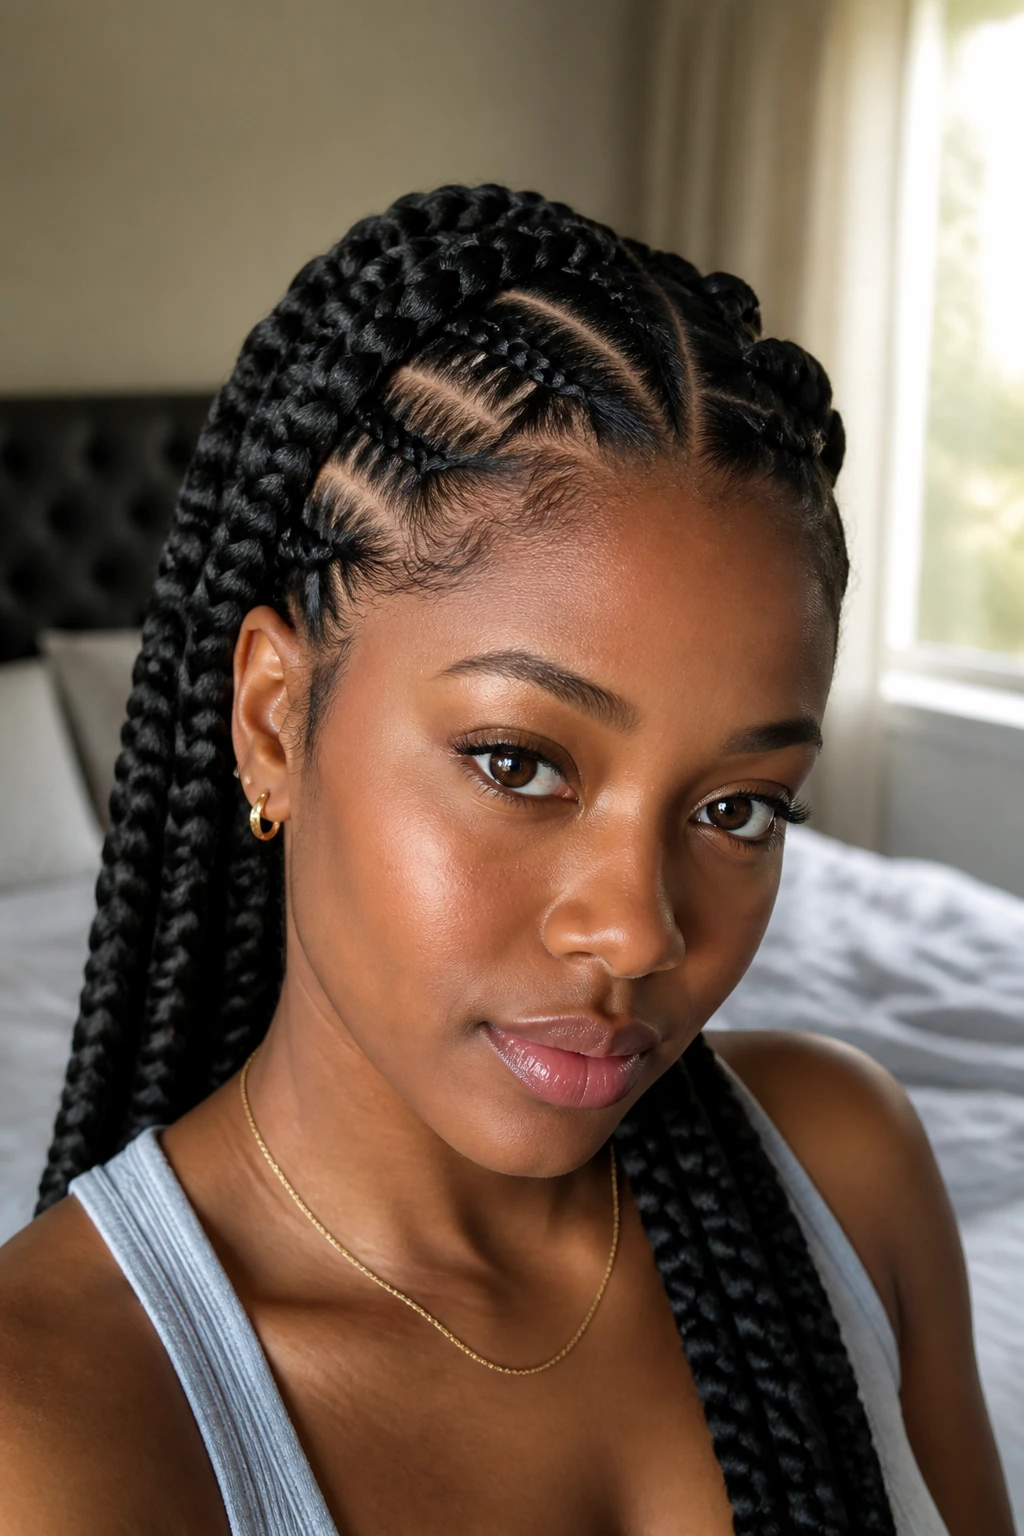
- Clean parting does half the work: Straight lines, curved rows, or triangles all read sharper when the sections are separated with a rat-tail comb and a light hand on the gel.
- Protective styling stays elegant here: The ends are tucked, braided, or softly curled, which keeps the style looking finished instead of frayed by day three.
- Accessories can stay minimal: Gold cuffs, a few beads, or one silk scarf are enough; piling on extra decoration usually fights the braid pattern.
- The shape does the talking: A low bun, side sweep, or crown braid changes the whole silhouette before you even get to the outfit.
- It works across settings: These braided hairstyles can look formal with clean edges and gloss, or more relaxed with loose curls and a few soft baby hairs.
- The look has range: Long, short, sleek, full, geometric, or romantic — goddess braid hairstyles can lean in any direction without losing the polished core.
1. Classic Crown-Back Goddess Braids
Three to five thick braids swept straight back have a kind of quiet authority that never needs extra noise. The look is clean at the scalp, strong through the middle, and soft at the ends when you leave a little curly texture or taper the finish. It’s one of those styles that makes the face look open and the neckline look longer.
Why it works
The crown-back shape keeps the braid lines simple, which is exactly why it reads polished. There’s no visual clutter. Your eye goes from the crisp parting to the smooth braid length and stops at the curled ends, where a little movement keeps the style from feeling stiff.
This version is also forgiving if you want a style that lasts. Because the braids travel back from the hairline instead of branching out in too many directions, the front can stay neat longer with less daily fuss. A light foam wrap at night helps the surface stay flat, and that matters more here than people admit.
Quick details that make it shine
- Keep the parting even from front to back.
- Use medium braid size so the style doesn’t look bulky.
- Finish the ends with a defined curl, not a rough bend.
- Add one or two cuffs near the temple if you want a dressier edge.
Best for: formal events, church, interviews, and days when you want the braids to do the styling for you.
2. Center-Part Goddess Braids with Curly Ends
A center part changes everything. It gives the style symmetry, and symmetry has a way of making even simple braids look intentional. With goddess braids, the middle part also creates a natural frame for the face, which is why this version works so well with hoop earrings, shaped brows, and a strong lip.
The curl at the ends matters here. Straight braid tails can make the style feel too severe, especially when the braids are thick. Soft curls at the bottom break the line just enough. I prefer a medium rod set or braids wrapped and pinned overnight, because that curl holds shape better than a loose twist-out at the ends.
What to watch for
If the center part drifts even a little, you’ll see it right away. That’s the curse and the charm of this look. A good stylist will measure the part from forehead to nape before braiding, and you can tell when it’s right because both sides feel balanced, not identical in a robotic way.
Wear this one when you want polished, not loud. It sits beautifully with a blazer, a satin dress, or a simple tee and hoop combination that lets the braid line stay in charge.
3. Side-Swept Goddess Braids
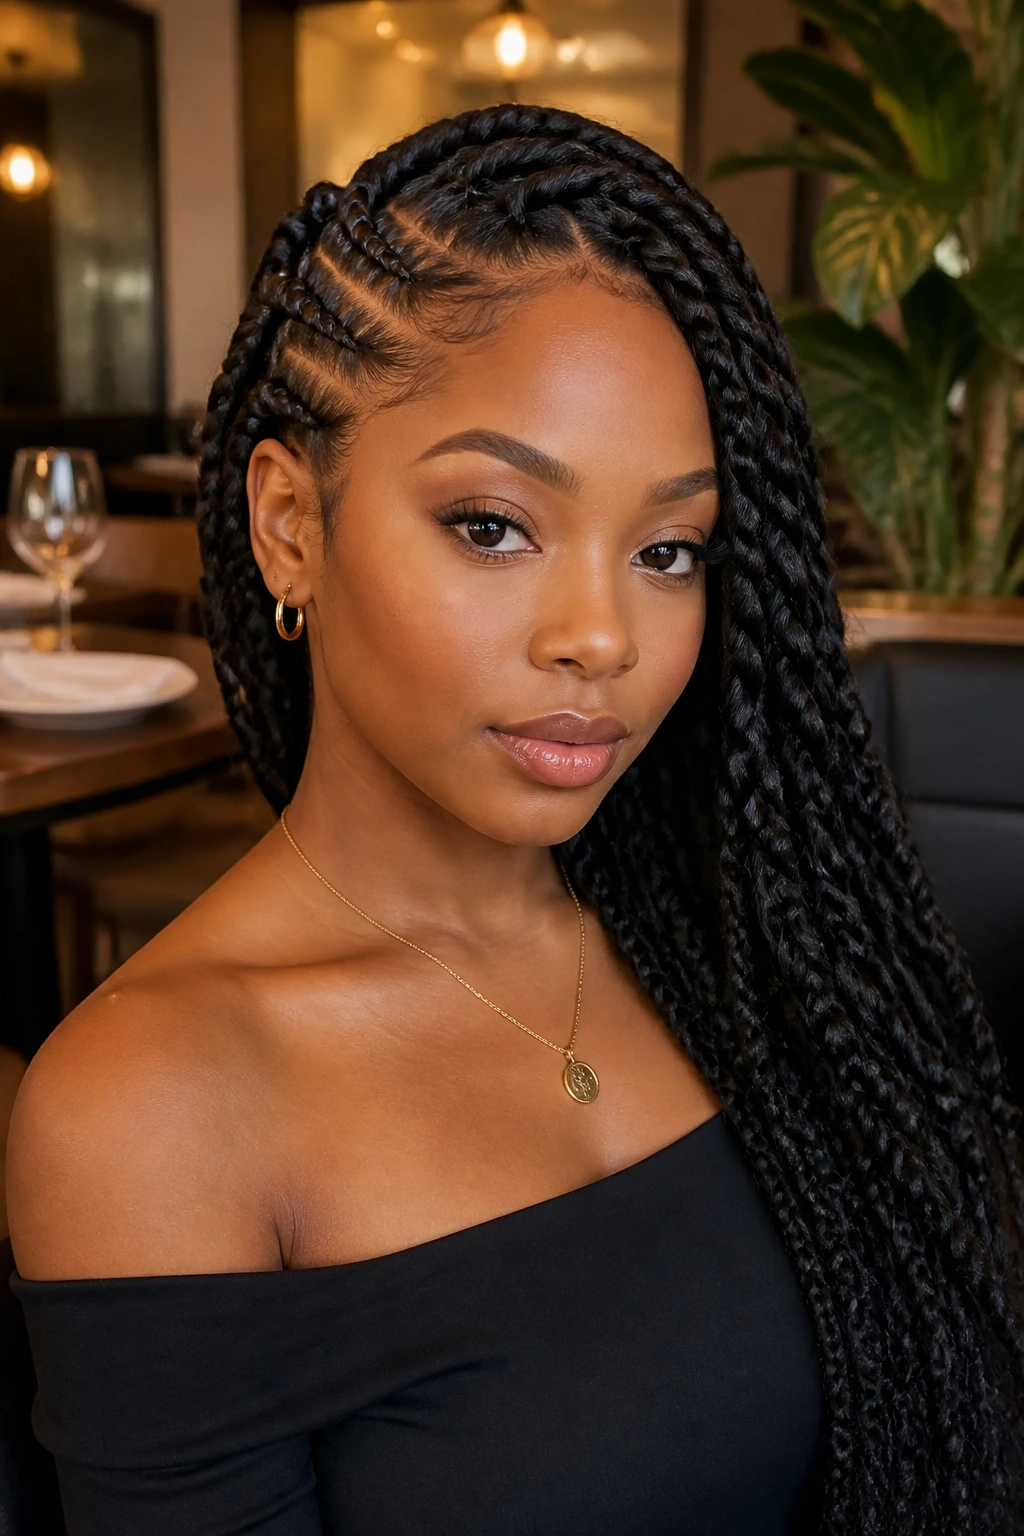
A side-swept braid pattern softens the whole face. Instead of splitting attention down the middle, the braids angle across the scalp and drift toward one shoulder, which gives the style movement before you even turn your head. It’s one of my favorite options when someone wants elegance with a little curve to it.
The diagonal part does something useful, too. It creates a natural line that draws the eye upward, then down along the braid lengths. That can be especially flattering if you like one side of your face more than the other, or if you wear your hair with a side profile in mind. The style feels a little more romantic than the centered versions, but it still looks tidy when the braids are close to the scalp.
Where it shines: dinner events, date nights, graduation photos, and any outfit with an open neckline.
If you want the finish to stay crisp, ask for the front sections to be slightly tighter than the back. Not tight enough to pull. Just firm enough that the front won’t puff up before the rest of the style starts to settle.
4. Half-Up Half-Down Goddess Braids
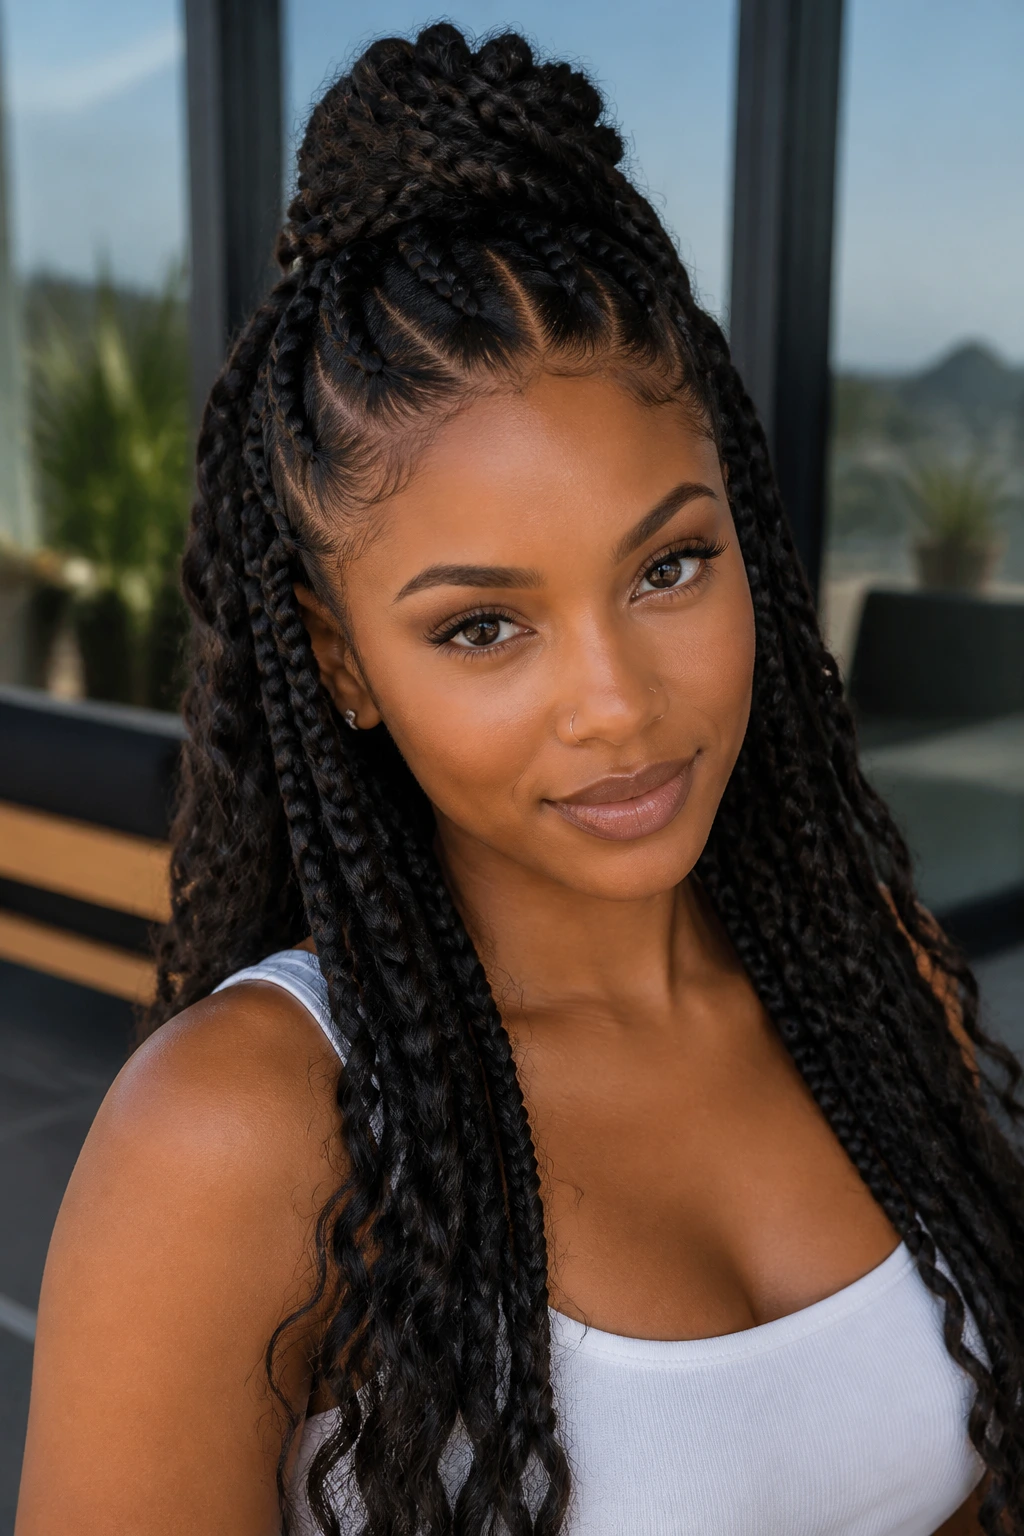
Half-up half-down goddess braids give you two moods at once. The top section sits pulled back and controlled, while the lower section spills over the shoulders in braids, curls, or both. That contrast is the whole point. It gives the style dimension without making it heavy.
This version is a smart choice when you want movement around the face but still want some lift at the crown. It can also make longer braids feel easier to wear because the top half takes some of the weight off your neck. If the braids are set with loose curly ends, the lower section gets a little bounce every time you turn your head.
A small detail makes a big difference here: the top knot, clip, or wrap should sit snugly enough to hold the shape, but not so tight that it flattens the front of the braids. A polished half-up style looks clean because the lifted section has purpose. It should not look like you grabbed the top layer and hoped for the best.
Wear it when you want to keep some softness around the face and some structure at the crown. It’s especially good with gold cuffs placed only on the visible lower braids.
5. Goddess Braided Bun
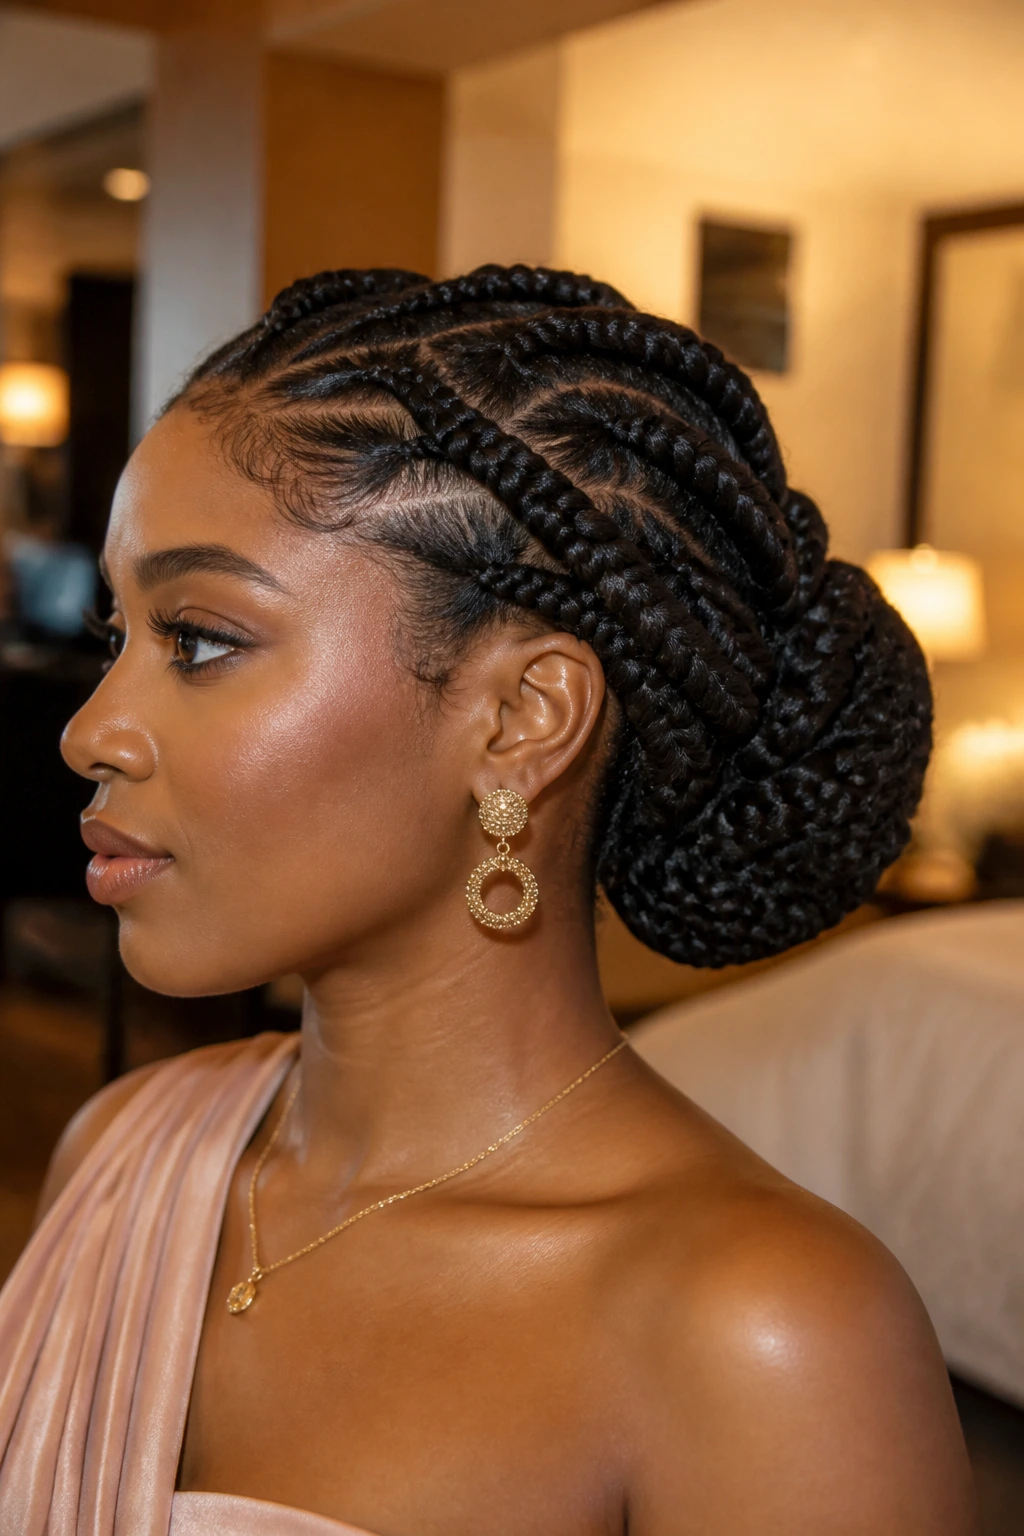
A braided bun changes the whole energy of goddess braids. Instead of letting length hang, you coil the braids into a low or mid bun and let the texture do the work. The result feels formal in a way that still looks rooted in the braid pattern, not dressed up on top of it.
This is the style I’d pick for heat, humidity, or a day when you don’t want hair brushing your shoulders. The bun keeps the silhouette compact, which makes the face and earrings stand out more. It also protects the ends better than a loose style, since the braids aren’t swinging around and catching on collars or straps.
A small styling note
Don’t twist the bun into a hard knot and call it done. Spread the braids around the base so the shape looks full, then pin them in a way that hides the ends. A smooth wrap at the perimeter helps, and a light sheen spray on the bun itself keeps the finish from looking dusty under bright light.
This one looks strongest with a deep side part or a clean center part. Both give the bun a strong starting point, which is half the battle.
6. Feed-In Goddess Braids with Tiny Cornrow Base
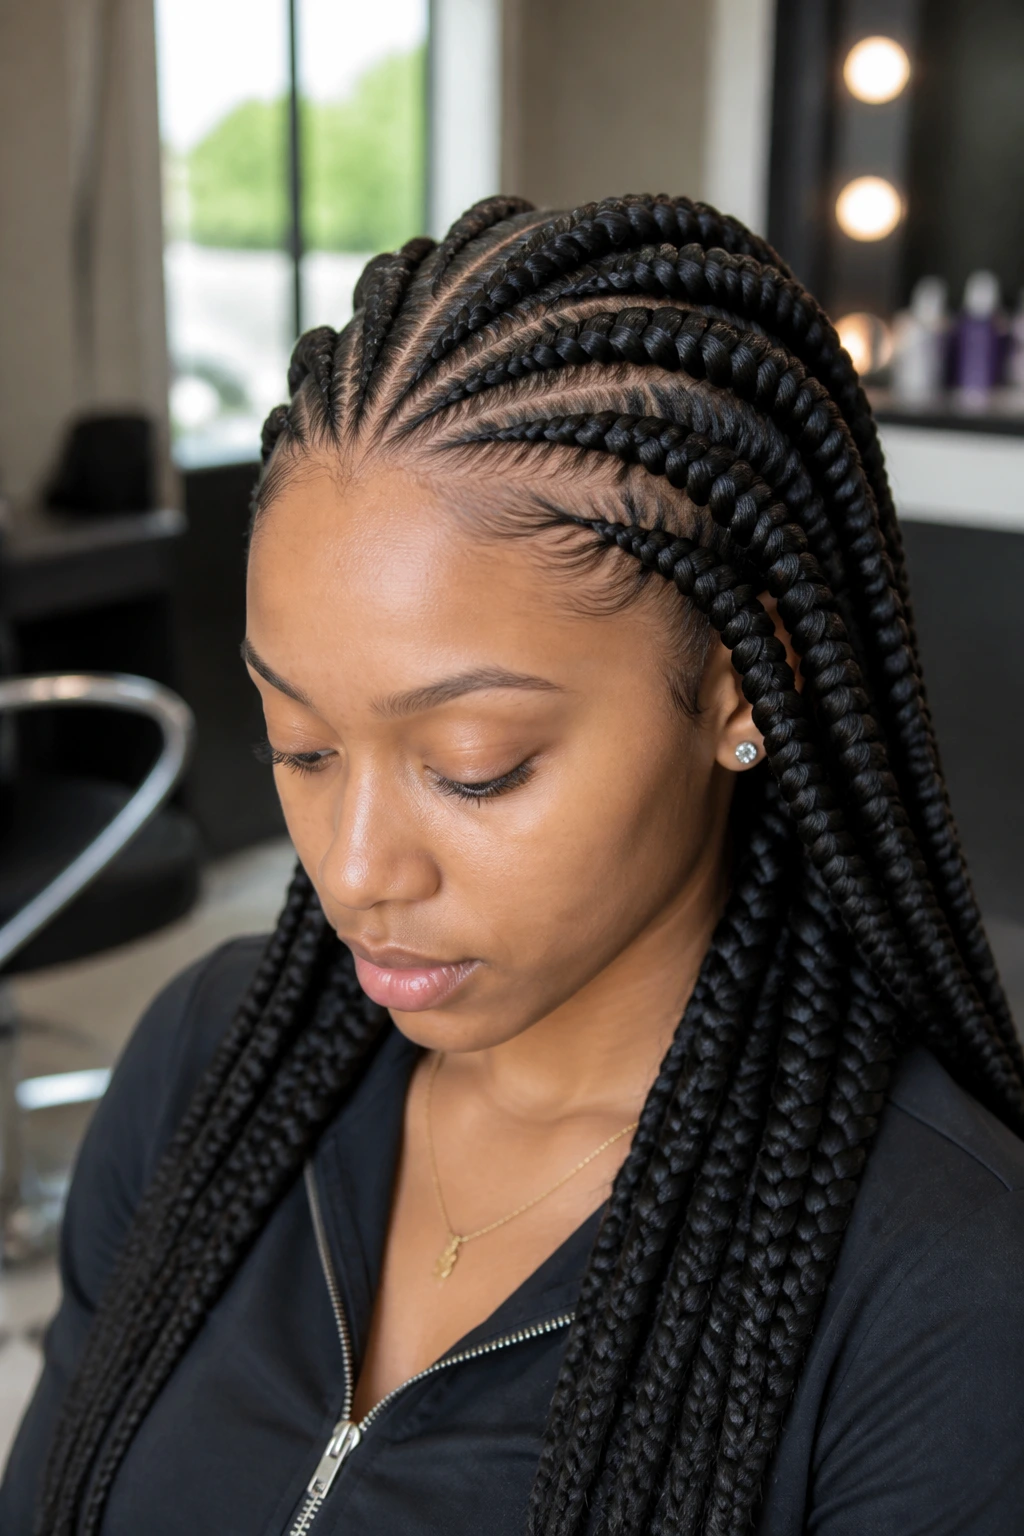
Feed-in goddess braids have a finer, more natural-looking start because the extension hair is added gradually instead of all at once. That tiny cornrow base matters. It keeps the line close to the scalp and avoids the bulky “braid cap” look that can happen when the beginning is too thick.
The polished effect comes from restraint. The braids start slim, then build in size as they move back. That gradual shift makes the style feel smooth and expensive-looking without needing a lot of decoration. If you’re trying to get a sleek cultural look that doesn’t overpower the face, this is one of the best choices in the whole group.
How to wear it
This version likes symmetry, but it doesn’t need perfect mirror imaging to look good. A set of four to six feed-in goddess braids with evenly matched thickness usually looks cleaner than a more crowded design. Keep the scalp lightly moisturized before the install, not greasy. Too much product at the base can make the parts look muddy by the second day.
I’d call this the “quiet luxury” option of goddess braids, if that phrase were not so overused. It’s plain in the best sense. The details do the work.
7. Jumbo Goddess Braids
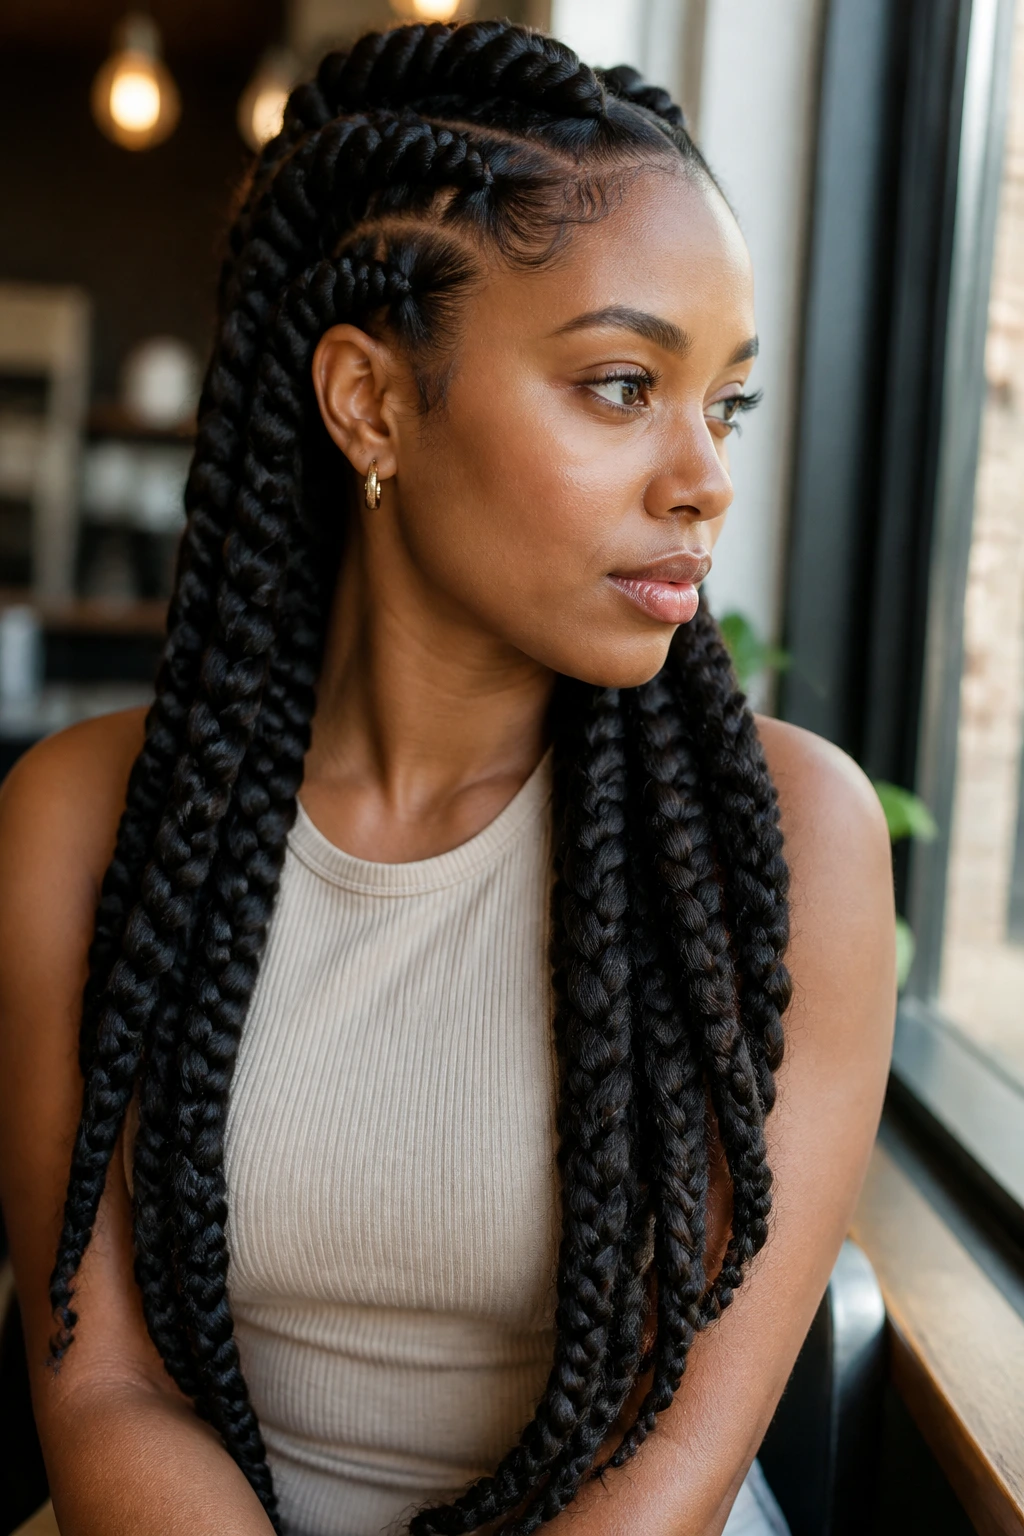
Jumbo goddess braids make a statement the second they’re done. Fewer braids, thicker sections, bigger visual impact. The look is bold, but if the parting is clean and the braid tension is even, it still reads polished rather than loud.
The best thing about jumbo braids is speed. You’re working with fewer sections, which means the install usually takes less time than a more intricate pattern. That’s useful if your scalp gets tired during long appointments or if you want a style that feels substantial without sitting in the chair all day.
Where they fit best
Jumbo braids work well with strong features and simple outfits because the hairstyle itself carries the visual weight. A high neck top, a plain dress, or even a tailored jacket can look better with jumbo goddess braids than with something more fussy. The style also does a nice job of showing off parting if the base lines are sharp.
A caution, though: bigger braids mean more weight per section, so the install has to be balanced. If one braid feels noticeably heavier than the others, you’ll feel it by day two. Good jumbo braids sit evenly, move evenly, and do not yank at one side of the head.
8. Boho Goddess Braids with Loose Curls
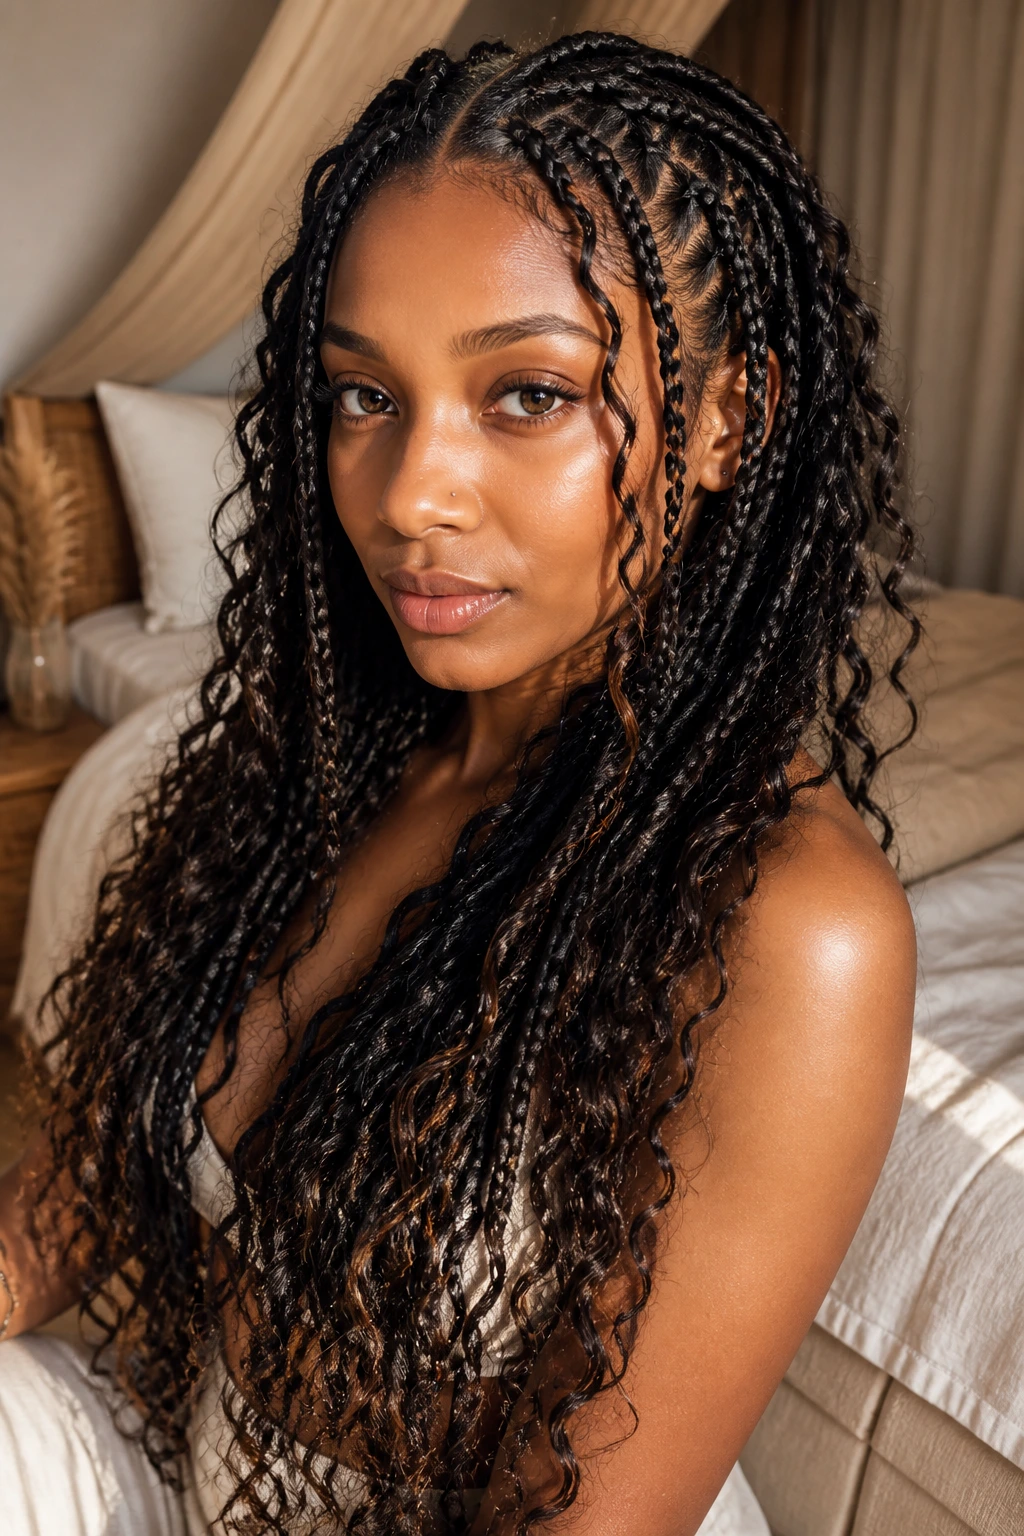
Boho goddess braids lean softer and more textured than the classic versions. You still get the braid structure, but loose curls are left out through the length or at the ends, which gives the style a little motion and a little messiness on purpose. Done well, it looks romantic. Done badly, it looks frizzy. The line between those two is thinner than people think.
What makes this style polished is curl control. The leave-out pieces should be set with rods, wand curls, or small braid-outs so they fall in a controlled pattern rather than a random cloud. A light mousse pass and a silk wrap at night help the curls keep shape. They’ll never stay perfect forever. That’s not the point. But they should stay defined.
This is the braid style I’d choose when I want the look to feel less rigid and more lived-in. It pairs beautifully with soft makeup, linen, satin, and layered jewelry. Keep the braid roots neat, though. The contrast between a crisp scalp and loose curls is what makes the style land.
9. Goddess Braids with Curved Partings
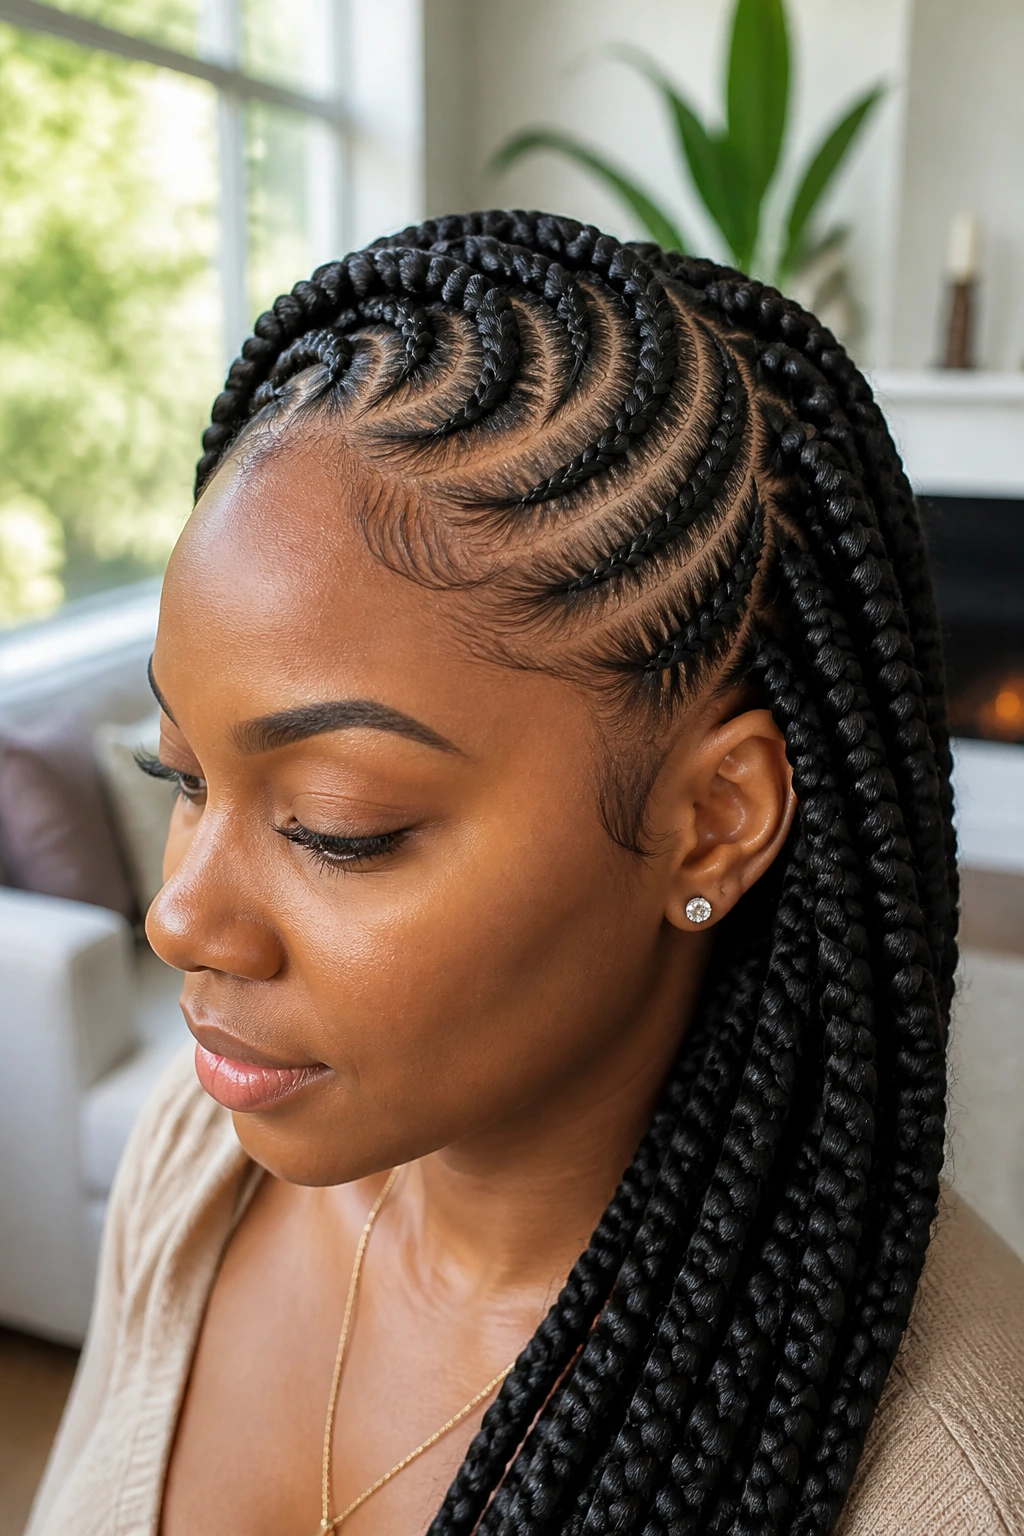
Curved partings change the whole mood of goddess braids. Straight lines feel formal and direct. Curves feel sculpted. They snake across the scalp in a way that makes the hair itself look like part of the design, not just the container for it.
This style asks for a braider with a steady hand. A curved part that wobbles loses its charm fast. But when the arcs are smooth and the sections follow the head shape, the result is gorgeous in a very quiet way. It looks considered. That’s the word I keep coming back to because it fits.
Why people choose it
Curved partings are a nice move when you want visual interest without pulling out extra accessories. The parting line becomes the accessory. A single curve across the front, then a series of flowing parts toward the nape, can make the braids feel custom-made to your head shape.
It’s also a smart choice if you want to avoid the standard middle-part or side-part look that everyone recognizes immediately. Curves break that pattern. They make the style feel fresh without needing color, beads, or a dramatic length change.
10. Low Ponytail Goddess Braids
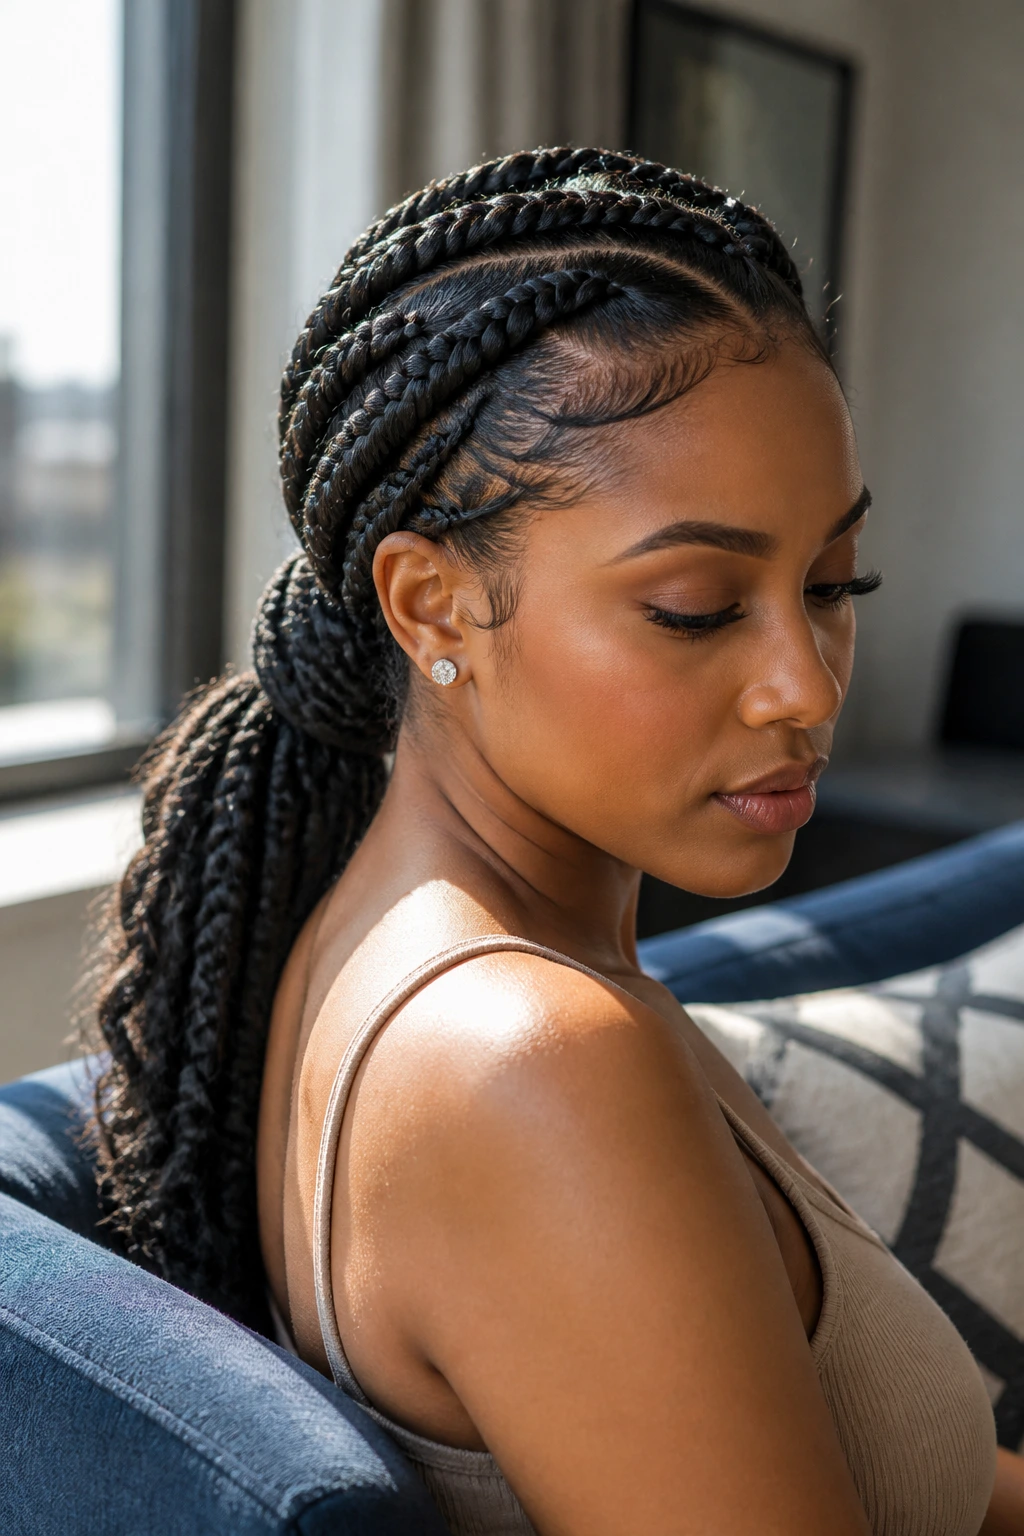
A low ponytail turns goddess braids into something sleek and practical, but it doesn’t flatten their personality. The braids are pulled into a nape-level ponytail, then left to hang in a controlled cascade. That keeps the profile clean from the front and elegant from the back.
This is one of those styles that works especially well with collars and earrings. Because the braids sit low, they don’t fight the neckline of a blazer, turtleneck, or dress. They also stay out of the way better than a loose look, which makes them useful for long workdays or events where you don’t want hair on your shoulders.
You want the base snug, not strangled. Too tight and the style loses its polish because the hairline starts looking stressed. Too loose and the ponytail sags. The sweet spot is firm enough that the braids anchor at the nape and stay put when you move.
A low ponytail with a wrapped base looks especially refined. A braided wrap, a single cuff, or a strip of hair wound around the elastic can turn the whole style from basic to finished in about thirty seconds.
11. High Ponytail Goddess Braids
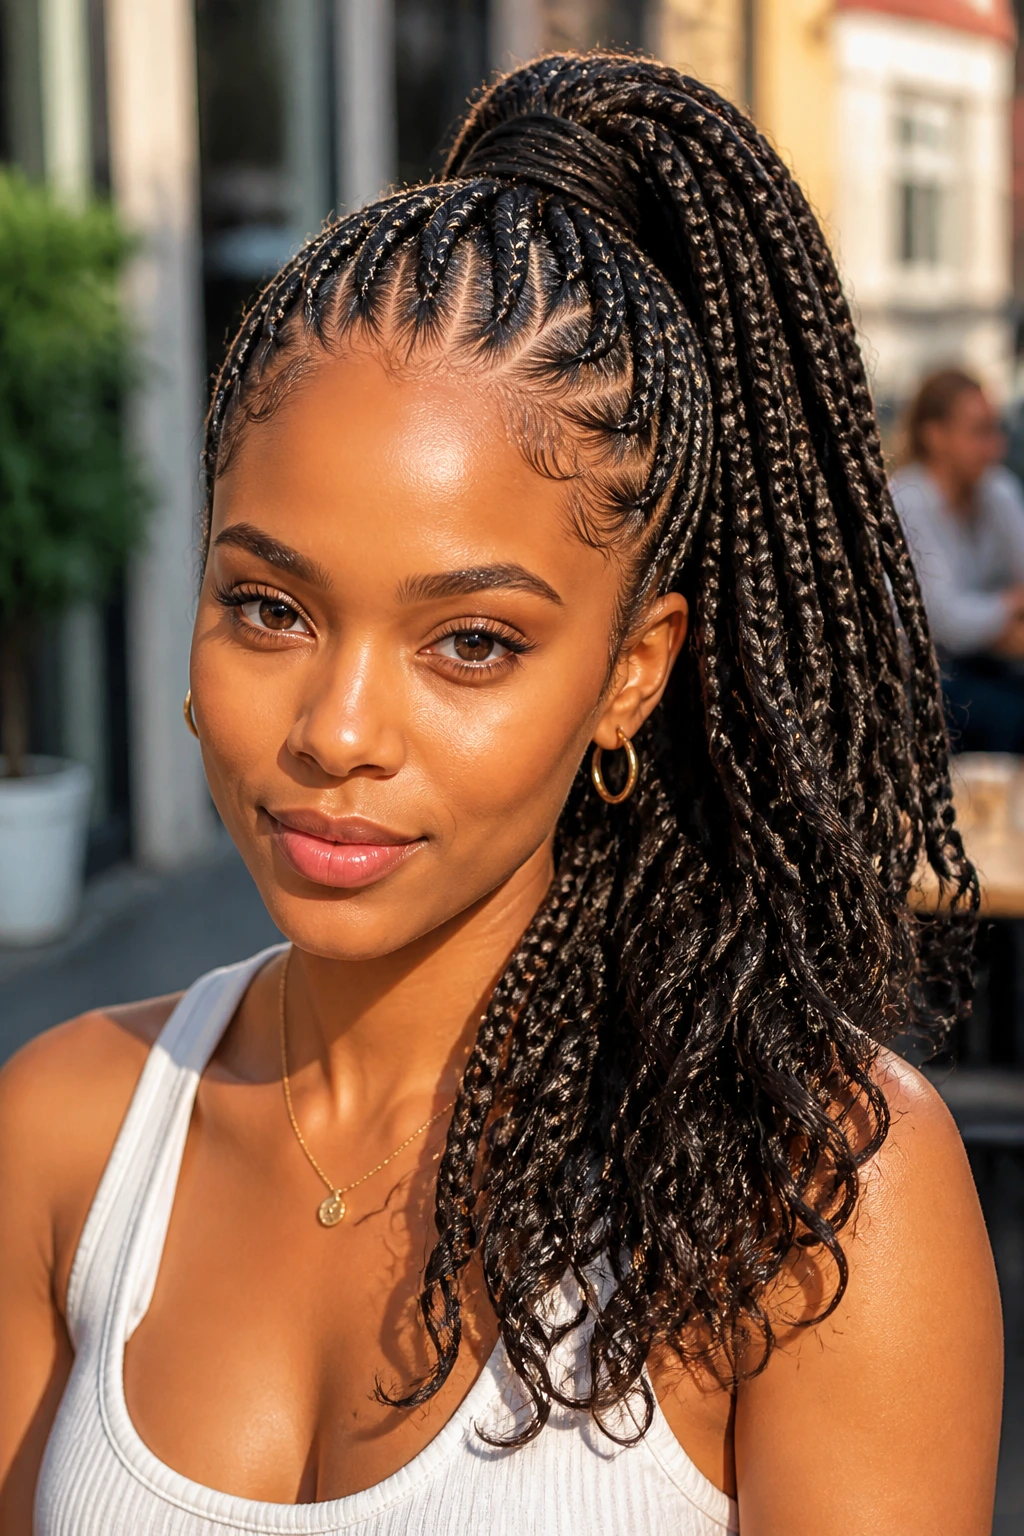
A high ponytail lifts everything. The face looks brighter, the cheekbones get more space, and the braids create movement that feels energetic without being messy. If the low ponytail is composed, the high ponytail is sharper and a little more dramatic.
This look works best when the scalp pattern is clean enough to stand on its own. You can see more of the parting from the front, so the braid base has to be neat. Once that’s right, the ponytail can swing, drape, or curl at the ends and still look polished. I like this version when the outfit is simple and the hair needs to carry a little more presence.
The one thing that can make or break it is the anchor point. If the ponytail sits too far forward, the style can look strained. Too low, and it loses the lift that makes it special. Aim for the crown area, then smooth the perimeter with a scarf before you step out.
This is a strong pick for nights out, photos, or any day when you want the braid style to feel a little more alive.
12. Two-Braid Goddess Halo
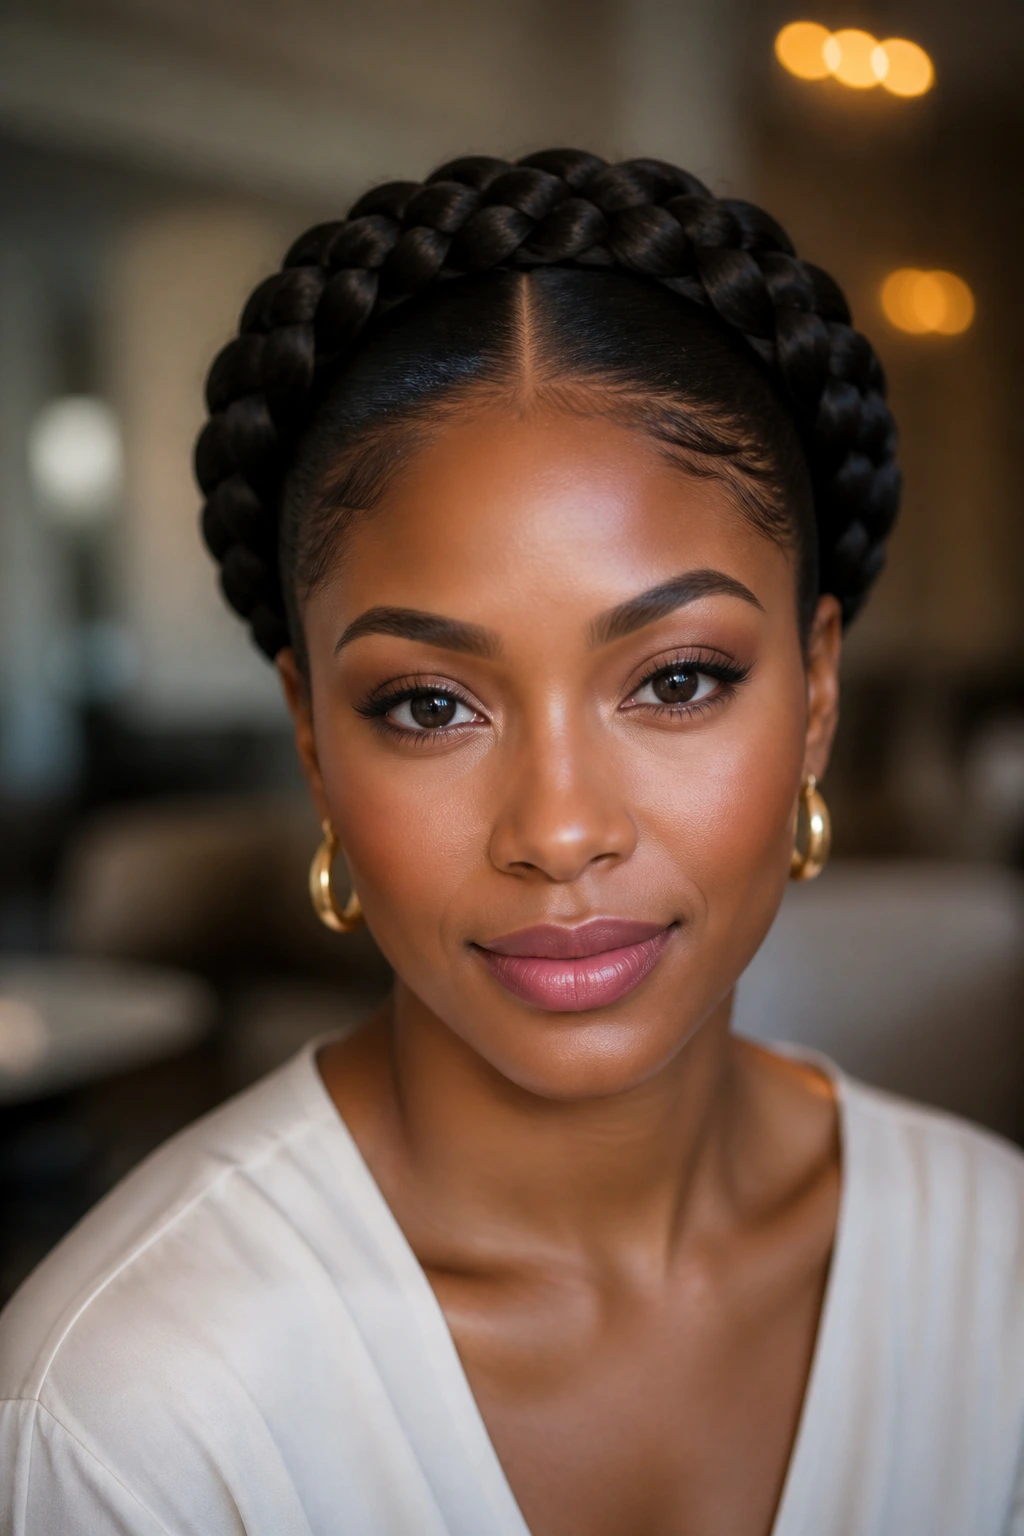
Two large braids wrapped around the head create a halo effect that feels regal without trying too hard. The style circles the face instead of framing it from a distance, which makes it feel intimate and structured at the same time. There’s a reason versions of this look show up in formal settings so often. It has shape. Real shape.
The halo works best when the braids are balanced and the ends are hidden cleanly. If the braids are too loose, the ring around the head loses its line. If they’re too tight, the style can feel rigid. The best version sits close enough to the scalp to hold its outline but still looks soft at the edges.
Who it flatters
Almost everyone can wear this, but it shines on people who like showing the face more than the length. It keeps the neck open and the focus up top. A pair of small earrings or a single statement necklace finishes it without competing.
This is also one of the more ceremonial goddess braid hairstyles in the group. Wedding guest. Graduation. Formal family event. That sort of thing. It’s not fussy, but it does carry a certain gravity.
13. Zigzag-Part Goddess Braids
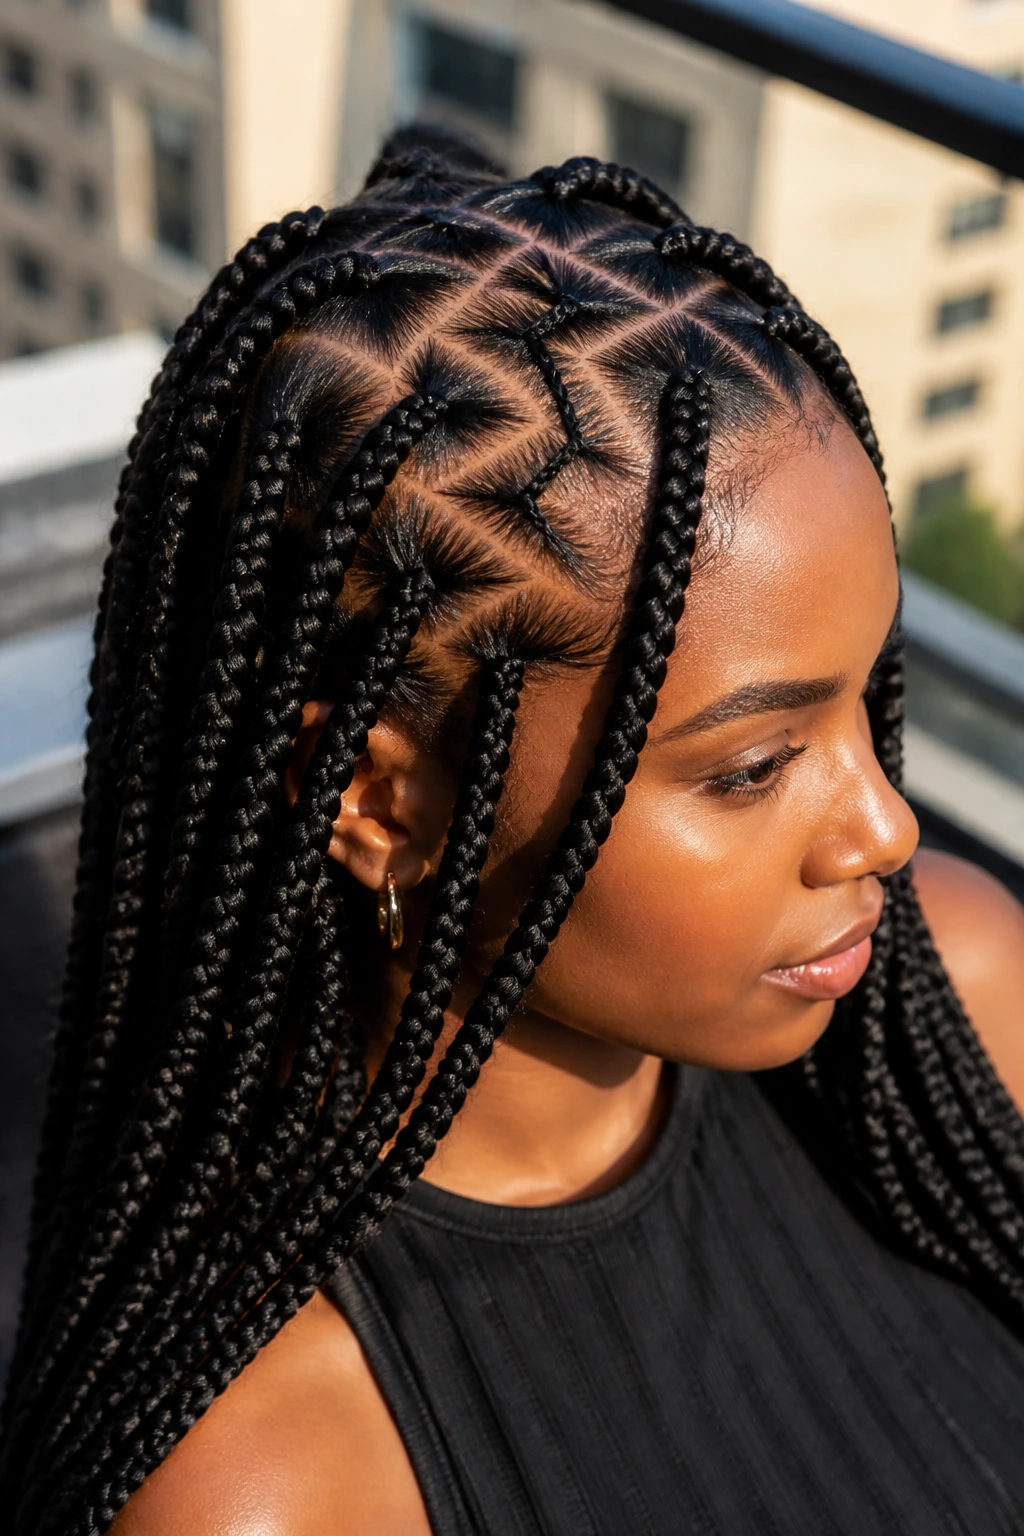
Zigzag parts bring edge to the style without changing the braid structure itself. The sharp, broken parting line creates a graphic effect that looks especially good when the rest of the braids are smooth and controlled. It’s a small design choice with a big visual payoff.
The trick is precision. Zigzags only work when the angles are crisp and the sections are clean. A sloppy zigzag looks accidental, and there’s no polite way to say that. A good one looks planned from the first line to the last braid. If you’re wearing accessories, keep them simple. The parting already gives you enough detail.
This is the style I’d pick when a person wants goddess braids but doesn’t want to look predictable. It gives the same protective-styling benefits as straighter parts, but the top layer feels more graphic and modern. A light sheen on the parting and a soft mousse on the braid surface help the pattern stay readable.
You do not need a lot of extra color or beads here. The geometry is the accessory.
14. Bob-Length Goddess Braids
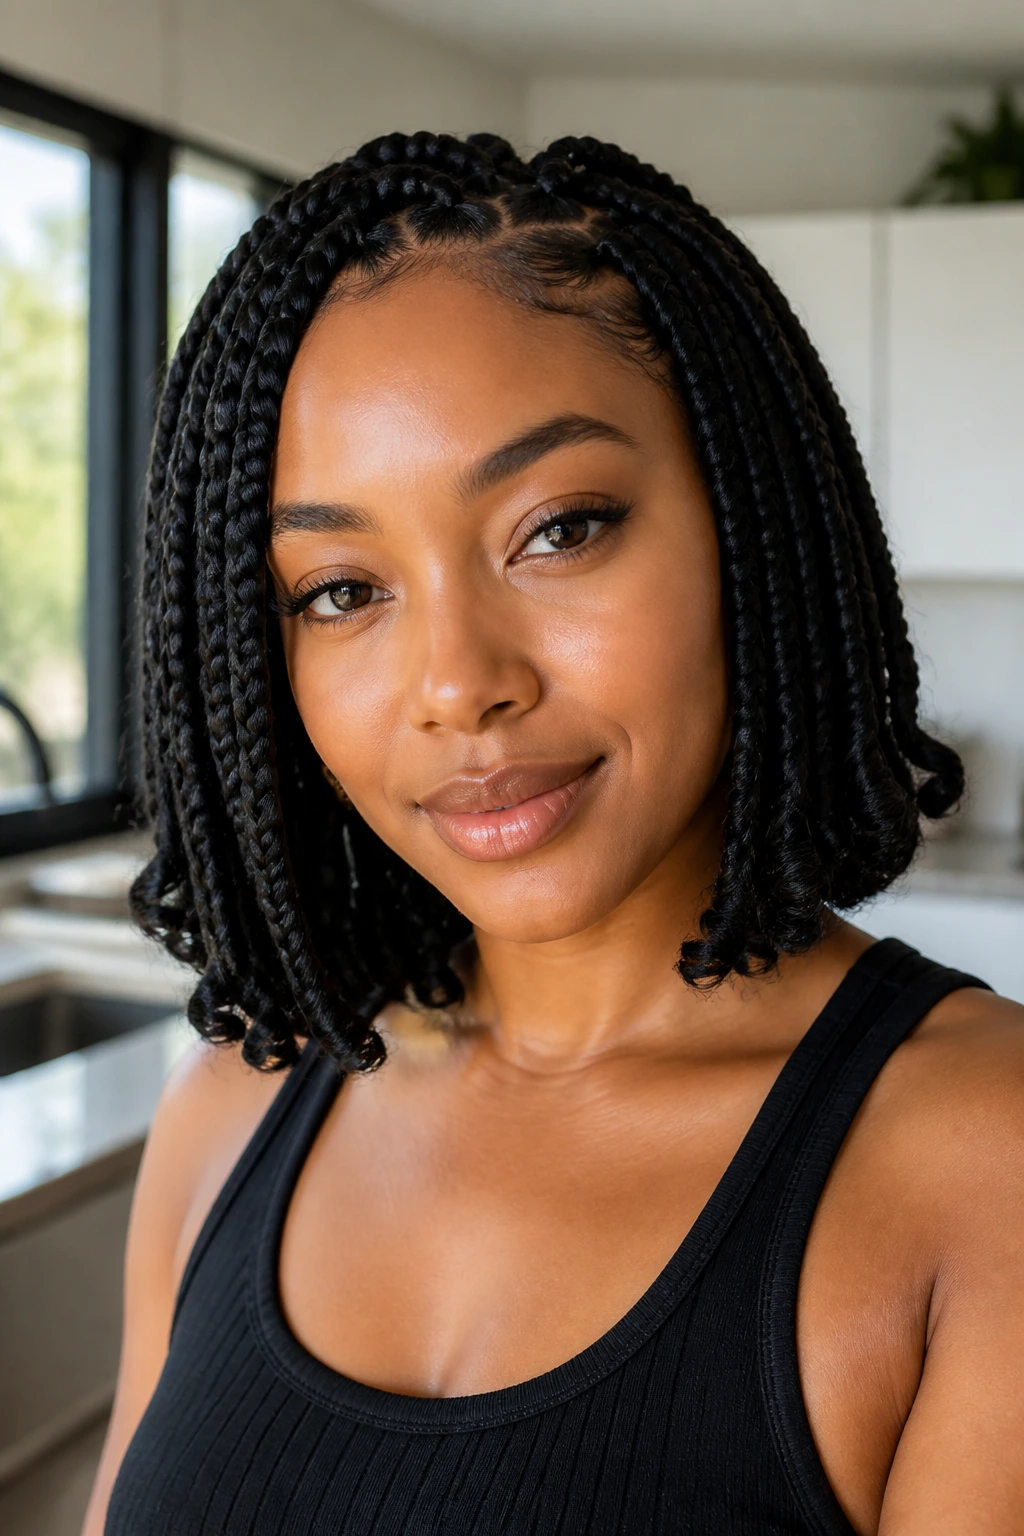
Bob-length goddess braids sit around the chin, jaw, or shoulders, and that shorter length changes the whole experience. The style feels lighter on the head, easier on the neck, and faster to manage when you’re sleeping or tying it up. It also brings more attention to the face because there’s less length pulling the eye downward.
This version is a smart choice if you want the polished cultural look without the weight of waist-length braids. Shorter braids can be easier to refresh, easier to pin, and easier to live with when you’re wearing them daily. They’re also a strong option if your natural hair is not especially long and you want to keep the install more compact.
A bob braid looks best when the ends are finished on purpose. Slight curl, blunt trim, or tiny beads — pick one direction and commit. A bob with undefined ends can look unfinished fast.
I like this style with a tucked ear and one visible hoop. It puts the braid line front and center and keeps the overall shape clean. That’s the whole point.
15. Goddess Braids with Beads and Cuffs
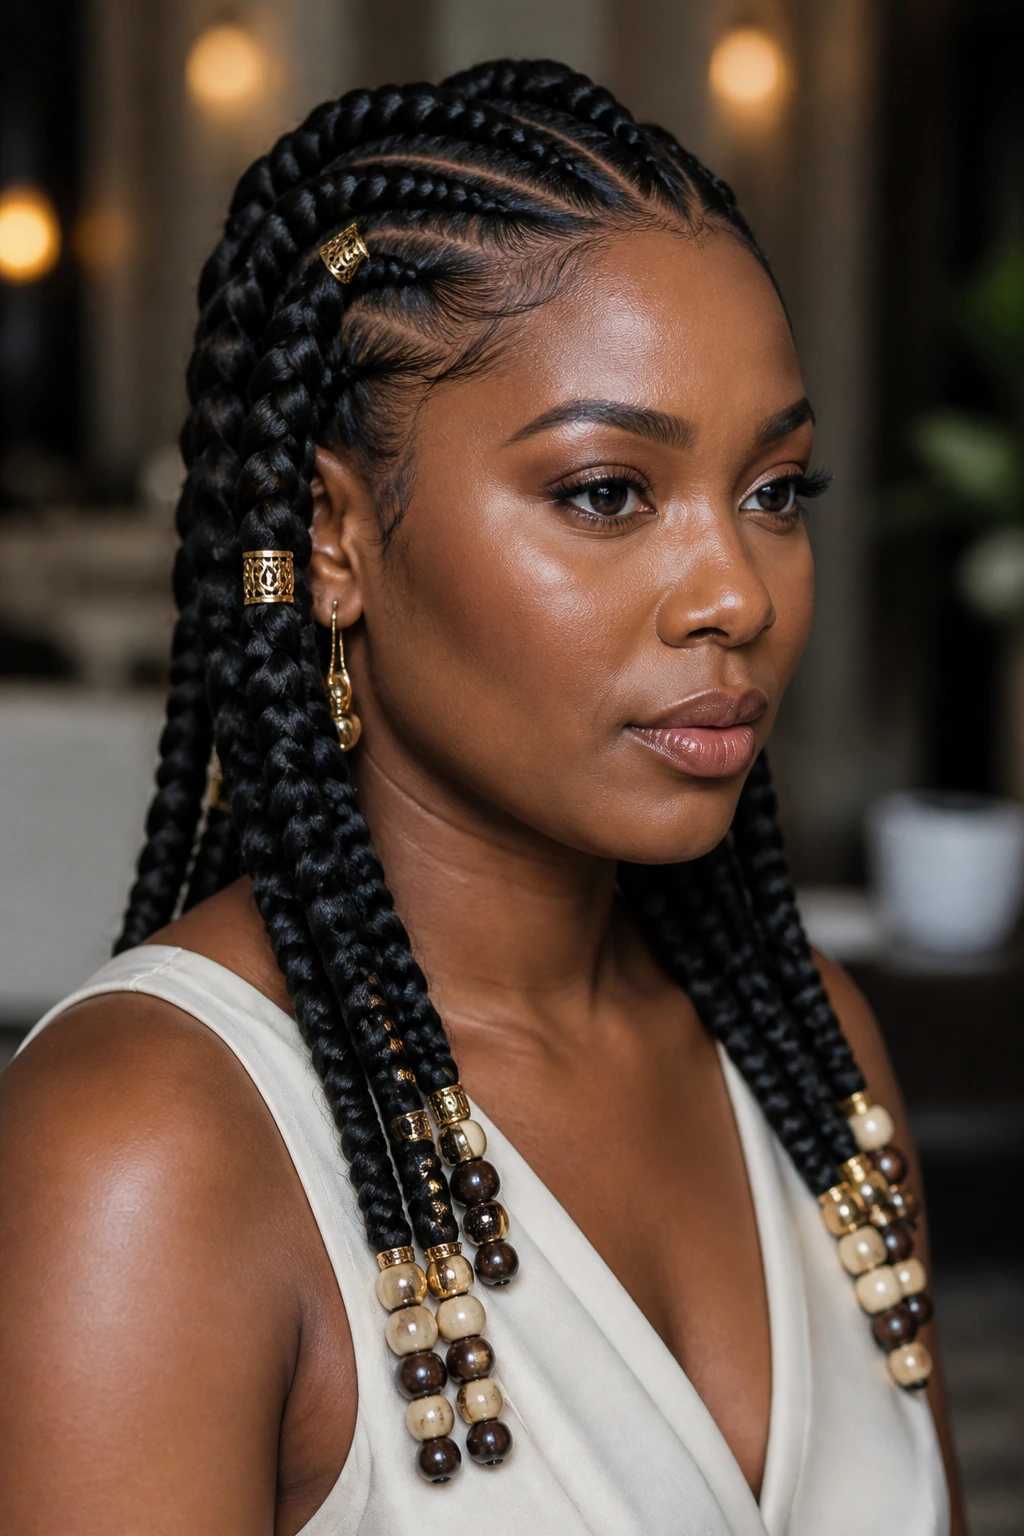
Accessories should punctuate goddess braids, not drown them. A few cuffs near the front, a line of beads at the ends, or a single shell accent can sharpen the style and give it a more dressed-up feeling. The polished part comes from choosing the right number of accessories and placing them with restraint.
Beads work especially well on braids that have a strong, straight drop. They add sound and movement, which can be lovely if the style otherwise reads too quiet. Cuffs, on the other hand, catch light in a more controlled way and often feel cleaner for formal wear. If you want the style to remain refined, pick one accessory family and stay there.
A practical note
Weight matters. Too many beads drag the ends, and heavy cuffs can pull on thin braids. If you want the style to last, keep the accessories light enough that they don’t shift the braid shape or snag at the ends.
This version is strongest when the braid base is already neat. Accessories are decoration, not rescue work. If the parting is crooked, the beads will only make that more obvious.
16. Stitch-Braid Goddess Fusion
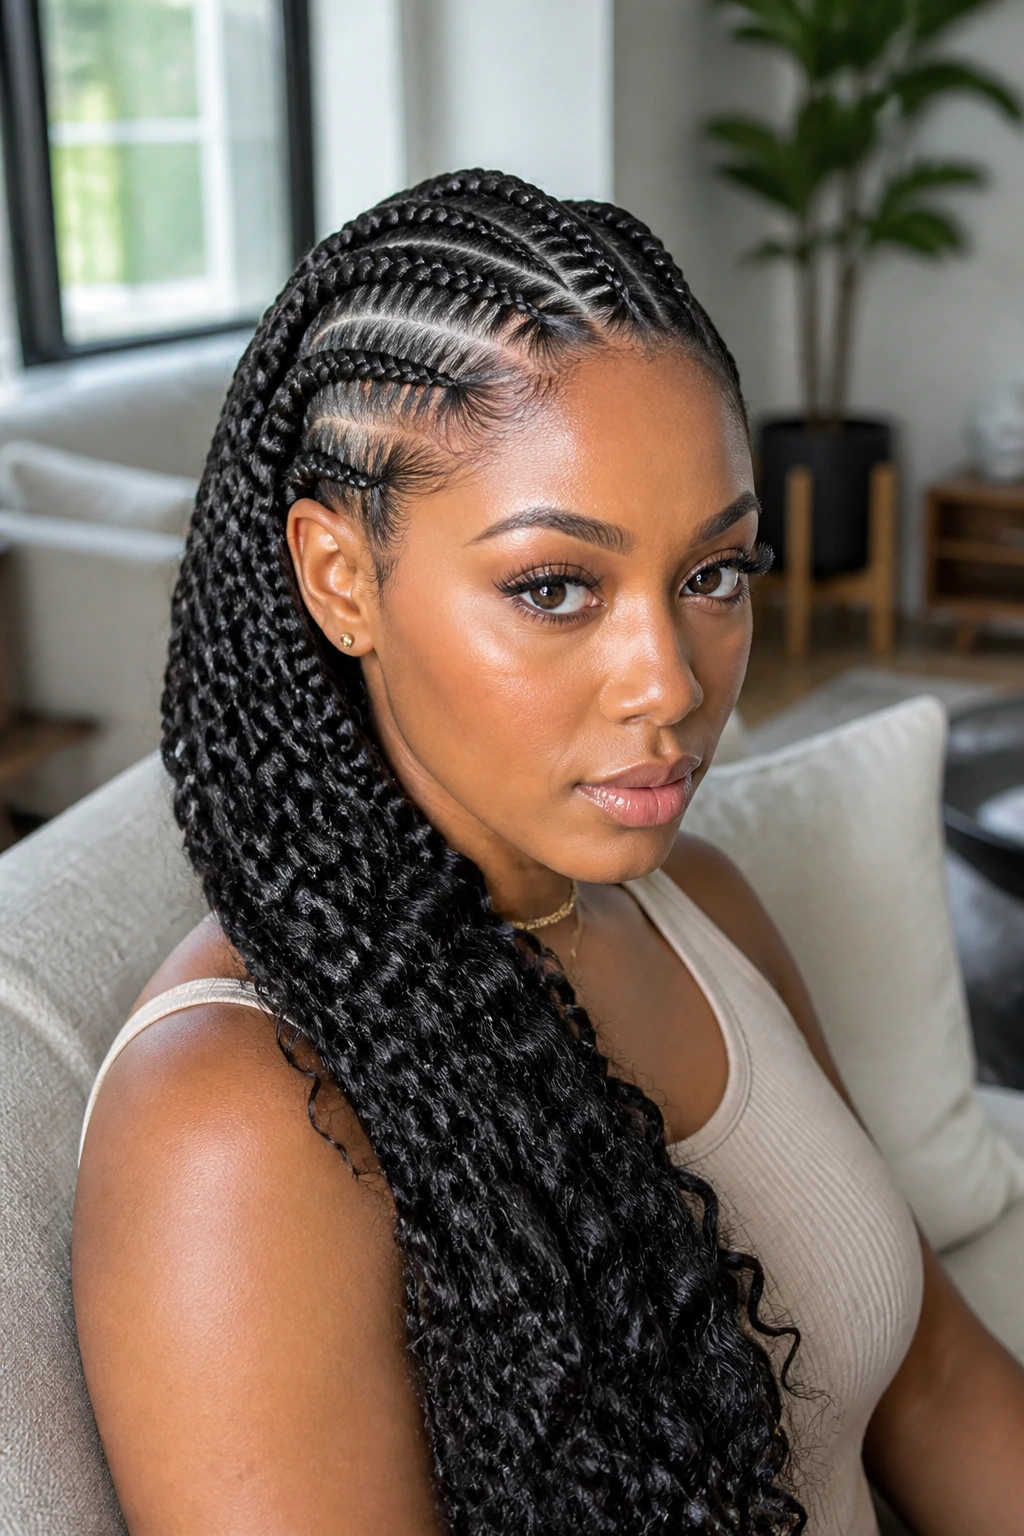
Stitch braids bring a segmented, almost architectural look to goddess styling. The braid base has clean, visible “stitch” sections that make the scalp design stand out before the length takes over. Blend that with goddess-length braids or curly ends, and you get a style that feels polished in a sharper, more deliberate way.
This is not the softest option in the group. It’s crisper. The line work is the point. Each section should look evenly spaced, and the braids should feed in smoothly so the transition from stitch base to length doesn’t look clunky. If your braider is strong at symmetry, this one can look stunning.
It’s especially good when you want the scalp pattern to be part of the final aesthetic. Some styles hide the base after the first inch. Stitch braids do the opposite. They put the base front and center, then let the goddess length soften the whole thing.
Wear it with simple makeup or a structured outfit. The style already has enough detail. Let the braid pattern stay the star.
17. Mohawk-Inspired Goddess Braids
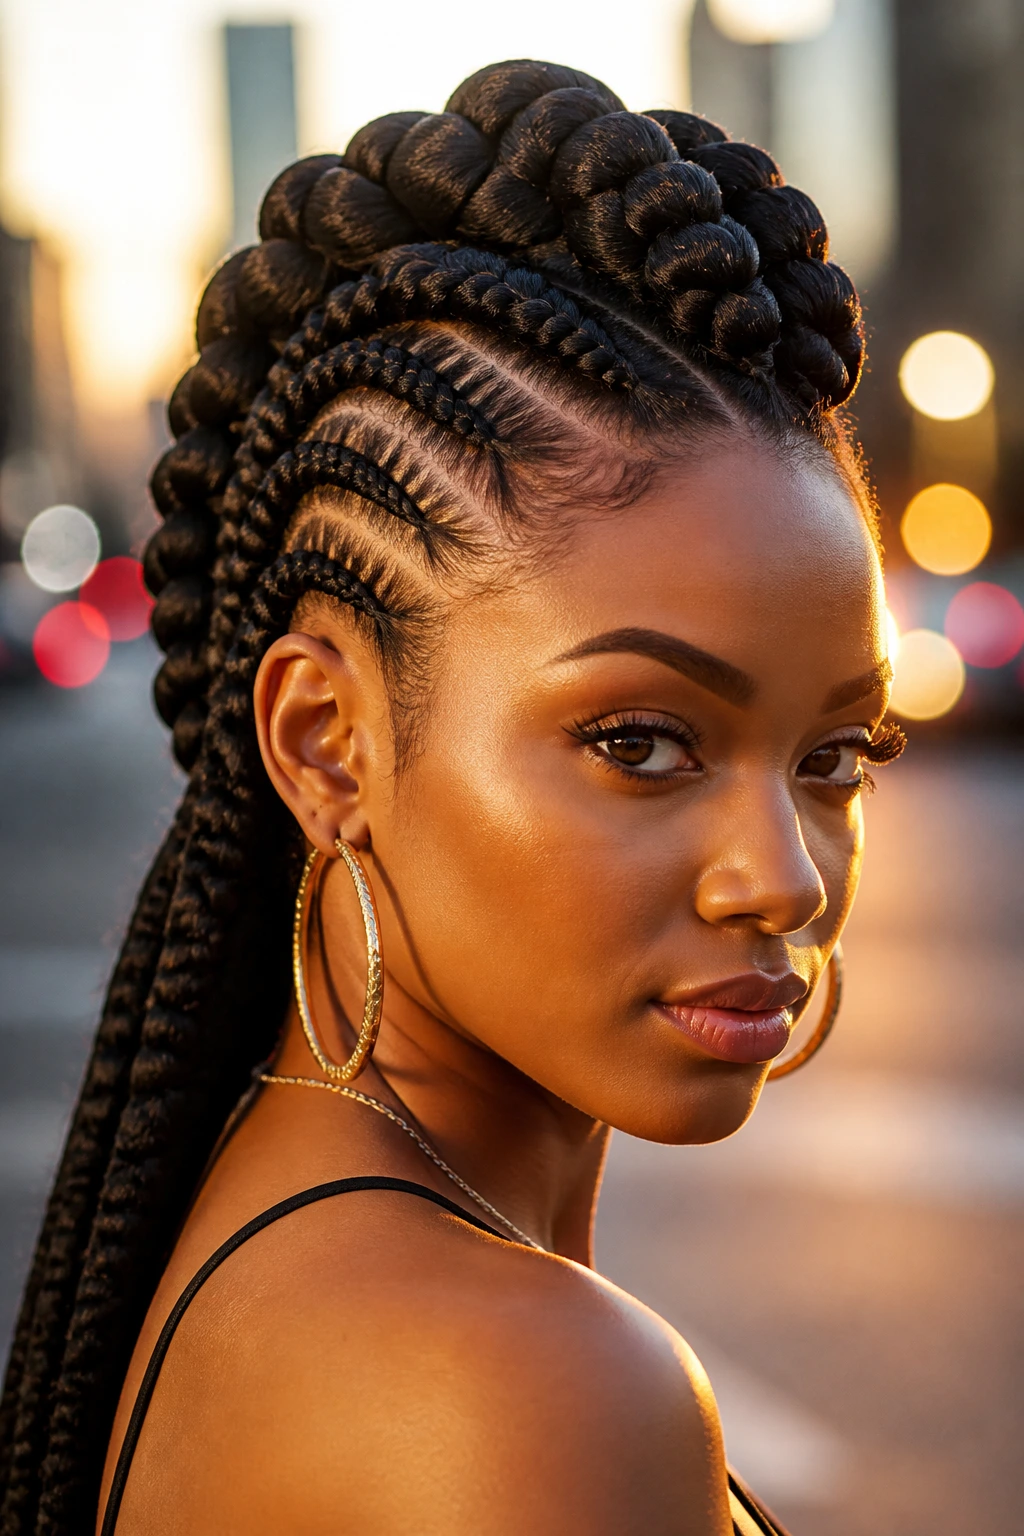
A mohawk-inspired goddess braid style creates height down the center and keeps the sides sleek. It has more attitude than the classic back-swept versions, but if the sections are neat, it still reads polished rather than wild. Think of it as controlled drama.
The shape is the appeal. The middle ridge draws the eye forward and up, which can make the style feel stronger and more editorial. If the sides are braided flat or smoothed close to the scalp, the contrast gets even better. You end up with a silhouette that looks intentional from every angle.
Best use case
This one works for events where you want the hair to lead the room a bit. Not in a loud, costume-y way. In a “yes, I planned this” way. It also looks good on someone who likes structure but does not want a soft, romantic braid style every time.
A strong mohawk-inspired install needs clean edges and stable anchors. If the center ridge wobbles, the whole effect collapses. That’s why the foundation matters more here than in a simpler pattern.
18. Triangle-Part Goddess Braids
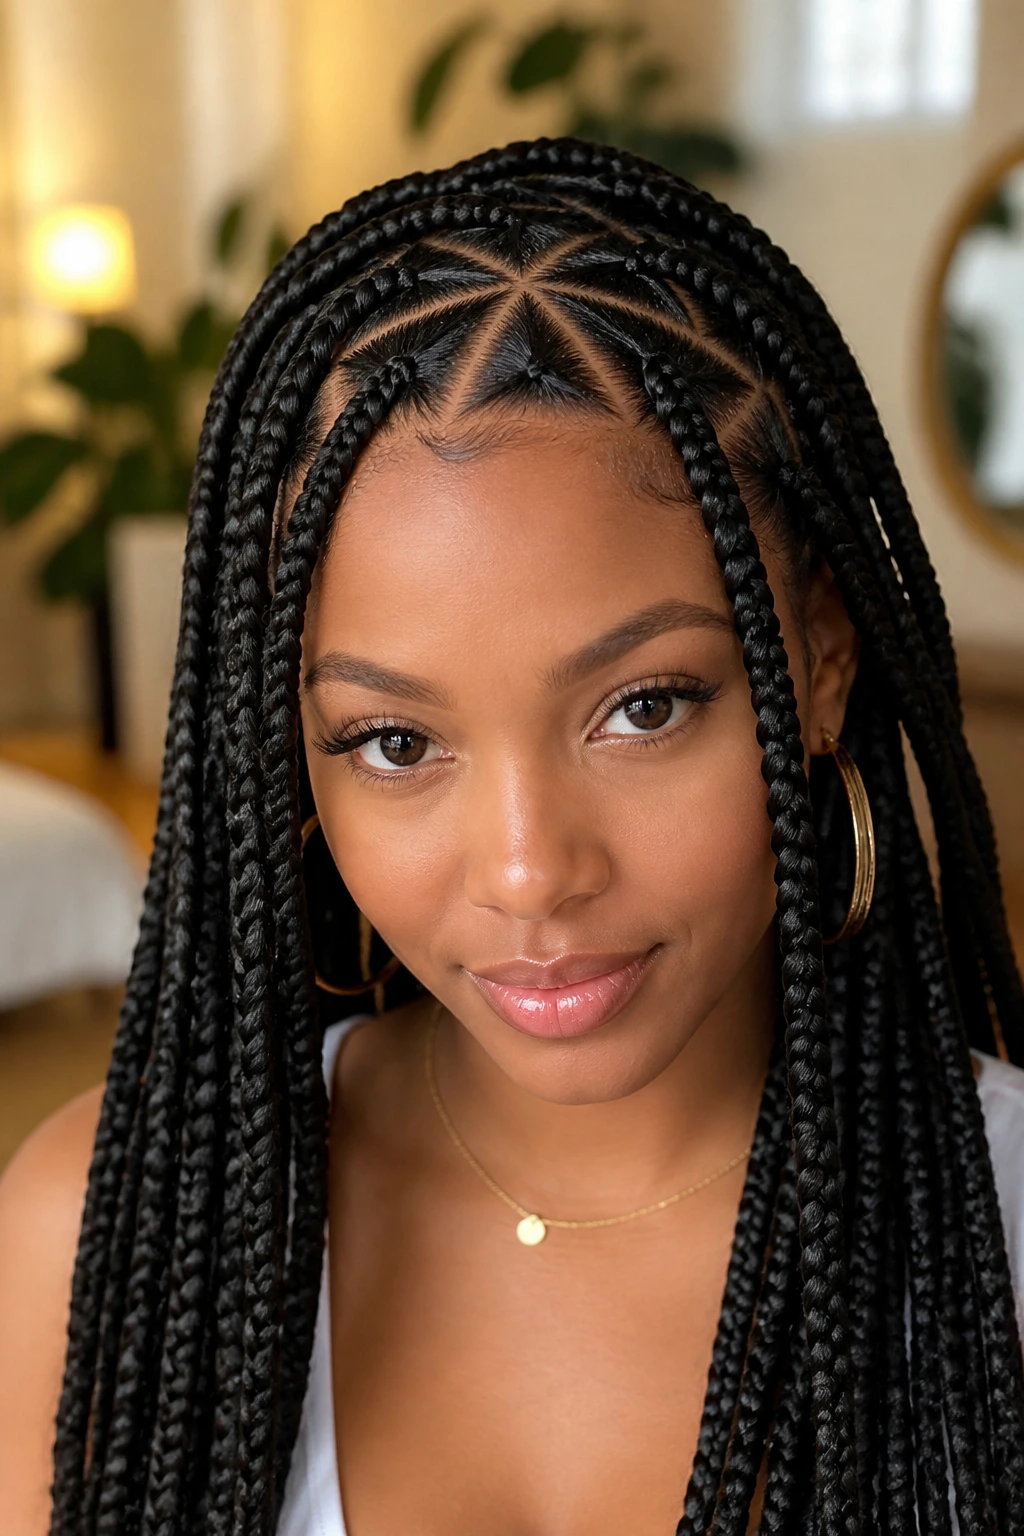
Triangle parts are a small detail with a big visual payoff. Instead of regular squares or straight rows, the sections are carved into triangles, which gives the scalp design a geometric edge. It feels clean and a little unexpected, and that’s exactly why it works so well with goddess braids.
The look stays polished because triangles keep the parting symmetrical while still offering variation. You get order, but not sameness. A triangle base can make even a simple braid layout feel custom and expensive-looking, especially when the lines are crisp and the braids are medium thickness.
This style suits medium to long hair best, though shorter installs can still borrow the triangle pattern if the parting space allows it. I’d pair it with minimal accessories. The geometry already creates its own rhythm, and too many extra pieces can fight that.
If your face shape is soft, the triangle structure adds a little edge. If your features are angular already, the style echoes that sharpness without going overboard. It’s a good middle ground.
19. Accessorized Side Bun Goddess Braids
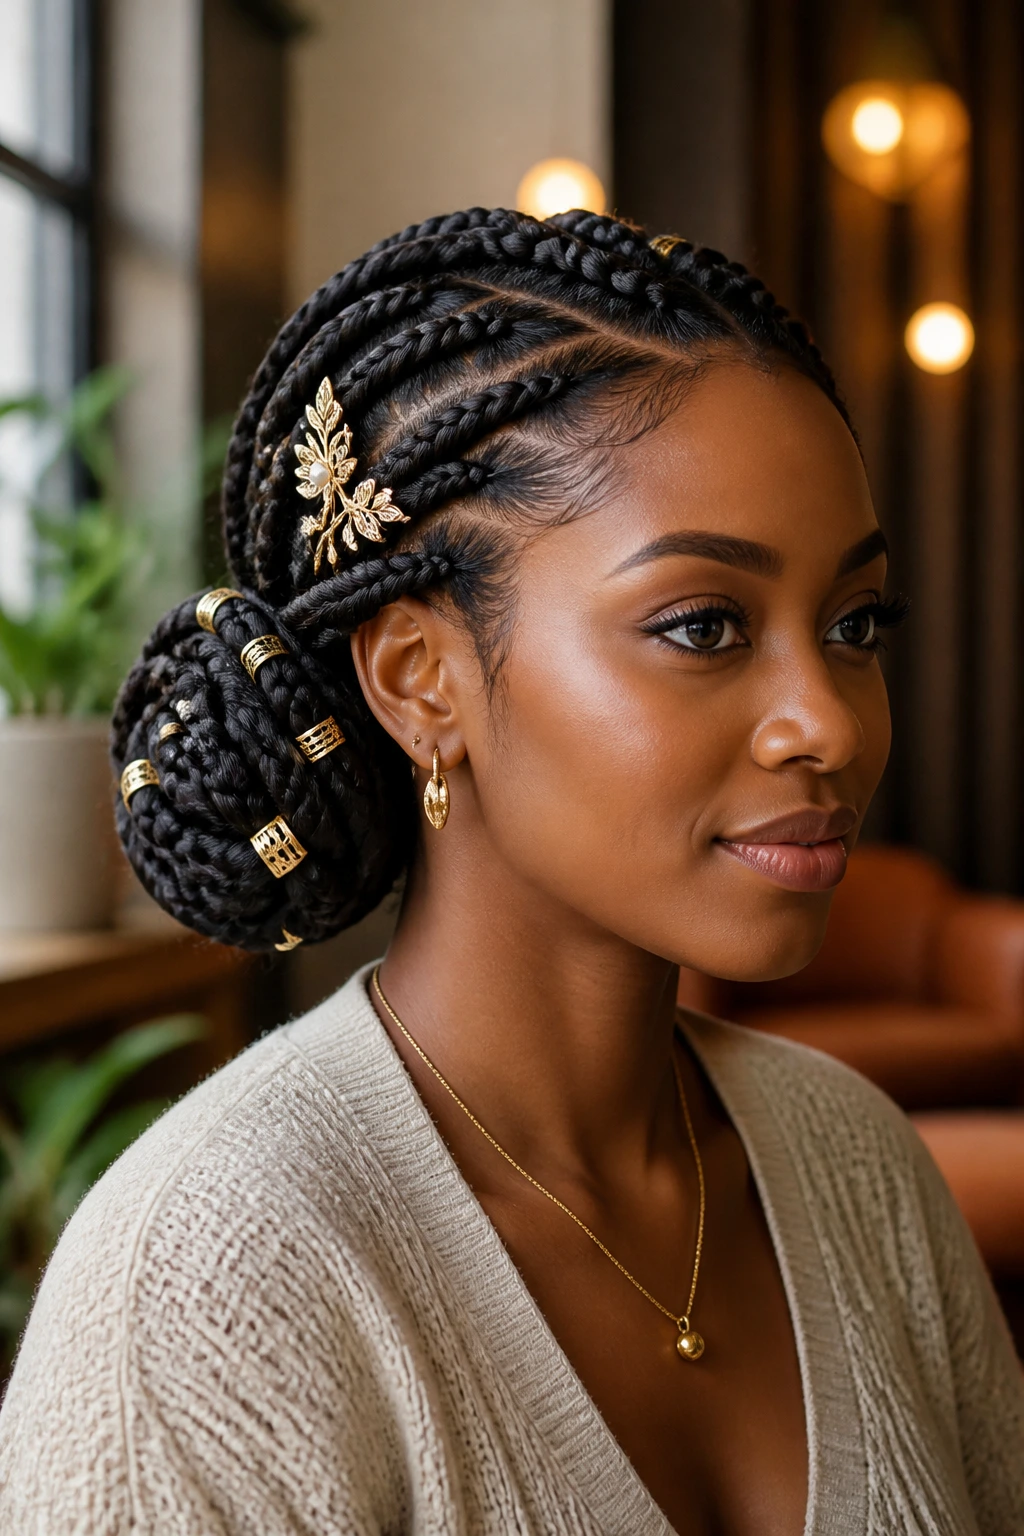
A side bun changes the placement of the whole style, and the accessories make it feel finished. A scarf tied into the bun, a few gold cuffs at the outer braid, or one decorative pin near the temple can turn a simple side wrap into a polished event look. The bun itself should stay smooth and anchored low to the side.
This version has a certain old-school elegance to it, but it doesn’t need to feel formal in a stiff way. The braid texture brings warmth, while the side placement keeps it from looking too severe. It’s a nice option when you want the front to stay soft and the back to carry the shape.
What makes it work
The bun has to sit where the head naturally tilts, usually just behind the ear or a little lower. If it floats too high, the style looks off-balance. A low side bun tucked neatly against the head creates a line that feels graceful, not accidental.
This is one of those looks that can dress up a plain outfit fast. A black tee and the right earrings can go a long way here. The braid texture, the side placement, and the accessory all do different jobs.
20. Waist-Length Goddess Braids with Curly Leave-Out
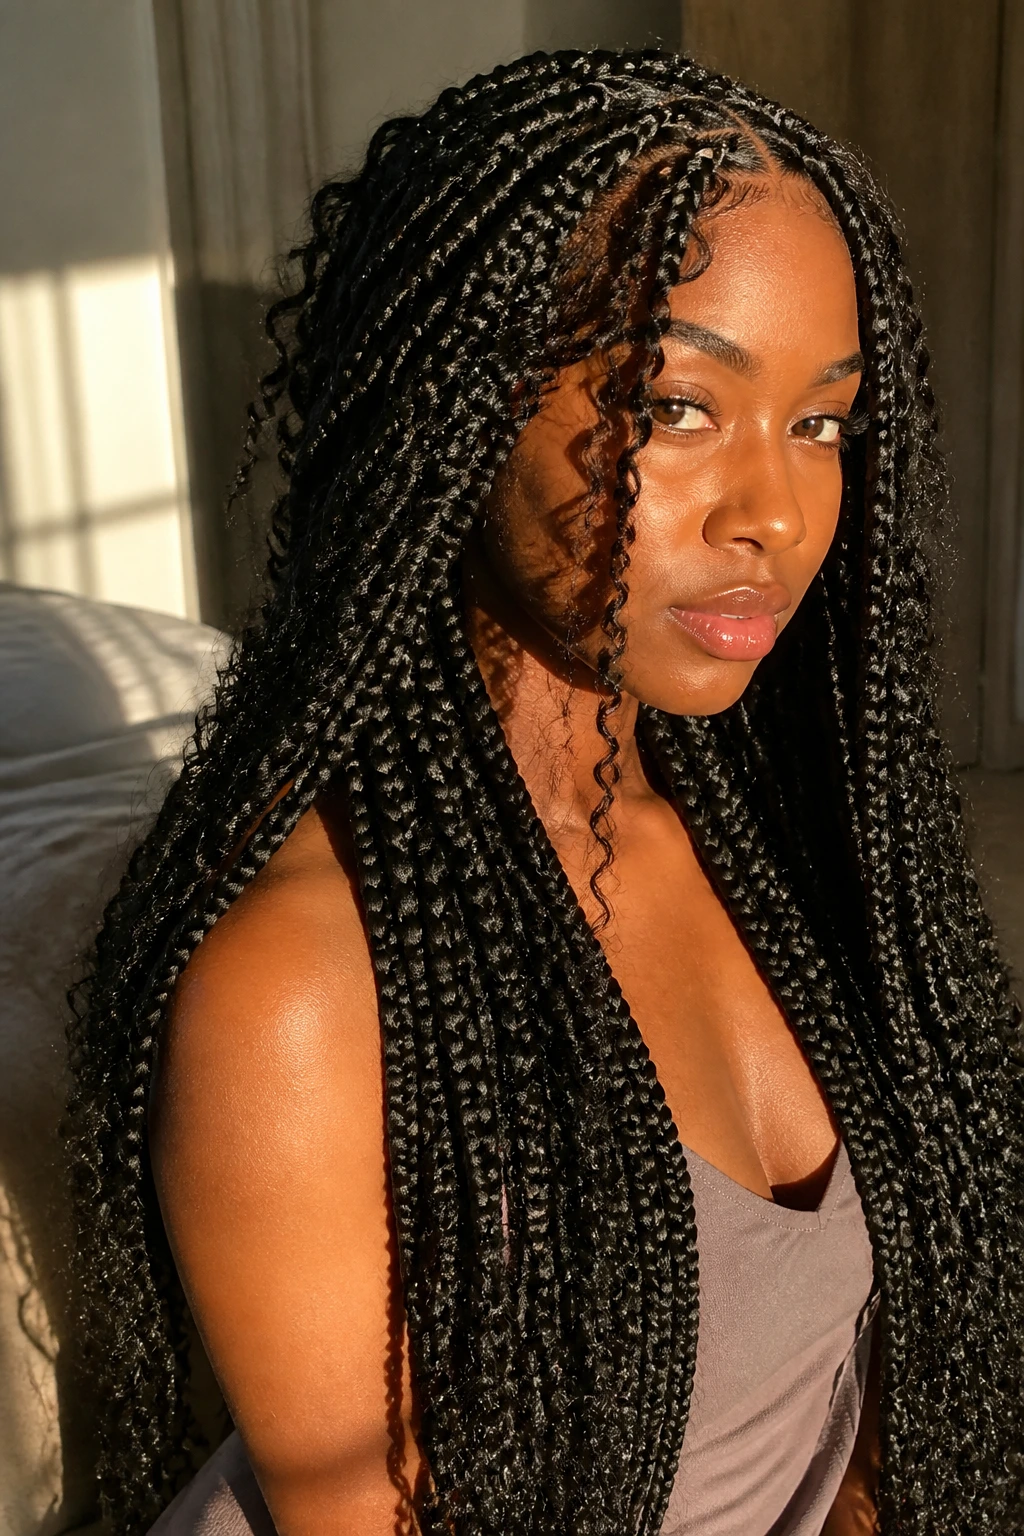
Waist-length goddess braids bring the most movement, the most drama, and the most maintenance. When the braids are this long, the overall shape becomes part of the outfit. They swing with your steps, sit against the waist or hips, and leave no doubt that the style was meant to be seen.
The curly leave-out keeps the long length from feeling heavy. Those soft pieces break up the braid line and make the ends look alive instead of blunt. But the longer the style gets, the more important nightly care becomes. You need wrapping, detangling at the ends, and a gentle hand when you dress or undress.
This is not the style for someone who hates upkeep. It is, however, a gorgeous choice when you want goddess braid hairstyles that feel full and unmistakably dressed. The key is balance: enough length to create movement, enough curl to soften the line, enough structure at the scalp to keep it polished.
Wear it when you want the hair to make the first impression. It usually does.
What Makes the Finish Look Polished Instead of Puffy
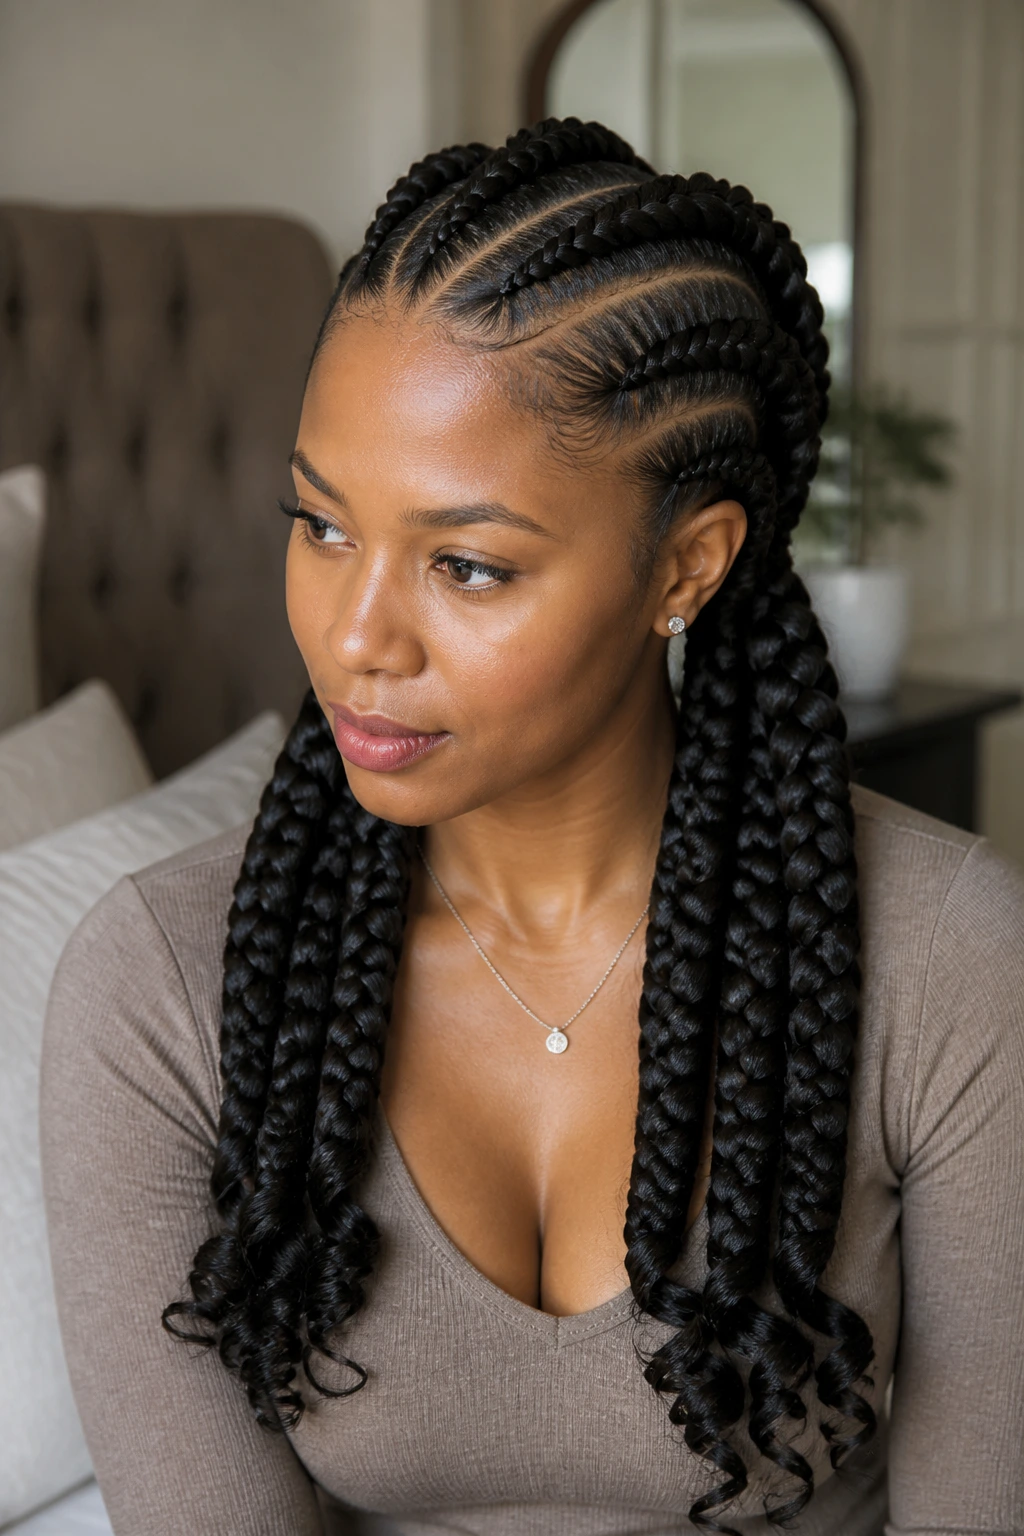
Polish starts at the scalp. Not at the end of the braid, not with the beads, not with the dress. The parting has to be clean enough that you can follow the line with your eyes, and the braid tension has to stay even from the first inch to the last. A braid that starts neat but loosens halfway down loses the whole effect.
Product choice matters, but less is more. A foam wrap or setting mousse can help smooth the braid surface, and a tiny bit of edge control can tidy the perimeter. Too much gel makes the roots shiny in a cheap way, then flakes when the style dries. That crusty look ruins a polished braid faster than almost anything else.
The end finish is where people get sloppy. Curly ends should be set, not improvised. If you want movement, use rods, braiding curlers, or a controlled hot-water set on extensions that can take it. If you want a cleaner ending, braid the tails tight and seal them so they do not puff up after the first night.
And one more thing. Wrapping the hair is not optional. A silk or satin scarf smooths the braid surface, keeps the parts from spreading, and stops the front from frizzing into a halo by morning. That nightly ritual is boring. It also keeps the style looking like it was done on purpose.
Essential Tools for These Styles
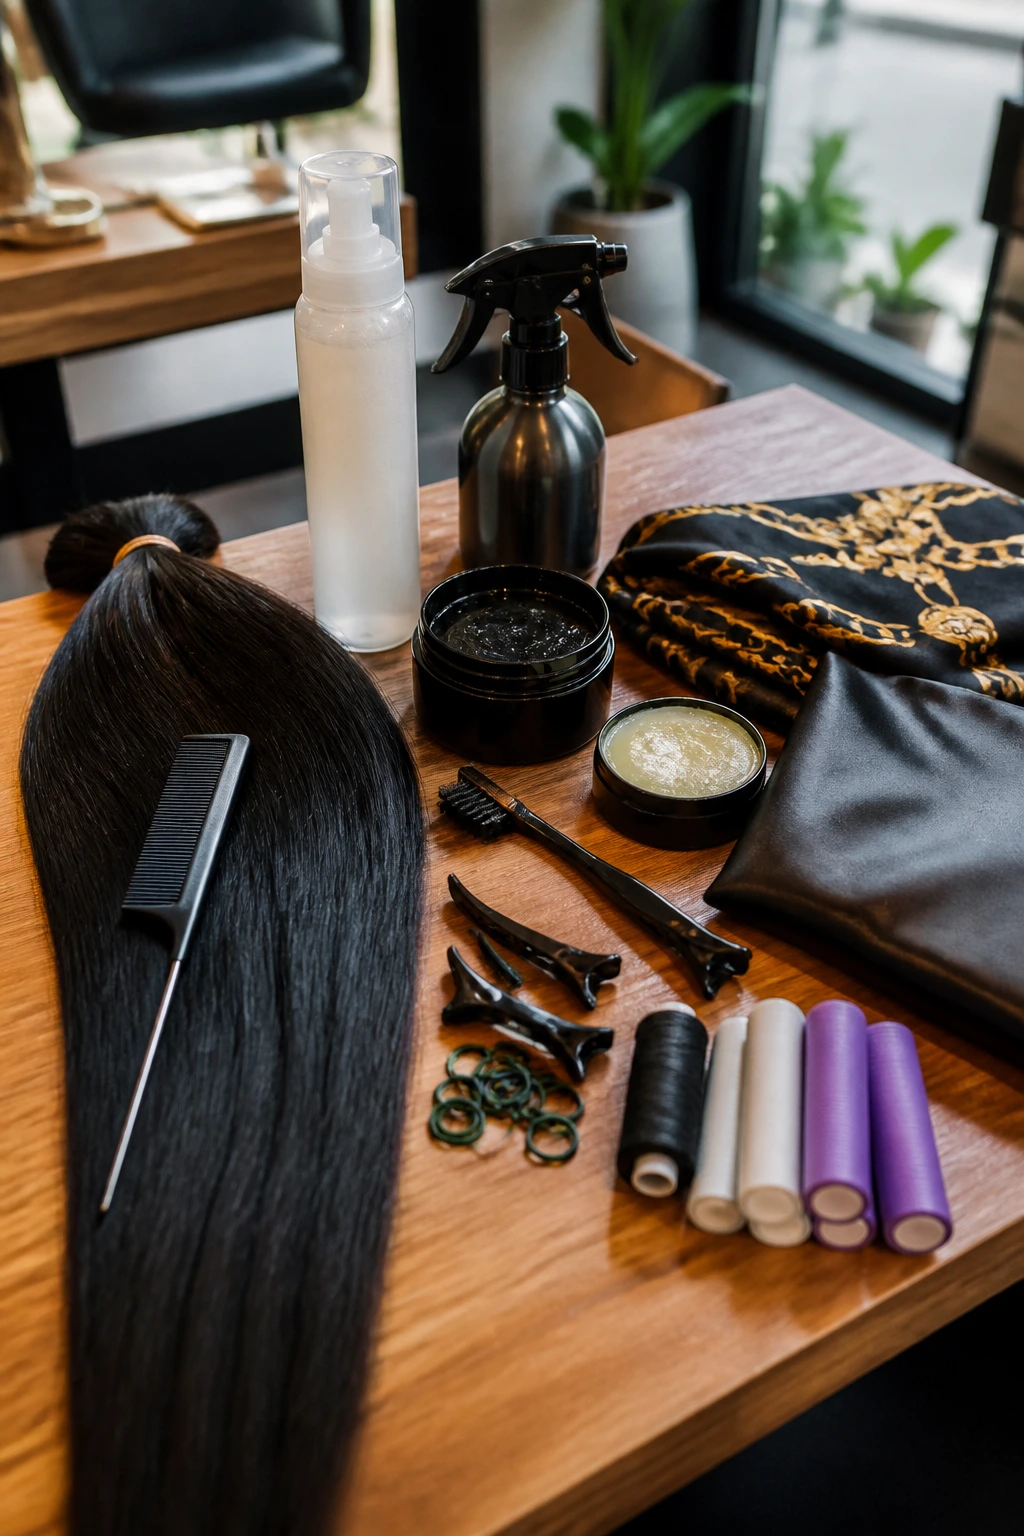
- Rat-tail comb: The pointed end helps create sharp part lines and section hair without chewing up the scalp.
- Braiding hair or extensions: Use pre-stretched hair if you want smoother feed-ins and less bulk at the base.
- Hair clips: Sectioning clips keep the rest of the hair out of the way while you braid.
- Styling mousse or foam: A light foam helps tame flyaways and sets the braid surface without making it stiff.
- Edge brush or soft toothbrush: Use it gently around the hairline; don’t overwork the front.
- Light gel or pomade: Good for parting and smoothing the base, but only in thin layers.
- Spray bottle with water: Useful for dampening hair before detangling or refreshing a stubborn section.
- Silk or satin scarf: Keeps the braids flat at night and protects the finish.
- Satin pillowcase: A backup if the scarf slips off.
- Small elastics and braid thread: Handy for ponytails, buns, and securing ends with a cleaner finish.
- Perm rods or flexi rods: Best for setting curly ends so they hold a defined shape instead of collapsing.
Prep the Hair So the Parts Stay Clean
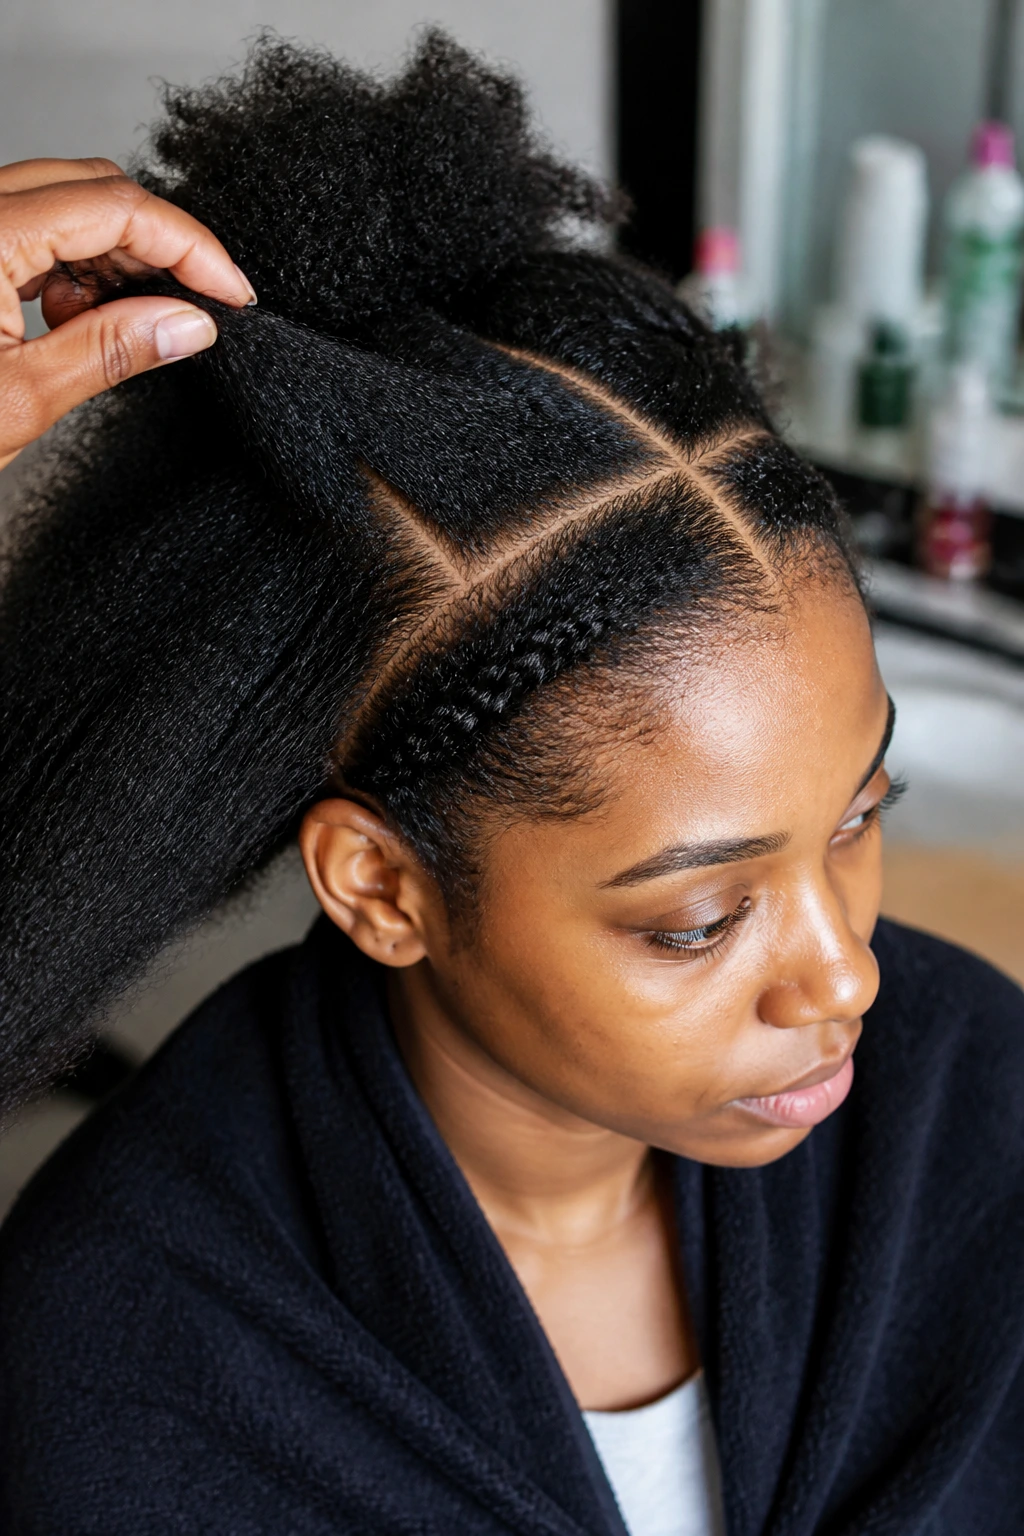
A polished braid style starts before the first section is split. Clean, fully dry hair is easier to part, easier to grip, and less likely to swell under the braid. If the hair is damp when you start, the parts can blur and the braids can puff faster than you expect. That one mistake changes everything.
I like stretched hair for most goddess braid hairstyles. Not bone-straight blown out hair if the texture doesn’t need it. Just enough stretch that the sections lie flat and the braider can move without fighting tangles. A low-heat blow-dry, banding, or twist stretching usually does the job. When the hair is stretched, the braid base looks smoother and the finished style lasts better.
Detangling matters more than people think. You want a comb or brush to glide through without snagging. If it catches at the nape, stop and work that knot out before the braid goes in. Once the hair is installed, a little snag can become a sore spot.
The scalp should be clean, moisturized lightly, and not loaded with heavy oils. Heavy product near the roots makes braids slip and parts look dull. A small amount of scalp oil later, after the style is in, does more good than drenching the base before installation.
How to Keep Goddess Braids Looking Sharp Day After Day
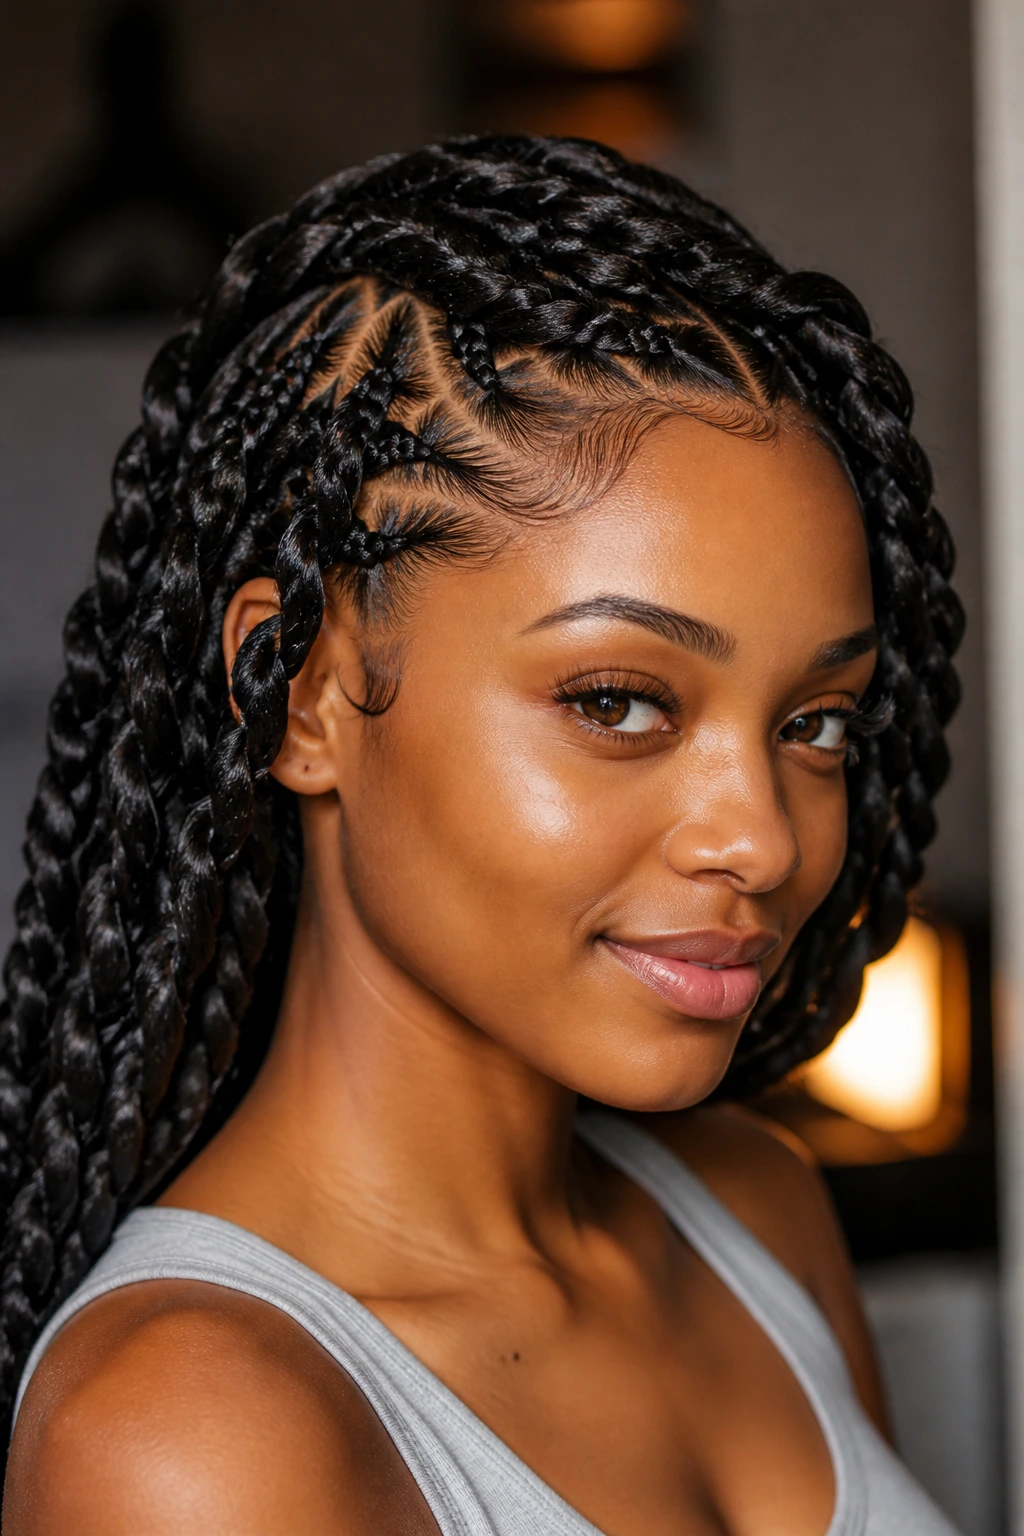
The first night decides a lot. Wrap the braids flat with a silk scarf, and if the style has a bulky crown or curved parting, use a second scarf or a soft bonnet over the first one. That keeps the pattern from lifting while you sleep. If the ends are curly, tuck them inside the bonnet so they don’t get crushed against the pillow.
Refresh the scalp on a slow schedule, not a frantic one. A light mist of scalp spray or diluted leave-in every few days is enough for most styles. Too much liquid makes the braids swell and the roots frizz out. If the hairline starts to puff, smooth it with a tiny bit of mousse on your fingers instead of piling on more gel.
Accessories need a check every couple of days. Cuffs can slide, beads can shift, and elastic wraps can loosen around the ponytail base. A two-minute fix keeps the whole style from looking worn out.
And don’t wait too long to take the style down. When the roots get too grown out, the braid base stops looking crisp no matter how much you wrap it at night. For most installs, the polished window closes before the hair becomes uncomfortable. That’s the moment to remove it, not the week after.
Additional Tips and Finish Boosters
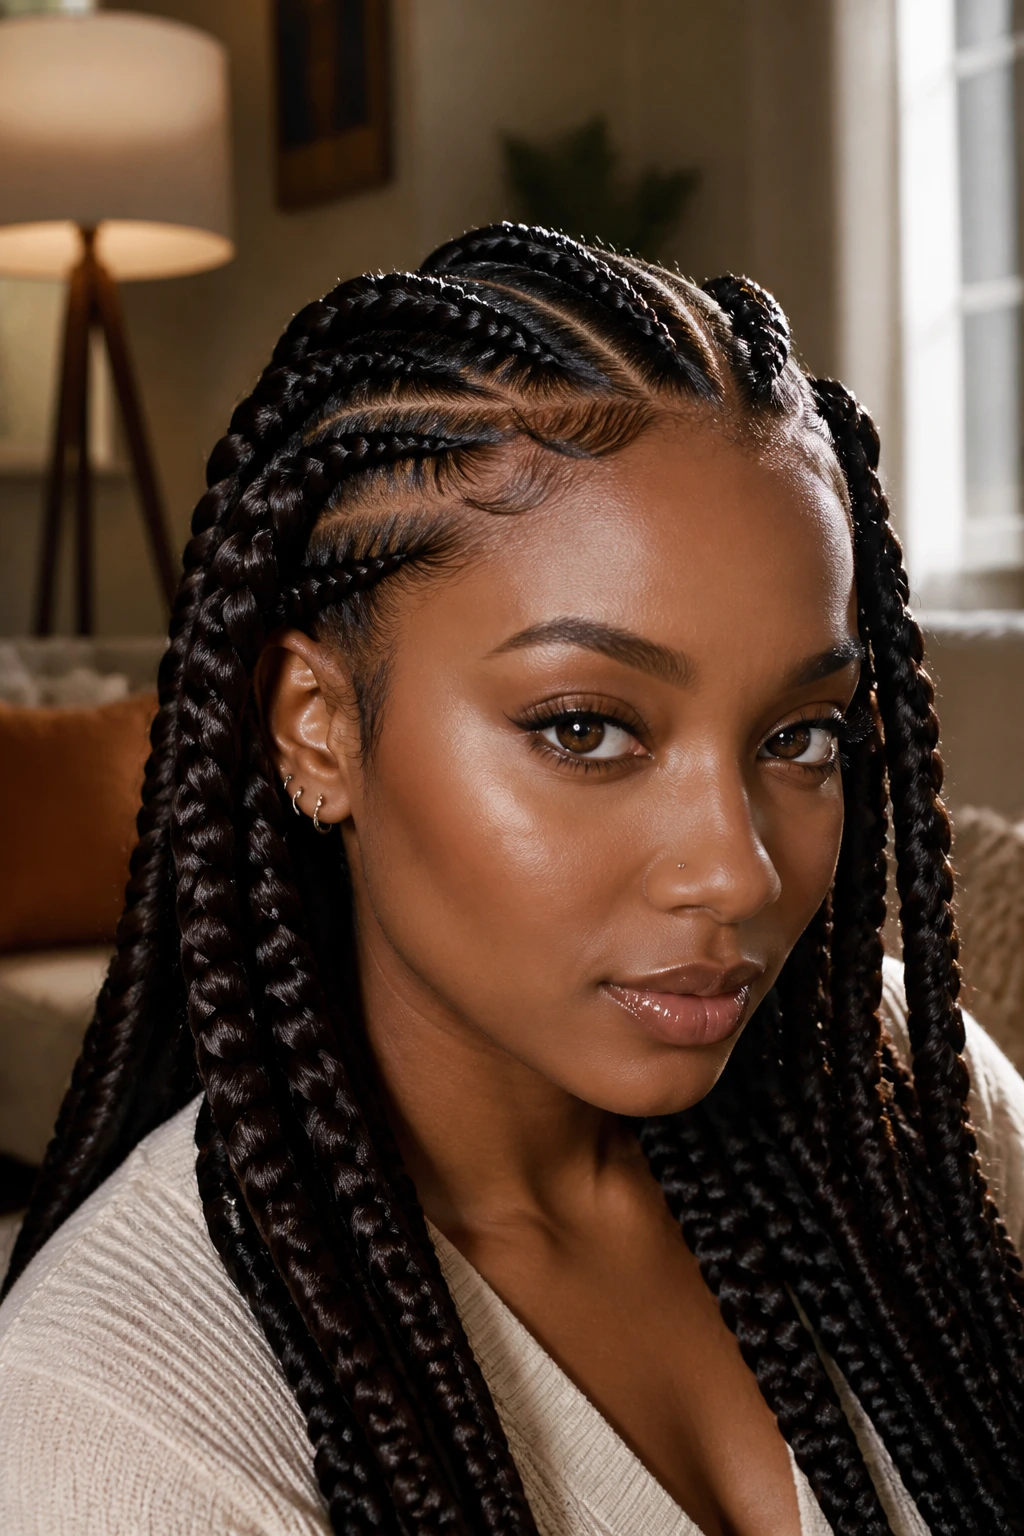
Flavor Enhancement: If hair is the “flavor” here, the closest thing to a finishing flourish is a light sheen spray or a tiny dab of oil rubbed through the braid surface only. It adds shine without turning the scalp greasy, and the style catches light better in person.
Customization: Swap curly ends for blunt sealed ends when you want a sharper, more minimal look. Or add one accent braid with cuffs near the face and leave the rest plain if you prefer the style to stay quiet.
Serving Suggestions: Pair curved or side-swept braids with statement earrings and a clean neckline. The face stays open, and the braid architecture gets the room it needs. For buns and ponytails, a structured jacket or a simple dress tends to look better than busy prints.
Make-It-Yours: For finer hair, smaller sections and feed-in braiding reduce bulk. For thicker natural hair, a larger braid size and fewer sections can keep the install lighter. If you wear glasses, avoid a braid that dumps too much hair around the temples; it gets annoying fast.
Common Mistakes to Avoid
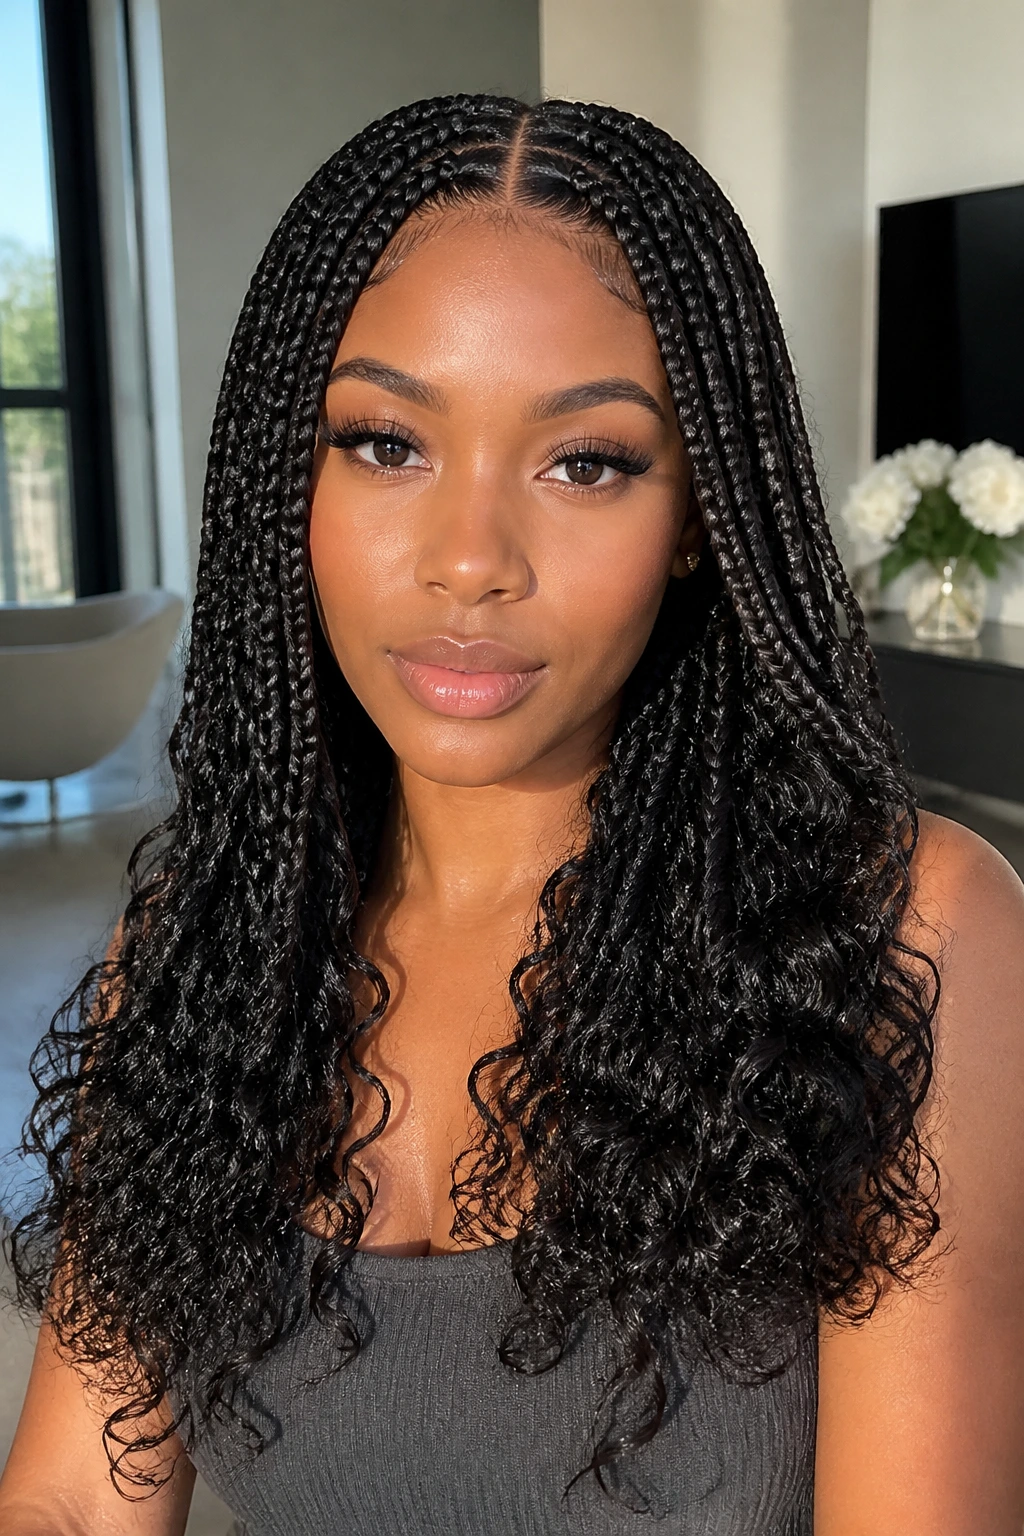
The biggest mistake is braid tension that’s too tight. You’ll feel it in the scalp within hours, and the hairline may look pulled or shiny where it shouldn’t. The fix is simple, even if people hate hearing it: ask for firmer sectioning, not a tighter grip. Those are not the same thing.
Another common problem is overloading the roots with gel. The parts look slick for a few hours, then dry into flakes or a hard shell. Use only enough product to define the line. A crisp part needs control, not plaster.
People also forget about setting the curls at the ends. Loose leave-out that never gets shaped tends to frizz into a soft fuzz by day two. If the style depends on curly ends, set them with rods or a controlled wrap, then keep them covered at night.
Uneven braid size is harder to forgive than most styling issues. If one braid is twice the size of the others, the style looks off even if each braid is neatly done. Match the sections before braiding begins, and check the size from both sides of the head.
Last, there’s skipping maintenance once the braids are installed. Even polished styles need a scarf, a light scalp refresh, and occasional edge smoothing. Treating them like they can survive on their own is how polished braids become fuzzy braids.
Variations and Other Directions to Try
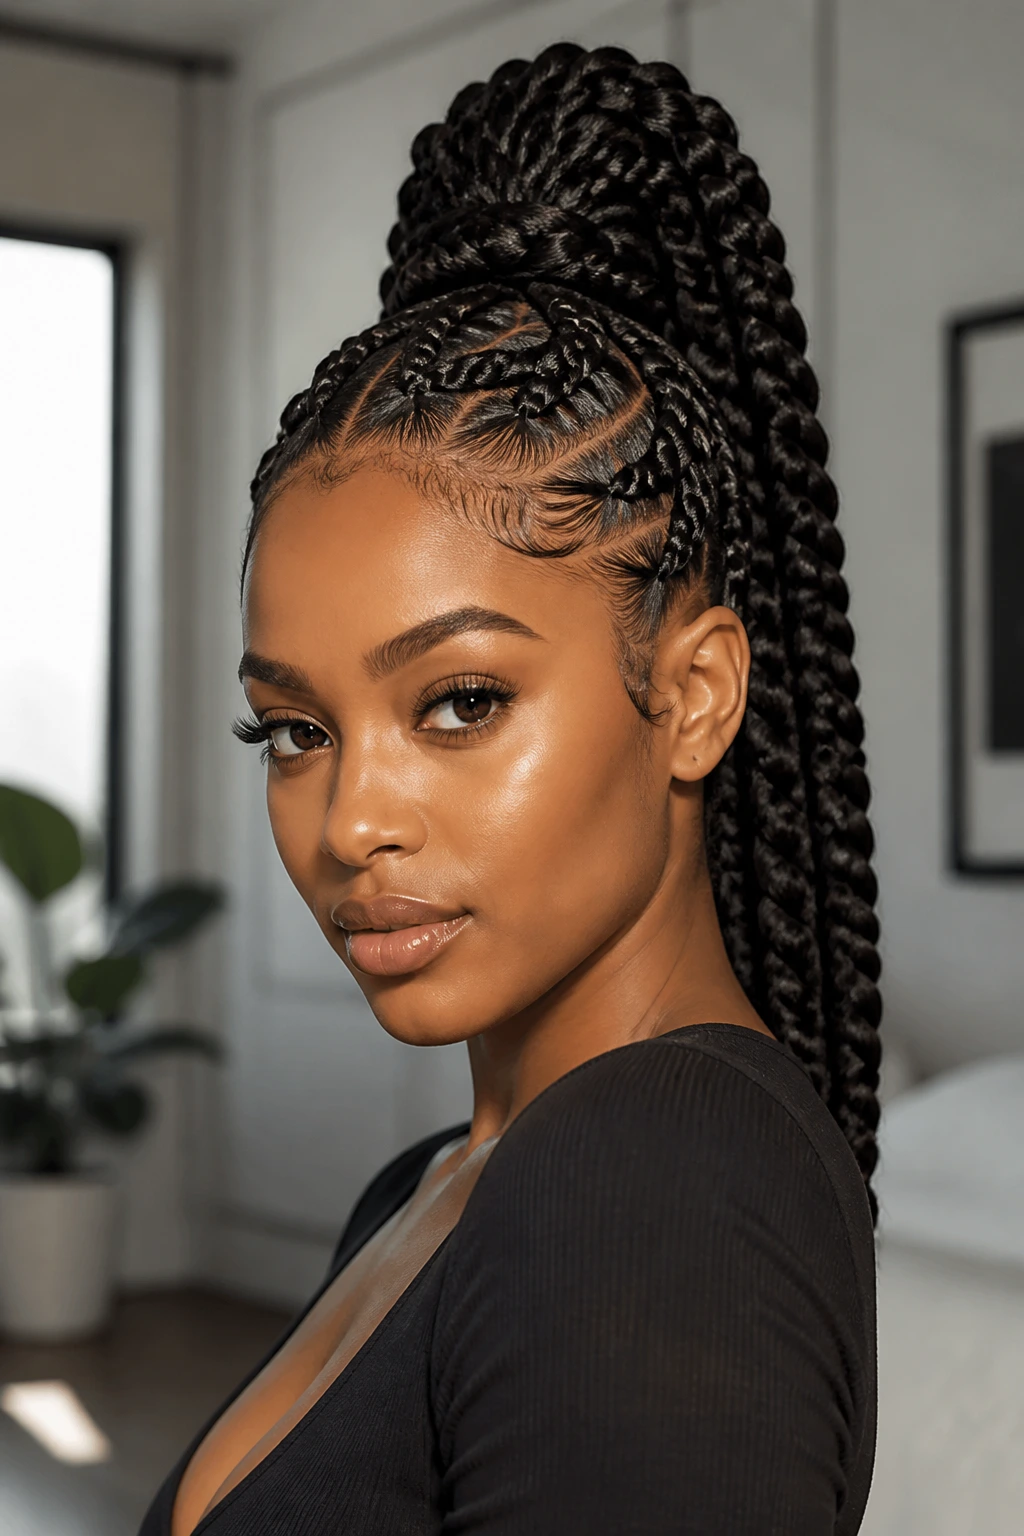
The Soft Glam Version: Keep the braids medium-thick, add curled ends, and use one or two gold cuffs near the face. This version leans dressy without turning ornate, which makes it a good match for formal dinners or special events.
The Minimal-Detail Version: Use clean parting, no beads, no cuffs, and blunt sealed ends. The finish feels quieter and more modern, especially if you wear sharp tailoring or plain colors.
The Braided Statement Version: Choose jumbo braids, a high ponytail, or a mohawk-inspired ridge. This route carries more drama and looks strongest when the clothing stays simple and the hair gets to be the main event.
The Soft Protective Version: Go for feed-in braids with low tension, a simple center part, and shorter bob-length ends. This is the easiest option to live with if your scalp wants less weight and more breathing room.
The Texture-Heavy Version: Mix in loose curls, curly leave-out, or boho pieces, but keep the roots neat. That contrast between crisp scalp work and soft movement is what gives goddess braid hairstyles their signature finish.
Maintenance, Sleep Prep, and Takedown
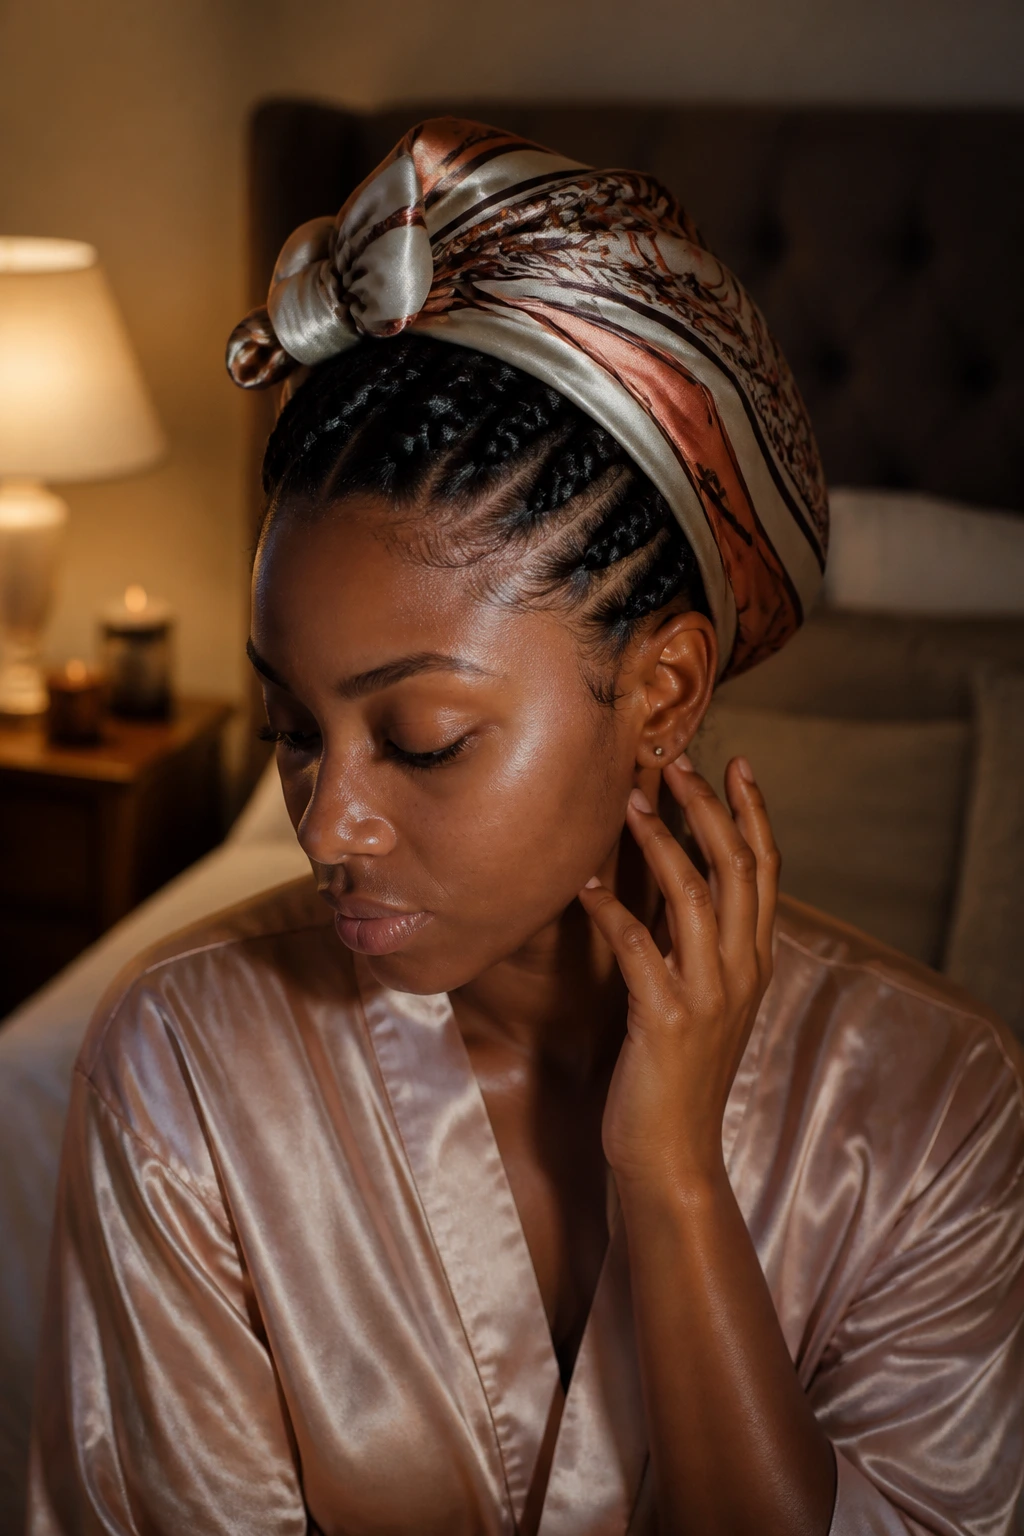
Most goddess braids stay polished longer when you treat them like a style with a schedule. Wrap them every night with a silk or satin scarf, and use a bonnet if the ends are long enough to rub against the pillow. If the style has a high ponytail or a bulky bun, pin it down before wrapping so the shape doesn’t shift while you sleep.
Refresh the scalp lightly every few days. A small amount of braid spray or a diluted leave-in mist can help if the hair feels dry, but heavy oils can flatten the roots and dull the parting. If the front starts to lift, smooth the edges with foam rather than a thick layer of gel. The goal is to keep the shape soft and tidy, not lacquered.
Washing depends on the install and the hair type, but many braided styles can handle a gentle scalp cleanse if you’re careful. Use diluted shampoo on the scalp, let the suds rinse through, and avoid rough rubbing along the braid length. Pat dry with a microfiber towel, then let the braids air-dry fully before wrapping again.
Takedown should happen before the roots become painful or the braid bases mat so tightly that detangling turns into a fight. A clean removal, section by section, protects the natural hair better than rushing through with scissors. Take your time. The braid looked polished because the setup was careful; the takedown should show the same respect.
Questions People Ask Before Booking
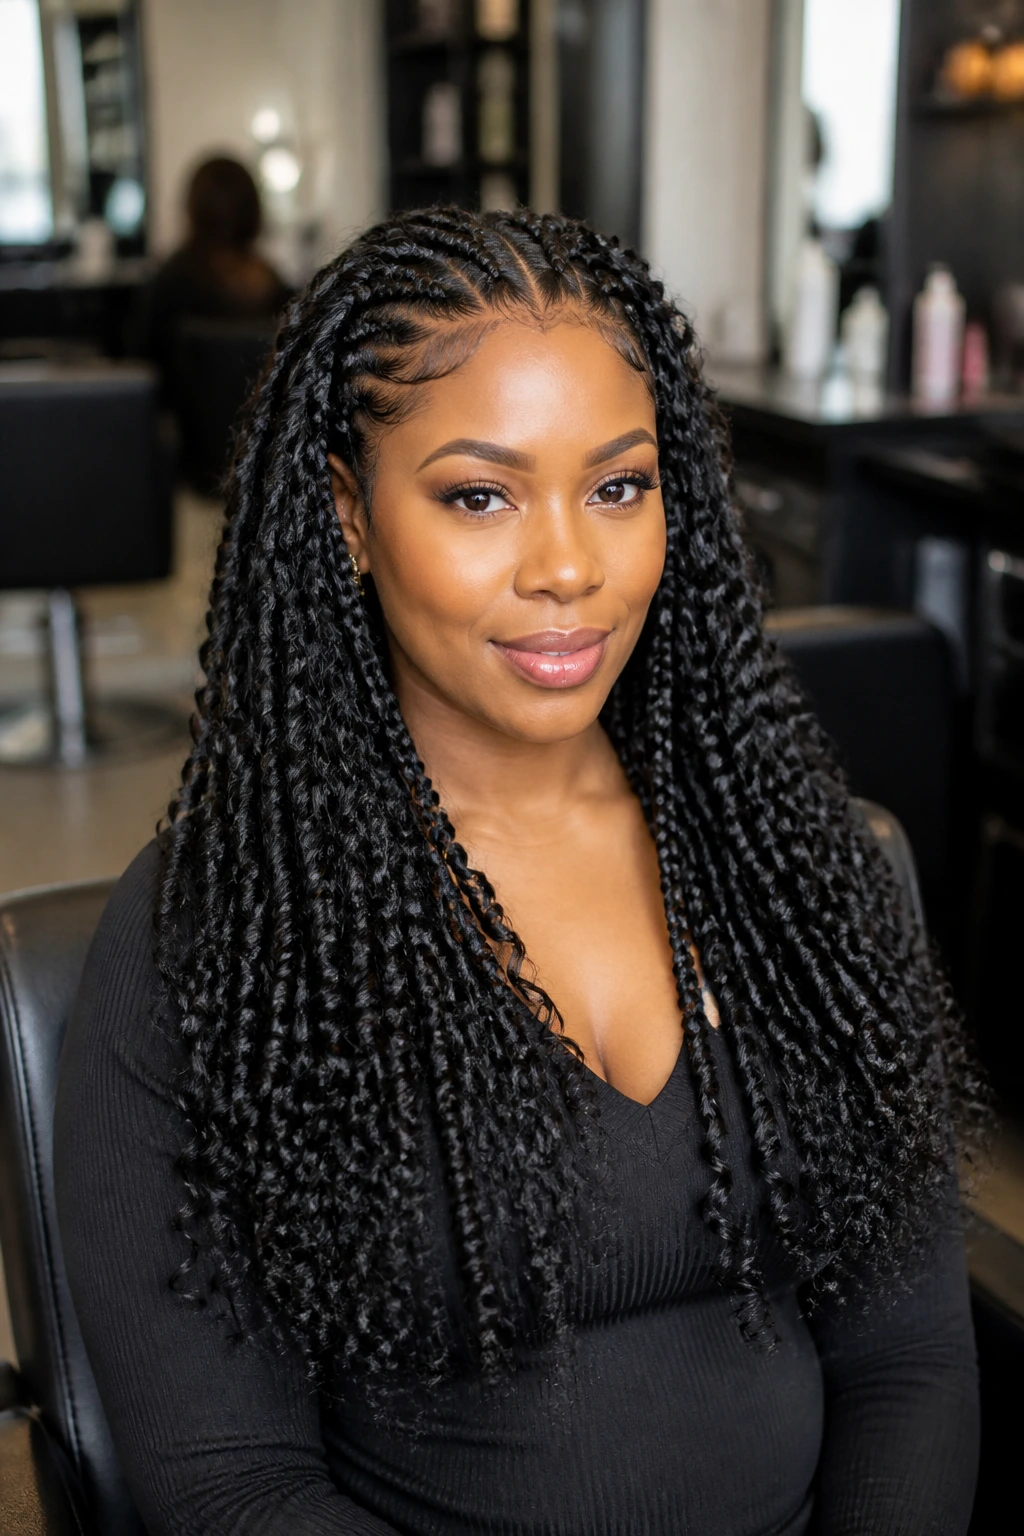
How long do goddess braids usually last?
Most installs stay neat for one to three weeks, depending on braid size, tension, and how much you sleep on them. Smaller feed-ins tend to hold their shape a little longer, while boho versions frizz sooner because of the loose curls.
Can goddess braids work on short hair?
Yes, as long as the stylist can grip the base safely. Bob-length goddess braids, feed-ins, and smaller scalp patterns usually work better than long, heavy installs on short hair.
What’s the difference between goddess braids and boho braids?
Goddess braids usually refer to the braided pattern itself, often with soft curls or a fuller, crown-like look. Boho braids lean more heavily into loose curly pieces and a softer, more undone finish. The overlap is real, but the texture balance changes.
Do goddess braids pull on the edges?
They shouldn’t. If the hairline feels tender, the braid base is too tight or the sectioning is too heavy. Ask for low tension near the perimeter and stop ignoring the first sign of soreness.
Can you wash goddess braids without ruining them?
Yes, if you’re gentle. Focus on the scalp, use diluted shampoo, and dry the braids fully afterward. Aggressive scrubbing will loosen the pattern and make the roots puff.
How many packs of braiding hair do you need?
That depends on braid size and length, but medium installs usually need fewer packs than jumbo or waist-length sets. A stylist can estimate based on the braid count and the look you want. Always ask before appointment day so you’re not guessing at the store.
What should I ask for if I want a polished cultural look and not a loud style?
Ask for clean parting, medium braid size, low tension at the hairline, and a finished curl pattern at the ends. Then keep the accessories restrained. The style will read refined without losing its character.
A Braided Crown That Still Feels Fresh
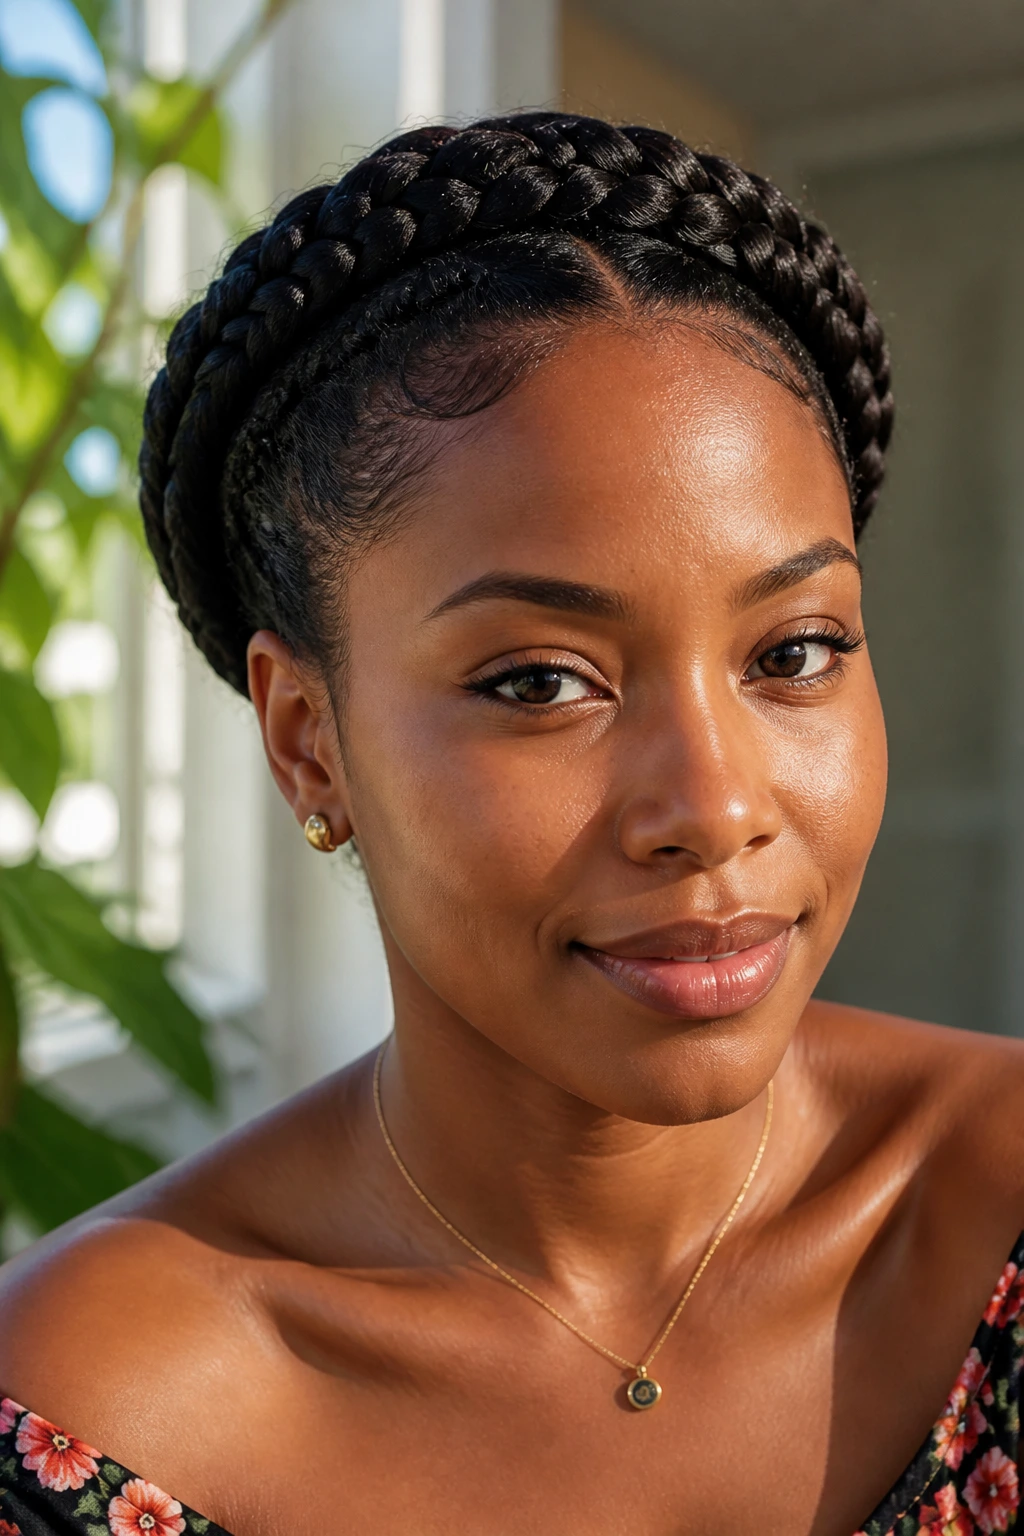
The best goddess braid hairstyles have the same quality a good suit has: the shape does the work, and the details hold the line. Clean parting, a thoughtful braid size, and a finish that matches the style’s mood — those are the pieces that separate polished from merely braided.
What I love about this set of looks is the range. You can go geometric, romantic, minimal, dramatic, low, high, long, or cropped, and still stay inside the same cultural language. That flexibility is the point. The style has history, but it also has room.
Pick the version that fits your hair, your schedule, and the kind of presence you want to walk in with. The braid pattern will take care of the rest if you let it.
