



Nothing changes a morning faster than hair that sits where you want it. A polished daily look does not need a marathon blowout or a cloud of hairspray; it needs a few everyday hairstyles that clean up the hairline, keep the crown from puffing out, and make the ends look intentional instead of tired.
The styles that earn their place are the ones that survive a scarf, a desk chair, and a windy walk without turning into a knot behind one ear. That usually means a low ponytail with a wrapped base, a smooth bun with a little lift at the crown, or waves that are brushed enough to move but not so much that they frizz into fuzz.
I keep coming back to looks that take five to ten minutes and still look like someone paid attention. A clean part helps. So does a bobby pin hidden under the fold, or a tiny bit of cream on the ends so they do not look dry and frayed. The difference is small. It reads as a big difference.
Why These Everyday Hairstyles Earn Their Place
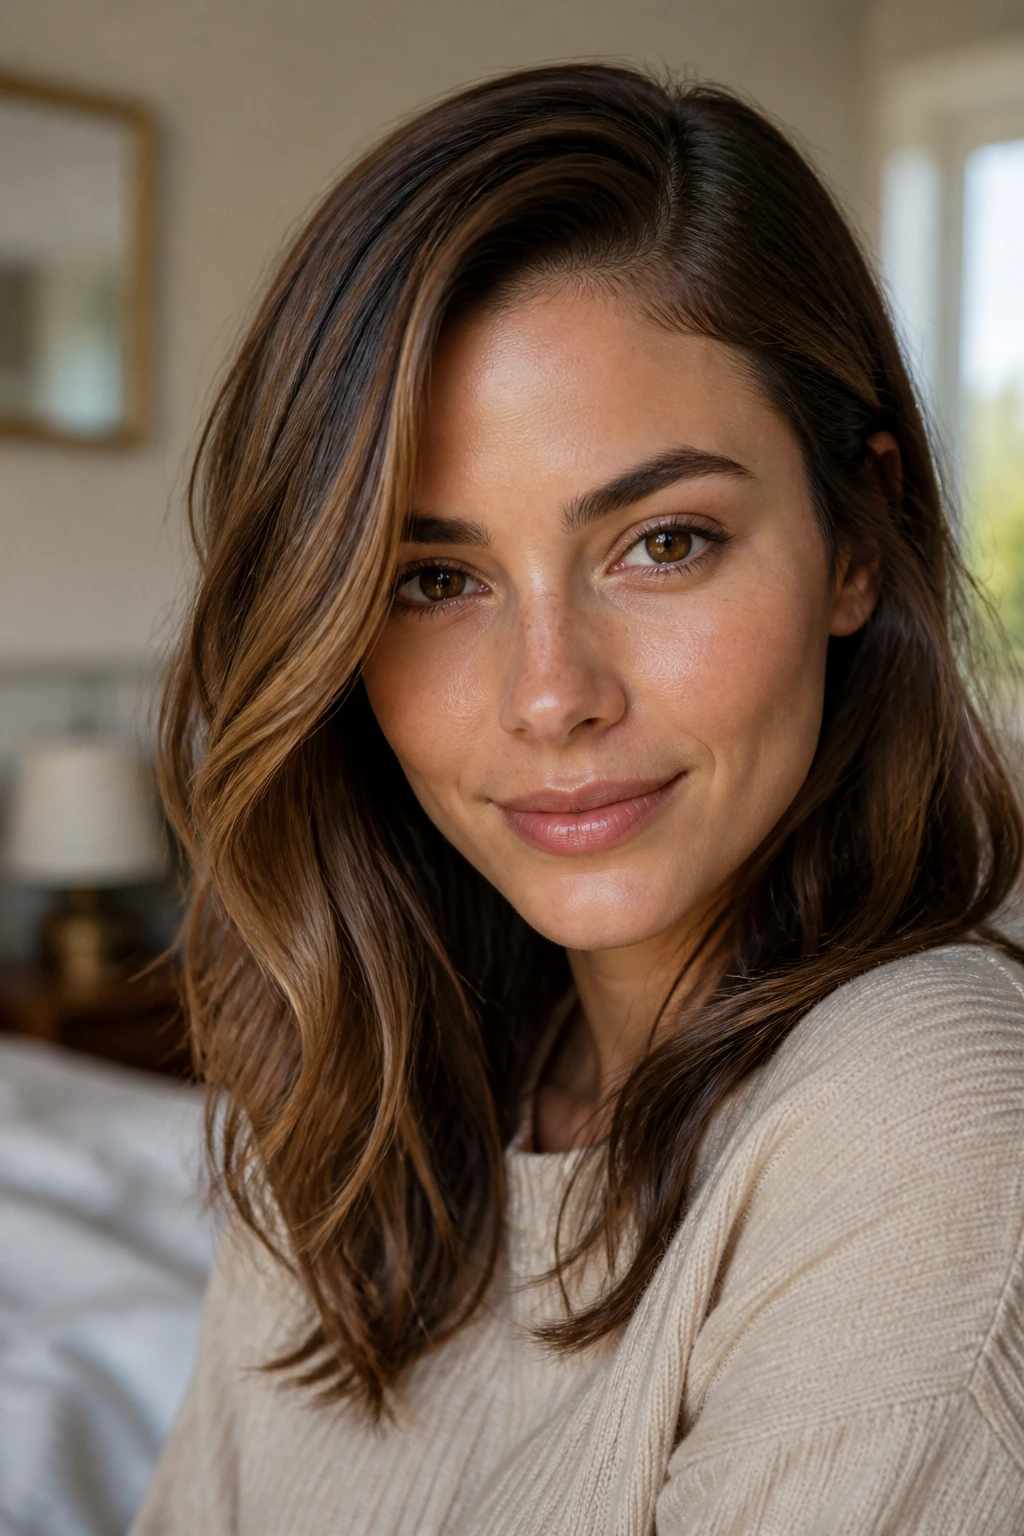
-
Polished without stiffness: Each style keeps the surface neat while leaving enough movement that the hair still looks like hair, not lacquered sculpture.
-
Friendly to second-day texture: A little natural grit helps braids, buns, and ponytails stay put, so these styles often work better after a light mist of dry shampoo than on squeaky-clean hair.
-
Built for real timing: Most of them use a brush, a tie, a few pins, and maybe one hot tool. That is the whole point.
-
Useful across lengths: You will find options for bobs, lobs, shoulder-length cuts, and long hair that falls past the shoulders.
-
Low drama, high payoff: A wrapped elastic, a tucked end, or a clean side part can make the same outfit look more finished in seconds.
-
Flexible enough to dress up: The same braid or bun can look relaxed with a sweater and sharper with earrings, a blazer, or a crisp button-down.
1. Sleek Low Ponytail
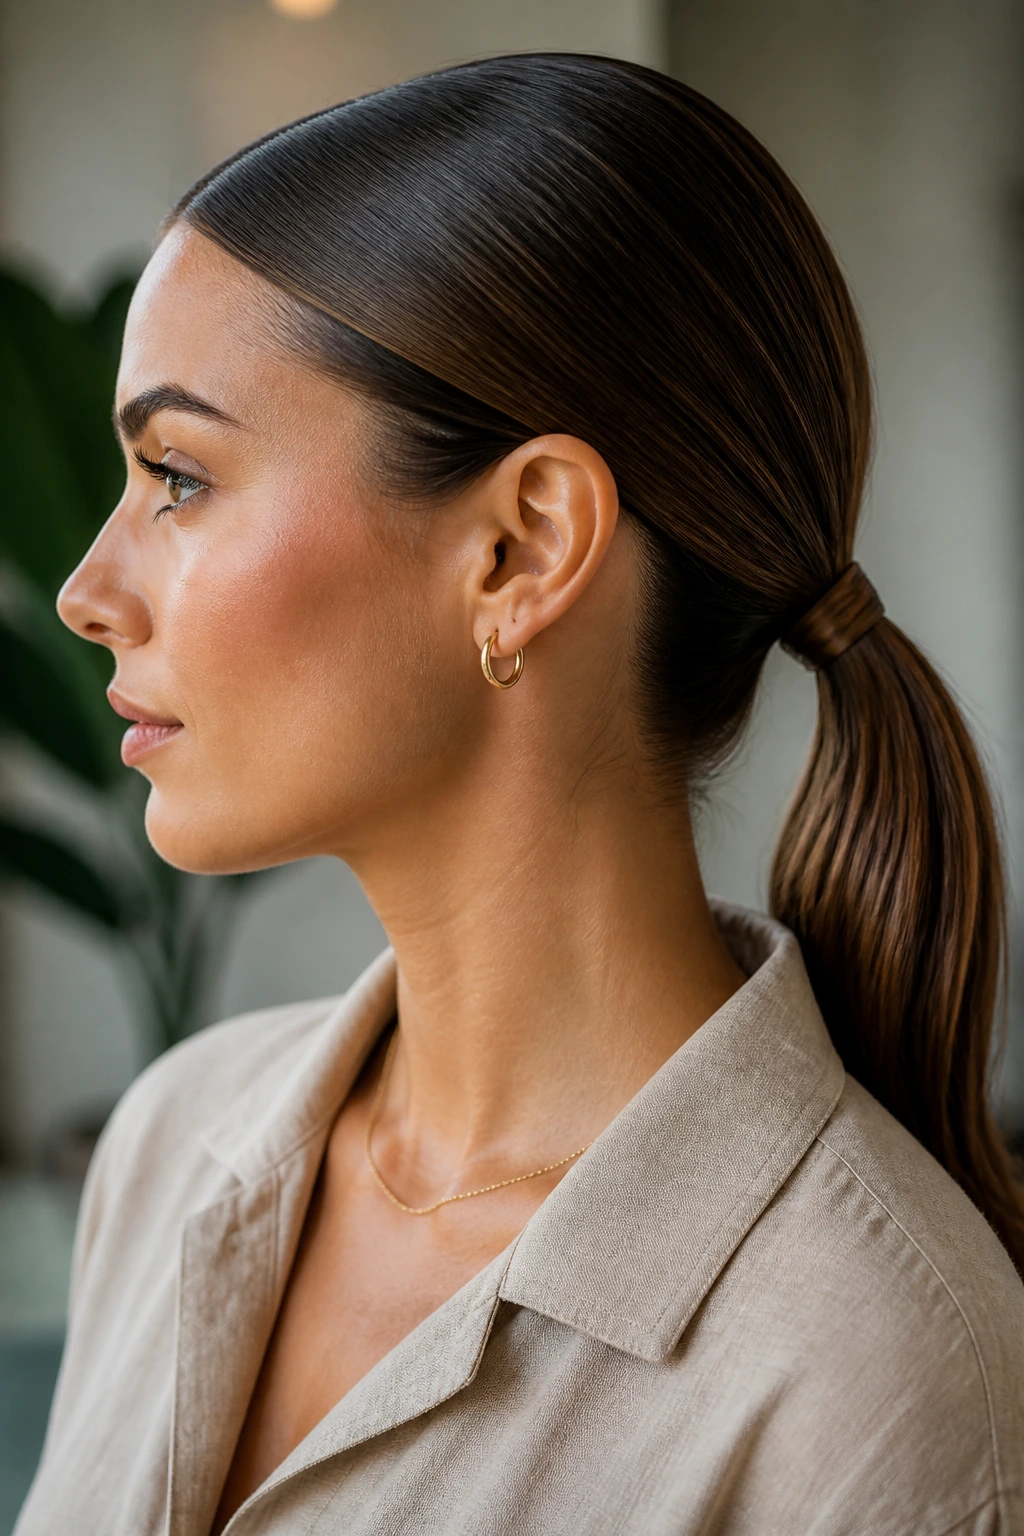
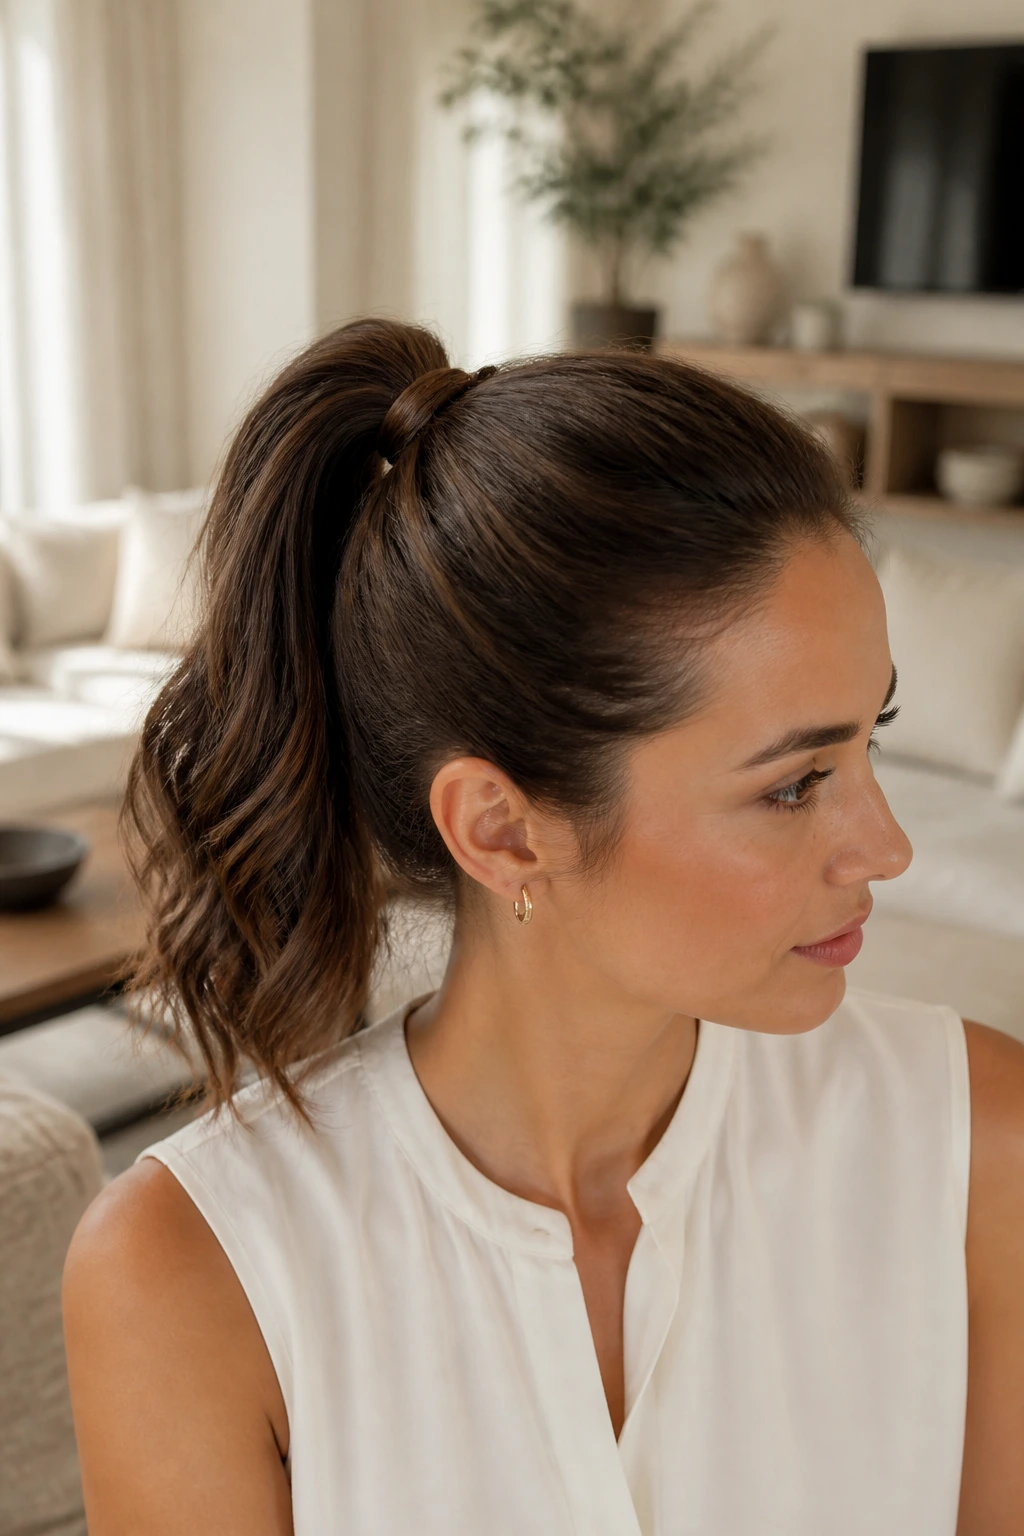
A sleek low ponytail is the dependable jacket of hairstyles. It goes with everything, and when the root line is clean, it looks more deliberate than half the styles people call “fancy.” The pony should sit just below the occipital bone, not sag at the nape like an afterthought. That placement gives the back of the head a better shape.
Why it works
The trick is tension, not volume. Brush the hair back with the flat side of a paddle brush, smooth the crown in small strokes, and keep the front pieces tight enough to lie flat but not so tight that the scalp shows every section line. A tiny wrap of hair around the elastic makes the whole thing look finished.
If your hair is fine, mist the roots with texturizing spray first. If it is thick, split the ponytail in two before securing it, then join the sections again after the elastic is in place. That keeps the base from ballooning out.
Best detail: a clean middle part or a deep side part both work, but the part needs to be crisp. A wobbly part makes the whole ponytail look rushed.
2. Wrapped Mid-Height Ponytail
A mid-height ponytail has more lift than the low version, which is useful when you want your face to look a little more open. The sweet spot sits between the crown and the nape, usually around the midpoint of the head where the back begins to round.
- Why it looks polished: the higher placement gives shape without pulling the hair so tight that it looks severe.
- Who it suits: medium to long hair, especially if the ends are blunt or slightly layered.
- What helps most: wrapping one thin section of hair around the elastic hides the hardware and makes the style feel intentional.
Keep the crown smooth with a brush, then secure the ponytail with a sturdy elastic that will not slide. If the ends are bent or dry, smooth a pea-sized amount of cream on just the last third of the ponytail. Too much product near the roots turns the whole thing greasy. Too much on the ends makes them stringy. There is a narrow lane here.
3. Low Twisted Bun
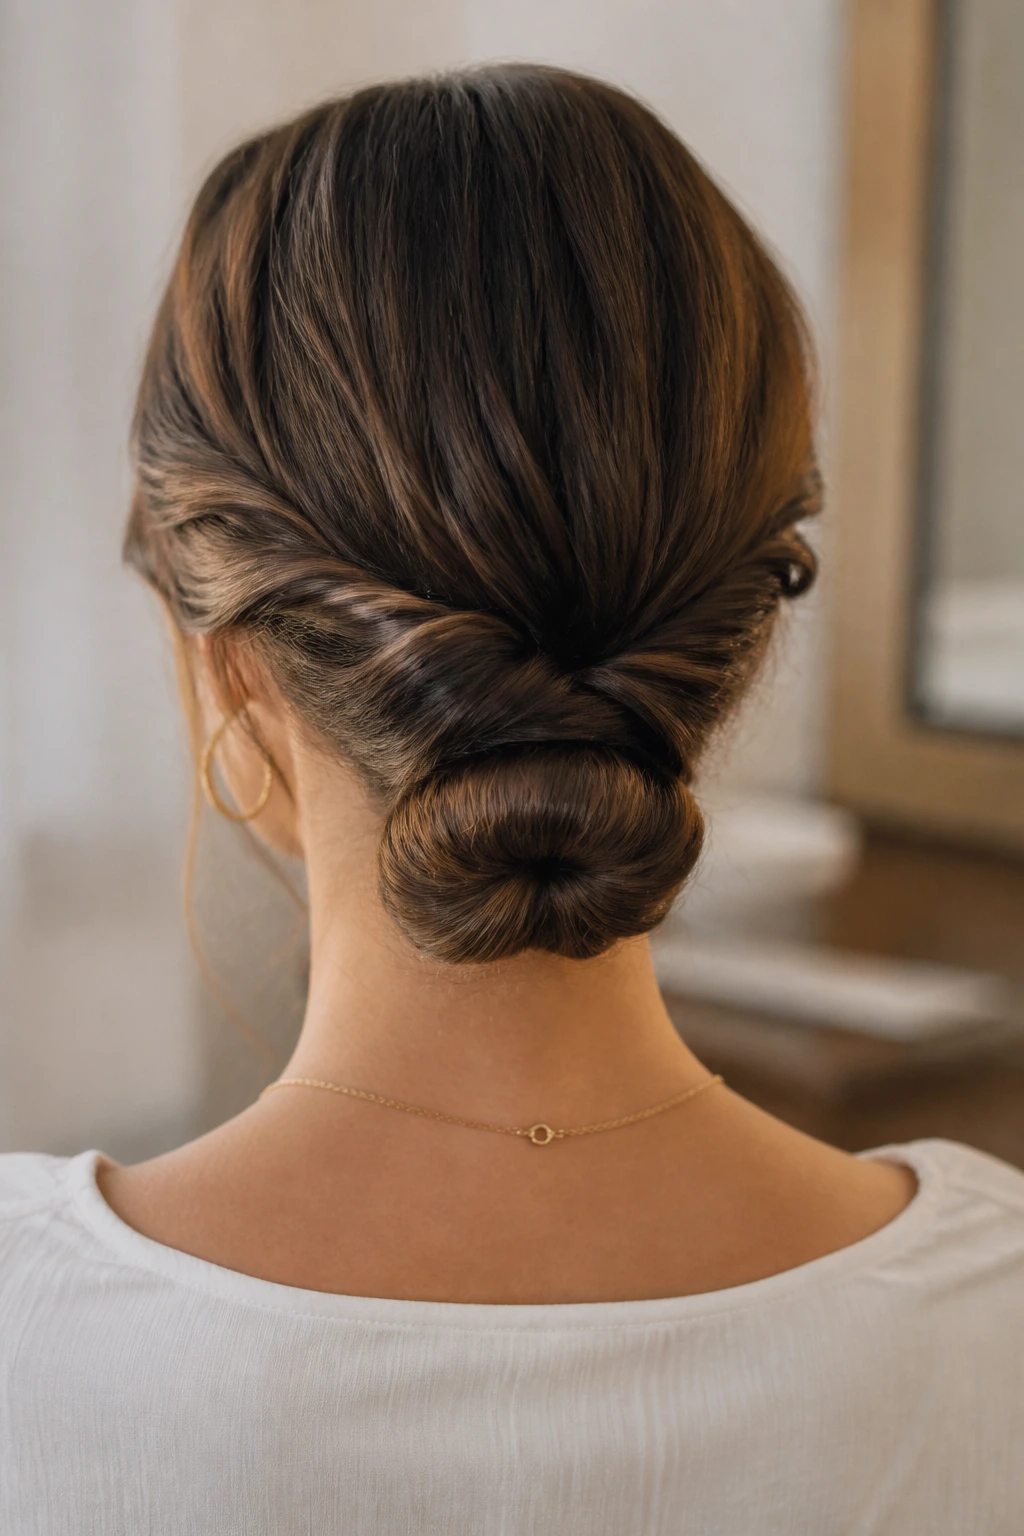
A low twisted bun has that nice, clean shape that looks like you planned ahead even if you were still choosing a shirt five minutes earlier. It works best when the sides are combed back in two sections, twisted toward the nape, and pinned into a compact knot.
The detail that matters is the twist direction. Twist both sides the same way, then cross them once before tucking the ends under. That gives the bun a little ridge and keeps it from collapsing into a flat oval.
This one is especially useful on humid days or when your hair is a little too soft to hold a braid. The twist adds grip without needing much length. If your hair is layered, pin the shorter pieces first, then hide the rest under the bun. Loose layers are what usually make this style look unfinished.
4. Claw-Clip French Twist
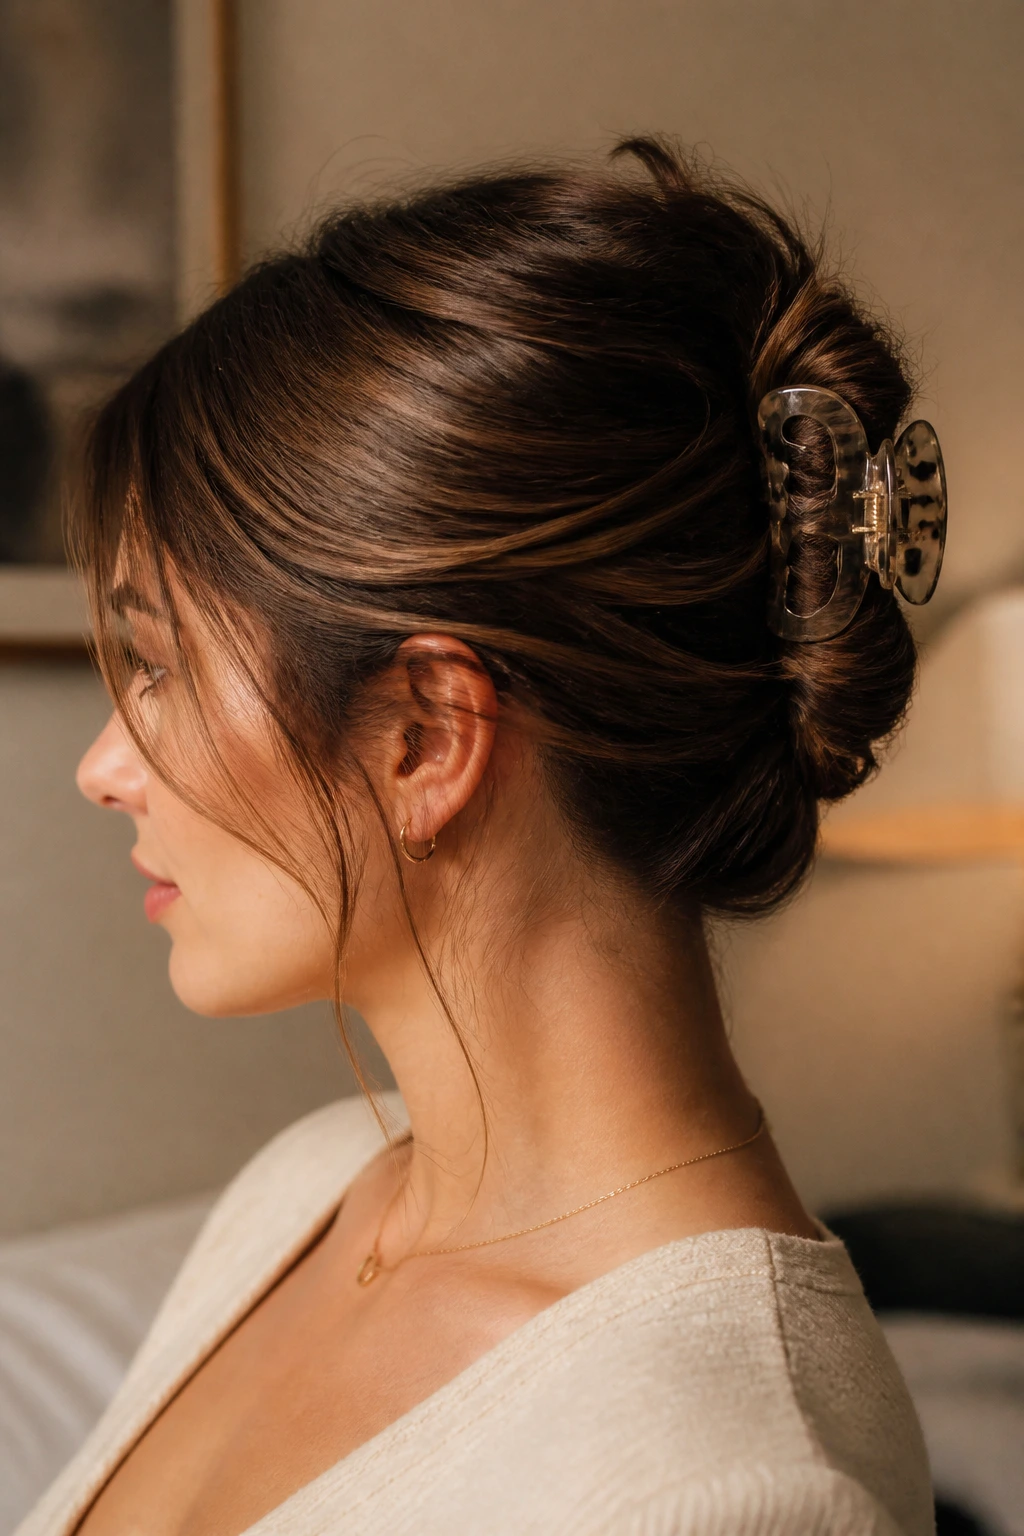
A claw-clip French twist can look very polished, but only if the clip is the right size. Too small, and the hair slips. Too large, and the clip dominates the whole head.
Here is the clean version: gather the hair at the back as if making a low twist, fold the lengths upward, then tuck the ends in and clamp the clip vertically. Leave the shell of the twist smooth. The point is not to build a giant mound.
- Best for: medium to thick hair with a bit of natural texture.
- Use this clip: medium-sized, curved enough to grip the fold.
- Avoid: wide clips with teeth that stick out like little claws on both sides.
This is one of those styles that looks better when a few soft pieces stay loose around the ears. Pulling every strand back can make it feel harsh.
5. Center-Part Straight Blowout
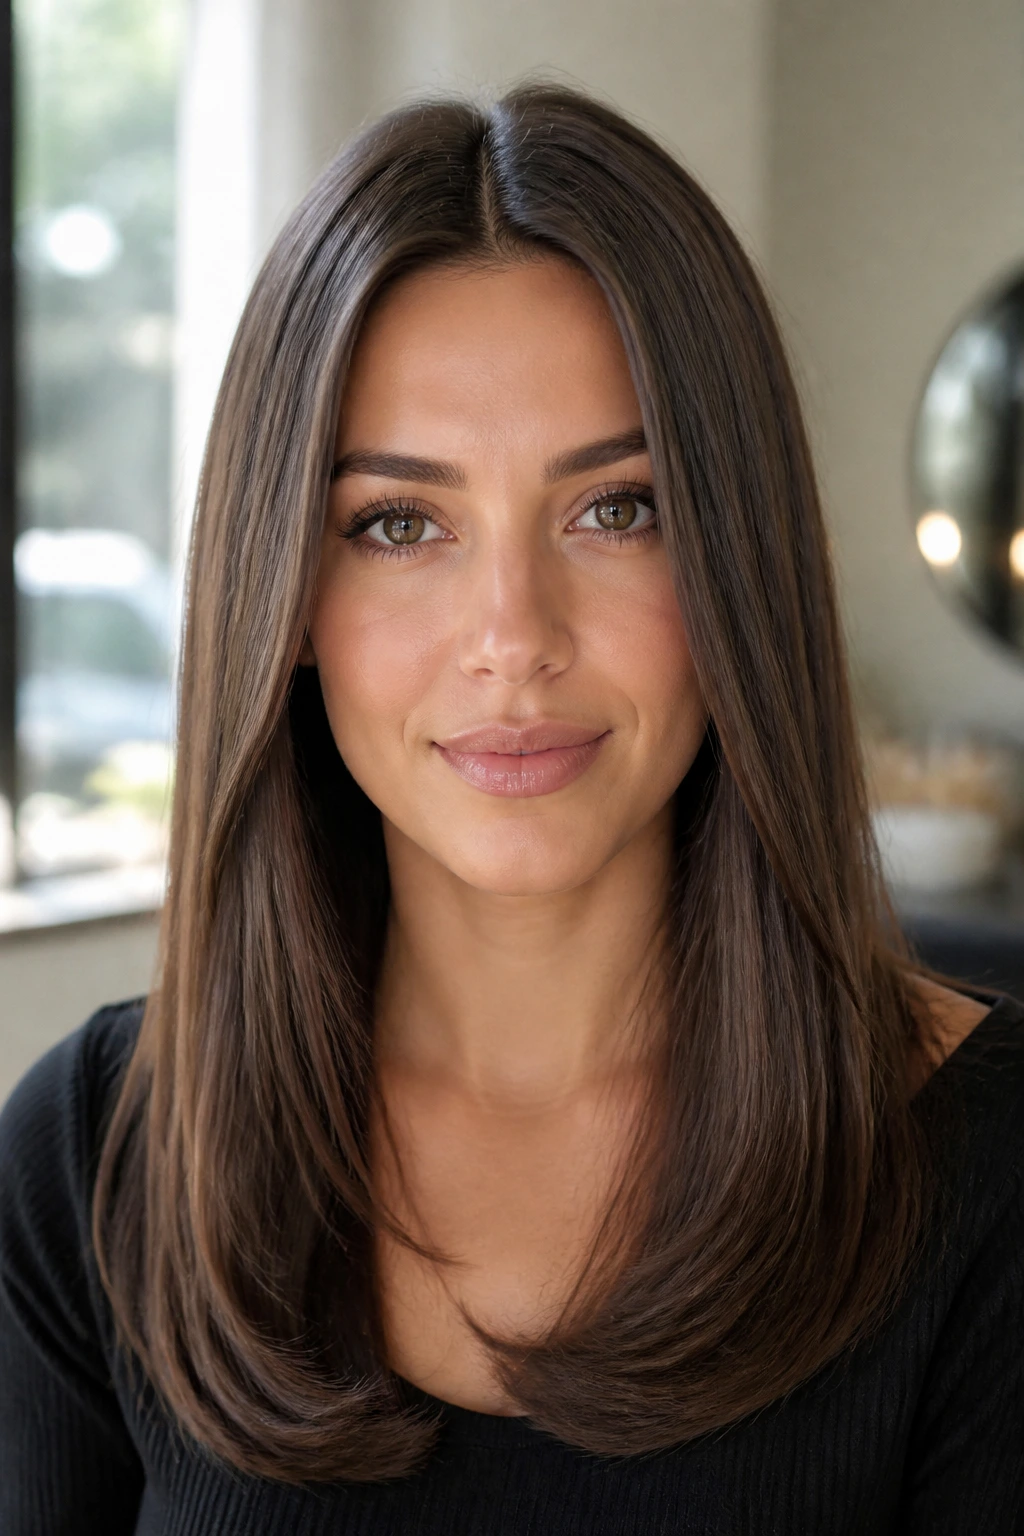
Straight hair with a center part can look spare or sharp, and the difference comes down to the finish. A polished blowout has movement at the ends, a smooth crown, and no puffed-up frizz at the temples. It should fall, not hang.
The surface matters
Use heat protectant first. Always. Then rough-dry the roots until they are fully dry before reaching for the brush, because damp roots are where flatness gets ruined. A round brush gives you bend at the ends; a flat iron gives you a cleaner line if you prefer that glassier look.
Where people miss it
They stop once the top looks smooth. That leaves the lower half heavy and dull. Run the brush or iron all the way through the last two inches and give the ends a gentle curve under. That little bend keeps the style from looking stiff and computer-generated.
6. Soft Side-Part Waves
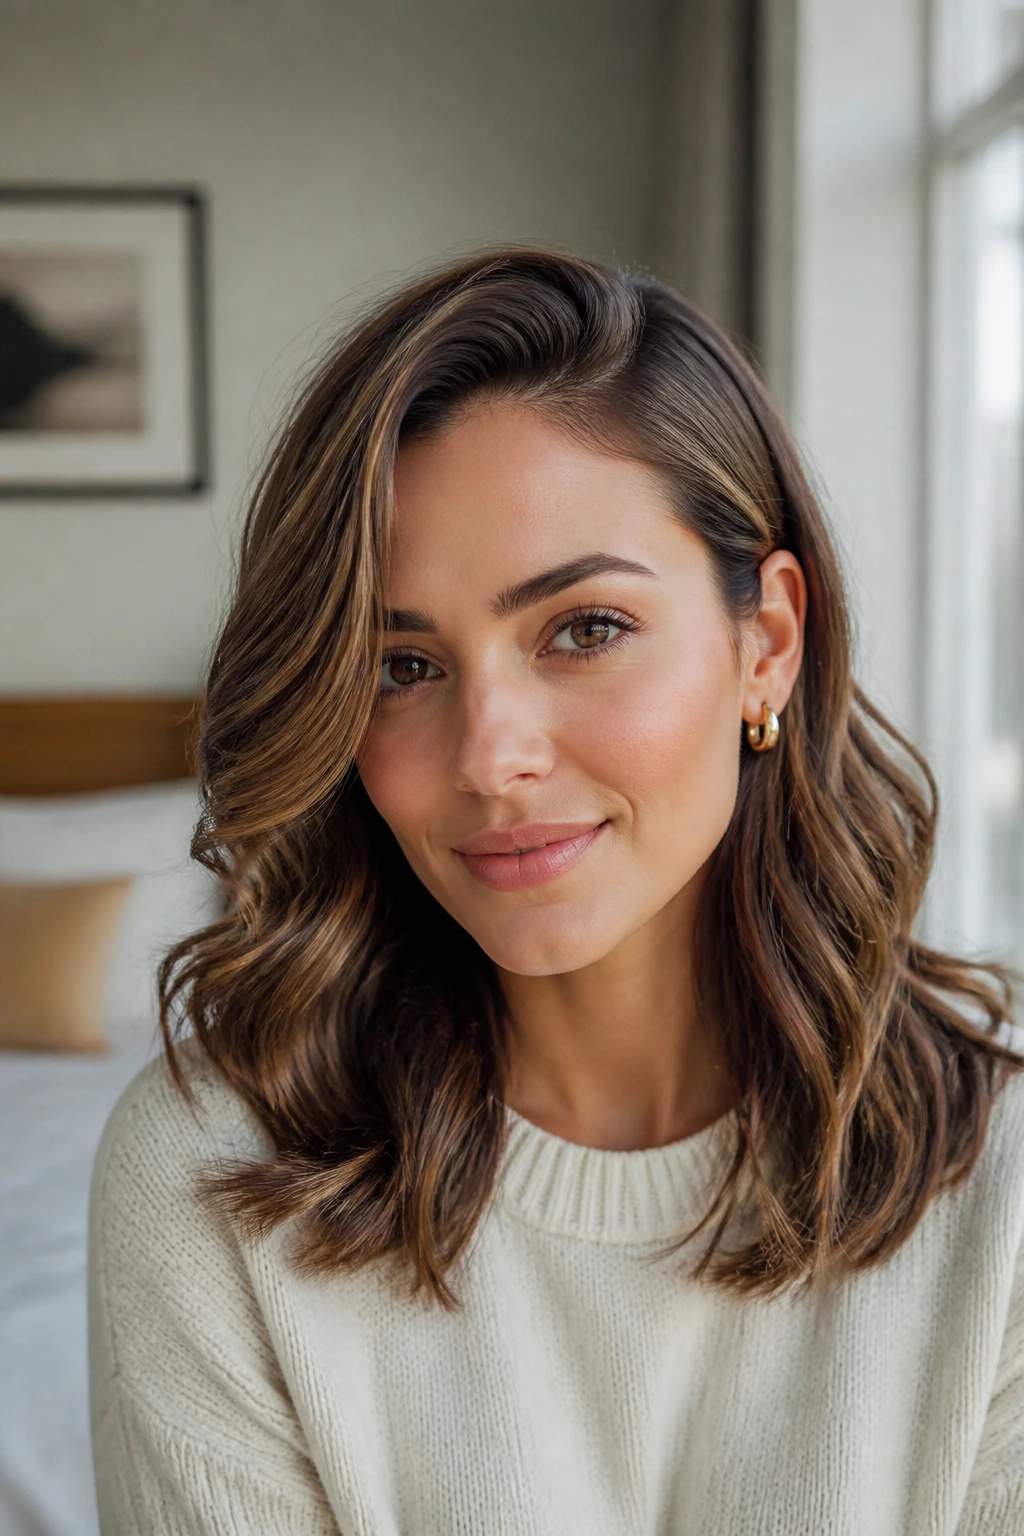
Soft waves with a side part have a way of making everything else look better. The hair moves away from the face, the cheekbones get a little space, and the overall shape feels less predictable than a straight middle part.
The trick is not to curl every section the same way. Alternate directions on the mid-lengths, then brush the waves out with a wide-tooth comb or your fingers once they cool. If you want that smoother polished finish, tuck one side behind the ear and let the other side frame the cheek.
This style works on shoulder-length hair as well as long lengths, but it needs restraint. Tight curls quickly turn it into evening hair. Loose bends are the whole point.
7. Half-Up Knot
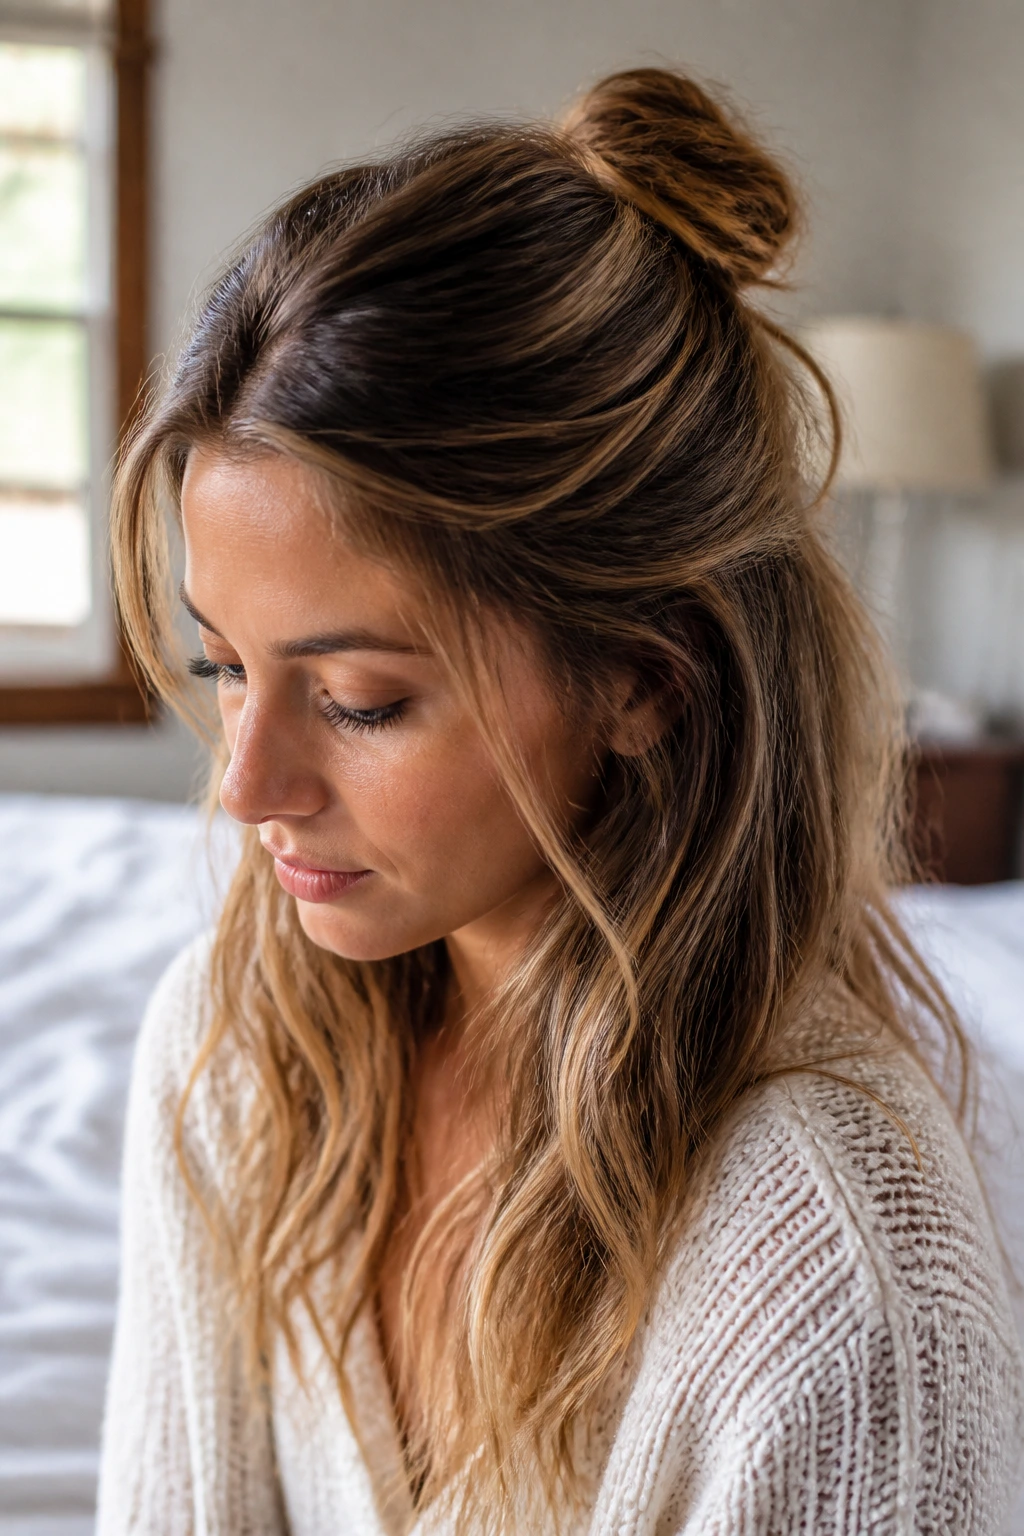
A half-up knot is the style you reach for when the top layer needs control and the rest of the hair should still move. It is especially useful for layered cuts, because it gathers the shorter pieces away from the eyes without forcing the whole head into an updo.
Pull back only the top third of the hair, twist it once, then knot it loosely and secure with pins underneath. If the knot sits too high, it starts to look playful in a way you may not want. If it sits too low, it loses the shape.
A tiny teaser at the crown helps if your hair is fine. No need for big volume. Just enough lift so the top does not flatten against the skull.
8. Braided Low Ponytail
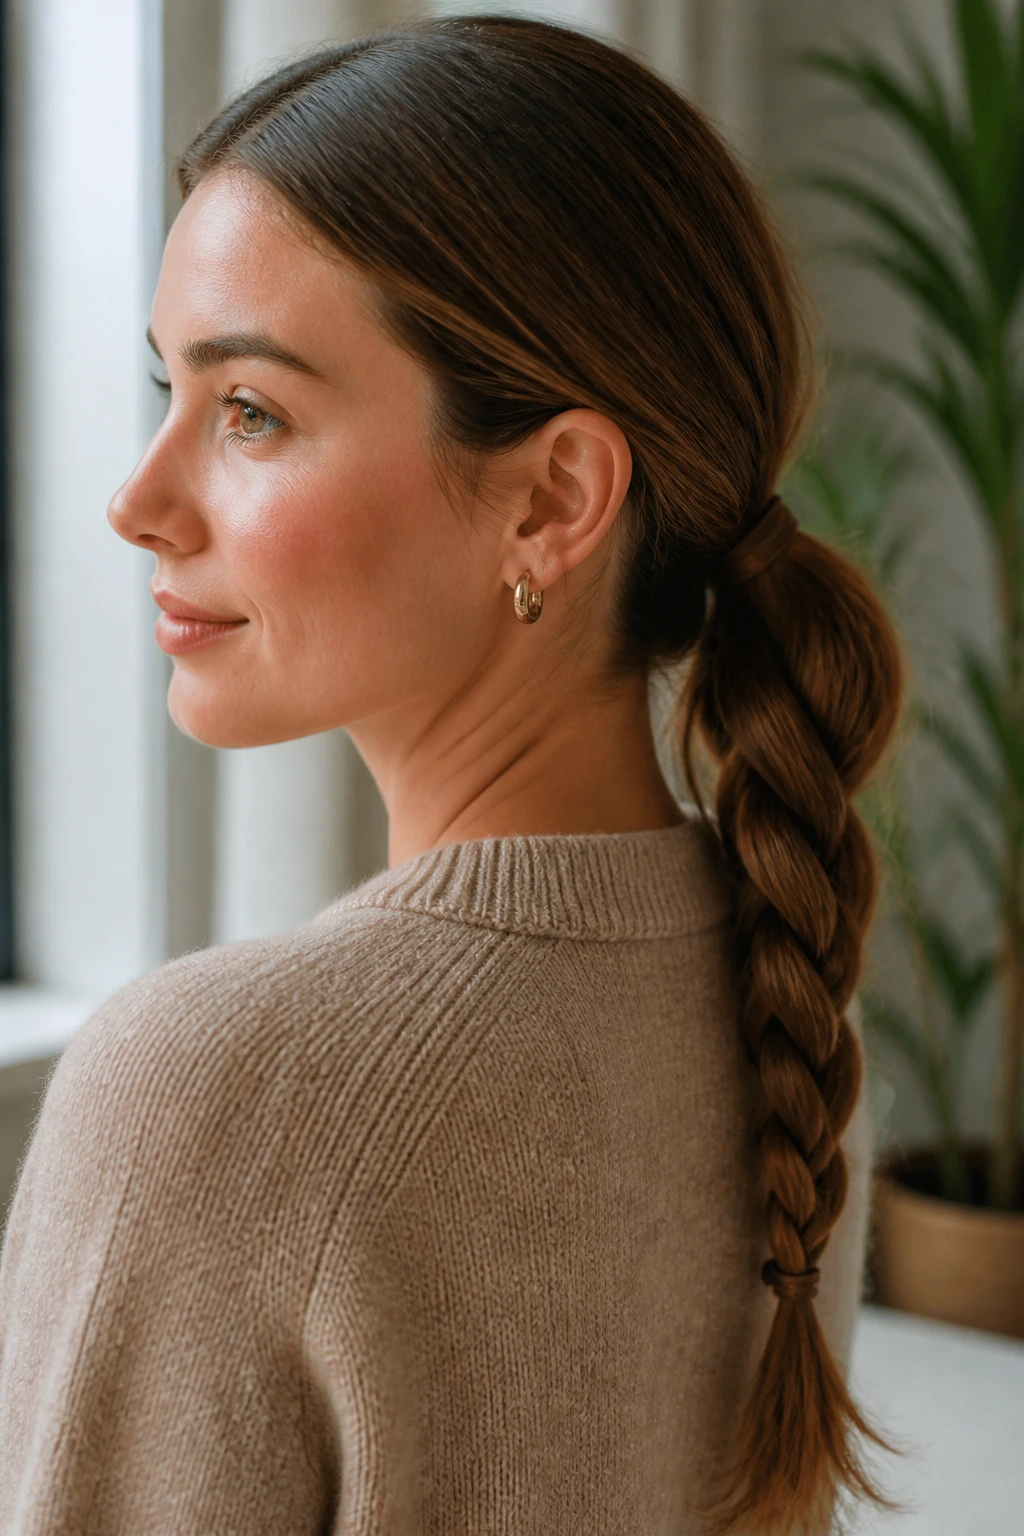
A braided low ponytail is one of those styles that looks more detailed than it is. Start with a smooth low ponytail, secure it well, then braid the tail into a three-strand braid or a softer fishtail if you want more texture.
The beauty of this one is the contrast. The root stays clean and polished while the braid adds a little pattern at the back. That combination keeps the look from feeling too plain.
- Good for: long hair, second-day hair, and anything that gets frizzy by midday.
- Works best with: a small elastic that disappears into the braid.
- Finish with: one drop of serum on the braid’s tail, not the whole head.
If you have layers, lightly mist the lengths before braiding so the shorter pieces do not escape every few inches. Dry, slippery hair is the enemy here.
9. Bubble Ponytail
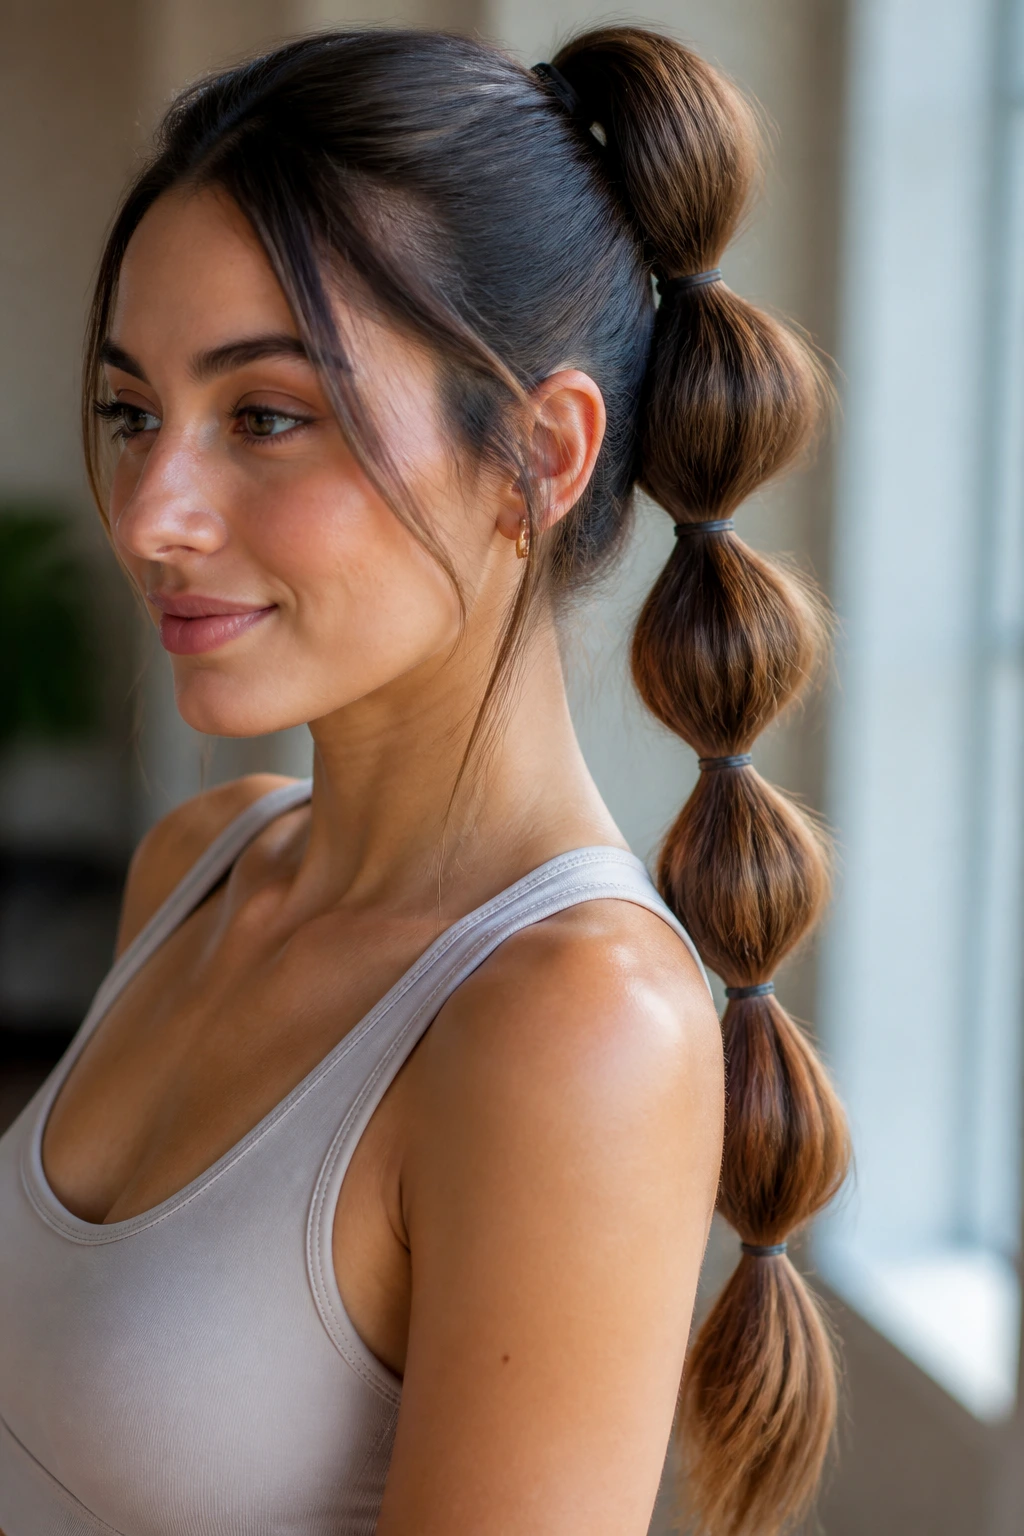
The bubble ponytail looks playful, but when the sections are even and the elastics are subtle, it reads as polished rather than childish. Put the hair into one ponytail first, then add small elastics every 2 to 3 inches down the length. Gently tug each section between the ties so the “bubbles” round out.
What makes it work
The spacing is the whole style. If the elastics are too close together, it looks cramped. Too far apart, and the bubbles sag. Keep the top smooth and the bubbles soft enough that the style still moves when you turn your head.
This one is especially good on long hair because length gives the sections shape. On shorter lengths, the bubbles can look stubby. A little shine spray on the outer surface keeps it from getting fuzzy.
10. Tucked-Under Chignon
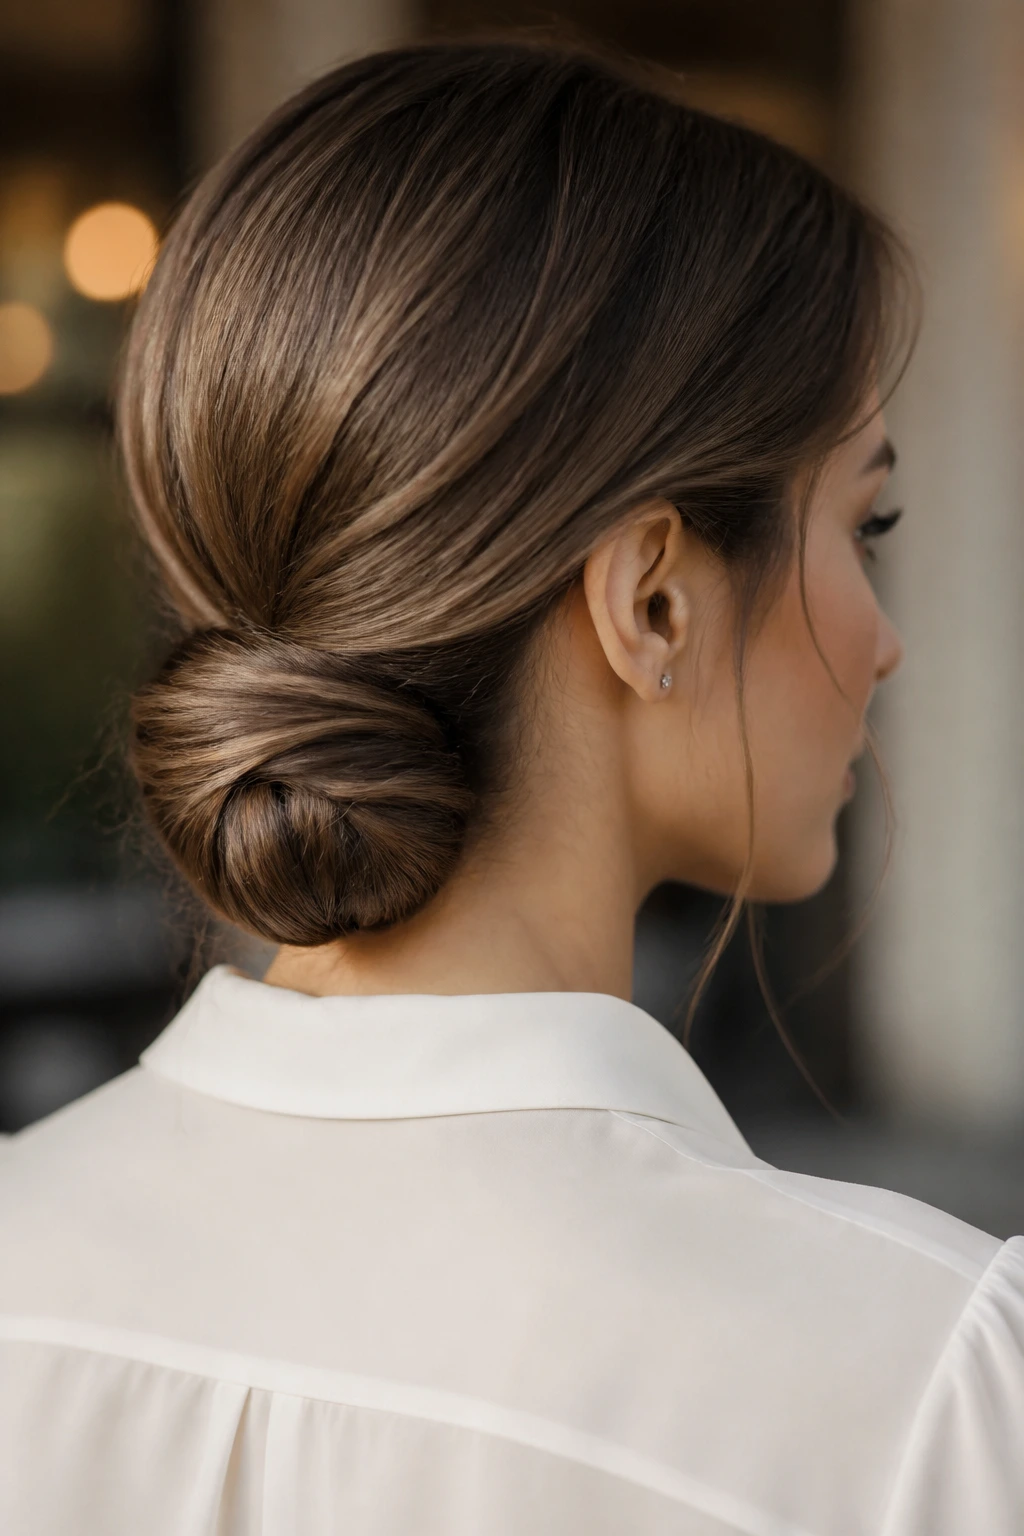
A tucked-under chignon is the low bun’s more tailored cousin. Instead of a twist sitting on top of the head, the hair is folded under itself so the bun hugs the nape and feels compact.
Pull the hair into a low ponytail, twist the tail, then fold it upward and tuck the ends underneath. Pin from the outside in so the pins disappear into the hair. You want the bun to look like one clean shape, not a stack of loose loops.
This is the style I reach for with collared shirts and high necklines because it clears the back of the neck and keeps the silhouette clean. It also behaves well on layered hair if you pin the short pieces before folding the tail under.
11. Dutch Braid Into Ponytail
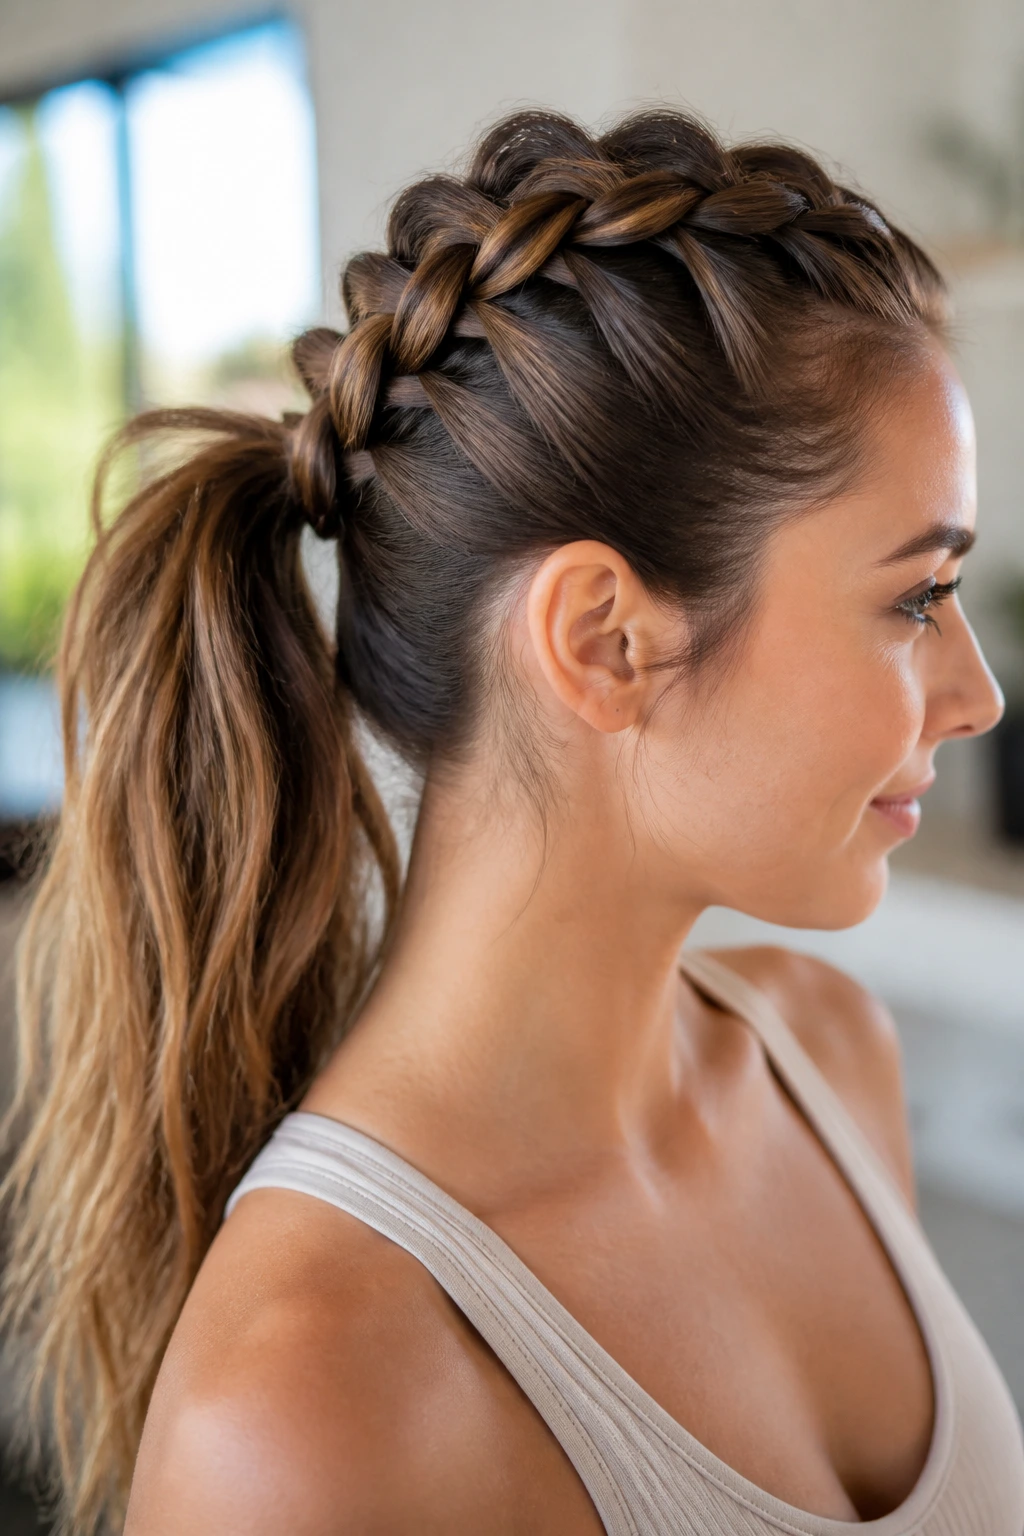
A Dutch braid into a ponytail gives you structure at the crown and movement through the tail. Start at the hairline, braid under instead of over, and stop at the back of the head before tying the remaining hair into a ponytail.
The under-braid creates that raised, rope-like line that looks tidy from the front and interesting from the side. It also keeps shorter front layers from slipping into your face.
If you want the braid to look neat, keep the sections even and your hands close to the scalp. If you want a softer finish, gently pull at the edges once the braid is secured. The first version reads sharper. The second reads more relaxed.
12. Face-Framing Half-Up With Barrettes
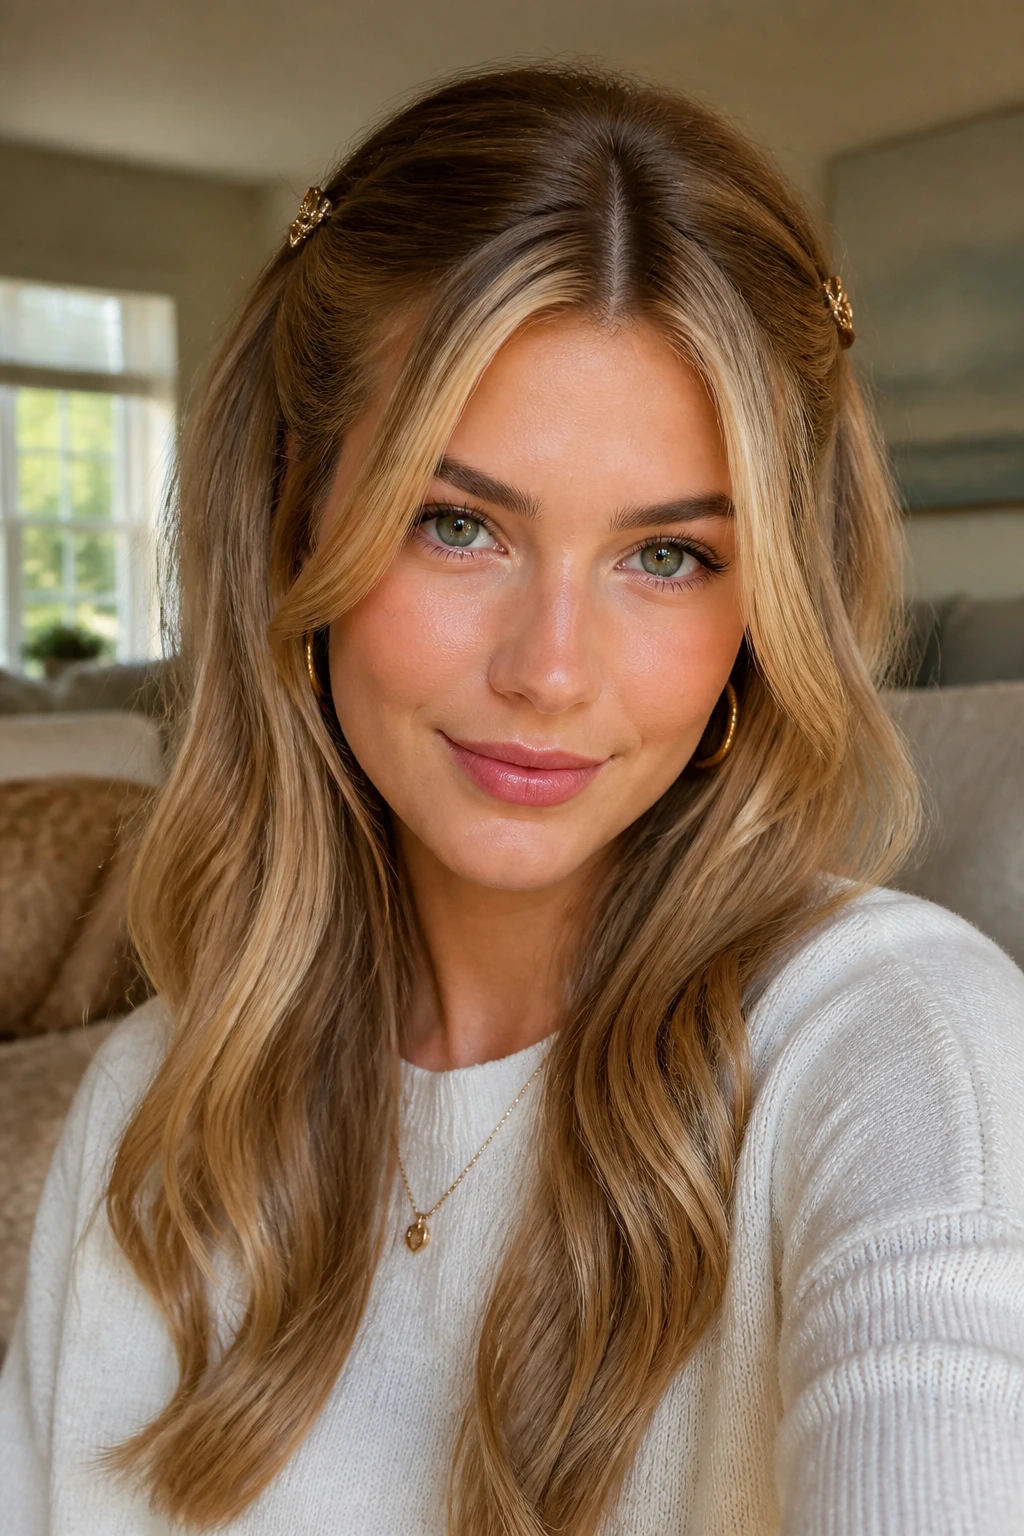
Two small barrettes can do what a giant styling effort cannot. A face-framing half-up look pulls the top sections back from the temples, leaves the rest down, and gives the whole style a cleaner outline.
- Best placement: clip the sections right above the cheekbone, not at the very top of the head.
- Best for: layered cuts, curtain bangs, and hair that wants to fall into the eyes.
- Choose: barrettes with a flat back so they sit close to the head.
The key is symmetry without perfection. The pieces do not need to be identical, but they should have the same intention. If one side is yanked tighter than the other, the style loses its quiet polish.
13. Polished Top Knot
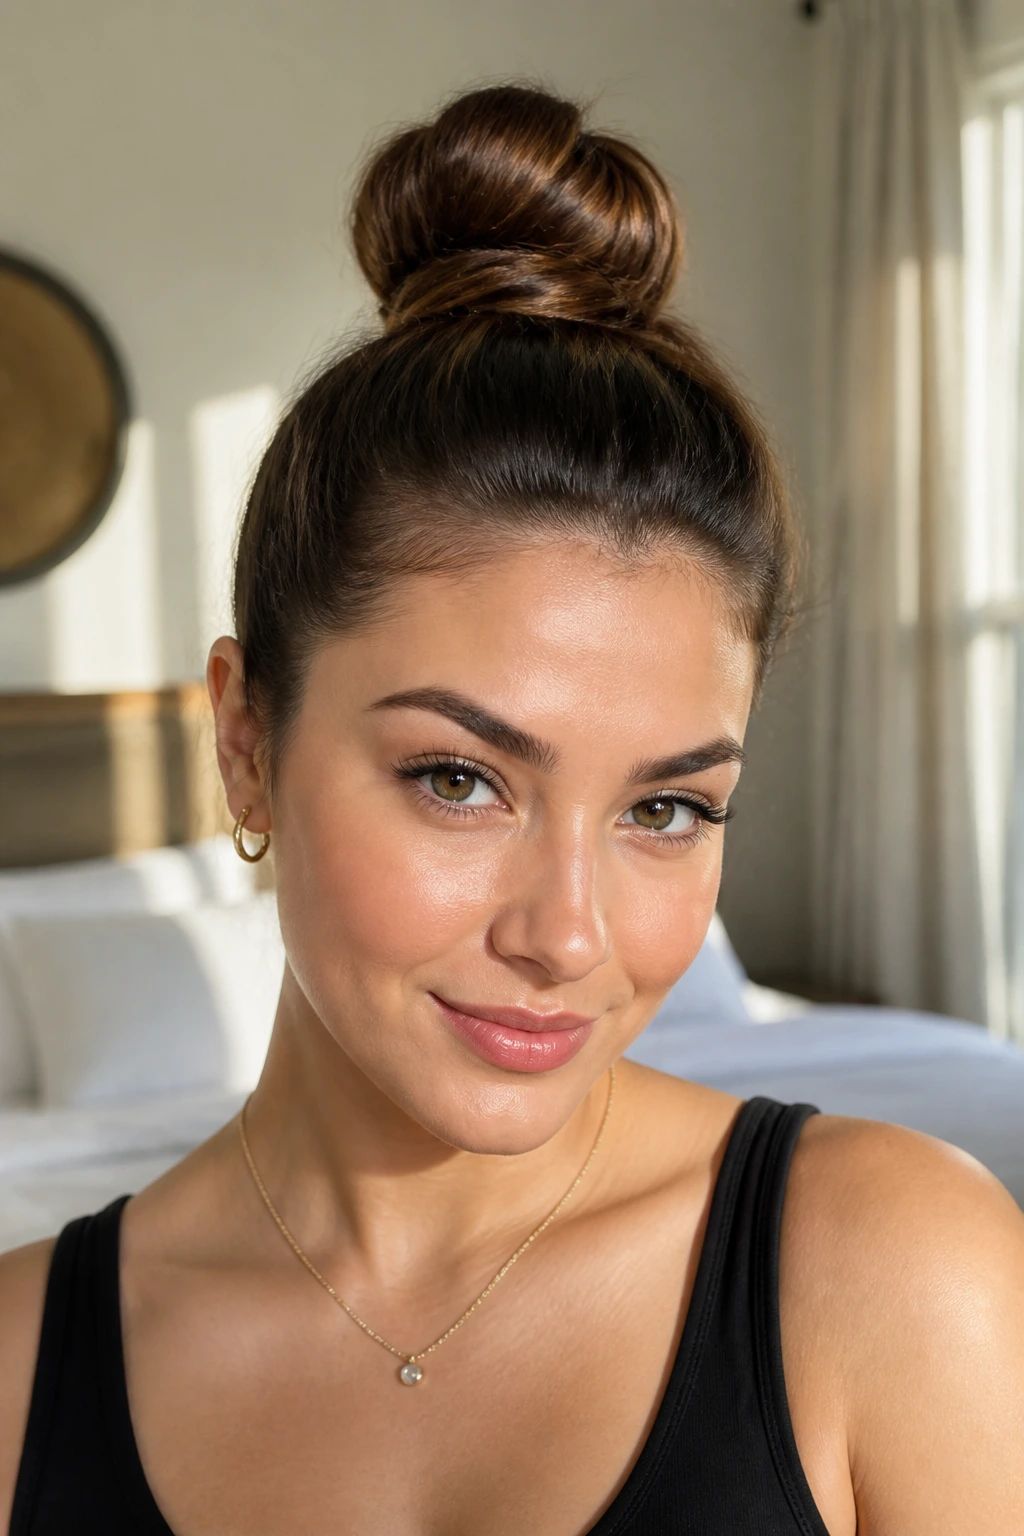
A polished top knot is not the same thing as a messy bun that wandered upstairs and stayed there. The difference is in the base. The hair should be brushed up smoothly, the knot should sit at the highest point of the head or slightly behind it, and the crown should stay flat.
This style works especially well with thick hair because it removes bulk from the neck without making the bun look puny. If your hair is fine, use a donut or a small tucked base to build a little shape. You do not want a giant bun. You want a balanced one.
A top knot looks sharp with earrings. It also looks sharp with no accessories at all, which is part of why it keeps coming back into rotation.
14. Braided Crown
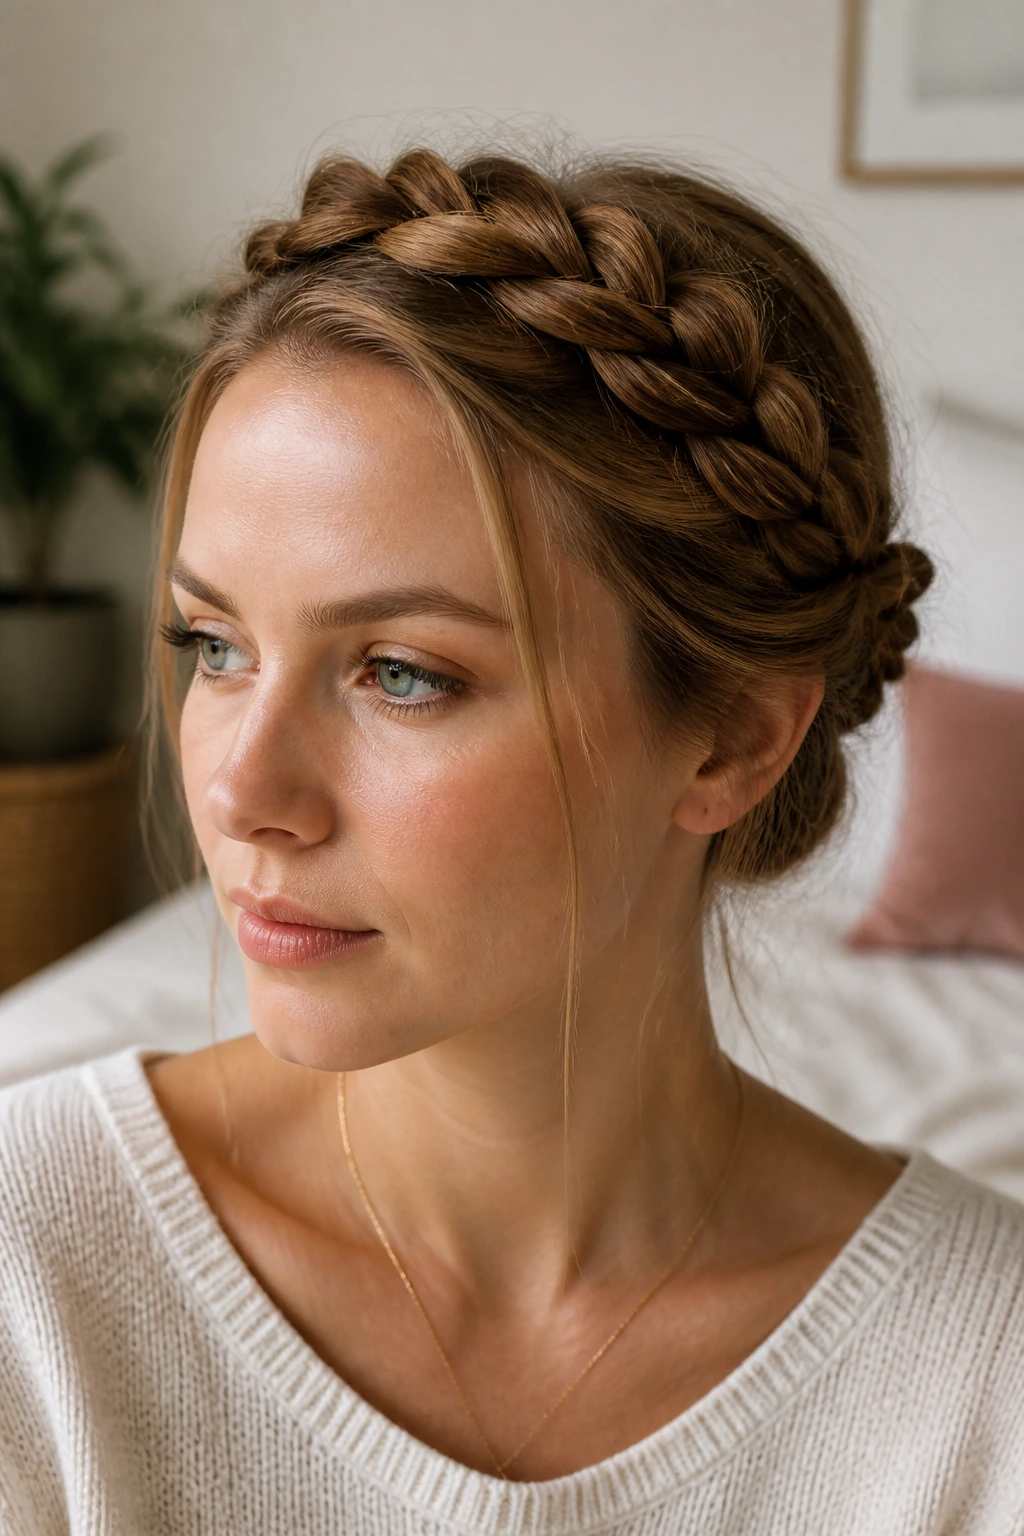
A braided crown gives the effect of a built-in headband, only neater and less likely to slide. You can braid from one temple to the other, or make two braids and wrap them across the top of the head.
What to watch for
The braid should be soft enough to feel wearable, not tight enough to pull the scalp. If it sits too high, it starts to look costume-like. Keep it lower, follow the hairline, and tuck the ends discreetly behind the ear or beneath the opposite braid.
This style is a nice fix for hair that has grown out a little and no longer sits cleanly in a bob or lob. It gathers the front sections, keeps them off the face, and leaves the rest free. That makes it one of the better polished daily looks for days when you want movement without fuss.
15. Side Braid With Smooth Roots
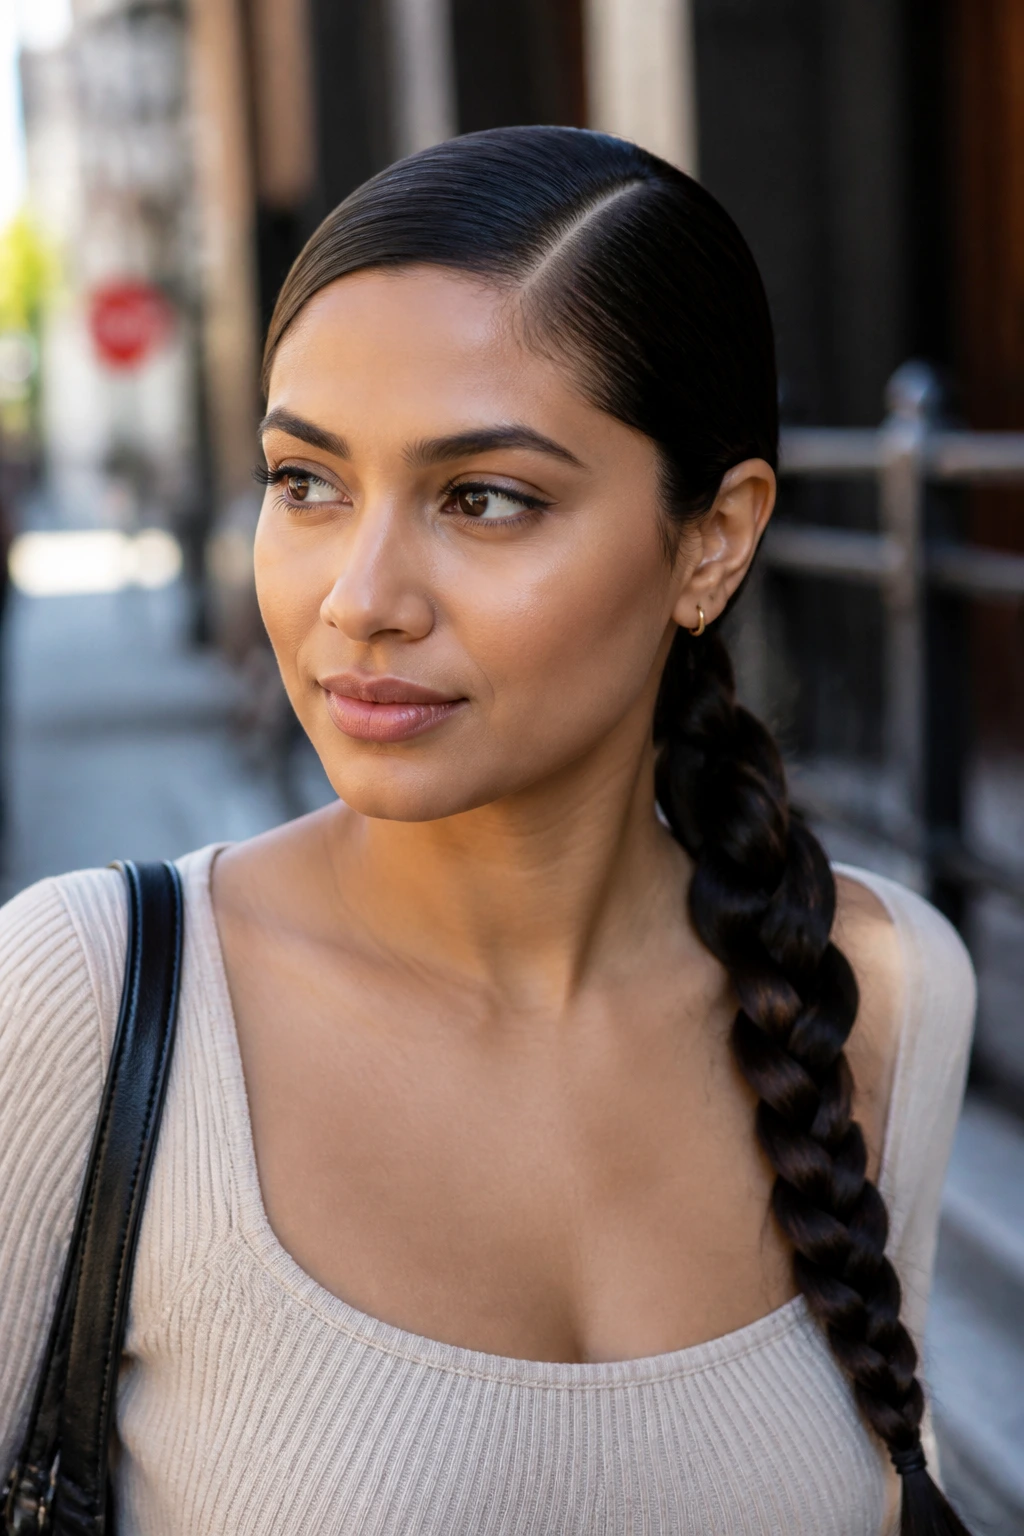
A side braid looks more grown-up when the roots are sleek and the braid starts low near the ear. Pull the hair into a deep side part, smooth the top flat, and let the braid fall over one shoulder.
The braid itself can be loose or tight depending on the mood, but the root area should stay controlled. That contrast is what keeps it from looking like gym hair. A little cream or gel near the part helps if your hair frizzes at the temples.
This is one of the better options for windy weather. The braid has a point of containment, but the length still moves. Good balance. No fight with the hair all day.
16. Sleek Half-Up Ponytail
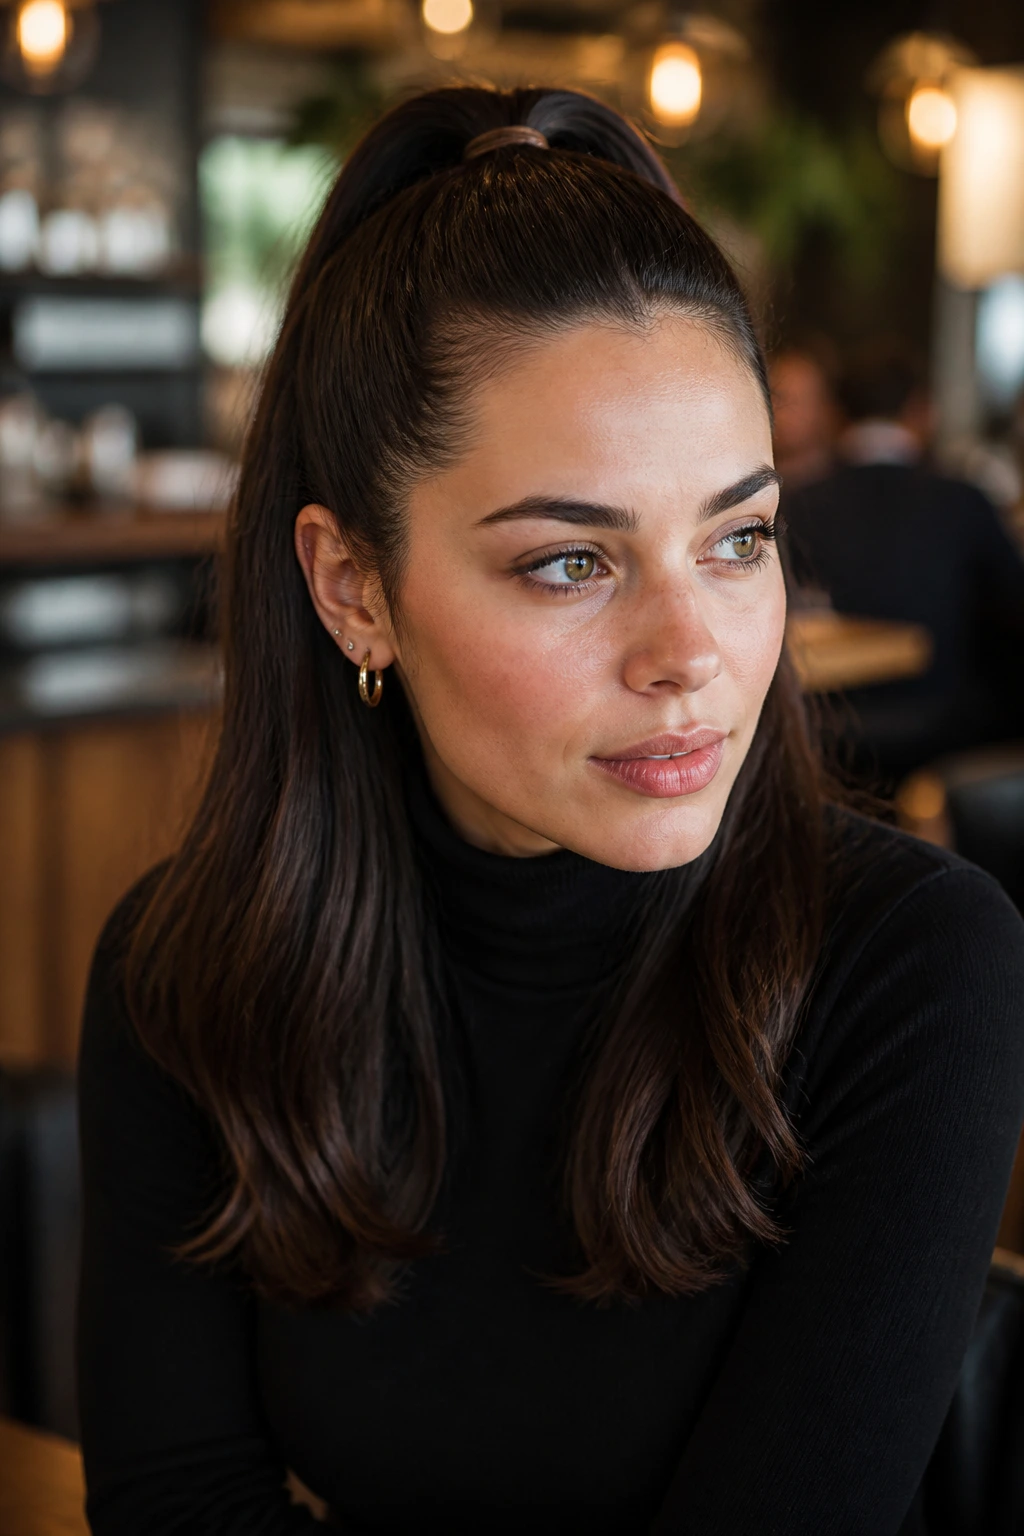
A sleek half-up ponytail is cleaner than a knot and quicker than a full updo. Gather the top section from temple to temple, smooth it back, and secure it with a small elastic or a narrow clip.
- Why it works: the top section stays controlled while the length keeps the hair from feeling overstyled.
- Best detail: wrap a tiny strand around the elastic if you want it to look more finished.
- Good on: straight, wavy, and slightly curled hair.
This style is useful when the bottom half is in decent shape but the top has gone a little flat. It gives the face a cleaner frame and takes less time than redoing everything.
17. Twin Low Braids
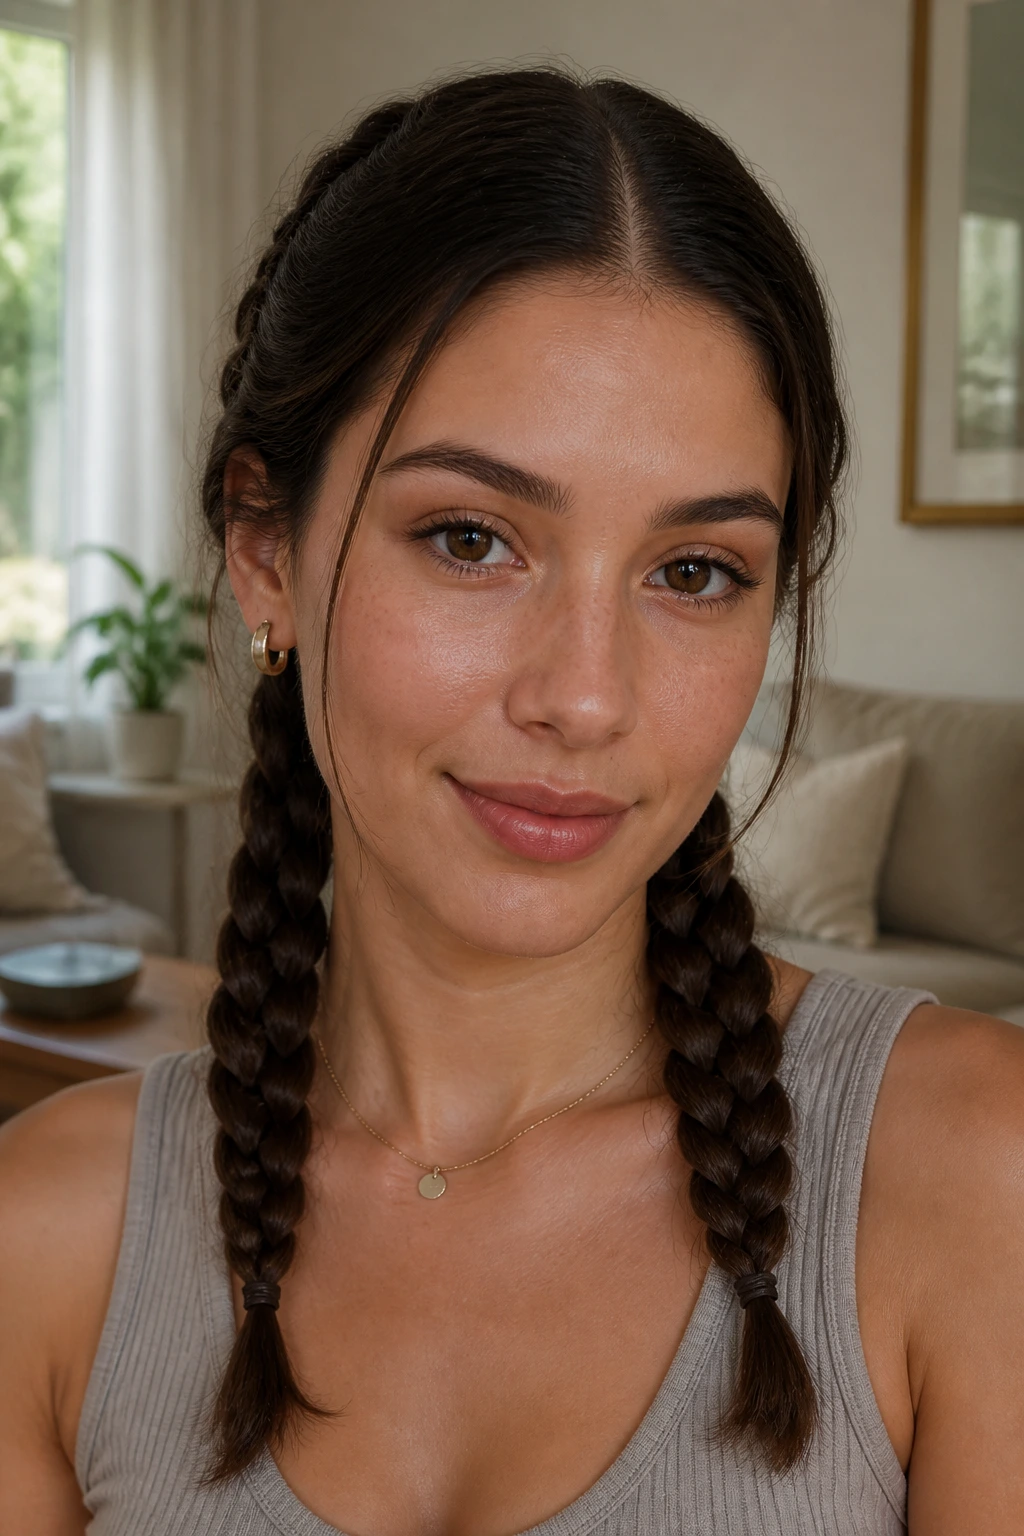
Twin low braids can look sweet, but when they are kept low, neat, and centered, they also look clean and practical. Part the hair down the middle, smooth each side back, and braid low so the braids fall along the collarbone rather than standing up by the ears.
The part matters more than people think. A clean center line makes the whole style feel deliberate. A crooked one makes the braids look accidental.
This is a smart choice for long hair that tangles easily. It keeps the length contained, works well under coats, and avoids the heavy feeling of one large braid down the back. If the braids feel too youthful, a plain black elastic or a small gold cuff changes the tone fast.
18. Flip-Under Ends
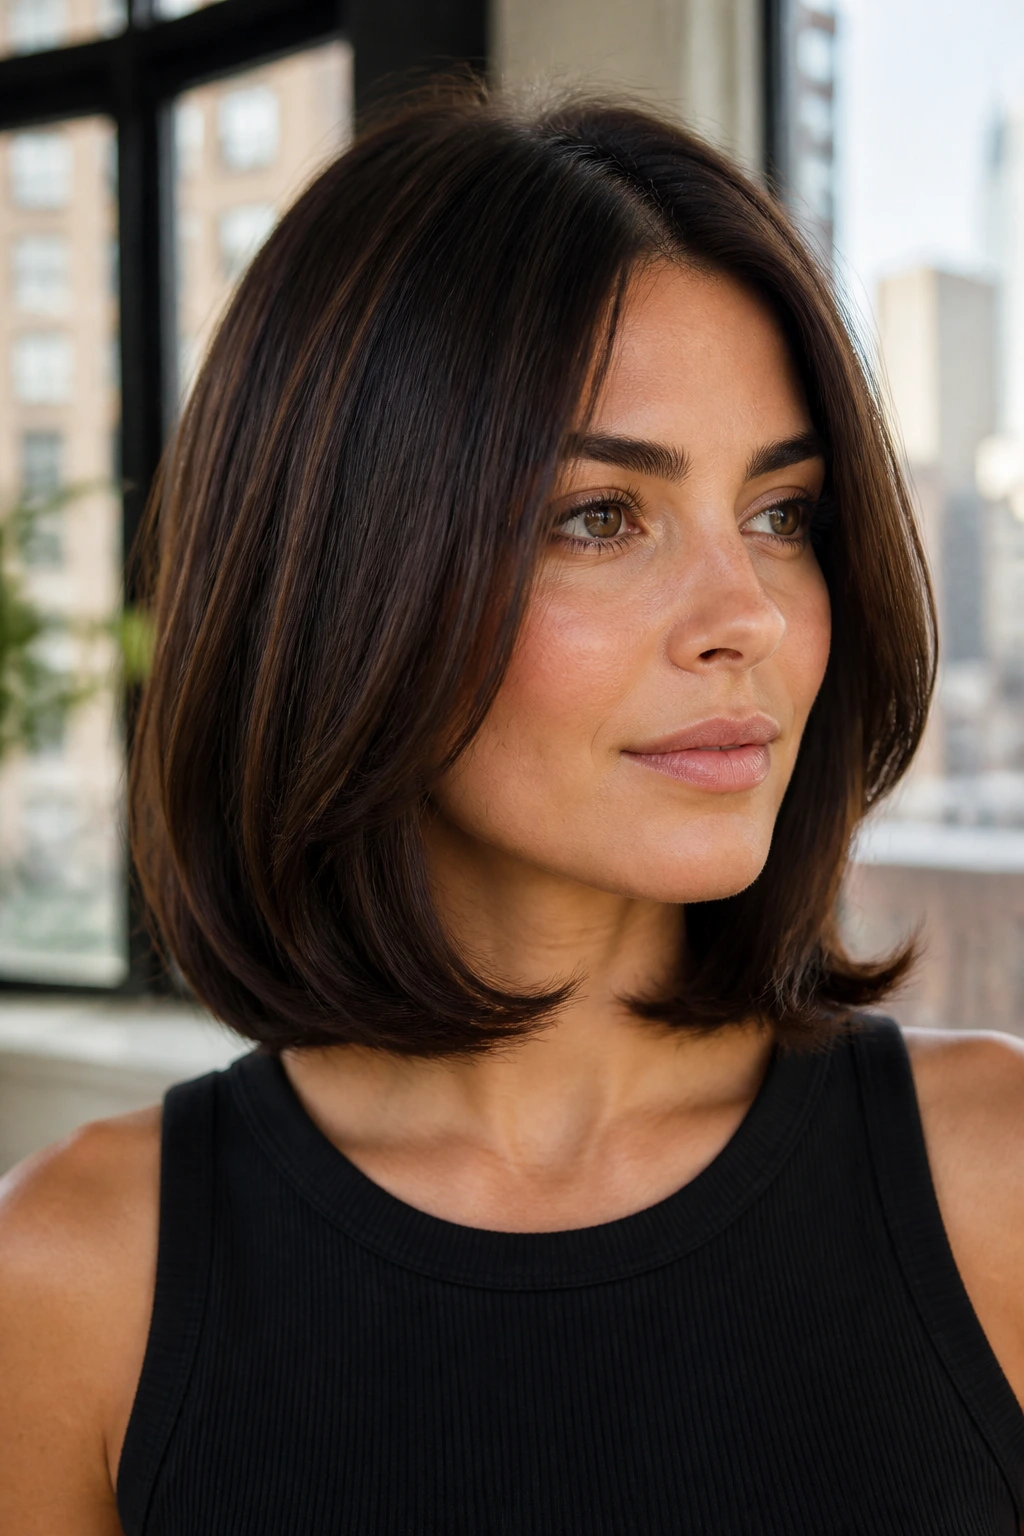
Flip-under ends do a lot of work for bobs and lobs. The roots can be nearly plain, but if the ends curve under in a smooth line, the whole haircut looks styled. A round brush and blow-dryer give the softest bend. A flat iron can do it too if you turn the wrist just slightly at the ends.
Why this little curve matters
Straight ends can look unfinished on shorter cuts. The under-flip gives the hair a shape that reads as tidy from every angle, especially when the hair grazes the jaw or collarbone.
If your hair resists movement, clip the ends under while they cool for a minute. That sets the shape better than chasing the bend with more heat. And yes, a tiny bit of shine cream on the ends helps. Too much, and the shape collapses.
19. Soft Curls With a Deep Side Part
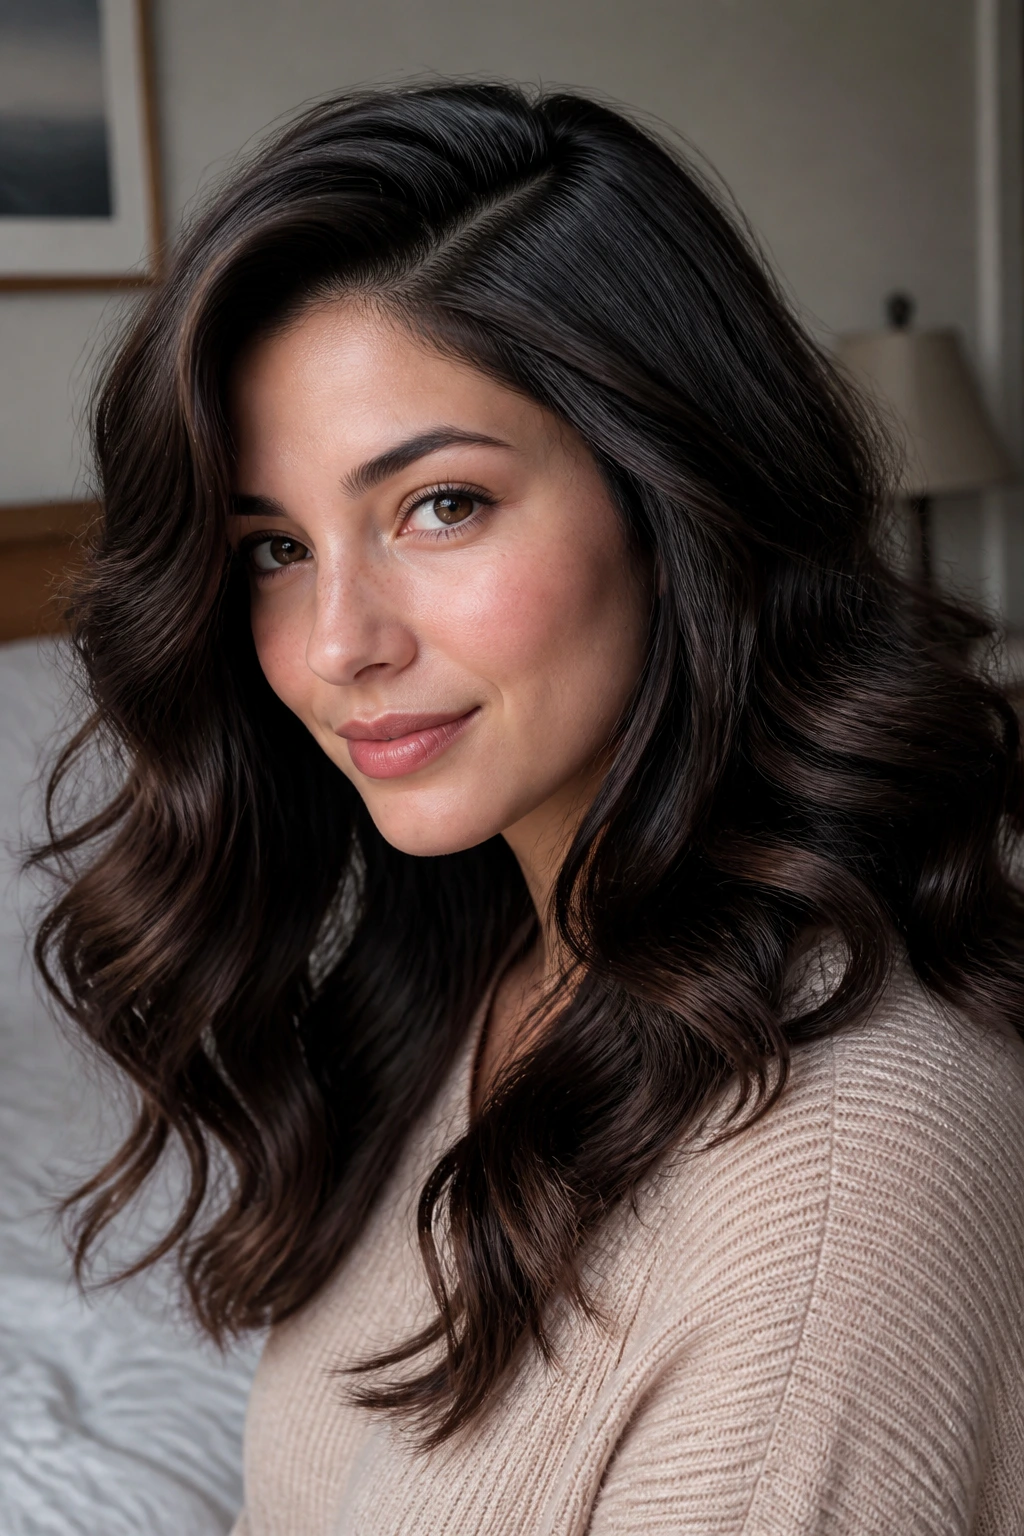
Soft curls with a deep side part feel polished without looking formal. The part shifts the volume to one side, and the curls should stay loose enough that they break into waves as they cool.
Curl away from the face on the front sections. That keeps the front line open and gives the face a cleaner frame. Once the curls are cool, shake them out gently with your fingers or brush them through for a softer shape.
This style is the one to pick when you want movement and a little drama, but not the full gloss of a red-carpet blowout. It works best when the curls are not all the same size. Slight variation makes the hair look natural. A row of identical ringlets can be too neat.
20. Rope-Braid Low Bun
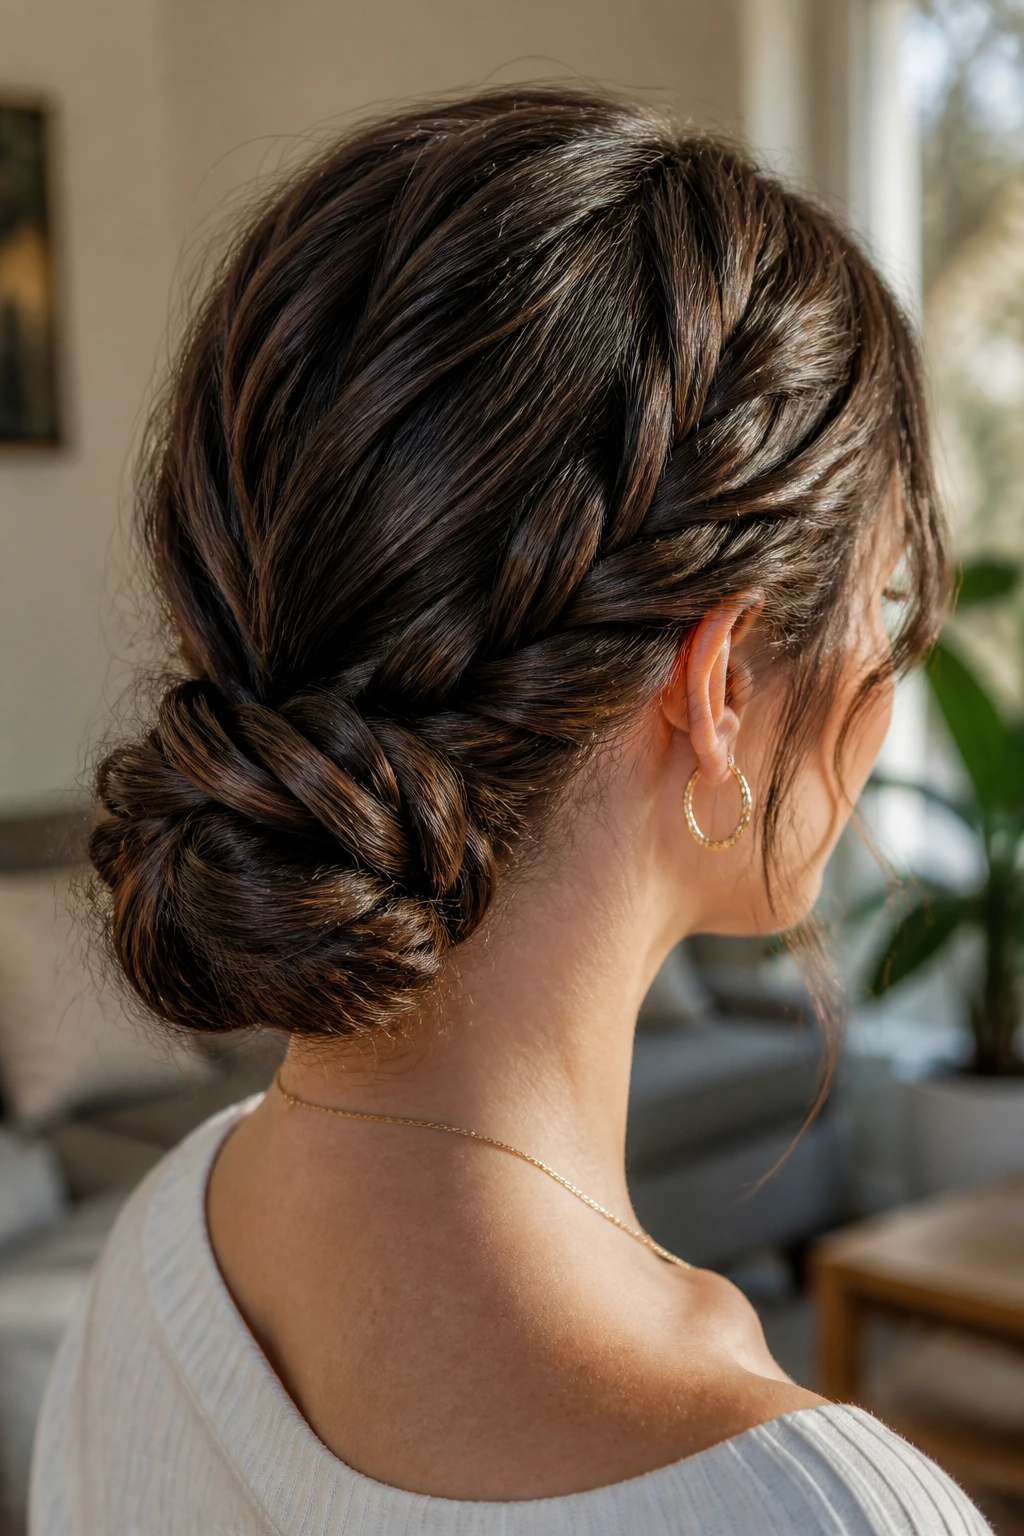
A rope-braid low bun has more texture than a standard bun and a slightly more modern feel than a plain twist. Split the ponytail into two sections, twist each one in the same direction, then twist them around each other in the opposite direction before coiling the rope into a bun.
The result is a compact bun with a rope-like surface that catches the light and looks deliberate from the side. It is especially good for thick hair because the braid structure holds the bulk in place.
- Pin trick: cross bobby pins in an X under the bun so it stays put.
- Best finish: smooth the crown first, then loosen the bun just a little.
- If it slips: use a second elastic at the base before pinning.
21. Sleek Bob Tucked Behind One Ear
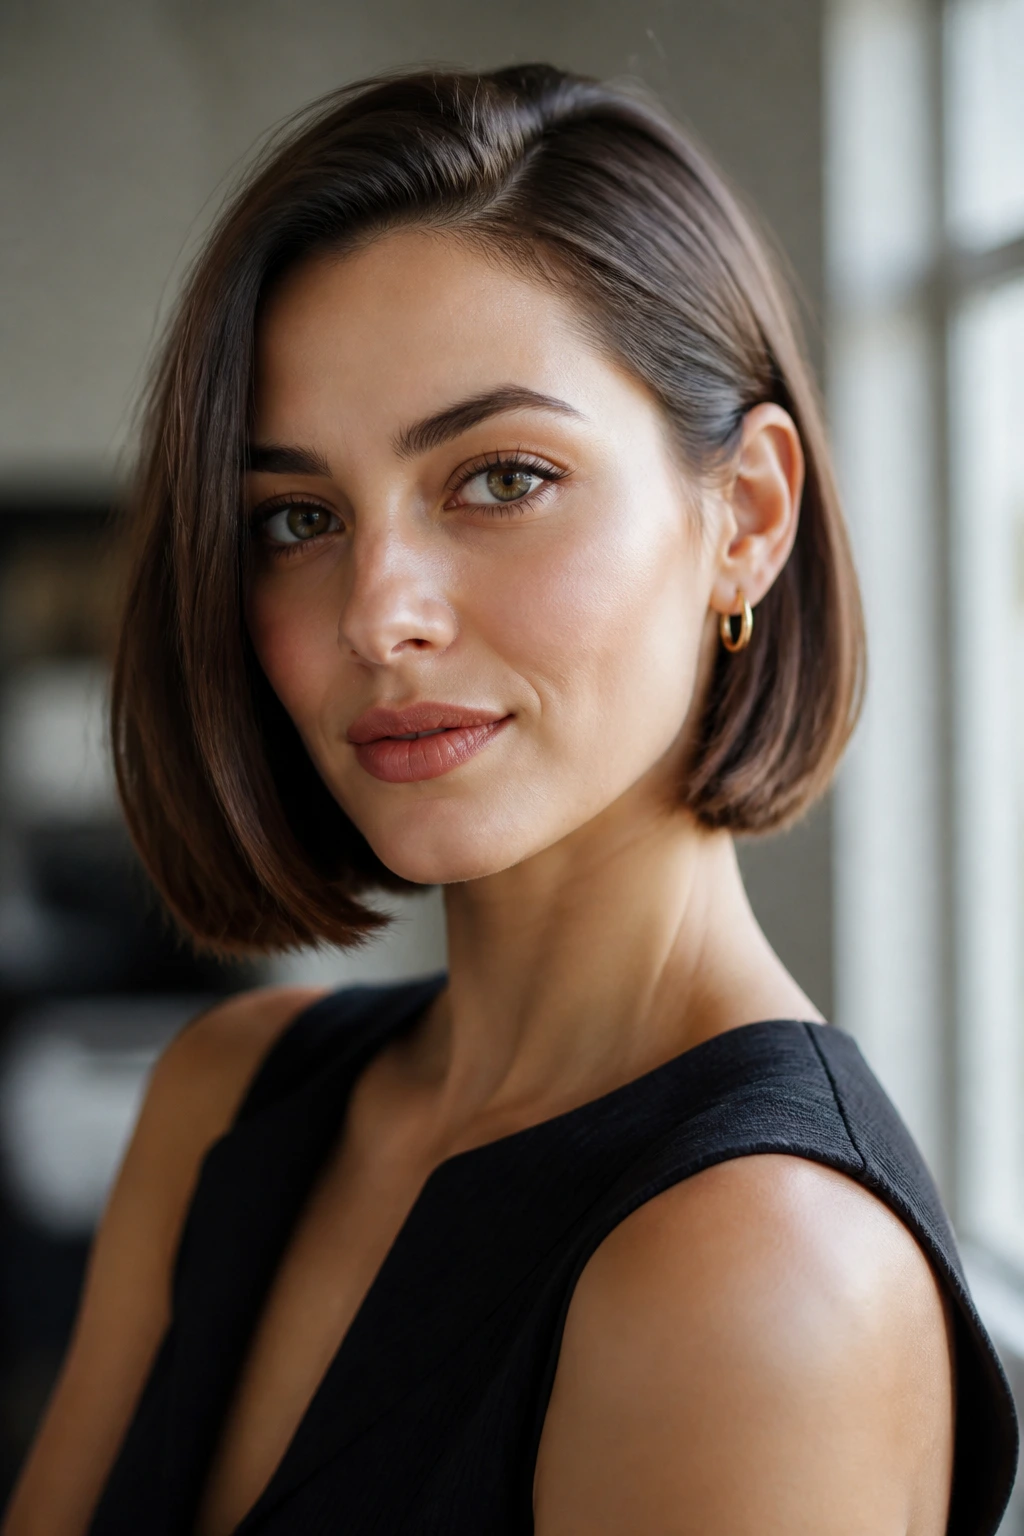
A sleek bob tucked behind one ear is proof that short hair can look polished with almost no effort. Smooth the hair with a light cream or spray, make sure the part is neat, and tuck one side back with a pin or small barrette.
The asymmetry is what keeps it from looking too plain. One side frames the face. The other side opens it up. That little imbalance feels modern without trying very hard.
This is a good everyday style for chin-length cuts and lobs that do not want to sit in a ponytail. It also pairs well with statement earrings. The tucked side gives the earring room to show.
22. Loose Twist Half-Up
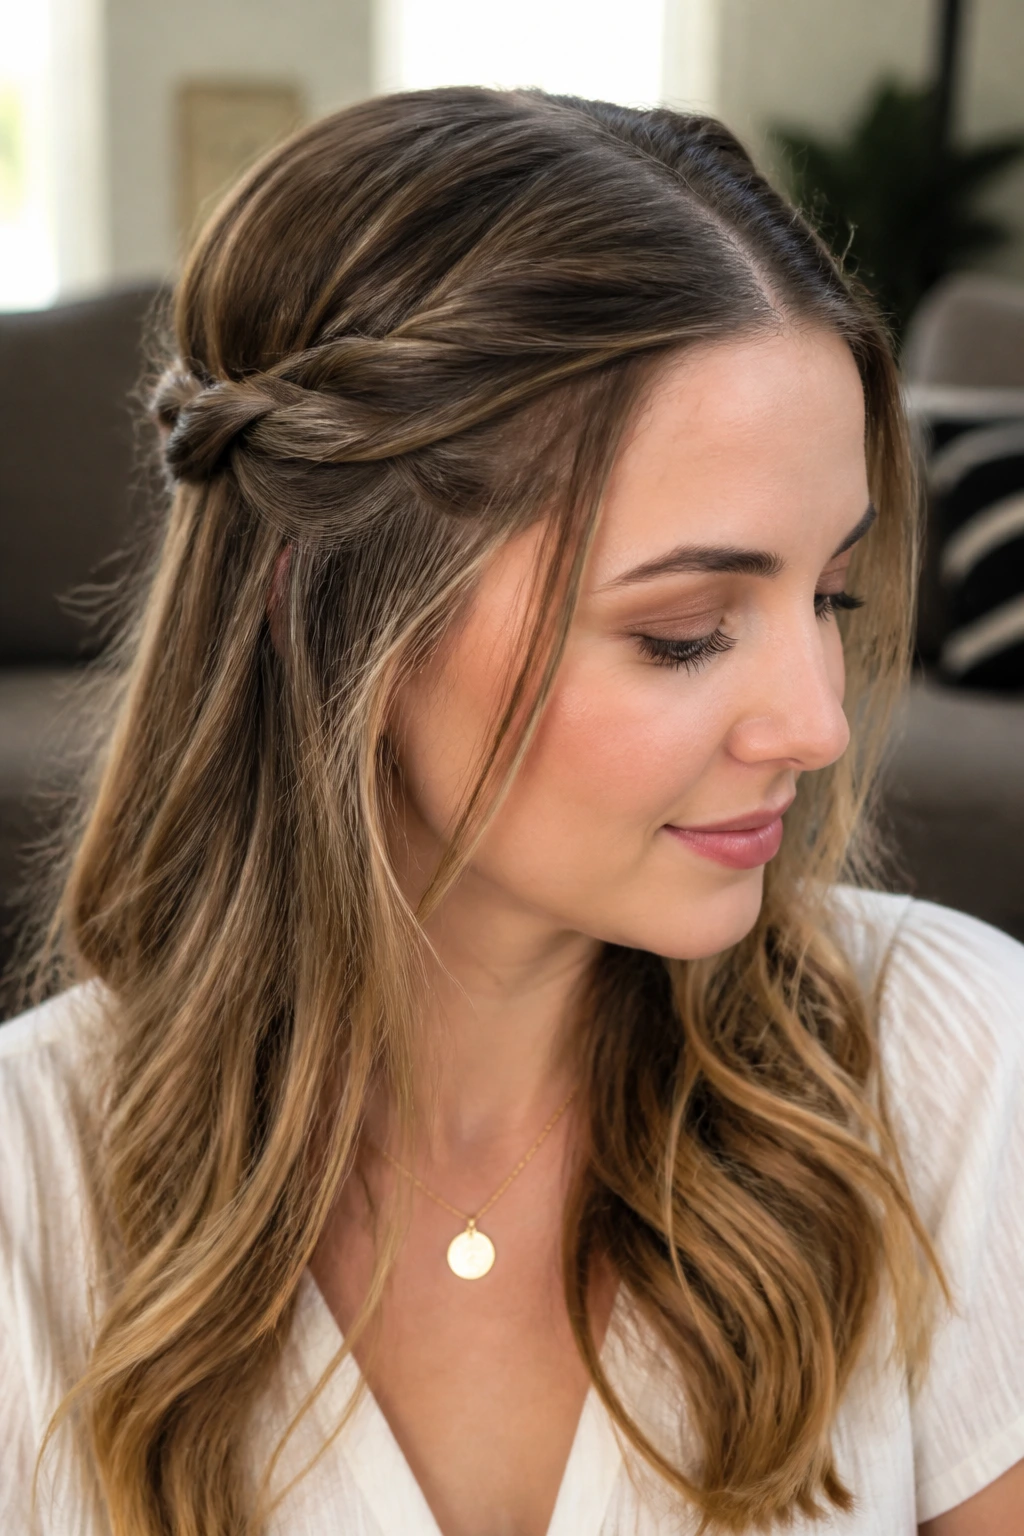
A loose twist half-up is softer than a knot and less structured than a clip. Take two sections from the temples, twist them back, and pin them together at the back of the head. Leave the twist a little airy so it does not sit flat and hard.
This style is kind to layered cuts because it keeps the front pieces out of the eyes while letting the ends move. It also works well when the hair has a bit of bend already. Straight hair can use a soft wave or a light bend at the ends first.
The best version of this look is subtle. Pull the twist apart too much and it loses its shape. Leave it too tight and it looks severe. Somewhere between the two is the sweet spot.
23. Headband Blowout
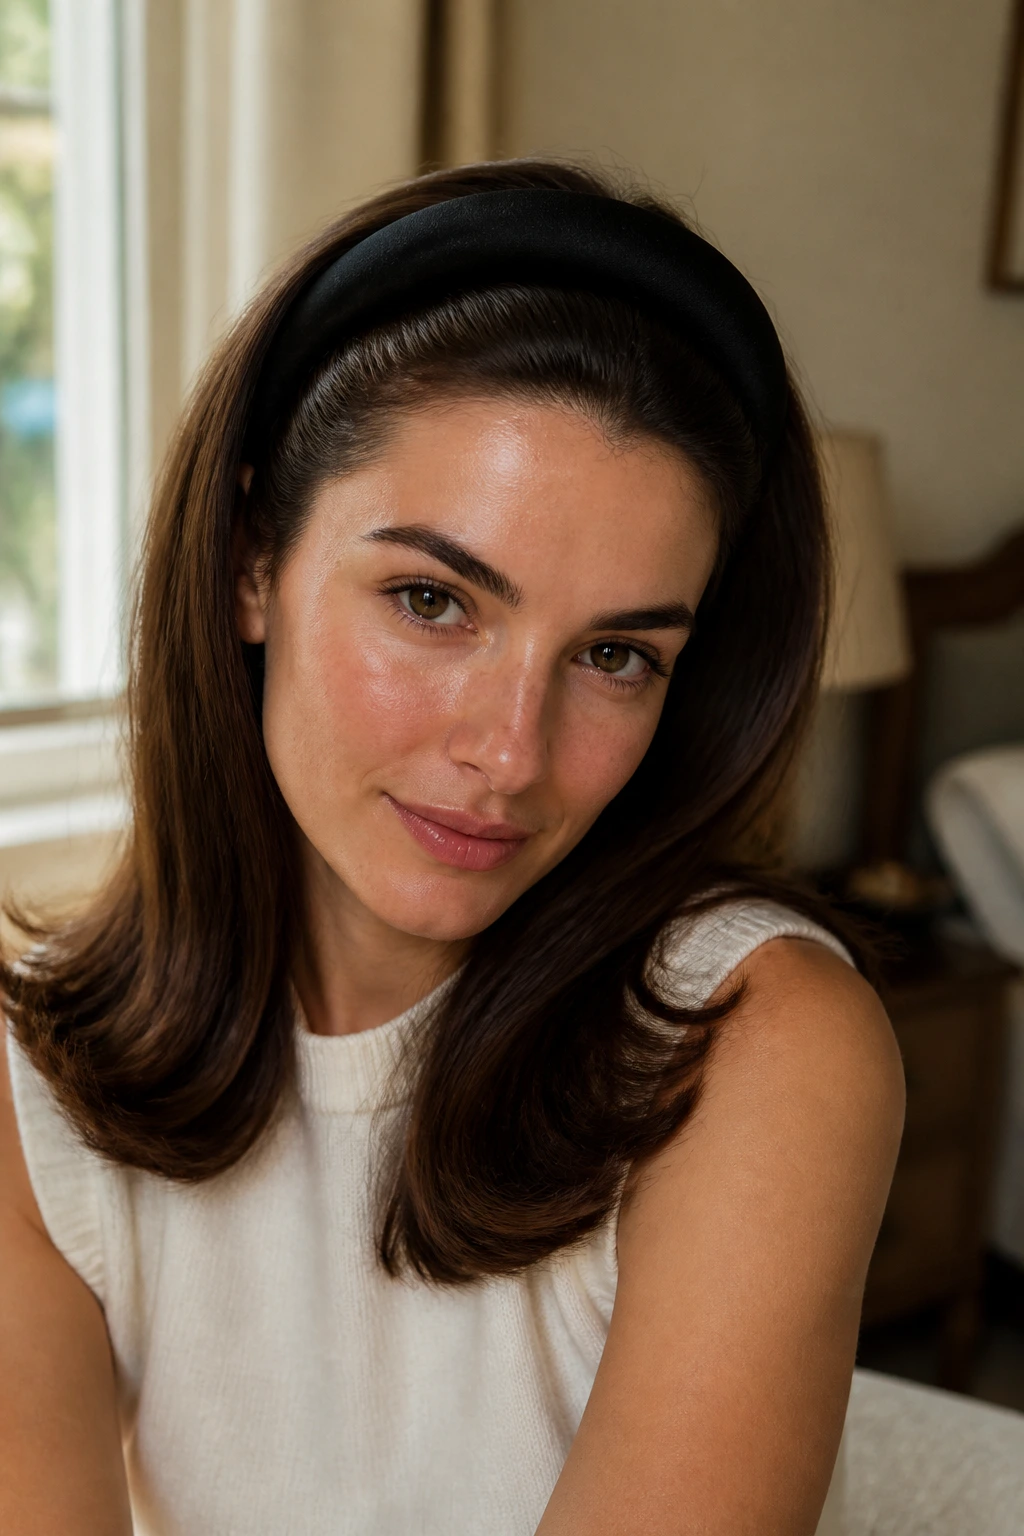
A headband blowout is one of the fastest ways to make hair look intentionally styled. Start with smooth roots and a little bend at the ends, then slide on a headband that sits about 1 to 2 inches back from the hairline.
- Best for: growing-out bangs, slightly oily roots, and mornings when you need speed.
- Choose: a headband that is structured but not tight enough to pinch behind the ears.
- Style note: lift the crown slightly before putting the band on so the top does not flatten.
This works because the headband gives the haircut a frame. The hair does not need to do all the work. That is useful, and a little underrated.
24. French Braid Into Low Bun
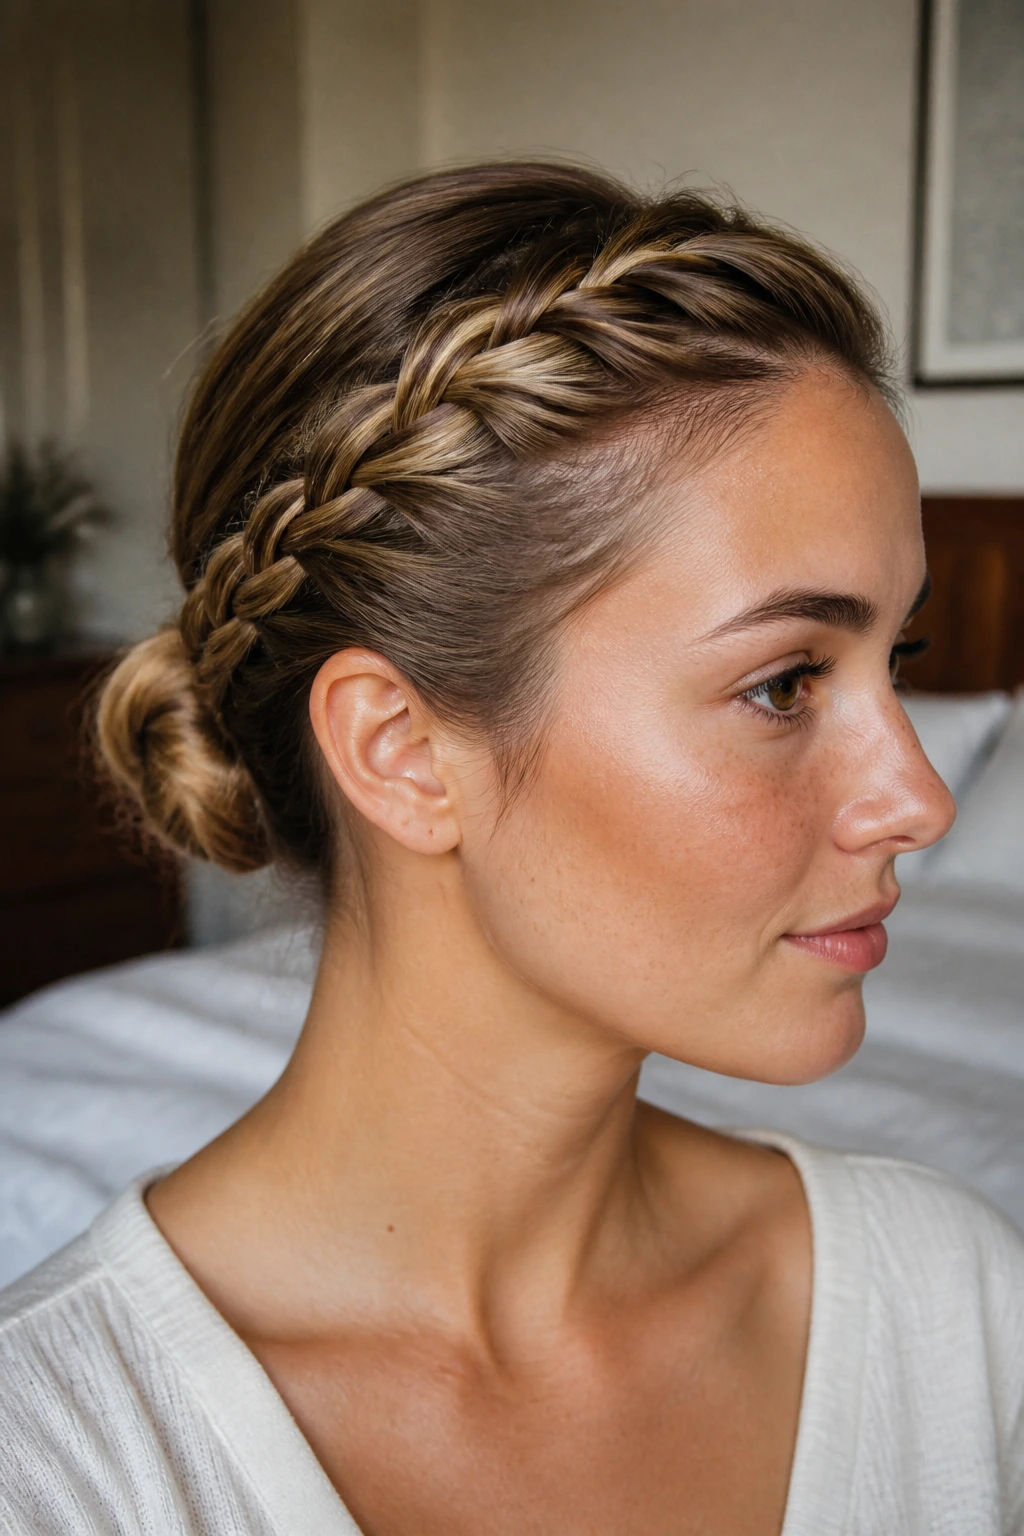
A French braid into a low bun gives you the control of a braid and the neatness of a bun in one style. Braid from the front hairline down to the nape, then gather the remaining hair into a compact bun and pin the ends under.
The top braid is where the polish lives. Keep it snug and even. The bun can be a little softer, because it sits lower and reads as the finish rather than the headline.
This is a strong choice for long days, physical errands, or hair that slips out of clips. It holds up well and keeps the line of the head tidy from morning to evening. Not glamorous in the loud sense. Better than that. It stays put.
25. Defined Natural Curls With Soft Edge Control
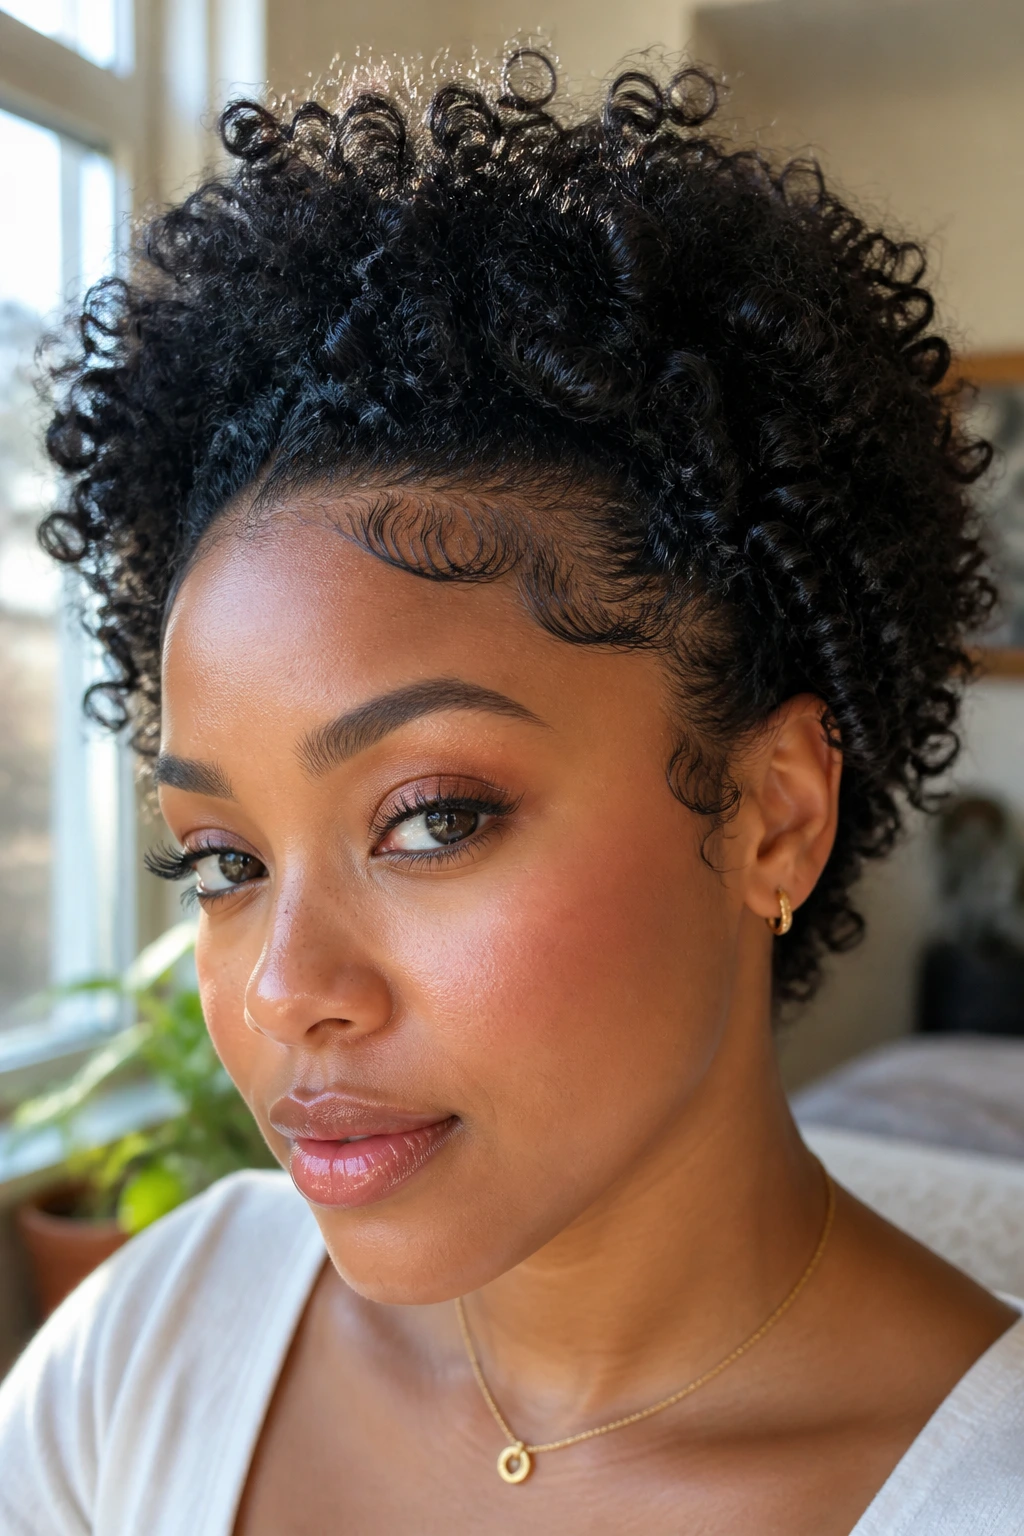
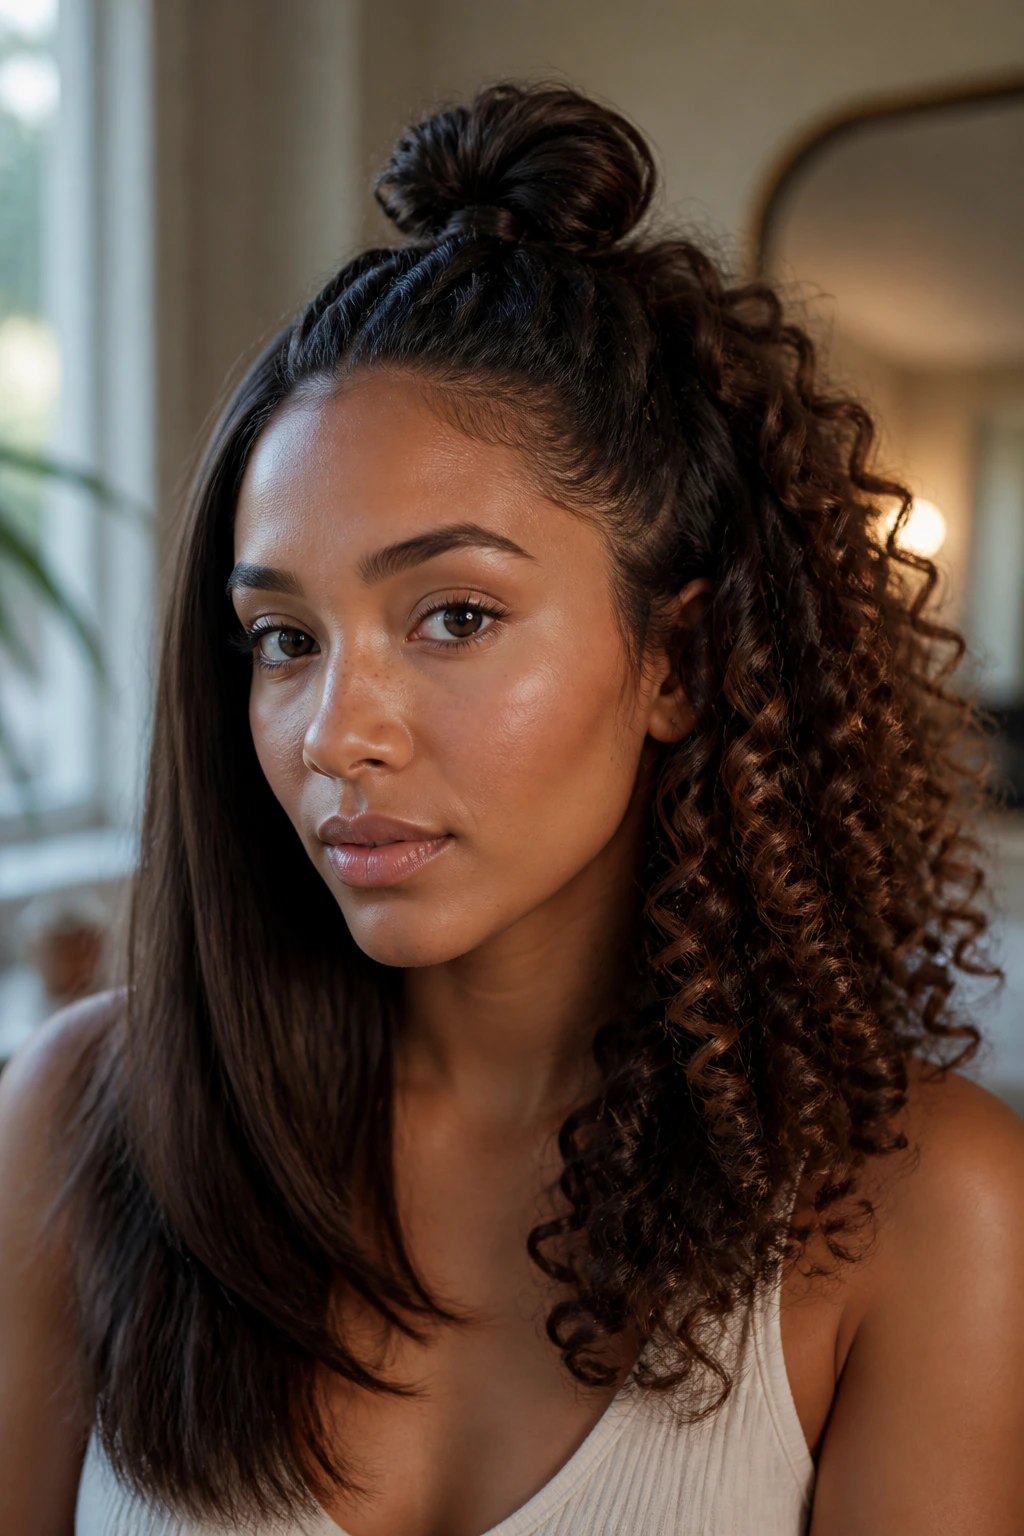
Defined natural curls can be one of the most polished everyday hairstyles in the room when the shape is respected instead of flattened. Apply leave-in conditioner and a curl cream or gel to damp hair, then scrunch or finger-coil the front pieces so the curl pattern is clean near the face.
Shape, not stiffness
The goal is definition with movement. Let the curls set fully, then separate only the pieces that cling together. A small amount of edge control at the hairline can smooth the front without making the whole style hard.
If your curls are coily, this look works beautifully with a rounded shape at the crown and a neat outline around the temples. If your curls are looser, keep the part clean and the ends hydrated so they do not look dry by midday. Frizz does not have to be the enemy. It just needs a boundary.
What Makes a Hairstyle Look Polished Instead of Fussy
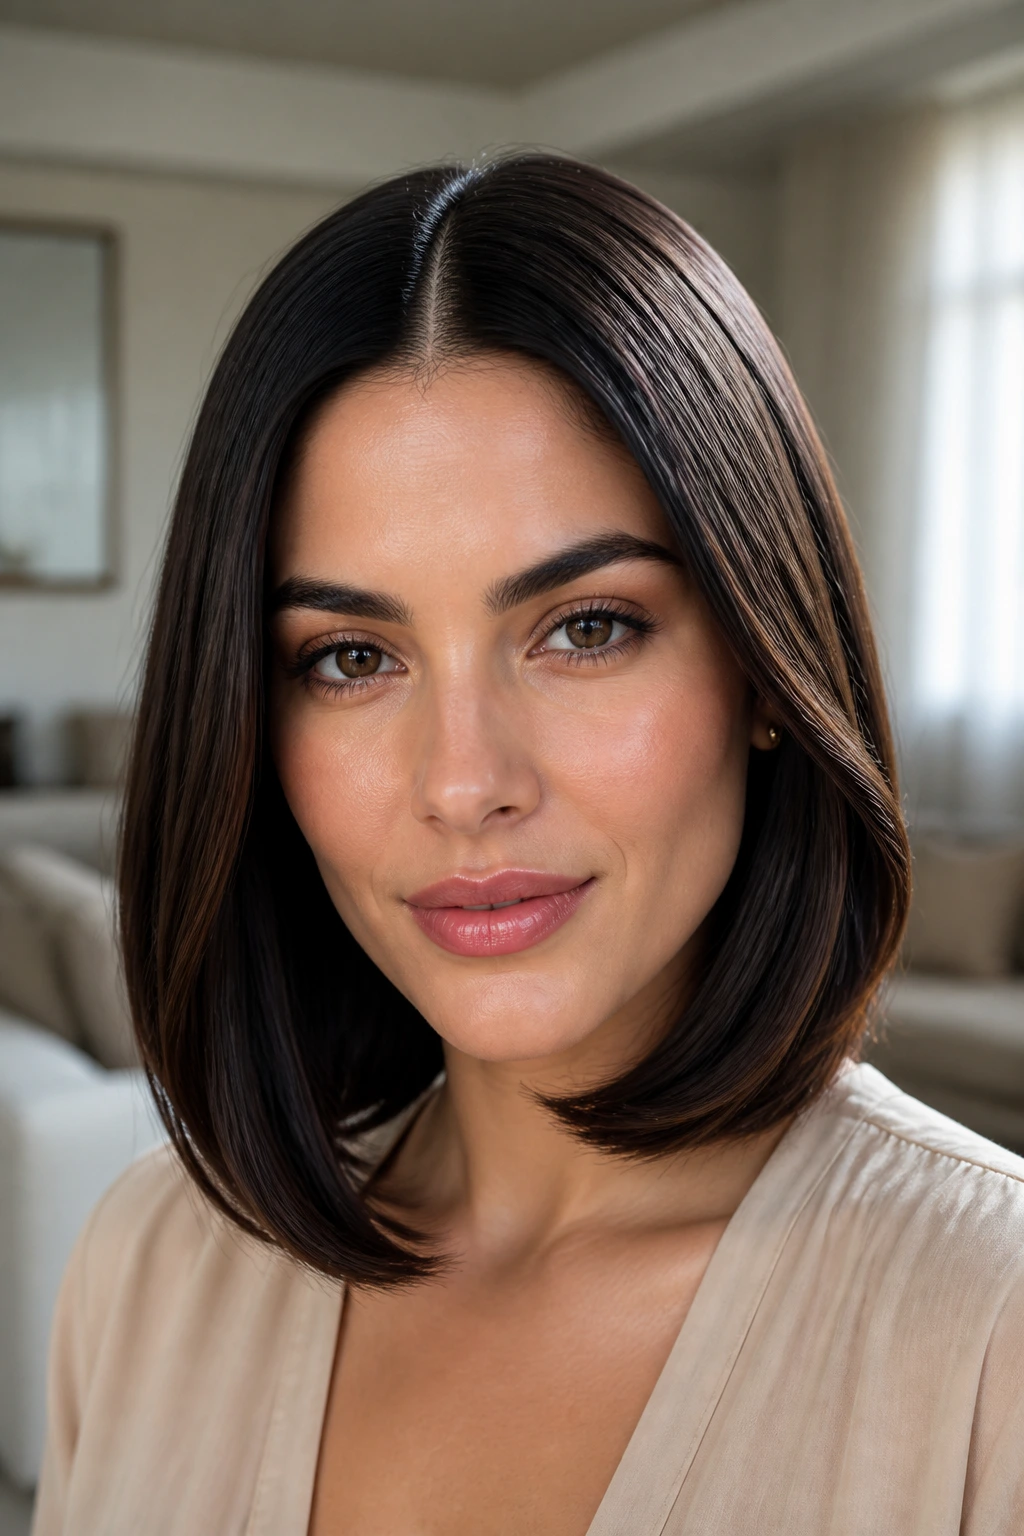
A hairstyle looks polished when three things line up: the part is clean, the surface is controlled, and the shape matches the haircut. Miss one of those, and the style can still be cute, but it will not look finished.
The part is the anchor. A sharp middle part, a deep side part, or a precise off-center part gives the eye a line to follow. A crooked part throws off the rest of the style, even if the ponytail or bun itself is perfect. That is a rude little truth of hair.
The surface matters next. Flyaways near the crown are fine in small amounts; a fuzzy halo everywhere is not. Use a soft brush, a tiny bit of smoothing cream, or a light mist of hairspray on the brush itself. That last trick works better than spraying directly at the head, especially if you do not want the roots to feel tacky.
The shape should match the cut
A blunt bob wants a cleaner outline. A layered cut wants a little looseness so the shorter pieces do not look trapped. Thick hair usually needs more pinning and division. Fine hair often needs less product and a bit more lift. The style should follow the haircut, not fight it.
Essential Tools for These Hairstyles
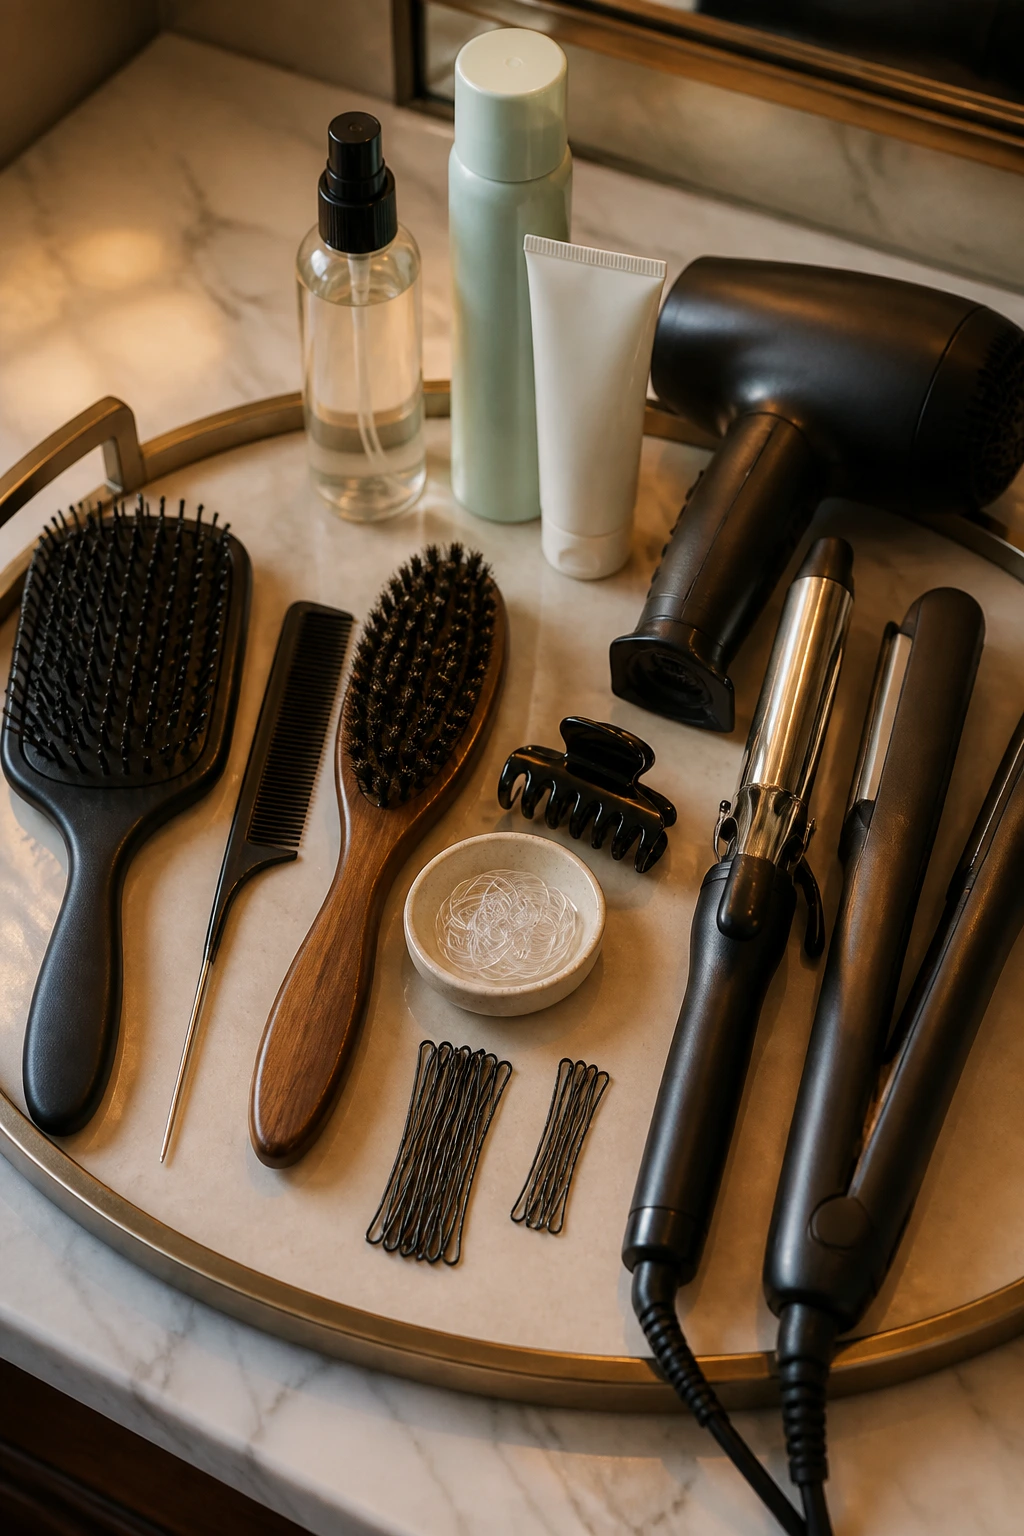
- Paddle brush: Smooths ponytails, buns, and half-up styles without making the hair too puffy.
- Tail comb: Helps create crisp parts and neat section lines.
- Boar-bristle or smoothing brush: Useful for taming the crown and keeping flyaways close.
- Small clear elastics: Best for braids, half-up styles, and wrapped ponytails where you do not want a bulky tie showing.
- Bobby pins in two sizes: Short pins disappear better in short hair; longer pins hold thicker buns and twists.
- Claw clip: Pick one with a strong spring and enough depth to grip the whole twist.
- Heat protectant spray: Non-negotiable if you use a blow-dryer, curling iron, or flat iron.
- Dry shampoo: Adds grip and absorbs root oil, especially on fine hair or second-day styles.
- Light smoothing cream or serum: Use sparingly on mids and ends to tame frizz without flattening the roots.
- Blow-dryer with nozzle: The nozzle directs airflow downward and helps keep the cuticle smoother.
- 1-inch curling iron or wand: Handy for soft waves, curls, and the bend on shorter layers.
- Flat iron: Best for sleek bobs, straight blowouts, and bending the ends under.
Hair Prep That Makes Styling Faster
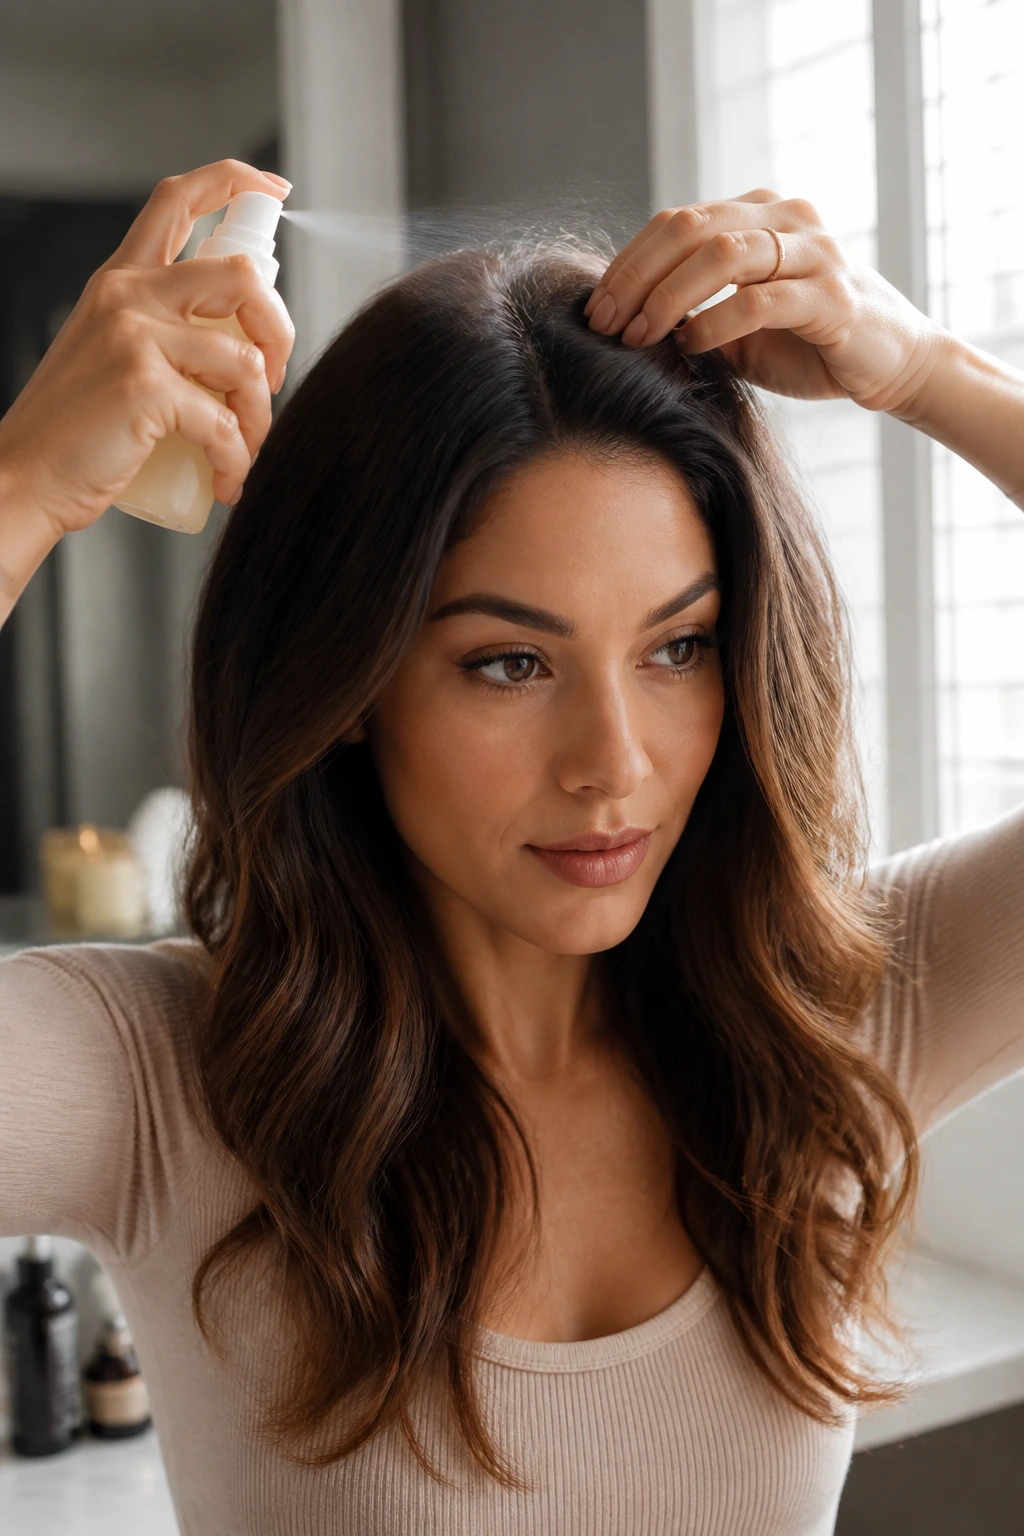
Hair prep is boring. It also saves the most time. A few minutes spent before styling means fewer fixes later, and fewer fixes later means the look still holds together when you step outside or pull on a coat.
Start with the scalp and roots. If hair is clean but slippery, mist dry shampoo at the roots, wait thirty seconds, then brush it through. That gives the style a little grip. If hair is oily, do not bury it in product. Clean the roots with a light wash or a quick blow-dry at the crown so the base has some life.
Mid-lengths and ends want different treatment. A pea-sized amount of cream or serum on damp ends can stop the frizz that makes a ponytail look ragged. Use heat protectant before any hot tool. Not after. Before. The order matters because the heat can seal in whatever is on the strand, for better or worse.
Rough-dry first, shape second
If you are using a blow-dryer, rough-dry the roots until they are at least 80 percent dry before switching to a brush. That prevents the flat, damp look that turns into puff by lunchtime. Once the roots are dry, shape the front sections, then finish the ends with a slight bend or a soft curve.
How to Wear These Styles With Different Outfits and Necklines
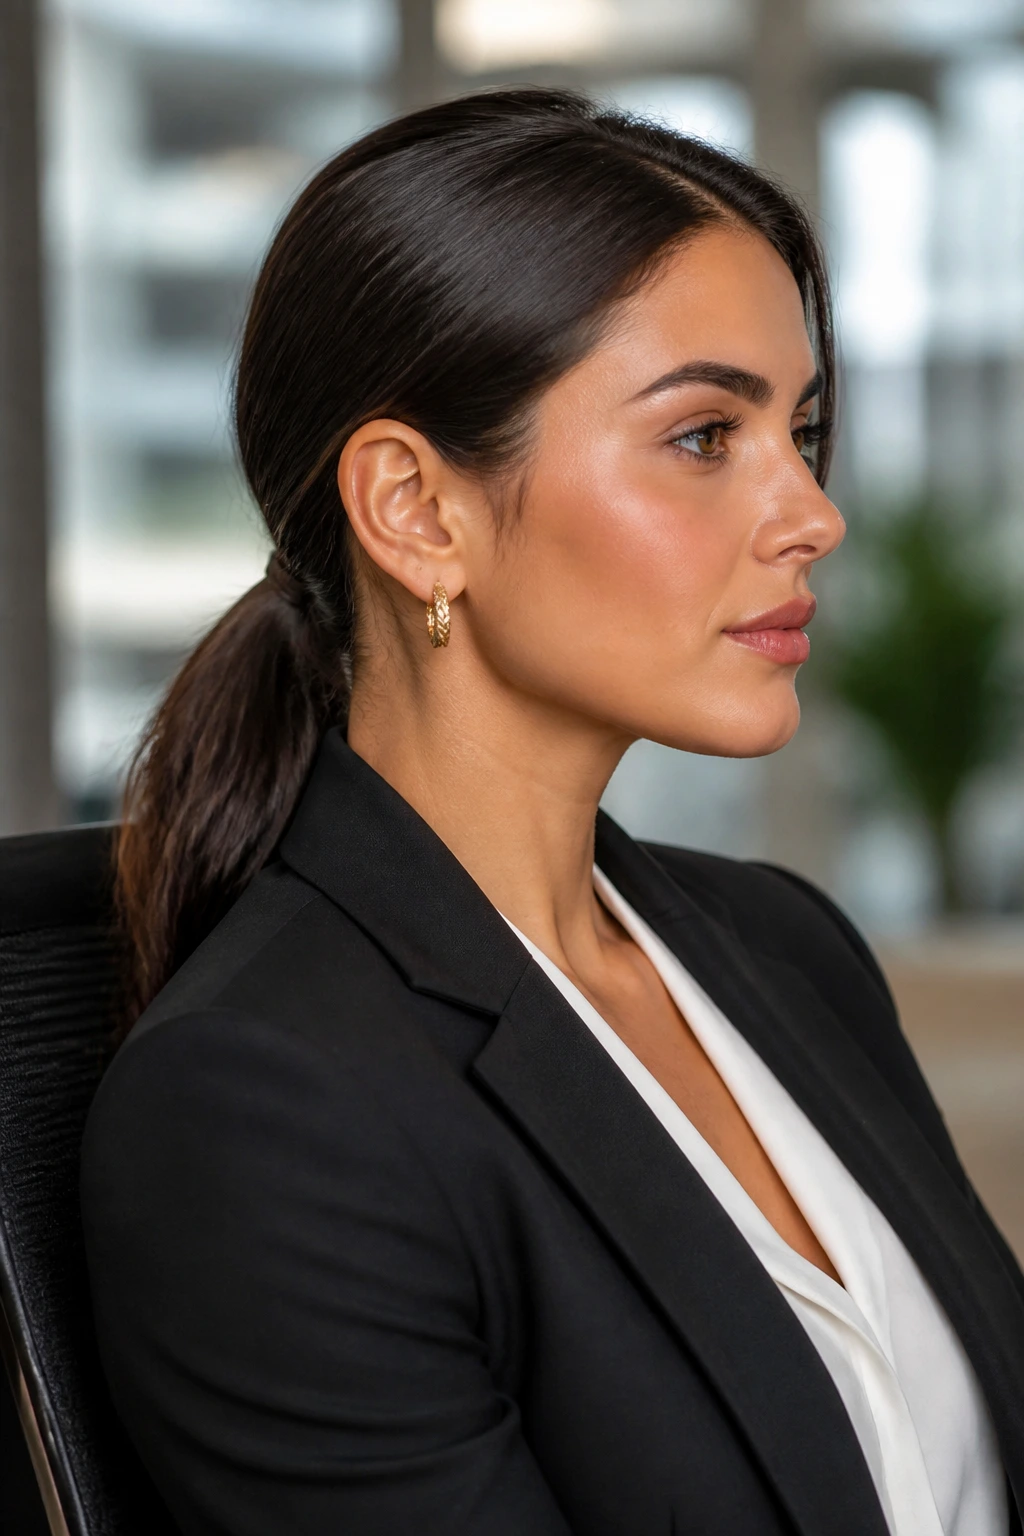
A hairstyle changes the whole line of an outfit. A low bun with a turtleneck keeps the neck area clean and makes the silhouette feel neat. A high ponytail can give a simple crew neck more energy, because the hair sits away from the fabric and keeps the top half from feeling heavy.
Button-down shirts and blazers usually like styles with a little structure: a sleek low ponytail, a tucked-under chignon, or a bob tucked behind one ear. Those choices keep collars from fighting with the hair. A loose side wave or half-up knot works better with softer knits and open necklines, where the movement feels balanced instead of crowded.
Earrings matter too. A tucked side, low braid, or clipped-back half-up style gives hoop earrings and drops room to show. If the earrings are the main event, do not hide them under a curtain of hair. Let the hairstyle cooperate.
Additional Styling Tips and Finishing Moves
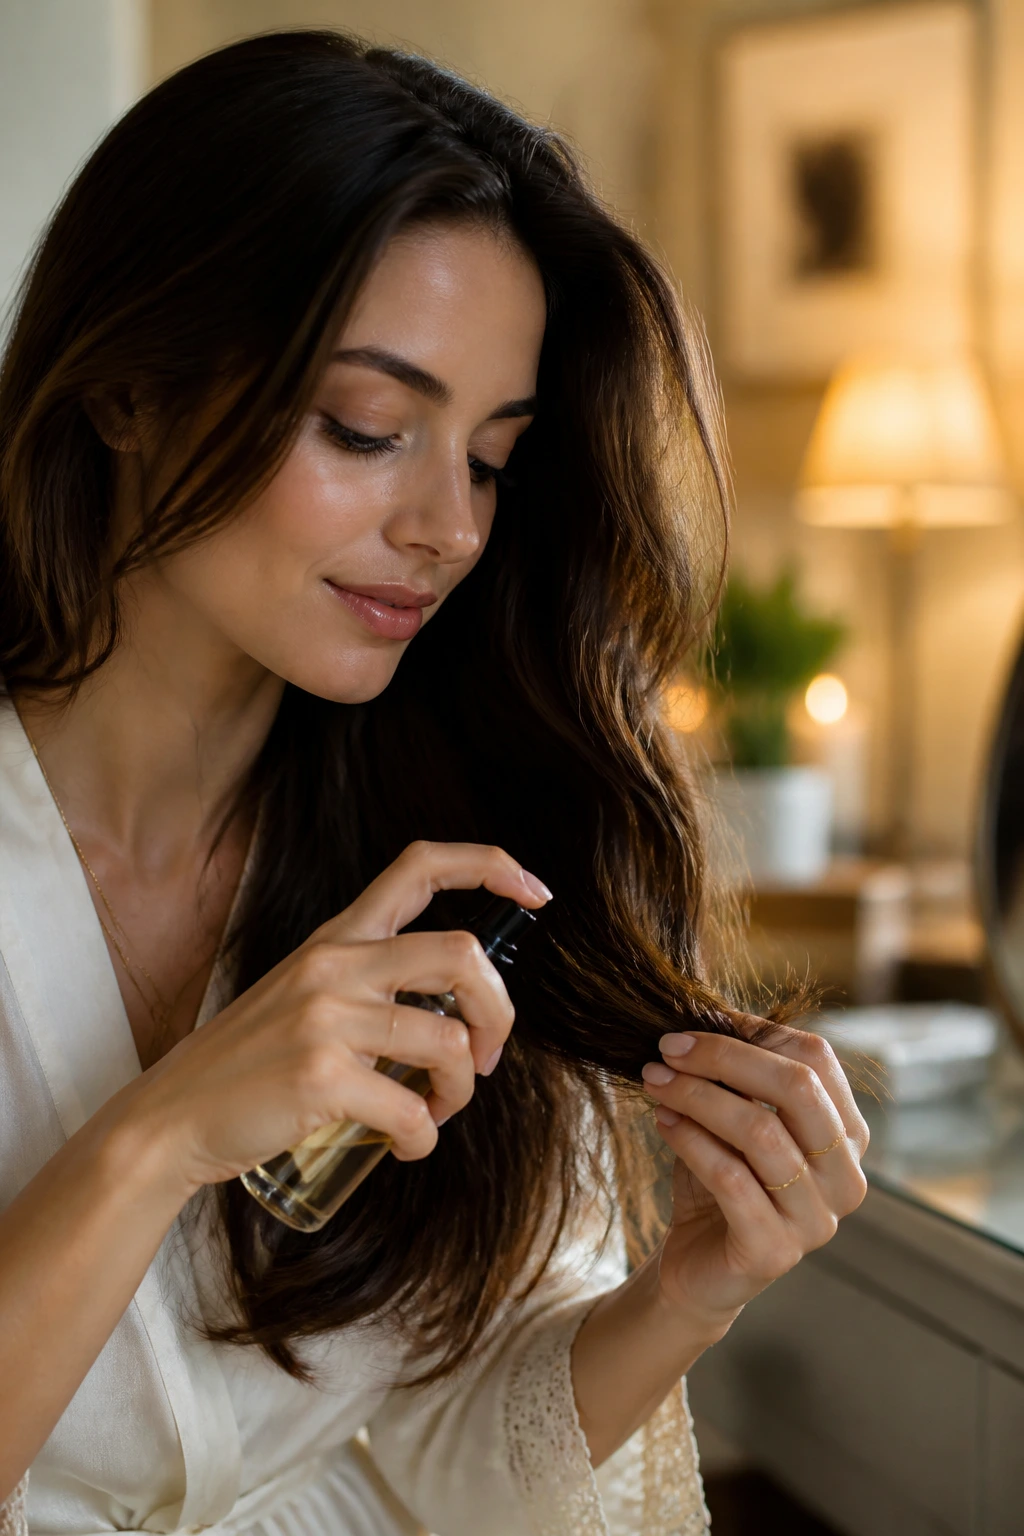
Shine: Warm a drop of hair oil between your palms and skim it over the last third of the hair. If the roots are oily, keep your hands away from the top.
Texture: Spray a little dry shampoo or texture spray on the underside of braids, buns, and ponytails. That is where grip matters most, and it keeps the surface from going flat.
Volume: Lift the crown with the tail of a comb before securing the style, then press the hair down gently with your hand. You get shape without the little bump that can make a style look dated.
Make-It-Yours: Fine hair usually benefits from smaller accessories and a bit of teasing at the roots. Thick hair needs sturdier elastics and more pins. Curly hair often looks best when the front and crown are defined, but the texture is left alone.
Speed trick: Keep a small kit together — one brush, one elastic, two pins, one clip, one travel-size spray. That turns a five-minute reset into a two-minute one.
Common Mistakes That Make a Neat Style Look Messy
The first mistake is over-tightening everything. Hair that is pulled hard at the hairline looks severe, and it often creates dents where the elastic sits. Leave a little softness at the temples and crown. The style will still hold.
Another one: using too much cream or oil near the roots. That makes the style collapse before lunch and gives the hair a damp, greasy shine that is hard to fix once it starts. Keep smoothing products on the mids and ends, and use the tiniest amount you can get away with.
Skipping the part is a quiet disaster. When the top section is brushed straight back without a clear line, the style loses shape. A defined part takes seconds and does more visual work than almost anything else.
Pins are another place people get sloppy. If the pin is visible, sticking out, or placed in the wrong direction, it telegraphs that the style was improvised. Slide pins in with the wavy side against the scalp for grip, and hide them under a fold or beneath another layer of hair.
Finally, do not ignore the ends. A polished root with dry, frayed ends looks half-finished. Trim when needed, or smooth the last inch with a little cream, a quick iron pass, or a soft curl under.
Variations and Alternatives for Different Hair Types
Fine-Hair Lift Kit: Use smaller sections, a light texture spray at the roots, and styles that create shape without too much weight — sleek low ponytails, half-up knots, and headband blowouts work especially well.
Thick-Hair Clamp Down: Choose stronger elastics, extra bobby pins, and styles that gather bulk in one place, like rope-braid buns, French braid into low bun looks, and polished top knots.
Curly-Hair Shape Shift: Start on damp hair with leave-in and define the front and crown first. Defined natural curls, half-up twists, and side parts usually read more polished than forcing curls into a fully smoothed style.
Short-Hair Workarounds: Claw clips, tucked sides, mini twists, barrettes, and clean parts matter more than ponytails. A bob can look every bit as finished as long hair if the edges are controlled and the shape is sharp.
Humidity Armor: Keep styles lower, tighter at the base, and finished with a light anti-frizz product. Buns, braids, and tucked styles tend to hold better than loose waves when the air feels sticky.
How to Keep the Style Fresh, Sleep-Friendly, and Reworkable
Most everyday hairstyles are built to last a day, not a week, but a little maintenance goes a long way. A low ponytail, braid, or bun can often be worn the next day if you refresh the roots and smooth the surface. A half-up style might need one extra pin or a quick re-twist. A blowout or soft wave usually needs the most help, especially around the front pieces.
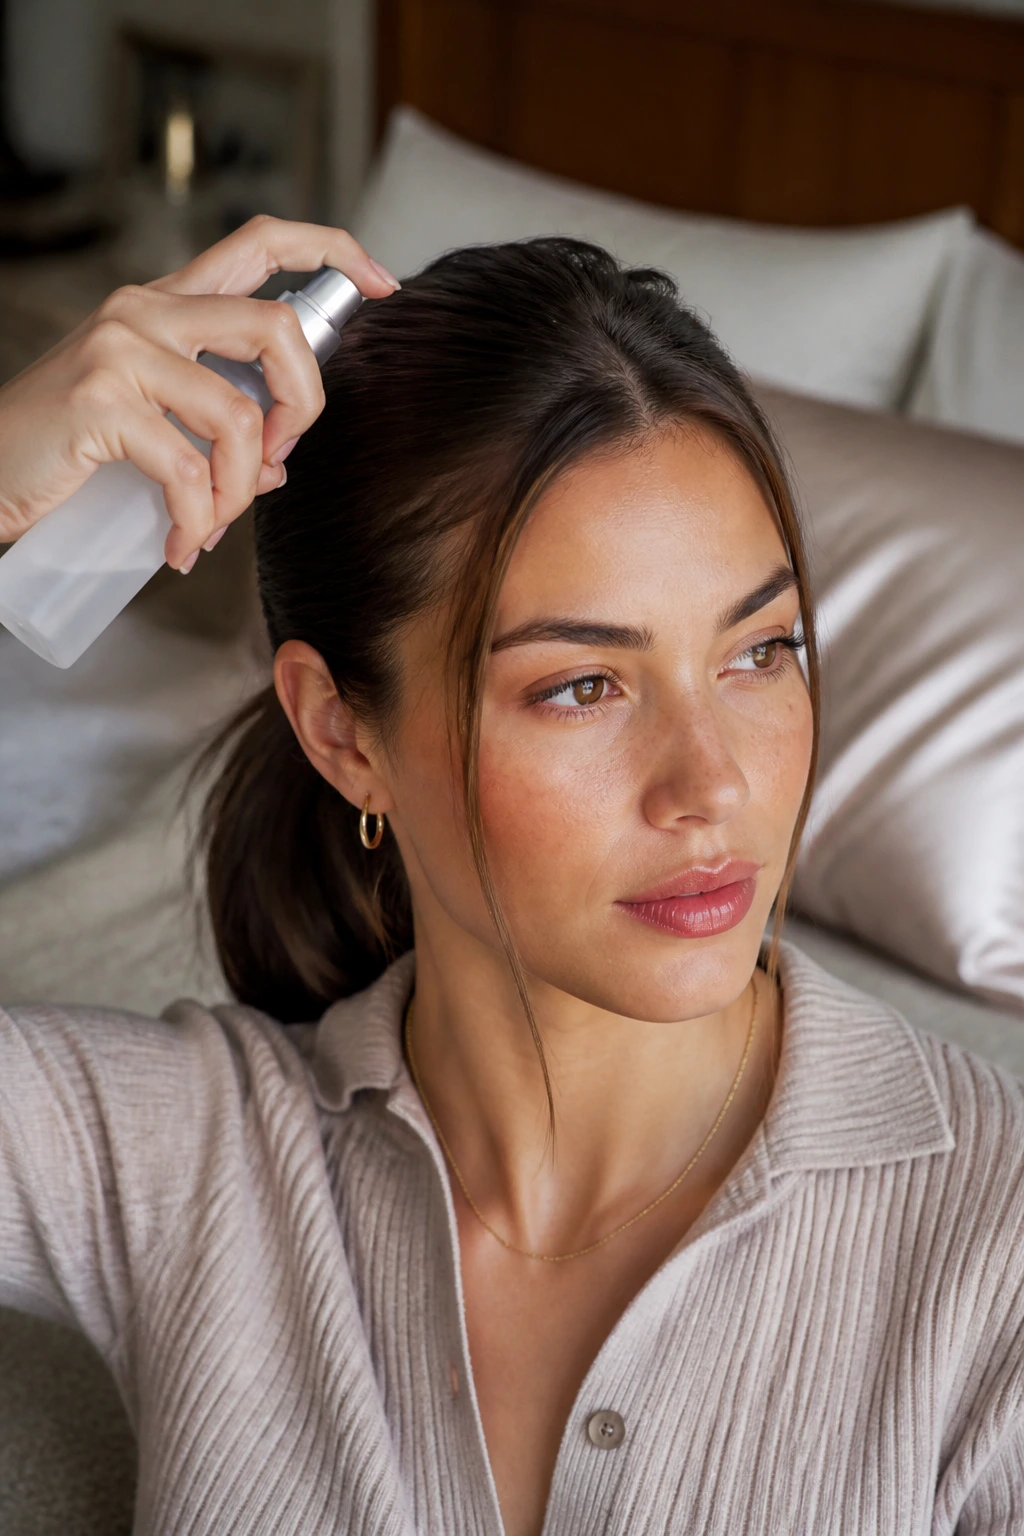
At night, looser braids and low buns are kinder than high ponytails or tight clips. If you can, switch to a satin pillowcase or wrap the hair loosely so the crown does not get crushed. That matters more than people think. Morning hair is often just sleep damage with a nicer attitude.
For refreshes, work in layers. First, loosen the elastic or clip and shake out the roots. Then use dry shampoo only where the hair looks flat. Finally, smooth the front with a brush and fix the part. If you add product first, you can end up with a sticky surface and no shape.
Some styles improve overnight. Low braids get softer. Twisted buns hold their outline. Sleek ponytails usually need a quick re-smooth. That is the trade-off. The longer the style depends on polished surfaces, the more it asks from the next morning.
Frequently Asked Questions
Which everyday hairstyle is best for fine hair?
Sleek low ponytails, half-up knots, and headband blowouts tend to work well because they create shape without needing a lot of bulk. A light texture spray at the roots helps the style hold, but use it sparingly or the hair can go limp.
How do I keep a ponytail from sagging by midday?
Start with a stronger elastic and place the ponytail a little higher than you think you need. Split thick hair before securing it, or anchor the base with two elastics crossed in an X if the weight keeps dragging it down.
Can I do polished hairstyles without heat?
Yes. Low buns, braids, claw-clip twists, and half-up styles do not need hot tools at all. The biggest difference comes from the part, the smoothing brush, and a little product on the surface.
What works best for curly hair when I want a clean finish?
Defined natural curls, low buns that respect the curl pattern, and half-up twists usually look best. The goal is to smooth the hairline and crown while leaving the curl shape intact, not flattening it into something else.
How much product is too much?
If the roots look shiny in a greasy way, you used too much. Start with a pea-sized amount of cream or serum, and use more only on the ends. Hair should feel controlled, not sticky.
How do I keep flyaways down without making the style hard?
Spray a bit of hairspray on a brush or your fingertips and smooth the flyaways gently. Direct spraying usually creates stiffness fast, especially around the hairline where the hair is shortest and most fragile.
Are claw clips damaging?
They can be fine if they are not too small or too tight. The damage usually comes from forcing too much hair into a clip that cannot hold it, which creates tension and snapping at the bend. Use a clip that matches your hair volume.
What if my hair is too short for a ponytail or bun?
Use styles that work with your length instead of against it: a tucked-behind-ear bob, a headband blowout, small twist-back sections, side braids, or barrettes near the temples. Short hair looks polished when the outline is neat.
How do I make these styles last after commuting or errands?
Carry a small brush, two pins, and a travel-size smoothing product. A one-minute reset at the crown and hairline usually fixes what a coat hood, backpack strap, or car seat caused.
The Hair You Can Live In
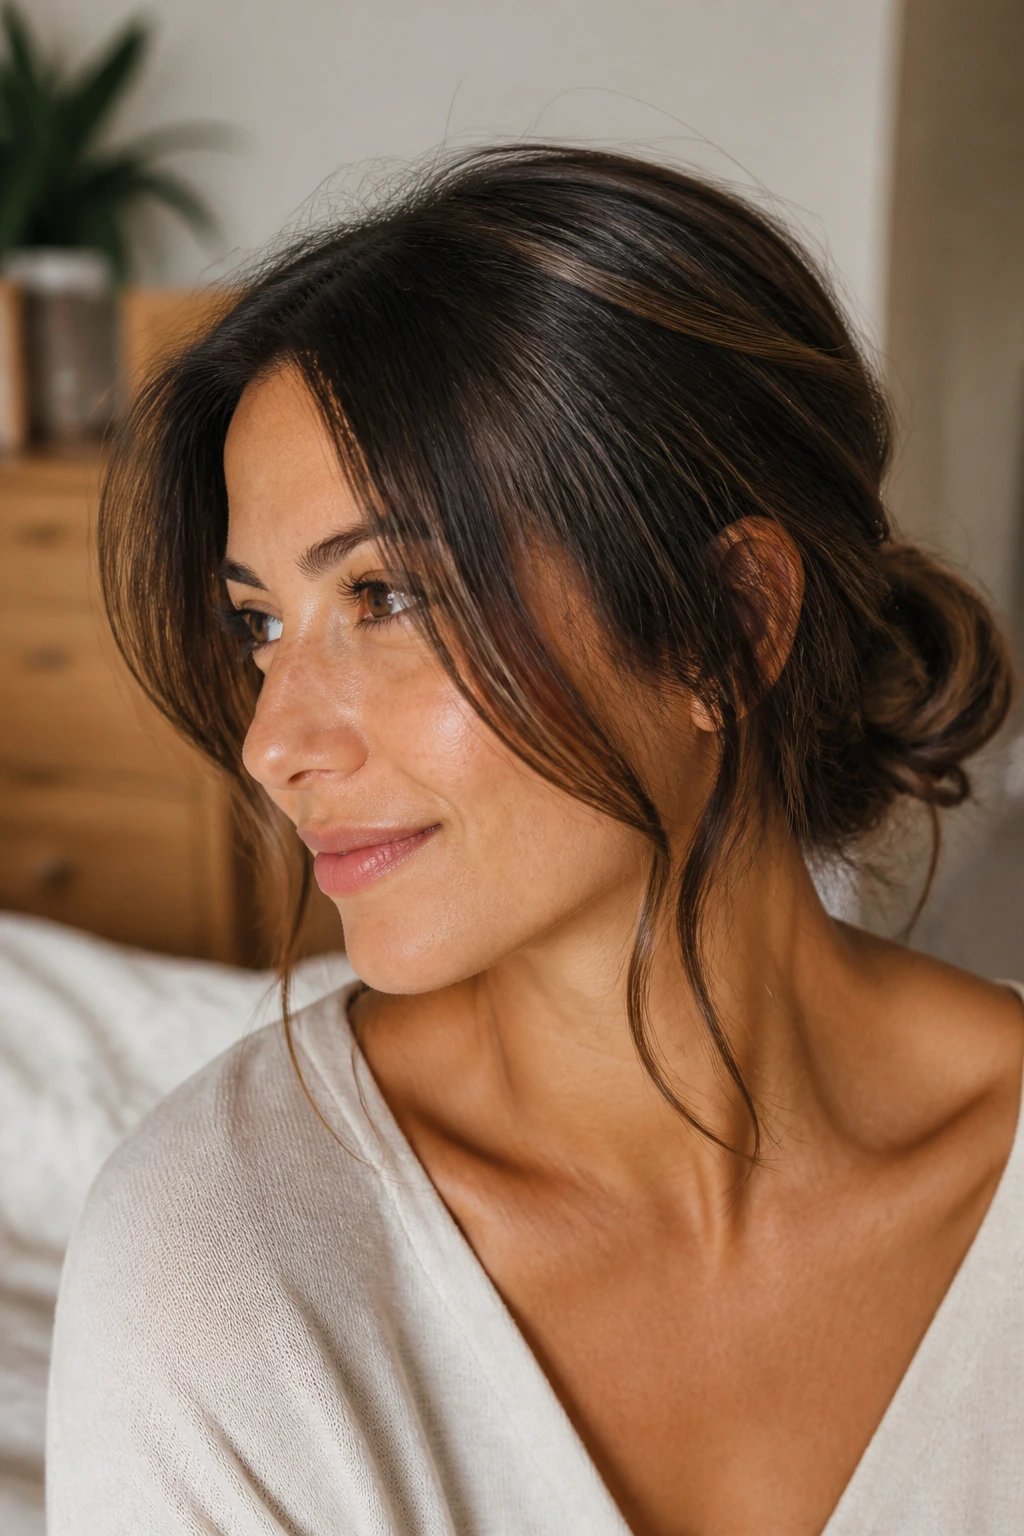
The best everyday hairstyles are the ones that feel repeatable. Not perfect. Repeatable. They should work on a Tuesday with a sweater, a blazer, or a damp day when the front pieces are doing their own thing.
Pick three or four from this collection and keep them in rotation. Learn which ones like second-day hair, which ones need a little heat, and which ones look best when you leave out two face-framing pieces. That small bit of knowledge makes the whole routine easier.
The polished daily look is rarely about doing more. It is about doing the right small things in the right order, then stopping before the hair starts to look forced.
