



Spring hair looks best when it moves a little. Not floppy. Not frozen in place. Just enough softness at the hairline, enough lift at the crown, and enough control at the ends to make the whole thing look deliberate instead of accidental.
These spring hairstyles lean hard on that idea. They clean up the shape without turning your head into a helmet. A center part that lies flat, a ribbon tied where a scrunchie would have felt lazy, a bend in the bob that stops right at the jaw — those are the little details that make a style read polished in daylight, not just in a mirror under bathroom lights.
And there’s a practical side to all of this. Spring weather can be sneaky. One hour the air feels dry, the next your flyaways are standing up like they paid rent. The styles below work because they give you structure in the right places and softness everywhere else. That balance matters more than people think.
Why These Spring Hairstyles Feel Fresh Without Trying Too Hard
-
Soft shape, not stiffness: A polished spring look usually has one clean line — a part, a tuck, a bun base, a braid path — and then a little movement somewhere else so it doesn’t feel severe.
-
Face-framing matters: Even the neatest styles look friendlier when you leave out a slim section at the temples, curve the ends under, or keep a fringe a touch airy.
-
Accessories do real work: A ribbon, claw clip, barrette, or scarf can turn a plain tie-back into something finished in seconds, and that matters on days when your hair is cooperating only halfway.
-
Humidity-proof shape wins: Styles with low buns, wrapped ponytails, braids, and tucked ends tend to outlast spring frizz better than loose styles that depend on perfect smoothness all day.
-
They suit real life: These looks work for office mornings, brunch plans, school runs, and late dinners because they don’t demand constant touch-ups or a half-hour of hot tools.
-
They grow out gracefully: A few of these styles still look intentional after a long day, which is more useful than a hairdo that only holds together for the first photo.
1. Sleek Low Bun With a Center Part
A low bun can look severe if you push it too far, but the center part changes the whole mood. It gives the face a clean frame, keeps the crown neat, and makes the bun feel calm instead of fussy. I like this one when the outfit has a sharp collar or when earrings need a little room to show.
Start with a smoothing cream or a drop of lightweight oil at the mid-lengths, then map the part with a tail comb. Brush the hair back low at the nape, secure a ponytail, and twist the length into a compact coil. Pin it flat with two or three bobby pins crossed over each other. If you have layered hair, tuck the shorter pieces under with a U-pin so the bun doesn’t sprout little ends by lunchtime.
2. Soft French Twist
Why does a French twist still feel polished when so many updos look overworked? Because the shape does the talking. A modern version stays narrow through the middle, has a bit of lift at the top, and leaves the surface smooth but not shellacked.
The trick is grip. Hair that’s too slippery will slide, so a light mist of texture spray at the roots helps before you gather it. Roll the length upward, tuck the ends inside, and secure the fold with pins placed vertically, not stuffed in randomly. Leave one or two fine pieces near the ears if you want the twist to feel lighter. Too many loose pieces and it loses the point.
Keep It Modern
- Use a smaller twist than you think you need; oversized twists can look dated fast.
- Press the top with a brush, not a comb, if you want the surface to stay smooth without harsh lines.
- A matte pin or two can disappear into dark hair and keep the whole thing looking neat.
3. Half-Up Ribbon Tie
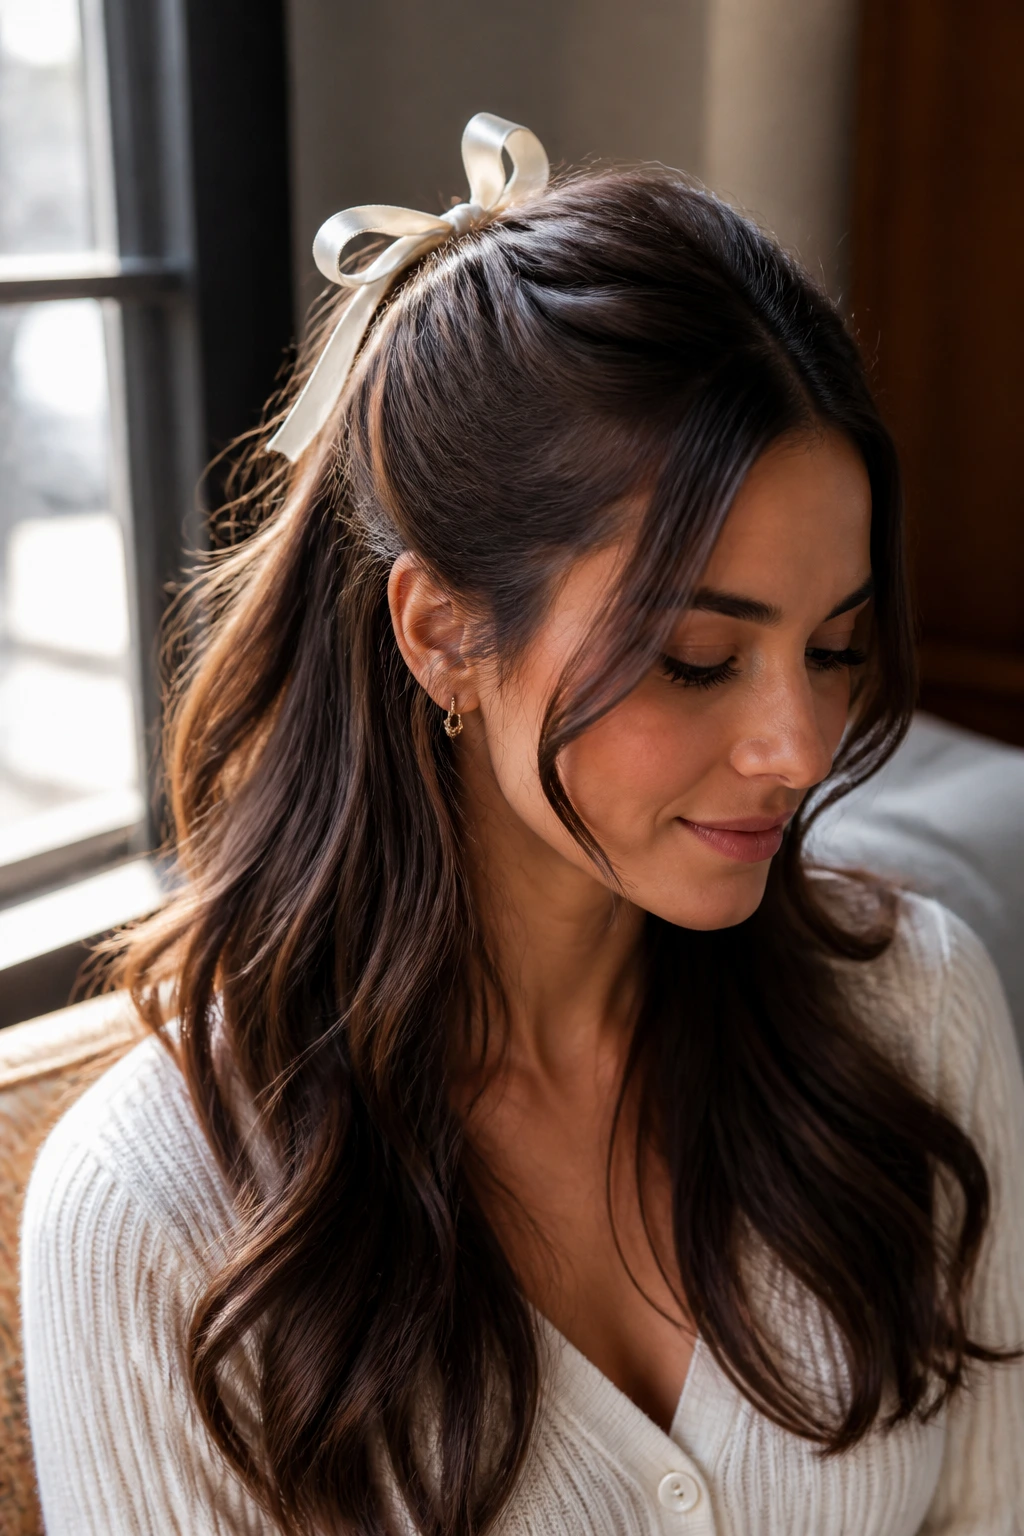
If your hair is too fine for a full updo to stay put, this is the move that saves the day. A half-up ribbon tie gives you the lift of a pinned-back style while leaving the length down, which keeps the whole look soft and springy. It also works when the hair has a little texture from the day before and doesn’t want to be fussed over.
Gather the top section from temple to temple, then secure it with a small clear elastic. Tie a ribbon over the elastic — satin if you want shine, grosgrain if you want a little grip. A ribbon between 1/2 inch and 1 inch wide usually reads polished without swallowing the style. Keep the tails long enough to show, but not so long they flop into your shoulders and catch on everything.
4. Blunt Bob With Tucked Ends
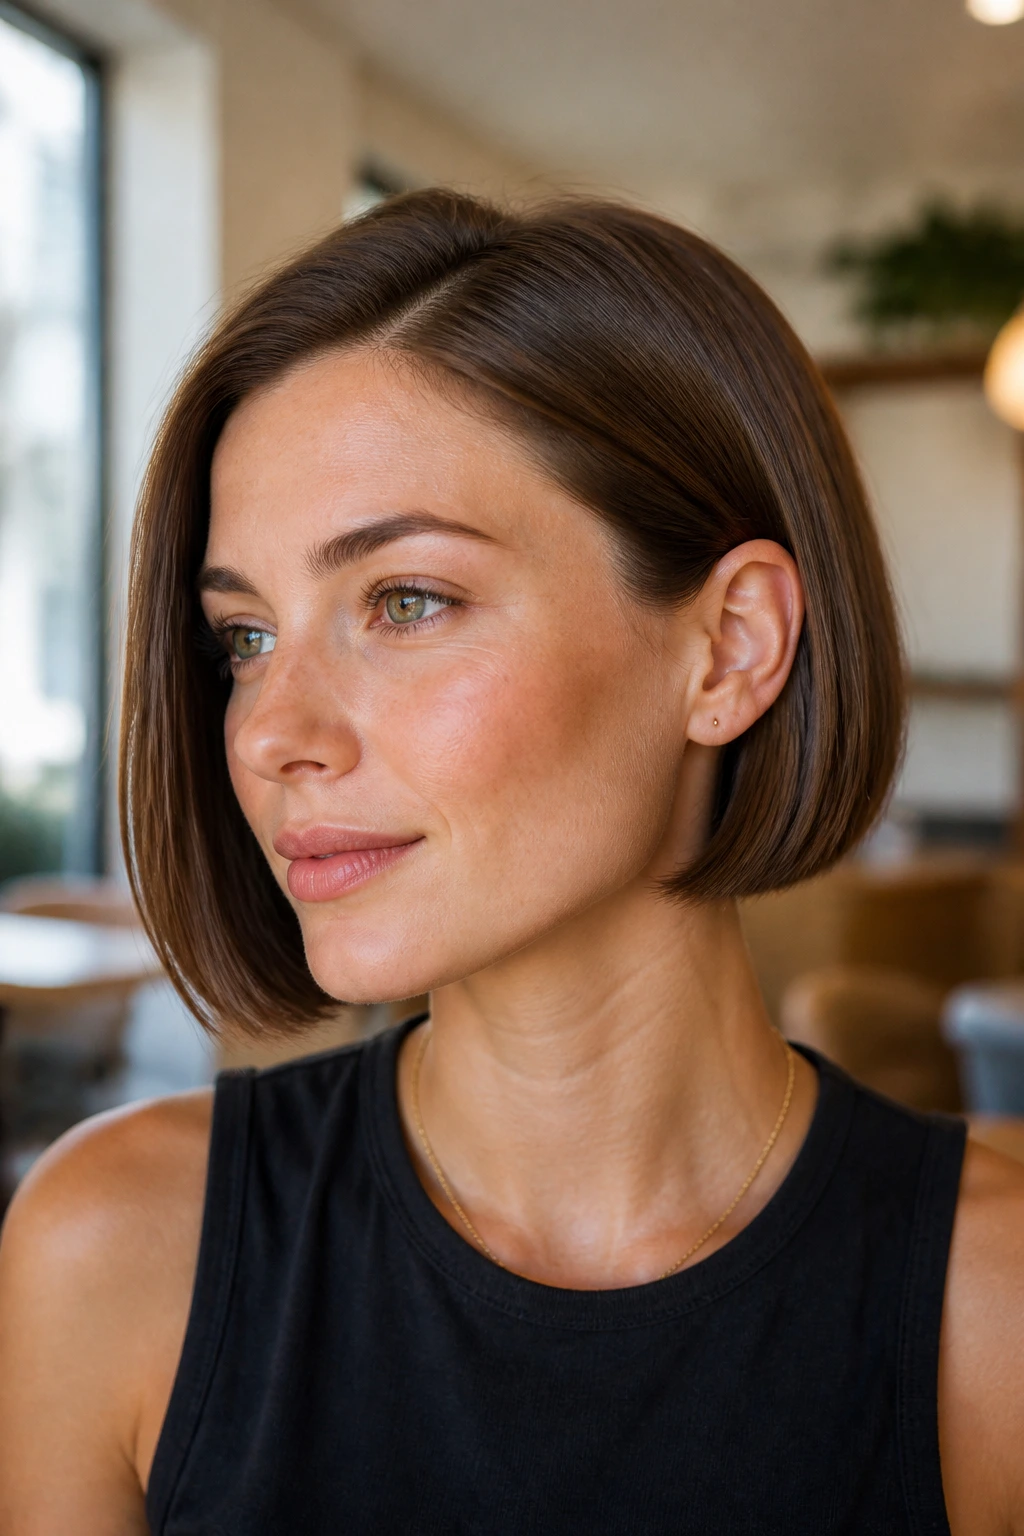
A bob does not need curls to look finished. Sometimes the sharpest version is the simplest one: smooth roots, ends tucked in just enough to curve under the jaw, and one side tucked behind the ear. That little move at the ear changes the whole line of the face.
Use a flat iron or a round brush to give the ends a soft inward bend. I prefer a bend, not a full curl. A curl can make a blunt bob feel too formal, while a tucked end keeps it clean and current. Run a tiny amount of serum through the tips only. If the product reaches the root, the bob collapses and stops looking crisp.
5. Bubble Ponytail
Bubble ponytails can look playful, but the polished version is built on restraint. The base should be smooth, the bubbles should be evenly spaced, and the sections between elastics should be gently pulled rather than puffed into giant balloons. Done right, it has a neat, slightly graphic line that works with a blazer as easily as a sundress.
- Place the first elastic at the nape or mid-back of the head.
- Add more clear elastics every 2 to 3 inches down the length.
- Gently pinch each section outward with your fingers so it rounds, but stop before it becomes lumpy.
- Wrap a tiny strand of hair around the first elastic if you want the base to look cleaner.
It’s a style that likes medium to long hair and rewards people who don’t mind a little structure.
6. Loose Braided Crown
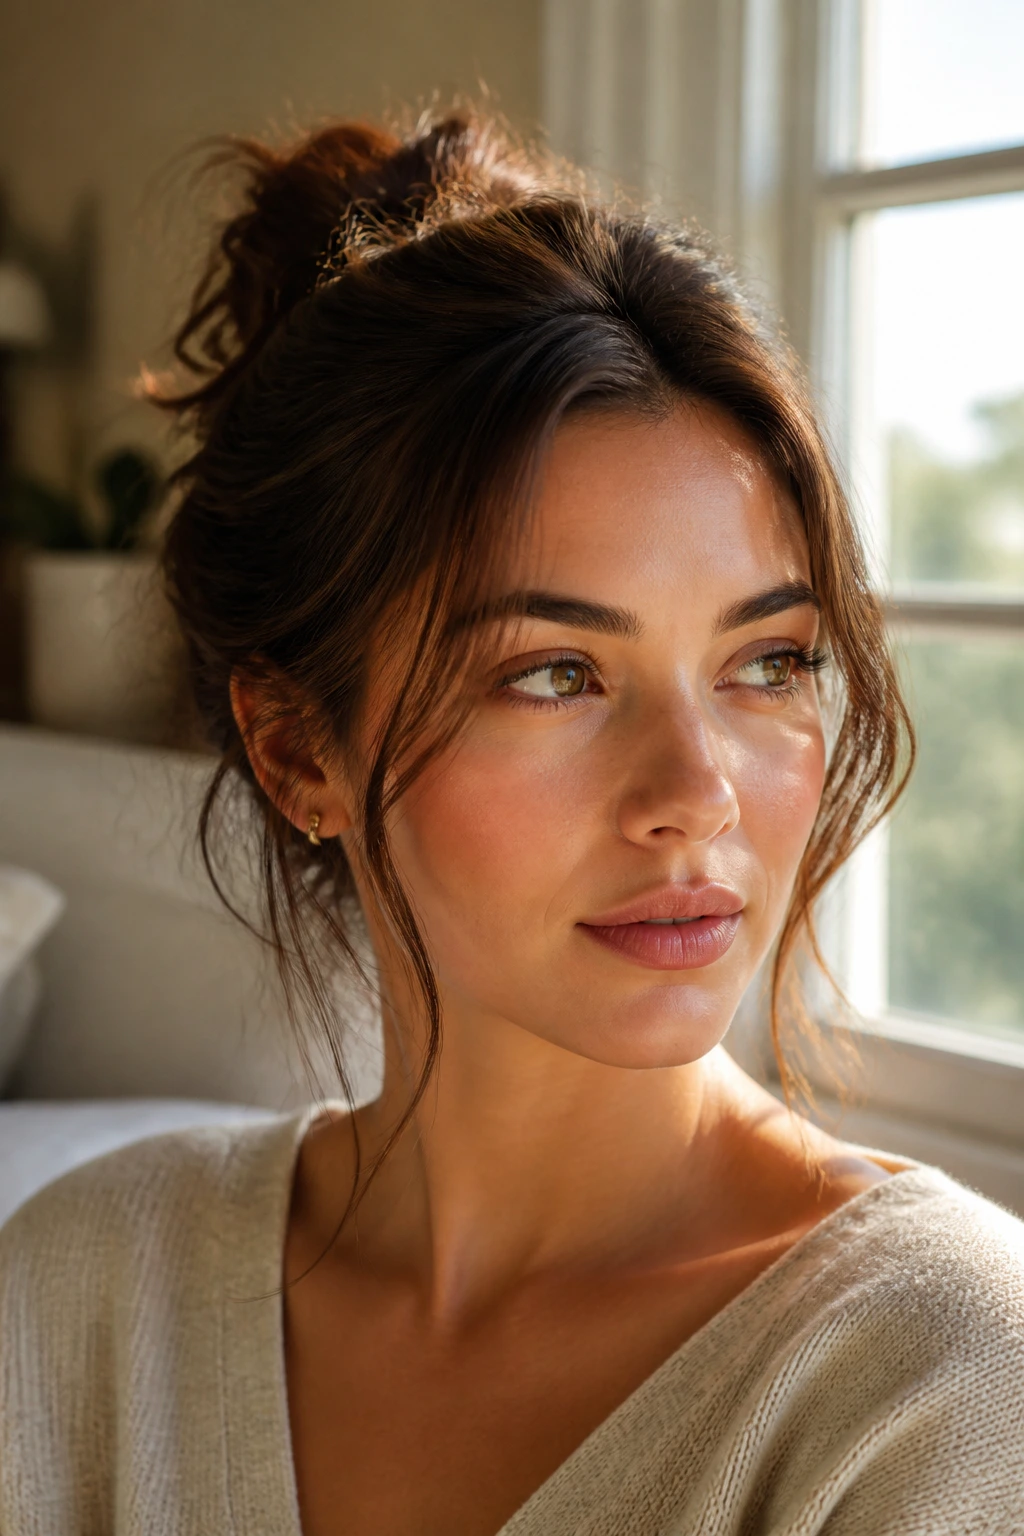
A braided crown can go twee fast. The polished version stays close to the head, with the braid loosened just enough to look full and not tight around the scalp. It’s one of the best spring hairstyles when you want hair off the neck but still want something softer than a hard bun.
Why It Works
The braid gives you shape across the top of the head, which is useful if your hair tends to puff at the sides. Two braids pinned across the crown can feel more relaxed than one thick braid wrapped like a halo. I like to pull a few millimeters of braid apart with my thumbs after it’s pinned; that tiny bit of slack makes it look less formal and more wearable.
Keep the crown itself smooth before you braid. If the roots are fuzzy before you start, the fuzz will multiply. It always does.
7. Modern Claw-Clip Twist
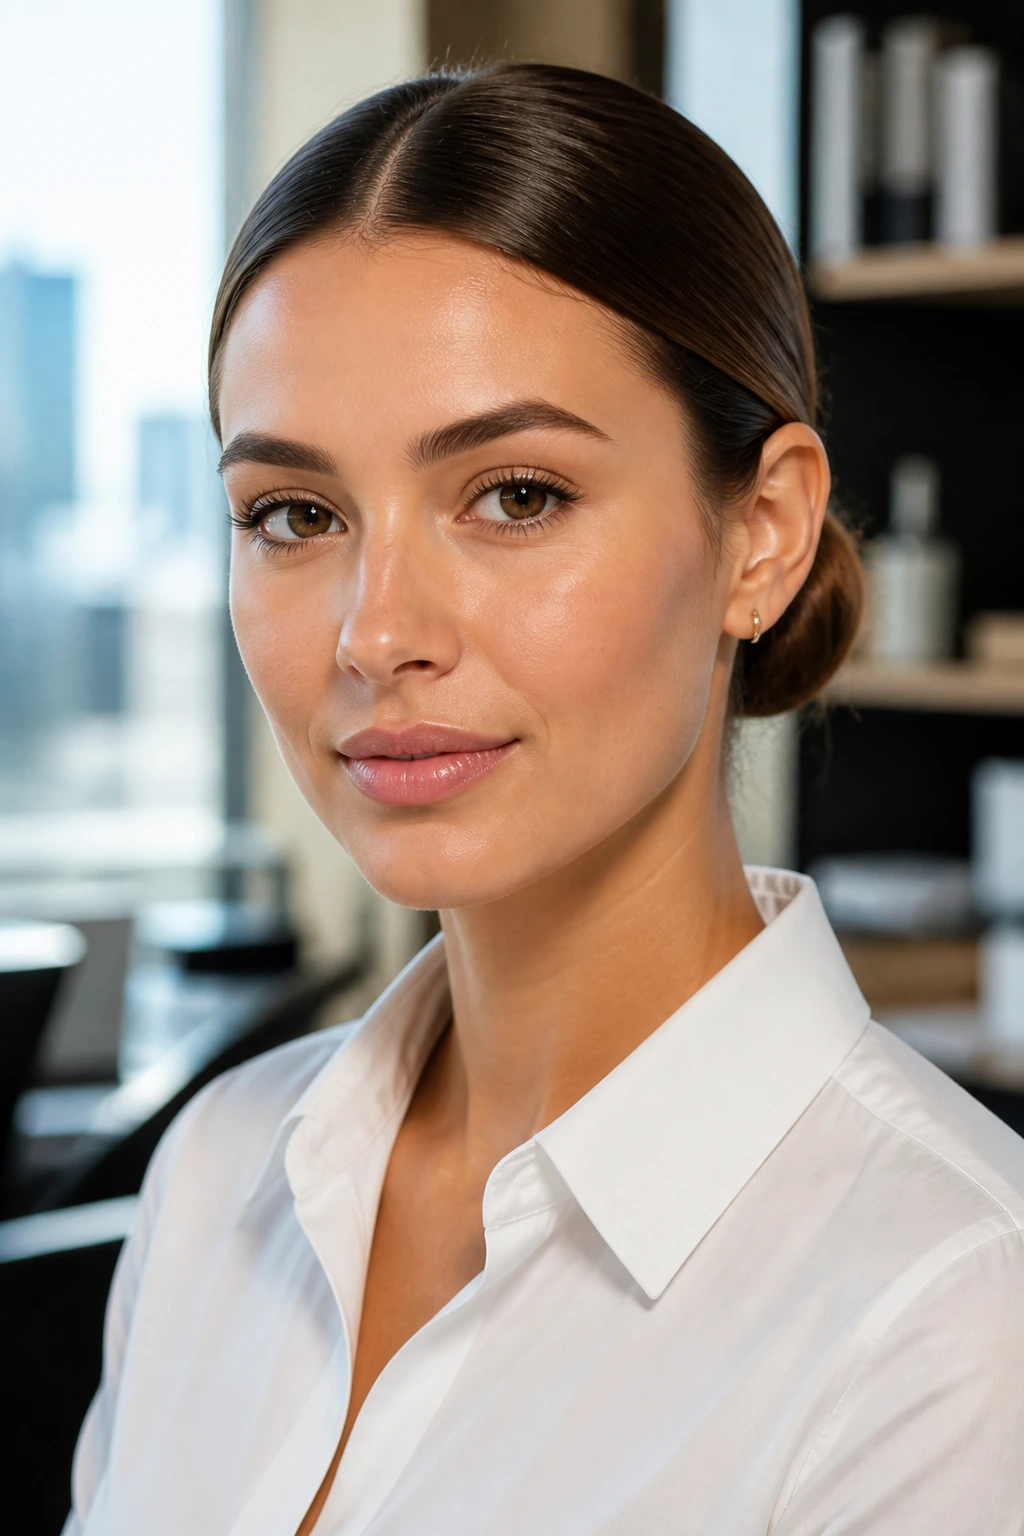
Do you want a style that looks like you tried, but only for five minutes? This is it. The modern claw-clip twist is still the easiest polished updo in the bunch, but the cleanest versions use a smaller, better-placed twist instead of the giant mess of hair some clips end up holding.
Work with hair that’s mostly dry and has a little grip. Twist the length upward, fold the ends under once, and place a claw clip vertically so it catches the center of the twist. A 4- to 5-inch clip usually holds shoulder-length hair without slipping. If your hair is layered, leave a thin section out near the nape and tuck it under the twist instead of forcing it into the clip. That keeps the shape neater.
8. Shoulder-Length Blowout With Bouncy Ends
Shoulder-length hair gets boring when it hangs straight and flat at the collarbone. A blowout with bouncy ends fixes that in one pass. The shape should skim the shoulders, curve softly outward or under, and hold enough body that the ends don’t flip in weird directions by noon.
Use a 1.5-inch round brush for most shoulder-length hair, and blow-dry the roots first so they’re not damp when you get to the ends. Direct the brush away from the face around the front, then turn the ends under slightly for a polished finish. Hit the shape with a cool shot before moving on. That one step matters more than people want to admit. It locks the bend and keeps the hair from collapsing the moment you step outside.
9. Curtain Bangs With a Half-Pin Back
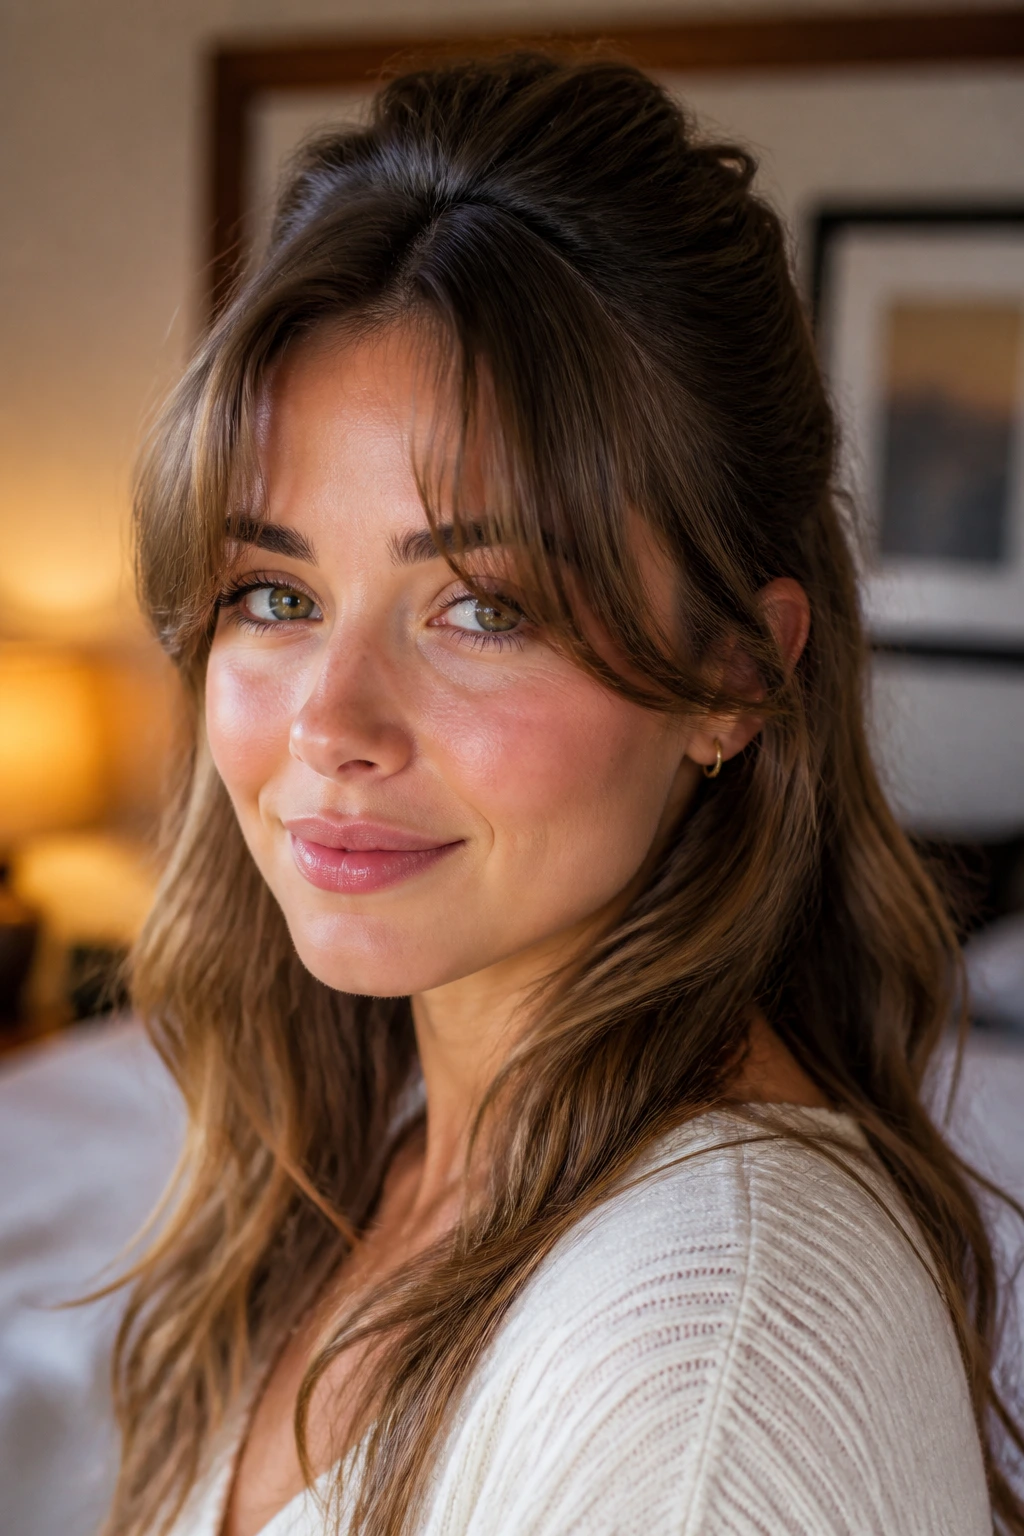
Curtain bangs can do half the styling work for you. They soften the face, but if you leave all the surrounding hair loose, the whole look can turn vague. Pinning back the top half gives the fringe a little stage and keeps the rest from swallowing your features.
The easiest version uses two small sections from above the temples, pinned or clipped behind the crown. Leave the bangs out and direct them away from the face with your fingers while they’re still warm. If they’re too straight, run a round brush through the first inch near the roots. If they’re too curled, brush them out while they’re still warm so they settle into that soft bend instead of a puffy wave.
10. Low Pony With a Wrapped Section
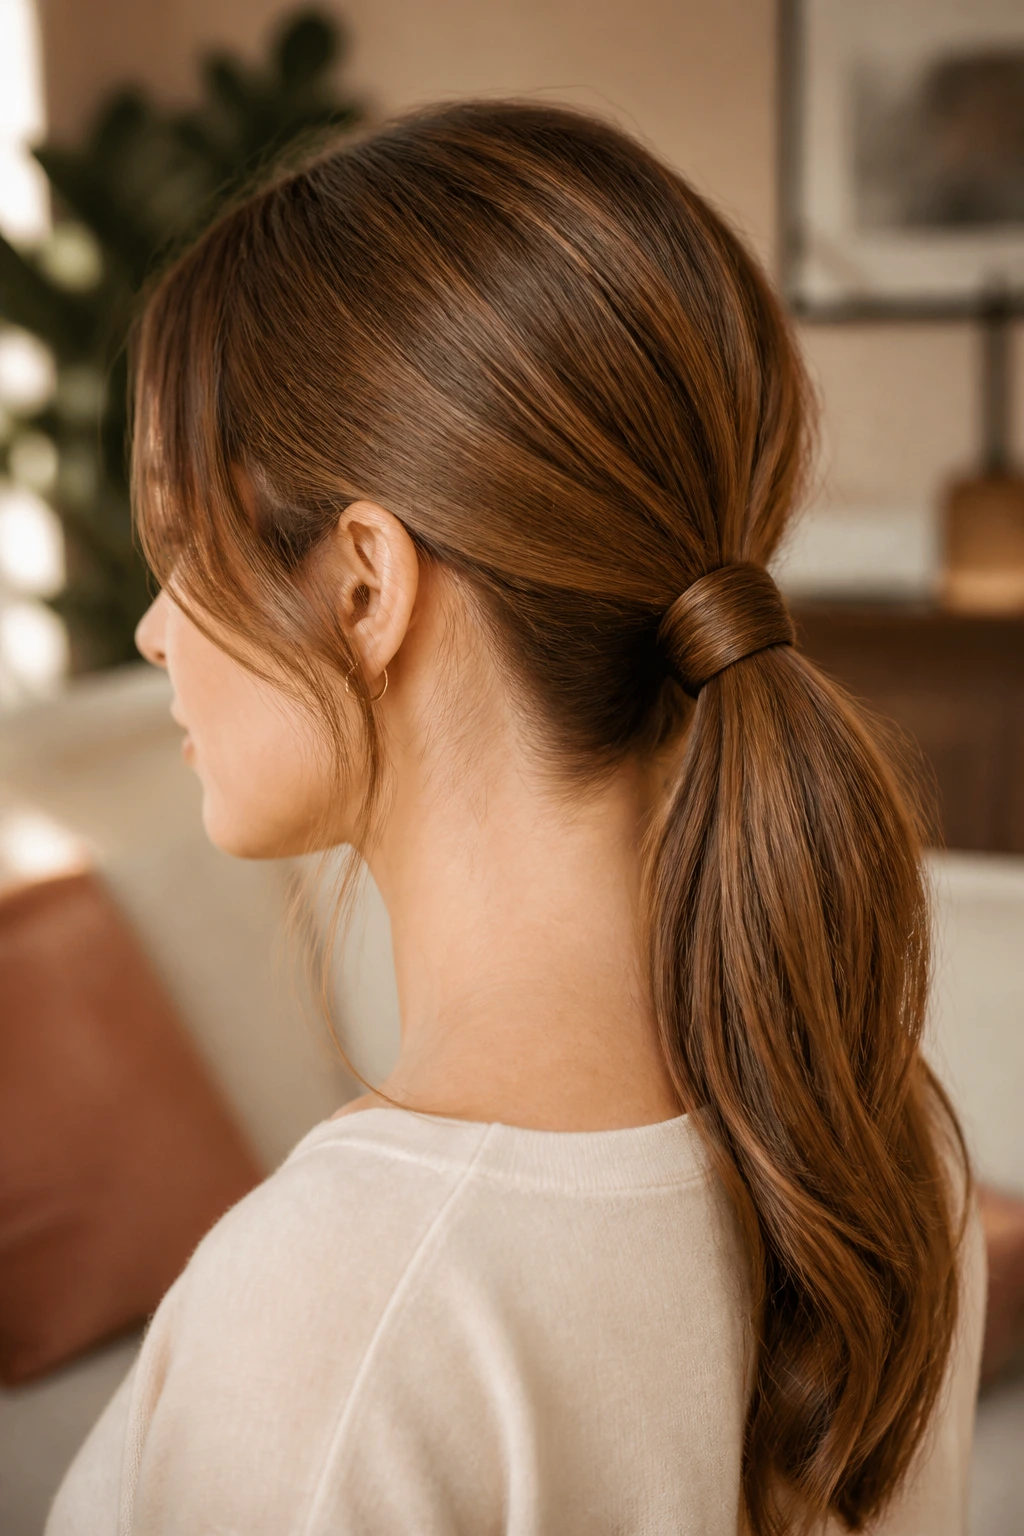
This is the low ponytail that looks like you took an extra two minutes, even though it barely takes any more time than the plain version. The wrapped section hides the elastic, which cleans up the base and gives the pony a finished edge. It’s one of those little tricks that makes a big difference in photos, but also in person.
Pull the hair back at the nape and secure it with a snag-free elastic. Take a 1-inch section from underneath the ponytail, wrap it around the elastic once or twice, and pin the tail underneath. Keep the wrap snug. If it hangs loose, the whole thing reads sloppy. A tiny spritz of hairspray on the wrapped section helps it stay in place without feeling stiff.
11. Textured Pixie With Piecey Fringe
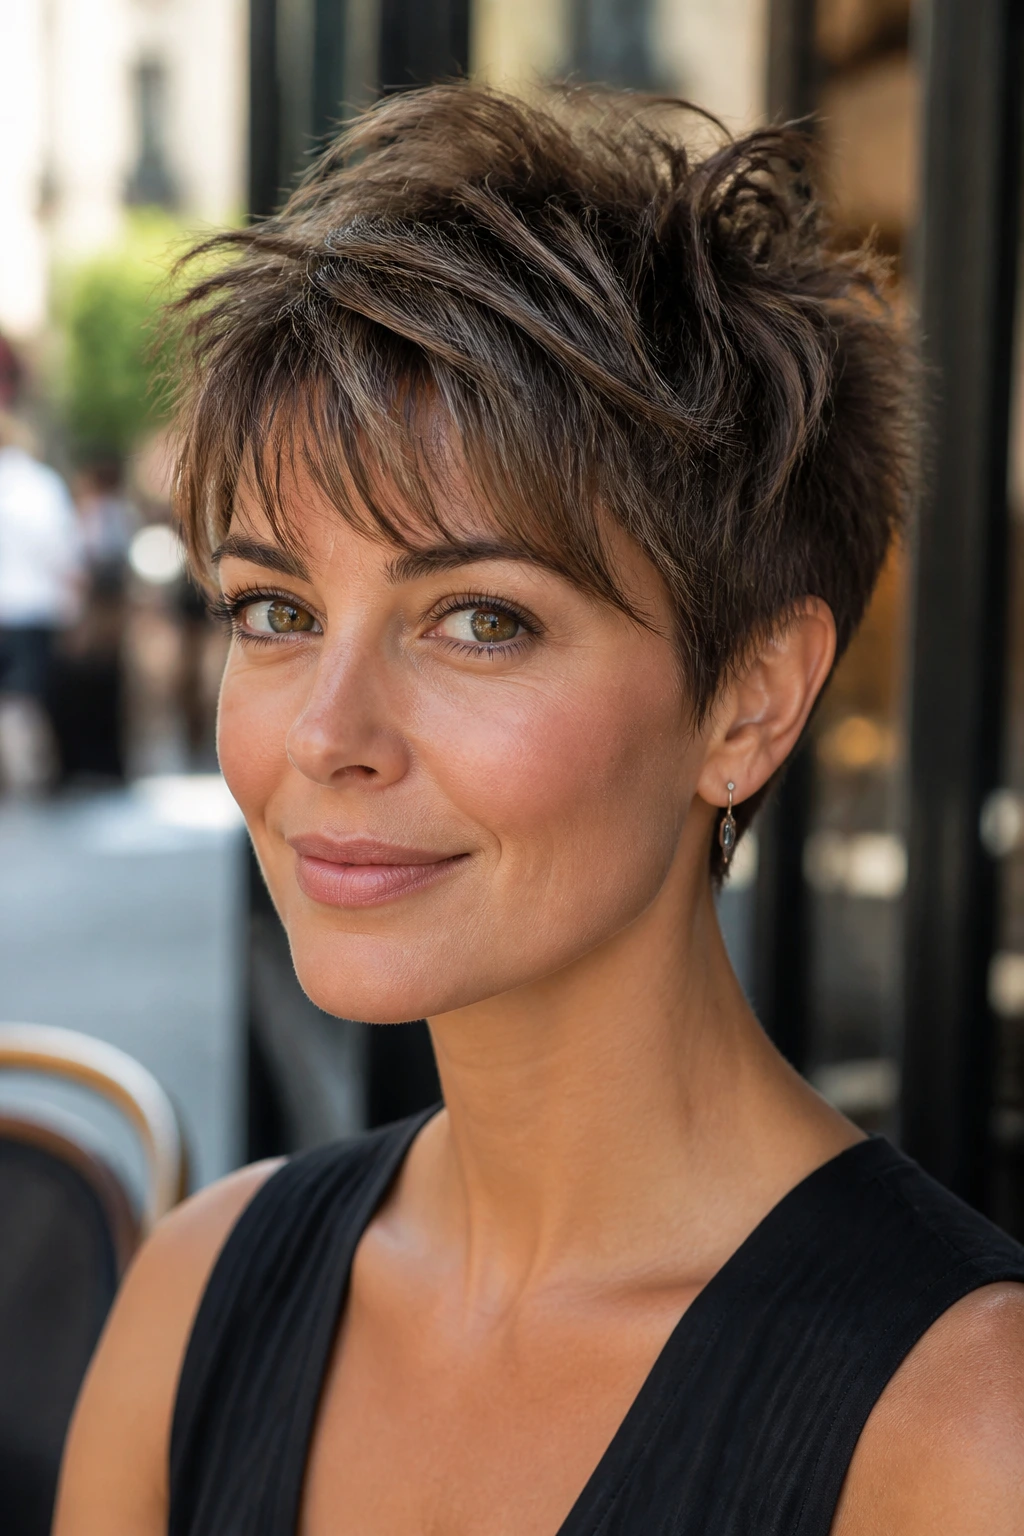
A pixie cut can look sharp or sleepy, and the difference usually comes down to how the fringe is handled. Piecey fringe gives the cut shape, movement, and a little attitude without turning it messy. That’s the version I like for spring — lighter at the front, controlled at the sides, and just rough enough to feel alive.
Use a pea-sized amount of matte paste or styling cream, then work it through the fringe with your fingertips. Separate the front into three to five little sections rather than one smooth slab. If the product starts at the roots, the cut can go flat fast, so keep most of it on the tips and middle lengths. Short hair shows every product mistake, which is annoying, but it also means a tiny adjustment goes a long way.
12. Side-Parted Waves
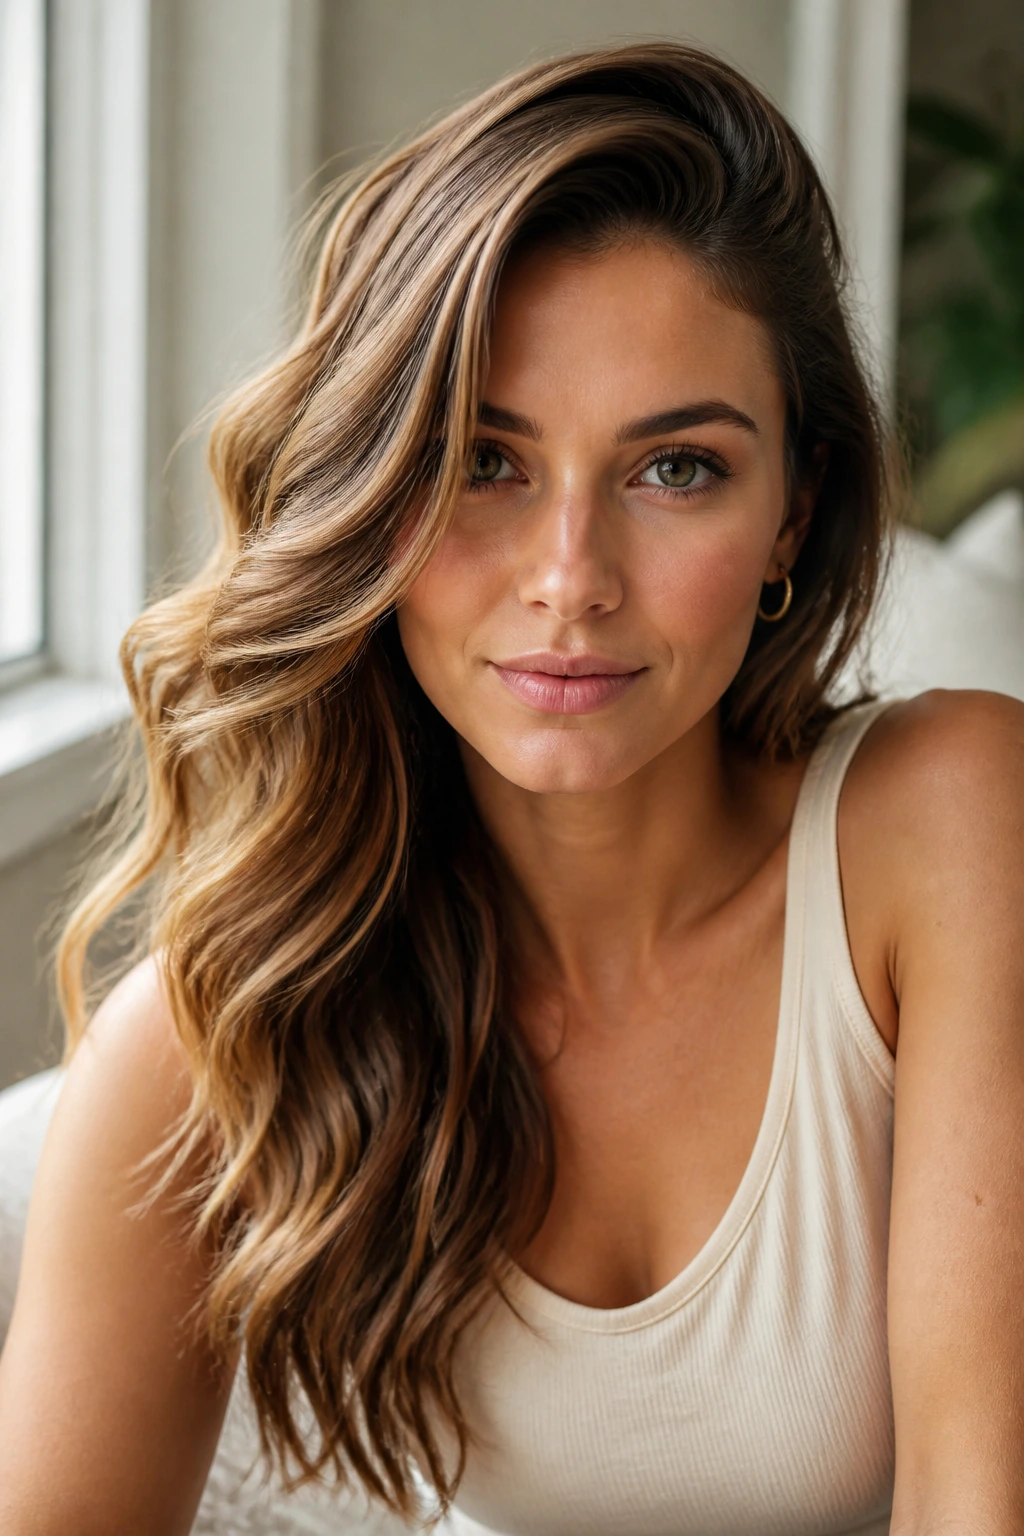
Why do side-parted waves look expensive even when the hair itself is simple? Because the part changes the face shape and gives the waves a direction. A deep side part adds lift on one side, softens the other, and makes medium or long hair look styled without having to pile on accessories.
A 1.25-inch curling iron is a solid choice here. Wrap sections away from the face near the front, then alternate the direction through the back so the waves don’t all sit in one pattern. Once the hair cools, brush it out with a paddle brush or wide comb. That step softens the curl into a wave and gets rid of the ringlet look that can make the style feel too done.
13. Silk Scarf Ponytail
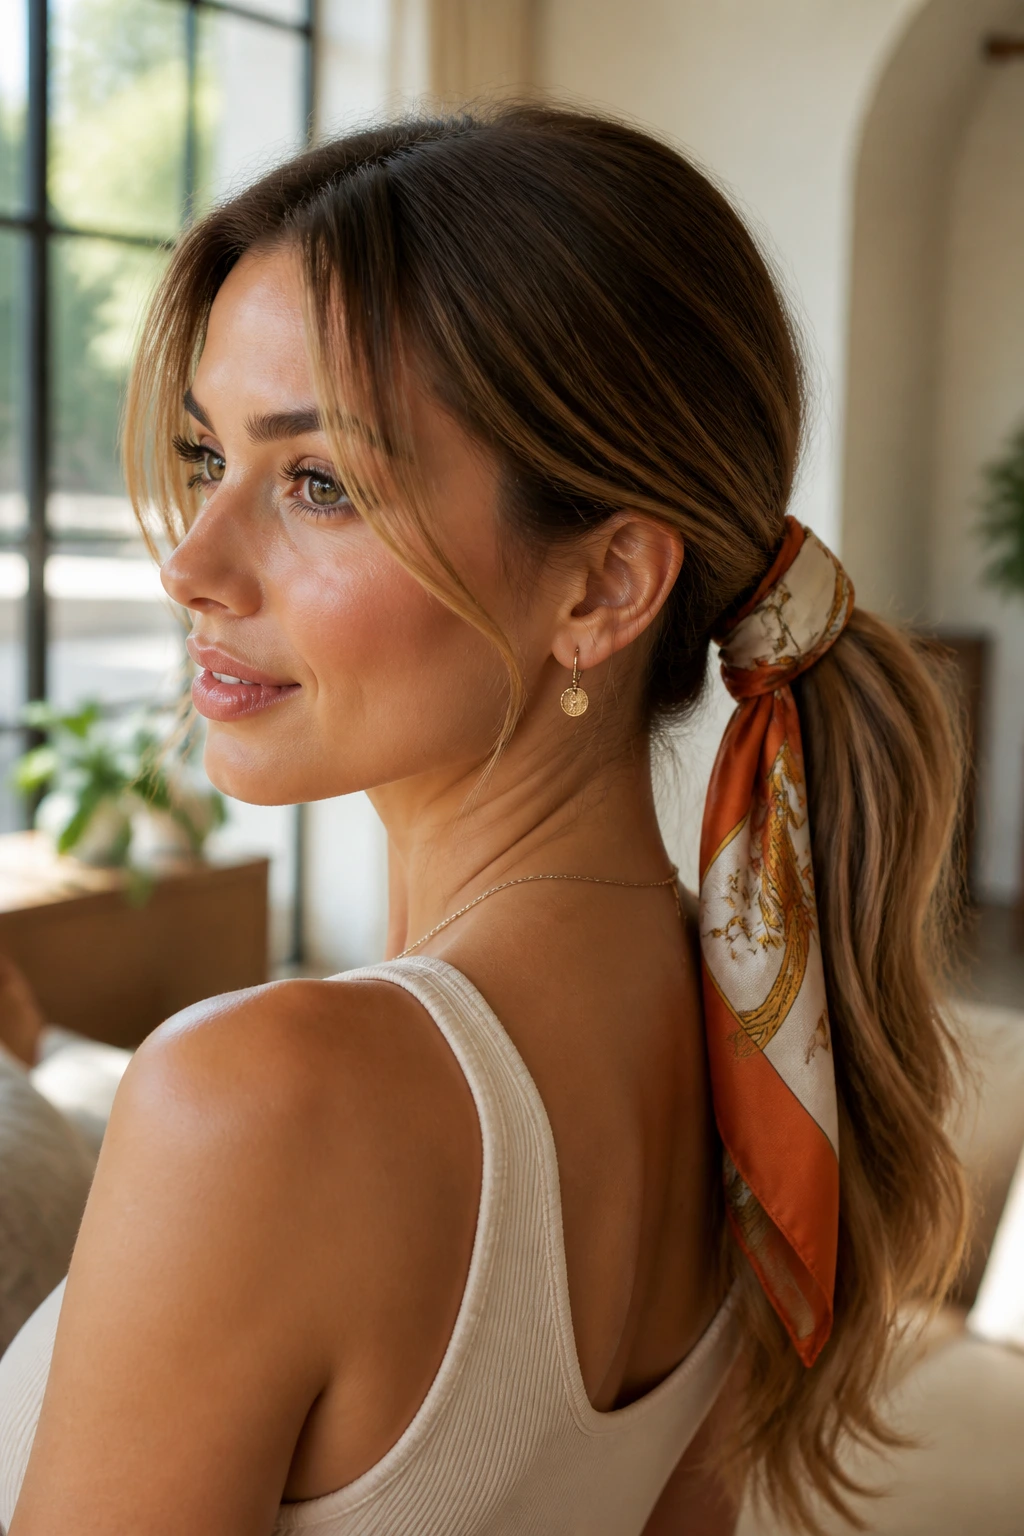
A silk scarf can rescue a basic ponytail in about ten seconds. It adds color, hides the elastic, and gives the whole style a cleaner finish than a scrunchie usually can. The nice thing is that it doesn’t need perfect hair underneath. Slight texture actually helps.
Tie the ponytail low or mid-height, then knot a folded silk scarf around the base. A scarf that’s about 2 to 3 inches wide when folded tends to sit better than a bulky square tied loosely. Keep the tail of the scarf tucked to one side or draped neatly down the back. If the scarf is loud, let the rest of the outfit stay quiet. If the scarf is muted, you can let it play against a patterned shirt or jacket.
14. Twisted Half-Up Halo
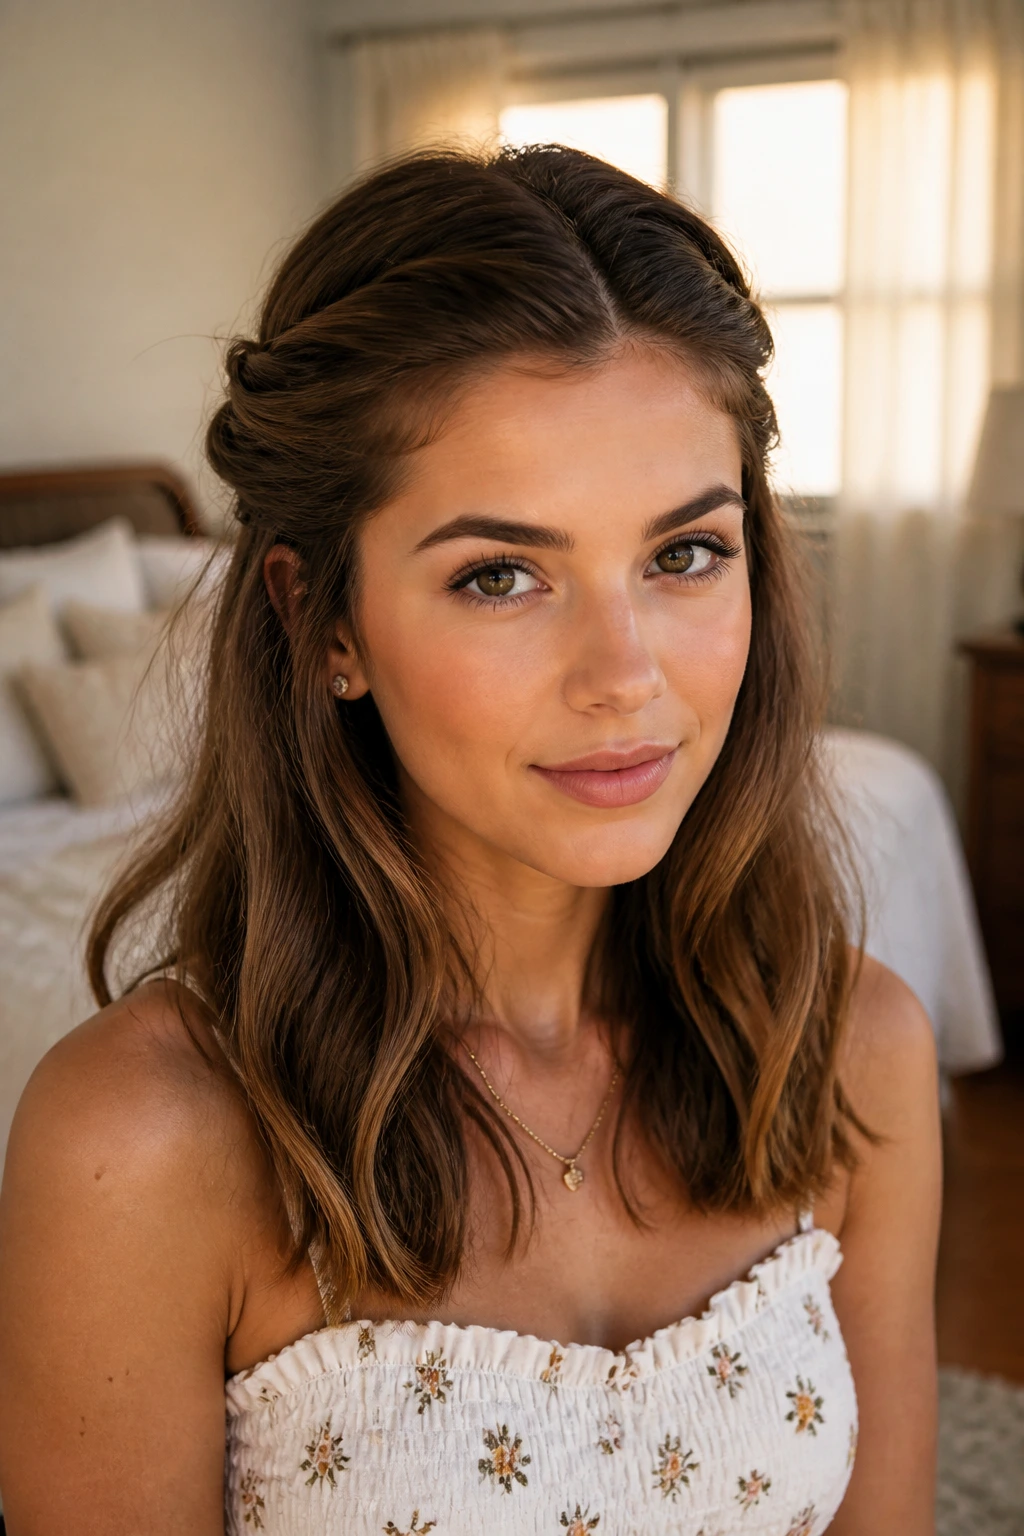
A twisted half-up halo is the braid’s softer cousin. Instead of weaving strands, you simply twist two sections back from the temples and pin them together at the back of the head. The effect is calm and slightly romantic, but not so delicate that it feels costume-ish.
The style works especially well when you want the face open but still want hair around the shoulders. Twists are faster than braids and easier to adjust if one side ends up thicker than the other. Keep the twists snug enough to hold their shape, then loosen them a touch with your fingers after pinning. That gives the halo a bit of width without losing the clean line.
15. Polished Top Knot
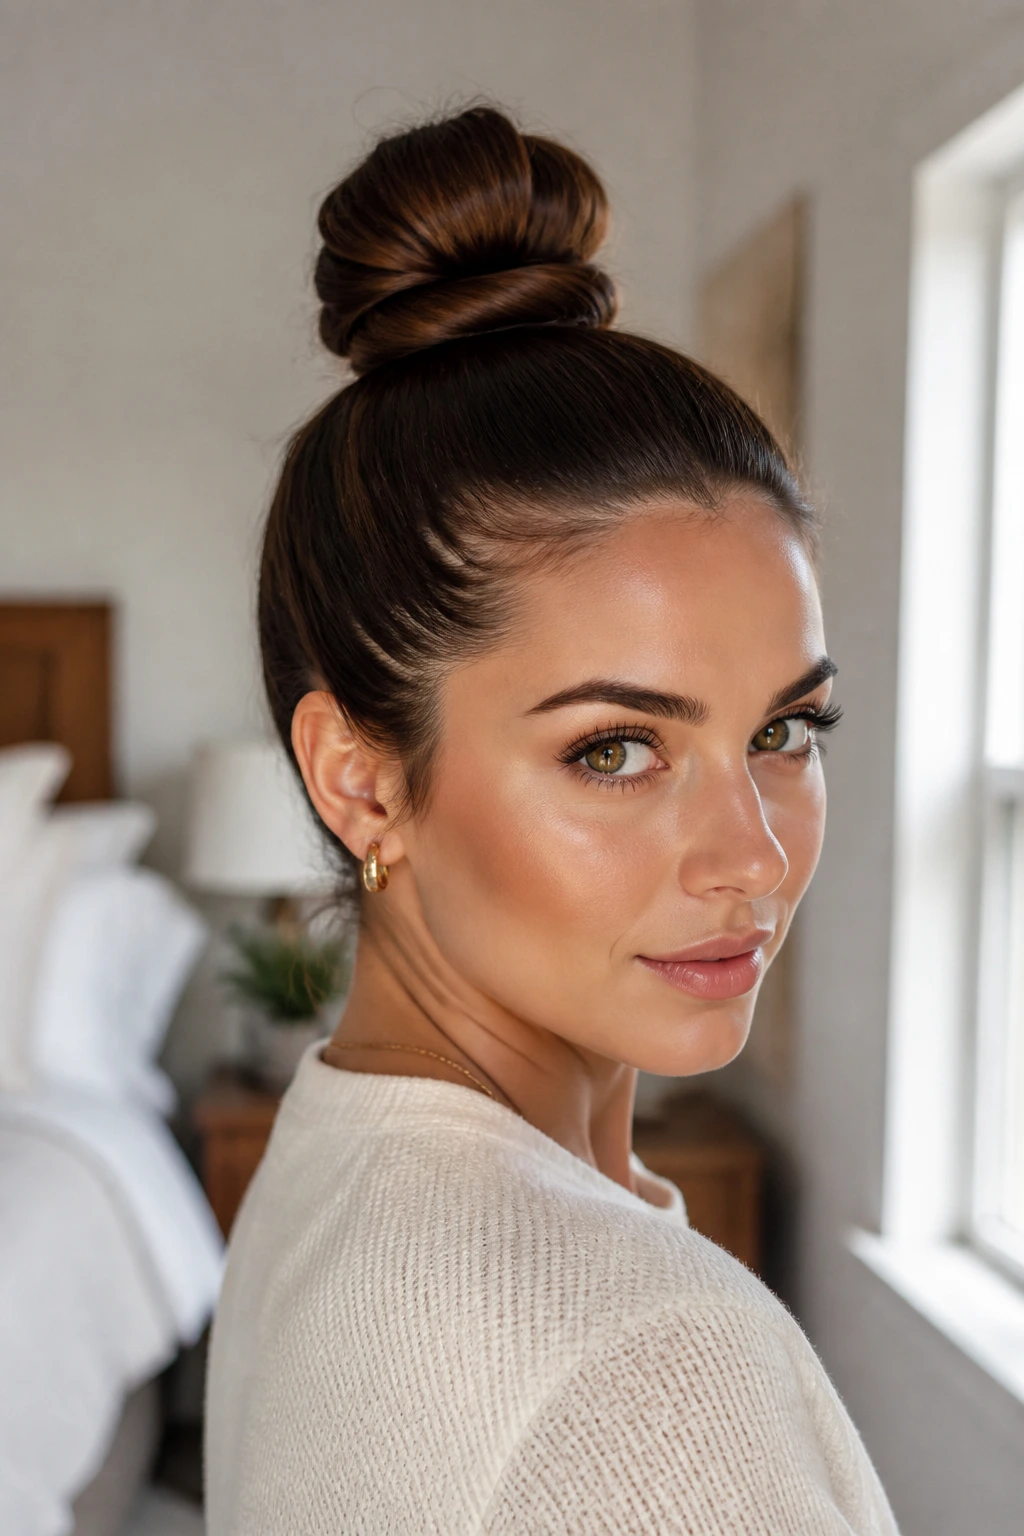
A polished top knot lives or dies by the crown. If the top is smooth and the knot sits in the right spot, the whole style looks intentional. If the crown puffs up and the bun sits too high, it starts to feel rushed.
Pull the hair into a high or slightly high ponytail, smooth the sides with a brush, and twist the length into a knot. I like a knot that is compact rather than huge; an oversized top knot can feel heavy and oddly informal. If your hair is thin, tease the ponytail base very lightly before twisting. If it’s thick, split the length into two sections and twist them around each other before pinning so the bun doesn’t unravel halfway through the day.
16. Deep Side Part Lob
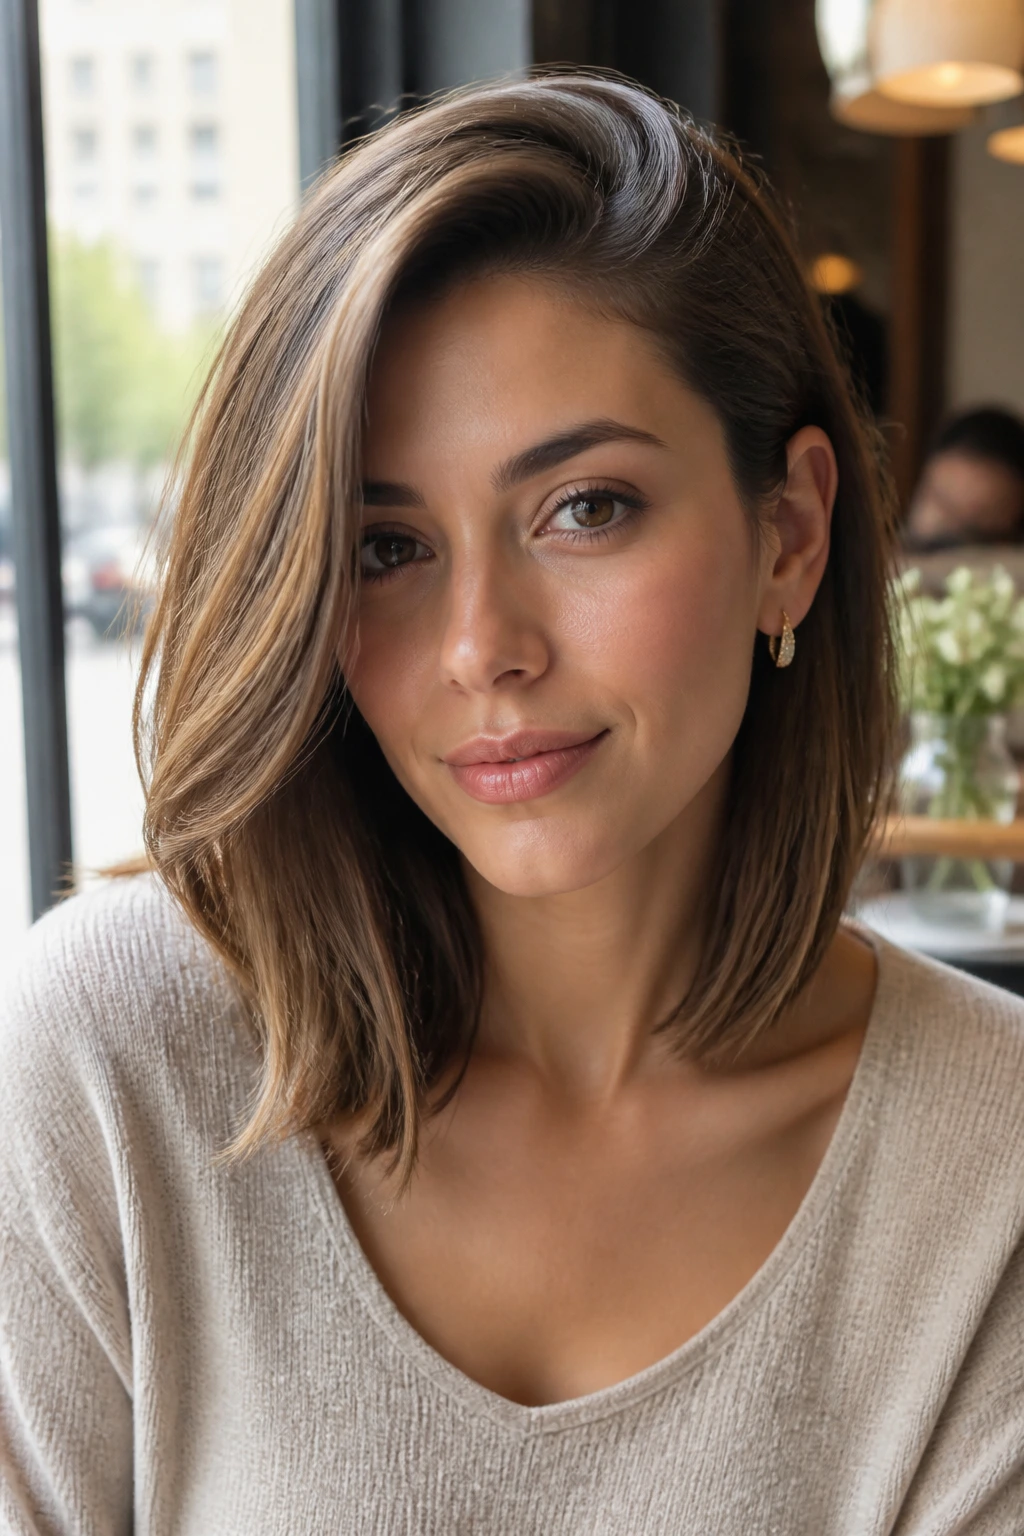
A lob with a deep side part is one of the easiest ways to make a cut feel fresh again. The part gives the hair instant shape, and the length keeps it practical. You don’t need wild volume here. You need a strong line and clean movement.
Blow-dry the roots in the opposite direction first if you want extra lift, then swing them back into the deep part. A bend near the ends is enough; the point is not to curl every strand. Tuck one side behind the ear, then let the other side fall forward. That asymmetry is what keeps the style from feeling stiff. If the hair is straight and slippery, a touch of texture spray at the mid-lengths helps the side hold.
17. Rope Braid Pony
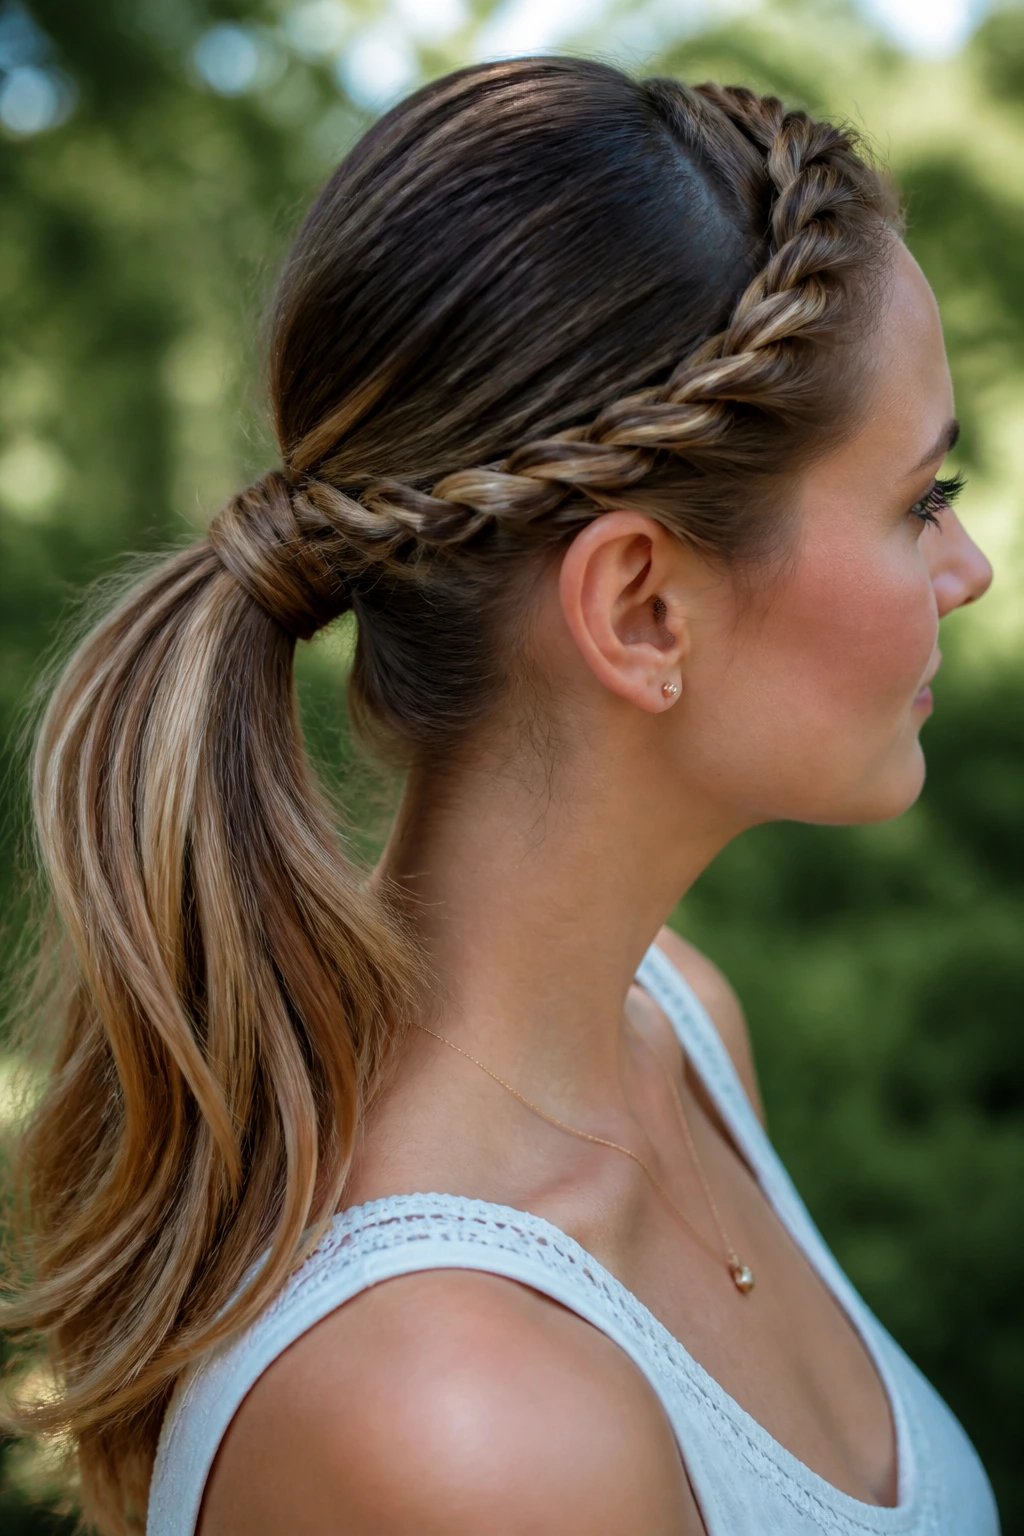
A rope braid ponytail sounds fancier than it is. You split the ponytail into two sections, twist each one in the same direction, then wrap them around each other in the opposite direction. The result is neat, tight, and clean in a way that regular braids sometimes aren’t.
- Start with a low or mid pony and secure it firmly.
- Divide the tail into two equal sections.
- Twist both sections clockwise, or both counterclockwise.
- Wrap them around each other in the opposite direction so the braid locks.
- Finish with a small elastic at the end and smooth the surface with a tiny touch of serum.
This one is especially good for straight hair, because the rope shape shows clearly and doesn’t need much texture to hold.
18. Wet-Look Slick Back
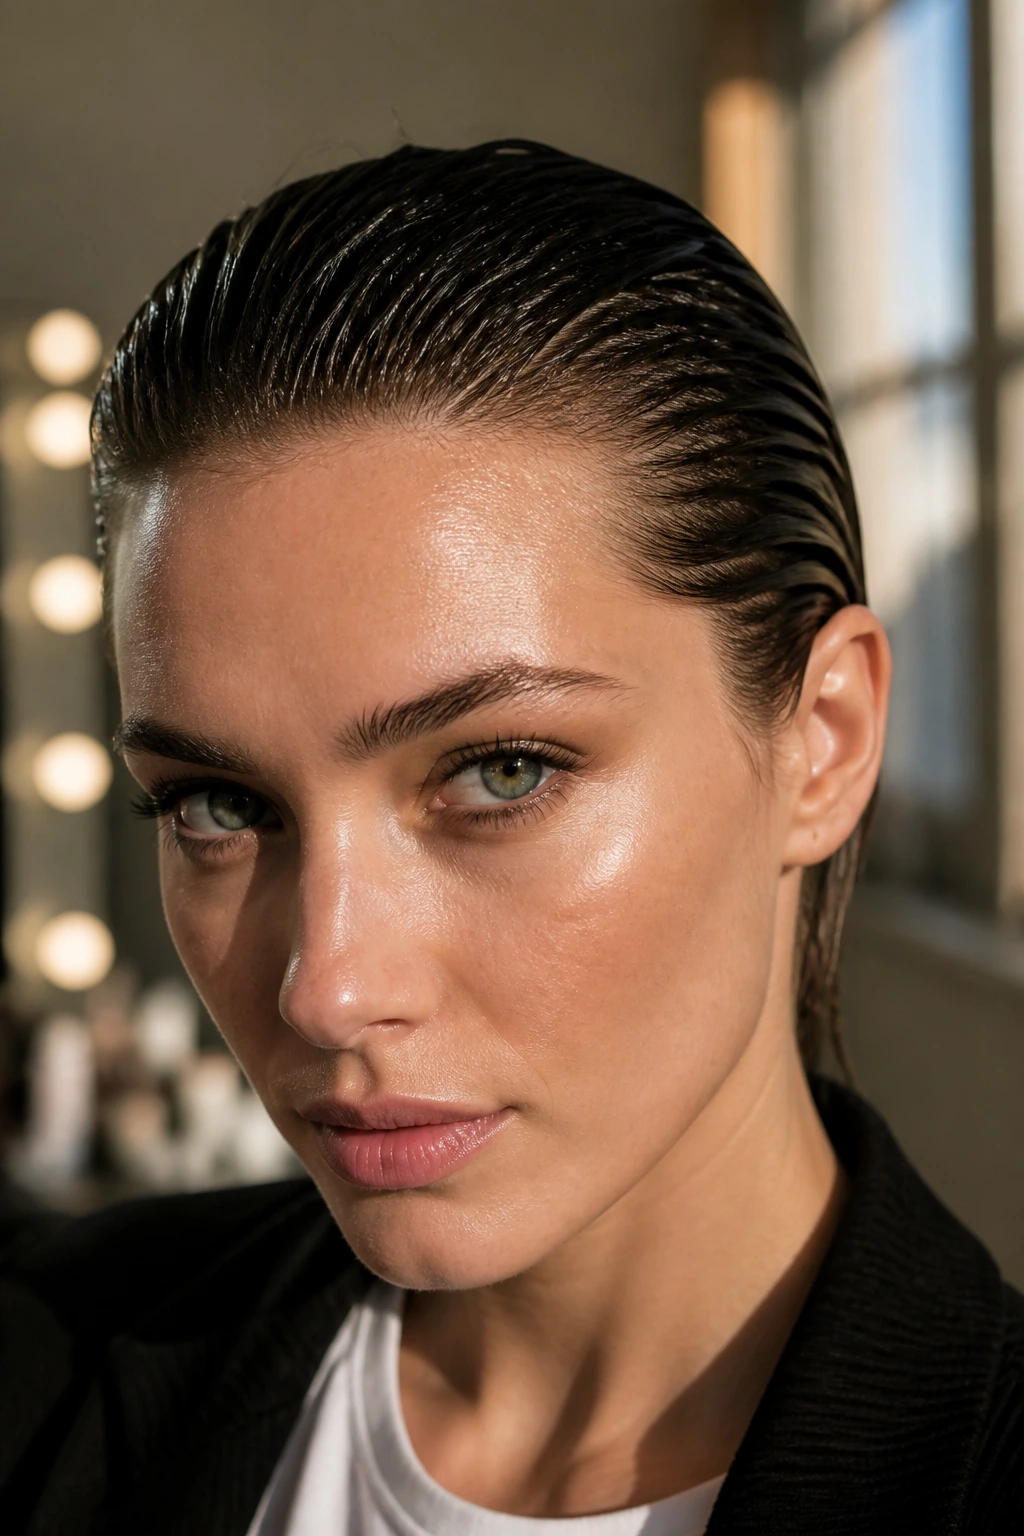
This style is blunt. That’s the appeal. A wet-look slick back has no interest in pretending to be soft. It’s sharp at the hairline, glossy through the crown, and clean enough to make a simple outfit feel deliberate. I like it when the clothes are tailored or the makeup stays minimal.
What to Watch For
Use gel on damp hair, not dripping hair. Too much water dilutes the hold and sends the whole style sliding. Comb the product back from the forehead with a fine-tooth comb, then press the sides into place with your palms. If the hair is long, keep the gel mostly at the top and crown; heavy product through the ends can make them look stringy instead of sleek.
This style works best when you commit to the line. Half-slicked hair almost always looks unfinished.
19. Feathered Shag With Soft Bend
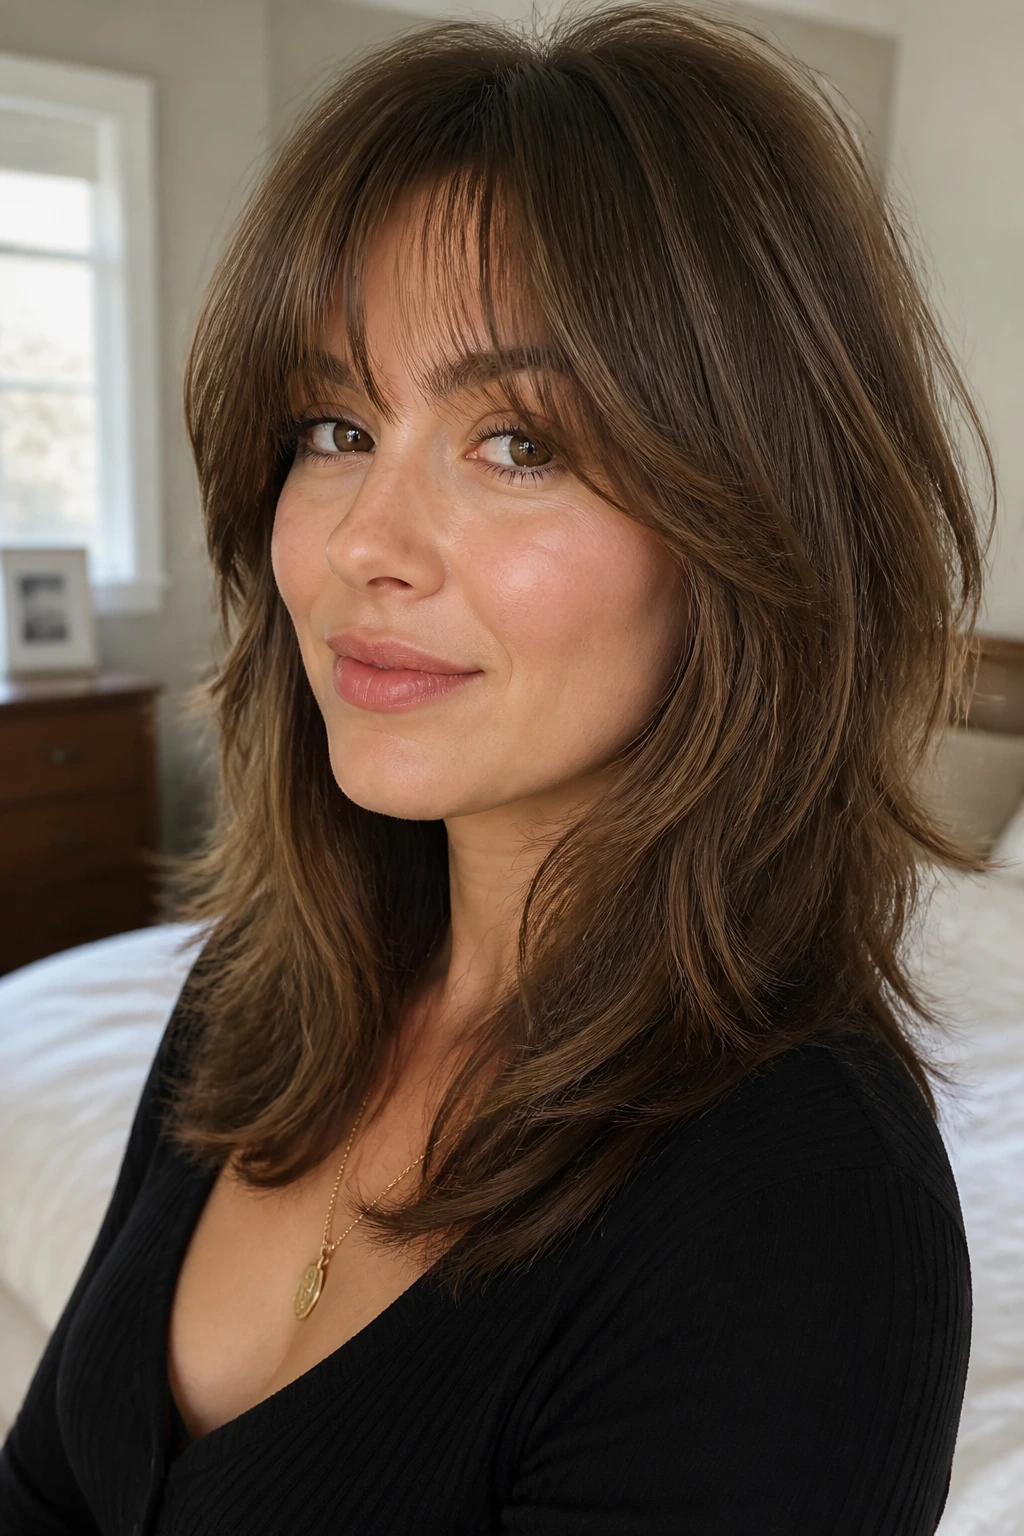
A shag can be rough, but a feathered shag with a soft bend feels far more polished. The layers move around the face and collarbone in a way that gives you shape without a hard outline. That loose motion is exactly why it belongs in a spring lineup.
You can air-dry this with a light cream and a little scrunching, or use a medium round brush to shape the front pieces away from the face. Keep the bends soft, not crimped. The longer layers should fall separately, not clump together. If the ends look too heavy, a touch of dry texture spray at the mid-lengths helps break them up. Don’t drown the cut in oil. Feathered layers need lift, not slip.
20. Mini Braids Into a Loose Low Bun
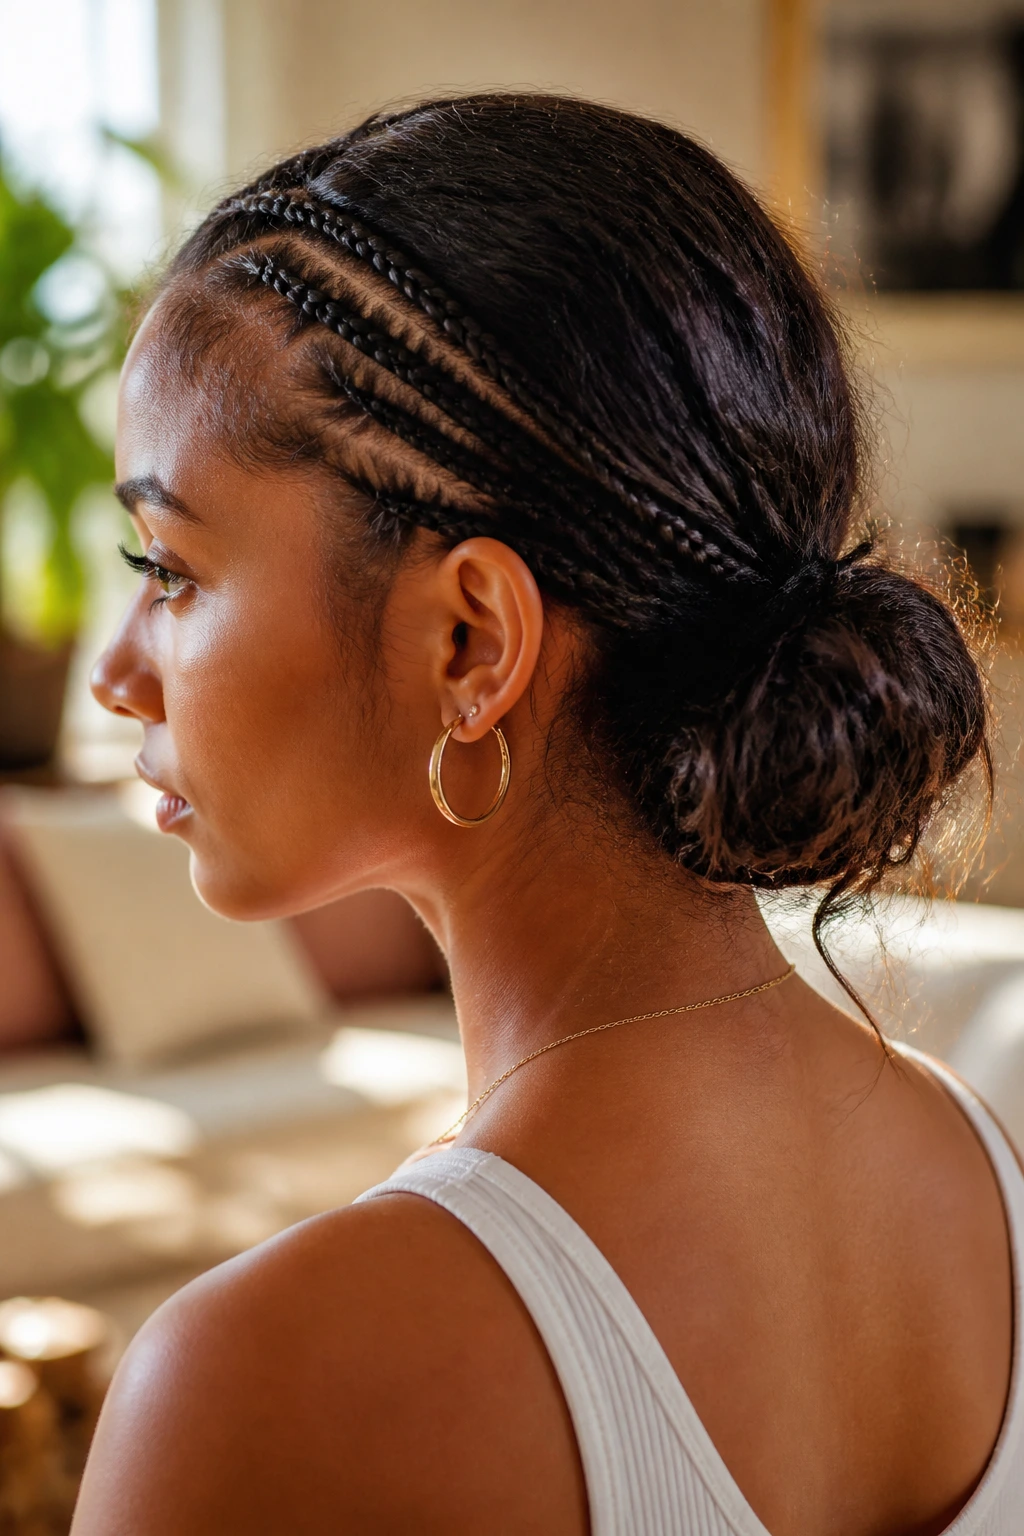
Mini braids can turn a plain bun into something with texture and detail. A few small braids at the temple or along the hairline give the style interest before it even reaches the knot at the nape. It’s a smart option if you want a little complexity without spending 40 minutes braiding your whole head.
Braid two to four small sections, then gather everything into a loose low bun. Leave the bun soft and a bit imperfect. The braids are already doing the work. If the braids are too tight, they can pull at the hairline and make the whole style look harsh. Keep them narrow, pin them flat, and let the bun stay slightly airy so it doesn’t feel boxed in.
21. Face-Framing Layers With an Airy Blowout
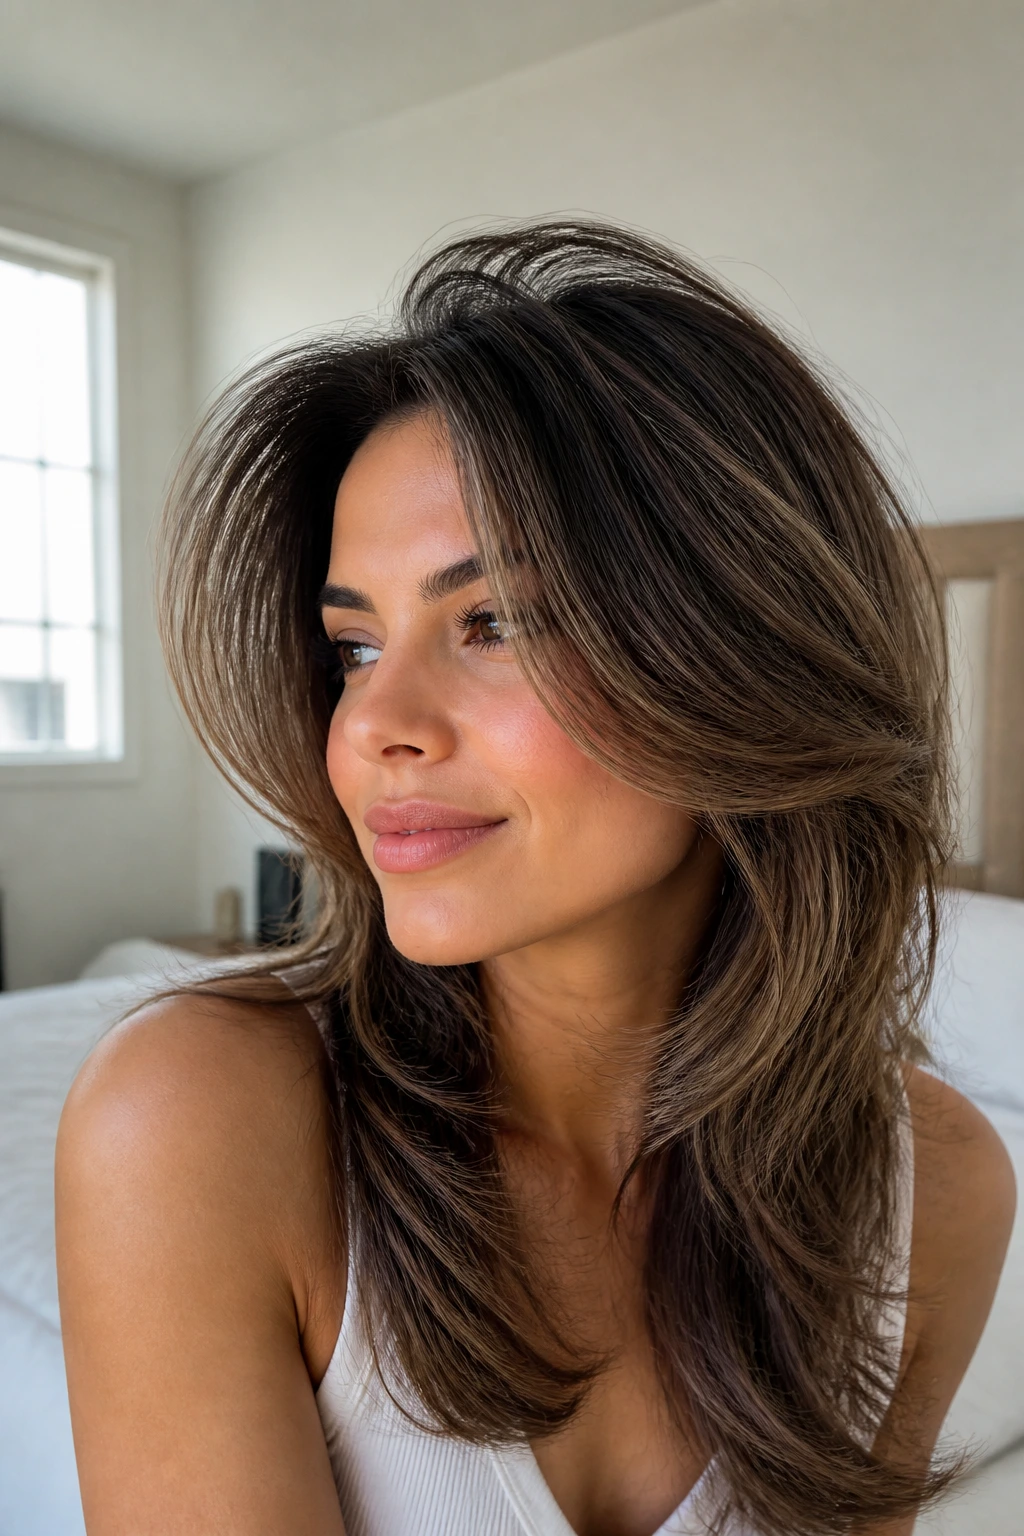
Some styles don’t need a full updo or a heavy accessory. They just need the front pieces to behave. Face-framing layers with an airy blowout are good at that. The shape stays open around the face, the ends move, and the whole look reads as finished without looking overly styled.
Use a round brush to lift the front away from the face, then turn the ends under or away depending on where the layers land. Work in 2-inch sections near the front; bigger sections tend to lose the shape before they cool. If the roots are flat at the crown, lift them with the nozzle of the dryer and a quick shot of cool air. That lift is what keeps the layers from collapsing into the rest of the hair.
22. Sleek Tucked-Behind-Ears Bob
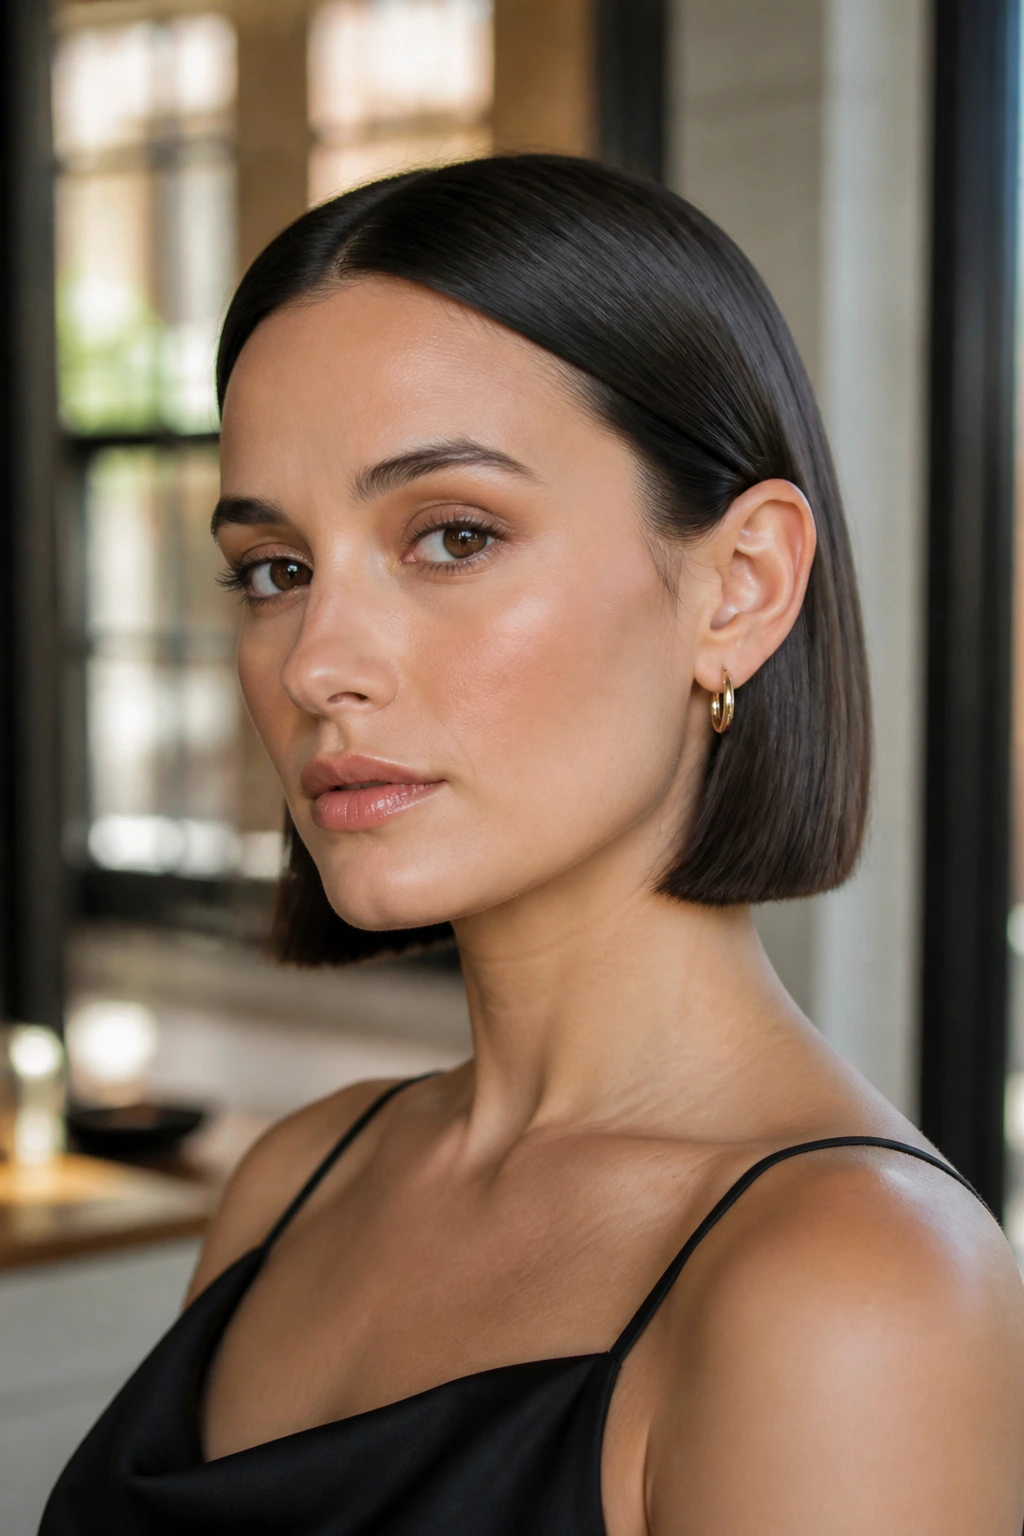
A tucked-behind-ears bob is one of the cleanest spring hairstyles because it strips away clutter. The face stays open, the neckline looks tidy, and the shape of the cut gets to do the heavy lifting. I like it best with a little shine and a center or slight off-center part.
Run a bit of smoothing cream through the mids and ends, then tuck both sides behind the ears or secure one side with a small barrette if the hair slips out. The trick is not to make the whole style too perfect. A bob that’s glossy but still has a tiny bit of bend at the ends feels modern. One that’s plastered down can look severe fast.
What Makes a Spring Hairstyle Look Intentional
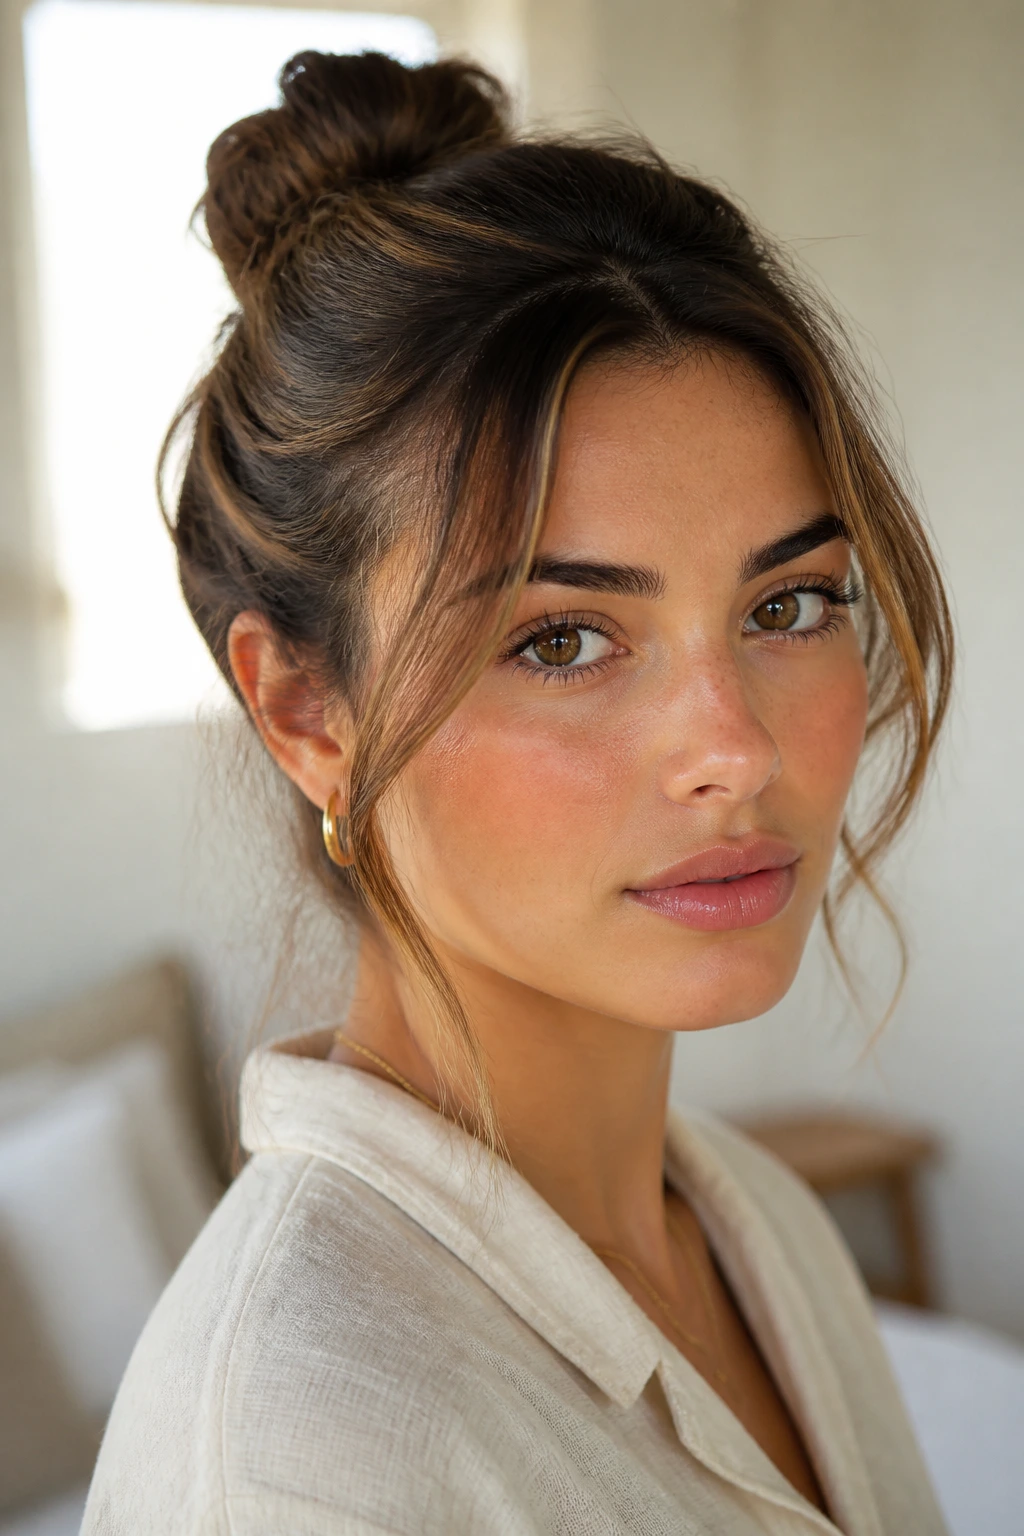
The styles that read polished all share the same basic architecture. There’s usually one clean anchor — a part, a bun, a braid line, a wrapped ponytail, a clip placement — and one softer area that keeps the hair from feeling stiff. That softer area might be the fringe, the ends, the crown, or a few face-framing strands. Without it, the style can tip into rigid territory.
Spring hair also tends to look better when the perimeter is controlled. Flyaways at the temples, puffy ends, and uneven nape pieces are the things that make a style look unfinished first. A small amount of smoothing cream, a good brush, and a cool shot from the dryer usually fix more than a heavy-handed spray ever will. Heavy spray can lock in a bad shape. A lighter touch lets you correct the line before it dries.
I also think accessory placement matters more than people want to admit. A ribbon tied too low can drag the eye down. A claw clip set too high can make the head look top-heavy. A barrette near the temple, though, can create just enough structure to feel deliberate. That’s the sweet spot: a style that looks thought through, not overbuilt.
Essential Tools for the Whole Lineup
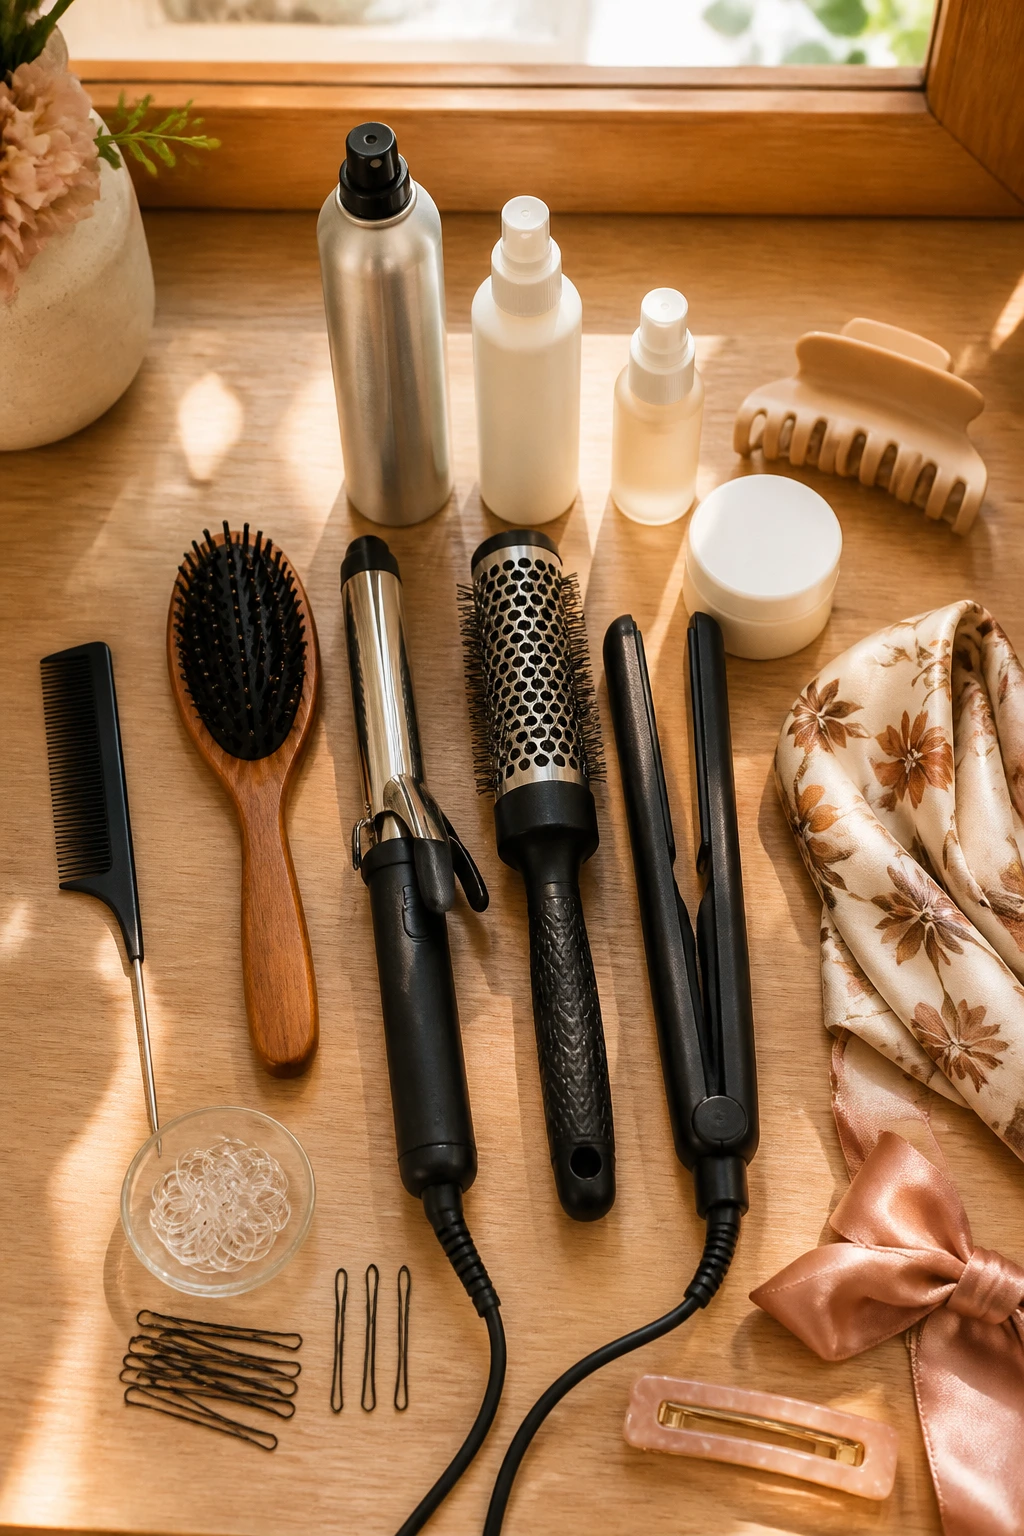
- Tail comb: Best for drawing a clean part and separating small sections without shredding the surface.
- Boar-bristle brush: Smooths the crown and brushes product through the hair without making it look wet.
- 1-inch curling iron or wand: Useful for adding soft bends, tighter waves, and ends that need a little direction.
- 1.25- to 1.5-inch round brush: Good for blowouts, face-framing layers, and polished ends.
- Flat iron with rounded edges: Helps tuck bob ends under or smooth a pixie fringe without hard creases.
- Small clear elastics: Keep ponytails, half-up sections, and mini braids neat without drawing attention.
- Bobby pins and U-pins: U-pins work better for buns and twists; bobby pins are better for tucking pieces in place.
- Flexible-hold hairspray: Holds shape without turning the hair crunchy.
- Texture spray: Gives grip to slippery hair before braids, twists, and clips.
- Lightweight smoothing cream or serum: Controls the top layer and adds shine to the ends.
- Claw clip, ribbon, scarf, and small barrette: These are the easiest finishers when you want the style to feel complete in under a minute.
Smart Product Choices That Make Styling Easier
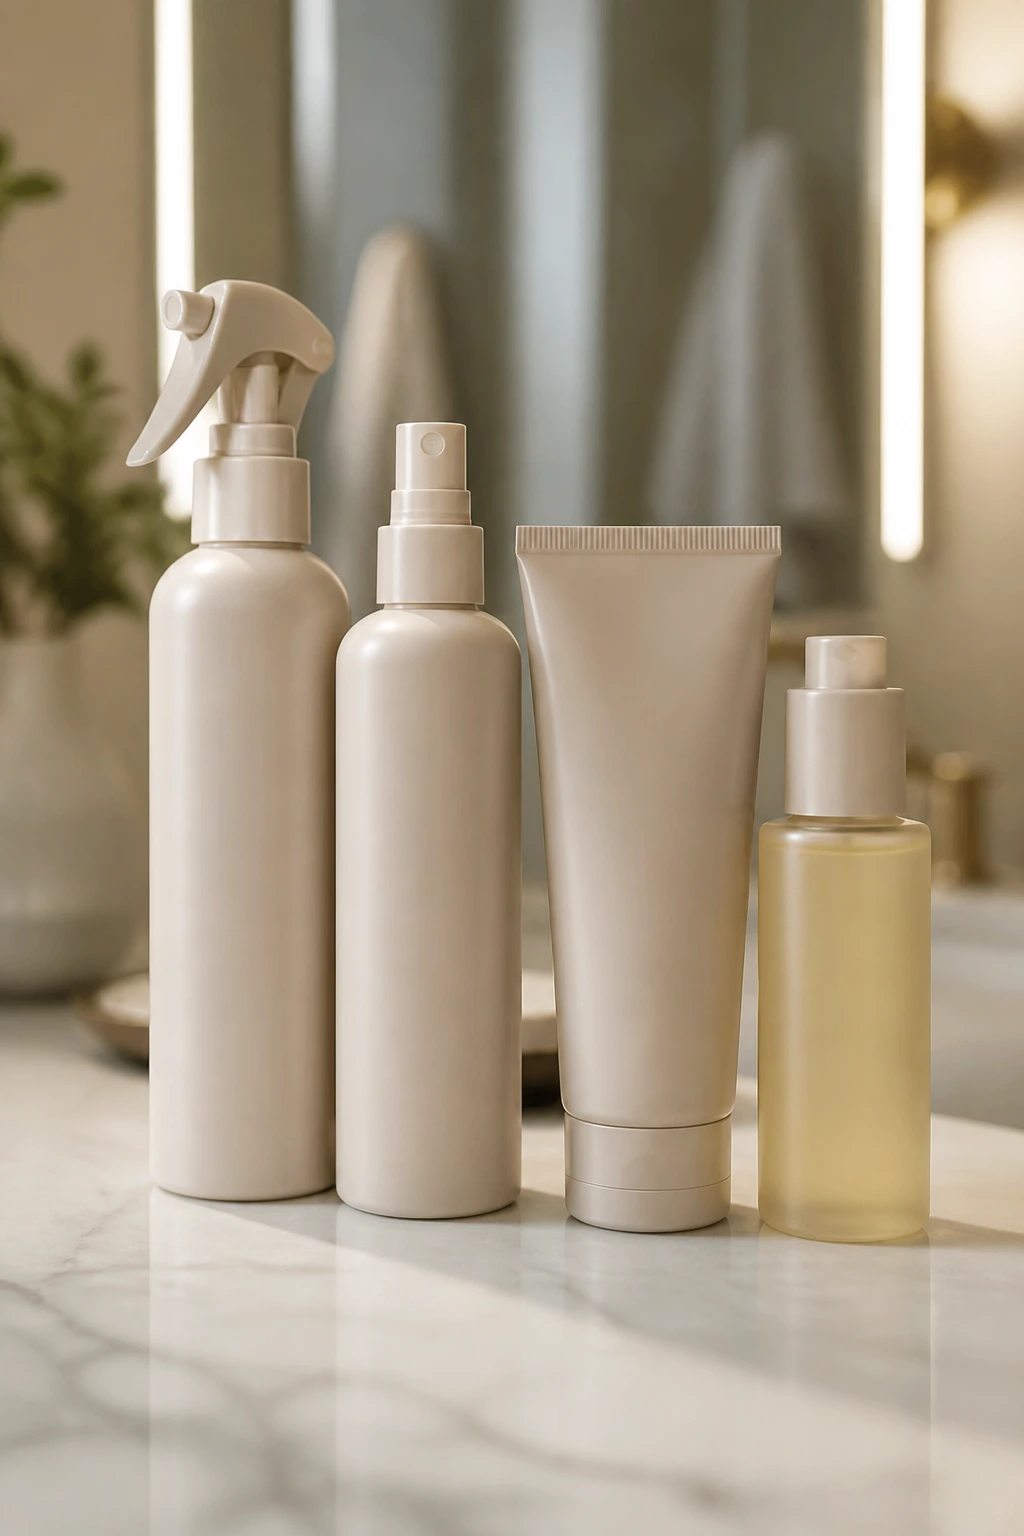
The best styling products are the ones that solve the actual problem in front of you. Fine hair usually needs lift at the root and almost nothing heavy at the ends. Thick or coarse hair often needs a cream or serum to calm the surface, but too much of either will flatten the shape and make the style slide. That’s why a single bottle of everything never works quite as well as a small, intentional lineup.
For hold, look for a flexible hairspray that says it can be brushed through. You want the hair to stay in place, not freeze the first time you touch it. On straight or silky hair, a texture spray before braiding or clipping makes a bigger difference than more pins. On curlier hair, a cream with slip can help the surface lie flat while the inside keeps its pattern.
Accessories matter too. A claw clip with teeth that actually grip hair beats a cute one that snaps shut and gives up by lunch. Same with elastics. Snag-free clear elastics are useful because they disappear into the style, but if your hair is thick, they need to be strong enough not to snap when you wrap them twice. A silk scarf should be long enough to tie cleanly, not so thin that the knot digs into the hair and leaves a crease.
Heat tools deserve some thought as well. Round brushes with vented barrels dry faster. Curling irons with a clipless barrel leave softer bends. Flat irons with rounded edges are better for tucking ends under because they don’t carve a blunt line across the hair. And yes, heat protectant matters. The best styles above still depend on the ends looking smooth, and scorched ends never look polished for long.
How to Wear These Styles With the Rest of Your Outfit
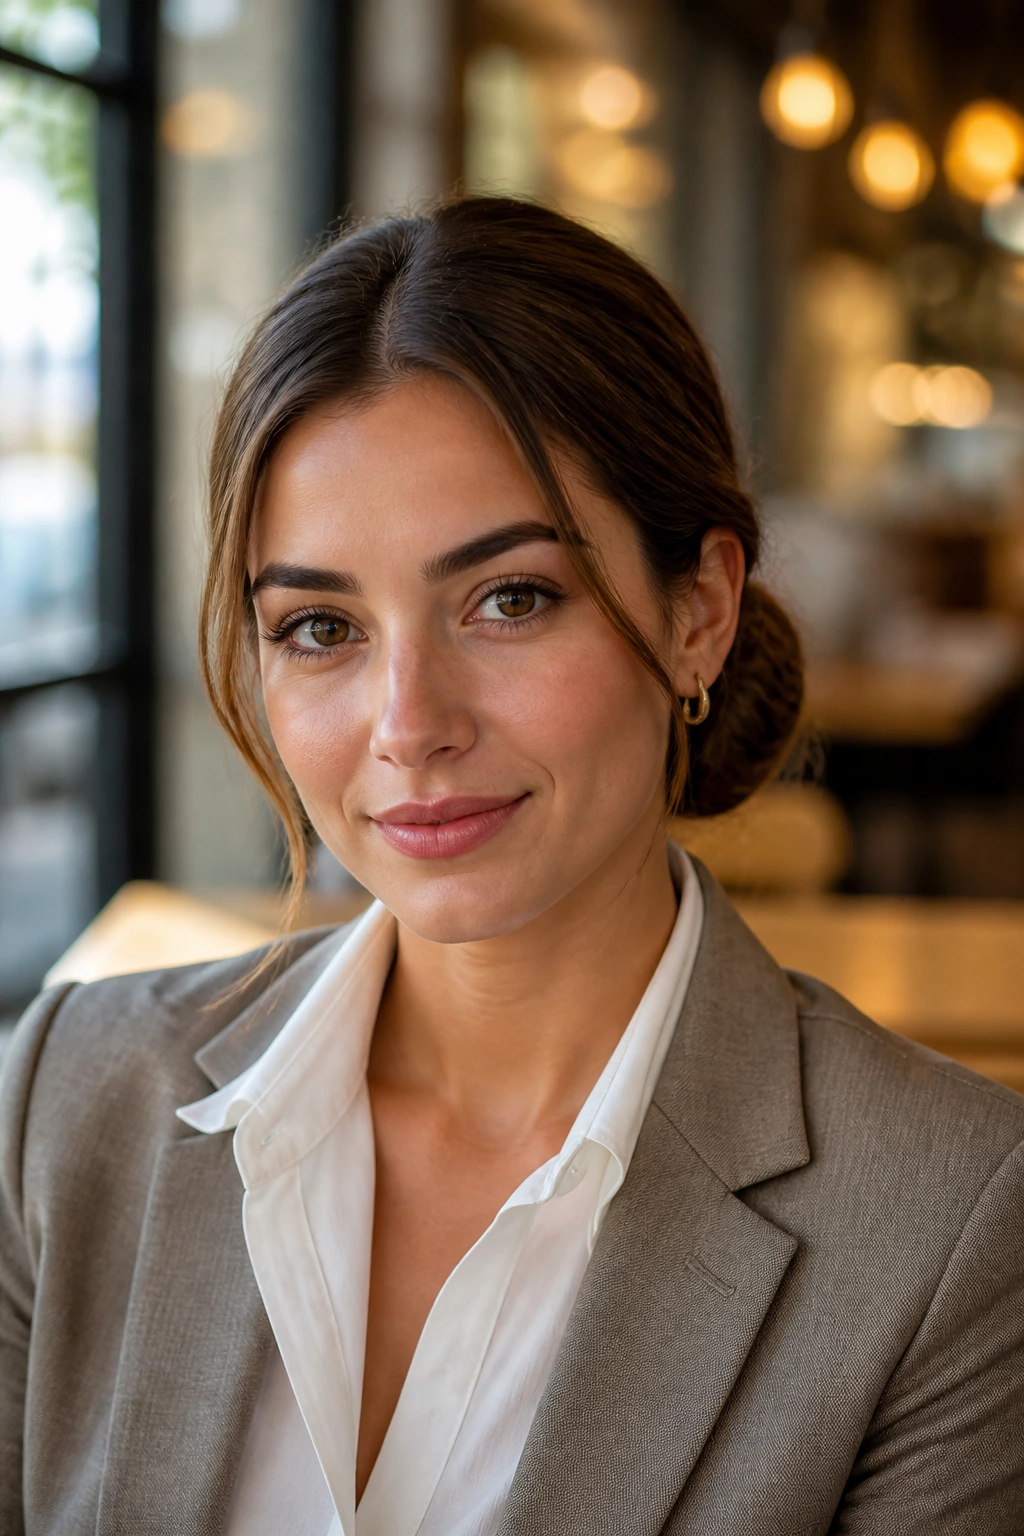
Presentation: Keep the hairline and neckline in mind before you decide where the style sits. Low buns and wrapped ponytails look especially clean with open collars, while a bob tucked behind the ears gives room for hoops, studs, or a slim necklace. If you want the style to read sharper, show a little more neck. If you want it to feel softer, let a few face-framing pieces stay out.
Accompaniments: Soft knits, linen shirts, trench coats, sleeveless tops, and structured blazers all pair well with these looks because they echo the same clean-but-not-hard feeling. A silk scarf ponytail likes a simple tee or crewneck. A wet-look slick back can handle something more sculptural. A half-up ribbon tie looks especially good when the rest of the outfit has one restrained detail and nothing else competing with it.
Portions: In hair terms, this means balance. Long, thick hair usually needs a slightly larger bun, a stronger clip, or more pinned support so the style doesn’t look tiny next to the amount of hair. Fine hair usually looks better with a smaller, tighter shape and a little lift at the crown, because too much bulk swallows it. Short styles like pixies and bobs need the opposite: less product, cleaner lines, and a sharper edge so the cut doesn’t disappear.
Accessory Pairing: Keep one strong accessory and stop there. A ribbon plus a barrette plus statement earrings turns a neat hairstyle into clutter. Pick one focal point. A single silk scarf, one matte claw clip, or two slim pins placed with purpose usually does more than a pile of extras.
Small Tweaks That Make the Whole Look Feel More Intentional
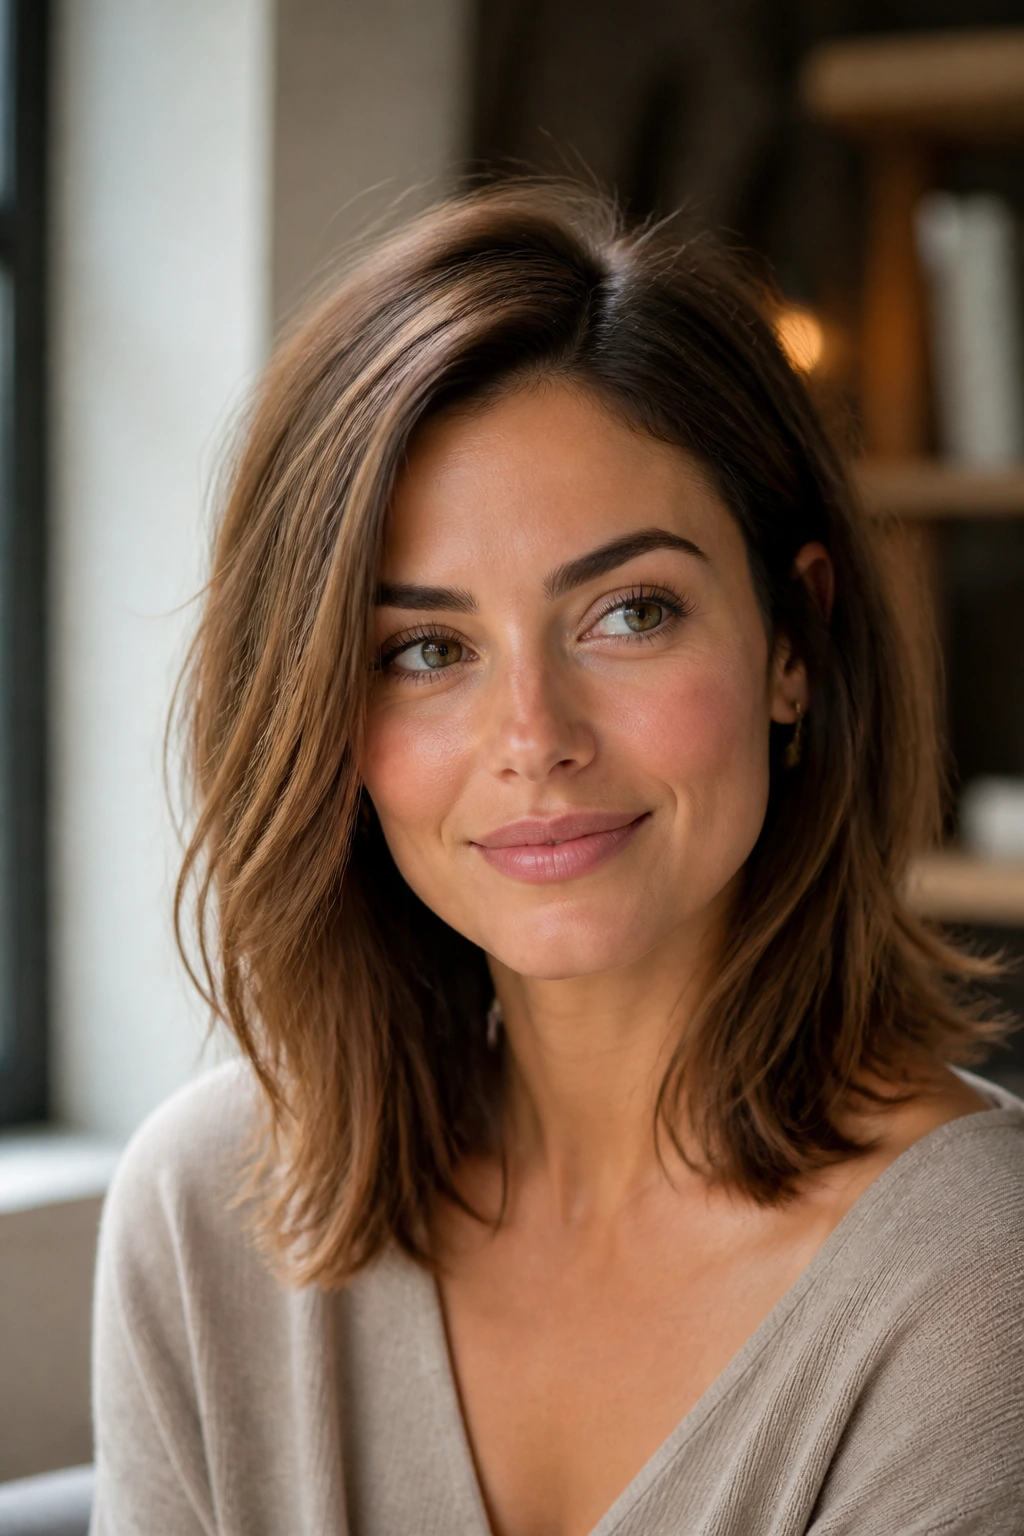
Shape Boost: If a style feels flat, change the part first. Moving a center part half an inch off-center or adding a little root lift at the crown can change the whole balance. For buns and ponytails, a slightly lower placement usually feels calmer and more polished than one that sits too high.
Texture Control: Use product where the hair needs help, not everywhere. Texture spray belongs at the roots before braids or clips. Smoothing cream belongs on the surface and ends. If you put both everywhere, the hair can end up dull and sticky at the same time. That’s a miserable look.
Time Saver: Work with second-day hair whenever you can. It has enough grip to hold twists, clips, and braids without constant correction. If it feels a little stiff, a tiny mist of water on the surface and a quick brush can reset it. Not soaking. Just enough to wake the hair back up.
Make-It-Your-Own: Swap a ribbon for a barrette, a braid for a twist, or a plain elastic for a wrapped one. Small changes keep the same style from feeling repetitive. That matters if you wear your hair up three days a week and don’t want to feel like you’re in a uniform.
Where Spring Hairstyles Usually Go Wrong
-
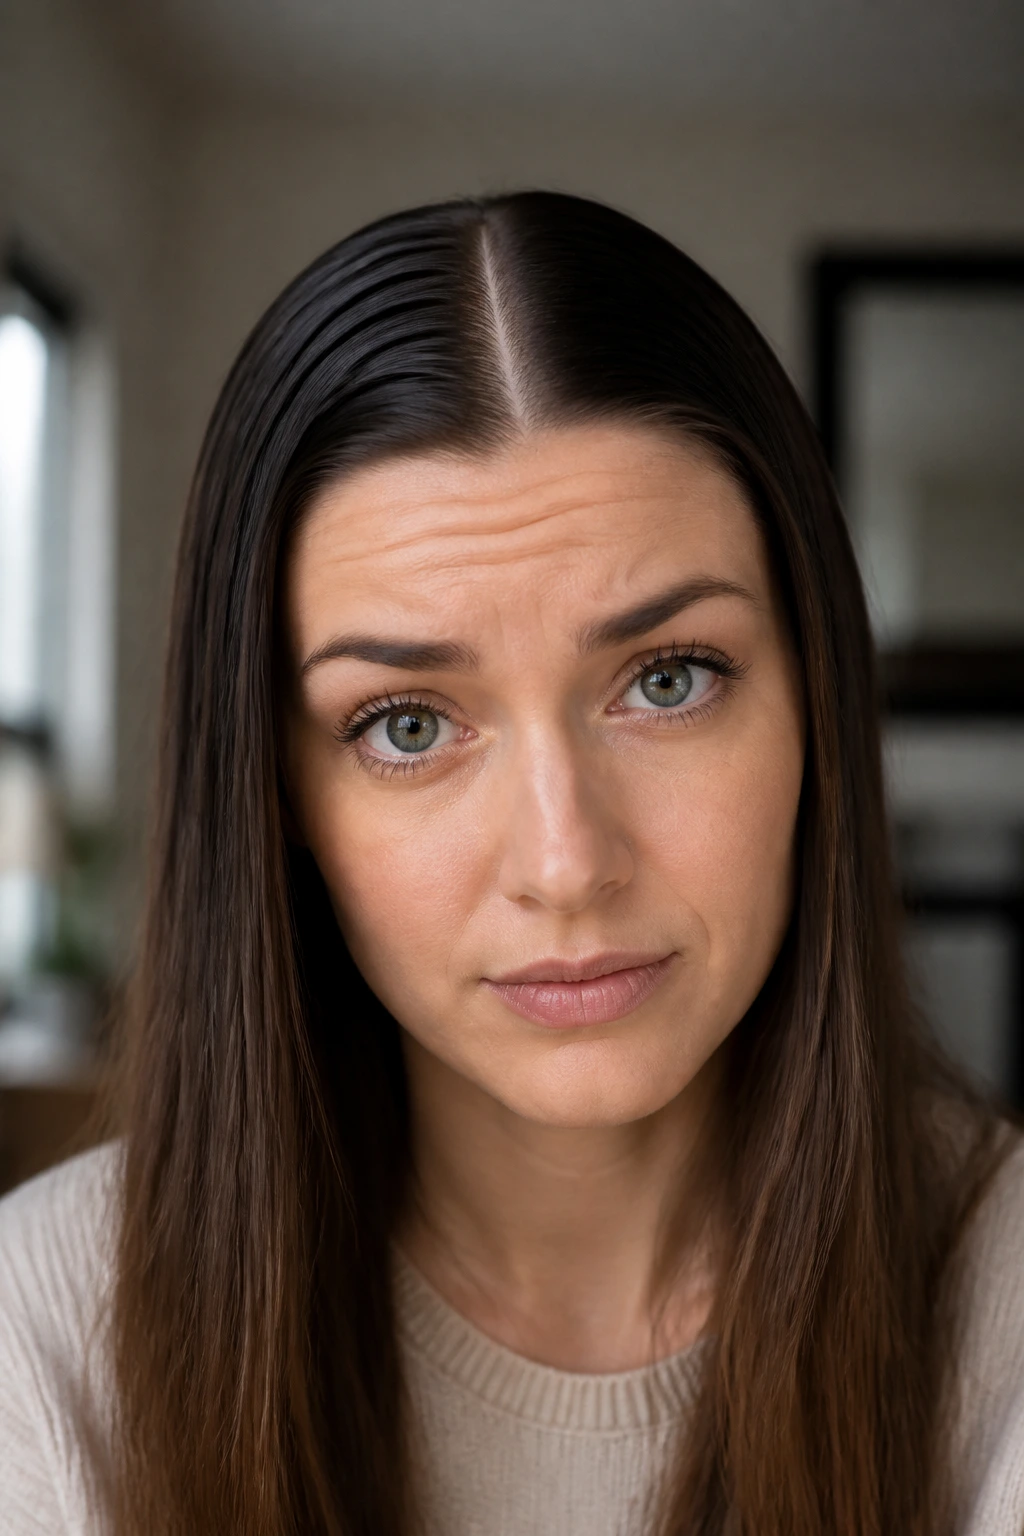
Too much product at the root: The hair looks slick for ten minutes, then collapses into a heavy, dull sheet. Use less, and keep the heaviest creams on the mid-lengths and ends.
-
A part that’s too perfect and too flat: A razor-straight part can look sharp, but if the root is pressed down hard, the style loses life. Lift the root with a brush or your fingers before the product dries.
-
Accessories that are too small or too weak: Tiny clips and flimsy elastics slide right out of thick hair. On the flip side, oversized clips can swallow fine hair. Match the accessory to the amount of hair it has to hold.
-
Curling every section the same way: The hair ends up stacked and obvious, which is the opposite of polished. Alternate direction in the back or brush the curls out into waves so the movement feels softer.
-
Skipping the cool-down: Hair set while warm won’t stay set long. Let waves, bends, and pinned sections cool before you touch them. A minute or two matters more than most people think.
-
Trying to fix frizz with more heat: That usually makes the frizz worse. Use a small amount of serum, smooth the surface, and stop there. Burnt ends don’t cooperate.
Adaptations for Short, Long, Curly, and Fine Hair
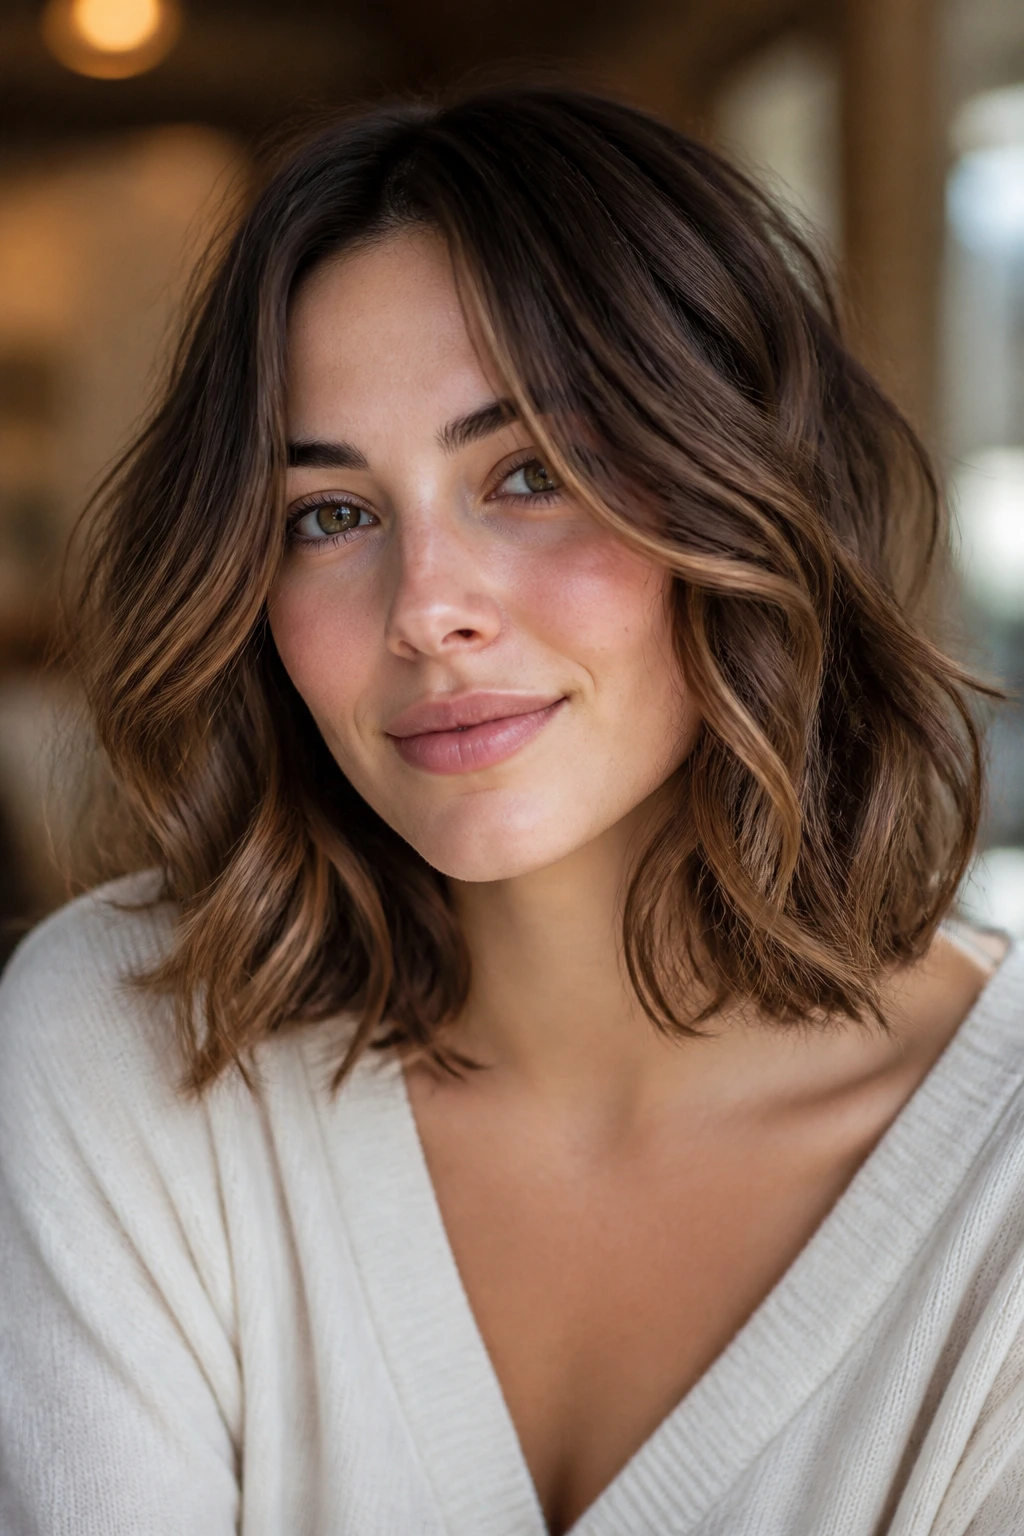
Fine-Hair Lift Off: Fine hair does best with smaller sections, lighter products, and styles that build shape at the crown instead of piling on length. A half-up ribbon tie, low wrapped pony, or side-parted wave usually gives the most visible structure without sagging by noon. Skip heavy creams. They steal volume fast.
Curly-Hair Soft Control: Curly hair can handle these looks beautifully, but the trick is choosing styles that work with the bend instead of flattening it. A loose braided crown, twisted half-up halo, or low bun with face-framing pieces can keep the pattern intact while still looking neat. Use a cream that defines, not one that coats the curls into a sticky shell.
Short-Hair Clean Line: Pixies and short bobs benefit from sharper surfaces and a little piecey detail at the front. A side part, tucked ear, or tiny barrette can add shape without forcing the cut into a style that doesn’t fit. Short hair shows the line first. Let that be the feature.
Humidity-Ready Finish: If the air feels damp, choose low styles with pins, wraps, or braids. Spritz a light anti-frizz product before styling, then finish with flexible hairspray and a touch of serum only on the ends. The goal is control, not stiffness.
Heatless Morning: Braids, twists, and scarf ties are the best low-heat options here. Set damp hair in one or two loose braids overnight, or twist the front sections while the hair is still a little moist, then let them cool in place. You’ll wake up with shape already built in.
Keeping the Style Fresh Between Washes
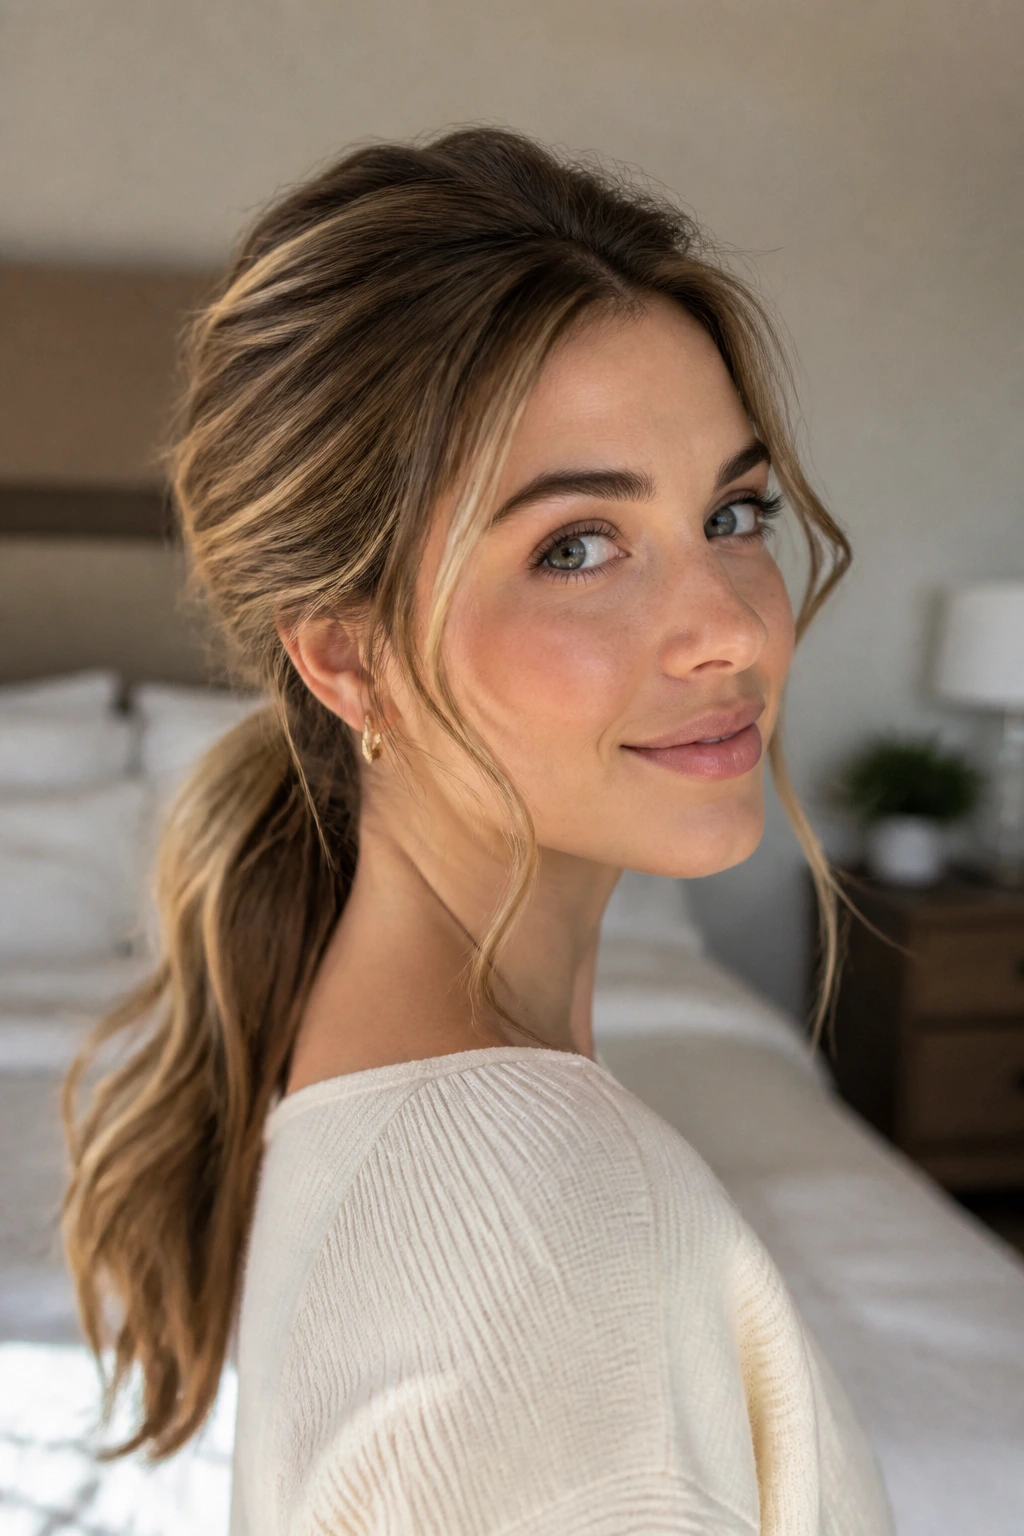
Most of these styles last better when the hair is not freshly washed. Day-two hair has grip. Day-three hair usually has even more. That said, the style needs a little care if you want it to look clean instead of tired. At night, sleep on a silk pillowcase or wrap the hair in a silk scarf if the style has a smooth crown. A loose low pony or soft braid is easier to preserve than a style with a lot of pins, so if you know you’ll wear it again tomorrow, choose one with less hardware.
For next-day refreshes, use dry shampoo at the roots from about 8 to 10 inches away, then wait a minute before massaging it in. That keeps white patches from settling on the part. If a bob or lob has lost its bend, rework only the front pieces and the ends. There’s no need to reheat the whole head. For buns, twists, and ponytails, swap any stretched elastic for a fresh one and smooth the crown with a brush. Small fixes go farther than a full redo.
Some styles improve overnight, and some don’t. Braids, wrapped ponytails, and low buns often settle into themselves and look even better the next day. Blowouts are the opposite. They hold shape, then slowly lose the clean edge at the ends. If you want a blowout to last, pin the curls or bends loosely until they cool, and avoid brushing them to death every hour. Touching the hair more than necessary is one of the fastest ways to turn polished into puffy.
Frequently Asked Questions
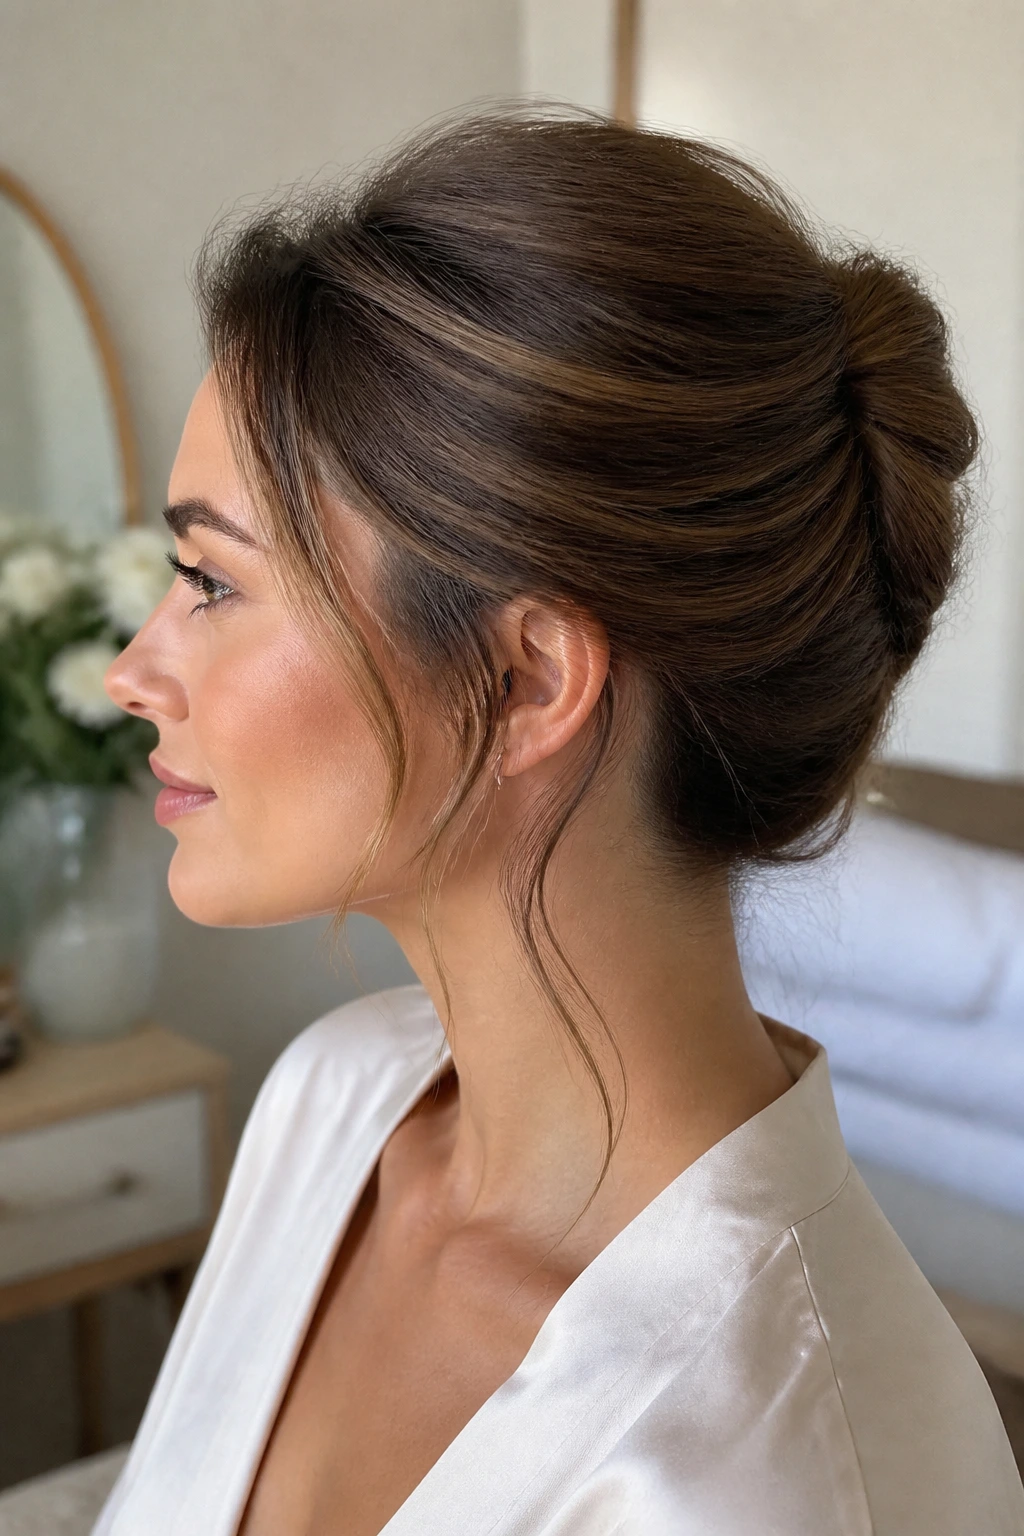
Which of these spring hairstyles works best on fine hair?
Fine hair usually looks best in styles that rely on shape, not bulk. The half-up ribbon tie, low wrapped ponytail, side-parted waves, and sleek tucked-behind-ears bob all give structure without needing a mountain of product. A little root lift and a small accessory usually go farther than big volume.
How do I keep flyaways down without making my hair greasy?
Use a light smoothing cream or serum on the outer layer only, then brush it in with a boar-bristle brush. If you need extra control, spray hairspray onto a brush or your fingertips and press the fuzzy spots down instead of coating the whole head.
Can curly hair wear these styles without losing its pattern?
Yes, but the best choices are the ones that work with the curl rather than against it. The braided crown, twisted half-up halo, low bun, and mini-braid bun all let curls keep their shape while still looking finished. A wet slick-back can work too, but only if you’re ready for a fully smooth finish.
What if my blowout collapses by midday?
Refresh the roots with dry shampoo and rework only the front pieces and ends with a round brush or a low-heat tool. Most blowouts fail at the crown first, not the ends. A quick lift at the root and a cool shot can bring back the shape faster than starting over.
Are claw clips still polished enough for work?
They are, if the twist is neat and the clip is placed with intention. A clean low twist held by a medium-to-large claw clip looks more finished than a messy pile of hair stuffed into the clip. Avoid clips that are too decorative or too flimsy if you want the look to stay office-friendly.
How can I make a style last through humidity?
Choose styles that sit low on the head, hold with pins or elastics, and don’t depend on perfect smoothness across every strand. A low bun, wrapped ponytail, braid-based look, or slick-back will usually survive damp air better than loose curls. Keep a tiny anti-frizz serum in your bag and use it only on the outer surface.
What’s the best way to make a style look less severe?
Soften one part of it. Leave out a slim face-framing section, loosen the braid a touch, curve the ends under instead of pinning them flat, or add a ribbon instead of another metal clip. One small softener makes the whole style easier to wear.
Which styles are best if I only have five minutes?
The modern claw-clip twist, low wrapped ponytail, half-up ribbon tie, and tucked-behind-ears bob are the fastest wins. They depend on clean placement more than complex technique. If your hair is already on day two, they’re even easier.
The Finish Matters
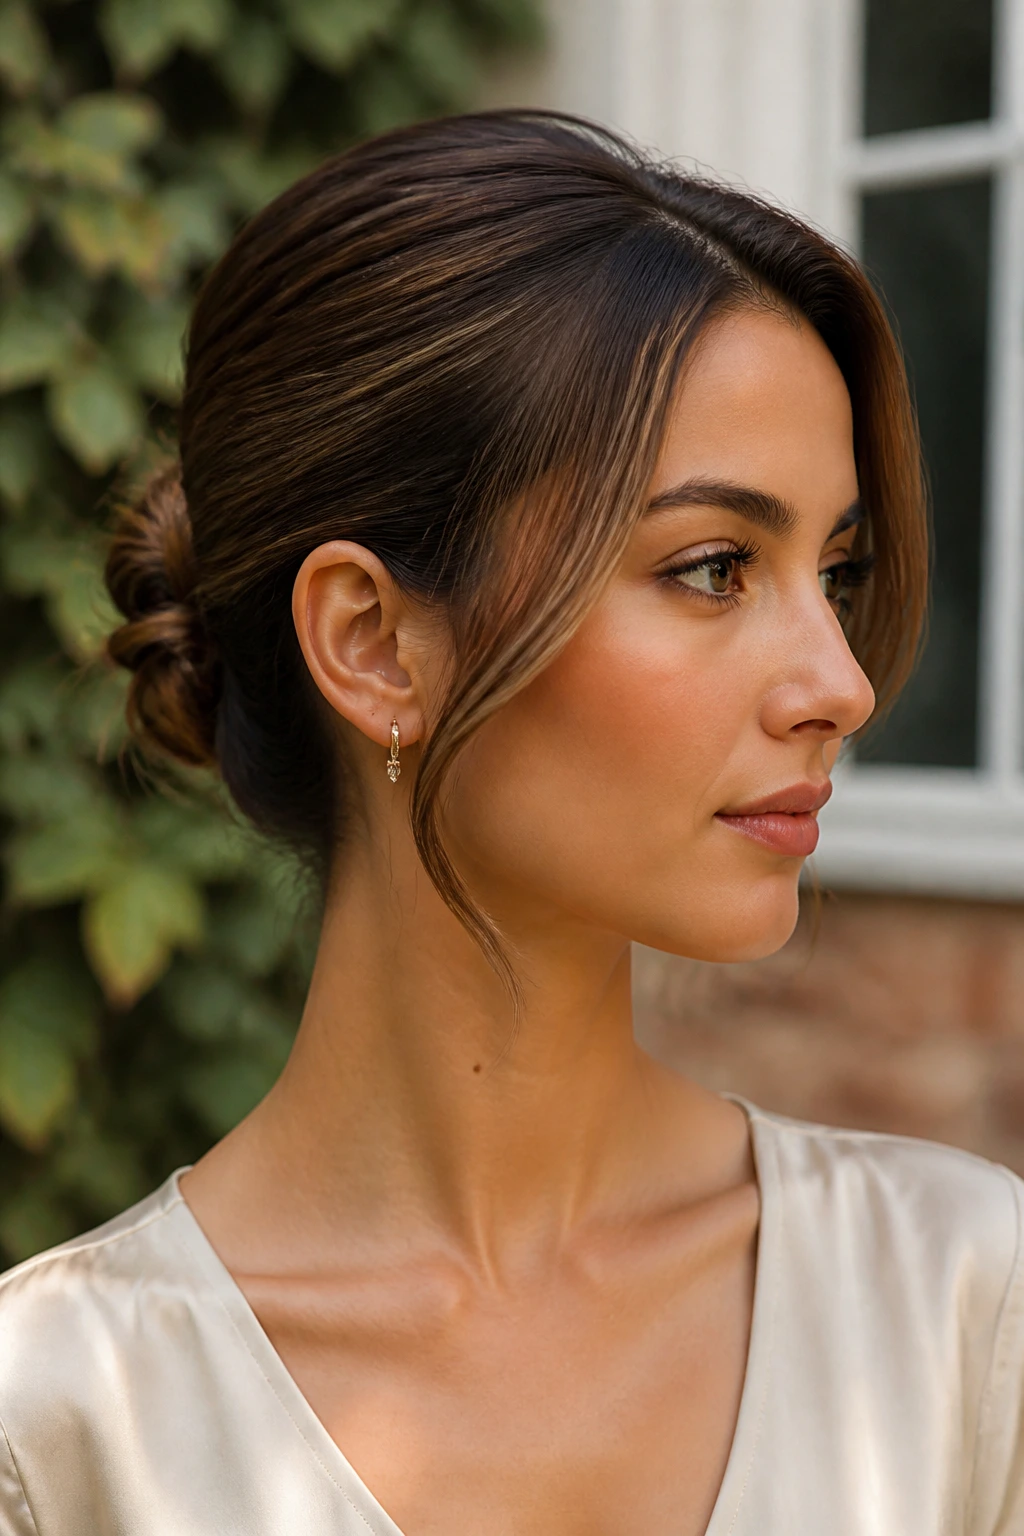
The best spring hairstyles don’t shout. They look clean from the front, neat at the nape, and easy around the face — which is harder to do than it sounds. That mix of softness and control is what makes a style read polished instead of overworked, and once you start noticing it, you’ll see it everywhere.
Pick the version that suits your length, your texture, and the amount of time you actually have in the morning. That’s the real trick. The right style is the one you can repeat without dreading it, and once you find that one, the rest of the lineup starts to make sense.
