



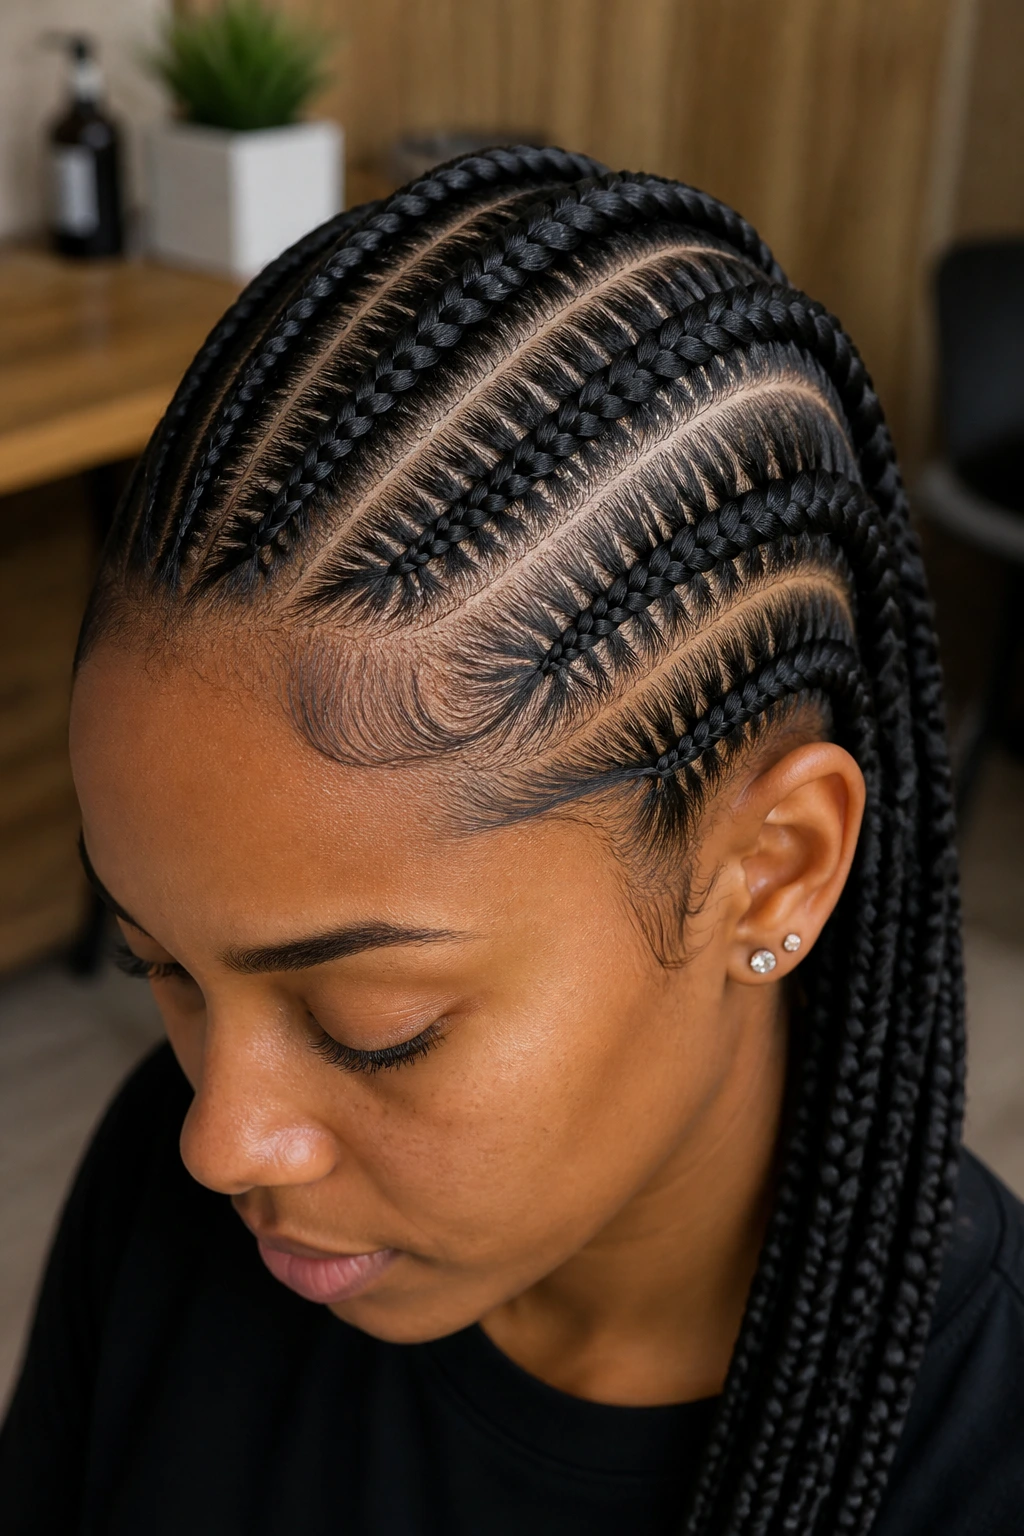
Feed-in braid hairstyles look polished for one simple reason: the braid starts small at the scalp and builds slowly, so your eye sees one smooth line instead of a bulky knot at the hairline. That tiny shift — a few strands, then a few more, then a braid that settles into its full width — is what gives the style that neat, tailored finish.
I like feed-ins when the parting does real work. A straight row, a curved arc, a deep side part, even a triangle section can change the mood completely, but the braid itself should still sit flat and controlled. Once the base is clean, the whole style reads sharper, and you don’t need a lot of extra decoration to make it look finished.
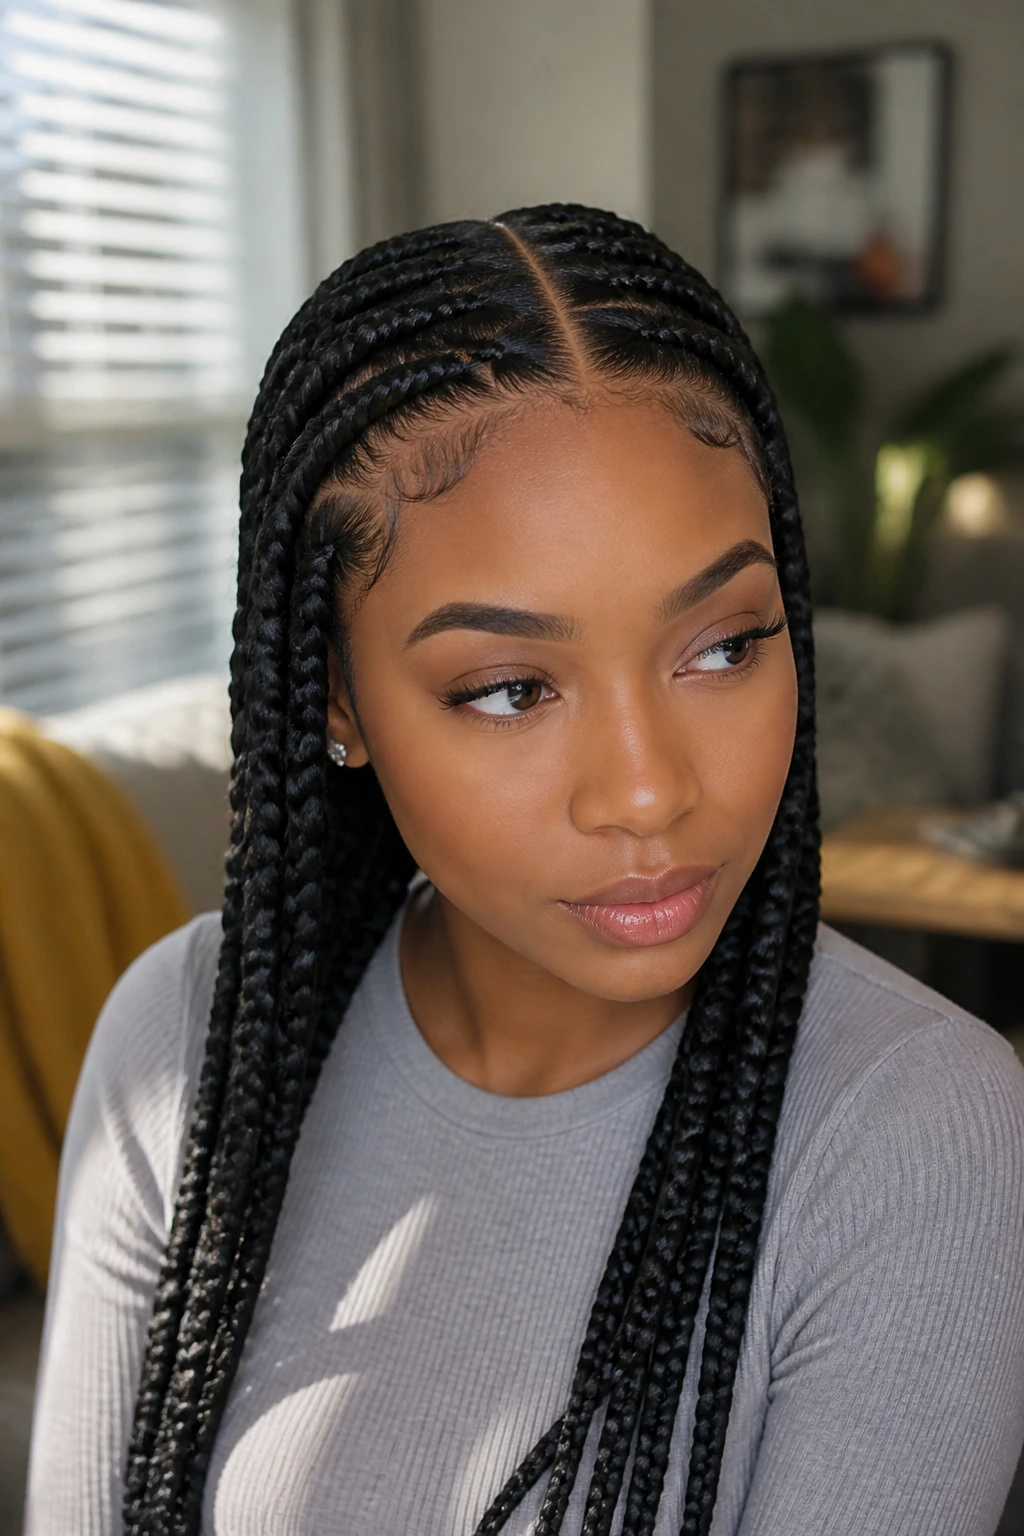
They also have range. Pull them into a ponytail, coil them into a bun, leave them long and straight, or add curls and cuffs at the ends. The structure stays the same. The finish changes with surprisingly small moves, and that’s why this style keeps showing up when someone wants hair that looks deliberate from the first part to the last braid.
Why These Feed-In Braids Earn Their Keep
-
The hairline stays cleaner: The feed-in method adds extension hair in small pieces, which keeps the first inch from looking stuffed or lumpy.
-
The parting does half the styling: Straight rows, curved rows, and diagonal rows all change the mood before the braid even starts to lengthen.
-
They can go formal or casual fast: A few cuffs, a bun, or curled ends can push the same braid pattern toward a sharper, dressier finish.
-
They sit well with low-tension styling: When the base is built carefully, the style can look neat without relying on a heavy hand at the scalp.
-
The look scales easily: Smaller feed-ins give a softer, more detailed result; larger rows read bolder and take less time.
-
They work with a lot of face shapes: A center part frames evenly, while a side part or curved pattern can soften a strong hairline or change how the style sits around the eyes.
1. Classic Straight-Back Feed-In Braids
Straight-back feed-ins are the cleanest starting point if you want the scalp to look crisp and orderly. The rows run straight from the front hairline to the nape, which makes every part line visible and every braid easy to read. There’s no extra shape to hide behind, so the polish has to come from neat sections and a smooth feed-in at the root.
This style works because it leaves no room for sloppy parting. If the spacing is even and the first inch stays slim, the whole look feels intentional. I like this one when the goal is a style that can hold up in a meeting, on a long day, or under a hat without losing its shape.
Ask for small, even feed-ins at the front and slightly fuller rows as the braid moves back. That little shift keeps the hairline from looking bulky while still giving the braid enough body to sit flat and last.
2. Center-Part Feed-In Braids for a Sharp Frame
Why does a center part look so polished? Because the symmetry does the work for you. When the part splits the hair evenly down the middle, the face gets a clean frame on both sides, and the braid pattern feels balanced before the lengths even fall.
This style is the one I’d choose when the parts need to look exact. The middle line should be straight enough to catch the eye, but not so hard that it looks scratched in. Once the first sections are laid down neatly, the rest of the braids can run straight back or angle slightly toward the shoulders.
It’s especially strong with long earrings, a strong brow, or a sharp neckline. The center part gives all of that room to breathe. If your hairline is a little uneven, this pattern can still work — the trick is to keep the front rows small and mirror the size on both sides so the imbalance doesn’t show.
3. Side-Part Feed-In Braids That Sweep Cleanly Across the Scalp
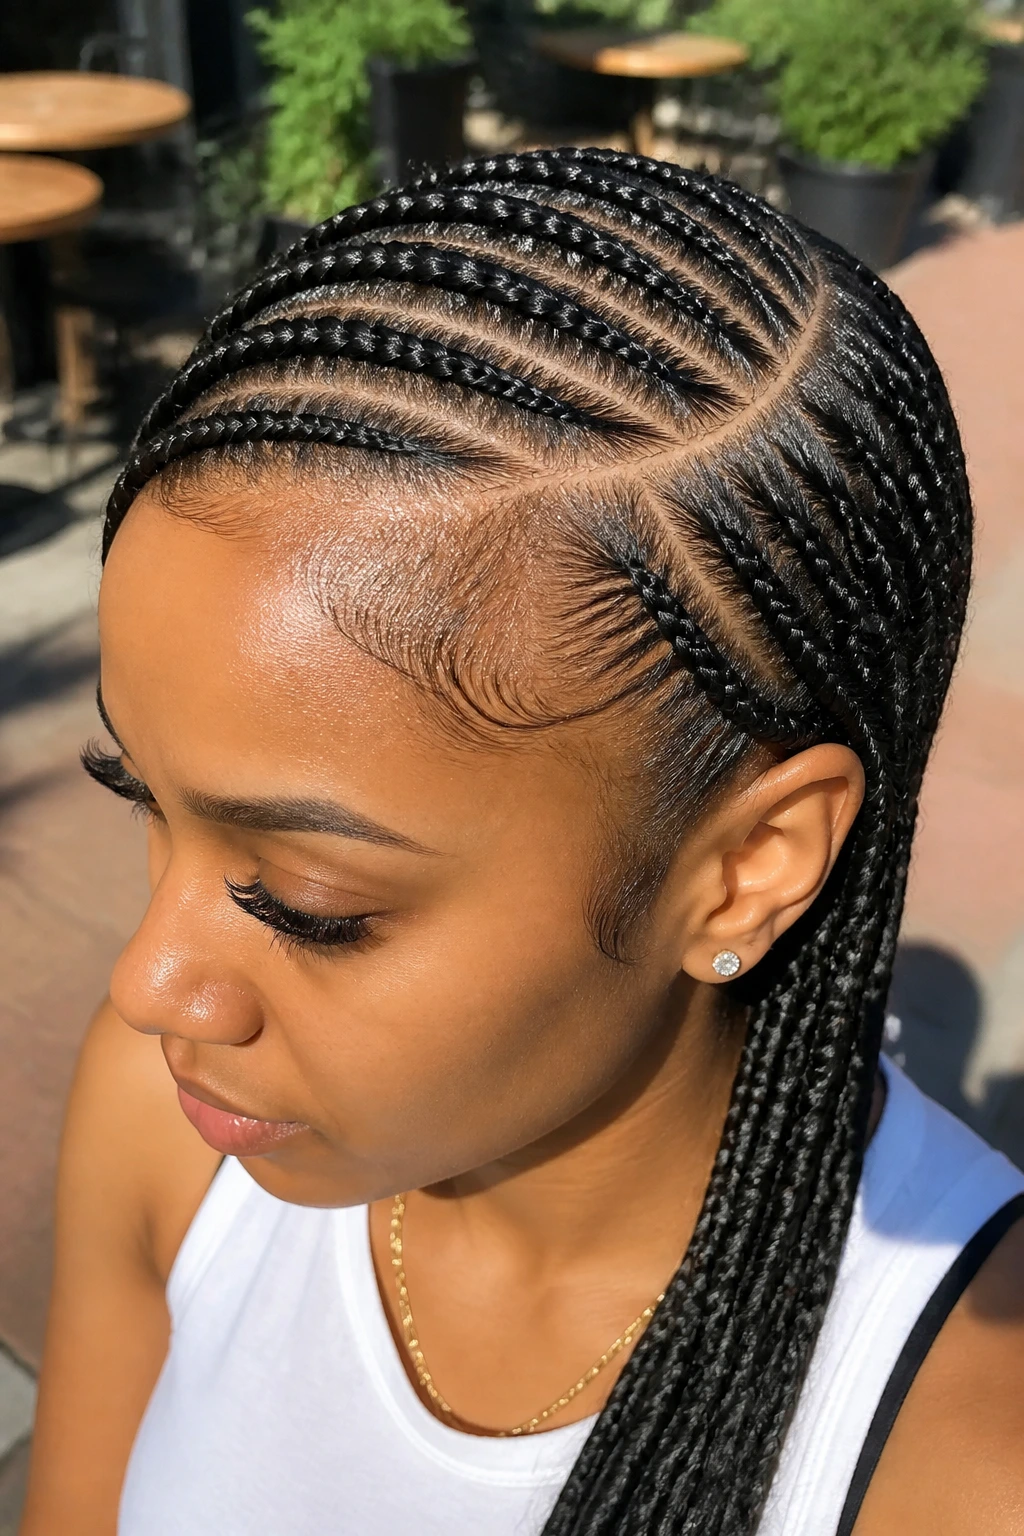
A side part changes the whole attitude of feed-in braids. The lines feel softer, the front is less severe, and the braids sweep across the head in a way that looks dressed up without trying too hard. You can still keep the scalp neat; the part just gives the style a little motion.
I reach for this when a center part feels too rigid. A deep side part can open the face, especially around the forehead and temple, and it makes room for a sweeping row that falls into place instead of locking everything into a straight frame. The result reads tailored, not stiff.
The cleanest version uses one dominant part and several slim rows running back from it. If the side section is too wide, the style starts to feel heavy on one side. Keep the feed-in gradual, and let the front braid curve just enough to follow the shape of the head.
4. High Feed-In Braided Ponytail
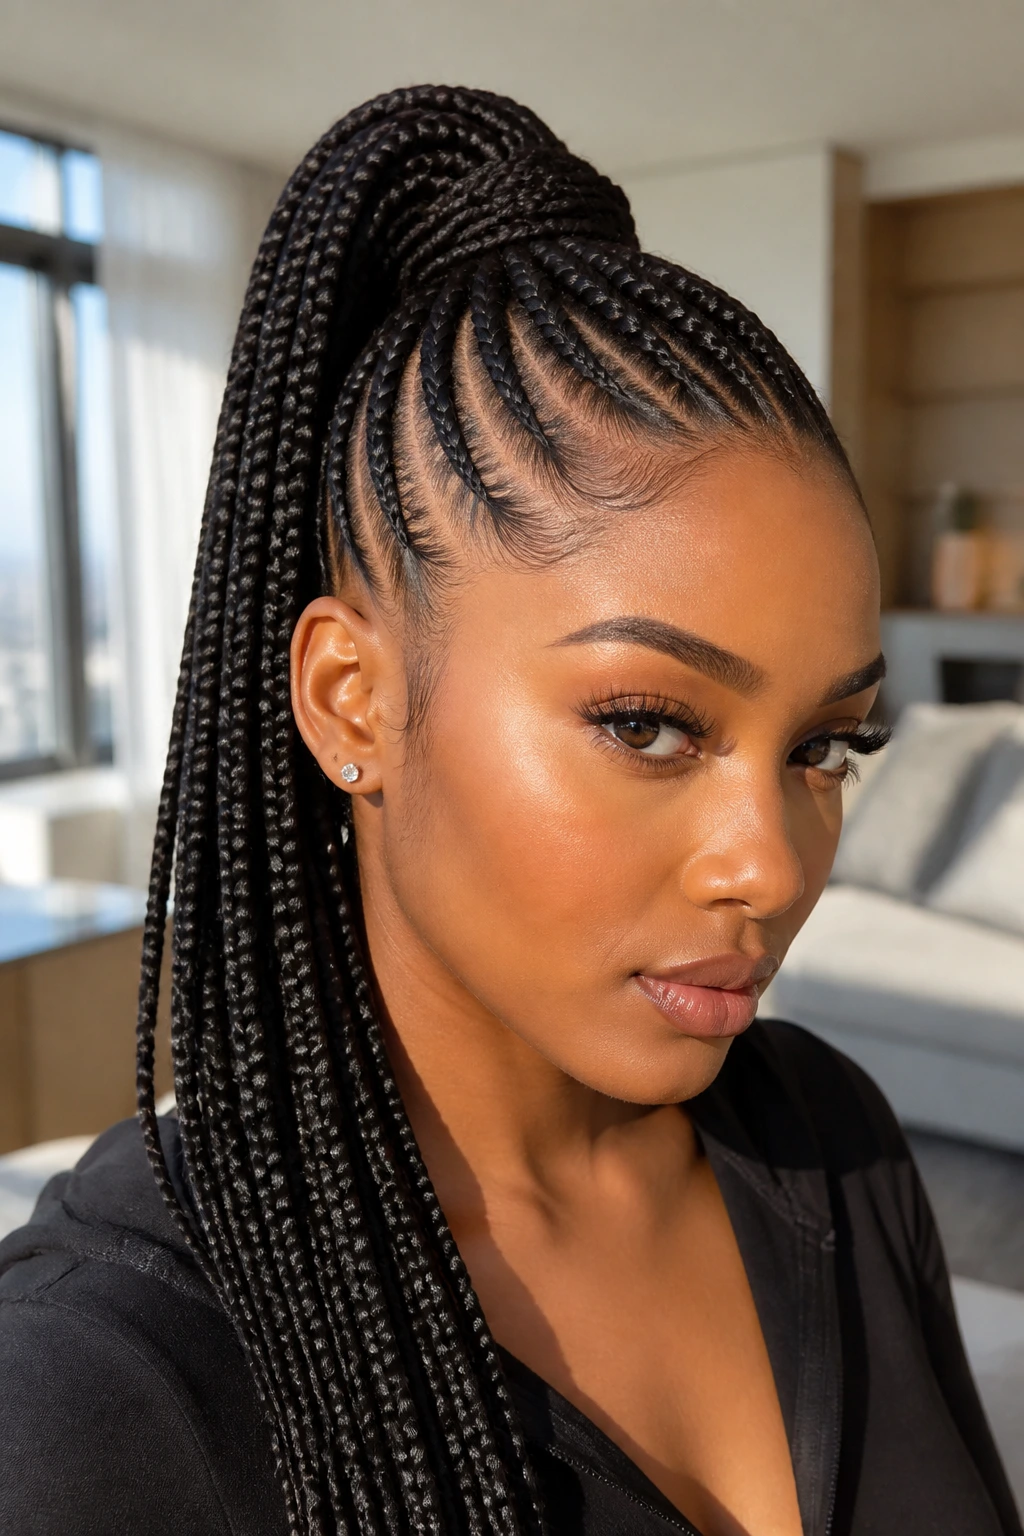
A high ponytail lifts the whole style off the shoulders, and that alone changes the energy. The braid pattern feeds upward toward the crown, then gathers into one taut ponytail base that sits high and tidy. It’s neat. It’s assertive. It shows the parting immediately.
This version works because the eye goes first to the lifted shape, not the length. That makes the crown look cleaner and the jawline more open. If you like a style that stays away from the neck — or you just want braids that can be tied down and still look sharp — this one earns its place.
Keep the feed-ins tight enough to climb upward, but not so tight that the scalp looks shiny or stressed. A wrapped ponytail base with one braided strand around the elastic makes the whole thing look finished instead of thrown together at the last minute.
5. Feed-In Braids Twisted Into a Low Bun
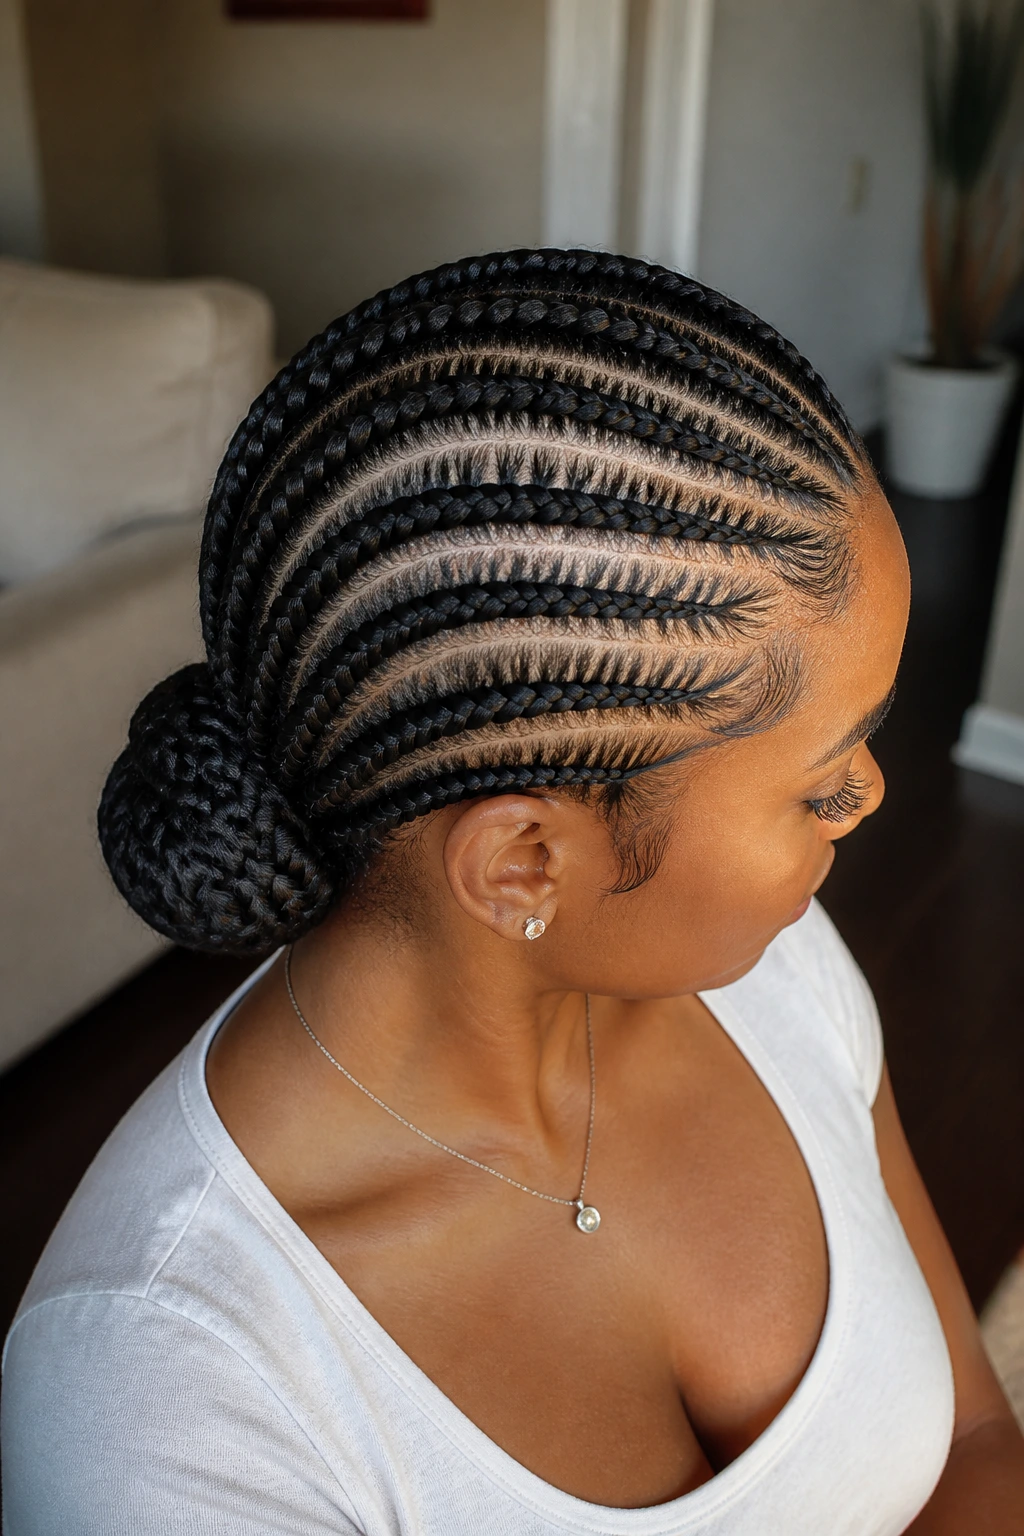
At the nape, feed-in braids change from sharp to elegant fast. A low bun turns the braid pattern into something quieter and more formal, with the rows directing the eye straight to the knot. The scalp work still matters, but the bun becomes the point.
This is the style I’d pick for clean necklines and structured outfits. It keeps the shape compact, and it looks especially good when the parts are tidy and the braids are uniform in thickness before they coil. If the braid base is loose, the bun shows it instantly.
The bun can sit tight and smooth, or it can be wrapped a little looser for a softer finish. Either way, keep the edges controlled and the front rows slim. That front shape is what keeps the whole style from reading like a last-minute updo.
6. Curved Feed-In Braids That Arc Around the Head
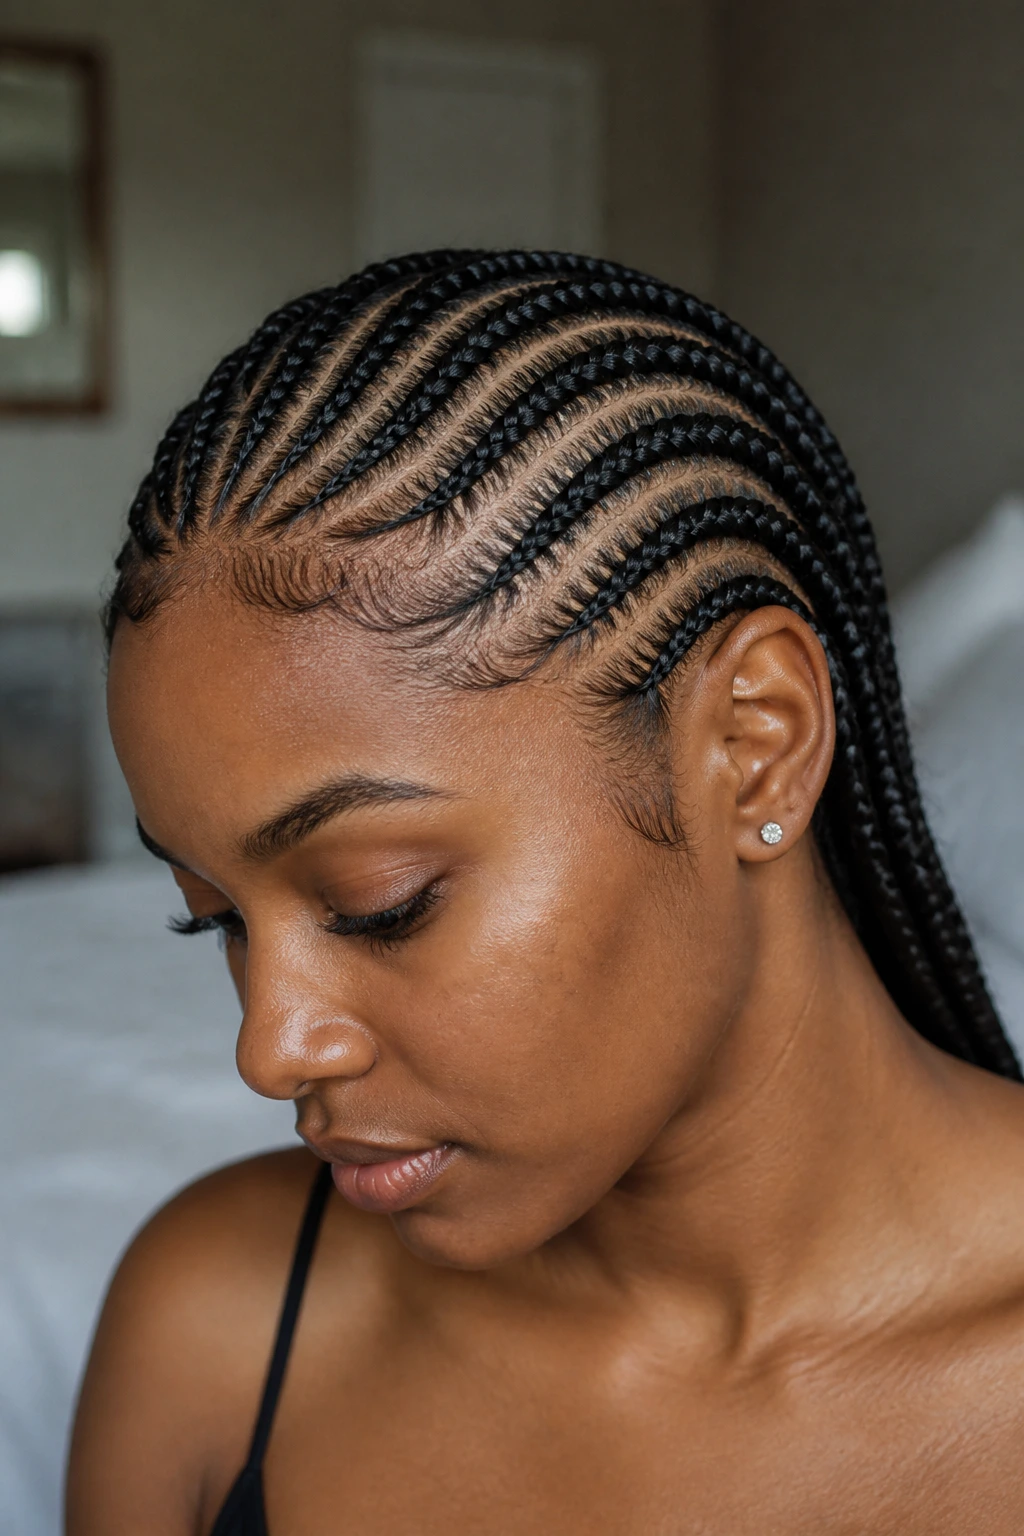
Curved parts give feed-in braids a more decorative shape without piling on extra hair or accessories. Instead of marching straight back, the rows arc around the head in soft curves, which makes the braid pattern feel more designed. The eye follows the line, and that line does a lot of the styling.
This is one of my favorites when a person wants something polished but not severe. Curves soften strong angles around the forehead and temple, and they let the braids move around the head in a way that feels deliberate. The parts need patience, though. A wobbly curve looks unfinished faster than a straight row does.
The best version keeps the curves smooth and the spacing even. Too many sharp turns make the braids fight the head shape. Keep the braid base slim, and let the curve settle naturally toward the back or toward one side.
7. Stitch Feed-In Braids With Crisp Part Lines
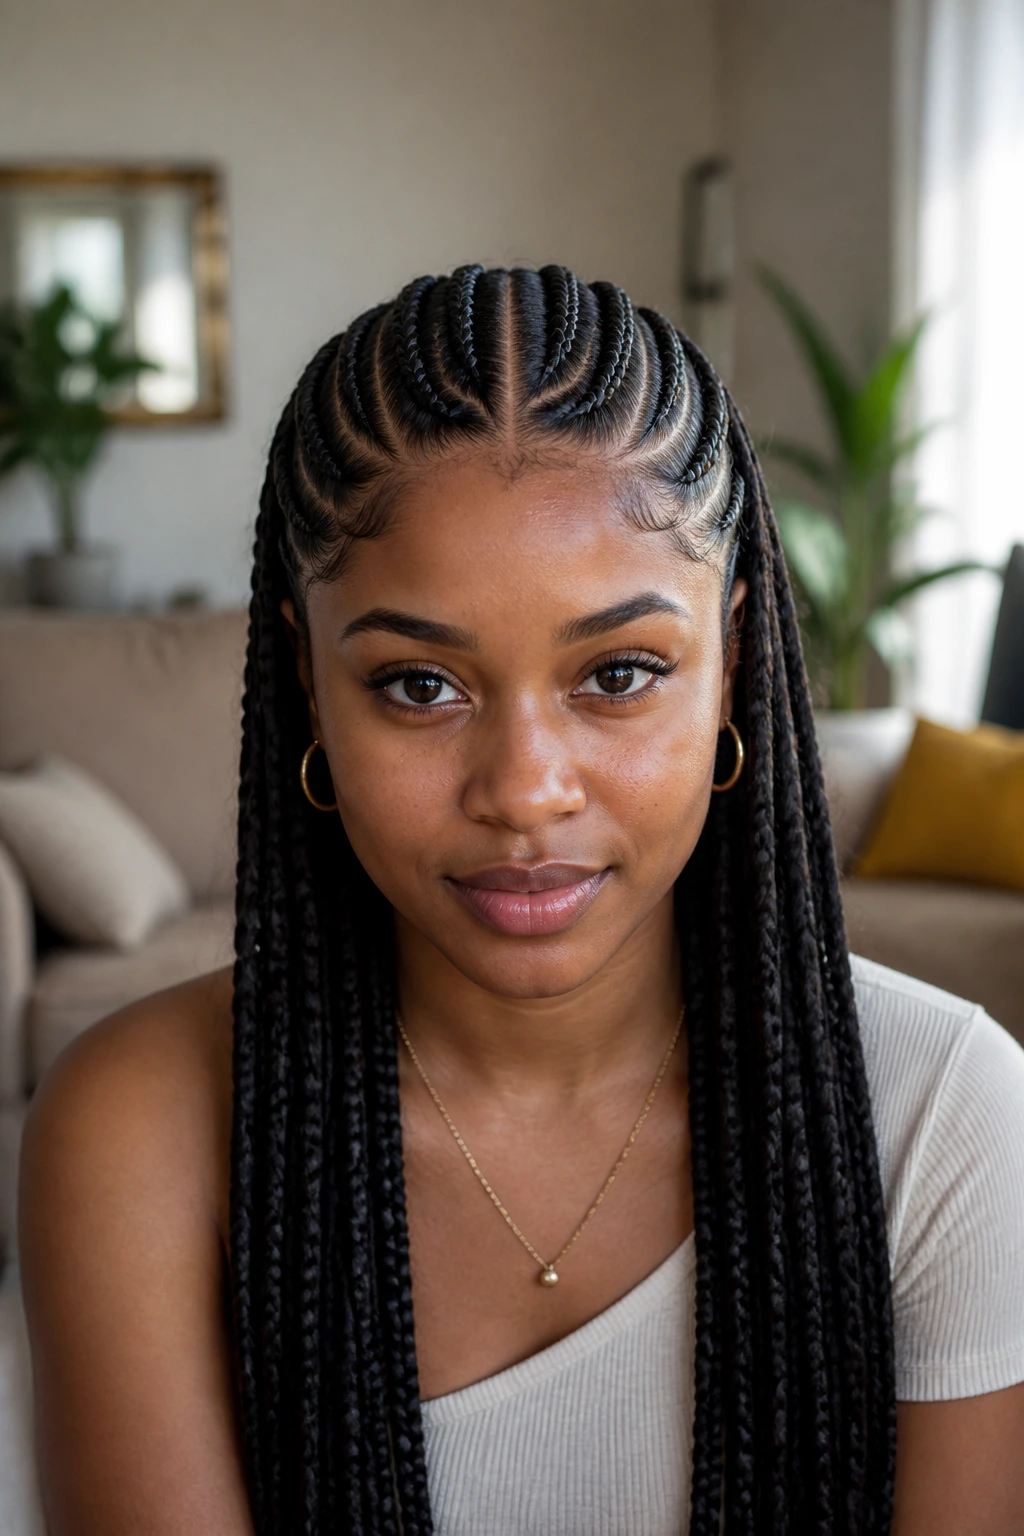
Stitch braids have that drawn-on look because the parting is narrow and the rows appear almost carved into the scalp. The lines are sharp, the sections are clean, and the finish feels precise from the start. If you like a style with visible geometry, this one has teeth.
The polished effect comes from repetition. Every stitch line should look like it was measured against the last one, not guessed. That’s what gives the style its strong, almost architectural feel. It can look bold without getting messy, which is a hard balance to hit.
This works best when the braider keeps the section width consistent and the feed-in smooth. If the braid starts thick and then thins out, the whole thing loses that carved look. Keep the root neat, and the stitch pattern does the rest.
8. Jumbo Feed-In Braids for a Bold, Clean Finish
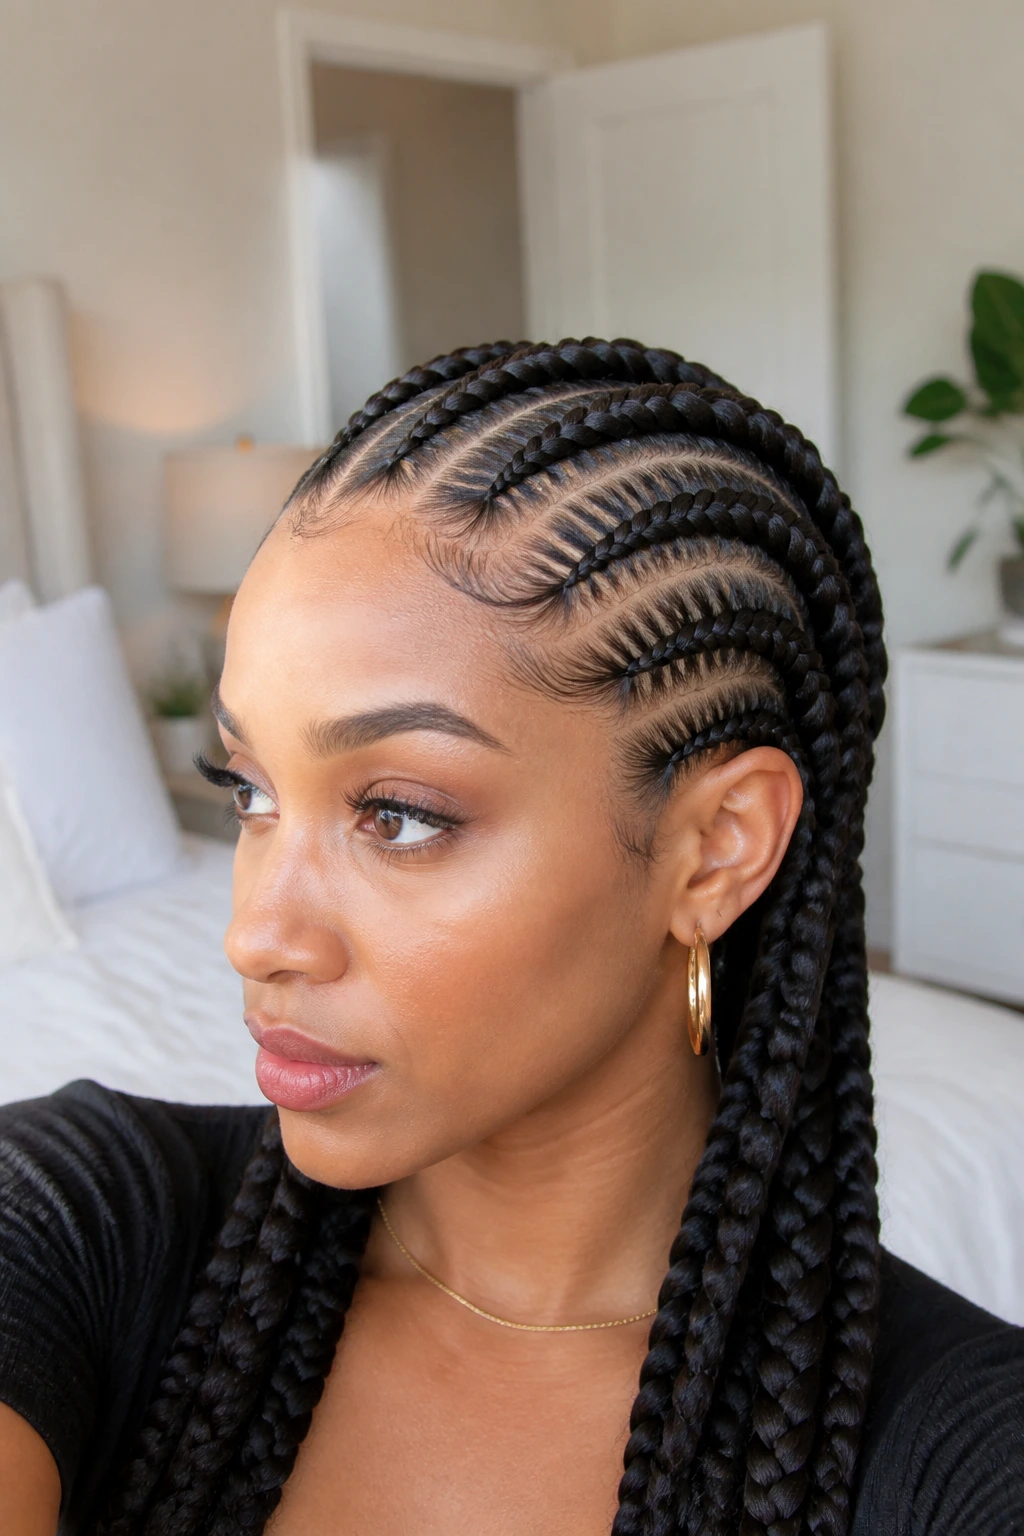
Jumbo feed-ins are the shortcut to a strong look with fewer rows. The braids are thicker, the parting is more open, and the scalp pattern reads from a distance. That can be a good thing. Not every polished style needs tiny sections to feel finished.
I like jumbo feed-ins when the hair needs to look styled fast but still deliberate. The larger size makes the braids fall in clean, heavy lines, and the finish can look especially sleek if the extensions are smooth and pre-stretched. Fewer braids also mean the style sits lighter on the head than people expect.
The catch is the front. A jumbo braid that starts too big at the hairline stops looking feed-in and starts looking bulky. Keep the first section slim, then build the width after the braid has anchored to the scalp.
9. Micro Feed-In Braids for a Dense, Neat Look
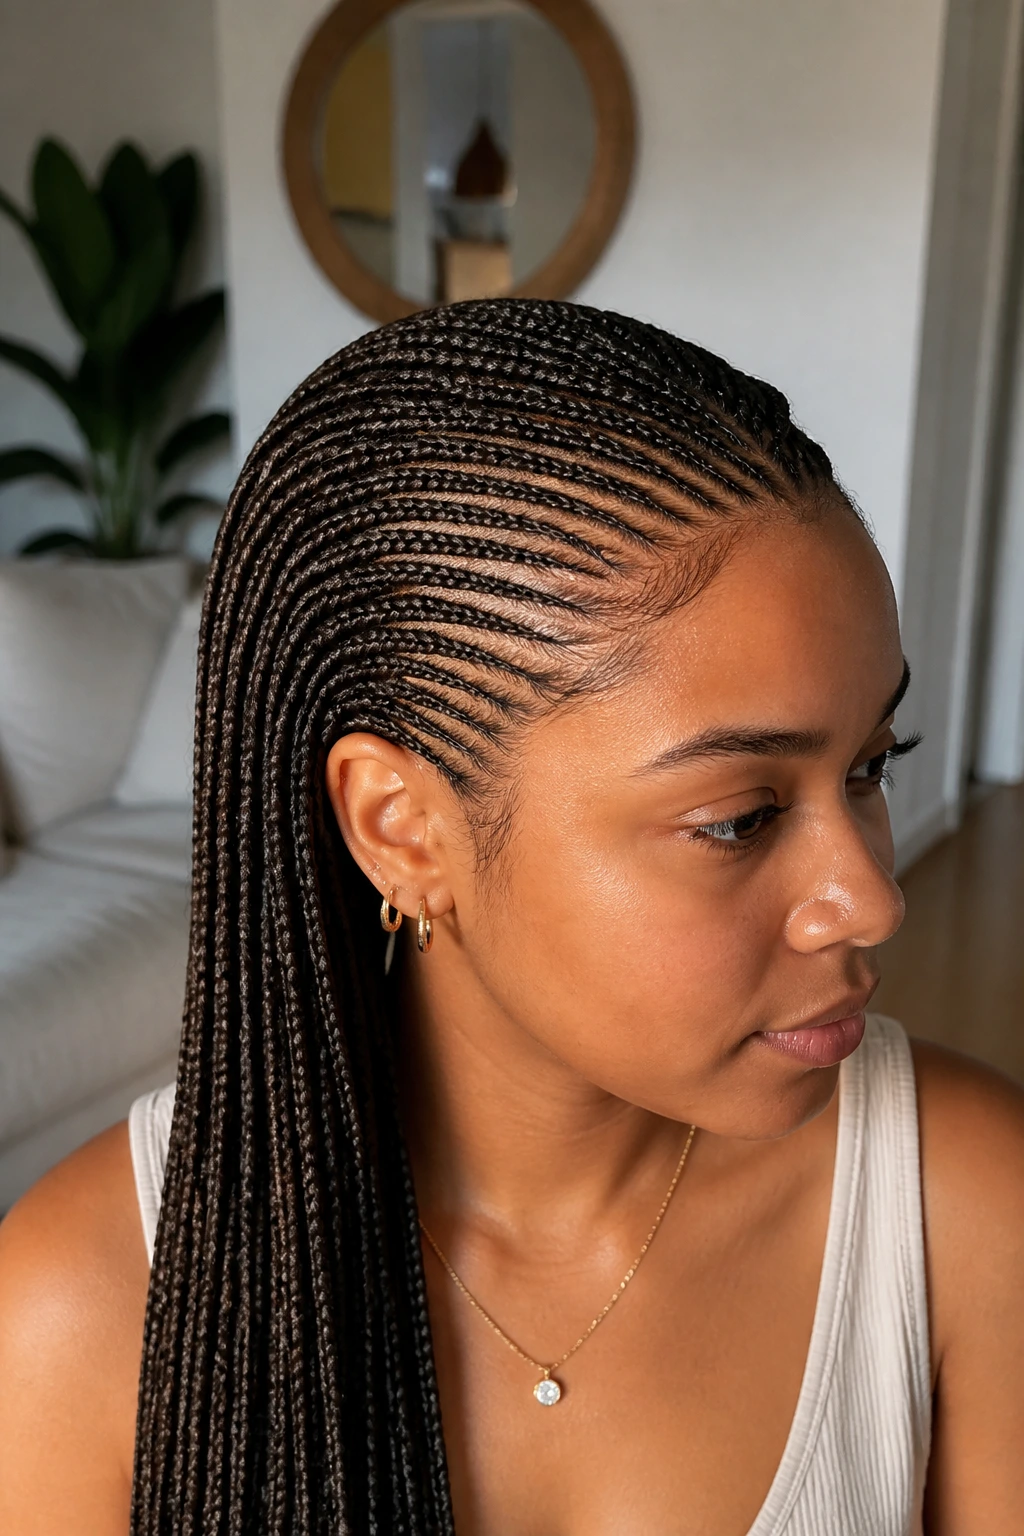
Micro feed-ins turn the whole head into a pattern of narrow, detailed rows. The style looks dense, tidy, and carefully mapped out, almost like the scalp itself has been drawn with fine lines. It takes more time, but the result has a controlled finish that bigger braids can’t mimic.
This version is strong when you want a lighter visual effect across the scalp. The smaller rows create a lot of movement without a lot of weight, and they can sit especially flat around the edges if the tension is even. The style feels refined because nothing is oversized.
Do not rush the front sections. Tiny braids show every mistake, including uneven feeding and rough parting. If the first rows are smooth and the extensions are added in slim pieces, the whole style reads clean instead of busy.
10. Five-Row Feed-In Braids With Even Spacing
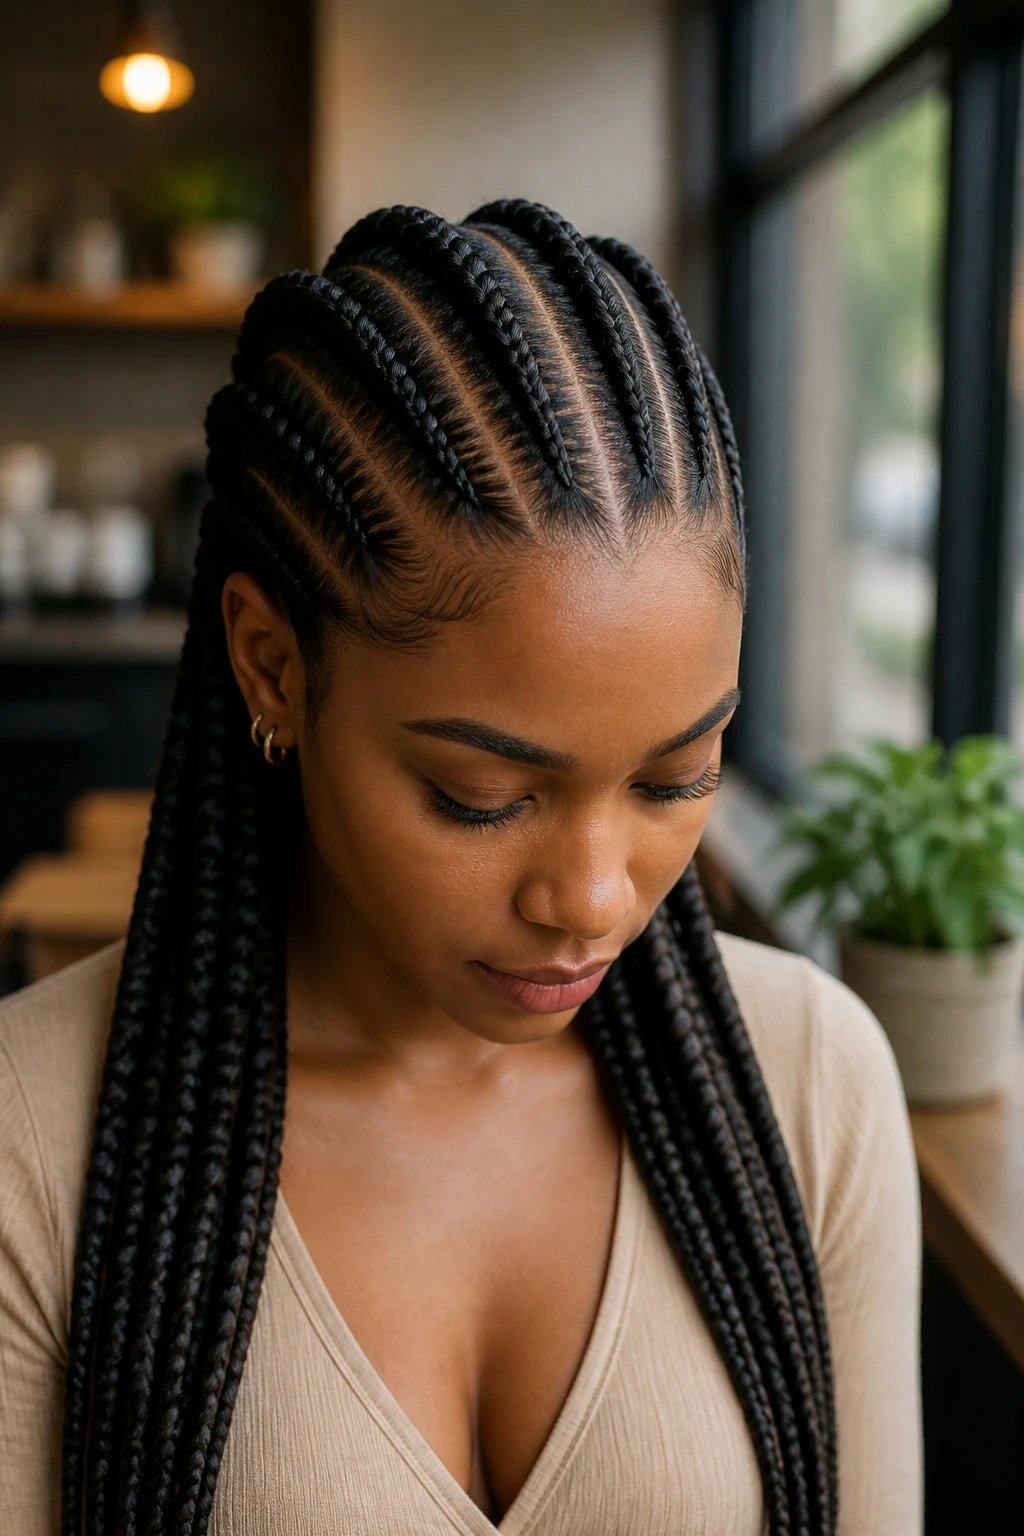
Five rows hit a nice middle ground. There’s enough structure to make the style look planned, but not so much that the scalp gets crowded. The spacing matters here more than the size — each row needs room to breathe, or the whole look collapses into a tight blur.
This is a dependable shape when you want something balanced across the head. Five rows can sit straight back, angle slightly, or gather into a low ponytail later. They tend to look especially neat on medium-density hair because the spacing doesn’t fight the natural fullness.
The key is consistency. Make the front rows slim, then keep the row widths matched as they move toward the back. If one braid starts swallowing the space next to it, the pattern loses that polished, orderly feel.
11. Half-Up Feed-In Braids With a Sleek Crown Lift
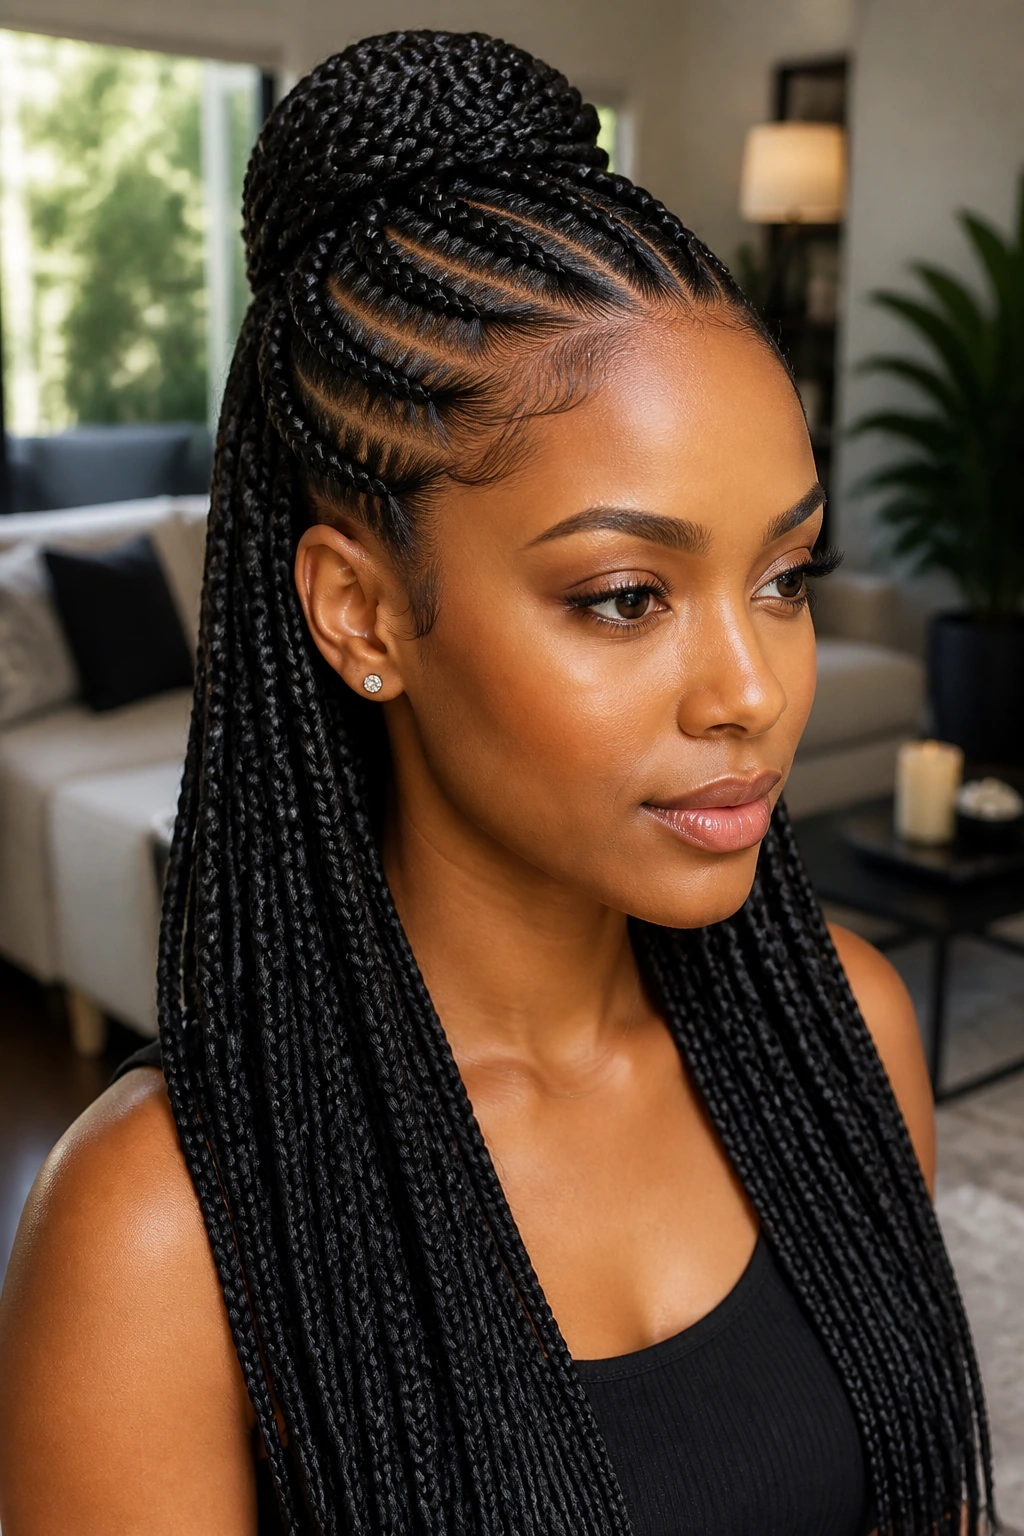
A half-up style gives you two moods at once: tight, smooth braids at the crown and length left free underneath. That lifted top section makes the face look open, while the back rows keep the style grounded. It feels put together without being severe.
I like this one when a full ponytail feels too exposed and leaving everything down feels too plain. The half-up lift gives shape to the crown, which is where a lot of braid styles either shine or fall flat. If the top section is neat, the rest can be simpler and still read polished.
The trick is the join point. Tie or braid the top section high enough to show the shape, but not so high that it pulls on the front rows. A wrapped base makes the finish look cleaner, and a light mist of mousse helps keep the top smooth.
12. Halo Crown Feed-In Braids Around the Hairline
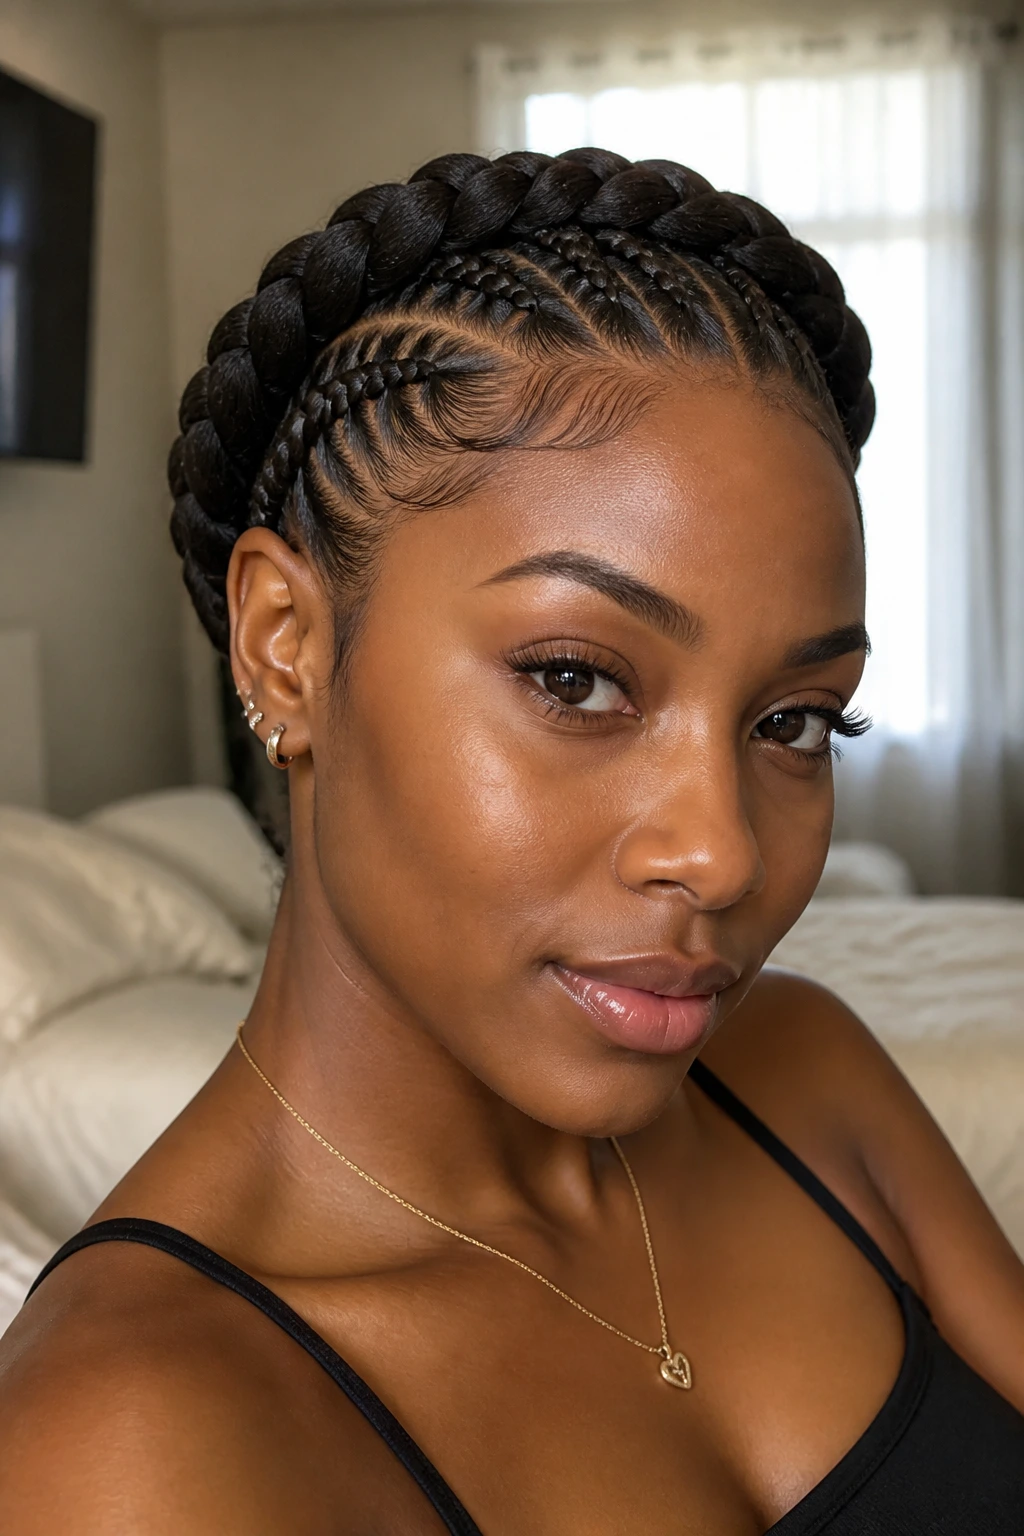
A halo crown braid wraps the head like a frame, and that frame is what gives the style its quiet drama. The feed-in rows sweep around the perimeter instead of stopping short, so the line feels continuous. It’s the kind of braid pattern that makes the hairline look intentionally shaped.
This style works best when the front and sides are especially neat. The eye stays on the braid path, so any wobble in the parting shows up fast. If the rows are clean, though, the result can look almost regal without needing beads, cuffs, or color to do extra work.
Keep the halo close to the hairline but not tight enough to tug. That shape should feel wrapped, not stretched. The finish is strongest when the ends disappear into the back or are tucked under with minimal bulk.
13. Feed-In Braids With Curly Ends
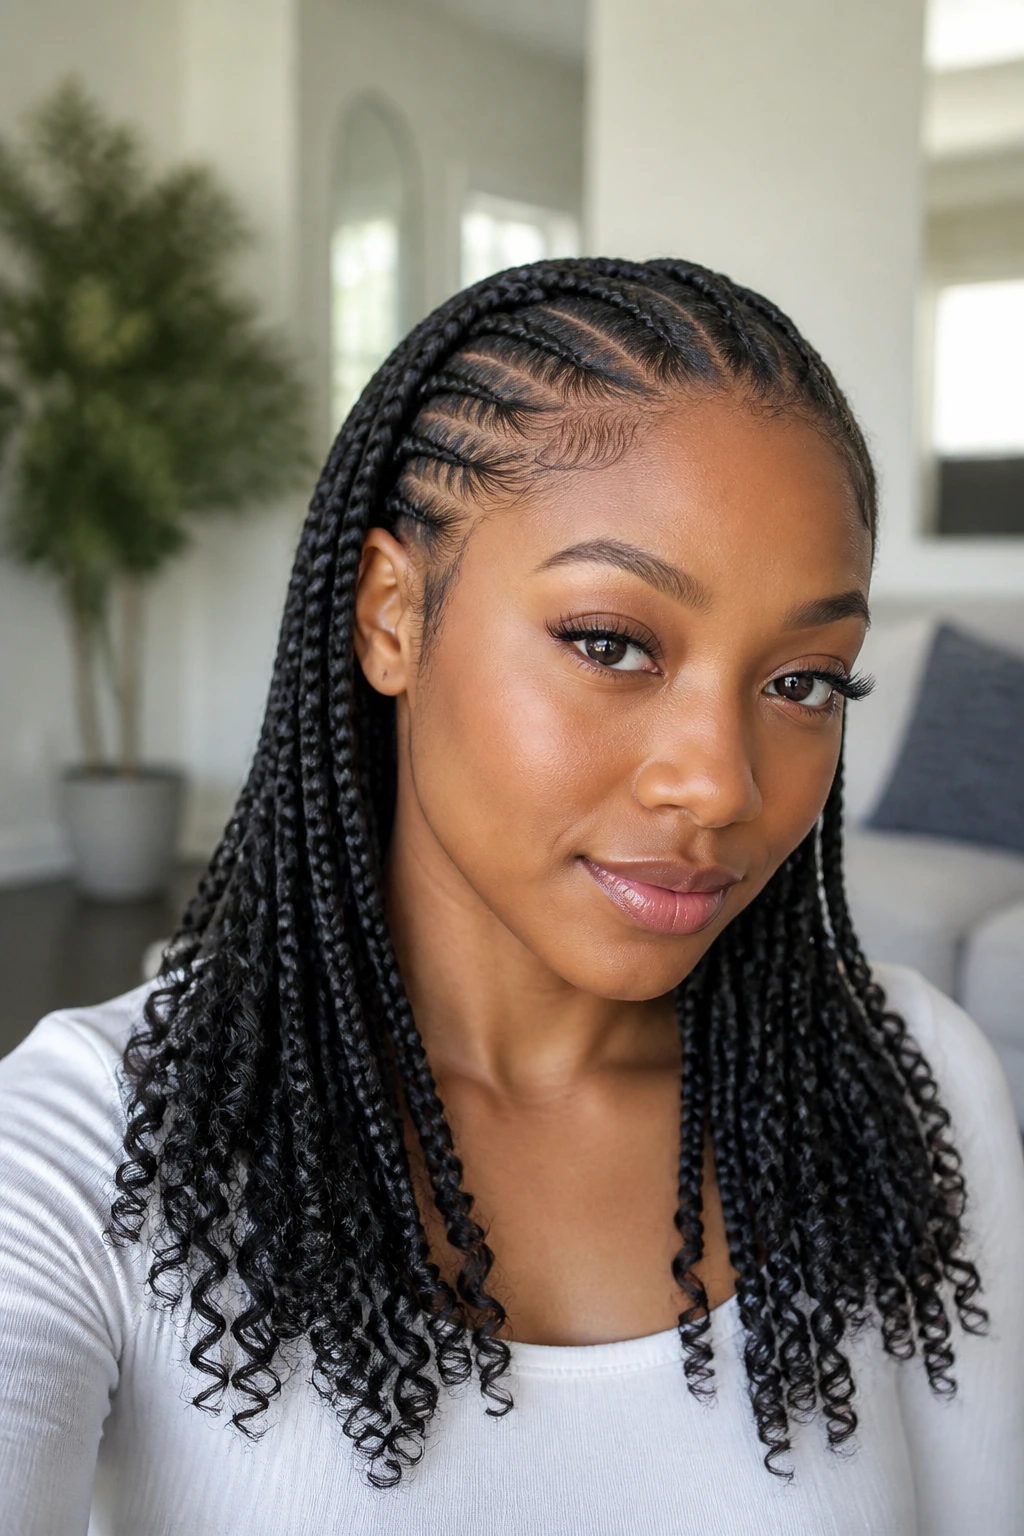
Curly ends soften the whole braid. The base still looks controlled and tidy, but the last few inches break into spirals or loose curls, which makes the style feel a little less severe. That contrast is the point: clean scalp, softer finish.
This version is one of the easiest ways to make feed-in braids feel dressier without changing the braid pattern itself. The curls add motion at the bottom, and they catch the eye after the neat rows have already done their work. The braid base should stay slim so the ends have room to move.
The curls hold better when the ends are set properly and not overloaded with product. Too much cream at the finish makes the curls droop. A light foam and a careful set on flexi rods or hot-water sealing, depending on the hair used, keeps the ends springy.
14. Triangle-Part Feed-In Braids With Sharp Geometry
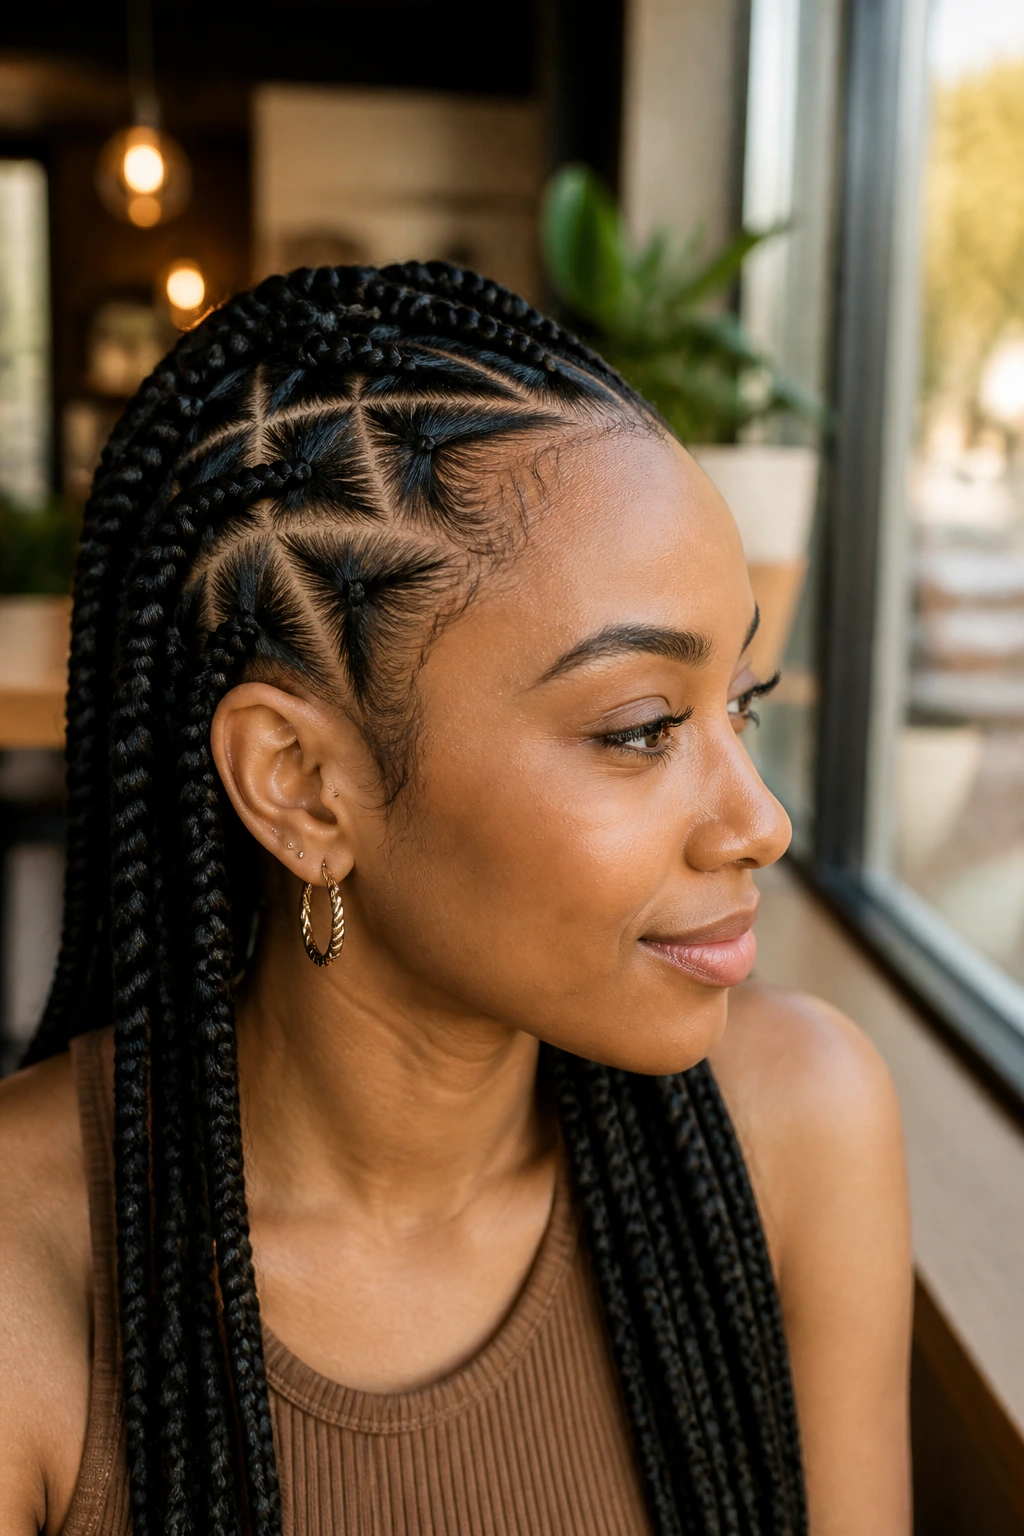
Triangle parts give the scalp a geometric edge that straight rows can’t quite match. The section lines create triangles at the roots, which adds interest before the braids even begin. If you like a clean look with a little visual twist, this one sits in that sweet spot.
The polish comes from sharp edges. Each triangle should look intentional and evenly sized, or the pattern starts to feel uneven very fast. Once the parts are clean, the feed-ins sit beautifully because the unusual shape keeps the scalp from looking flat.
I’d choose this style when a standard row pattern feels too expected. It still looks neat, but the geometry gives it personality. Keep the braids themselves simple so the parting gets room to show off.
15. Beaded Feed-In Braids That Finish With a Clean Tap
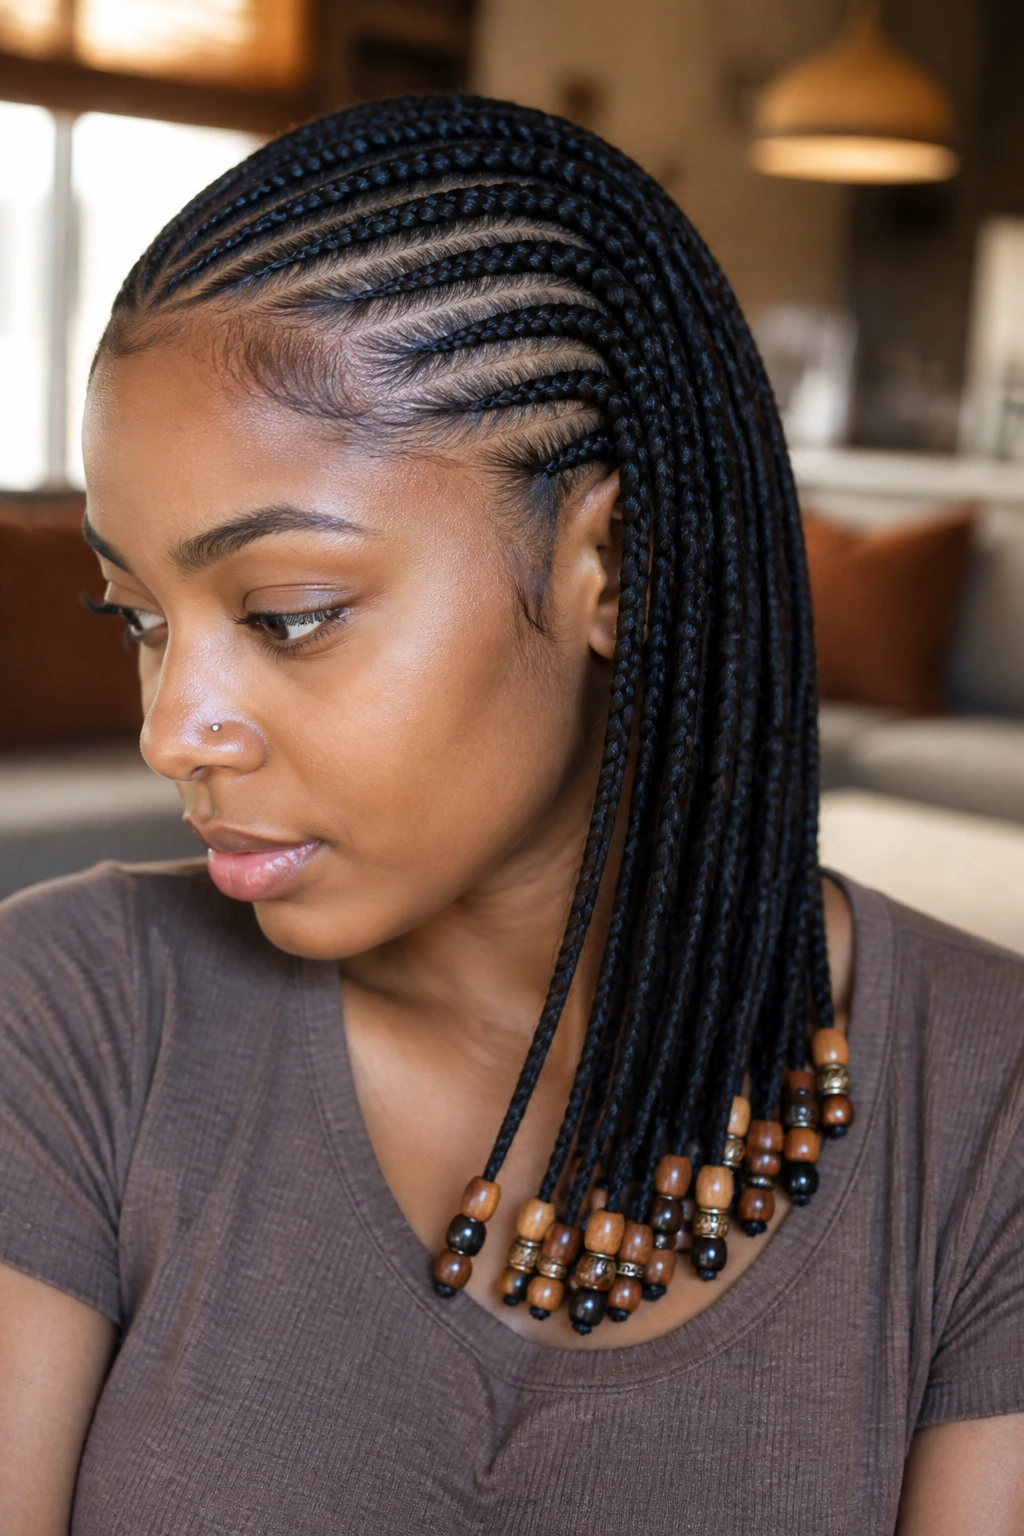
Beads change the sound and the finish. A few well-placed beads at the ends give the style weight, motion, and a polished tap when the braids move. It’s not about piling them on. It’s about using them where they sharpen the finish.
This style works because the braid pattern stays disciplined while the ends carry the decoration. That keeps the scalp from getting crowded. If the braids are neat and the beads are spaced with restraint, the whole look feels deliberate rather than costume-like.
I prefer beads on medium or longer feed-ins, where the ends have enough length to balance the hardware. Too many beads on short braids can make the style feel noisy. A small cluster near the tips usually reads cleaner.
16. Feed-In Braid and Twist Combos
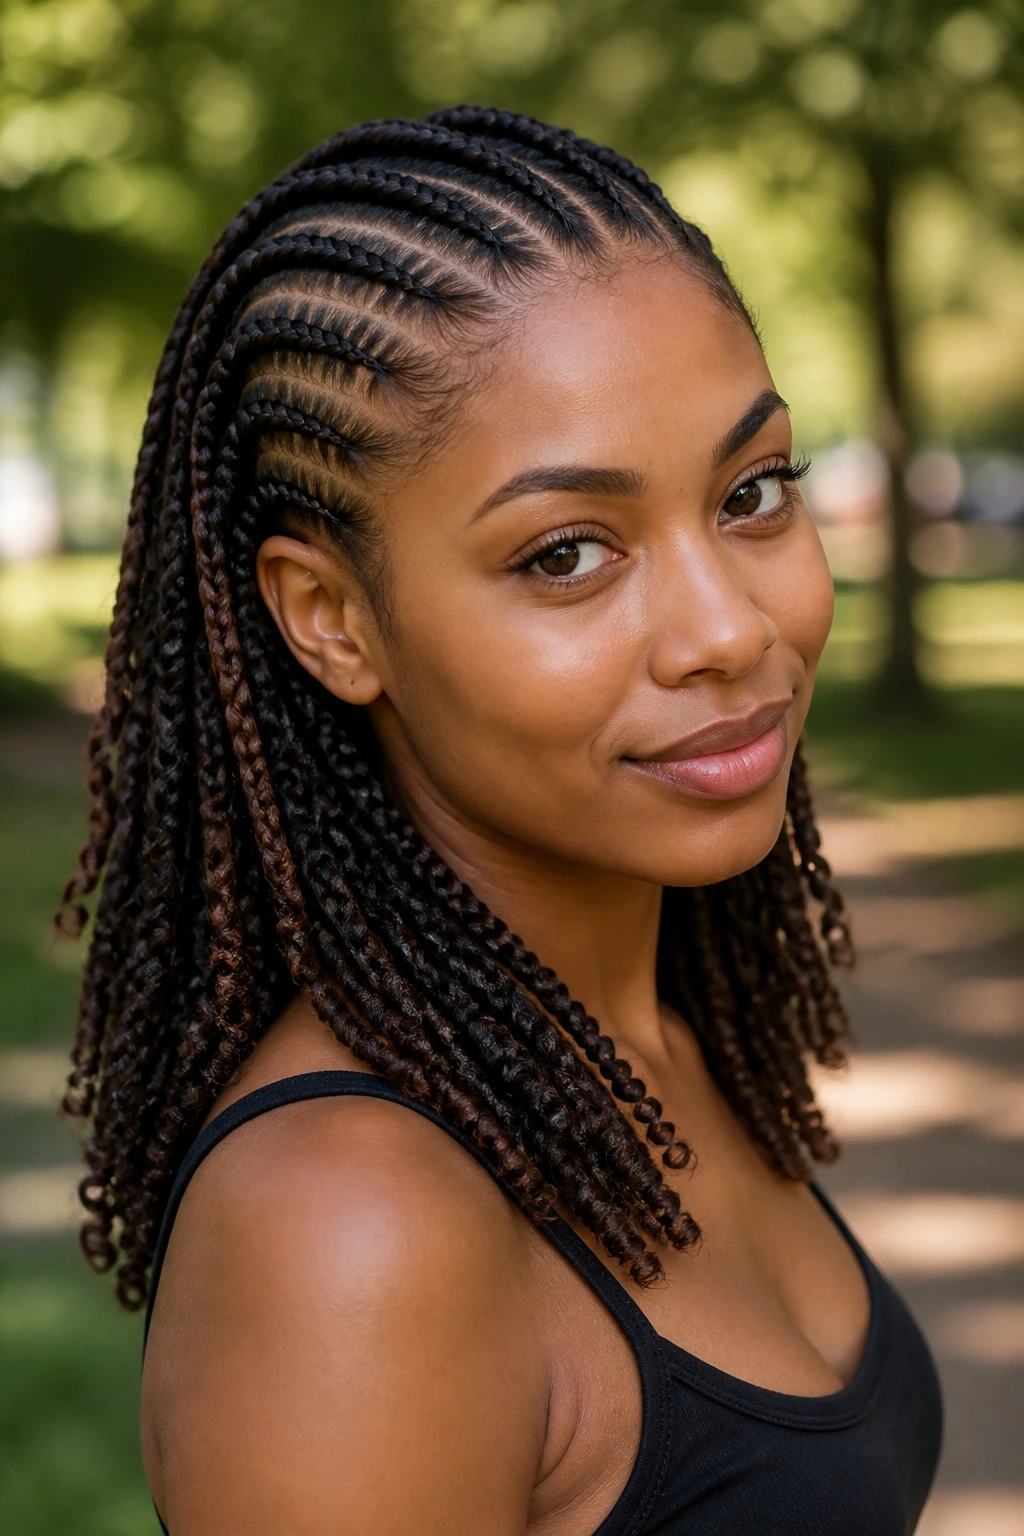
Why choose between a braid and a twist when both textures can live in the same style? The feed-in section at the scalp gives structure, then the ends switch to twists for a softer, looser finish. That mix looks polished because the style shifts gears on purpose.
This combo is useful when you want the scalp to stay tight but the lengths to feel lighter. Twists tend to move more softly than full braids, which makes the finish less rigid. The contrast is subtle, but it changes how the whole style falls around the shoulders.
The transition point matters. If the braid-to-twist shift happens too early, the style loses its shape. Keep the braid strong through the base and mid-length before letting the ends soften into twists.
17. Side-Swoop Feed-In Braids With Face Framing
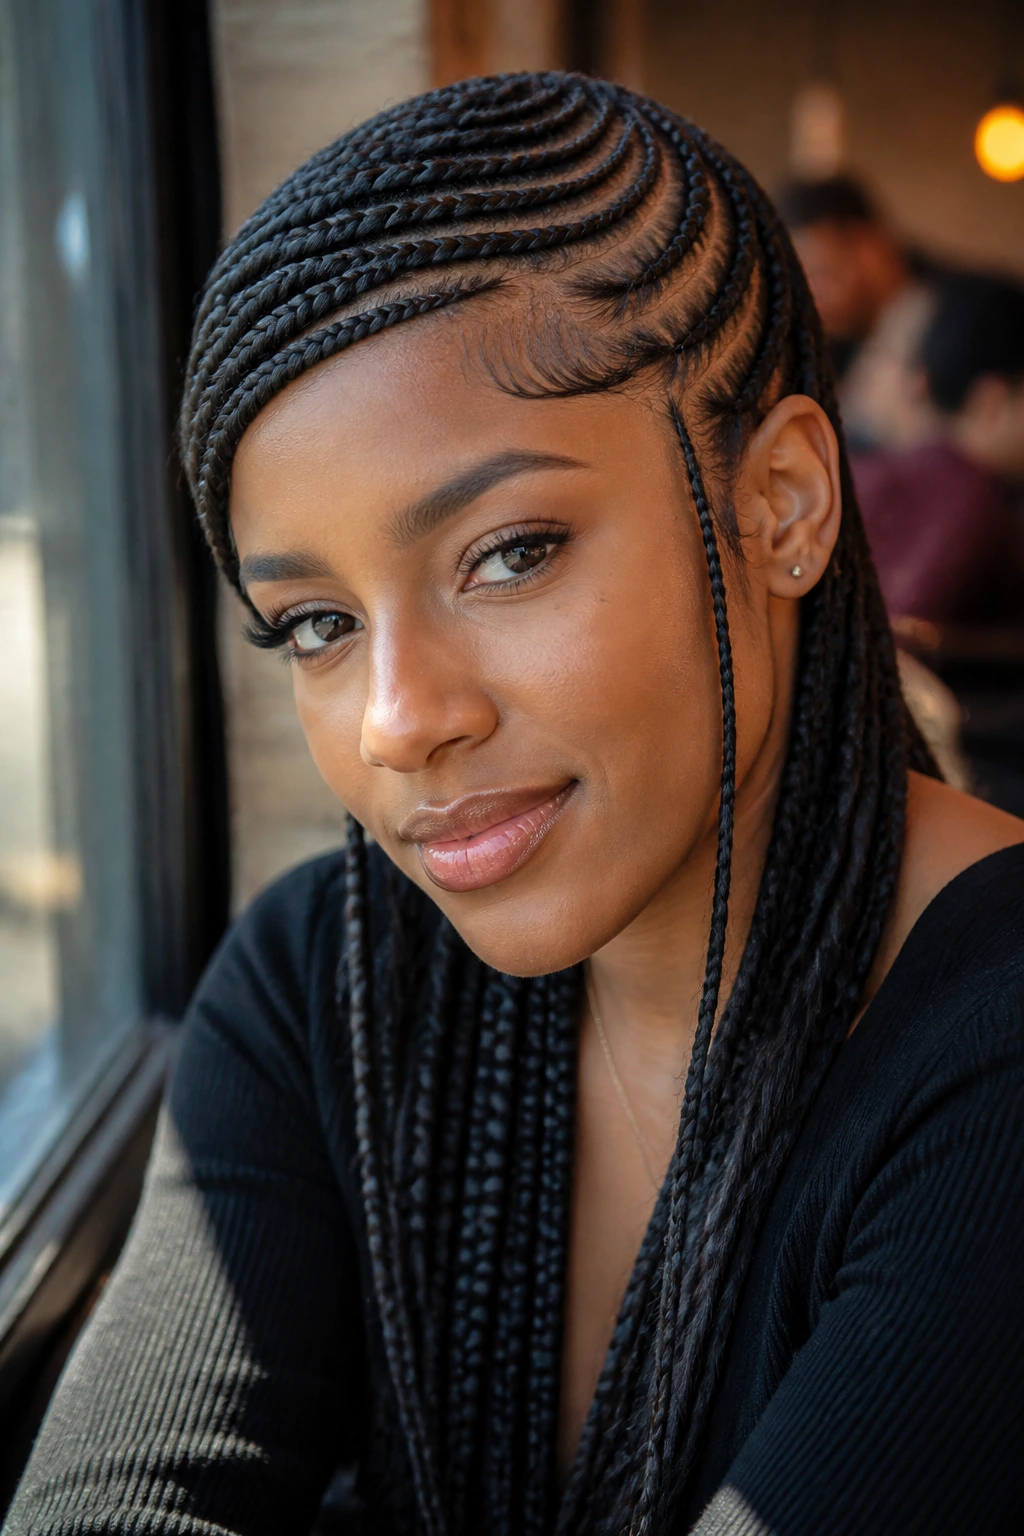
A side-swoop can make feed-ins feel almost tailored. The front section sweeps across one side of the forehead, which gives the style motion right where people notice it first. The rest of the braids can follow the same direction or sit lower and quieter behind it.
This shape works especially well if you want one side of the face to stay open. The swoop softens the front without hiding the scalp work, and it can make strong features feel a little less boxed in. The braid itself still needs to stay flat, or the swoop loses its elegance.
Keep the front sweep smooth and avoid overloading it with product. A little mousse and careful finger-set shaping usually do more than a thick layer of gel. The goal is a glide across the forehead, not a hard shell.
18. Braided Mohawk Feed-In Braids
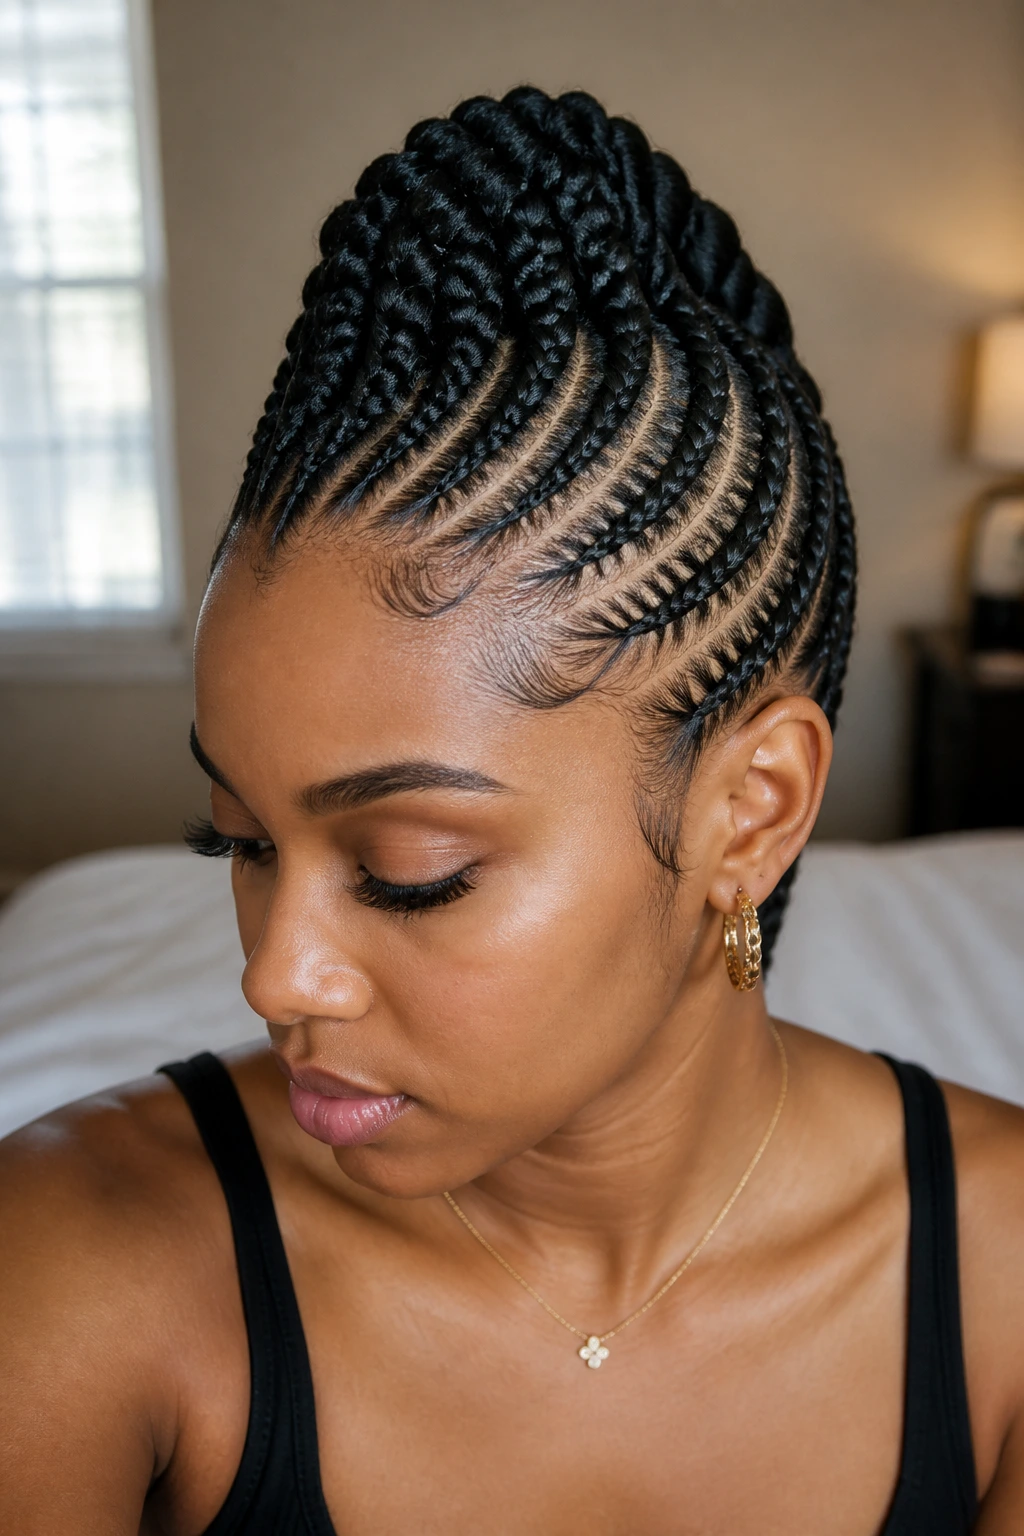
A mohawk shape gives feed-in braids a sharper edge. The sides stay neat and low, while the center rows carry the height and length, which creates a strong line down the middle of the head. It looks bold, but the polish comes from the clean contrast between the sides and the center.
This is one of those styles that reads cleanest when the sides are very tidy. If the side rows are loose or the parting is fuzzy, the whole thing loses the mohawk shape. Keep the center braid pattern strong and the side sections controlled.
The finish can stay straight and sleek, or the center rows can gather into a ponytail or bun. Either way, the silhouette is the point. The braid base needs enough tension to hold the lifted shape, but not enough to make the scalp look strained.
19. Shoulder-Length Feed-In Braid Bobs
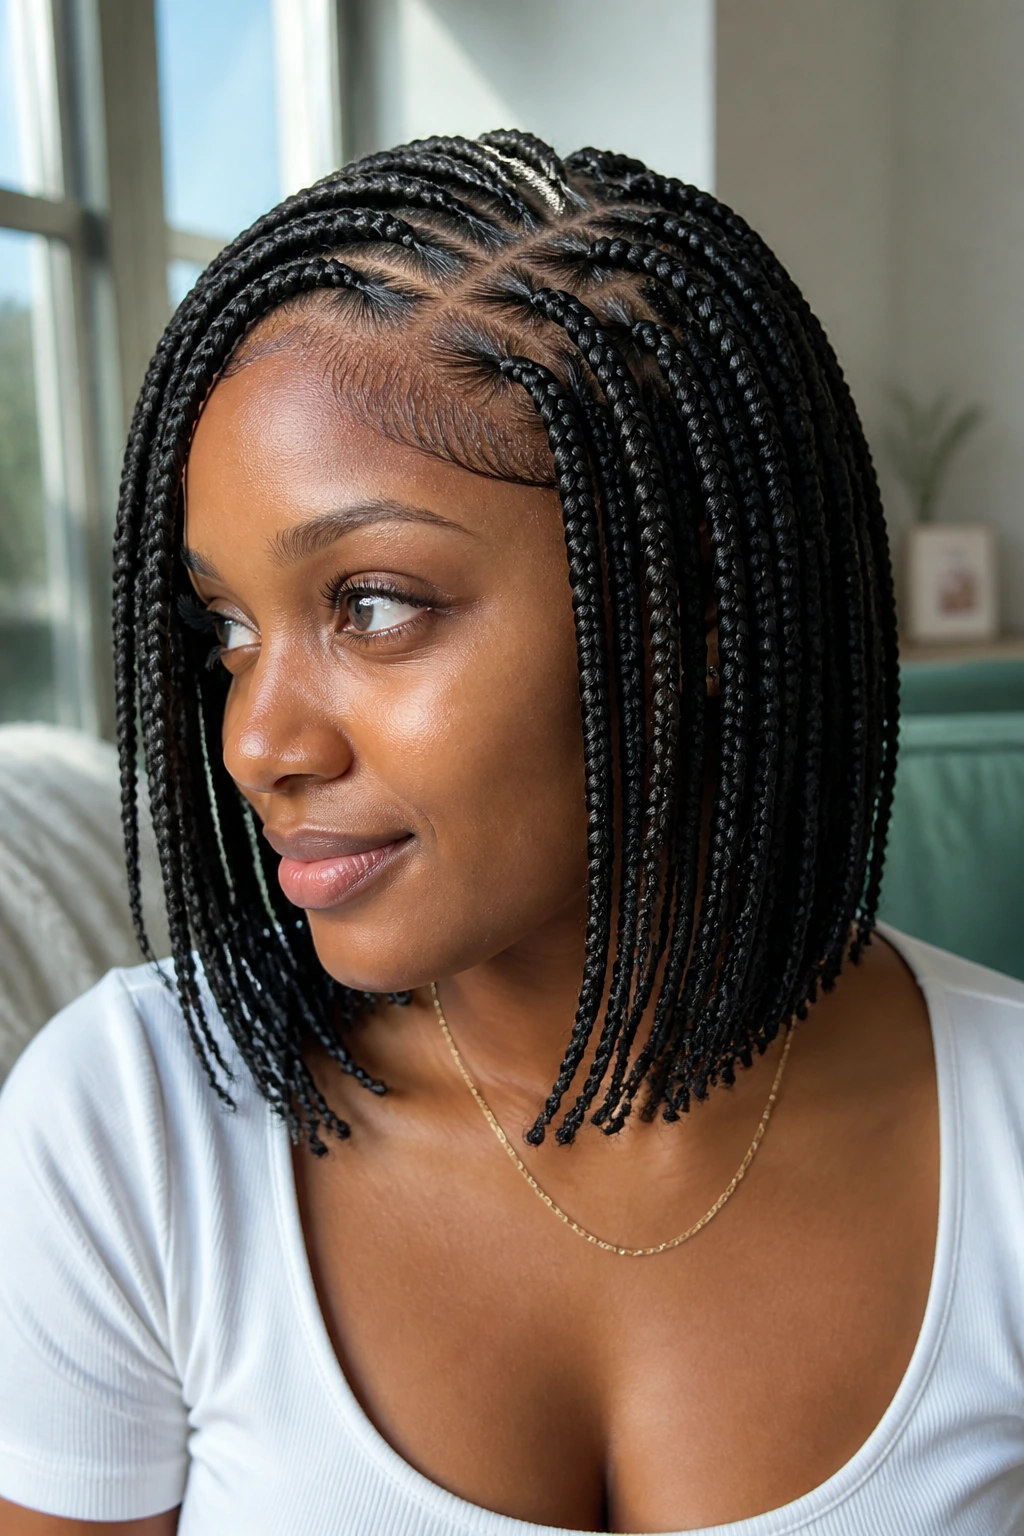
A braid bob changes the feel immediately. The lengths stop at or around the shoulders, so the style looks lighter, quicker, and more compact than waist-length feed-ins. The polish comes from the clean cutoff — the end line has to sit evenly, or the whole bob looks accidental.
This version is one I reach for when long braids feel like too much weight. The bob keeps the scalp pattern visible, and the shorter length makes the finish feel crisp. It also draws attention to the parting, which is where feed-ins tend to look their smartest.
Keep the ends even and the row sizes proportional to the shorter length. If one braid hangs longer than the others, the bob shape loses its clean edge. A little mousse on the ends helps them settle into a neat line.
20. Feed-In Braids With Color Accents
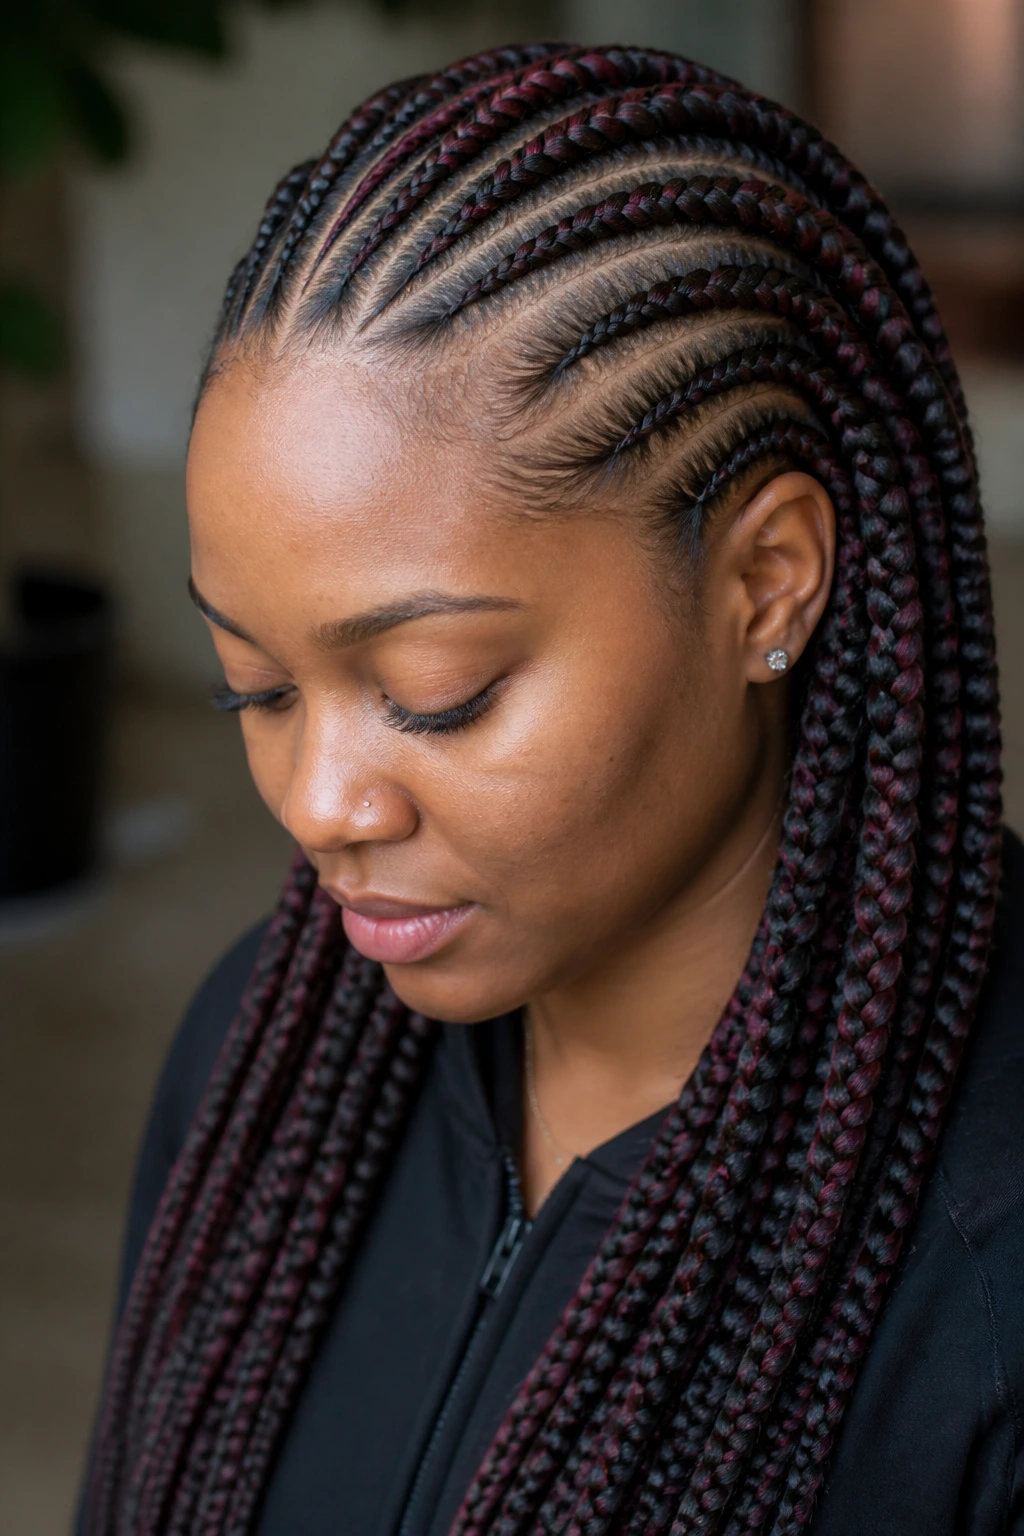
A color accent doesn’t have to be loud to make a point. One warm brown strand, a honey-blonde blend, or a soft burgundy tone woven through the extension hair can sharpen the whole style. The braid pattern stays clean; the color gives it depth.
This works best when the accent shade is repeated with restraint. One or two tones are enough. Too many shades can blur the braid lines, and the polished finish starts to get muddy. I like color accents when the goal is to keep the style neat but give it a little more movement under light.
Match the accent to the root color or choose a shade that sits a tone or two away from it. That keeps the blend tidy. The braid still needs to read as one structure, not a stack of unrelated colors.
21. Diagonal Feed-In Braids Across the Scalp
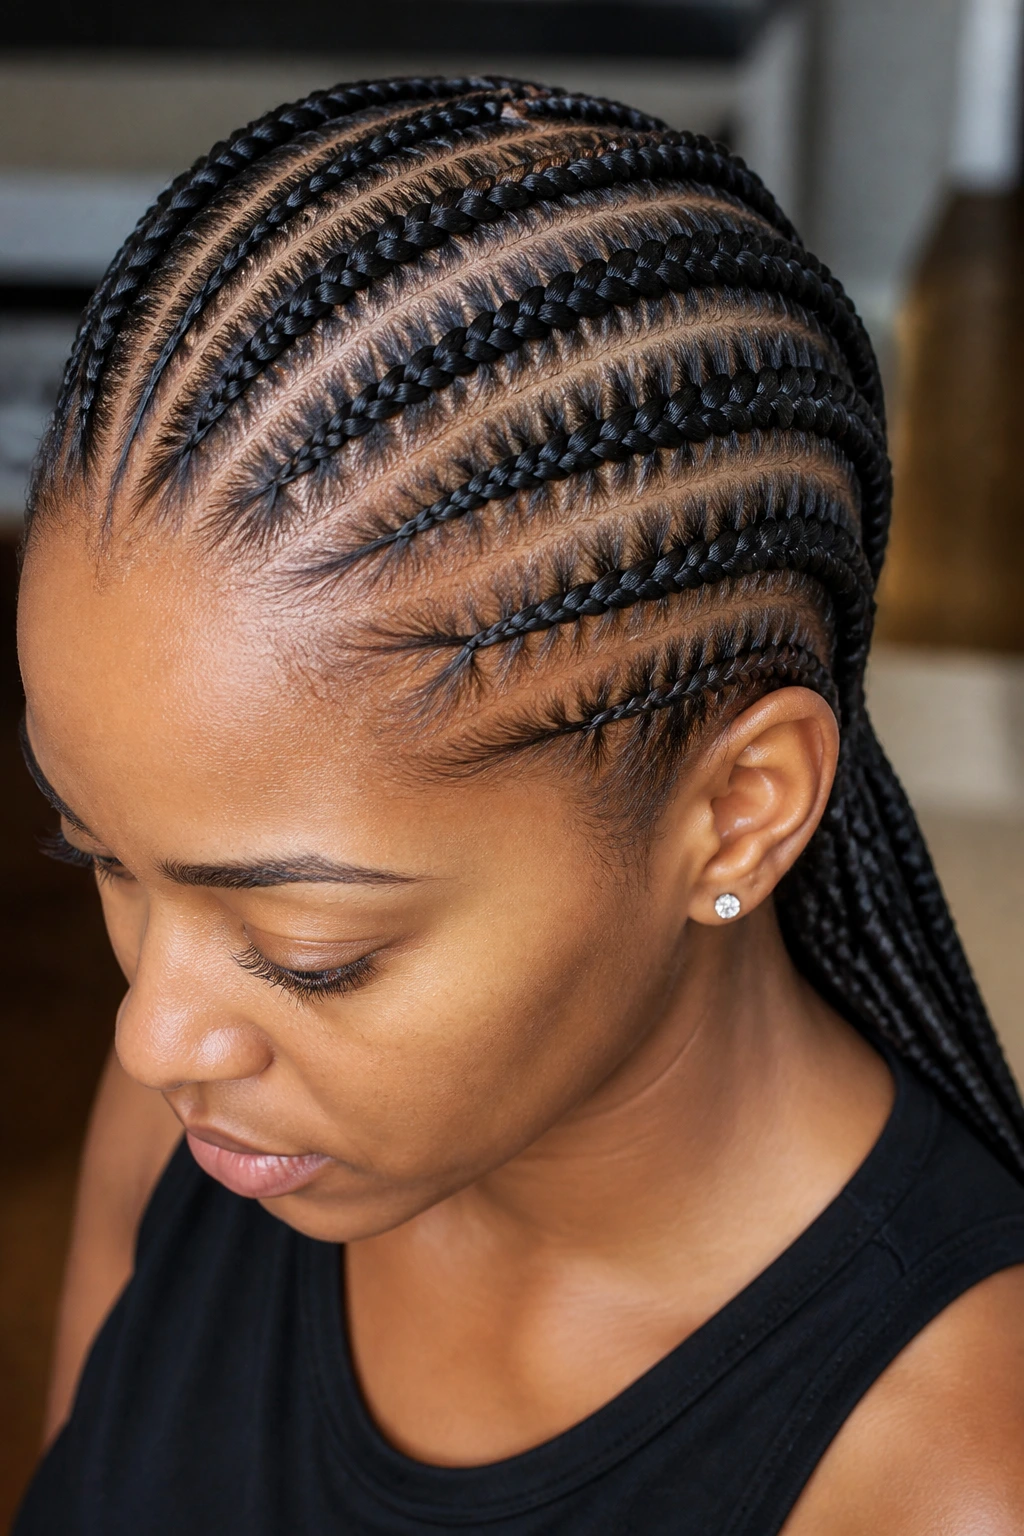
Diagonal rows bring a little motion into a style that can otherwise feel too fixed. The braids angle across the scalp instead of running straight back, which makes the whole head look more sculpted. It’s a small change, but the effect is obvious.
The diagonal shape is especially useful when you want the face to feel framed from one side. It can soften a broad forehead or shift attention toward the cheekbones. Because the lines move, the style feels dynamic even when the braid size stays moderate.
The parts need to stay even as they angle. Wobbly diagonals look rushed fast. Keep the front feed-ins slim, then let the angle widen slowly as the braids move back and down.
22. Heart-Part Feed-In Braids
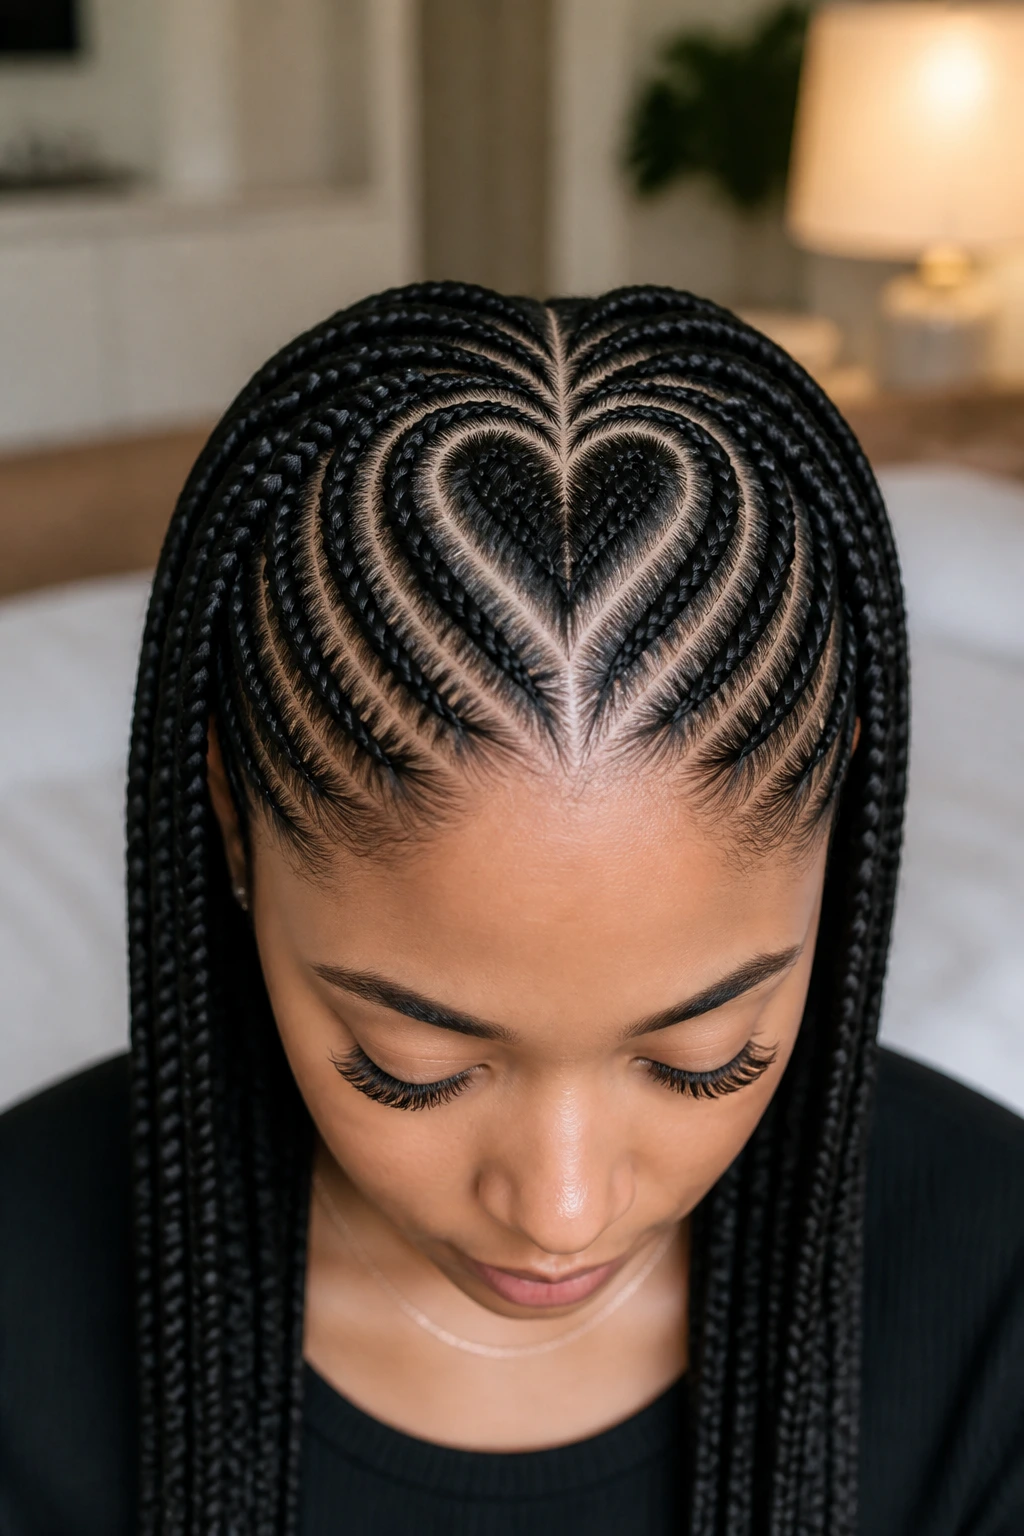
A heart part puts the design at the crown before the braids even start. It’s decorative, yes, but it also signals care. When the heart is clean and symmetrical, the rest of the braids feel more special without needing extra decoration.
This style is the one I’d choose when the parting itself should be part of the look. It works well with smaller rows around the heart so the shape can stay legible. If the sections are too large, the heart gets lost and the whole point disappears.
The best version keeps the heart centered and the lines smooth. That shape is unforgiving. If the curve is uneven, everyone notices, so the cleaner the part, the better the whole style lands.
23. Low Feed-In Braided Ponytails
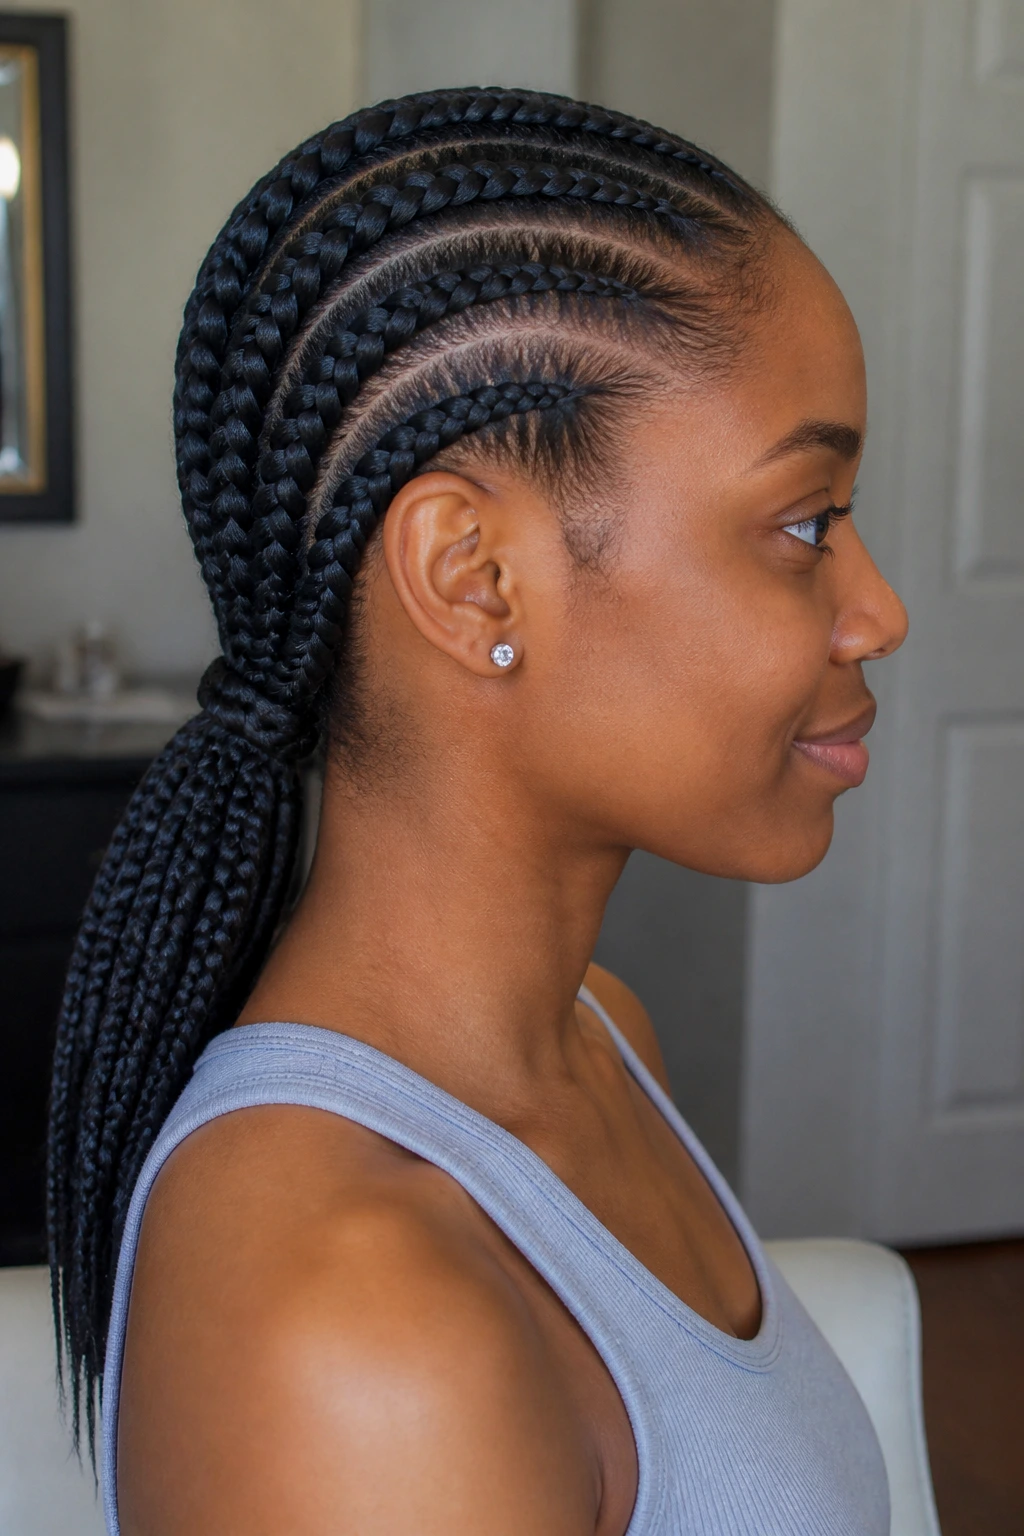
A low braided ponytail is sleek in a quieter way than a high one. The rows feed downward toward the nape, where they gather into a single tail that sits close to the neck. It feels controlled, stable, and neat from every angle.
This version is especially good when you want polish without lift. The lower position keeps the style grounded, and it’s easier to wear under coats, scarves, or structured collars. The scalp pattern still shows, but the silhouette is softer than a high ponytail.
Keep the ponytail base smooth and wrap the elastic with a small braid or extension strand. That one move changes the finish fast. A messy tie ruins the shape more than people expect.
24. Space-Bun Feed-In Braids
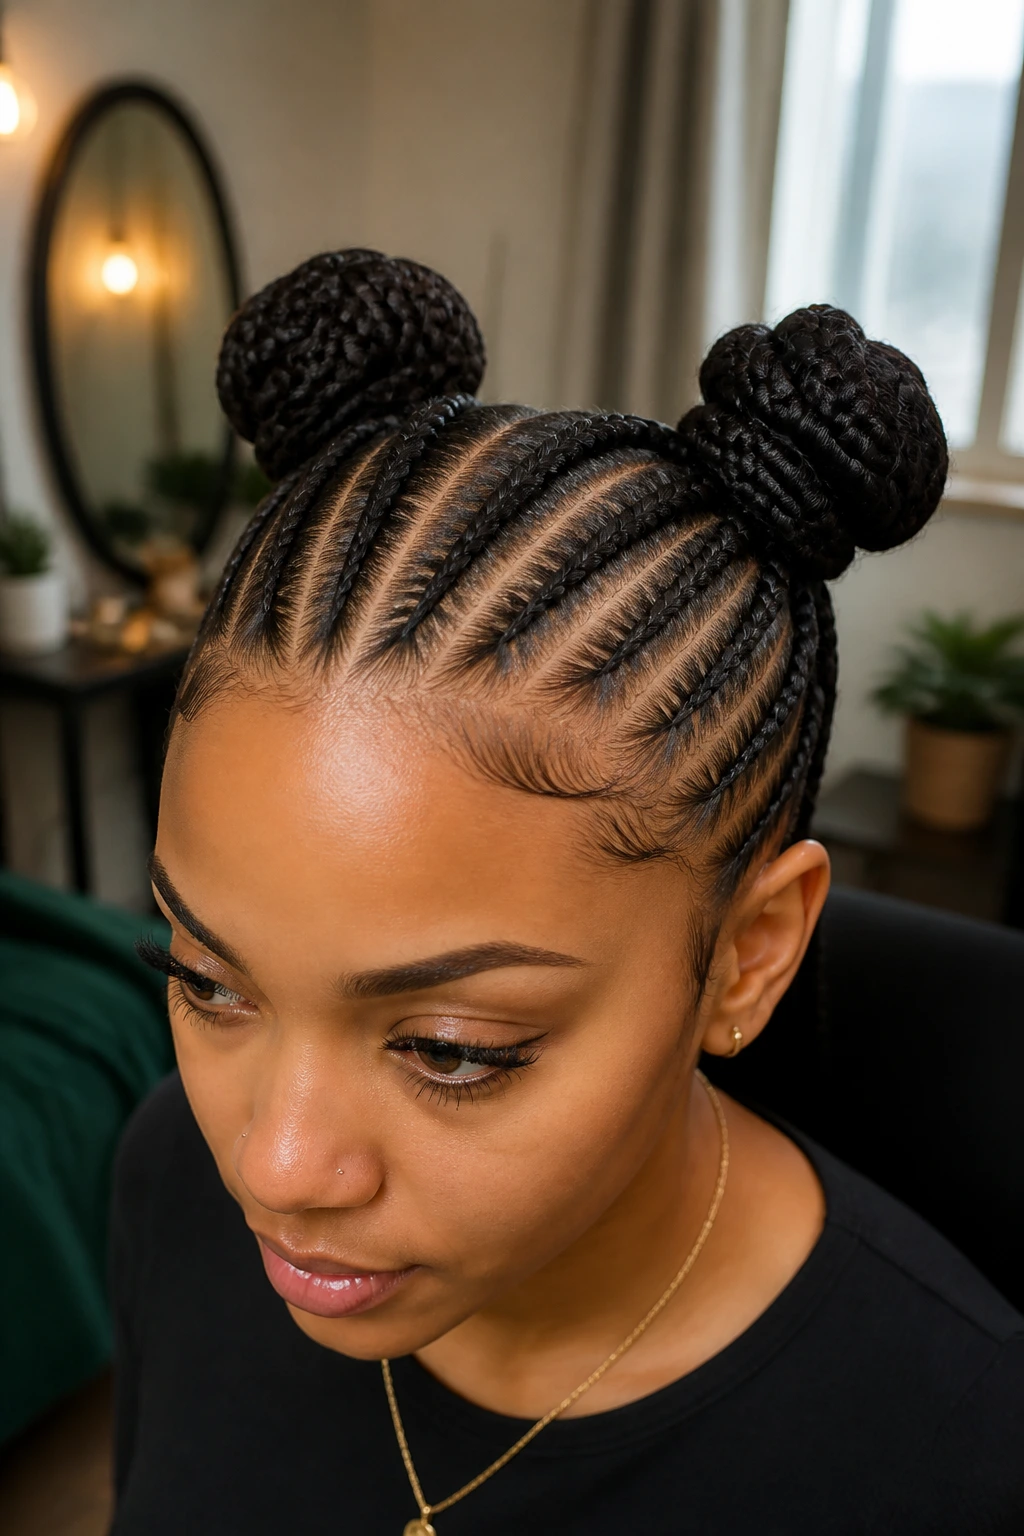
Space buns give feed-in braids a playful edge while keeping the parts tidy. The braids split into two lifted buns, one on each side, so the head gets shape and height without losing the clean row work at the scalp. It’s neat, but it doesn’t feel stiff.
I like this style when the braid pattern needs to do more than just lie flat. The buns draw the eye upward, and the parts at the front can stay slim and controlled. If the buns are balanced, the whole look feels intentional and a little architectural.
The base braids should be smooth before they wrap upward. If they start out bulky, the buns get heavy fast. Keep the front rows slim and the buns compact, and the silhouette stays crisp.
25. Fishtail-Ended Feed-In Braids
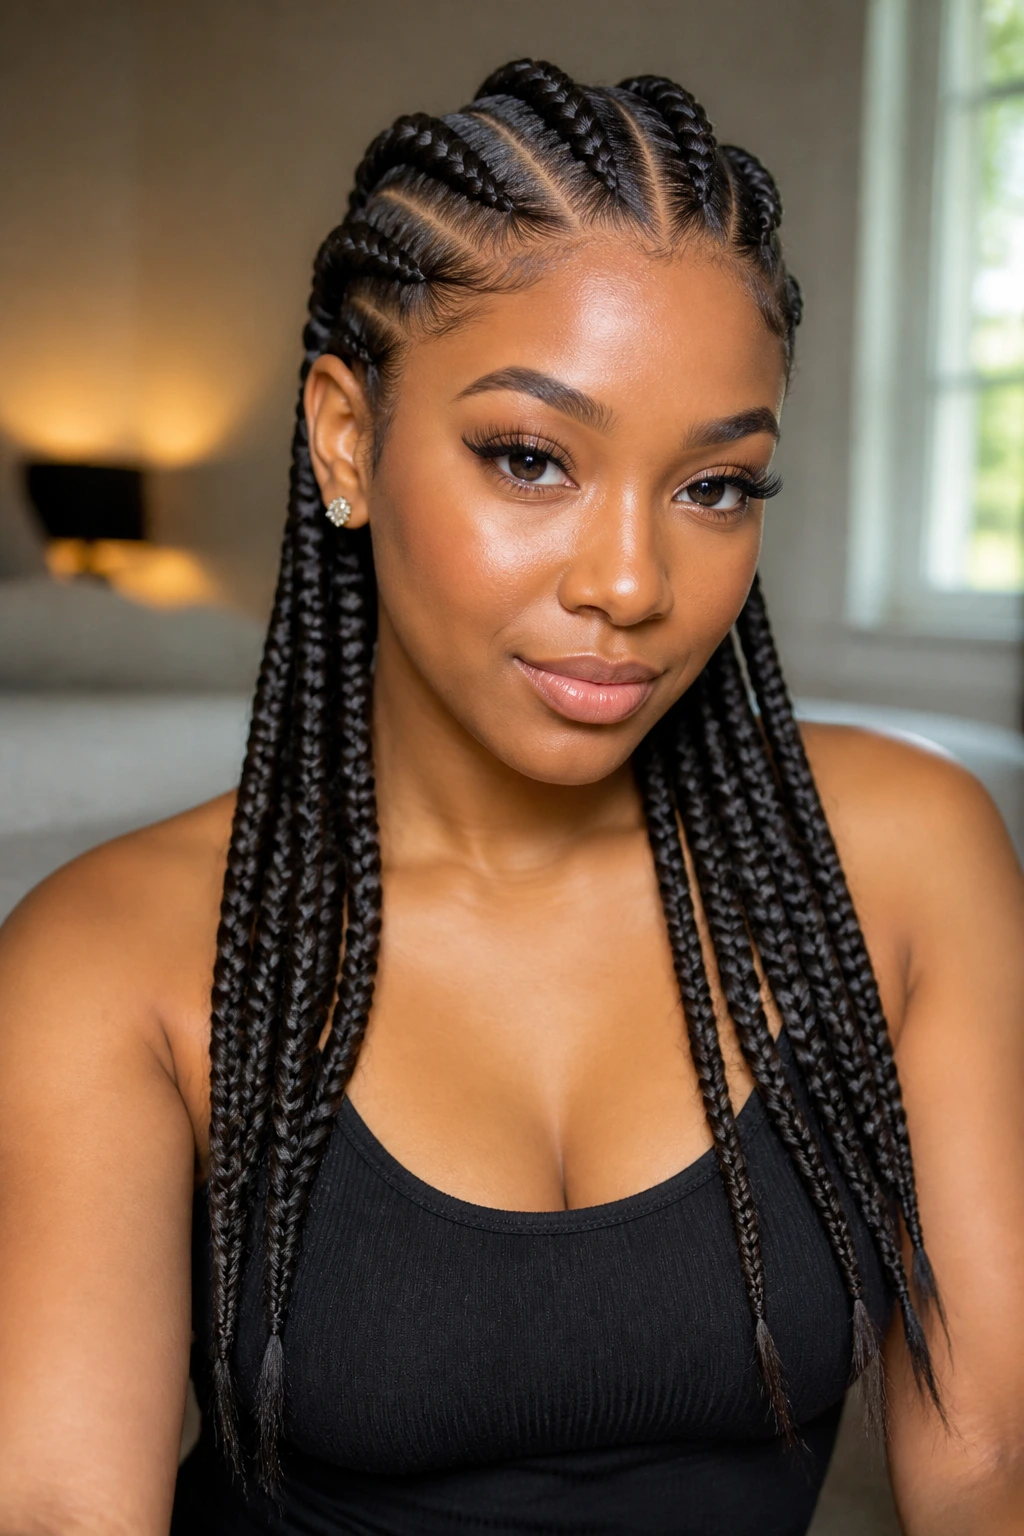
Fishtail ends add texture at the last possible moment. The braid pattern starts as a clean feed-in, then the ends split into a tighter, woven fishtail finish that looks intricate without crowding the scalp. It’s a neat way to make the last few inches feel special.
This style works because the contrast is subtle. The roots stay structured, the mid-lengths stay smooth, and then the ends shift into a different pattern. That change keeps the eye moving, which helps the whole style feel more finished.
The fishtail section should start where the braid still has enough length to hold shape. If it begins too soon, the transition can look awkward. Keep the top tidy, and let the ends carry the detail.
What Makes Feed-In Braids Look So Smooth at the Hairline
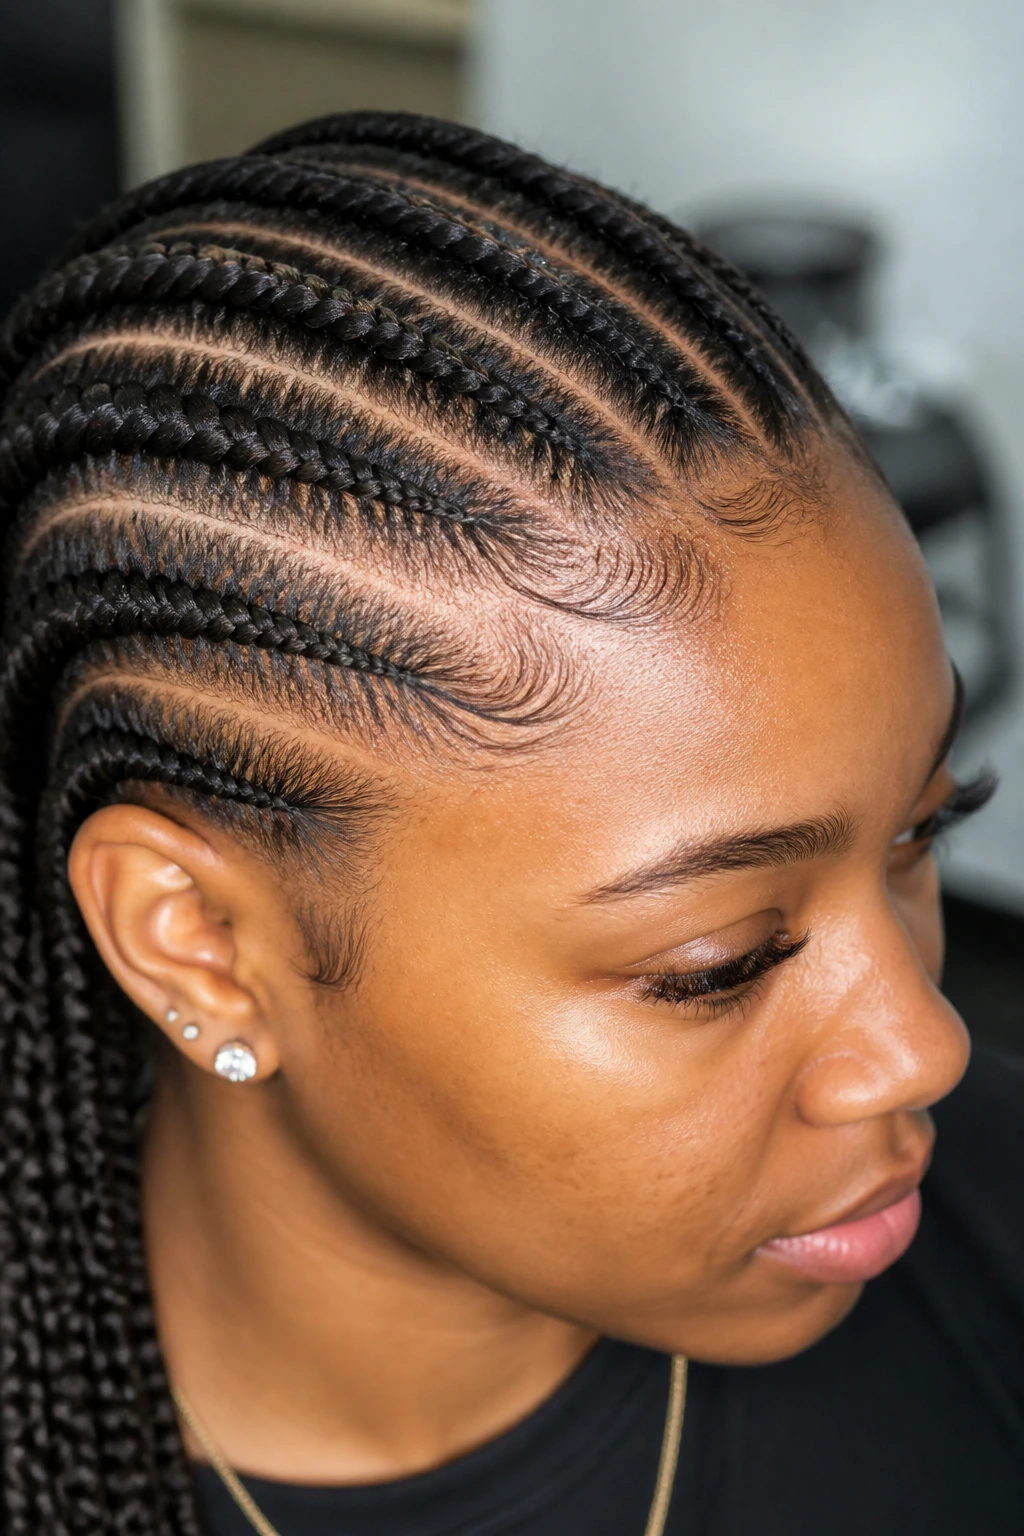
The polished finish starts before the first braid is even formed. Feed-in braids look clean when the parting is sharp, the front section is small, and the added hair is introduced in tiny pieces instead of all at once. That gradual build is the whole trick. It keeps the braid from sitting like a lump on top of the scalp.
A neat base matters more than people think. If the first inch is too thick, the eye goes straight to the bump, not the braid pattern. When the front is slim, the braid can expand naturally as it moves back, and the style keeps that smooth taper that makes feed-ins look expensive even when the design is plain.
The product layer matters too. A thin layer of gel or braid cream will keep flyaways down without turning the hair into a stiff shell. I prefer a style that moves a little at the ends and stays tidy at the roots. That balance is the sweet spot.
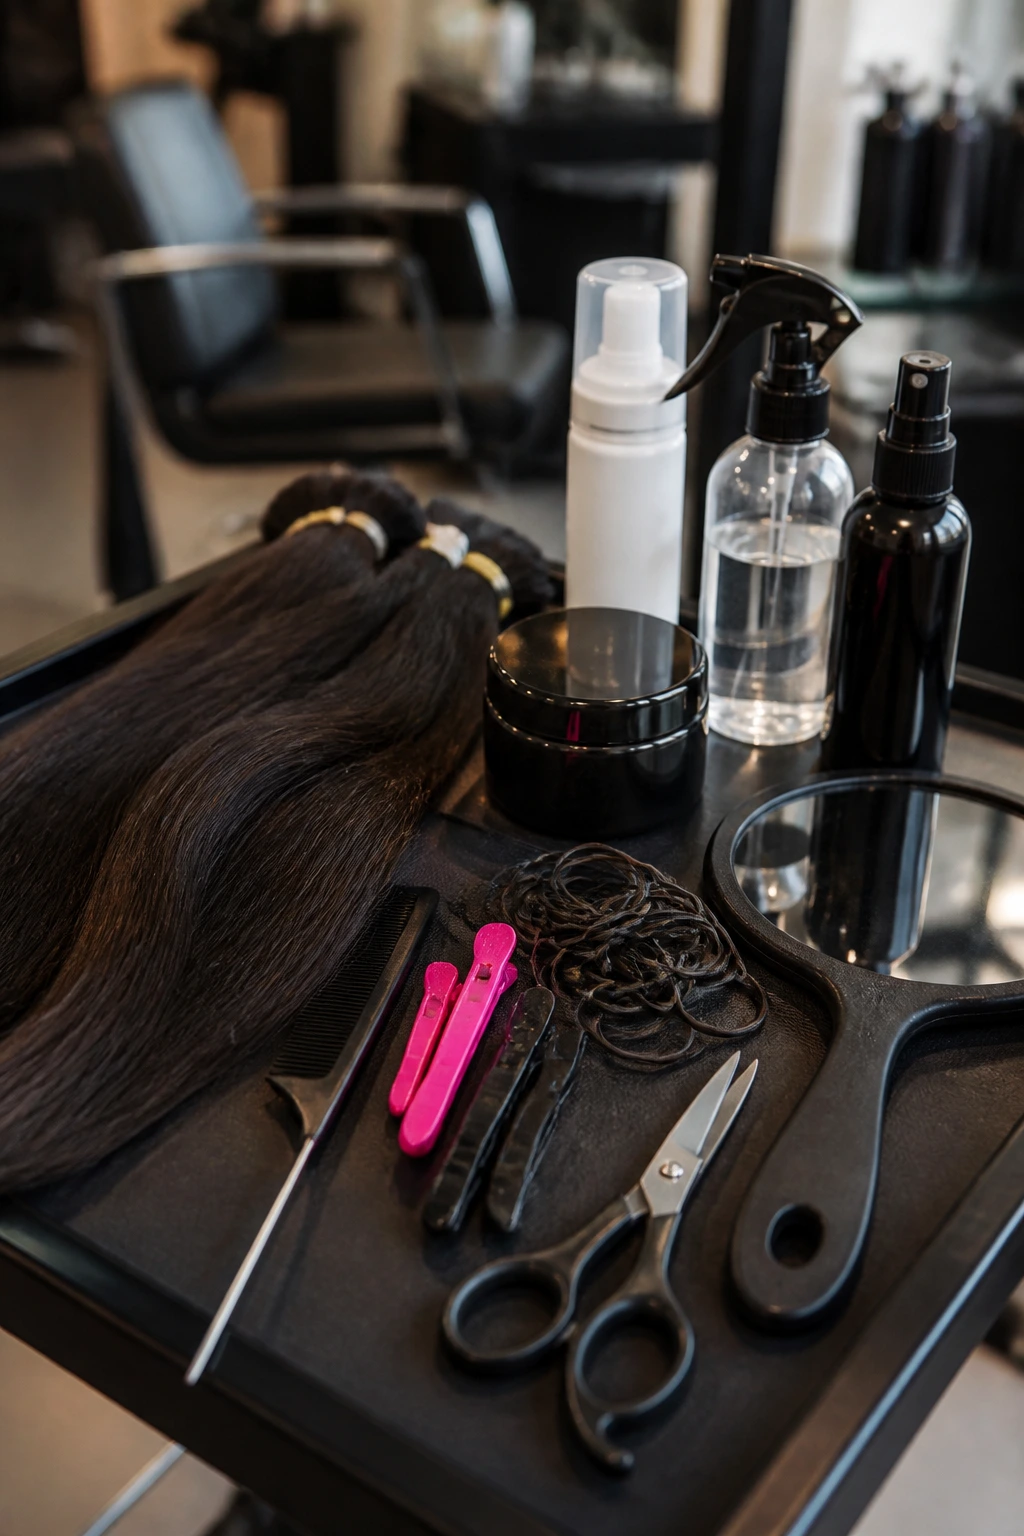
Essential Tools for These Styles
-
Rat-tail comb: The pointed tail makes crisp part lines, and that matters more than people admit.
-
Hair clips or sectioning clamps: These keep the rest of the hair out of the way while you build each row.
-
Pre-stretched braiding hair: It saves time and helps the braid lengths look smoother at the ends.
-
Braiding gel or light edge control: Use a thin layer at the roots to smooth flyaways without weighing the hair down.
-
Mousse or foam wrap: This helps the finished braids settle and keeps the surface neat.
-
Spray bottle with water or leave-in mix: A light mist softens the hair for parting and keeps natural hair from frizzing up mid-style.
-
Small elastic bands: Handy for ponytails, buns, and temporary section control.
-
Hair scissors: Useful for trimming extension ends or cleaning up stray strings. Keep them sharp.
-
Hand mirror: Essential if you’re checking the back yourself. The front can look perfect while the nape tells a different story.
Choosing Braiding Hair, Gel, and Accessories With a Cleaner Finish
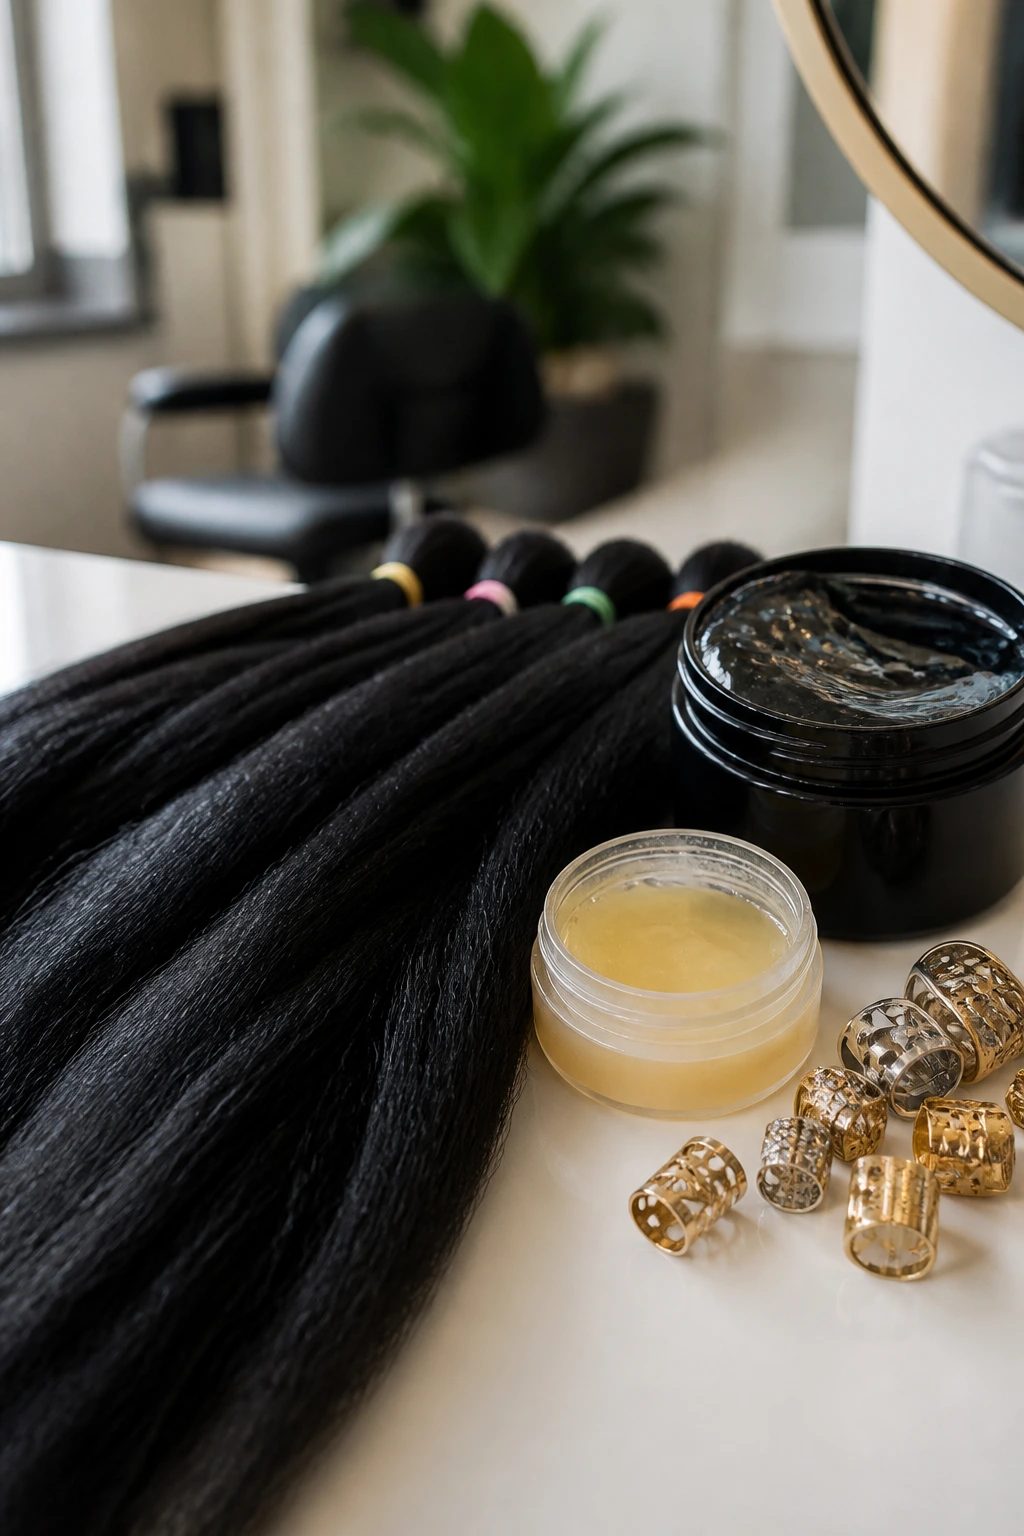
The cleanest feed-ins start with braiding hair that behaves. Pre-stretched synthetic hair usually lays flatter and blends more easily than stiff, heavy packs straight out of the bag. If the ends are rough or frayed before you begin, they’ll only look worse once the braid starts moving.
Color matching matters more than most people expect. If the extension hair is a little too dark or too shiny compared with the natural hair, the braid can look obvious at the root. One shade off is usually fine. Three shades off starts to look deliberate in a way you may not want.
For product, I’d keep the root layer light. A small amount of braid gel, edge control, or styling cream is enough to smooth the front. Heavy waxes and sticky pomades tend to leave residue that flattens the style for the wrong reason — the braid looks pressed down, not polished.
Accessories should match the mood of the parting. Metallic cuffs sharpen neat rows. Beads make the ends move with a little sound. Wrapped thread or subtle rings work well when the braid pattern is already busy and you do not want to crowd it.
How to Wear and Style Them So They Look Finished, Not Fussy
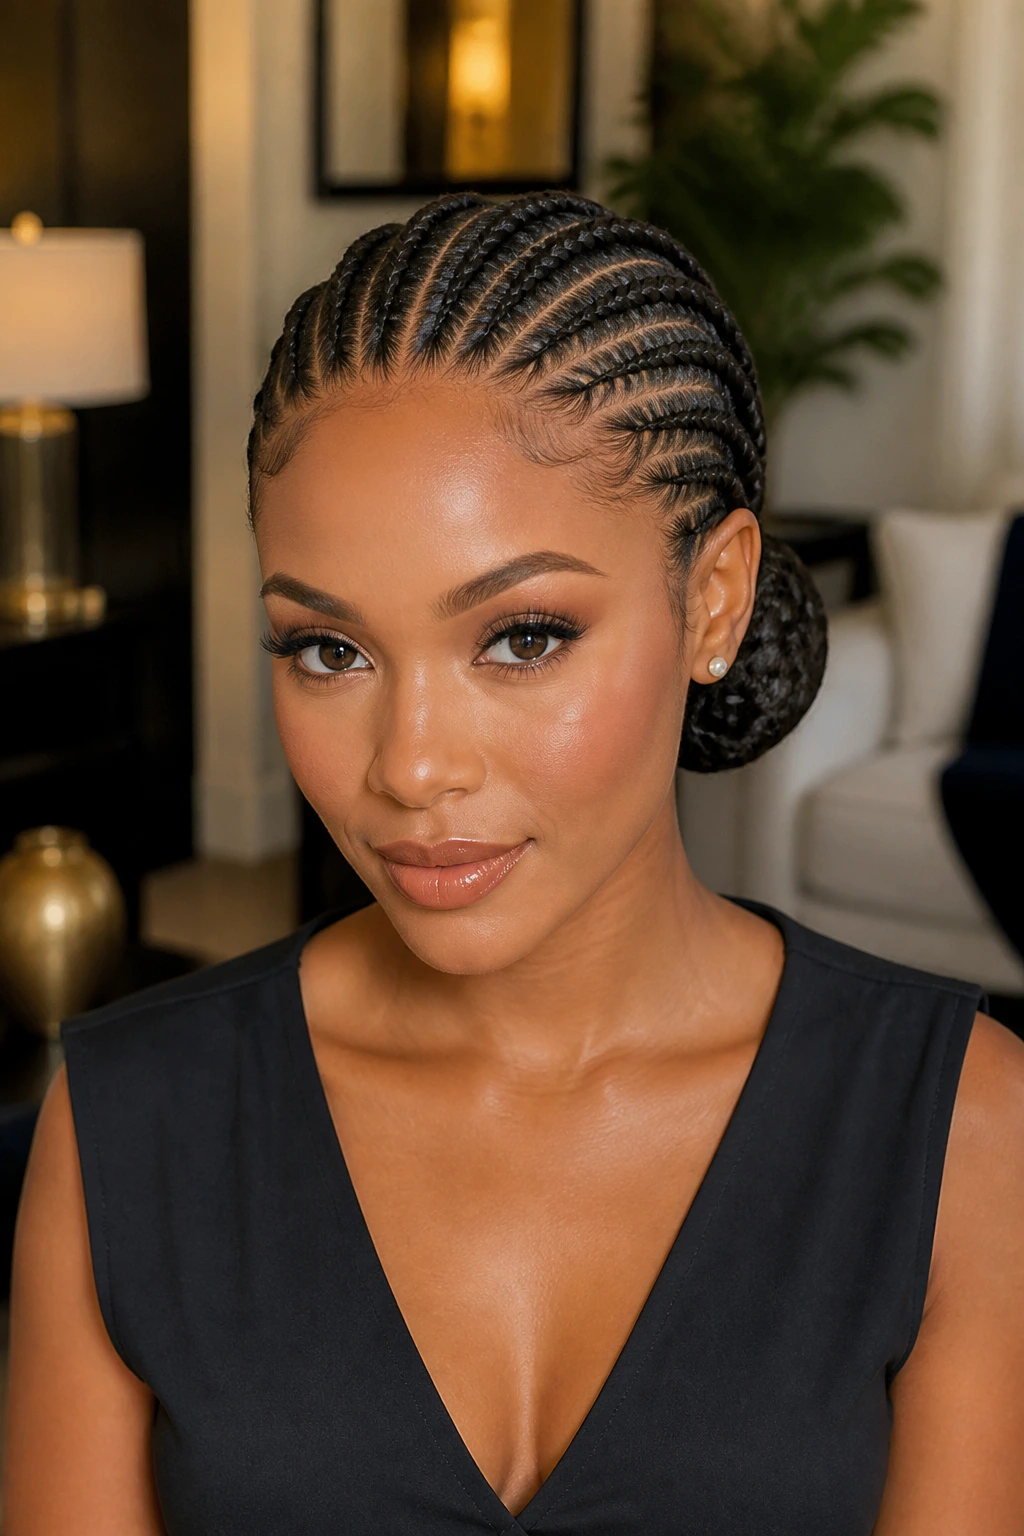
Presentation: Keep the parting visible. Feed-in braids look their sharpest when the sections are easy to read, so don’t bury the pattern under too much product or too many accessories. A little shine at the root is enough.
Accessories: Choose one direction and stay there. Beads, cuffs, or a wrapped braid tie can all work, but stacking every option at once tends to crowd the style. A few cuffs on the front rows or a simple wrap at the ponytail base is often enough.
Scale: Match the braid size to the head and the setting. Smaller rows feel more detailed and usually look better when the style needs to last several weeks. Larger rows make a stronger statement and keep the look a little lighter.
Occasion: Straight-back rows and low buns read sharper for formal settings. Curved parts, colored accents, and curly ends loosen the mood. Same braid family. Different tone. That flexibility is a big part of the appeal.
Extra Tips to Personalize the Finish
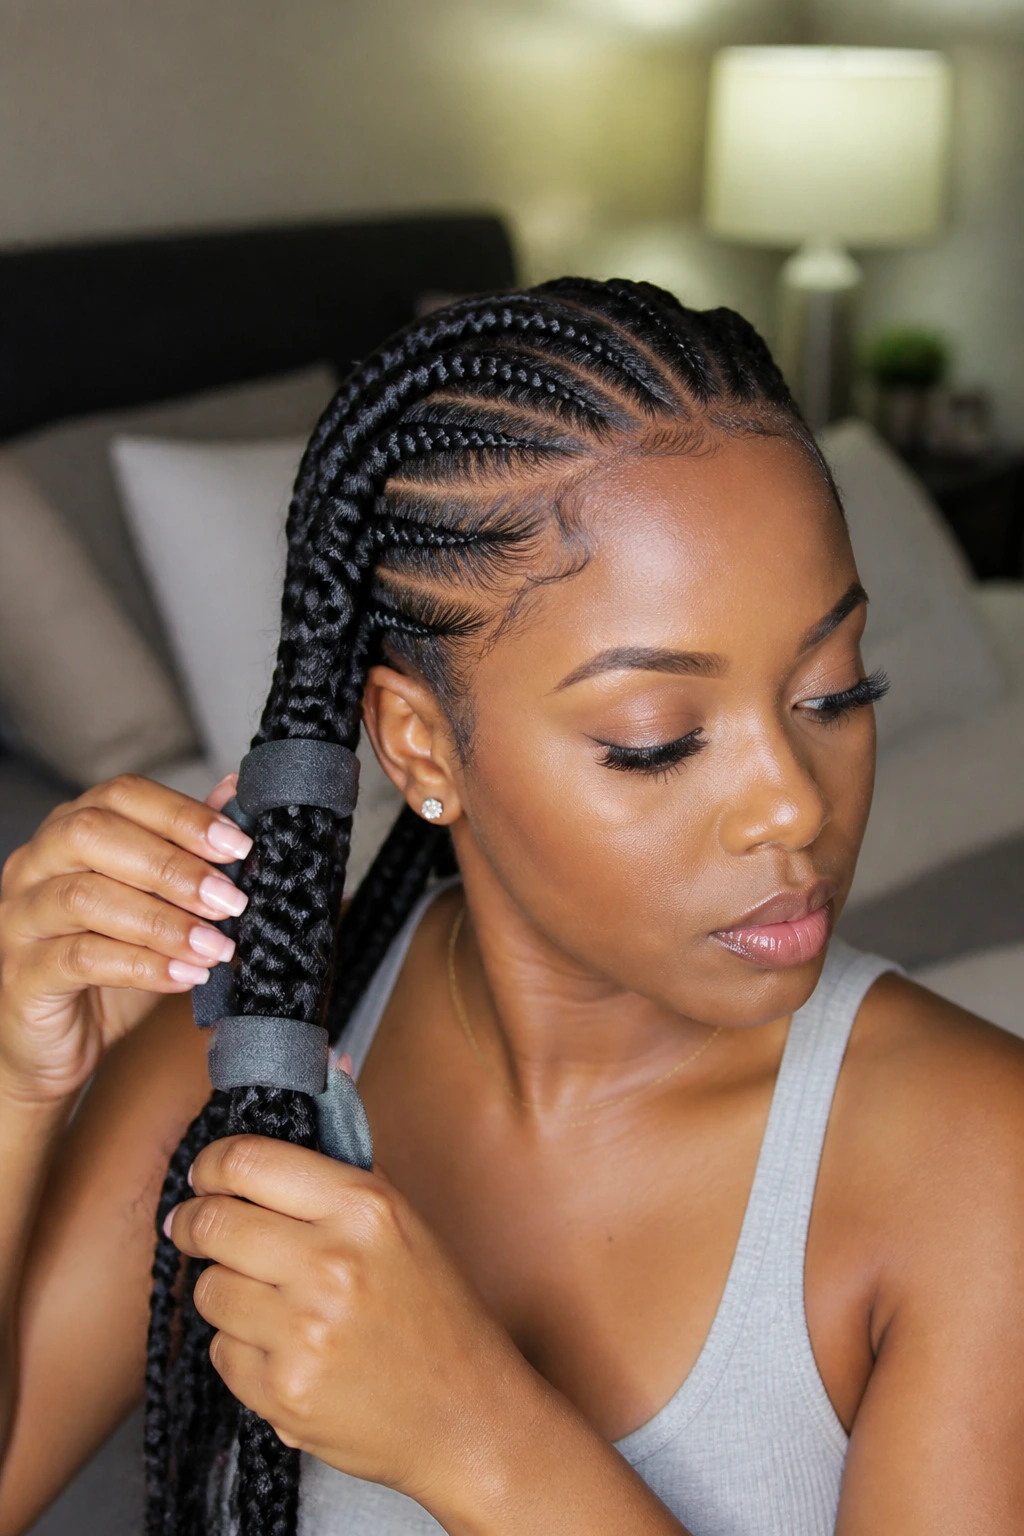
Texture Boost: A light foam wrap at the end of styling helps the braids settle down and keeps the surface from looking fuzzy by the next morning. I like to smooth it from root to mid-length, then tie the hair down for a few minutes so the braid memory sets.
Customization: Change the braid count before you change everything else. Fewer, thicker braids feel bolder; more rows feel more detailed and controlled. If you want the style to look sharper around the face, keep the front sections smaller than the back sections.
Face-Frame: Pull one braid or one side into a softer curve if you want the forehead or temple to look less boxed in. That small adjustment can soften the entire style without touching the length.
Make-It-Yours: If you wear glasses, keep the side rows close enough to the scalp that they don’t fight the arms of the frames. If you work out often, high ponytails and braided buns keep sweat off the neck better. If your hairline is tender, choose fewer rows and a looser feed-in base rather than chasing a super-tight finish.
Keeping Feed-In Braids Fresh and Comfortable
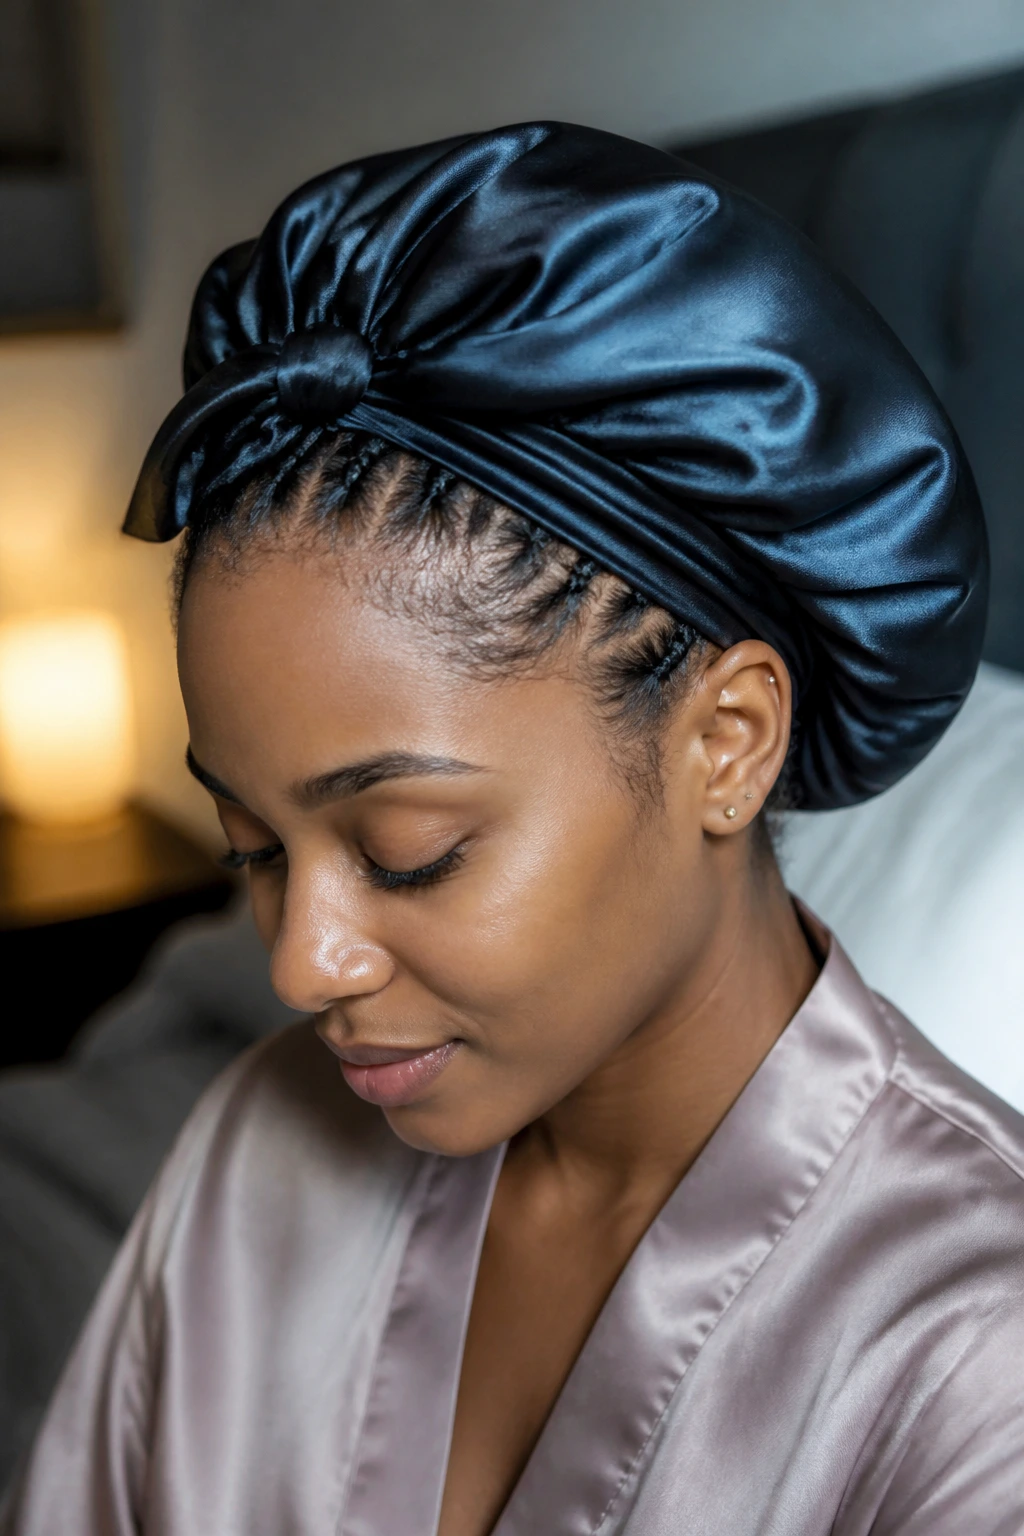
Feed-in braids usually look their best for several weeks, but the way you care for them on the first night matters a lot. Tie them down with a satin scarf or bonnet before bed so the roots don’t puff up. If you skip that step, the front rows fray fastest, and the polished look fades in a day or two.
Every few days, check the scalp for dryness and product buildup. A light braid spray, a bit of diluted leave-in, or a small amount of scalp oil can help if your scalp feels tight, but don’t soak the style. Too much moisture makes the roots swell and can leave the braid looking dull.
Washing depends on how much product you used, but a gentle scalp cleanse every 1–2 weeks is usually enough for most wearers. Use a nozzle bottle or a diluted cleanser, focus on the scalp, and let the water run down the braid lengths. Dry thoroughly. Damp braids tucked away at the nape are a bad idea.
If the front rows begin to loosen or the tension shifts, refresh the edges or re-do the front sooner rather than later. Waiting until the style is half gone makes the whole look seem tired. A small refresh goes a long way.
Feed-In Variations to Try When You Want a Different Mood
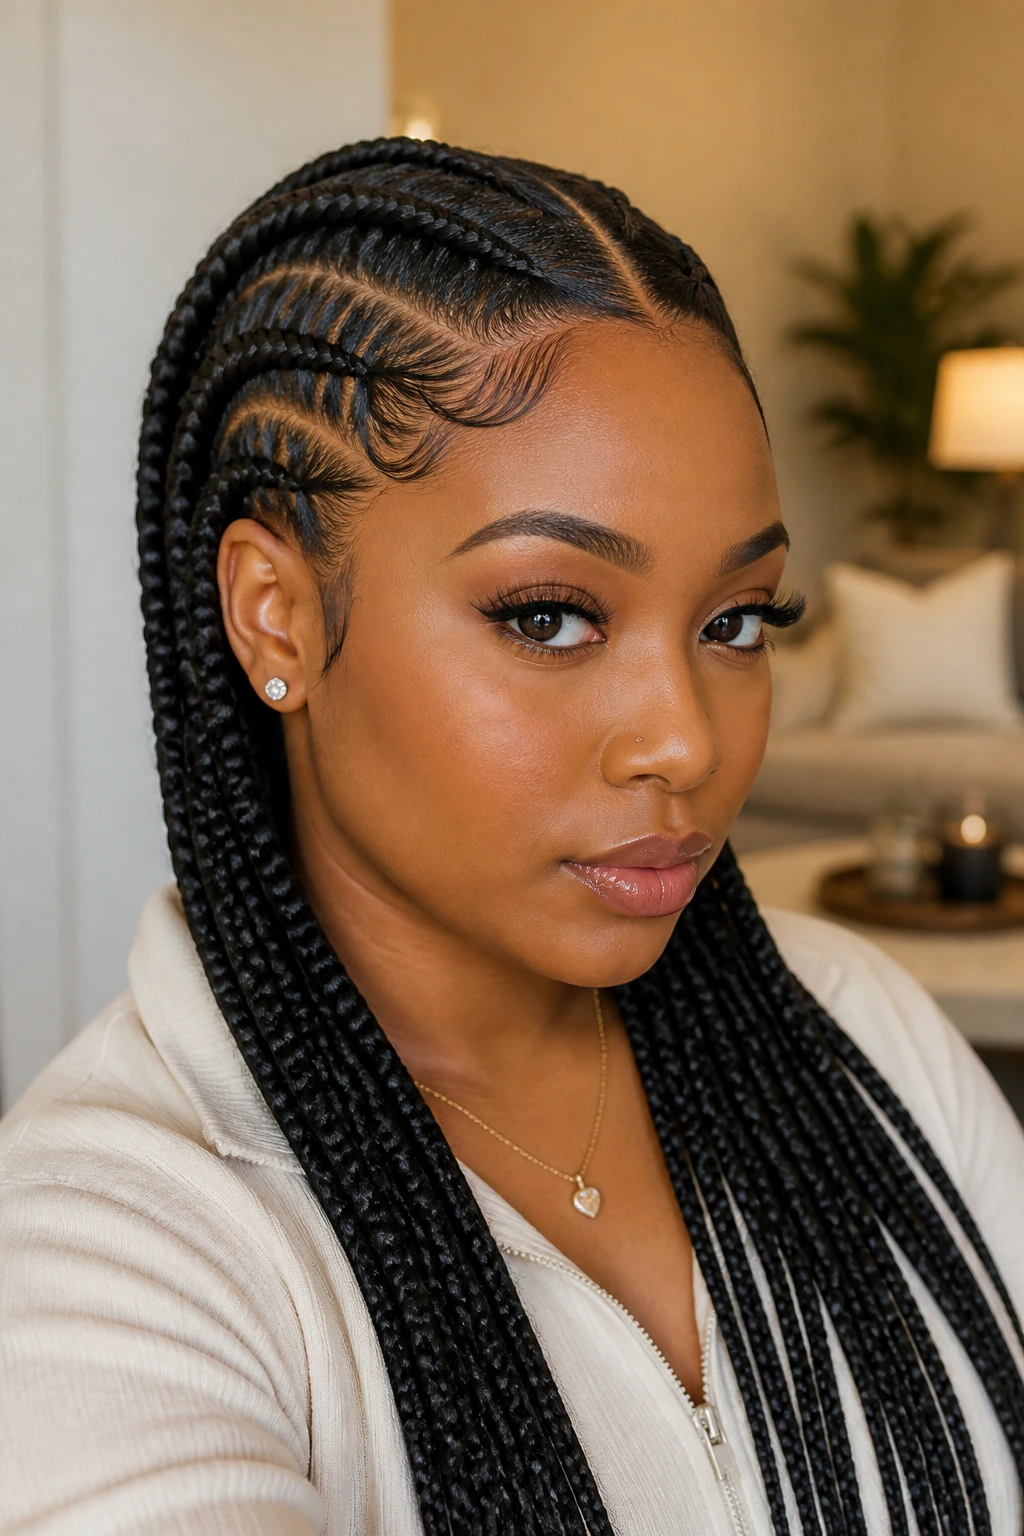
Soft-Edge Feed-Ins: Keep the rows a little wider around the temples and avoid sharp angles at the front. This softens the face frame and makes the style feel less severe, especially with center parts.
Statement-Length Feed-Ins: Extend the braids much longer and keep the finish straight and glossy. The length gives the style more movement, but only if the root area stays tight and neat.
Color-Streak Feed-Ins: Work one highlight shade into the extension hair and repeat it through the rows. A single accent tone can add depth without making the braid pattern hard to read.
Lightweight Protective Feed-Ins: Choose fewer rows and stop at shoulder length. This keeps the scalp from feeling crowded and can be easier to wear if you do not want a heavy style.
Event-Ready Feed-Ins: Add cuffs, curved parts, or curled ends. You don’t need all three at once — one upgrade is enough to change the tone of the whole look.
Common Mistakes That Make Feed-In Braids Look Off
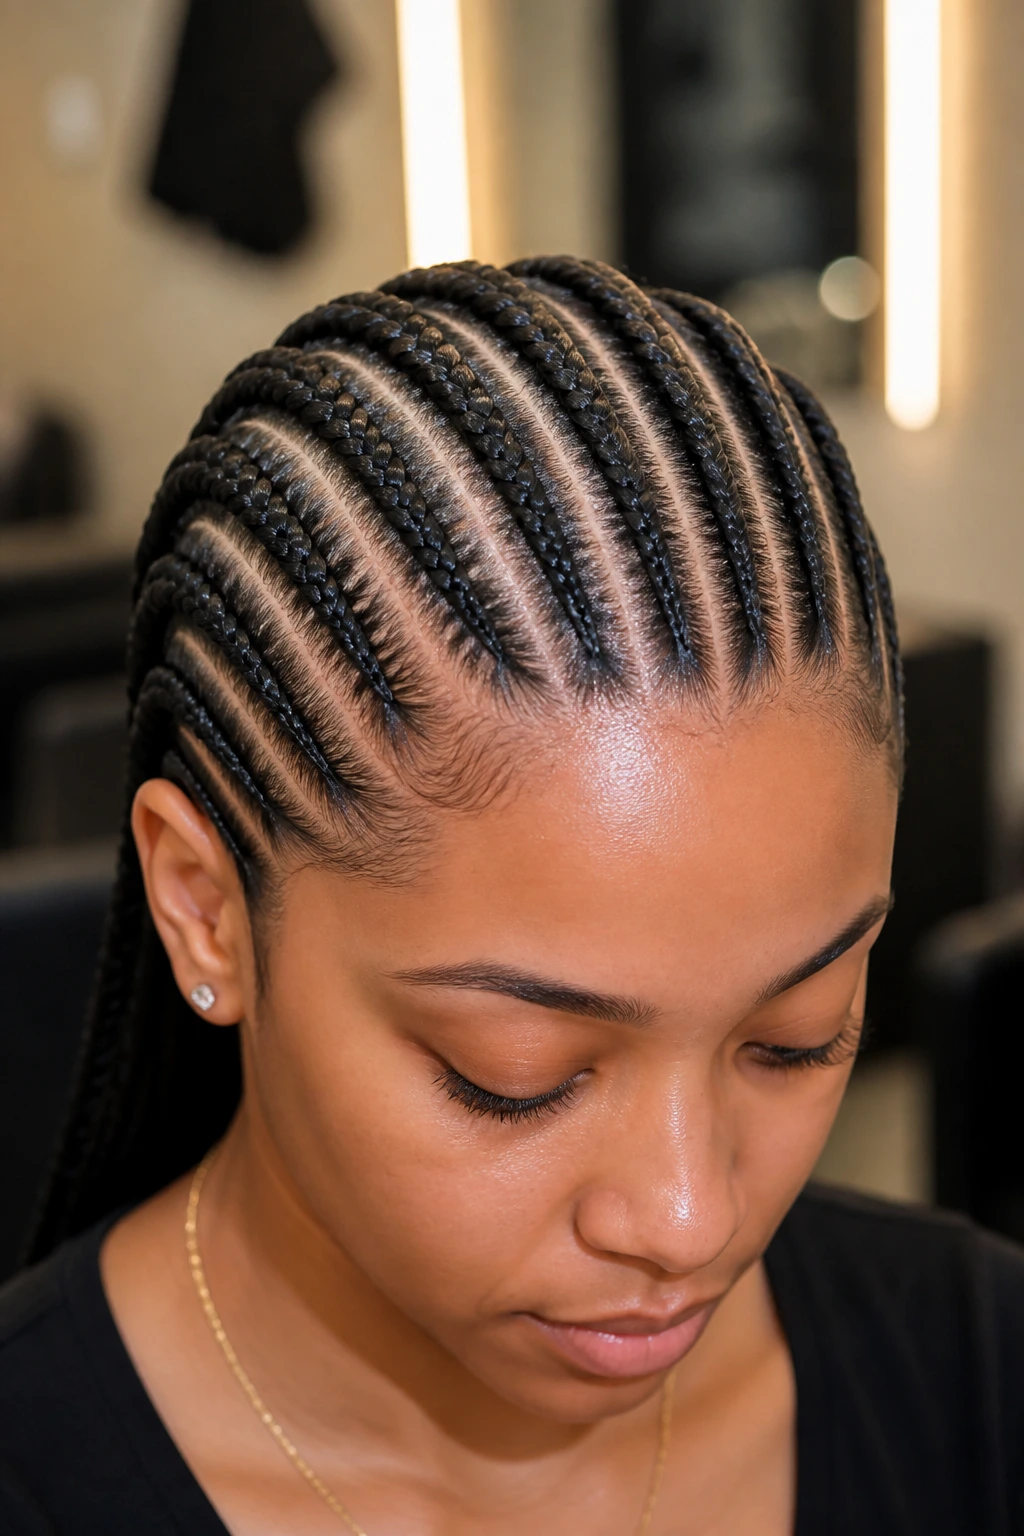
The first mistake is starting too thick at the hairline. You can spot it immediately: the braid sits like a ridge instead of melting into the scalp. The fix is simple but non-negotiable — start with smaller sections and feed in the extension hair gradually.
Too much product is another one. When the roots get plastered with wax or heavy gel, the style may look sleek for an hour, then it starts to flake and feel stiff. Use a light layer, smooth the front, and finish with foam instead of piling on more grease.
Tension causes trouble fast. If the scalp throbs, pulls, or shines in a stretched way, the braid is too tight. A polished look should sit close, not hurt. Speak up during the install if the front feels too locked down.
Mismatched extension hair can also ruin the finish. If the synthetic hair is too shiny, too coarse, or the wrong shade, the braid pattern loses that smooth blend. Pre-stretched hair and a careful color match usually fix the problem before it starts.
Finally, people forget the ends. Frizzy or unfinished ends make the whole style look older than it is. A light setting foam and a proper seal or finish keep the last few inches as tidy as the roots.
Frequently Asked Questions
How long do feed-in braids usually last?
Many people wear them for 2 to 6 weeks, depending on braid size, scalp care, and how fast the roots grow out. Smaller rows tend to last longer because they stay neat at the base, but they also need more time to install.
Can you do feed-in braids on short hair?
Yes, as long as the natural hair has enough grip for the braid to anchor securely. Shorter hair often works best with smaller sections and a careful feed-in at the start, so the style doesn’t slip or look bulky.
Do feed-in braids hurt?
They shouldn’t. A snug braid is normal; throbbing, headache pressure, or a burning scalp is not. If the front rows feel too tight while they’re being done, say something right away and ask for the tension to be eased.
How many packs of braiding hair do you need?
It depends on the braid size, length, and fullness you want. Small-to-medium feed-ins often need fewer packs than waist-length styles, while jumbo or long styles can take more. It’s smarter to have an extra pack nearby than to run short halfway through.
What’s the difference between feed-in braids and regular cornrows?
Feed-in braids add extension hair gradually at the root, which creates a smoother, more tapered start. Regular cornrows often begin with the full section of added hair sooner, so the base can look thicker at the scalp.
Can you wash feed-in braids?
Yes, but keep the focus on the scalp and be gentle with the lengths. Use diluted cleanser or a nozzle bottle, rinse well, and dry thoroughly so moisture doesn’t sit at the roots.
What if the front of the style looks bulky?
That usually means the first section was too large or the added hair went in too fast. The fix is to restart the front rows with smaller pieces and tighter sectioning, even if the rest of the braid stays the same.
How do you keep feed-in braids from frizzing up overnight?
Wrap them with a satin scarf or bonnet every night and keep friction low. If the ends start to fuzz, a light foam and a quick tie-down can smooth them back into shape without a full redo.
The Look That Stays Clean
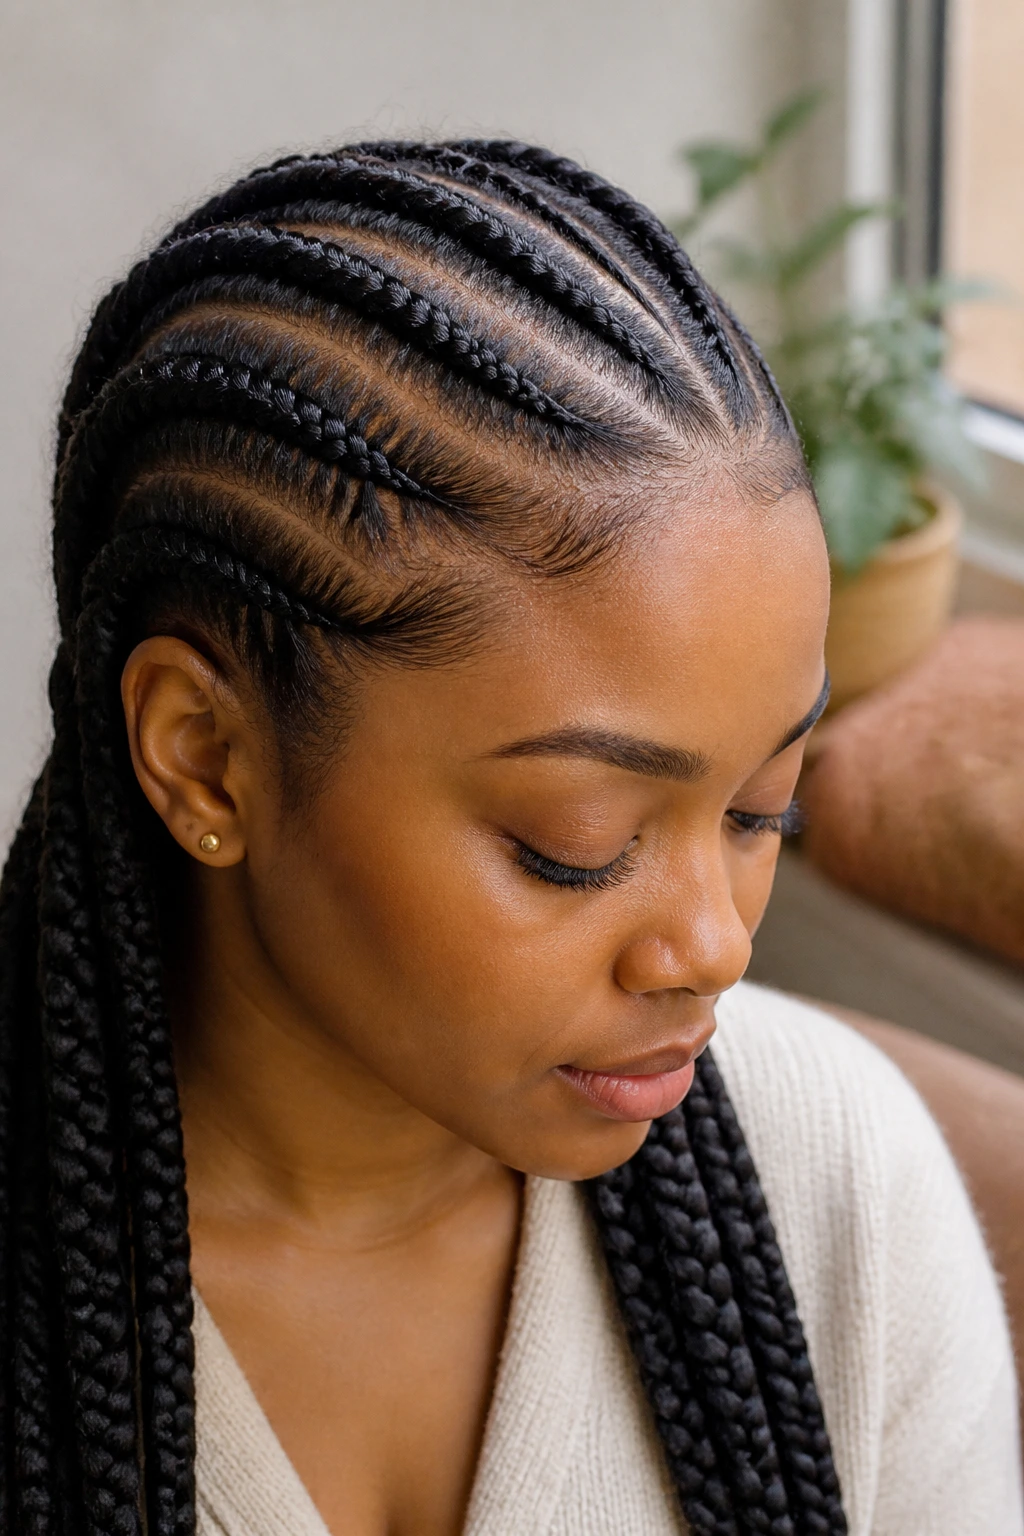
Feed-in braids do one thing unusually well: they make structure look graceful. The parting can be straight, curved, diagonal, or shaped like a heart, but the real magic sits in the first inch where the braid starts to merge with the scalp. Get that part right and the whole style reads cleaner, longer, and more intentional.
What I love most is how much room there is to move after that. You can go bold with jumbo rows, quiet with a low bun, detailed with stitch parts, or playful with beads and curly ends. The base stays disciplined. The finish is where you get to have a little fun.
Pick the shape that suits your hairline, keep the roots slim, and let the braid build gradually. That’s the difference between a style that looks merely done and one that looks carefully put together.
