



Medium-length hair is the sweet spot people underestimate. It’s long enough to twist, braid, and tuck, but short enough that an updo doesn’t turn into a heavy, dragging knot that slips the second you move your head.
That’s why updos for women with medium length hair can look sharper than styles on longer hair. The shape holds. The pins catch. The ends disappear into the style instead of fighting it. If your hair falls anywhere from collarbone to just past the shoulders, you’ve got enough length to build real structure without wrestling with extra weight.
And yes, the awkward parts are real. Layers slide. Fine hair goes flat. Thick hair can balloon at the crown. The good news is that medium hair gives you room to work around all of that, which is why this length can handle everything from a clean low chignon to a messy braided crown without looking overdone.
Why These Updos Earn Their Spot
-
They hold without a wrestling match: Medium-length hair has enough length to anchor pins, but not so much bulk that the base collapses under its own weight.
-
They make second-day hair useful: A little grit from natural oils or dry shampoo gives these styles more bite, which means less slipping and fewer re-pins.
-
They work with layers instead of against them: The right twist, braid, or tuck can hide shorter pieces instead of making them stick out like little escape artists.
-
They move from casual to polished fast: Swap a loose texture spray finish for a smoothing cream finish, and the same basic shape can go from coffee run to dinner.
-
They’re kind to the neck: Low buns, tucked ponies, and braided rolls keep hair off your skin without needing a mountain of hair to stay put.
-
They suit a lot of textures: Straight, wavy, curly, coily, fine, thick—medium length gives each one a different path into an updo, which is half the fun.
Why Medium-Length Hair Is the Sweet Spot for Updos
Medium hair has a practical advantage that long hair never quite gets. It can be pinned close to the scalp without the style getting top-heavy, and it can still create enough twist and wrap to look intentional. That’s why a low bun on shoulder-length hair often looks cleaner than the same bun on waist-length hair, which may need extra pins just to stop sagging.
There’s also the matter of balance. A collarbone-length cut gives you enough ends to fold under, but not so many that they poke out from every angle. If your hair is layered, that’s not a deal-breaker. It just means you need to choose styles that hide the ends in folds, braids, or overlapping twists instead of relying on one tight coil.
For a lot of people, this is the length where updos stop feeling like a formal-event-only thing. You can pull hair into a knot for a hot afternoon, twist it up for work, or dress it up with a barrette for a wedding. It’s not fragile territory. It’s useful territory.
Essential Tools for These Looks
-
Bobby pins in two shades: One that matches your hair and one slightly darker for hidden support. Mixed pin colors vanish better than a single obvious shade.
-
U-pins: These are the quiet workhorses for buns and French rolls. They hold without stabbing your scalp the way some straight pins do.
-
Clear elastics: Best for securing small sections, pony bases, and bubble styles without adding a thick visible band.
-
Texturizing spray: A light mist gives medium hair grip, especially if it’s freshly washed or naturally slippery.
-
Dry shampoo: Useful even on clean hair. It adds a little roughness at the roots and helps flat crowns stay lifted.
-
Rat-tail comb: Good for clean part lines, sectioning, and smoothing the top layer without dragging product through the whole head.
-
Teasing brush or fine comb: Handy when you need a small cushion at the crown for shape.
-
Strong-hold hairspray: Not the helmet spray. A firm but brushable formula keeps flyaways down while leaving some movement.
-
Mini claw clips: Great for sectioning while you work, and sometimes the style itself depends on one.
-
Smoothing cream or light pomade: Use a pea-sized amount on the surface of the hair, not the roots, to tame frizz and short layers.
Smart Prep and Product Choices for Medium-Length Hair
Freshly washed hair is tricky. It can be too soft, too clean, and too slippery, which sounds nice until your braid starts sliding out by lunch. Most of these updos behave better on hair that was washed the day before or the morning before that, especially if you rough-dry it with a little mousse at the roots.
Fine or Silky Hair
Fine hair needs texture before shape. A light mousse at the roots, then a quick blow-dry with the head flipped upside down, gives enough lift to stop buns from collapsing. Don’t drown it in oil or heavy cream. The style will look glossy for about ten minutes and then go limp.
Thick or Heavy Hair
Thick hair wants structure. Split it into smaller sections and pin each one as you go rather than trying to twist the whole head at once. A dab of smoothing cream on the outer layer helps the top look neat, but the real job is done by the pins underneath. Use more than you think. Thick hair is not polite.
Curly or Wavy Hair
Curly hair often looks best when you stop trying to flatten it into obedience. Keep some natural texture, define the crown with a little leave-in, and work with twists or braided sections that let the curl pattern show. If the ends are frizzy, tuck them inside the bun instead of fighting every strand. That’s usually the cleaner move.
1. The Low Twisted Chignon
This is the style I reach for when I want hair off the neck without looking like I rushed through the bathroom with a prayer and five pins. Medium-length hair does especially well here because the ends tuck into the twist instead of hanging loose and fraying the silhouette.
Why It Works
A chignon sits low enough to feel calm, but the twist keeps it from looking flat. It’s one of the easiest ways to make shoulder-length hair look deliberate, especially if you leave a soft side part and smooth only the top layer. A few crossed bobby pins at the nape do more than a dozen scattered ones.
- Best on hair that hits the collarbone or shoulders
- Use 6-8 pins, crossed in pairs
- Finish with a light mist of hairspray
Tip: If the ends are short, curl them once with a 1-inch iron before tucking. They’ll bend into the knot instead of poking out.
2. The Polished French Twist
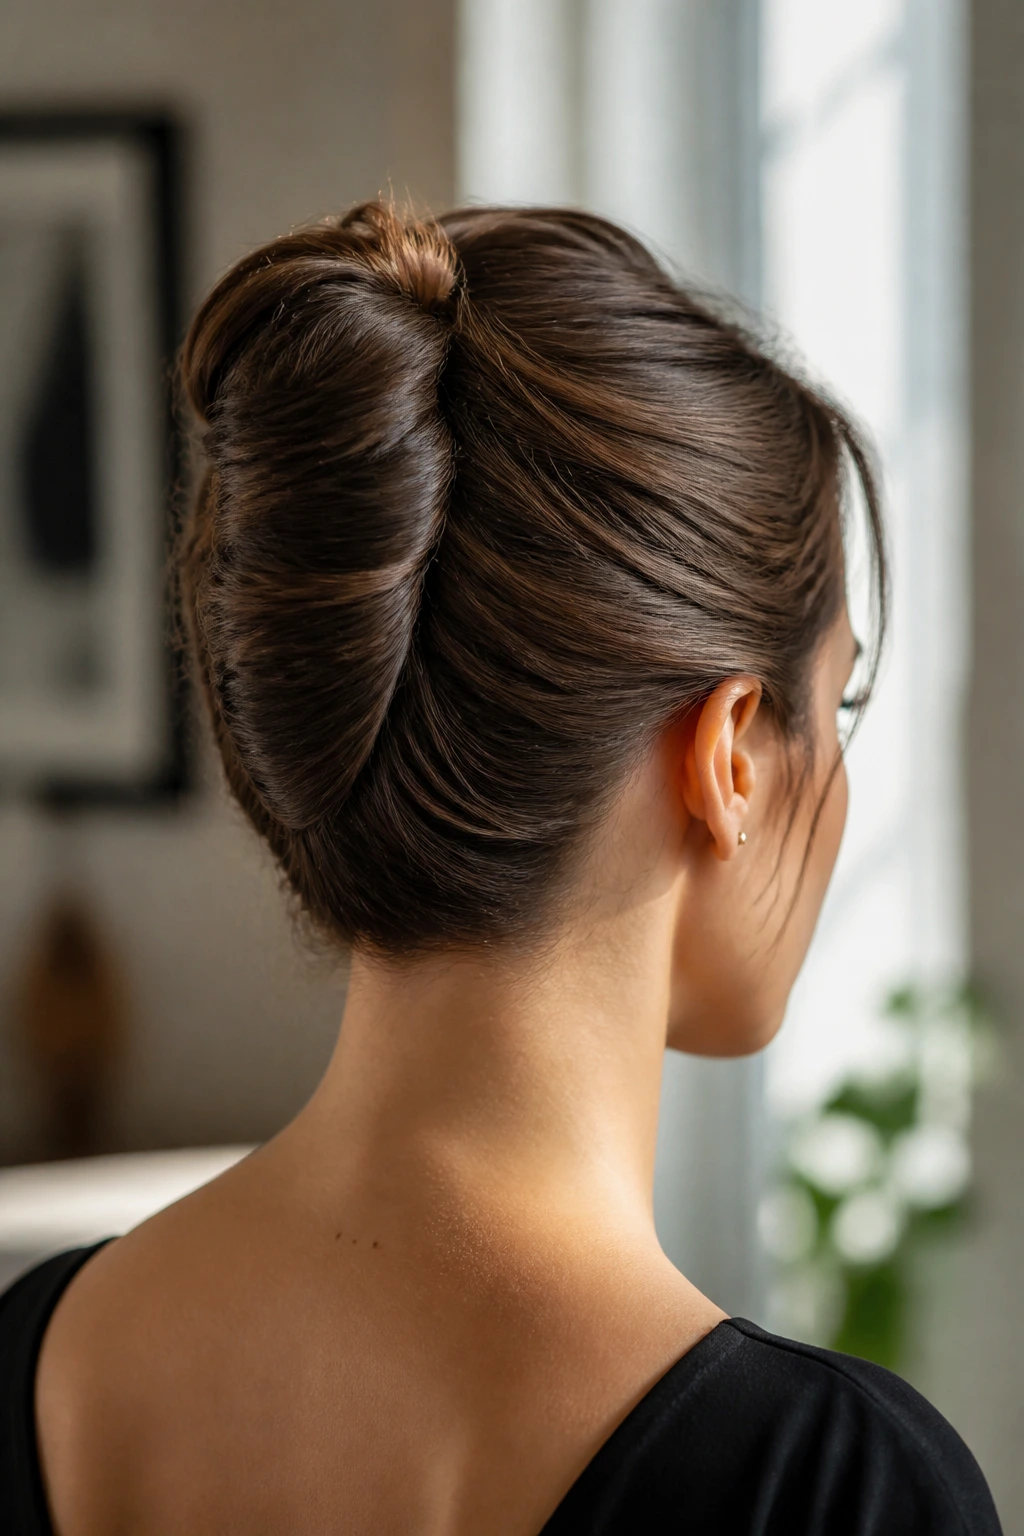
A French twist on medium hair needs a little less drama than the classic long-hair version, which is exactly why it often looks better. The shape sits tighter, the roll stays compact, and the whole thing reads clean instead of bulky.
Start with smooth roots and gather the hair at the back like you’re making a low ponytail. Twist upward, tuck the ends inward, and pin the seam vertically. If you’ve got layers near the face, leave one thin section loose and tuck it behind the ear. It softens the line without wrecking the shape.
This style likes a comb more than a brush. A brush can overwork the top and make it puff in weird places. A rat-tail comb plus a pea-sized bit of pomade on the surface is enough.
3. The Knotted Half-Up Bun
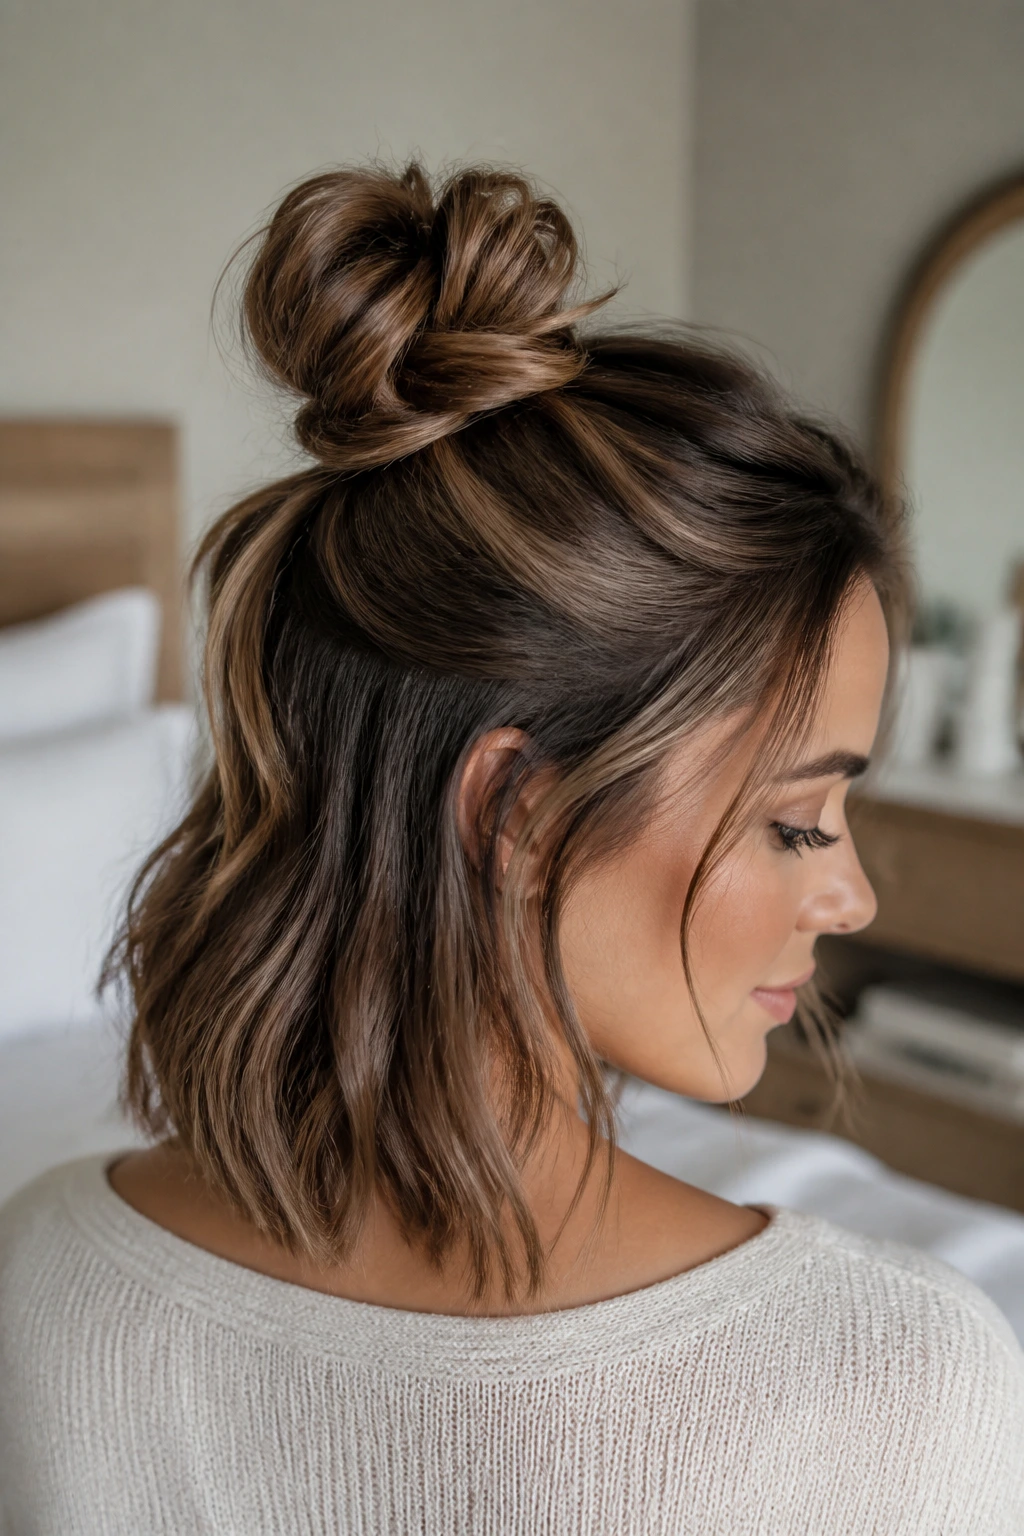
What I love about this one is that it solves the “I want my hair up, but not all the way up” problem without trying too hard. You gather the top half of the hair, knot it once or twice, then pin the knot open or tuck it into a tiny bun.
How to Wear It
Use this when your hair is at that shoulder-grazing length where a full bun can feel too small. It gives lift at the crown and leaves the bottom length visible, which works well on medium cuts with soft layers. If your hair is straight, add texture spray first. If it’s wavy, don’t over-smooth it; the bend helps.
A single decorative pin across the knot can make this look finished in about ten seconds. That matters more than people admit.
4. The Messy Textured Top Knot
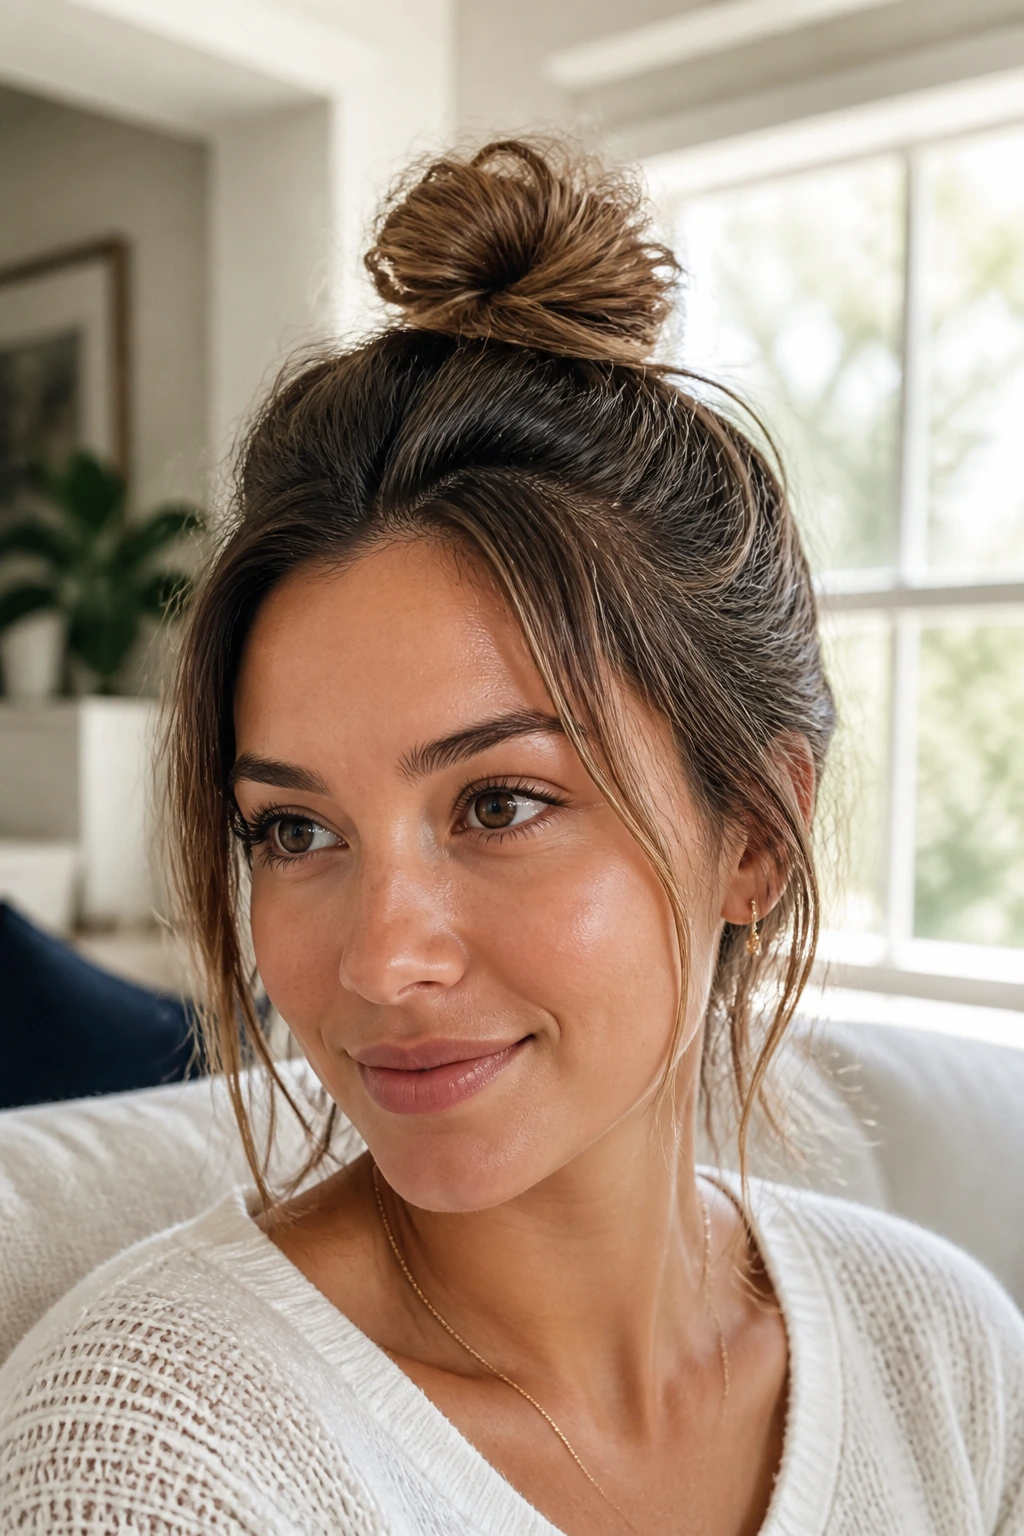
A top knot on medium-length hair is not about making a giant pile of hair. It’s about keeping the knot small enough to stay secure and messy enough to hide the fact that your ends are shorter than they look.
Pull the hair high, twist it loosely, and let the loops land where they want. Then pin the base instead of forcing the bun into a perfect circle. That uneven shape is the trick. A too-perfect top knot on medium hair can look fake fast, while a loose one reads intentional and relaxed.
Use dry shampoo at the roots first. It gives the style the grit it needs and keeps the crown from flattening by noon. If the bun feels too tiny, pull a few strands at the sides and around the face to widen the silhouette.
5. The Sleek Low Bun with Side Part
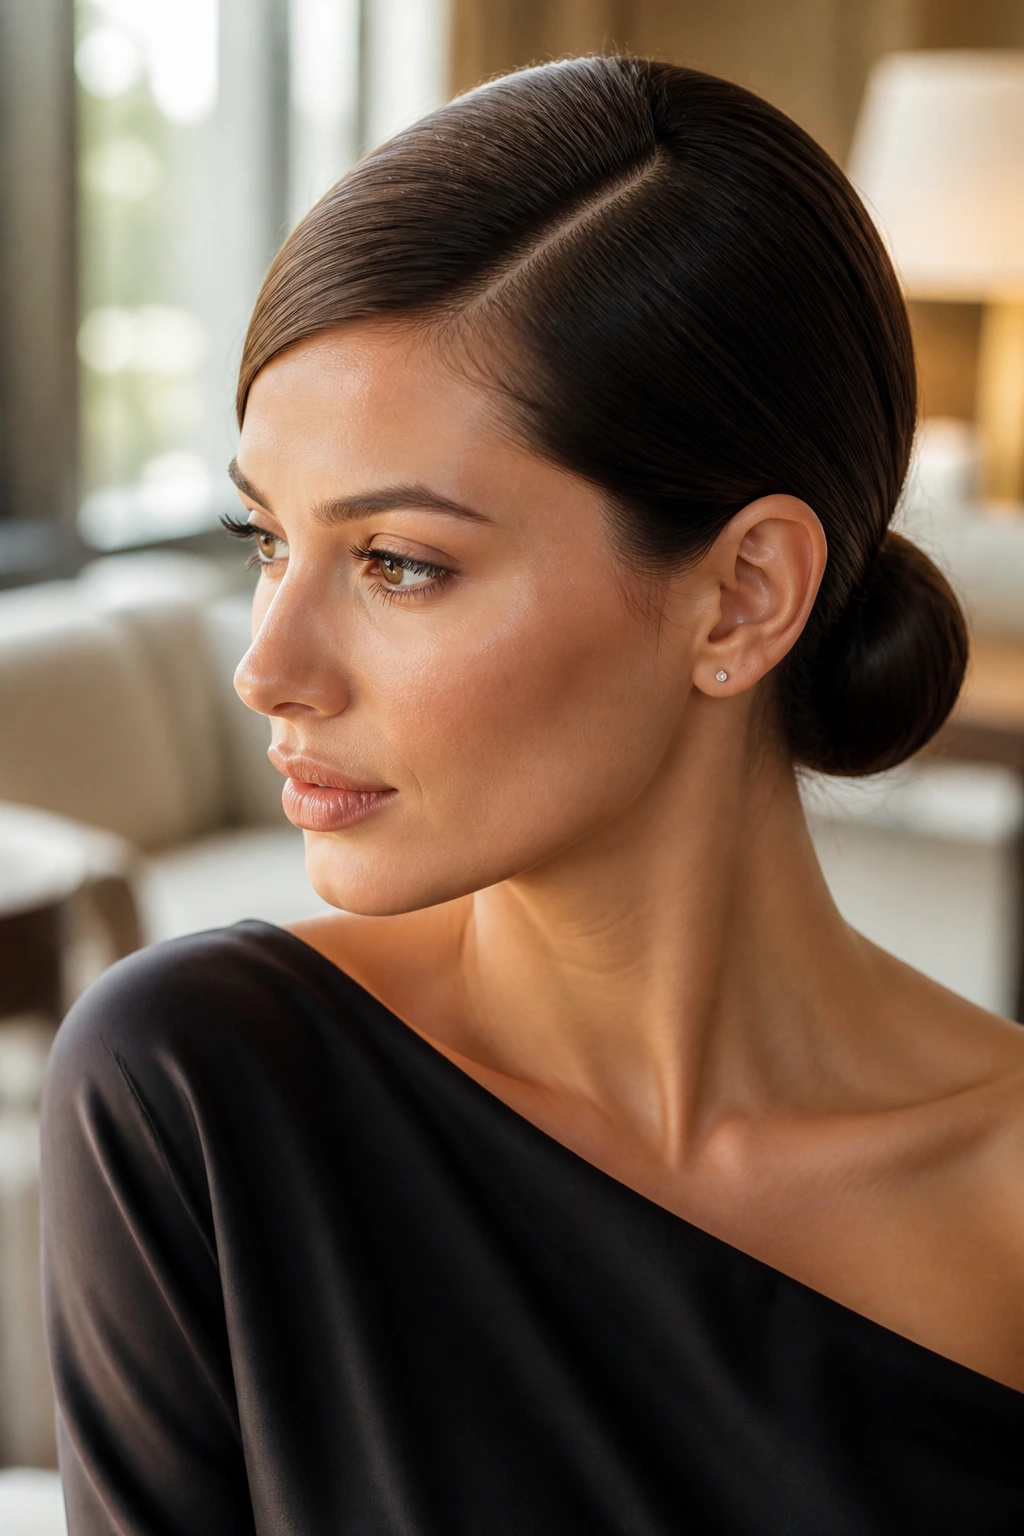
This one is all about the line. A deep side part changes the whole mood of a plain low bun, especially on medium-length hair where the cut already has a little shape built in. The bun itself should stay compact and smooth, sitting right at the nape.
Use a smoothing cream on the outer layer and comb everything toward the low side. Then twist the ponytail into a bun and pin the seam tight. The side part does a lot of work here, so don’t over-accessorize. A single gold pin, if any, is enough.
If your hair has short layers that like to break away, brush them into the part with a touch of hairspray on a toothbrush. Old trick. Still works.
6. The Braided Crown Halo
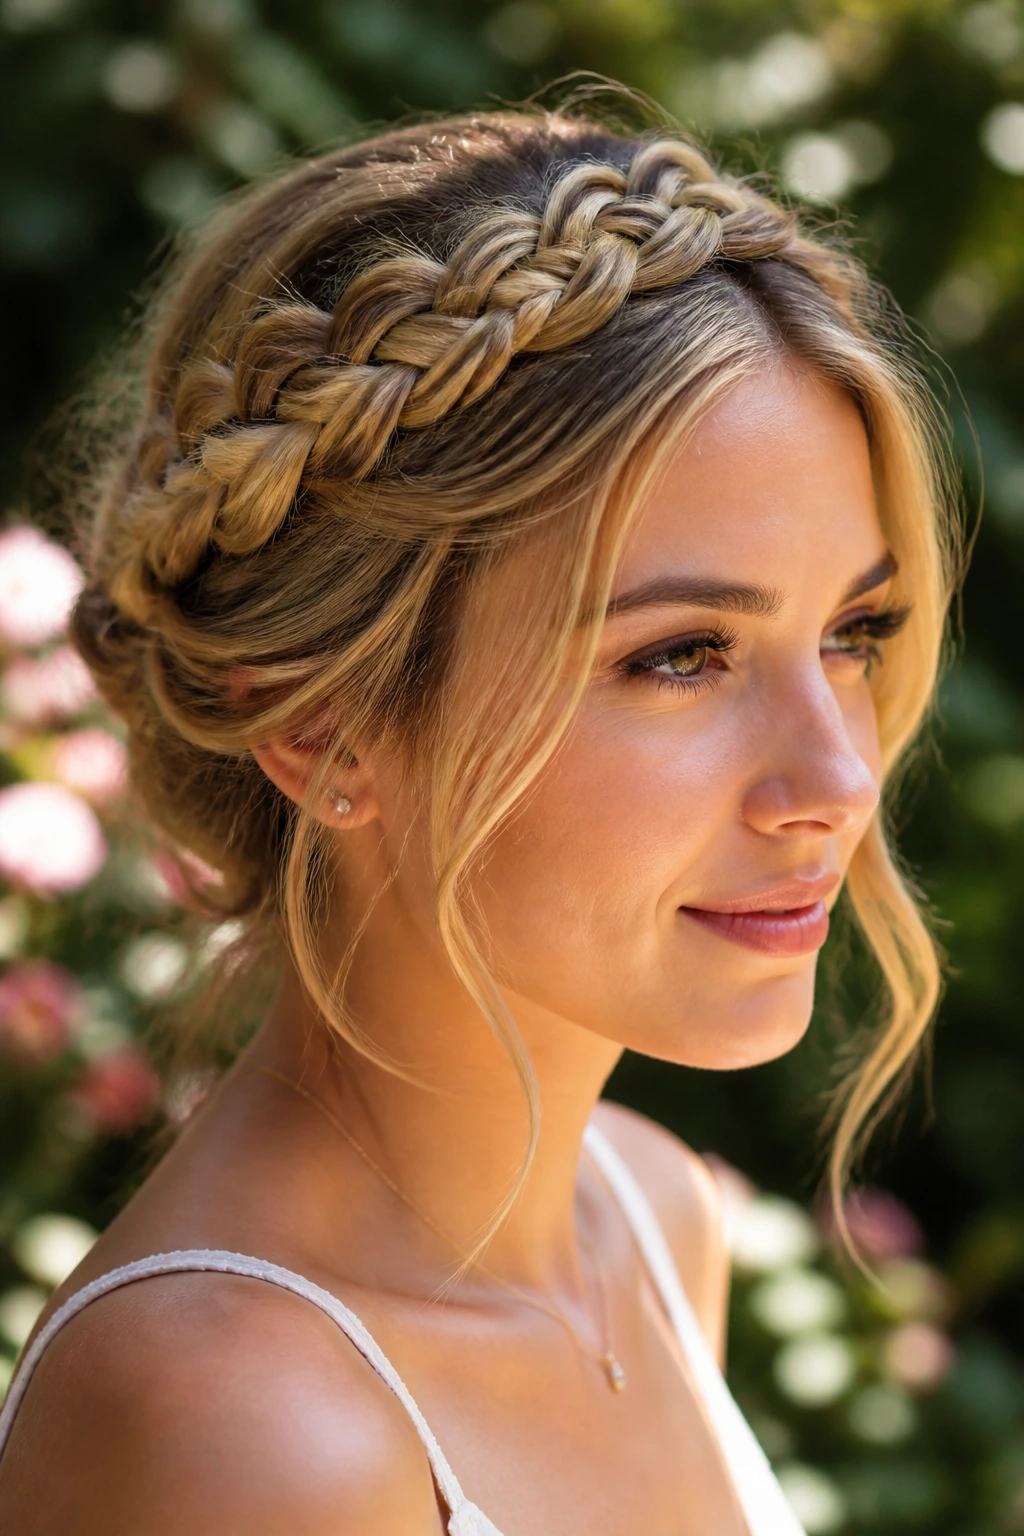
A braided crown halo is one of the few updos that makes medium-length hair feel richer than it is. The braid circles the head, and the ends can be tucked into the back or hidden under another braid, which means you do not need waist-length hair to get the full effect.
This style works best when the braid is slightly loose. Tight braids on medium hair can expose every shorter layer and make the crown look thin. Keep your fingers in the braid as you go, pull the edges softly once it’s pinned, and let a few pieces fall around the temples if you want the halo to feel less formal.
It’s a good wedding option, but it also behaves on a weekday if you keep the braid simple and skip sparkly clips.
7. The Rope-Braid Roll
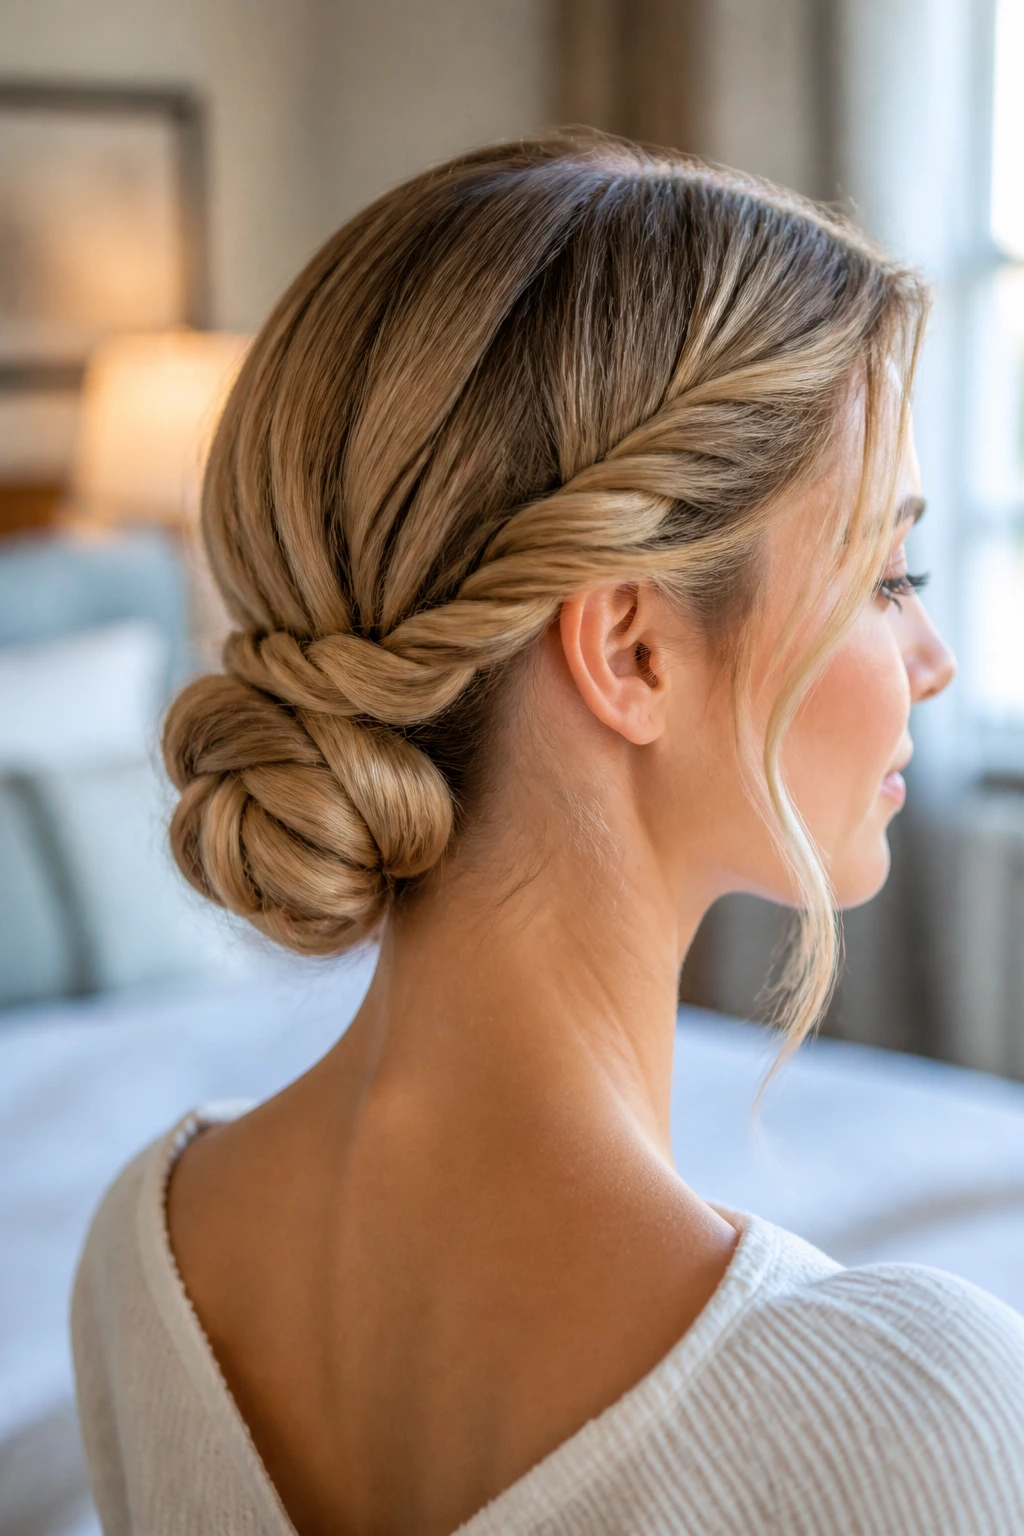
A rope braid gives medium-length hair a cleaner twist than a three-strand braid because the strands cling to each other and roll into shape fast. Twist two sections away from the face, wrap them together, and fold the result into a low roll.
The Science Behind It
Rope braids like hair with a little texture. Freshly washed, ultra-soft hair can slip apart; second-day hair stays put much better. If the ends are blunt, mist them lightly before you twist so they don’t look spiky at the fold.
This style is a nice compromise between polished and relaxed. It has enough structure to feel done, but not so much that it reads stiff. That balance is the point.
8. The Tucked Ponytail
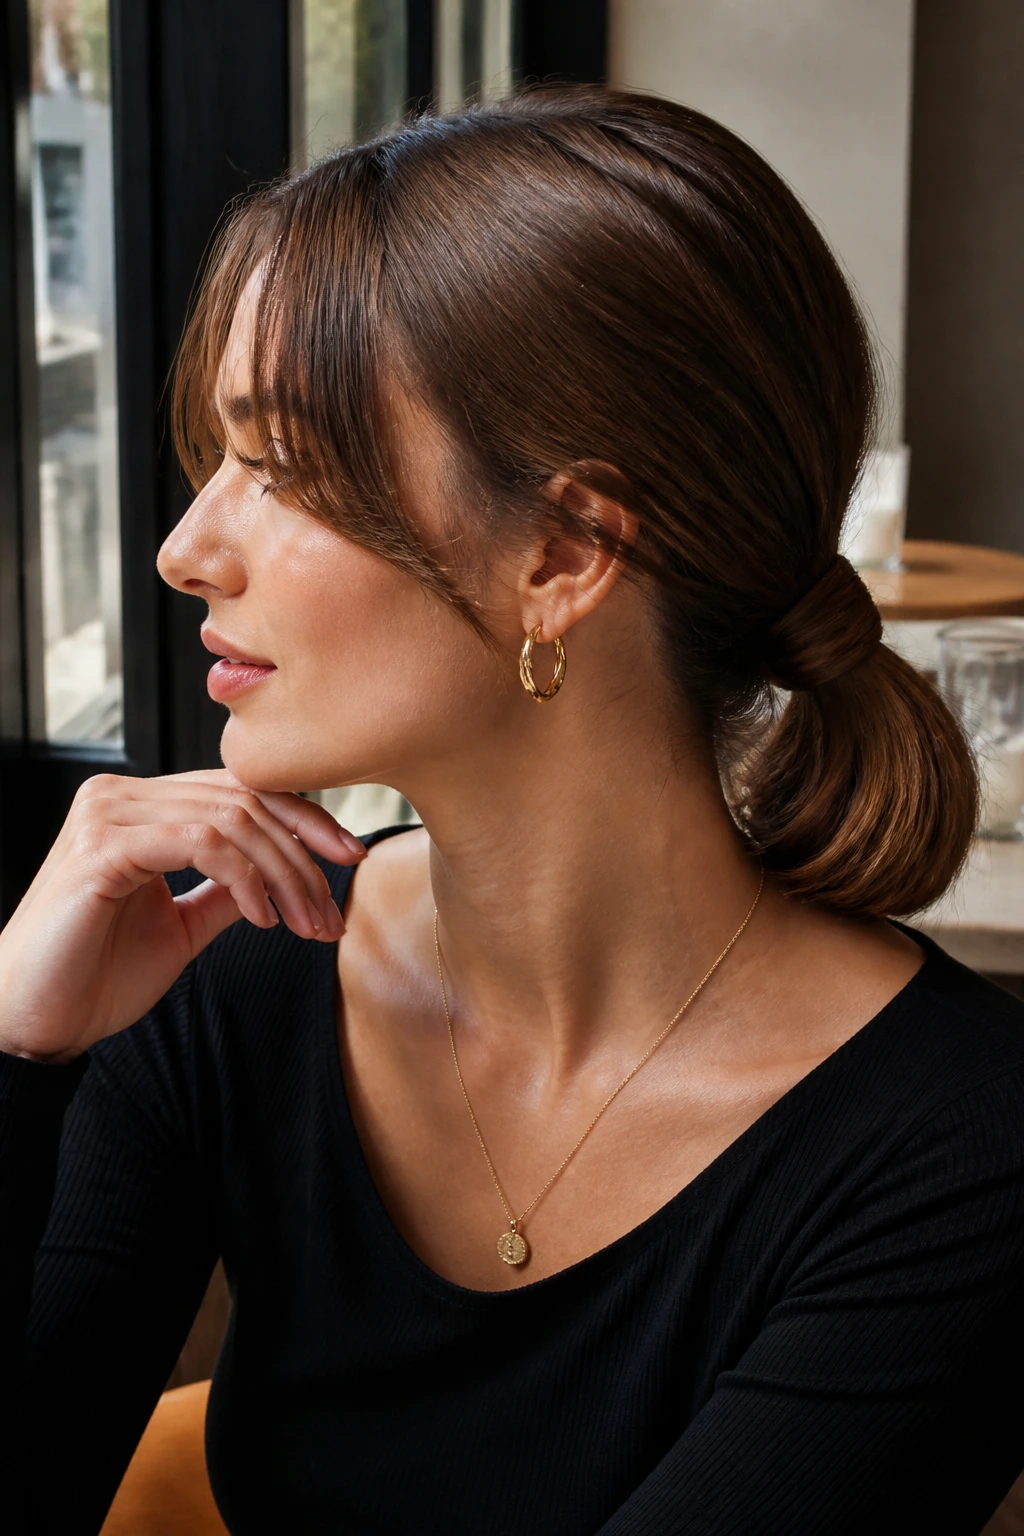
A tucked ponytail turns medium-length hair into an updo without asking it to do too much. Tie a low ponytail, split the hair above the elastic, flip the tail through the gap, and tuck the ends under or wrap them around the base.
It’s one of those styles that looks more complicated than it is. That’s a useful thing. On medium hair, the tucked section usually sits neatly under the pony base instead of hanging like an awkward tail, which gives the whole style a neat finish.
If you want it to look more dressed up, smooth the top with a tiny bit of gel or cream. If you want it softer, tug the crown loose and let a few shorter pieces frame the face.
9. The Bubble Pony Updo
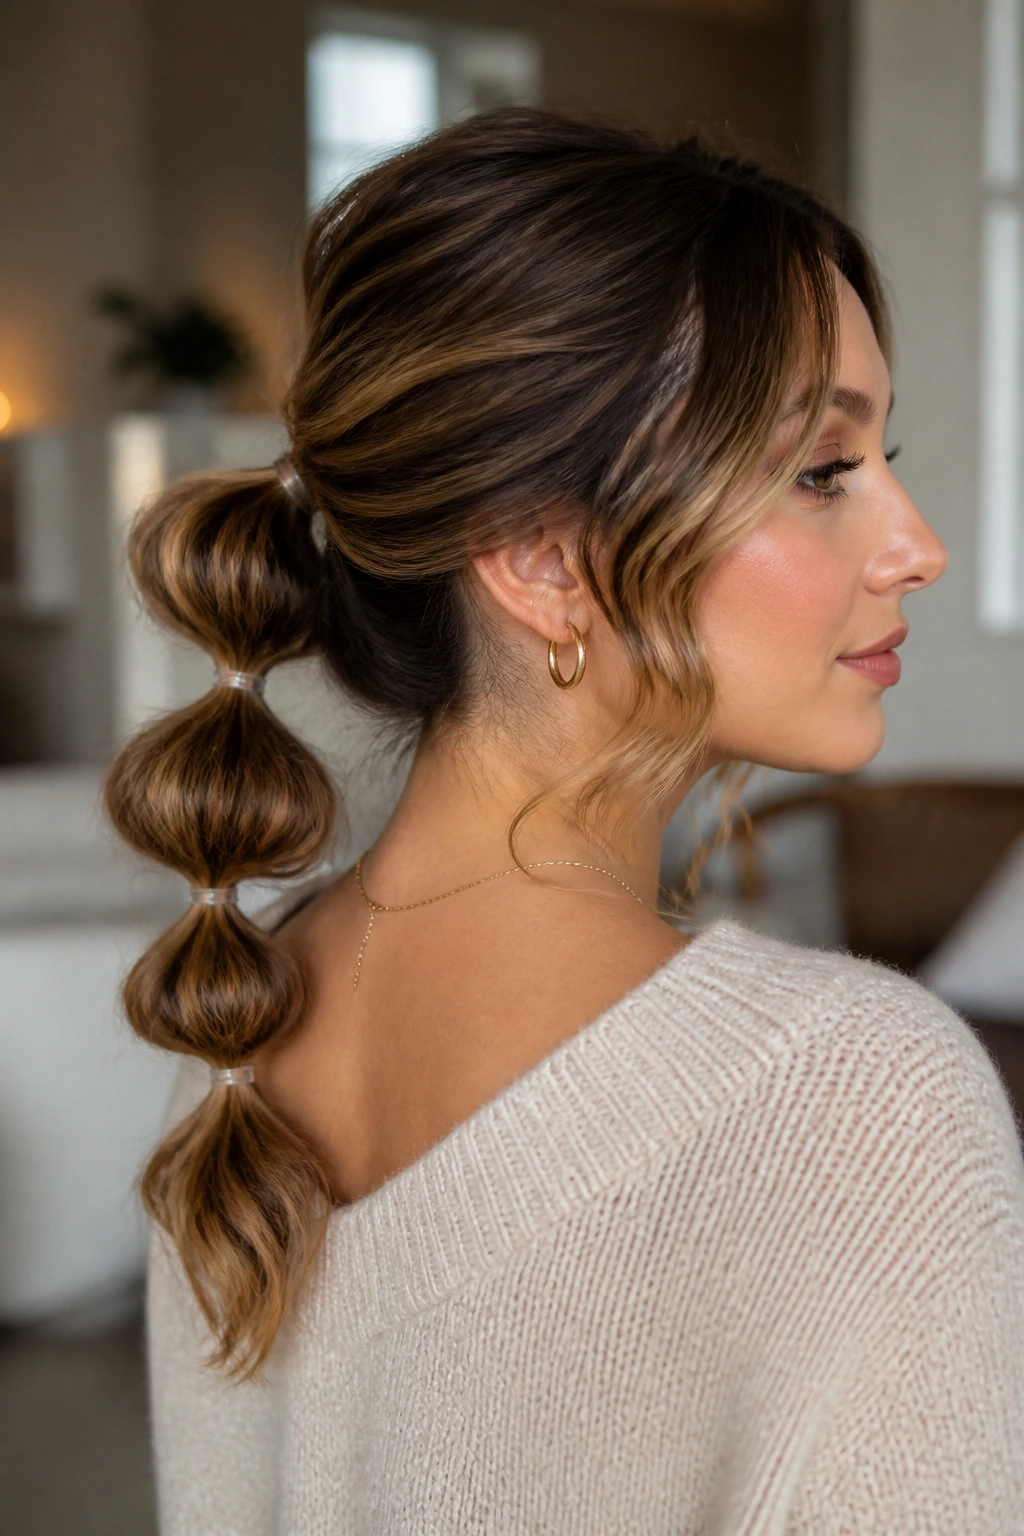
Bubble ponytails are not just for long hair. On medium-length hair, the spacing between elastics is shorter, which actually makes the bubbles look fuller and cleaner if you set them right.
Why It Works
Start with a low or mid ponytail, then add clear elastics every 2 to 3 inches down the tail. Gently pull each section outward to make the bubble. The trick is not to stretch the hair so hard that the whole thing collapses; you want roundness, not a flat accordion.
This looks especially good on hair with a little wave. The bubbles catch the texture and keep the style from feeling too juvenile. Use it when you want something playful but still controlled.
10. The Double-Twist Bun
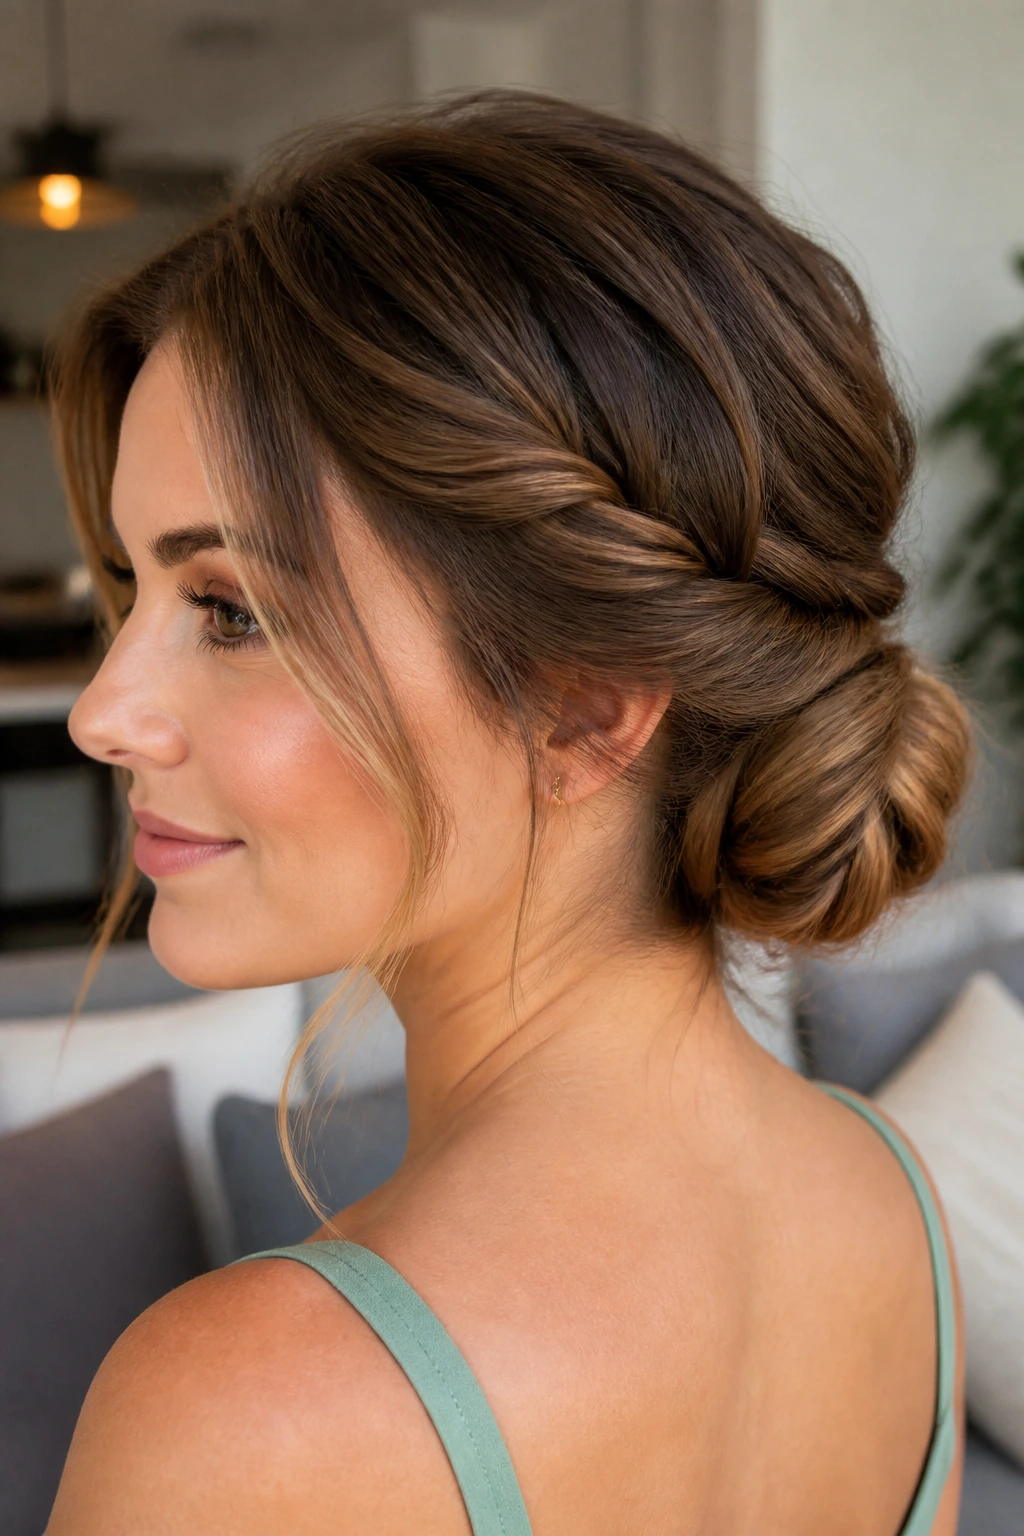
Two twists beat one big twist when your hair sits at medium length. Split the hair down the middle or slightly off-center, twist each side back toward the nape, and wrap both into a bun.
Quick Details
- Best for hair with layers, because the twists hide the shorter pieces
- Use pins where the two twists meet
- Keep the bun low if your hair is thick
The style has a nice built-in symmetry. It feels balanced without being severe, and the overlapping twists give the bun enough texture to look polished even if the ends are uneven. I like this better than a plain bun on medium hair because it creates more shape with less work.
11. The Dutch-Braid Into Bun
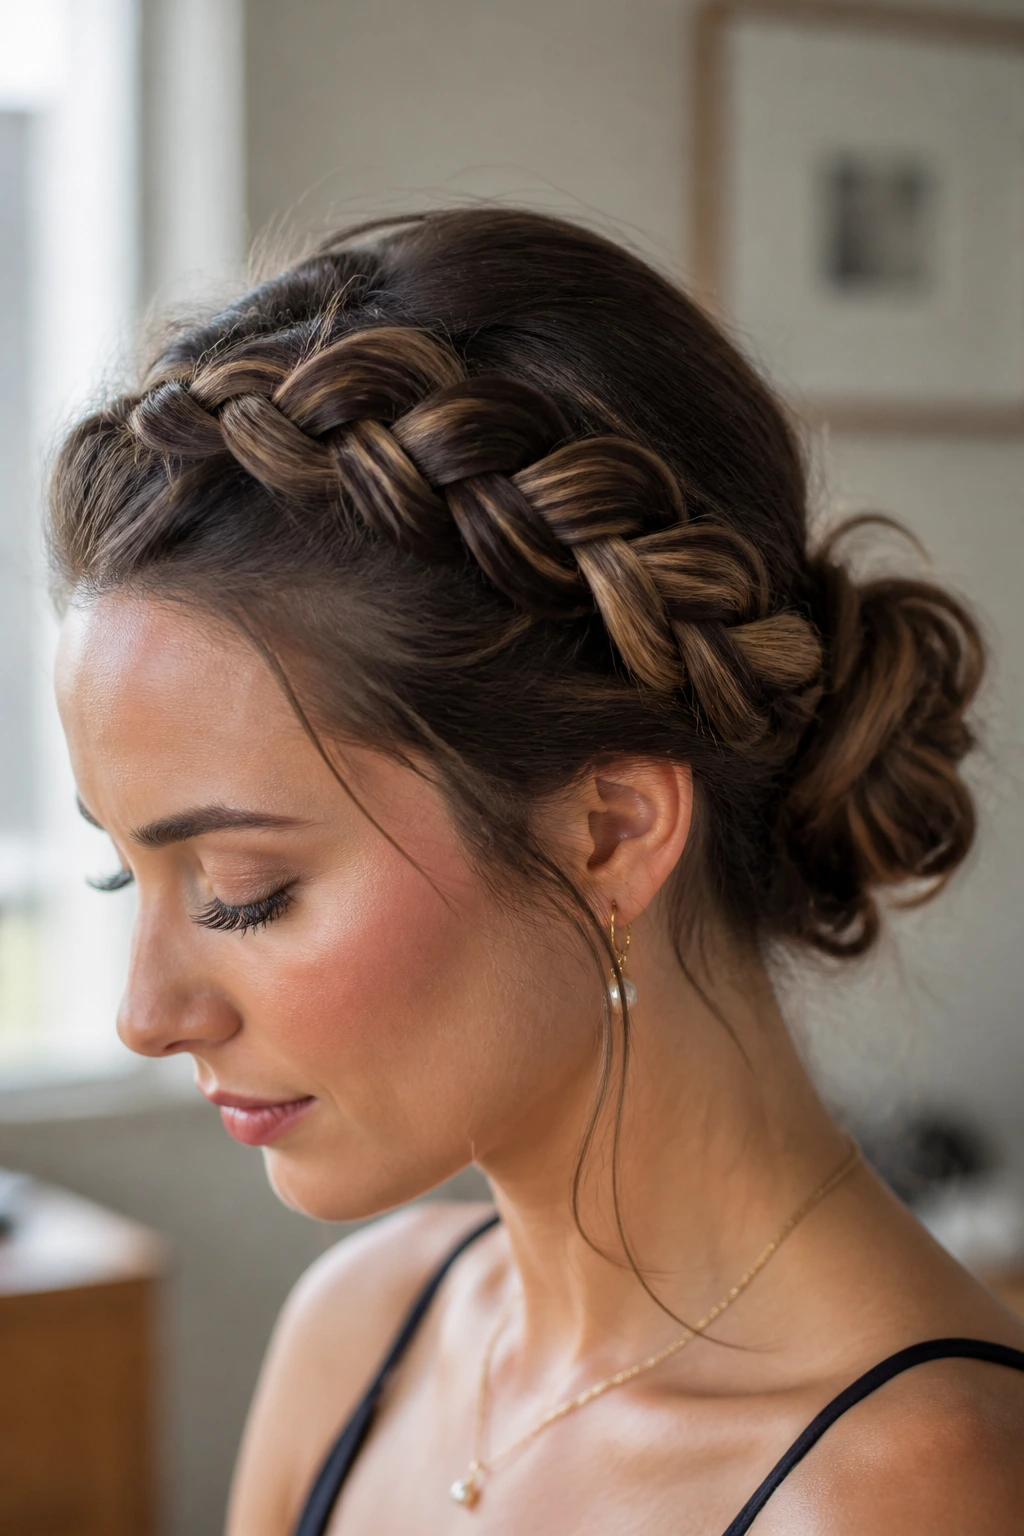
A Dutch braid gives the crown some lift before the hair disappears into a bun. That lift matters on medium-length hair, which can flatten quickly if the braid sits too close to the scalp without support.
Braid from the front hairline back toward the crown, then gather the rest into a low bun. The braid becomes the detail; the bun becomes the anchor. If your hair is fine, this is a smart move because the braid creates the illusion of fuller hair without needing padding.
Keep the braid slightly loose and pancake the edges once it’s set. Tight Dutch braids can look sharp in a way that fights the softness of medium-length cuts. A little looseness helps.
12. The Claw-Clip French Roll
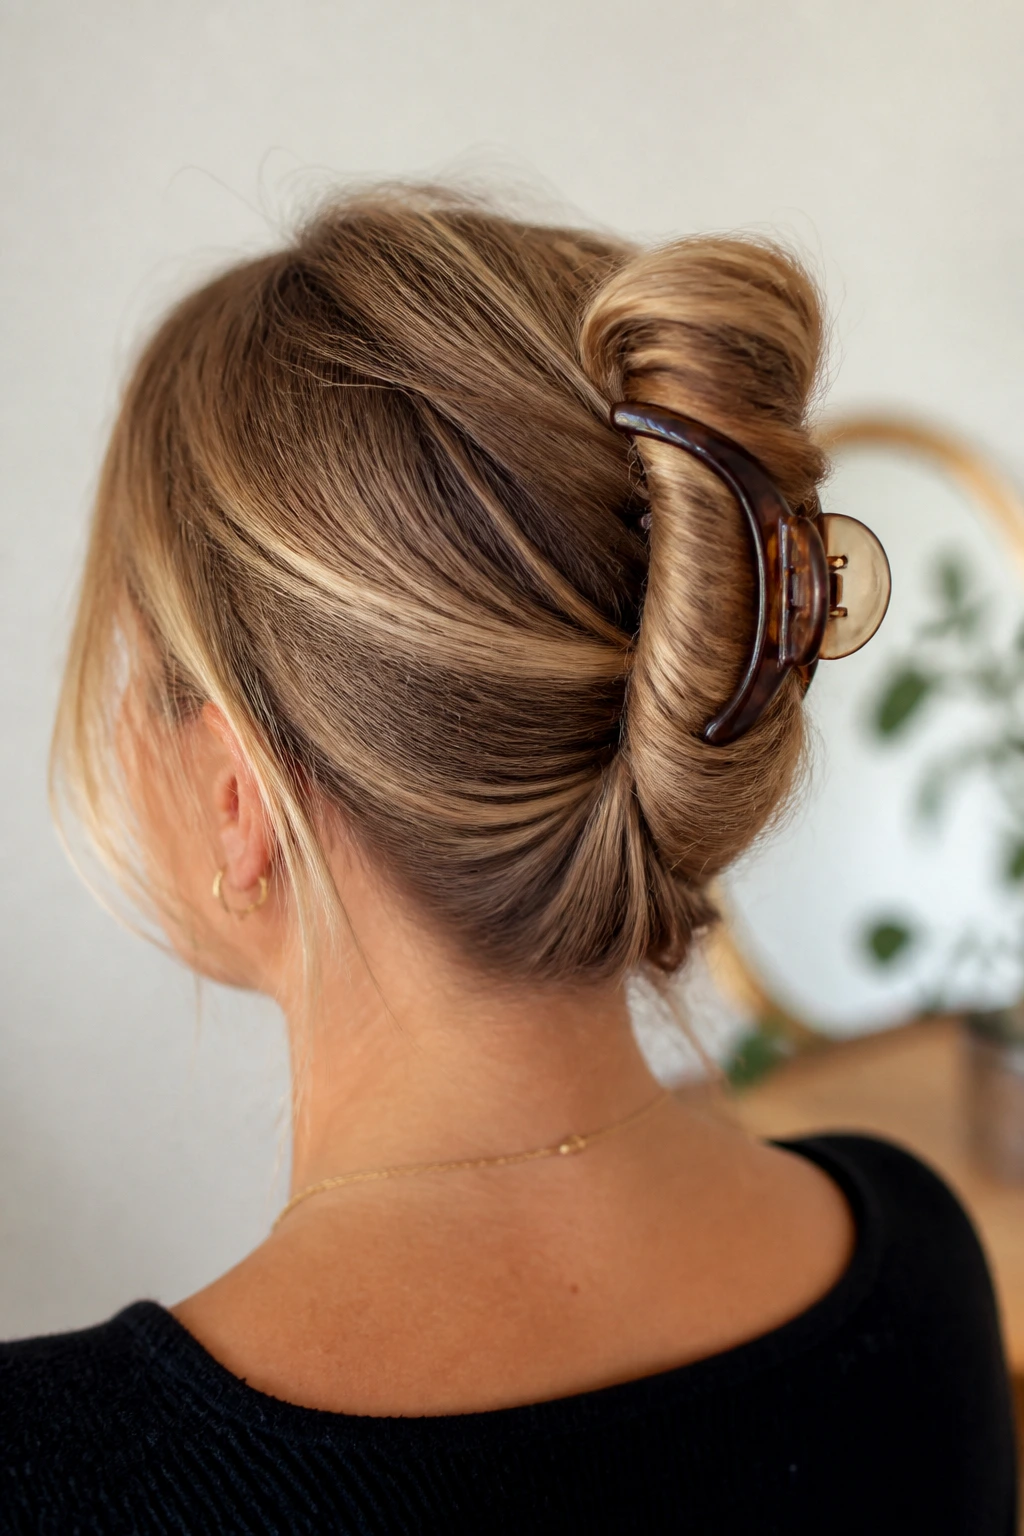
If you own one good claw clip, this is the style that proves it was worth buying. Twist the hair upward from the nape like a French roll, then secure the twist with the clip instead of a wall of pins.
The reason it works on medium-length hair is simple: there isn’t too much bulk for the clip to catch, so it holds better than it would on very long hair. Choose a clip with strong teeth and a curved back that fits the shape of your head. Cheap flimsy clips slip. They all do.
For a softer look, leave the ends a little loose inside the roll. For a neater one, tuck them fully and mist the surface with spray before clipping.
13. The Gibson Tuck
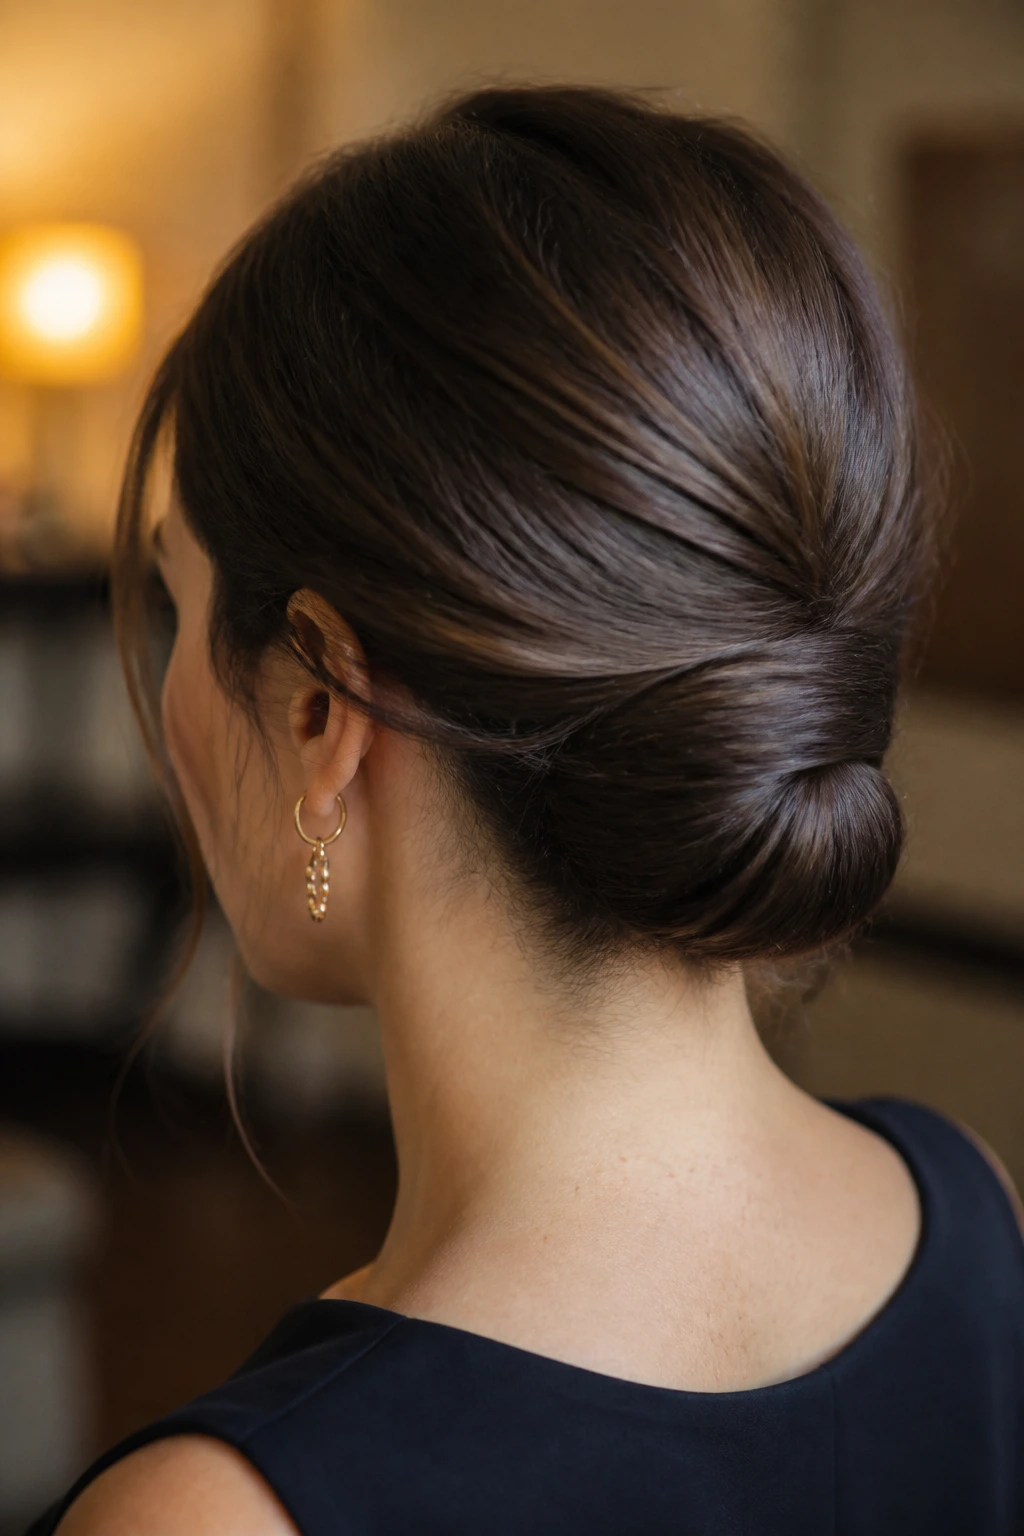
The Gibson tuck feels old-fashioned in the best possible way. It’s a rolled style that turns medium-length hair into a smooth fold at the back of the head, and because the length is moderate, the tuck often stays neater than on longer hair.
How to Shape It
Make a low ponytail, split the hair just above the elastic, and tuck the tail inward through the gap. Then roll the tail up and under until the ends disappear. Pin the fold from the inside so the outside looks clean.
This is a good choice for formal events or work functions because it sits somewhere between strict and soft. It doesn’t need shine spray, but a light gloss mist helps if you want the finish to look more deliberate.
14. The Half-Up Halo Knot
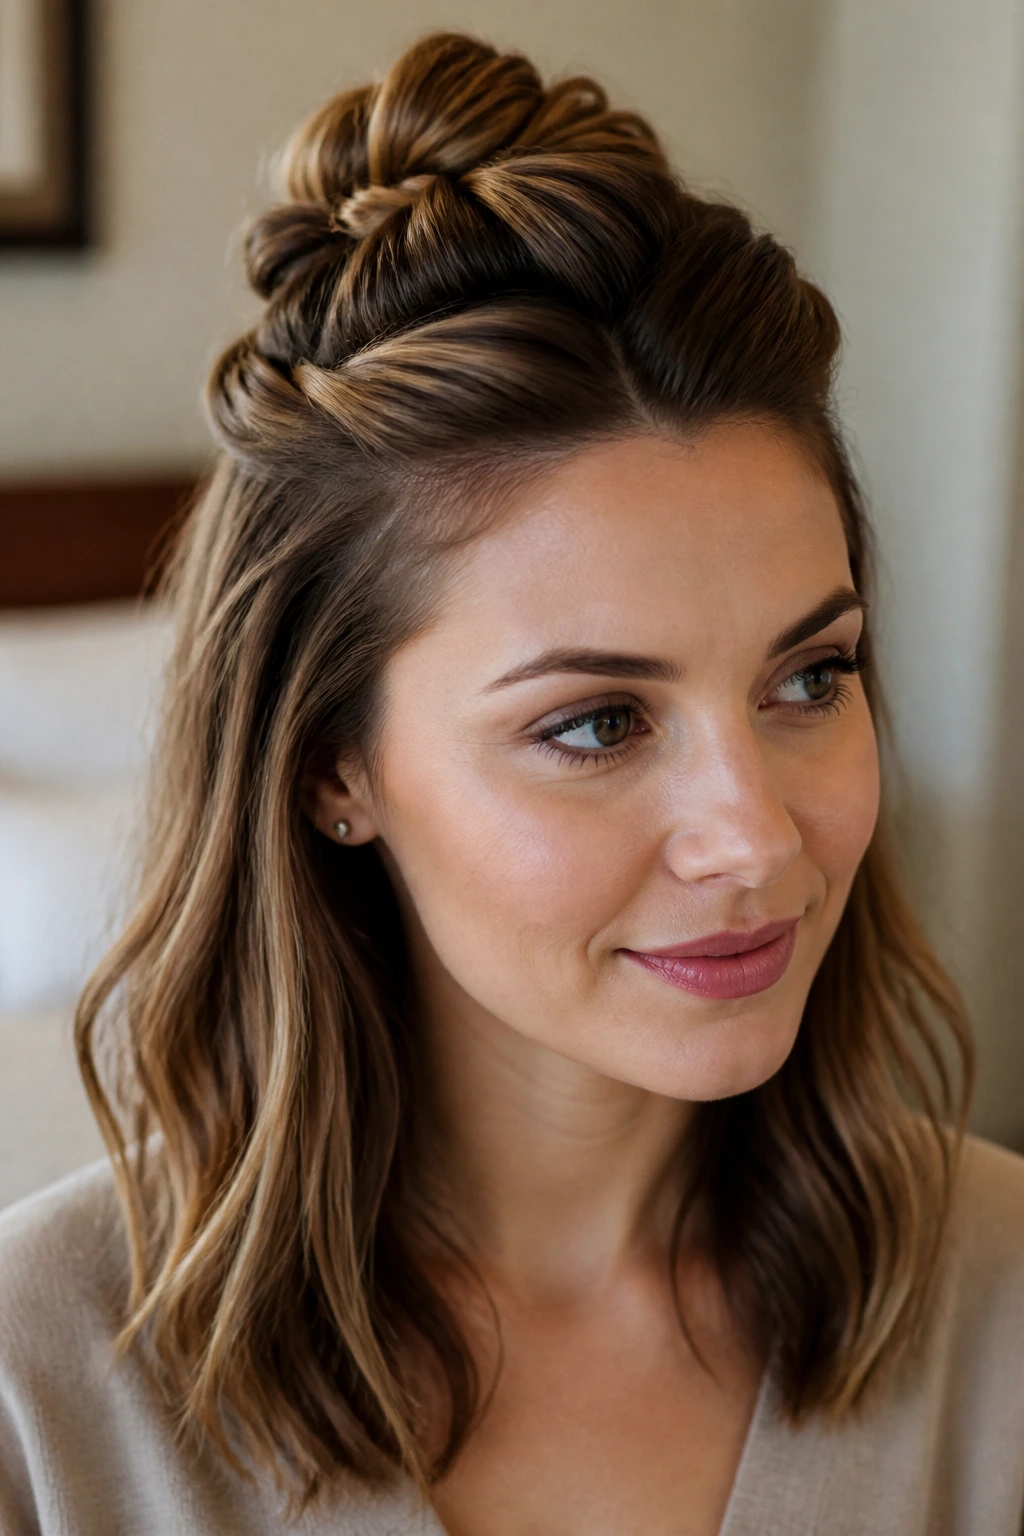
This is a friendlier version of a crown braid. Instead of braiding the whole perimeter, you twist two sections back from each temple, knot them at the crown, and let the rest of the hair hang.
The knot sits high enough to give lift, which medium-length hair often needs. The loose length underneath keeps it from feeling too severe. I like this style on layered cuts because the shorter top pieces can be tucked into the knot while the rest falls naturally.
A small barrette behind the knot can pin the whole thing together and hide the elastics. It’s a tiny detail, but it changes the finish from casual to intentional.
15. The Wrapped Low Pony Knot
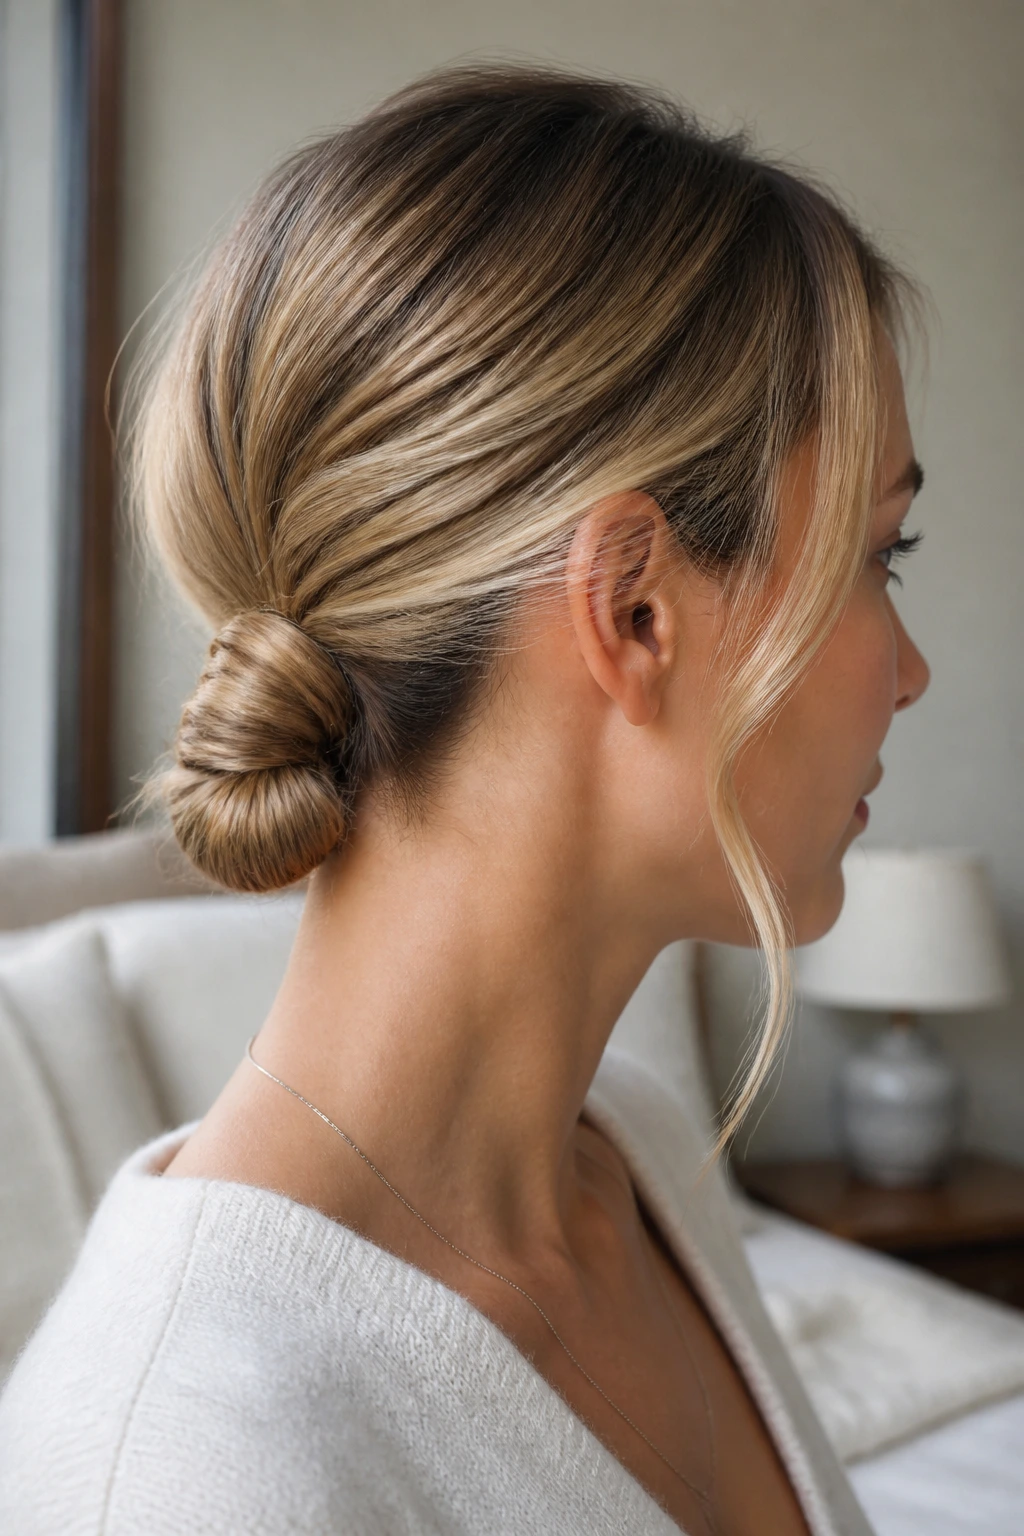
This is what happens when a low ponytail gets dressed properly. Tie the pony, take a small section from underneath, wrap it around the elastic, and secure it with a pin. Then fold the tail under itself and pin the end into a compact knot.
It’s neat, quick, and very good for medium hair because the tail is usually just the right length to fold without flopping. If the hair is blunt, curl the ends once before you tuck them. That soft bend keeps the knot from looking chopped off.
Use it when you want something clean but not stiff. It’s one of the most underrated styles in the whole bunch.
16. The Side-Swept Twist
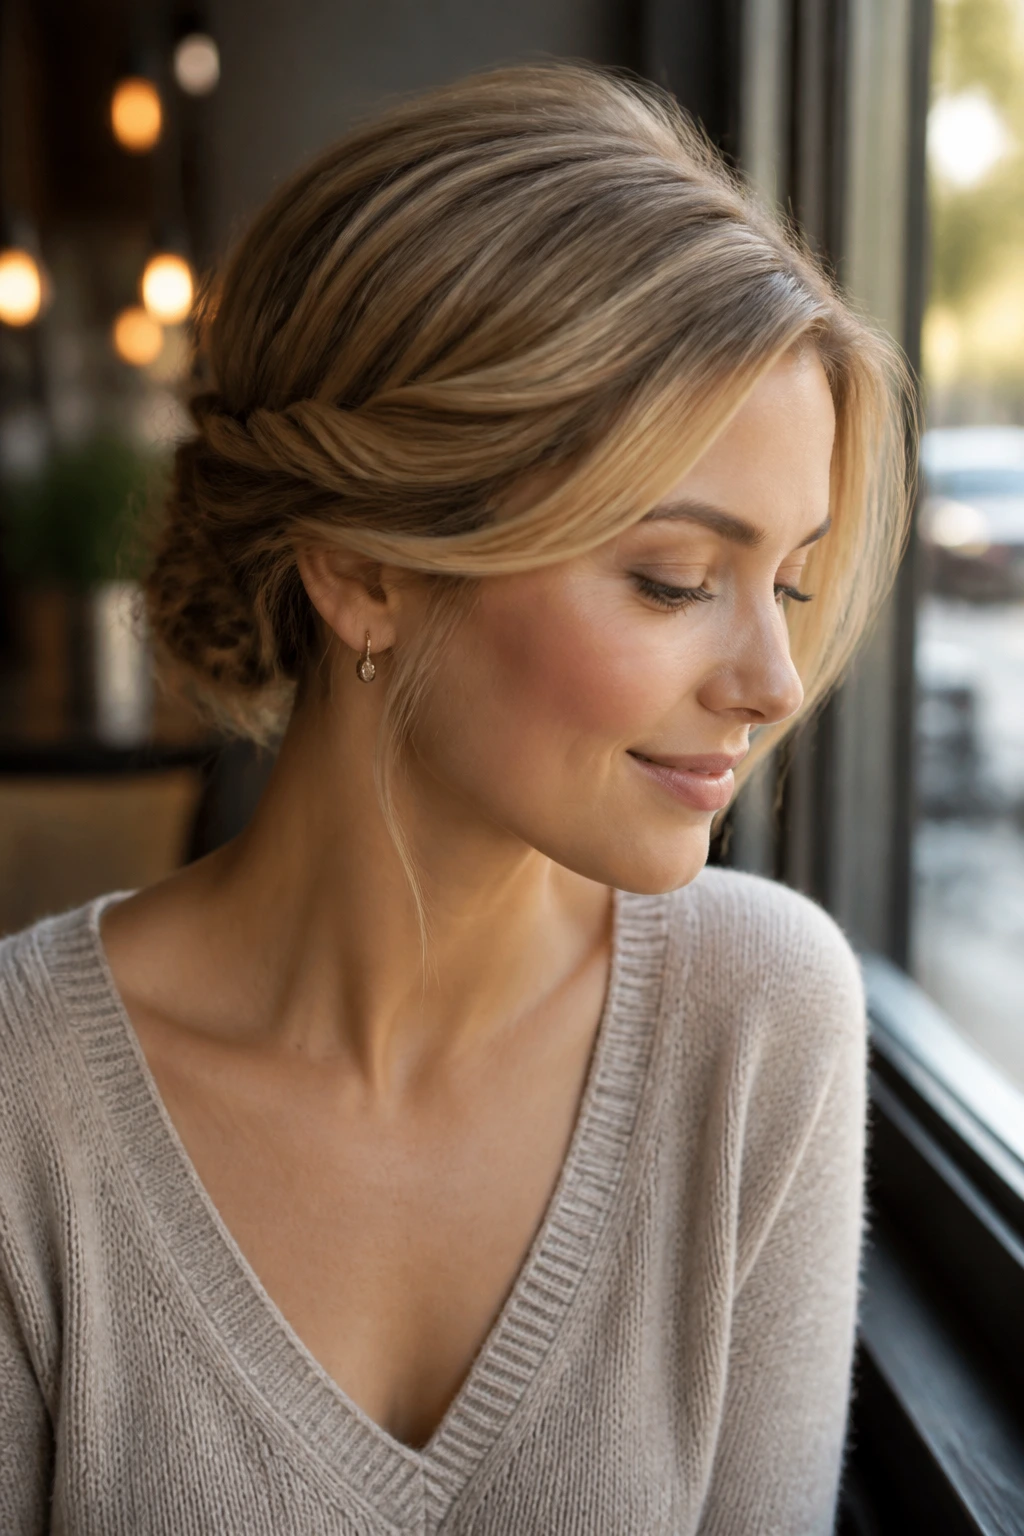
A side-swept twist is what I’d call a quiet style. Nothing shouts. It just works. You sweep the hair to one side, twist it back in sections, and pin the ends low and slightly off-center.
The asymmetry is the point. Medium-length hair can feel too regular in a straight low bun, but a side twist adds movement and makes the cut look longer. If you’ve got a side part already, even better. Build from it instead of fighting it.
This style is especially kind to face-framing layers. They can stay loose while the main body is pinned back, which gives you shape without trapping every strand.
17. The Flat-Twist Bun
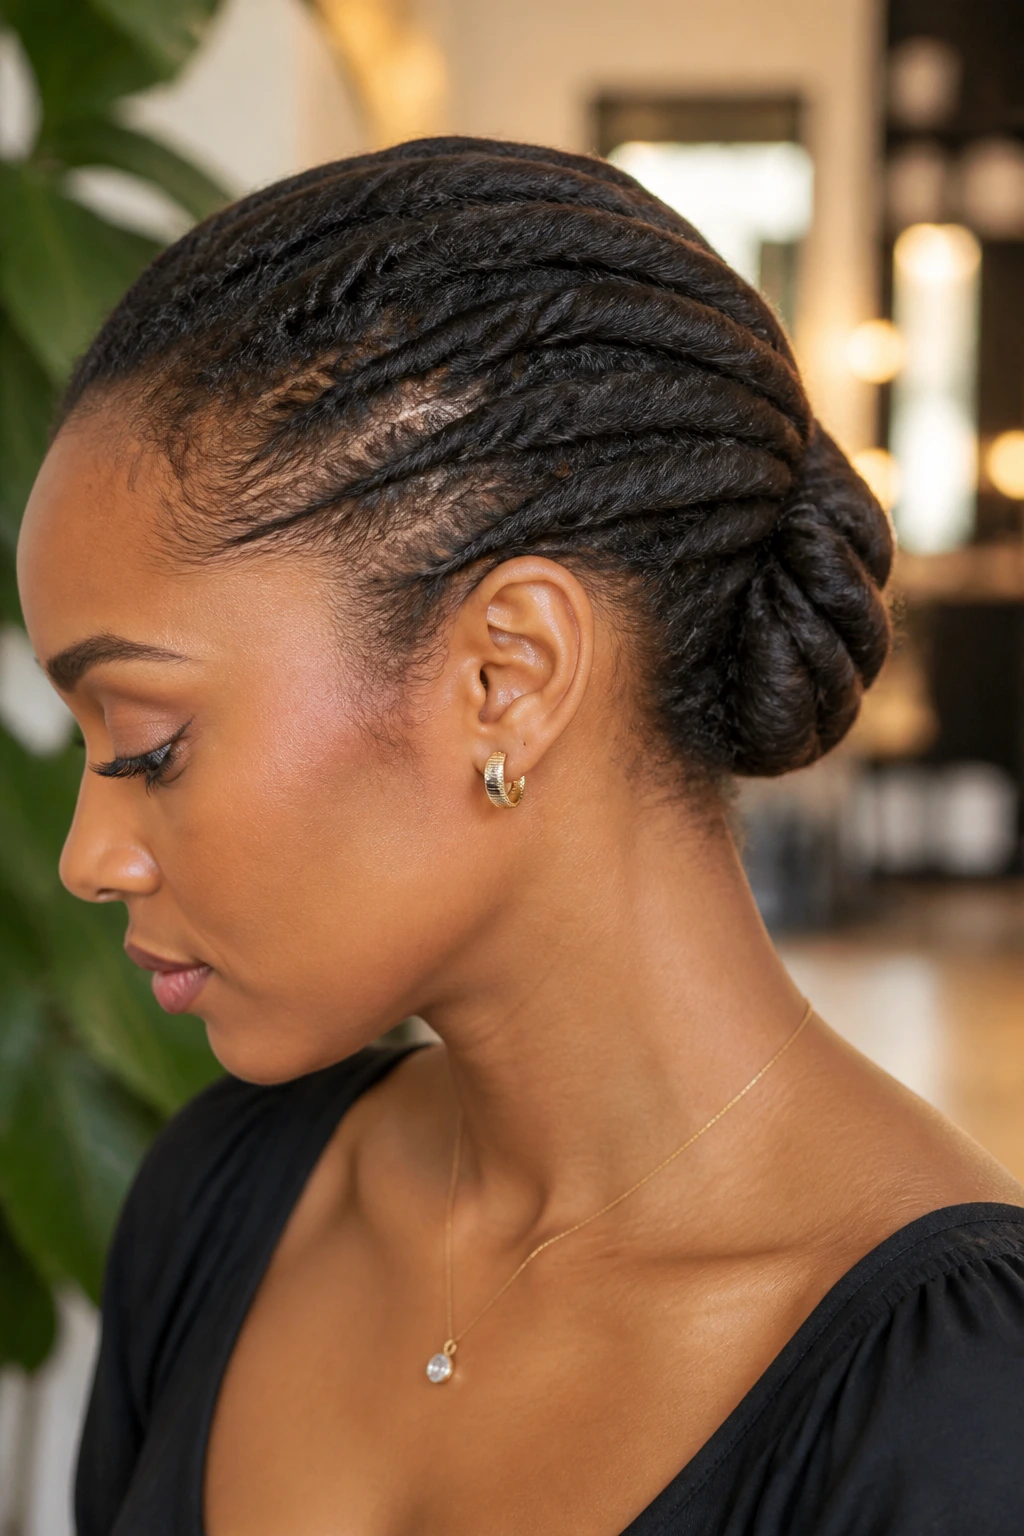
Flat twists are excellent when you want control without braids. They sit close to the scalp, so they keep medium-length hair from puffing up at the crown, then fold into a bun at the nape.
What Makes It Different
Unlike a regular twist, a flat twist takes hair from the surface and rolls it inward as you move back. That keeps the style closer to the head, which is helpful if your hair has a lot of body or if you’re trying to keep it tidy in humidity.
This is one of the better options for textured hair because it respects the natural pattern instead of trying to iron it away. Add pins only at the ends and where the twist crosses itself. Too many pins can break the line.
18. The Curly Pineapple Updo
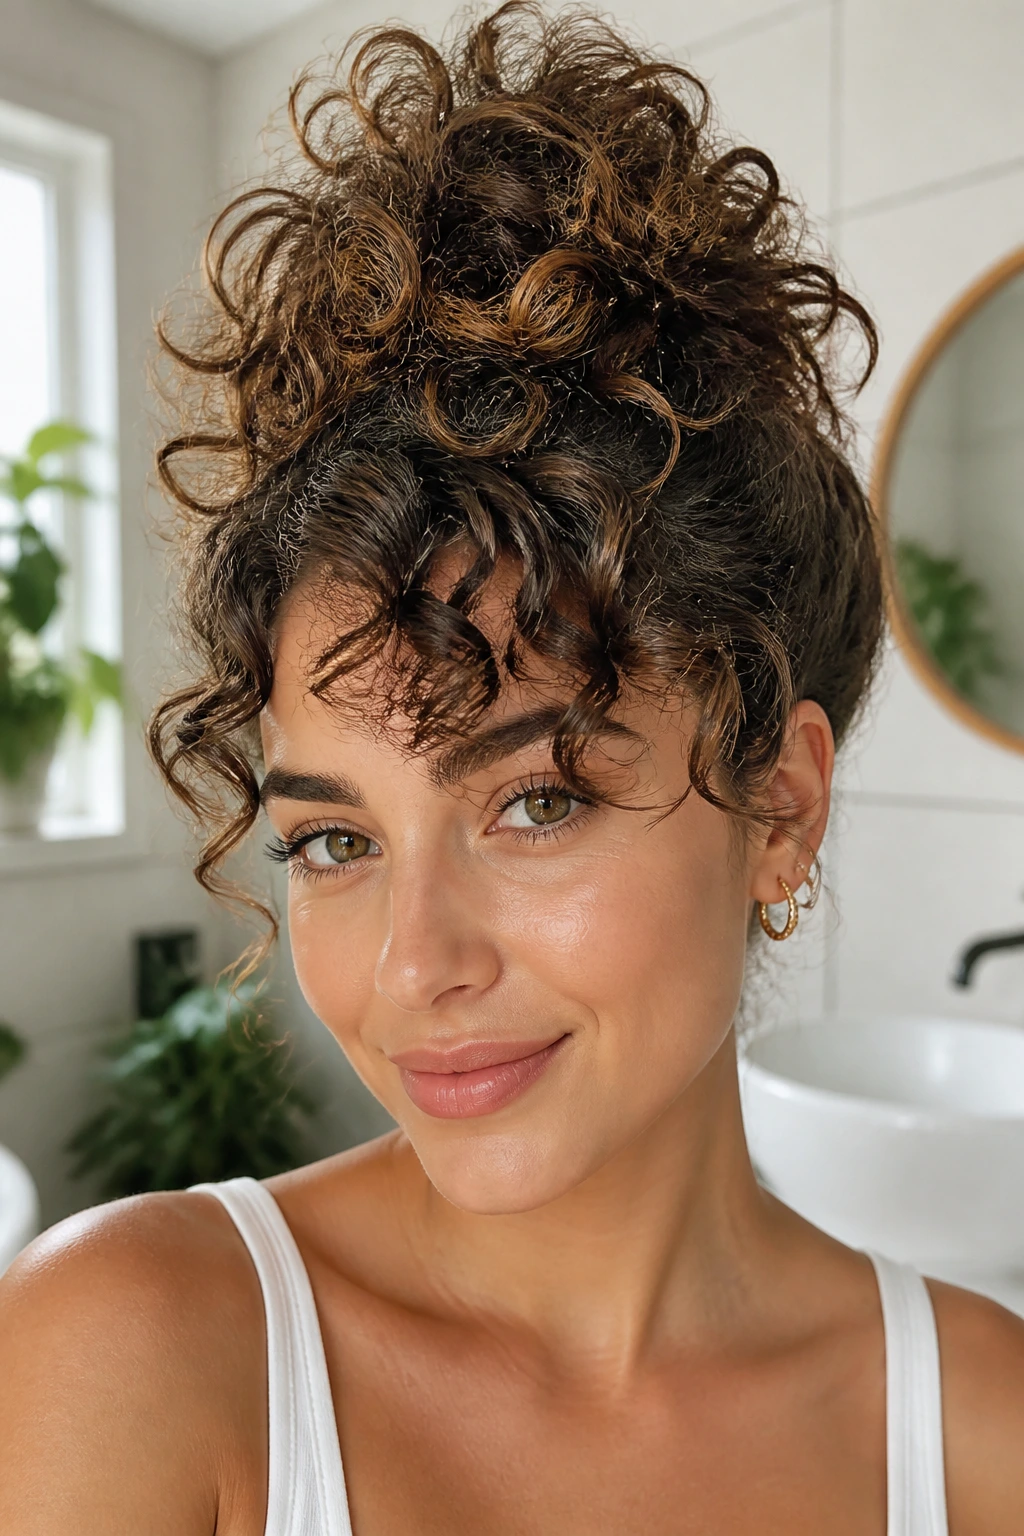
Curly hair on medium-length cuts deserves its own category, and the pineapple does exactly what it should: it lifts the curls high, keeps the ends safe, and leaves the crown with a soft shape.
Gather the curls loosely at the top of the head and secure them with a soft elastic or scarf, then let the curls spill forward and outward. The height keeps the style light. The softness keeps it from crushing the curl pattern.
This looks best when you don’t over-comb the curls first. Let them be curls. Refresh the ends with a little water and leave-in, then finger-shape them rather than brushing. That keeps the style from turning into a frizzy mound.
19. The Faux Hawk Twist
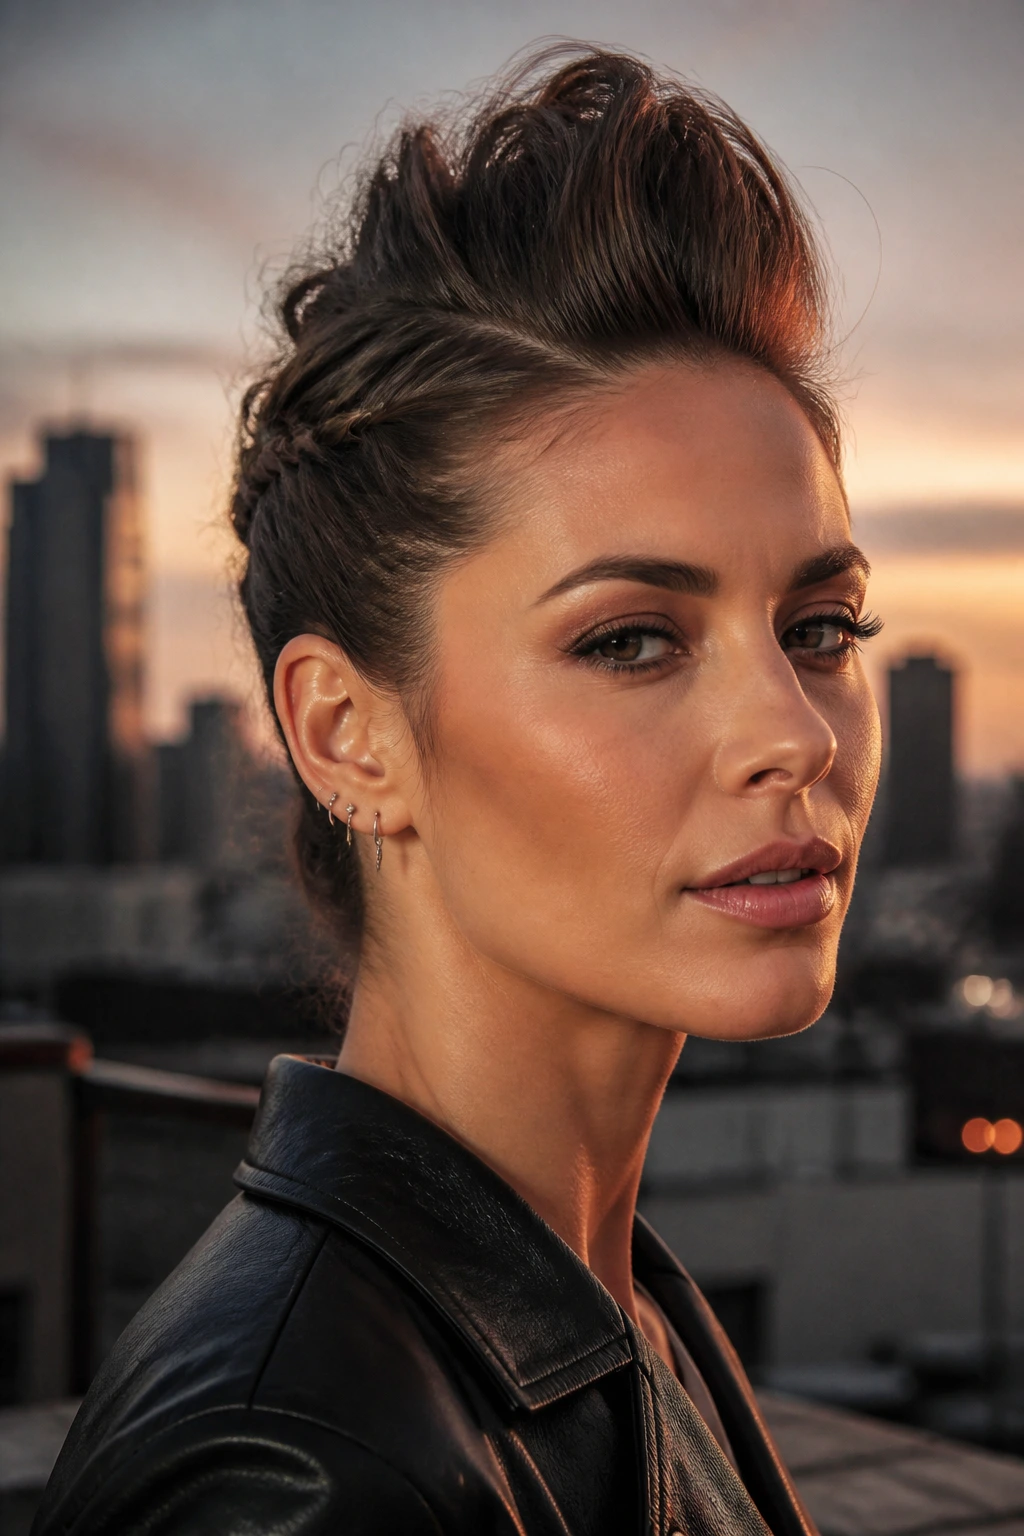
If you want a little edge, this is the one. The faux hawk twist pulls the sides back tightly, stacks volume along the center strip, and leaves the silhouette tall without needing a mohawk haircut.
Medium-length hair is useful here because the sections are manageable. You can twist or pin each side into the center, then loosen the top just enough to create height. The style looks especially good on layered cuts because the layers feed the shape instead of fighting it.
I like this for nights out or anything where you want a stronger profile. It’s not delicate. It has some attitude.
20. The Roll-and-Tuck Updo
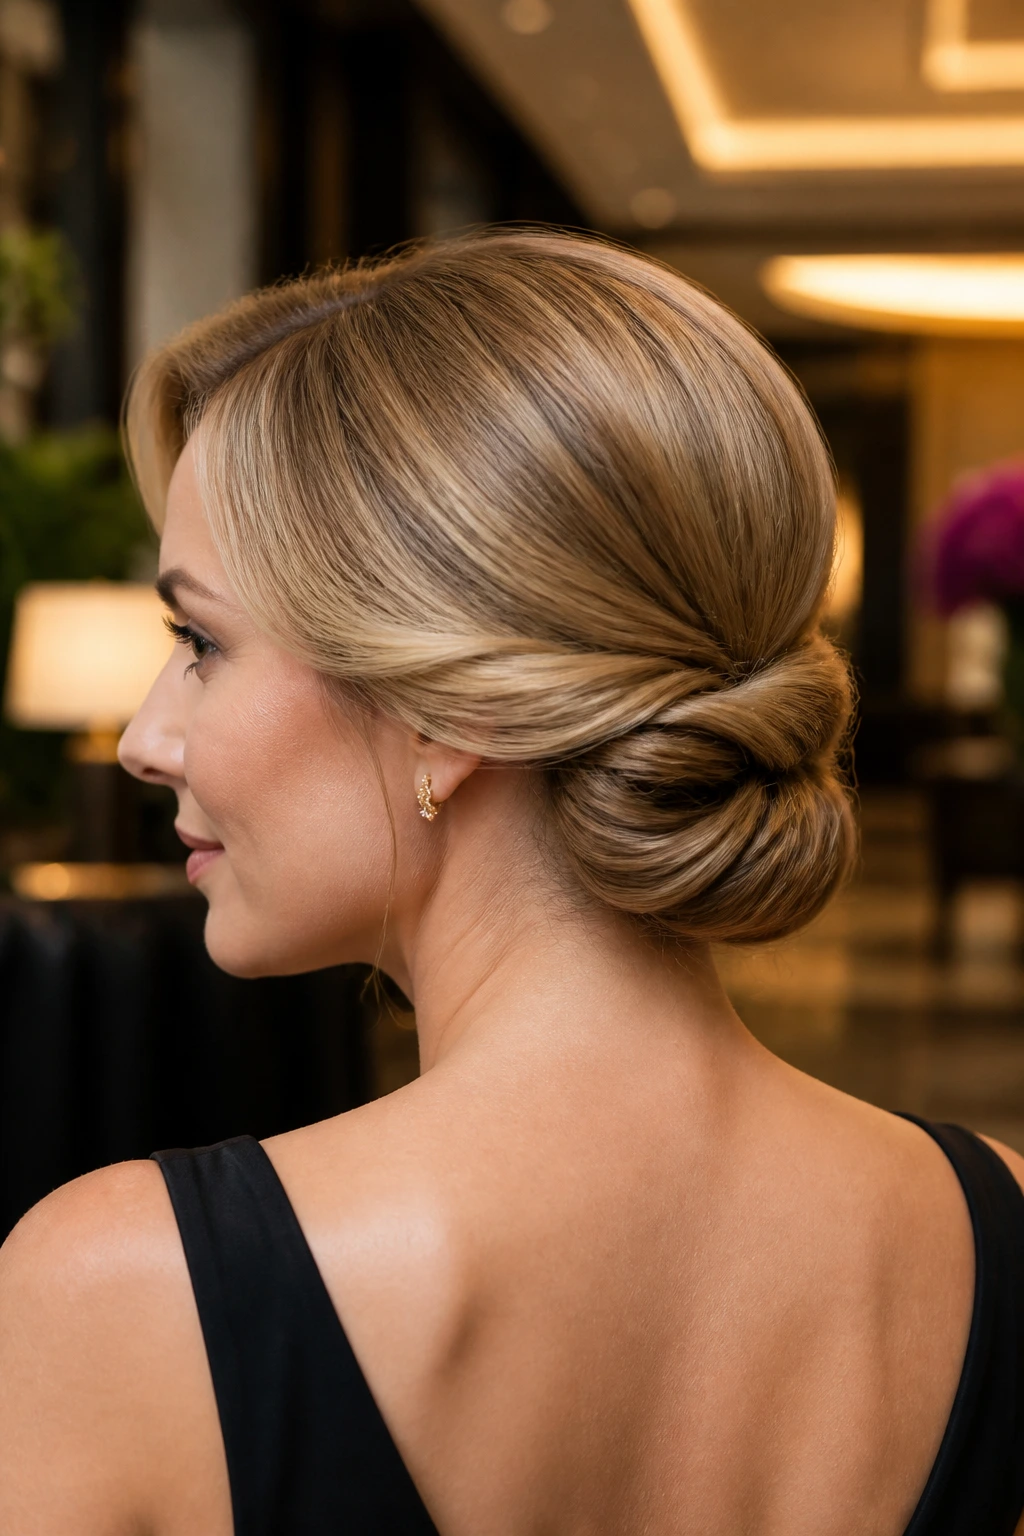
A roll-and-tuck style sounds simple, and it is, but the result can look surprisingly refined. Roll small sections inward from the sides, then tuck the back section under them at the nape.
How to Get the Shape
- Work in 2-inch sections for better control
- Pin each roll as soon as it lands
- Keep the tuck low if your hair is thick
The beauty of this style is that medium-length hair can usually be fully hidden in the tuck without needing extra padding. It’s one of the easiest ways to make a medium cut look neat for a formal event.
21. The Braided Low Bun
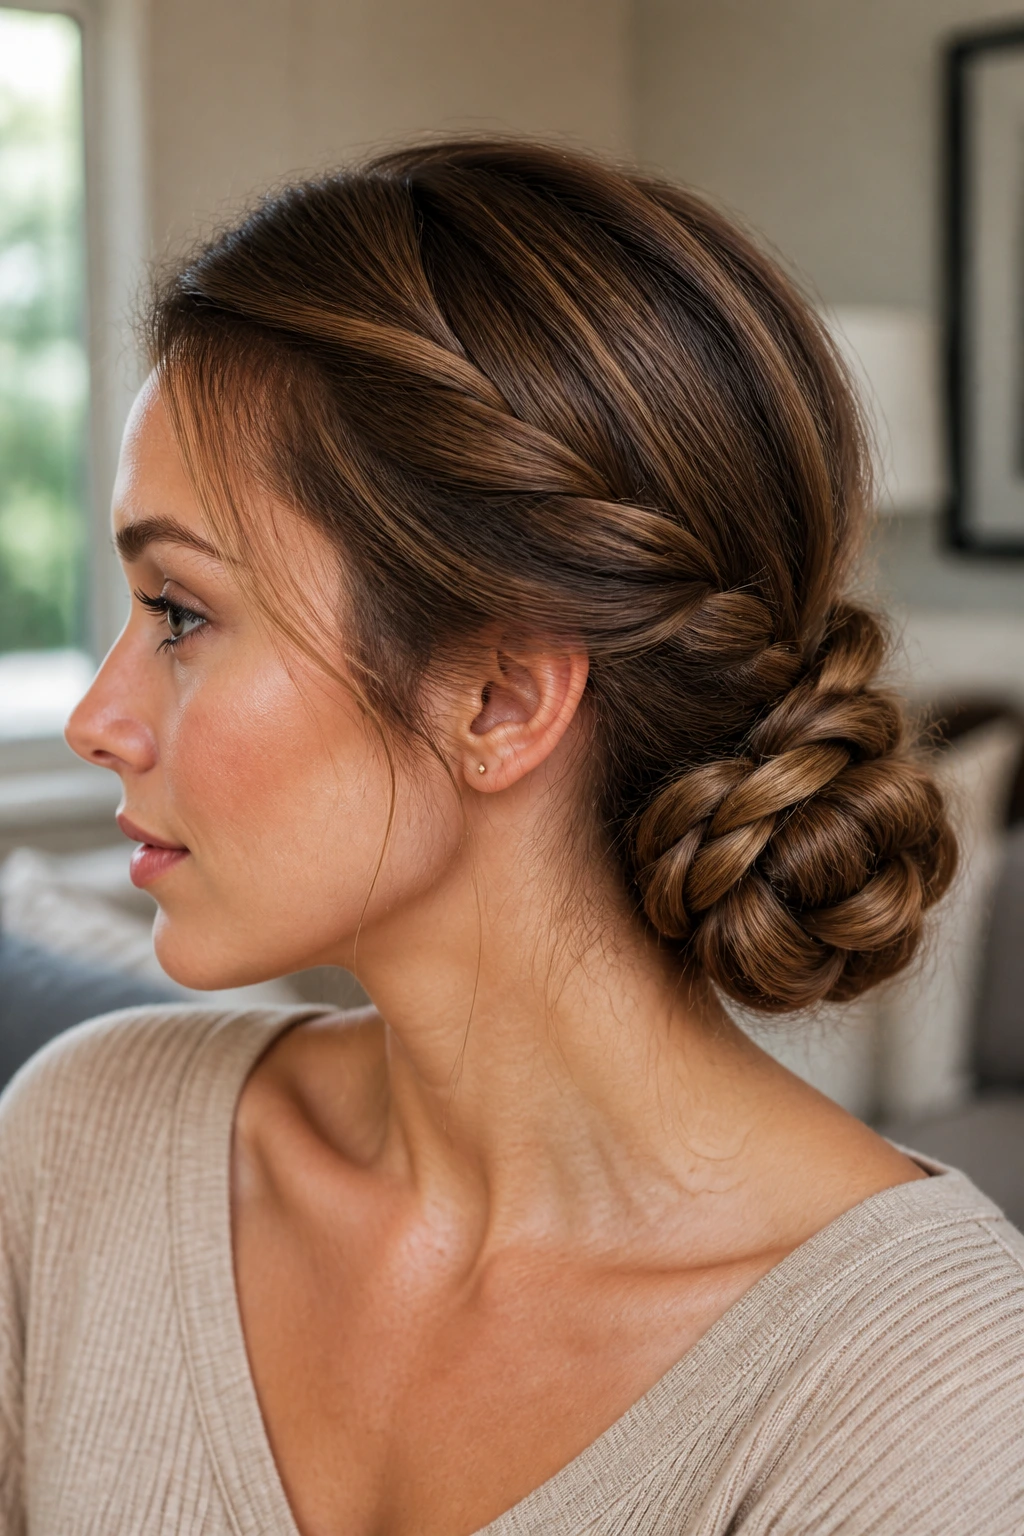
A braided low bun gives you texture without making the hair feel busy. Braid the ponytail first, then coil the braid into a bun and pin it from the outside in.
That braided surface makes the bun feel richer, especially on medium hair where a plain bun can sometimes look too small. If your hair is fine, lightly tug the braid edges before you wrap it. If it’s thick, keep the braid tighter and let the bun sit flatter.
This is one of the most reliable styles in humid weather because the braid gives the hair a locked-in texture that resists puffing.
22. The Scarf-Woven Updo
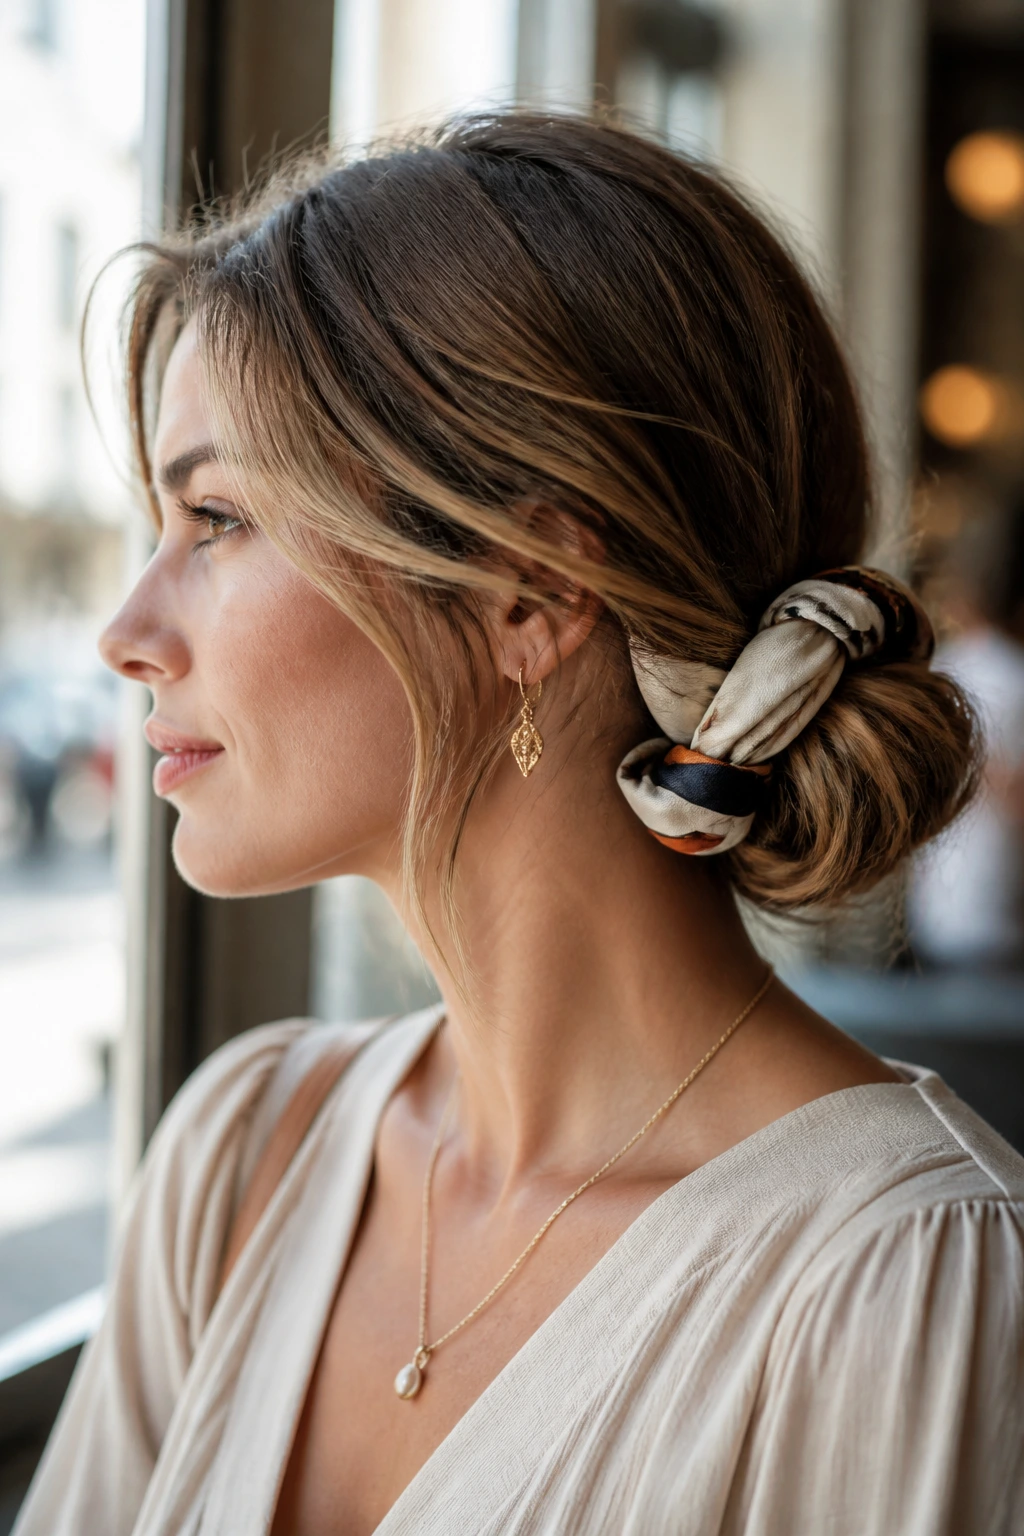
A scarf changes the whole style. Tie a slim scarf into a low bun, weave it through a braid, or wrap it around a pony base, and suddenly medium-length hair has extra shape without extra heat.
Choose a scarf that isn’t too silky. A little texture helps it stay in place. I prefer a narrow scarf for medium hair because a wide one can overpower the cut and make the style feel bulky at the nape.
This is a smart way to make second- or third-day hair look intentional. The scarf gives the eye something to read, even if the hair itself is a little fuzzy.
23. The Voluminous Half-Up Crown
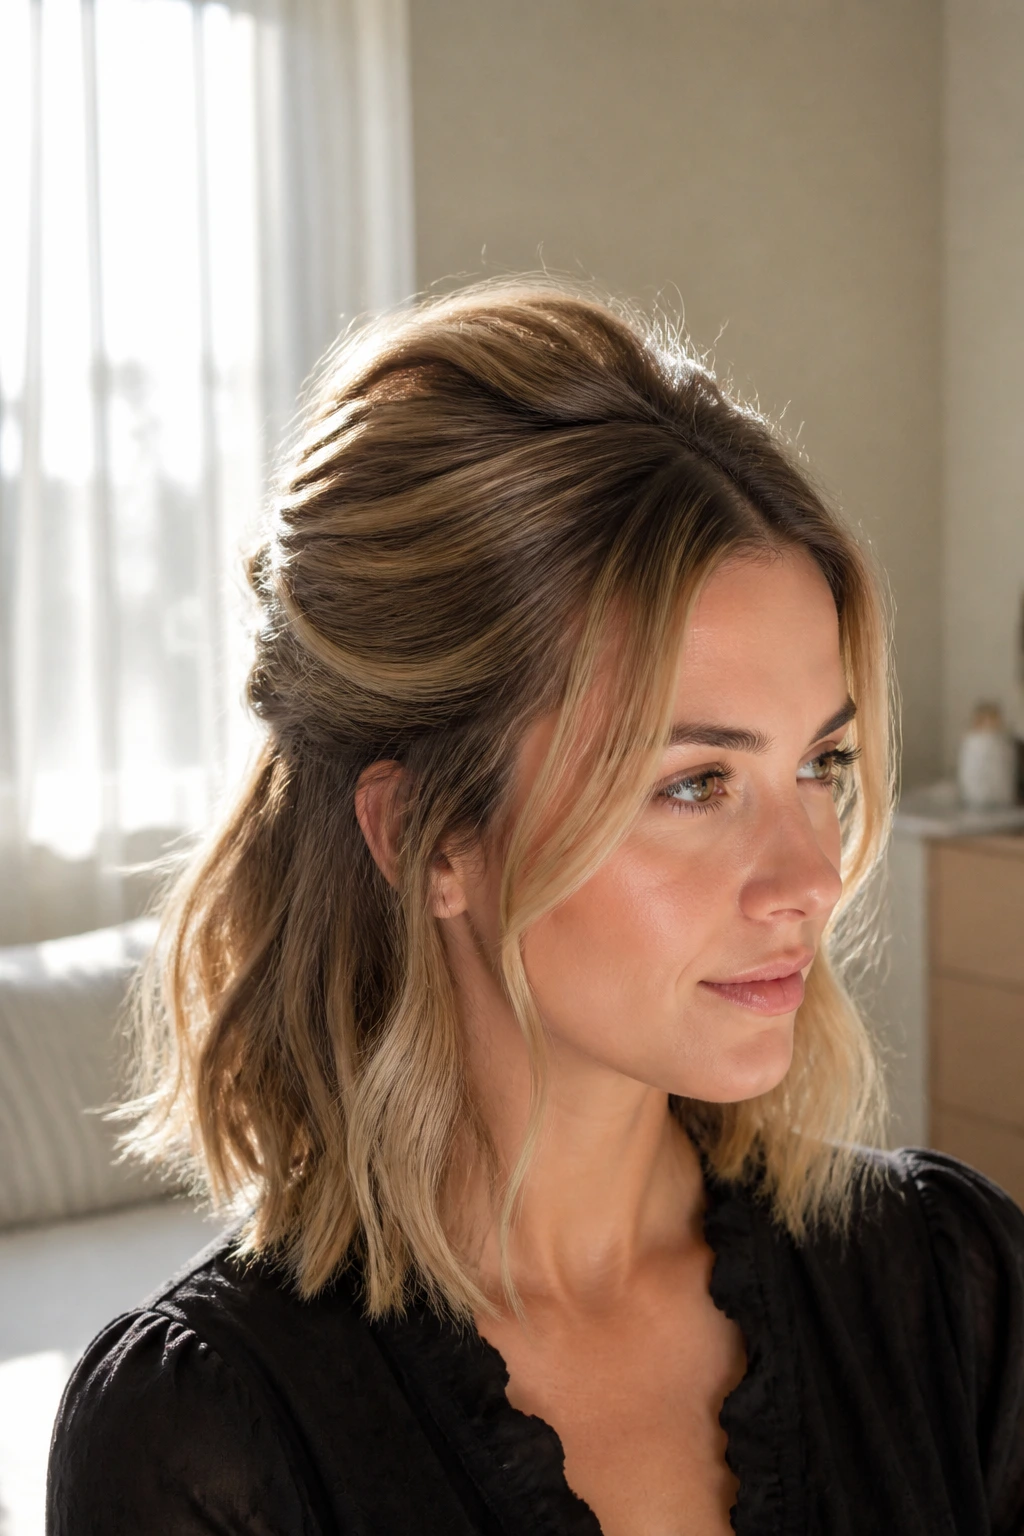
A half-up crown with crown-height volume is a good answer when you want lift at the top but don’t want all your hair pinned. Tease the crown lightly, smooth the outer layer, and pin the top sections back so they form a soft halo.
It works especially well on medium-length hair because the loose bottom layer keeps the look from feeling too high or stiff. That balance matters. Too much teasing, and the style goes straight from elegant to 1990s prom hair. A little goes a long way.
Use this when your hair has a blunt or rounded cut and needs a bit more shape around the face.
24. The Twisted Crown Low Knot
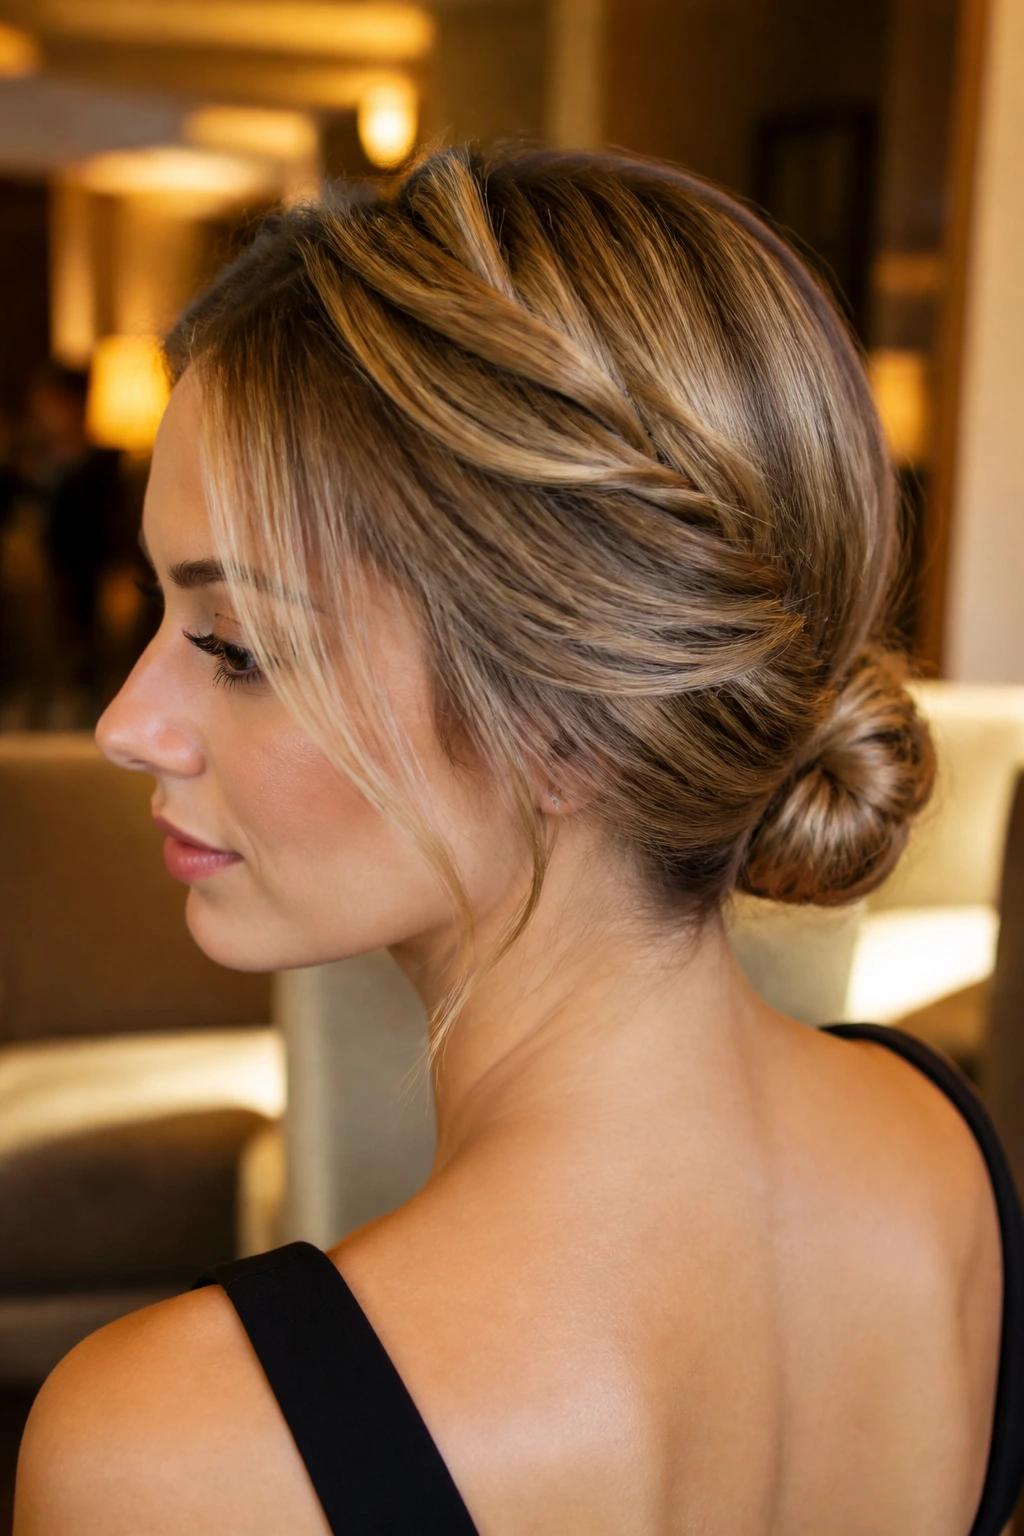
This style starts like a crown and ends like a knot. Twist the front sections back toward the crown, cross them at the back, and gather the rest into a low knot or compact bun.
Why It Fits Medium Hair
Medium-length hair gives you enough material to make the crown twist visible, but not so much that the knot grows unwieldy. That makes the shape cleaner and easier to pin. If you have layers around the temples, leave them soft. They frame the twist and make it look less severe.
The finish should look tucked and controlled, not stiff. A little movement around the face helps.
25. The Wet-Look Sleek Knot
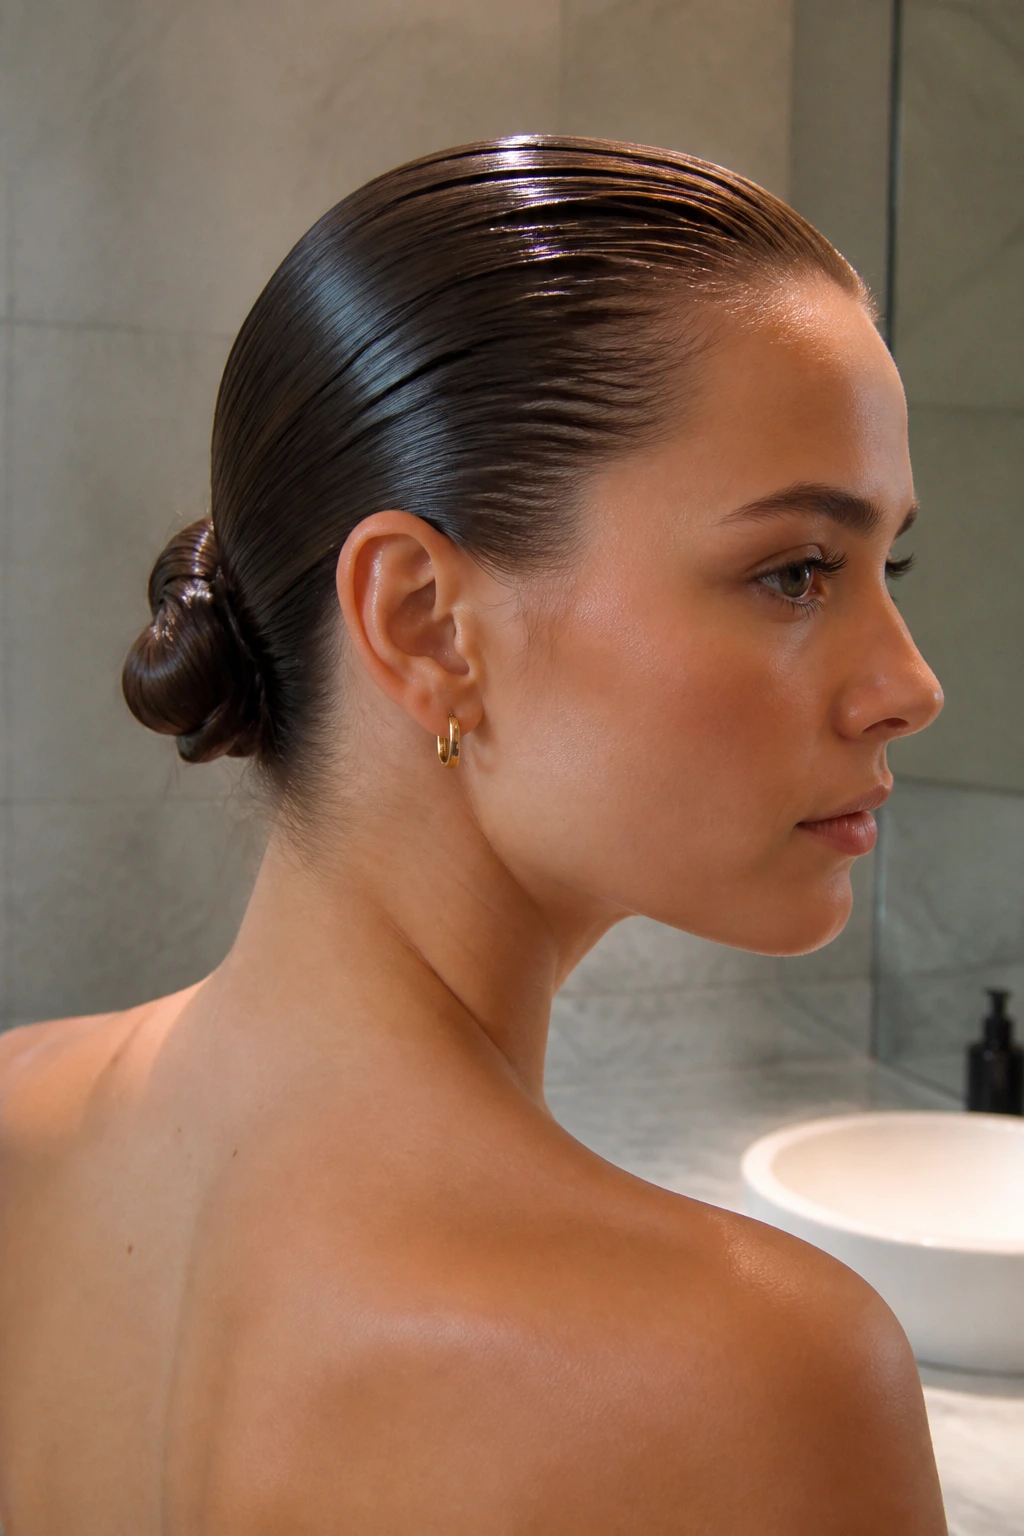
The wet look can be a bad idea if the product is too heavy, but when it’s done carefully, medium-length hair handles it beautifully. Comb gel or cream through damp hair, smooth it back, and twist it into a low knot.
The knot itself should stay tight and compact. That’s the point. The shine at the top contrasts with the matte texture of the bun, and medium hair is long enough to create that contrast without needing a ton of product.
Use a light hand with gel. Too much and the style looks greasy instead of glossy. Keep the knot simple so the finish carries the look.
26. The Soft Side Bun with Tendrils
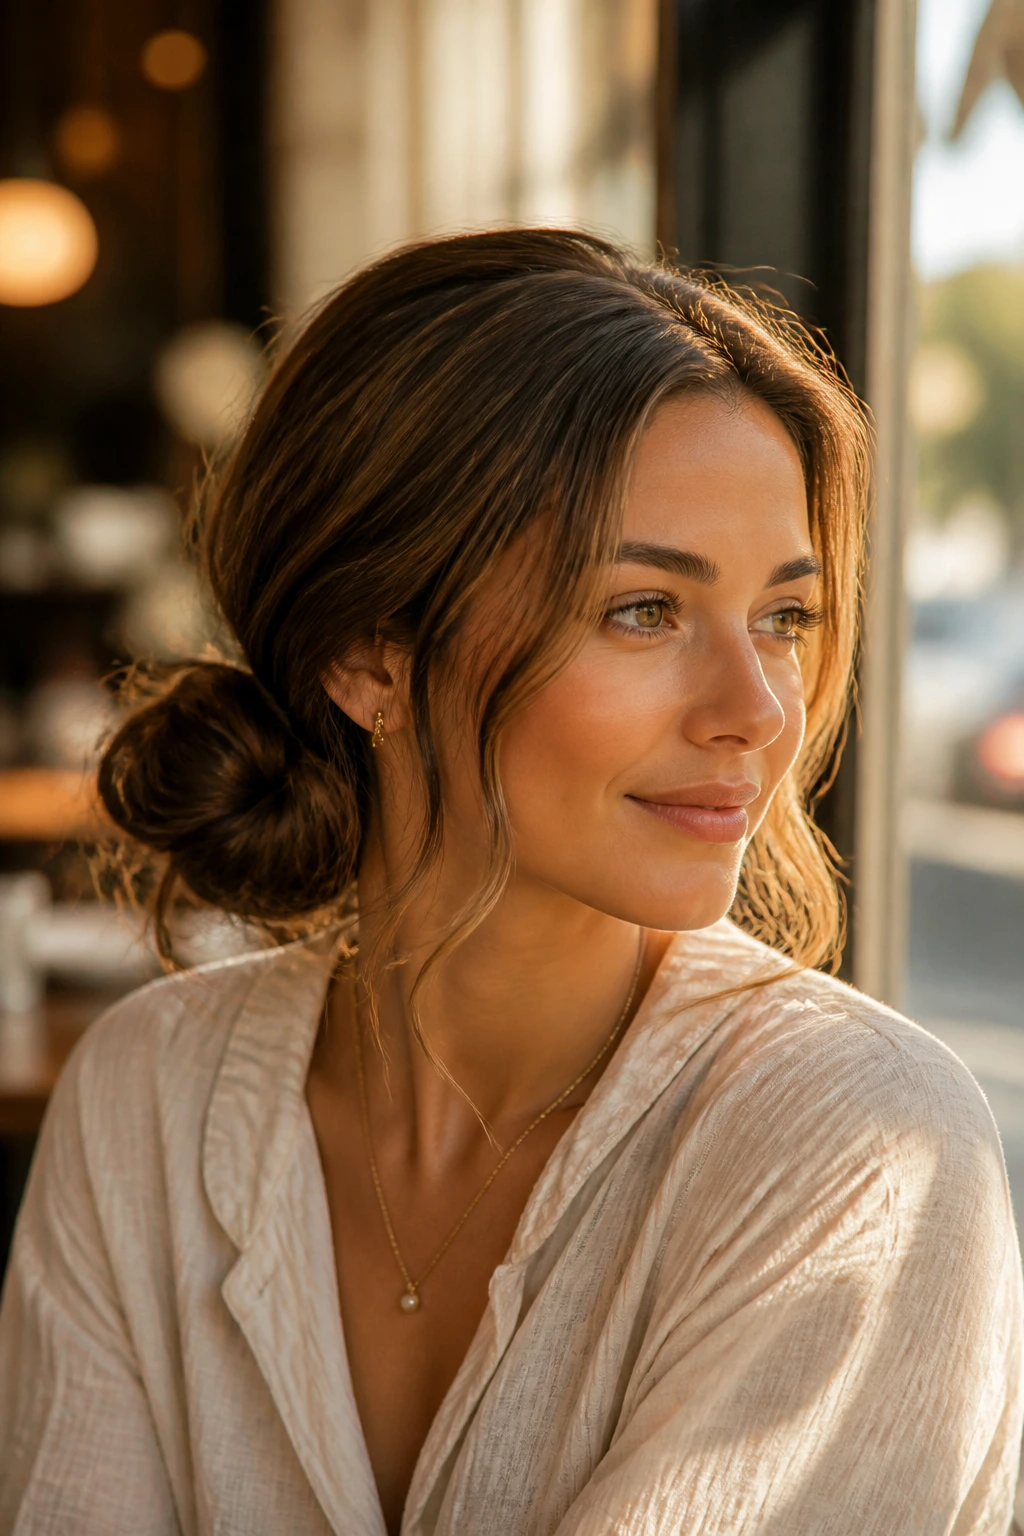
A side bun looks lovely on medium hair because the length is often just right for a soft coil at one side of the nape. Leave a few tendrils loose around the face, especially if your cut has layers or curtain bangs.
This style has a more relaxed feel than the centered low bun. It suits dinner plans, casual weddings, and any moment where you want the hair up but not locked down. The tendrils should be intentional, though. Pull them out after the bun is pinned, not before, so you don’t end up with pieces hanging at random.
A touch of shine spray on the bun itself keeps the style looking finished.
27. The Pinned Roll-Up
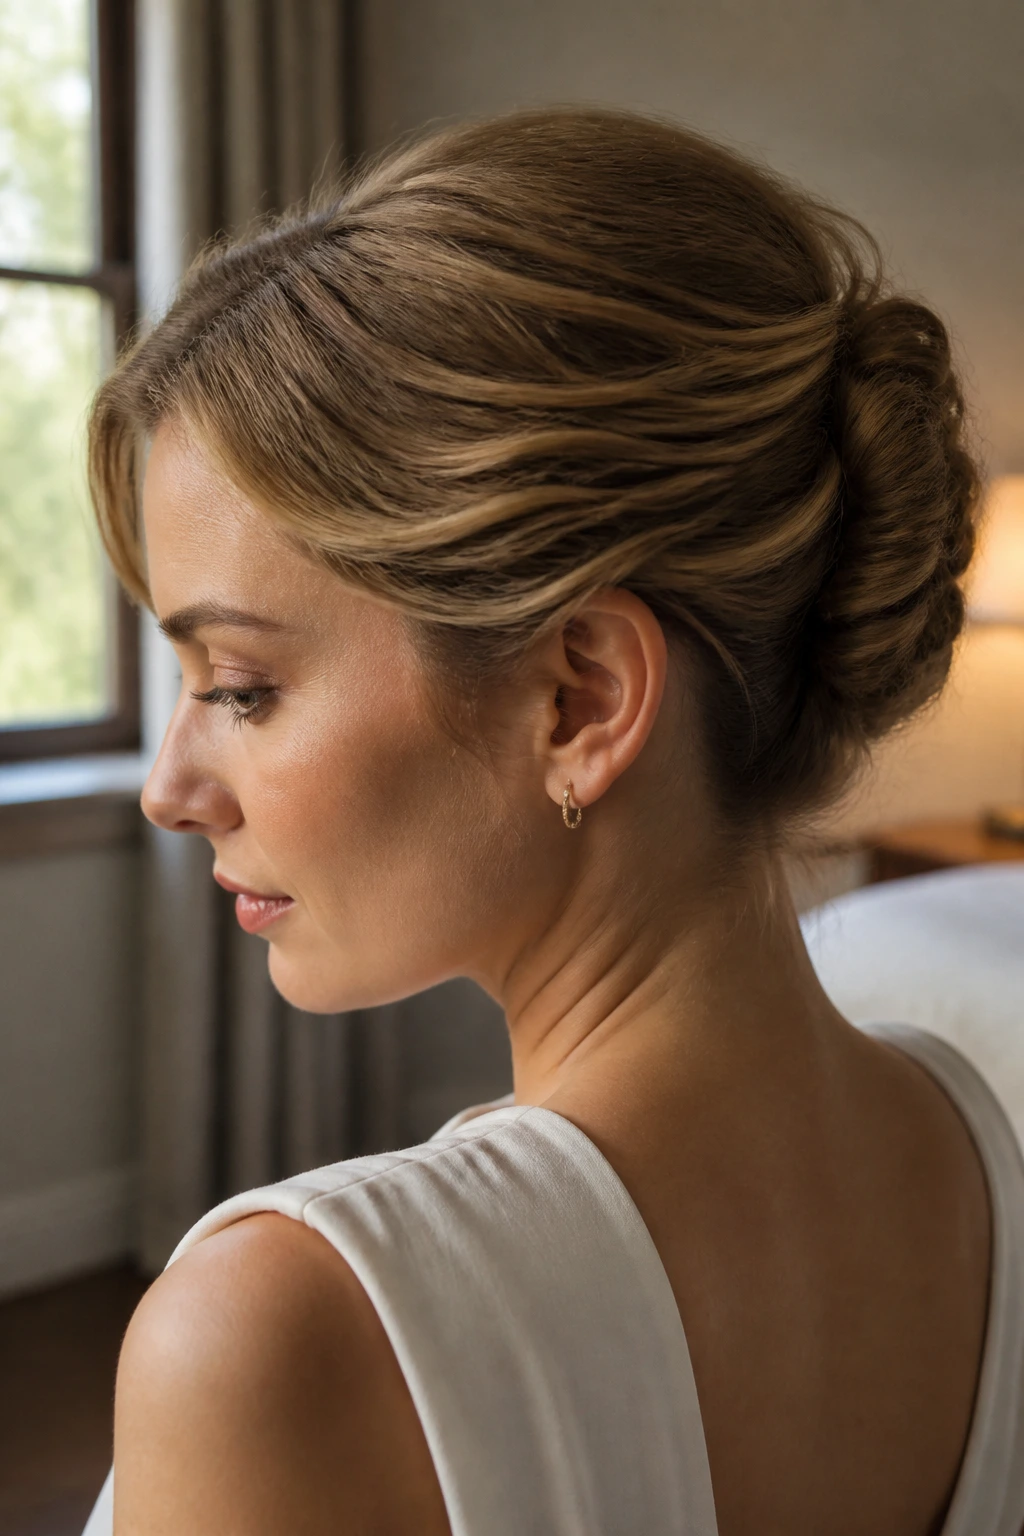
This is the sleeper hit of the whole list. Roll the hair upward from the ends, fold the roll against the back of the head, and pin it in place with hidden bobby pins or U-pins. Medium-length hair is often the ideal length for it because there’s enough hair to roll, but not so much that the shape sags.
Why I’d Choose It
It looks more complicated than it is. That’s useful if you want a style that reads polished without taking forever to build. If your hair is layered, curl the very ends first and they’ll disappear into the roll instead of sticking out sideways.
It’s a good “last minute but still nice” style. Not flashy. Just clean and steady.
How to Make These Styles Last Without Feeling Helmet-Hard
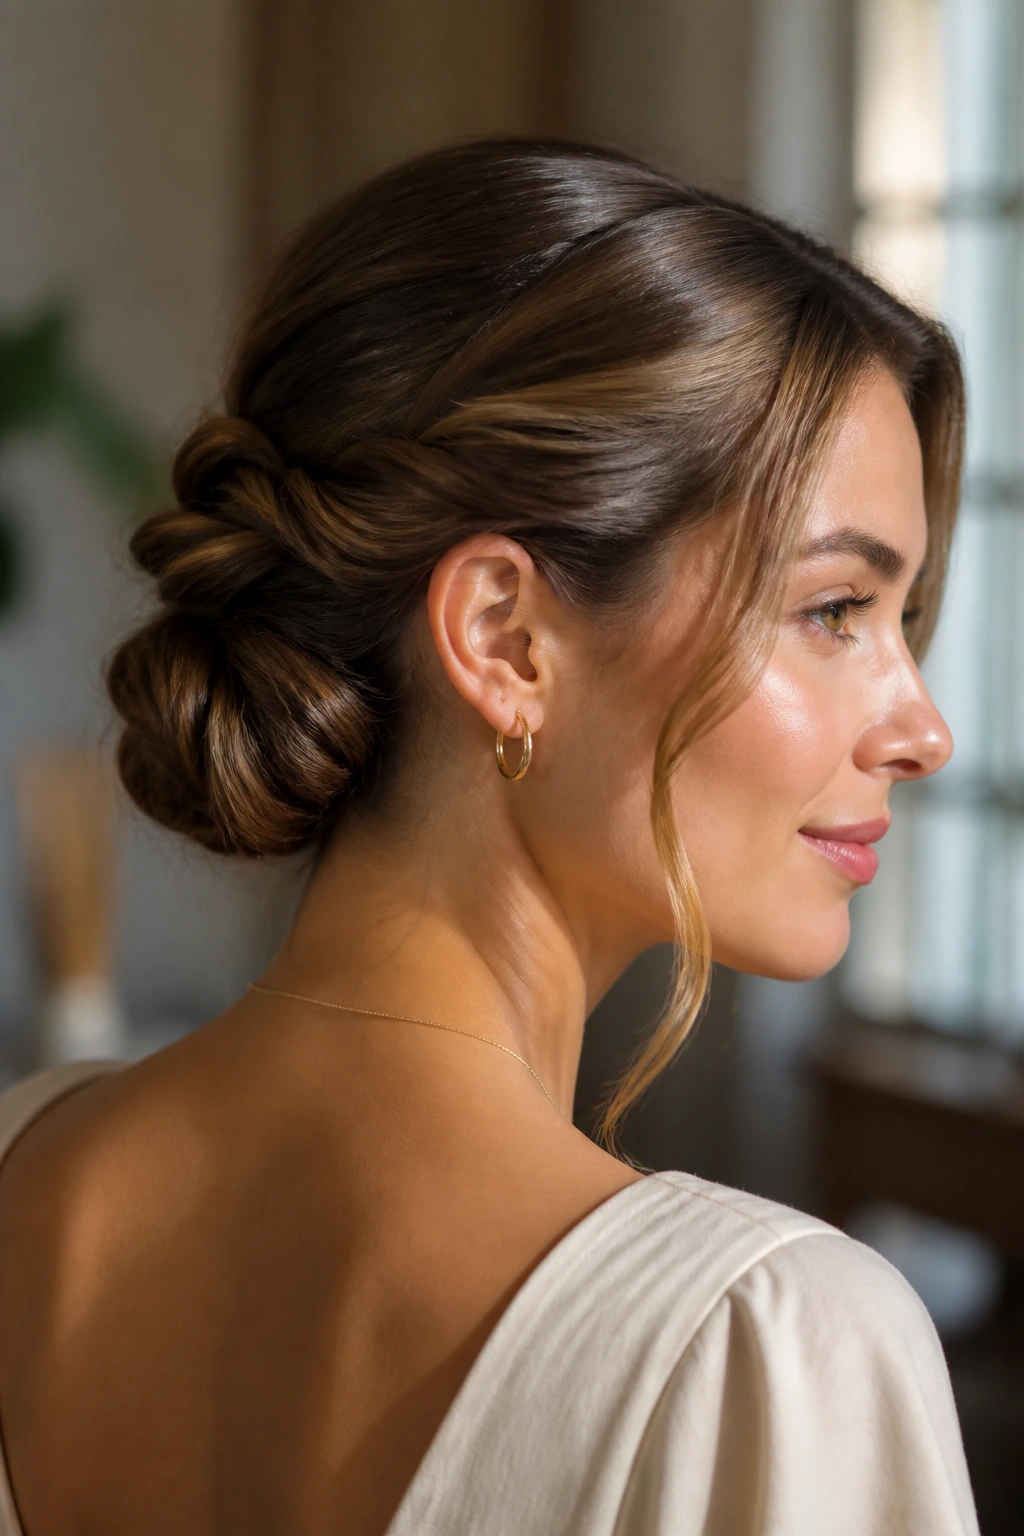
The best way to keep an updo in place is not to drown it in spray. It’s to build a base that has enough grip before you pin anything. A little dry shampoo at the roots, a little texture spray through the mid-lengths, and only then the twist, braid, or bun. That order matters more than people think.
Use pins in pairs when possible. Cross two bobby pins in an X shape at the point where the hair wants to open. One pin can slip; two pins fight for the same spot and hold better. If your hair is thick, pin the underside first and the surface last. If it’s fine, tease a small cushion at the crown before you gather the hair so the style doesn’t sink flat by afternoon.
Weather changes the whole game. In humidity, choose tighter shapes like wrapped knots, flat twists, and braided buns. On dry days, softer styles with loose tendrils or crown volume behave better because the hair doesn’t puff as much. And if you know you’ll be wearing the style for 8 hours or more, keep two spare pins in your bag. That tiny habit saves you from the mid-day collapse.
Common Mistakes to Avoid
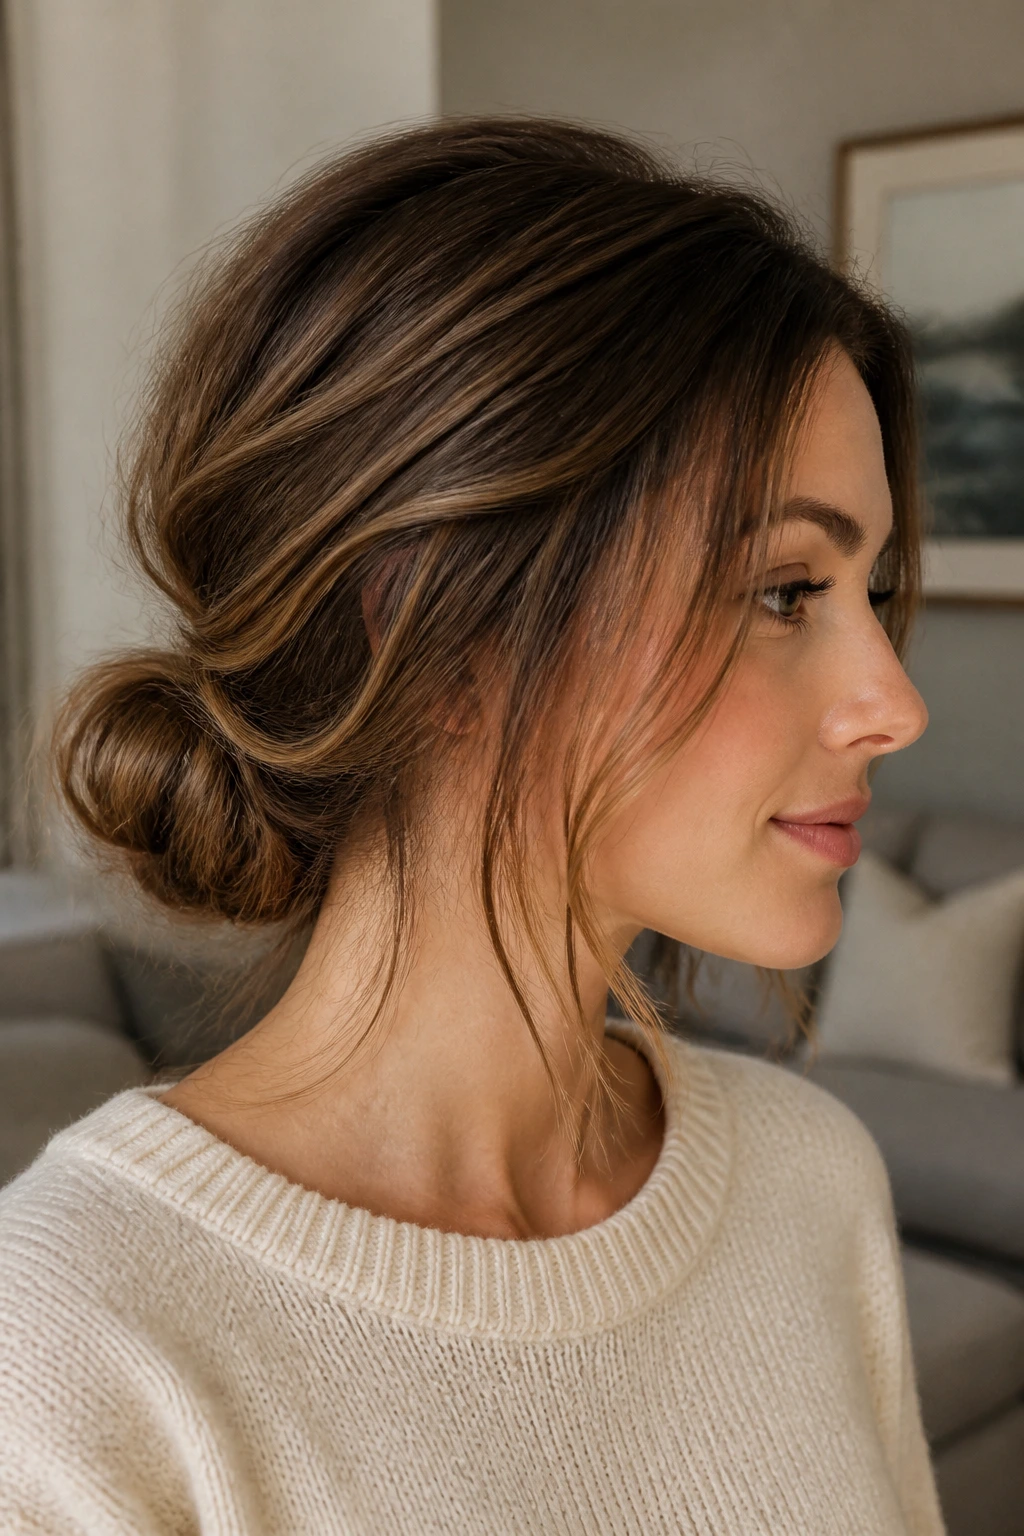
The first mistake is starting with hair that’s too clean and too slippery. Freshly washed hair can slide out of pins like it has someplace else to be. If that’s your situation, add texture spray or dry shampoo first, then work in sections.
The second mistake is making the bun or knot too large for the hair length. Medium-length hair can build shape, but it cannot always support a giant topknot without sagging. If the style feels heavy while you’re still pinning it, it will probably look tired an hour later. Shrink the shape and secure it closer to the head.
The third mistake is using one pin in the wrong place and hoping for the best. That rarely works. Pin where the hair crosses, pin from underneath, and think in layers. One visible pin at the edge is not the same as real support.
The fourth mistake is ignoring the haircut. Layers, blunt ends, bangs, and face-framing pieces all change how an updo sits. A style that looks sleek on one cut can look frayed on another. Build around the cut you actually have, not the one you wish you had.
Variations and Adaptations to Try
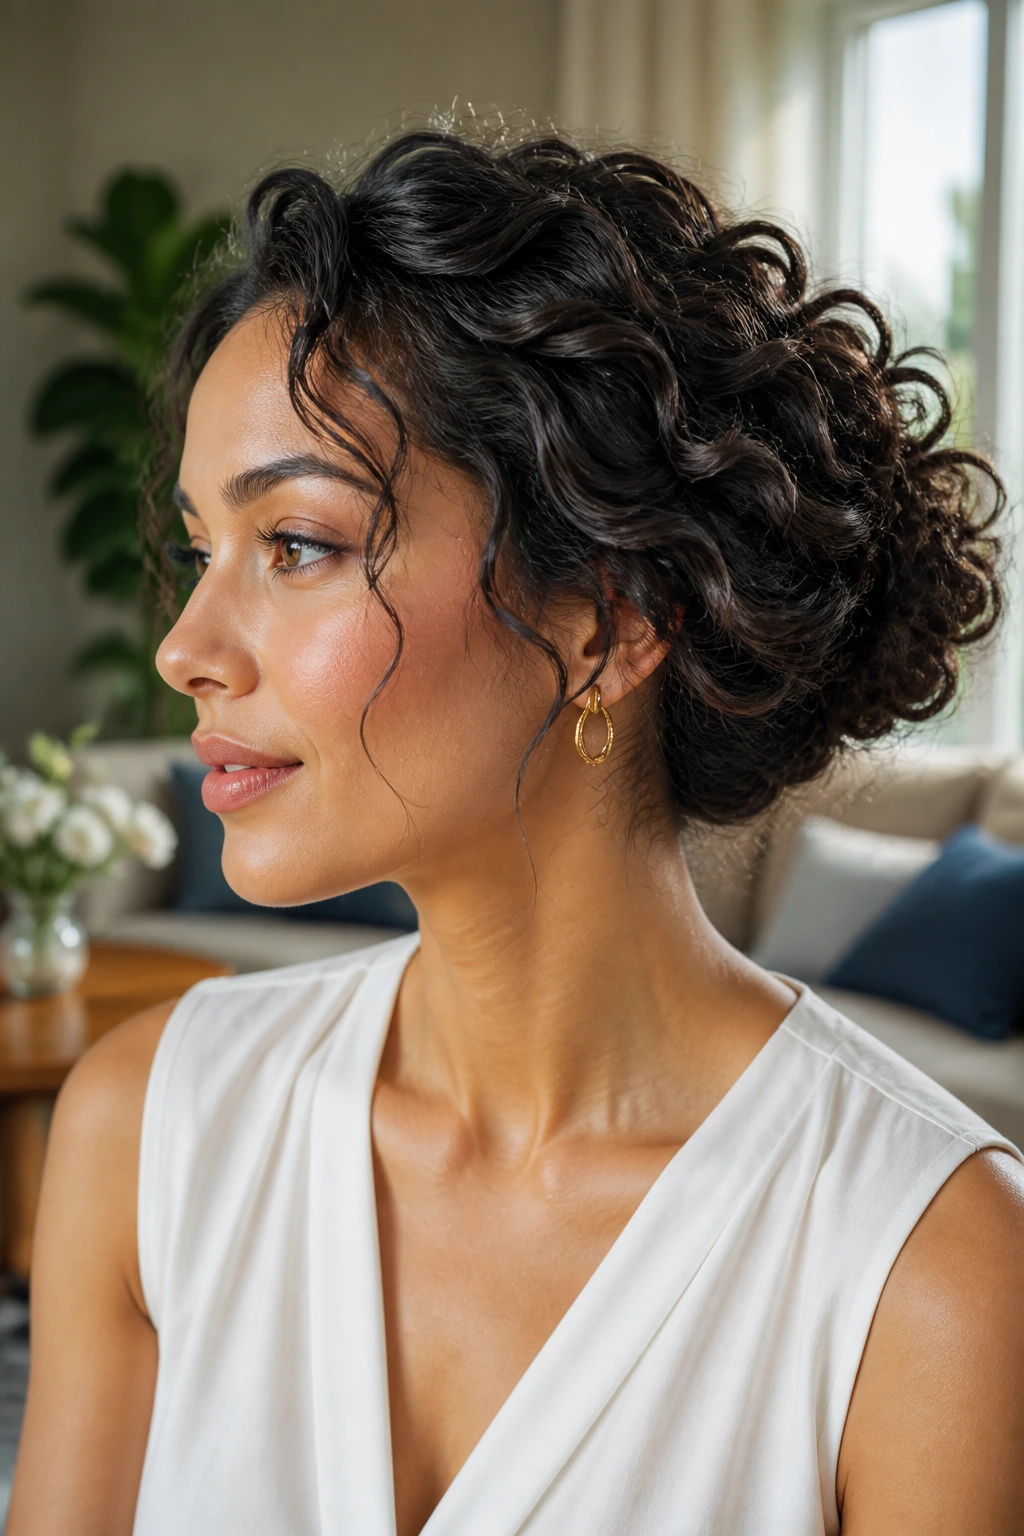
Fine-Hair Lift Version: Add a light mousse at the roots and set the crown with dry shampoo before you pin anything. This makes low buns, French twists, and tucked ponytails hold shape longer without needing a ton of product.
Curly-Texture Version: Skip the comb-out and work with the natural bend. Twists, pineapples, and side buns look better when curls stay soft and defined instead of brushed into puffiness.
Formal-Event Version: Swap matte pins for pearl, gold, or crystal accents. The style stays the same, but the finish feels more dressed up without changing the structure.
Heat-Free Version: Use overnight braids, air-dried waves, or a little texture spray instead of curling irons. Medium-length hair often has enough natural bend to support the style once it’s been rough-dried properly.
Short-Layer Rescue Version: If the front pieces won’t stay put, leave them loose on purpose and treat them like part of the shape. Trying to force every layer into the updo usually makes the whole style look fussier than it needs to.
How to Refresh, Rework, and Sleep on Them
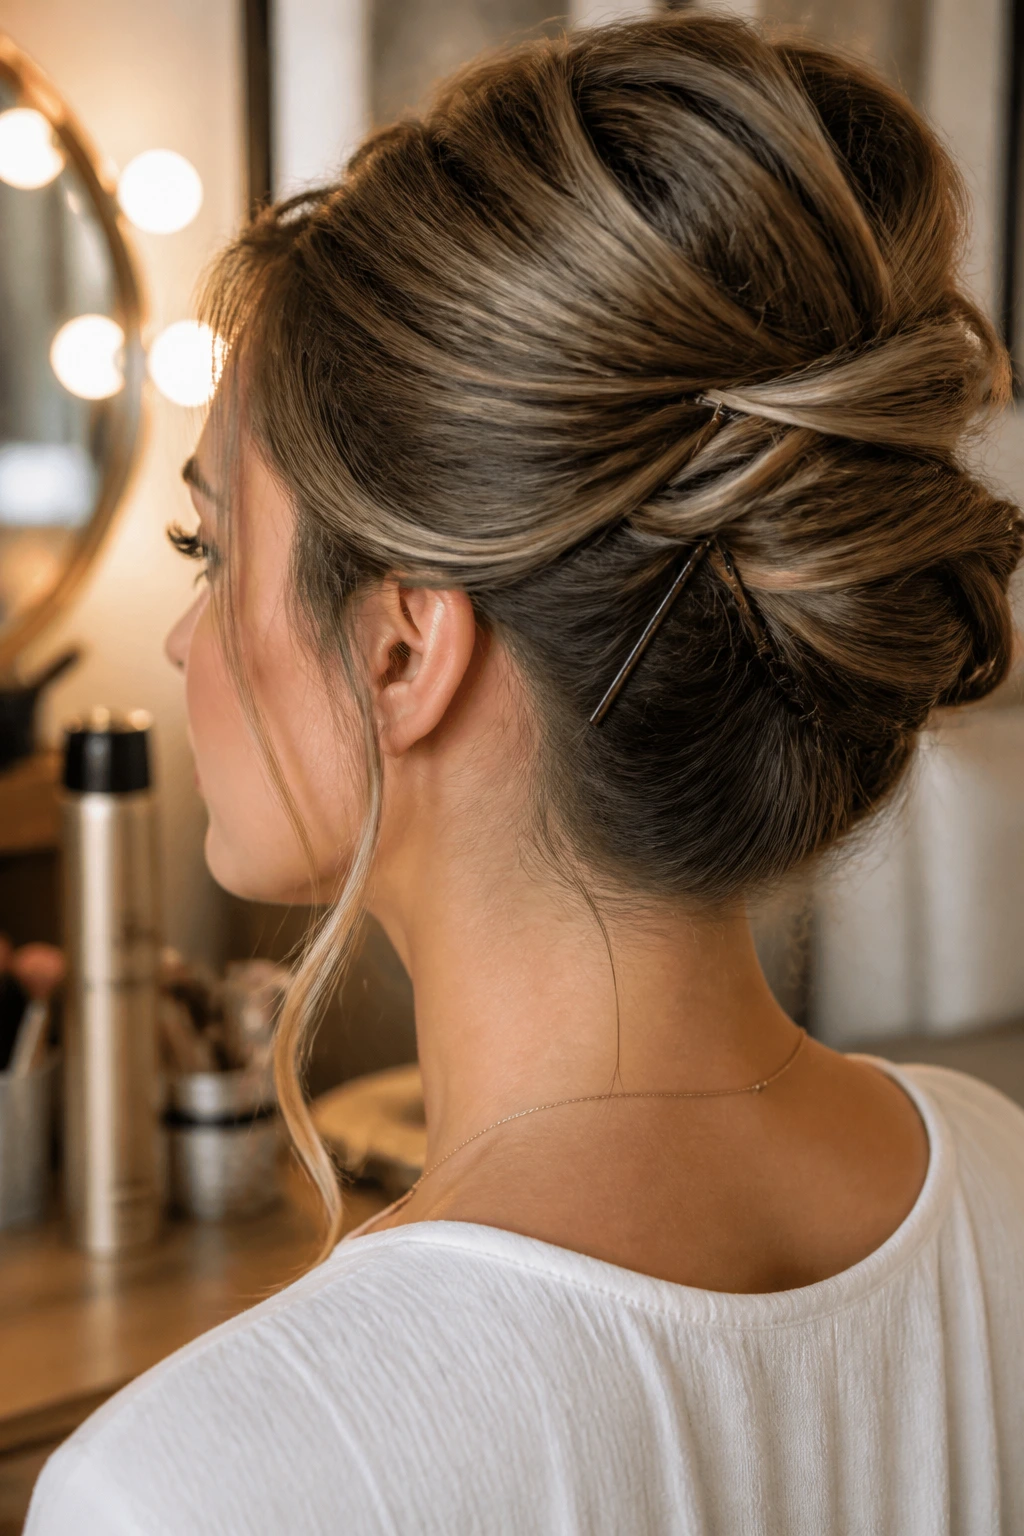
Most of these styles hold best for a full day if you pin them carefully and avoid touching them every ten minutes. If the crown starts to flatten, lift the top layer with your fingers and add one or two hidden pins near the seam. Don’t rebuild the whole style unless it truly fell apart.
For overnight wear, choose the cleaner styles: low buns, tucked knots, and braided rolls. Sleep on a silk pillowcase or wrap the hair loosely with a silk scarf to reduce friction. The next morning, a quick mist of water or leave-in spray can wake up the front pieces, but if the style has gone soft, that’s the moment to rework it into a new shape rather than fight it back into place.
If you need a two-day style, start with a braided base. Braids keep their structure better than loose twists, and medium-length hair usually keeps enough shape in the braid to let you rebundle it the next day. That’s one of the rare cases where a slightly imperfect finish works in your favor.
Frequently Asked Questions
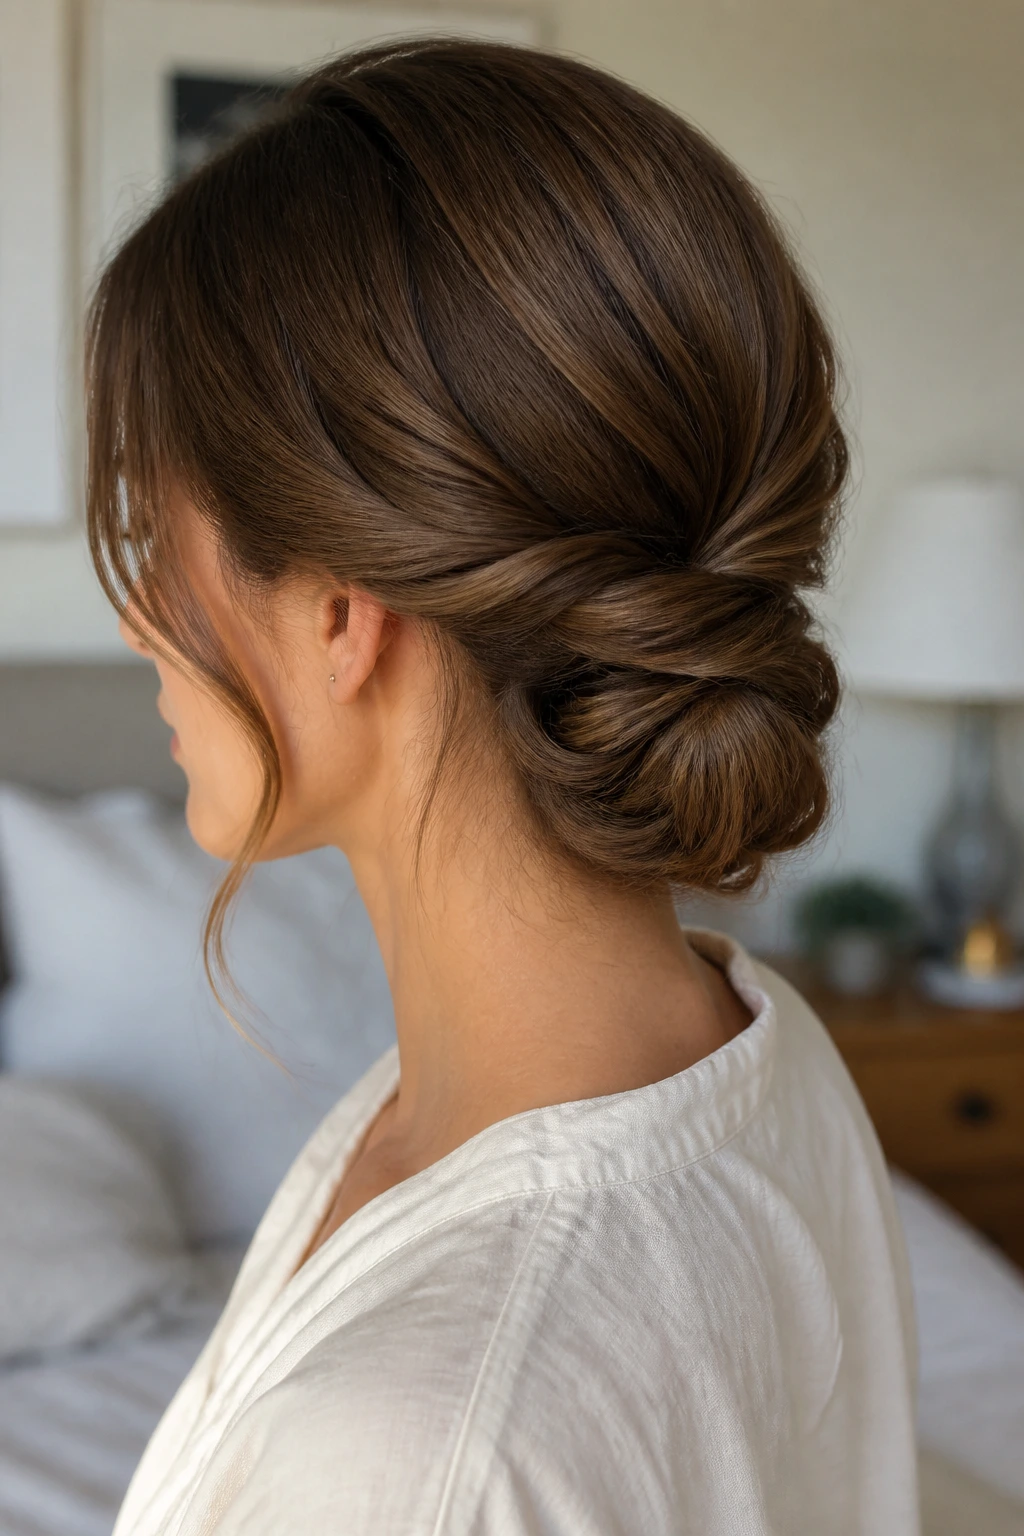
Can medium-length hair really hold a French twist?
Yes, and sometimes it holds better than longer hair because there’s less weight dragging the roll down. The trick is to keep the twist compact and pin the seam securely from the inside.
What’s the easiest updo for layered medium hair?
A low twisted chignon or a tucked ponytail is usually the safest place to start. Both styles hide shorter pieces inside the shape instead of forcing them to lie flat.
How do I keep fine medium hair from slipping out of pins?
Start with dry shampoo or texture spray, then pin in crossed pairs rather than using one pin at a time. A tiny bit of teasing at the crown can also give the hair something to grip.
Are these styles better on second-day hair?
Usually, yes. Second-day hair has more texture and less slipperiness, which helps buns, twists, and braids stay in place longer. If your hair is freshly washed, just add product first.
What if my hair is too short for a full bun?
Pick styles that tuck the ends inward, like the Gibson tuck, French roll, or a low wrapped knot. Those shapes use the length you have instead of asking for more.
Can I wear these updos with curly hair?
Absolutely. Curly hair often gives these styles more body and grip. The main adjustment is to keep the curl pattern soft and avoid over-brushing the strands before you pin them.
How many bobby pins should I expect to use?
For most medium-length updos, plan on 6 to 12 pins depending on thickness and texture. Fine hair may need fewer, but thick hair can use more than you think, especially for styles that sit low at the nape.
Which styles work best for a wedding or formal event?
Braided crowns, Gibson tucks, polished chignons, and sleek low buns are the safest bets. They read elegant without needing a complicated structure, which matters when you want the style to survive photos, dancing, and a long evening.
How do I make an updo look softer around the face?
Pull out two thin pieces at the temples or loosen the side part a touch before you set the pins. Don’t overdo it. A couple of soft strands do more than a handful of frayed ones.
A Better Way to Wear Medium-Length Hair
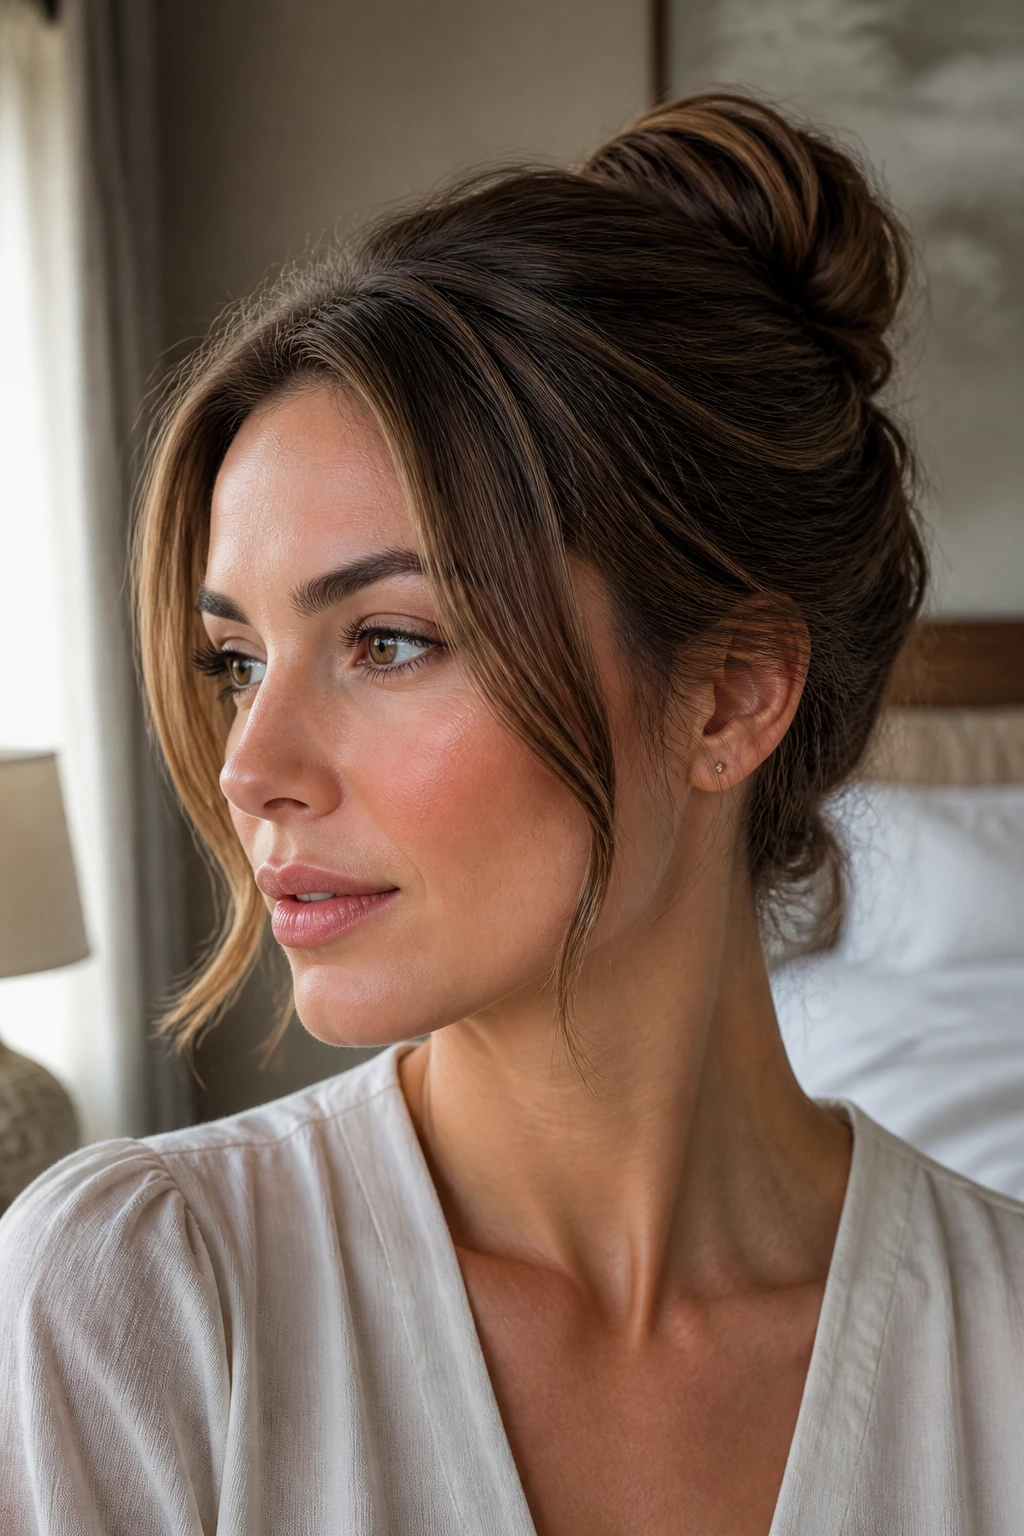
The nicest thing about medium-length hair is that it doesn’t force you into one camp. It can look clean, loose, sculpted, messy, modern, or formal without needing extra inches to fake the idea. That’s why these updos keep showing up in real life, not just on inspiration boards.
If you pick the right base, use a few honest pins, and work with your cut instead of fighting it, the style usually settles into place fast. That’s the part I trust most. Not the perfection. The fact that medium-length hair can look finished with a small handful of the right moves, and still feel like hair rather than a helmet.
