



Curly hair does not flatten itself into a neat little knot, and that is exactly why bun hairstyles for curly hair can look so rich when they’re done with a light hand. A bun made from coils, ringlets, or tight curls has built-in volume; you get shape, shadow, and movement before you even add a pin.
The catch is control. Pull too hard and the crown goes flat; smooth too much and the bun loses the texture that makes it interesting; leave it too loose and it slips into a lopsided puff by lunchtime. The sweet spot is usually one part polish, one part imperfection, and a bun that sits where your curl pattern wants to fall instead of fighting it.
That balance shifts with length, density, and curl type. A shoulder-length 3B head needs a different anchor than a long 4C coil, and a style that looks lazy on day-one wash hair can look polished on day-three hair with a little frizz and a softer bend. The best buns for curls are the ones that respect the curl’s own spring.
Why These Bun Styles Earn a Spot in a Curly Routine
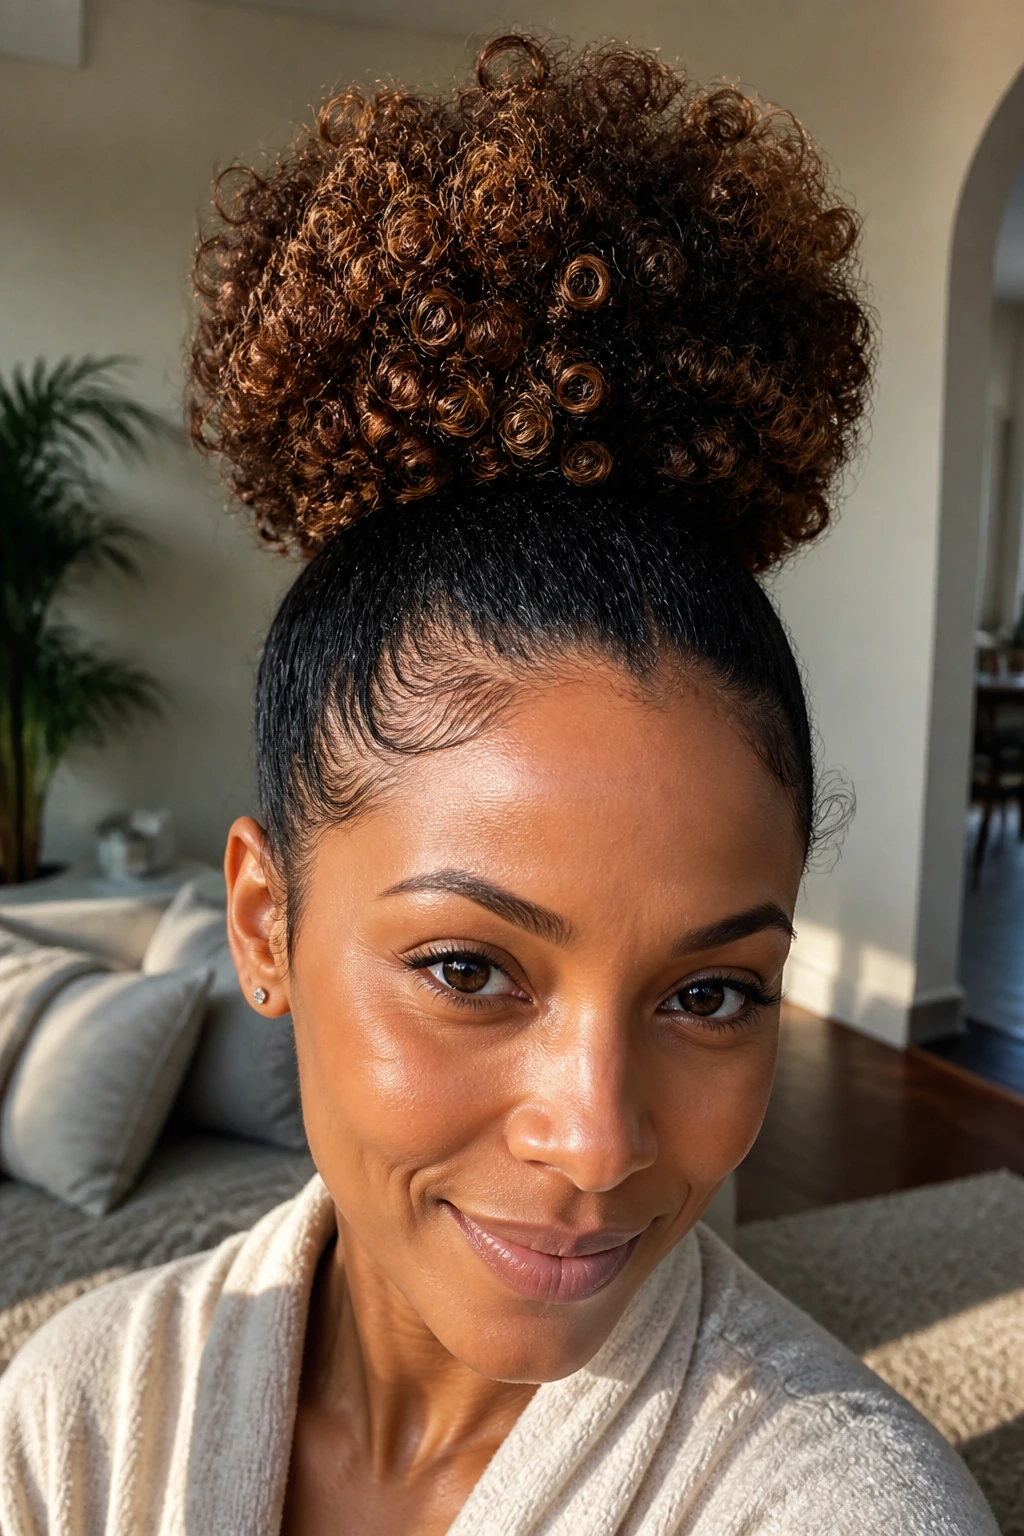
- Built-In Shape: Curly hair gives the bun body without stuffing, padding, or an army of pins. You get a fuller outline with less work.
- Shrinkage Friendly: A bun can sit higher or lower depending on how much your curls contract, so the same style can look different on different days without failing.
- Low-Heat Styling: Most of these looks need water, hold, and placement, not a flat iron. That matters when you want to keep the curl pattern intact.
- Day-Two Rescue: A bun is one of the few styles that can hide a little frizz and still look intentional, especially around the hairline and crown.
- Protective When Done Right: If the elastic is soft, the tension is even, and the edges are not yanked back, a bun can give your ends a break for a few hours or a whole day.
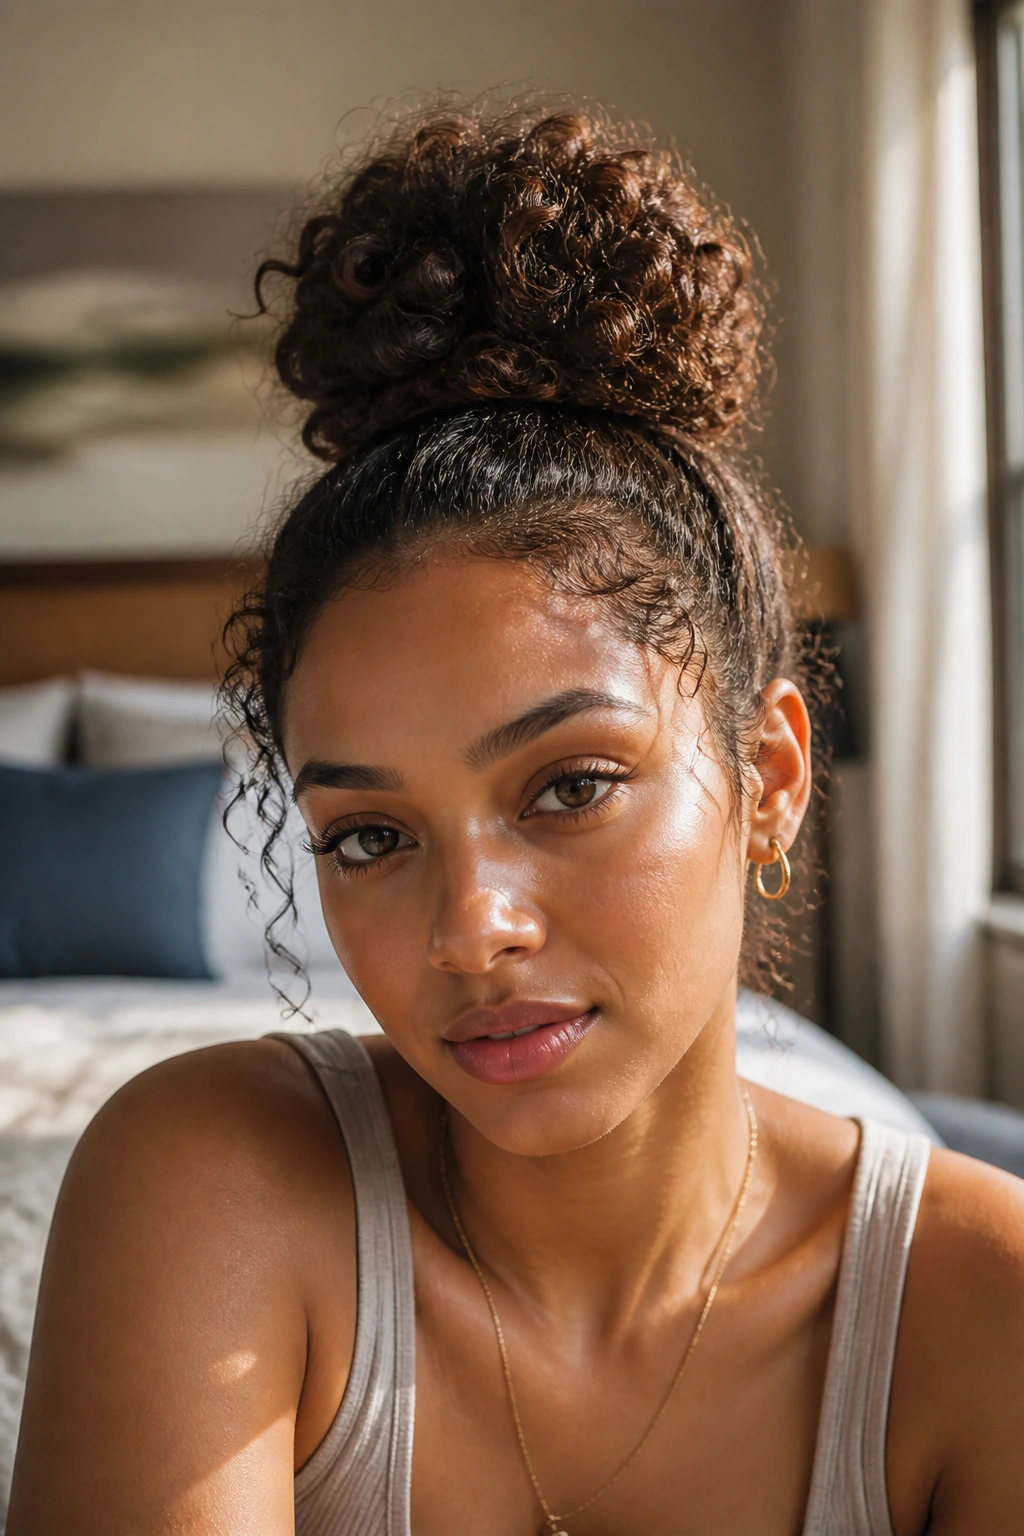
1. High Puff Bun With a Defined Crown
The high puff bun is the one I reach for when the curls are doing that big, rounded, slightly rebellious thing at the crown. It sits above the head instead of at the back, so the silhouette looks buoyant rather than heavy. If your curls are dense, this style uses that density as the point.
Why It Works
A high placement lifts the hairline and keeps the bun from disappearing into the back of your head. The puff around the base gives the bun a soft outline, which matters because curly hair can look sparse if it is stretched too tightly.
Quick Shape Notes
- Best on medium to long curls
- Works with a satin scrunchie or a stretchy coil tie
- Leave the front hairline a little softer if you want height
Best move: Gather the hair with your fingers first, not a brush, so the crown keeps a little lift instead of going flat.
2. Pineapple Bun That Keeps the Curl Pattern Alive
This is the bun I like for second-day curls that still have definition but need to get out of the way. It sits high, almost like a pineapple tail folded into a knot, and the ends stay curly instead of being tucked into a rigid ball. The result looks less like a formal updo and more like your curls got organized without losing their nerve.
The trick is not over-collecting the hair. Pull it to the top of the head, secure it once, then wrap only the loose length into a soft coil. If you force every strand into the same direction, the style loses the airy shape that makes it work.
A pineapple bun also handles frizz well. A few flyaways at the temple can stay put, and the bun still reads clean because the height does the visual work.
3. Low Nape Coil Bun
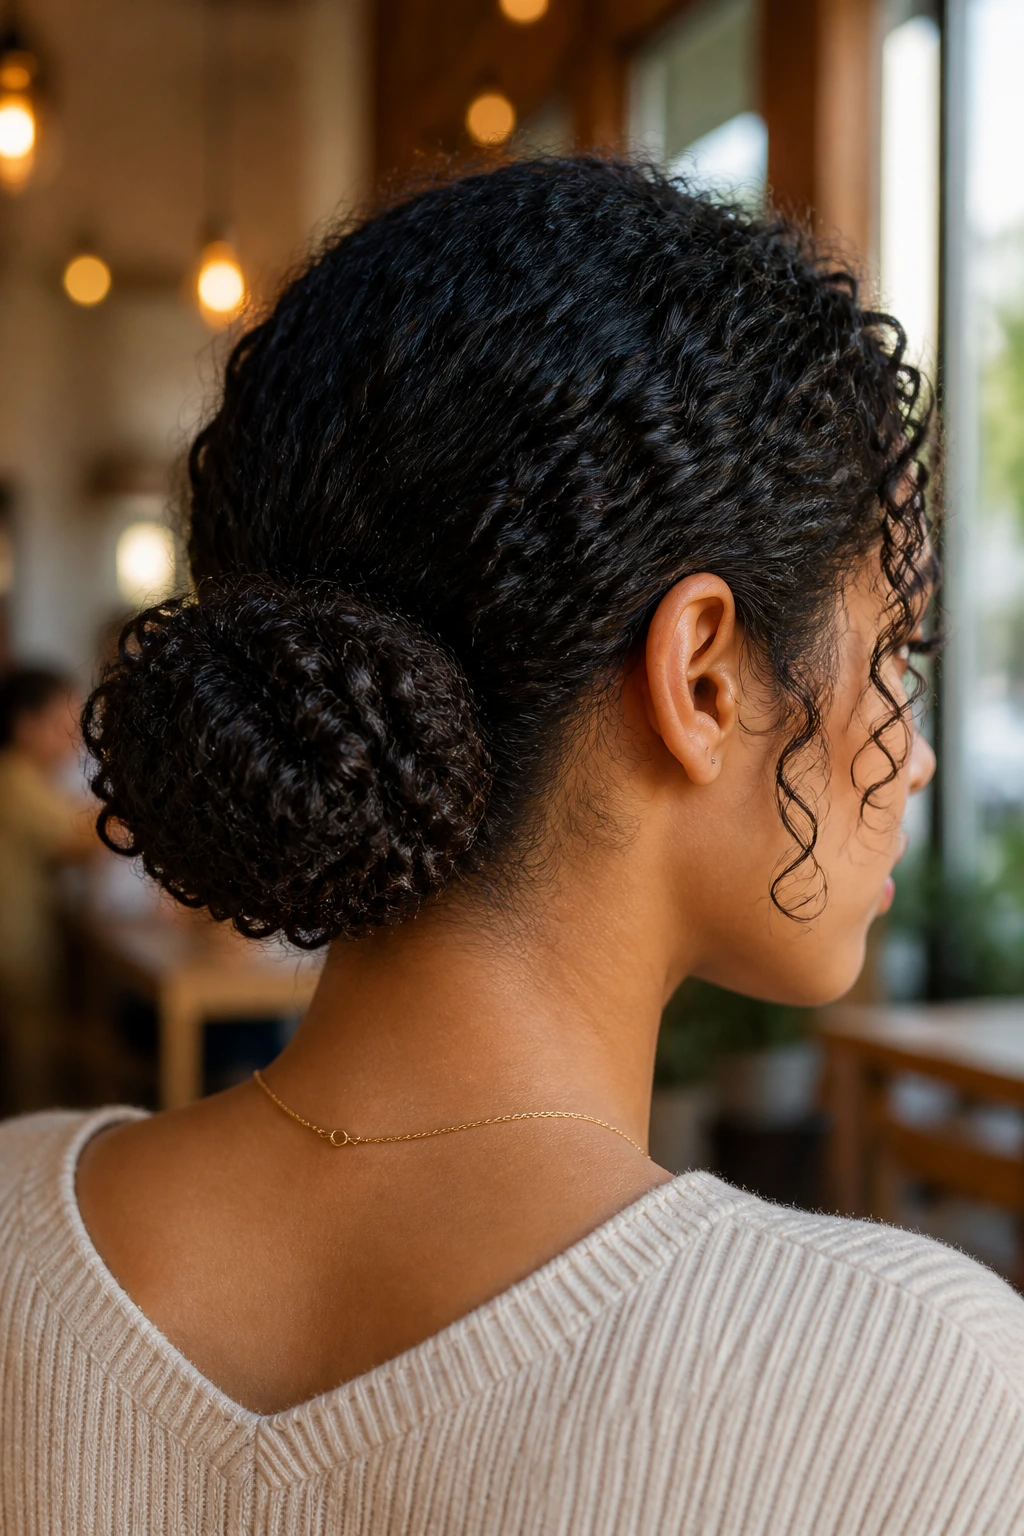
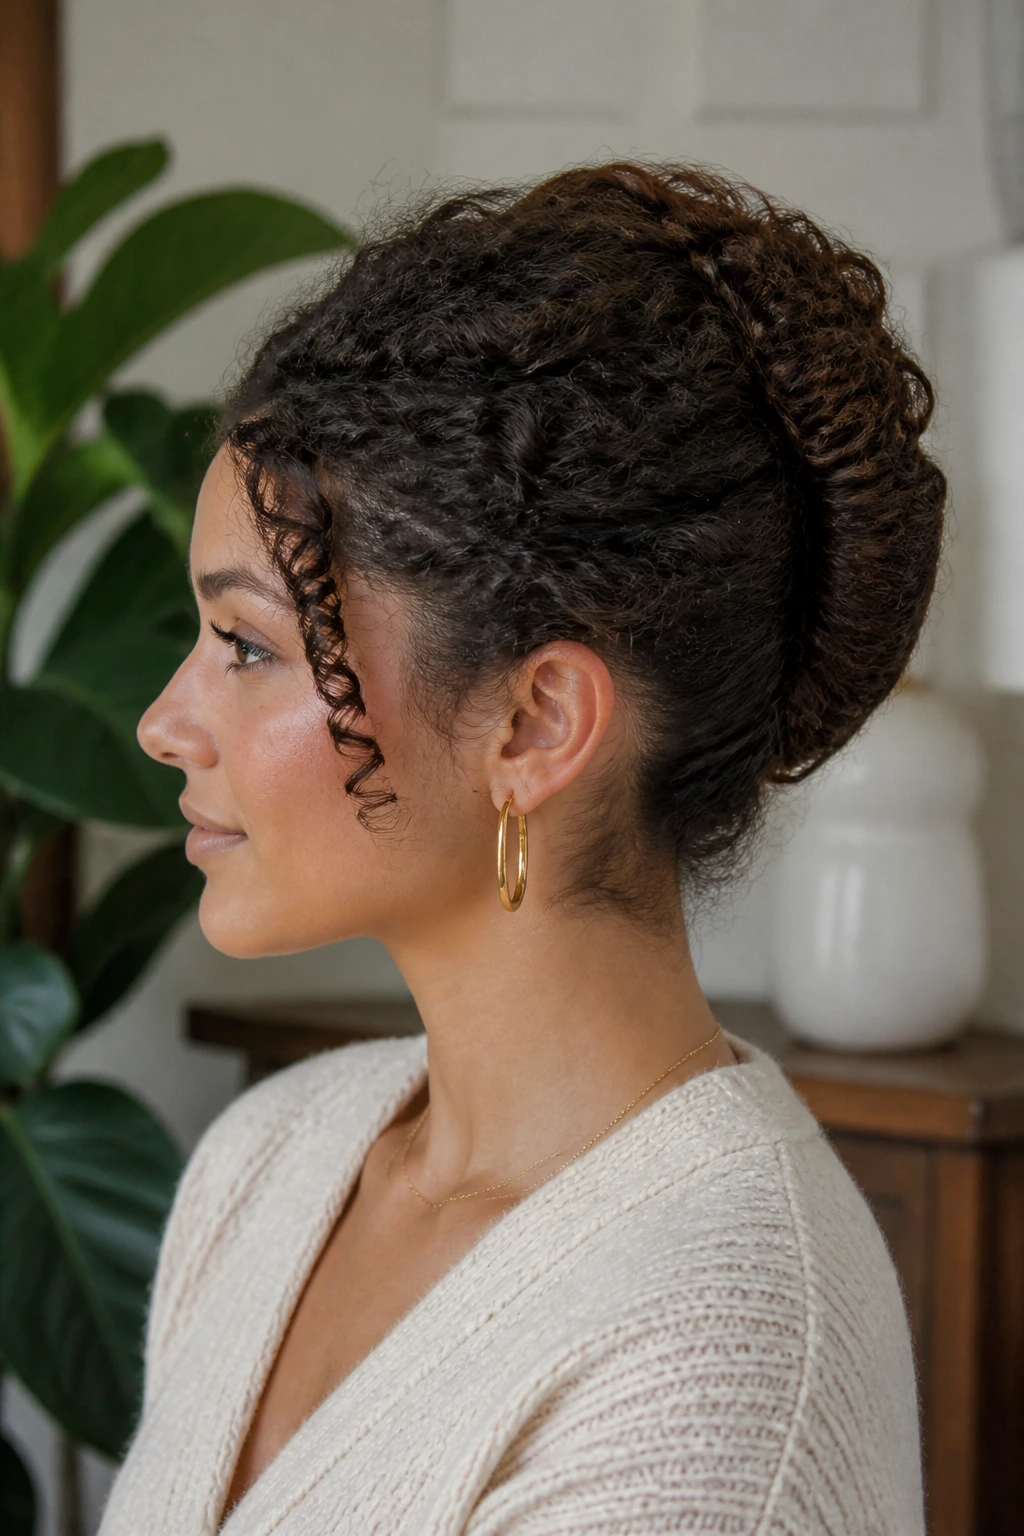
If high buns feel too loud, this low coil bun is the quiet, polished option. It sits right at the nape, where curls can be twisted around themselves and pinned without shouting for attention. The shape is compact, but not stiff.
You want the bun to feel anchored, not crushed. Start with the hair gathered low and twist the tail until it wants to coil back on itself. Then tuck the end under and pin through the thickest part of the coil, not the wispy tail.
This is the style I’d choose for a long day because it tends to hold better under a scarf or coat collar. It also works when you want earrings, a high neck, or a clean profile from the side.
4. Sleek Side-Part Bun With Curly Ends
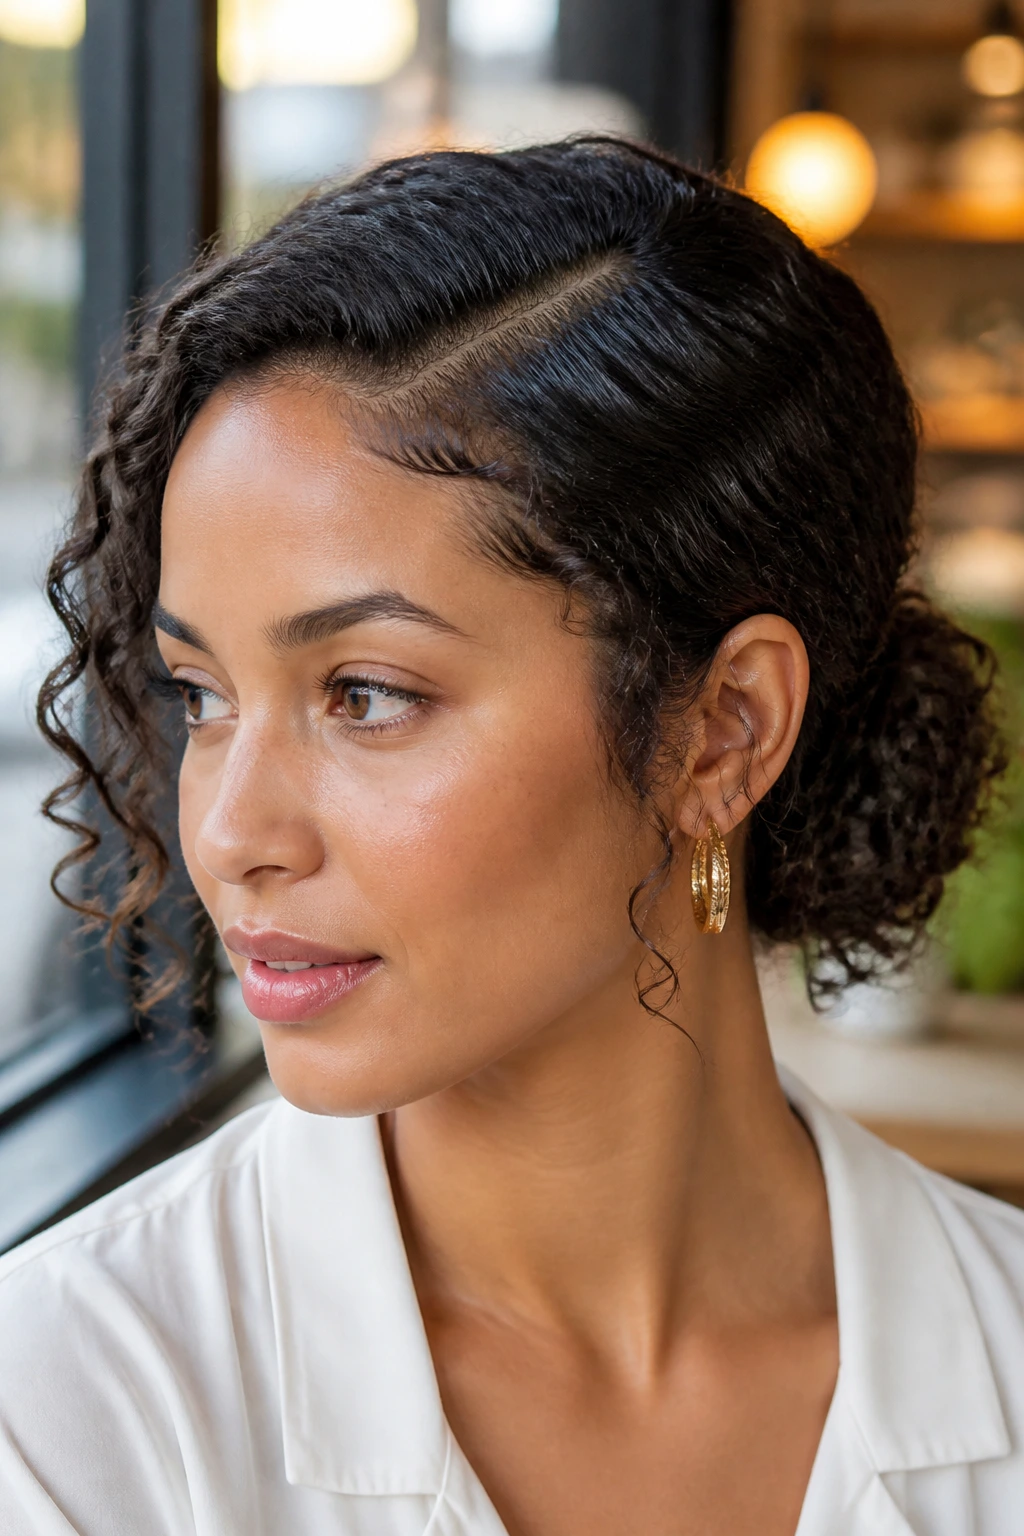
A deep side part changes everything. It gives the bun a line, which curly hair can sometimes lack when it’s pulled straight back, and it lets a few textured ends soften the shape instead of sealing it into a hard knot. The contrast is the whole point.
Keep the part crisp and the bun itself fairly compact, but do not slick the whole head down like it’s straight hair. That is where people go wrong. The roots should look controlled; the bun should still look like curls, not shellacked rope.
This style works especially well if one side of your hair has a stronger wave or curl than the other. Let the curl texture show at the base and at the ends. It looks deliberate, not messy.
5. Twisted Crown Bun for Extra Hold
Twists are the unsung hero of curly buns. Two front twists fed into a bun give the style more grip at the hairline, and they also stop shorter layers from popping out before you’re ready. The bun itself can be small or medium; the crown is what makes this style feel finished.
The front sections should be twisted back with enough tension to stay in place, but not so much that the scalp feels tight by the end of the day. If your curls are thick, split the front into four smaller twists instead of two larger ones. They lie flatter and hold better.
Best For
- Layered curls that refuse to stay in a ponytail
- Formal or work settings
- Hair that needs a little structure without full slick-back styling
6. Braided Base Bun That Grips Without Snags
A braid beneath the bun gives you hold you can feel. It is one of the best choices for curls that are slippery at the roots, especially if your hair tends to puff out before the afternoon is over. A simple three-strand braid from the ponytail base gives the bun a ribbed texture that pins catch more easily.
I like this one because it solves a real problem: some curly buns unravel at the core while still looking fine on the outside. The braid gives the middle something to bite into. Wrap it around itself, pin the outer edge, and the style stays put longer than a plain twist.
Use this when you want to skip heavy gel. The braid does some of the work the product would otherwise have to do.
7. Messy Mid-Height Bun With Face-Framing Pieces
A mid-height bun with a few loose face pieces is one of those styles that looks relaxed but still intentional. It sits between sporty and dressed up, which is exactly why it works so often. Curly hair gives the loose pieces nice shape, so you do not need to over-style them.
The bun should be loose enough to keep volume, but centered enough that it does not slide toward one ear. Pull out two curls near the front, then leave them alone. Do not keep touching them. That is how they turn into frizz.
This is the kind of bun I’d wear on a day when I want my hair out of my face but still want some movement near the cheeks and jaw. It softens the whole look.
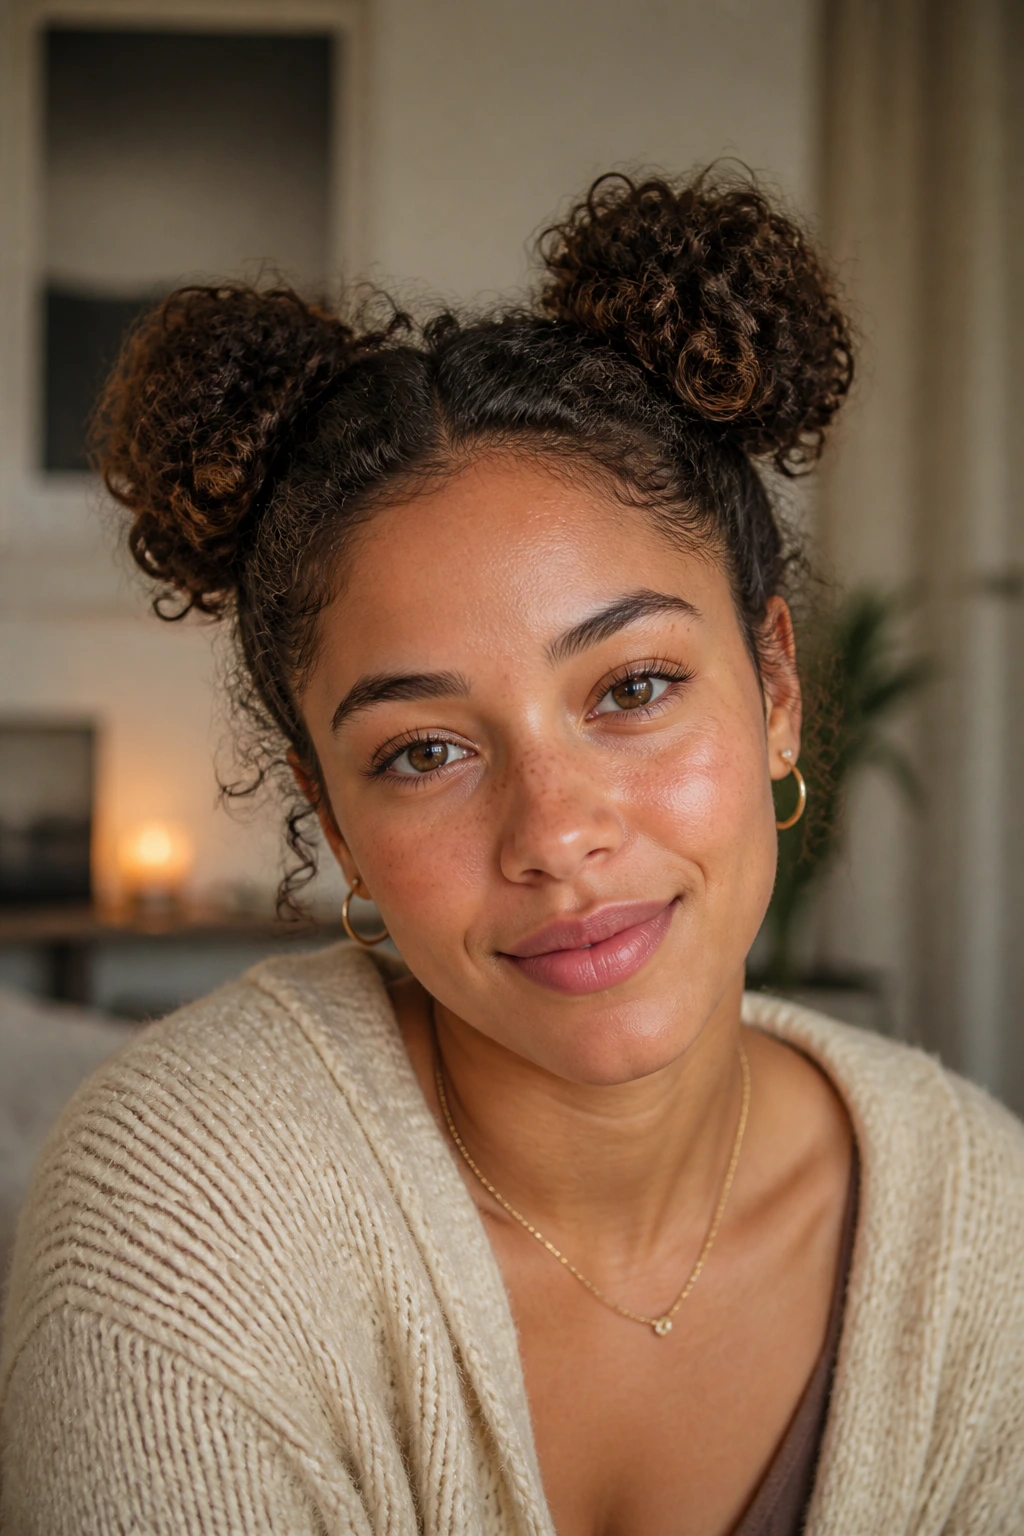
8. Double Space Buns for Shorter Curls
Space buns are the answer when your hair is too short for one full knot or when you want a style that uses every inch of curl. Two buns mean less tension in each section, which matters for shoulder-length curls that do not want to be dragged into one heavy center knot.
The placement is what makes or breaks them. Too low and they look droopy. Too high and they can feel cartoonish. Sit them just above the ears or a little higher, and leave enough curl around the bun to give each one volume.
This style works especially well with tighter textures because shrinkage makes the buns look fuller than you expect. It is playful, sure, but it is also practical. Two smaller buns often hold better than one overstuffed one.
9. Rolled French Bun for Dense Curls
A rolled French bun is a smart choice when you have a lot of hair and you want it contained without looking flattened. Dense curls can make a traditional bun bulge in the wrong places. The roll helps distribute that volume vertically instead of forcing it into one round lump.
Think of the bun as a tucked cylinder rather than a ball. Pull the hair back, fold the length inward along the scalp, and pin from top to bottom. Use more pins than you think you need. Dense curls love to spring free after ten minutes if you get stingy.
This style looks especially good when the crown is smooth and the bun itself keeps a little texture. It has structure without losing the shape of the curl pattern.
10. Top Knot Bun with a Hidden Cushion
A top knot bun with a hidden cushion is useful when your curls are long enough to feel heavy but you still want a lifted shape. The cushion can be a small bun maker, a folded satin scrunchie base, or even a soft fabric ring tucked inside. The point is support, not fake volume.
You do not want the bun to sit like a hard sphere. Let some curls drape over the cushion so the texture stays visible. That keeps the style from looking overbuilt.
This is the one I’d recommend when the hair is day-two or day-three and needs a little help staying round. It saves your arms too. Long curls wrapped around a cushion take less pinning than a loose top knot that keeps collapsing.
11. Half-Up Bun for Long, Thick Curls
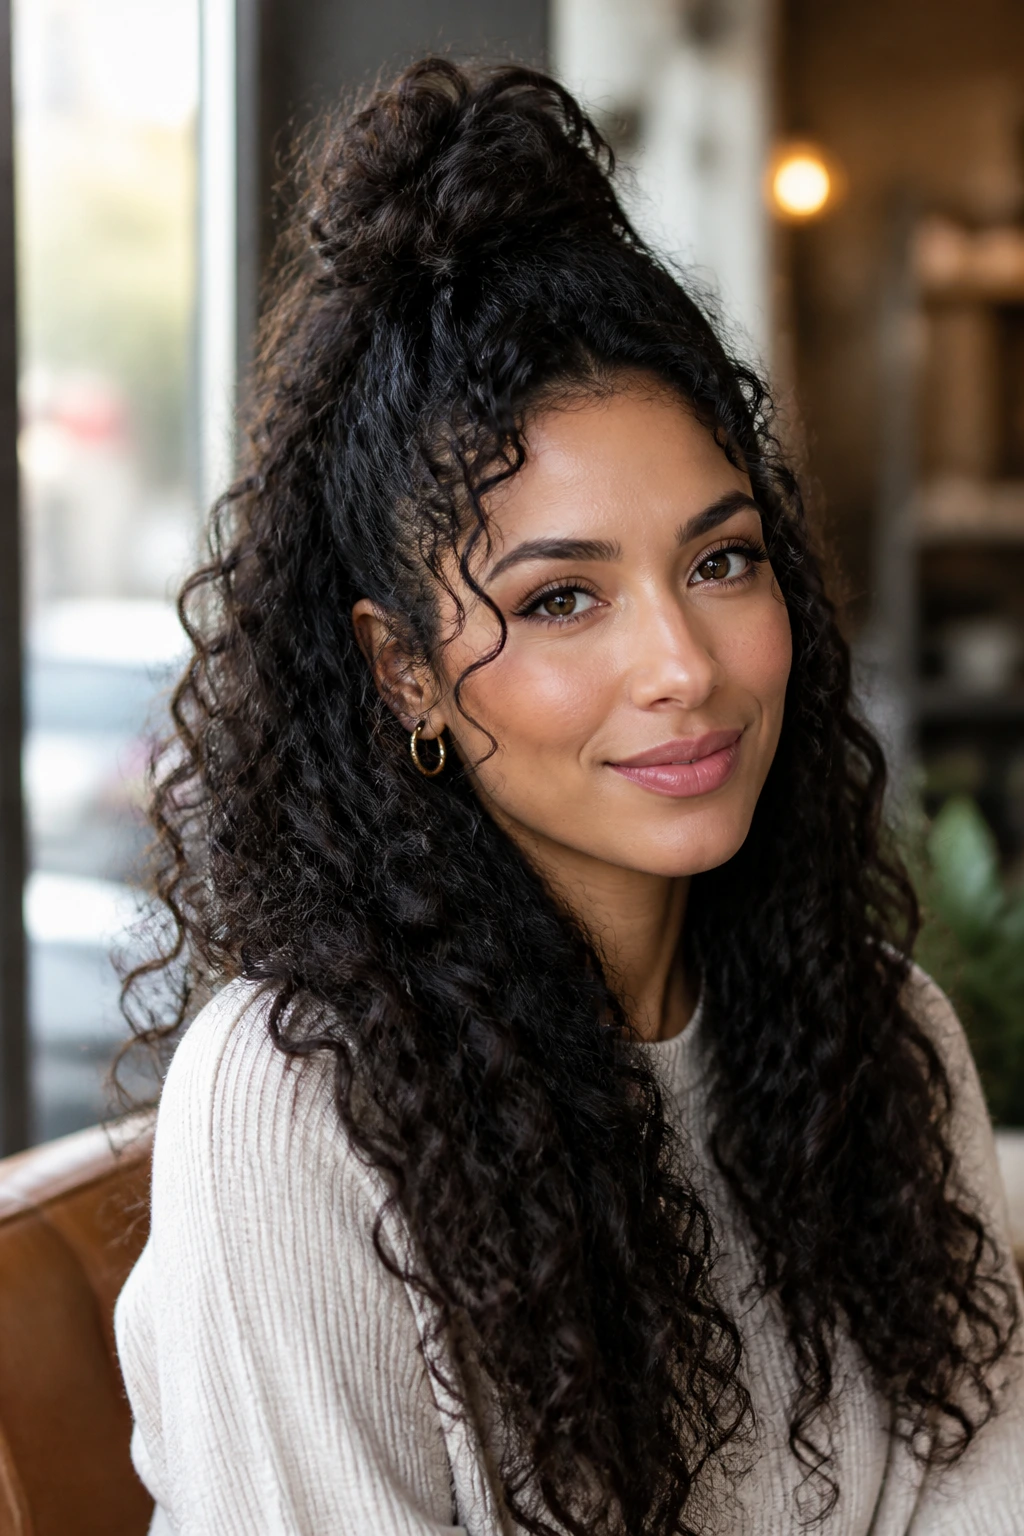
Half-up buns are underrated on curly hair because the contrast between the lifted top section and the loose bottom curls looks clean without trying too hard. The bun only carries part of the weight, so you avoid the headache that a full updo can bring. The rest of the hair keeps its spring and movement.
The top section should be secure, but not so tight that the curl pattern at the crown gets smoothed into a flat patch. Let the bun stay fairly small and let the rest of the curls do the work below it.
This style is especially good when your ends are still defined and you do not want to hide them. It gives the face a little lift and leaves length where it matters.
12. Scarf-Wrapped Bun with a Clean Edge
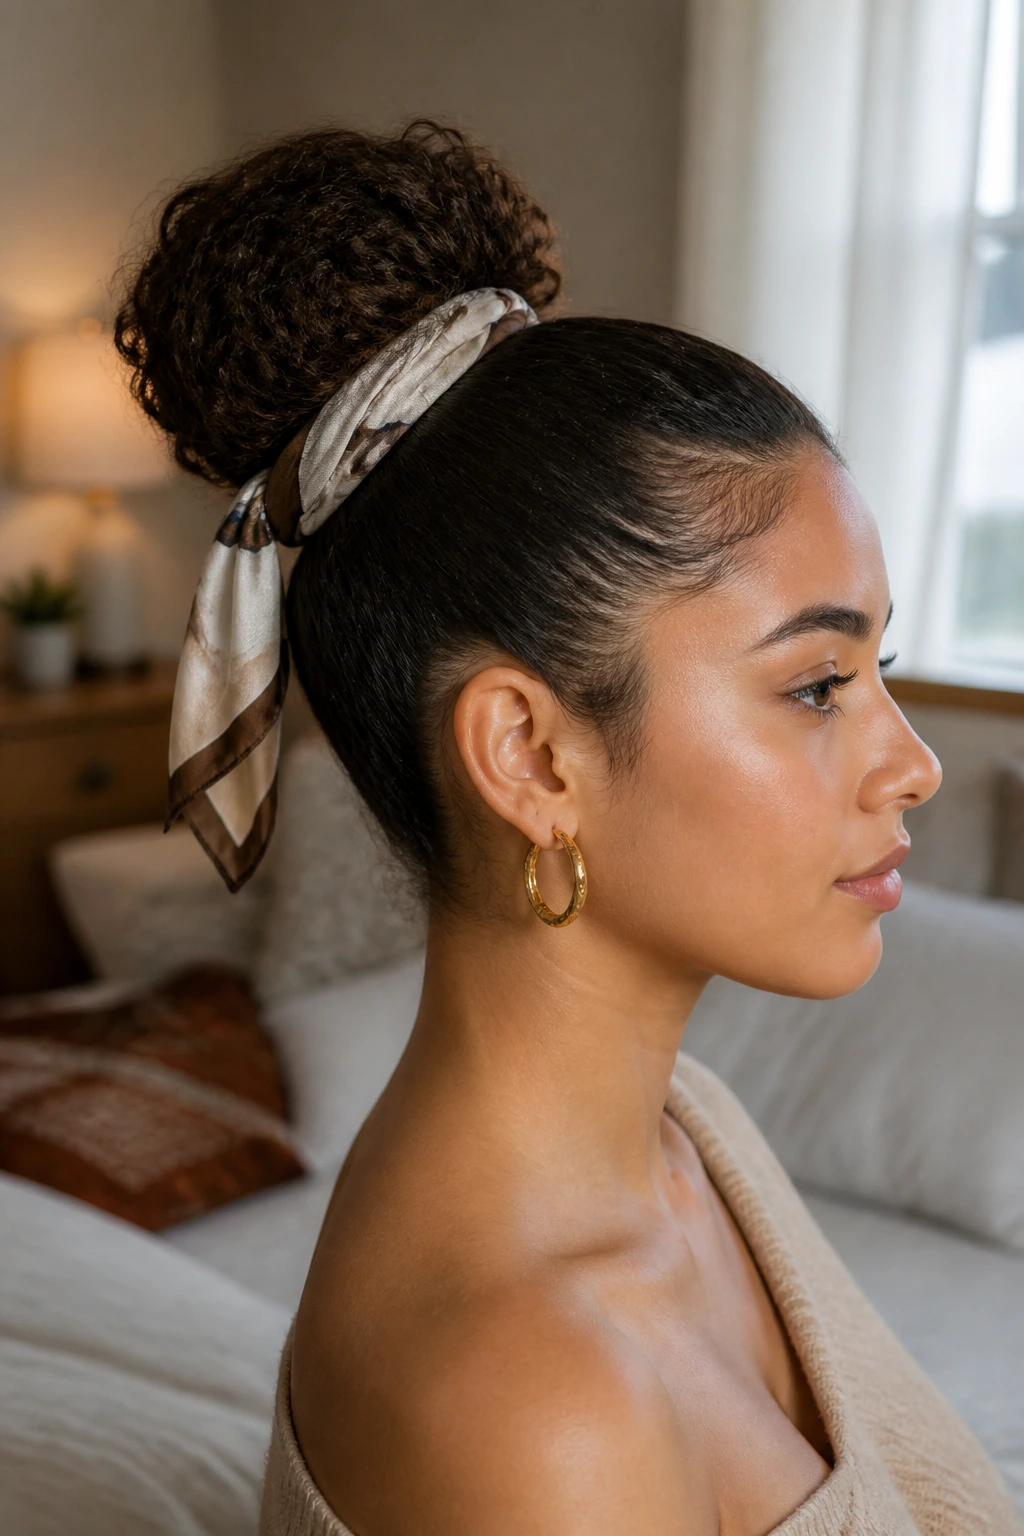
A scarf changes the mood of a bun instantly. Wrap one around the base, and the style reads intentional even if the bun underneath is loose. With curly hair, that matters because the scarf can tame the visual edge where layers and frizz would otherwise show.
Silk or satin works best because it slides less and does not rough up the hairline. Tie it low and let a tail hang if you want movement, or tuck the ends in for a neat finish. The bun itself can be messy, but the scarf gives the whole thing a cleaner frame.
This style is a good fix when your curls are a little fuzzy and you do not want to rebuild the entire head from scratch. One scarf. Much less drama.
13. Claw-Clip Bun With a Loose Coil
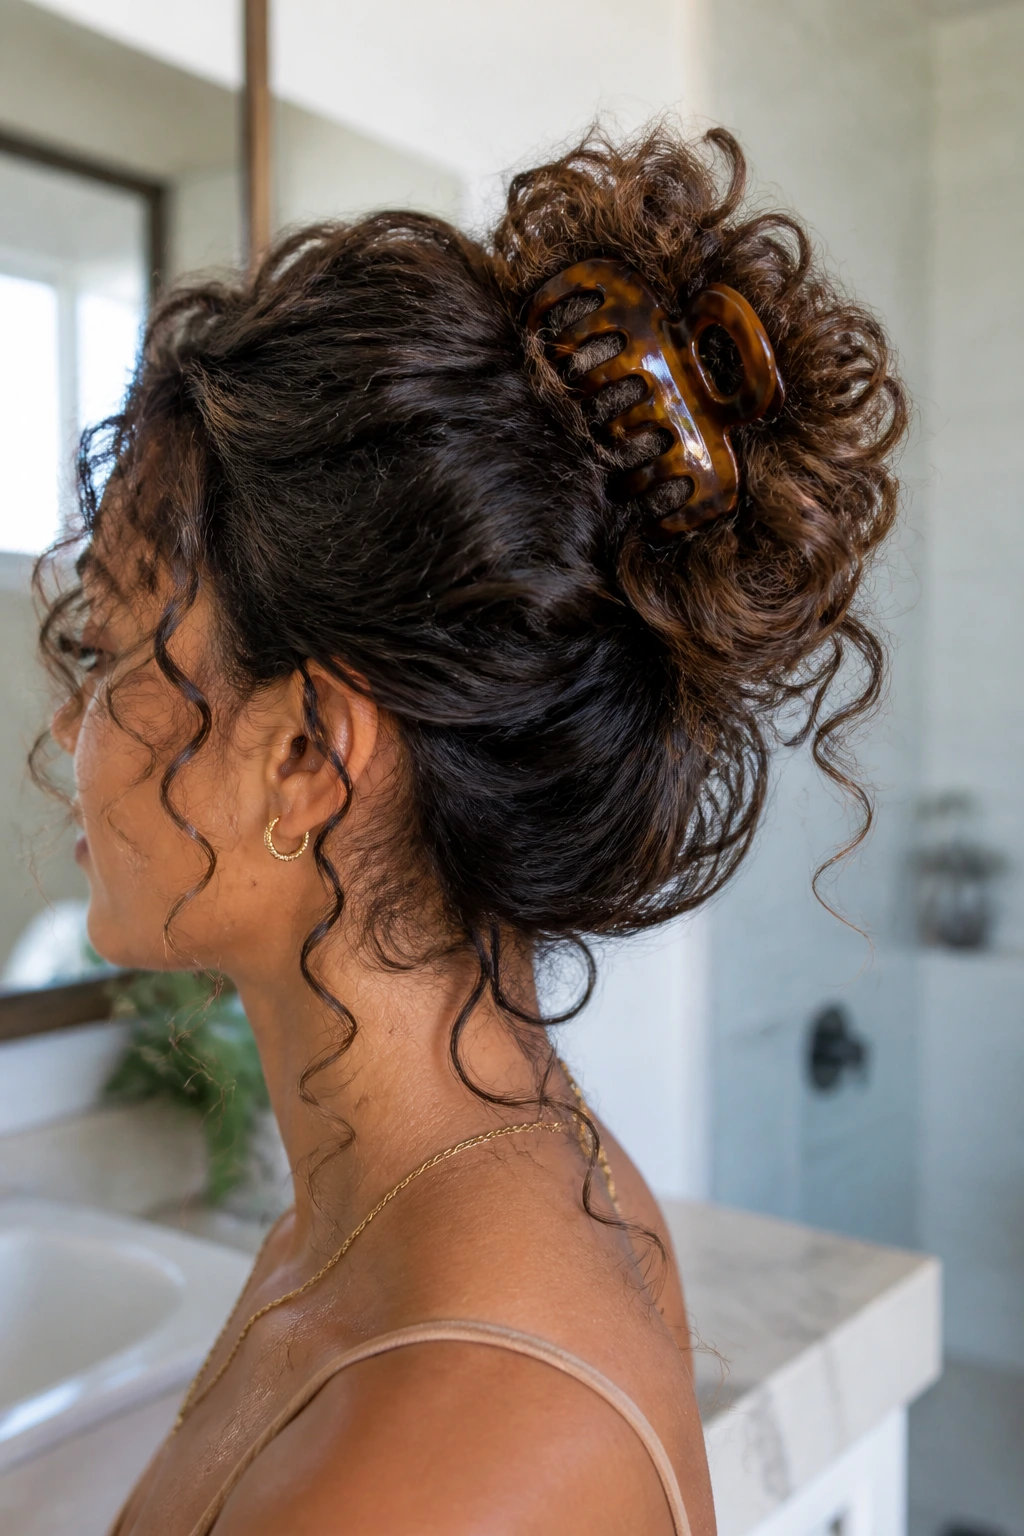
A claw-clip bun is one of the easiest ways to get curly hair off your neck without flattening the crown. The clip holds the coil in place, while the curls themselves create a soft, undone shape around it. It is fast, which is nice, but it is not lazy if you place the clip correctly.
Gather the hair into a loose twist, fold it upward or inward, and clamp the clip over the thickest part of the coil. If the clip only catches the ends, the style will slip. If it grabs the center, it holds better and the bun keeps its rounded shape.
This works well for thick hair that gets tired of elastics. It also lets you take the style down without that weird elastic dent at the back of your head.
14. Side Bun with Volume and Soft Tendrils
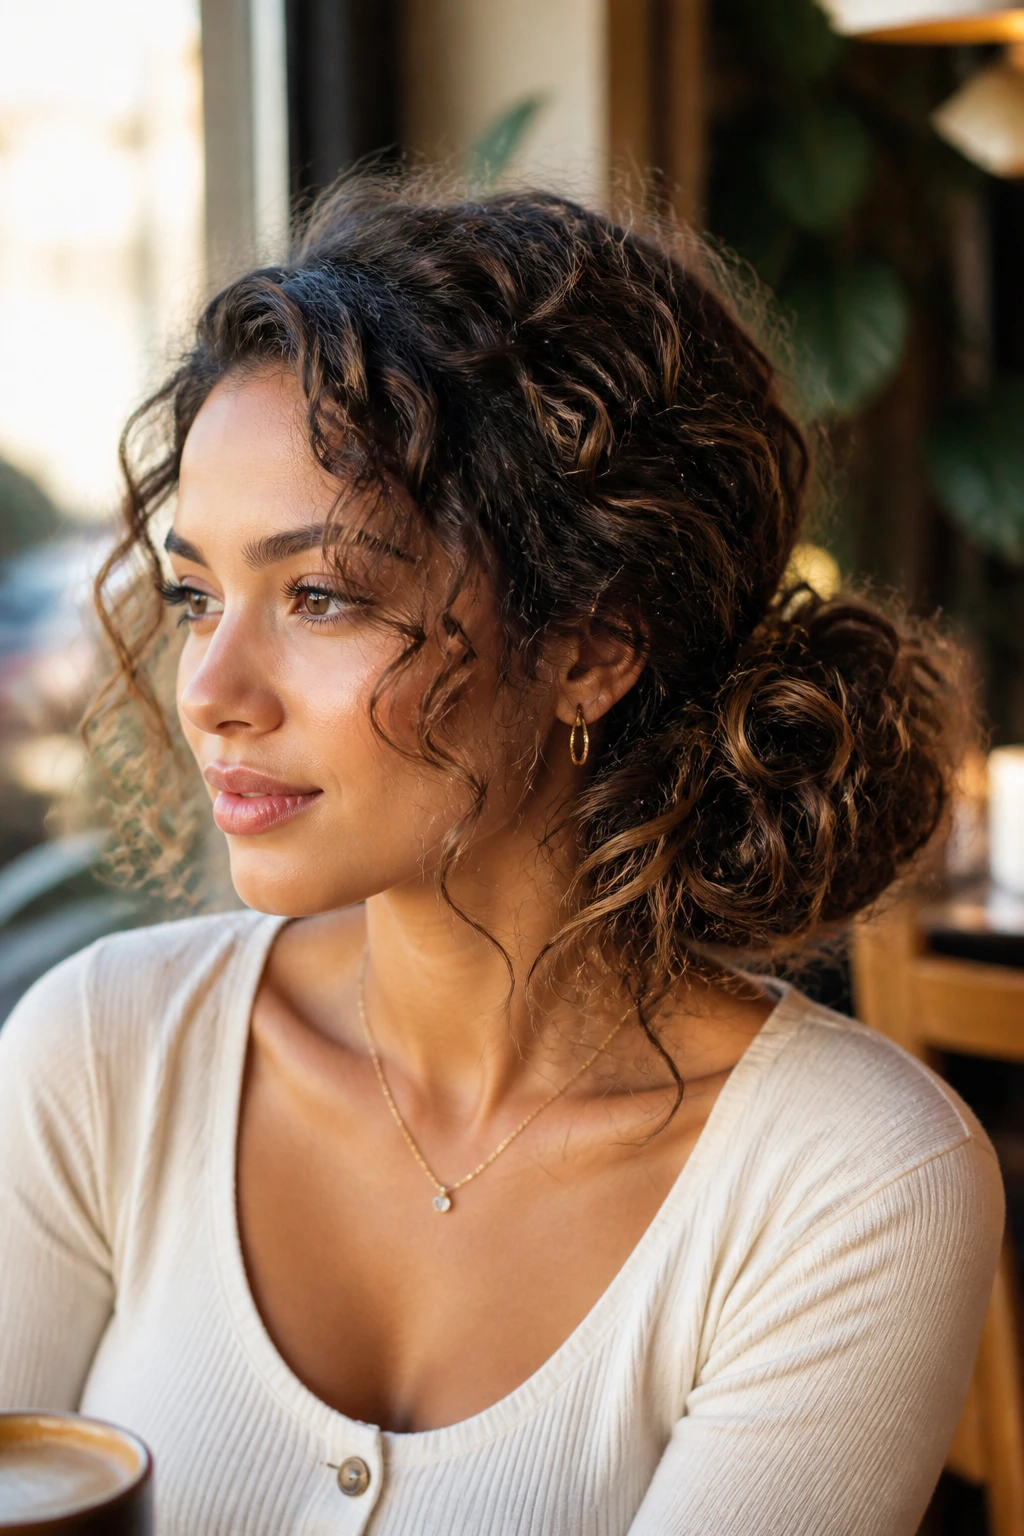
A side bun has a little old-school drama, and curly hair makes it look richer than it does on straight texture. Set the bun behind one ear or just below it, and leave two or three soft tendrils around the face. The curls frame the cheek and jaw without turning the style into a loose mess.
The side placement matters because it creates asymmetry. That keeps the look from feeling too formal. If your hair is dense, pin the bun closer to the neck so the volume does not push it outward like a shelf.
I like this style for evenings because it holds shape and still looks soft in motion. The tendrils should be curled, not ironed straight. Let them be curls.
15. Flat Twists Into a Bun for Tighter Textures
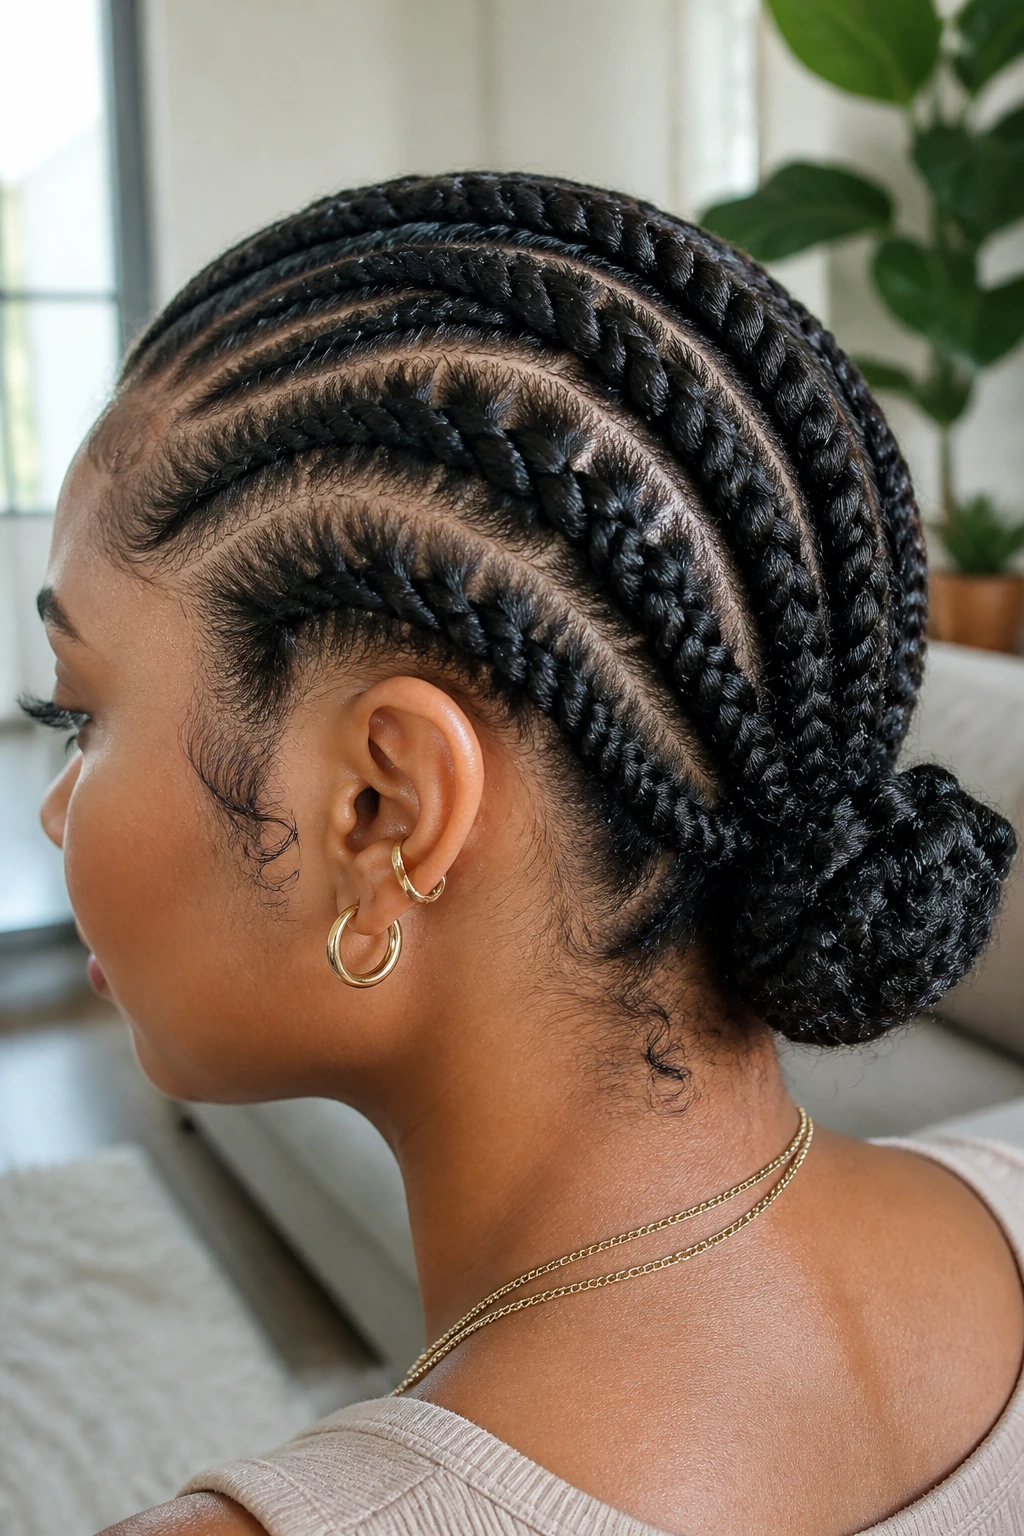
Flat twists are one of the cleanest ways to bring tighter textures into a bun without forcing the roots to do too much. They anchor the front and sides, and they feed neatly into the bun at the back or crown. The finished style has pattern at the scalp and volume at the bun.
This is a good choice when you want protection more than polish. Flat twists reduce the number of loose points around the hairline, and they give the bun a visible structure that looks deliberate even after a long day.
If your hair is very coily, twist on lightly damp, conditioned hair, not dry hair that snaps. The twist should feel smooth under your fingers, not sticky or rough.
16. Ballerina Bun That Keeps Some Spring
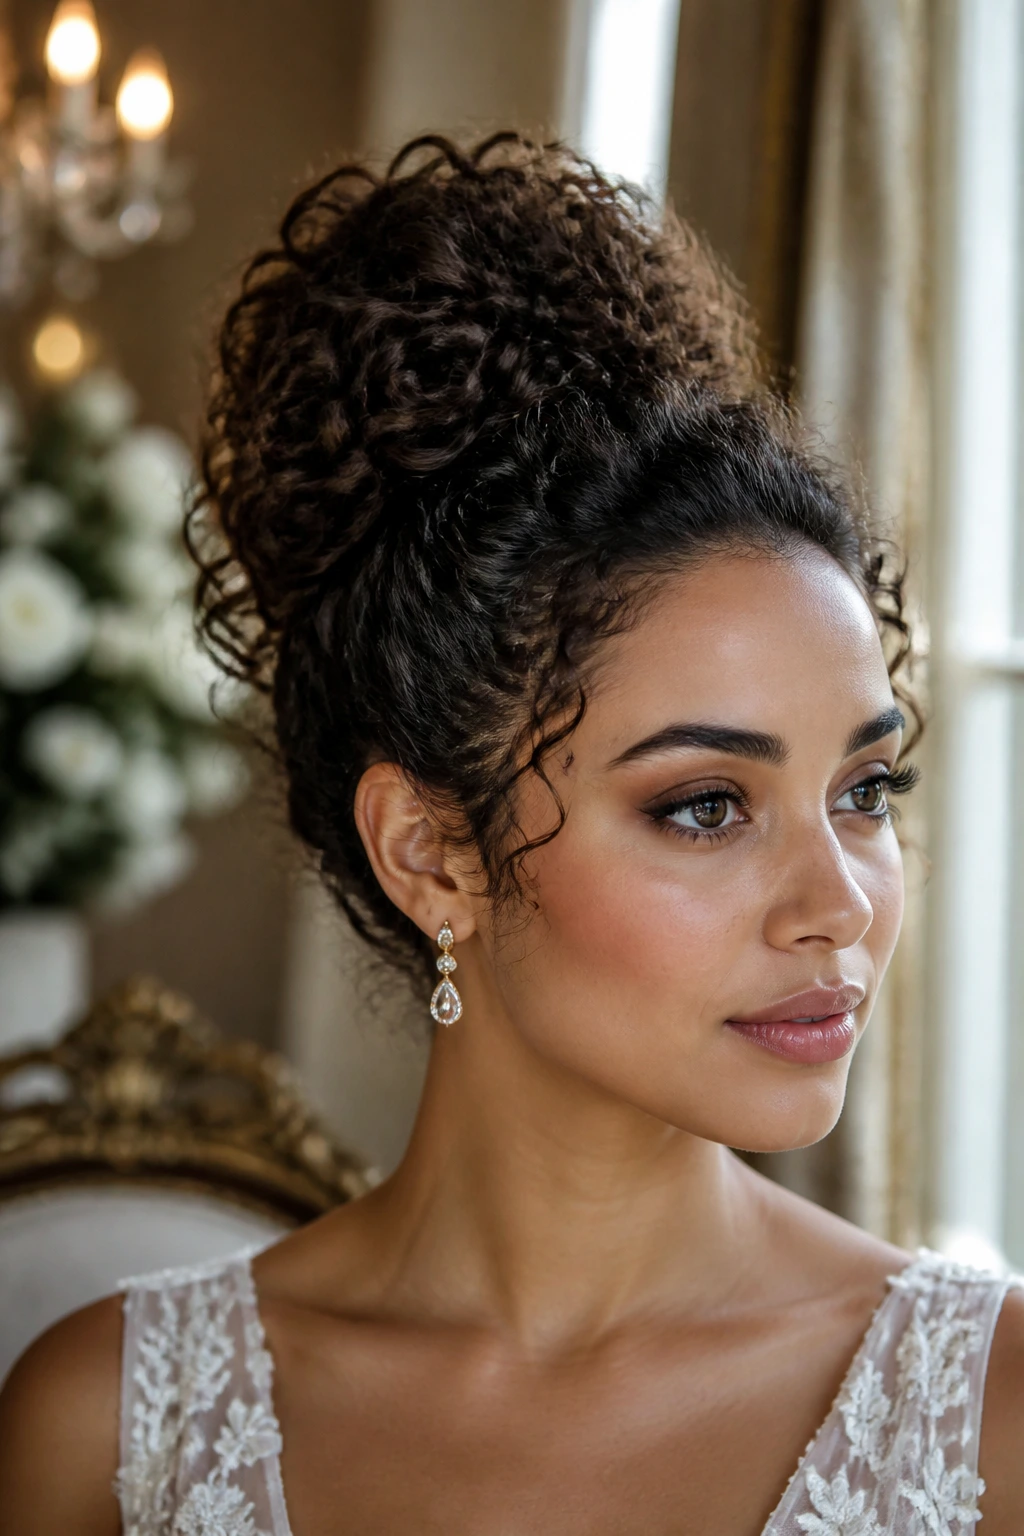
A ballerina bun on curly hair does not need to be plastered into a helmet. The better version keeps the silhouette clean while leaving enough texture to avoid that stiff, over-smoothed look. The result is neat, but still human.
Use a brush only where you need it, usually at the surface and around the part. Leave the bulk of the curls intact as you wrap them, because that texture keeps the bun from looking thin or lifeless. A little shine cream on the surface is enough.
This is the bun I’d choose when the dress code is strict but the hair still deserves some shape. It looks sharp from a distance and softer up close.
17. Knotted Loop Bun With a Soft Finish
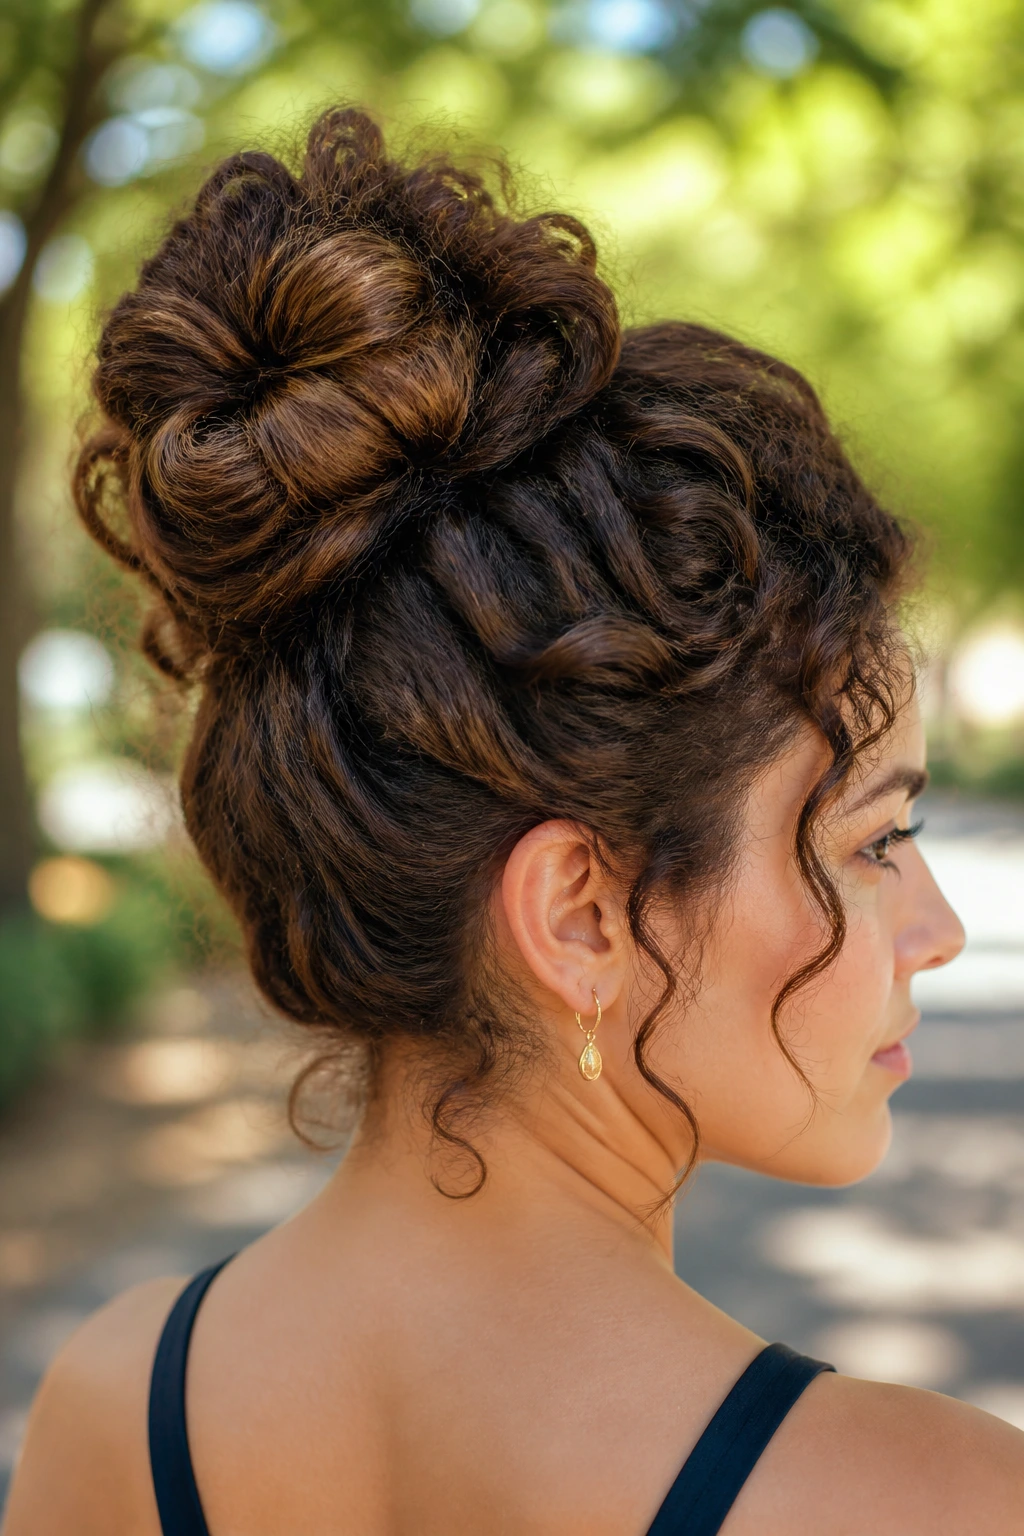
A knotted loop bun feels a little more relaxed than a classic twist, which is why it works so well on curls. Instead of winding the hair into a tight rope, you create a loop, tuck the ends through, and let the natural texture soften the knot. It has shape without being severe.
The loop is especially nice for mid-length hair that is too short for a large chignon but too long to leave loose. Pull the hair halfway through a final tie, stop before it’s fully pulled, and spread the loop so it looks rounded. That one move changes the whole silhouette.
This style likes a few loose curls at the temples. They keep it from looking boxed in.
18. Low Puff-Back Bun for Stacked Volume
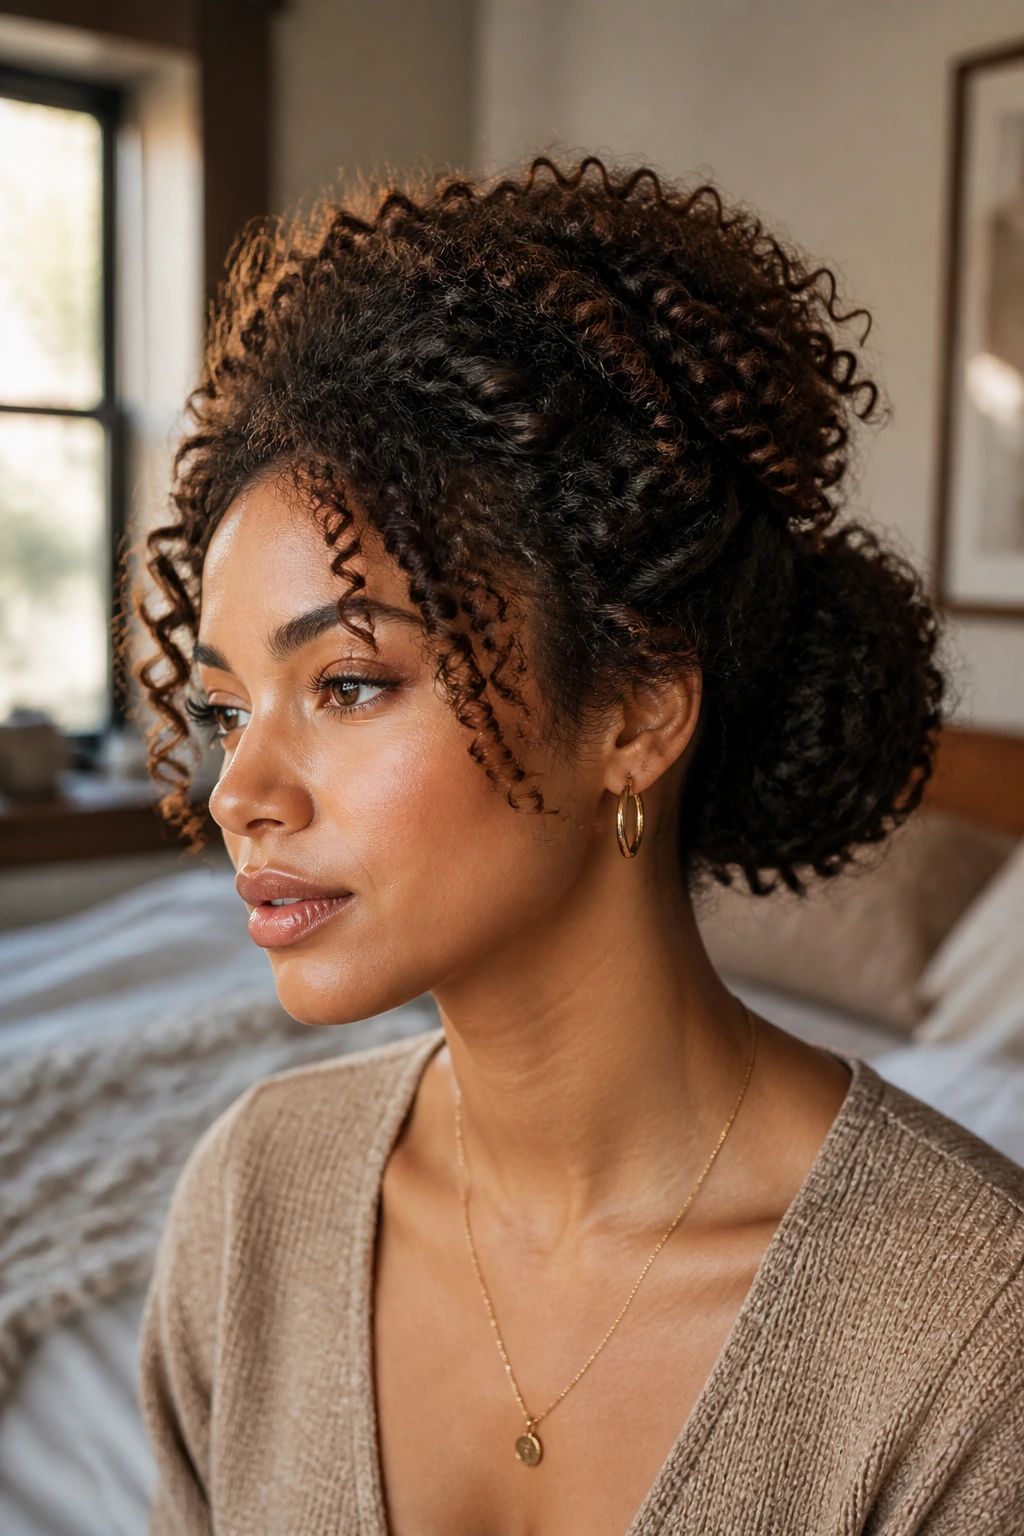
A low puff-back bun gives you one of my favorite curly silhouettes: controlled in the front, fuller in the back, and not smashed against the scalp. The bun sits low, but the crown keeps some lift, so the style has depth instead of lying flat.
The key is not over-combing the top. Smooth the surface just enough to gather the hair, then let the natural fullness remain at the back before you tuck it into the bun. That stacked shape is what gives the style its character.
This is the bun I’d choose when I want a low style but do not want it to look dull. It feels a little softer than a strict chignon and a little more grown-up than a messy knot.
Why Curly Hair Makes Bun Shapes Look Fuller
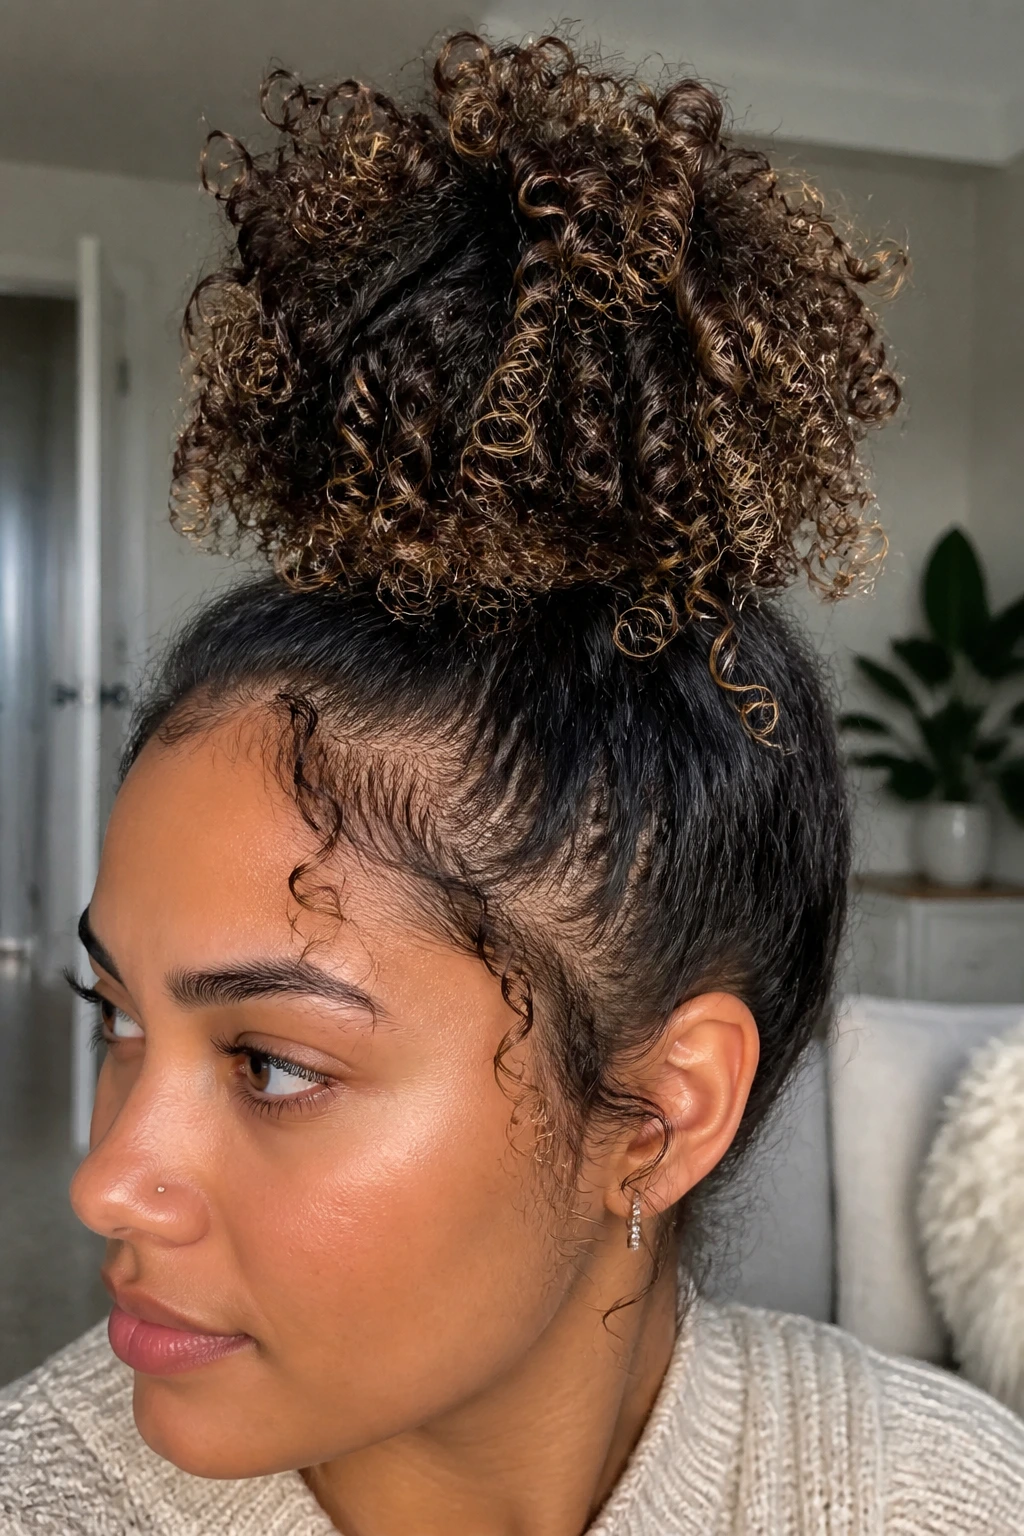
Curly hair gives a bun something straight hair often has to fake: natural bulk. Each coil creates a tiny change in direction, and those bends catch light and shadow in a way that makes the bun look deeper and more dimensional. That does not mean every curly bun should be huge. It means you get more shape from less manipulation.
Shrinkage matters here. A bun that looks modest when you first set it can grow rounder after twenty minutes, especially if the curls are dry and springy. That is why placement matters so much. High buns give drama at the crown; low buns feel grounded and cleaner; side buns let the volume fan out laterally. Same hair. Different line.
There is also the question of frizz, which a lot of people treat like a problem to erase. Sometimes it is just texture doing its job. A little frizz at the hairline can make a bun look lived-in instead of severe, and a few loose curls around the face can soften an otherwise tight shape. The trick is deciding what to control and what to leave alone.
One more thing. Curly buns hold better when the hair is not stripped dry. A small amount of leave-in or a soft cream gives the strands enough slip to gather without shredding the cuticle, and that makes a visible difference when you take the style down later.
Essential Tools for Curly-Hair Bun Styling
- Satin scrunchies: They stretch without biting into the curls the way thin elastics do.
- Coil hair ties: Good for thick hair that needs a firmer grip without a hard crease.
- Bobby pins, medium and long: Use the longer ones for dense buns; they anchor deeper.
- Wide-tooth comb: Useful for sectioning, not for aggressive brushing.
- Rat-tail comb: Helps make a clean part or separate twists without tearing curls apart.
- Edge brush or soft toothbrush: For smoothing the hairline in tiny amounts.
- Claw clip: Perfect for loose coil buns and fast resets.
- Satin scarf or bonnet: Keeps the shape intact overnight and reduces friction.
- Light mist bottle: A few spritzes can wake up the curl pattern before styling.
Choosing the Right Products and Prep for Hold
Curly bun styling starts before you touch the elastic. Hair that is too dry will puff and snag. Hair that is too wet will shrink in weird places and make the bun look uneven once it dries. A light mist of water, then a small amount of leave-in, usually gives you the best middle ground.
For hold, choose the product based on the finish you want. A mousse works well when you want the bun to keep its movement and avoid a crunchy surface. A gel gives more grip at the roots and around the part, which helps if your hair slips out of buns halfway through the day. Heavy creams are fine on the ends, but if you put too much on the roots, the bun can slide.
The real trick is product placement. Smooth the hairline and the first inch or two of the crown. Leave the rest with enough texture to grip. That little distinction matters more than buying another jar of something shiny.
How to Wear These Buns With Different Outfits
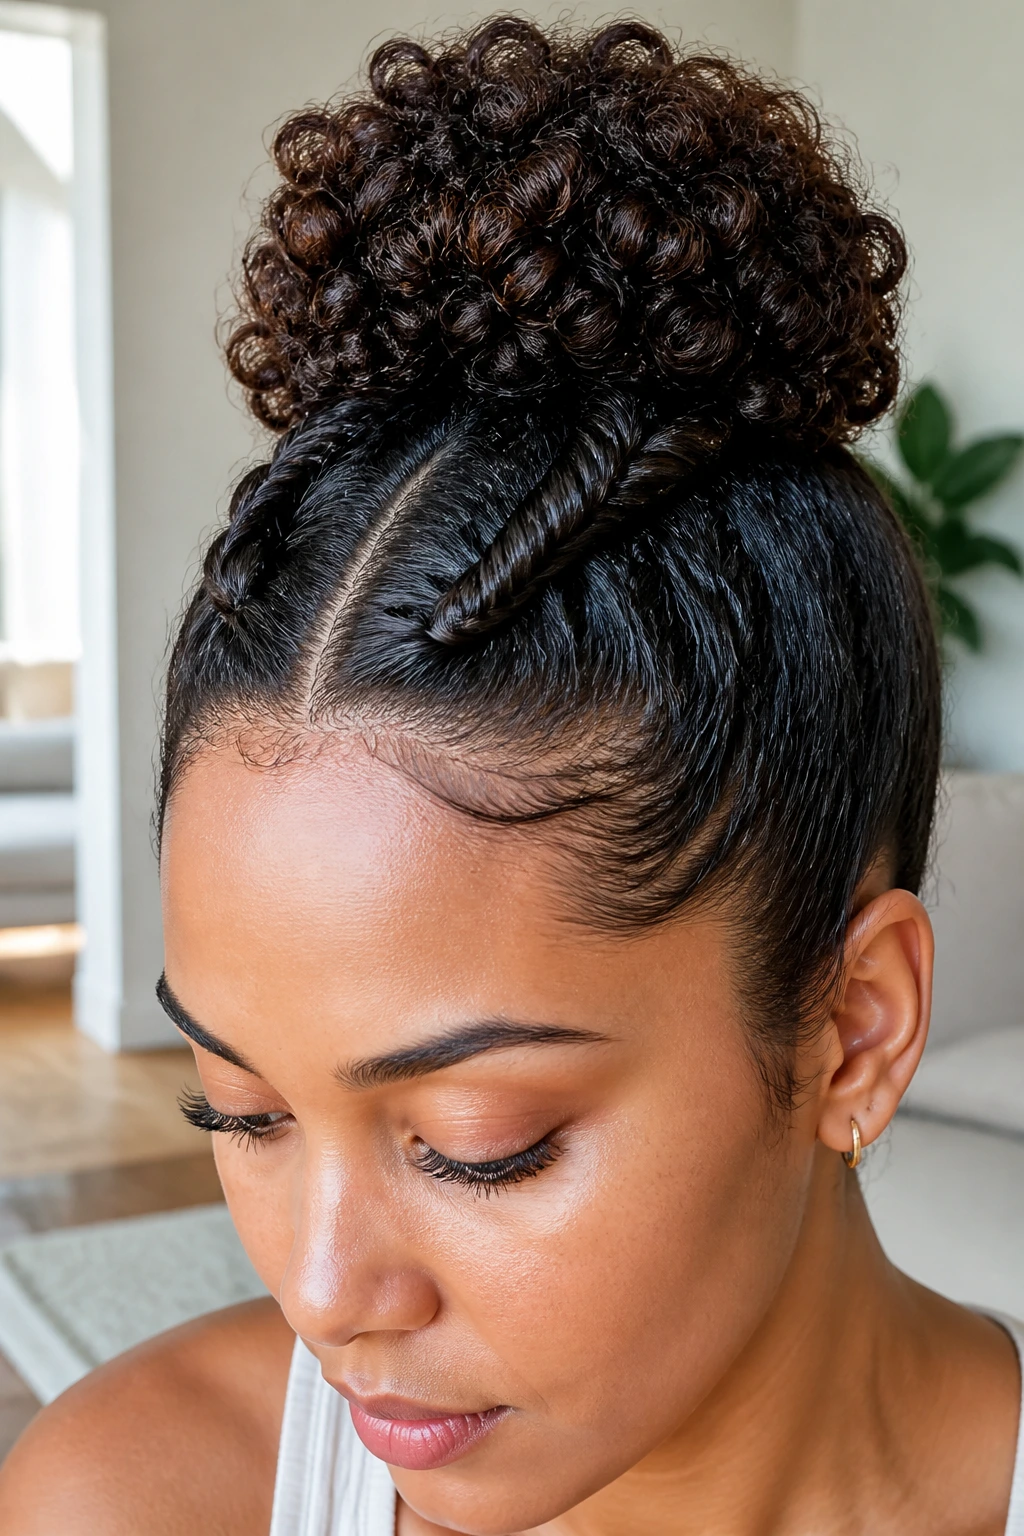
Placement: High buns lift the face and show off the neck; low buns sit neatly under collars and coats; side buns create a softer line that works well with open necklines.
Finish: A polished bun reads sharper with structured clothes, while a fluffy or scarf-wrapped bun looks better with relaxed fabric, knit tops, or anything with movement. Curly texture can handle both. It just needs the shape to match the clothes.
Outfits: Big earrings love high buns. Turtlenecks and collared shirts pair well with low buns because the hair stays out of the way. Half-up buns give balance when you want the hair visible but not loose everywhere.
Occasions: Claw-clip buns and messy mid-height buns suit errands and low-key plans. Twisted crown buns, ballerina buns, and side buns carry a little more polish for meetings, dinners, or events where you want the hair to look finished from every angle.
Extra Styling Tricks That Change the Finish
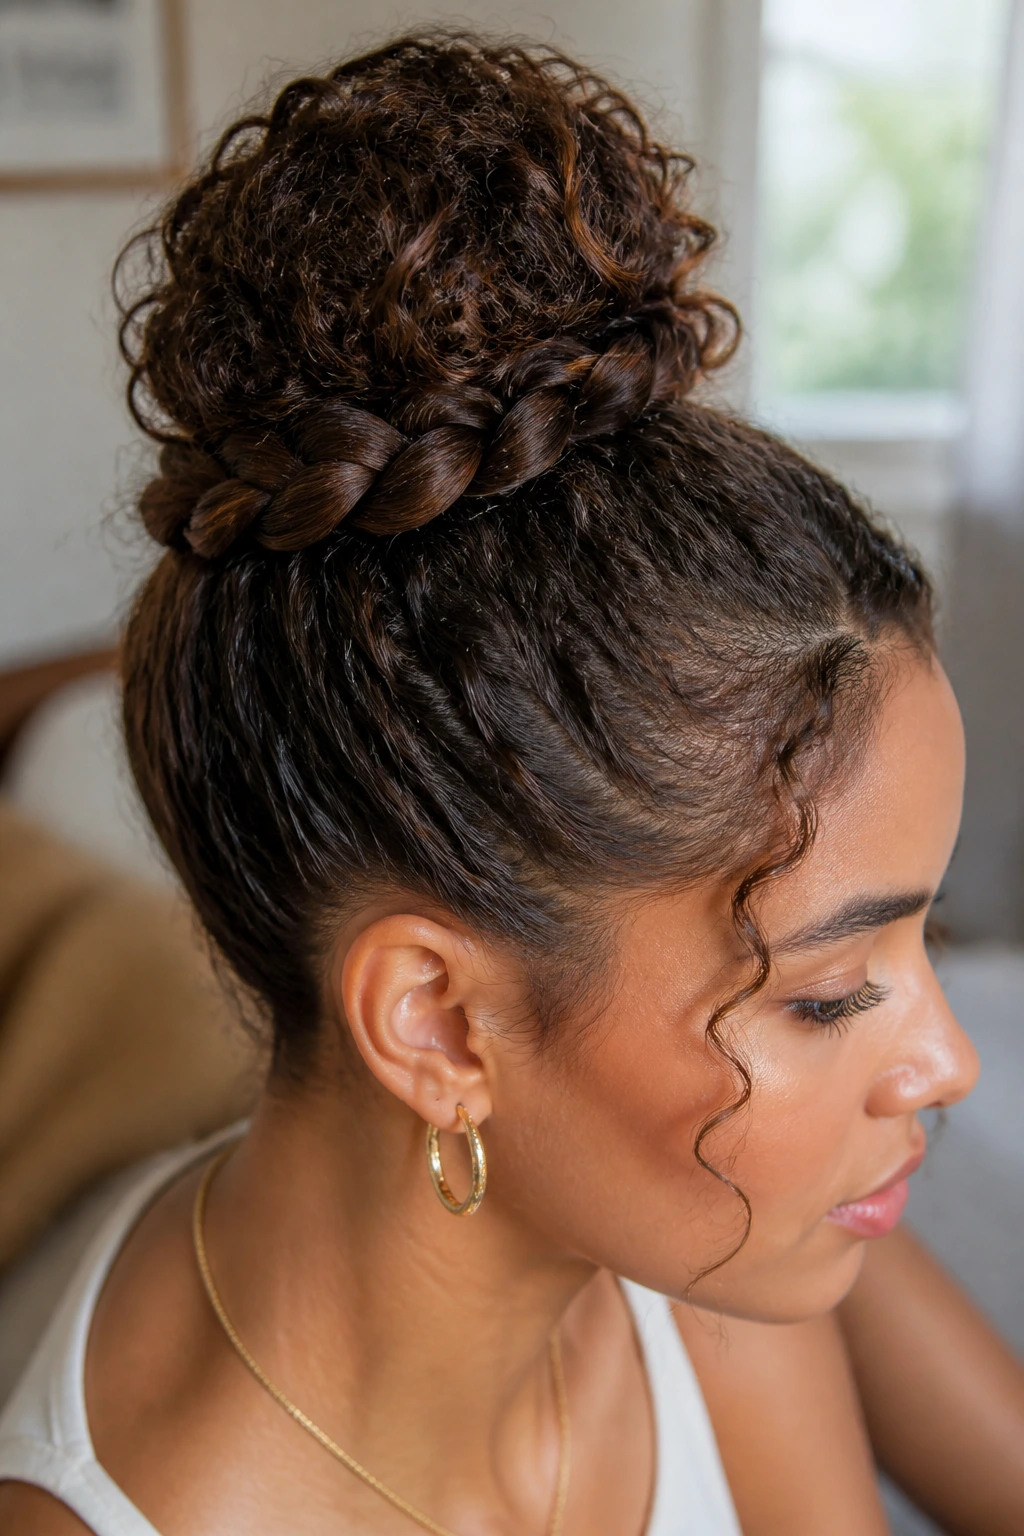
Definition Boost: Smooth the bun base with a small amount of gel, then stop. Let the bun itself stay textured. That single choice keeps the style from looking painted on.
Grip Without Crunch: If your hair slips, braid or twist the ponytail before wrapping it. The texture gives pins something to hold without needing a thick layer of product.
Volume Rescue: If the bun looks too small, gently pull at the outer loops after it is pinned. Do it in tiny lifts, not one big yank, or the shape will collapse.
Accessory Move: A satin scarf, a simple clip, or one decorative pin changes the tone fast. Use one strong accessory, not three competing ones. Curly hair already brings enough texture to the frame.
Keeping a Bun Fresh Overnight and Beyond
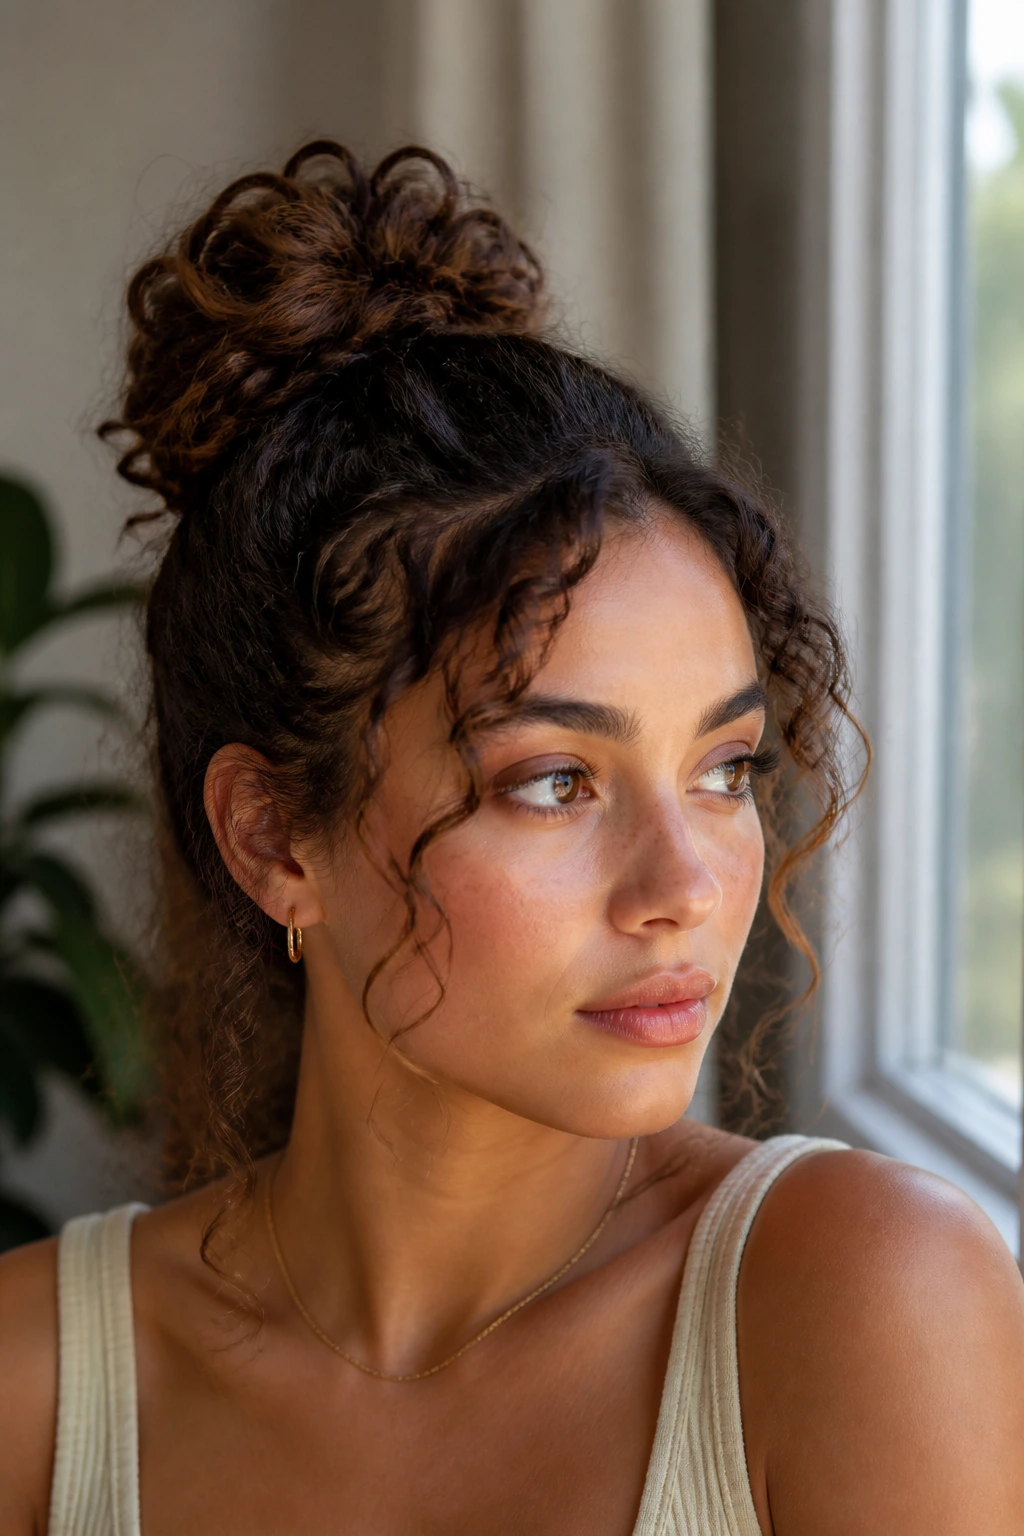
A good curly bun usually looks best in its first 24 hours, but the right one can stretch to two days if you handle it gently. Low buns, braid-based buns, and scarf-wrapped buns tend to survive the longest. Space buns and looser top knots usually need more touch-up because they move around more when you sleep.
Sleep on a satin pillowcase or wear a bonnet if the style needs to stay intact. If you want the bun itself to keep shape, loosely wrap the hair with a scarf before bed and pin only the parts that need support. Do not sleep on a bun that is painfully tight. It will show up the next day as a sore scalp and a flattened crown.
For a refresh, mist the hair lightly, rub a pea-size amount of leave-in between your palms, and smooth only the frizzy spots. If the bun has gone fuzzy but the shape is still there, do not rebuild everything. Re-pin the loose section and leave the rest alone. That is usually enough.
Variations and Adaptations to Try
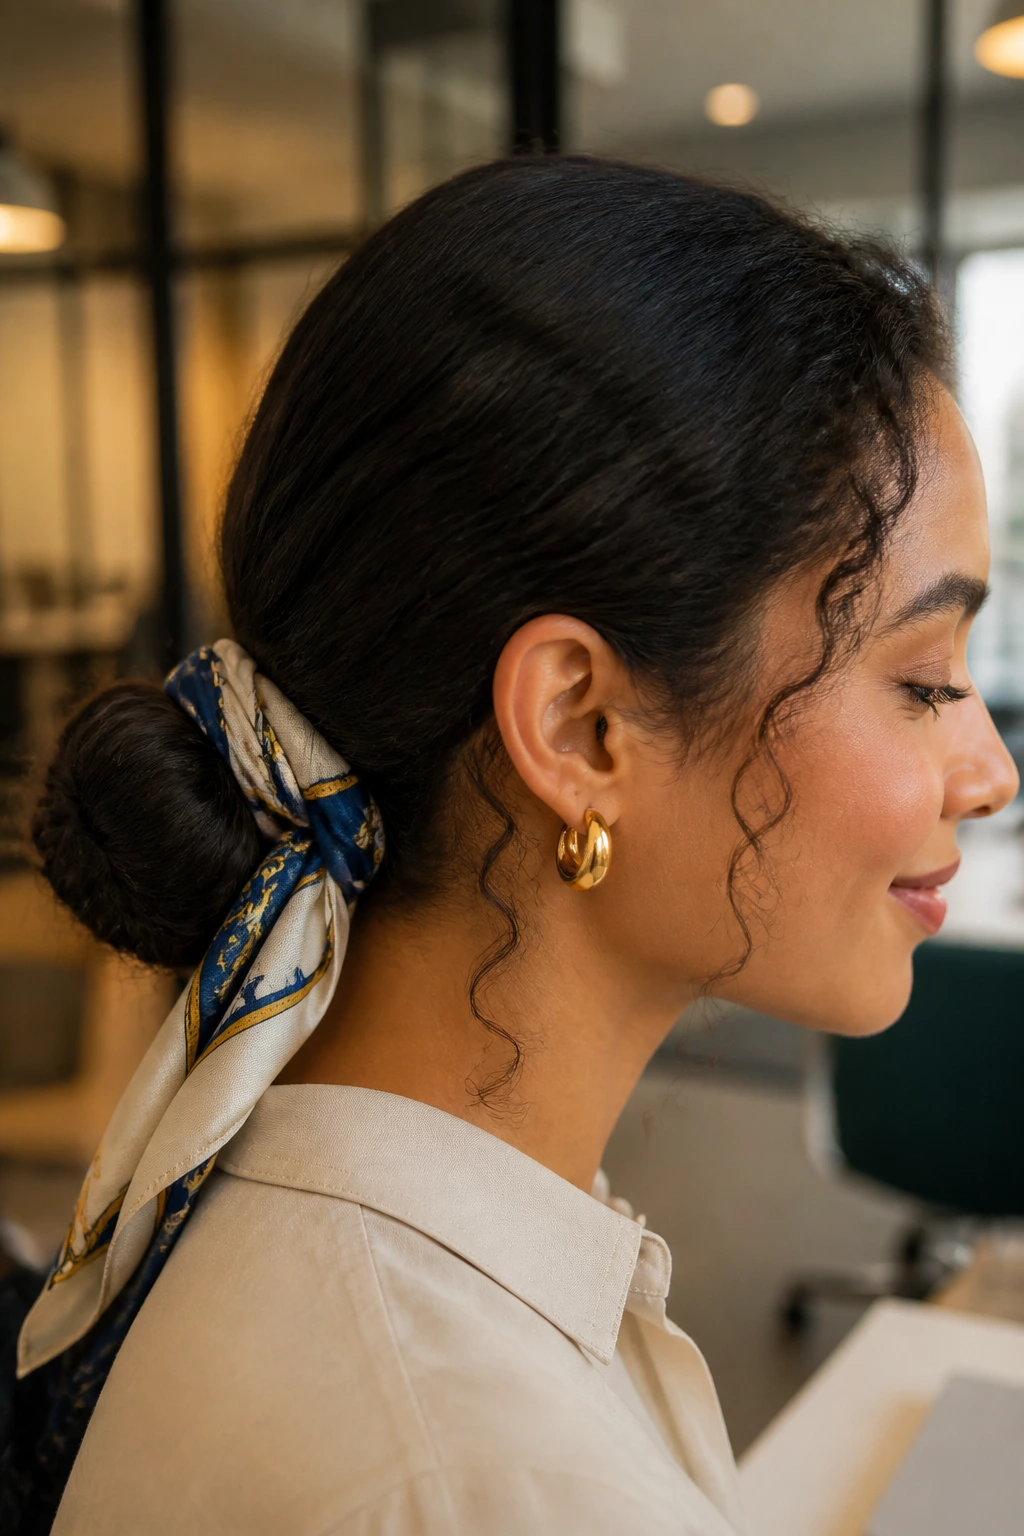
The Office Sleek Shift: Keep the crown smoother, use a deep side part, and tuck the bun low at the nape. It feels sharper than a messy bun and stays friendly to collars and blazers.
The Gym-to-Errand Coil: Use a claw clip or a high puff bun with a satin scrunchie. It comes apart fast, which matters if you want to shake it loose after a workout without starting from zero.
The Silk-Sleeve Wrap: Add a scarf over a low bun, then knot it once at the base or tuck the ends under. This is the easiest way to hide frizz and still keep the curl pattern visible at the edges.
The Tight-Texture Protective Twist: Flat twists or small front braids feeding into a bun keep tighter curls anchored with less daily handling. It’s a useful choice when you want the style to hold and the roots to stay calm.
The Short-Curl Double Knot: If one bun feels like too much weight, split the hair into two smaller buns. It works on shorter lengths and gives you a style that holds better than one overstuffed knot.
Common Mistakes That Flatten Curly Buns
- Pulling too tight at the crown: The bun may look neat for ten minutes, then the whole top goes flat and sore. Leave a little lift where the hair enters the elastic.
- Using tiny elastics that bite the curls: They snag, break strands, and leave dents that are hard to smooth out. A satin scrunchie or coil tie is kinder and usually holds better.
- Smoothing the whole head with heavy gel: The style can look shellacked at first, then collapse when the product gets warm or sticky. Use hold only at the roots and hairline.
- Ignoring pin direction: Pins inserted parallel to the bun often slide out. Push them in against the twist or coil so they lock under tension.
- Making every bun sit in the same spot: Repeating the exact placement can stress the same section of scalp and leave one side flat. Move the part or bun height from day to day.
- Trying to fix every flyaway: A few loose curls are not a failure. If you chase every one, the style usually gets rougher and frizzier.
Frequently Asked Questions
Can I do bun hairstyles for curly hair on freshly washed hair?
Yes, but it helps if the hair has a little product and has dried at least partially. Fresh wash hair can be too slippery at the roots, which makes buns slide. A soft cream or gel plus a low-tension tie usually helps.
What bun works best for very thick curls?
Braided base buns, rolled French buns, and low nape coils handle dense hair better than tiny top knots. They spread the weight out and give pins more to grab. A large claw clip can help during the first stage, too.
How do I keep the bun from pulling on my edges?
Use less tension at the hairline and smooth only the outer surface. If the front feels tight before you leave the mirror, it will feel worse an hour later. A soft brush and a little gel are enough; you do not need to yank the hair back.
Do I need gel for every curly bun?
No. Some styles look better with just water and a light leave-in, especially messy buns and pineapple buns. Use gel when you want a smoother base, a cleaner part, or more hold at the crown.
Can shorter curls still make a bun?
Absolutely. Space buns, half-up buns, and small claw-clip coils are often better for shorter lengths than one full knot. If the hair will not fit into one bun without strain, split it.
Why does my bun look flat on top?
Too much smoothing at the crown usually does it. Try gathering the hair with your hands instead of a brush, then lift the roots slightly before you secure the elastic. That small change keeps the silhouette round.
How do I make a bun look fuller without adding fake hair?
Loosen the outer loops after pinning, pull a few curls forward around the face, and keep some puff at the crown. Curly texture does the rest. A little asymmetry often looks richer than a perfectly round knot.
What’s the easiest bun to refresh the next day?
The low nape coil bun or a scarf-wrapped bun. Both keep their structure with less morning repair. A quick mist, one or two pins, and you’re back in business.
A Bun That Still Looks Like Your Hair
The best buns for curly hair do not erase the curls. They gather them. That sounds like a small difference, but it changes everything: the texture stays visible, the shape has character, and the style feels like it belongs to the hair instead of fighting it.
If a bun makes your curls look thinner, tighter, or more uncomfortable than they should, something in the tension or placement is off. Loosen the crown, switch the tie, move the bun higher or lower, and let the curl pattern keep a little of its own voice. That is where these styles really start to work.
Keep the silhouette clean where it needs to be clean. Leave the texture where the texture looks best. That’s the whole trick, and once you start noticing it, buns stop feeling like a fallback and start acting like one of the most useful shapes curly hair can wear.
