



The difference between braids that look neat and braids that look fussy usually shows up at the ends. With knotless braids with beads, one crooked part or one overstuffed bead stack is enough to throw off the whole line. Get the spacing right, though, and the style lands with that crisp, finished look that makes people think the install was longer and harder than it really was.
Knotless braids deserve the attention. They start with your own hair and gradually feed in extension hair, so the root sits flatter and the scalp line looks cleaner than a traditional knotted base. That matters here because beads are brutally honest. They expose uneven parts, sloppy tension, and bead placement that was chosen without thinking through the shape.
I like beaded knotless braids most when the bead story feels intentional: clear beads on dark braids, matte wood beads on warm tones, pearl or gold accents when you want the whole style to read dressed up instead of playful. The strongest versions are never overloaded. They let the braid pattern breathe, then use the beads as punctuation. That’s where the polished finish lives.
- Flatter roots: The knotless base keeps the scalp area smooth, so the style looks tidy from the first inch instead of bulky at the start.
- Cleaner bead placement: A repeated bead pattern reads sharper than a random scatter of sizes and colors.
- Works with many lengths: Short bob braids, waist-length sets, and half-up looks all hold beads well when the weight stays balanced.
- Easy to dress up: Swap clear beads for pearl, gold, or shell, and the same braid pattern suddenly feels ready for a dinner, photo shoot, or event.
- Less visual clutter: When the braid work is clean, you do not need a dozen bead colors. Two or three is usually enough.
- More control over the finish: Small details like part size, bead count, and end spacing make the style look planned, not improvised.
Why the Knotless Base Changes the Whole Finish
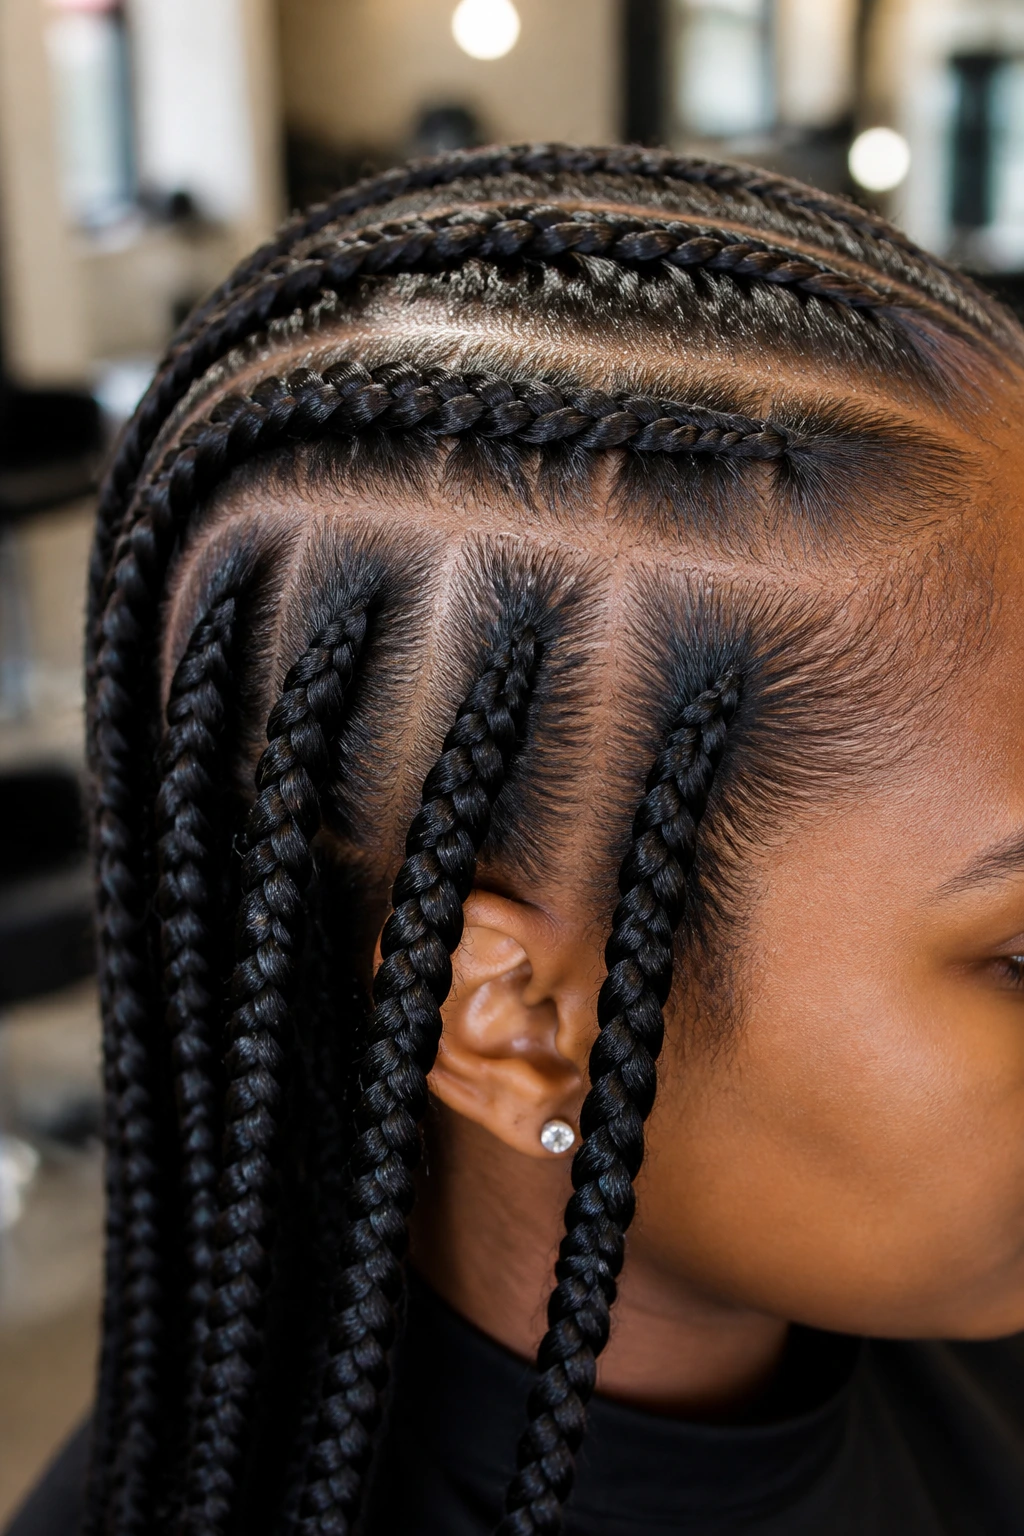
Knotless braids change the whole mood before the beads even show up. The braid begins with your own hair, then extension hair gets fed in gradually, which means there is no hard knot sitting at the scalp. That flatter root is doing a lot of work here. It keeps the style from looking bulky, and bulky roots plus beads can make even a pretty braid pattern feel heavy.
Polished beaded braids depend on a clean line from scalp to tip. If the parting is wobbly or the braid starts too thick, the beads end up looking like an afterthought. When the base is smooth, the beads can do what they do best: frame the finish, catch light, and draw the eye down the braid in a controlled way.
There is another quiet advantage. Knotless braids make it easier to vary bead weight without the whole style feeling lopsided. A few clear beads on the front braids, a slightly denser cluster at the ends, and a neat center or side part can make the style read crisp rather than busy. The braid itself is the structure. The beads are the accent.
That is why the styles below lean on symmetry, spacing, and material choice. Beads are not the whole story. They are the final sentence.
1. Clear Beads on Long, Slim Knotless Braids
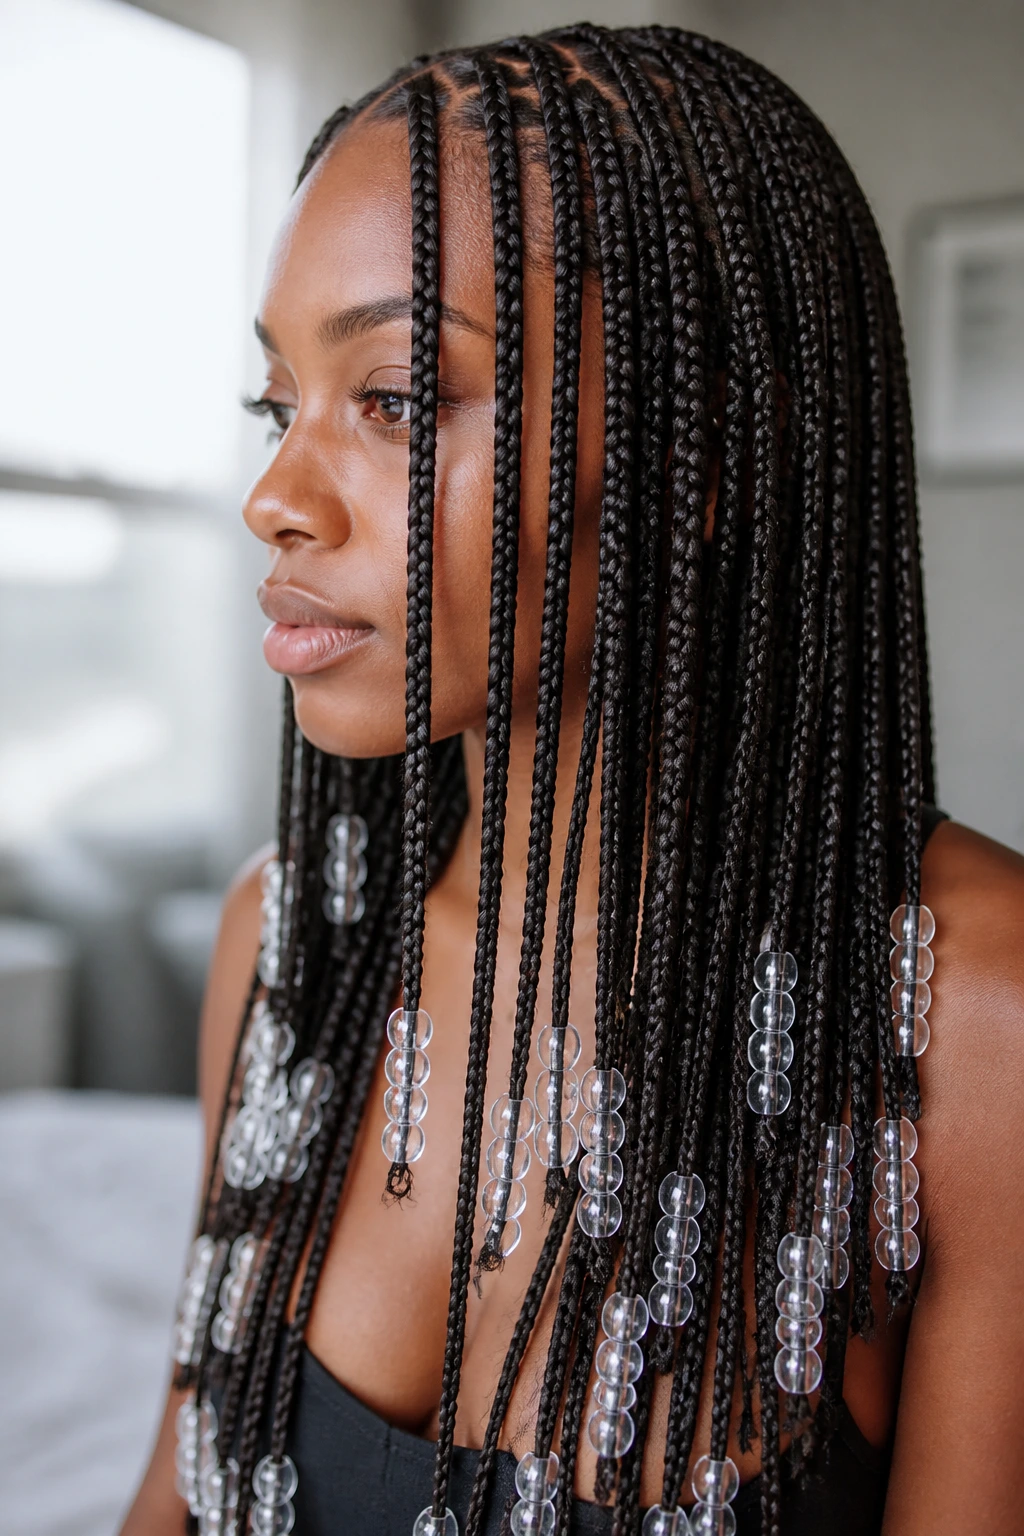
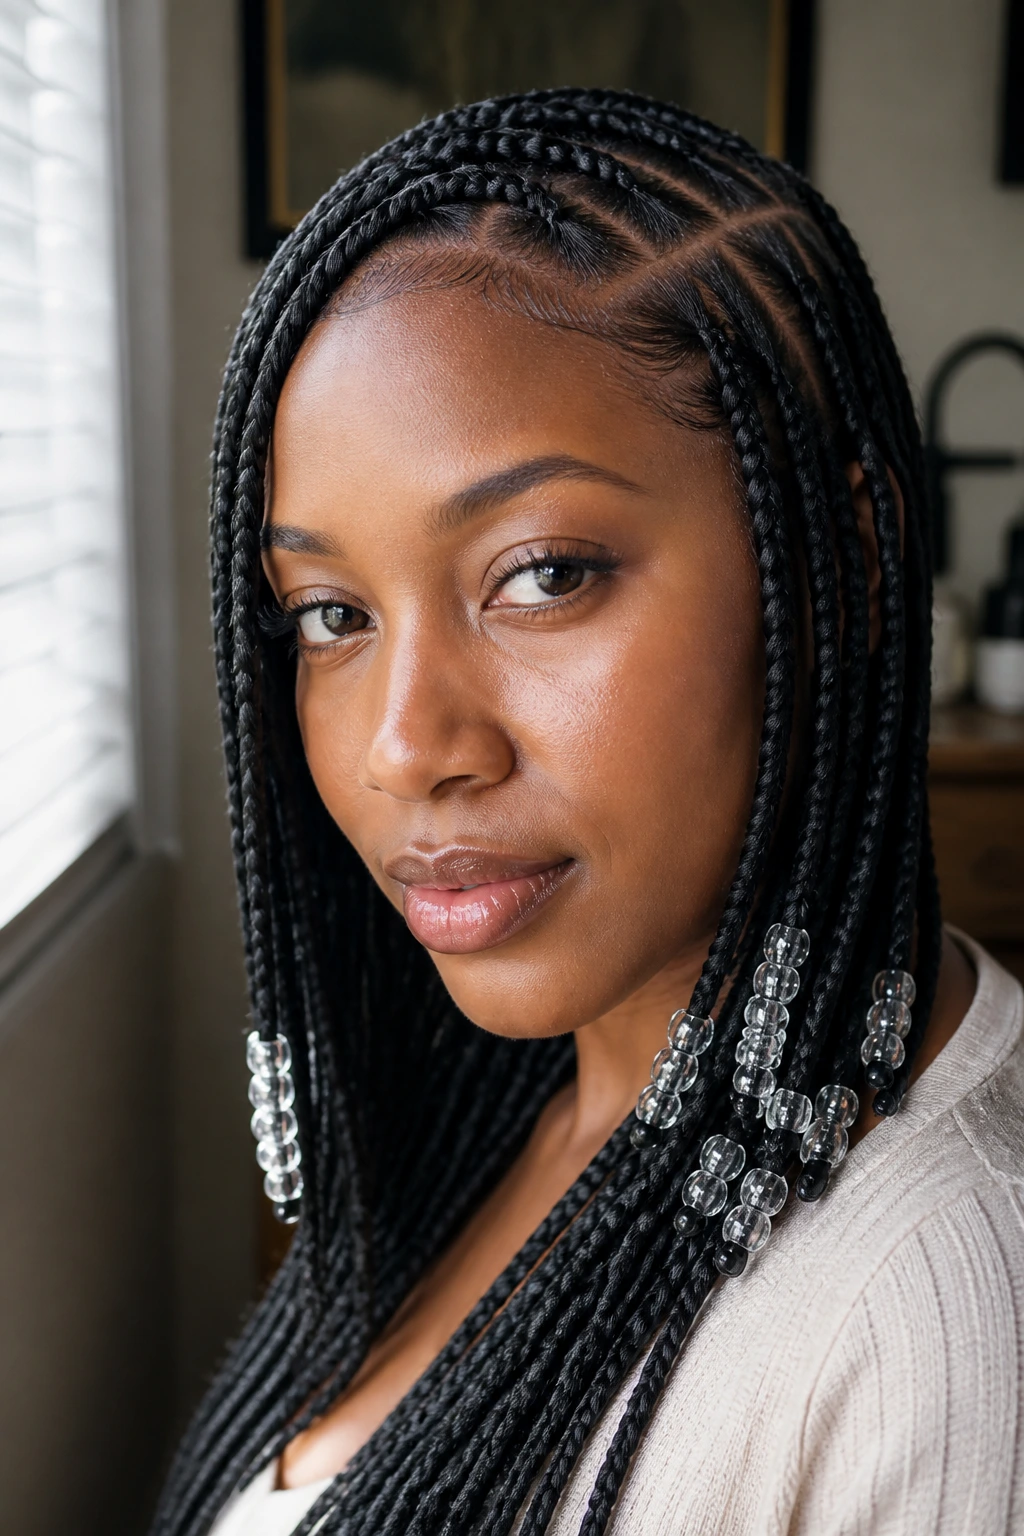
Clear beads are the safest place to start, and I mean that in the best way. On long, slim knotless braids, they give you that glassy finish that moves when you turn your head and does not fight the braid color underneath. If your braids are dark brown, black, or even burgundy, clear beads let the parting and the texture stay front and center.
This look works because the beads repeat at the ends without stealing the show. Keep the size medium, not oversized. Two to four clear beads per braid is enough for a polished finish; any more and the ends can start to look crowded.
A clean center part makes this style feel sharper. If you want the whole look to read expensive without being loud, this is the one I would reach for first.
2. Gold-Tipped Ends With Warm Bead Spacing
Gold beads change the whole temperature of knotless braids. They look especially good on dark braids because the metal finish gives you a sharp line at the end of each plait, almost like jewelry built into the style.
The trick is restraint. Use gold on the last inch or two of the braid and keep the spacing even. When the beads sit too high, the shine gets noisy. When they sit low and repeat at the same point on each braid, the style looks deliberate.
This is the version I like for evenings, weddings, and any outfit with warm tones. Black, chocolate, rust, cream, camel, deep green—gold beads sit comfortably with all of them.
3. Side-Part Knotless Braids That Frame the Face
A side part changes the whole attitude of the braids. It softens the line, pulls one side of the face forward, and gives the beads a little asymmetry without making the style messy. The result feels polished in a way that a perfect center part sometimes does not.
Keep the bead placement lighter on the fuller side and let the front braid or two carry the visual weight. That keeps the eye moving toward the face instead of straight down the length. Small clear or pearl beads work best here because they echo the clean shape of the part.
If your face shape benefits from a little softness near the temples, this is a smart choice. It gives movement, but the movement is controlled.
4. Half-Up Knotless Braids With Bead Clusters
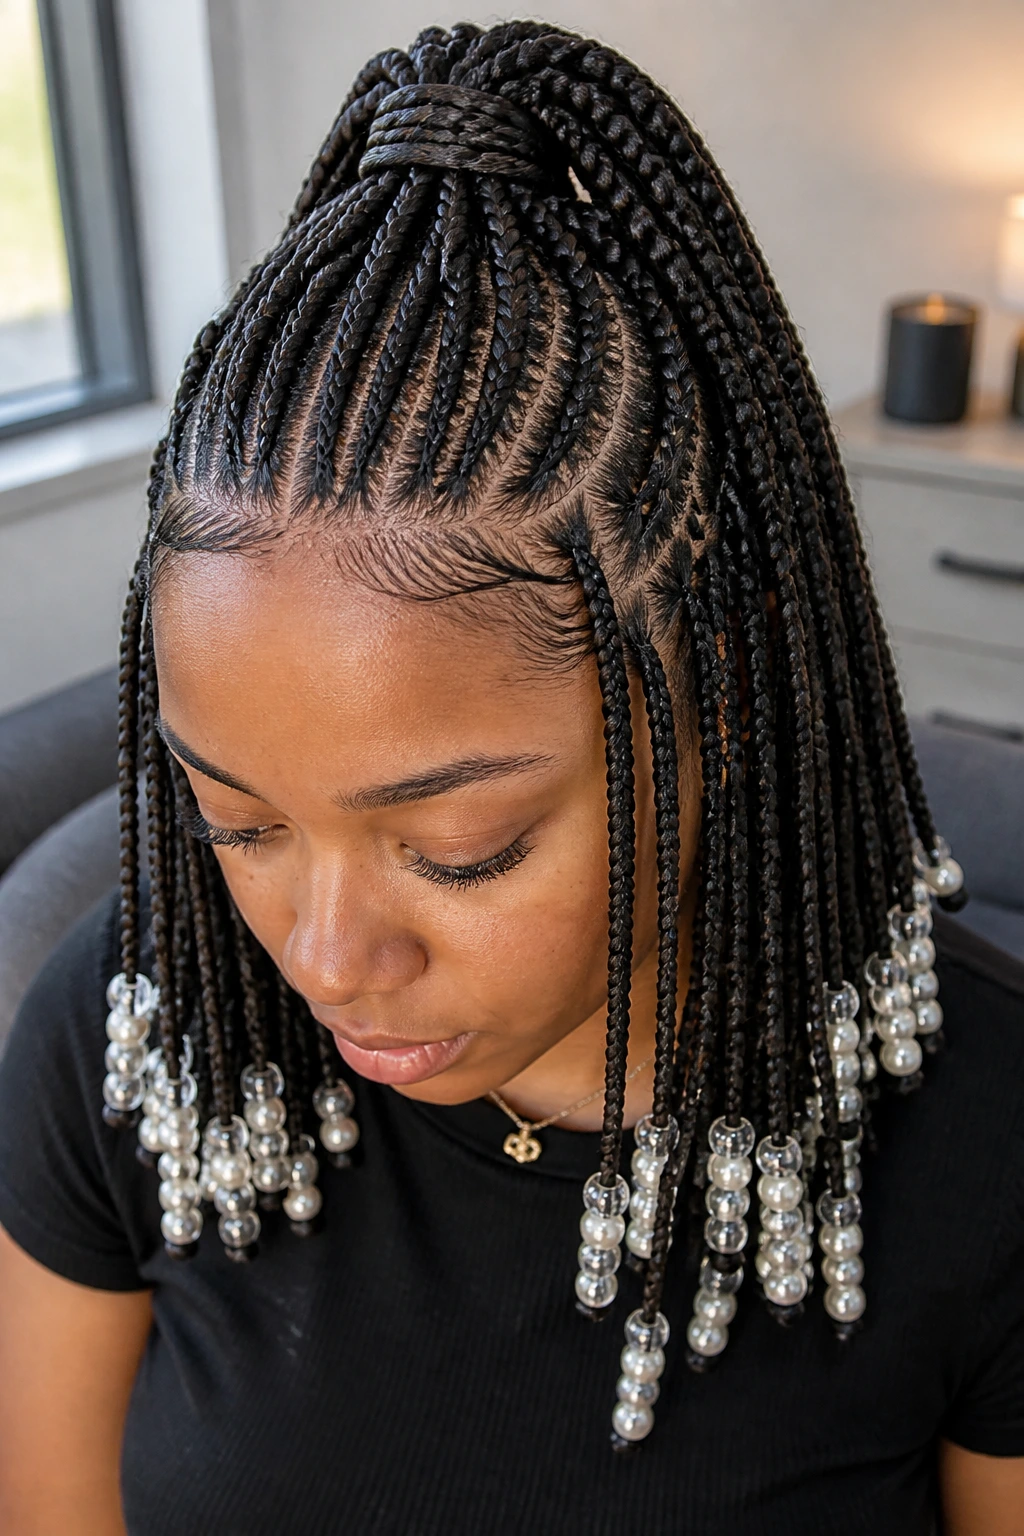
Half-up styles can go wrong fast if the top section is too bulky. With knotless braids, though, a half-up pullback looks neat when the crown stays smooth and the bead clusters stay on the lower half of the braids. That keeps the top clean and lets the ends do the talking.
I like this version with clear or pearl beads grouped in small stacks at the bottom. The half-up section gives structure; the beads add shine. If you are going for an outfit with a sharp neckline or statement earrings, this style leaves room for both.
One useful detail: do not let the beads crowd the ponytail base. Keep them down at the ends so the top still looks sleek.
5. Triangle-Part Braids for a Sharper Finish
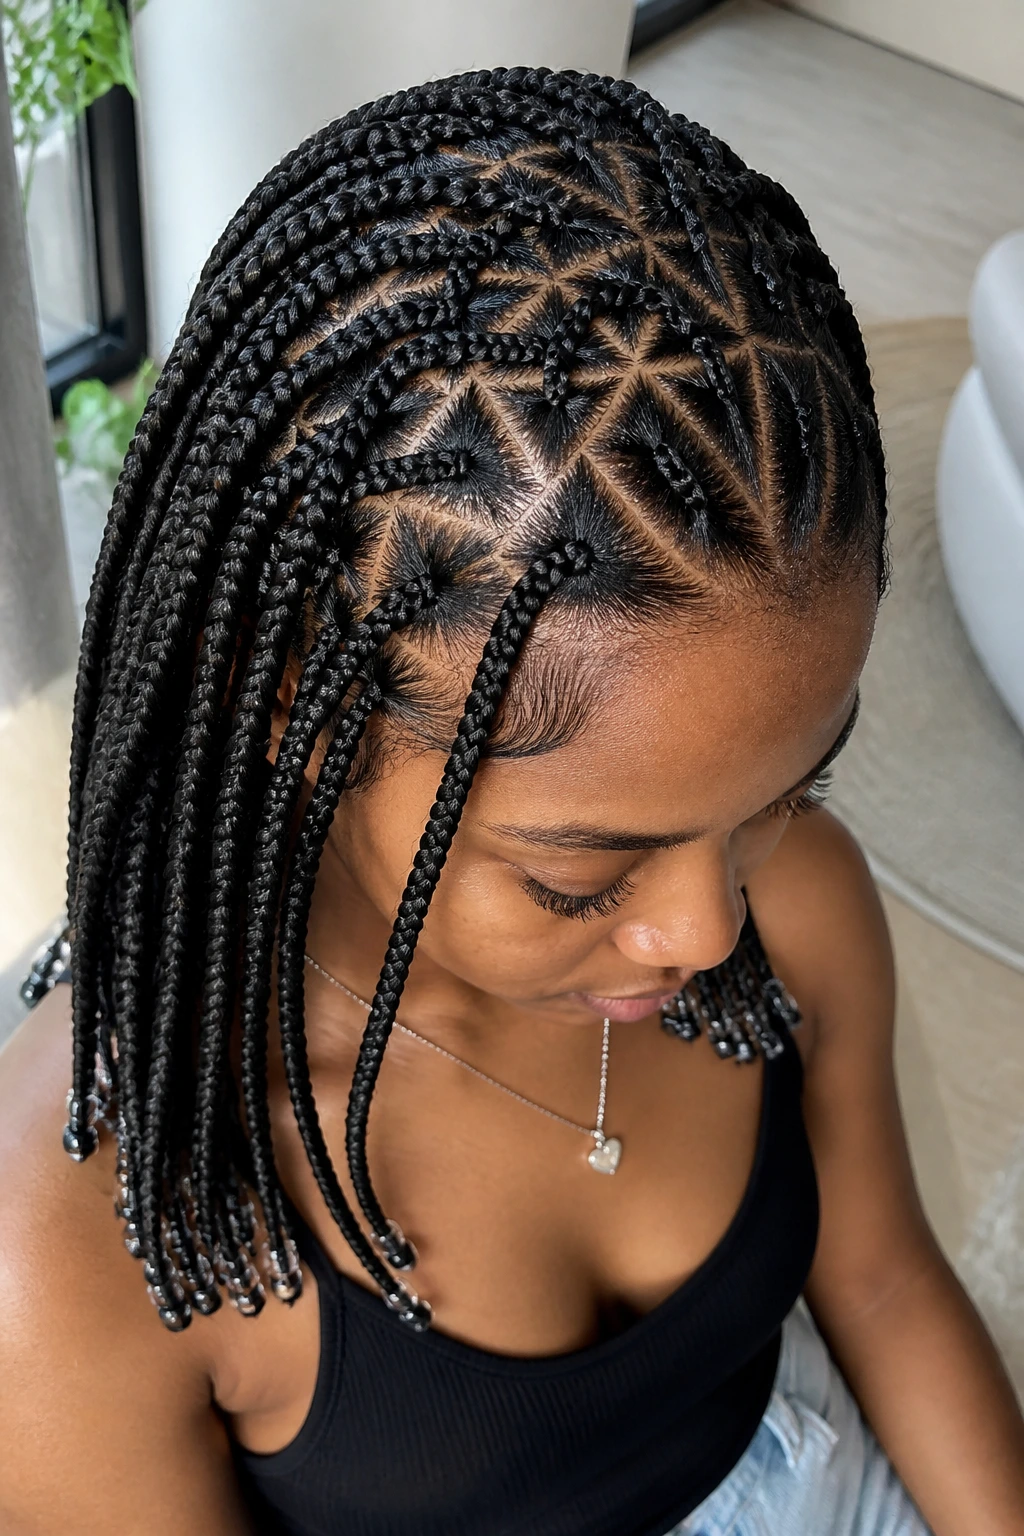
Triangle parts make the braid pattern look more intentional right away. The geometry is the point. Each braid starts from a slightly different angle, so the beads at the ends feel like part of a design rather than random decoration.
This style works best when the beads echo the same clean lines. Small clear or black beads keep the triangles readable. If you mix in too many colors, the parting gets lost.
Triangle parts pair well with medium-size braids. The shape already brings interest, so you do not need huge beads. A simple repeated bead choice will do more for the polished look than a pile of extras ever will.
6. Shoulder-Length Braids With Tiny Glass Beads
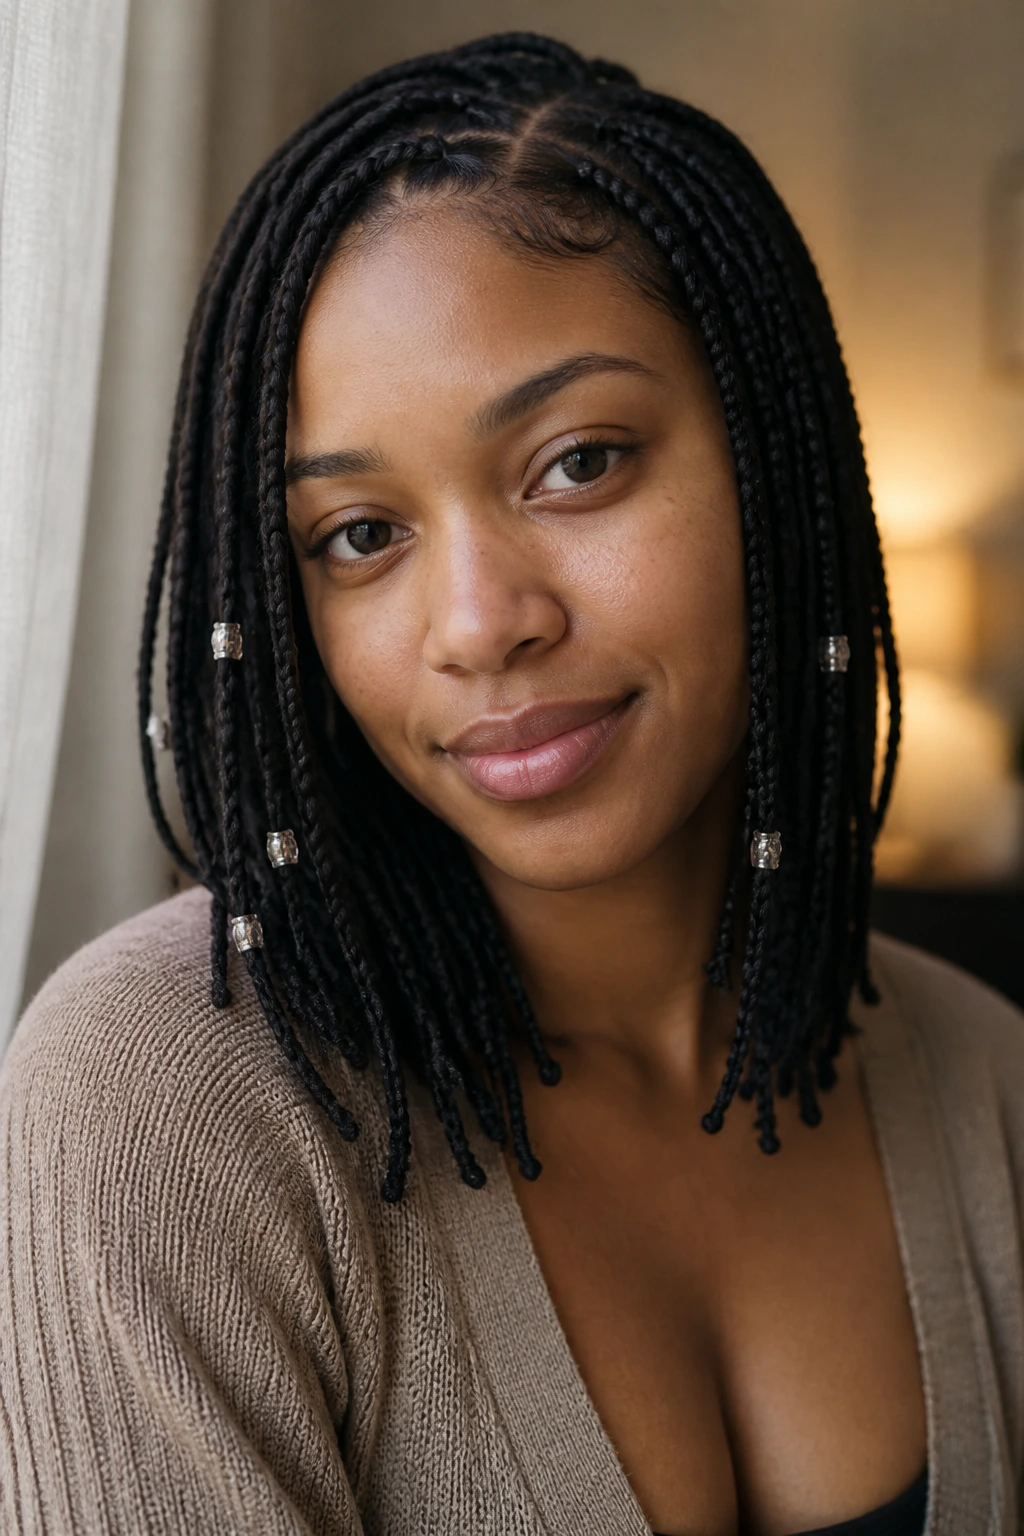
Shoulder-length knotless braids can look fresh instead of heavy if the beads stay small. Tiny glass beads are the best bet. They add a faint clink and a little shine without dragging the braids down or making the ends feel crowded.
This is one of my favorite polished looks for everyday wear because it sits right between casual and dressed-up. The shorter length keeps the style light on the neck, and the tiny beads keep the end line clean. You can wear this with a crisp T-shirt or a blazer and it still works.
Keep the bead count modest. A few well-placed beads beat a dense stack every time here.
7. Waist-Length Braids With Graduated Bead Sizes
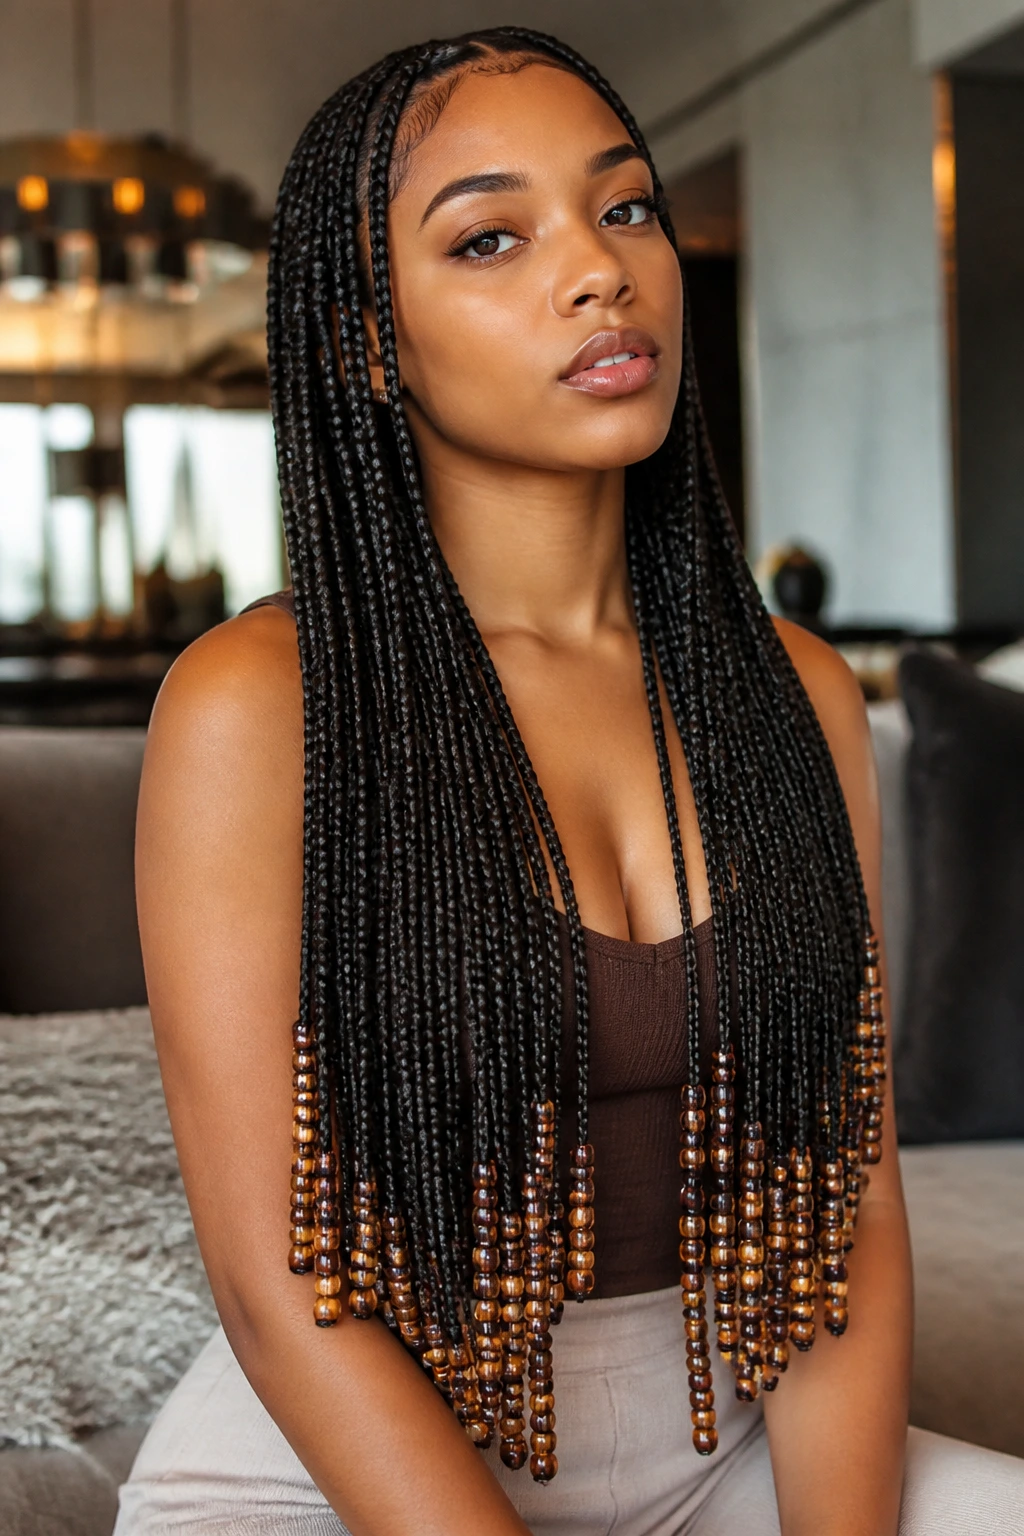
Long braids give you room to play with bead size, and graduated beads make the most of that length. Start with smaller beads higher on the braid, then move to larger ones near the end. The eye reads the change as movement, not clutter.
This works because the beads create a tapering effect that matches the braid length. The style feels polished when the transition looks smooth, not abrupt. Use the same material across the braid—clear, amber, or black—so the size change is the star.
If your braids reach the waist or lower, this style keeps the finish from disappearing into one long blur. The bead progression gives it shape.
8. Knotless Braids Finished With Wood Beads
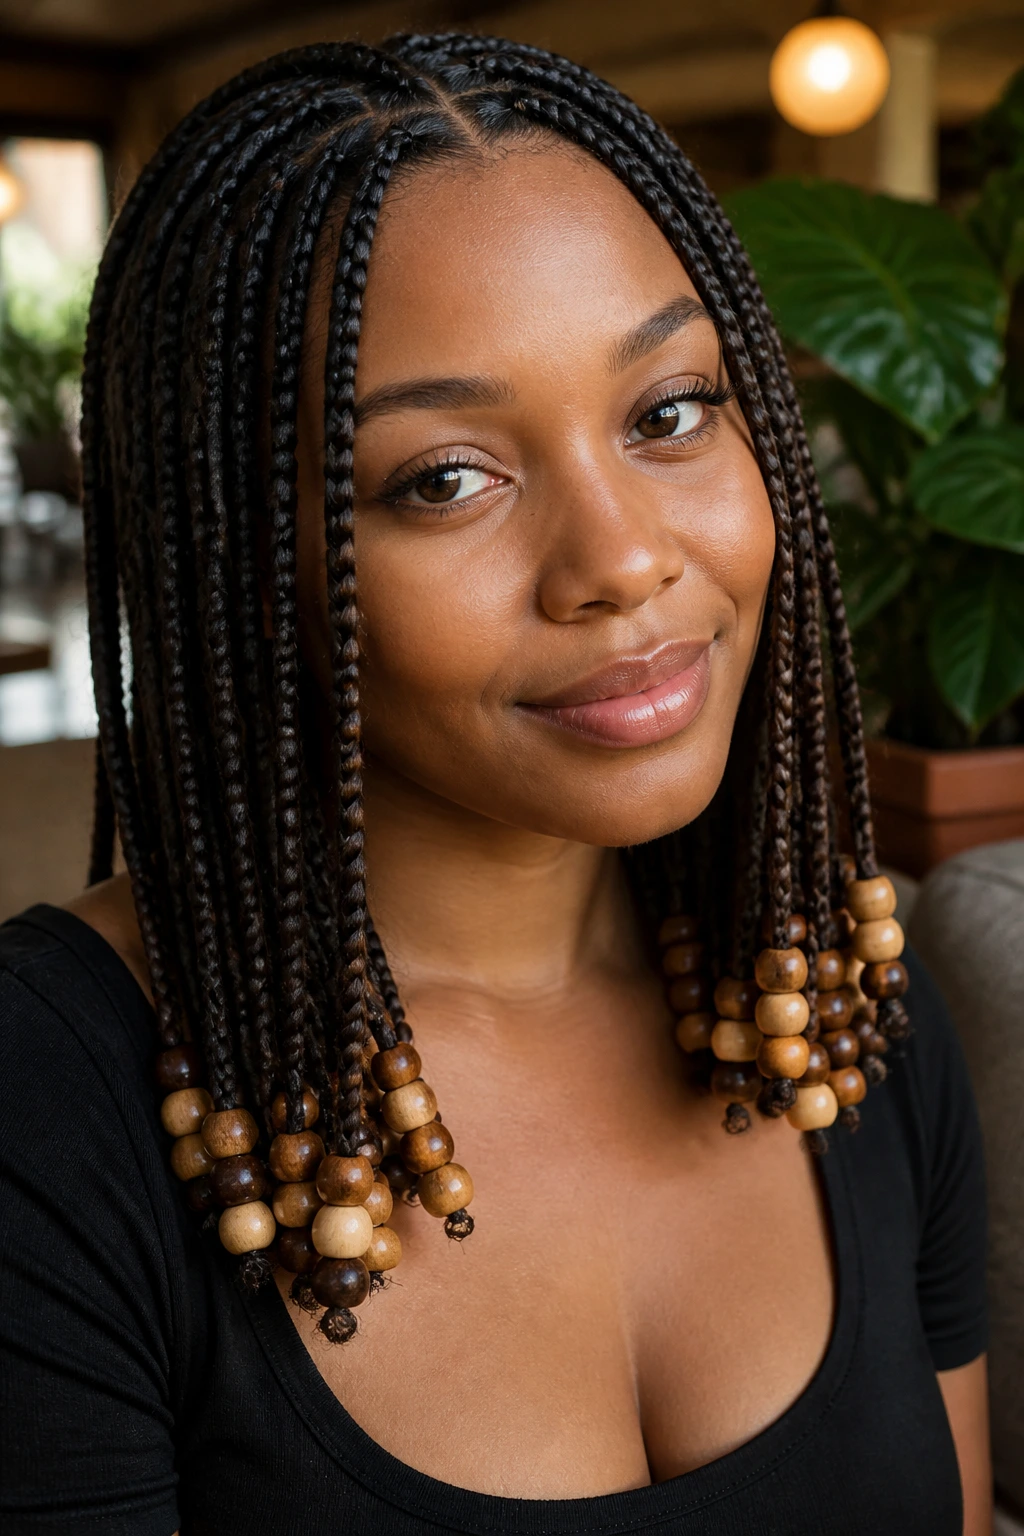
Wood beads bring a matte contrast that looks especially good when the braid hair itself has a slight sheen. They soften the style. Not dull. Soft.
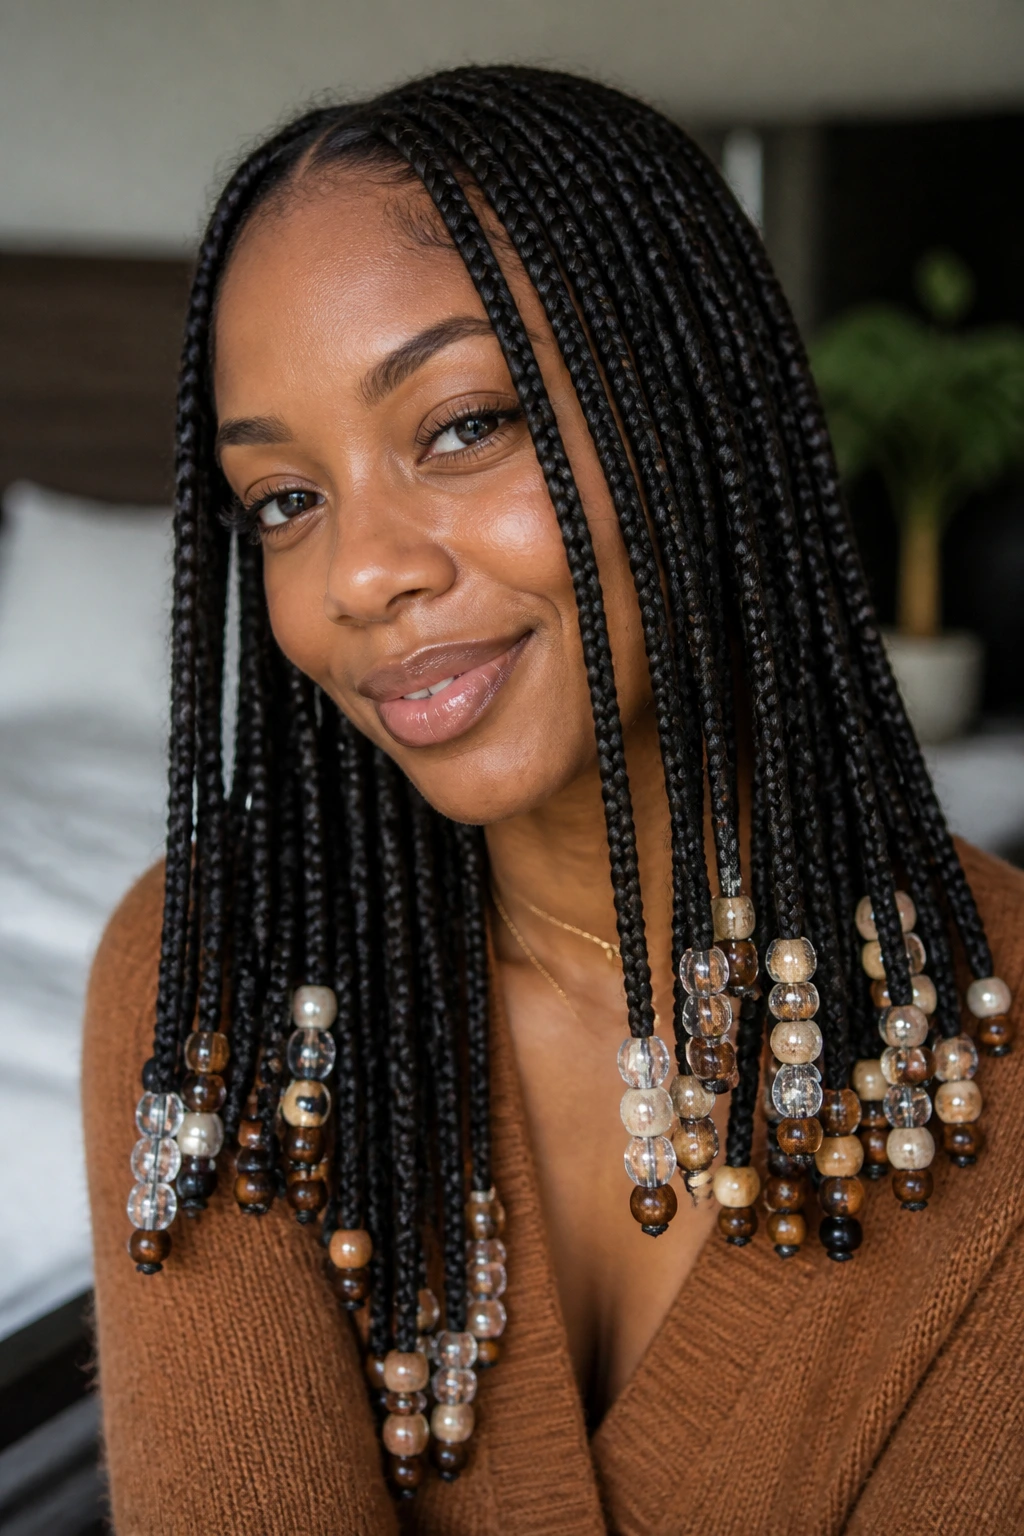
I like wood beads on braids with warm brown, black, or honey-colored extension hair because the textures play well together. They make the style feel grounded and intentional, not overproduced. If clear beads are glassy and gold beads are dressy, wood beads are calm and clean.
Use smooth, rounded wood beads only. Rough edges will snag the braid ends and wreck the polished finish you were trying to get in the first place.
9. Pearl Beads for a Clean, Dressy Look
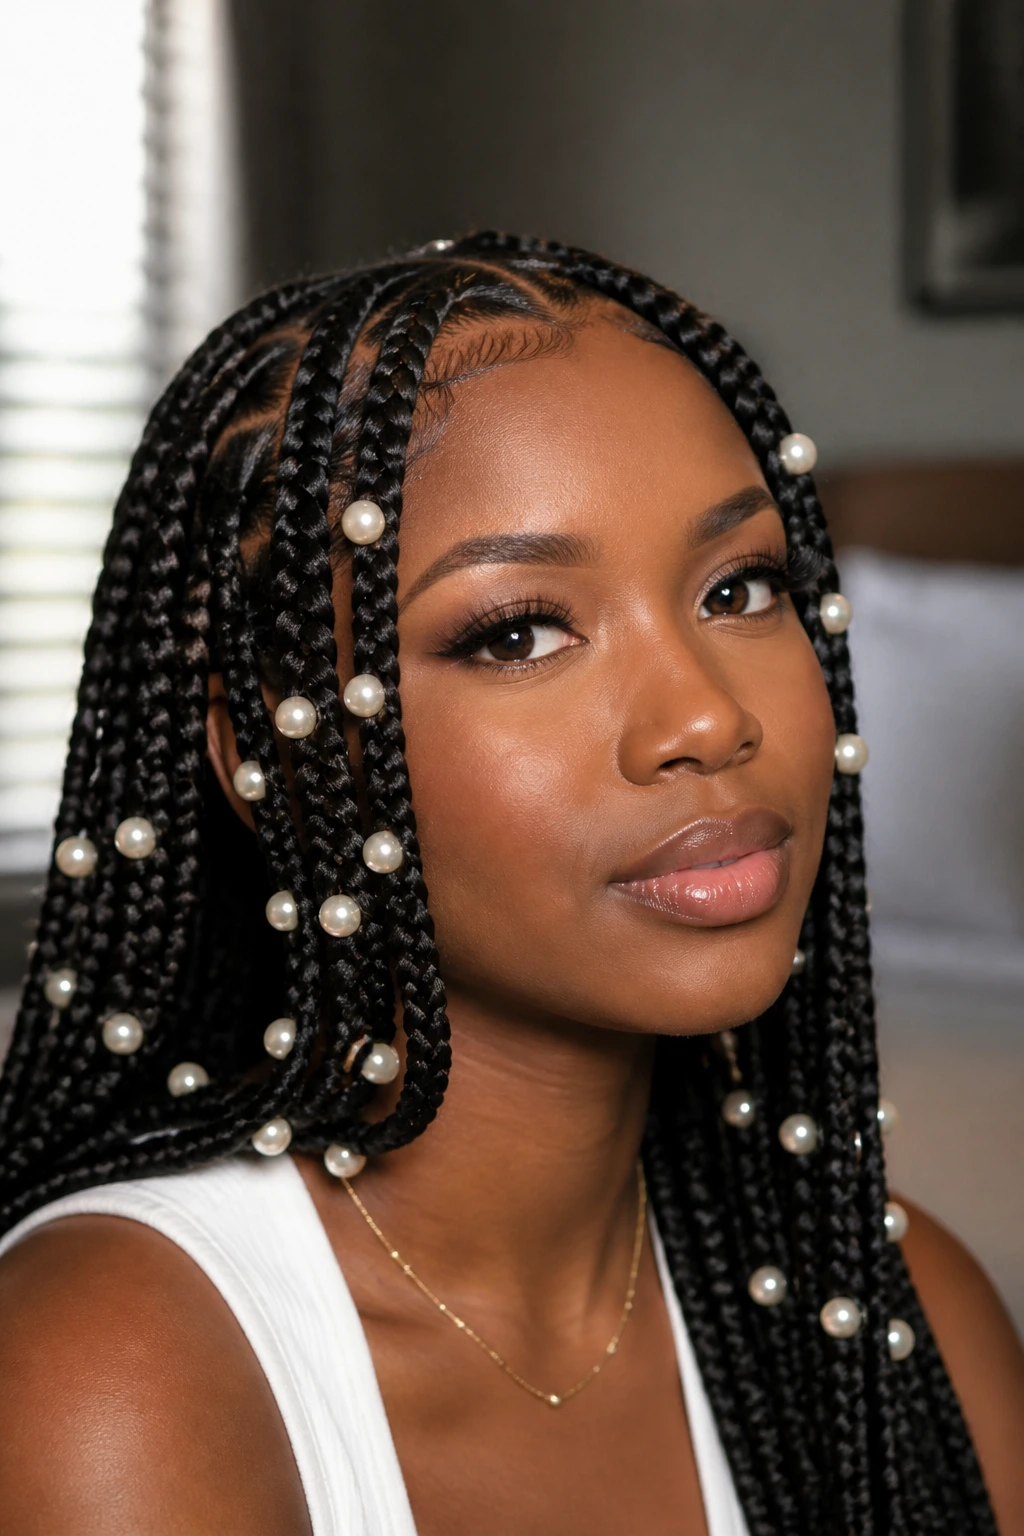
Pearl beads are what I reach for when I want the braids to look more formal without changing the braid pattern itself. They sit close to white, but the finish is softer than bright acrylic. That makes them easy to pair with satin, silk, lace, and anything with a clean neckline.
The best part is how calm they look against dark braids. You get contrast without glare. Keep the pearls fairly small and let them repeat in a steady pattern. Too many huge pearls can tip the style into costume territory, and that is not what we want here.
Pearls are a smart choice for weddings, photos, or any event where you want the braids to look neat from every angle.
10. Metallic Cuffs Mixed With Small Beads
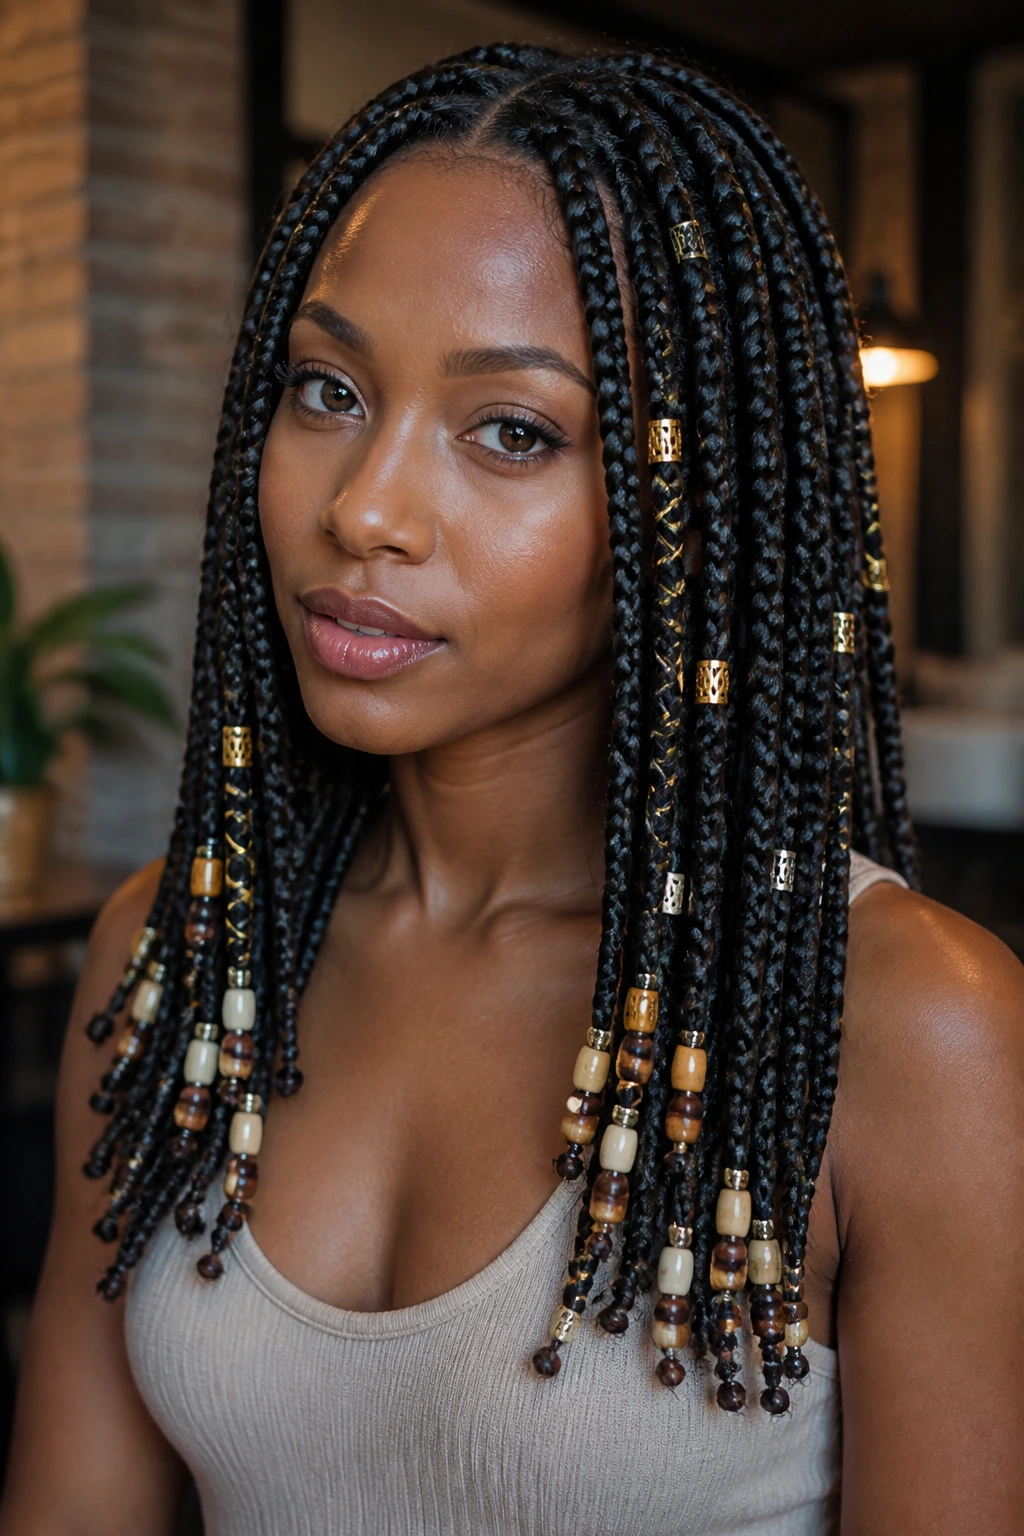
This version has a little edge, but it still reads polished when the proportions are right. Use small beads as the base and add metallic cuffs sparingly, not on every braid. The cuffs create a line break, which makes the braid ends feel more styled.
I prefer this look when the braid parts are crisp and the bead color stays mostly neutral. Silver cuffs on black braids look sharp. Gold cuffs on brown braids feel warmer. Mixing both metals can work, but only if the rest of the outfit is quiet.
If you want shine without filling every end with beads, this is a good compromise.
11. Boho Knotless Braids With Curly Ends and Beads
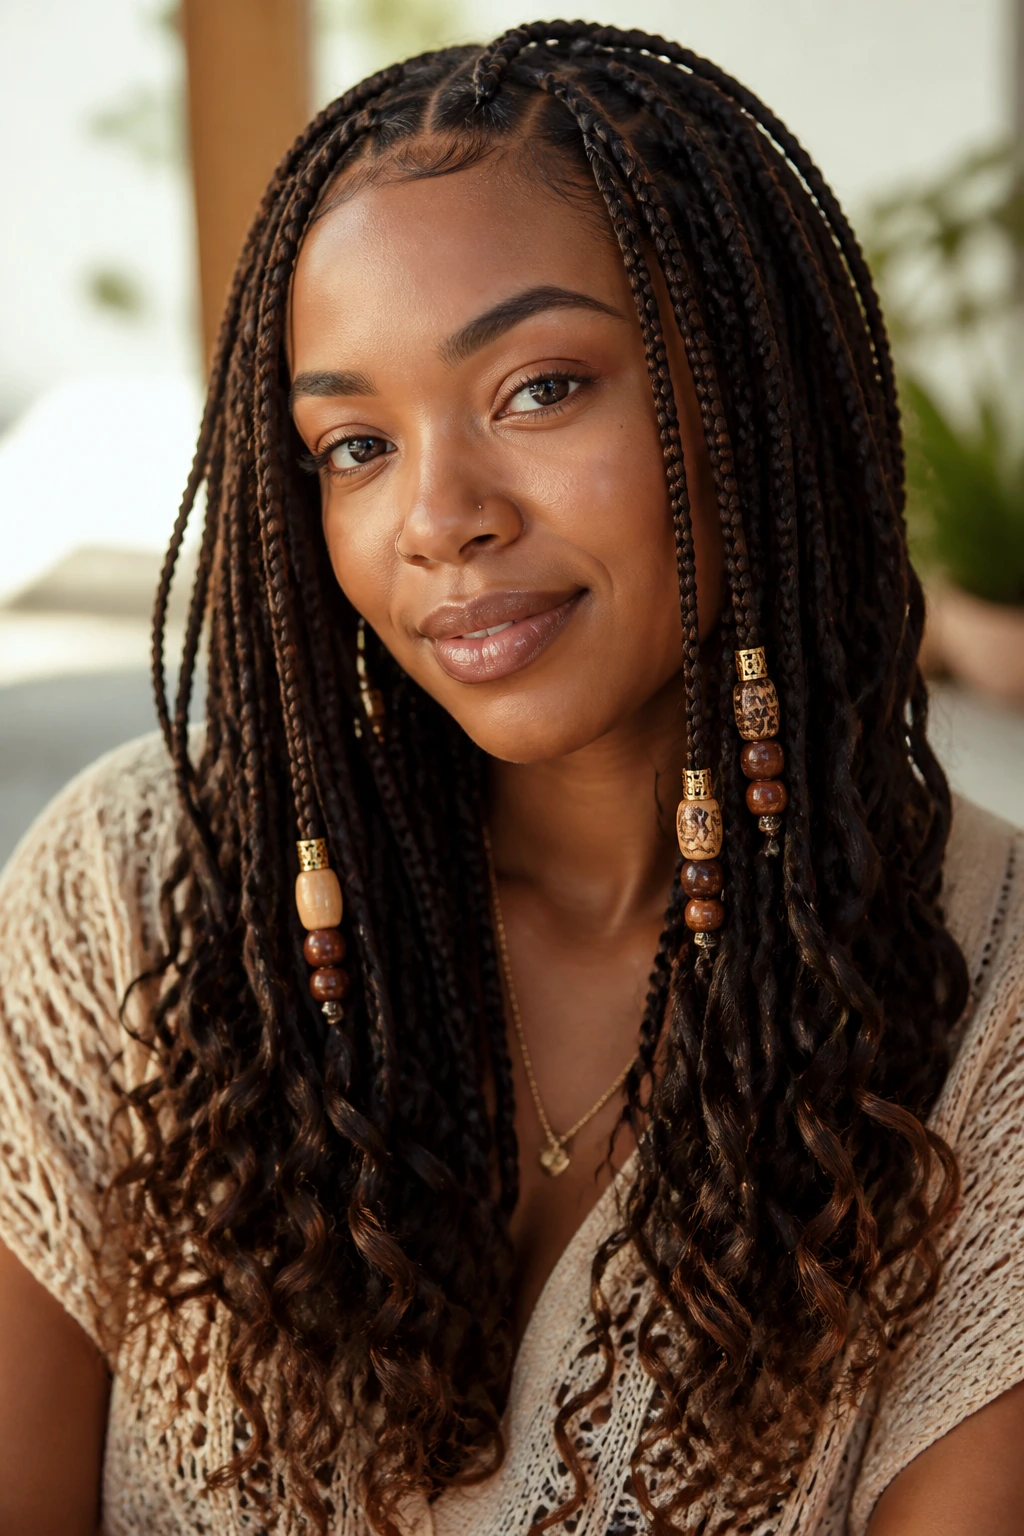
Curly ends change the whole rhythm of the style. Add beads to the straight part of the braid or just before the curl starts, and the look becomes softer and a little more romantic. The key is not to overload the ends. The curl already brings movement.
This style looks best with a lighter bead hand. Think one to three beads on selected braids, not every single strand. That keeps the boho texture from tipping into chaos. Clear, pearl, or amber beads are usually the best match because they do not fight the curl pattern.
If you want the polish of knotless braids but still want a little softness at the ends, this is the sweet spot.
12. High Ponytail Knotless Braids With Beaded Tips
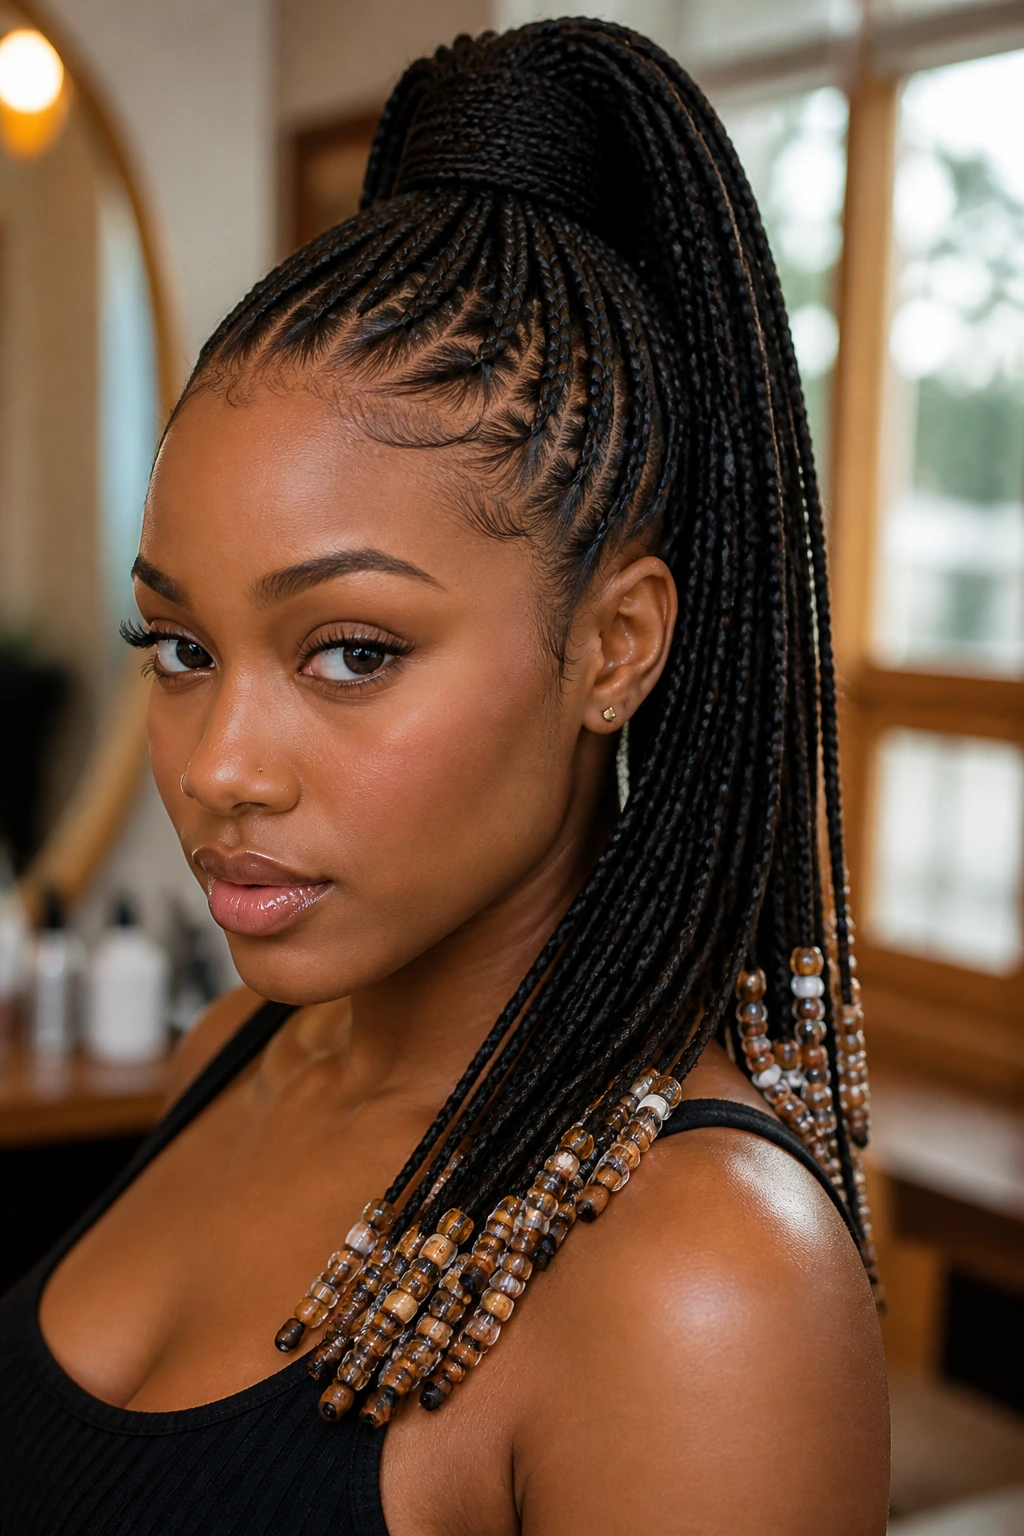
A high ponytail turns braids into a clean, lifted shape fast. When the beadwork sits on the ponytail ends, the whole style looks sharper because the eyes go up first, then down to the decorated tips.
Keep the crown smooth. That matters more than the bead choice. If the base is clean and the ponytail sits high and secure, even simple clear beads will look dressed up. A messy crown steals the attention from the braid line, and this style depends on that line staying neat.
This is a good pick when you want the face open and the ends active. It has energy without losing polish.
13. Low Ponytail Braids With a Smooth Center Part
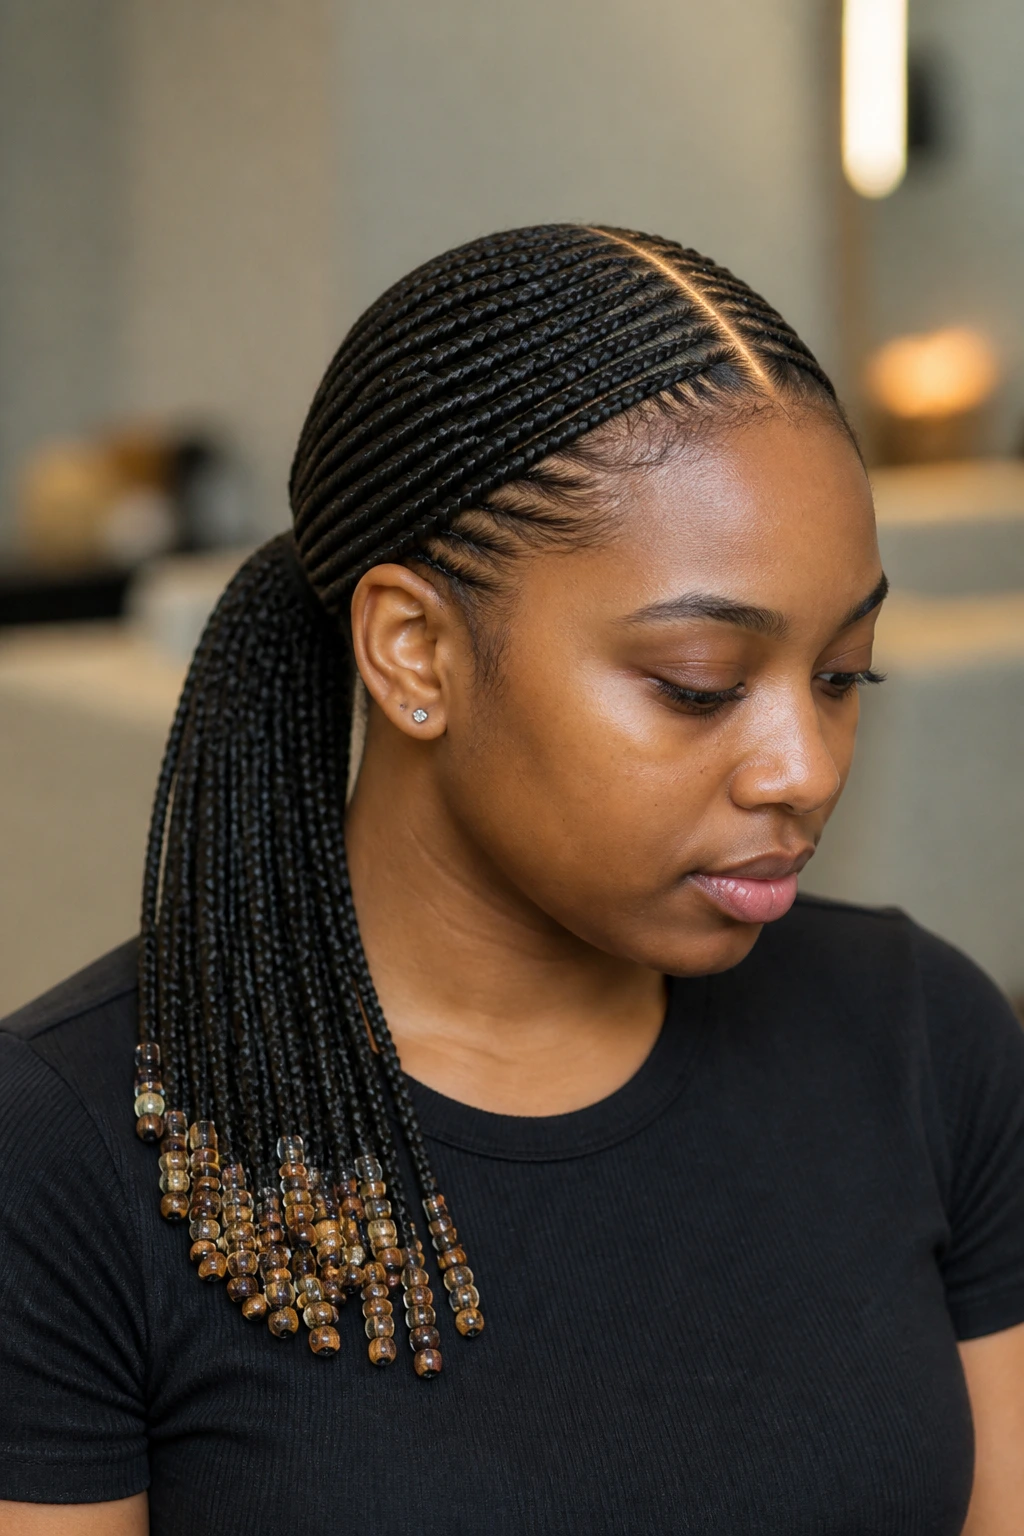
A low ponytail is quieter, and that is exactly why it can look so polished. The braids sit low at the nape, the center part stays visible, and the beads only need to show up at the ends. That means the whole style feels controlled from top to bottom.
I like this version with black, clear, or pearl beads. Nothing too loud. The effect is clean and a little formal, like the braid version of a pressed shirt. If you are heading to work, a dinner, or a family event, this style behaves.
One note: keep the ponytail tie hidden if you can. Visible elastic and bead clutter can break the line.
14. Black-and-Clear Beads for a High-Contrast Finish
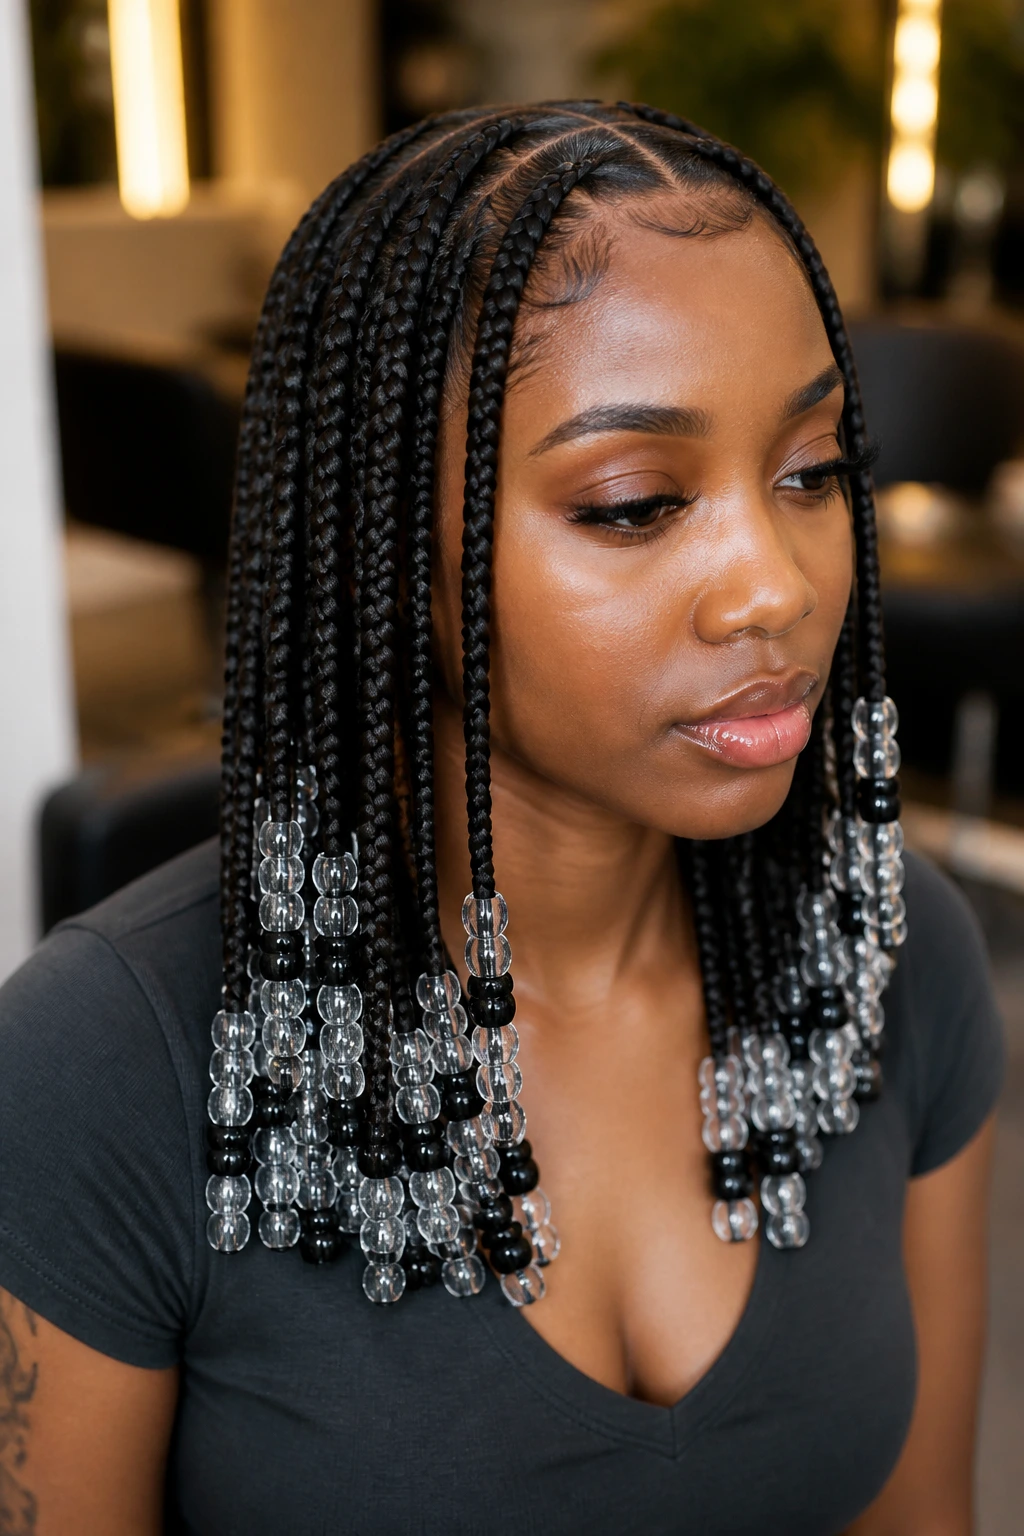
Black and clear beads together have a crisp, graphic look that works beautifully on dark braids. The contrast is clean, not fussy. It is the kind of finish that feels planned because the pattern is obvious from a distance and more interesting up close.
This combo works best when the beads are grouped in a repeat pattern—black, clear, black, clear—or used in alternating rows across the head. That rhythm helps the style stay polished. Random mixing makes it look like you grabbed whatever was left in the bag.
If you like structure and a little drama, this is one of the strongest options.
15. Jewel-Tone Beads for a Rich Color Story
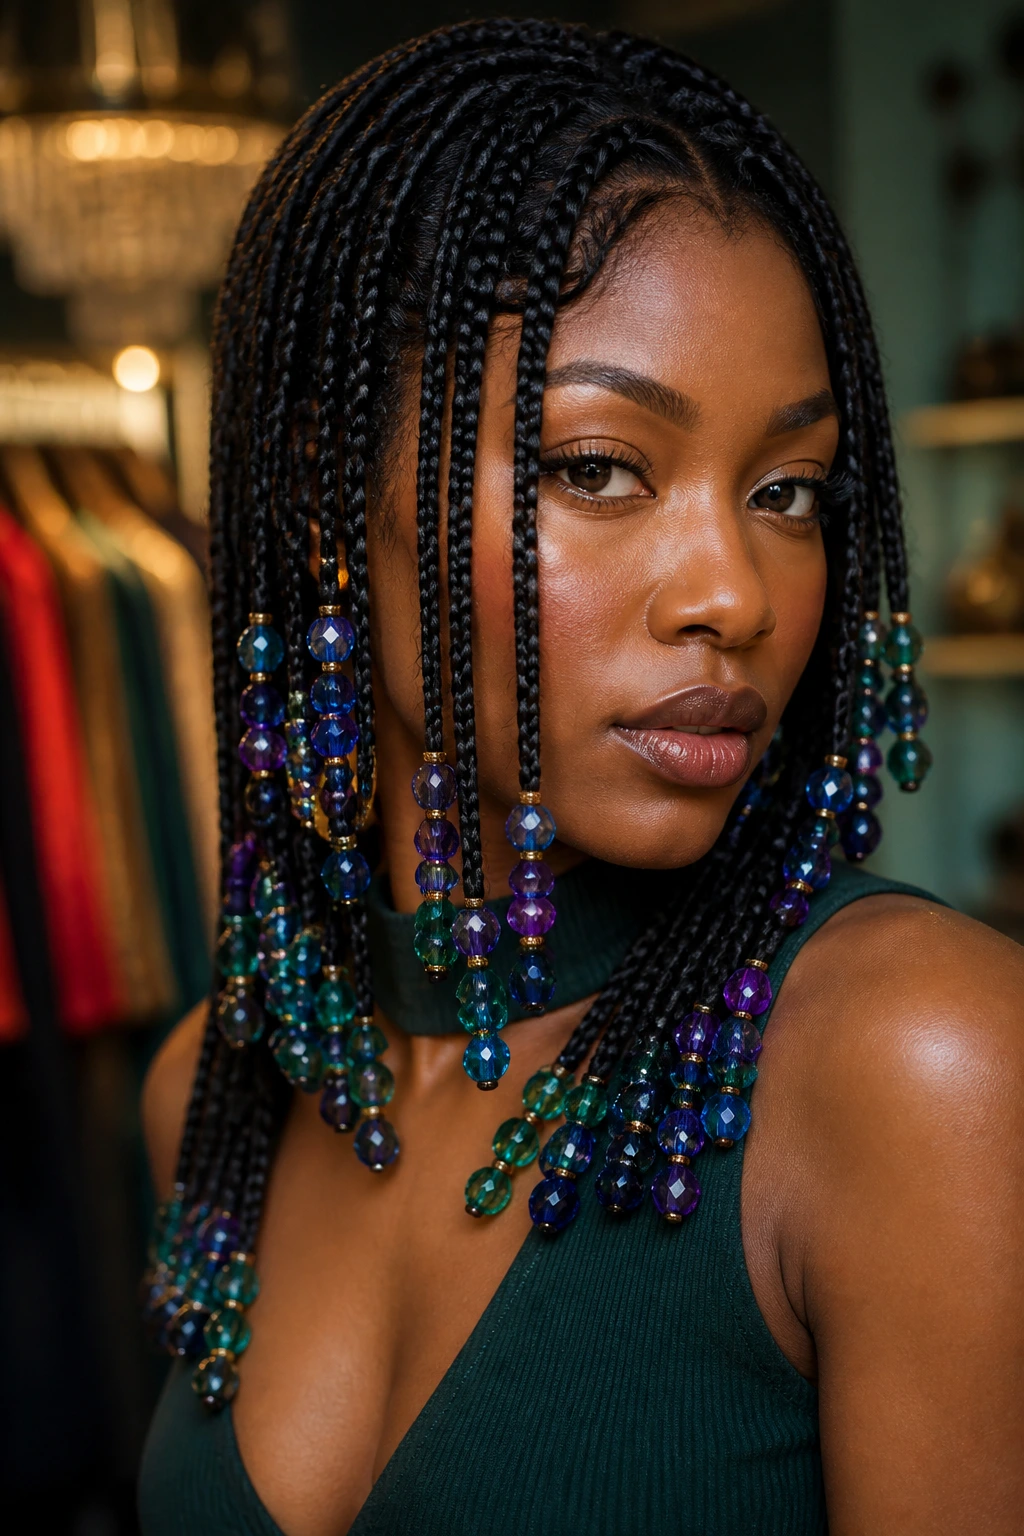
Emerald, sapphire, amethyst, and garnet beads can make knotless braids look more tailored than playful if you keep the palette tight. Pick one jewel tone and repeat it, or choose two that sit well together. Don’t scatter six bright shades across the head and call it a day.
This style is especially good when the outfit has one strong color already. The beads can echo it without matching too hard. On dark braids, jewel tones read deep and rich. On lighter braids, they look brighter and more obvious.
A polished look comes from repetition here, not volume.
16. Shell Beads for an Earthy, Textured Finish
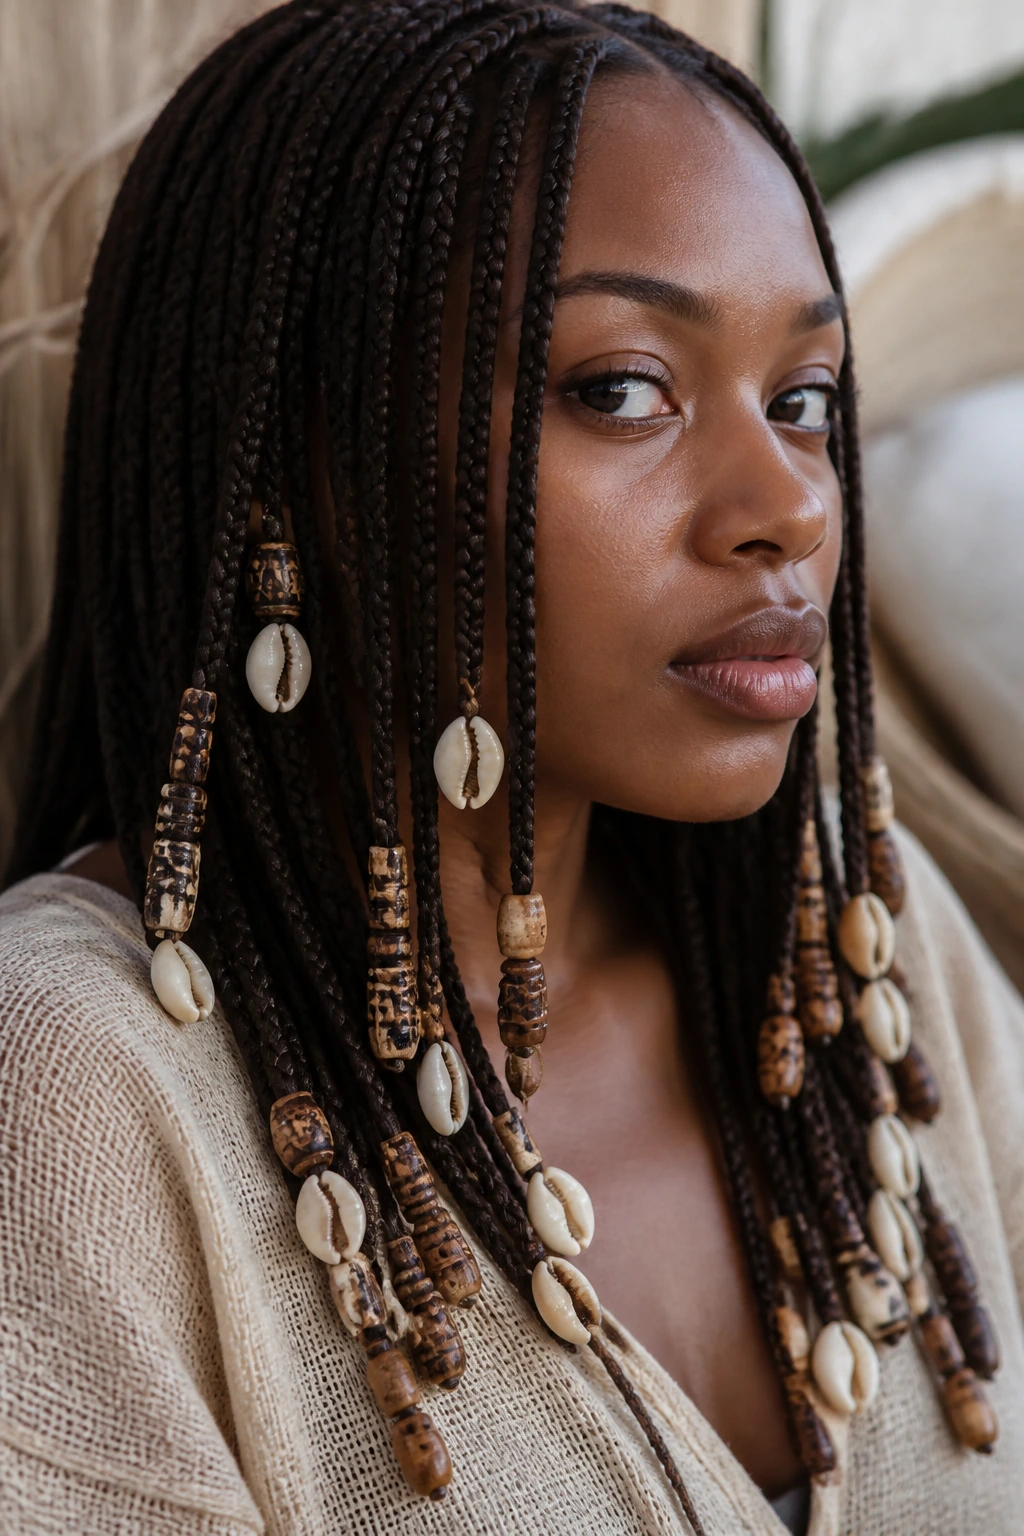
Shell beads bring a little texture and a softer shine than straight acrylic. They work well when you want the braids to feel grounded but still intentional. The finish is less glossy, more organic, and that contrast can be lovely against neat parts and smooth braid shafts.
Keep the rest of the style very tidy if you use shell beads. The more textured the bead, the cleaner the braid work should be. Otherwise the look starts to feel messy instead of styled.
This is a smart pick with linen, cream, tan, and earth-tone clothing. It reads relaxed, but the clean parting keeps it polished.
17. Braided Wraps That Hold the Beads in Place
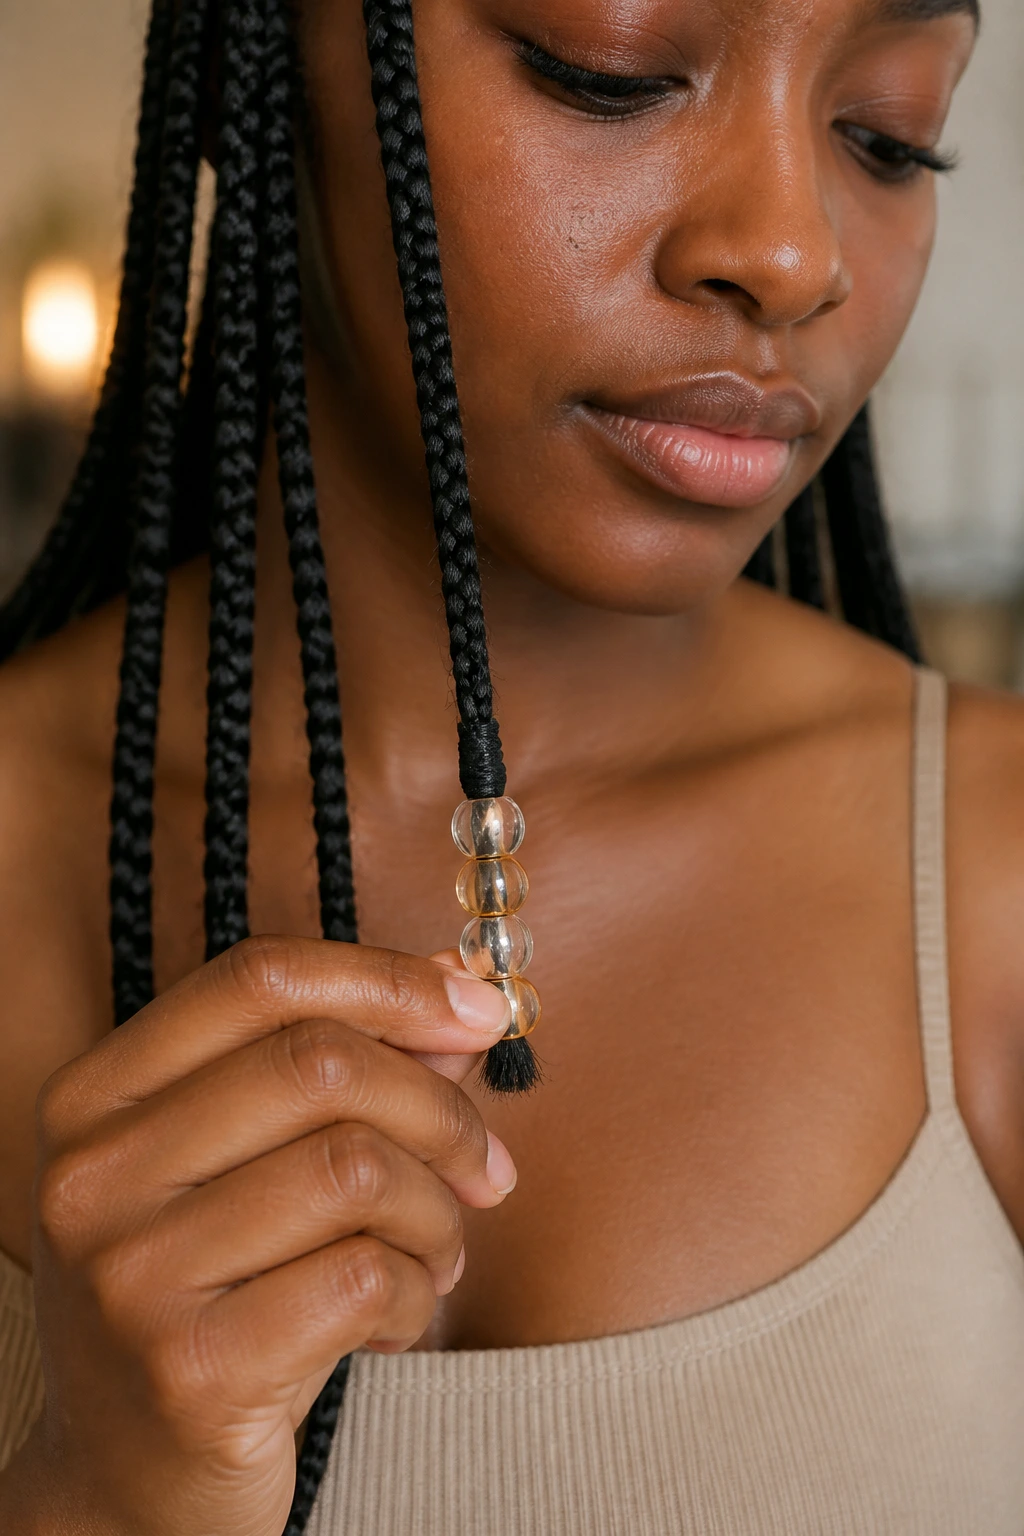
Sometimes a small wrap does more for polish than another bead ever could. Wrapping a thin strand around the end before adding the bead gives the braid tip a neat finish and helps the beads sit exactly where you want them. It also keeps the end from looking bare between bead clusters.
I like this for styles where the bead weight might otherwise slide down. It is practical and it looks deliberate. The wrap creates a tiny visual pause, which makes the ends look finished instead of thrown together.
Use this approach when you want your braids to look controlled from every angle. It is subtle. That’s the point.
18. Face-Framing Braids With Beads at the Front Only
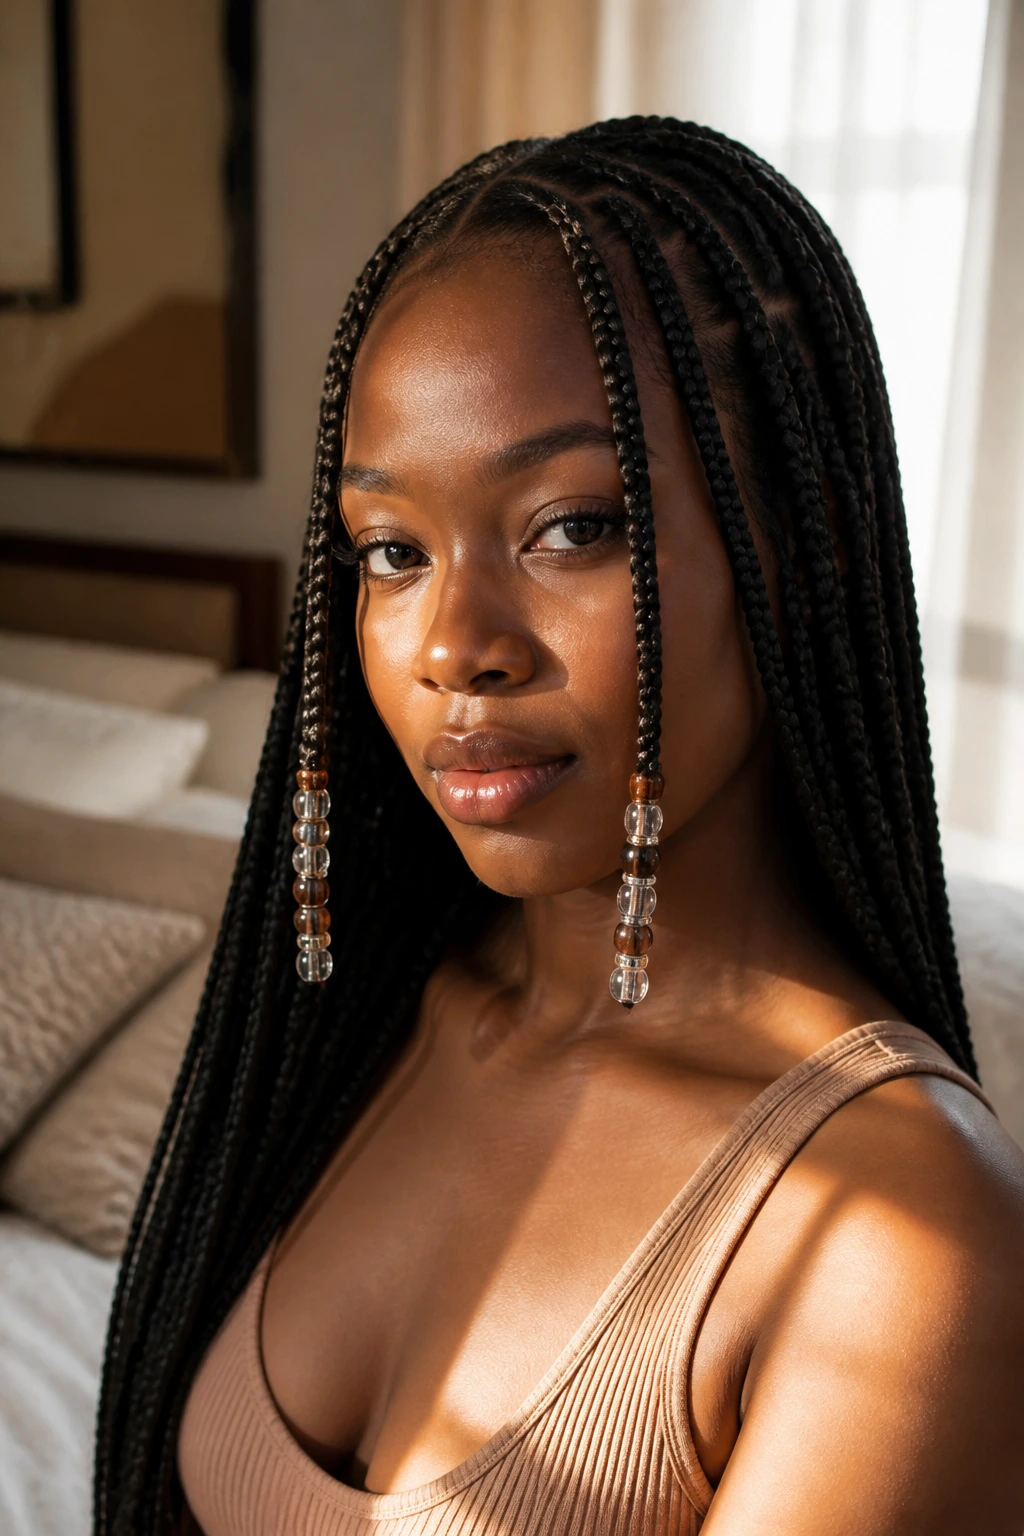
Not every braid needs a bead. In fact, one of the cleanest looks is to put the bead focus on the front two or four braids and leave the rest bare. That frames the face, keeps the finish light, and gives the style a point of focus.
This is a good move if you wear glasses, bold earrings, or a strong neckline. The front beads catch the eye first and the rest of the braids stay calm in the background. That contrast is what makes the style read polished instead of busy.
Use smaller beads near the face so they do not dominate your features. Let the back stay simple.
19. Jumbo Knotless Braids With Statement Beads
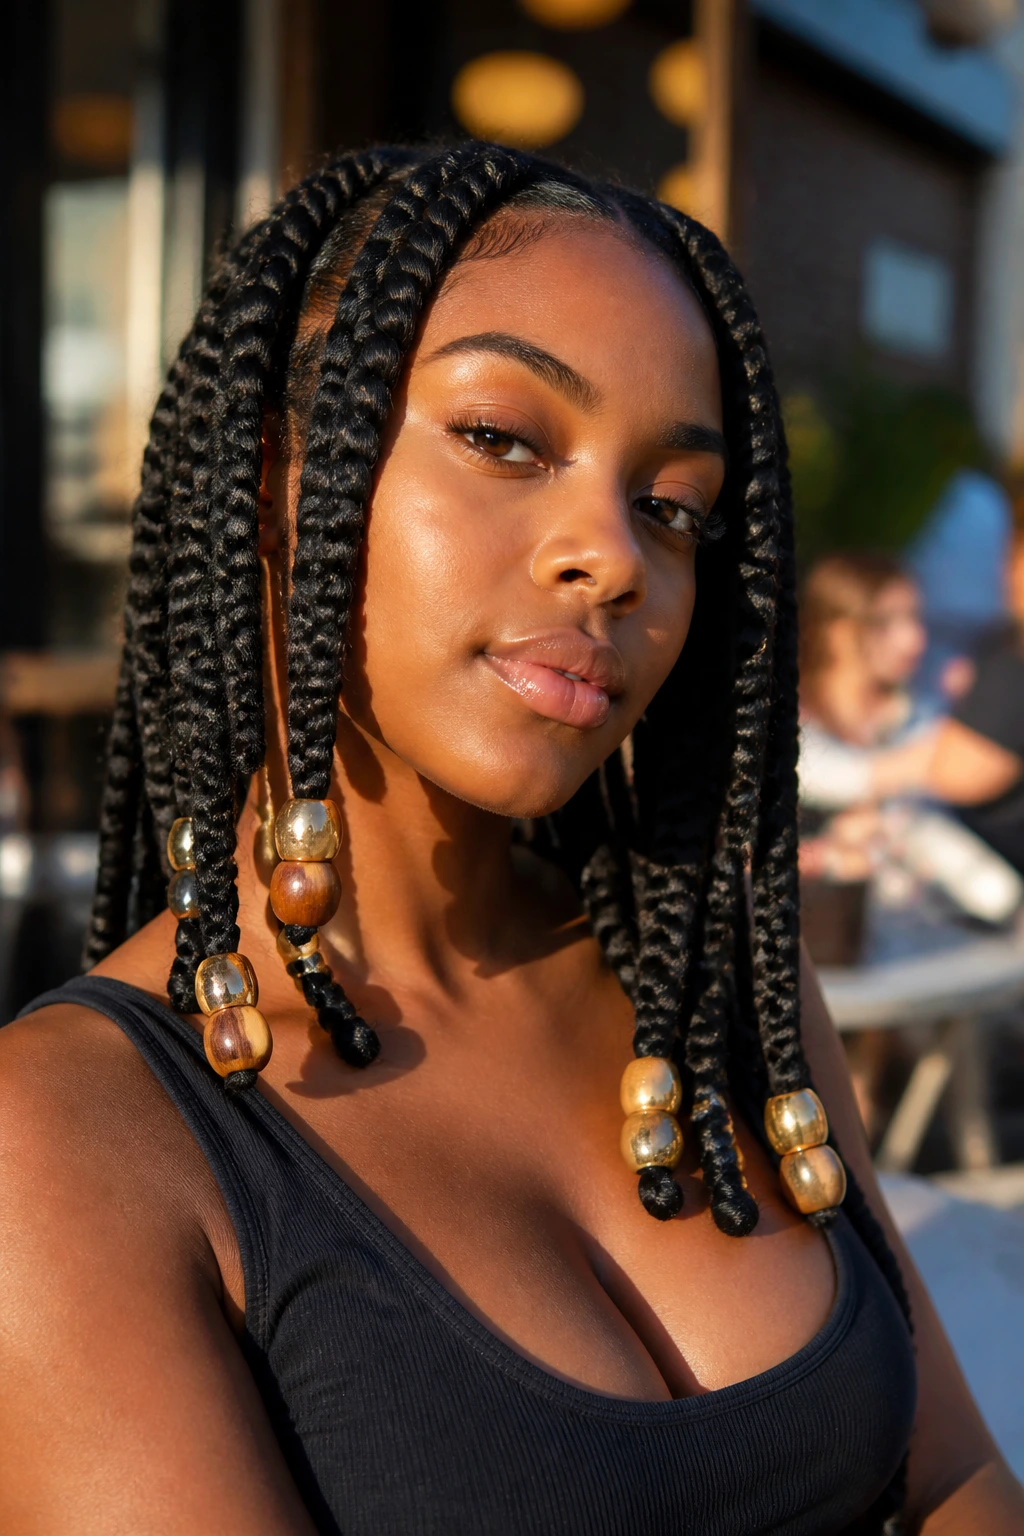
Jumbo braids need confidence. So do the beads. Because the braid size is already bold, the beads can be larger too—but only if you keep the number low. One or two statement beads at the end of each braid is enough.
This look works because the braid structure has weight on its own. Large beads won’t get lost the way they can on micro braids. Still, there is a line you do not want to cross. If every braid gets oversized beads, the style loses its shape fast.
Use this version when you want a stronger silhouette and do not mind the ends making a little noise when you move.
20. Micro Knotless Braids With Seed Bead Details
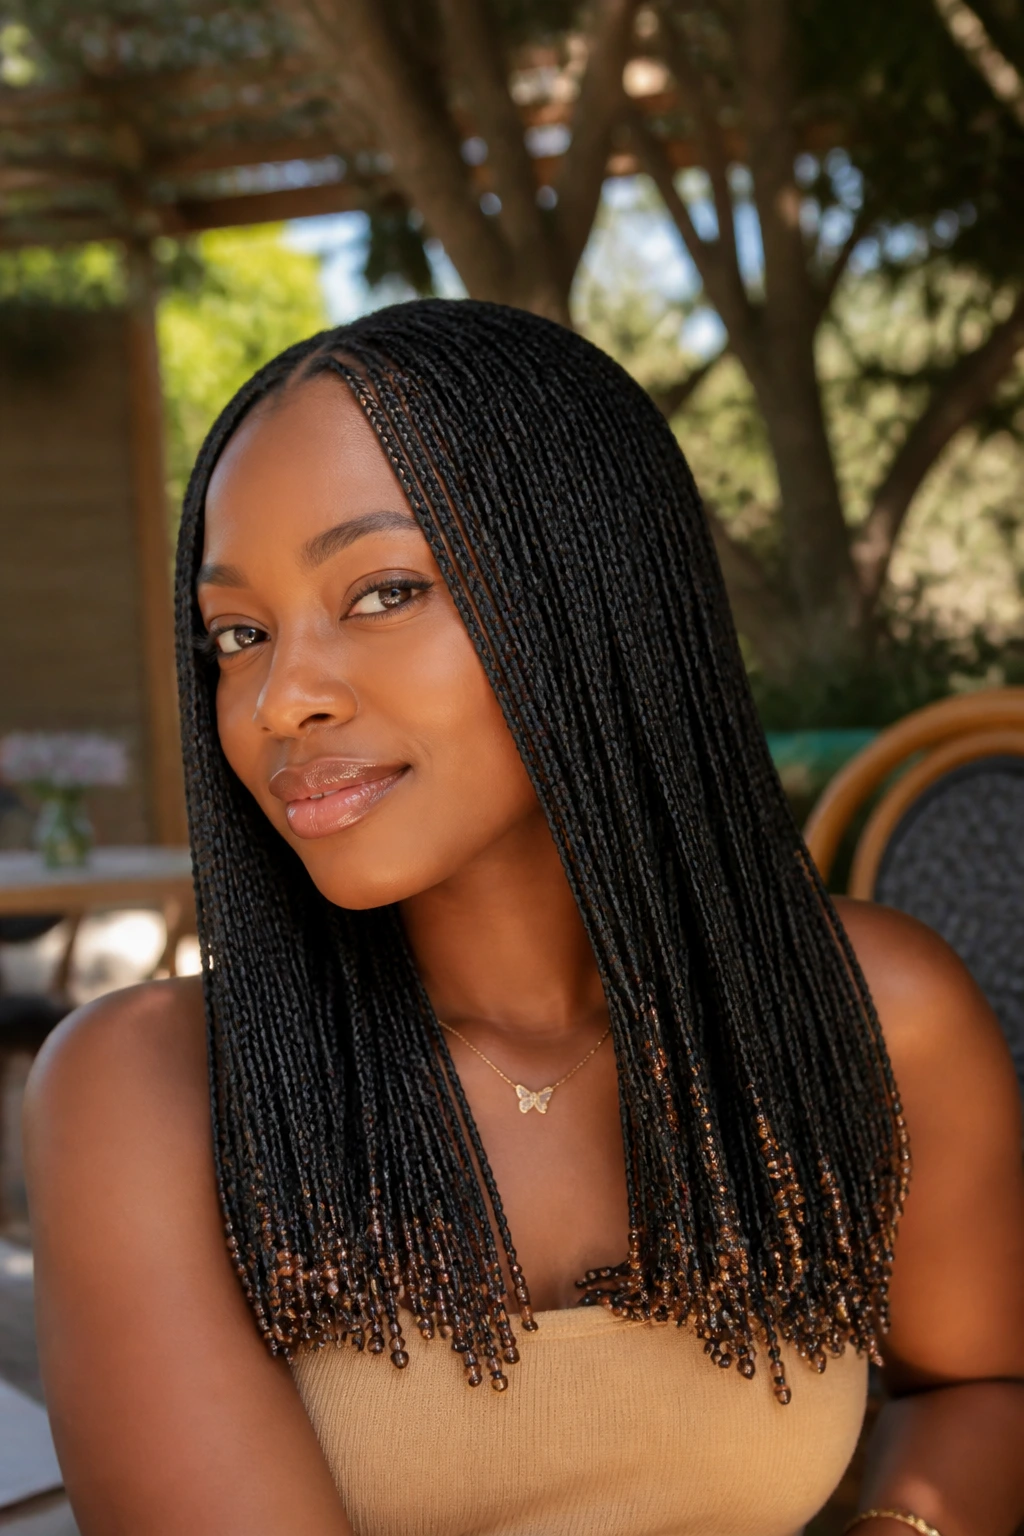
Micro knotless braids feel delicate, and seed beads match that mood. Tiny beads sit lightly at the ends and create a fine, textured finish that reads close up. From a distance, the effect is subtle. Up close, it gets interesting.
This style is best when you want the beads to whisper instead of shout. It takes more time to place, but the result is neat and refined. Keep the bead color near the braid color for the quietest look, or use clear seed beads for a bit of sparkle.
If you like detailed work and do not want the ends to overpower the braids, this is a strong choice.
21. Side-Swept Knotless Braids With Loose Ends
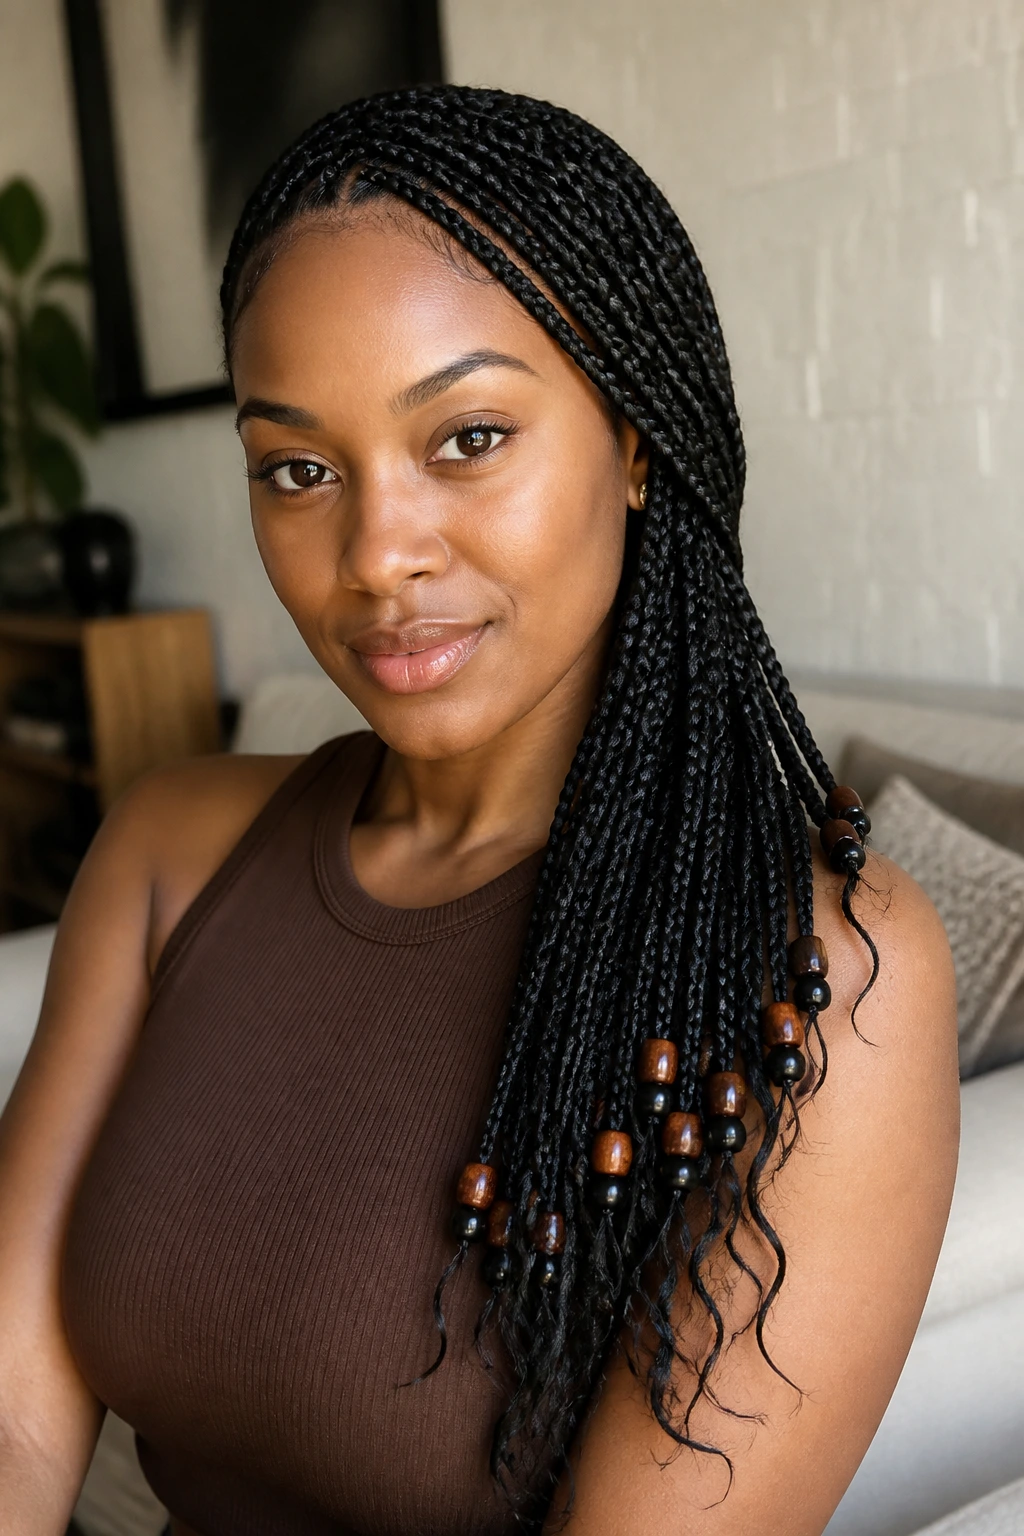
A side-swept finish changes the whole energy of beaded braids. Instead of hanging evenly, the braids fall over one shoulder, which gives the beads a longer line to travel. The style feels polished because the sweep is controlled and the ends all land in one place.
This works best when the bead placement is consistent. If the ends are all different weights or sizes, the shoulder sweep can look uneven. Keep the bead color unified and let the angle of the drape do the interesting work.
A side-swept look is also practical. It keeps braids off the face and lets the bead detail show without being overcomplicated.
22. Layered-Length Knotless Braids With Even Bead Placement
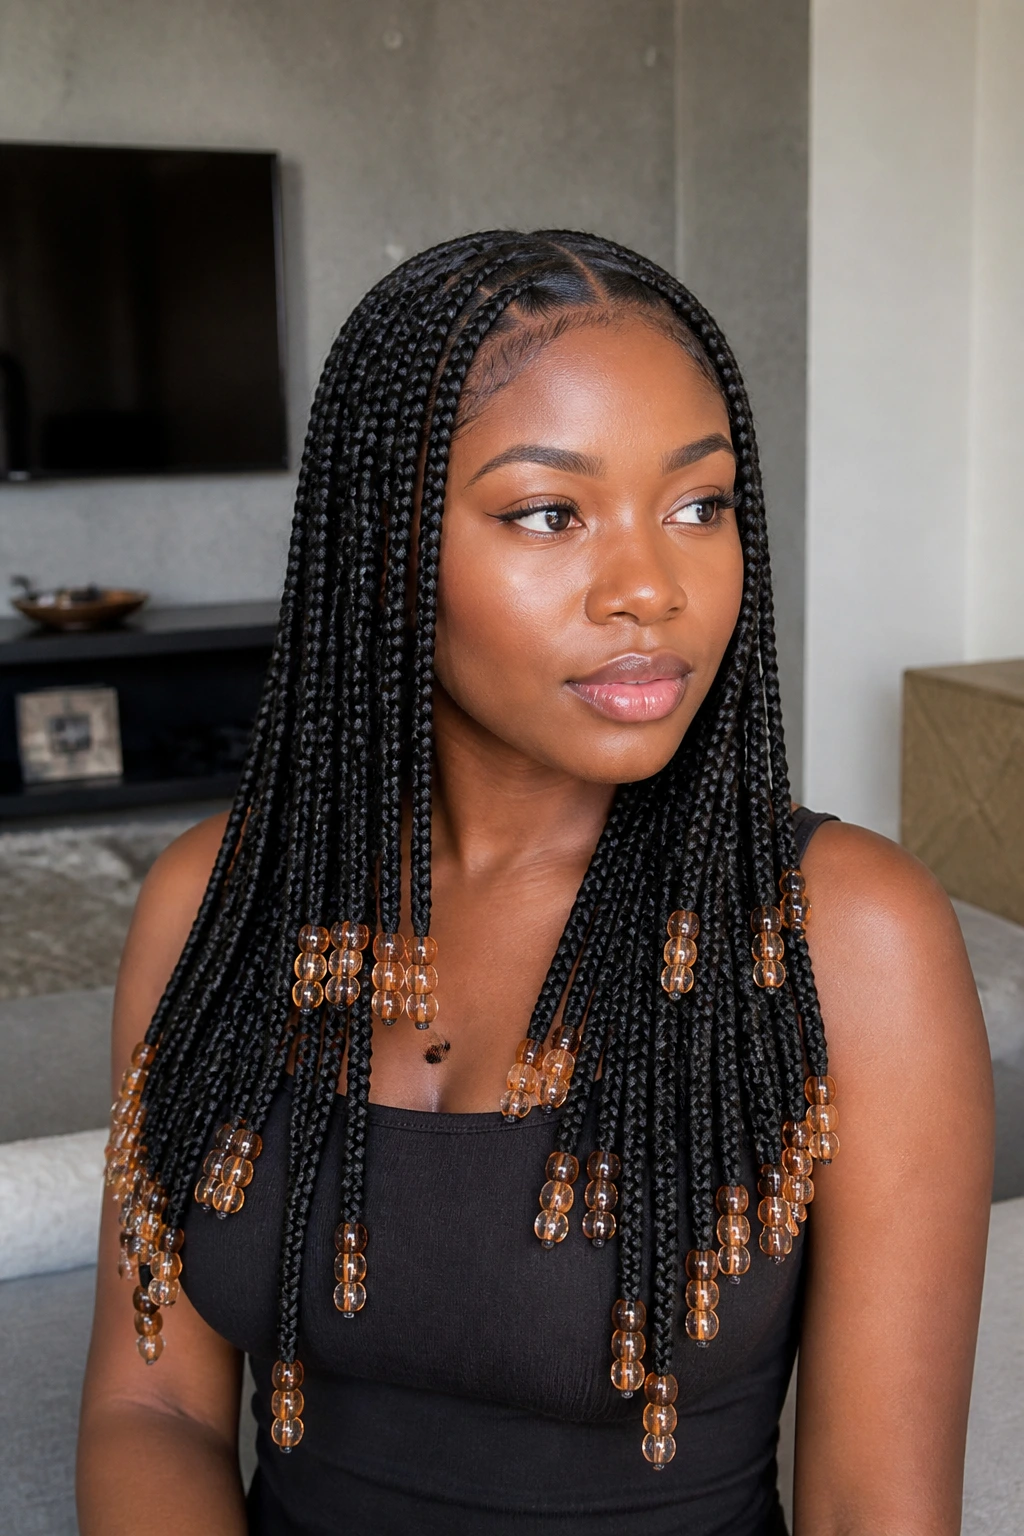
Layered lengths can look messy if the beads are random. But when the bead placement repeats across the shortest, medium, and longest braids, the whole style feels structured. The different lengths create movement; the beads create order.
I like this version when the braids are cut in gentle tiers around the shoulders and chest. The eye moves from one layer to the next, then lands on the beads at the bottom. That landing point matters. It keeps the style from looking like three different ideas at once.
If you are after a softer shape without losing the polished finish, layered lengths are worth it.
23. Rainbow Accent Beads Used Sparingly
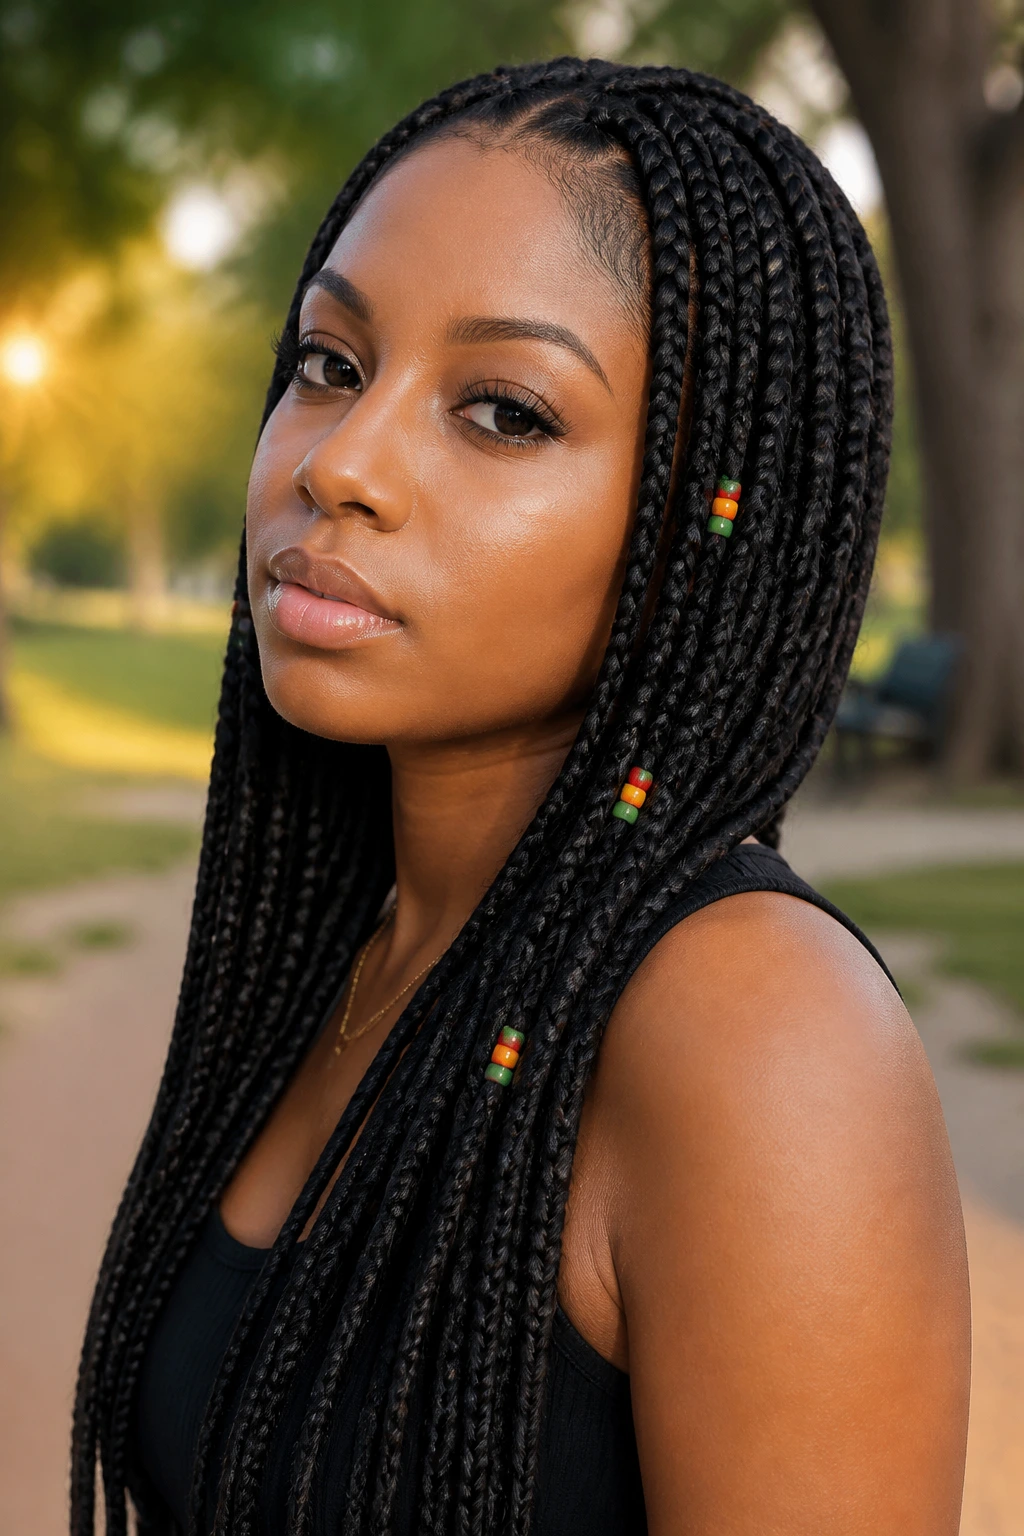
Rainbow beads can look childish fast if you use too many. The polished version uses them with discipline. Pick two or three colors from the same family, then repeat them in a controlled way. Think accent, not confetti.
This is a good option when you want personality without a full-color explosion. On darker braids, small pops of color stand out. On lighter braids, the same colors can read sweeter and more playful. Either way, the trick is to keep the rest of the style very neat.
If the parts are crisp and the colors repeat on purpose, rainbow beads can look sharp rather than random.
24. Two-Tone Ends With Matte and Gloss Beads
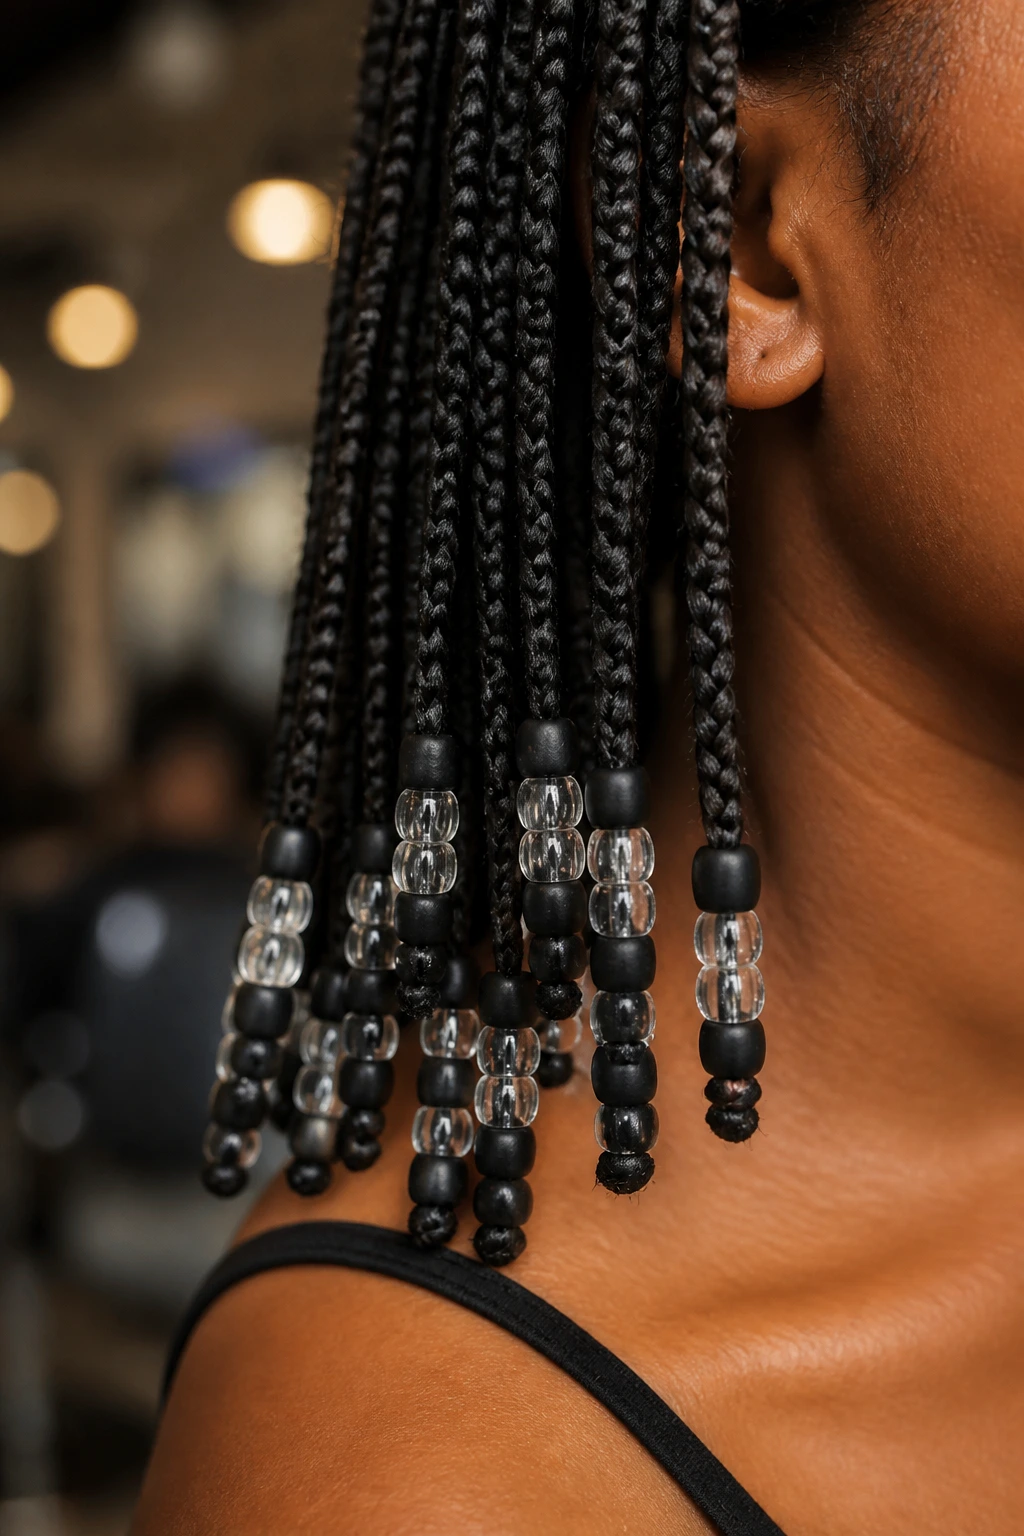
Mixing matte and glossy beads gives the ends depth without needing more color. A wood bead paired with a clear bead, or a matte black bead with a glossy one, adds a small textural contrast that feels thoughtful. It is the braid version of mixing a silk shirt with denim.
This works best when the two tones stay close in color family. The difference should come from finish, not from a fight between shades. That is how the style stays polished.
I reach for this when I want the ends to feel custom but not loud. It’s understated in the best possible way.
25. Sleek Center-Part Knotless Braids for an Evening Finish
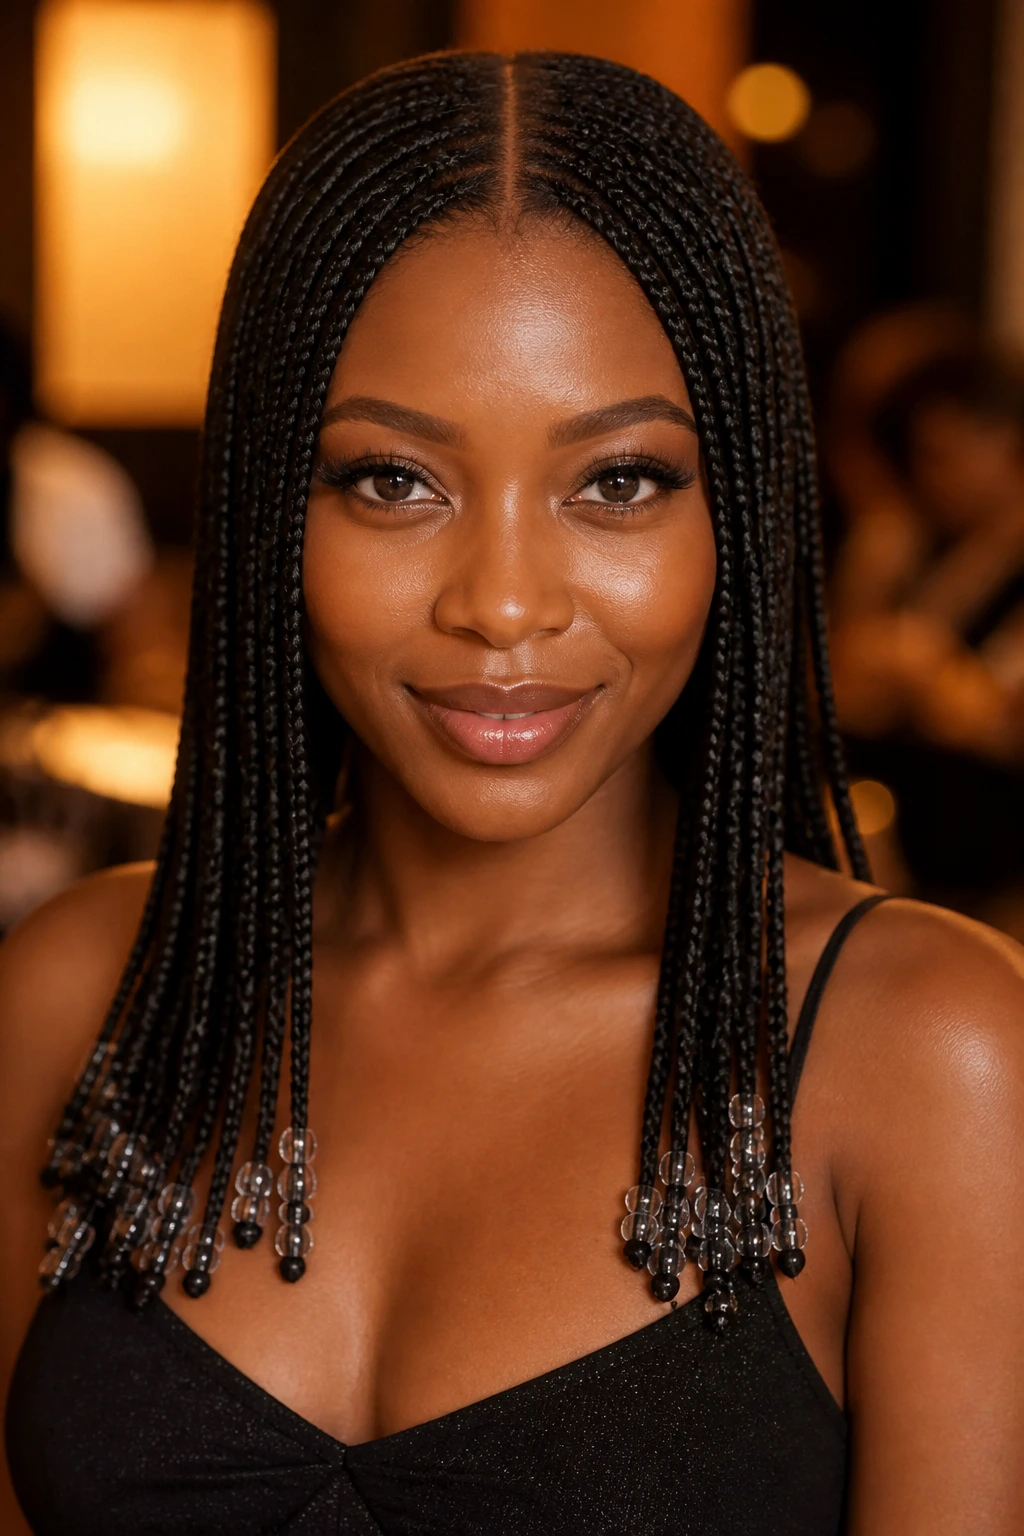
A sleek center part with beads placed only at the ends is the most controlled version of the bunch. Nothing is competing with the part, the braid line, or the face. The style stays polished because it is almost architectural. Clean line. Clean finish. Done.
This is the one I’d pick for an evening event, a photo session, or any moment where the outfit already has enough going on. Use clear, pearl, or silver beads so the braids stay elegant. Keep the bead count low and let the symmetry do the heavy lifting.
If you want the most refined look in the set, start here.
How the Braid Base Changes the Whole Finish
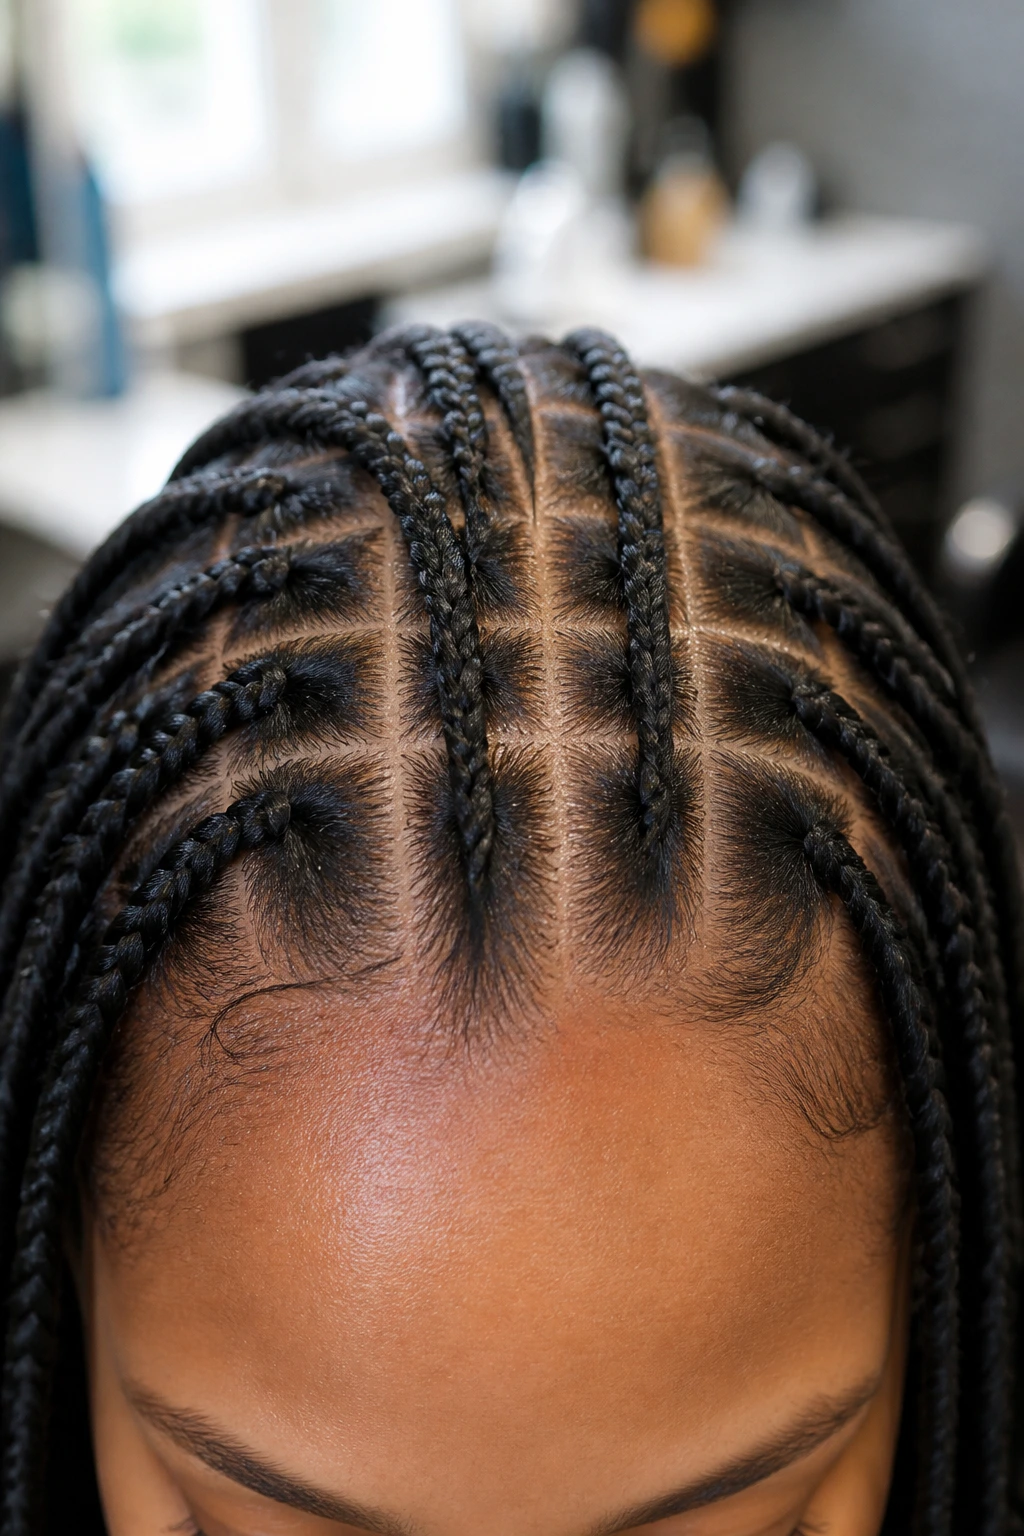
Polished knotless braids with beads start long before the beads are added. They start at the scalp. A neat feed-in, steady tension, and parts that are actually even will do more for the final look than a pricey bead kit ever could. That is the part people miss when they try to fix an uneven style with accessories.
A clean base makes the ends look cleaner, too. If the braid starts flat, the bead sits at the end like a finishing piece. If the braid starts bulky or twisted off-center, the bead just highlights the problem. You cannot hide a sloppy root with shiny plastic. The eye always goes back to the base.
There is also a simple visual rule worth remembering. The lighter the bead, the more the braid pattern shows through. Clear and pearl beads let the structure stay visible. Wood, matte black, and shell beads soften the shine and make the braid line feel warmer. Neither one is better. They just tell different stories.
If you are doing the style yourself, spend more time on parting than you think you need. A half-inch of extra care at the scalp often saves the whole look.
Essential Tools for These Styles
- Rat-tail comb: The pointy tail gives you crisp parts and helps you separate sections without shredding the braid hair.
- Sectioning clips: Keep the unused hair out of the way so the parts stay clean while you work.
- Braiding gel or edge control: Use a light hand near the roots; too much product makes the parts shiny in the wrong way.
- Knotless braid hair: Pre-stretched synthetic hair gives the ends a smoother finish and blends better into the feed-in sections.
- Beads in more than one size: Small, medium, and one statement size cover almost every look in this set.
- Bead threader or bead stuffer: A cheap threader saves time and keeps your fingers from getting tired halfway through.
- Small clear elastics: Handy when you need extra grip before sliding a bead into place.
- Foam mousse: Great for laying flyaways down after the install and keeping the braids smooth.
- Satin scarf or bonnet: Keeps the style from frizzing up overnight.
- Lightweight oil or scalp spray: Use sparingly. The scalp needs comfort, not a slick film.
Smart Shopping and Hair Prep Tips
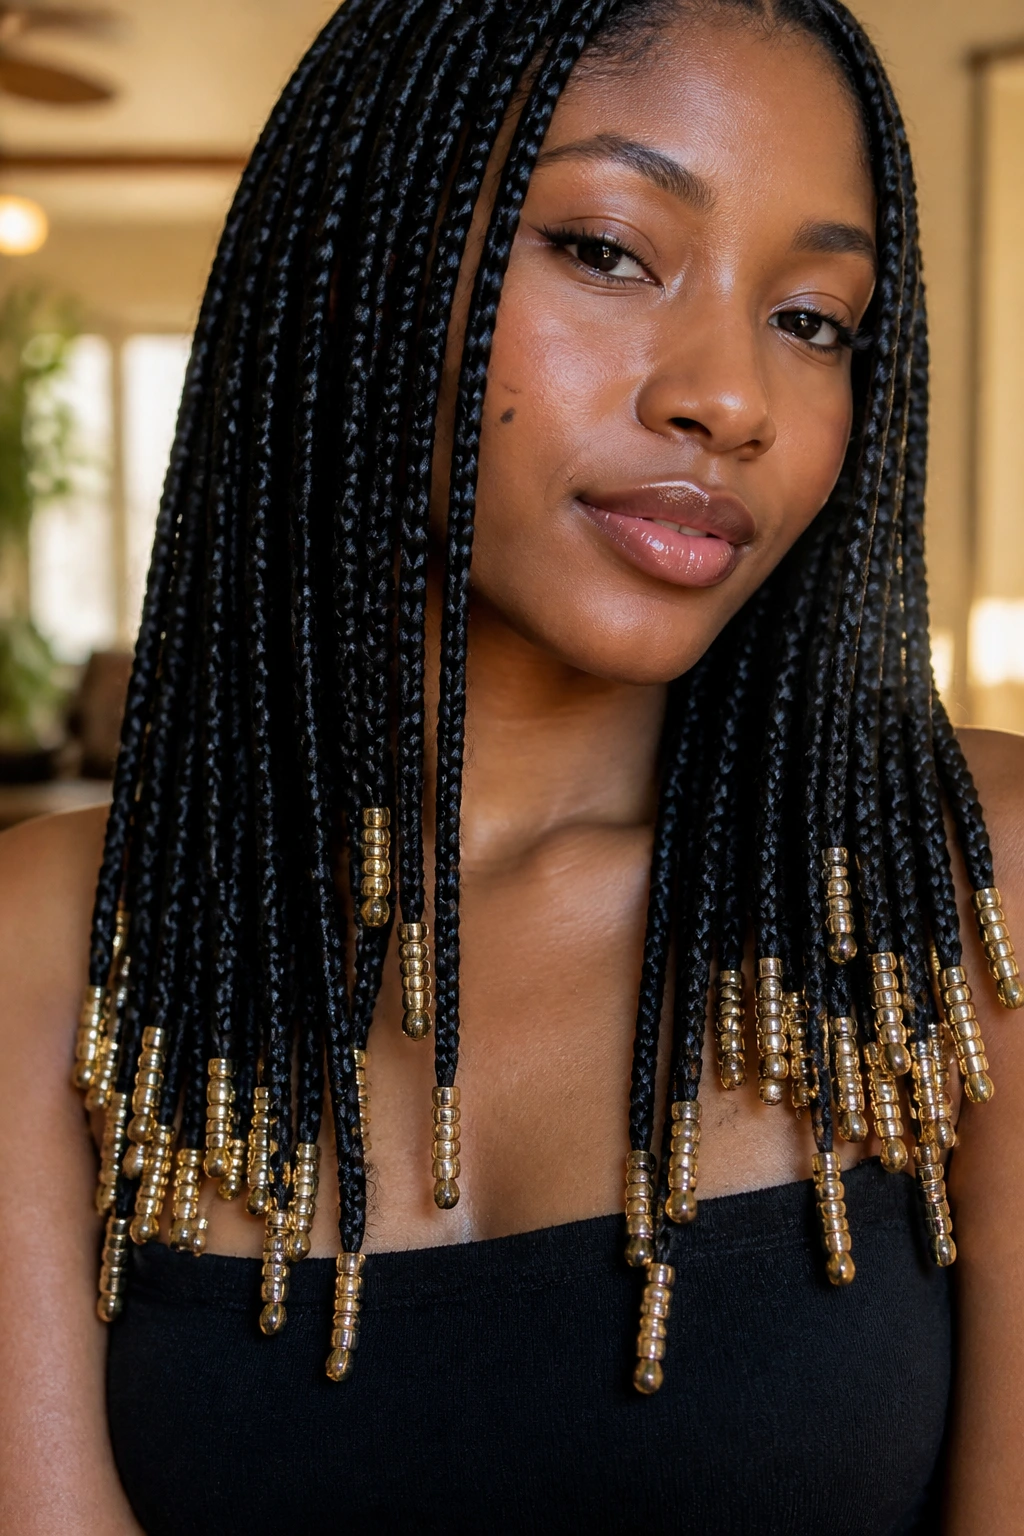
Start with the beads, not the hair. That sounds backward, but it helps. If you want a polished finish, buy beads with rounded edges and smooth holes. Rough edges catch on extension hair and leave the ends fuzzy. A bead that looks pretty in the bag can still be a nightmare if the hole is too small or the cut inside is sharp.
Buy more beads than you think you need. A mixed pack with clear, black, pearl, and one accent color gives you more room to play without running back to the store in the middle of the install. I also like having a few spare statement beads in a separate container, because one cracked bead can make the whole end line look sloppy.
Match the bead material to the braid length and density. Tiny seed beads work on micro braids. Medium acrylic or glass beads suit most classic knotless braid lengths. Wood and shell beads look better when the braids are neat and the rest of the styling is calm. If your hair is fine, keep the bead stack light. If your hair is dense and the braids are fuller, you can carry a little more weight at the ends.
Prep the hair well before the install. Freshly washed, fully dried hair parts cleaner and holds the braid base better. A little scalp oil is fine. Heavy cream is not. It makes the roots slippery, and slippery roots lead to loose braids that unravel too soon.
If you plan to dip the braid ends in hot water, do that before the beads go on. Heat and beads do not always play nicely, and it is easier to finish the braid first, then decorate it once the ends are sealed and cool.
How to Wear and Style These Looks
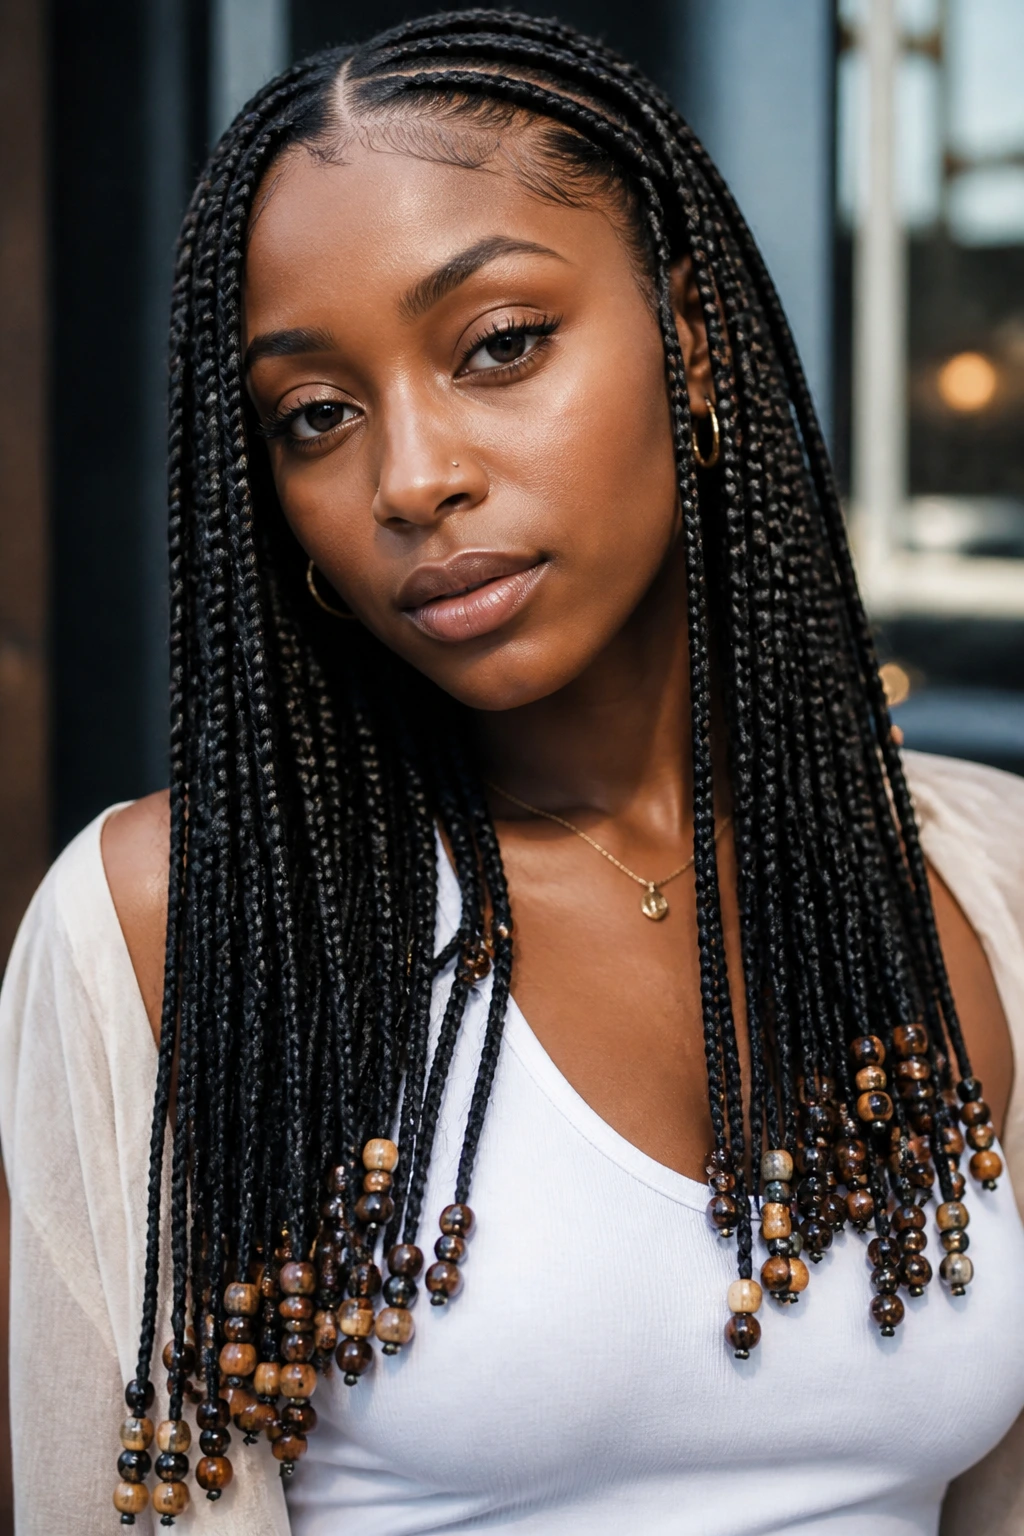
Presentation: Keep one thing in charge. If the beads are bright, let the parts be crisp and the outfit simple. If the beads are clear or pearl, you can lean harder on jewelry, bold lipstick, or a sharp collar without the look tipping over. The goal is balance, not competition.
Pairings: Beaded knotless braids love clean necklines, small hoops, and clothes that do not snag the ends. Crewnecks, off-shoulder tops, button-downs, and structured jackets all sit well with them. A satin shirt or a smooth blazer collar can make the whole look feel finished fast.
Scale: The longer the braids, the more breathing room the beads need. On waist-length braids, let the bead work sit in the last few inches so the style does not feel bottom-heavy. On bob-length braids, keep the beads small and close to the tips. Large beads on short braids can make the ends look crowded.
Finish: A light foam wrap, laid down overnight with a satin scarf, keeps the braid shafts smooth. Use a tiny bit of shine spray if the braids look dry, but do not soak the beads. A greasy bead finish reads messy. Always has.
Additional Tips and Finishers
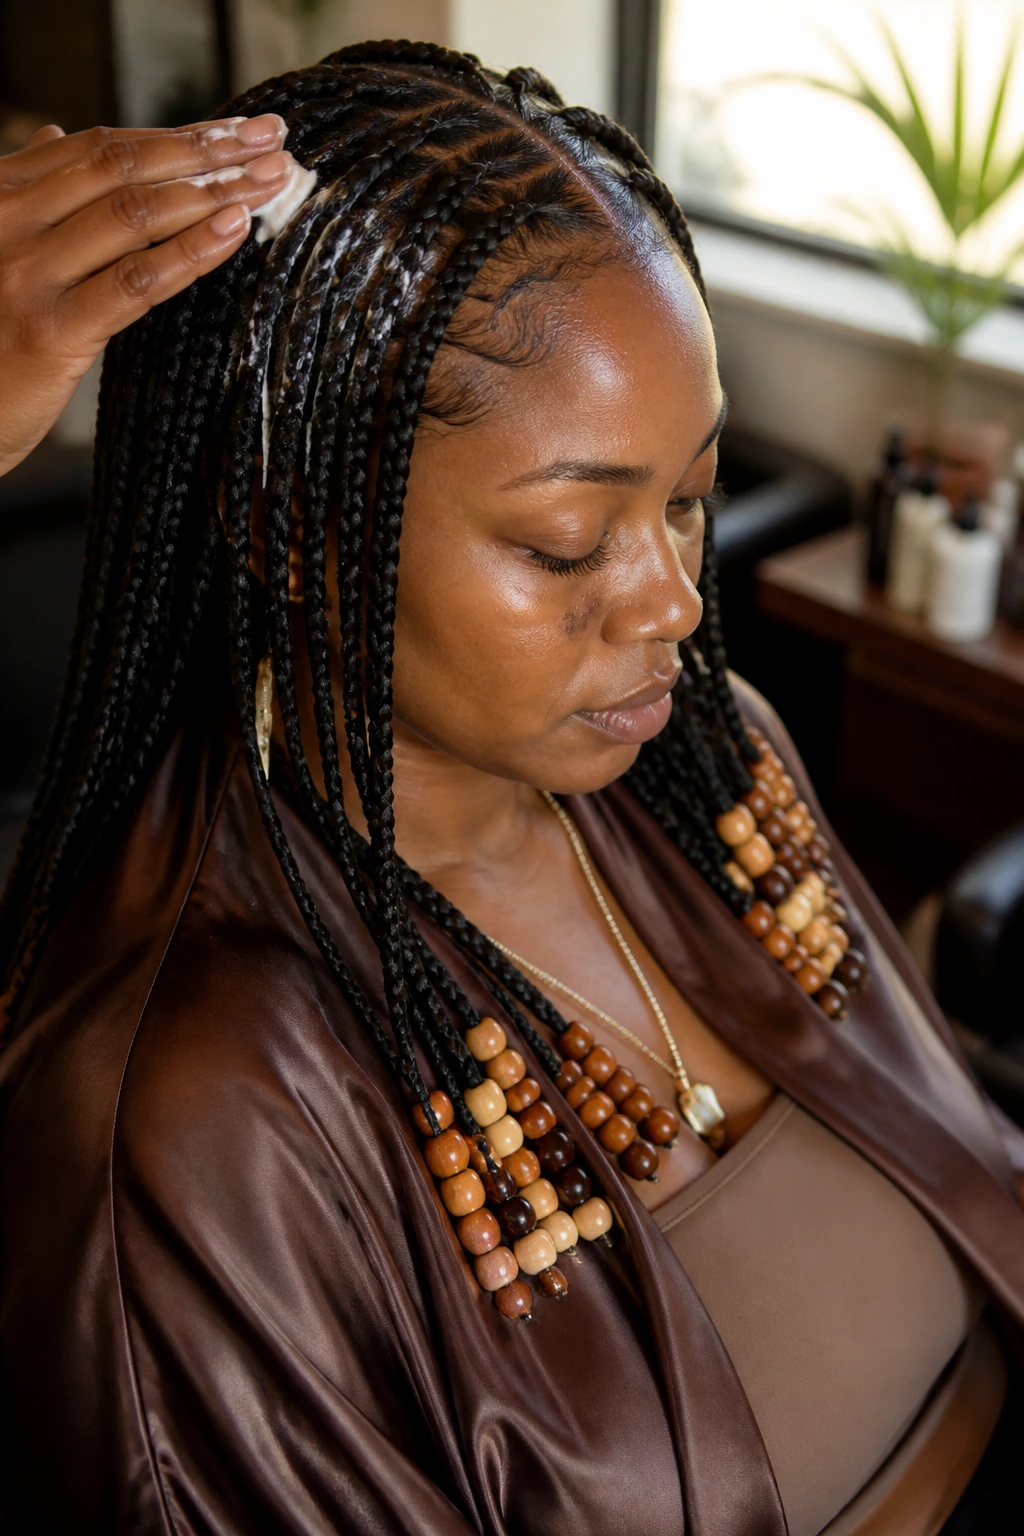
Texture Finish: A small amount of mousse rubbed over the braid shafts after the install can tame flyaways and give the hair a smoother line. Let it dry under a scarf or wrap it overnight so the finish sets instead of turning sticky.
Customization: If you want the style to feel more tailored, repeat one bead color at the front and use a different matching bead at the back. That tiny shift gives you personality without turning the whole head into a mixed bag.
Scalp Comfort: Keep heavier beads closer to the braid ends, not stacked too high. The further the weight sits from the root, the less tug you feel when the braids move. That matters more than most people think.
Make-It-Yours: For a quieter version, choose clear or pearl beads and keep the count low. For a bolder version, use one accent color only—cobalt, amber, or red—and repeat it in a straight pattern. For a softer version, mix matte and glossy finishes so the light catches in different ways.
Ways to Change the Look Without Rebraiding
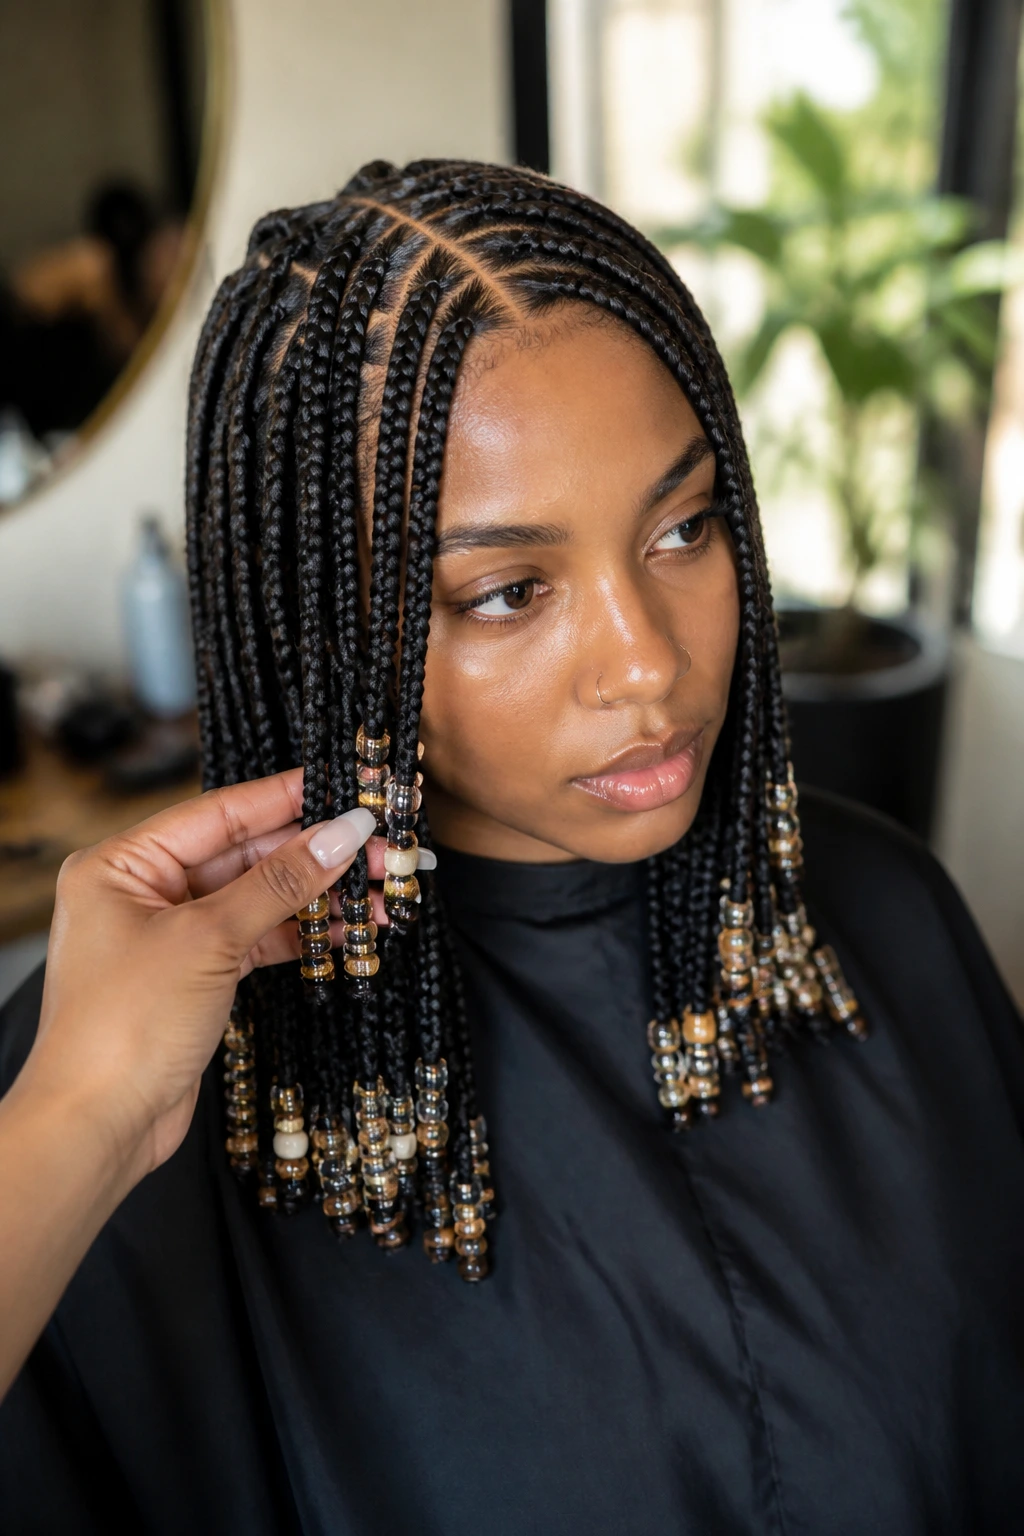
Swap the Material Story: Take the same braid install and switch from clear beads to wood, pearl, or gold. The style changes from casual to dressy fast, and you do not have to touch a single braid.
Reduce the Bead Count: Removing every other bead cluster gives the look more air. That works especially well when the braids are long or thick and the ends need room to move.
Move the Part: A center part reads sharp. A side part reads softer. A zigzag part reads more playful, though it still stays polished if the rest of the style is neat.
Add One Front Accent: Put a slightly larger bead on just the front two braids. It frames the face and gives the style one focal point without crowding the whole head.
Mix Finish, Not Color: Pair matte wood with clear acrylic or black beads with one glossy metal accent. The contrast feels custom and keeps the look from falling flat.
Make-Ahead, Storage, and Maintenance Guidance
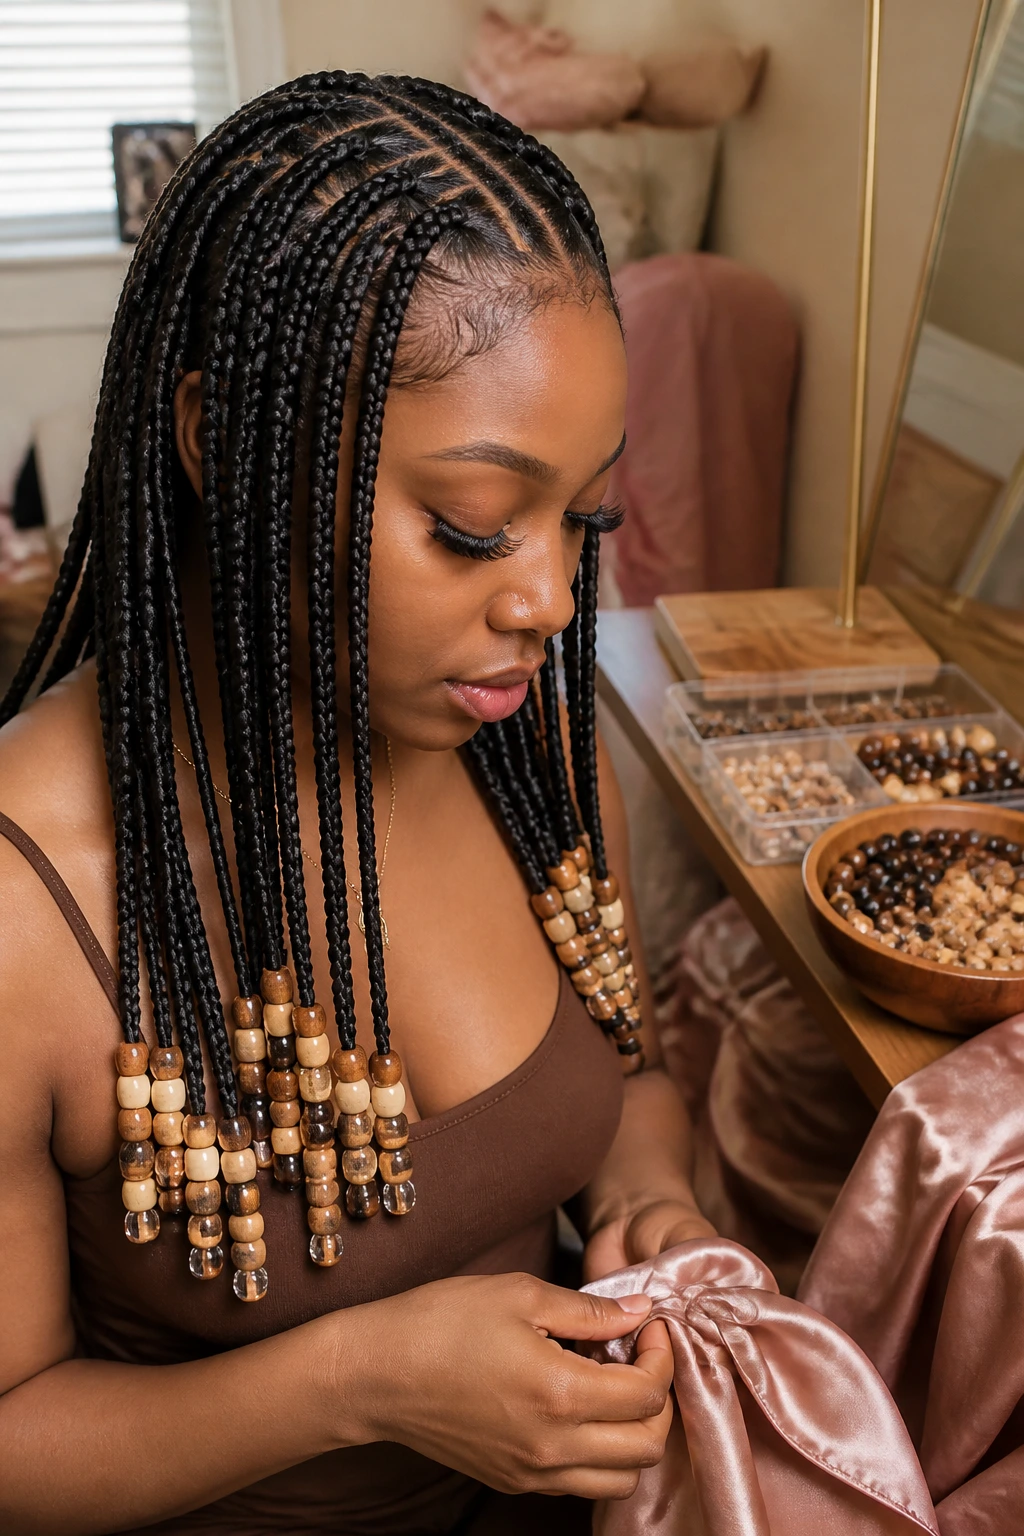
The style starts lasting longer when you treat it like a finish, not a set-it-and-forget-it install. If you are preparing for an event, sort the beads ahead of time by size and material. Put the front-row beads in one small dish and the accent beads in another. That sounds tiny, but it keeps the install moving and helps the bead pattern stay consistent from braid to braid.
At night, wrap the braids in a satin scarf or bonnet. A scarf gives you more control over the roots; a bonnet is easier if the braids are longer. Either way, the goal is to keep the braid shafts from rubbing against cotton pillowcases, which roughen the surface and make the beads look less crisp.
Refresh the style every few days with a light mousse or foam wrap if flyaways start to show. Use a scalp spray or a few drops of lightweight oil only where the scalp feels dry. Too much product makes the roots dull and can gather dust around the beads.
Wash the braids when the scalp needs it, usually every 1 to 2 weeks depending on product buildup. Use diluted shampoo at the scalp, squeeze the foam through the braids, and rinse carefully. If the beads are wooden or shell, avoid soaking them longer than needed. Dry the braids fully before wrapping them up again. Damp braid hair under beads is how you get that heavy, stale smell nobody wants.
Most knotless braid installs with beads look their best for about 4 to 8 weeks, depending on hair growth, tension, and how much movement the beads get. Once the roots start lifting too much or the bead line starts shifting, it is time to retire the style.
Common Mistakes to Avoid
- Stacking too much weight at the ends: Heavy bead clusters can pull the braid downward and make the ends swing awkwardly. Use fewer beads or smaller ones if the braid starts to bend under the weight.
- Choosing bead holes that are too tight: If you have to force the braid through, the surface of the braid will fray. Test one bead first, then switch sizes if it catches.
- Letting the pattern get random: Different bead sizes, colors, and placements can look messy fast. Repeat a pattern on purpose so the eye sees rhythm instead of clutter.
- Putting beads too high on the braid: Beads that sit close to the root draw attention away from the braid base and can make the style feel crowded. Keep them near the ends unless you are doing a very deliberate accent look.
- Skipping overnight protection: Cotton friction roughs up the braids and dulls the bead finish. A satin scarf or bonnet keeps the style smoother for longer.
Variations and Alternatives to Try
All-Clear Minimalism: Use only clear beads and keep the count low. This version works when you want the braid pattern to stay front and center and the beads to act like a light finish rather than a statement.
Warm Wood Mix: Pair wood beads with a few clear accents on the front braids. The style feels softer and more grounded, and it suits earth-tone clothing better than high-shine acrylic.
Pearl Accent Rows: Put pearl beads only on the outer braids, then leave the center section simple. That gives the face a neat frame and keeps the style from looking overdone.
Metal-and-Matte Contrast: Use matte black beads at the tips and one small metallic cuff higher up on selected braids. The mix of finishes makes the style look deliberate without needing bright color.
Single-Color Pop: Choose one bold bead color and repeat it, but only in one zone—front braids, one side, or the back row. That keeps the style polished while still letting the color show up with purpose.
Frequently Asked Questions
How many beads should I put on each braid?
For a polished look, fewer usually wins. One to three beads per braid is enough for most styles, and long braids can handle a small cluster near the ends without looking crowded.
Are knotless braids with beads too heavy for fine hair?
They can be if you use oversized beads or stack too many at the tips. Keep the beads small, cut the count down, and place the weight lower on the braid so the roots do not pull.
What bead material looks the cleanest?
Clear acrylic or glass beads usually give the sharpest finish because they stay visually quiet. Pearl and black beads read clean too, but they change the mood more than clear beads do.
Can I add beads after the braids are already installed?
Yes. That is often easier, especially if you are testing the look. Just make sure the braid ends are smooth and dry first so the beads slide on without snagging.
How do I keep beads from slipping off?
Use the right hole size first. If the bead is a little loose, a tiny clear elastic or a small wrapped section before the bead can help hold it in place.
Can I wash the braids with beads on them?
You can, but be gentle. Diluted shampoo at the scalp and careful rinsing is the safest route, and wood or shell beads should not sit in water any longer than needed.
Do knotless braids with beads work for short hair?
Yes, especially bob-length or shoulder-length knotless braids with smaller beads. The main thing is to keep the bead weight light so the shorter length does not look bottom-heavy.
What if the beads make too much noise?
That usually means the beads are too large, too loose, or too numerous. Swap to smaller beads or reduce the count so the ends move with a softer sound.
A Clean Finish
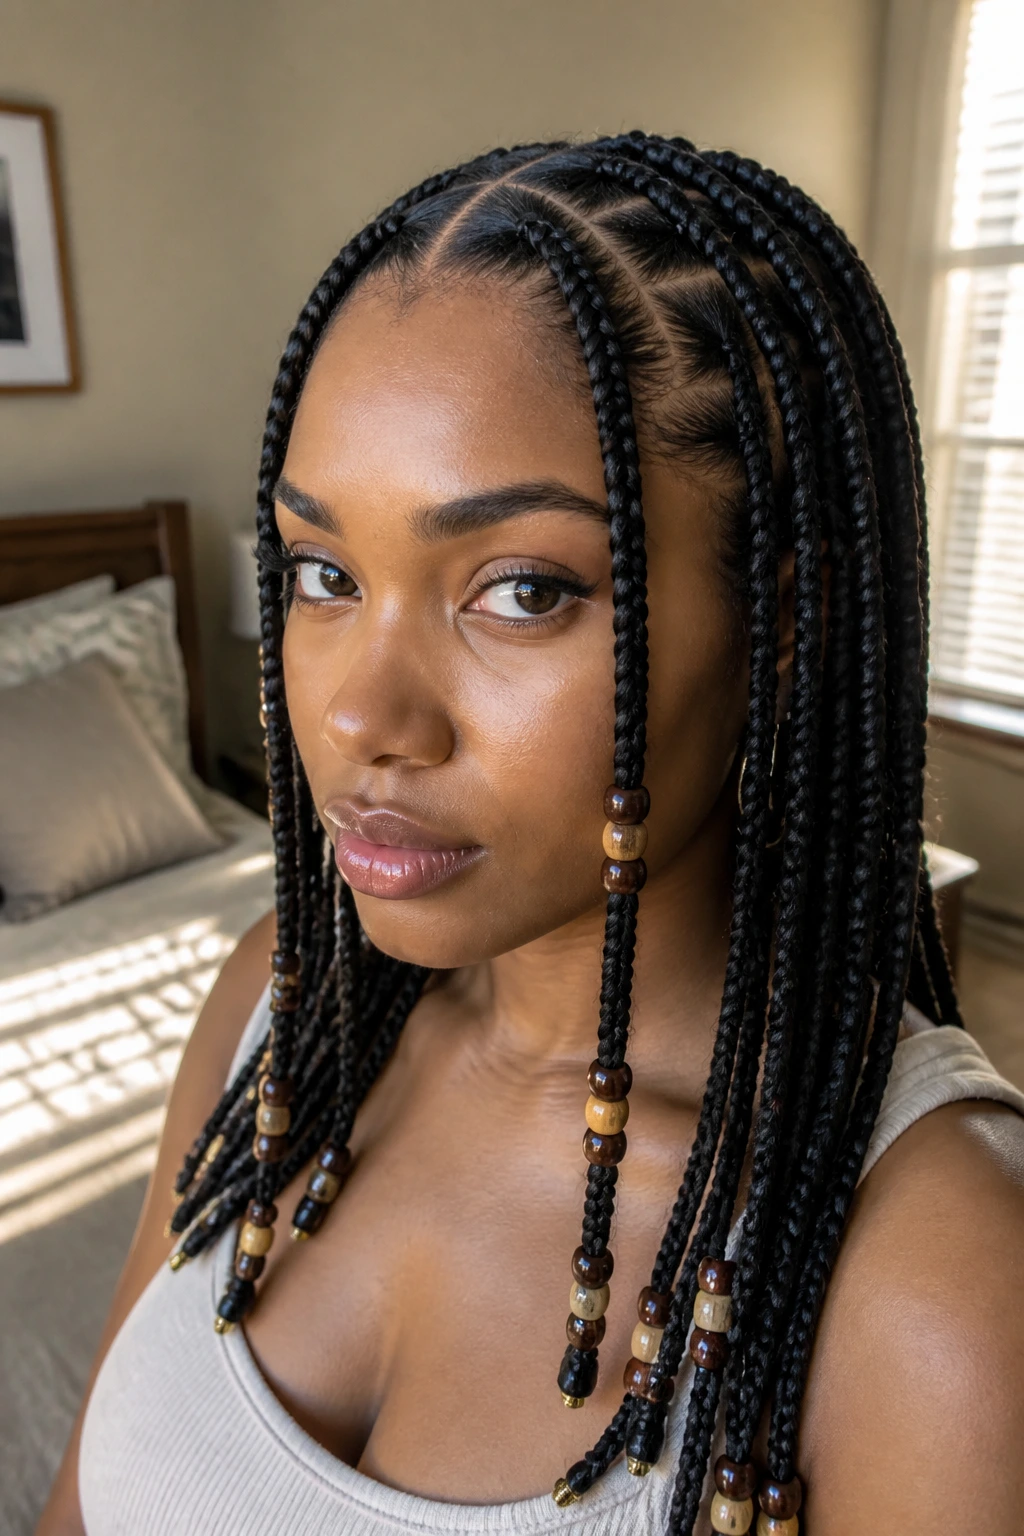
The neat part about knotless braids with beads is that they can look playful, formal, earthy, or sharp without changing the braid pattern itself. The real difference comes from restraint. One bead story repeated on purpose will always look better than six ideas fighting for space on the same head.
If you want the polished version, start with the base, not the bling. Straight parts, balanced tension, and a bead choice that matches the braid length will carry the style farther than any extra decoration ever will. Pick your finish, keep the pattern consistent, and let the beads act like punctuation.
