



Polished locs are not about making your hair look frozen in place. They’re about shape, clean parting, and a finish that looks deliberate from the front and from the back. The best loc hairstyles for a polished natural look tend to do one simple thing well: they keep the silhouette neat without sanding off the texture that makes locs worth wearing in the first place.
That balance matters more than people admit. A style can be tidy and still feel too tight, too shiny, or too busy. And a style can be soft and still look pulled together if the base is clean, the ends are tucked, and the details are controlled. A fresh retwist helps, sure, but it is not the whole story. A low bun with hidden pins can read more refined than a complicated updo with ten accessories fighting for attention.
What I love about a polished loc style is how forgiving it can be when you choose the right shape for your length and density. Medium locs need different handling than long, heavy ones. Sisterlocks and microlocs behave differently from thick traditional locs. Once you start styling with that in mind, the whole thing gets easier — and a lot more elegant.
Why These Loc Styles Read Polished Instead of Busy
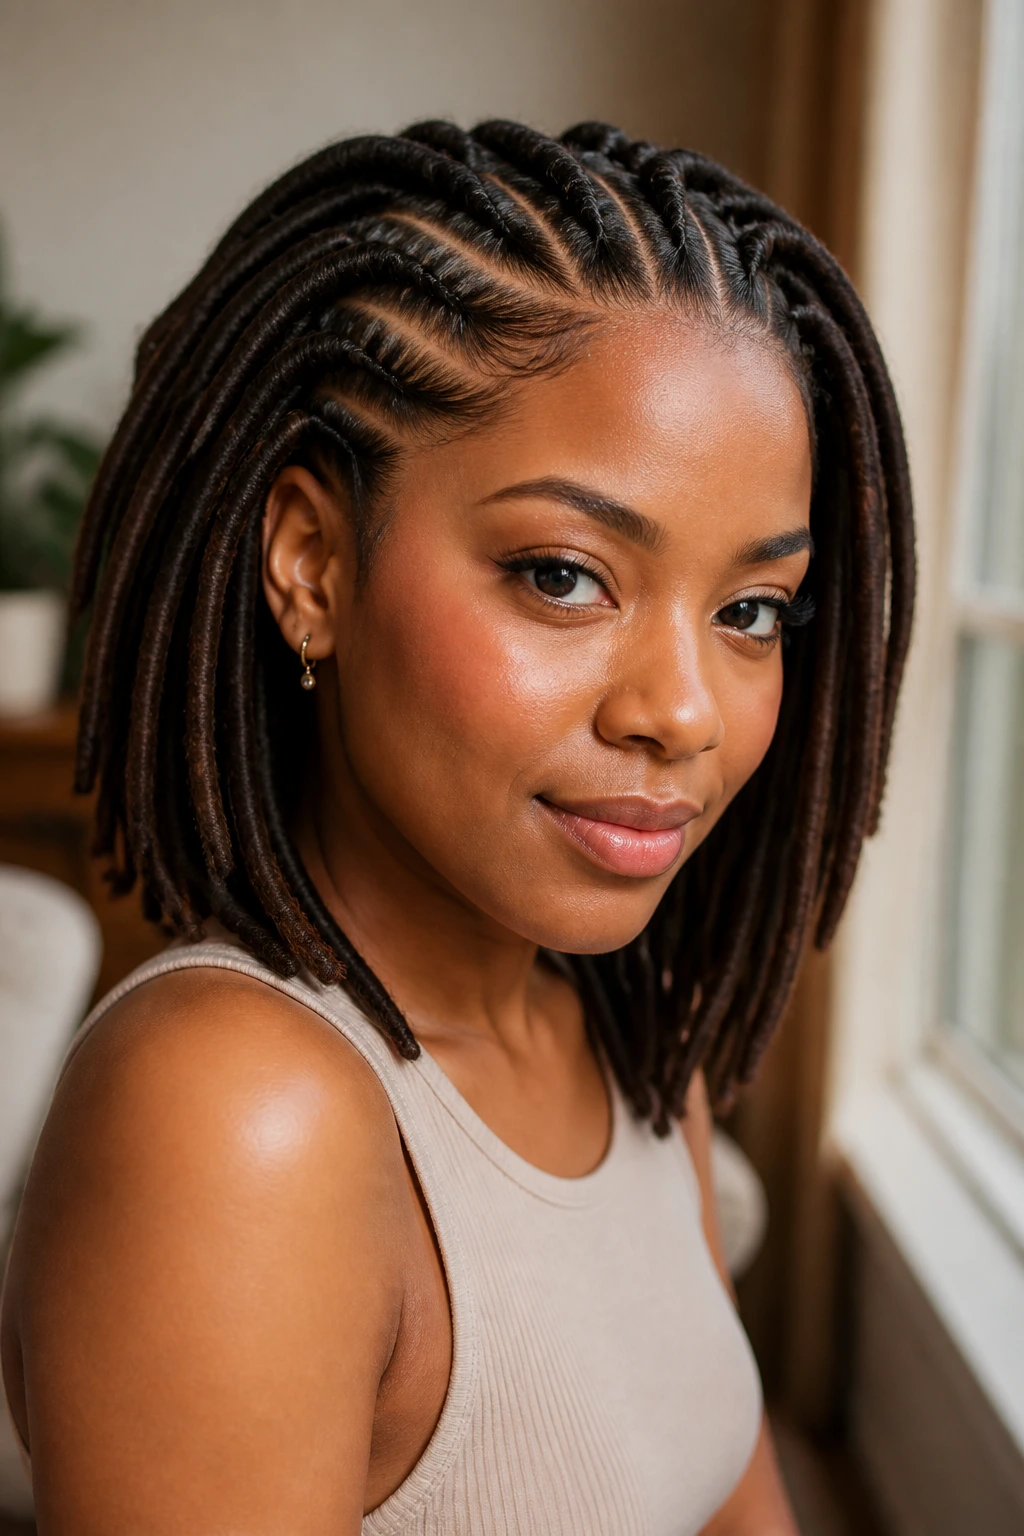
-
Clean parting: A sharp side part, center part, or crown section does half the work before you even pick up a pin. It gives the style a clear frame, which is why the finish looks intentional instead of random.
-
Low-tension shaping: Styles that tuck, roll, or wrap the ends keep the outline smooth. They also sit closer to the head, which tends to look neater on locs than loose, sprawling shapes.
-
One focal point: A single cuff, scarf, or sculpted twist gives the eye somewhere to land. Too many extras make the style look crowded fast.
-
Length-aware design: The styles here aren’t all built the same way, because short locs, medium locs, and long locs do not behave the same on the hands or on the pillow.
-
Night-friendly structure: A polished look only stays polished if it survives a satin scarf, a bonnet, or a wrap. If a style falls apart by morning, it was never really finished.
-
Face-framing control: A few intentional locs left at the front can soften the look without turning it messy. That tiny choice changes the whole mood.
1. Deep Side-Part Barrel Twist Low Bun
A deep side part changes everything here. The style reads crisp at the scalp, then softens as the locs sweep down into a low bun that sits at the nape instead of ballooning out in the middle of the head. I like this one when I want locs to look dressed up without looking severe.
Why it works
The barrel twist pattern gives the base enough structure to stay neat for days, and the low bun keeps the weight close to the neck. That matters if your locs are thick or long; a high, loose bun can start leaning by midday, while this one stays put with fewer pins.
Quick details
- Best for medium to long locs
- Works well with a side part that starts above the arch of one brow
- Hold it with 4 to 8 bobby pins, tucked under the bun’s base
- Finish with a light sheen spray, not a soaking oil
A tiny tip: smooth the roots with your fingers first, then use the rat-tail comb only for the part. If you comb too much, the scalp can get fuzzy before the bun is even finished.
2. Wrapped Nape Chignon with Hidden Pins
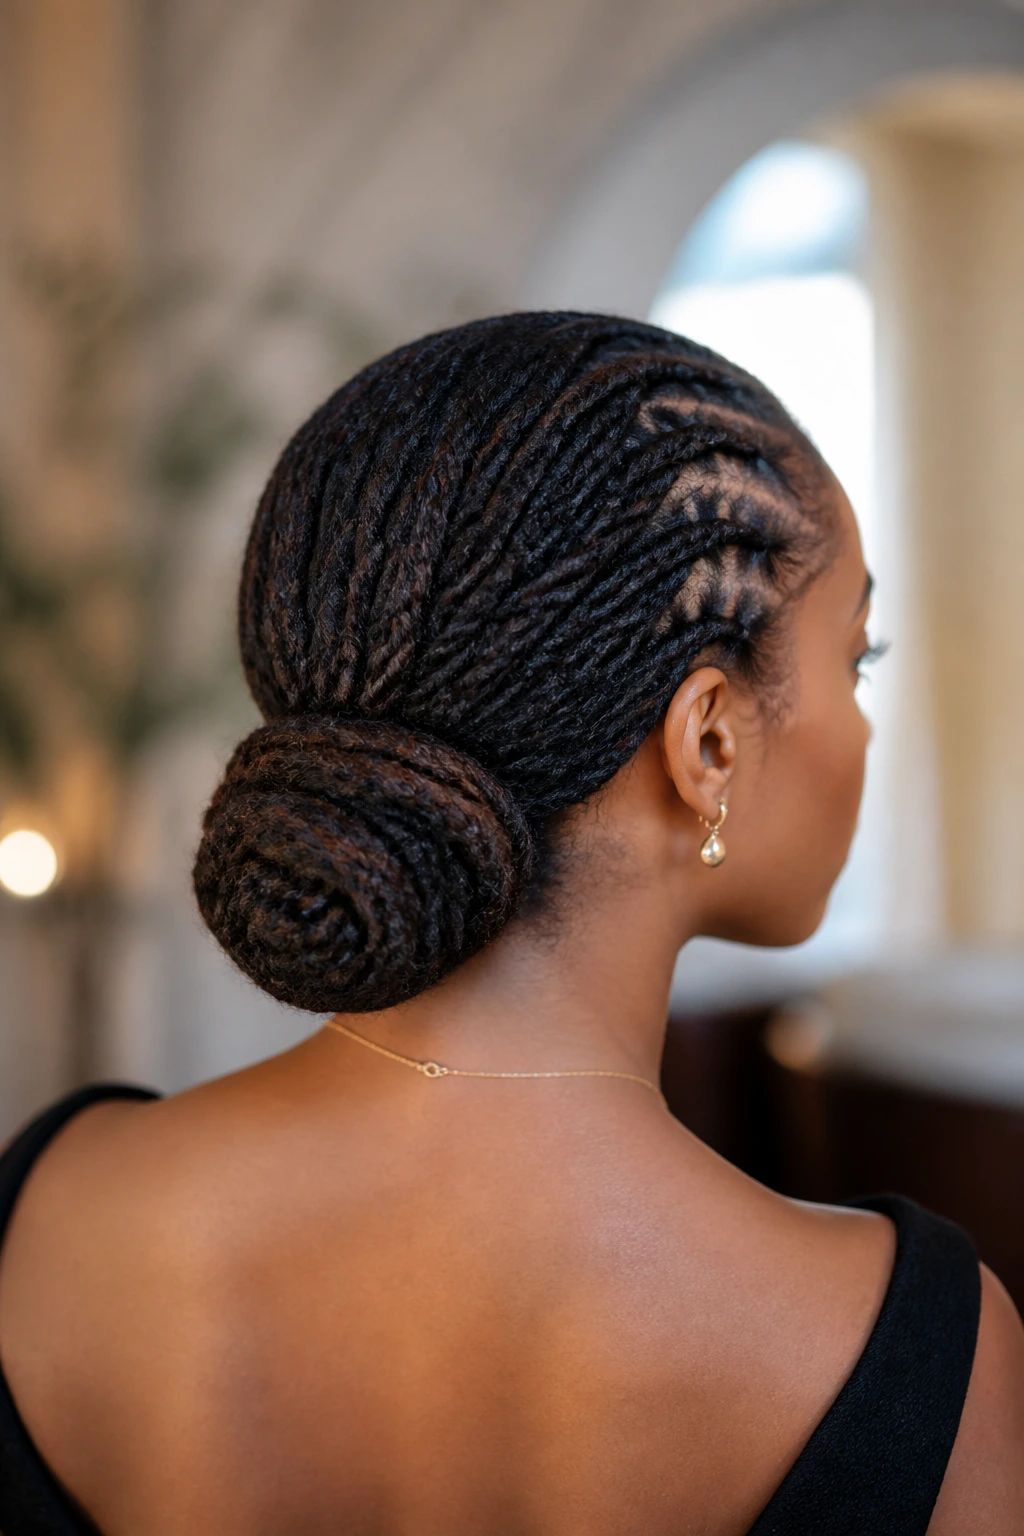
This is the style I reach for when I want locs to look formal without looking overworked. The chignon sits low and compact, almost like a sculpted knot, and the wrapped base hides the mechanics so the eye sees shape first and pins second.
If you’ve ever watched a style go from “nice” to “clean enough for a dress code,” this is the move. It’s the tucked ends that do it. The locs disappear into themselves in a way that feels tidy, not stiff.
You can keep the front smooth with a center part or give it a softer look with a deep side part. Either works. What matters is the low anchor point and the hidden pin placement along the underside of the roll.
3. Crown Halo Braid with Tucked Ends
Why does this style stay so polished? Because the braid frames the face like a band, and the rest of the locs stay out of the way. It’s one of those styles that looks more complex than it is, which is useful if you want elegance without sitting in the mirror for an hour.
How to wear it
Start with two sections from the front hairline and build a halo braid or twist around the crown. Gather the remaining locs into a tucked back section or small bun at the nape. If your locs are shorter, let the back section sit lower and flatter so the braid does the visual work.
- Best for medium locs and long microlocs
- Uses 6 to 10 pins depending on density
- Looks especially sharp with a small hoop earring or plain stud
- Keeps the neckline clear, which pairs nicely with collared shirts and higher necklines
The trick is not to make the braid fat. Keep the sections clean, cross them evenly, and smooth flyaways with a tiny touch of mousse on the fingertips. Not a handful. A trace.
4. Sleek High Ponytail with a Scarf-Wrapped Base
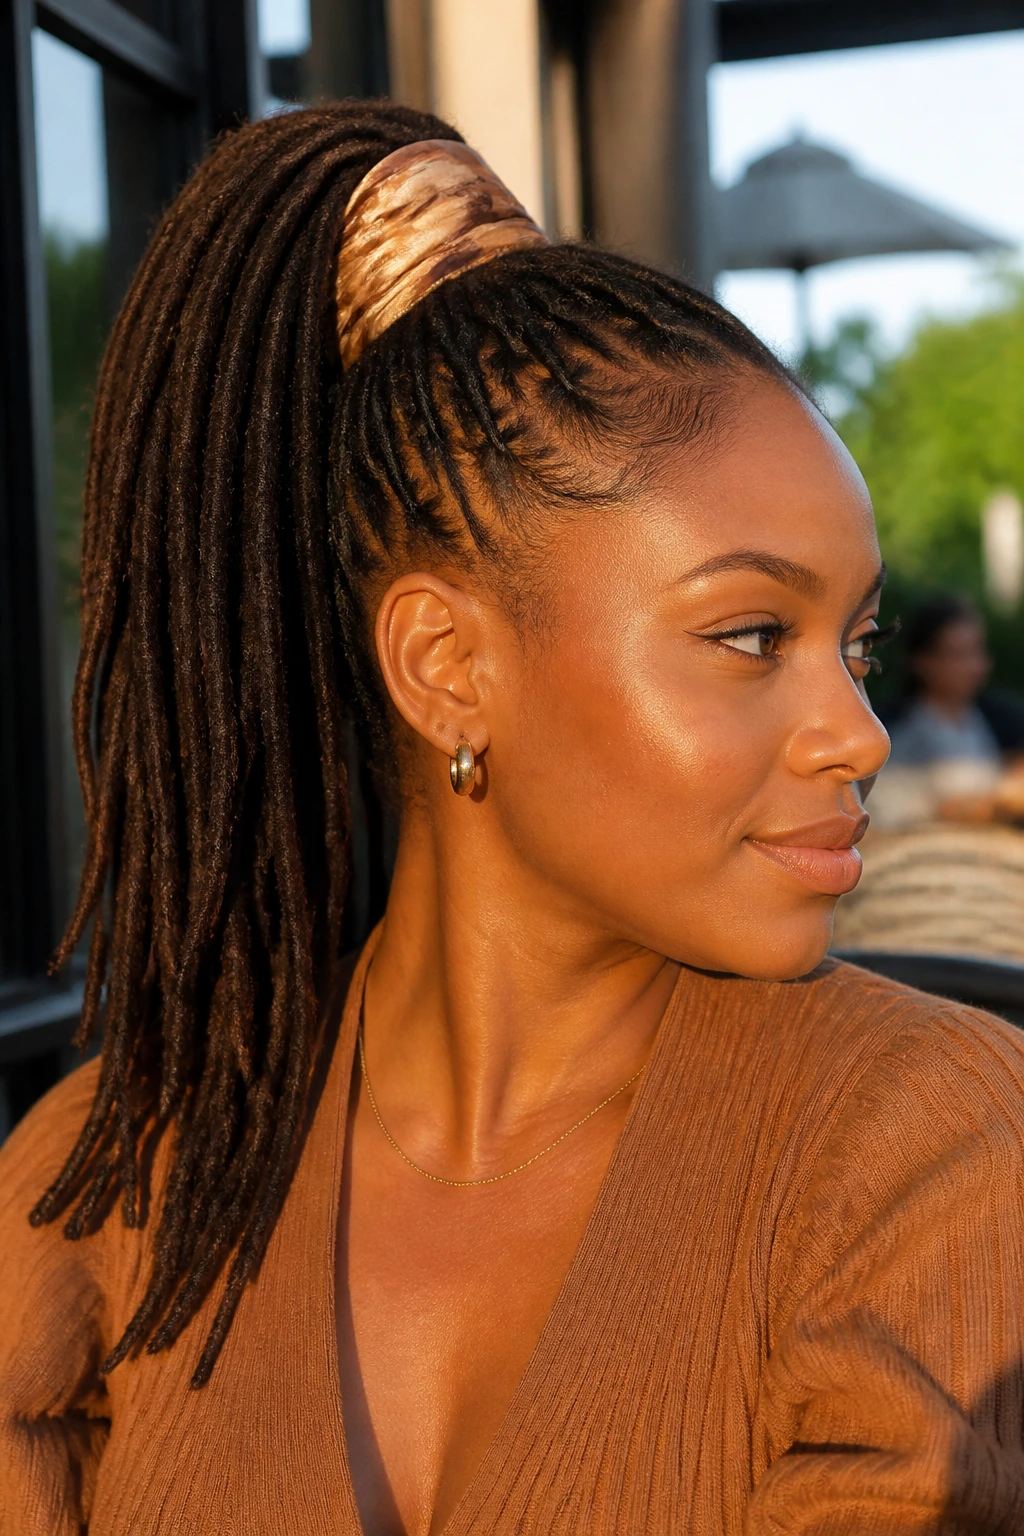
A high ponytail on locs can go two ways: sharp and lifted, or floppy and tired. The scarf-wrapped base is what keeps it in the first category. It hides the tie, cleans up the perimeter, and gives the whole style a finished edge that plain elastic never quite manages.
I like this for days when you want your face open and your outfit to do some of the talking. The ponytail itself can swing a little, which keeps it from feeling too strict, but the base stays polished.
Use a snag-free elastic first, then wrap a narrow satin or silk scarf around the base 2 or 3 times. Tie it off underneath the pony or pin the knot out of sight. If your locs are heavy, add one or two crossed bobby pins through the elastic before wrapping so the pony does not slide downward.
5. Half-Up Rope Twists Over Loose Locs
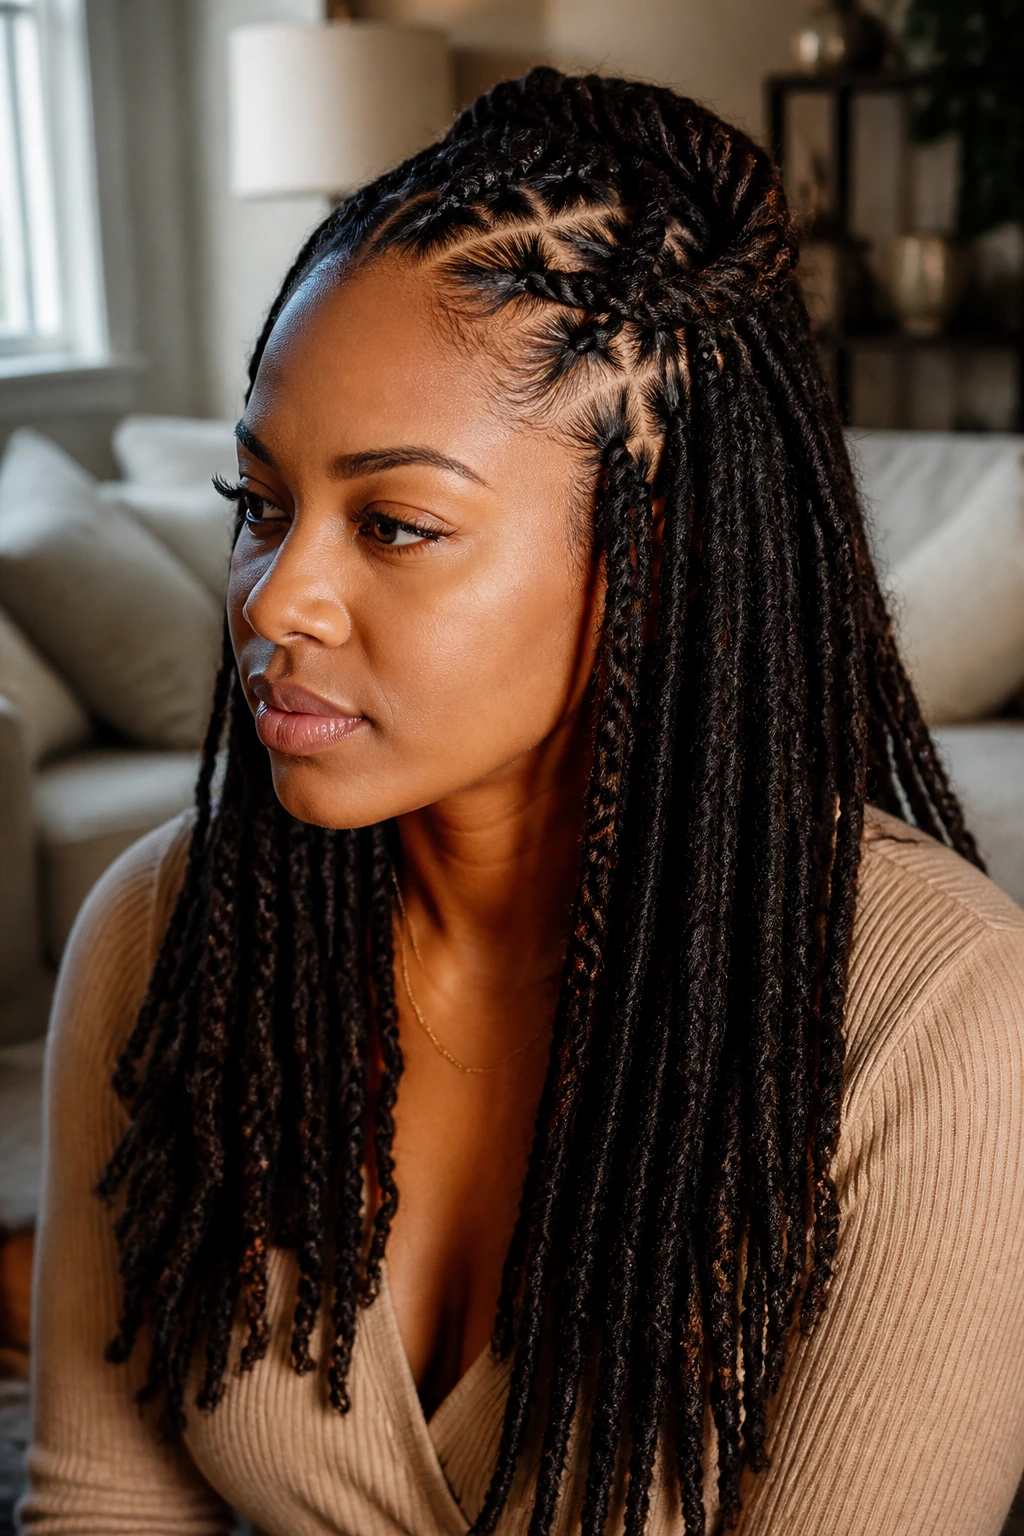
This is the easy style that still looks thought through. Pulling just the top section into two rope twists gives the crown some shape, while the rest of the locs fall freely down the back or shoulders. It’s polished because the front is controlled, not because everything is locked into place.
I prefer this on locs that are one or two days past a retwist. Fresh roots can sometimes look too slick with this style, while slightly lived-in roots give the twists a little grip. That tiny bit of texture helps the twists stay neat without fraying.
A lot of people overcomplicate half-up styles. Don’t. Two clean twists, a smooth part, and a tidy tie-off are enough. If you want more finish, wrap a small section of loc around the elastic to hide it.
6. Flat-Twist Front into Open Length
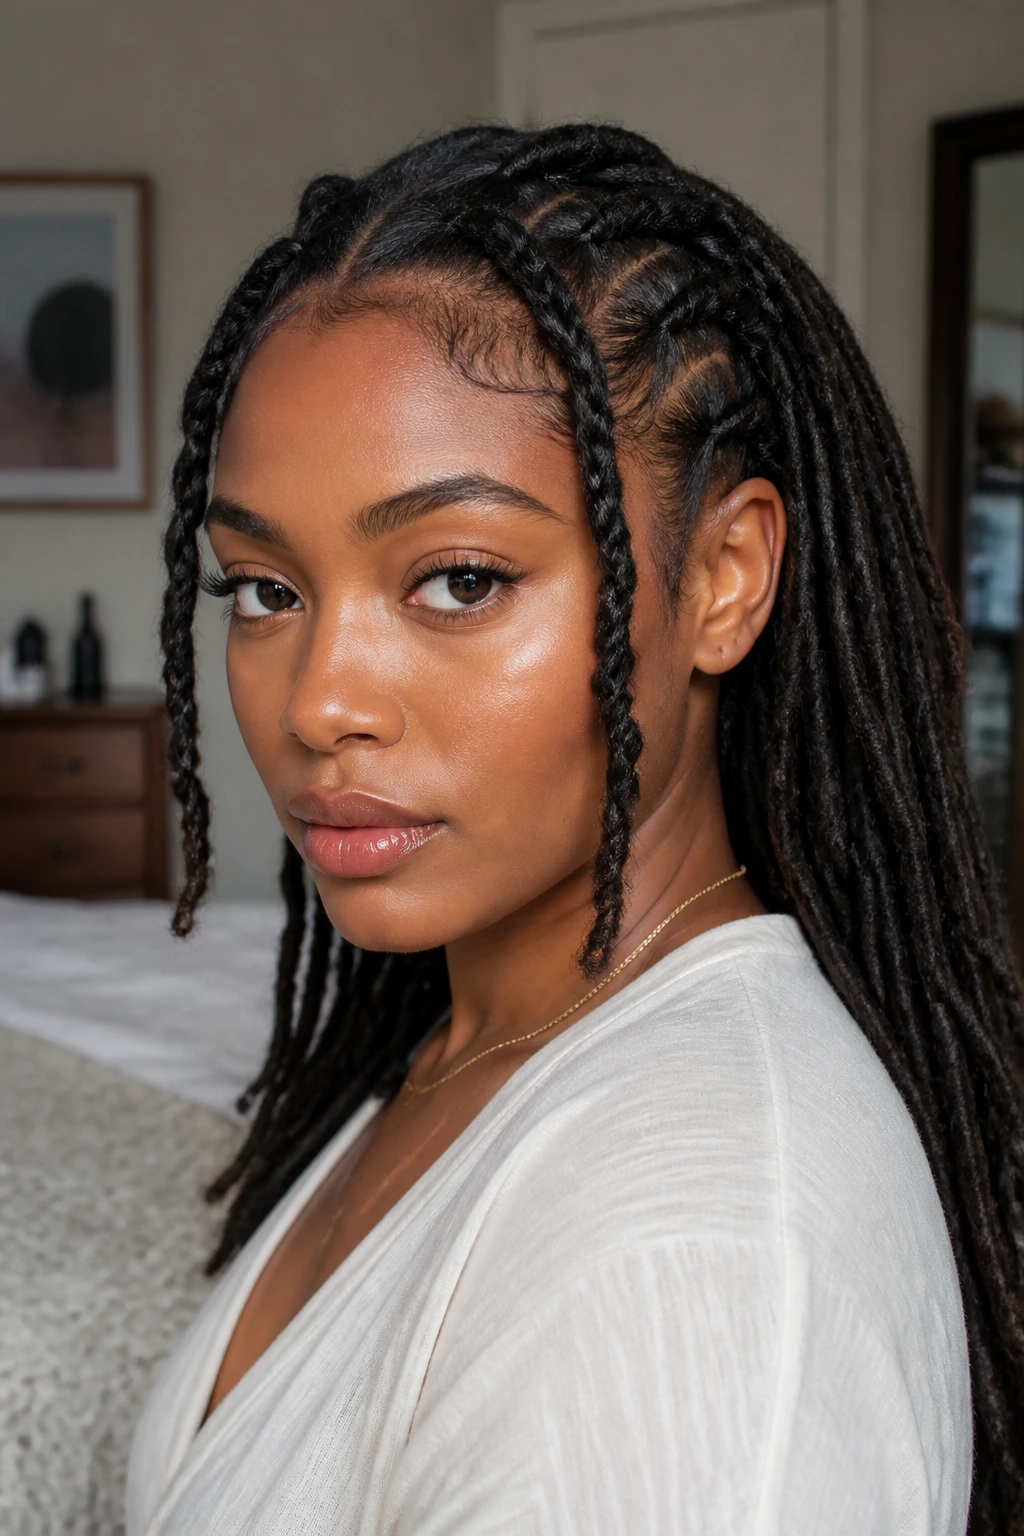
Unlike a full updo, this one leaves your length visible, which is exactly why it works for a polished natural look. The front is disciplined, the back stays soft, and the whole style feels balanced instead of overmanaged.
The front flat-twist acts like a frame. It pulls the eye up and away from the face, which can be especially nice if your locs are thick at the ends or if you want to show off length without letting the style sprawl everywhere.
Use one flat twist on each side, or a single twist that sweeps across the forehead and tucks near one ear. Keep the twists snug at the roots and slightly looser through the body. If you pull too hard, the front gets sharp in an unflattering way. Snug is enough.
7. Side-Swept Shoulder Cascade
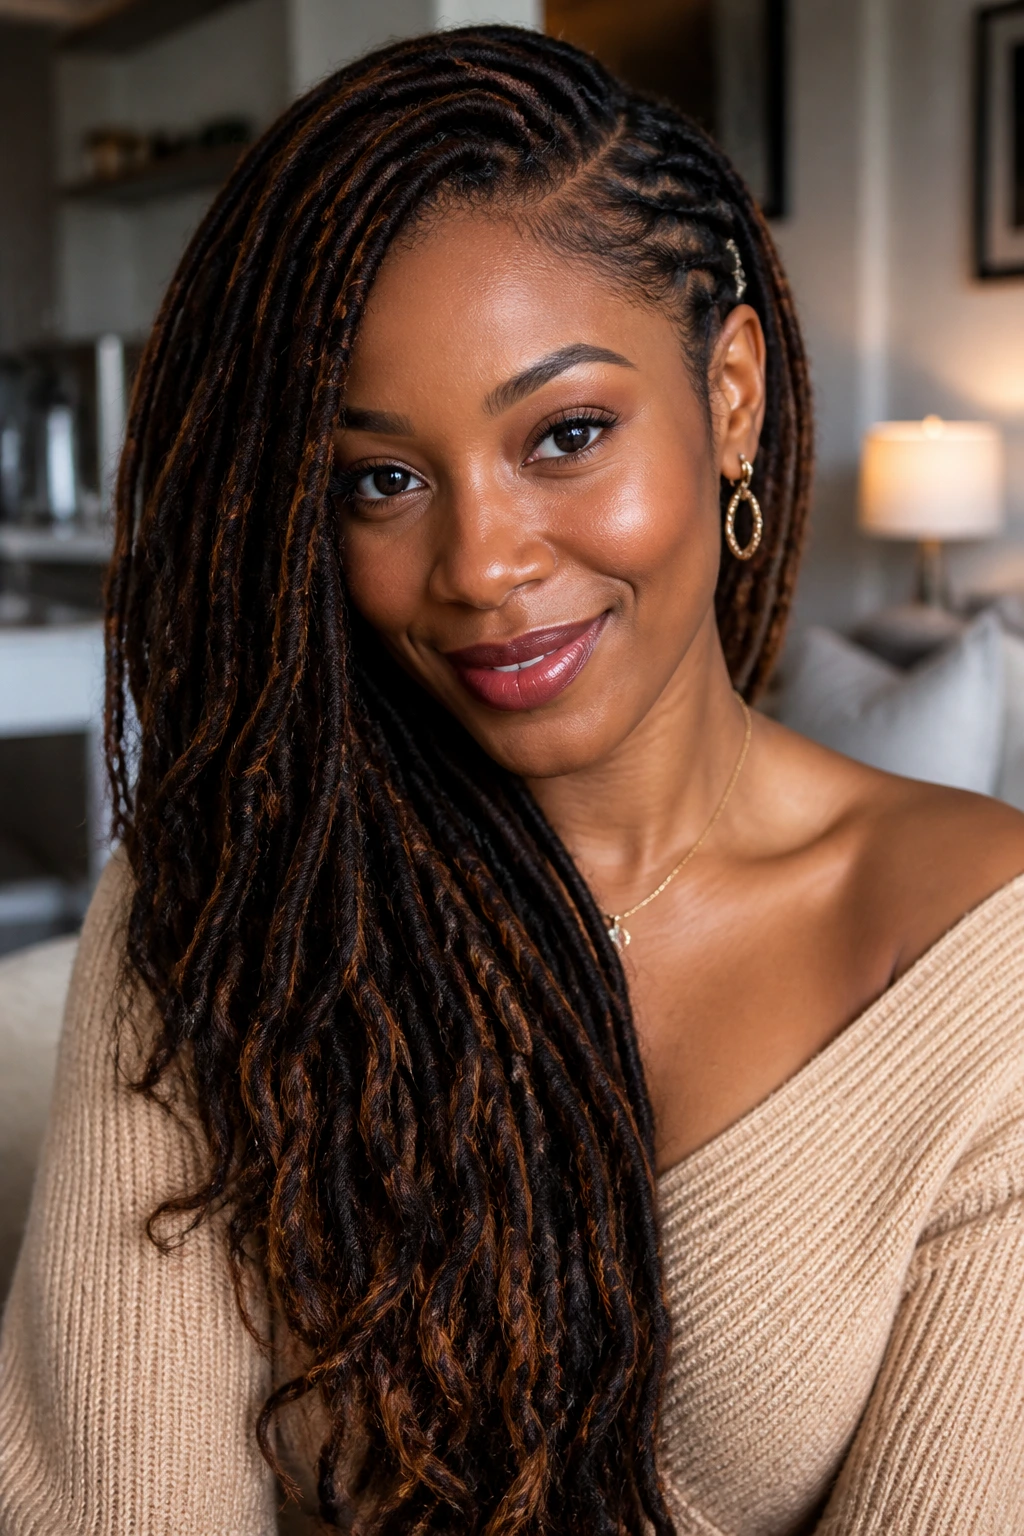
The first thing you notice is the line. Everything moves in one direction, and that alone makes the style feel more polished than a center-pulled look with the same locs. It has a bit of red-carpet energy, but without the drama of a full updo.
Best on shoulder-length to mid-back locs
This style shines when the locs have enough length to drape across one shoulder without collapsing. Use a side part, pin the opposite side flat behind the ear, and let the bulk fall over one side. A cuff or two near the front section can sharpen the look, but don’t pile on extra pieces.
- Works well with medium-to-thick locs
- Needs 3 to 5 hidden pins at the temple and crown
- Looks cleanest when the front section is smoothed before the rest is arranged
- Good choice for earrings, because one side stays open
If the ends feel dry, mist them lightly and smooth with your palms before arranging. Dry ends stick out at the wrong angles. You’ll see them every time you pass a mirror.
8. Twisted Mohawk with Pin-Smooth Sides
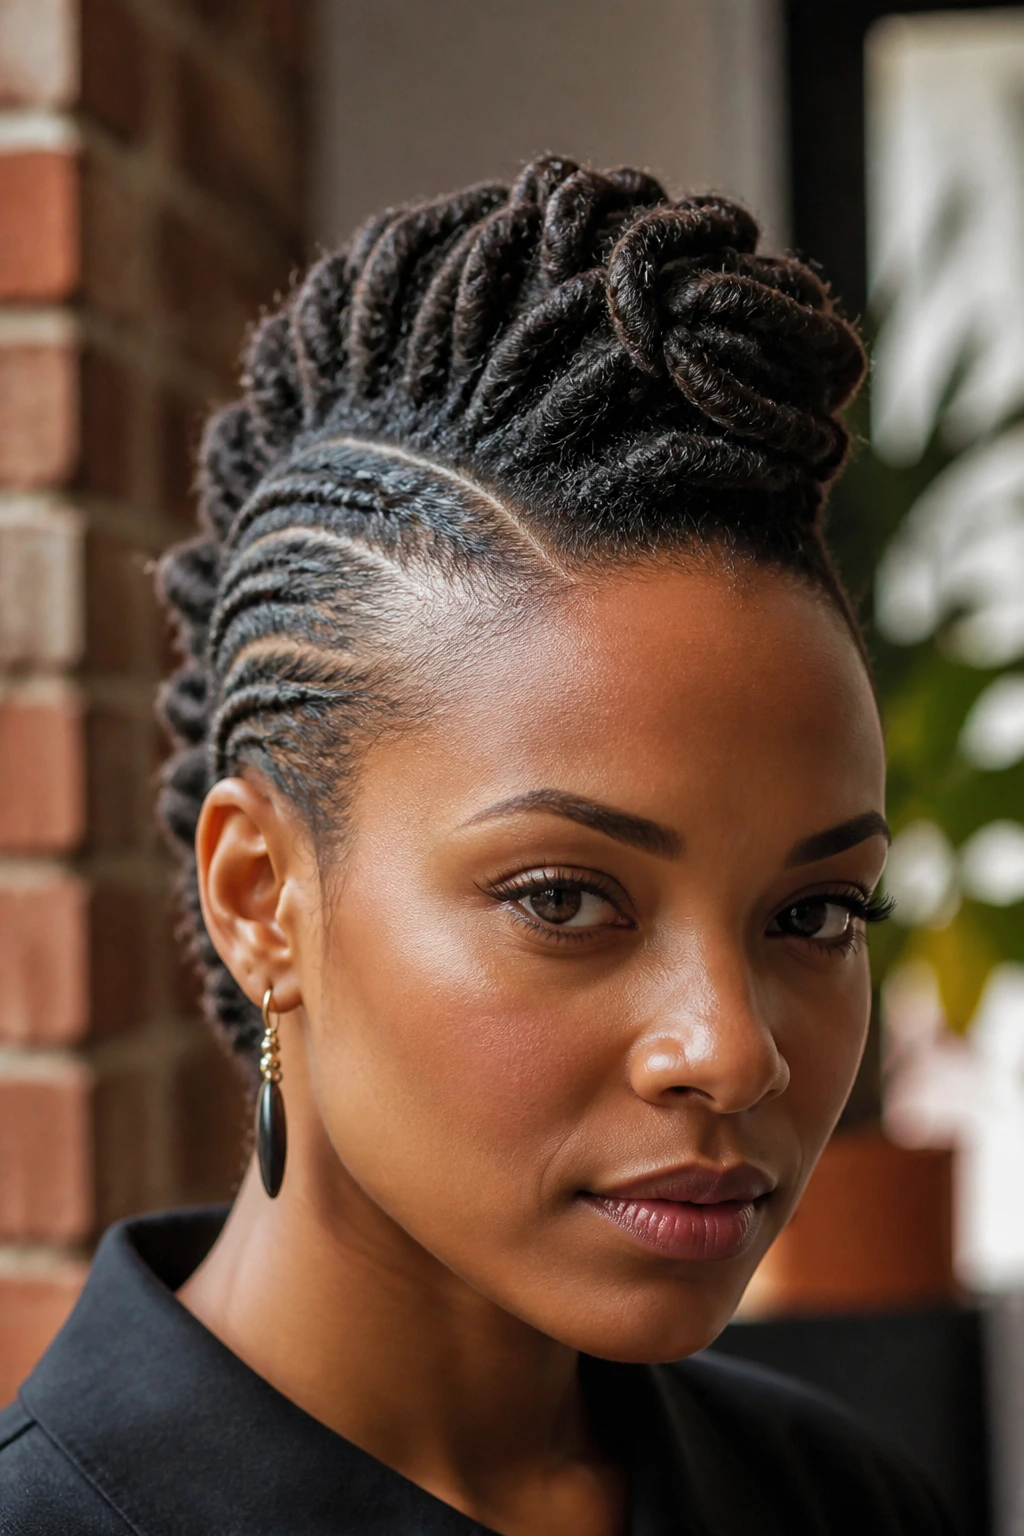
A mohawk on locs can look edgy in a polished way if the sides are controlled tightly enough. The center strip gives height, the sides stay flat, and the style reads sculptural instead of messy.
This is one of my favorites for people who want their locs to have presence. Not volume for the sake of volume. Presence. The shape does the talking, and the face stays open.
Keep the sides braided, flat-twisted, or pinned back in small sections. Then build the middle into a row of twists or a lifted puff of locs that runs from forehead to nape. If the side sections puff up too much, the whole style loses its line. That line is the point.
9. Faux Bob with Tucked Under Ends
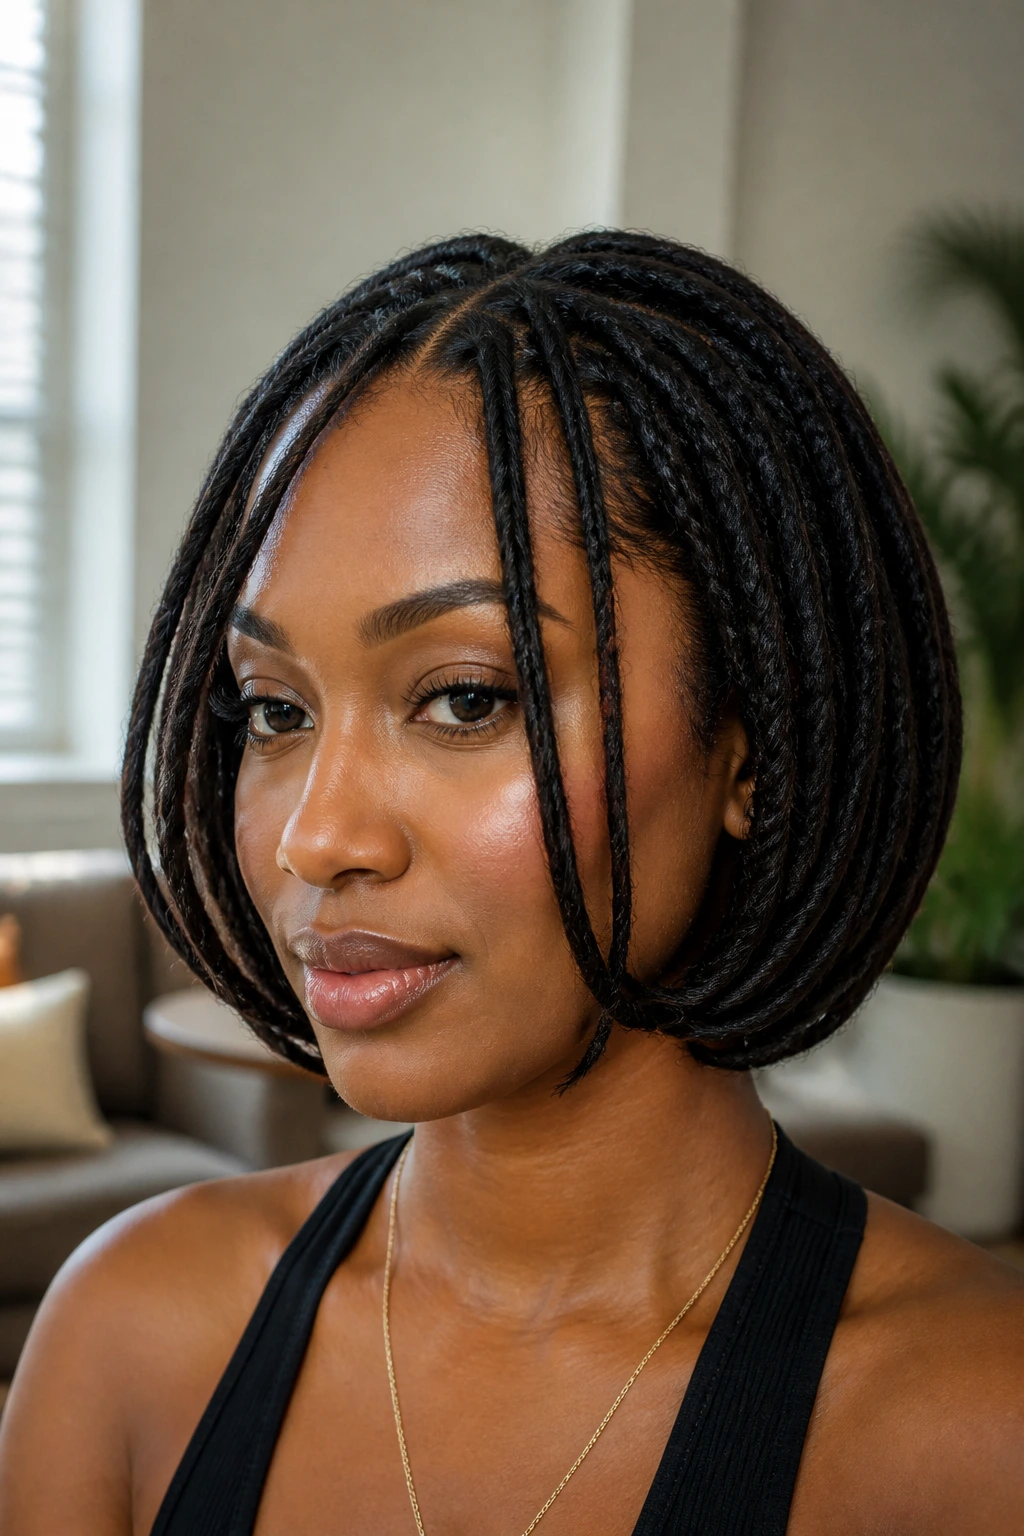
A faux bob is pure trickery, and I mean that as praise. Long locs get folded and pinned under so the finished shape sits around the jaw or collarbone, giving you a shorter, neater silhouette without cutting a single strand.
It’s a smart style when you want your locs off your shoulders but don’t want a bun. The tucked ends help the style look compact, and the curved shape around the face usually softens the whole look.
The best version starts with a low loose gather, not a high pony. Pin the lengths upward and inward, hiding the ends in layers. Leave a few locs near the front slightly looser so the bob shape doesn’t look too rigid. If every piece is pinned into place with equal tension, it starts to look like a helmet. Nobody wants that.
10. Nape Barrel Roll Bun
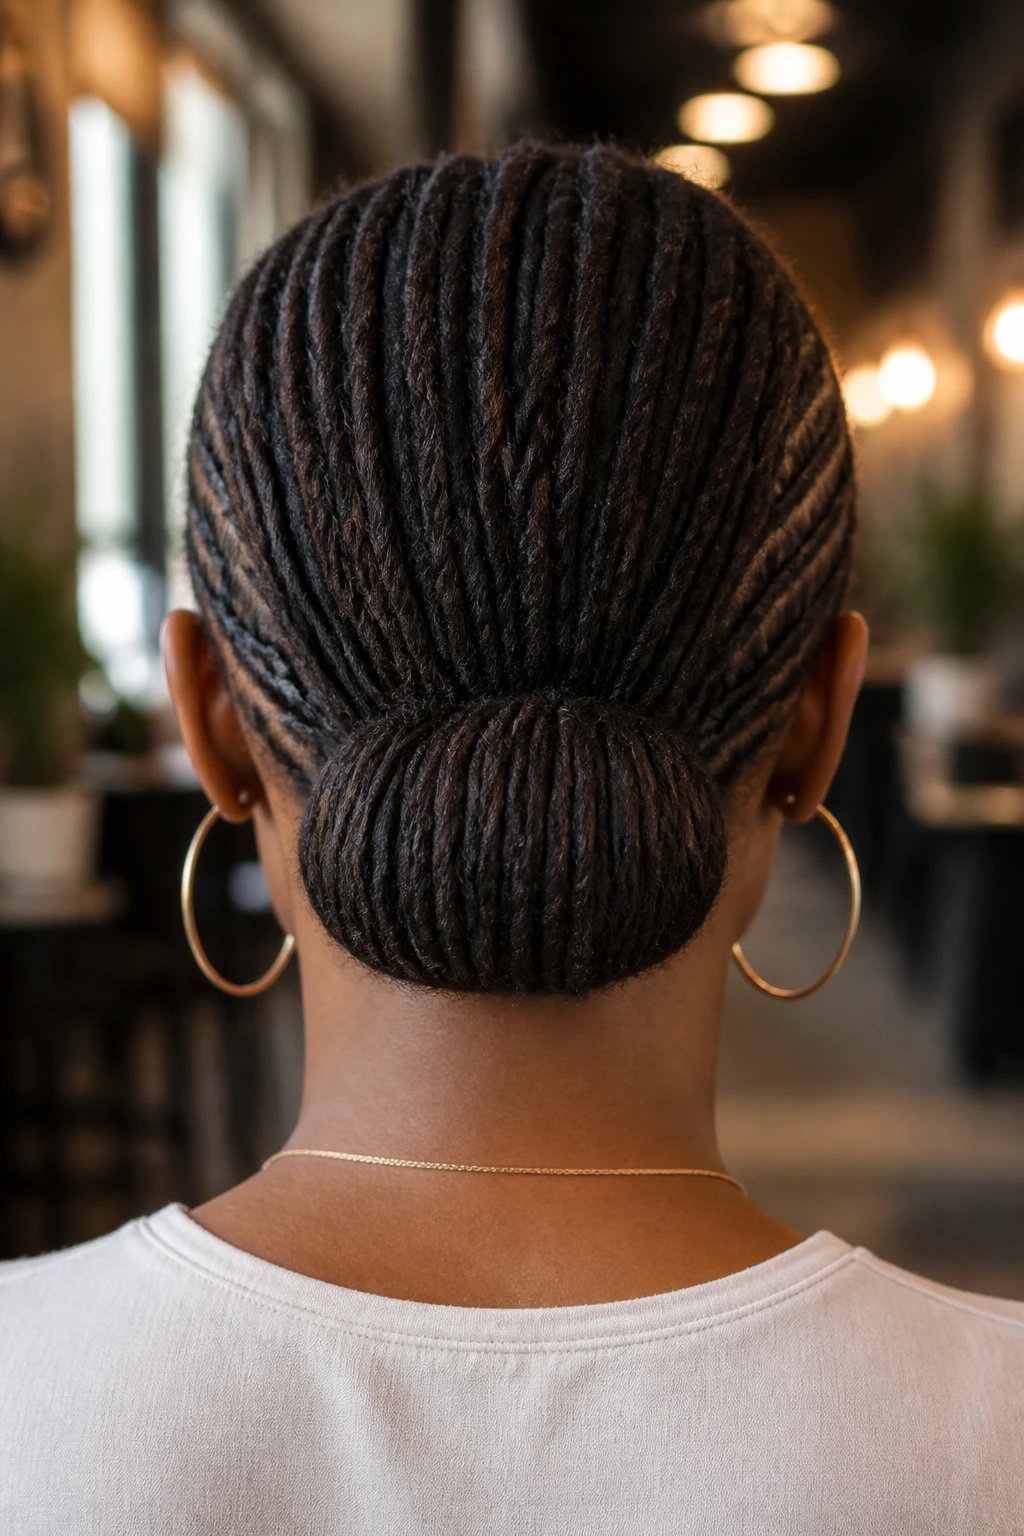
There’s something satisfying about a barrel roll bun at the nape. It’s low, smooth, and easy to control, which makes it feel more tailored than a loose coil bun. The shape is narrow from the side, so it works especially well with collared shirts and earrings.
The trick is to roll the locs in one direction and keep the wrap tight against the head as you go. I usually anchor the first section at the center back, then curve around it with the rest of the locs, tucking the ends under the roll. A few pins through the seam are enough if your locs are not too heavy.
If your locs are thick, split the bundle into two smaller rolls and join them at the base. That keeps the bun from standing off the head like a shelf.
11. Space Buns with Clean Part Lines
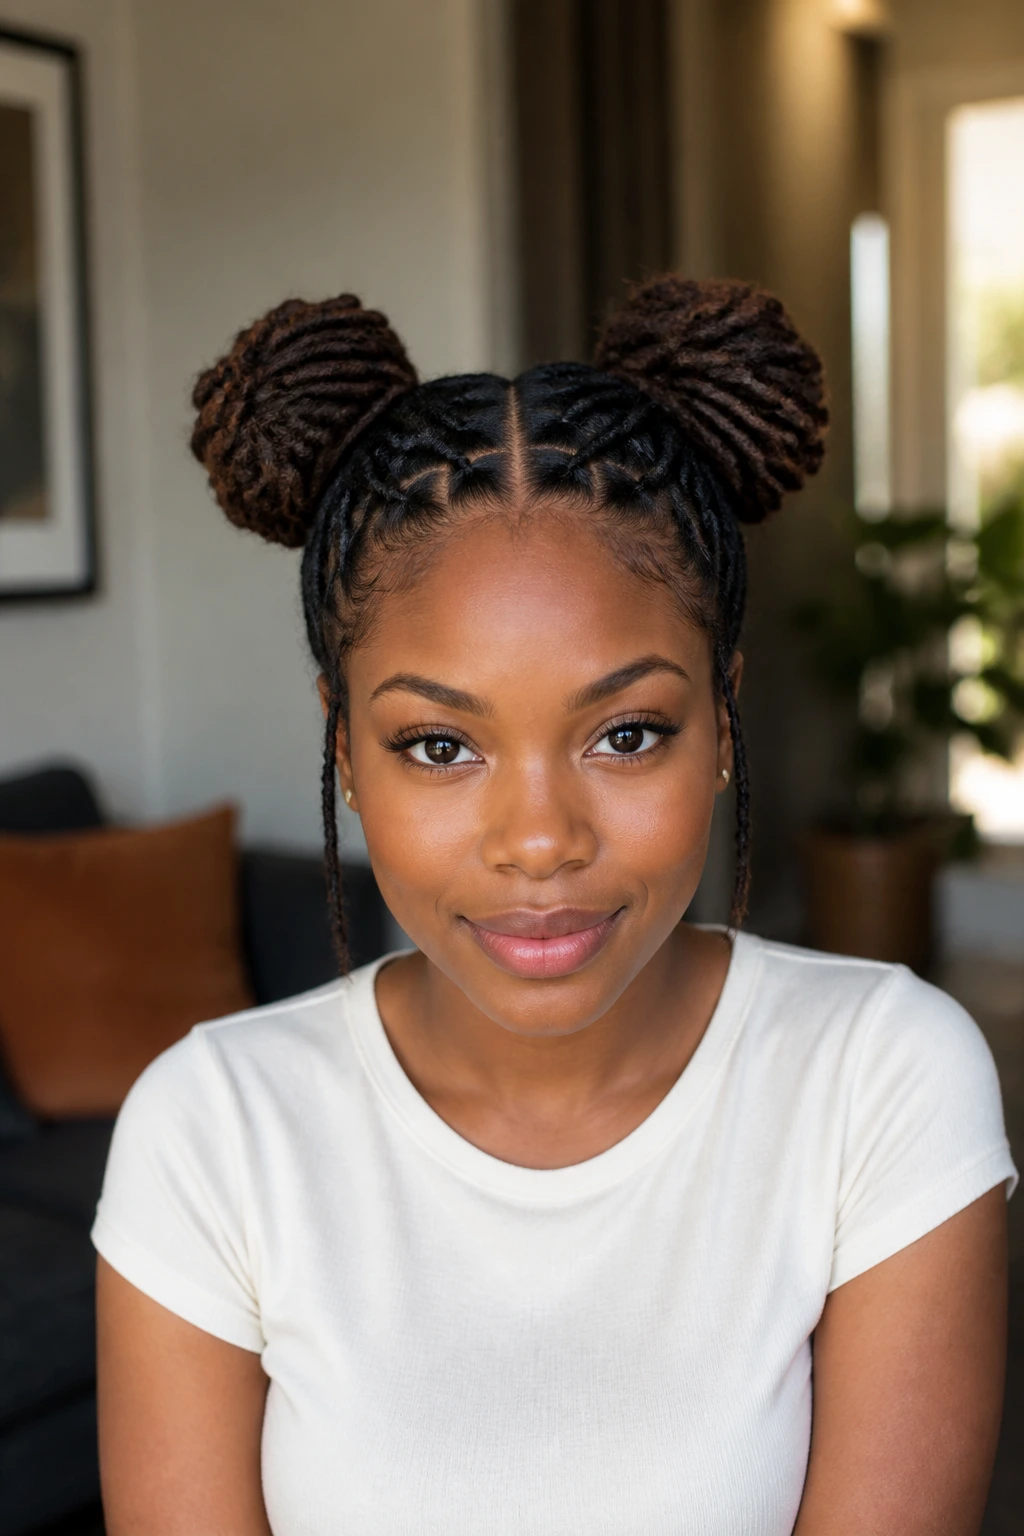
Space buns can look playful and still polished when the parting is crisp. The difference is in the center part and the symmetry. If the two buns sit at the same height and the parts are clean enough to trace with a fingertip, the style reads intentional rather than casual.
What makes them feel grown-up
Use medium-sized buns instead of tiny, lopsided knots. Keep the sections sleek at the scalp and secure each bun with a wrapped elastic or several hidden pins. I like this style best when the locs are neat but not overly stiff; a little movement in the ends keeps it from feeling childish.
- Best for medium-length locs
- Symmetry matters more than size
- Works nicely with minimal jewelry
- Faster to build than a full braided updo
This one has a clear personality. Keep the outfit simple and the hair becomes the focal point.
12. Cuffed Statement Bun
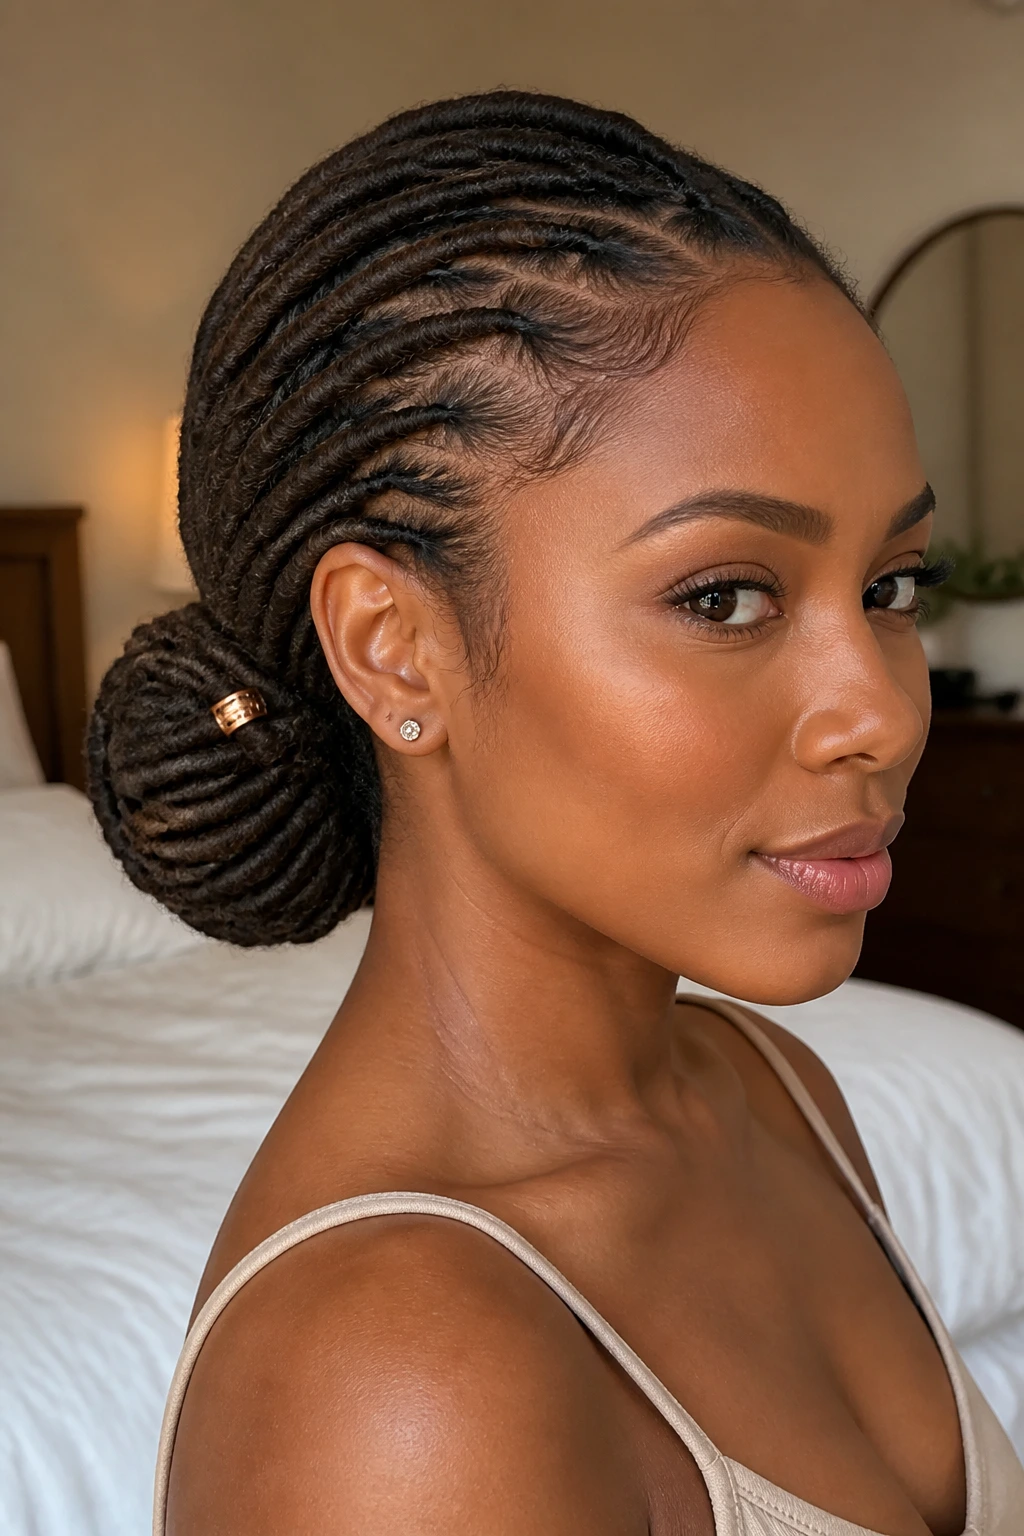
A plain bun becomes polished when one deliberate accessory finishes it. Loc cuffs, if used with restraint, can turn a basic low bun into something that feels styled instead of simply tied back.
I prefer one or two cuffs placed where the bun catches the light, usually near the outer loop rather than scattered everywhere. Too many cuffs and the bun starts looking busy. One good placement says enough.
Use a low or mid-height bun for this. Wrap the locs into a round coil, secure them, then add the cuffs after the shape is locked in. If you add cuffs too early, they get bent out of shape while you’re tucking and pinning. That is an annoying way to ruin a clean finish.
13. French Roll Inspired Loc Updo
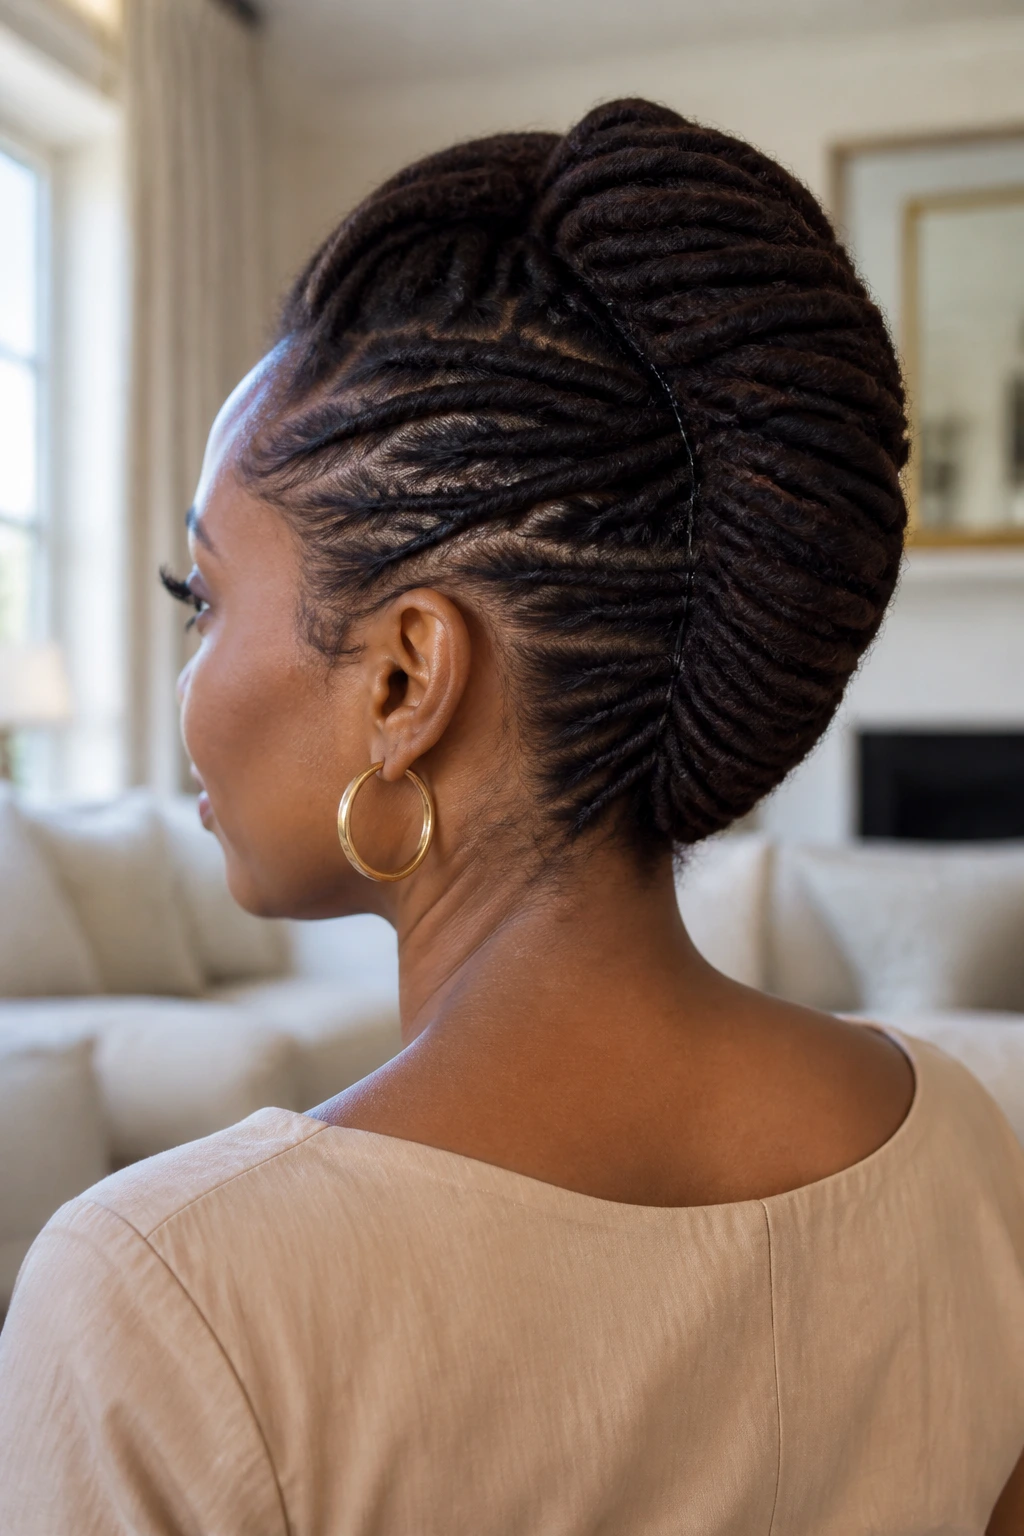
A French roll shape gives locs a very tailored silhouette. The vertical sweep at the back keeps the style neat, while the side sections flatten and tuck in a way that feels calm and composed. It’s a strong choice for work, events, or any time you want your hair to look finished without shouting.
The roll is built by gathering the locs to one side first, then folding them inward so they stack against the back of the head. Use pins along the seam, not just at the top. That seam is what holds the whole thing together.
If your locs are longer, the roll can gain some height. If they’re shorter, keep it close to the head. Either way, the outline should be smooth, not bulky.
14. Braided-Base Ponytail with Wrapped Tail
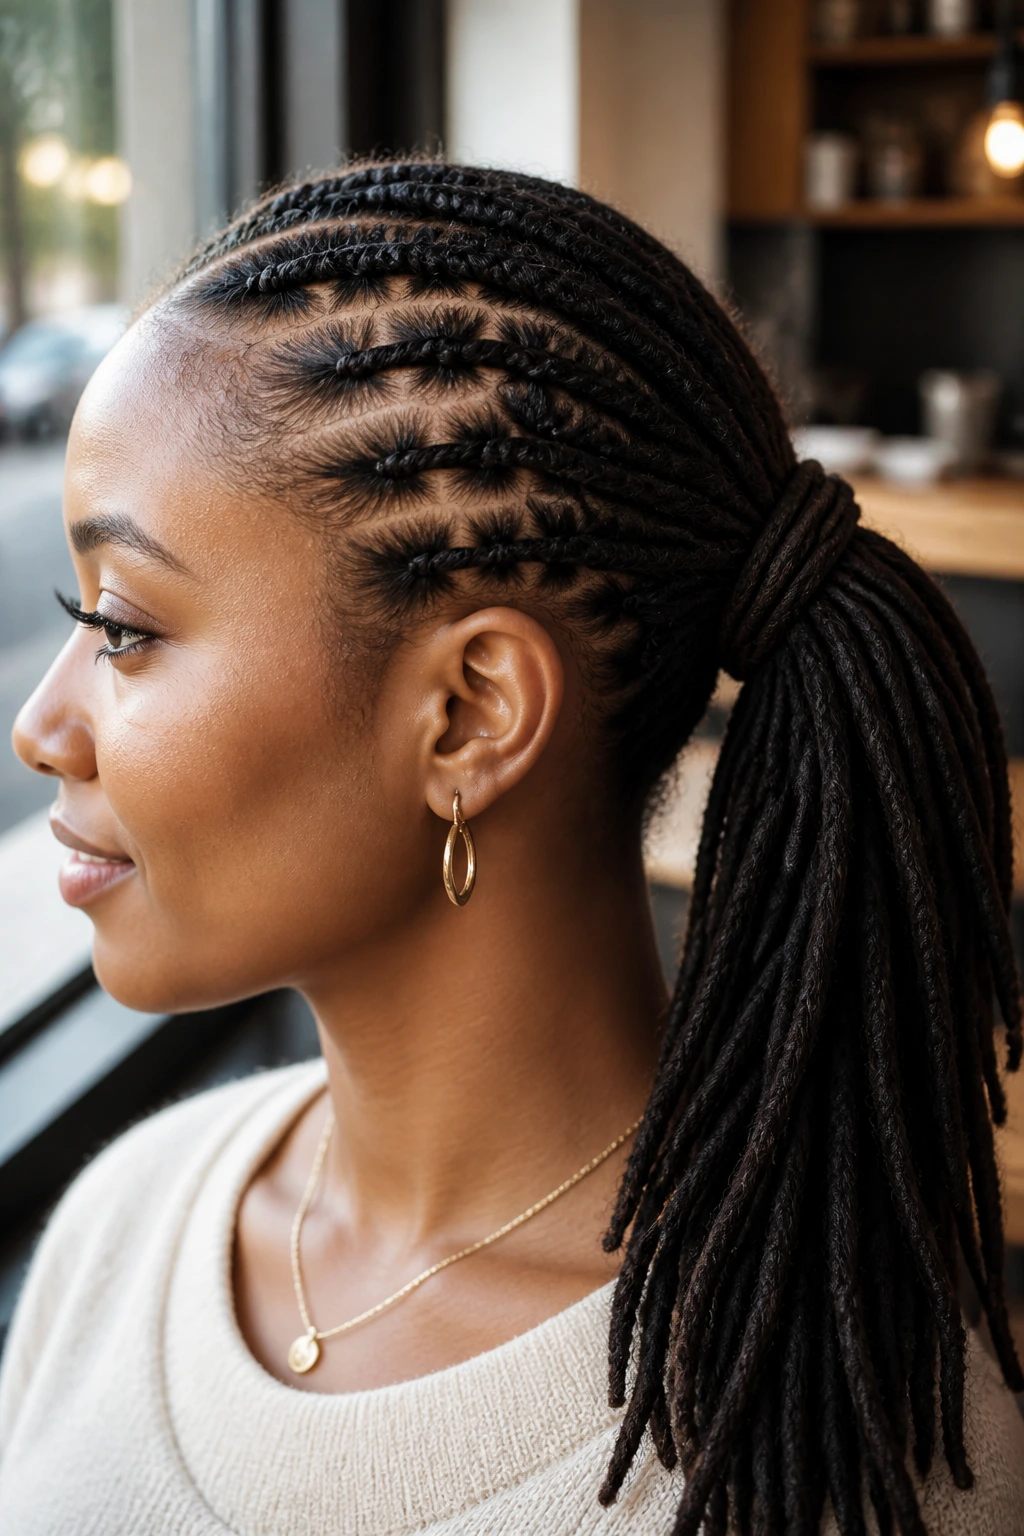
A braided base makes a ponytail feel more polished because it controls the transition from scalp to length. The braid acts like a clean anchor, and the wrapped tail hides the elastic so the finish looks planned from top to bottom.
This style is a nice middle ground between formal and practical. You still get a ponytail, which means movement. But the details are neater than a simple pull-back.
Use one braid or two slim braids at the crown, then gather the rest into a pony. Wrap one loc around the elastic and pin it underneath. If your pony sits heavy, place a second elastic lower down to distribute the weight and reduce sagging. That small move helps more than a lot of people expect.
15. Low Side Pony with Soft Face Framing
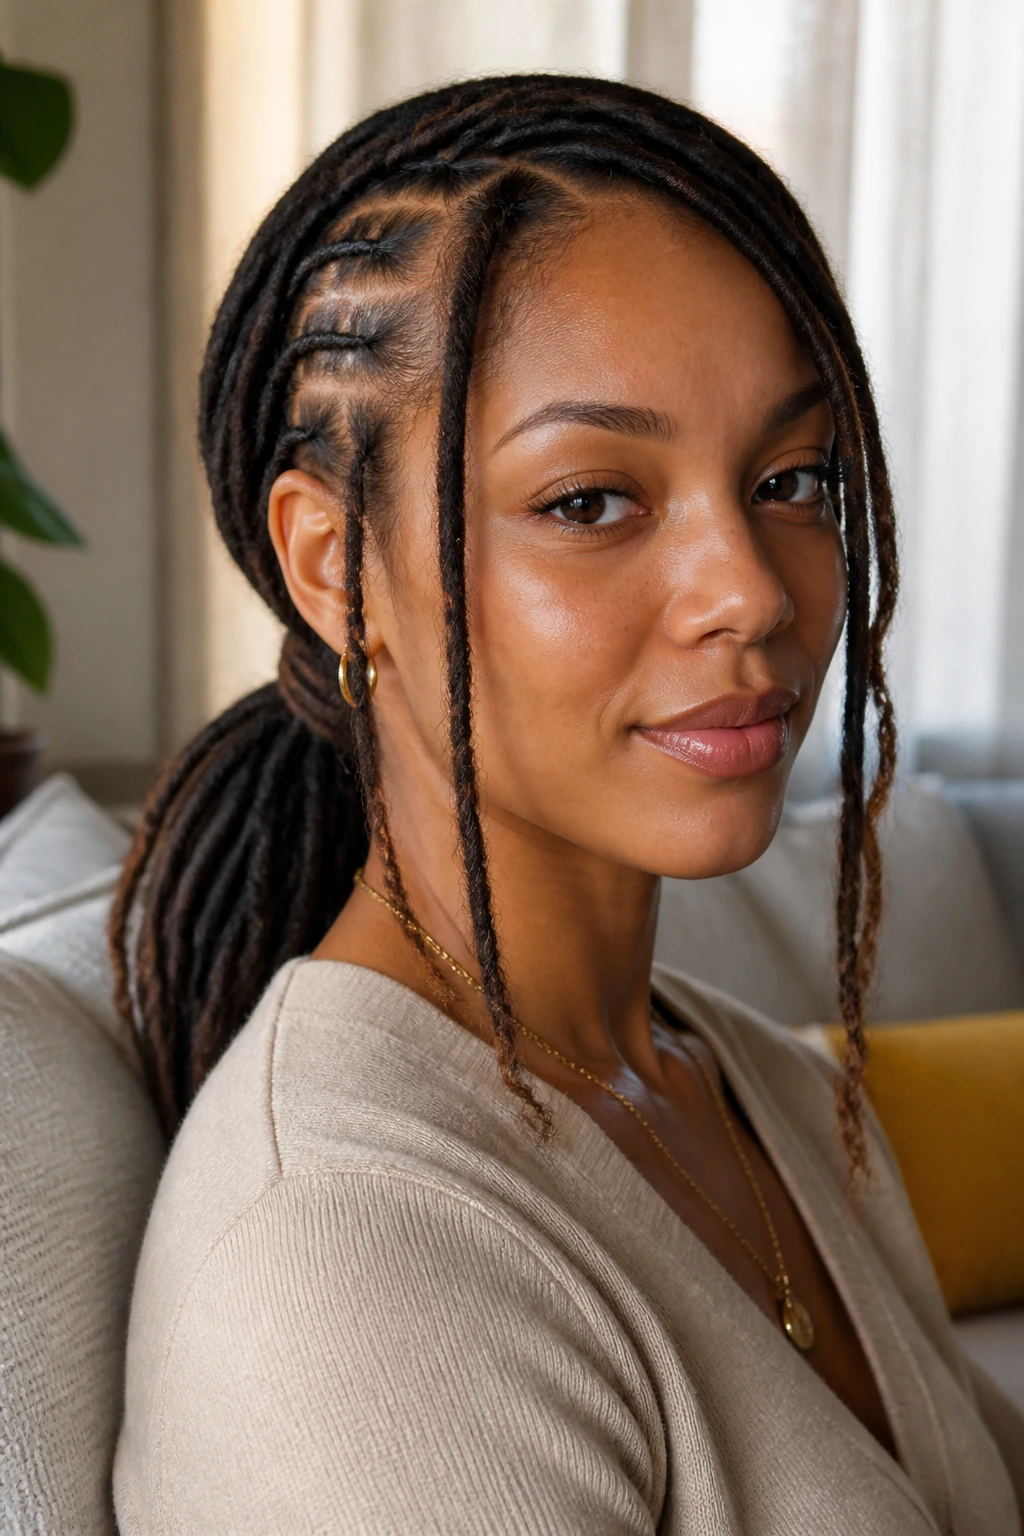
A low side pony can look almost tailored when the front pieces are handled well. The pony sits near one shoulder, the front line stays smooth, and a few face-framing locs make the style feel relaxed instead of severe.
The part can be deep or shallow. I prefer a deep side part because it gives the look more curve. The pony itself should sit low enough that it doesn’t drag on the neck, especially if your locs are dense.
The polish comes from restraint. Don’t tease the crown, don’t pile on clips, and don’t over-spritz the roots. Smooth, gather, secure, finish. That’s the whole formula, and honestly it’s enough.
16. Pinned Crown Lift
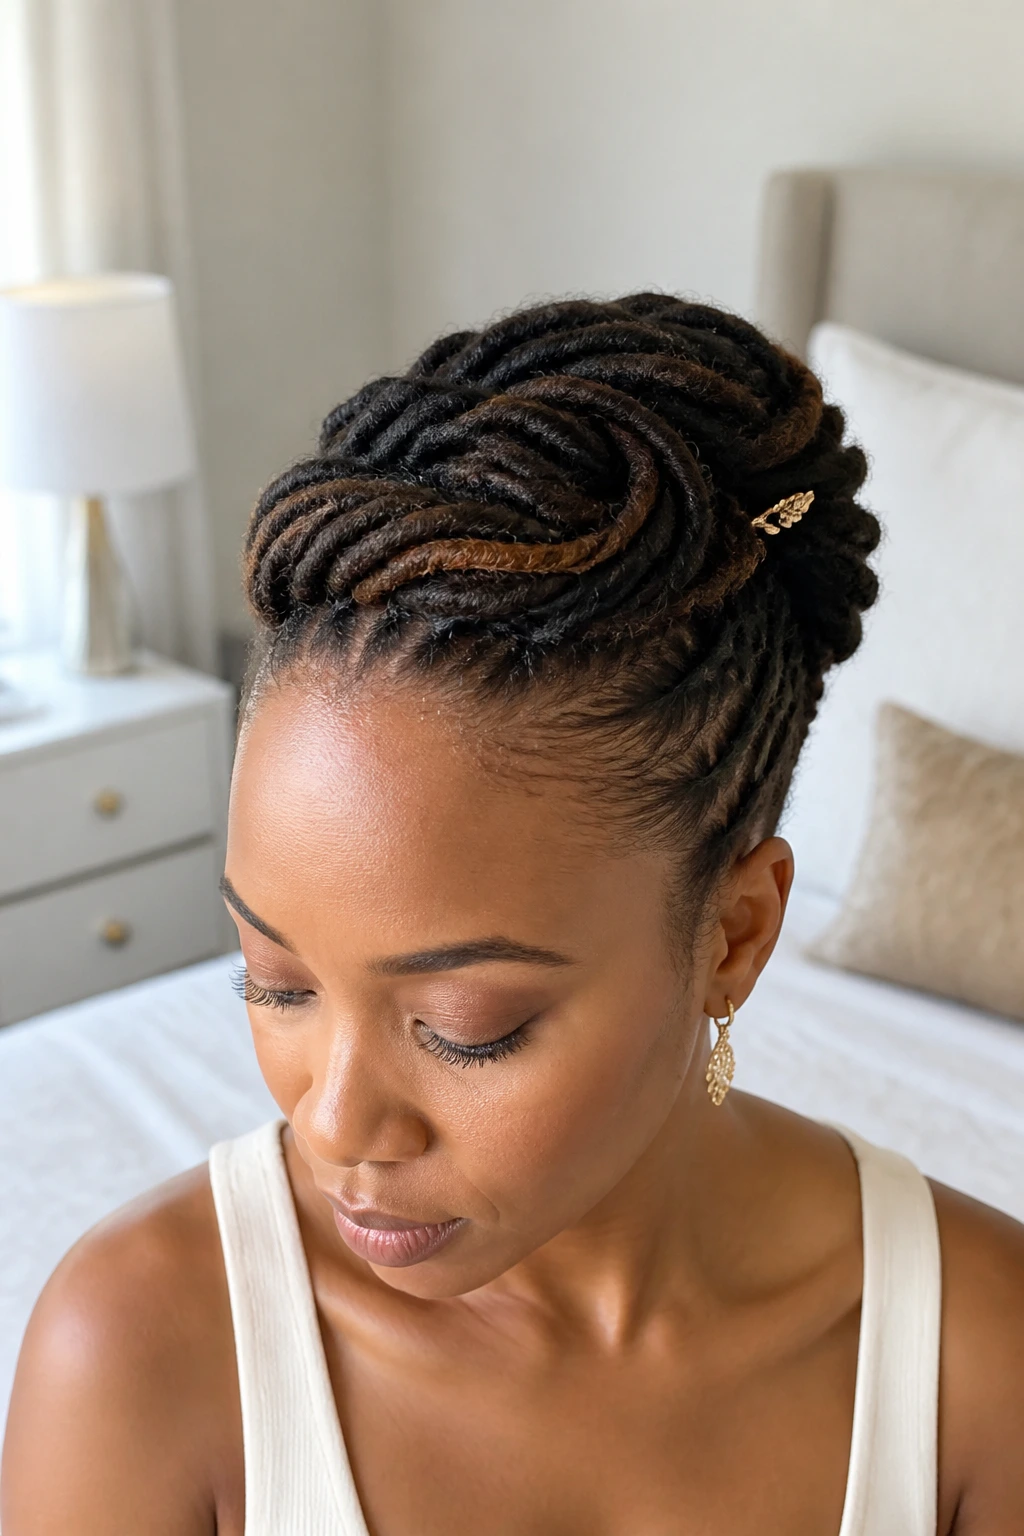
Why do I like this one for long locs? Because it creates height without building a full tower on top of the head. The crown lift lets the front section rise slightly, then pins the rest back in a soft arc that feels airy but controlled.
This is a good style when your locs need some relief from hanging all day. A pinned crown lift gets the ends off the shoulders while keeping the face open. It also works well with outfits that have detail at the neck, since the hair doesn’t cover everything up.
Use a shallow section at the front, lift it over the crown, and secure it behind the highest point of the head. Then tuck the rest into a low gathered section or compact knot. Keep the lift smooth, not puffed. There’s a difference.
17. Curved Fringe with a Low Bun
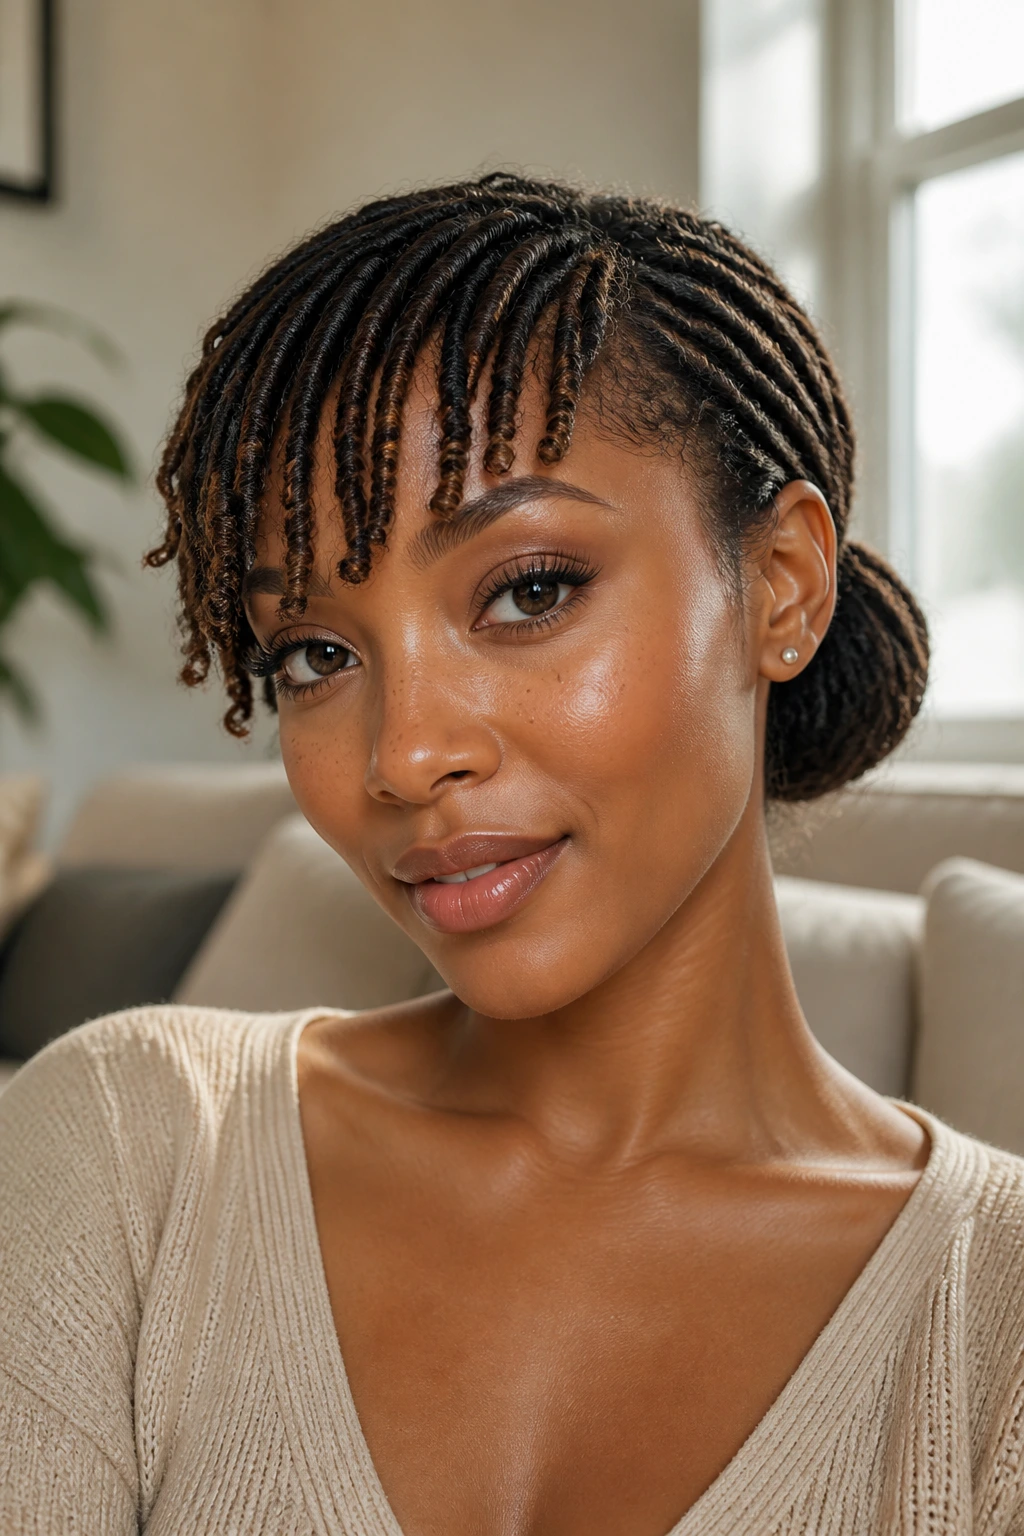
This style starts with a choice that changes the mood immediately: leave a curved front section loose. Not a messy bang. A deliberate curve that skims the forehead or temples and then blends into the rest of the style.
The bun keeps the back neat, while the front softens the face. That makes this a nice option if you want your locs to feel elegant but not too severe around the hairline.
If the fringe pieces are too short, pin them lightly so they graze the face instead of sticking up. If they’re long enough, let them curve naturally and rest against the temple. The low bun should stay smooth and compact so the front detail has room to breathe.
18. Twin Crown Twists into a Back Knot
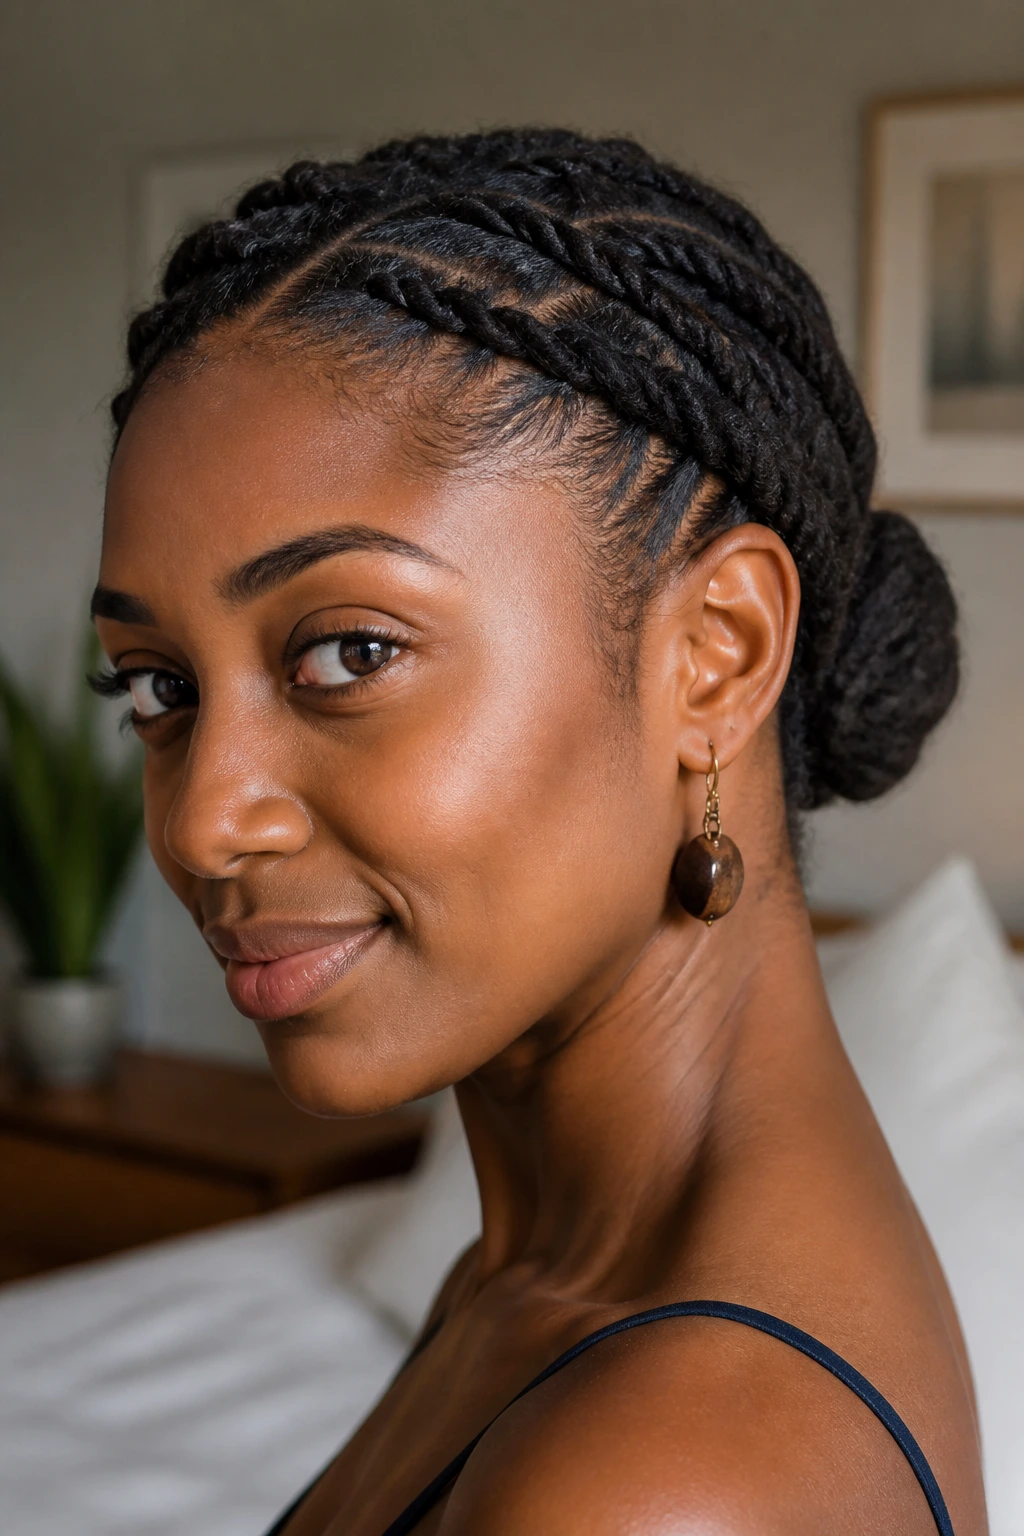
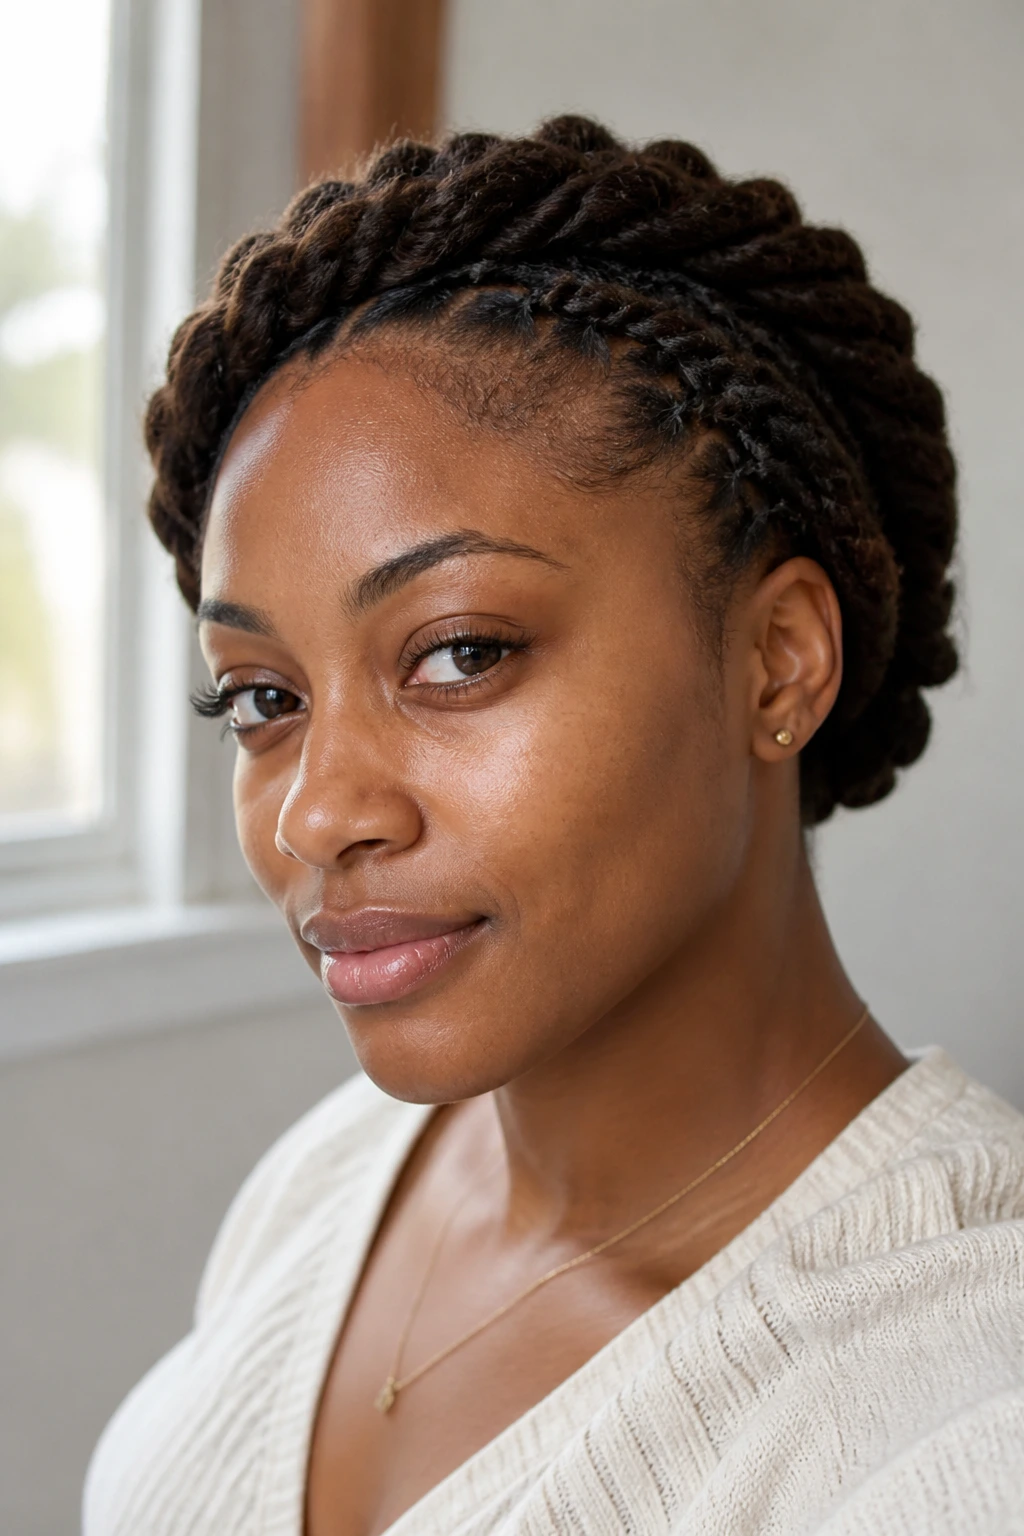
A pair of crown twists can do what a braid halo does, but with a lighter feel. The twists track along the hairline, meet at the back, and then disappear into a knot or tucked coil. It has a soft geometry to it, which is why it looks so clean.
There’s a slight edge to this style, but not too much. The twists frame the head in a way that feels controlled and graceful. Good for medium locs. Good for thick locs. Good when you want something neater than hanging lengths but less formal than a full roll.
Keep the twists the same size on both sides. If one is wider than the other, the back knot can never quite fix it. Symmetry matters here more than ornament.
19. Basket-Weave Side Roll
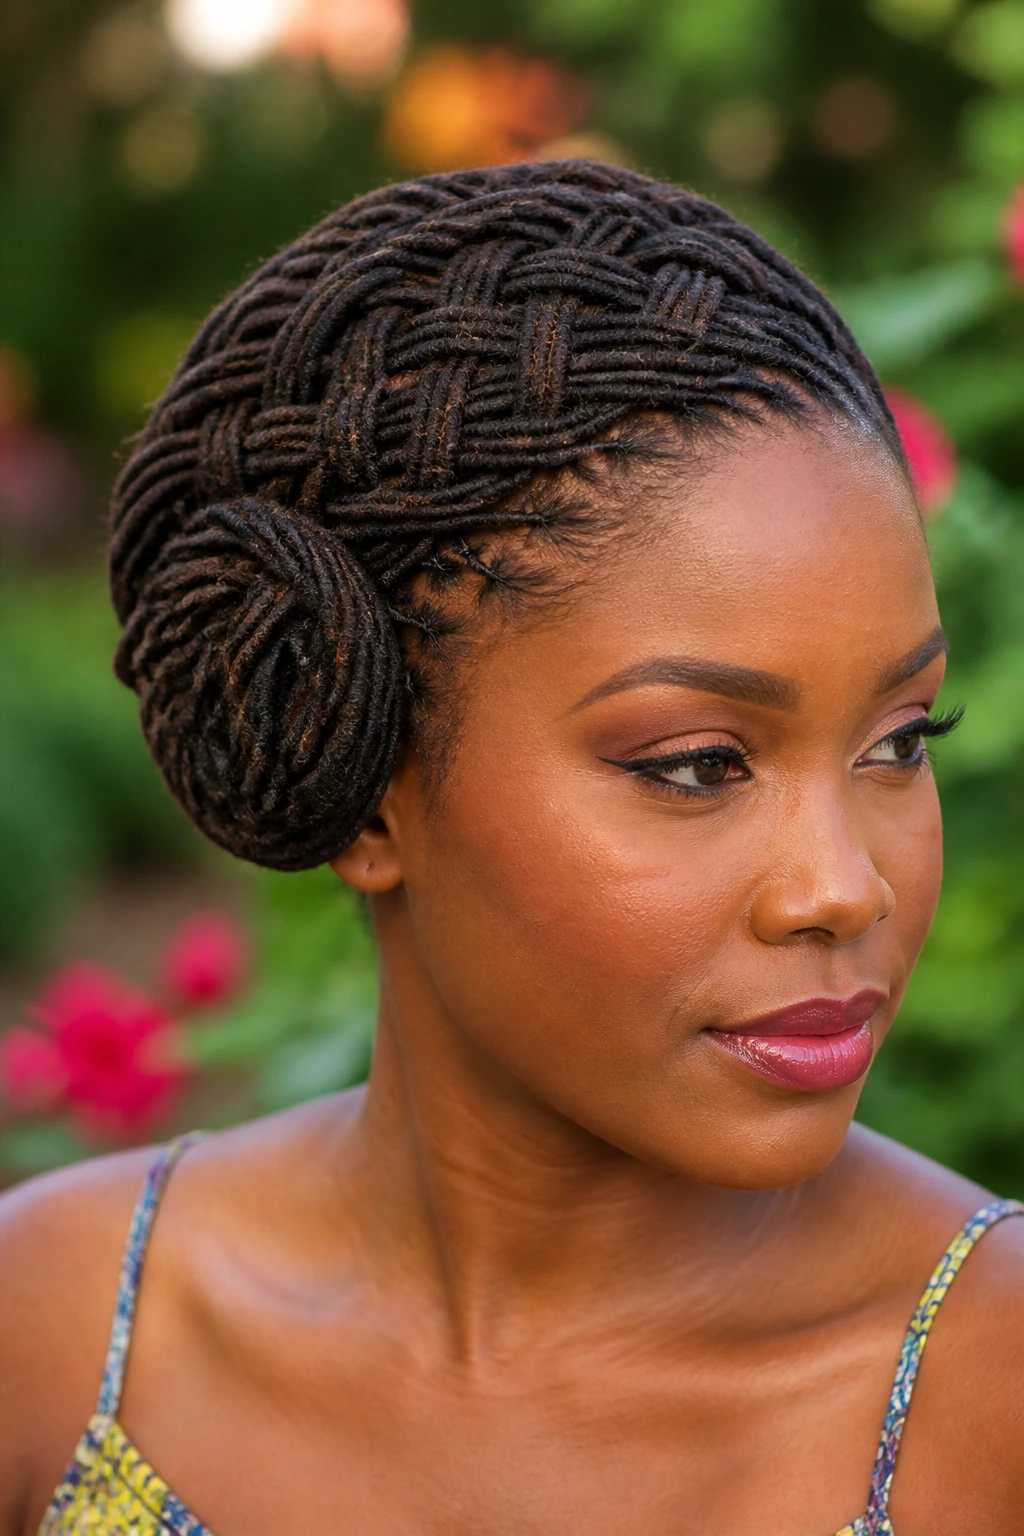
This is the kind of style that looks intricate from a distance and surprisingly simple up close. Sections are crossed over each other in a woven pattern before being tucked into a side roll, and the result is a structured shape that sits close to the head.
It works best when your locs have enough length to cross and tuck without popping loose. The side roll holds the woven pattern together, so the finish stays compact. I like to keep the weave tight near the scalp and a little softer as it approaches the roll. Too tight from end to end and the style loses its softness.
Use this when you want something more detailed than a basic bun. It reads like effort, even if the actual technique is mostly patient hands and a few good pins.
20. Minimalist Knot at the Nape
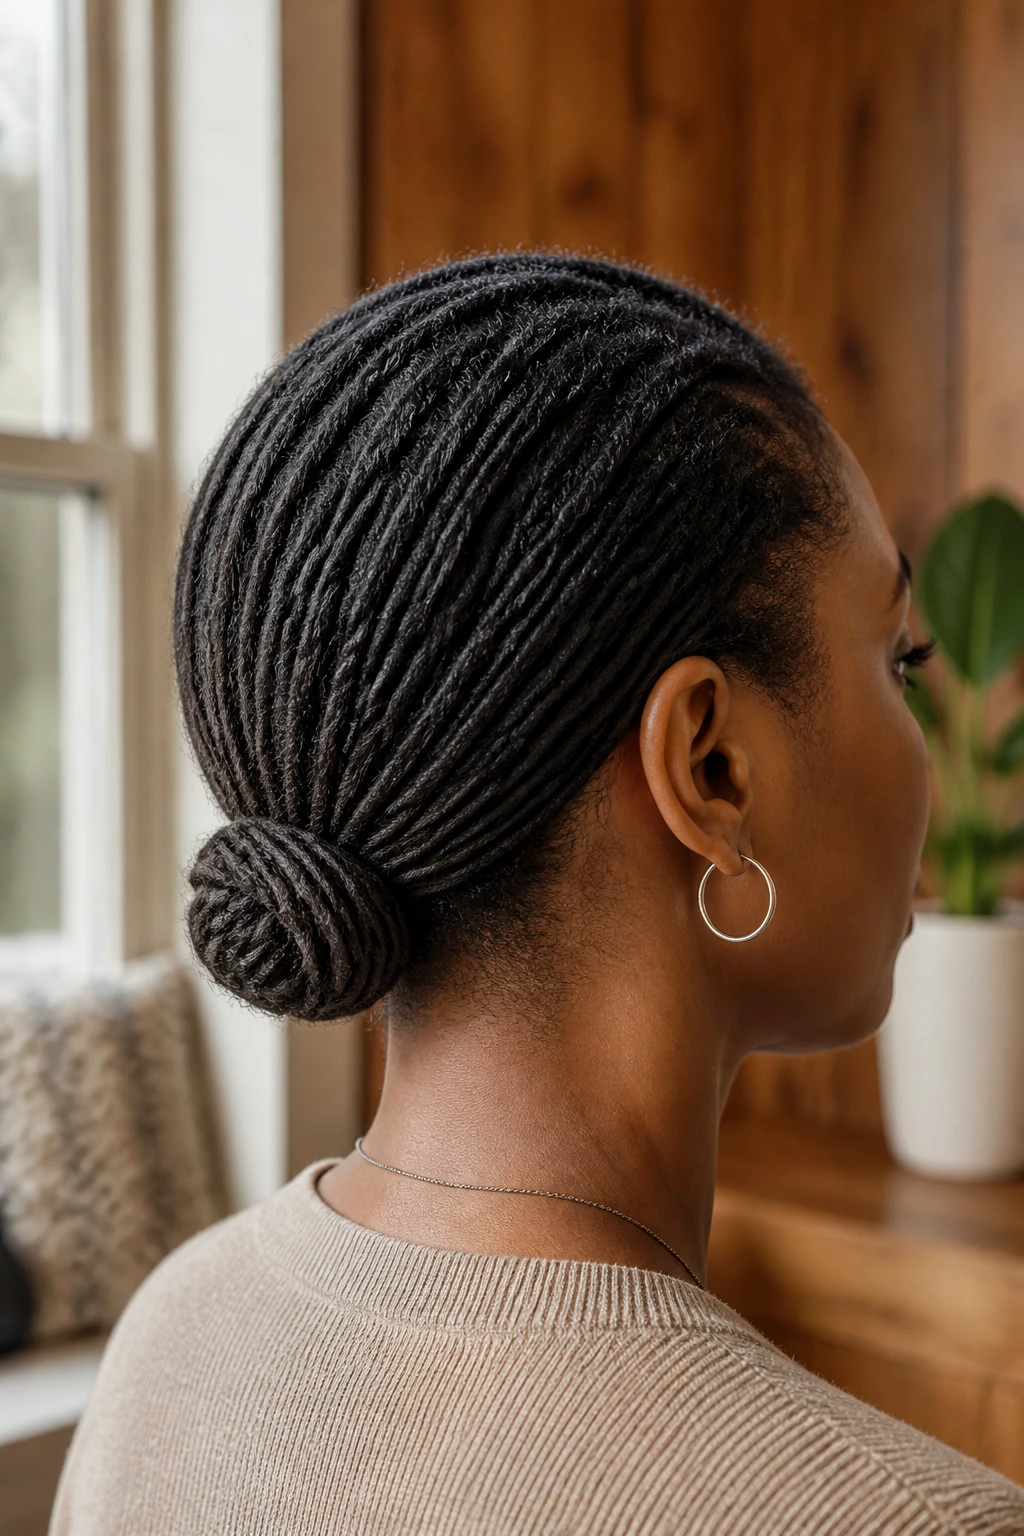
A minimalist knot is what I recommend when someone wants neat locs and refuses to fuss. The hair is gathered low, folded once or twice, and pinned into a small knot that sits almost flush with the neck. No extra wrapping. No dramatic height. No clutter.
That restraint is the point. It’s one of the cleanest looks in the bunch, and it works because the line is so simple. The front stays smooth, the knot stays small, and the whole style looks like it belongs in real life, not only in photos.
If your locs are long, tuck the ends deeper into the knot so the shape stays compact. If they’re shorter, let the knot stay a bit looser and keep the pins invisible. Either way, aim for clean edges and a low profile. It’s a small style, but it lands.
The Clean-Part Rule That Makes Loc Styles Read Polished
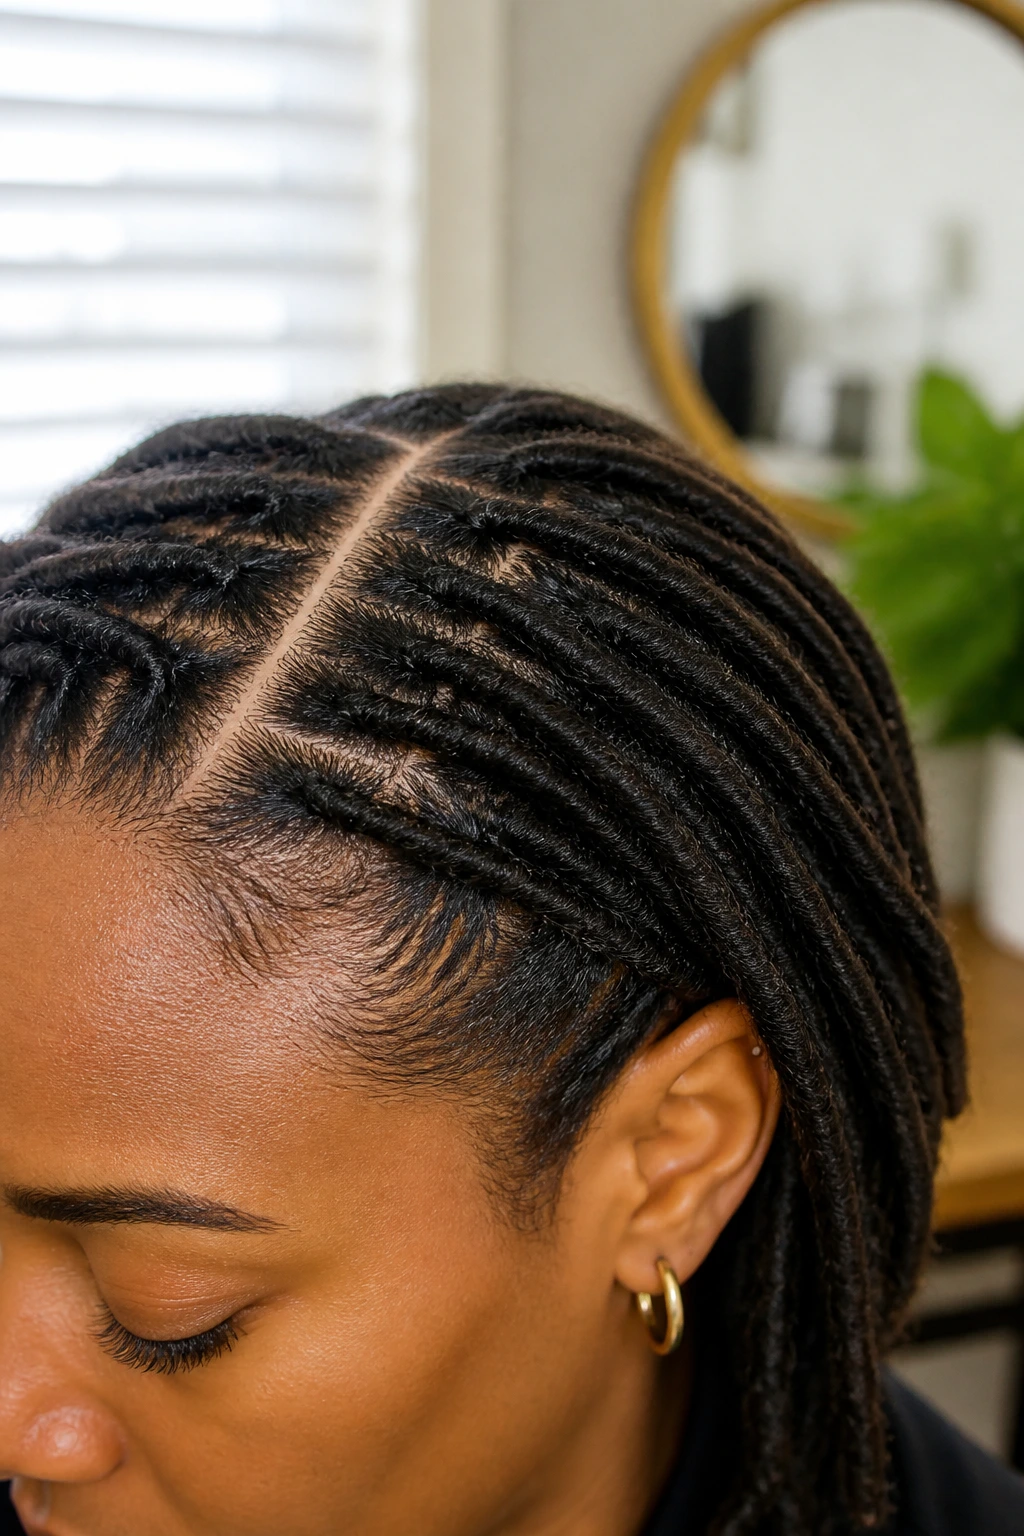
A polished loc style starts at the scalp, not at the accessory stage. If the parting is crooked, if the roots are puffed in random places, or if the front line is fuzzy from too much handling, the finished style has to work twice as hard to look neat. Sometimes it can. Often it cannot.
I’ve always thought people underestimate how much a clean part changes the whole read of a style. A center part makes the face look longer and more symmetrical. A deep side part can soften the forehead and add shape to a low bun or side sweep. Even a tiny zigzag or curved part can feel intentional if it is crisp and not overdrawn with product.
Product should support the shape, not sit on top of it. A little mousse at the roots, a pea-sized amount of edge control only where needed, and a light mist to calm flyaways usually go further than a thick layer of gel that turns white by hour three. The scalp should still breathe. If it looks lacquered, you’ve crossed the line.
Heat is not the answer here, either. You do not need to flat-iron the perimeter to get a polished finish. You need clean sections, firm but not tight tension, and a style that respects the weight of your locs. That’s the piece most glossy pins-and-spray tutorials skip over.
Essential Tools for These Loc Hairstyles
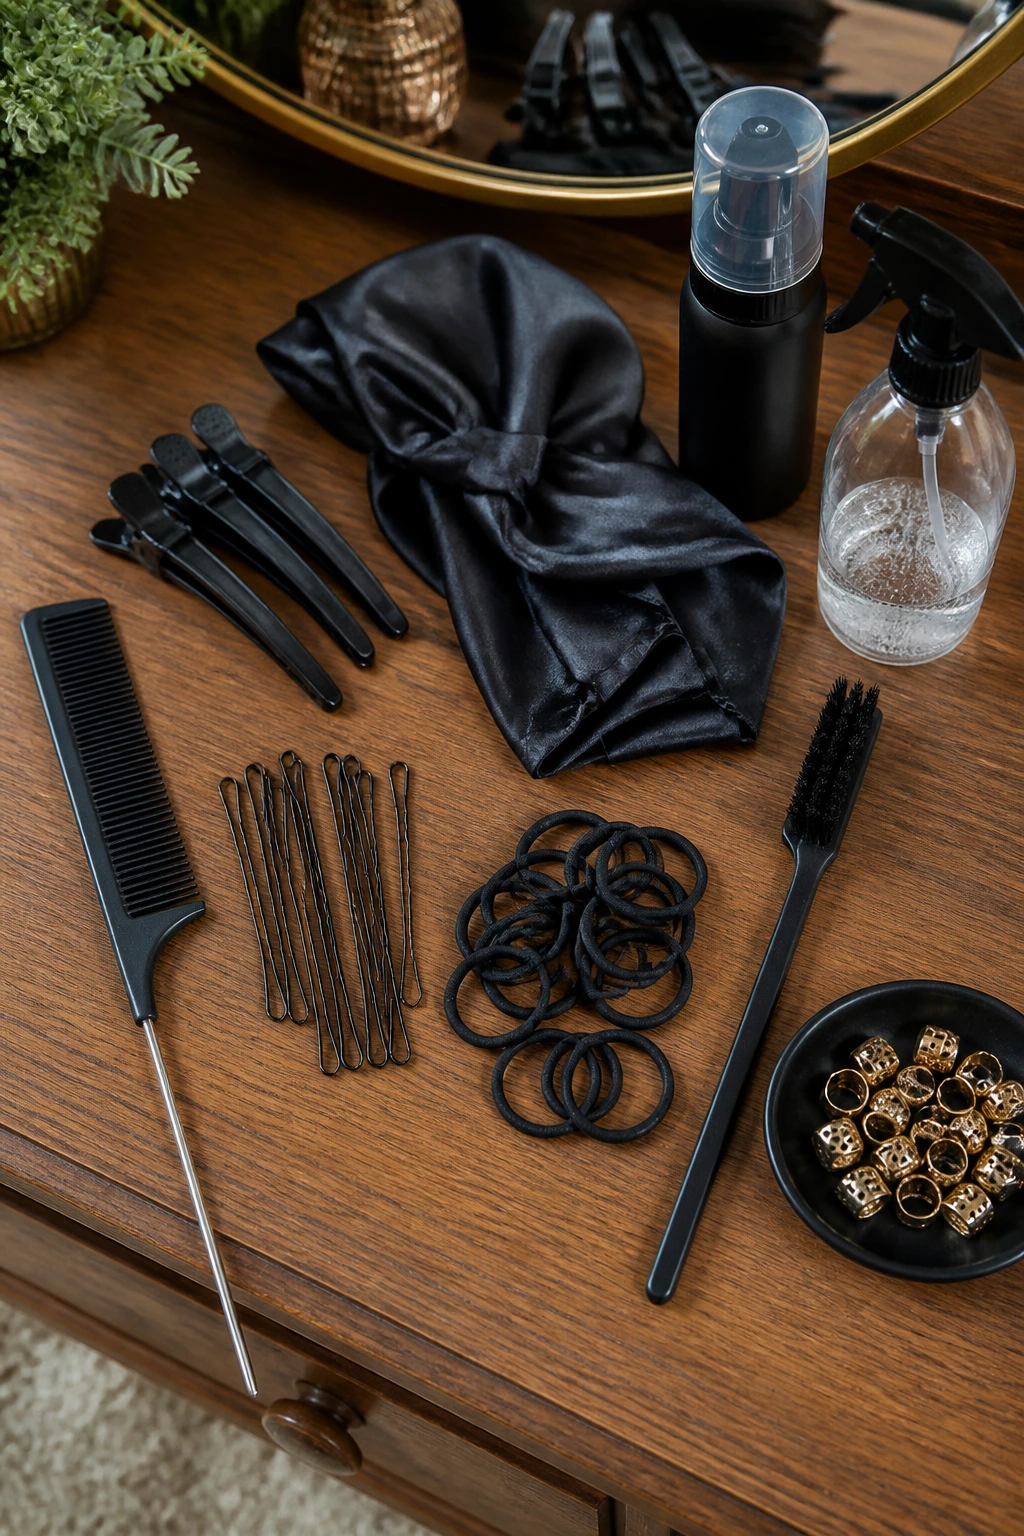
- Rat-tail comb: Best for crisp parts and clean sectioning along the scalp.
- Duckbill clips: Keep sections out of the way while you build the style.
- Bobby pins: Use the longer kind if your locs are thick or heavy; they hold better.
- Snag-free elastics: Good for ponytails and half-up sections without catching the hair.
- Satin scarf or wrap: Essential for setting the style and protecting it at night.
- Edge brush: Helpful for smoothing the hairline without dragging product everywhere.
- Styling foam or light mousse: Adds hold and a little control without a hard shell.
- Spray bottle with water or leave-in mix: Useful for refreshing roots before restyling.
- Hair cuffs or small decorative clips: Best used as a finishing touch, not the whole show.
- Hand mirror: Saves you from guessing at the back of your head, which is always a bad idea.
Smart Product and Accessory Choices
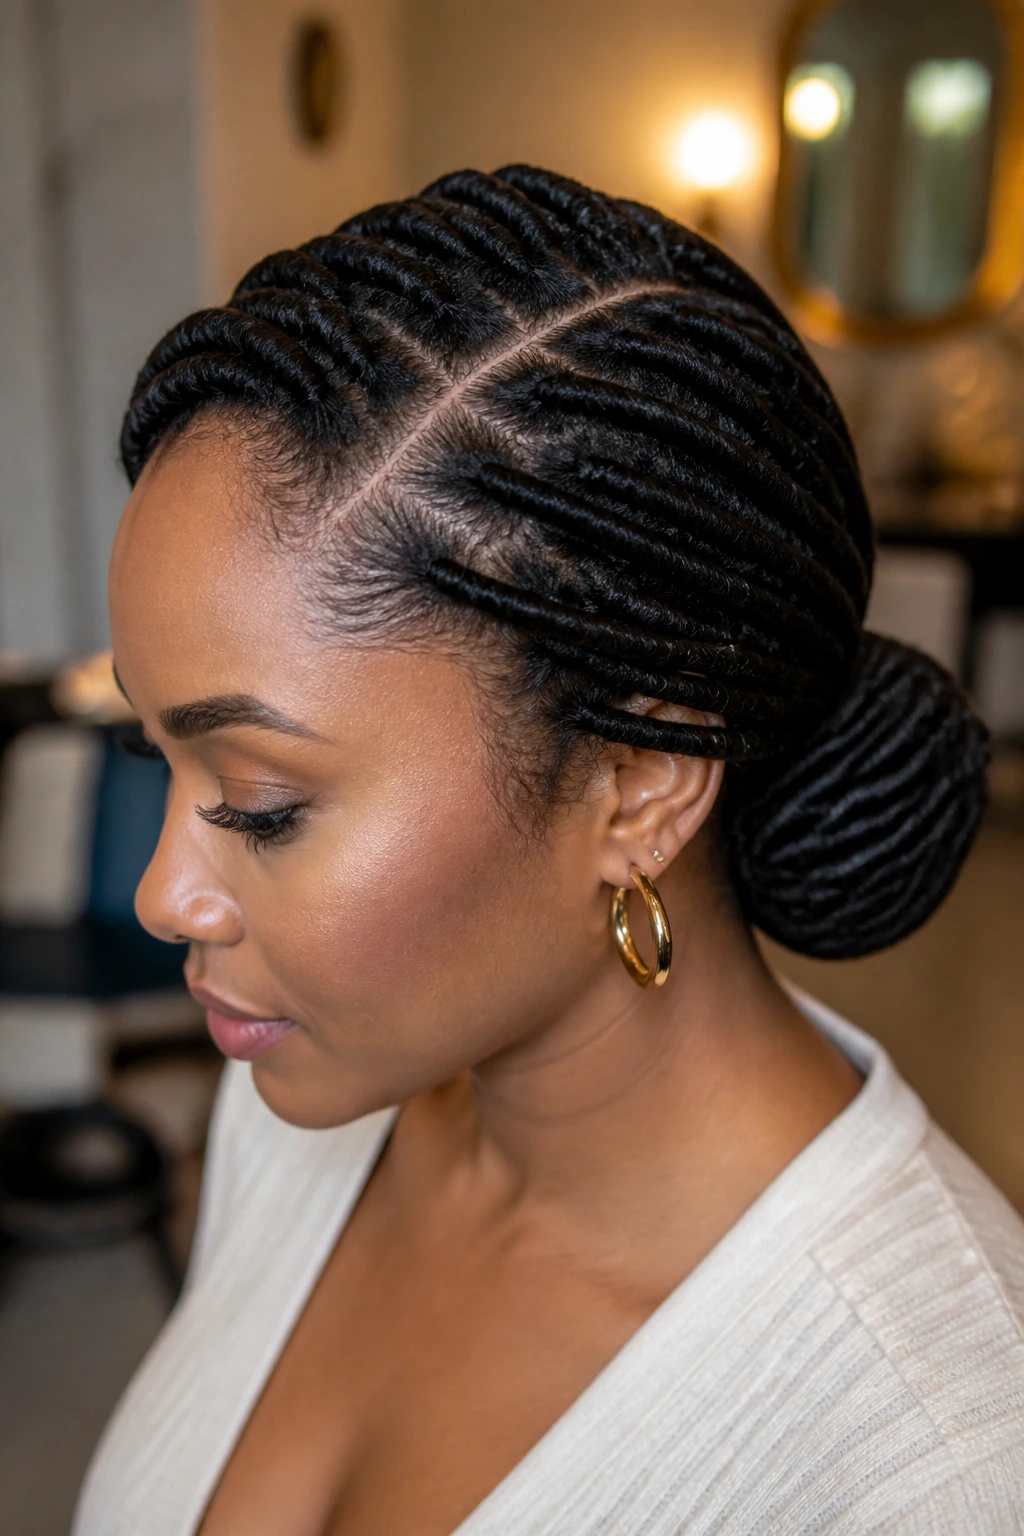
The product aisle can make loc styling look harder than it is. Don’t fall for heavy, sticky formulas unless your hair truly needs them. A lightweight foam or mousse usually gives enough grip for updos, ponytails, and twists, especially if your locs are already mature and textured.
For the roots, choose a gel or edge control that dries clean. If it leaves a chalky ring around the hairline, pass. If it stays wet for hours, pass again. You want something that sets the front without turning the part into a crusty mess the next morning. That kind of residue is one of the fastest ways to make a polished style look tired.
Accessories should match the density of your locs. Thick locs need larger cuffs and sturdier pins, not delicate little clips that bend on contact. Microlocs and sisterlocks often look better with smaller cuffs, slimmer pins, and narrow scarves, because oversized accessories can swallow the whole style.
I’m also picky about elastics. Use snag-free ties with a soft outer layer, especially if you’re working near the root. Cheap rubber bands break, snag, and leave a dent that takes longer to smooth out than it should. Save yourself the irritation.
How to Wear These Styles in Real Life
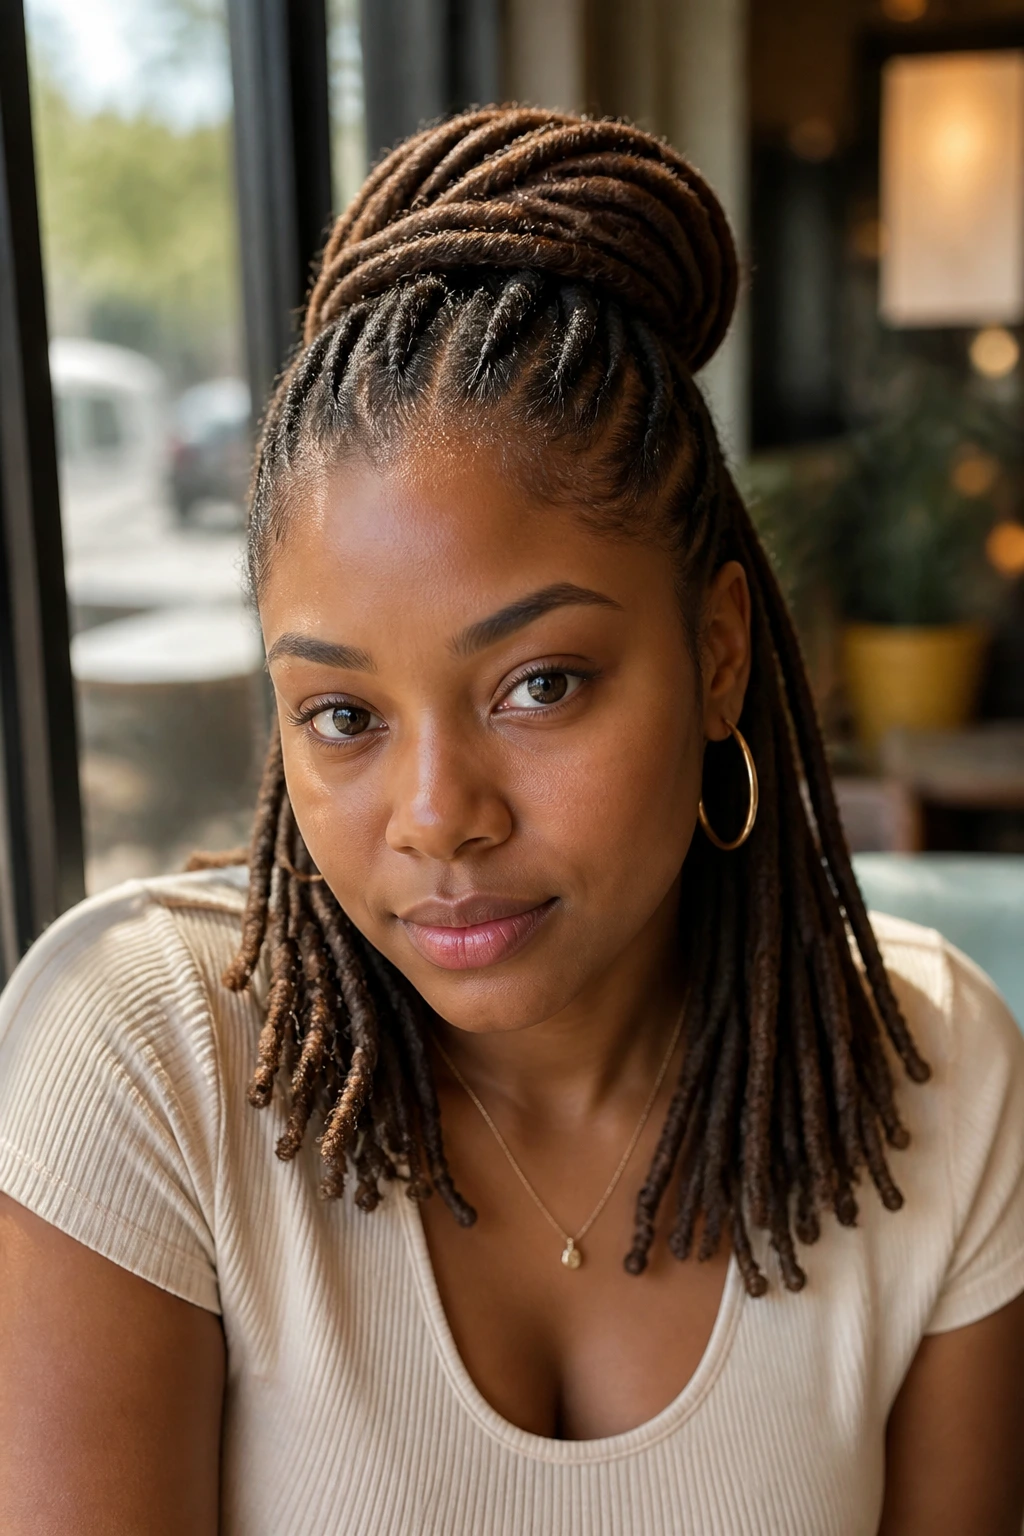
Presentation: Keep the finish focused on one main feature — a clean part, a wrapped base, a twist crown, or a sculpted bun. When everything is fighting for attention, the style loses that polished natural look fast.
Outfit Pairings: Sleek ponytails and low buns look sharp with collared shirts, knit dresses, and structured jackets. Softer side sweeps and face-framing styles work well with open necklines, hoop earrings, and layered jewelry.
Hold Level: For daytime wear, aim for firm but movable. The style should stay in place when you turn your head, but it should not hurt by lunchtime. If your temples feel strained, the hold is too tight.
Length Notes: Shorter locs usually do better in flat-twists, half-up styles, and low knots. Longer locs handle rolls, wrapped buns, and side sweeps more easily because there’s more weight to shape and tuck.
Time Needed: The simplest polished styles take 10 to 15 minutes once you get the rhythm. More structured ones — the halo braid, French roll, basket weave — can take 25 to 40 minutes, especially if you’re checking the back with a mirror.
Practical Finishers That Make Loc Styles Look Intentional
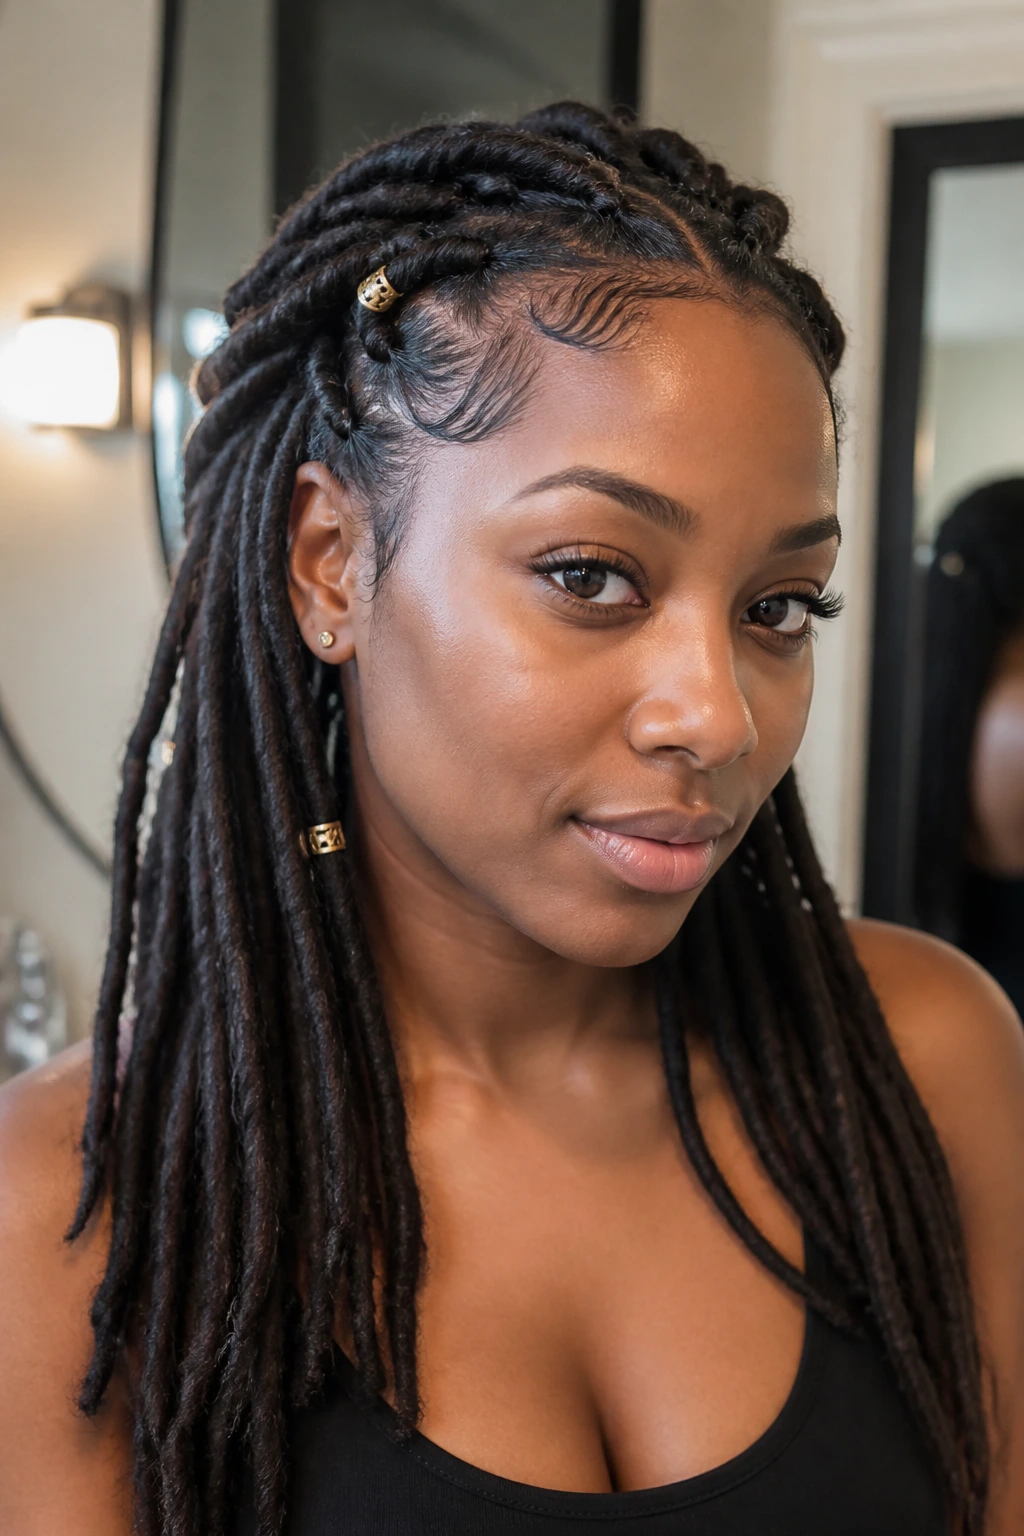
Moisture Mist: A light spritz before styling helps the locs settle into place. Wet hair is a bad idea, but lightly damp hair behaves better than dry hair that keeps springing apart.
Edge Control: Use it sparingly along the hairline and temples. A thin layer pressed in with a brush usually works better than a thick swipe that flakes once it sets.
Pin Placement: Hide pins under overlapping locs, not on top where they catch the eye. The less visible the hardware, the cleaner the finish.
Accessory Rule: Pick one accent and let it breathe. A scarf, a cuff, or a pair of pins can finish the look. All three at once usually makes it busier than it needs to be.
Night Reset: After a long day, smooth the front again before wrapping your hair. That two-minute reset matters more than people think. It keeps the style from drifting into “almost neat.”
Common Mistakes to Avoid
The first mistake is pulling the roots too tight. You’ll feel it around the temples, and the style may look crisp for a few hours, but the tension can leave the whole thing looking stiff and give you a headache. The fix is simple: anchor the style firmly, then ease up on the front and sides.
Another one is overusing gel. Thick product builds up at the scalp, turns white near the part, and makes the style feel dirty before the day is over. Use less than you think you need, and apply it only where the flyaways actually need help.
Skipping the night wrap is a classic problem. Locs hold shape well, but they still frizz, flatten, and snag against cotton pillowcases. A satin scarf or bonnet keeps the parts cleaner and the edges smoother.
People also choose styles that ignore weight. Long locs in a loose top knot may look fine in the mirror and then sink by the second hour. Heavy locs need lower anchors, more support, and a shape that respects gravity.
Then there’s the accessory overload problem. Too many cuffs, clips, beads, and pins make the style feel crowded. One accent is polish. Five accents are noise.
Variations and Alternatives to Try
Office-Quiet Minimalism: Keep the parts sharp, skip the decorative cuffs, and choose low shapes like a chignon or side pony. This version is for people who want the hair to look neat but not flashy.
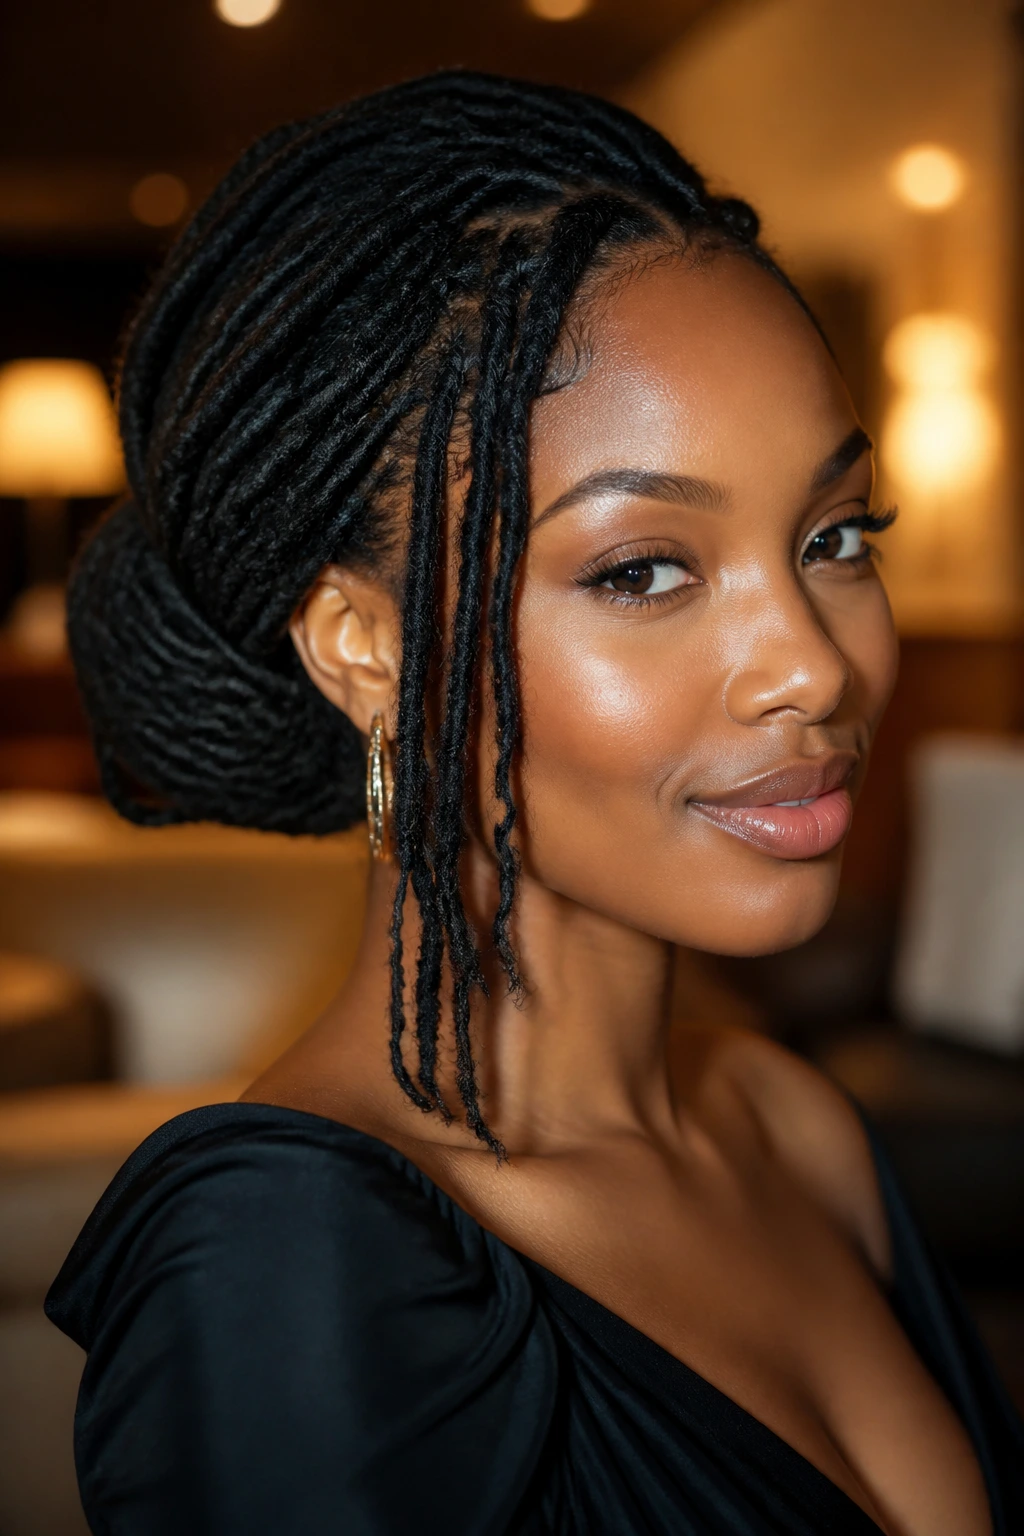
Soft Event Sweep: Leave a few face-framing locs loose and build the rest into a low roll or side sweep. It keeps the finish elegant while softening the edges around the face and neckline.
Short-Loc Adaptation: Use flat-twists, pinned crown lifts, and compact knots instead of large buns or rolls. Shorter locs need smaller shapes, and forcing them into a big style usually makes the finish look strained.
Long-Loc Sculpted Updo: Split heavy locs into two sections before pinning, then fold them into a barrel roll, French roll, or tucked knot. This reduces bulk and keeps the style closer to the head.
No-Product Finish: For sensitive scalps or flake-prone hair, rely on clean sectioning, careful pinning, and a satin wrap instead of piling on gel. The style can still look polished if the parts are precise enough.
Texture-Forward Twist: Embrace a little frizz and let the loc texture show through a half-up, rope-twist, or halo style. The goal is not a plastic shine. It is a controlled finish with real hair texture still visible.
Overnight Care, Refreshing, and Long-Wear Maintenance
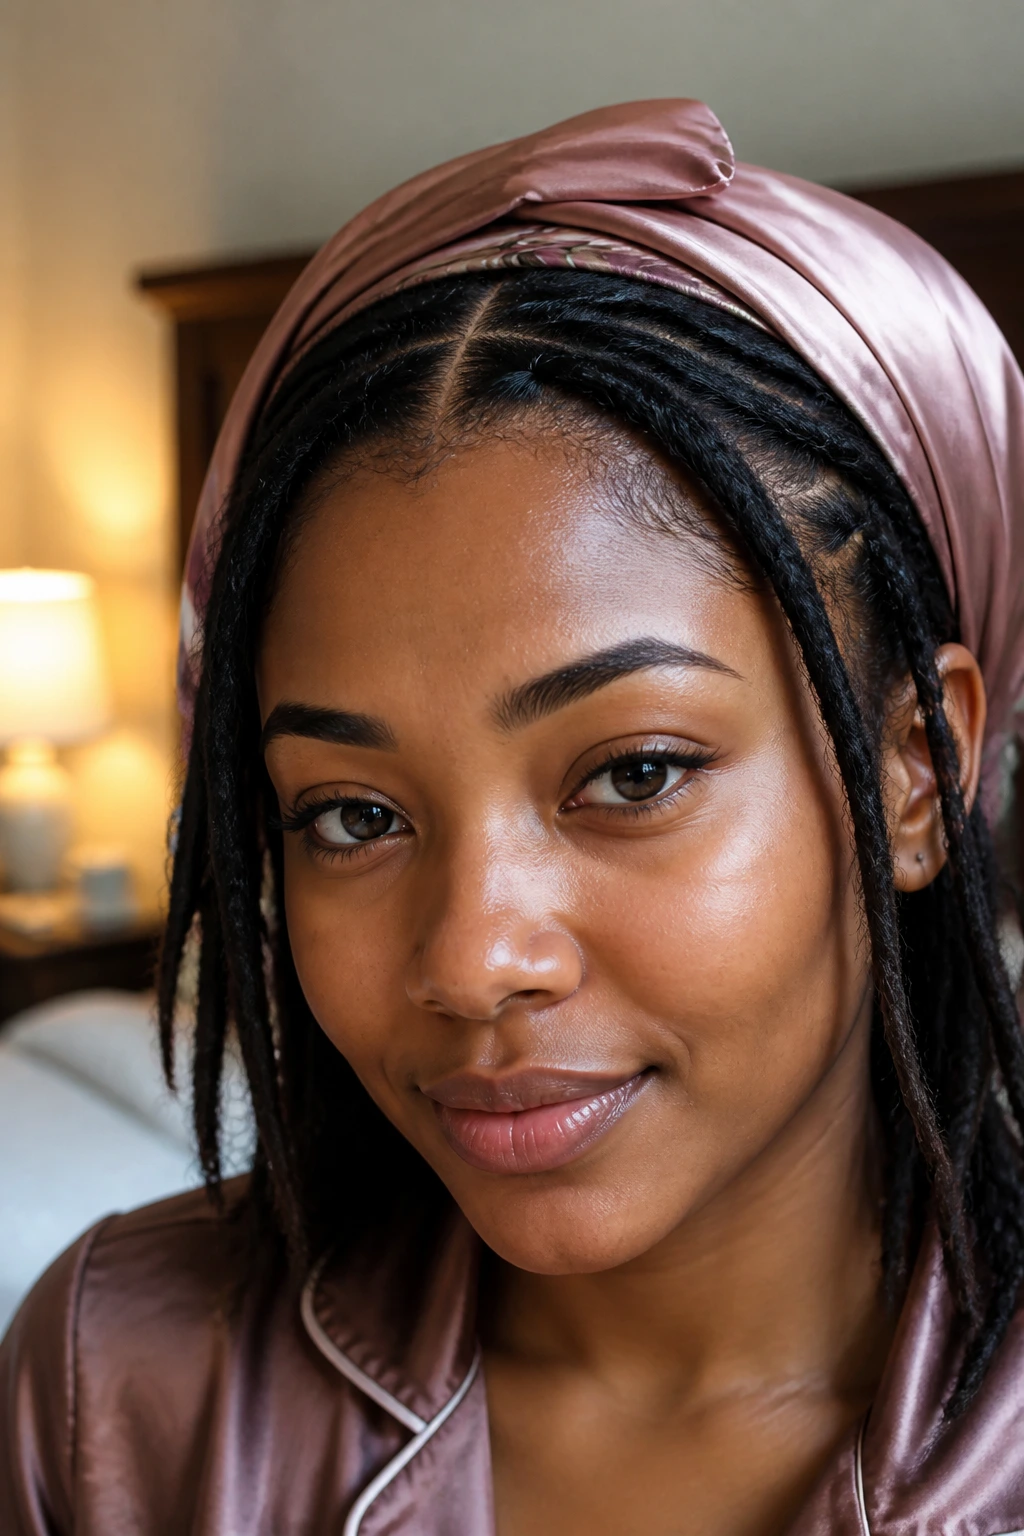
A polished loc style usually lasts longer when you treat the night before sleep as part of the style, not an afterthought. A satin scarf keeps the parts smoother and helps the roots stay in place. If the style has a bun, chignon, or roll, wrap the scarf around the perimeter rather than squashing the whole shape flat. That way you preserve the outline and wake up with less rework.
For styles with loose lengths, gather the locs into a soft pineapple or low loose tie before wrapping. Heavy locs can stretch the front if they’re left hanging on one side all night. If the ends are tucked into a bob, roll, or knot, check the pins in the morning and reset the sections that shifted.
Most of these looks can make it through 3 to 5 days with a light refresh, and some of the tighter updos can go a full week if the scalp stays comfortable. What usually breaks first is the front, not the back. Smooth the hairline, tighten the hidden pins if needed, and re-wrap the base if the scarf has loosened.
If you sweat at the crown or nape, let the hair dry completely before covering it again. Trapped moisture can flatten the style and make the roots smell stale, which ruins the clean effect faster than anything. Give the locs a little air when you can.
Frequently Asked Questions
Which loc hairstyles work best for short locs?
Short locs usually do best in flat-twists, half-up styles, low knots, and pinned crown looks. These styles use the length you have instead of asking it to behave like long locs, which is where a lot of frustration starts.
Can I do these styles on freshly retwisted locs?
Yes, but not every style needs fresh roots. Sleek ponytails, side parts, and low buns often look especially sharp on a fresh retwist, while softer styles like side sweeps can look better after the hair has settled for a day or two.
How do I keep a polished loc style from frizzing overnight?
Use a satin scarf or bonnet, and make sure the front and edges are tucked smooth before bed. If the style has a bun or roll, protect the base too, because that’s usually where the shape loosens first.
What should I use if gel makes my scalp flaky?
Try a lightweight mousse or foam and use less product at the hairline. Flaking usually gets worse when heavy gel is layered over dry hair or when the formula is too strong for the amount of hold you actually need.
Are these styles safe for my edges?
They can be, if you keep the tension firm but not harsh. If your temples feel sore, or if your hairline looks pulled thin after a style, back off immediately and choose lower-tension options like side sweeps or low buns.
How long do polished loc updos usually last?
Most hold for 3 to 7 days with night wrapping and a small refresh midweek. Styles with more pins and structure tend to last longer, while softer half-up looks may need reshaping sooner.
Can I wear cuffs and beads without making the style look too busy?
Yes, but keep the accents limited. One cuff placement, one scarf, or a single line of beads is enough for most polished styles; more than that starts to compete with the shape of the locs.
What if my locs are thick and heavy — will these styles still hold?
They will, but you need lower anchors and sturdier pins. Heavy locs do better in low buns, barrel rolls, side sweeps, and compact knots than in high styles that fight gravity all day.
The Quiet Power of a Clean Finish
Polished locs have a way of looking calm even when the rest of the day is not. That is probably why these styles stay useful. They do not rely on fuss. They rely on shape, parting, and a willingness to keep the finish clean instead of crowded.
The styles that last best are usually the ones that respect your hair’s weight and texture instead of trying to flatten everything into submission. A tidy bun, a clean side sweep, a well-wrapped ponytail — those never really go out of place because they solve the same problem in different ways. They make locs look intentional, and that is the whole point.
Pick the shape that suits your length, keep the parts sharp, and leave yourself enough time to pin the back properly. That small bit of patience shows every time you catch your reflection.
