



Some knotless braid ideas look polished in a chair photo and fall apart the minute you lean back against a headrest. The better versions do something harder: they keep the hairline calm, the parting crisp, and the whole style neat enough to survive a week of real life.
That feed-in start matters. Instead of a hard knot at the root, the braid begins with your own hair and gains bulk little by little, so the first inch lies flatter and usually feels lighter around the temples. If you’ve ever taken down braids and found your scalp sore right at the front, you already know why that small detail changes everything.
The styles here lean polished on purpose—sleek lengths, sharp bobs, clean center parts, soft curls, beads, cuffs, color, and a few shapes that give the braids some attitude without wrecking the finish. I like braid looks that still look intentional on day twelve. That’s the standard here.
Why You’ll Love This Collection
-
Less pull at the hairline: The feed-in start keeps the root area lighter, which matters if your edges are touchy or you hate that tight, stiff feeling around the crown.
-
Built-in polish: Clean parts, even braid size, and finished ends make these styles look deliberate from every angle, not only from the front.
-
Easy to personalize: The same knotless braid base can read sleek, playful, glam, or minimal depending on length, accessories, and color.
-
Works with real schedules: Some styles here are quick to install, others take patience, but all of them are wearable long enough to justify the chair time.
-
Flexible on hair texture: If your hair is stretched and prepped well, these styles can be adapted to fine hair, dense hair, short hair, or longer natural lengths.
-
Low-drama upkeep: A satin scarf, light mousse, and a little scalp care go a long way when the parting is done right.
1. Waist-Length Classic Knotless Braids
Waist-length knotless braids are the cleanest starting point if you want a look that never feels fussy. They swing when you walk, gather into a ponytail without a fight, and look especially sharp when the braids are the same thickness from top to bottom. The length does the work here. It gives movement, but the polished finish comes from restraint at the root.
I like this version when the parts are medium-sized and the ends are sealed neatly, not left ragged or uneven. If the extension hair is too heavy, the whole style starts dragging at the scalp after a few days. Keep the braid count balanced, and the style reads sleek instead of bulky.
2. Mid-Back Knotless Braids with a Center Part
A center part changes the whole mood. With mid-back knotless braids, the line down the middle gives you symmetry, and symmetry is what makes a braid style look expensive even when the hair itself is straightforward. The look lands somewhere between casual and dressed up, which is why it works so well for daily wear.
This is the version I’d point to if you wear glasses, tuck your hair behind your ears a lot, or like a face that feels open rather than covered. The center part needs to be clean all the way back to the crown, though. If the part wanders even a little, you’ll see it every time you catch your reflection.
3. Jumbo Knotless Braids
Jumbo knotless braids are blunt in the best way. Fewer braids mean less sitting time, and the bigger sections give the style a bold shape that reads clearly from across the room. They also show off parting work, so if you want to see whether a braider is precise, jumbo braids will tell you fast.
The trick is keeping them neat, not loose. A jumbo braid that starts too heavy at the root can feel like a weight belt after day three, especially near the temples. I prefer this size when the install is spaced well and the finish is smooth, because a chunky braid with rough ends looks unfinished in a hurry.
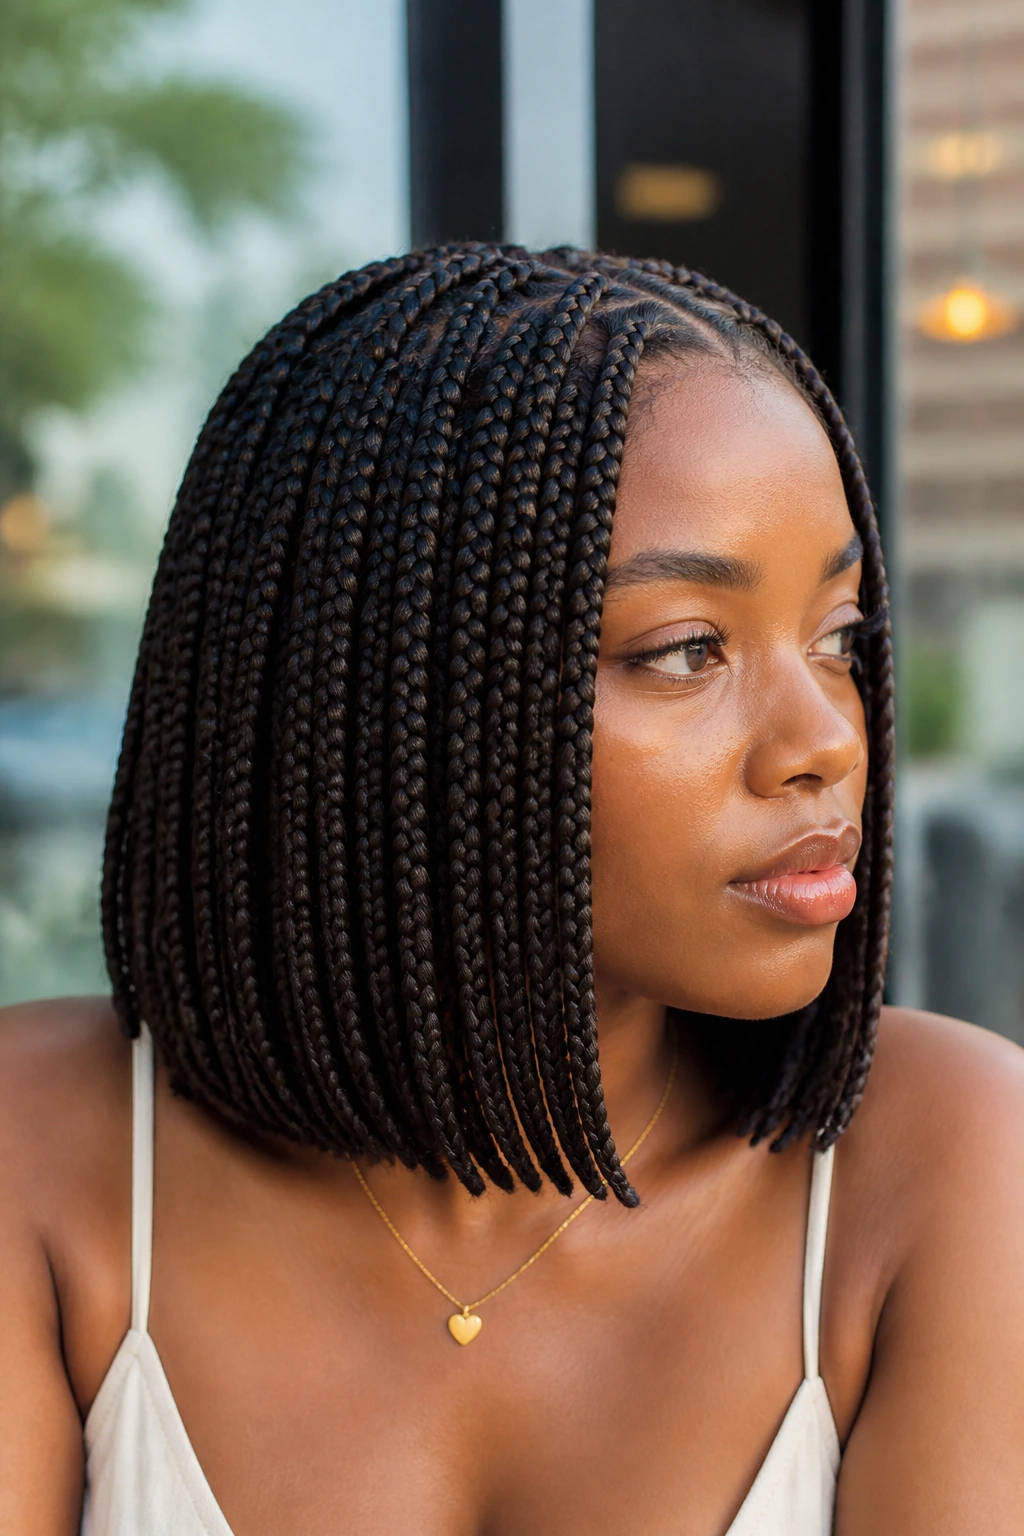
4. Shoulder-Grazing Knotless Bob
If you want braid ideas that look polished without all the extra swing, the shoulder-grazing bob is hard to beat. The line sits right where the neck and collarbone meet, so the style feels structured and easy to manage. It’s one of those looks that makes a clean sweater or a plain tee look intentional.
The bob also keeps the weight down. That matters more than people admit. Long braids can be beautiful, but a shorter knotless bob gives you the same neat parting and root comfort with less drag on your head. It’s especially nice if you sleep on your side or hate having braid ends brushing your shoulders all day.
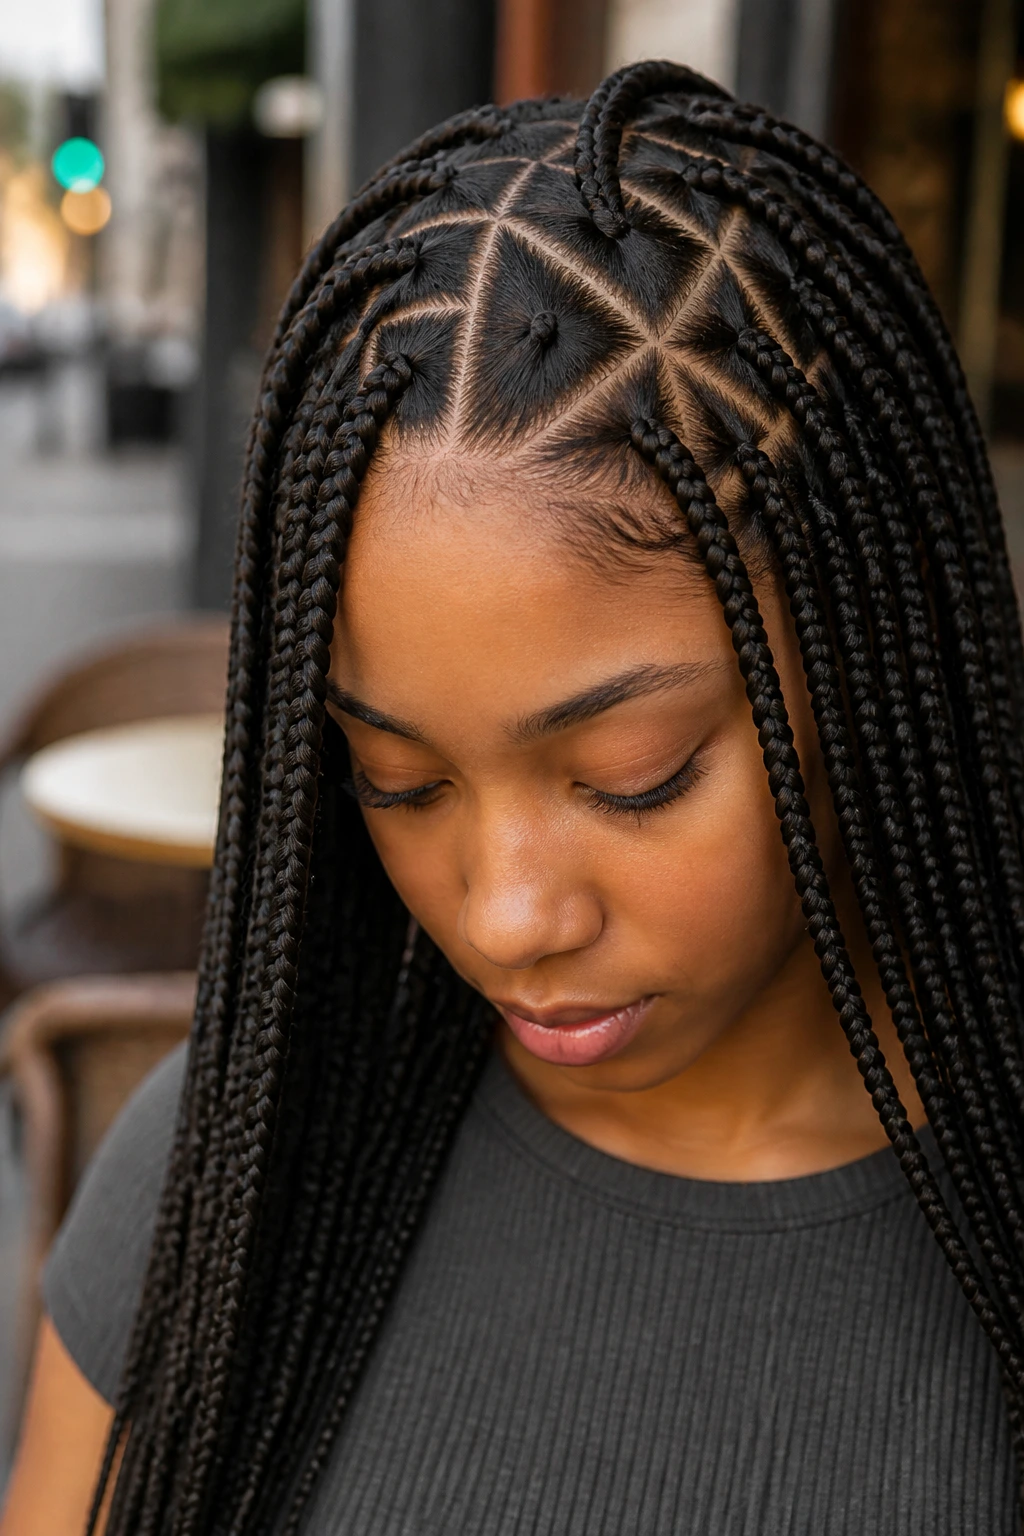
5. Triangle-Part Knotless Braids
Triangle parts are a small design change that makes a big visual difference. Instead of a straight grid, each section opens with a little angle, and the whole head starts to look custom-made. From the top, the parts catch the eye before the length even gets a chance to move.
This is the style for someone who wants structure with a bit of edge. Triangle parts look best when the braid size is consistent, because the parting shape needs to be the star. If the sections are sloppy, the geometry gets lost. Done cleanly, though, they give even plain black braiding hair a sharper finish than the usual square parts.
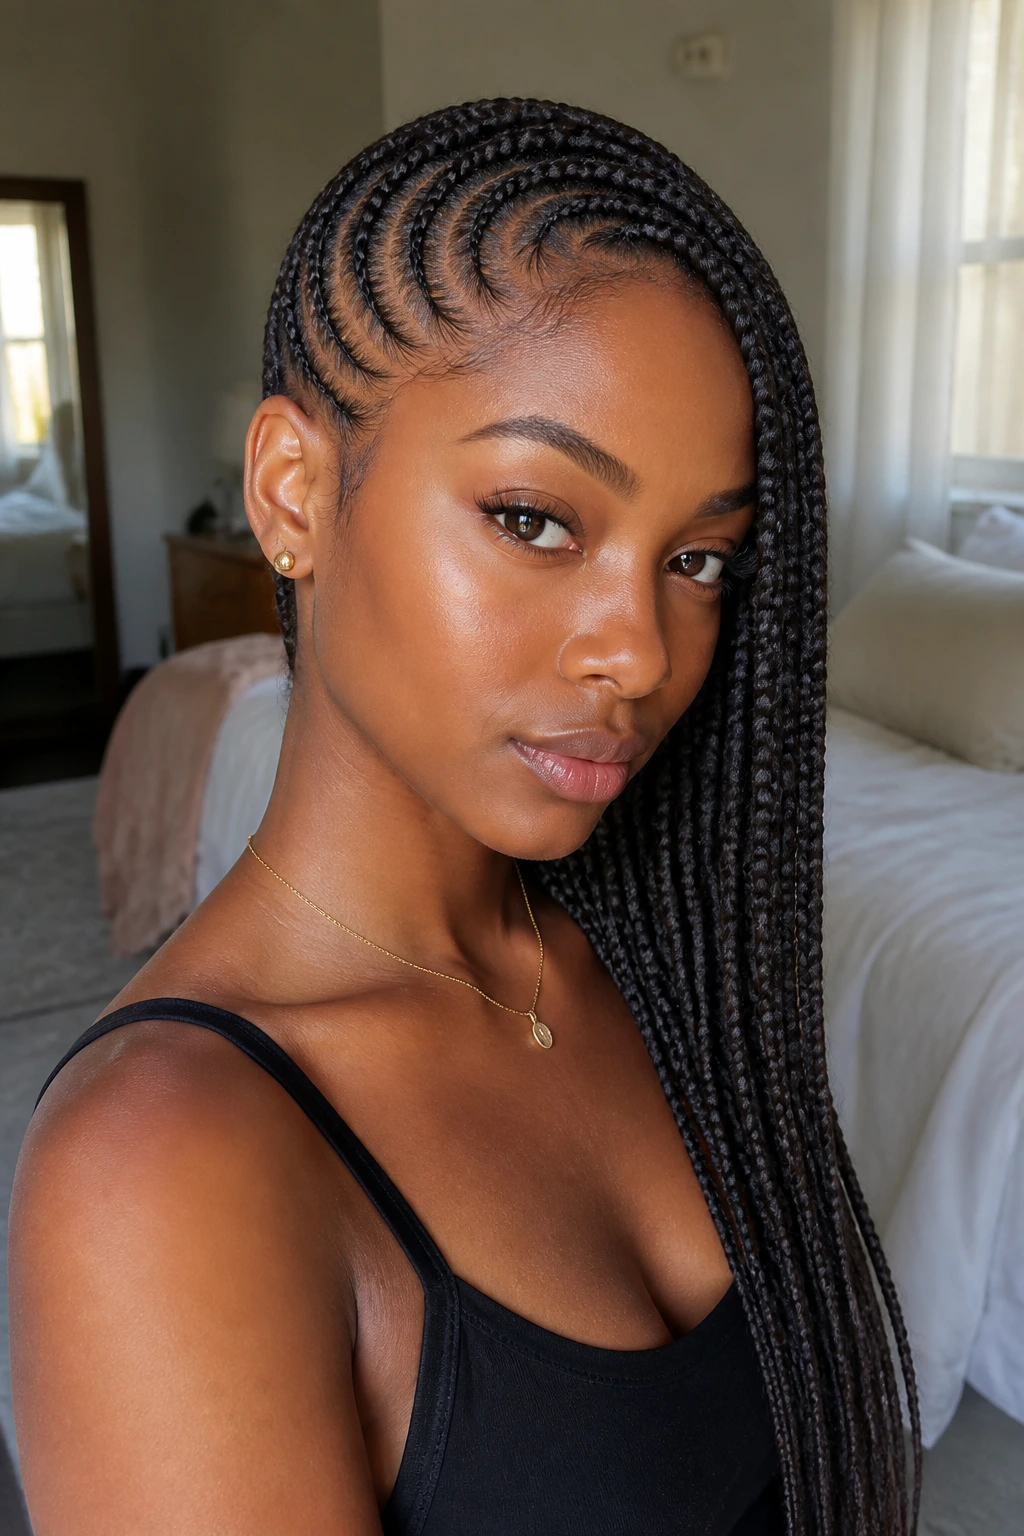
6. Side-Swept Lemonade Knotless Braids
Side-swept knotless braids have a little drama without going overboard. The angle pulls the eye across the face, which can soften a strong jaw or add shape to a rounder face. The style also has a built-in motion that center-part braids can’t always give you.
I like this one when the braids are directed cleanly over one shoulder and the nape stays neat, because the contrast matters. The side sweep should look intentional, not accidental. Keep the temple area comfortable and avoid tiny, over-tight roots near the hairline. That’s where this style can go from sleek to sore.
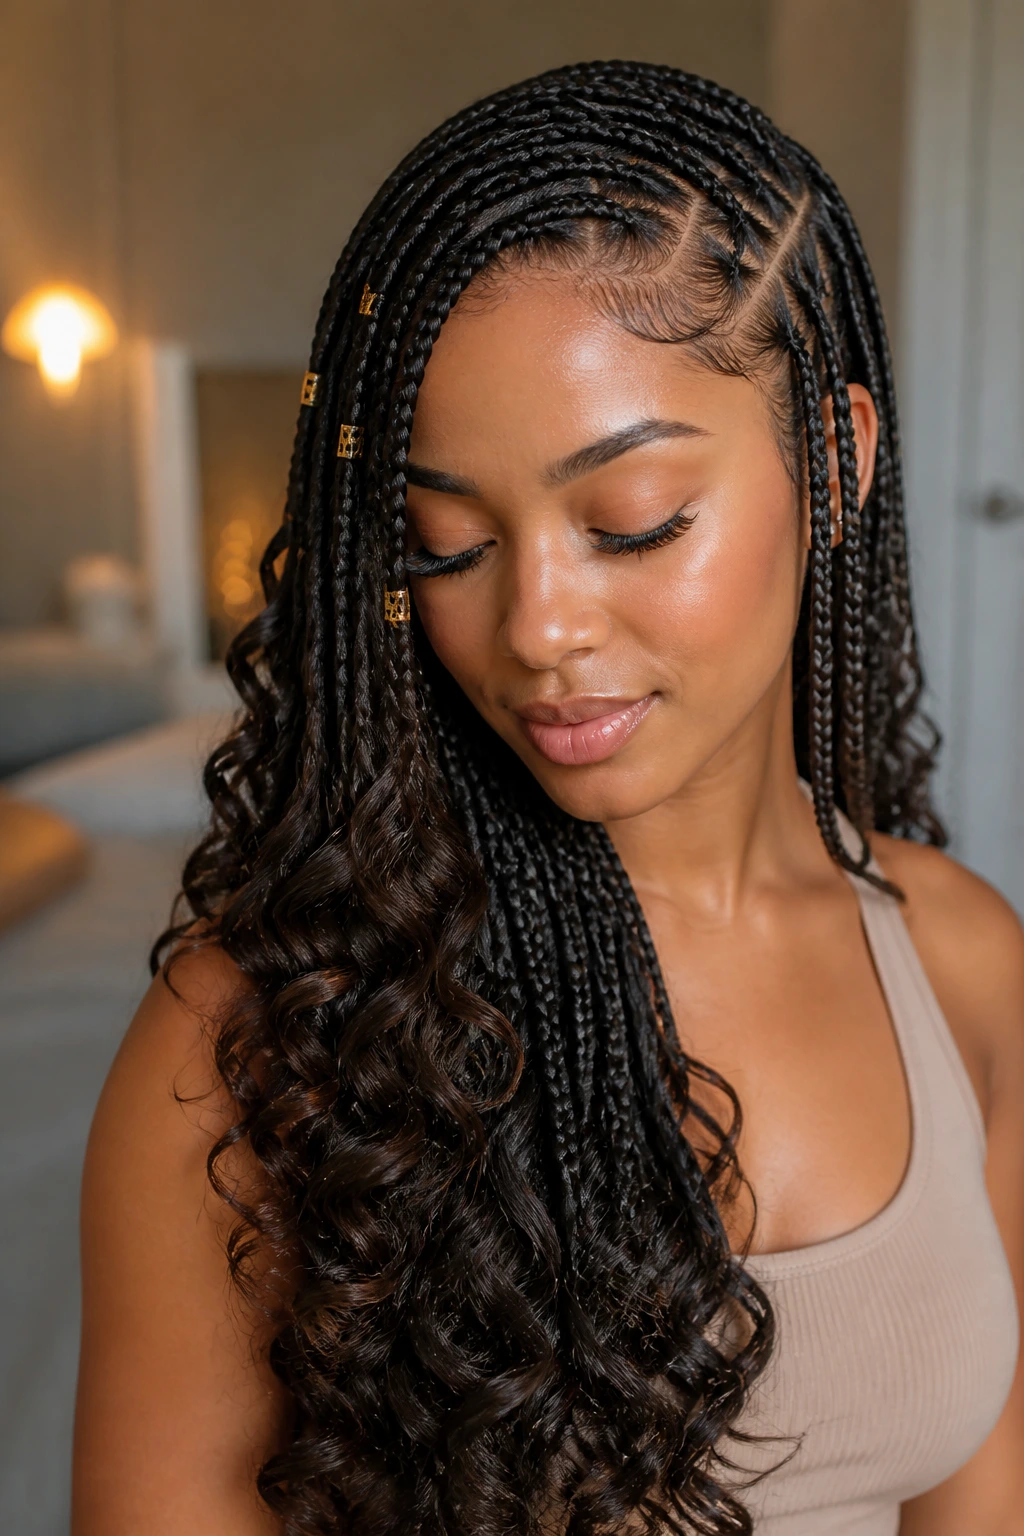
7. Knotless Braids with Curly Ends
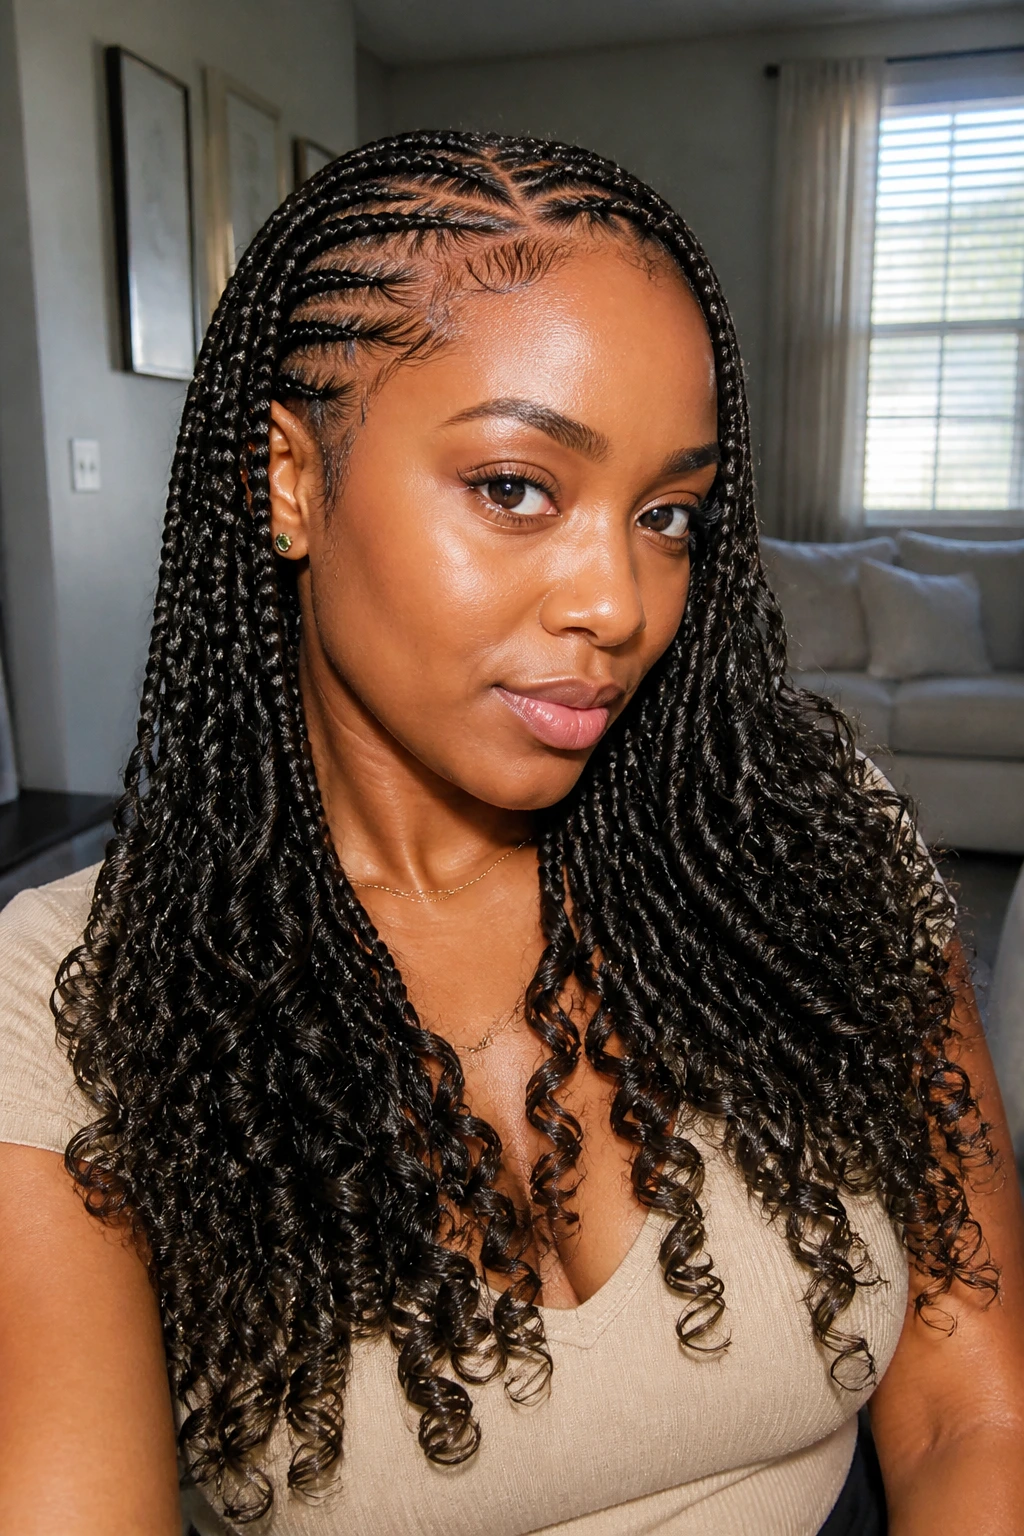
Curly ends change the whole personality of knotless braids. The braid stays tidy through the root and body, then softens at the bottom into bends or spirals that move when you walk. It’s a nice way to keep a polished shape while giving the style a little more softness near the shoulders.
The ends do need attention, though. Curly finishes frizz faster than blunt sealed ends, so a light mousse or setting foam helps them hold their shape. I’d choose this version if you want the braid length to feel less severe. It’s especially useful when you love the structure of braids but don’t want the final look to land too hard.
8. Goddess Knotless Braids
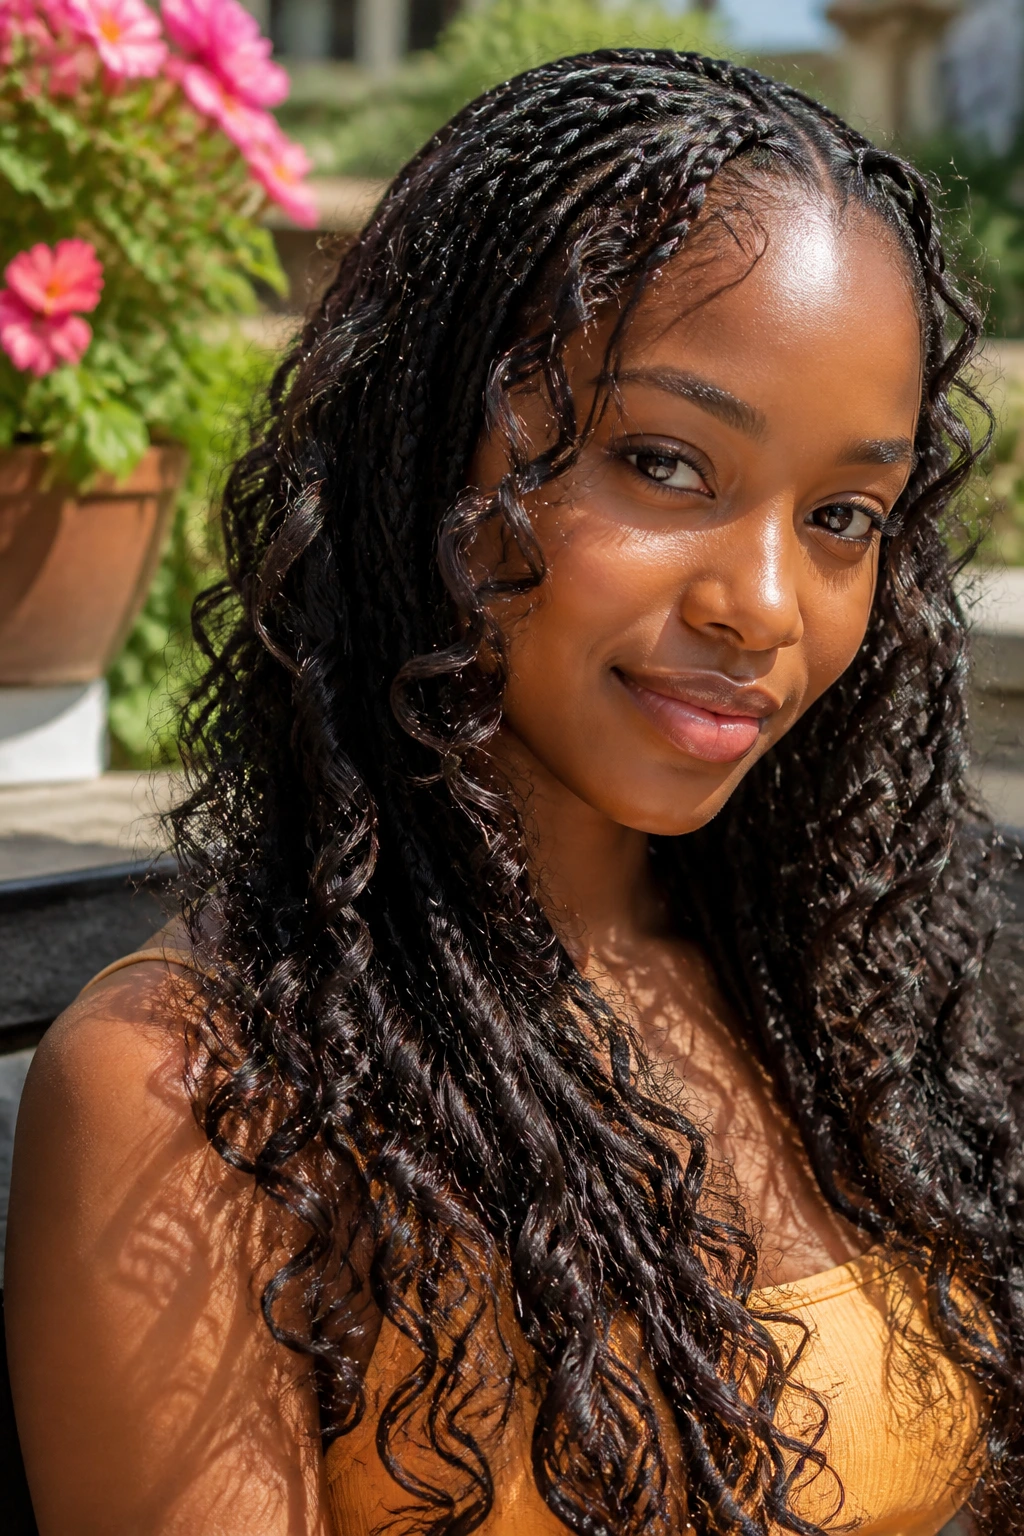
Goddess knotless braids add loose curls through the length, and that changes the texture from sleek to airy in one move. The curls break up the braid line, which makes the style feel less dense around the face and shoulders. Visually, it has more softness. Practically, it asks for more upkeep.
That’s the part people skip over. The loose curls need refreshing, and if they’re installed too generously, they frizz before the braids themselves do. Keep the curls intentional and spaced out. When the balance is right, this style looks expensive without looking stiff.
9. Knotless Braids with Beads
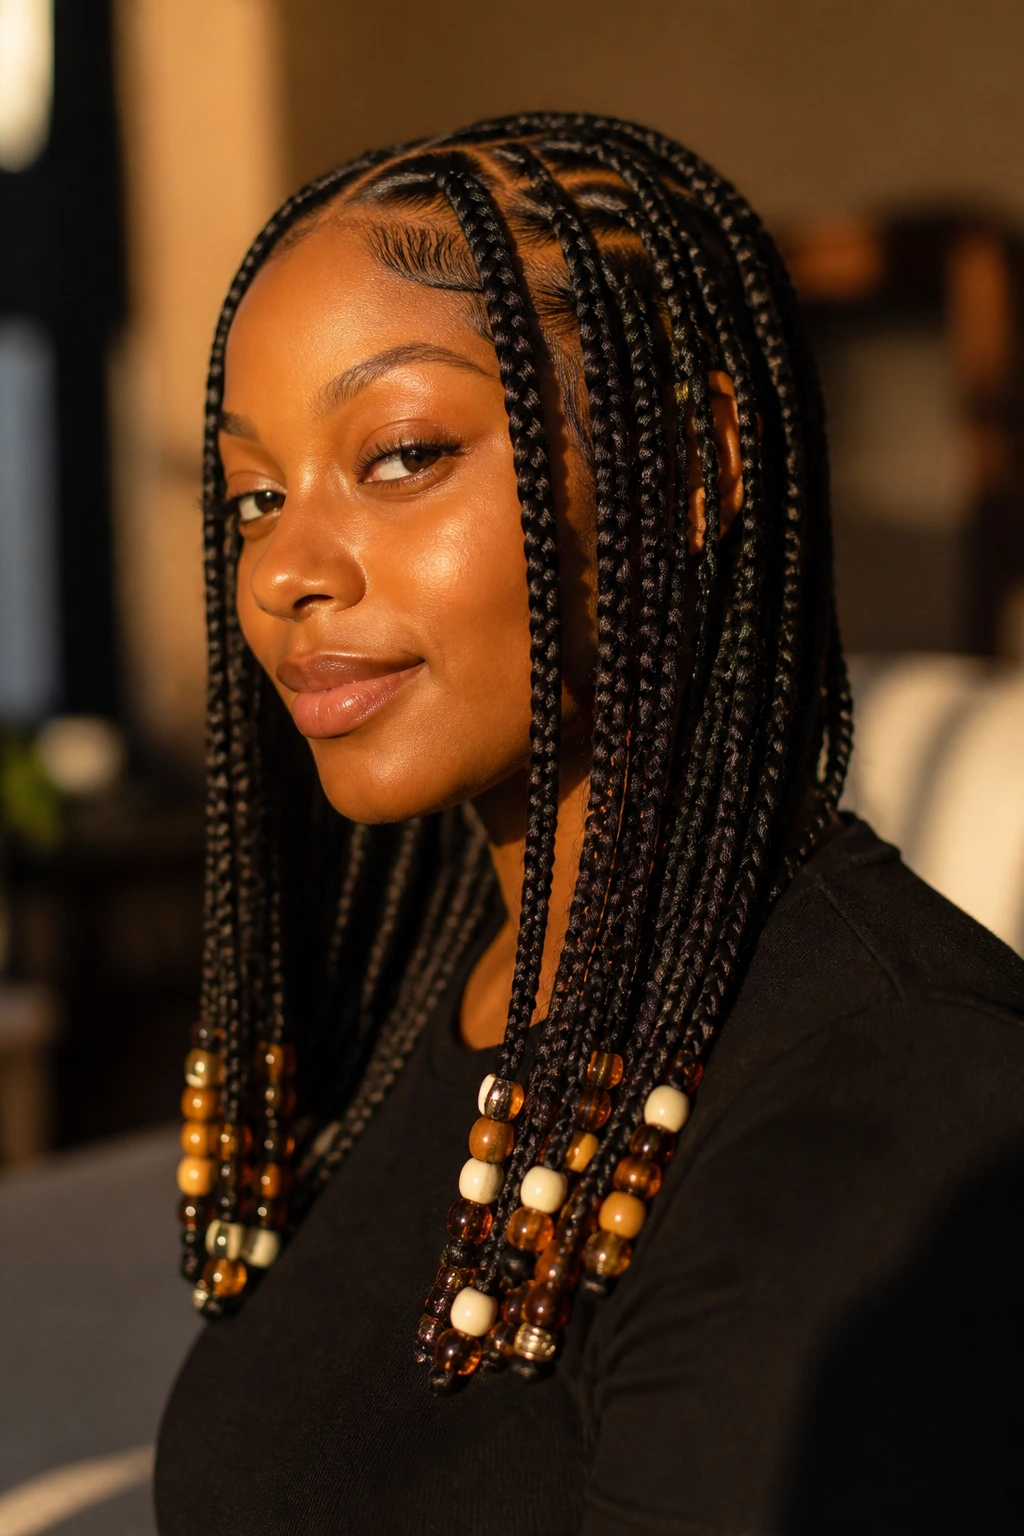
Beads give knotless braids rhythm. A few placed on the ends can turn a clean braid set into something with sound, movement, and a little personality every time you turn your head. Clear beads feel crisp. Wooden beads feel warmer. Metallic ones pull the eye first.
Don’t overload them. That’s the whole lesson here. Too many beads make the ends heavy and can tug at the braid line, especially on shorter braids. I like beads best on medium or long lengths, with maybe a cluster near the front and fewer at the back so the style keeps its polish instead of turning busy.
10. Knotless Braids with Gold Cuffs
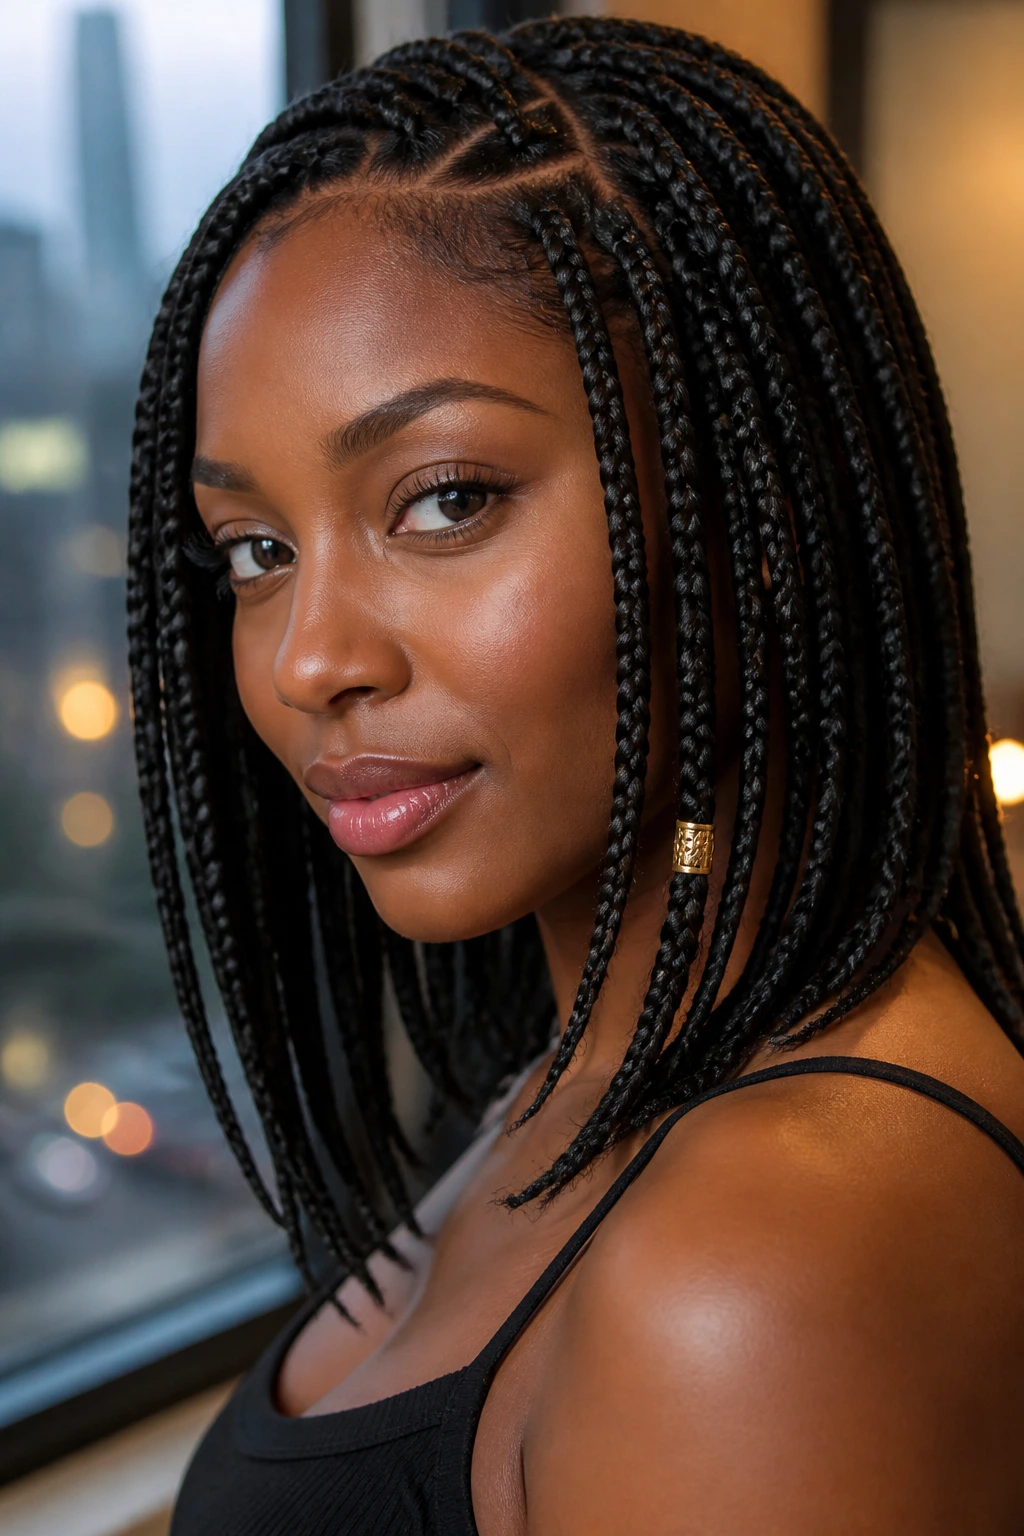
Gold cuffs are the quietest kind of shine. One cuff placed low on a braid can catch light without stealing the whole look, and a few scattered cuffs can make even simple black braiding hair look finished. The key is placement. They should feel like accents, not decoration piled on decoration.
This style works best when the braid size is medium or small, because the cuffs sit better on slimmer sections. If the braids are huge, the cuffs can look lost. If they’re too many, the style starts to feel crowded. A little shine at the lower third of the braid is usually enough.
11. Ombre Knotless Braids
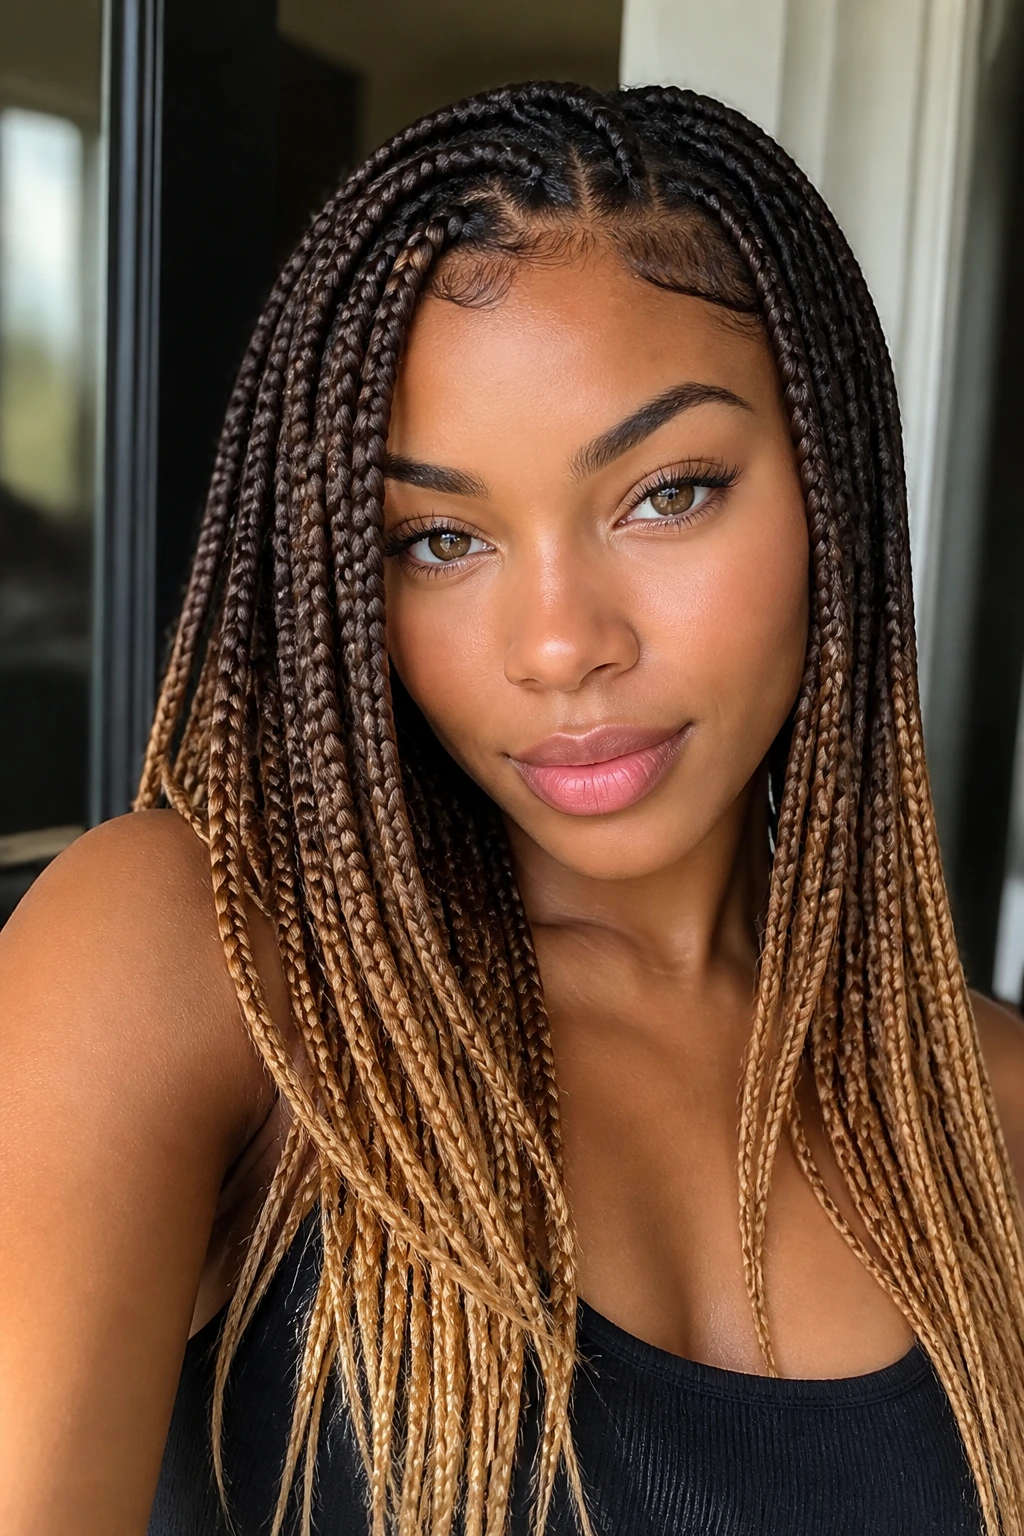
Ombre knotless braids are one of the easiest ways to make the style feel custom without changing the braid pattern at all. Dark roots flowing into honey, auburn, chestnut, or blonde ends add depth right away. The color shift also softens the outline of the braid, which helps the whole set look dimensional instead of flat.
I’m partial to ombre when the root shade stays close to your natural hair color. That makes the grow-out line less obvious, and the style keeps its shape longer. If you want a polished version, keep the color change smooth rather than choppy. A sudden jump from dark to light can look loud in a way that fights the braid detail.
12. High Ponytail Knotless Braids
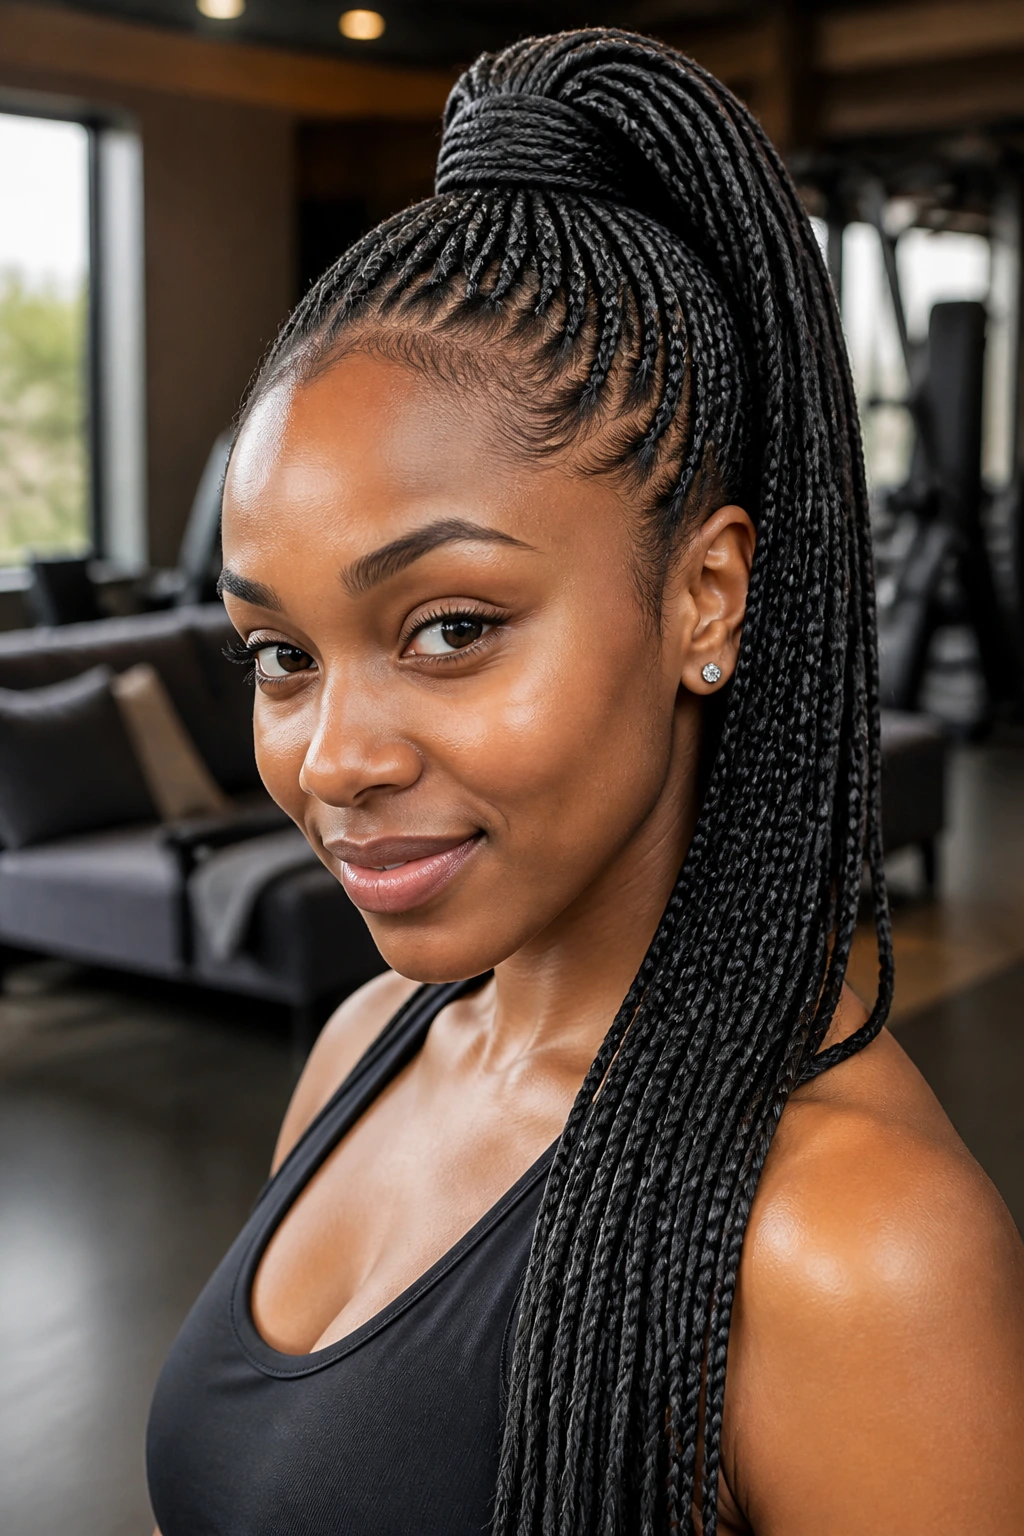
A high ponytail with knotless braids looks sharp when the installation is done with movement in mind. The braids sweep up cleanly, the crown stays sleek, and the length drops from the top like a curtain. It’s a style that reads athletic and dressed up at the same time.
The catch is tension. If the braids are too heavy or the hairline is too tight, the ponytail will tell on you fast. I’d avoid jumbo weight at the roots if you know you’ll wear the hair up often. A high ponytail is at its best when the foundation is light enough to stay comfortable after a full day.
13. Half-Up, Half-Down Knotless Braids
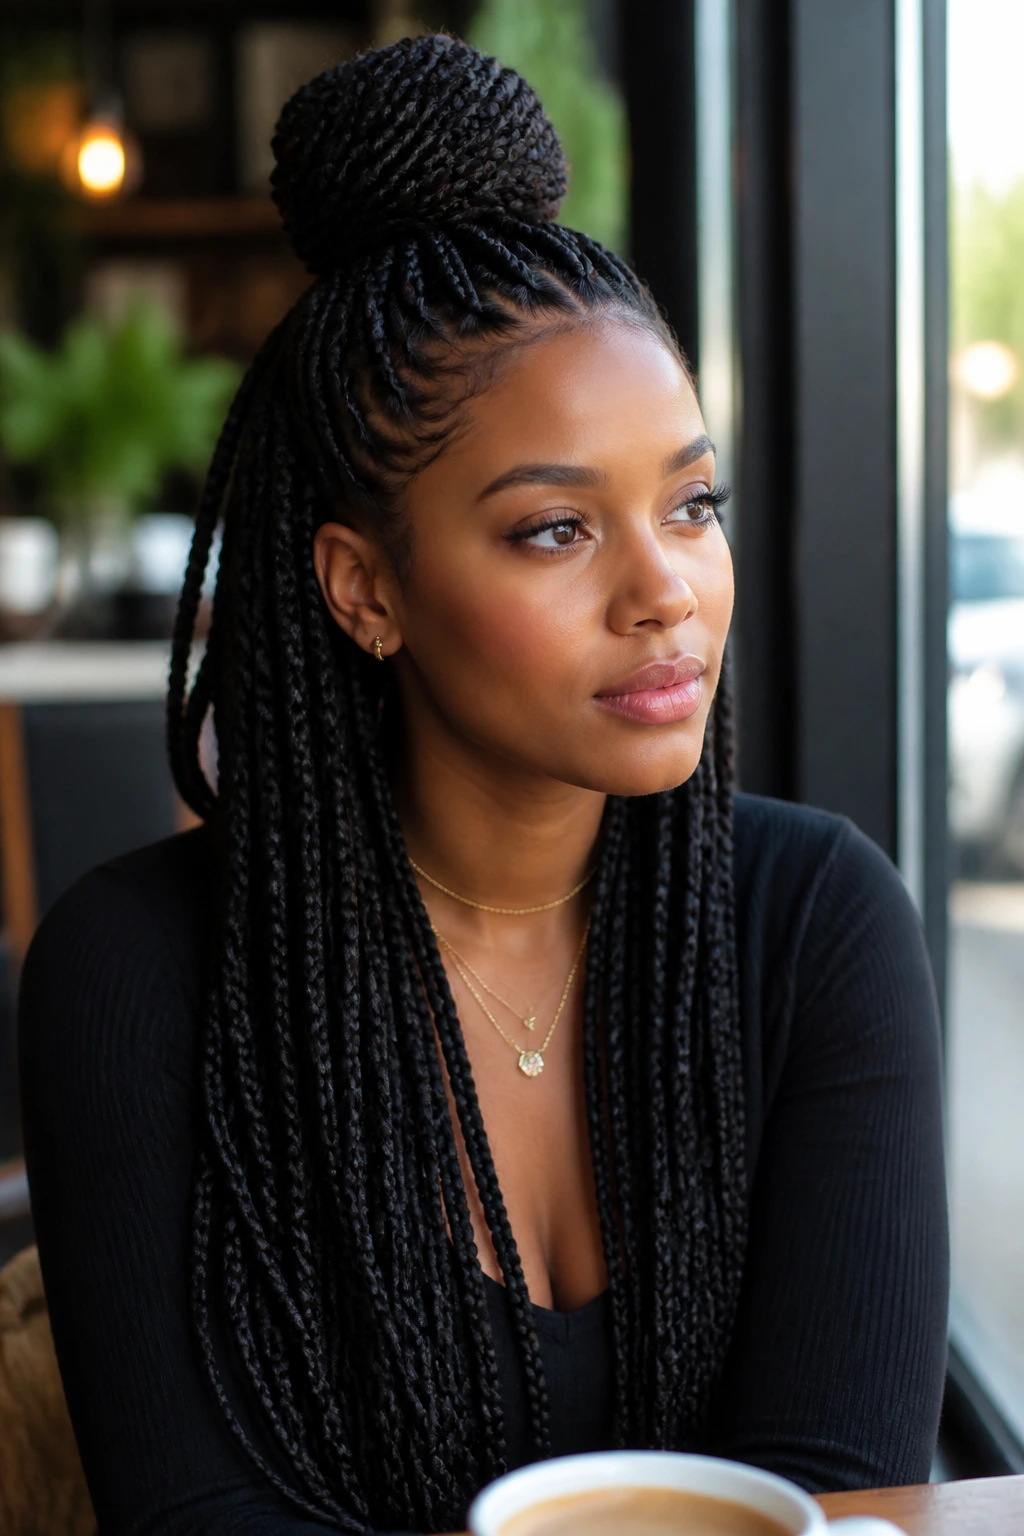
Half-up, half-down knotless braids give you two moods in one style. The top section gets pulled back and lifted, which opens the face, while the rest hangs loose for movement. It’s a clean choice when you want polish without committing to a full updo.
This version also hides a little grow-out better than a strict center part worn down every day. The top section can be gathered into a bun, puff, or small ponytail, and the loose lengths still do their thing. If you like to switch your look midweek without redoing your hair, this is one of the smarter options.
14. Deep Side-Part Knotless Braids
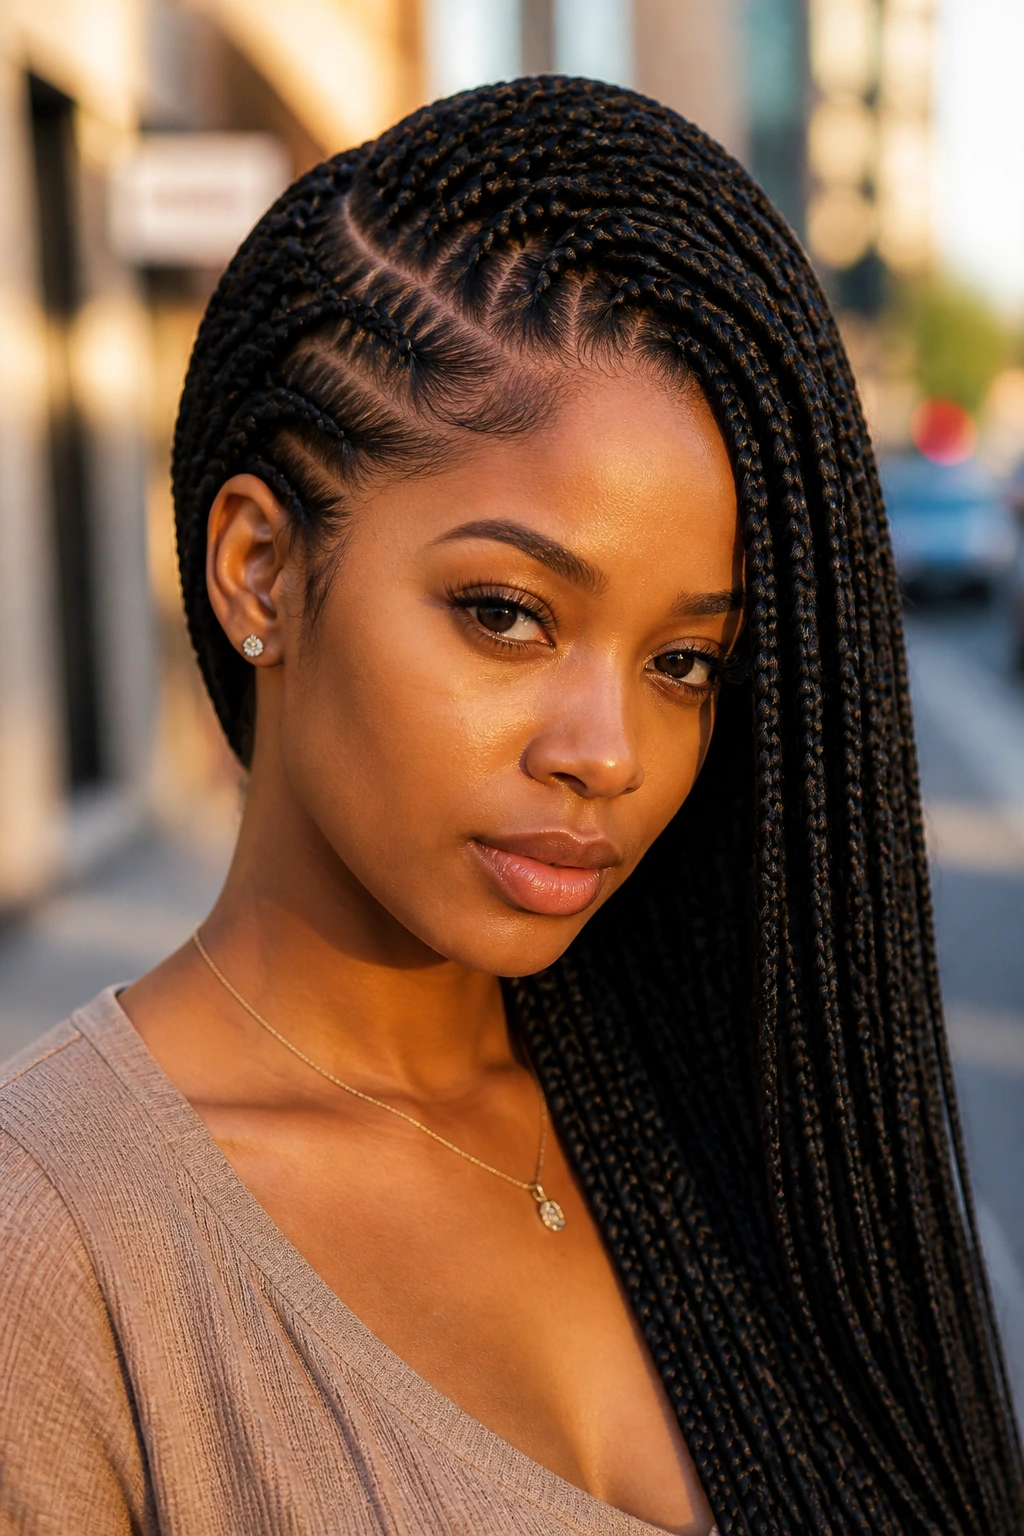
A deep side part gives knotless braids a more dramatic shape than a center part ever will. The swept section adds height on one side and frames the face with a little more curve. It feels polished, but not severe.
The part itself needs to be sharp from the front hairline through the crown. If the line is cloudy, the whole style loses the effect. I like deep side parts most when the braids are medium-sized, because there’s enough length for the part to matter and enough fullness to keep the style looking balanced.
15. Micro Knotless Braids
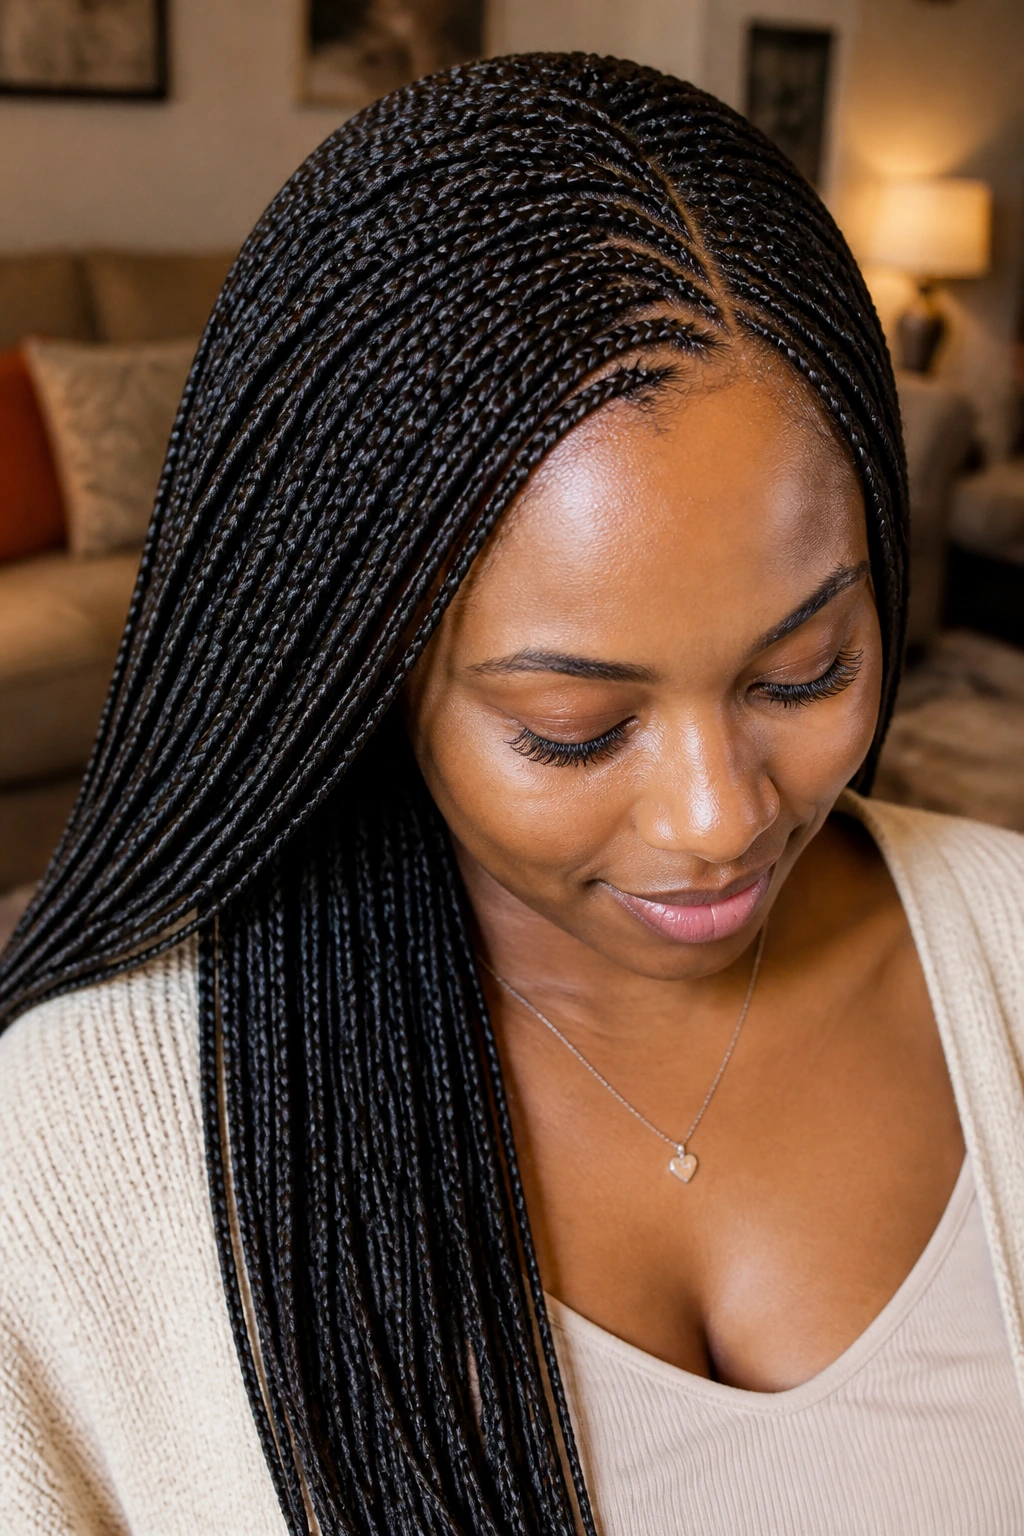
Micro knotless braids are the most detailed option on this list. The parts are tiny, the finish is fine, and the whole head starts to read like a curtain of thread rather than a set of chunky sections. They’re elegant in a quiet way, and they age well if they’re installed cleanly.
They do take time. A long install is the tradeoff for the refined look and long wear. I’d choose micro braids only if you’re comfortable sitting for them and you know you’ll care for them properly. When they’re done well, they look smooth for a long stretch because the size hides frizz better than larger braids do.
16. Layered Knotless Braids
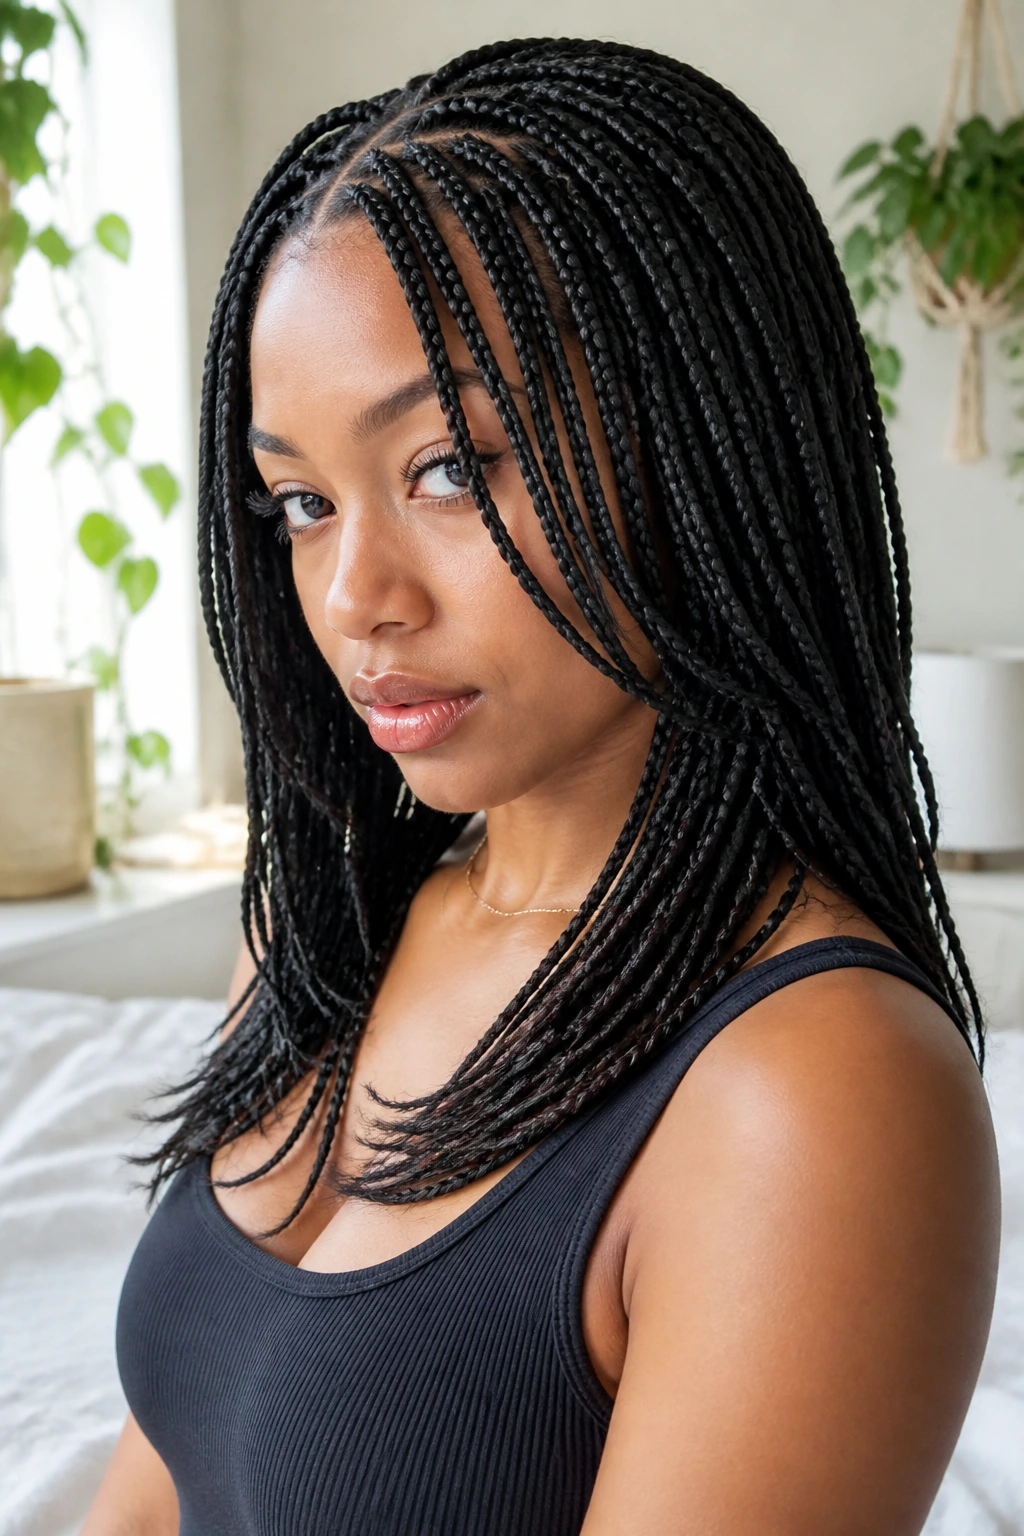
Layered knotless braids use length the way a good haircut does. Some pieces fall a little shorter around the face, while others run longer in back, so the silhouette has movement instead of one flat line. That small shift makes the style feel sculpted.
This is a smart option if you don’t want curls or beads but still want motion. Layers also keep the weight from sitting all in one place, which can help the style feel easier to wear. I’d ask for layers when you want the braids to frame the face but not crowd it.
17. Ribbon-Wrapped Knotless Braids
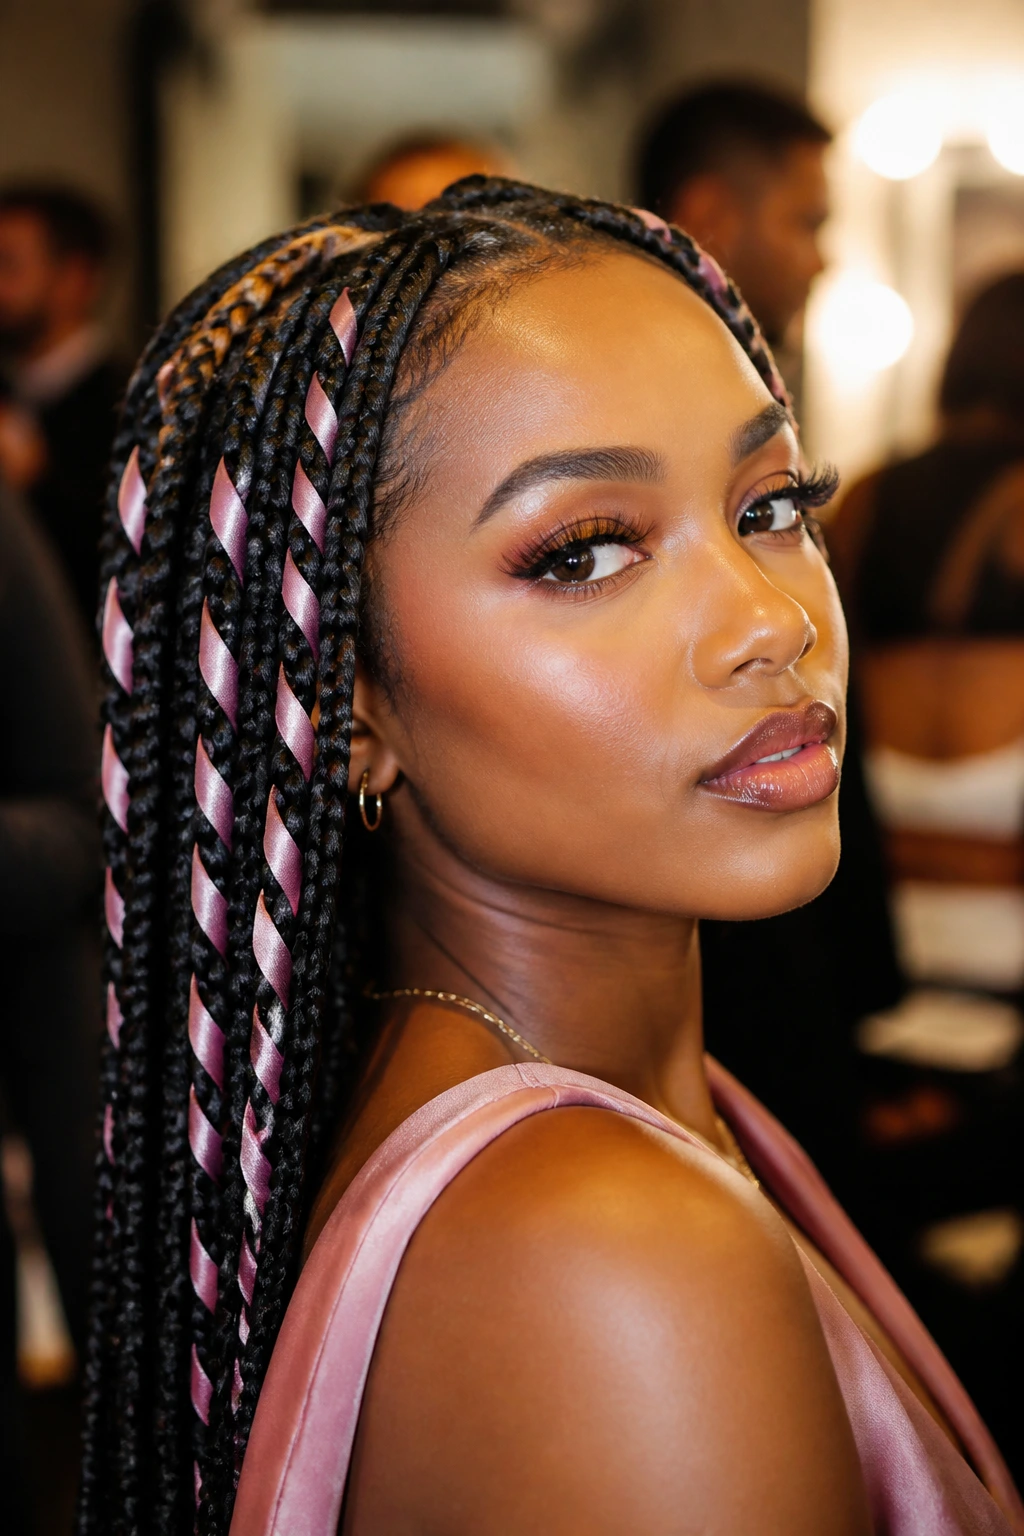
Ribbon-wrapped knotless braids bring in color and texture without changing the braid pattern itself. A thin ribbon tied or woven through a few braids can give the whole style a softer, more styled finish. Satin ribbon feels elegant. Grosgrain reads more playful. A narrow width keeps it tidy.
The mistake is wrapping too much. One or two accents near the front often look better than ribbons on every braid, because the eye needs space. This style works well for events, photos, or any day you want the braids to feel a little more dressed up than usual.
18. Curved-Part Knotless Braids
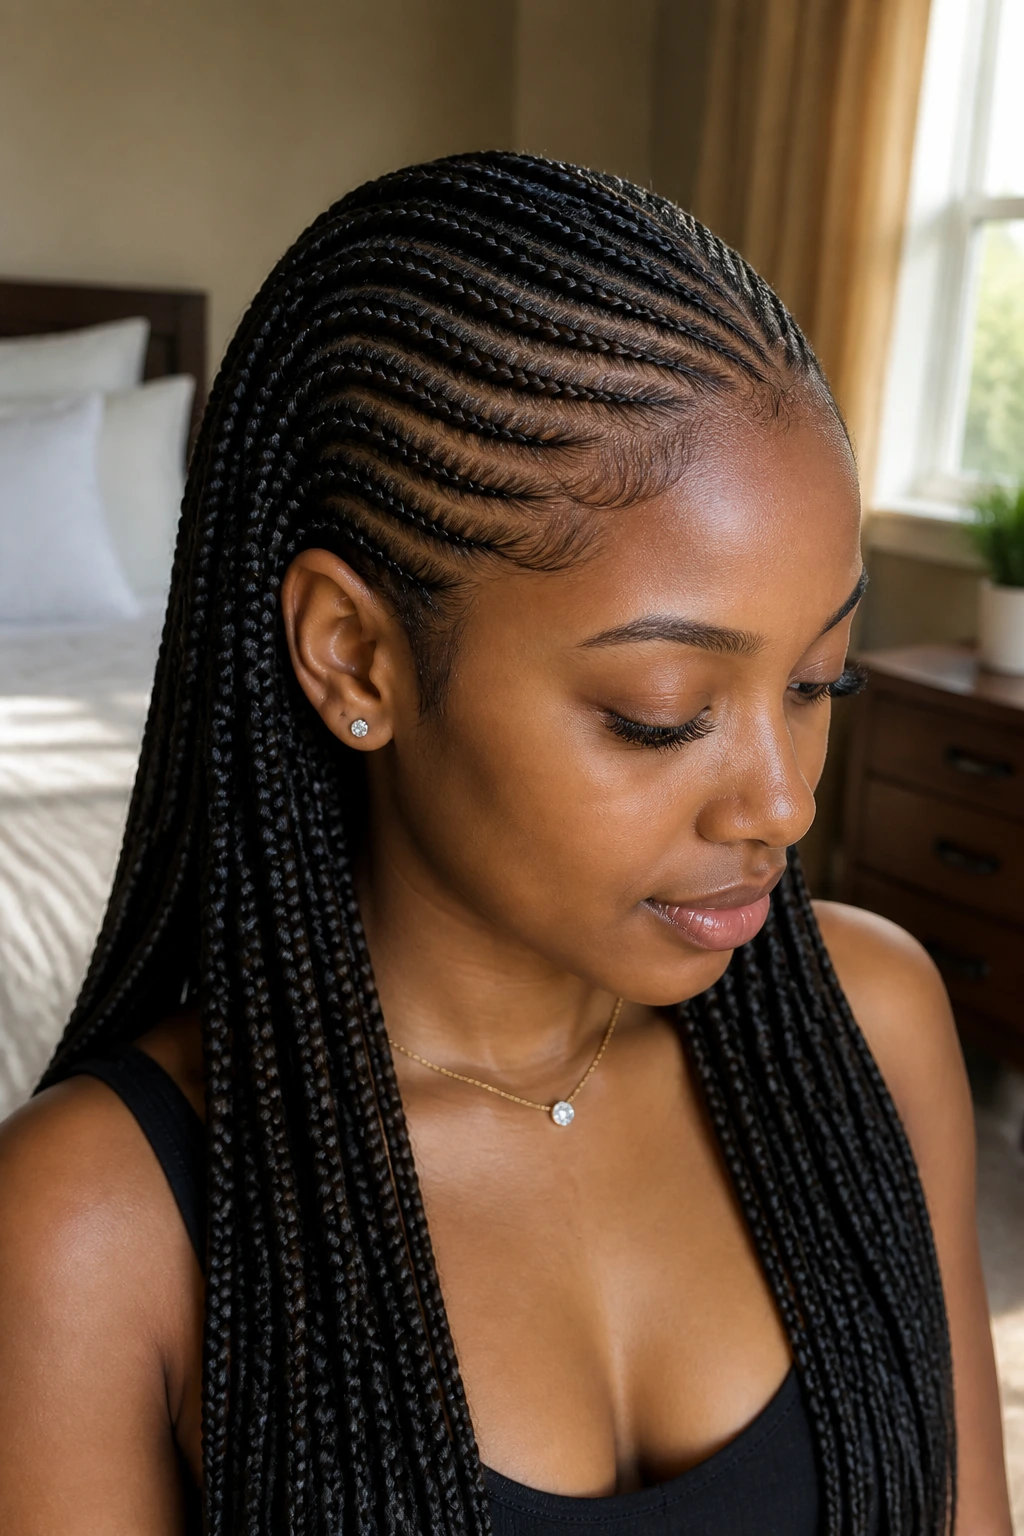
Curved parts are one of my favorite ways to make knotless braids look custom without adding extra length or color. Instead of a straight grid, the parts arc gently across the scalp, which adds movement before the braids even start. It’s subtle. It’s smart. And it makes a plain braid set look considered.
The style is strongest when the curves are clean and repeated with purpose. A single awkward bend in the parting can throw off the whole head. This option rewards precision, and that’s why it looks so polished when done well.
19. Knotless Braids with Face-Framing Pieces
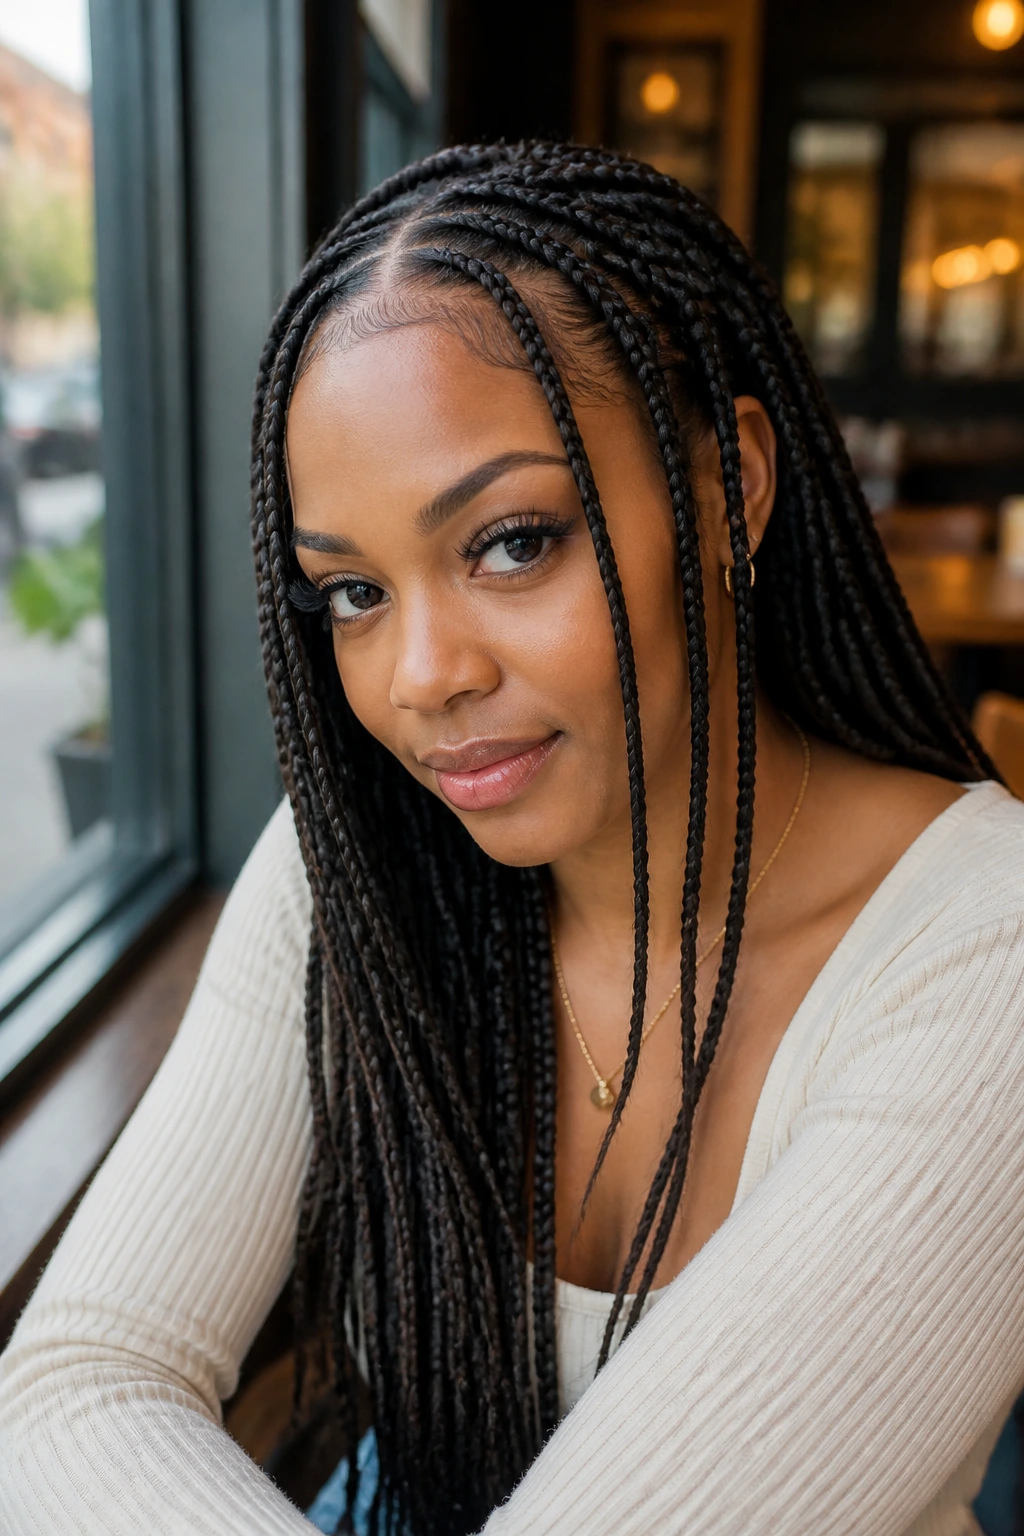
Face-framing braids soften the line around the forehead and cheeks. A couple of shorter pieces near the front can make the style feel less severe, especially when the rest of the braids are long. It’s a small edit that changes how the whole look sits on the face.
I like this choice when the hairline needs a little visual break. The shorter pieces can also help if you like tucking hair behind one ear or wearing the rest in a ponytail. They make the style more flexible, which is a nice bonus when you don’t want one rigid shape every day.
20. Knotless Braided Bun
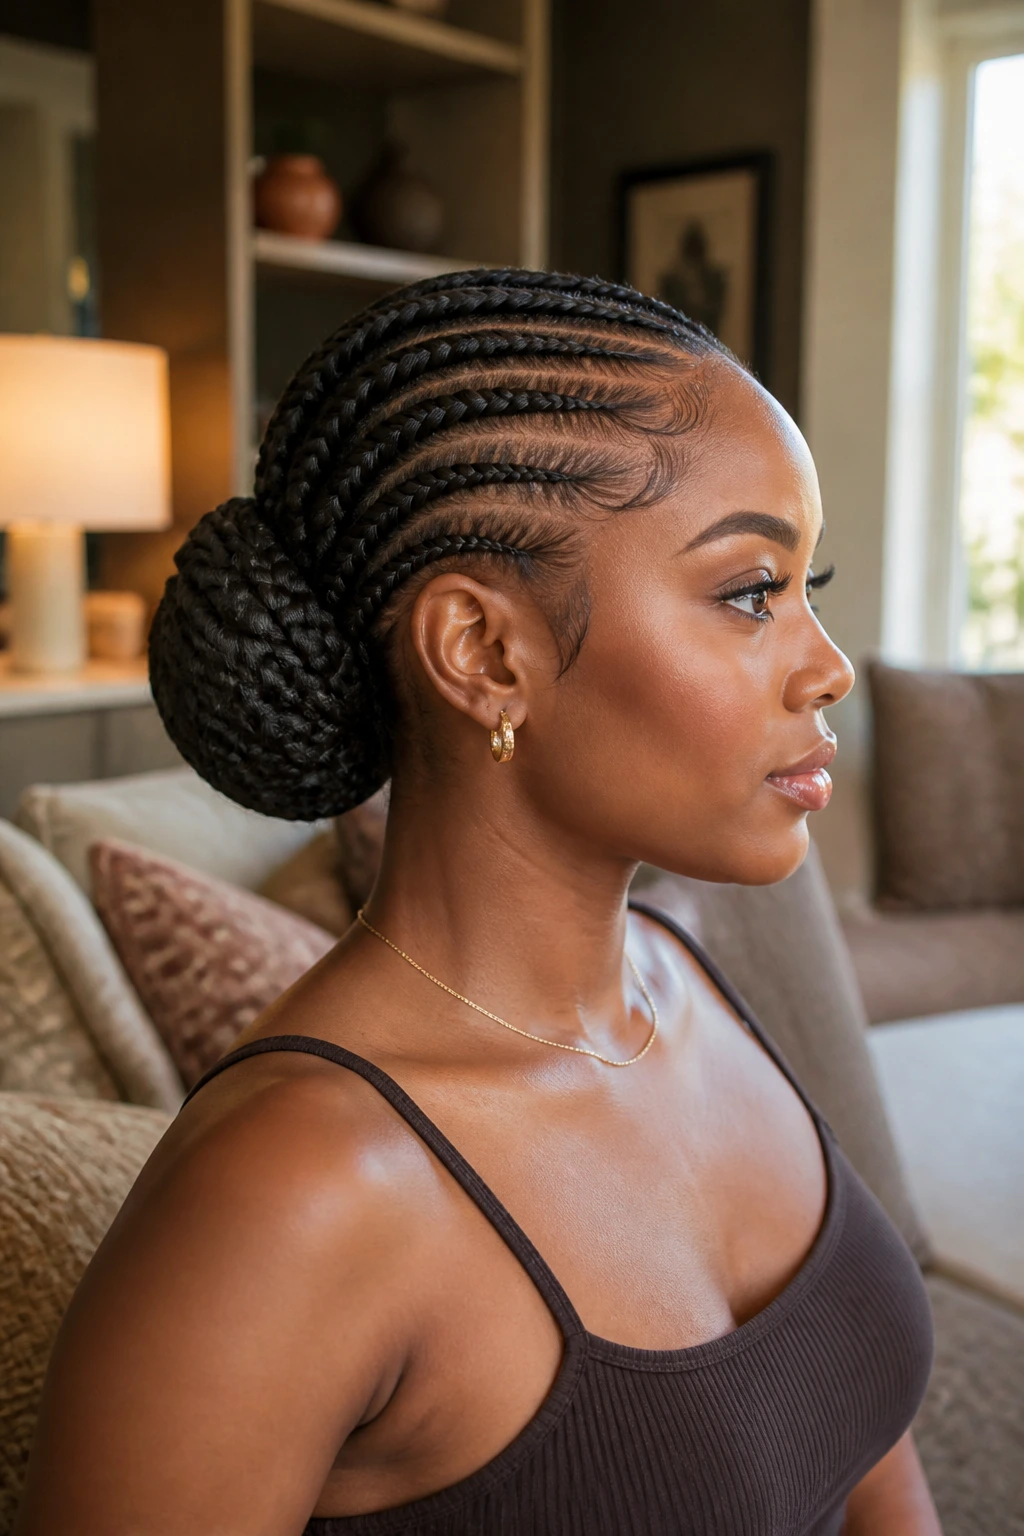
A braided bun is what I reach for when I want the braids out of the way but still want the style to look finished. The length is gathered low or mid-height and wrapped into a compact bun that holds the clean line of the braids. It looks neat with structured clothes and even better with a strong part.
The bun should feel secure, not tight. If the hair is pulled hard into the base, the style loses the whole point of knotless comfort. Keep the wrap smooth, pin it where needed, and let the ends disappear cleanly. It’s a practical style, but it can still look elegant if you keep the edges calm.
21. Highlighted Knotless Braids
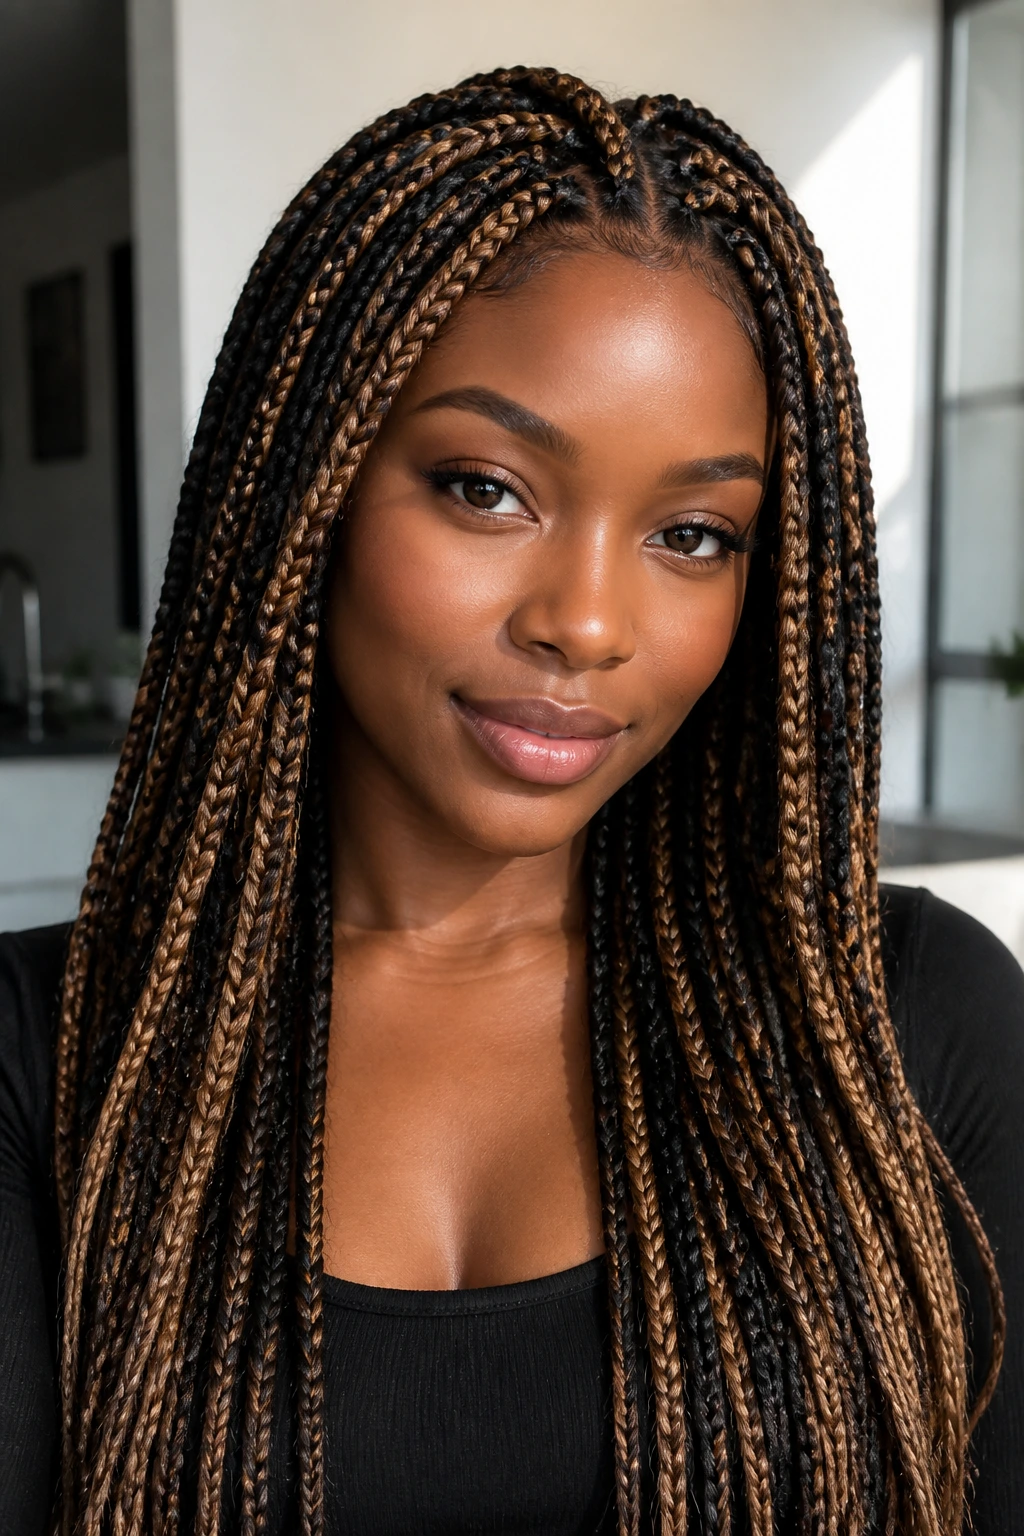
Highlighted knotless braids add dimension the way a good stripe can change a plain shirt. A few lighter strands, placed with intent, catch the braid pattern and make each section stand out. Caramel against black hair is classic. Copper against deep brown can be gorgeous. Even a single accent tone can do plenty.
The best part is how much dimension you get without needing a full color shift. Keep the highlight tone consistent, though. If too many shades are mixed in, the style can look noisy. One accent color repeated through the set looks far cleaner than a whole bag of random tones.
22. Short Knotless Braids with a Tapered Nape
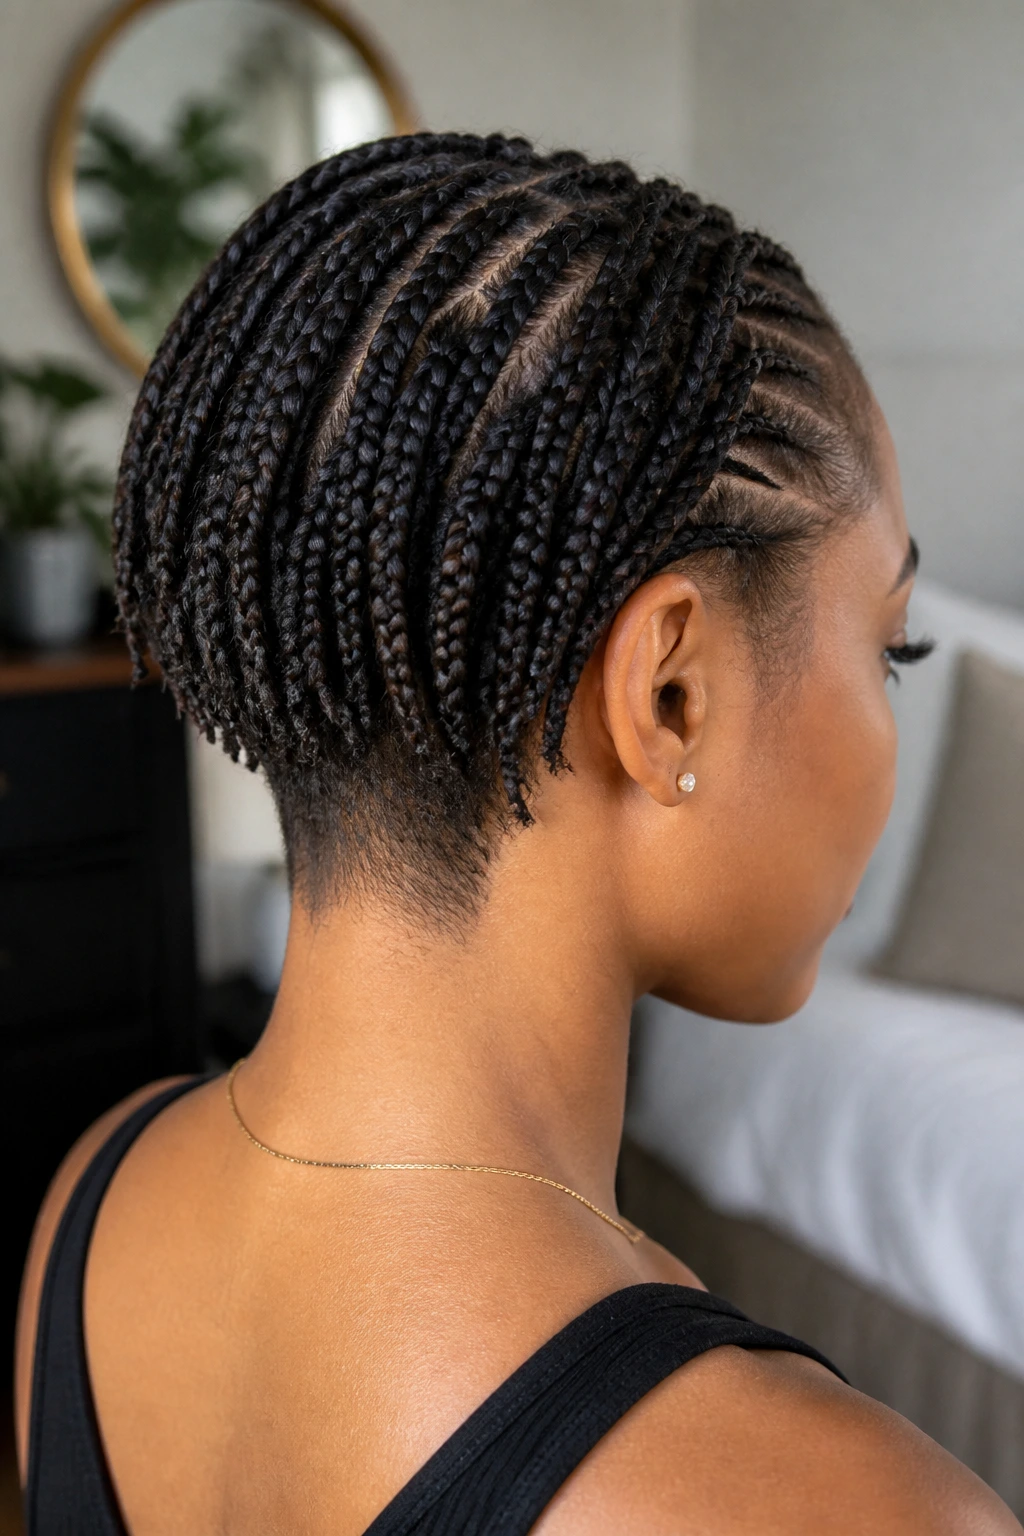
Short knotless braids with a tapered nape are neat in a way that feels almost architectural. The back sits closer to the neck, the silhouette stays tidy, and the shorter length makes the whole style easier to handle. It’s a smart choice if you want polish without the bulk of long hair.
The taper at the neckline matters. It keeps the cut clean and makes the braid set feel shaped rather than simply shortened. I especially like this version when the braids are medium-sized and the nape is crisp, because the contrast between the short back and fuller top gives the style a fresh edge.
23. Knotless Braids with Curly Accent Pieces
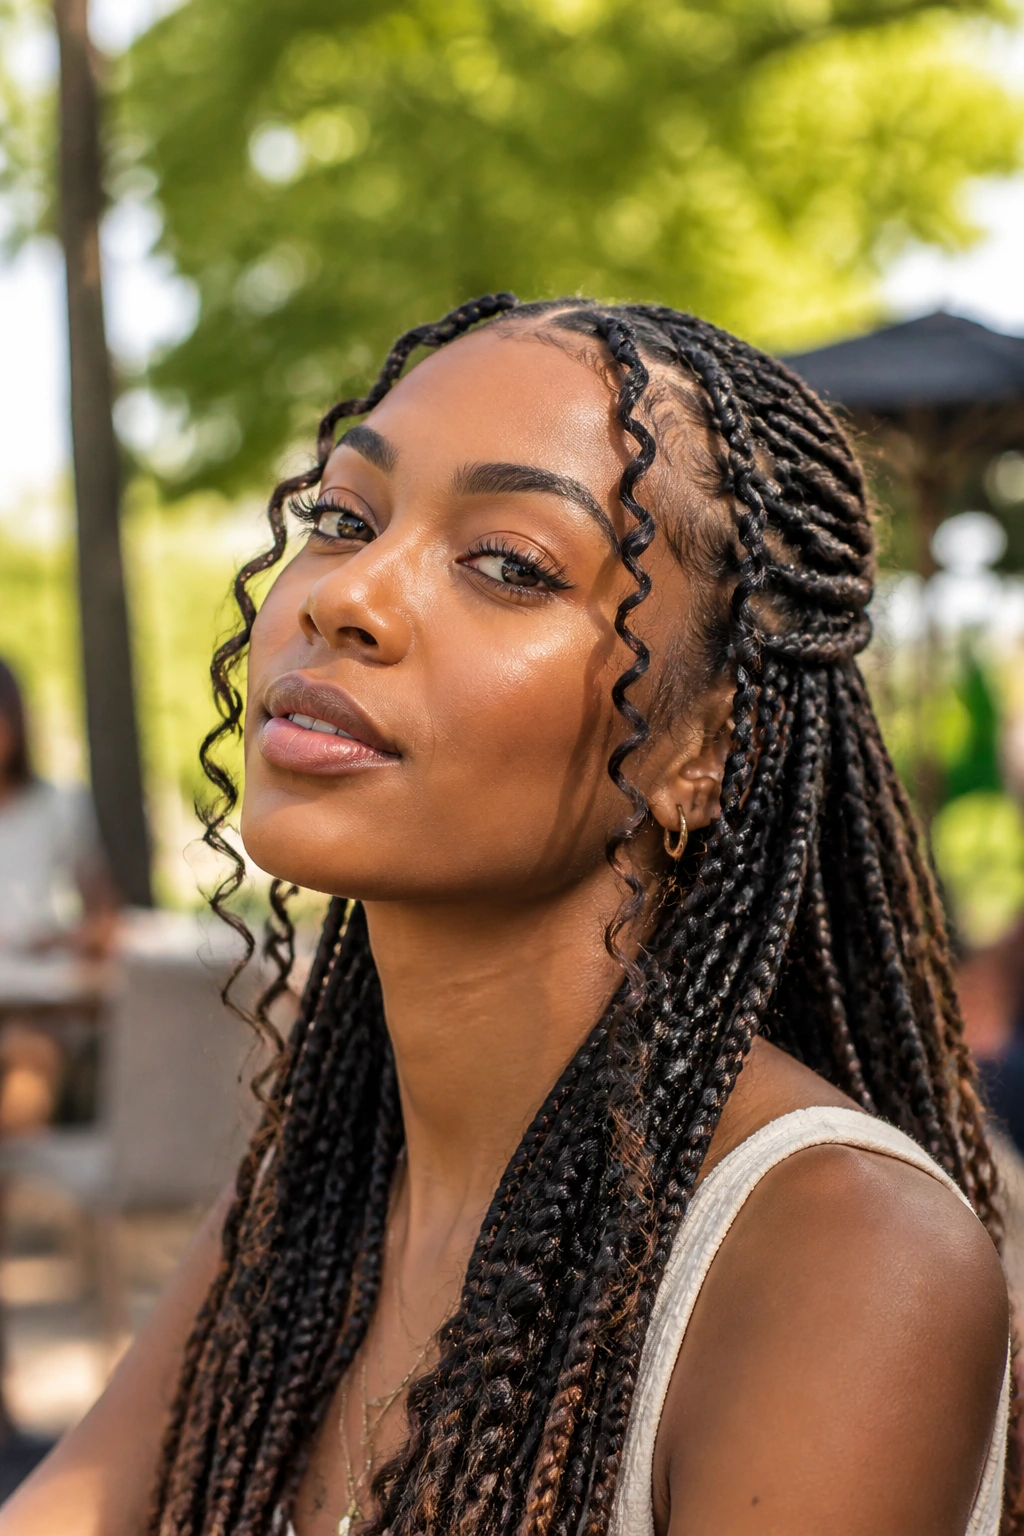
Curly accent pieces are the restrained cousin of goddess braids. Instead of curls throughout the whole style, a few placed near the temples, crown, or outer lengths give the braids some softness where the eye lands first. It keeps the set polished while still breaking up the line.
This option is easier to maintain than full curls, which is why I like it. You get movement without turning every braid into a frizz project. If you want a little texture but don’t want to babysit it every morning, this is the version to ask for.
24. Accessory-Heavy Knotless Braids
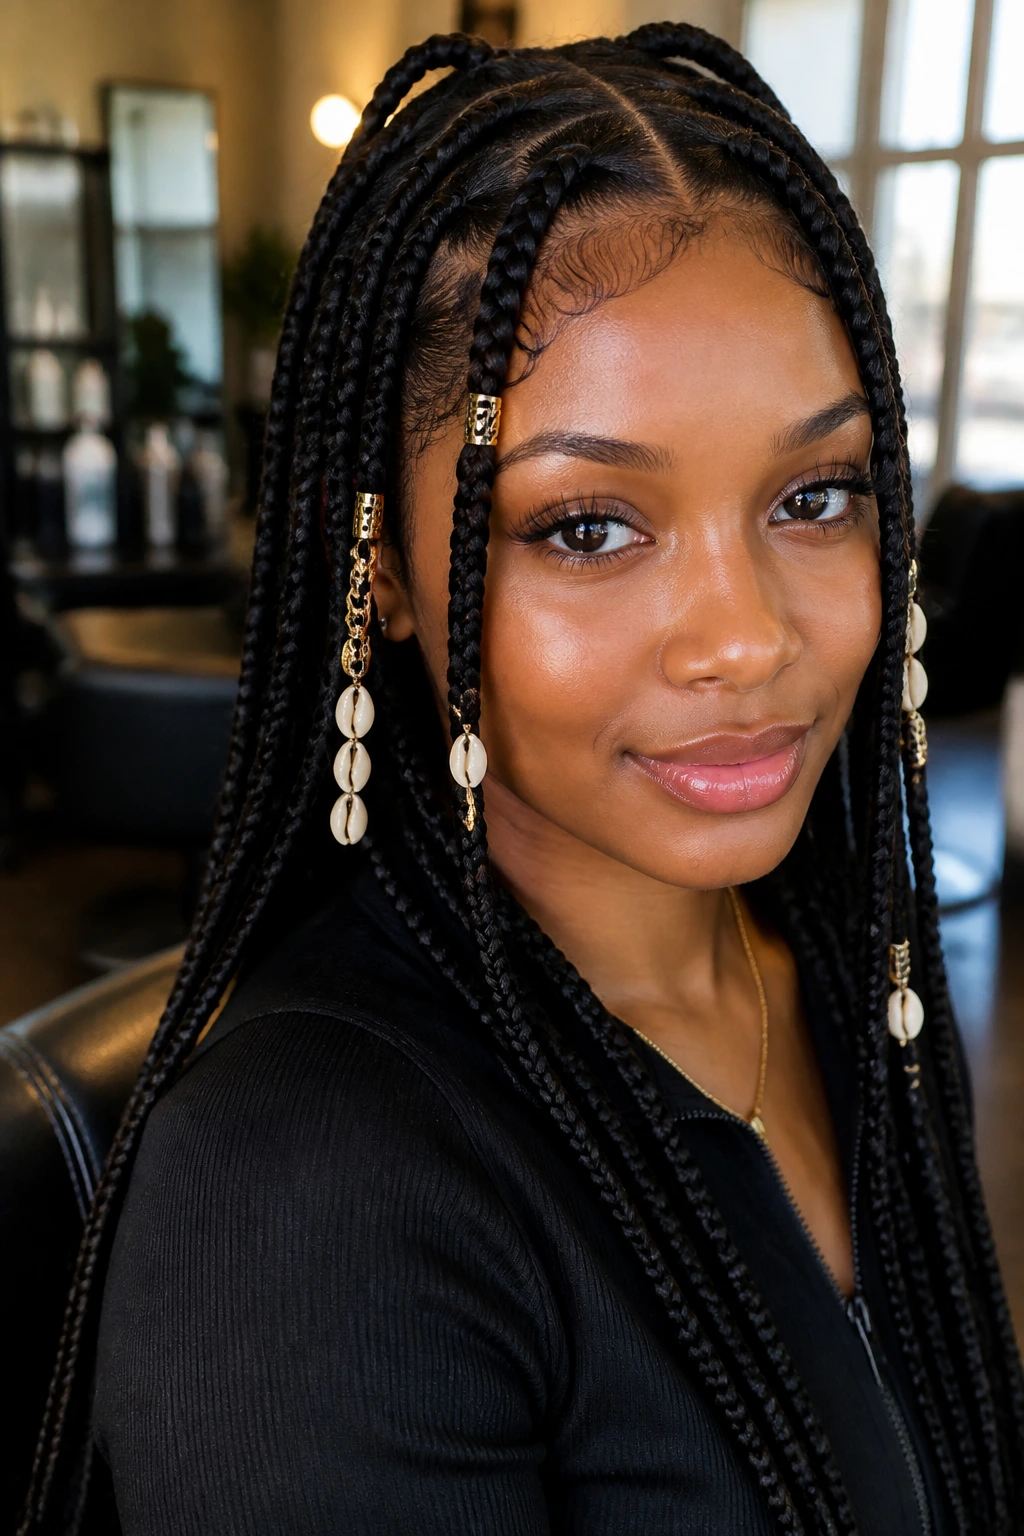
Accessory-heavy knotless braids are for the person who likes a finished look with a bit of shine and pattern. Think cuffs, rings, thread, maybe a few shells—but not all at once. The trick is to let one accessory type lead while the others stay quiet.
I’ve seen this style go wrong when people stack every possible decoration onto every braid. It gets heavy fast, and the parts stop reading clean. Pick a focal point. Place the accessories where they frame the face or repeat every few braids. That’s enough to look styled without looking crowded.
25. Low Sleek Knotless Ponytail
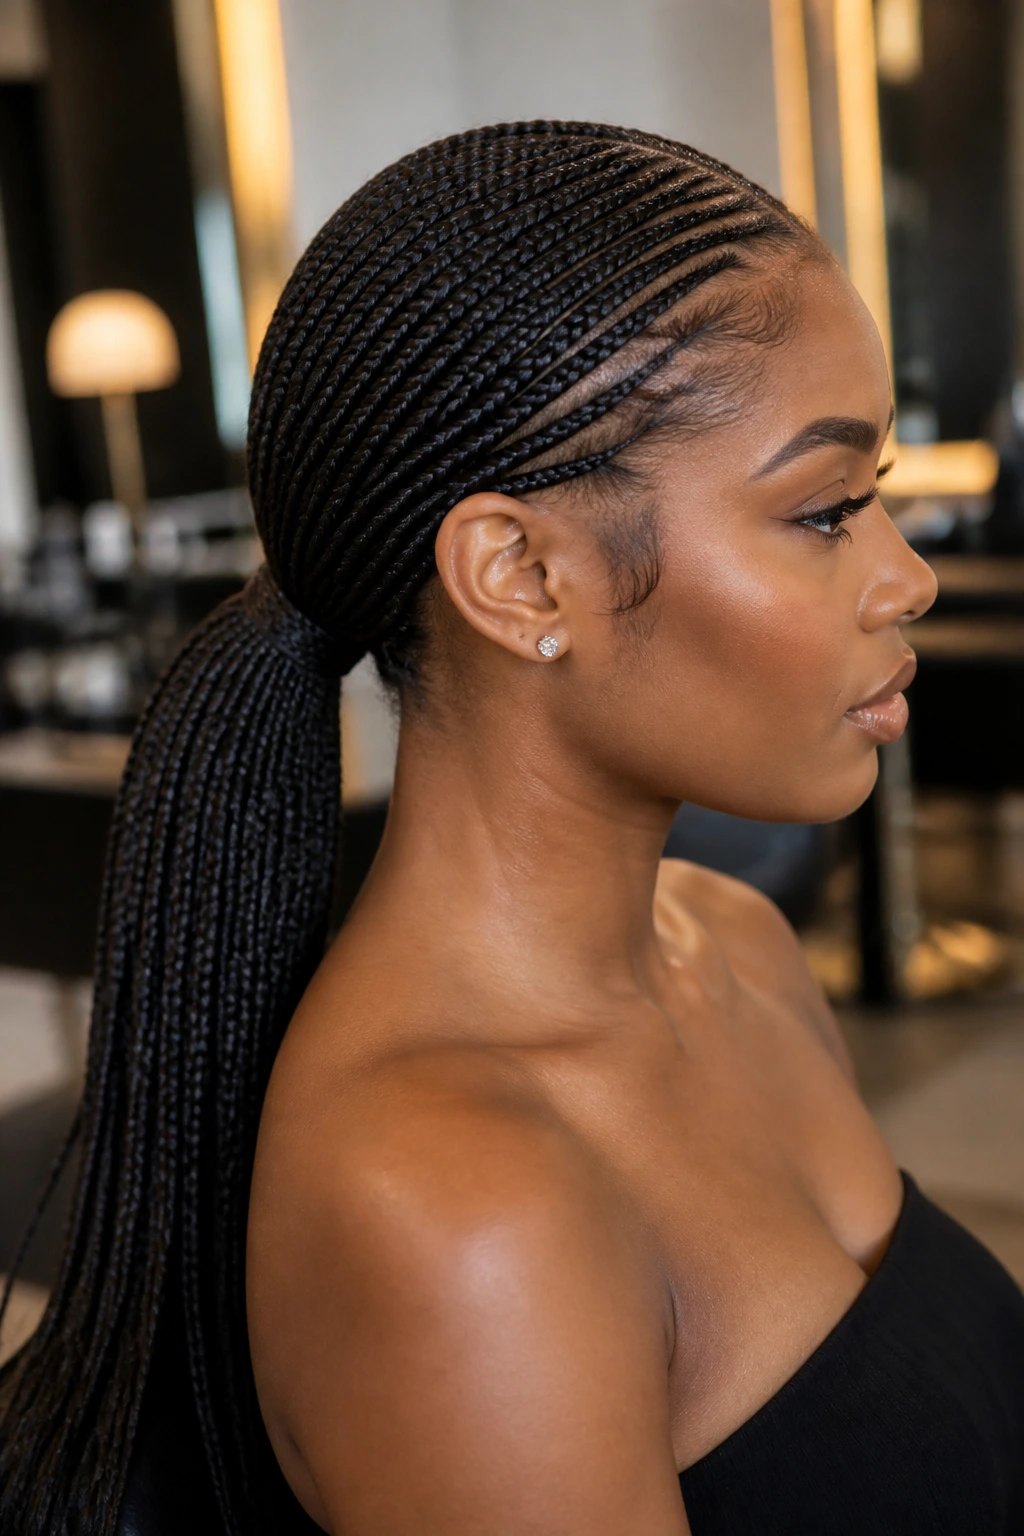
A low sleek ponytail is the cleanest ending point for knotless braid ideas because it keeps the style controlled and polished without asking for extra height. The braids gather at the nape, the crown stays smooth, and the result feels calm rather than flashy. It’s the braid version of a tailored jacket.
This style is also kinder than a high ponytail on long installs. The weight sits lower, so the tension spreads out better across the head. If you want one braid style that can move from errands to a formal setting without changing much, this is the one I’d put near the top of the list.
Why Knotless Braids Stay Comfortable Longer
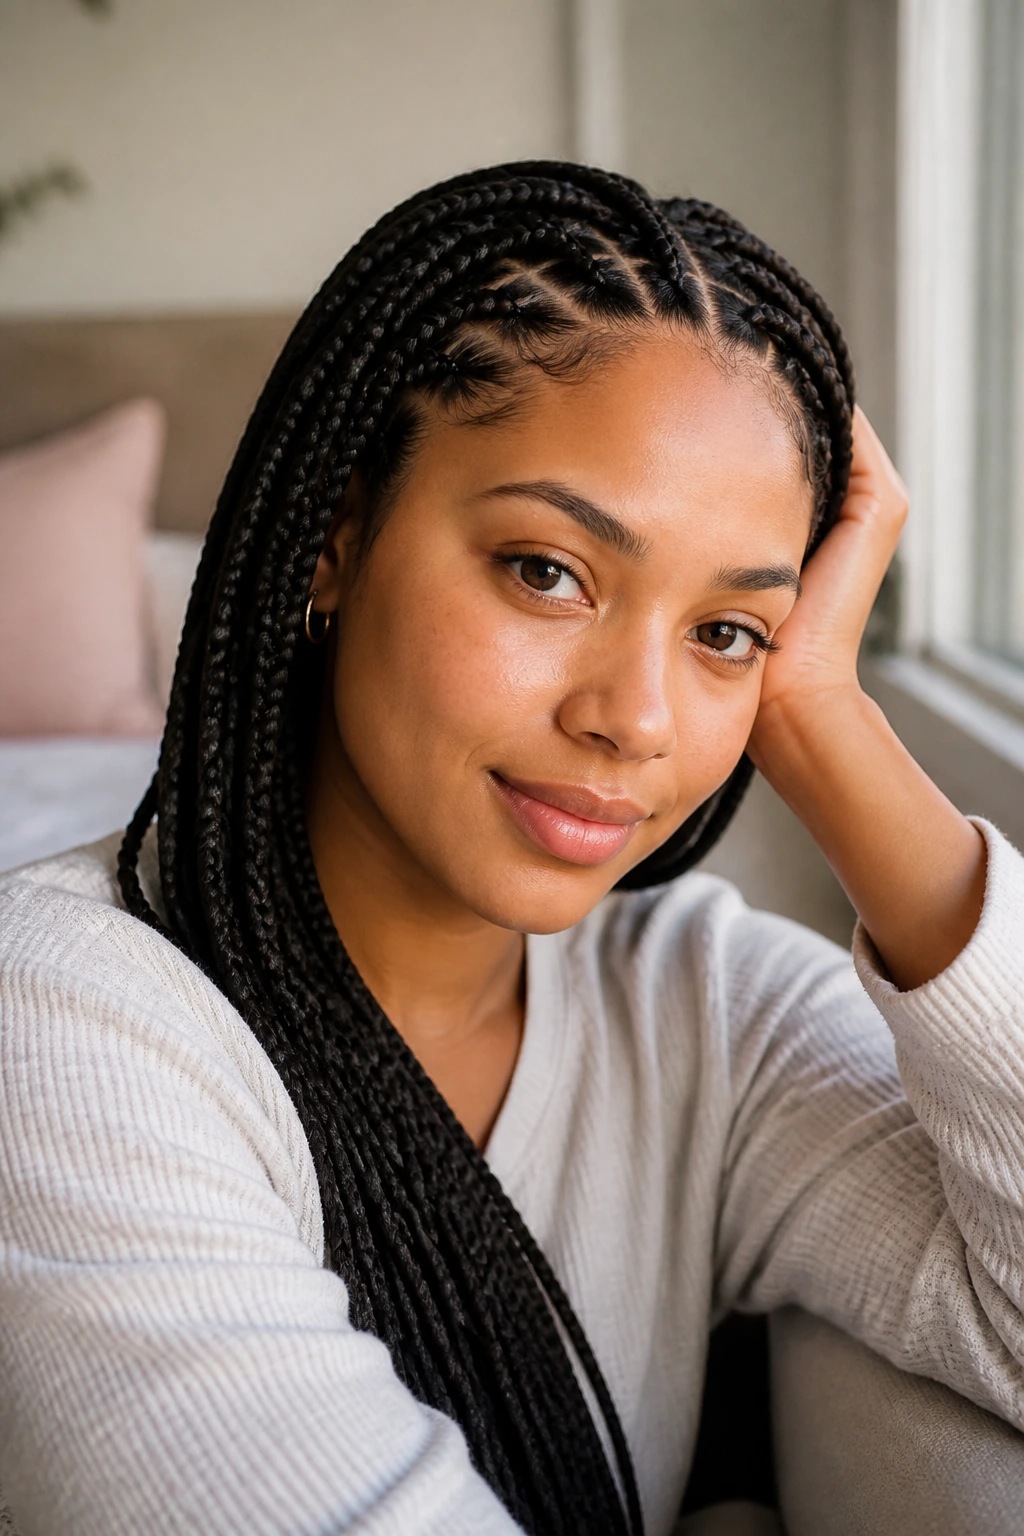
The comfort comes from the root, not the length. In knotless braids, the braid starts with your own hair and the extension hair is fed in gradually, so the base stays flatter and usually puts less pressure on one small point of the scalp. That’s a big reason people keep coming back to the style.
The parting still matters. If the sections are too small for the braid size, or if the braid is pulled too tight near the first inch, the style stops feeling light no matter how good the technique looks. I’d rather see a slightly softer install than a razor-tight one that leaves the front tender for days.
There’s also the weight question. Long waist-length braids look beautiful, but the longer the extensions, the more strain the style puts on the neck and crown. Medium lengths often hit the sweet spot: enough movement to look finished, not so much drag that you start noticing every swing of your head.
Essential Tools for These Styles
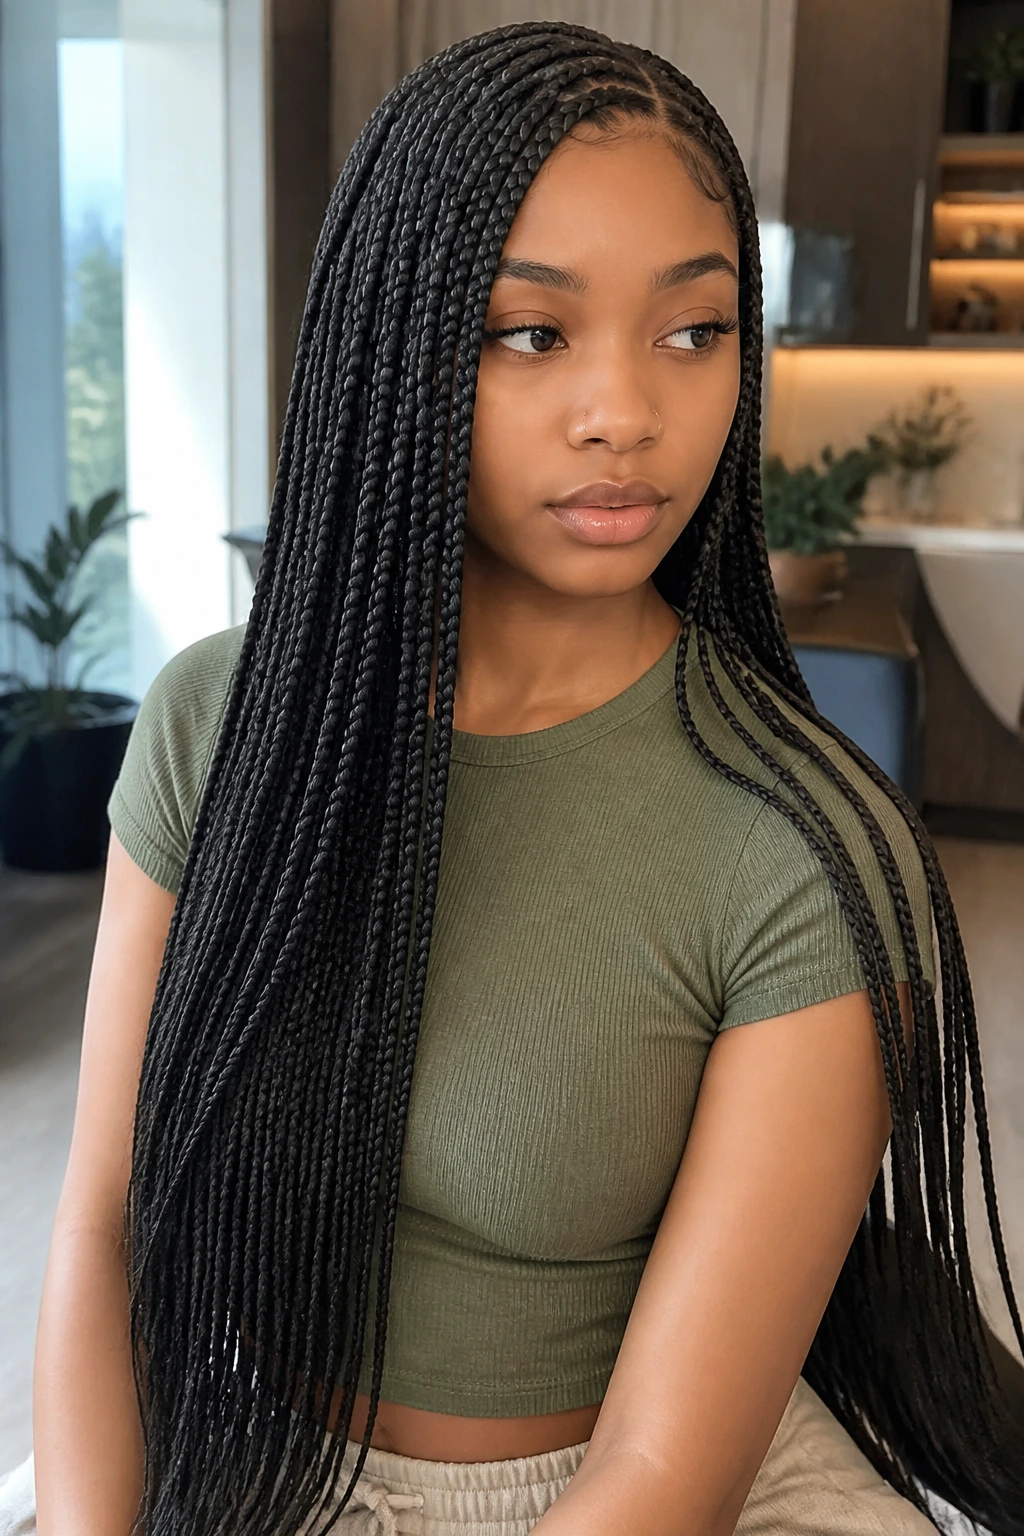
-
Rat-tail comb: The pointed handle makes clean parts and sharp sections much easier to manage.
-
Sectioning clips: These keep loose hair out of the way while you braid, which saves time and keeps the grid clean.
-
Braiding hair in the right texture: Pre-stretched synthetic hair is a practical choice for most knotless looks because it saves prep and blends more smoothly.
-
Moisturizing spray or light leave-in: Use this on the natural hair before installation so the base stays soft without feeling slick.
-
Edge brush: Useful for smoothing the hairline before a style with a center part, side part, or ponytail.
-
Foaming mousse: Helps tame flyaways, set curls at the ends, and keep the braid surface neat.
-
Small scissors: Handy for trimming stray extension fibers and cleaning up loose bits, if needed.
-
Satin scarf or bonnet: This matters more than people want to admit; it keeps the parting and braid surface from getting fuzzy overnight.
-
Hair clips or small rubber bands: Helpful for ponytails, half-up styles, and section control during the install.
-
Hot water source or heat-safe bowl: Only needed if your braider seals synthetic braid ends with a dip or finish.
Smart Prep Before You Sit in the Chair
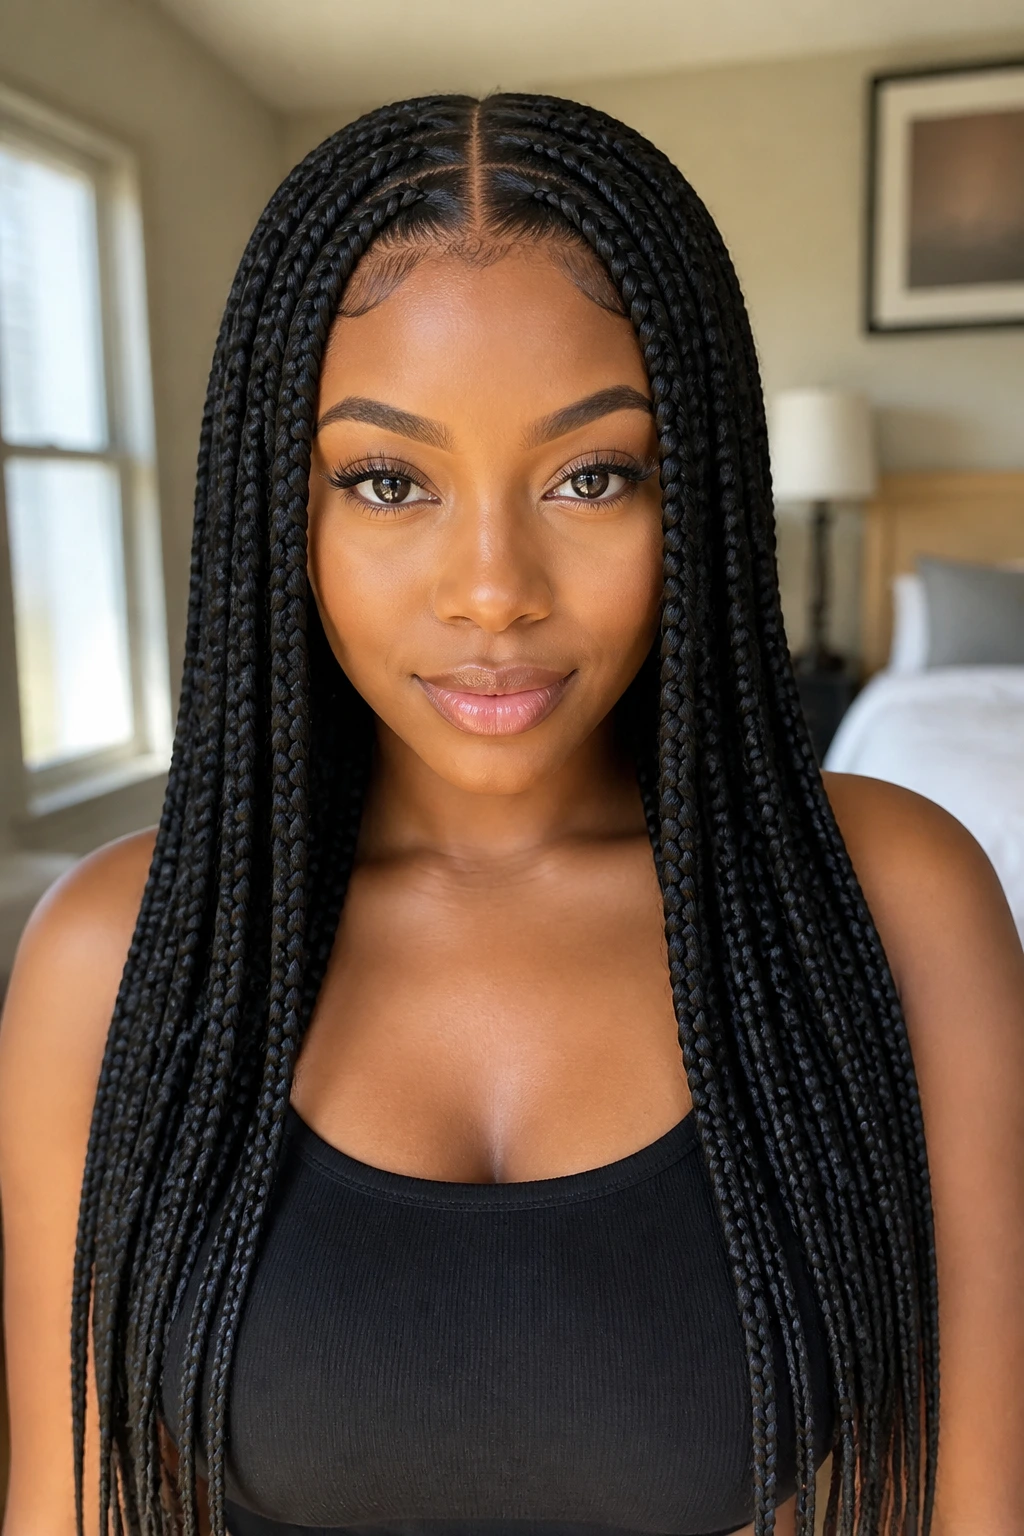
Clean, stretched hair makes the whole install behave better. That means washing your hair beforehand, detangling thoroughly, and drying it fully so the braider isn’t working through damp roots or tangled patches. Damp hair under braids is a bad bargain. It smells off later, and it makes the base harder to part cleanly.
A light leave-in is useful. Heavy cream isn’t. If the hair is too coated, the grip at the root can slip, and the braids won’t hold the same neat shape. I like a moisturizing spray or a thin leave-in mist, then a good blow-dry or stretch method so the sections lie smoother when they’re parted.
Bring your own reference photos, but bring a real one. One photo of the braid size, one for the parting, one for the length. A style can look simple in a picture and be a different beast in practice. The more exact you are before the first braid starts, the less likely you are to end up with a shape that feels off once it’s all installed.
How to Choose the Right Size, Length, and Part
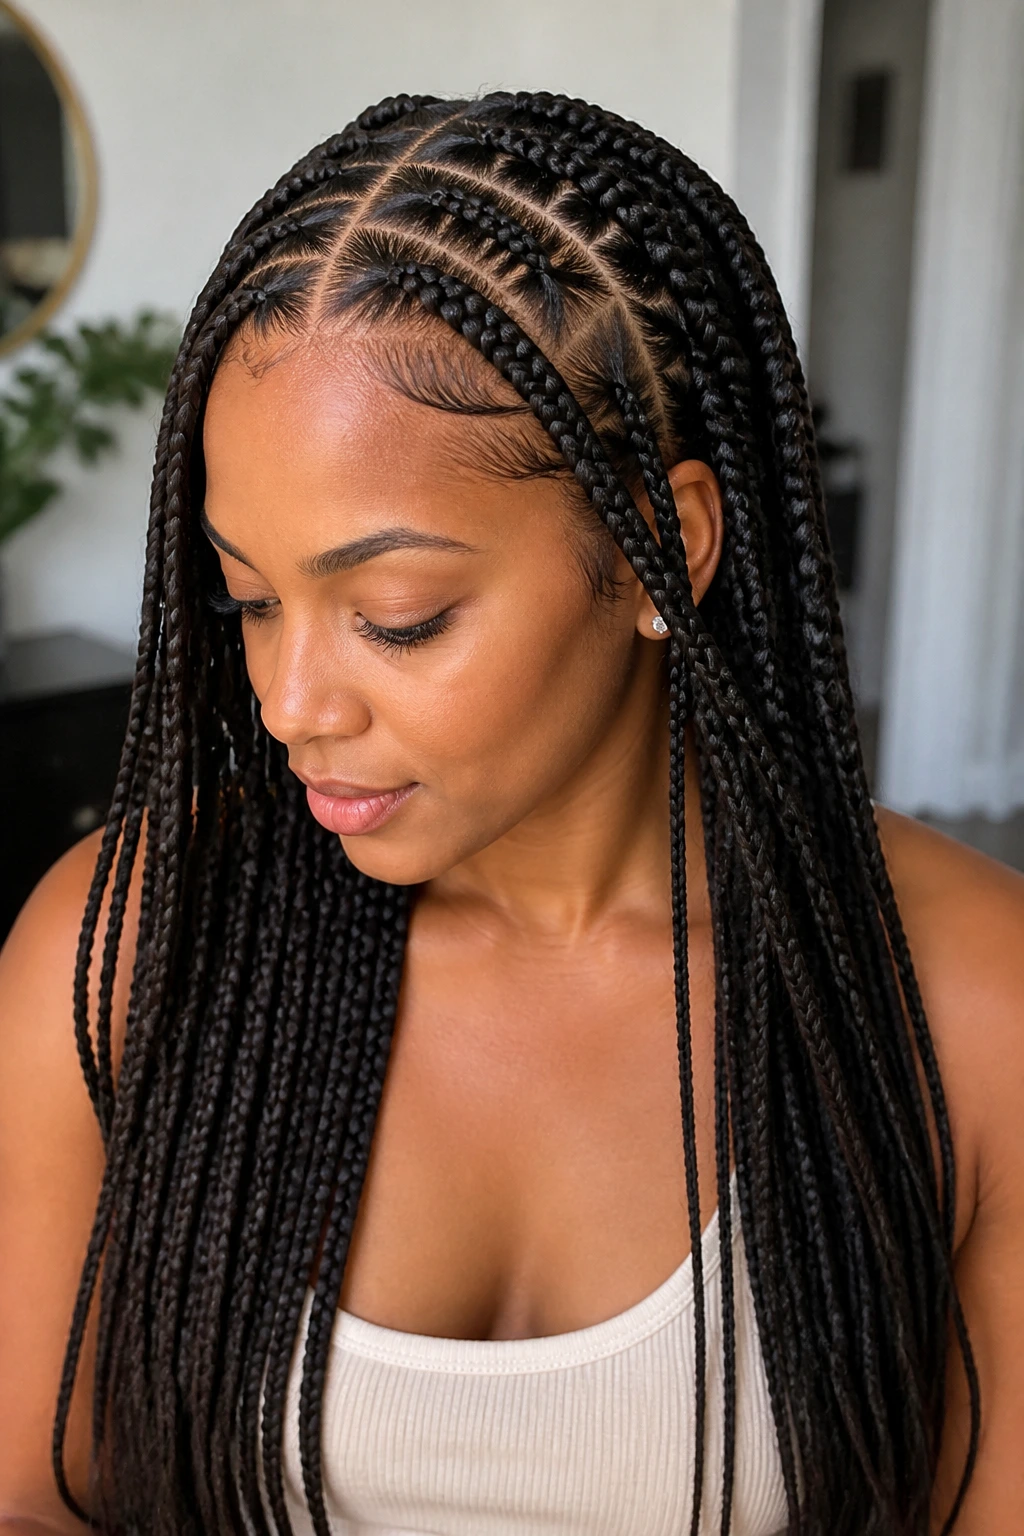
Start with your daily life, not the photo. If you wear glasses, exercise often, or keep your hair tied back most days, medium knotless braids usually land better than huge ones. They sit flatter around the temples and are easier to gather without fighting the base.
Length changes the mood and the strain. Waist-length braids give drama, but they pull more. Bob length or shoulder length is easier on the neck and cleaner for people who don’t want hair touching the back of a chair every ten minutes. If you love long hair but hate heaviness, mid-back is the middle ground I’d pick first.
Parting does more than people think. Center parts feel balanced. Side parts feel softer. Triangle or curved parts turn the braid work into the design itself. If your face is already very angular, a softer part can keep the style from feeling too severe. If your features are rounder, sharper parting lines can add structure. The braid shape and the part shape should talk to each other. When they don’t, the style looks slightly off even if each piece is done well.
Extra Ways to Keep the Finish Clean
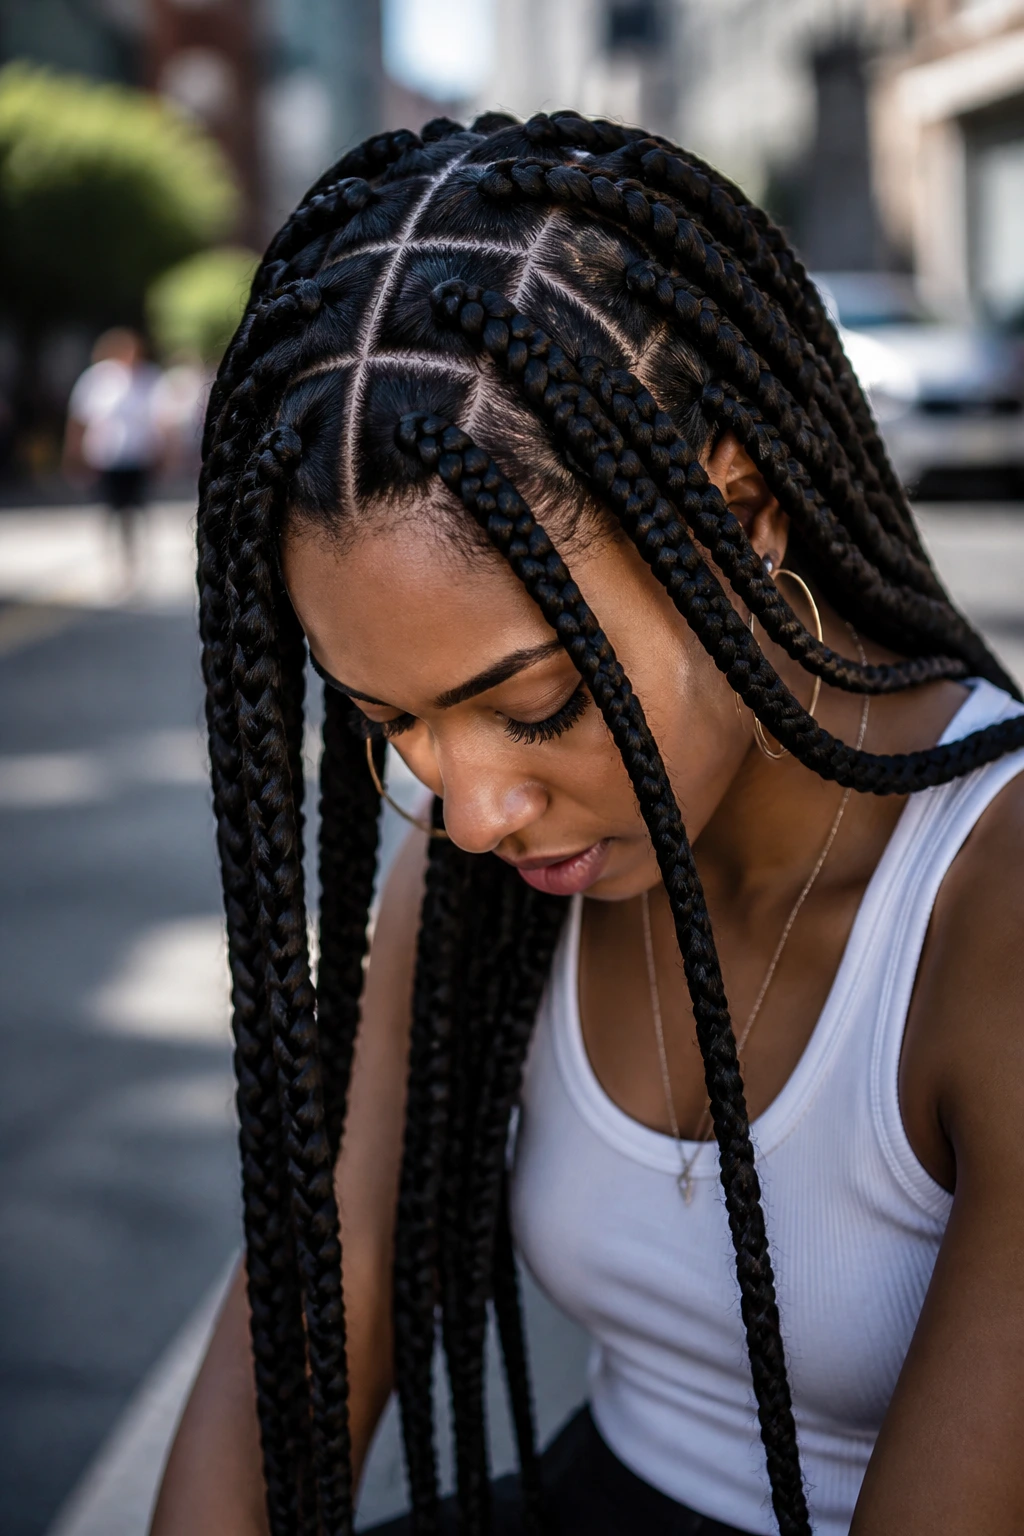
Scalp care: A little oil on the scalp goes a long way. Use a nozzle bottle or dropper so the product lands at the root, not over the braid length. Too much oil makes the parts shiny in the wrong way and collects lint faster.
Surface control: A light foam wrap down the braid surface after installation helps the flyaways settle. Don’t soak the hair. Saturated braids puff up and lose the clean line you paid for.
Accessory restraint: Pick one hero detail. If the style already has curly ends, skip the heavy cuffs. If the braids are ombre, keep the beads or ribbon minimal. One visual idea per style usually looks sharper than three competing ones.
Edge protection: If the front is delicate, ask for slightly fuller braids away from the hairline and gentler tension near the temples. The finished style can still look neat without pulling like it’s auditioning for a tug-of-war.
Common Mistakes to Avoid
Braiding too tightly at the root: If your scalp feels tender before you even leave the chair, that’s not a badge of honor. The fix is simple: ask for less tension at the base, especially around the temples and nape.
Using extensions that are too heavy: Thick hair can look rich and full, but too much weight makes the install sag and pulls at the neck. Match braid size to the amount of hair you’re willing to carry for weeks, not the biggest look on the board.
Skipping prep on your natural hair: Product buildup, tangles, and damp roots all make the braid line less smooth. Wash, detangle, stretch, and dry first. It’s boring. It also saves the style.
Choosing accessories that fight the braid: Heavy beads on tiny braids or too many cuffs on thin sections can tug the shape off balance. Keep the decoration proportional to the braid size.
Letting curls or ends go unchecked: Curly finishes need refreshing; they don’t stay tidy on their own. If you want the style to hold, plan on mousse, a scarf, and a quick reset now and then.
Variations and Adaptations to Try
The Minimalist Set: Pick medium knotless braids, a center part, and no accessories. This version works when you want the cleanest line possible and don’t want to think about matching jewelry or outfit color.
The Soft Glam Set: Add curly ends, a few gold cuffs, and a side part. It keeps the braid base neat while giving the lengths a softer finish that moves well in photos and in real life.
The Lightweight Everyday Set: Go for shoulder-length or mid-back braids with a smaller braid size than jumbo but larger than micro. This is the version I’d choose for long wear, easier sleeping, and less neck strain.
The Color Shift Set: Use ombre extensions or a few highlighted streaks through the length. Keep the root close to your natural shade so the grow-out stays quiet and the style keeps its polished look longer.
The Event-Ready Set: Choose a braided bun, half-up style, or high ponytail with one accessory focal point. It reads more dressed up without needing a full re-install or extra heat.
Night Care, Washing, and Freshening Up
A satin bonnet or scarf should go on every night. No excuses. It keeps friction down, protects the parting, and helps the braid surface stay smoother for longer. If your hair is long enough to get crushed under the bonnet, use a large one or wrap the braids into a low tie first.
Wash the scalp when it needs it, not when the style is already irritated. For most people, a gentle cleanse every 1 to 2 weeks works better than waiting until the roots feel sticky. Focus shampoo on the scalp in diluted form, let it rinse through the lengths, and dry the braids fully afterward. Wet braids hiding under a scarf are how mildew starts. Nobody wants that.
Freshening the style is more about touch-ups than reinvention. A little mousse on the surface, a clean-up of the parting line, and a light oil at the scalp can bring the style back to life. If the front starts getting fuzzy, that’s normal. If the roots are slipping or the hairline feels sore, the style needs a serious reset or a takedown, not more product.
Frequently Asked Questions
How long do knotless braids usually last?
Most installs look tidy for several weeks, but the cleanest stretch is usually the first part of the wear. The exact timing depends on braid size, hair growth, and how well you wrap it at night, yet the style starts looking softer as soon as new growth comes in.
Are knotless braids better for tender edges?
They can be, because the feed-in start usually reduces pressure at the root. That said, a knotless braid can still be too tight if the installation is rushed or the braids are too heavy near the hairline.
Can I wash knotless braids without ruining them?
Yes, if you keep the shampoo focused on the scalp and dry the braids fully afterward. Use diluted shampoo, squeeze the lengths gently, and avoid rough towel rubbing, which turns the surface fuzzy fast.
What braid size is easiest to manage every day?
Medium knotless braids are the sweet spot for a lot of people. They’re not so tiny that they take forever, and not so large that they feel heavy or look bulky when pulled back.
Do knotless braids work on short natural hair?
They can, as long as the braider can build enough grip at the root and the hair is properly prepped. Very short hair may need more careful sectioning and a skilled hand, so the length of your natural hair matters more than people admit.
Can I wear knotless braids in a ponytail or bun?
Yes, but the install should be planned with that in mind. If you know you’ll wear high styles often, avoid extra-heavy braids at the front and ask for a base that can handle being gathered without pulling.
What do I do if the roots start frizzing early?
A light mousse and a scarf can smooth the surface, but frizz at the roots is also a sign that the style is aging. If the braids still sit well, freshening may help; if the parts have lost shape, it’s probably time to restyle or take them down.
Can I add accessories after the install?
Absolutely, and sometimes that’s smarter than loading everything on from day one. Add cuffs, beads, or ribbon after you’ve lived with the style for a bit, so you can see where the hair actually sits and where an accessory will look balanced.
A Clean Finish That Still Feels Light
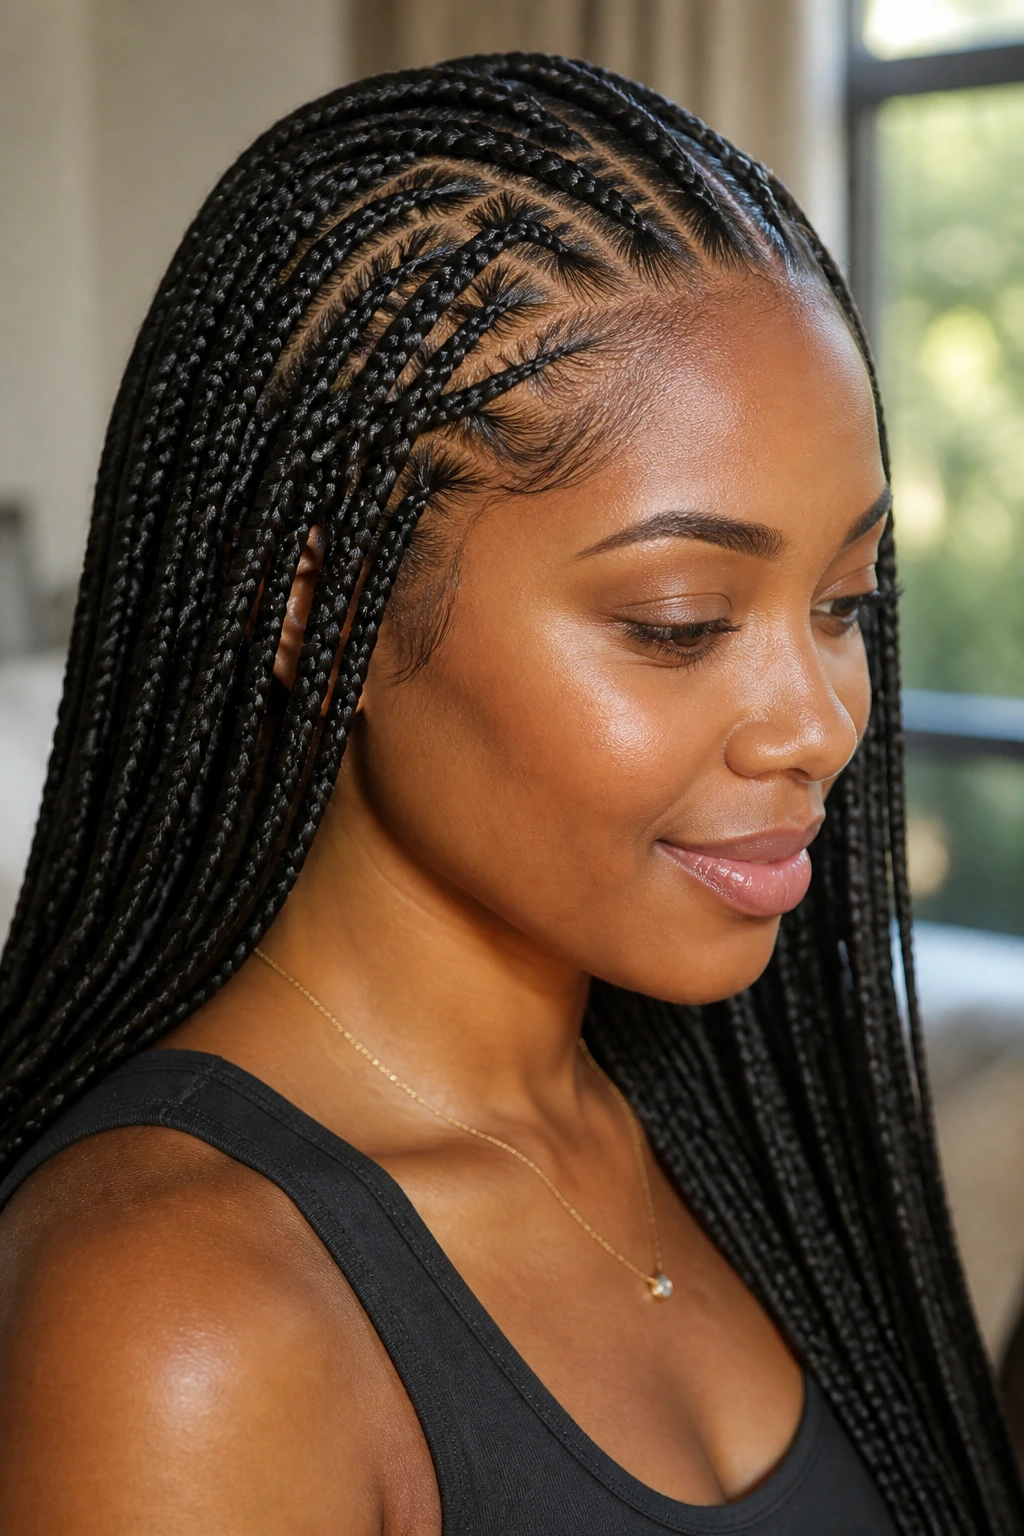
The best knotless braid styles are the ones that look considered from the first braid to the last end. Not overloaded. Not over-tight. Just clean parting, smart sizing, and a finish that still feels wearable after the novelty wears off.
Pick the version that fits your routine first, then layer in the details—length, color, curls, cuffs, or a sharp part—once the base makes sense. That’s how knotless braids stay polished instead of becoming a week-long regret.
