



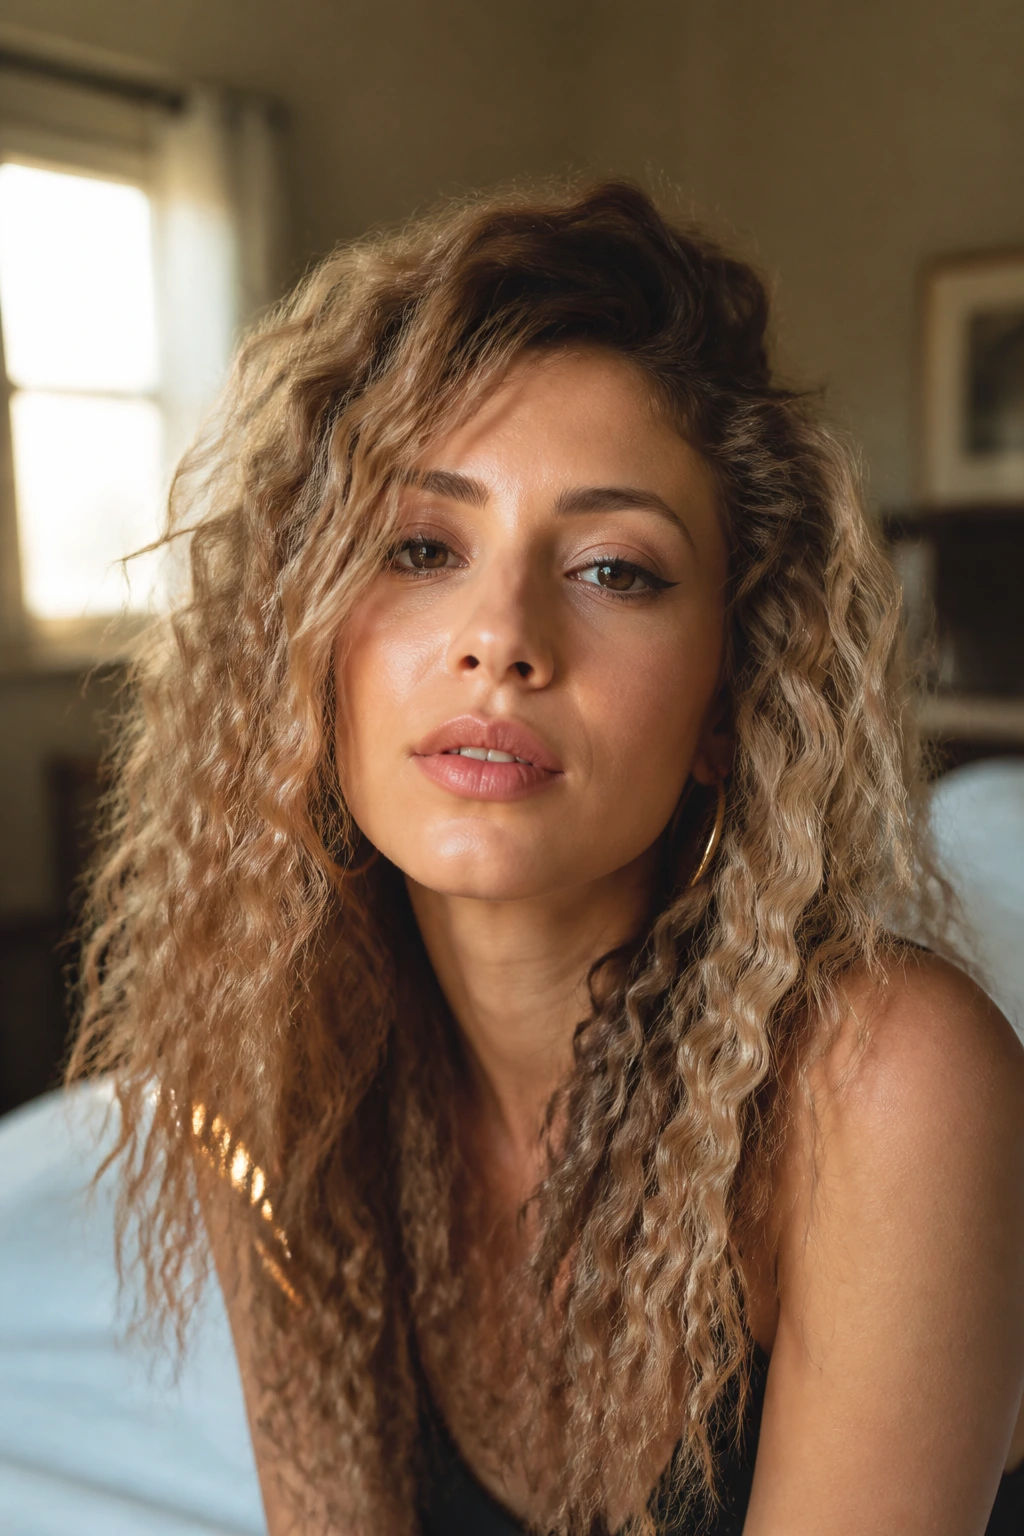
Crimped hair has a strange habit of making flat lengths look fuller, sharper, and a little bit dangerous in the best way. Retro crimped hair looks for women are not one single style so much as a whole family of texture choices: tight zigzags, brushed-out waves, pin-straight roots with ridged ends, full-on 80s volume, or a tiny crimp hidden under a smooth top layer. Get the placement right and the style feels intentional. Put it everywhere without a plan and it can tip into costume territory fast.
The old version many people remember was crunchy, hot, and a bit overworked. That’s the part people complain about, and fair enough. But a cleaner crimp, done with sectioning clips, heat protectant, and a little restraint around the ends, has a completely different feel. It gives fine hair grip. It makes balayage read more clearly. And on long hair, it keeps the shape from collapsing into one bland sheet.
What matters most is where the ridges live. All-over crimping gives you drama. Crimping just the crown changes the silhouette. Crimping the underlayer gives you secret texture that only shows when you move. That’s where the fun starts.
Why Retro Crimped Hair Still Earns Space
-
It builds volume without teasing: The zigzag pattern makes hair stand away from itself, so even fine strands look denser at the crown and through the mid-lengths.
-
It shows off color work: Highlights, balayage, copper ribbons, and lowlights all catch light differently across the ridges, which makes the color placement easier to see.
-
It can be loud or subtle: A full-head crimp is pure statement hair, while a few face-framing pieces or crimped ends stay much calmer.
-
It holds accessories well: Barrettes, ribbons, clips, and pins grip textured hair better than glassy straight hair, which matters if you like to pile on extras.
-
It behaves on day-two hair: Slightly lived-in hair usually takes the crimp better than squeaky-clean lengths, so this is one of those rare styles that forgives real life.
1. Full-Head Zigzag Crimp with a Deep Side Part
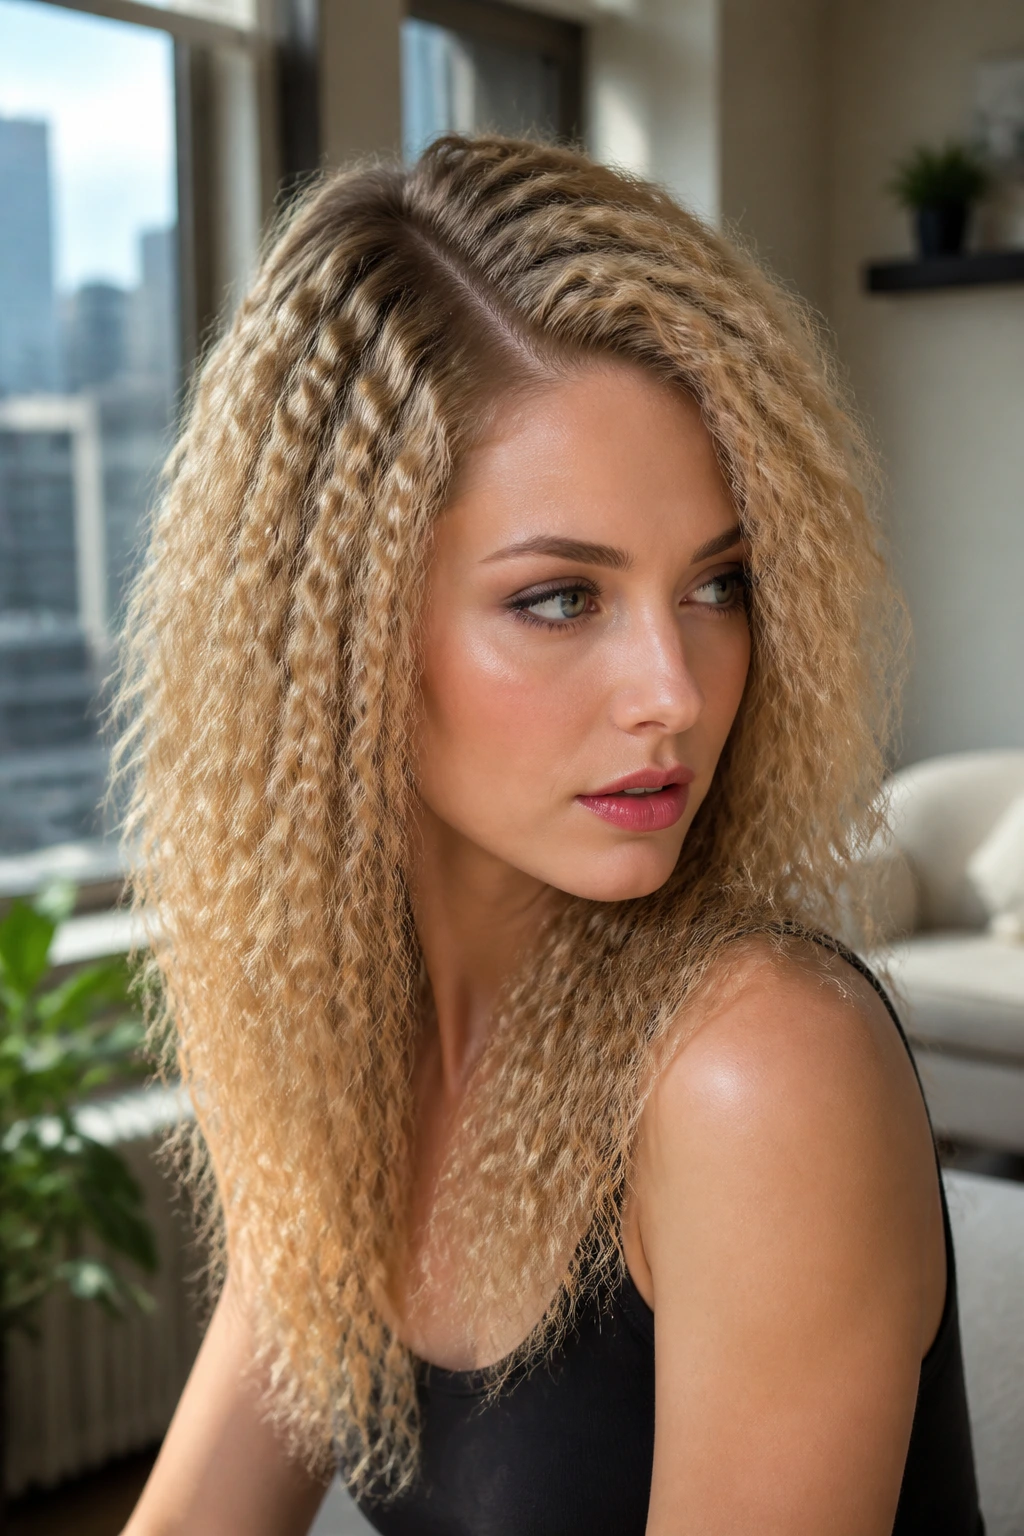
A full-head crimp is the loudest version, and I mean that as a compliment. On medium to long hair, the deep side part stops the texture from looking blocky and gives the whole shape some swing when you turn your head.
Why it works
The deep part creates height on one side, which keeps the zigzags from turning into one giant textured rectangle. If your hair is fine, this style can make it look like you’ve got twice as much of it. If your hair is thick, the side part keeps the bulk from spreading evenly and flattening your face shape.
Quick styling note
- Crimp in 1-inch sections for a clear pattern.
- Stop about 1 inch from the scalp if you want the part to stay neat.
- Finish with a light mist of flexible hairspray, not a shell.
Best tip: Let each section cool in your hand for a few seconds before you move on. Hot ridges flatten if you touch them too soon.
2. Half-Up Crimp Crown
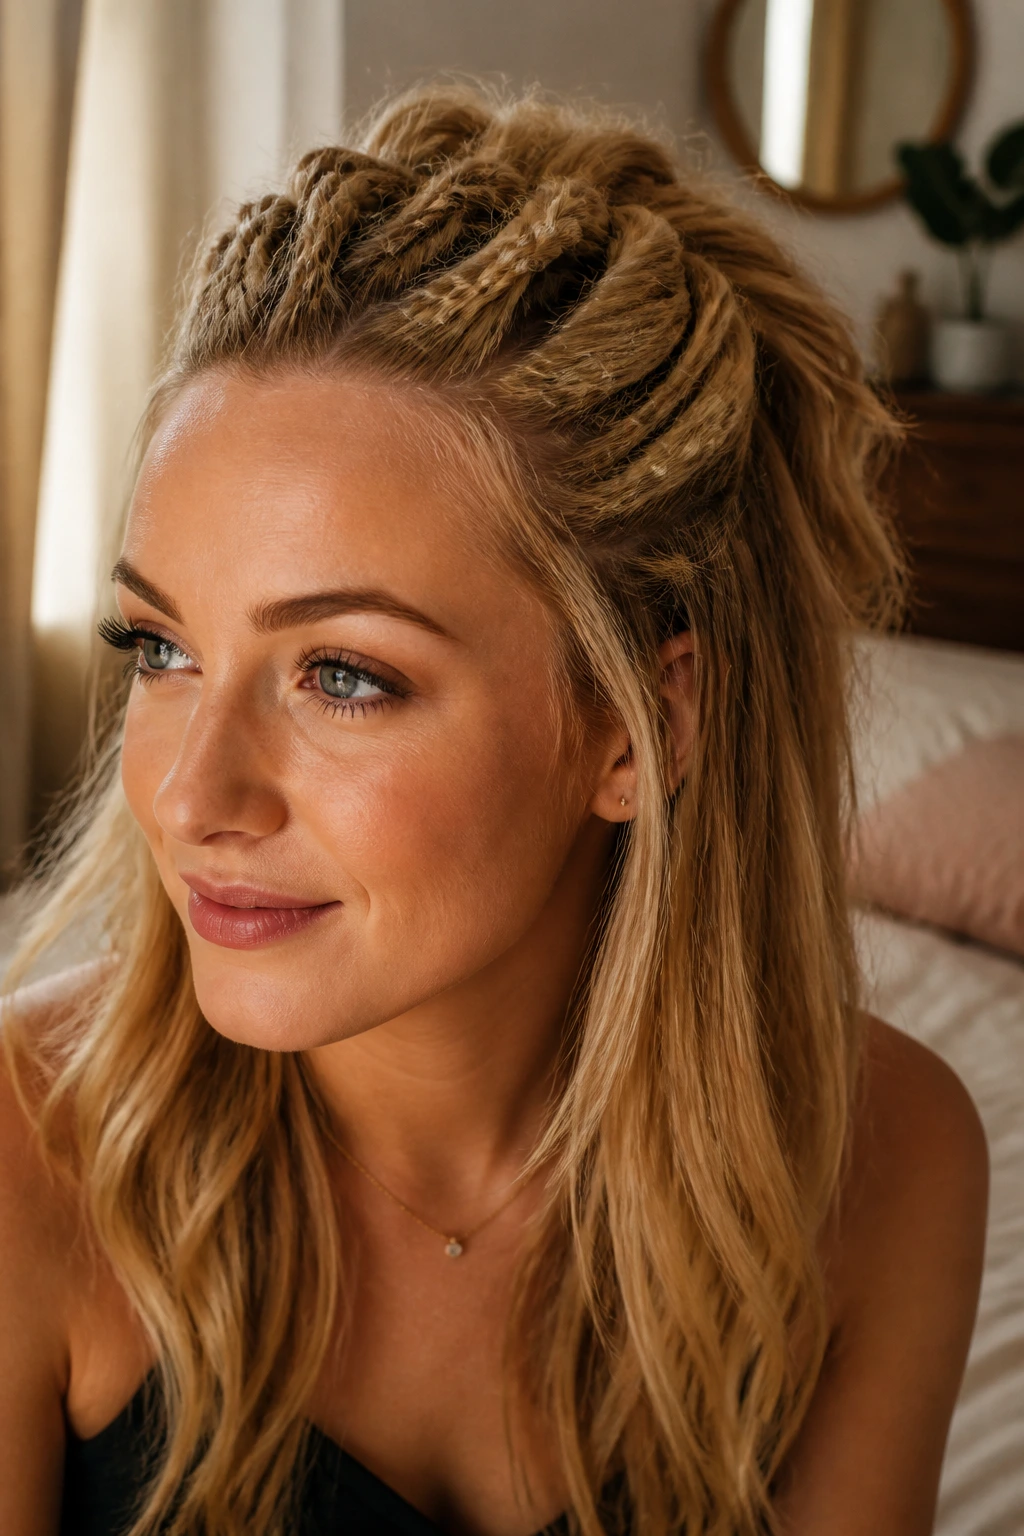
Want the top to look dressed up while the ends stay calm? This is the one. A half-up crimp crown gives you texture around the head and leaves enough smooth length below to keep the style from feeling heavy.
The trick is placement. Crimp the top half from temples back to the crown, then pull that section into a small knot, clip, or half pony. Leave the bottom layers straight or softly waved. The contrast is what makes it work. All texture, no fuss.
This is also one of the easiest ways to make crimping feel less retro-costume and more wearable. The smooth lower half gives your eye a place to rest. And if you have balayage, the crimped top catches the lighter pieces near your face while the rest stays sleek.
3. Crimped High Ponytail
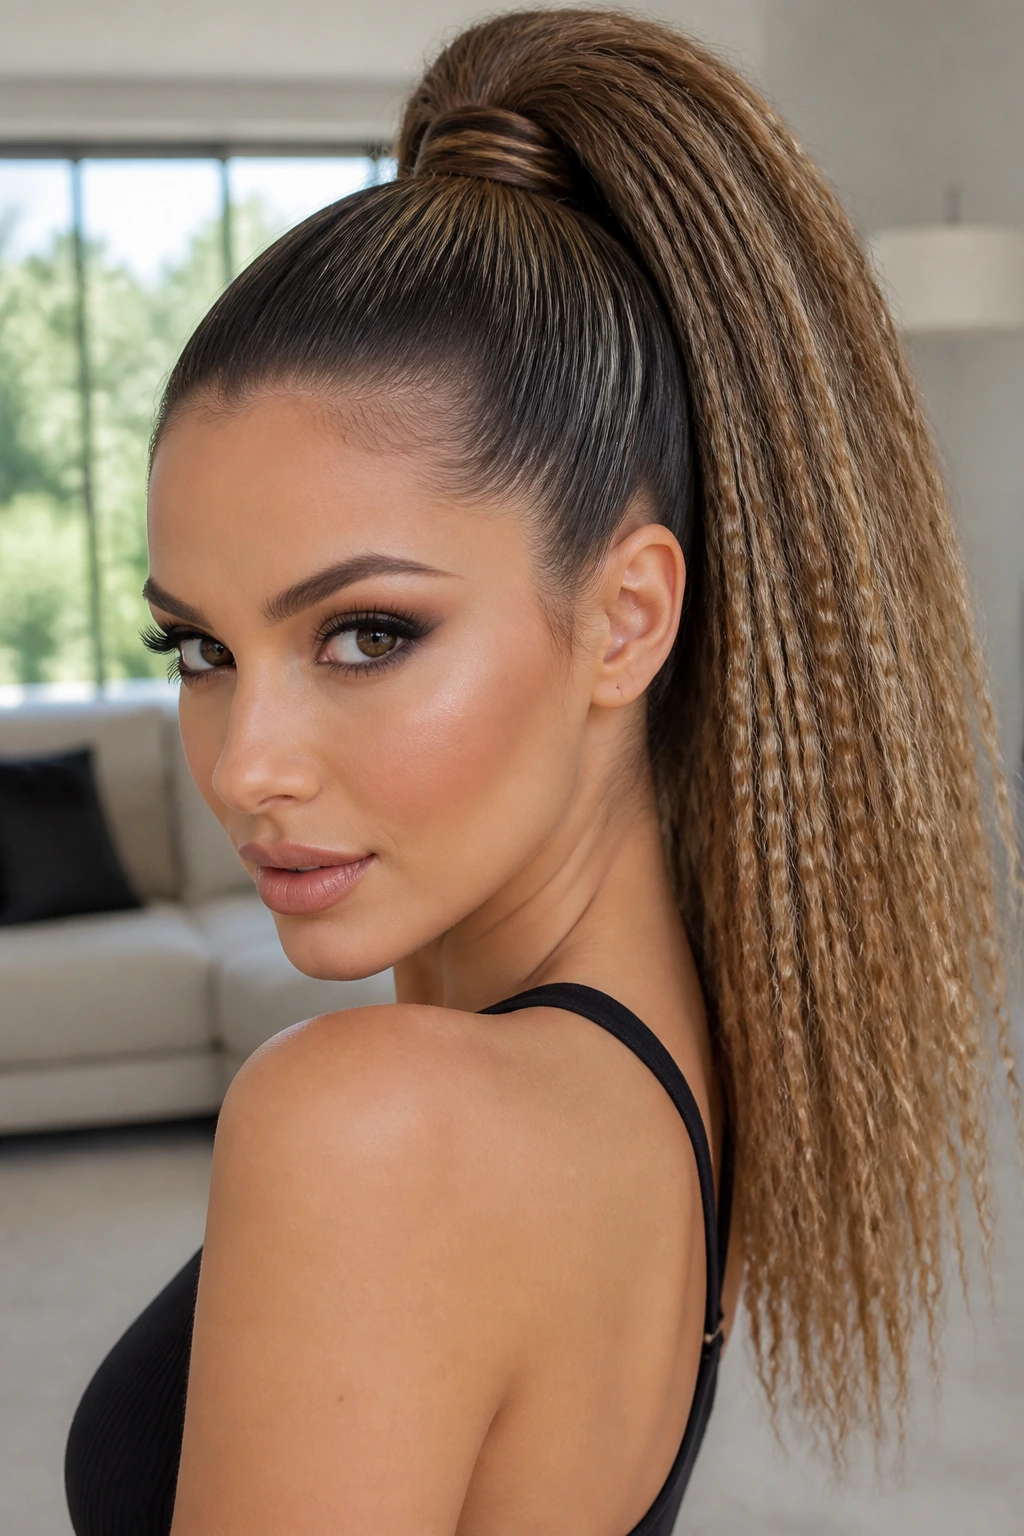
A high ponytail with crimped lengths has a sort of bratty polish that I like a lot. The roots stay smooth, the tail gets all the texture, and the result looks cleaner than a fully crimped head of hair.
Pull the pony tight at the crown, wrap a small strand around the elastic, then crimp the tail in sections after it’s secured. That order matters. If you crimp first and tie later, the ridges get flattened at the base and you lose the shape where it counts.
This version works especially well on longer hair because the ponytail sways instead of hanging dead straight. If you’ve got color dimension, the movement shows it off from every angle.
4. Face-Framing Crimp Strips
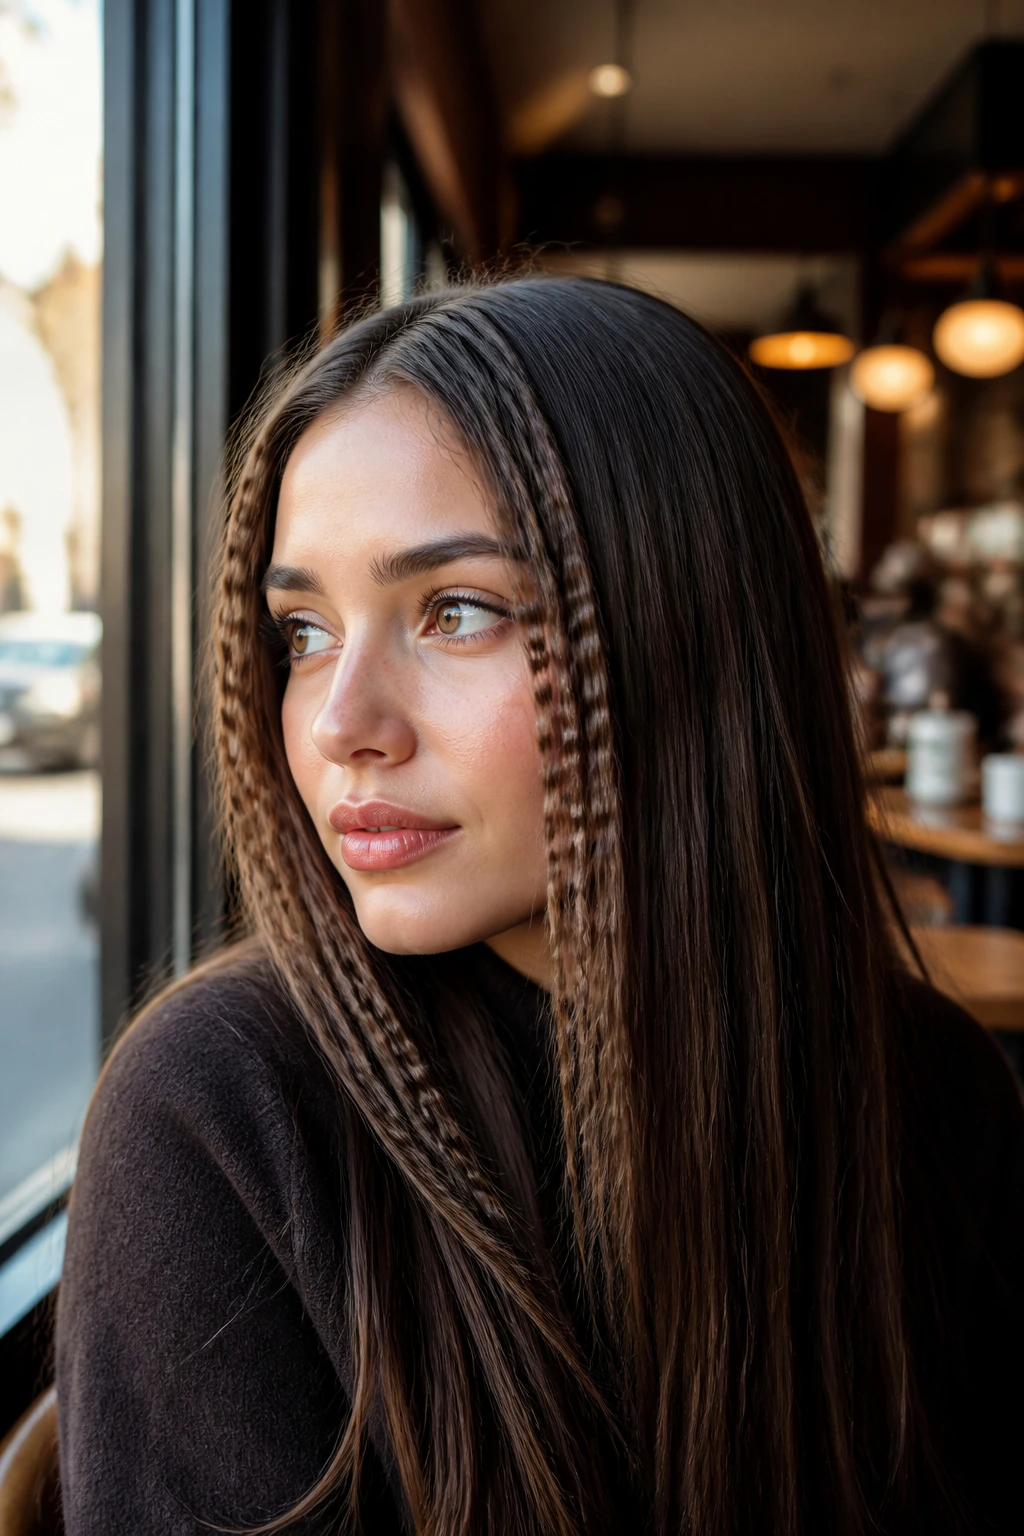
This one is for people who want the joke without telling the whole joke. Crimp just the pieces that fall beside the face, and keep the rest smooth.
The style works because those front strips sit in the line of sight. Even two narrow crimped panels can change the whole mood of a blunt cut or layered lob. If the hair is dark, the texture reads as edgy. If it’s blonde or highlighted, the ridges catch the light and the front sections look thicker than they really are.
How to wear it
- Crimp pieces no wider than 3/4 inch.
- Leave the crown smooth.
- Tuck one side behind the ear if you want the texture to feel less busy.
A tiny crimp can be enough. Seriously.
5. Crimped Bob with Blunt Ends
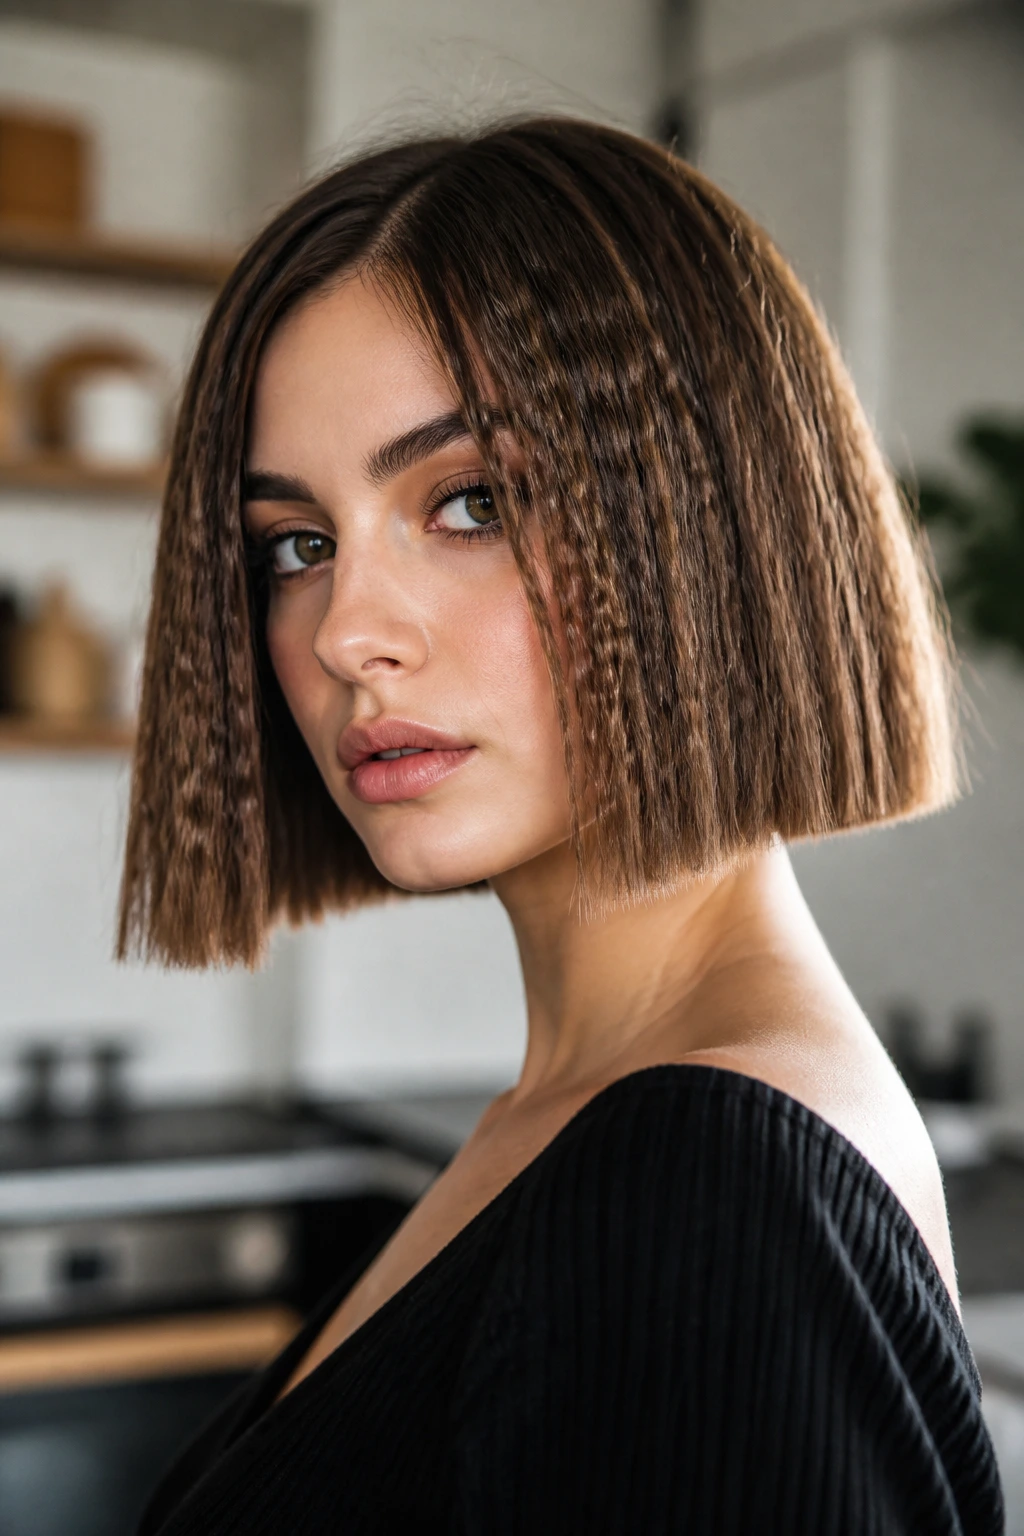
A bob can go too cute too fast if you texture the wrong part. Crimping the body of a blunt bob, while leaving the ends crisp and clean, keeps it sharp instead of fuzzy.
That hard line at the bottom is the whole point. If the ends are crimped too, the cut can puff out and lose its shape. But if the texture starts mid-length and stops short of the hemline, the bob looks fuller and the edge stays obvious.
This is one of my favorite versions for shorter hair because it proves crimping is not only for long layers and festival looks. It can be neat. Even a little architectural.
6. Crimped Ends Only
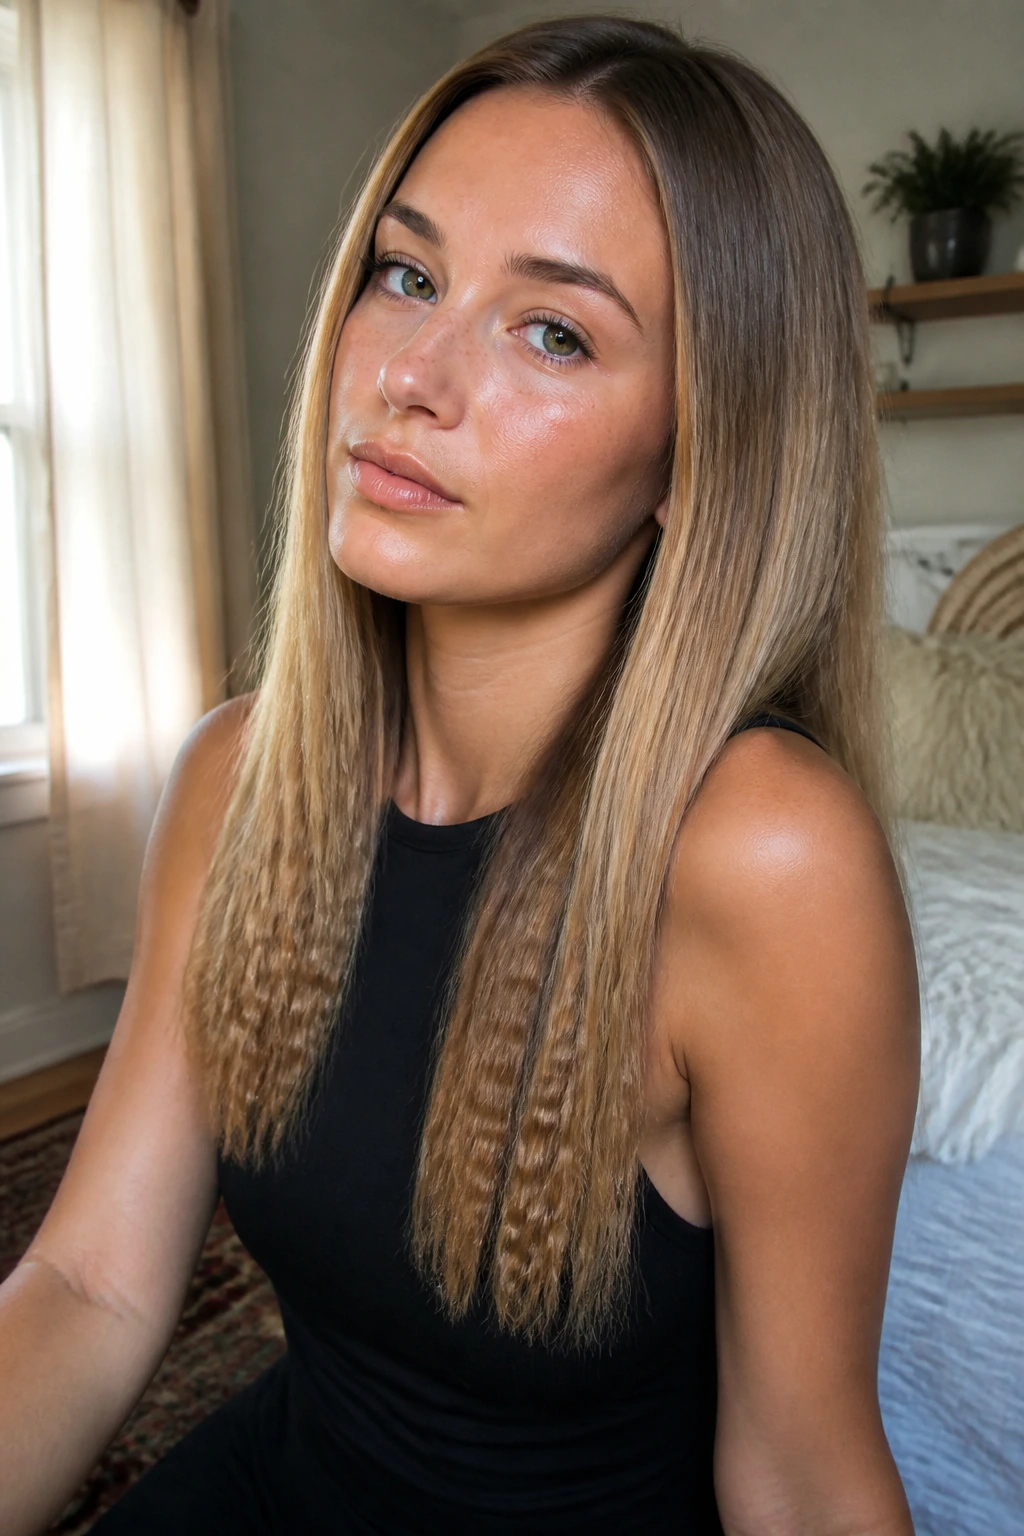
Sometimes the smartest choice is also the laziest one, and I mean that kindly. Crimping only the last few inches gives long hair a nudge of texture without turning the whole head into a zigzag field.
It’s a nice move for straight, heavy hair that tends to hang flat at the ends. A small crimp on the bottom third adds movement and makes the shape seem more alive. Keep the upper lengths smooth, especially if your hair has highlights or balayage; the contrast makes the lighter ends stand out.
This style is also easier to brush out later. If you’re nervous about going all in, start here.
7. Deep Side-Part Power Crimp
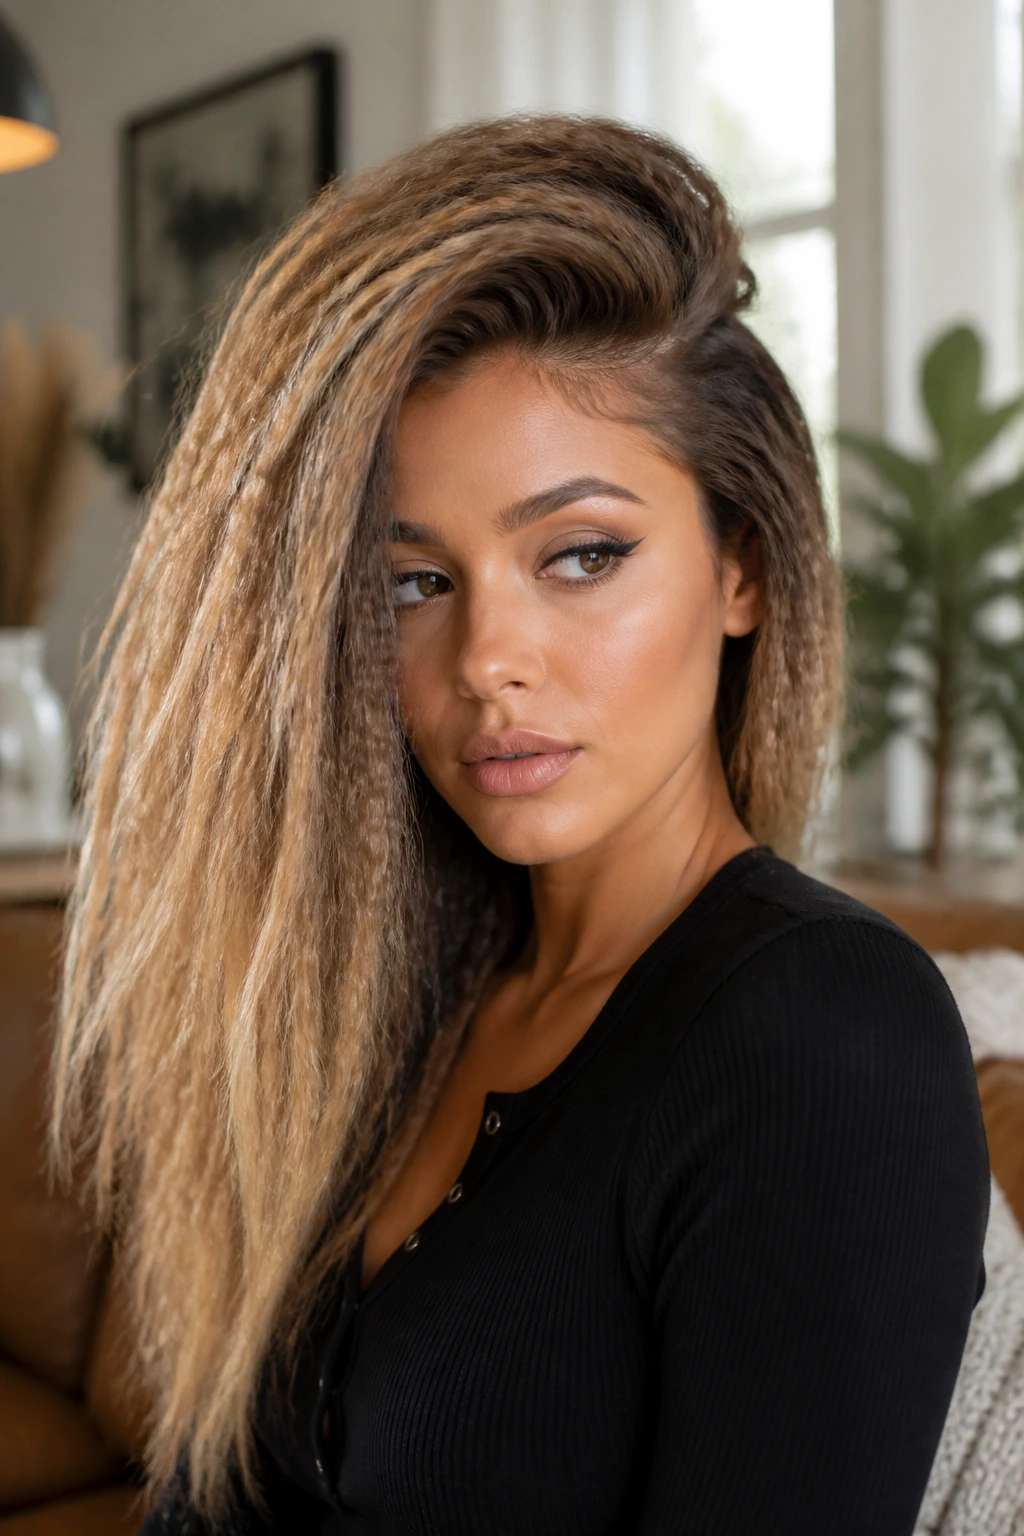
A side part changes crimped hair more than people expect. With a center part, the pattern can read symmetrical and strict. With a deep side part, the same texture suddenly feels bigger and a little more glamorous.
I’d use this on medium to thick hair that needs lift at the roots. Crimp the sections away from the face, then sweep the heavier side over one shoulder. You get volume near the part, a flattering angle around the cheekbones, and enough movement that the style doesn’t sit there like a helmet.
If your hair is long, this is one of the best ways to keep a full-head crimp from feeling too heavy.
8. Brushed-Out 80s Crimp Blowout
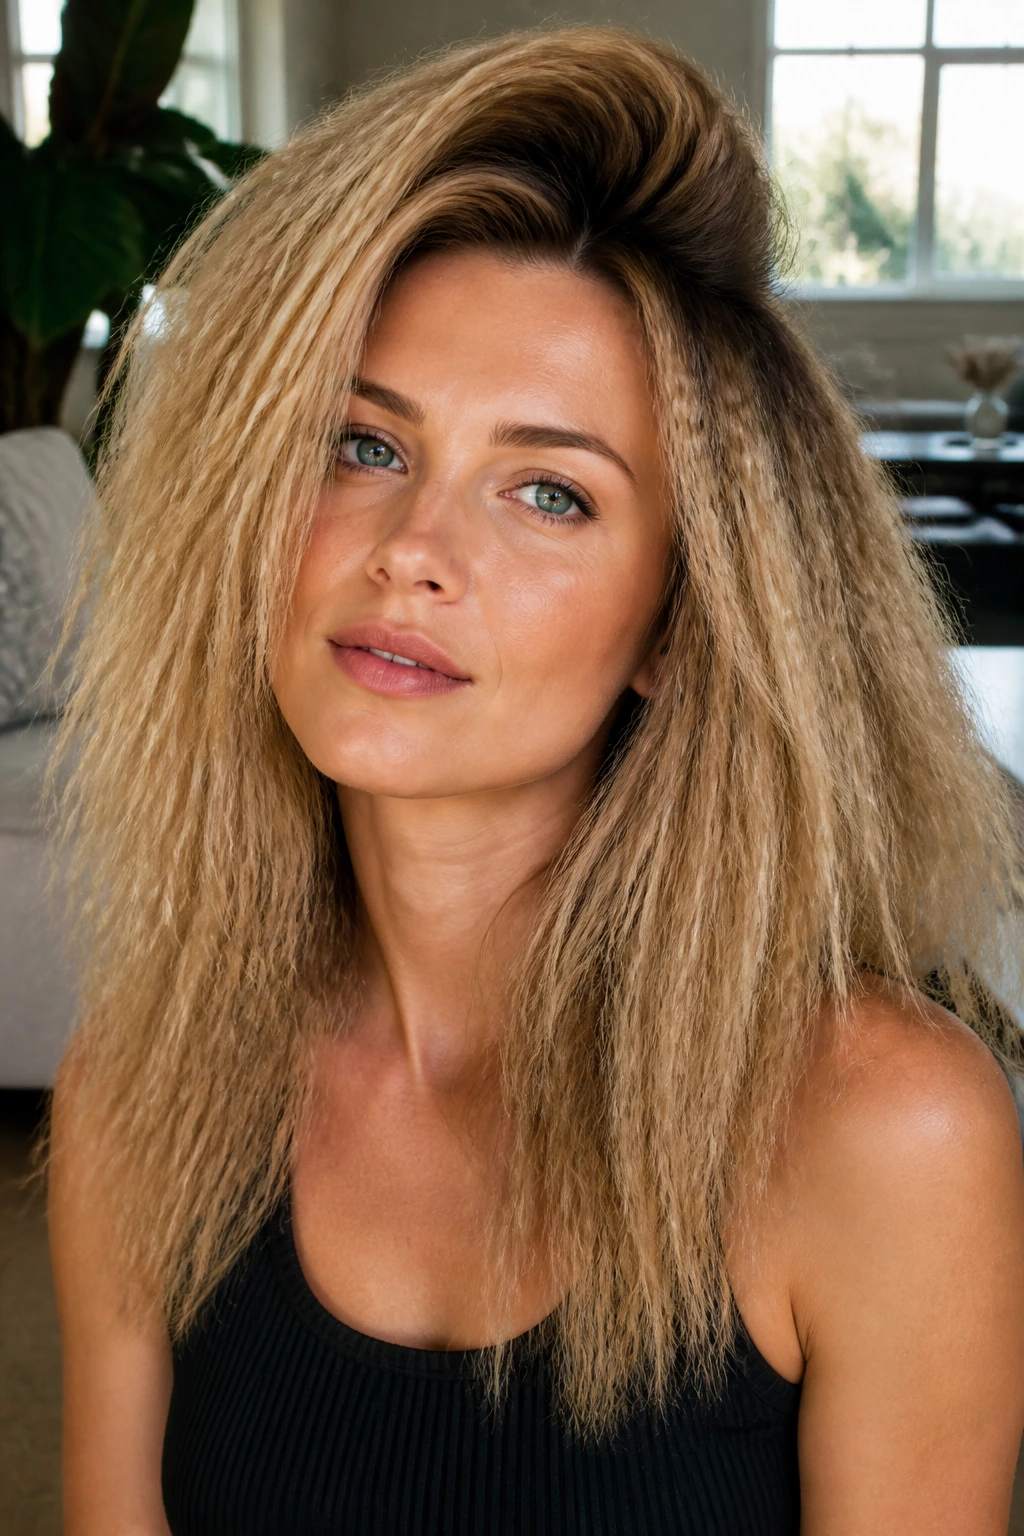
This is the version for people who love volume but not the hard zigzag look. You crimp the hair, let it cool, then brush it out with a paddle brush or your fingers until the ridges soften into a big, cloudier shape.
What to watch for
The brush is doing a lot here, so stop before the hair turns into frizz. You want a soft, airy pattern, not a puffball. A little shine spray on the outer layer keeps the finish from looking dusty.
Brushed-out crimp works best on layered cuts. The layers keep the volume from turning boxy, and the soft collapse of the ridges gives the style a very specific 80s-feeling lift. Not sleek. Not neat. Deliberately big.
9. Crimped Hair with Curtain Bangs
Curtain bangs and crimped lengths live in different moods, which is exactly why they work together. Keep the bangs smooth and bendy, then crimp everything below the cheekbones.
That contrast matters. If the bangs are crimped too, the face can start to look crowded. But smooth bangs against textured lengths create a nice frame and keep the style from swallowing your features. It’s a good choice if you want retro energy without losing softness around the eyes.
On balayaged hair, this version is especially useful. The bangs stay tidy, while the crimped layers underneath show off the color melt.
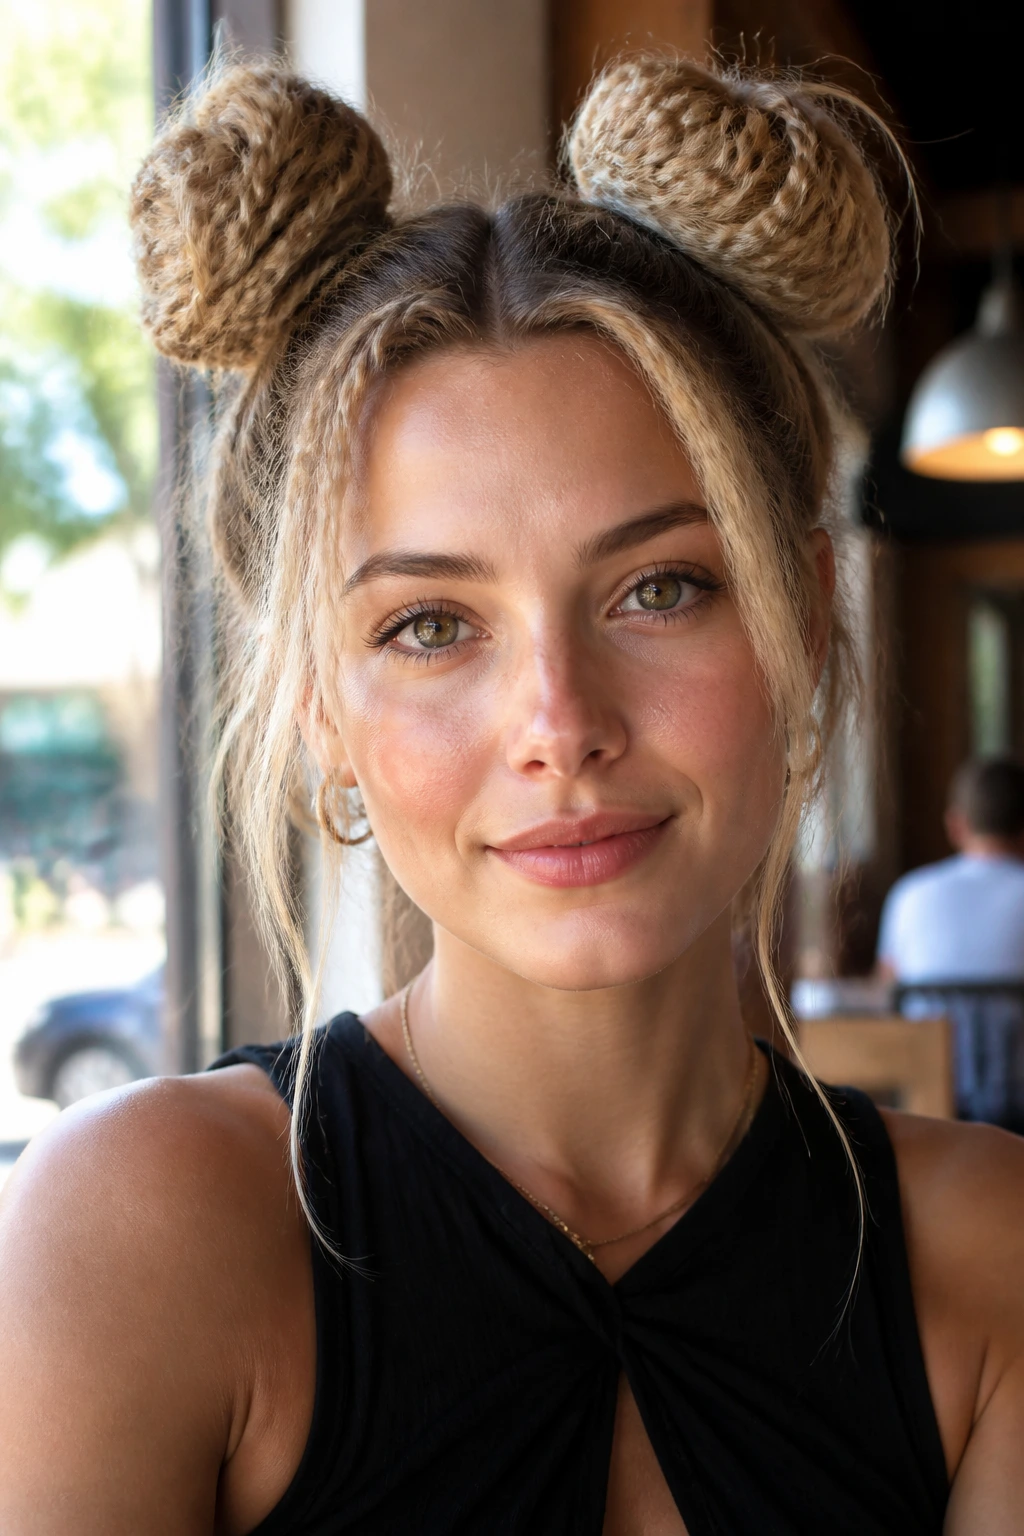
10. Crimped Space Buns
Space buns love texture. A crimped base makes the buns look fuller, and the leftover lengths around the neck or temples can stay loose and piecey.
I’d do this with medium-length hair first, because the ridges make the buns feel thicker than they are. Crimp the whole head or just the top half, split the hair into two high sections, and twist each side into a bun. The texture helps the buns hold their shape without a ton of pins.
This one leans playful, obviously. But it can look sharper than you’d think if you keep the part clean and leave a few face-framing strands out.
11. Wet-Look Crimp
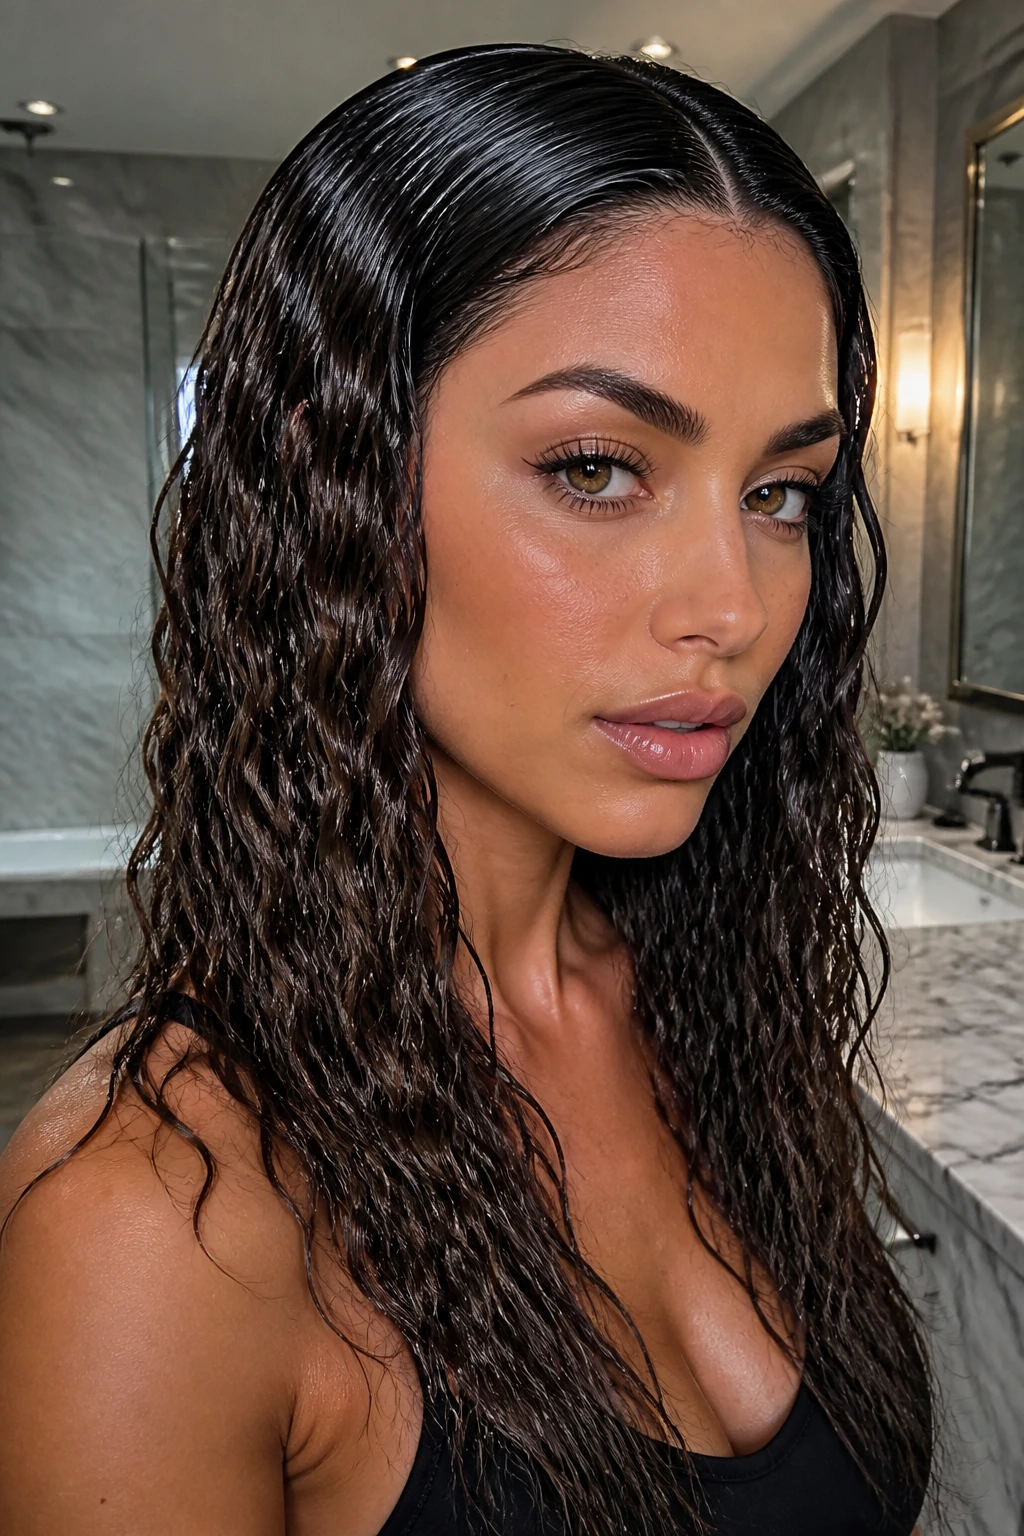
Wet-looking crimp sounds contradictory, and that’s why it stands out. You’re not aiming for actual wet hair. You’re aiming for a slick, shiny root area and defined ridges through the lengths.
Use gel or a lightweight styling cream near the scalp, then crimp the mid-lengths and ends. The texture should feel crisp, almost sculpted, while the crown stays glossy and controlled. It works especially well with darker shades, where shine reads more clearly and the texture feels sharp instead of fluffy.
If you’ve got highlights, keep the product light. Too much shine on blonde pieces can make them clump in a bad way.
12. Balayage-Boost Crimp
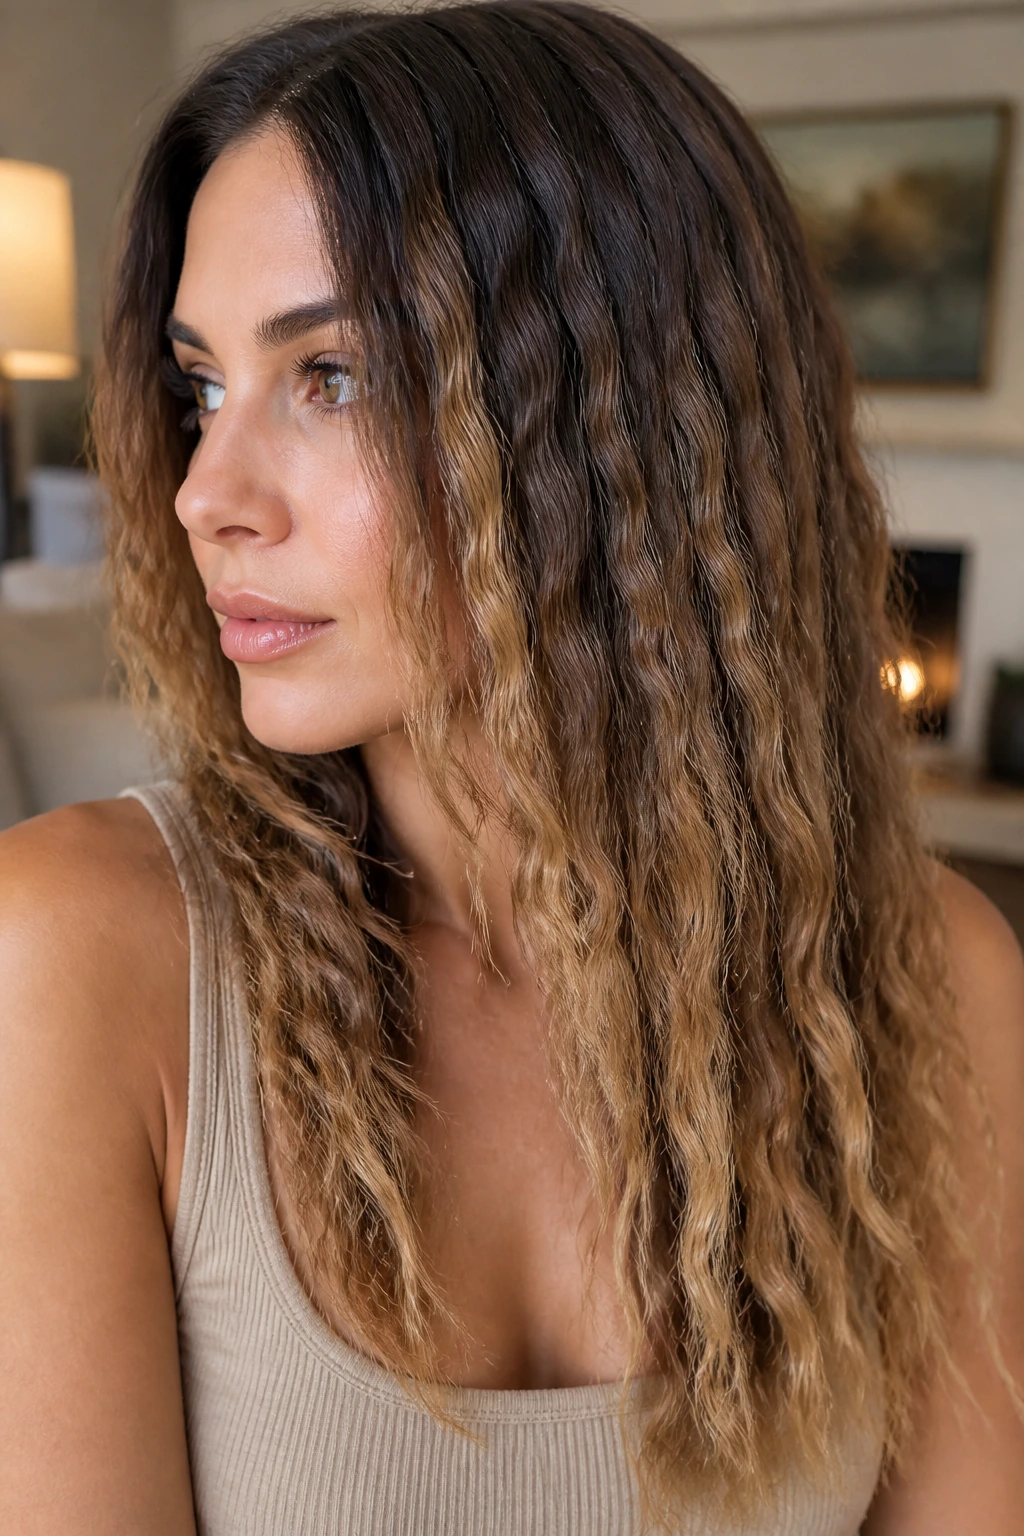
This is where crimping and color really start talking to each other. The ridge pattern makes balayage stripes more obvious because the light hits each bend at a slightly different angle.
Keep the crimp soft enough that the color still reads as blended. Wide sections, not tiny ones. If you’re working with caramel, honey, or ash-blonde ribbons, crimping mid-lengths to ends creates a bit of sparkle without making the blend look harsh. On darker roots, the contrast gets even better.
This is the kind of style that makes colored hair look intentional on a day when you don’t want to do much else. That’s the value.
13. Crimped Braided Pigtails
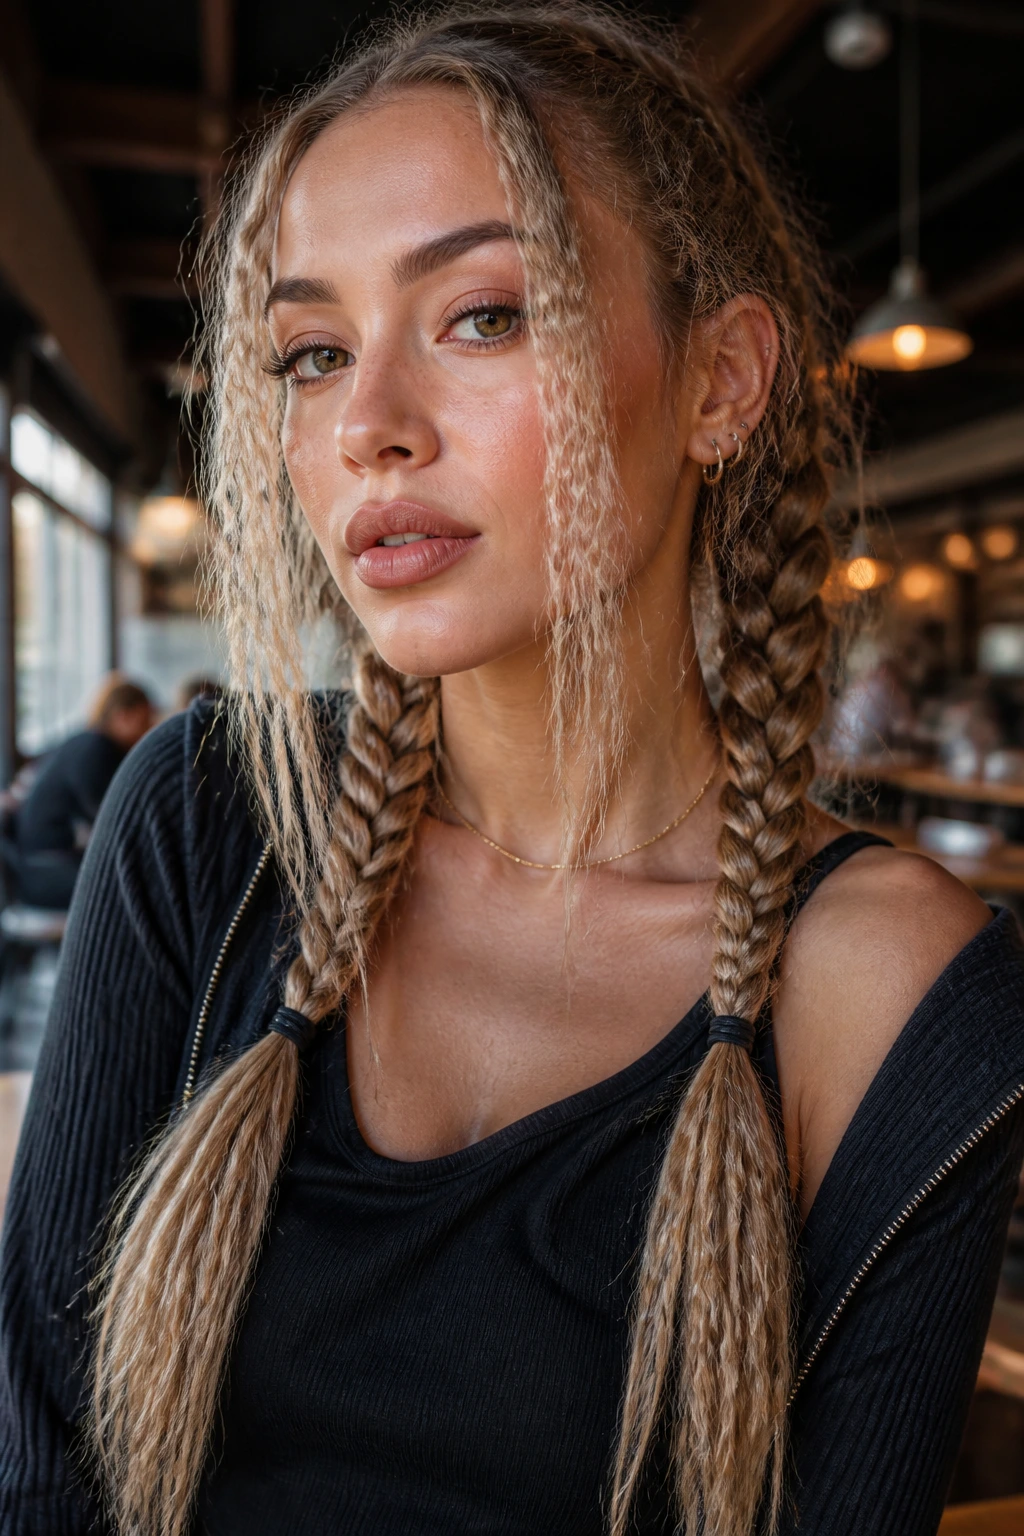
Braids and crimping shouldn’t work this nicely together, but they do. The braid gives structure. The crimped pieces around it add grit.
Try two low pigtails or two high ones, then crimp the loose hair before you braid it, or crimp only the tails after braiding if you want a cleaner base. The result has a little schoolgirl energy, sure, but it reads more fashion-forward when the texture is tight and the part is sharp.
A satin ribbon tied at the base can soften the whole thing without taking away the edge.
14. Loose Mermaid Crimp
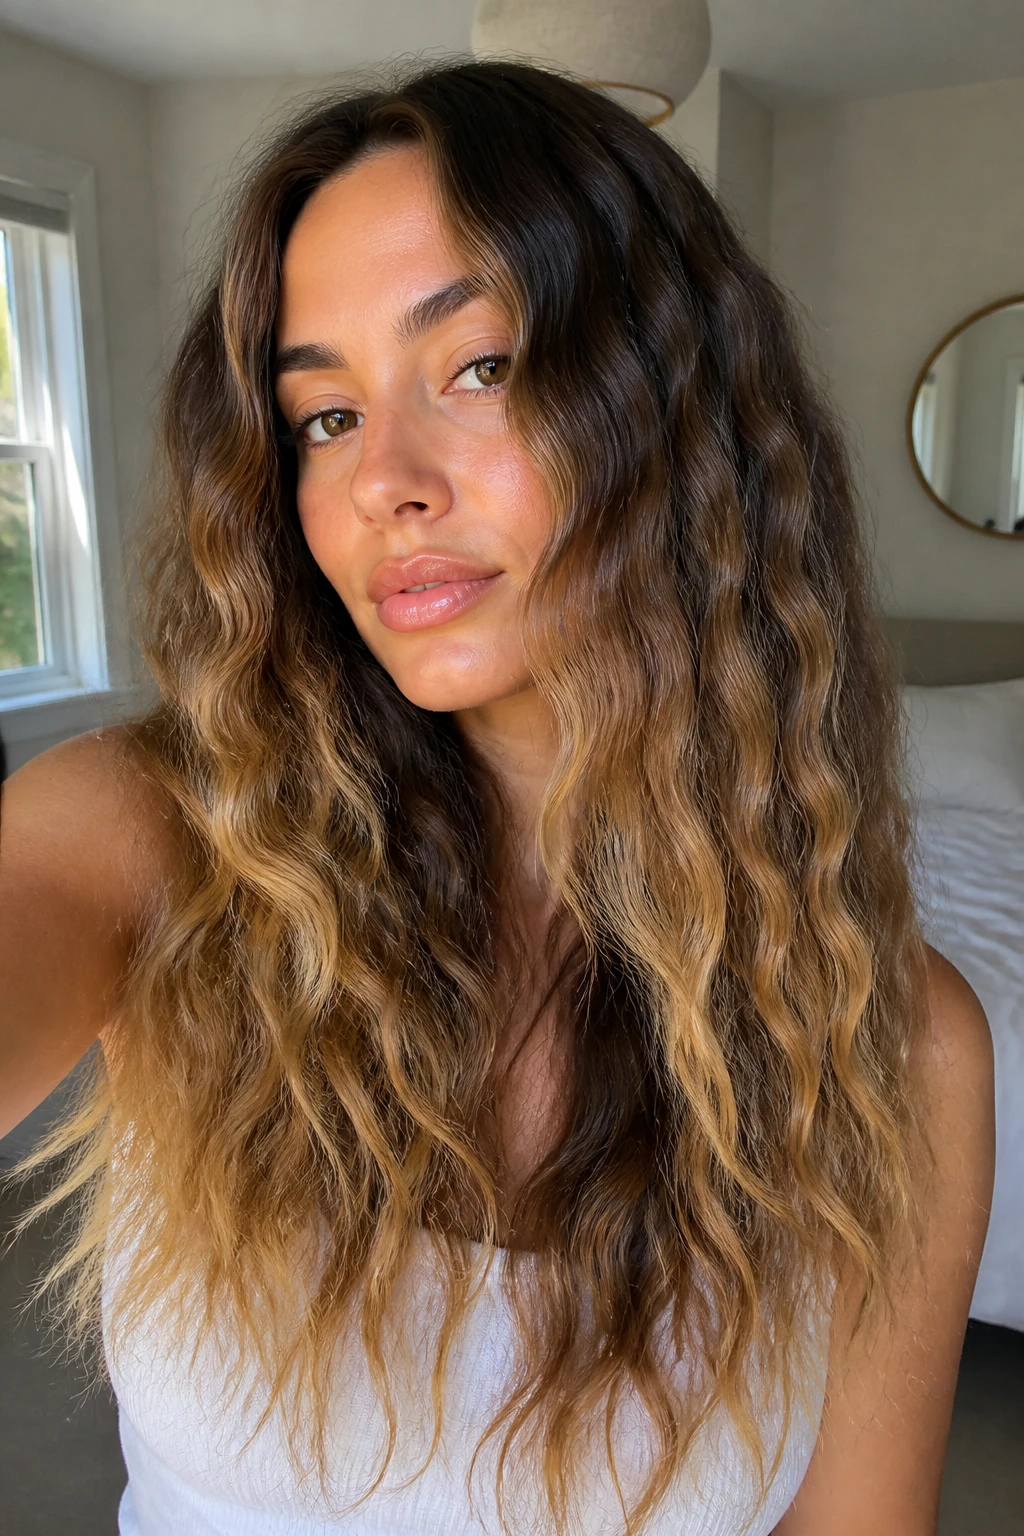
If the tight zigzag feels too hard, this is your softer lane. Use wider plates or a larger crimper, and aim for a longer, looser wave pattern that still shows texture.
The beauty of this version is movement. The hair doesn’t sit in stiff ridges; it bends in broader ripples, which looks good on long layers and chest-length cuts. It also plays nicely with ombré and balayage because the color sweep stays visible, not chopped into tiny segments.
This one is a good bridge for anyone who wants retro texture but hates the idea of a full throwback.
15. Crimped High Bun
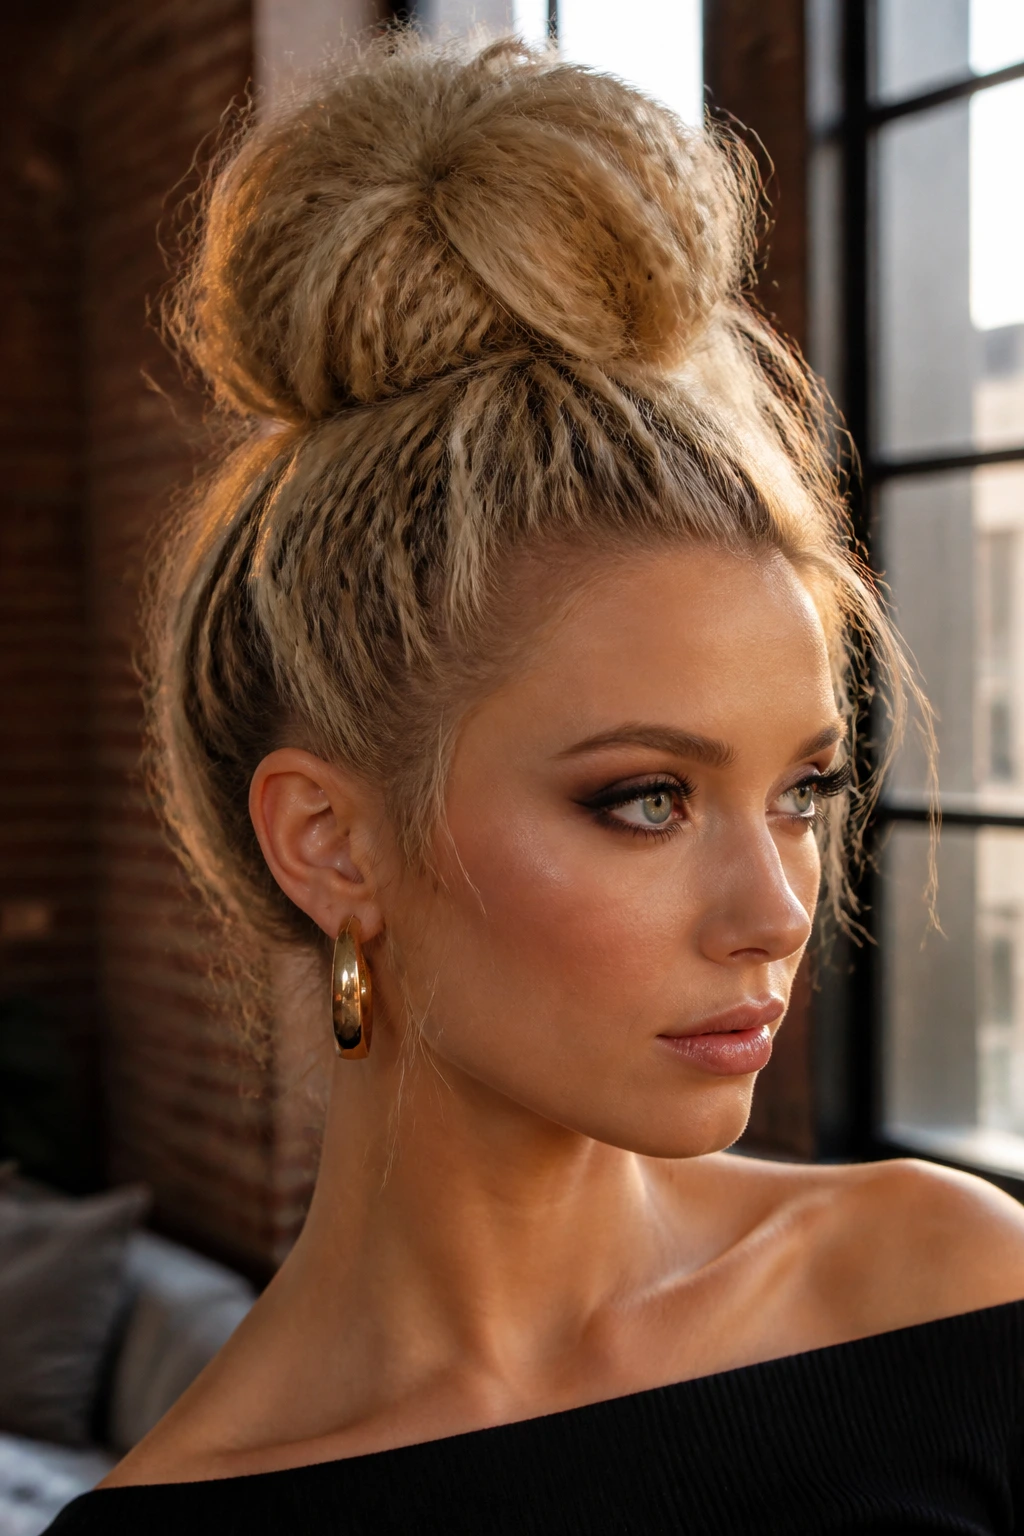
Crimping a bun isn’t about making the bun huge. It’s about making the hair around it hold shape and feel less slippery.
You can crimp the whole ponytail before twisting it into a bun, or crimp only the halo around the bun and leave the knot smooth. I prefer the second version if the hair is very thick. It keeps the bun controlled while still giving the style some roughness around the edges.
This works especially well with statement earrings. The bun sits high, the neck stays open, and the texture does enough visual work that you don’t need much else.
16. Glossy Crimped Lob
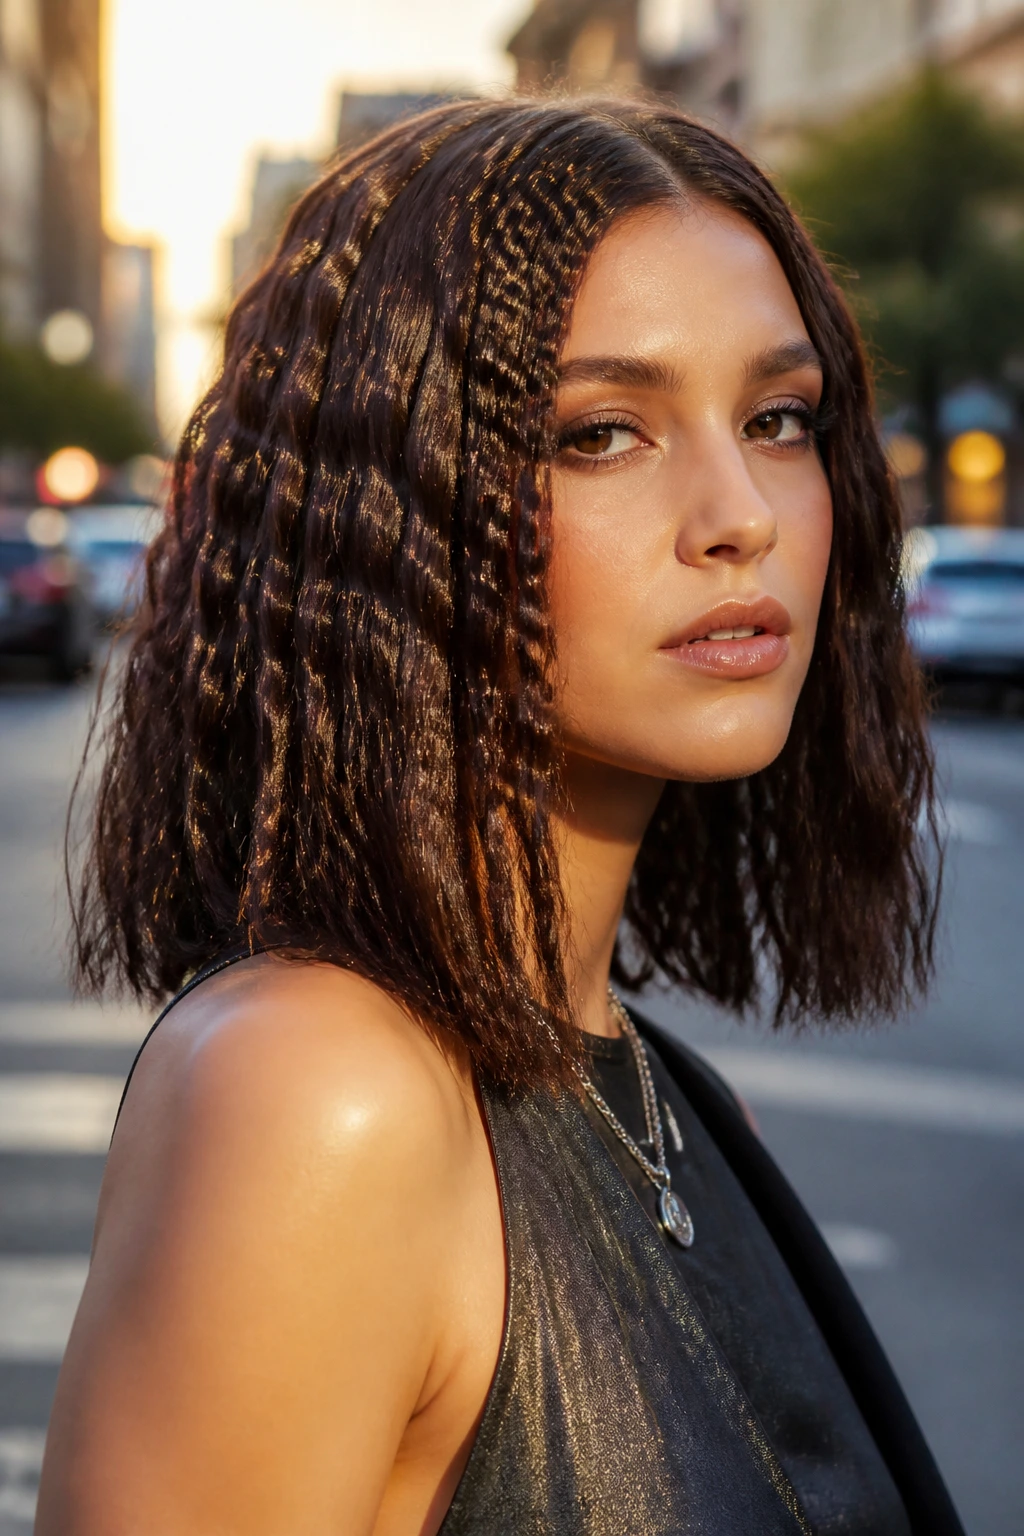
A lob with crimped texture and a shiny finish is a cleaner, more grown-up take on the whole thing. The cut keeps the hair from going too wide, and the shine keeps the ridges from feeling dusty.
Use smaller sections near the front and slightly wider ones at the back so the shape doesn’t balloon out around the face. A drop of serum on the last two inches can help the ends stay smooth while the rest keeps the crimp. That mix is what makes it look deliberate.
If you wear a middle part and have lighter pieces around the face, this is a strong choice. It gets texture without losing the line of the cut.
17. Micro-Crimp Underlayer Surprise
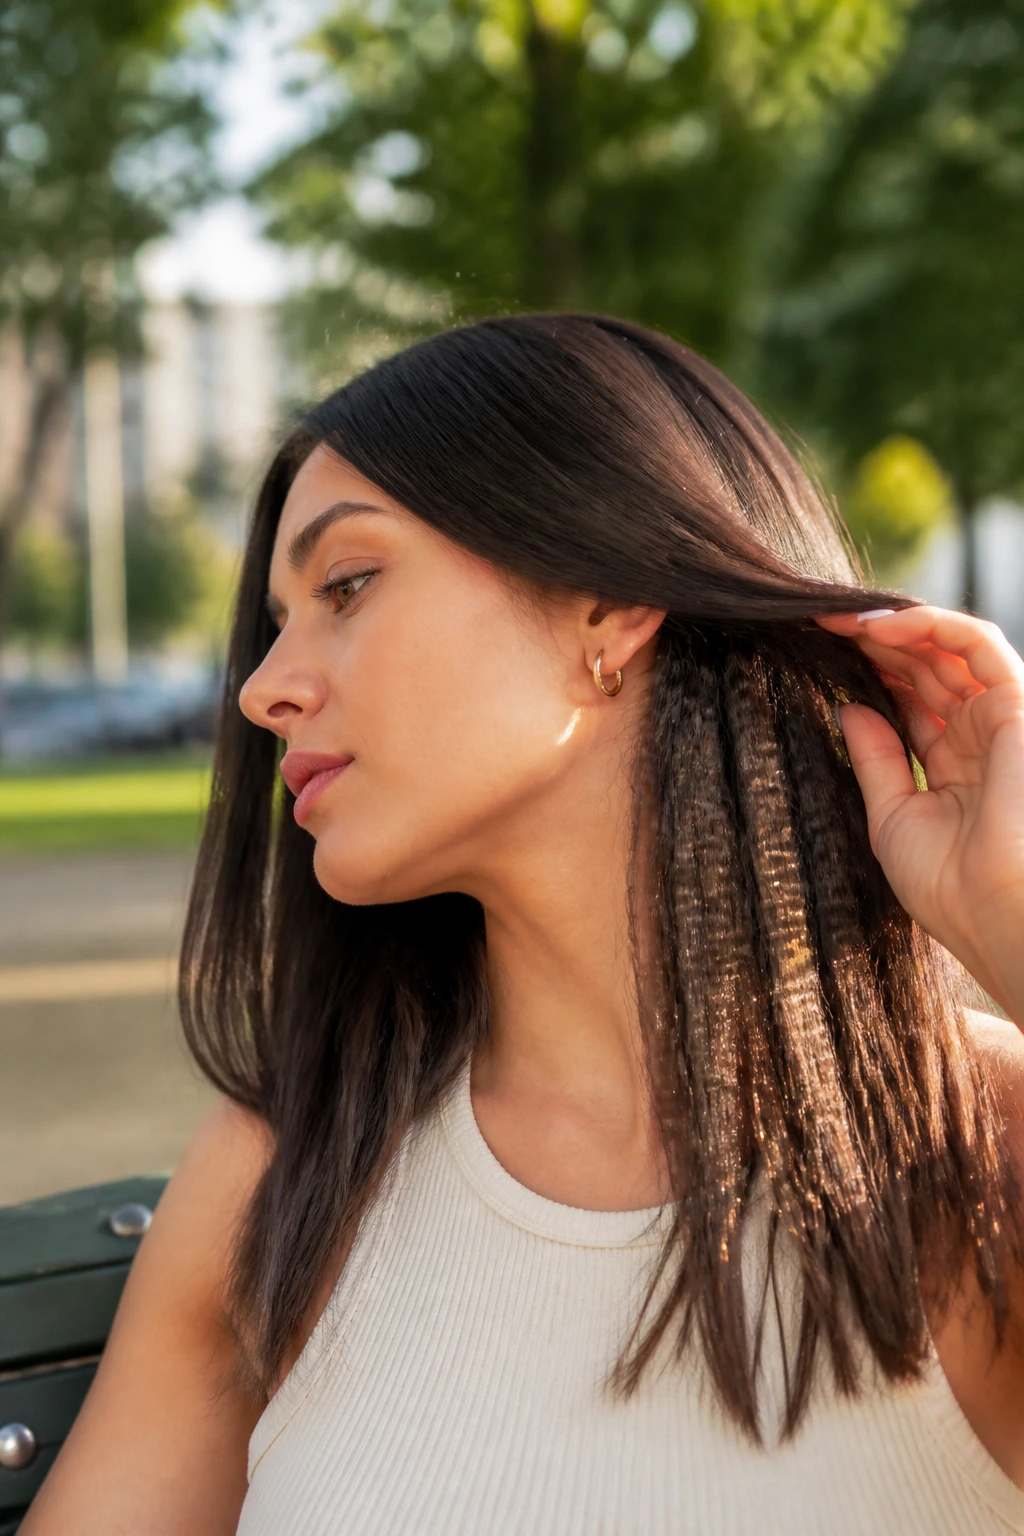
This is one of those styles people notice only when you move, and that’s the point. Leave the top layer smooth, lift out the underlayer, and crimp the hidden pieces underneath.
It’s a clever trick for shoulder-length hair and longer cuts. The surface looks normal when you’re still, then the texture peeks out under the top sheet of hair when you turn your head or tuck it behind one ear. The look feels secretive in a good way.
If you like dark hair with bright highlights underneath, the contrast shows especially well here. The color flashes without needing the whole head to be textured.
18. Crimped Low Pony with a Ribbon
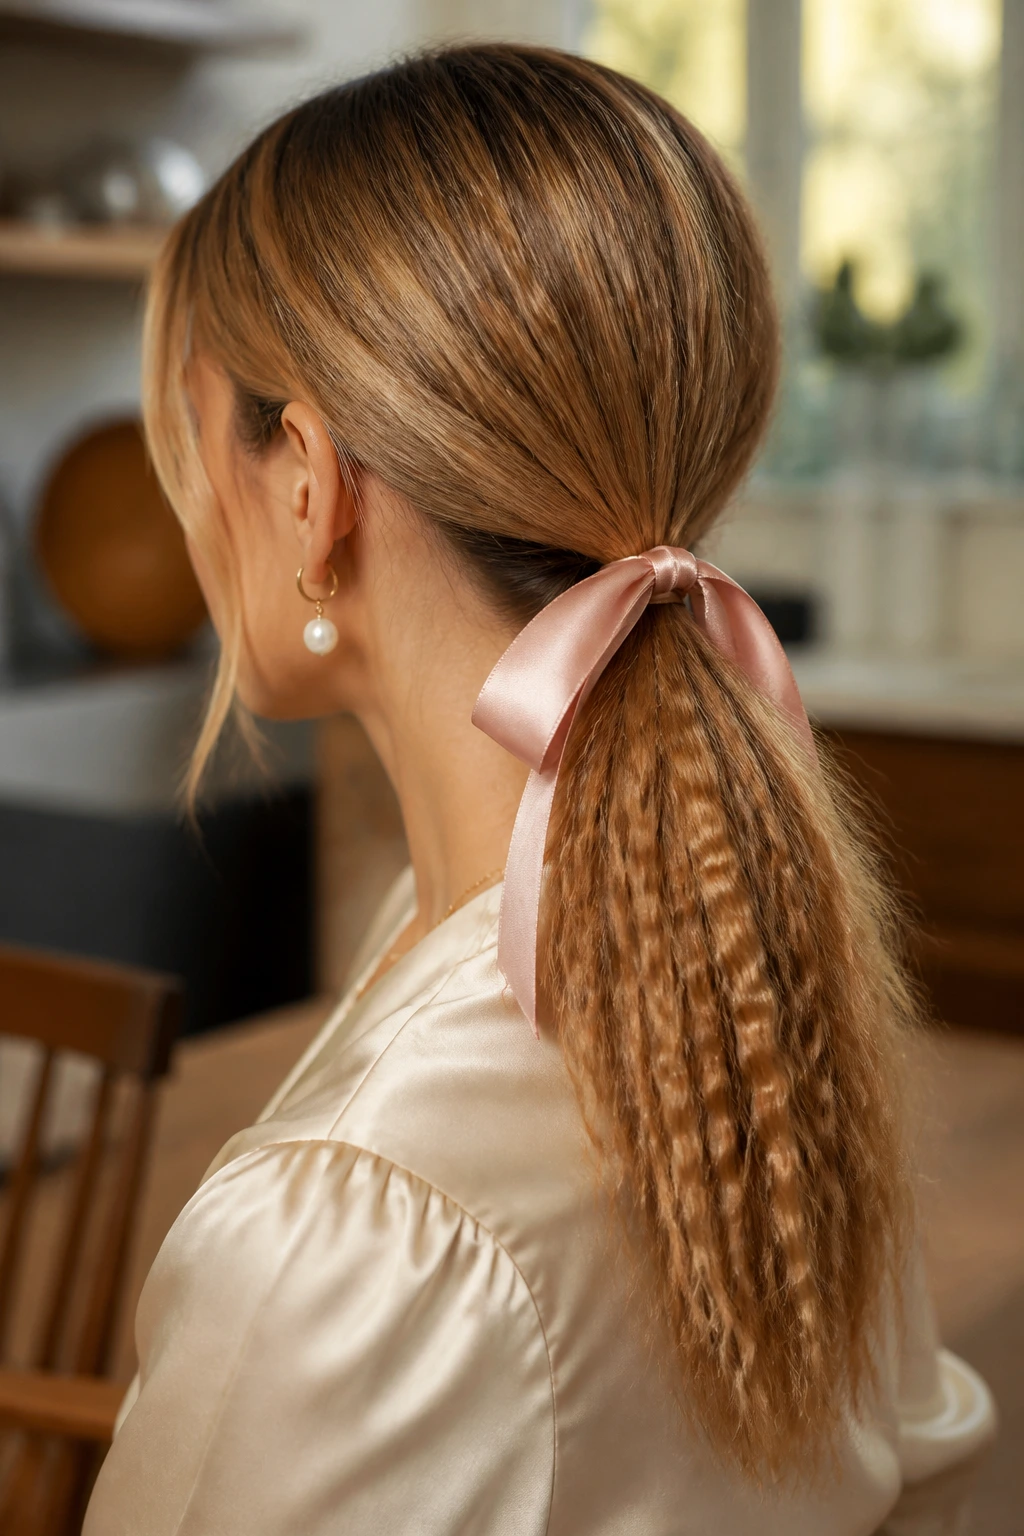
Low ponytails can look plain fast. Crimp the tail, tie it low at the nape, and finish with a ribbon or narrow satin tie, and suddenly the style has shape.
The pony sits close to the neck, which keeps the crimp from expanding too much. That’s helpful if your hair is thick or if you want something polished enough for dinner, not just a themed party. A ribbon softens the edges, but the texture keeps it from slipping into sweetness.
This is one of the few crimped looks that can work with a tailored outfit without fighting it.
19. Crimped Blowout for Curly or Coily Hair
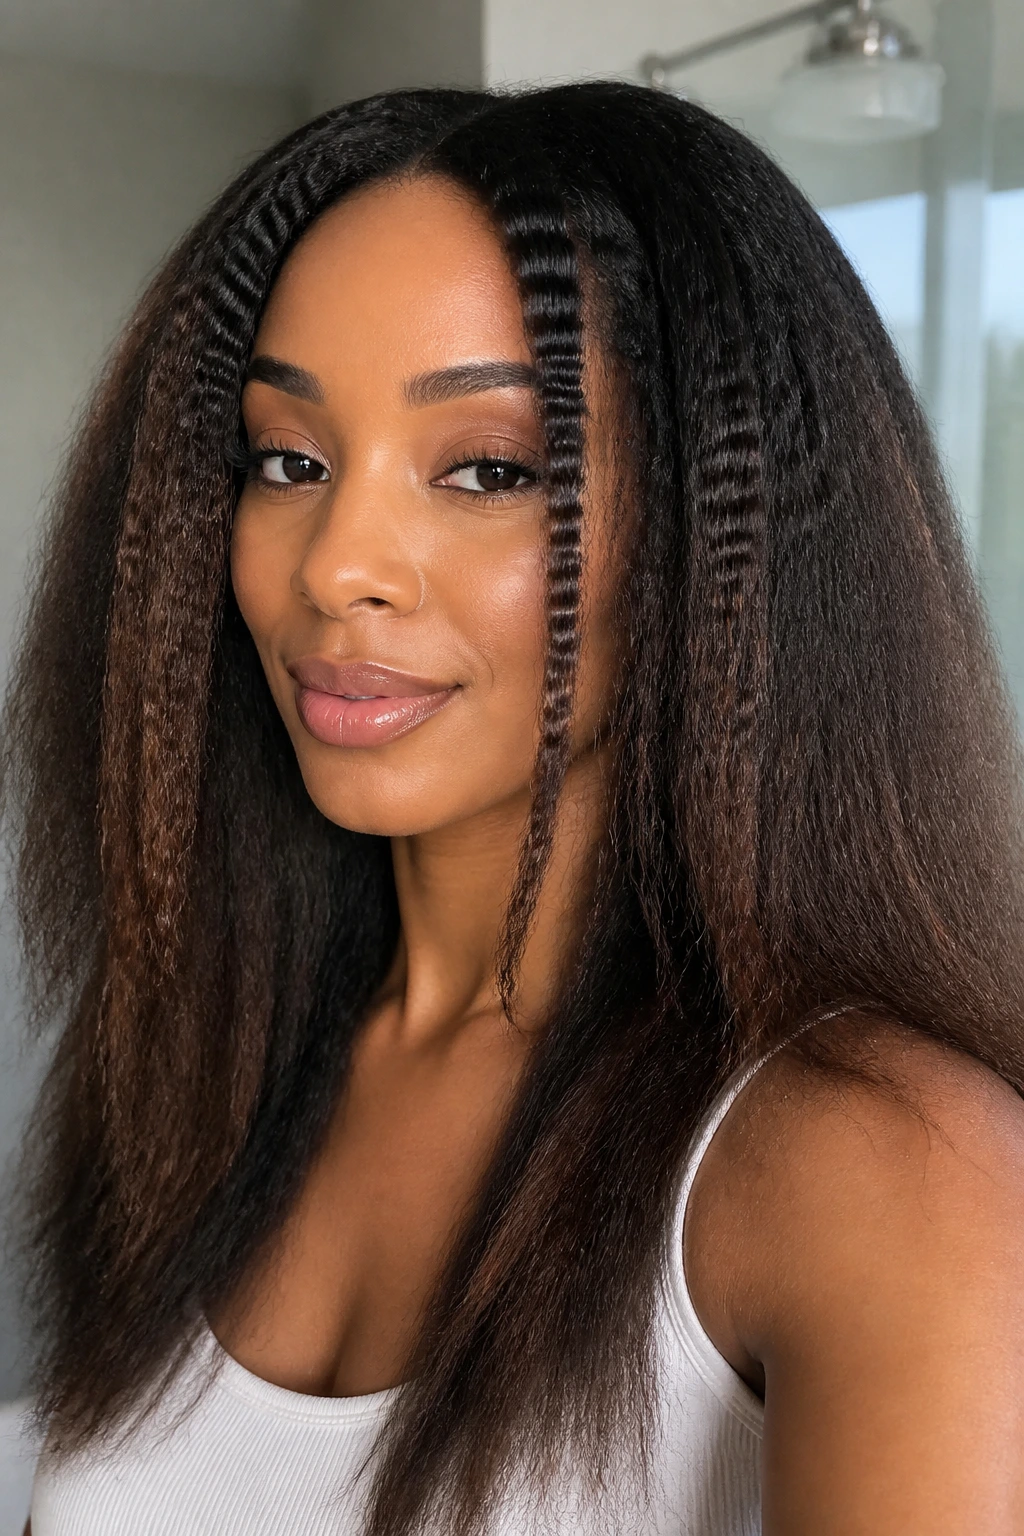
Can crimping work on natural texture? Yes, if you start with a stretched blowout and treat the hair gently. You’re not fighting the curl pattern; you’re changing the surface shape in selected sections.
I’d keep the heat lower here and use fewer passes. Hair that has been lightened or repeatedly straightened needs more care, and natural texture can get fuzzy if you rush. Crimp a few face-framing pieces, or do the mid-lengths only and leave the ends soft. That keeps the style flexible and avoids a stiff finish.
This version can be excellent on dense hair because the crimp breaks up the mass without forcing everything to lay flat.
20. Crimped Chignon
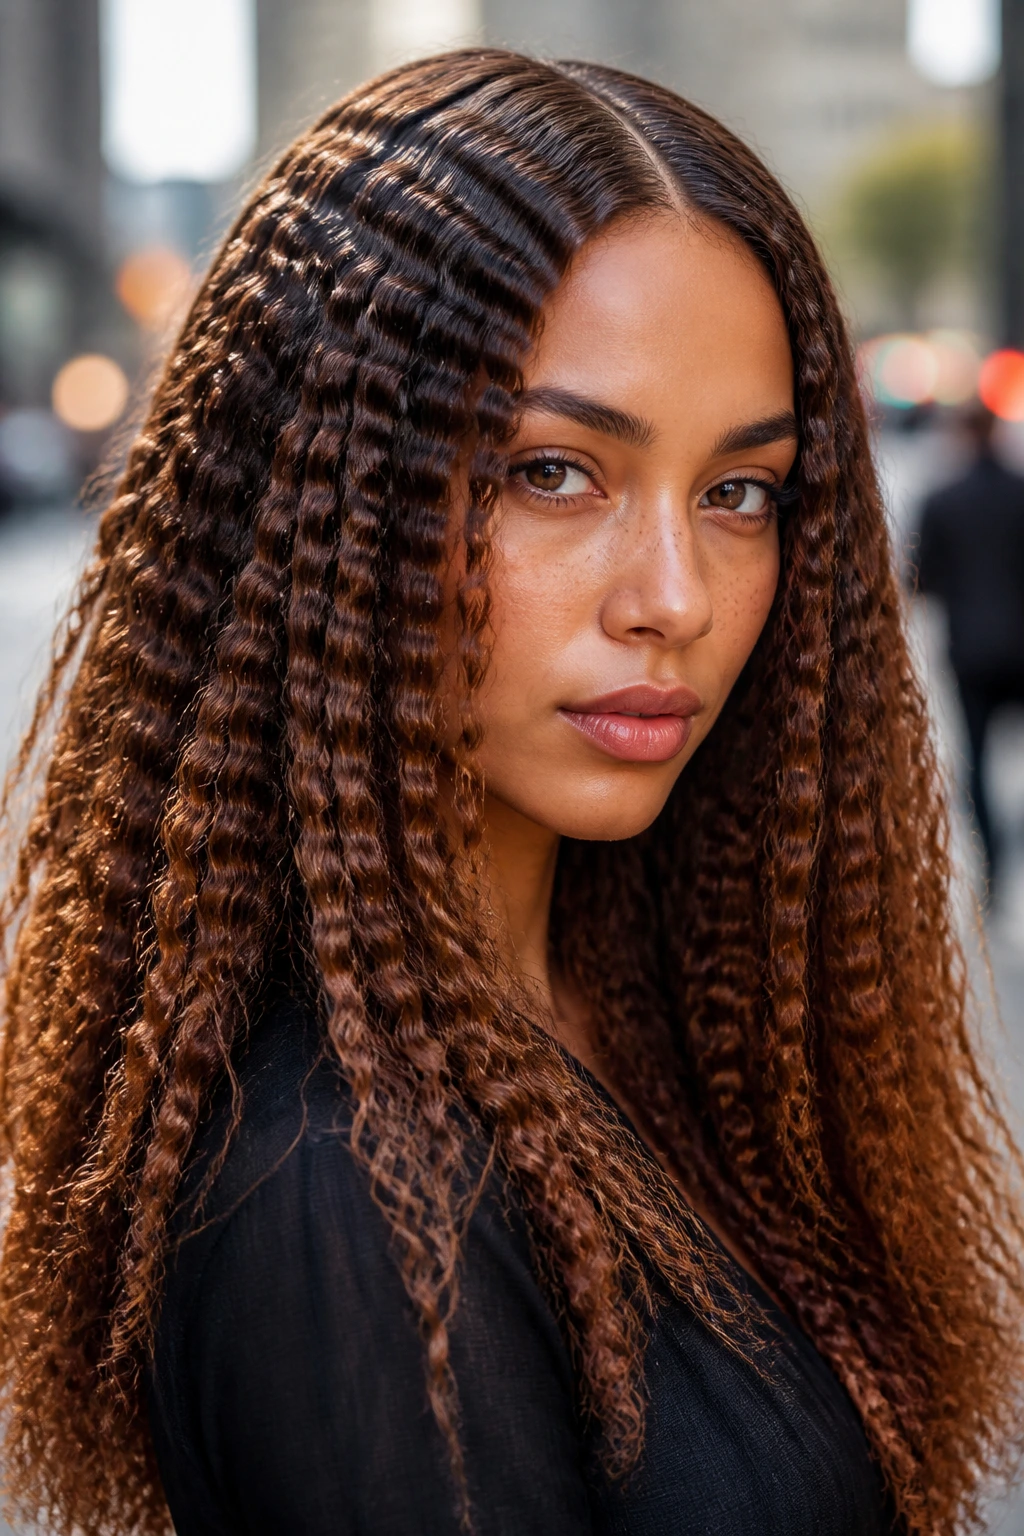
A chignon with texture around the knot has a more interesting silhouette than a plain smooth twist. Crimp the hair first, then pin it into a low knot at the nape.
The ridges help the pins grip, which is useful if your hair tends to slide out of neat buns. They also keep the chignon from looking too formal. A slick low knot can feel severe; a crimped one feels touched by hand.
This is a quiet choice compared with the bigger styles, but it still has enough personality to keep people from calling it boring.
21. Ombre-Ended Crimp
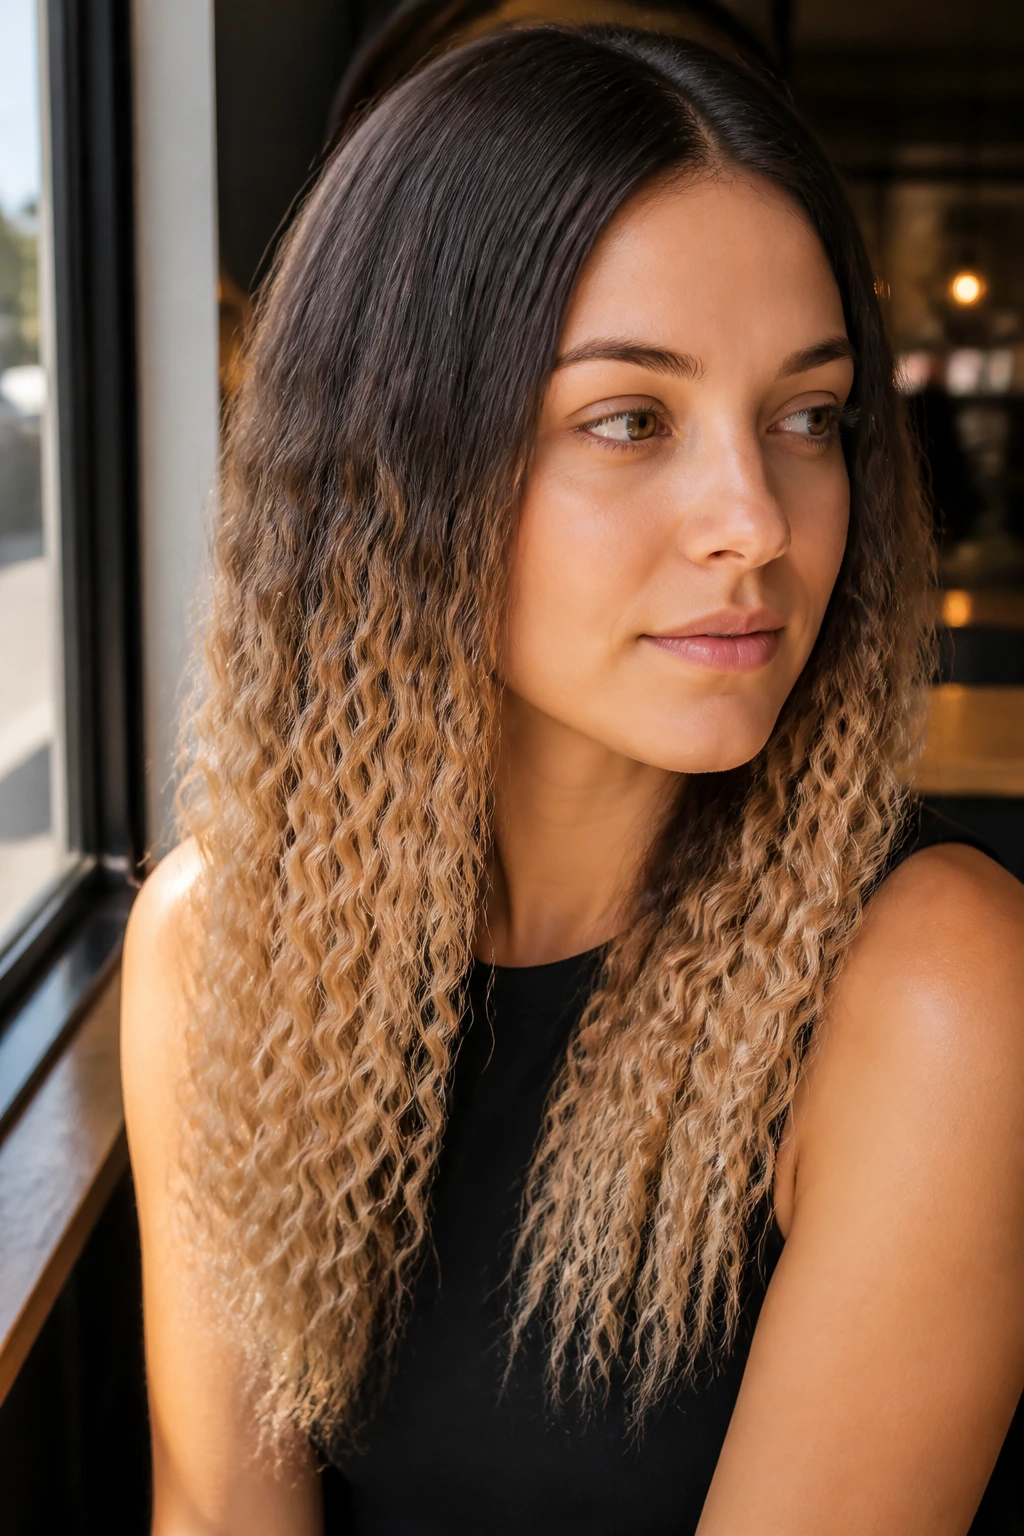
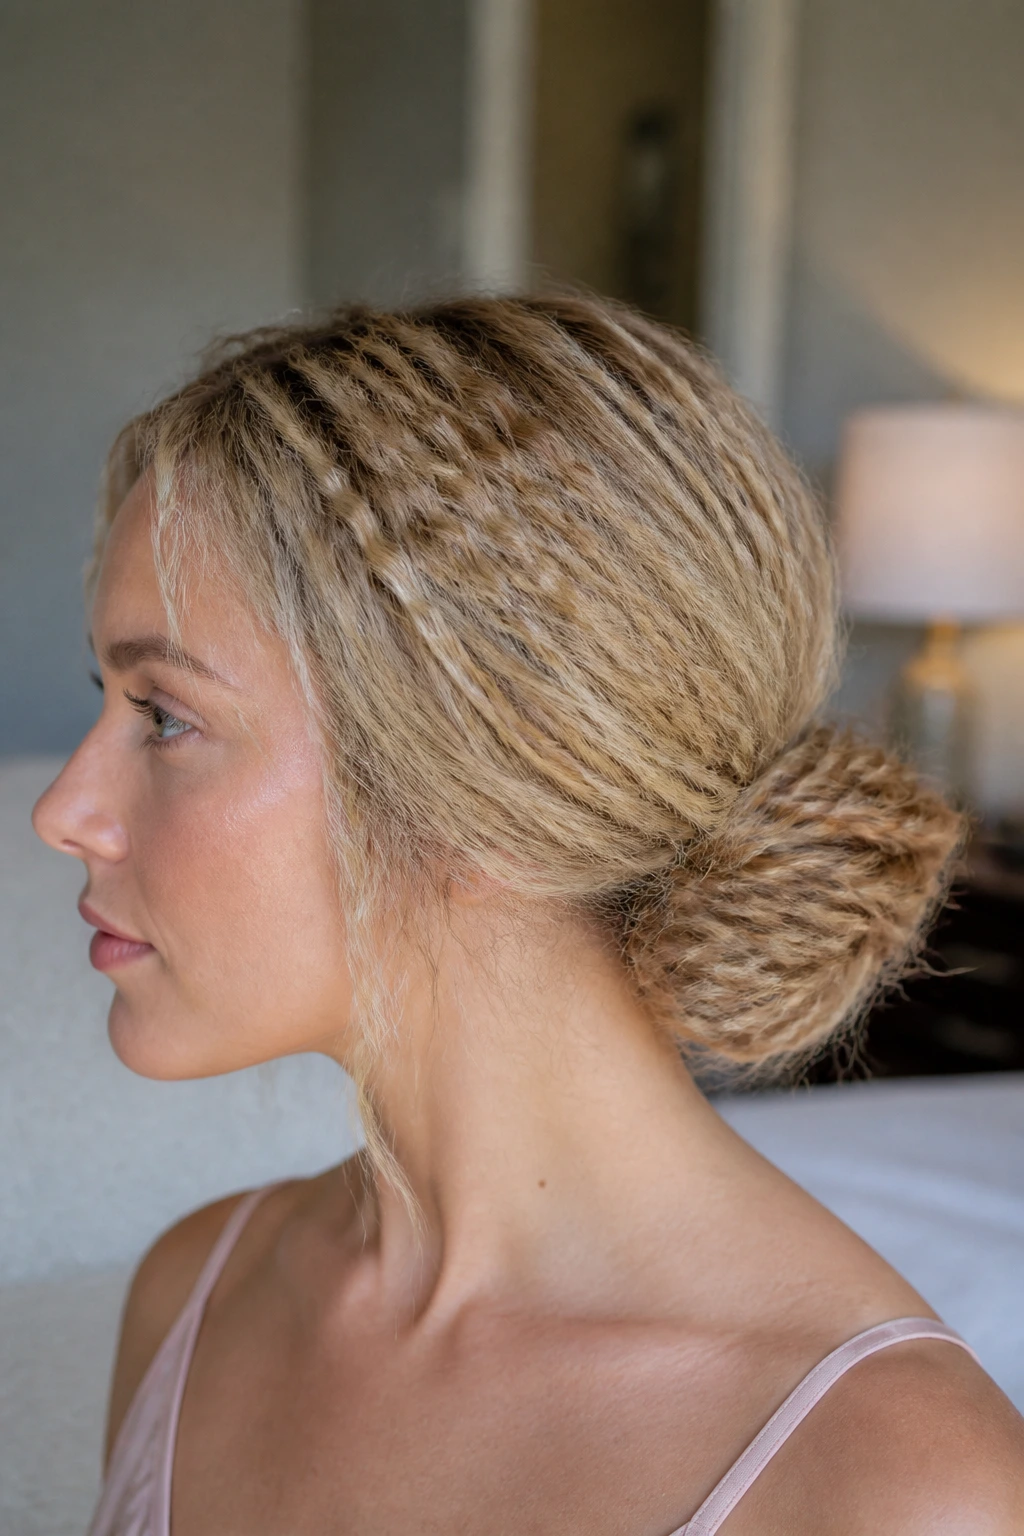
Ombre hair and crimping are a strong pair because the lighter ends show every bend. If the top is darker and the bottom is bright, the ridges make the color shift look more obvious.
Focus the crimp from just below the ears downward. Leave the root zone smooth so the color transition stays readable. Too much texture near the scalp can muddy the effect, especially when the hair is shoulder length or shorter.
This is one of the nicest ways to make a color job do more work without changing the cut. The style gives you movement, and the color does the rest.
22. Feathered Flip Crimp Layers
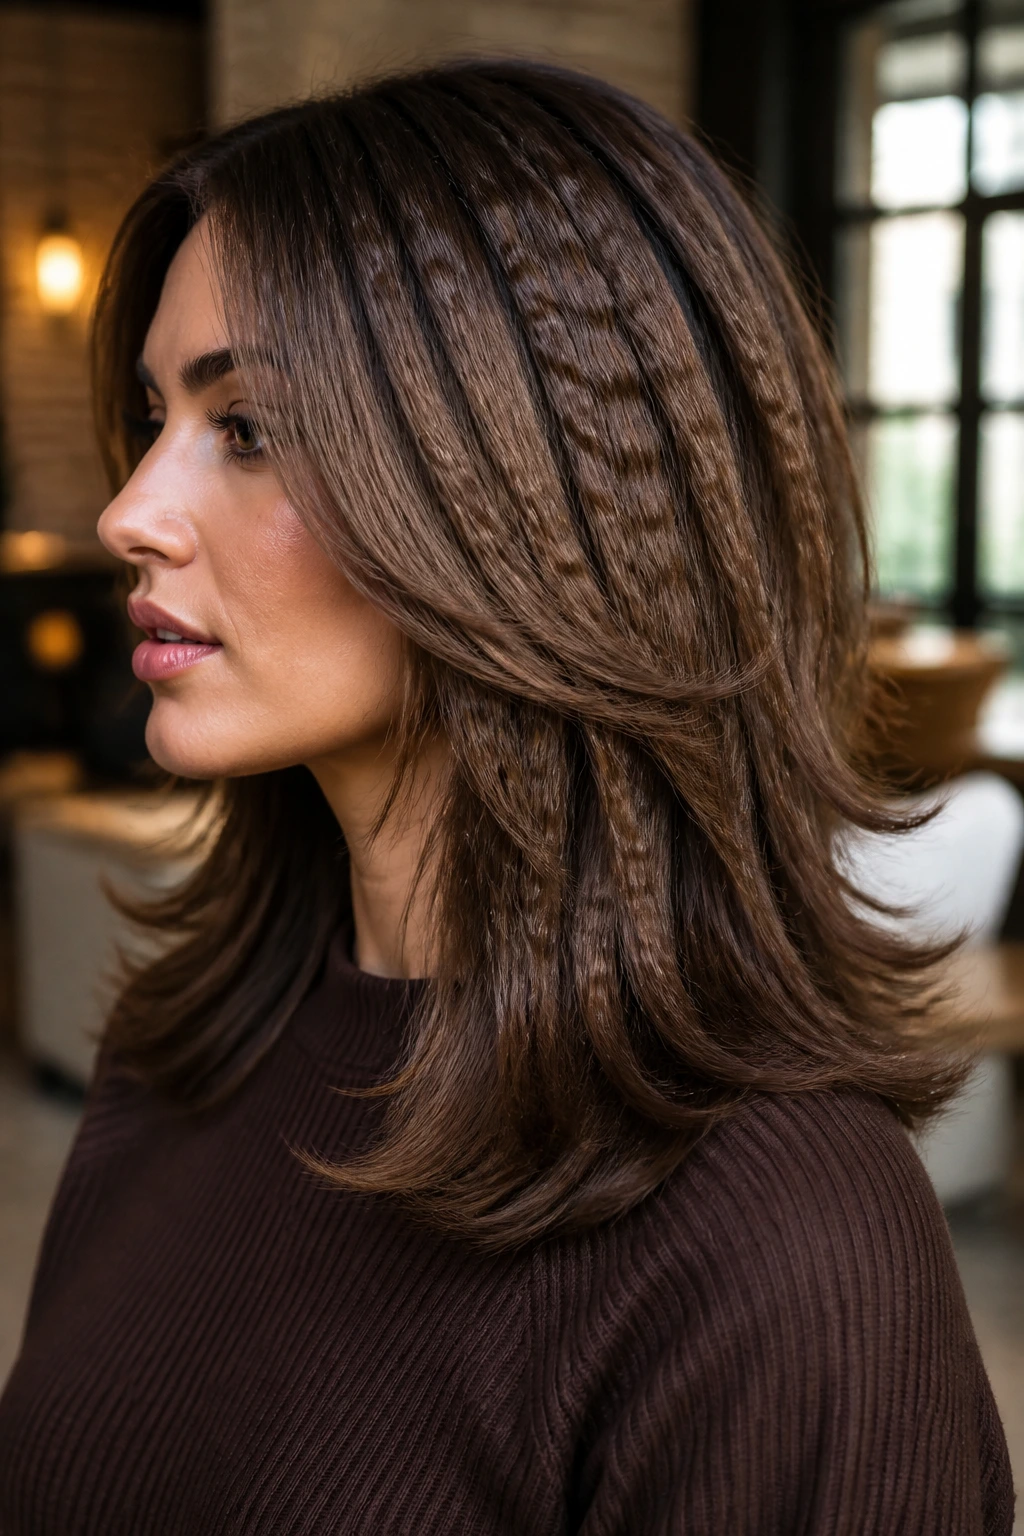
A feathered flip is already a little retro. Add crimped layers, and the whole shape starts to move like it has a fan under it.
Keep the top smooth enough that the layers can kick out at the ends. Crimp the middle sections, then flip the last inch or two outward with a brush or a bend from the iron. It works best on layered cuts that already have some movement around the jaw and collarbone.
This is a very specific look. If you like polished minimalism, skip it. If you want your hair to have personality from every angle, it’s hard to beat.
23. Side Braid with Crimped Panels
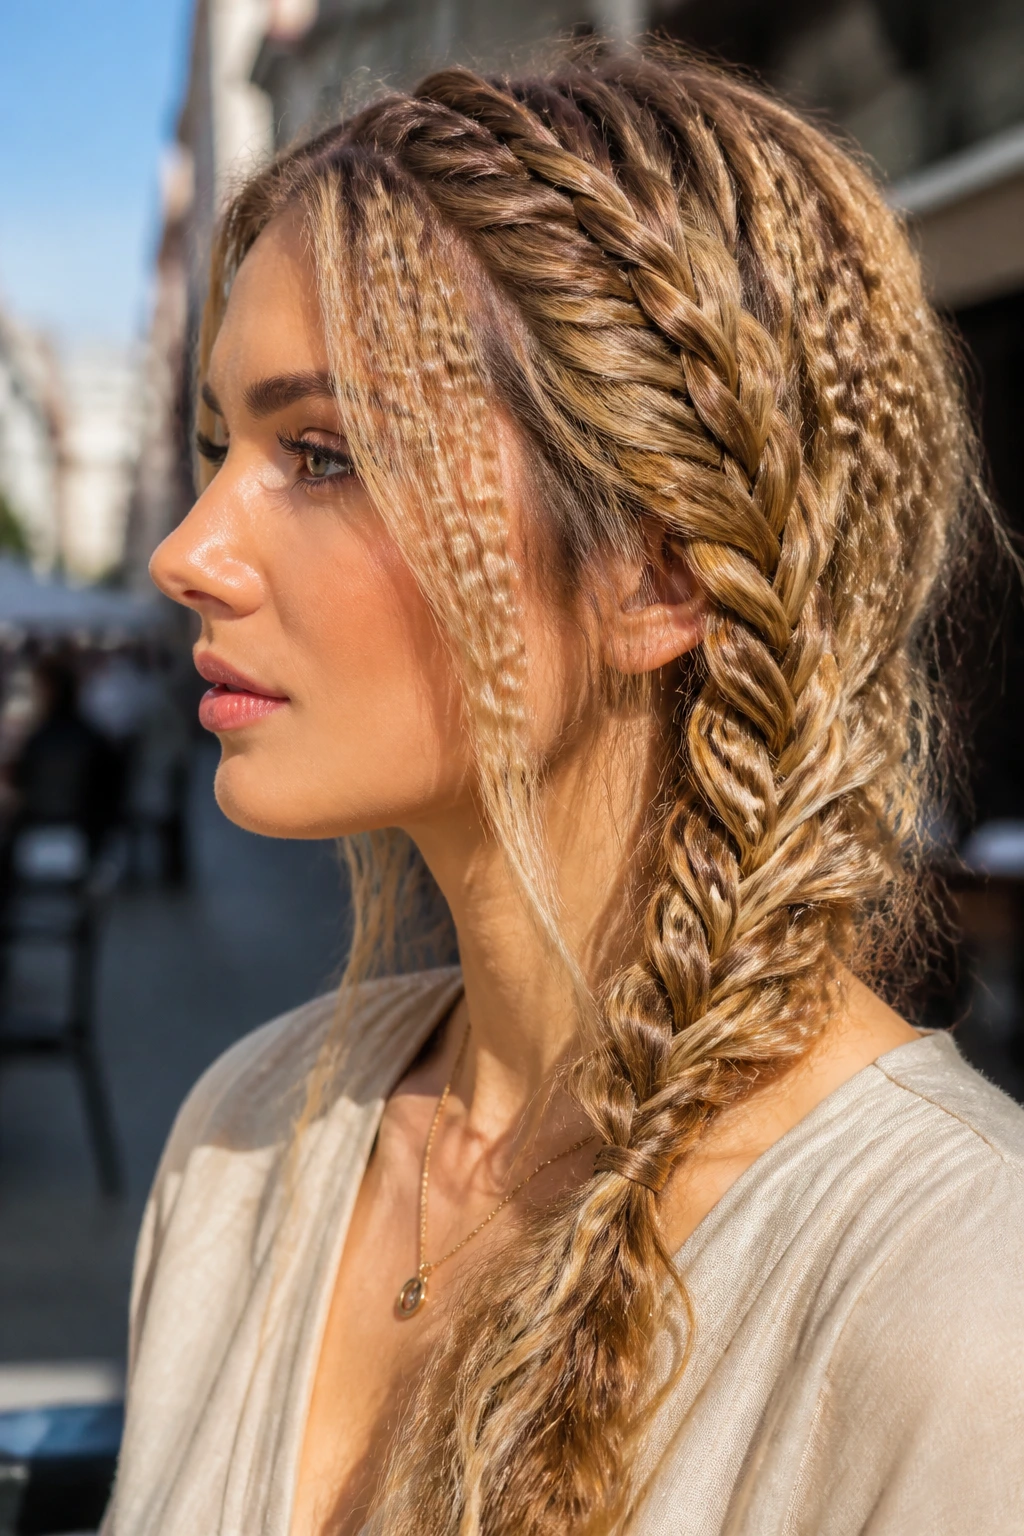
The braid gives you the structure; the crimped panels give you the attitude. That’s the whole story.
Leave a few sections crimped loose around the braid, or crimp the hair before you braid so the plait looks thicker and more dimensional. On long hair, this stops the braid from looking flat against the head. On medium hair, it makes the braid look fuller than it really is.
This is a good option if you want texture but need the hair off your face. The braid keeps things controlled, and the crimp gives it a rough, lived-in edge.
24. Crimped Top Knot with Face Pieces
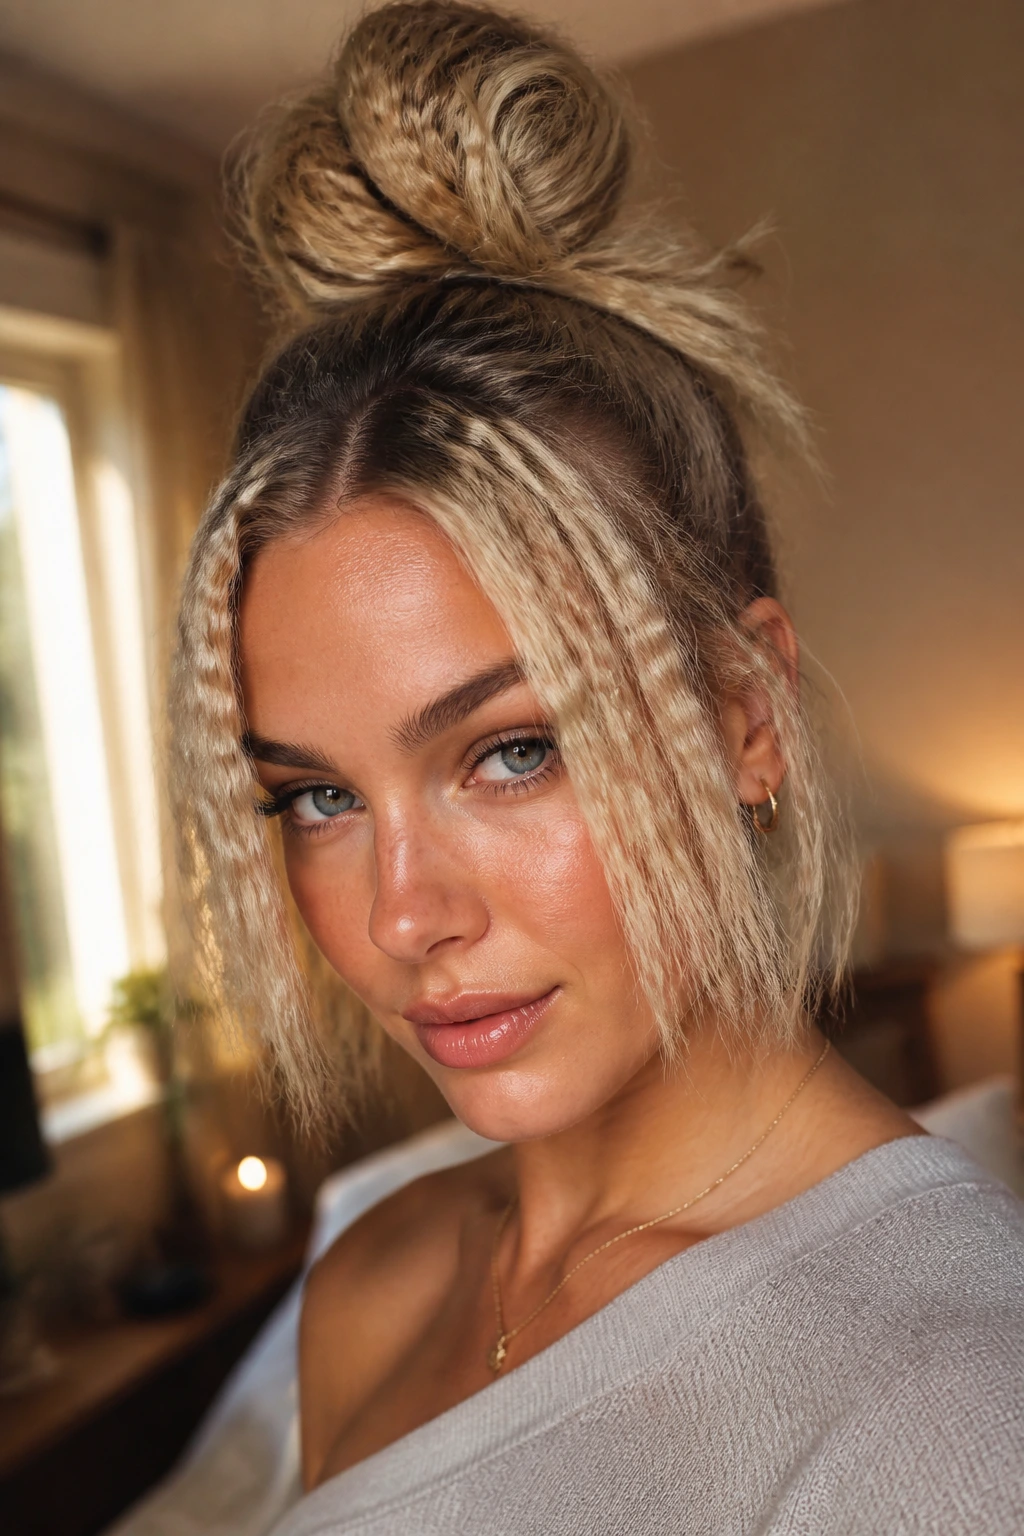
A top knot gets a lot better when the front pieces are left out and crimped. The knot stays high and clean, while the loose face-framing sections do the decorative work.
That contrast keeps the style from feeling too top-heavy. Crimp the loose pieces from the cheekbones down, then leave a few shorter strands around the temples soft so the face doesn’t get boxed in. If you have highlights, the face pieces can carry the color without requiring a full crimp.
I like this look on days when you want your hair up but still want a little shape around the jaw.
25. Editorial Full Crimp with Oversized Clips
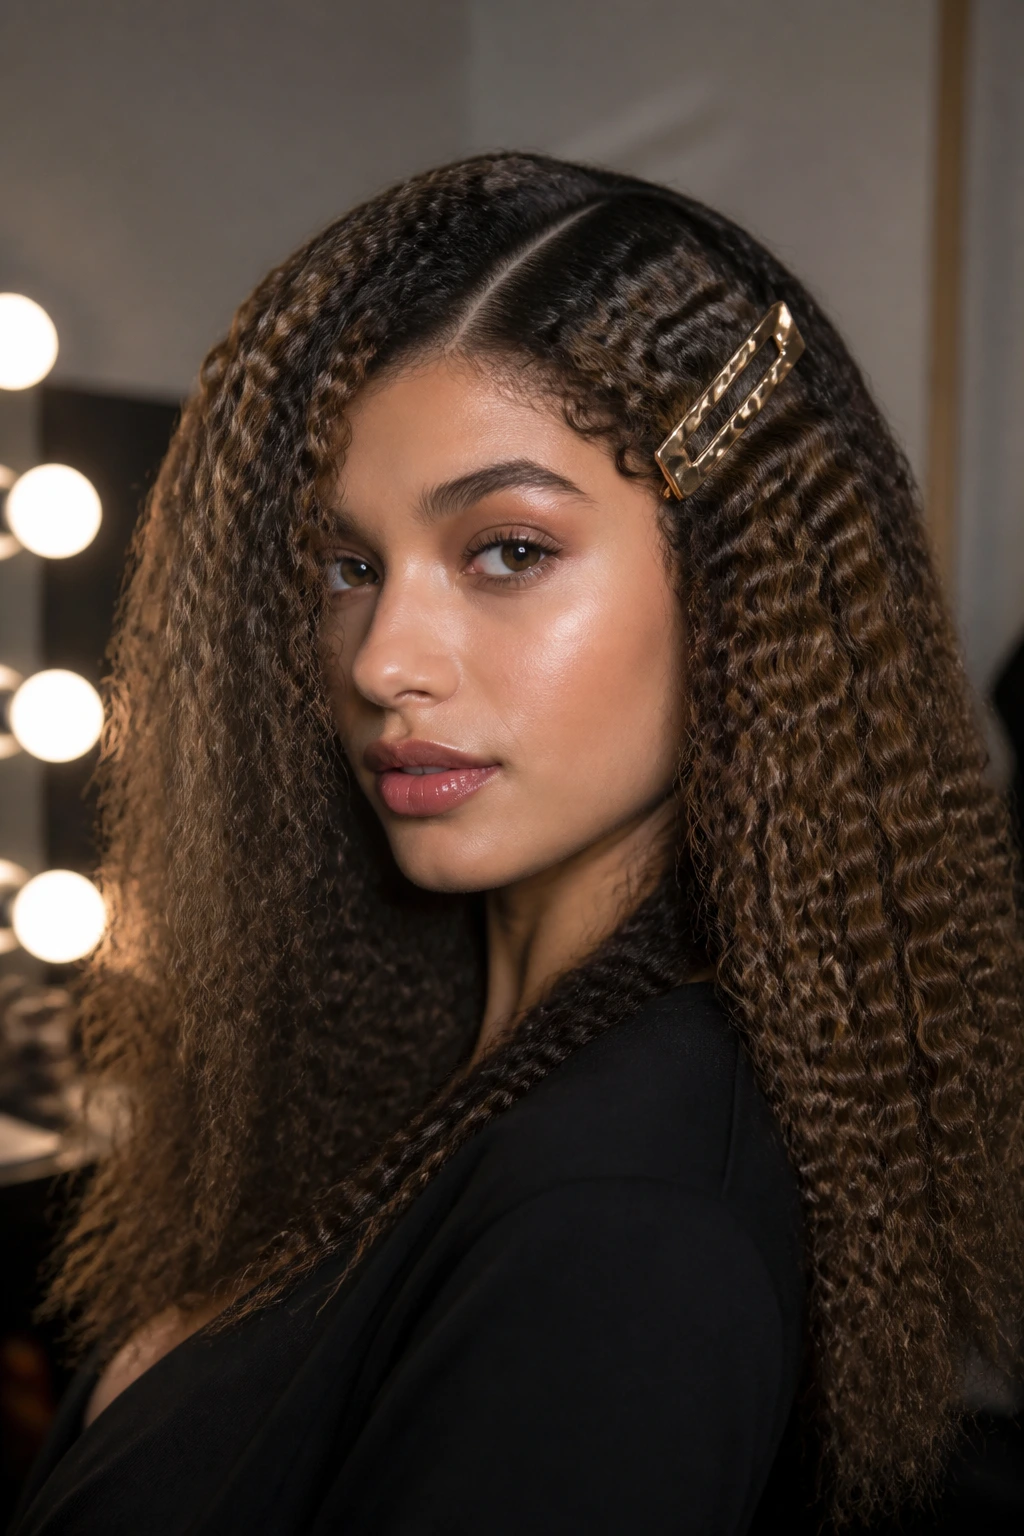
If you want the full fashion-magazine mood, this is the one. Go all in on the crimp, then add oversized clips, stacked barrettes, or a heavy part line to keep the texture from wandering.
The key is confidence and control. Keep the ridges even, press the part clean, and choose one or two accessories instead of five. A giant clip on one side plus a glossy finish on the lengths is usually enough. More than that and the look starts to crowd itself.
This version is dramatic, but it doesn’t need to be messy. Clean lines plus heavy texture is the sweet spot.
Why Crimped Texture Still Feels Fresh on Real Hair
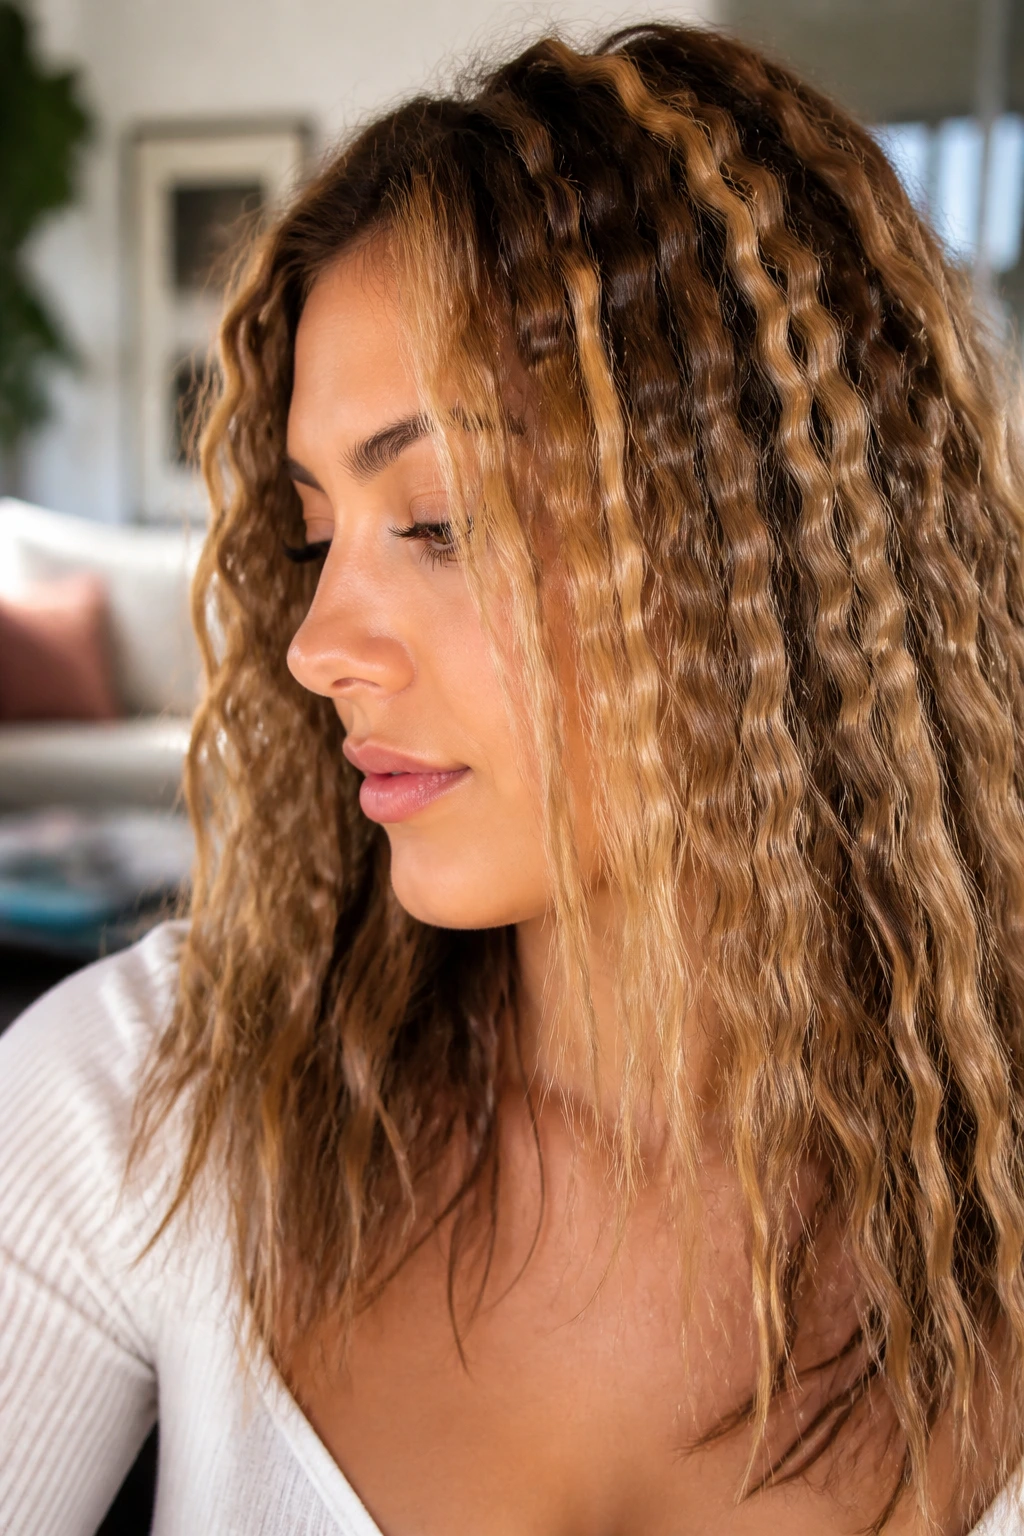
Crimping survives because it changes the shape of hair in a way straightening and curling don’t. Straight hair lies flat. Curling rounds it out. Crimping adds edges, and those edges change how light moves across the head. That matters on color-treated hair, especially balayage and highlight work, because every ridge gives the lighter pieces a new surface to catch.
There’s also a practical reason people keep circling back to it: crimped texture helps hair hold pins, clips, and shape. On silky hair, a style can slide apart in an hour. On textured hair, the same style has more grit. That makes this look useful, not only decorative.
The best versions also give you options. You can crimp the whole head, half the head, the ends, the underlayer, or just a few front pieces. That flexibility is the reason the style keeps getting reworked instead of disappearing.
Tools That Make Crimping Easier
-
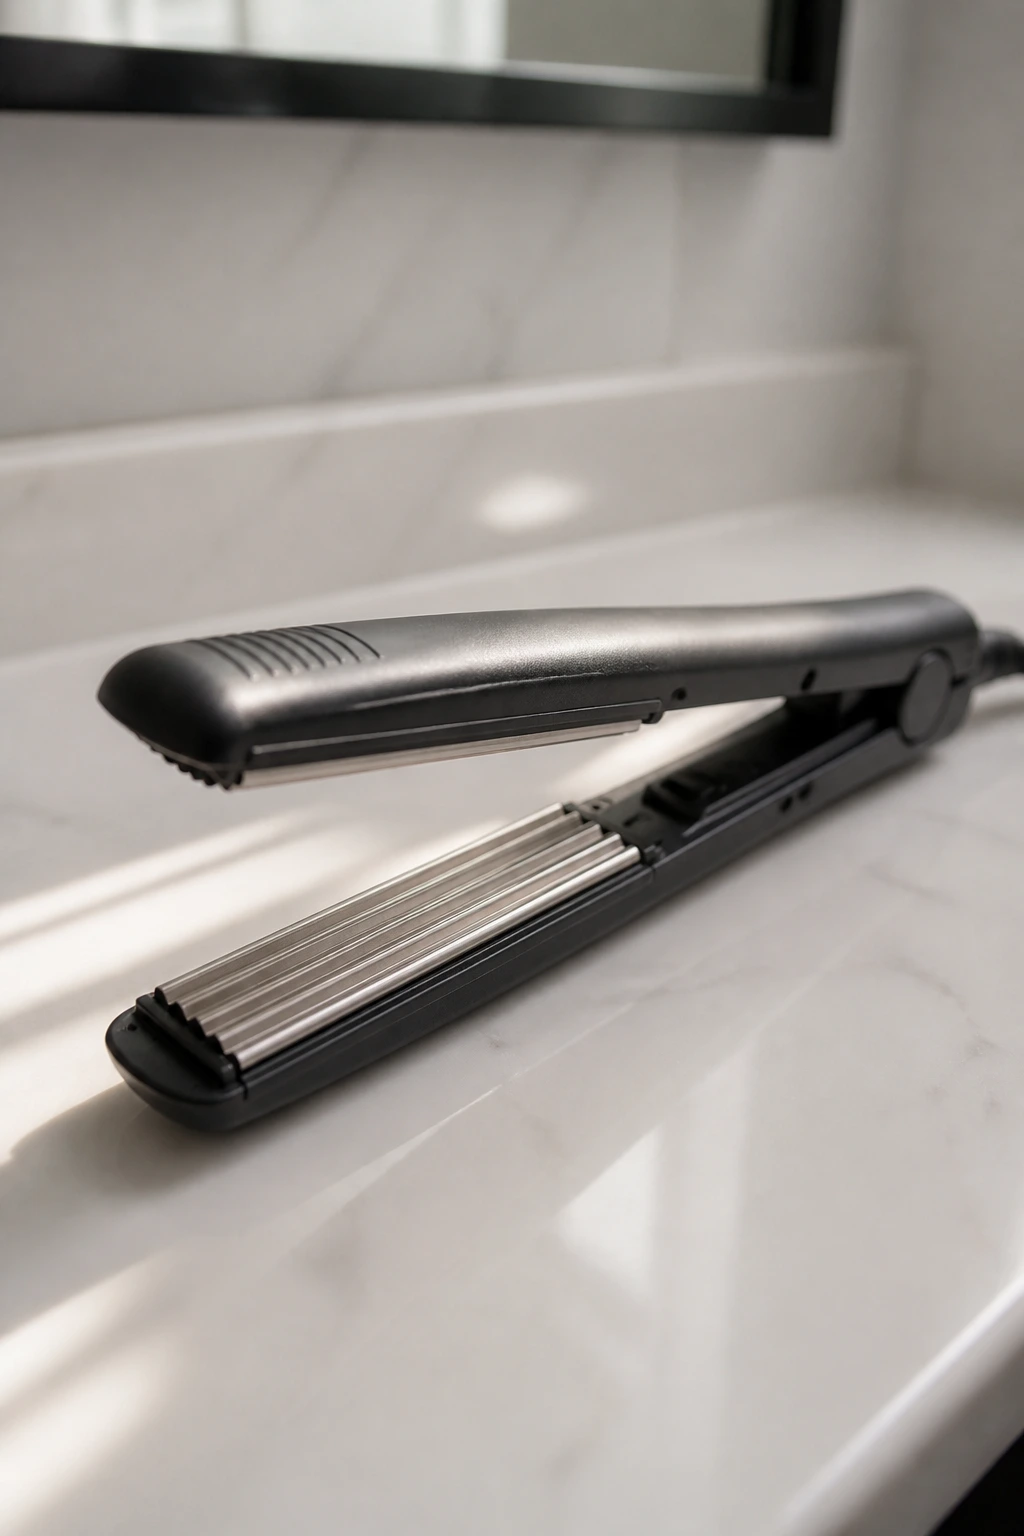
Crimping iron or deep waver: A narrow iron gives a tighter zigzag; a wider plate makes a looser pattern with less visual noise.
-
Heat protectant spray: Use it on dry hair before any hot tool touches the lengths. Skipping this is a cheap way to fry the cuticle.
-
Sectioning clips: These keep the hair out of your way and help you work in clean, even rows.
-
Tail comb: A pointed comb makes the part lines and section widths cleaner, which matters more here than people think.
-
Lightweight hairspray: Use a flexible formula so the ridges stay touchable instead of stiff.
-
Dry shampoo or texture spray: Helpful on clean, slippery hair and great on day two when the crown starts to collapse.
-
Shine serum: Use sparingly on the ends or outer layer if you want the texture to look polished, not dusty.
-
Bobby pins and clips: Necessary for half-up looks, buns, and pinned side sections. Crimped hair usually grips them better than smooth hair.
Choosing the Right Iron, Finish, and Products
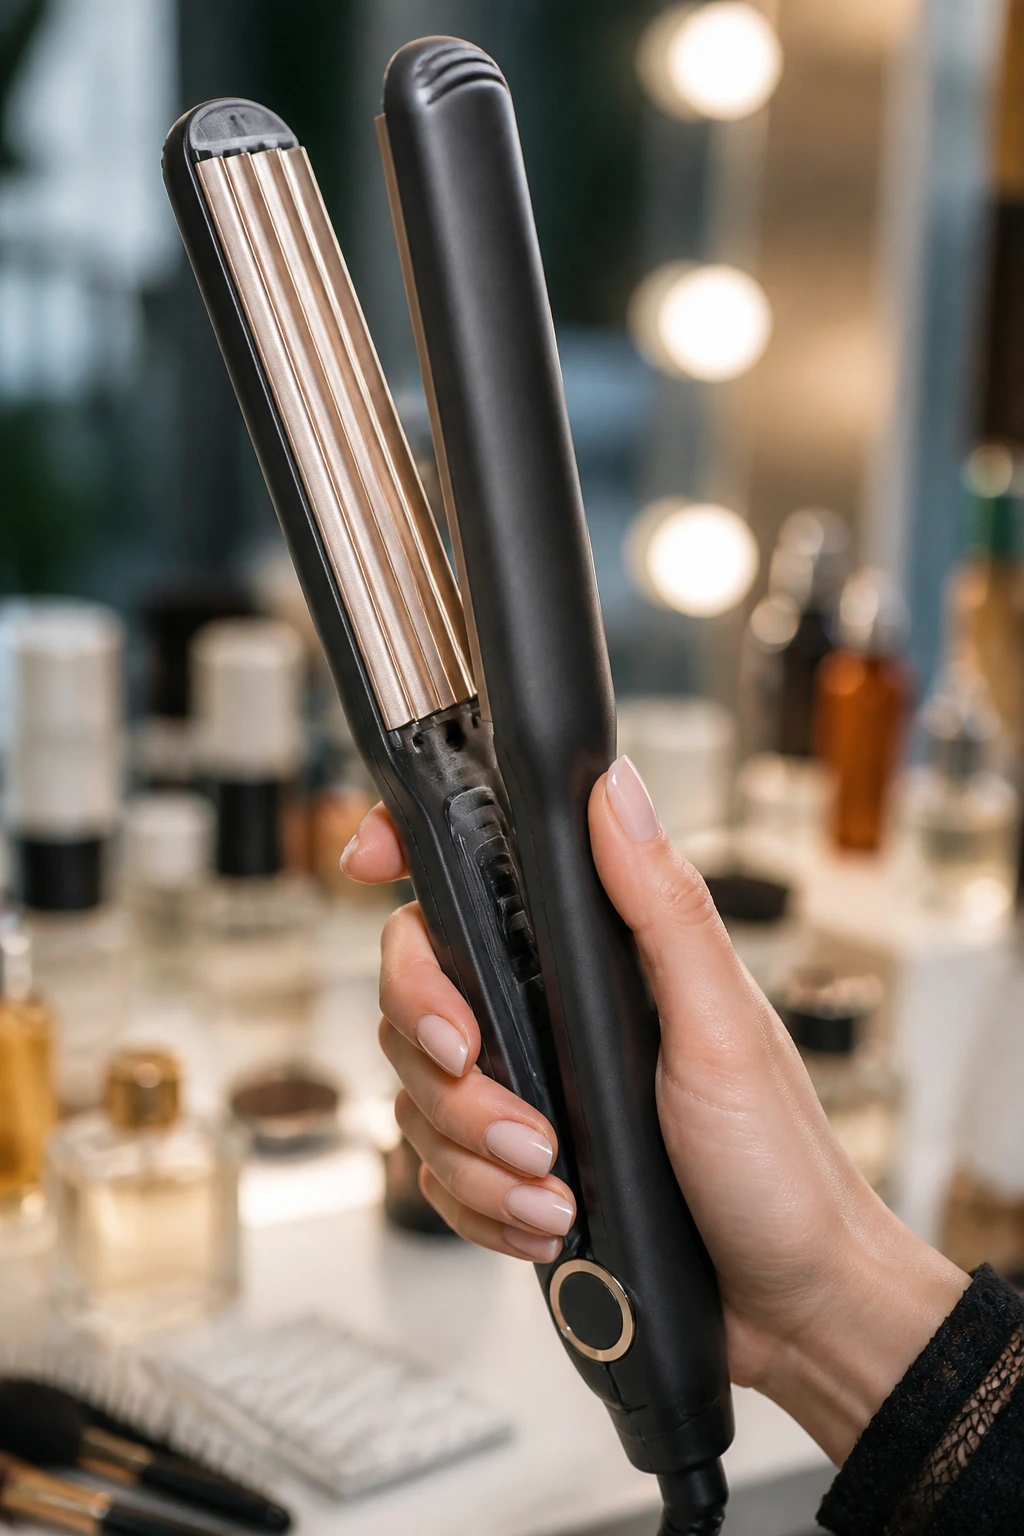
A crimped style looks better when the tool matches the hair. Narrow plates make a sharper pattern, which is useful on short hair or when you want a strong retro line. Wider plates create a looser, more modern bend that works better on long hair and layered cuts. If your hair is fine, a tool with adjustable heat is worth it because you do not need extreme temperature to get visible ridges.
For temperature, I’d keep fine or color-treated hair around 280–300°F, medium hair around 300–330°F, and coarse hair around 330–350°F. Past that, you’re usually buying more damage than shape. Bleached ends need the most caution. If the hair feels gummy, stretchy, or rough after heat styling, stop there.
Products matter too. A tiny bit of mousse at the roots can help the crown hold up. Texture spray gives the ridges some bite. Shine spray or a drop of serum on the final inches keeps the style from looking dry. The mistake I see most often is using too much product before heat, which makes the hair steam instead of set. Keep the layers light.
How to Wear Crimped Hair Without Looking Costumey
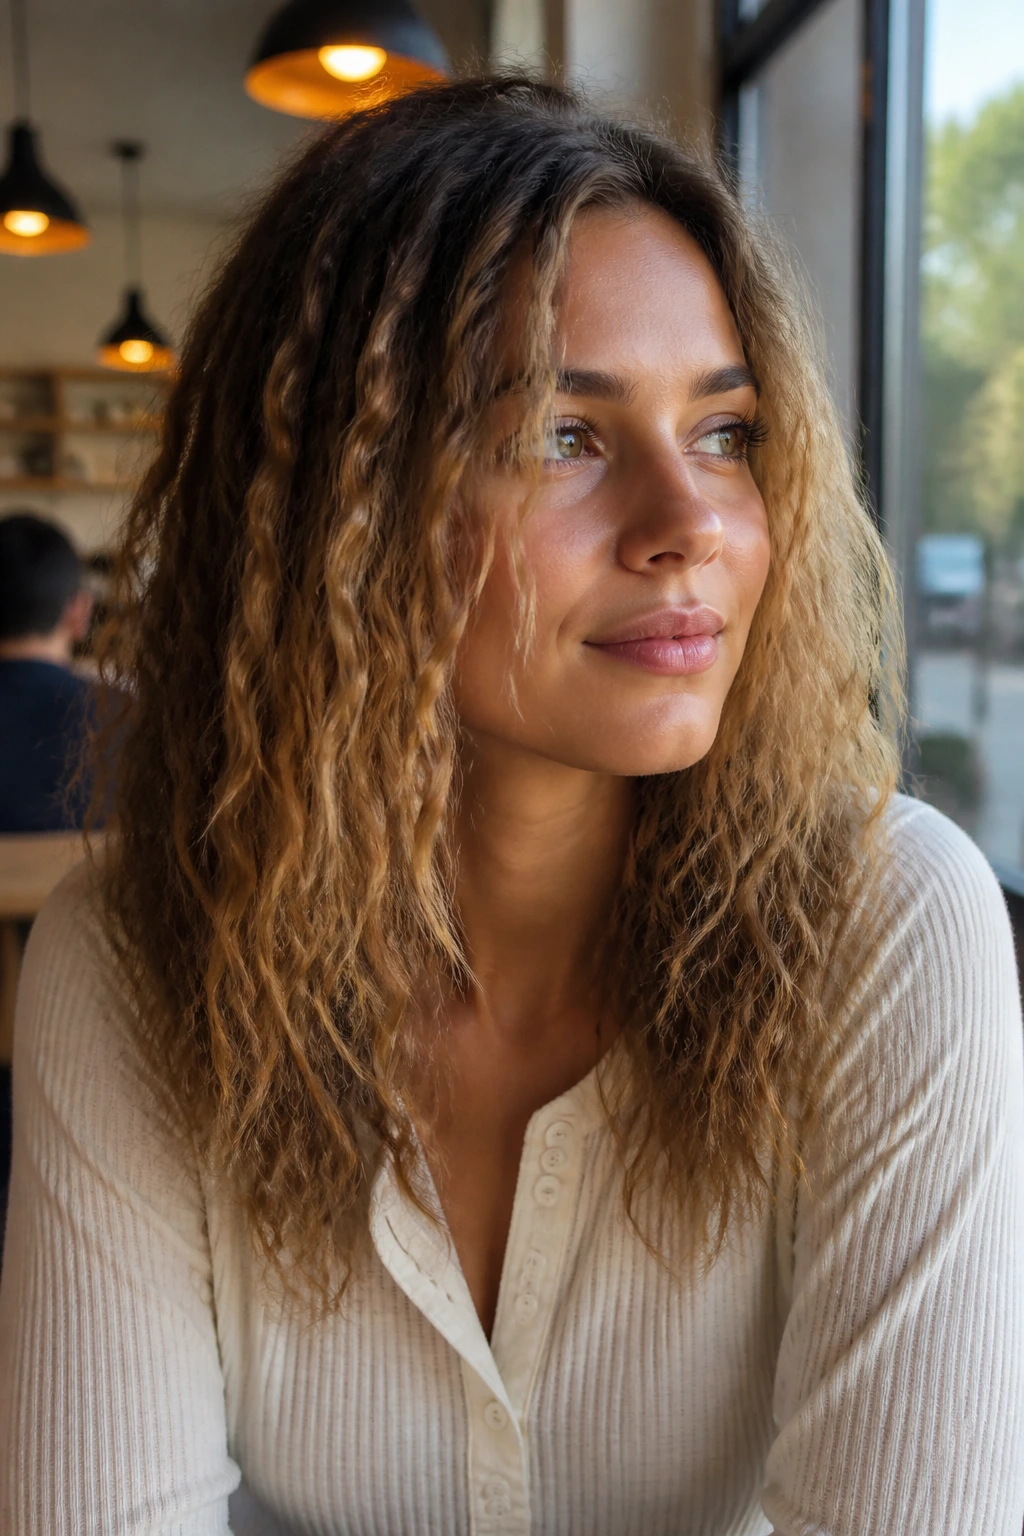
Presentation: Start the texture a little lower than you think. If the crimp begins right at the scalp, the style can look rigid; if it starts one to two inches down, the root stays clean and the movement feels more modern.
Accessories: Choose one loud piece or two small ones. Pearl clips, metal barrettes, ribbon ties, and claw clips all sit well on crimped hair, but a pile of competing accessories can make the texture feel confused.
Coverage: Full-head crimp is strongest on long layers, while bob lengths usually look better with partial crimping or looser waves. If your hair is thick, leave some sections smooth so the volume doesn’t spread outward like a triangle.
Occasion: Full crimp, space buns, and oversized clips lean party or editorial. Half-up styles, crimped ponytails, and low buns work better for everyday wear because they keep the shape controlled.
Tips That Make Crimped Hair Look Better
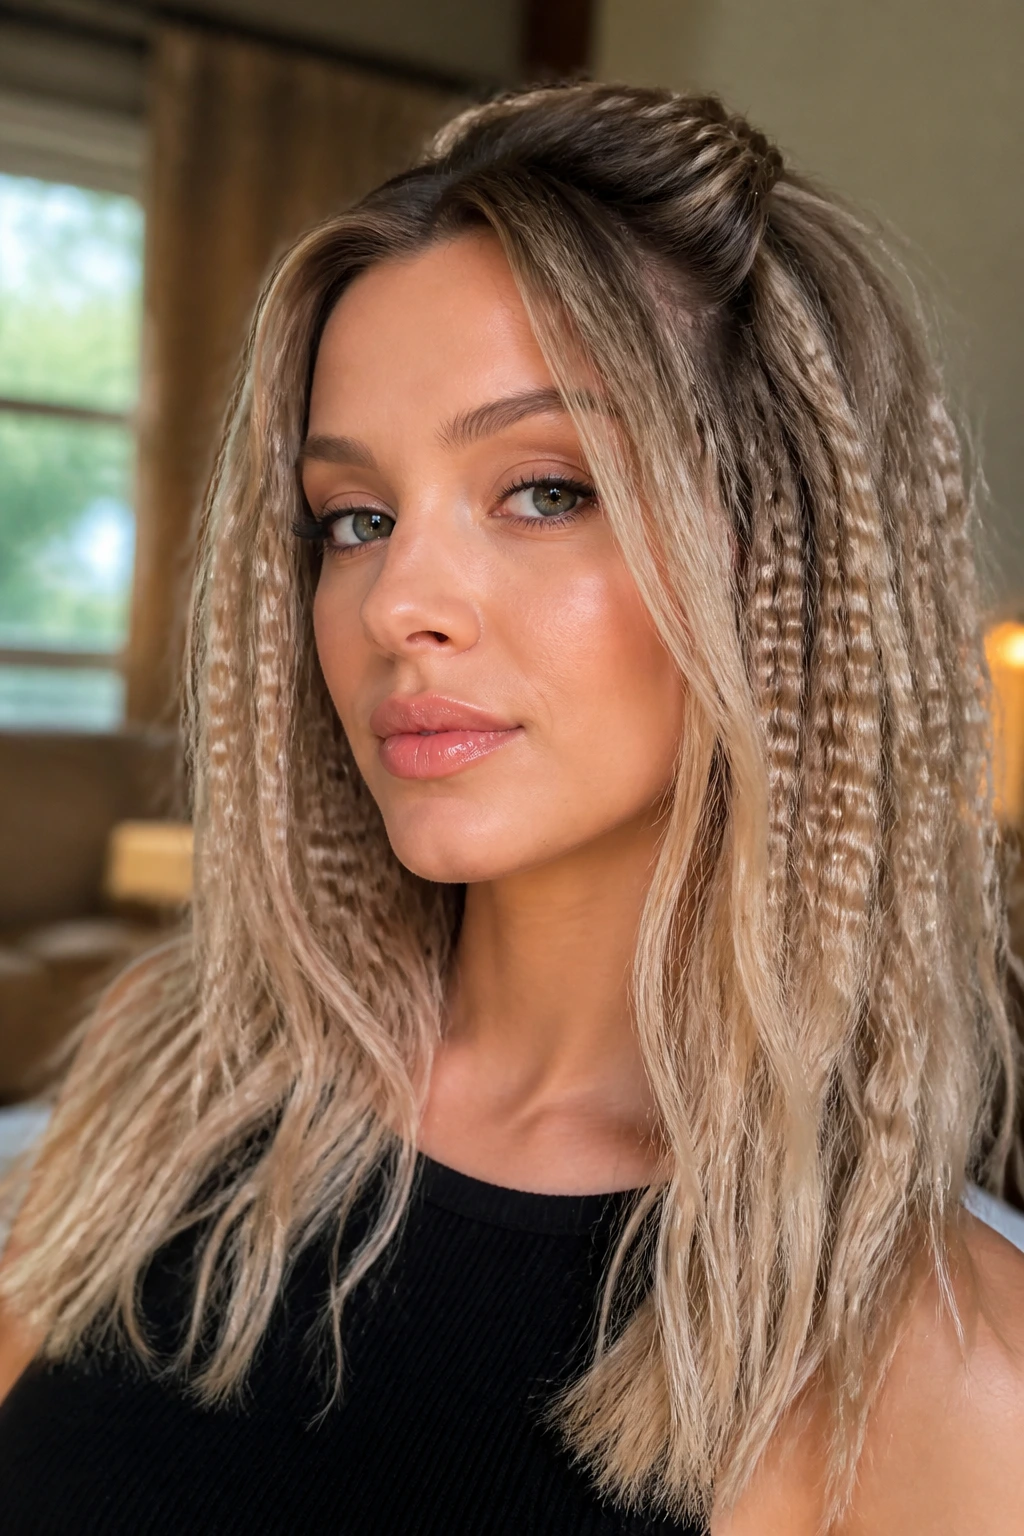
Texture Balance: Leave the last inch or two smooth on most styles. That little strip of calm at the ends keeps the shape from turning fuzzy, and it makes the cut line easier to read.
Color Play: If you have balayage, crimp the pieces where the lighter color lives most visibly—around the face, at the mid-lengths, and through the outer layer. The ridges will show off the color instead of hiding it.
Customization: Mix section sizes. A few narrow panels near the face and wider ones in the back give the whole head more shape than perfectly identical rows.
Make-It-Yours: Fine hair likes a root lift plus partial crimp. Thick hair usually looks better with a looser wave pattern or a half-up style that removes some weight. Curly hair can use crimping on stretched lengths to add structure without losing all movement.
Common Mistakes That Flatten the Look
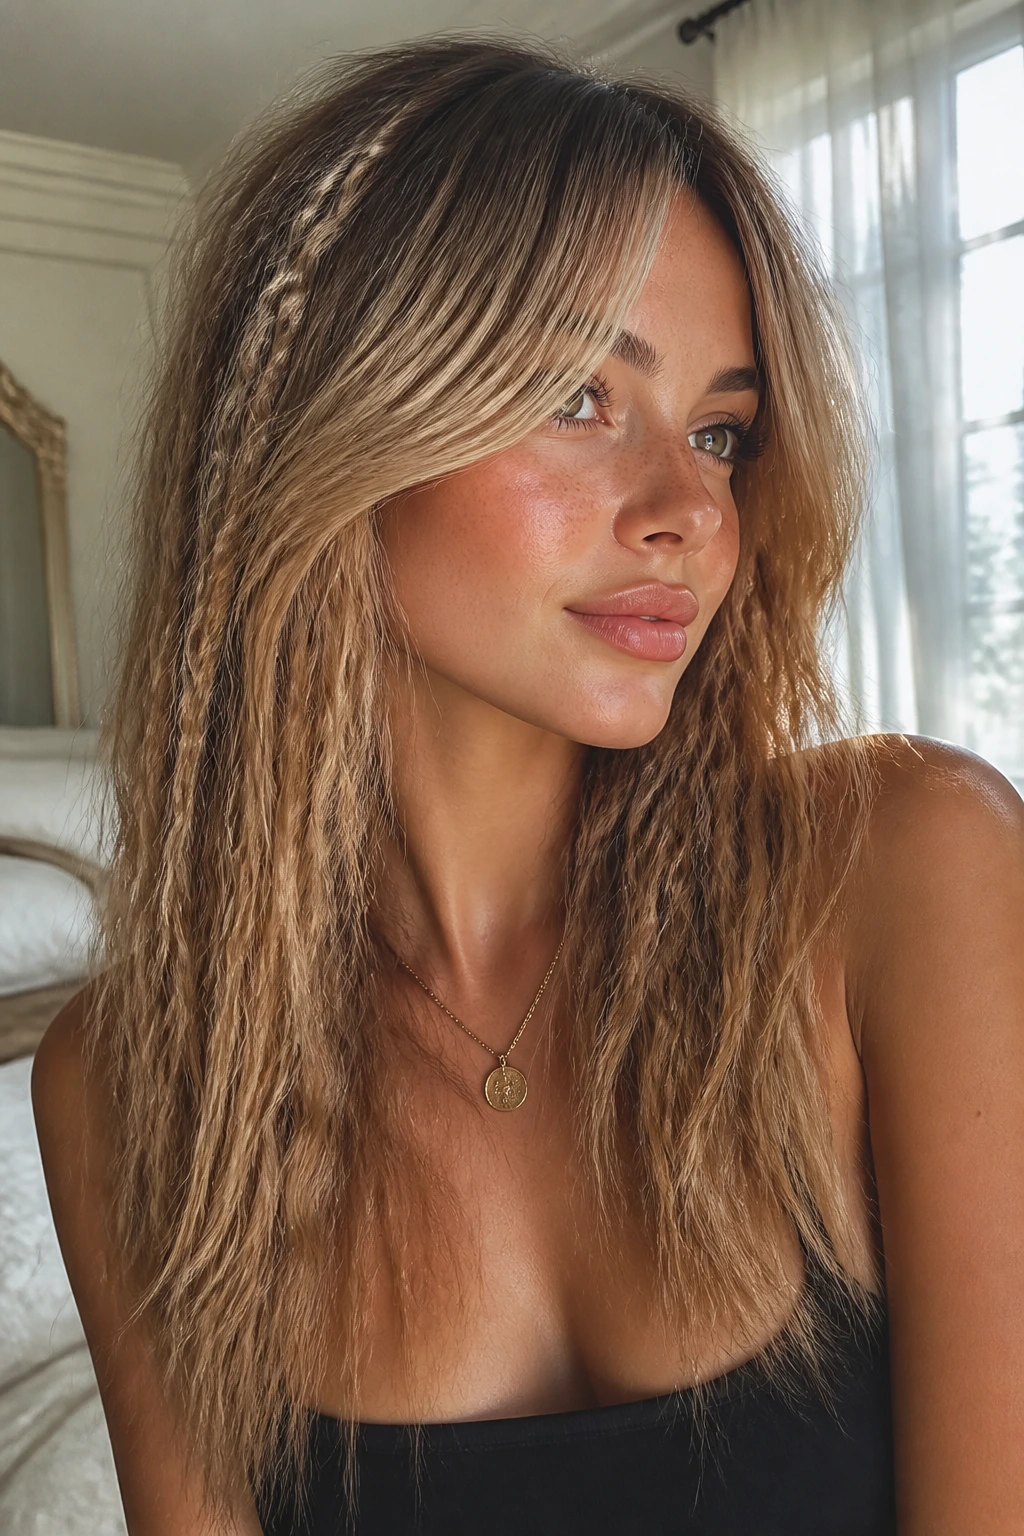
The first mistake is crimping hair that is too clean and slippery. Freshly washed hair often looks shiny, but it can refuse to hold the ridge pattern. A little texture spray or dry shampoo gives the plates something to grip.
The second is using sections that are too wide. If you try to rush through 2-inch sections, the outside may crimp while the center stays limp. That creates a weird patchy bend, and it never looks as good as clean, smaller panels.
The third is crimping every single inch of the hair, including the ends and the root. That’s the fastest way to turn a good style into a puffball. Leave some smooth space at the scalp or the ends so the eye has a place to rest.
The fourth is brushing or touching the hair before it cools. Hot hair sets while it cools. If you move it too soon, you lose the shape and sometimes the shine too.
The fifth is using too much high-hold spray before heat. That can make the hair tacky and dull, and it can also leave the ridges stiff in a weird way. Set first, spray after.
Variations and Adaptations to Try
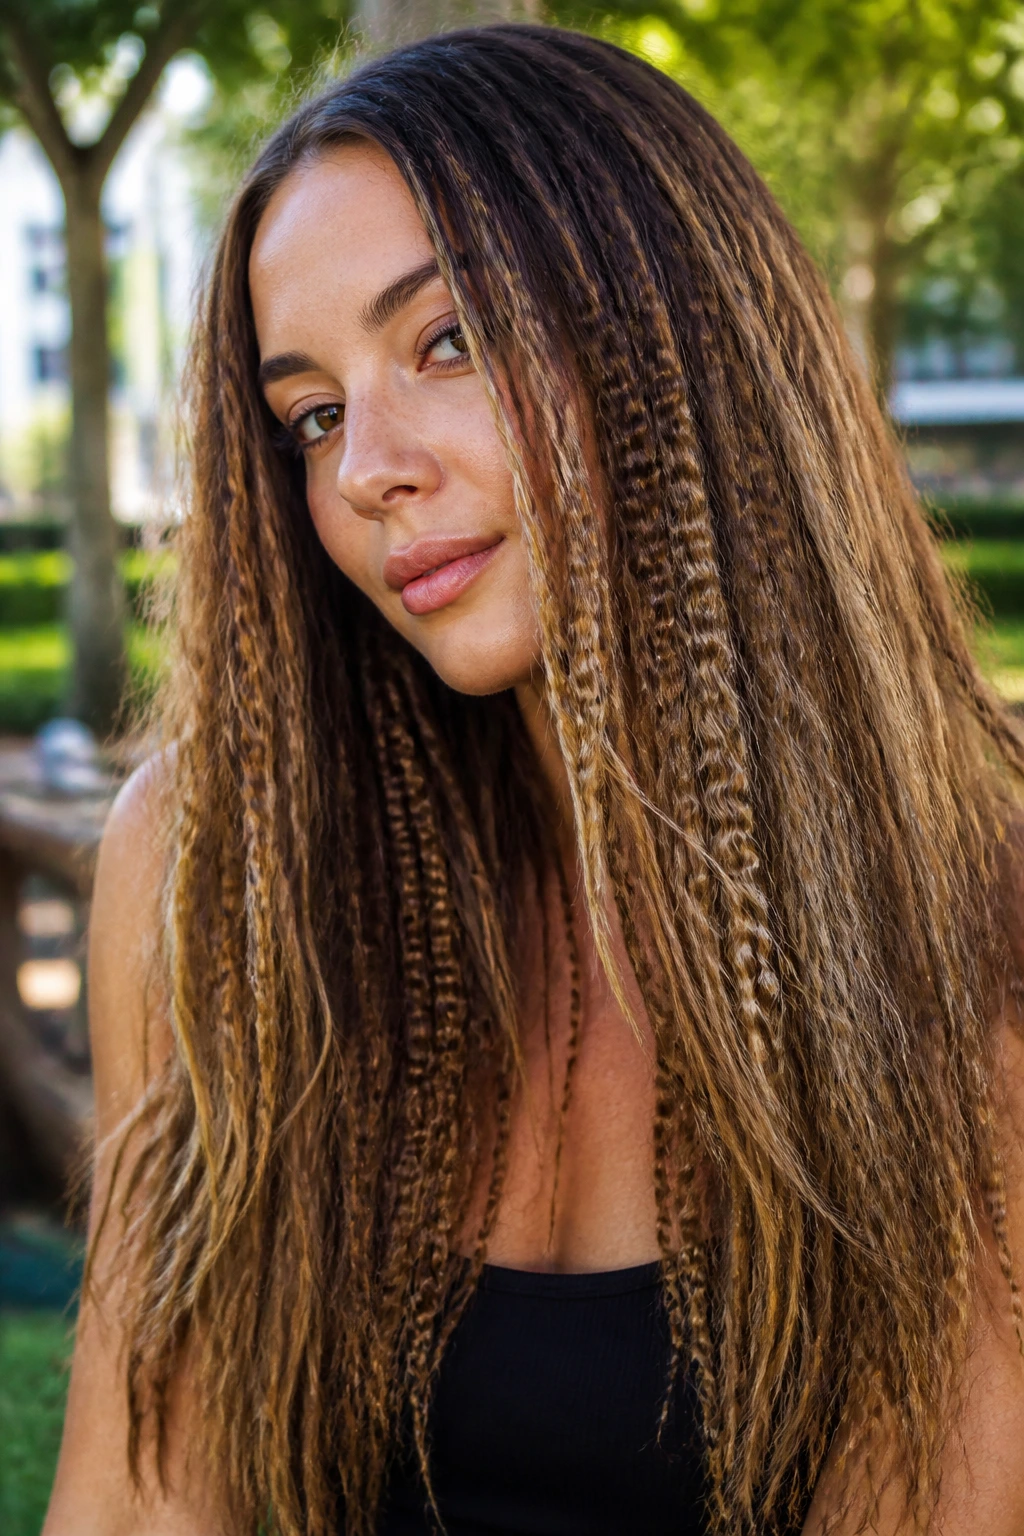
Soft Ribbon Crimp: Use a wider crimper or brush out the ridges lightly after cooling. This gives you a looser texture that works on long hair and softens the 80s edge.
Dark-Roots Glam Crimp: Keep the roots smooth, crimp the lower two-thirds, and finish with shine spray. This version looks especially good on balayage because the color gradient stays readable.
Festival Half-Up Crimp: Crimp the top half, pull it into mini buns or clips, and leave the lower half loose. Add ribbons or star pins if you want more personality.
Heat-Light Accent Crimp: Crimp only the front pieces or the underlayer. This is the move for anyone who wants the trend without committing to the whole head.
Heat-Free Rope Crimp: Braid damp hair into several tight braids, let it dry fully, then undo and separate lightly. The bend is softer than iron-made crimps, but it gives a similar textured feel with less heat.
Curly-Texture Crimp Mix: Stretch natural curls first, then crimp selected sections to change the surface without erasing the natural pattern completely. It works best when you leave the ends a touch softer.
How to Keep Crimped Hair Going for Days
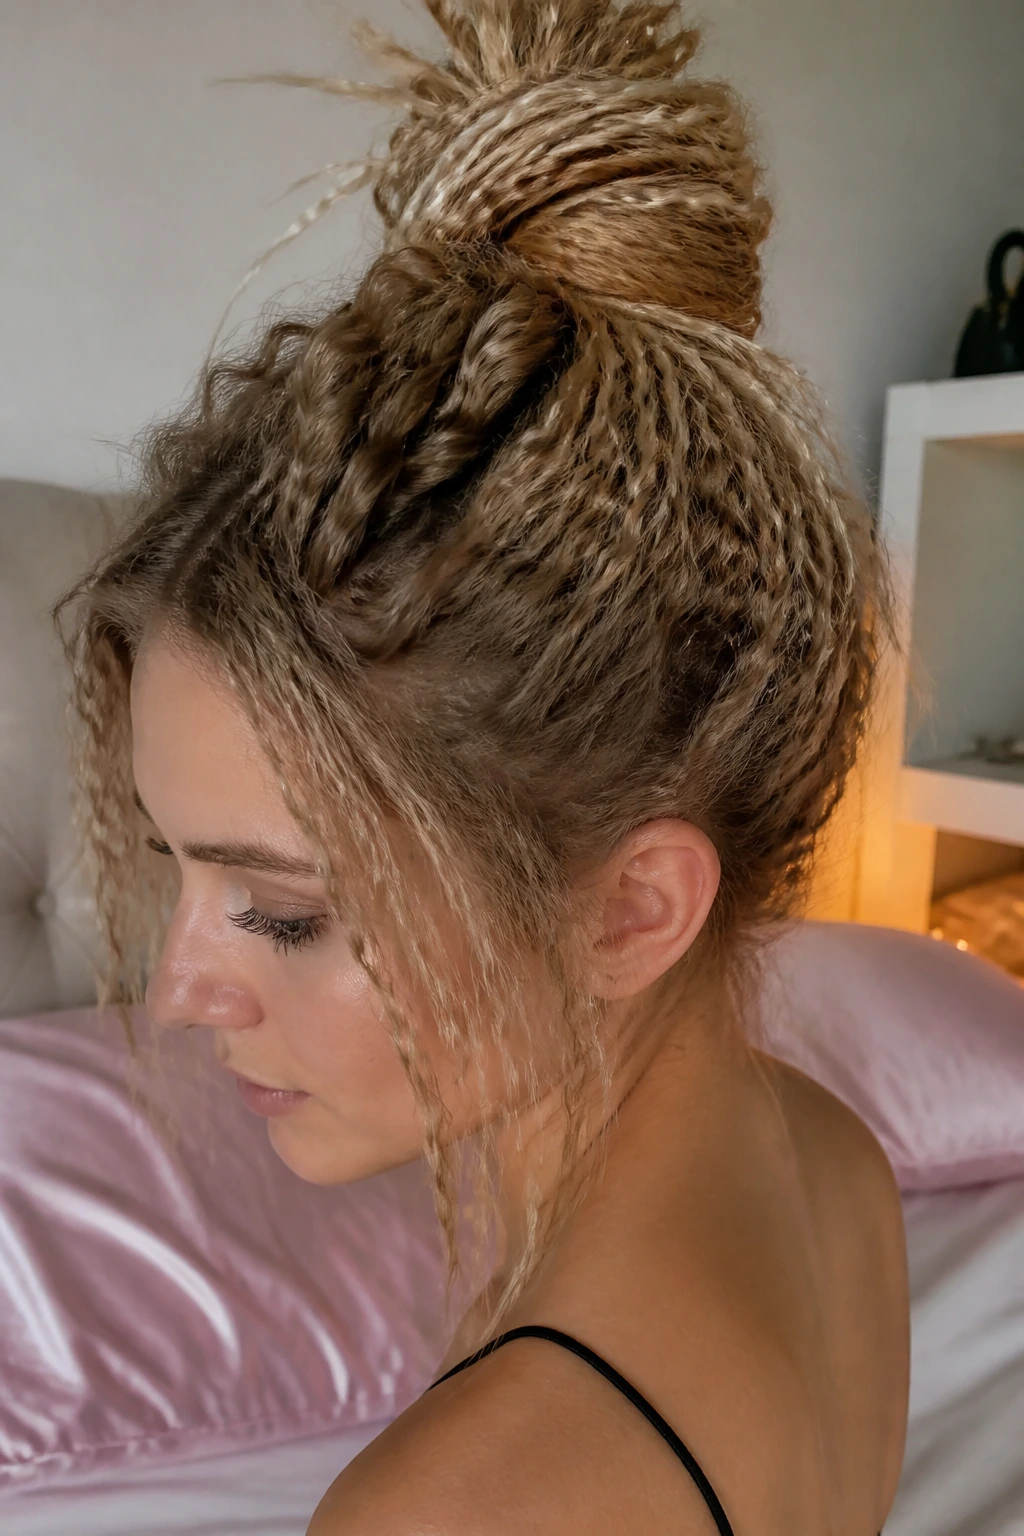
A good crimp can last one to three days if you treat it like texture, not a curling blowout. Sleep on it loosely. A silk scarf, silk pillowcase, or a very loose top knot protects the ridges from being crushed flat. If you toss and turn a lot, pin the top section into a soft wrap rather than sleeping on it spread out.
In the morning, don’t reach for a brush first. Shake the hair out, separate any clumped pieces with your fingers, and use dry shampoo at the roots if the crown has gone soft. A quick pass of the iron on only the sections that collapsed can bring the pattern back without redoing the whole head.
On fine hair, I usually expect the front to soften before the back. That’s normal. On thicker or color-treated hair, the texture can last a little longer, but humidity will still blur the ridges. If the hair smells burnt or feels rough after a refresh, stop reheating it. More passes are not always better.
Frequently Asked Questions
Does crimping damage hair more than curling?
Not automatically, but it can if you run hot plates over the same section again and again. Use heat protectant, keep the iron moving, and stay in a sane temperature range for your hair type.
Can I crimp short hair?
Yes, but the look changes a bit. Bobs, lobs, and shaggy cuts often work better with partial crimping, face-framing pieces, or crimped ends instead of a full head of tight ridges.
Should I crimp clean hair or day-two hair?
Day-two hair usually behaves better because it has a little grip. If your hair is freshly washed, add texture spray or dry shampoo first so the pattern sets instead of sliding.
Will crimped hair work on balayage or highlights?
Very much so. The texture makes light pieces more visible because each ridge catches the light from a slightly different angle, which is a gift if your color has dimension.
How do I keep the crimp from looking frizzy?
Don’t overdo the heat, and don’t brush the hair before it cools. Keep a few ends smooth, and finish with a light shine spray if the outer layer looks dry.
What if my hair falls flat an hour later?
Your sections were probably too wide, or the hair was too soft to start with. Go smaller next time, prep with a light texture product, and let each panel cool completely before touching it.
Can I do this on bleached hair?
Yes, but with care. Use lower heat, fewer passes, and focus on the mid-lengths rather than the most fragile ends. If the hair feels weak or stretchy, skip the hot tool and try a heat-free bend instead.
Is a crimping iron better than a flat iron for this look?
A crimping iron is easier because it gives you a consistent ridge pattern without a lot of hand work. A flat iron can mimic some of the effect, but it takes more practice and usually looks softer.
Keeping the Zigzag in the Style, Not the Joke
Crimped hair works when the texture has a point. One clean part, one thoughtful accessory, one smart sectioning pattern — that’s usually enough. The style doesn’t need every inch of hair to shout at once. It just needs enough ridge, enough shine, and enough control to keep the shape readable.
That’s the real reason retro crimped hair looks for women still matter. They give you a built-in way to change the silhouette without cutting, coloring, or curling everything from scratch. Pick the version that suits your cut, your color, and your patience, then let the texture do the talking.
