



Medium-length hair is the easiest length for braids to behave on. It has enough weight to stay where you put it, but not so much length that every plait turns into a heavy rope by lunch. That balance matters. When braid hairstyles for medium length hair are sized right, they sit closer to the head, show cleaner lines, and don’t drag the scalp the way overly long braids often do.
There’s also a practical reason these styles work so well at collarbone or shoulder length: the ends tuck, wrap, or curl before they get unruly. You don’t have to wrestle with three feet of hair to get a crisp shape. You just need the right sectioning, a little grip at the roots, and a decision about whether you want sleek, soft, or full-on graphic.
The big mistake people make with medium-length braids is treating them like a compromise length. They’re not. Medium hair is its own lane, and once you stop trying to force long-hair braid logic onto it, the styles start to look sharper, cleaner, and more deliberate. A few of these are polished enough for dinner. A few are the kind of thing you throw on before a workout and end up wearing all day. Several sit right in the middle, which is where most real-life hair actually lives.
Why These Braids Work So Well on Medium-Length Hair
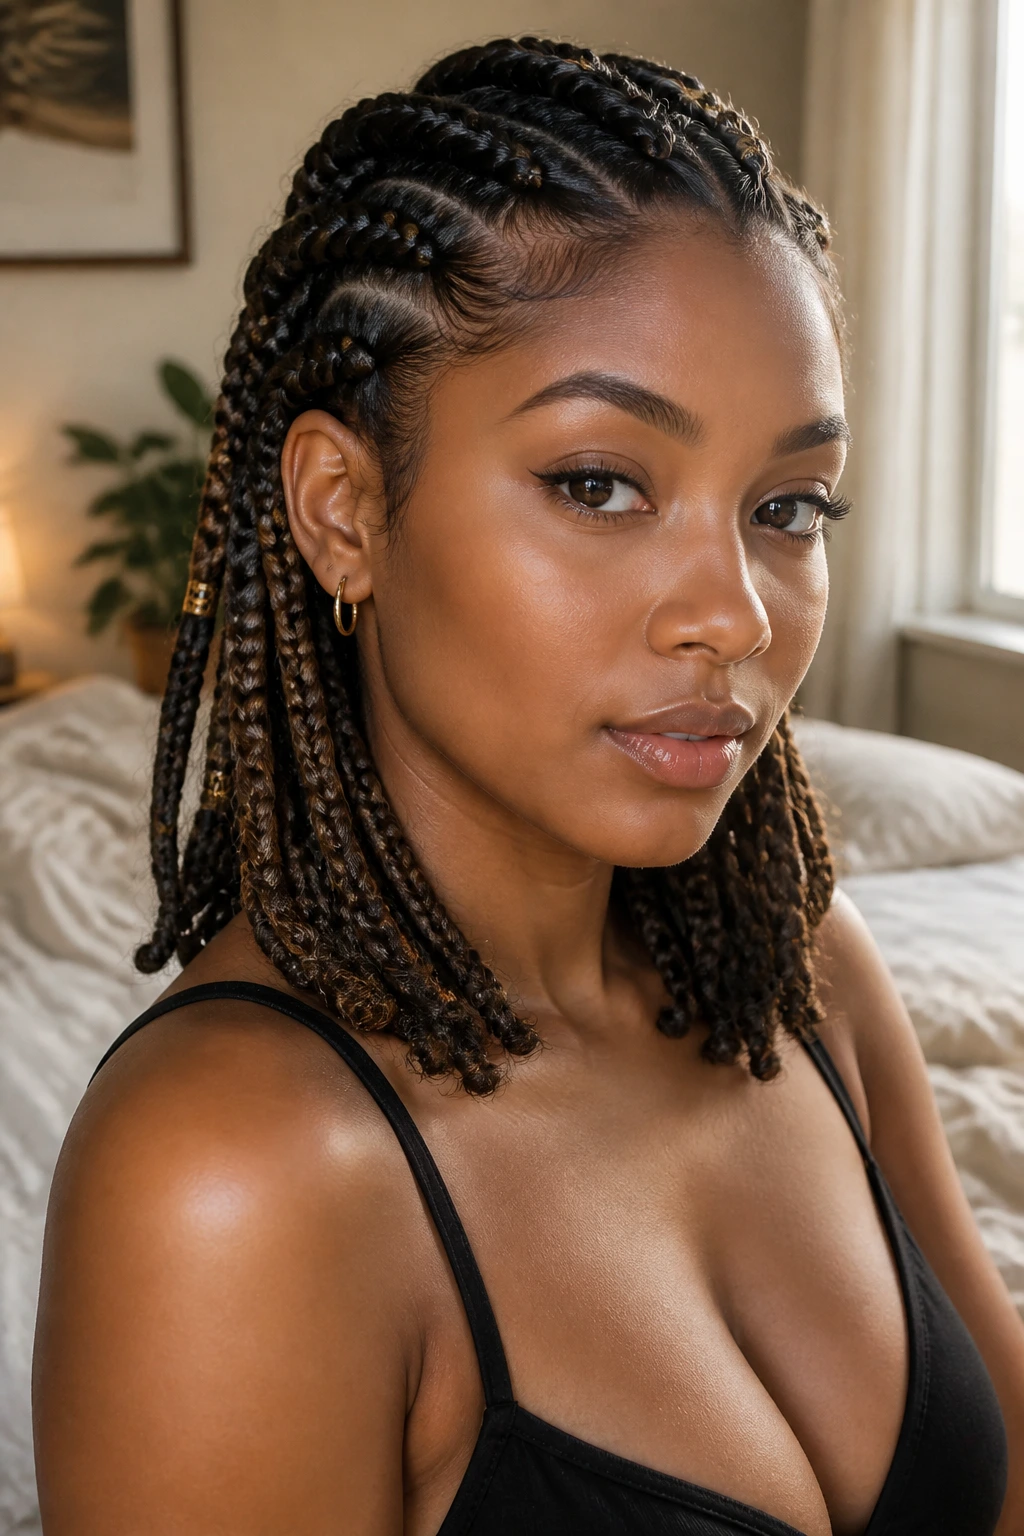
Built-in control: Medium-length hair gives braid sections enough weight to stay tidy without collapsing into a heavy rope at the nape.
Cleaner finishes: Ends are easier to tuck, pin, curl, or wrap when they stop around the shoulders instead of hanging far past them.
Less tension needed: You can get a structured braid with lighter pressure at the scalp, which keeps the style more comfortable for all-day wear.
Layer-friendly shaping: Face-framing pieces and shorter layers can be worked into the style instead of constantly falling out of it.
Fast reset: Most of these looks can be revived with a mist bottle, a small comb, and a few pins, which is a lot less annoying than redoing everything.
Works with texture: Straight, wavy, curly, and coily hair all fit somewhere in this collection; the real difference is how much grip and smoothing product you use.
1. Side-Swept Three-Strand Braid
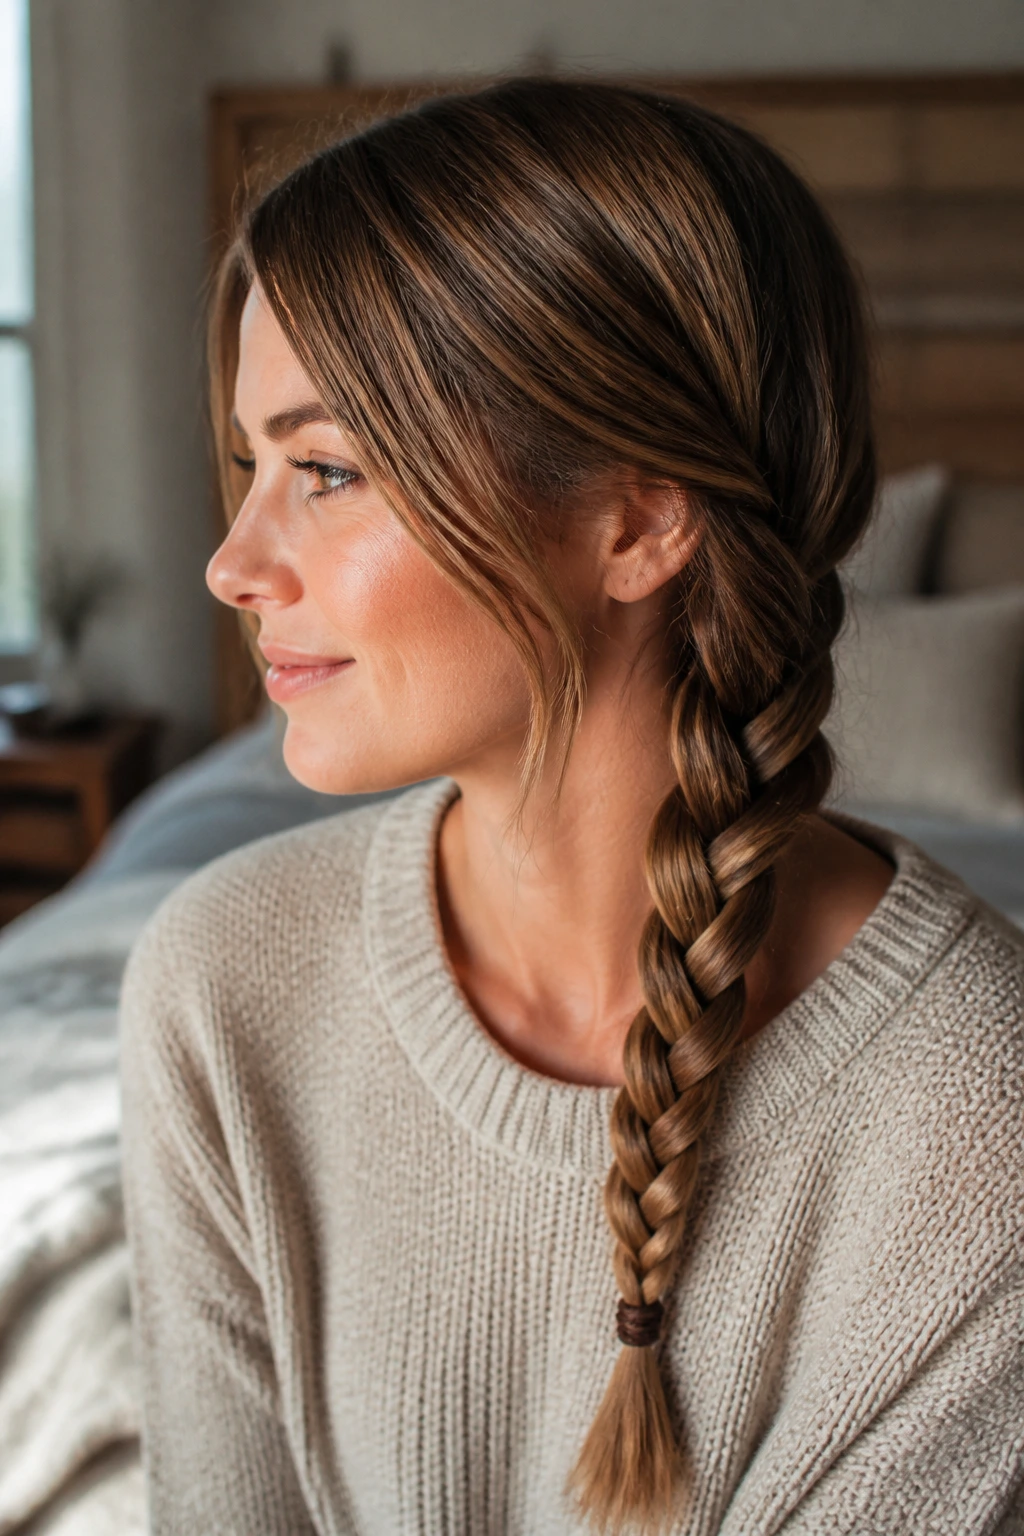
A side-swept three-strand braid is the one I’d hand to someone who wants braids without making a production out of it. It starts with a deep side part, slides over one shoulder, and lands in that neat, low-maintenance shape that looks intentional even when the rest of the hair is a little lived-in. On medium-length hair, the braid stays compact instead of going ropey and tired halfway down your back.
The trick is to leave the first inch near the hairline slightly looser, then tighten as you move through the mid-lengths. That gives the front a soft bend and keeps the braid from looking like it was tied on by a cable technician. Finish by gently pulling the outer loops apart just a bit. Not enough to wreck the pattern. Just enough to make the braid look fuller.
Why It Works for Shoulder-Length Hair
Medium-length strands have enough length to keep the braid from slipping, but not so much that it loses its shape. If your hair has layers, this style also lets you hide the shortest pieces under the braid instead of fighting them around the face.
2. Classic French Braid
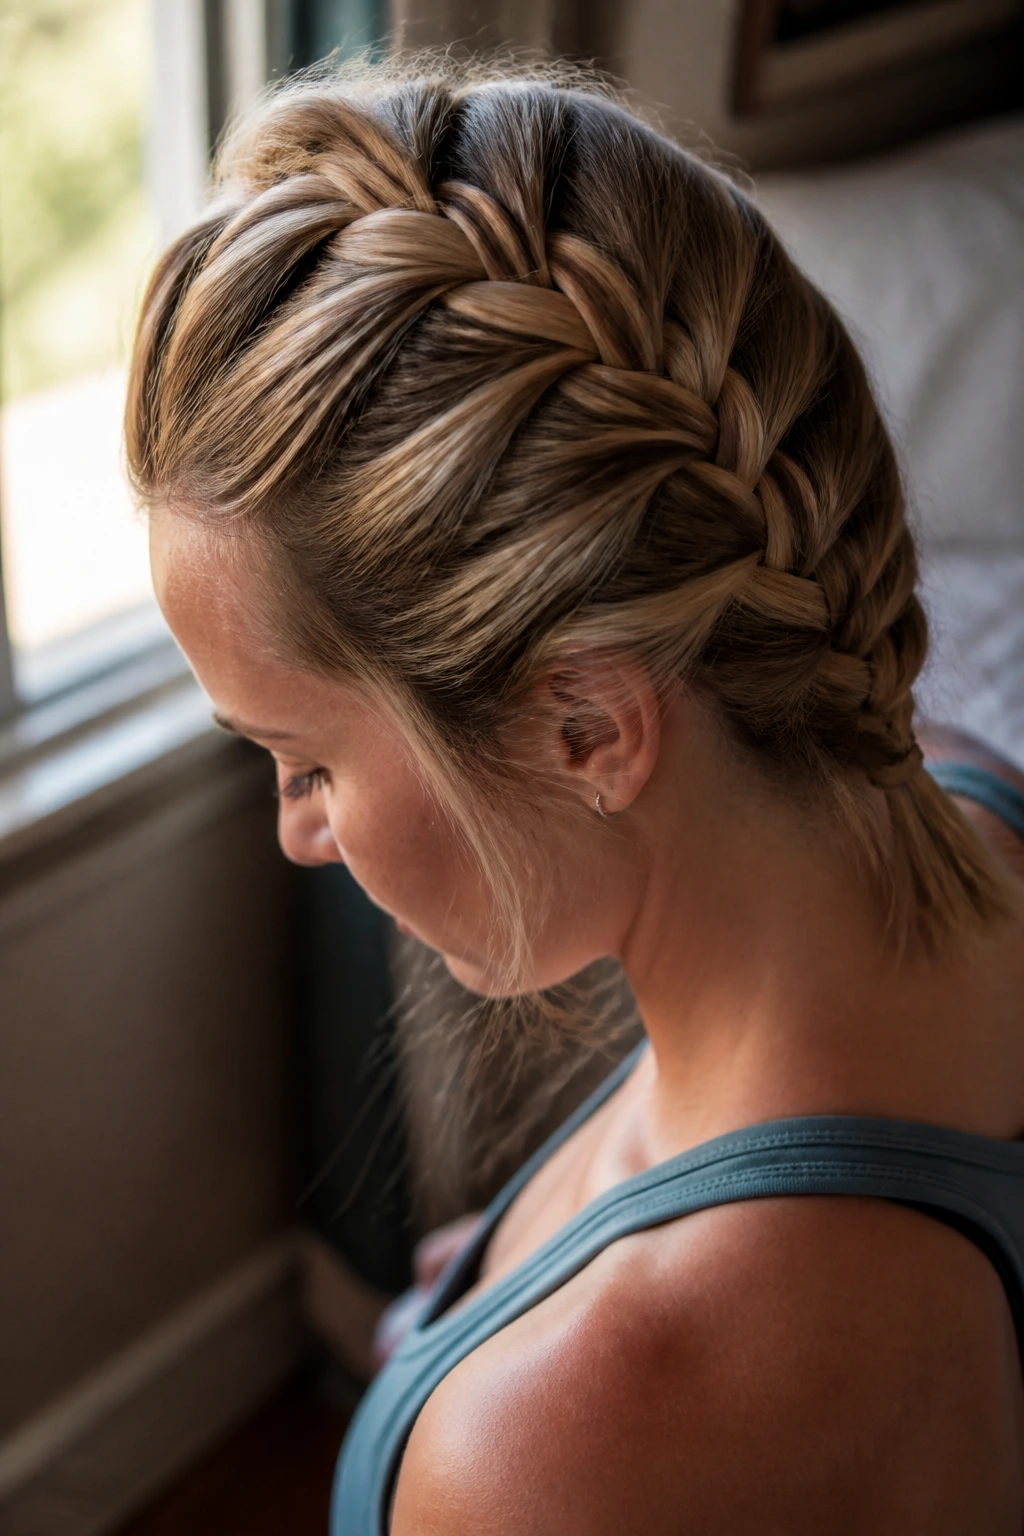
What makes a French braid hold its own on medium-length hair is the way it builds from the scalp downward. You get that snug, anchored look at the crown, then the braid tapers neatly at the back of the head before the ends need to be pinned or tucked. It’s one of the few styles that looks polished even when the sectioning isn’t perfect.
I like this one most on second-day hair, especially if the roots have a little texture. Freshly washed hair can be too slippery, and then you spend all morning chasing flyaways. A tiny bit of styling cream at the part line helps, but don’t coat the whole head. You want grip, not grease.
3. Dutch Braid Pigtails
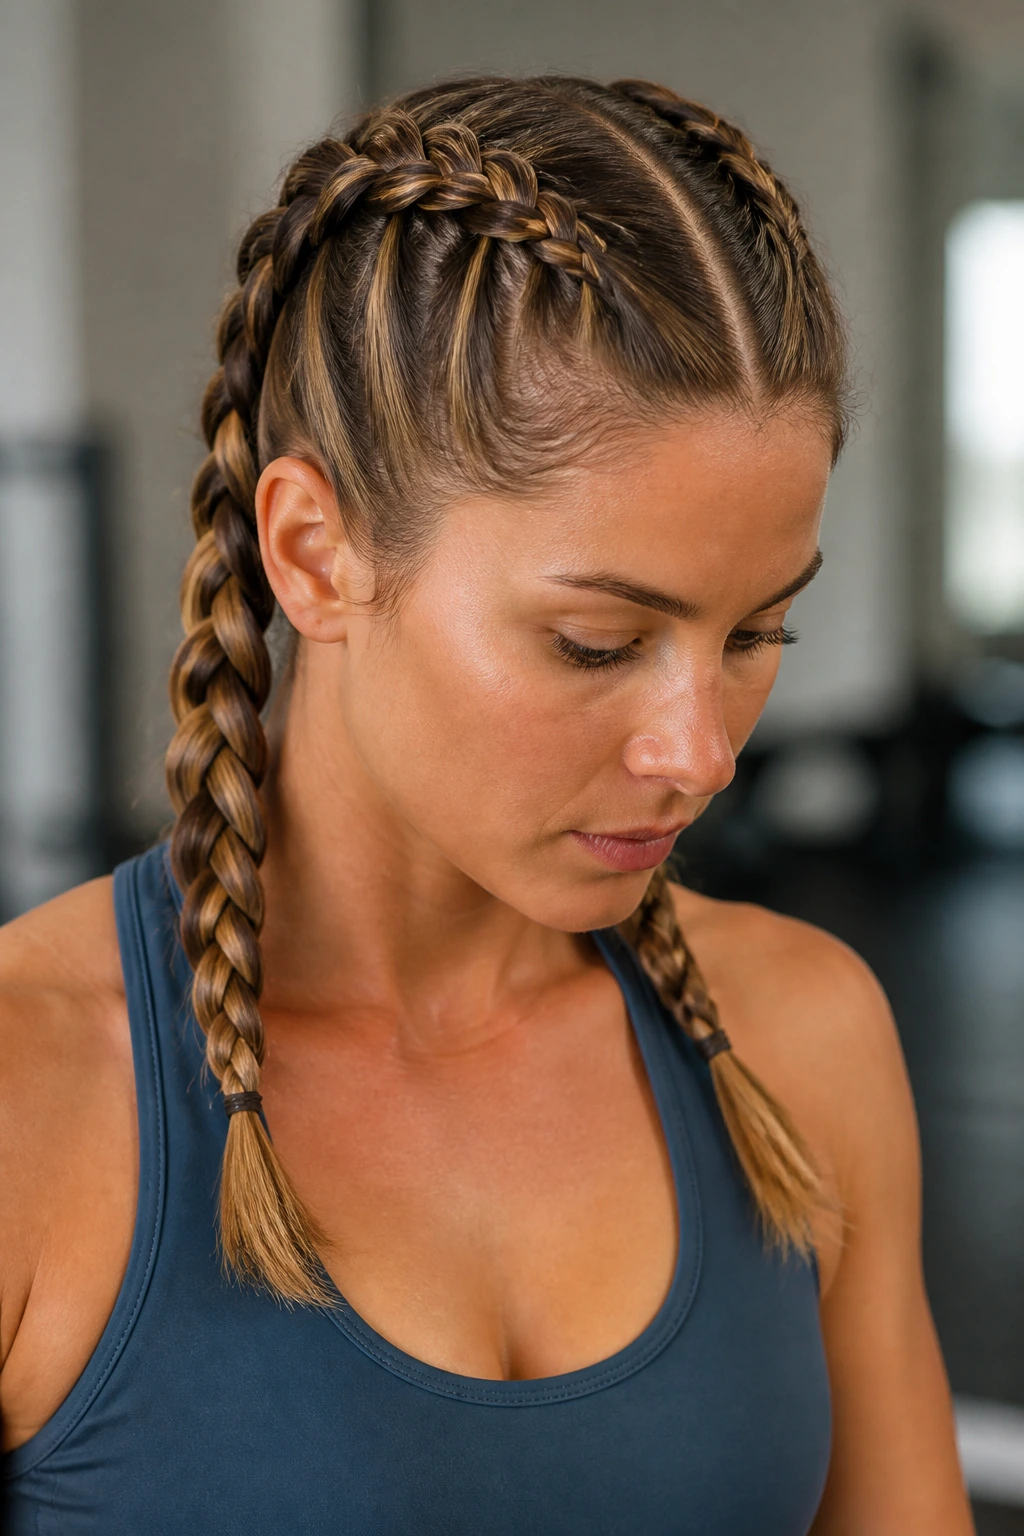
Two Dutch braids can look sporty, tidy, or plain sharp depending on how tight you pull them. Medium-length hair gives them a useful advantage: the braids sit away from the neck without becoming bulky at the ends. That means they’re comfortable enough for errands or workouts, but still neat enough that you don’t look like you gave up on the day.
Start each braid with even part lines. That part matters more than people think. If one side is wider, the braid will feel lopsided all the way down. Pull the loops apart once the braids are secured, especially if your hair is fine. The shape gets fuller without needing extra product or fake hair.
4. Fishtail Braid
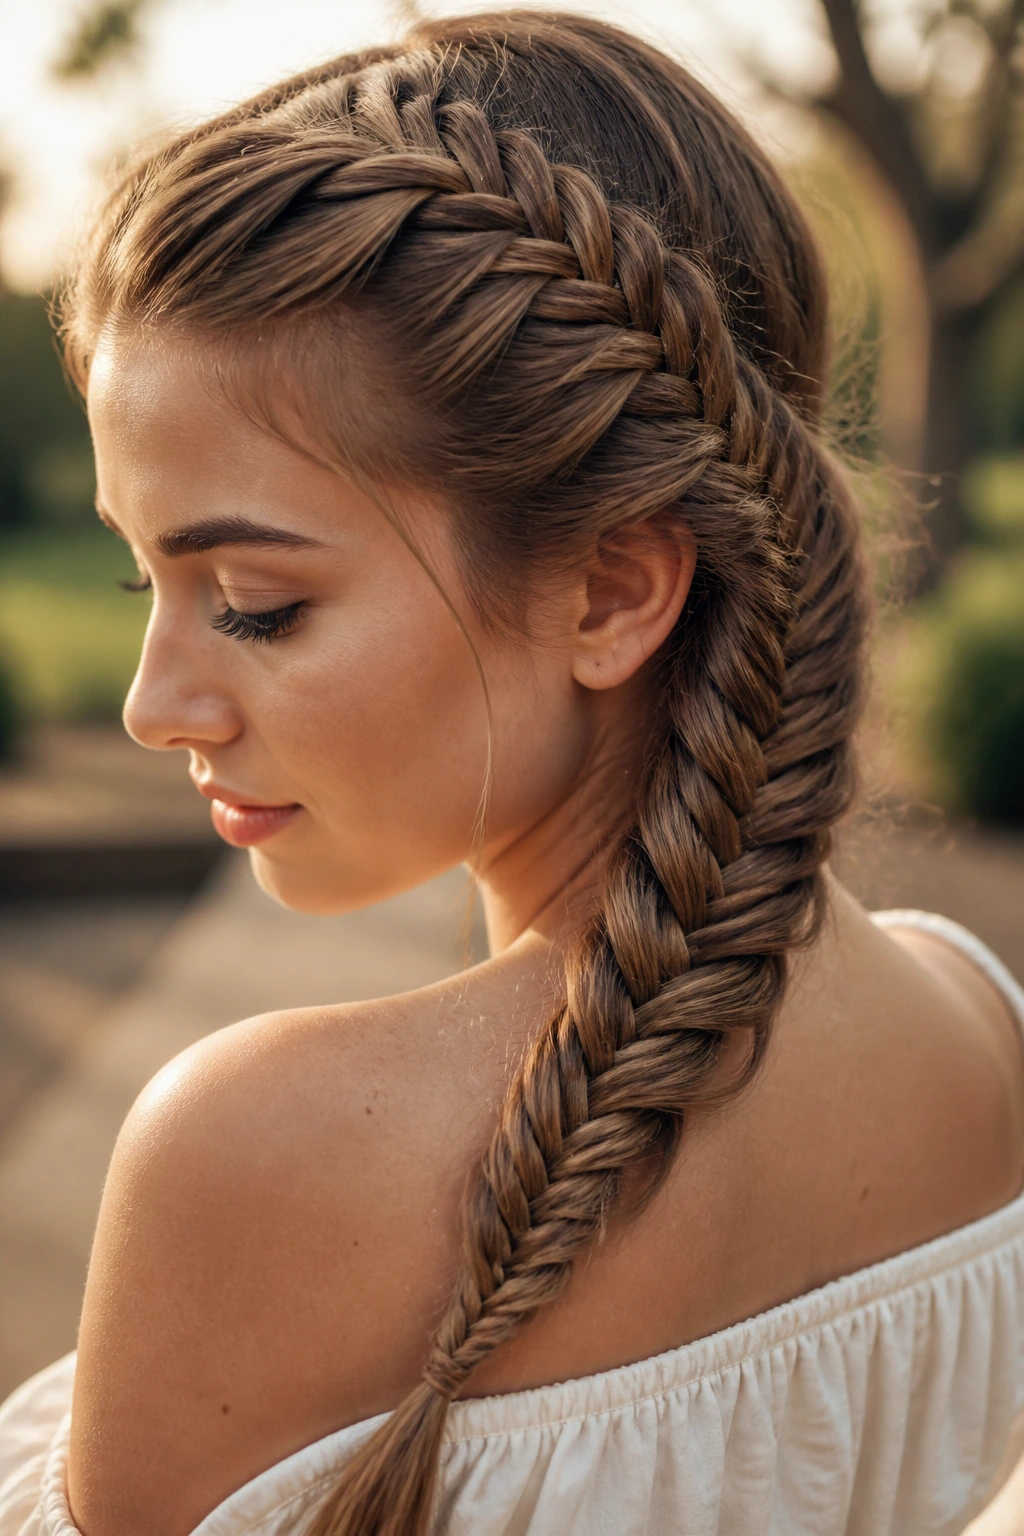
A fishtail braid is basically the detail-oriented cousin in this list. It looks intricate because the pattern is tight and small, which is exactly why medium-length hair is such a good match. You see the weave clearly before the ends start to thicken into a mess. Long hair can make fishtails look heavy. Medium hair keeps them tidy.
Work with tiny outer sections and keep your fingers close to the braid. If you grab too much hair at once, the pattern turns chunky and loses that woven look. A bit of dry shampoo at the roots or a light texturizing spray helps the braid hold its shape, especially if your hair slips easily.
5. Crown Braid Halo
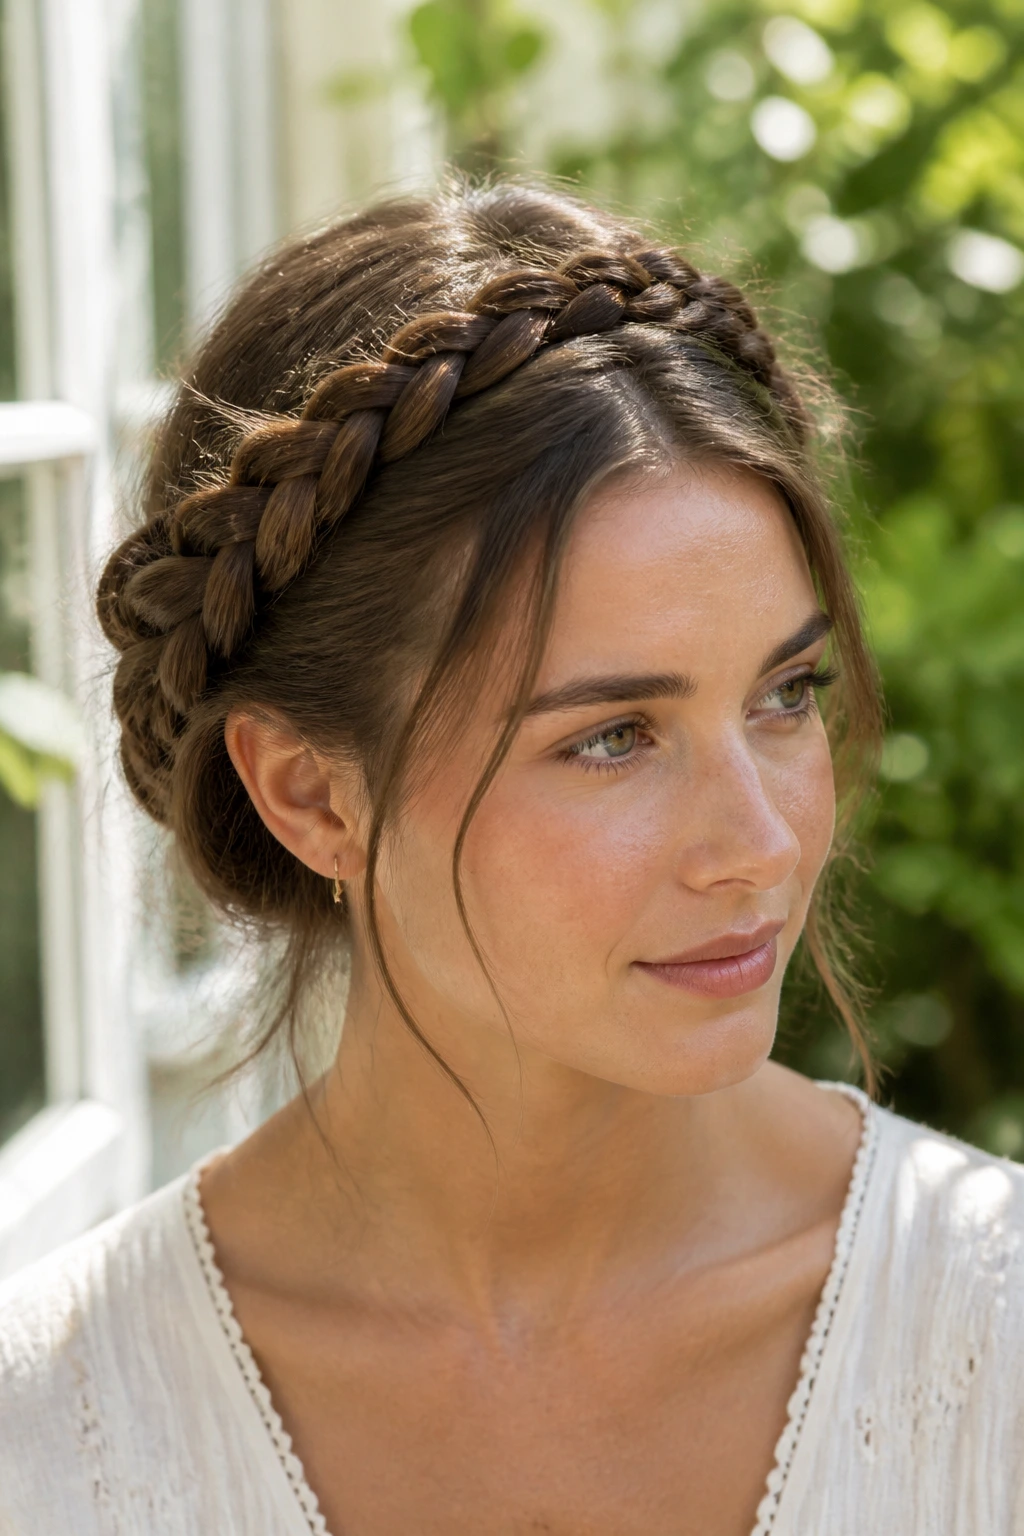
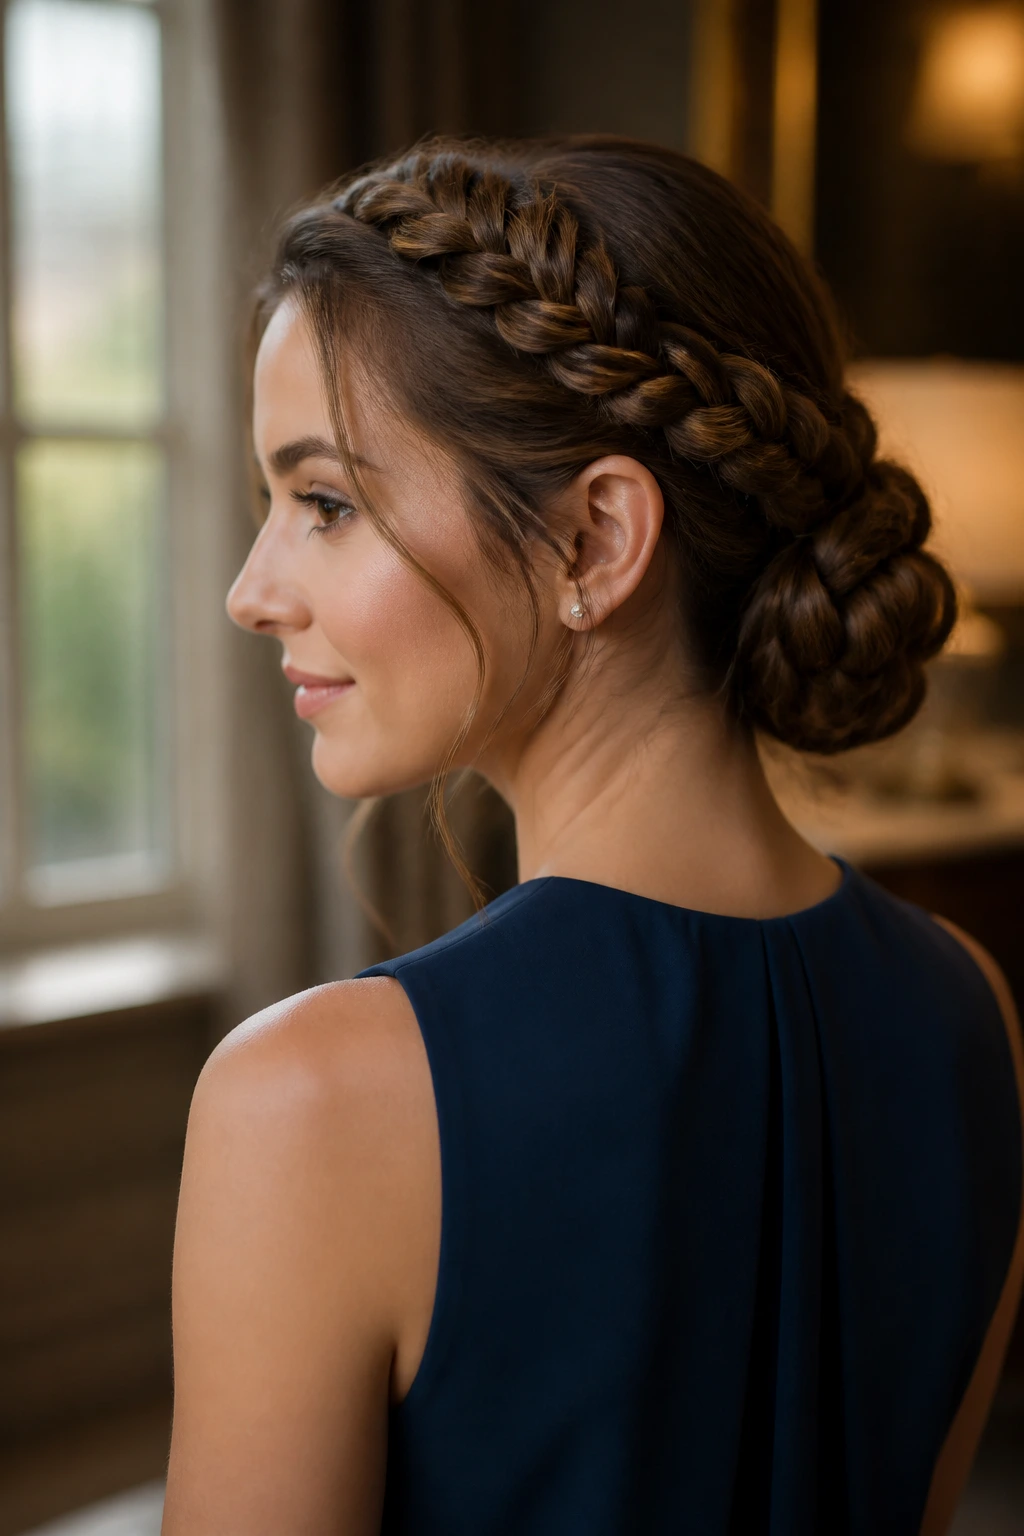
A crown braid halo sits beautifully on medium-length hair because the braid has just enough length to wrap across the head without building into a giant coil. It reads soft and formal at the same time, which is a hard balance to find in hairstyles. If the braid is too long, it starts to fight the shape of the head. Here, it usually sits where it should.
Pin the braid from underneath, not on top where the clips show. That’s the difference between a halo that looks clean and one that looks like it’s holding itself together by willpower. A few loose pieces near the temples keep the style from feeling severe. I’d skip heavy oils here; they make the braid slide.
6. Milkmaid Braids
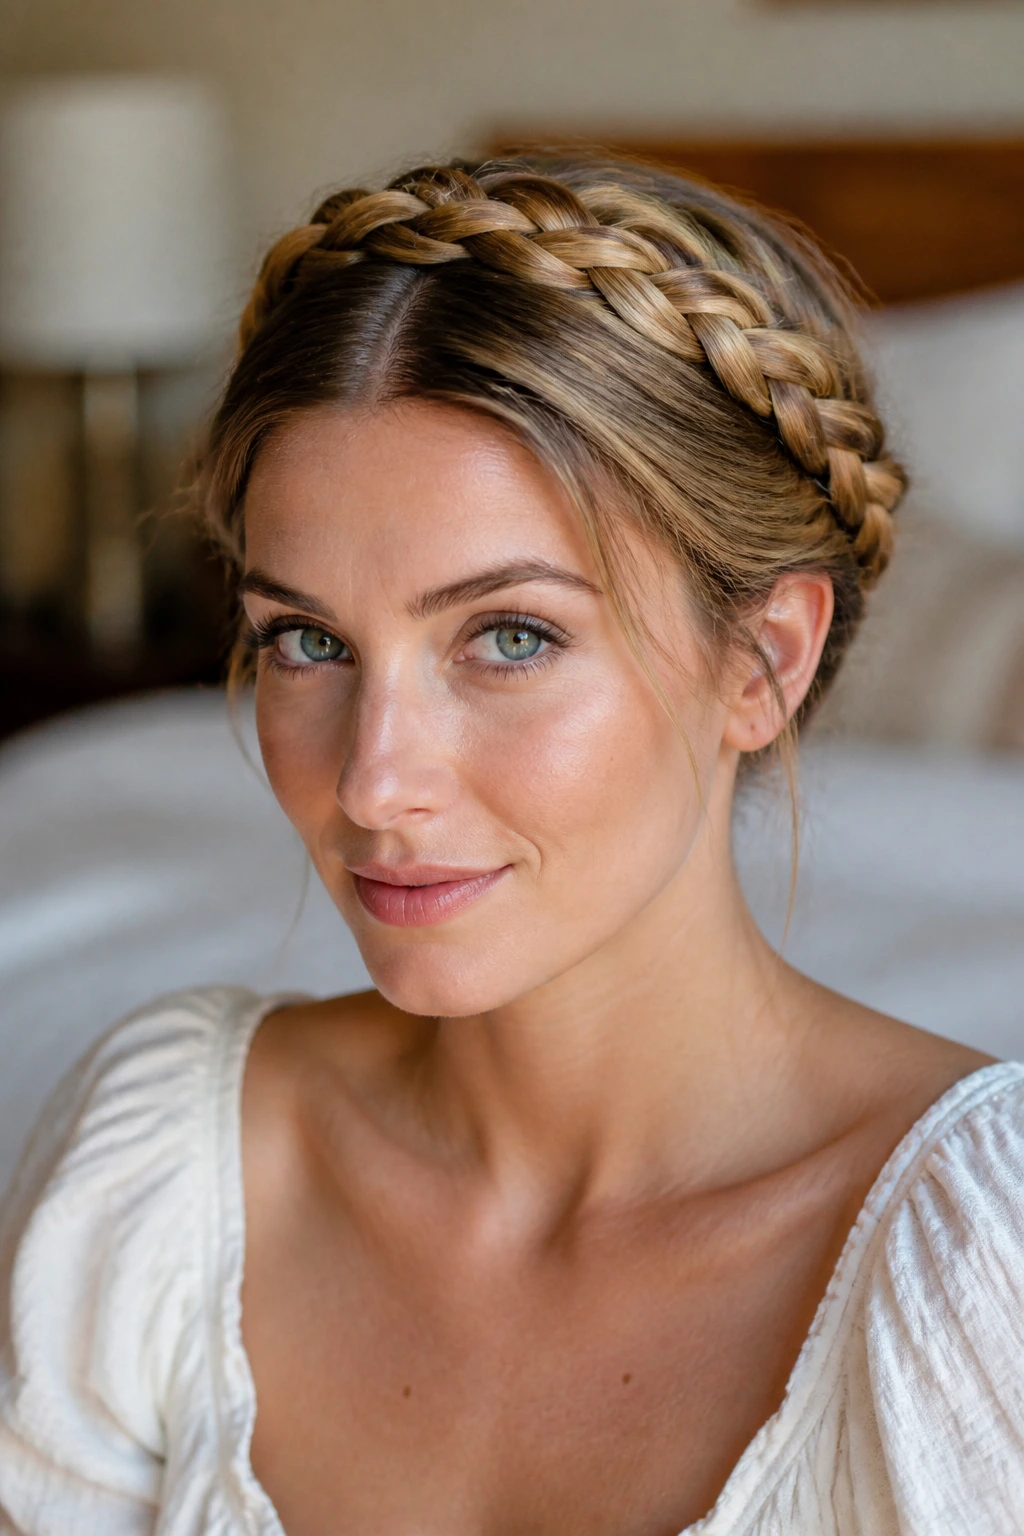
Milkmaid braids are one of those styles that looks old-world and easy, even though the pinning takes a little patience. On medium-length hair, the two braids cross over the crown without leaving awkward, overlong tails to hide. That alone makes the style easier than it sounds. The shape stays compact.
Braid each side first, then wrap them over the top of the head and anchor them with bobby pins that match your hair color. If your hair is layered, keep the braid slightly tighter at the back so shorter pieces don’t poke out near the ears. I prefer this style with a middle part, but a side part gives it a softer feel.
7. Pull-Through Braid Ponytail
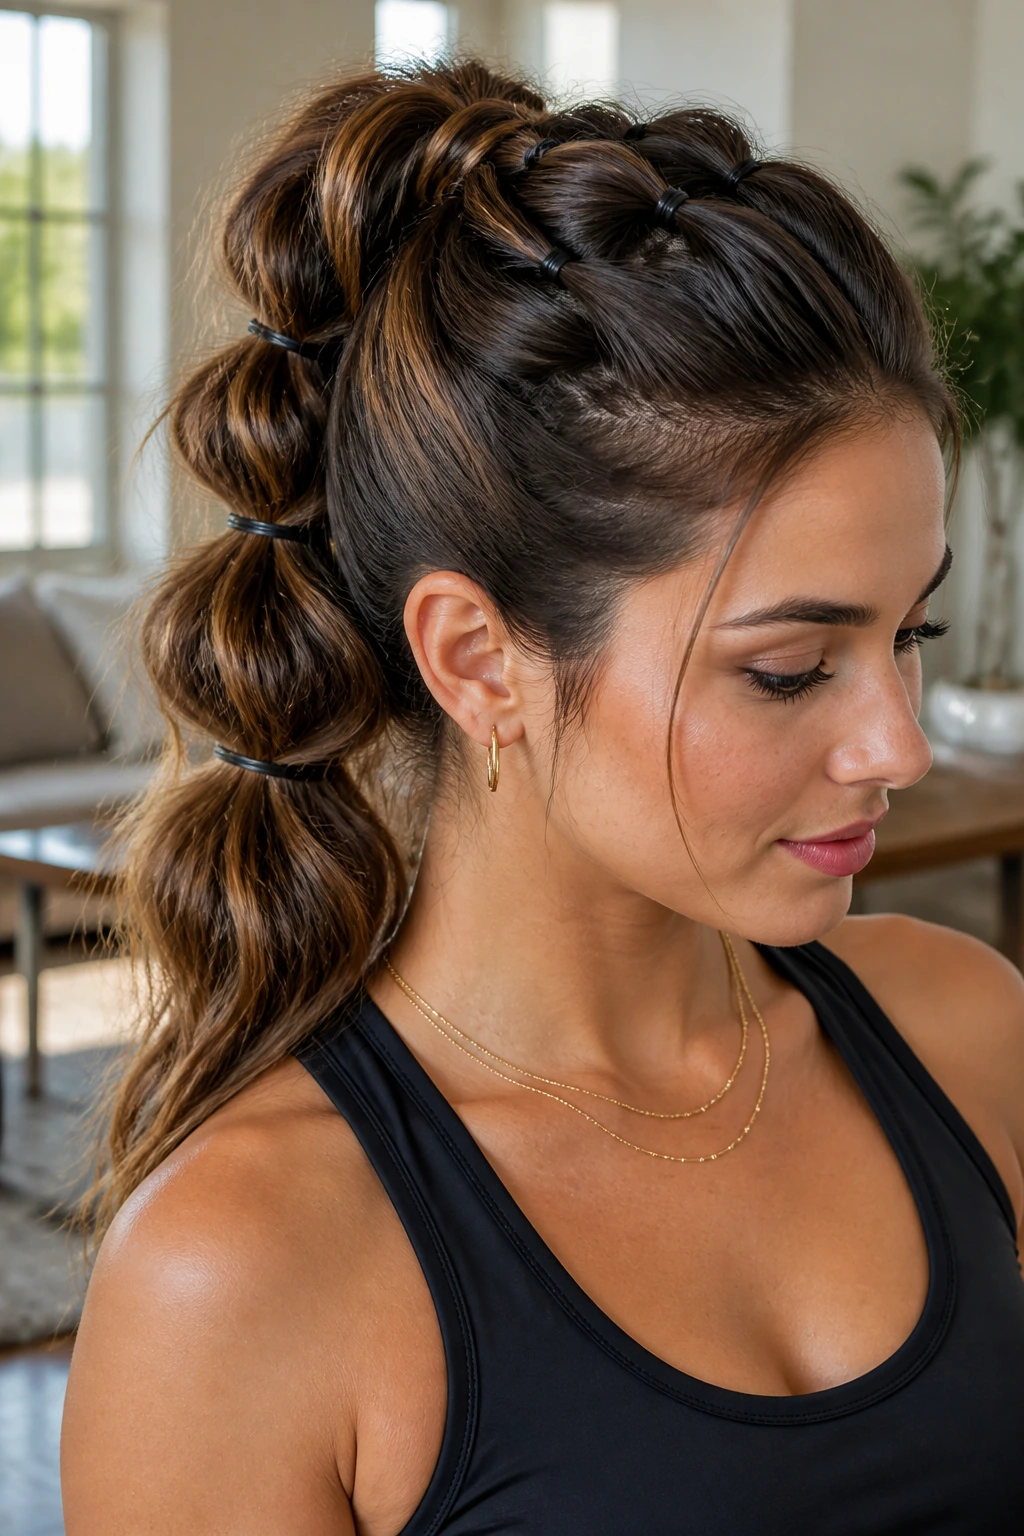
This is the braid for anyone who wants fullness without needing a mile of hair. Pull-through braids are made with small ponytail sections stacked one on top of another, so medium-length hair gets a fake-long look that’s crisp and controlled. The finished braid looks chunky and lifted, which is useful when your own hair would normally lie flat.
Use clear elastics every 1½ to 2 inches. That spacing keeps the sections puffed evenly. If you place them too close together, the style starts to look busy. Too far apart, and the braid sags. Pancake each section gently once it’s set. Don’t overdo it or the braid turns fuzzy.
8. Rope Braid Low Ponytail
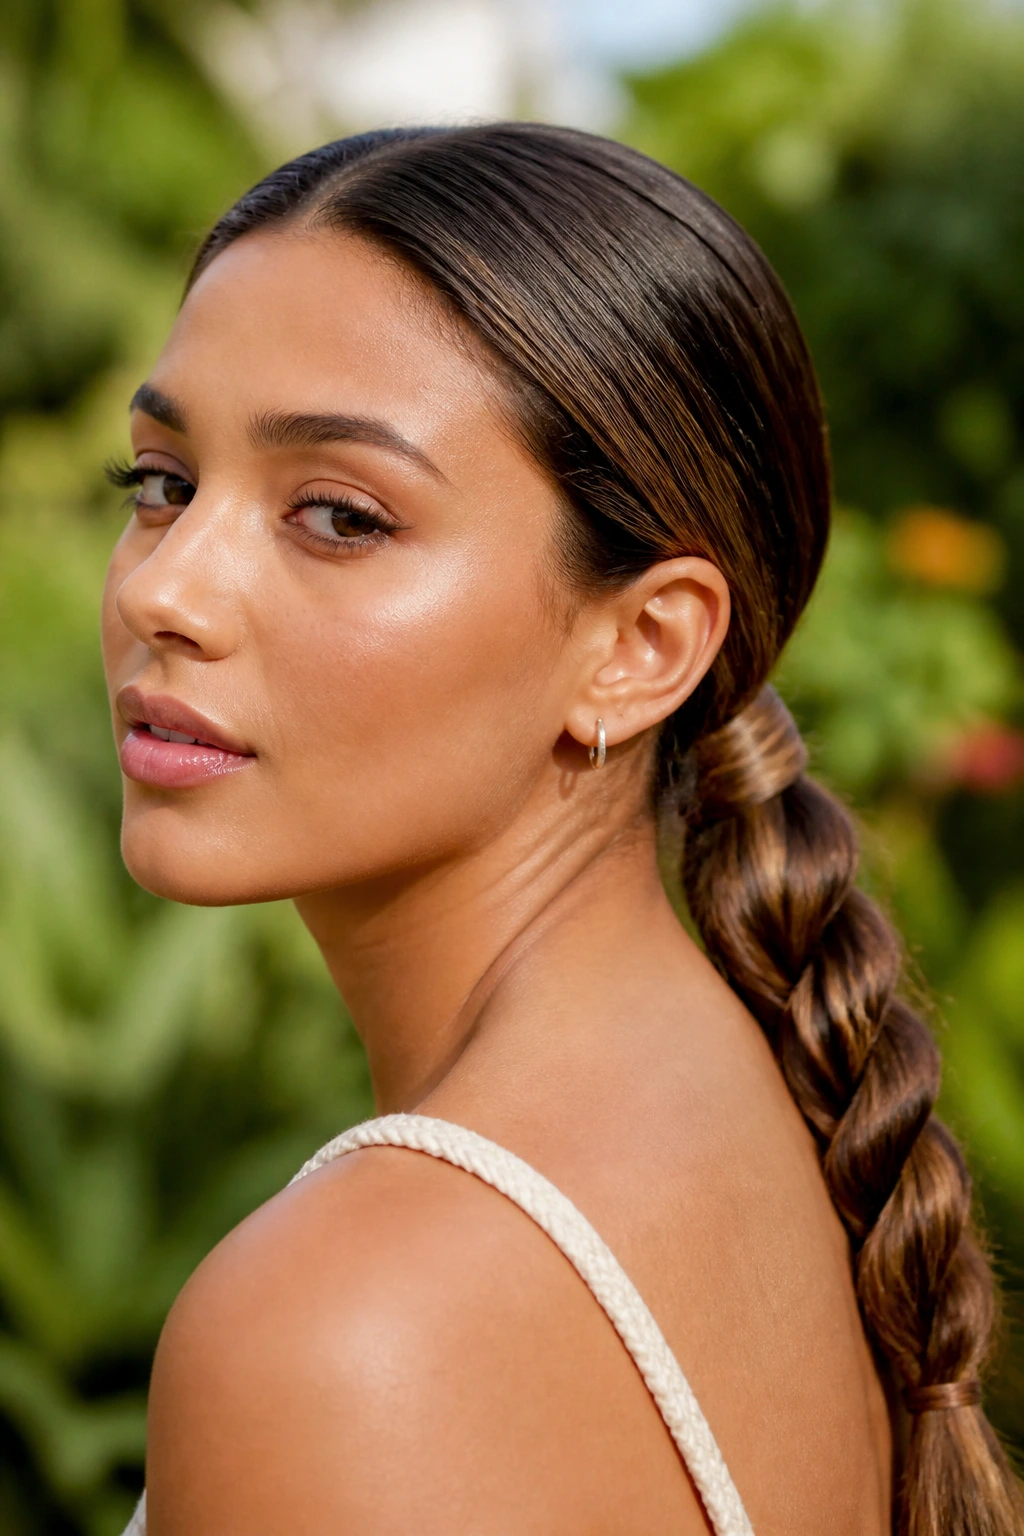
A rope braid is just two strands twisted around each other, but it has a cleaner, glossier feel than a standard three-strand braid. On medium-length hair, that twist lands neatly at the nape and doesn’t unravel into the kind of tail that needs constant fixing. It’s fast. It’s tidy. And it works especially well on hair with a little natural wave.
Smooth a pea-size amount of cream between your palms before twisting, then keep tension even from roots to ends. If one side is tighter than the other, the braid starts to corkscrew in an ugly way. Secure the base with a small elastic, and wrap a thin strand around it if you want the finish to look more polished.
9. Waterfall Braid Half-Up
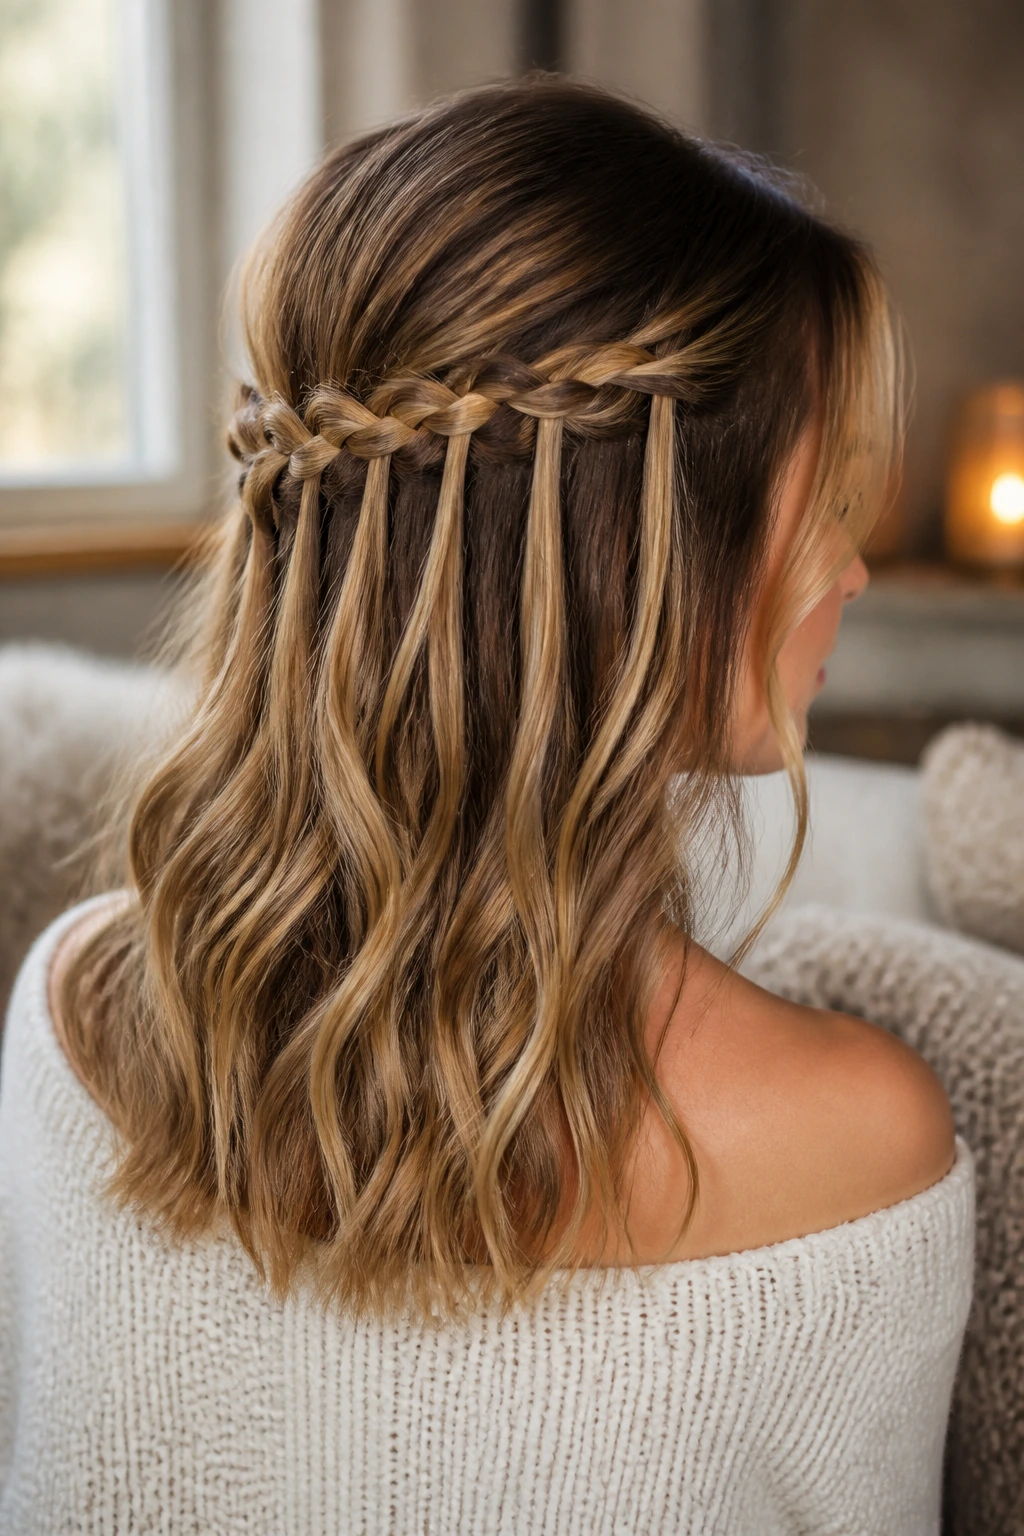
A waterfall braid works because it leaves some hair out on purpose. That’s the point. The dropped strands create movement across the back of the head while the braid frames the top half. Medium-length hair is perfect here because the loose lengths still show shape and don’t weigh the braid down.
This style looks best when the lower hair has a little bend or wave. Straight, pin-straight hair can make the cascade look thin. If your ends tend to puff out, run a curling iron through the bottom half first, then braid the top section. Keep the waterfall drops consistent, or the braid loses its rhythm fast.
10. Braided Half-Up Top Knot
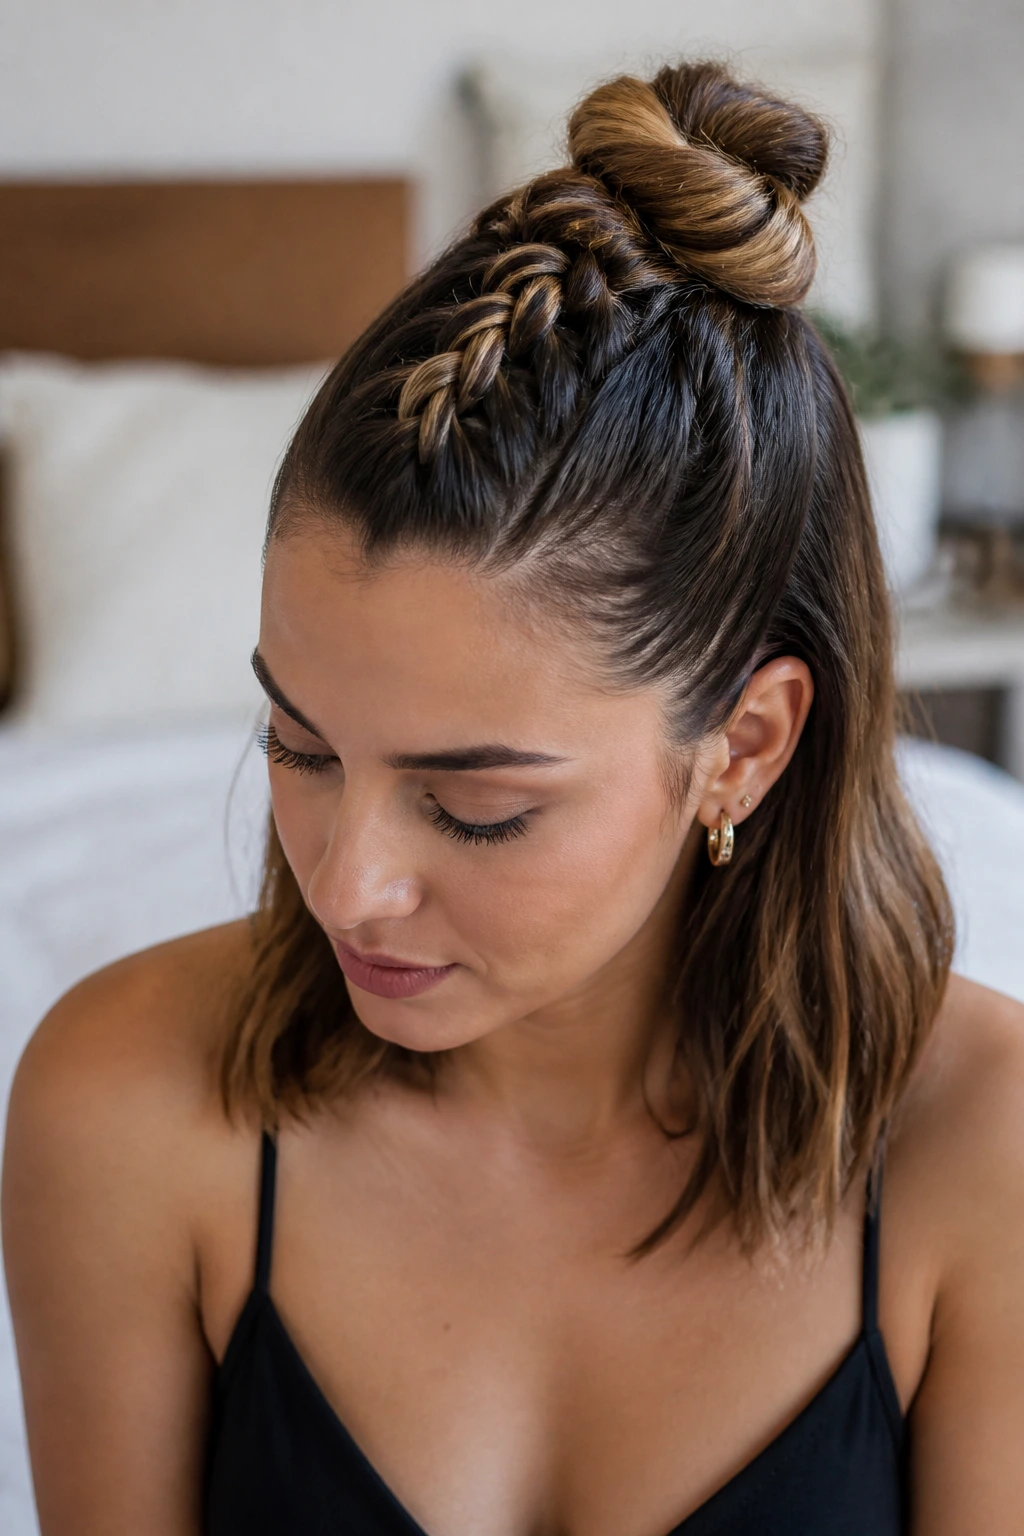
A braided half-up top knot feels casual in the best way. You braid the front or center section, then twist or knot the rest of the top half high on the head. Medium-length hair keeps the knot small and neat instead of making it look like a lopsided puffball. The braid adds just enough shape to make the style look deliberate.
This one is excellent for second-day hair because the texture helps the braid hold and keeps the bun from slipping. Use one small clear elastic to anchor the braid, then another to secure the knot if your hair is silky. A few pulled-out pieces around the temples soften the look without wrecking the shape.
11. Boxer Braids
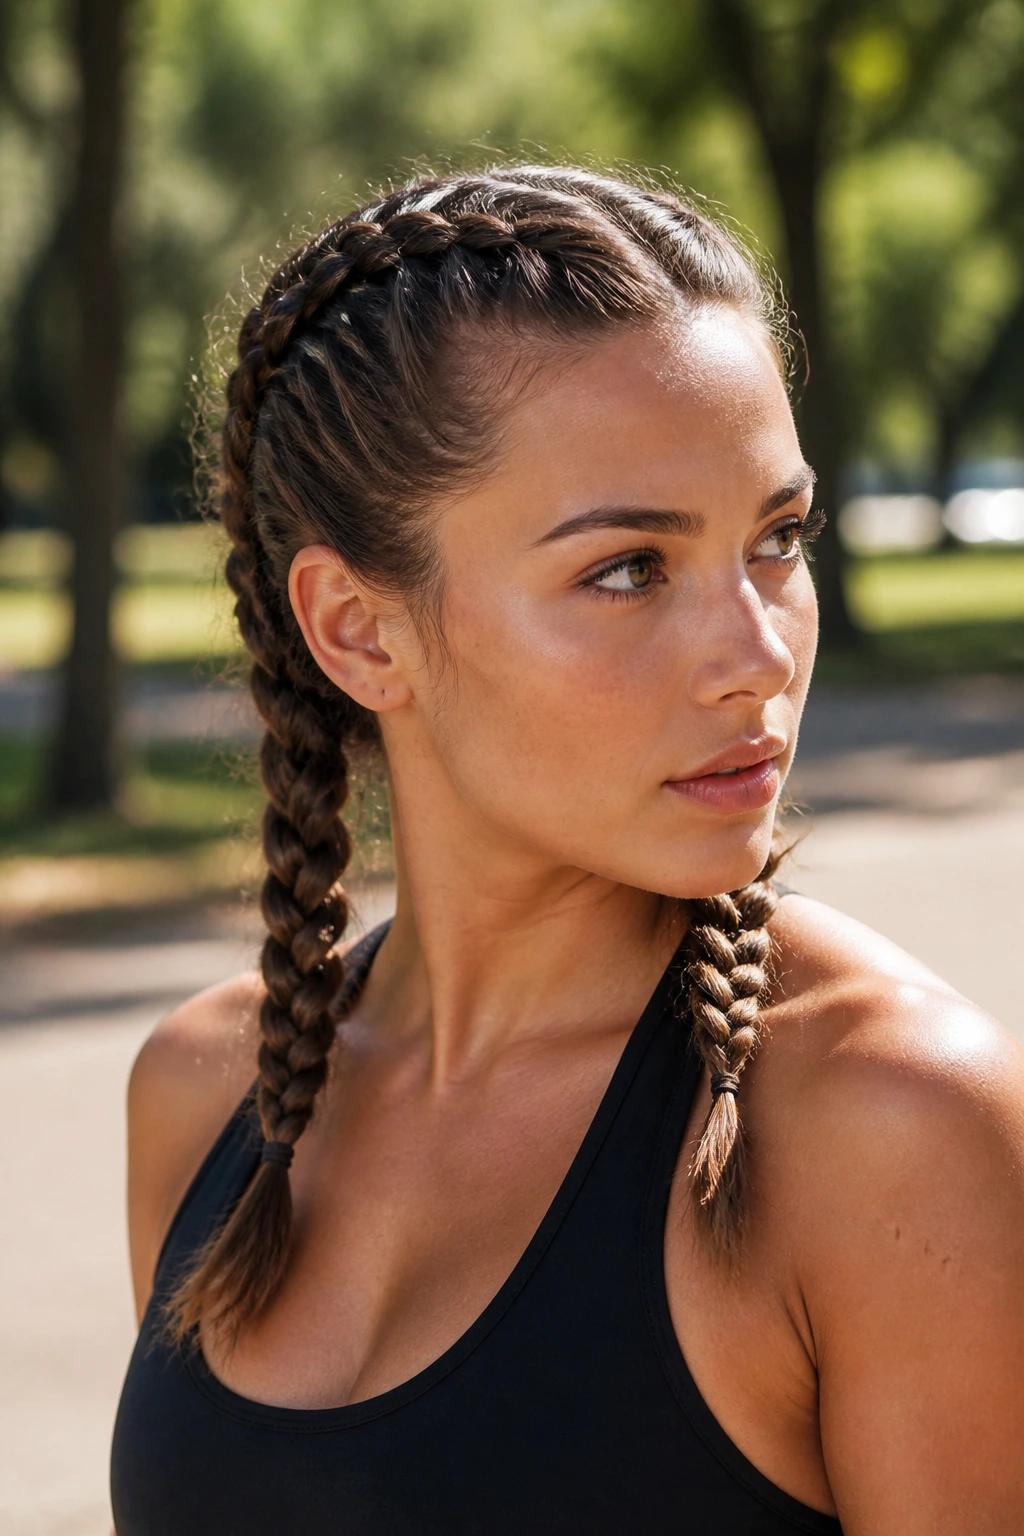
Boxer braids are tight Dutch braids worn close to the scalp, and medium-length hair gives them a nice practical edge. The braids usually stop around the shoulders, so they stay light and don’t swing around like heavier, longer versions. That makes them a strong choice for workouts, humid days, or any morning when you need hair out of the way.
Use a little gel or edge control at the part line, but keep it thin. Thick product piles up and makes the sections slippery. The cleanest boxer braids start with sharp parts and even tension from the crown all the way down. If your scalp feels sore before you finish, loosen immediately. No braid is worth a headache.
12. Reverse French Braid into a Bun
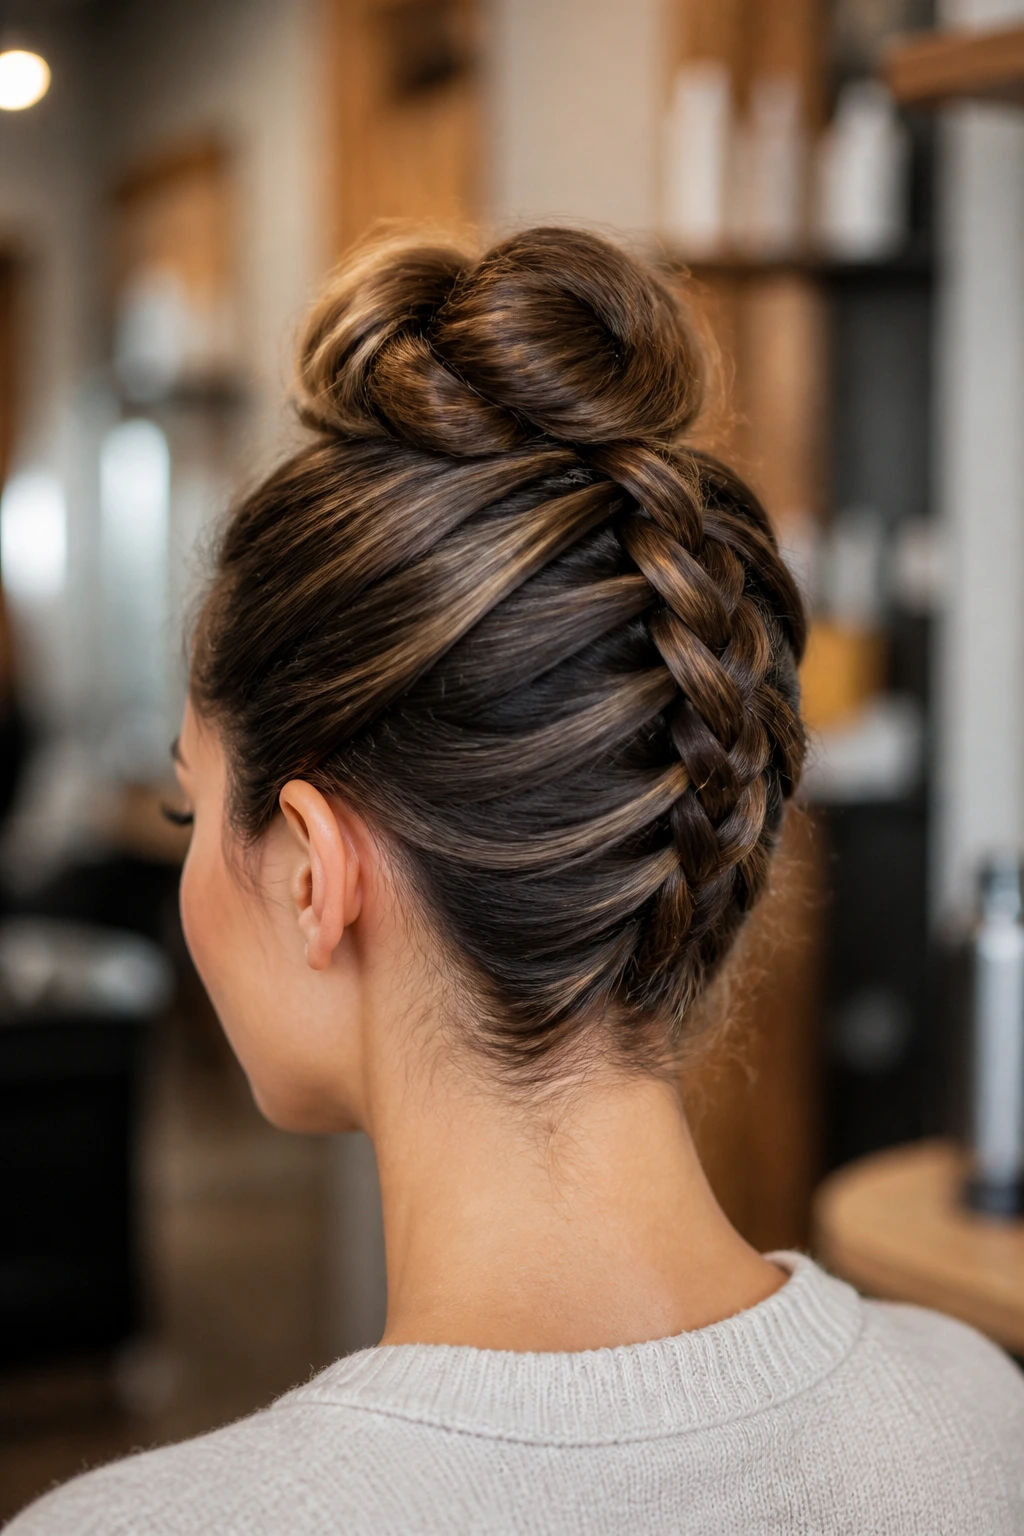
A reverse French braid, often called a Dutch braid from the nape upward, gives medium-length hair an upward sweep that looks better than people expect. It pulls the eye toward the crown, then ends in a bun that stays compact because the hair isn’t overly long. That’s the sweet part: you get lift without a giant knot at the back.
Flip your head forward to start the braid at the nape if your arms tolerate it. If not, work in a mirror and keep the sections small. Once you reach the crown, twist the remaining hair into a bun and pin from multiple directions. The bun should feel stable, not stiff.
13. Accent Braid Low Bun
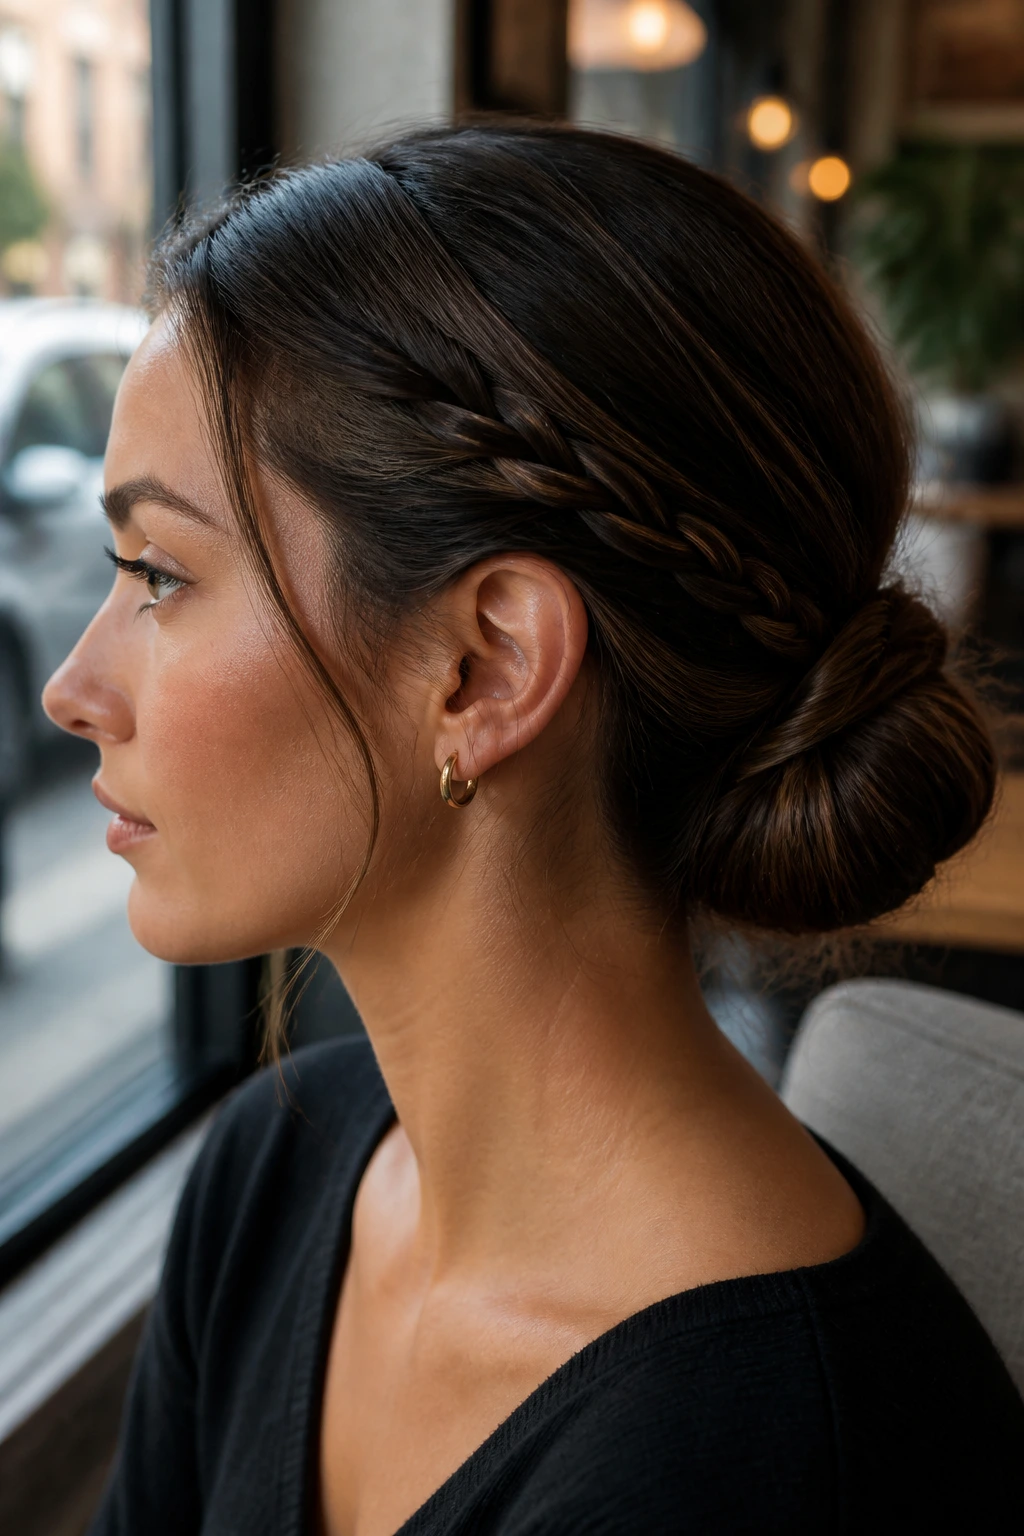
A low bun with one accent braid is understated in a way I like. The braid doesn’t need to dominate the style; it just needs to break up the smooth surface and give the bun some texture. On medium-length hair, that braid has enough length to wrap around the base cleanly before being tucked in.
This is the look I’d pick for a blazer, a dinner reservation, or any day when you want your hair to behave without looking overly styled. Keep the bun low and the braid narrow. A thick accent braid can overpower the whole shape. A thin one gives the style just enough edge.
14. Four-Strand Braid
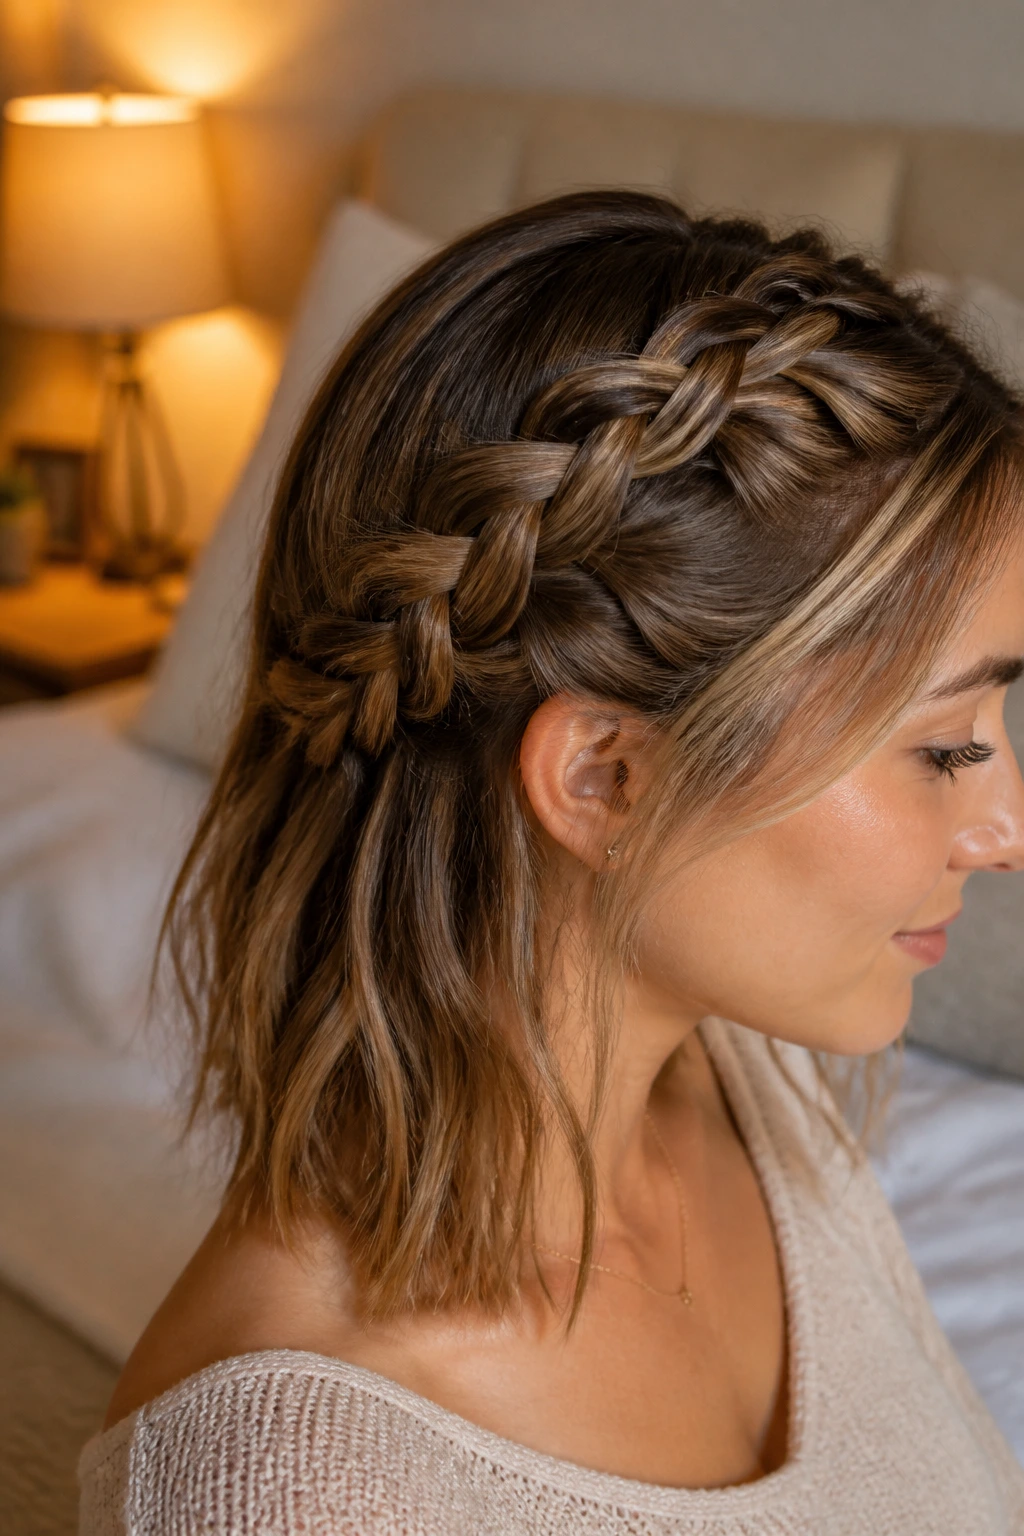
A four-strand braid gives medium-length hair more visual depth than a standard braid without asking for extra length. The pattern looks woven, almost ribbon-like, and that makes it one of the few braids that can hold attention even when the hair stops at the shoulders. It’s one to practice before you’re in a rush.
The key is even tension. If one strand is looser, the whole braid twists sideways and the pattern gets muddy. I’d use this on hair that’s been brushed smooth and lightly misted with a detangling spray. Dry, flyaway-prone hair makes the sections catch and slows you down.
15. Infinity Braid
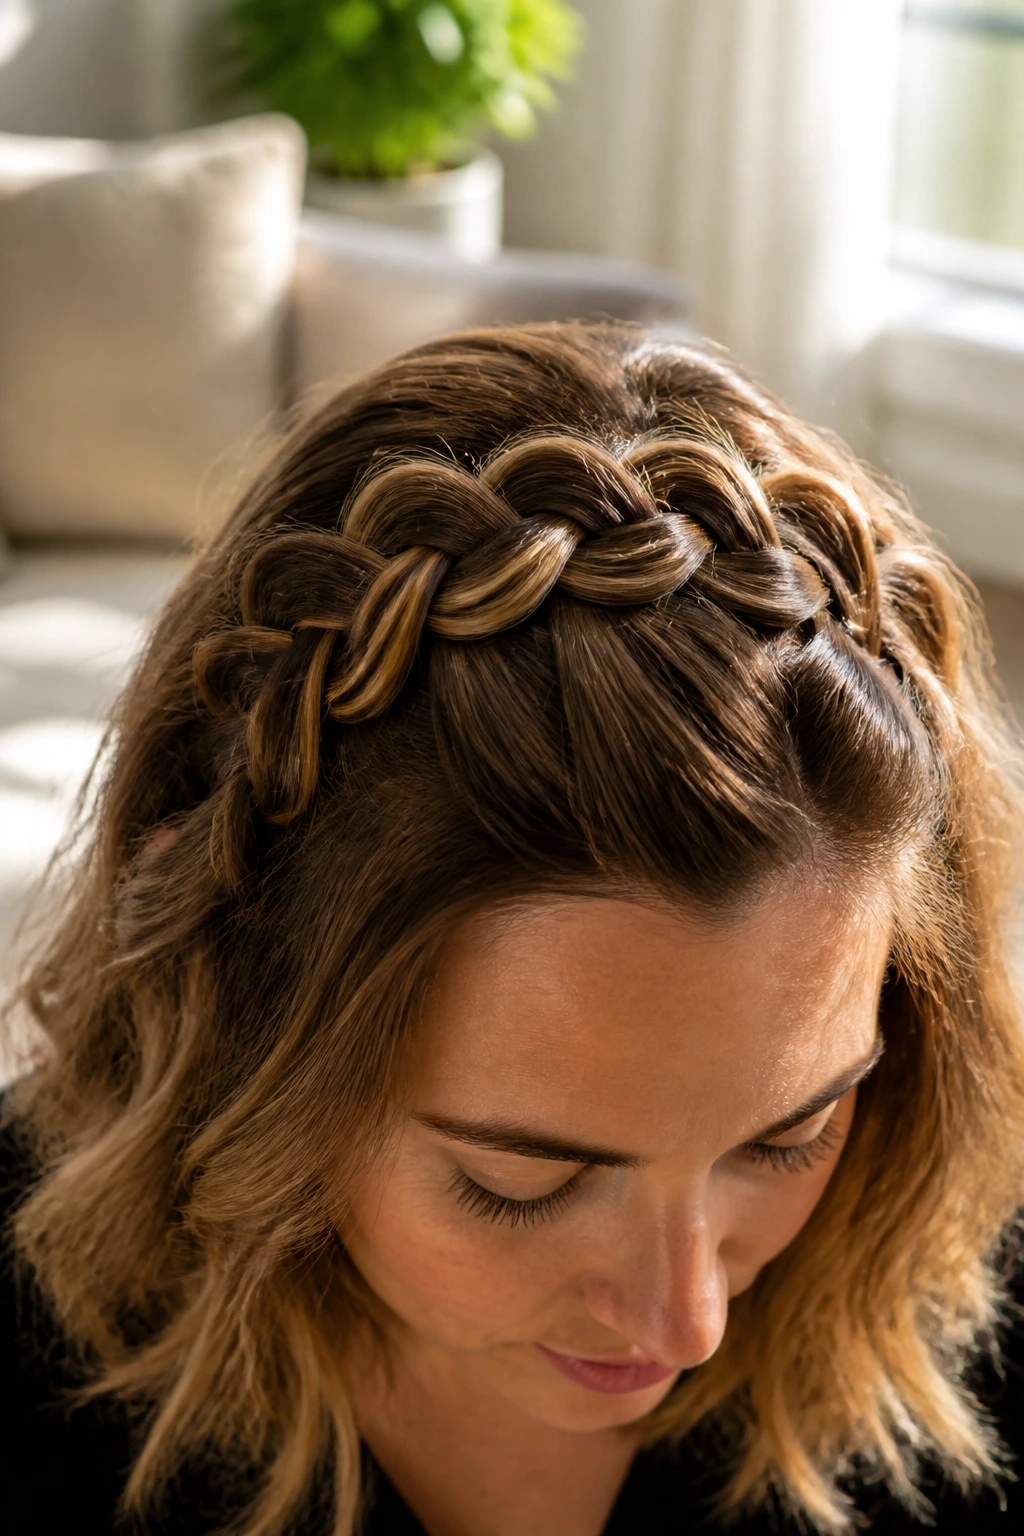
The infinity braid has a looped pattern that looks more complicated than it is, which is part of its charm. On medium-length hair, the shape shows up quickly before the ends get too heavy to manage. That means the braid reads clearly even if you wear it as a side style or tuck it into a low finish.
This is a braid for someone who doesn’t mind a little concentration. The sections are small, and the pattern can slip if your fingers lose track. Start with slightly textured hair and keep a tail comb nearby so you can fix a crooked part before it spreads through the whole braid. Once the loops settle, the effect is worth it.
16. Ladder Braid Half-Up
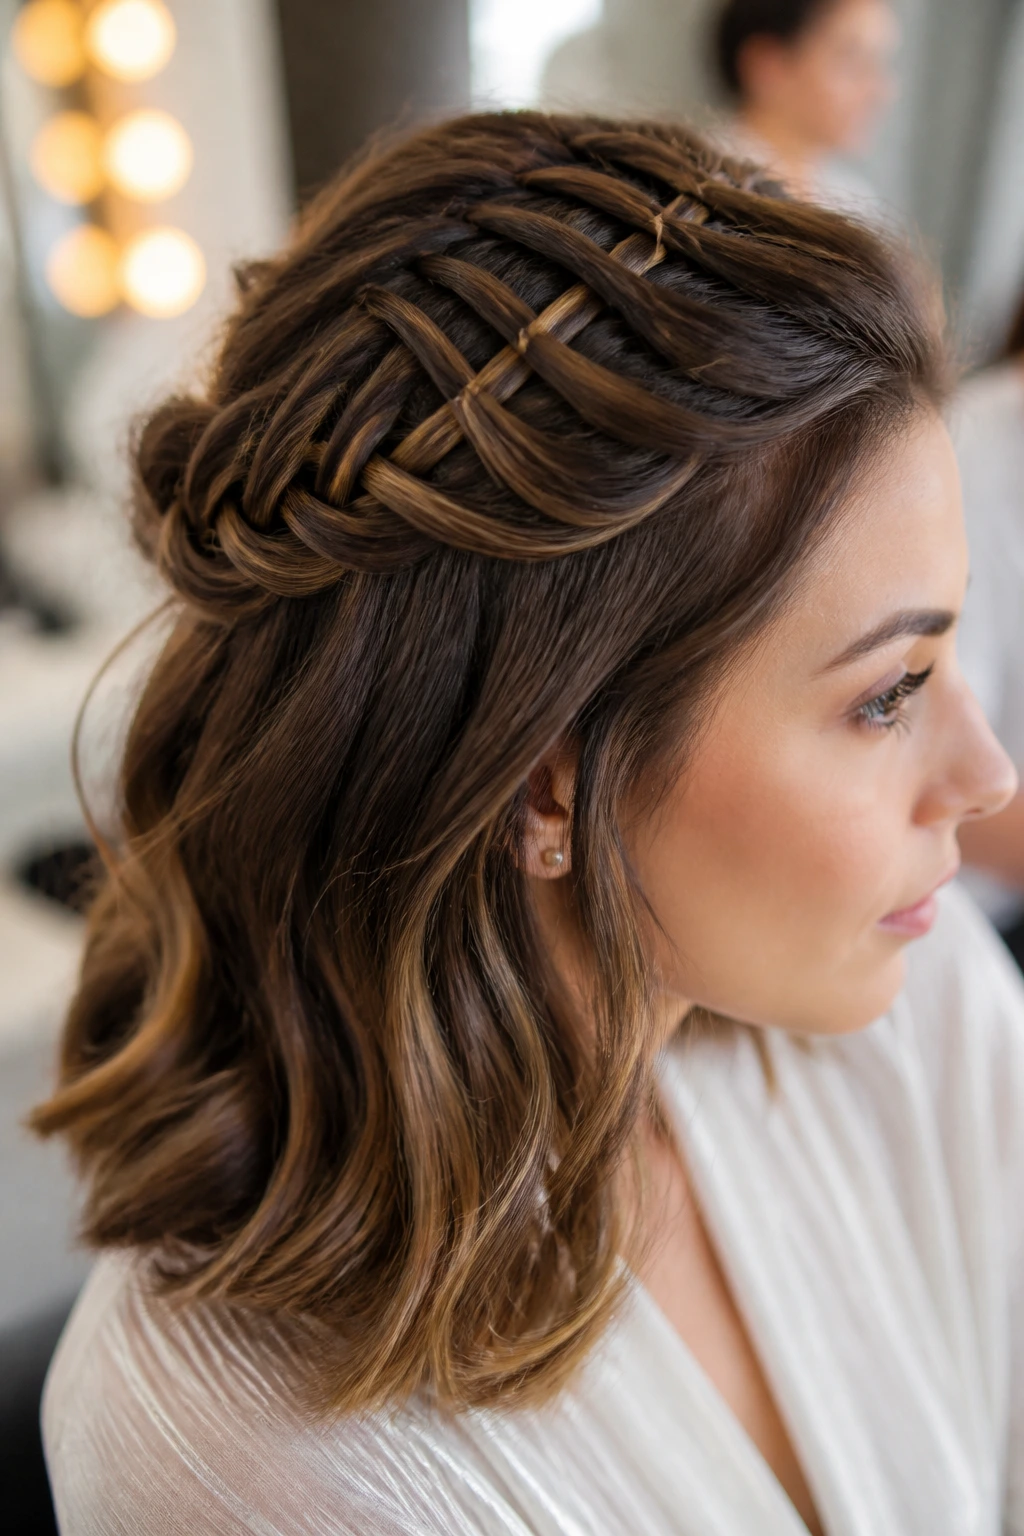
A ladder braid gives you one of the more detailed finishes in this whole set. The braid itself acts like the side rails, while small woven pieces create the “rungs.” Medium-length hair works because the pattern is visible across the crown without being buried under too much weight.
This style is easiest on hair that holds shape well. If your strands are silky, add a touch of mousse before drying or the woven pieces will slip. I’d use this for an event, a photo day, or anytime you want something that looks fussy in a good way but doesn’t require an hour of curling afterward.
17. Zigzag Part Braids
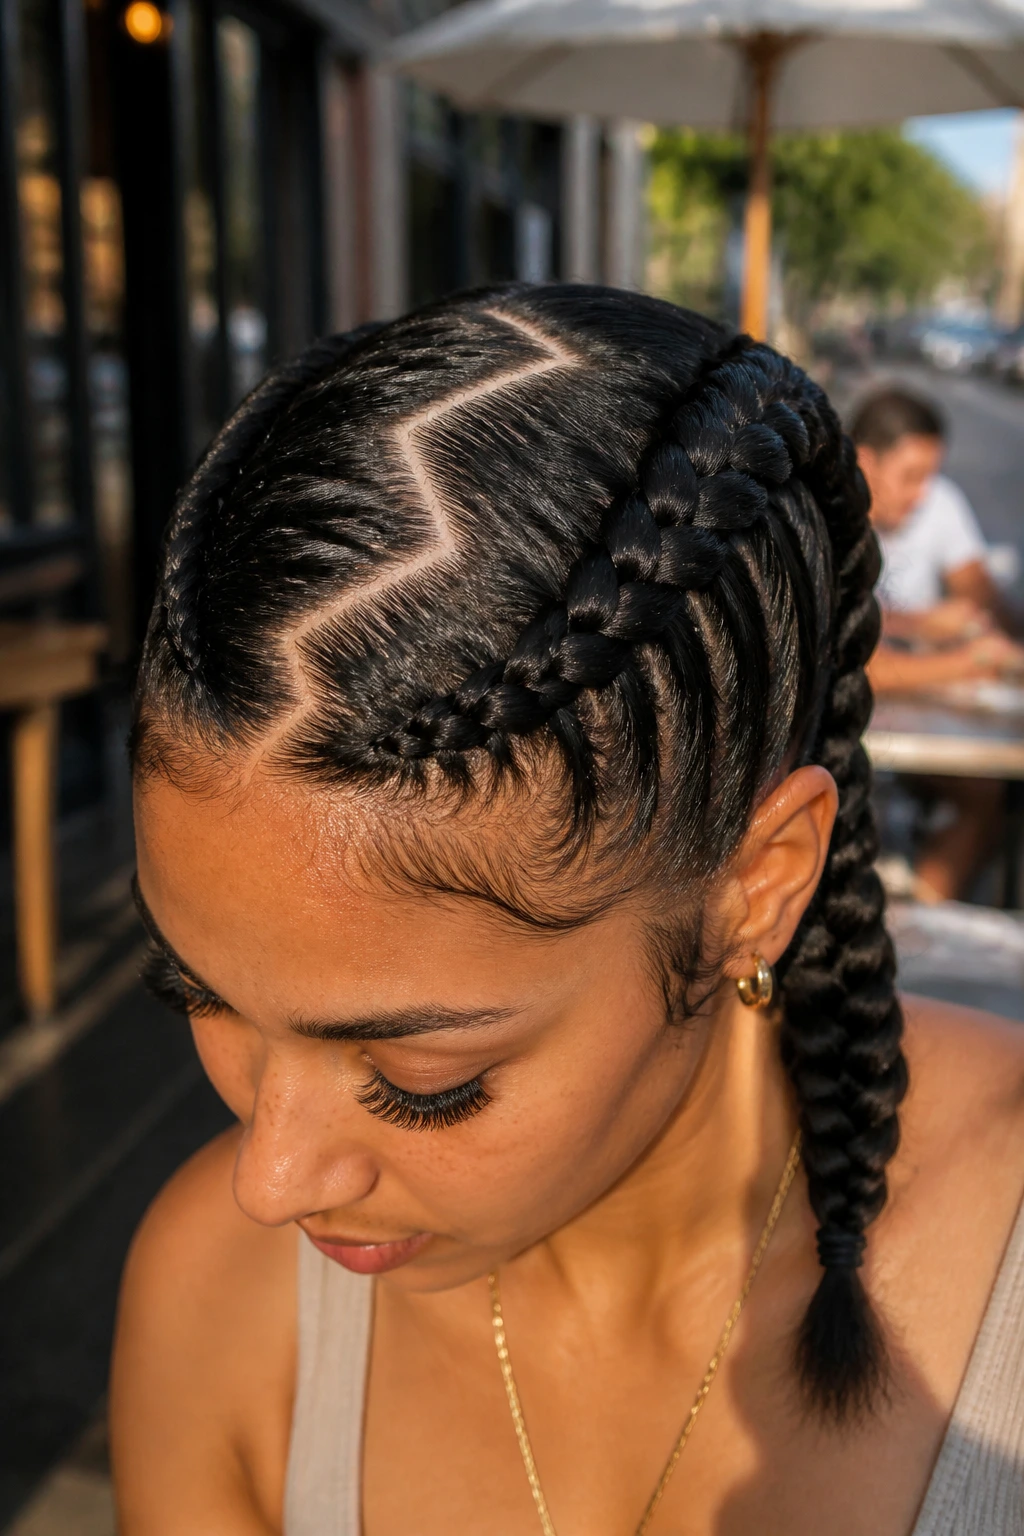
The zigzag part is the star here, not the braid itself. That’s why the style works so well on medium-length hair: the parting line creates enough visual movement that even a simple braid looks more designed. It’s playful without turning childish, which is a useful line to walk.
Use the pointed end of a rat-tail comb to sketch the part slowly. Don’t rush it. Once the line is set, braid the sections into pigtails, twin plaits, or a low pair of braids, depending on how much structure you want. The part should feel crisp; if it’s wobbly, the whole look loses its punch.
18. Braided Headband
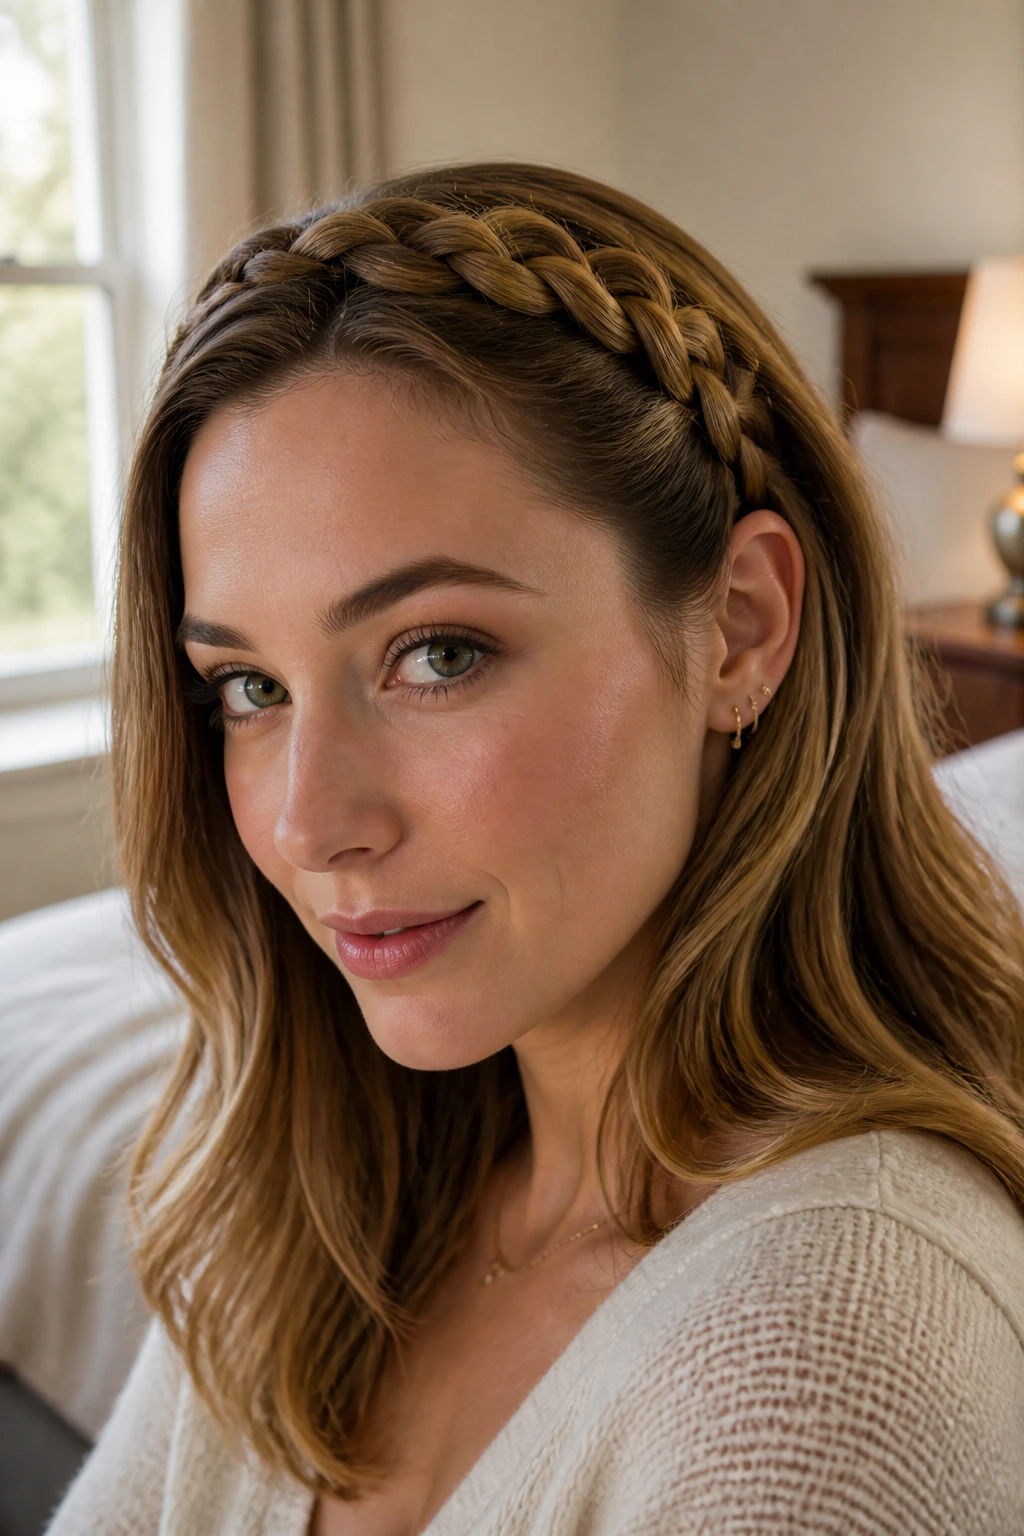
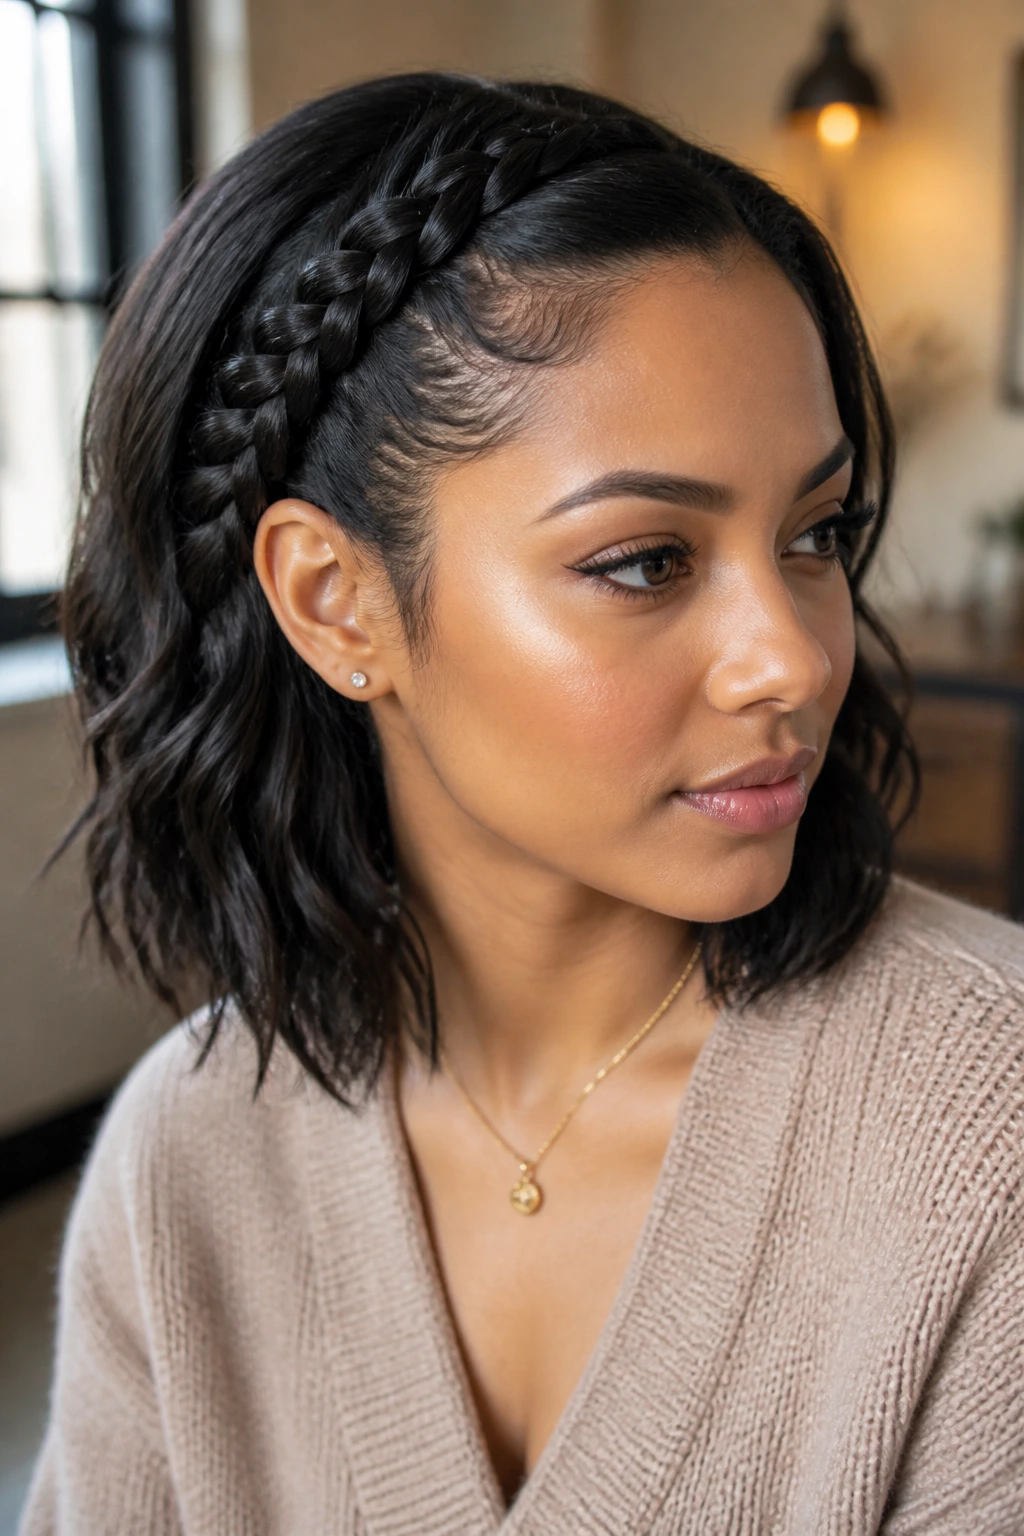
A braided headband is one of my favorite fixes for front pieces that keep falling into your eyes. The braid travels from one side of the head to the other, then tucks behind the ear like an accessory. Medium-length hair is enough to build the band without making the rest of the style feel crowded.
Leave the back hair loose, smooth, or lightly waved. That contrast keeps the headband braid from reading too busy. Pins should disappear under the braid, not stab out around the temples. If your hairline has shorter layers, a dab of lightweight gel will keep them from fluffing up by noon.
19. Side Braid into Loose Waves
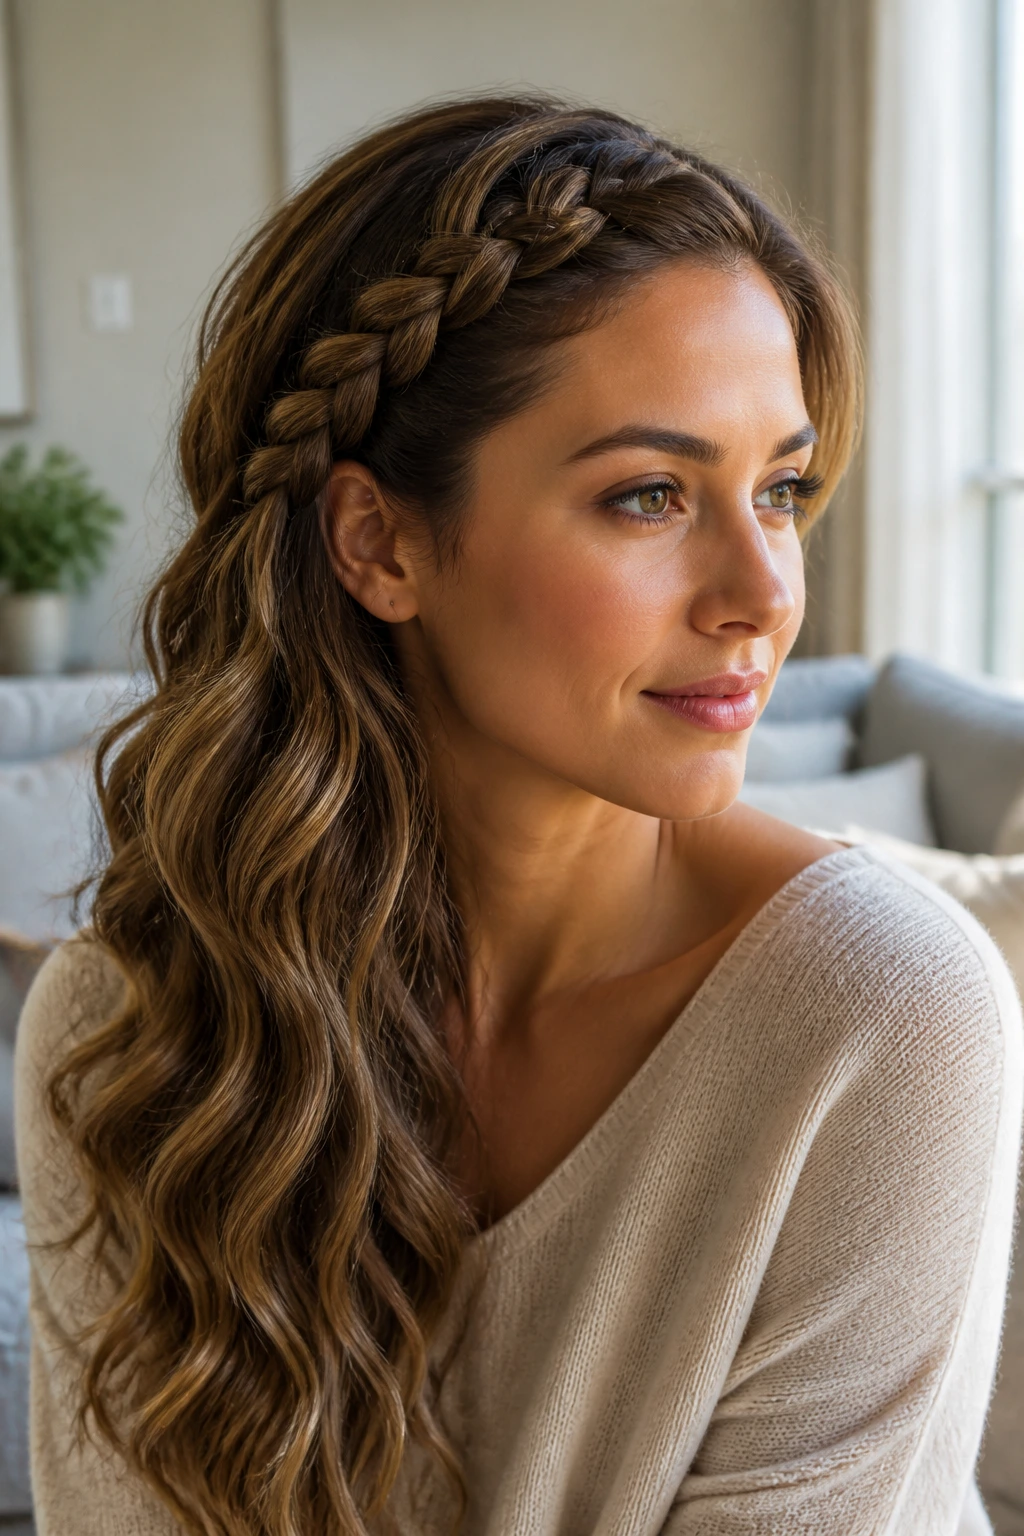
A side braid into loose waves is the definition of controlled softness. You braid one side, leave the rest of the hair free, then let the longer pieces around the shoulder move naturally. On medium-length hair, the braid is visible enough to matter without taking over the whole head.
I’d curl the loose sections first if the hair tends to lie flat. That gives the braid a better frame and keeps the style from looking half-finished. The braid itself can be tight or a little slouched, depending on the mood. Tight gives structure. Loose gives that worn-in texture people keep trying to fake.
20. Front Cornrow Braids
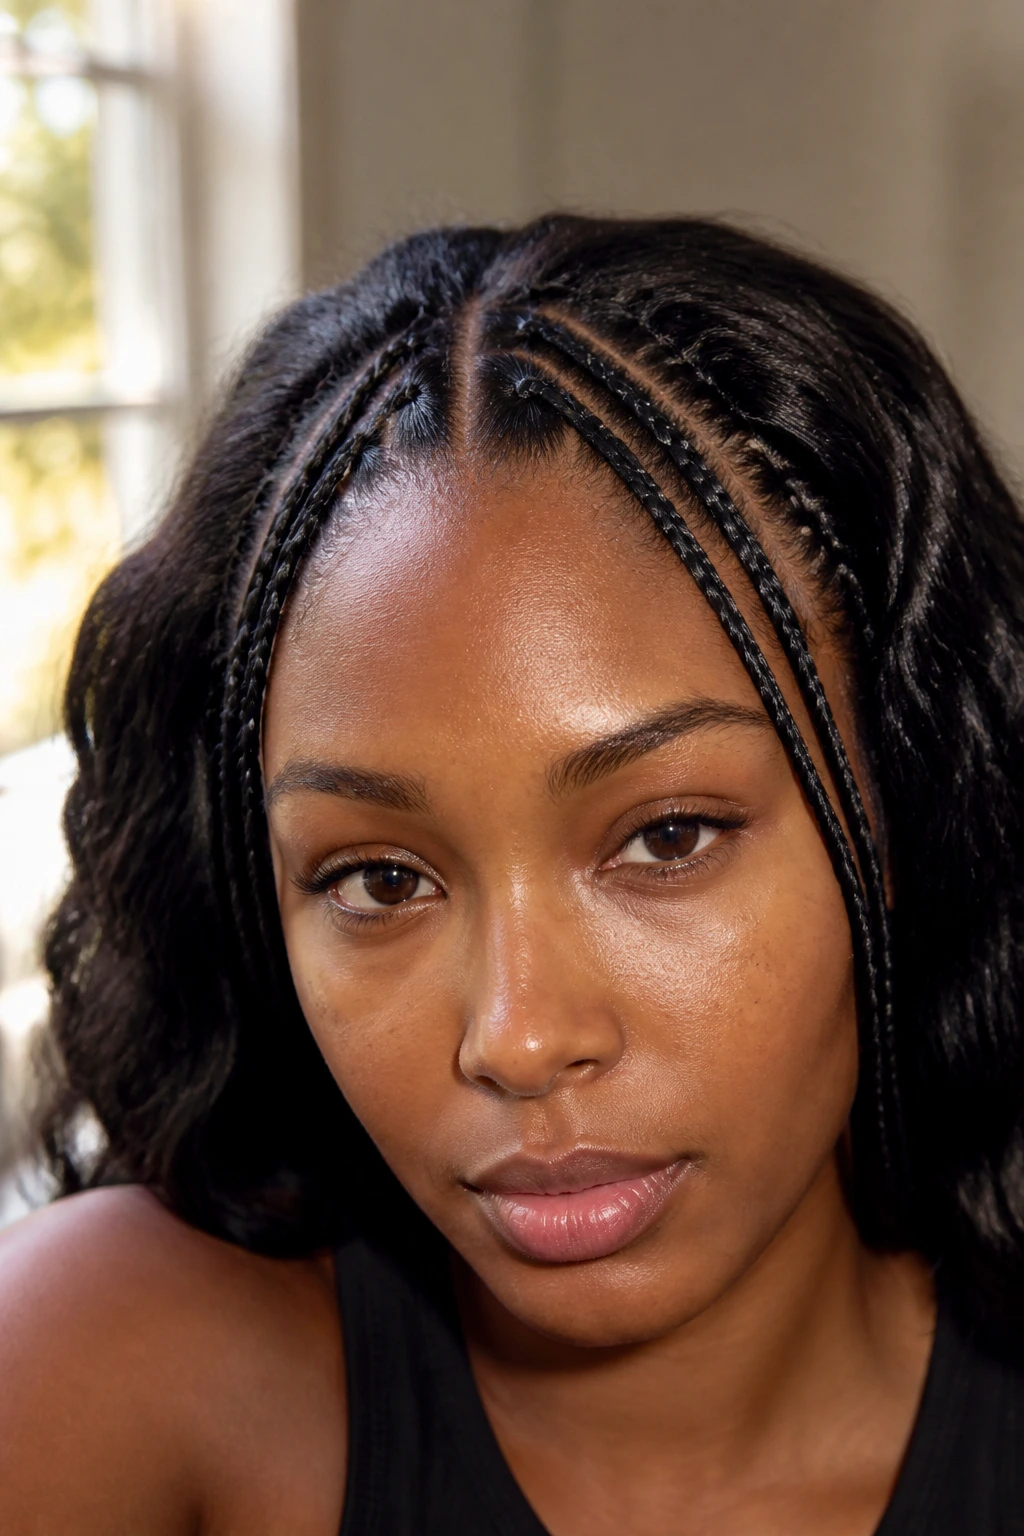
Front cornrow braids give medium-length hair a strong frame at the face. You can keep two, three, or four narrow braids at the front and leave the back loose, braided, or pinned back. The shorter length is a benefit here because the front sections are easier to control and the style doesn’t get heavy.
The only thing I’d insist on is light tension. Tight braids may look neat for a minute, but they leave the hairline sore and can make the scalp feel hot. If your texture needs more hold, use a little braid gel at the roots instead of pulling harder. The line should stay close to the head without making your face feel tugged.
21. Braided Space Buns
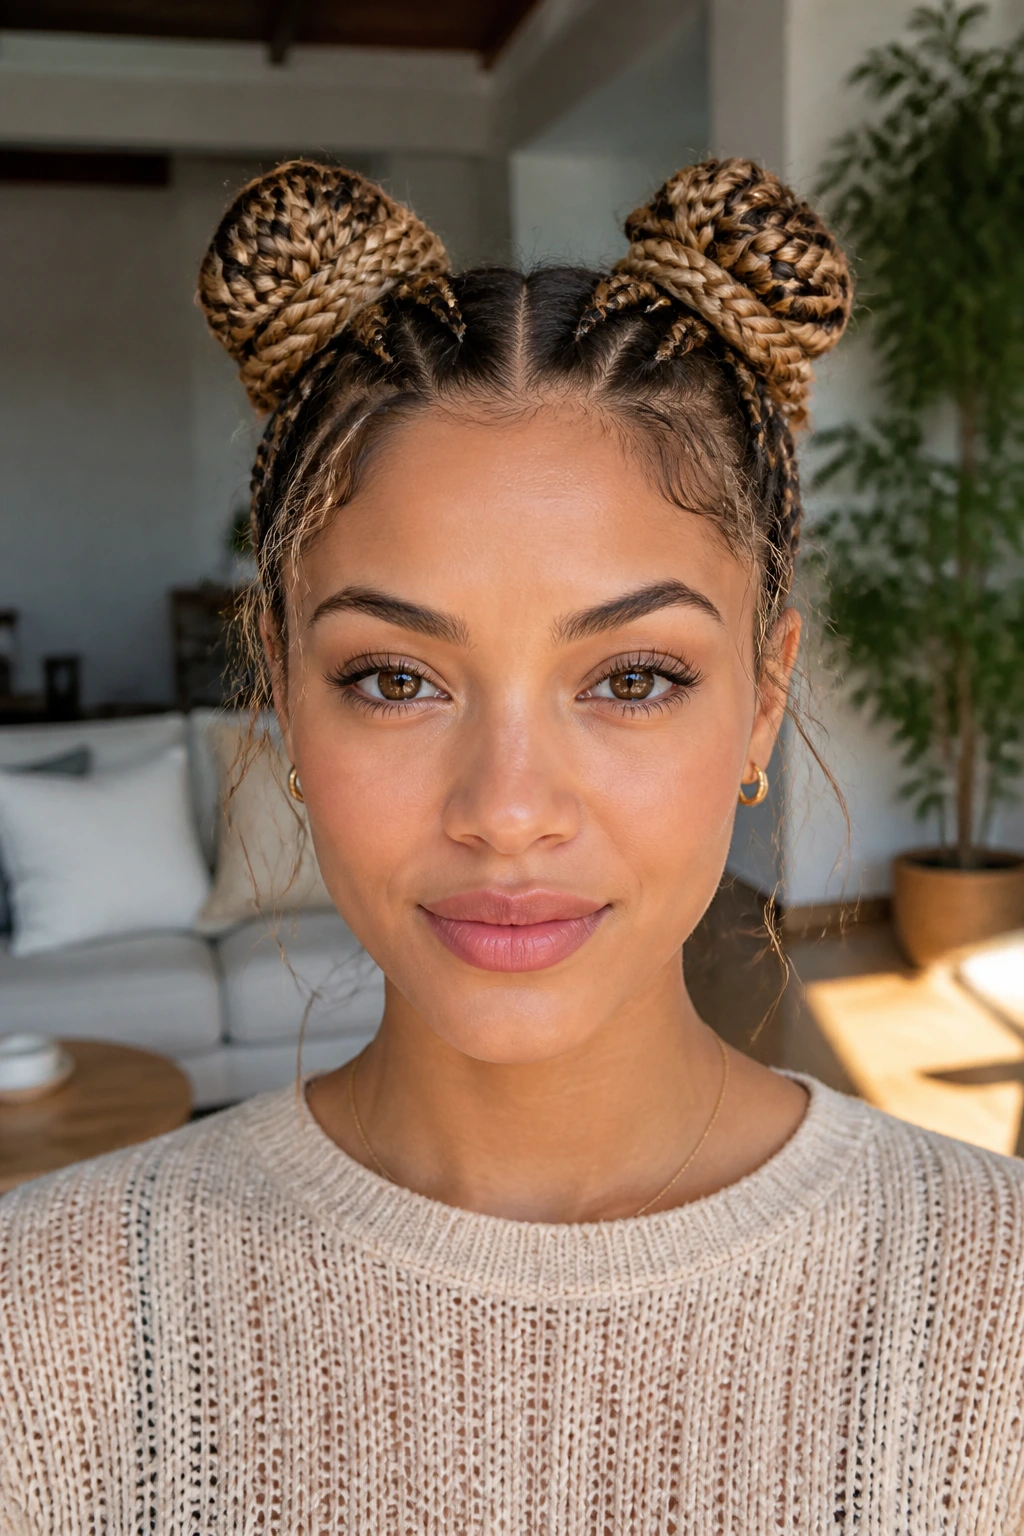
Braided space buns are playful, but they work best when the braid itself is tidy. Split the hair into two sections, braid each side, then coil the braids into buns high on the head or closer to the ears. Medium-length hair is ideal because the buns stay compact. Long hair can make them bulky. Short hair can make them loose.
Keep the sections even from the start. If one side has more hair, one bun will look larger and the whole style gets lopsided. I’d use pins and small elastics together here, especially if your hair is layered. The pins do the quiet work that the elastics can’t.
22. Braided Mohawk Ponytail
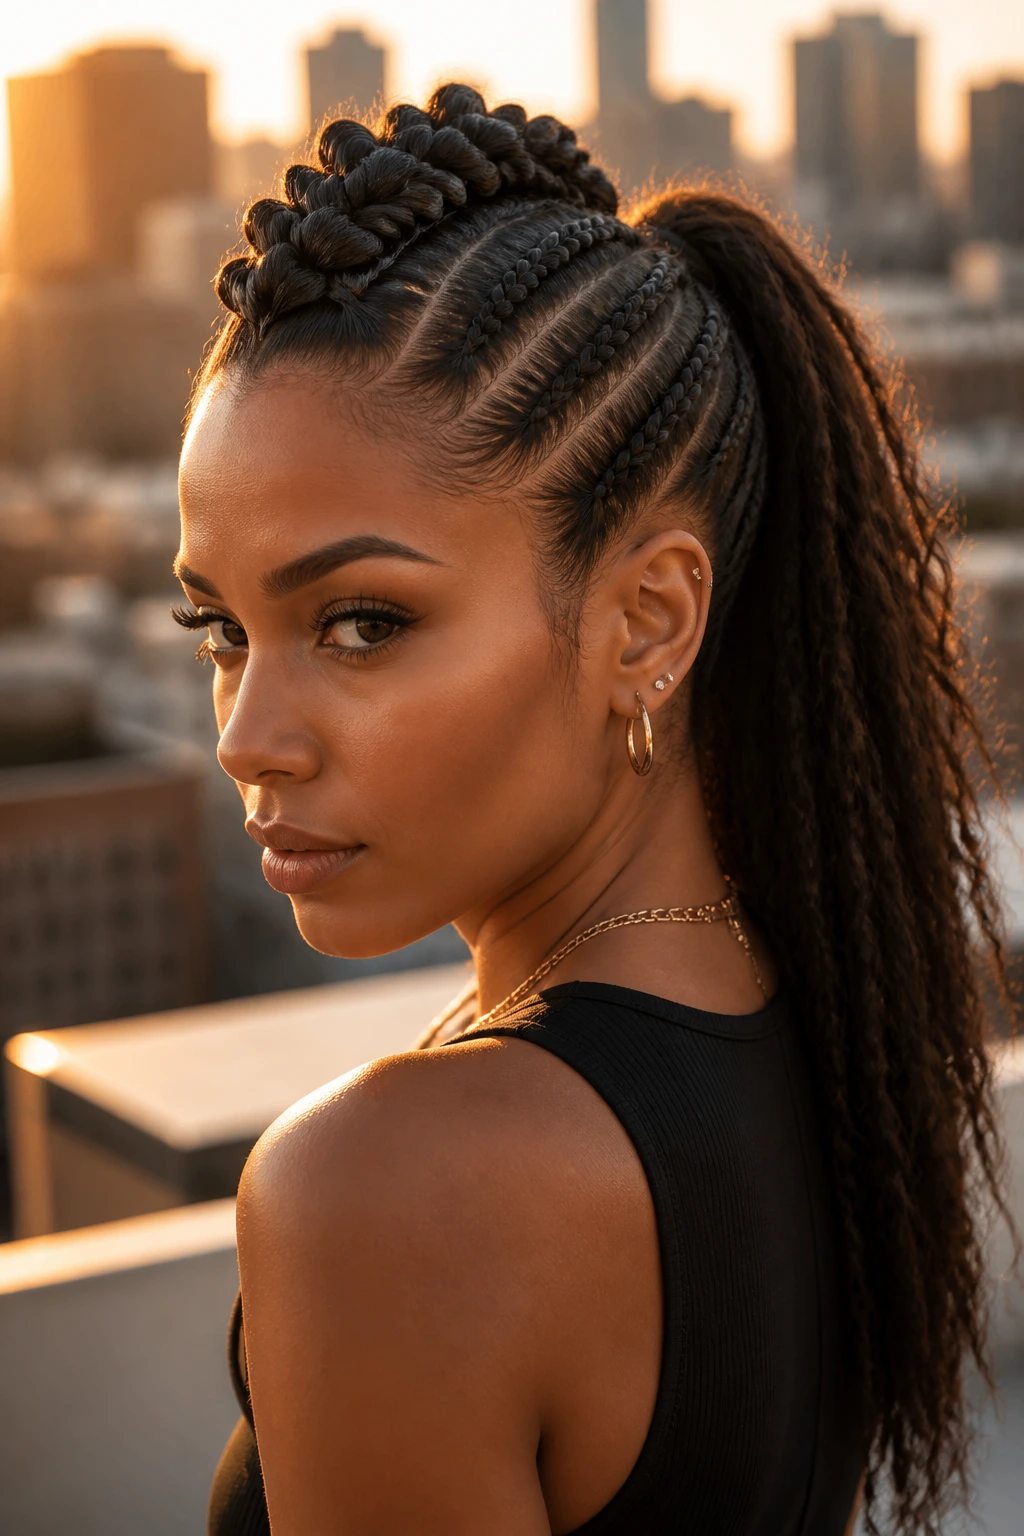
A braided mohawk ponytail gives you height without making the sides of the head look flat. The center braid becomes the spine of the style, while the remaining hair feeds into a ponytail at the back. Medium-length hair keeps the ponytail light enough to move, which is a nice change from the heavy versions this look can become on longer hair.
This one looks strongest with a little root lift. Tease only the center strip if your hair is fine, then smooth the sides back so the braid stands out. The ponytail can be straight, wavy, or curled at the ends. I’d avoid over-smoothing the sides; a little texture keeps the style from looking helmet-like.
23. Bubble Braid with Braided Base
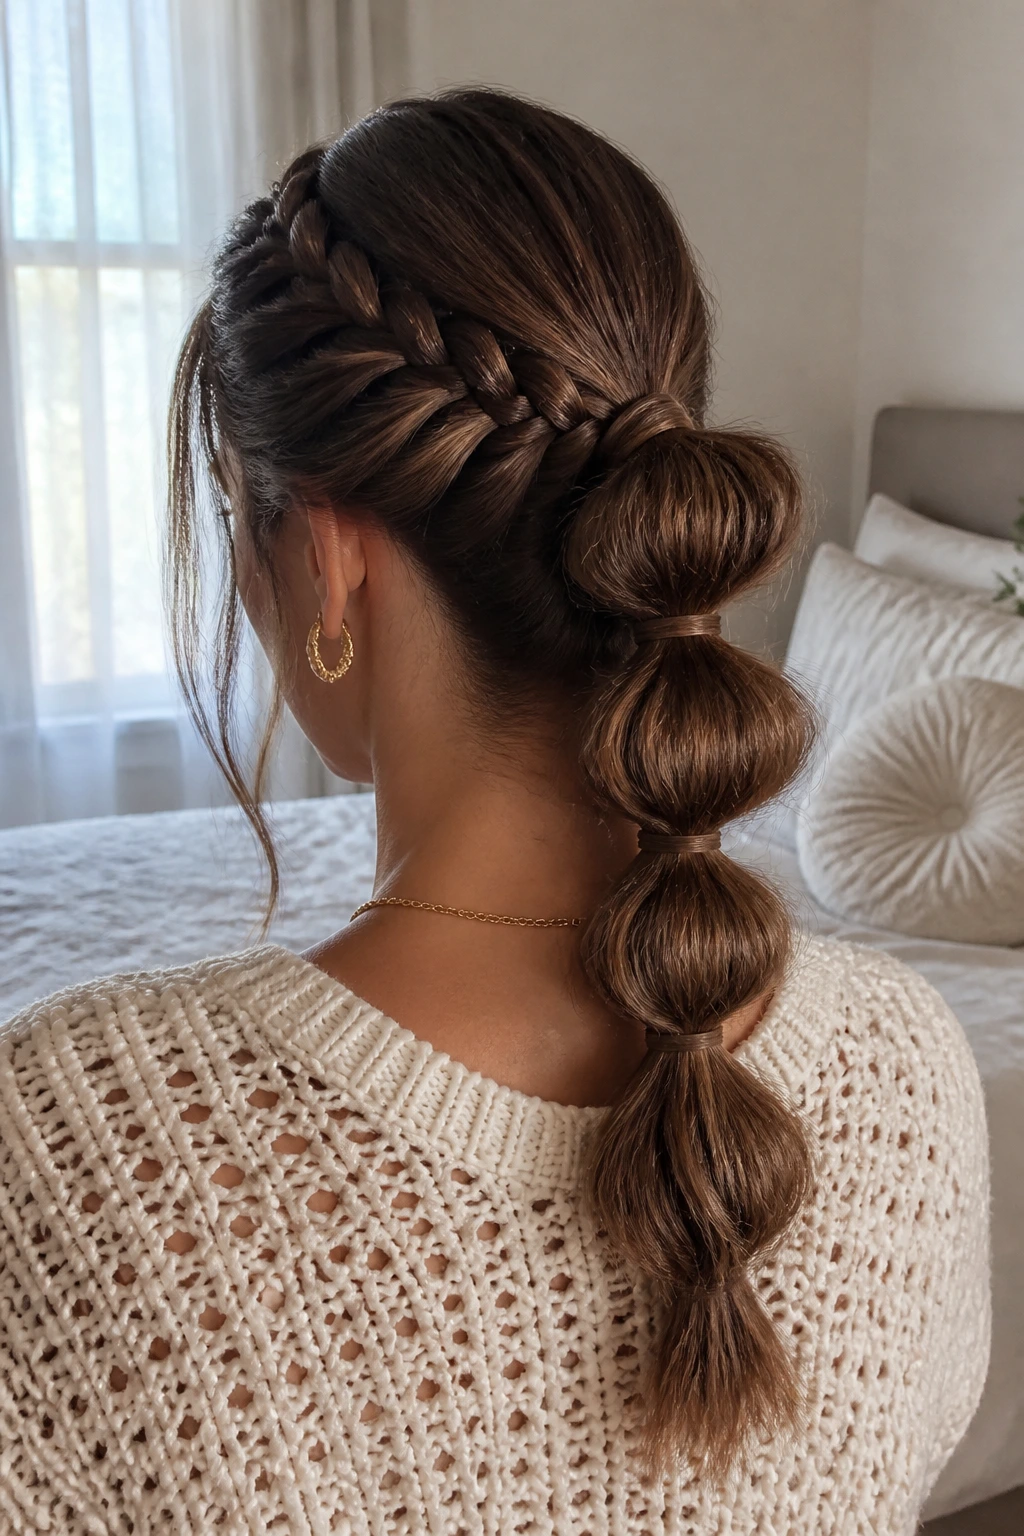
A bubble braid with a braided base gives medium-length hair a useful mix of structure and volume. The braid at the top keeps the style anchored, then the elastic-segmented bubbles create a round shape down the back. The bubbles show up especially well when the hair ends around the shoulders because each section stays visible.
The base braid only needs to be a few inches long before you start adding elastics. After that, gently tug each bubble outward so it looks full instead of flat. If your hair is very fine, a bit of dry texturizing spray at the root gives the segments more shape. Don’t skip the final smoothing pass around the elastic points.
24. Twisted Rope Crown Braid
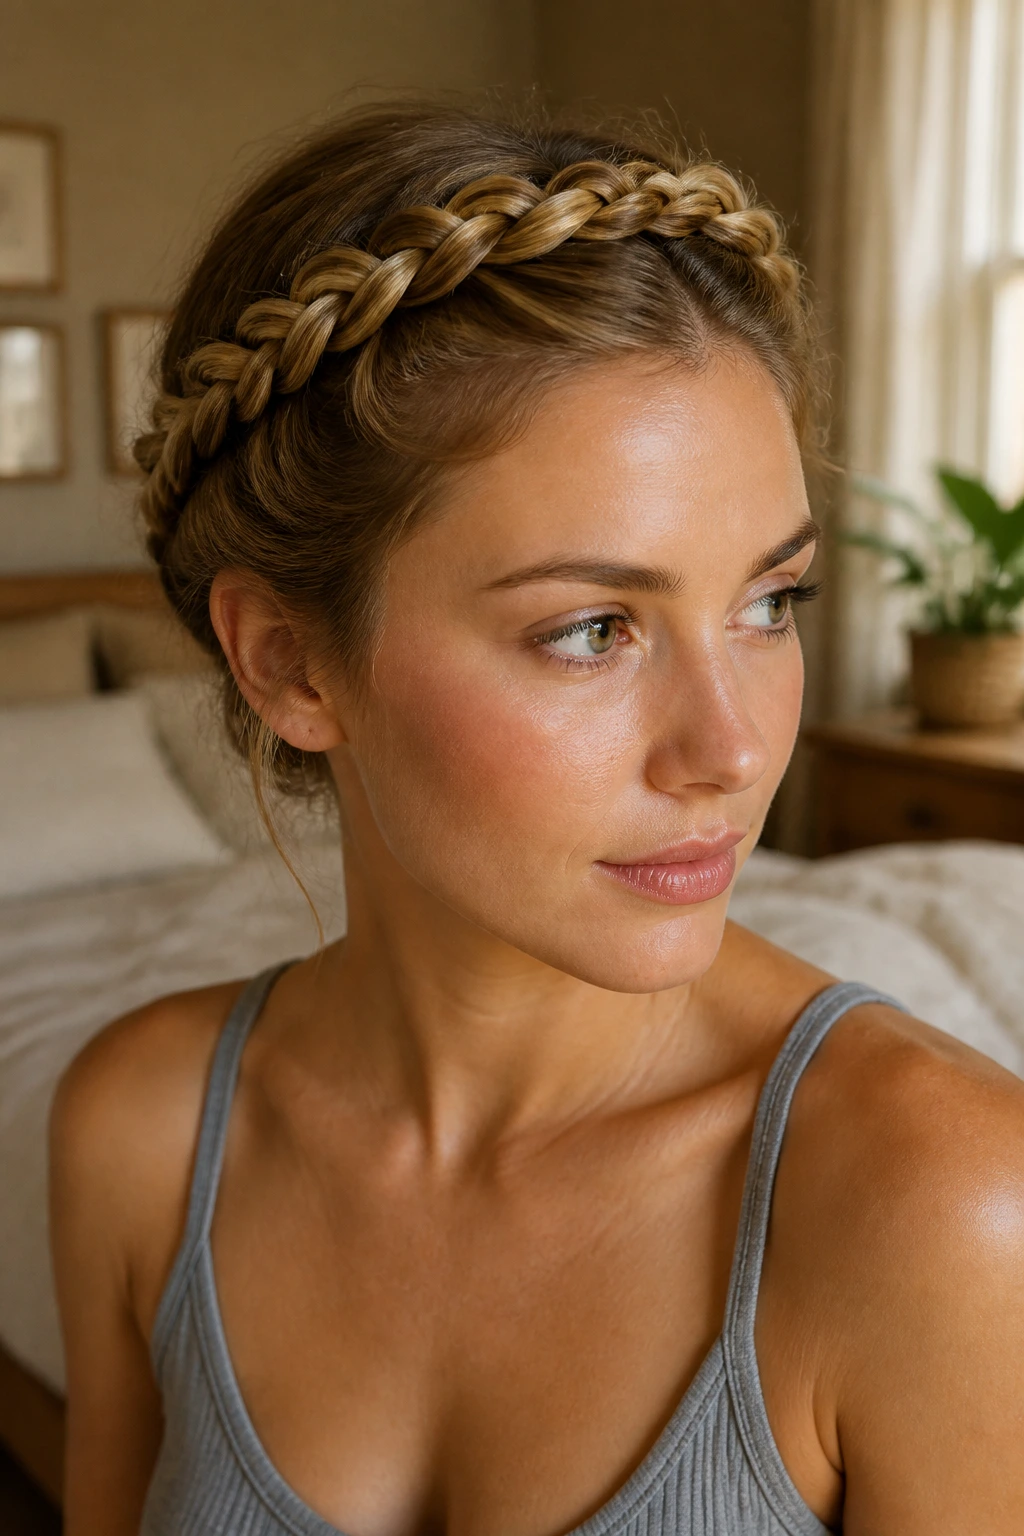
A rope-twist crown braid sits flatter than a three-strand halo, which is why I like it on medium-length hair. It creates a clean band around the head without adding too much bulk at the sides. The finish feels neater and a little more modern than a traditional crown braid, especially if you keep the parting simple.
Two tight rope twists, pinned across the crown, are enough. You do not need a dozen bobby pins if the sections are even and the ends are tucked well. A satin ribbon threaded through the base can make the style feel more dressed up, but I’d keep the rest of the hair soft so the crown stays the focus.
25. Stitch Braid Ponytail
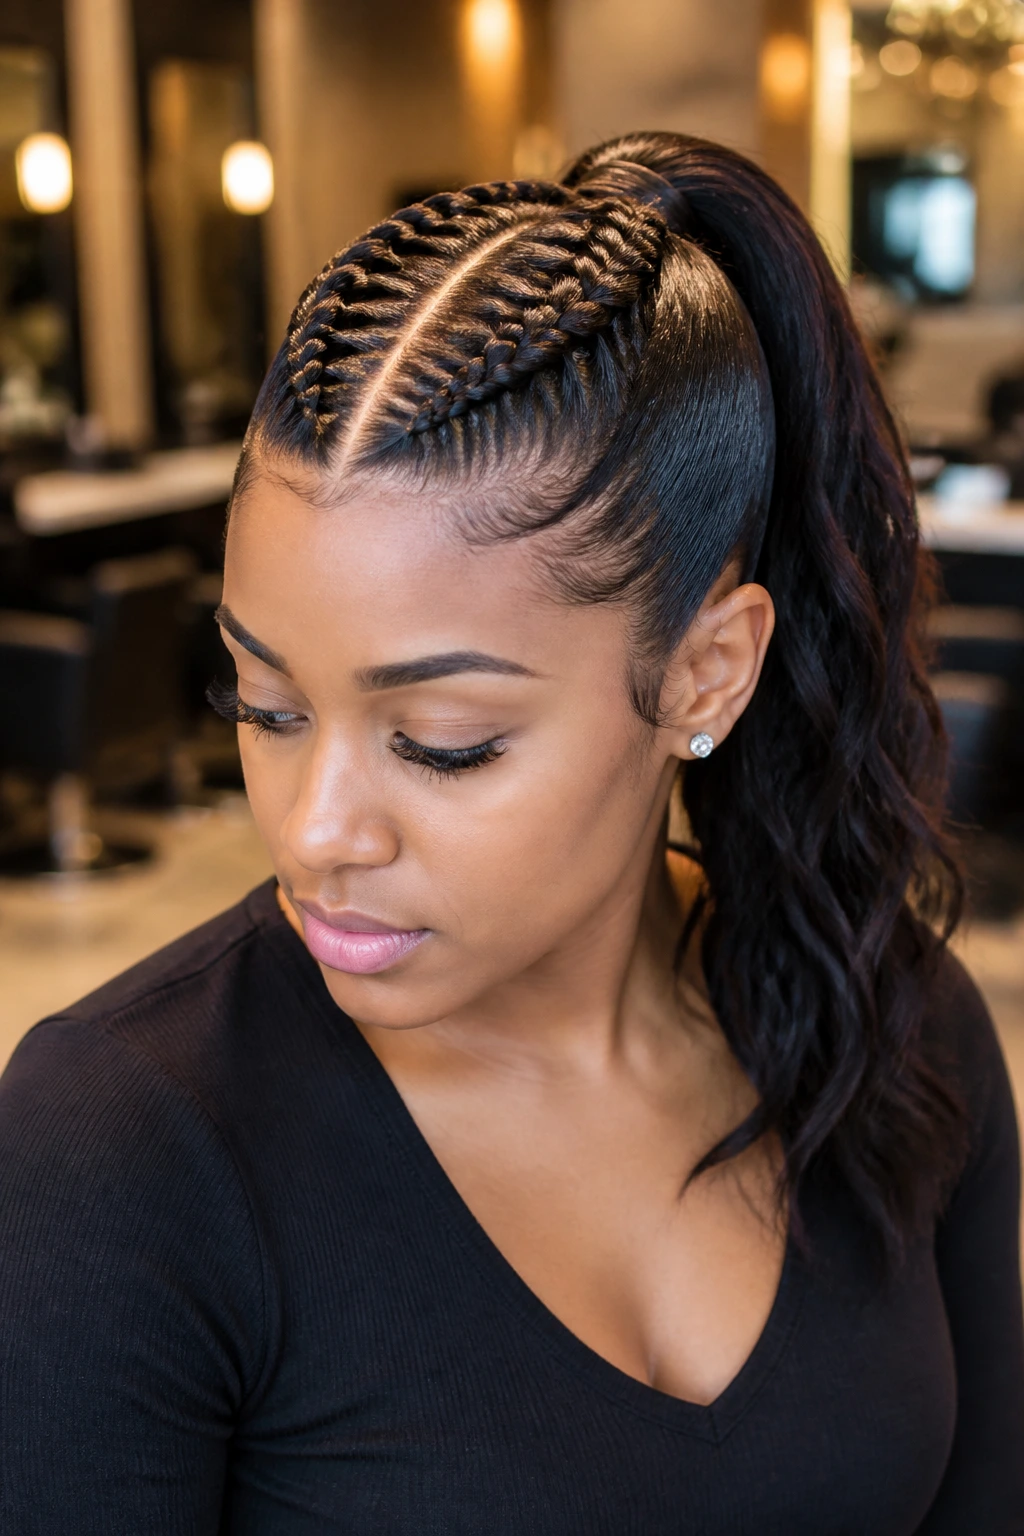
A stitch braid ponytail gives you a graphic line down the scalp before everything falls into one gathered tail. That crisp center stripe looks especially good on medium-length hair because the length is enough to show the pattern without making the ponytail heavy. It’s a neat, clean style with a little edge.
The braid should sit flat and even. If the sections bulge, the “stitched” look gets lost. Use the tip of a comb to keep the part exact and the first few crosses small. Once the ponytail is secured, you can curl the ends or leave them straight, but I’d make sure the elastic is hidden for a cleaner finish.
26. Low Braided Chignon
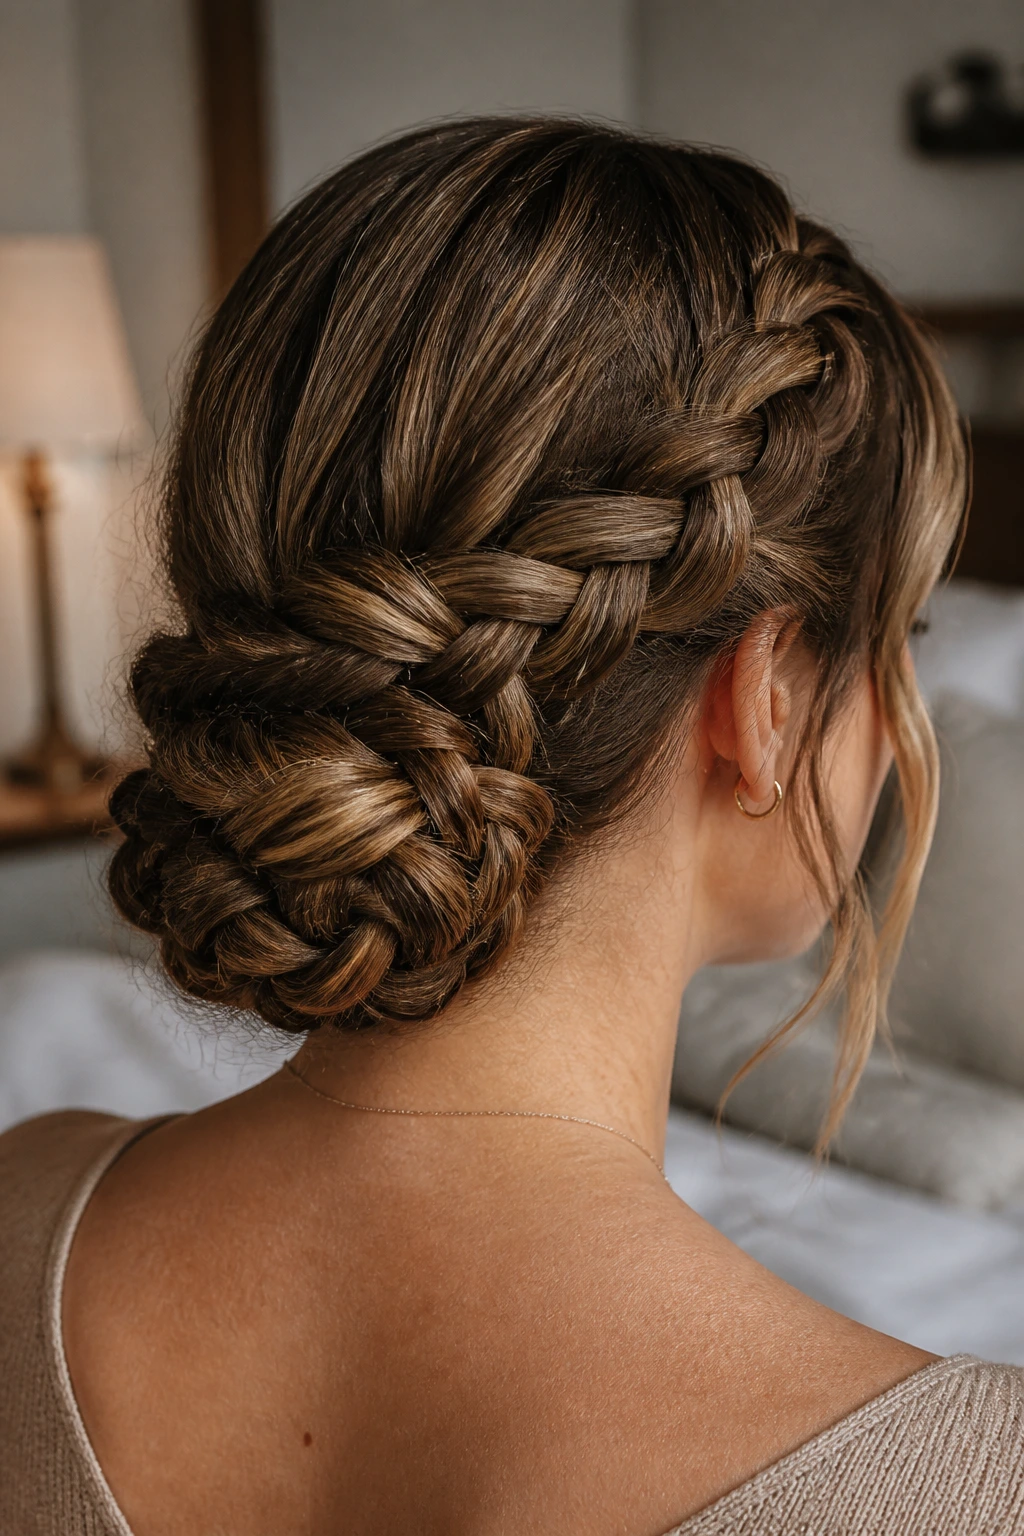
A low braided chignon is the polished option in the group. Braid the hair first, then wrap the length into a knot at the nape and pin it from the inside out. Medium-length hair works here because the braid has enough length to coil without turning into a heavy, oversized bun.
This style is strongest when the braid is fairly tight at the start and a little looser in the middle. That keeps the chignon from looking flat against the head. If you want a softer finish, pull a few face-framing pieces free before you pin the bun. The shape should look calm, not stiff.
27. Double Dutch Braids into Curly Ends
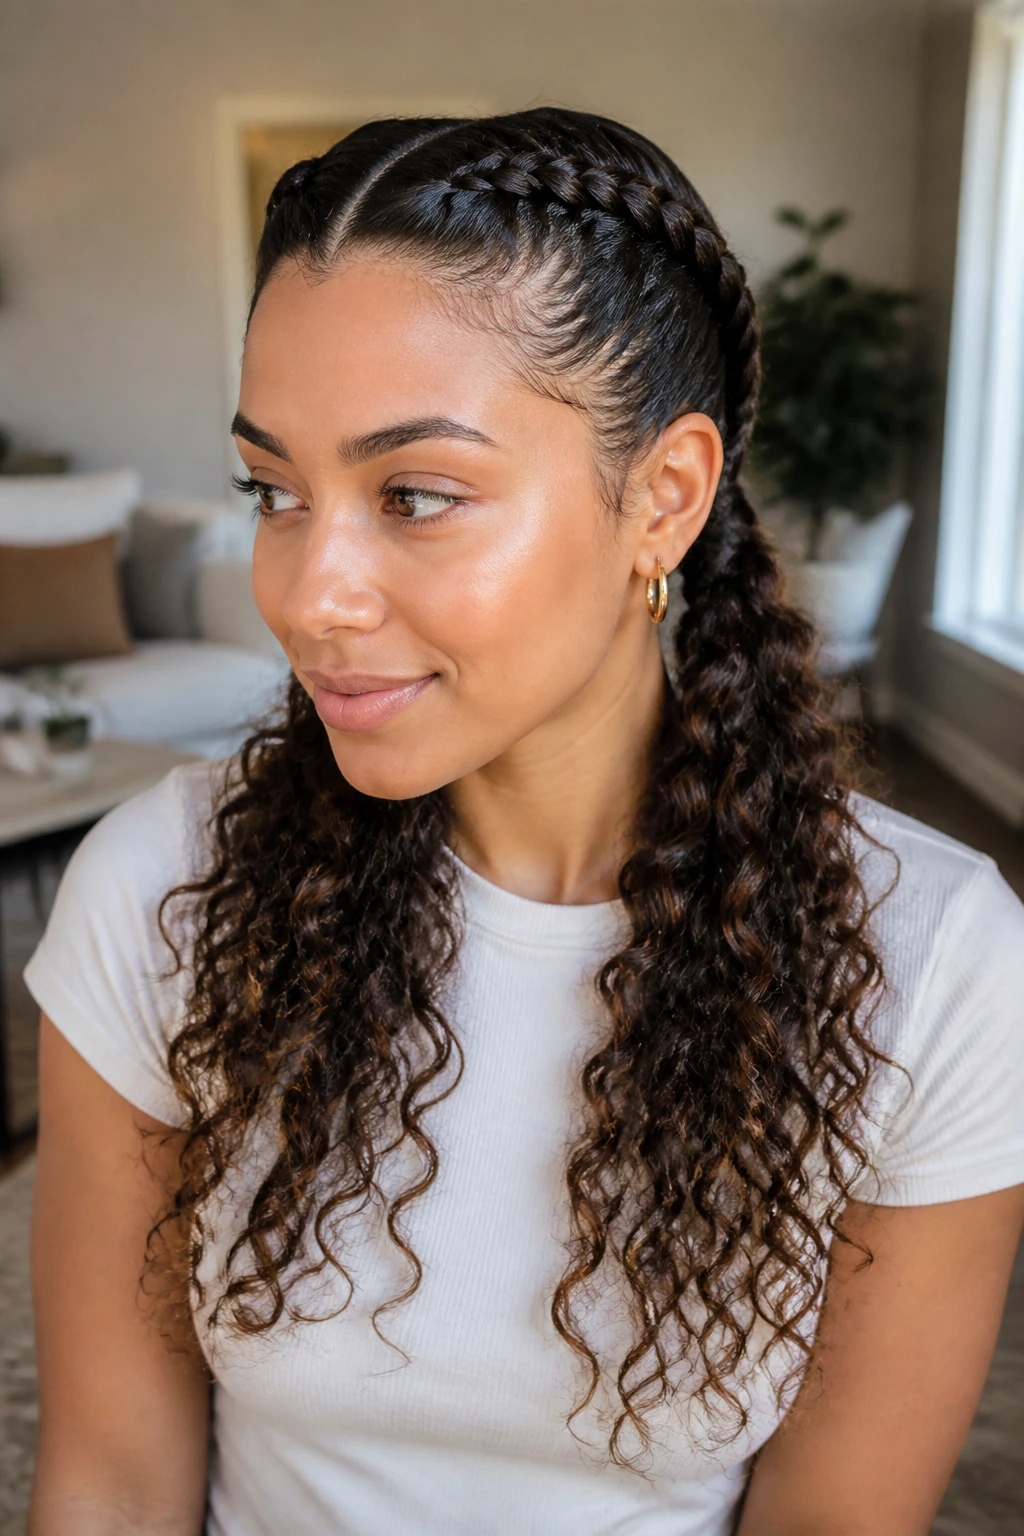
Double Dutch braids into curly ends give medium-length hair a nice split personality: structured at the roots, soft at the bottom. The braids hold the front and crown in place, then the loose ends can be waved or curled so the style doesn’t end in a blunt line. That balance is what makes it wear well.
I’d stop each braid at the nape instead of dragging it too far down. Medium-length hair doesn’t need extra length to prove the style. A small iron bend at the ends is enough. If you want the look to last, set the curls lightly and avoid overbrushing them afterward. The braids do the work up top; the ends should just move.
Why Medium-Length Hair Gives Braids Better Shape
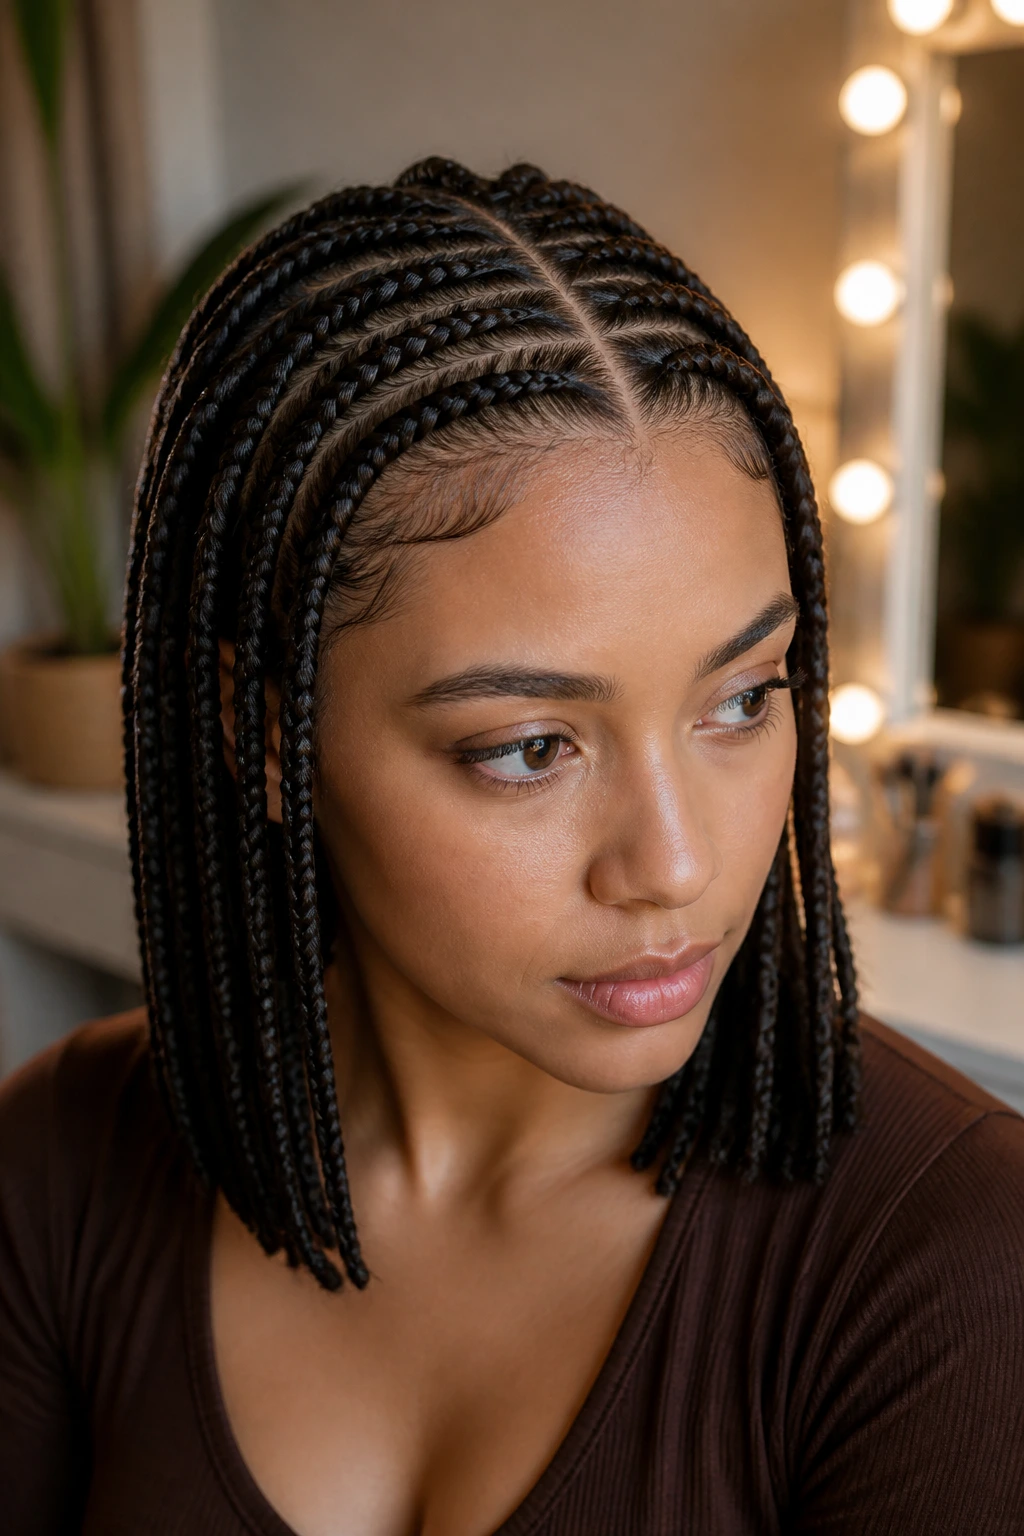
Medium-length hair is forgiving in a way long hair often isn’t. The braid has enough body to hold its pattern, but the ends don’t create so much weight that the style slouches by the end of the day. That matters for everything from a crown braid to a low ponytail. The shape stays readable. The scalp feels calmer. And the finish usually looks more deliberate.
The parting does more work than people think
A clean part can make a simple braid look expensive and a messy part can make a complicated braid look rushed. Tail combs, clips, and a little patience at the root line pay off quickly. If your hair has layers, parting becomes even more important because the shorter pieces need a clear path to stay inside the braid.
Tension should be firm, not painful
Hair should feel held, not yanked. That’s the line. Dermatologists and trichologists are blunt about this for a reason: repeated pulling around the hairline can irritate the scalp and break fragile edges. If the braid aches within the first hour, loosen it and redo the front section with less force. A style that hurts is too tight, full stop.
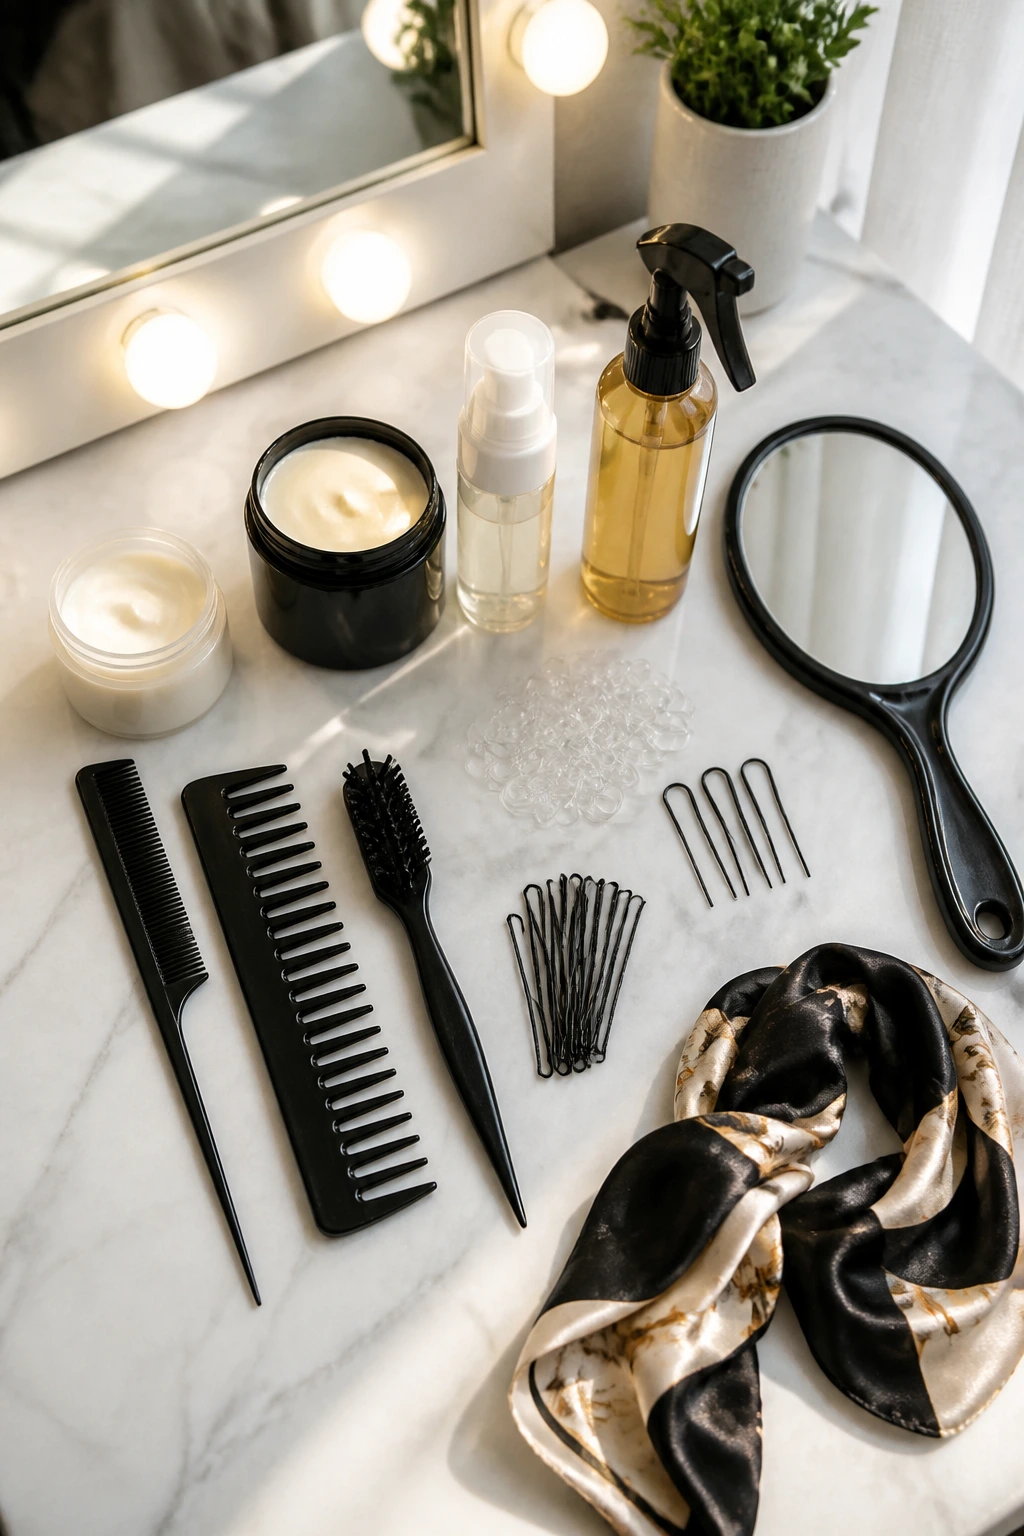
Essential Tools for These Styles
-
Rat-tail comb: Best for clean parts, zigzags, and sectioning the crown without guesswork.
-
Wide-tooth comb: Helps detangle medium-length hair without pulling too hard at the ends.
-
Styling cream or leave-in conditioner: Adds slip and keeps flyaways from sticking out of the braid.
-
Mousse or foam: Useful for grip on slippery hair, especially on French, Dutch, and pull-through styles.
-
Clear elastics: Small, snag-free bands keep braid ends neat without leaving obvious bumps.
-
Bobby pins and U-pins: Necessary for crown braids, milkmaids, buns, and hidden tucks.
-
Edge brush: Good for smoothing the hairline if you want a sharper finish.
-
Texturizing spray or dry shampoo: Gives clean hair more hold when the roots are too silky.
-
Hand mirror or three-way mirror: Makes back-of-head braids far less of a guessing game.
-
Silk scarf or bonnet: Helps protect the style overnight and cuts down on frizz.
Smart Product Picks for Clean Braids
Choose products based on how slippery your hair actually is, not on whatever claims sound nice in the bottle. Fine, straight, freshly washed hair usually needs grip first. That means a little dry shampoo, foam, or texturizing spray at the roots before you start braiding. Thick, curly, or coily hair usually benefits more from slip, so a creamy leave-in and a small amount of styling butter can make the sections behave without puffing up.
Tiny elastics matter more than people admit. Cloth bands stretch out, and thick ties leave bumps under the braid. Clear elastics or snag-free mini bands keep the line cleaner. If you plan to pin a bun or crown, match the pins to your hair color and buy more than you think you need; half of them vanish into the floor the first time you braid in a hurry.
Heat protectant belongs in the prep if you stretch, blow-dry, or curl the ends before braiding. A braid looks better when the base is smooth, but heat should stay moderate and brief. You want the hair pliable, not fried into submission.
How to Wear These Braids With Clothes, Accessories, and Part Lines
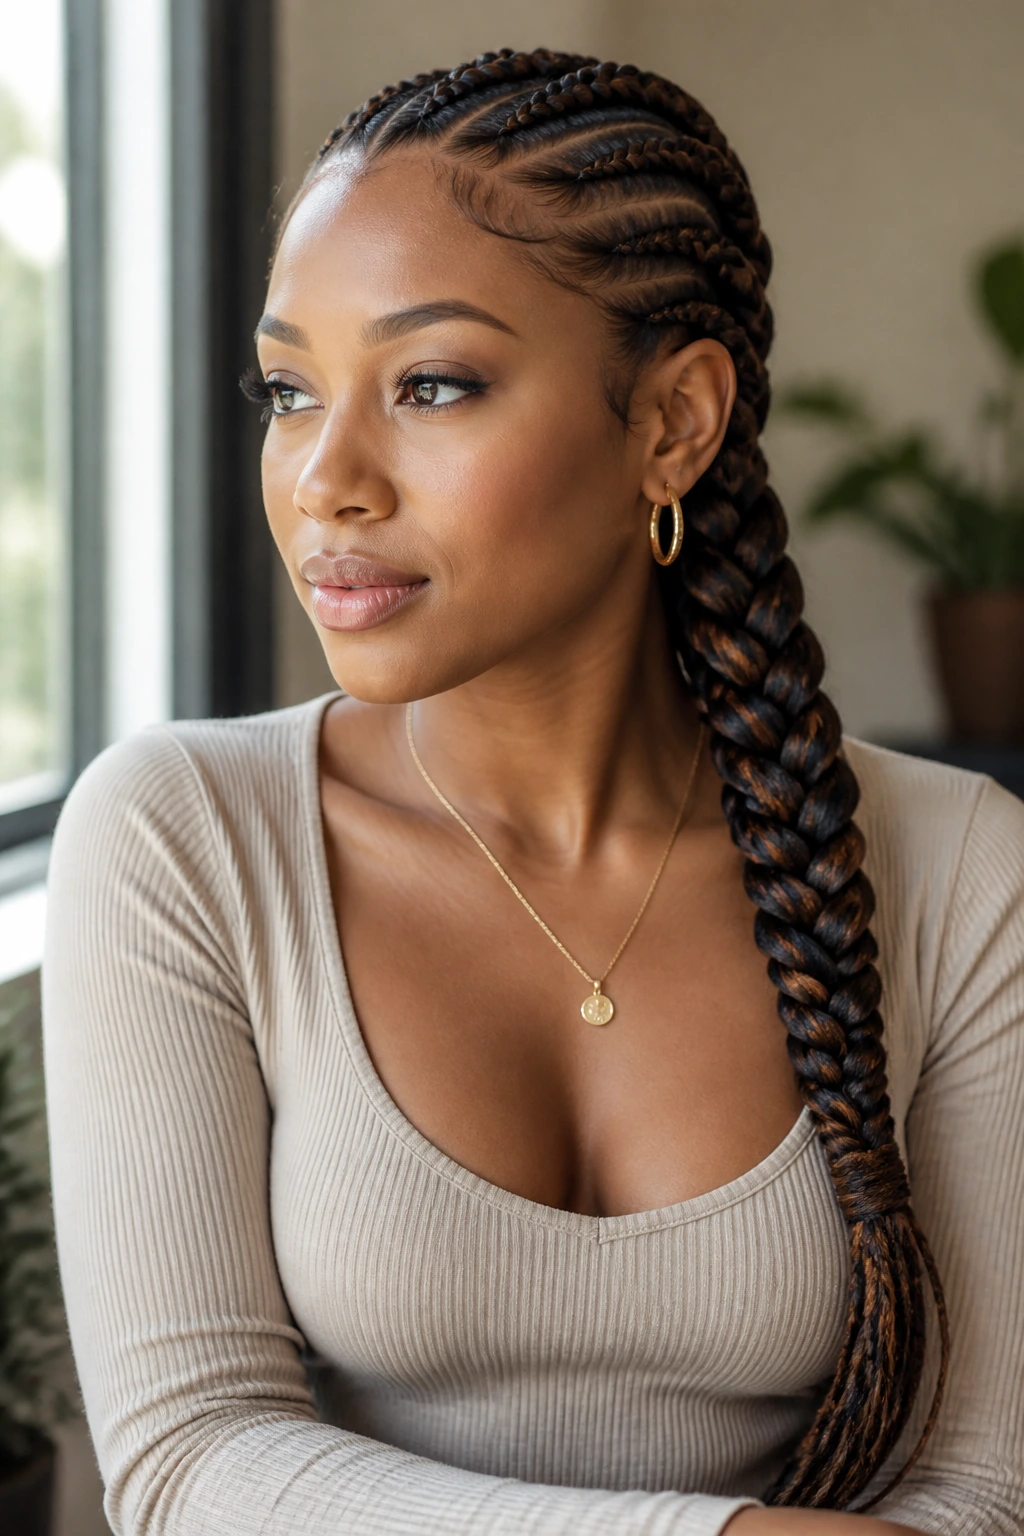
Presentation: Put the braid where the outfit needs balance. A side braid softens a sharp collar. A center-part Dutch braid sharpens a simple T-shirt. A crown style lifts the whole face and makes even a plain top look finished.
Accessories: Small hoops work well with side braids and half-up looks because they don’t compete with the braid line. Satin ribbons, slim claw clips, and a few tiny cuffs can dress up the simpler styles without making them loud. Heavy earrings plus a bulky braid at the neck is a lot. Pick one focus.
Scale: If your hair is medium and fine, one larger braid often looks cleaner than several tiny ones. If your hair is thick or curly, the opposite can be true; two or three smaller braids can keep the shape controlled. The goal is proportion, not matching a photo that was built on someone else’s density.
Best Match: Low braids suit high necklines. Crown braids work with open collars and simple earrings. Sportier double braids sit well with hoodies, crewnecks, and anything you don’t want snagging the ends. The outfit doesn’t need to “match” the braid in a formal sense, but the neckline should leave the style room to breathe.
Extra Finish Tricks That Make Braids Look Better
Texture Boost: If your hair slips out of braids by lunch, mist the roots with dry shampoo or texturizing spray before you start. That little bit of grit makes the braid hold without forcing tighter tension.
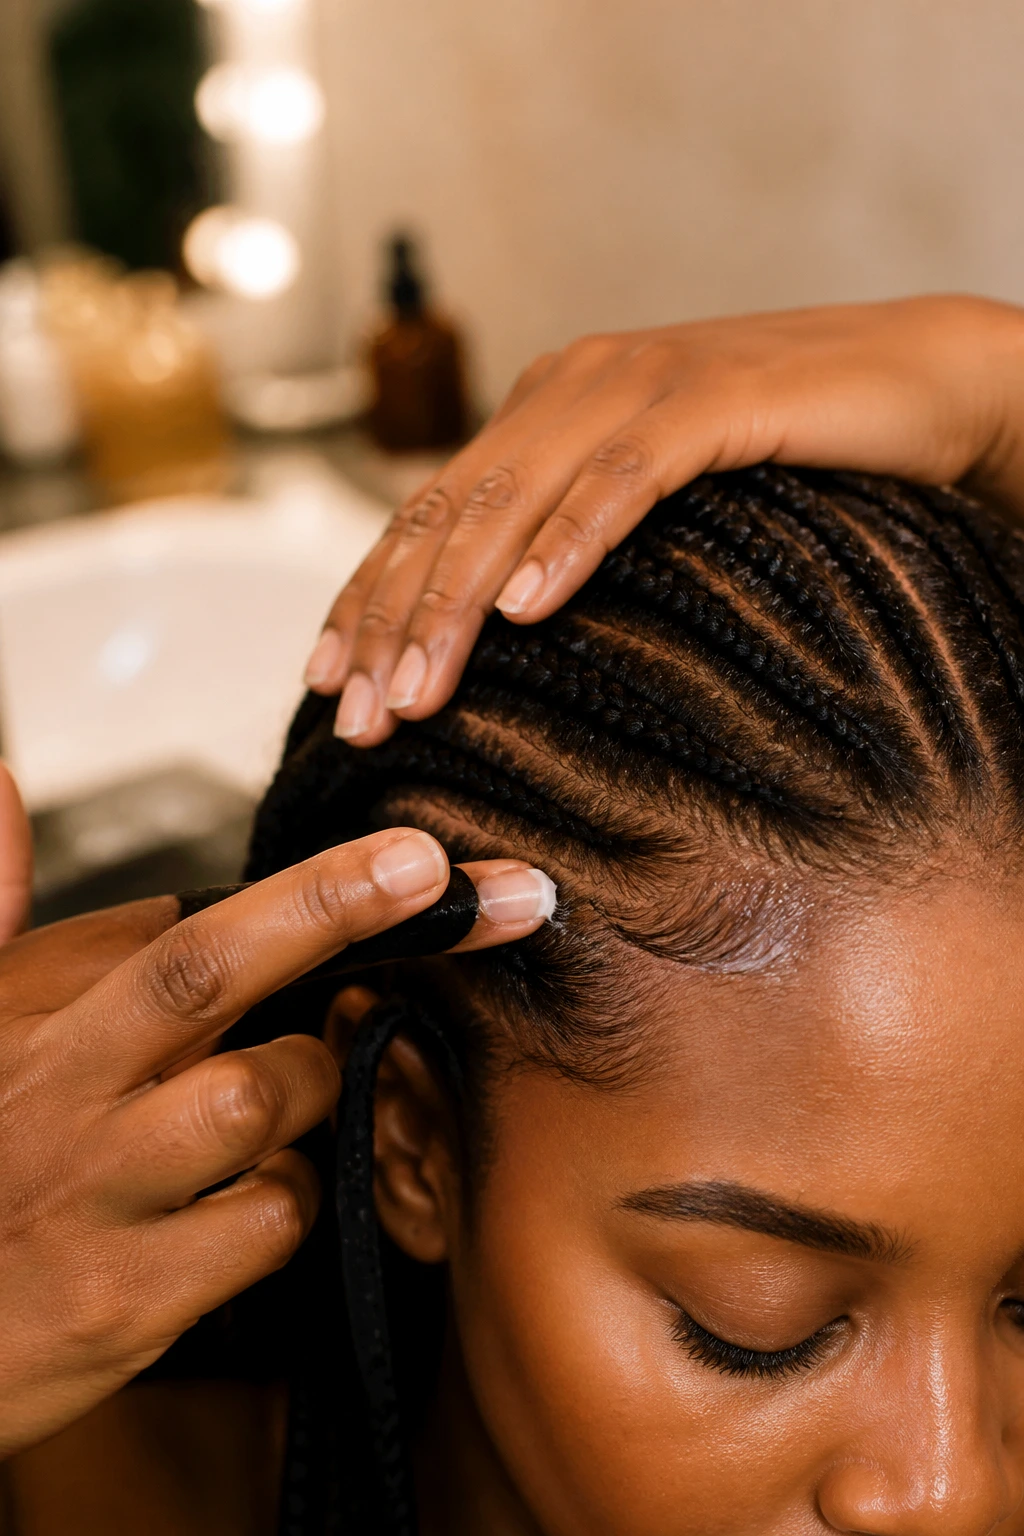
Smooth Finish: Put a pea-size amount of styling cream on your palms and glide it over the first two inches of hairline and the top of the braid. That’s enough to tame frizz without flattening the whole style.
Accessory Swap: A ribbon woven through the tail, a single scarf tied at the base, or a few braid cuffs can change the whole mood of the style. I’d keep the accessory small if the braid itself is already detailed.
Make-It-Yours: Fine hair usually does better with pull-through, rope, or Dutch styles that create the look of fullness. Thick hair often looks strongest in one or two large braids with a low bun or ponytail finish. Curly hair can be braided while damp for stretch, or braided dry for more volume at the ends.
How to Keep Braids Fresh Overnight and Through the Week
Braids hold up best when you let them set before you start touching them. Give the finished style 15 to 20 minutes to settle, then smooth down any puffiness with clean hands instead of a brush. Once the braid pattern is disturbed early, it rarely looks crisp again.
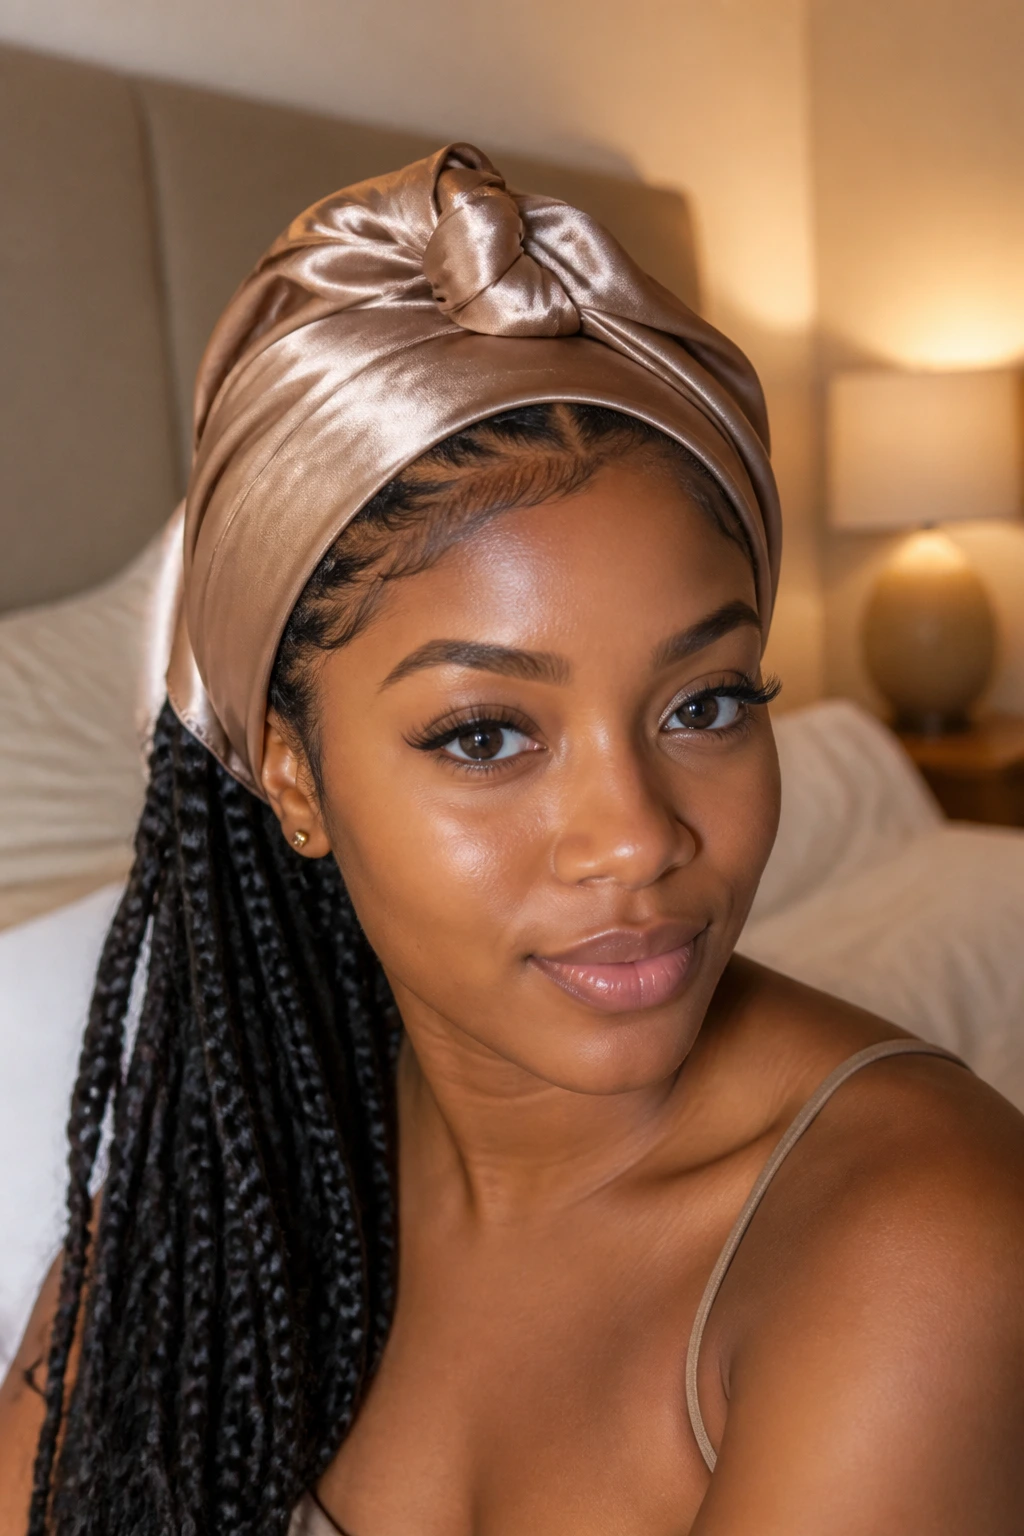
At night, a silk scarf or bonnet protects the braid line and keeps the crown from frizzing against the pillow. A satin pillowcase helps too, especially if you toss and turn. If you’re wearing a crown braid, milkmaid braid, or any style pinned across the top, sleep on your back if you can. Side sleeping crushes the shape faster than people expect.
For refreshes, use a mist bottle with plain water or a very diluted leave-in mix and smooth only the outer layer. Don’t soak the braid lengths. If the roots start feeling greasy, a little dry shampoo at the part line usually fixes the problem without forcing a wash. Most of these styles can make it through 2 to 3 days with minor touch-ups. Beyond that, rebraid the front pieces rather than trying to polish the same frizz into obedience.
Common Mistakes That Make Braids Fall Apart
-
Starting on hair that’s too wet: Damp hair can look cooperative, but it stretches and frizzes as it dries. Dry the roots first, then braid.
-
Pulling too hard at the hairline: If the scalp hurts, the tension is wrong. Loosen the first section and start again before the style gives you a headache.
-
Using too much cream or oil: Heavy product makes the braid slide apart and leaves the lengths slick. Use small amounts, especially near the part.
-
Ignoring layer lengths: Shorter layers near the face will pop out unless you tuck them into the first braid passes or smooth them with a little mousse.
-
Leaving the ends unfinished: A braid that ends in a frayed tail looks abrupt. Curl, tuck, wrap, or pin the ends so the finish feels deliberate.
-
Making every section uneven: If one side has more hair than the other, the braid twists off-center and gets harder to save later. Even parts at the start prevent half the problems.
Adaptations That Change the Mood Without Changing the Structure
Sleek Office Version: Keep the parts sharp, smooth the hairline, and tuck the ends into a low bun or ponytail. This works especially well for French braids, stitch braids, and low chignons.
Soft Weekend Version: Loosen the outer loops, pull out two face-framing pieces, and let the braid sit slightly lower on the head. Side braids, fishtails, and half-up styles all take to this treatment easily.
Workout-Proof Version: Tighten the braid close to the scalp, use a bit of gel at the roots, and keep ends secured with snag-free elastics. Boxer braids and Dutch pigtails are the obvious picks here.
Formal Finish: Wrap the braid into a crown, milkmaid, or low bun and hide the pins under the braid line. A small accessory—one ribbon, one cuff, one pin—looks better than a pile of extras.
Curly-Ends Version: Leave the braid to stop around the nape, then curl the remaining hair in loose bends. This keeps the style from looking too severe and adds movement to medium-length hair.
Frequently Asked Questions
Can medium-length hair really hold a full braid all day?
Yes, if the sectioning is clean and the braid starts with enough tension at the scalp. Medium hair usually holds better than people expect because it has less drag than long hair, which means the style can stay put without needing constant re-pinning.
Is it better to braid clean hair or second-day hair?
Second-day hair usually wins for grip. Freshly washed hair can be too slippery, especially if it’s fine or straight, so a little texture from natural oils or dry shampoo helps the braid stay tidy.
What if my hair has layers and the shorter pieces keep slipping out?
Work the shorter pieces into the first few braid passes and use a small amount of mousse or cream at the front. For really stubborn layers, styles like Dutch braids, boxer braids, or a braided headband tend to hold better than loose side braids.
How do I keep braids from looking flat?
Gently pull the outer loops apart after the braid is secured. That soft “pancaking” gives the braid more width without destroying the pattern, and it matters a lot on medium-length hair where shape can disappear fast.
Which braid style is easiest for beginners?
A side-swept three-strand braid or a rope braid low ponytail. Both are easier to control than fishtails, crowns, or ladder braids, and they still look finished when the sectioning is clean.
Can I braid wet hair?
You can, but I wouldn’t braid it tightly while it’s soaking. Wet hair stretches more easily and can dry into an odd shape, especially around the roots. If you want a stretched style, dry the scalp first and braid when the hair is damp, not dripping.
What braid works best if I need my hair off my face?
A braided headband, boxer braids, or front cornrow-style braids are the most direct fixes. They keep the front clear without needing the entire head pinned back, which is useful if you still want some movement in the rest of the hair.
How do I sleep without wrecking the braid?
Use a silk scarf or bonnet and a satin pillowcase if possible. For pinned styles like crown braids or milkmaids, try to keep pressure off the top of the head and don’t pile the braid under a loose knot that can flatten it overnight.
Braids That Fit the Length You Have
Medium-length hair doesn’t need extra inches to look finished. It needs the right shape, the right tension, and a style that respects where the hair actually lands. That’s why these braids work: they use the length instead of fighting it.
Pick one that matches your day, not one that asks for more patience than you have. A clean side braid can carry you through a normal Tuesday. A crown or milkmaid braid can do the heavier lifting when you want polish. And the rest—pull-throughs, fishtails, Dutch pigtails, rope twists—give you enough room to play without needing waist-length hair to make the point.
