



Long hair looks impressive until it gets caught in a coat zipper, flops into your soup, or spends the whole day sliding off your shoulders in one heavy sheet. Braid hairstyles for long hair solve that with style, not just utility. A braid can turn all that length into shape: a rope, a ridge, a crown, a thick tail, or a pattern that looks more considered than any loose style ever will.
The interesting part is how different long hair behaves once you braid it. Fine hair can look fuller in a fishtail or pull-through braid. Thick hair gets calmer inside a French or Dutch braid. Layered hair, which can be a small nightmare in loose styles, often looks better once the shorter pieces are folded into a braid instead of left to float around like they’re not part of the plan.
Some of these styles take five minutes and a brush. Others ask for a rat-tail comb, a few pins, and a little patience. All of them work because long hair gives braids something shorter hair can’t: enough length for the pattern to show before the braid runs out of room. That’s the fun of it, really. The shape gets a chance to breathe.
Why These Braids Earn Their Place
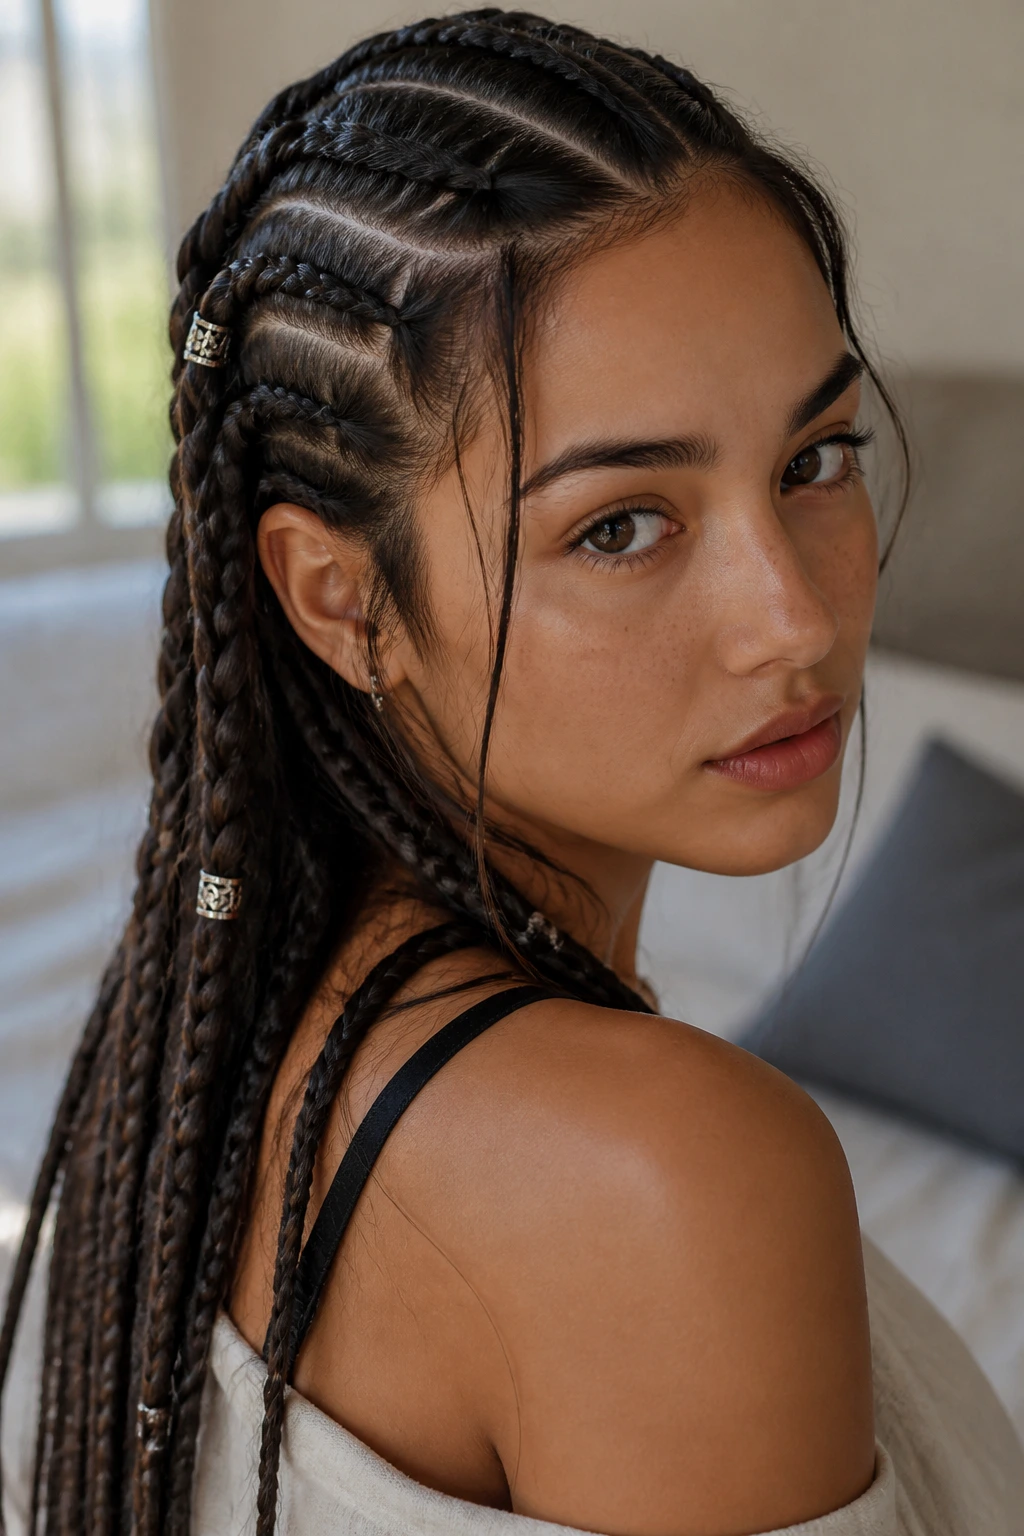
- Long Hair Changes the Silhouette: A braid on long hair doesn’t just sit there; it becomes a line, a loop, or a thick woven shape that changes how the whole head reads.
- Some Styles Look Better on Day Two: A little natural grip helps the braid hold, so these styles often behave better after a wash day has passed.
- There’s a Style for Every Texture: Smooth, wavy, curly, and coily hair all braid differently, which means the same technique can look polished, soft, or bold depending on the hair itself.
- You Can Go Low-Key or Formal Fast: A plain three-strand braid and a ribbon braid both start from the same basic idea, but one is a grab-and-go fix and the other looks ready for a dinner party.
- Long Hair Makes Small Details Visible: Tiny sections in a fishtail, four-strand, or ladder braid show up much better when the braid has real length to stretch out.
- Braids Keep Working Past the First Hour: Unlike styles that collapse as soon as you move, a braid usually gets better with a little wear, a little looseness, and a few flyaways left alone.
1. Classic Three-Strand Braid That Never Looks Plain
A standard three-strand braid is the backbone of long-hair styling for a reason. On waist-length hair, it turns into a solid rope with a clean end, and that length gives it more presence than people expect. Pull the outer edges slightly after you tie it off, and the whole thing gets thicker and a little softer around the seams.
I like this braid when the hair is already smooth and I don’t want to fight it. Add a touch of leave-in cream or a tiny bit of serum to the ends so they don’t fray, then secure the tail with a small elastic. If the hair is very layered, stop one inch earlier than you think and leave the ends tucked into the braid instead of letting them split apart.
2. French Braid for Keeping Long Hair Off the Face
A French braid is the style I reach for when long hair needs to behave without looking stiff. It starts at the crown, gathers hair as it goes, and pins the whole top section close to the head so the front doesn’t keep falling into your eyes. On long hair, that growing line down the back has a tidy weight to it.
This one works especially well if your hair has a little grit from dry shampoo or second-day texture. Super-slippery hair can slide out of the side sections, so mist the roots lightly and brush from the part line before you start. If the braid looks too severe, loosen the first three loops near the hairline with your fingers; that tiny move changes the whole mood.
3. Dutch Braid With Raised Ridges and More Volume
A Dutch braid is the French braid’s louder cousin. Instead of tucking strands over the middle, you cross them underneath, which makes the braid sit on top of the hair like a raised ridge. On long hair, that raised shape shows up beautifully because the pattern keeps going for a while before it reaches the end.
This is the braid I use when I want the plait itself to be the point, not just the hairstyle. It looks especially good on darker hair, layered cuts, and hair with some texture, because the shadows between the ridges make the pattern easier to see. After you finish, “pancake” the sides gently by pulling the outer loops apart one at a time. Don’t yank. You’re widening the braid, not undoing it.
4. Double Dutch Braids for a Clean Middle Part
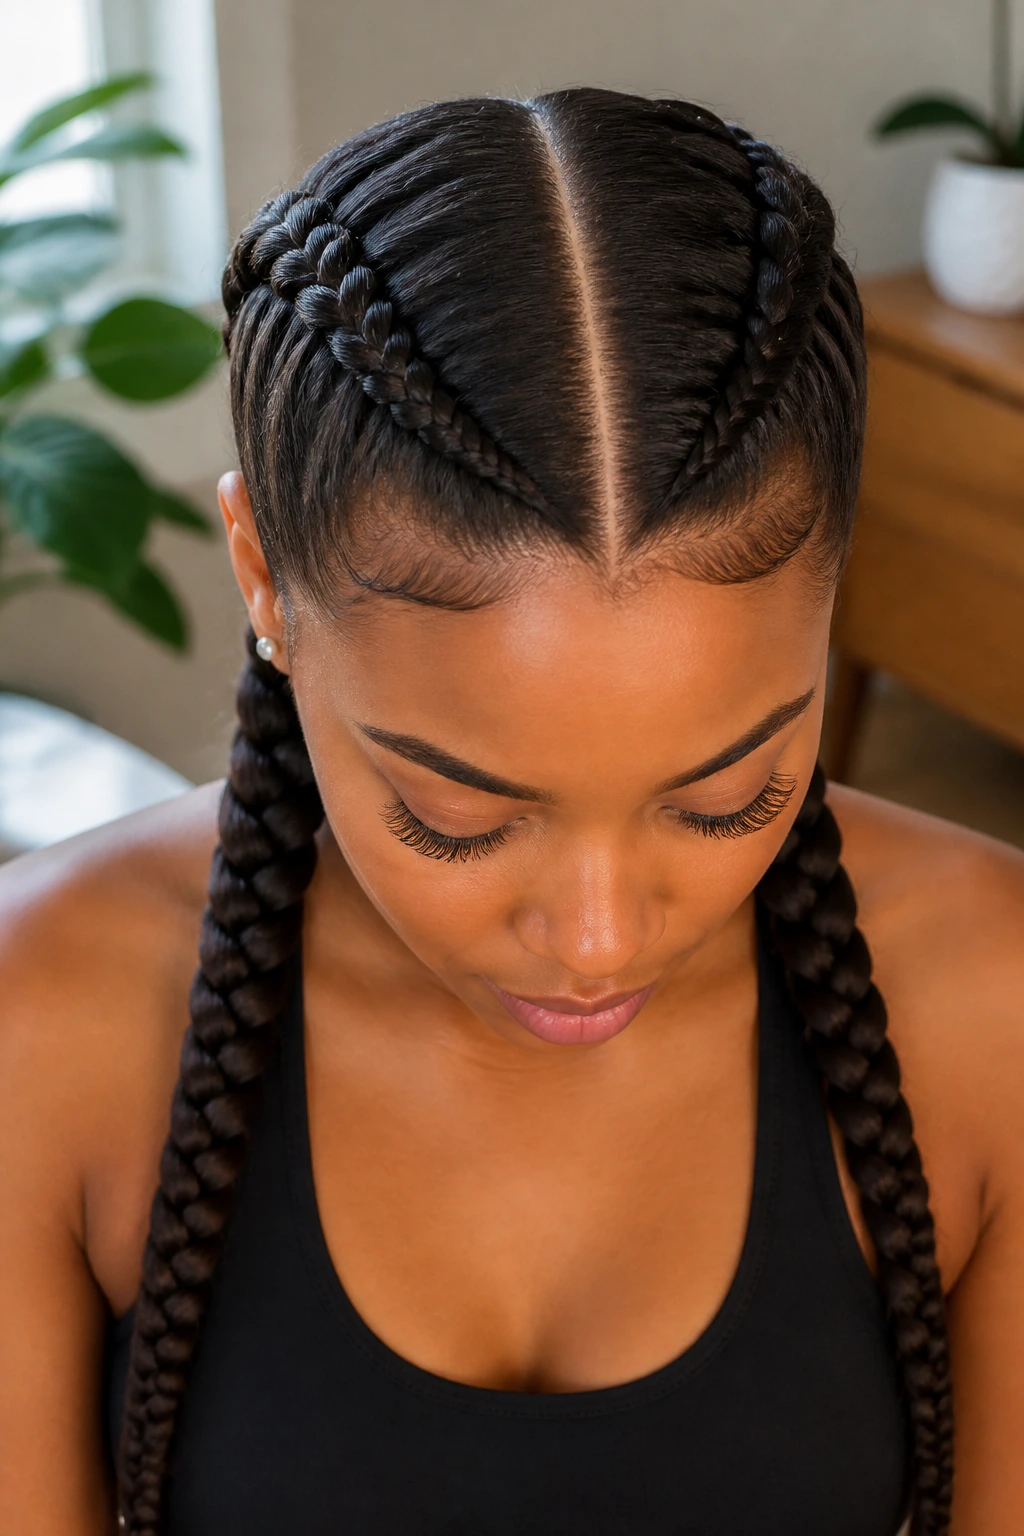
Two Dutch braids down the head divide long hair into halves that are much easier to manage. The style feels sporty, but it can look sharp and polished if the parting is straight and the braids are even. I’d call this one one of the most useful braid hairstyles for long hair because it keeps the weight distributed instead of hanging from one side.
The middle part matters here. Use the tail of a comb, not your fingers, and check the back in a mirror before you start braiding. If one braid is tighter than the other, the imbalance shows fast. I also like a small dab of styling cream at the roots so the front pieces stay smooth without turning greasy.
5. Fishtail Braid With a Fine, Woven Finish
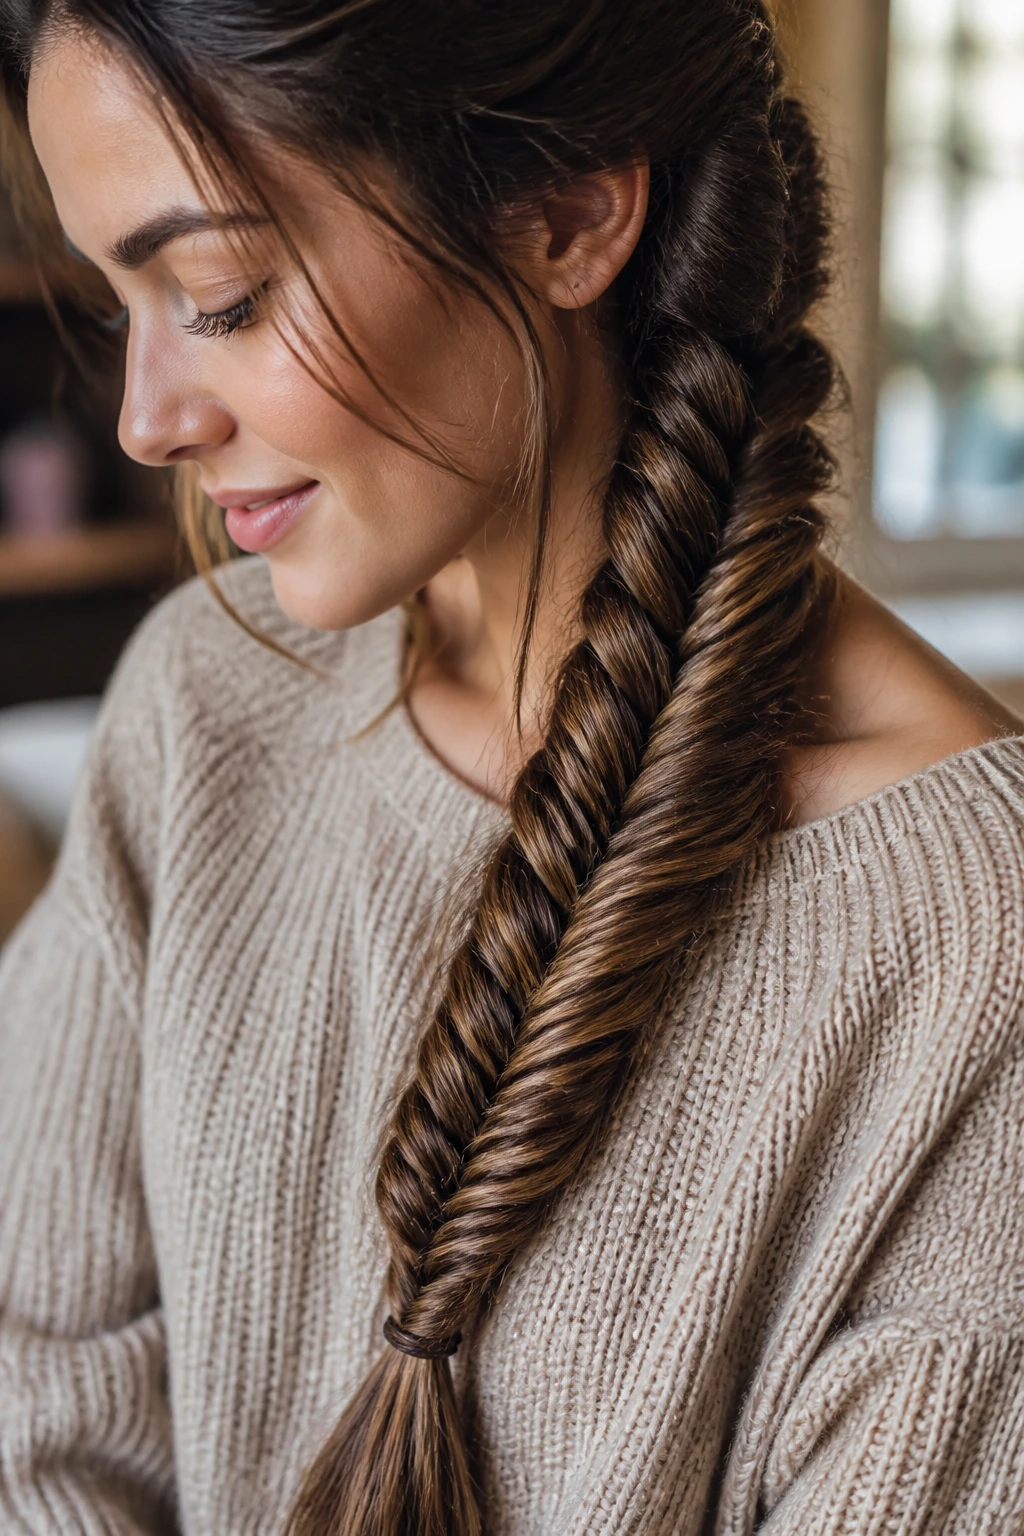
A fishtail braid gives long hair a different kind of texture. Instead of big sections, you keep taking tiny pieces from the outer edges, so the finished braid looks narrow, tidy, and almost woven. Long hair is what makes it work; without enough length, the pattern can disappear before it has time to look interesting.
This braid is one of my favorites for fine hair because the repeated little crossings make it look fuller than it really is. The trick is patience and tension. Keep each piece small and even, then secure the end with a clear elastic. If the braid is looking flat, tug the edges very lightly with your fingertips, starting from the bottom and working upward.
6. Side Fishtail Braid That Falls Over One Shoulder
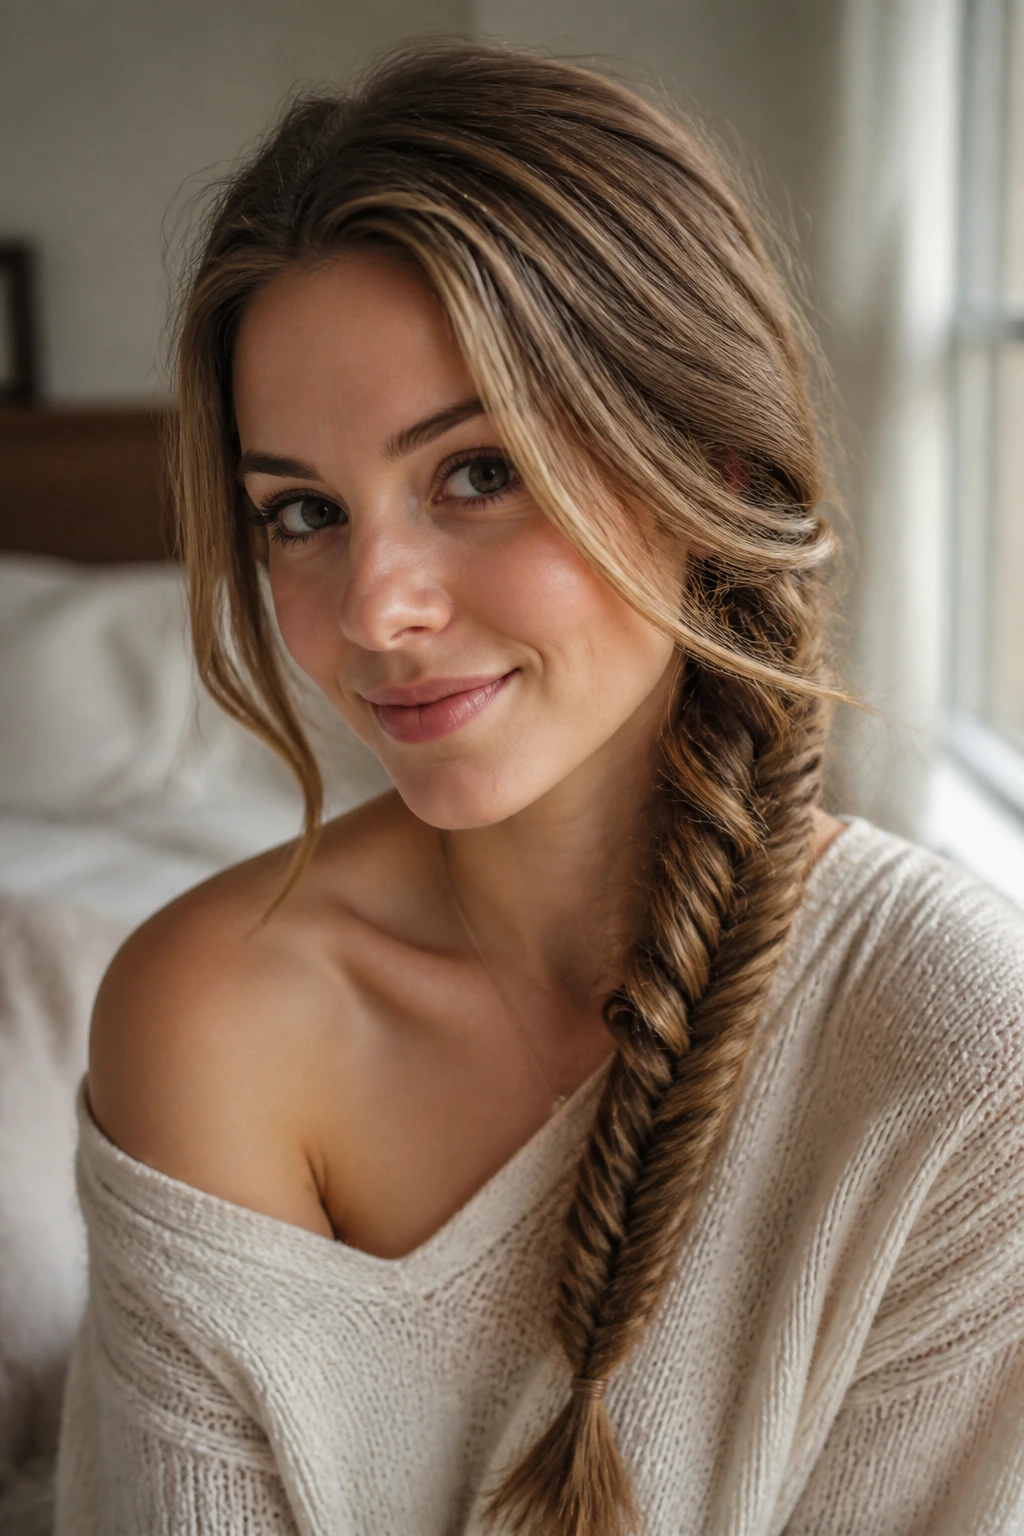
Move the fishtail to one side and the whole thing softens. The braid drapes over a shoulder like a long piece of ribbon, which makes it feel less severe and a little more romantic. On long hair, that sideways fall also shows off the braid length in a way a center-back style sometimes hides.
This version is especially nice with layered cuts because the front pieces can escape a little and blend into the braid instead of sticking out awkwardly. If your hair is silky, prep it with a bit of texturizing spray before you begin. A side braid like this is one of those styles that looks better after you touch it once or twice and stop trying to make it perfect.
7. Rope Braid With a Glossy, Twisted Look
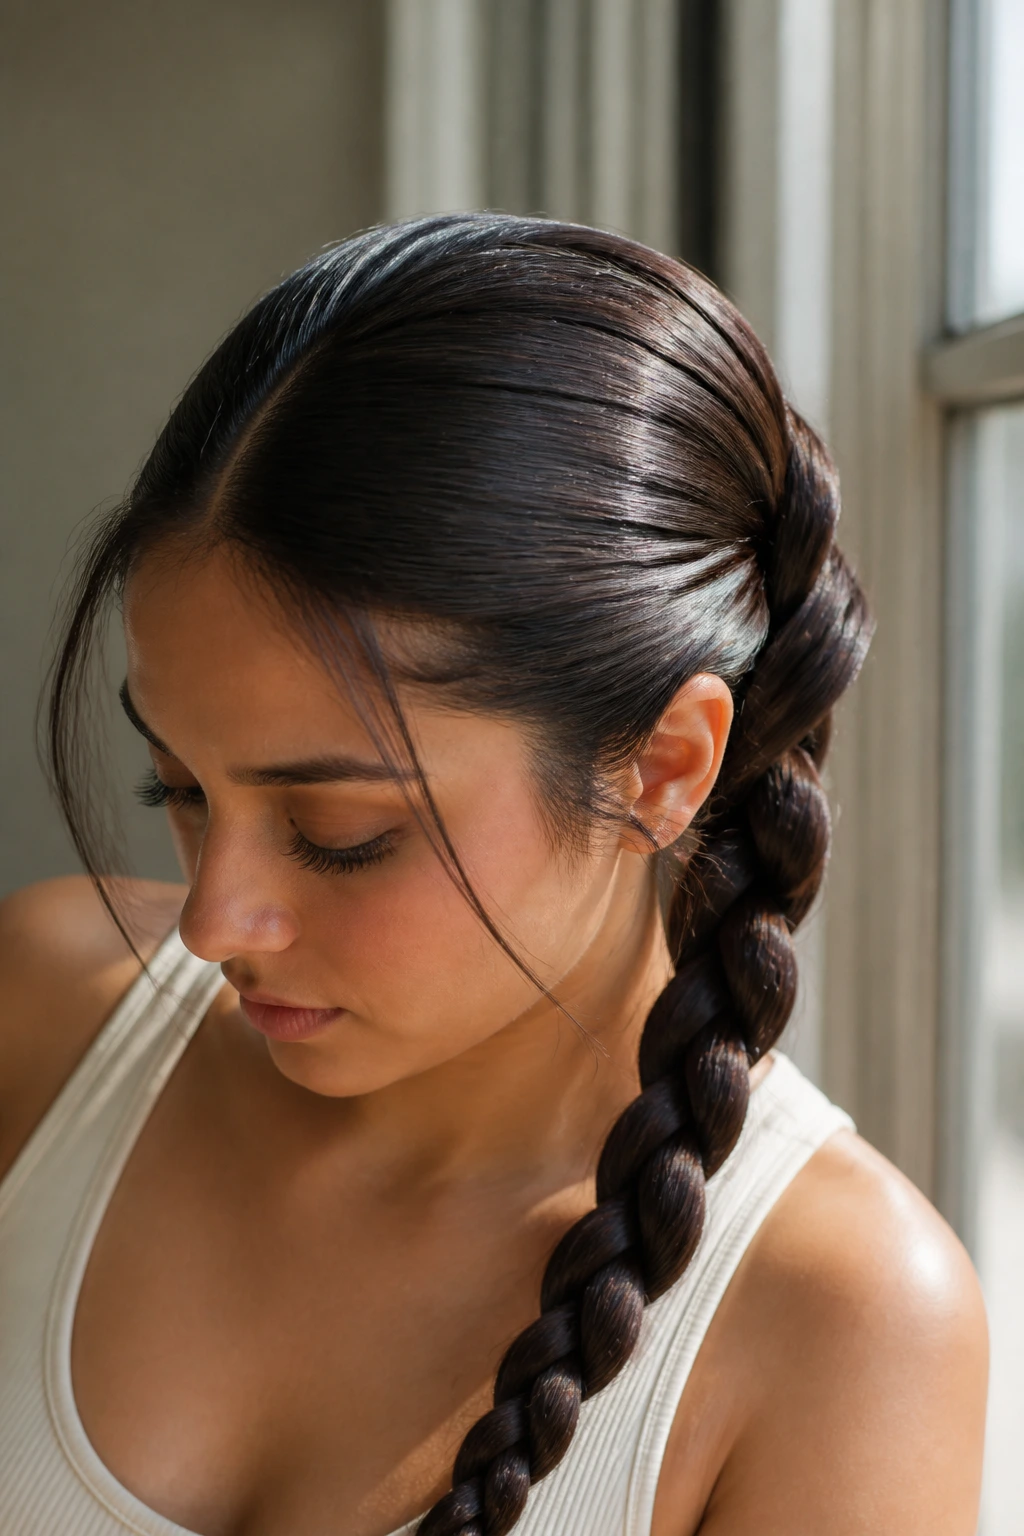
A rope braid uses two sections instead of three, which gives it that clean twisted look people often mistake for something much harder than it is. On long hair, the twist reads really clearly, especially if the hair has shine or you smooth it with a little serum first. It’s a smart choice when you want polish without a complicated weave.
The important part is direction: twist each section one way, then wrap them around each other the opposite way. If both twists go the same direction, the braid falls apart fast. I like this braid low at the nape or pulled into a ponytail because the finish looks crisp and the length gives the rope a nice, heavy swing.
8. Pull-Through Braid for Big Volume Without Tight Weaving
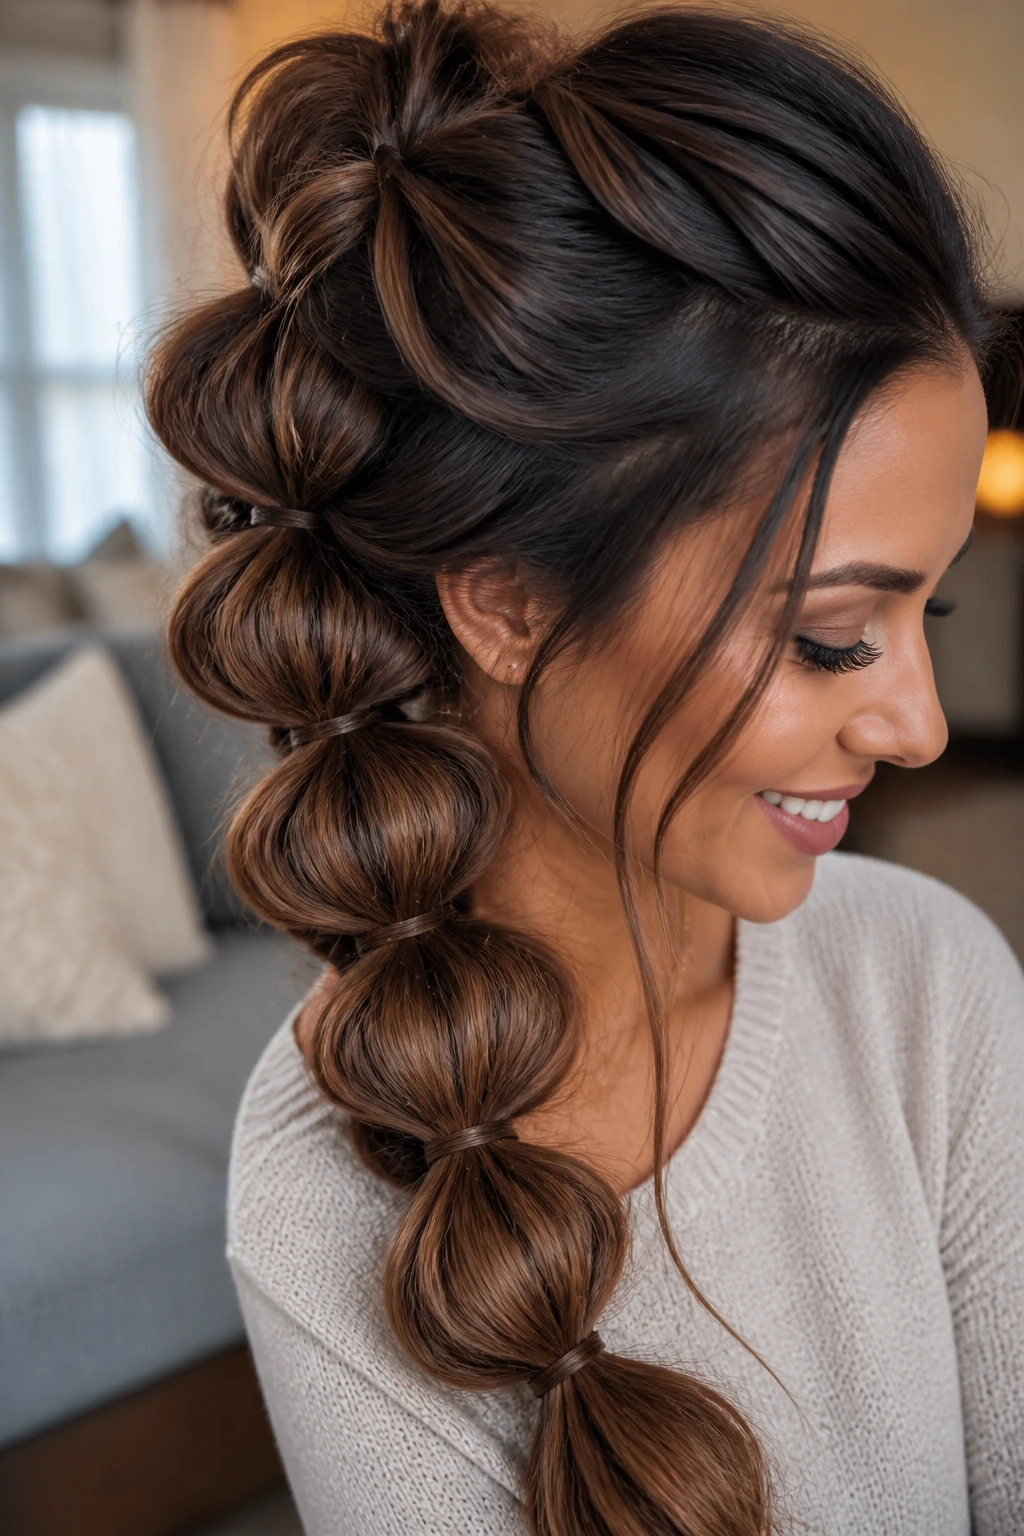
This is the cheat code braid for long hair that feels thin or for anyone who wants the look of a thick braid without doing actual braid math. Small elastics create stacked ponytail sections, and then you pull the loops apart so the braid looks massive and almost cloud-like. It’s not a traditional braid, but it earns its spot on any braid hairstyles for long hair list.
You need more elastics than you think, and they should be snag-free. Clear elastics or tiny covered bands work best. Start with a ponytail at the crown, then add another just below it and flip the lower tail up through the opening. Keep repeating. Once it’s built, tug the loops outward evenly so it looks full instead of lopsided.
9. Waterfall Braid for Loose Length and Face-Framing Pieces
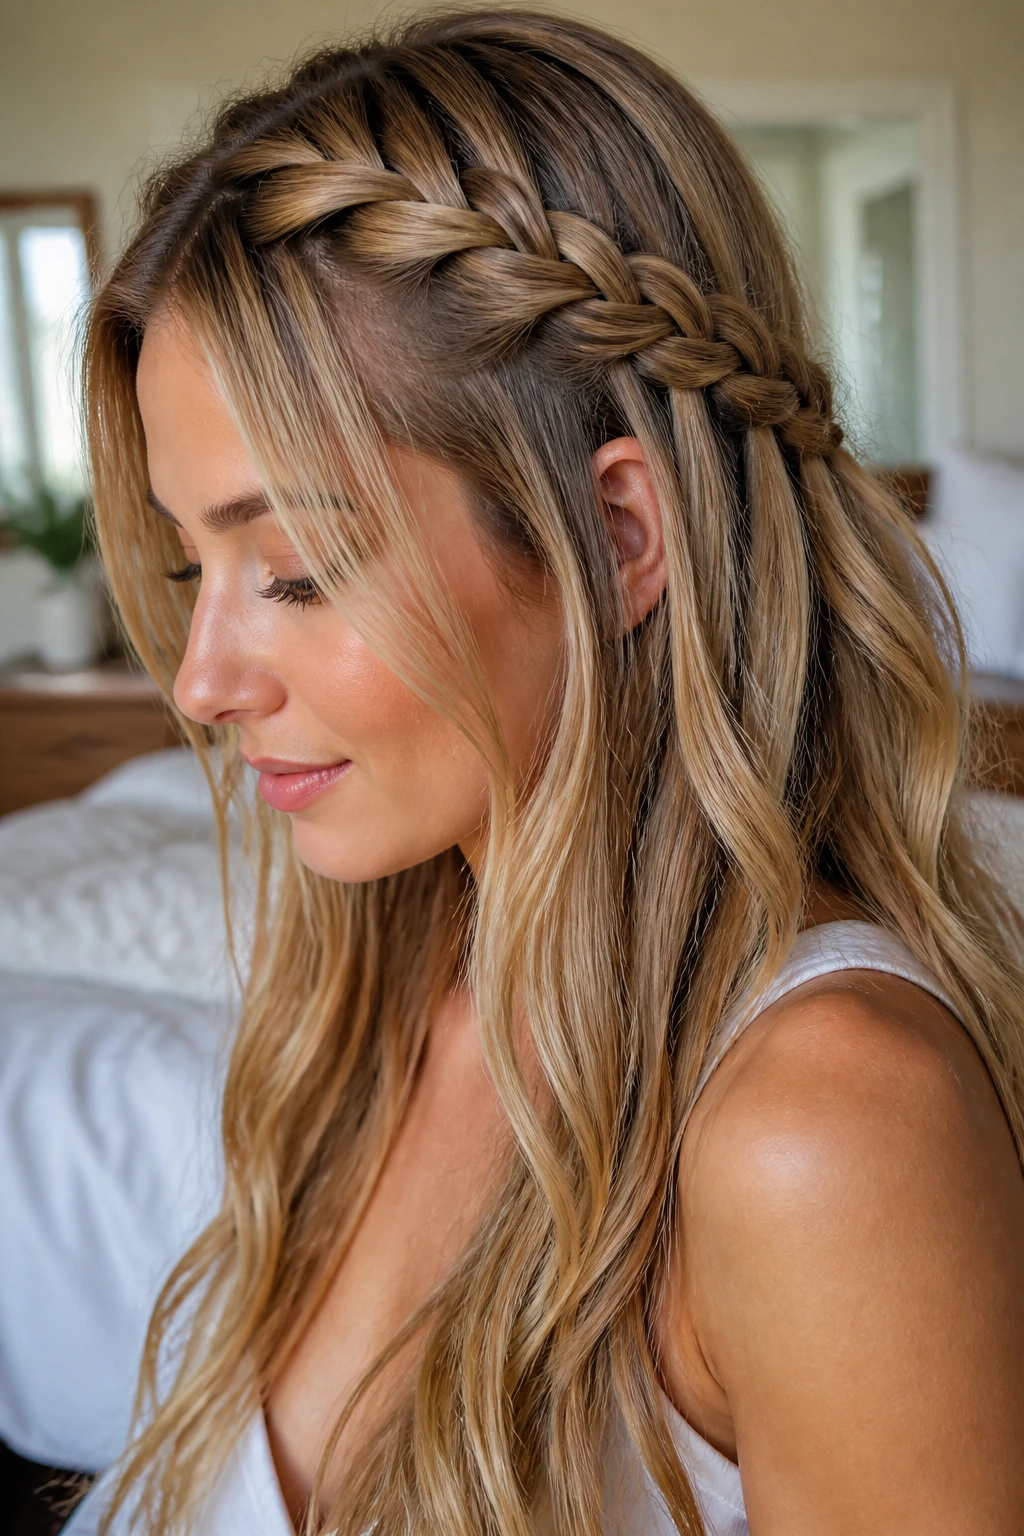
A waterfall braid is half-up styling with a little movement built in. As the braid travels across the head, one section drops out each time, which leaves a soft cascade of loose hair behind it. On long hair, that falling pattern has room to show, and the style feels airy instead of crowded.
I like this braid on wavy or curled hair because the loose strands blend more naturally. Straight hair can work too, but it helps to add a bend with a curling iron or a foam roller beforehand. Pin the braid firmly where it ends; otherwise the weight of long hair can tug the whole thing down over the course of an evening.
10. Crown Braid Wrapped Around the Head
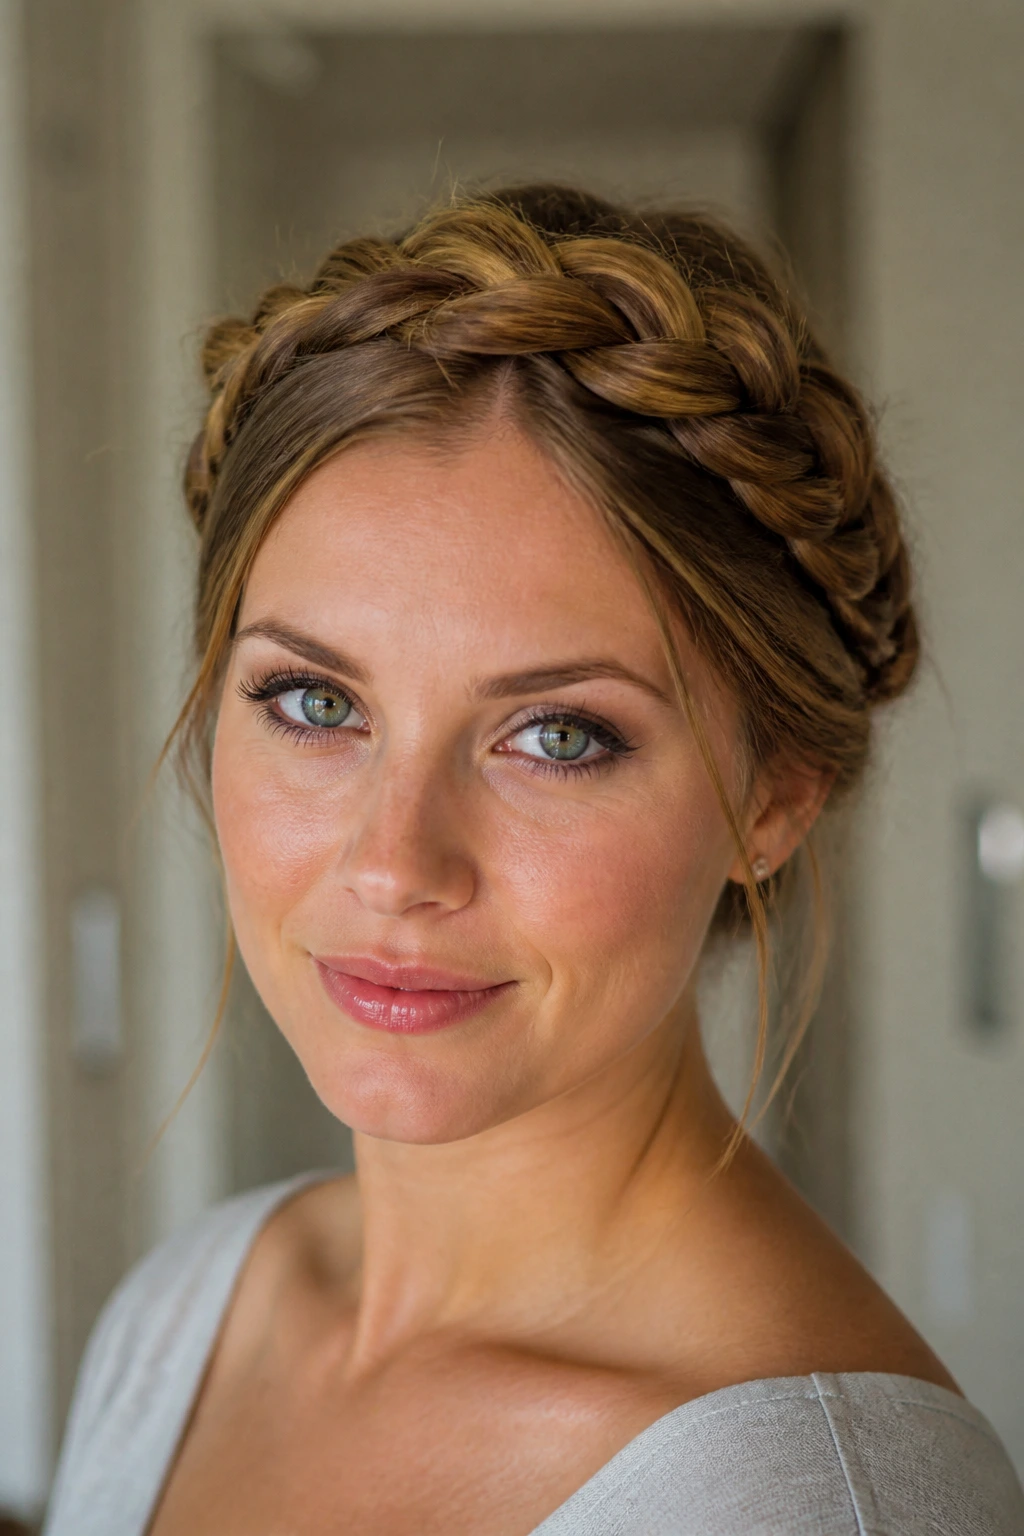
A crown braid turns long hair into a shape instead of a length. The braid loops around the head like a band and keeps the ends tucked in, which is useful when you want the neck clear and the front smooth. It has a formal feel, but it’s not fussy if the braid is kept a little loose.
This style is at its best when the braid is anchored with pins that disappear under the weave. A tiny edge of flyaways is fine. In fact, too much tightening makes the whole thing look hard. If your hair is very thick, braid in two sections and cross them at the back; it’s less painful than trying to force one braid around the whole head.
11. Halo Braid That Sits Softly Along the Hairline
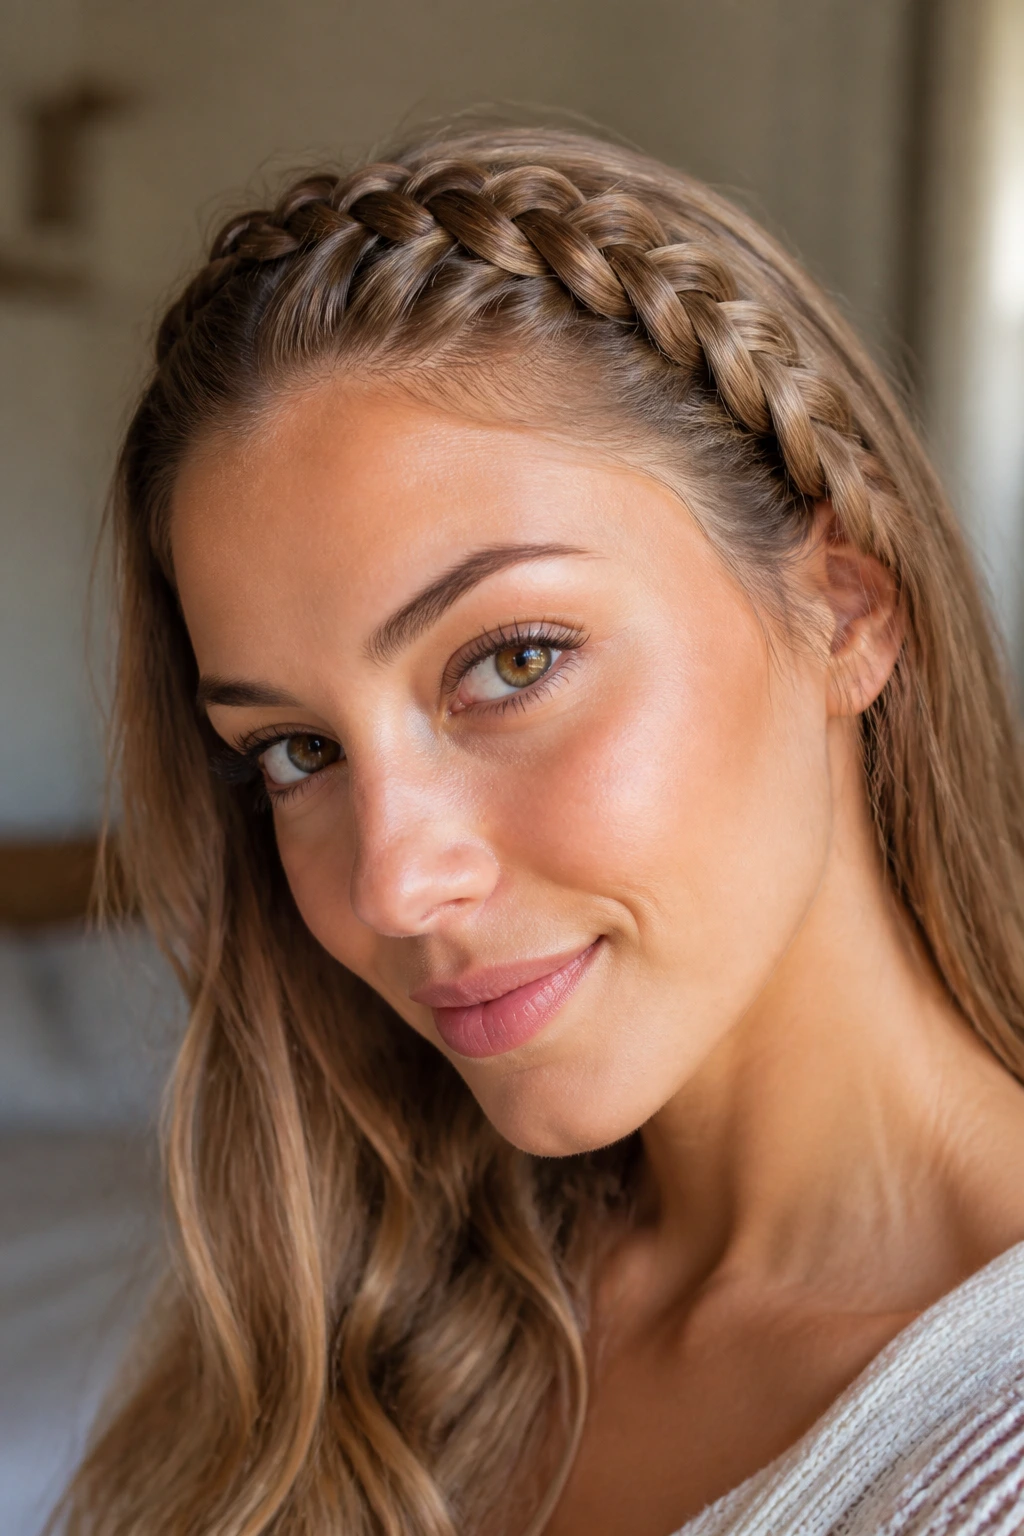
A halo braid and a crown braid look related, but the halo usually feels softer and more continuous. The braid hugs the hairline and circles the head like a frame, which can be lovely on long hair because the rest of the length gets tucked or pinned under the loop. It’s one of the prettiest braid hairstyles for long hair when you want the hair off your face without losing the feeling of length.
This one works well when the parting is clean and the braid has enough tension to hold shape. Pin the ends under the braid near the nape, then check the front from both sides. If one side sits higher, it shows. A soft halo needs symmetry, even when you’re aiming for looseness.
12. Milkmaid Braids Pinned Across the Top
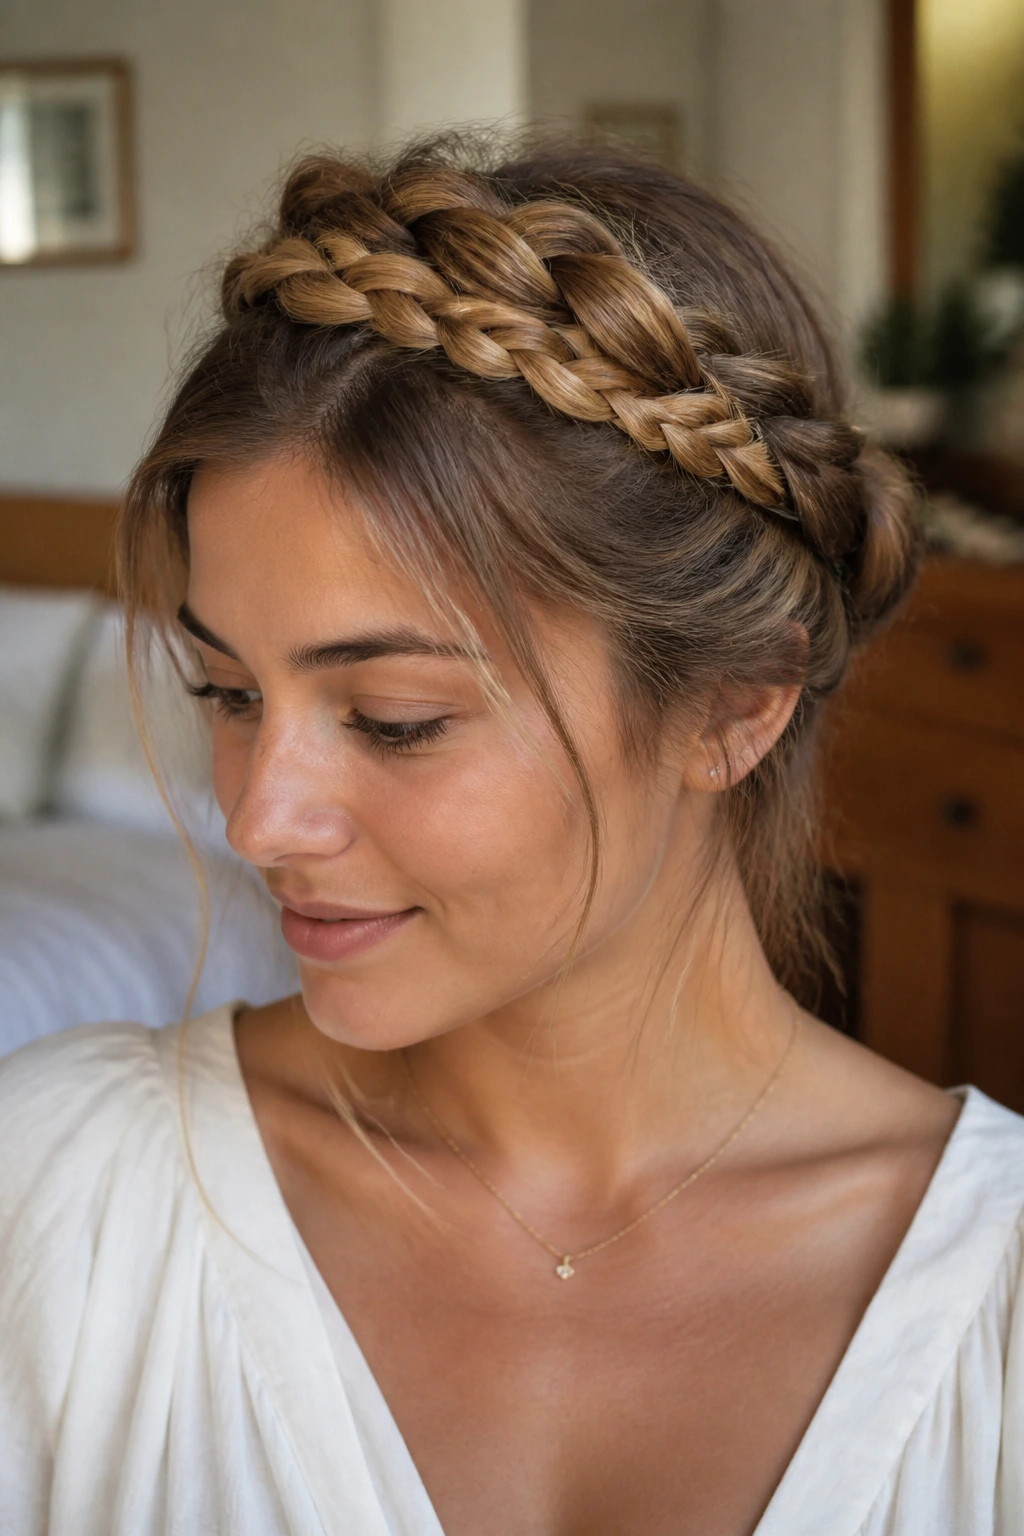
Milkmaid braids are two braids that cross over the top of the head and pin in place, and I like them because they don’t ask the hair to do anything impossible. Long hair gives you enough length to make two solid braids, then enough leftover tail to tuck and hide. It’s neat, practical, and a little old-fashioned in the best way.
This style looks good with a center part, but a soft off-center part works too if you want it to feel less school-uniform and more relaxed. Pull a few pieces around the temples if you want movement near the face. If the braids are too tight, the whole style loses the soft, wrapped feeling that makes it worth doing.
13. Braided Ponytail That Turns a Simple Tail Into a Style
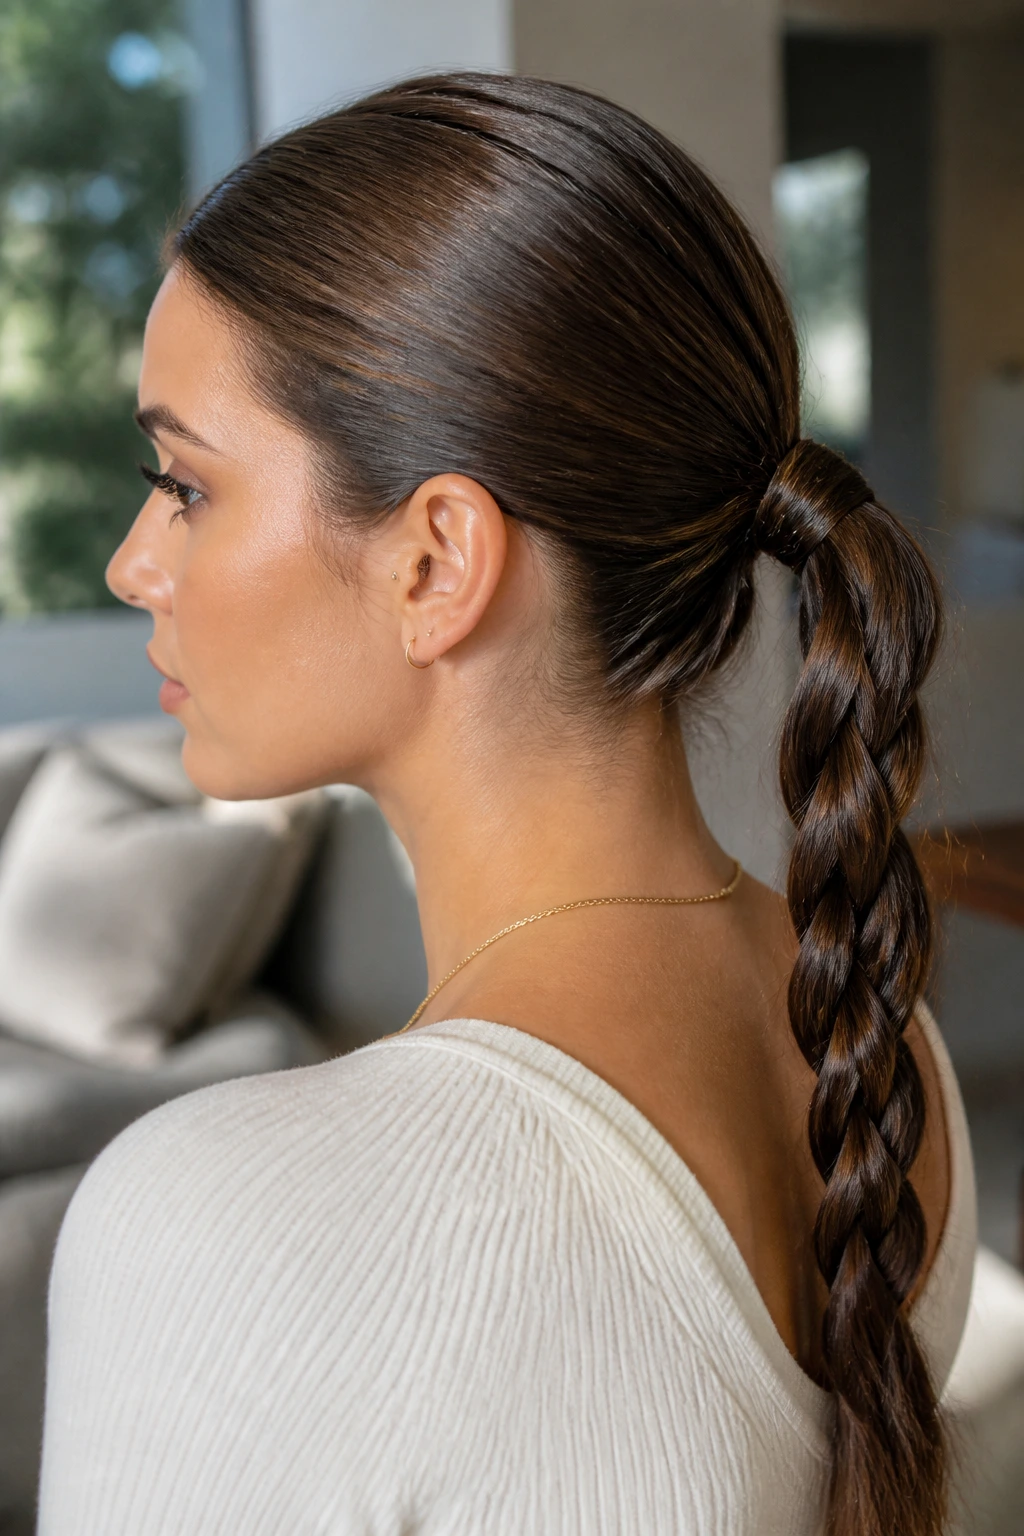
A braided ponytail is the kind of move that makes long hair look styled with almost no drama. You gather the hair first, then braid the tail, which means the braid sits cleaner and the crown stays smoother than it would in a full braid from the scalp. It’s a good answer when you want the hair controlled but not hidden.
This works at any height, though I’m partial to a low ponytail for a more polished shape. Wrap a small strand around the elastic if you want the base to disappear. On very long hair, the braid tail can get heavy, so secure the end well and consider a second elastic halfway down if your hair is slippery.
14. Braided Bun With a Tidy, Low-Neck Finish
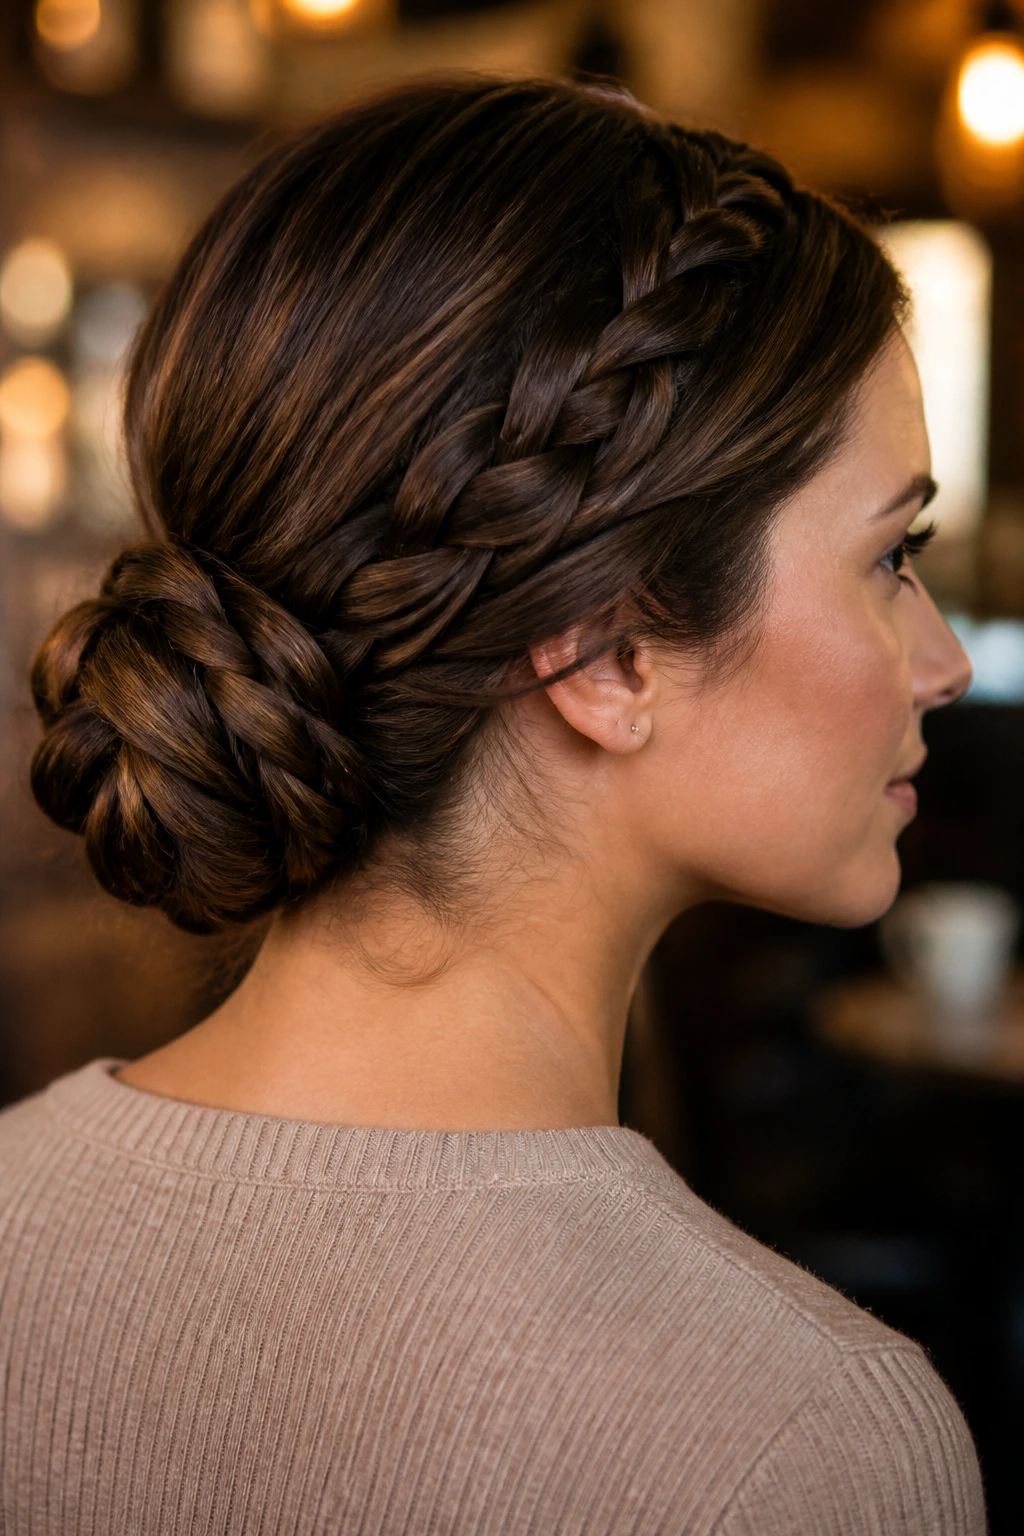
Braiding before you bun the hair keeps the shape from turning into a loose knot with opinions. Long hair can make buns sag, especially at the nape, but a braid gives the bun a spine. That makes this one a smart choice for workdays, events, or any time you need the style to stay in one place.
I prefer a low braided bun because it sits flatter and puts less strain on the scalp. Start with a standard braid, twist it into a coil, then pin around the edges instead of stabbing random pins through the middle. If you want it smoother, brush the hair into a ponytail first and braid from there. If you want it softer, leave the braid a little loose before you coil it.
15. Braided Top Knot That Lifts Everything Up
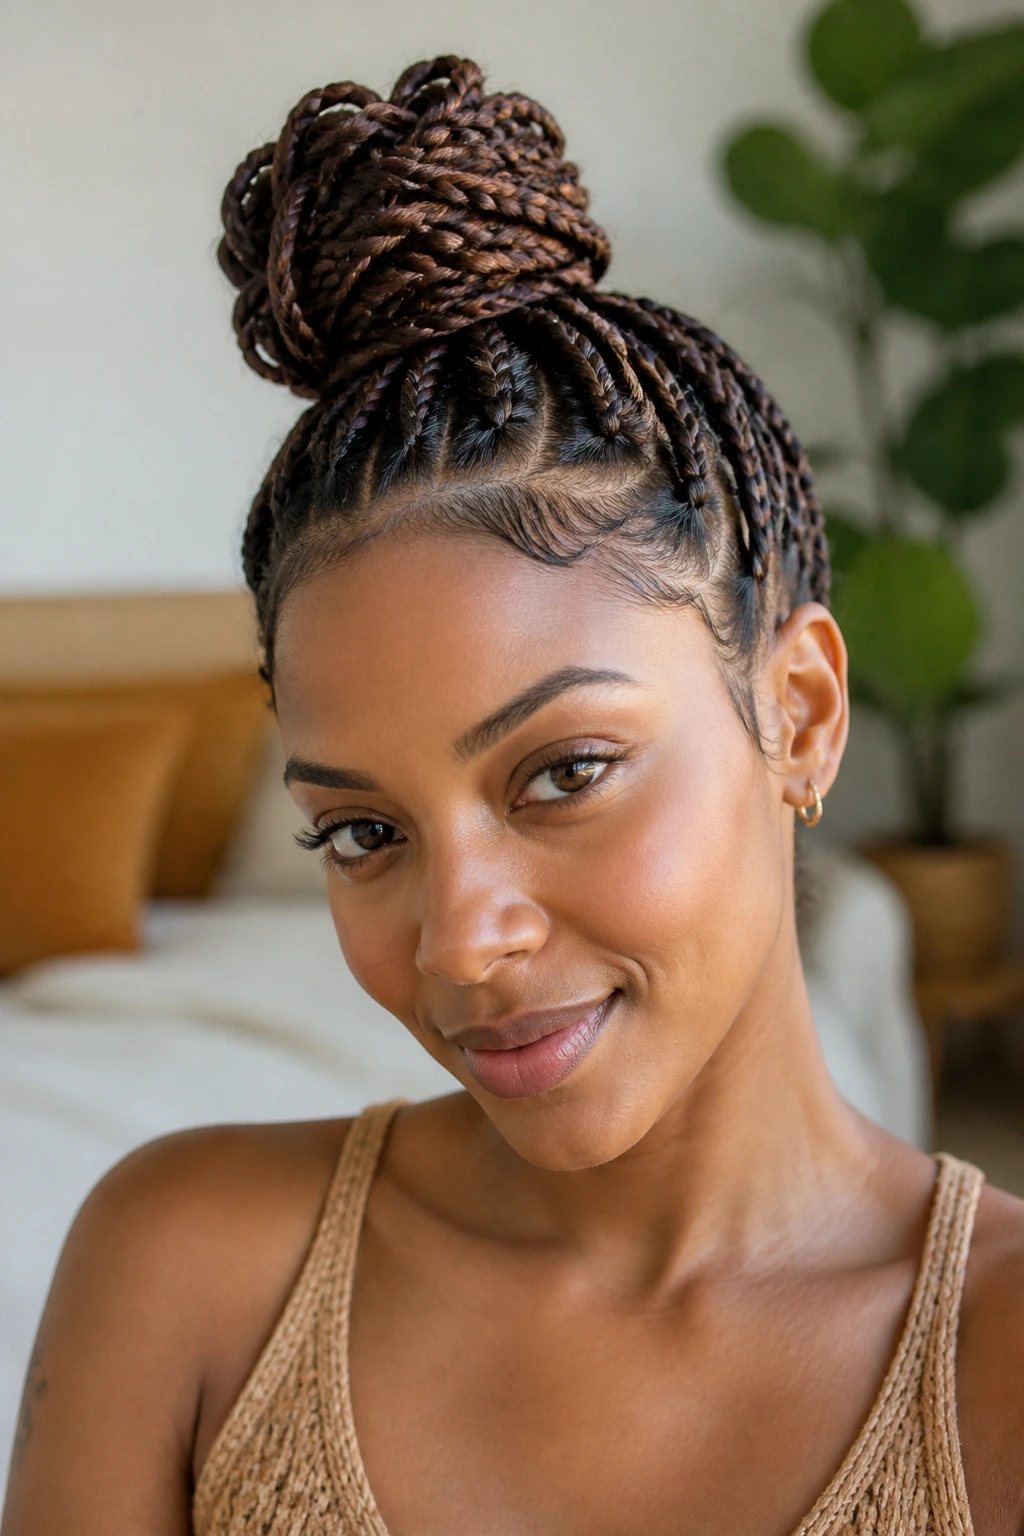
A braided top knot gets the hair off the neck and gives the bun more grip than a plain twist. The braid adds texture before it gets wrapped, so the final knot feels fuller and less likely to slide. On long hair, that matters. Plain top knots can get heavy fast.
This style works best when the ponytail base is secure and the braid is not too tight at the crown. That crown tension is where people go wrong; too much and the style starts to ache by lunchtime. I like to rough up the lengths a little before braiding so the knot doesn’t end up looking too shiny or too flat.
16. Boxer Braids That Stay Put Through a Long Day
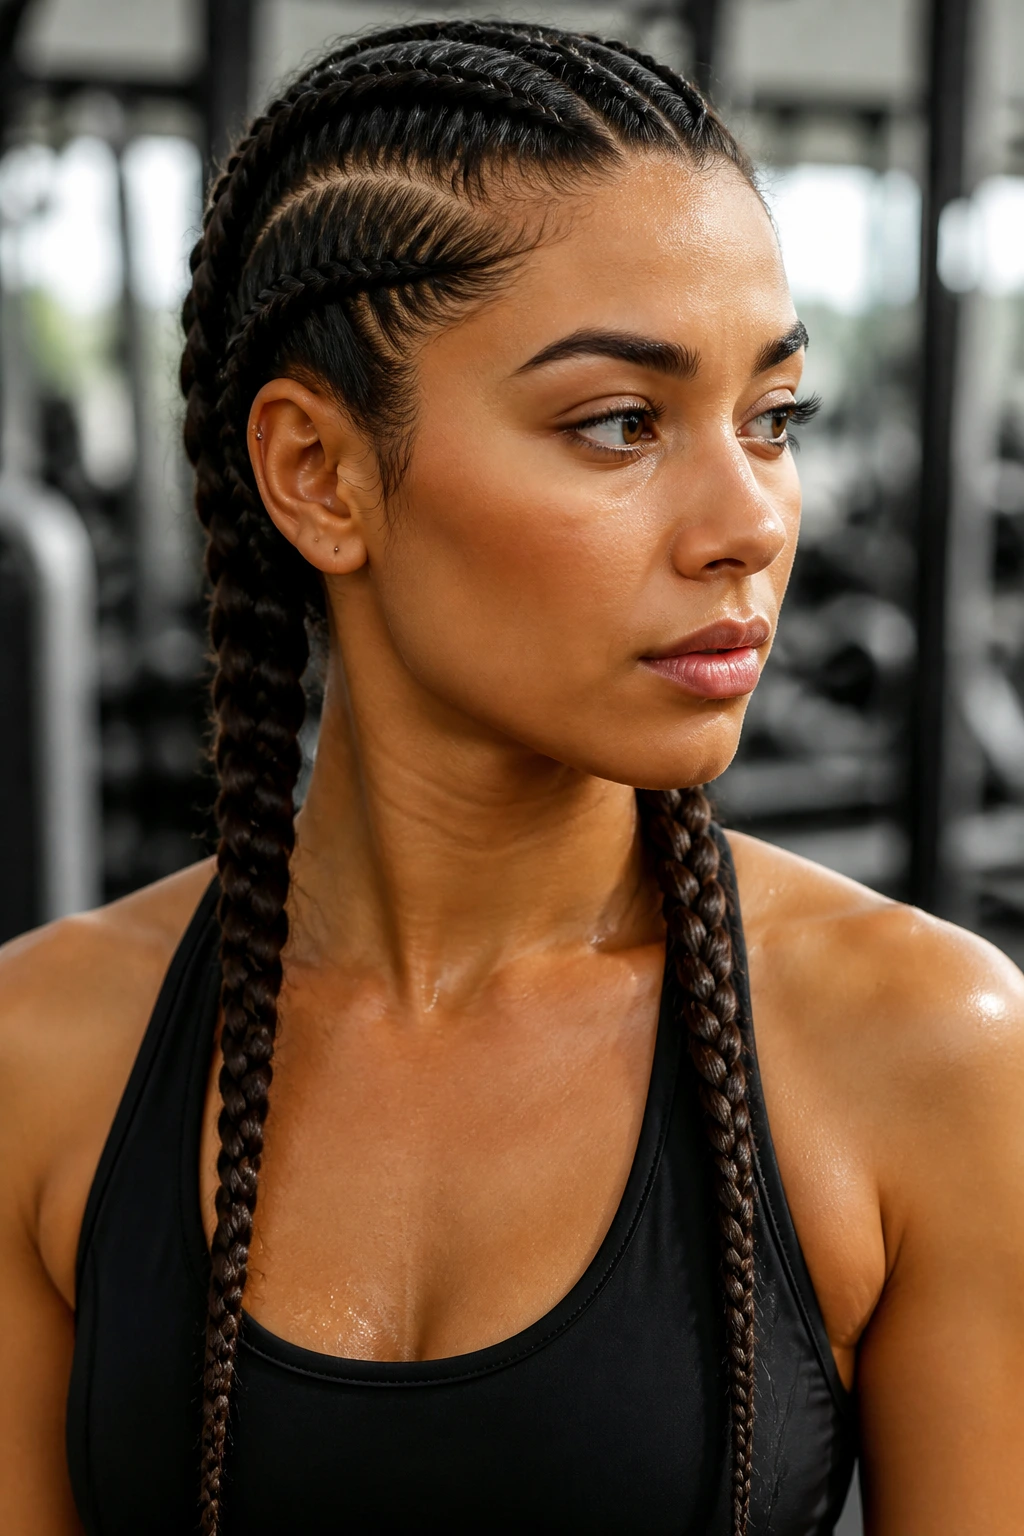
Boxer braids are basically two tight Dutch braids, and they are not pretending to be delicate. They keep long hair pinned close to the scalp, which makes them useful for workouts, travel, helmets, or days when you know you’ll be moving constantly. The look is clean, direct, and hard to ruin.
Use a rat-tail comb to split the hair as evenly as you can. Uneven sections make the braids pull in different directions and that throws off the whole style. I also avoid loading the roots with too much product here; you want grip, not slip. If the braids feel too severe, loosen the front edge just a bit after you finish. That gives the face some room without weakening the style.
17. Half-Up Braided Crown for Leaving the Length Down
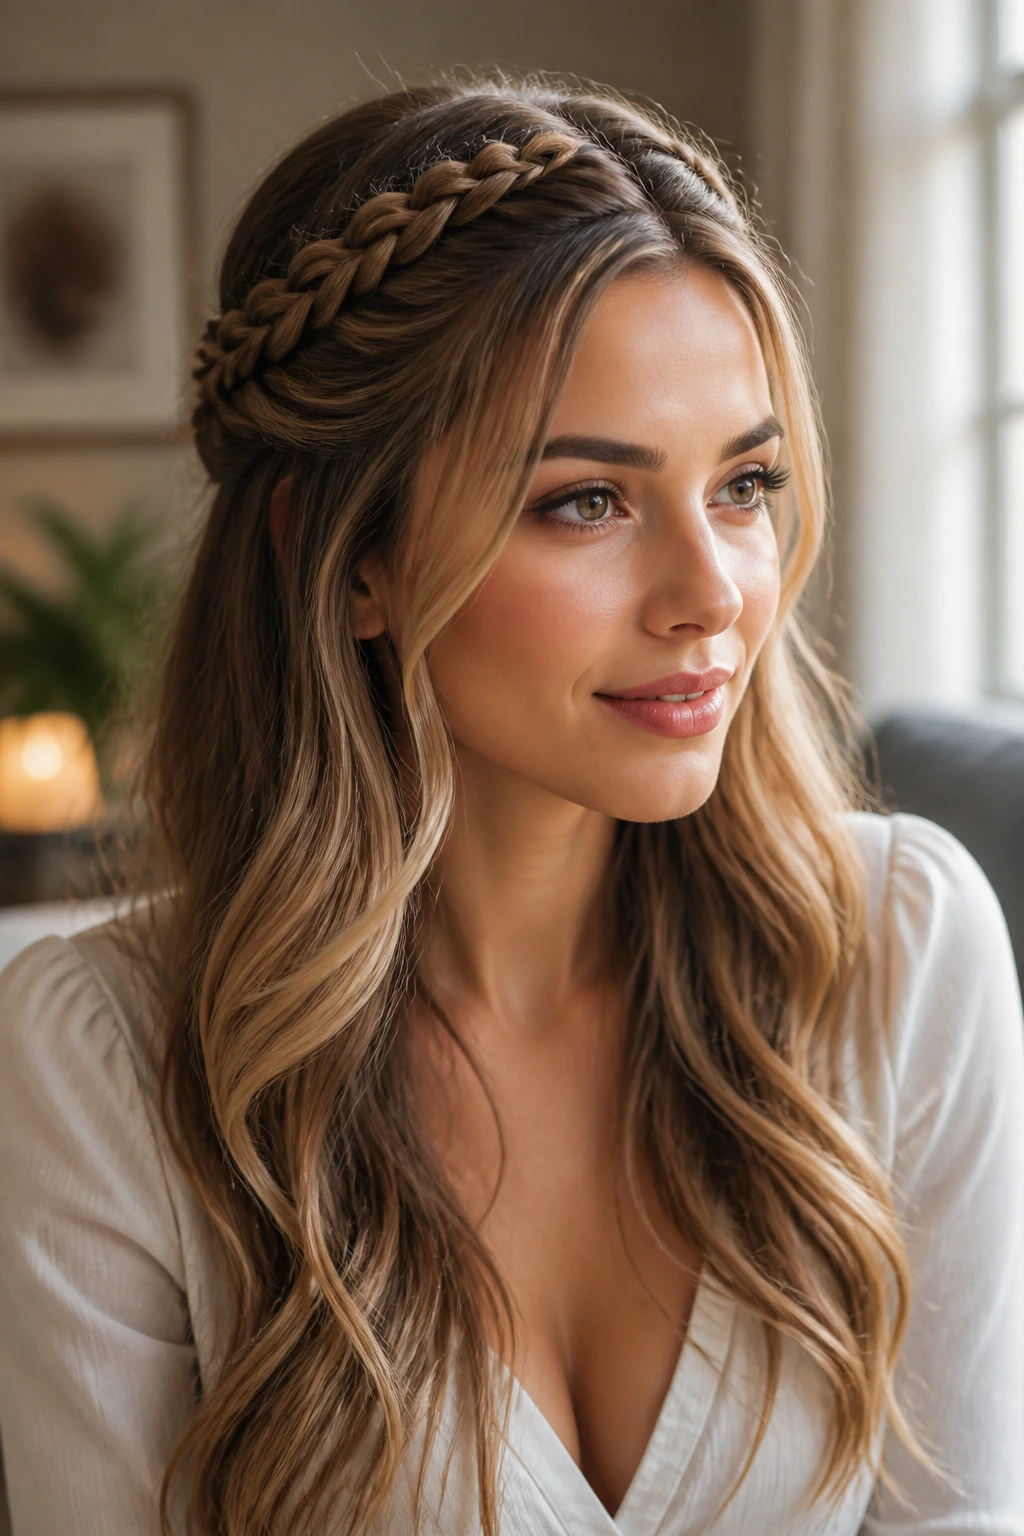
A half-up braided crown is for the person who wants the top section handled and the rest left loose. It keeps the front away from the face while still showing off the length down the back. On long hair, this balance is the whole point. You get shape up top and movement underneath.
This style can be done with a pair of small braids crossed at the back or with one braid pinned like a band across the crown. Either way, the loose lengths look better if they’ve got a little bend in them. Straight, ultra-flat ends tend to make the top braid look heavier than it is. A wave or curl on the lower half softens that.
18. Side-Swept Braid for One-Shoulder Drama
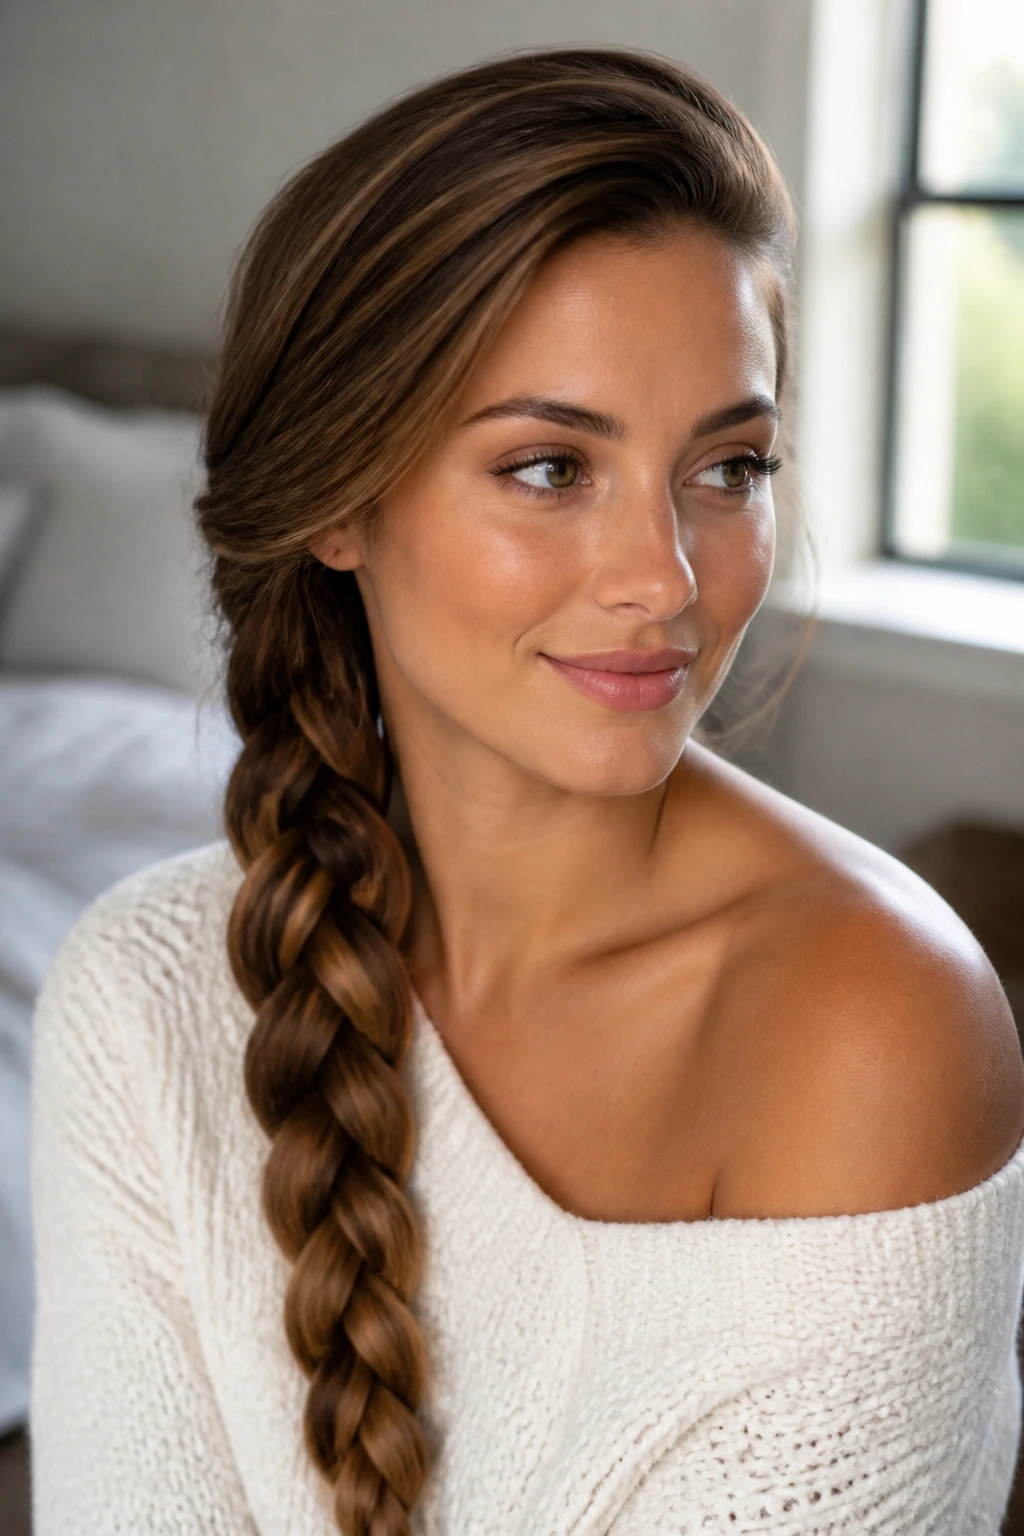
A side-swept braid has a lot of visual payoff for very little effort. The braid falls over one shoulder and turns long hair into something you can actually see from the front. I like it with a deep side part because the shape gives the braid a stronger line and keeps it from looking accidental.
This style is friendly to layers, especially when the front pieces are long enough to tuck in near the ear. If your hair is thick, start the braid a little lower so it doesn’t balloon at the crown. If it’s fine, loosen the braid after securing it and let the tail fan out slightly. That little spread gives the whole style more presence.
19. Lace Braid Tracing the Hairline
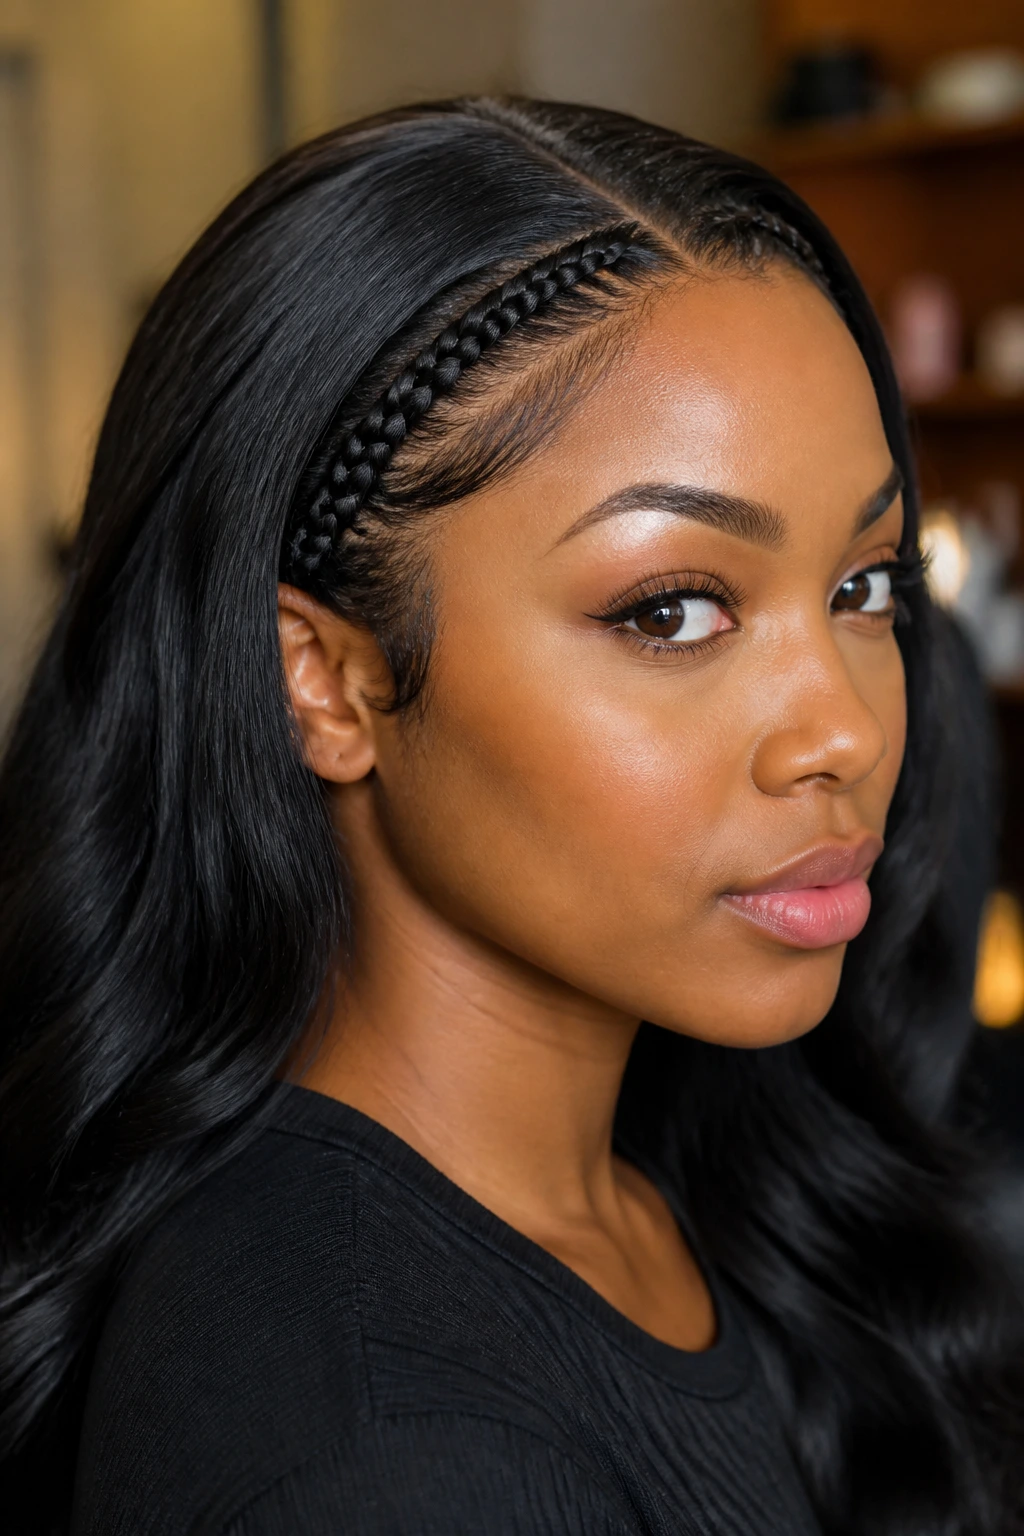
A lace braid is a French braid with one side feeding in and the other side left alone, so it traces the hairline instead of swallowing the whole head. That makes it a useful accent braid for long hair when you want some structure without giving up the rest of the length. It’s neat in the front and loose everywhere else.
This braid works especially well on side parts and layered cuts because it can follow the curve of the face. Secure it behind the ear with a pin, then let the rest of the hair fall naturally. If you want the braid to stand out, braid it a touch tighter than the rest of the style so the line stays clean.
20. Feed-In Braids With a Smooth Scalp Finish
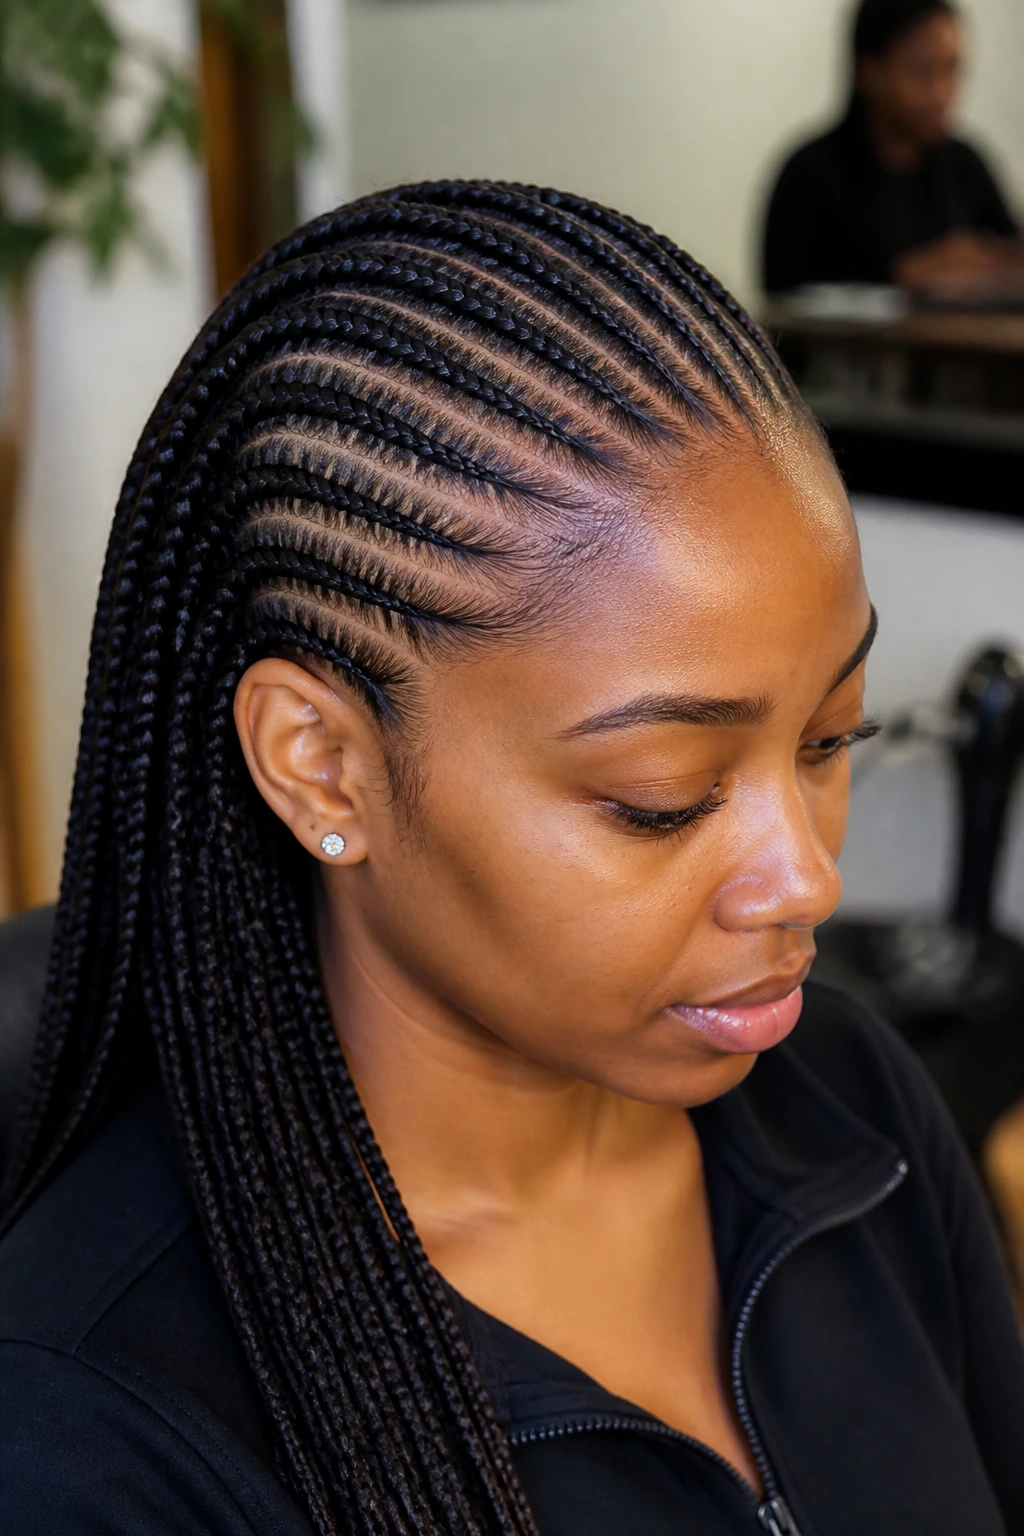
Feed-in braids are built gradually, which is why they sit close to the scalp and look so smooth. The technique is common in protective styling, and on long hair it helps keep the weight even instead of dragging from one heavy starting point. The braid grows in tiny additions, which makes the finish neat and controlled.
This style is usually best done carefully, and for some hair textures it makes sense to have a braider do it. If you’re wearing your own long hair in feed-ins, keep the sections even and avoid tugging the hairline too hard. Clean parts matter here more than drama. A messy feed-in braid looks messy fast.
21. Goddess Braids With Width and Soft Ends
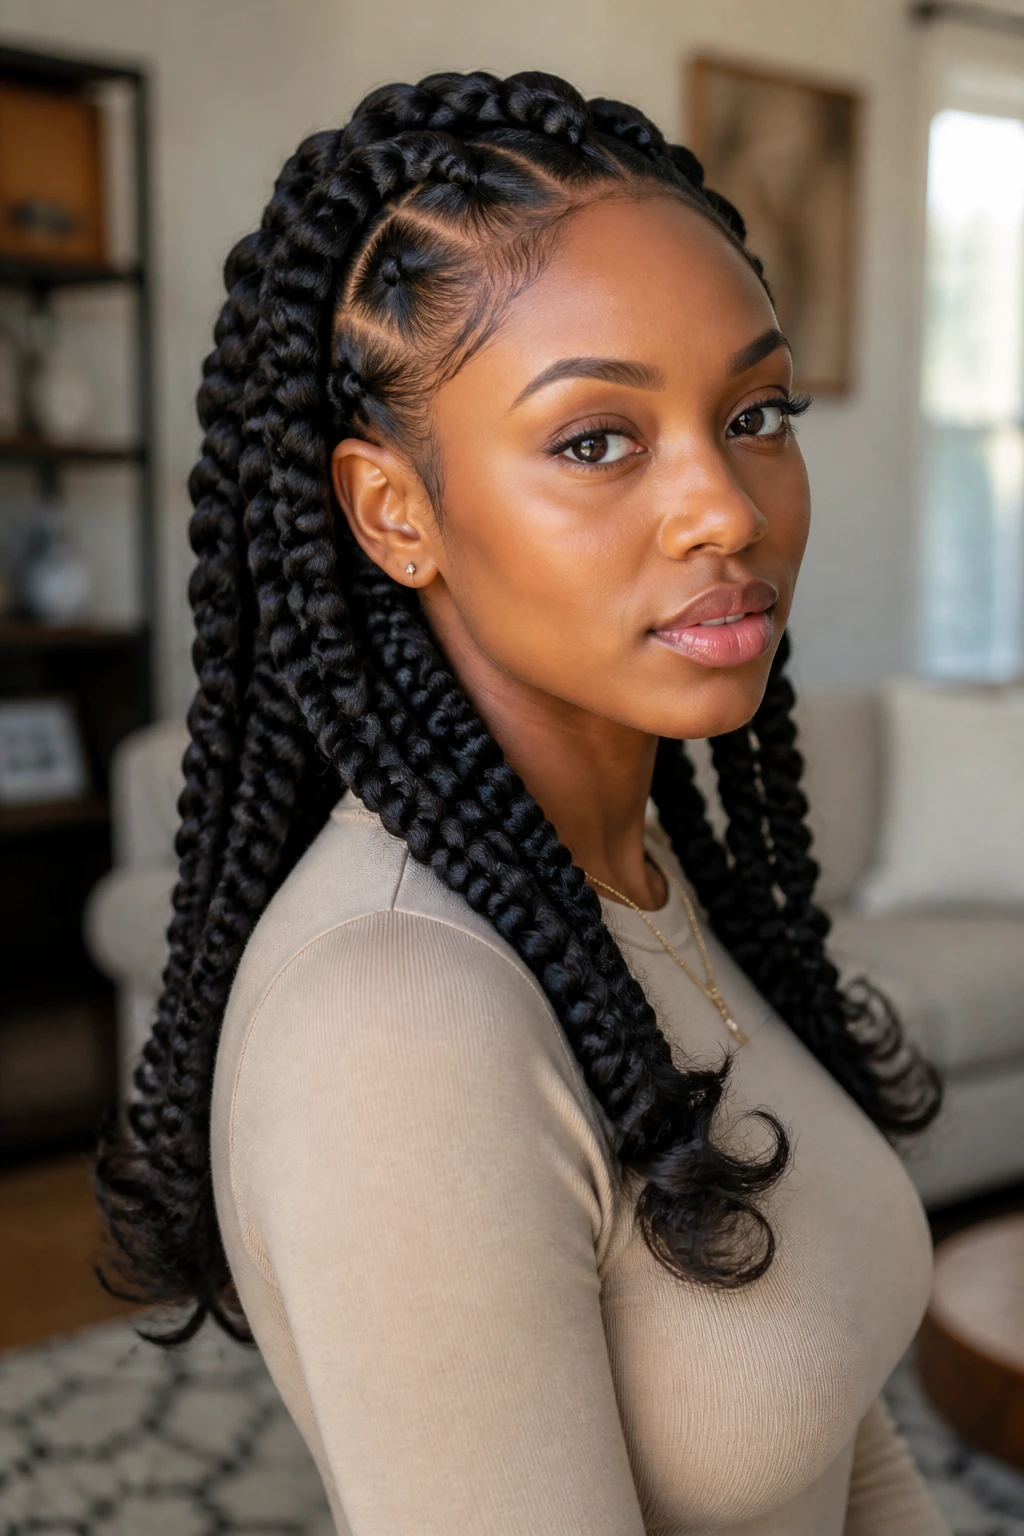
Goddess braids are feed-in braids with more width, more shape, and often softer ends. They sit larger on the scalp and give long hair a sculptural feel without needing tiny, fiddly sections all over the head. I like them because they make the braid itself the feature, not just the technique.
You can leave the ends braided, curl them, or tuck them into a low shape. If the hair is very dense, don’t try to force the sections too small; the braid needs enough width to look like a goddess braid rather than a regular tight cornrow. A little scalp oil along the part line can help the finished style look clean without turning shiny in a greasy way.
22. Jumbo Side Braid With Chunky Texture

A jumbo side braid is one of the quickest ways to make long hair look intentional with almost no setup. The sections are larger, the braid is thicker, and the finished style sits over one shoulder like a single heavy rope. It looks especially good on hair with natural wave or a little bend.
This braid gets its shape from size, so don’t overthink the parting. Gather the hair to one side, braid loosely, then gently pull the sides outward to widen it. If the hair is very long, a low side braid keeps the tail from becoming too heavy. A high side braid can start to feel like it’s dragging at the scalp.
23. Four-Strand Braid With a Flat, Woven Surface
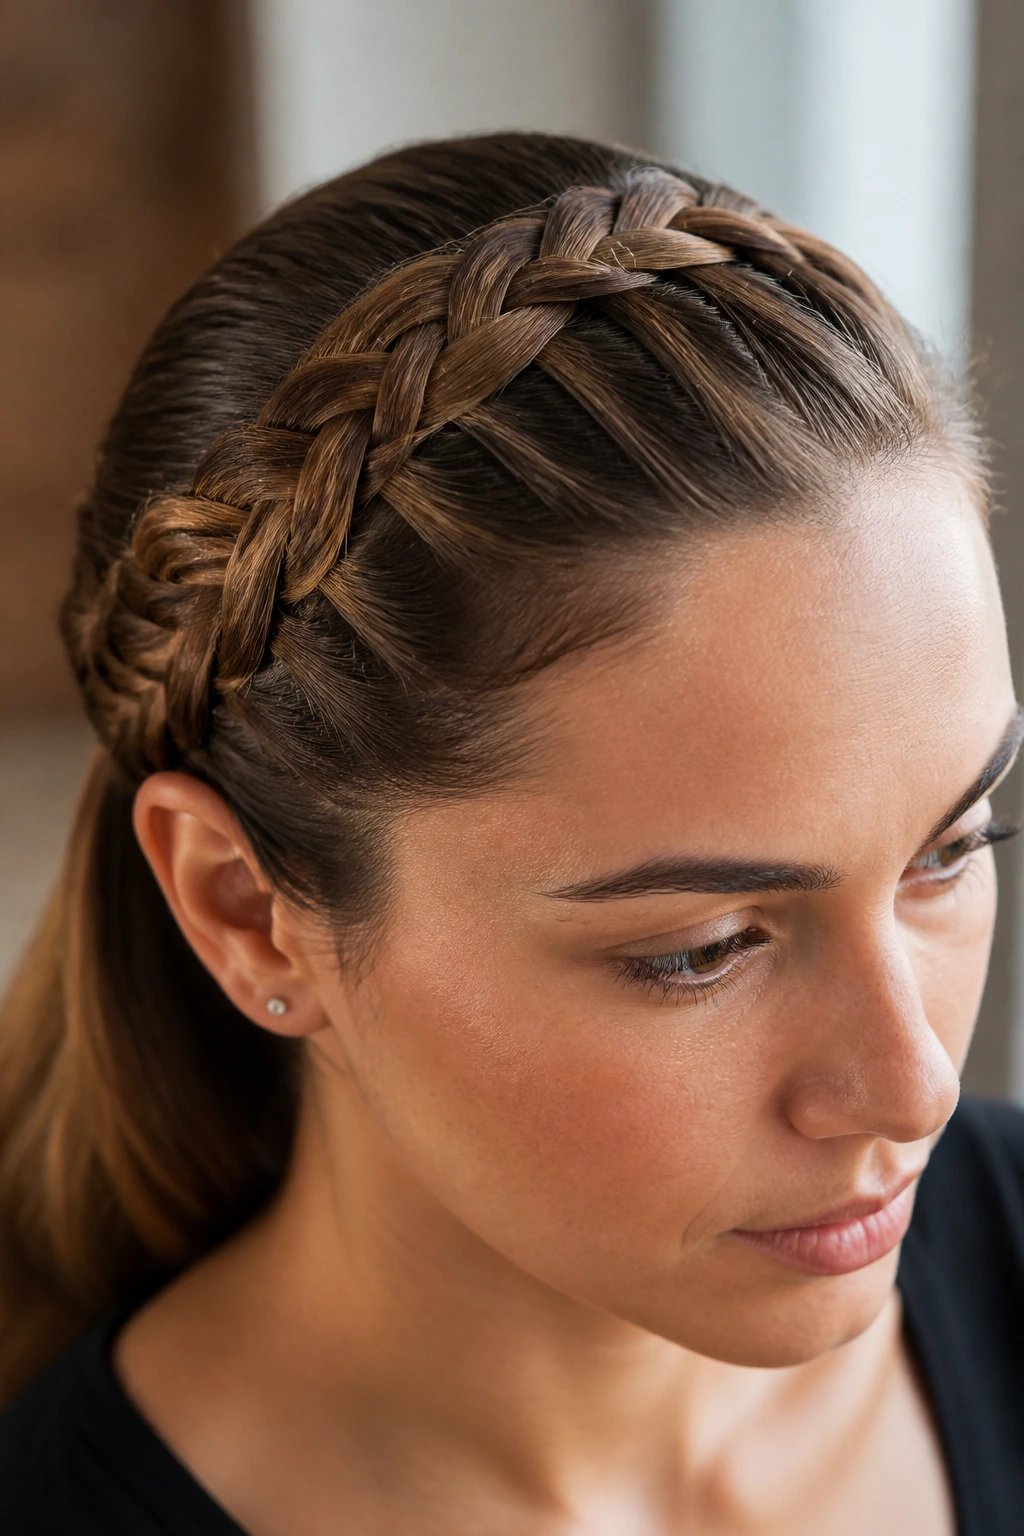
A four-strand braid is for anyone who wants the look of a braid but with more pattern than a standard plait. The surface looks flatter and a little more architectural, which long hair shows off well because the weave has room to stretch. It’s one of those styles that looks more complicated than it is once your hands learn the rhythm.
I’d do this braid on hair that’s been brushed smooth and lightly misted. Flyaways make the crossing harder to read. If you’re new to it, practice on a ponytail first, then move to the whole length once the hand pattern feels less fussy. The finished braid looks lovely with a simple elastic and no extra decoration.
24. Five-Strand Braid for Extra Detail
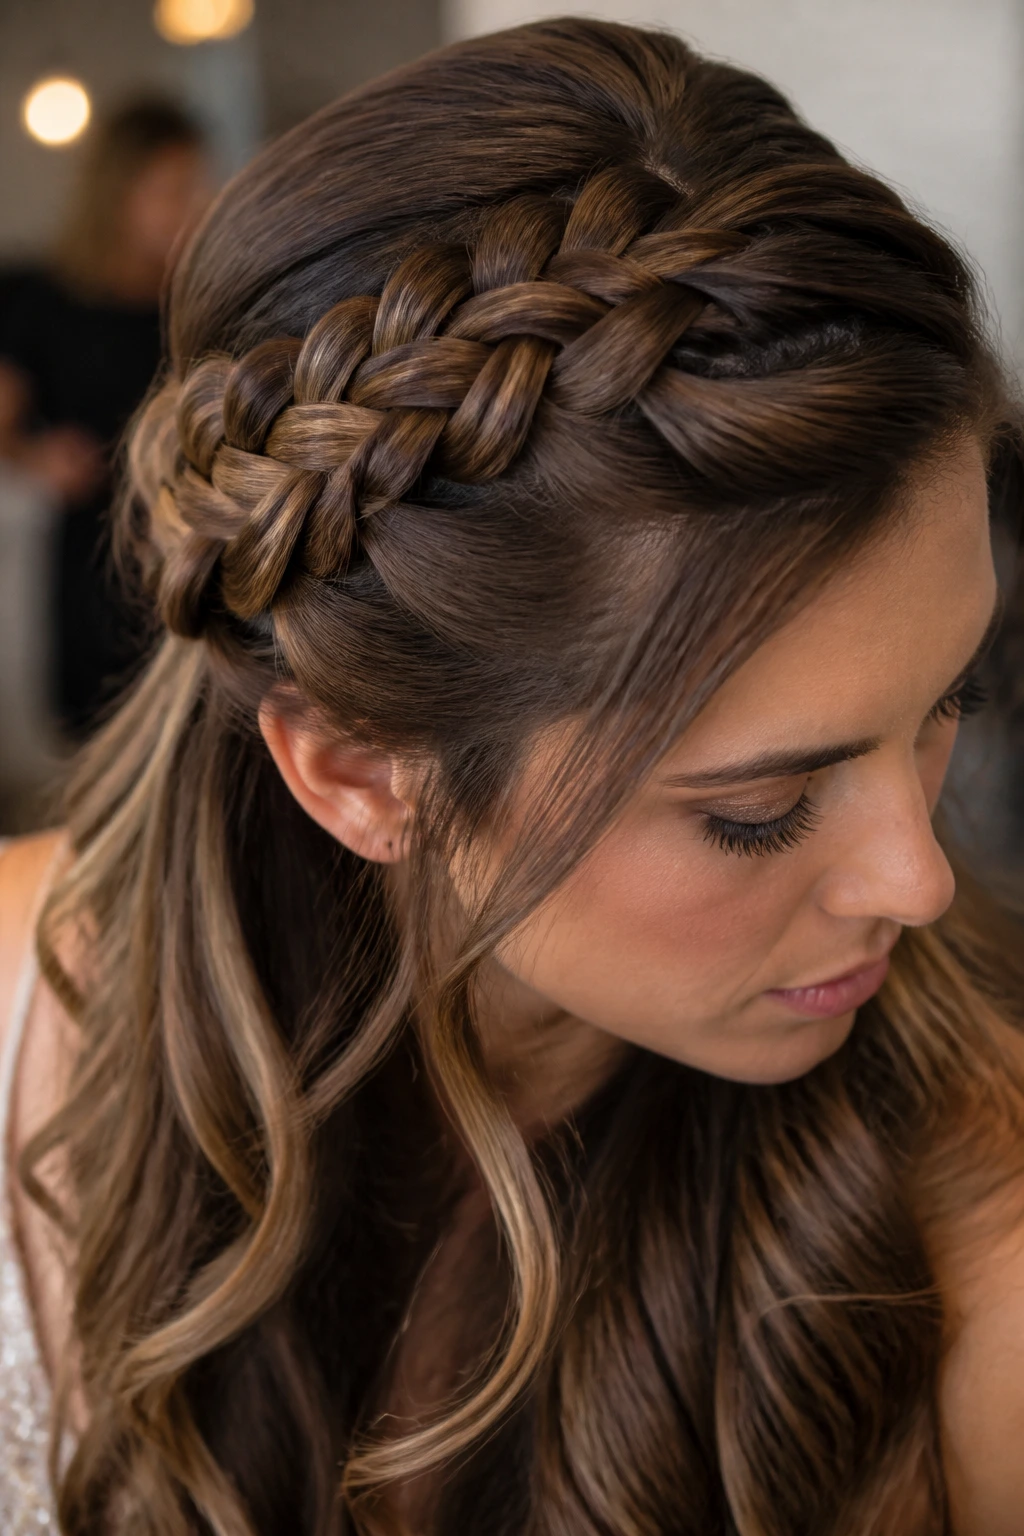
A five-strand braid is fiddly, yes, but the effect on long hair is worth it when you want a braid that looks like you spent time on it. The weave is wider and more intricate than a three-strand braid, and the length lets the detail run without collapsing into itself. It’s a quiet flex.
I like this style for events, dinners, or days when the outfit is simple and the hair can carry some of the work. Keep the strands separated with clips while you braid so they don’t tangle into one another. If the braid looks uneven at first, that’s normal. Tighten the outer strands gently and it settles into a nicer pattern.
25. Infinity Braid With Looping Pattern
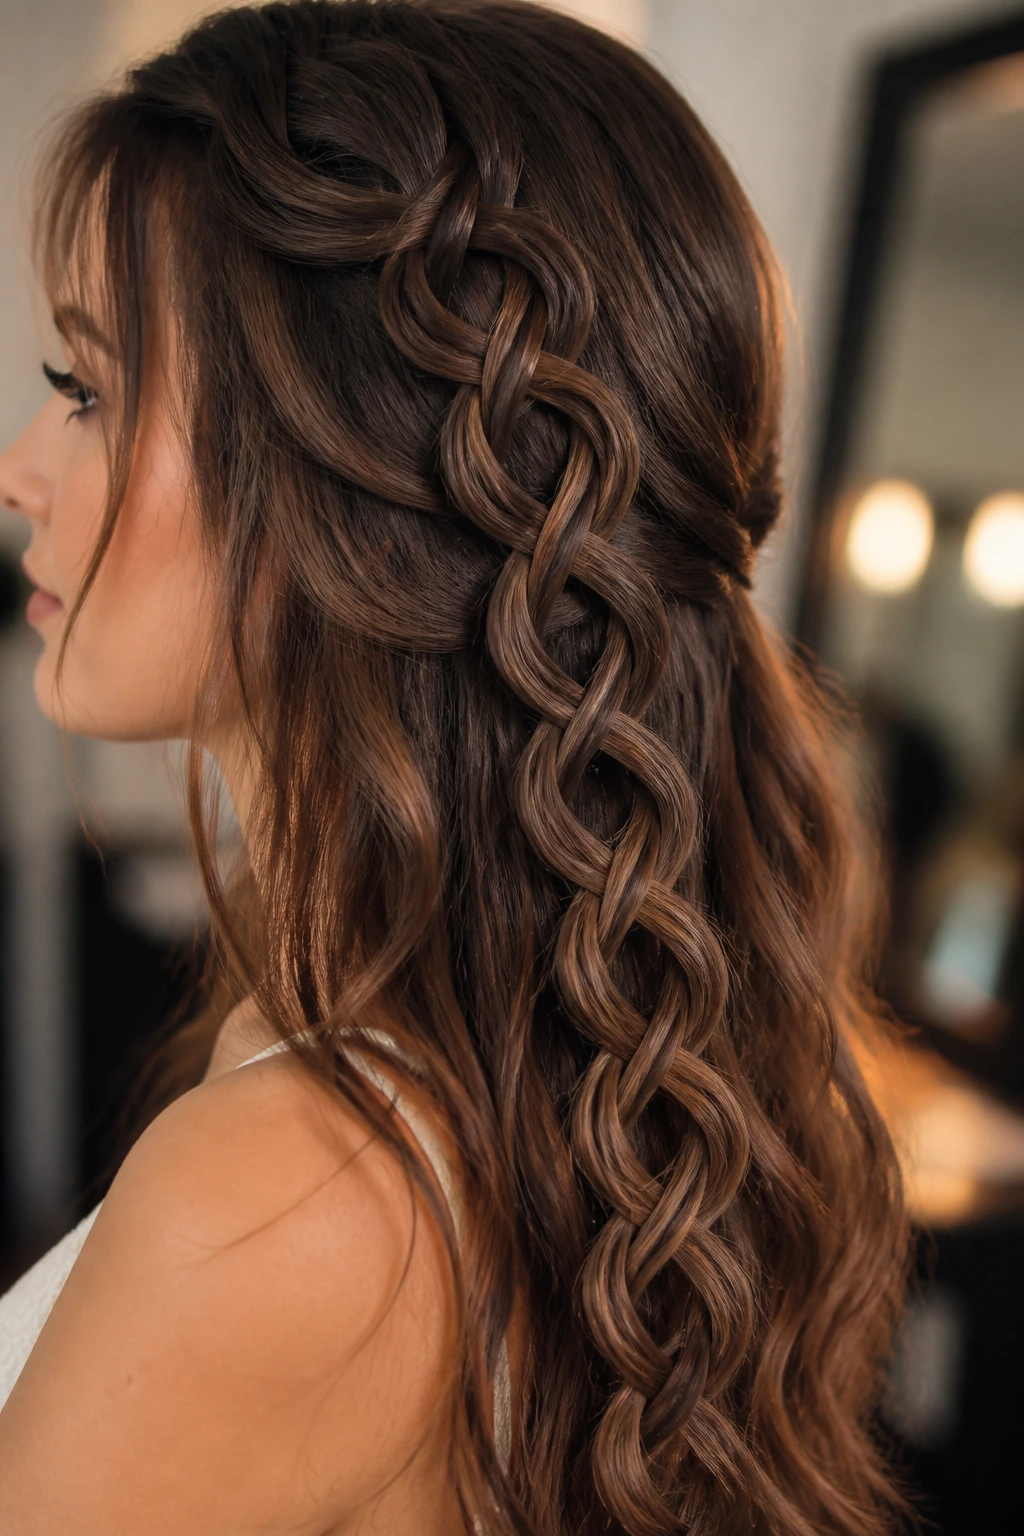
An infinity braid looks decorative in a way that makes people assume it took an hour. It uses looping movements that create a figure-eight feel through the center of the braid, and long hair gives those loops room to show instead of bunching up. The style is neat, but not stiff.
This braid works best when the sections are even and the hair has enough slip to move without catching. A tiny bit of styling cream or detangler helps. If you’re doing it on freshly washed hair, add texture first or the loops can slide before you finish. On day-two hair, it’s easier.
26. Ladder Braid With Decorative Crossbars
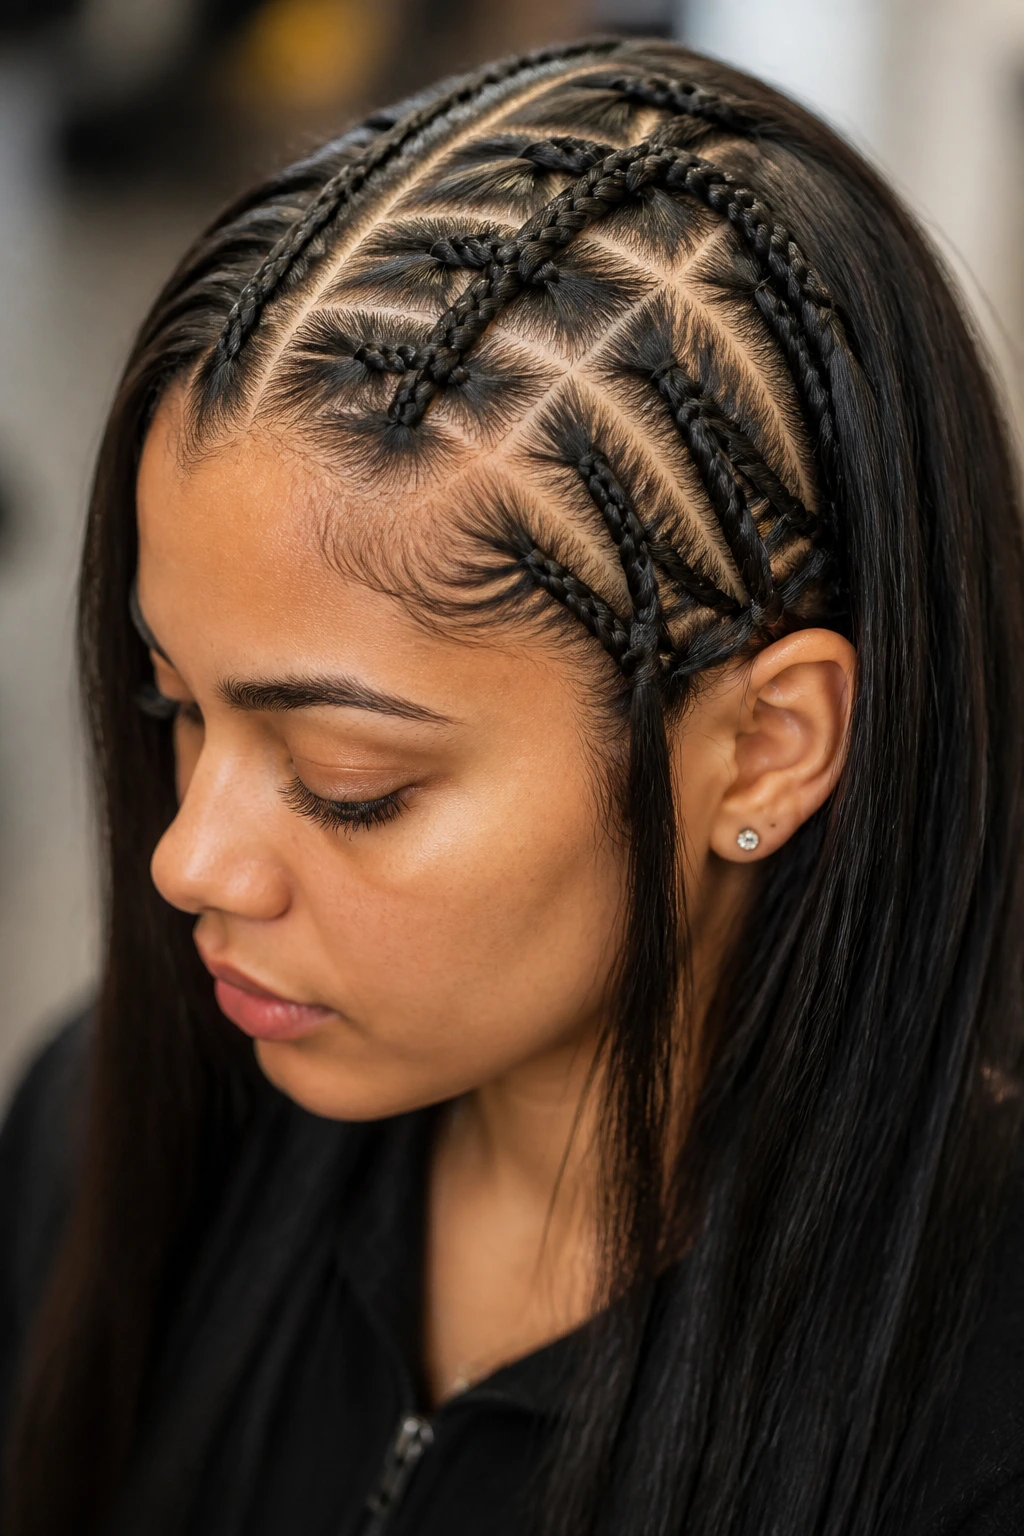
A ladder braid is one of the most striking braid hairstyles for long hair, partly because it gives the eye something to follow. You’re usually working with one or more braids that create the “rungs,” so the finished look feels deliberate and a little ornamental. It’s not a quick weekday style, but it’s memorable.
This is a braid for clean sections and patient fingers. Clip away any loose hair before you begin so the small crosspieces stay visible. Long hair helps because the ladder pattern has enough space to stretch vertically without looking cramped. If the braid is for an event, keep the rest of the hair smooth so the structure stands out.
27. Mermaid Braid Stretched for Maximum Length
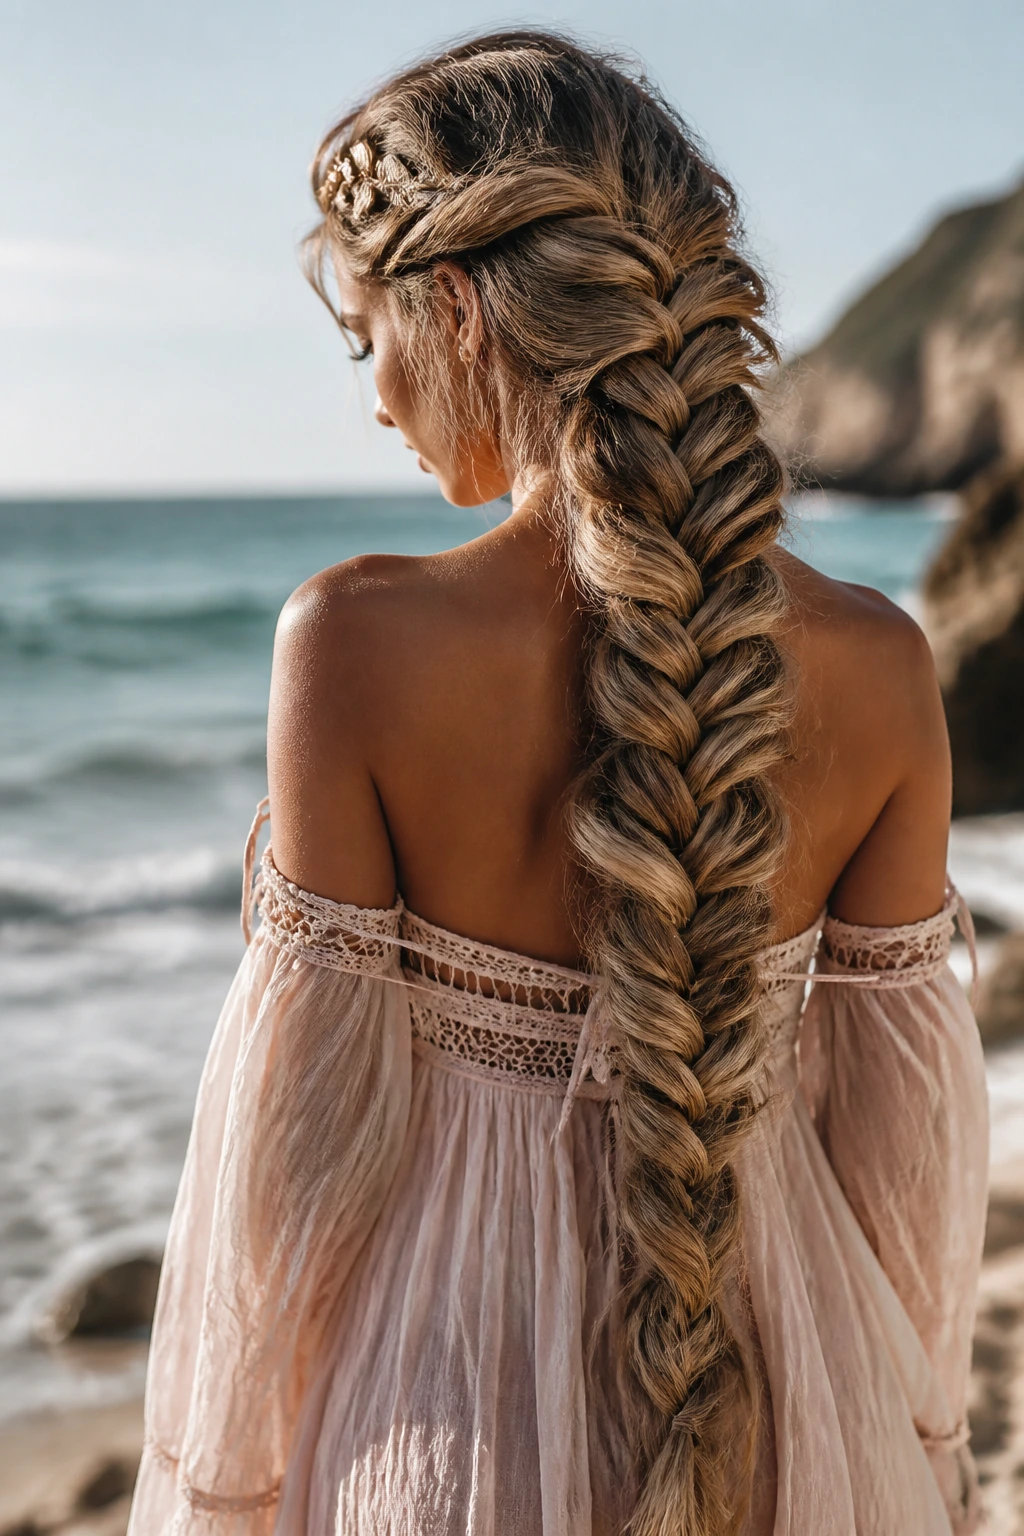
A mermaid braid has a soft, oversized quality that makes long hair look even longer. It can be built from a pull-through base or a loose fishtail shape, and the point is the same: width, movement, and a little drama. On very long hair, the braid becomes a statement rather than just a way to hold hair back.
I like this style when the hair has waves or a rougher texture because it keeps the braid from looking too neat and flat. If your hair is very straight, add texture spray before you start. Once the braid is done, tug each section gently so the edges round out. A mermaid braid needs air around it.
28. Accent Braid Into Loose Waves
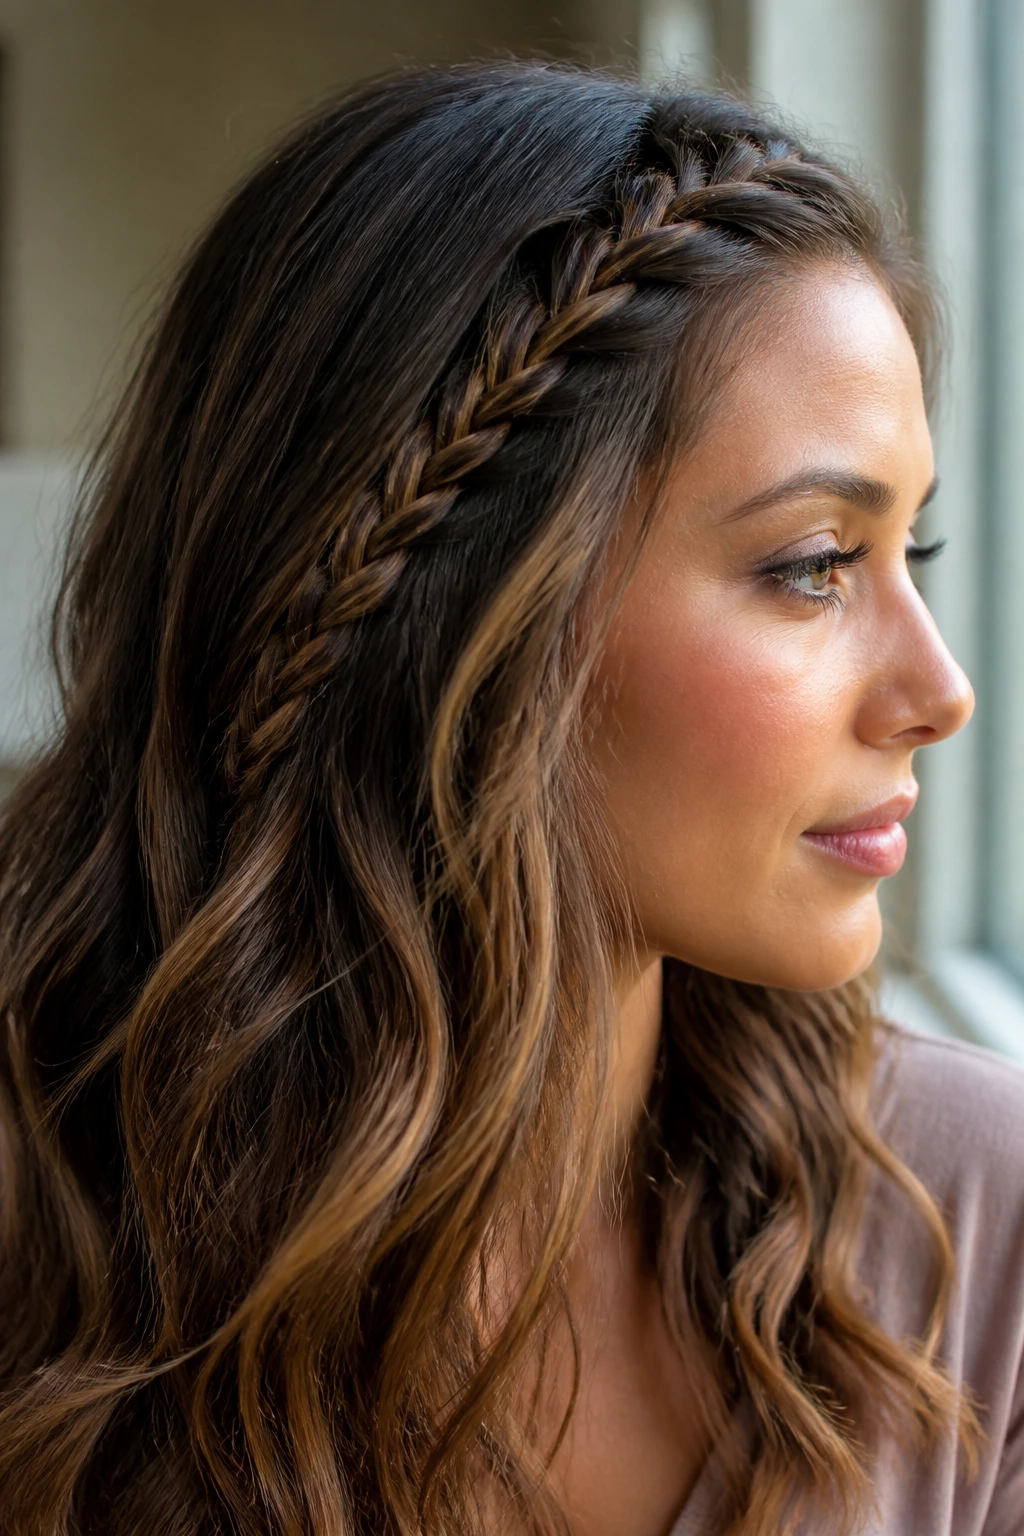
A small accent braid at the hairline is the easiest way to make long hair feel styled without locking everything down. One thin braid can run along the temple, tuck behind the ear, or blend into loose waves for a soft finish. It’s subtle, but that’s why it works.
This is the braid I’d choose when I want a little detail and the rest of my hair to stay free. It’s especially nice on curled ends because the braid gives the front shape while the length keeps its movement. Secure the accent braid with a tiny elastic or pin it hidden under a layer of hair so it doesn’t look like an afterthought.
29. Braided Faux Hawk With Volume Through the Middle
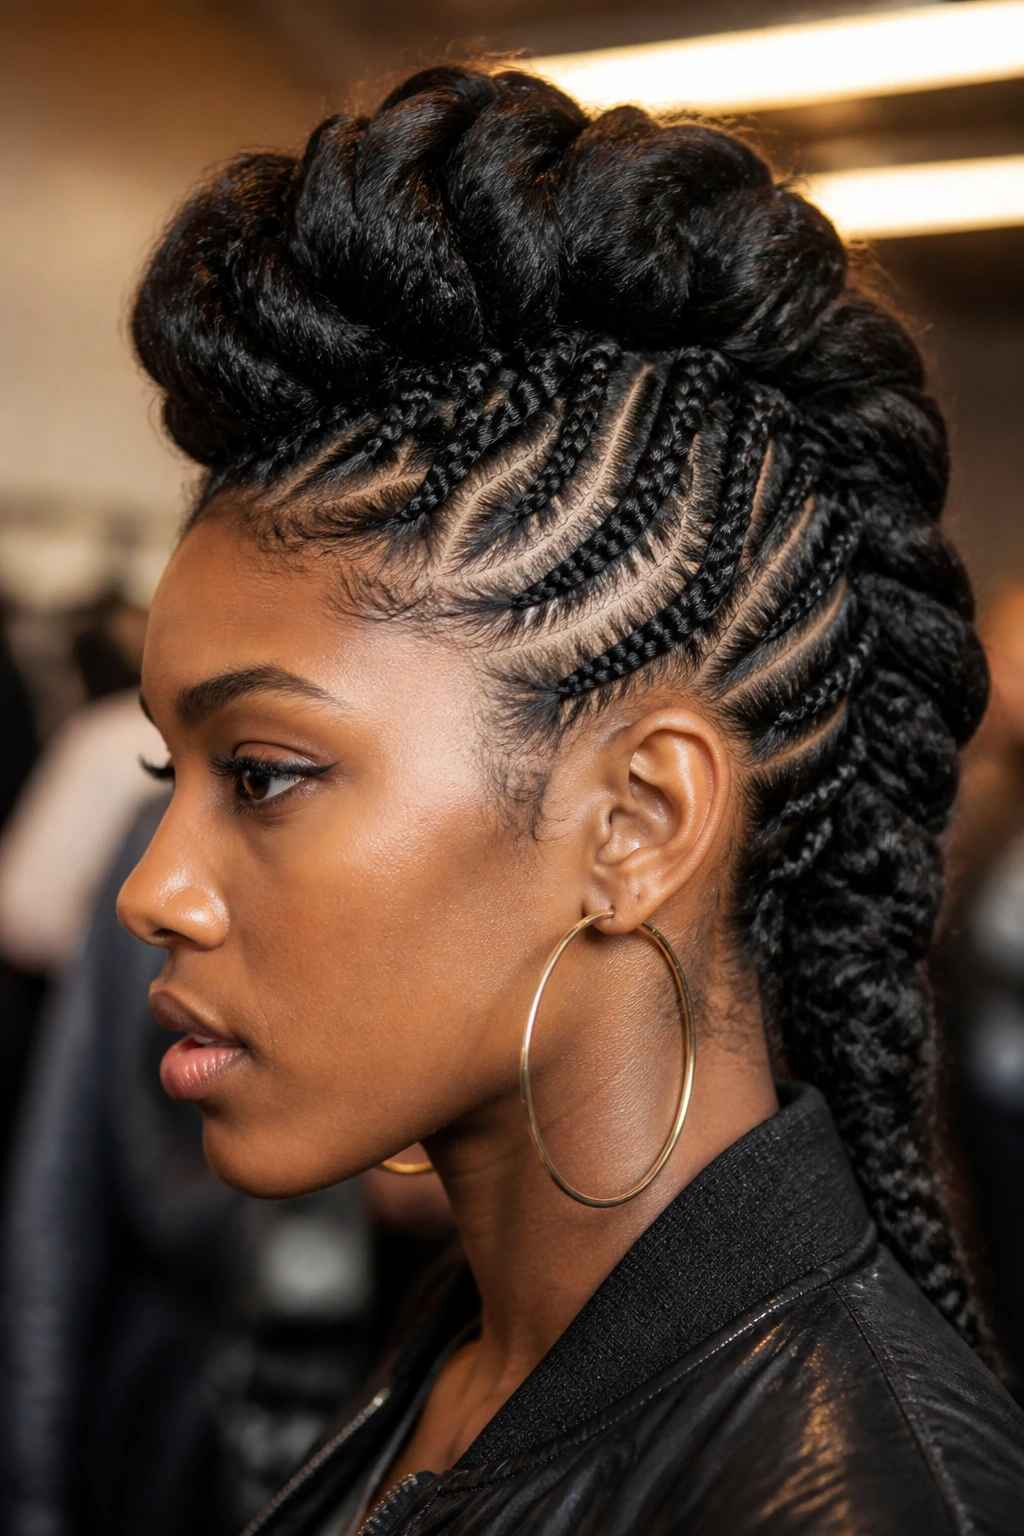
Braids along the sides and volume through the center make long hair look sharper without chopping any length off. The faux hawk shape pulls the eye up the middle of the head and keeps the sides controlled, which is useful if your hair gets bulky around the temples. It’s one of the more dramatic braid hairstyles for long hair, but it’s still wearable.
Backcomb the center section lightly if you want more lift, or leave it smooth if you want a sleeker line. The side braids can be tight Dutch braids, small cornrow-style braids, or simple twists feeding backward into the center. Pin everything well. If the side sections are loose, the whole shape loses its edge quickly.
30. Ribbon Braid Woven With Fabric or Satin
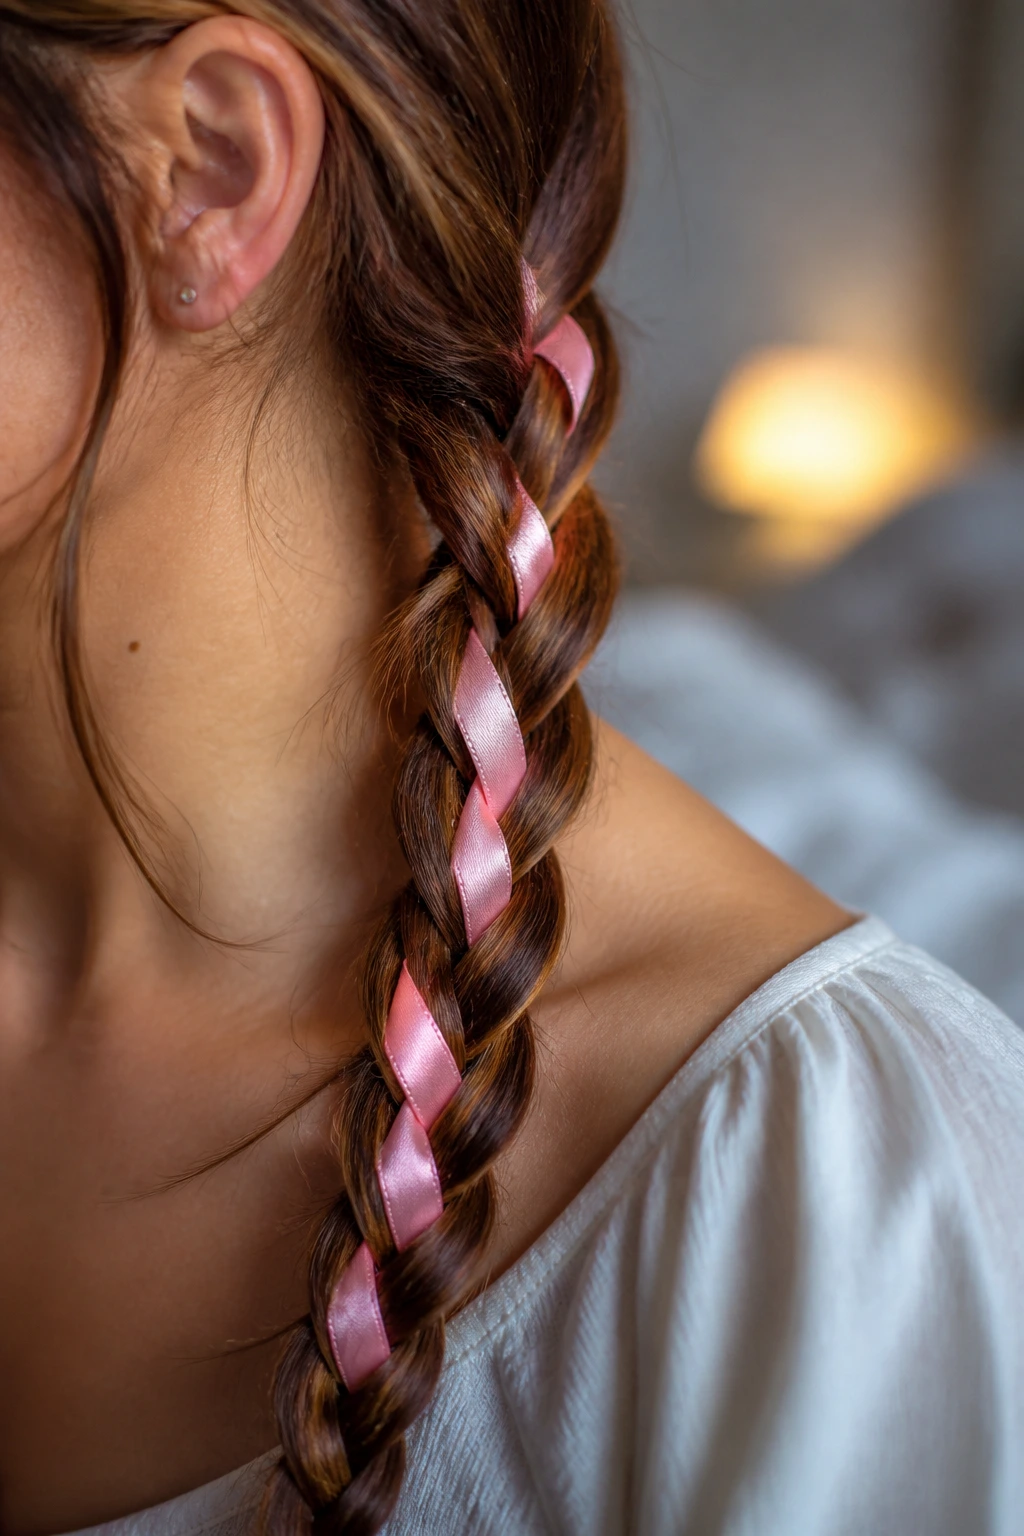
A ribbon braid is old-school in the best way. Woven ribbon gives long hair a clean stripe of color or shine, and the extra length means the ribbon has room to show before it gets buried under the braid. It’s a good choice for parties, holidays, or any outfit that needs one more detail.
Choose a ribbon that doesn’t shred easily. Satin, grosgrain, or a narrow velvet strip all behave better than flimsy fabric that frays after three crossings. Keep the ribbon flat as you braid, or it will twist weirdly and show the wrong side. A ribbon braid can look charmingly soft or very polished depending on the material.
31. Bubble Braid With a Braided Base
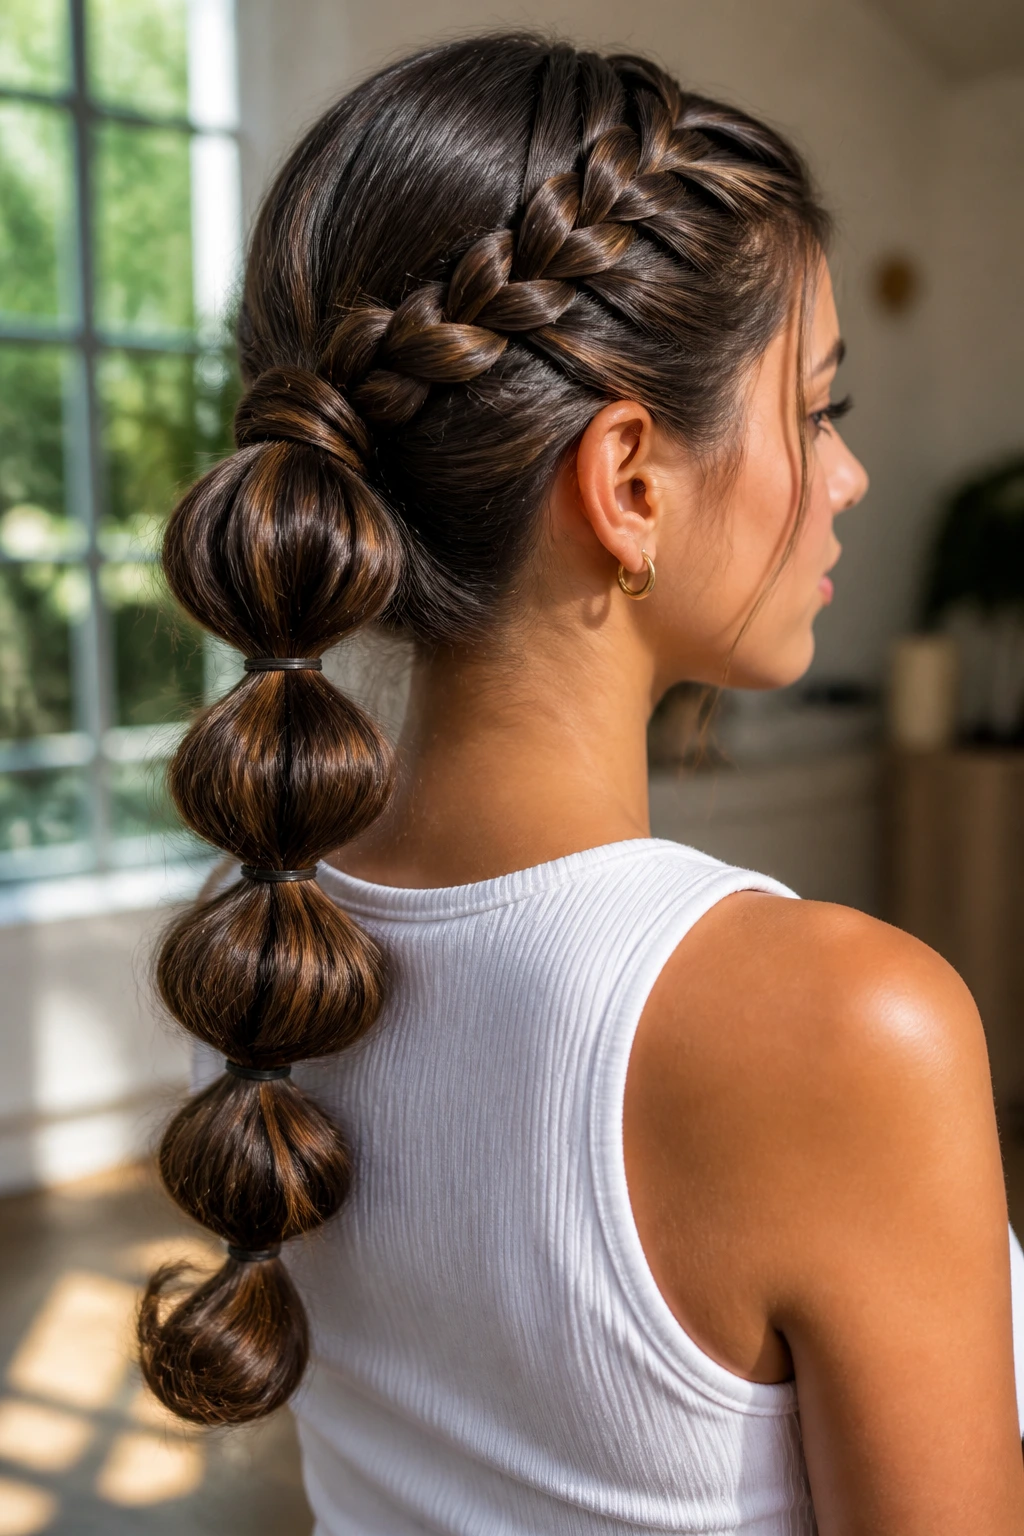
A bubble braid with a braided base gives you structure at the top and rounded sections down the length. The small braid at the crown keeps the style anchored, and the bubbles make long hair look playful without needing a traditional plait all the way through. It works especially well when the hair is thick or a little layered.
The spacing between elastics matters. Too close, and the bubbles lose their shape. Too far apart, and the style can sag. After each elastic, tug the section outward gently to round it into a bubble, then smooth the surface with your hands. If you want more polish, wrap a tiny strand of hair around each elastic.
32. Braided Space Buns That Keep Things Playful
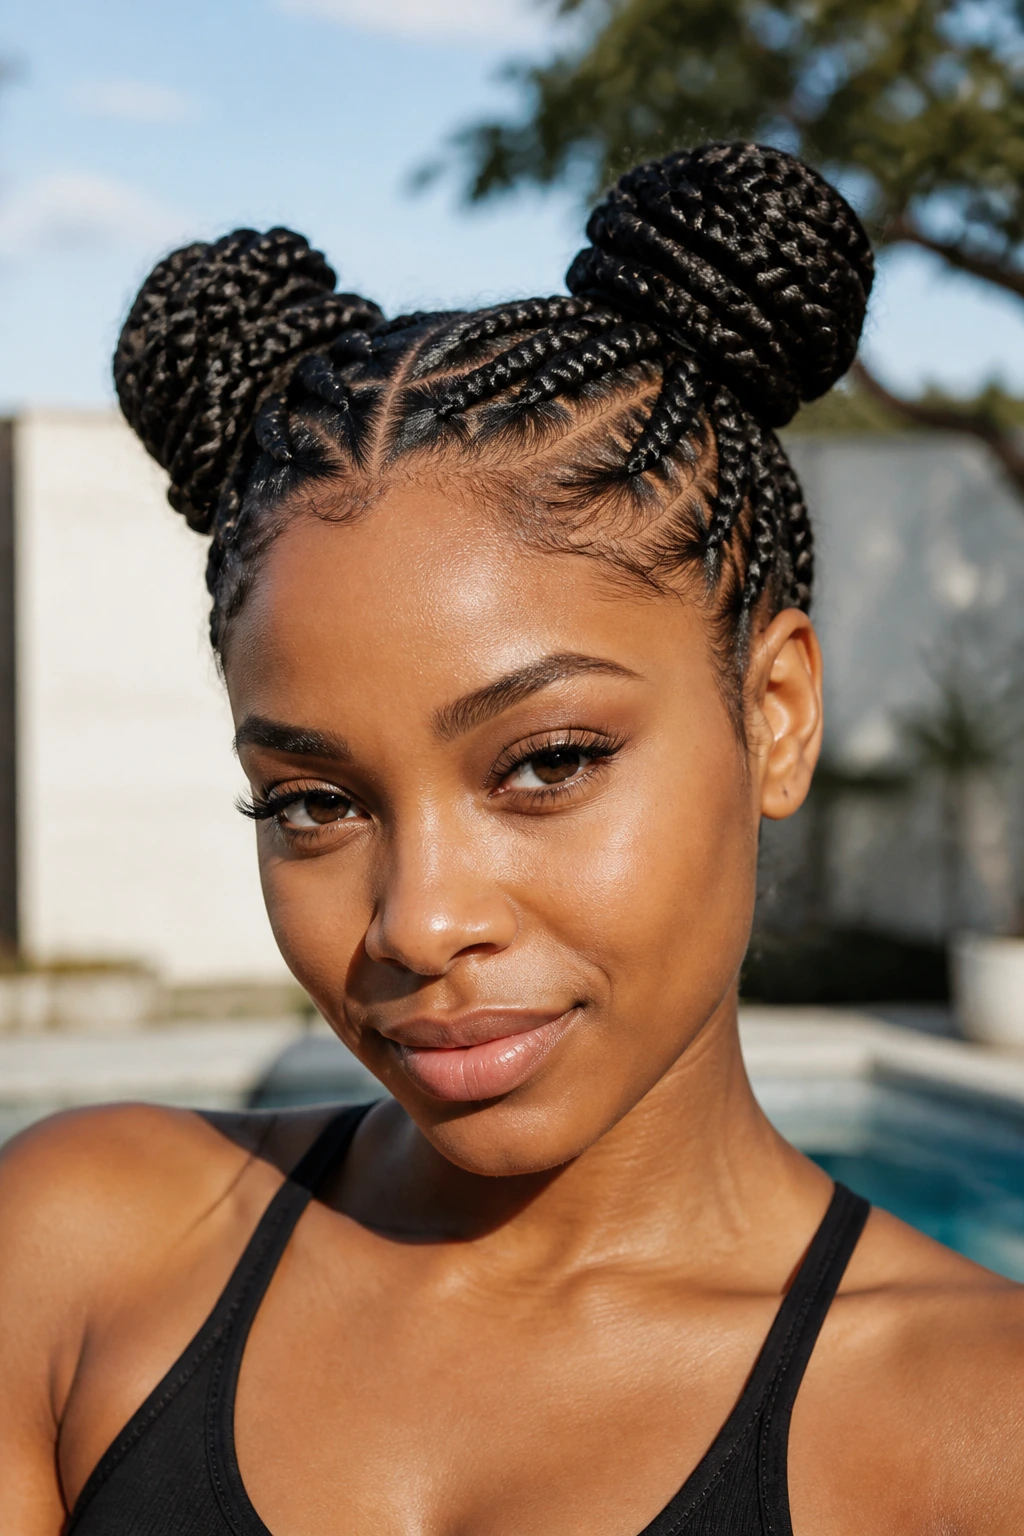
Braided space buns are the style I’d hand to anyone who wants long hair out of the way without making it disappear. Two braids wrapped into buns give the style volume and a clear shape, and the symmetry looks especially fun on long hair because the buns stay full instead of tiny. They’re playful, but not sloppy if the parting is clean.
This style works with Dutch braids, standard braids, or even rope braids. I like the braids to start near the temples and move back evenly, then coil each tail into a bun and pin it hard at the base. A few loose face pieces soften the look. If you want it to last all day, use pins, not just elastics. Pins do the boring work.
How to Make Long Braids Hold Their Shape
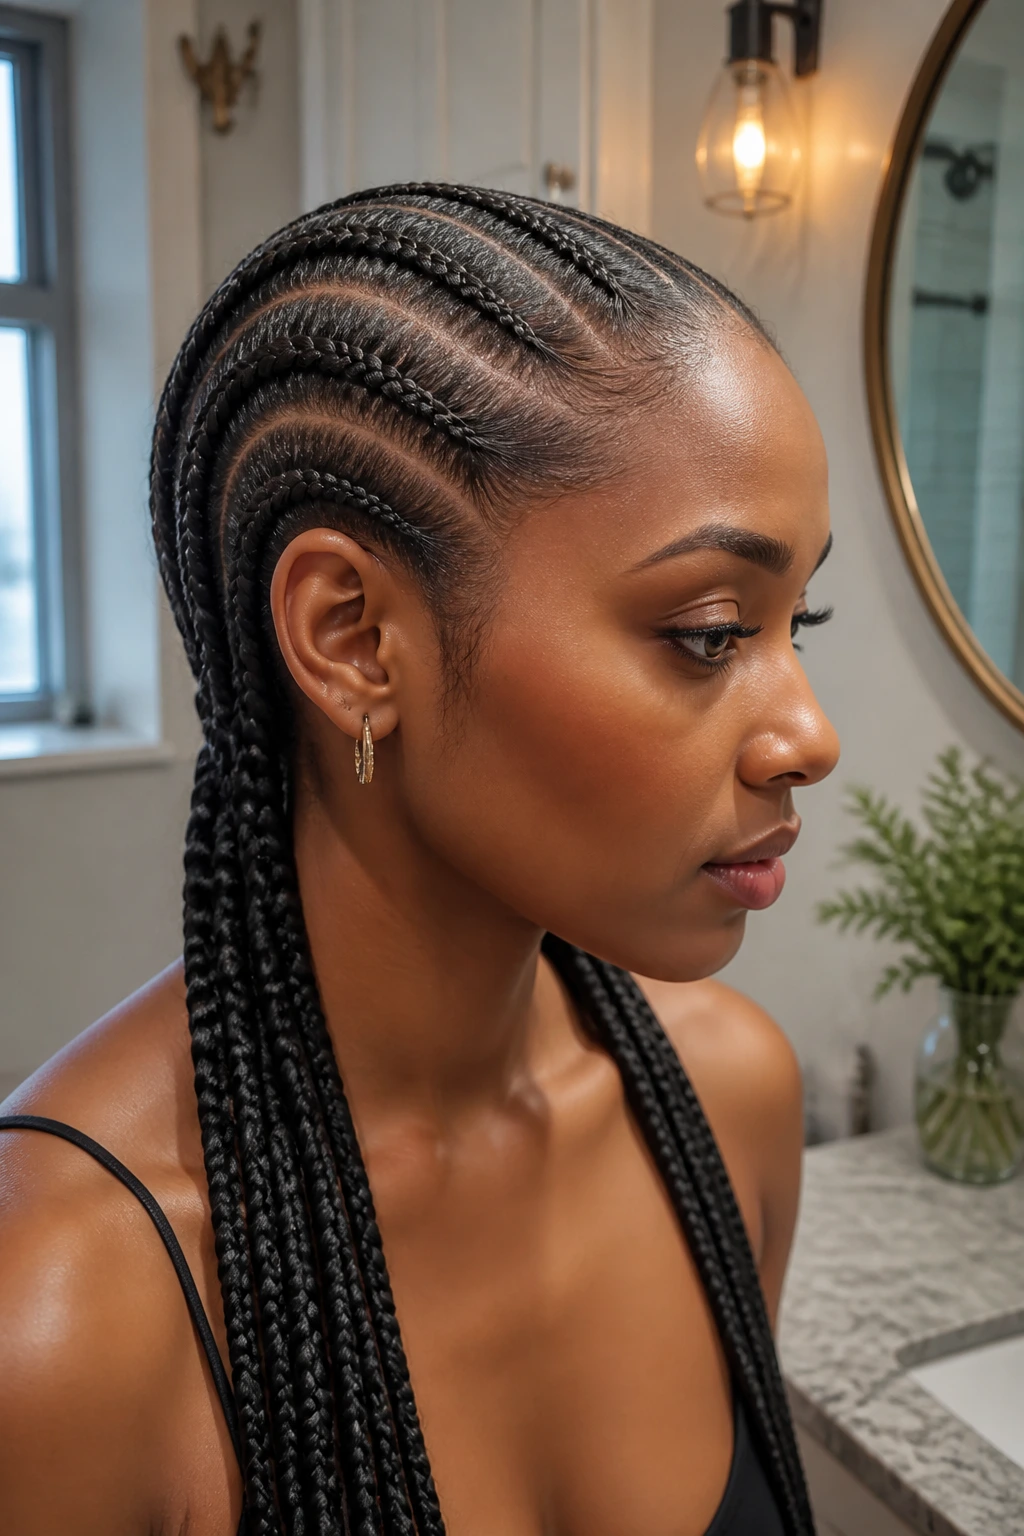
Long hair looks generous in a braid, but that length also means extra weight. If the base is weak, the whole style starts sliding by lunch. I’m a fan of starting with hair that has a little grip: second-day hair, a touch of dry shampoo, or a light mist of texturizing spray at the roots. Freshly washed hair can work, but it’s slippery. Slippery is the enemy.
Section first, braid second. A clean part line and even sections make the finish look deliberate, not improvised. Use a rat-tail comb, clip away the hair you are not touching, and check the back before you commit. That tiny pause saves a lot of frustration.
Finish with the right tension. A braid should feel secure, not like it’s pulling your scalp. If the hairline aches, it’s too tight. If the braid starts puffing apart after ten minutes, it’s too loose. That middle ground takes a little practice.
Common Mistakes That Make Braids Sag or Puff Up
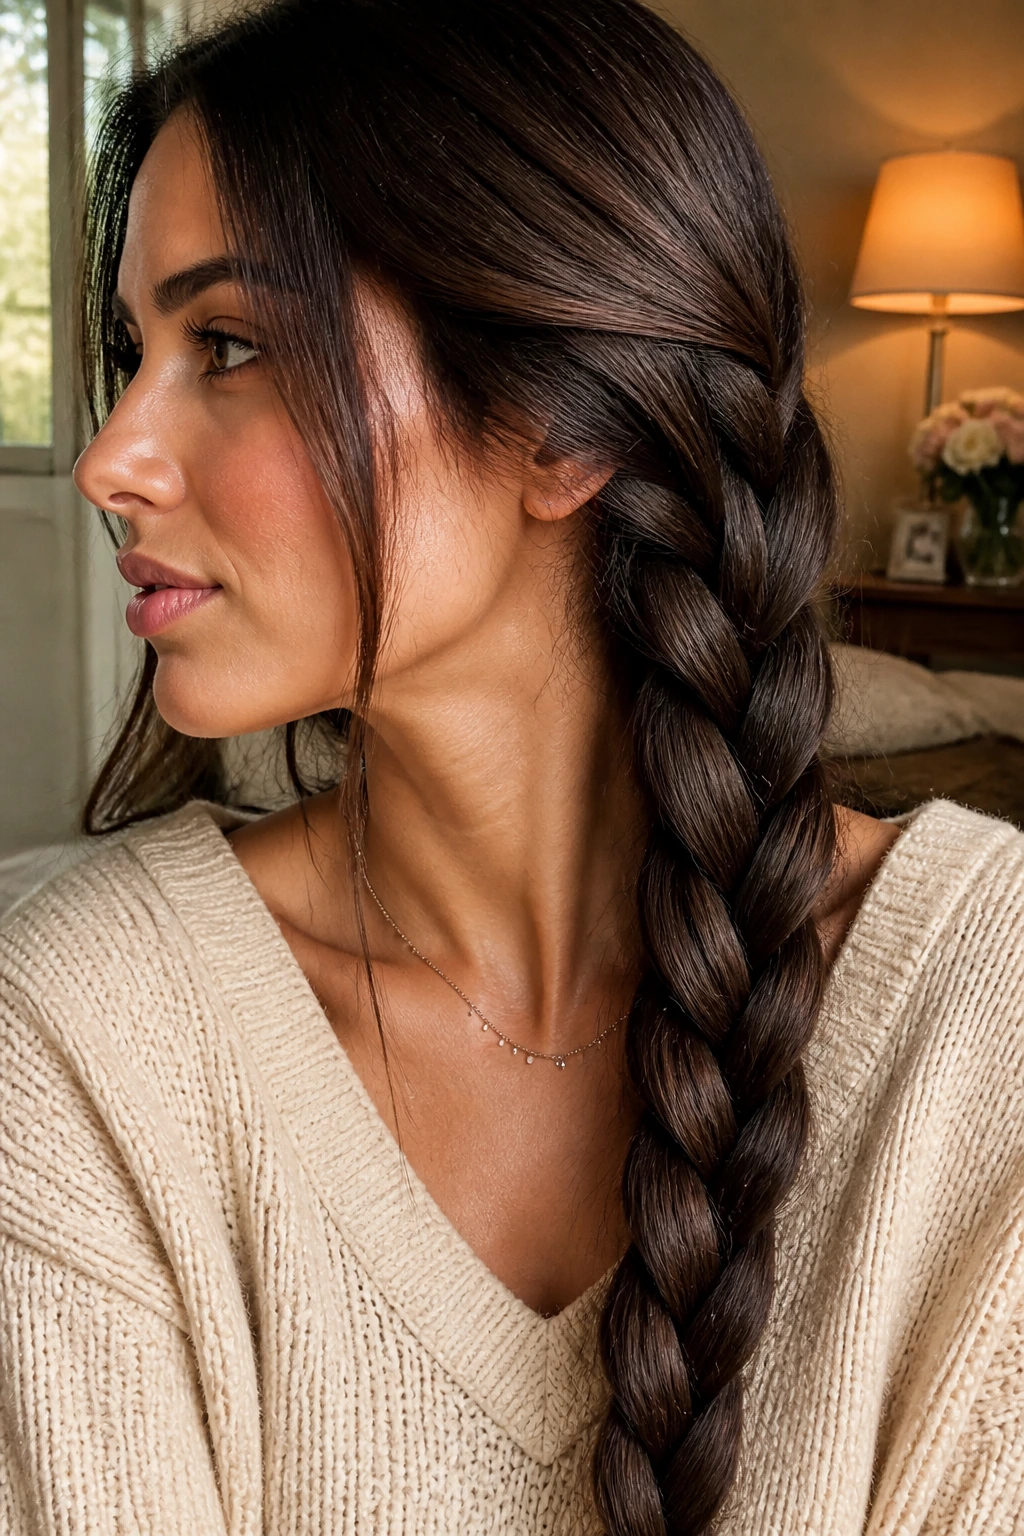
- Starting With Hair That’s Too Silky: The braid slips open fast and the sections don’t stay put. Add texture spray, a little mousse, or even a light dusting of dry shampoo before you braid.
- Parting in a Rush: Crooked sections make the braid lean and twist in odd places. Use a comb and check the back in a mirror before you start.
- Overtightening the Crown: The braid may look neat at first, but the scalp will complain and the style can distort after an hour. Keep the front snug, not strained.
- Ignoring the Ends: A frayed tail makes a good braid look unfinished. Secure it with a small elastic and smooth the last inch with a dab of cream.
- Pancaking Too Hard: Pulling the braid apart too aggressively can break the weave and expose gaps. Widen the sections gently, one loop at a time.
- Using the Wrong Elastic: Thick, rubbery bands snag long hair and make removal painful. Use snag-free elastics or covered bands whenever you can.
Ways to Change the Mood Without Learning a New Braid
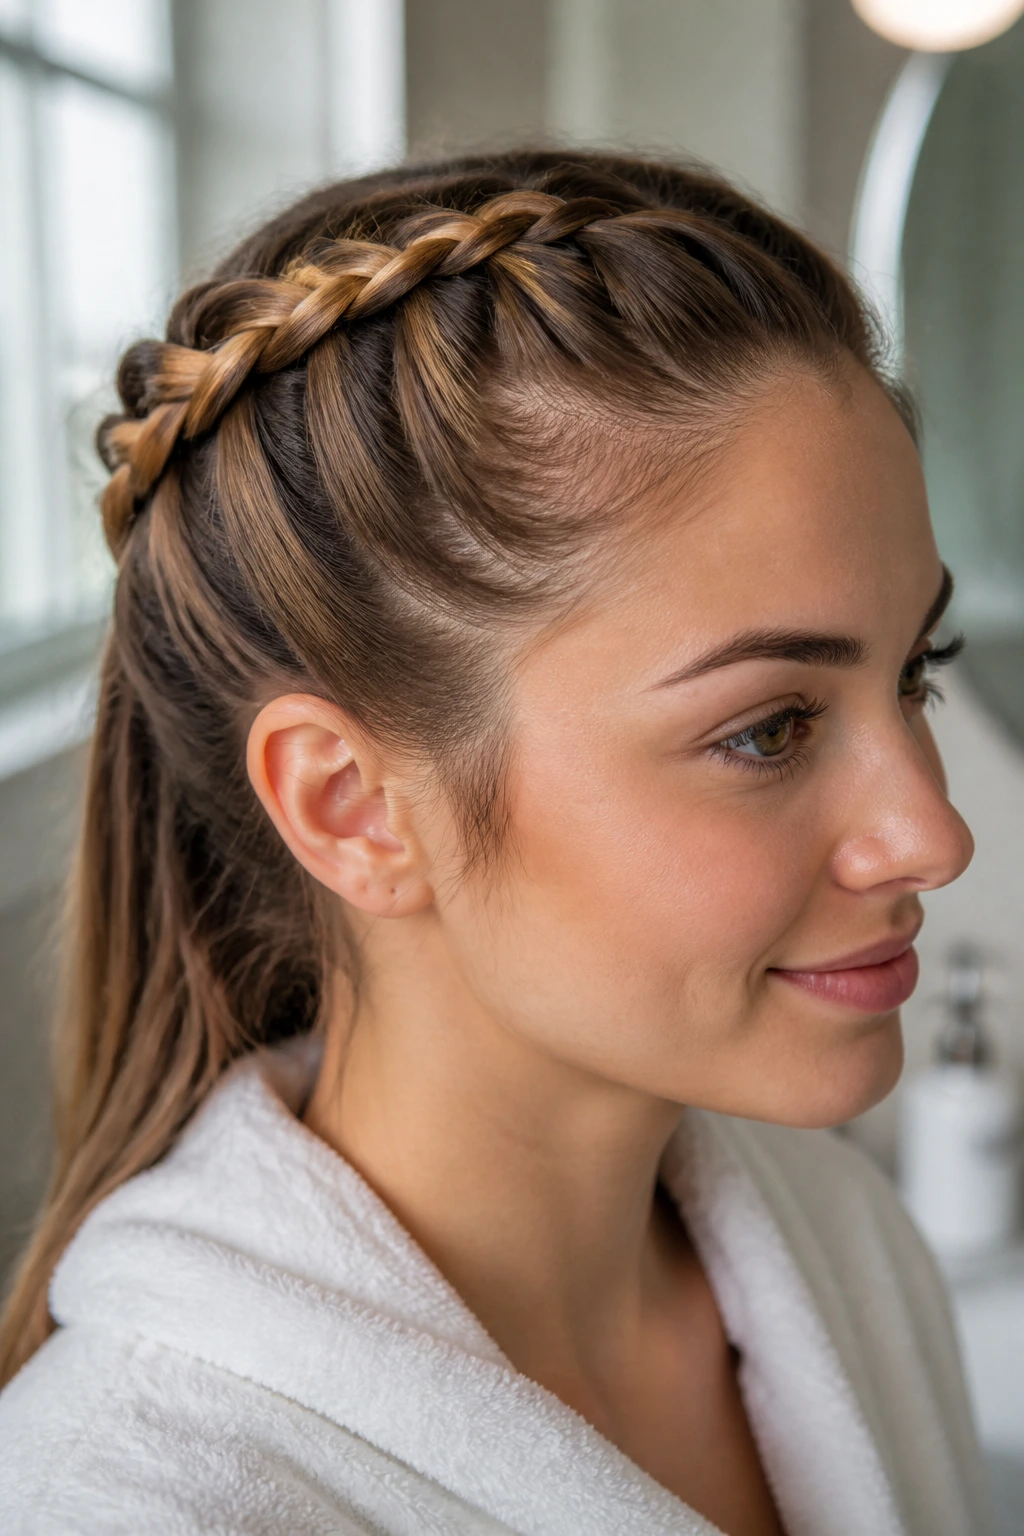
Soft Romantic Finish: Leave two thin face-framing pieces out and curl just the front section with a 1-inch iron. This works best on French, crown, and waterfall braids when you want the style to feel lighter.
Sporty Grip: Start with dry shampoo, braid a little tighter at the root, and skip the loose wisps. Dutch braids, boxer braids, and pull-through braids fit this mood cleanly.
Dressy Ribbon Detail: Add a satin ribbon to a side braid, milkmaid braid, or low ponytail braid. Choose a color that either matches your outfit or gives one sharp contrast.
Low-Tension Protective Version: Use feed-in or goddess braids with a gentle scalp line and no hard tugging at the hairline. This is the version to choose when comfort matters as much as the look.
Tools That Make Braiding Easier
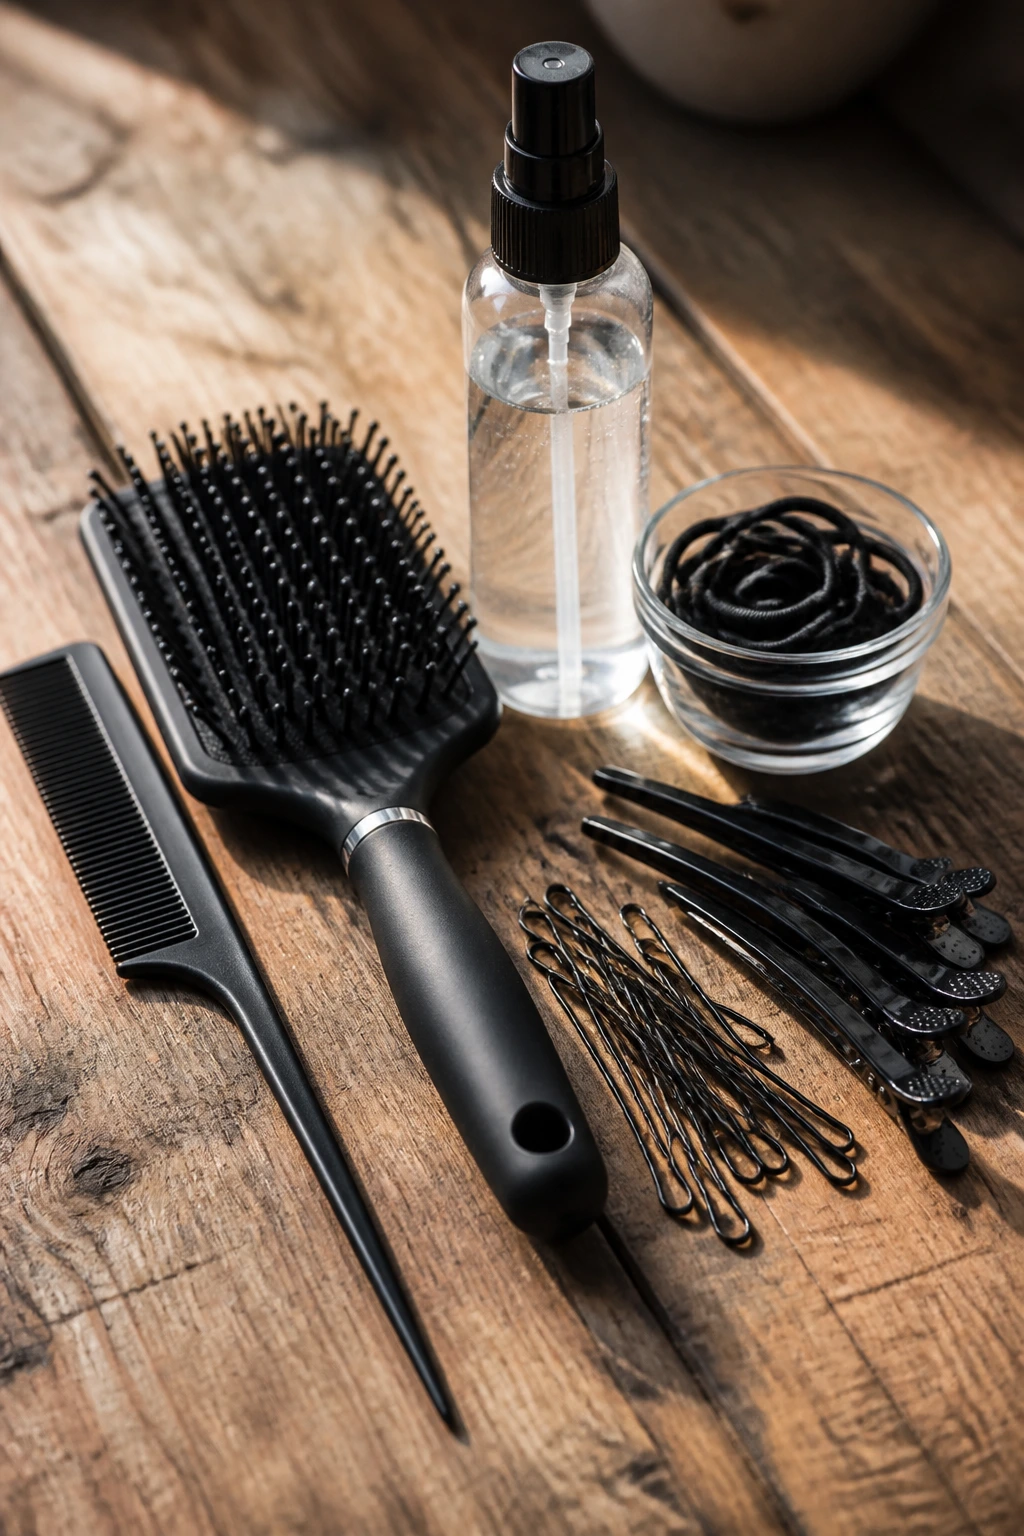
- Rat-tail comb: For clean parts and precise sectioning. This one matters more than most people think.
- Paddle brush or detangling brush: Helps smooth long hair before braiding so the surface stays neat.
- Snag-free elastics: Better for tails, bubbles, and any braid with a defined end.
- Bobby pins: Essential for crowns, halos, buns, and any braided style that wraps around the head.
- Hair clips: Keep extra sections out of the way while you work.
- Texturizing spray or dry shampoo: Adds grip to slippery hair and helps the braid hold.
- Light styling cream or leave-in conditioner: Smooths frizz and keeps the ends from looking dry.
- Hand mirror: The back of a long braid lies to you. A second mirror tells the truth.
- Ribbon or scarf: Optional, but useful when you want to dress up a simple braid without changing the technique.
Keeping Braids Neat Between Washes
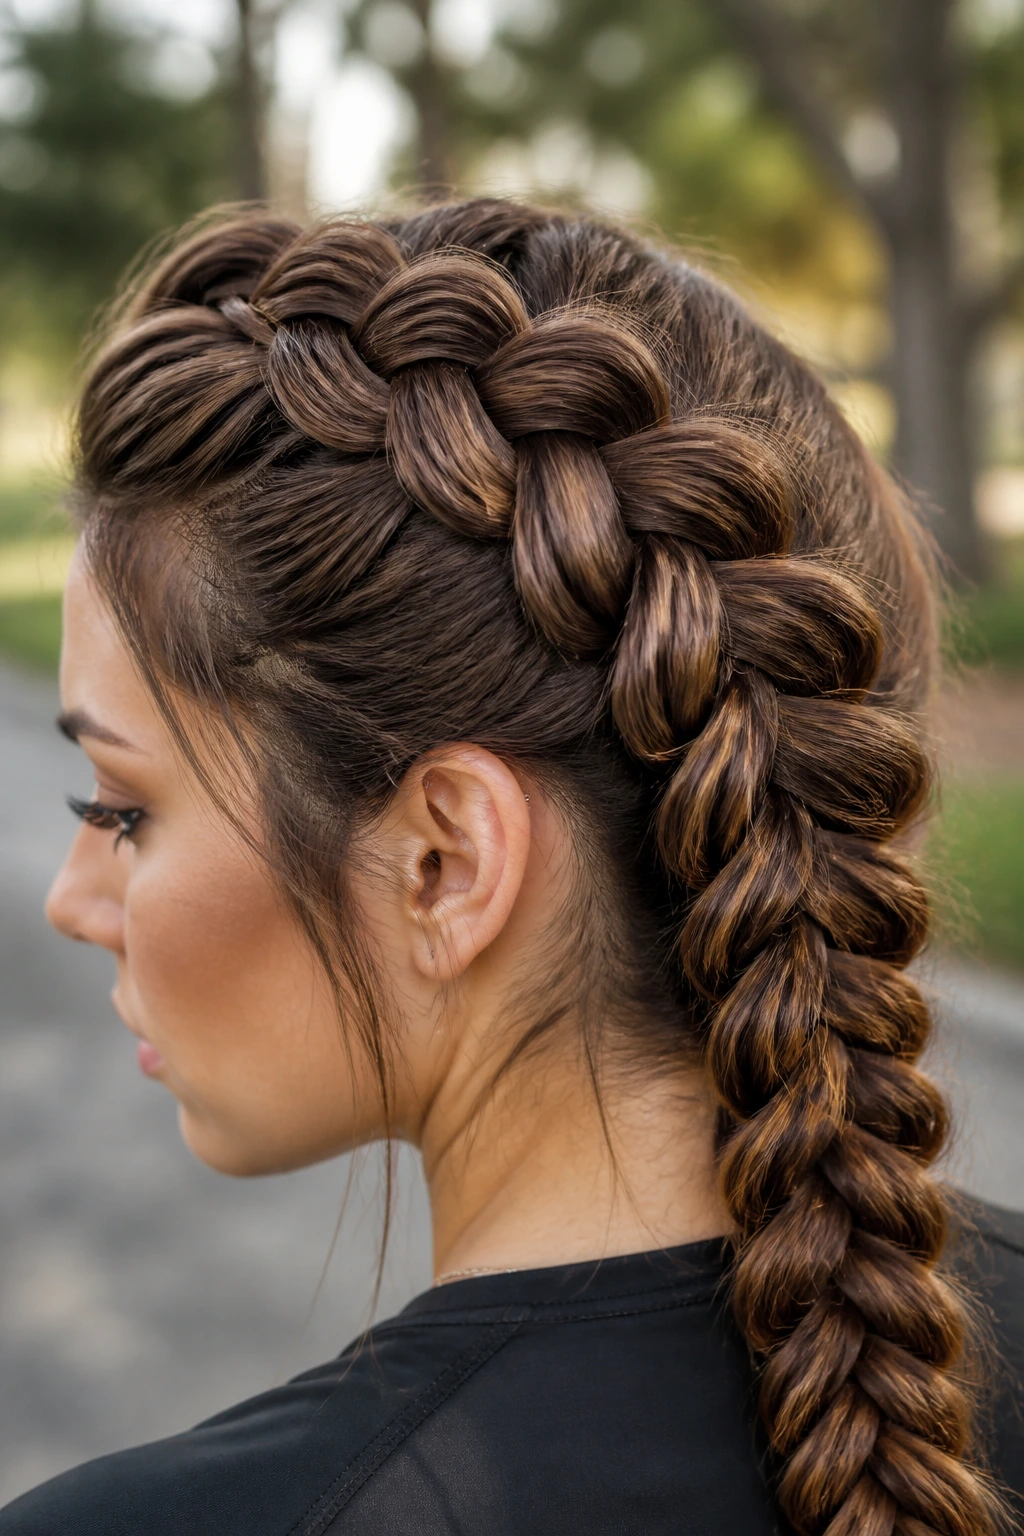
Braids on long hair usually last better when you stop fussing with them. Touching the surface all day loosens the weave, so I’m a fan of braiding once, adjusting once, and then leaving it alone. For loose styles, a satin pillowcase or bonnet keeps the surface from rubbing itself into a frizz halo overnight.
If you’re wearing tighter scalp braids or feed-ins, keep the scalp clean and light. A small amount of diluted shampoo or a gentle scalp cleanser every few days is enough for most people; heavy product buildup just makes the parts look dusty. Open braids, like a fishtail or side braid, can often be refreshed by misting the lengths with water, smoothing a little leave-in through the ends, and re-securing the elastic.
For protective styles that stay in longer, don’t push them too far. If the scalp feels sore or the edges are getting stressed, take the braid out. A braid should help the hair, not put it on strike.
Frequently Asked Questions About Braid Hairstyles for Long Hair
Which braid lasts the longest on long hair?
Tight styles with a solid base usually last longest: boxer braids, Dutch braids, feed-in braids, and braided buns. The more the braid sits close to the scalp, the less likely it is to collapse under the weight of long lengths.
What braid is easiest if I’m new to braiding my own hair?
A classic three-strand braid or a low side braid is the safest place to start. They’re forgiving, and if one side is slightly larger than the other, the style still reads well.
How do I keep long braids from slipping apart?
Use a little texture spray, braid on hair that isn’t freshly washed, and keep the sections even. A braid that slips usually needs grip, not more force.
Can layered long hair be braided without pieces falling out?
Yes, but the style choice matters. French braids, Dutch braids, and lace braids usually hold layers better than loose fishtails or soft side braids.
Should I braid damp hair or dry hair?
Dry hair is safer for most braid styles because it reduces stretch and breakage. Damp hair can help if your hair is very thick or poofy, but never braid hair that stays wet for hours.
How do I make a braid look fuller?
Loosen the outer edges with your fingers after securing it. Pull in small, even motions from the bottom upward so the braid gets wider without breaking apart.
Are tight braids bad for long hair?
They can be if the scalp feels pulled or the edges are being stressed. A braid should feel secure, not painful. If it aches, redo it looser.
What braid works best for a formal event?
Crown braids, halo braids, ribbon braids, and five-strand braids all carry a dressier look. They hold their shape well and photograph in a clean, readable way.
How do I sleep in braids without ruining them?
Use a satin bonnet or pillowcase and tie long braids low so they don’t bend sharply under your head. For looser styles, a soft scrunchie at the end helps keep the shape overnight.
Braids That Let Long Hair Behave
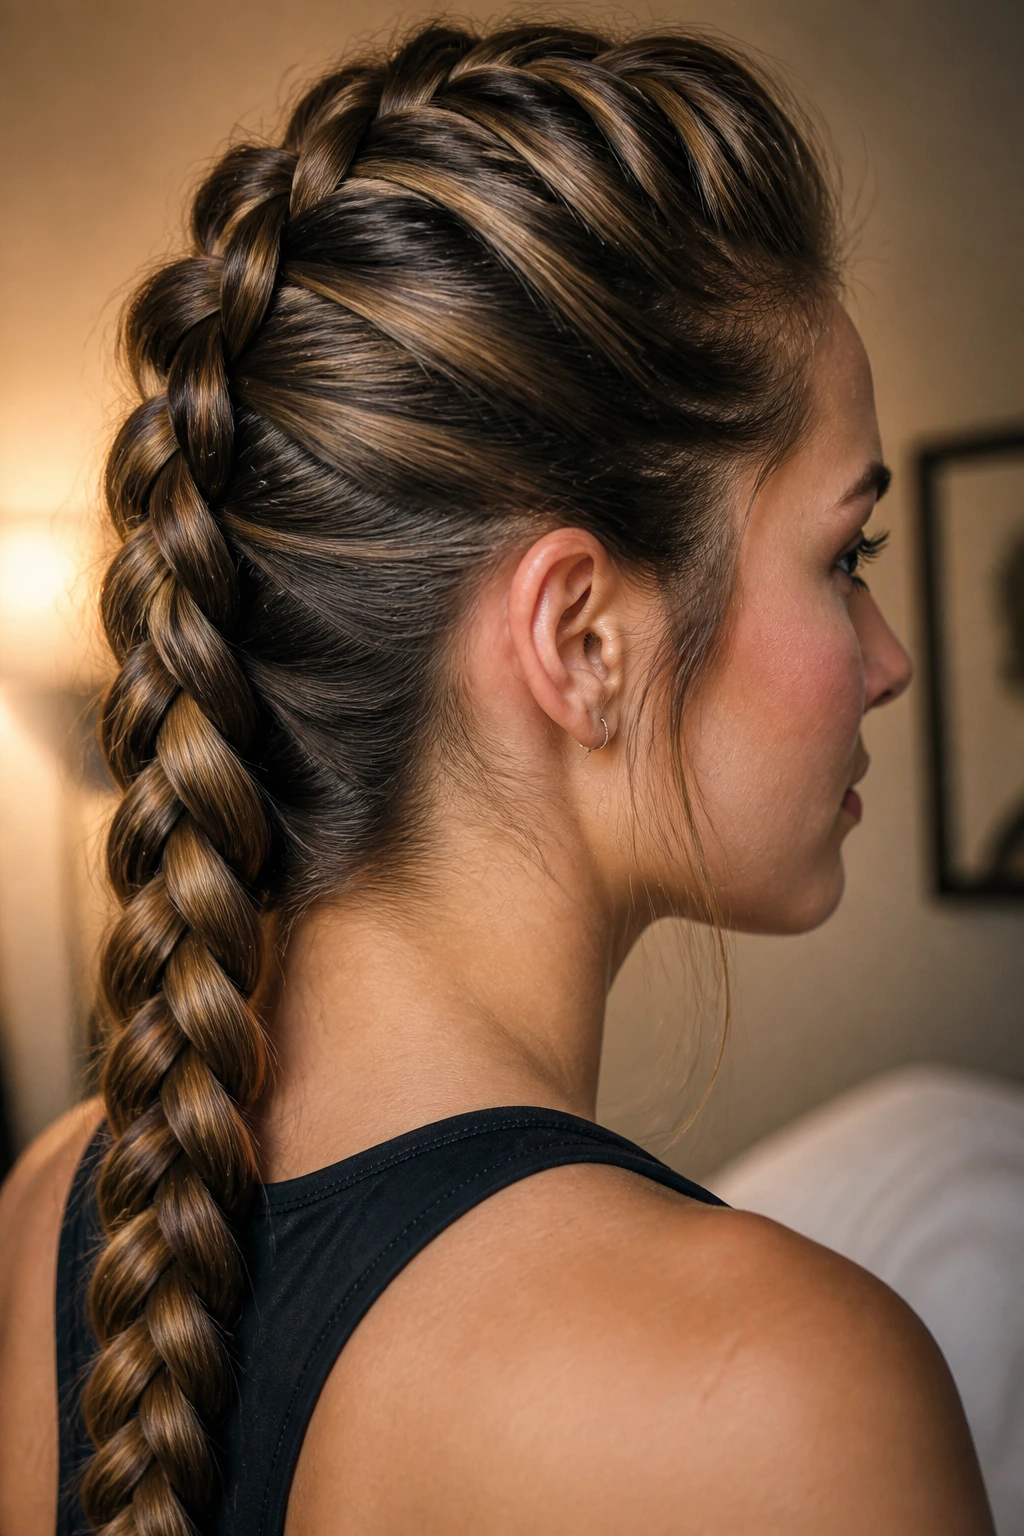
Long hair does not need to stay loose to look good. Sometimes the best move is to fold it into shape, let the braid do the heavy lifting, and enjoy how much easier the rest of the day feels when your hair isn’t swinging into everything.
The nice part about these styles is that they don’t all live in the same lane. Some are clean and practical, some are decorative, some are the kind of thing you wear to make a plain outfit look finished. Pick the one that matches the day, the weather, and how much patience you have for sectioning.
And if you only remember one thing, make it this: long hair rewards a braid that respects its weight. Start clean, secure the base, and let the length do its work.
