



A mohawk on a little girl does not have to mean stiff gel, shaved sides, or anything that feels too sharp for a child’s face. The best mohawk styles for little girls are usually the soft ones: curls gathered up the middle, tiny braids feeding into a ridge, a few puffs stacked neatly down the head, or a ribbon tucked through a braid so the whole look feels playful instead of severe. The silhouette does the work. You get height, shape, and a little drama without turning the style into a wrestling match.
What makes this shape so useful is how many directions it can go. On one child, it looks sweet and airy with loose curls. On another, it becomes a neat protective style with cornrows and beads. If the hairline is stretched, the style is wrong. If the child keeps touching the sides because they feel tight, the style is wrong again. A mohawk should feel secure, not punishing.
And that flexibility matters on real mornings, not just in neat photos. School drop-off. Birthday cake. A recital. A family dinner where somebody will absolutely take a picture under bad indoor light. The same basic ridge can be calm, bold, polished, or whimsical, and that range is exactly why these styles keep coming back.
Why Mohawk Styles for Little Girls Work So Well on Busy Mornings
- The shape does the heavy lifting: Once the center ridge is in place, even a simple side braid or puff reads as a full style instead of “hair that was rushed.”
- They work with a lot of textures: Curls, coils, waves, and even stretched hair can all form a mohawk silhouette without needing the same exact method.
- They can stay soft on the scalp: If you keep the side sections snug but not tight, the style can last through school without the “my head hurts” drama at pickup.
- They stretch your styling options: One day it’s a quick faux hawk with clips. Another day it’s a braided ridge with beads. Same idea, totally different mood.
- They photograph well without looking frozen: A little lift on top and some movement in the curls keeps the style lively instead of helmet-flat.
1. Soft Curly Faux Hawk
This is the version I reach for when I want height without making the hair feel overworked. The sides stay gently smoothed back, and the center curls are fluffed into a soft ridge that sits right down the middle of the head. It looks polished, but not stiff. That matters on a child, because hair that feels crunchy or too sculpted usually gets touched, pulled, or taken apart by lunch.
Why It Works
The curl pattern does most of the visual work here, so you do not need a pile of product. A little leave-in, a soft brush on the sides, and a few bobby pins or small elastics are enough. If the curls are already defined, this style comes together fast and still looks deliberate.
Best For
- Medium to long curly hair
- Kids who do not like tight braids
- Days when you want a mohawk look without a long styling session
Pro tip: Keep the center section slightly looser than you think you need. When curls dry, they shrink upward, and that tiny bit of extra room keeps the shape from looking squeezed.
2. Braided Cornrows with a Curly Center
This one has a cleaner, sharper outline. Two or three cornrows on each side pull the hair back neatly, while the center hair stays loose and curly from forehead to crown. The contrast is the whole point: smooth sides, textured middle, no confusion about where the mohawk lives.
A style like this is especially handy if the hair is thick or easily frizzy at the temples. The cornrows keep the sides calm, and the curls in the center keep the look from feeling too strict.
How to Wear It
If the center curls are long, let them fall a little toward the back for a fuller ridge. If they’re shorter, pick them gently with your fingers instead of a brush so you keep the shape without turning the curl pattern into fluff. A small bow at the crown is enough. More than that can start fighting the braid pattern.
3. Triple Bantu Knot Mohawk
Three neatly placed Bantu knots down the center make a mohawk that feels playful and very clear in shape. Each knot sits like a little rounded stop on the ridge, so the style reads strong even on short hair. It’s a good choice when the hair needs a protective style but you still want something that stands out.
The trick is spacing. Too close together and the knots blur into one lump. Too far apart and the line breaks. Keep the parts even, smooth the roots lightly, and let the knots sit with a little lift.
What Makes It Work
Bantu knots hold the eye because they create their own structure. You do not need curls or beads to make this one interesting. If the child has medium or short natural hair, this style can look neat for a full day and still come down gently later if you want a knot-out.
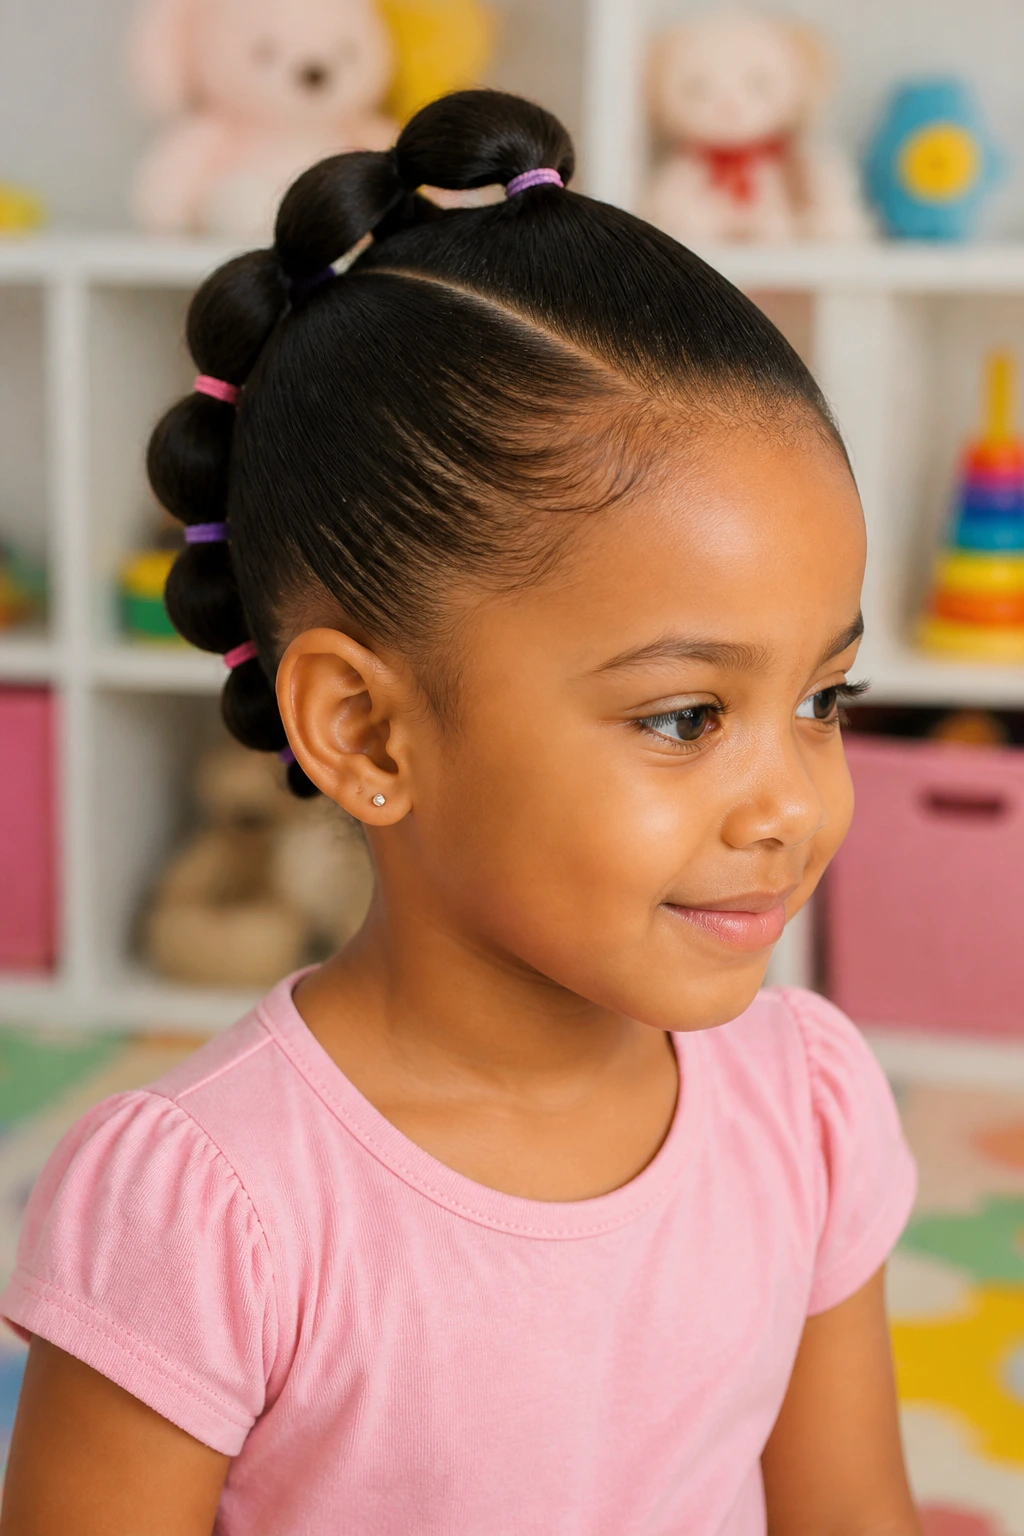
4. Bubble Ponytail Mohawk
A bubble ponytail mohawk gives you a row of rounded sections that look lively without much fuss. You gather the center hair into one ponytail, then place small elastics every inch or two and gently puff each section into a bubble. The sides can stay sleek, braided, or softly brushed back, depending on how much time you have.
This is one of those styles that looks harder than it is. It is not. The elastics do the design work.
Quick Notes
- Use clear or fabric-covered elastics so the bubbles look clean.
- Space them evenly; uneven gaps make the style sag.
- Puff each section with your fingertips, not a brush.
- If the hair is fine, a light mist of water and a tiny bit of mousse can help the bubbles hold their shape.
5. Flat-Twist Mohawk with Puff Ends
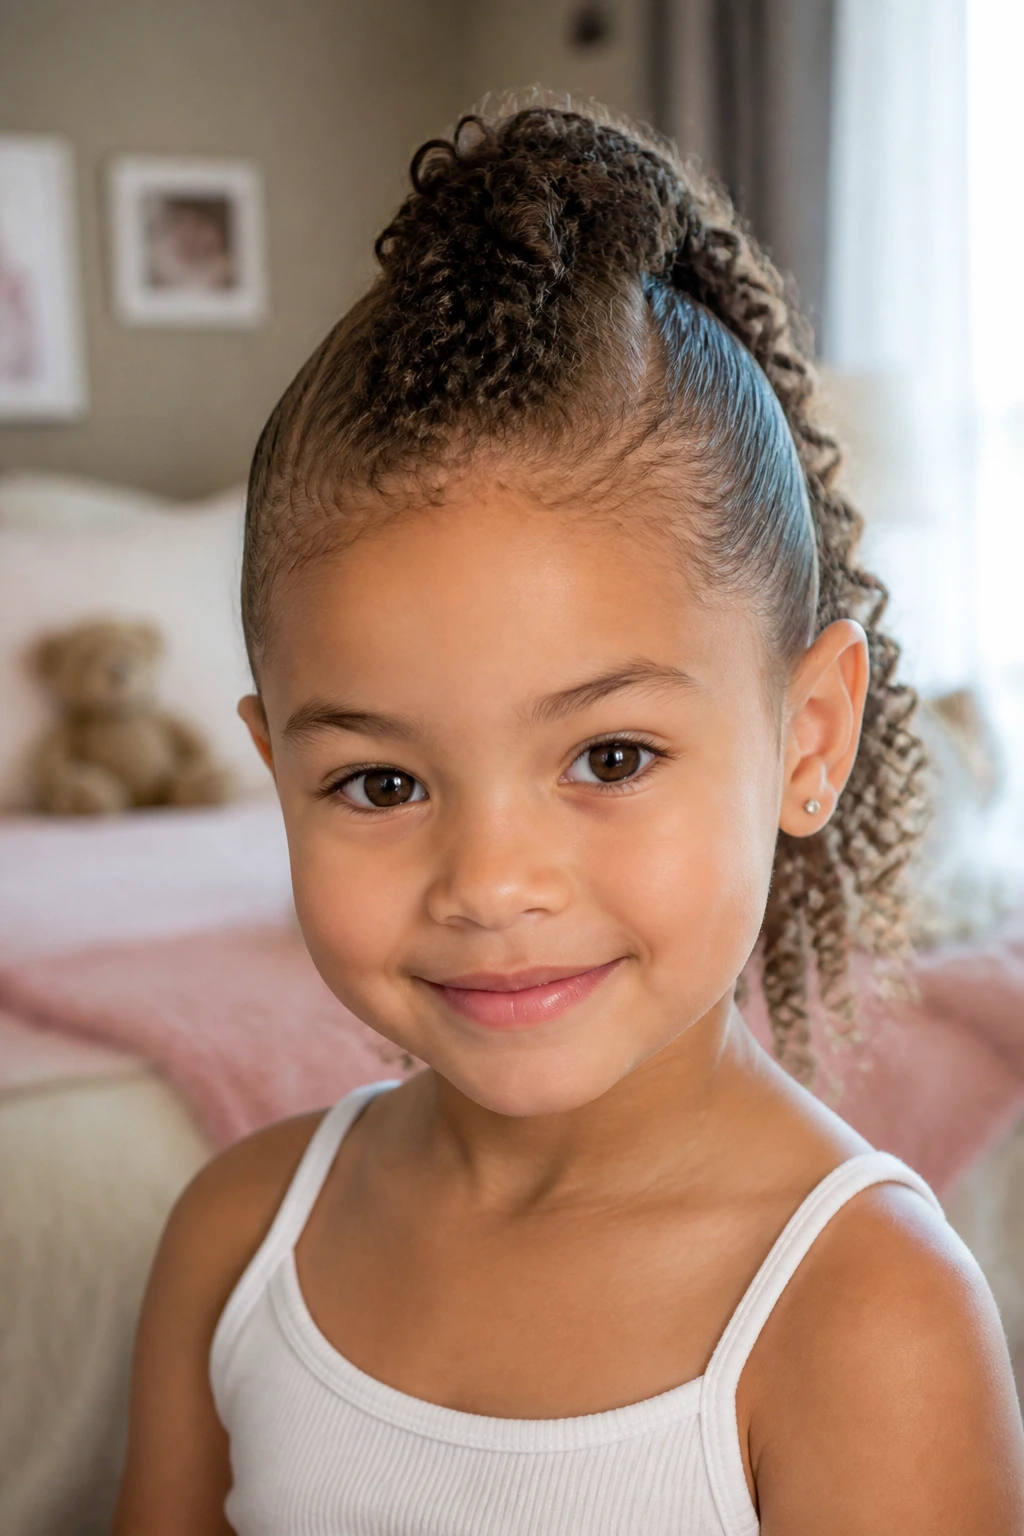
Flat twists on the sides give this style a smooth, tucked-in base, and the back or center can finish in one soft puff. It’s a good middle ground between a full protective style and a loose everyday look. The flat twists help keep the front neat, which is useful if the child tends to touch the hairline all day.
The best version of this style keeps the twist tension even from root to end. If one side pulls harder than the other, the ridge sits off-center and the whole thing feels lopsided.
Best For
Kids with natural hair that needs a little control, not a full overhaul. It also works nicely when you want the front to stay out of the face but still want a soft finish at the back. Add a small puff cuff or a satin scrunchie if you want the end section to look finished, not accidental.
6. Half-Up Mohawk for Loose Curls
Not every mohawk has to be braided down tight. This half-up version keeps the lower hair loose and uses the top and side sections to build a raised ridge. It is a good choice when the curls already have nice shape and you do not want to disturb them too much.
The style has a very easy charm. The top looks styled, the bottom still moves, and the result feels casual in the best way.
A Small Styling Rule
Take the top sections only. If you grab too much from the sides, the mohawk shape gets heavy and starts looking like a regular ponytail with opinions. Keep the lifted section centered and let the rest fall naturally. A single clip or two small elastics can hold the ridge in place.
7. Feed-In Braided Mohawk
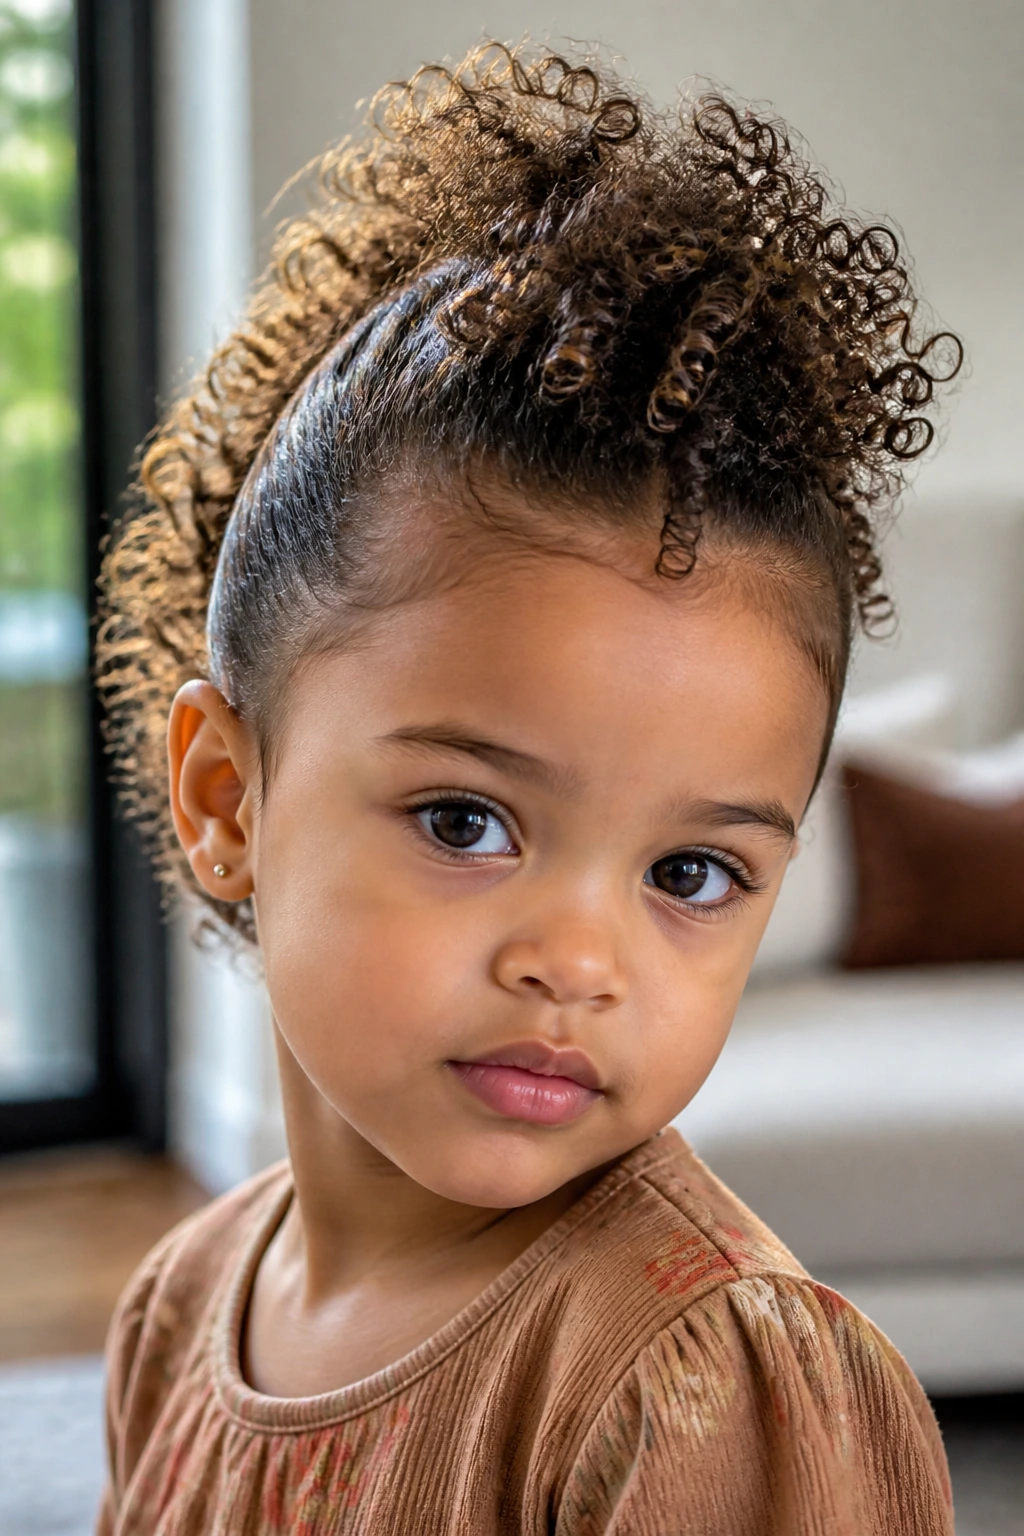
Feed-in braids give the mohawk a long, sleek line that grows from small at the front to fuller through the crown. That gradual size change is what makes this style look polished. It also helps the braids lie flatter at the hairline, which is a relief if you’re styling a child who does not like tugging.
This is one of the more protective options in the group. The hair stays tucked, the ridge stays clear, and the braids can last longer than a one-day puff style if the scalp is comfortable.
How to Get the Best Shape
Start with very small sections at the front and add hair gradually as you move back. If you jump to thick braids too fast, the front can look bulky. Keep the parts crisp. That clean parting is half the style.
8. Side Cornrows into a Top Puff
This style pulls the sides into neat cornrows that meet a puff at the crown. It works especially well on short-to-medium natural hair, because the puff gives volume even when the length is not dramatic. The sides stay controlled, the top stays full, and the whole look feels balanced.
It’s a smart option if the child has a round face or a very full curl pattern. The puff adds height, which stretches the silhouette upward instead of outward. That tiny shift changes the whole look.
Good to Know
Use a soft brush and a little water or leave-in on the crown before gathering the puff. If the center section is dry and fuzzy, the puff can look messy instead of shaped. A satin scrunchie is kinder than a tight elastic, and it keeps the base from digging in.
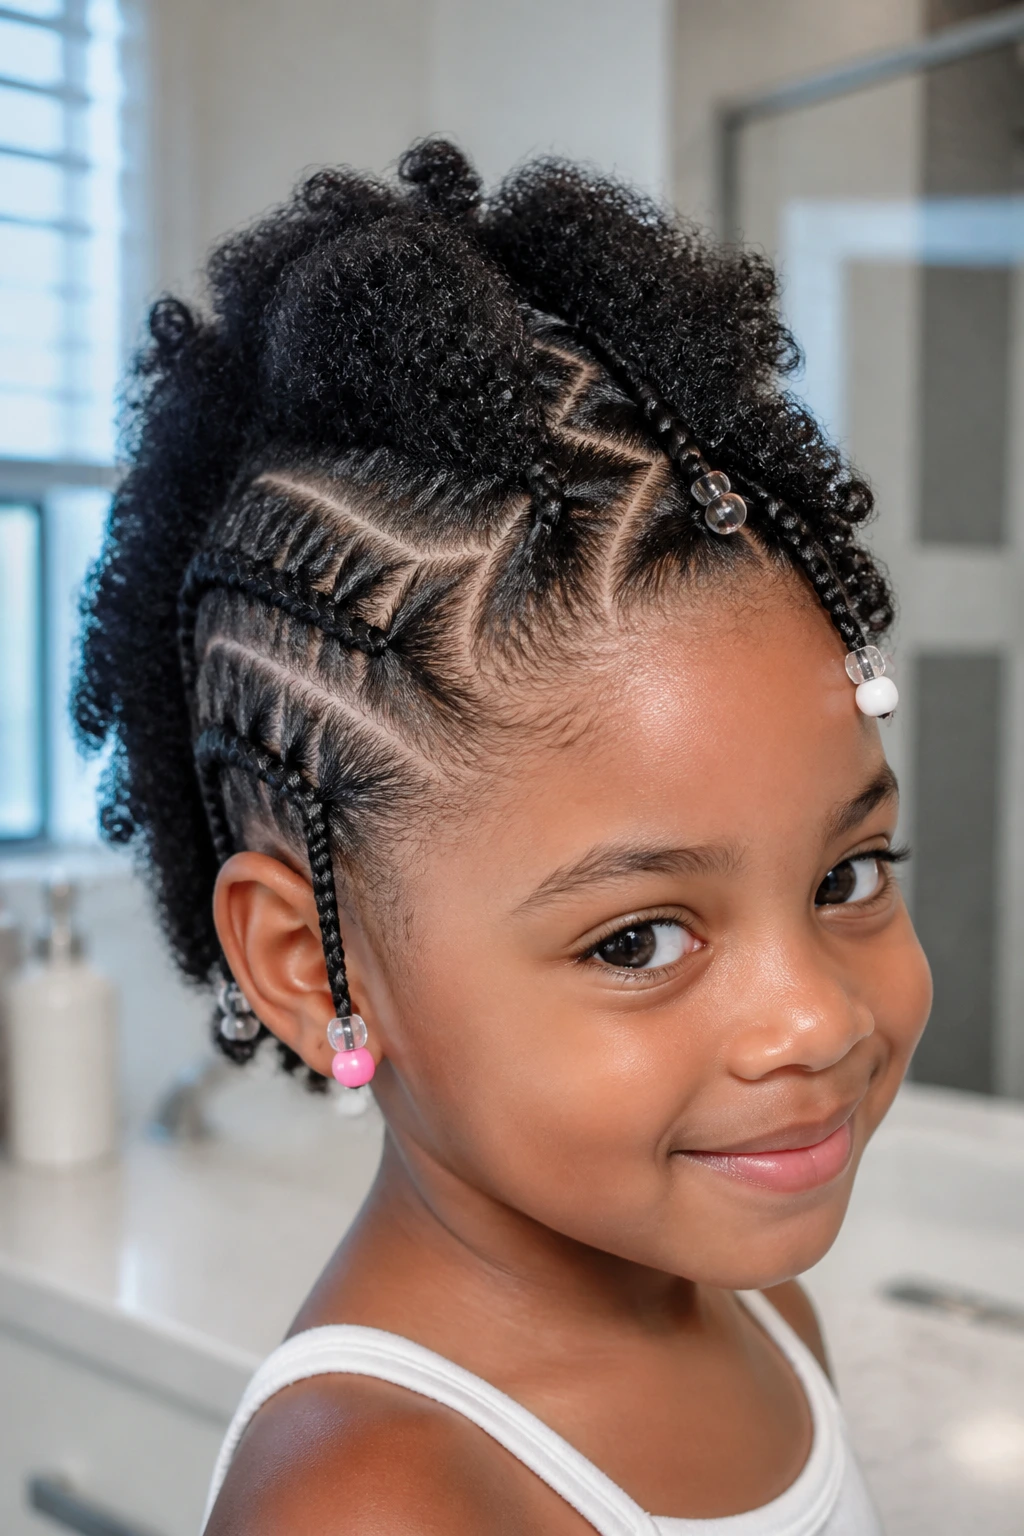
9. Zigzag-Part Mohawk
The zigzag part is the detail that turns a simple mohawk into something children actually notice in the mirror. The style itself can be as basic as small ponytails or flat twists along the ridge, but the parting breaks up the scalp in a playful way. It adds a little surprise before you even get to the accessories.
This one needs a rat-tail comb and a steady hand. Not a lot else. The parting lines matter more than fancy product here.
What to Watch For
Keep the zigzags shallow and even. If the turns are too sharp, the part looks jagged and messy rather than intentional. Once the lines are in place, smooth the sections gently so the parting stays visible. A small bead at the end of each section is plenty if you want extra detail.
10. Double Puff Mohawk
Two puffs down the center make a mohawk that feels soft, round, and easy to wear. One puff sits closer to the front or crown, and the second sits behind it. The spacing gives the style its ridge shape without requiring braids or knots.
This is a good fallback when you want a mohawk effect but the child is tired of being styled for half an hour. It’s quick, and it still looks deliberate.
Why I Like It
The style gives a child volume without a lot of heat or tension. If the hair is curly or coily, each puff can be shaped with your fingers and a bit of cream. If the hair is straighter, a little texturizing spray or a twist-out the day before helps the puffs hold better.
11. Rope-Twist Mohawk
Rope twists bring a neat spiral texture to the mohawk ridge. Two strands twist around each other instead of three, so the style has a tighter, more rope-like finish that stays tidy for a good stretch of time. If you want something that looks protective but not heavy, this is a solid pick.
The sides can stay flat-twisted or simply smoothed back. The center twists carry the look. And because rope twists lie close to the head, they tend to be easier on sensitive little scalps than a thick, bulky braid.
Best Tip
Twist in the same direction all the way down each section so the rope doesn’t unravel unevenly. If you’re adding little cuffs or beads, keep them near the ends. That keeps the roots lighter and the overall style more comfortable.
12. Beaded Mini-Braid Mohawk
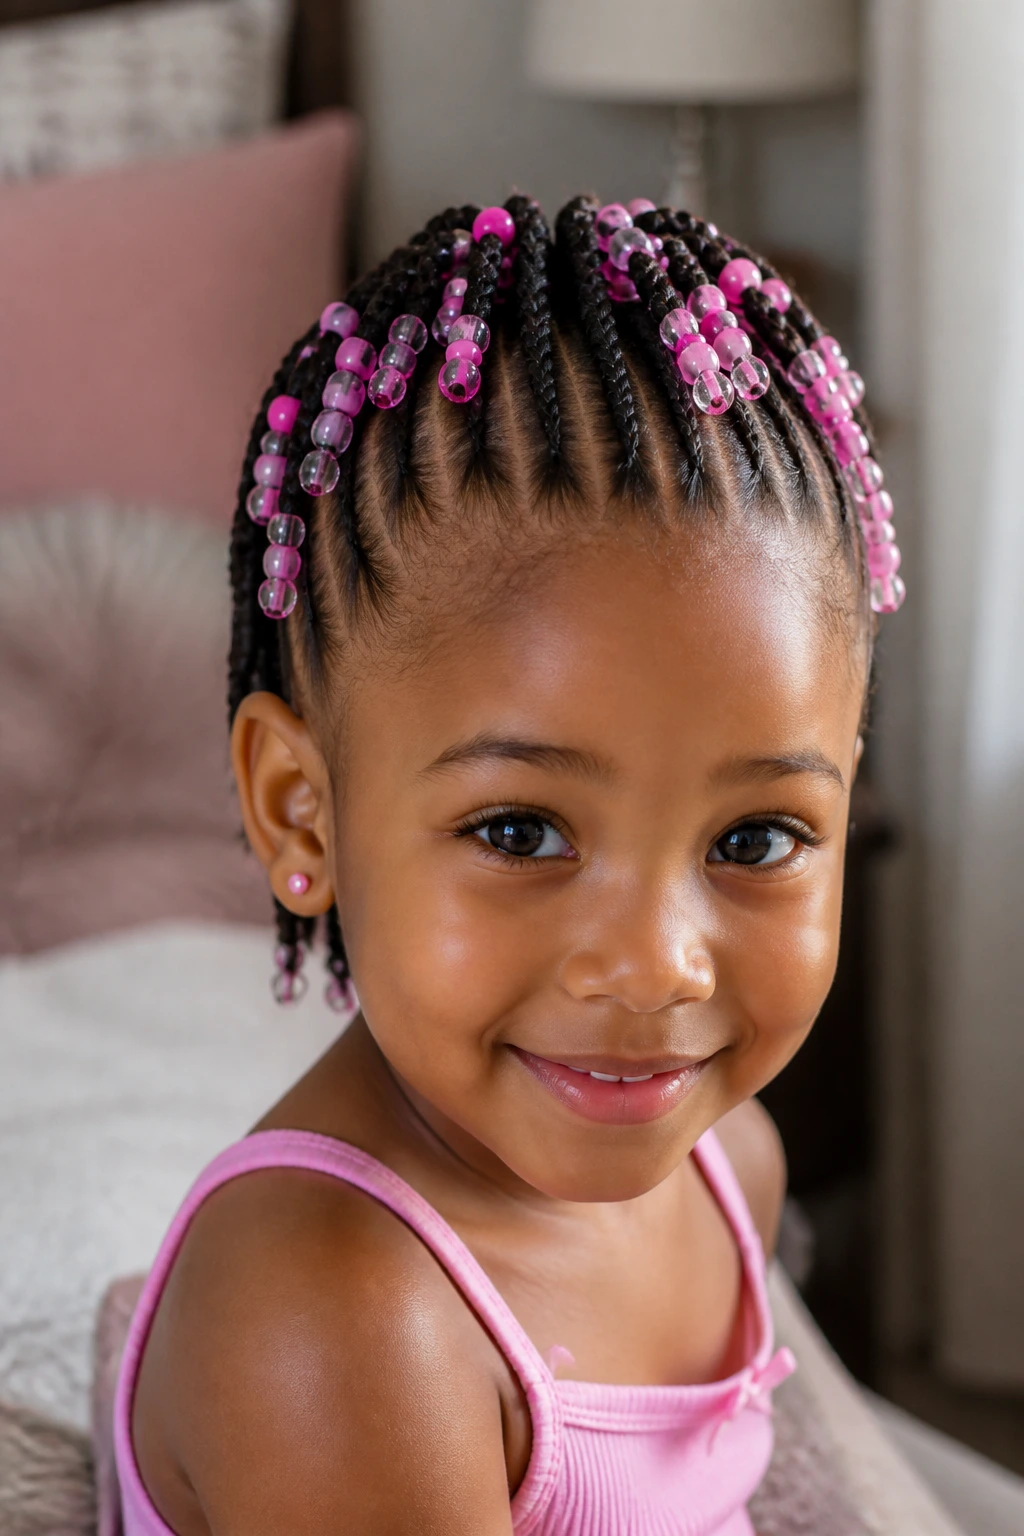
Tiny braids with beads at the ends give the mohawk a bright, rhythmic look. It’s one of those styles that sounds busy on paper but actually looks clean when the braids are spaced well. The beads add movement and sound—the soft little click when the child walks is part of the charm.
Keep the braids narrow and consistent. That keeps the ridge neat instead of puffy. If the child has fine hair, a light touch is better than forcing too many accessories onto thin sections.
A Useful Rule
Use smooth beads with rounded openings, not sharp ones. Hair catches in rough plastic edges, and nobody wants that tugging at the end of a school day. Two or three beads per braid are enough. You do not need a full load for the style to read clearly.
13. Space-Bun Mohawk
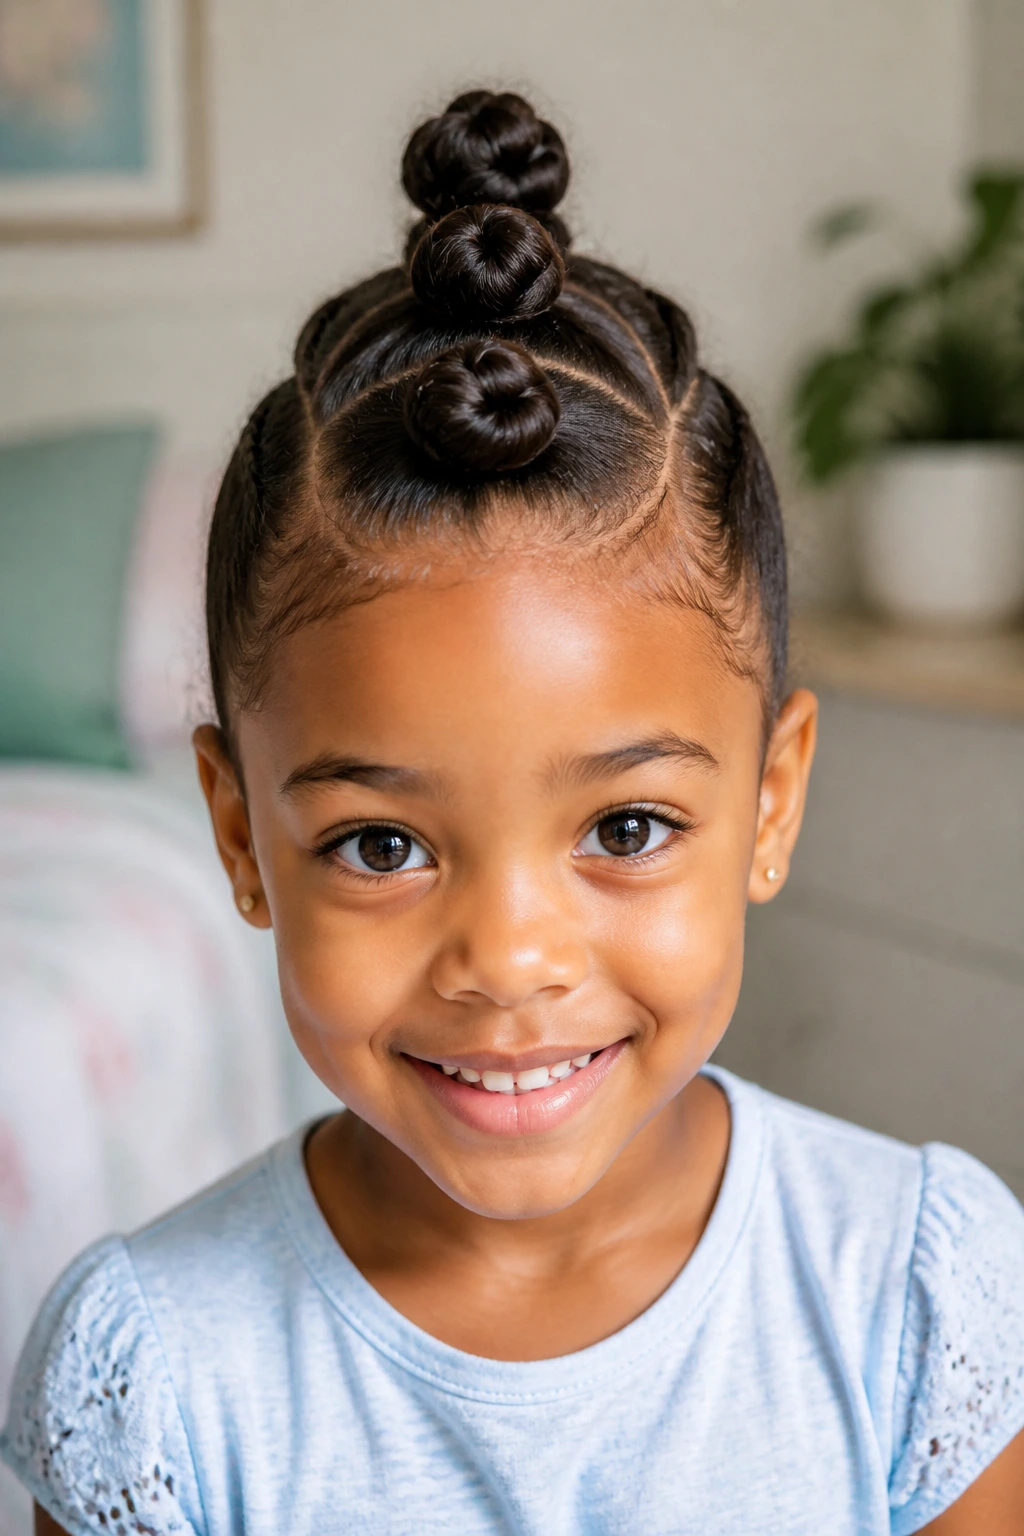
Space buns down the center turn the mohawk into something playful and a little cheeky. Three small buns in a row, or two larger ones, create a ridge with enough shape to feel special but not so much that it looks stiff. This is a good choice for parties, school events, or any day when the outfit already has some personality.
The buns should sit close enough together to read as one line, not as separate mini hairstyles. That’s the part people miss. The silhouette matters more than the count.
How to Finish It
Wrap each bun loosely and pin the ends flat so they don’t poke out like little rabbit ears. If you want extra polish, slick the sides down with a small amount of gel and a soft brush. A couple of glitter clips near the front can work, but keep them small. The buns already do most of the talking.
14. Heart-Part Mohawk
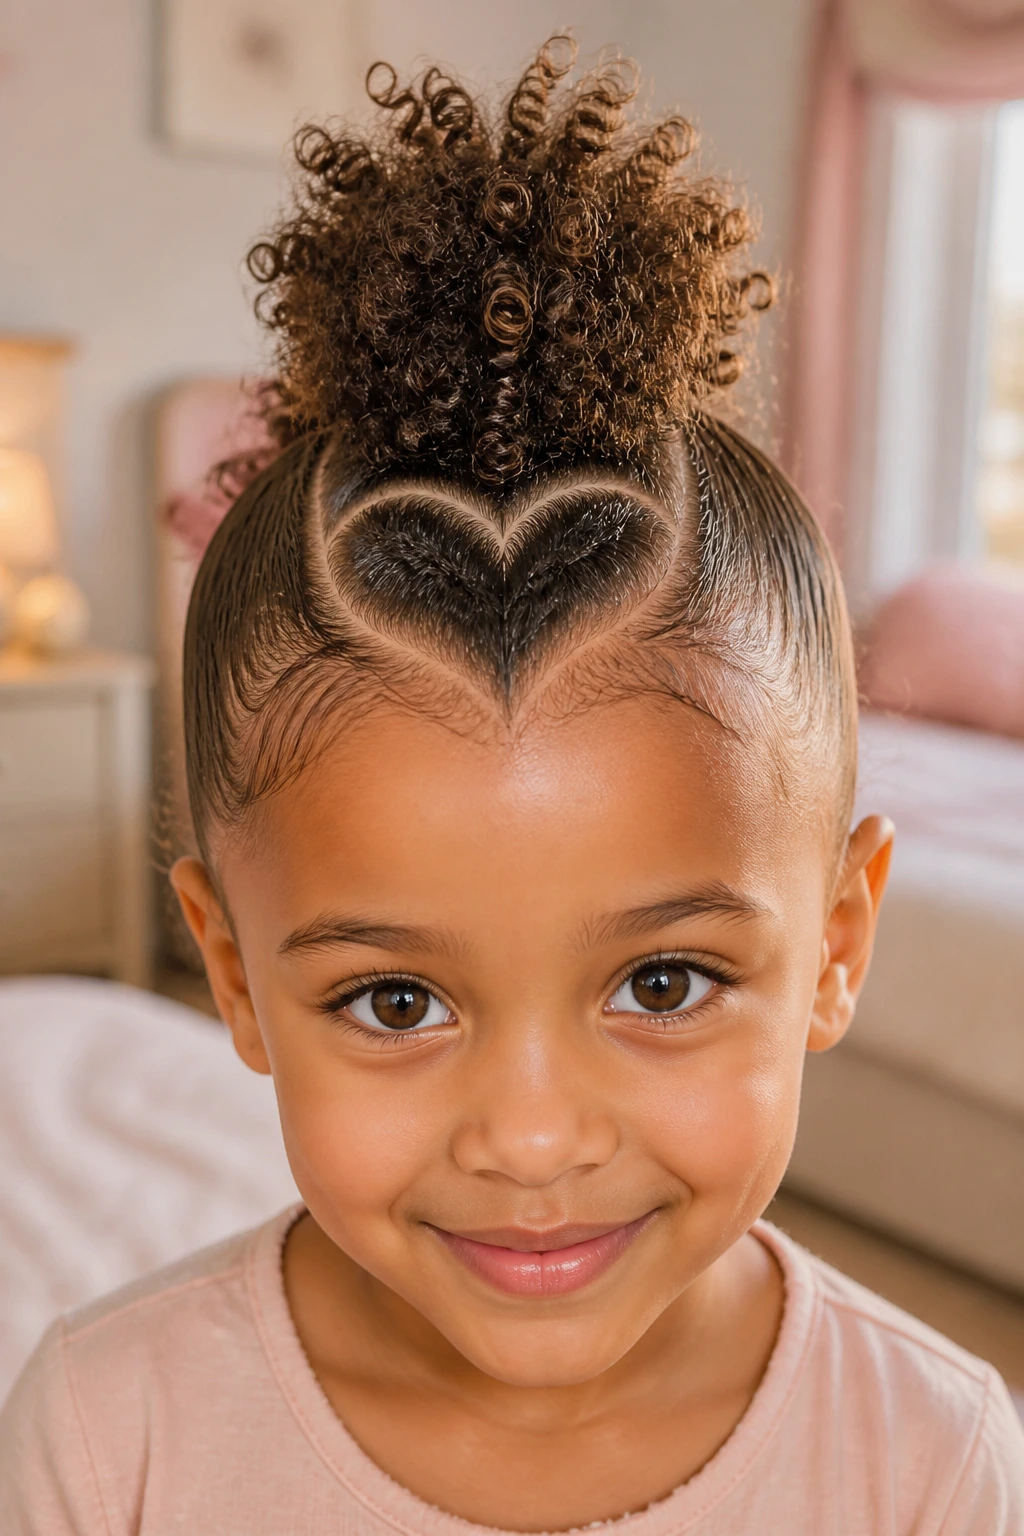
A heart part does not change the mohawk shape, but it changes the whole mood. The parting itself becomes the decoration, with the center ridge sitting inside a more playful design. It’s especially nice for birthdays, photo days, or any time a child wants something that feels special without adding a lot of accessories.
This style works best when the heart is drawn clearly and evenly. A blurry heart just looks like a missed turn with a comb.
Best For
- Children who like visible details
- Medium or long hair with enough length to show the shape
- Days when the outfit is already simple and the hair needs to carry the look
Keep the center section soft so the parting can stand out. Too much product around the part line makes the heart disappear.
15. Rolled Faux Mohawk
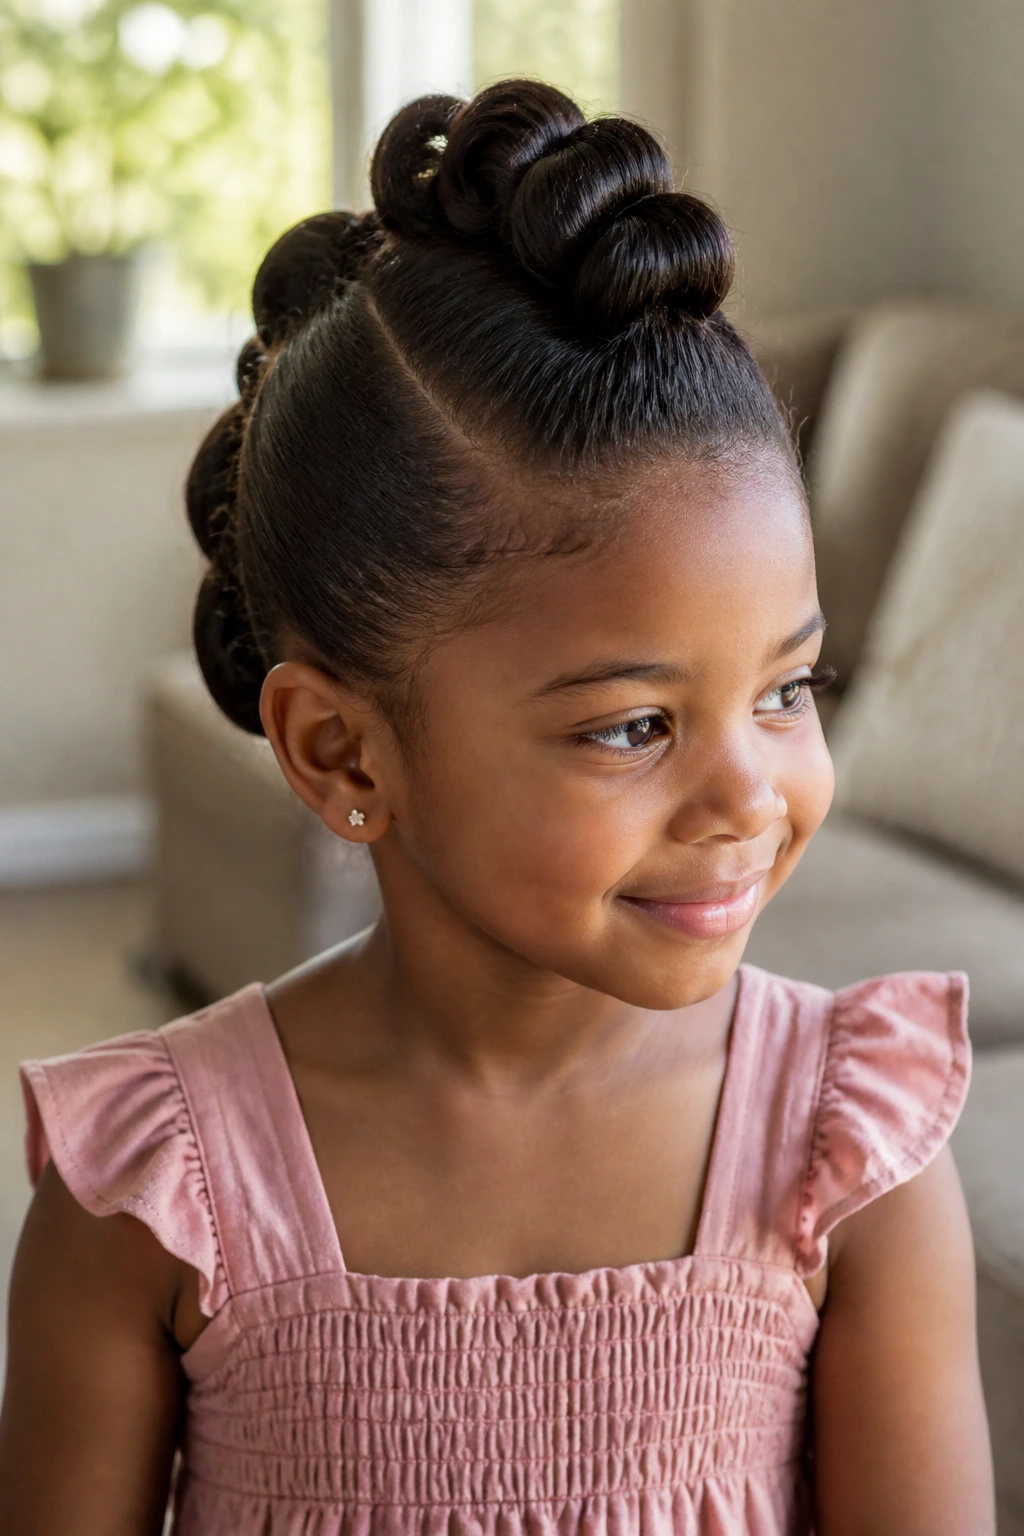
A rolled faux mohawk has a vintage feel to it, though kids never care about that. They just see a shape that looks different from the usual ponytail. You roll sections of hair inward toward the middle and pin them so the ridge stands up softly from the scalp. It works well on straight, relaxed, or stretched hair.
The nice thing about rolled styles is that they can look more elaborate than they are. If you have six bobby pins and a little patience, you can make the head shape look tidy fast.
The Pin Trick
Cross two bobby pins in an X when the section needs more hold. One straight pin can slip, especially if the hair is smooth. An X grips better and keeps the rolled section from collapsing halfway through the day.
16. Sleek Sides Mohawk
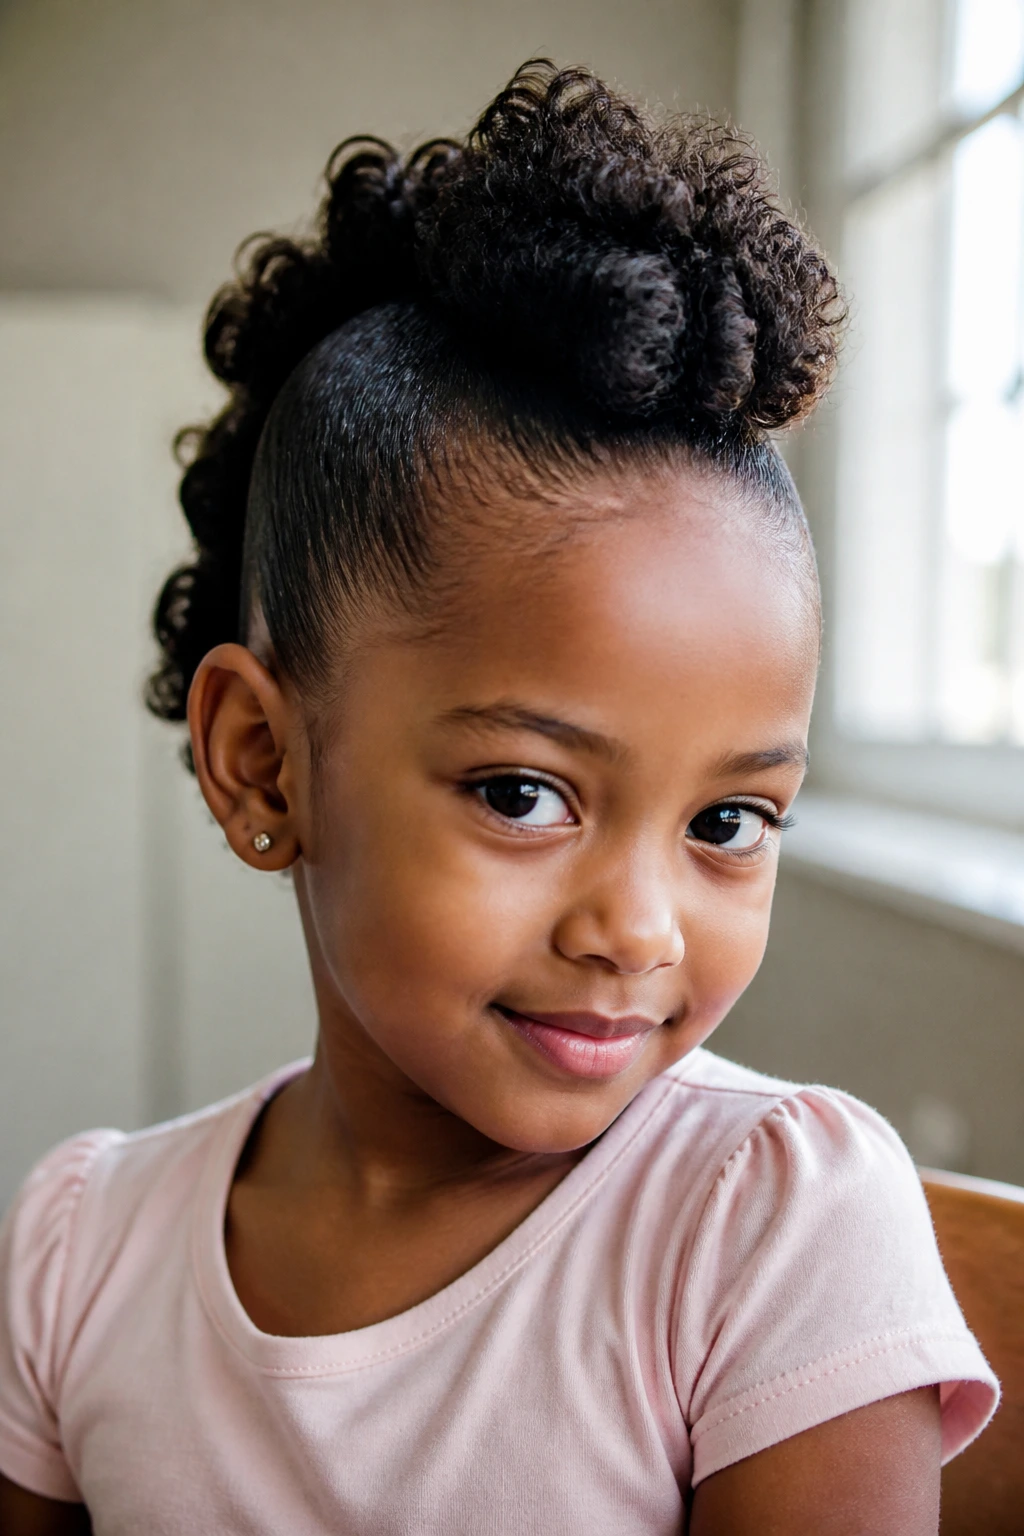
This is the sharpest version in the set, but it still does not need to feel harsh. The sides are brushed flat and smoothed with a light layer of product, while the center can be a puff, braid, or curly ponytail. The contrast between the polished sides and the textured ridge is what makes it work.
Go easy on the product. If the sides look wet for hours, there’s too much on them. You want smooth, not greasy.
What Makes It Look Clean
Use a soft brush in short strokes, following the same direction each time. If you brush every which way, the hair stands up at the crown and the sides lose that neat line. A tiny bit of edge control at the temples can help, but keep it away from the whole head unless you want flakes later.
17. Ribbon-Woven Braided Mohawk
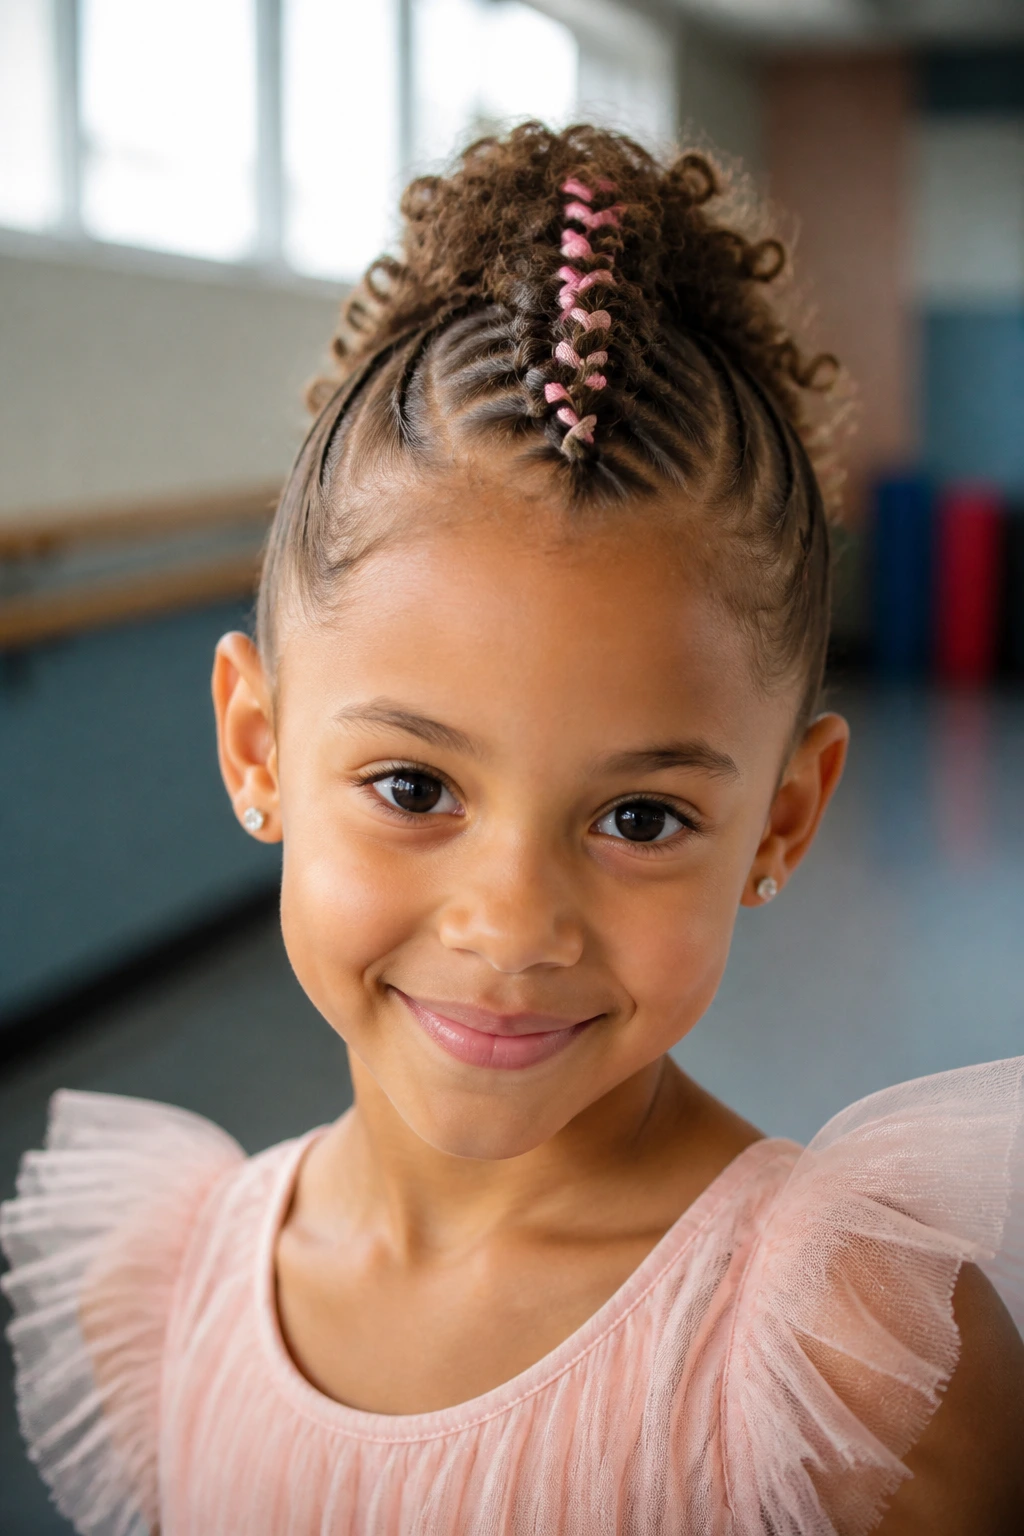
Ribbon changes everything. A simple braid turns into a decoration the second you weave in a thin ribbon that matches the outfit or contrasts with it. The mohawk shape stays center stage, but the ribbon gives it movement and color.
This style works especially well for school performances, holidays, or picture days. It does not need much else. The ribbon is the accessory and the statement.
How to Use It
Choose ribbon that is soft and narrow enough to braid through without bulk. Satin ribbon tends to glide better than stiff grosgrain. If the ribbon keeps twisting, cut the length a little shorter and secure the ends under the braid so they don’t poke out like loose tags.
18. Mini Box-Braid Mohawk
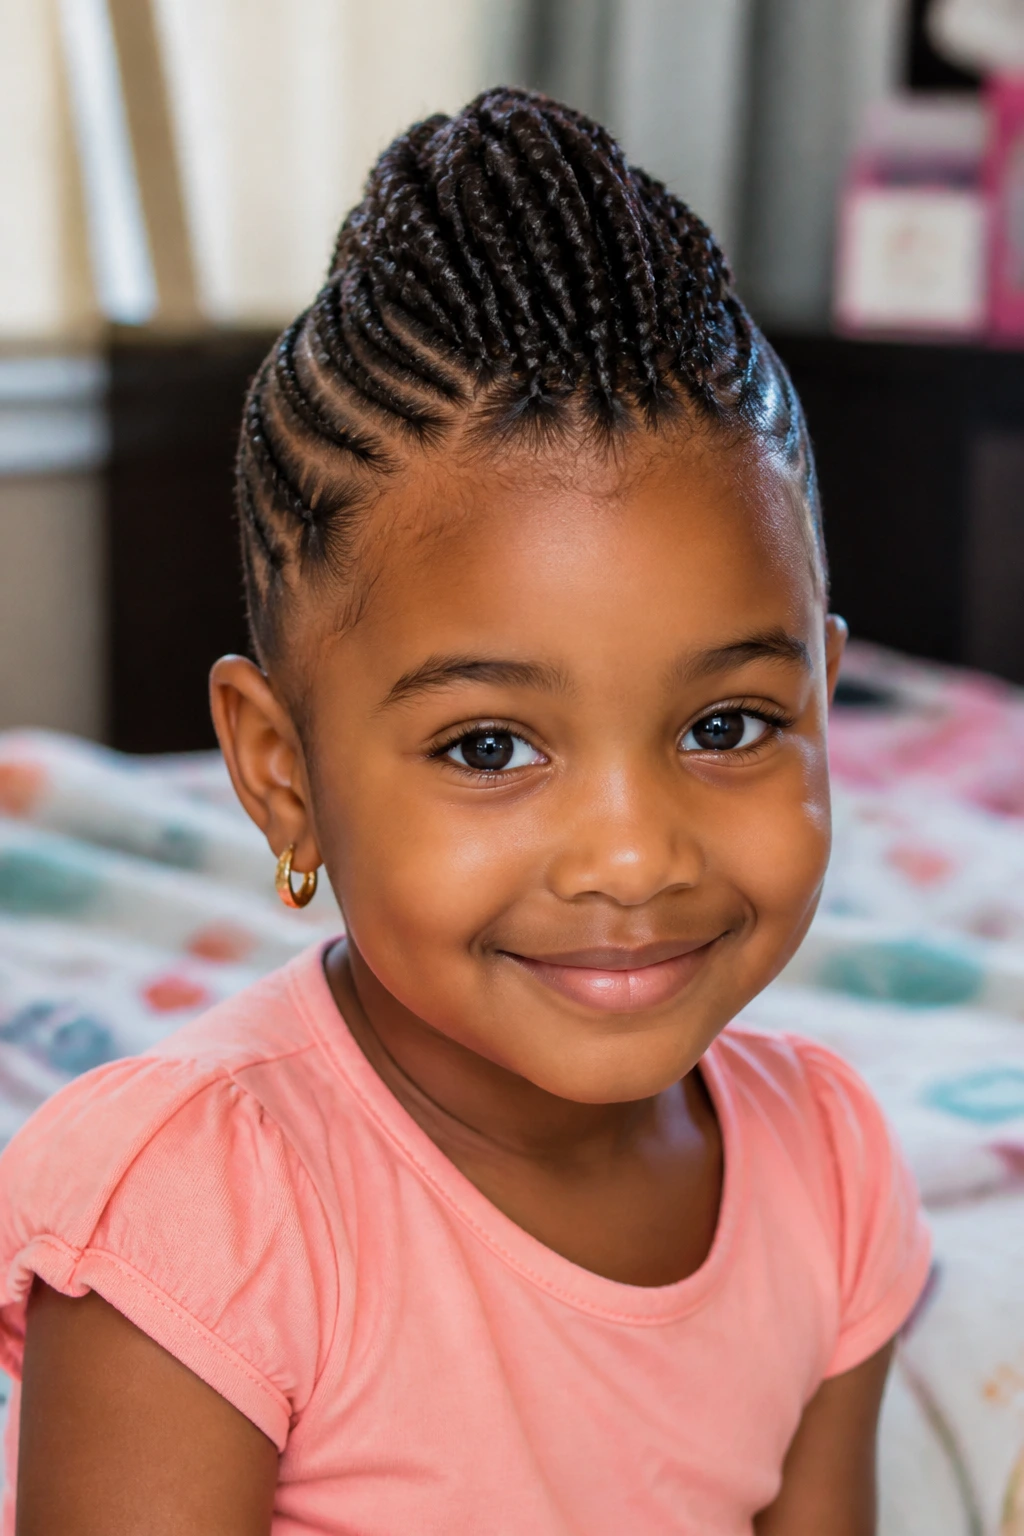
Mini box braids gathered into a center ridge create a very tidy, long-lasting mohawk. The braids keep the texture controlled, and because the sections are small, the whole style lies flatter and lasts longer. It’s one of the more protective options here.
The box parts should be clean and even. That’s the difference between a braid style that looks crisp and one that looks like it was thrown together before breakfast.
Good to Know
If the child has a tender scalp, keep the front box parts slightly larger. Smaller isn’t always better. Tiny sections can pull too much if the hair is dense. A light scarf at night will keep the braids from fuzzing up faster than you expect.
19. Curly-Ends Mohawk with Flat Sides
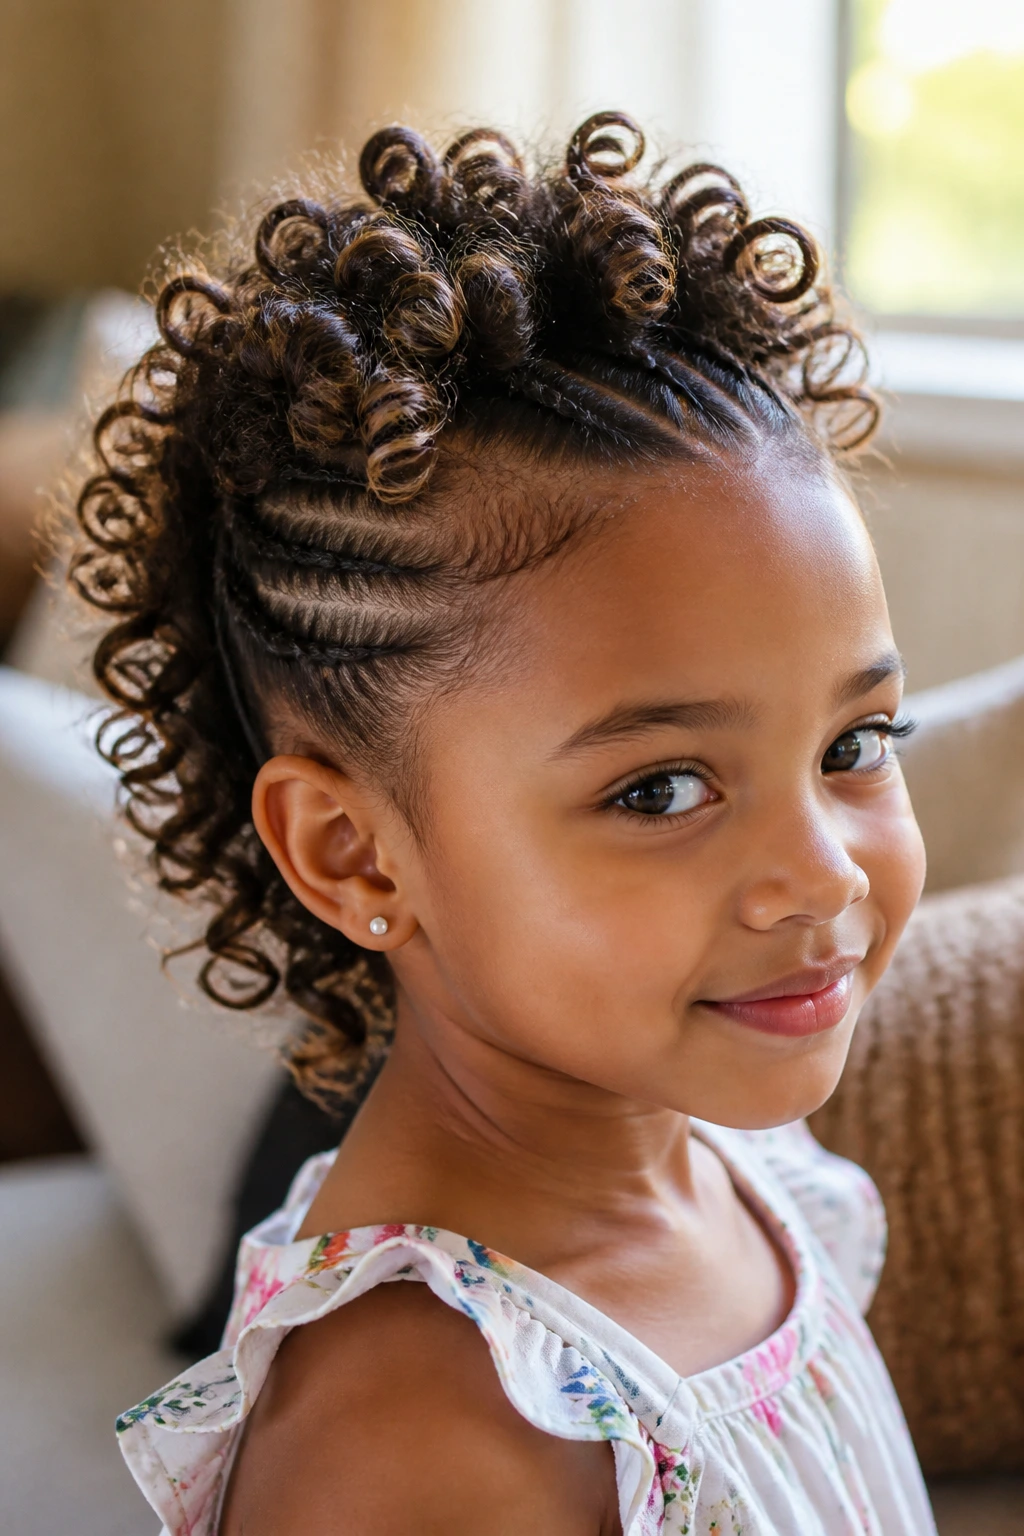
This style starts sleek and ends soft. The sides stay flat or braided close to the scalp, while the center sections finish in curls that bounce at the ends. That contrast makes the mohawk shape feel lively without needing a lot of height at the roots.
It’s a smart fix when the hair needs structure but you still want movement. The curled ends do the softening job for you.
The Detail That Matters
Use flexi rods, perm rods, or small braids at the ends if you want the curls to hold their shape. If you leave the ends loose and hope for the best, they can frizz before lunch. A small setting mousse on the ends helps, too.
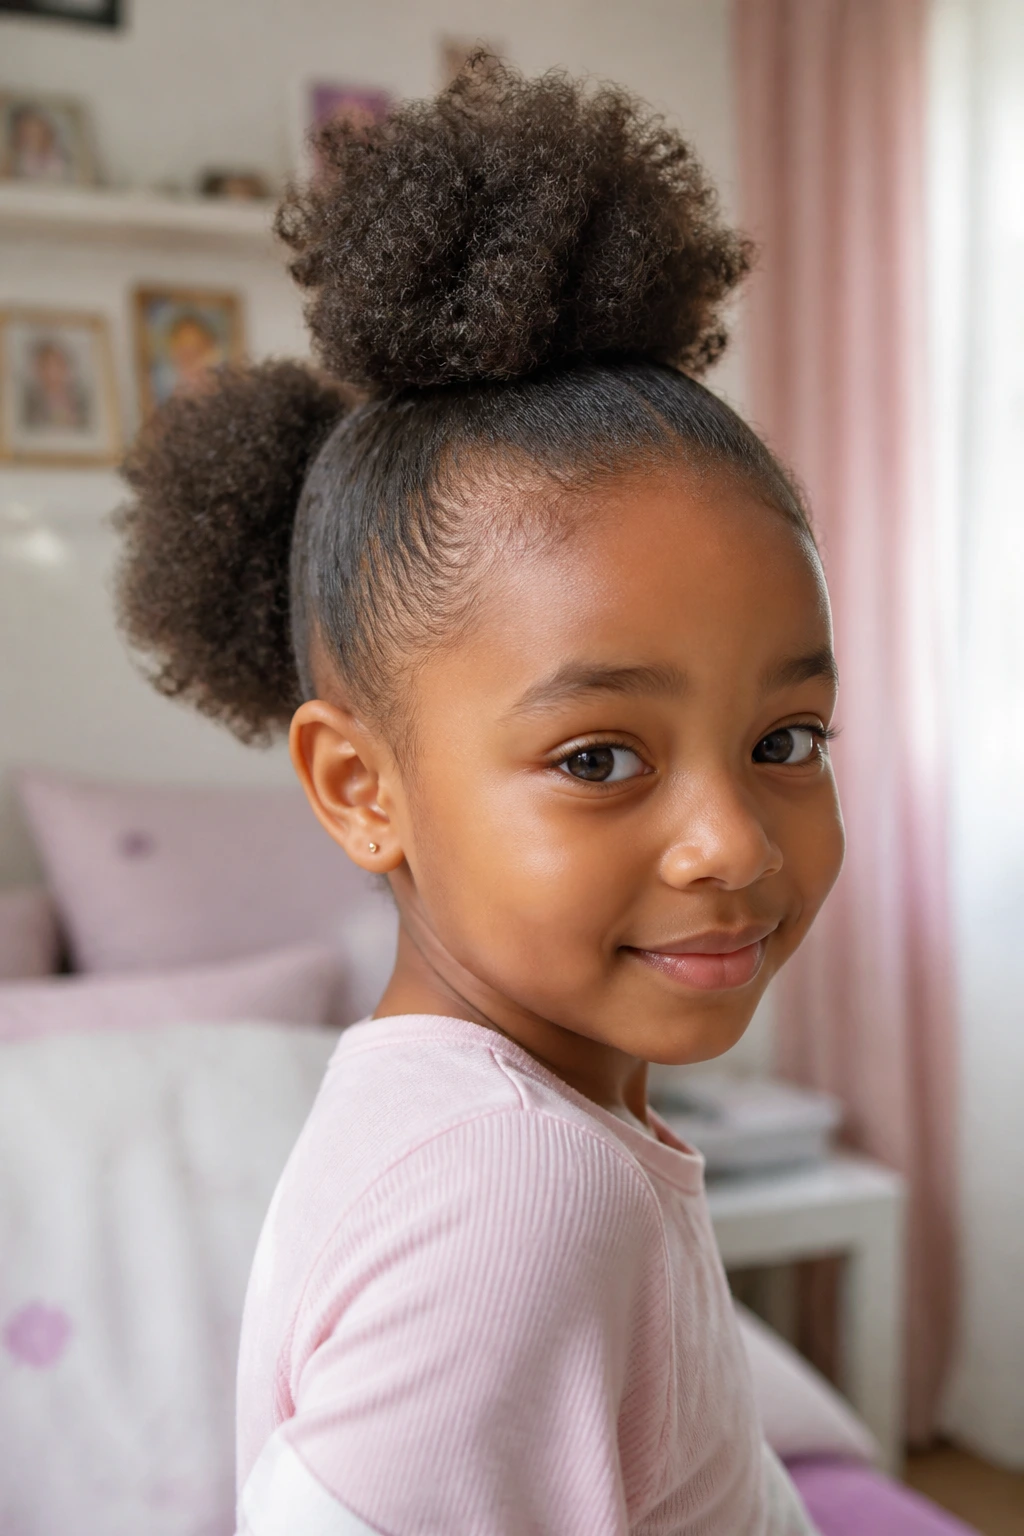
20. Pineapple Mohawk
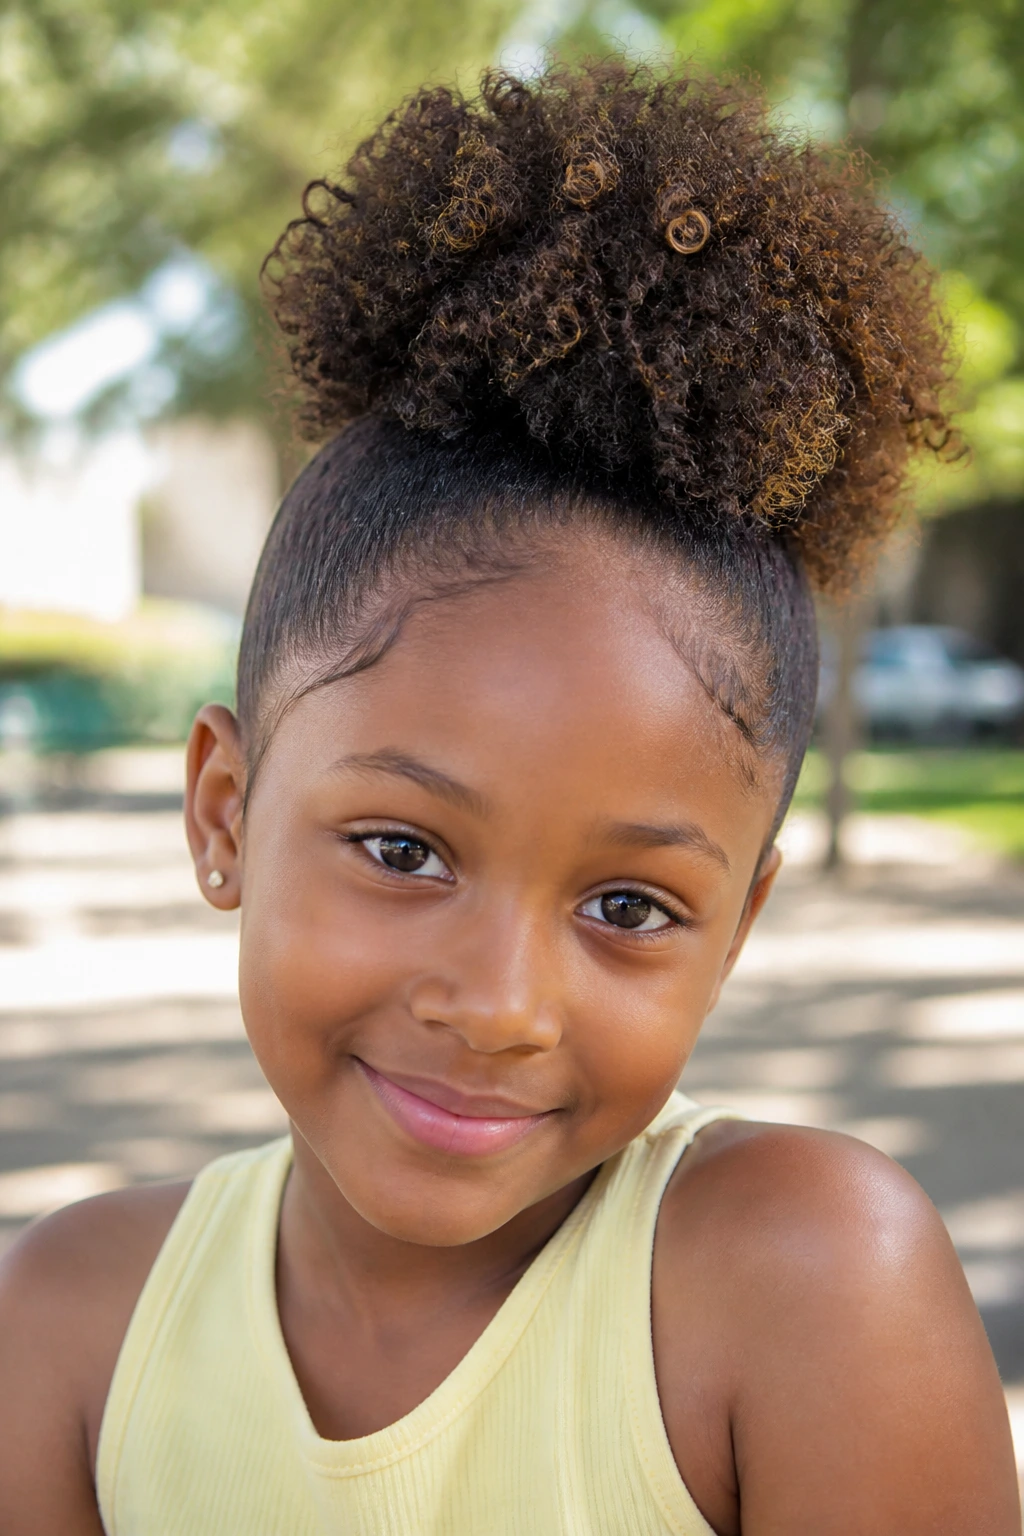
A pineapple mohawk is basically a high, textured ridge made from one or more lifted puffs that sit on top of the head. It is quick, easy, and especially good on curly hair that already has volume. The name fits because the silhouette really does stand up like a crown of curls.
This one is great for rushed mornings. If the hair is moisturized and the crown is gathered neatly, the whole style can be done quickly and still look intentional.
Best For
Short to medium curls, second-day hair, and children who do not want a lot of handling. You can add one cute clip at the front, but the style usually works best when the curls stay the star.
21. Crown-Braid Mohawk
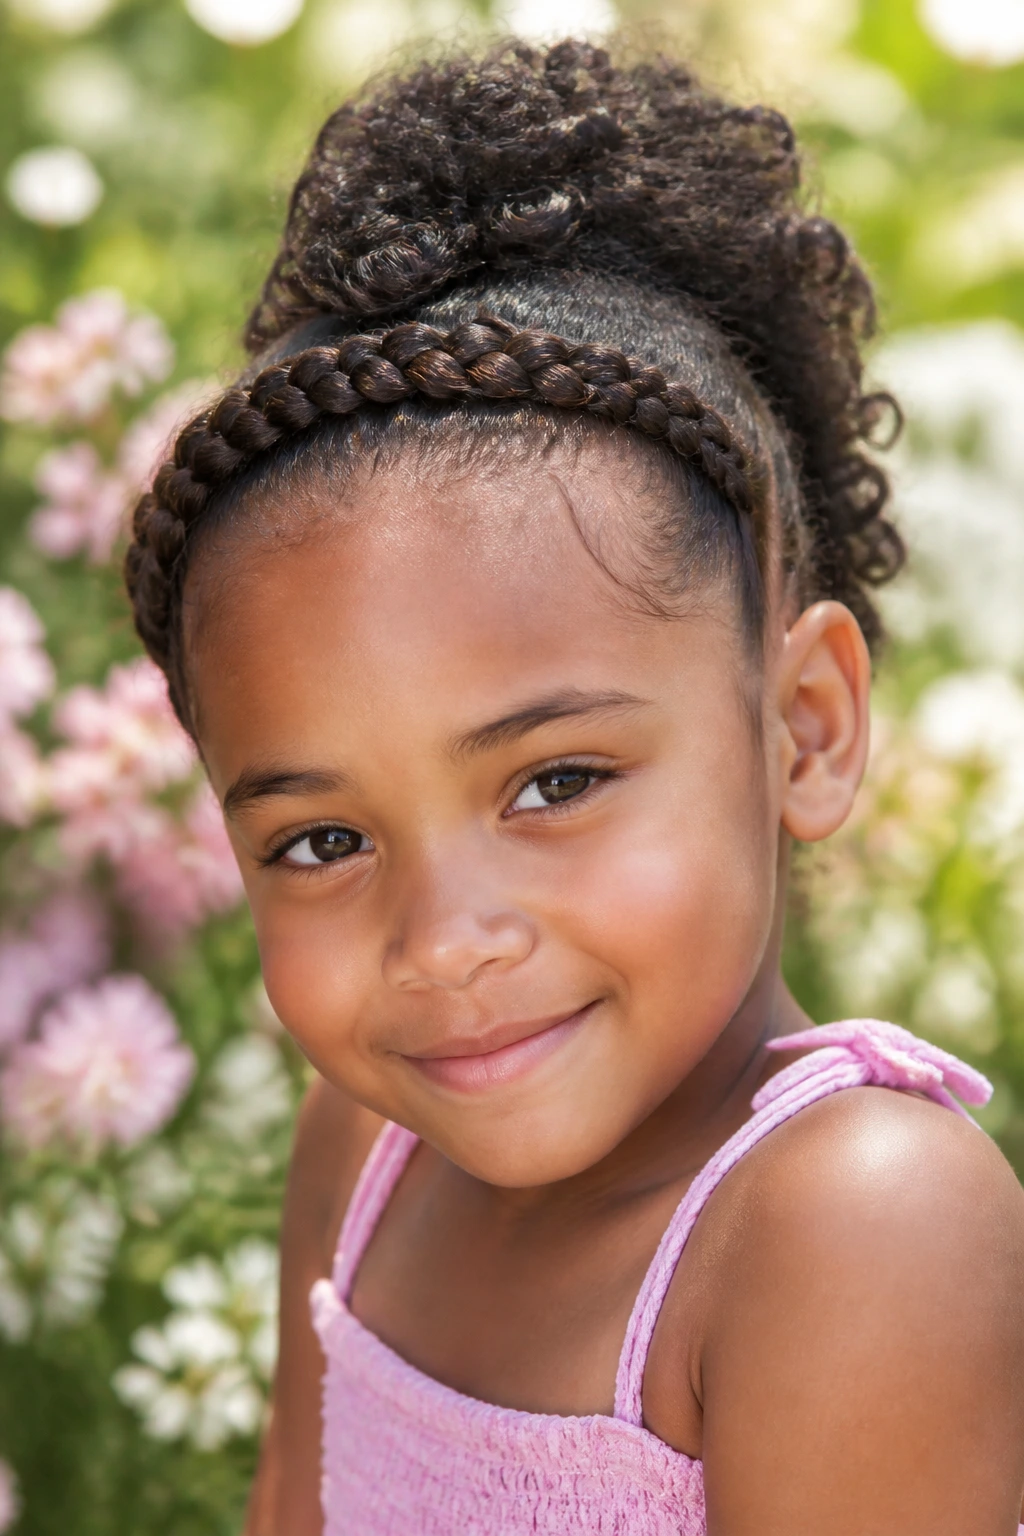
A crown braid around the front of the head gives the mohawk a softer, almost princess-like edge. The braid frames the face, while the center section stays lifted in curls, twists, or a puff. It’s one of the prettiest ways to combine neatness with height.
The braid should sit close enough to the hairline to hold its shape, but not so close that it feels tight. That balance matters. A good crown braid is snug, not clenched.
Why It Works
It gives structure to the front of the style, which can be helpful if the child’s hairline tends to puff up quickly. The crown braid acts like a frame, and the mohawk ridge becomes the focal point instead of the whole head competing for attention.
22. Side Ponytail Mohawk
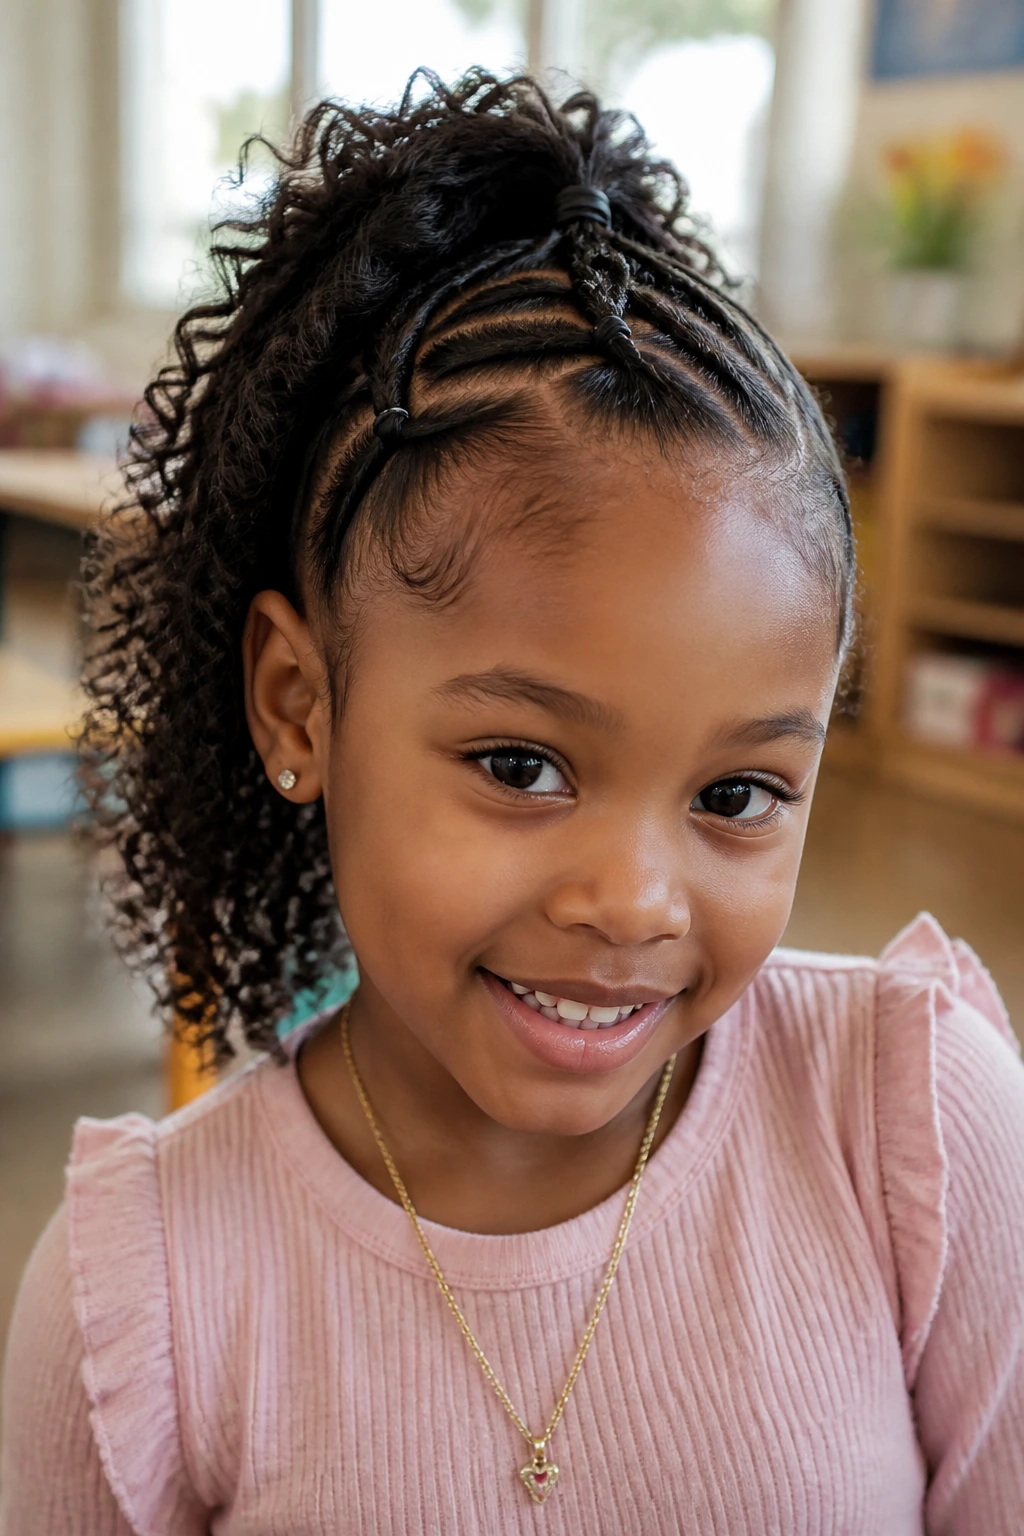
This one uses small side ponytails or sectioned bands to pull the hair inward toward the center ridge. It’s quick, practical, and easier than a full braided style when you need a clean result fast. The ponytails can stay simple or get wrapped with ribbon.
The style looks best when the side sections are even. Uneven parts make the ridge wobble visually, even if the ponytails are technically secure.
A Good Shortcut
If the hair is very thick, use a little water and detangler before making the ponytails. That makes the parting cleaner and the sections easier to gather. A satin scrunchie at each tie point is kinder than a thin elastic.
23. Knotted Mohawk
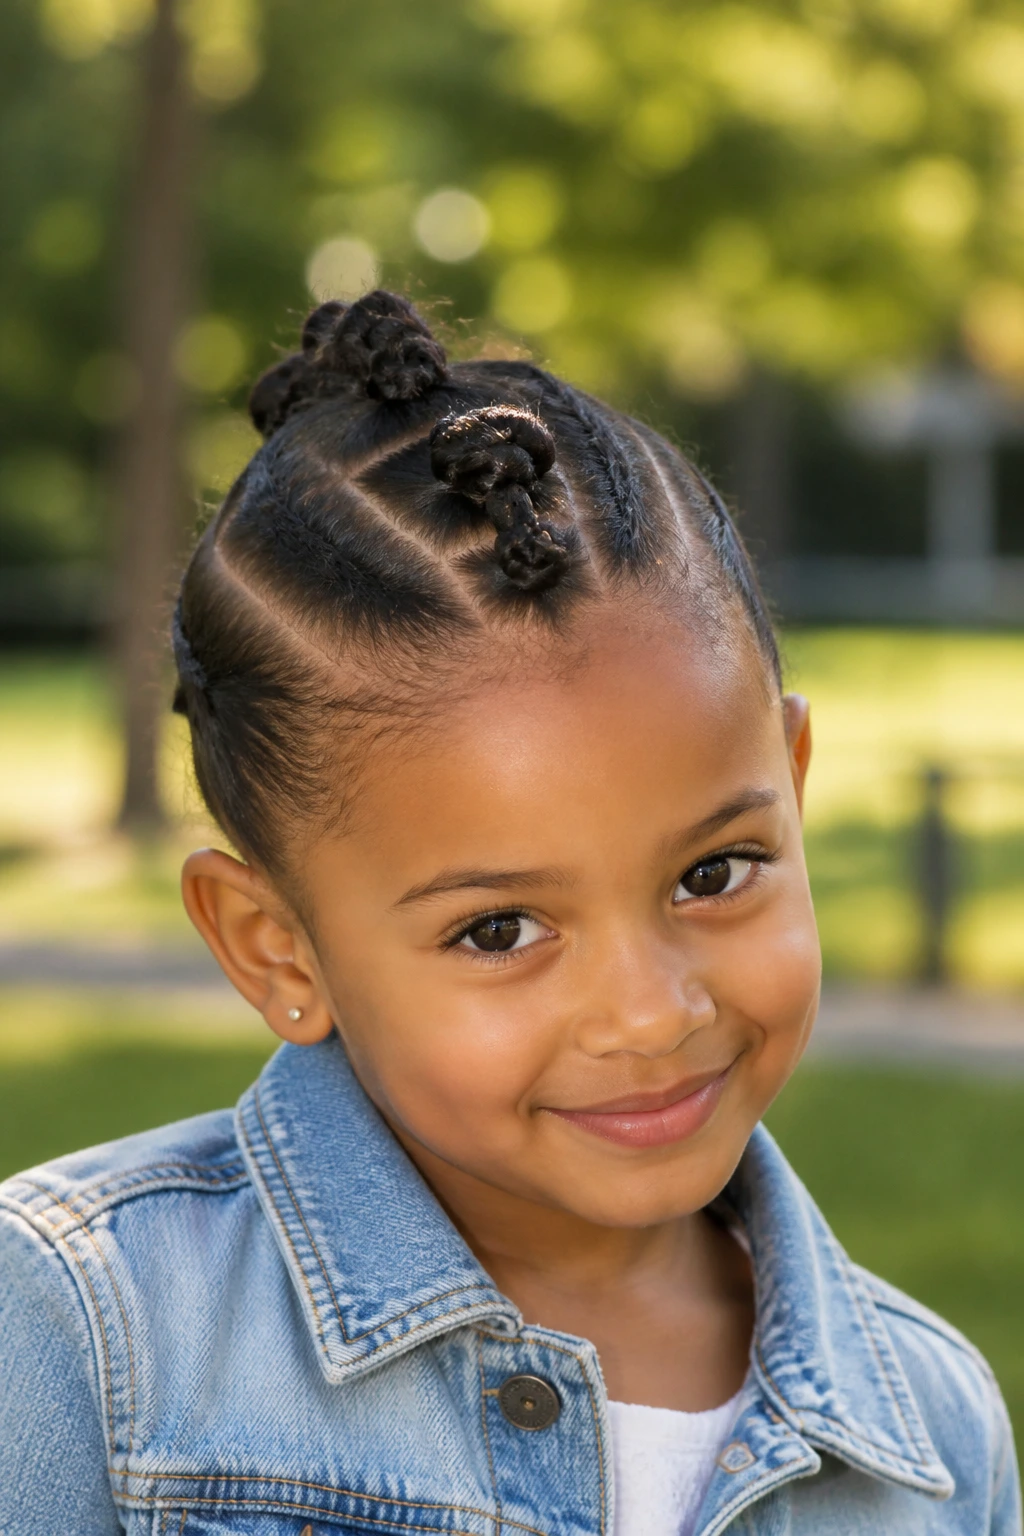
Knots in the center section create a textured ridge that feels playful and a little unexpected. They can be tiny knots made from two-strand twists, or larger decorative knots if the hair is long enough. Either way, the line of knots reads clearly as a mohawk shape.
This style is handy when the hair has lots of texture and you want to use it instead of fighting it. The knots do not need to be perfect. They just need to be even.
What to Watch For
Keep the knots low enough that they stay secure, but not so tight that the scalp feels pulled. If one knot sits much larger than the others, the ridge can tilt. Equal size helps the style look calm, even when it has plenty of texture.
24. Butterfly-Clip Mohawk
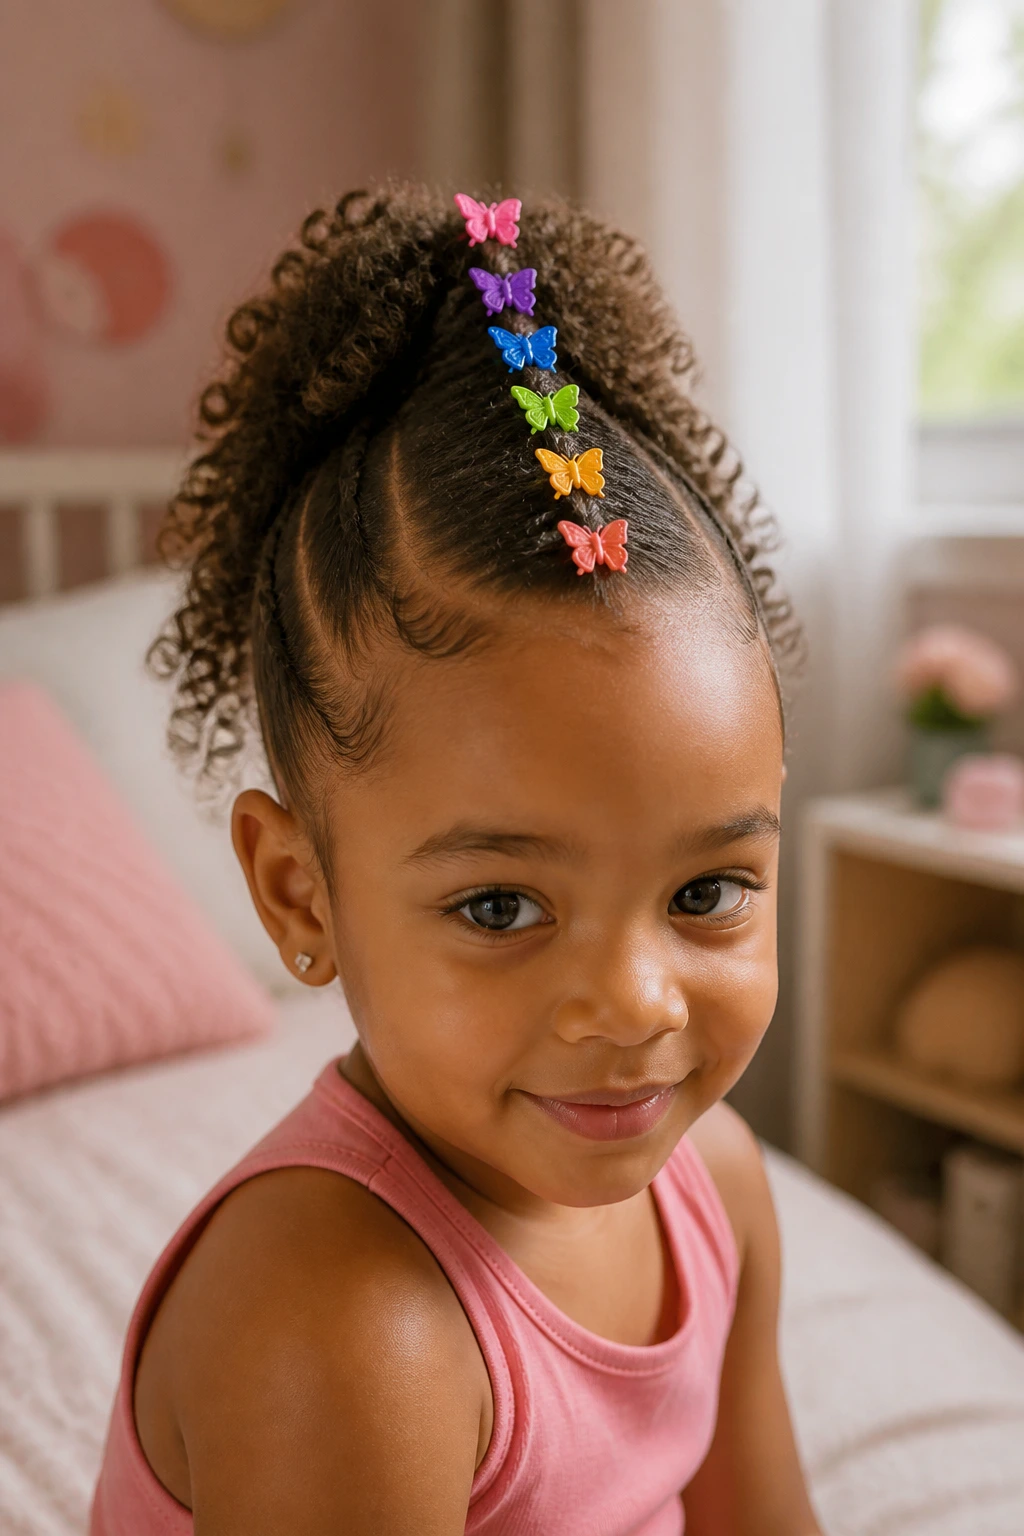
Butterfly clips are back in the best possible way when they’re used in a mohawk ridge. Tiny sections of hair get twisted, folded, or gathered, then clipped along the center with bright plastic clips. The style is youthful, playful, and easy to change if the child wants a different color halfway through the day.
This is a low-commitment style, which is sometimes exactly what you want. No heavy braiding. No long sitting time. Just a neat ridge and a row of clips.
Why Kids Like It
The clips are small enough to feel fun without weighing the hair down. Use a few colors instead of many. Too many clips start to look cluttered, and the shape gets lost under all the extras.
25. Twist-to-Puff Mohawk
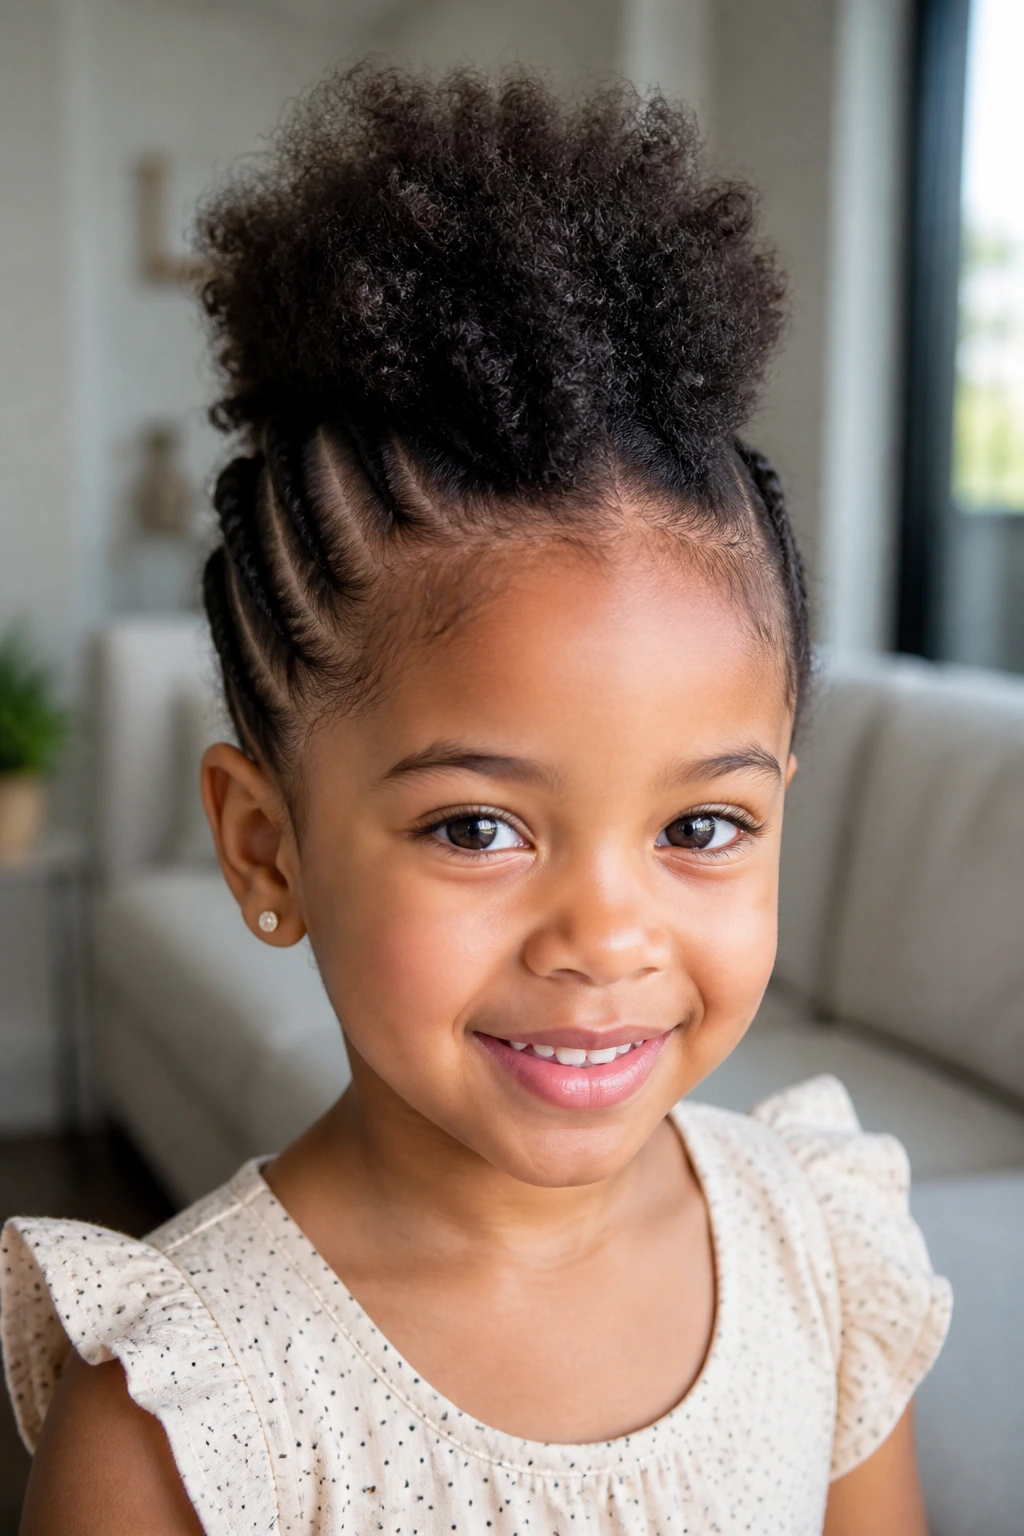
Twists on the sides and a puff in the center make a very nice hybrid style. The twists keep the hair tucked away near the scalp, and the puff gives the mohawk its height and softness. It’s a useful version when you want a protective base with a looser finish on top.
The transition from twist to puff should look intentional. If the puff starts too far back, the style can seem split into two separate ideas instead of one shape.
Best for a Quiet, Everyday Look
This is one of those styles that fits almost anywhere: school, errands, church, or a family dinner. It doesn’t shout. It just holds together well and stays pleasant to wear.
26. Faux Loc Mohawk
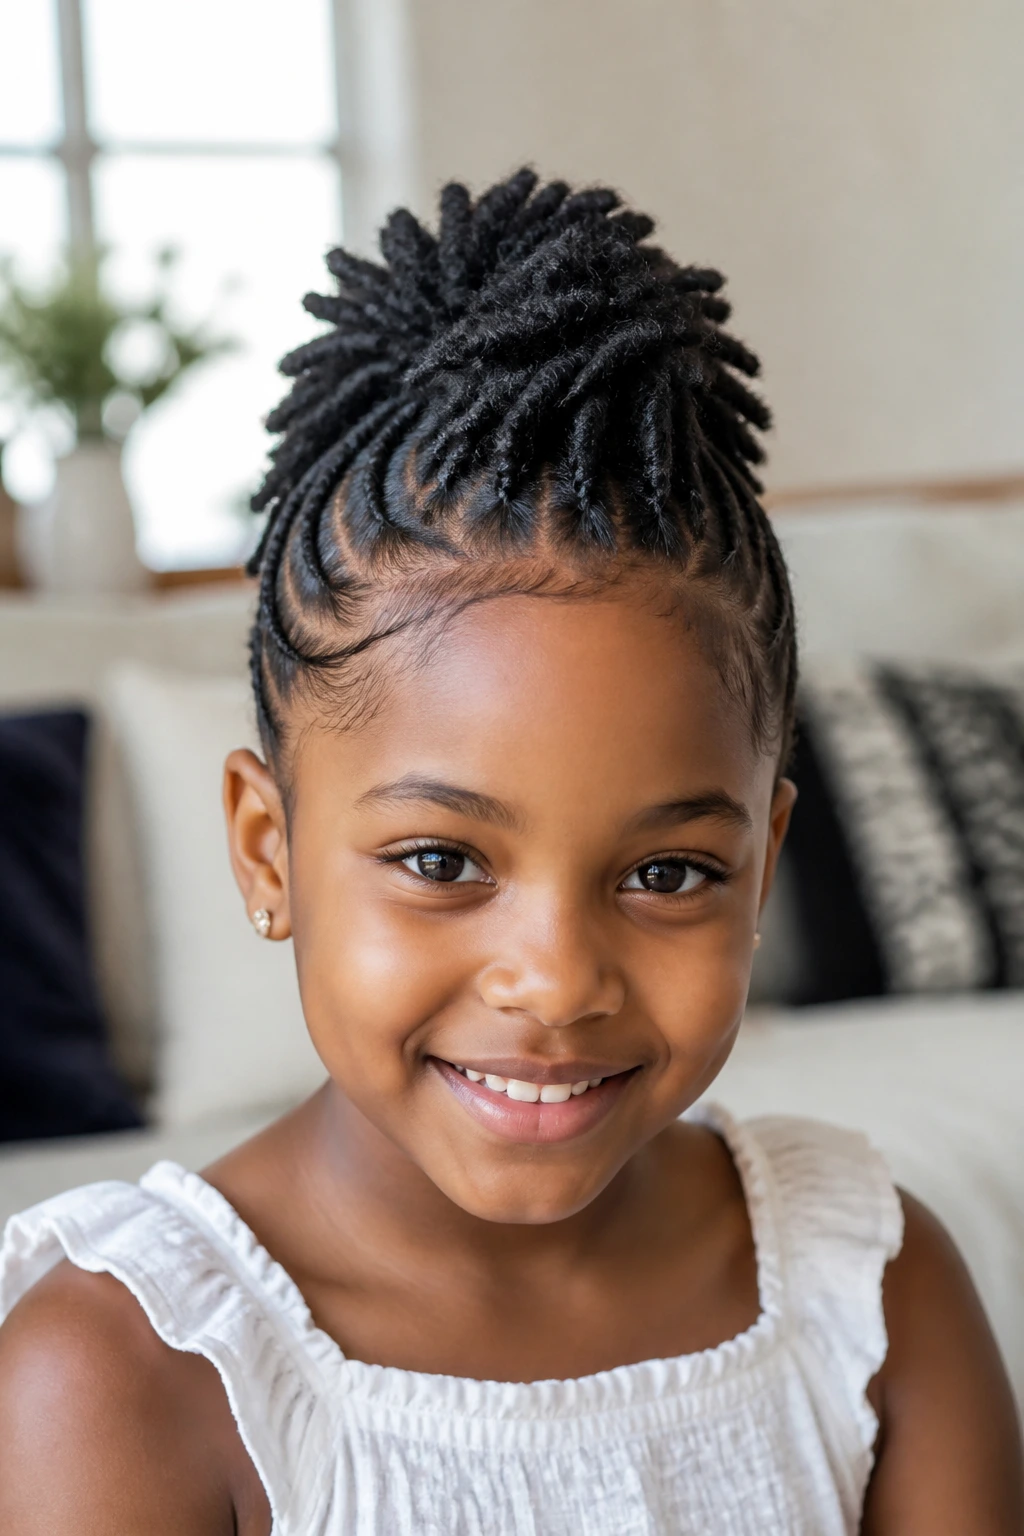
Faux locs pulled into a center ridge give the style weight and texture. This is one of the longest-lasting options in the group, and it looks especially strong on older little girls who can sit still for the install and are comfortable wearing the added length. The ridge feels full, which makes the mohawk shape very visible.
Keep the locs balanced from side to side. If one side is packed tighter, the ridge shifts and the profile gets uneven.
A Practical Note
This style can last much longer than a puff or clip style, but the scalp still sets the limit. If the roots start feeling tight or tender, that is your sign to take it down. A style being pretty does not make it worth soreness.
27. Bow-Topped Party Mohawk
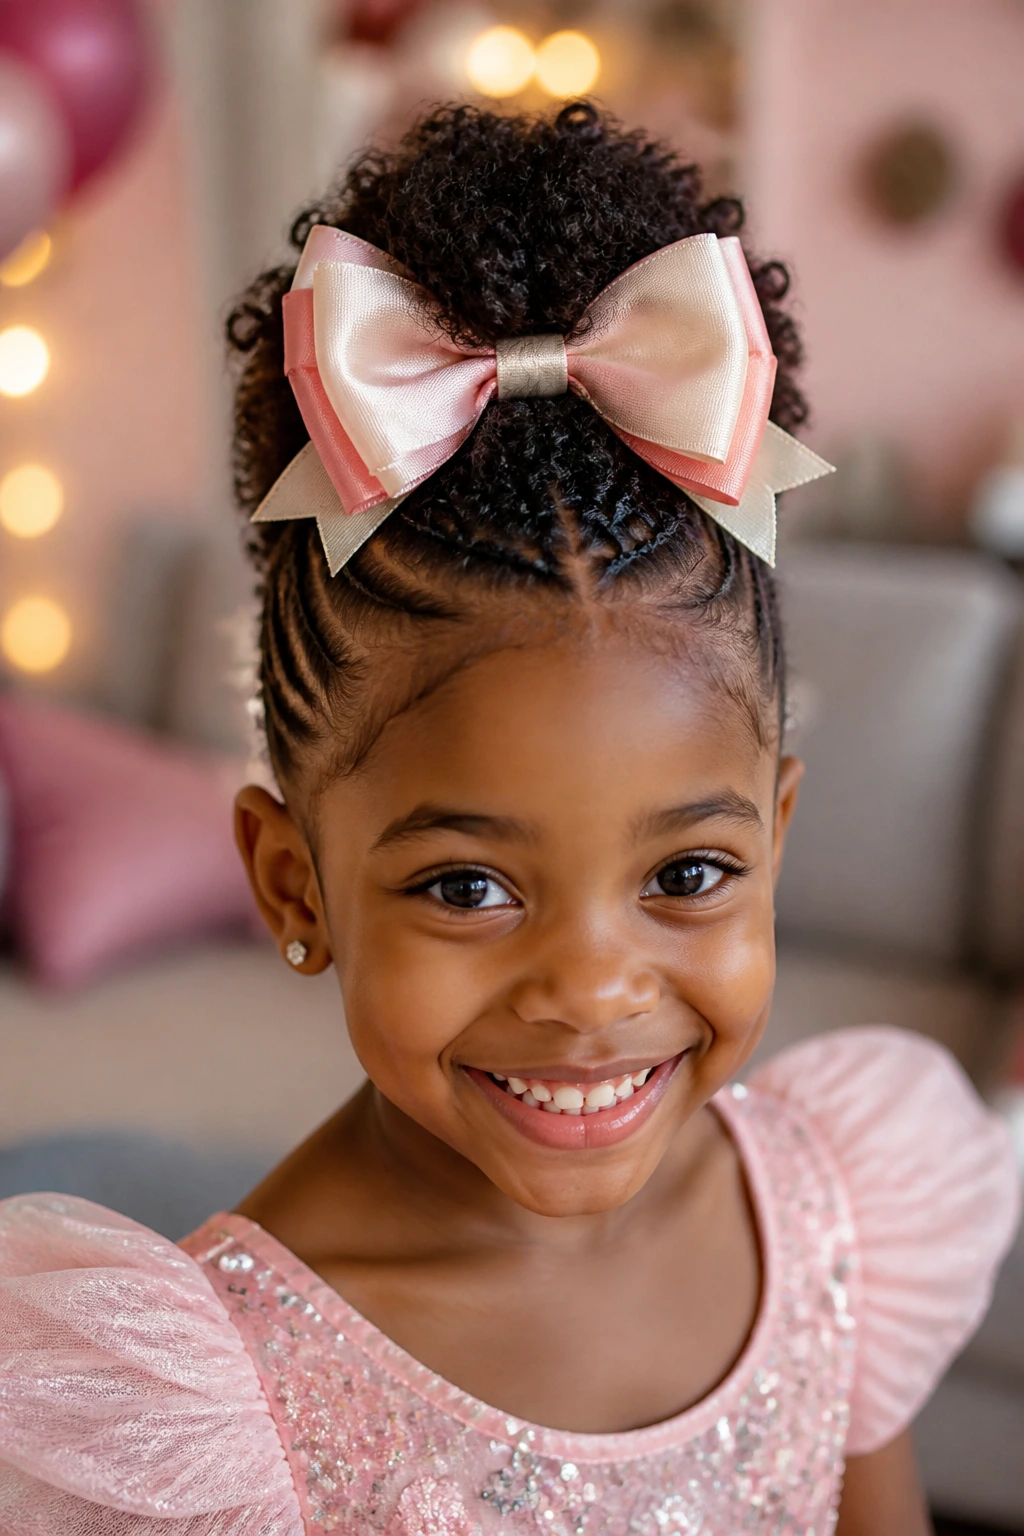
A big bow turns almost any mohawk into a celebration. The base can be braided, twisted, puffed, or clipped, but the oversized bow at the crown makes the whole style read as special. It is the easiest way to give the look a birthday mood without redoing everything else.
The bow should sit where the ridge is tallest. If it’s too far forward, it overwhelms the face. Too far back, and it looks like an afterthought.
The Final Detail
Pick one bow with enough structure to stay upright. Floppy fabric works if you want softness, but a bow with a little body tends to hold its shape better in photos and in motion. After that, keep everything else fairly simple. The bow is the point.
Why the Mohawk Shape Works Without a Shave
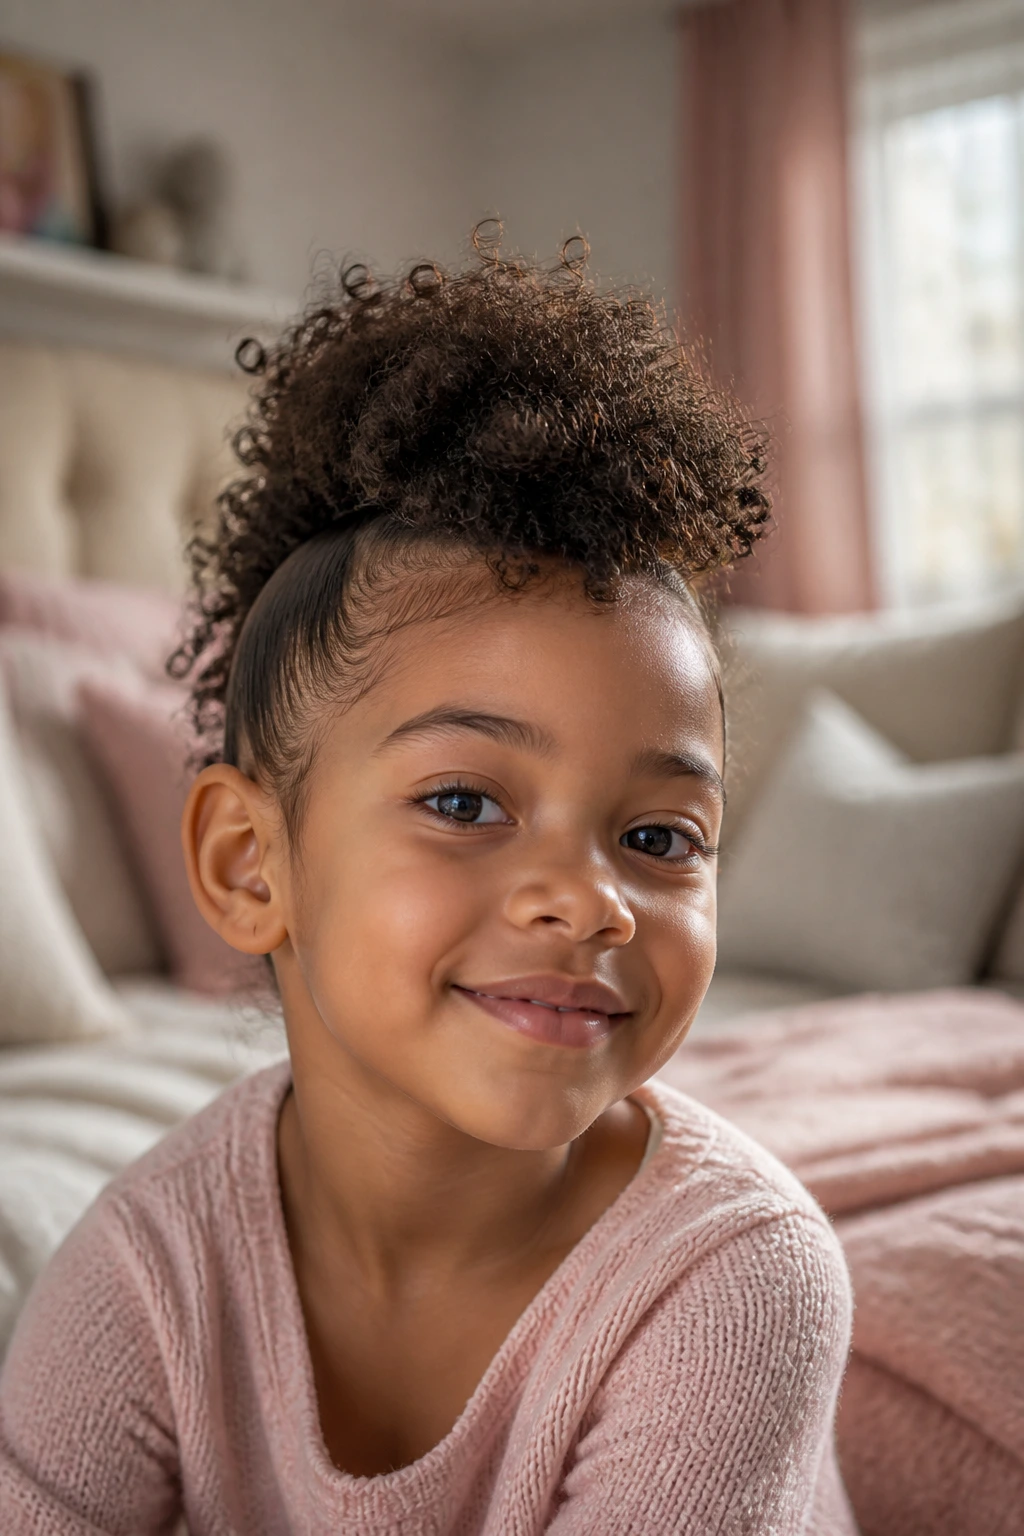
A lot of people hear “mohawk” and picture clipped sides and a very specific haircut. That’s not what most little-girl versions need. The real strength of the style is the silhouette: a lifted center, calmer sides, and a clean line running from front to back. Once you understand that, the rest gets flexible fast.
Some versions lean on braids. Some rely on puffs. Others use twists, knots, or clips. That flexibility is why the style can live on hair that is short, long, thick, fine, curly, or stretched. The shape stays the same even when the construction changes.
And that matters in practical life. If your child hates tension at the temples, choose a soft faux hawk. If the goal is to keep hair neat for days, go braided. If the morning is already running late, take the puff route and move on. The style is a shape, not a single recipe, and that is the part most people overlook.
The Comb, Clips, and Satin Gear You’ll Actually Reach For
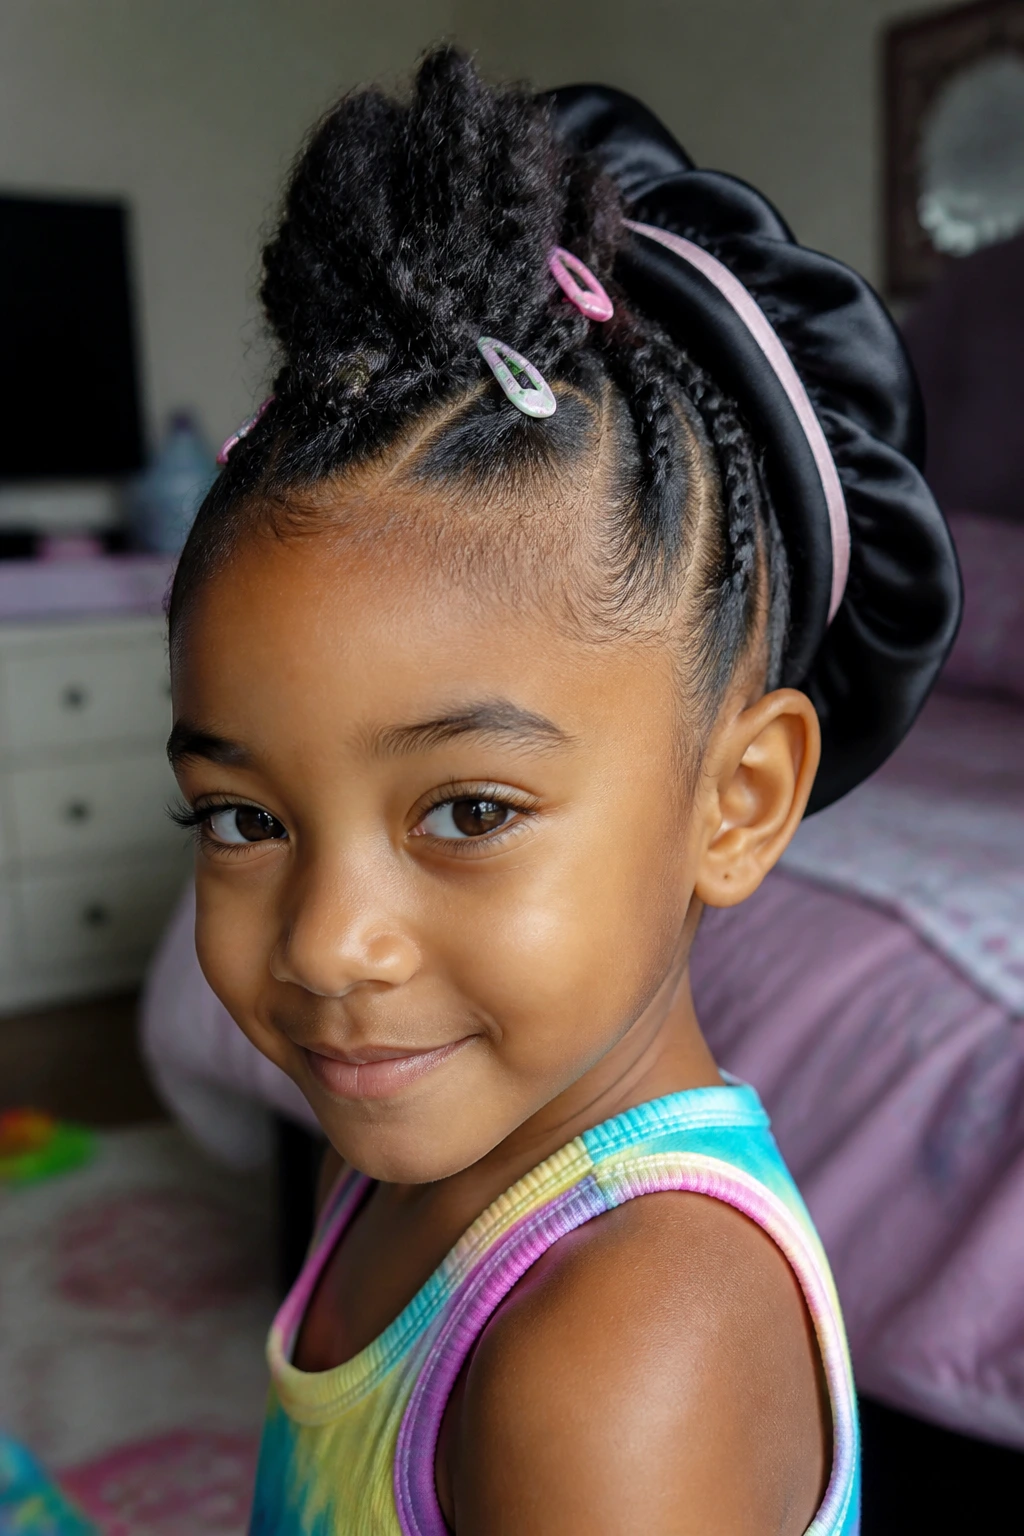
- Rat-tail comb: Needed for clean parting, especially for zigzags, hearts, and crisp center sections.
- Wide-tooth comb: Easier on curls and coils when you’re detangling before styling.
- Soft bristle brush: Useful for smoothing sides without roughing up the cuticle too much.
- Sectioning clips: Keep the parts separated while you work; they save time and reduce stray tangles.
- Small elastics: Best for bubble ponytails, mini ponytails, and sectioned mohawk shapes.
- Bobby pins: A handful helps secure rolled styles, clips, and loose sections that won’t stay put on their own.
- Satin bonnet or scarf: Protects the style overnight and cuts down on frizz.
- Spray bottle: Water plus a little leave-in conditioner makes re-styling easier on dry hair.
- Edge brush or soft toothbrush: Helpful for smoothing the hairline without overloading it with product.
- Beads, ribbons, or bows: Optional, but they change the mood of the style fast.
Smart Product Picks for Mohawk Styles for Little Girls
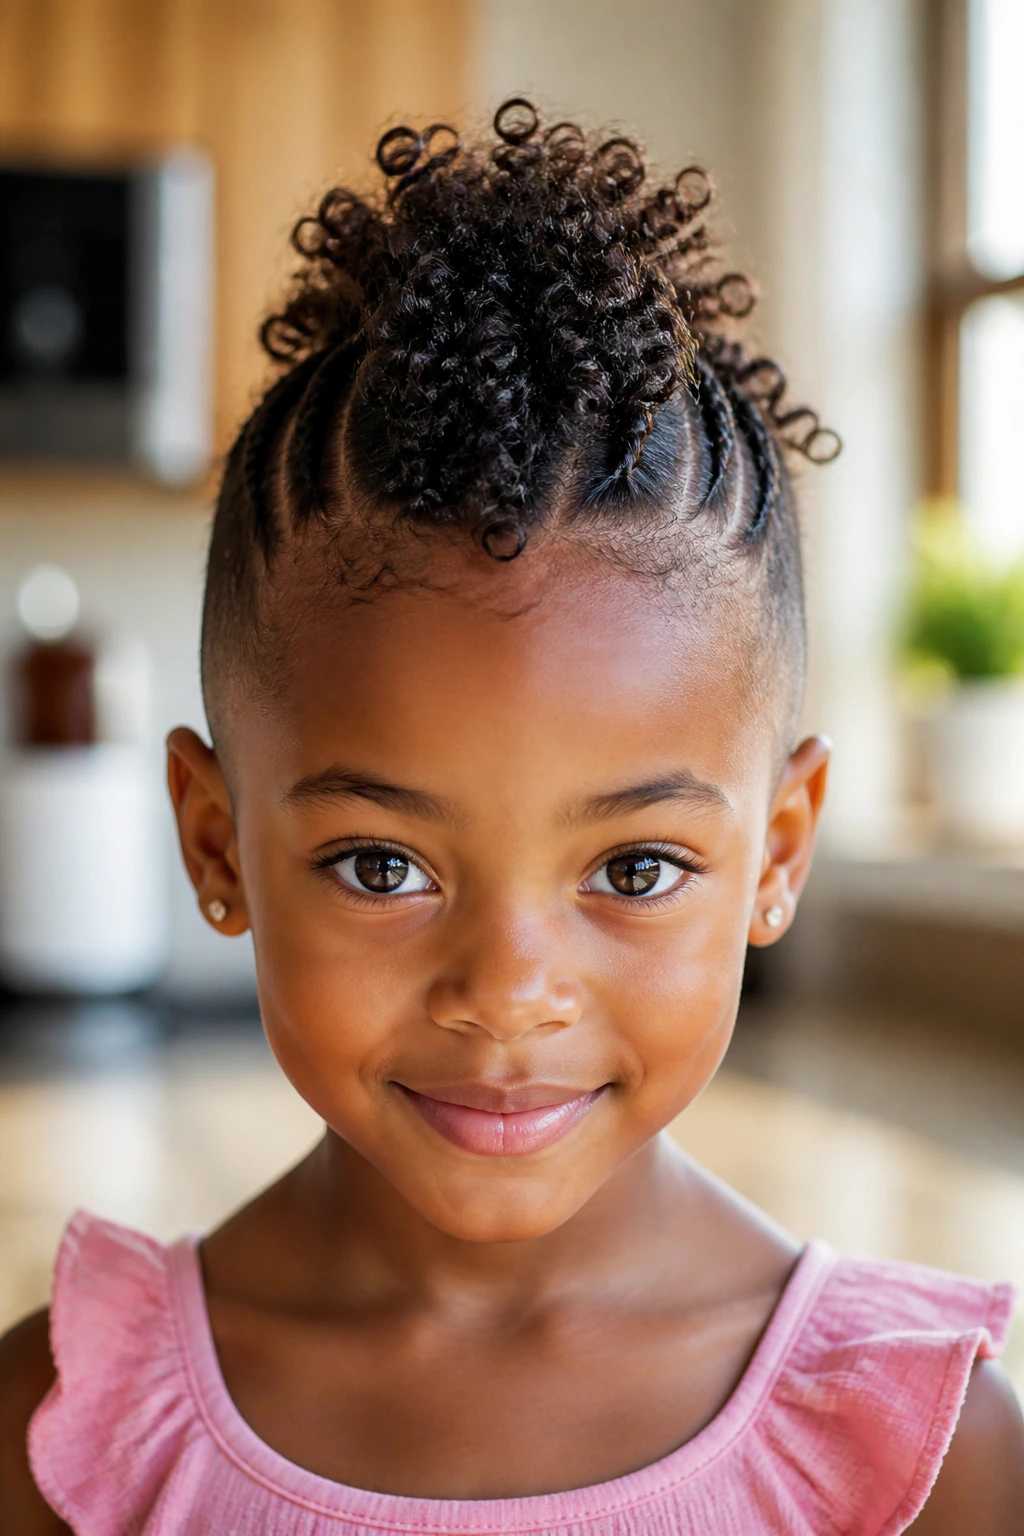
Choose products that behave well on a child’s hair, not products that promise a glossy finish and leave a sticky film by noon. A light leave-in conditioner is more useful than a heavy cream if the hair is fine or prone to buildup. For tighter curls and coils, a richer cream can help, but only if you use a small amount and work it through section by section.
For hold, water-based gel and soft-hold mousse tend to be more forgiving than thick waxy gels. Waxy products can flake, especially if you layer them on top of old product. If a product feels tacky in your hands but leaves residue when you rub it between your fingers, that is a warning sign. Kids’ styles are much happier when the finish stays flexible.
Accessories matter just as much. Look for elastics that do not snag, beads with smooth holes, and bows with clips that sit flat against the hair instead of tipping sideways. If your child has very thick hair, fabric-covered bands are often kinder than tiny hard elastics, which can cut in faster than you expect. That one detail can save a lot of tugging later.
How to Dress the Look for School, Parties, and Photos
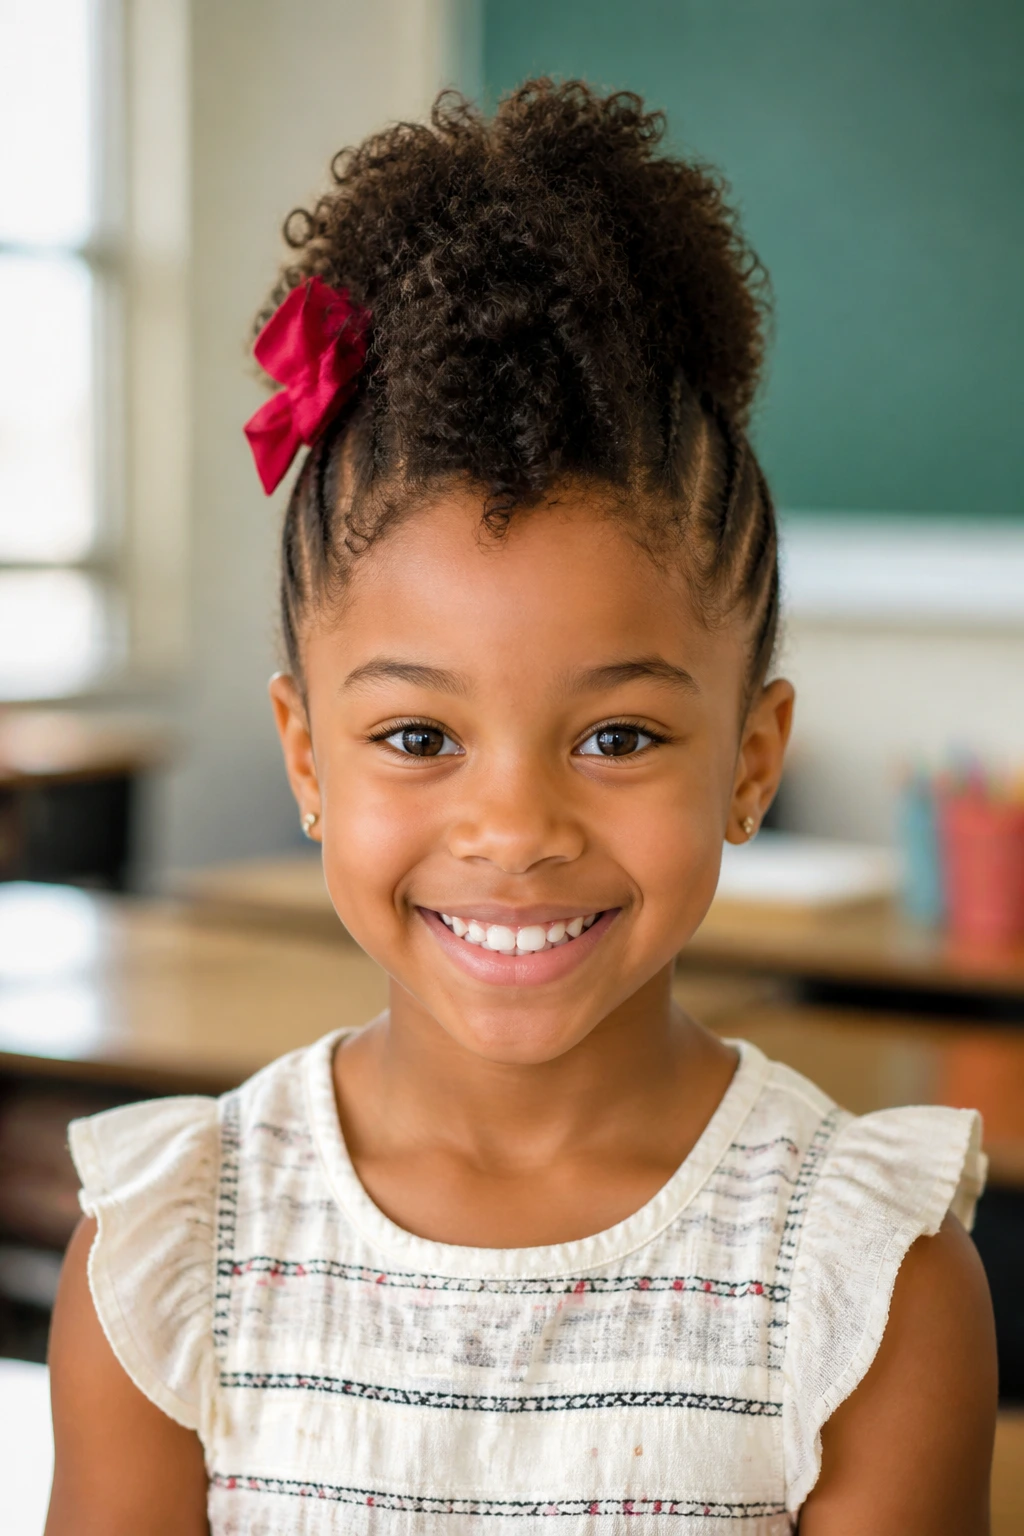
Presentation: Keep the tallest part of the mohawk centered on the crown or just behind it so the shape reads clearly from the front and side. A clean part is more useful than piling on product; if the lines are sharp, the style already looks finished.
Accessories: One strong accent usually beats three small ones. A ribbon, a bow, or a row of beads is enough when the hairstyle already has texture. If the style has a lot going on—braids, twists, and a puff—leave the extras simple.
Best Matches: School days call for styles that stay close to the head and do not flop into the face. Parties can handle buns, bows, and sparkly clips. Photo days are where crown braids, neat parting, and bubble ponies pay off, because those details hold up under flash and close-up shots.
Scale: Younger children usually do better with fewer sections and less time in the chair. Older kids can handle a more detailed braid pattern or a longer install, but only if they are actually comfortable sitting through it.
Extra Touches That Keep the Style from Looking Flat
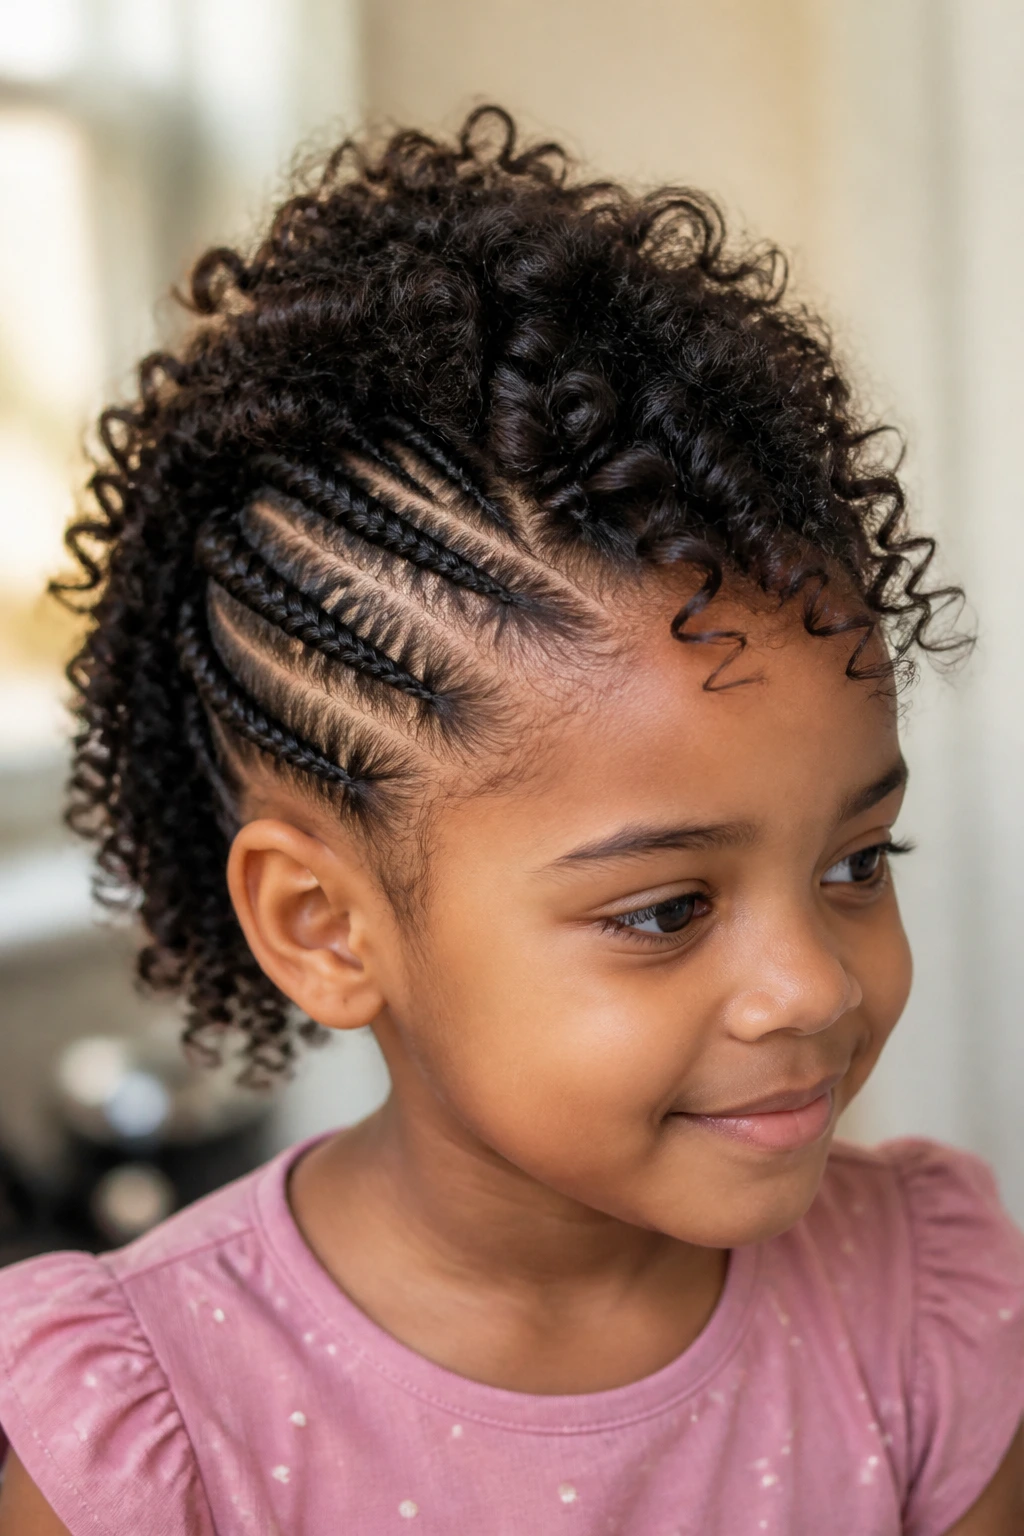
Texture Boost: Work with hair that is lightly damp, not dripping. Damp hair takes product more evenly, and the sections hold their shape better. If the hair is soaking wet, the style can collapse while it dries.
Time-Saver: Pre-part the hair before you start tying, twisting, or braiding. That one step saves a surprising amount of time, especially on styles like zigzag parts, heart parts, and side cornrows.
Finish Without Crunch: Use a tiny amount of product at the roots, then stop. If the hairline looks lacquered, the style will feel heavy and can flake as it dries. A soft brush and a light hand usually beat “more hold.”
Make-It-Their-Own: Let the child choose the bow, clip color, or bead shade. If the style is being worn by someone small, a little ownership goes a long way. They are much more likely to keep the accessory in place if they picked it.
Nighttime Care and How Long Each Style Usually Lasts
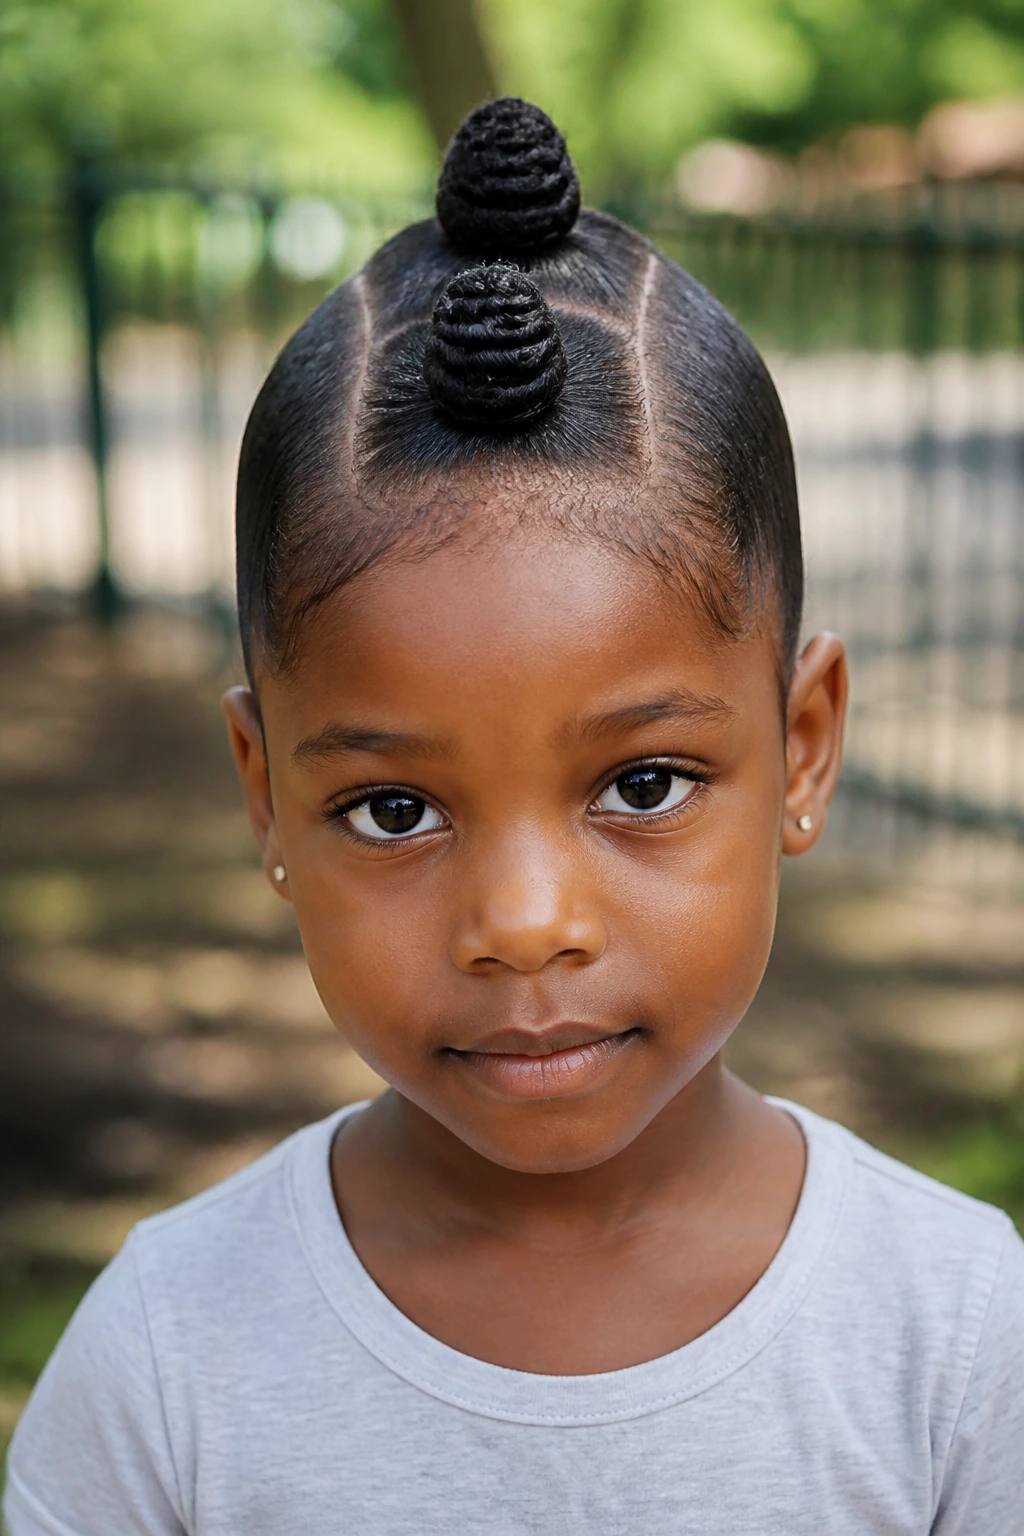
Simple puff styles usually look best for one day, maybe two if the child sleeps carefully and the weather is kind. Braided and twisted mohawks can last several days, often five to seven if the scalp stays comfortable and the parts are protected at night. Faux locs or mini-braid versions can stretch longer, but longer does not automatically mean better on a child. Comfort still wins.
A satin bonnet or scarf matters more than people like to admit. Cotton pillowcases pull moisture out of the hair and rough up the surface, which makes the sides puff out sooner than you expect. If the style has a center puff, you can pineapple the top loosely and tuck the sides flat beneath the bonnet. If it has beads or bows, use a scarf to keep them from getting bent or scratched.
Refreshing the style should be gentle. Mist the hair lightly with water, smooth the sides with your hands, and touch up only the sections that need it. Re-brushing the entire head every morning usually creates more frizz than it fixes.
Variations and Adaptations to Try
Tender-Scalp Version: Choose a soft faux hawk, double puff, or butterfly-clip style with very little tension at the roots. Skip tiny sections at the hairline and keep the accessory count low. Comfort comes first, and the style can still look neat.
Picture-Day Version: Use a crown braid, ribbon-woven braid, or bow-topped ridge with clean parting and a little extra smoothing at the sides. These versions hold shape well under a camera flash and do not need much retouching once they’re done.
Short-Hair Version: Work with puffs, knots, or side cornrows that create the outline of a mohawk without needing long lengths. Short hair often looks strongest when the center section is compact and the sides are polished.
Protective Version: Pick feed-in braids, mini box braids, faux locs, or rope twists if you want a style that can last several days. Keep the roots comfortable, and protect the hair at night with a satin bonnet so the style doesn’t unravel into fuzz.
No-Gel Version: If your child dislikes product on the scalp, lean on braids, twists, clips, and well-placed elastics instead. A little leave-in and water can be enough; you do not need a slicked-down finish for the mohawk shape to read clearly.
Common Mistakes to Avoid
- Pulling the sides too tight: If the child flinches when you smooth the front, the style is already too tight. Tight sides may look sharp for an hour, but they lead to soreness, and sore heads do not cooperate. Loosen the section, soften the brush pressure, and start over if needed.
- Loading on too much product: Heavy gel and thick cream can turn the hair greasy, flaky, or stiff. The fix is simple: use less product, work in smaller sections, and stop once the hair is controlled instead of plastered down.
- Making the center section too wide: A mohawk loses its shape when the middle becomes a giant block of hair. Keep the ridge narrow enough that the sides still frame it. If it starts feeling bulky, remove a little hair from the center and keep the rest neat.
- Skipping detangling before parting: Parting through knots creates crooked lines and little bumps that show in the finished style. Detangle first, then part, then style. That order saves time later.
- Leaving it in too long without checking the scalp: A style can look fine and still feel wrong underneath. Check for itching, pulling, and sore spots after a day or two, especially with braids or twists. If the child is scratching or complaining, take it down.
Frequently Asked Questions
Can you do a mohawk on short hair?
Yes. Short hair can look excellent in a mohawk shape if you use puffs, knots, clips, or small braids along the center. The key is shape, not length.
What is the easiest mohawk style for beginners?
A soft curly faux hawk or a double puff mohawk is usually the easiest place to start. Both need fewer parts, fewer tools, and less sitting time than braid-heavy styles.
How long does a braided mohawk usually last?
A neat braided or twisted mohawk can last several days, often around five to seven if the scalp stays comfortable and you protect it at night. If the roots get tender sooner, take it down sooner.
How do I keep the style from getting frizzy so fast?
Start with clean, detangled hair and use only the amount of product the style needs. Then protect it with a satin bonnet or scarf at night. Most frizz comes from friction, not bad styling.
Can I do these styles on straight or fine hair?
Yes, though you’ll usually want styles that rely on structure, like bubble ponytails, rolled faux hawks, or sleek sides with clips. Fine hair often needs a little texturizing spray or a day-old wash to hold better.
Do mohawk styles have to use gel?
No. Gel helps with sleek sides, but braids, twists, puffs, pins, and clips can carry the style on their own. If your child hates gel, skip it and lean on shape instead.
What if my child says the style hurts after an hour?
Take that seriously and loosen it. A style that hurts is too tight, full stop. Remove the tightest parts first—the front hairline and temple sections usually cause the most trouble.
Are beads and clips safe for toddlers?
They can be, as long as they are smooth, secure, and not too heavy. For very young children, keep the accessories small and avoid anything that can catch on clothing or get pulled off easily.
The Shape That Never Gets Boring
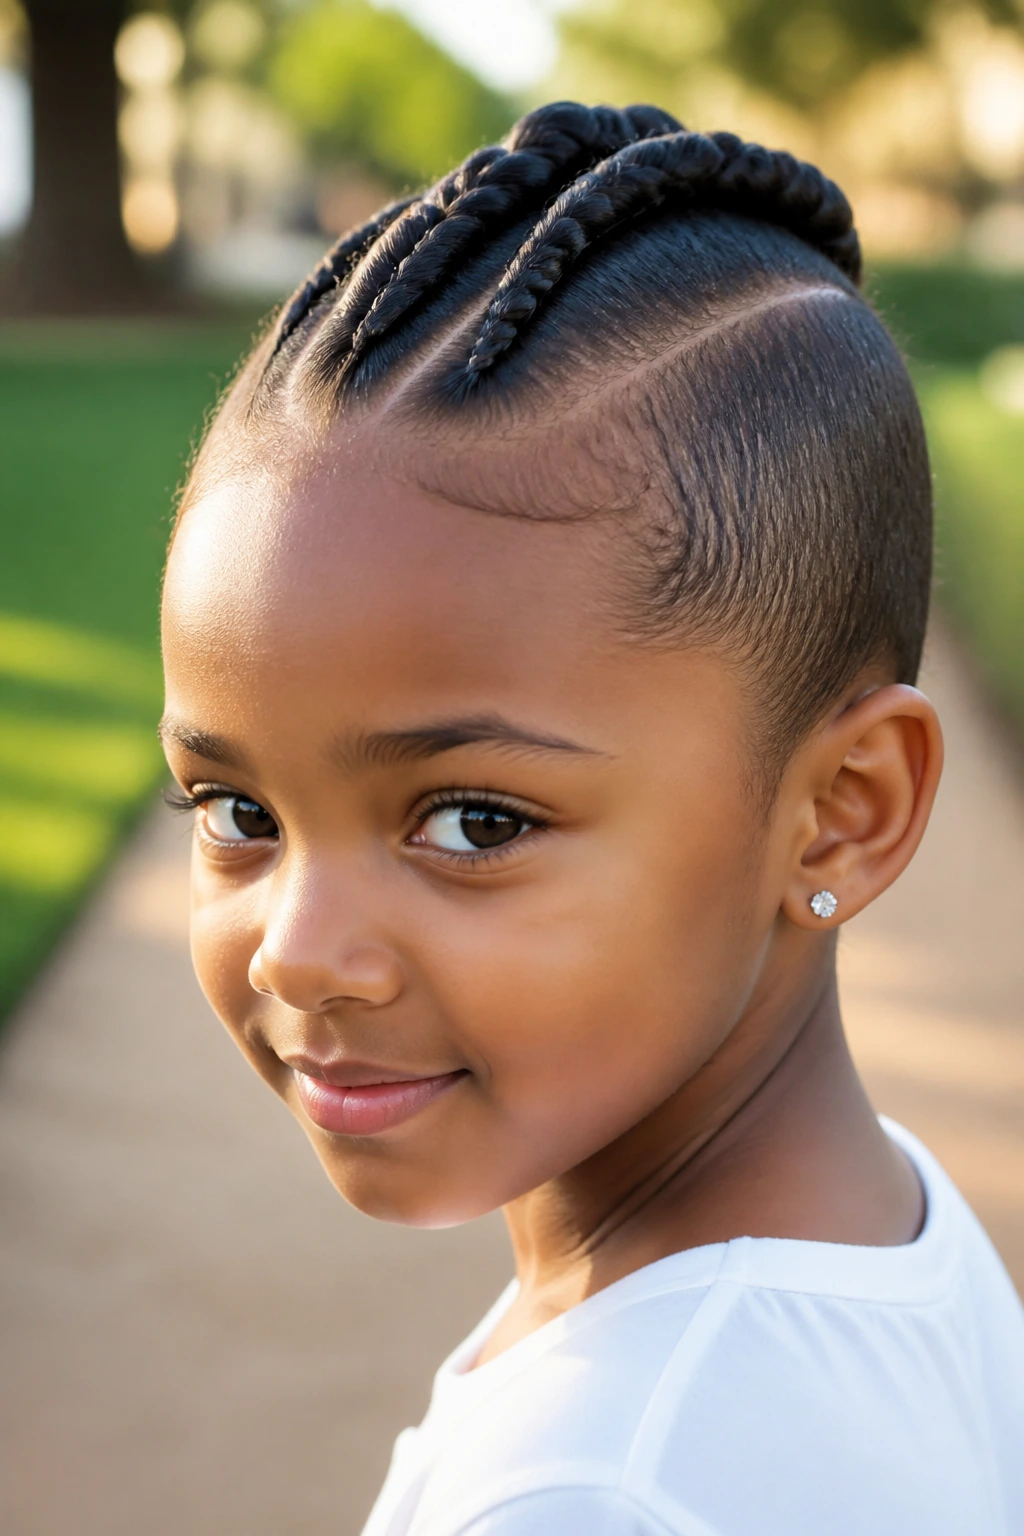
A good mohawk for a little girl is not about making her look tougher. It is about giving her hair shape, movement, and a little presence without asking her scalp to suffer for it. That is the part I like most: the style can be sweet, neat, loud, protective, or playful, and it can still feel like the same idea.
The best versions are usually the ones that respect the child in the chair. Gentle tension. Clean parts. One strong accent instead of five competing ones. When those pieces line up, the style lasts longer, feels better, and looks more intentional from the front row of a classroom or the back seat on the ride home.
Keep the center comfortable, keep the sides calm, and let one good detail do the talking. That’s usually enough.
