



Little boys are often the easiest and hardest braid clients in the same five-minute window. Easy, because the style can look neat for days, keep hair out of the eyes, and survive a school run, a playground tumble, and a car nap. Hard, because if the parting is off by a quarter inch or the braids pull at the front hairline, they’ll let you know. Immediately.
That’s why braid hairstyles for little boys work best when they’re chosen with the child’s hair length, texture, and patience level in mind. A style that looks crisp on a kid with thick coils and five inches of growth may be a bad idea on a younger boy with shorter, finer strands. The trick is not picking the flashiest braid. It’s picking the braid that holds, sits comfortably, and still looks like a kid actually gets to move in it.
And yes, the details matter more than people think. A clean part, a gentle first row, a little leave-in conditioner, and the right braid size can make the difference between a style that lasts and one that frizzes out by lunch. Some looks take ten minutes. Others ask for a patient hand and a child who can sit still long enough for sectioning. That tradeoff is the whole game.
Why These Braid Styles Are Worth the Chair Time
-
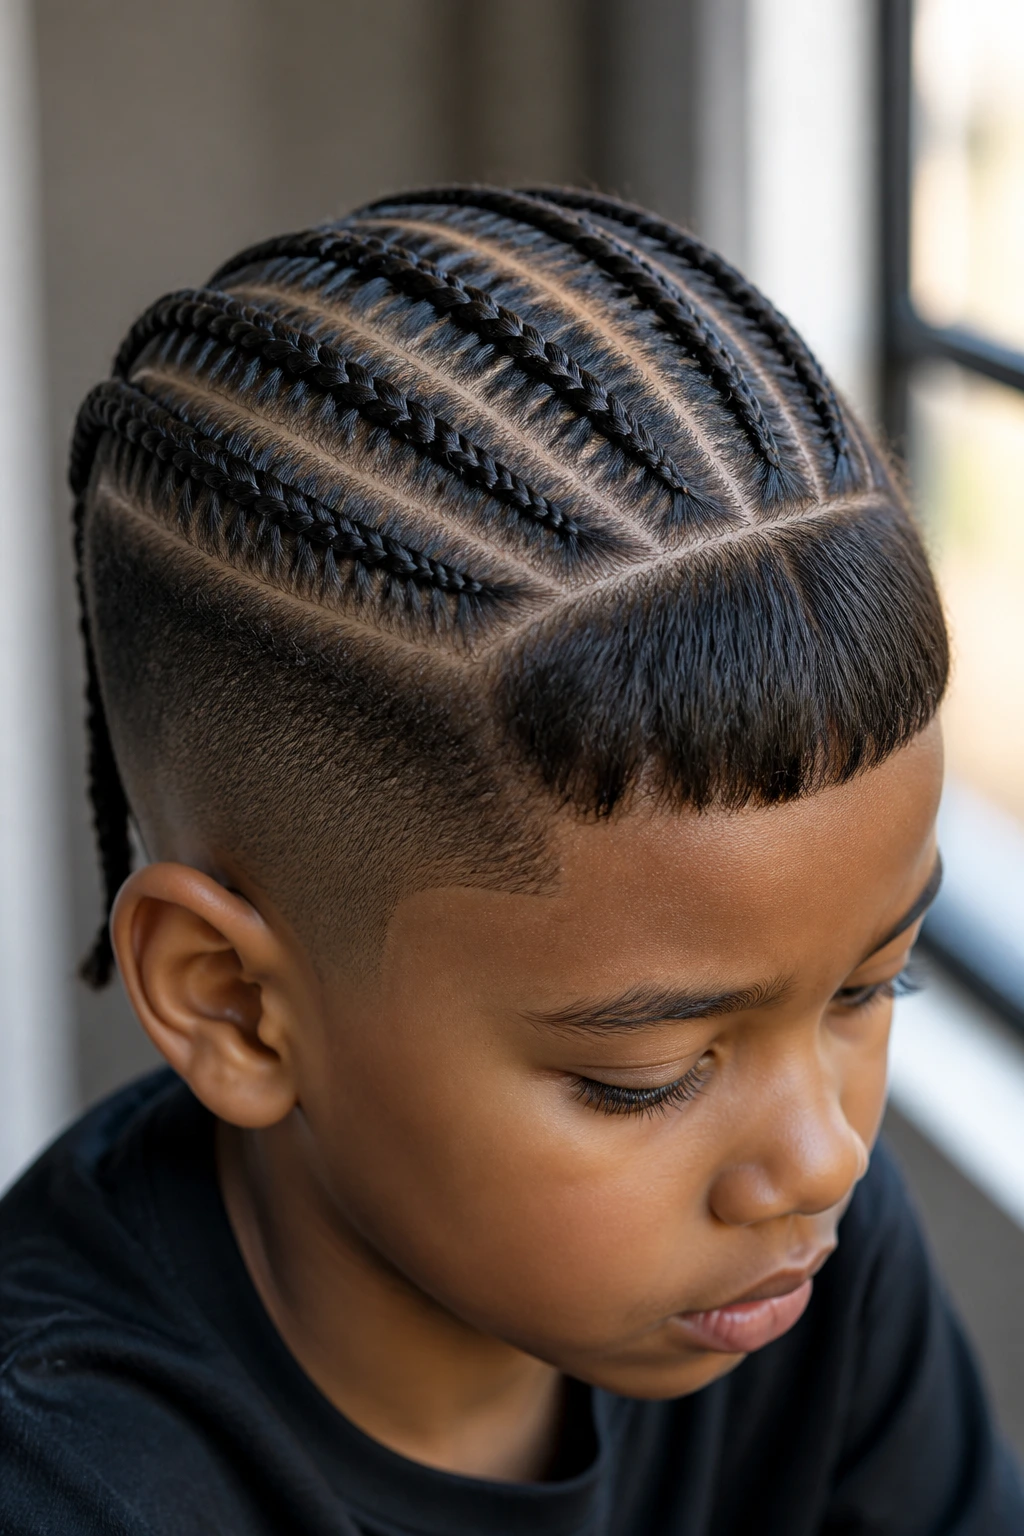
They keep hair out of the face: A good braid keeps bangs, curls, and flyaways off the forehead, which is a relief for school, sports, and every meal involving sauce.
-
They stretch a haircut longer: Braids buy you time between trims because the shape still looks intentional even when the sides and top start growing in unevenly.
-
They work with different textures: Tight curls, soft coils, and thicker mixed textures all hold braids differently, but they all have styles that can sit cleanly for days.
-
They can be as simple or as detailed as you want: Two neat rows, zigzag parts, beads, a top knot, a crown braid — the same head can wear very different moods.
-
They make morning routines easier: Once the braids are in, you’re mostly refreshing the scalp and edges instead of fighting tangles from scratch every day.
-
They look polished without demanding perfection: A little frizz after a few days is normal. That roughened-up edge is part of the charm, not a disaster.
1. Straight-Back Cornrows
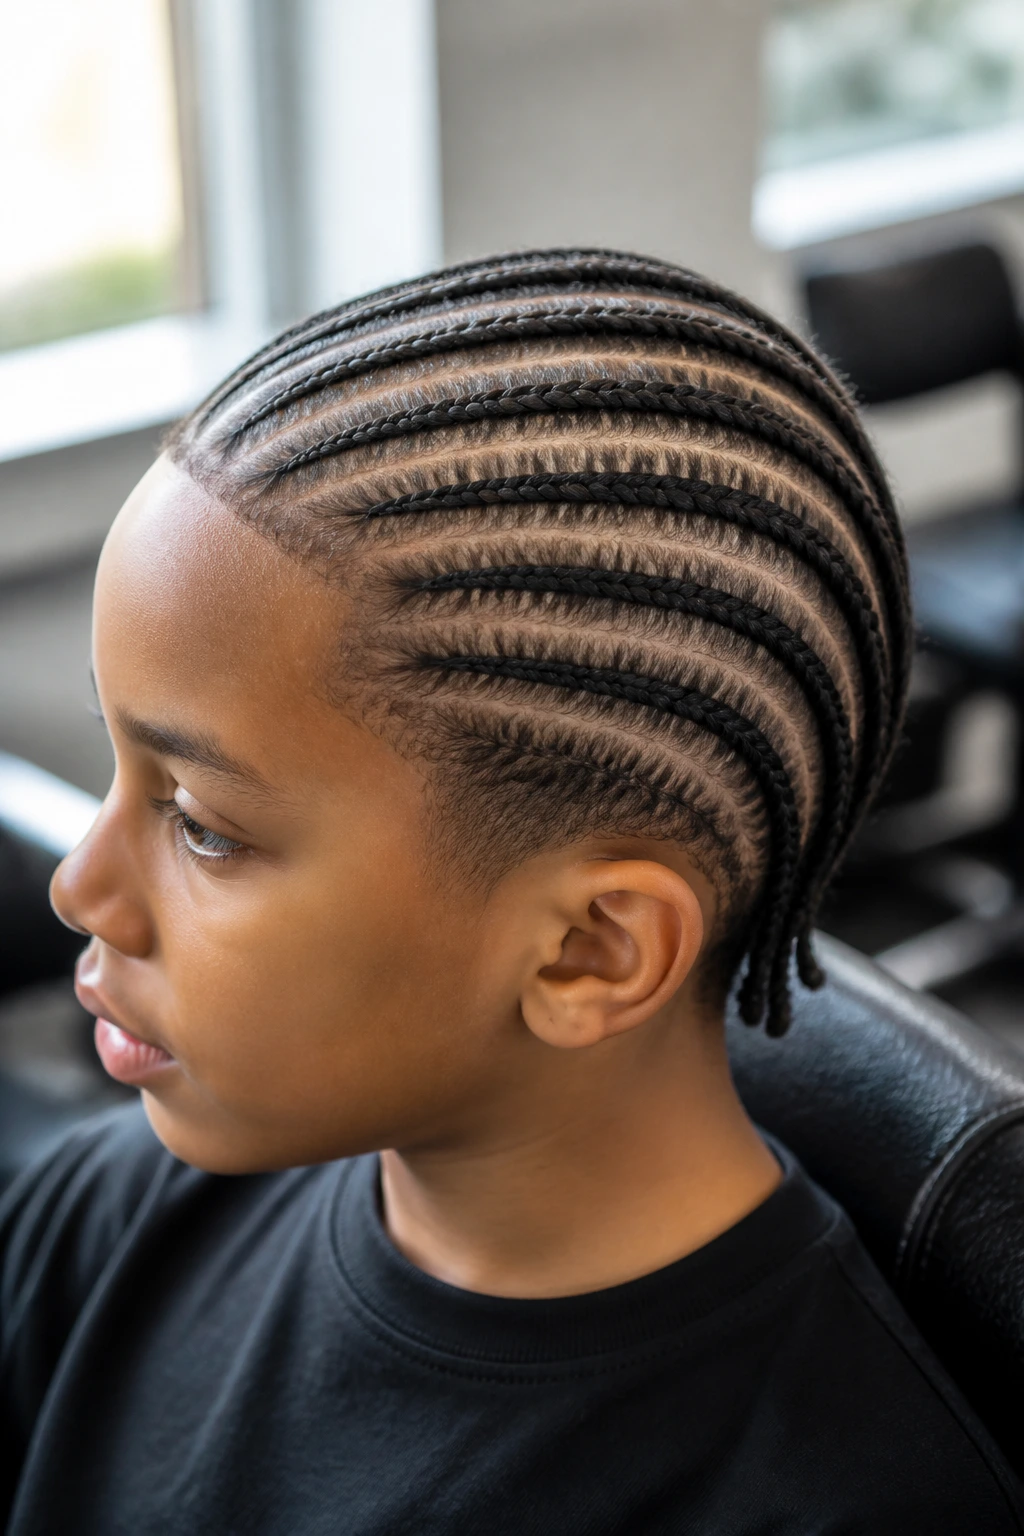
Straight-back cornrows are the workhorse of boys’ braids. Clean, fast, and easy to explain to a braider who’s seen every kind of kid under the sun, they run from the hairline to the nape in even rows and keep the shape tidy without trying too hard.
Best for: short to medium natural hair, especially tightly coiled textures that grip well. If you want one style that doesn’t look fussy on the first day or the fifth, this is the one I’d start with.
The key is row size. Too wide, and the braids loosen fast. Too tiny, and the scalp can feel overworked. Aim for neat, narrow rows and a gentle start at the front hairline. That first inch matters. It’s where kids usually notice pulling first.
2. Two Center Braids
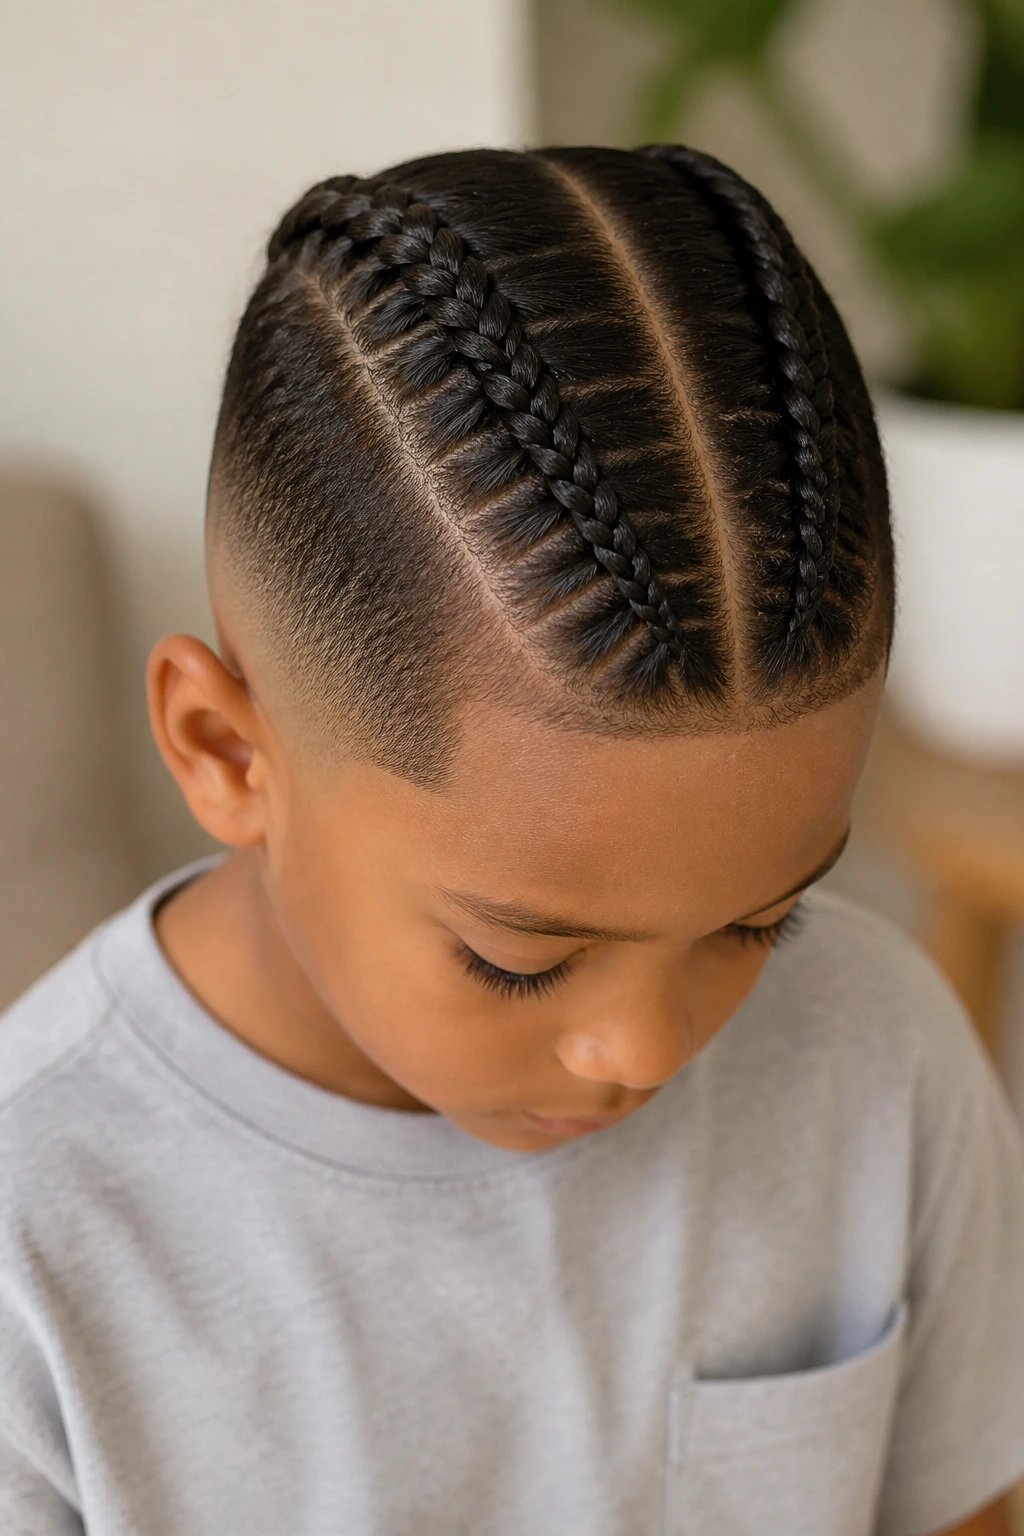
Two center braids are the low-drama version of braided styles. You part the hair down the middle and braid each side straight back or slightly toward the nape, which gives you a clean look without a lot of chair time.
That simplicity is the point. If your child is new to braids, this style is a friendly entry because it doesn’t feel crowded on the scalp. It also works well with a taper or fade on the sides, so the top can stay the star.
I like this one for younger boys who don’t want “too much hair stuff.” The style is tidy, quick to take down, and easy to refresh with a little water and leave-in conditioner at the roots.
3. Side-Swept Feed-In Braids
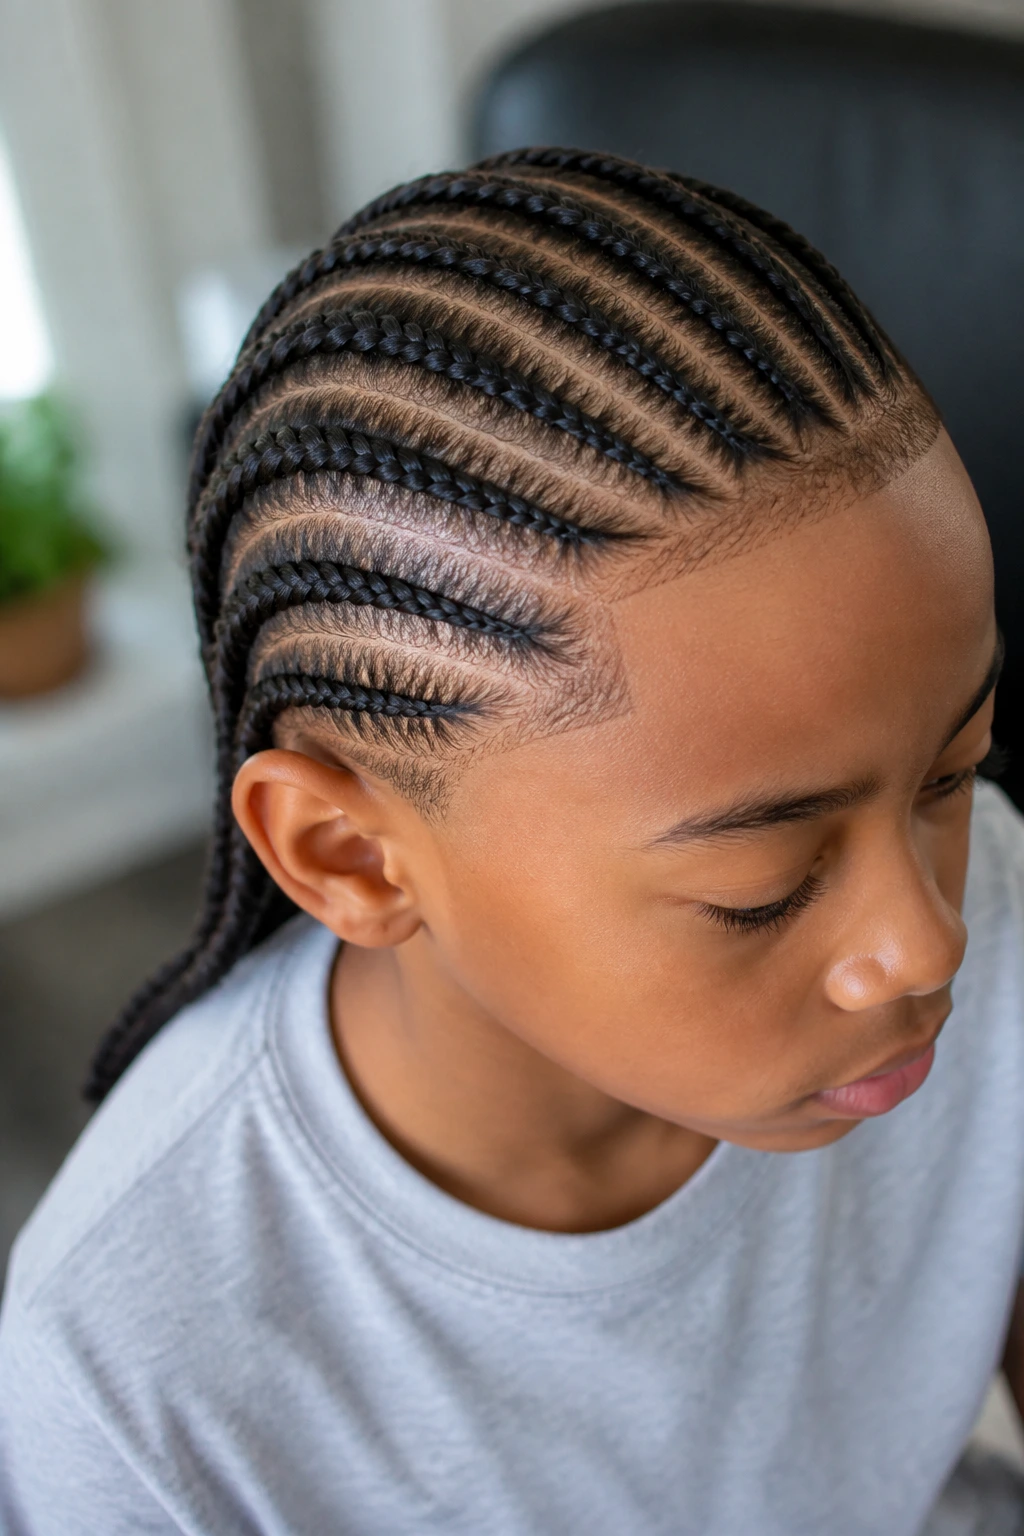
Side-swept feed-in braids start near the temple and sweep across the head instead of running straight back. The feed-in method adds hair gradually, which keeps the first section from looking bulky or blocky.
That gradual build makes the braid sit flatter and smoother at the root. You get a cleaner finish, especially on thick hair where a hard start can look puffed up by day two. The angle also gives the style a little movement, which keeps it from feeling stiff.
If the child has a side part already, this is a smart choice. It lines up with the natural growth pattern and usually sits more comfortably around the front.
4. Zigzag Part Cornrows
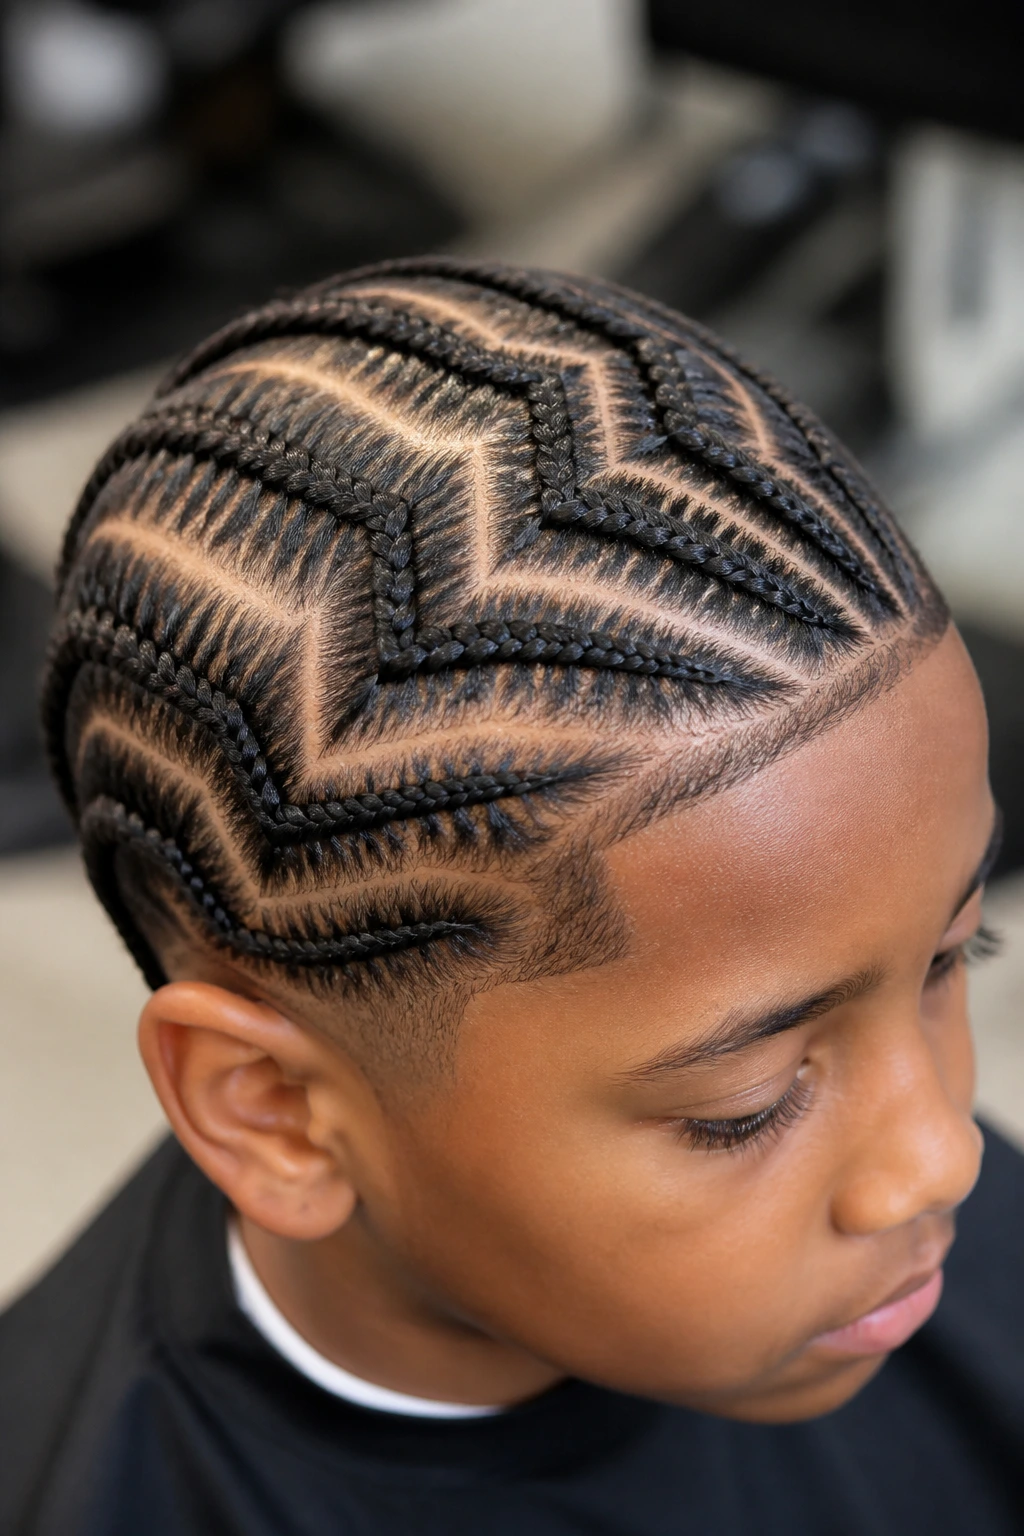
Zigzag part cornrows are for kids who like a little pattern in the parts but still want a practical style. The braids themselves may be straightforward, but the parting zigzags across the scalp and breaks up the usual straight-line look.
A good zigzag part can make a simple braid set feel special without adding a lot of extra bulk. It’s the kind of detail that gets noticed up close, not from across the room. That matters if you want a style that feels fun but still works for school.
The catch? The parting takes patience. If the zigzags are too tight or too small, the scalp can feel tender. Ask for clean, roomy curves rather than needle-thin lines.
5. Braided Mohawk
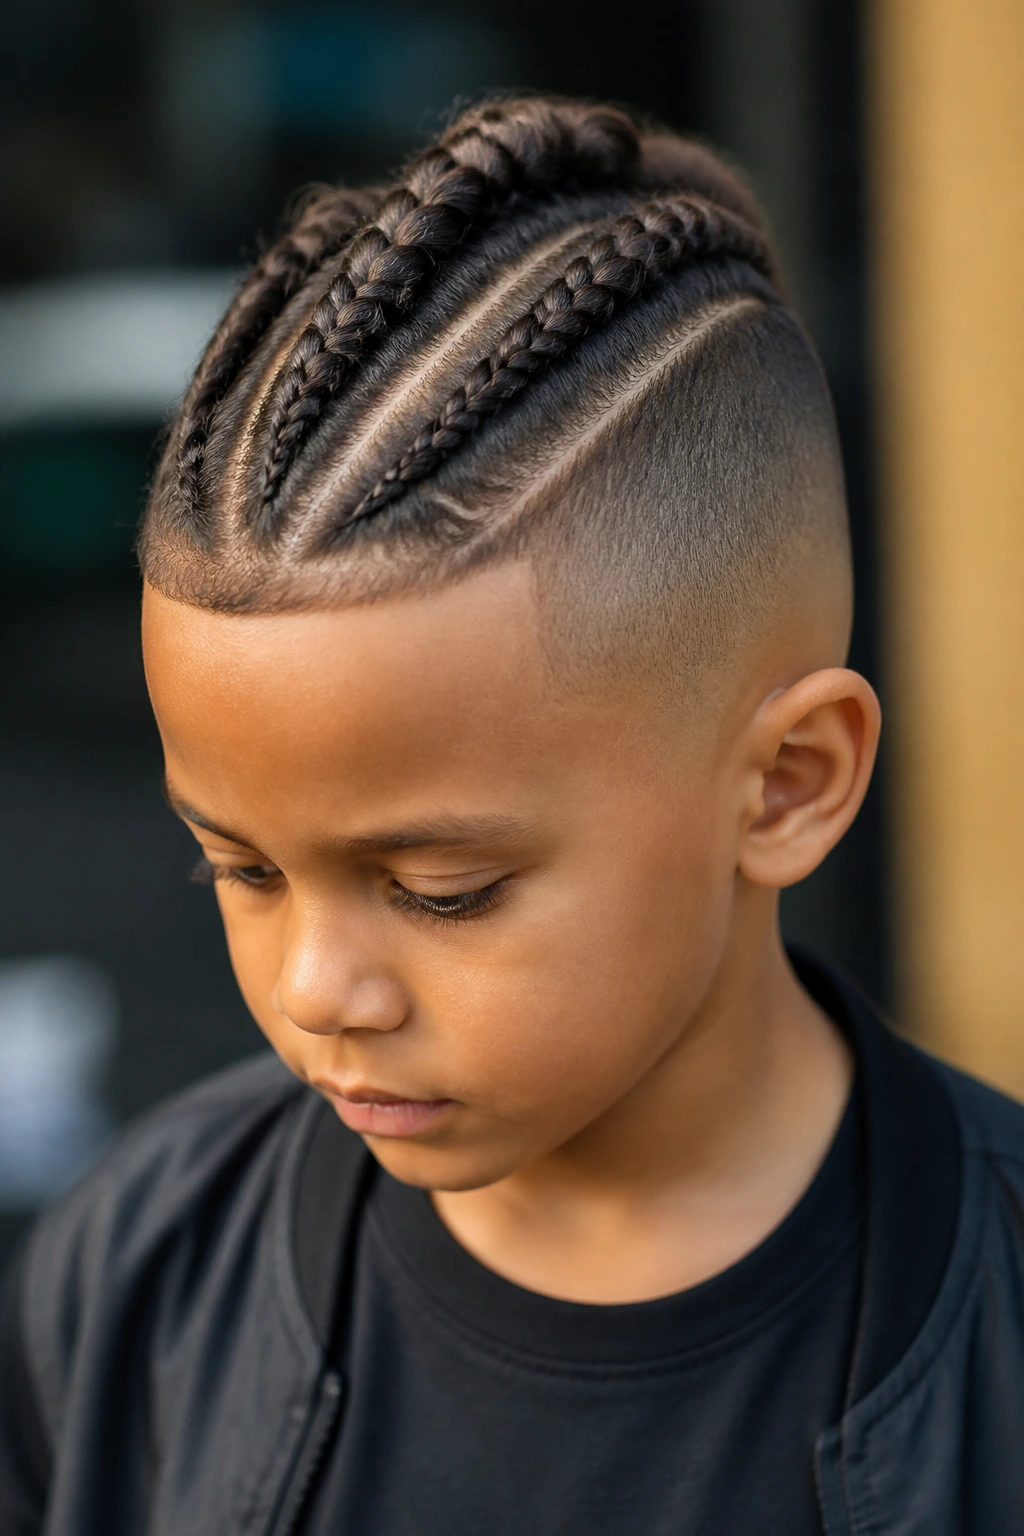
A braided mohawk keeps the sides neat and puts the braid energy right down the middle, where it has room to show off. It’s a strong look without being fussy, and it works especially well with a fade or taper on the sides.
This one gives you a little more edge than straight-back rows. The braid ridge sits like a strip down the center, which makes the style feel active and a bit sporty. That’s why boys who don’t love a full head of braids often warm up to this one.
Use moderate braid size here. Too many tiny braids in the middle can turn the mohawk into a fragile little row of knots. One to three clean braids usually does the job.
6. Four Neat Rows
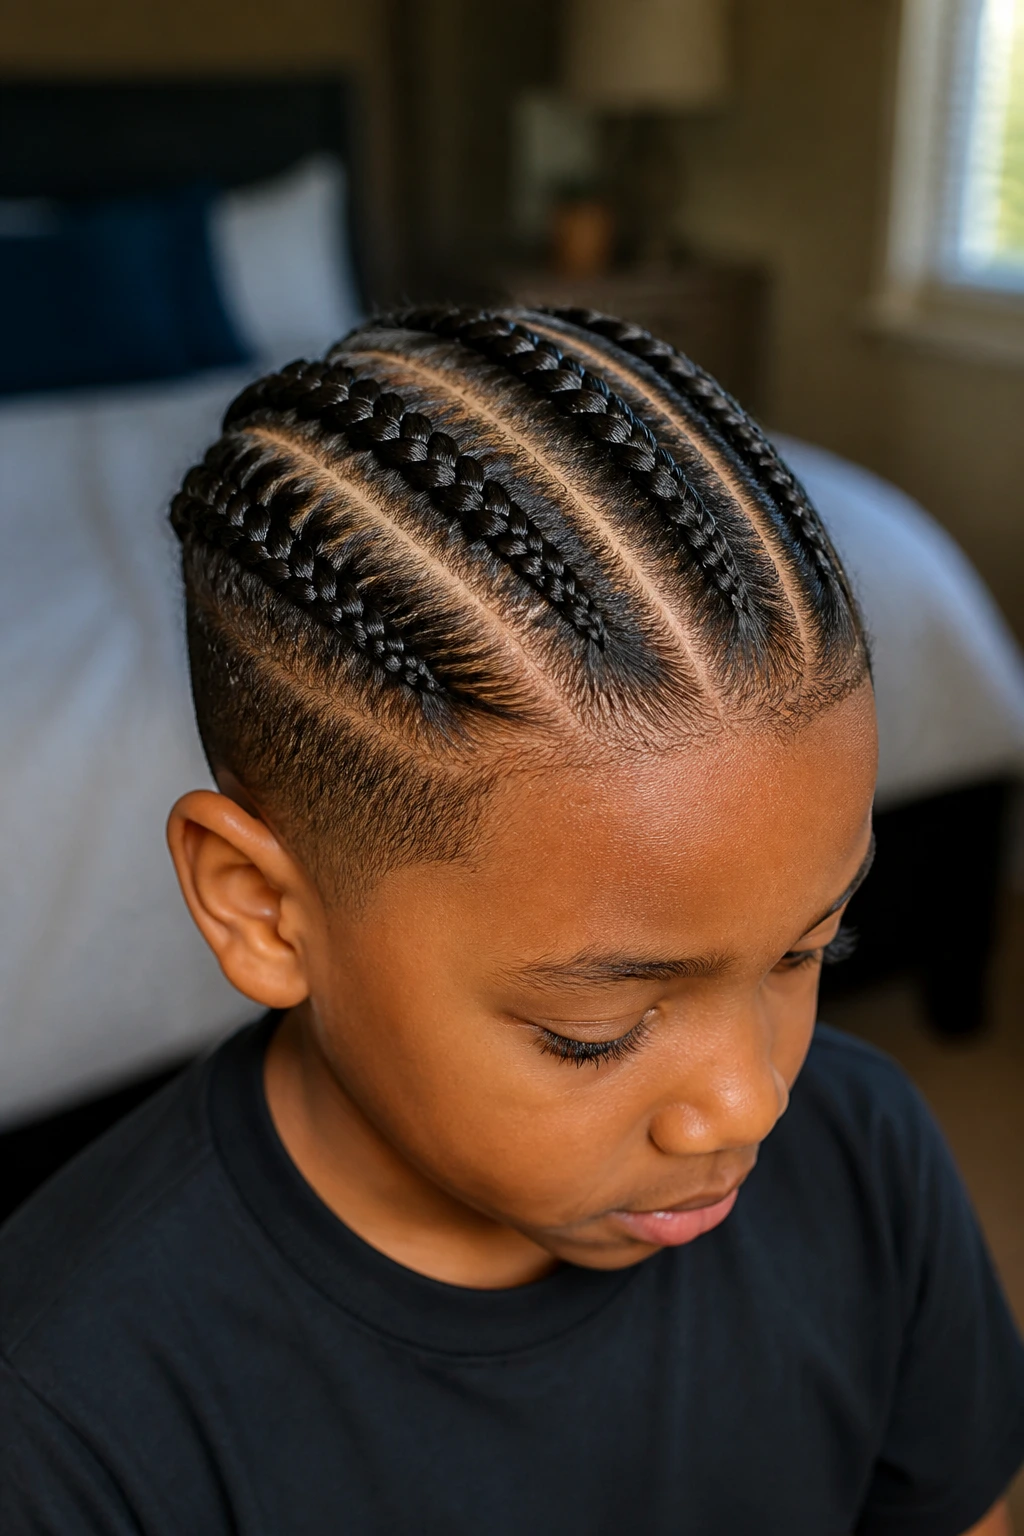
Four rows are the sweet spot when you want more structure than two braids but less time than a full head of tiny cornrows. The look is balanced, easy to read, and not so crowded that a child feels trapped in the chair.
This is the style I reach for when the hair is long enough to braid but you do not want the maintenance of micro braids. It holds better than very wide sections and still comes out looking crisp after a few days. That’s a nice middle ground.
If the hairline is sensitive, keep the front rows a touch looser and avoid dragging the first section too far forward. You want neatness, not tension.
7. Box Braids With Clean Parts
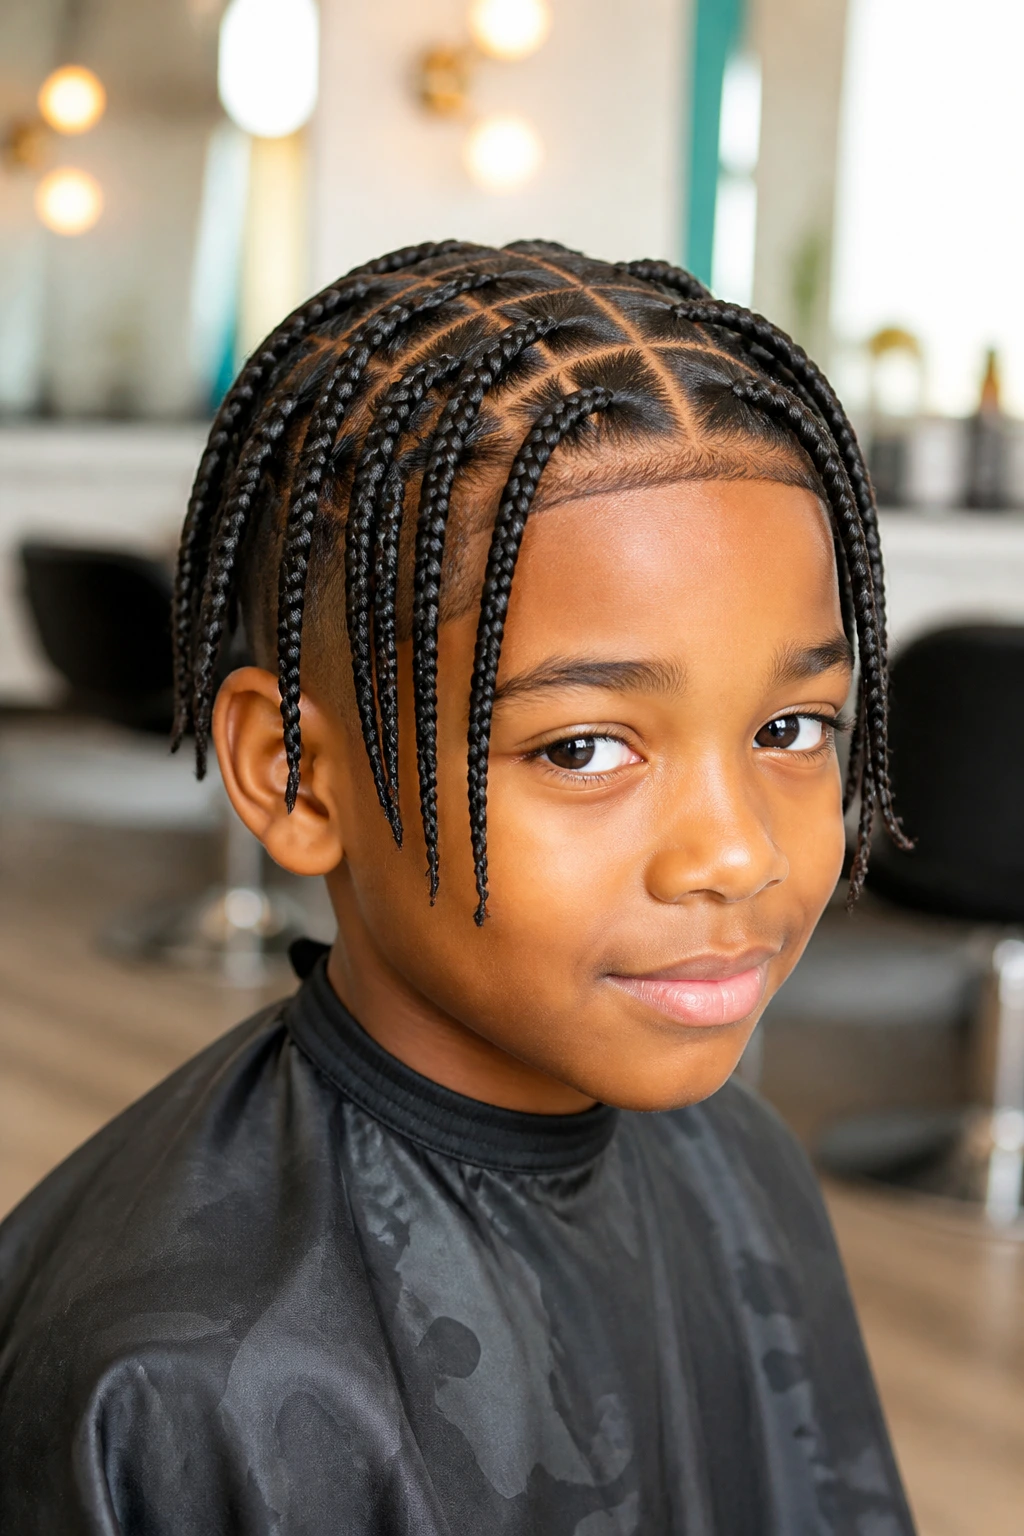
Box braids are individual braids separated into square sections, and they’re one of the best options for thicker hair that needs a longer-lasting style. The parting gives the head a grid-like look, and the braids themselves move a little more than cornrows do.
For boys who don’t mind a bit of length, box braids can be a great protective style. They keep ends tucked away and reduce daily combing. I like them when the child’s hair has enough density to support individual sections without the roots looking sparse.
The parts should be clean and not too big. Oversized boxes can make the style sag, while tiny ones may take too long and feel too tight. Balance matters here.
8. Triangle-Part Box Braids
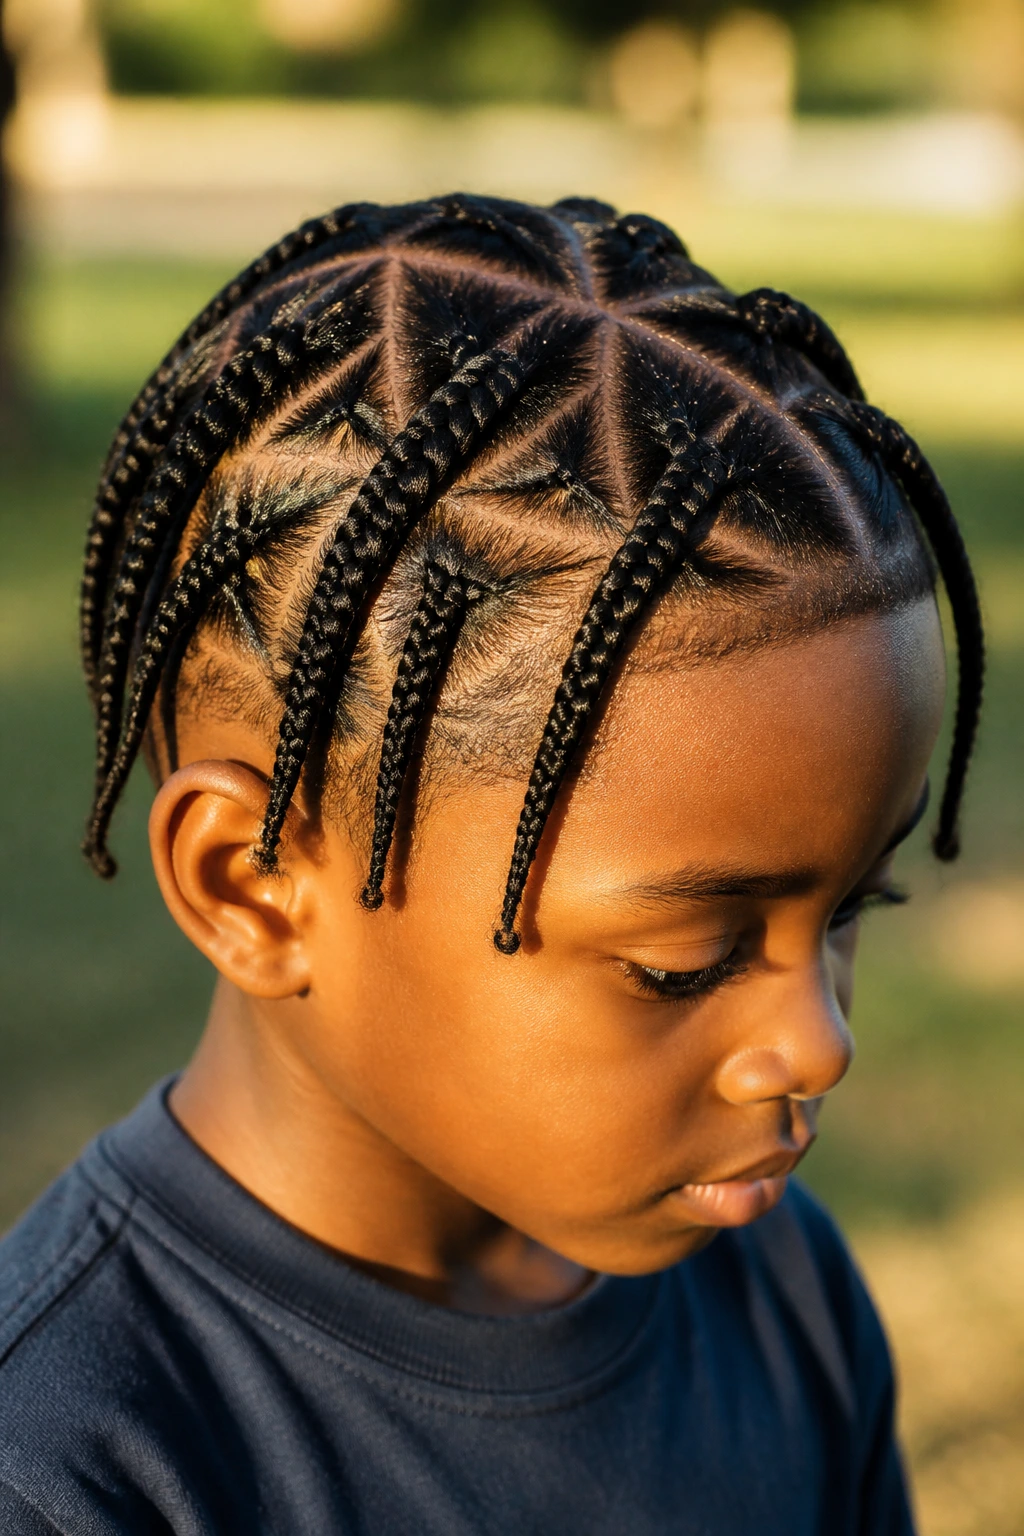
Triangle-part box braids do the same job as classic box braids, but the parts are cut into triangles instead of squares. That tiny change makes the style look sharper and a little more deliberate.
It’s a good option when you want the style to stand out without adding more braids. Triangle parts can make the head look more patterned, almost like a design was carved into the scalp before the braiding even started. Kids who notice details tend to like this one.
The practical upside is that the sections can sit more naturally around curves in the head than square parts do. If the hairline or crown has a tricky shape, triangles sometimes fit better.
9. Braids With a High Fade
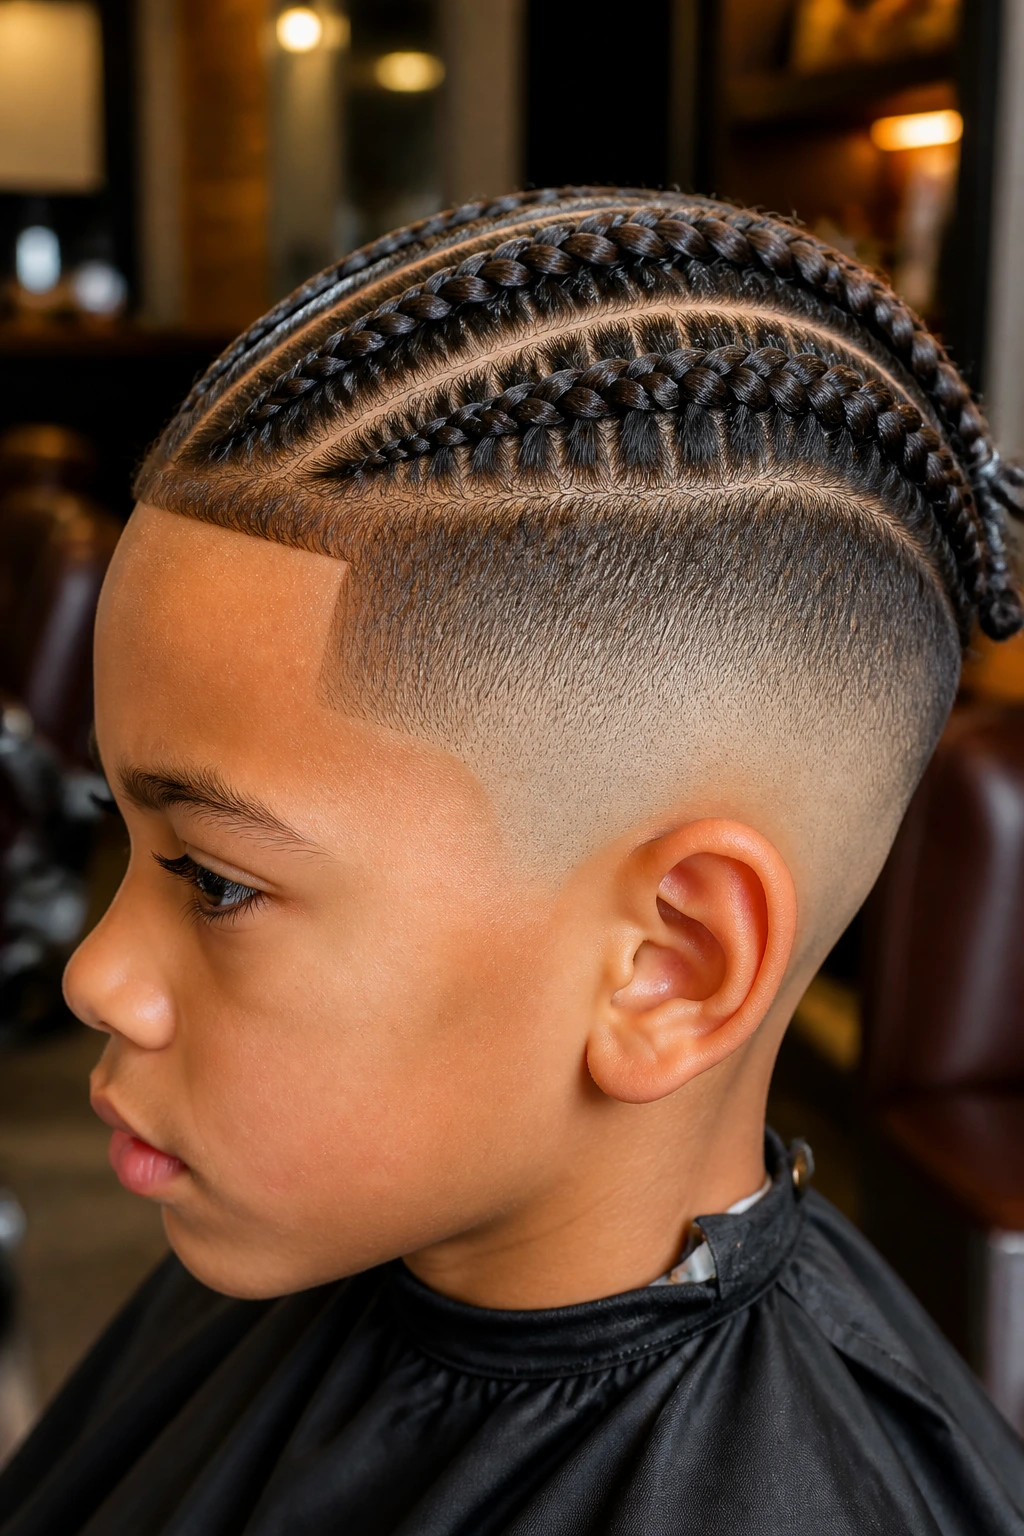
Braids with a high fade are one of those combinations that make sense fast. The fade keeps the sides clean and short, while the braids on top carry the style and give the whole cut a sharper outline.
This works especially well if the child likes a neat, barbershop finish. The contrast between the short sides and the braided top makes the style look tidy even when the braids loosen slightly. That is a useful trick, because kids do not stay still forever.
A high fade pairs well with cornrows, two braids, or small box braids. Ask for the braid area to be left a little longer than you think you need. A fade eats visual space.
10. Crown Braid Halo
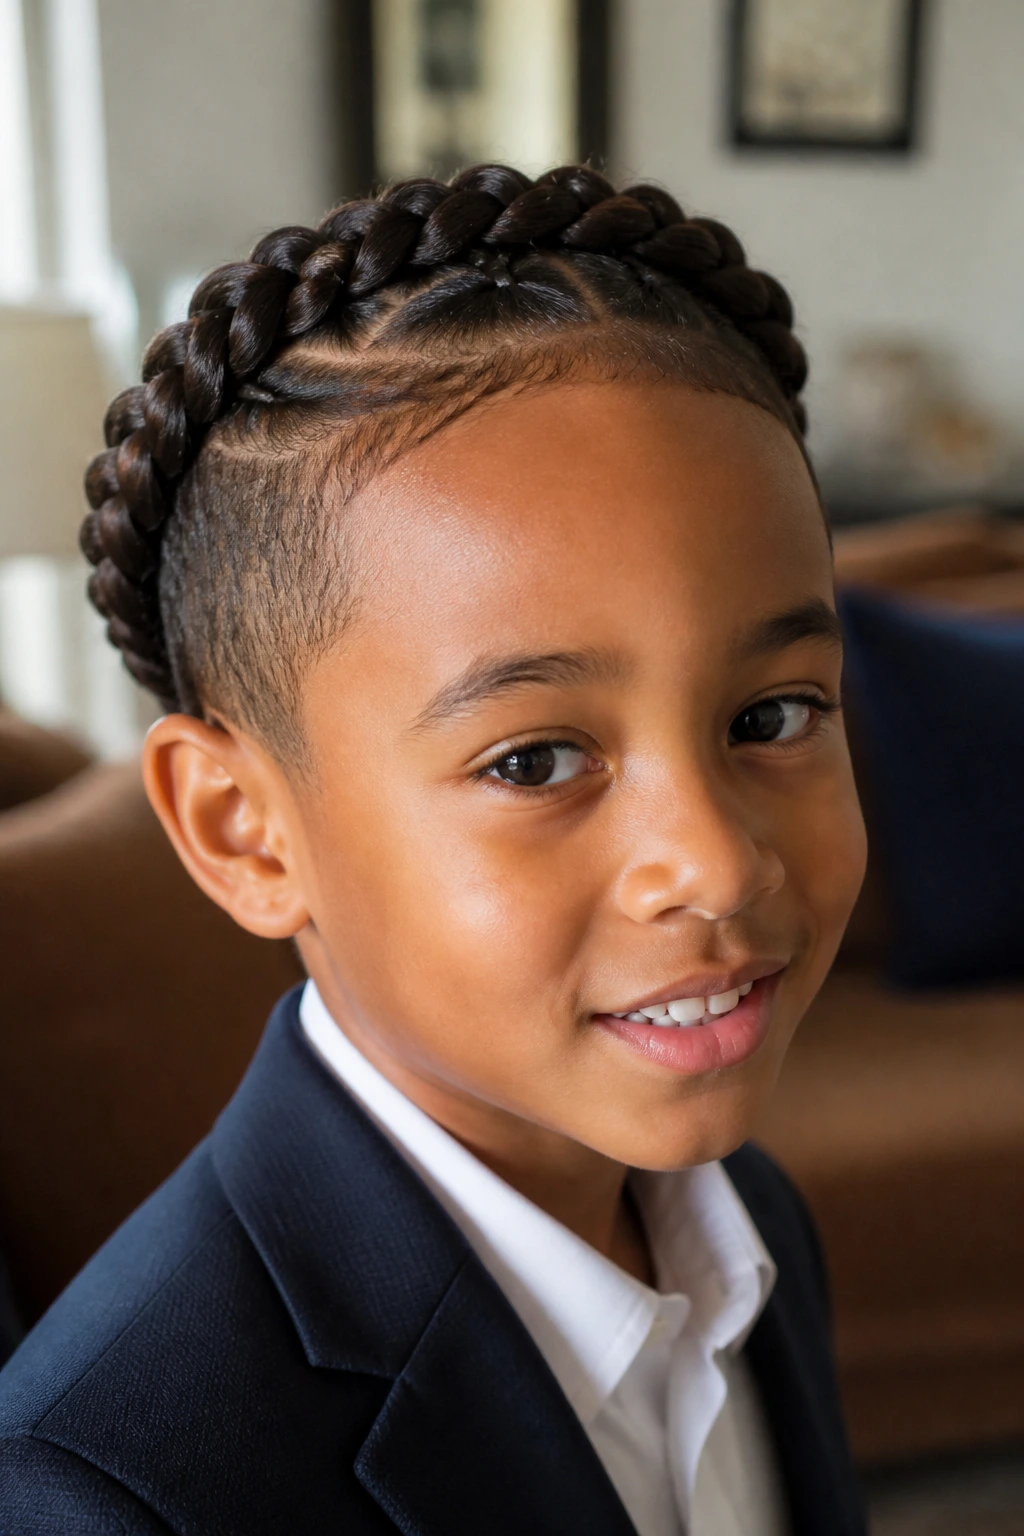
A crown braid halo wraps around the head like a circle, which gives the style a neat, framed look. On little boys, it reads clean and intentional, not delicate, when the braid is sized right and kept close to the scalp.
This is a better special-occasion style than an everyday one, mostly because the shape is a little more involved. But when it’s done well, it sits beautifully around the face and keeps hair completely away from the forehead and ears. That makes it useful for events, photos, and family gatherings where you want the hair to stay put.
Keep the braid tension gentle around the temples. That area gets sore faster than the crown, and kids will complain there before anywhere else.
11. A Single Center Braid
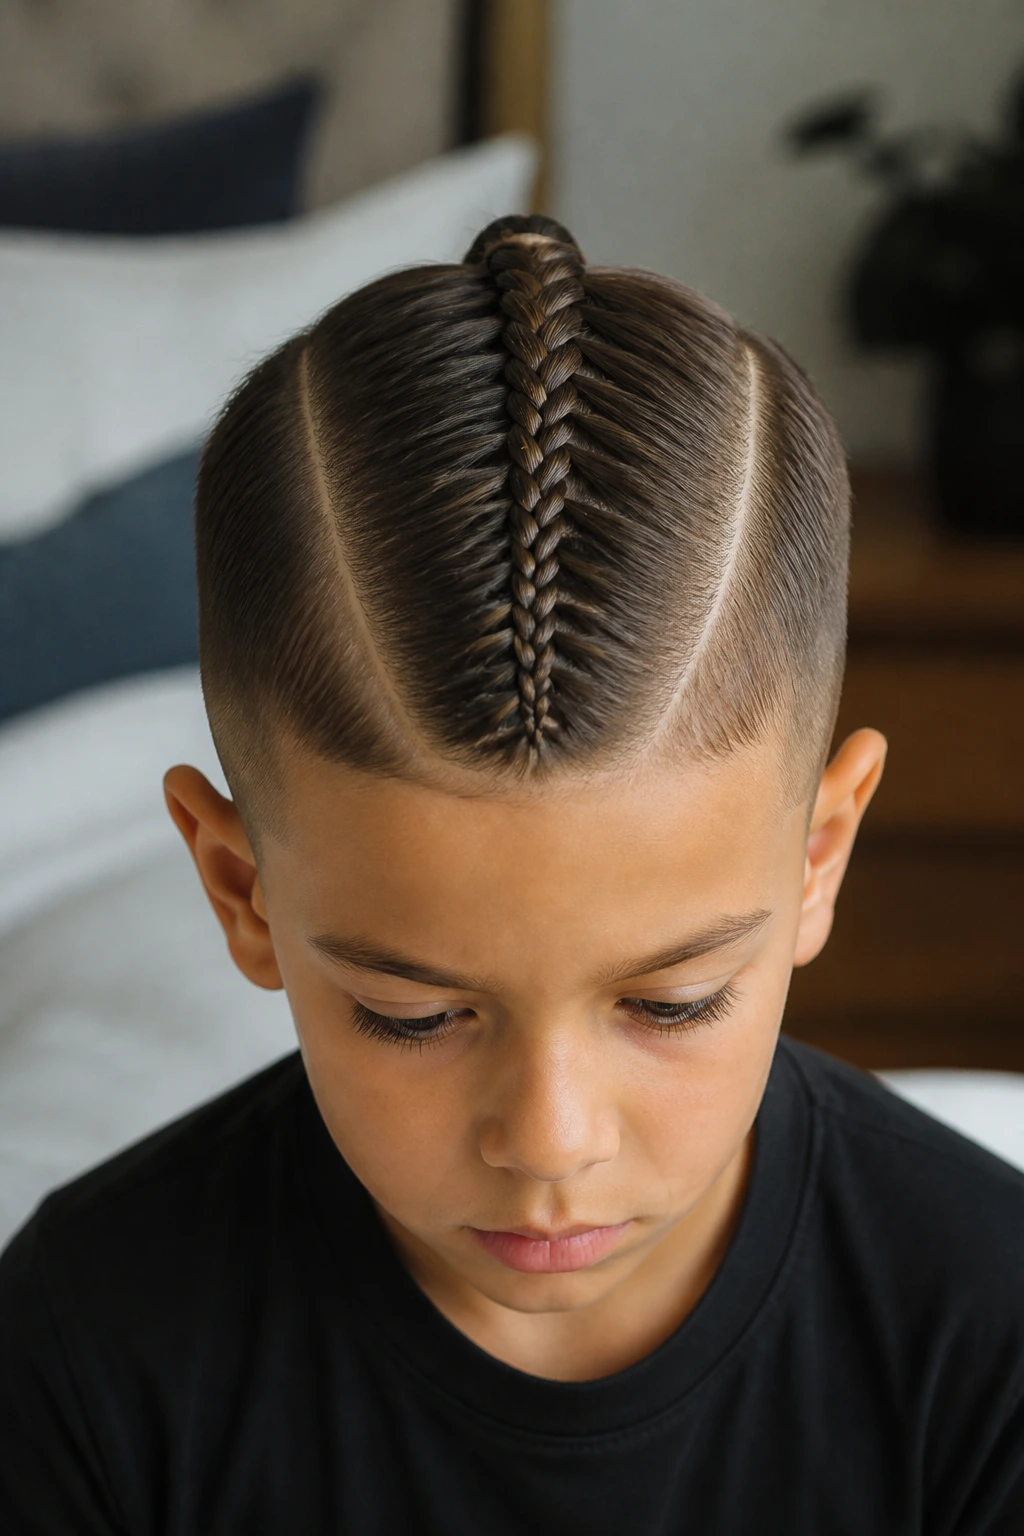
One braid running straight down the center is simple, direct, and weirdly handsome in a no-nonsense way. It works best when the hair is long enough to gather cleanly and the child does not want a head full of sections.
There’s a nice confidence to this style. It does not try to hide the hair or turn it into a pattern-heavy design. It just gathers everything into one neat line and lets the texture do the talking. If the rest of the cut is short or faded, the braid becomes the one clear feature.
Use a small elastic at the end, especially if the braid reaches the upper back or neck. Loose ends look tidy only for about ten seconds.
12. French Braid for Medium Length Hair
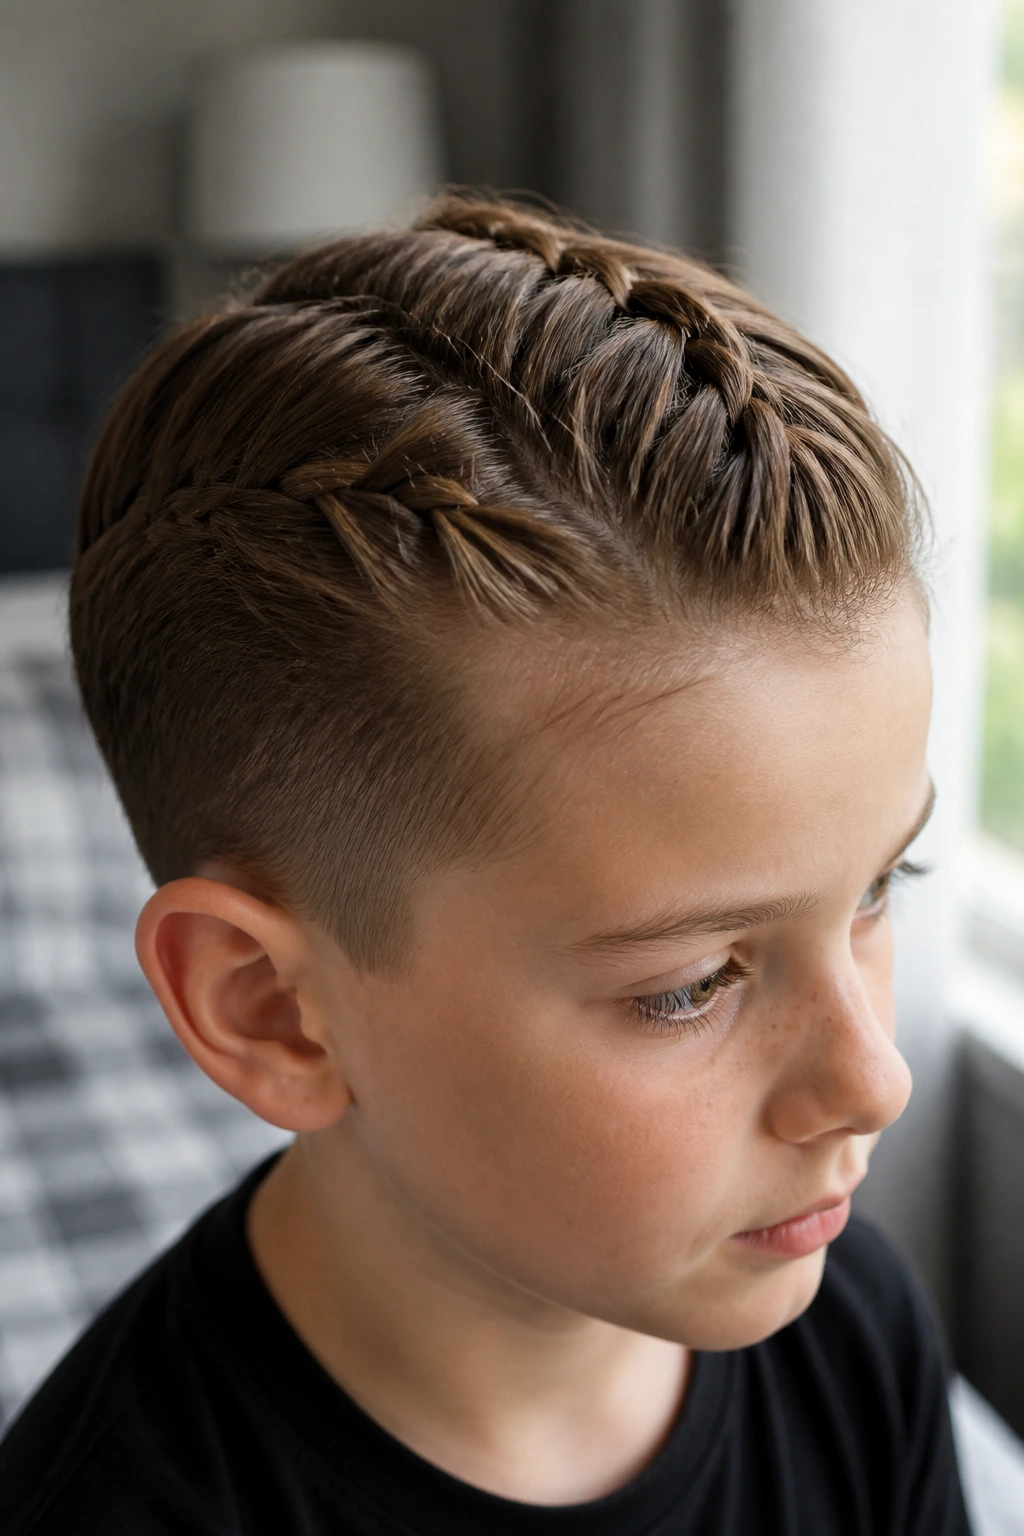
A French braid starts at the hairline and keeps adding sections as it moves back, which makes it a smart choice for medium-length hair that needs control without a lot of individual braids. It’s a little more involved than a simple plait, but it gives a smooth, continuous finish.
This style is useful when the hair is growing out and the front starts falling into the eyes. The braid captures that front section early and holds the shape close to the scalp. On boys with looser curls or wavier hair, it can keep the top clean without flattening everything.
The braid should lie close to the head, not sit up like a loose rope. If it feels bulky, the sections are probably too large.
13. Dutch Braid That Pops Off the Scalp
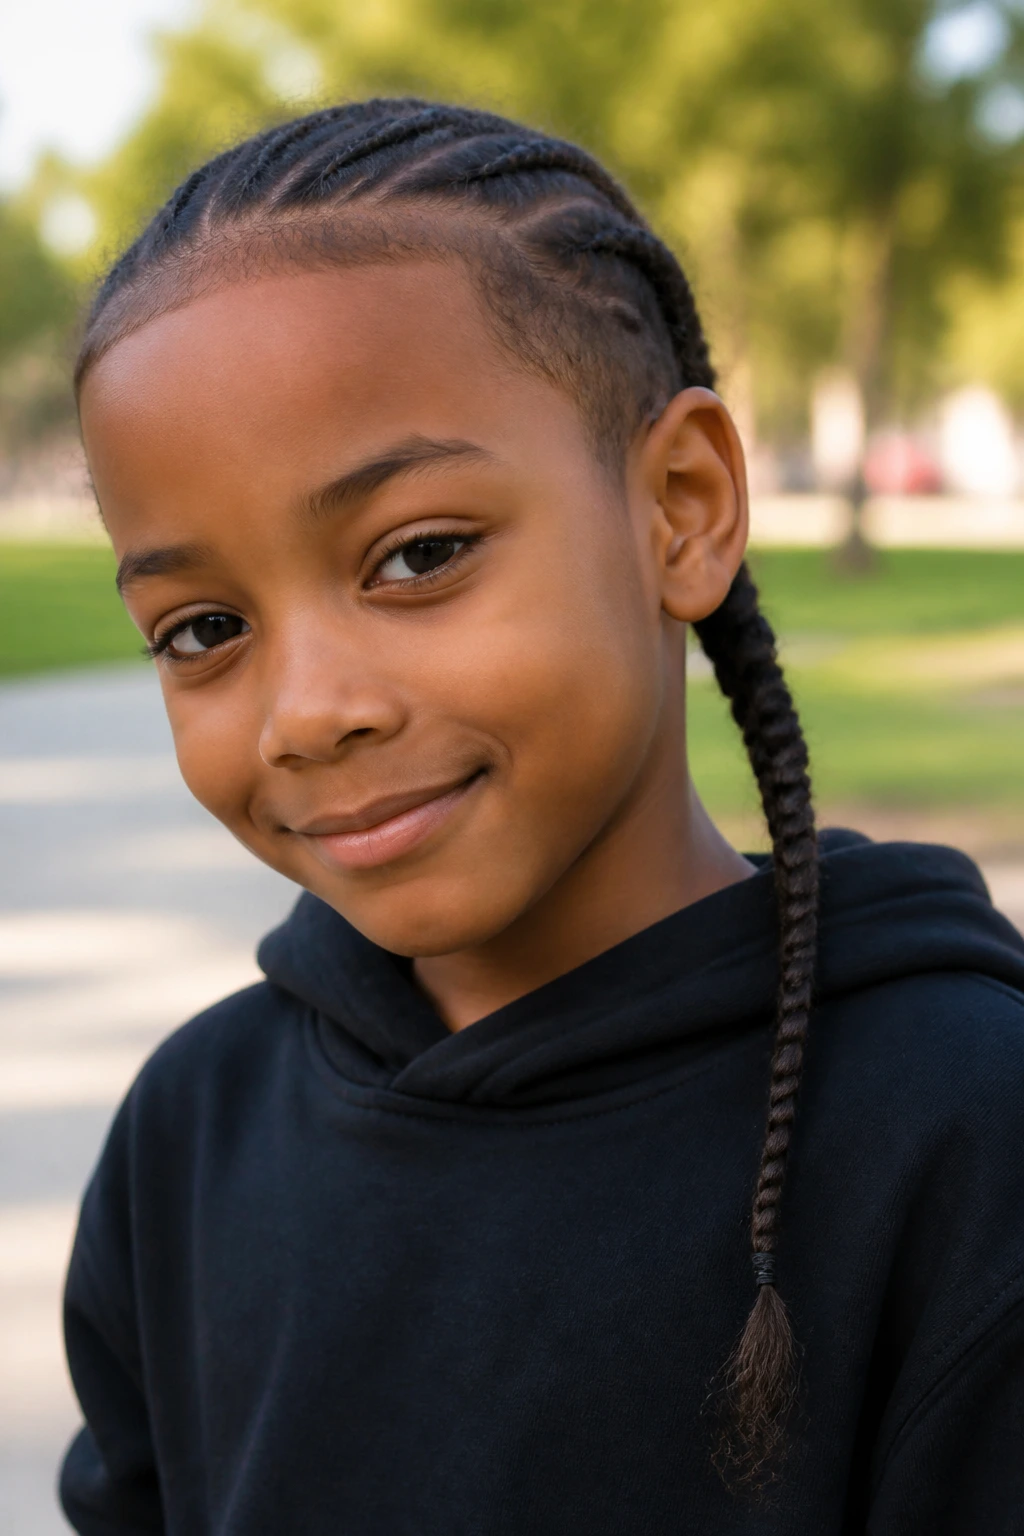
A Dutch braid is the reverse of a French braid, and that underhand weaving makes the braid stand up more visibly from the scalp. The result is a raised line that looks bolder and more textured.
On a boy’s head, that extra lift can be useful. It gives you a style that reads clearly from a distance, especially if the child has thick hair or a clean fade on the sides. The braid becomes a visible stripe rather than a subtle pattern.
I like Dutch braids for kids who want something a little more dramatic without adding beads or color. Keep the braid medium-tight. Too much pull at the start makes the front look harsh, and that wears on the scalp fast.
14. Stitch Braids With Sharp Lines
Stitch braids are all about the parting. The sections are carved into crisp, straight lines that look almost stitched across the scalp, and then the braids sit neatly between those lines.
This style belongs on a head where the parting can be precise. It’s not the fastest style in the box, but the payoff is a very clean look with strong visual structure. Boys who like sharp edges, line-ups, and a “fresh from the chair” finish usually love it.
The braid rows are often narrower here, so the style can feel detailed without looking crowded. If the child has a sensitive scalp, ask for soft tension even if the parts are sharp. Clean does not have to mean tight.
15. Crisscross Braids
Crisscross braids give you overlapping sections that form an X-like pattern on the scalp. It’s a bit more playful than straight rows, and it looks especially good when the parting is clean and the hair has enough thickness to hold the pattern.
The charm is in the movement. Straight lines say “tidy.” Crisscross says “someone thought about this.” That extra bit of design can make a simple braid set feel more special for picture day or a family event.
You do need a steady hand, though. If the parts wander too much, the whole look loses the sharp crossing effect and just becomes messy sections. Keep the lines clear and the braids snug, not strained.
16. Heart-Part Braids
Heart-part braids are decorative right from the scalp. The parting forms a heart shape, which gives the style a fun, detailed look that still works on boys when the rest of the haircut stays crisp.
This is a strong choice for a child who likes patterns and enjoys noticing the little things. It’s not loud. It’s just specific. And specific styling tends to age better than overcomplicated styling because it still looks neat when a little frizz shows up.
Ask for enough space in the heart shape so the design is readable. Tiny hearts get lost once the braids settle, and then you’ve gone through all that effort for nothing.
17. Braided Top Knot
A braided top knot pulls the braids up and out of the way, usually into a bun or knot at the crown. That keeps the neck clear and gives the style a tidy, stacked look that works well for active kids.
This is one of my favorite practical styles for boys who are always moving. The braids stay contained, the ends stay off the shoulders, and the silhouette looks neat from every angle. It also works well when you need the style to survive a long day with a cap, hoodie, or sports gear.
Use a soft band and do not yank the knot too tight. If the braid bundle is heavy, splitting it into two smaller knots may be kinder to the scalp.
18. Braids With Beads on the Ends
Beads on the ends turn a braid into a little bit of rhythm. They move, they click, and they give the style a bit of personality that kids notice right away.
Lightweight beads are the key. Heavy ones tug the braid down and can pull on the ends after a while, especially if the hair is fine or the child is rough on the style. Secure the end first, then add the bead set you actually want to hear and see.
This look is fun, but it does ask for a bedtime routine. Beads can snag on blankets if the hair is left loose. A satin bonnet or loose wrap keeps the ends from knotting overnight.
19. Braids With Cuffs and Color Bands
If beads feel like too much, cuffs and color bands are the cleaner option. They add shine and a little color without the weight or noise of heavier accessories.
This style works nicely when you want the braids to look finished but still understated. A few silver cuffs along the length of a braid can give it structure, while tiny color bands can match school colors, team colors, or just a favorite shade. It’s a small detail, but kids love seeing it.
The best part is that cuffs are easier to remove and reset than beads. If you’re not ready for a style that lasts around the clock, this is the gentler accessory route.
20. Braided Ponytail
A braided ponytail gathers the braids at the back or crown and ties them together into one ponytail. It’s practical, neat, and easy to keep out of the way during play.
This is one of those styles that looks more polished than it sounds. The braids can be two rows, several small braids, or box braids gathered into one point. The shape keeps the head tidy while letting the length swing a little at the back.
Keep the ponytail placement low if the child’s hairline is sensitive. A high ponytail looks sharp, but it can pull hard when the child leans back in a chair or naps in the car.
21. Mini Braids for Thicker Hair
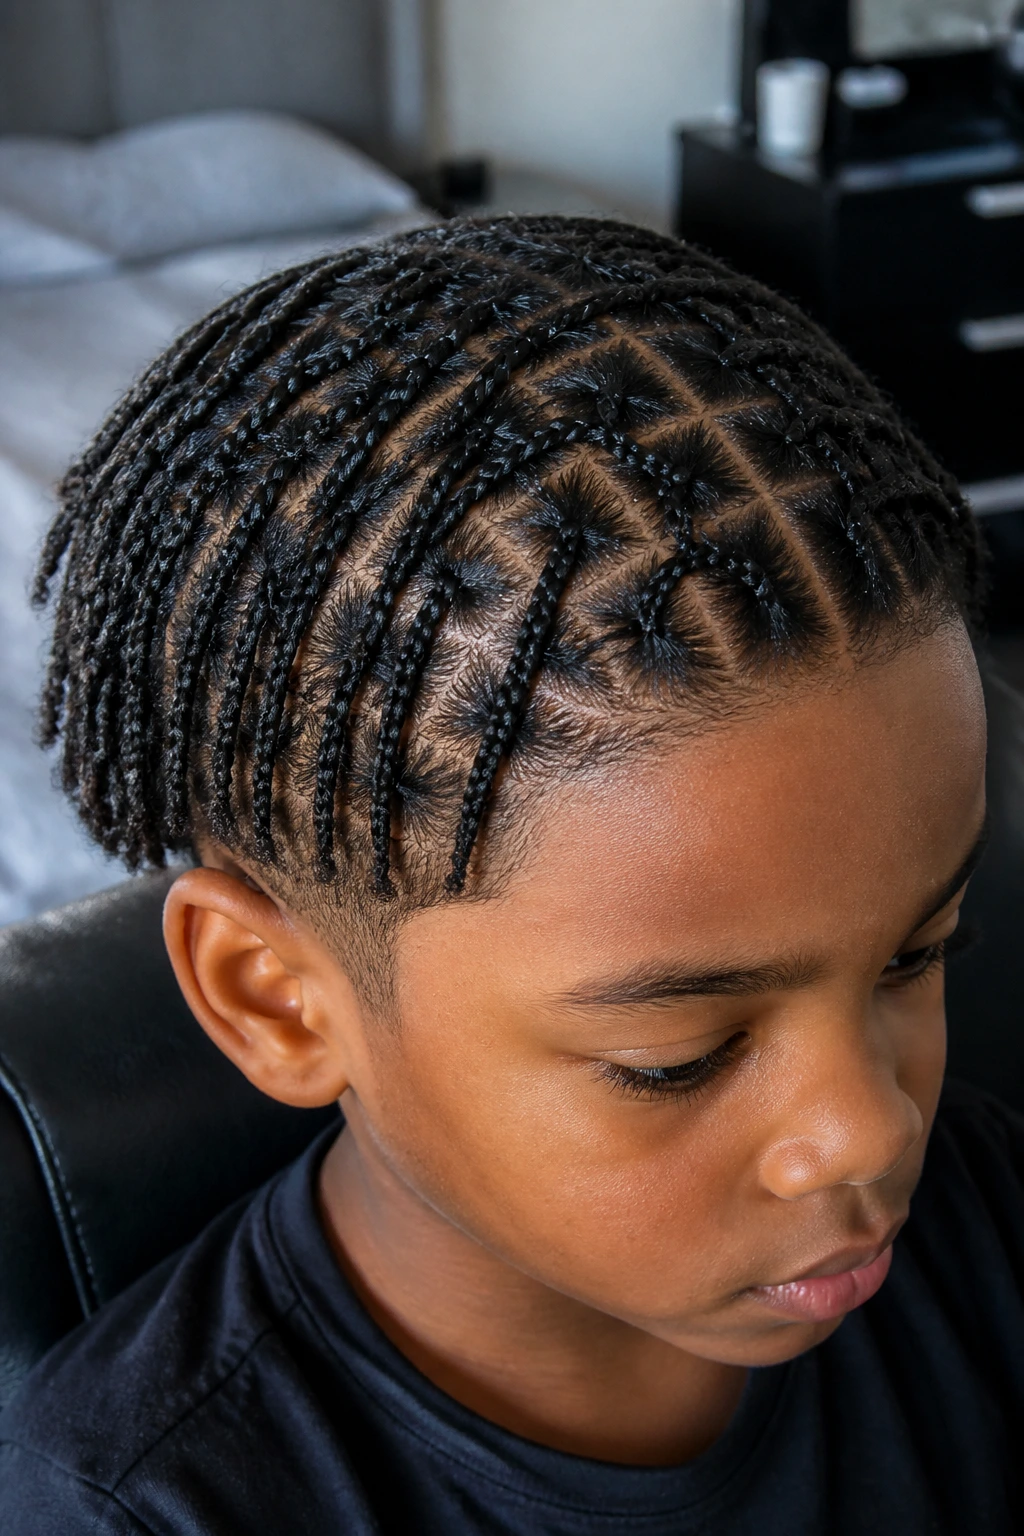
Mini braids are a strong choice when the hair is dense and full enough to support lots of tiny sections. They take time, yes, but they give a very even, controlled look and can hold for a longer stretch if the scalp is cared for.
The smaller the braid, the more important the parting becomes. Uneven tiny braids show every mistake, so the sections need to be clean and deliberate. That said, on thick coily hair, mini braids can settle into a really nice natural flow after the first day.
These are not the fastest option, and they’re not the best choice for a child who hates sitting still. But if the goal is a long-wear style with a lot of flexibility, they earn their place.
22. Half-Braided, Half-Left-Out Curls
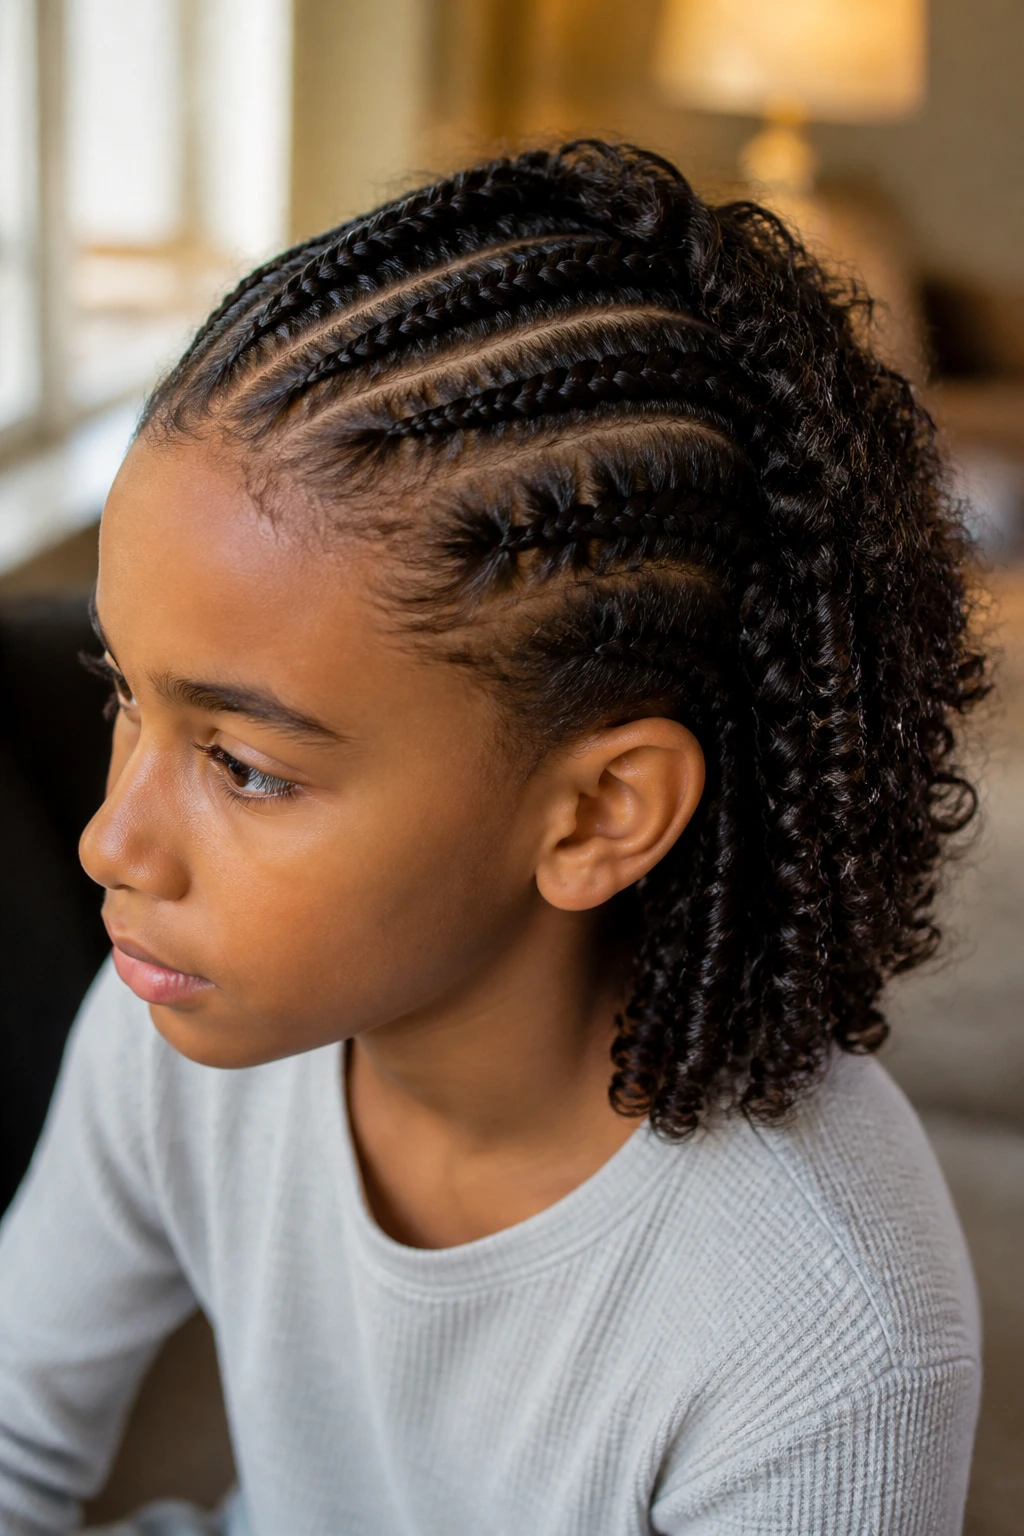
Half-braided styles let the front or top stay braided while the back or sides remain loose and curly. It’s a nice compromise when you want control without covering the whole head.
This approach works especially well for boys who like their natural texture and don’t want every strand tied up. The braids keep the front neat, and the loose section gives the style movement. That contrast keeps the whole look from feeling too severe.
Moisturize the loose curls well before styling, because they’ll show dryness faster than the braided sections. A little leave-in cream and a soft brush on the free hair make a big difference.
23. Braid-and-Twist Combo
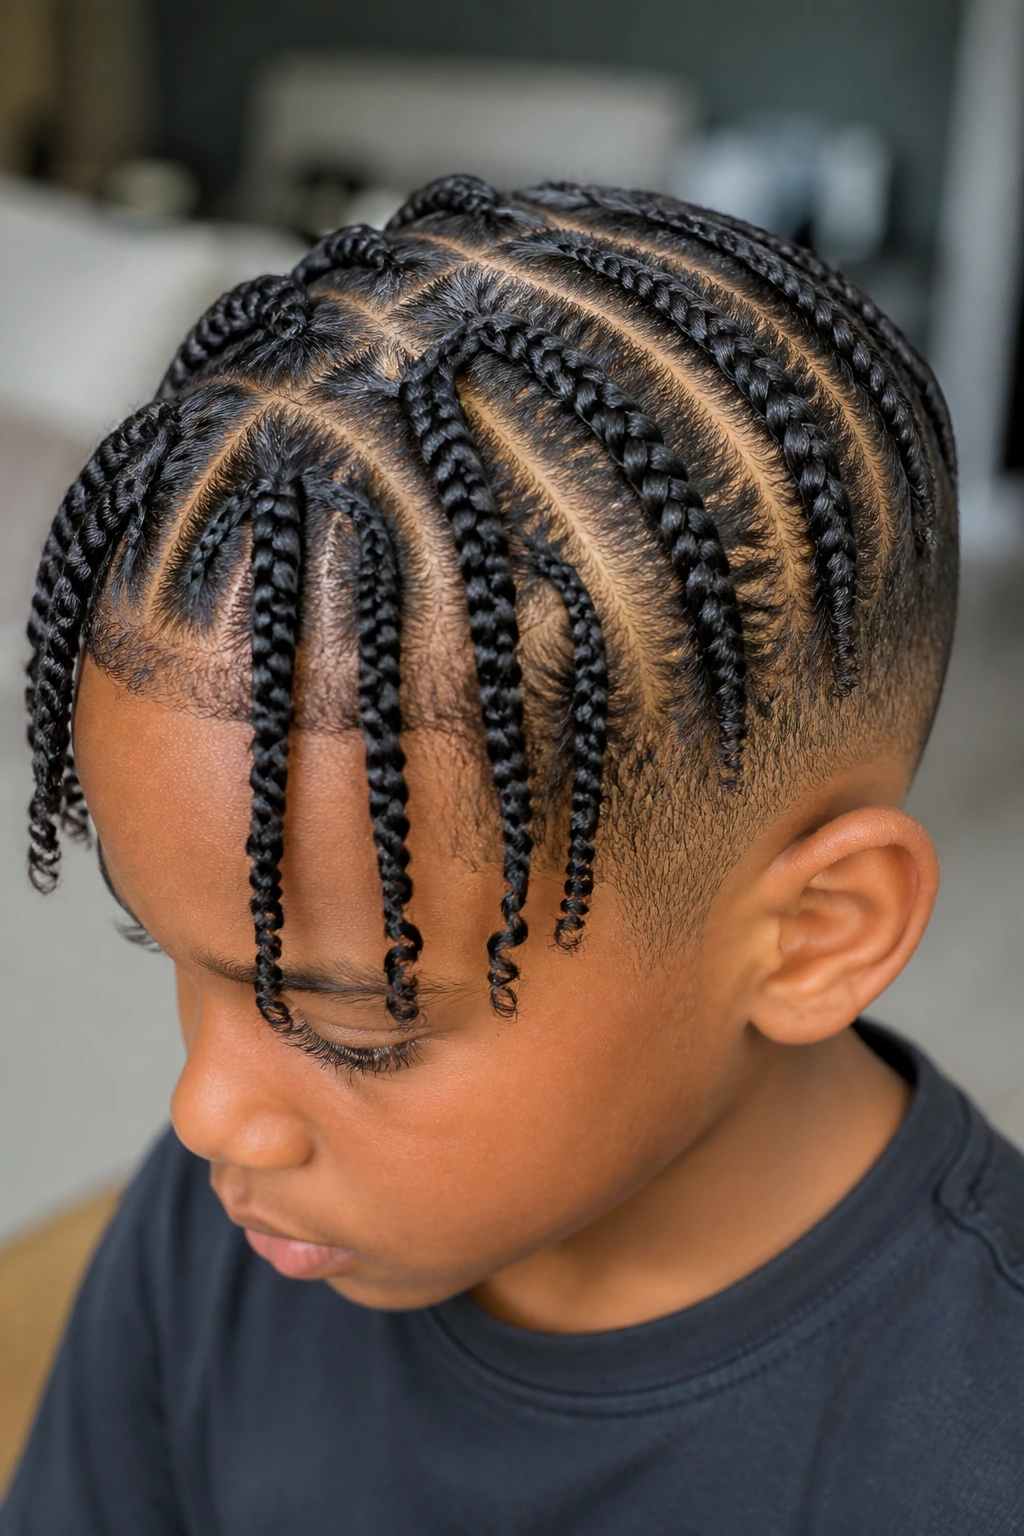
A braid-and-twist combo starts with braids near the scalp and shifts into two-strand twists or rope twists toward the ends. That change in texture softens the style and gives it a little movement at the tips.
It’s a smart option when full braids feel too heavy or too tight near the ends. Twists are often gentler at the finish and can be easier for younger kids to tolerate. The combo also looks less rigid than all-braids-all-the-time, which some boys prefer.
If the hair is shorter, this style can help bridge the gap between enough length for braiding and not quite enough for long plaits. It buys you styling options while the hair keeps growing.
24. Braided Bun at the Crown
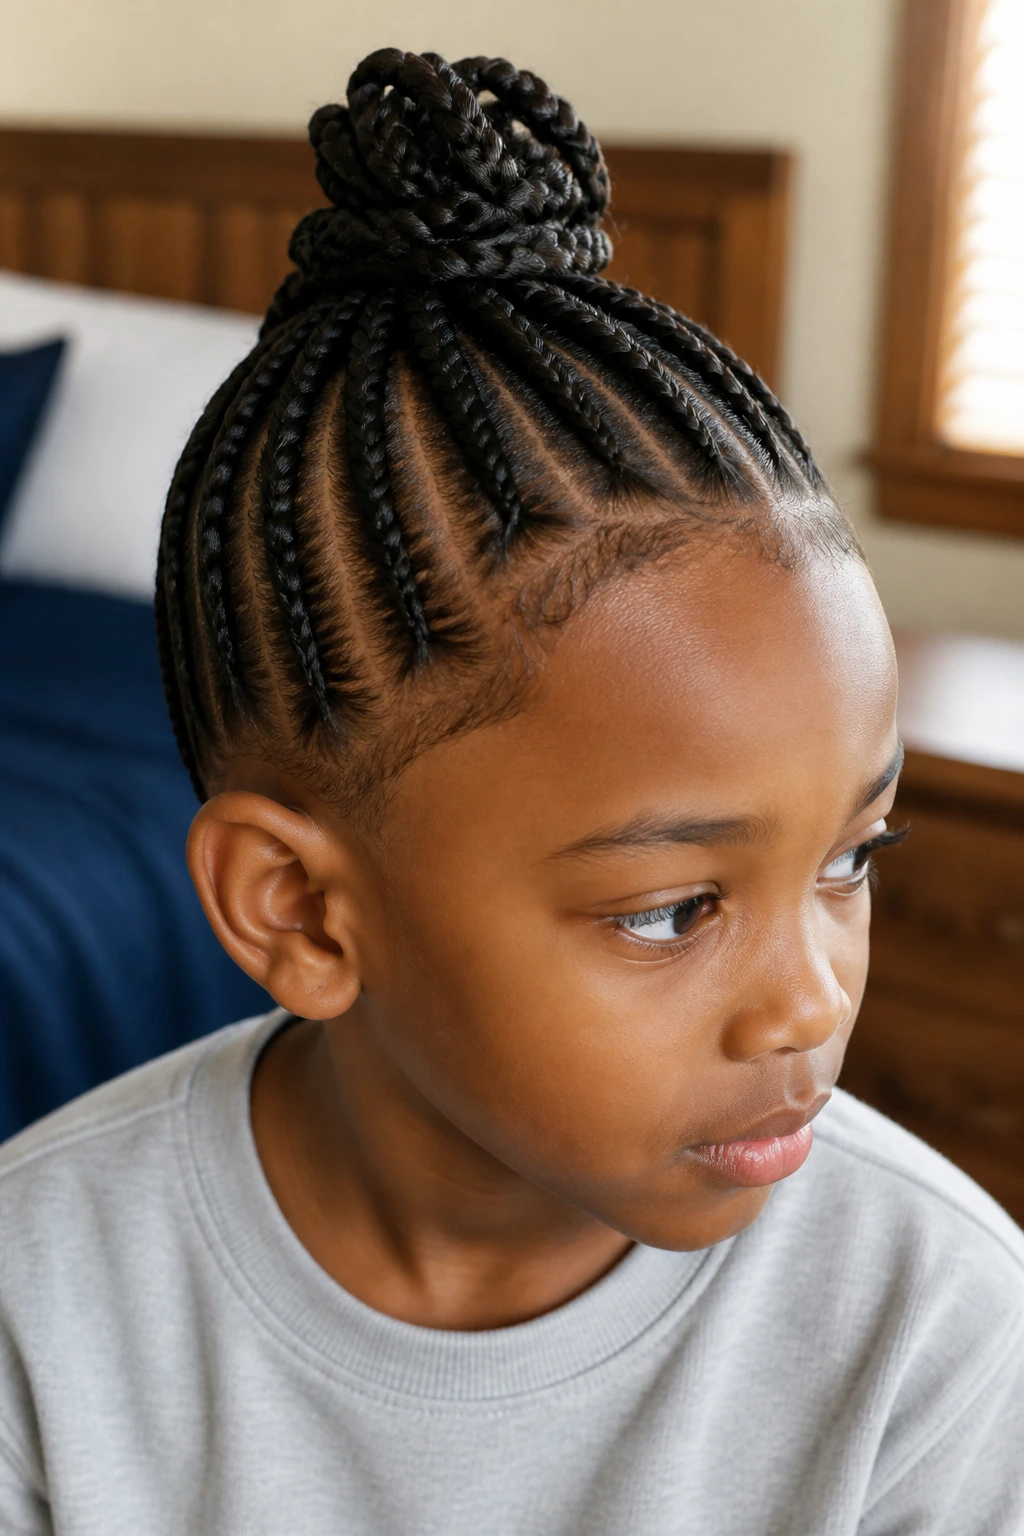
A braided bun at the crown keeps the braids piled up and out of the way, which is useful when you want a clean profile from the front and the sides. The bun can sit high for a bold look or lower for something softer.
What makes this style work is the shape. The braids feed into a single point, so the head looks tidy from every side. That’s handy for school portraits, performances, or any day you don’t want loose ends bouncing around.
Don’t overload the bun with too much braid length if the child has a tender scalp. A bulky bun can feel heavy by lunchtime, and kids notice weight sooner than adults do.
25. Spider Braids
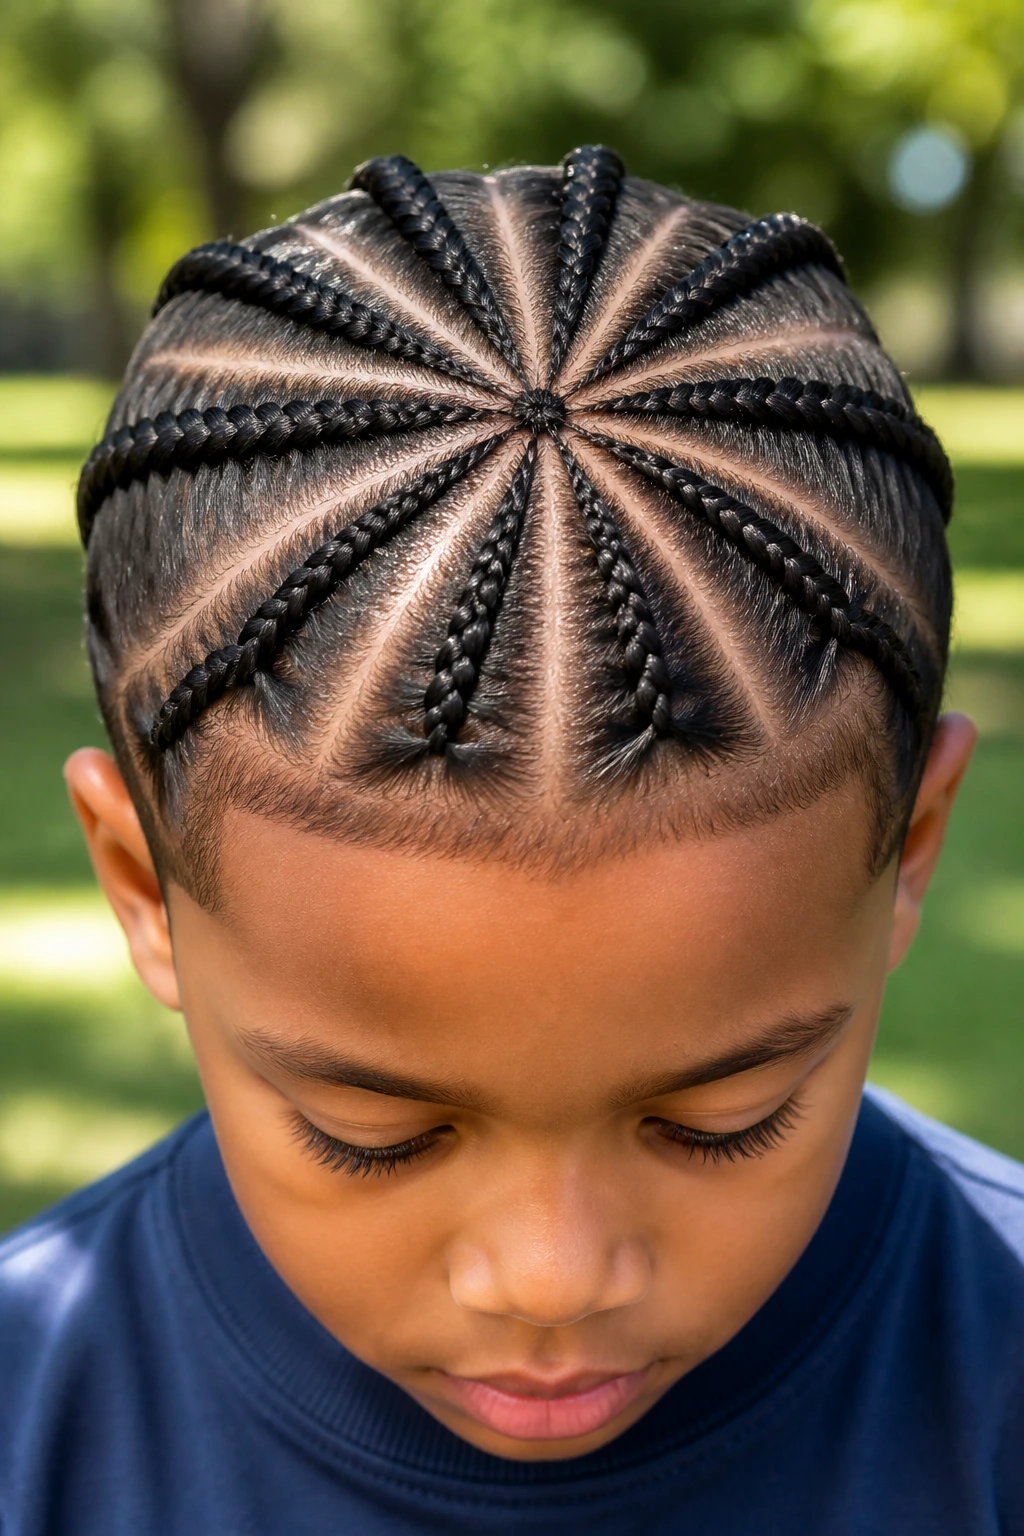
Spider braids use a center point and radiating sections that fan outward, which gives the scalp a dramatic pattern that looks a little like legs spreading from a body. It sounds bold because it is bold.
This style is less about blending in and more about having fun with the parting. The braids themselves can stay fairly simple, but the layout on the scalp turns the whole head into the design. Kids who like novelty tend to ask for this one again.
The main thing is precision. If the rays do not line up, the spider effect disappears and you just have a complicated part. Give the parting time, and do not rush the first few sections.
26. Side Braids With a Hard Part
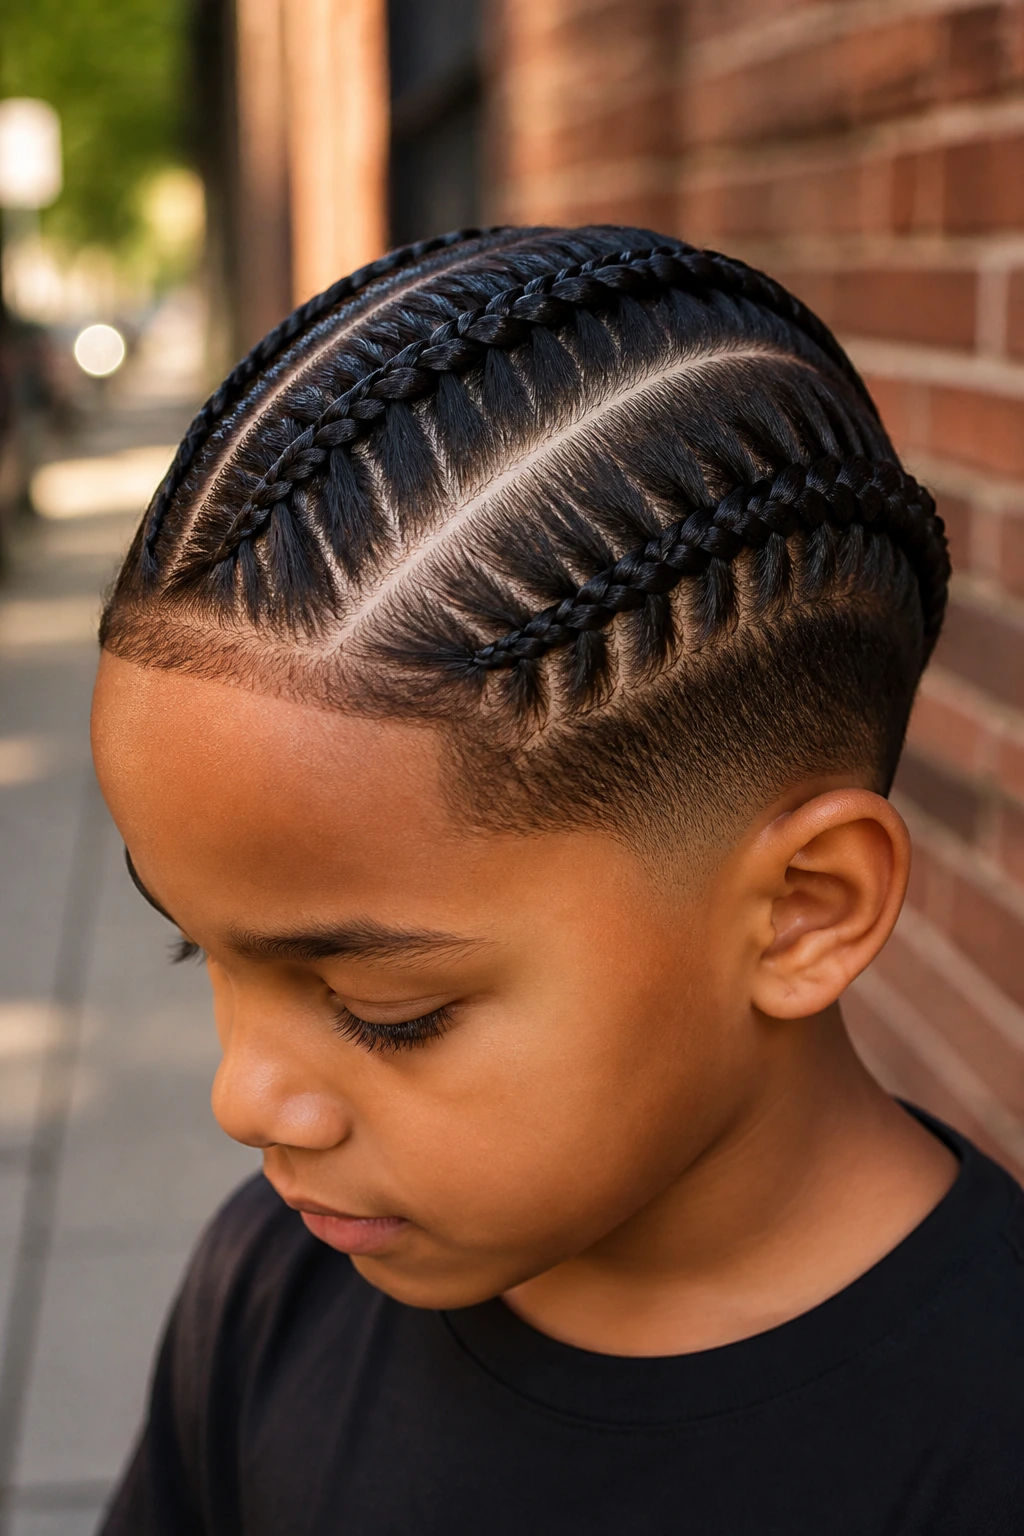
Side braids with a hard part bring in that crisp barbershop line along one side and then let the braid flow from there. The hard part gives the style a frame, while the braids soften the rest of the look.
This combination works well with fades and tapers because the hard part already creates contrast. You get structure without having to make the braids themselves too elaborate. That makes it a solid pick for boys who want a sharp look but still need the style to be practical.
A little product near the part can help the line stay visible, but don’t build it up until it looks greasy. Clean and dry beats shiny and heavy.
27. Short-Hair Cornrow Rows
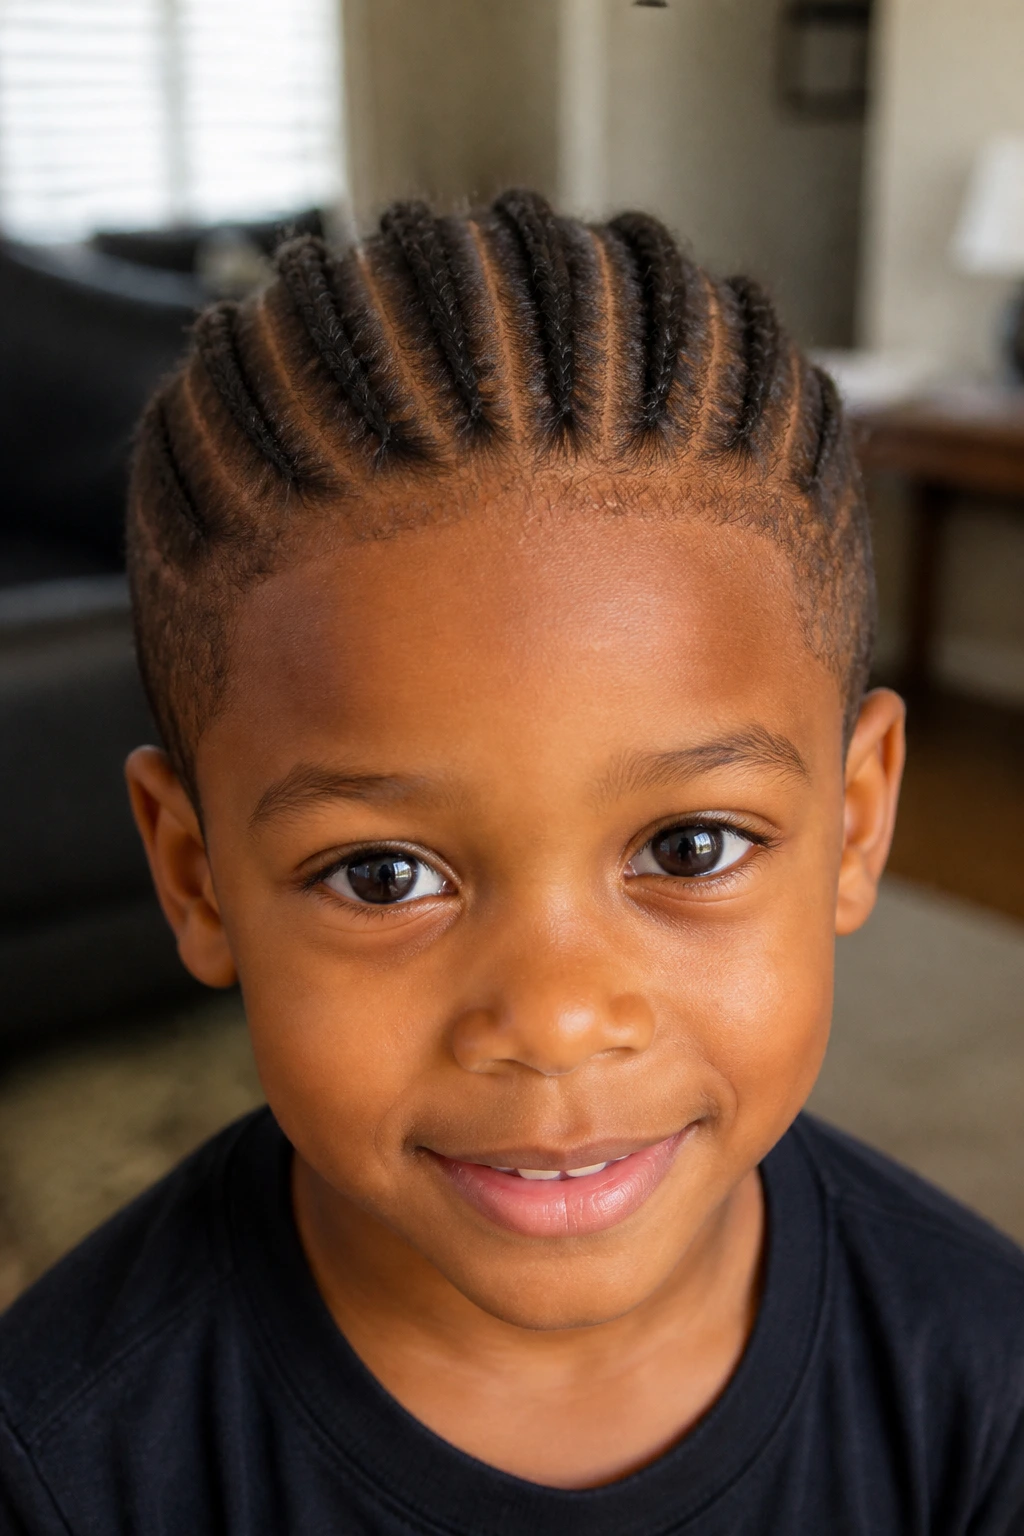
Short-hair cornrow rows are for the stage where the hair is just long enough to grab, not long enough to feel cooperative. They can be tiny, close rows that hold the crop together and give it shape.
This style matters because a lot of boys get told they need “more length” before braids can happen. Not always. If the hair is around the right length and has enough grip, very short cornrows can work neatly and look tidy instead of forced.
The tension needs to be gentle. Short hair exposes every tug, and the scalp has less buffer. Use light product, small sections, and a calm hand.
28. Bubble-Braid Finish on Box Braids
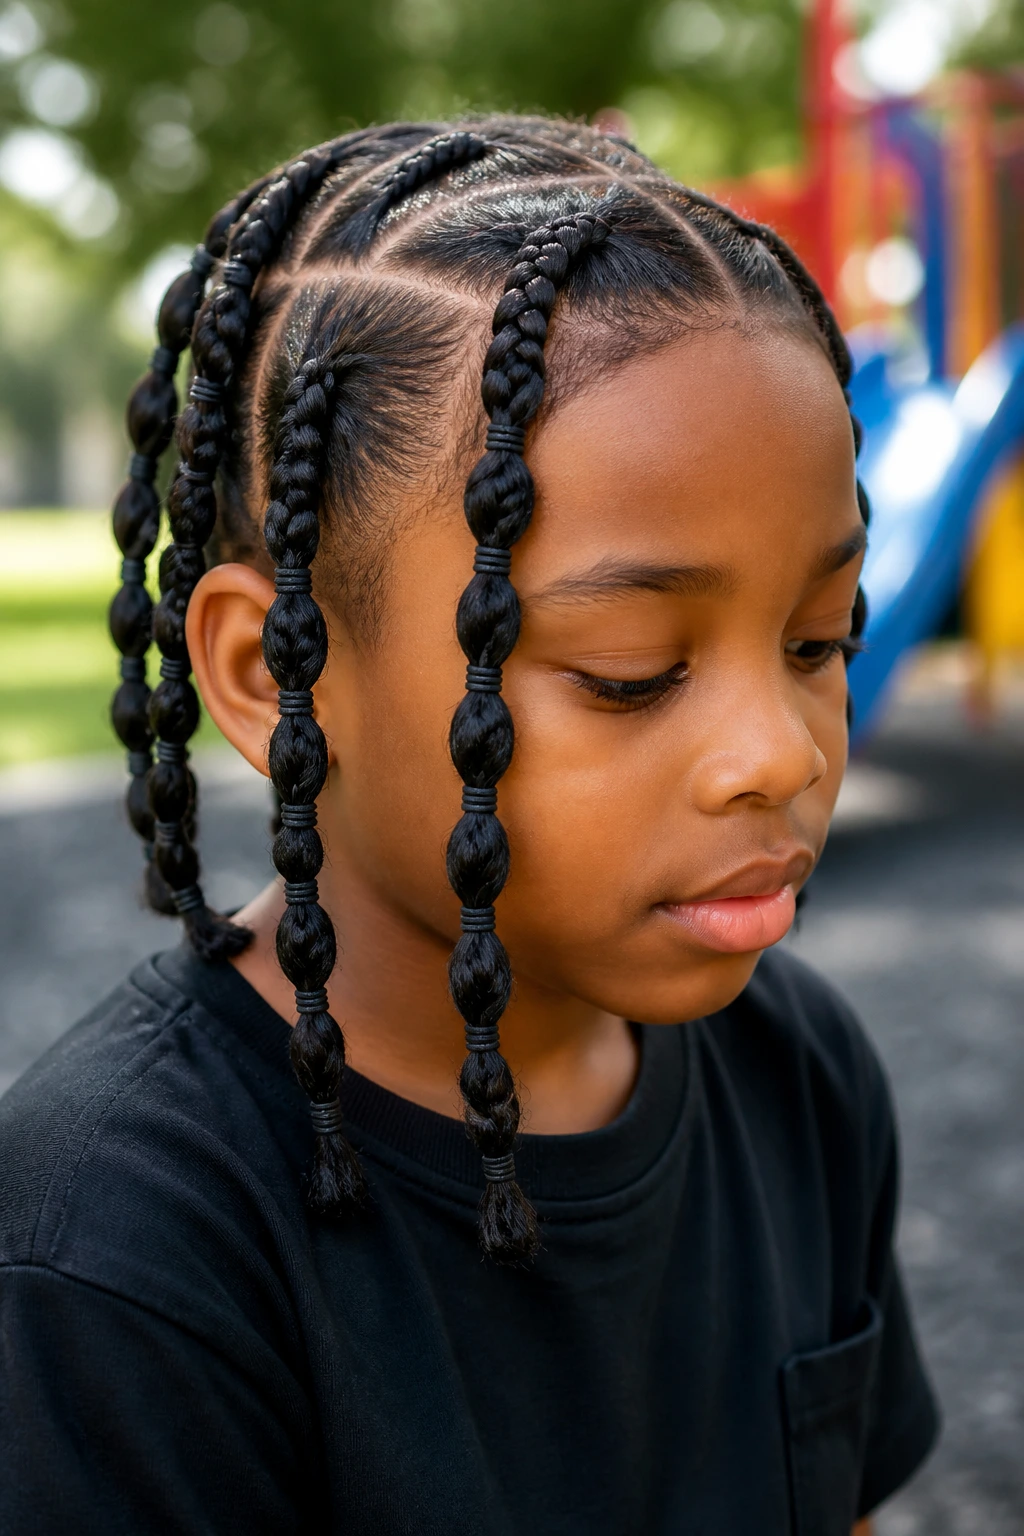
Bubble-braid finishes turn box braids into a segmented look by adding small elastics every few inches. The sections puff a little between bands, which creates a neat, playful rhythm down the length.
This is a clever way to freshen up box braids without redoing the whole head. Kids like the movement, and parents like that the ends stay better contained. It also helps longer braids look intentional instead of stringy as they grow out.
Keep the elastic spacing even. Three to four inches between bands usually looks balanced, though shorter sections work better on smaller heads. Too many bands make the braid look cramped.
Why Braids Work So Well for Active Little Boys

Braids earn their place because they handle motion better than loose styles. A child can run, nap, slide, and wrestle a backpack over one shoulder without completely undoing the shape. That matters more than people admit.
The other advantage is time. A well-braided style cuts down the morning comb-out and reduces the number of days you have to fight knots near the nape and behind the ears. If a boy’s hair tangles fast, braids can turn a rough morning into a manageable one.
There’s also a texture benefit. Braids can stretch curls and coils so the hair sits longer between detangling sessions. That does not mean you ignore the hair underneath. It means you stop starting from scratch every single day.
Hair Length, Curl Pattern, and Which Braids Hold Best
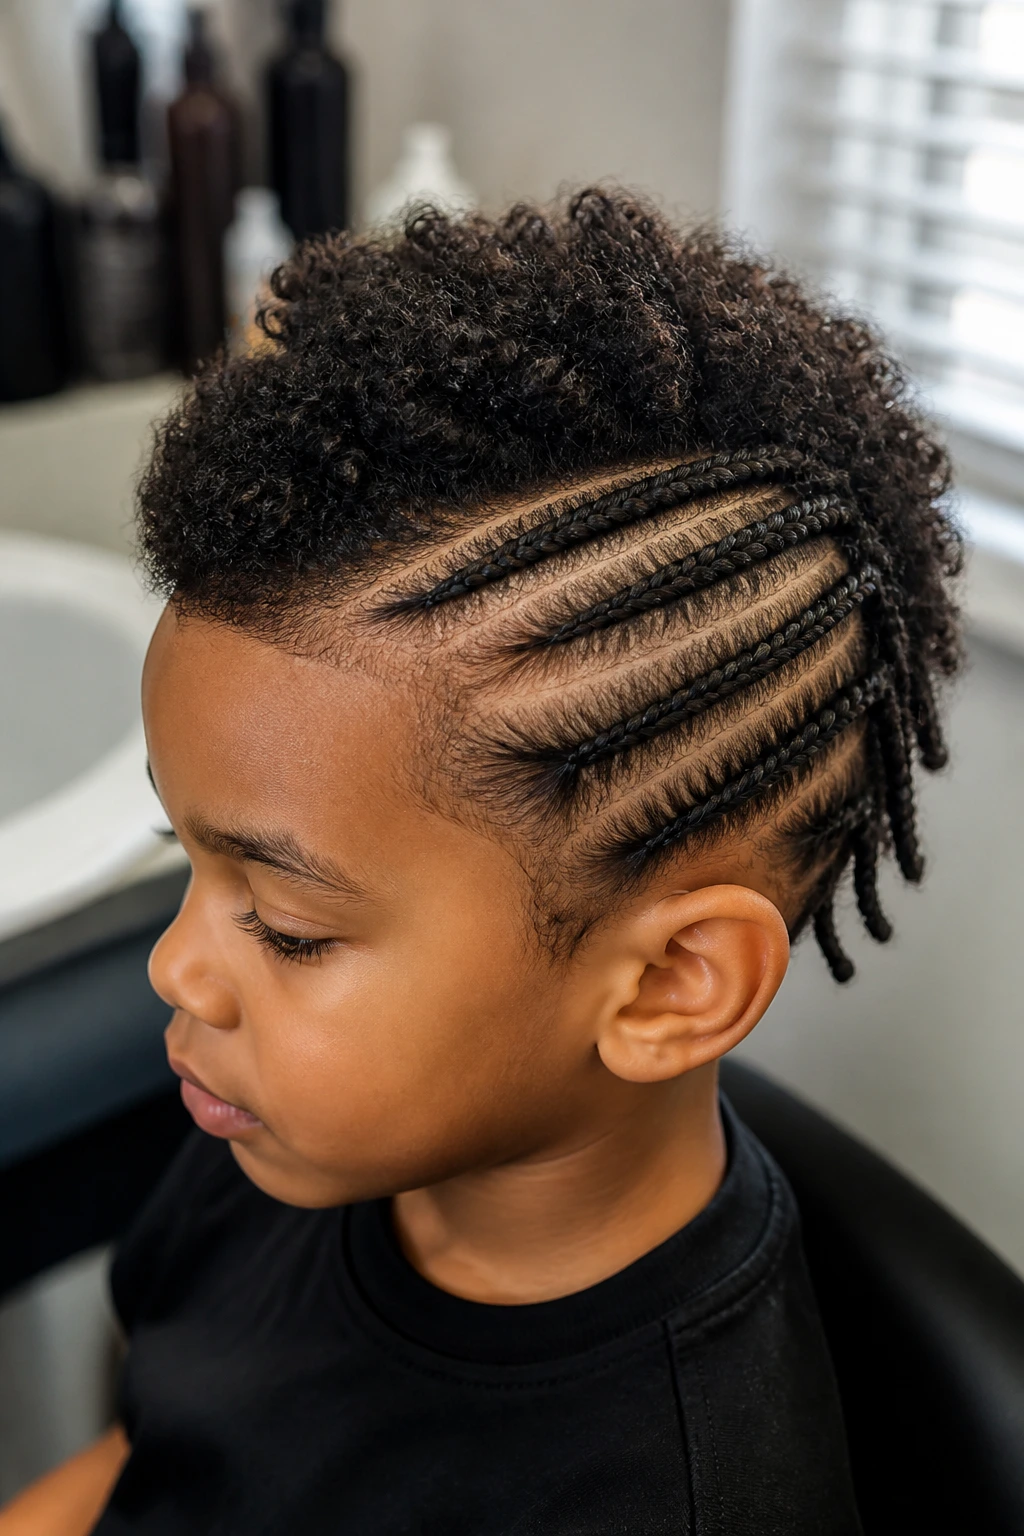
Hair length changes everything. Around 2 inches, you’re usually looking at very small cornrows, short rows, or simple braid starts. By 4 inches, more styles open up, including two braids, side sweeps, and cleaner feed-in designs. Around 6 inches or more, box braids, ponytails, buns, and braided crowns become easier to build without the ends slipping apart.
Curl pattern matters just as much. Tighter coils tend to grab the braid better and hide small gaps at the root. Softer curls and straighter textures often need more grip from product and cleaner sectioning so the braids do not slide loose after one day.
If the hair is fine, keep the braid size modest and the parting clean. If it’s thick, you can go a little bigger, but do not make the sections so large that the braid flattens out and puffs at the root by afternoon. Balance is the whole trick.
What to Have on the Counter Before You Start Braiding
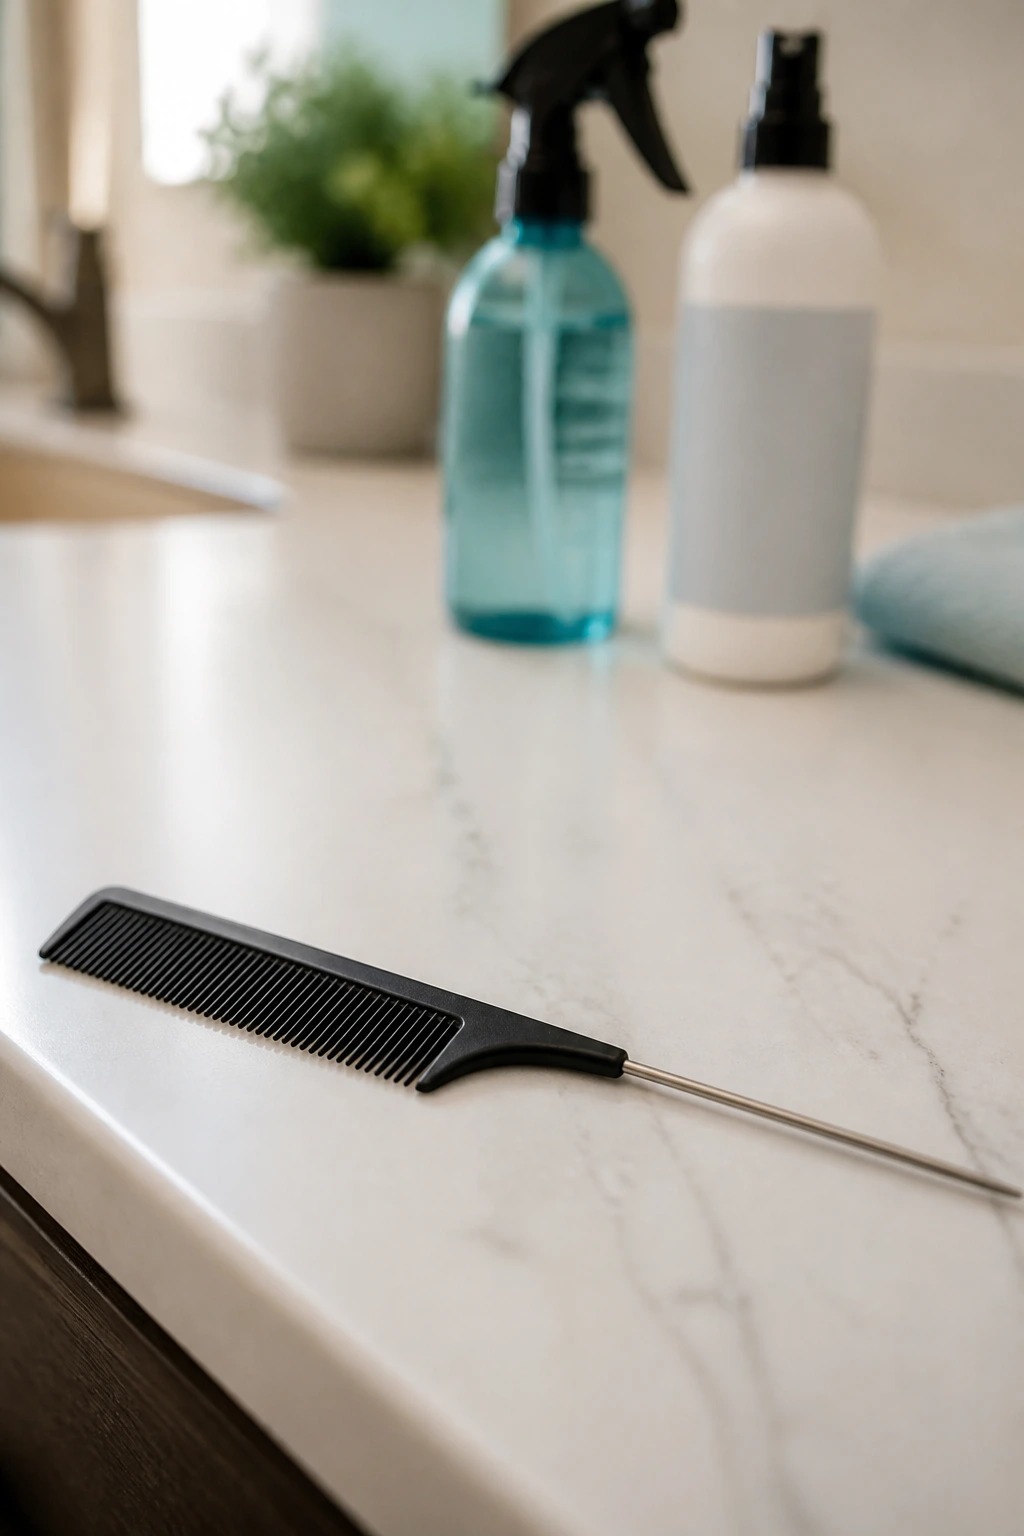
A calm braid session starts with the right tools already open, lined up, and easy to reach. Nothing kills a child’s patience like a braider digging for clips mid-section while the hair starts drying out.
-
Rat-tail comb: This is the parting tool, and the fine tip helps make clean sections without tearing through curls.
-
Spray bottle with water: A light mist softens the hair and makes detangling less of a tug-of-war. Do not soak it.
-
Leave-in conditioner: A small amount adds slip and helps the hair feel softer while you braid.
-
Detangling brush or wide-tooth comb: Use this before sectioning so the braid starts smooth instead of fighting knots.
-
Sectioning clips or small clamps: These keep the unbraided hair out of the way and stop the parts from collapsing.
-
Light styling gel or braid cream: A small amount at the roots can help with neatness, but too much leaves buildup fast.
-
Soft towel or cape: Keeps hair and product off clothes, which makes the whole process less irritating for everyone.
-
Satin bonnet or scarf: Handy for bedtime, and worth having ready before the first braid goes in.
-
Small elastics: Useful for ends, ponytails, and bubble-braid finishes. Pick ones that do not snag.
-
Optional bead set or braid cuffs: Nice for kids who want a little finish detail, but they should never be so heavy that they tug the braid down.
How to Prep Little Boys’ Hair Without a Fight
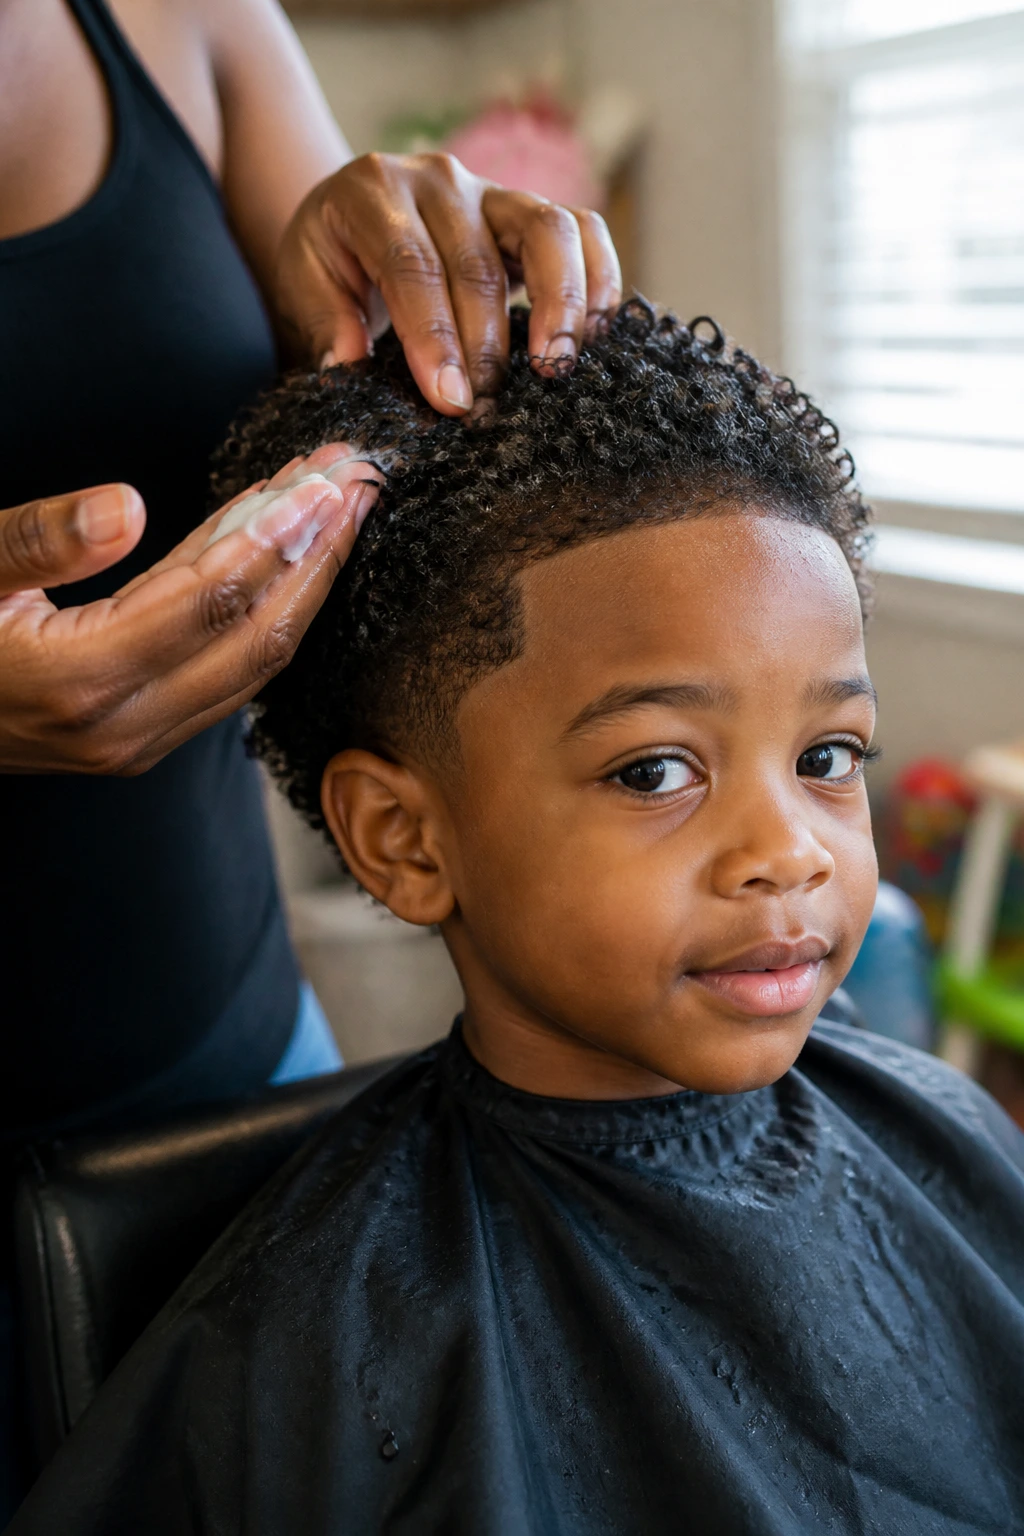
Prep is where good braid styles are either saved or ruined. Start with hair that is clean enough to part, but not so dry that every comb stroke snaps at the ends. A little leave-in conditioner on damp, detangled hair usually gives you the best base.
Work from the ends upward. That part matters more than people think. If you attack the roots first, you trap knots underneath and the braid will feel lumpy no matter how neat the top looks. A wide-tooth comb or detangling brush moves easier once the tangles are broken down in small sections.
And keep the product light. Heavy grease near the scalp makes parts slide shut and gives braids a greasy look before they’ve even had a chance to settle. A thin layer of cream, not a thick coating, is enough for most heads.
One more thing: get the child comfortable before you start. Snack, show, tablet, whatever works. Little boys can handle braid time much better when they know the chair is not a punishment.
How to Keep Braids Comfortable and Neat
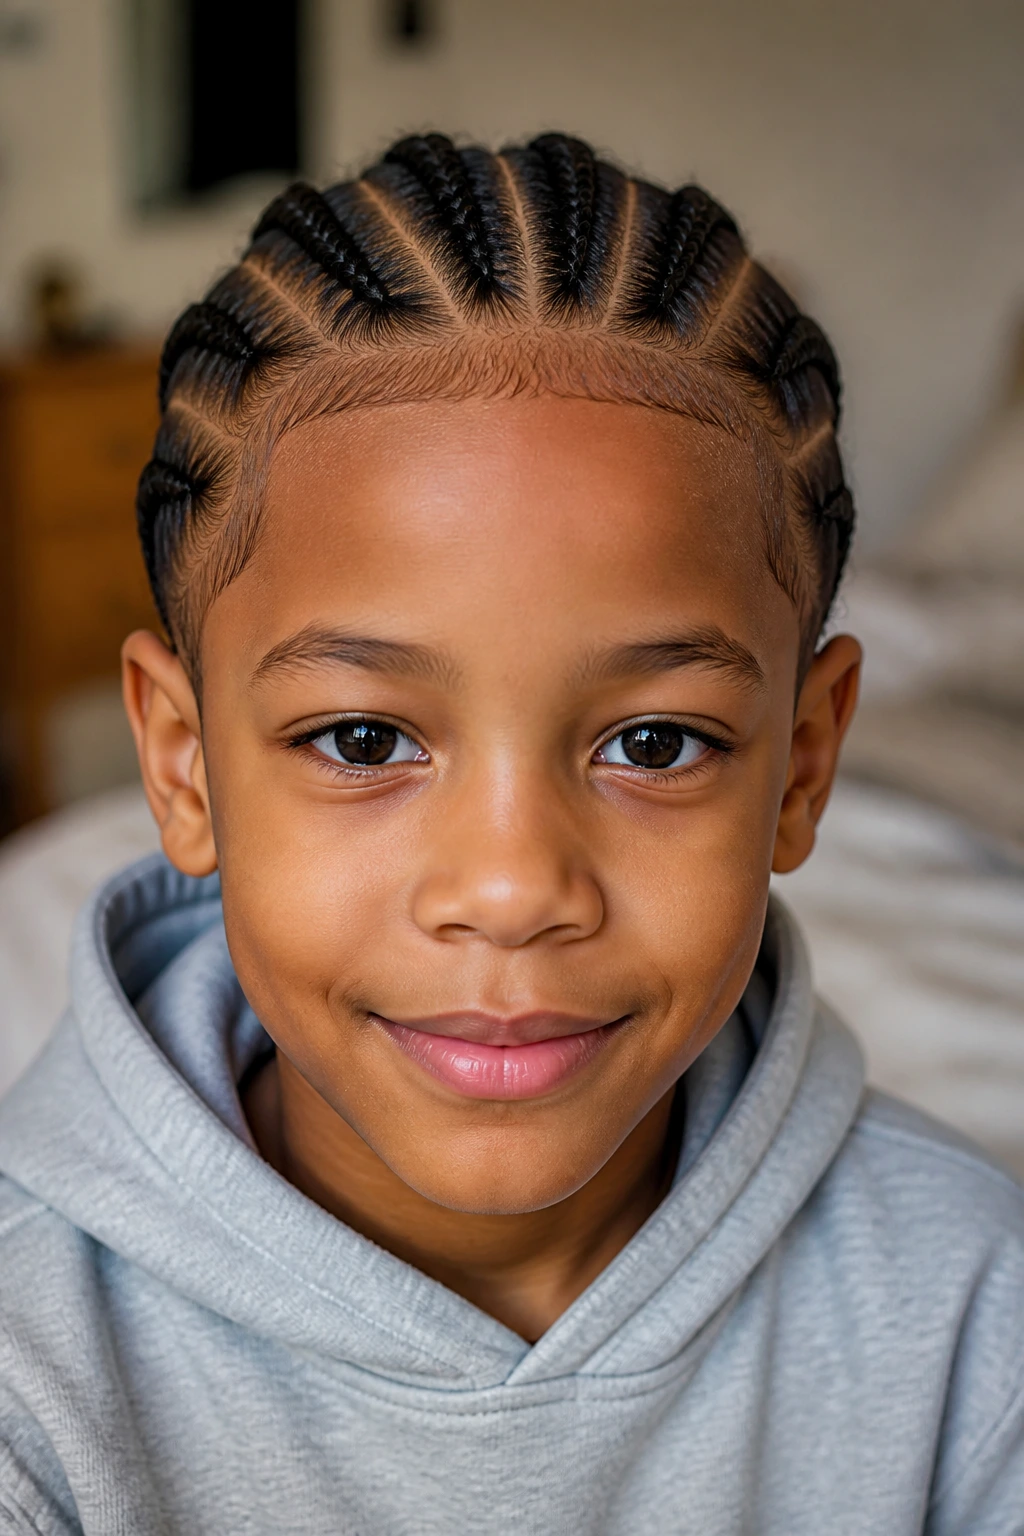
The cleanest braid is not the tightest braid. If the first row feels like a tug at the temples, the style may look fresh for a day, then turn into a complaint by bedtime. Gentle tension wins.
Keep the braid size matched to the hair density. Tiny sections on thin hair can look sparse, while huge sections on thick hair can puff out too fast. The braid should sit close enough to the scalp to hold, but not so close that the skin looks angry afterward.
I’m also a fan of a soft finish at the hairline. The edges should lie down, not be scrubbed flat with layers of product. Too much gel at the front can flake and dry out by lunchtime, which is not the look anybody wants.
Common Mistakes That Make Braids Hurt or Fall Apart
The first mistake is braiding too tight at the hairline. Kids will tell you with their faces, and sometimes with tears, before they use words. If the style pulls when they blink or lean back, loosen the first section next time.
Another common problem is overloading the scalp with product. Thick cream and heavy gel make the parts greasy, attract lint, and leave the braids dull before the day is half over. Use enough to help the hair move, then stop.
Skipping detangling is a fast way to get a lumpy braid with little knots trapped inside. The outside may look fine, but the braid will not sit smooth and the child will feel every snag. Work the hair out first, even if you’re in a hurry.
One more: parting too big. Large sections fall apart faster and leave the braid looking sloppy sooner. Smaller, cleaner sections usually last longer and look better as they loosen.
Variations and Adaptations for Different Hair Types and Routines
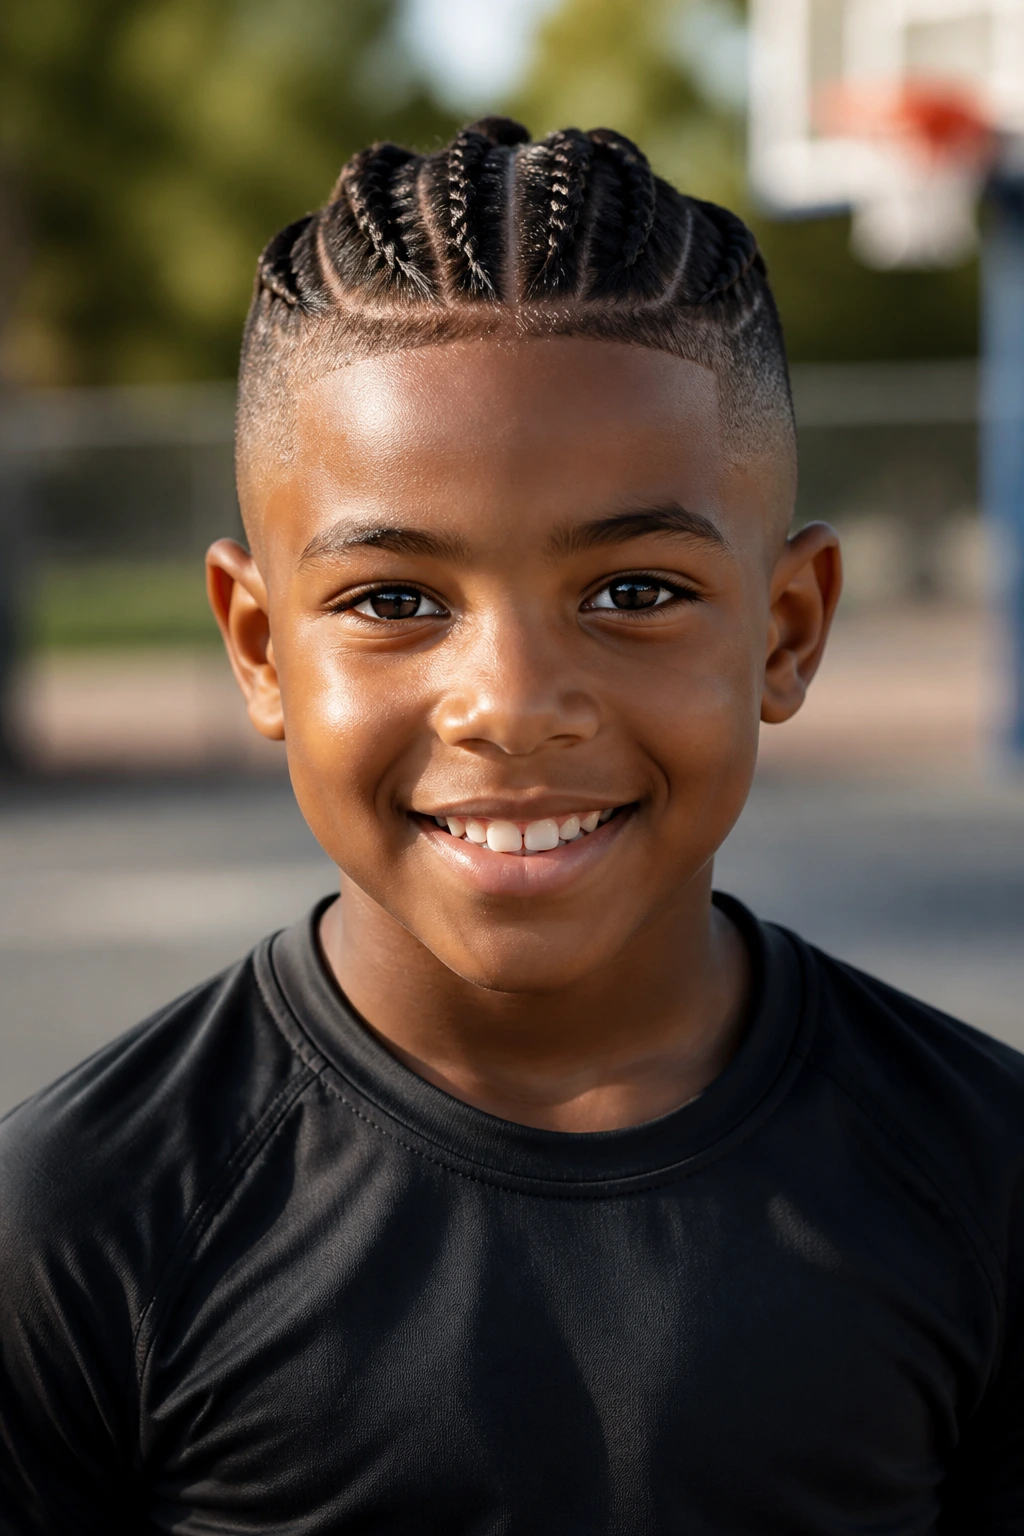
The School-Morning Shortcut: Use two braids, four rows, or a single center braid when time matters more than decoration. These styles keep the front neat without turning the morning into a full salon session.
The Sensitive-Scalp Version: Choose larger sections, gentler tension, and fewer accessories. Skip heavy beads and keep the first inch at the hairline soft, because that is where most children object first.
The Thick-Hair Shield: Box braids, mini braids, and braid-and-twist combos hold well when the hair is dense and springy. They stretch the texture a bit and can last longer between resets, which is useful if the child is active.
The Photo-Day Style: Zigzag parts, heart parts, stitch braids, or crisscross patterns give a little extra detail without needing bright color. These are the styles that read well in pictures because the parting shows up clearly.
The Sport-Ready Edit: Braided ponytails, braided buns, and braided mohawks keep length off the neck and out of the eyes. They’re better when helmets, sweat, and quick changes are part of the day.
Sleeping, Washing, and Refreshing the Style
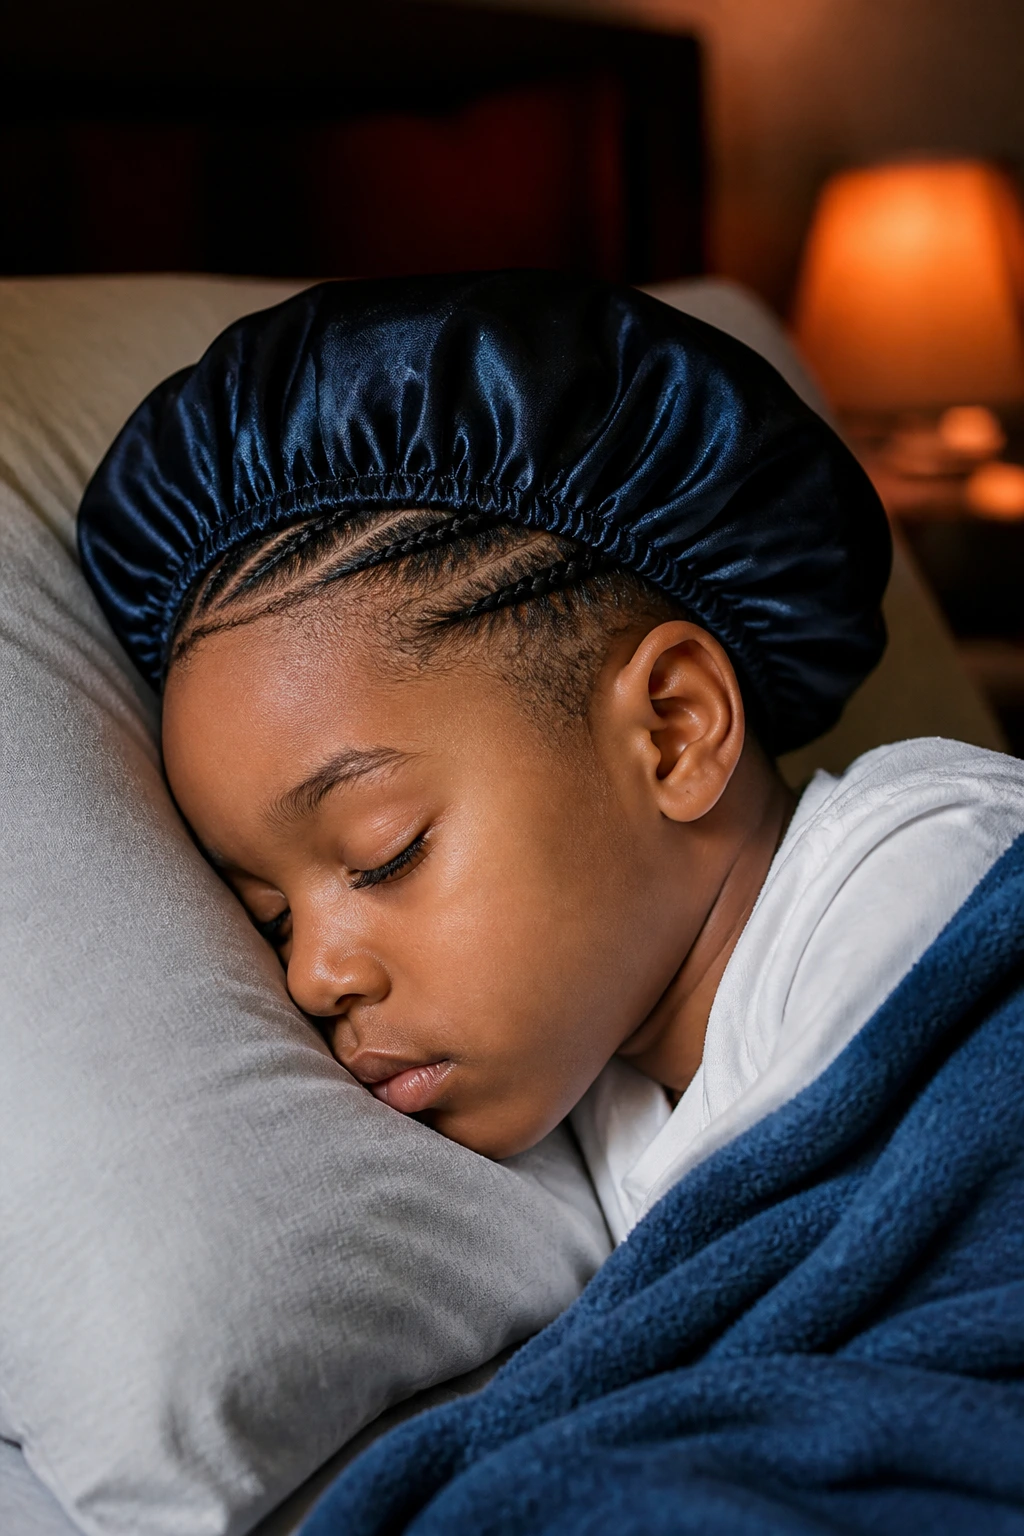
Braids last longer when they’re treated like a style, not a one-time event. At night, a satin bonnet or scarf keeps the rough cotton pillowcase from frizzing the roots and drying the hair out. If the child hates hats on their head, a satin pillowcase is the next best thing.
Washing depends on the style and how much product was used, but many braided looks do best with a gentle wash every 1 to 2 weeks. Use a diluted shampoo at the scalp, massage with the pads of the fingers, and rinse carefully so product does not sit in the roots. Then dry the hair fully. Damp braids that stay wet too long can smell off and feel heavy.
For refreshing, a light mist of water plus a little leave-in conditioner at the roots is usually enough. Don’t soak the whole head. A dry scalp with a clean parting is more useful than wet braids that smell like half-dried towels by the afternoon.
Essential Equipment for These Hairstyles
-
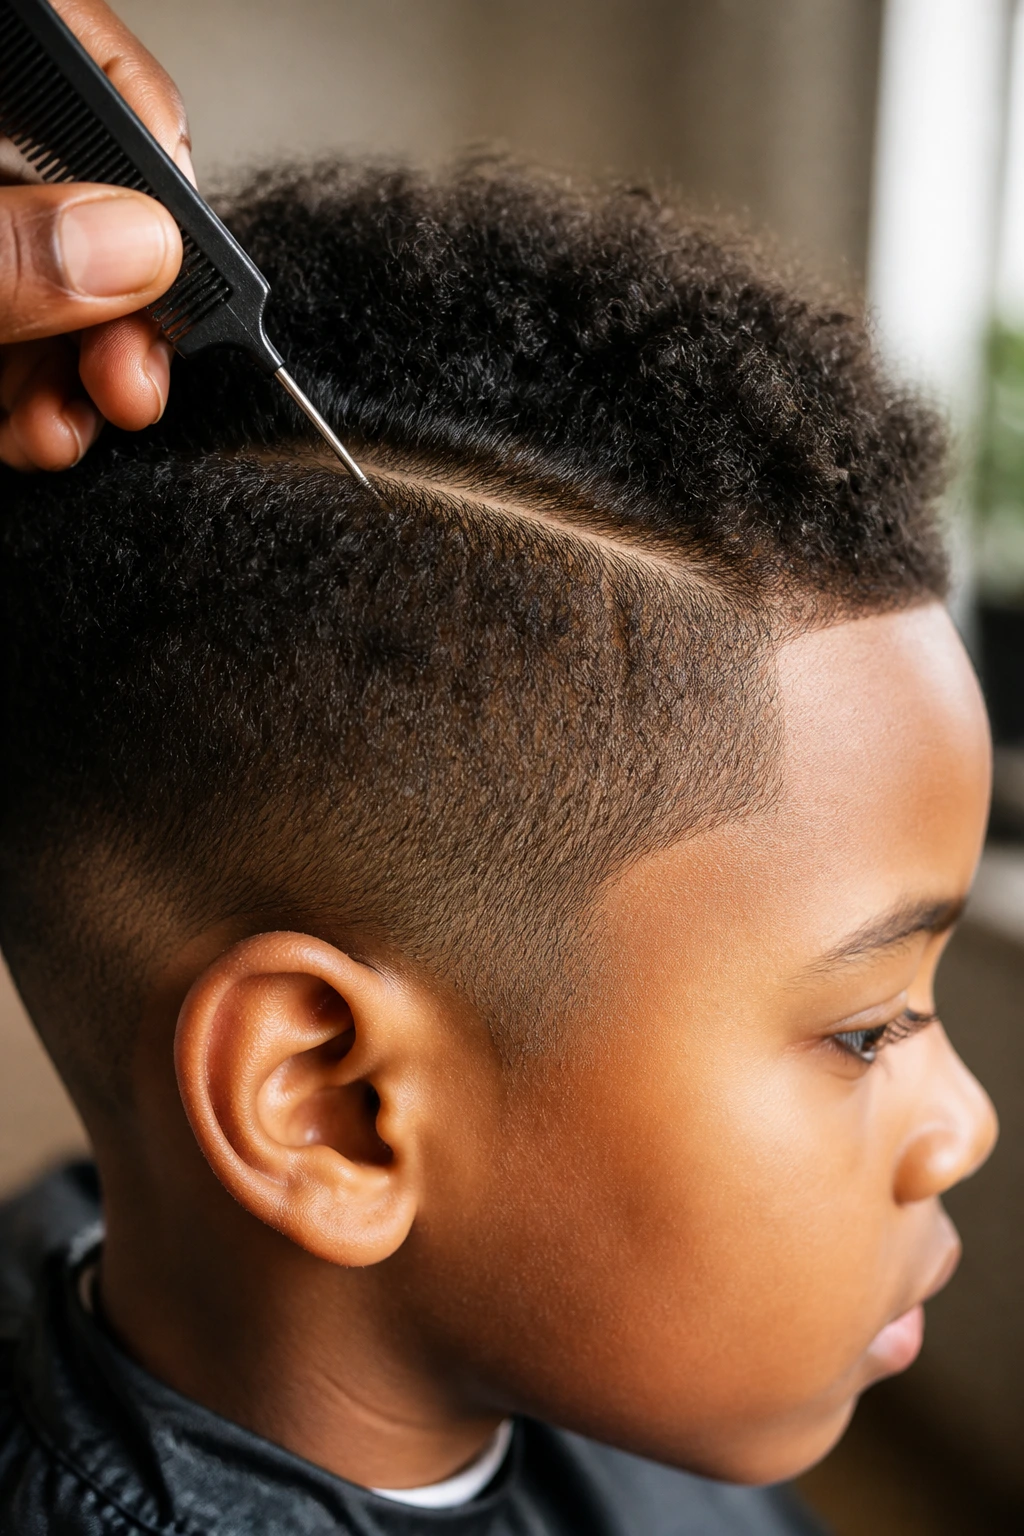
Rat-tail comb: Best for crisp parting, especially in zigzags, hearts, and stitch patterns.
-
Wide-tooth comb or detangling brush: Helps smooth hair before sectioning so the braid starts clean.
-
Spray bottle: A mist of water softens hair and makes braiding easier without soaking the scalp.
-
Leave-in conditioner: Adds slip and helps reduce snagging on dry ends.
-
Light braid gel or cream: Useful for smoothing roots and taming flyaways, but keep the layer thin.
-
Sectioning clips: Hold the unbraided hair away from the section you’re working on.
-
Small elastics: Needed for ponytails, braid ends, bubble finishes, and some bead styles.
-
Satin bonnet or scarf: Helps preserve the shape overnight and reduces friction.
-
Soft towel or barber cape: Keeps product and damp hair off clothing and shoulders.
-
Optional beads, cuffs, or wraps: Nice for finishing touches, but light is better than heavy.
Smart Product Choices for Cleaner Parts and Softer Holds
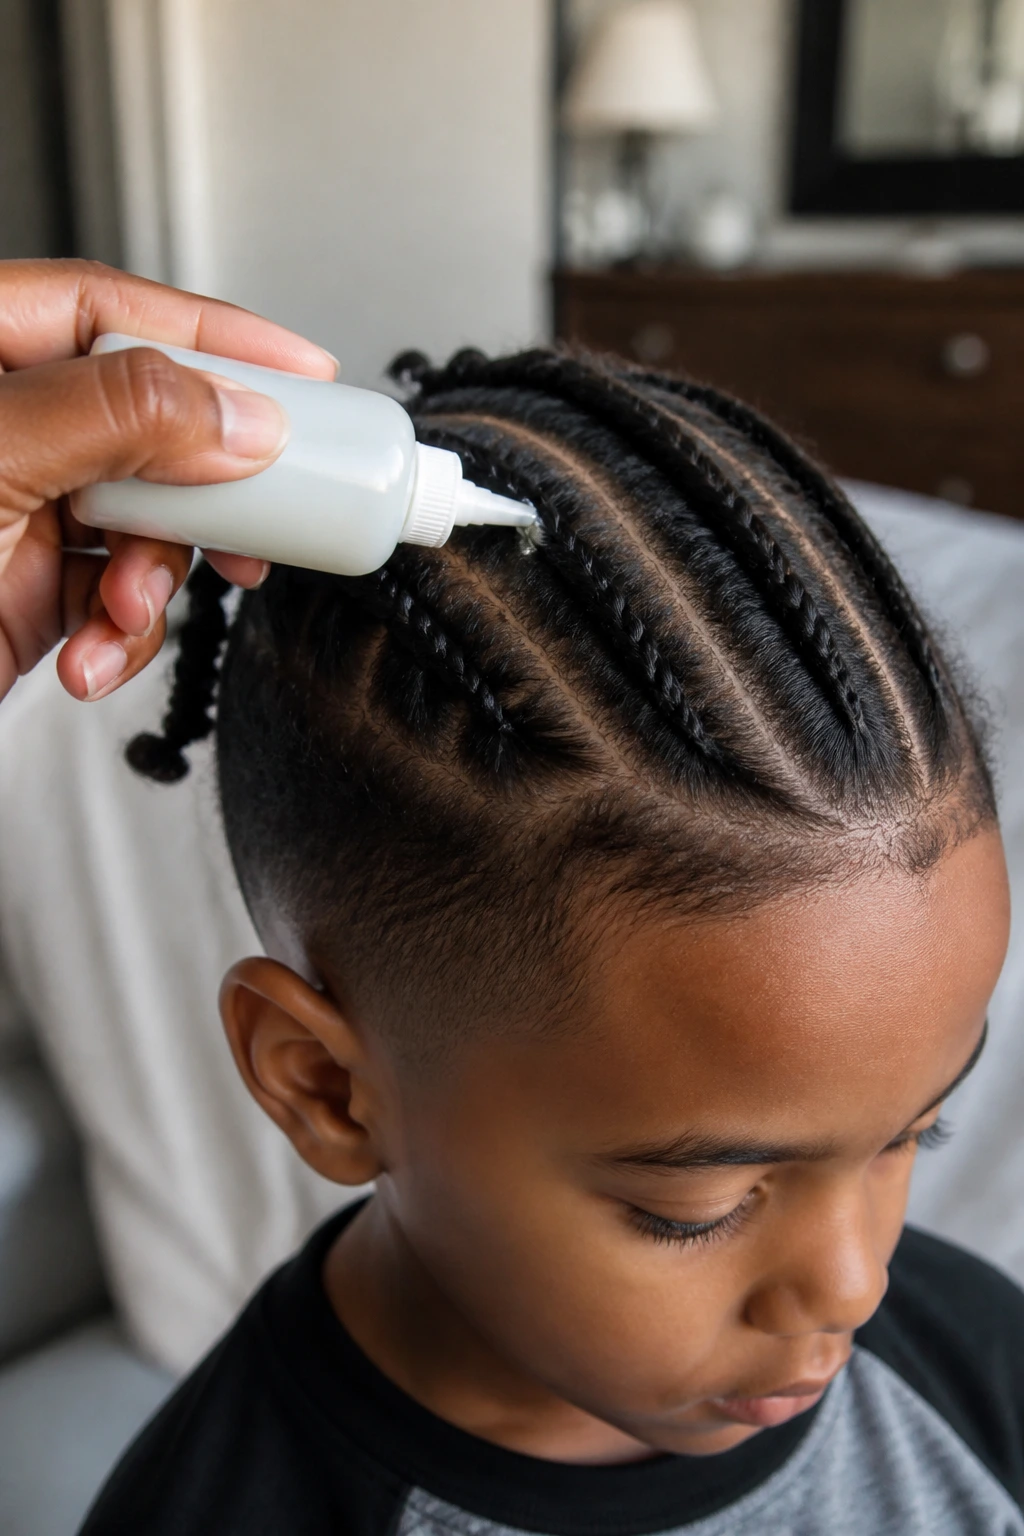
The best product for boys’ braids is usually the one that helps without leaving a hard shell on the scalp. Heavy pomades can make the hair look neat for an hour and messy by lunch because they collect lint and flatten the braid at the roots. A lighter cream or alcohol-free gel usually gives you more control with less buildup.
If the hair is coarse and dry, a leave-in conditioner does more for the finished look than a pile of edge control ever will. Moisture at the strand level helps the braid lie smoother and makes take-down easier later. On softer hair, use even less product so the braids don’t slip.
Accessory choice matters too. Lightweight beads, small rubber bands, and slim cuffs hold up better for kids than chunky decorative pieces. If it feels heavy in your hand, it will feel heavier after a full day of moving around.
How to Keep Braids Neat Without Pulling the Hairline
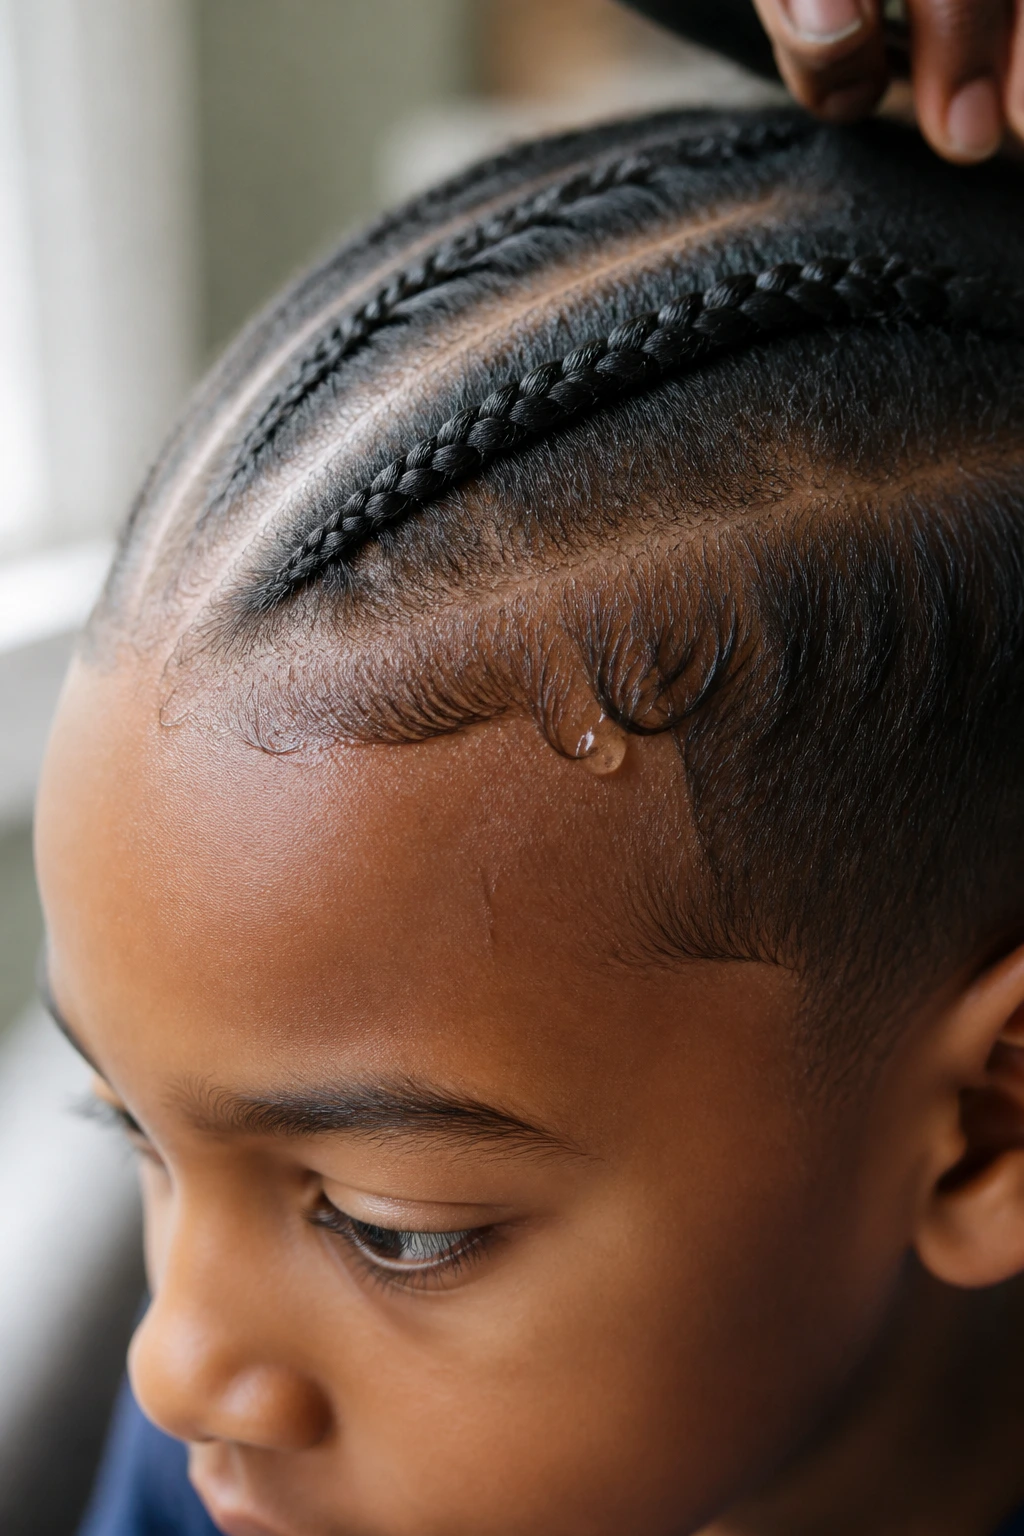
The front hairline is the part that gives braids away first. If it looks tight, red, or puffy, the whole style reads uncomfortable even when the rest is perfect. So the goal is neat, not strained.
Start the braid with a little room at the hairline, then gradually tighten only as much as the texture needs. The braid should settle close to the scalp, not dig into it. A child who keeps touching the front by midday is telling you the first row was too aggressive.
A little water and a small amount of product help the braid sit smoother than force does. And if the parts are crooked, do not fix them by pulling harder. Re-part the section. That takes longer, but it saves the scalp.
Frequently Asked Questions
How short can a boy’s hair be for braids?
Usually around 2 inches gives you enough grip for very small cornrows or simple rows, though thicker textures can hold a little sooner. If the hair keeps slipping when you section it, it’s probably not ready for larger styles yet.
Do braids hurt little boys?
They should not. A firm braid can feel snug, but it should not pull at the temples, behind the ears, or at the nape. If the child complains early in the style session, the tension is too high.
How long do boys’ braids usually last?
Simple cornrows may look clean for about 1 to 2 weeks, while box braids and smaller sections can last longer with good care. The actual wear time depends on how active the child is, how much they sweat, and whether they sleep with a bonnet or scarf.
Can straight or wavy hair be braided the same way as coily hair?
Yes, but the braid may need more product and tighter sectioning to keep it from slipping. Looser textures often do better with styles that hold the hair close to the scalp, like French braids or feed-in rows.
What if the braids puff up after the first day?
That usually means the parts were too large, the hair was too dry, or the style needed more grip at the root. A light mist and a tiny amount of leave-in can help, but if the sections were oversized, the next braid set should be smaller.
Are beads okay for school?
Usually, yes, if they’re lightweight and secured well. Some schools are fine with them, while others may have rules about noise or dangling accessories, so check the dress code before adding a full bead set.
How often should braided hair be washed?
Many boys do well with a gentle cleanse every 1 to 2 weeks while braids are in, depending on scalp oil and activity level. Clean the scalp carefully and dry the style fully so moisture doesn’t sit trapped at the roots.
Can these styles be done without extensions?
Absolutely. Most of the styles here are built with the child’s own hair and do not need added hair. Extensions only make sense if you want extra length, a fuller braid, or a more dramatic finish.
Variations That Fit Different Days and Different Kids
Soft-Edge Braids: Use looser first rows, smaller amounts of product, and fewer accessories for a child with a tender scalp. This version keeps the look neat without turning the hairline into a pressure point.
Fast-Exit Braids: Choose two braids, four rows, or a single center braid when you need the style done before attention runs out. These are the easiest shapes to remove later, too, which matters on busy weeks.
Long-Wear Braids: Box braids, mini braids, and braid-and-twist combos usually hold longest when the hair is thick enough to support them. They take more time upfront, but they stay orderly better than very wide rows.
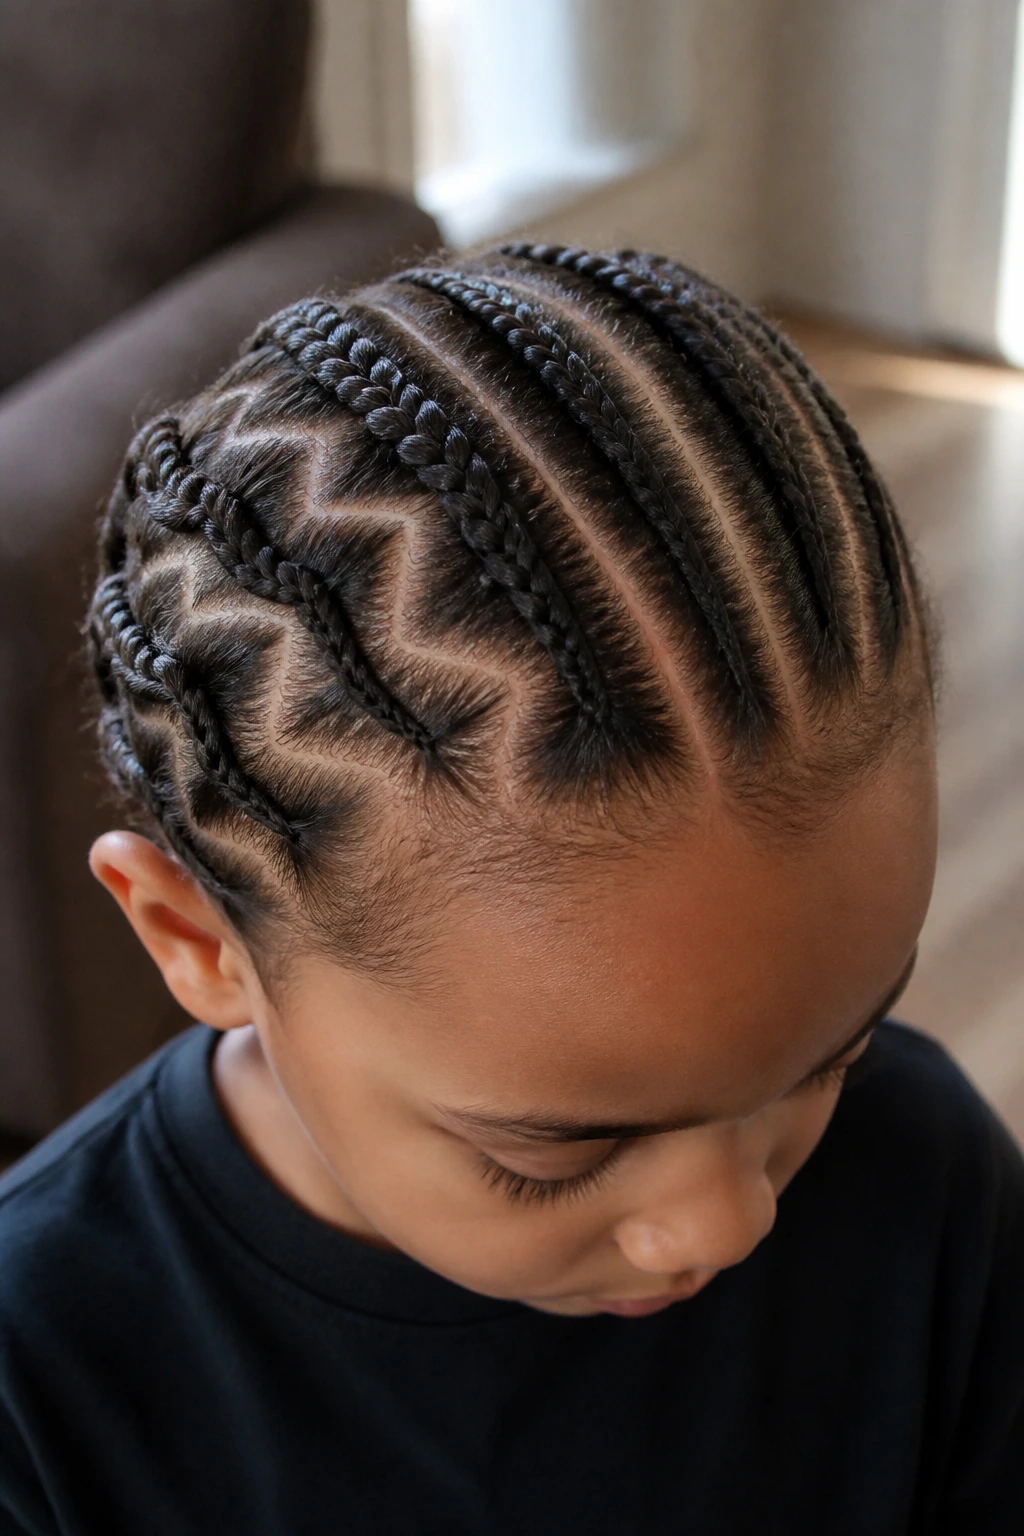
Picture-Day Braids: Heart parts, stitch braids, crisscross patterns, and zigzags give you visible design without needing bright color. They look best when the parting is sharp and the braid size stays even.
Playground Braids: Braided ponytails, braided buns, and braided mohawks keep length contained and reduce mid-day unraveling. They’re not fancy. They’re practical, and that’s why they work.
The Styles That Still Feel Like Kids
The best braid on a little boy is the one that still lets him be a little boy. It should survive the slide, the nap, the snack break, and the rush out the door without needing three rescue products and a pep talk. That’s the real test.
Pick the style that fits the hair you actually have, not the one you wish would magically appear. Shorter hair wants simpler rows. Thick coils can carry more pattern. Sensitive scalps need gentler tension, even if the parts are not perfect.
And if one style does not hold the way you hoped, that’s not failure. It just means the next one needs a different braid size, a different parting pattern, or a lighter hand at the front. The good braid is the one he’ll wear comfortably tomorrow, not the one that looks frozen in place today.
