



Long hair can go flat in a way that feels unfair. The length is there, the shine is there, and still the whole shape hangs like a curtain that forgot to move. Short layers on long hair for volume fix that by taking weight off the places where hair collapses — around the crown, through the cheeks, and sometimes right under the top surface — so the hair lifts instead of dragging itself down.
The tricky part is that not all layers do the same job. A short piece cut in the wrong place can make the ends look thin and the top look busy, which is why some layered cuts feel airy and others feel choppy in the worst possible way. The good ones keep the long silhouette intact while giving the hair room to bend, swing, and separate just enough to look full.
Some of the cuts below are quiet and polished. Others lean into texture and a little attitude. What they all have in common is simple: long hair does not need to be heavy to look long, and it does not need to be blunt to look healthy. It just needs the right layer map.
Why These Layered Cuts Stand Out
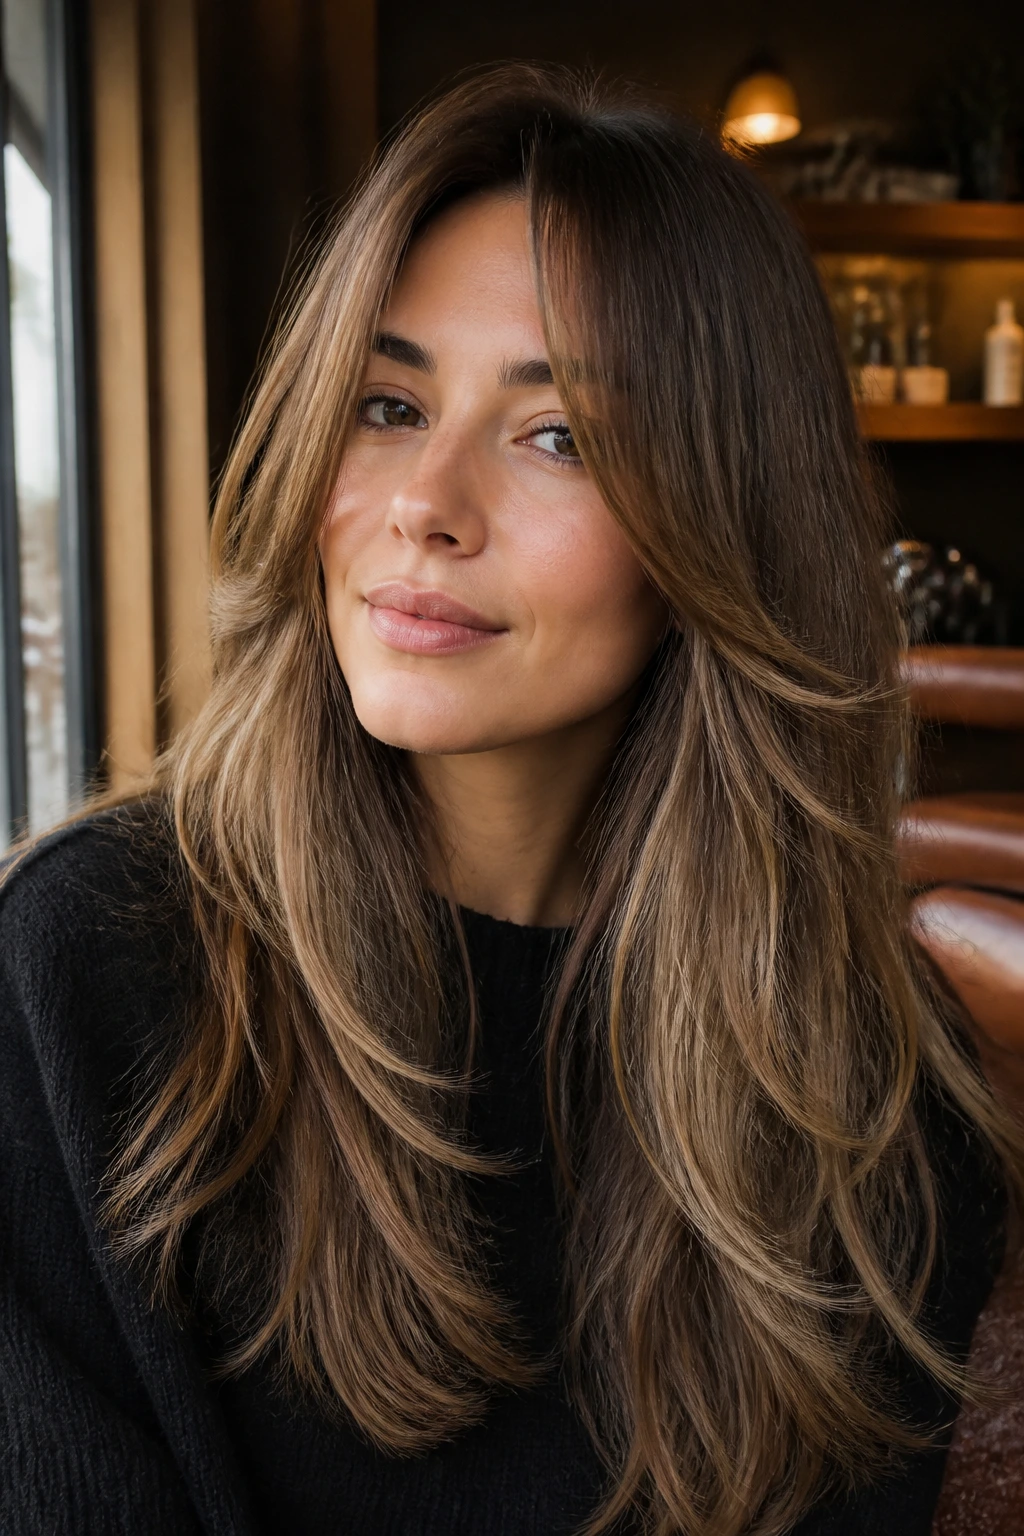
- They remove weight where hair collapses: A few well-placed short layers keep long hair from sitting like one solid sheet across the back.
- They keep the length you want: You still get the swish, the braid length, and the ponytail reach; the lift comes from inside the shape.
- They work with more than one texture: Fine hair, dense hair, waves, and curls all need different layer placement, and this collection covers that spread.
- They change the way light hits the hair: When sections separate a little, the cut reads fuller because the eye sees movement instead of a flat block.
- They can be styled up or down: A blowout, an air-dry, or a loose bend with a flat iron all show different sides of the same cut.
- They age well as they grow: The better layer maps soften instead of turning into a mess two weeks later.
1. Chin-Grazing Face Frames
Chin-level face framing is one of the cleanest ways to add volume without making long hair feel overcut. The shortest pieces sit where the jaw turns, so they pull the front of the hair forward and give the whole cut a little swing. On straight hair, that creates a soft inward bend. On waves, it gives the front half somewhere to land instead of draping flat against the cheeks.
What I like about this shape is how quietly it works. The back still reads as long hair, which matters if you want length to stay the main event. But the front no longer acts like dead weight. It opens the face and makes the ends feel lighter when you tuck the hair behind one ear.
Best for:
- Hair that goes flat around the front first.
- Anyone who wants the volume to show around the face, not just at the crown.
- Long lengths that need movement without a shaggy finish.
Ask for the shortest pieces to land right around the chin or just below it, then blend them into longer mid-length layers. If your hair is very fine, do not let the front pieces get too short. They can start to look like accidental bangs.
2. The Butterfly Cut with Lifted Crown
The butterfly cut has a theatrical name, but the reason it works is practical. The short top layers hover around the cheekbone and jaw, while the bottom stays long and heavy enough to keep the length. That split gives the hair two jobs at once: the upper section creates lift, and the lower section preserves the long line people actually came for.
It’s especially good if you like a round-brush blowout or a big, loose bend through the ends. The short upper layers swing away from the face, and the longer pieces underneath behave almost like a hidden support system. The result looks fuller even before you touch any styling tools.
If you air-dry and never reach for a round brush, the butterfly shape still helps, but it reads softer. It’s not a cut that depends on a perfect styling routine. It just gets louder when you give it one.
3. Short Crown Layers for Fine Hair
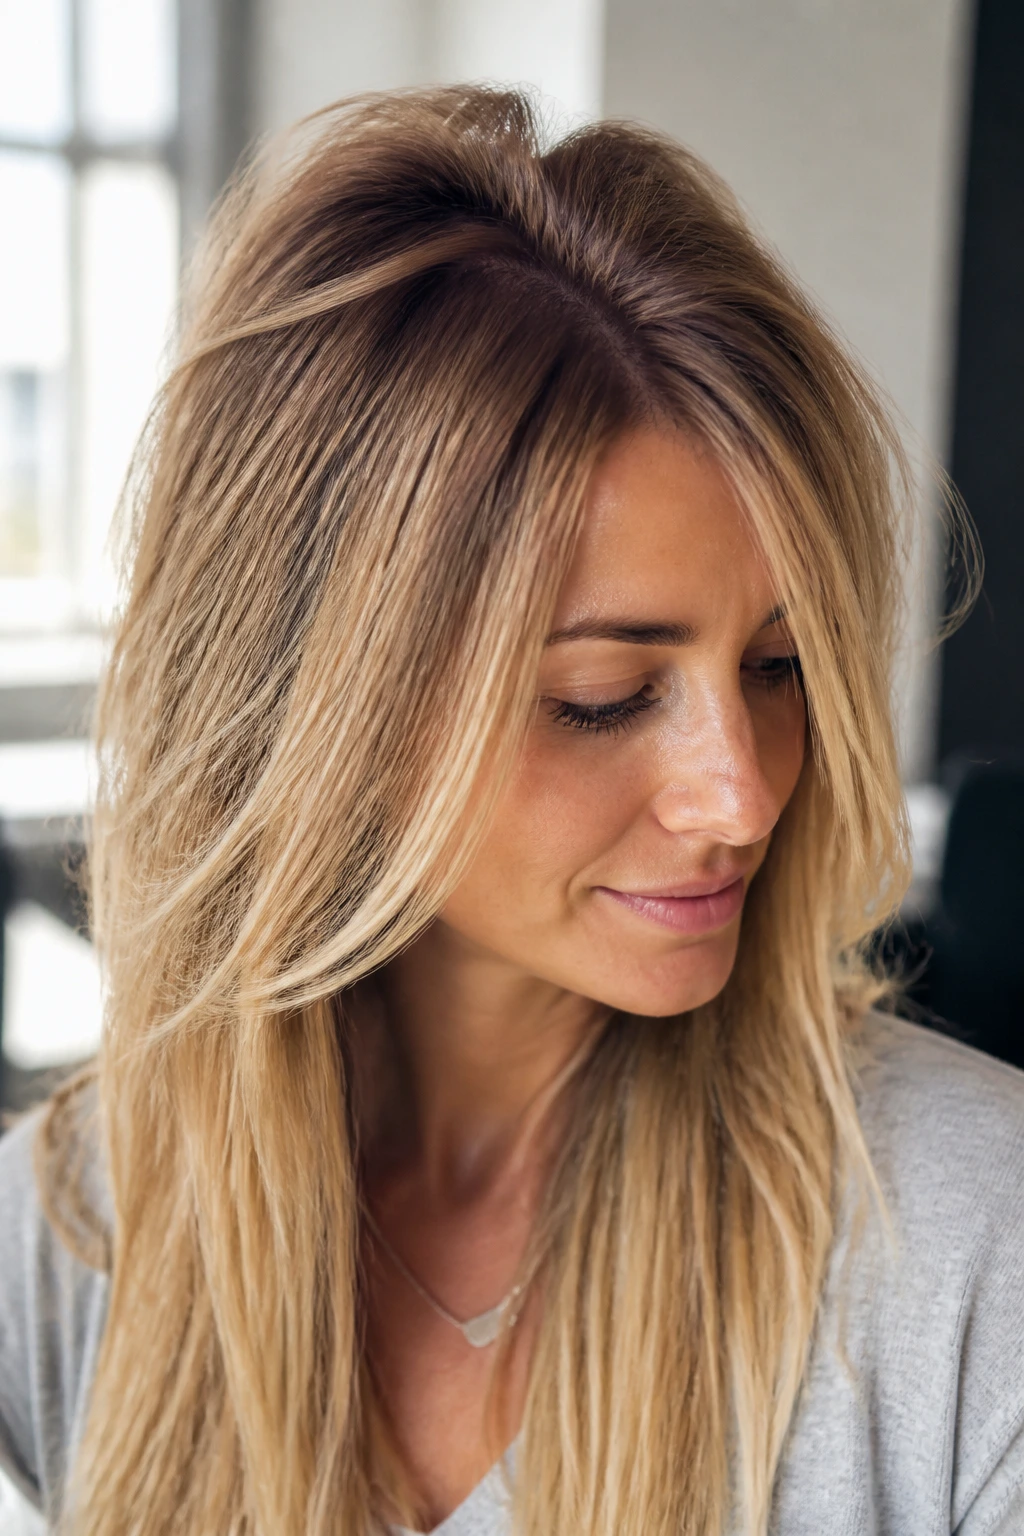
Why does fine hair go flat so fast? Because the weight of the length wins every time if the cut never removes enough mass near the top. Short crown layers fix that by shifting the balance. The shortest pieces live near the upper third of the head, where they can lift instead of hang, while the rest of the hair stays long enough to keep the look feminine and full.
The key here is restraint. Fine hair does not need random short pieces all over the place. It needs a few deliberate layers that create air between the roots and the lengths. Too many pieces and the whole cut starts to look wispy, which is the exact opposite of volume.
What to tell your stylist
Ask for subtle short layers near the crown, but keep the perimeter strong. That way the ends still look dense, and the top does not collapse into a thin halo. A light mousse at the roots and a quick blow-dry with the head tipped forward will make the lift show up much better than heavy creams ever will.
4. Curtain Fringe and Feathered Sides
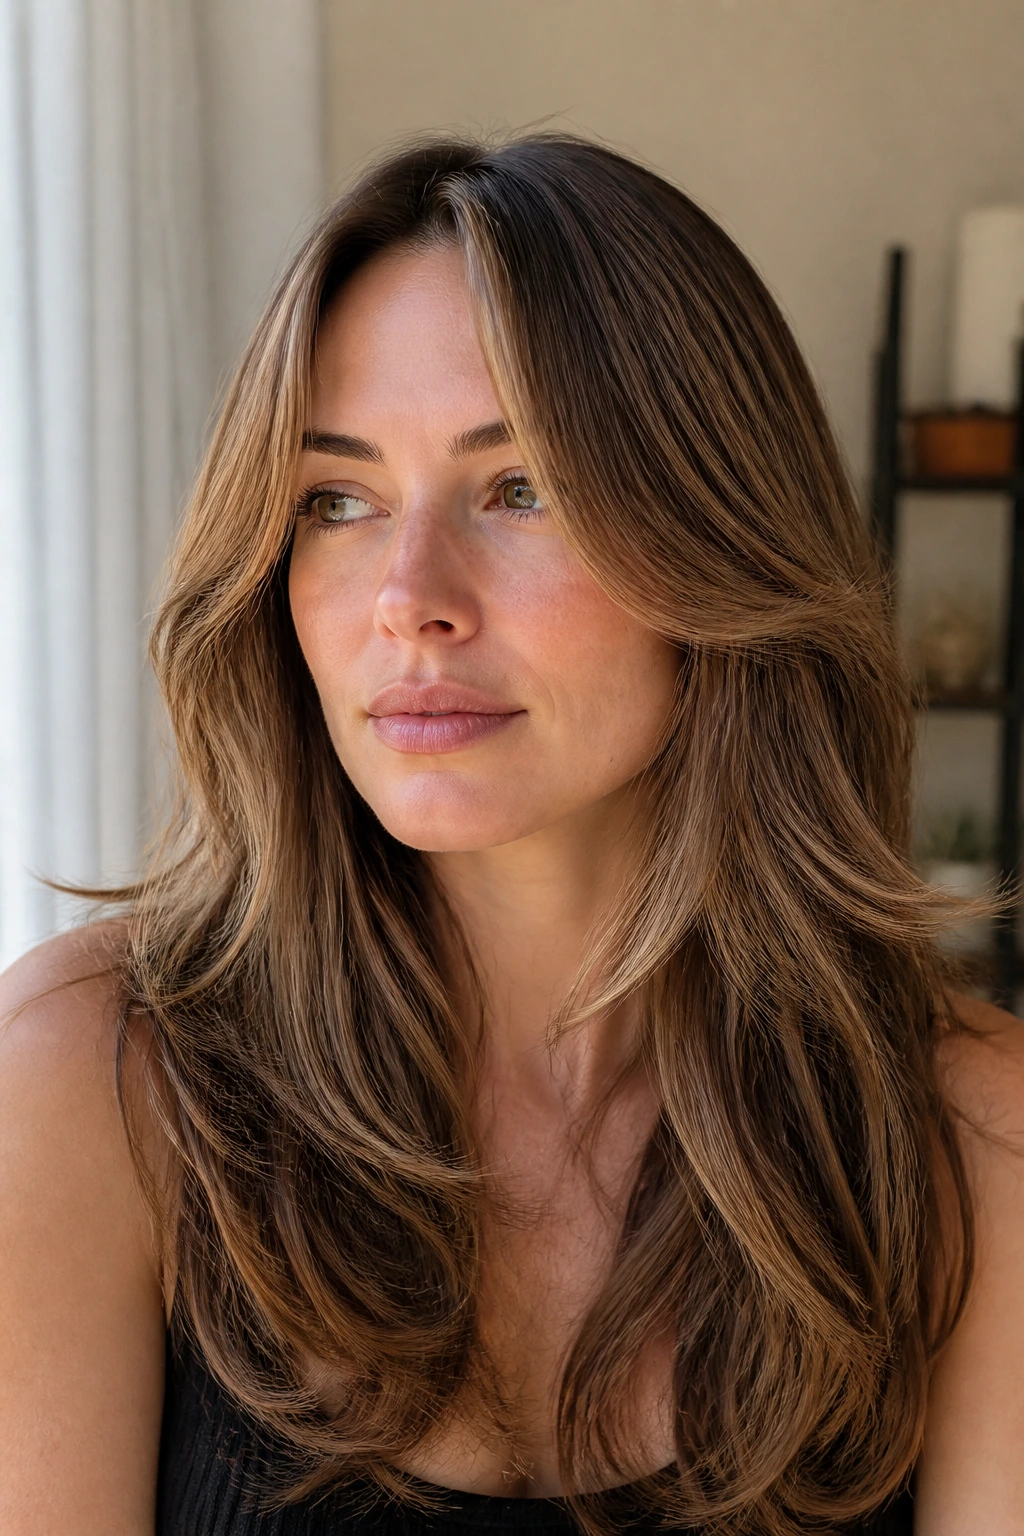
Curtain fringe changes the entire front of long hair because it puts volume exactly where people look first. The split fringe opens at the center and falls away from the face, while feathered side layers soften the line from temple to collarbone. That combination gives the cut a softer shape than blunt bangs, but it still keeps the top from looking flat and pinned down.
This is one of the easiest layered looks to live with. It grows out without a fight. The fringe can turn into face-framing pieces, and the side layers just keep lengthening into the rest of the cut. If you hate the feeling of a haircut that needs a strict schedule, this one has a forgiving mood.
A round brush and a quick twist at the ends make a huge difference here. The fringe only needs a small bend, not a full curl, and the feathered sides look best when they move away from the cheek instead of sticking to it.
5. Soft U-Shape with Airy Ends
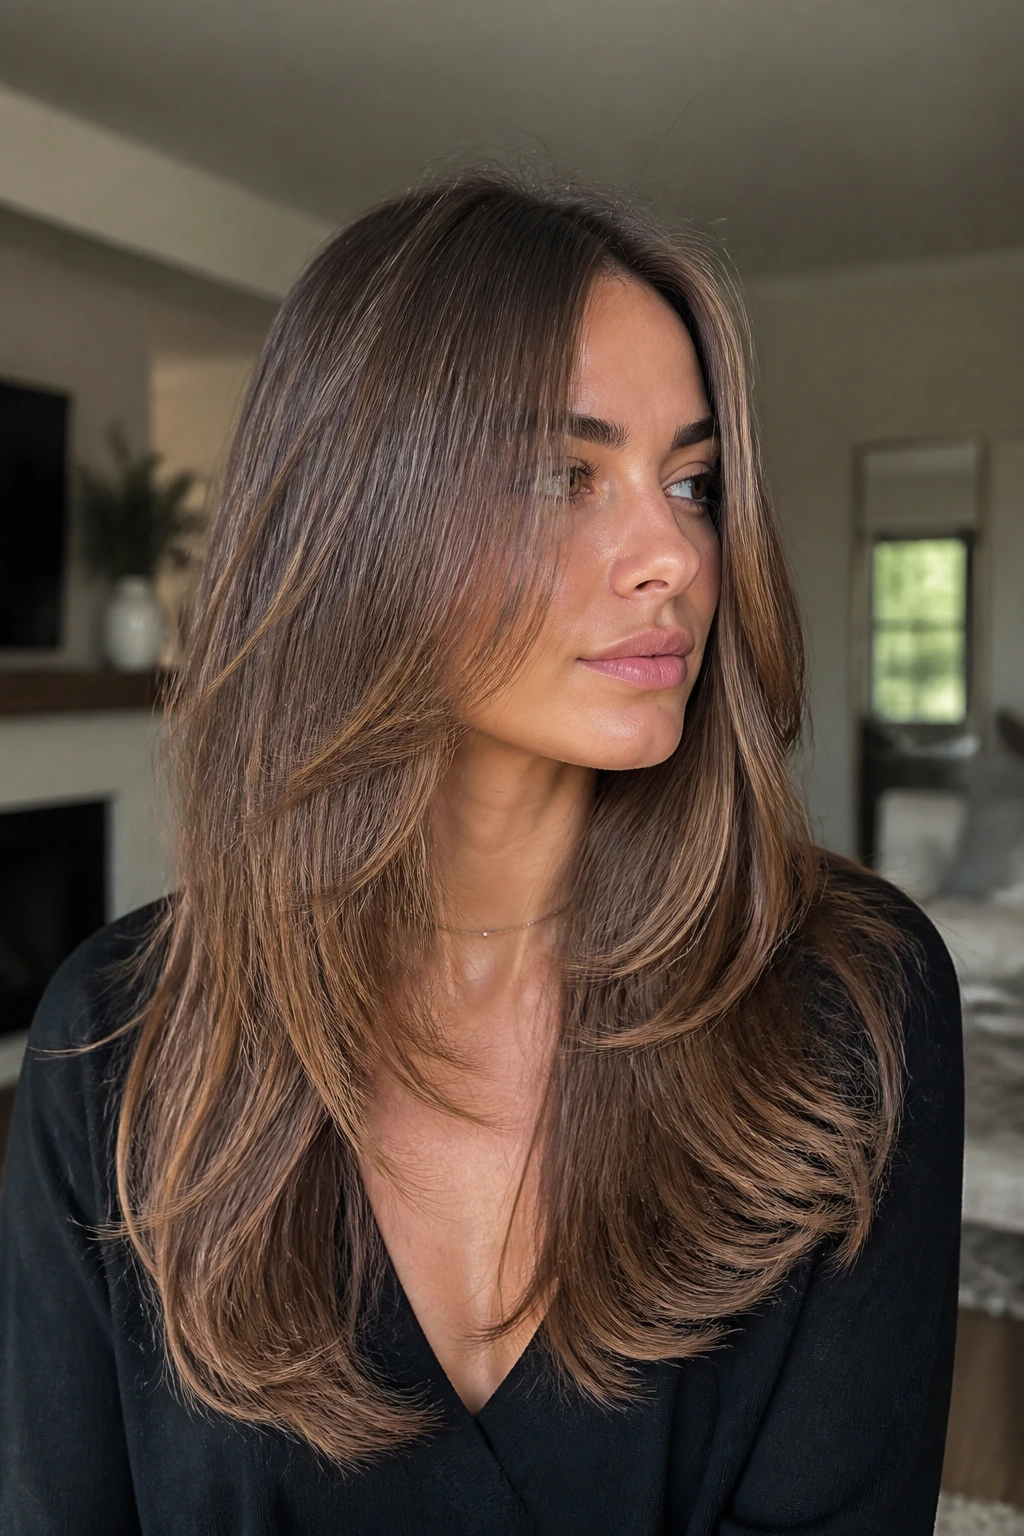
A U-shaped hemline gives long hair a graceful back view, and the short layers inside it keep the whole thing from feeling too heavy. The shape is subtle. From the front, the hair still looks long and even. From the back, the U draws the eye gently downward, which makes the length feel fuller instead of blunt.
This is the cut I’d point to if someone says they want layers but do not want anyone to notice the layers. The movement shows up when the hair turns, not in a loud staircase of short pieces. That’s a real advantage if you wear your hair down at work and want it to look finished without looking styled within an inch of its life.
It’s also smart for medium-thick hair that tends to bunch at the bottom. A U-shape keeps the ends from looking like one hard line, and the internal layers stop the lower half from turning into a dense blanket.
6. V-Shape Layers That Open the Back
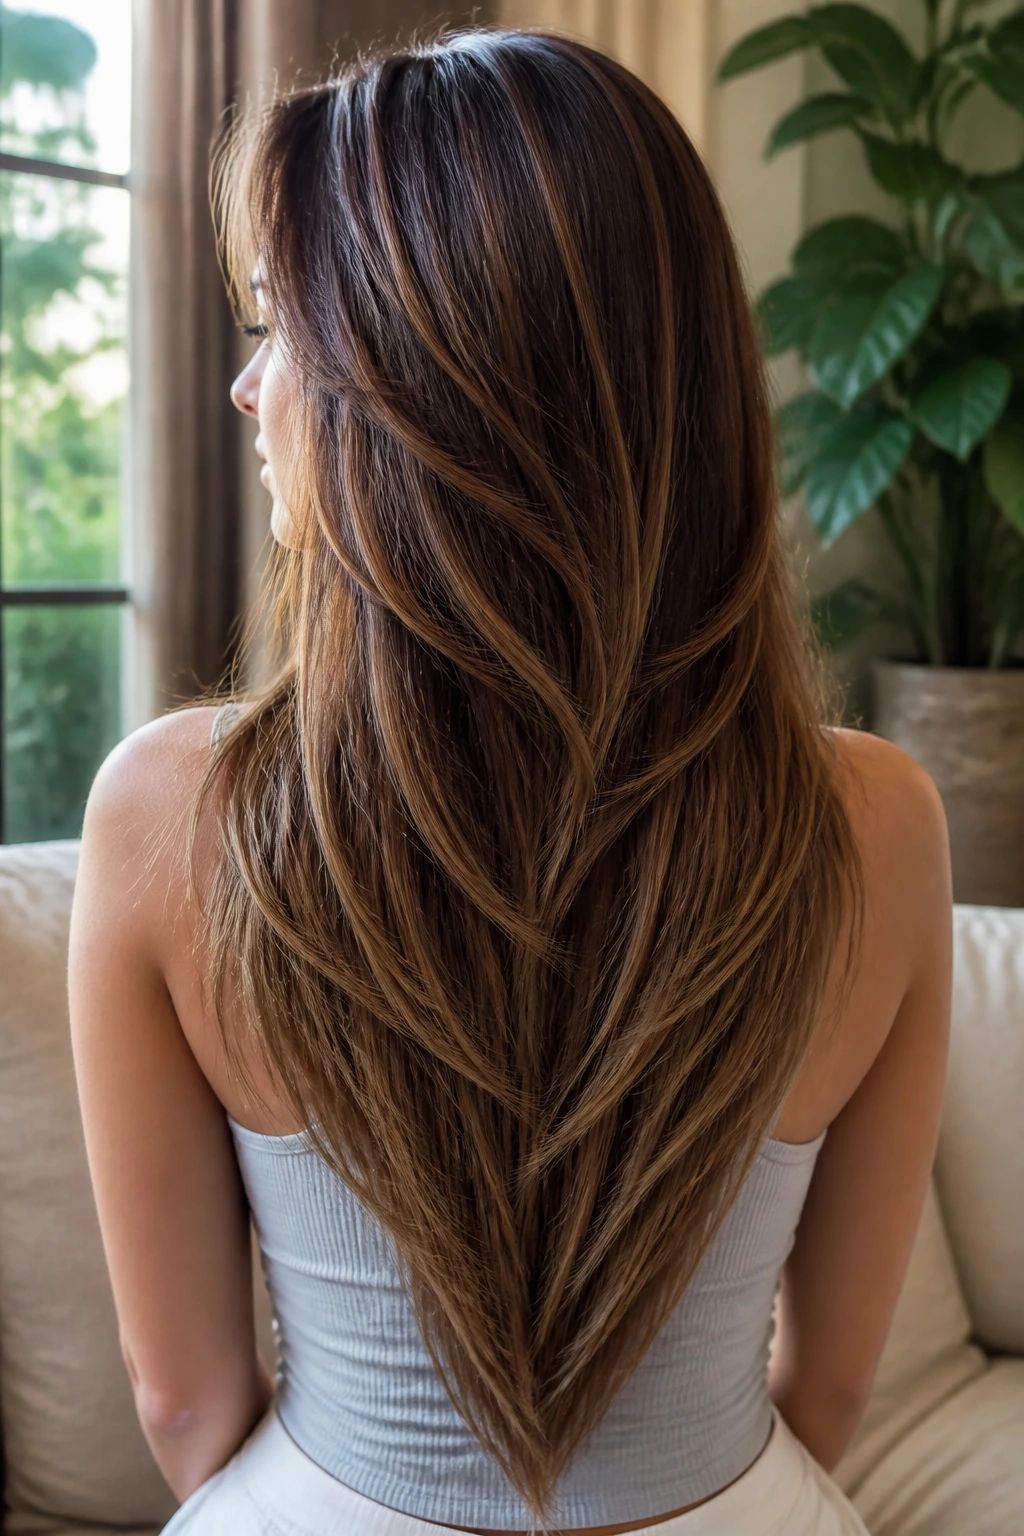
A V-shape is the opposite of shy. The center back falls to the longest point, while the sides taper upward enough to make the whole silhouette narrower and more dynamic. On long hair that needs volume, this works because the hair is not allowed to hang in one flat curtain from shoulder to hem. It gets pulled into a more active outline.
The back view matters here. A V-cut gives the hair a sense of direction, which helps the ends move when you walk. It also gives blowouts more shape, especially if the last few inches are brushed under or out with a slight bend.
Not every head of hair wants this. Very fine hair can look stringy if the V is too sharp. But on dense or straight hair with some body, the shape can be exactly the thing that keeps the length from looking heavy and boxy.
7. Invisible Interior Layers
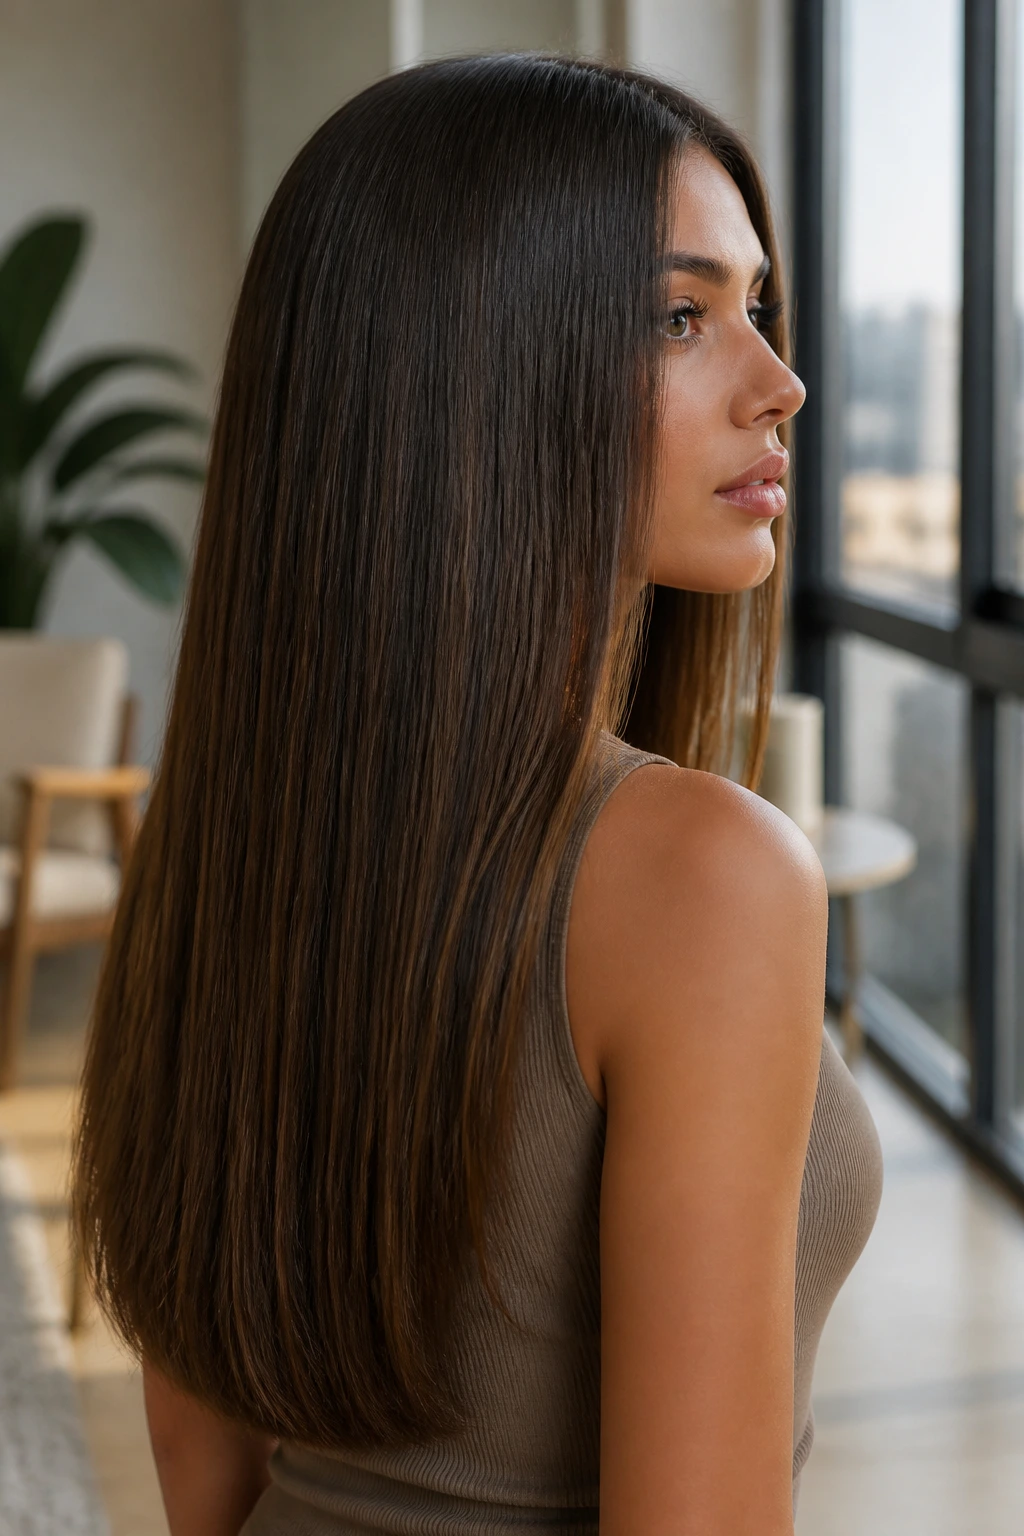
If you hate obvious layers, this is the smart version. Invisible interior layers are cut underneath the top surface, so the outer shell of the hair still looks smooth and nearly one-length. The weight comes out from the inside, where it matters most, and the result is movement without a lot of visible step lines.
That makes this shape a favorite for people who want their long hair to look glossy and controlled from the outside but less thick at the shoulder blades. It’s a useful trick when the top of the haircut needs to lie flat and polished, yet the ends need room to breathe.
The success of this cut depends on a stylist who knows how to remove bulk without chewing up the outline. If the interior layers are too high or too aggressive, the hair stops looking expensive and starts looking hacked. You want softness, not random gaps.
8. Razor-Cut Movement for Straight Hair
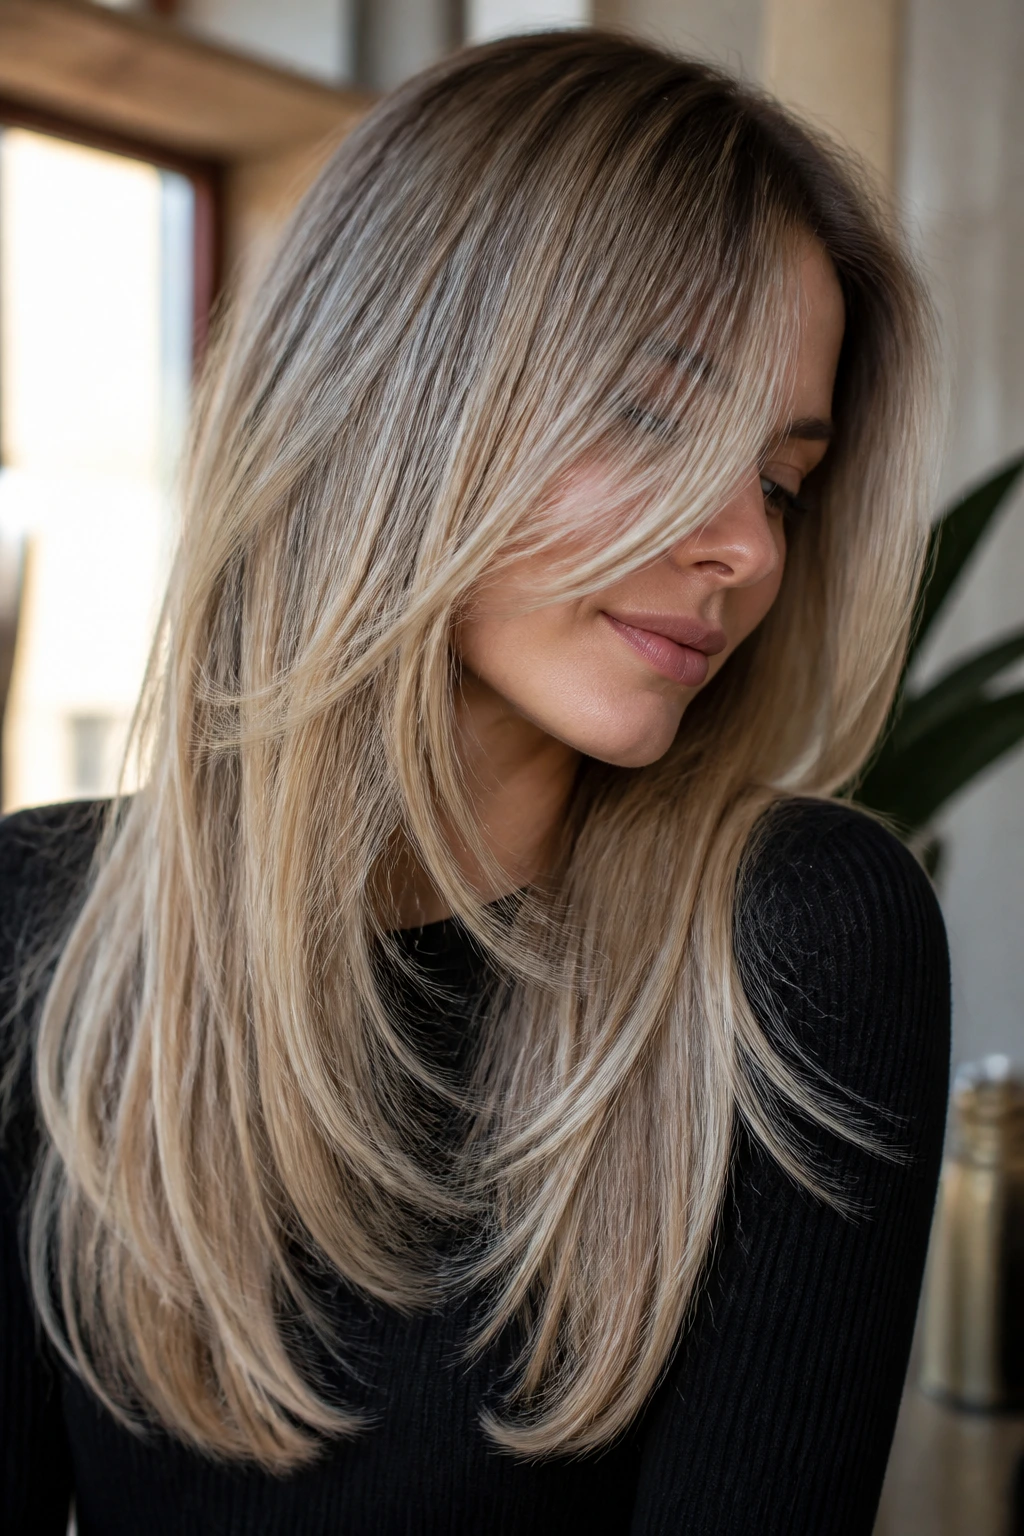
Straight hair can be annoyingly cooperative. It sits exactly where it lands, which sounds nice until it turns into a flat rope with zero interest in volume. Razor-cut layers loosen that problem by softening the ends and taking the edge off the line. The hair starts to move instead of just lying there.
This is a cut that needs a careful hand. On healthy straight hair, a razor can create a light, swinging finish that a blunt scissor cut often refuses to give. On fragile or split ends, though, the same tool can make the ends look shredded. I’d only do this with a stylist who cuts straight hair with a razor all the time.
How it reads
The effect is airy, not messy. Think motion through the mid-lengths and a softer edge at the bottom, especially when the hair is tucked behind the shoulders or brushed into a loose bend with a flat iron.
9. Choppy Layers with Piece-y Ends
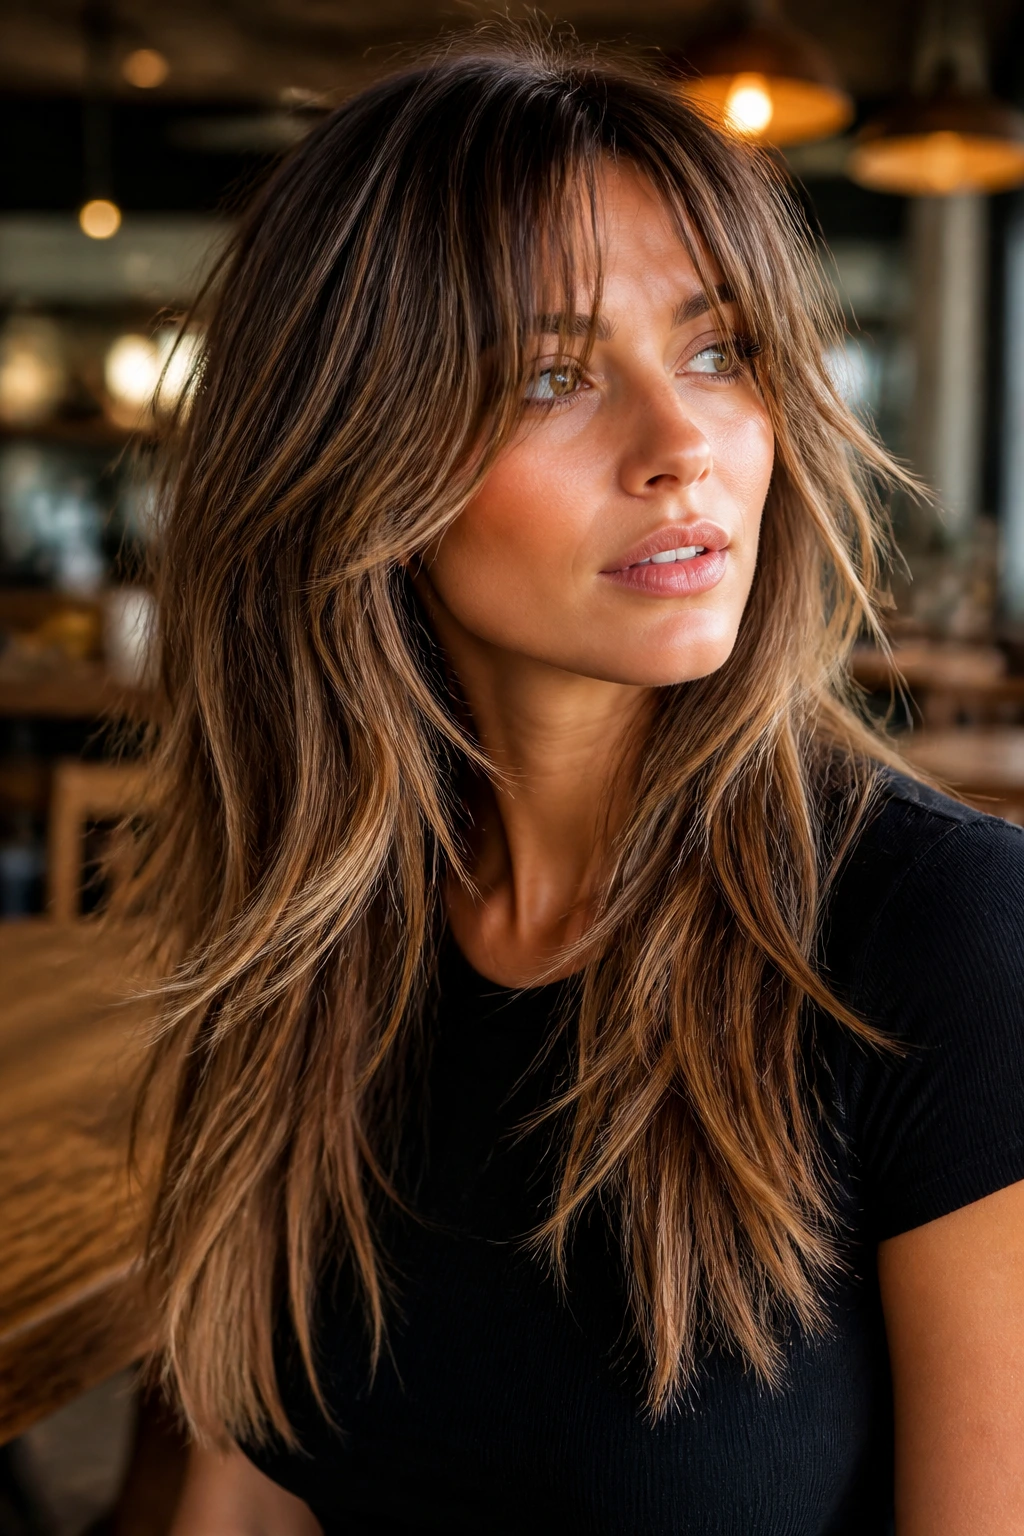
Choppy layers are for people who want the hair to look separated on purpose. There’s a little more bite in the silhouette, and that piece-y finish can make long hair look fuller because the eye sees several moving sections instead of one flat sheet. It’s not delicate. That’s the point.
This kind of cut works well if you use a texturizing spray or a dry paste at the ends. The product grabs the layer edges and gives them a little grit, which helps the hair keep its shape. Fine hair can benefit from that extra separation, but only if the layers are kept light enough to avoid that stringy, over-textured look.
I’d call this a better fit for someone who likes a lived-in finish. If your hair looks best after a day or two, choppy layers give you something to work with instead of a cut that depends on perfect smoothness.
10. Long Shag with Tapered Bangs
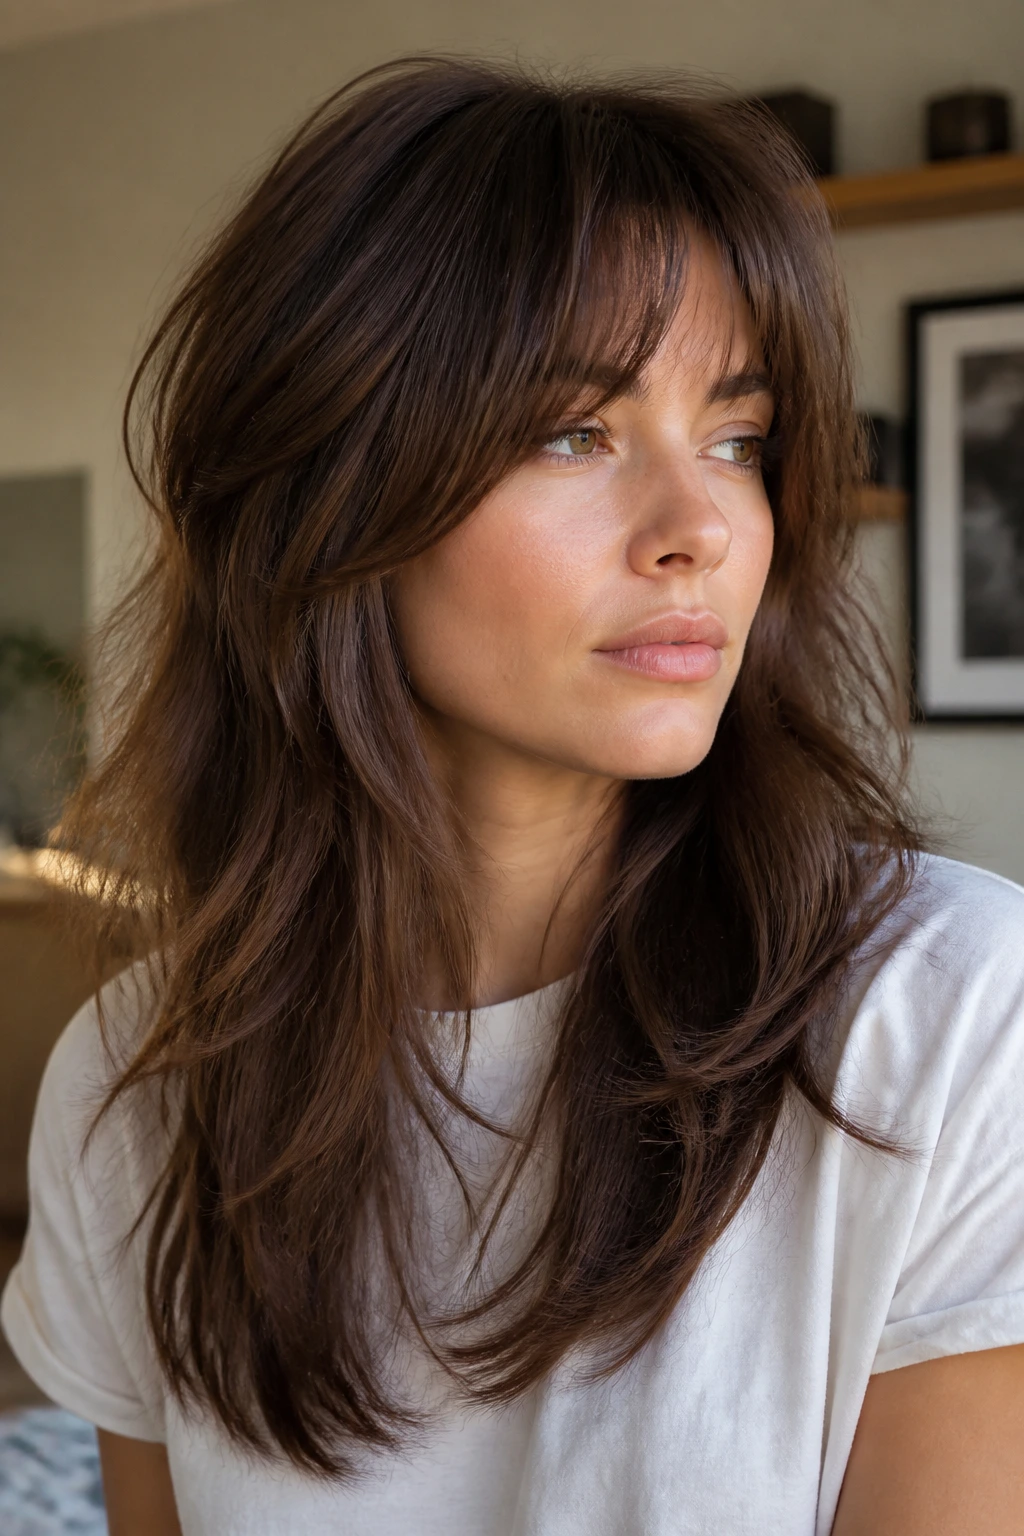
The long shag is the louder cousin in this group, and I mean that kindly. It has short crown layers, a bit of fringe or taper at the front, and a long length underneath that keeps it from feeling too cropped. The shape brings volume by breaking up the surface of the hair from the top down.
What makes it different from a classic shag is the restraint. The edges are softer, the layers are longer, and the whole thing can still be worn in a ponytail without looking like a totally different haircut. That matters. Nobody wants to love a cut in the mirror and hate it in a clip.
It works best on hair that already has some wave, even a little. Straight hair can wear it too, but it usually needs texture spray or a bend from a flat iron to show the shape properly. Otherwise, the short crown can feel disconnected from the length.
11. Blowout Layers Built for Round-Brush Styling
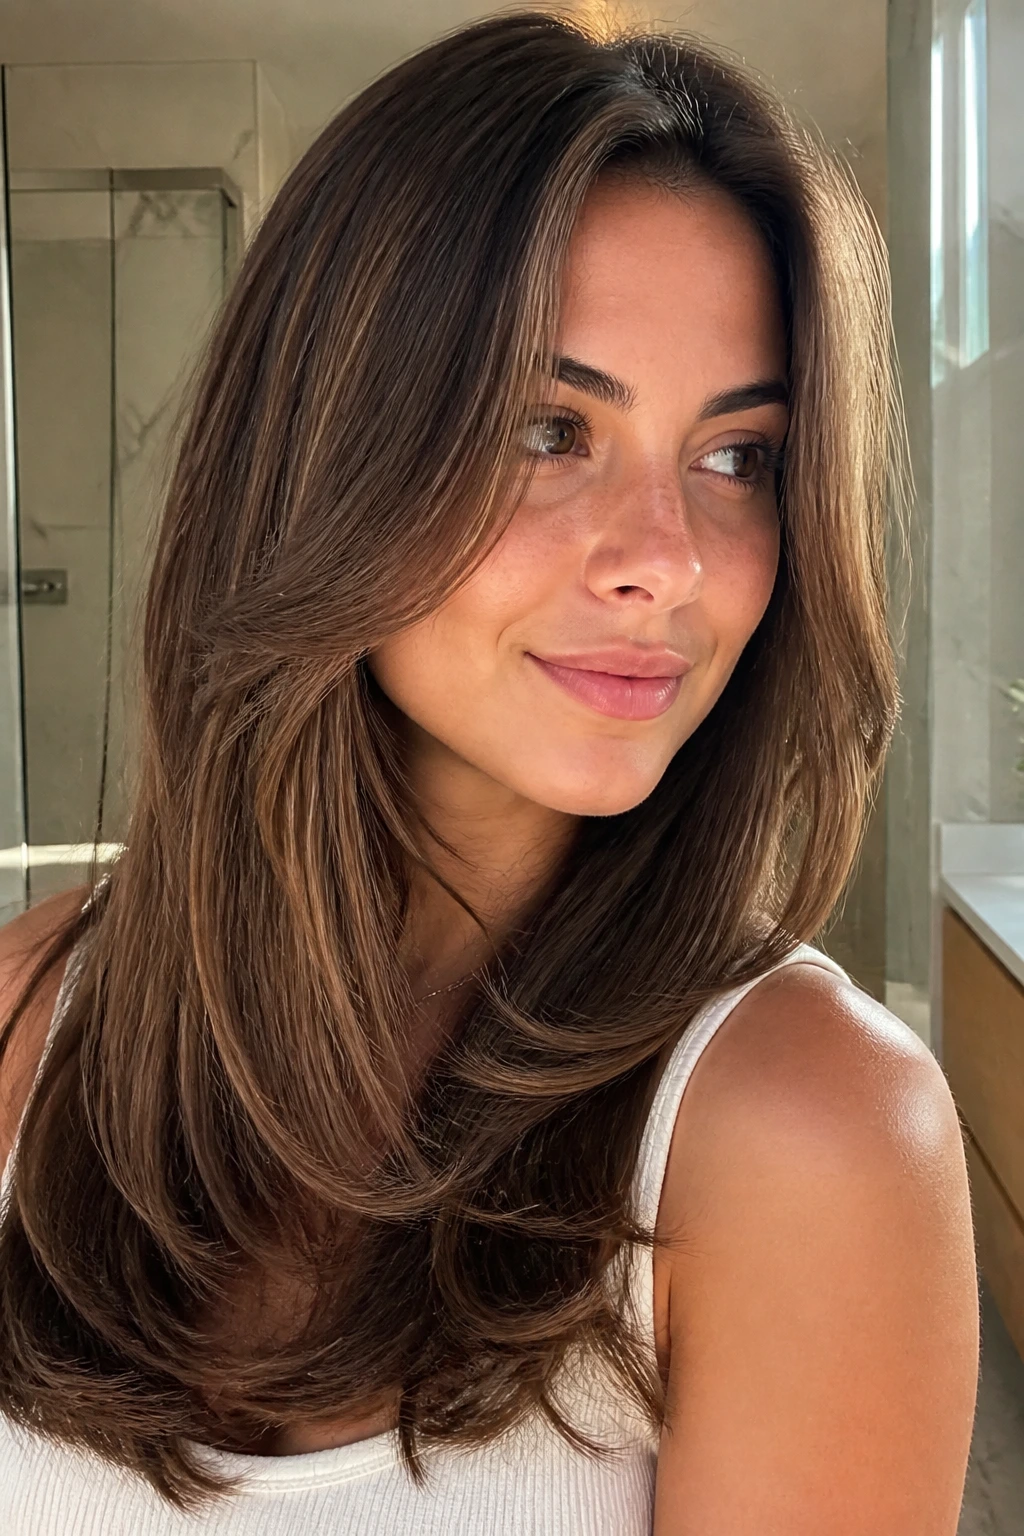
Some cuts are designed to dry themselves. This one is designed to be touched by a brush, and that’s a different animal. Blowout layers are usually placed so the round brush can push the shorter pieces away from the face and roll the ends just enough to show movement. The result is lifted, not fluffy.
The smartest version of this cut keeps the shortest layers around the cheekbone or collarbone, where the brush can catch them easily. If the shortest pieces are too high, the shape can turn round in a dated way. If they’re too low, the blowout loses the whole point. Balance matters more here than drama.
This is the cut for people who like hair that looks done without looking stiff. It plays well with a little root spray, a concentrator nozzle, and a round brush that’s the right size for your length. Small brush for tighter bend, bigger brush for a smoother wave.
12. Dry-Cut Layers for Wavy Hair
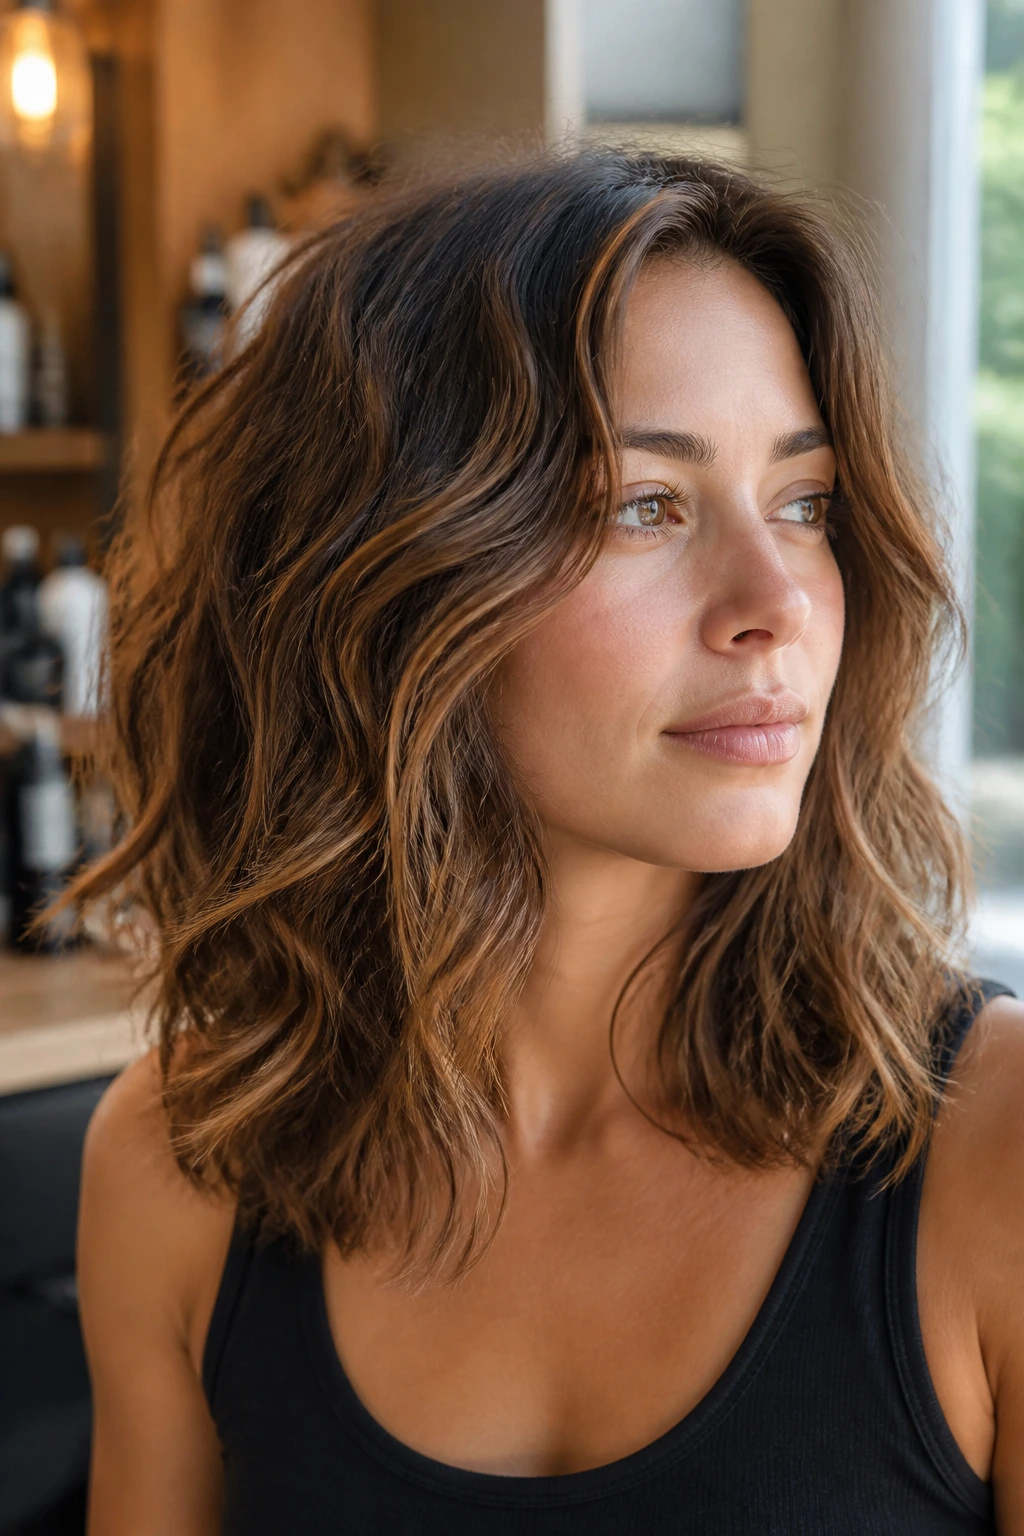
Wavy hair has a habit of lying to people when it’s wet. It stretches out, then springs back with opinions once it dries. That is why dry cutting can be such a smart move. The stylist sees the true wave pattern, the true length, and the places where the hair already wants to lift.
With short layers on long hair for volume, that matters a lot. Cut a wave too high while it’s wet, and it can bounce up into a short piece you never asked for. Cut it dry, and the layer map respects the curl and the wave pattern instead of guessing at it.
What to ask for
Ask for layers that follow the way your hair naturally bends, not just the way it lies in the chair. If you wear your hair air-dried, say that out loud. It changes the whole haircut.
13. Thick-Hair Debulking Layers
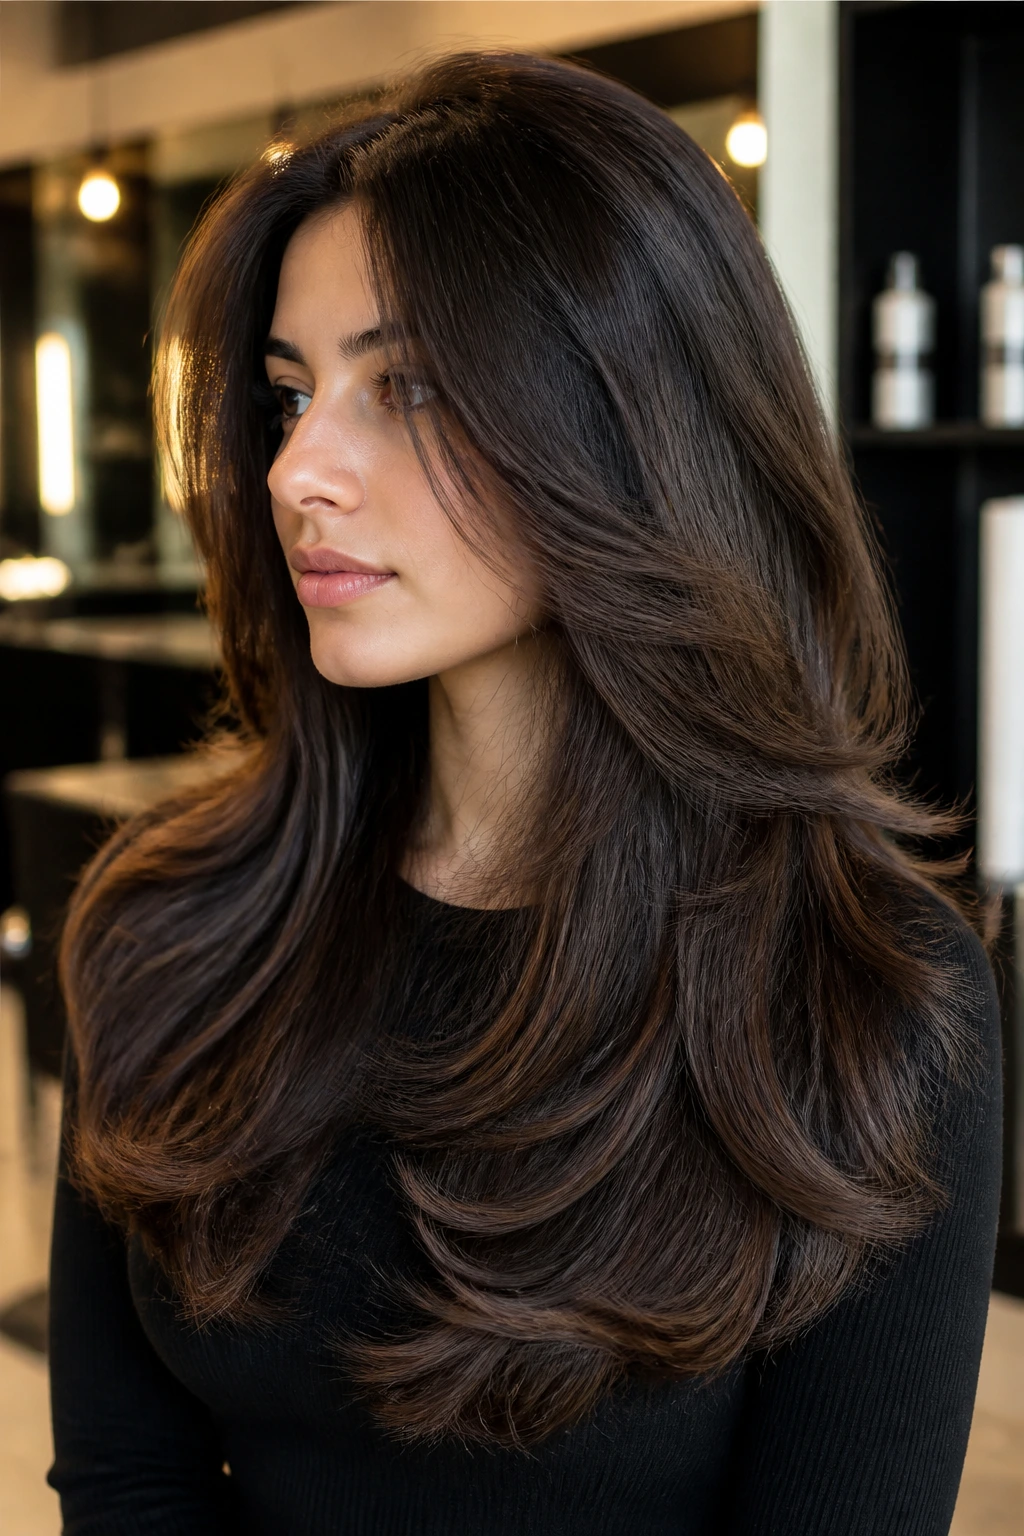
Thick hair does not need more hair. It needs smarter hair. That’s the whole game here. Debulking layers remove weight from the inside so the top can lift and the ends can move instead of forming one giant, stubborn block. If you’ve ever had long hair that felt impressive when you flipped it and exhausting when you washed it, you know the problem.
The caution is obvious: too much thinning can make thick hair frizzy and hollow. I’d rather see weight removed in deliberate sections than see a stylist take texture shears to the whole head and hope for the best. The goal is shape, not a shredded outline.
This cut is especially useful if your hair puffs at the ends but goes flat at the root. Done right, the upper half gets room to breathe and the lower half stops feeling like a backpack.
14. Wolf Cut Lite for Long Lengths
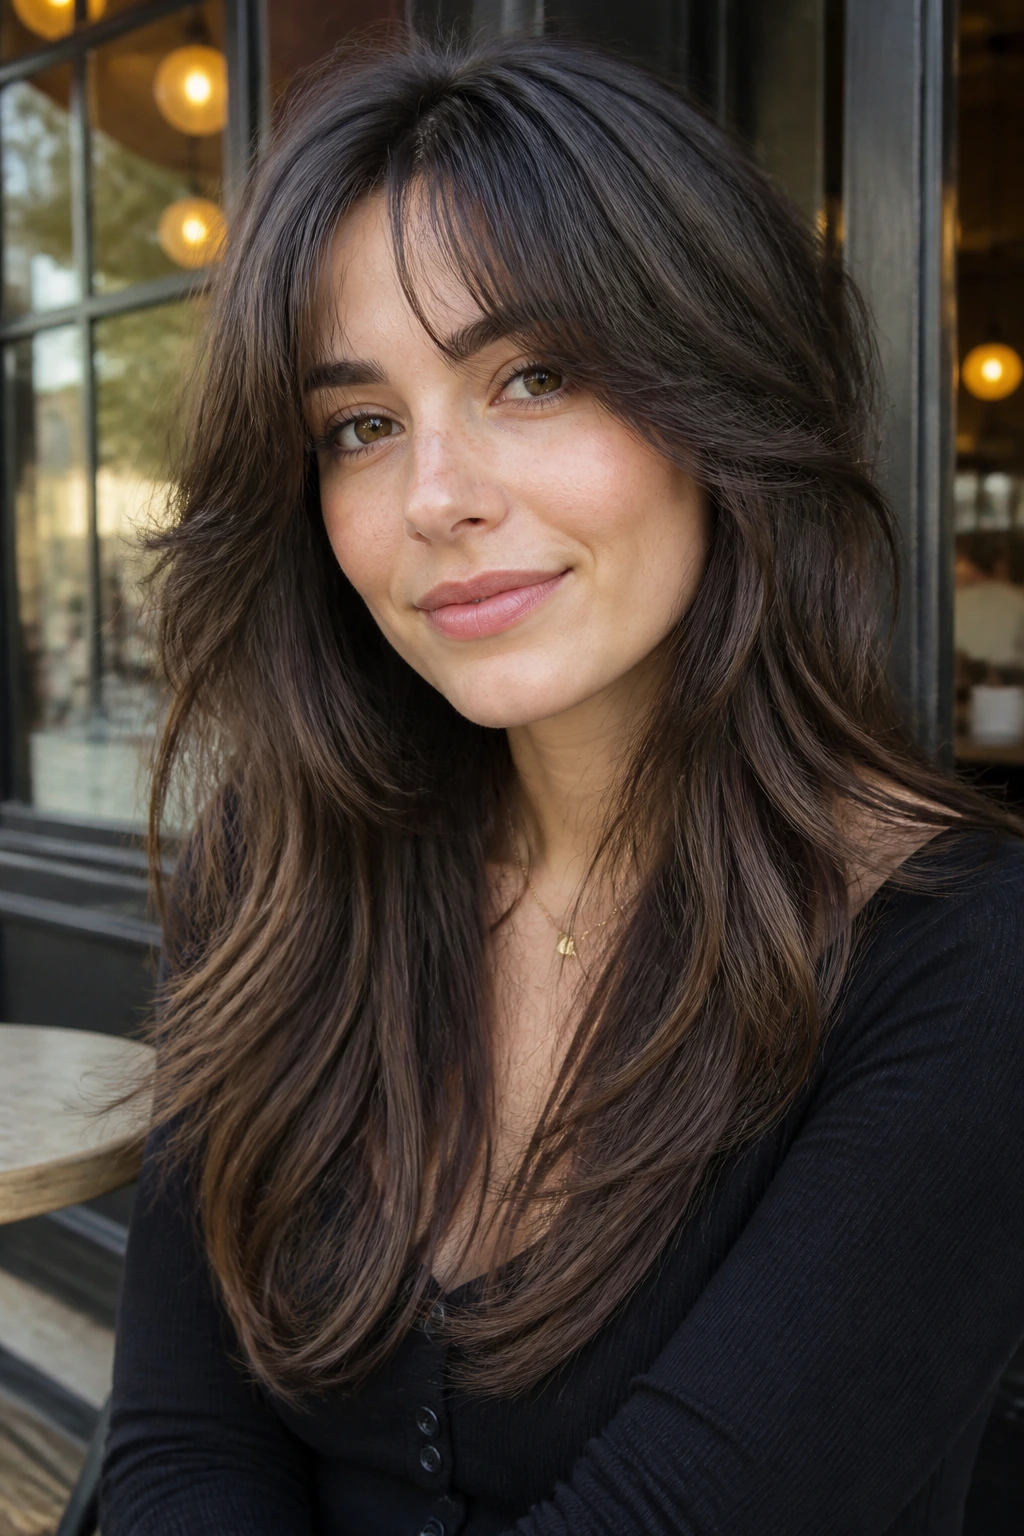
The wolf cut can be too much for people who want long hair to still look polished. The lite version solves that by keeping the crown short enough to create lift, but softening the transitions so the haircut doesn’t look like it’s trying to start a band. It keeps the edge. It drops the chaos.
This version is useful if your hair has texture and you like a little unevenness around the face. It gives volume fast because the top layers don’t have to fight the bottom length. When the hair is pulled back, the shape still has interest. When it’s down, the layers create movement around the cheeks and shoulders.
It’s not the best choice for someone who wants almost invisible layering. The wolf-lite look still has personality. It just wears that personality with better manners.
15. Side-Part Layers That Steal the Lift
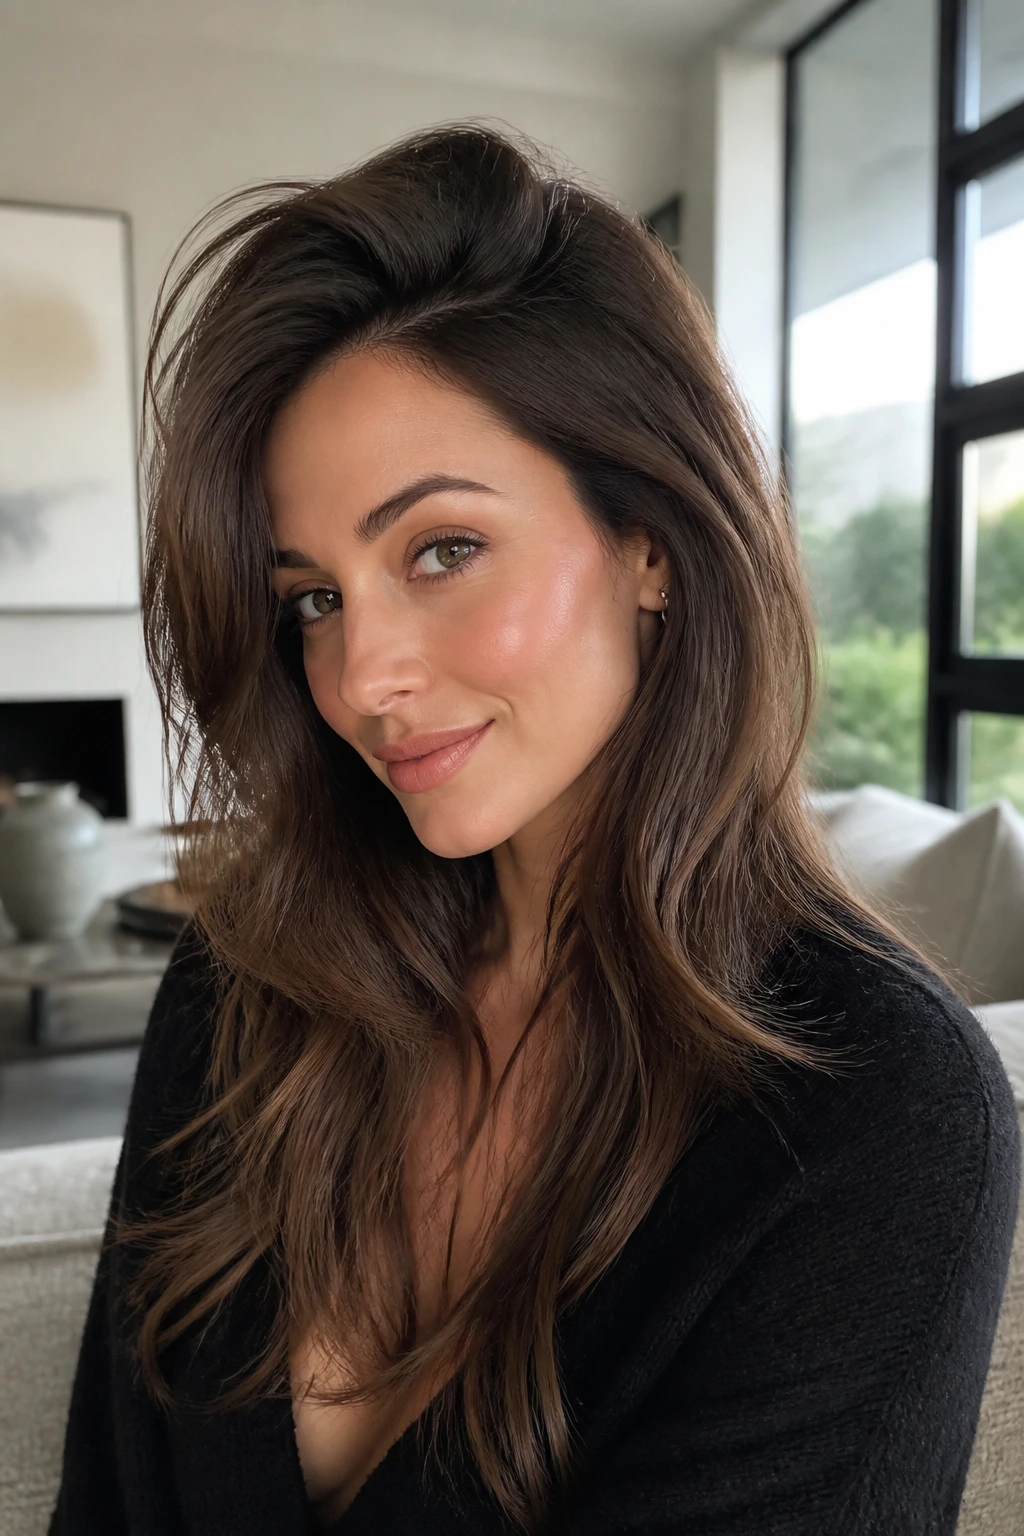
A side part changes gravity in a way people underestimate. The heavier side gets a little lift at the root, and the layers can be cut to support that movement instead of fighting it. If your hair always flops flat down the middle, a side-part layer map may fix more than a bottle of spray ever could.
The front pieces on the heavy side can be cut slightly shorter so they sweep away from the face instead of collapsing onto the cheek. On the lighter side, longer blending keeps the shape from looking lopsided. The cut needs balance, but it does not need symmetry to work.
This is a good option if you want volume without a major style shift. A quick side part, a root spray, and a round brush at the crown can change the whole mood of the haircut.
16. Highlight-Mapping Layers
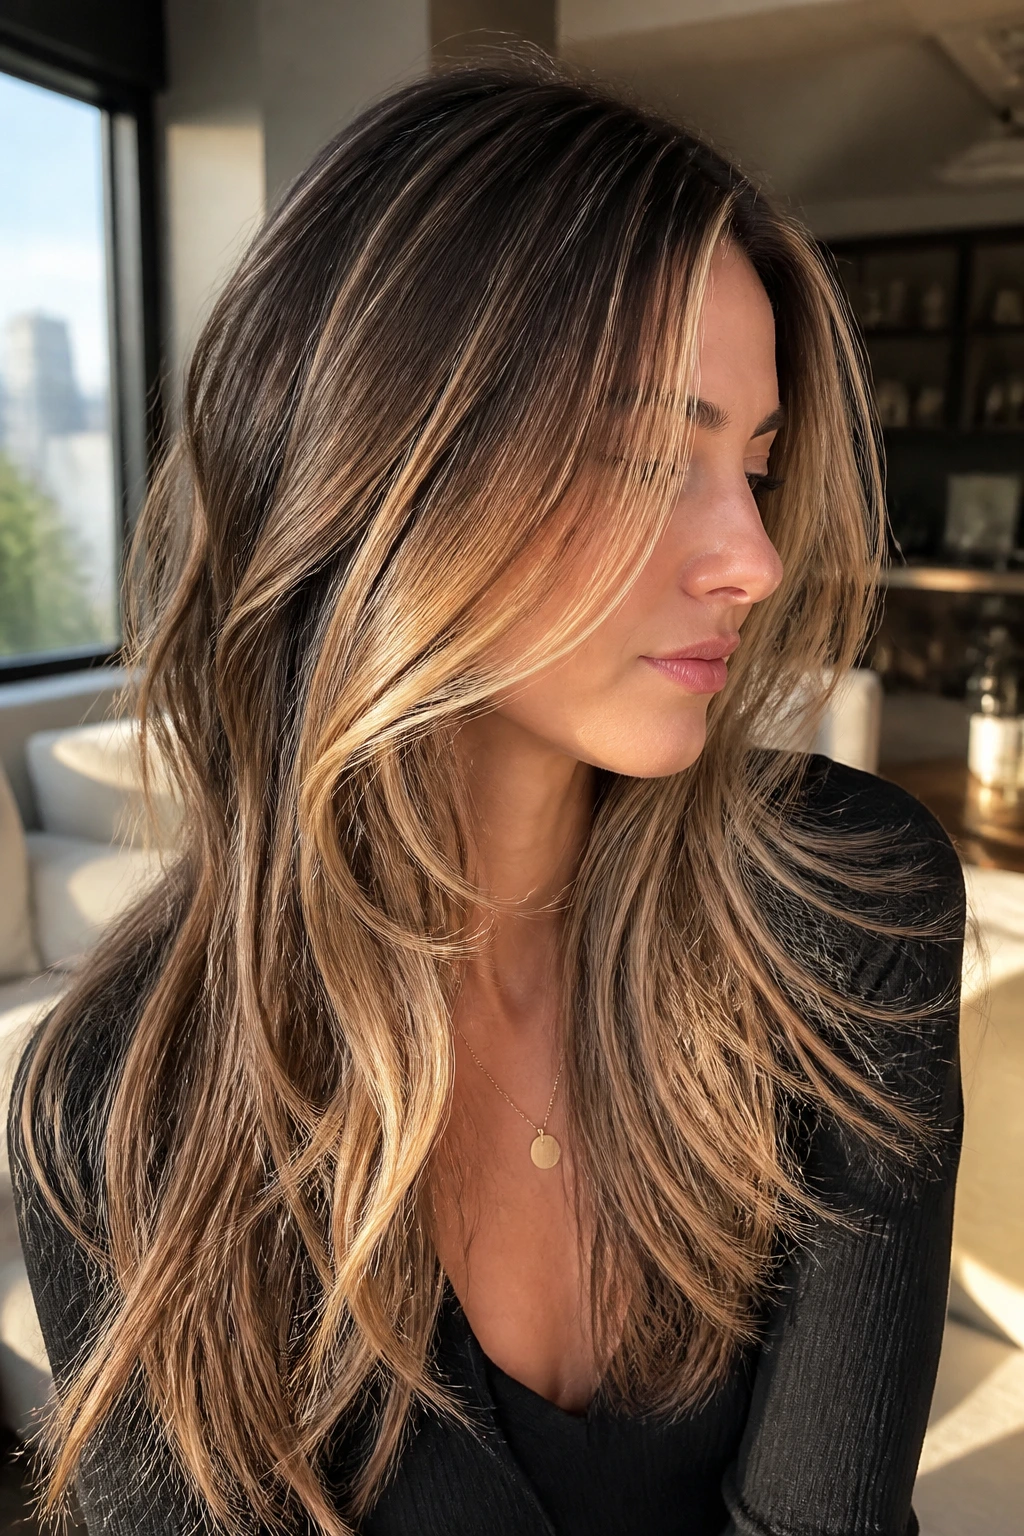
Highlight-heavy hair looks dull when the color disappears inside a dense sheet of length. Layer placement fixes that by giving the lighter pieces room to show themselves. The cut does not create the color, obviously, but it makes the color easier to see because the sections separate and move.
That’s why this style matters if you wear balayage, ribbons, or any kind of dimension through the mid-lengths. Shorter layers stop the highlights from hiding behind the longer bottom layers. Even on darker hair, the movement makes sheen and tone shifts more visible.
I like this approach because it does not rely on bright color alone to create interest. The shape does the heavy lifting. If the layers are placed well, the hair looks fuller from the side and more alive in motion, which is a nicer result than a stiff, over-colored block.
17. Clavicle-and-Shoulder Cascade
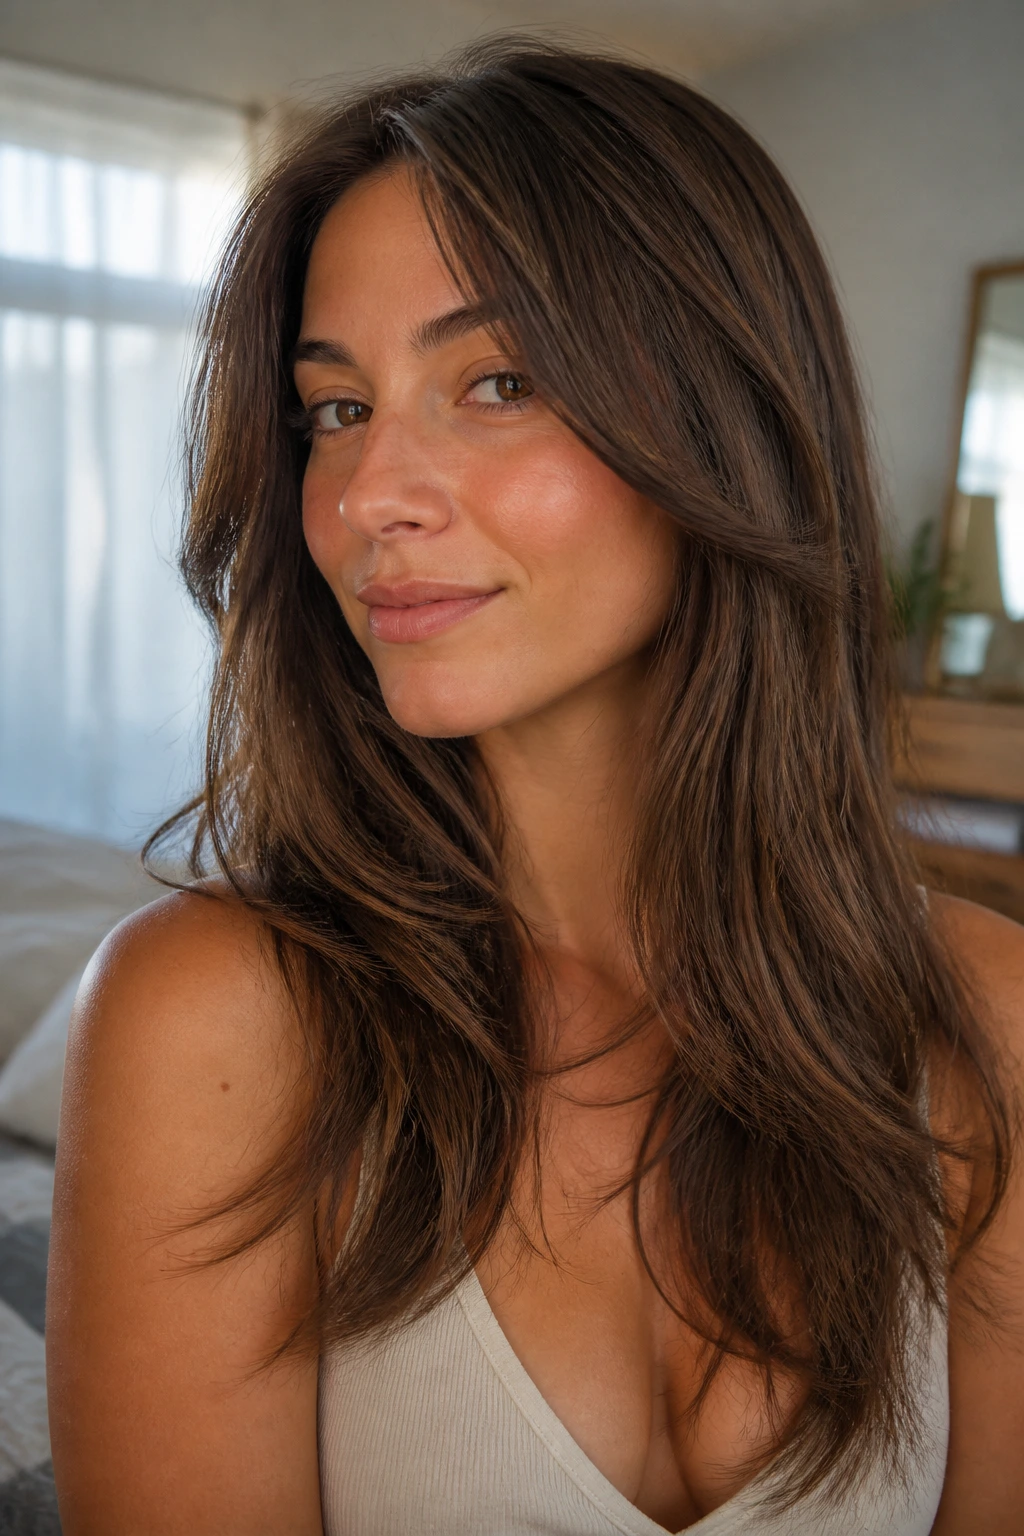
Some volume cuts live closer to the face than others. This one starts around the collarbone and shoulder, then cascades down into the longer lengths. It’s a softer, more grown-in way to get movement, and it works well if you want your hair to stay clearly long but not weigh itself down.
The collarbone is a good landmark because it’s where long hair starts to feel heavy against the body. Put short layers there, and the cut gets lift exactly where the hair begins to drag. The shoulder area also matters because the hair bends there naturally; layers that land there can keep the ends from sticking out like a blunt shelf.
This is a nice middle ground for people who want a little shape but do not want anything near a shag. It looks quiet in the chair and better once it moves.
18. Nape-Stacked Volume Layers
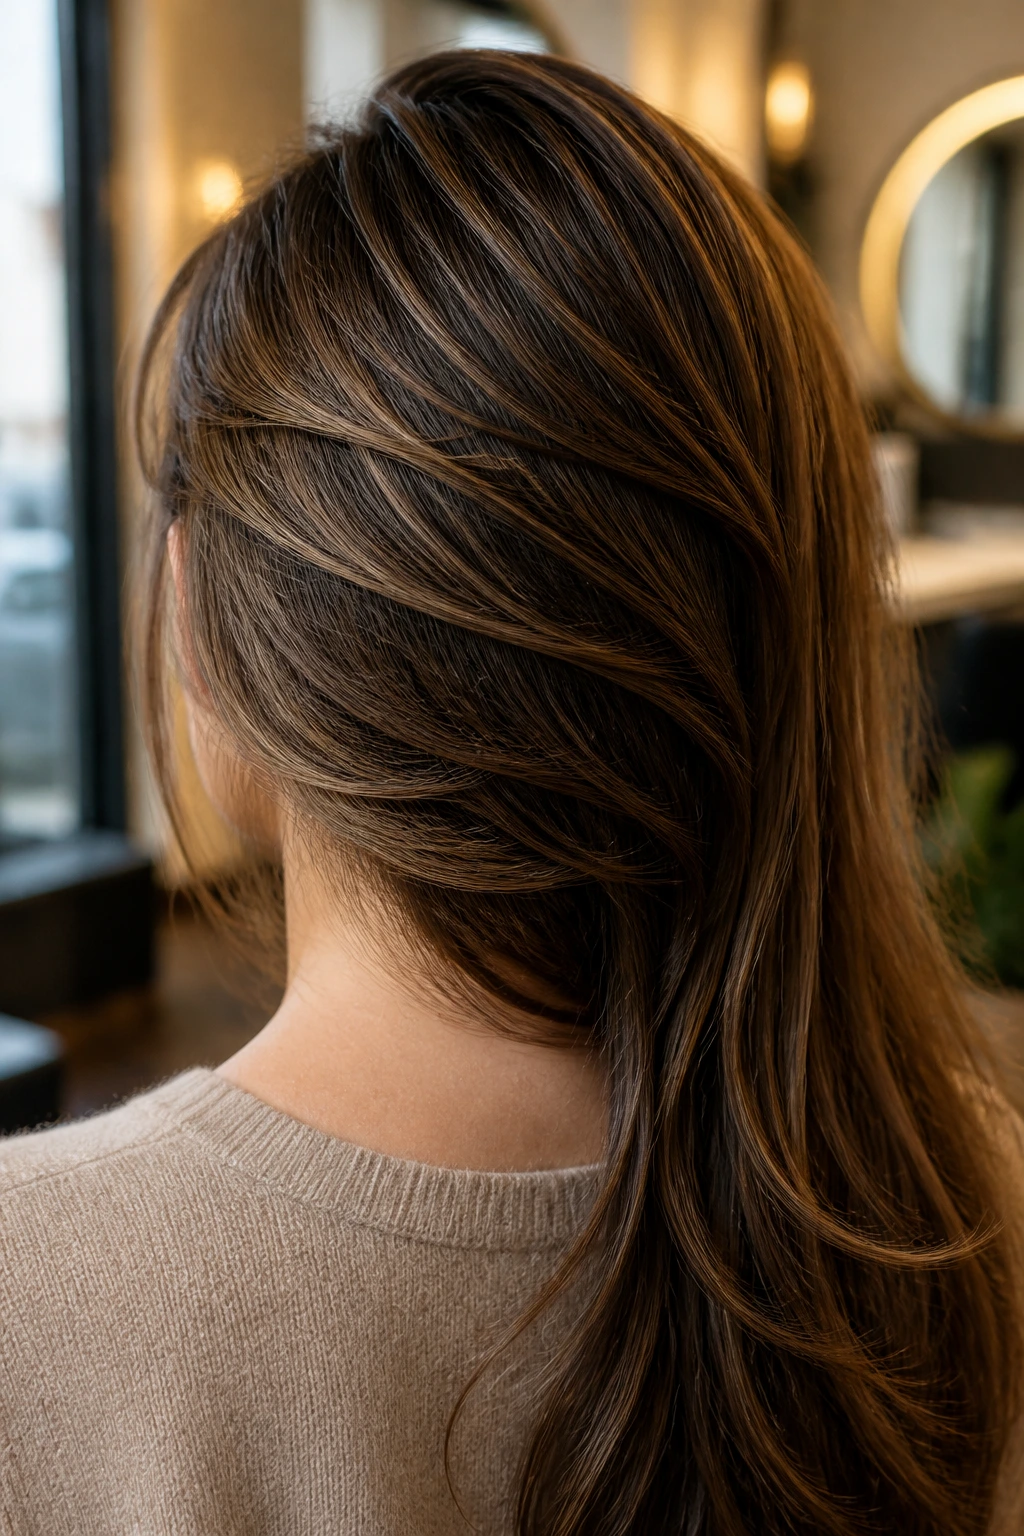
The nape is the hidden place where a lot of long hair loses its shape. Once that area gets too dense, the hair starts sitting low at the back of the head and the whole silhouette slumps. Nape-stacked layers fix that by lifting from underneath, which gives the crown and back a more rounded line.
This is one of the better choices for thick or straight hair that goes flat at the back but still has length everywhere else. It also helps ponytails. The hair gathers with more body instead of folding into one heavy rope.
There’s a small caveat. If the shortest layers are cut too high at the nape, they can pop out around coats, scarves, and collars. Keep them soft and blended, and the shape stays useful instead of annoying.
19. Blunt Perimeter, Soft Interior
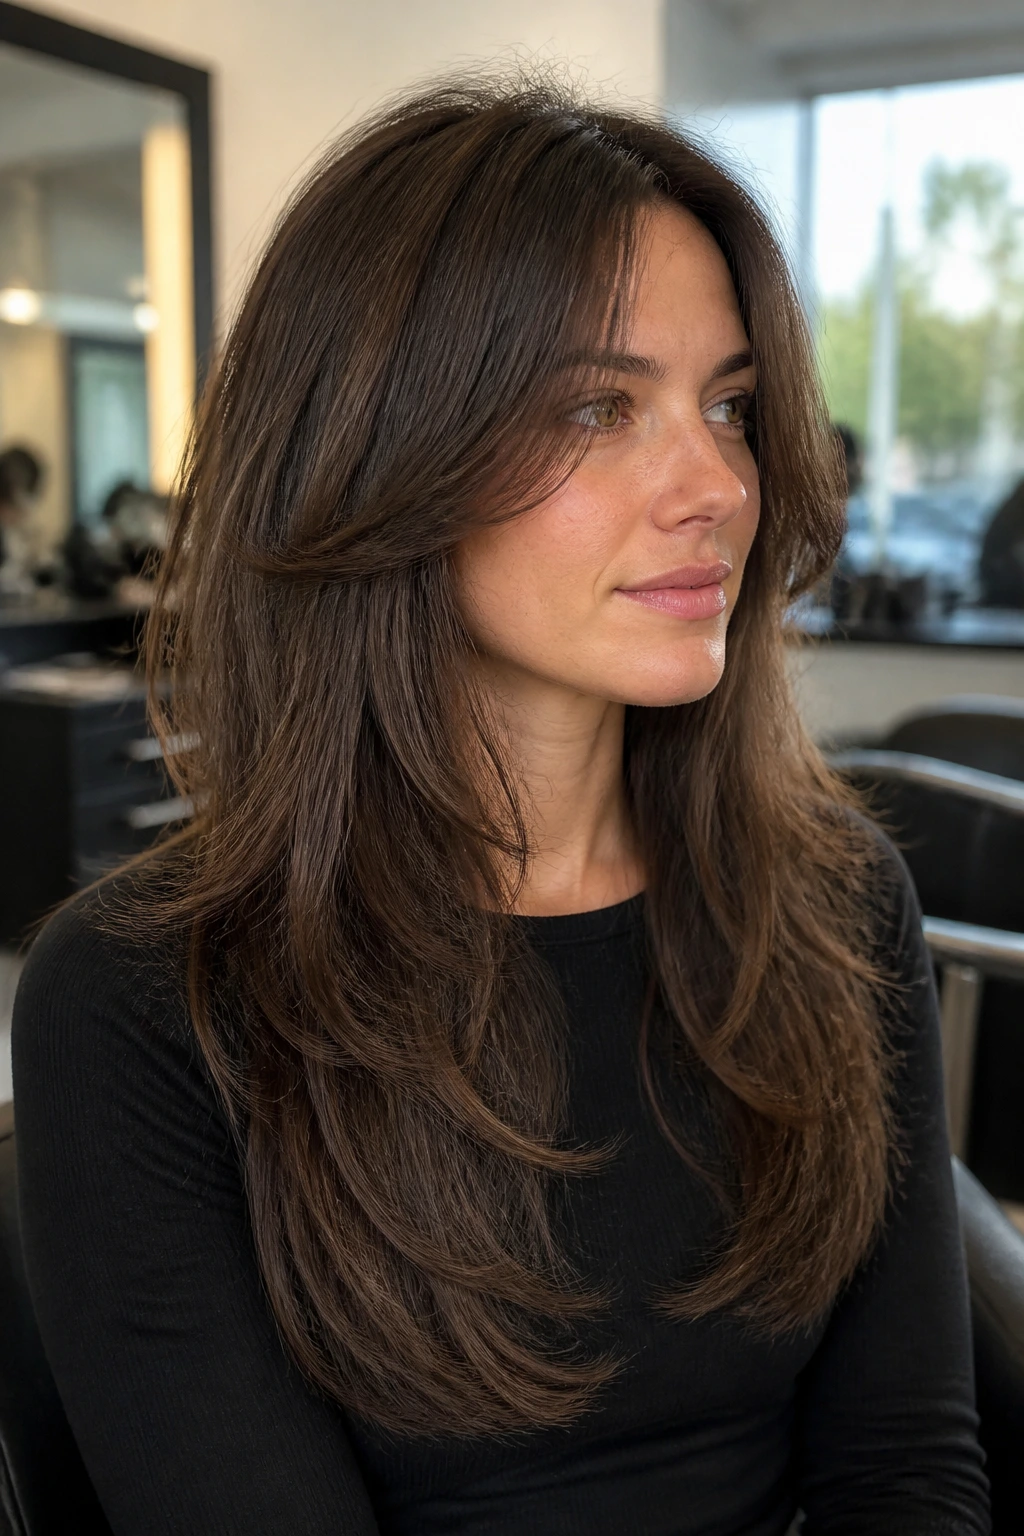
This is the compromise cut for people who like a polished line but still want the hair to move. The perimeter stays blunt, which keeps the ends looking dense and healthy, while the interior gets soft layers that create lift and make the length feel lighter. It’s a good-looking contradiction.
The blunt edge helps the hair hold weight at the bottom, which can be useful if your ends are naturally fine. The interior layers do the volume work higher up, where the eye notices lift first. That means the hair can feel fuller without losing its solid finish.
I like this shape for straight hair and for anyone nervous about going too layered. It keeps a calm outline. Then, when the hair swings or gets brushed back, you notice the movement tucked inside it.
20. Rounded Layers for Big Curls
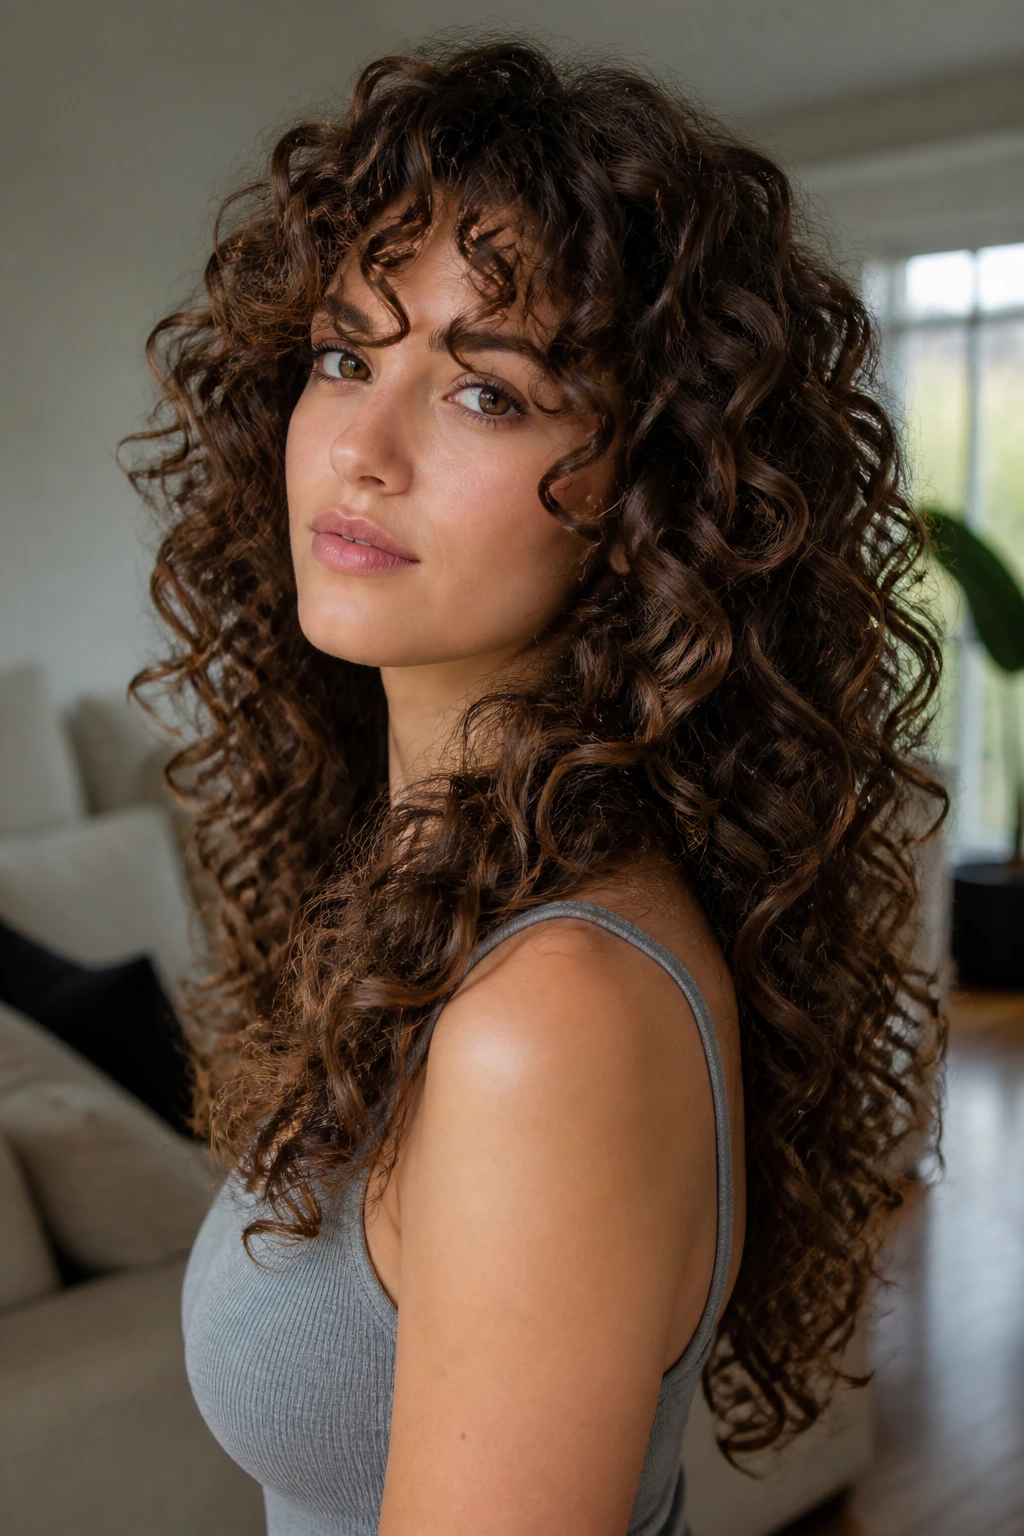
Curly hair has to be cut with respect, or it will punish you with shape. Rounded layers keep the silhouette from turning into a triangle by taking away bulk at the right heights and preserving spring where the curls need support. The goal is a soft round shape, not a pile of disconnected levels.
A dry cut usually makes the most sense here because curls shrink, and shrinkage changes everything. Short layers around the crown can help curls lift away from the scalp, while longer layers through the sides keep the whole shape from ballooning. The result feels balanced, not bulky.
This is especially useful if your curls are long enough to weigh themselves down at the root. Once the layers are in the right place, the curls sit on top of each other instead of dragging in one straight line.
21. Wispy Straight-Hair Layers
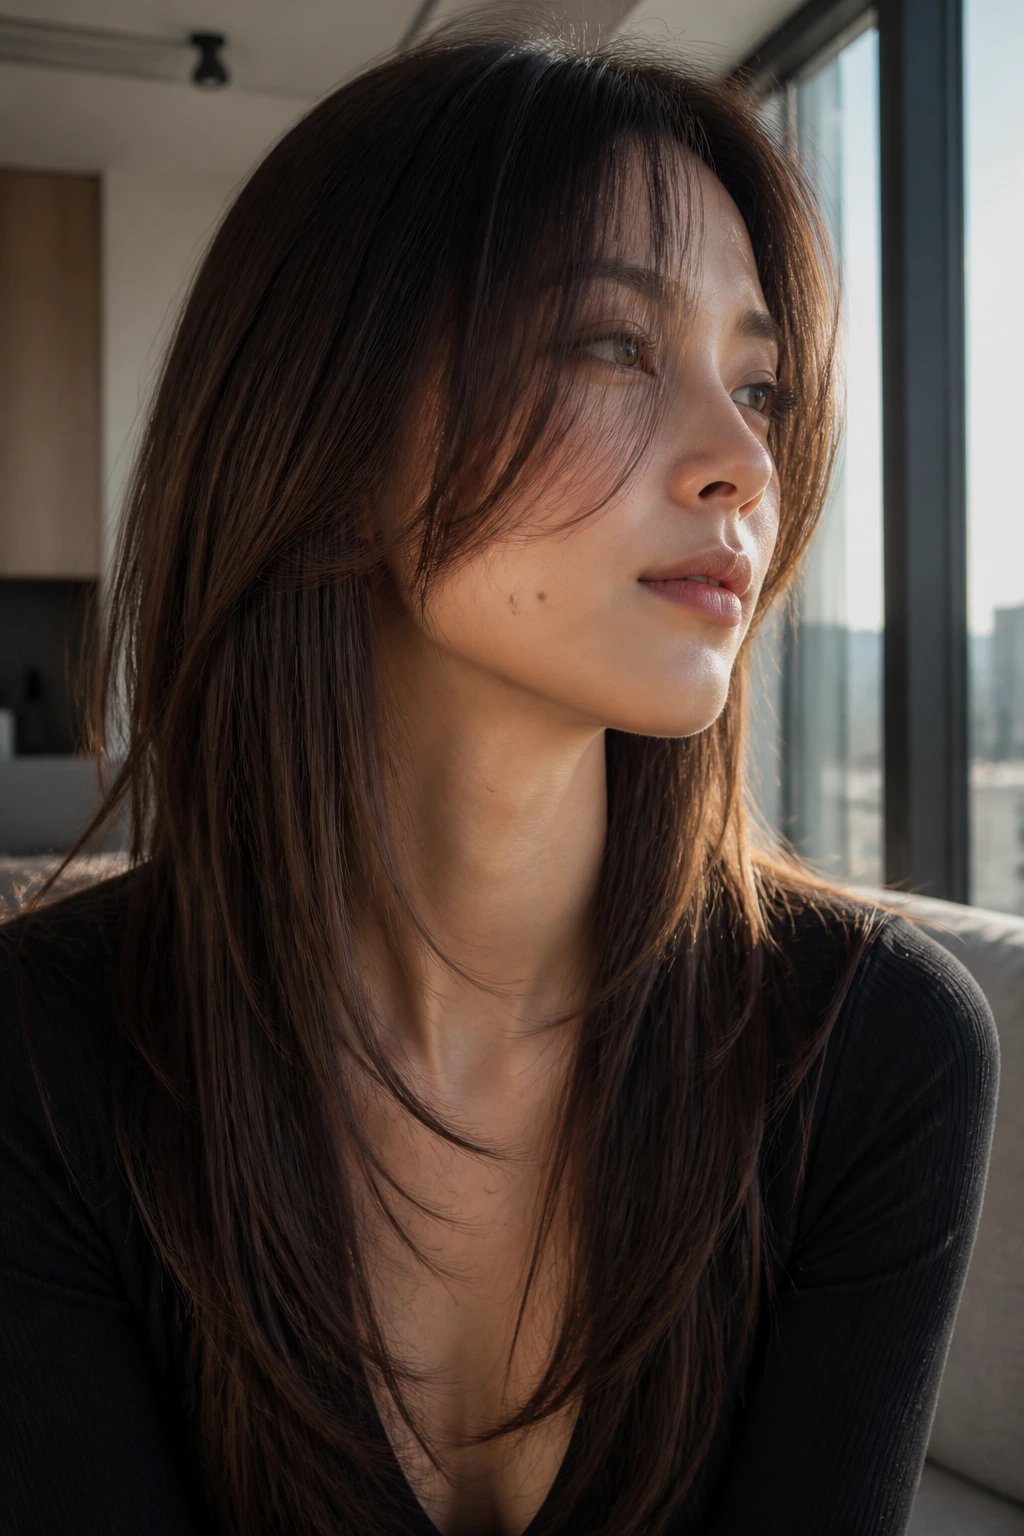
Straight hair often needs a gentler hand than people think. Wispy layers give it motion without cutting out so much bulk that the ends look see-through. The cut is quiet, almost cautious, but that’s exactly why it works on long lengths that need lift without drama.
The best version keeps the transitions soft. No hard jumps. No chunky chunks. Just enough separation to stop the hair from clinging to itself. When styled with a small bend at the ends, wispy layers can make straight hair look much more expensive than a blunt one-length cut ever does.
This is a cut for people who want to keep the hair sleek. If you love smoothness more than texture, this is the safer lane.
22. Ponytail-Friendly Layer Breaks
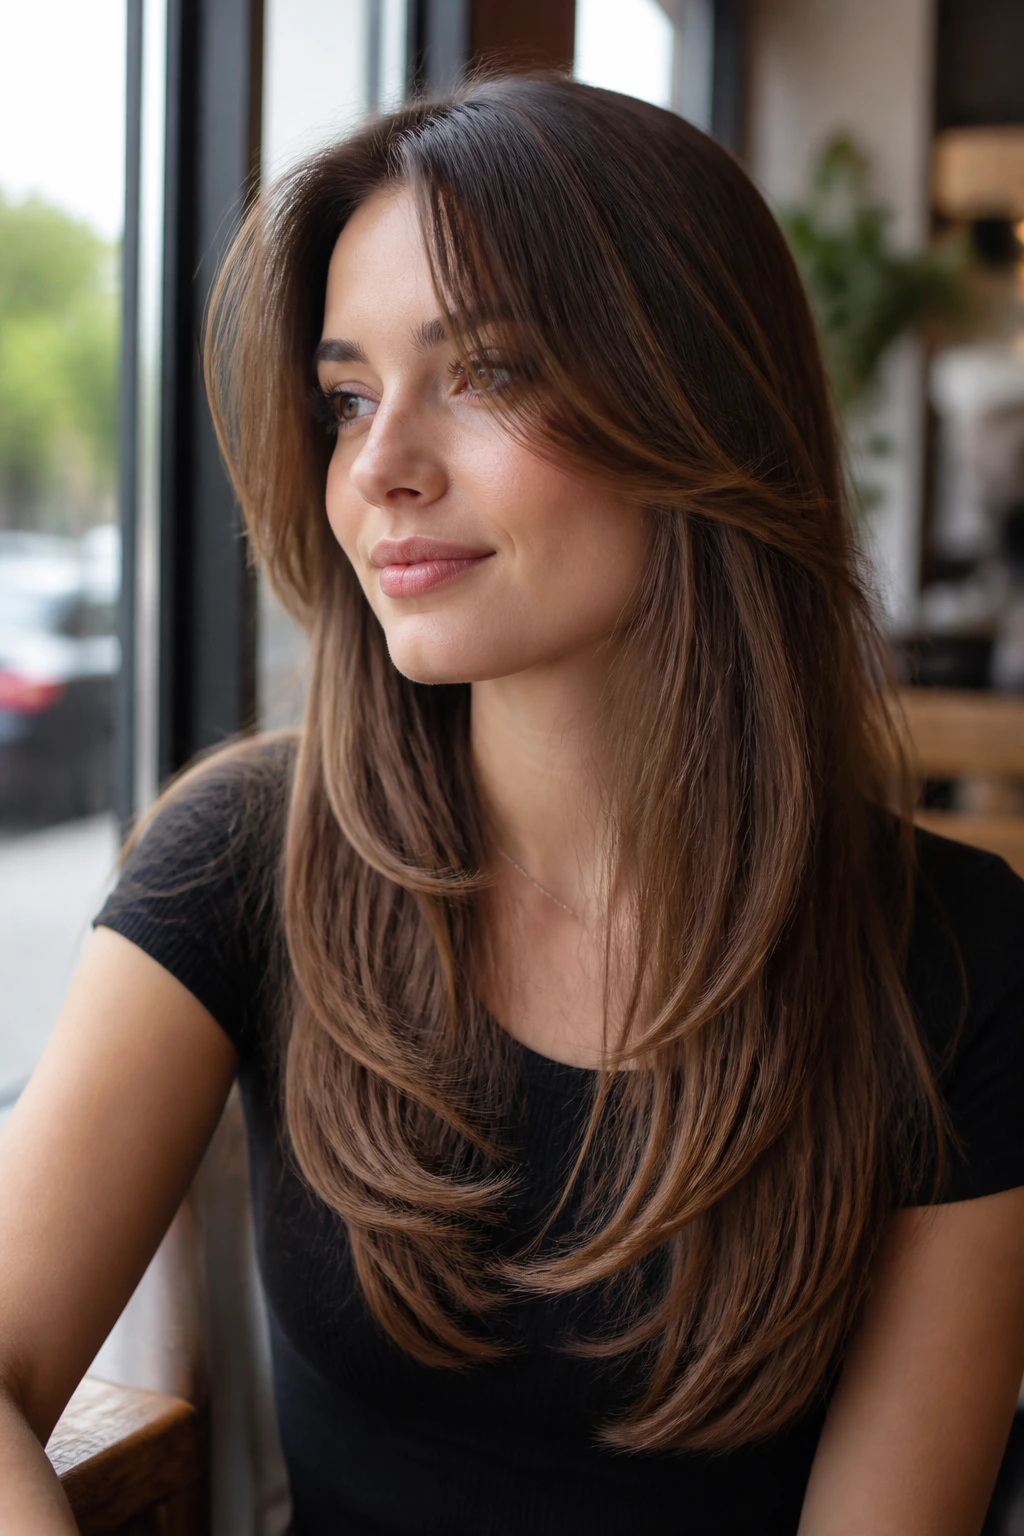
Short layers can be annoying if you live in ponytails, but they do not have to be. A ponytail-friendly layer map places the shortest pieces around the face and crown where they help volume when the hair is down, while keeping the back long enough to gather cleanly. That way you get lift and function.
This kind of cut matters if your routine changes. One day the hair is down and loose. The next day it’s in a clip for work, school, or the gym. The shape should survive both.
I’d ask for the shortest front pieces to sit just long enough to tuck behind the ears without falling apart. That little detail keeps the haircut from becoming a nuisance when you’re not styling it.
23. Swooped Face-Opening Layers
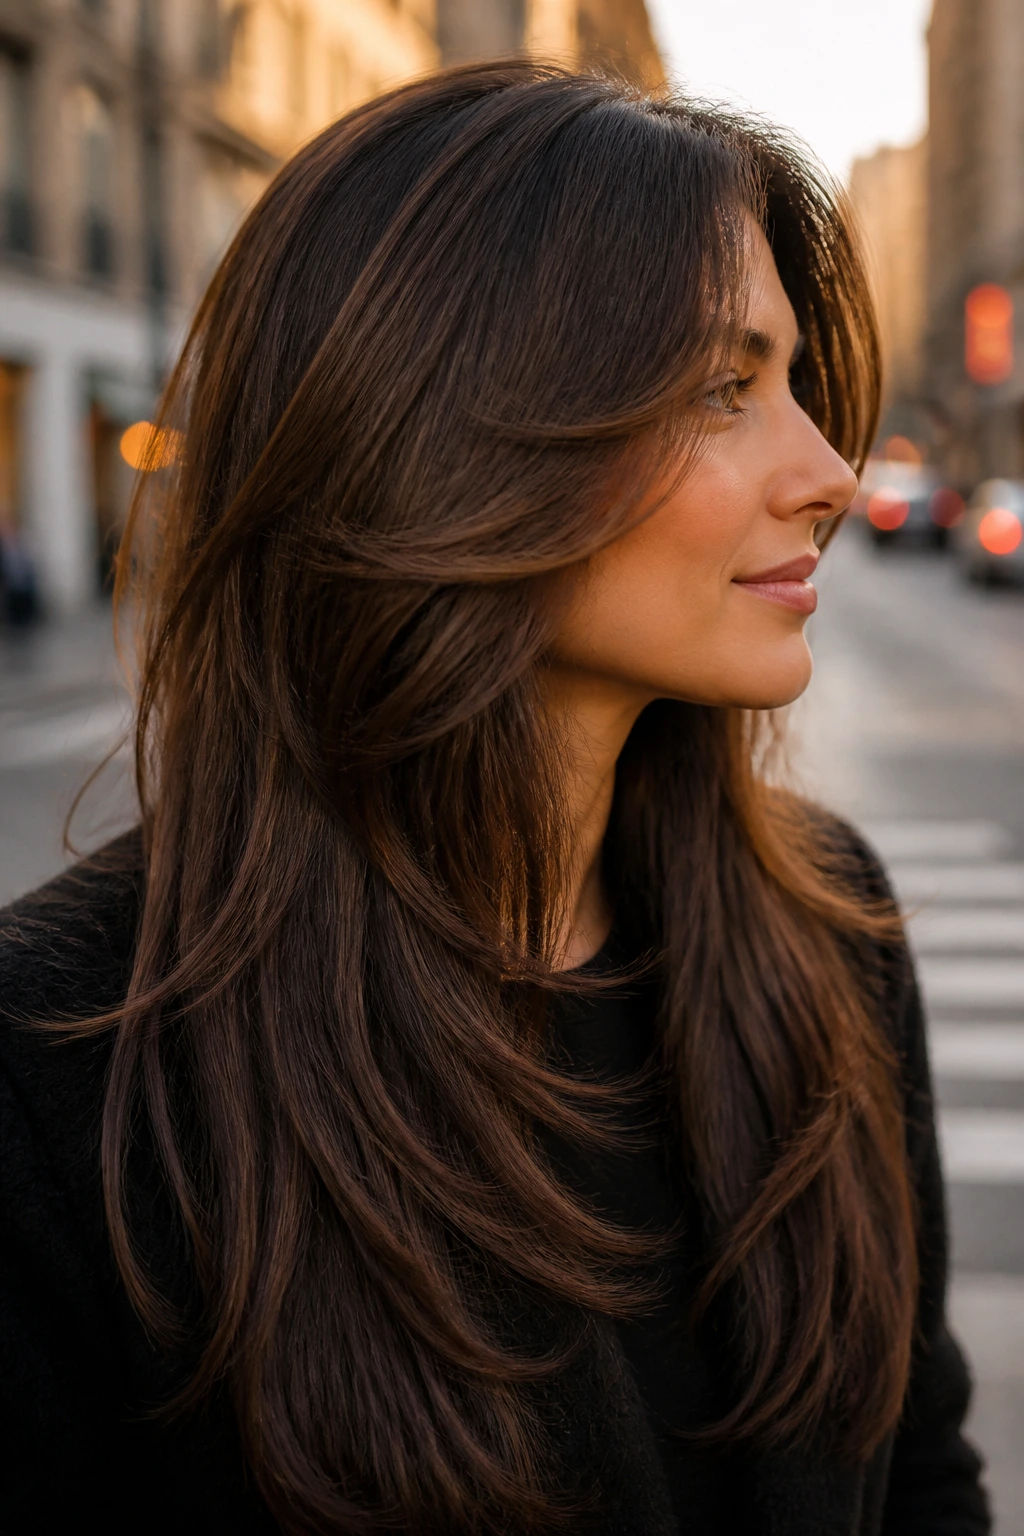
A swooped layer pattern pushes the hair away from the face in one sweeping motion, usually starting near the temple and falling toward the jaw. It’s a strong shape for volume because it creates movement right where people notice it most: around the eyes and cheekbones.
This is not the same as curtain fringe. Curtain fringe splits down the middle; swooped layers lean into one side and create a more dramatic curve. It can be a good move if your hair tends to sit flat at the front and you want a style that looks intentional even when you do very little to it.
It also has a nice side effect: the hair feels less heavy against the cheeks. That can make long hair seem lighter even if the total length stays exactly the same.
24. Root-Lift Crown Layers
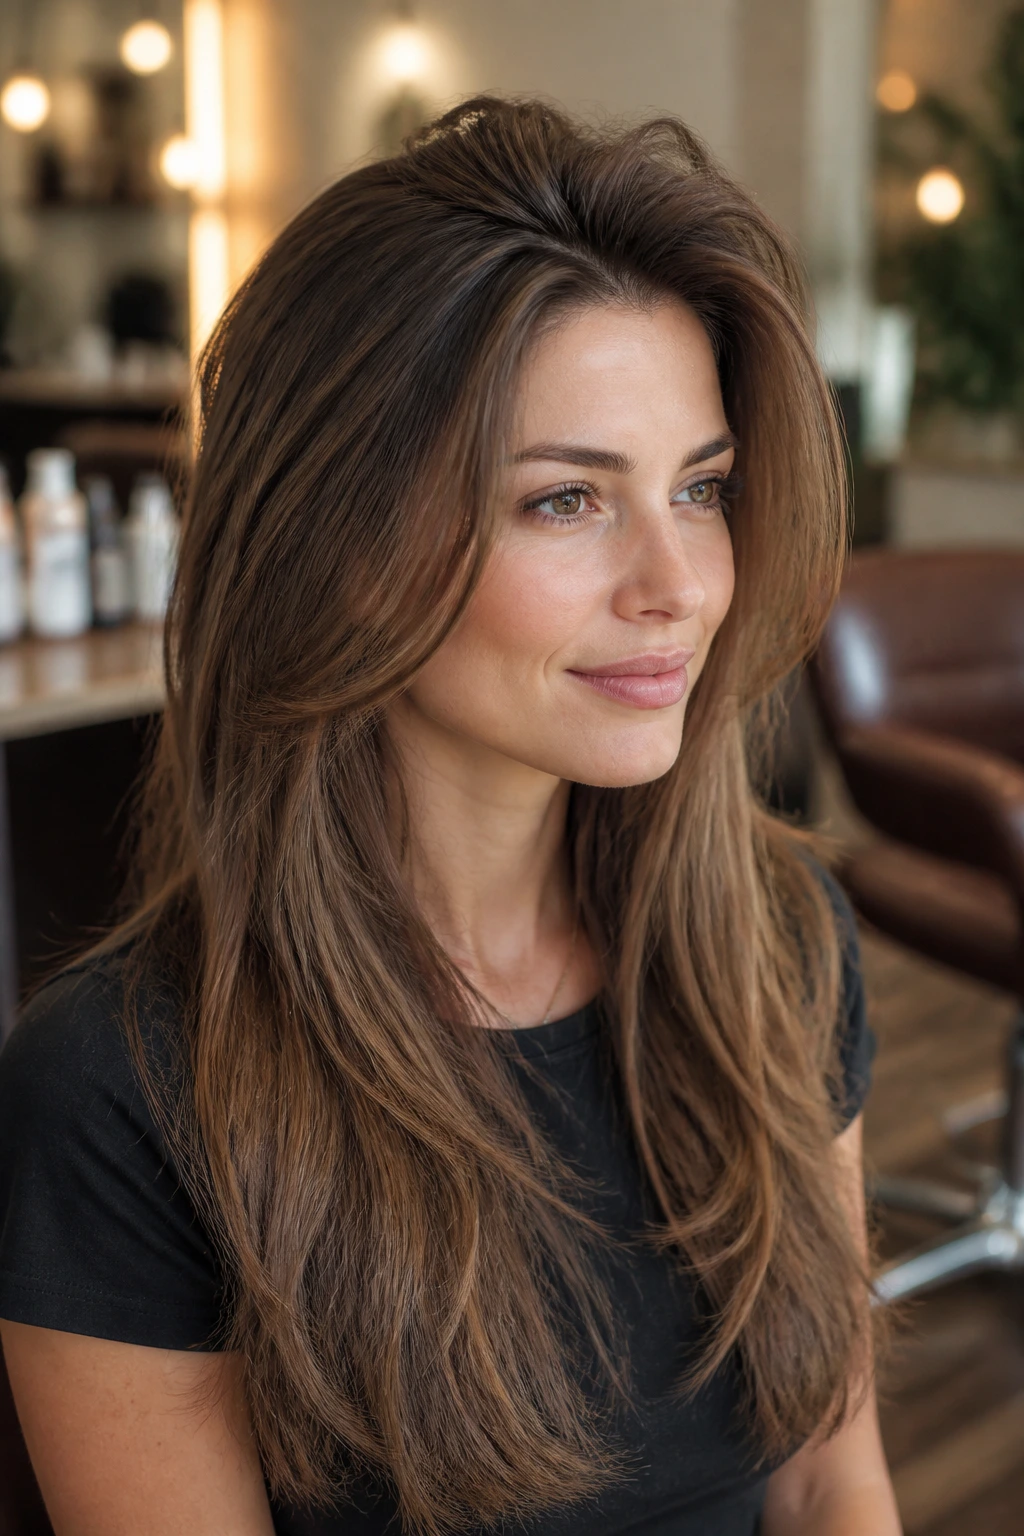
If your roots collapse first, start there. Root-lift crown layers are short enough at the top to create height, but not so short that they turn into a helmet. The cut is about engineering. The crown needs room to rise, and the long lengths need room to hang below it.
This works especially well on heavy straight hair that gets dragged down by its own weight. A bit of root spray, a round brush, and a cool shot from the dryer can make the crown sit higher without turning the rest of the hair frizzy.
Be careful with the placement. Layers that are too short at the crown can stick up in a way that looks awkward rather than full. The best version creates lift, then blends out quietly.
25. Broken-Edge Layers for Long Hair
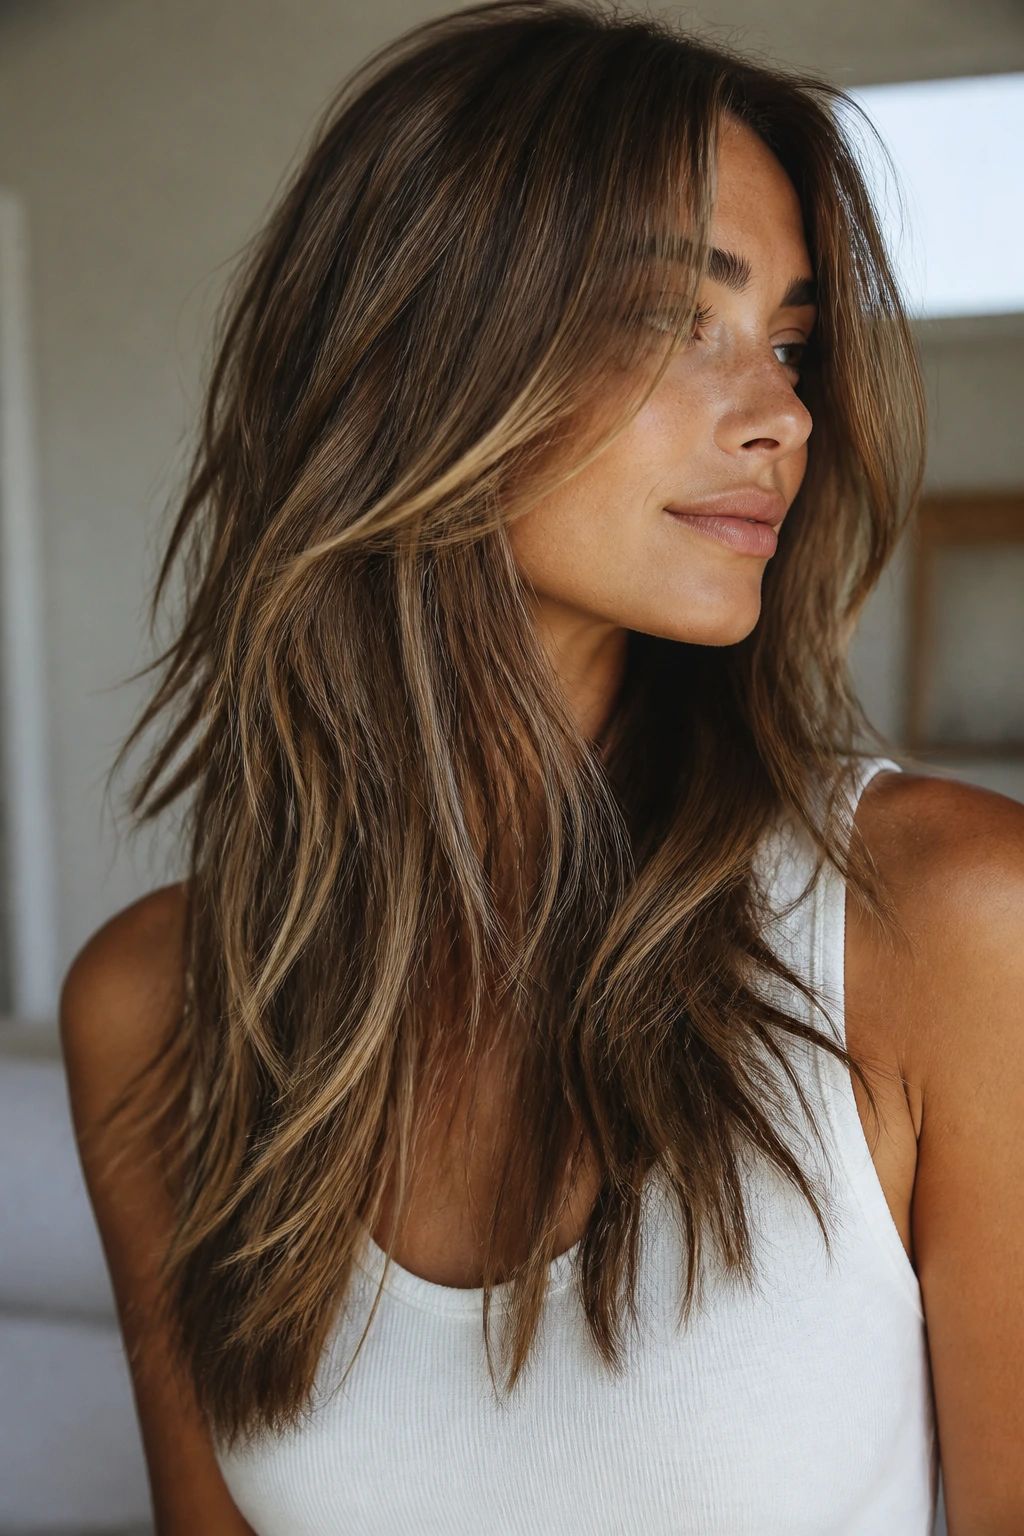
Broken-edge layers soften the perimeter just enough to keep long hair from looking like a solid, rigid line. The ends have a little irregularity, a little air around them, which makes the whole cut feel lighter when the hair moves. It is not about roughness. It is about shape that does not feel boxed in.
This is a useful middle ground for people who like their long hair to look lived-in but not shaggy. The cut has texture, but it still reads as controlled. That makes it easier to wear down and easier to pin up without the shorter pieces escaping everywhere.
A texturizing spray helps, but only a little. If you load the hair up with too much product, the broken edges can start to look dry. Light hands work better here.
26. Soft Drape Layers for Mid-Back Length
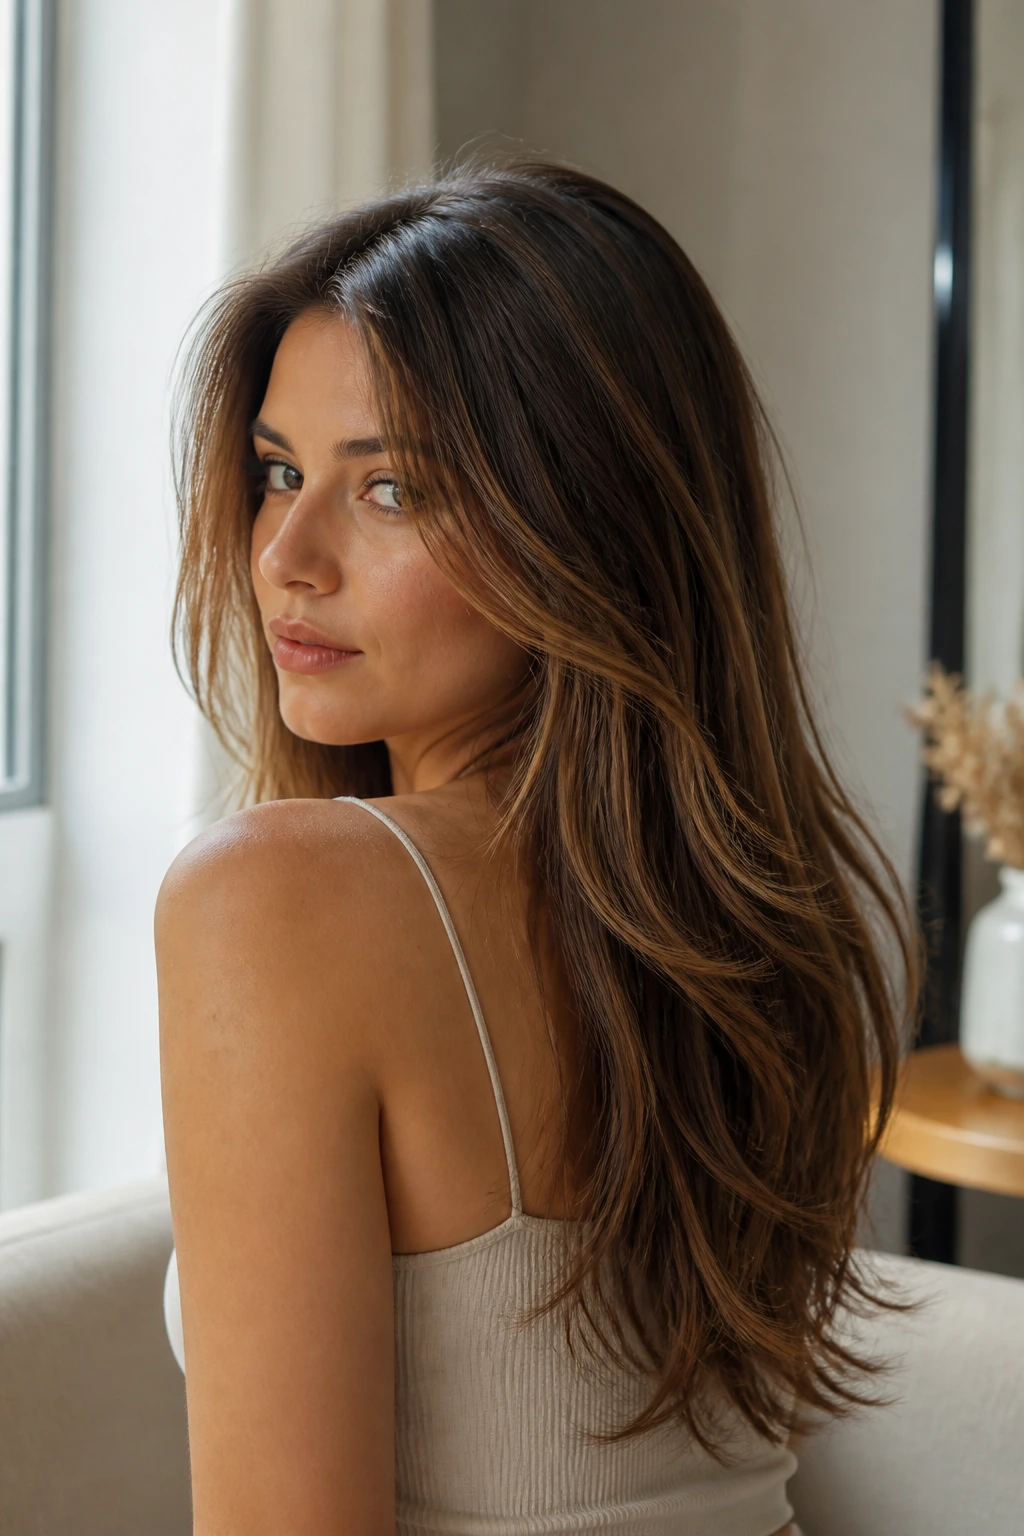
Long hair that reaches mid-back or lower can get heavy in a way that no one notices until it starts collapsing into the same old shape every day. Soft drape layers fix that by starting lower, where the weight really accumulates, and letting the hair fall in loose folds instead of one giant curtain.
This is a good choice if you love length more than anything else. The layers are not loud. They just keep the bottom half from feeling stuck to itself. That gives the hair a softer outline and a little more movement when you walk, sit, or toss it over one shoulder.
It’s a calmer kind of volume. Less about height at the crown, more about ease through the ends. I think a lot of people overlook that difference.
27. The Low-Maintenance Grow-Out Layer Map
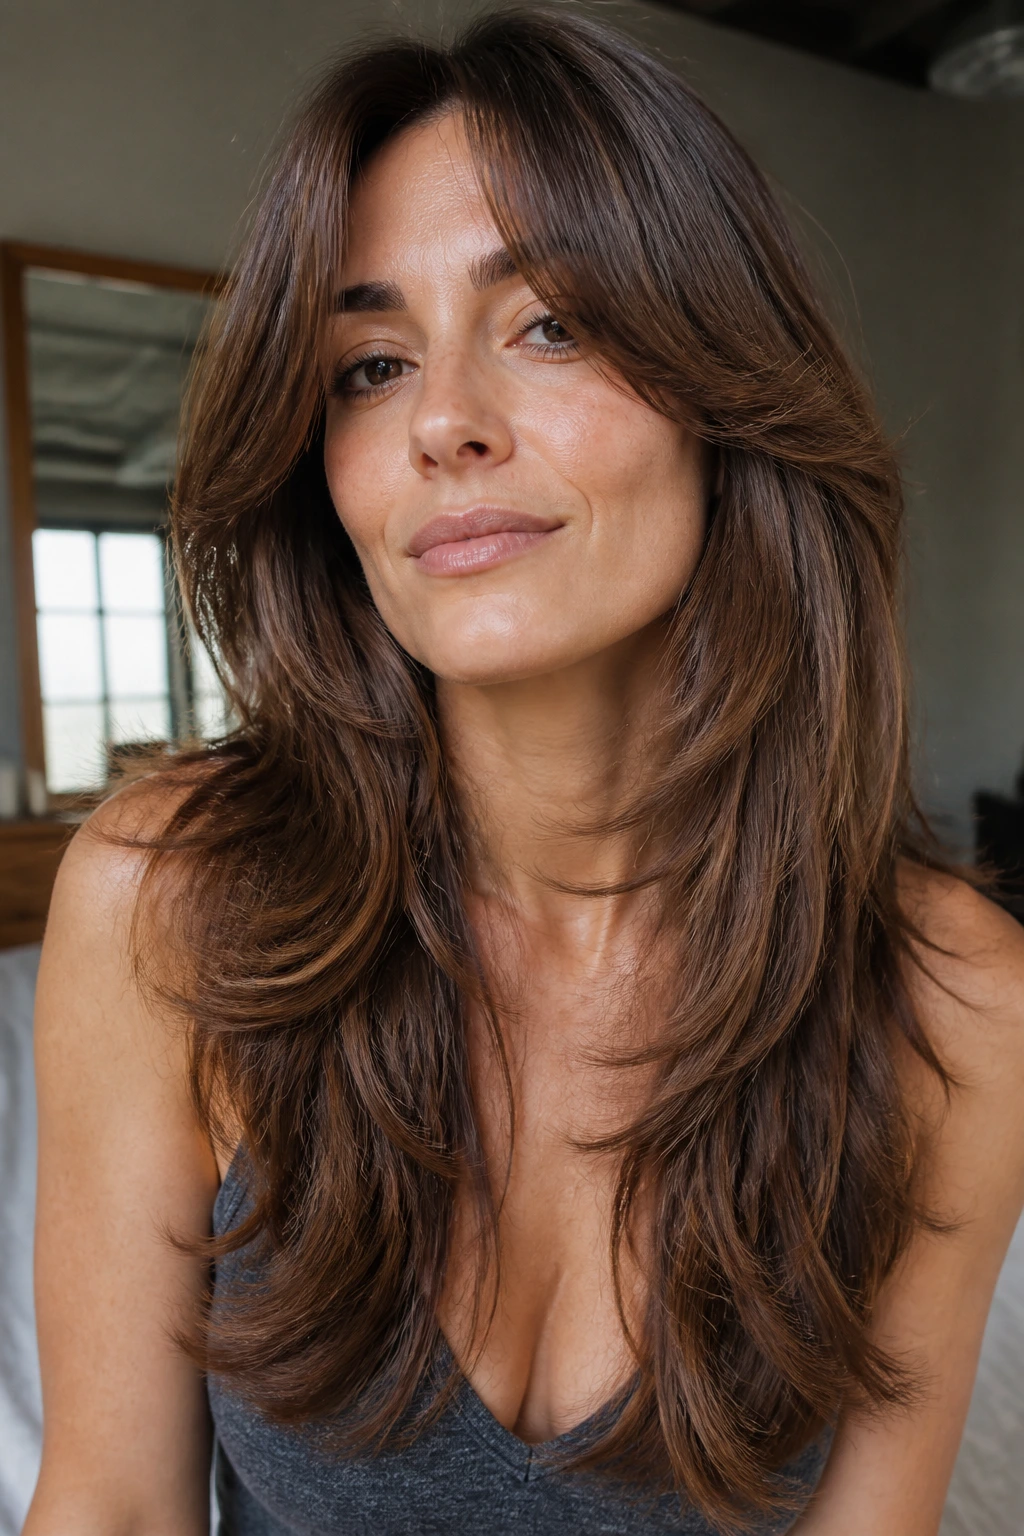
Some layered cuts are built for the next trim. This one is built for the weeks in between. The shortest pieces are kept long enough to blend as they grow, which means the haircut does not turn patchy the minute it loses its fresh edge. That matters if you do not want to live at the salon.
A low-maintenance layer map is smart for anyone who likes volume but hates the awkward grow-out phase. The shape keeps moving because the layers are staggered gently, not chopped in one dramatic step. Even when the cut softens, it still has structure.
If you are the type who lets hair go a little longer than planned between appointments, this is the version to ask for. It gives you breathing room. And honestly, that makes the whole haircut easier to live with.
What Makes Short Layers Actually Lift Long Hair
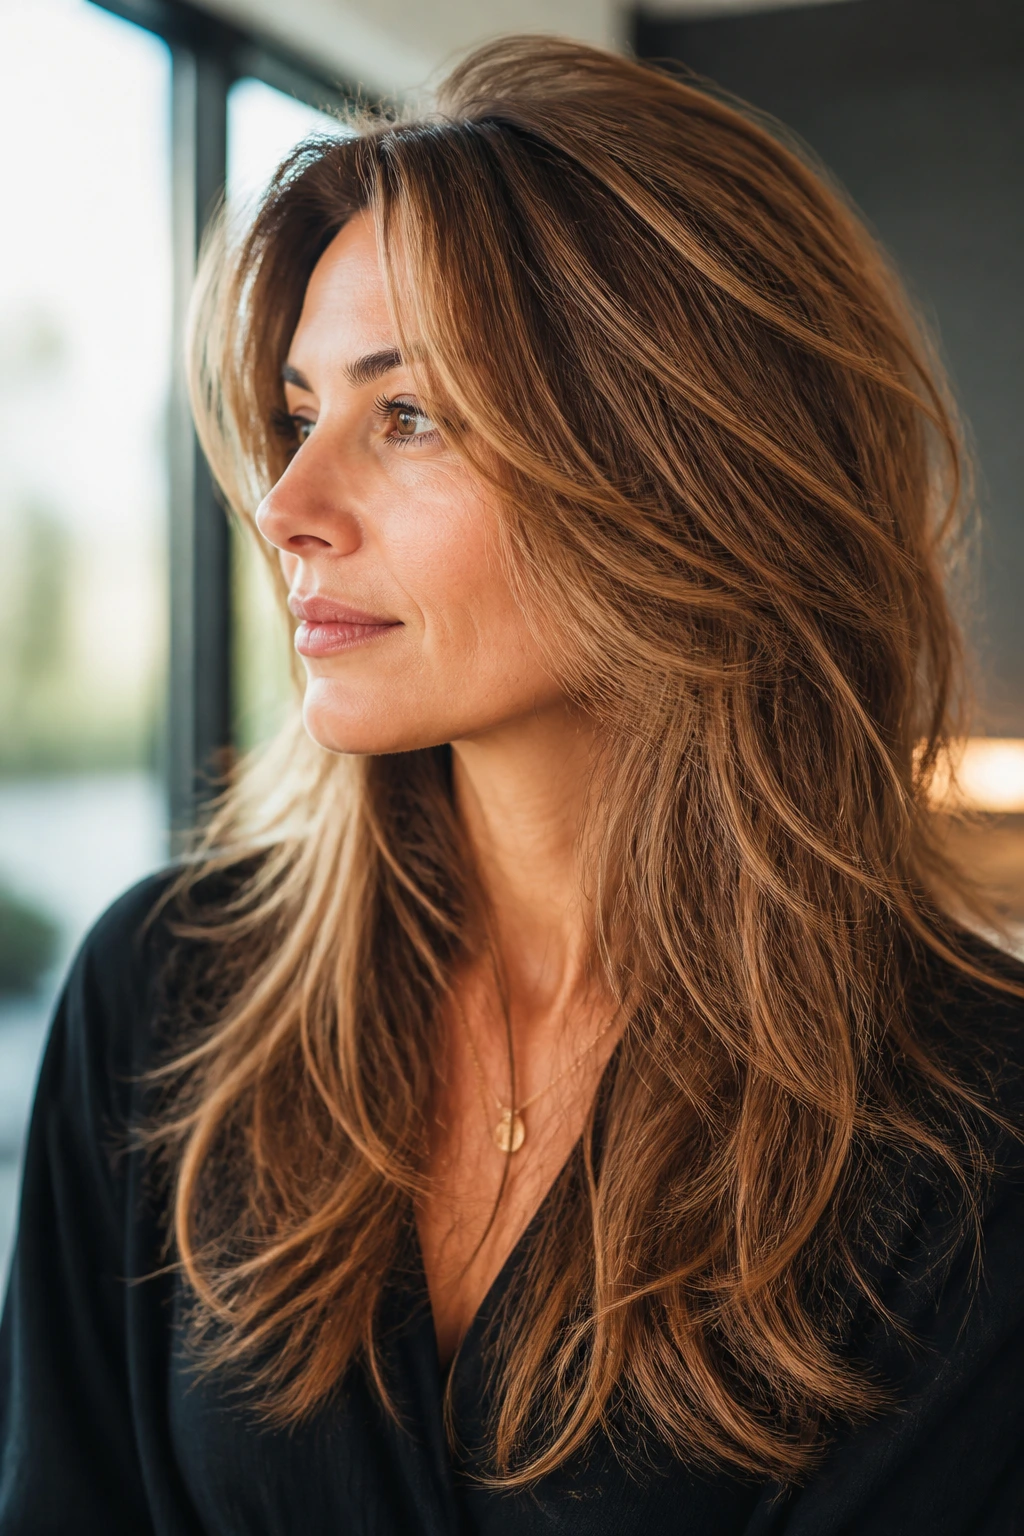
Weight is the enemy here. Long hair gets heavy fast, especially if the same section of hair has to support the whole length from roots to ends. Short layers break that weight into smaller pieces so the upper half can rise instead of slumping. That is why a well-cut layered style can look fuller without adding a single ounce of hair.
The cut changes the line of fall
Hair falls where gravity tells it to fall. Short layers interrupt that line and make the hair bend, separate, or turn slightly under. The ends stop acting like a fence line. They move.
Texture decides how visible the volume looks
Fine straight hair shows lift in a different way than thick curls do. On fine hair, a small change near the crown can make the whole style look fuller. On curly hair, the same kind of change has to respect shrinkage or the layers can puff out too high. That is why layer placement matters more than the label on the cut.
Shape beats product, every time
A can of mousse can help. A good haircut helps more. If the layer map is smart, you need less work in the morning. That is the real payoff.
How to Ask for Short Layers on Long Hair at the Salon
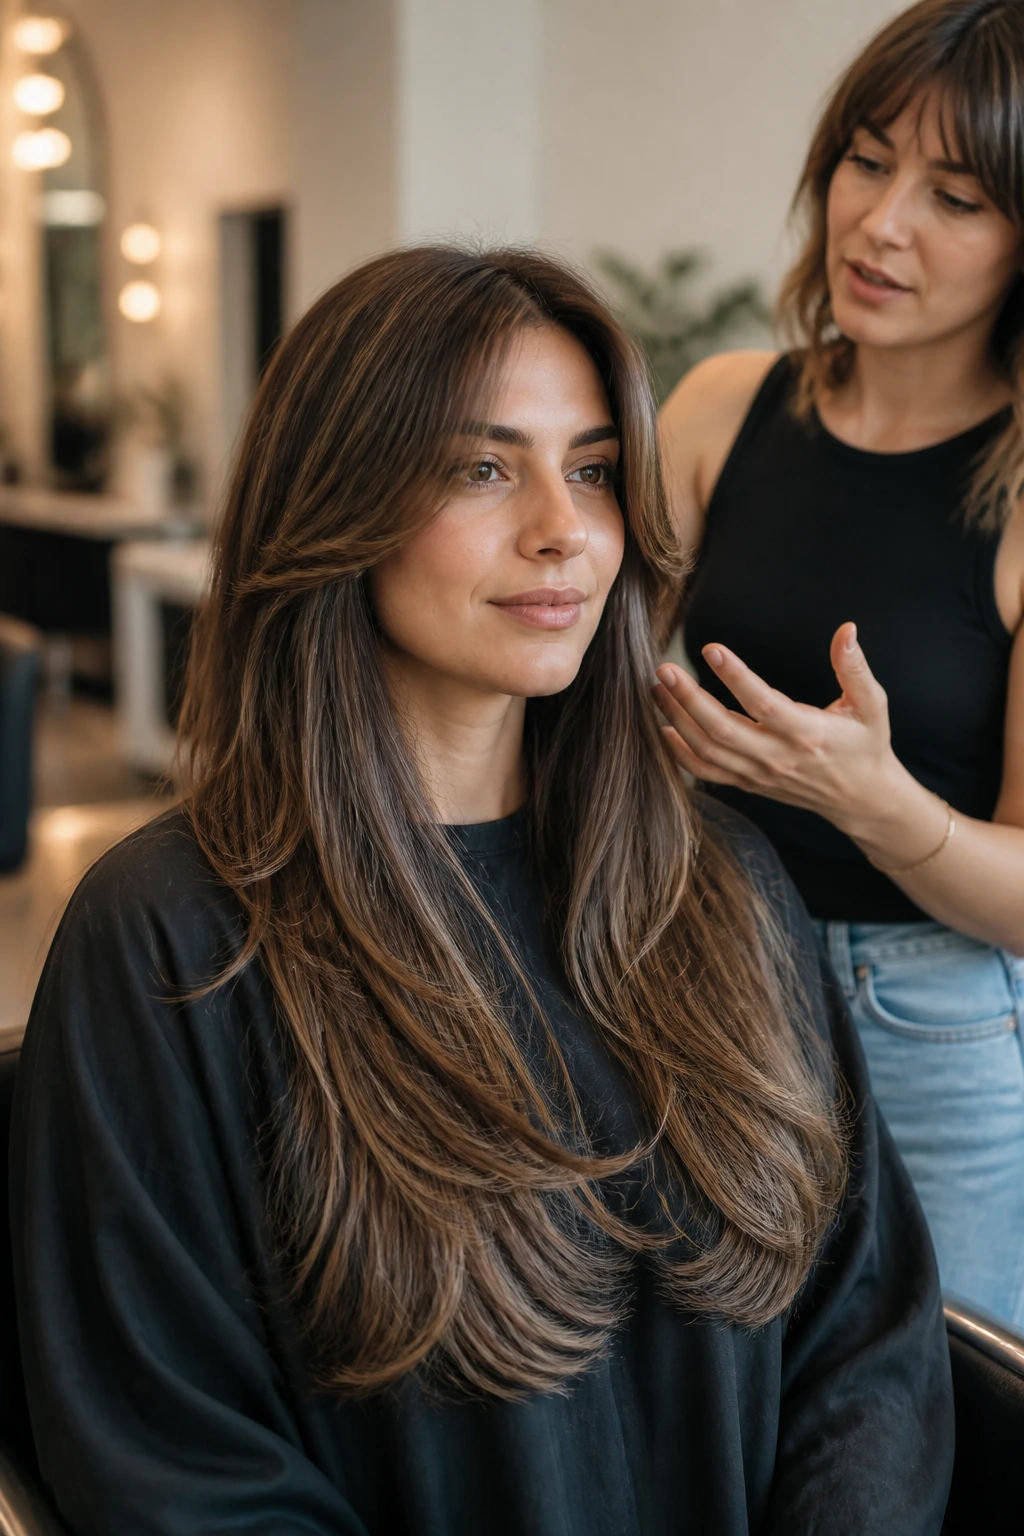
Bring photos, but bring the right photos. One front view is not enough. The front shows face framing; the side shows volume; the back shows whether the shape collapses or stays open. If you can only bring one image, bring the one that matches your hair texture more closely, not just the one you think is pretty.
Say how you wear your part. Center part and side part are not interchangeable when layers are cut for lift. A piece that looks perfect with a deep side part can sit wrong down the middle, and the reverse is true too. Mention whether you air-dry, blow-dry, diffuse, or flat-iron. That one detail changes where the stylist should place the shortest pieces.
If you have fine hair, ask the stylist to preserve a strong perimeter. If you have thick hair, ask for interior weight removal instead of an aggressive thinning pass at the ends. And if your hair is curly, ask whether the cut will be done dry or stretched, because that affects shrinkage more than people expect.
Tools That Help Layered Hair Look Full
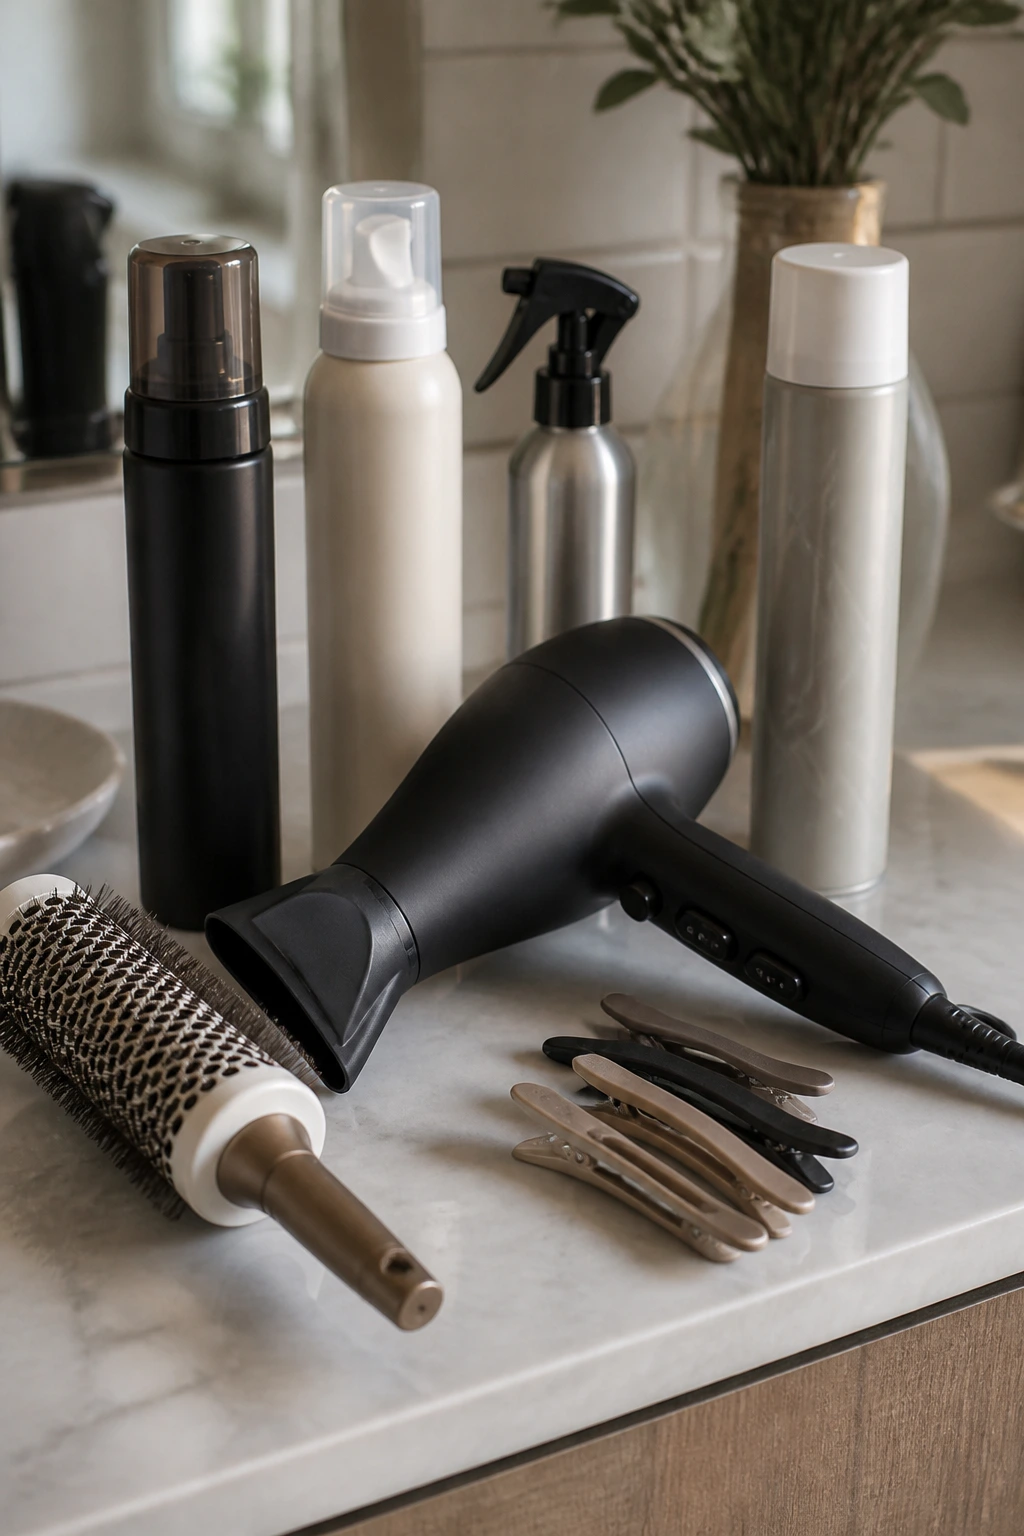
- Round brush, 1.5 to 2.5 inches: Small enough to bend the front pieces, large enough to smooth the long lengths without making them look puffy.
- Blow dryer with a concentrator nozzle: Directs air exactly where you want lift, especially at the roots and crown.
- Volumizing mousse: Best on damp roots and mid-lengths when you want body without stickiness.
- Heat protectant spray: Non-negotiable if you use a dryer, flat iron, or curling iron even twice a week.
- Duckbill clips or root clips: Useful for setting the crown while the hair cools in place.
- Dry shampoo: Helps keep the roots from collapsing between washes, especially on fine hair.
- Texturizing spray: Good for piece-y layers and broken edges; use lightly or the ends can feel dry.
- Wide-tooth comb or flexible detangling brush: Easier on layered hair than a stiff brush that yanks the shorter pieces out of shape.
Styling Moves That Make the Volume Last
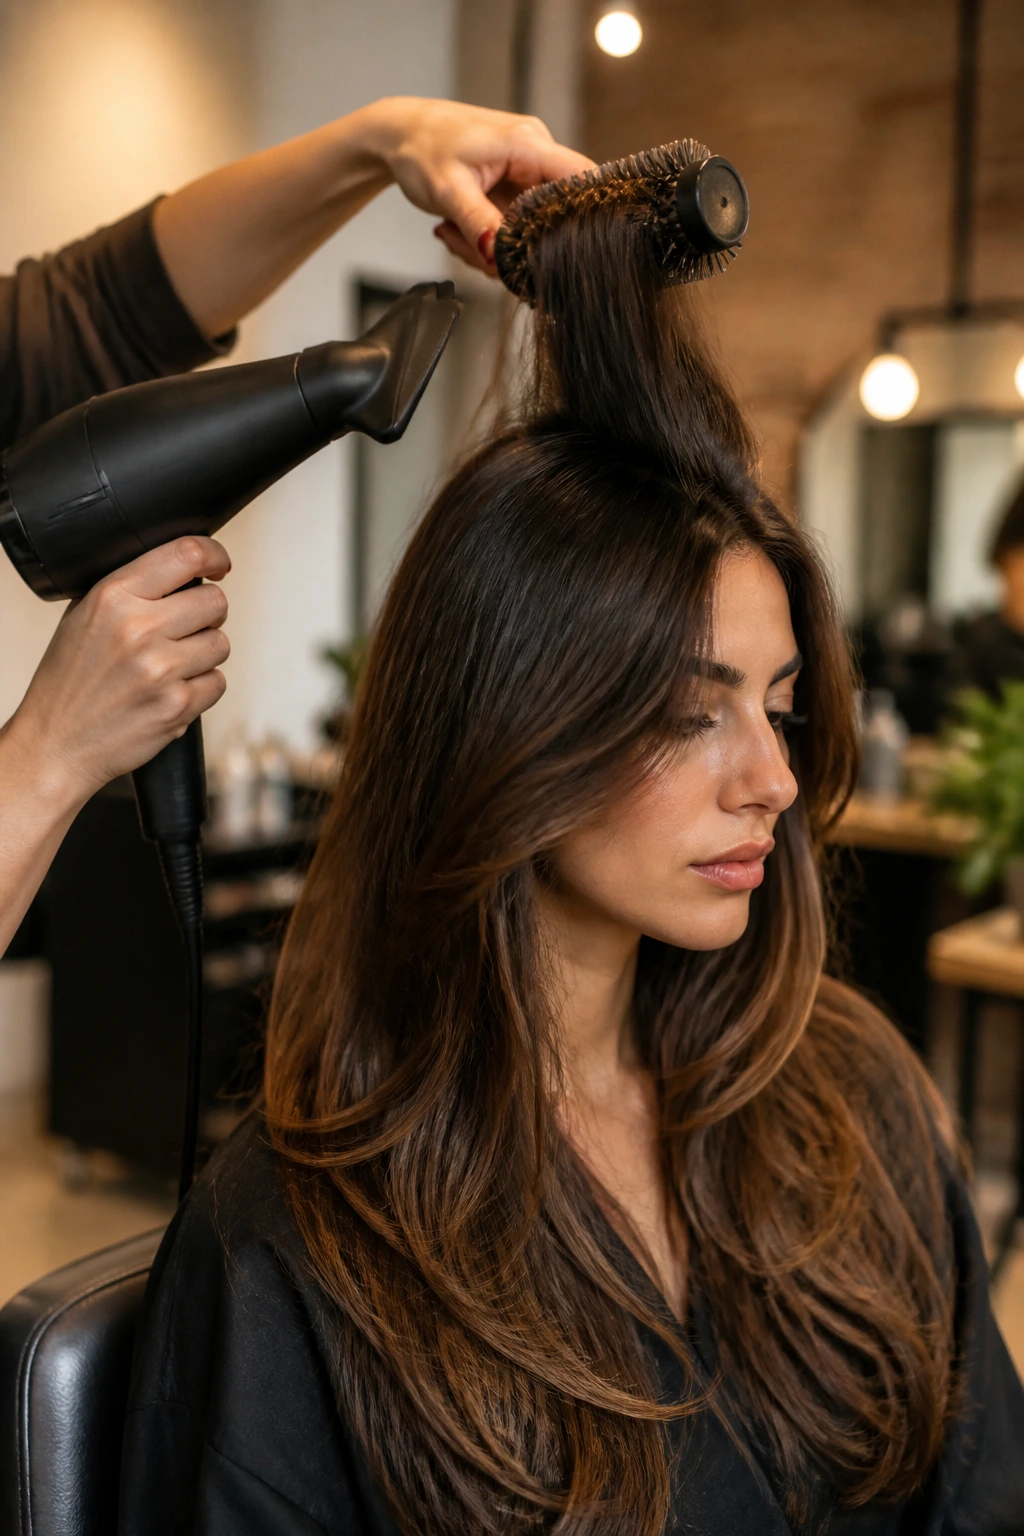
The fastest way to kill a good haircut is to dry it in the wrong direction. If you want lift, dry the roots against their natural fall first, then switch to the direction you actually wear. That little reset at the root matters more than most people think. Hair remembers the shape it cooled in.
Root clips are worth the small annoyance. Put them at the crown while the hair cools after blow-drying. They lift the base for 10 to 15 minutes, which is often enough to hold the shape through the day. If you skip that step, the crown can sink before lunch.
Finish with a cool shot and a light spray, not a heavy lacquer. Heavy hairspray can glue the layers together and make the haircut look smaller. A softer hold keeps the movement visible. If you like air-drying, scrunch in a small amount of mousse, flip your part once while it dries, and leave the hair alone.
Common Mistakes That Flatten the Whole Look
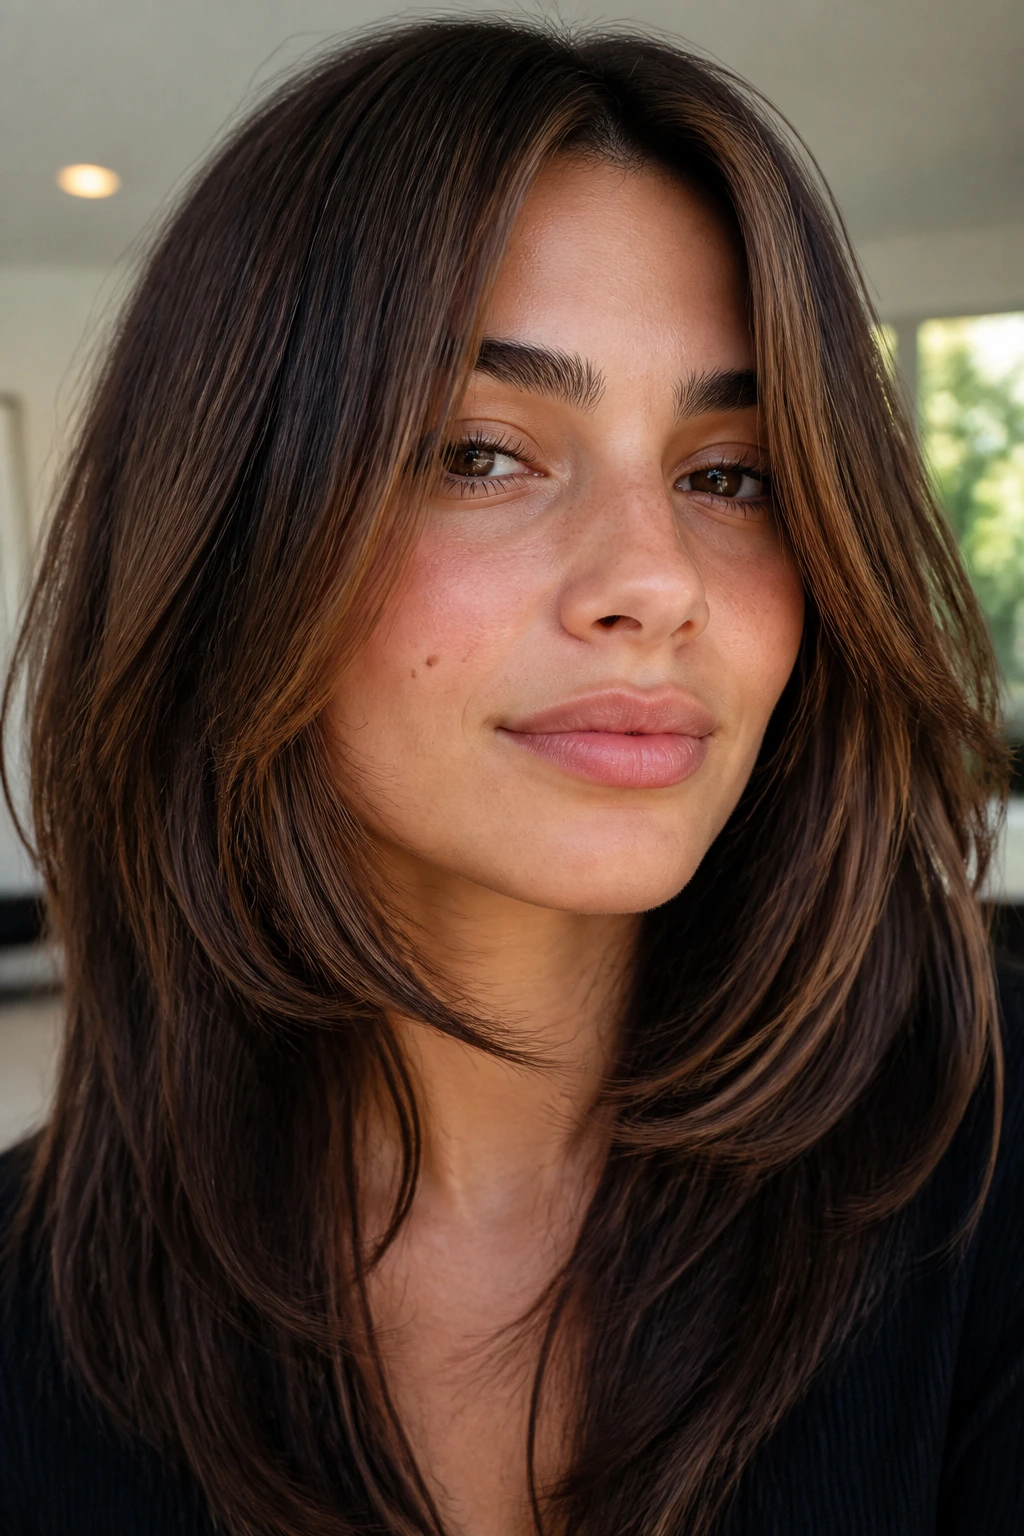
Cutting the shortest layer too high is the easiest way to ruin the shape. The hair can pop up around the face and refuse to blend, which is especially brutal on fine hair. The fix is to keep the shortest pieces connected to the rest of the haircut instead of making them look like an afterthought.
Over-thinning thick hair is another classic mistake. The ends start looking see-through, and the haircut loses its weight in the wrong place. Thick hair usually needs strategic removal through the interior, not a lot of scissor work at the bottom line.
Ignoring your natural part can make the haircut look lopsided or flat. If you never wear a center part, do not ask for layers that only look good centered. Have the stylist cut the shape around the way you actually style it.
Using heavy oils at the root sounds nourishing and usually backfires. The roots collapse, the crown goes flat, and the volume disappears before the day is half over. Keep heavier products on the ends only.
Asking for the same layer map on every texture is a mistake people make after saving one photo. A cut that gives body to straight hair might turn puffy on curls or stringy on fine hair. The photo is a starting point, not a copy job.
Variations and Adaptations to Try
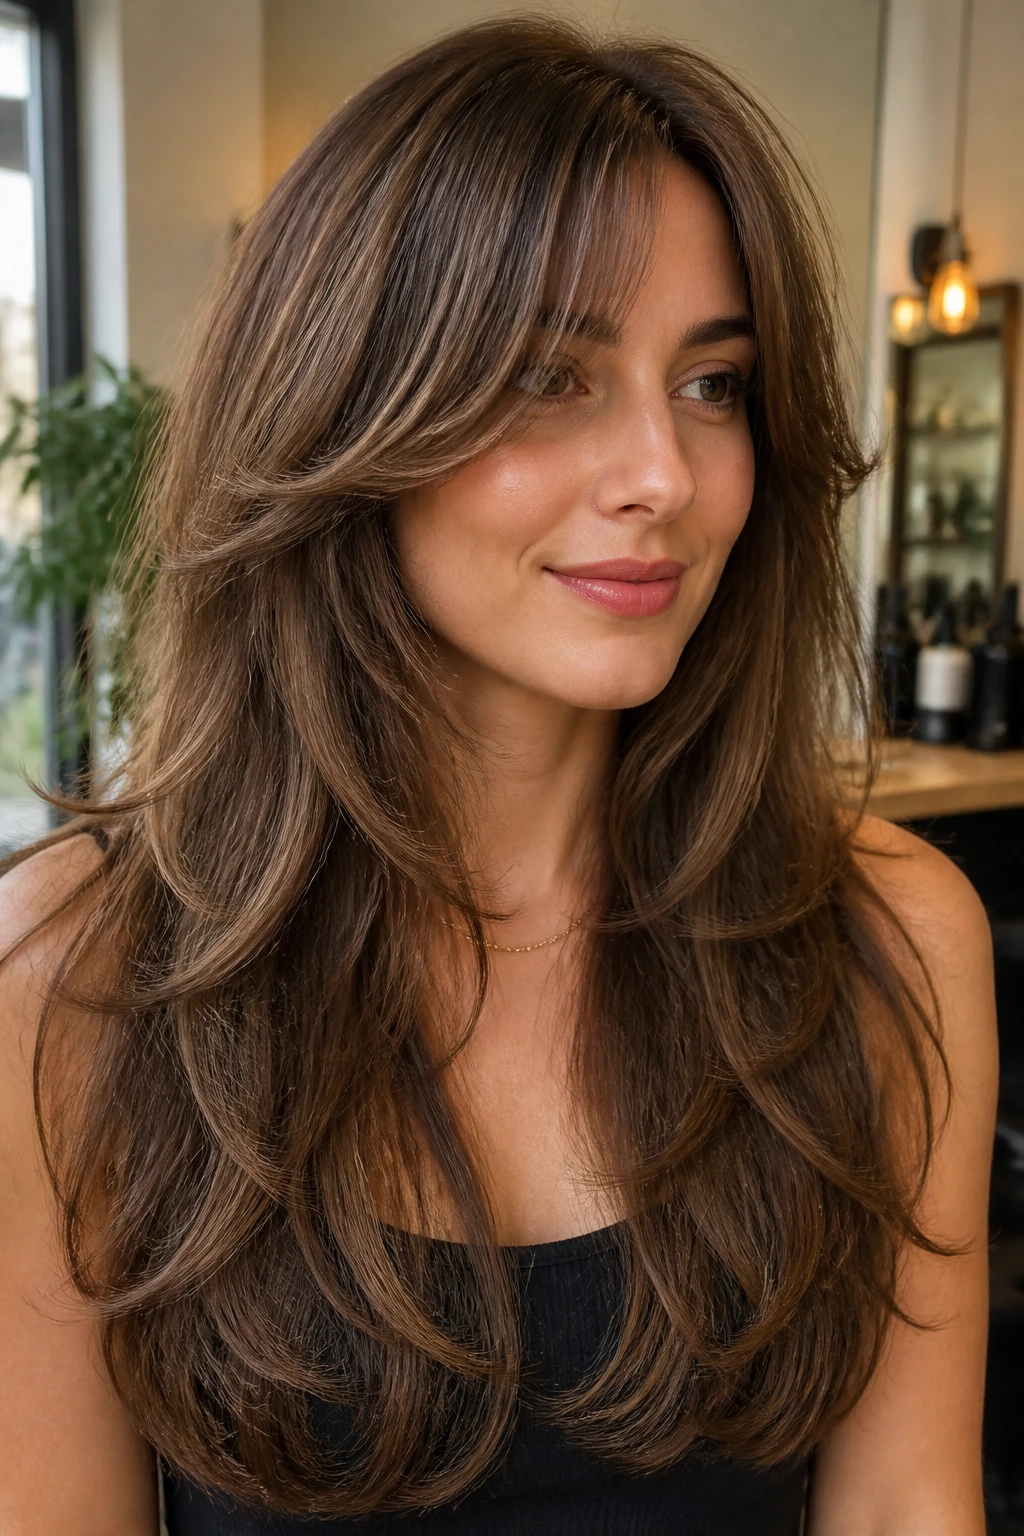
Fine-Hair Lift Map: Keep the perimeter fuller and the crown layers subtle. A little root mousse and a round brush will give you the most lift without making the ends look sparse.
Thick-Hair Release Cut: Ask for interior weight removal and blended face framing. This version takes bulk out of the middle so the hair moves without losing its dense, expensive-looking edge.
Curly Coil-Friendly Shape: Have the cut done dry or with the curl pattern stretched only enough to see length. Short layers should support the curl stack, not interrupt it.
Straight-Hair Swing Layers: Use soft, blended layers with a slight point cut at the ends. Straight hair needs motion more than drama, and this version keeps the outline sleek.
Grow-Out-Friendly Blend: Ask for the shortest pieces to stay long enough to blend for months, not weeks. If you hate awkward stages, this is the safest route.
Keeping the Shape Fresh Between Trims
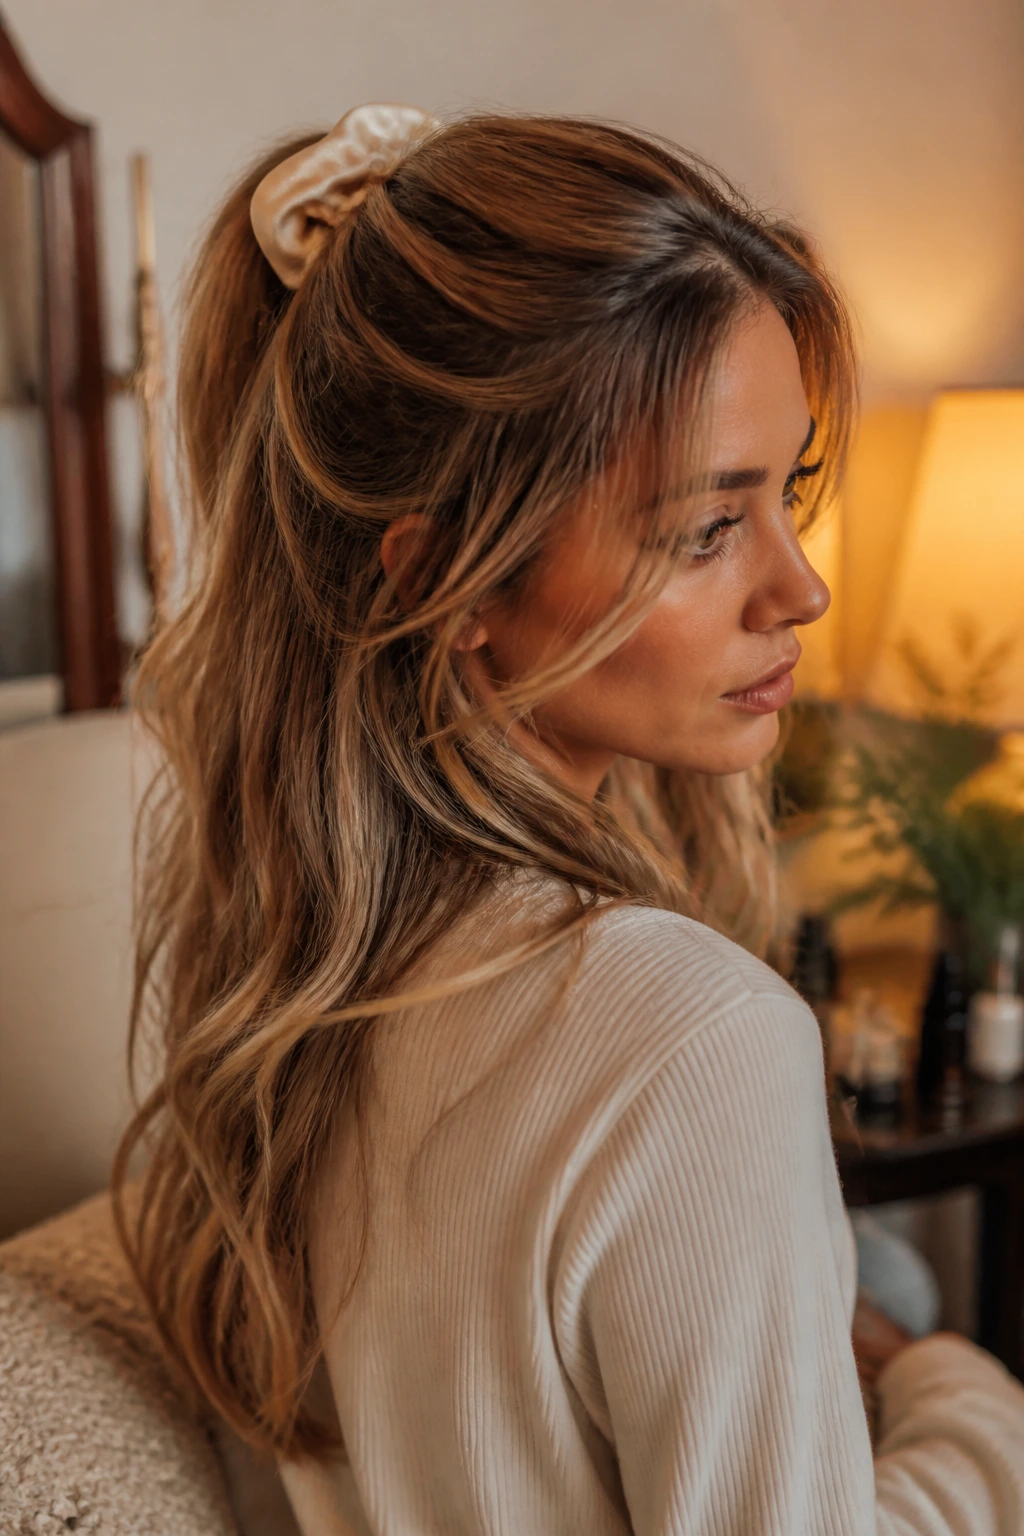
Long layered hair gets tired when the ends start splitting and the root lift disappears. A trim every 8 to 12 weeks keeps the shorter layers from turning fuzzy and the ends from looking ragged. If your layers are very soft and low-slung, you can often stretch that a little longer. If your hair is fine or heavily heat-styled, stay closer to the shorter end of that range.
Wash rhythm matters too. Heavy product buildup drags the roots down, so a clarifying shampoo every 2 to 4 weeks can help if you use mousse, dry shampoo, or texturizing spray often. Don’t overdo it. The point is to reset the hair, not strip it raw.
At night, a loose braid, silk scrunchie, or low twist keeps the shorter front pieces from tangling around the face. If your hair is wavy or curly, avoid rough brushing when it’s dry; that can flatten the volume you paid for. For blowout styles, a quick re-bend with a brush and a warm dryer takes less time than starting from scratch.
Questions People Usually Ask Before Booking
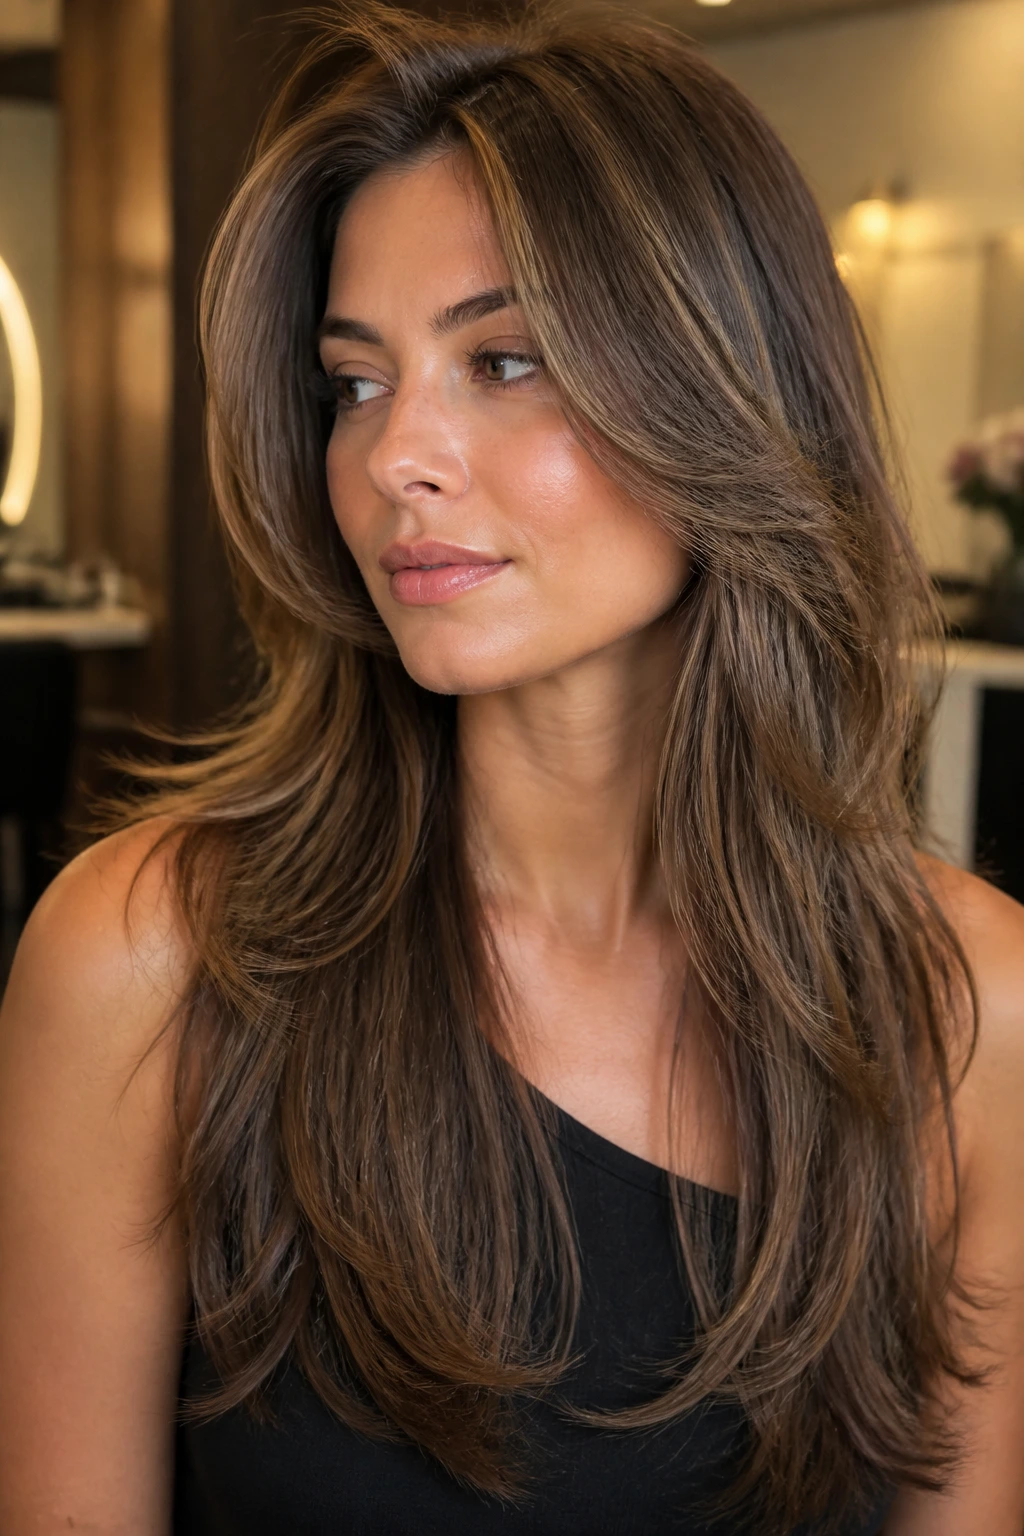
Will short layers make long hair look thinner?
They can, if they’re cut too aggressively or too high on fine hair. The safer version keeps the perimeter strong and removes weight inside the shape, so the hair looks fuller instead of sparse.
Are short layers a good idea for very fine hair?
Yes, but the cut has to be measured. Fine hair usually looks best with a few strategic short layers at the crown or around the face, not a head full of chopped pieces.
What if my hair is thick and heavy?
That is actually one of the best hair types for short layers on long hair for volume, because the haircut can release weight without sacrificing length. The trick is not to over-thin the ends.
Can curly hair handle short layers?
It can, and often benefits from them, but the cut should respect shrinkage. Dry cutting or curl-by-curl shaping usually gives the most honest result.
How do I know if the haircut will work with my styling routine?
Say how much heat styling you do in a normal week. A round-brush blowout cut behaves differently from a wash-and-go cut, and the layer placement should match that reality.
What if the layers look too choppy after the cut?
Wait until the hair is fully dry and styled the way you usually wear it. If the lines still feel harsh, the stylist may need to soften the transition with more blending rather than shortening anything else.
Can I keep my length and still get real volume?
Yes. That is the whole point of the better versions here. The length stays, but the weight shifts so the hair can stand up a little instead of slumping.
How often should I trim layered long hair?
For most people, every 8 to 10 weeks keeps the shape tidy. If your layers are soft and grown-in, 12 weeks can still work, but the ends will start to lose some of their bounce.
A Shape That Keeps Long Hair Moving
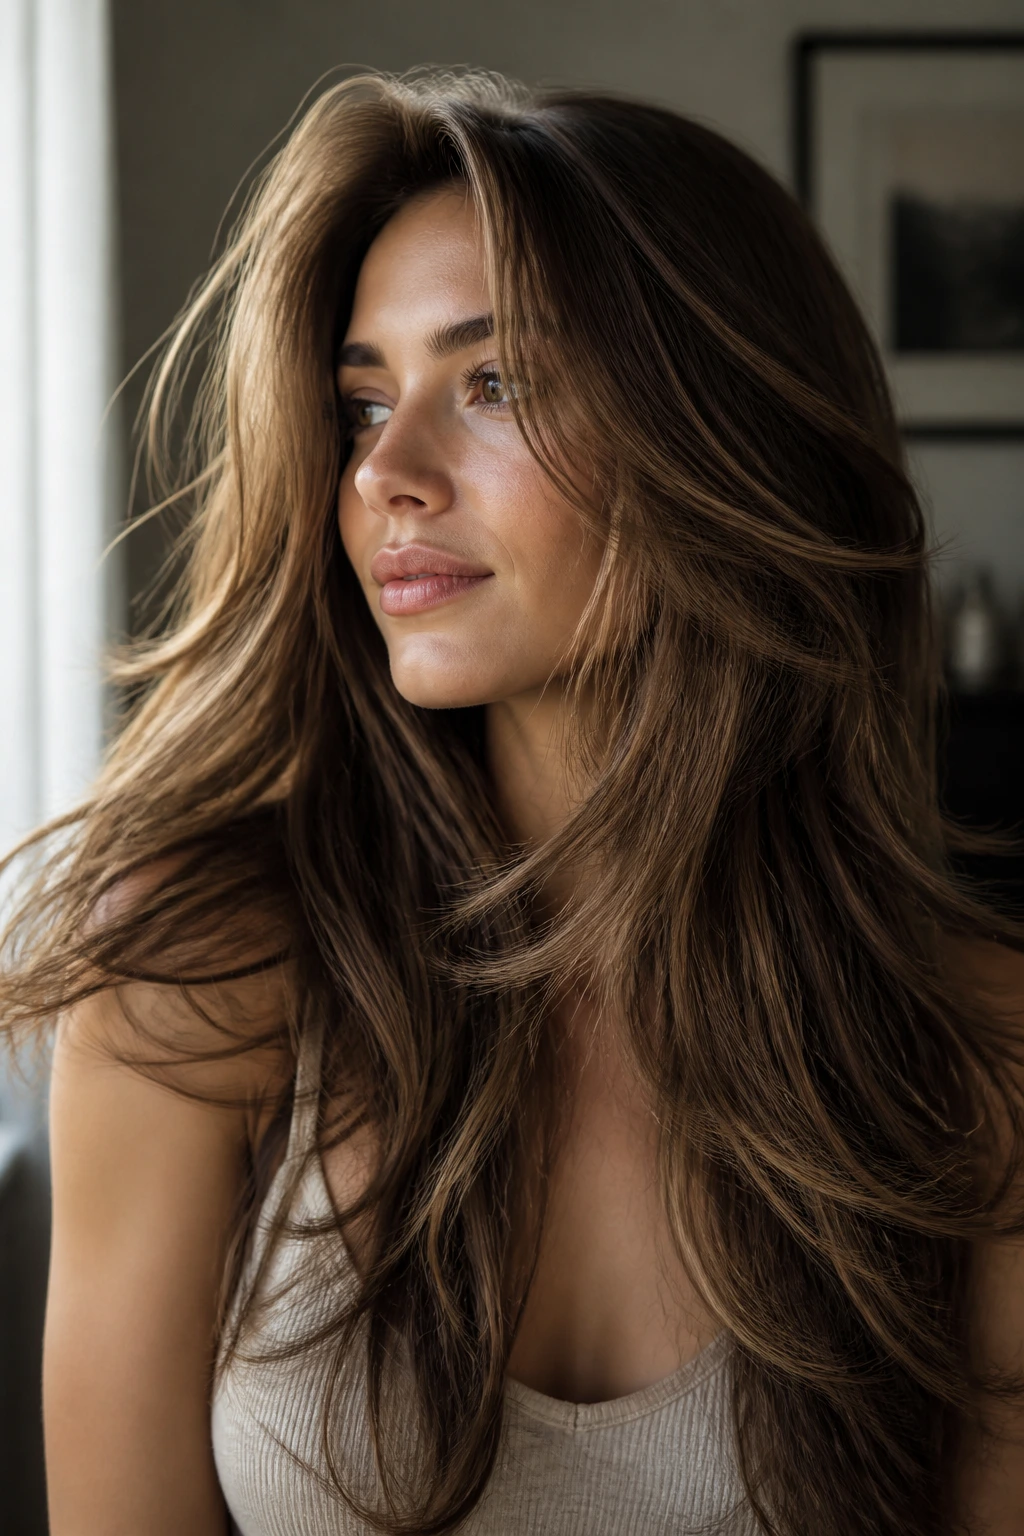
The best layered long hair does not scream for attention. It just moves better. The front lifts a little, the crown stops collapsing, and the ends stop hanging in a single heavy line. That is a much nicer result than a haircut that looks dramatic for three days and confusing after that.
If you’re choosing between several versions, start with how you wear your hair most often, not how you wish you wore it. A cut that works with your part, your texture, and your patience will always beat one that only looks good in a salon mirror. And once the shape is right, long hair feels lighter in the hands, which is the part people usually notice first.
