



A vintage bridal updo has to do two jobs at once: it should look like it belongs under a pearl comb or birdcage veil, and it should survive hugs, dancing, and every head turn at the reception without sagging. Vintage bridal updos live or die on restraint. The best ones don’t scream a decade; they borrow one clean cue — a finger wave, a rolled side, a tucked chignon — and leave the rest calm and polished.
That balance matters because wedding hair gets photographed from the front, the side, and the back, often under hard indoor light that exposes every loose pin and puff of frizz. A style that looks lush in a mirror can turn into a flat knot after an hour if the base isn’t anchored well. I tend to favor shapes that keep some grip near the crown and a soft edge near the temples; they hold better and feel less stern.
The styles below lean into different eras — 1920s gloss, 1940s rollwork, 1950s softness, a little 1960s lift — so you can match the dress, the veil, and your hair texture instead of forcing one rigid look. Some are kinder to fine hair, some love thickness, and a few need only a good set of pins and a patient hand. Start with the silhouette that feels right, then worry about the pearl comb.
Why These Updos Feel Vintage Without Looking Costume-Y
-
One era cue is enough: A single finger wave, rolled side, or tucked veil comb gives the nod to the past without turning the bride into a movie extra.
-
They hold their shape better than loose curls: A pinned base keeps the style from collapsing when you hug people, bend for photos, or wear a heavier veil.
-
They work with real wedding accessories: Pearl pins, combs, birdcage veils, and fresh flowers need a secure anchor, not a soft pile of hair that slips around.
-
They flatter different necklines: A low chignon clears a high collar, while a bouffant or crown roll gives balance to a simple slip dress.
-
They photograph from every angle: The back matters. So does the profile. These styles keep the silhouette readable when someone catches you in motion.
-
They can be softened or sharpened: The same structure can feel romantic, sleek, or a little theatrical depending on shine, volume, and how much face-framing hair you leave out.
1. The Soft French Twist With Face-Framing Waves
A soft French twist is one of those styles that looks expensive without trying too hard. The shape is clean at the back, but the loose waves near the cheeks keep it from feeling severe, which is the difference between “vintage bride” and “tight bun from a recital.”
Why It Works
This version borrows the polish of a classic French twist and softens it with two front pieces curled away from the face. That tiny move changes everything. The twist itself can sit low and slim, or a little fuller at the crown if you want a more 1950s finish.
Quick Details
- Best for: medium to long hair, especially if your dress has a high neckline or an open back.
- Vintage cue: a smooth twist with waved front pieces and a tucked veil comb.
- Watch for: too much volume at the nape, which can make the head look short from the side.
Pro tip: set the front pieces with a 1-inch curling iron, then let them cool fully before brushing them into a soft wave. Warm hair forgets its shape fast.
2. Low Chignon With Side-Swept Victory Rolls
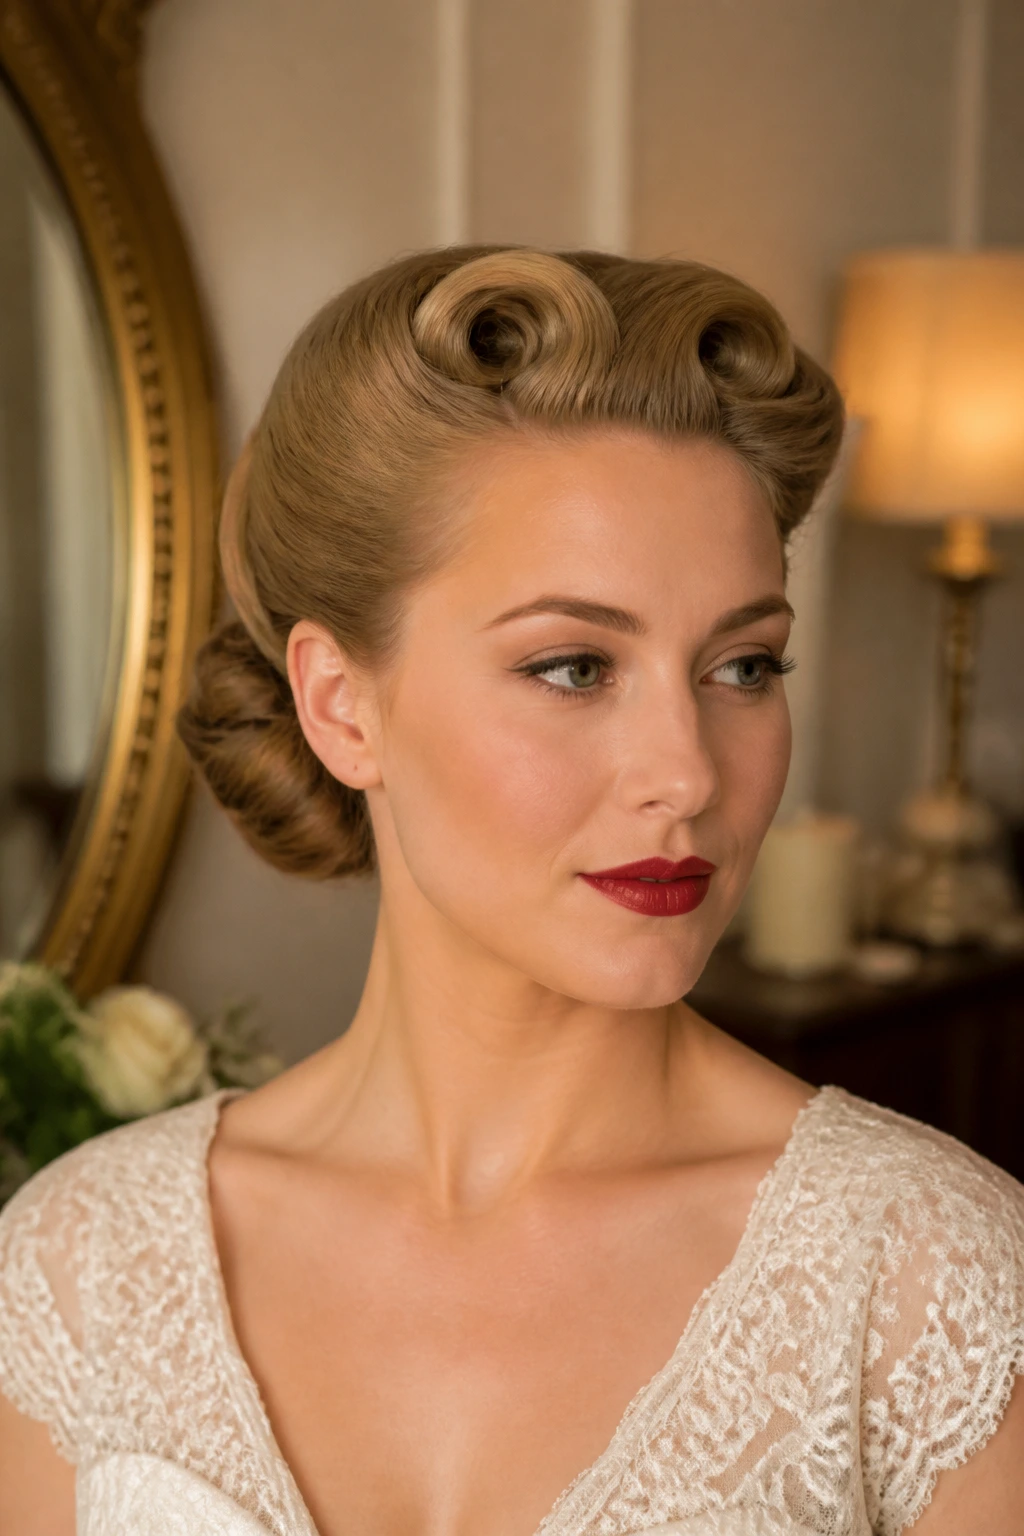
If you want the clearest 1940s reference without going full costume, this is the one. The victory rolls give you that sculpted front shape, and the low chignon keeps the whole thing grounded and bridal instead of theatrical.
The trick is to keep the rolls modest. Two smooth rolls at the temples are enough; you do not need giant loops. Pin each roll in the direction it naturally wants to fold, then anchor the bun low and neat so the style reads as deliberate, not stacked.
This looks especially good with satin gowns, pearl studs, and a lip color that has some depth to it. It has backbone. That matters.
3. Gibson Tuck With Pearl Pins
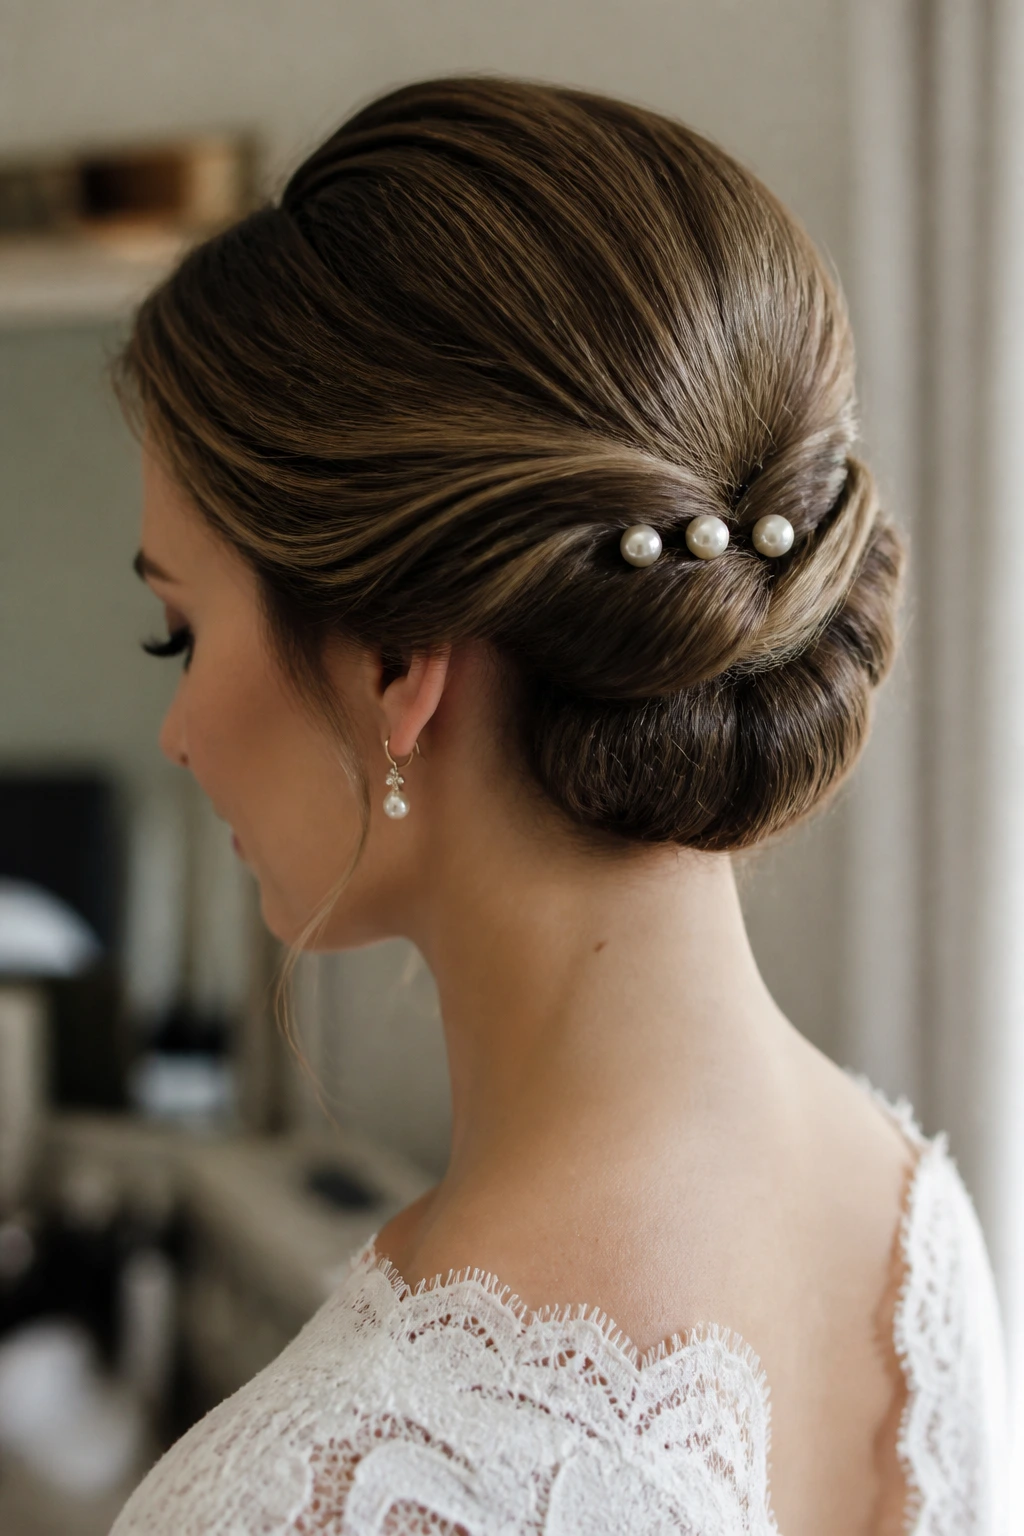
Why does the Gibson tuck keep showing up on bridal boards? Because it hides awkward ends, works on medium lengths, and gives you that soft, tucked-in shape that feels period-appropriate without asking for a ton of hair.
The style starts with a low roll or “pocket” at the nape, then the hair gets tucked upward and secured. Pearl pins along the seam make it feel wedding-ready instead of school-dance neat. If your hair has layers, this is one of the friendliest options on the list because the tuck itself does the hiding.
How to Use It
Keep the crown smooth and a little lifted, then leave the tuck itself compact. A wide tuck turns fluffy fast. A narrow tuck looks sharper and survives longer, especially if your hair likes to slide out of pins.
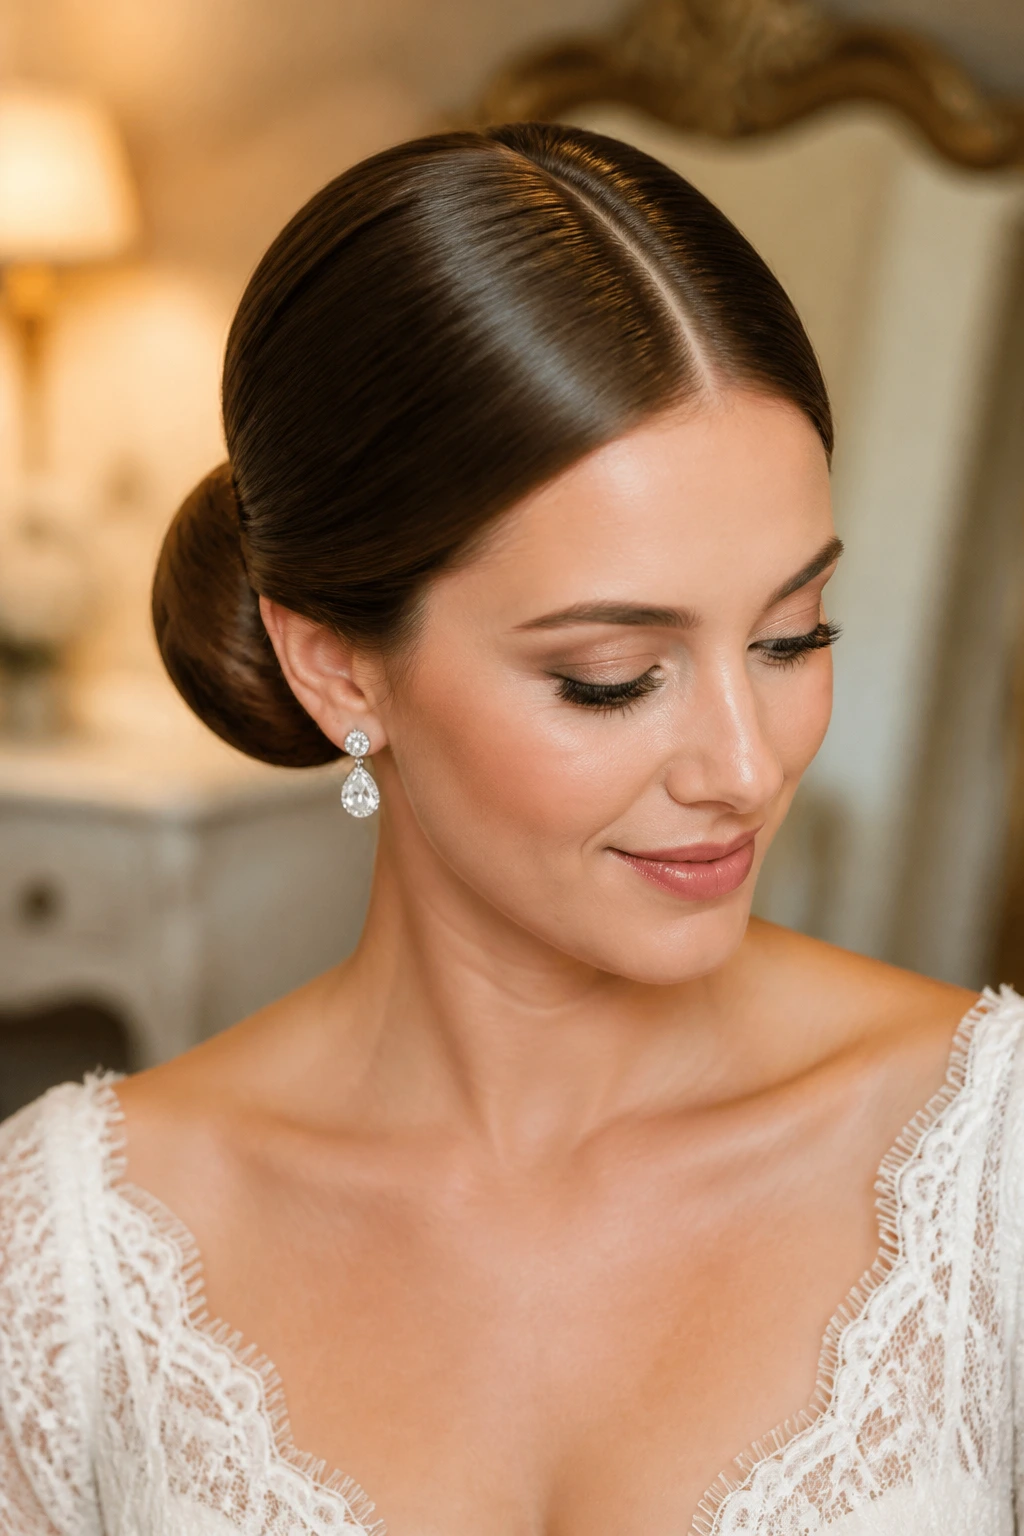
4. Rolled Bun With a Center Part
Picture a crisp center part, a smooth crown, and a rolled bun sitting low enough to show off the neck. That’s the whole appeal. It feels clean in the best way, and it has a quiet 1960s lean if you keep the sides taut.
The center part is doing most of the vintage work here. Without it, the style can drift modern or plain. With it, the face reads a little longer, the symmetry gets stronger, and the whole look feels carefully arranged.
- Good match: square necks, bateau necks, and dresses with sharp seams.
- Best accessory: one narrow comb or a pair of small pearl pins.
- Avoid: puffy sides; they fight the neat line.
This is one of those styles that rewards a good flat brush and a steady hand more than fancy techniques.
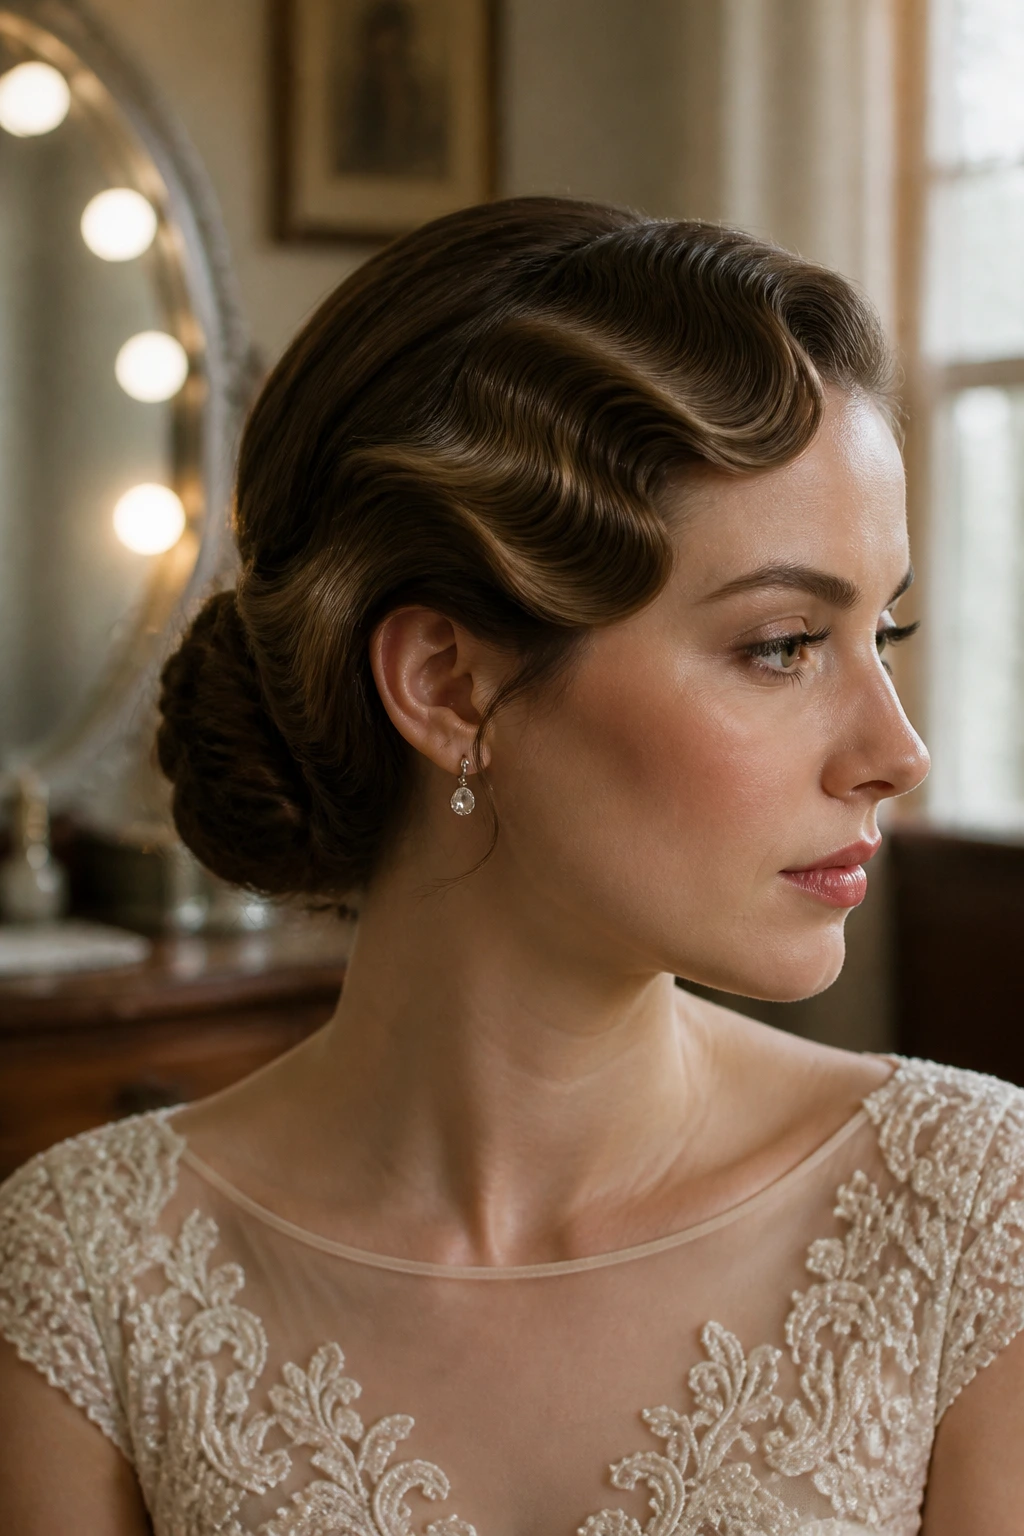
5. Finger Wave Crown Into a Low Knot
Finger waves at the temples are pure old-Hollywood language. Add a low knot at the back, and the look stops being costume-y because the rest of the head stays restrained and modern in its simplicity.
The nice thing about this style is that it doesn’t need perfect waves everywhere. You only need the front to behave. The crown can stay smooth, the knot can stay compact, and the whole updo still reads as vintage because the wave pattern is so specific.
A little shine serum on the wave section helps, but keep it off the roots. Too much product and the wave collapses into slick strands.
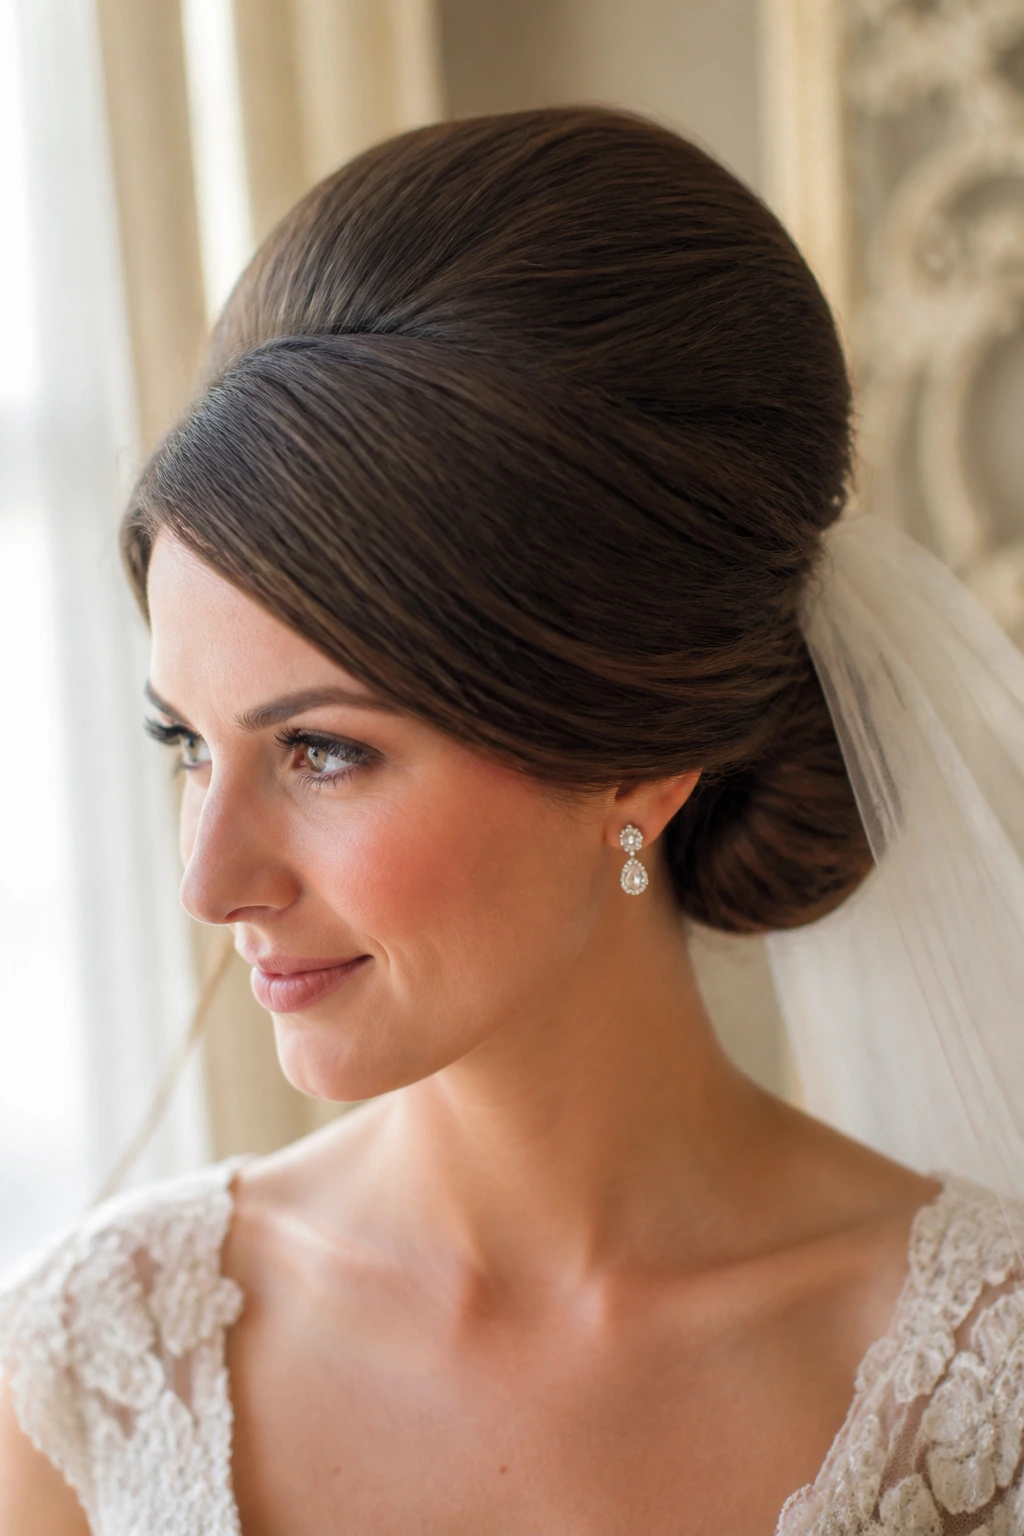
6. Bouffant Chignon With a Tucked Veil
Unlike a sleek knot, this one builds height at the crown, so it suits brides who want a little lift without wearing a full beehive. The bouffant gives the head shape under a veil, which matters more than people think. A flat crown under tulle can look unfinished in photos.
Keep the bouffant controlled, not huge. About 1.5 to 2 inches of lift is enough for most faces. Pulling the top too high can make the back feel heavy and the profile look like two separate hairstyles stitched together.
This is a strong choice for cathedral veils, satin dresses, and brides who want the front to feel elegant from a distance.
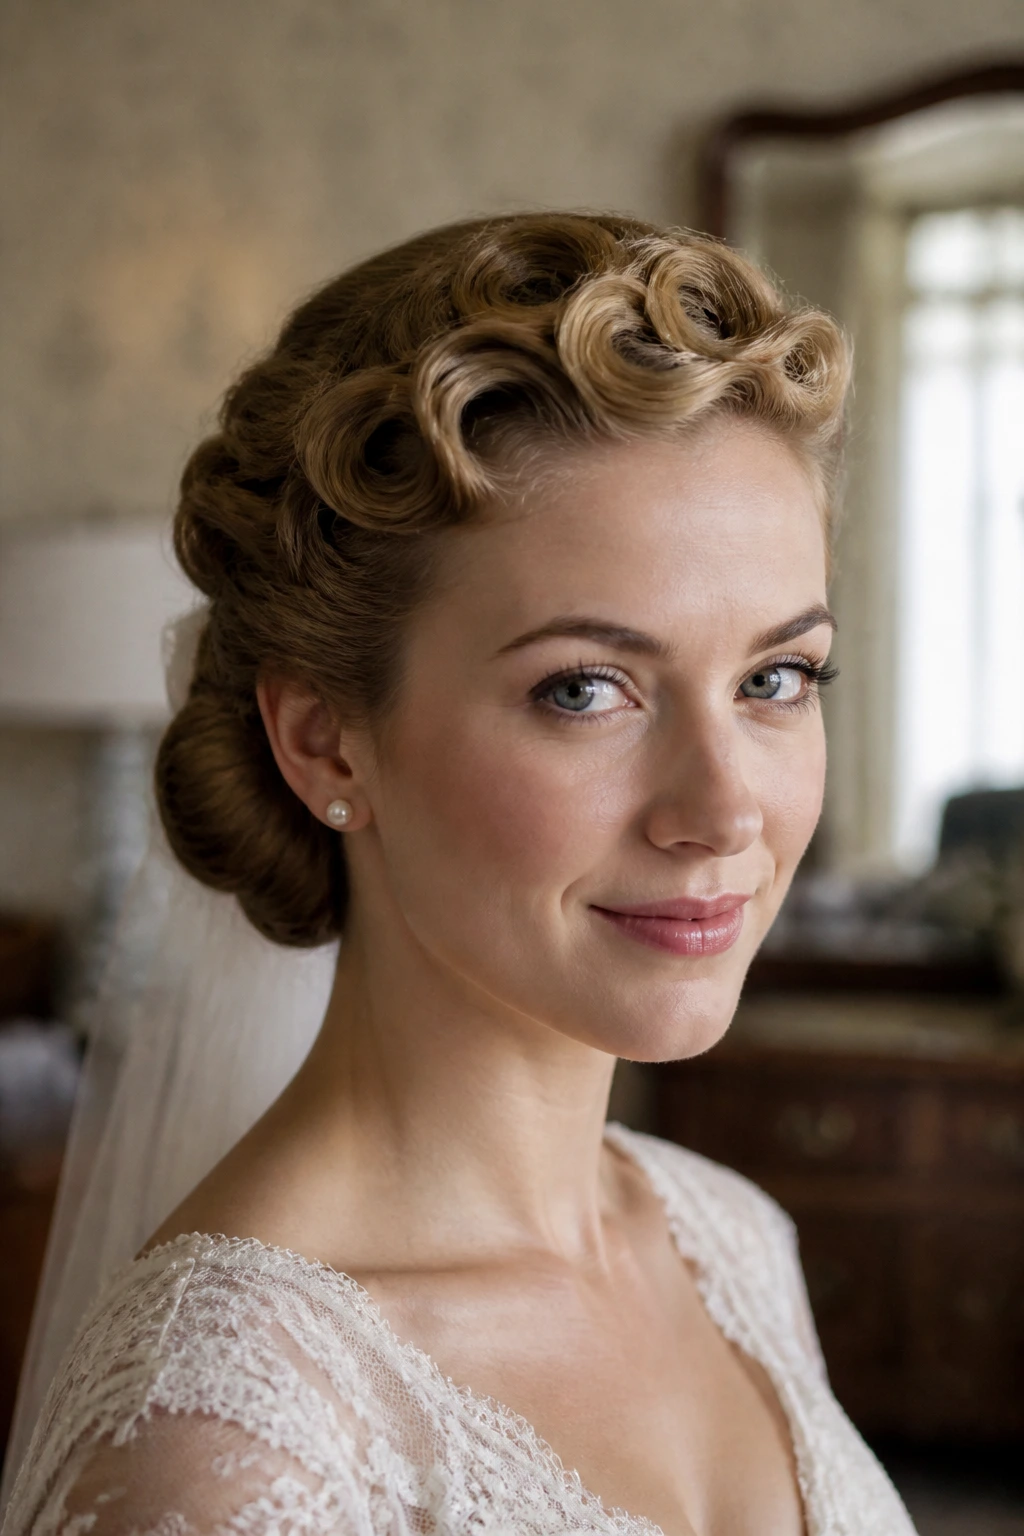
7. Pin-Curl Halo With a Neat Bun
The pin-curl halo is for brides who want a softer 1920s or 1930s note without building a full wave set over the entire head. The halo sits around the hairline, then the rest gets gathered into a tidy bun. It’s a pretty specific look, and that specificity is what makes it good.
Why It Feels So Period-True
Pin curls around the face create little scalloped bends that resemble old set styles better than loose modern waves do. The bun beneath them keeps the silhouette from getting too busy. You get texture up front and order in back.
What to Remember
- Use 8 to 12 pin curls around the front and sides, depending on density.
- Let them cool fully before brushing or shaping.
- Anchor the bun low so the curls stay the star.
A thin veil comb tucked just behind the halo can look fantastic here.
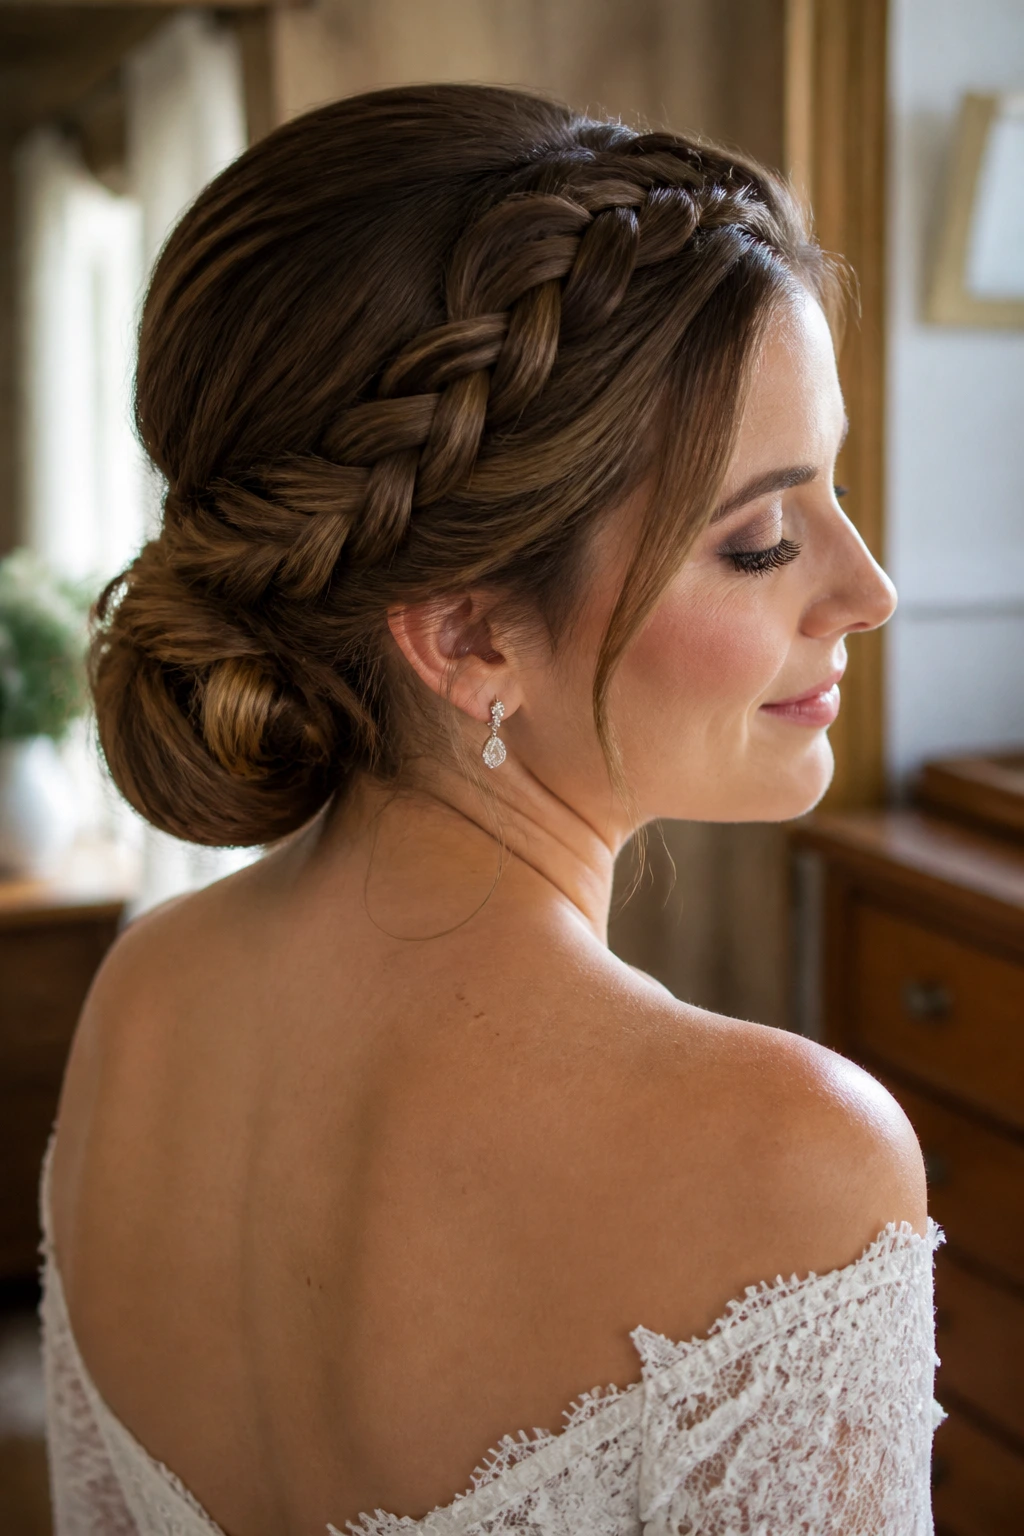
8. Braided Crown Into a Low Coil
A braided crown makes even a plain low coil feel dressed up, and it gives you a vintage-adjacent softness that works well for brides who don’t want anything too stiff. The braid acts like trim. That’s the easiest way to think about it.
This style is kinder to slightly textured hair than a glassy smooth updo, because the braid gives the rest of the hair something to grip against. If you pancake the braid a little — pull the outer edges wider with your fingers — the crown gets that fuller, old-photo feel without needing extra padding.
It’s especially good with lace details, off-the-shoulder sleeves, and flowers pinned into the coil rather than scattered everywhere.
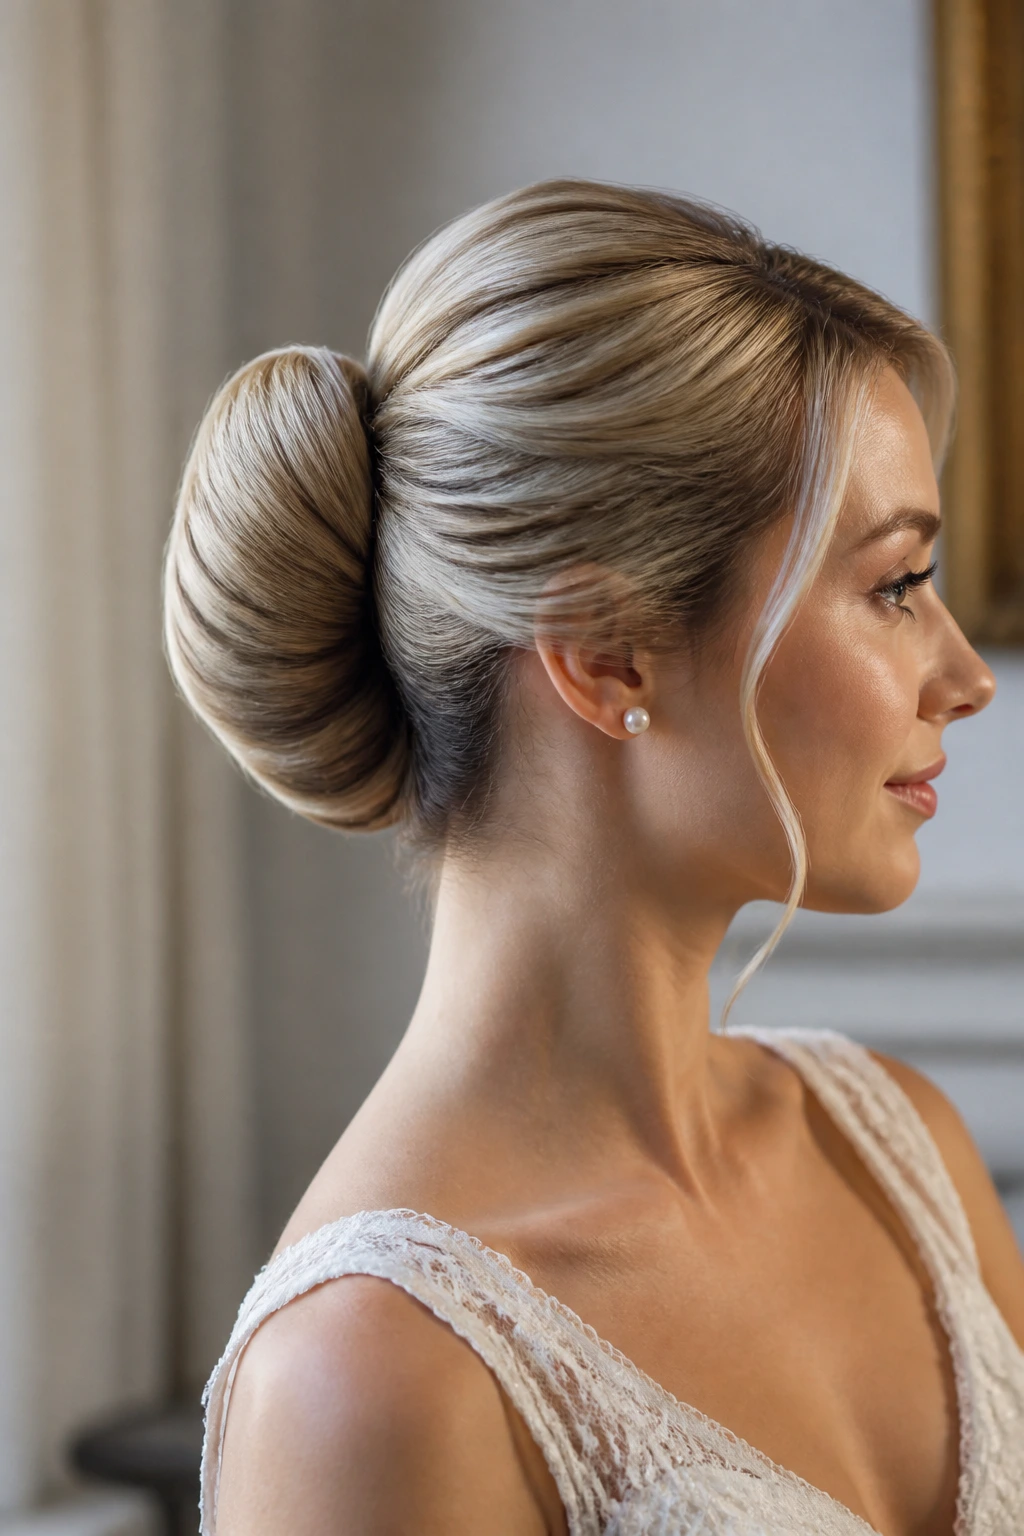
9. Sculpted Shell Chignon
What makes a shell chignon feel retro instead of plain? The roll direction. A shell chignon has that tucked, curved shape that echoes mid-century bridal hair, especially when the surface is smooth and the edges are crisp.
The style works best when the hair is brushed into one clean sweep before it gets folded. If you skip that part and just coil the length, the shape turns ordinary fast. Use a light smoothing cream, then pin the shell in small, hidden steps so the edges stay tight.
How to Wear It
This is a strong choice if your dress already has detail at the collarbone. The chignon won’t fight the gown. It sits back, behaves itself, and lets a veil or comb do the decoration.
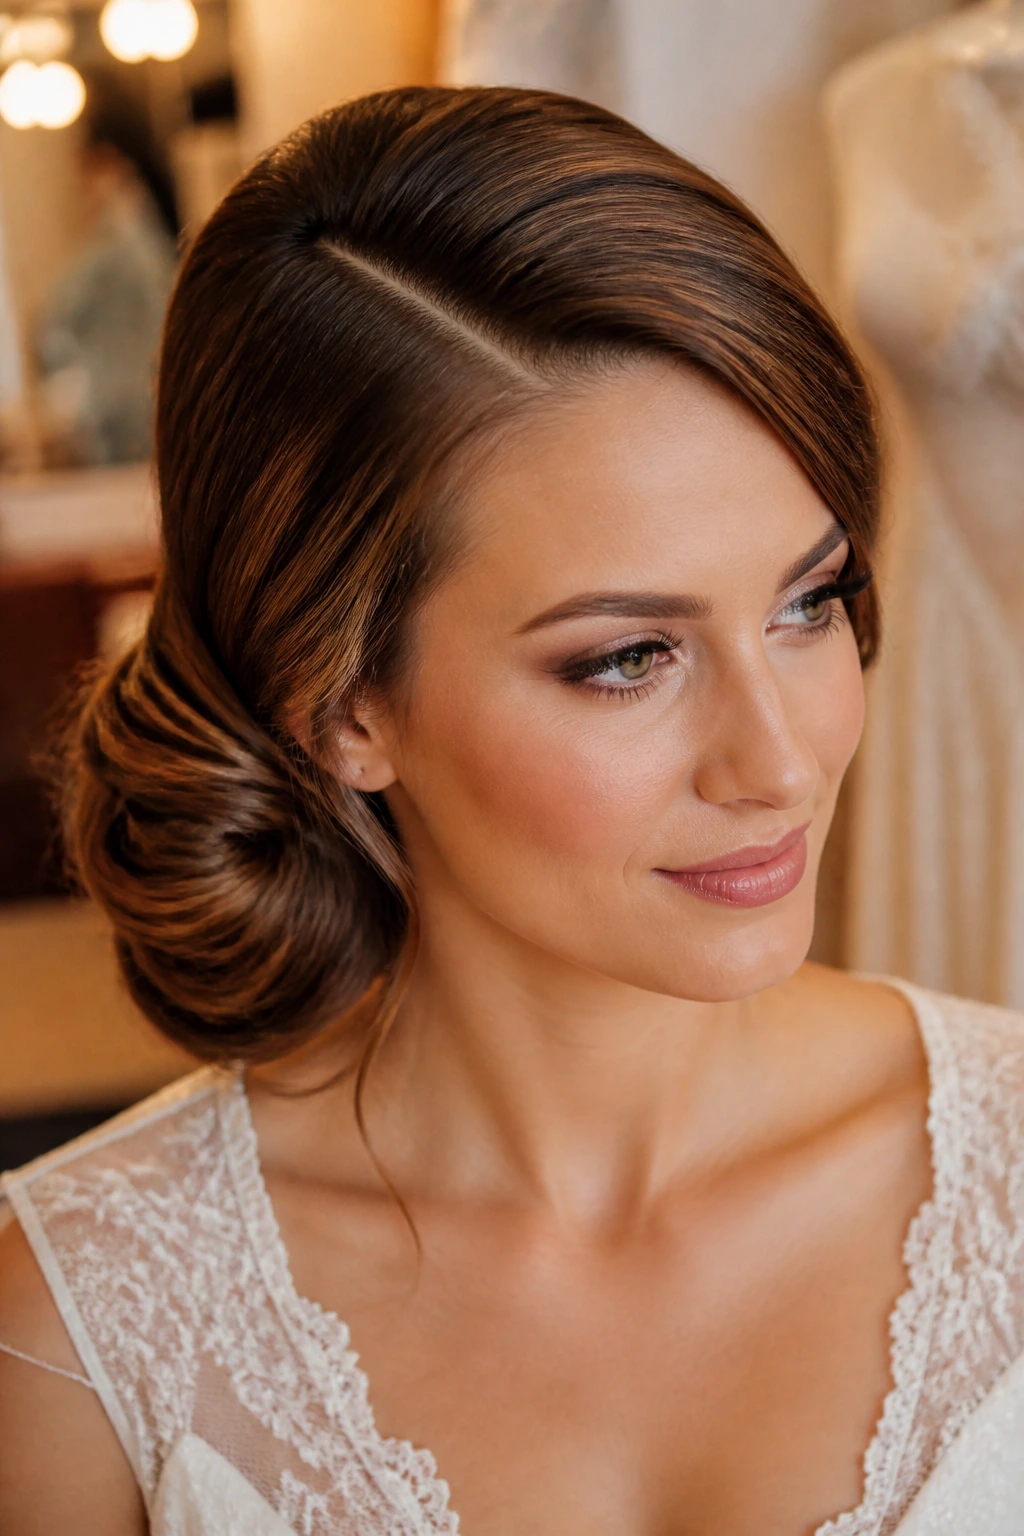
10. Side-Swept Bun With a Deep Part
A deep side part changes the whole mood of a bun. Suddenly it feels less bridal-ballet and more 1940s screen siren. The sweep across the forehead creates a diagonal line that makes the face look softer, especially if your features are sharp.
The bun itself should stay low and slightly off-center, not floating directly behind the head. That offset is the point. It gives the style movement without letting it unravel into something casual.
- Best for: drop earrings, one-shoulder dresses, and brides who like a little asymmetry.
- Best front detail: a smooth sweep with a curled end, not a heavily teased crown.
- Avoid: a center part here; it kills the whole effect.
This is one of the easiest styles to make look expensive with only a few well-placed pins.
11. Sleek Knot With Old Hollywood Waves
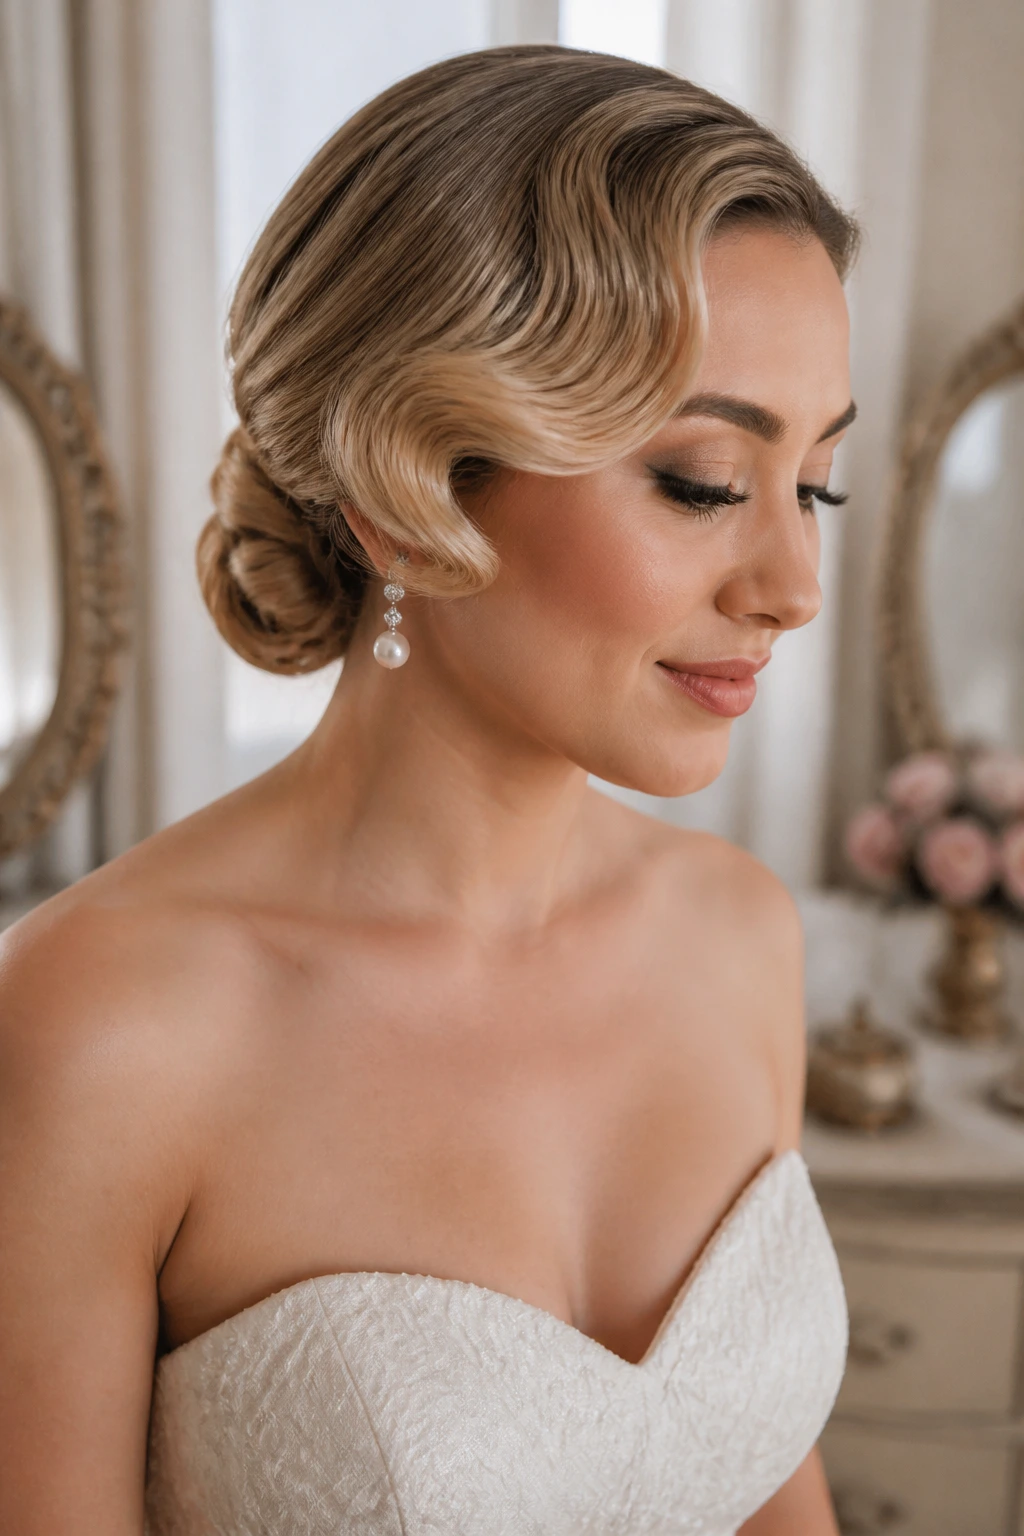
A sleek knot can feel stark if the front is too plain, so the Old Hollywood waves are doing the real work here. They bring in that glossy, sculpted movement near the face while the knot stays compact and low.
The contrast is what makes it bridal. Smooth sides. Controlled wave. Tight knot. No frizz, no fluff, no random wisps that look accidental. If you like a very clean finish, this style is a sharp choice.
Use a curling iron in the 1-inch to 1¼-inch range for the front waves, then clip each bend until it cools. That cooling time is not optional. Warm hair falls faster than people expect, and wedding-day humidity will happily finish the job.
12. Banana Roll Updo
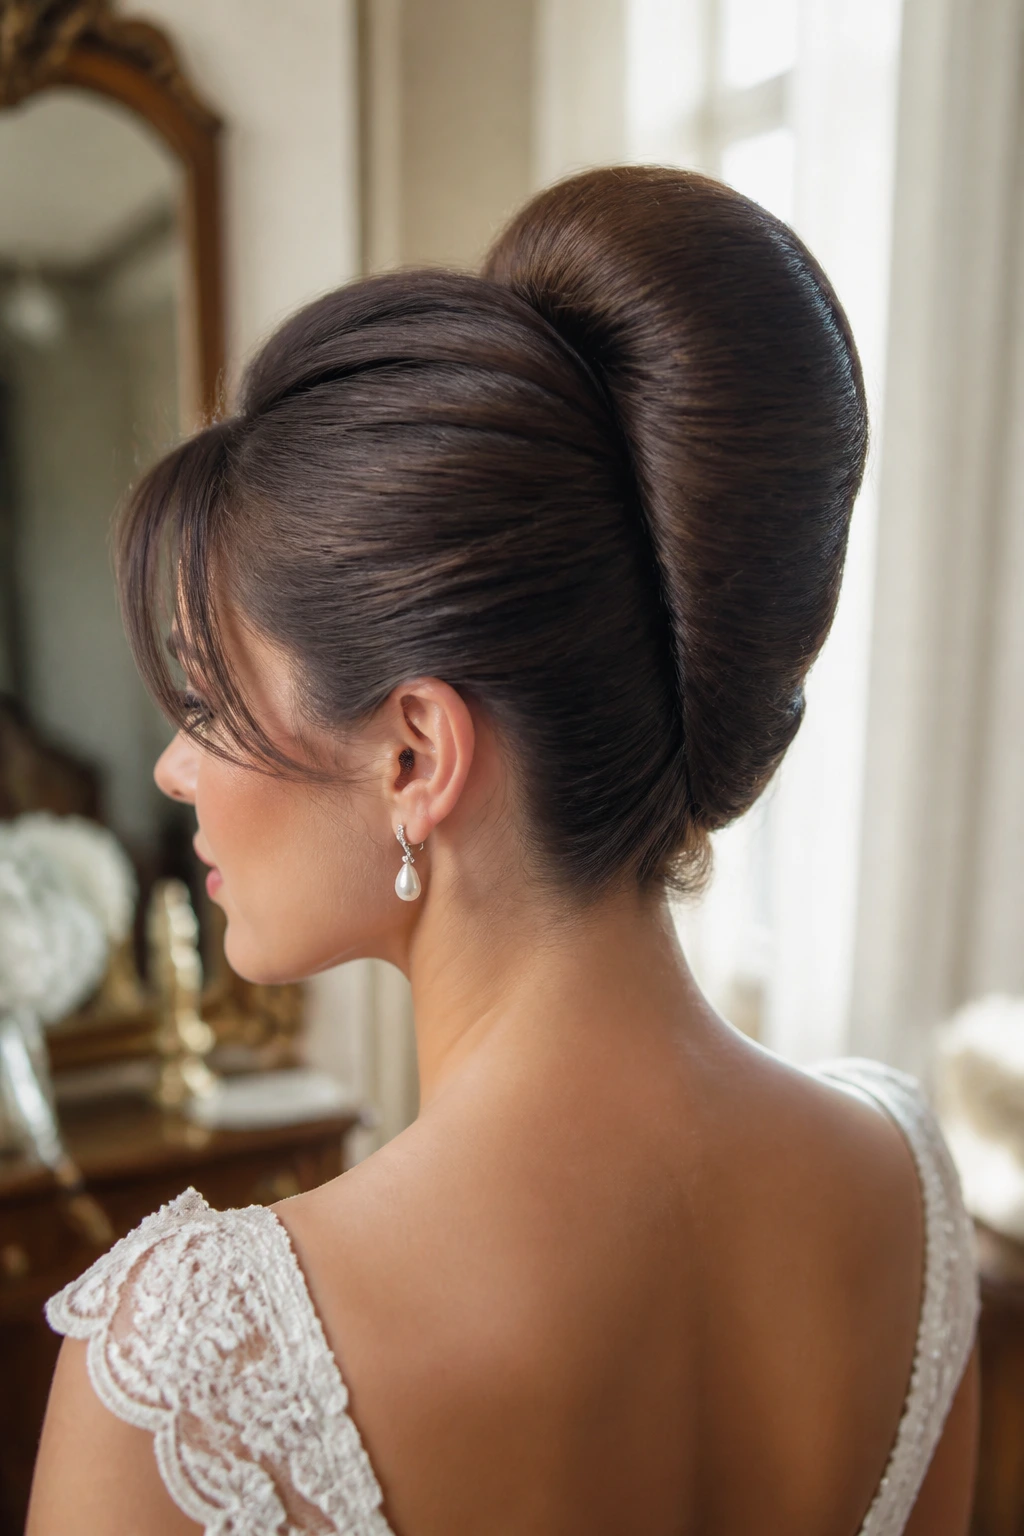
The banana roll is one of the most elegant shapes in the vintage updo family because it rises vertically along the back of the head instead of spreading out wide. That means it looks neat from the side and very polished from behind.
Unlike a French twist, the banana roll can take on a stronger 1960s feel, especially if you keep the crown lifted and the sides smooth. It’s a good option when you want the head to look a little longer and the dress neckline to stay visible.
This style loves longer hair, but it can be built with padding or a hidden roll if the length is shy. Don’t let the surface get bulky. The whole point is that long, slim line.
13. Victory Roll Crown Into a Low Bun
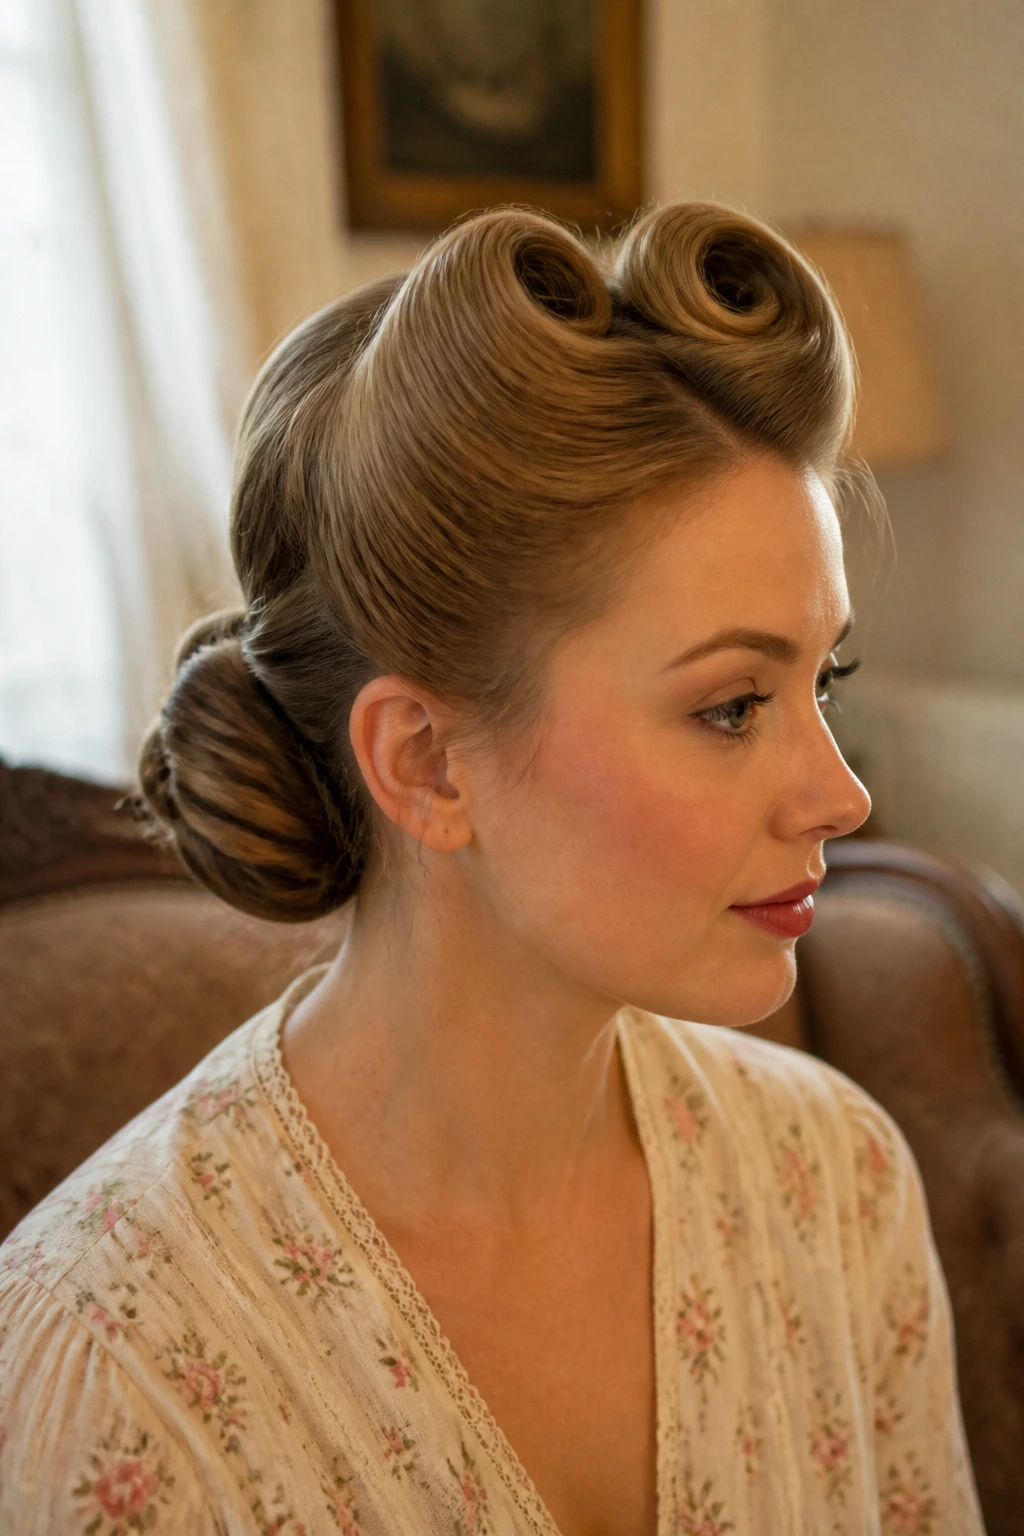
If you like 1940s references but don’t want two big rolls at the temples, put the victory roll up higher and let it frame the crown instead. That gives you the retro nod while leaving the cheeks softer.
The low bun underneath should stay neat and compact. A messy base under a rolled crown looks unfinished, and this style has no patience for sloppiness. Use a rat-tail comb to smooth each section before rolling, then pin the roll flat against the head so it doesn’t wobble.
A short veil or netting can sit beautifully with this shape. So can a red lip, if that’s your thing.
14. Twisted Gibson Knot With Loose Tendrils
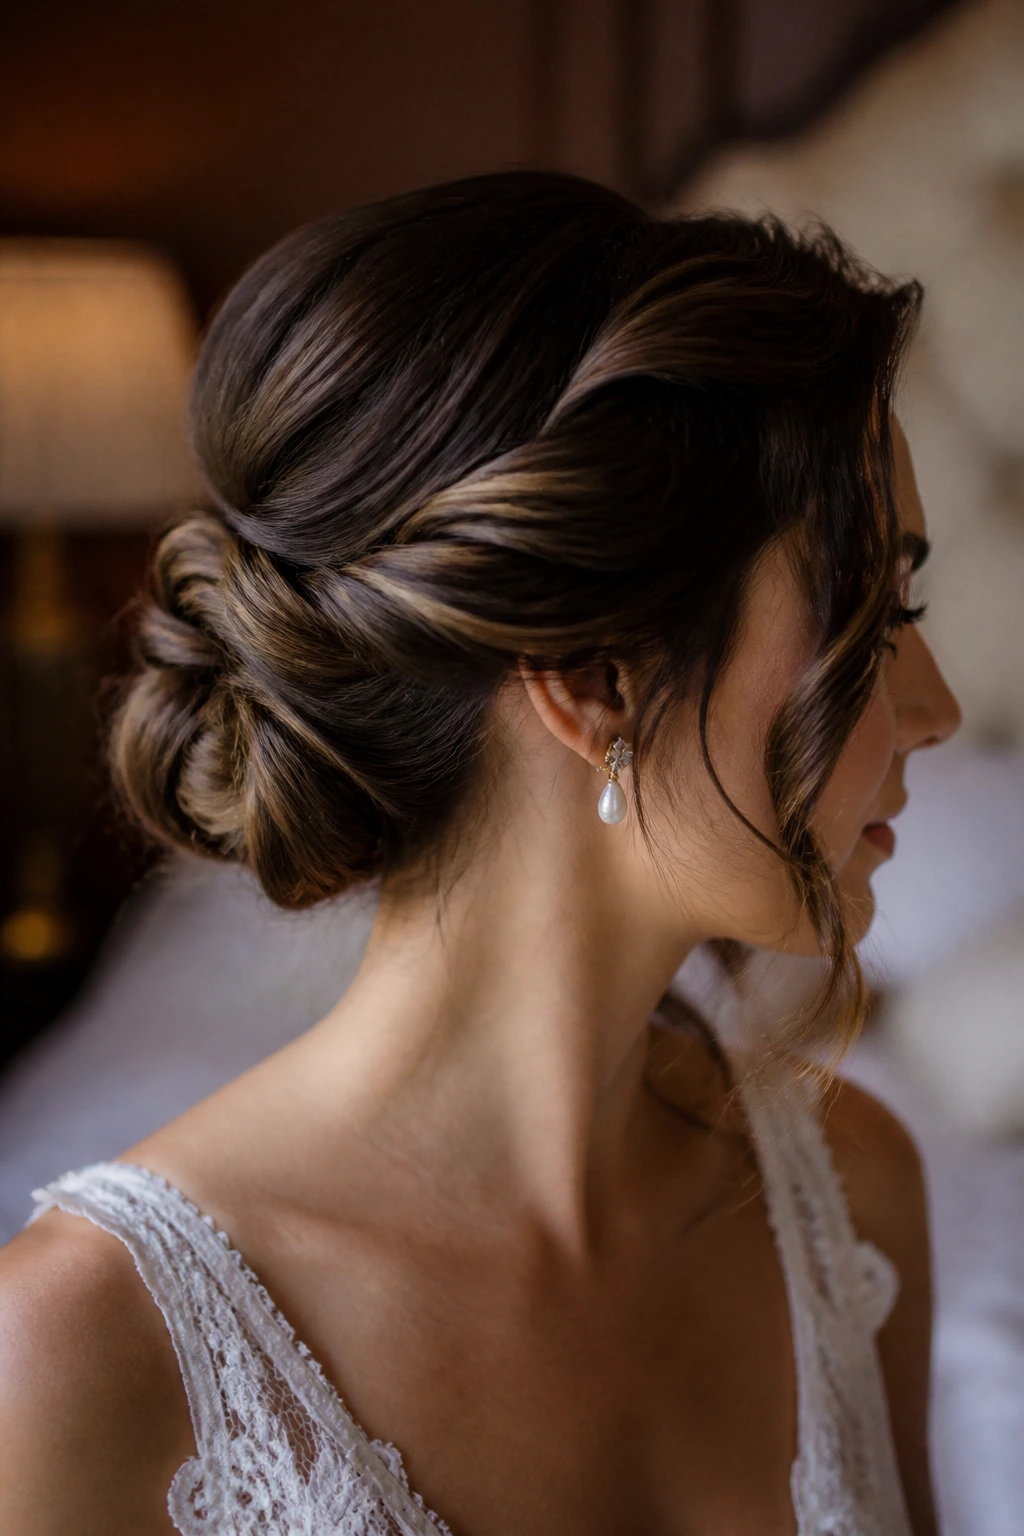
If your hair fights strictness, this one gives you room. The Gibson knot keeps the shape in place, but the loose tendrils near the temples and ears soften the edges enough to keep it from feeling severe.
The tendrils should be narrow, not chunky. Two wispy pieces can do the job better than two thick face-framing strips that take over the whole front. Curl them away from the face with a small iron, then let them fall where they want after the knot is secured.
This is a good middle ground for brides who want a vintage outline but still want some movement around the face. It’s less formal than a full tuck and less fussy than a wave set.
15. Braided Gibson Tuck With Pearl Comb
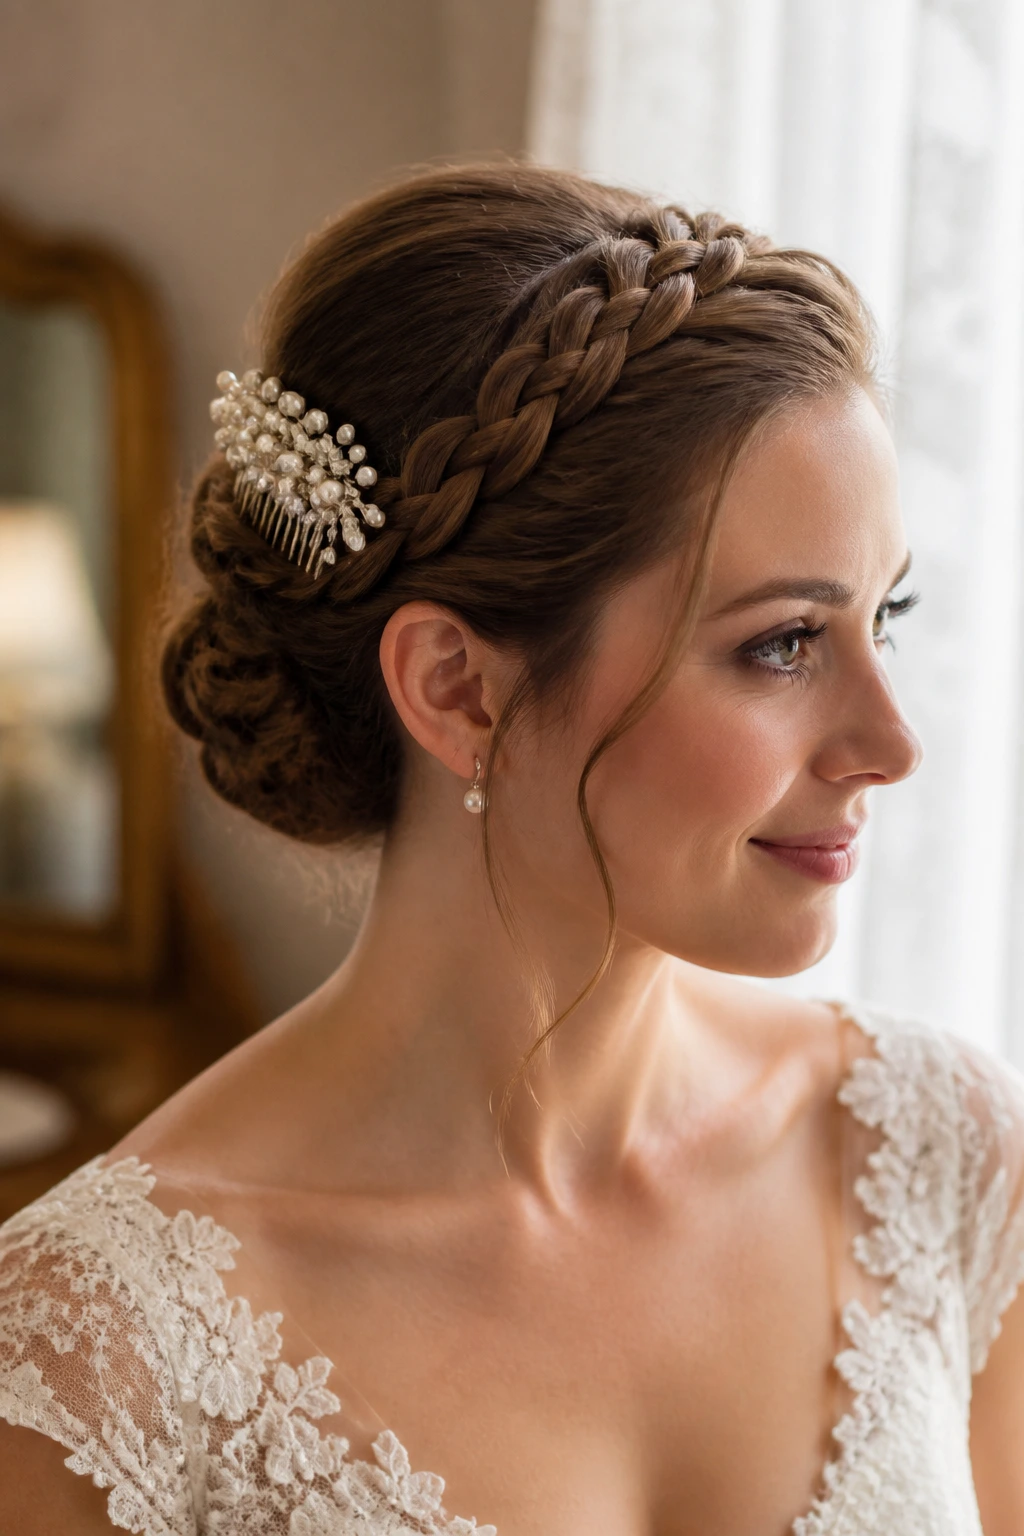
A braided Gibson tuck adds texture where a plain tuck might feel flat. The braid runs into the tuck and gives the style a slightly more handcrafted look, which pairs nicely with pearl combs and old lace.
The braid doesn’t need to be a showpiece. A simple three-strand braid across the crown is enough. Keep it snug, then fold the remaining hair into the tuck so the braid’s end disappears cleanly.
How to Use It
Place the comb just above the tuck seam, not buried inside it. If the comb sits too deep, the pearls vanish and the detail gets wasted. A centered comb works for symmetry; a side-set comb looks softer and less formal.
16. Soft Barrel Curls Pinned Into a Low Nest
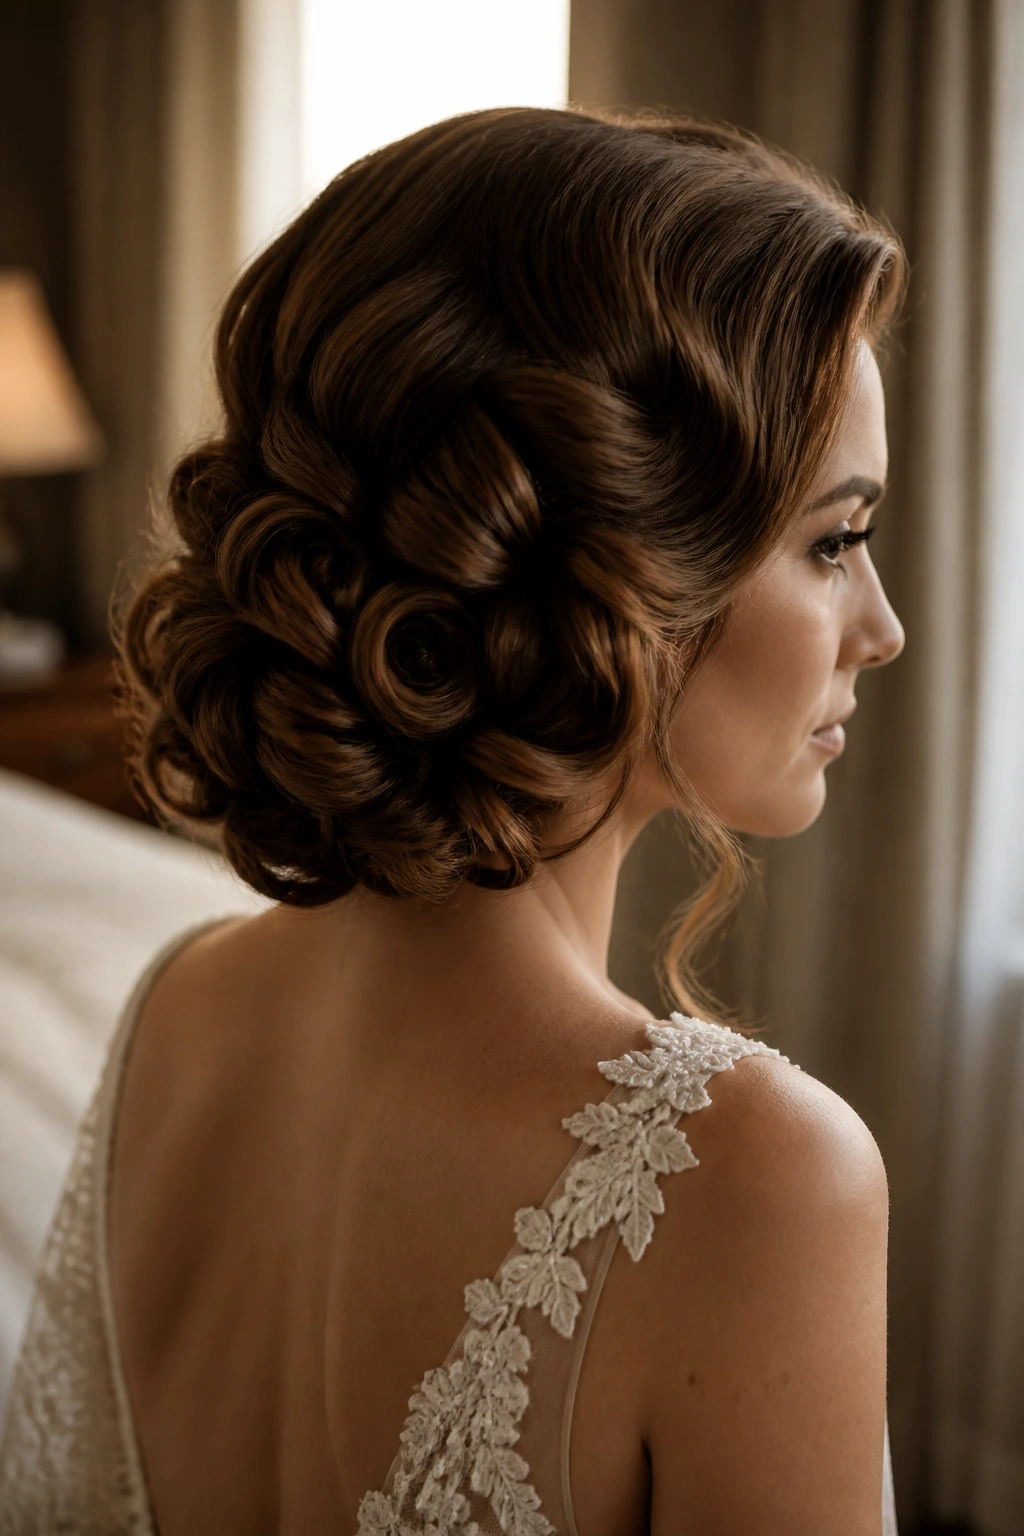
Soft barrel curls give this style that plush, 1930s-to-1950s hybrid feeling, especially when each curl gets pinned into a low nest rather than brushed into one blur of volume. The texture stays visible, which is the whole charm.
Think of this as a more romantic cousin of the chignon. Each curled section keeps a little of its own identity, so the back has depth without looking messy. It’s a good use of medium-thick hair that refuses to lie perfectly flat.
- Good for: fuller hair that holds curl well.
- Nice with: a lace veil or a comb placed off to one side.
- Not ideal for: very humid outdoor ceremonies unless you seal the curls properly.
Leave the curls cool before pinning. Hot curls slide. Cold curls stay where you put them.
17. Beehive Bun With Smooth Sides
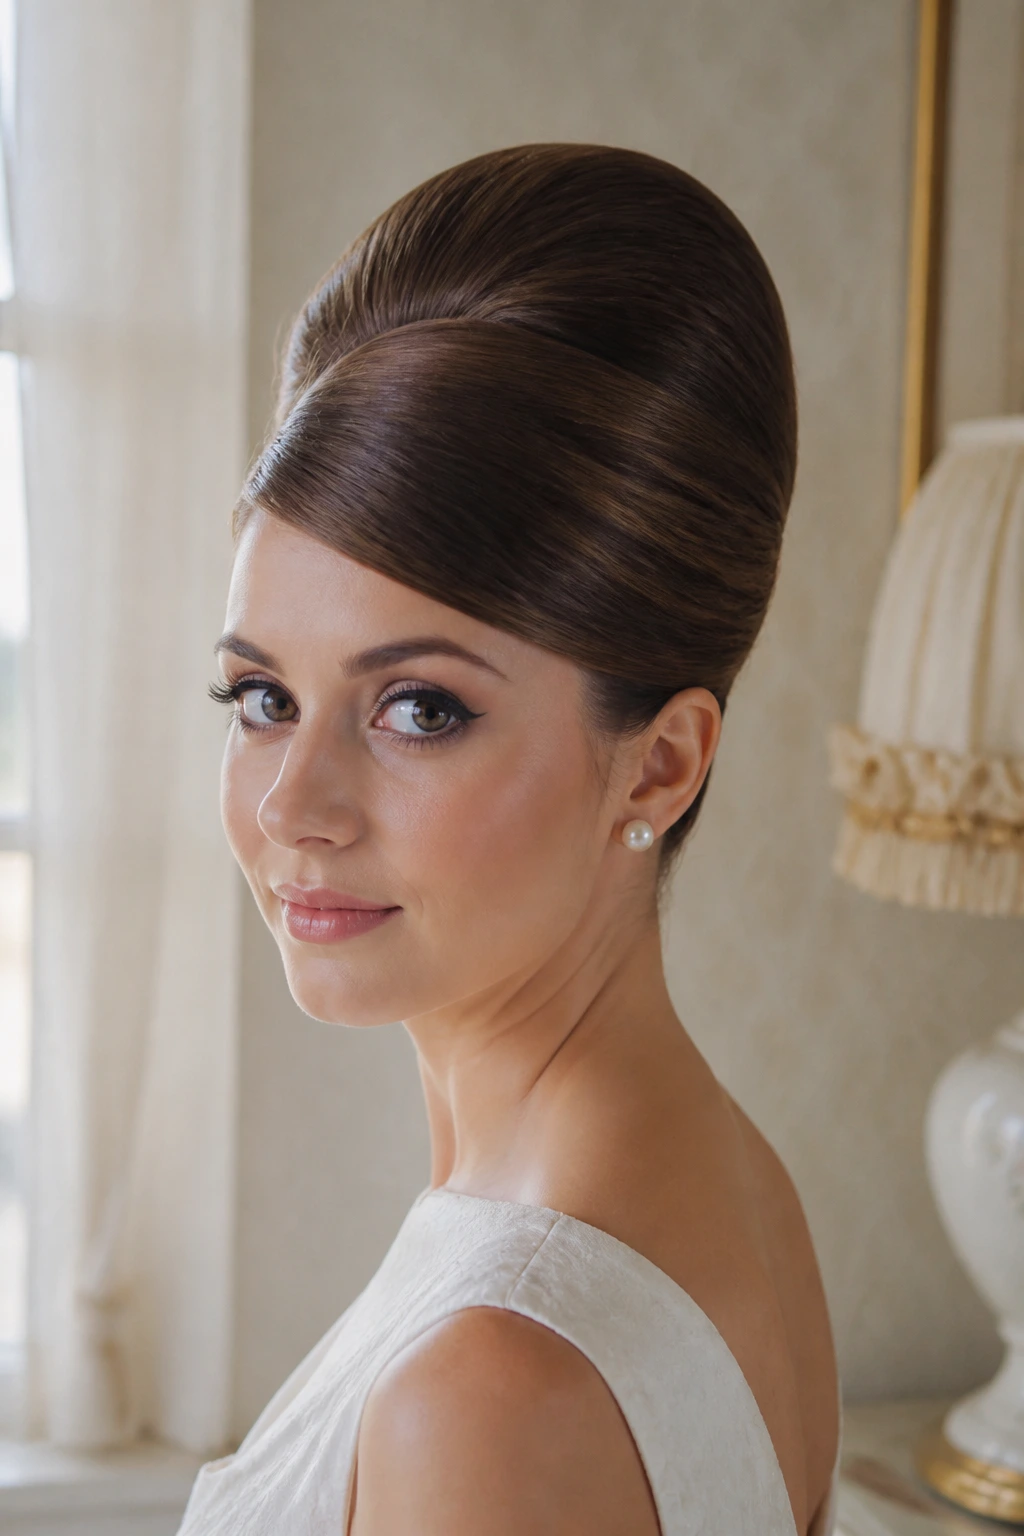
A beehive bun makes the strongest 1960s statement on this list, but it works best when the sides are smooth and the height is controlled. Too much teasing and it starts looking like a costume; the goal is a sculpted crown, not a helmet.
The bun at the back should be tidy and slightly tucked under, which keeps the whole shape from feeling top-heavy. A beehive also does a nice job balancing a high neckline or a dress with strong shoulders. The volume gives the upper half of the outfit some breathing room.
If your hair is fine, a bit of padding under the crown helps. If your hair is thick, don’t over-tease it or the surface gets gritty and hard to smooth.
18. Faux Bob Updo With Tucked Ends
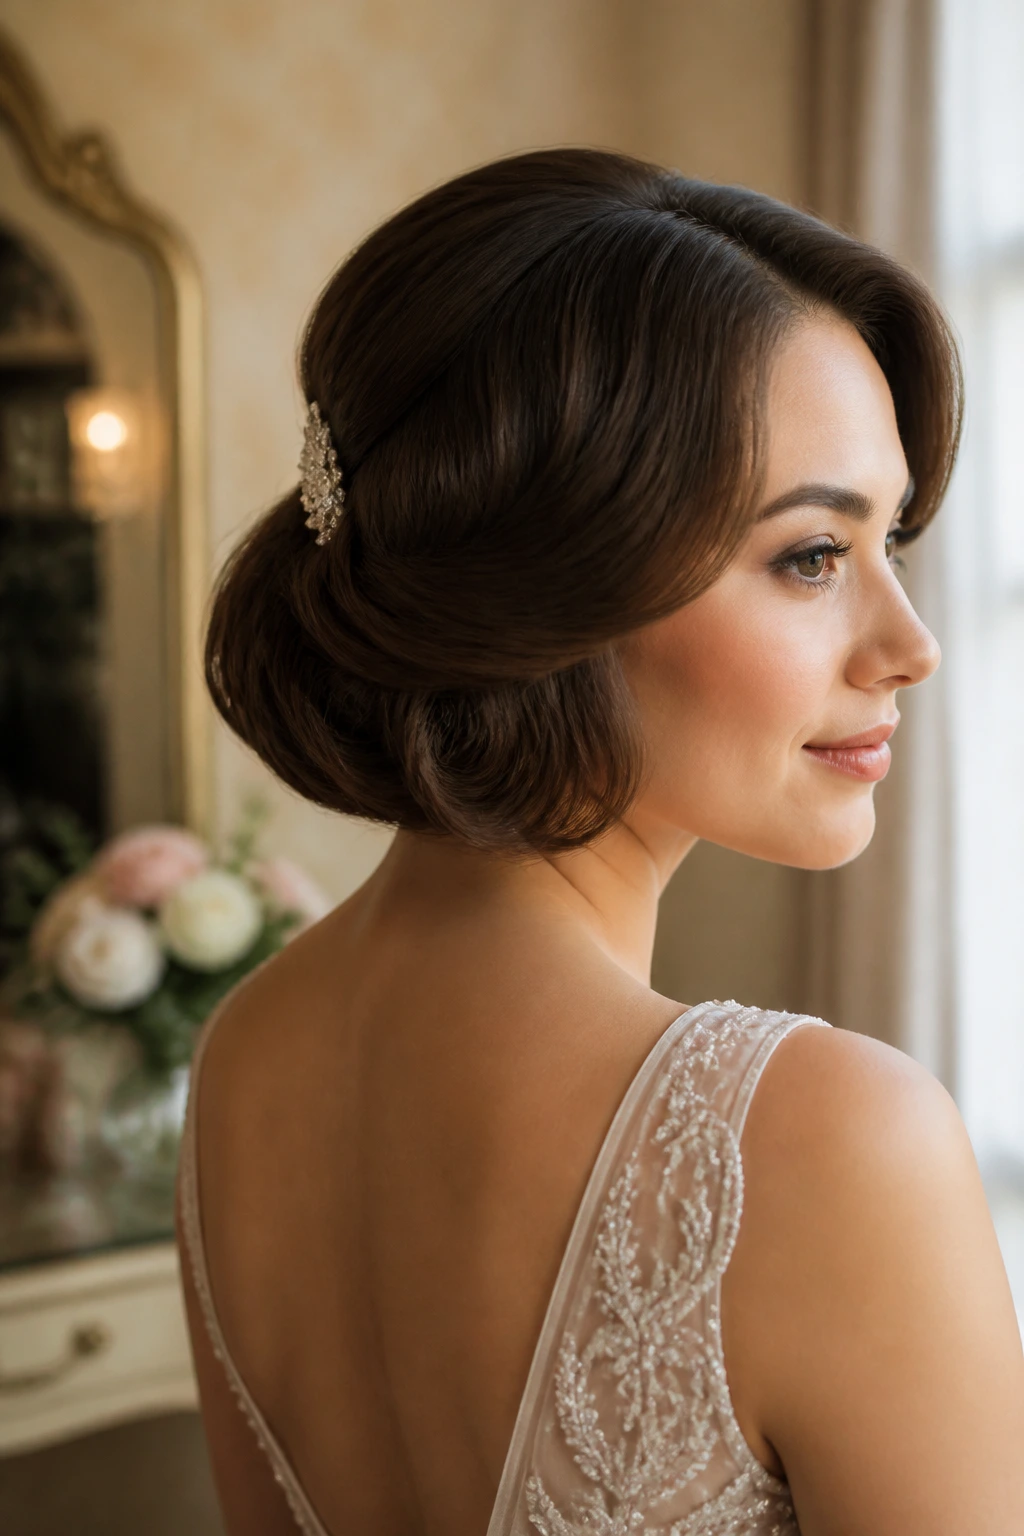
A faux bob is one of the smartest tricks here because it gives the illusion of a short vintage cut without actually chopping your hair. The ends disappear under themselves, and the neck stays open, which looks lovely with a delicate neckline.
Unlike a classic bun, this style wants the hair to curve inward at the bottom. That inward sweep is what sells the bob illusion. If the ends poke outward, the whole thing falls apart visually.
It’s especially good for brides who like 1930s shapes, small veils, or dresses with beading near the collarbone. You get a retro line with a little playfulness, and it never feels overly stiff.
19. Double Roll Updo With a Center Veil
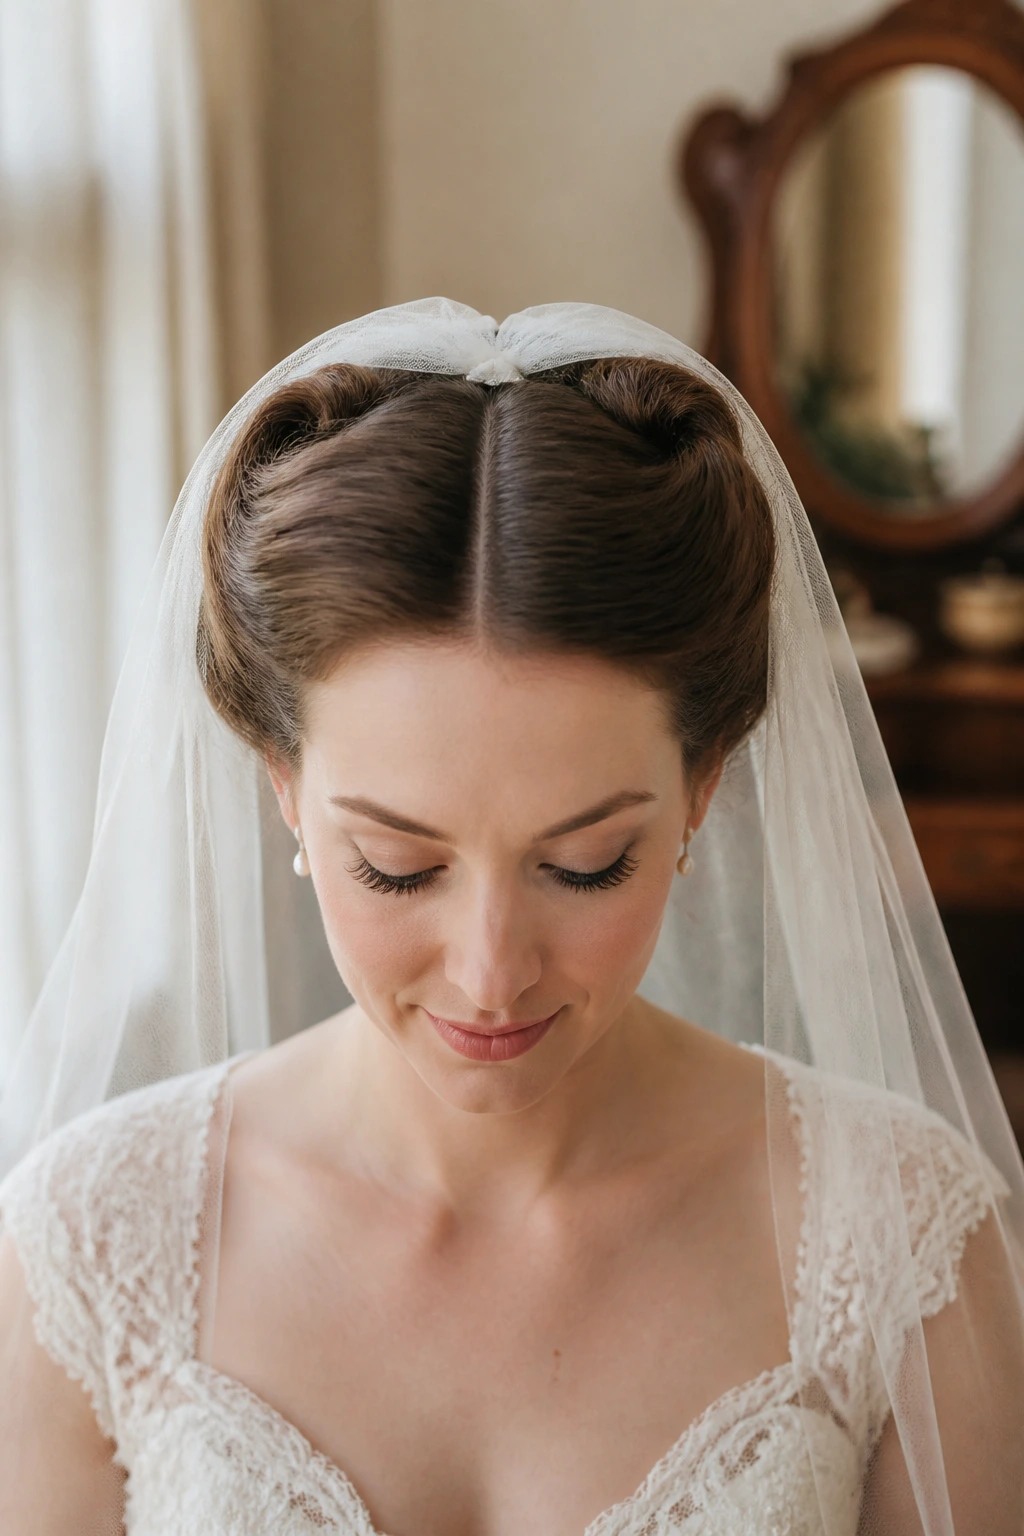
Two rolls can do what one large shape can’t: frame the head without overwhelming it. A double roll updo keeps the vintage reference obvious, while the center veil makes the whole style feel formal and symmetrical.
This is one of those styles that loves precision. The rolls should match in size, but they don’t need to be twins. A tiny difference in shape can actually look more natural. Keep the center section smooth so the veil comb sits flat and doesn’t tilt.
If you have a long face, this style can help break up vertical length. If your face is shorter, keep the rolls slim so they don’t crowd your features.
20. Low Knot With a Side Comb
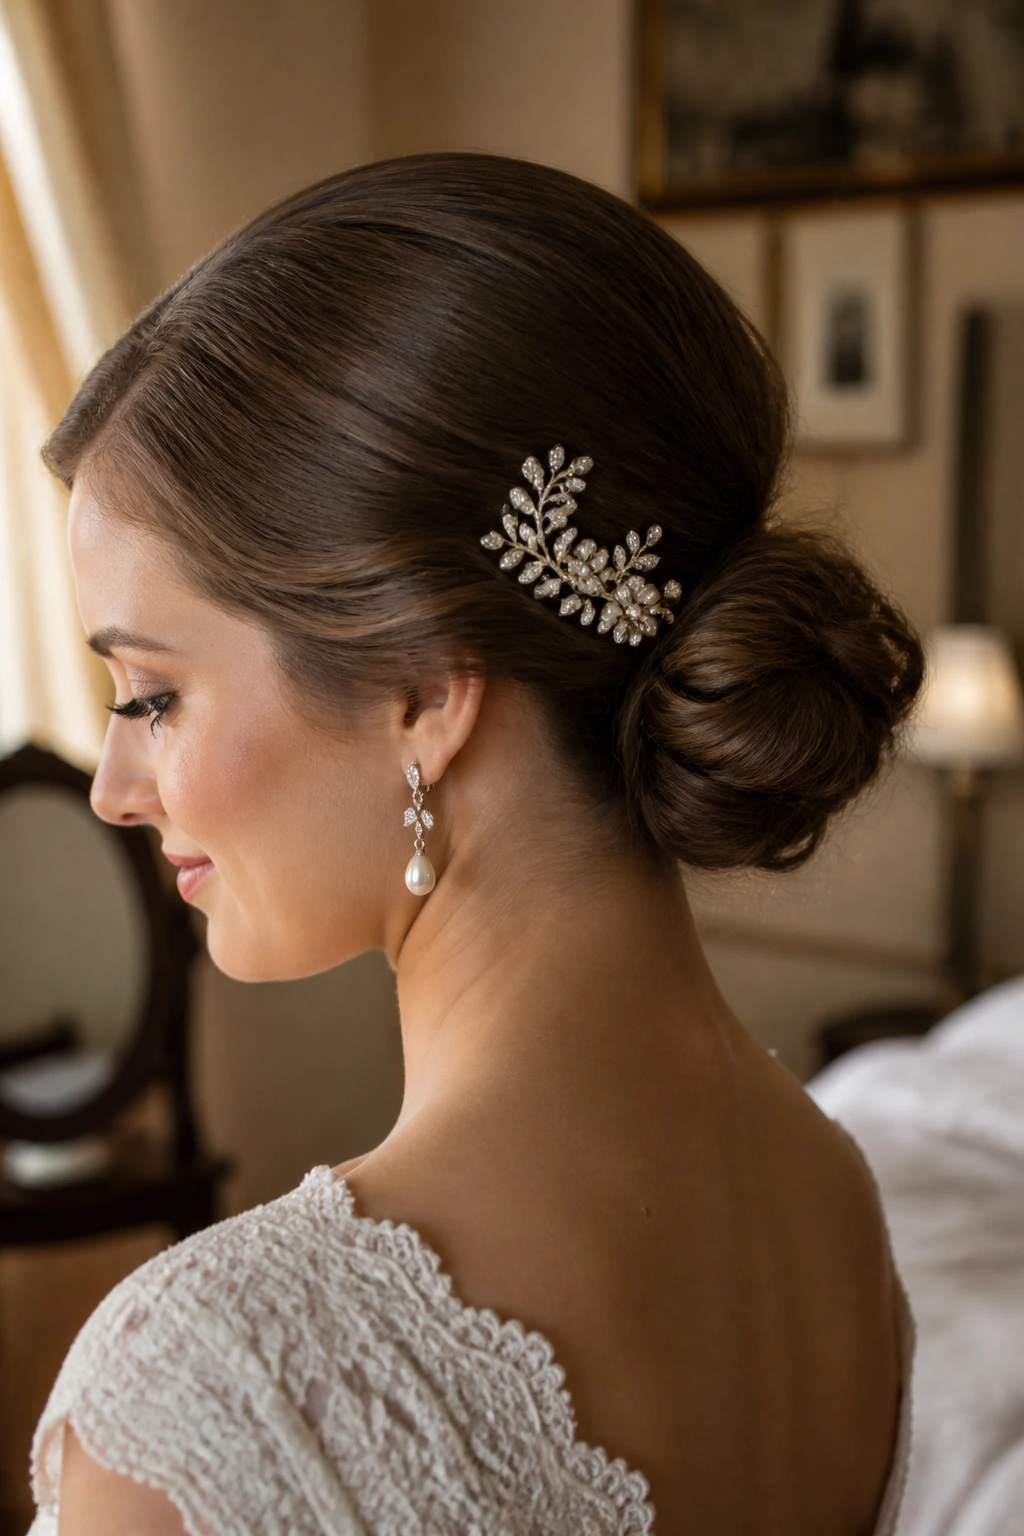
This is the easiest style here to keep elegant when the dress is busy. A low knot doesn’t compete with embroidery, and the side comb gives you one clear ornament instead of a cluster of extras.
The side comb should sit just above the knot or slightly off to one side, never jammed into the center like a paper clip. That offset feels more intentional. It also helps the eye travel across the hairstyle instead of stopping dead in the middle.
If you want a vintage note without much fuss, this is a good place to land. Clean. Stable. No drama unless you add it.
21. Scalloped Pin Curl Updo
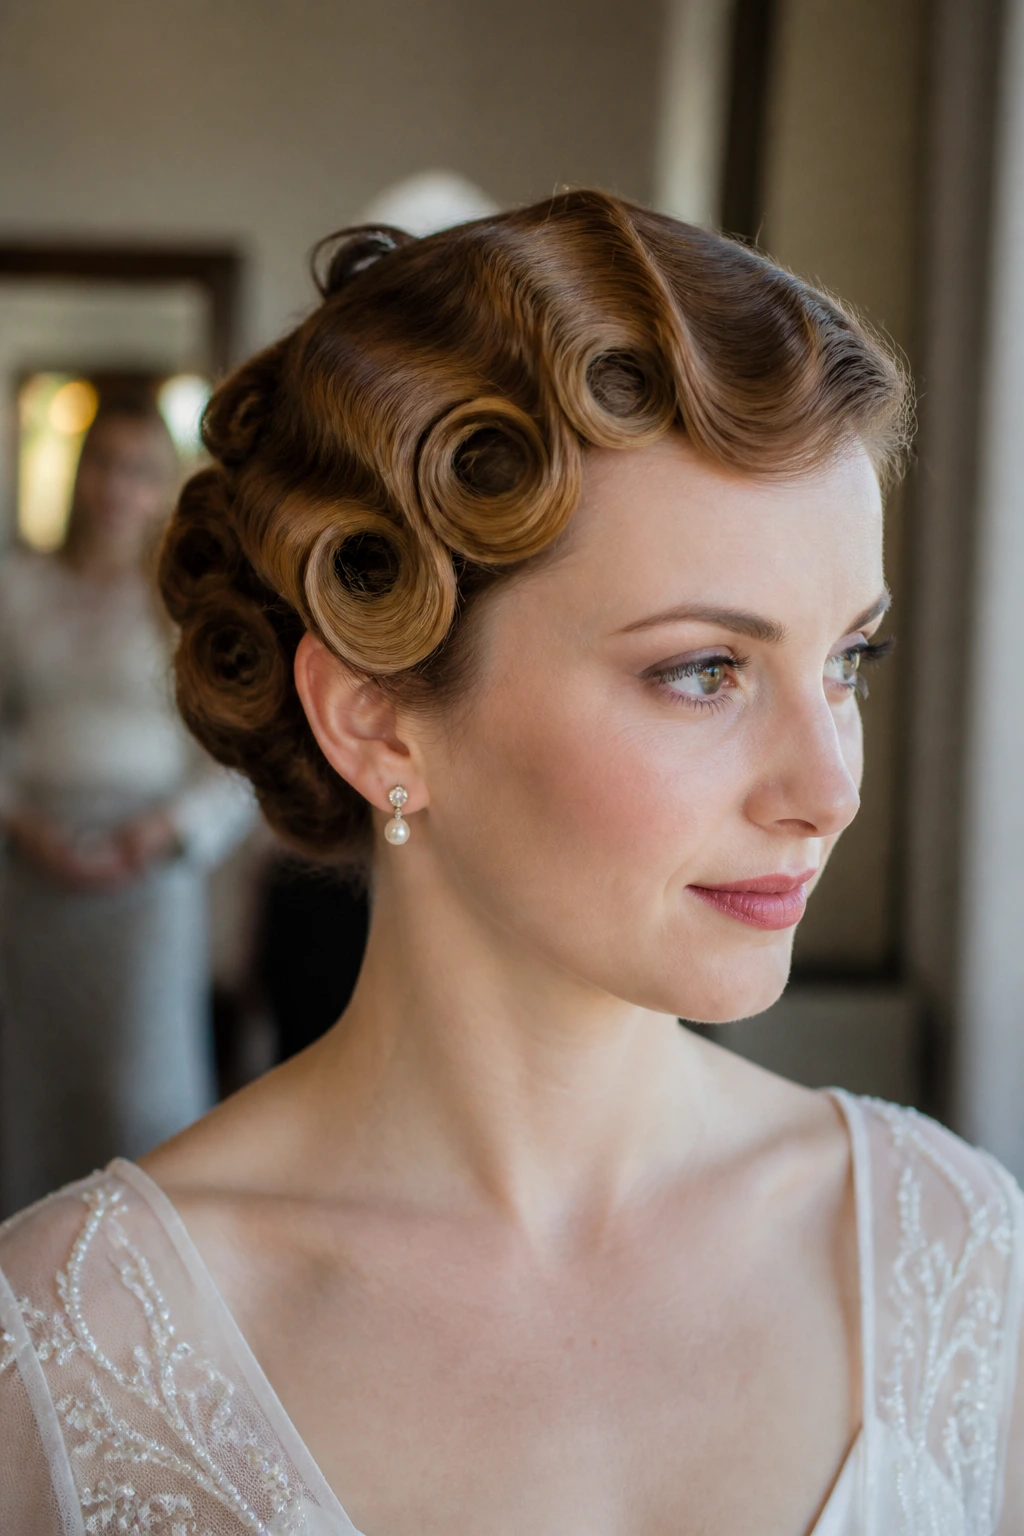
Why does a scalloped pin curl updo feel so old-fashioned in the best way? Because the curl edges make a soft repeating line around the head, almost like tiny waves stacked into place. That repeated pattern is instantly period-coded.
This works especially well for shorter hair or for brides who want a 1920s or 1930s silhouette with a lot of detail near the face. The curls can be clustered into a low shape or wrapped around the crown, depending on how much length you have to work with.
How to Use It
Set the curls first, let them cool fully, then pin them where the scallops fall naturally. Don’t fight the bend. The charm is in the curve, not in making every curl match exactly.
22. Rolled Chignon With Ribbon Detail
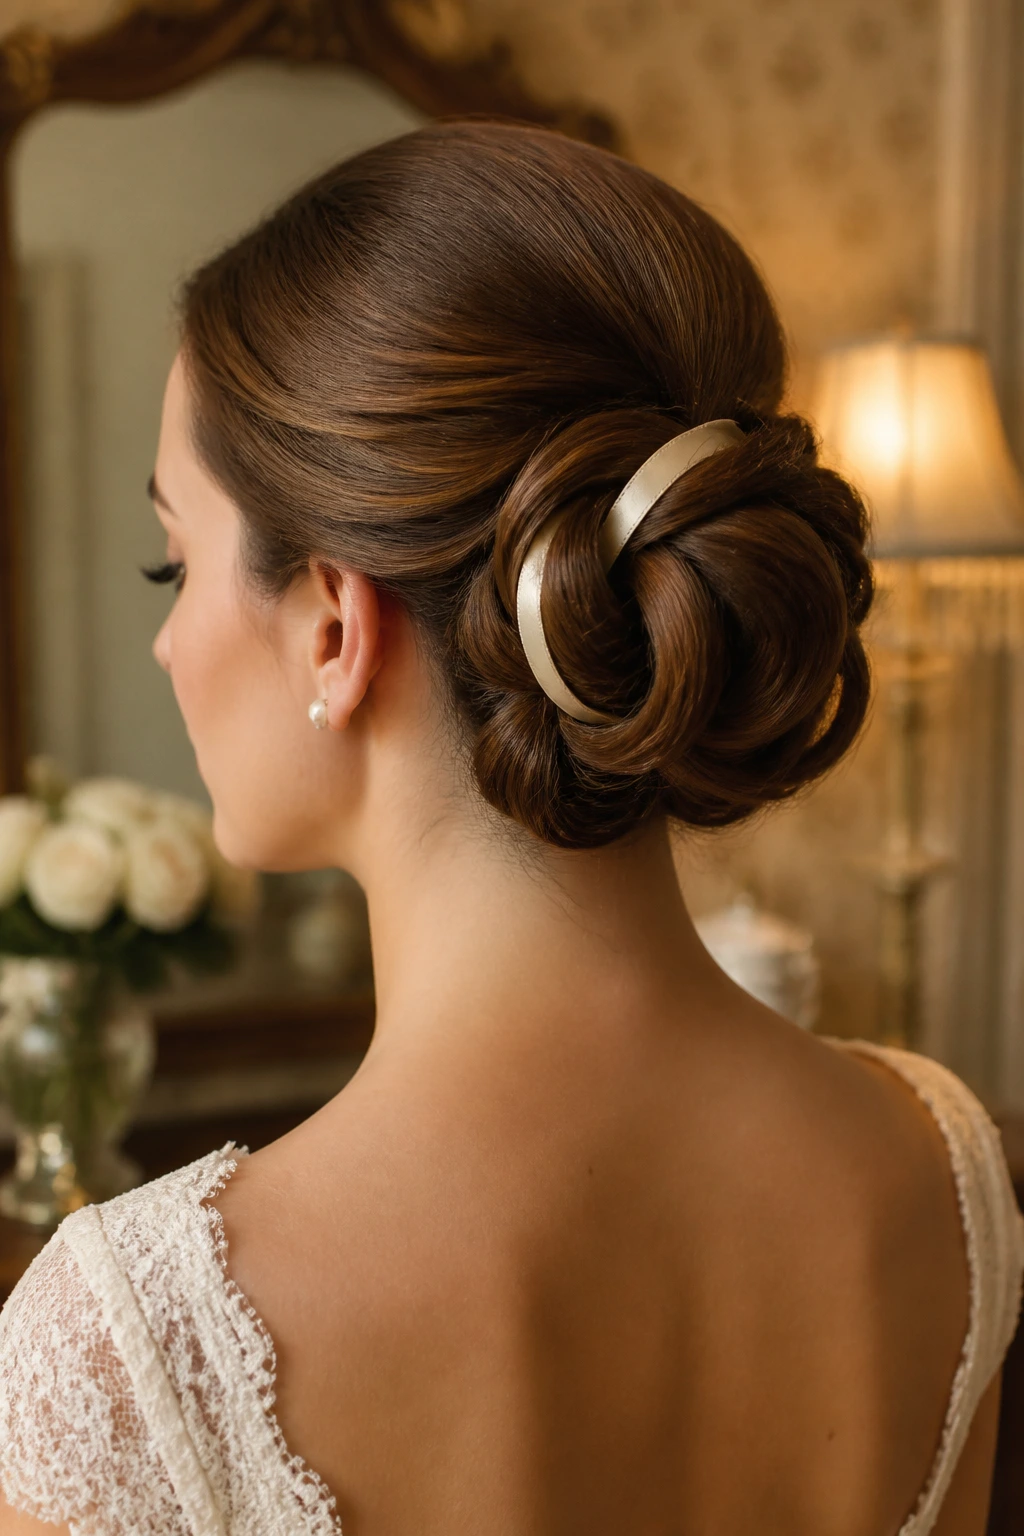
A ribbon tucked into a rolled chignon can look sharp, but only if the ribbon acts like part of the structure instead of a loose afterthought. Think of it as a finishing seam.
This style leans a little toward 1950s bridal looks, especially when the roll is neat and the ribbon matches either the bouquet or the dress trim. Satin ribbon gives more gloss; velvet ribbon reads heavier and colder, so I’d reserve it for a thicker hairstyle.
A narrow ribbon works better than a wide one. Wide ribbon can drag the eye away from the shape of the bun, and that shape is what makes the style feel vintage in the first place.
23. Curled Pompadour Into a Low Bun
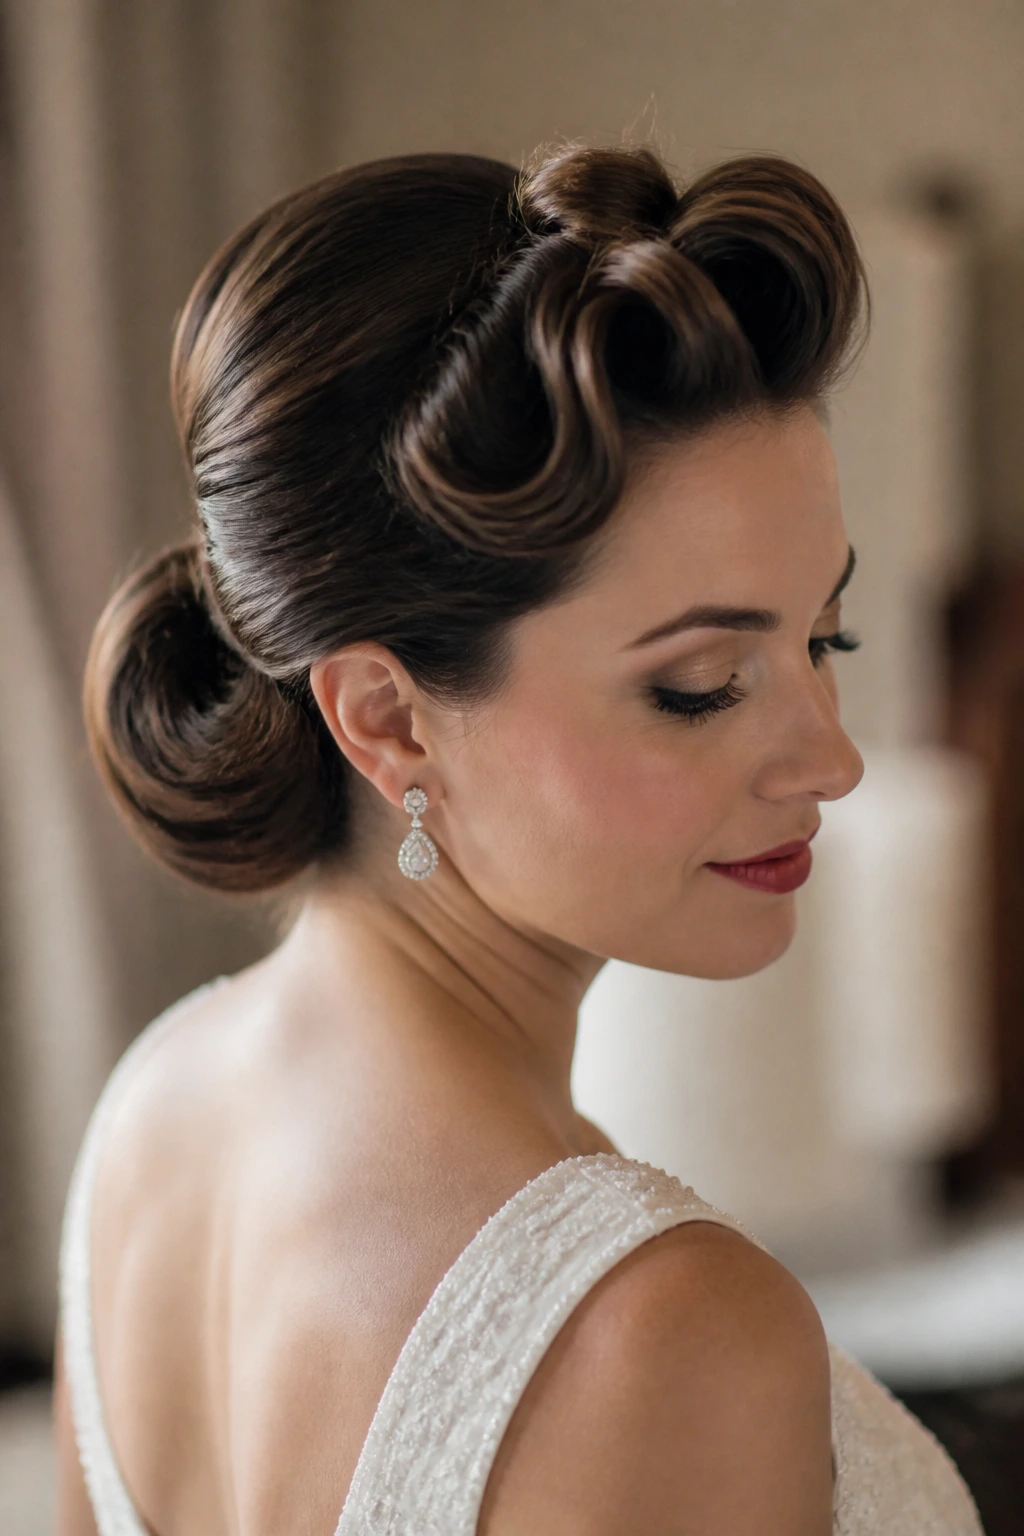
The pompadour lift at the front gives this style a confident, slightly theatrical edge, and the low bun keeps it grounded. That contrast is the whole reason it works. Without the lift, it becomes just another bun.
The front section should rise smoothly from the crown, not puff up in a vague hump. Shape matters. Use backcombing sparingly and smooth the surface over it, then direct the rest of the hair into the bun at the nape.
This one looks especially good with dresses that have clean lines and a little structure. It has presence. It also photographs well from the side, which is where many updos either shine or fall apart.
24. Twisted Side Roll With Birdcage Veil
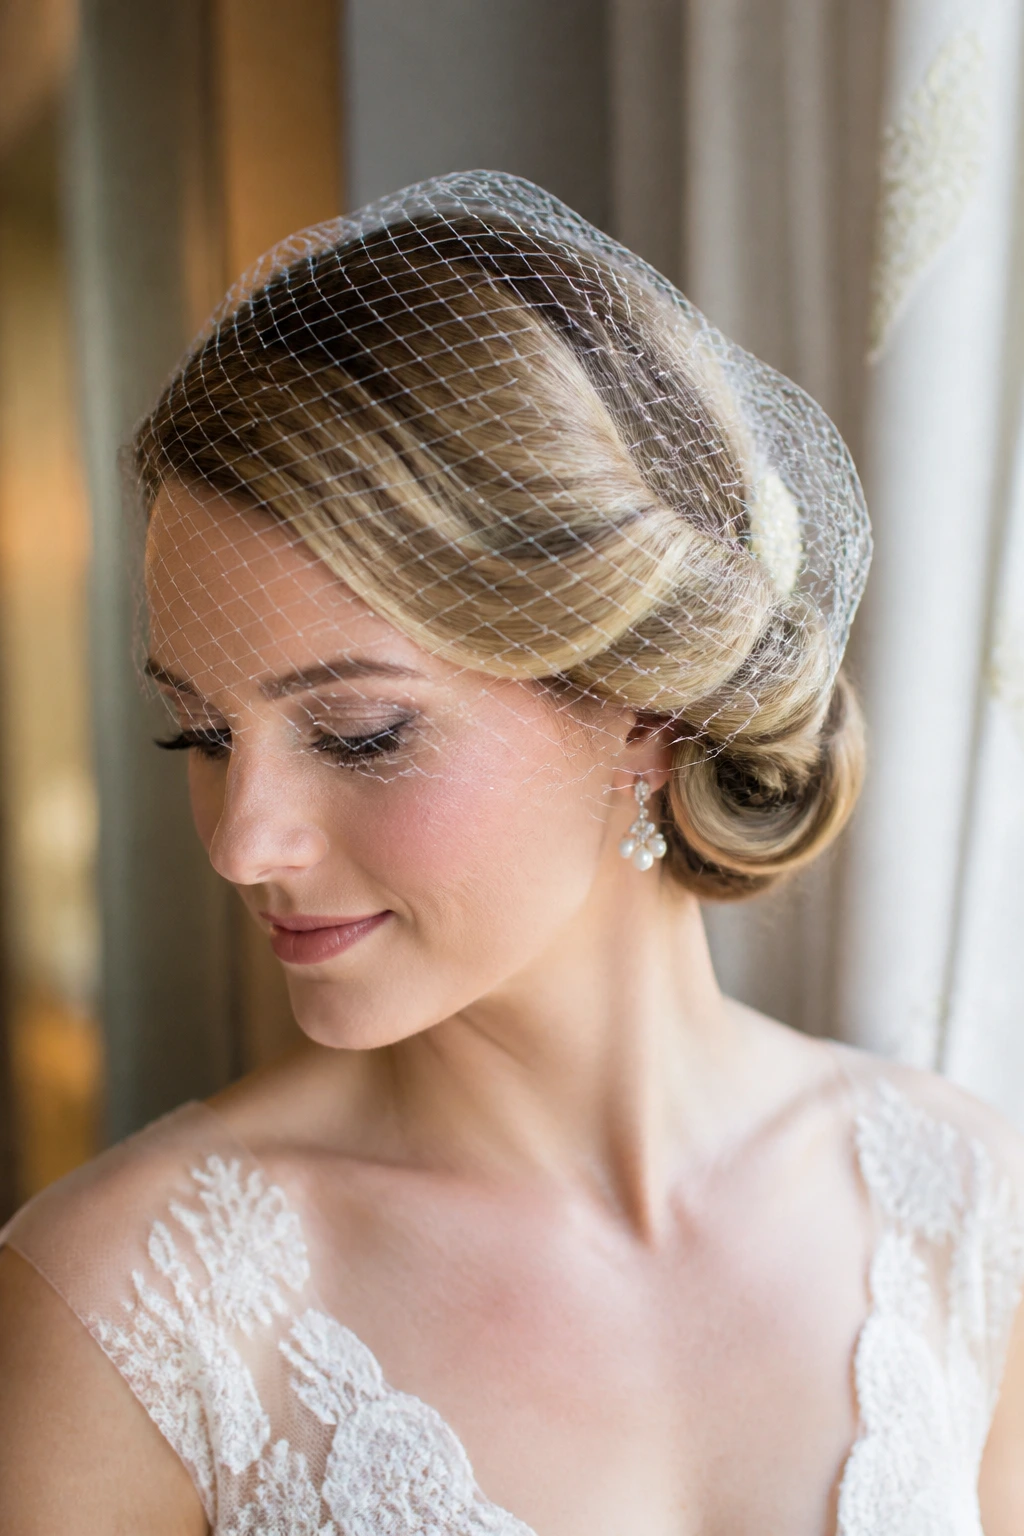
Unlike a full updo, a side roll keeps one side a little open and lets the birdcage veil sit naturally without crowding the face. That makes it a smart option for shorter hair, fine hair, or brides who want the veil to do some of the visual work.
The twist should sit close to the head and curve back toward the nape. A loose twist turns limp fast, especially once the veil comb goes in. Keep the line crisp and anchor it with pins underneath rather than on top where they can show.
This is one of the most flattering ways to wear a birdcage veil because the veil gets a strong anchor without hiding the face shape.
25. Halo Braid With a Hidden Bun
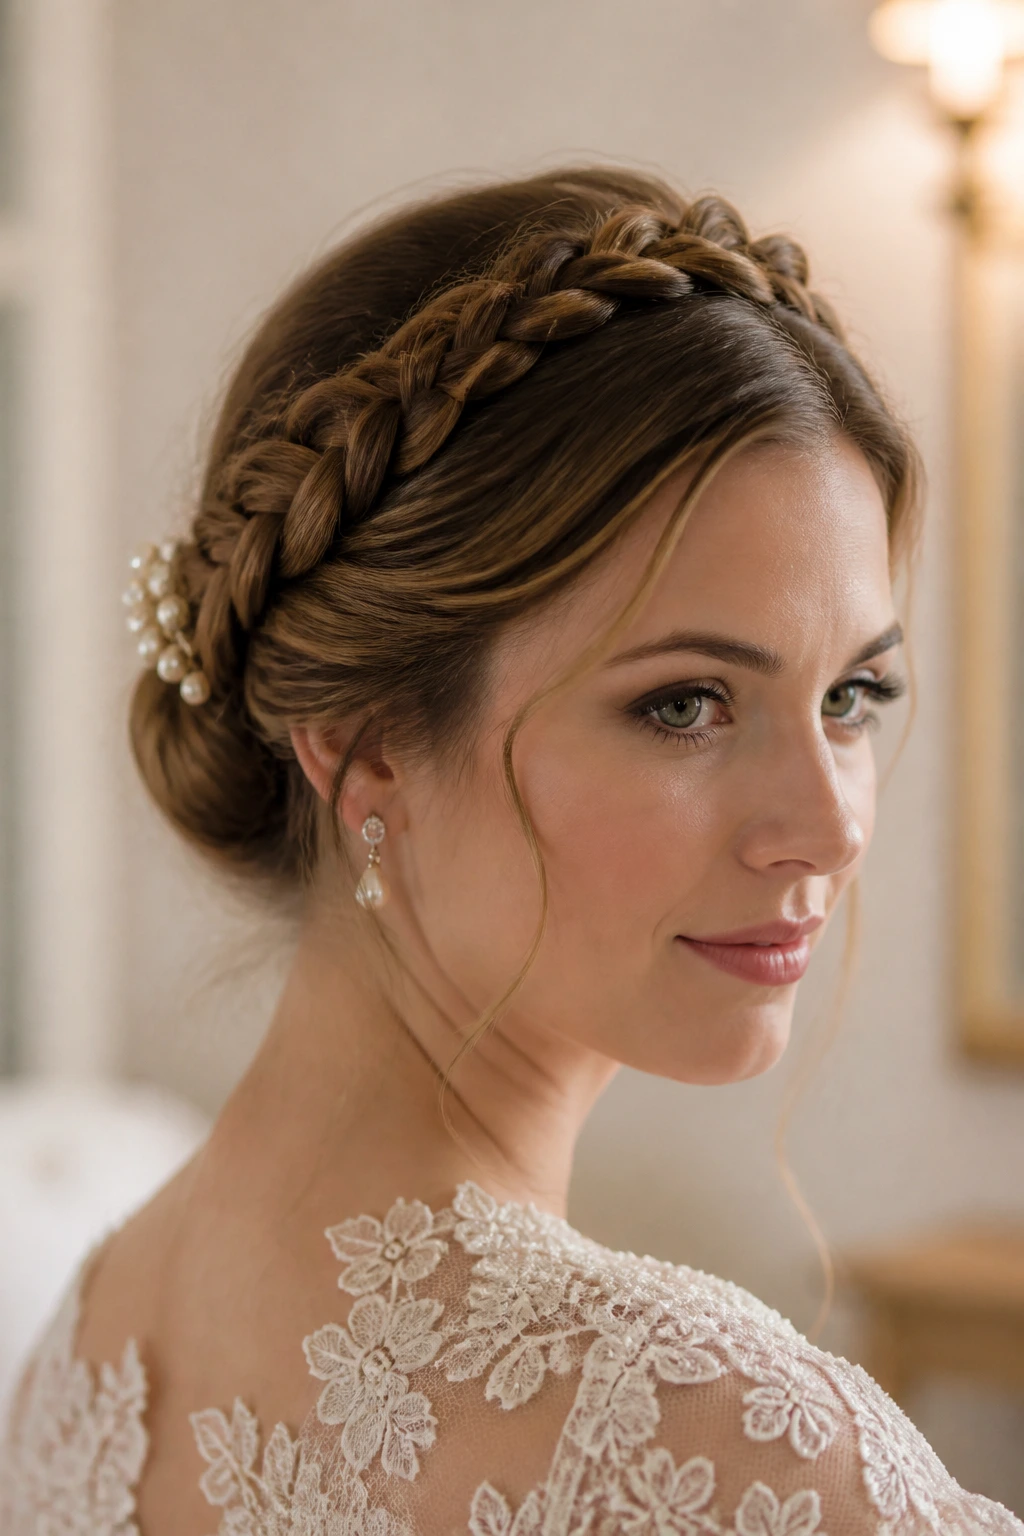
A halo braid can read bohemian if you let it, but hide the ends into a small bun and the whole thing picks up a much more vintage, almost portrait-like feel. The braid becomes a frame. The bun becomes the quiet anchor.
This is a good choice for brides who want softness around the head but still need a style that won’t unravel during a long event. Keep the braid snug enough to hold, then loosen just the outer edges for a little fullness. If you over-pancake it, the shape can get fuzzy.
A few pearl pins tucked into one side work better than scattering flowers all around. One clear accent beats six competing ones.
26. French Twist With a Tucked Comb
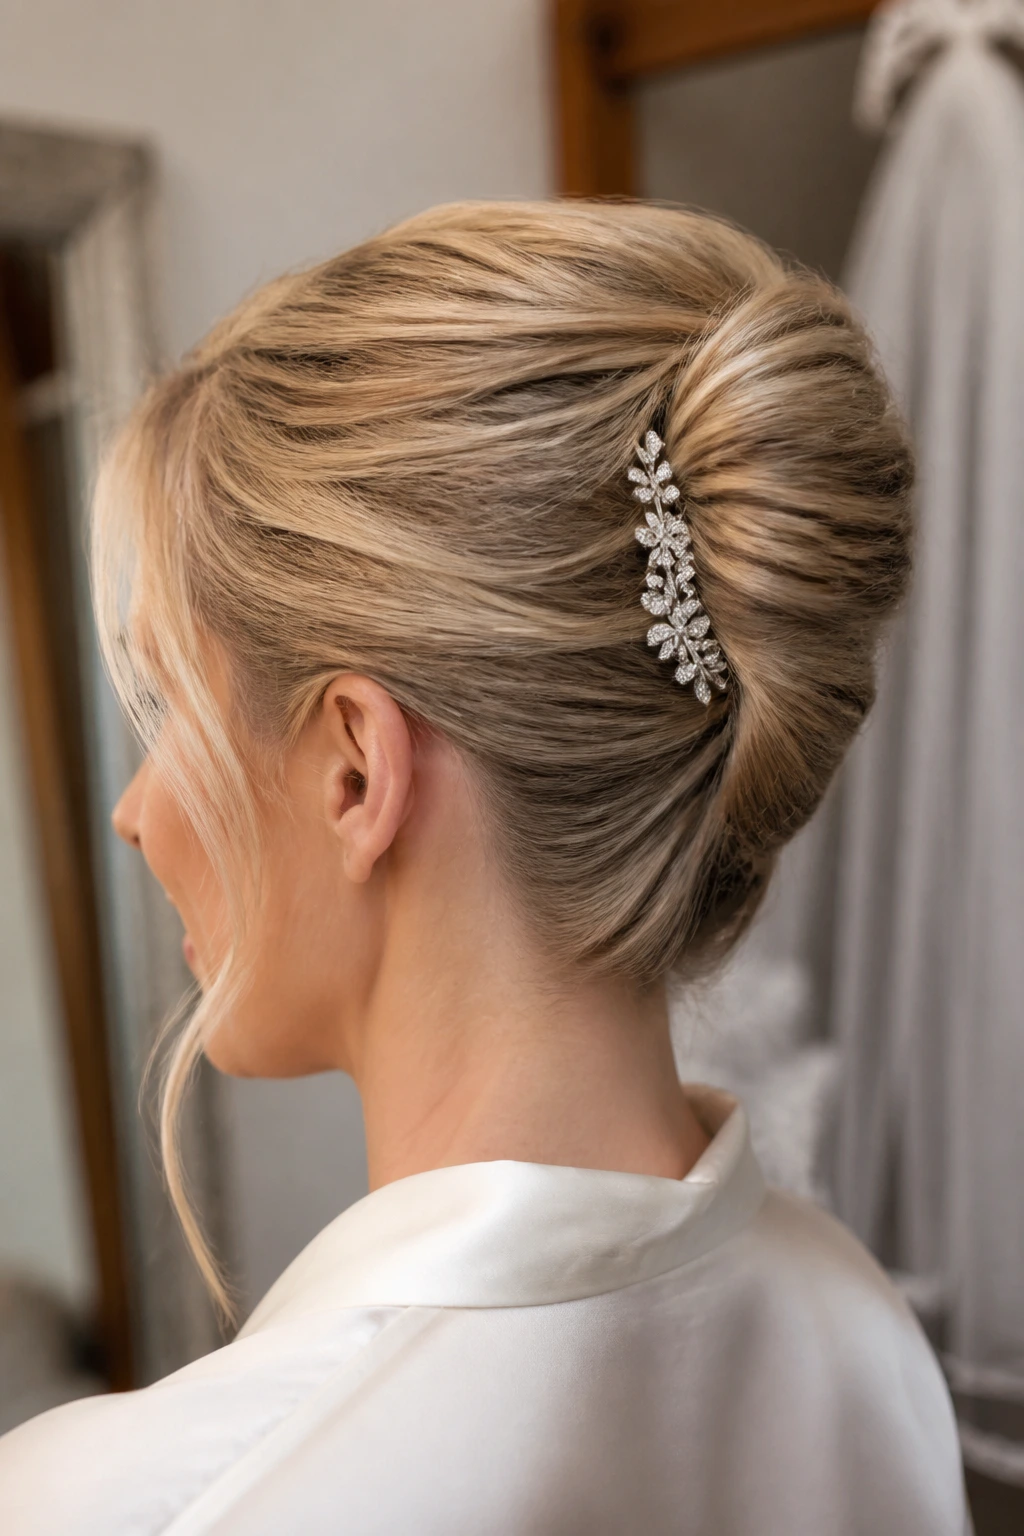
If you only choose one vintage bridal updo, make it this one. The French twist is adaptable, clean, and capable of looking sleek or soft depending on how tightly you roll it and how much height you allow at the crown.
The tucked comb is what gives it bridal polish. Insert the comb slightly off-center or just above the seam of the twist so it catches the hair rather than floating on top of it. A badly placed comb can make even a good twist look unfinished.
This style is the safest bet for brides who want something timeless, especially with a veil that needs a secure base. It’s not flashy. That’s exactly why it works.
27. Pinned Barrel Waves With a Soft Knot
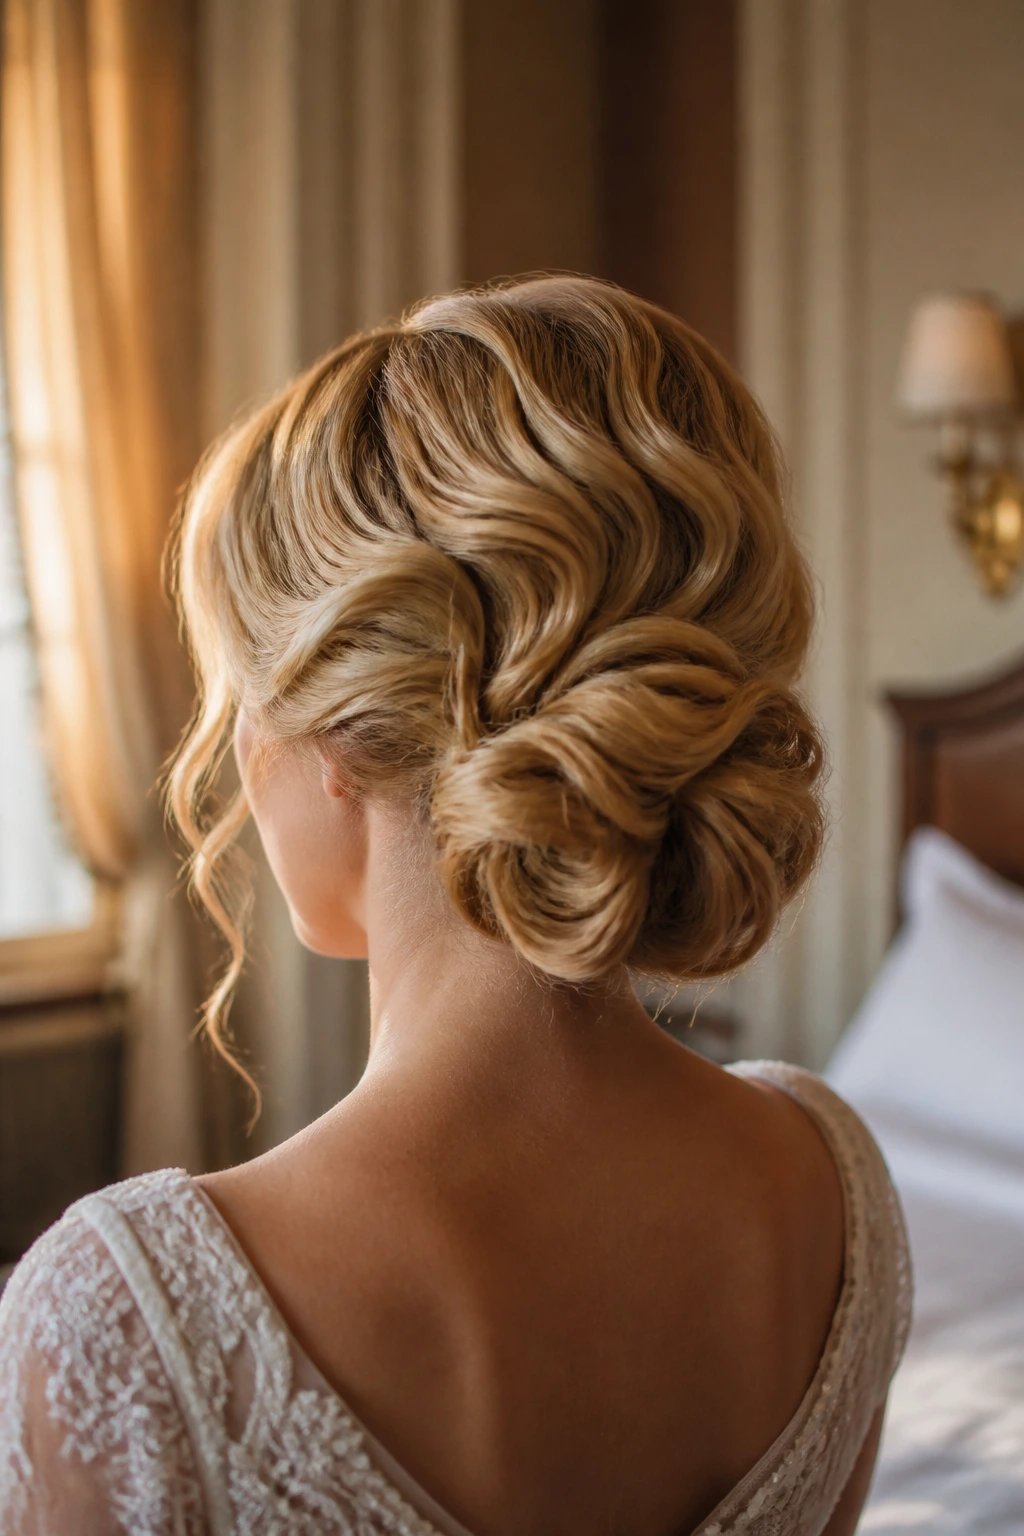
What makes pinned barrel waves feel different from a regular low bun? The movement is visible before the knot even begins. The waves curl into one another, then gather softly at the back, which gives the whole style a 1930s-to-1950s mood without locking you into a single decade.
How to Wear It
This works best when the front and sides are set on medium barrels, pinned, and left to cool before being shaped. The soft knot should stay low and slightly rounded, not knotty or twisted in a visible way. If you want a little sparkle, place a small comb just above the knot so it doesn’t interrupt the wave pattern.
It’s a lovely choice for brides who want softness, motion, and a bit of structure all at once.
What Makes a Vintage Bridal Updo Hold Its Shape
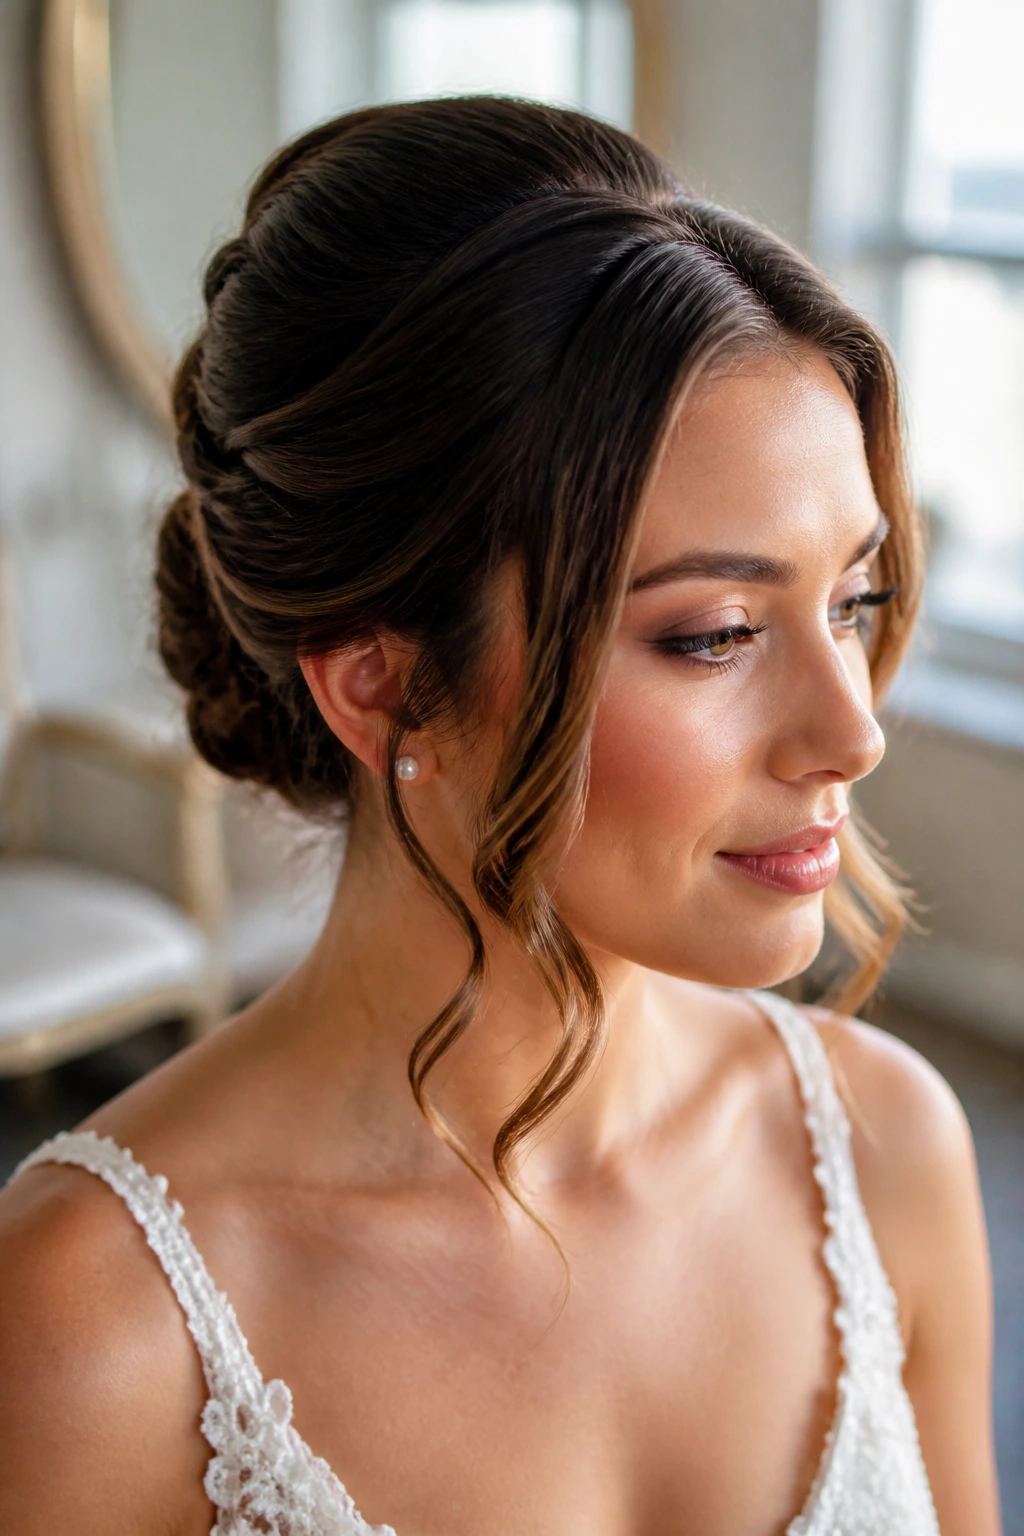
The strongest vintage bridal updos usually share the same backbone: a controlled silhouette, a little root grip, and pins placed like you mean it. The mistake people make is thinking the style itself is what holds. It isn’t. The prep holds it.
Silhouette First
A style needs one clear shape from the side. If the crown is tall, the nape should stay slim. If the front has rolls or waves, the back should calm down. That contrast makes the style readable, and readable hair photographs better than vague fluff.
Finish Second
Vintage hair usually looks better with some polish, but not mirror gloss everywhere. A little shine on the surface and a little texture underneath is the sweet spot. If the whole head gets coated in oil or serum, the pins start sliding. If it’s too dry, the style looks dusty and flat.
Anchoring Matters
Use hidden pins in layers. A bun pin or U-pin can give structure, while smaller bobby pins hold the surface. Cross them. Don’t just slide one pin straight in and hope it behaves. Hope is not a styling method.
Essential Tools for Building These Looks
- Rat-tail comb: For clean parts, sectioning, and precise roll placement.
- Boar-bristle brush: Smooths the surface without wrecking the shape.
- Sectioning clips: Keep curled or waved sections out of the way while you build the base.
- 1-inch curling iron or wand: The most useful size for face-framing waves and vintage bends.
- Teasing comb: Adds lift at the crown without making the hair look puffy all over.
- Bobby pins matched to hair color: These disappear better and keep the finish cleaner.
- Long U-pins: Good for anchoring buns, twists, and rolls that need extra support.
- Strong-hold hairspray: A flexible spray for shaping, plus a firmer finishing spray for the final lock-in.
- Texturizing spray or dry shampoo: Helps slippery hair grip; use it at the roots, not the ends.
- Hair padding or a small bun donut: Optional, but useful for fine hair or for building shape without too much teasing.
- Silk scarf or bonnet: Handy for keeping test styles intact overnight or protecting curled sections before the ceremony.
- Mini flat iron: Useful for smoothing a stubborn part line or temple section without redoing the whole head.
Smart Hair Prep and Product Choices
Vintage bridal updos behave better when the hair has a bit of memory. Freshly washed hair is usually too soft and too slippery, especially if your strands are fine or straight. I prefer hair that’s been washed the day before, then misted at the roots with dry shampoo or texturizing spray so the pins have something to catch.
Choose your products based on finish, not just hold. If you want a 1940s roll or a finger-wave look, a light mousse at the roots and a brushable hairspray are enough at the beginning. If your hair is thick or layered, you’ll need stronger pins and probably a little padding to stop the shape from collapsing in the middle of the day.
Color-matched pins matter more than people admit. Dark brown pins disappear in dark hair; blonde pins vanish better in lighter shades. And if you’re adding extensions, use human-hair clip-ins when possible. Synthetic pieces can fight heat styling, and that becomes a mess when you’re trying to match a vintage bend at the temple.
How to Match the Style to Your Dress, Veil, and Jewelry
Neckline: High necks and dresses with strong collars usually look best with low shapes like French twists, Gibson tucks, or slim chignons. Open backs can handle a little more crown lift, because the hairstyle and dress get different jobs.
Veil placement: Birdcage veils like smooth fronts and clear anchor points near the temple or crown. Longer veils need a stronger base, so styles with tucked seams, buns, or compact rolls usually hold them better than soft, floppy knots.
Jewelry: Statement earrings need a cleaner side line so they don’t compete with the hair. If the earrings are large, keep the temples smooth and the volume toward the back. If the earrings are tiny, a wave or roll near the face can carry more of the visual load.
Silhouette: Tall or structured dresses like a little height in the hair. Slippery silk and satin can handle sleeker shapes. Lace and beading often benefit from softer texture, because too much shine can look harsh beside the fabric.
Additional Styling Tricks That Make the Finish Look Intentional
Texture: Add texture at the roots before you shape anything. A small amount of dry shampoo, rubbed in with your fingertips, gives pins something to bite into. That tiny bit of roughness keeps the style from sliding during photos and hugs.
Accessory placement: Put combs and pins where the hair is already strongest, usually at the seam of a roll or the base of a twist. If you force an accessory into weak hair, it tips or drops. A proper anchor point solves that fast.
Softness: Leave a little movement near the temples or nape if the dress and makeup feel severe. Two thin waves can soften a face more effectively than a big cloud of curls. More hair is not automatically better.
Make-it-yours: If you want the style to feel more modern, keep the shape clean and the adornment minimal. If you want stronger vintage character, lean into a defined part, a visible roll, or one piece of jewelry that matches the era cue.
Common Mistakes That Flatten the Silhouette
-
Starting with hair that’s too clean: Freshly washed hair slips, especially when it’s fine. Day-old hair usually behaves better, and a little texturizing spray at the roots helps the pins stay put.
-
Over-teasing the crown: Too much backcombing can make the top of the head look rough and puffy instead of sculpted. Use just enough lift to support the shape, then smooth the outer layer carefully.
-
Using the wrong accessory size: A huge comb on a narrow twist or a tiny pin on a thick roll throws off the balance. Match the scale of the accessory to the scale of the style.
-
Making the face-framing pieces too thick: Big front sections can swallow the hairstyle and make it look casual. Narrower pieces feel more deliberate and hold a vintage line better.
-
Skipping hidden pins: One visible pin is not a foundation. If the style only has surface pins, it will shift. Build from underneath, then finish on top.
-
Forgetting the side view: A style that looks neat from the front can turn lopsided in profile. Check the silhouette from the side before you call it done.
Vintage-Inspired Variations for Different Hair Types
Fine-Hair Support Version: Use a small amount of padding under the crown or bun, plus dry shampoo for grit. Fine hair can look elegant in these styles, but it needs structure underneath or it will collapse by dinner.
Thick-Hair Weight-Balanced Version: Break the hair into smaller sections and pin each section separately instead of forcing one giant roll. Thick hair often looks better when the weight is spread across two or three anchor points.
Curly-and-Coily Version: Keep some of the natural pattern visible near the front or at the ends. If you flatten every strand, the style can lose life. A curl-friendly updo often feels more expensive because it looks intentional, not forced.
Short-Hair Faux-Length Version: Use discreet clip-ins or hidden padding to build the silhouette, then tuck the ends carefully. You’re not trying to fake waist-length hair; you’re building a shape that reads well in photos.
Minimalist Bride Version: Stick to one signature vintage element — maybe a wave, a roll, or a tuck — and keep everything else clean. One detail is often enough, and it ages better in photographs than a heavily decorated head full of pins.
Keep the Style Fresh from Trial Run to Last Dance
A good bridal hair trial should be worn long enough to tell the truth. I’d give it at least 4 to 6 hours, then check the temples, the crown, and the nape for slipping. If a pin is going to pop, you’ll see it before the wedding.
If you’re setting curls or rolls the night before, keep the finished sections clipped or wrapped in a silk scarf so they don’t flatten under a pillow. For styles that need a lot of shape — beehives, bouffants, barrel waves — the prep can start the night before with dry shampoo at the roots and a loose set of curls, then the final sculpting happens the next day.
During the event, resist the urge to keep touching the hair. The more you touch the crown, the more oils you move around and the faster the style softens. If a piece needs help, use a single bobby pin and a light mist of hairspray. Two minutes of fixing is enough. Thirty minutes is how people end up redoing the whole thing in a bathroom mirror.
After the event, remove pins gently and slide a bit of detangler over any sections that feel stiff or snagged. That keeps the hair from breaking around the pin holes. Accessories should go back in a labeled box right away. Pearl pins and combs disappear with alarming speed once everyone is tired.
Frequently Asked Questions About Vintage Bridal Updos
Can short hair still work for a vintage bridal updo?
Yes, if the style relies on rolls, pin curls, or a faux-bob shape rather than long coils. Short hair often holds shape well, especially when you build one strong front element and keep the back tucked.
Should I wash my hair the morning of the wedding?
Usually no. Day-old hair has more grip, which helps pins and rollers stay in place. If your scalp gets oily fast, use a little dry shampoo at the roots the night before or the morning of.
What if my hair is very fine and slips out of everything?
Use texturizing spray at the roots, then build a hidden base with padding or a small donut. Fine hair often needs fewer visible curls and more internal support, which is why the structure matters so much.
Can I wear a veil with a vintage updo?
Absolutely, but placement matters. Birdcage veils work well with smooth fronts and side rolls; longer veils usually need a compact bun, twist, or chignon to anchor the comb securely.
How do I keep the style from falling during dancing?
Use a real pin structure, not just spray. The hair should be anchored in layers — hidden pins underneath, then surface pins, then hairspray after everything is shaped. That order matters.
Do these styles work with curly or coily hair?
Yes, and they can look stunning. The key is not forcing the hair into a texture that fights it. Keep some natural bend, then shape the front or crown into the vintage cue you want.
Are extensions necessary for these looks?
Not always. They help with volume, length, and braid thickness, but a lot of vintage styles are built from shape rather than sheer hair volume. If you add extensions, make sure they match texture and weight.
What if the style looks too stiff in the mirror?
Soften one detail, not the whole thing. Loosen a face-framing piece, ease out a wave, or move a comb slightly off-center. Small changes do the work here; ripping the style apart usually makes it worse.
A Vintage Finish That Holds Its Shape
The nicest thing about vintage bridal updos is that they give you a clear line without turning the hair into a rigid prop. A good twist, tuck, roll, or wave should look considered from across the room and still feel comfortable when you’re wearing it for hours. That combination is harder to get than people expect, and more useful than a style that only looks good in one mirror angle.
Pick the era cue that fits the dress, then build the shape around how your hair actually behaves. Fine hair needs grip. Thick hair needs weight control. Curly hair needs room to be itself. Once those pieces are handled, the rest is mostly pin placement and restraint.
And restraint, honestly, is the secret here. One clean roll beats three competing ideas.
