



Thin hair tells on you fast. One loose pin, one heavy bun, one too-clean ponytail, and the whole shape can start looking smaller than you meant it to. The fix is not more hair. It’s better architecture.
The best updos for thin hair do not fight the strand. They use the strand’s slip, softness, and lightness to their advantage. That means low knots that sit close to the nape, tucked rolls that hide the ends, braids that give pins something to grab, and ponytails that get a little help from texture spray before they ever touch an elastic.
I’ve always had more luck with updos that look as if they were built from the inside out. The mistake a lot of people make is piling hair upward and hoping volume appears by force. It doesn’t. Fine or thin hair usually looks better when the shape stays compact, the crown gets a little lift, and the finish has just enough grit to keep the whole thing from slipping by lunchtime.
Why These Styles Hold Better on Fine Strands
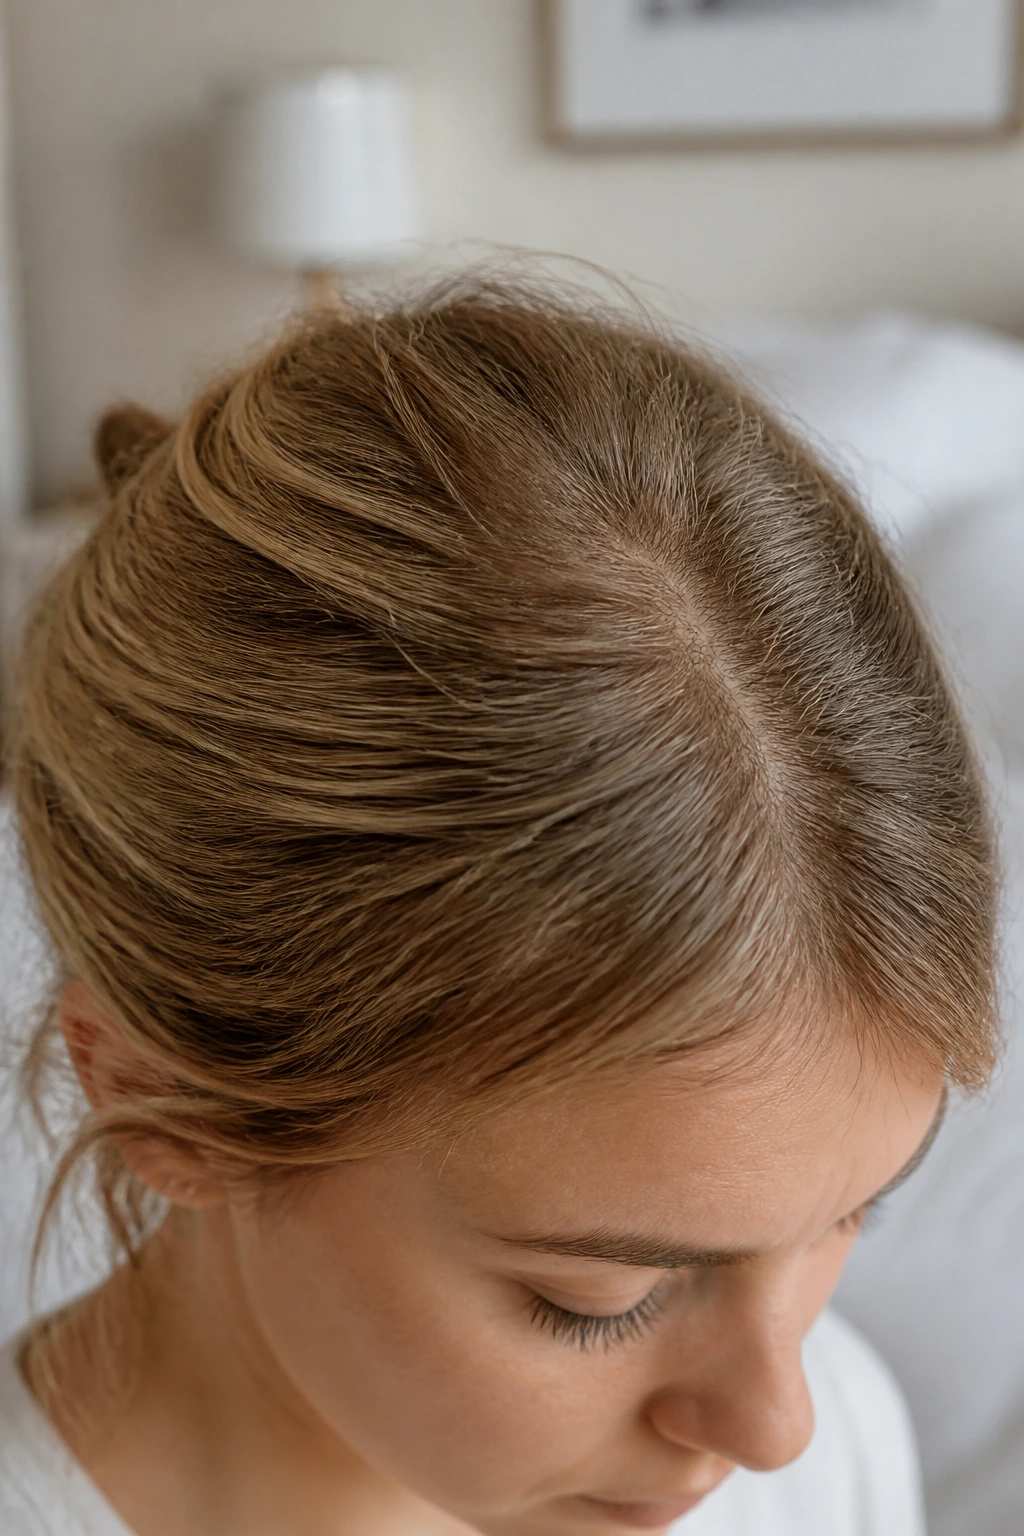
Better shape beats bigger shape. Thin hair tends to collapse under its own weight when you ask for a tall, heavy bun. A lower center of gravity — at the nape, just behind the ears, or wrapped close to the head — keeps the style from leaning, sagging, or splitting open.
Grip matters more than product load. A teaspoon of dry shampoo at the roots gives better hold than a handful of sticky cream. Fine hair gets greasy-looking fast, so the trick is to create a slightly matte surface without making the hair stiff.
Small pins do more than one big claw. A 1-inch bobby pin tucked in against the twist holds better than a giant clip that only catches the outer layer. Thin hair needs anchoring, not squeezing.
You can hide a lot with placement. A braid across the front, a little side part, or a folded section over the elastic keeps the eye on the shape, not the scalp. That matters. A style can be simple and still look deliberate.
Why These Styles Work: Each look below borrows volume from structure, not density. That’s the whole game with thin hair. Build a shape that sits close to the head, then use texture, pins, and a little bend in the ends to make it hold.
- Low placement: Styles at the nape usually stay put longer because they’re not fighting gravity all day.
- Hidden anchors: Braids, twists, and folds give bobby pins something solid to grip.
- Light product: Dry shampoo, mousse, or texturizing spray gives fine strands traction without weighing them down.
- Face-framing balance: A few soft pieces around the face make the rest of the hair look fuller by contrast.
- Fast reset: Most of these can be refreshed in two minutes with one comb, two pins, and a mist of hairspray.
1. The Low Knot That Hides Its Own Elastic
A low knot is the oldest trick in the book for a reason: it works. On thin hair, it looks cleaner than a big bun and stays close enough to the neck that it doesn’t droop by the afternoon.
Why It Works: The knot sits where the hair has the most natural support, so it doesn’t have to carry extra height. If you twist the tail loosely before tucking it, the shape feels fuller without turning bulky.
Key Products:
- 1 clear elastic
- 4 to 6 bobby pins
- 1 teaspoon dry shampoo at the roots
- 2 to 3 spritzes of flexible-hold hairspray
- 1 pea-size dab of lightweight pomade for flyaways
Quick Steps:
- Spray dry shampoo at the crown and through the mids, then rough it in with your fingers until the roots feel a little gritty.
- Gather hair at the nape, tie it into a low ponytail, then twist the tail around the base in a loose coil.
- Tuck the end under the knot and pin it from underneath, not on top, so the pins disappear into the shape.
Equipment for This Style:
- Tail comb for the part
- 1-inch bobby pins
- Small elastic
- Hand mirror if you want to check the back
How to Wear It: This sits nicely with a boatneck, button-down, or anything with a collar that would fight a taller bun. It also plays well with small earrings because the neck stays open.
Pro Tips:
- Place the elastic lower than you think. That extra inch matters.
- Pin against the direction of pull. The grip is stronger.
- Leave the knot a little loose before you pin. Tight twists expose the scalp more.
Variations:
- Sleek Office Knot: Smooth the crown with a touch of pomade and keep the knot tight.
- Soft Evening Knot: Pull two face-framing pieces free and mist the ends with hairspray.
Common Mistakes to Avoid:
- Don’t twist the knot into a tiny ball. Thin hair looks sparse when it gets over-compressed.
- Don’t pin only the outer layer. If the pins don’t catch the base, the style slides.
2. The Twisted Chignon at the Nape
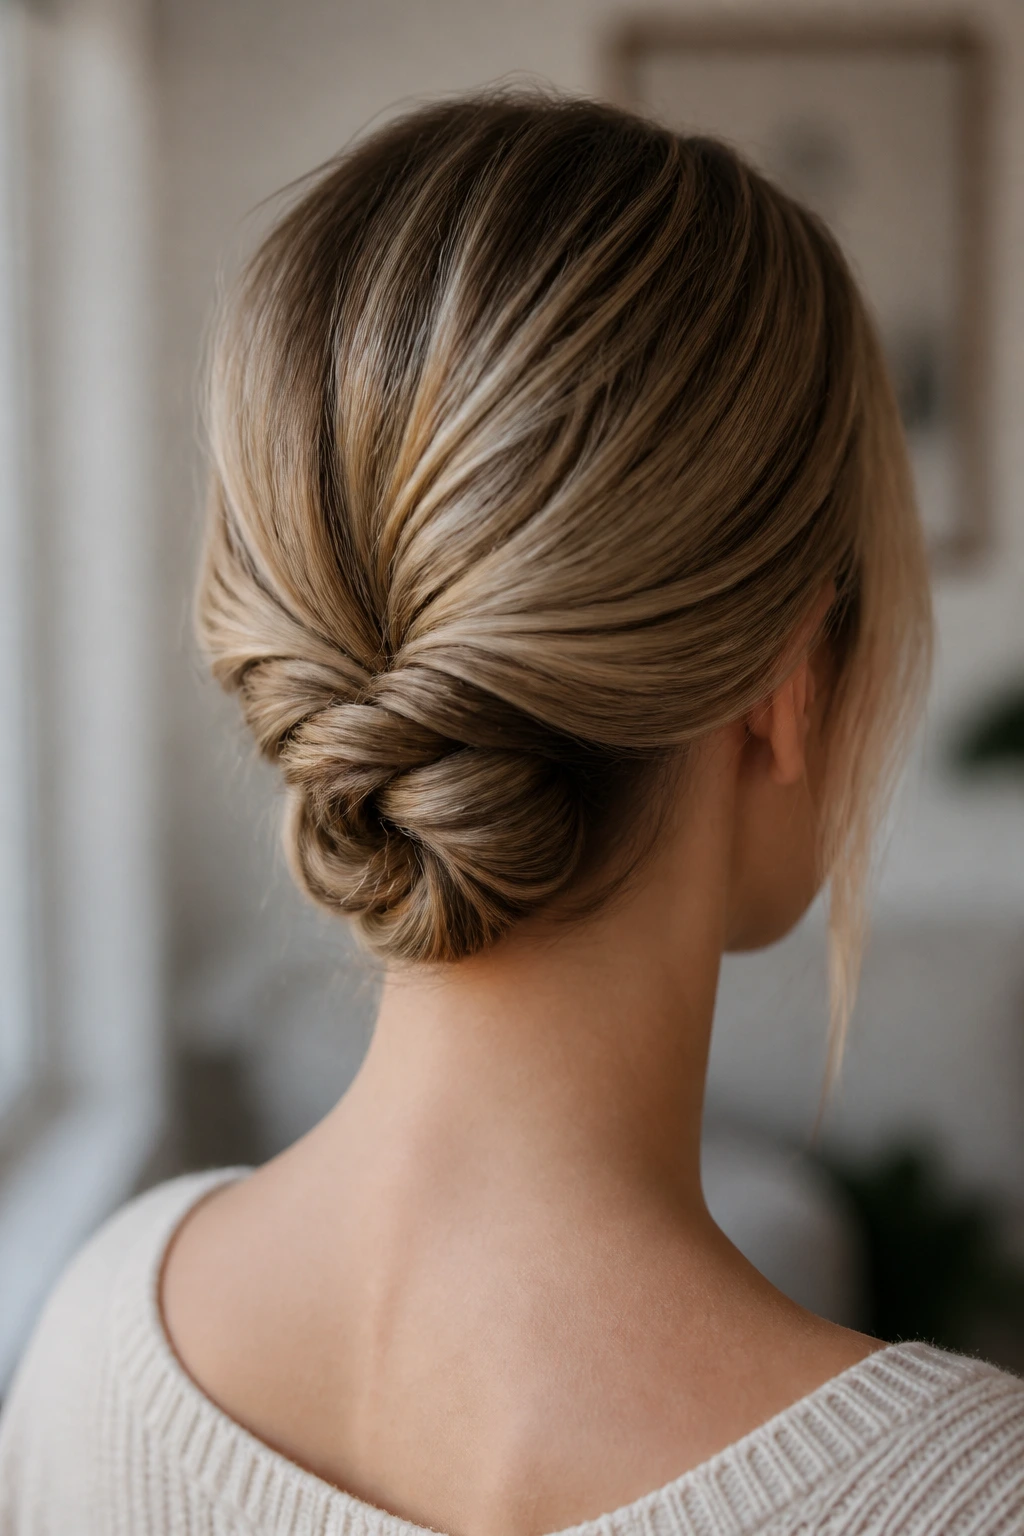
A chignon sounds fancy, but the thin-hair version is really just a tucked twist with a bit of restraint. That’s a compliment. It gives you polish without asking for a huge amount of hair.
Why It Works: The twist creates the illusion of thickness because the eye reads the folded shape, not each individual strand. Keeping it low and slightly off-center makes the bun look intentional instead of stingy.
Key Products:
- 1 light mist of texture spray
- 1 clear elastic
- 5 to 8 bobby pins
- 1 small finishing spray
- Optional: 1 hair net in a matching shade for extra hold
Quick Steps:
- Prep dry hair with texture spray, focusing on mids and ends.
- Make a low ponytail, split it in two, and twist both sections together until they look rope-like.
- Wrap the twist into a small circle at the nape, then pin across the base and through the middle of the fold.
Equipment for This Style:
- Tail comb
- 8 to 10 bobby pins
- Small mirror
- Optional hair net
How to Wear It: This one suits dressier necklines, especially anything with a slit or a sharp shoulder line. It gives structure without shouting for attention.
Pro Tips:
- Twist the sections loosely first. A tight twist can make thin hair look wiry.
- Use matching pins if your hair is dark or very light. Visible pins break the illusion.
- If the bun feels too small, loosen the outer edge with a fingertip instead of adding more hair.
Variations:
- Side-Swept Chignon: Move the part deep to one side and tuck the bun slightly behind the ear.
- Braided Chignon: Braid the ponytail before wrapping it for more grip.
Common Mistakes to Avoid:
- Don’t wrap the bun too many times. Thin hair runs out fast, and the ends start poking out.
- Don’t rely on one pin at the center. The shape needs several anchors around the perimeter.
3. The Braided Halo That Buys You Width
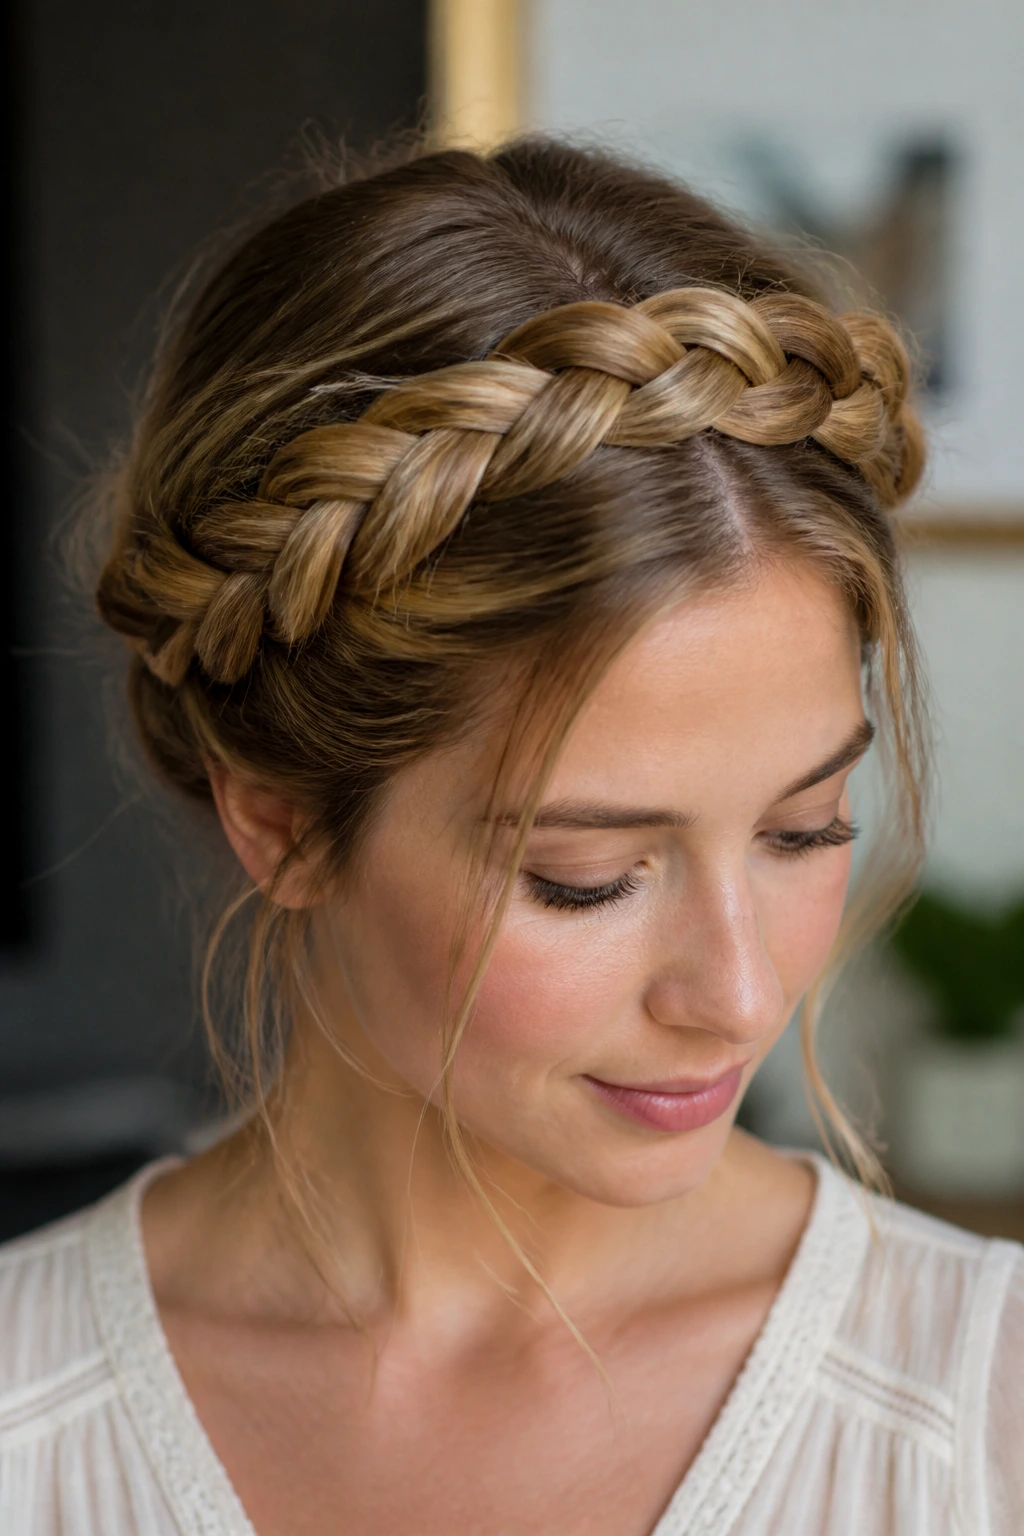
A halo braid is one of the few styles that actually makes thin hair look fuller because the braid sits where the eye naturally travels — around the head. It’s not subtle, and that’s the point.
Why It Works: Braiding compresses the hair into a thicker-looking rope. When you wrap that rope around the crown, it creates a band of texture that reads as density, even if the ponytail underneath is small.
Key Products:
- 1 small clear elastic
- 2 to 4 mini elastics, if you split the braid
- 6 to 10 bobby pins
- 1 handful of dry shampoo
- 1 flexible-hold hairspray
Quick Steps:
- Start with second-day hair or spray the roots with dry shampoo until they feel less slippery.
- Create two side braids or one Dutch braid that runs around the hairline.
- Wrap the braid across the crown and pin it flat, tucking the tail under the braid line.
Equipment for This Style:
- Tail comb
- Rat-tail comb for clean sectioning
- Bobby pins
- Small brush for smoothing
How to Wear It: This works beautifully with simple necklines and open collars because the braid does the talking. Keep jewelry small; the head shape already has enough detail.
Pro Tips:
- Pancake the braid gently by pulling the outer loops apart. Not too much. Just enough to make the braid look broader.
- Start the braid slightly behind the hairline so it does not dig into your face.
- If your ends are wispy, hide them under the back of the braid instead of trying to smooth them in.
Variations:
- Crown-Only Halo: Braid only from temple to temple and leave the back loose.
- Half-Halo: Run the braid across the front hairline and pin it behind one ear.
Common Mistakes to Avoid:
- Don’t braid on freshly washed hair unless you want a slippery mess. It won’t hold the shape.
- Don’t yank the braid apart after pinning. The style loosens from the inside first.
4. The Rope-Braid Bun That Pretends to Be Bigger
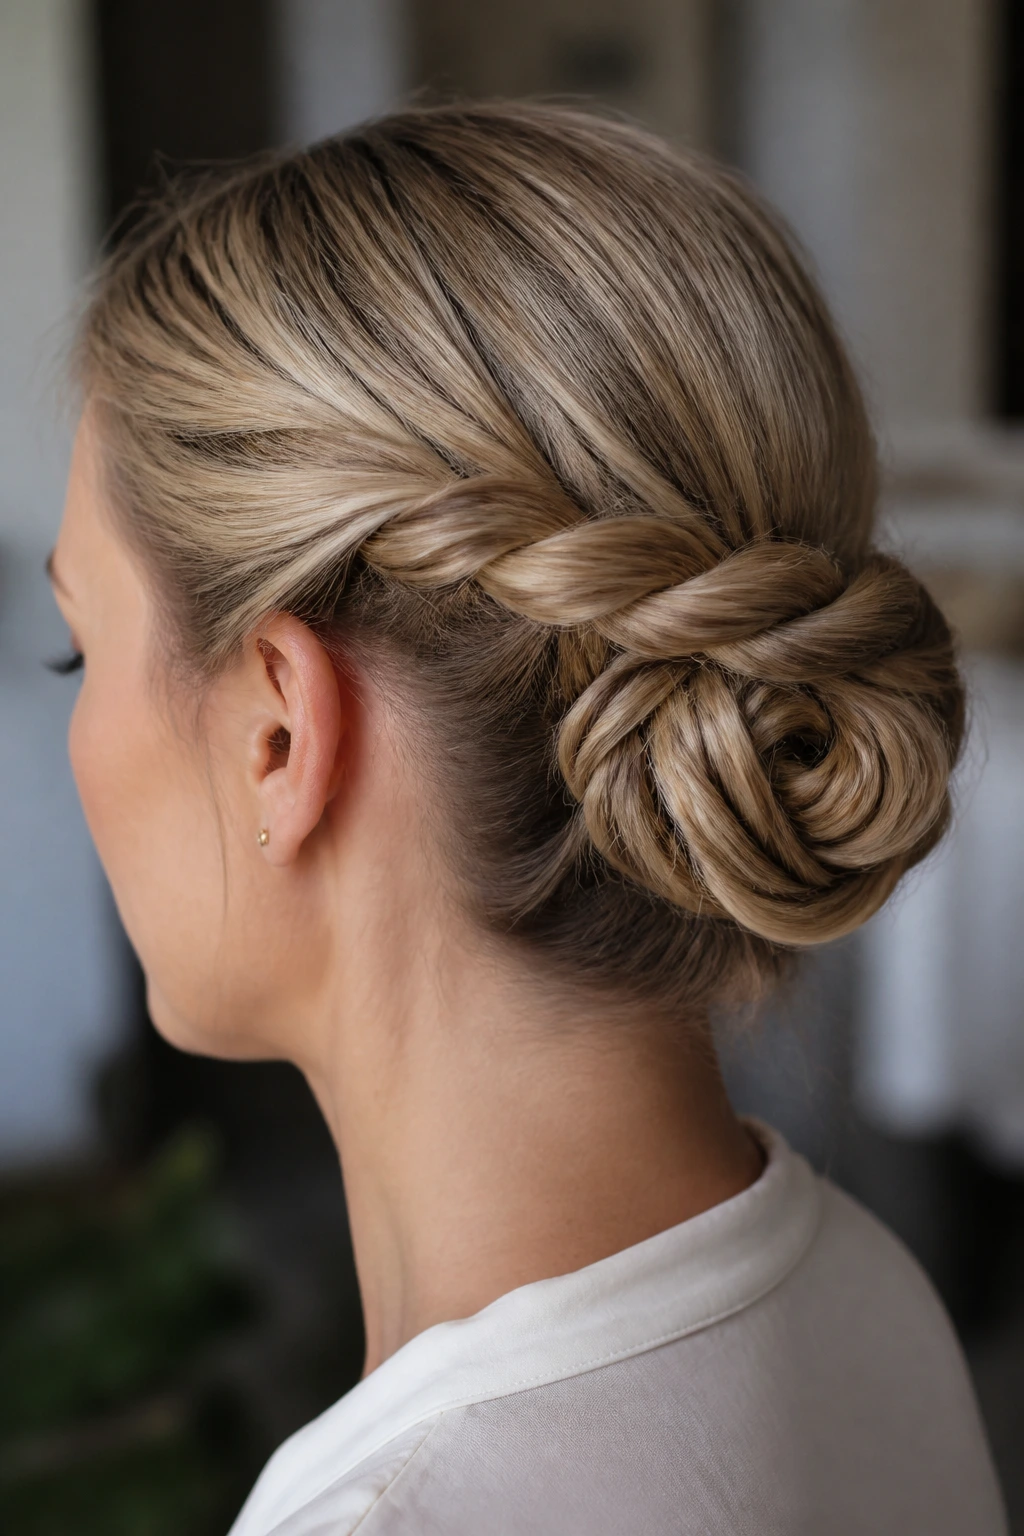
Rope braids are underrated. They’re quick, they hold texture well, and on thin hair they look slightly denser than a regular three-strand braid because the twist reads as one thick line.
Why It Works: Two twisted sections wrapped together create tension without crushing the hair shaft. That extra tension gives the bun shape, and the twist pattern makes the final coil look fuller than it really is.
Key Products:
- 1 clear elastic
- 4 to 6 bobby pins
- 1 pump of volumizing mousse
- 1 mist of shine spray, if you want a polished finish
- 1 teaspoon dry shampoo at the roots
Quick Steps:
- Work mousse through damp hair, then blow-dry it with the roots lifted.
- Split hair into two sections, twist each one clockwise, then twist them around each other counterclockwise.
- Coil the rope braid into a bun and pin through the center and outer edge.
Equipment for This Style:
- Blow dryer
- Round brush or vent brush
- Bobby pins
- Elastic
How to Wear It: This looks best with sharper outfits — blazers, square necks, crisp shirts. The braid gives enough structure to keep the rest of the look from feeling flat.
Pro Tips:
- Twist each section in the same direction before combining them. That keeps the rope braid tight.
- If the bun looks too thin, tug the outer edge once, then stop. Thin hair gets frayed fast.
- Use mousse, not cream. Cream makes the braid slip apart.
Variations:
- Messy Rope Bun: Pull out a few ends after pinning for a softer finish.
- Low Rope Crown: Cross the rope braid over the nape instead of centering it.
Common Mistakes to Avoid:
- Don’t over-twist the sections. They’ll spring loose later.
- Don’t use big chunky elastics. They create a lump you can see through fine hair.
5. The Topsy-Tail Pony Bun
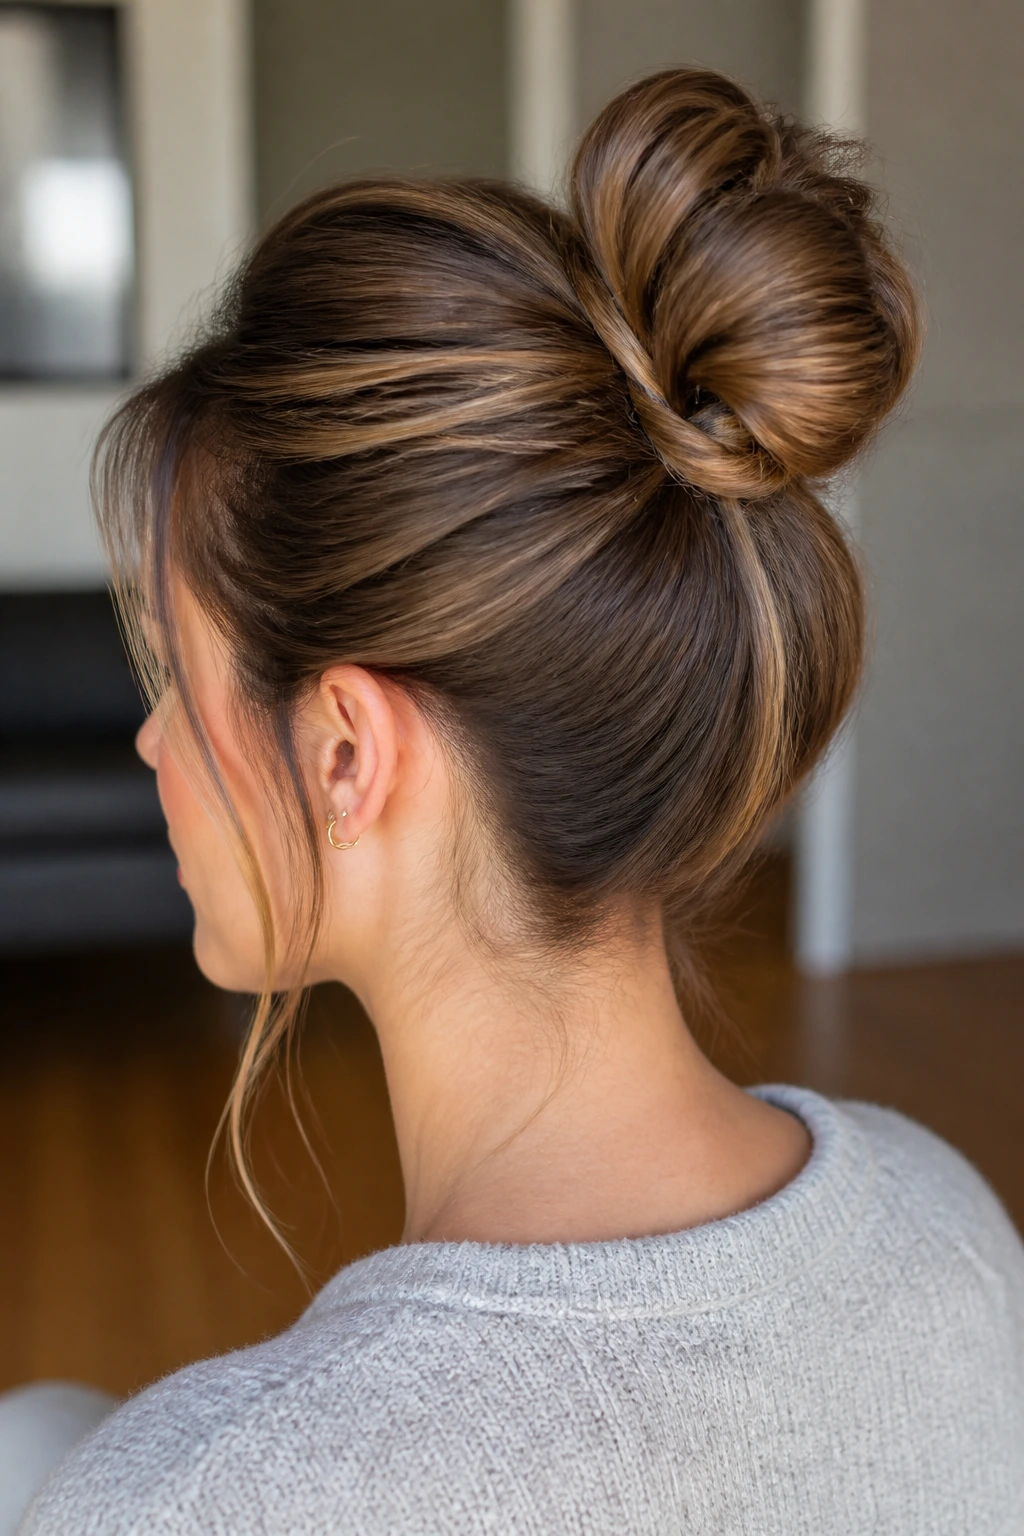
If you want a style that feels a little clever without looking complicated, this is the one. A topsy-tail flip gives the illusion of extra structure, which thin hair loves.
Why It Works: The flipped ponytail creates a built-in pocket of volume just above the elastic. That tiny lift helps the bun look less flat and gives the back of the head a more filled-out shape.
Key Products:
- 1 clear elastic
- 4 bobby pins
- 1 texturizing spray
- 1 comb with a pointed tail
- 1 light hairspray mist
Quick Steps:
- Make a low ponytail and leave it slightly loose at the scalp.
- Split the hair above the elastic, flip the ponytail through the opening, and pull gently.
- Coil the flipped tail into a bun and pin it close to the base.
Equipment for This Style:
- Tail comb
- Bobby pins
- Elastic
- Hand mirror
How to Wear It: It works well with casual daytime clothes or anything that needs a neat but not severe finish. The flip makes the style look a little more interesting than a plain bun.
Pro Tips:
- Keep the opening above the elastic neat; messy parting can make the flip look accidental.
- Pull the flipped section only halfway tight. That’s where the fullness comes from.
- If the ends stick out, tuck them under the coil rather than trying to smooth them flat.
Variations:
- Double Flip Bun: Do two topsy-tail flips before you coil the ends.
- Low Side Flip: Move the ponytail behind one ear for a softer, asymmetrical shape.
Common Mistakes to Avoid:
- Don’t pull the flip too hard. It can flatten the crown instead of lifting it.
- Don’t place the elastic too high. The style loses its quiet, tucked shape.
6. The Bubble Pony That Ends in a Coil
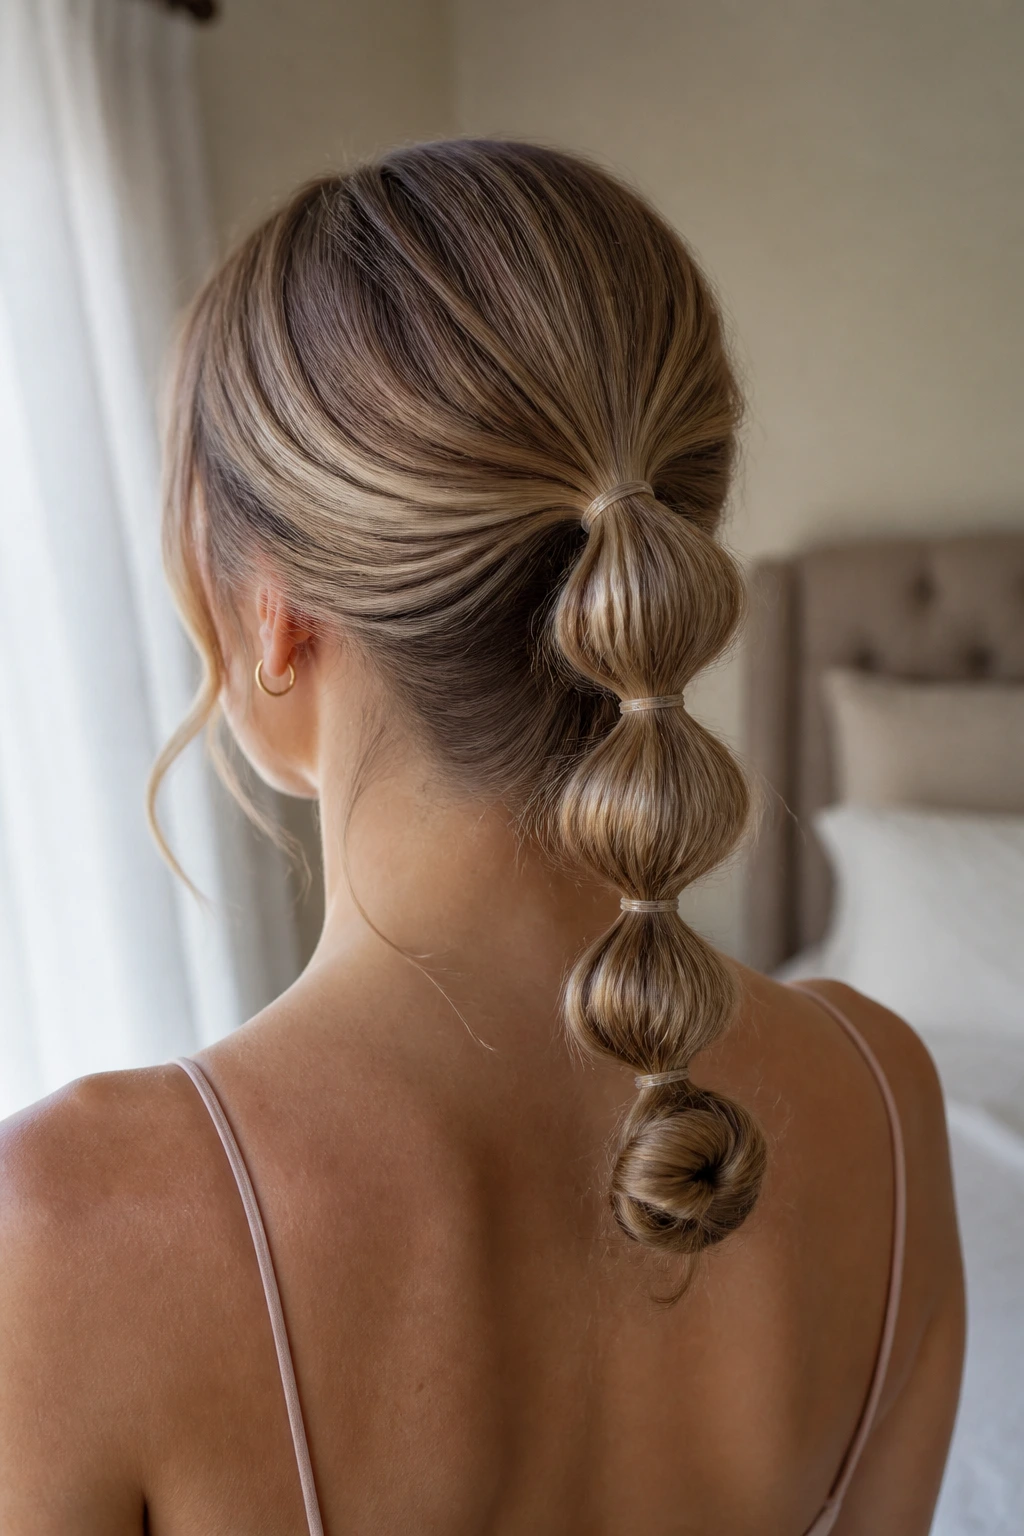
Bubble ponytails are useful because they let thin hair fake density in sections. Instead of showing every strand, they create little rounded pockets that read as volume.
Why It Works: Each bubble interrupts the eye, so the ponytail looks thicker from top to bottom. When you coil the ends into a small bun, the style finishes cleanly instead of hanging limp.
Key Products:
- 3 to 5 small elastics
- 2 to 4 bobby pins
- 1 texturizing spray
- 1 light shine serum for the ends
- Optional: 1 teasing comb for the crown
Quick Steps:
- Tie a low or mid ponytail, then add elastics every 1½ to 2 inches down the length.
- Gently tug each section between the elastics until a round bubble forms.
- Wrap the final end into a coil and pin it under the last bubble.
Equipment for This Style:
- Small elastics
- Bobby pins
- Tail comb
- Mirror for checking the back
How to Wear It: This one works with casual outfits, sporty looks, or anything with a clean neckline. The bubble line adds enough interest that you don’t need much else.
Pro Tips:
- Use elastics in a color close to your hair so they disappear.
- Keep the bubbles uneven and soft. Perfect symmetry can make thin hair look overly staged.
- Spray the tail before forming bubbles if your ends are slippery.
Variations:
- High Bubble Coil: Move the ponytail higher and leave the coil exposed.
- Soft Party Pony: Add a ribbon or velvet tie around the top elastic.
Common Mistakes to Avoid:
- Don’t make the bubbles too far apart. Thin hair needs tighter spacing to keep the illusion of fullness.
- Don’t over-pull the sections. Once they distort, the pony looks patchy.
7. The Half-Up Knot That Uses Less Hair on Purpose
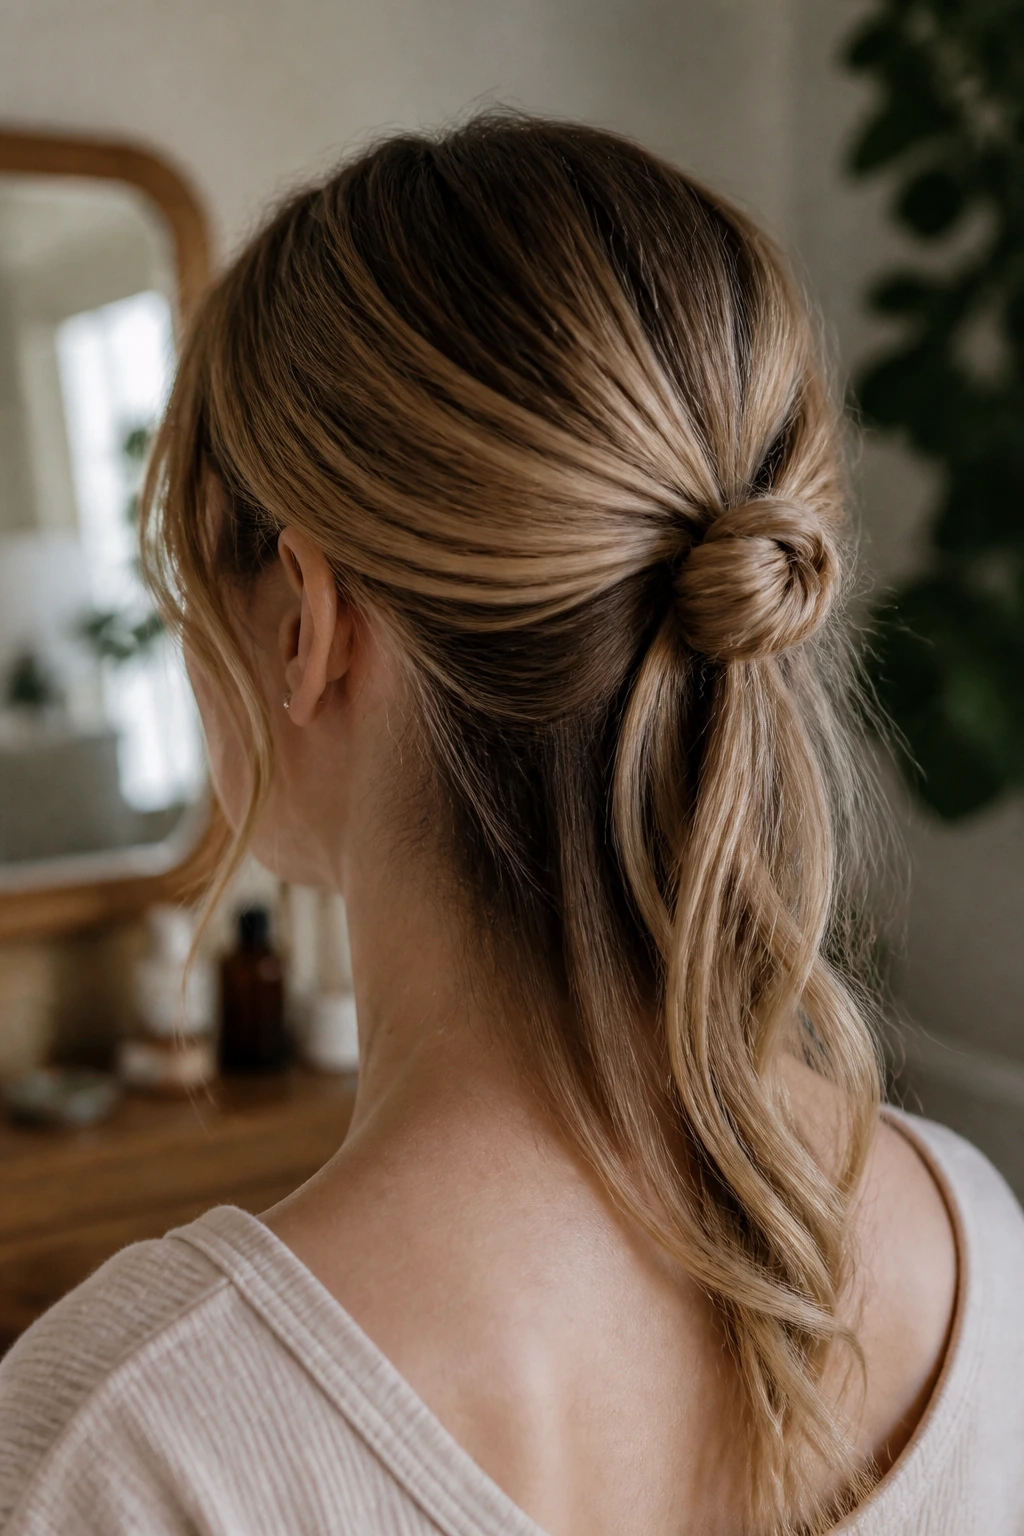
Half-up styles are a gift for thin hair because they keep the lower length loose while letting the top section do the work. A small knot at the back is enough to look styled without draining volume from the ends.
Why It Works: You’re only collecting the crown and temple hair, which means the style stays light and avoids the heavy, pulled-down effect that full updos can create. The loose bottom layer adds visual thickness around the shoulders.
Key Products:
- 1 mini clear elastic
- 2 to 4 bobby pins
- 1 root-lifting spray
- 1 texturizing mist
- 1 smoothing cream, just a dab for the top
Quick Steps:
- Section off the top third of the hair from temple to temple.
- Tie it into a tiny ponytail, twist it once, and fold it into a compact knot.
- Pin the knot flat, then fluff the lower hair so it doesn’t cling to the scalp.
Equipment for This Style:
- Tail comb
- Bobby pins
- Small elastic
- Blow dryer, if you want root lift
How to Wear It: This is one of the easiest styles to pair with daywear because it keeps the face open but leaves enough hair down to feel soft. It also works with earrings that need space to show.
Pro Tips:
- Tease the crown lightly before gathering the top section.
- Keep the half-up piece small. A giant half-up knot can overwhelm thin hair.
- Curl the bottom lengths with a 1-inch iron for extra body.
Variations:
- Half-Up Bow Knot: Split the knot into two loops for a bow-like shape.
- Half-Up Twist: Twist the top section instead of knotting it for a smoother finish.
Common Mistakes to Avoid:
- Don’t pull too much hair into the top section. The lower half will go flat.
- Don’t skip root lift. Half-up styles need it more than full ones do.
8. The French Twist With a Little Backbone
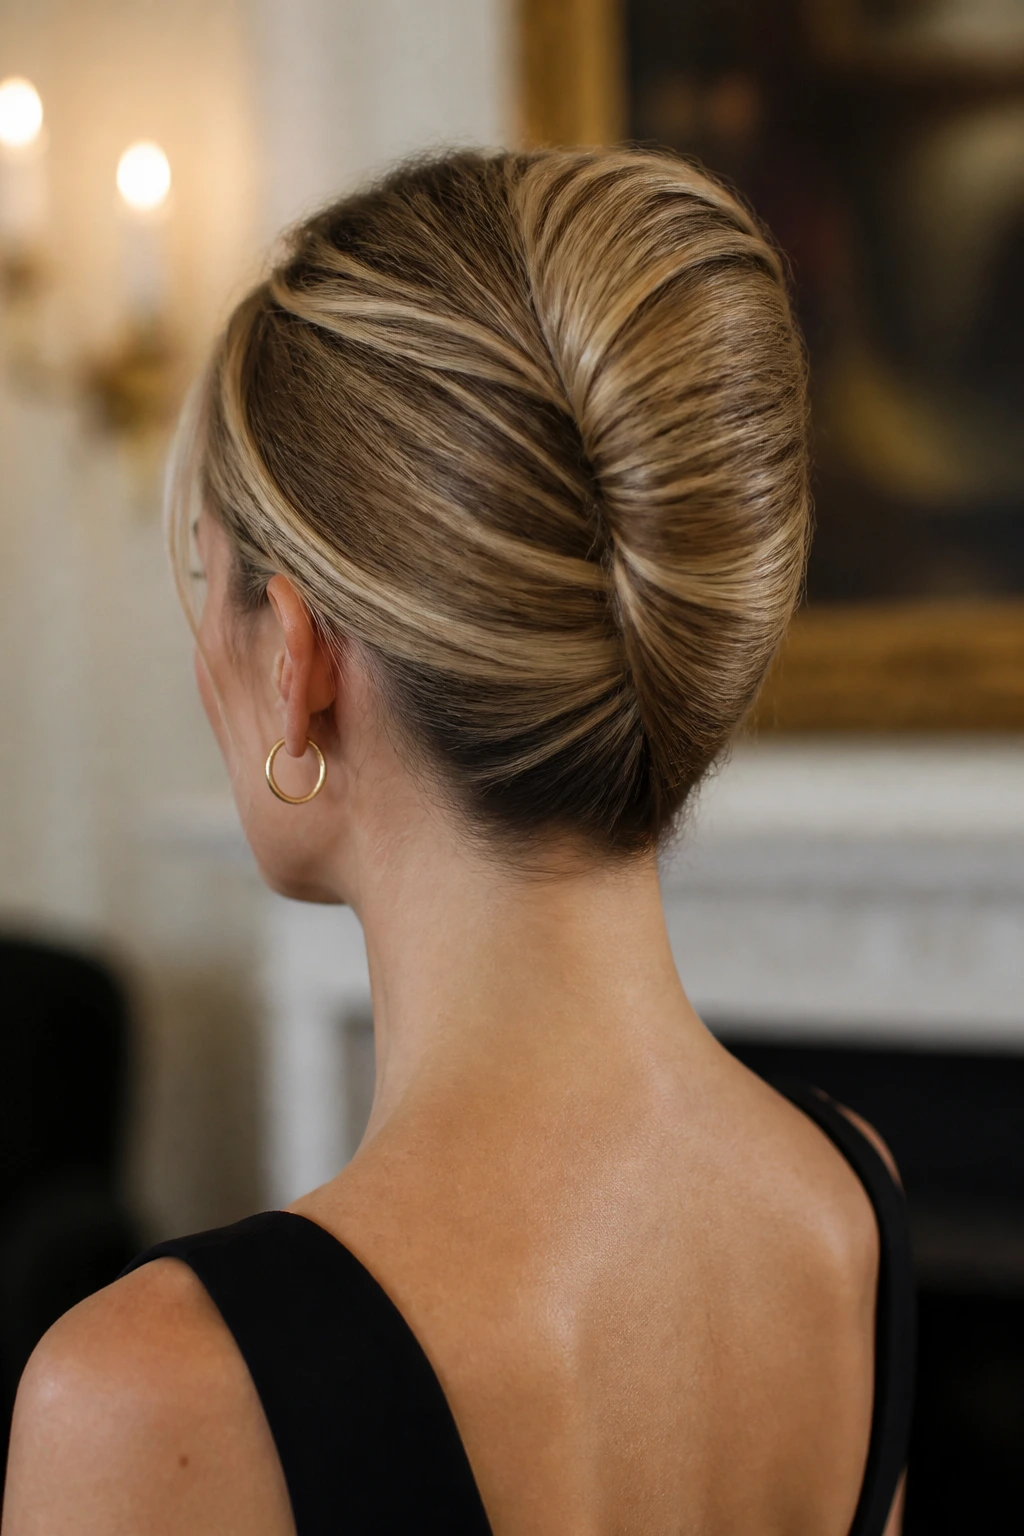
A French twist on thin hair needs support, but when it’s done right, it looks crisp and long-necked in the best way. The trick is not to build a tower. Keep it slim.
Why It Works: The vertical roll creates a clean line that makes the hair look polished, while the tucked ends hide the fact that there isn’t a ton of bulk. Thin hair is often better suited to a narrow French twist than a wide one.
Key Products:
- 5 to 8 bobby pins
- 1 clear elastic
- 1 strong flexible-hold spray
- 1 teasing brush
- 1 light mousse or root spray
Quick Steps:
- Backcomb the crown lightly and smooth the top layer over it.
- Gather hair at the back, twist it upward, and fold the ends inward.
- Pin vertically along the seam, then cross-pin the top for extra hold.
Equipment for This Style:
- Teasing brush
- Tail comb
- Bobby pins
- Hairspray
How to Wear It: This belongs at dinners, formal events, or any outfit with a high neckline that needs a little lift at the nape. It also looks good with red lipstick, which is maybe too simple a thought, but it’s true.
Pro Tips:
- Use a small bump at the crown, not a giant tease.
- Pin the twist into the hair that’s already folded, not just the surface.
- If your hair is too slippery, rough-dry it with mousse first.
Variations:
- Soft French Twist: Leave a few loose pieces around the face.
- Side French Twist: Roll the twist off-center for a less severe shape.
Common Mistakes to Avoid:
- Don’t make the twist too wide. It starts to split open on thin hair.
- Don’t smooth every flyaway away. A little texture helps the style stay put.
9. The Side-Bias Low Bun

A side bun changes the whole mood of thin hair. By shifting the weight off the centerline, you get a softer shape that often looks fuller than a bun parked directly in the middle.
Why It Works: Off-center styling creates visual asymmetry, and asymmetry is friendly to thin hair because it distracts from sparse spots. The bun can be smaller than usual and still look deliberate.
Key Products:
- 1 clear elastic
- 4 to 6 bobby pins
- 1 texturizing spray
- 1 light hold hairspray
- Optional: 1 decorative pin
Quick Steps:
- Create a deep side part and sweep the hair toward the opposite nape.
- Tie a low side ponytail, twist it into a bun, and secure it just behind one ear.
- Pull a small section loose near the face if you want softness, then pin the rest flat.
Equipment for This Style:
- Tail comb
- Bobby pins
- Elastic
- Small brush
How to Wear It: This looks especially good with one-shoulder tops, wrap dresses, or earrings that need room on one side. It has a little movement, which helps thin hair avoid looking too rigid.
Pro Tips:
- Put the bun where the head naturally curves inward. It’ll sit better there.
- Keep the part clean. A messy part steals the effect.
- Use a decorative pin only after the structure is solid.
Variations:
- Low Side Chignon: Smooth the bun tighter for a more formal finish.
- Loose Side Roll: Twist the ponytail and pin it into a softer coil.
Common Mistakes to Avoid:
- Don’t place the bun too low behind the ear. It can drag the whole style down.
- Don’t skip the side part; that’s the point of the look.
10. The Dutch Crown Into a Tucked Bun
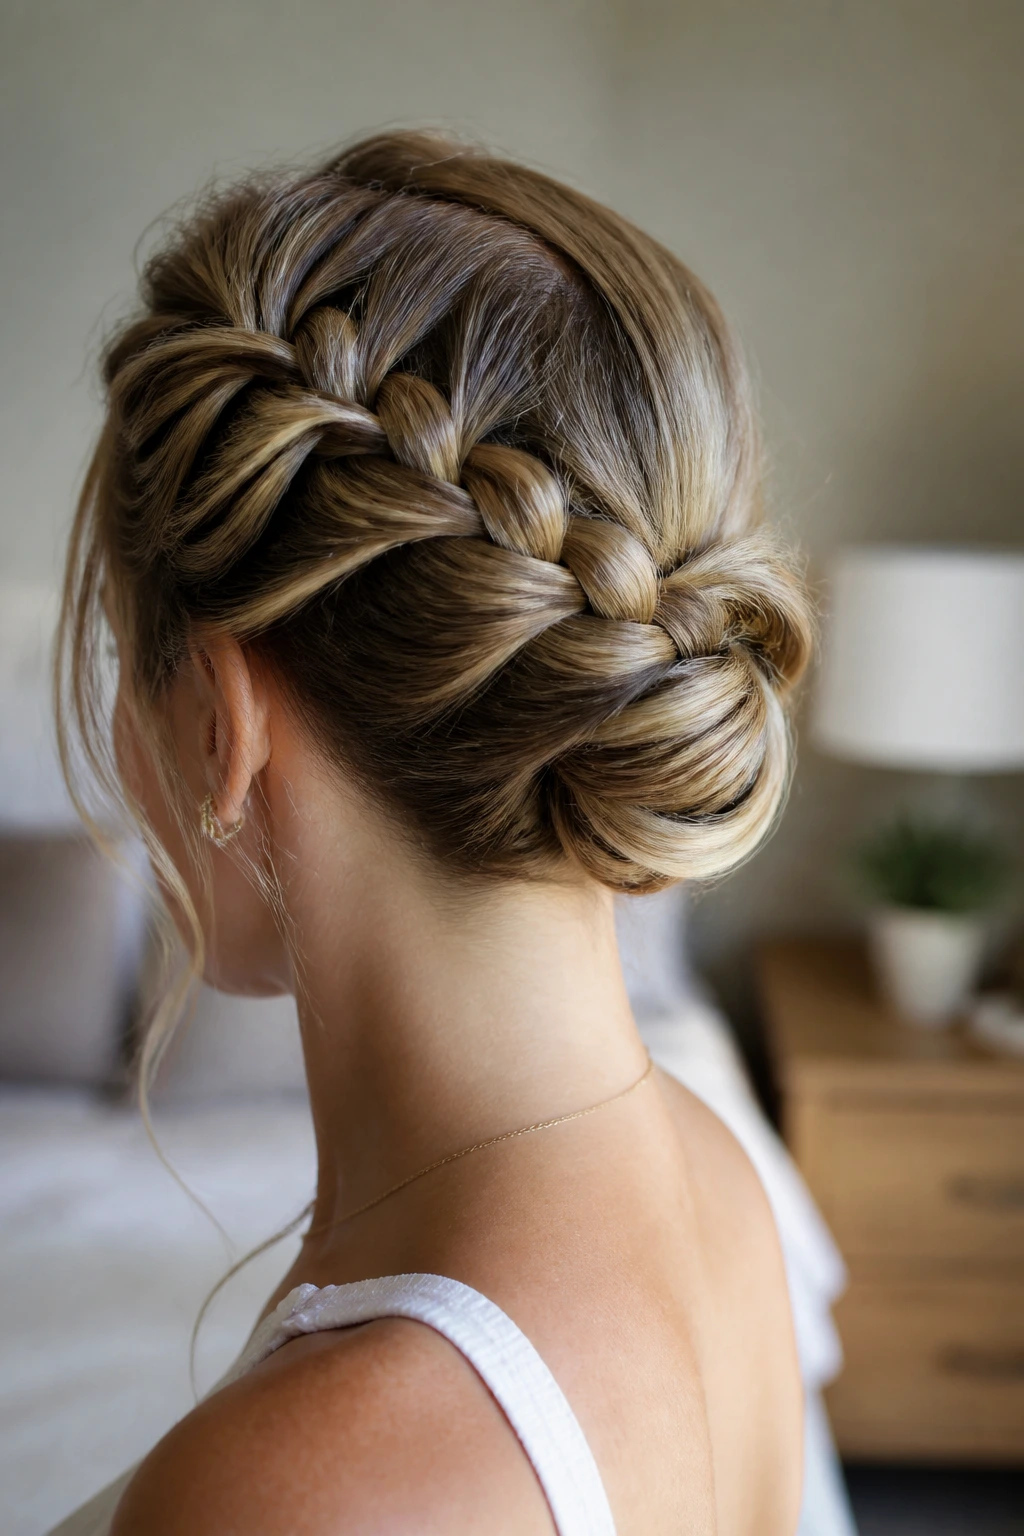
Dutch braids are nice on thin hair because they sit on top of the head instead of disappearing into it. That raised braid line gives the illusion of thickness right where you need it.
Why It Works: The braid creates a ridge around the crown, and that ridge adds height and structure without demanding a lot of hair. When the braid ends in a tucked bun, the style stays compact.
Key Products:
- 2 small elastics
- 6 to 10 bobby pins
- 1 texturizing powder
- 1 flexible hairspray
- 1 tail comb
Quick Steps:
- Part the hair and begin a Dutch braid from one temple, working around the hairline toward the back.
- Continue the braid to the nape, secure it, then gather the remaining hair into a small bun.
- Tuck the braid tail under the bun and pin the seam closed.
Equipment for This Style:
- Rat-tail comb
- Bobby pins
- Small elastics
- Mirror
How to Wear It: This has enough detail for a weekend event but still looks tidy for day-to-day wear. It’s especially good when you want your hair to feel styled from every angle.
Pro Tips:
- Keep the braid snug against the scalp so it forms that visible ridge.
- Pancake the braid after it’s secured, not before, to avoid losing grip.
- If the bun looks tiny, wrap the braid tail around it once before pinning.
Variations:
- Double Dutch Crown: Add a second braid from the other side for more width.
- Braided Nape Bun: Stop the braid lower and let the bun sit right at the collar line.
Common Mistakes to Avoid:
- Don’t pull the braid too loose at the start. Thin hair needs the braid line to stay clear.
- Don’t make the bun huge if the braid is small. The ratio will look off.
11. The Folded Tuck-Under Roll
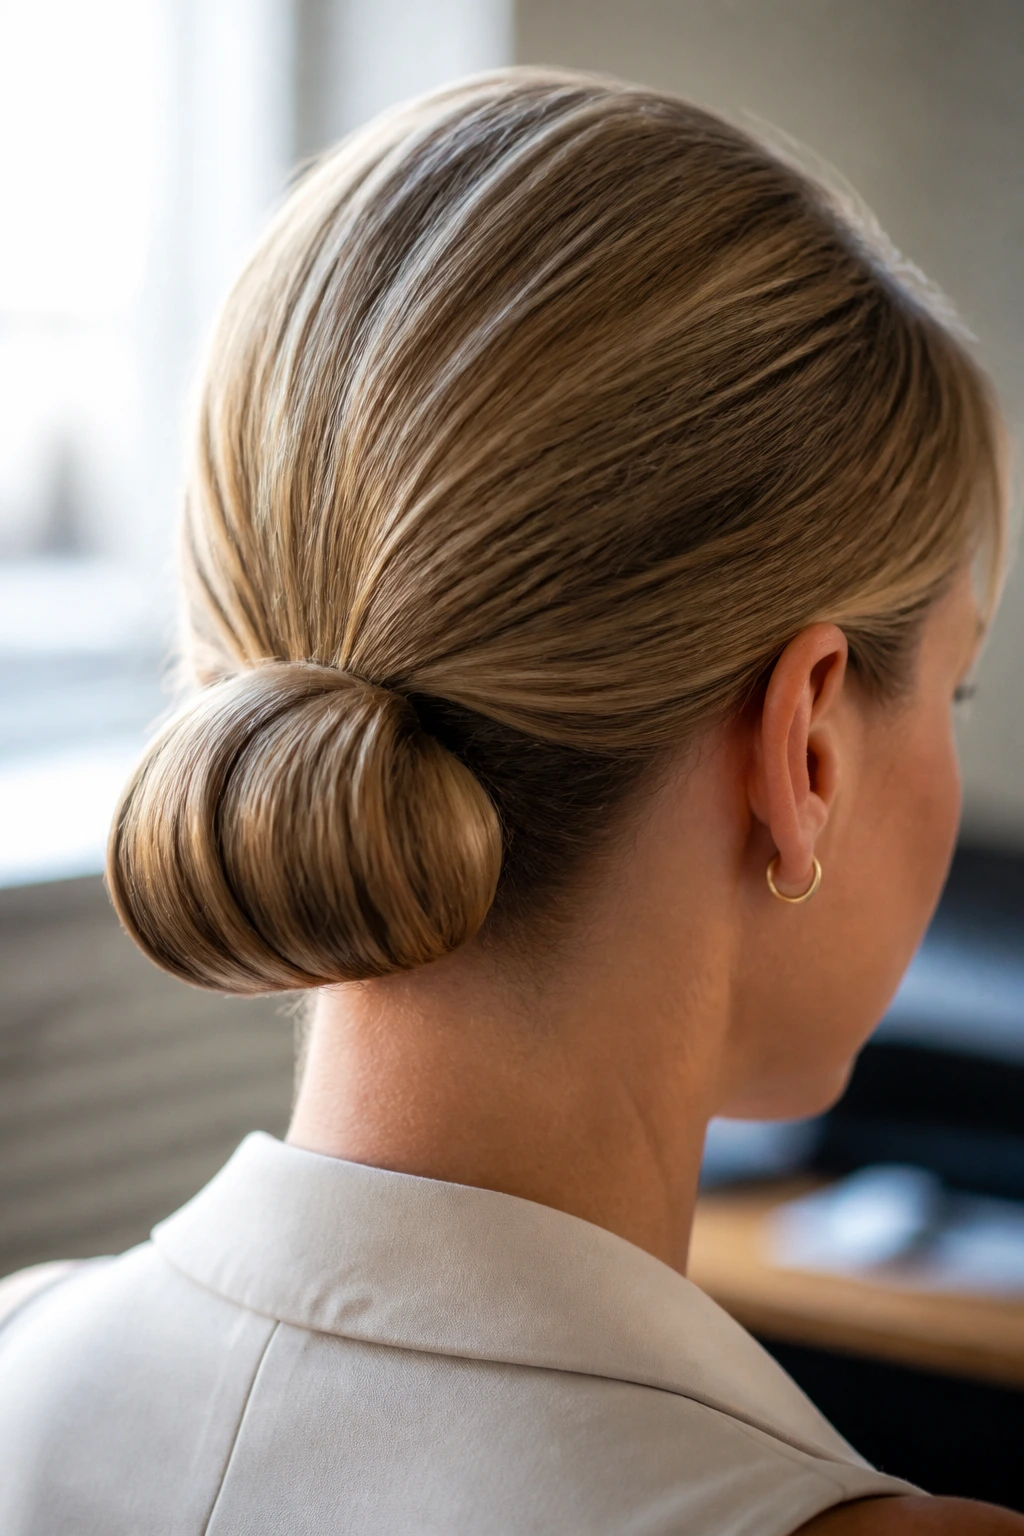
This one feels old-school in the best possible way. It’s neat, fast, and friendly to hair that refuses to stay voluminous for long.
Why It Works: Folding the hair under itself creates a clean loop, so the ends stay hidden and the style looks fuller at the curve than it would in a straight ponytail. Thin hair does well with shapes that curve back on themselves.
Key Products:
- 1 clear elastic
- 4 bobby pins
- 1 smoothing cream, tiny amount
- 1 dry-texture spray
- Optional: 1 decorative comb
Quick Steps:
- Make a low ponytail and loosen the hair just above the elastic.
- Split the space above the elastic, flip the tail through, and pull it downward.
- Roll the tail under once, tuck the ends inside the fold, and pin.
Equipment for This Style:
- Tail comb
- Bobby pins
- Elastic
- Small mirror
How to Wear It: This style is easy to wear with collared shirts and soft knit tops because it sits flat against the head. It doesn’t fight scarves or jackets either, which matters more than people admit.
Pro Tips:
- Leave a bit of slack before the flip. A tight base flattens the crown.
- Use a tiny bit of cream only on the surface. Too much and the roll slides.
- Pin through the folded layers, not just the outer shell.
Variations:
- Low Flip Roll: Keep the fold very small for a minimalist finish.
- Side Flip Roll: Move the roll to one side for a softer shape.
Common Mistakes to Avoid:
- Don’t over-tighten the base. The crown will go flat.
- Don’t leave the ends exposed. Thin hair looks thinner when the tips stick out.
12. The Textured Bun With Face-Framing Pieces
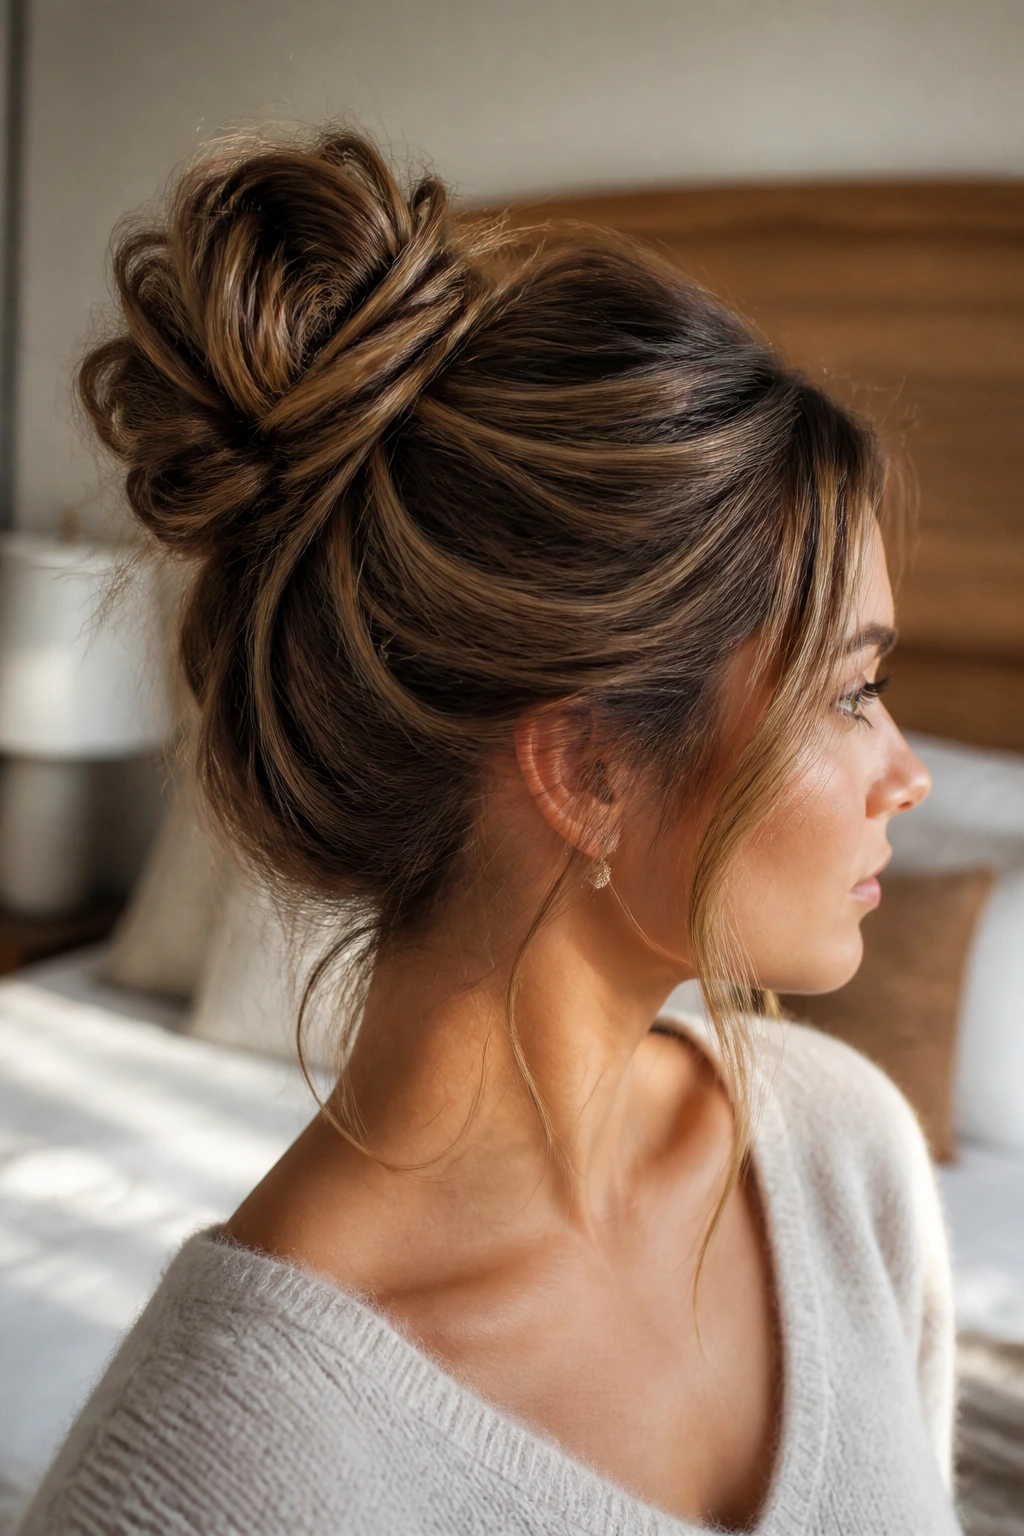
Messy works when the mess is controlled. This version uses a little bend and a few loose tendrils to make thin hair look less severe, more lived-in.
Why It Works: Texture tricks the eye into reading more hair than is actually there. The loosened face pieces also break up the outline of the head, which helps the bun feel larger and less exact.
Key Products:
- 1 texturizing spray
- 1 clear elastic
- 6 bobby pins
- 1 curling iron, 1 inch or smaller
- 1 light hairspray
Quick Steps:
- Curl the mids and ends with a 1-inch iron to create a soft bend, not a full curl.
- Gather the hair into a low bun, leaving a few face-framing pieces out.
- Pin the bun loosely, then roughen the edges with your fingertips.
Equipment for This Style:
- Curling iron
- Bobby pins
- Elastic
- Wide-tooth comb
How to Wear It: This one likes soft fabrics, open necklines, and anything a little romantic. It’s the style you pick when you want “done” without looking pinned to death.
Pro Tips:
- Curl away from the face at the front pieces.
- Do not over-ruffle the bun. Thin hair frays quickly.
- Spray the ends lightly after curling so they hold their bend.
Variations:
- Undone Wedding Bun: Add a small braid before pinning.
- Soft Casual Bun: Skip the curling iron and use dry shampoo for texture instead.
Common Mistakes to Avoid:
- Don’t make the face pieces too thick. They can swallow the style.
- Don’t use heavy cream to create texture. It flattens thin hair fast.
13. The Braided Ponytail Wrap
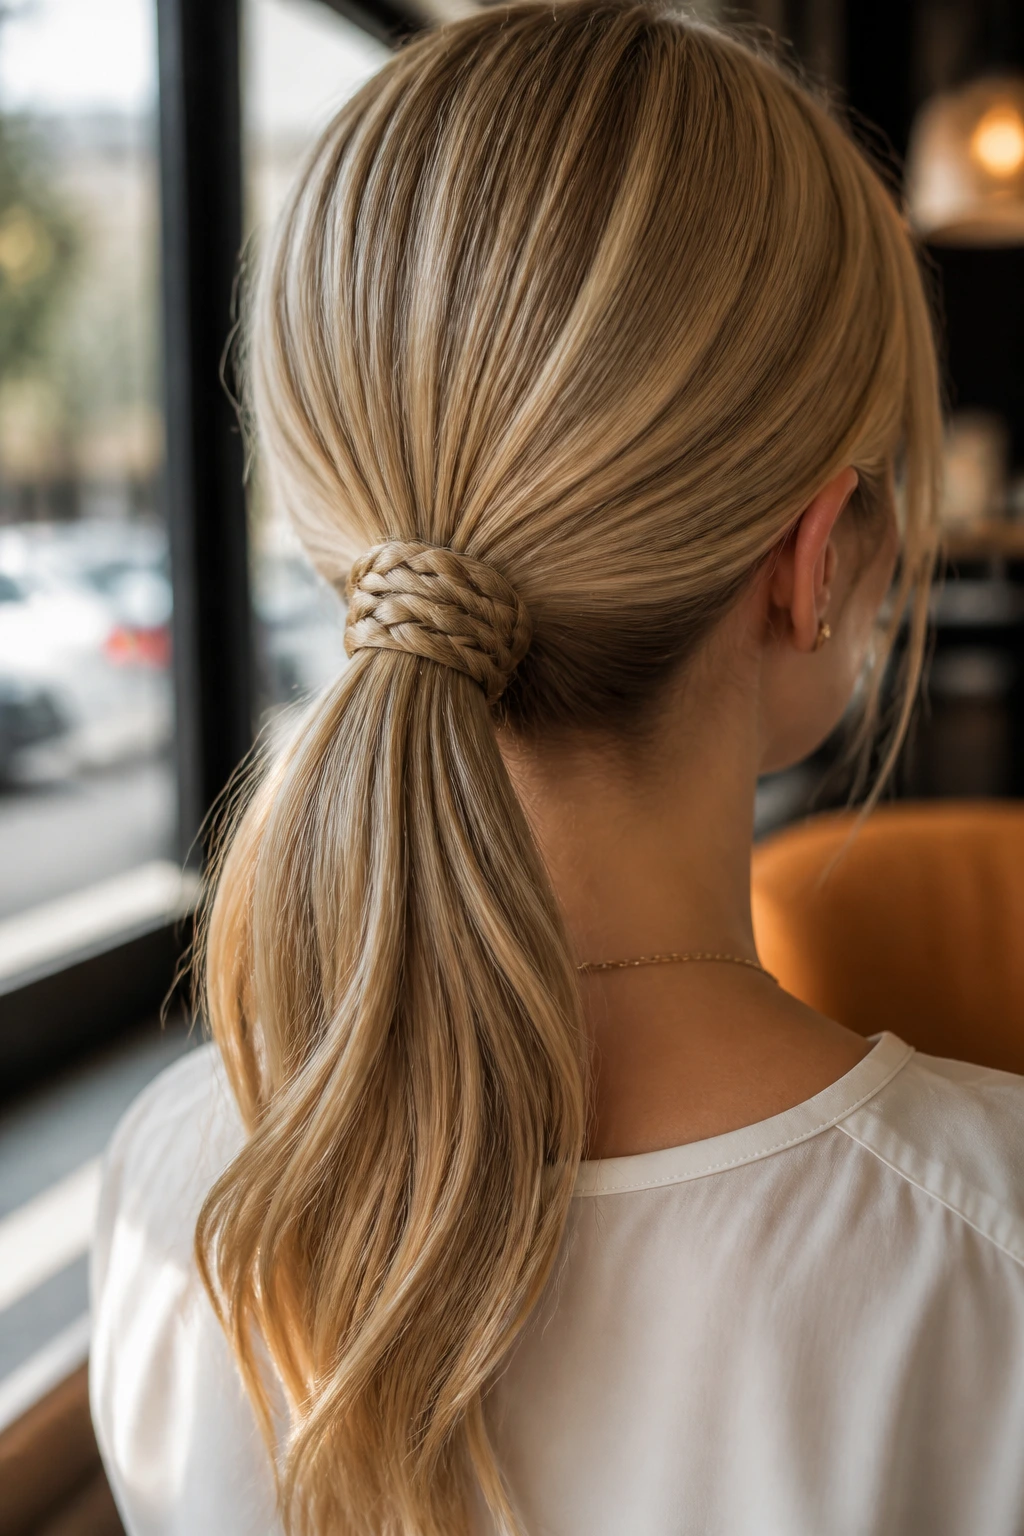
A braided wrap gives a ponytail a better finish and sneaks in the illusion of extra hair around the base. That little detail matters more than people think.
Why It Works: The braid wraps around the elastic like a belt, which hides the tie and adds a second layer of texture. On thin hair, that layered look is often what makes a ponytail read as intentional.
Key Products:
- 1 clear elastic
- 4 bobby pins
- 1 small braid section from the ponytail
- 1 texturizing spray
- 1 shine mist for the wrap
Quick Steps:
- Gather hair into a low or mid ponytail and secure it.
- Pull out a small strand from underneath, braid it, and wrap it around the elastic.
- Pin the braid tail underneath the ponytail base.
Equipment for This Style:
- Tail comb
- Bobby pins
- Small elastic
- Brush
How to Wear It: This is a good everyday style because it looks neat from the front and finished from the back. It works with casual clothes and office clothes alike.
Pro Tips:
- Braid a strand that’s thicker than you think you need.
- Keep the wrap snug against the elastic so it doesn’t fan out.
- If your ponytail is too thin, tease the underside a little before wrapping.
Variations:
- French Braid Wrap: Use a tiny French braid instead of a simple braid.
- Ribbon Wrap: Tie a slim ribbon around the base after the braid is pinned.
Common Mistakes to Avoid:
- Don’t braid a strand that’s too short. The wrap will unravel.
- Don’t pin the wrap too high on the ponytail; it should sit right at the base.
14. The Claw-Clip Twist That Saves the Day
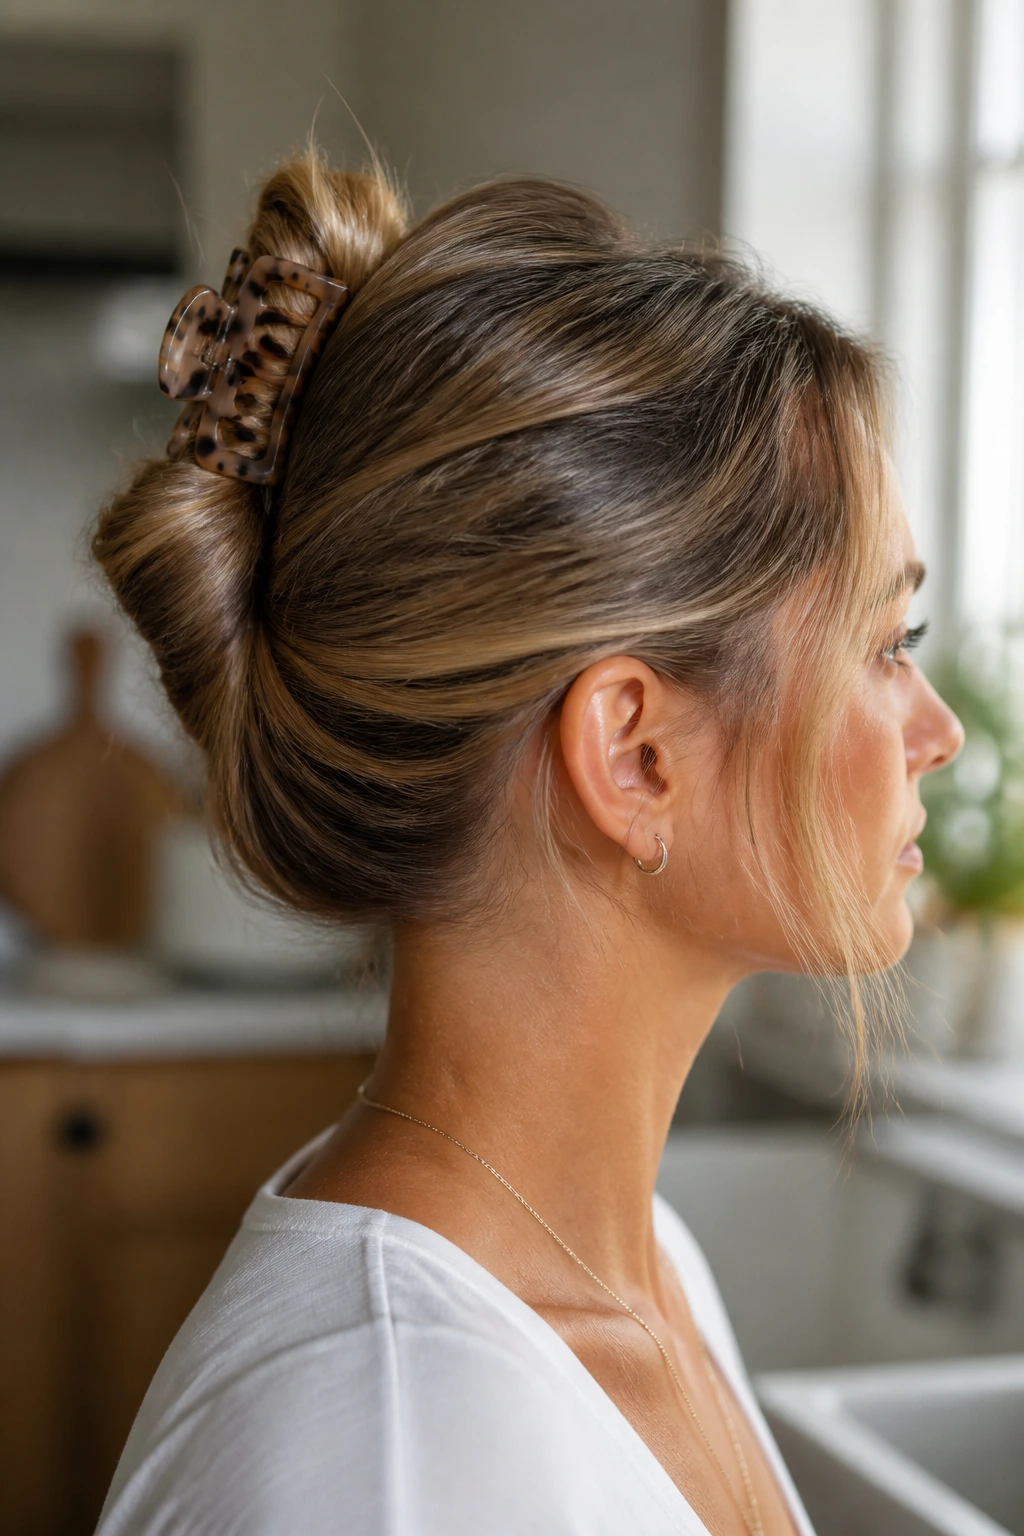
This is the fastest style in the group, and I say that without apology. A good claw clip can hold thin hair surprisingly well if you prep the twist correctly.
Why It Works: The clip grabs the folded length near the scalp, where the hair is densest. Because thin hair isn’t fighting a lot of weight, the twist can stay compact and secure without a pile of pins.
Key Products:
- 1 medium claw clip
- 1 texturizing spray
- 2 bobby pins for backup
- 1 dry shampoo puff at the roots
- Optional: 1 small elastic to pre-twist
Quick Steps:
- Rough up the roots with dry shampoo.
- Twist the hair upward from the nape, folding the ends inward.
- Clip the twist securely, then add one or two pins at the bottom if the hair is slippery.
Equipment for This Style:
- Medium claw clip
- Bobby pins
- Comb
- Mirror
How to Wear It: It’s an easy weekend style, but it can also look clean enough for errands or a low-key dinner. The clip itself can become the accessory if you pick one with a matte or tortoiseshell finish.
Pro Tips:
- Use a clip with teeth that are close together. Big gaps let fine hair slip.
- Let the twist sit slightly lower than the clip’s center.
- If your hair is shoulder-length, tuck the ends upward before closing the clip.
Variations:
- French Clip Twist: Fold the hair in one clean roll before clipping.
- Low Side Clip: Place the clip off-center for a softer silhouette.
Common Mistakes to Avoid:
- Don’t buy a clip that’s too large. It will slide on thin hair.
- Don’t skip dry shampoo. Smooth, clean hair slips right out of most clips.
15. The Double Twist Low Bun
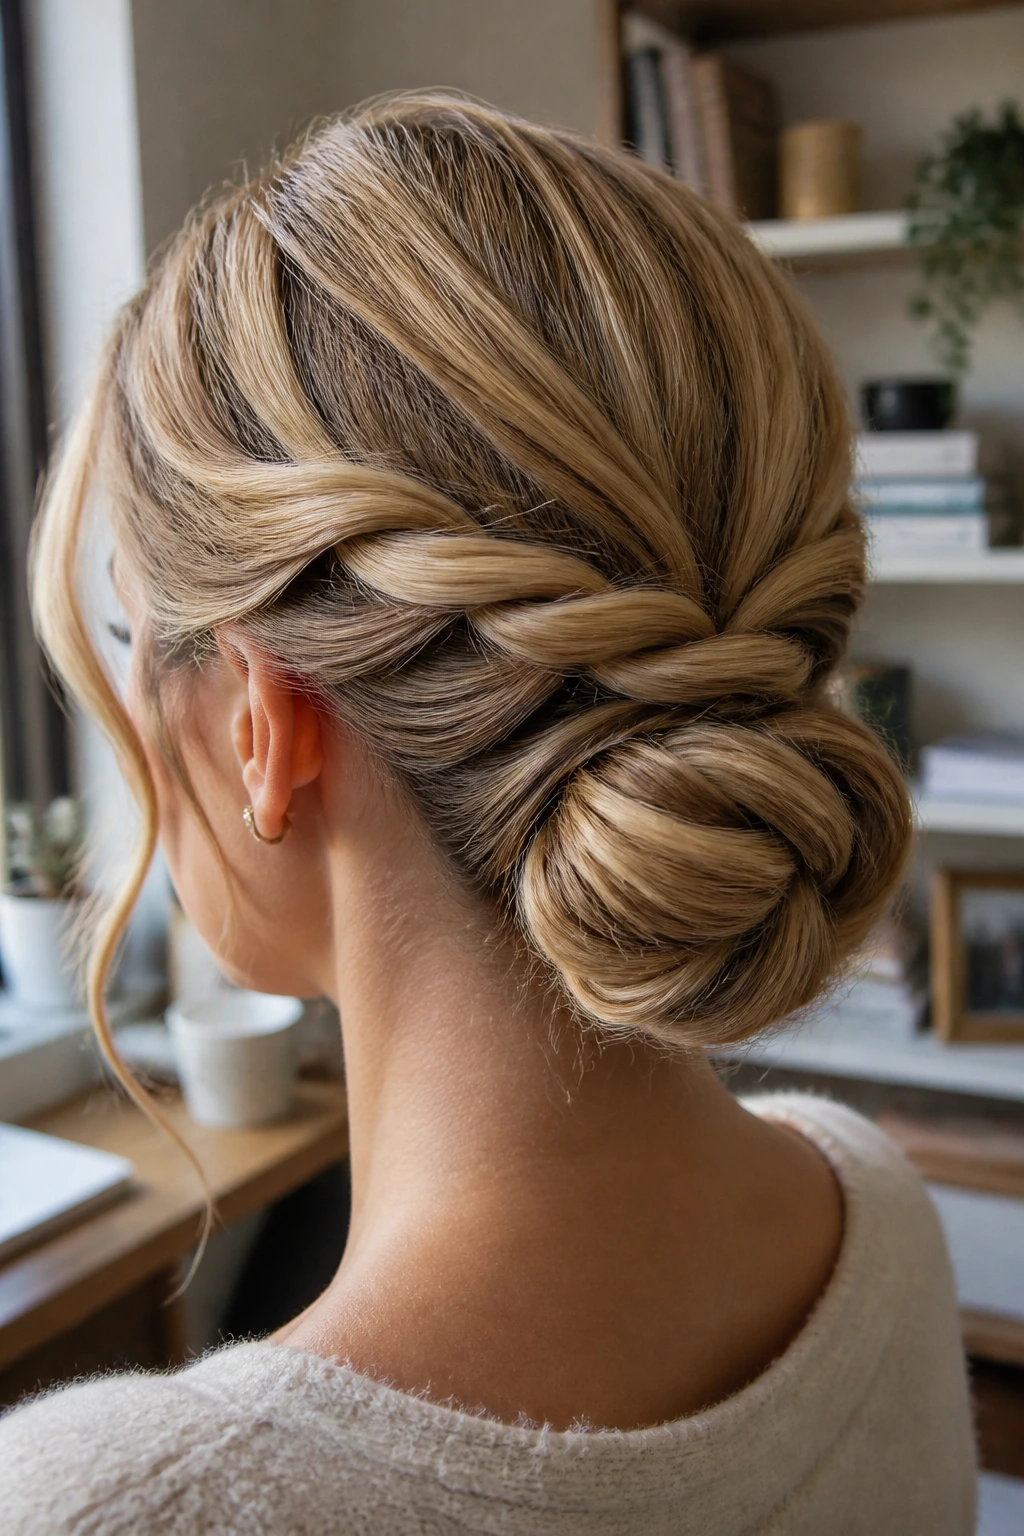
Two twists give thin hair more visible structure than one plain coil. The style looks more filled-in, which is half the battle.
Why It Works: Splitting the hair into two sides lets you build the bun from two smaller sections that create more width across the back of the head. The overlap makes the bun look thicker than a single twist would.
Key Products:
- 1 clear elastic
- 6 bobby pins
- 1 root spray
- 1 texturizing mist
- Optional: 1 small teasing brush
Quick Steps:
- Split the hair into left and right sections and lightly twist each one toward the back.
- Join the twists at the nape and wrap them into a small bun.
- Pin across the join point and around the outer edge.
Equipment for This Style:
- Tail comb
- Bobby pins
- Elastic
- Small brush
How to Wear It: This style is practical for workdays because it stays compact and doesn’t need constant adjusting. It looks especially good with tops that have a clean neckline.
Pro Tips:
- Twist each side toward the back, not toward the face, so the bun stacks neatly.
- Cross your pins in an X where the two sections meet.
- Keep the bun broad, not tall.
Variations:
- Side Double Twist: Twist both sections to one side for a softer finish.
- Braided Double Twist: Braid each side first, then twist them together.
Common Mistakes to Avoid:
- Don’t make both twists too tight. The bun will look small and rope-like.
- Don’t forget to pin the center join. That’s the spot that slips first.
16. The Crown Braid Into a Nape Knot
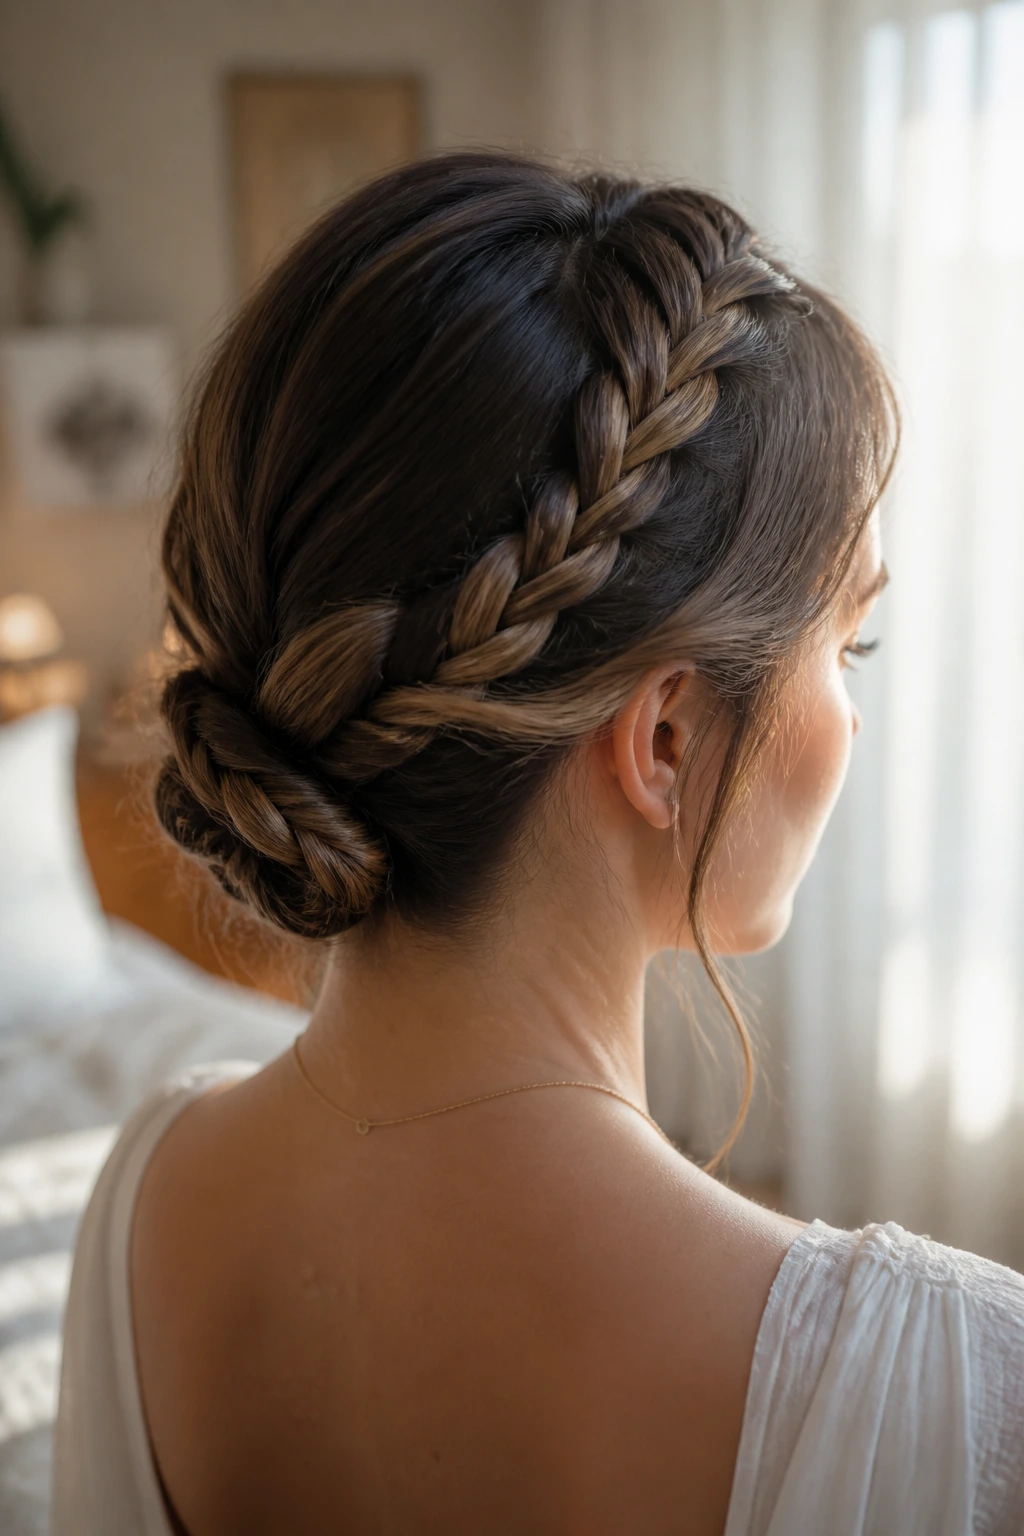
This style gives you braid detail up top and a knot at the bottom, which is a smart trade for thin hair. You get texture where people look first and volume where the head naturally supports it.
Why It Works: The crown braid creates visual width around the face, while the nape knot stays compact and doesn’t require a lot of hair to feel complete. It’s a balanced shape, and balance matters more on thin hair than drama does.
Key Products:
- 1 clear elastic
- 6 to 10 bobby pins
- 1 dry-texture spray
- 1 flexible-hold hairspray
- 1 tail comb
Quick Steps:
- Braid a section from one side of the crown toward the back.
- Gather the rest of the hair into a low knot at the nape.
- Wrap the braid tail around the knot and pin the end underneath.
Equipment for This Style:
- Rat-tail comb
- Bobby pins
- Elastic
- Mirror
How to Wear It: This has enough detail for dressier events but doesn’t look fussy. It’s the kind of style that can carry a simple dress without needing much else.
Pro Tips:
- Keep the braid line close to the head so it reads as a crown, not a loose side braid.
- Pin the knot first, then wrap the braid tail.
- If you have layers, mist the braid before you start. It helps catch the shorter pieces.
Variations:
- Full Crown Version: Continue the braid all the way around the head.
- Half Crown Version: Stop at the back and keep one side looser.
Common Mistakes to Avoid:
- Don’t braid too loosely at the front. The crown loses definition.
- Don’t pile the knot too high. It fights the braid and makes the style tip backward.
17. The Center-Part Chignon That Looks Clean, Not Severe
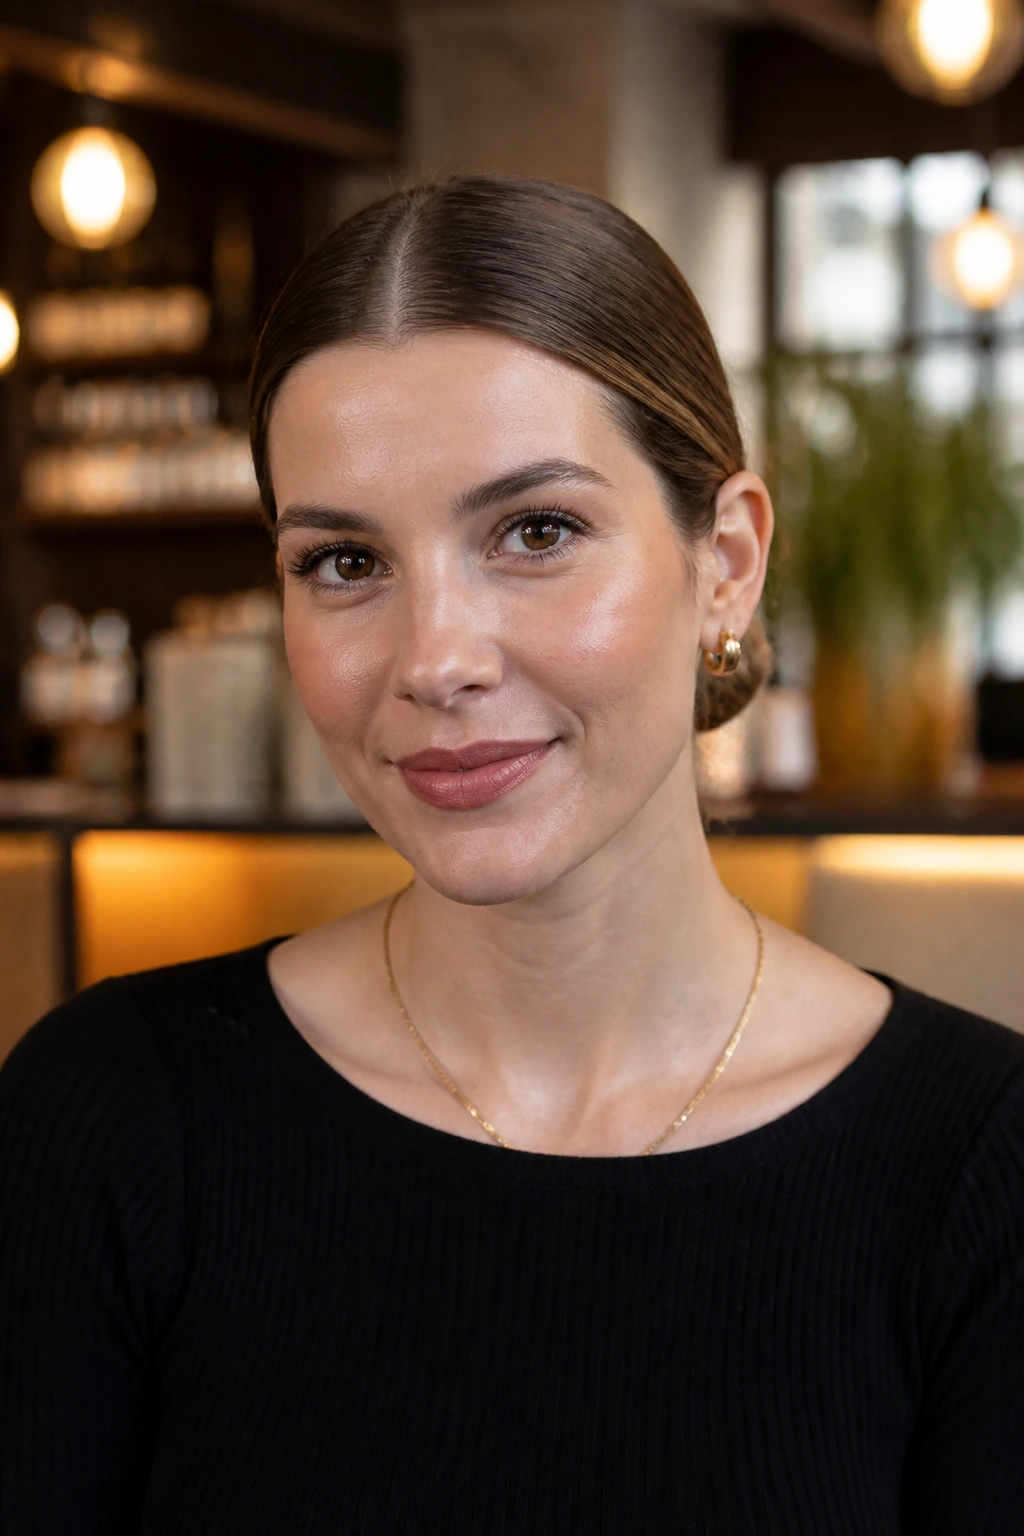
A center part can be a tough sell on thin hair if the rest of the style is flat. But a sleek chignon with a middle part works because the line creates order before the bun even starts.
Why It Works: The center part gives symmetry, and symmetry makes a small bun look intentional rather than underbuilt. The sleek surface also helps the chignon feel smooth and neat without needing excess volume.
Key Products:
- 1 smoothing cream, pea-size
- 1 clear elastic
- 5 bobby pins
- 1 shine spray
- 1 fine-tooth comb
Quick Steps:
- Make a clean center part and smooth the top layer with a small amount of cream.
- Gather hair low at the nape and twist it into a compact chignon.
- Pin the bun flat, then refine the part with the tip of the comb.
Equipment for This Style:
- Fine-tooth comb
- Bobby pins
- Elastic
- Small brush
How to Wear It: This is the style for sharper outfits and simple jewelry. It frames the face in a clean way that can make thin hair look more deliberate.
Pro Tips:
- Keep the part narrow and straight. A wobbly middle part reads messy fast.
- Use a tiny amount of smoothing cream. More than that and the hair starts to separate.
- If you want more body, curl the ends under before pinning.
Variations:
- Low Sleek Knot: Swap the chignon for a knot if you want less shape.
- Soft Center Chignon: Leave two thin pieces loose at the temples.
Common Mistakes to Avoid:
- Don’t flood the hair with serum. It makes fine hair go limp.
- Don’t place the bun too far back. The symmetry gets lost.
18. The Pinned Faux Hawk Updo
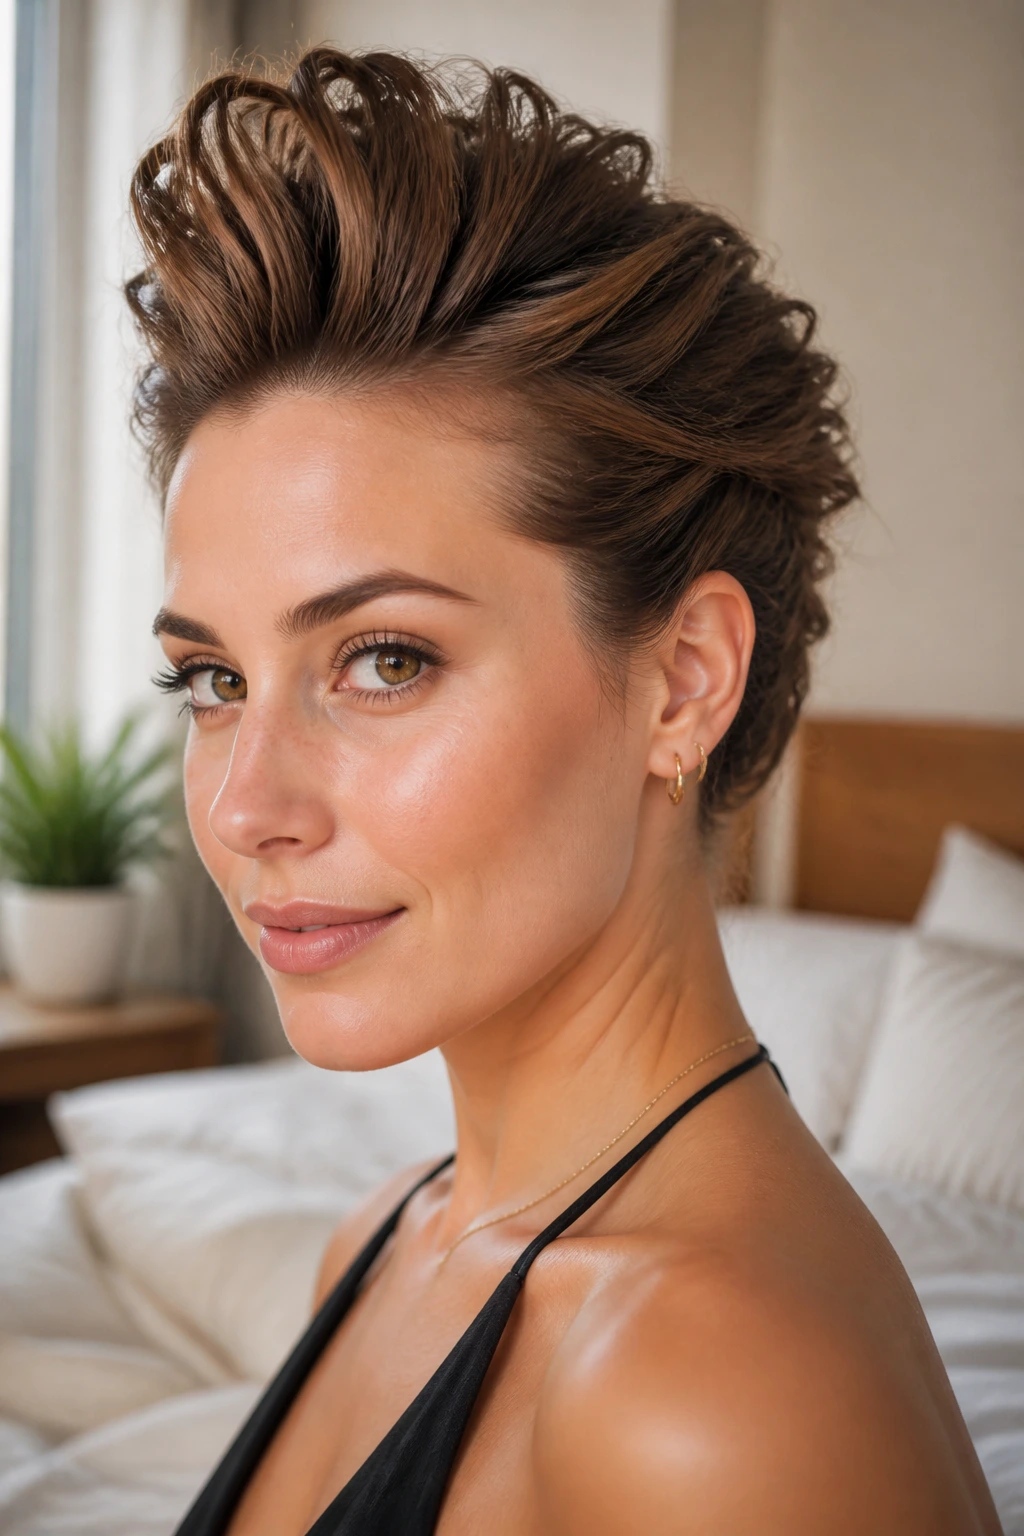
This one gives thin hair an edge without asking it to become something it’s not. The faux hawk shape uses lifted sections down the center, with the sides pinned back tight.
Why It Works: The raised middle line creates the appearance of height, while the pinned sides keep the style compact. Thin hair often does well with directional styles like this because the eye follows the shape, not the density.
Key Products:
- 6 to 12 bobby pins
- 1 texturizing spray
- 1 teasing comb
- 1 light hairspray
- 1 small elastic, optional
Quick Steps:
- Tease the crown lightly in a narrow strip down the middle.
- Pin the side sections back close to the head, leaving the center lifted.
- Gather the lifted center into small loops or knots along the top and pin each one.
Equipment for This Style:
- Teasing comb
- Bobby pins
- Mirror
- Hairspray
How to Wear It: This is the boldest look in the set. It works for nights out, concerts, or any outfit that can handle a little attitude.
Pro Tips:
- Keep the teased section narrow. A huge bump makes thin hair look fuzzy.
- Pin the sides low and flat so the center has room to stand up.
- Use matte spray at the roots if your hair is slippery.
Variations:
- Soft Faux Hawk: Keep the center flatter and less edgy.
- Braided Faux Hawk: Add tiny braids along the center line for extra texture.
Common Mistakes to Avoid:
- Don’t tease the entire crown. You only need a strip.
- Don’t leave the side pins visible unless you want the hardware to show.
19. The Half-Up Bouffant Twist
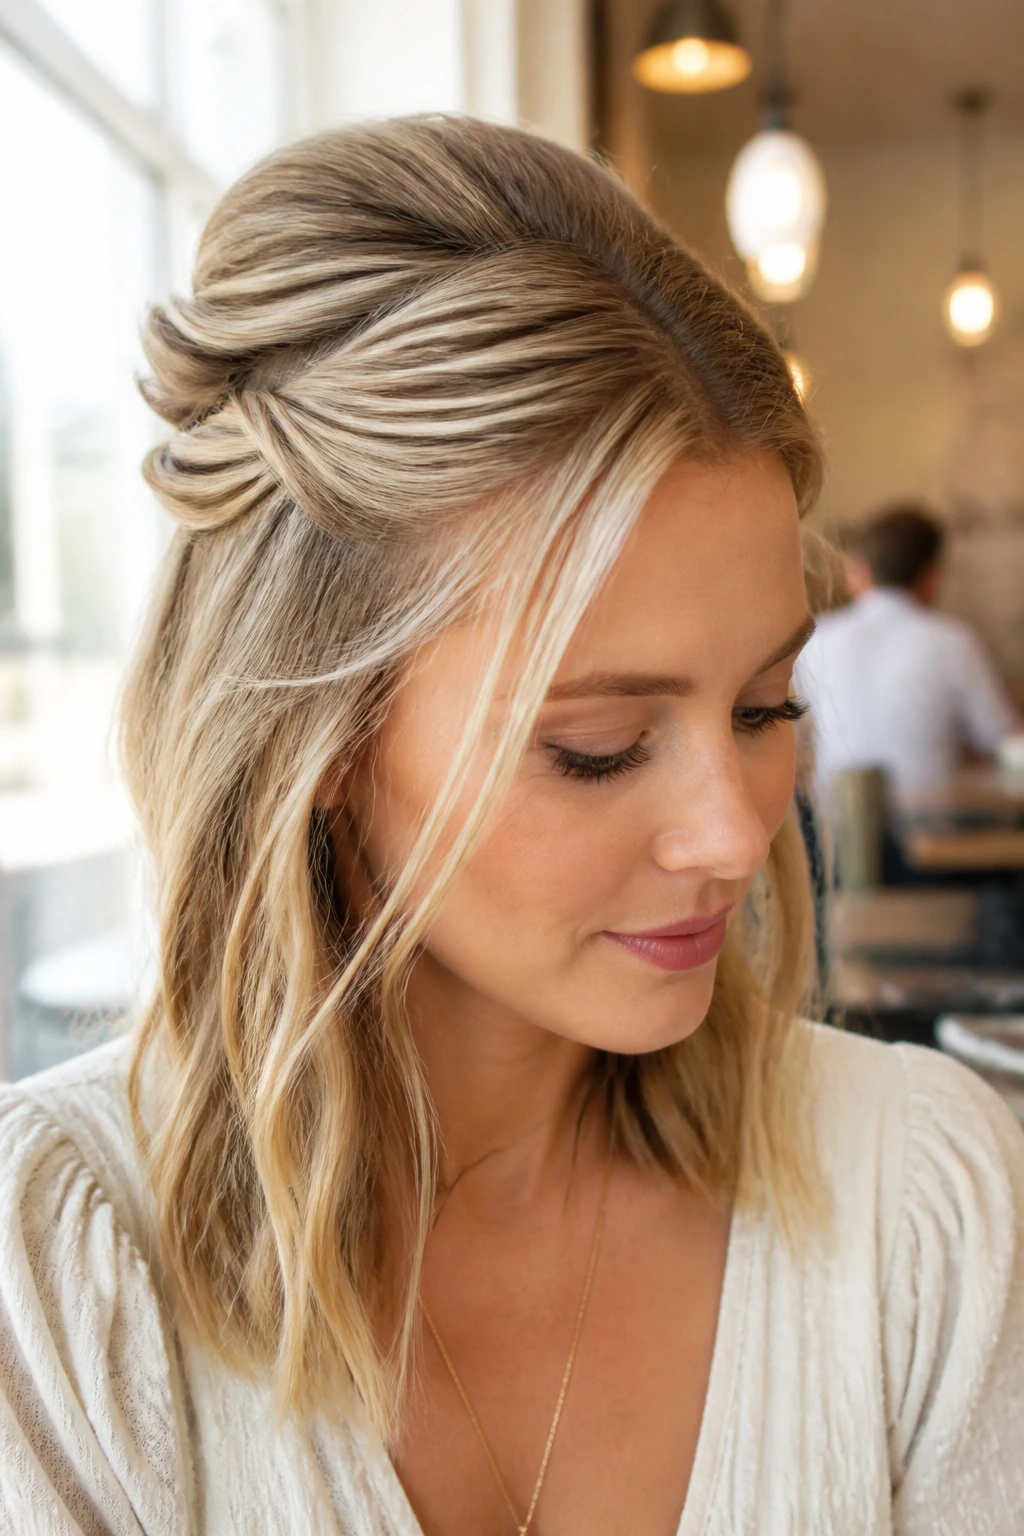
A little crown lift changes everything on thin hair. This style creates that lift with a half-up section and a twist that sits right where the head starts to round.
Why It Works: The bouffant effect gives the top section more air, which helps the rest of the hair look fuller too. Since the bottom is left down, you keep length and movement without sacrificing the crown.
Key Products:
- 1 teasing brush
- 1 clear elastic
- 3 to 5 bobby pins
- 1 root-lifting spray
- 1 soft-hold hairspray
Quick Steps:
- Lift a section at the crown and tease it lightly underneath.
- Sweep the top section back, twist it once, and pin it where the crown begins to slope.
- Leave the lower half loose or lightly curled.
Equipment for This Style:
- Teasing brush
- Bobby pins
- Elastic
- Curling iron, optional
How to Wear It: This is one of the best styles for daytime events because it gives shape without looking overdone. The loose bottom half keeps it from feeling too stiff.
Pro Tips:
- Tease only the underlayer of the crown section.
- Pin the twist below the bump so the lift stays visible.
- Curl the lower lengths away from the face if you want more body.
Variations:
- Half-Up Wave Version: Add loose waves to the bottom for a softer look.
- Half-Up Knot Version: Replace the twist with a tiny knot.
Common Mistakes to Avoid:
- Don’t over-tease until the crown looks fluffy. Thin hair goes from lift to fuzz fast.
- Don’t pull the half-up section too tight. The bouffant disappears.
20. The Looped Knot Ponytail
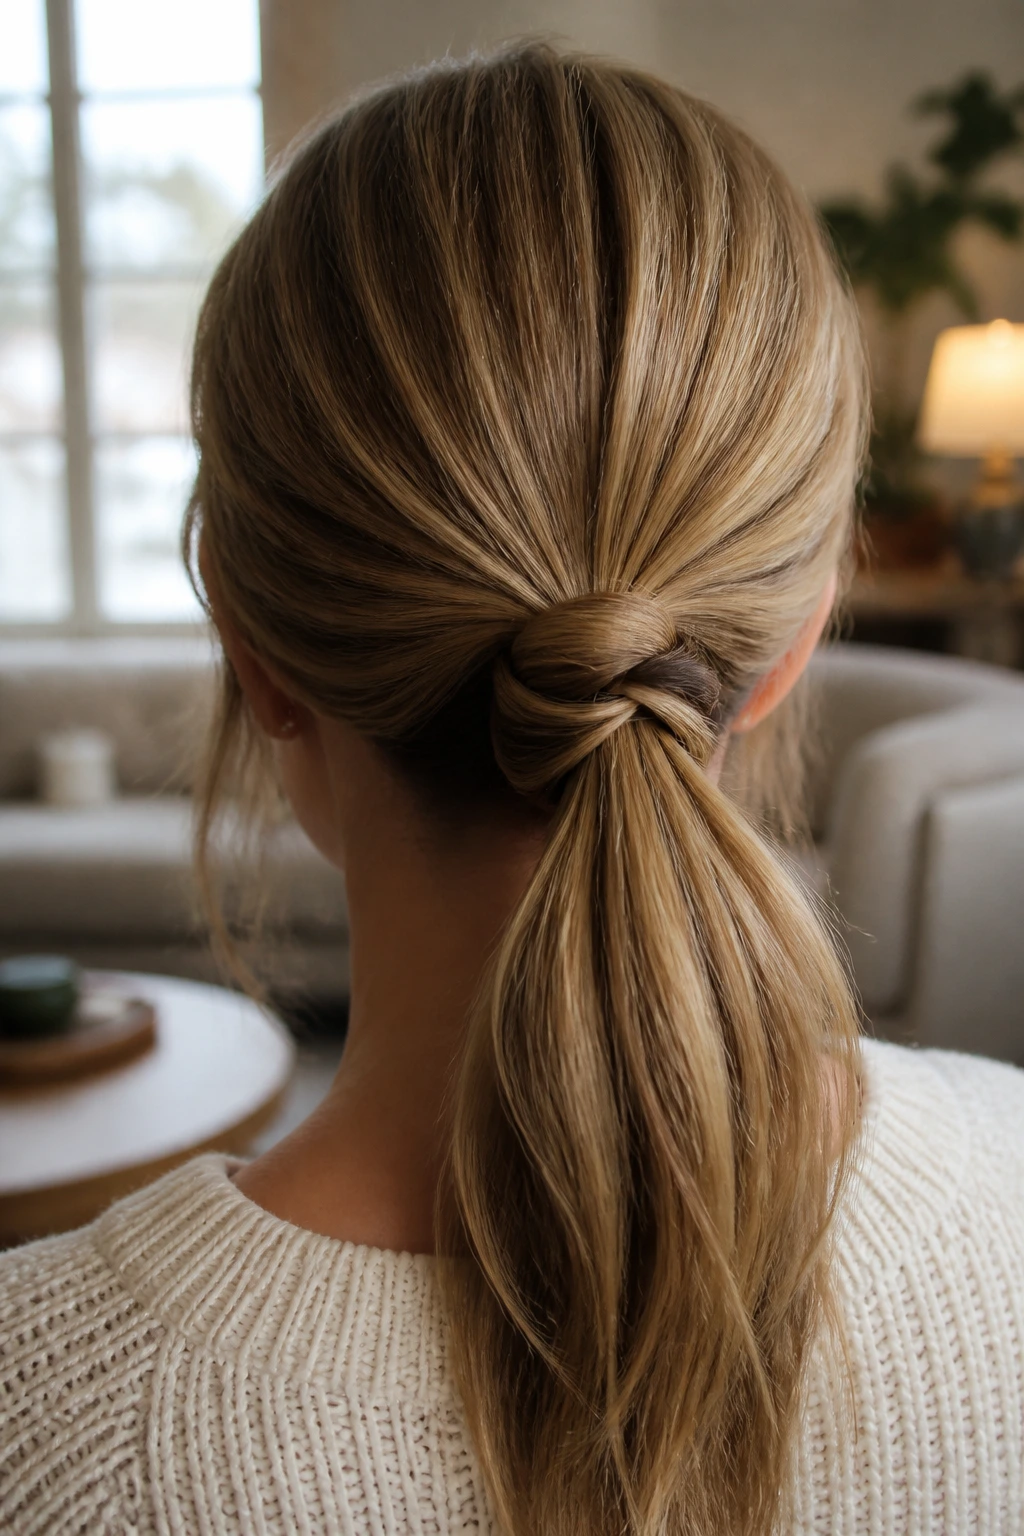
This style gives you the neatness of a ponytail with a little twist at the back. The loop creates a small pocket of volume that helps thin hair look less flat.
Why It Works: The loop breaks up the straight line of a regular ponytail, and that interruption makes the tail look fuller. It also keeps the finish soft instead of stringy.
Key Products:
- 1 clear elastic
- 3 to 4 bobby pins
- 1 texturizing spray
- 1 light serum for the ends
- 1 comb
Quick Steps:
- Tie a low ponytail and pull the tail halfway through the elastic on the final wrap.
- Fan the loop slightly so it looks rounded.
- Wrap the remaining tail around the base or let it hang with a soft bend.
Equipment for This Style:
- Elastic
- Bobby pins
- Comb
- Hairspray
How to Wear It: This works well when you want a tidy back but not a strict bun. It’s also a good option for shirts with open backs or sporty collars.
Pro Tips:
- Make the loop a little larger than you think you need.
- Hide the elastic under a thin wrap of hair if you want a cleaner finish.
- Curl the tail ends if they look too wispy.
Variations:
- Side Loop Pony: Move the loop behind one ear.
- Double Loop Pony: Make two small loops for a more decorative shape.
Common Mistakes to Avoid:
- Don’t pull the loop too tight or it collapses.
- Don’t leave the ends flyaway-dry. A drop of serum on the tips helps.
21. The Scarf-Wrapped Low Bun
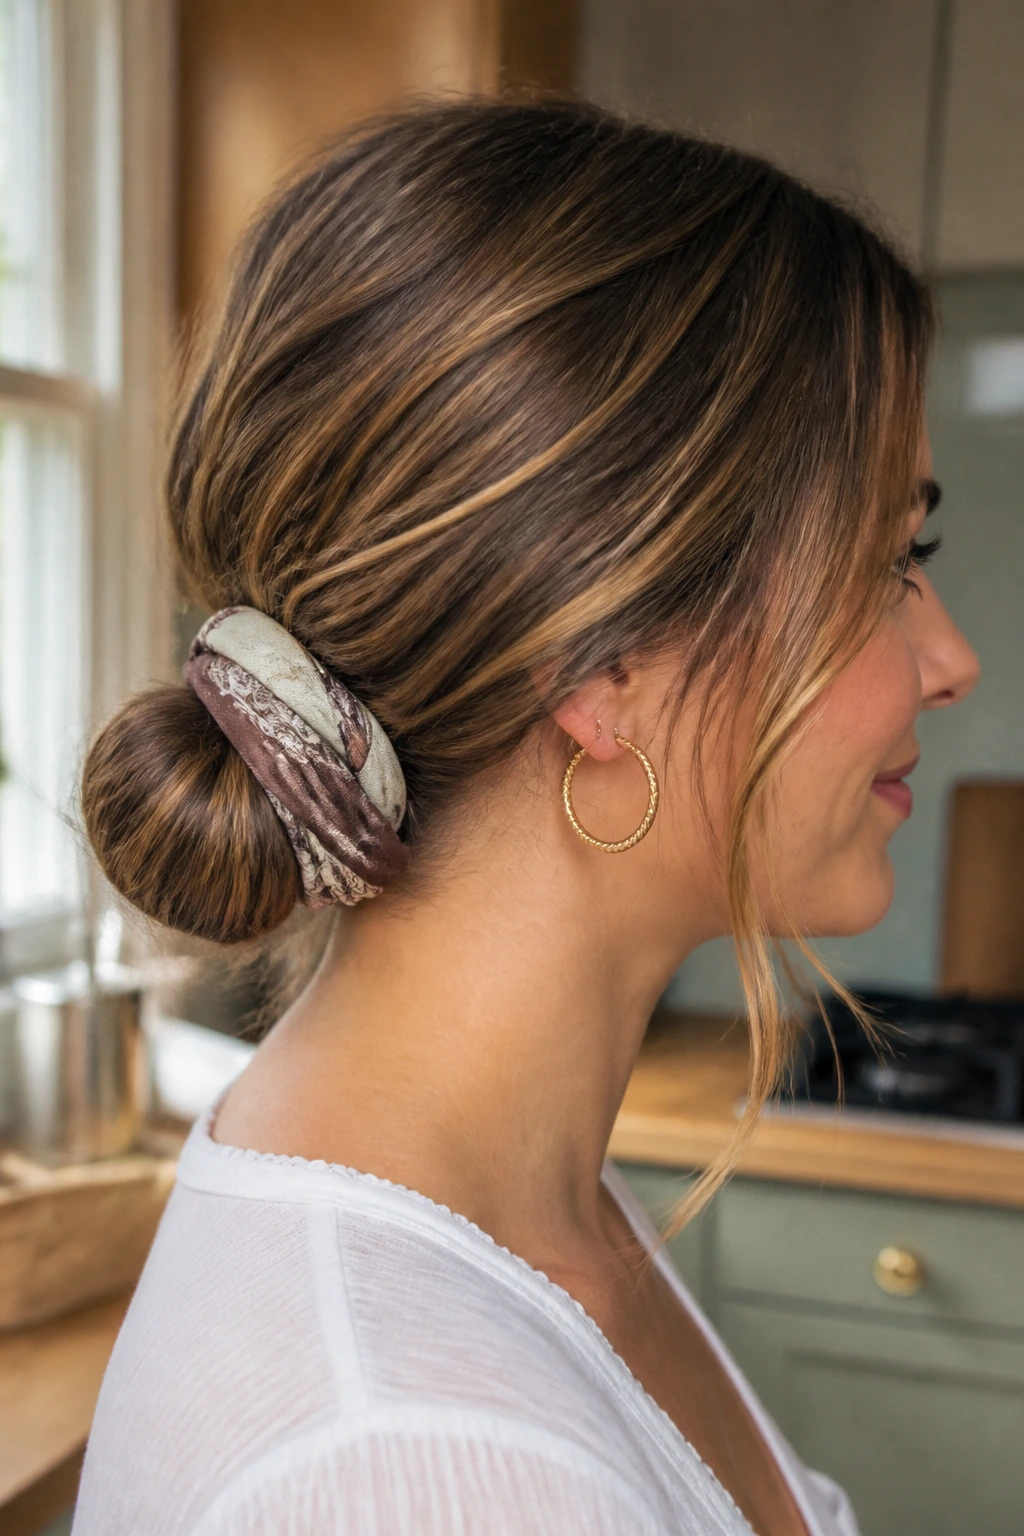
This one is generous to thin hair because the scarf adds color, shape, and a little extra visual width around the bun. It’s less about pretending there’s more hair and more about dressing the style well.
Why It Works: The scarf gives the eye a wider target, which makes the bun feel fuller by comparison. It also helps disguise thin ends and a small base.
Key Products:
- 1 soft scarf or skinny silk tie
- 1 clear elastic
- 4 to 6 bobby pins
- 1 texture spray
- 1 small comb
Quick Steps:
- Make a low bun or twisted knot.
- Tie the scarf around the base and wrap it once or twice, depending on length.
- Tuck the ends neatly and pin the scarf where it crosses the bun.
Equipment for This Style:
- Bobby pins
- Elastic
- Scarf or tie
- Comb
How to Wear It: This is easy to make casual or polished depending on the scarf fabric. Silk reads dressier; cotton reads relaxed and weekend-ready.
Pro Tips:
- Choose a scarf that is thin enough to wrap cleanly, not a bulky bandana.
- Keep the knot under the bun so the focus stays on the shape.
- If your hair is very fine, pin the scarf to the elastic before wrapping.
Variations:
- Printed Scarf Bun: Use a bold print for a statement finish.
- Minimal Tie Bun: Use a narrow ribbon for a lighter touch.
Common Mistakes to Avoid:
- Don’t use a heavy scarf. It drags the bun down.
- Don’t wrap the scarf over a loose bun. It will shift all day.
22. The Gibson Roll for Shorter Lengths
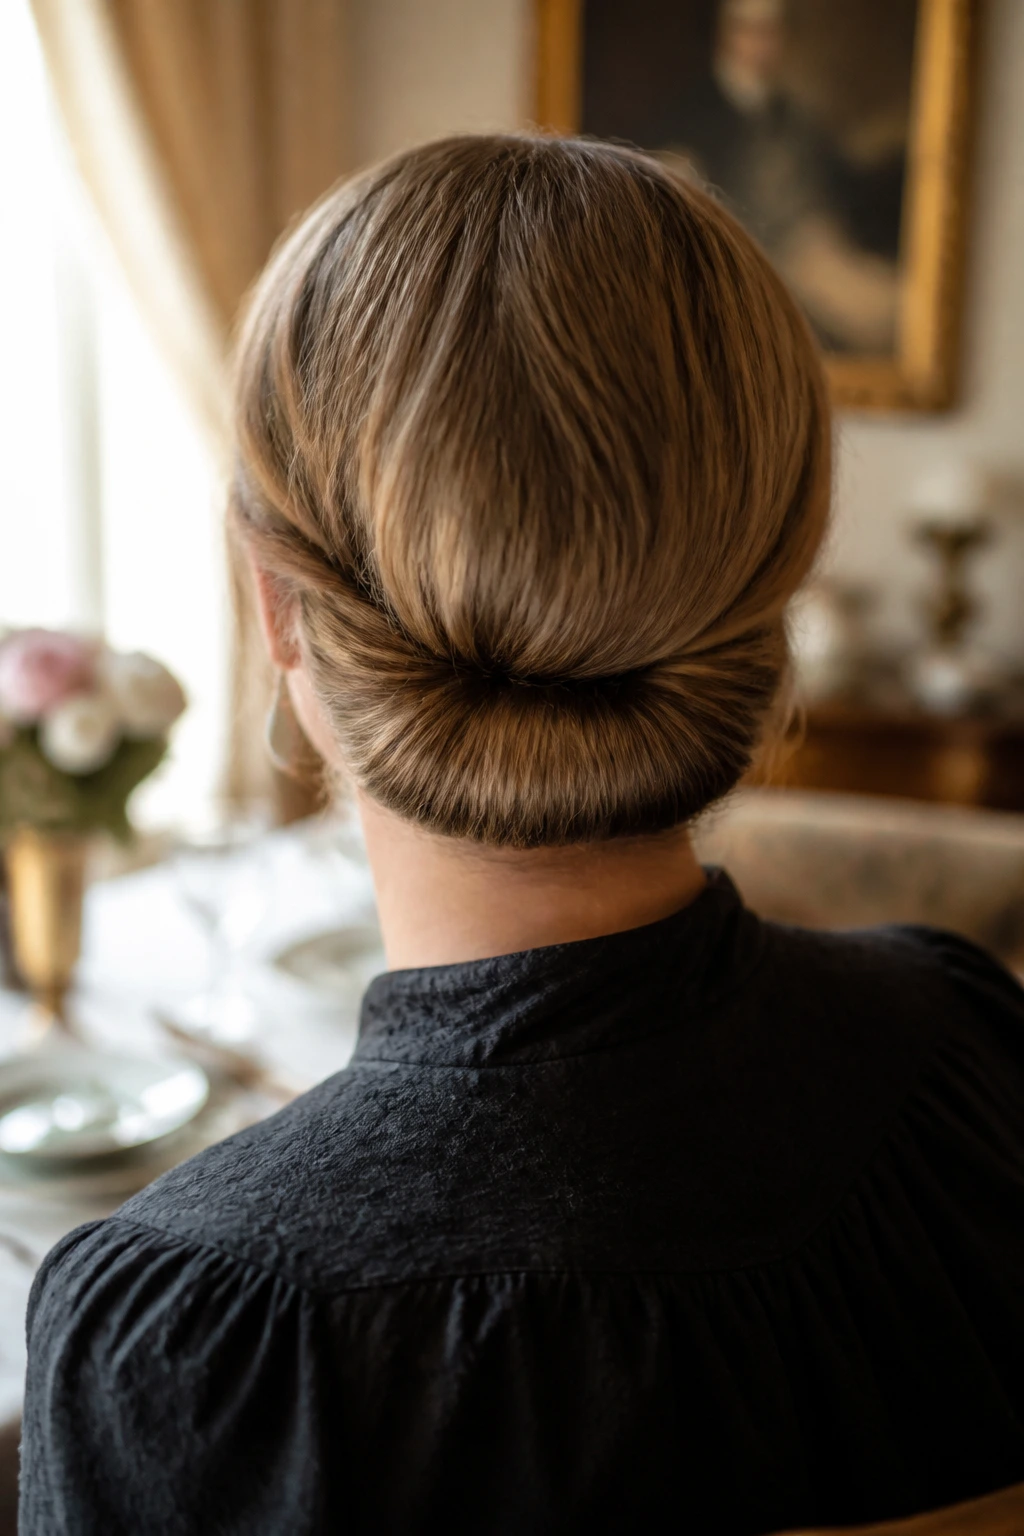
The Gibson roll is one of those styles that looks more complicated than it is. On thin hair, it becomes a neat tuck that works especially well when the length barely reaches the shoulders.
Why It Works: The roll hides the ends inside the fold, which keeps short or fine hair from looking stringy. It also creates a smooth back line that feels more substantial than a plain ponytail.
Key Products:
- 1 clear elastic
- 4 to 6 bobby pins
- 1 smoothing cream
- 1 strong-hold spray
- Optional: 1 hair padding strip
Quick Steps:
- Gather the hair low and make a loose ponytail.
- Fold the ponytail upward and tuck the ends into the roll.
- Pin along the inside seam until the roll feels secure.
Equipment for This Style:
- Tail comb
- Bobby pins
- Elastic
- Mirror
How to Wear It: It’s a smart choice for vintage outfits, dressy dinners, or any setting where a clean nape looks better than loose lengths. It pairs well with high necklines.
Pro Tips:
- Keep the roll narrow on thin hair; wide rolls can split apart.
- If the hair is short, use a touch of padding inside the roll.
- Pin from the inside out to keep the hardware hidden.
Variations:
- Loose Gibson Roll: Leave a little softness at the top.
- Padded Gibson Roll: Add a small insert for more shape.
Common Mistakes to Avoid:
- Don’t try to make the roll too big. That’s how it starts to open.
- Don’t use slippery conditioner right before styling.
23. The Two-Minute Pin-Up Twist
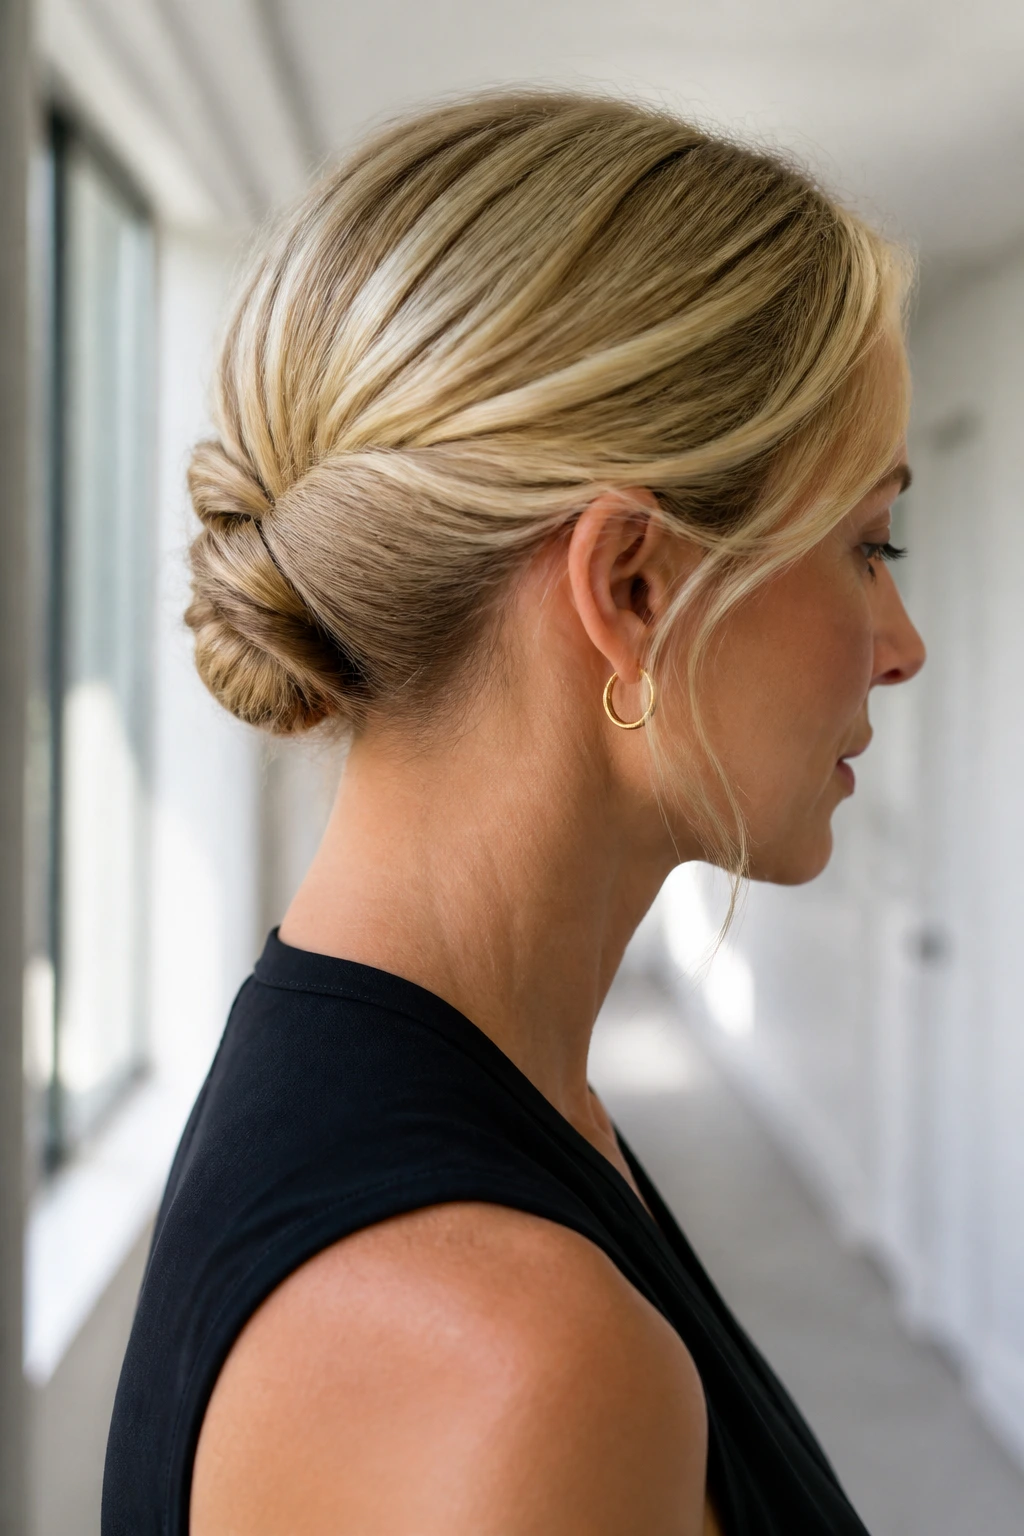
This is the emergency style. When the clock is rude, it still looks like you made an effort.
Why It Works: The twist gathers the hair into one narrow shape, which means fewer escape points and less visual clutter. Thin hair often does better with one clean twist than with multiple pieces flopping around.
Key Products:
- 2 to 4 bobby pins
- 1 small elastic, optional
- 1 dry shampoo puff
- 1 flexible hairspray
- 1 tail comb
Quick Steps:
- Mist the roots with dry shampoo and run your fingers through the crown.
- Twist the hair back from one side or both, then tuck the ends under.
- Pin the twist flat and mist lightly to set it.
Equipment for This Style:
- Bobby pins
- Comb
- Mirror
- Hairspray
How to Wear It: This is the style for school runs, errands, and the kind of day that does not wait for you to get fancy. It still looks clean enough to pass in a meeting.
Pro Tips:
- Keep the twist narrow and low.
- Pin the tightest point first.
- If a piece falls out, tuck it under the twist instead of trying to smooth it in.
Variations:
- Side Pin-Up: Twist only one side back for a softer feel.
- Double Pin-Up: Make two small twists meeting at the nape.
Common Mistakes to Avoid:
- Don’t overthink the finish. The style works because it’s quick.
- Don’t overload with hairspray or it gets sticky and dull.
24. The Braid-and-Bun Hybrid
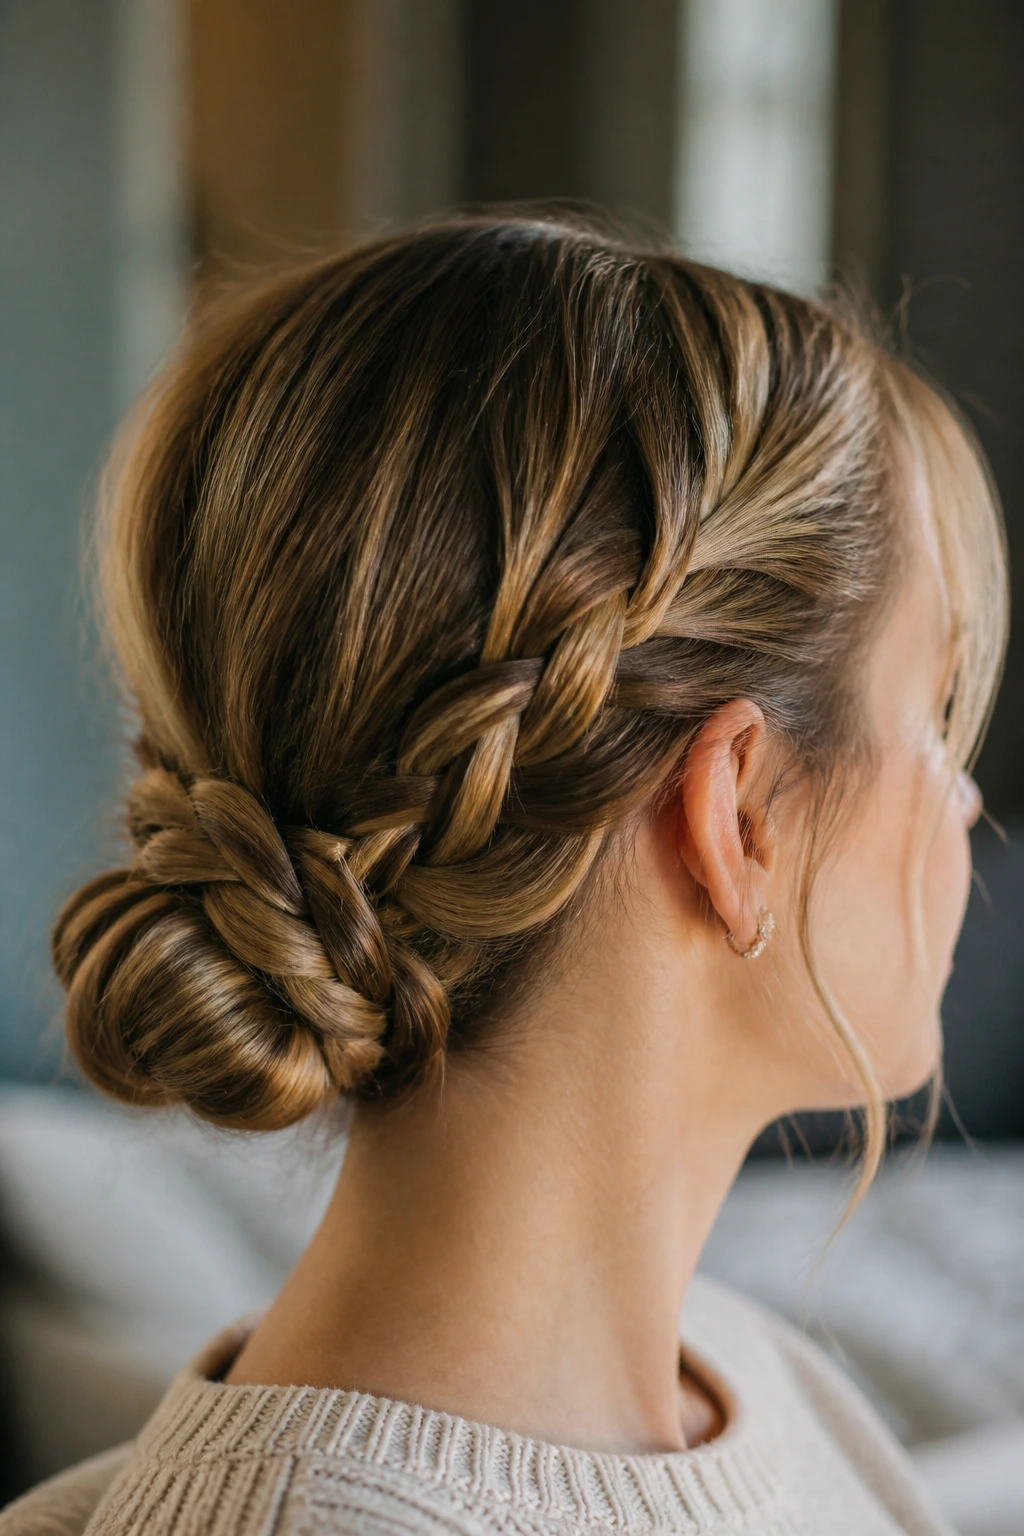
If a plain bun feels too plain, braid a section first. The braid gives the bun shape and keeps the ends from looking sparse.
Why It Works: The braid adds a textured band across the bun, which makes the whole style look fuller. Thin hair benefits from any built-in detail that breaks up the roundness.
Key Products:
- 1 clear elastic
- 4 to 8 bobby pins
- 1 texturizing spray
- 1 small braid section
- 1 light hairspray
Quick Steps:
- Braid a side section or the ponytail itself.
- Gather the rest into a low bun.
- Wrap the braid around the bun and pin the end underneath.
Equipment for This Style:
- Tail comb
- Bobby pins
- Elastic
- Mirror
How to Wear It: This one can lean casual or dressed up depending on how tight the braid is. It’s a nice middle ground when you want the bun to look more interesting than basic.
Pro Tips:
- Braid a section with a little root texture so it grips better.
- Do not make the braid too thin; it disappears.
- Pin the braid over the bun seam to hide any gaps.
Variations:
- Side Braid Bun: Keep the braid low and off-center.
- Crown Braid Bun: Run the braid around the head before finishing the bun.
Common Mistakes to Avoid:
- Don’t braid freshly straightened, slippery hair and expect it to stay.
- Don’t tuck the braid tail too shallow. It slips.
25. The Volumized Ponytail Cinch
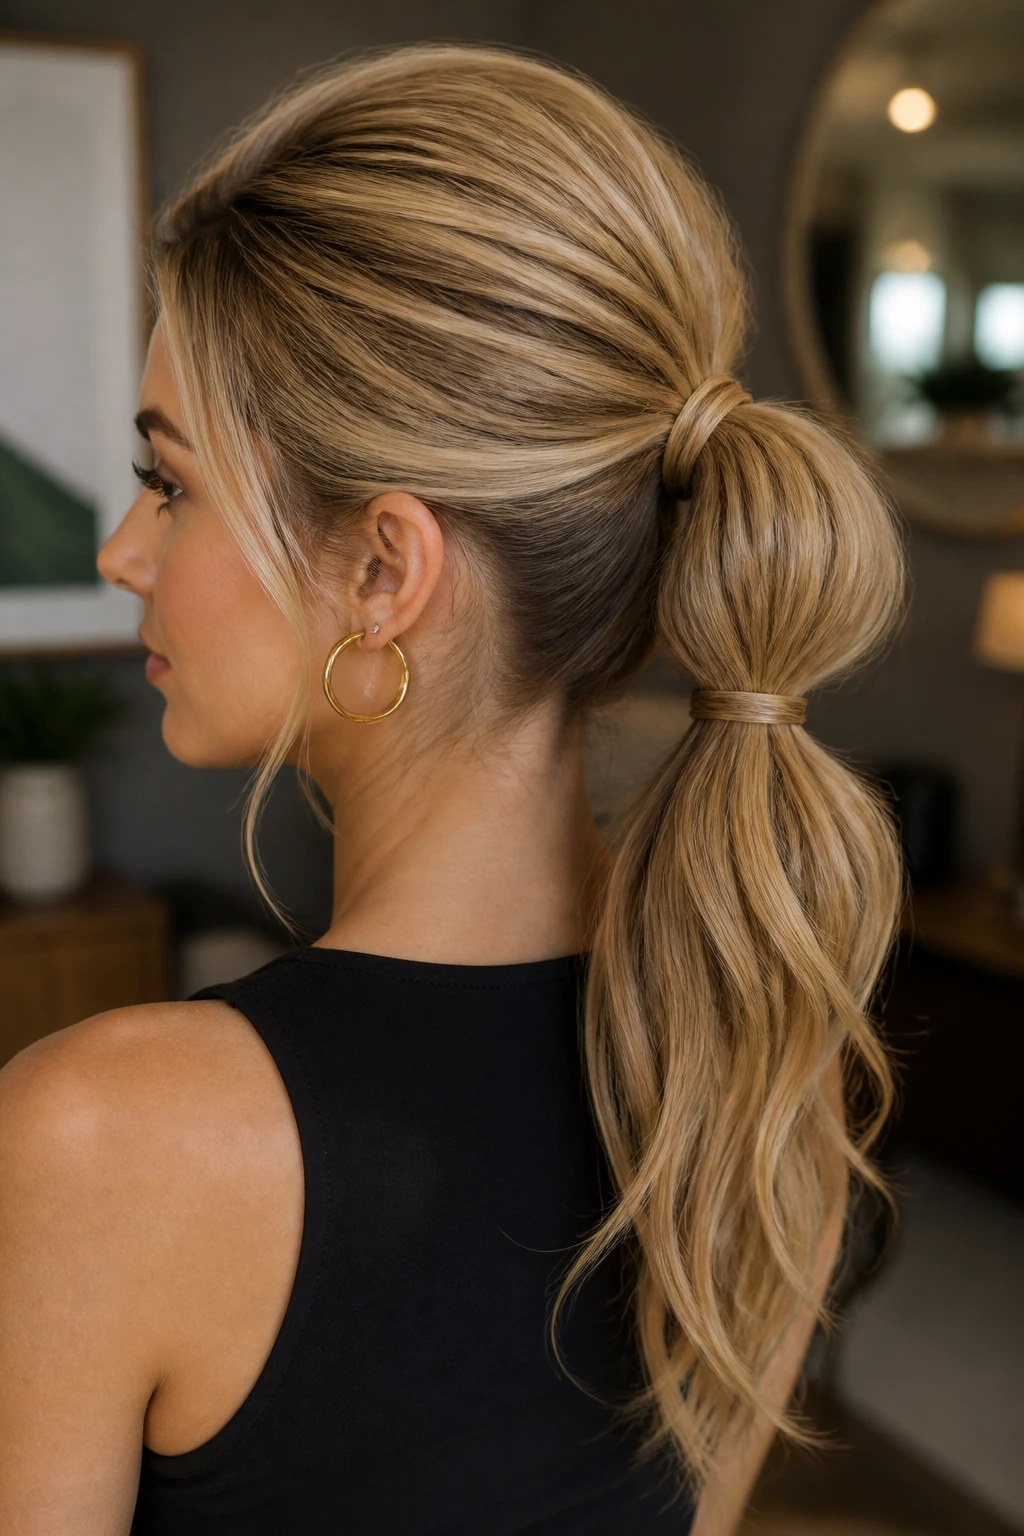
A ponytail can absolutely count as an updo when it’s shaped with a little intention. This version creates lift at the crown and a fuller-looking tail without requiring much length.
Why It Works: A cinched ponytail breaks the hair into sections, which makes each section look thicker than one long line. The crown lift also keeps the scalp from showing too plainly.
Key Products:
- 2 clear elastics
- 1 teasing comb
- 1 root-lift spray
- 1 texture mist
- 1 smoothing brush
Quick Steps:
- Tease the crown lightly and smooth the top layer over it.
- Split the ponytail in two and secure each section with an elastic a few inches apart.
- Pull the sections gently apart until the ponytail looks fuller.
Equipment for This Style:
- Teasing comb
- Elastics
- Brush
- Hairspray
How to Wear It: This looks good with casual tops, gym-to-street outfits, or anything where a full bun would feel too much. It’s neat without being fussy.
Pro Tips:
- Keep the crown tease narrow and controlled.
- Add a tiny bend to the tail with a curling iron if the ends are too blunt.
- Wrap a strand around the top elastic to hide it.
Variations:
- Low Cinch Pony: Keep the ponytail at the nape for a softer line.
- Wrapped Cinch Pony: Use a braid around the base for extra detail.
Common Mistakes to Avoid:
- Don’t cinch the sections too tightly. The hair starts to look segmented in a bad way.
- Don’t leave the crown flat. That kills the whole point.
26. The Soft Side Bun With Loose Tendrils
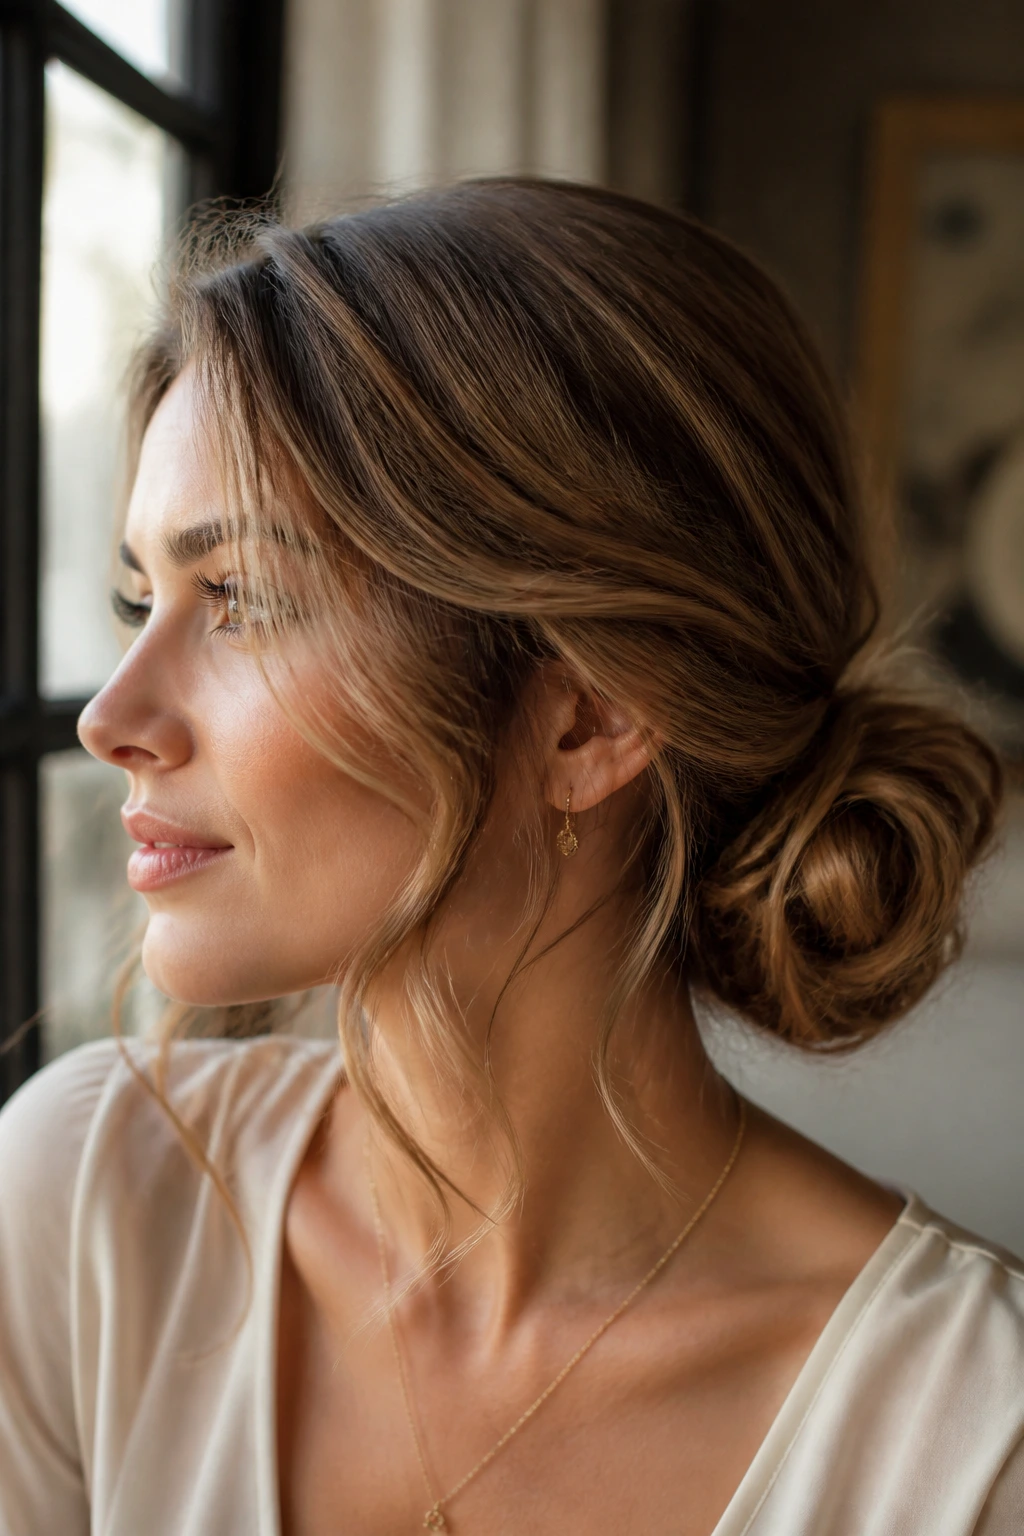
This is one of the most forgiving styles for thin hair because it doesn’t demand perfection. A few loose tendrils and a side-swept bun make the shape feel fuller and easier.
Why It Works: The side placement gives the hair somewhere to go visually, and the loose pieces soften the outline of the head. Thin hair often looks more abundant when you avoid hard edges.
Key Products:
- 1 clear elastic
- 4 to 6 bobby pins
- 1 texturizing spray
- 1 curling iron, optional
- 1 light hold hairspray
Quick Steps:
- Sweep the hair to one side and create a low bun just behind the jawline.
- Leave a few thin tendrils out around the face and nape.
- Pin the bun loosely, then curl the tendrils if you want more bend.
Equipment for This Style:
- Bobby pins
- Elastic
- Curling iron
- Comb
How to Wear It: This is easy to dress up with earrings or a soft neckline. It has enough movement to feel romantic, but it still behaves.
Pro Tips:
- Don’t leave out thick face pieces. Thin hair needs delicate tendrils, not curtains.
- Pin the bun at the lowest stable point on the side.
- Curl the tendrils away from the face for a softer frame.
Variations:
- Low Romantic Side Bun: Add a tiny braid at the temple.
- Smooth Side Bun: Keep the front sleek and the bun low.
Common Mistakes to Avoid:
- Don’t make the loose pieces too long and heavy. They pull the style down.
- Don’t place the bun too far forward on the cheekbone.
27. The Last-Minute Textured French Twist
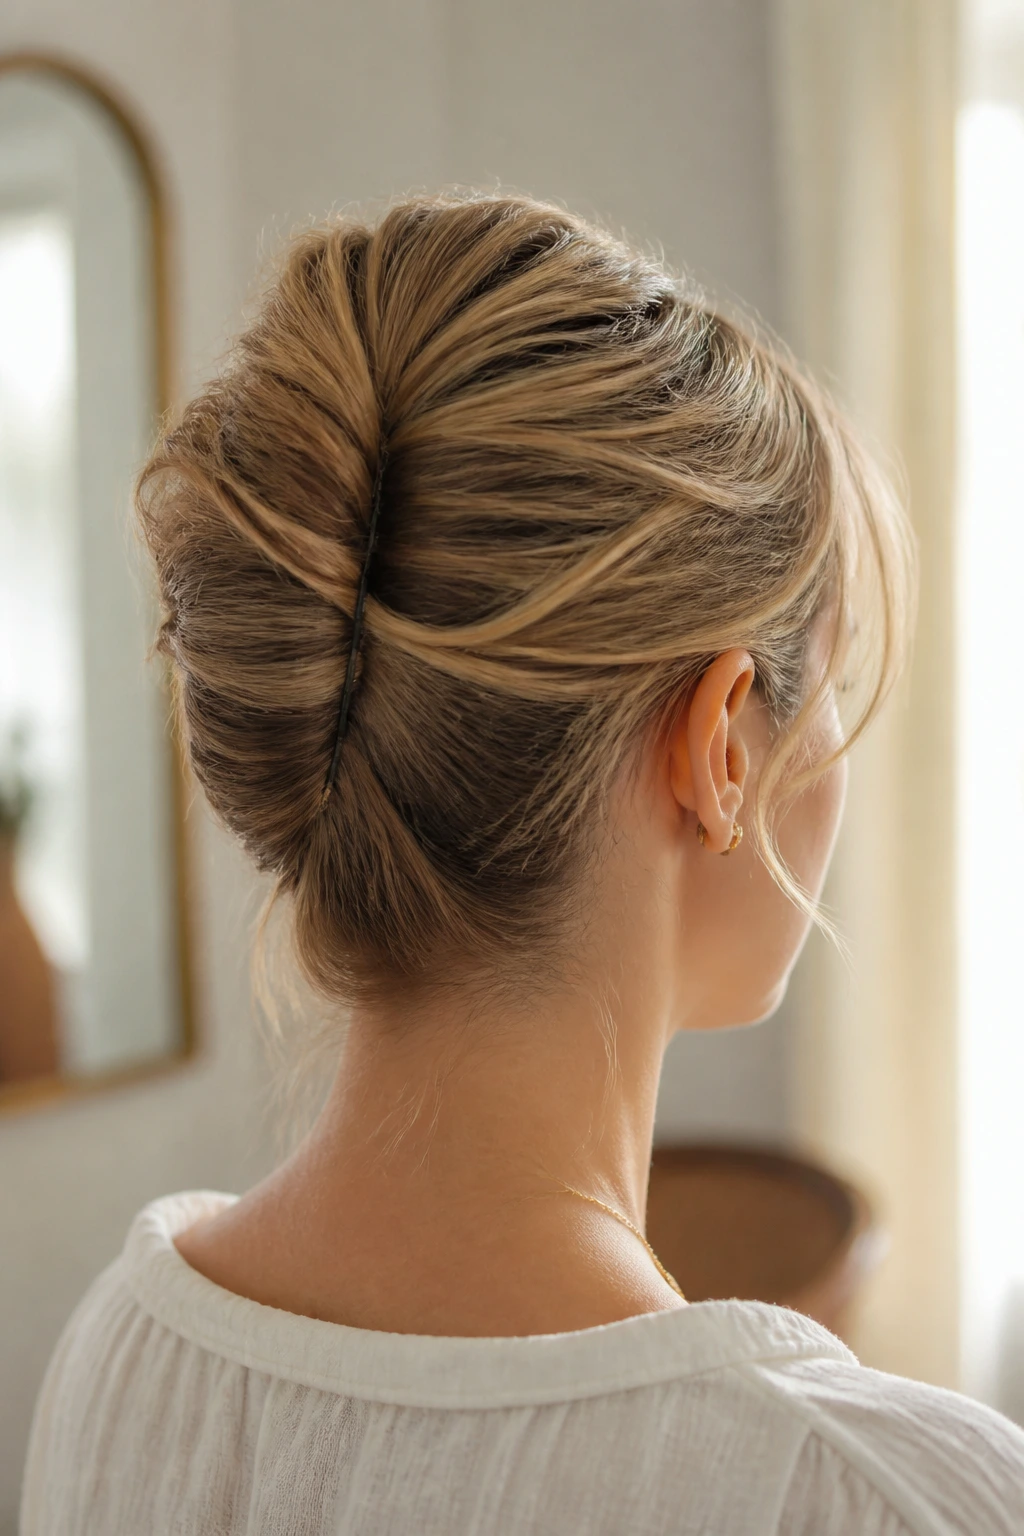
This is the rescue style I’d reach for if the clock is embarrassing me. It looks polished, but the texture keeps it from feeling too strict.
Why It Works: A textured French twist gives fine hair a vertical shape, which looks elegant without needing a ton of mass. The surface texture also keeps the twist from sliding apart the second you leave the bathroom mirror.
Key Products:
- 1 texturizing spray
- 5 to 8 bobby pins
- 1 teasing comb
- 1 flexible hairspray
- 1 small clip, optional for prep
Quick Steps:
- Spray the roots and mids with texture spray, then tease the crown lightly.
- Sweep the hair backward, twist it upward, and fold the ends into the roll.
- Pin the seam in several spots and mist the finished twist from arm’s length.
Equipment for This Style:
- Teasing comb
- Bobby pins
- Comb
- Mirror
How to Wear It: This is the cleanest finish in the collection and a strong choice for dinners, interviews, and dressier events. It looks neat from every angle, which is hard to get with thin hair.
Pro Tips:
- Build the base before you build the twist. That tiny bit of lift changes the whole shape.
- Pin in an alternating pattern, one high and one low, so the roll does not slide.
- If the twist looks too severe, loosen one temple piece slightly.
Variations:
- Soft Twist: Leave the front hair looser and less structured.
- Pin-Accent Twist: Add a decorative pin where the twist folds in.
Common Mistakes to Avoid:
- Don’t try to make the twist wide enough to fake thickness. It usually splits.
- Don’t ignore the crown. A flat crown makes the whole style look smaller.
Why Thin Hair Needs a Different Updo Strategy
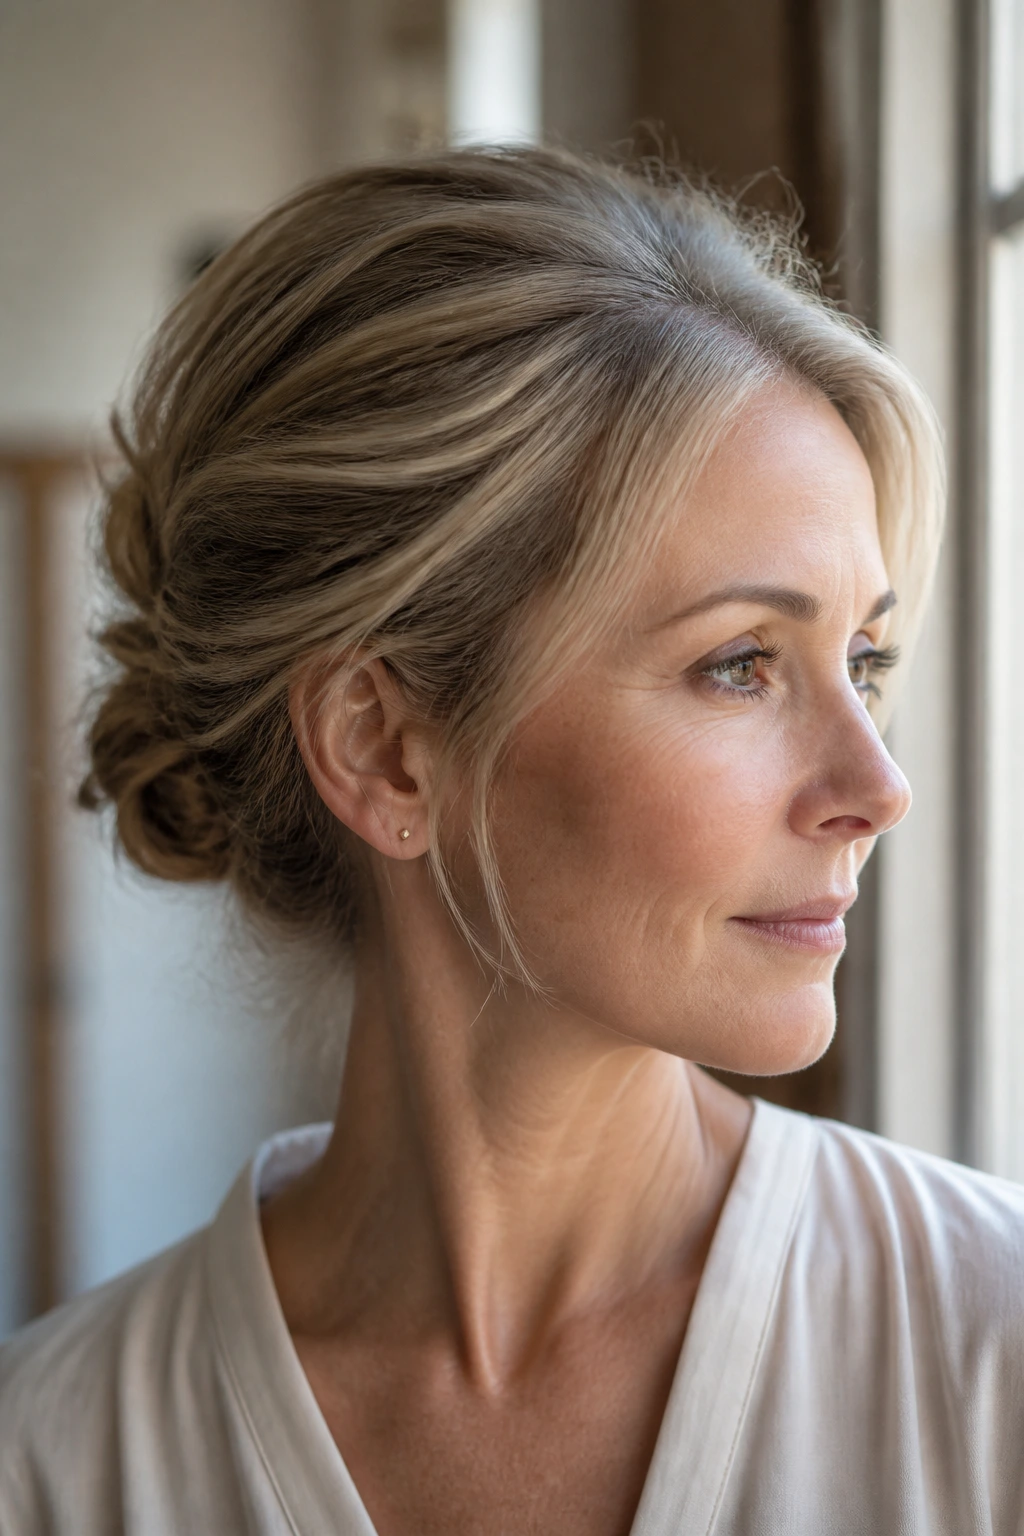
Thin hair is not the enemy. Bad styling assumptions are. A lot of the frustration comes from treating fine strands like they ought to behave the way thick hair does, and that’s how you end up with puffy crowns, droopy buns, and pins sliding out ten minutes after you leave the house.
Start with traction, not shine
Freshly washed hair looks clean, sure. It also behaves like silk ribbon. Fine hair needs a little friction, which is why second-day hair, dry shampoo, or a quick dusting of texture powder often works better than a glossy product. You want the strand to feel slightly grippy between your fingers, not squeaky or coated.
Keep the bulk low
The best shapes for thin hair usually sit close to the head. That might sound limiting, but it actually opens things up. Once you stop asking hair to build height on its own, low buns, tucked rolls, side knots, and braided crowns start making a lot more sense. Gravity is still there. You might as well use it.
Hide the weak spots where no one looks
Thin hair often exposes the elastic, the pins, and the sparse ends if you leave them out in the open. Wrap a section around the base. Tuck the ends under. Add a braid over the seam. Small coverage moves make the style look bigger than it is.
And yes, that sounds fussy until you do it once and see the difference. Then it’s just common sense.
Essential Tools for These Styles
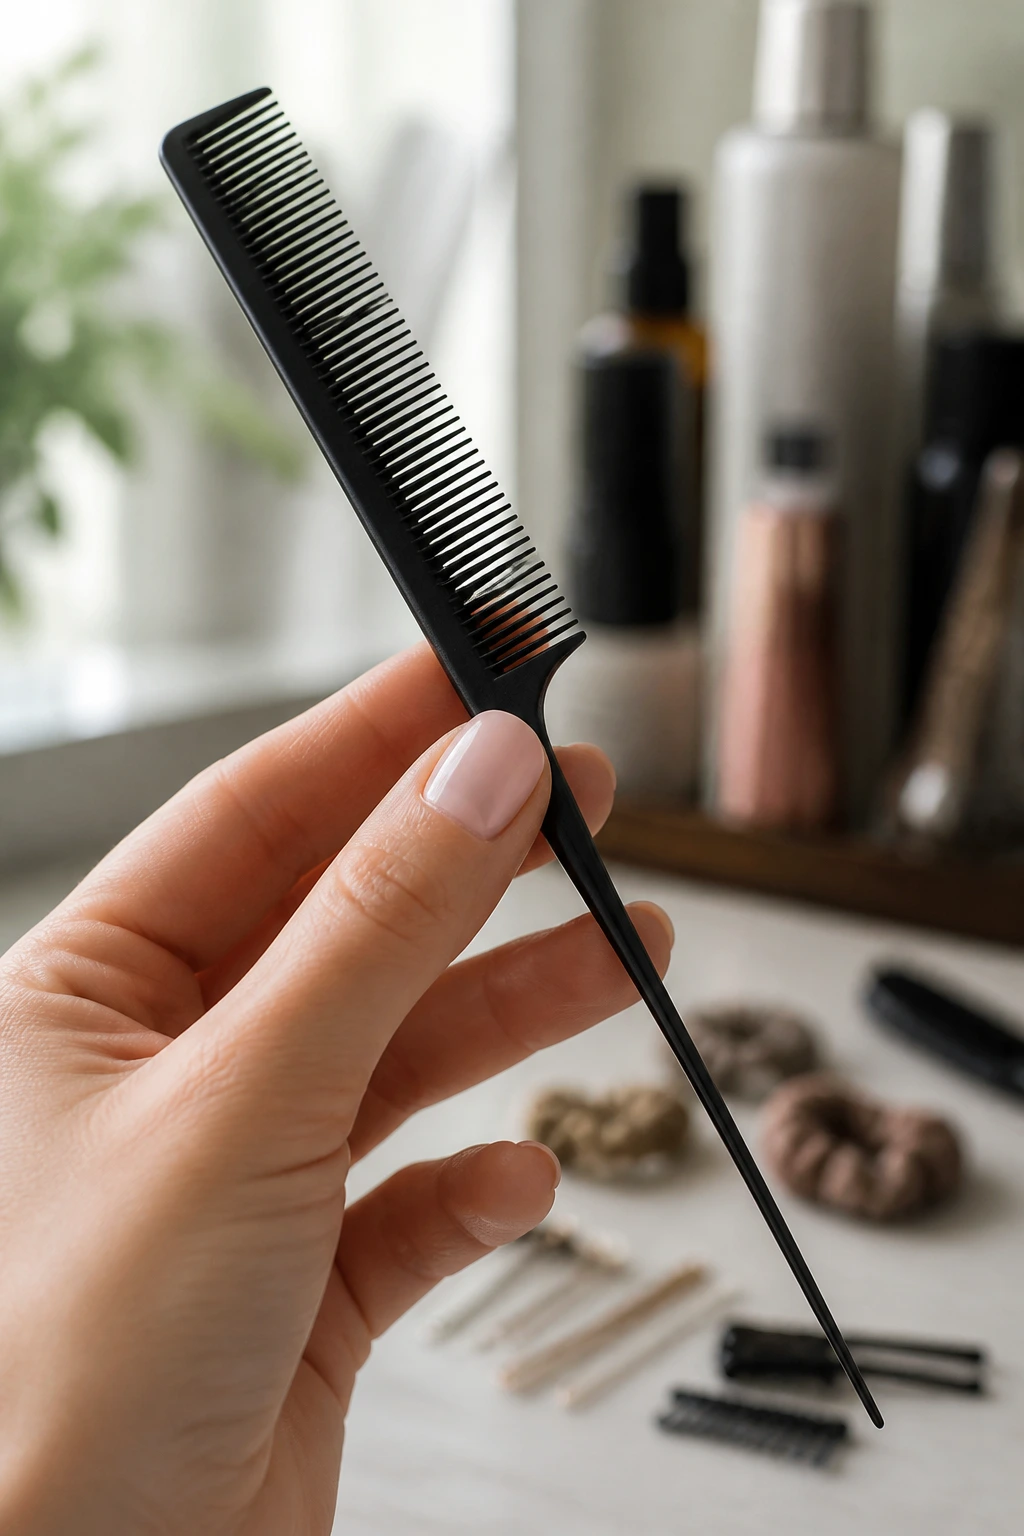
You do not need a drawer full of gadgets. You need a short, sensible kit that gives thin hair grip and shape.
- Tail comb: Sharp parting and clean sectioning make every style look neater.
- Teasing brush or small backcombing brush: Use this for a little crown lift, not a giant nest.
- 1-inch bobby pins in a matching color: Small pins disappear better and grip closer to the scalp.
- Clear mini elastics: They keep ponytails and small braids tight without adding bulk.
- Texturizing spray or dry shampoo: This is the difference between slippery and workable.
- Flexible-hold hairspray: You want hold without shellacked stiffness.
- Small mirror: Checking the back saves you from pin chaos.
- Optional claw clip or decorative pins: Good for quick styles or finishing touches.
Smart Product Picks for Fine Hair
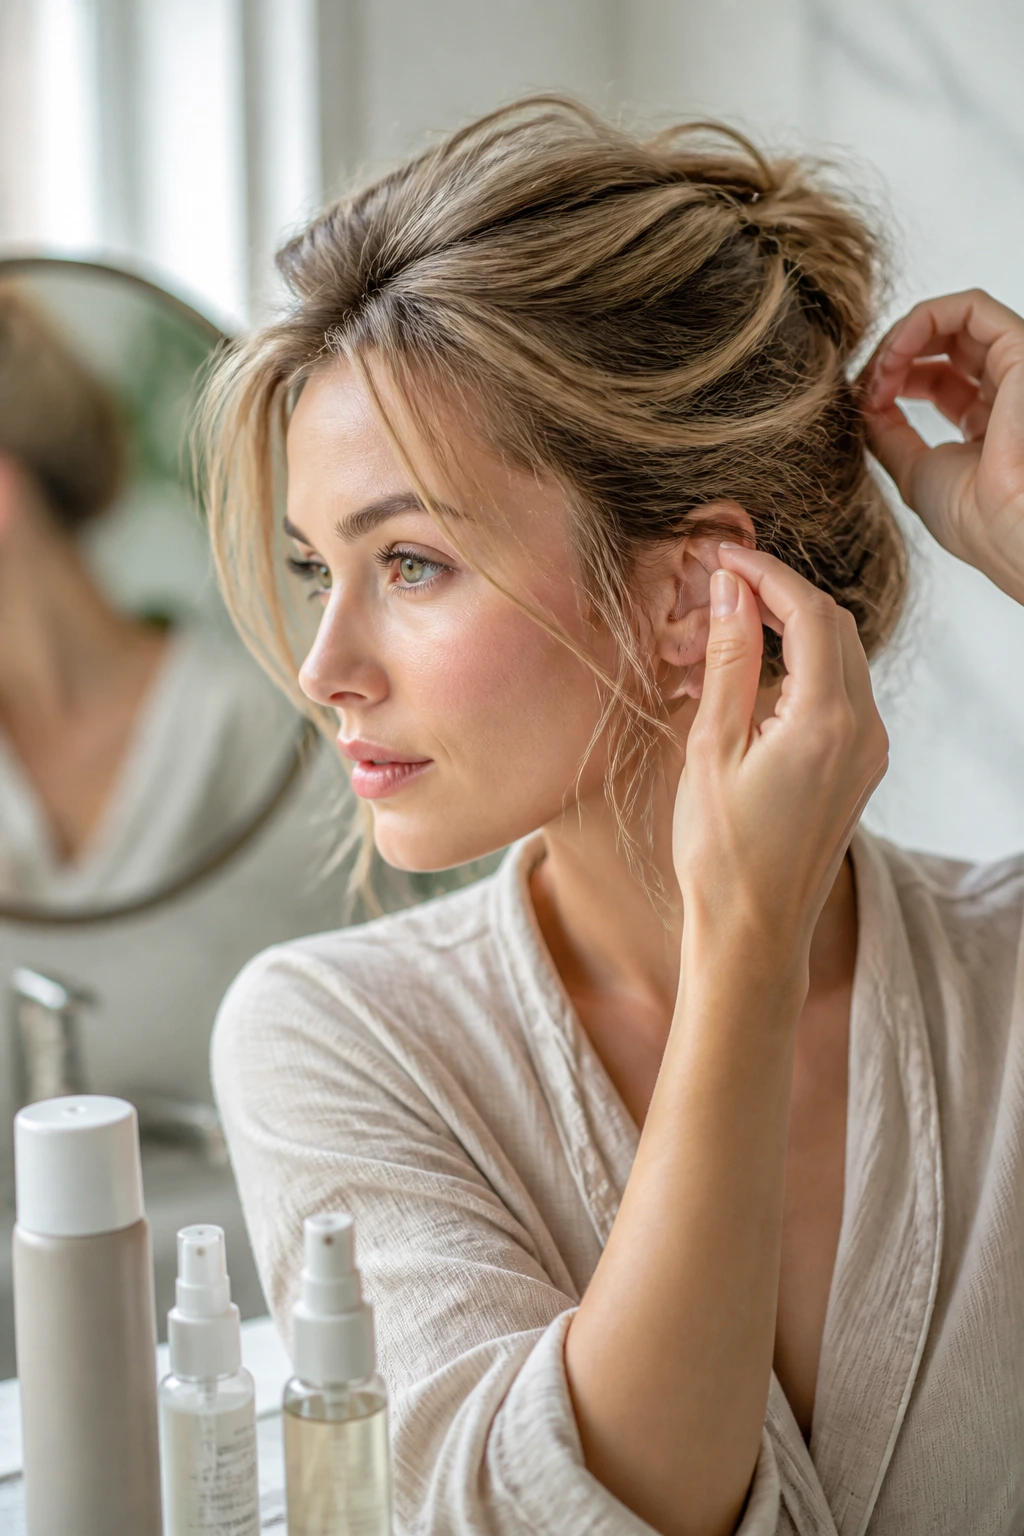
Pick products that add grit without leaving a film. That’s the whole shopping rule, and it keeps you from buying the wrong heavy cream or an overbearing pomade that turns thin hair limp by noon.
Choose lightweight texture first
A light texturizing spray, dry shampoo, or root lift spray gives better results than thick creams. Fine hair can only carry so much product before it collapses. If a product leaves your fingers feeling slippery, it will probably do the same to your style.
Buy pins that actually match
If your hair is dark brown, use pins that are close to that shade, not shiny black hardware that shows at every twist. For blondes, matte blonde or soft gold pins disappear better. Matching pins don’t just look nicer; they also let you place them where the hold is strongest instead of where they’re least visible.
Use elastics that don’t bulk up the base
A giant scrunchie can be cute, but it can also swallow a small ponytail and make thin hair look even smaller. Clear elastics and tiny covered ties are usually the better call. They let the hair do the work instead of the accessory.
Keep one finishing spray flexible
Hard-hold sprays can freeze fine hair into a brittle shell. Flexible-hold spray keeps the shape touchable and makes it easier to refresh later. If your hair falls flat fast, a little root lift spray at the crown will often help more than more hairspray.
How to Keep Thin Hair Updos in Place All Day
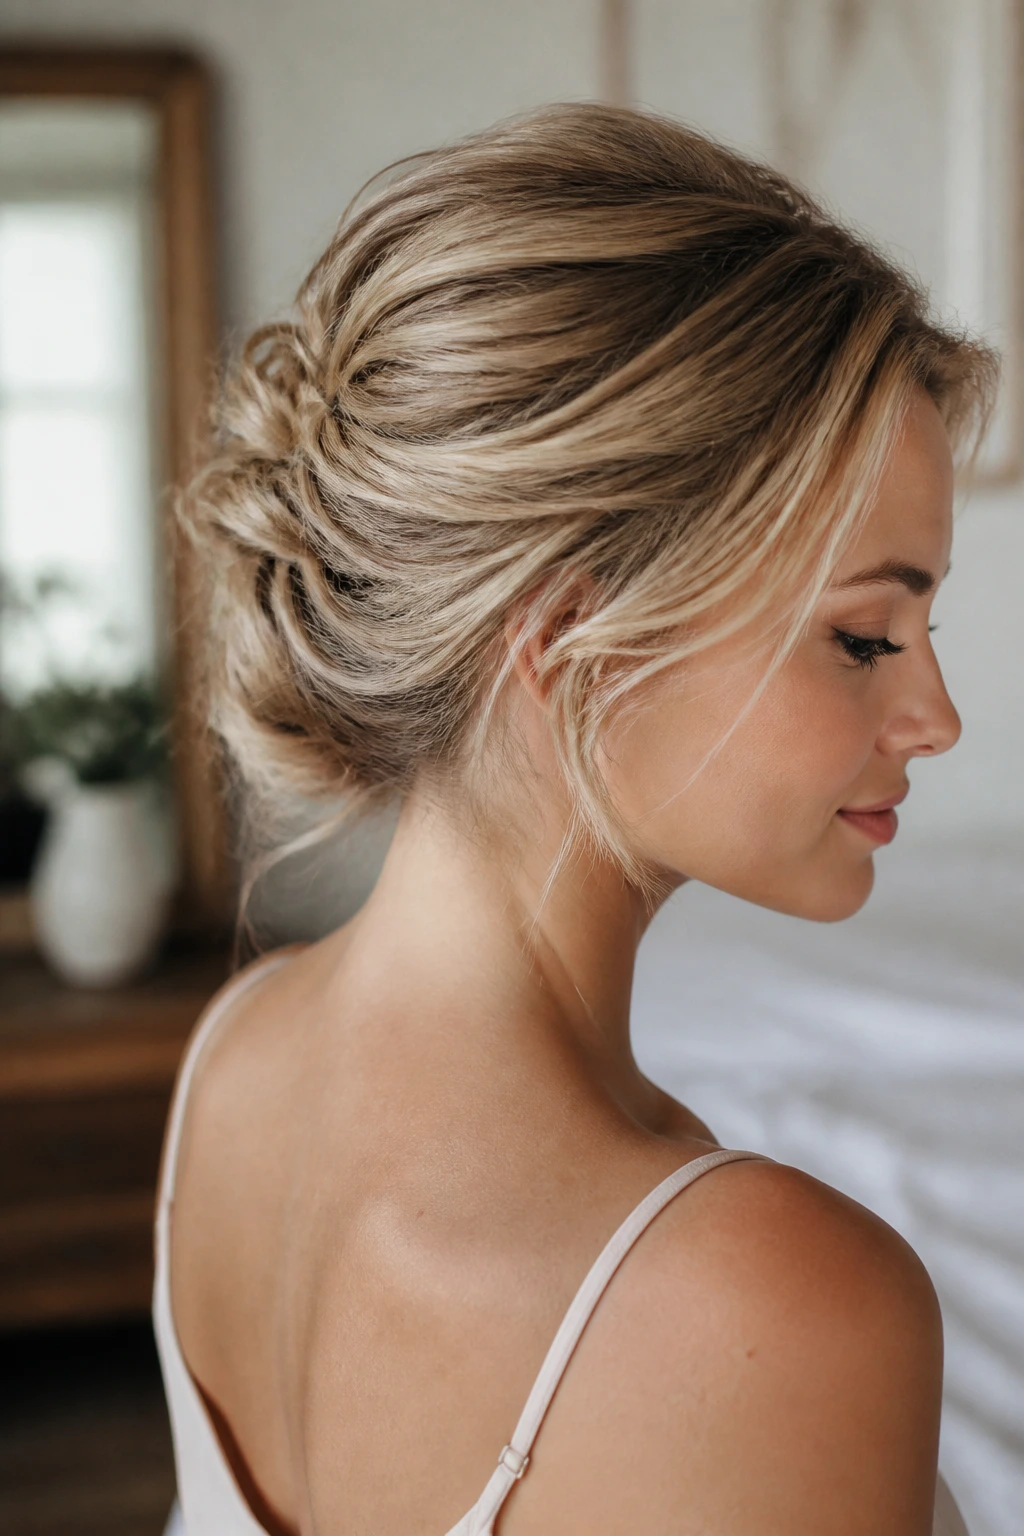
The hold starts long before the last pin goes in. Thin hair stays in place when the base is prepped properly, the pins are hidden in the structure, and the finish gets a little discipline.
Prep the roots before you gather
Dry shampoo, texture spray, or a small amount of mousse on blow-dried hair changes the whole story. The hair should feel a little rough at the roots. Not dirty. Just not slick.
Pin into the direction of tension
Bobby pins hold best when they cross into the twist or tuck, not when they sit on top of it like decoration. If the bun pulls backward, the pin should point slightly upward and in. If the twist pulls sideways, pin across that side.
Carry two rescue pins
One loose piece can unravel the whole illusion if you ignore it. Two pins in your bag solve most of that. A tiny mirror doesn’t hurt either.
Refresh without rebuilding
If the crown goes soft, lift a small section at the root and mist dry shampoo underneath. If the bun loosens, push one pin deeper into the base instead of taking everything apart. Most thin-hair styles only need a nudge, not a full restart.
Texture Boosters That Add Grip Without Weight
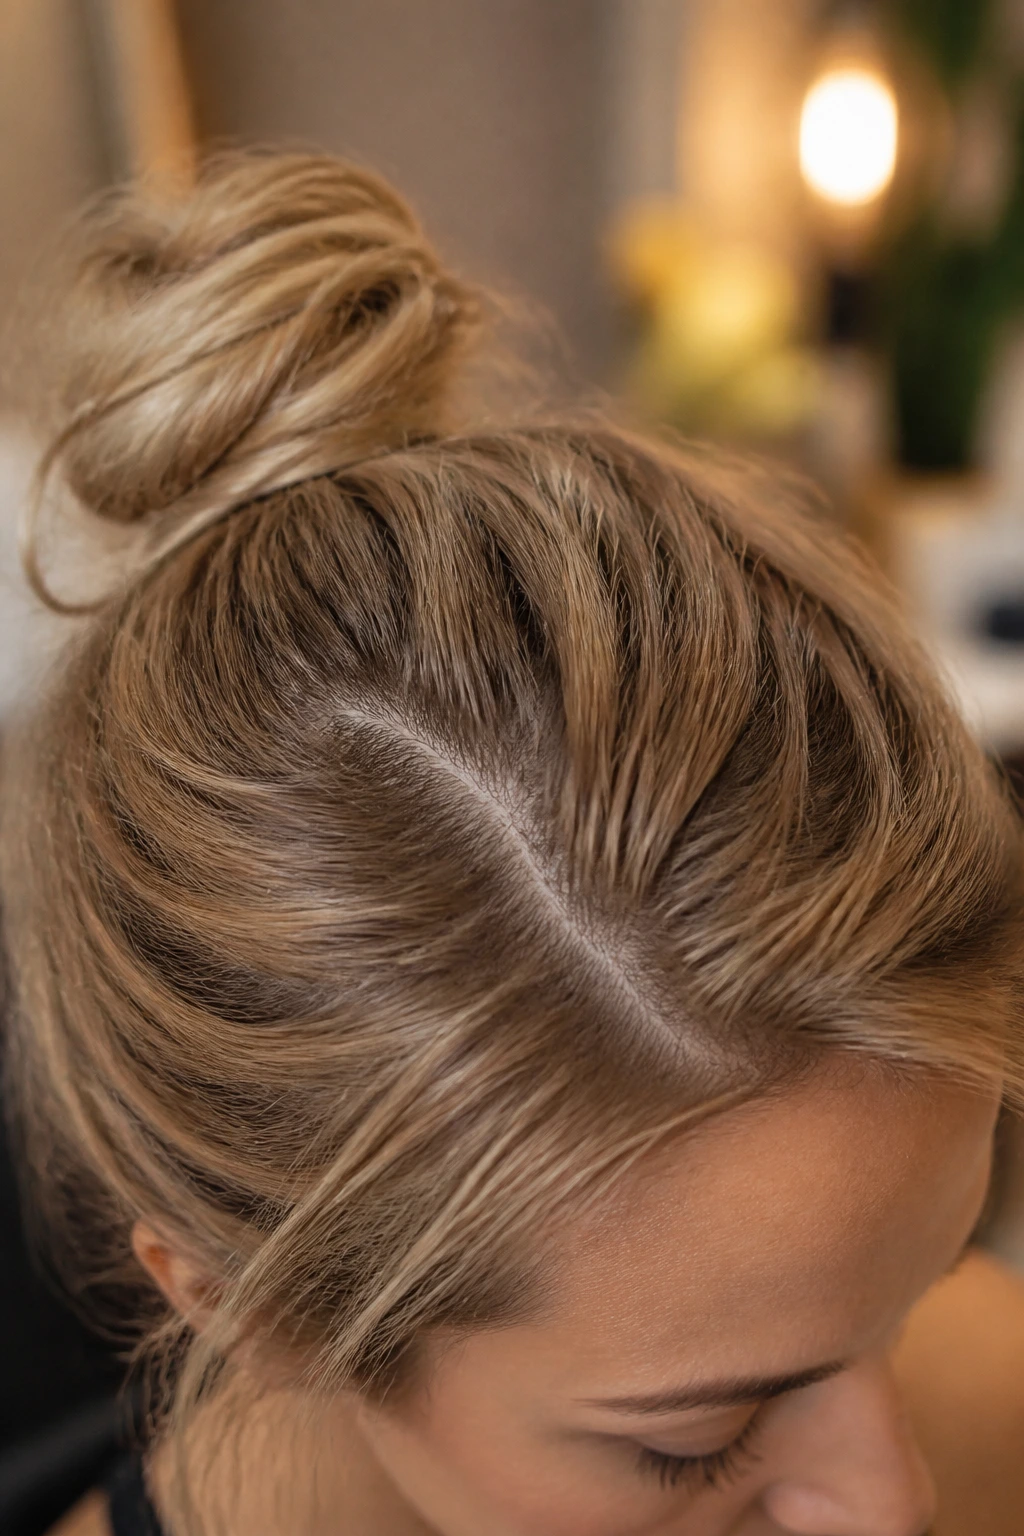
A little bend goes a long way with fine hair. You do not need full curls on every style. You need just enough grit to stop the hair from gliding apart.
- Soft waves: A quick 1-inch iron bend at the mids gives pins something to hold.
- Dry shampoo at the roots: Use it even if your hair is not oily; it adds friction.
- Tiny backcombing at the crown: One or two strokes underneath can create just enough lift.
- Mousse on damp hair: Blow-dry it in for grip that lasts longer than surface spray.
- Texturizing powder at the part line: Use a light touch. Too much can look dusty.
If a style keeps slipping, do not blame the hair first. Check the surface. Smooth hair is pretty until it becomes a slide.
Make-Ahead, Sleep-In, and Next-Day Maintenance

Some of these styles can be built in stages, which is useful if you hate getting ready in a rush. The trick is knowing which part can wait and which part needs to happen fresh.
A low bun, French twist, or braided crown can often be prepped the night before with the base pinned loosely, then tightened and finished the next morning. If you sleep on it, use a silk or satin pillowcase and wrap a soft scarf around the hairline so the crown does not get flattened. A claw-clip twist can survive overnight only if it’s not pulled too tight.
Most styles look best on hair that is one wash past clean. If you wash at night, let the roots dry fully before bed and add dry shampoo in the morning. A style with loose tendrils usually needs the quickest refresh — a 10-second curl re-bend and one mist of spray often enough.
If the hair is truly flat the next day, do not rewash immediately. Work a little dry shampoo in at the roots, flip your part, and rebuild the bun or twist from the lower half. Thin hair often comes back better with a reset than with a fresh shampoo cycle.
Variations and Adaptations to Try
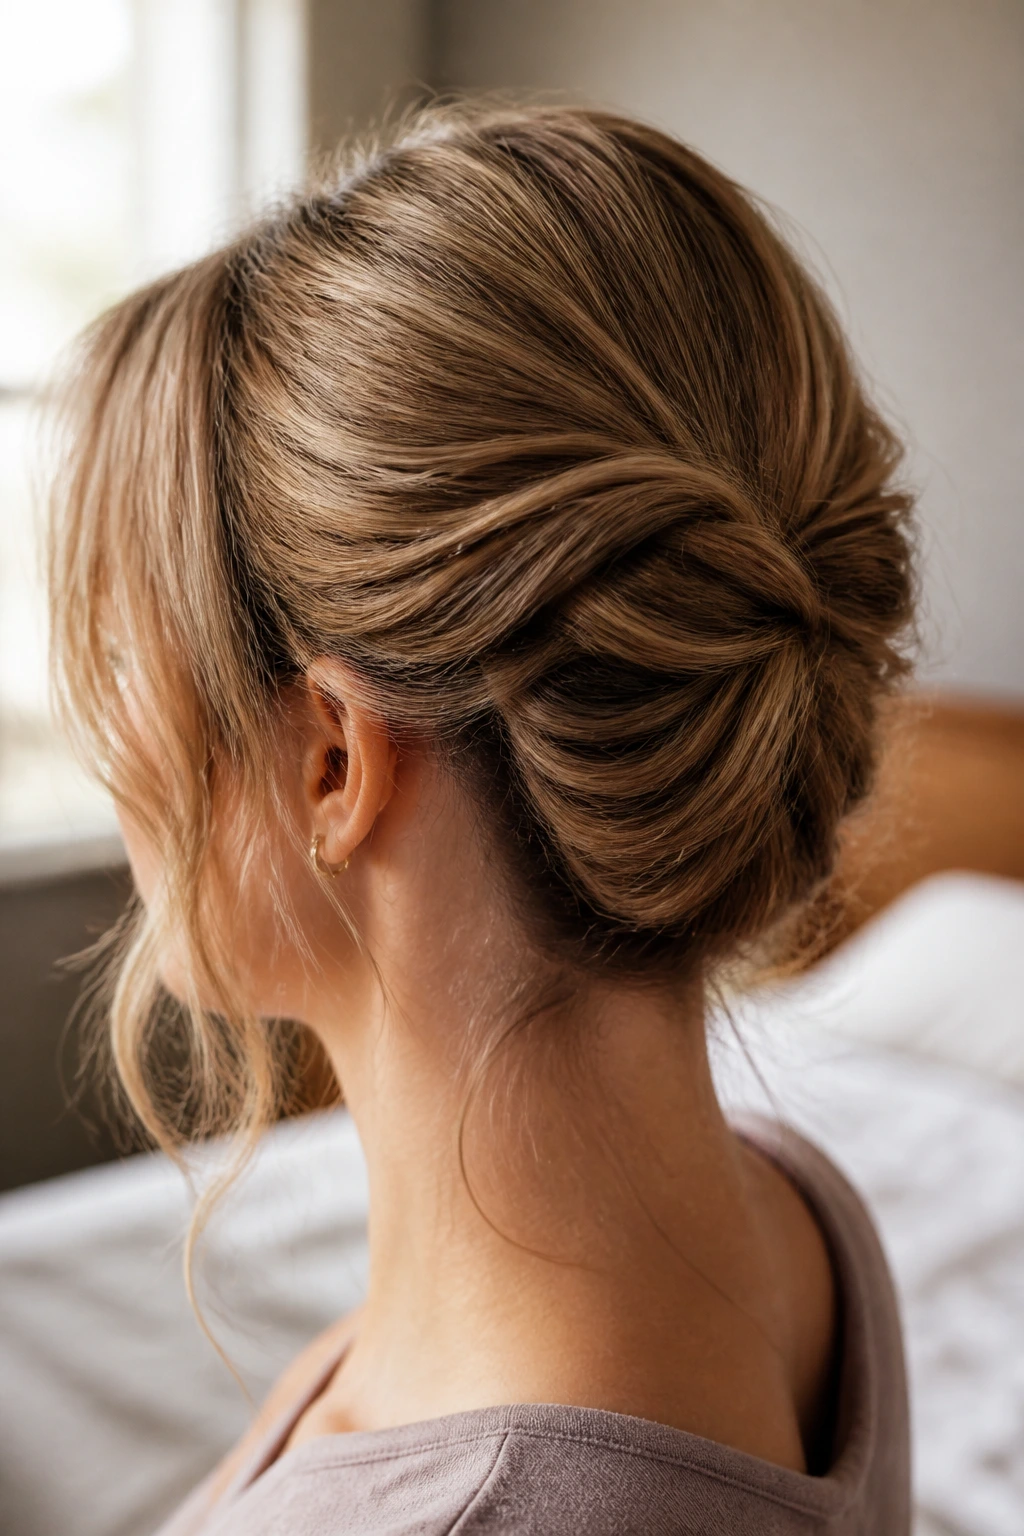
Not every head of hair behaves the same way, and that is fine. Some people need more grip, some need less tension, and some need a way around short layers or a blunt bob.
Short-Length Rescue: If your hair barely reaches the nape, stick with folded rolls, mini knots, and claw-clip twists. These styles hide shorter ends instead of forcing them into a bun they cannot fill.
Curly-Texture Version: Work with the bend you already have. Use a lightweight cream only on the ends, then build the updo loosely so the curls can stack instead of getting crushed. Thin curly hair often looks fuller in a soft bun than in a slick one.
Extra-Fine Grip Version: Swap smooth styling cream for dry shampoo, mousse, or texture powder. This version is for hair that slips through pins if you even look at it the wrong way.
Dress-Up Version: Add pearl pins, a slim barrette, or a silk ribbon to one side of the style. The accessory should sit near the seam or base, not float randomly on top.
Heat-Free Version: Build everything from second-day texture and a little braid work. No curling iron, no hot tools, no problem. You give up some polish, but you keep the shape.
Common Mistakes to Avoid
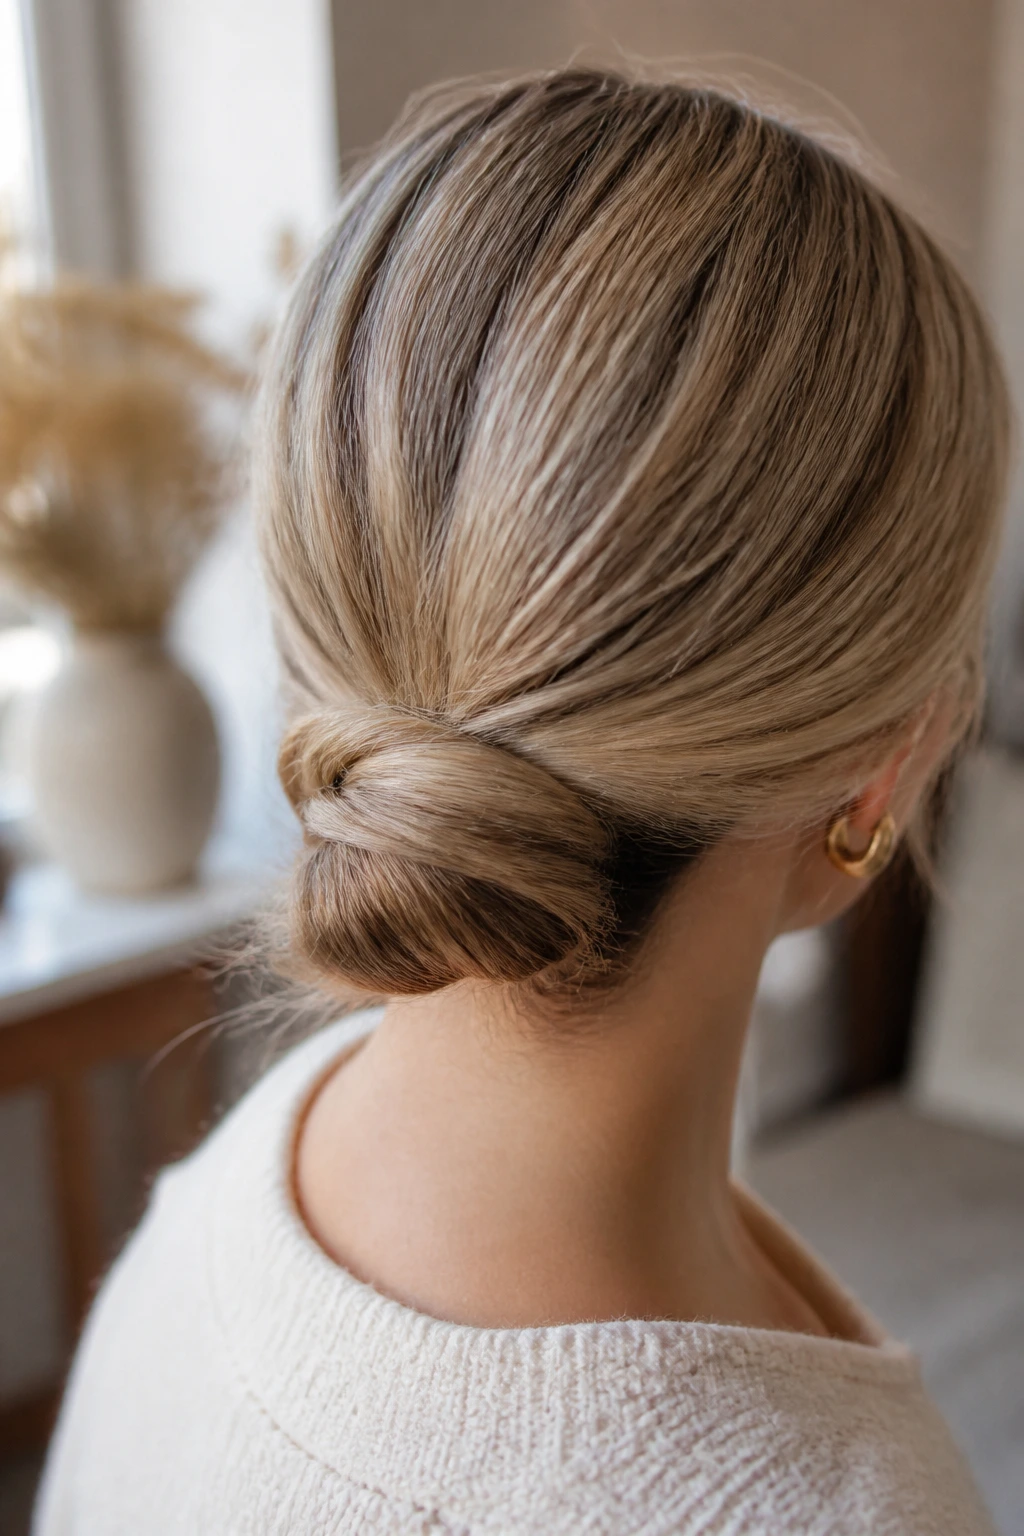
Thin hair punishes a few bad habits fast. The good news is that the fixes are boring, simple, and repeatable.
Using hair that is too clean: Freshly washed hair often slides out of buns and twists. If you need to wash, add texture spray or dry shampoo before you start.
Making the style too large: A huge bun on thin hair looks unsteady because there isn’t enough hair to support the shape. Keep the silhouette compact and let the texture do the work.
Skipping the hidden pins: One pretty pin on top is not enough. Use several bobby pins inside the twist or coil so the style is anchored where the pull happens.
Overloading with heavy product: Thick creams, oils, and sticky waxes can flatten fine hair in minutes. Light products are the safer bet.
Pulling the crown too tight: A sleek crown can be sharp, but if you pull every strand flat, the head starts to look smaller. Leave a little softness at the top.
Ignoring the ends: Wispy ends left hanging outside the style make the hair look thinner than it is. Tuck, fold, or curl them in so they disappear into the shape.
Frequently Asked Questions
Can thin hair hold an updo without extensions?
Yes, if you choose the right structure. Low knots, tucked rolls, braid-based styles, and half-up shapes usually hold better than oversized buns because they work with the hair’s natural weight.
What product helps thin hair stay up the longest?
Dry shampoo or texturizing spray usually helps more than cream. You want a little grit at the roots and mids so pins can grip, then a flexible-hold spray on top to finish.
How do I make a bun look thicker on fine hair?
Use a low placement, twist the hair loosely before pinning, and wrap one small strand around the elastic. A little backcombing at the crown helps too, but don’t overdo it or the surface gets fuzzy.
Should I curl thin hair before an updo?
Not always. A soft bend in the mids and ends usually gives enough texture for grip. Full curls can help for romantic buns or softer styles, but they are not required for every look.
How many bobby pins do I actually need?
More than you think, but not in a random pile. Most thin-hair updos hold with 4 to 8 pins placed into the base and seam, and a French twist or halo braid may need a few more.
What if my updo keeps sliding out?
Check the roots first. If the hair is too smooth, the pins are probably not the real problem. Add dry shampoo, rebuild the base with a little texture, and cross the pins into the direction of pull.
Can I do these styles on shoulder-length hair?
Yes. Shoulder-length hair often does very well with folded rolls, half-up knots, claw-clip twists, and mini buns. You may need fewer wraps and more hidden pins, but the styles still work.
How do I hide thin ends in an updo?
Tuck them under the base of the bun, braid them before wrapping, or coil them inside a folded roll. Thin ends look best when they disappear into the shape instead of hanging outside it.
Is teasing bad for thin hair?
Gentle teasing is fine. The problem is aggressive backcombing that roughs up the cuticle and makes the hair look frizzy. One small lift at the crown is plenty for most of these styles.
Soft Lift, Solid Hold
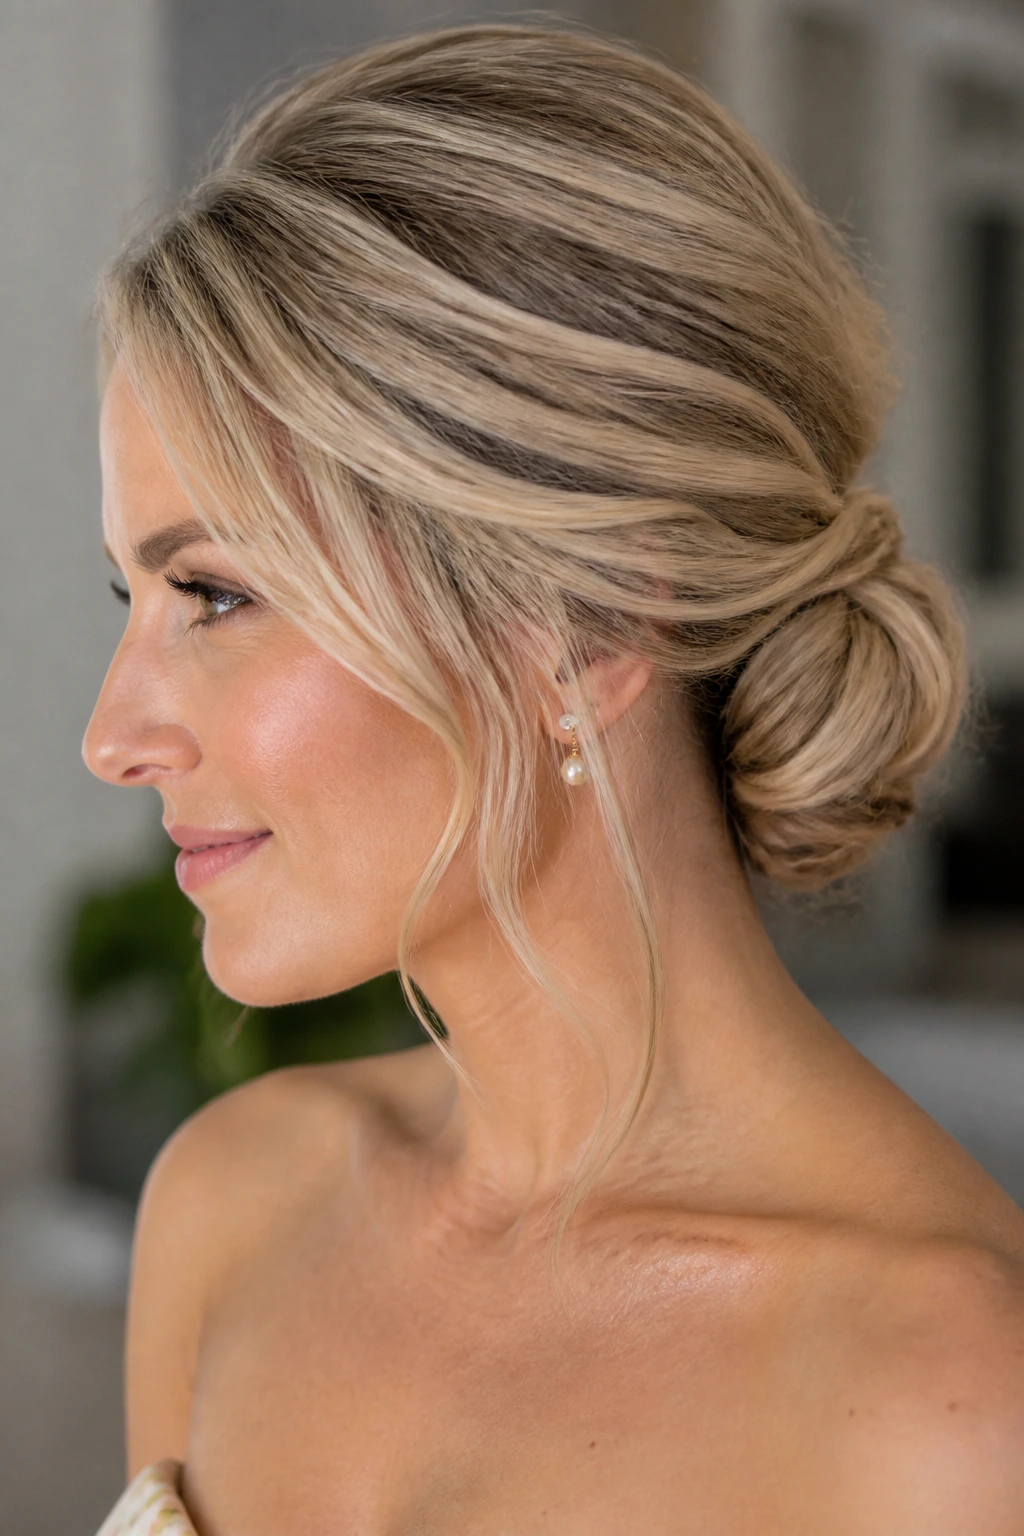
Thin hair does not need to be bullied into a giant bun to look finished. It needs smarter shapes, better grip, and a little respect for gravity. Once you start thinking in terms of low placement, hidden pins, and texture that helps rather than hurts, the whole category of updos gets easier.
Pick one style, keep the base small, and let the details do the heavy lifting. That’s where the real payoff lives — in the clean part, the tucked end, the pin you never see, and the little bit of lift that makes the mirror look back at you differently.
