



By the time the sun has warmed the back of your neck, medium-length hair starts acting like it has someplace better to be. It brushes the collar, sticks to damp skin, and catches every hint of humidity like it’s being paid for it. That is why updos for medium length hair in summer matter more than they usually get credit for. The length is awkward only when you try to force it into one shape.
Shoulder-skimming hair sits in a useful middle zone. It’s long enough to twist, braid, roll, and tuck without needing a full arm workout to gather it all, but short enough that the finished style stays lighter and cooler than a long-hair knot. You can make a polished chignon, a clipped French roll, a braided crown, or a fast half-up knot without hauling around extra weight.
I keep coming back to this length because it gives you options without demanding a complicated routine. Some styles need three pins and a claw clip. Others want a clean part, a little dry shampoo, and five quiet minutes in front of a mirror. None of them asks you to wrestle your own hair for half the morning, and that is the part worth respecting.
Why These Styles Earn Their Keep
-
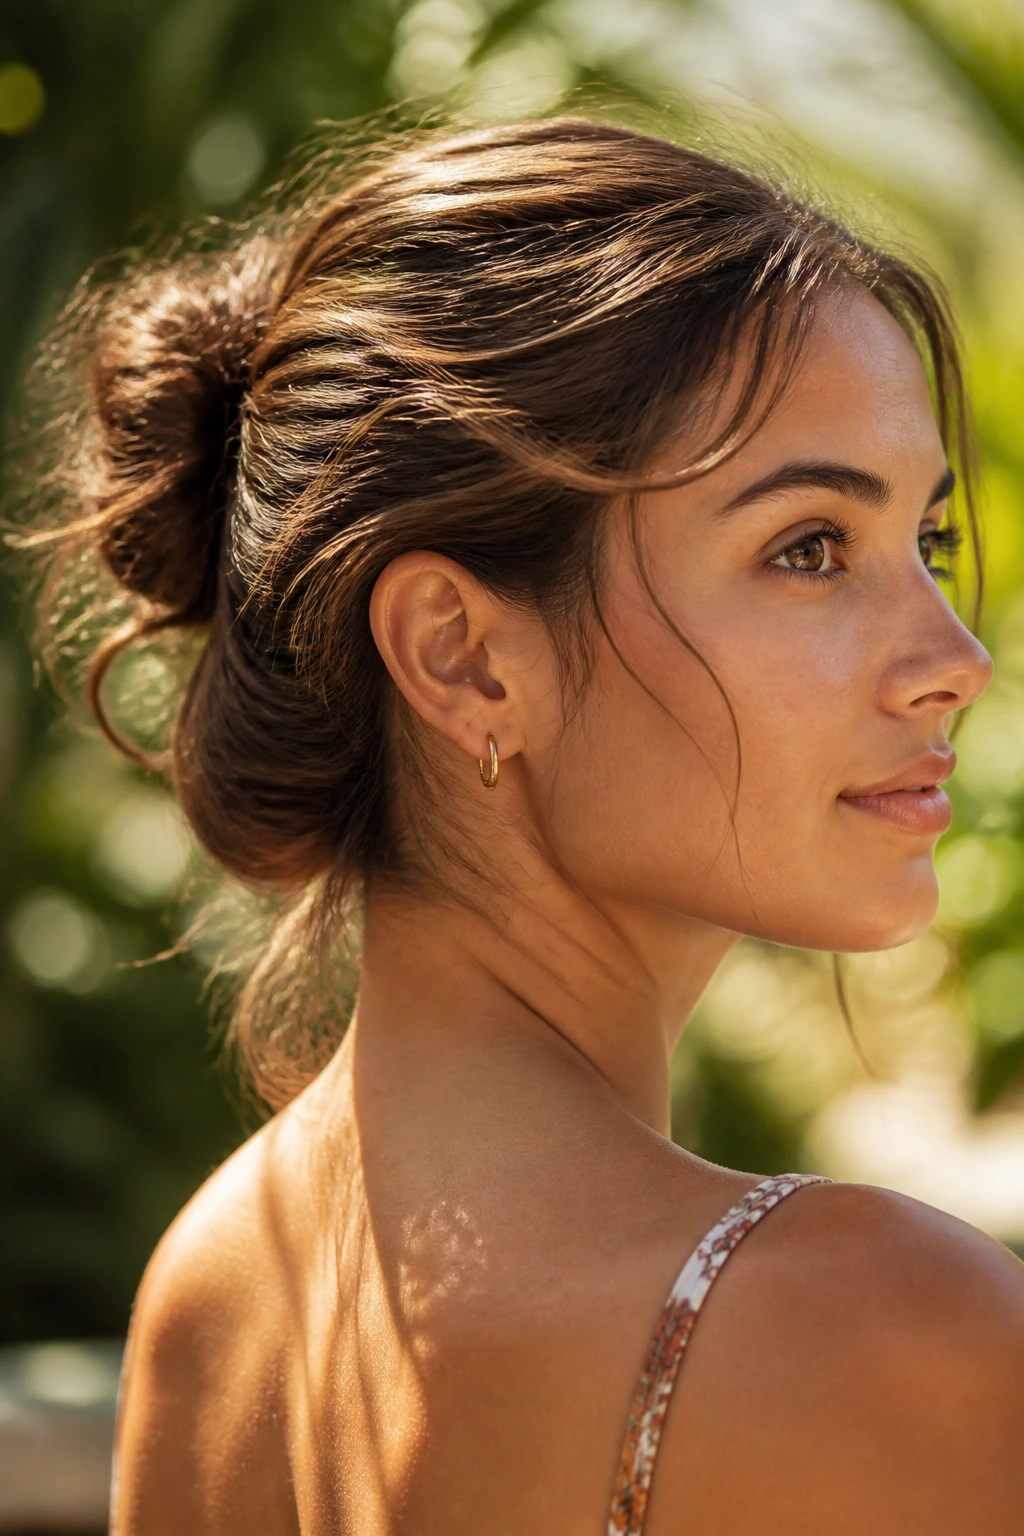
Cooler neck, less drag: Pulling medium-length hair off the nape changes the whole feel of a hot day, especially once the air turns heavy and your hair starts clinging in the wrong places.
-
Fewer pins than long hair needs: Most of these styles hold with 4 to 8 bobby pins and one small elastic, which means less bulk and less fuss when you’re in a hurry.
-
Texture helps instead of hurts: Day-two hair, a little dry shampoo, or even a hint of sea-salt spray gives the pins something to catch, so the style tends to stay put longer.
-
Layers stop being a problem: Those shorter face-framing pieces that ruin a plain ponytail can actually soften a bun, tuck neatly into a twist, or create a better outline around the face.
-
Easy to dress up or down: The same base can look casual with a claw clip, sharper with a center part, or more finished with a ribbon, scarf, or a pair of curled tendrils.
Why Medium-Length Hair Is the Sweet Spot for Summer Styling
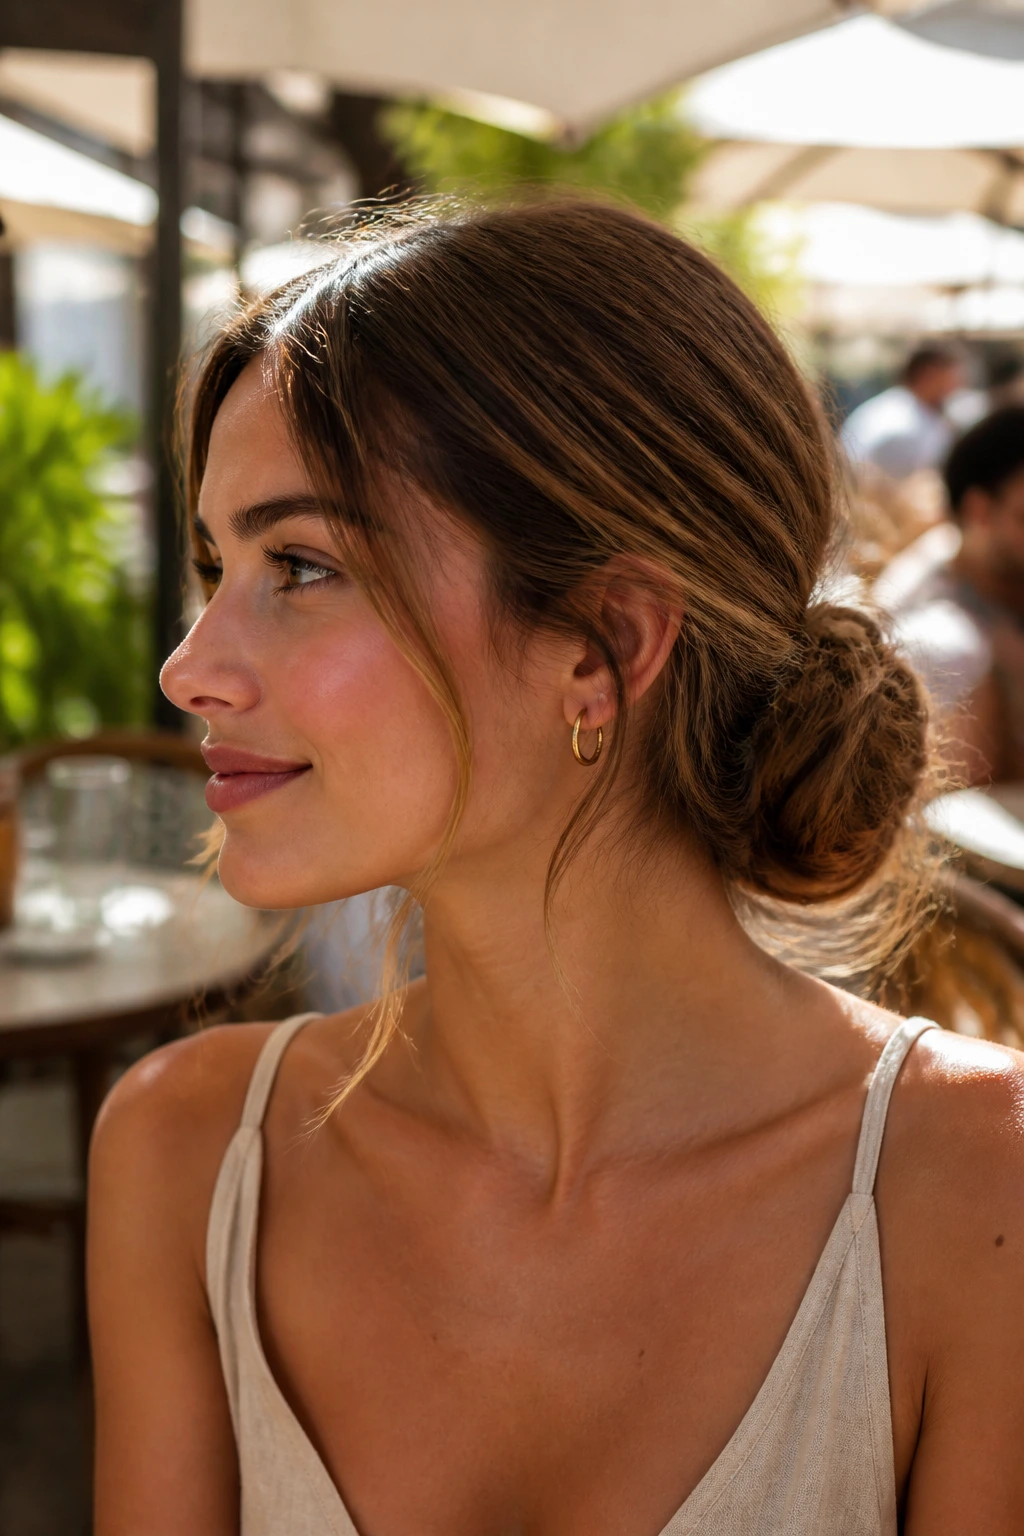
Shoulder-skimming hair gets called awkward a lot, and I think that misses the point. This length is usually the easiest to manipulate once the temperature rises. You have enough hair to build a real shape, but not so much that a bun turns into a heavy knot that slides down your head by lunch.
The difference shows up fast in heat. Long hair drags. Very short hair pops free. Medium-length hair can sit close to the scalp, fold under itself, and still leave room for movement around the face. That means a low chignon, a braided crown, or a tucked roll can look finished without requiring a dozen pins and a prayer.
Where the Length Works for You
If your hair lands around the collarbone, the ends usually tuck under cleanly, which matters more than people think. You can hide the tips inside a bun, fold them into a Gibson tuck, or let them soften the shape of a side knot instead of sticking out like little flags.
Where It Needs a Little Help
Layers are the only real catch. They’re not a deal-breaker. They just need grip. A light mist of texturizing spray, dry shampoo at the roots, or a tiny amount of mousse on damp hair gives the shorter pieces something to hold onto. Hair that is too silky slides. Hair with a little grit behaves.
1. Twisted Low Chignon
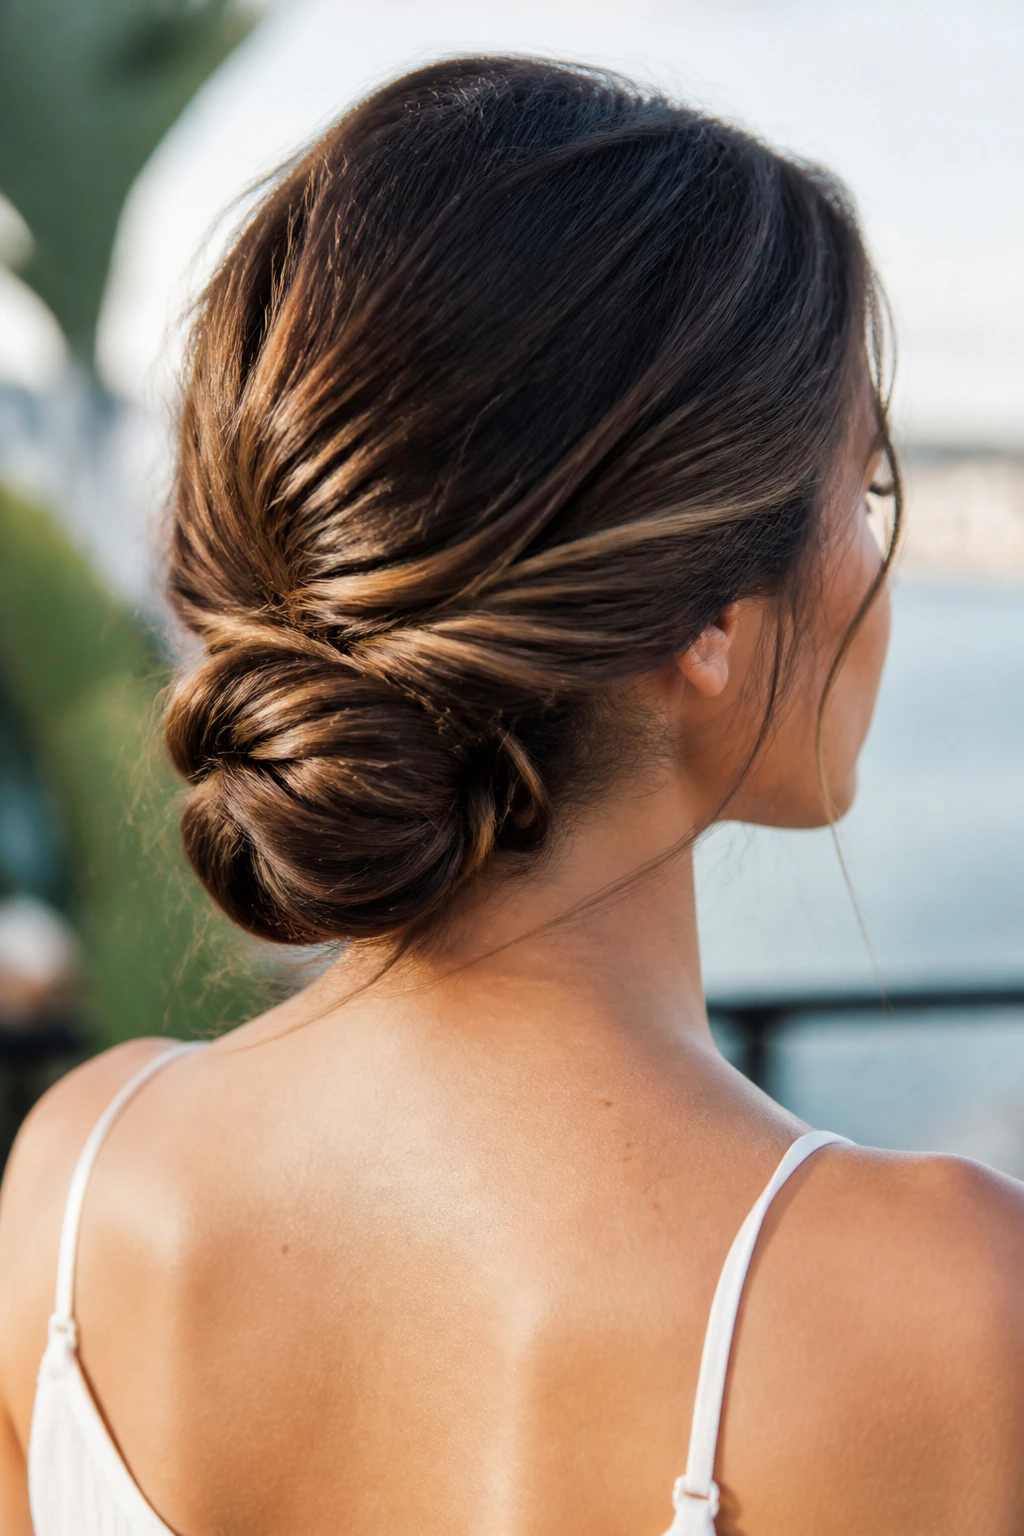
A twisted low chignon is one of those styles that looks calm even when the day is not. It sits at the nape, keeps the neck clear, and gives medium-length hair a shape that feels neat without looking stiff. The little twist detail matters. It keeps the bun from flattening into something plain.
How to Build the Shape
- Gather hair into a low ponytail with a clear elastic, keeping it snug but not tight.
- Split the tail into two sections and twist each section in the same direction until it starts to rope.
- Wrap the twisted pieces around each other, then coil them into a flat bun against the nape.
- Pin each overlap point with 4 to 6 bobby pins, sliding them in from different angles so the bun doesn’t shift.
- Finish with a light mist of flexible-hold spray and press any short layers into the twist with the tip of a pin.
Best for: medium hair that was washed the day before, or freshly washed hair with a bit of dry shampoo at the roots.
The shape is especially good if you want the front to stay clean and the back to feel controlled. It’s quiet in the best way.
2. Rope-Braid Low Bun
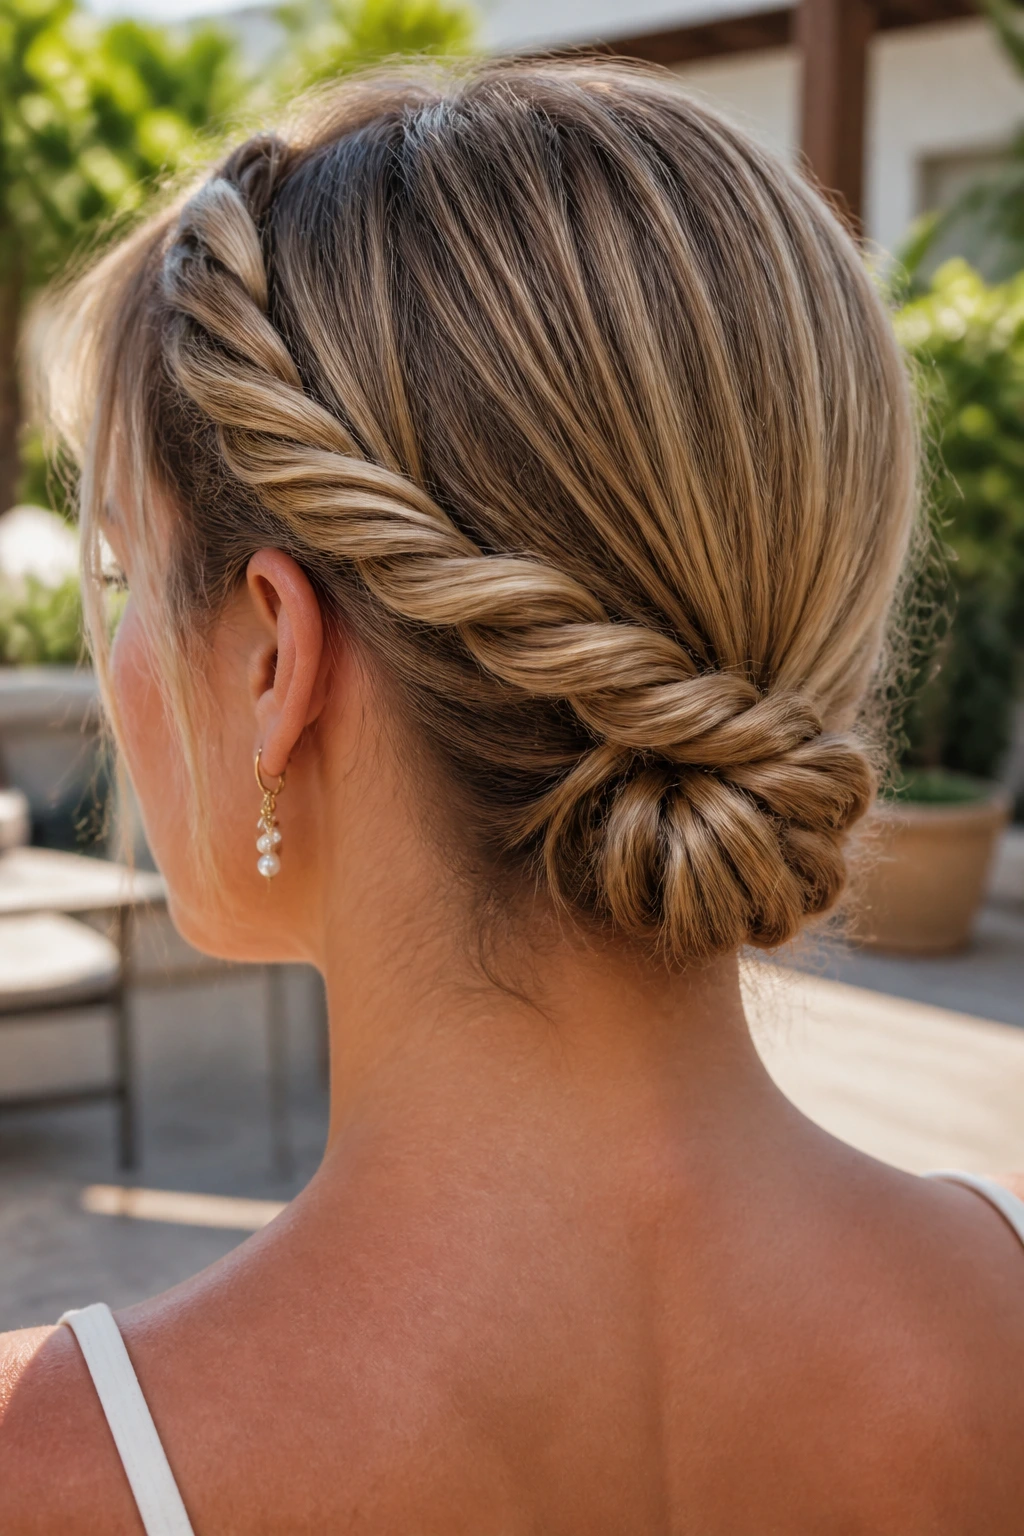
A rope-braid low bun holds because the braid itself gives the hair more grip. That sounds small. It isn’t. Smooth twists can slip when hair is fine or freshly blown out, while the rope braid creates tiny ridges that catch on themselves.
Start by dividing the hair into two equal sections and twisting each section tightly before wrapping them around one another. Secure the rope braid at the nape, then coil it into a bun and pin the edges where the weight sits. If your hair feels slippery, spray a little texturizing spray on the mid-lengths first and wait about 20 seconds before you braid. That pause helps.
This is a good pick for a humid patio dinner or a day when you know you’ll be moving around. It reads tidy from the front, but the braid texture keeps it from looking flat and fussy. I like that balance. It does the job without acting precious.
3. Half-Up Halo Twist
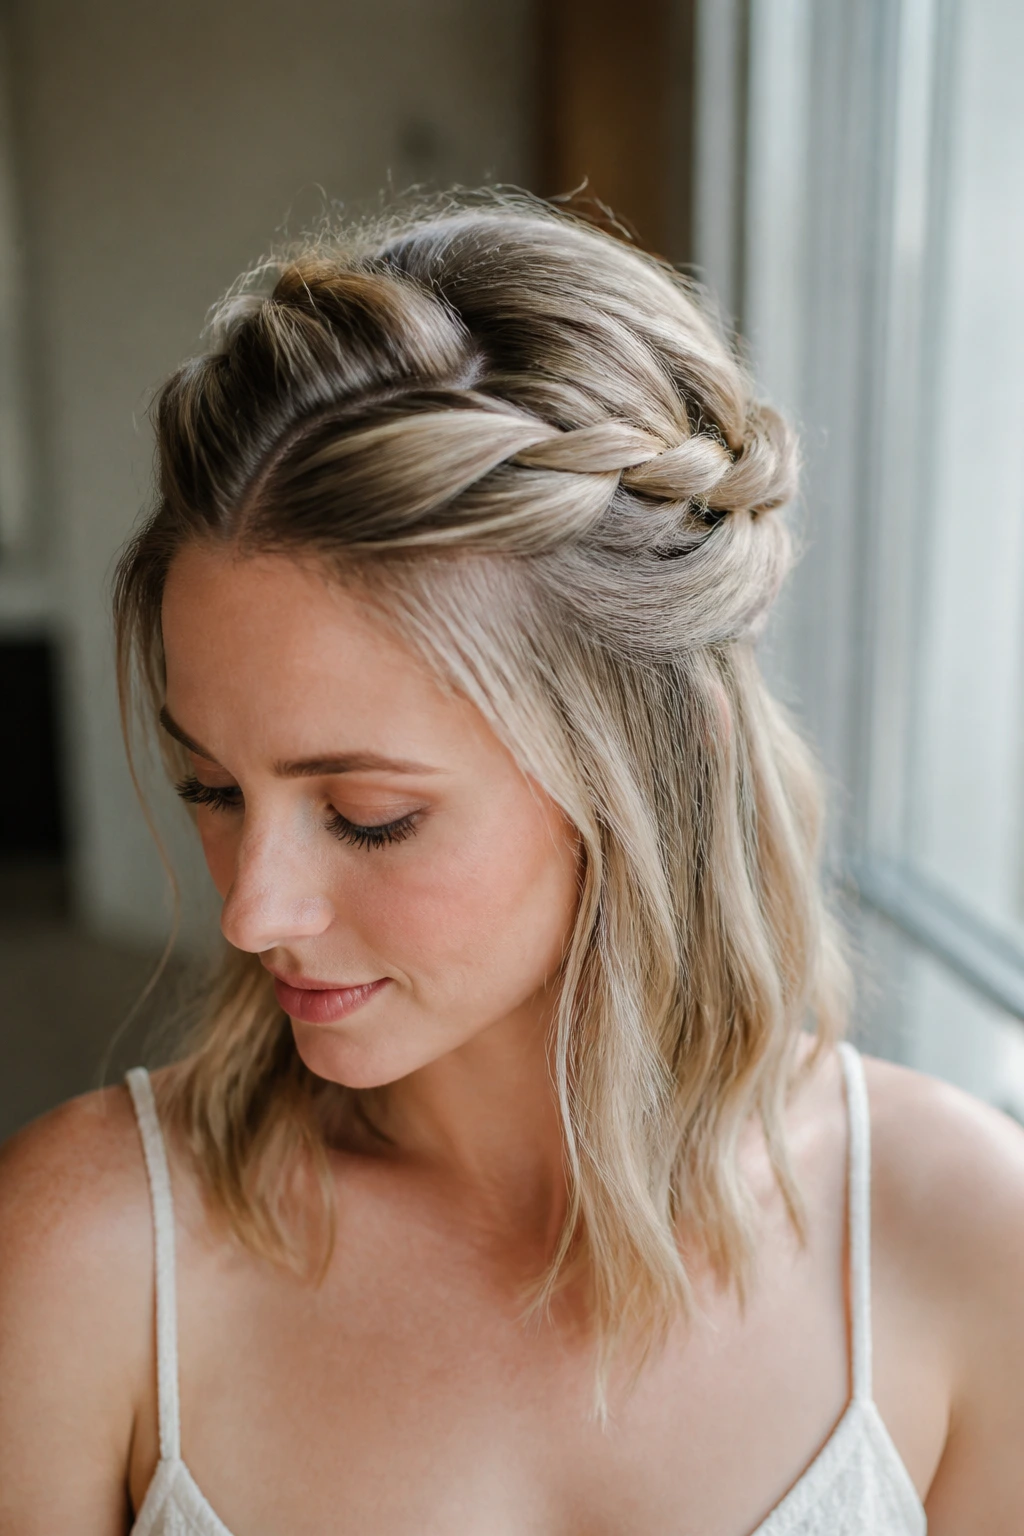
Why does a half-up halo twist feel cooler than it looks? Because it gives you the lifted shape of an updo without asking every strand to commit. The crown opens up, the hair around the face gets swept back, and the rest stays down with movement.
Take a 1- to 1½-inch section from each temple and twist it back toward the crown. Pin each side with two bobby pins crossed in an X, then let the lower half hang loose or add a bend with a curling iron if you want a cleaner outline. If the layers near your cheekbones are short, leave them alone. They soften the style and keep it from looking overworked.
How to Wear It
This is the one to choose when you want hair off your face but do not want a full bun. It works with air-dried waves, blunt ends, and even straight hair if you smooth the front first. The shape is light, quick, and a little easier on hot afternoons than a full updo.
4. Claw-Clip French Roll
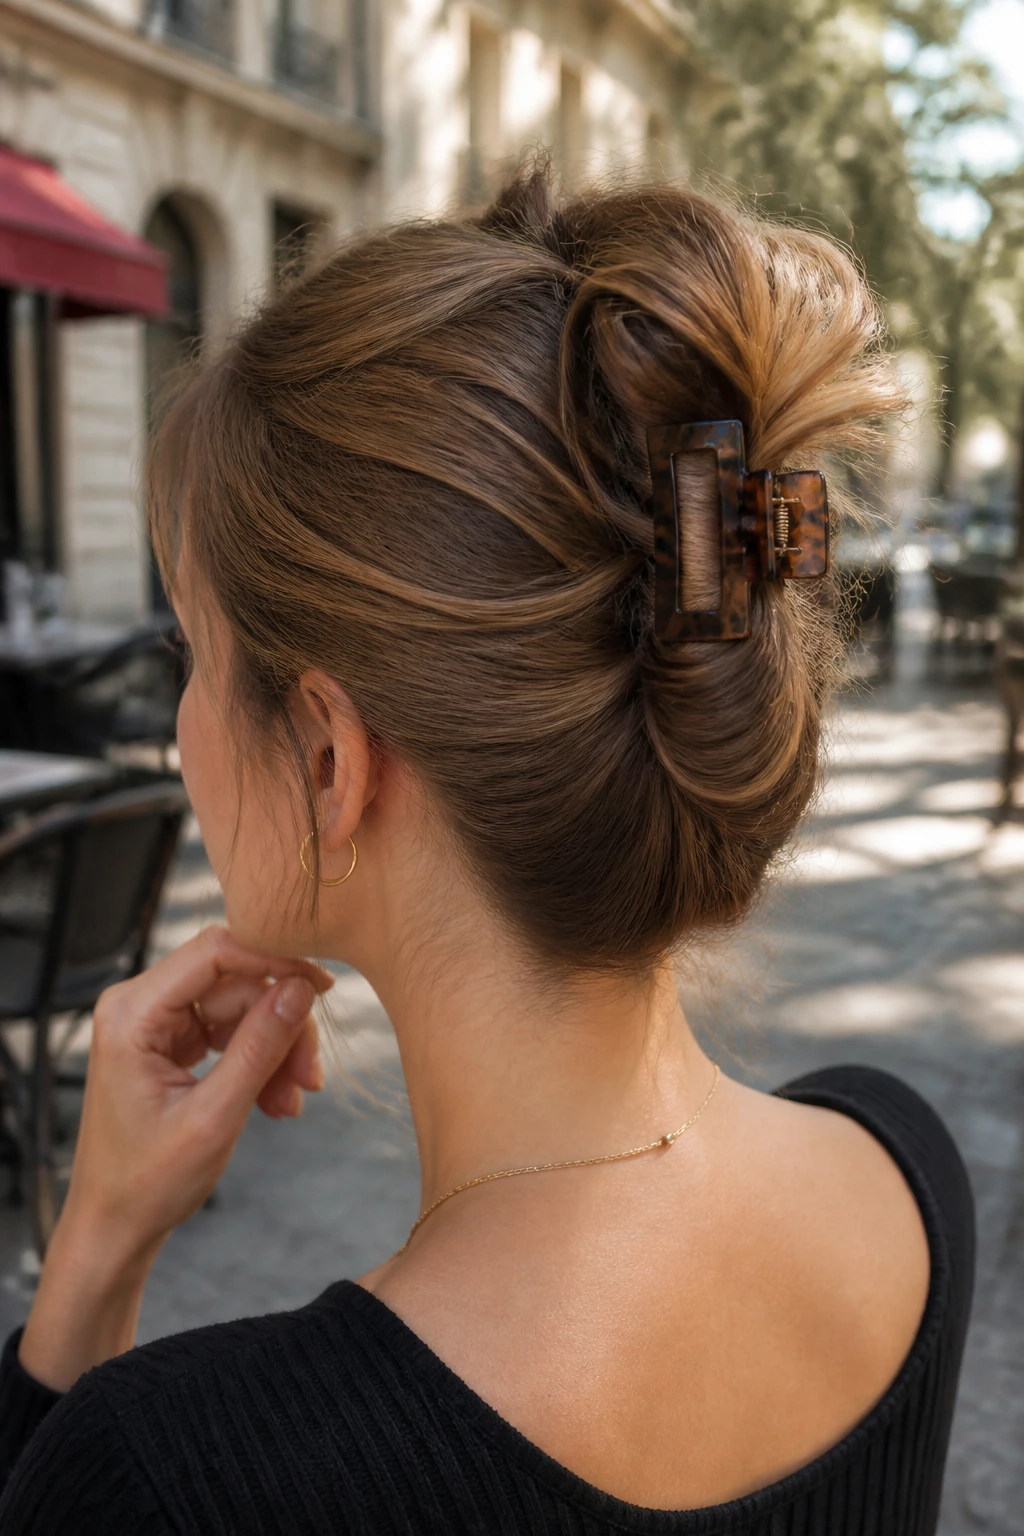
If you have a claw clip in one hand and six minutes before you leave, this is the move. A claw-clip French roll takes the old rolled shape and makes it less precious, which is exactly why it works in summer. You get the neck relief without pretending you had time for a formal style.
Pull the hair back as if you’re making a low ponytail, twist it upward, and fold the length back into itself so the roll sits vertically against the head. Catch the center with a medium claw clip, not the tiny decorative kind that slips after twenty minutes. If the ends poke out, fold them under and pin once.
- Use a medium clip: Tiny clips look cute and fail fast on medium hair.
- Rough hair holds better: Day-two texture gives the clip something to bite into.
- Hide one pin if needed: A single bobby pin at the base can stop the roll from tilting.
The clip should grip the center of the roll, not just the edges. That detail decides whether the style lasts the afternoon.
5. Double Mini Buns
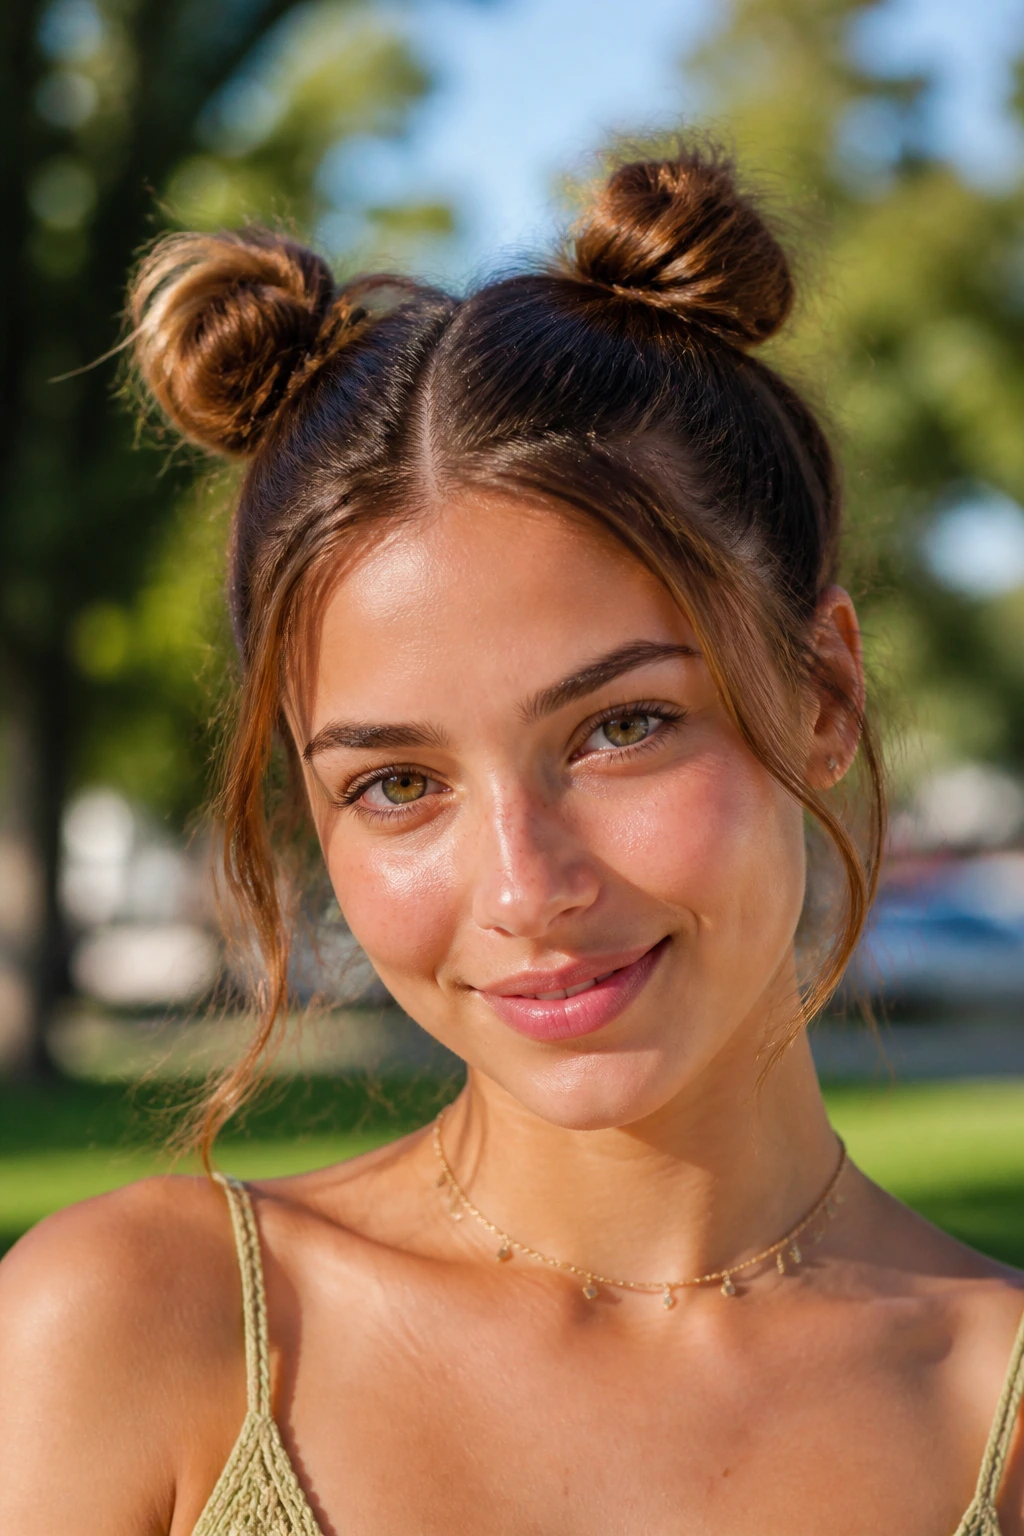
Double mini buns work because they divide the weight of your hair in half. That sounds almost too simple, but it’s the reason they stay cooler and sit higher than one large knot. Medium-length hair does not have to be forced into one giant bun to count as an updo.
Part the hair down the middle, then gather each side into a small ponytail near the crown or just above the ears. Twist each ponytail into a compact bun and secure it with a small elastic and 3 to 4 pins. If your hair is straight, start with a little dry shampoo at the roots. If it is wavy, let the texture stay a little messy. The buns do not need to match perfectly.
Best for: hot walks, casual lunches, music festivals, and any day when you want your hair up without looking formal.
The part can stay crisp or slightly loose. Either way, this style has energy. It does not try to be quiet, and that is part of the appeal.
6. Sleek Center-Part Knot
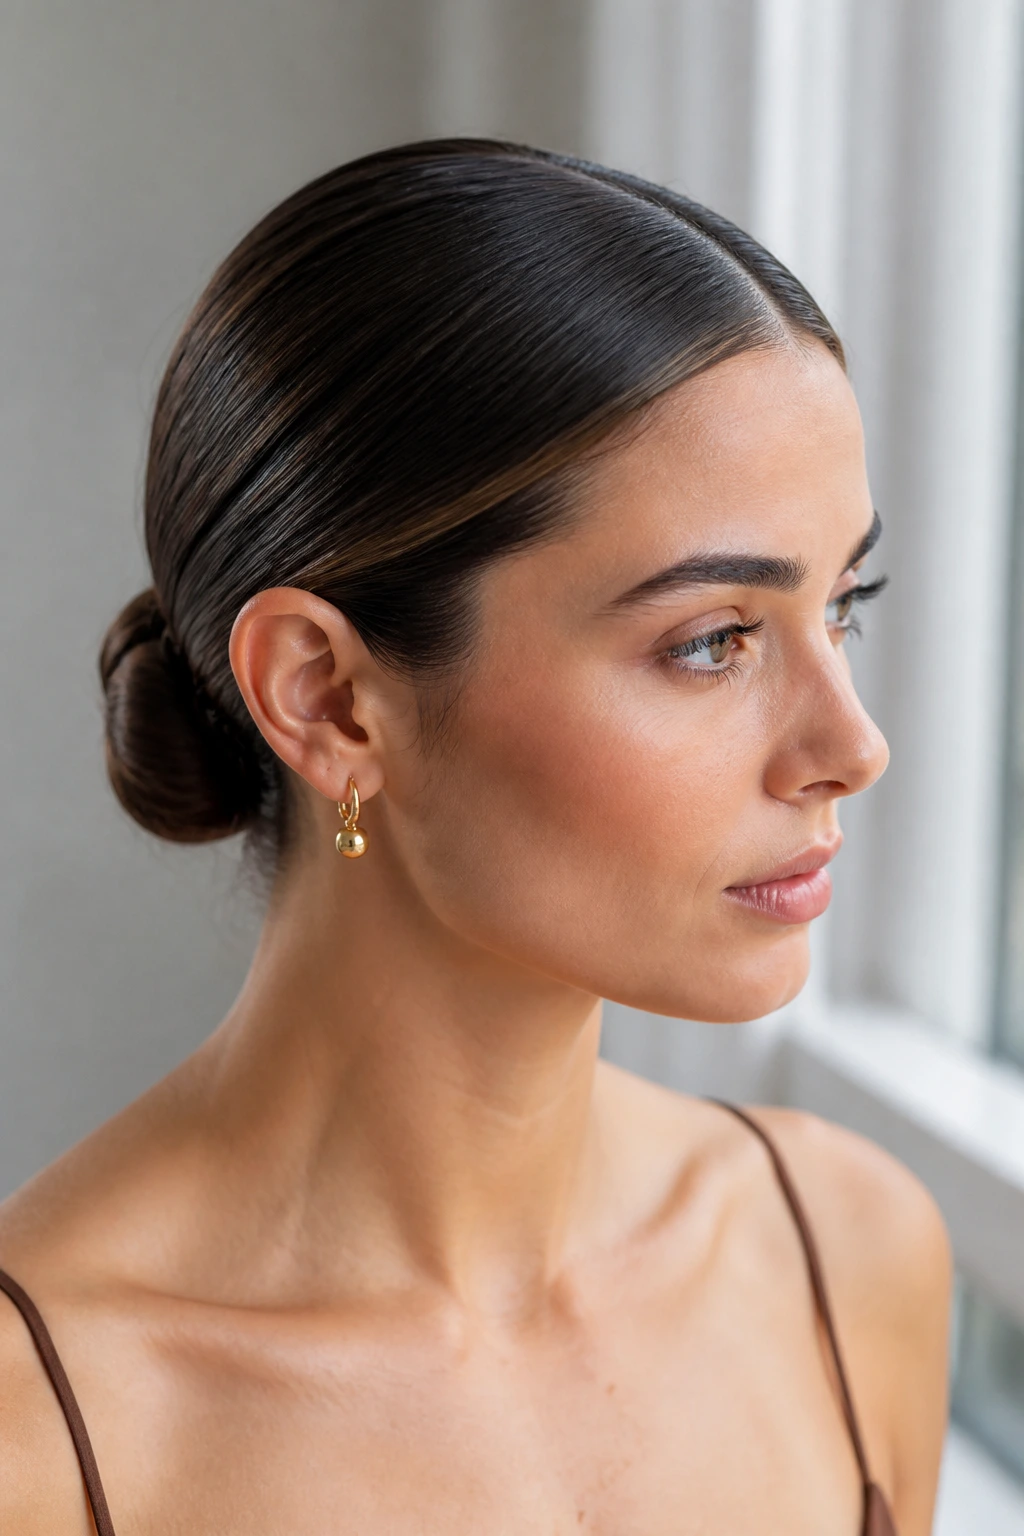
A sleek center-part knot is what happens when you want control, not volume. Unlike a messy bun, this one depends on a flat base and clean lines. That makes it a good fit for straight hair, blown-out hair, or any day when humidity would otherwise turn your crown into fuzz.
Use a rat-tail comb to draw a center part from forehead to crown, then brush the hair into a low or mid-height knot with a little styling cream or gel around the hairline. Secure it with one elastic, twist the length into a compact knot, and pin the ends flat against the base. If your hair is medium-length and the wrap feels short, fold the ends under twice instead of forcing a bulky loop.
This is the style I’d pick for a sharper outfit or a day when I want my face to look more open. It frames earrings well. It also behaves better than a loose bun in wind, which matters more than people admit.
7. Braided Crown Tuck
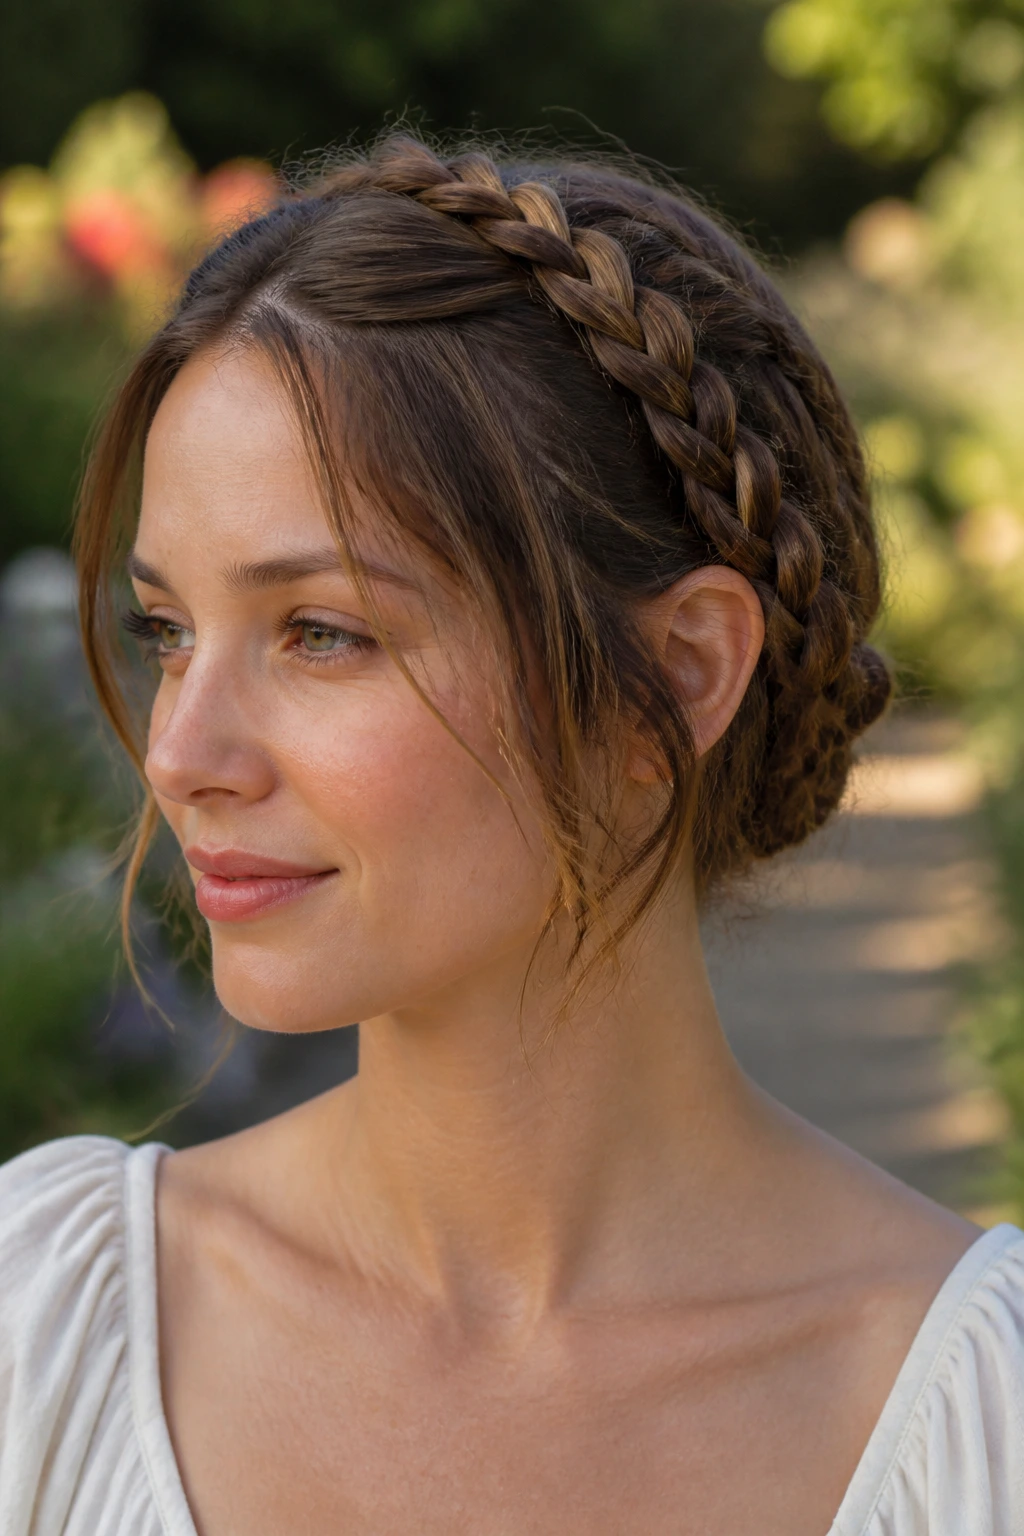
A braided crown tuck gives medium-length hair a shape that feels secure from every angle. The braids act like rails, and the tuck at the back keeps the ends hidden so the style stays clean in heat and wind. It’s practical, but it still looks deliberate.
Why It Survives Wind
- Braid two sections from the temples back toward the crown, keeping each braid close to the head.
- Cross the braids at the back of the crown and pin them where they overlap.
- Tuck the ends underneath and secure them with 2 or 3 more pins at the nape.
- Use day-two texture if you have it; it keeps the braids from sliding apart.
The nice thing here is that the style can loosen a little and still look good. That matters on long summer days, because hair that stays too perfect tends to show every tiny shift. This one gets a little softer and still holds its shape.
8. Messy Gibson Tuck
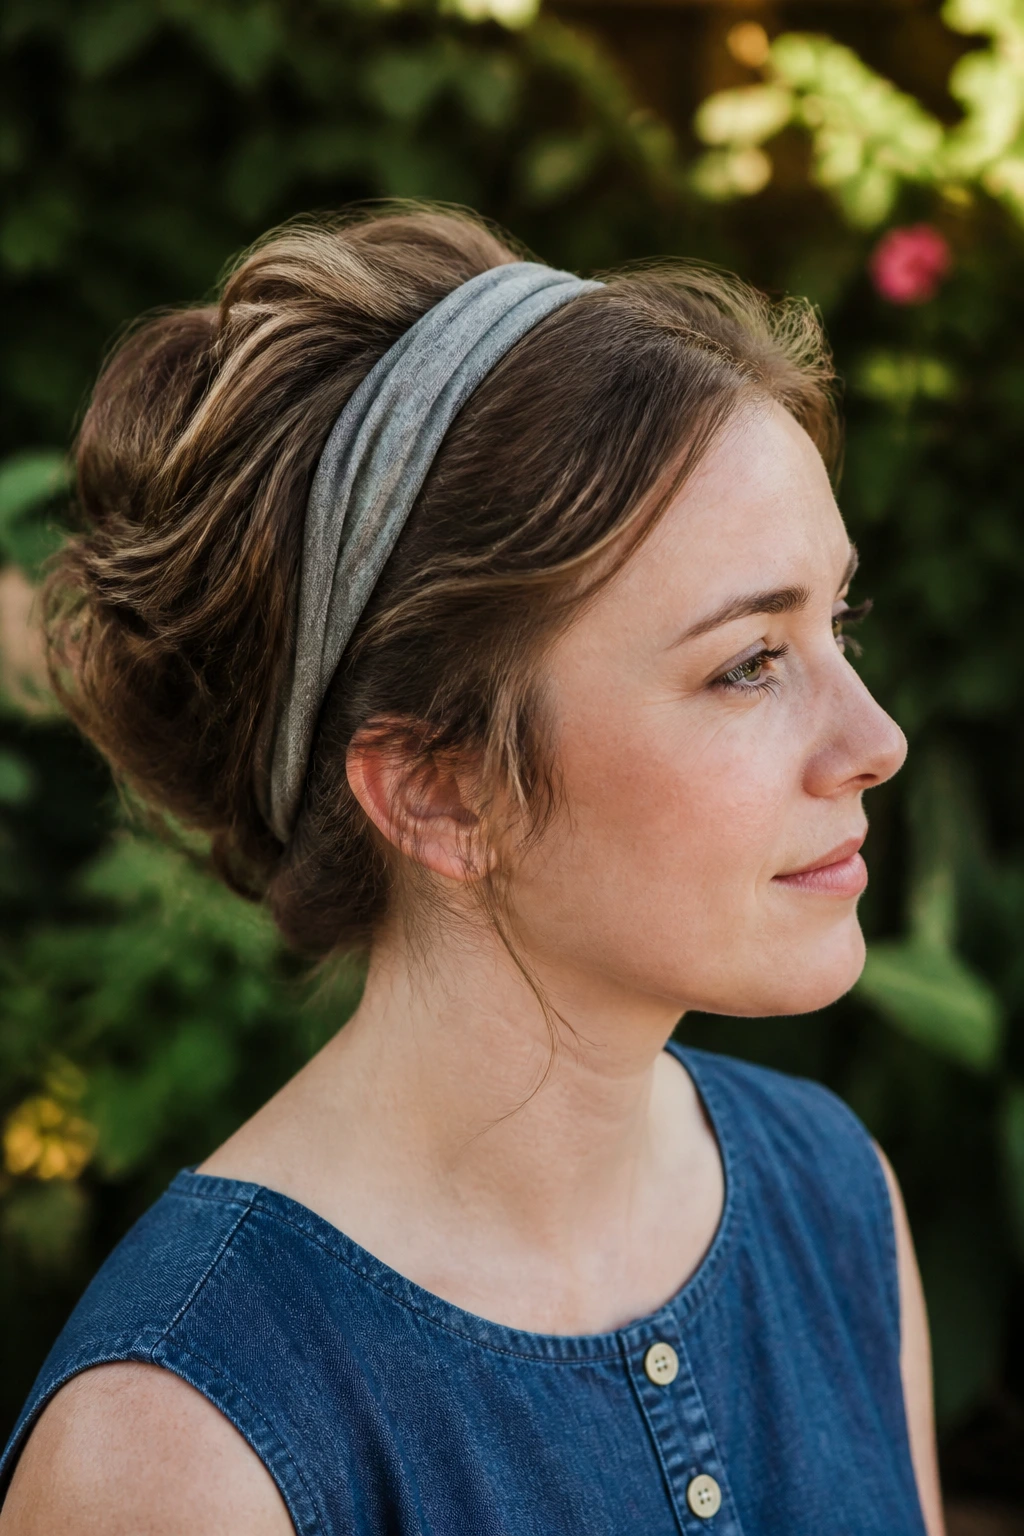
The Gibson tuck looks more complicated than it is, and that is exactly why people keep reaching for it. A stretchy headband or a soft elastic gives the style its structure, and the hair does the rest by folding itself upward. Medium-length hair is long enough to create the tuck, but not so long that the roll becomes bulky.
Place a headband around the crown, then tuck the length upward into the band in sections until the ends disappear. If your layers are short, smooth a little styling cream on your fingertips and feed them in one by one instead of trying to shove everything under at once. That small bit of control keeps the finish from looking frayed.
The Gibson tuck feels relaxed, which I like. It has vintage energy without needing a formal setting. It works for a picnic, a workday, or a dinner where you want your hair up but not pinned into a hard shape.
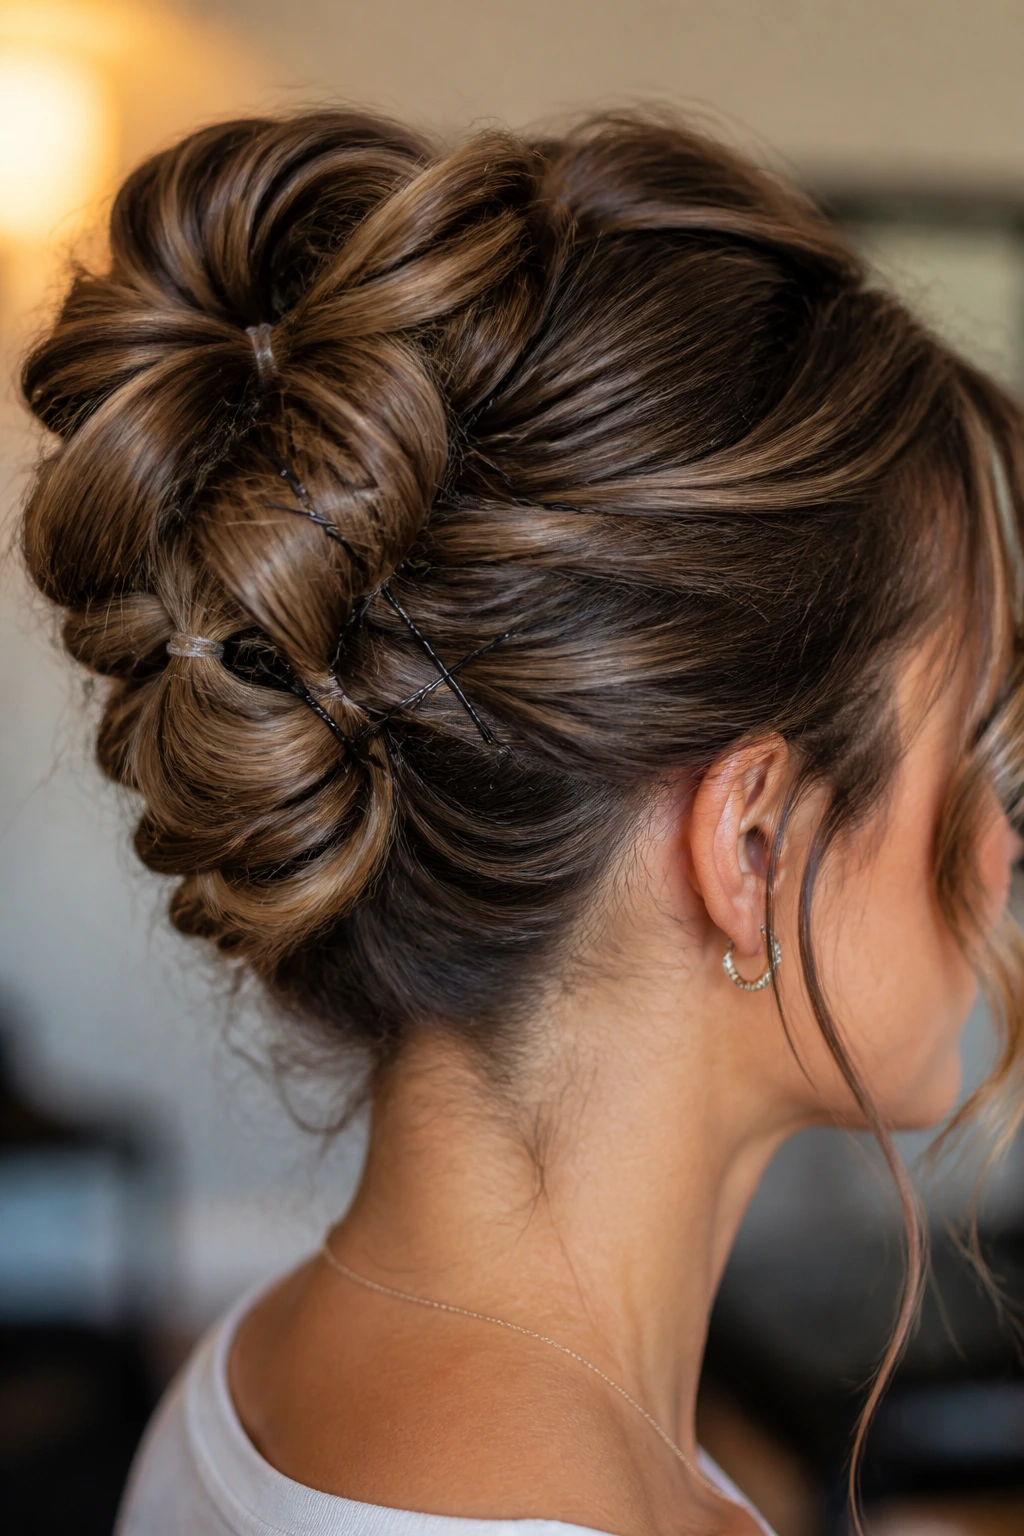
9. Bubble Ponytail Bun
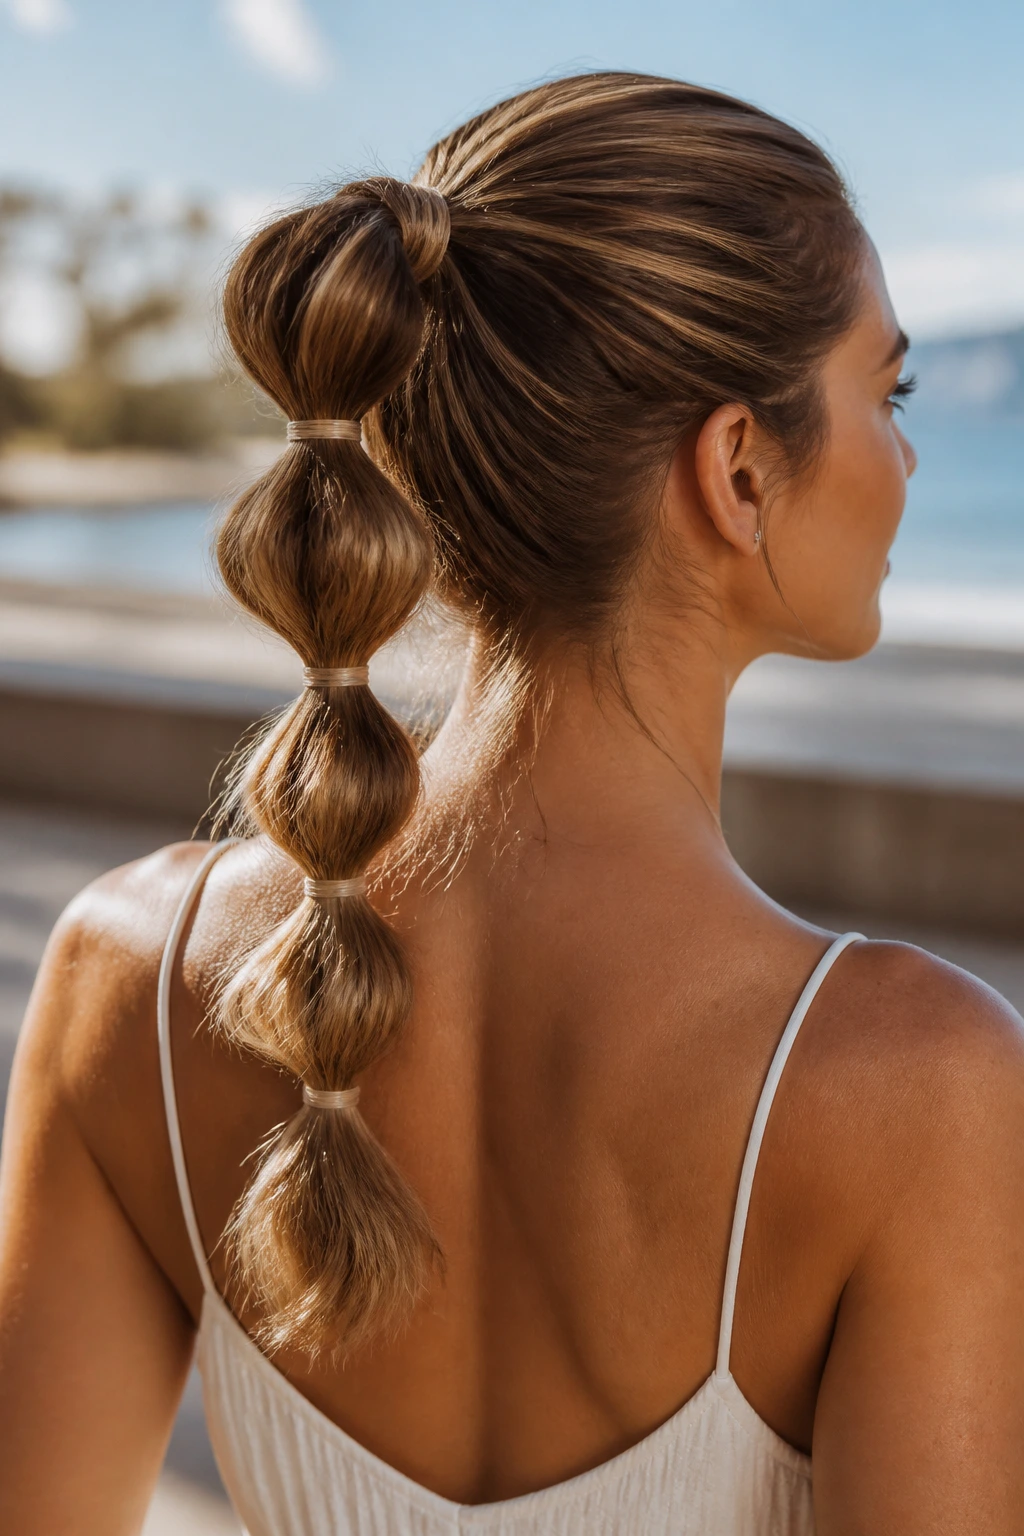
Want more shape than a plain bun gives you without learning a braid? A bubble ponytail bun is the answer. The bubbles add volume and movement, and medium-length hair is just long enough for the spacing to show without becoming fussy.
Tie the hair into a low or mid ponytail, then add clear elastics every 2 inches down the tail. Gently tug each section outward until it rounds into a bubble. Once you reach the ends, twist the tail into a bun or coil it back on itself and pin it in place. If you want more structure, tug the top bubble a touch more than the rest so the shape reads clearly from the front.
How to Make the Bubbles Read
Keep the elastics snug, but not so tight that they dent the hair hard. A little fullness is enough. If your hair is fine, backcomb the tail lightly before adding the bubbles; if it’s thick, keep the sections smaller so the shape doesn’t turn into a lump.
10. Dutch Braid to Low Bun
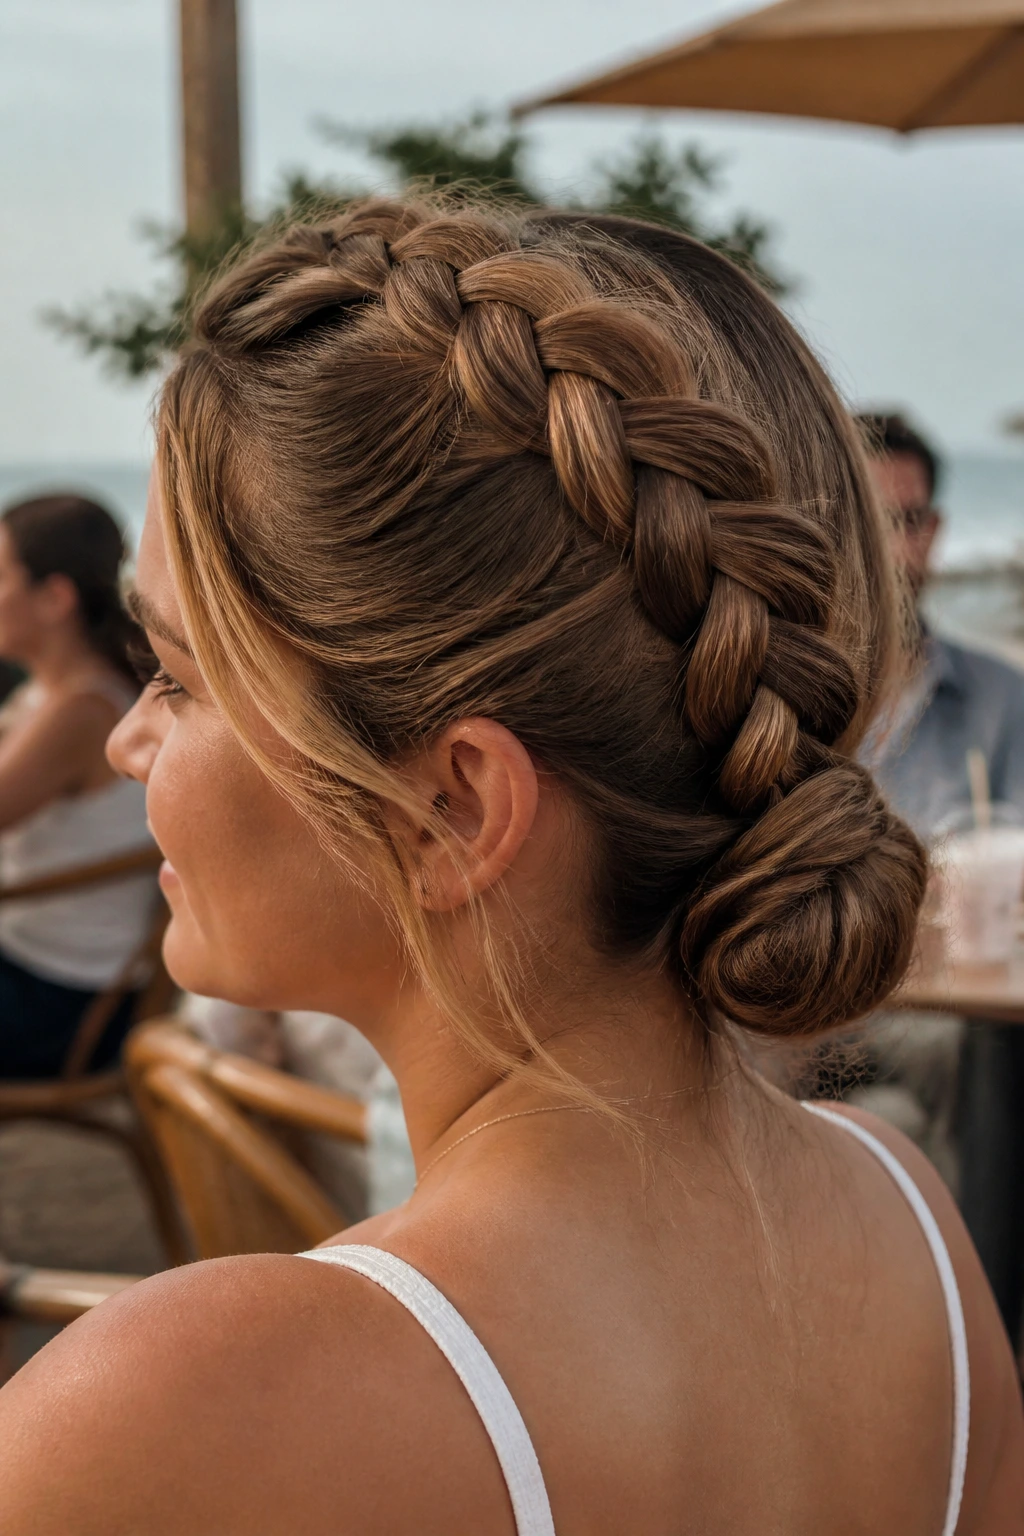
If you need one style that can survive heat, movement, and a long dinner outside, this is the one I’d trust. A Dutch braid creates a raised line of texture that anchors the whole style, and the low bun gives the hair a place to rest instead of hanging loose.
Start the braid at the hairline or just off-center, depending on your part. Braid toward the nape, keeping the sections tight at the roots and a little looser through the ends. Secure the braid with a small elastic, then coil the tail into a low bun and pin it at four points, especially where the bun feels heavy. Dry shampoo at the roots helps the braid hold shape if the hair is silky.
- Tighter roots, looser ends: That gives the braid structure without making it stiff.
- Pin where the weight sits: The bottom and one side usually need the most help.
- Texture helps the braid stay visible: Clean hair can work, but it needs a little grit.
The braid itself does half the styling work. That is why this one behaves so well in summer.
11. Side-Swept Braided Bun
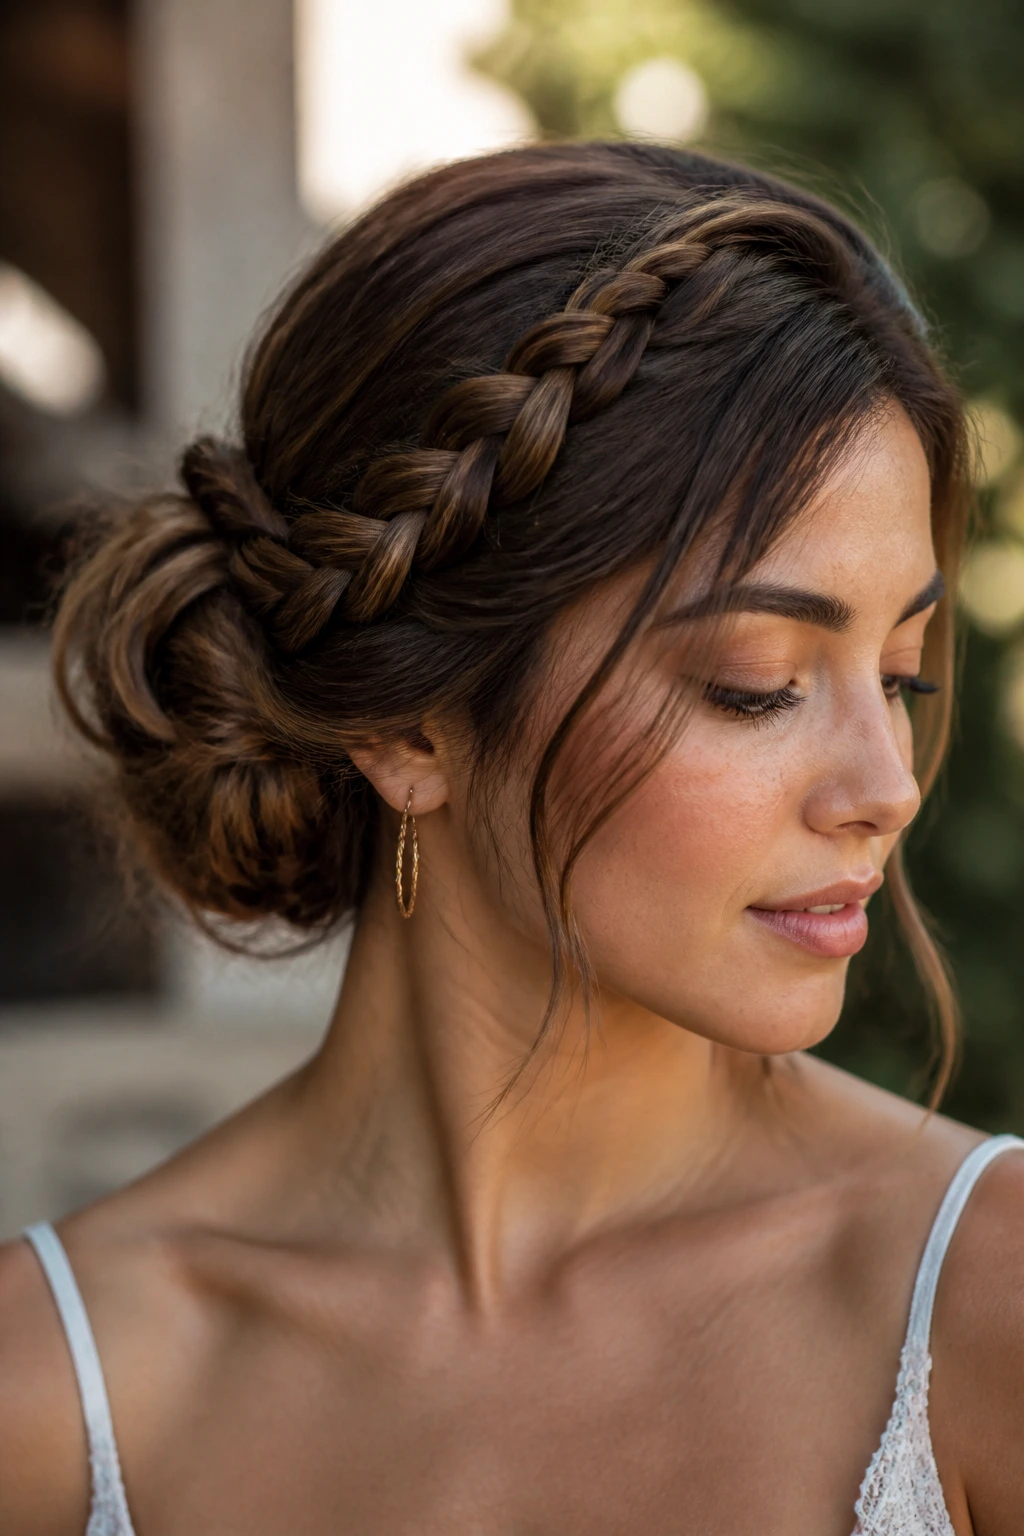
Asymmetry does a lot of quiet work here. A side-swept braided bun gives medium-length hair a softer outline than a centered knot, and it uses the angle of the part to make the whole style feel more relaxed. It’s one of those updos that looks especially good once a few pieces loosen.
Start with a side part, then braid the heavier side from the temple back toward the nape. Gather the braid with the rest of the hair just below one ear and shape it into a bun slightly off-center. Leave two narrow face-framing pieces out if you want the style to feel less severe. A flat iron bend on those pieces can keep them from looking straight and accidental.
This works well on layered hair because the off-center placement hides little imperfections. If one section is shorter than the other, the eye reads it as shape rather than mistake. That is the kind of trick I always want in a summer style.
12. Scarf-Wrapped Bun
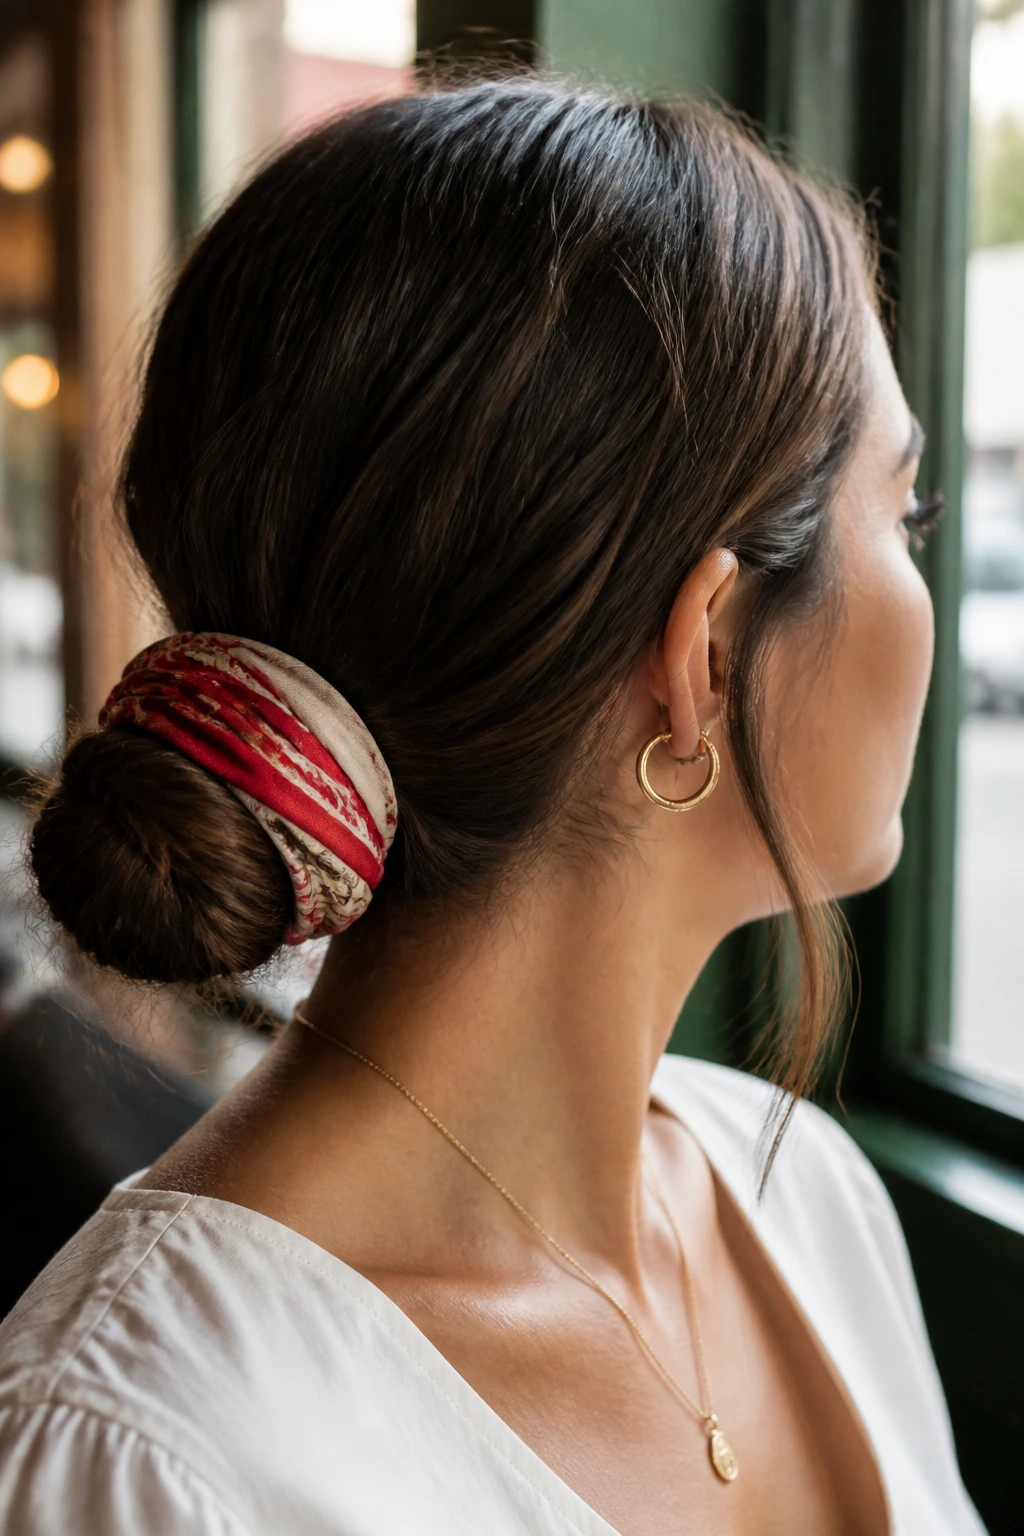
A scarf-wrapped bun is not decoration first. It’s structure first. The scarf catches the eye, but it also helps hide pins, tuck away slippery ends, and make a low bun feel finished when your hair is a little flat.
Use a cotton bandana for grip or a silk scarf if you want shine and a softer drape. Tie the hair into a low bun, wrap the scarf around the base, and knot it underneath so the fabric doesn’t slide. If the bun is small, fold the scarf lengthwise into a narrower band. Too much fabric overwhelms medium-length hair fast.
This style is useful on days when your hair needs help but you don’t want to add another layer of product. The scarf does some of the visual work, and that keeps the bun from looking bare. It also buys you a little forgiveness if a few ends poke out.
13. Triple Twist Updo
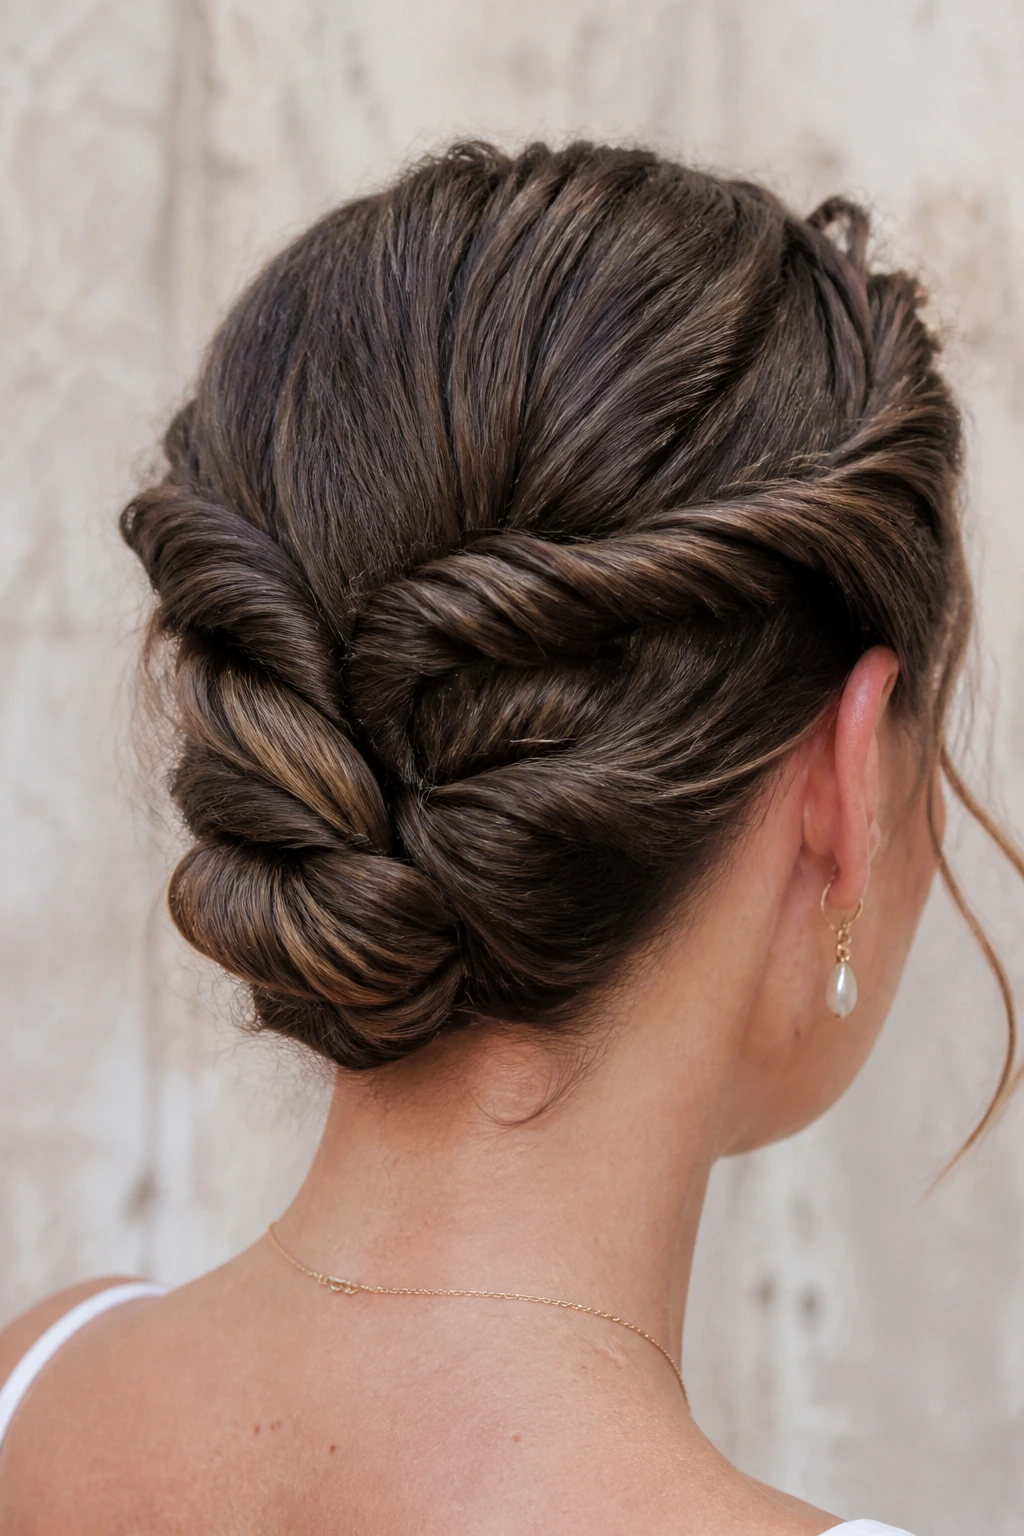
Three twists can do more than one bulky bun ever will. The shape looks built, not stuffed. Medium-length hair is a good match because the twists can stay relatively small, which keeps the whole updo compact and cooler at the neck.
Three Sections, One Finish
- Split the hair into three zones: a center section and two side sections.
- Twist each section back toward the middle, keeping the twists about 1½ to 2 inches wide.
- Cross the side twists over the center twist and pin each overlap point with 2 bobby pins.
- Tuck the ends under the base and secure them with 2 more pins if needed.
This style works especially well if your layers tend to escape from larger buns. Smaller sections mean fewer runaway pieces. It also gives you a little movement around the sides, which keeps the shape from looking sealed shut.
14. Faux Bob Pin-Up
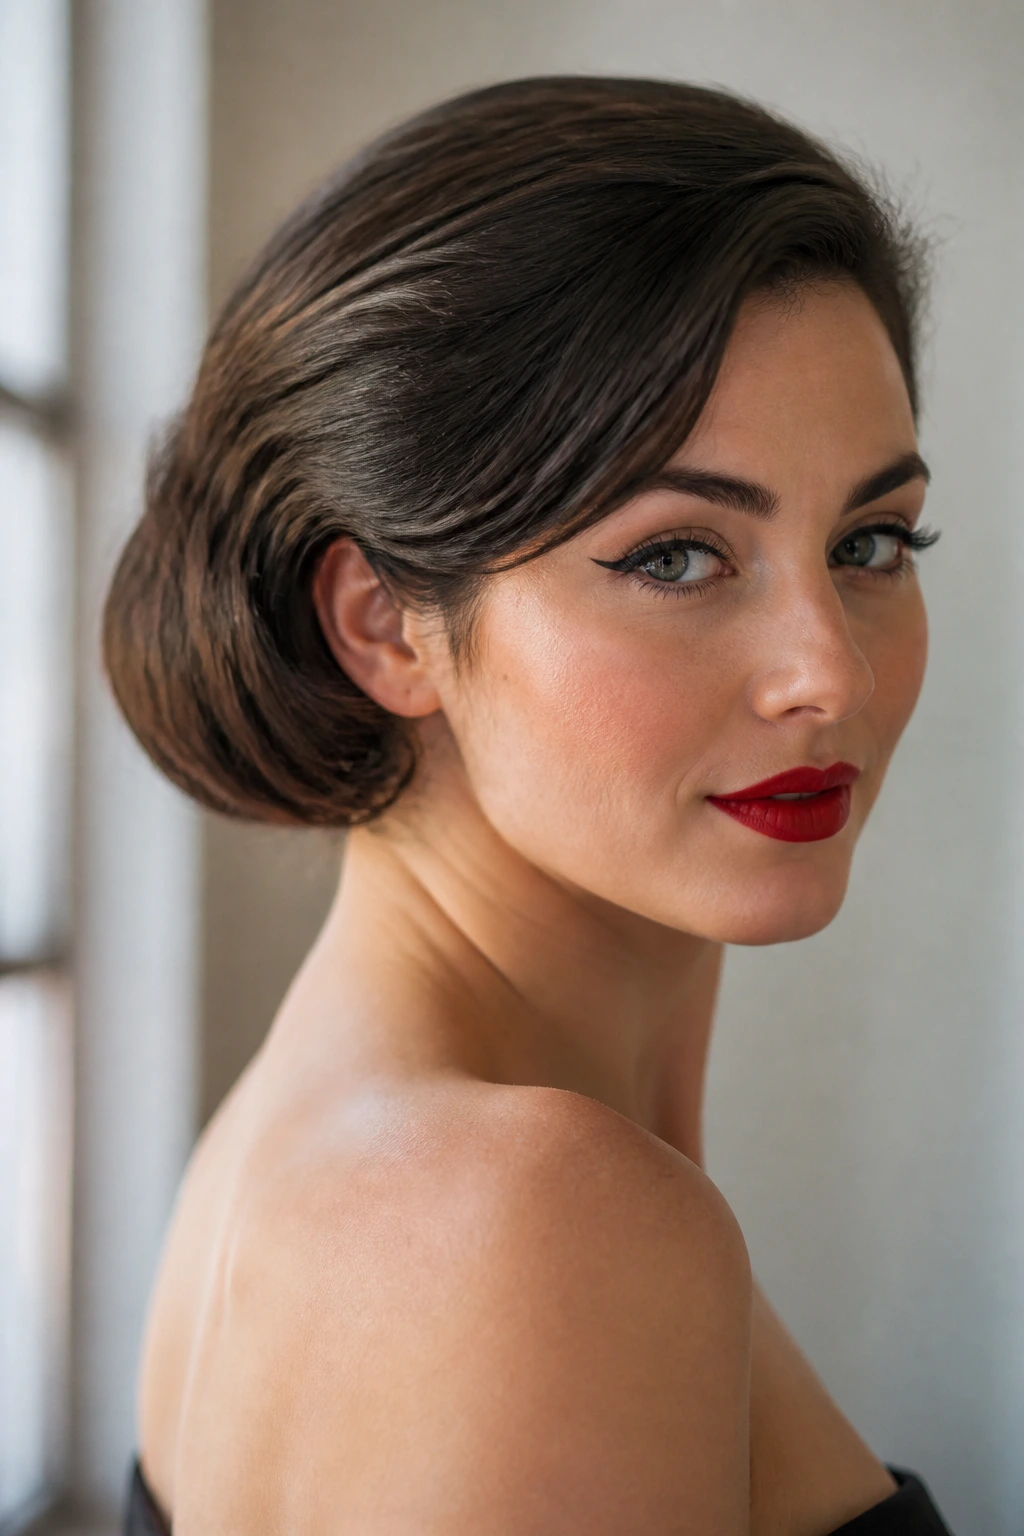
A faux bob gives medium-length hair short-hair energy without a haircut, and I never get tired of that trick. The real work is hidden at the nape, where the ends are folded under and pinned flat. From the front, you get a cleaner line and a little retro shape.
Start by curling the ends under with a 1-inch iron if the hair is blunt or stubborn. Then gather the length toward the back, roll the ends upward, and pin them in overlapping rows underneath so the hidden pins are doing the support work. Let the front pieces sit slightly forward so the style reads like a bob, not a tucked bun.
This is a good one for dresses or earrings that need the neckline clear. It feels dressier than a casual knot, but it still uses the same basic tools. The best part is how light it feels once the ends are tucked away.
15. Curly Pineapple Tuck
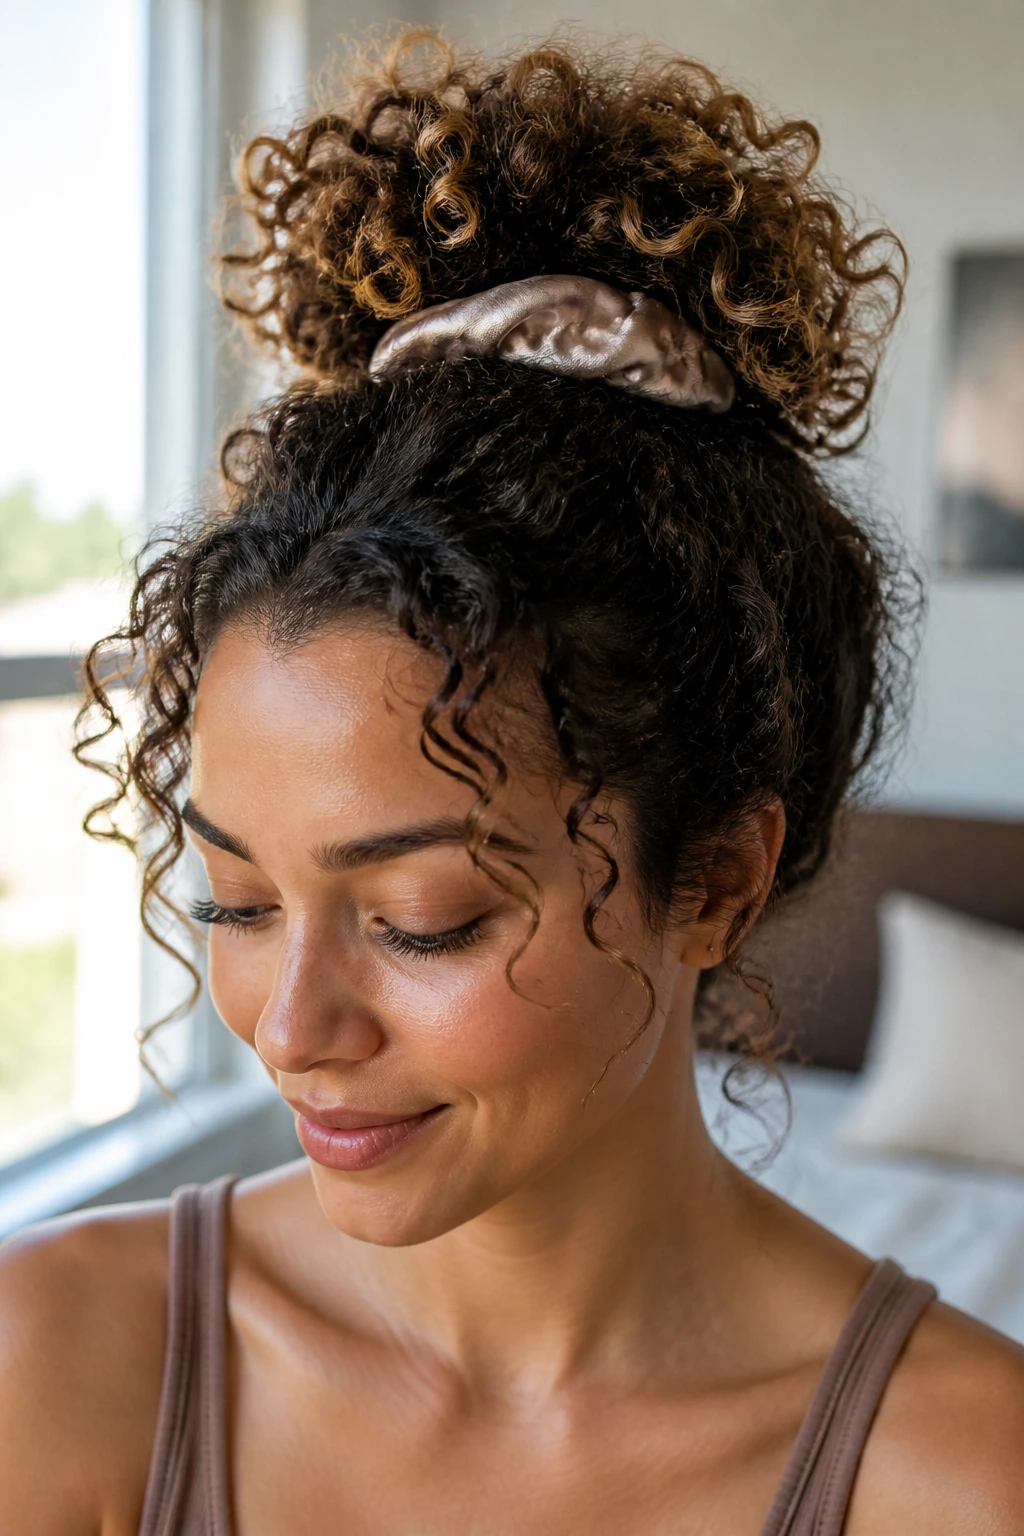
What if you want your curls off your neck but do not want to crush the pattern? The curly pineapple tuck solves that neatly. It keeps the curl clumps intact while lifting the weight up and away from the skin, which matters on hot days.
Gather the curls loosely at the crown with a satin scrunchie, then tuck the ends into the base or fold them around the band so they sit on top of the head instead of hanging down. Use 1 or 2 pins at the front if you need to keep the shape from slipping. The point is to preserve the curl, not flatten it.
How to Keep the Curl Pattern Intact
Start with curls that have already been refreshed or lightly dampened with water and leave-in conditioner. If the hair is dry and frizzy, the tuck can look puffier than you want. A satin scrunchie matters here. It holds without pulling the curl apart, and that small thing makes a visible difference.
16. Woven Low Bun
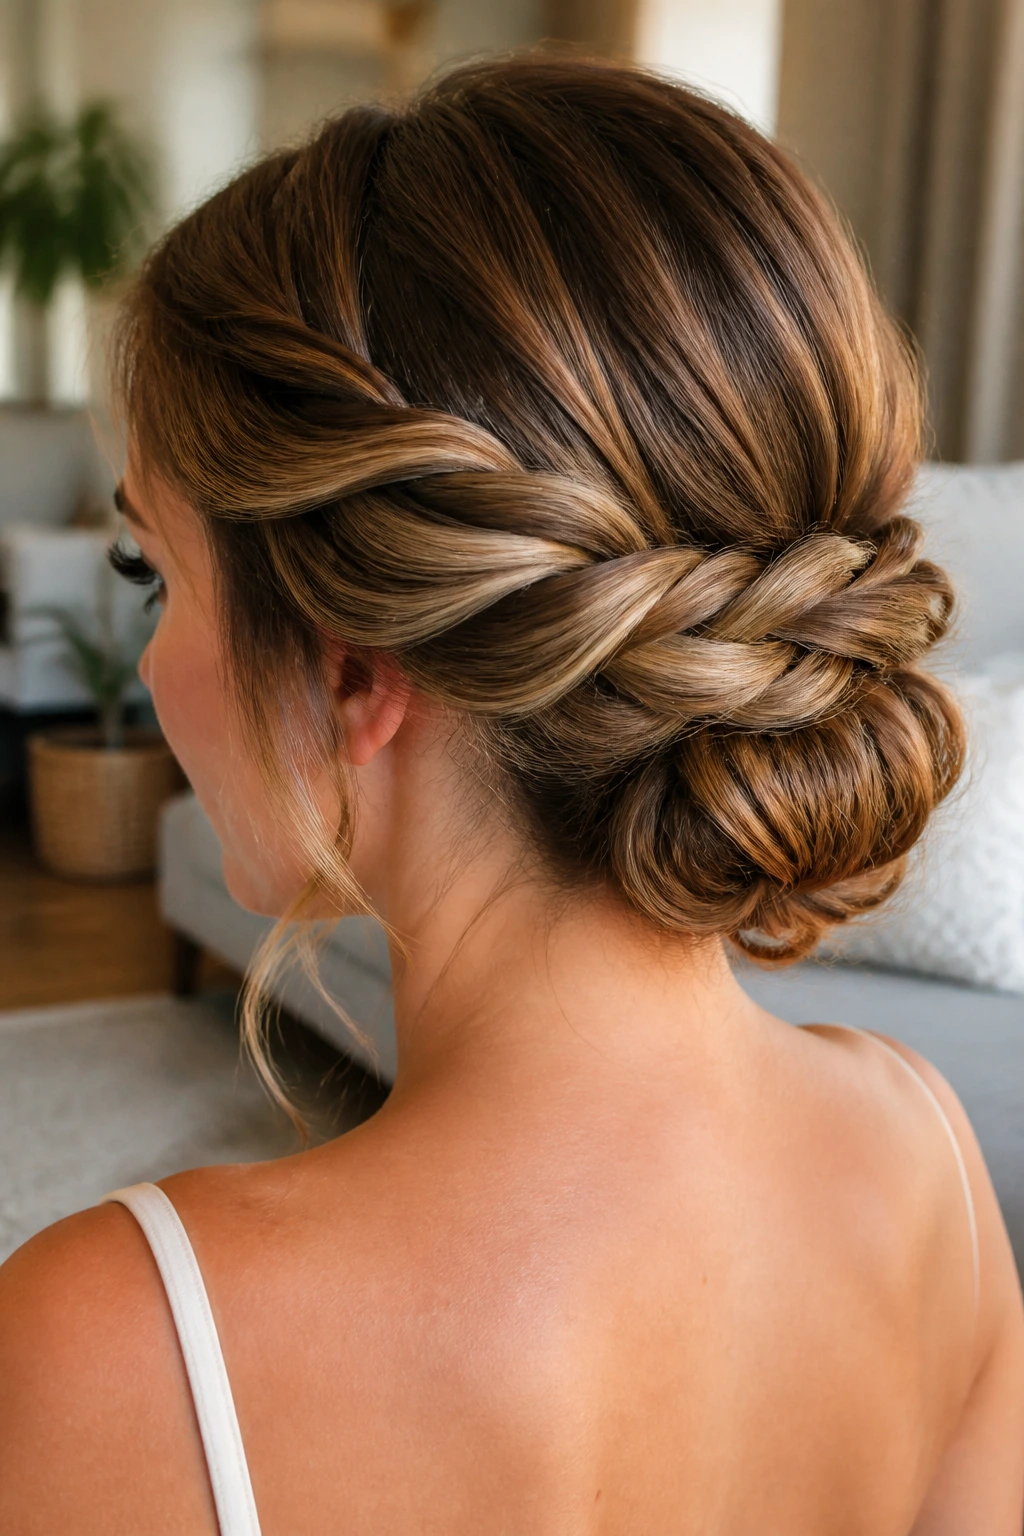
A woven low bun looks more detailed than it is. That’s the fun part. The overlaps do the visual work, so you do not need a lot of product or a fancy tool. Medium-length hair is ideal because the sections are long enough to cross, but not so long that the bun gets heavy and loose.
Take two side sections, twist them lightly, and weave them over each other around a low base. Pin each overlap as you go instead of waiting until the end. A couple of small pins placed at the crossing points keep the pattern from unzipping. If the hair is layered, let the shorter pieces stay a little loose; they disappear into the weave better than you’d expect.
- Use a low base: That keeps the weave flat.
- Pin as you cross: Waiting until the end lets the whole thing shift.
- Don’t over-tighten: A little looseness makes the weave easier to read.
The style holds up well in humidity because the texture hides minor bends and dents. That is worth a lot on a sticky afternoon.
17. Rolled Headband Updo
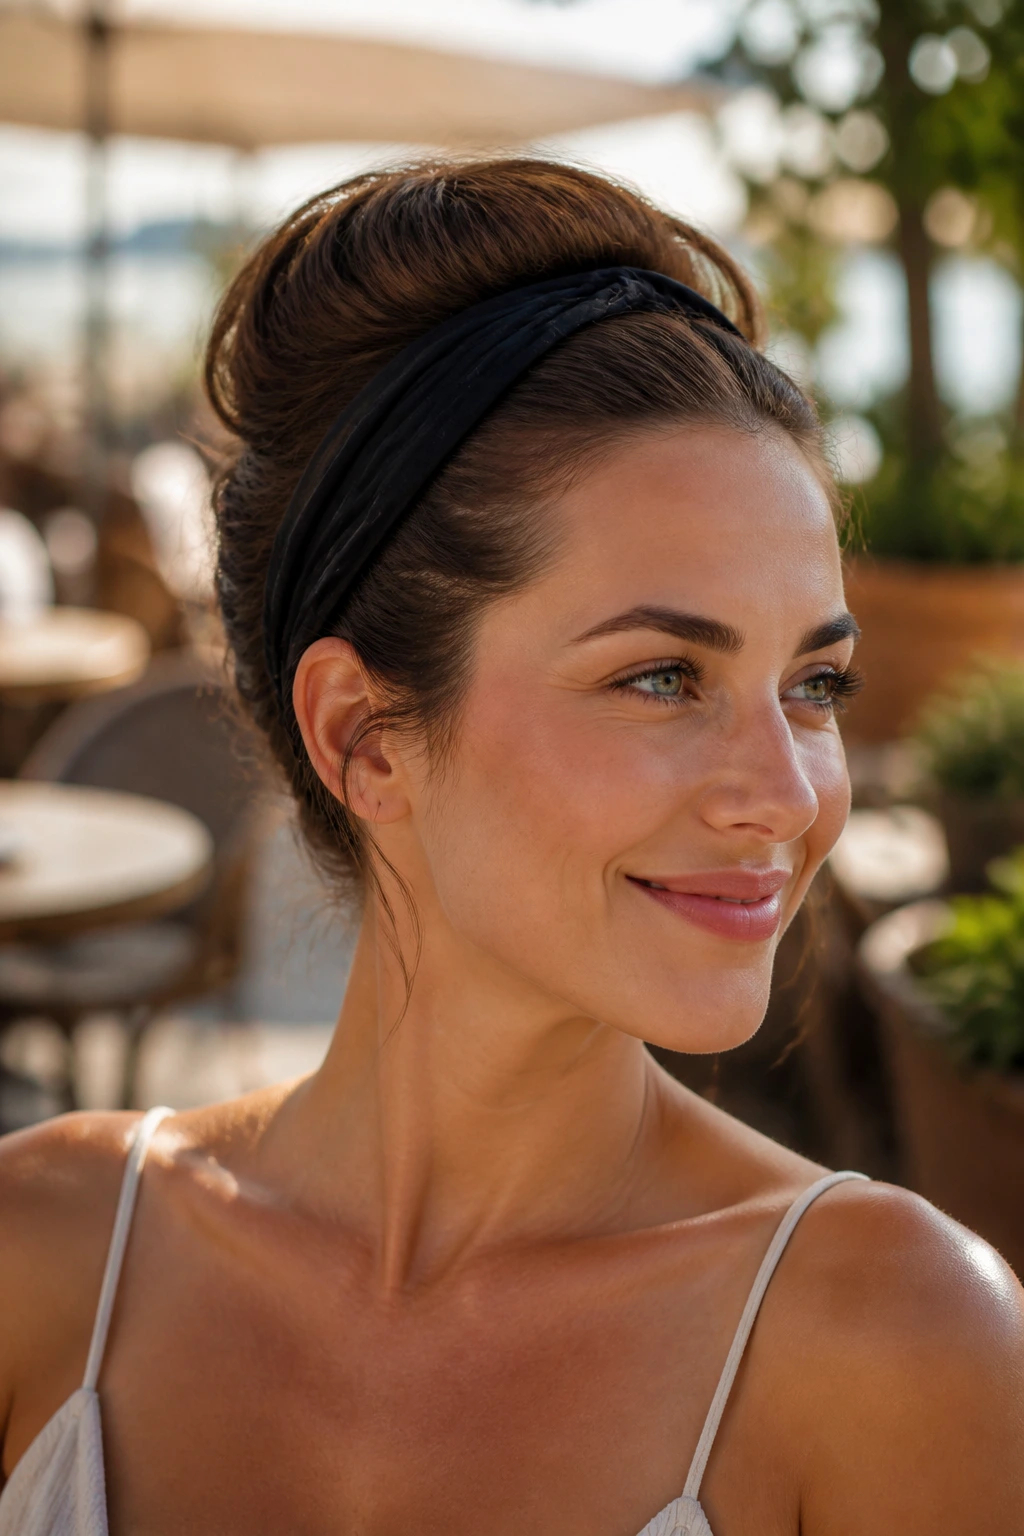
The rolled headband updo is one of the easiest summer fixes on the list. The band does half the styling for you. You place it, roll the hair upward into it, and let the structure appear as the length disappears. Medium-length hair is long enough to make the roll look full, but not so long that the tuck becomes bulky.
Use a stretchy headband or flat elastic, place it across the forehead or just behind the hairline, then take the hair in sections and roll it up and under the band until the ends are hidden. If your hair is thick, choose a wider band so it doesn’t dig in. If it’s fine, a slimmer band keeps the shape from looking wide and loose.
This is a strong option for beach days, errands, or a quick change after the gym. It is also one of the best styles for people who do not want to think too hard about pin placement. The band gives you the shape. You just help it along.
18. French Twist Pony Roll
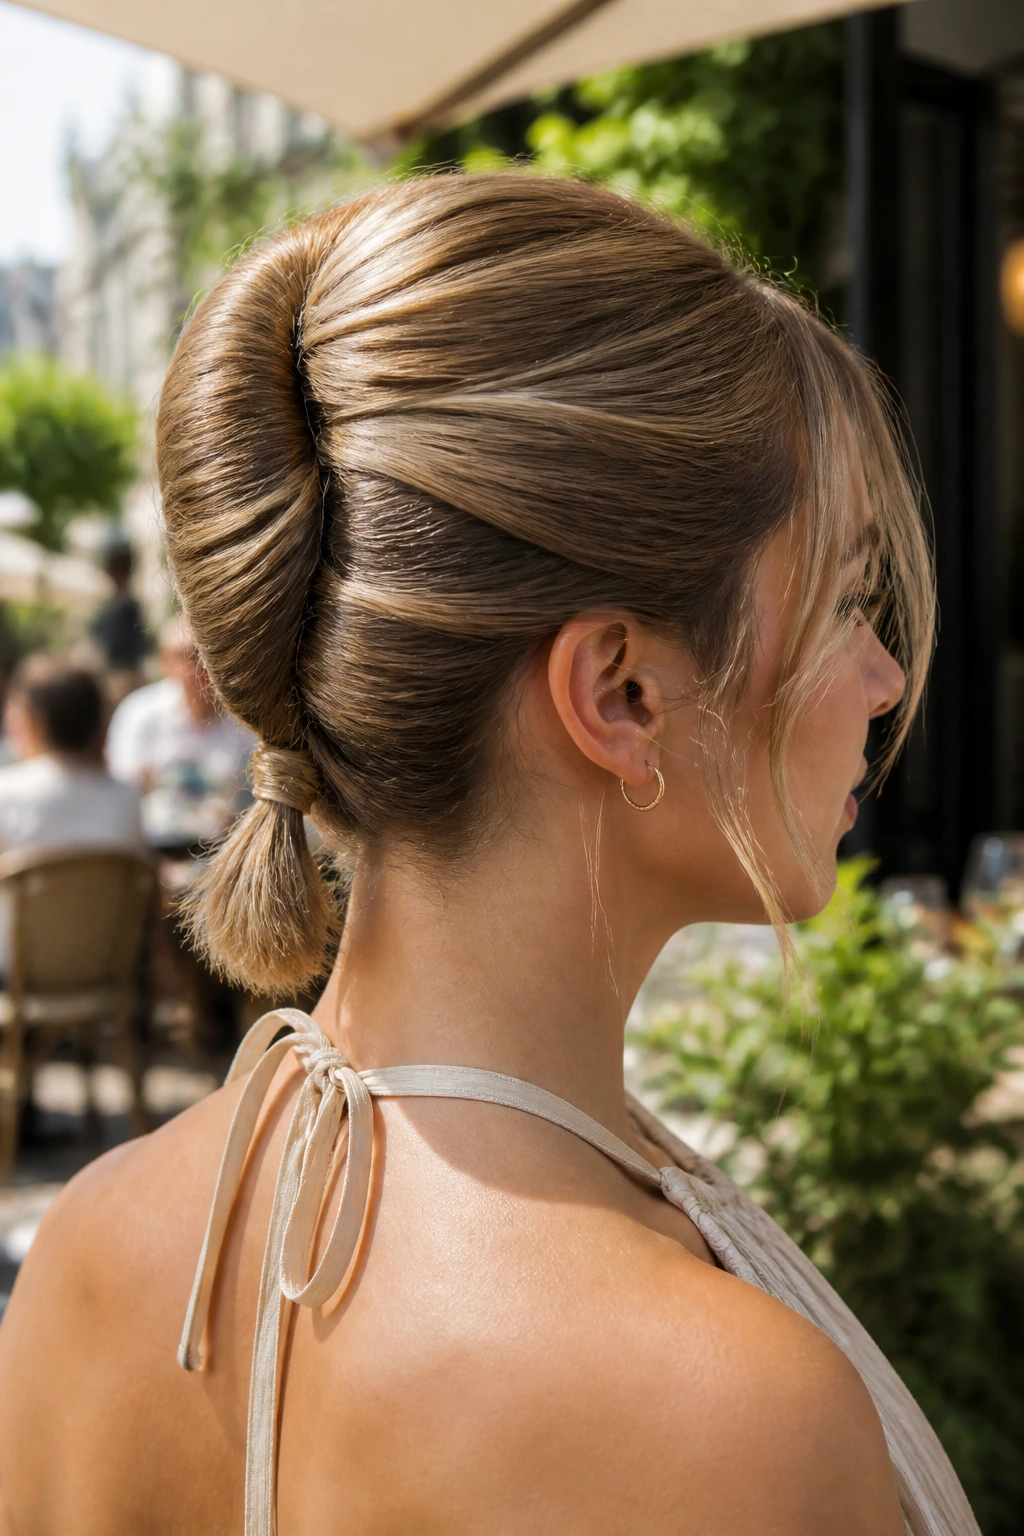
A classic French twist can feel a little formal for warm weather, which is why this pony-roll version is easier to wear. It keeps the vertical seam of the twist but softens the bottom into a short tucked tail instead of a rigid shell. Medium-length hair is enough to make the roll, but not so much that it turns into a lump.
Pull the hair back, twist it upward along the back of the head, and leave the ends folded into a small pony-like tail at the base. Pin the seam from top to bottom with several bobby pins, then tuck the ends into the roll so they sit flat. If the hair is slippery, place the pins one under another in a staggered line rather than straight across.
This is the style I’d choose when I want polish without the stiffness of a full formal updo. It works well with a blazer, a summer dress, or anything that needs the hair to look intentional without feeling overdone.
19. Braided Mohawk Updo
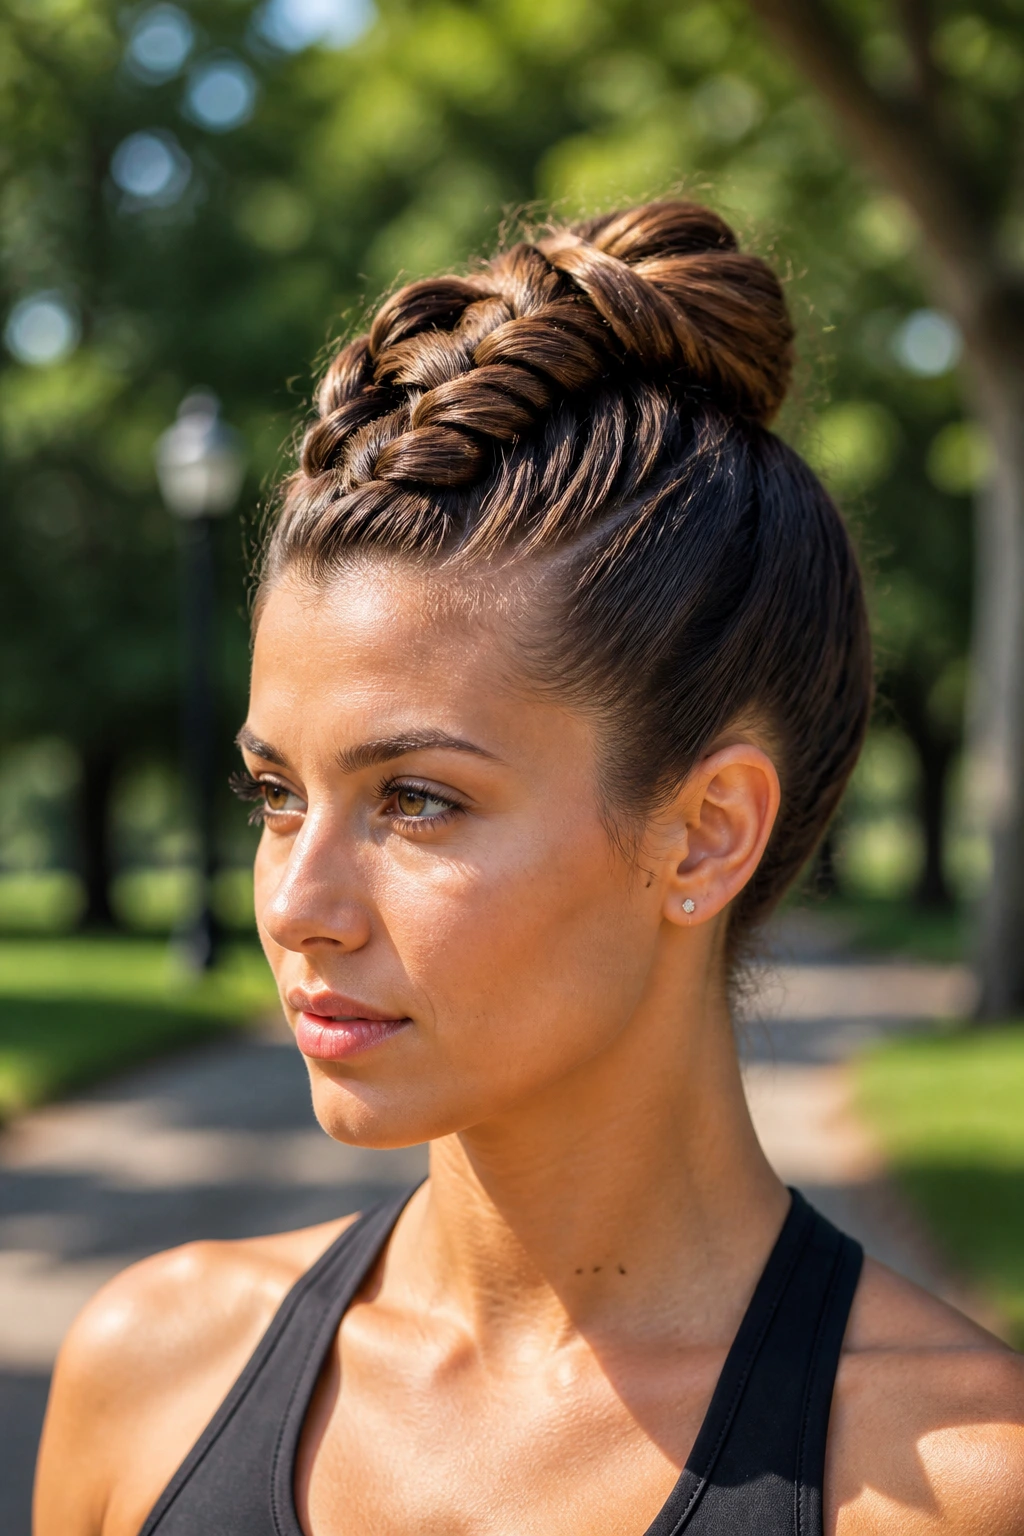
A braided mohawk updo gets a lot of mileage out of one central braid. The sides are pinned or smoothed back, which makes the braid look fuller and gives the hair a stronger shape through the middle. Medium-length hair works well here because the braid has enough length to rise, but not so much that it droops.
Why the Center Braid Adds Lift
- Braid a strip from the hairline straight back toward the crown in a Dutch or tight French braid.
- Pin the sides flat or leave them lightly smoothed for contrast.
- Tuck the braid tail into a small bun or loop it under at the nape.
- Add 4 to 6 pins along the sides where the braid needs support.
The style suits fine hair especially well because it creates the look of density without needing extra bulk. It also lets you keep the face clean while leaving the outline a little sharp. If you like a more sporty or edgy look in summer, this one earns its spot fast.
20. Knotted Half-Up Bun
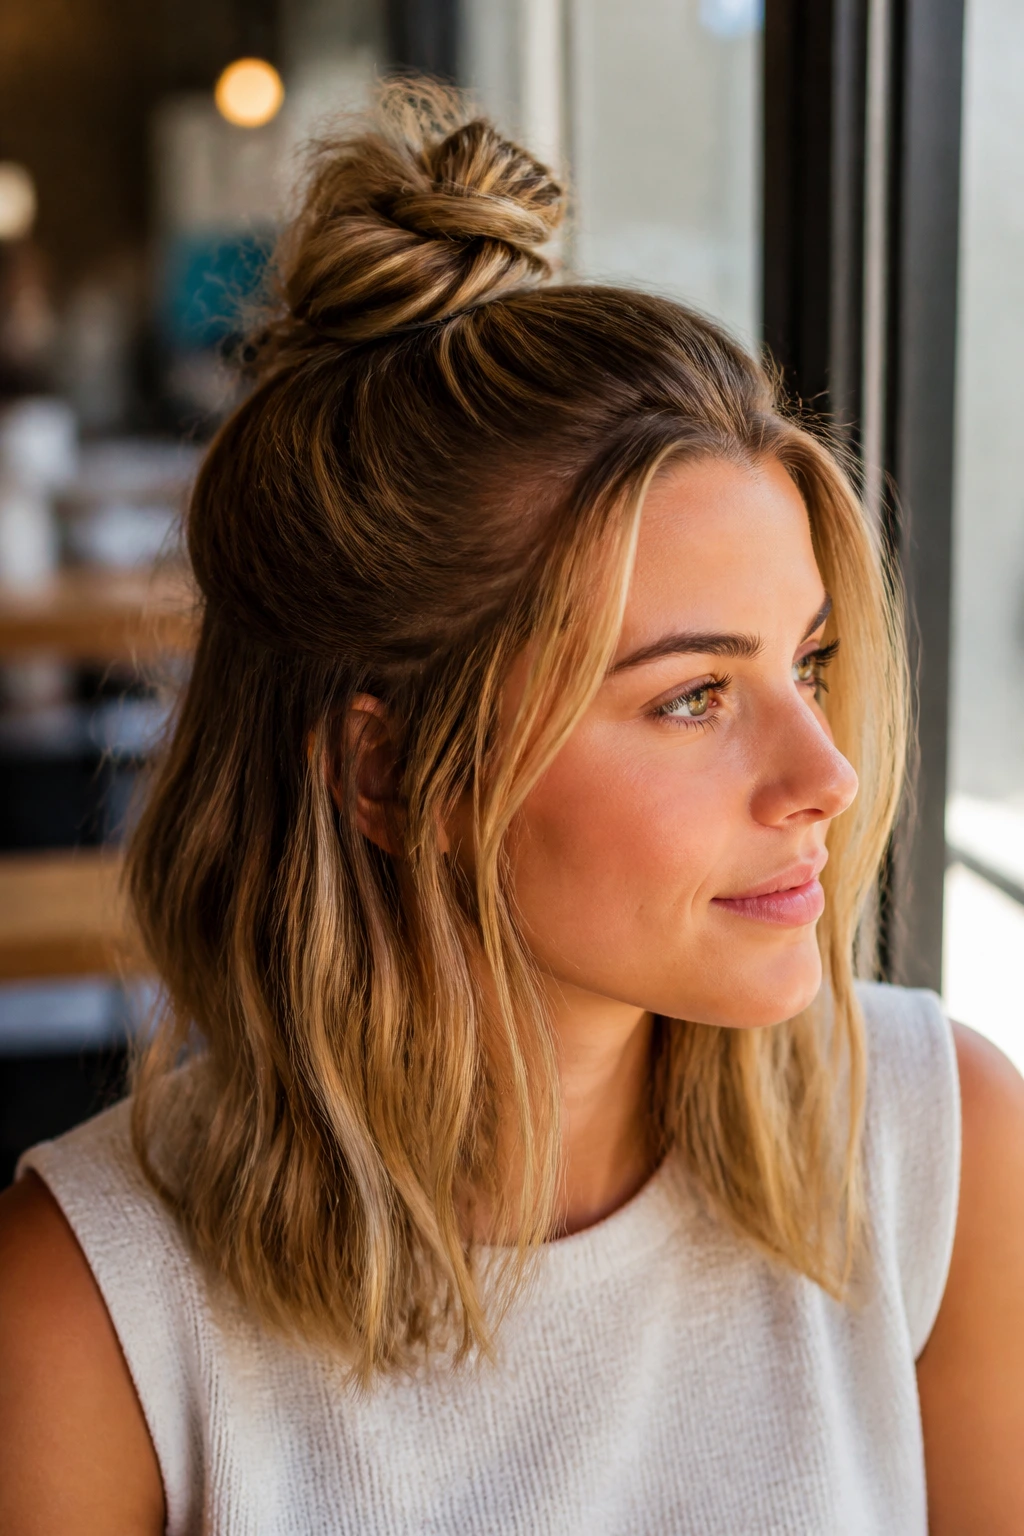
This is the five-minute style that still looks like you planned ahead. A knotted half-up bun gives the crown some lift, keeps the face clear, and leaves the rest of the hair down so the style doesn’t feel too serious. Medium-length hair is long enough to knot cleanly, but short enough that the knot stays compact.
Split the top half of the hair into two sections, knot them once or twice depending on length, and secure the base with a small elastic underneath. If the knot feels loose, tuck the ends under and pin once at the center. The lower half can stay straight, wavy, or lightly curled. That part is not picky.
This one is good for very hot days when a full bun feels like too much commitment. It also handles uneven layers better than a slick ponytail because the knot gives the shorter pieces a place to disappear.
21. Low Side Chignon with Tendrils
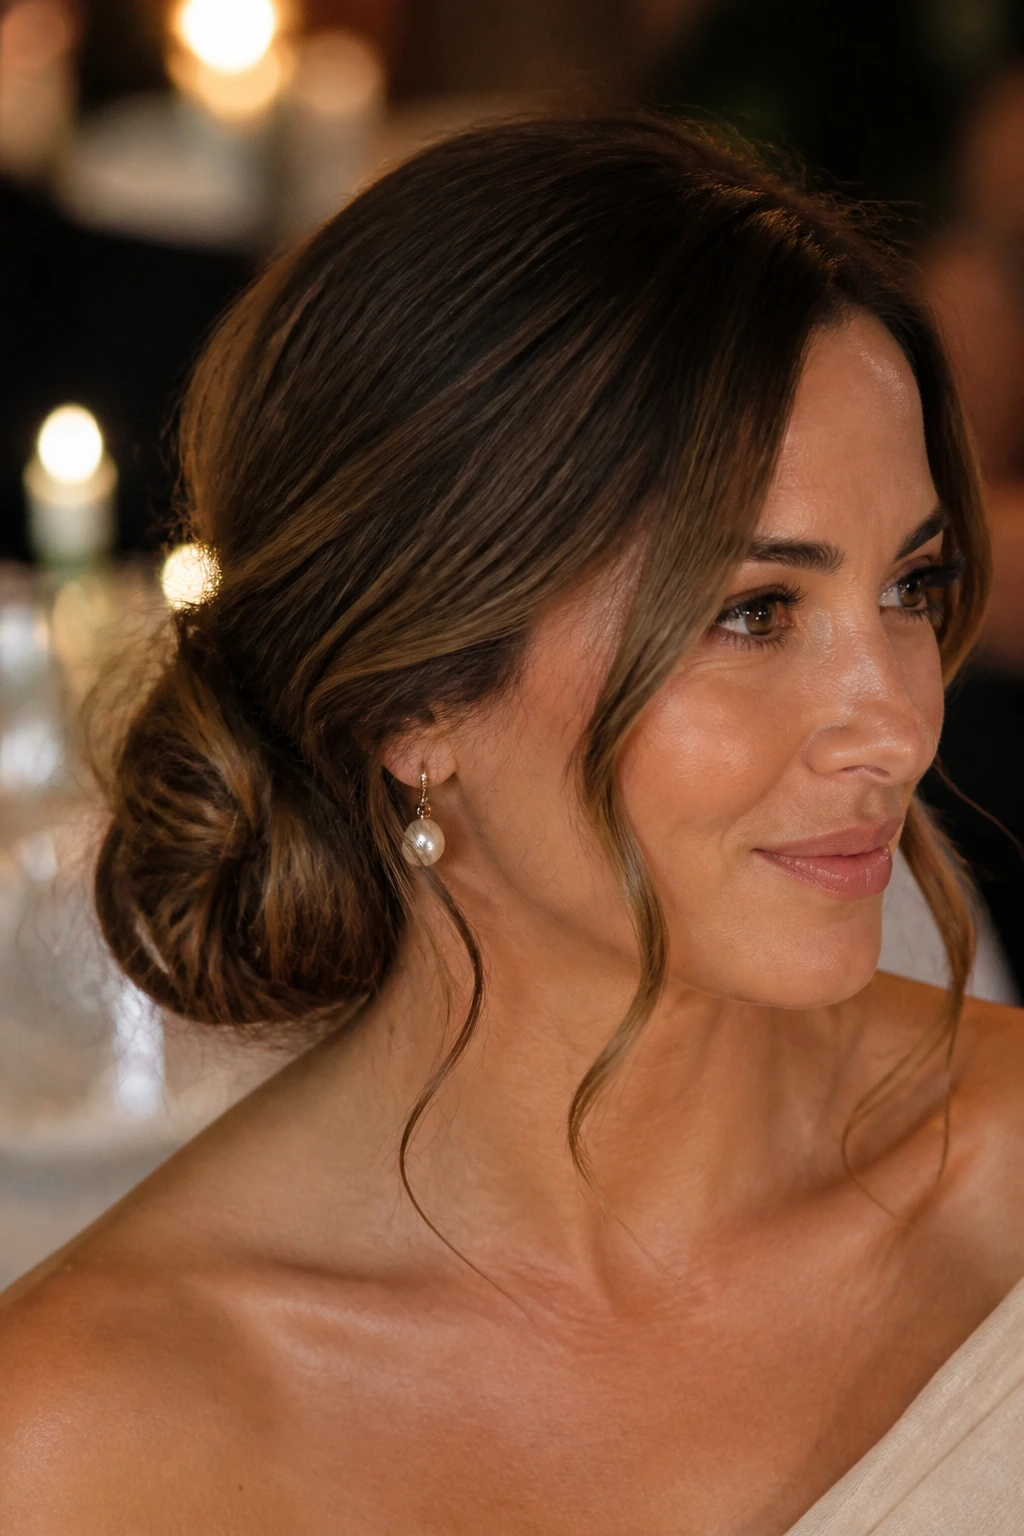
How do you get softness without letting the whole style fall apart? A low side chignon with tendrils handles that balance well. The bun sits just off one ear, the face-framing pieces stay narrow, and the finish feels light instead of severe.
Part the hair to one side, gather it low near the opposite ear, and twist it into a small chignon with the ends folded under. Leave two thin pieces out at the front and curl them with a 1-inch iron, pulling the curl away from the face so it opens the cheekbones a little. Use a light mist of spray on your fingers, not directly on the curls, if you want the tendrils to stay soft.
How to Keep the Tendrils Soft, Not Stringy
Do not make the front pieces too thick. That’s the mistake. Narrow sections hold a better curve and stay airy around the face. This style works especially well for dinners, evening events, or any time you want something a little gentler than a neat low bun.
22. Mini Braids Into Bun
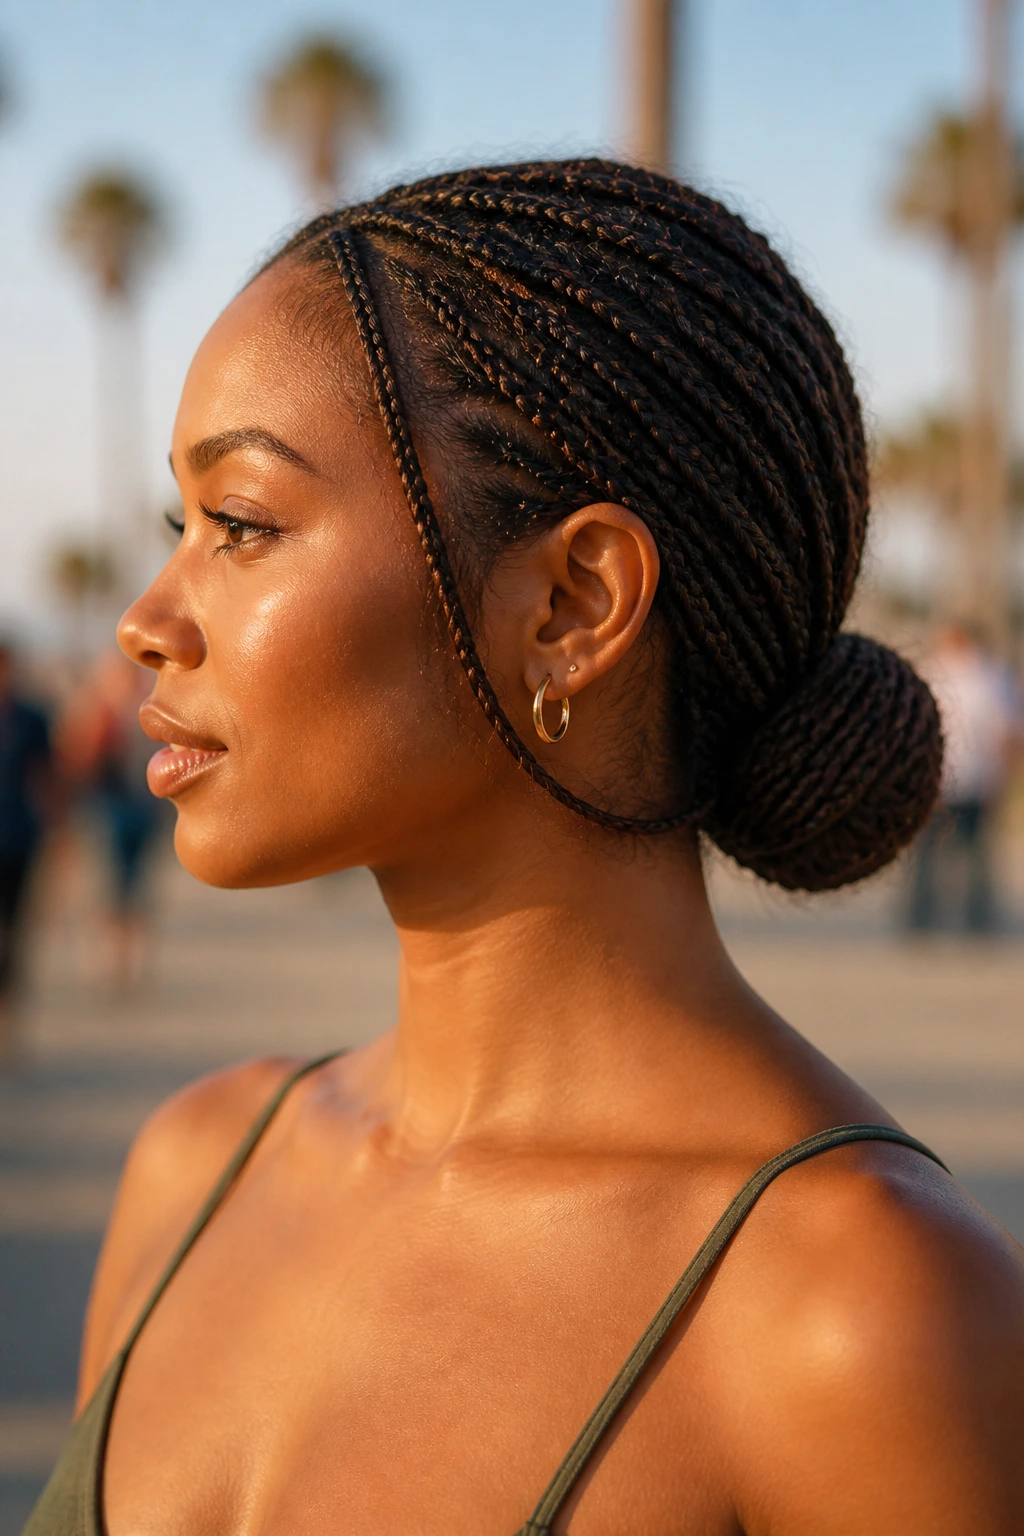
Two or three tiny braids can carry a plain bun a long way. They add texture, hide awkward layers, and make the style feel more put together without asking for much more time. Medium-length hair is perfect for this because the braids can be short and still show.
Braid 1/4-inch sections at the temples, behind the ears, or near the nape, then gather the rest of the hair into a low bun. Feed the braids into the bun as you pin it so they become part of the shape instead of sitting on top of it. Use small clear elastics on the braids and 5 to 6 pins around the bun base.
- Use 2 to 4 mini braids: More than that can start to look busy.
- Place them where layers live: That hides the pieces that escape first.
- Work best on second-day hair: The tiny braids hold better when the hair has a little grip.
The style has a boho feel without looking messy. That matters when you want texture but not chaos.
23. Twisted Crown Bun
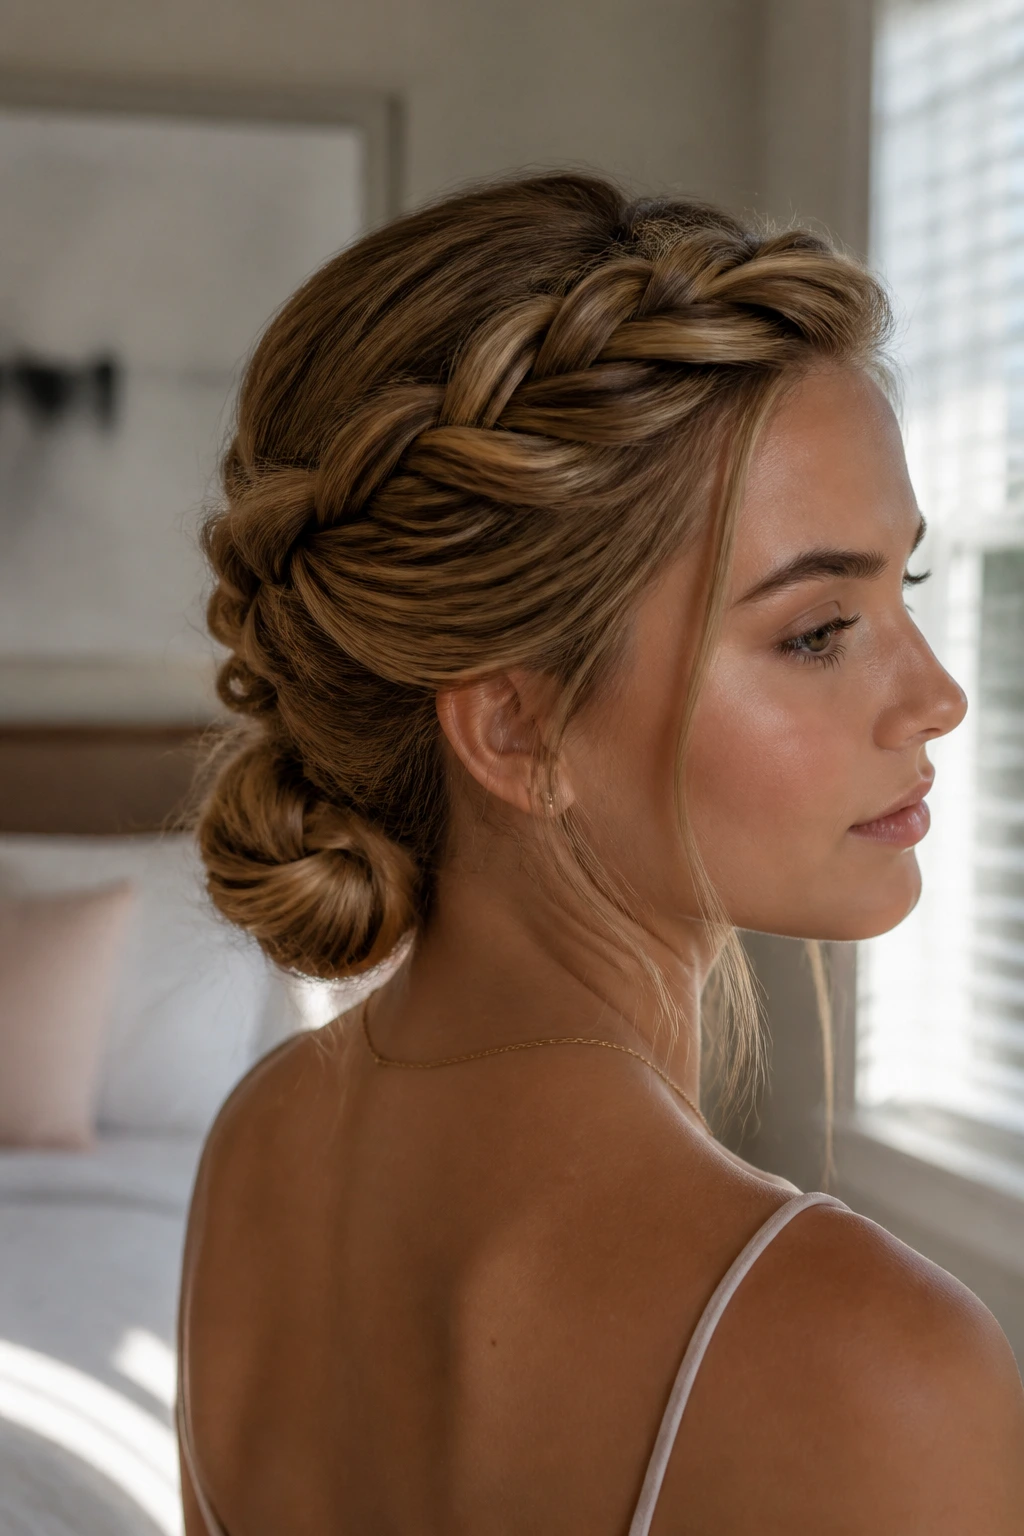
A twisted crown bun takes the clean line of a halo style and sends it into a low bun instead of leaving the hair down. The result feels a little more formal, but not stiff. Medium-length hair is a good fit because the front sections are long enough to sweep back, and the ends still fit neatly into a bun.
Twist sections from the hairline back toward the crown on both sides, then gather everything low and wrap the ends into a bun at the nape. Pin where the twists cross and again at the bun base. If the hair is fine, gently backcomb the roots at the crown before you start; that tiny bit of lift keeps the twists from lying too flat.
This style works best when the twists are not pulled painfully tight. A little looseness gives the crown shape and keeps the line from looking severe. It is one of the more polished looks here, but it still moves in heat.
24. Loop-and-Pin Bun
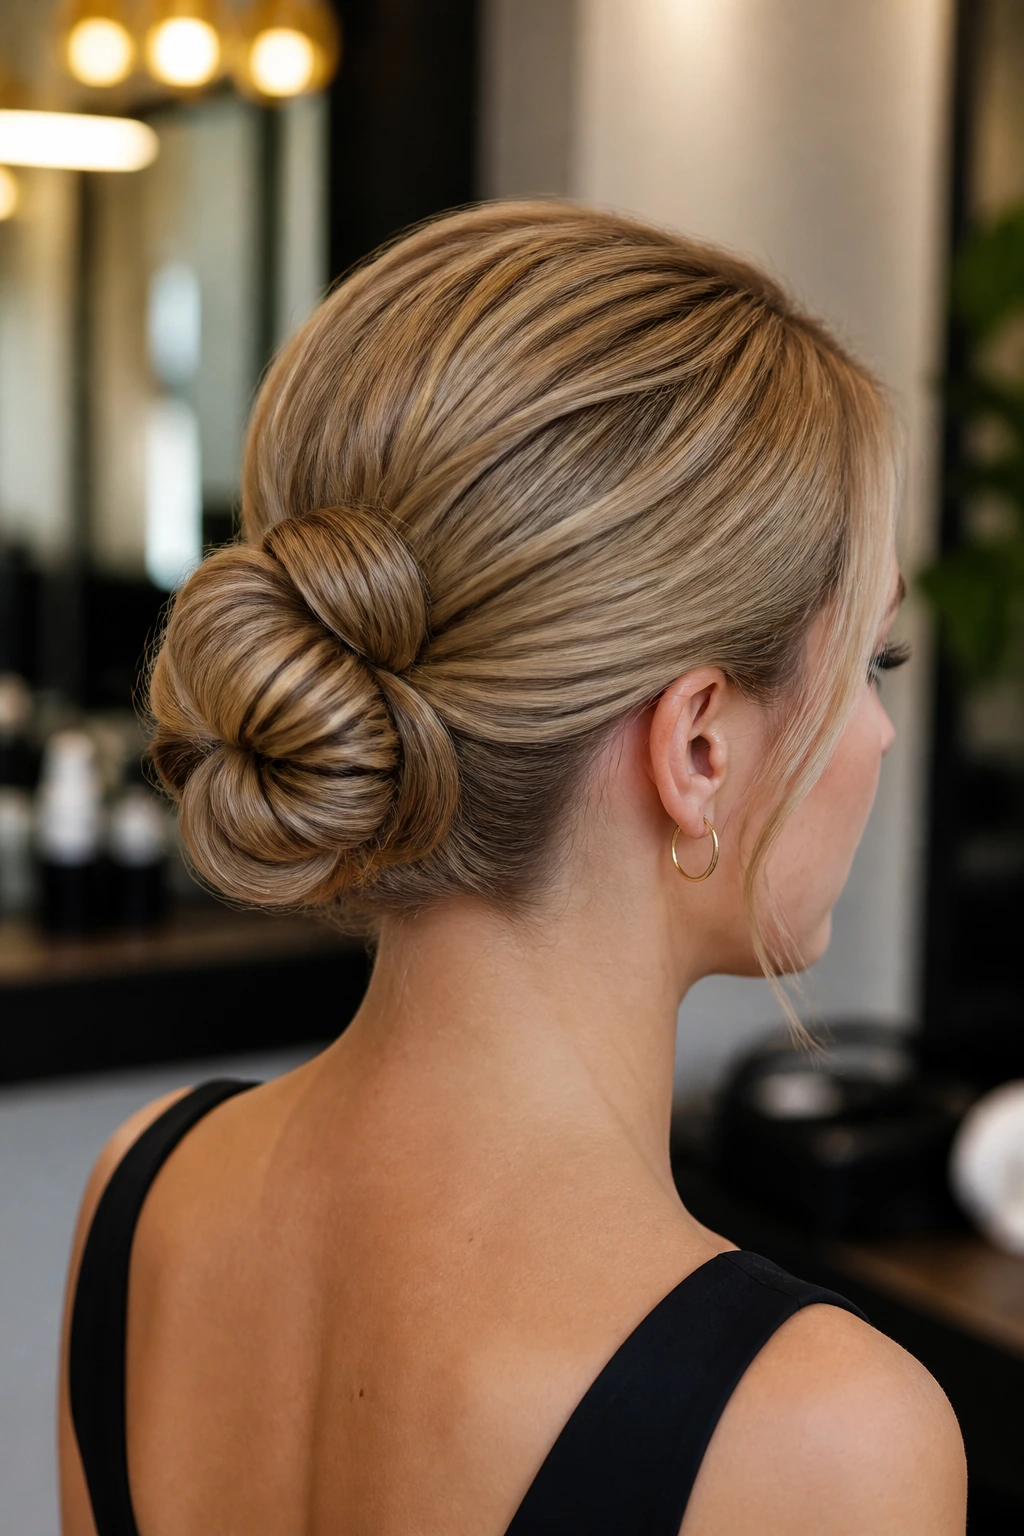
A loop-and-pin bun has more grip than a wrapped bun because each loop is laid flat before the next one goes in. That makes it a strong choice for thick or coarse medium-length hair, especially if the ends usually stick out of standard buns. It also stays compact, which helps on hot days.
Gather the hair low, twist the length once, then fold it into small loops and pin each loop flat to the head with U-pins or sturdy bobby pins. Add pins as you go, not after the whole bun is built. If the hair is especially dense, use a little flexible hairspray between loops so the shape doesn’t swell.
This style is practical in a good way. It does not ask for decoration to look finished. It looks like the kind of bun that can survive errands, travel, and a long afternoon in the sun without collapsing sideways.
25. Slicked-Back Top Knot
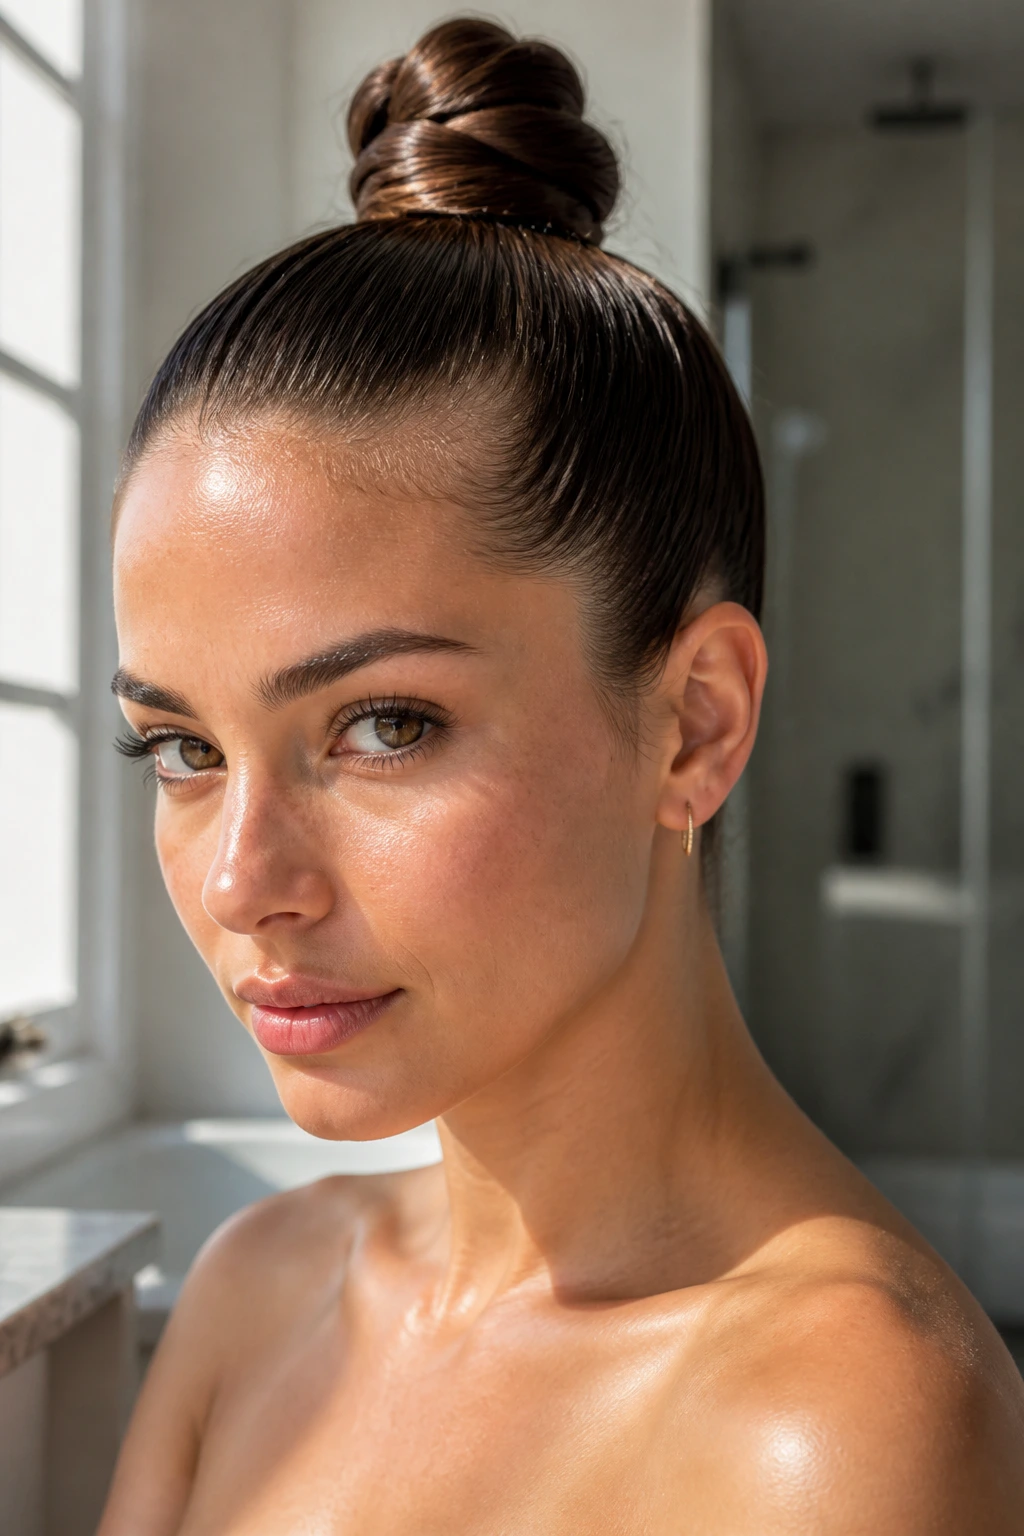
A slicked-back top knot solves a hot day fast. It pulls the hair off the face, lifts the weight to the crown, and keeps the outline crisp. Medium-length hair is enough to create a compact knot without the extra bulk that long hair brings.
When to Reach for It
- Smooth gel or styling cream around the hairline and part with a fine comb.
- Gather the hair high at the crown and secure it with one elastic.
- Twist the length into a small knot and pin any loose ends flat against the base.
- Add 2 extra pins where the bun feels heavy, usually at the back and one side.
This style tends to behave better on day-two roots than on squeaky-clean hair. A little oil at the scalp can make the knot look better if it is controlled with gel. The look is simple, but it is not soft. That is part of the appeal when the weather gets rude.
26. Ribbon-Threaded Pony Twist
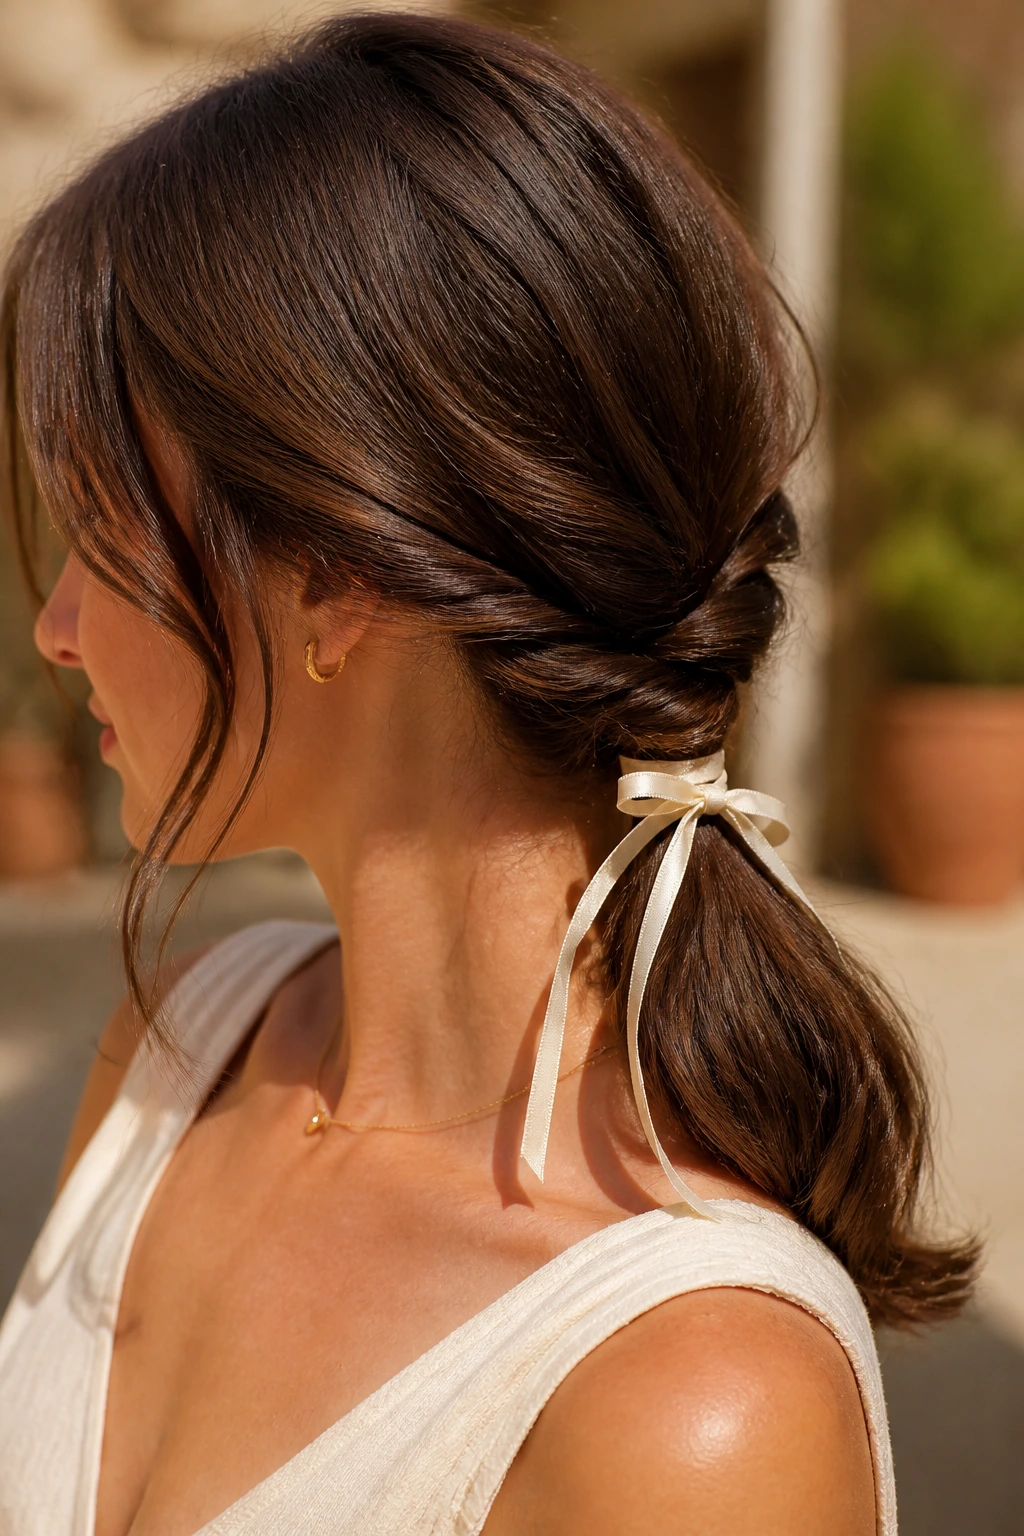
A ribbon can make the simplest pony twist look finished in ten seconds. That’s the charm here. Medium-length hair does not need a complicated braid when a narrow strip of fabric can change the whole line of the style.
Tie the hair into a low pony or twist it into a low roll, then thread a 1-inch ribbon around the base and knot it underneath. Grosgrain ribbon grips better than satin, which matters if your hair is slippery. If the hair is fine, keep the ribbon narrow so it does not pull down the style. If the hair is thick, let the ribbon ends trail a little for balance.
This is one of the easiest ways to make a workday bun feel less plain or a weekend twist feel a little dressed up. The ribbon adds shape without adding heat, and that matters more than decoration alone.
27. Interlaced Low Bun
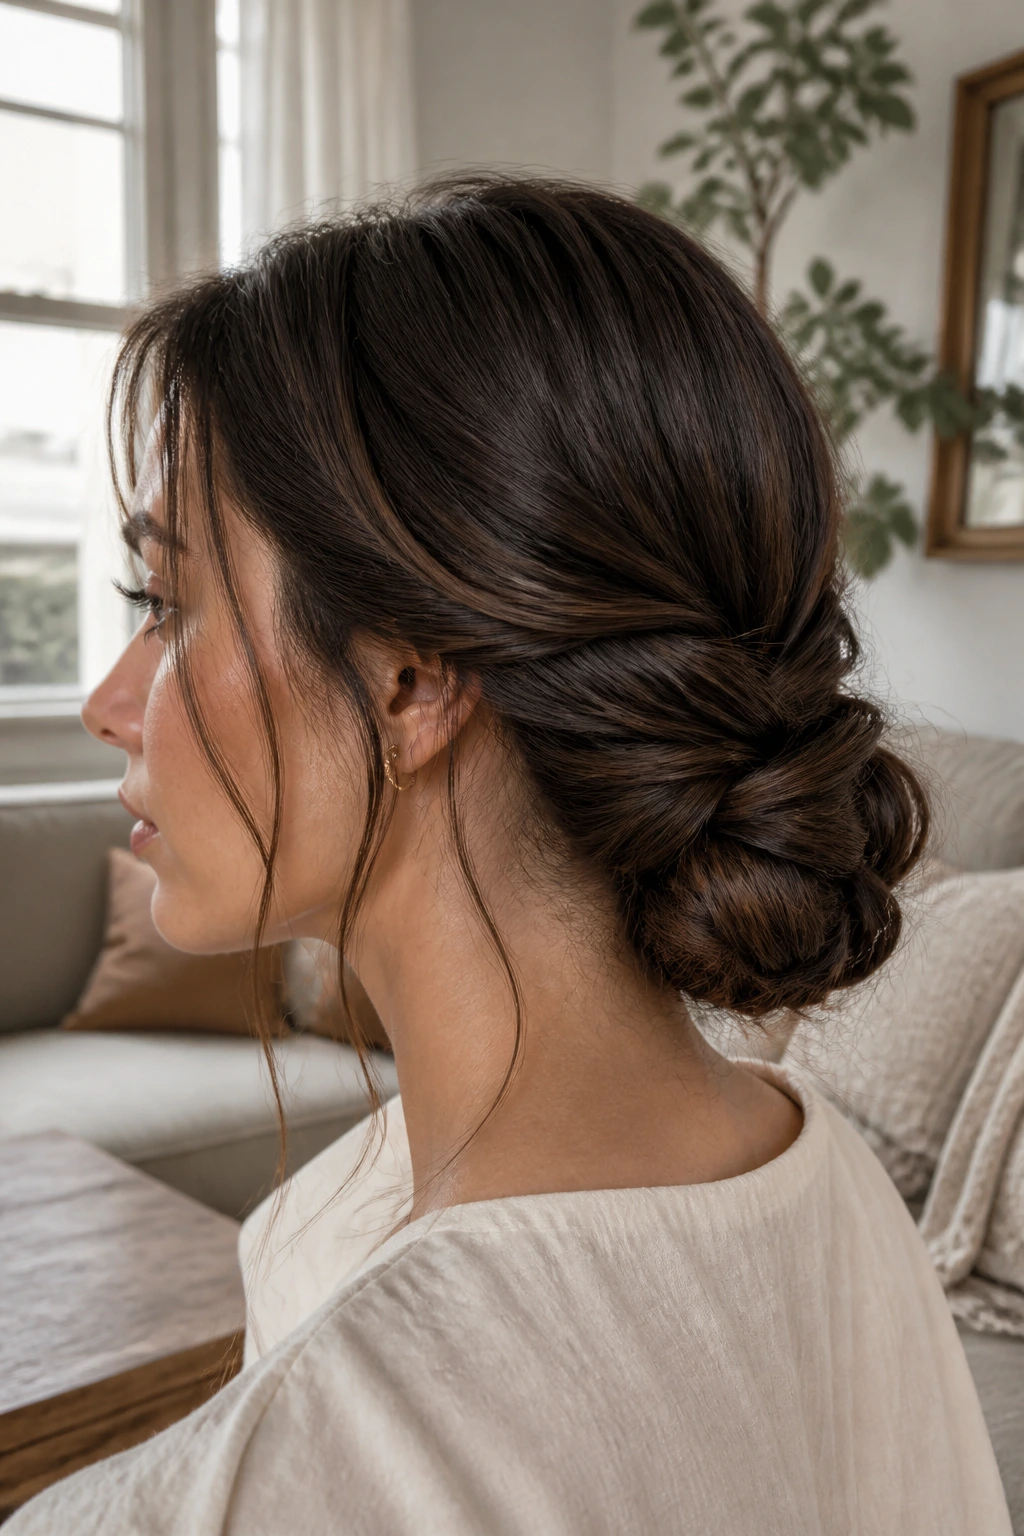
What if you want the most forgiving style of the whole set? Interlaced low buns are good for that. They absorb layers, tolerate a little frizz, and usually look better after they loosen a touch. Medium-length hair fits them well because the sections are long enough to cross but short enough to stay light.
Take two side sections, cross them over a low base, then weave the remaining length through the center before folding everything into a bun. Pin each crossing point as you go. Leave narrow face-framing pieces out if you want the style to feel softer, or keep the front smooth if you want the bun to look more structured.
This is the style I’d choose when I know I’ll be out all day and do not want to babysit my hair. It holds the shape, hides the uneven bits, and keeps the neck clear without asking for perfection.
How to Make Summer Updos Stay Put Without Feeling Stiff
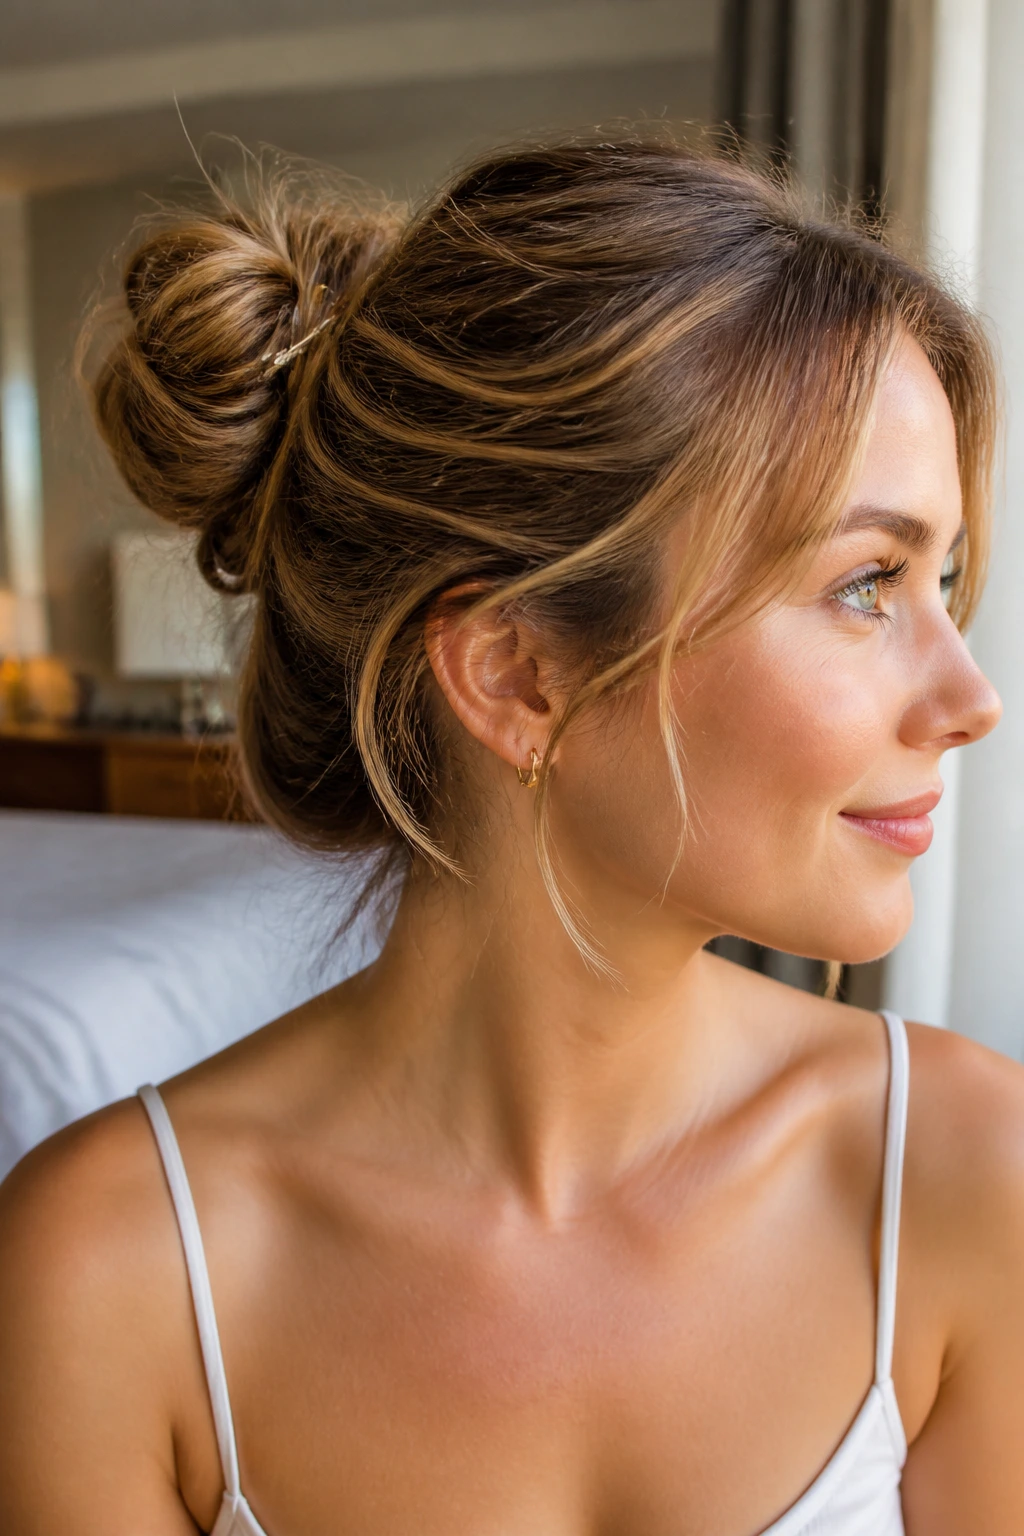
The trick with summer hair is not getting it to look unmovable. It’s getting it to stay together while still moving like hair. That usually comes down to grip, pin placement, and how much product you pile on before you start.
Start with the right texture: Clean, slippery hair is harder to shape than hair with a little grit. A light dusting of dry shampoo at the roots or a mist of texturizing spray through the lengths gives pins something to hold. If your hair is freshly washed and very soft, let it air-dry with a pea-size amount of mousse first.
Pin the heavy spots first: The nape, bun base, and places where two sections cross are the points that matter. Put one pin in at an angle, then another crossing it. One pin alone often looks neat for five minutes and then gives up.
Keep the scalp comfortable: Tight styles often fail because they hurt before they fail visually. Leave a little slack at the hairline and around the ears, especially if you plan to wear the style for hours. A style that feels tolerable at minute ten tends to stay on your head longer.
Use flexible spray in layers: One heavy blast from close range makes the hair crunchy and can leave white flecks on dark hair. Mist from about 10 inches away, let it settle, then smooth only the pieces that need help. That keeps the finish touchable.
The Little Mistakes That Flatten a Good Updo
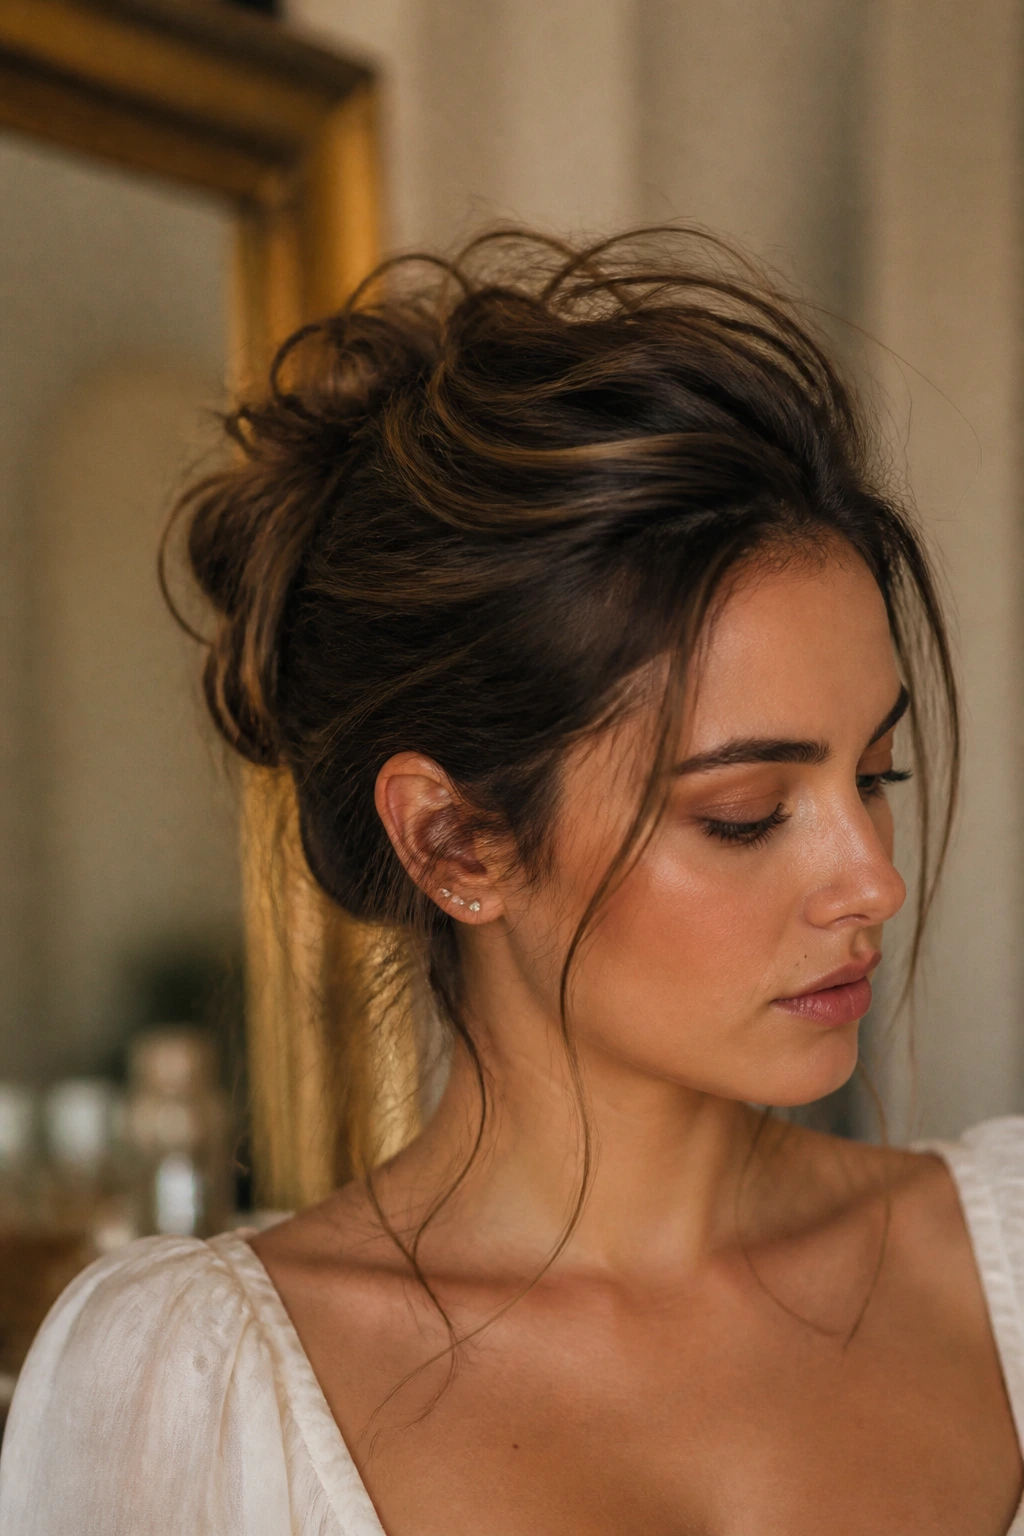
-
Starting with hair that is too slippery: If the style slides out in under an hour, the problem is often clean hair, not your technique. The fix is simple: add dry shampoo or texture spray before you begin, especially at the roots and mid-lengths.
-
Pulling every section too tight: This creates a flat crown, sore scalp, and little pieces that pop free later. Leave a touch of slack so the shape has room to move. Pins hold better when the hair is not stretched like a rubber band.
-
Using the wrong size elastic: A thick pony holder can leave a lump under the bun or make the knot sit too high. Clear mini elastics and small fabric ties usually work better on medium-length hair because they keep the base smaller.
-
Ignoring layers: Shorter pieces near the face or nape tend to spring out first. Mist them lightly, twist them into the shape, and pin them where they naturally want to live instead of forcing them straight back.
-
Over-spraying too early: Heavy hairspray before the shape is built makes hair sticky in the wrong spots. Build the updo first, then finish with a light layer of spray once the shape is set.
Easy Swaps That Change the Mood
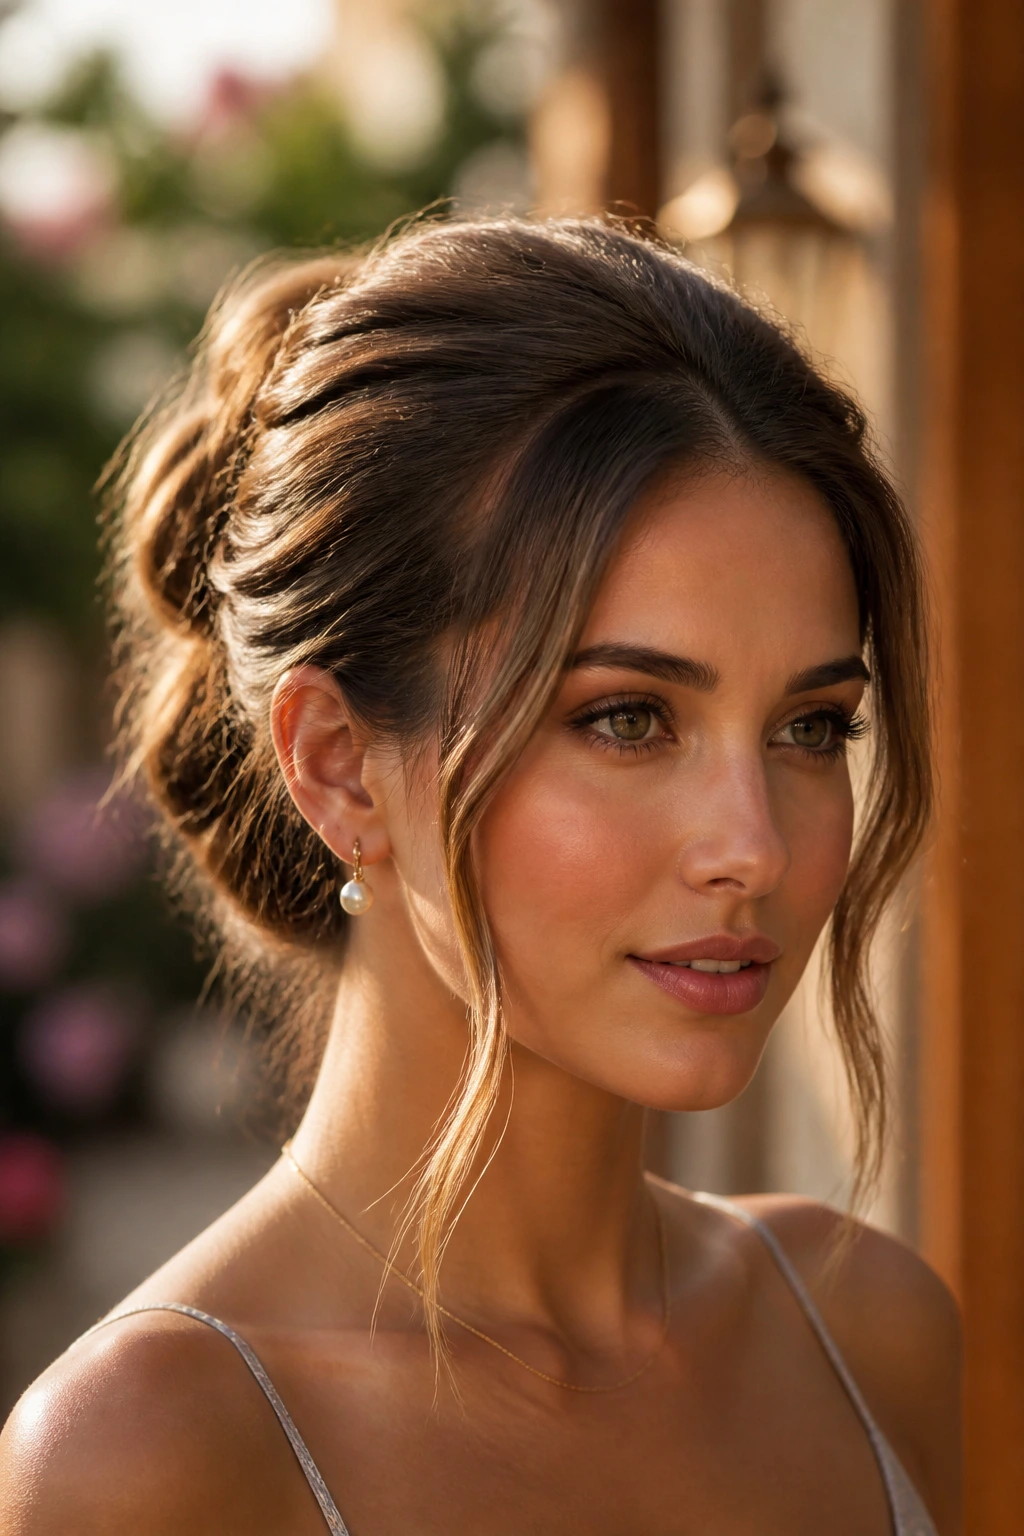
Soft and Romantic: Leave two narrow tendrils out around the face and curl them with a 1-inch iron. This works on almost any bun or twist and gives a softer edge without changing the structure.
Curly-First Finish: Let natural curl and wave patterns lead the style instead of brushing them out. Use a satin scrunchie, a few pins, and a light leave-in spray so the texture stays visible.
Clean and Sleek: Smooth the hairline with gel or styling cream and keep the part sharp. This turns a simple knot or French roll into something more polished without changing the core shape.
Accessory-Heavy Day: Add one scarf, ribbon, or claw clip and keep the rest plain. Pick one focal piece, not three, or the style starts fighting itself.
Extra-Hold Version: If you expect wind or a long day outside, use a mini elastic plus crossed pins at each anchor point. It sounds fussy, but it saves you from rebuilding the style halfway through the day.
Tools That Earn Their Drawer Space
-
Rat-tail comb: Best for clean parts, sectioning, and tucking small pieces into a roll or bun.
-
Bobby pins in two sizes: Standard pins work for most twists; shorter pins are better for face-framing pieces and tiny braids.
-
U-pins: Useful for thick buns and French twists because they support shape without adding bulk.
-
Clear mini elastics: Handy for bubble styles, tiny braids, and holding sections before you pin them.
-
Texturizing spray: Gives smooth hair enough grip to hold a twist or braid without falling apart.
-
Dry shampoo: Good for roots that feel too soft, too shiny, or too clean to cooperate.
-
Flexible-hold hairspray: Keeps flyaways down without locking the whole style into a shell.
-
Medium claw clip: Essential for French rolls, casual twists, and fast off-the-neck styles.
-
1-inch curling iron or wand: Great for soft tendrils, bent ends, and the little shape around the face that keeps an updo from looking severe.
-
Satin scarf or ribbon: Useful when you want to hide pins, soften a bun, or add a small visual change without rebuilding the style.
Keeping the Style Fresh Through Heat, Sweat, and Sleep
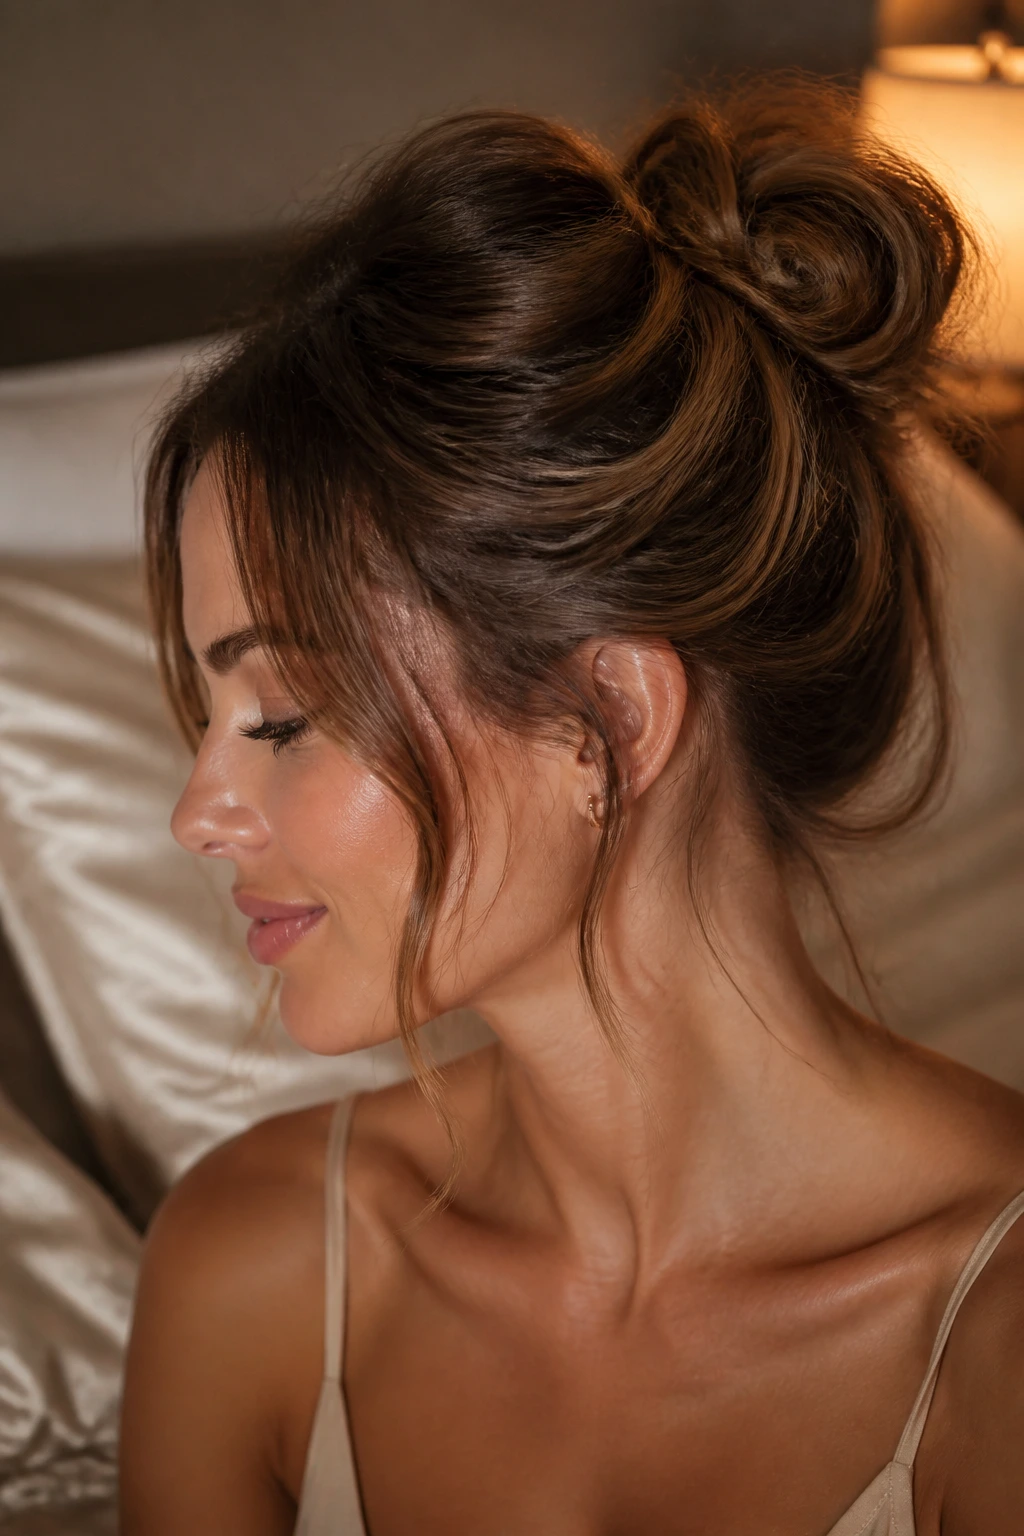
Most of these updos are meant to last one good day. That’s the honest answer. Braided styles and tighter buns can often make it into a second day if you do not sleep on them too hard, but anything slick or highly pinned usually looks best the same day it’s built.
If you want to wear a style overnight, choose one with a softer base — a braid, a loose twist, or a low bun — and sleep on a silk or satin pillowcase. A loose scarf can help keep the crown from flattening, though you do not want to wrap the hair so tightly that the shape dents. When you wake up, smooth the hairline with a tiny bit of styling cream on your fingertips and re-pin only the spots that loosened.
Sweat and product build-up are the other issue. If you’ve used gel or strong spray around the hairline, rinse that area when you wash your face or shampoo next day. Do not scrub the bun while it’s still in place; that just tangles the pins and roughs up the ends. After a swim or a very sweaty day, let the hair dry fully before you tuck it back up again. Damp hair under pins can smell stale fast, and nobody wants that.
The styles that age best are usually the ones with some texture in them from the start. A loose braid, a woven bun, or a side knot tends to look better after a little movement. The sleek styles are sharper but less forgiving. Pick accordingly.
Questions People Ask Before They Pin Their Hair Up

Can medium-length hair really hold a full updo?
Yes, if you choose the right shape. Medium-length hair holds low buns, twists, braided crowns, and tucked rolls well because the length is enough to create structure without adding too much weight. The key is using a base that matches your texture instead of forcing a style that needs more hair than you have.
What works best if my hair is layered?
Styles with built-in texture usually behave better: twisted buns, mini braids, woven rolls, and half-up crowns. Layers can slide out of smooth ponytails, but they tuck into braids and twists more easily. A little dry shampoo at the roots helps the shorter pieces stay where you put them.
Is day-two hair better than freshly washed hair?
Usually, yes. Fresh hair can be too soft and slippery, especially if it’s straight or fine. Day-two hair has more grip, which helps the pins and elastics hold. If your hair has to be washed first, add texture spray or mousse before you start styling.
How many bobby pins should I use?
Start with 4 to 6 and add more only where the style feels loose. If you use too many, the bun turns bulky and the pins start to show. Cross two pins in an X at the heaviest point and you’ll often need fewer overall.
Can I do these styles on curly hair?
Absolutely, but the prep changes. Work with the curl pattern instead of brushing it flat, and use satin scrunchies or wider elastics so you don’t pull the curl apart. Curly hair often needs fewer pins than straight hair because the texture already helps hold the shape.
What if my hair is too short for a bun?
Choose a half-up knot, a Gibson tuck, a braided crown, or a faux bob. Those styles use the available length without demanding a full wrap. If the ends are just a little too short, tuck them under with a small pin and let the front pieces soften the look.
How do I keep flyaways down without making the style crunchy?
Use a small amount of styling cream or flexible spray on your hands, then smooth only the surface pieces. A toothbrush or spoolie brushed lightly through the hairline helps, too. Heavy spray from close range is what creates that stiff finish.
Can I sleep in a braided or twisted updo?
Yes, but only if it’s loose enough to stay comfortable. Braids and low twists are the safest styles to sleep in, especially with a silk pillowcase. If the style has a lot of pins or sits high on the head, take it down before bed so it doesn’t pull in the night.
Off the Neck
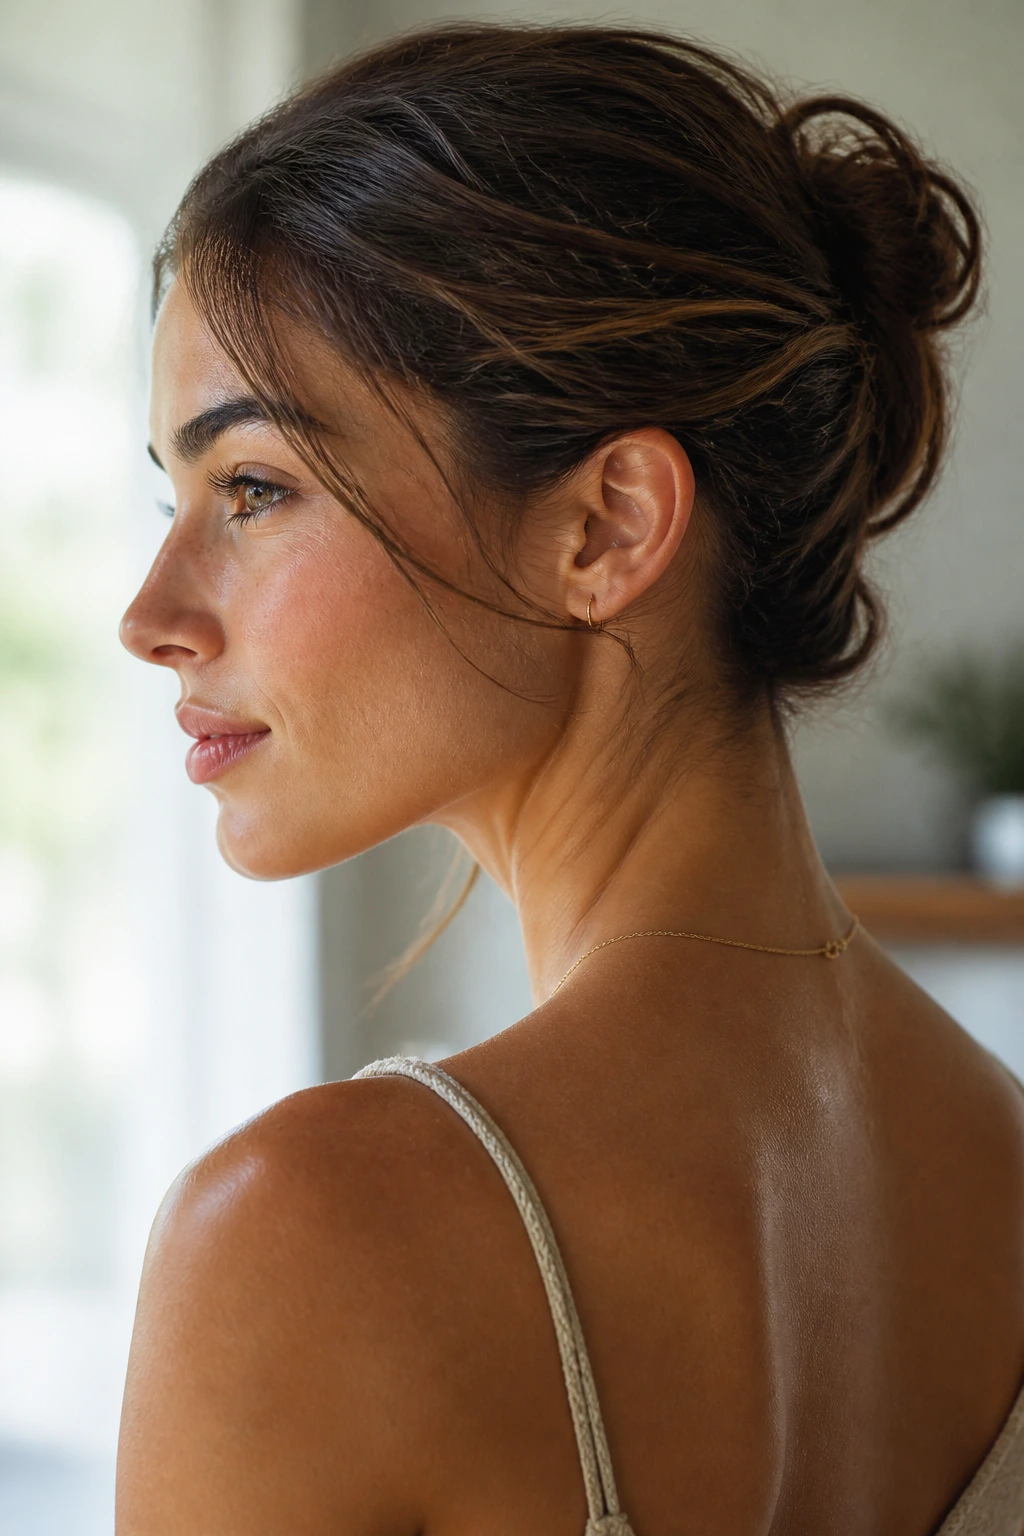
Medium-length hair does not need to sit in the middle of summer and suffer. It has enough length to become a bun, a tuck, a braid, or a clipped roll without turning into extra weight, and that makes it one of the easiest lengths to style once the weather gets hot.
Pick the shape that matches the day, not the fantasy version of the day. Some mornings call for a sleek knot and a comb. Others need a scarf, a few pins, and an honest knot at the nape. The good part is that you have room to choose, and that usually makes the whole season easier to wear.
