



Wavy hair can be generous or stubborn, depending on the day. Put it in the wrong kind of updo and the crown goes flat, the ends puff out, and the whole thing starts sliding loose before lunch. Put it in the right one and the texture does half the work for you. The bend gives pins something to hold. The unevenness hides small flaws. A few loose strands at the temples stop the style from looking helmet-hard.
That’s the sweet spot with updos for wavy hair: they should look like they were designed around the wave, not imposed on top of it. Clean buns are nice. So are polished twists. But wavy hair has its own advantages, and the smartest styles use that natural bend as structure, grip, and decoration all at once. You do not need to iron every strand into submission to make the style behave.
A good wavy-hair updo also has range. Some days call for a fast claw-clip knot that survives a commute and a scarf. Other days want a low chignon with soft face pieces that doesn’t budge through dinner. And sometimes you want a style with enough detail to look like you spent time on it, even if the actual pinning took eight minutes and a mild amount of swearing.
There’s a lot here, but that’s the point. Different wave patterns, lengths, and textures need different tricks. The styles below lean into that, and the better you know where your waves naturally fall, the easier every one of them gets.
Why These 27 Updos Work on Wavy Hair
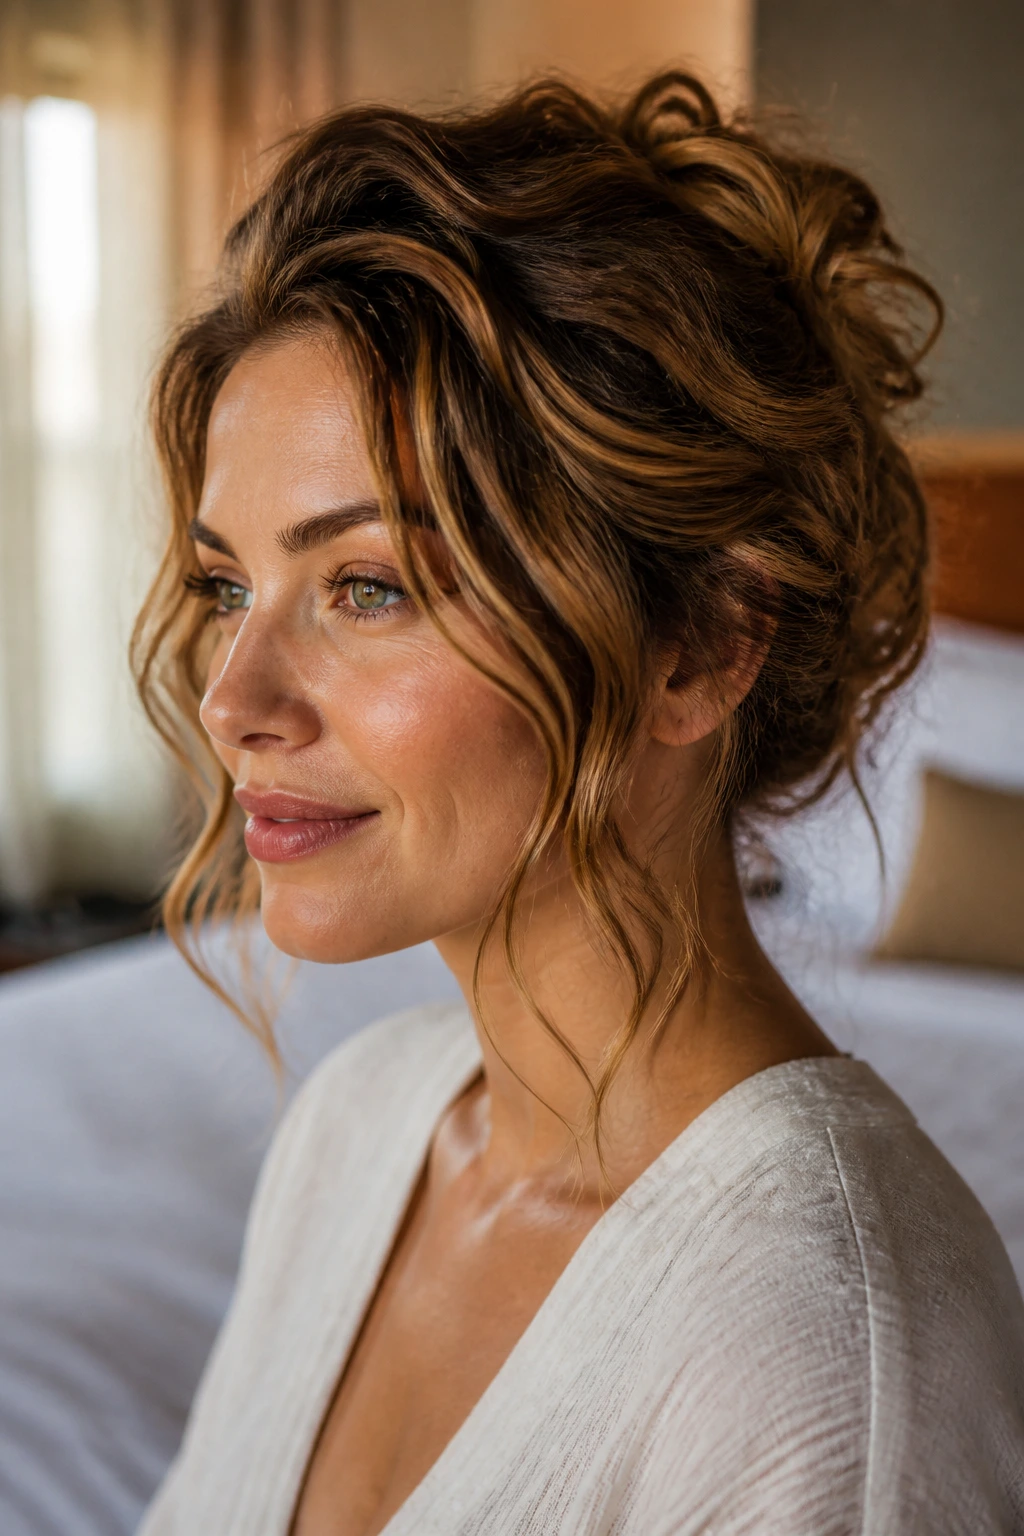
- The bend gives pins something to grab: Straight hair often needs more teasing or product; wavy hair already has little dips and ridges that help bobby pins stay put.
- Second-day texture is your friend: Slightly lived-in waves usually hold twists, knots, and braids better than freshly washed hair that still feels slippery.
- Loose ends look intentional here: A few piece-y bits around the face or neck do not read as sloppy on wavy hair the way they can on stick-straight hair.
- You can choose your level of polish: These styles range from softly undone to sleek and glossy, so you can match the mood without changing your whole prep routine.
- Most of them need fewer tools than you think: A tail comb, elastic, pins, and a little texture spray will get you surprisingly far.
- They work with your natural pattern instead of against it: That usually means less fighting, less frizz at the crown, and a style that still looks good after a few hours of wear.
1. Low Twisted Bun with Face-Framing Pieces
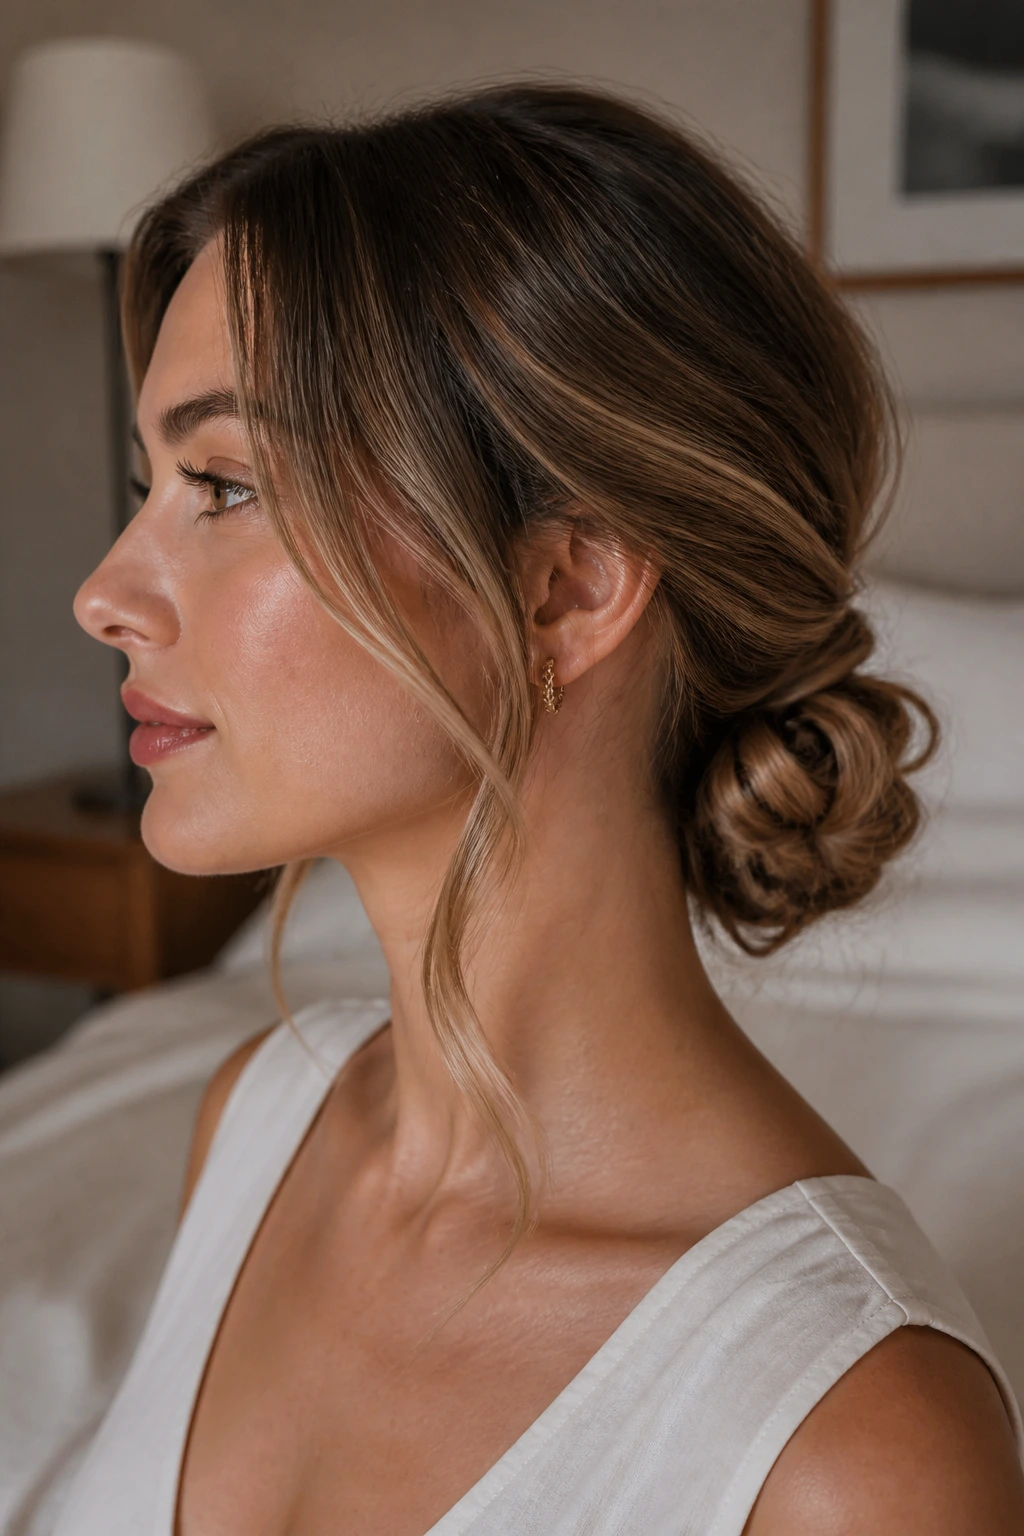
Want the easiest kind of low drama? Start here. A low twisted bun is one of those styles that looks calm and deliberate even when you threw it together in under ten minutes. The waves give the twist a soft ridged texture, which is exactly why this looks better on wavy hair than on hair that’s been pressed flat.
Where the twist sits matters
Keep the bun anchored right at the nape, not halfway up the back of the head. That lower placement lets the natural bend fall into the twist instead of sticking out around it. Leave out two slim face-framing pieces before you gather the rest, then twist each side back and pin them over the bun.
A pea-sized bit of texture spray at the roots helps if your waves are freshly washed. If the ends are dry or frayed, tuck them inward and pin them from the underside. The style should look soft, not fuzzy.
2. Half-Up Knot on Loose Waves
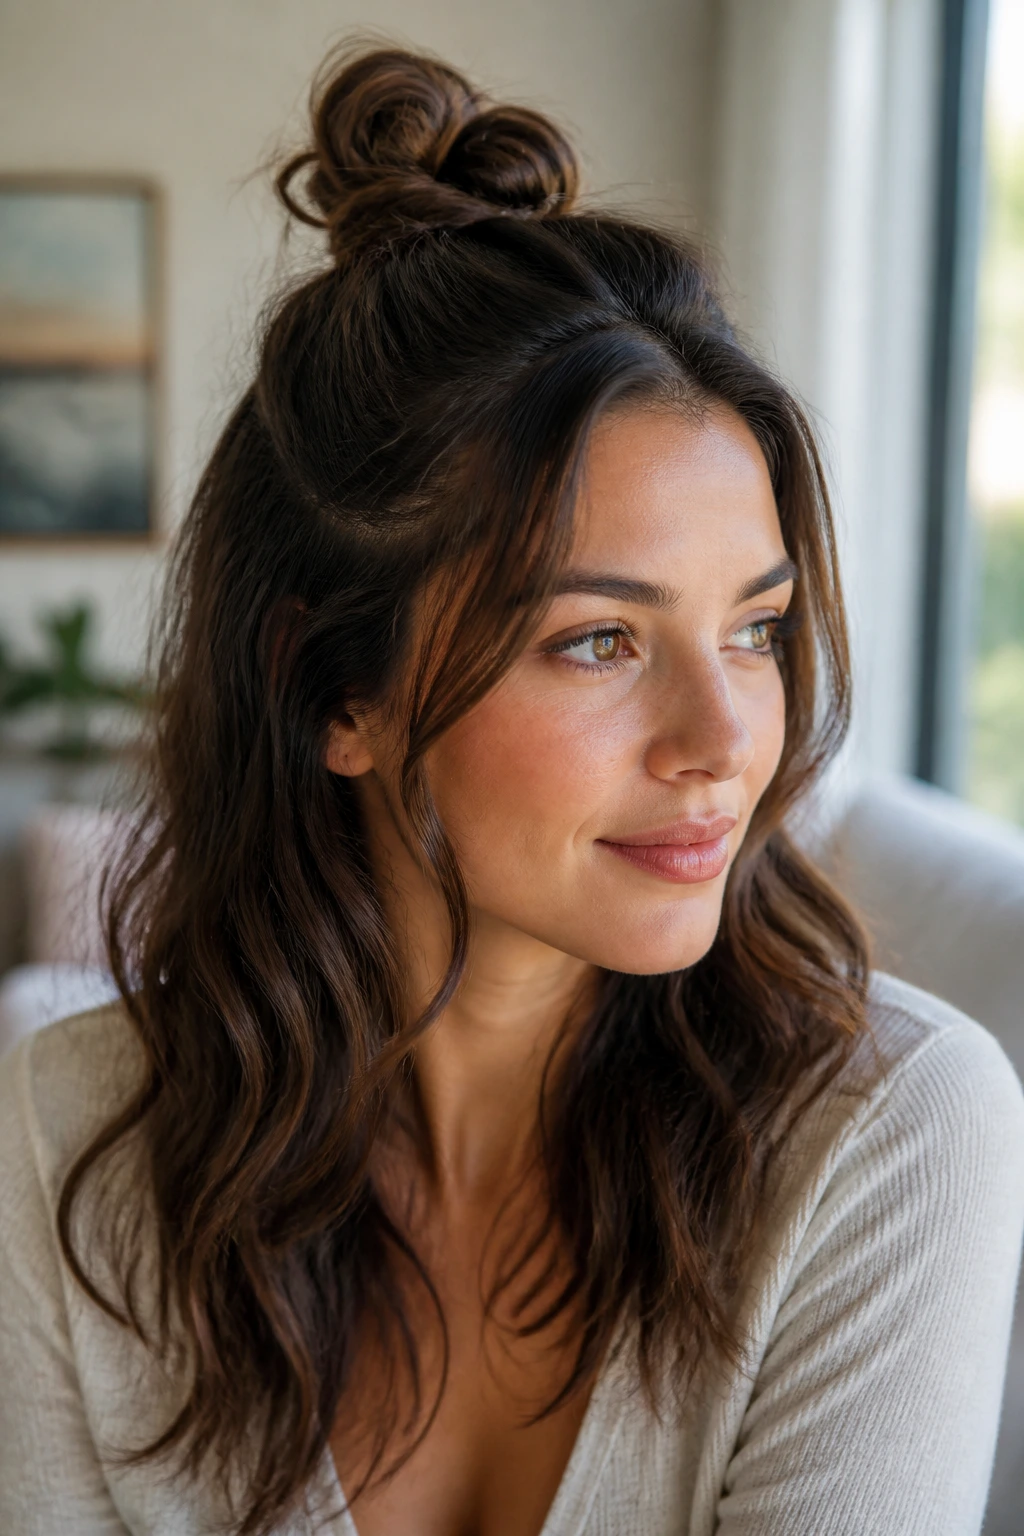
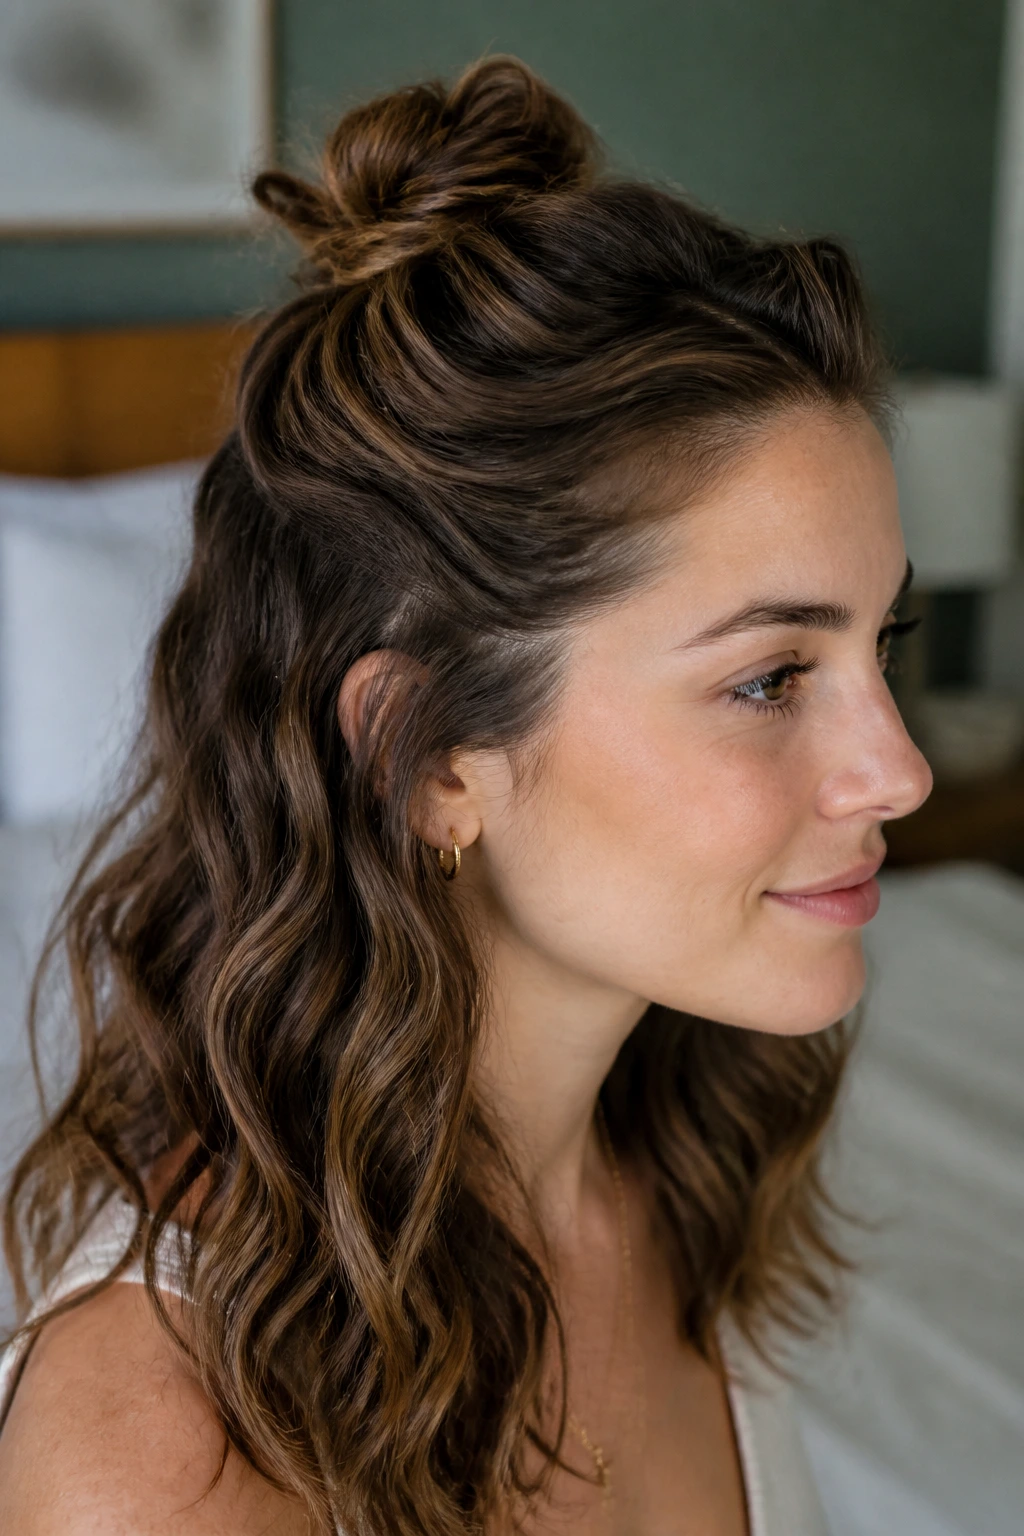
A half-up knot is the fastest way to get your hair off your face without giving up the length. It works especially well when your waves are shoulder-length or just past it, because the loose lower section still has room to move. The top knot acts like a little anchor while the rest of the hair keeps its shape.
The best version isn’t tight. Pull the top section back with your fingers, not a brush, twist it once or twice, and knot it loosely at the crown. If the knot sits too high, it can look like it’s trying too hard. Keep it low enough that the lower waves still drape naturally.
A few lifted pieces at the crown are fine. Better than fine, actually. They keep the style from looking overworked.
3. Crown Braid Into a Hidden Bun
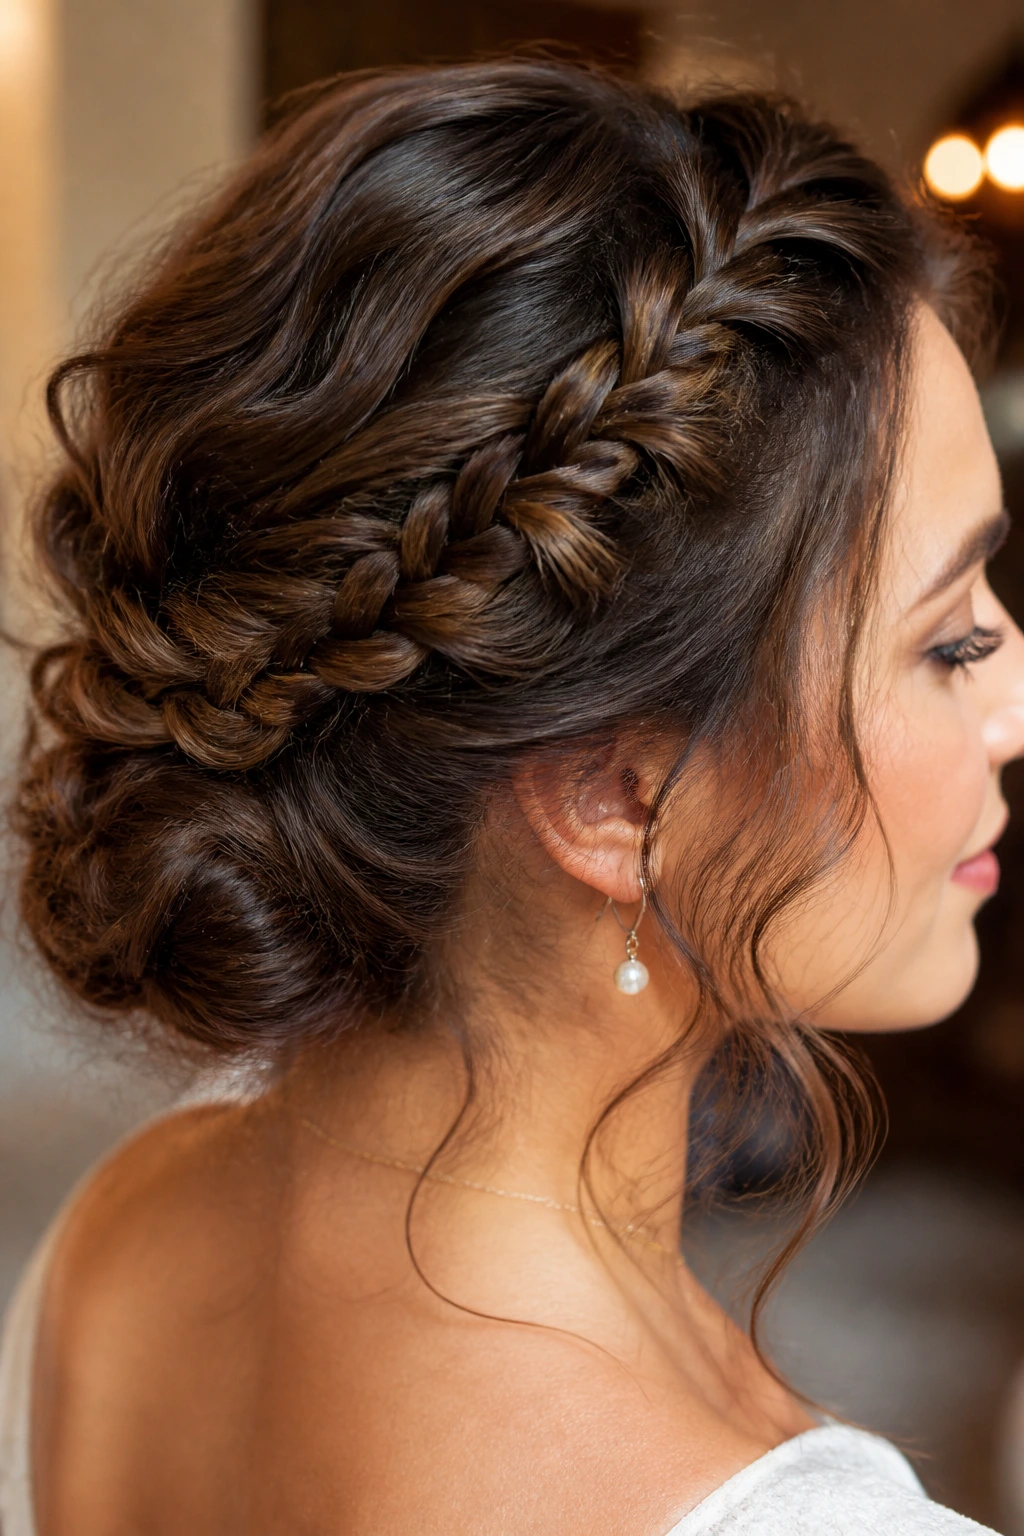
If your waves are thick enough to eat bobby pins, braid first and pin later. A crown braid creates a built-in path across the head, so the rest of the style has a stronger base. Once the braid wraps across the crown, you can tuck the ends into a low bun and let the waves at the back do the softening.
How to keep it from looking stiff
Braid a little looser than you think you should. On wavy hair, a tight braid can fight the texture and make the whole style feel sealed shut. A braid that sits a touch airy along the scalp looks better and lets the natural pattern show through.
This is one of the better styles for fuller hair, especially if the underside tends to puff up. The braid controls the top, the bun hides the tail, and the waves fill in the gaps.
4. French Twist with Loose Ends
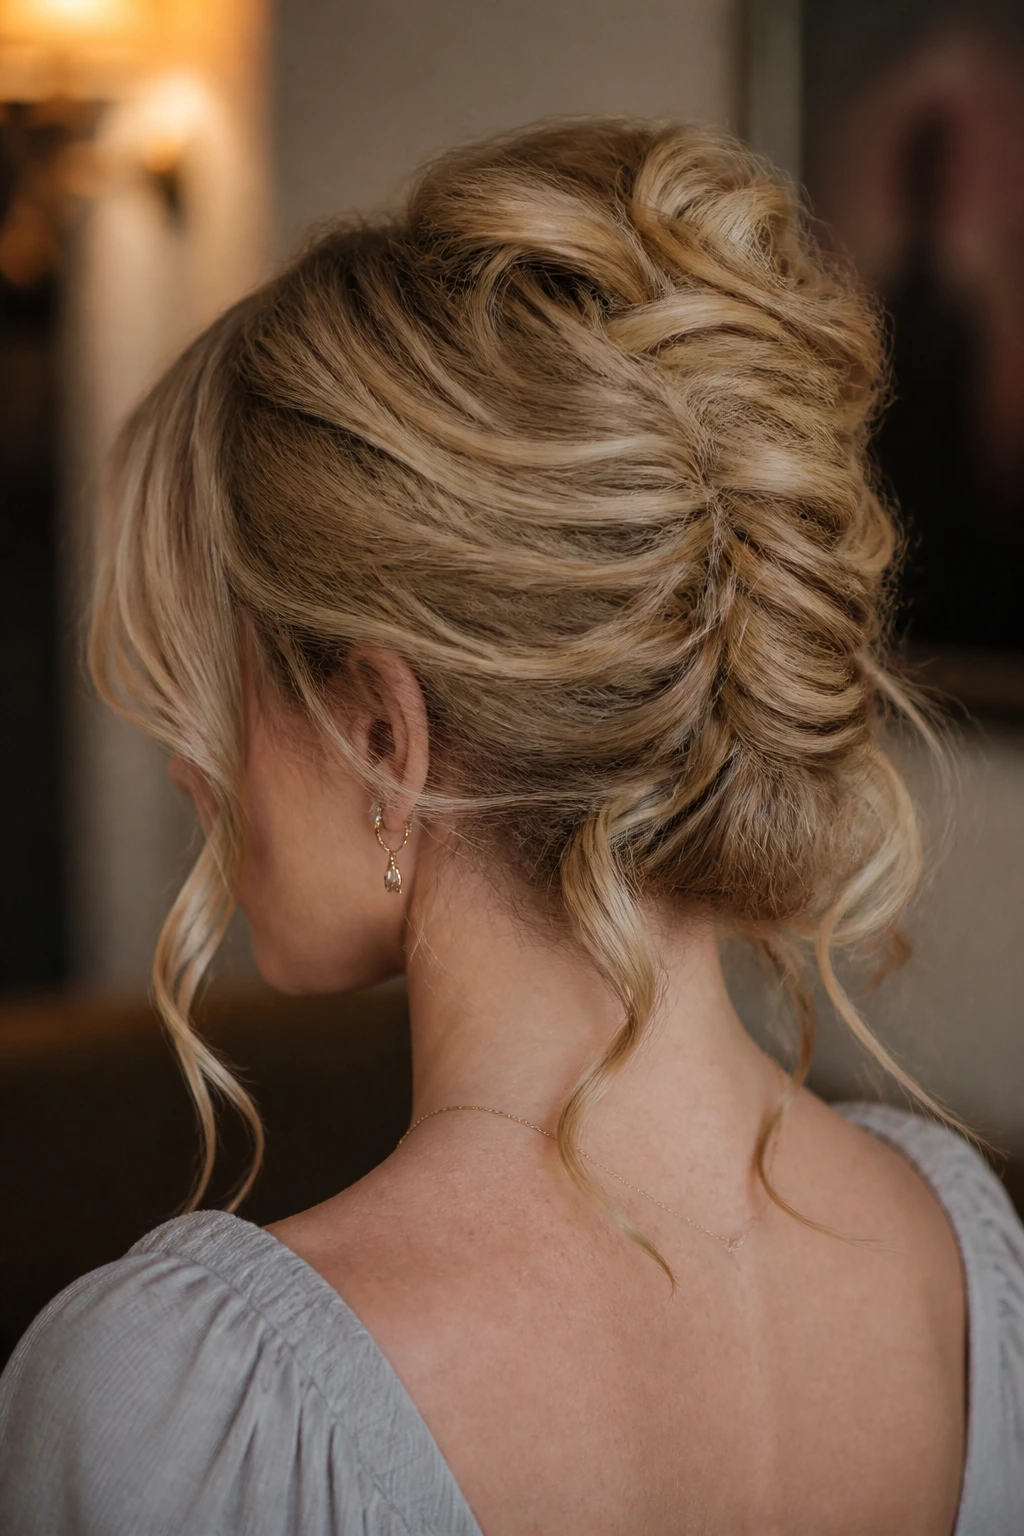
The French twist gets a lot less formal the second you let the ends keep their texture. That’s good news. Wavy hair softens the structure, which keeps the style from looking severe or old-fashioned. The result still feels elegant, but not precious.
Keep the twist narrow and vertical, then let the lower ends fold into the shell instead of tucking every last strand into place. A few loose pieces at the nape are part of the charm here. If the wave pattern is strong, those ends curl around the twist and create a little movement at the back.
This one likes medium to long hair best. Very short layers can slip out, but longer waves will settle into the twist with almost no fuss.
5. Claw-Clip Chignon
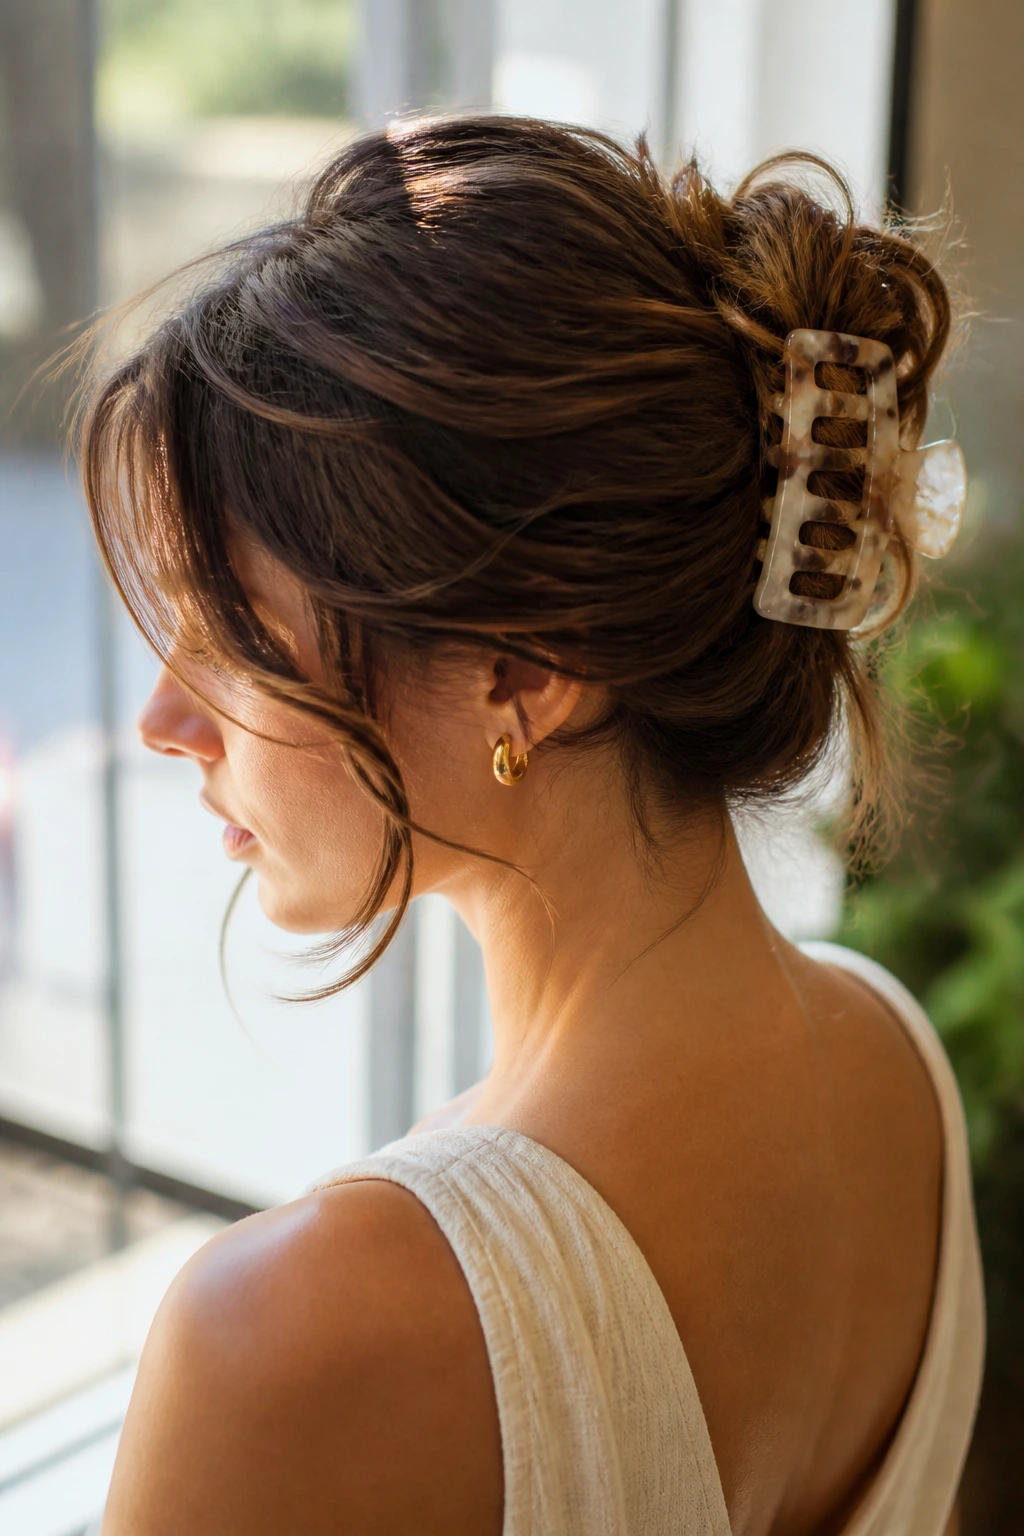
A claw-clip chignon is the answer for the mornings when your hair needs to be up, and that’s the end of the discussion. It depends on texture more than precision, which is why wavy hair usually handles it so well. The bend keeps the twist from unraveling, and the clip gives the whole thing a relaxed, slightly architectural shape.
Unlike a polished bun that wants six pins and a mirror, this style can be built with one clip and a couple of strategic bends. Gather the hair at the back, twist it upward, fold the ends under, and clamp the clip over the center of the twist. If the ends poke out, leave them. That rough edge makes the style look deliberate.
Best for thick or medium-density waves. Fine hair can do it too, but you’ll want a smaller clip with narrow teeth.
6. Rope-Braid Ponytail Bun
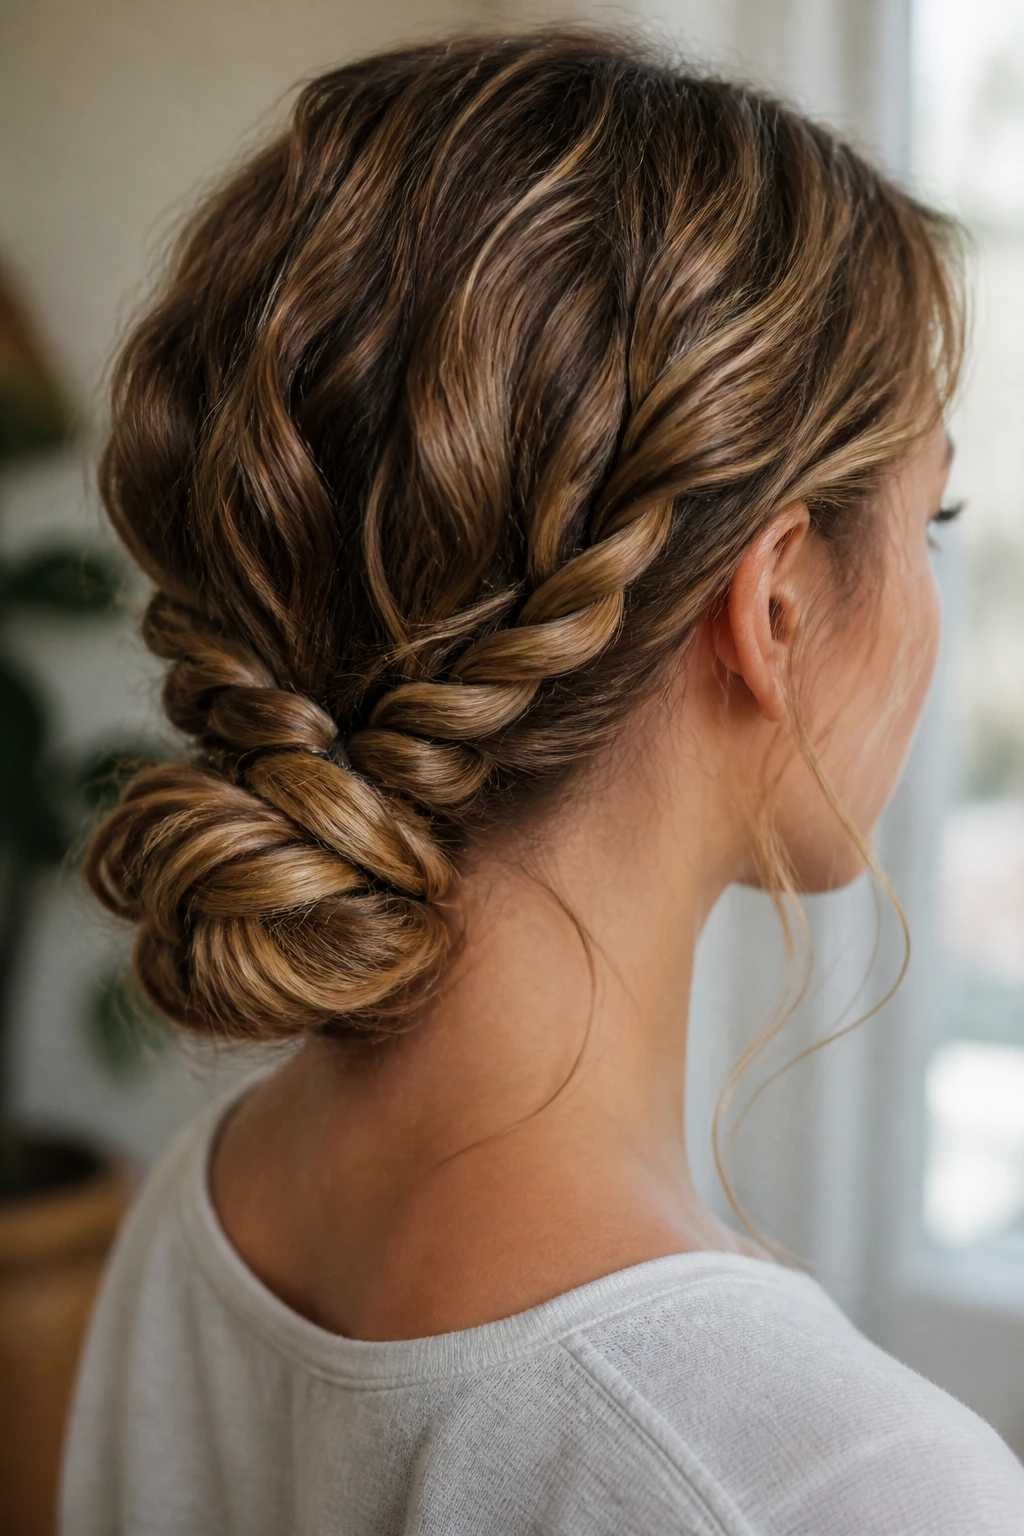
Rope braids and wavy hair get along because neither one needs to be flawless. Pull the hair into a low ponytail, split it into two sections, twist each section in the same direction, and then twist them around each other the opposite way. That rope-braid texture gives you a stronger, more compact shape once you coil it into a bun.
The bun ends up with a corded look that’s especially nice on longer waves. If the waves are a little frizzy, do not panic. That tiny bit of roughness makes the braid look fuller, not messy. In fact, the style tends to look better with some air in it.
Use a clear elastic at the ponytail base and 2-4 bobby pins to secure the coil. It holds better than you’d expect.
7. Braided Halo Bun
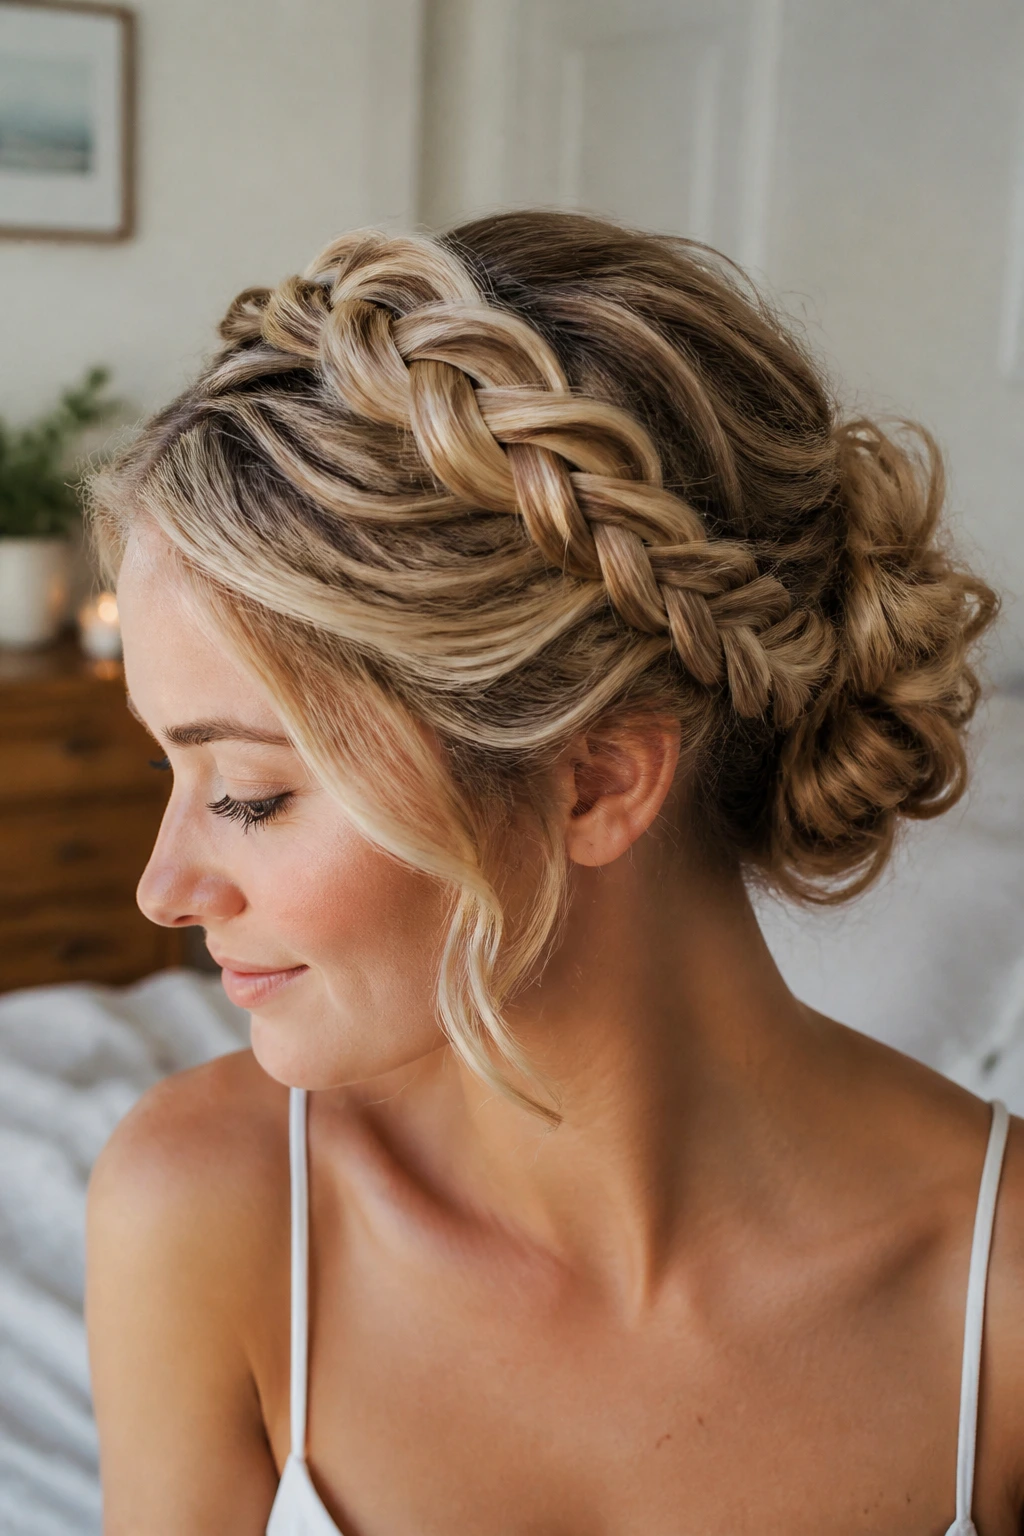
Need hair that stays off your neck but still looks ceremonial? A braided halo bun is the one that earns its keep. The braid wraps around the head like a narrow crown, which means the eye sees shape before it sees loose texture. Then the remaining length tucks into a bun at the back or side.
What makes it work on waves
Wavy hair gives the braid more body, so the halo looks thicker without needing extra hair. That’s useful. A thin braid can look skimpy fast, but waves puff it up just enough to feel full.
If your hair is slippery, prep the mids and roots with dry shampoo first. It adds grip without turning the hair chalky. Keep the halo slightly soft around the temples rather than pulling it tight to the scalp. Tight halos can leave a hard line that feels too severe for the texture.
8. Sleek Low Bun with One Soft Wave Left Out
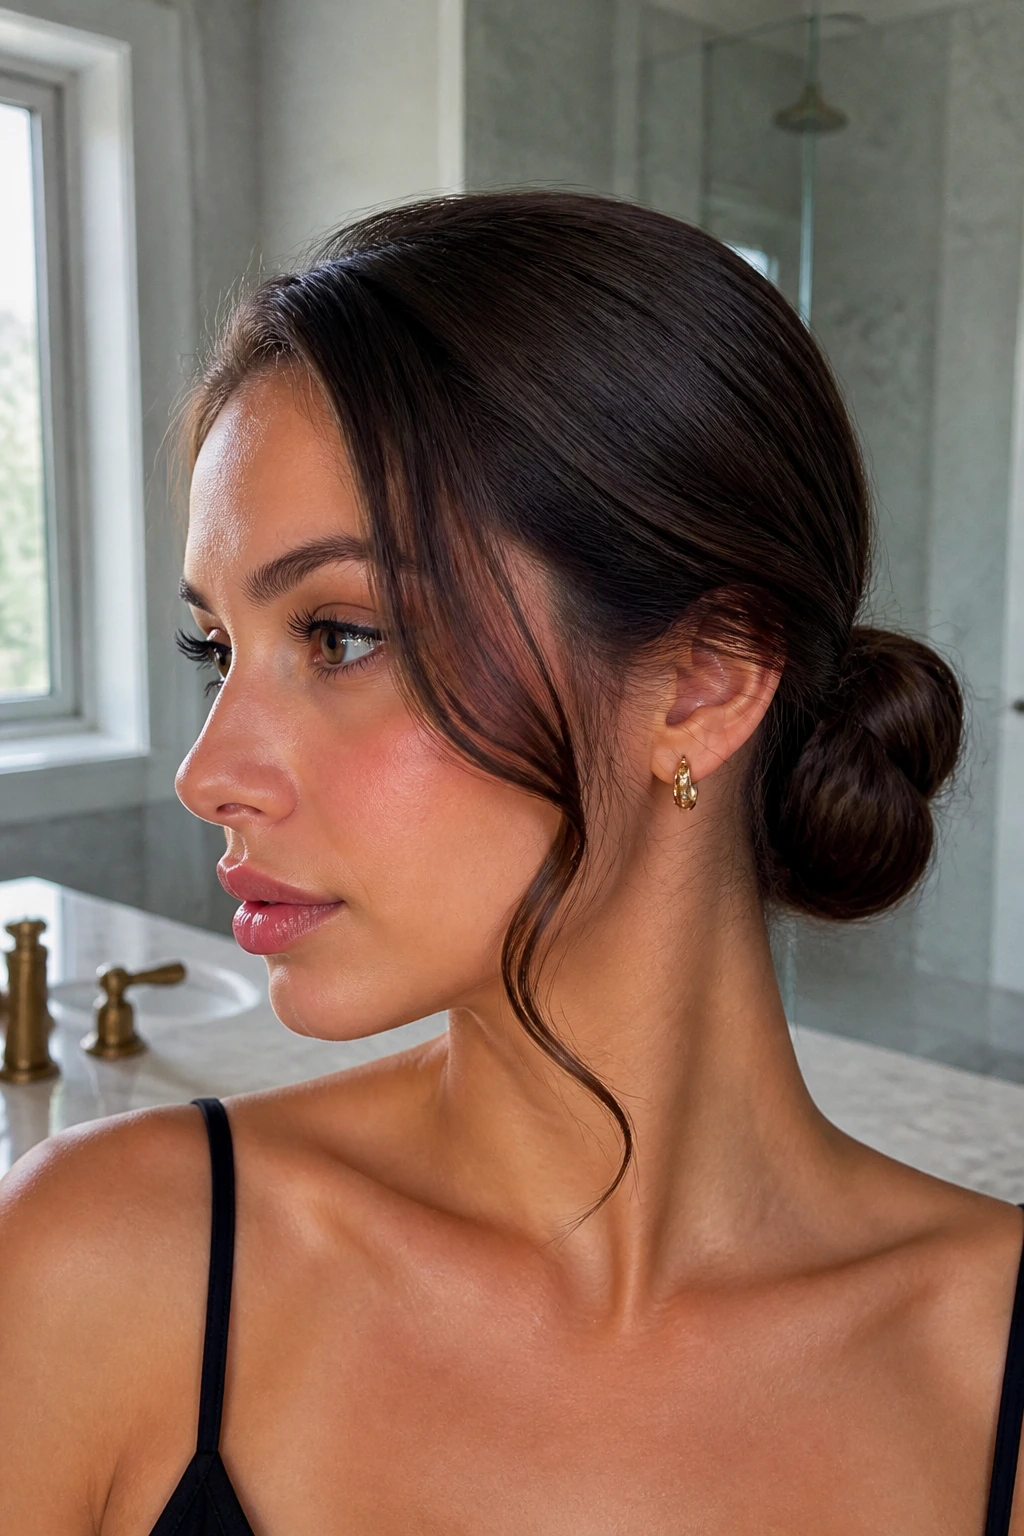
The easiest way to make wavy hair look polished is not to smooth everything. Smooth the top two inches, yes. The rest? Let it stay wavy. That contrast is what makes the style feel intentional instead of flat.
Pull the crown and sides into a low bun, then leave one narrow wave at the temple or one soft strand near the ear. That single loose piece changes the whole mood. It keeps the face open, softens the jawline, and stops the bun from looking too strict.
This style works best when the top is controlled with a bit of gel or a lightweight cream, but the ends stay textured. If the bun is shiny and the loose piece is airy, the contrast looks sharp in a good way.
9. Bubble Ponytail Updo
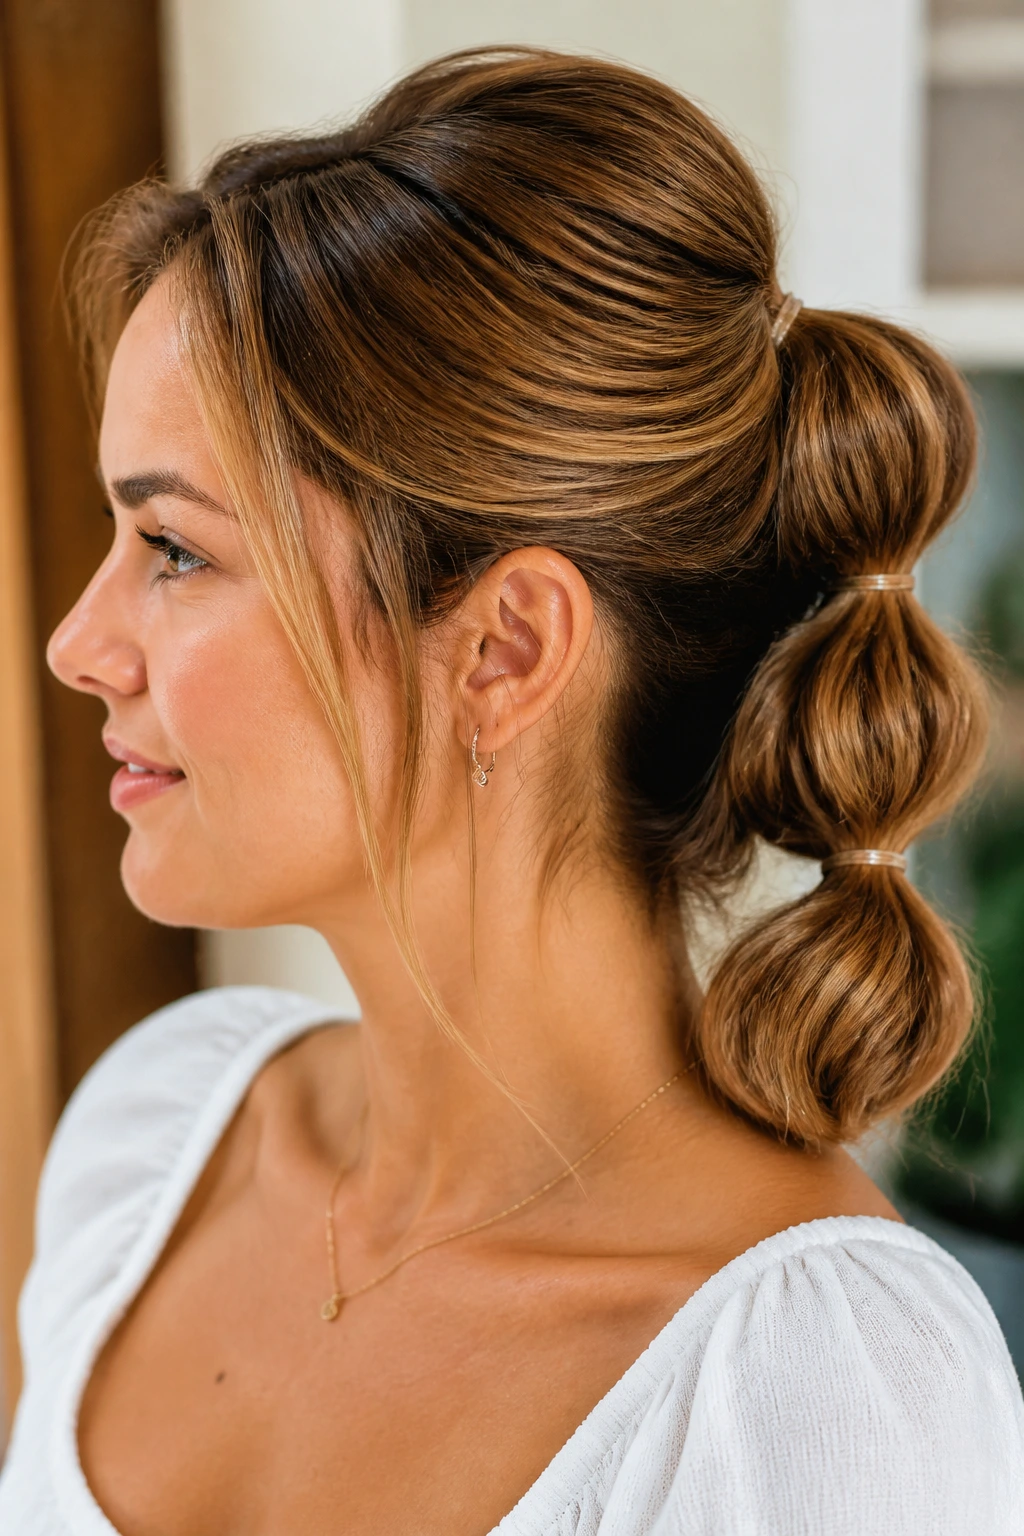
A bubble ponytail is playful, but on wavy hair it can also look polished enough for a dinner out. The trick is spacing. Tie the ponytail, then add clear elastics every 2 to 3 inches down the length. Gently tug each section outward so it forms a soft bubble instead of a hard knot.
For an updo version, you can fold the lower length back and pin it into a low loop after the last bubble. That keeps the style from hanging too far down while still showing off the segmented shape. Wavy texture fills out the bubbles better than sleek hair does, which is why this one looks fuller with less effort.
A quick mist of flexible hairspray helps the bubbles keep their round shape. Don’t clamp them too hard. A little looseness is the whole point.
10. Side-Swept Pinned Roll
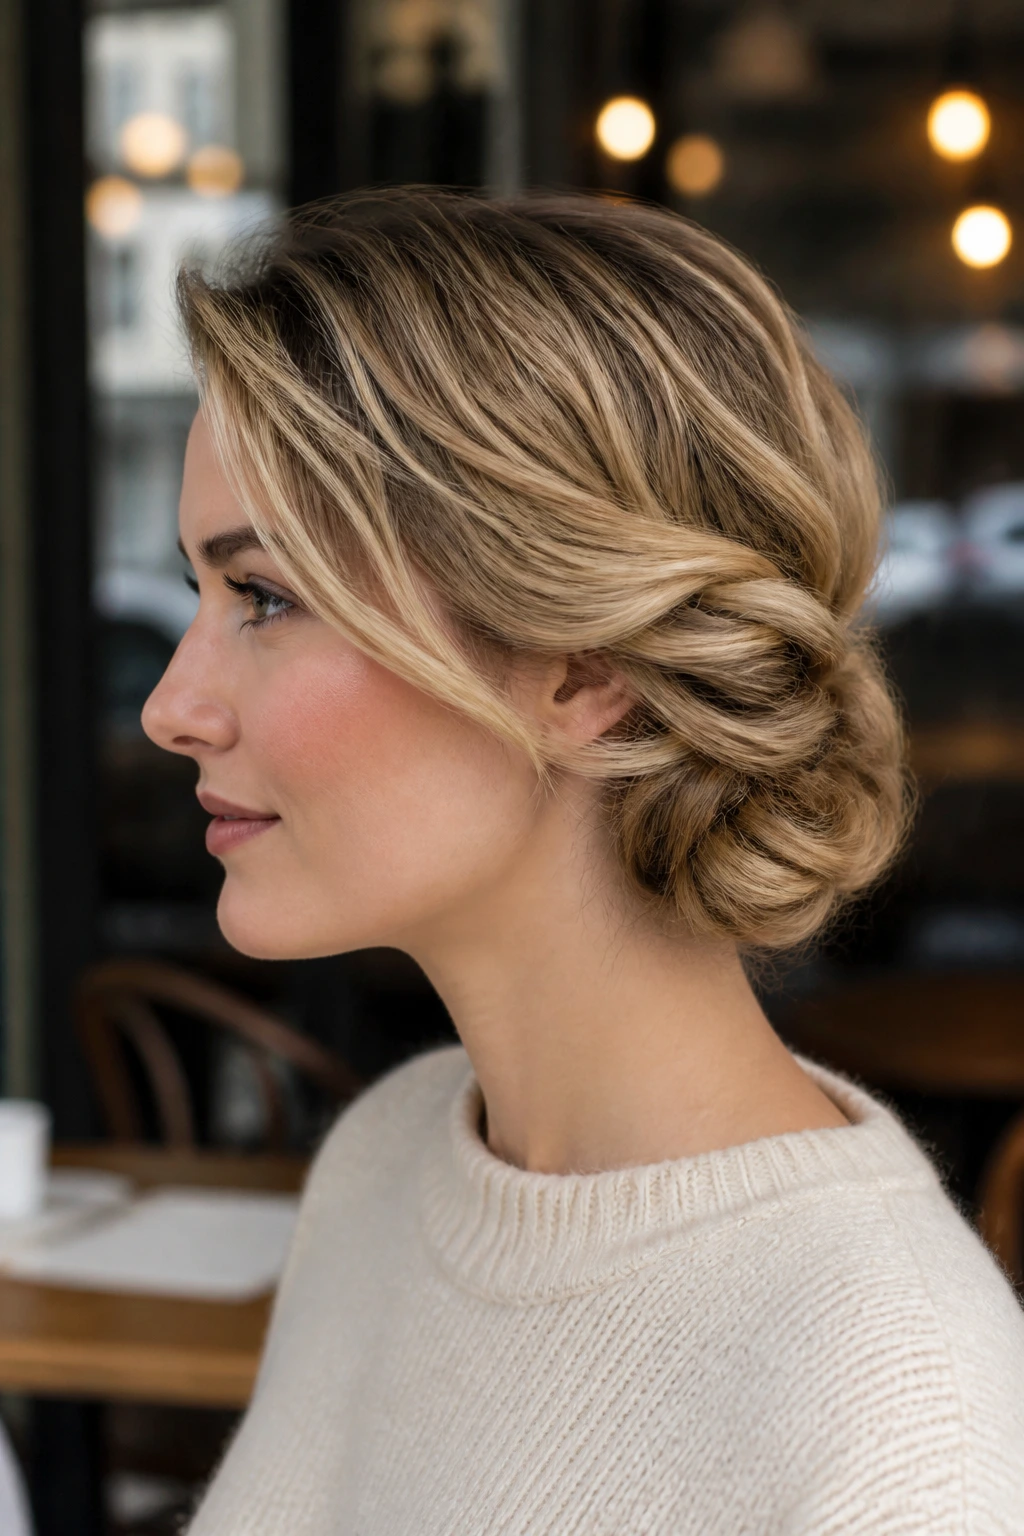
The side-swept pinned roll has old-Hollywood bones, but wavy hair keeps it from feeling too stiff. Sweep the bulk of the hair to one side, roll the lower section inward at the nape, and pin it in place so the roll sits just behind the ear or along the neck.
Best angle for the part
A deep side part usually gives this style more shape. It creates a visible sweep at the front and leaves enough weight on one side to form the roll without fighting the natural texture. On fine waves, a little teasing at the crown helps the lift stay in place.
This one is lovely when you want asymmetry. It looks especially good with earrings because the neckline stays open.
11. Double Mini Buns
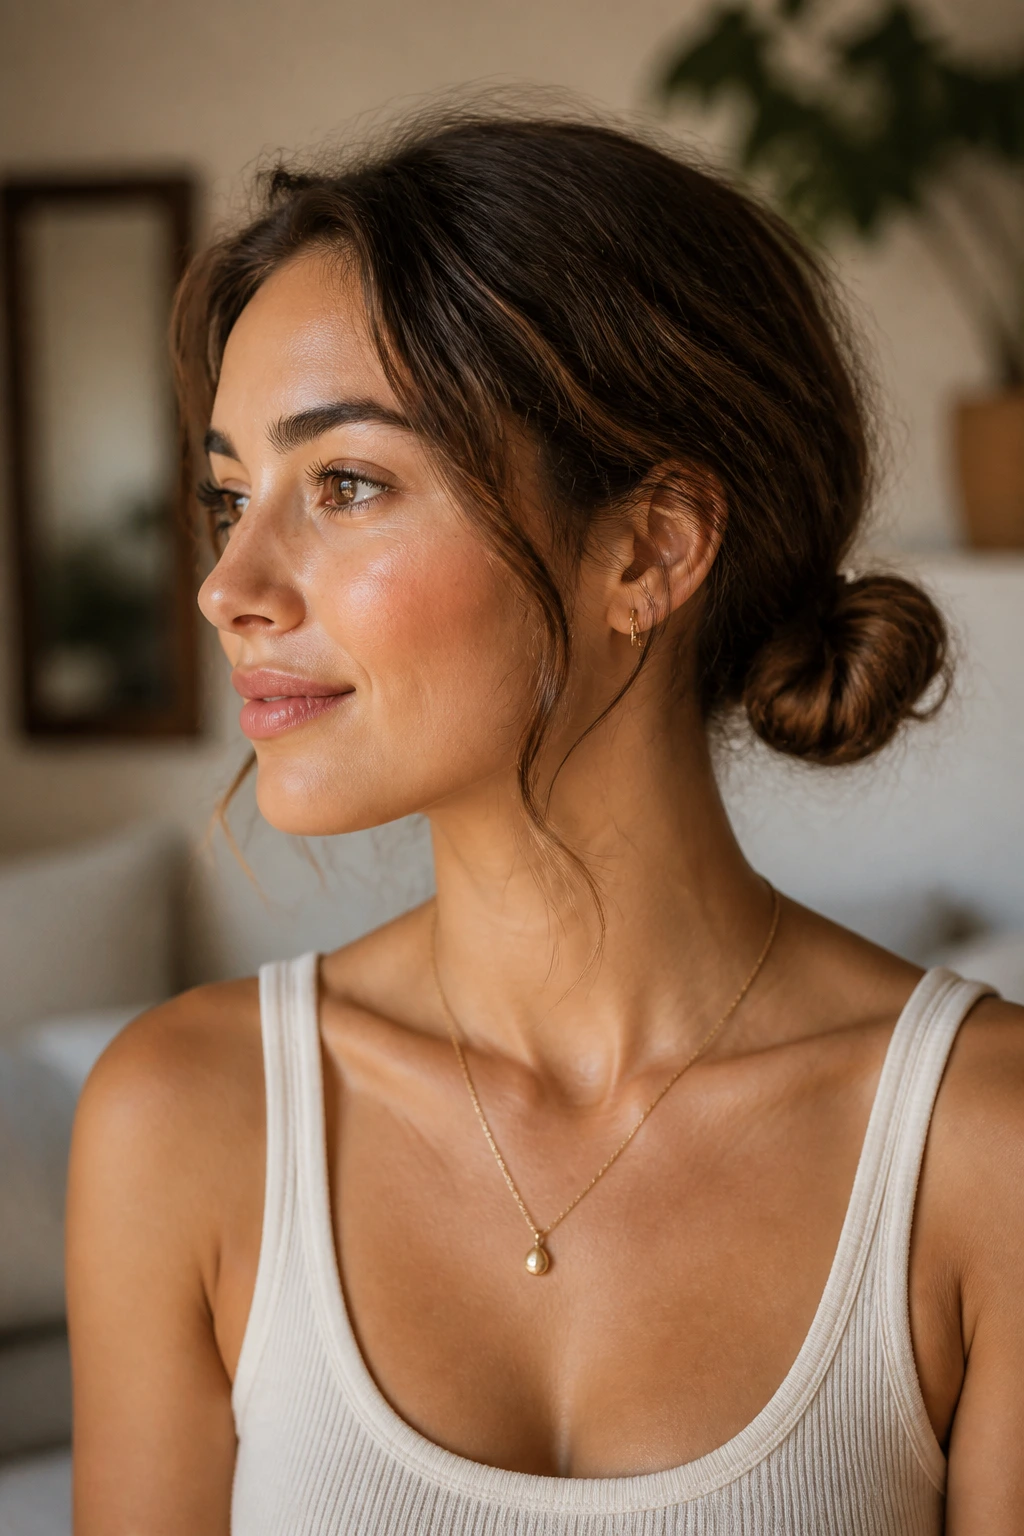
Double mini buns are less childish than people think when you place them low and keep them neat. Think of them as two compact knots sitting near the nape, not cartoon space buns at the top of the head. Wavy hair gives the buns enough texture that they do not need to be overbuilt.
Part the hair down the middle, gather each side low, twist each section into a small bun, and pin from the underside. The symmetry is what makes this feel clean. A tiny bit of frizz at the outer edge is fine. In fact, on wavy hair, a perfectly smooth finish can make the style look less natural than a soft one.
This is a good pick for thick hair that feels too heavy in a single bun.
12. Knotted Pony Updo
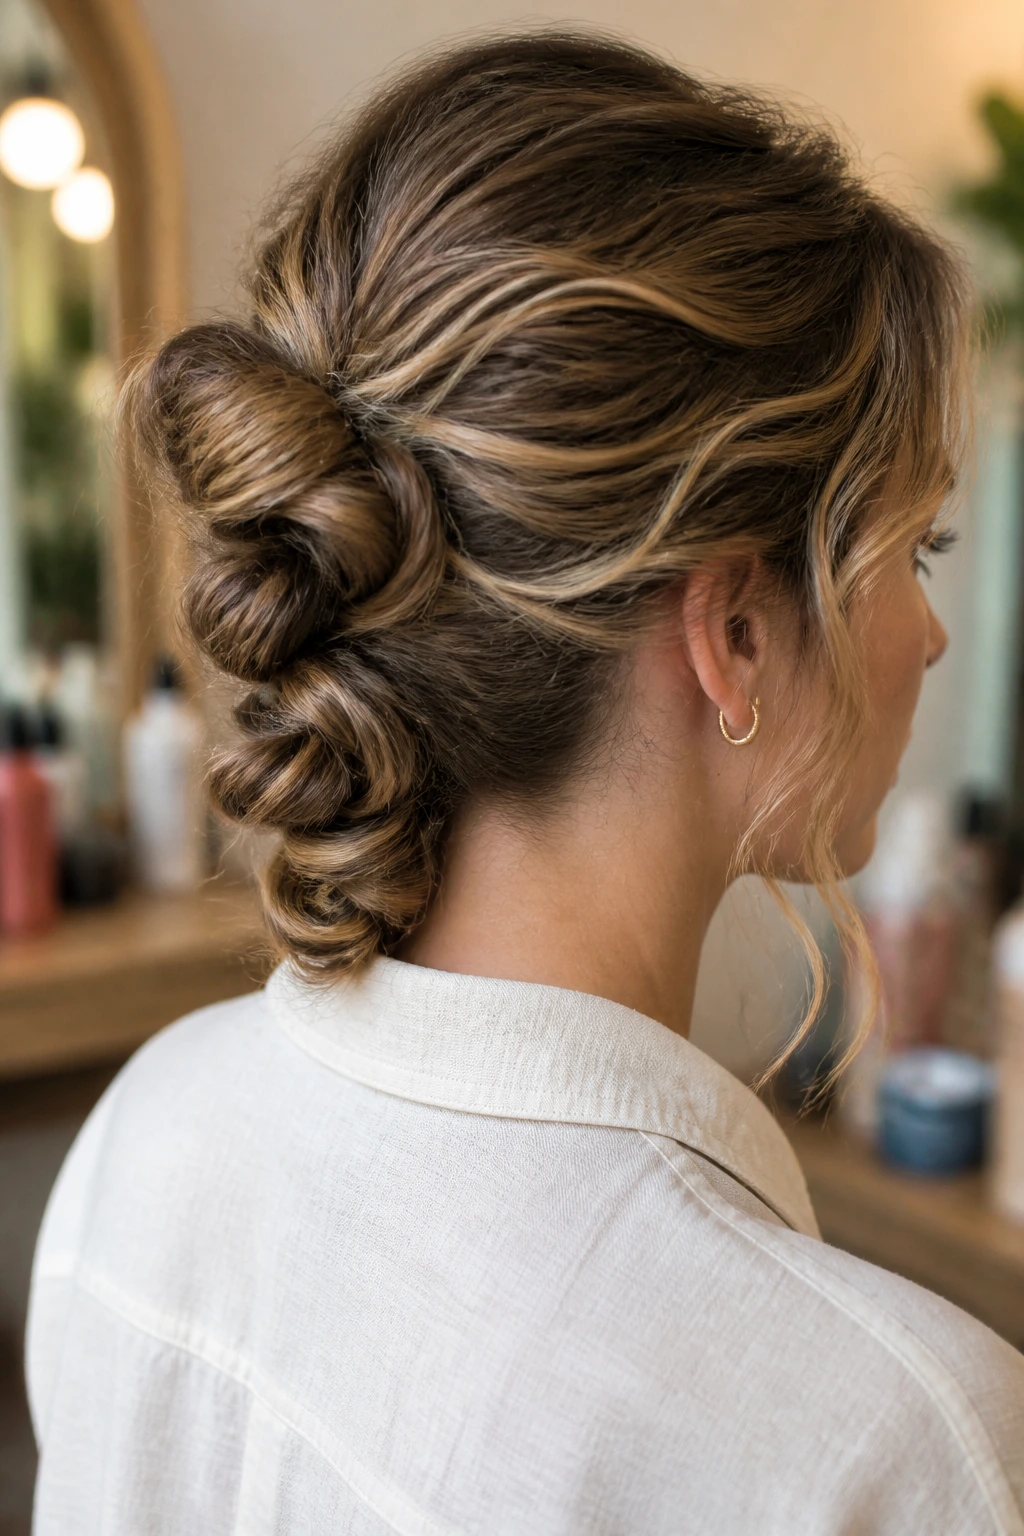
What if you want structure without braiding? Knot it. A knotted pony updo turns the ponytail into a chain of simple overhand knots that stack down the back before they’re tucked in. It sounds a little fussy, but it’s faster than a braid once you’ve done it a couple of times.
Start with a low ponytail, split the length into sections, and knot each section around the next. Pin the last section into itself or tuck it beneath the knot stack. The wave pattern makes the knots look fuller because the hair already has bend and movement.
This style reads a bit modern, a bit crafty, and very good on medium-length waves that need a shape with some interest.
13. Twisted Half-Up Bun
A twisted half-up bun is what you reach for when you want the crown controlled but the ends left alone. Take the top section from temple to temple, twist it back, and secure it into a compact bun at the back of the crown. The lower waves stay loose and visible, which keeps the whole style from feeling closed off.
If your hair is layered, this one is kind. The shorter pieces around the face can fall naturally, and the twist hides the uneven lengths in the section that’s pinned. A soft hold spray is enough. You don’t need to plaster the top down.
This works especially well when the wave pattern is loose and the hair has some movement at the ends.
14. Braided Low Pony Bun
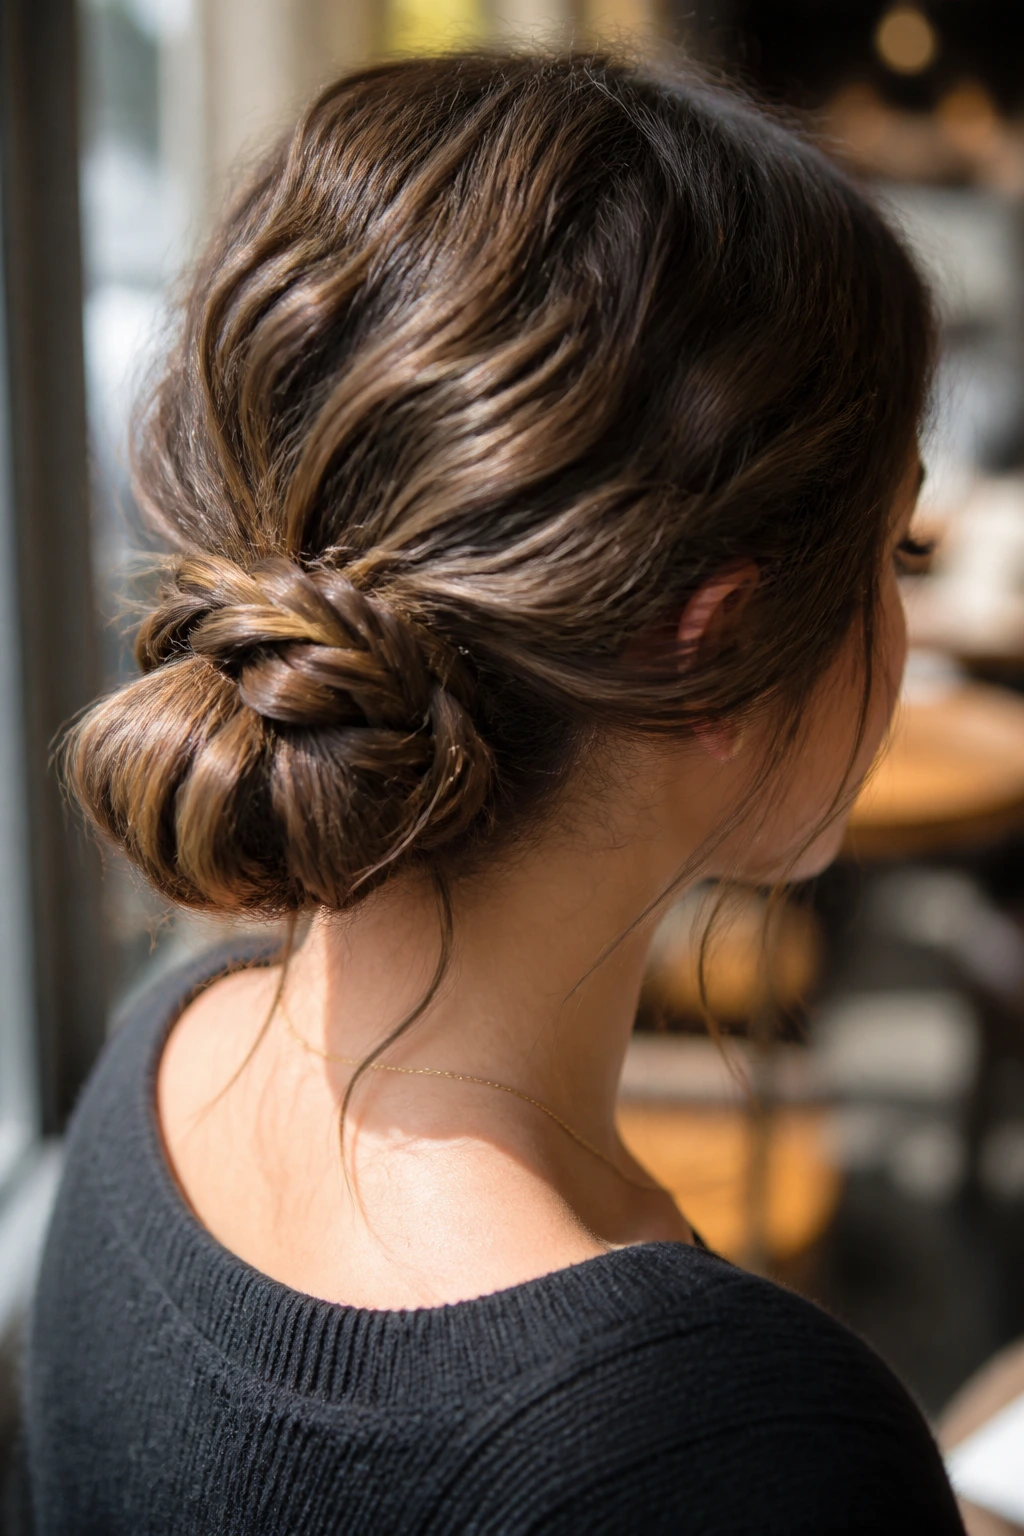
If your waves slide out of pins, braid the pony first. That simple extra step gives the bun a spine. Pull the hair into a low ponytail, braid the length, wrap the braid around its base, and pin it into a bun.
The braid keeps the style compact, which is helpful on humid days or when the hair feels extra clean. Wavy hair also makes the braid look thicker, so the bun ends up fuller than a plain wrapped knot. That’s a good trade.
This one is a strong choice for workdays or long events because it stays put longer than a loose twist.
15. Gibson Tuck
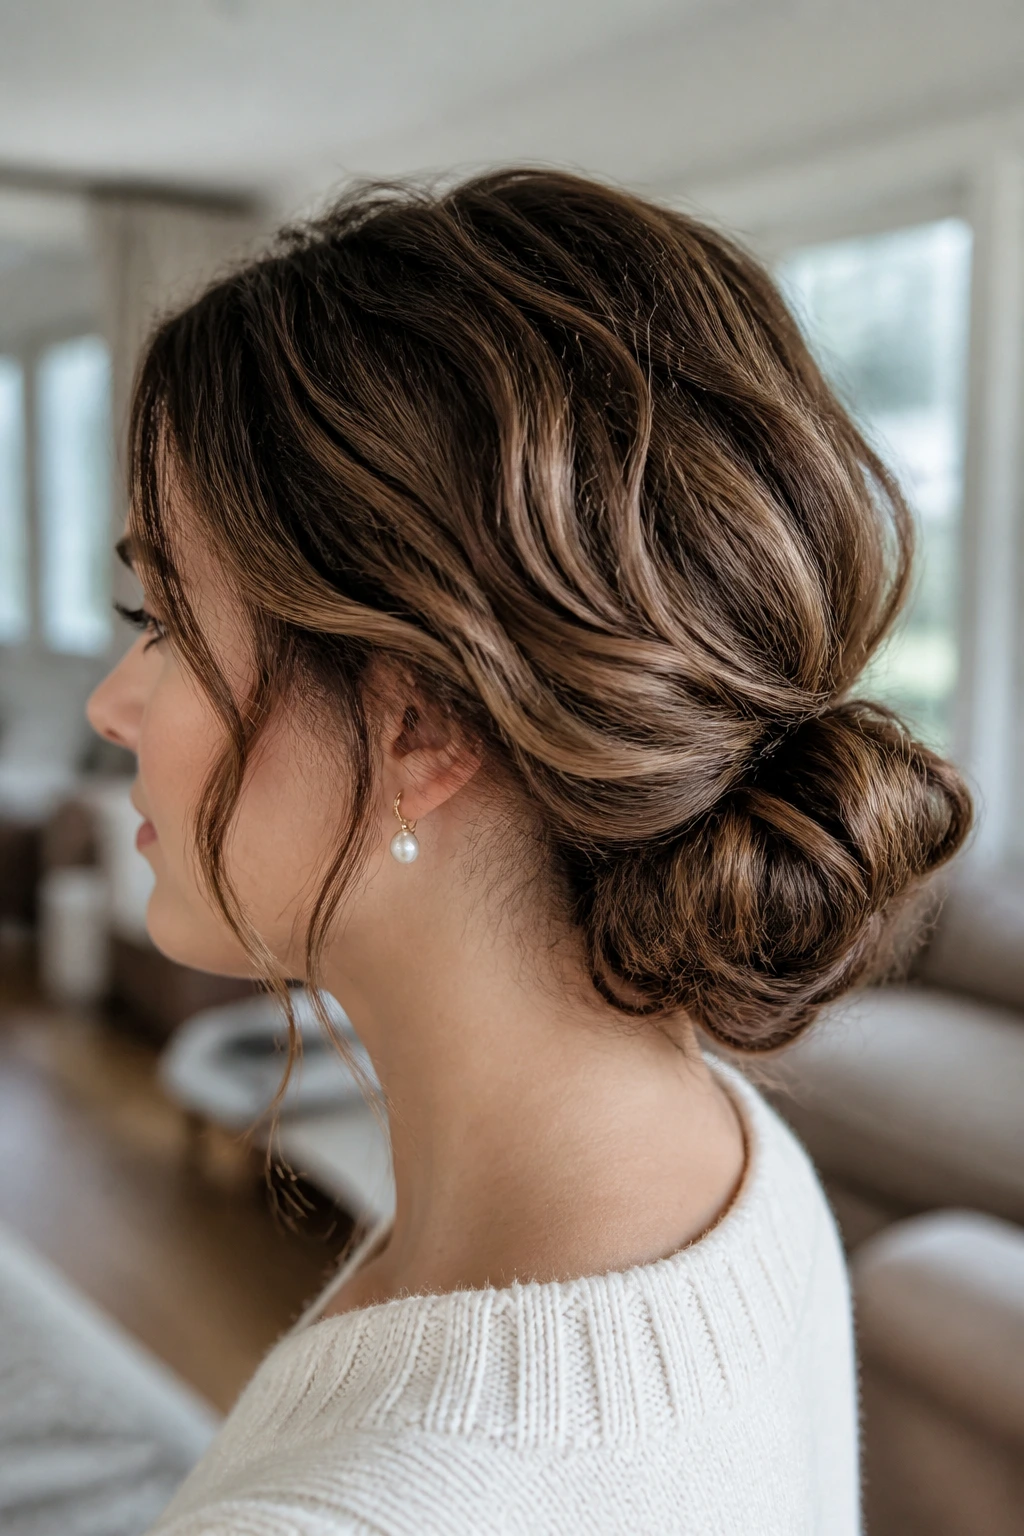
The Gibson tuck looks old-fashioned until you see how fast it goes together. Brush or finger-comb the hair into a low loose ponytail, create a gap just above the elastic, and roll the tail upward and inward until it tucks into the fold. Pin the roll from the sides so it stays rounded.
Wavy hair gives the tuck a little body, which keeps it from collapsing into a flat roll. That shape matters. A Gibson tuck that sits too thin can look limp, but a wave-rich version has enough movement to feel soft and finished.
This is a lovely option for shoulder-length hair, especially if the ends are too short for a full chignon but too long to leave loose.
16. Loose Ballet Bun
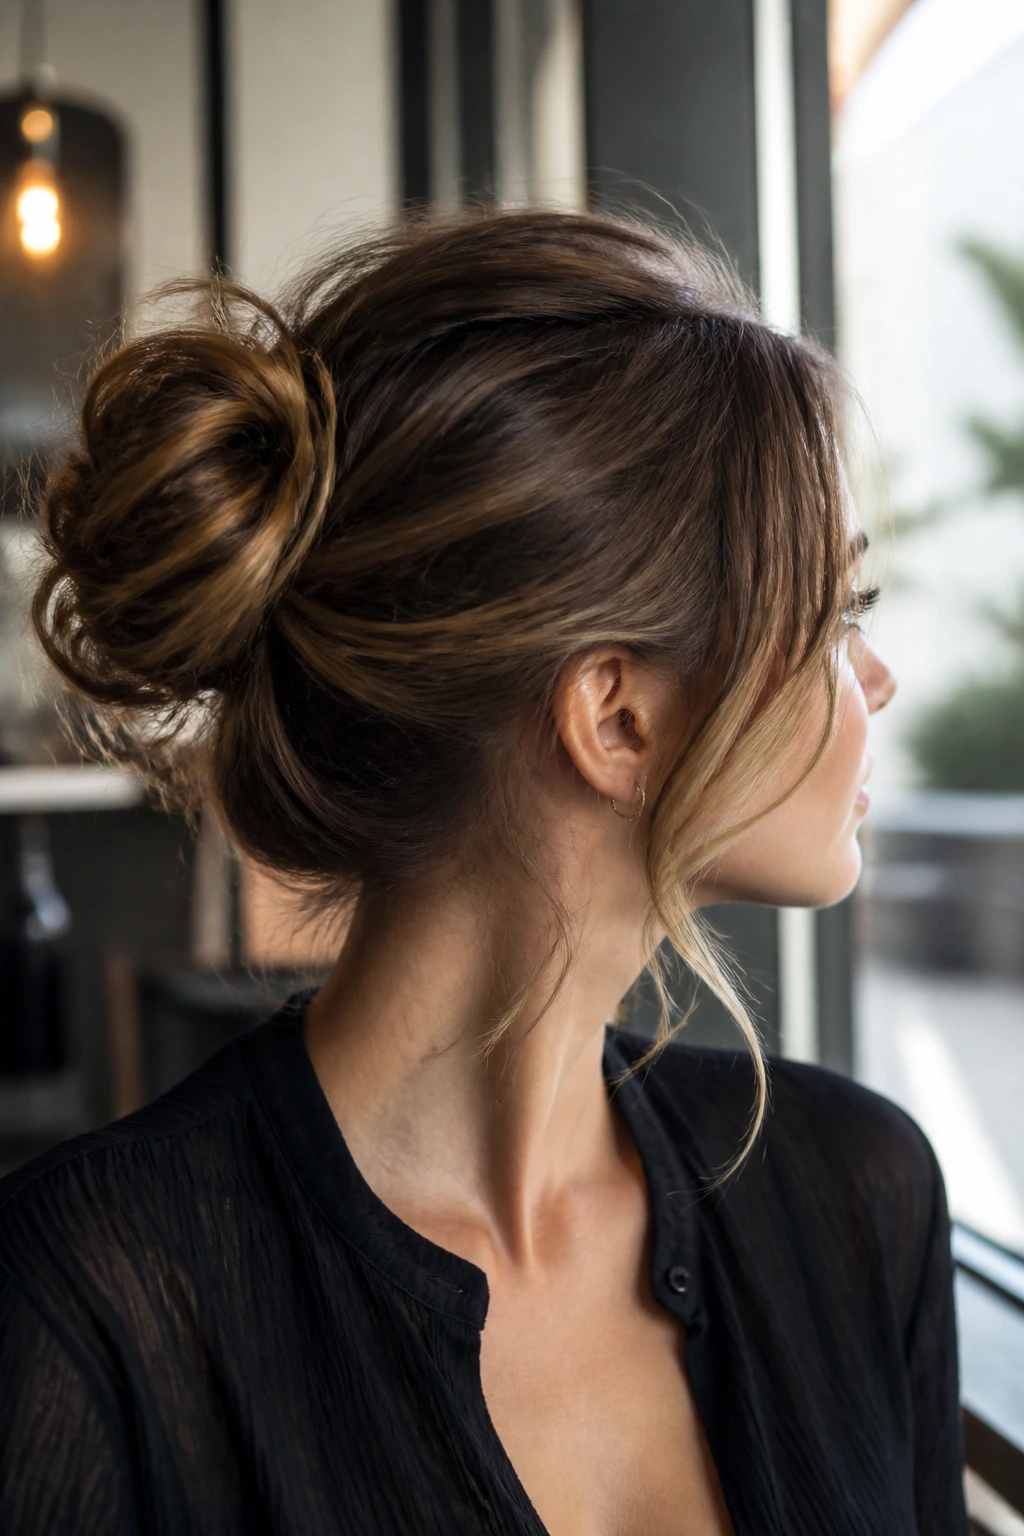
A loose ballet bun sits in a strange middle ground, and that’s why it works. It’s neat enough to feel deliberate, but the edges stay soft and the texture remains visible. On wavy hair, it doesn’t need to be slicked to read as elegant.
Gather the hair into a mid-height ponytail, twist the length loosely, and wrap it around the base in a flat coil. Pin as you go, then pull one or two tiny pieces free near the temples if the style needs softness. If your waves are strong, the outer loops of the bun will show that texture in a way straight hair just can’t fake.
This is a useful style when you want height without a towering bun.
17. Twisted Crown Into Low Bun
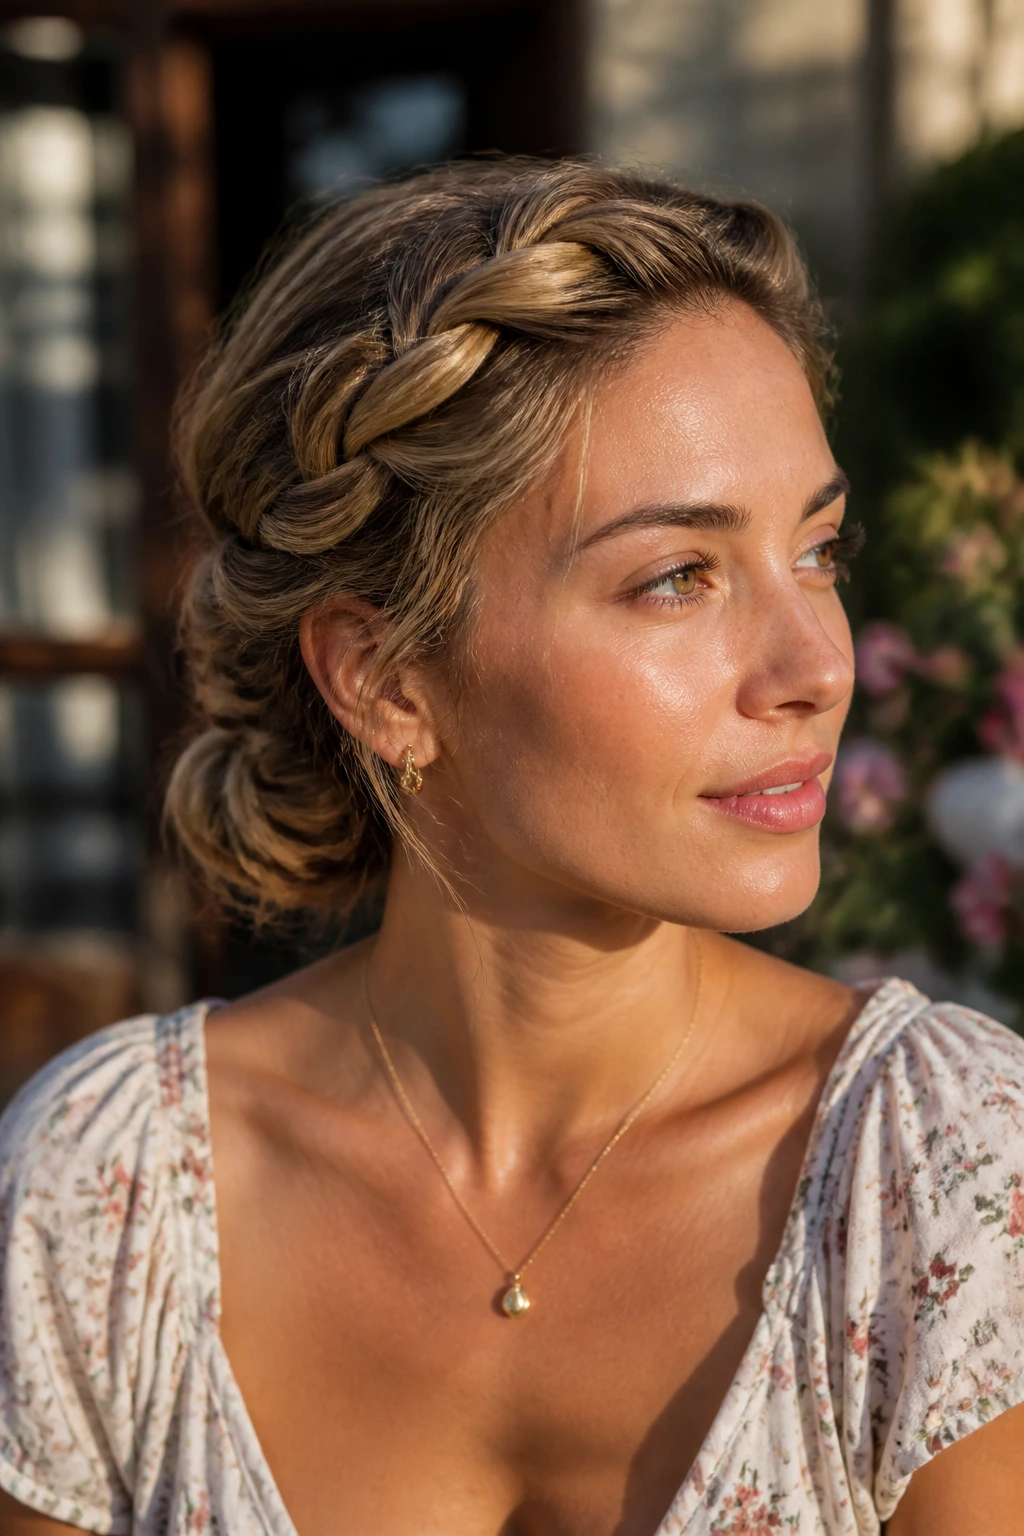
A twisted crown into low bun feels softer than a braid crown and usually takes less time. Instead of weaving sections, twist the hair from each front side back along the hairline, then join both twists at the nape and wrap the rest into a bun. It has the same “kept away from the face” benefit without the tighter braid line.
Why I like it on medium waves
The twist follows the wave pattern instead of compressing it. That means the crown stays airy and the top does not look overhandled. It also flatters layered cuts because the twists can catch the shorter face pieces without forcing them into submission.
If the nape bun is small, let the ends fan out a little before pinning. A tiny bit of softness keeps the shape from feeling too formal.
18. Faux Bob Tucked Under
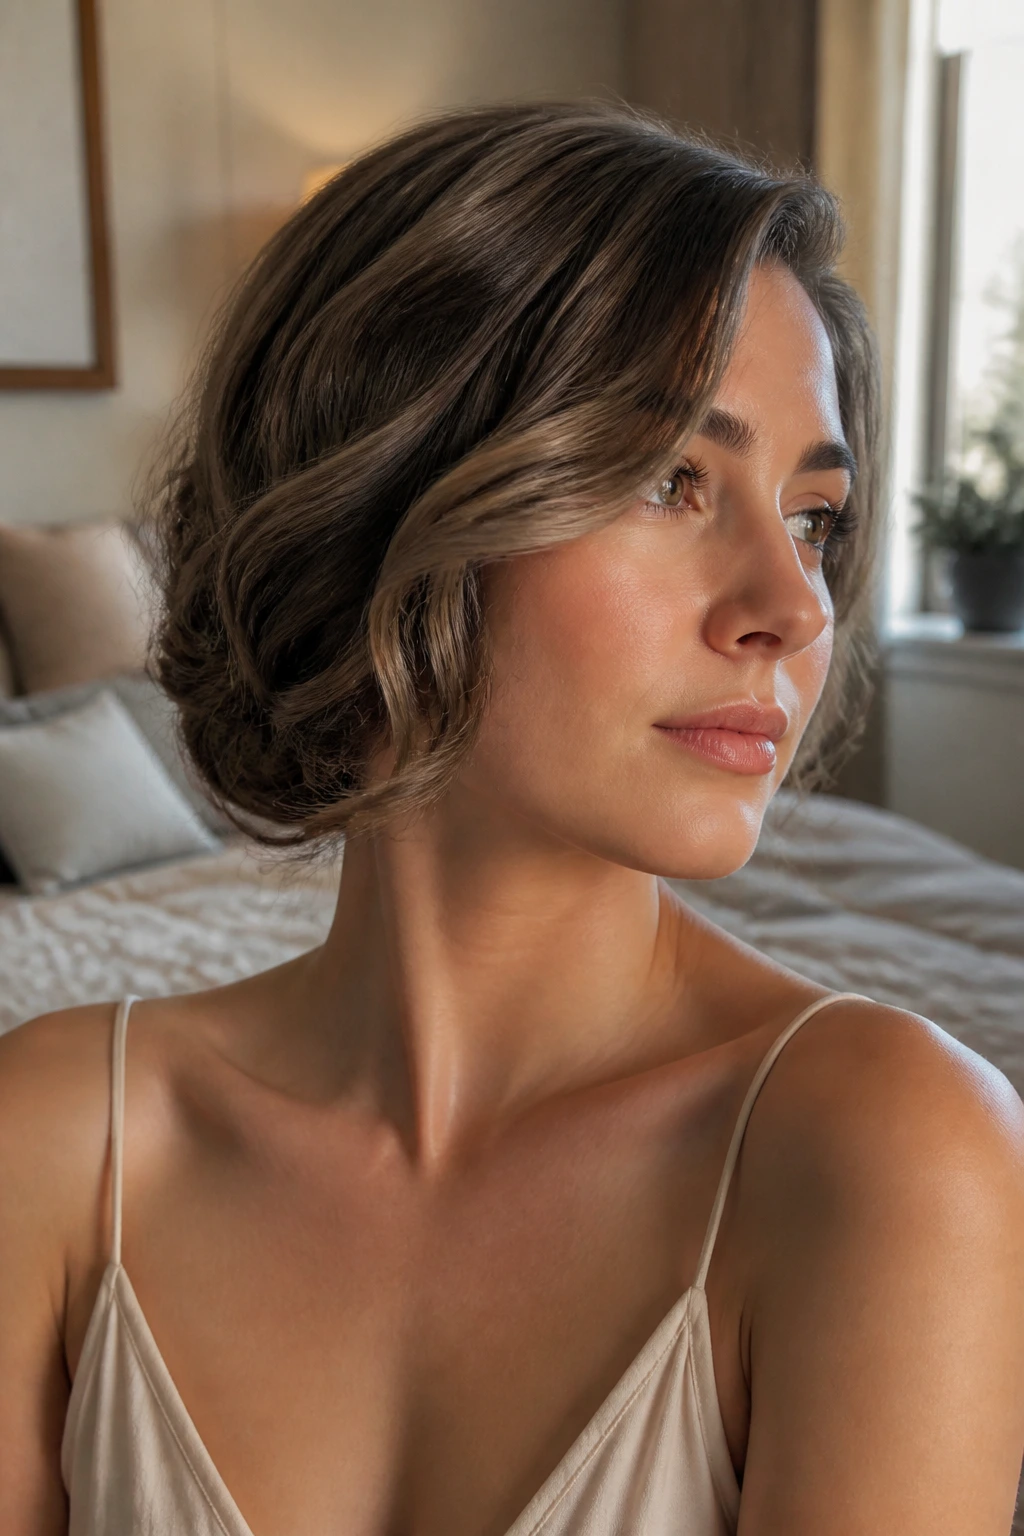
The faux bob is one of those styles that always gets a double take. Long hair gets tucked under and pinned so it sits at bob length, usually around the jaw or just below it. On wavy hair, the texture helps disguise the tucked sections, which makes the illusion stronger.
The key is not to cram all the length into one hard fold. Roll the ends inward in sections and pin them flat against the neck, then let the outer top layer drape over the tucked ends. If the hair is particularly thick, split it into two rolls instead of one giant tuck.
This style is worth trying when you want a shorter silhouette for a night out but don’t actually want to cut your hair.
19. High Messy Bun with Tendrils
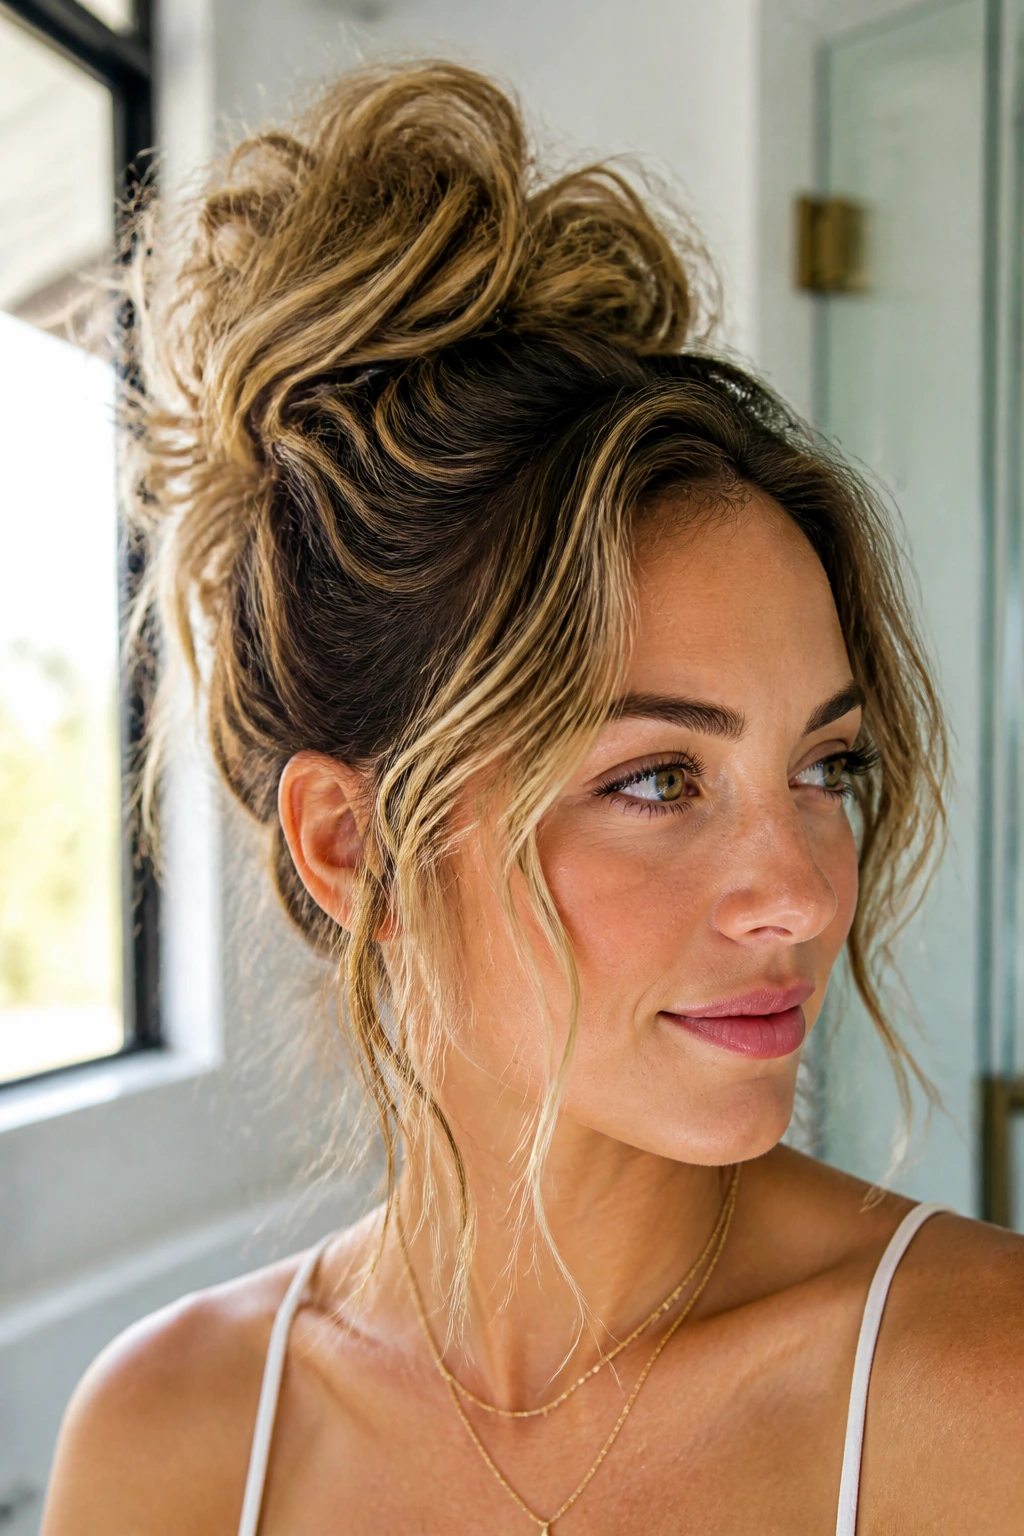
How do you keep a high bun from looking like a lump? You leave room for the shape to breathe. Gather the hair high, twist it into a loose bun, and pull a few face-framing pieces out before you pin the ends. Wavy hair gives the bun enough texture that the mess reads as deliberate, not careless.
The trick is balance. If every strand is too controlled, the bun feels stiff. If every strand is loose, the style falls apart. Aim for a strong center with soft edges. A little lift at the crown and two wavy tendrils near the cheeks is usually enough.
This is the style I’d call the most forgiving. It hides a lot and still looks finished.
20. Infinity Braid Bun
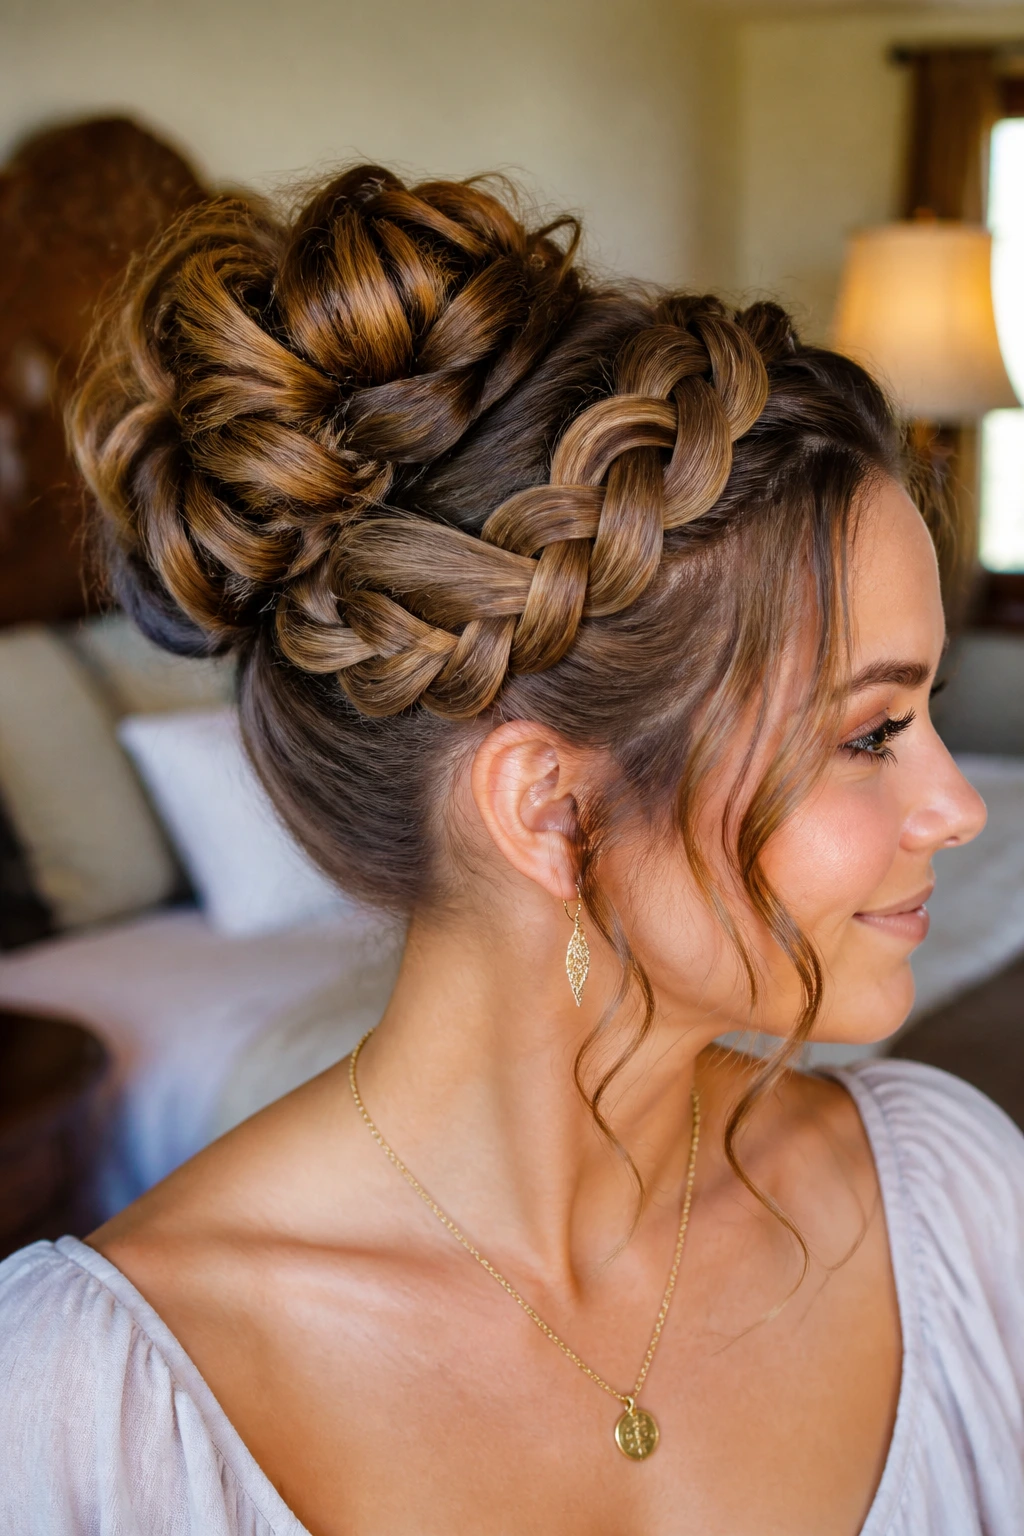
If you like detail, the infinity braid bun gives you something to show off. The braid itself creates a figure-eight pattern across the section, which looks more intricate than a plain three-strand braid without becoming a full braided crown. Once the braid is done, coil the length into a bun and pin it from several directions.
Wavy hair helps here because the texture makes the braid look fuller and the bun look denser. A very smooth braid can read almost too crisp for this kind of style, while waves soften the line and make the pattern easier to see from a distance.
This is a better choice when you have a little time and want the hair to be the main detail on the head.
21. Rolled Sides Into a Low Bun
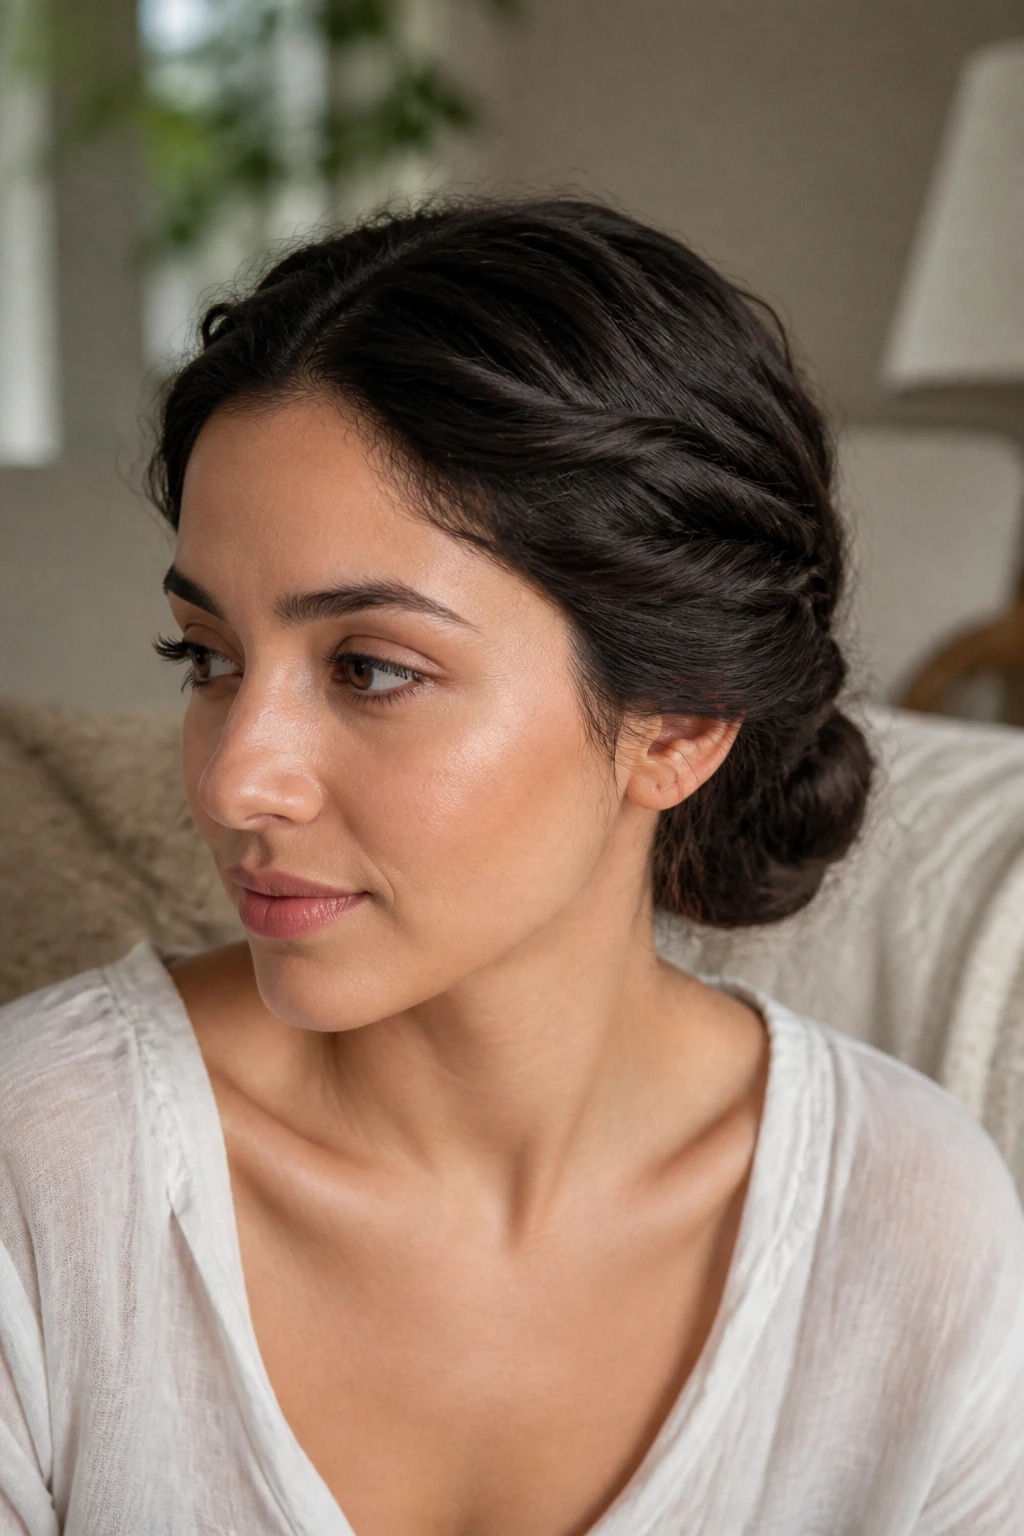
The rolled-sides style is the one I reach for when face layers refuse to behave. Roll each side back from the temple toward the ear, pin them low, then gather the rest into a small bun at the nape. The front stays clean, the sides look shaped, and the bun gets a nice soft frame.
It works especially well on wavy hair with layers around the cheekbones. Those shorter pieces slip into the roll more easily than they would into a tighter braid. If your hair is fine, add a little dry shampoo at the roots before you roll. It gives the twist enough grit to stay put.
The result is tidy without looking lacquered. That’s the part I like most.
22. Scarf-Wrapped Bun
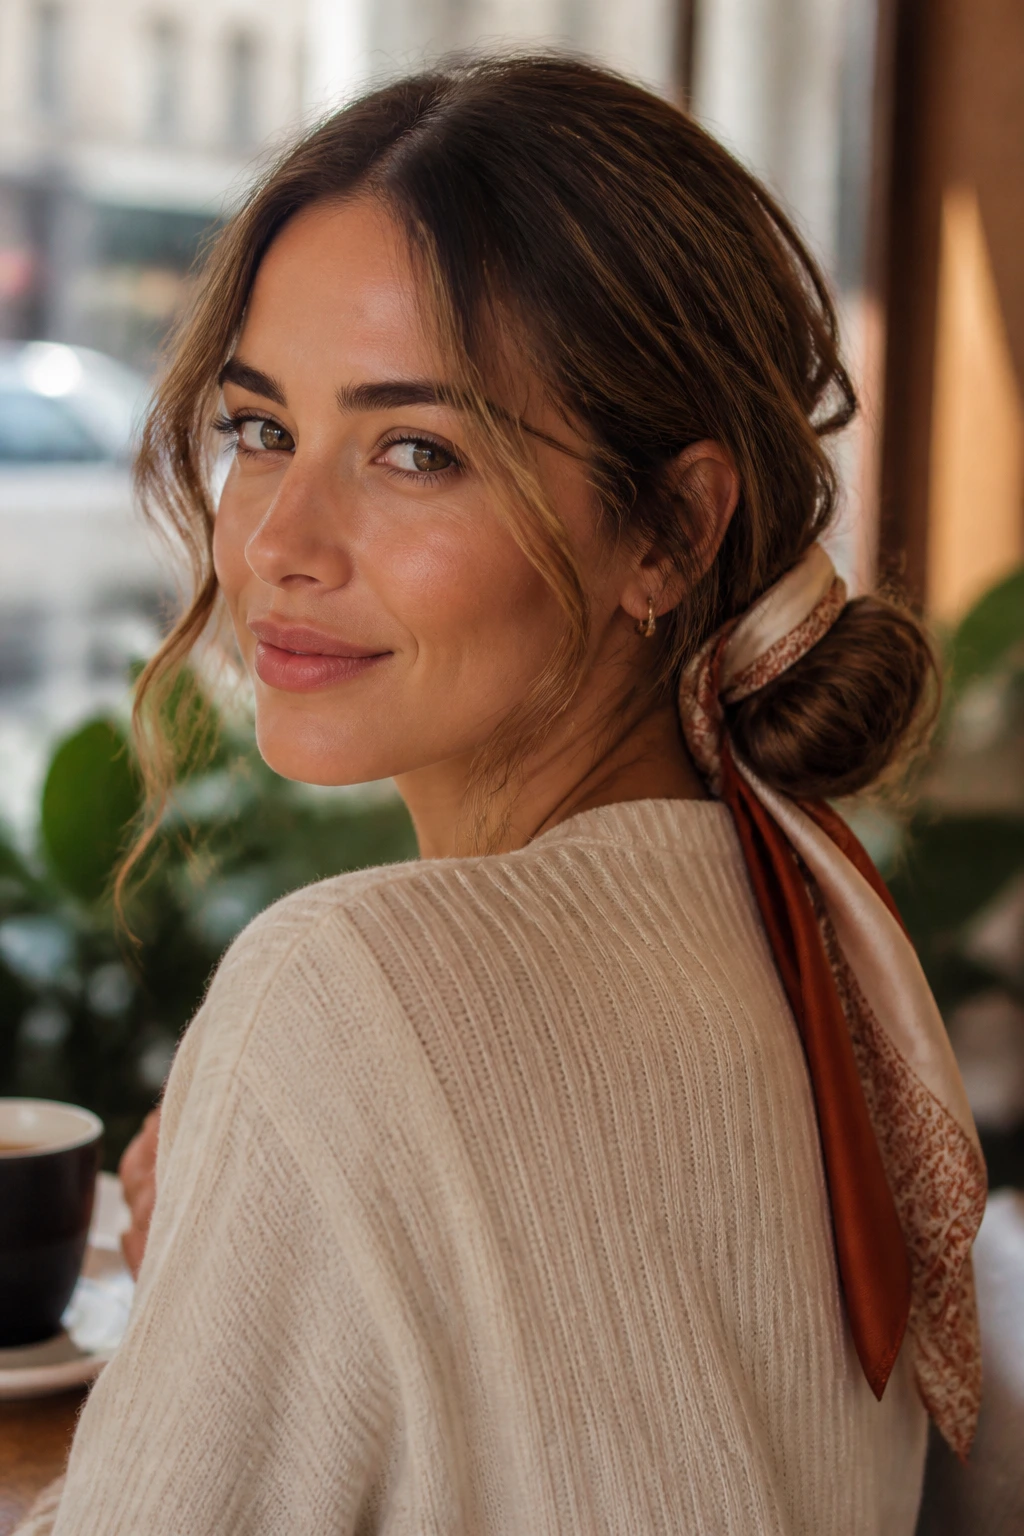
A scarf-wrapped bun does a lot of work with one simple accessory. Gather the hair into a low bun or twist, then knot a silk scarf or ribbon around the base and let the ends trail a little. Wavy hair and fabric get along well because the texture gives the scarf something to nestle into instead of sliding across a perfectly smooth surface.
Pick a scarf that’s wide enough to show, but not so bulky that it swallows the bun. A ribbon about 1 to 2 inches wide works nicely for smaller buns, while a longer scarf adds more shape around a low twist. If the scarf is slippery, anchor it with a hidden bobby pin under the knot.
This is one of the easiest ways to make a simple bun look styled on purpose.
23. Slicked-Back Wet-Look Bun
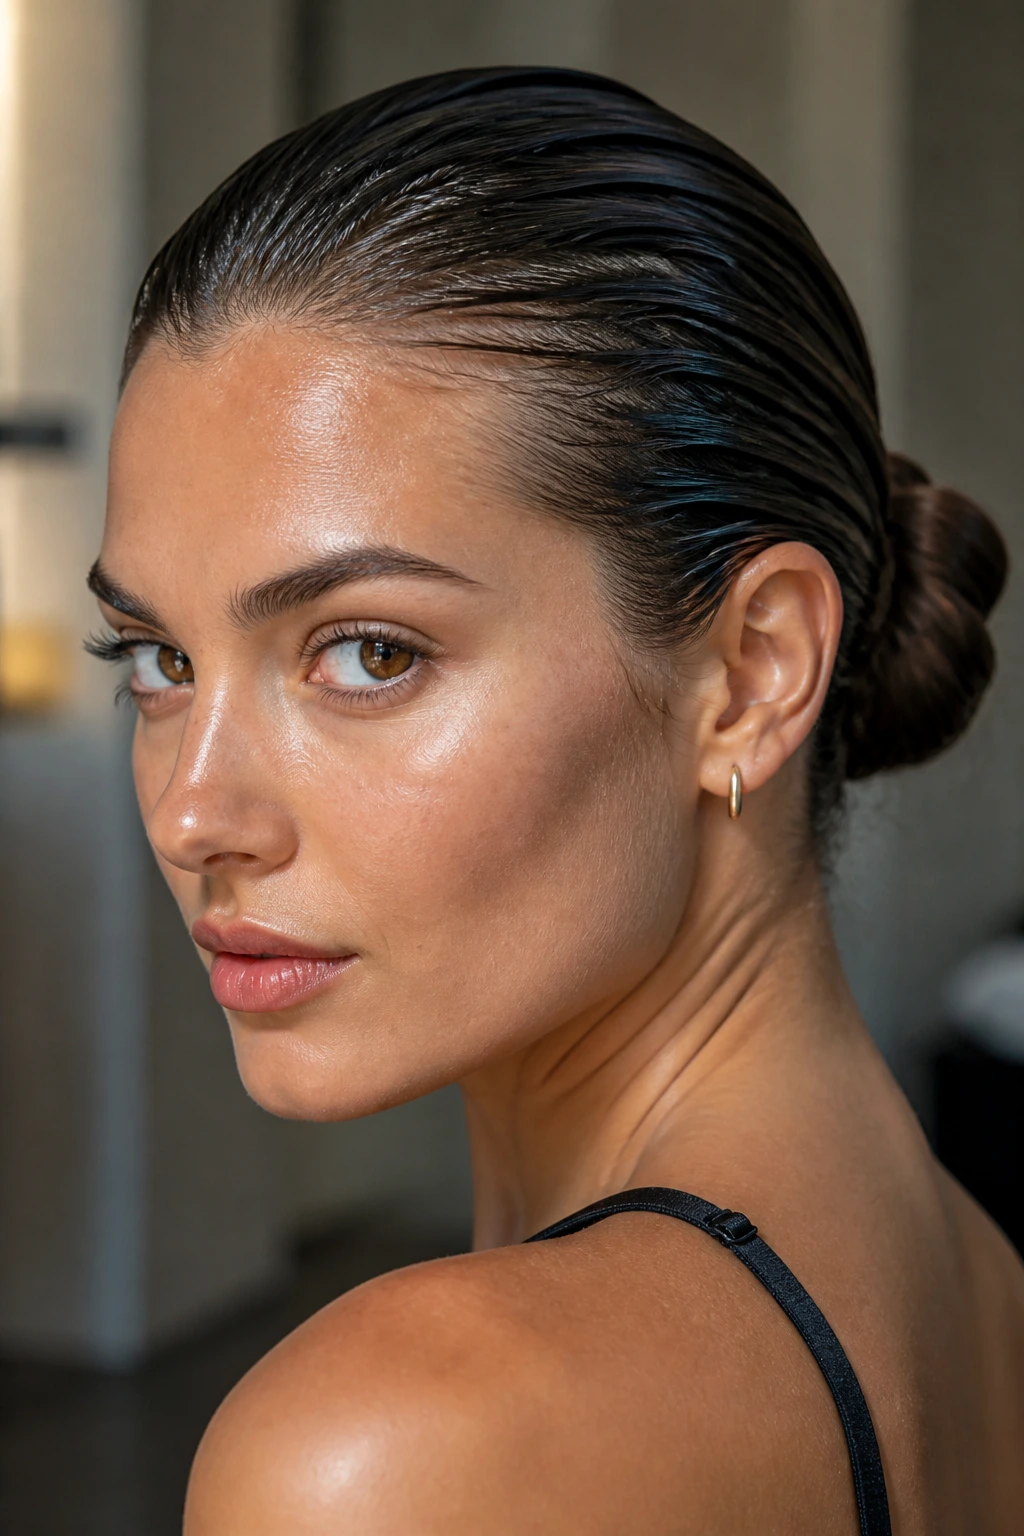
A slicked-back bun on wavy hair has a cleaner line than people expect, and the natural wave keeps it from looking severe. Apply gel or a strong styling cream to damp roots, brush the hair straight back, and gather it into a low or mid bun before the hair dries. The crown should look smooth and compact, while the bun itself can keep a little texture.
Do not pile oil on top of gel. That can make the hold slip and the finish look greasy instead of glossy. A light layer of product at the roots is enough. Use a fine-tooth comb to smooth the front, then stop fussing with it. The style depends on restraint.
This is the one for humid days, dressy evenings, or whenever you want your waves contained, not erased.
24. Side Bun with Deep Part
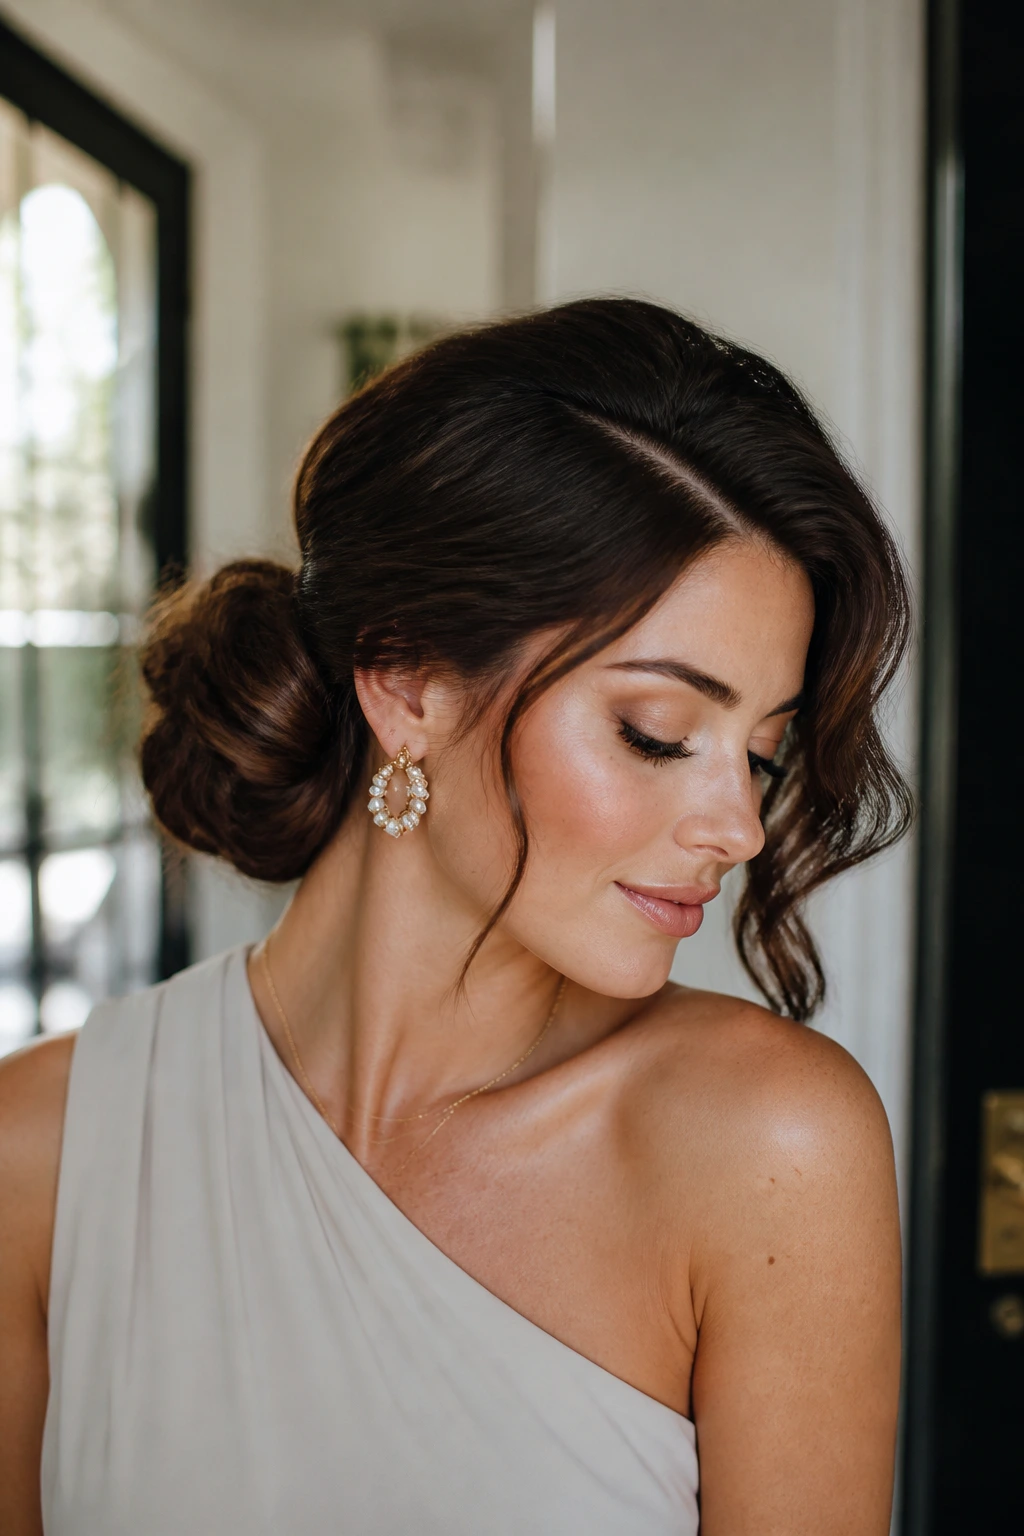
A side bun with a deep part shifts the whole mood of wavy hair. The part gives the style a dramatic sweep, and the bun sits low enough to stay soft around the neck. That offset shape is flattering because it lets one side frame the face while the other side tucks neatly back.
The bun itself can be loose or compact. I prefer loose for wave patterns that already have body, because the texture fills the shape naturally. A few pins under the outer edge keep the bun from drifting downward through the day.
This style looks especially good with a one-shoulder top or a neckline that needs a little asymmetry.
25. Braided Mohawk Updo
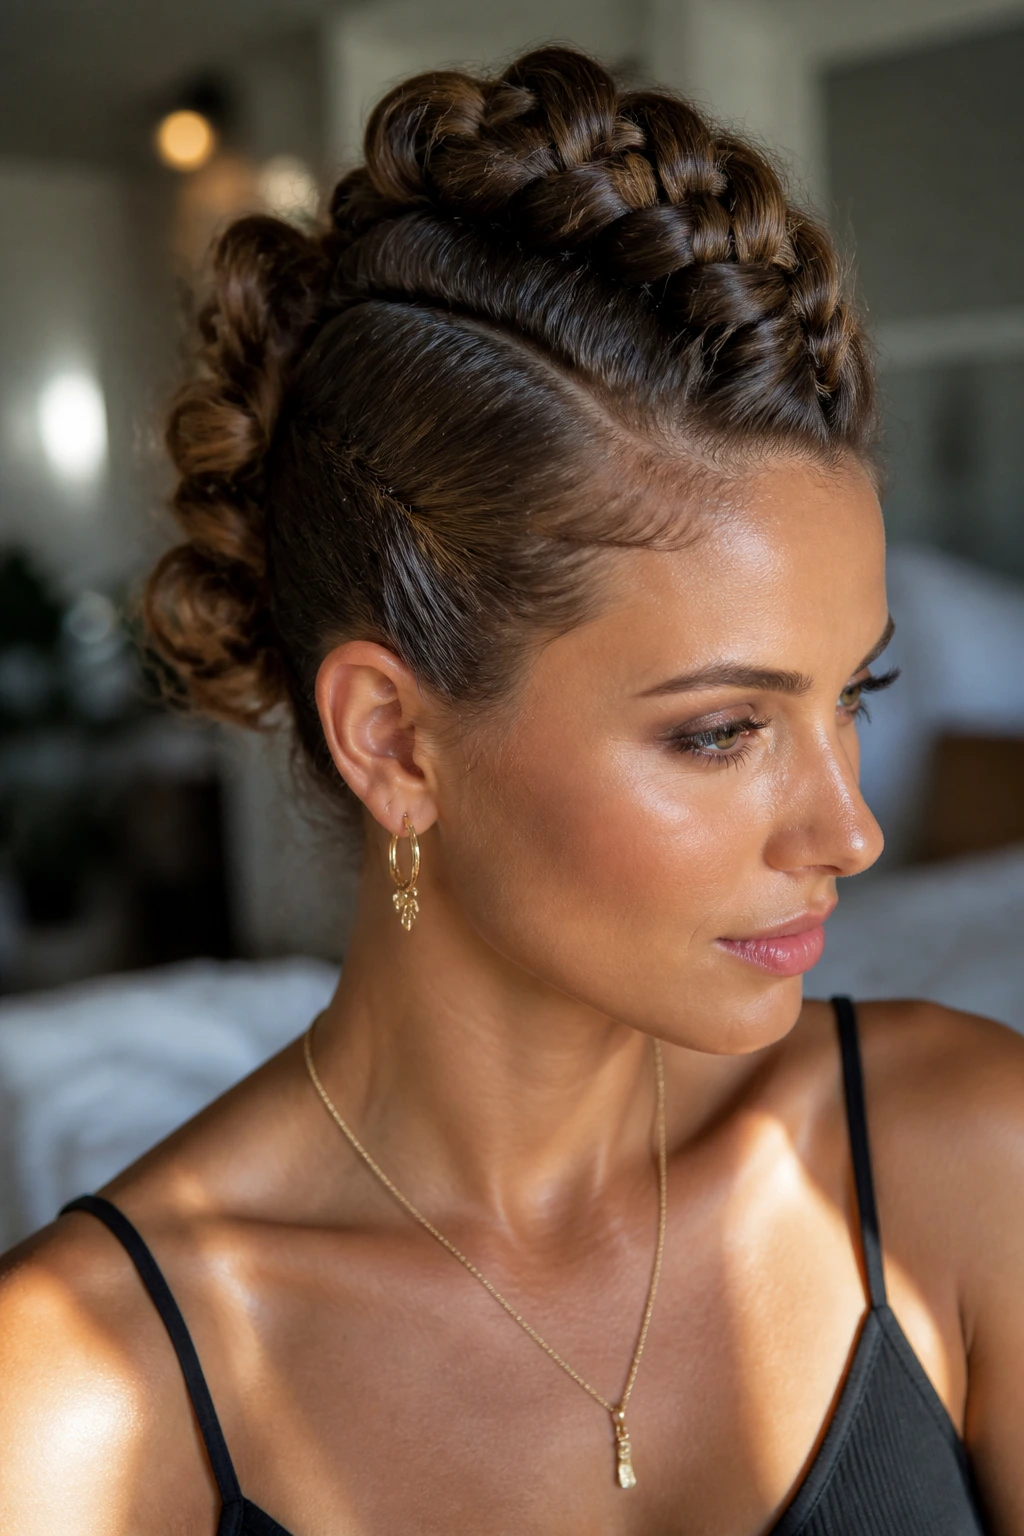
Want more drama without a full shaved-side illusion? A braided mohawk updo gives you the center line of height and keeps the sides tucked tight. Braid or twist the hair from the forehead back through the crown, then pin the side sections flat before gathering the length into a bun or knot at the back.
Wavy hair makes the center section look fuller, which is a nice bonus. The wave pattern creates body at the top of the braid, so you do not need heavy teasing. If your hair is thick, this one is excellent for controlling bulk. If it’s fine, keep the braid loose and let the sides stay sleek for contrast.
It’s a statement style, no question. But it’s a controlled one.
26. Pin-Curl Inspired Vintage Updo
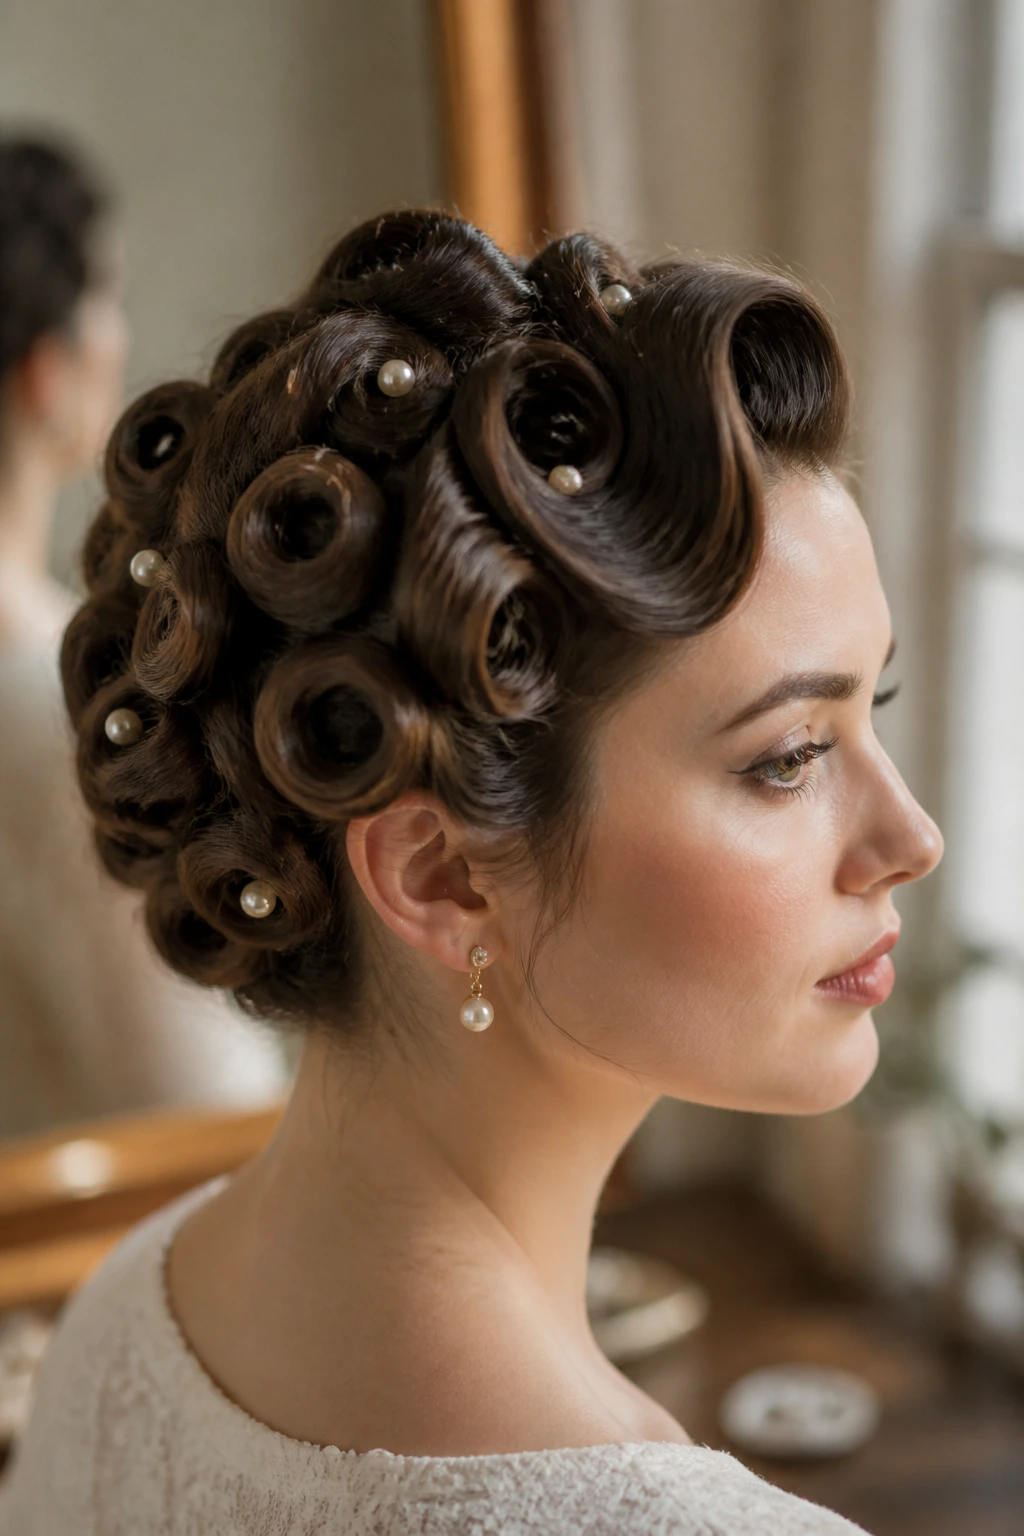
Pin curls are old-school for a reason: they give wavy hair a shape that stays put. Section the hair into small pieces, roll each one under toward the scalp, and pin the curl flat. Once the set is in place, arrange the pinned curls into a soft updo shape at the back or side.
How to keep the vintage feel
Use smaller sections than you think you need. Big rolls tend to fall apart, especially if the hair is layered or fine. Tiny rolls create the neat, sculpted surface that makes this style feel vintage instead of random.
This is a good pick for formal events, photo days, or whenever you want the hair to look dressed up without adding a ton of accessories. Pearl pins work well here. So do simple metal clips.
27. Loose Chignon with Secure Twist-Pins
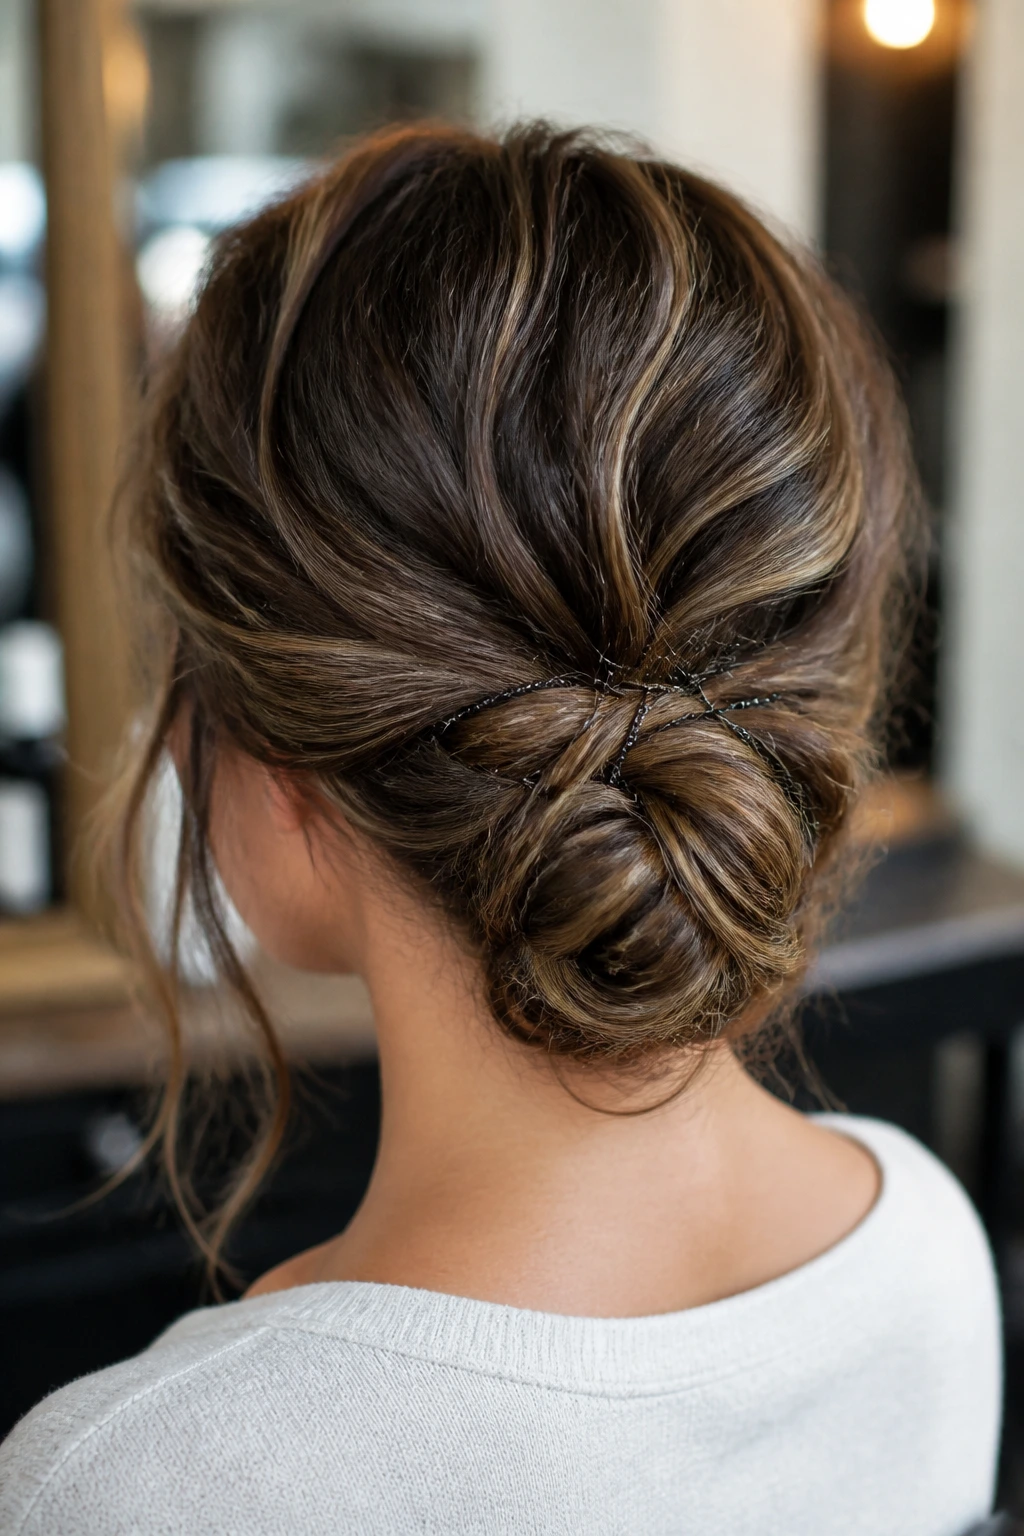
Some styles are for showing off. This one is for getting it done beautifully and moving on with your day. A loose chignon with secure twist-pins sits low at the nape, uses the wave pattern for softness, and relies on a few well-placed U-pins instead of a dozen bobby pins.
Gather the hair into a loose coil, fold the ends under, and pin the center of the chignon first. Then use two or three twist-pins from different directions to lock the shape. Wavy hair makes this style especially nice because the texture hides the seam where the hair folds.
It’s the last style on the list, and maybe the one I trust most when I need something calm, fast, and not fussy about being perfect.
Why Wavy Hair Makes These Styles Hold Better Than You’d Expect
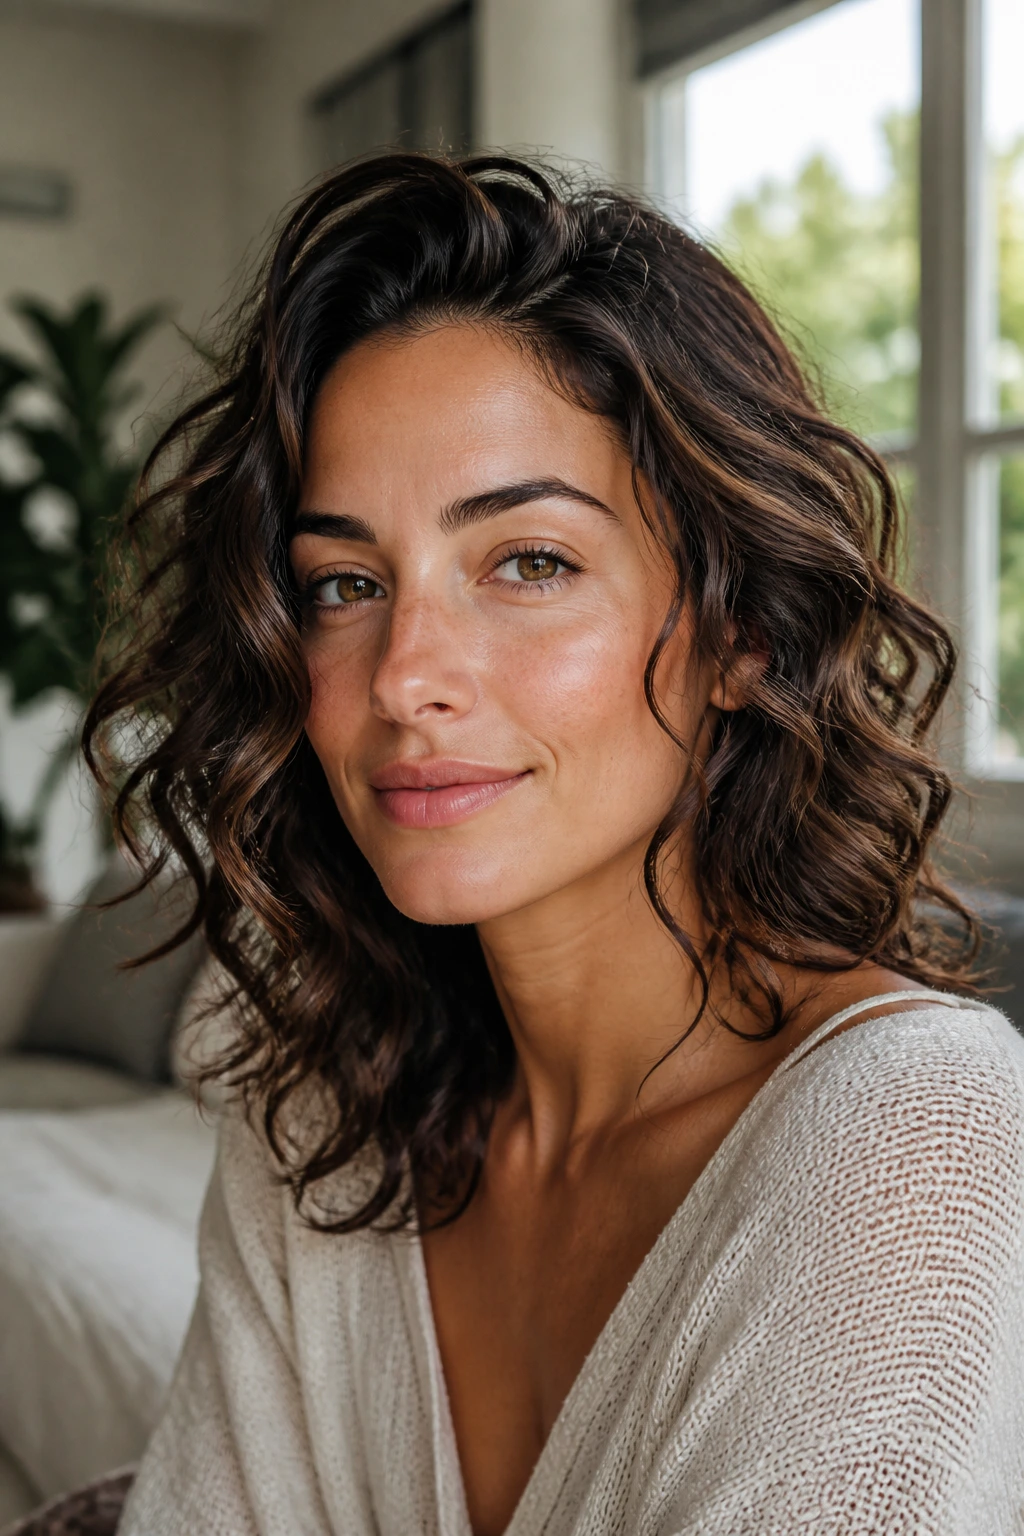
Wavy hair has a built-in advantage that gets overlooked all the time: texture creates grip. Pins slide less when they have bends and ridges to catch onto, and twists hold better when the hair already wants to curve. That’s why so many of these updos work with fewer pins than you might use on straight, silky hair.
The catch is that waves can also puff up if you over-handle them. Brush too hard and the surface goes fuzzy. Add too much cream and the crown goes limp. The sweet spot lives in the middle, where the waves still show shape but the roots have enough control to stay in place.
There’s also a visual benefit. Wavy hair hides the tiny transitions between pinned sections, which means a style can look detailed even when the construction is pretty simple. A twist, a knot, a braid, and a few careful pins can go a long way when the hair already has movement.
The Pins, Elastics, and Products That Make Wavy Updos Easier
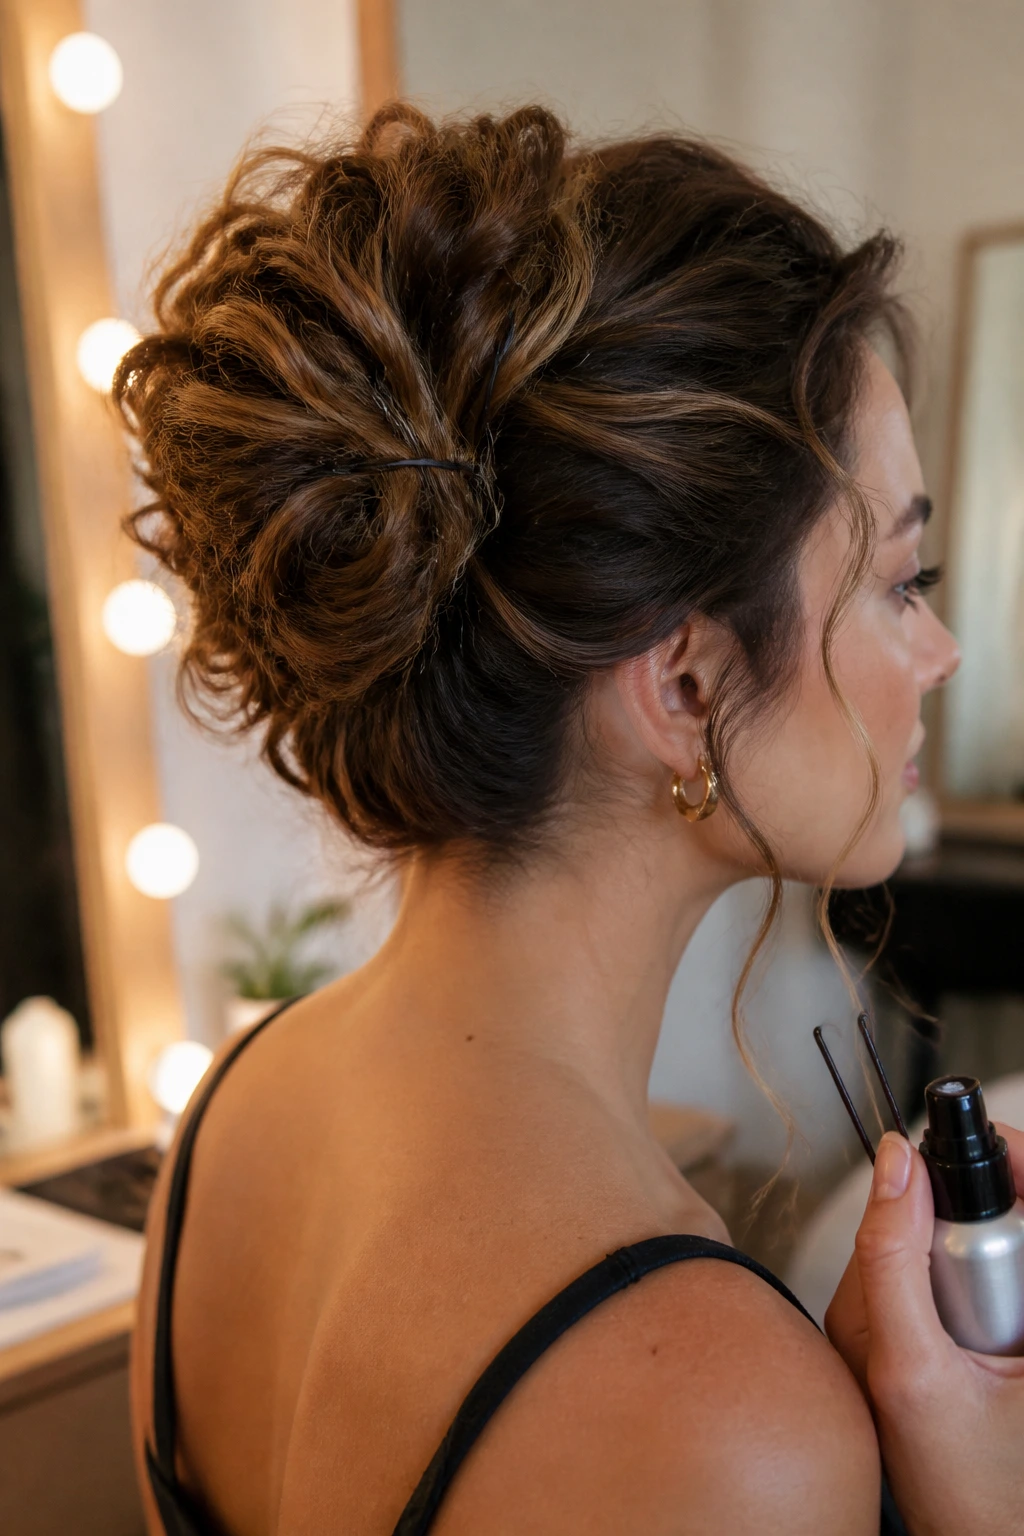
- Bobby pins in two lengths: Short pins work for small face pieces and tighter rolls; longer pins are better for buns and heavier twists.
- U-pins: These are useful for chignons and French twists because they anchor into the bulk of the hair instead of gripping just one layer.
- Clear elastics: Keep a pack nearby for half-up knots, ponytail bases, and bubble sections.
- Tail comb: The pointed end makes clean parts and helps you lift the right section without over-separating the rest.
- Dry shampoo: Best for roots that are too clean or too soft to hold a style.
- Texturizing spray: Adds grit to wavy hair without making it feel sticky.
- Flexible-hold hairspray: Holds the shape while still letting a few pieces move.
- Small claw clip: Useful for fast chignons and scarf-wrapped buns when you want less pinning.
- Smoothing cream or light gel: Handy for sleeker looks, but use a little. Too much product can make waves sag.
How to Prep Wavy Hair So the Style Lasts
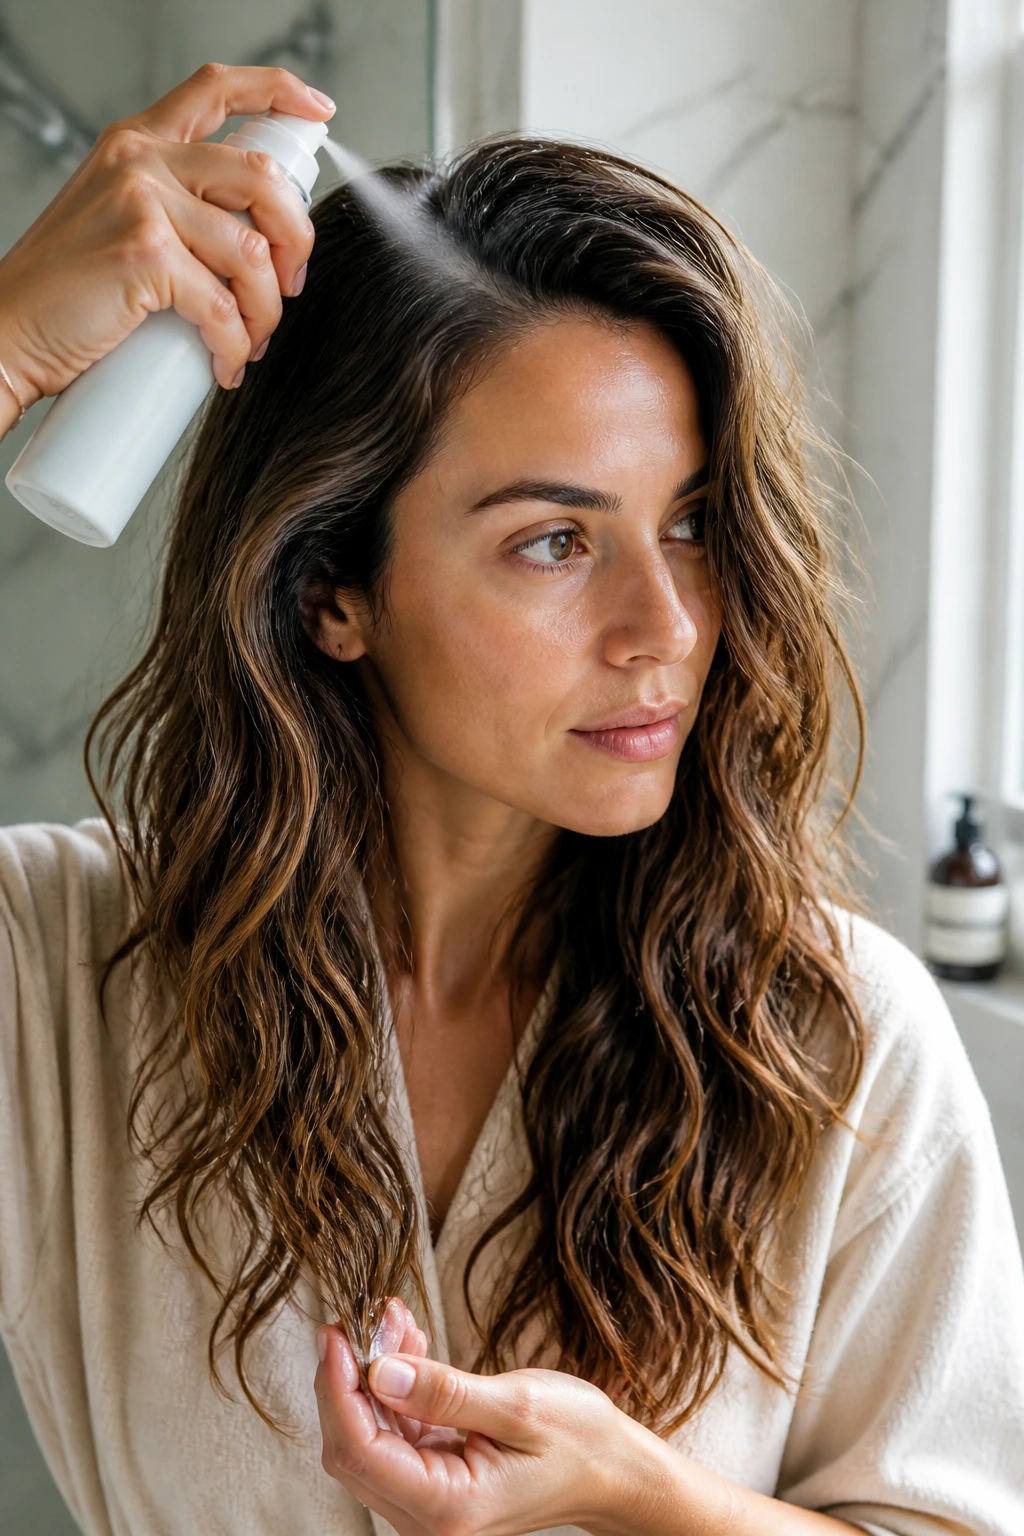
Start with hair that is fully dry or mostly dry. Damp waves seem cooperative for about five minutes, then the shape changes as they dry and the whole updo shifts. If you have time to air-dry, great. If not, rough-dry the roots and leave a little bend in the mids rather than blasting everything smooth.
Texture first, polish second. That’s the order I trust most. A light mist of dry shampoo at the roots gives slippery hair something to hold onto, and a small amount of serum or cream on the ends keeps the final look from frizzing apart. Put the product where it solves a problem, not everywhere because you feel like you should.
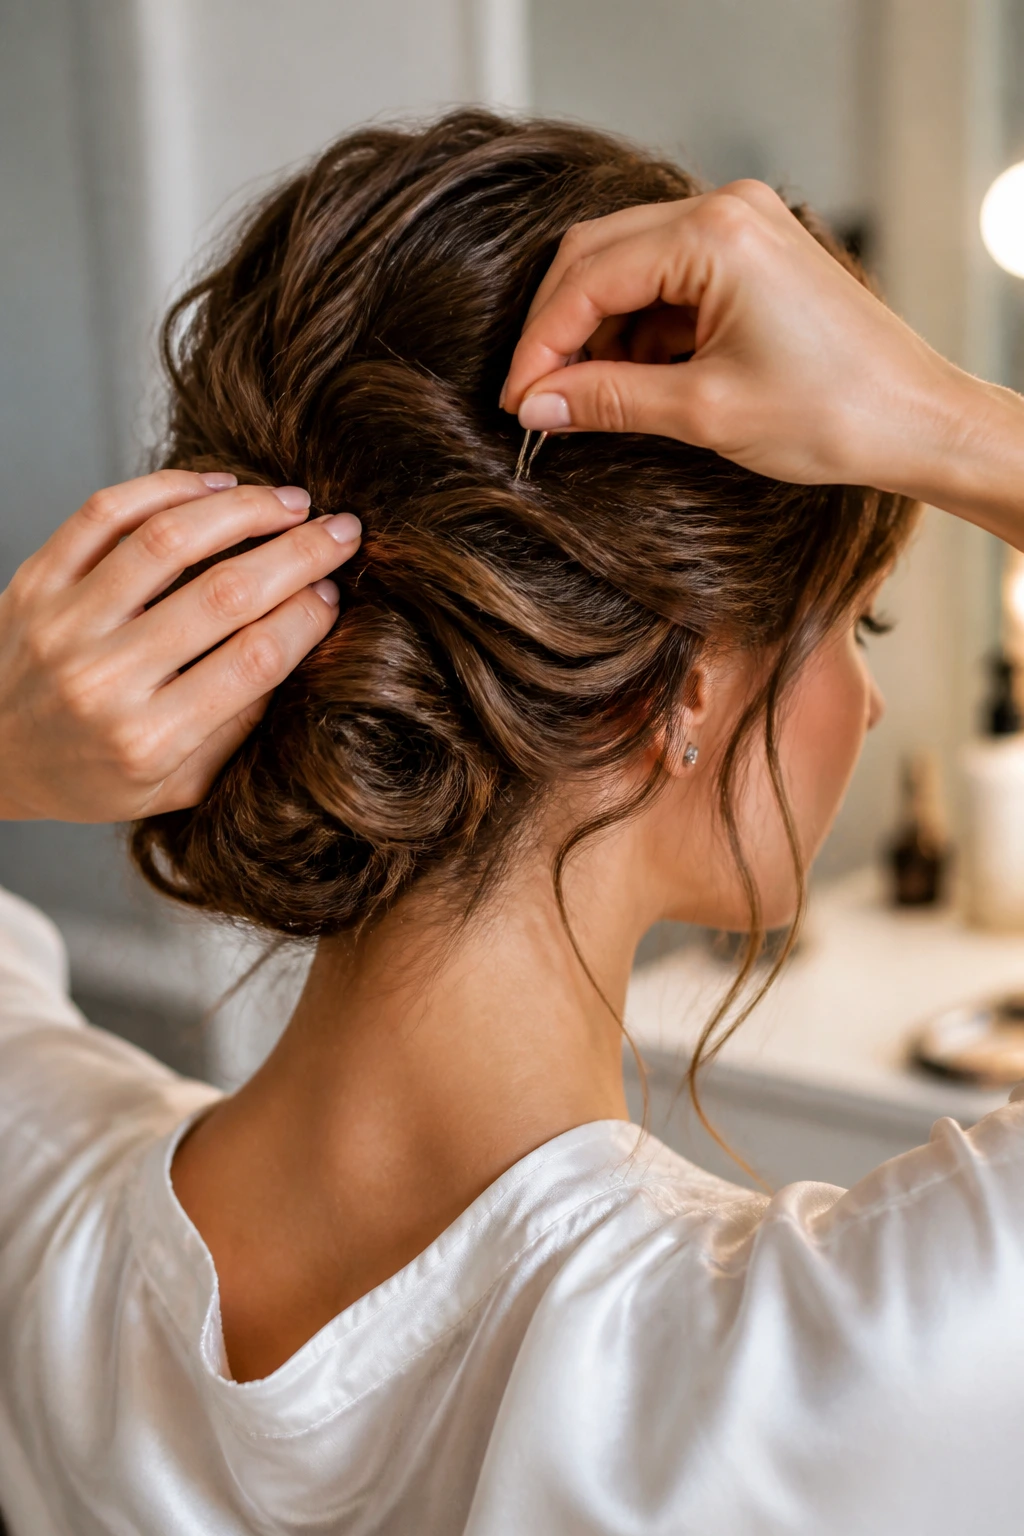
Anchor into the scalp, not just the surface. A pin that only catches one top layer will slide. Slide the pin in against the direction of the twist, then cross a second one over it if the hair is thick or layered. That little X shape is boring to talk about and excellent in practice.
One more thing: stop brushing the life out of the texture. Fingers or a wide-tooth comb are usually enough. If you flatten every bend before styling, you lose the very thing that helps the updo stay put.
Common Mistakes That Make Wavy Updos Fall Apart
- Starting with hair that’s too clean: Freshly washed waves can be silky and slippery, which makes buns slide. Fix it with dry shampoo or a bit of texture spray at the roots before you start.
- Brushing out the wave pattern: The style may look smoother for a minute, then go fluffy and loose. Use fingers or a wide-tooth comb so you keep some bend.
- Using too much cream or oil: The crown can look greasy and the style loses grip. Keep shine products on the mids and ends, not the roots.
- Pinning only the outer layer: The bun feels secure at first, then loosens from the inside. Push pins into the dense center of the twist or chignon, not just the shell.
- Pulling the style too tight: Tight updos can make waves kink in bad places and leave the front looking strained. Leave enough room for the texture to breathe.
- Skipping a test pin: If one bobby pin slips during setup, it’ll usually slip faster once you move. Wiggle each pin after placement and replace the weak ones before you leave the mirror.
Ways to Change the Mood of Any Wavy Updo
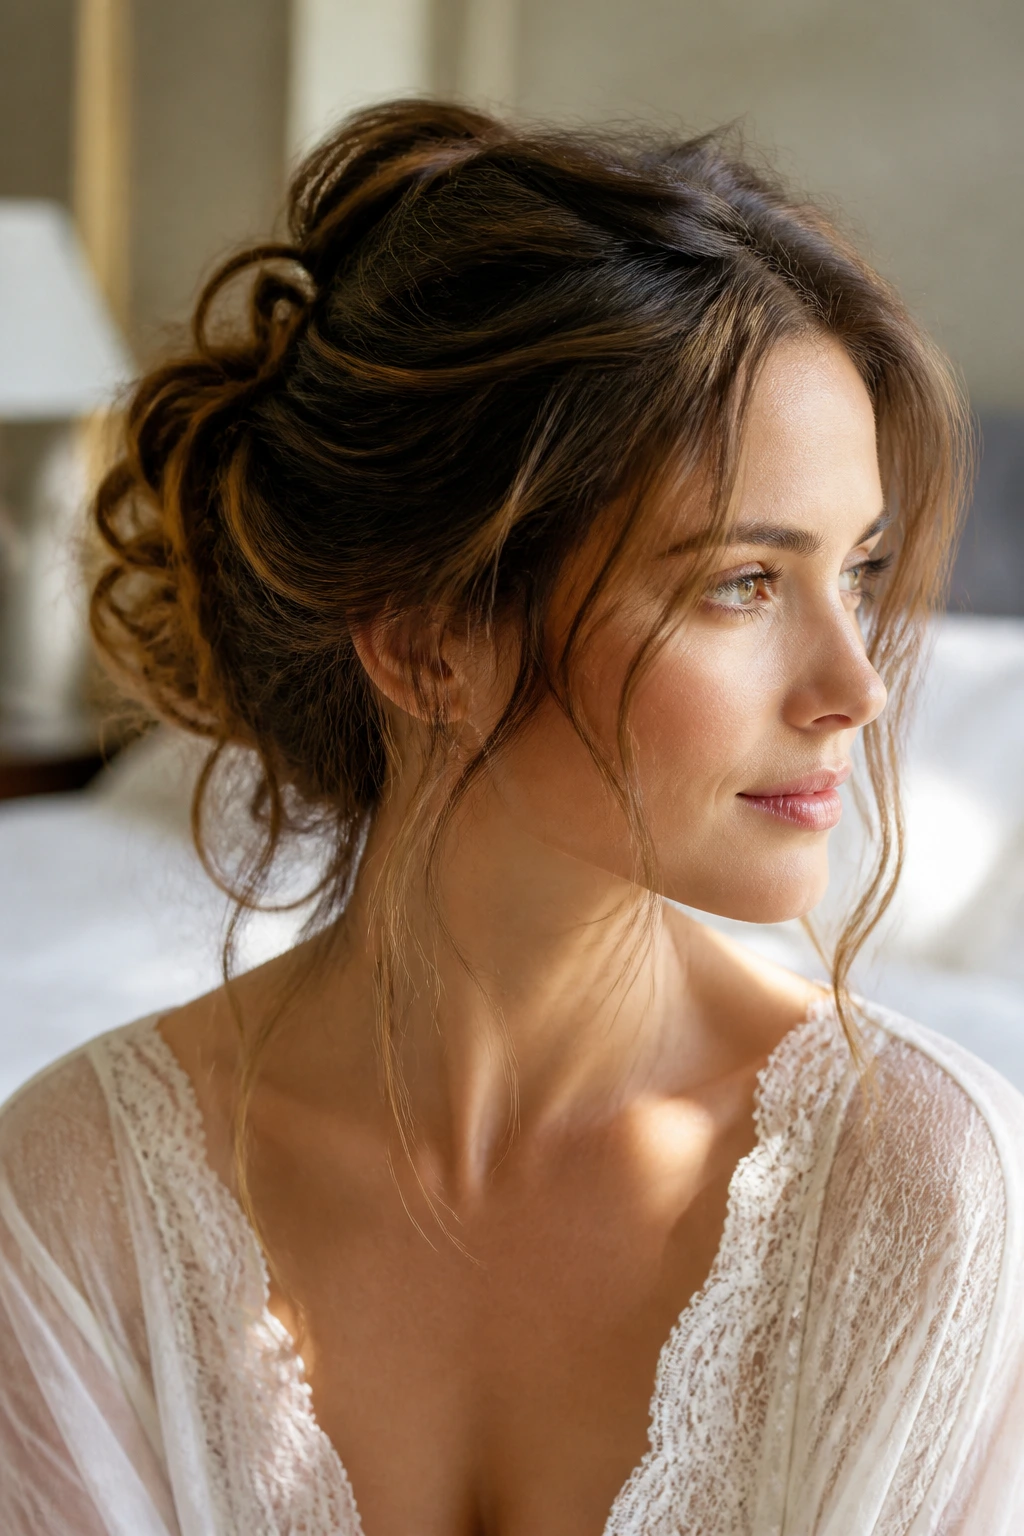
- Soft and romantic: Leave thinner face pieces, keep the crown loose, and let the wave pattern show through instead of smoothing it away. This works best with low buns, twists, and halo styles.
- Clean and polished: Use gel at the roots, a fine-tooth comb, and a tighter shape like a French twist or low bun. The contrast between a sleek top and textured bun looks crisp.
- Braided detail: Add one small braid at the temple, or braid the ponytail before you wrap it into a bun. It gives the style more surface detail without changing the whole shape.
- Accessory-forward: Wrap a ribbon, silk scarf, or decorative comb into the style. Wavy hair holds accessories better because the texture keeps them from sliding around.
- Short-hair friendly: Use mini twists, half-up knots, pinned rolls, and multiple small pins instead of one large coil. Shoulder-length waves often do better with these smaller structures.
- Dressy event version: Choose a style with an anchor point at the nape — a chignon, Gibson tuck, or side roll — and finish with flexible spray, not stiff lacquer. The hair should move a little when you turn your head.
Keeping Your Updo Fresh Through the Day and the Next Morning
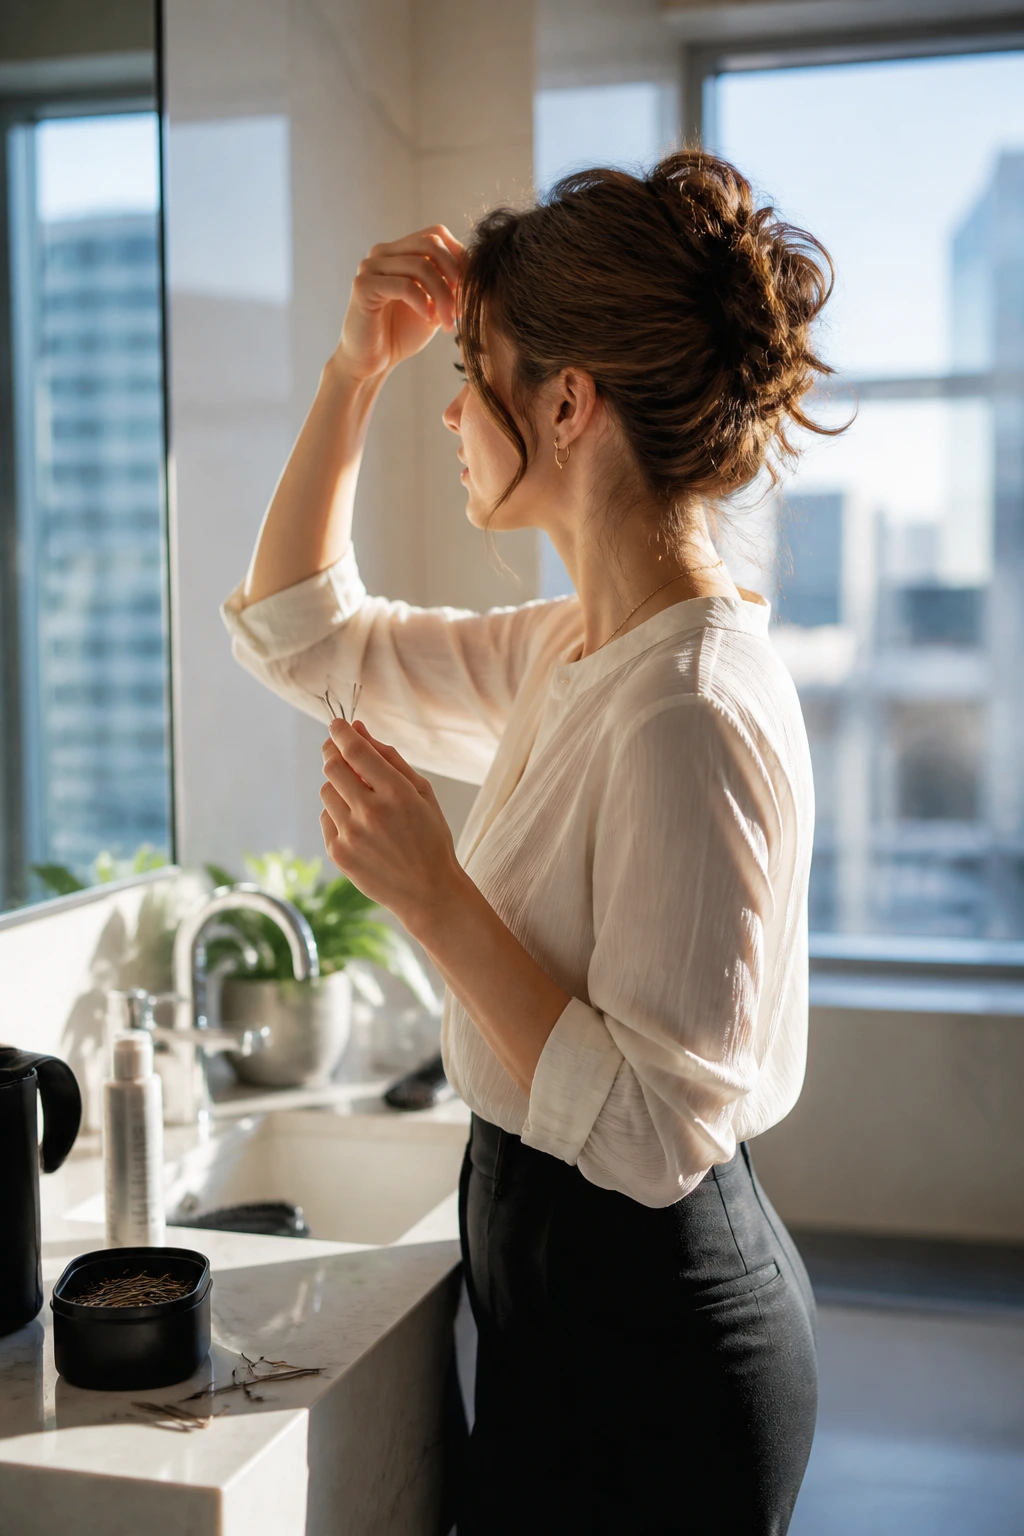
Most wavy updos are happiest for a full day of wear, give or take a few hours. If you’re wearing one to work, an event, or a long dinner, start with dry, textured hair and keep a couple of spare pins in your bag. That’s usually enough to fix the one side that starts to lean.
For overnight preservation, take the style down unless it’s a very loose twist or soft bun. Sleeping on a silk pillowcase or wrapping the hair with a silk scarf cuts down on frizz and flattened pieces. If you want to wear the same shape again the next day, mist the waves lightly with water, add a touch of dry shampoo to the roots, and re-pin the pieces that lost their grip.
A style with stronger hold — like the braided low bun, French twist, or slicked-back bun — can often be refreshed with a damp brush or a little gel at the hairline. A looser chignon, though, usually wants to be rebuilt. That’s not a flaw. It’s the deal with softer styles.
Frequently Asked Questions
Are these updos better on fresh hair or second-day hair?
Second-day hair usually wins. The texture is drier, the roots have more grip, and the style tends to stay put longer. If your hair is freshly washed, dry shampoo or texture spray can give you enough hold to work with.
Should I straighten wavy hair before styling it up?
Usually, no. Straightening takes away the bend that helps pins catch and often makes the finished look flatter. If you want a sleeker finish, smooth only the top and keep the lower texture in place.
What if my waves are very loose and fine?
Use smaller sections, more pins, and a little more grip at the roots. Dry shampoo, a light texturizing spray, and crisscrossed bobby pins usually solve more problems than extra hairspray.
Can shoulder-length wavy hair do these styles?
Yes, but the best bets are half-up knots, Gibson tucks, low twists, side rolls, and faux-bob styles. Very long buns may need a few hidden pins or a small elastic to keep the ends tucked in.
How do I keep the crown from going flat?
Do not crush it with a brush. Lift the roots slightly with your fingers before pinning, then add a little dry shampoo or texture spray where the bun starts. A soft crown usually looks better than a perfectly plastered one anyway.
How many bobby pins do I need?
For a simple twist or knot, 4-6 pins usually does it. Braided halos, French twists, and fuller buns may need 8-12, especially if your hair is thick or layered.
What if the style starts sliding after an hour or two?
Take out one weak pin and replace it with a stronger anchor pin, crossing it against the direction of the twist. Most sliding comes from shallow placement, not from the style itself.
Can I wear these for a wedding or formal event?
Absolutely. The French twist, braided halo bun, side bun, pinned roll, and loose chignon all work well for dressier settings. Add pearl pins, a comb, or a ribbon if you want the style to read a little more finished.
One Last Pin
Wavy hair does not need to be tamed into silence to look put together. The bend, the soft bends, the little uneven bits near the ends — those are the things that make these updos hold shape and look interesting at the same time. Once you stop treating texture like a problem, the whole process gets easier.
The best styles here are the ones that let your hair stay itself while still getting it off your neck, out of your face, and into a shape that feels finished. Start with the wave you already have. Then pin from there.
