



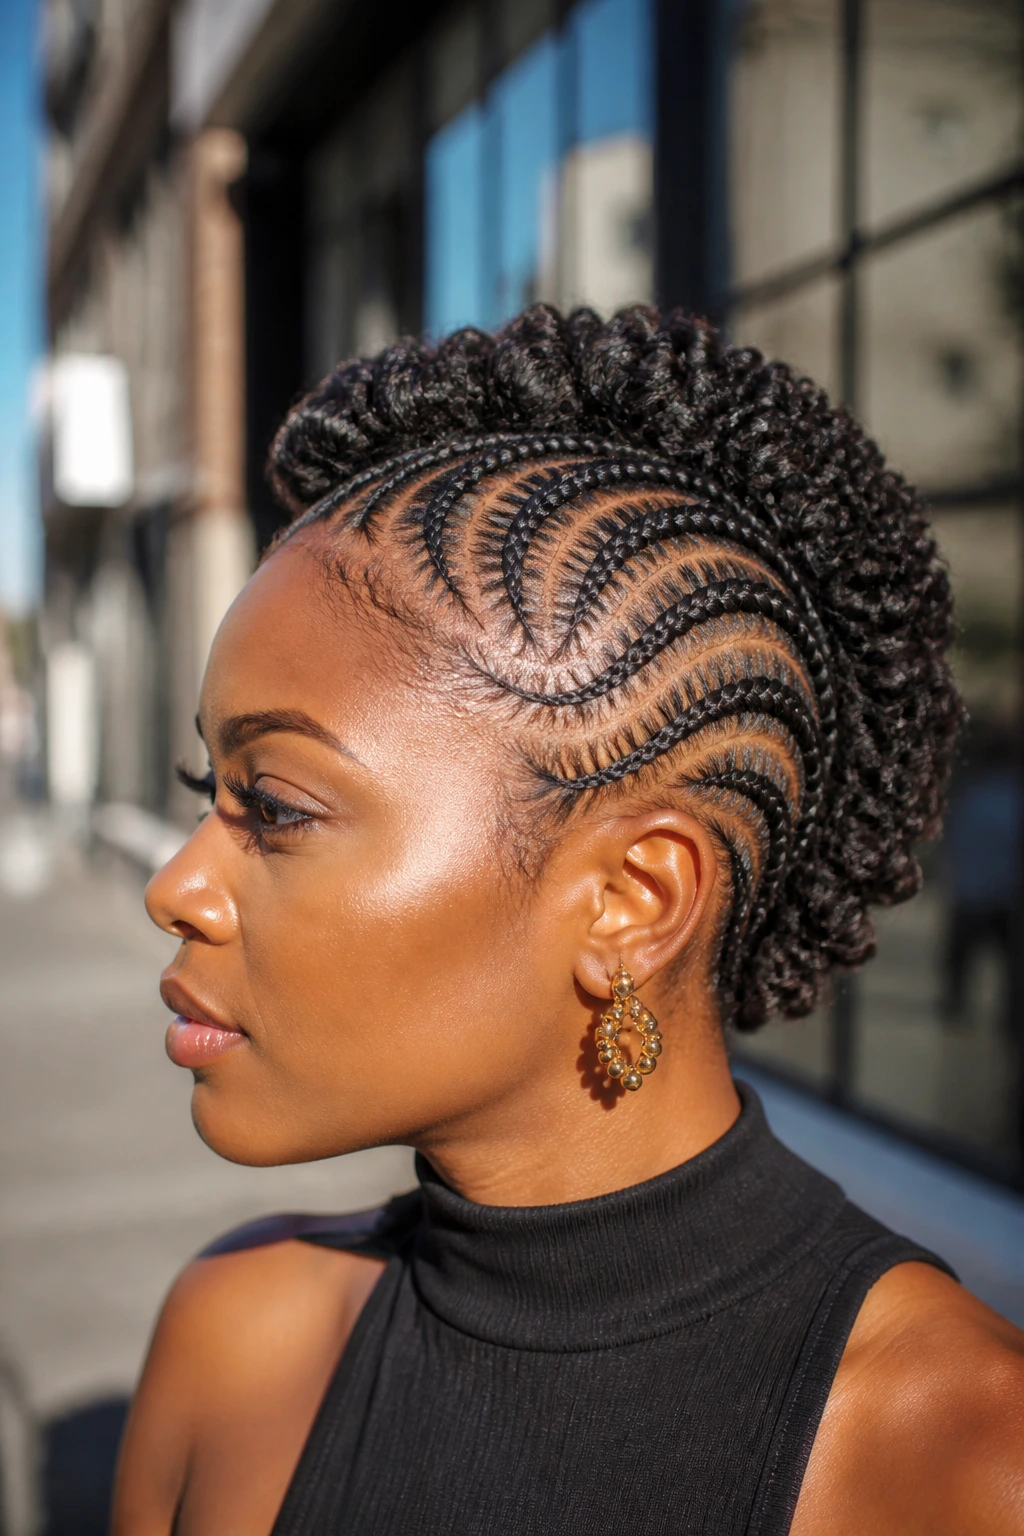
Short natural hair does not need more length to look finished. Give it a clean mohawk braid shape and the whole head gets direction, height, and a little attitude without asking the curls to become something they’re not. On a TWA, the center ridge sits tight and graphic. On a grown-out fade, the same shape can pick up a little puff and still stay sharp.
The parting is doing more work here than most people realize. A good mohawk braid style on short natural hair is not just “hair braided up the middle.” It’s a layout decision: where the sides sit, how narrow the center strip stays, whether the rows curve or run straight back, and how much lift you leave at the crown. Get those parts right and even a short length looks intentional.
Some versions stay close to the scalp and clean. Others bring in feed-in hair, beads, cuffs, or a soft puff at the top so the style reads bigger than the actual length. That range is why this category keeps showing up in chair conversations. It works for office days, concert nights, school runs, and those in-between weeks when your curls want structure more than anything else.
Why This Collection Pulls Its Weight
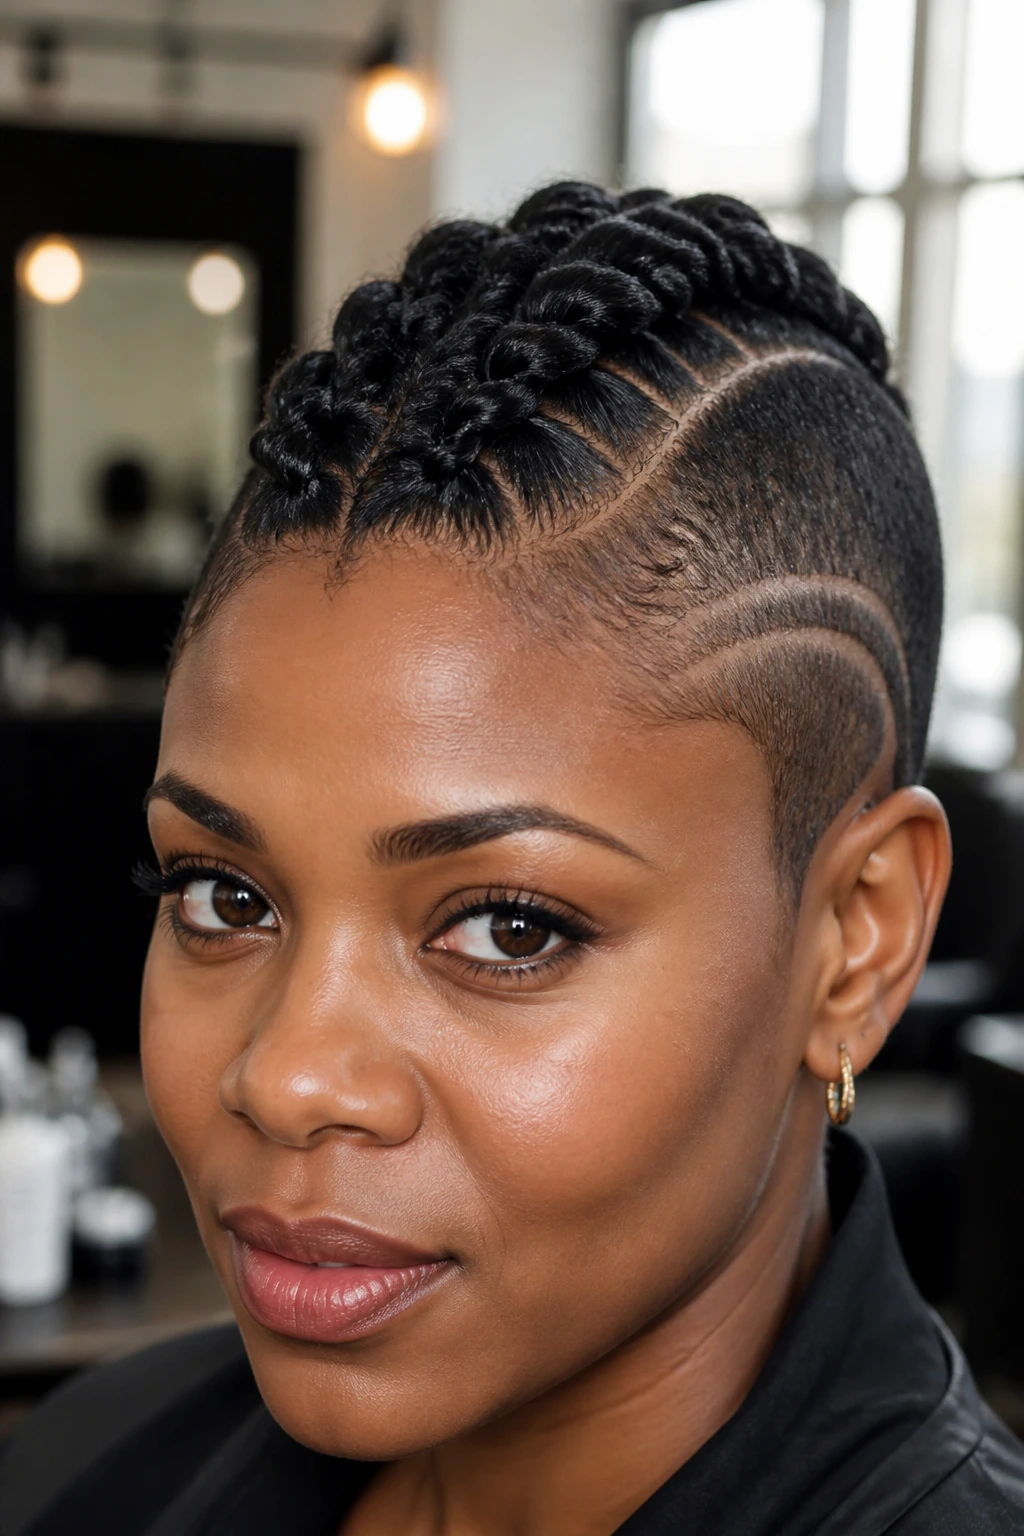
- Short-hair friendly shape: These styles use the middle strip as the focal point, so even a TWA can look deliberate instead of unfinished.
- Low-tension options: Most of the looks keep the sides close to the scalp, which helps when your edges get fussy under heavy pulling.
- Room for texture: Some styles stay tight and sleek; others leave a puff, coil, or curly top in the center so your natural texture still gets to show.
- Works with or without added hair: You can keep it all your own hair or add a few feed-in pieces where the braid needs extra length.
- Easy to refresh: A satin scarf, a light mist, and a little part-line cleanup can buy you several extra days.
- Dress-up range: Bare braids look clean and simple; cuffs, beads, thread, or a bandana turn the same base into something louder.
1. Center-Strip Cornrow Mohawk
A center-strip cornrow mohawk is the cleanest place to start, and honestly, it’s hard to beat when the hair is short and dense. The sides sit in tight braids running straight back, while the middle strip stays fuller so the shape reads immediately from across the room.
Why It Works on Short Hair
The side rows do the framing. That means you do not need dramatic length to get a strong silhouette. On hair that’s 2 to 4 inches, three to five slim cornrows on each side often look better than trying to cram in too many wide rows.
Quick Details
- Keep each side section about 1 to 1½ inches wide.
- Part the center strip straight from forehead to nape.
- Stop the braids at the nape or tuck the ends into tiny knots if the hair runs out.
- Use gel on the parts only; too much product makes the scalp look greasy by day two.
Best tip: A rat-tail comb with a fine point matters more here than fancy products. Clean part lines make the whole style read crisp.
2. Feed-In Braid Ridge
This is the version that buys you height without needing long hair. Feed-in braids let the center ridge look fuller, and because the added hair starts small and grows gradually, the braid doesn’t feel bulky at the base.
The trick is in the first few stitches. Add the braiding hair in thin, tapered pieces so the braid grows as it moves back. If you start with a thick chunk, the base sits like a lump and the whole mohawk loses that smooth line. On short natural hair, that taper makes the difference between “hairdo” and “helmet.”
I like this style for events, photos, or any day when you want a bit more structure than your own length can provide. Keep the side braids close and let the center ridge do the talking. If the hairline is soft or your edges are tender, ask for a lighter grip at the front and a firmer hold farther back.
3. Flat-Twist Frohawk
Why do flat twists work so well on short coils? Because they grab hair without needing as much length to lock in. A flat-twist frohawk keeps the sides smooth, then leaves the center section with enough lift to look like a real frohawk instead of a flattened braid set.
The finish is softer than cornrows. That matters if your hair is short enough that tight braids can look harsh around the temples. Flat twists also stretch the texture a little as they go, which helps if you want the middle to sit up instead of hugging the head.
How to Ask for It
- Ask for two or three flat twists on each side.
- Keep the center section stretched and slightly fluffy.
- Use a styling foam or setting mousse if you want the twists to hold their shape overnight.
- Leave the ends coiled or pinned into tiny knots if the length runs out early.
4. Side-Curved Braided Mohawk
If a straight center part feels too stiff, this is the turn to make. Side-curved braids sweep around the head instead of running dead straight, and that curve gives the style a little motion before the eye even reaches the top ridge.
I like this one on rounder face shapes because the curve lengthens the outline without trying too hard. It also works when the sides are very short and you want the parting to do more of the styling work. The curve can be wide and gentle or tight and dramatic, depending on how much scalp you want to show.
- Curved rows soften the head shape.
- Slim side sections keep the mohawk line visible.
- A little edge control at the part keeps the curve from fuzzing out.
- This style reads especially well with a side part at the front.
Small warning: If the curves are too symmetrical, they can look stiff. Let one side sit a little higher than the other, and the shape wakes up fast.
5. Stitch-Braid Mohawk
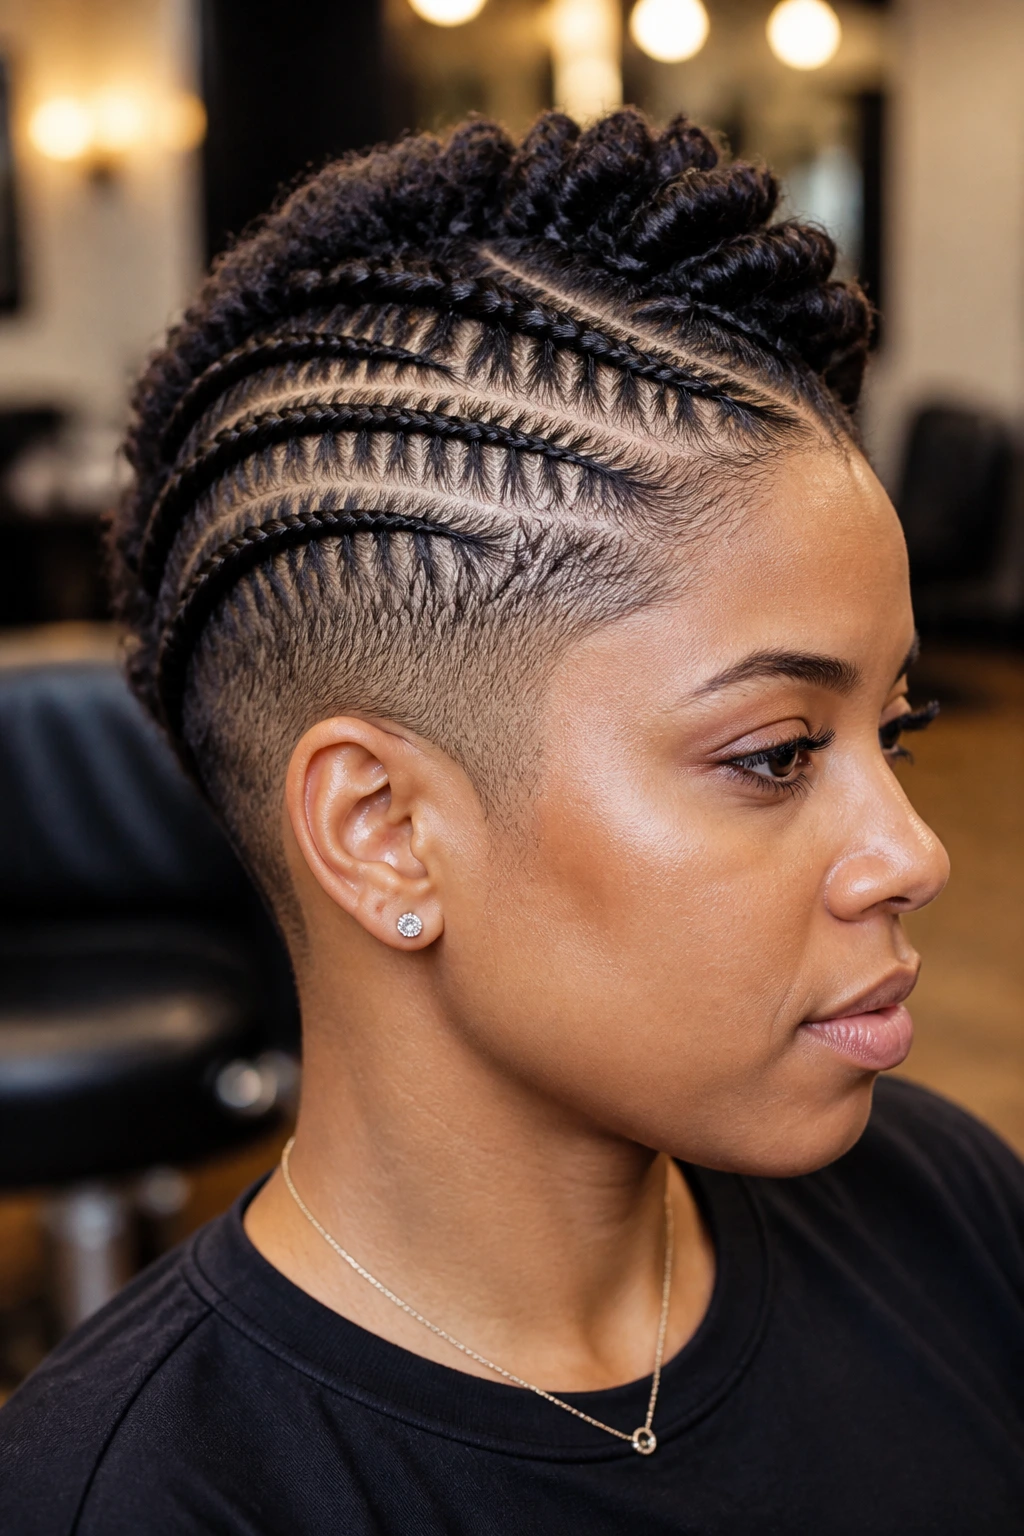
Stitch braids bring a sharper, more graphic line than plain cornrows, and on short natural hair that crispness is the whole point. The braid segments look almost ribbed, with each “stitch” showing up as a neat little ridge along the scalp.
The style works best when the parting is clean and the hair has a little stretch. If your coils are dry and springy, the stitch pattern gets fuzzy fast. That’s why I always start with freshly detangled hair, a light leave-in, and enough hold product to keep the part lines visible without turning them chalky.
This is one of those styles that looks more difficult than it is, but only if the braider is patient. The hands stay close to the scalp, the feed stays even, and the tension stays steady. Short hair loves that kind of control.
6. Mini Dutch Braid Hawk
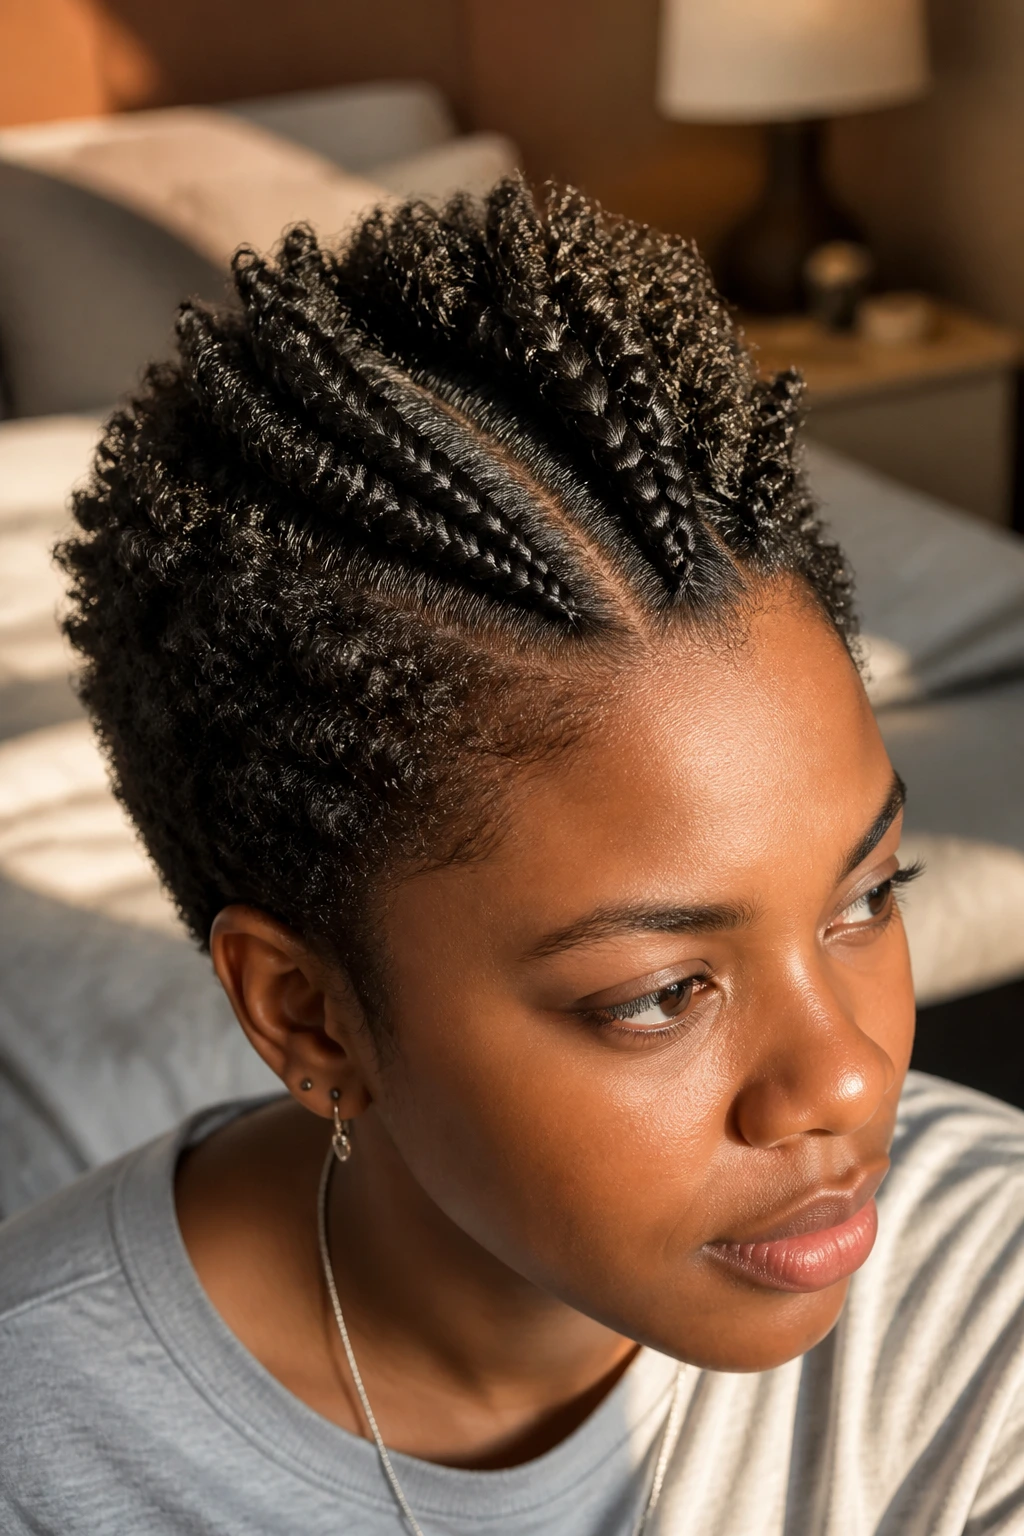
Unlike cornrows, Dutch braids sit on top of the hair instead of sinking into it, so the center ridge gets a little lift right away. That raised look is useful on short natural hair because you get shape even when the length is not giving much drama.
This version is better for 3 to 5 inches of hair than for a tiny TWA, since the braid needs enough length to stay visible. If your hair is on the shorter side, keep the sections narrow and don’t overpack the braid. A tight little Dutch braid can look neat; a fat one can swallow the head.
Best for: people who want a mohawk with more texture and less scalp exposure.
Skip it if: your curls are too short to hold a raised braid without slipping.
My recommendation: use two mini Dutch braids in the center and leave the sides flat or twisted. That keeps the hawk shape readable without making the whole style too busy.
7. Mohawk with Tapered Puff Ends
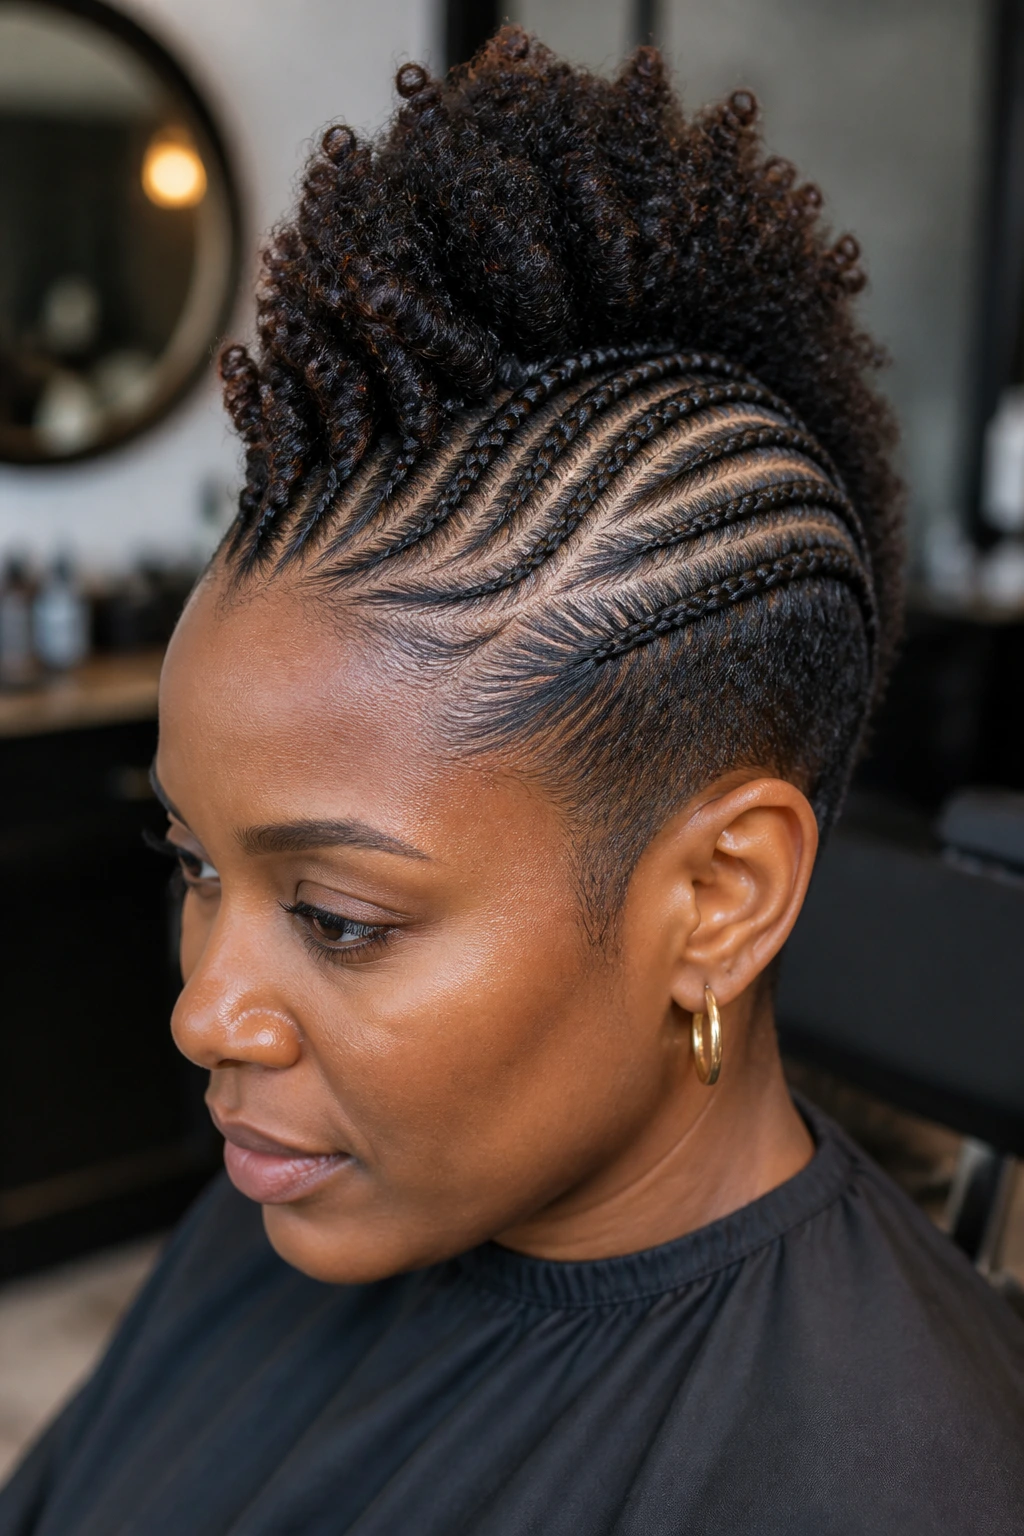
A mohawk with tapered puff ends gives you the braid structure up front and the softness of a puff at the back or crown. The shape is a nice compromise for short natural hair because you keep the lines neat, then let the ends breathe instead of forcing them into tiny knots.
What the Shape Does
The braid ridge pulls the eye upward. The puff gives the style a little air, which stops it from looking too tight or too “done.” On very short hair, this often looks better than trying to fake a long hanging ponytail that the hair can’t support.
For a smoother finish, braid the side panels first, then gather the center hair into a puff with a small elastic or a covered band. Use a toothbrush or edge brush around the front only if the hairline can handle it; too much brushing can make the front look thin.
8. Triangle-Part Scalp Braid Hawk
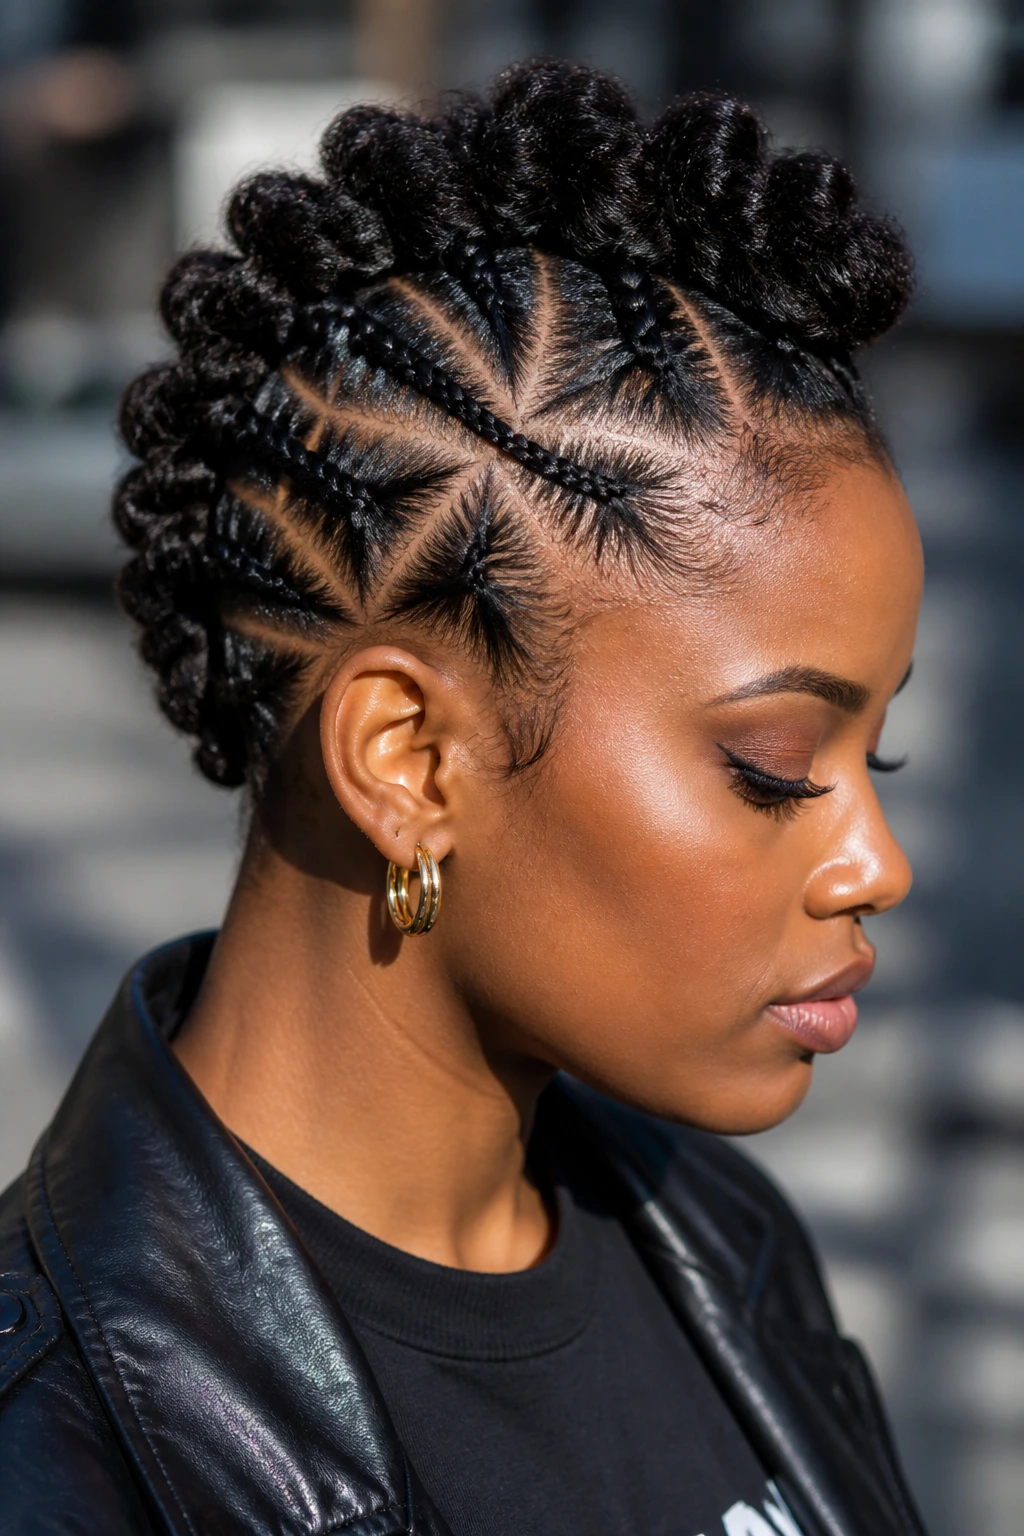
Triangle parts do a lot of visual work, and that’s the real reason this style stands out. The mohawk itself may be simple, but the parting turns the scalp into the design. Every triangle points toward the center ridge, which makes the whole style feel sharper without adding more braids.
This is a smart choice when your hair is short enough that extra braid size would look bulky. The triangle layout creates interest through geometry, not through length. That’s useful, because short natural hair often looks best when the design is deliberate rather than oversized.
If you’re doing this yourself, draw the parts first before you start braiding. Do not freestyle the triangles while the hair is already sectioned and frizzy. That’s how the layout gets lopsided.
Practical use: triangle parts work especially well with small gold cuffs or clear elastics at the ends, because the part pattern stays visible even when the braid itself is short.
9. Two-Tone Braided Frohawk
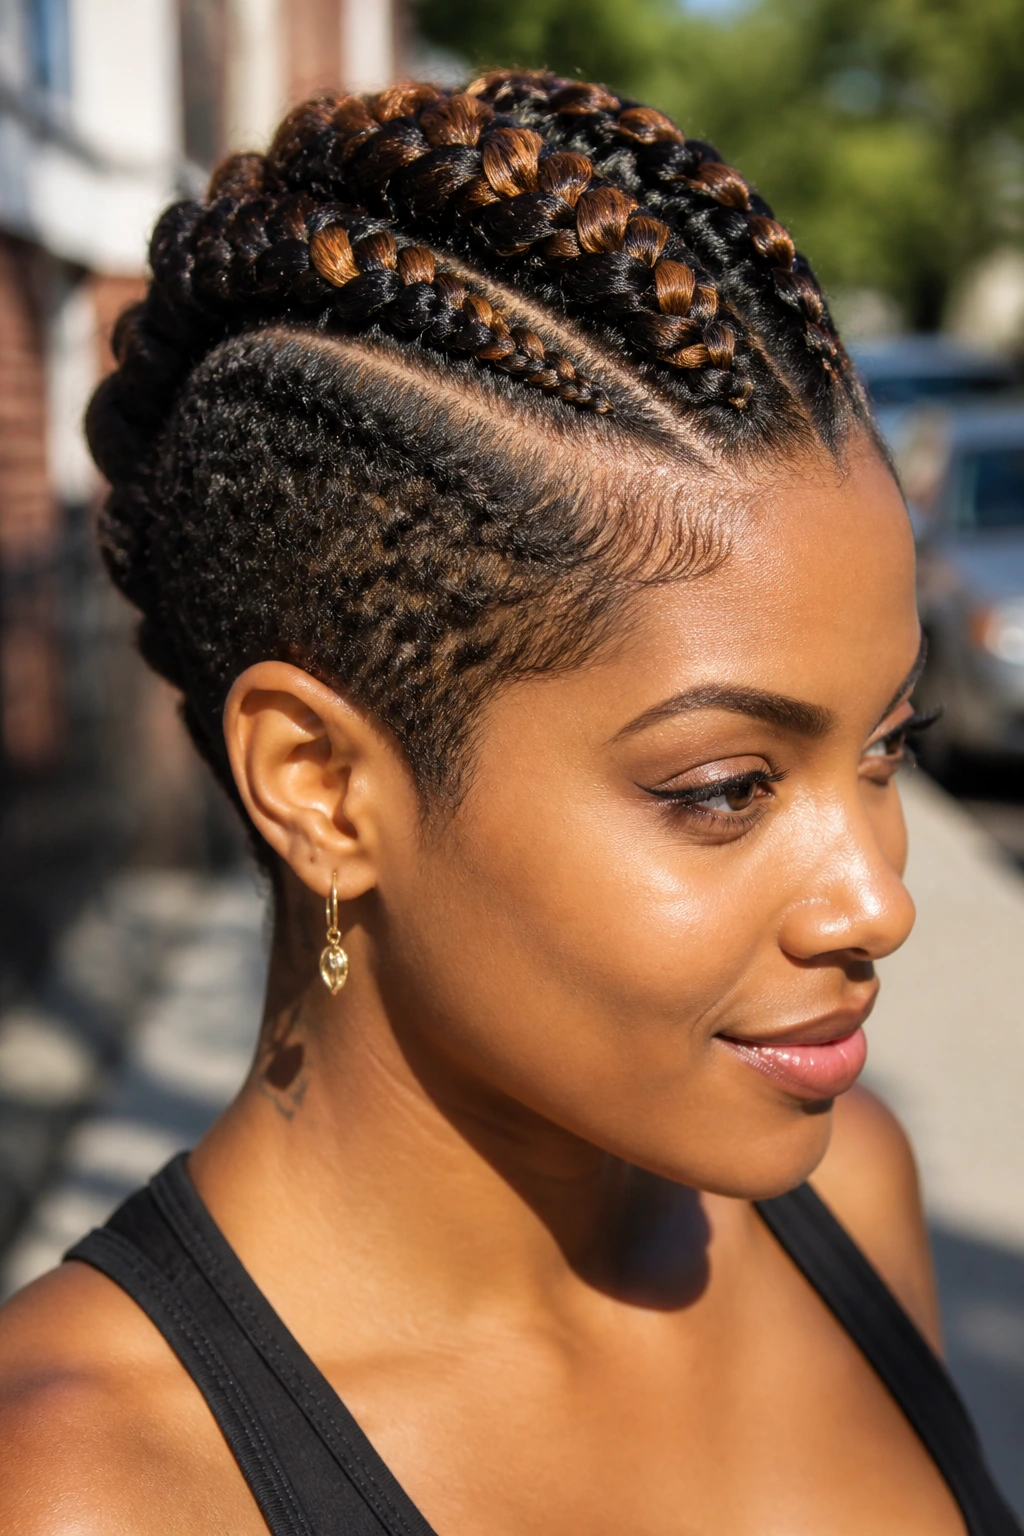
Why do two-tone braids look so strong on short natural hair? Because the color shift shows off the braid pattern itself. A dark base with honey-brown feed-ins, or a deep auburn braid against black curls, makes every row easier to see.
That matters when the hair is short and the mohawk shape depends on contrast. The color split gives the eye something to follow from the hairline to the crown, and the style looks fuller without needing more length. If you’re adding extensions, keep the added hair close in texture so the difference stays in the color, not in the feel.
How to Ask for It
- Pick one accent color, not three.
- Keep the sides darker and the center slightly lighter if you want the hawk to pop.
- Ask for tapered feed-ins so the color change does not start as a blunt block.
- Use color only where it helps the pattern; too much can make short hair look busy.
10. Half-Up Crown-to-Hawk Braid
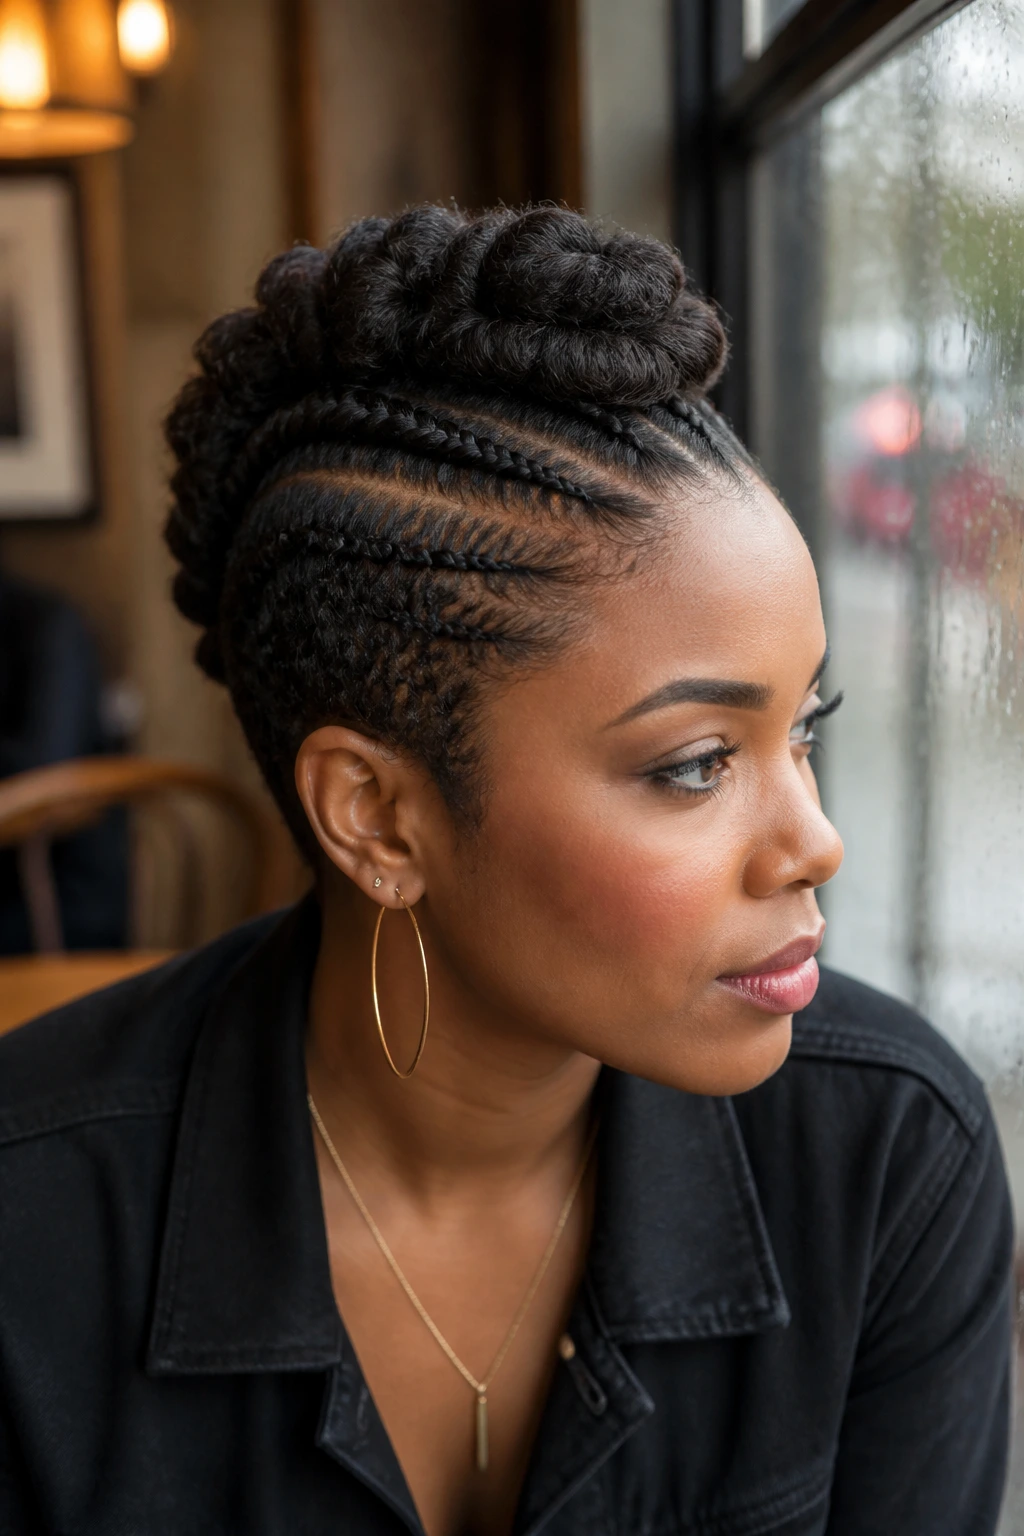
If a full mohawk feels too hard-edged, this half-up version softens the whole thing. The crown braid wraps from the front toward the back and lands in the center, so the top reads lifted while the sides stay anchored.
The style works well for short natural hair that has some crown length but not enough length everywhere else to support a full braided hawk. It also suits people who want a style that looks neat from the front and still has a little movement from the side.
A good version of this braid keeps the front section smooth, then lets the braid travel slightly off-center before it settles into the mohawk line. That little shift adds shape. Small thing, big difference.
11. Zigzag Part Mohawk
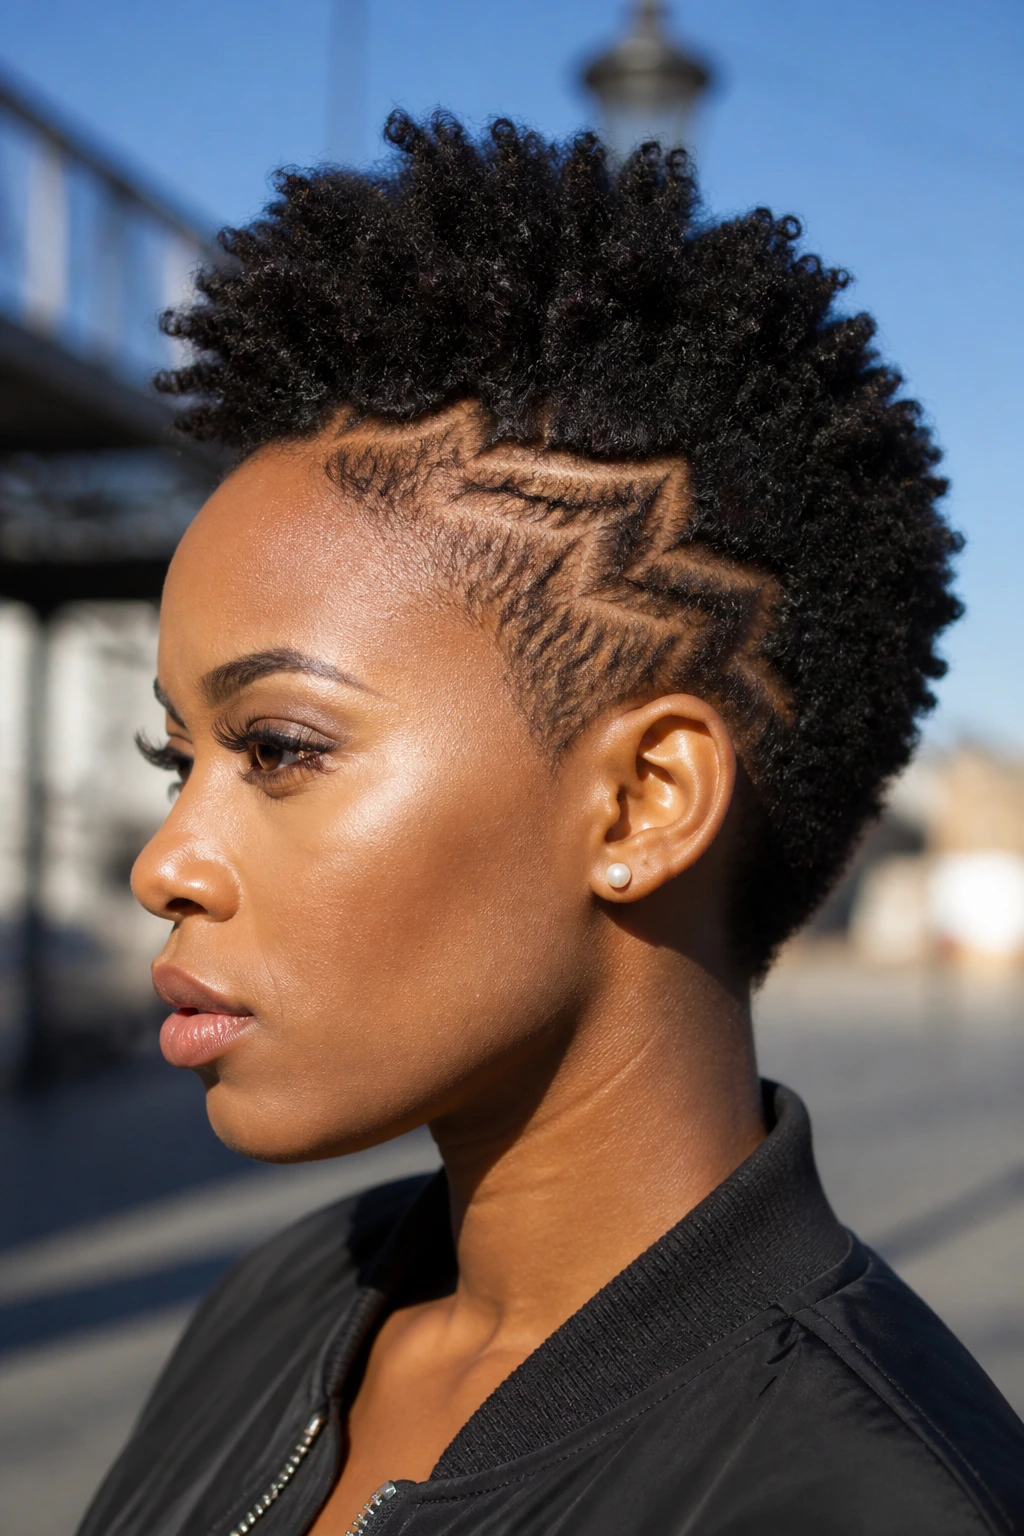
Zigzag parts are one of those details that turn a basic braid set into something with a pulse. The mohawk itself can be very simple, but once the parts start cutting back and forth, the style picks up motion before a single braid is finished.
Short natural hair tends to show parting clearly, which is a gift here. Instead of fighting that texture, use it. A zigzag line across the sides creates a kind of visual zig and zag that keeps the head from looking flat, especially if the center section is only medium length.
The best part is that the zigzags do not have to be perfect. In fact, a slightly irregular line often looks more natural than a ruler-straight pattern. You want the part to feel intentional, not frozen.
12. Braided Pompadour Hawk
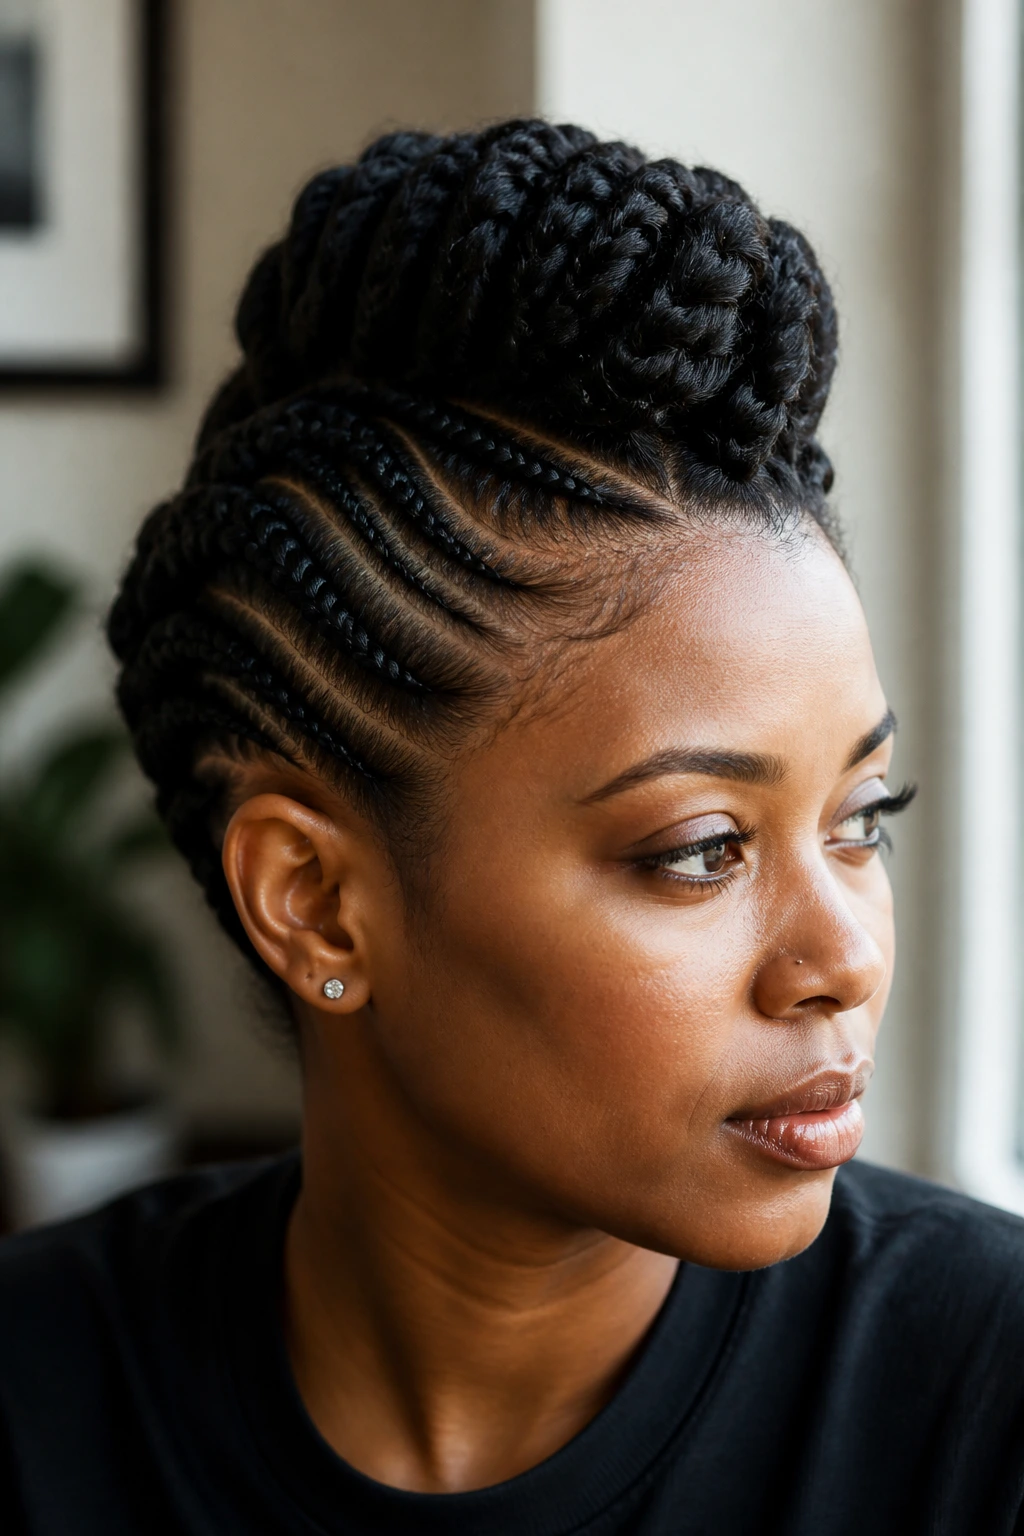
A braided pompadour hawk is what happens when the front gets the volume and the sides stay disciplined. The braid pattern stays close around the head, but the front lifts a little higher, almost like a soft roll before it joins the center shape.
Compared with a flat mohawk, this version gives more height at the forehead and crown. That makes it a strong pick for short natural hair that needs help looking longer without actually adding length. If your curls are dense at the front, this style can use that thickness instead of flattening it.
It’s best for people who like a more polished look. The front gets brushed up, braided, or twisted into place, then pinned so the lift holds. A little mousse helps, but heavy gel can make the pompadour go stiff in an awkward way.
My take: if you want one mohawk braid style that reads “done” from every angle, this one earns its spot.
13. Cornrow and Twist Combo Hawk
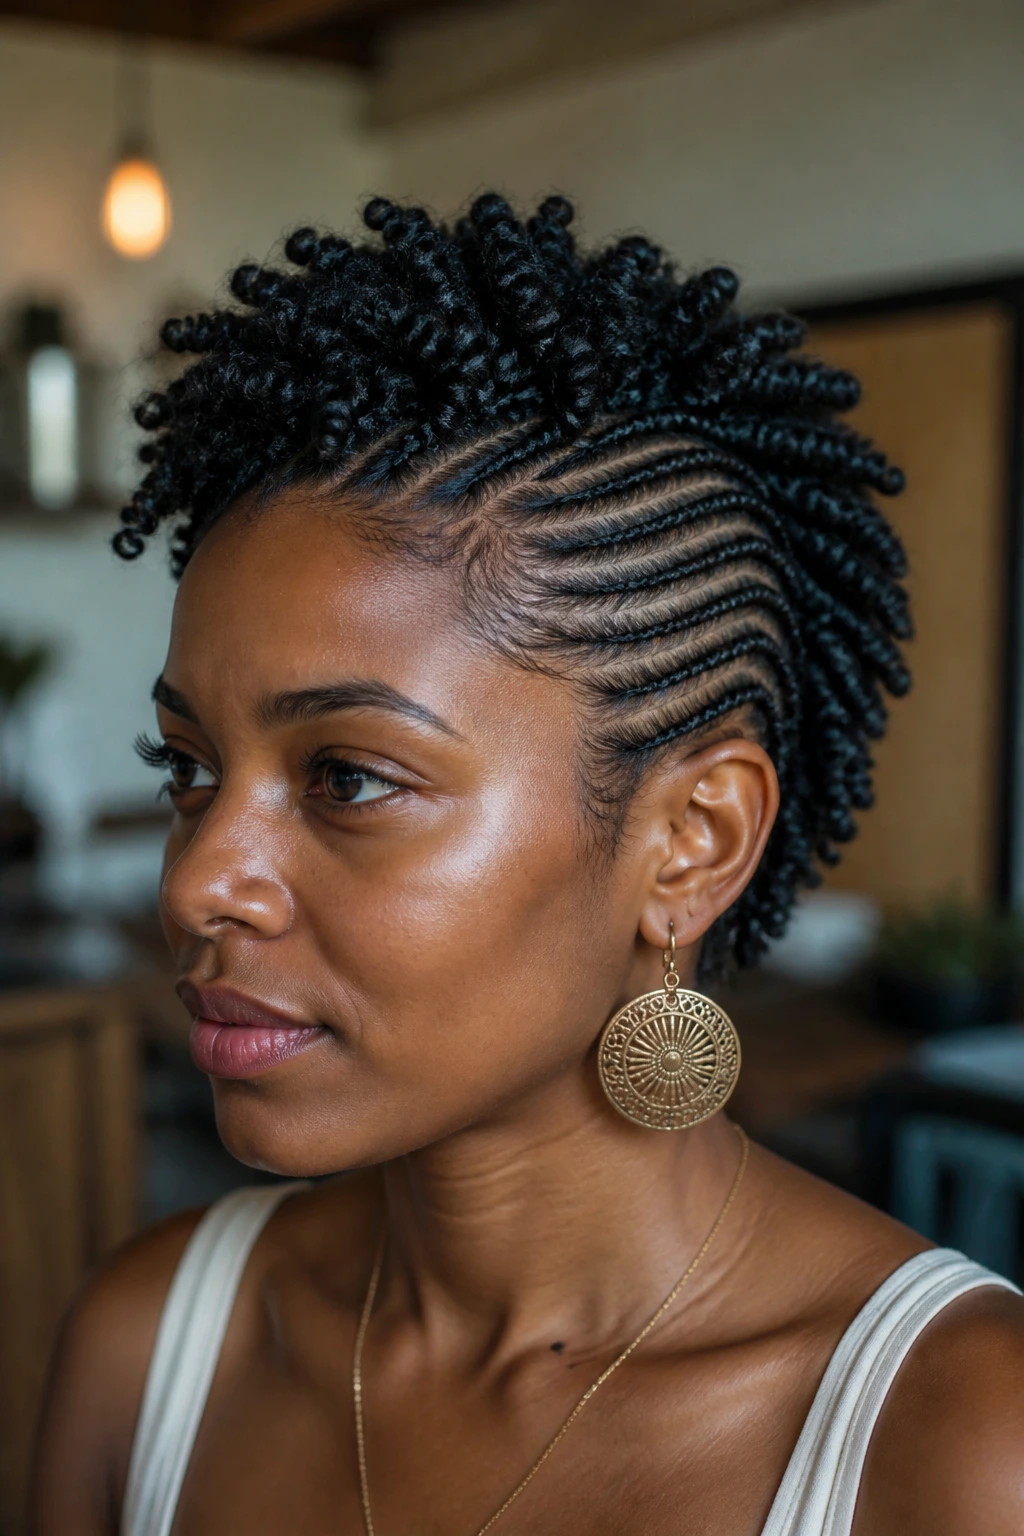
Mixing cornrows and twists keeps the style from feeling too rigid. The cornrows give the sides structure, while the twists add softness and a little movement, which short natural hair usually wears well.
Why the Mix Works
Cornrows alone can sometimes look severe on very short hair. Twists break that up. They also give you a way to play with texture if the crown is very dense and the sides are tighter or finer.
If I were asking a stylist for this one, I’d keep it simple: straight-back cornrows near the temples, flat twists closer to the top, and a small puff or braid ridge in the center. That balance keeps the style from veering into costume territory.
- Use the cornrows where you want clean edges.
- Use twists where you want softness.
- Leave the center section slightly fuller so the mohawk still reads first.
- Add cuffs only if the parts are already neat.
14. Braided Bantu-Knot Hawk
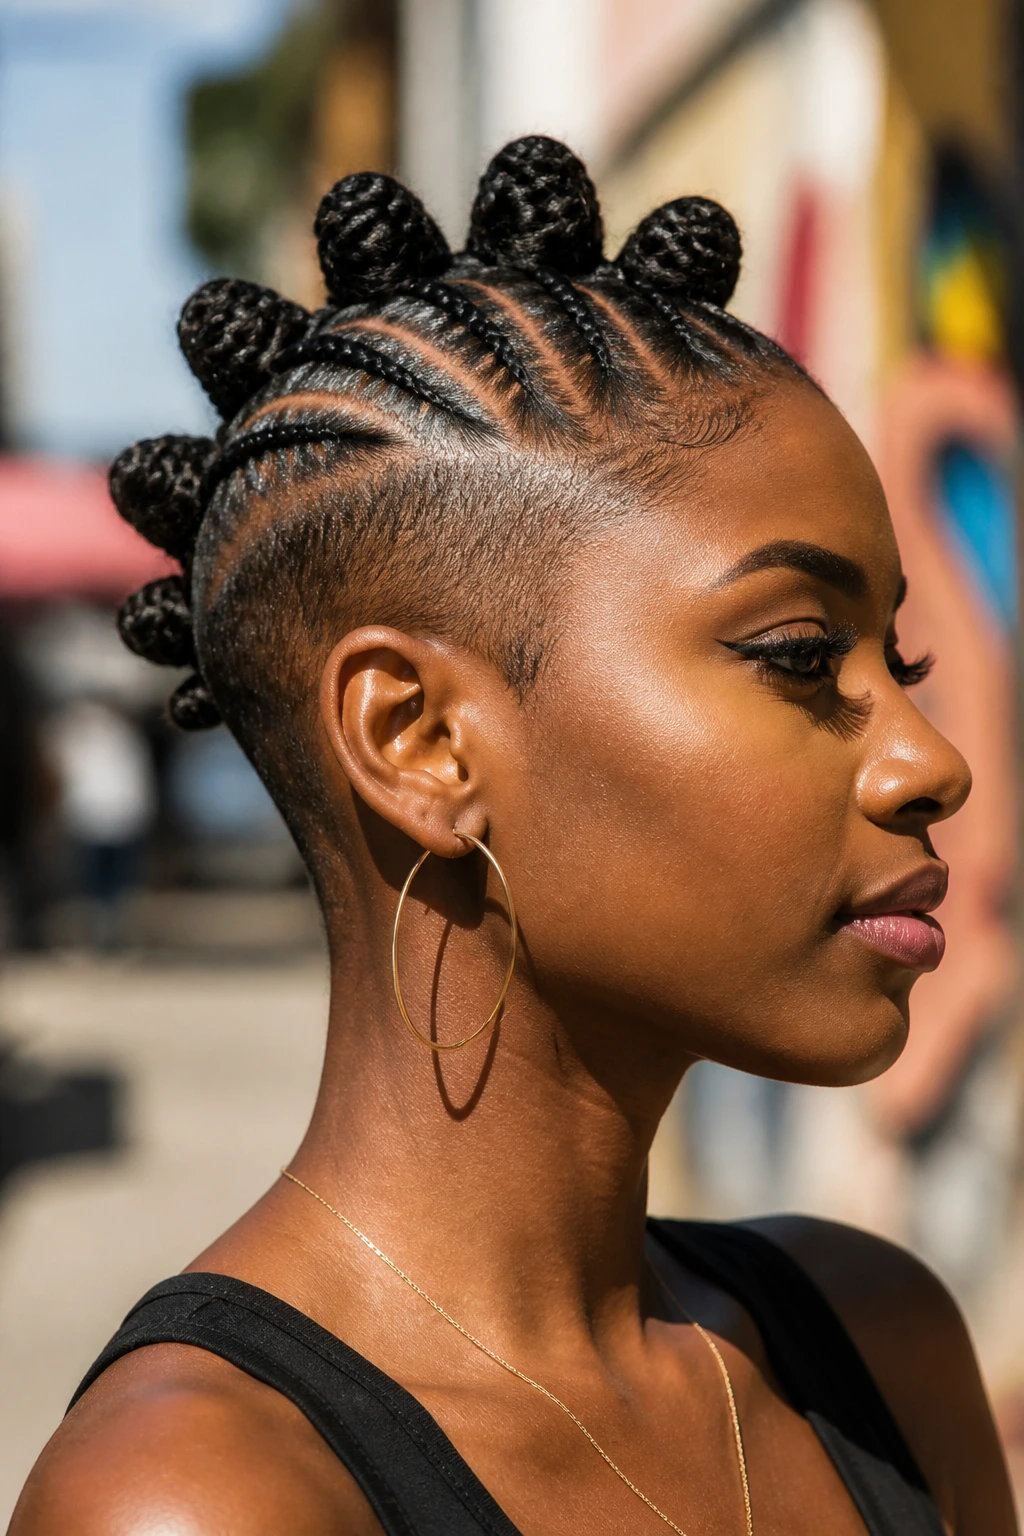
This is the drama pick, and it works because the knots sit high without needing a lot of length. Braids or twists run toward the center, then fold into small bantu knots along the ridge. On short natural hair, the knots look playful instead of bulky.
The style is especially useful if your hair is too short to hang or puff but still has enough length to loop into compact knots. You can keep the side sections low and smooth, or add a little curved parting if you want the hawk to look less boxy.
A little tension goes a long way here. If the knots are pulled too tightly, the style stops feeling cute and starts feeling poky. The sweet spot is a knot that sits firm but not strained.
15. Low-Profile Protective Hawk
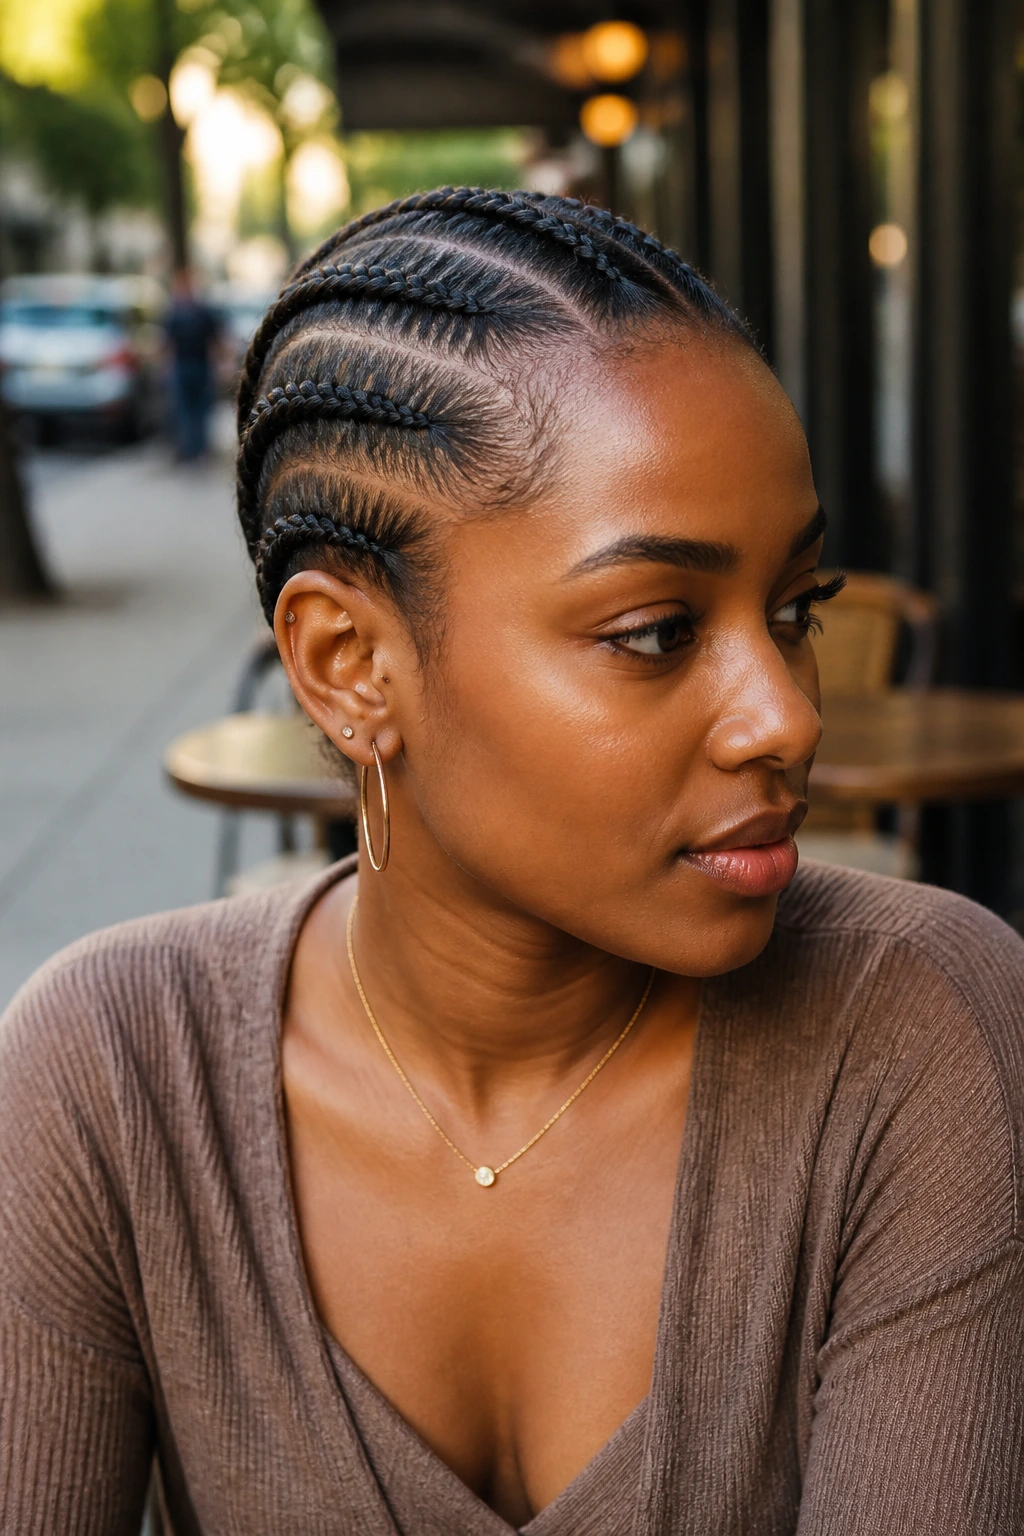
What if you want the mohawk shape without the height? Go low-profile. This version sits close to the head, keeps the parts tidy, and leaves the center strip flat enough to wear under hats or scarves without friction.
That makes it a good choice for work weeks, busy days, and anyone whose scalp prefers less handling. The style still reads as a mohawk because the side panels are braided away and the center ridge stays marked, but the look is quieter.
How to Ask for It
Ask for small, flat cornrows or two-strand twists on the sides, then keep the center section narrow rather than full. If you use gel, keep it light and only on the roots. Heavy product at the hairline is the thing that usually ruins this style first.
16. Beaded Mini-Braid Hawk
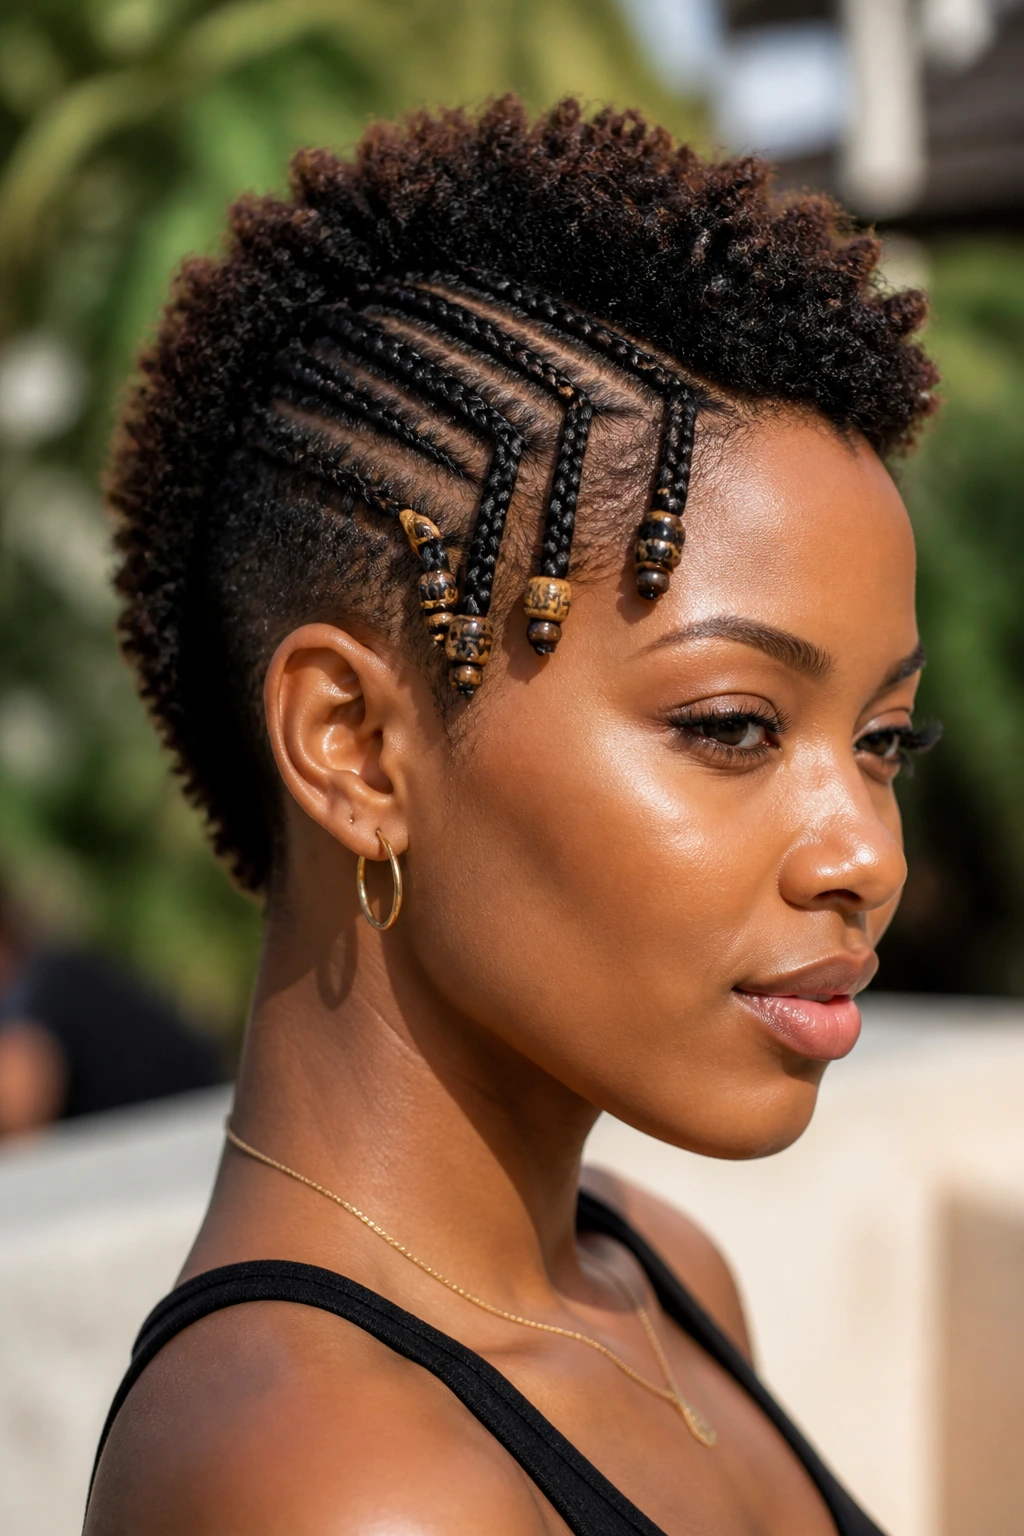
A beaded mini-braid hawk has movement built in. Every little braid shifts slightly when you move, and the beads give the ends a little weight so the shape hangs in a cleaner line.
This is one of the easiest ways to dress up short natural hair without changing the braid pattern itself. Keep the braids small and the beads selective. Two or three beads on each braid are enough; more than that starts to feel noisy, especially on a short cut.
The best version uses clear, wood, or matte metal beads depending on the outfit. If the hair is very short, place the beads near the ends only. Loading them too close to the scalp makes the braid sag.
Closing thought: the braid is the base here, but the bead placement is what makes the style feel finished.
17. Asymmetrical Side-Sweep Hawk
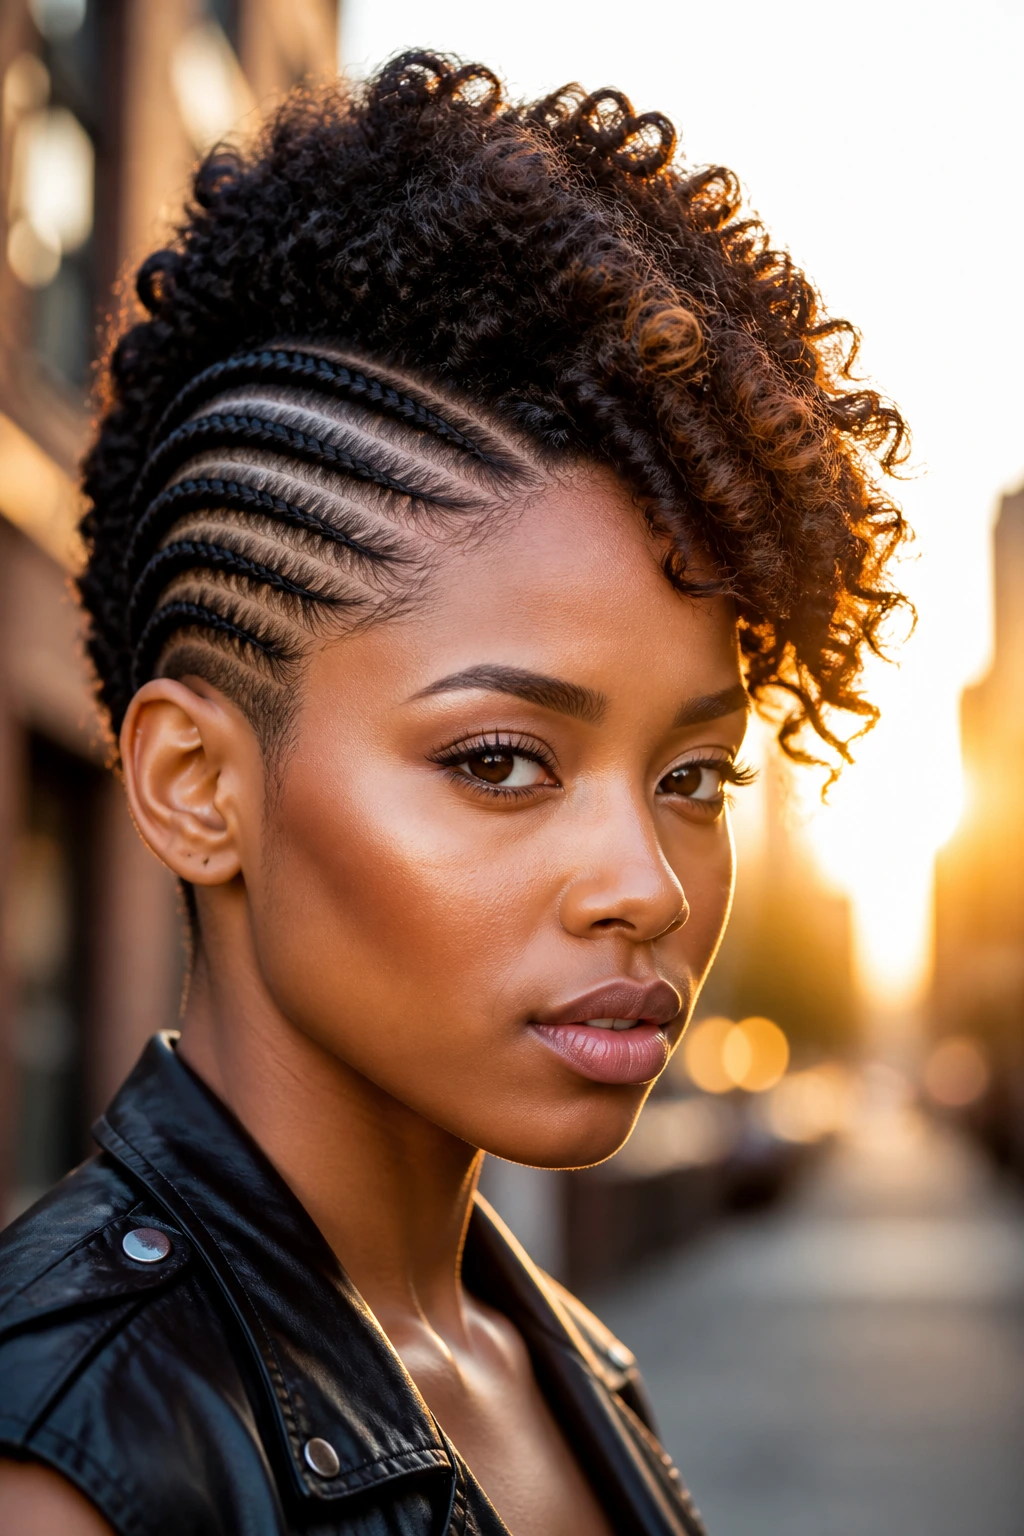
An asymmetrical side-sweep hawk gives one side more volume, more braid detail, or a wider parting than the other. That imbalance is the point. It keeps short natural hair from looking boxed in and gives the style a little motion even when you’re standing still.
I like this on faces that can handle a bit of drama near one temple. The sweep pulls the eye across the head, then back toward the center ridge. If the braids are too even, the style can lose that flow. The asymmetry brings it back.
This is also a smart style when one side of the hair is denser than the other. Instead of forcing perfect symmetry, let the stronger side carry a little more of the design. Hair rarely grows in a perfectly polite way anyway.
18. Faux Hawk with Flat-Twist Rails
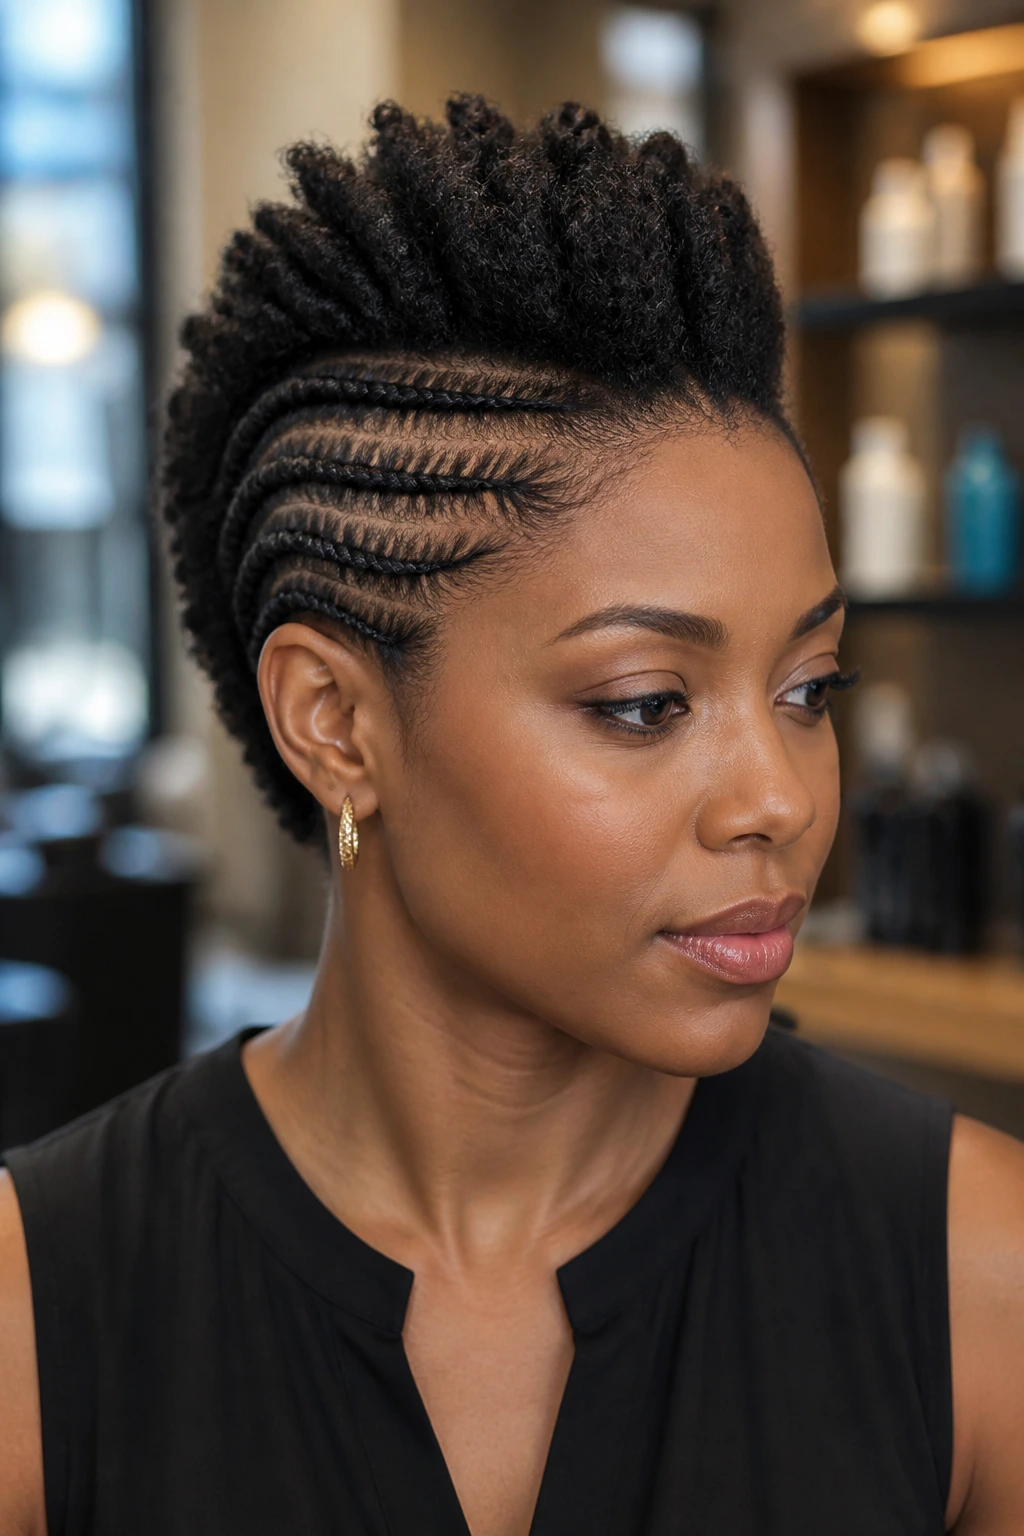
Unlike a full braided hawk, this one uses flat-twist “rails” on the sides to create the illusion of a lifted center. The result is sleeker, softer, and easier to wear on very short natural hair that doesn’t have much braid length to spare.
The rails keep the outline clean while the center section gets pushed up and forward. If you want a style that looks neat in a work setting but still has edge, this is the one I’d point to first. It also tends to be kinder on fragile edges because the twists can be kept looser than tight braids.
Best for: short hair, low-maintenance days, and anyone who wants the hawk shape without a lot of scalp exposure.
Recommendation: use mousse on the twists and a satin scarf overnight so the rails stay smooth.
19. Mohawk with Curly Puff Top
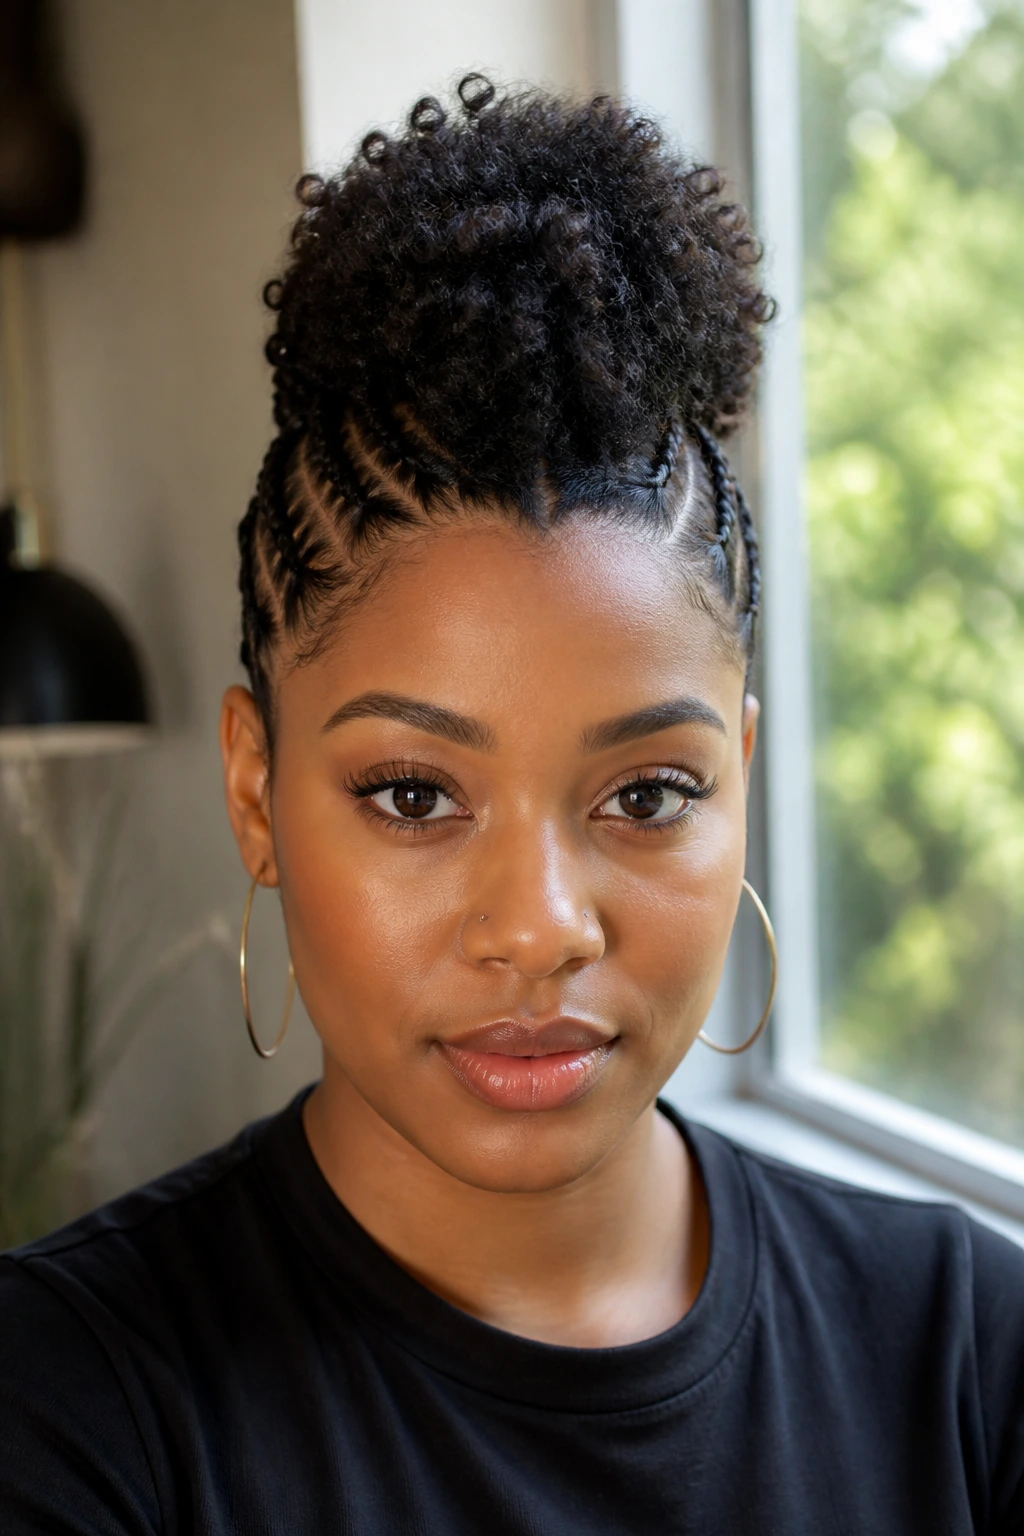
The center puff changes everything here. Braids or twists along the sides keep the frame tidy, then the top is gathered into a curly puff that shows off the hair’s natural texture instead of hiding it.
This works especially well when the top section is denser than the sides. Short natural hair often has that shape already, so the style feels honest rather than forced. If the puff is dry, mist it lightly with water and a leave-in mix, then separate the curls with your fingers instead of a comb.
What to Leave Loose
- The crown should keep some body.
- The front can stay smooth, but not pasted down.
- The puff should sit high enough to show the mohawk shape.
- A silk scrunchie helps the top hold without a hard dent.
20. Rope-Twist Hawk
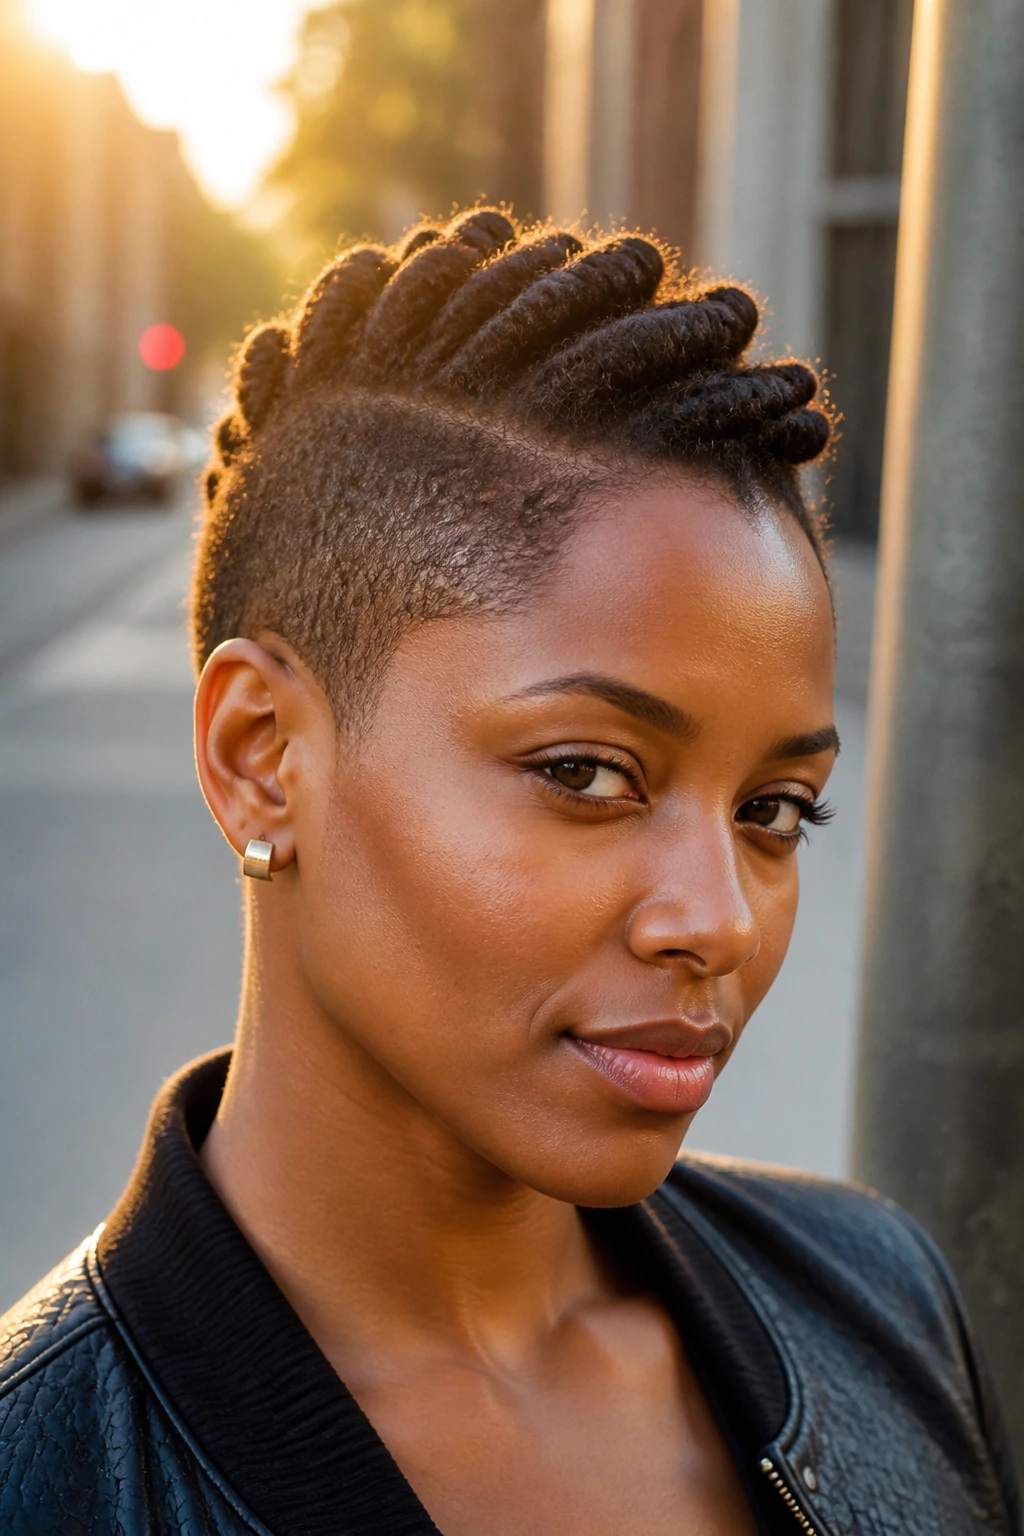
A rope-twist hawk is a softer cousin to the braided versions. Two strands twist around each other instead of three strands crossing, so the texture looks rounder and a little less rigid.
That roundness helps on very short natural hair because rope twists often grip faster than braids. The finish looks neat without demanding as much length. If your hair slips easily, use a little cream at the root and keep the sections small. Big sections unravel faster than people expect.
This style is also quick to freshen up. A finger-twist at the end of the day can bring a sagging section back to life. No need to rebuild the whole head.
21. Crisscross Braided Mohawk
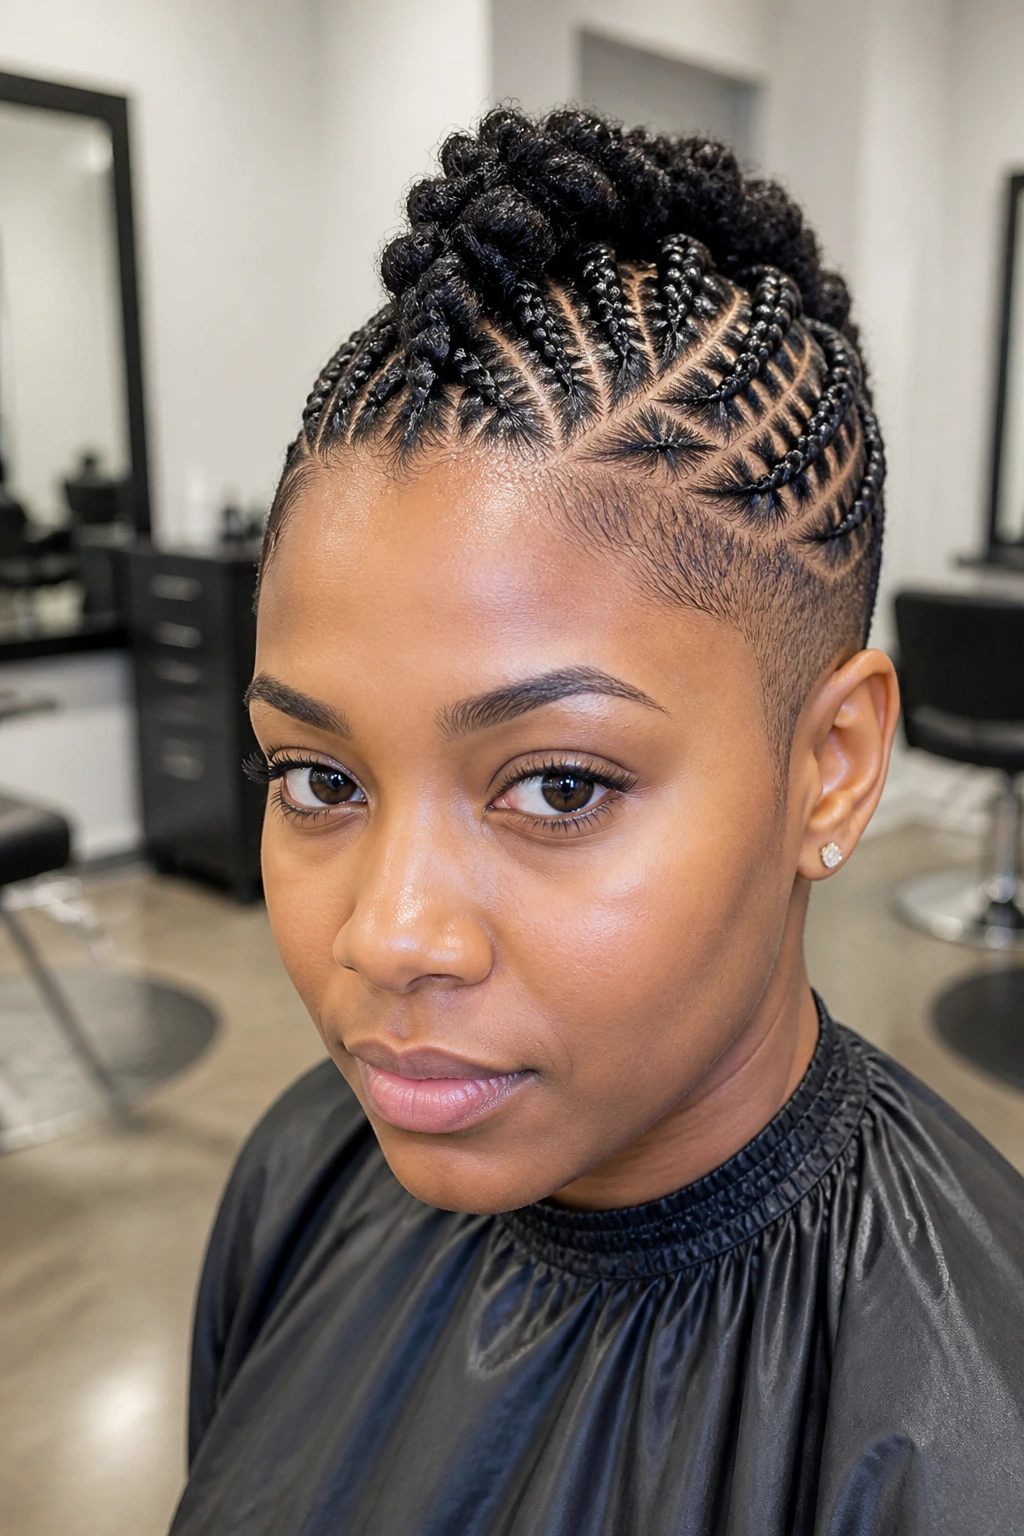
Why does crisscross parting make such a difference? Because it turns the scalp itself into the pattern. The braids may be short, but the lines that feed into them create movement and make the style feel layered.
The crisscross effect works best when the sections are small and the intersections are planned before the first braid starts. On short natural hair, that map matters. If you wing it, the crossing lines can get muddy fast.
How to Ask for It
Ask for the parts to cross diagonally into the center ridge, not just run straight back. Keep the center section slightly fuller so the braid pattern does not disappear. A light sheen spray at the end is enough; the parts should stay visible, not glossy like plastic.
22. Mohawk with Accent Feed-Ins
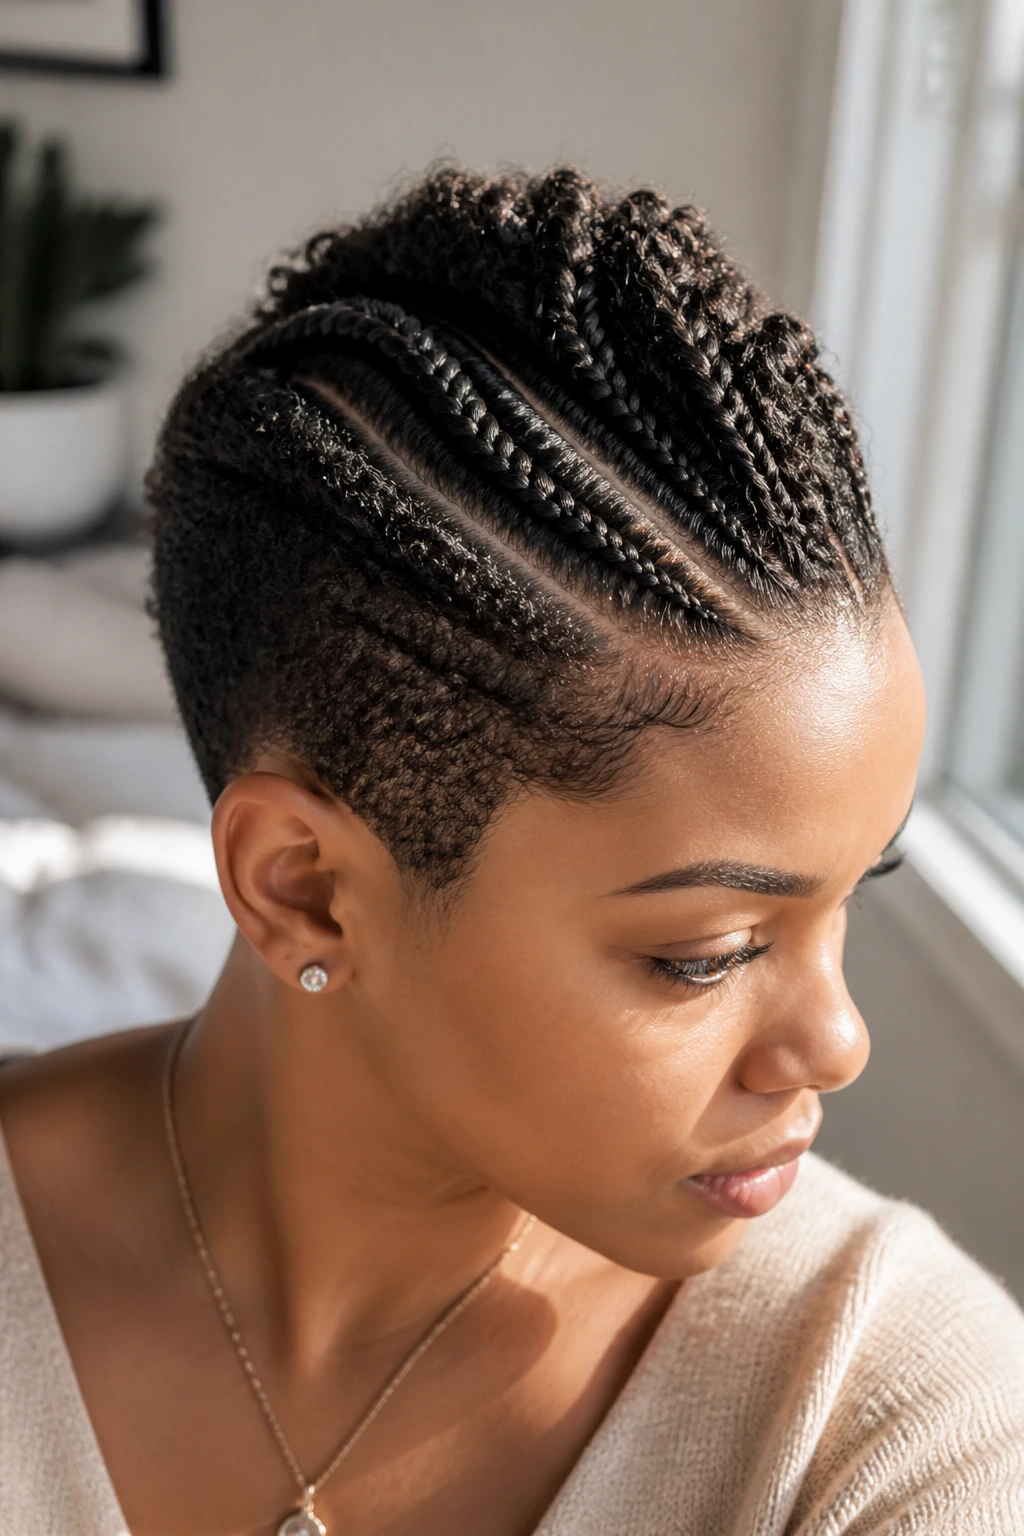
This version keeps most of the hair natural and uses feed-in pieces only where they help the shape. That makes it a good middle ground if you want a little extra length or thickness but do not want a full head of added hair.
Accent feed-ins work best on the center ridge. The sides can stay in your own hair, which keeps the style lighter and easier to sleep on. If the braids are short, you can use the added hair at the top only, then let the ends finish in your natural texture.
I like this for people who want one detail to pop rather than a full transformation. One small addition at the center is often enough. More than that can overwhelm short hair and make the style look like it’s wearing you.
23. Bandana-Wrapped Braid Hawk
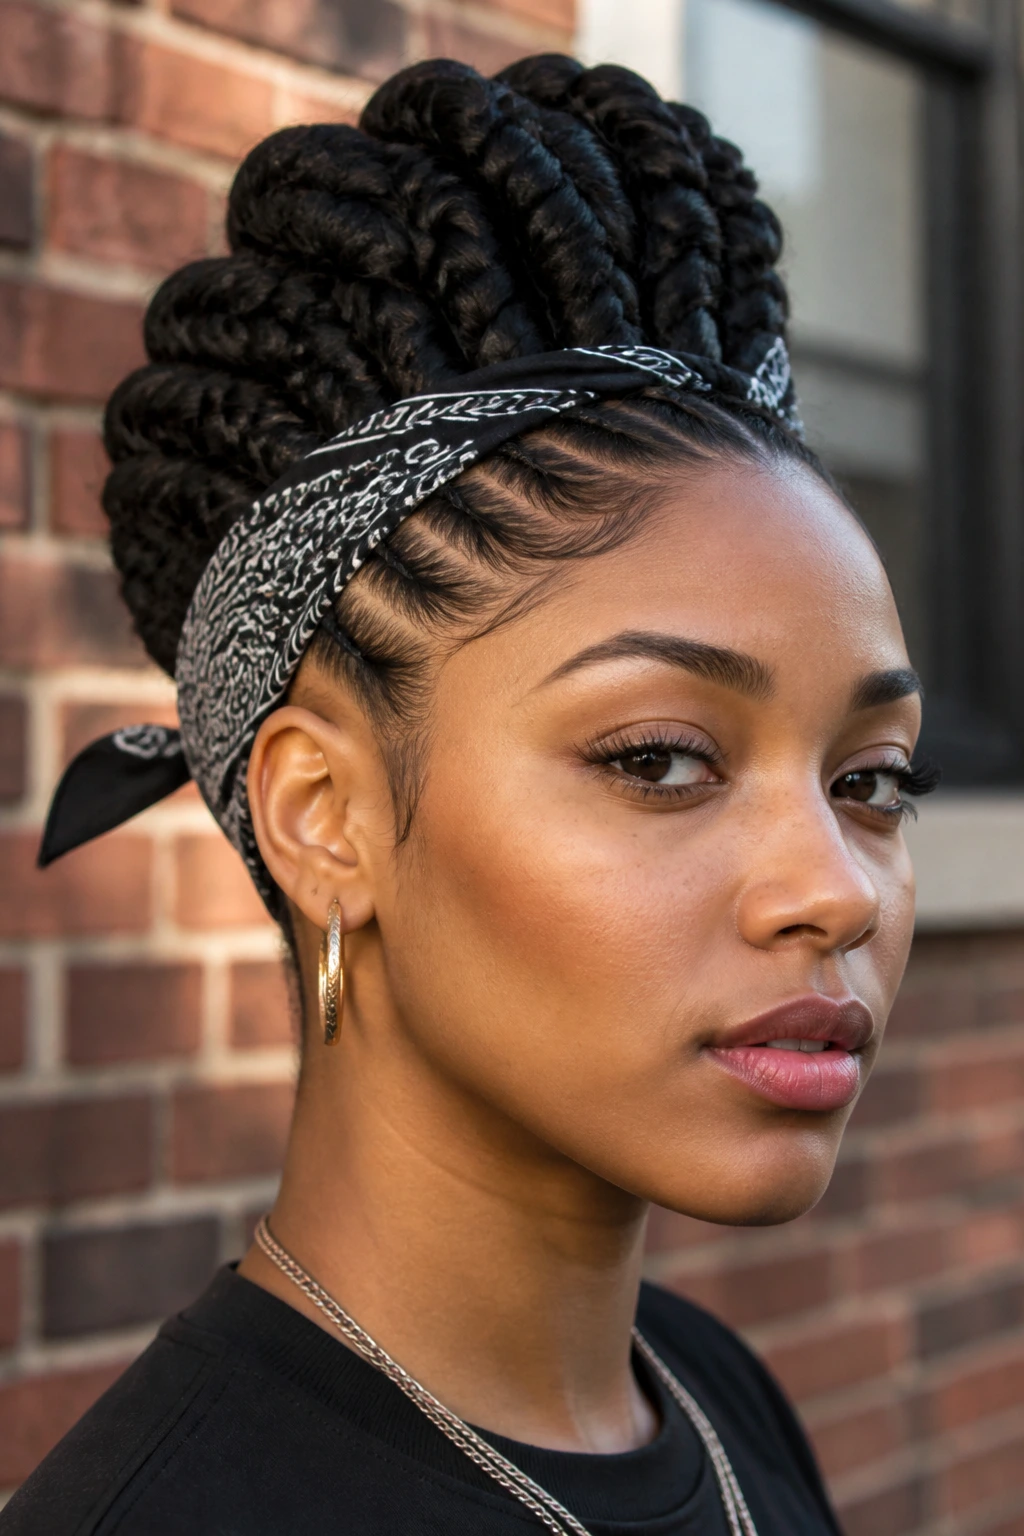
A bandana can save a style that feels too plain, and on short natural hair that little piece of cloth does a lot of work. Wrap it around the base of the mohawk, tie it low at the nape, or tuck it into the side braids and the whole look picks up shape.
This version is especially useful on days three or four, when the braids are still fine but the roots need a little help. The bandana hides fuzz, frames the face, and lets the style stay in rotation a bit longer. Choose a fabric that is not too stiff; a hard bandana can dig in at the temples.
The style reads casual, but it doesn’t look lazy. That’s the sweet spot.
24. Jewel-Clip Party Hawk
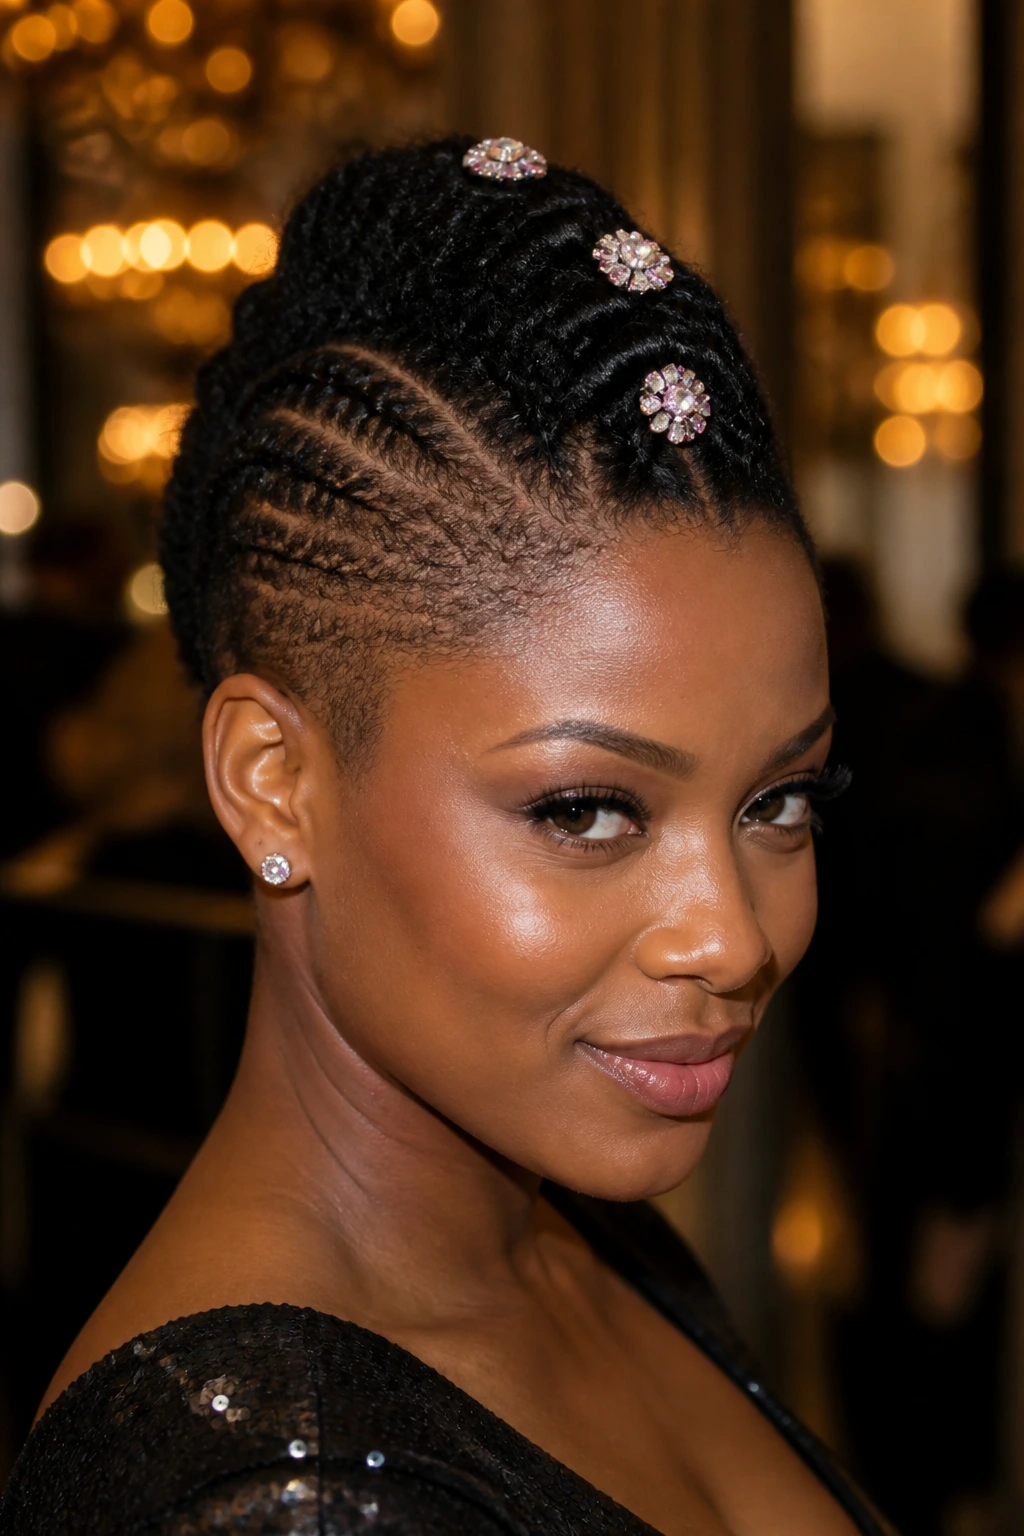
Compared with bead-heavy looks, jewel clips give you sparkle without much weight. They sit on top of the braid or part line instead of hanging from the ends, so the style stays light enough for short hair.
This is the right move when you want the mohawk braid shape to stay the main event. A few clips along the center ridge are enough. Put them too close together and the design gets crowded. Spread them with intention and the shine lands where you want it.
Best for: evenings, celebrations, and hair that already has a clean braid pattern.
Specific recommendation: use two or three clips near the front and one near the crown, then stop. Short hair looks better with restraint here.
25. Undercut-Style Illusion Hawk
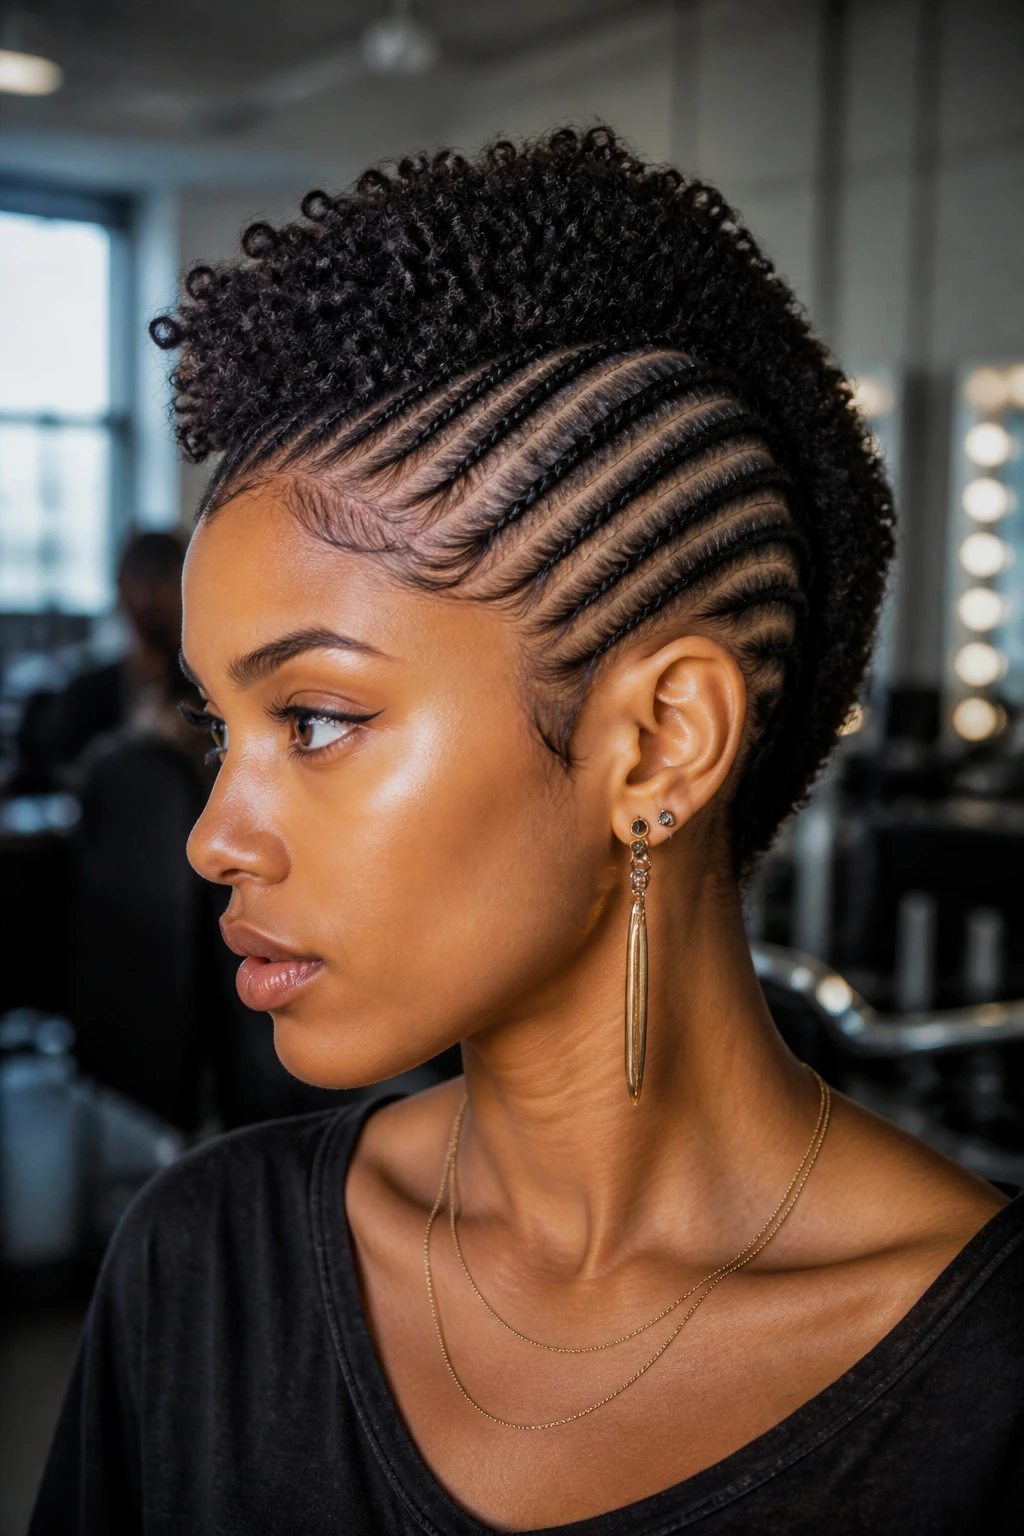
A good illusion style makes short hair look sharper than it really is. This one uses tight side braids, clean parting, and a narrow center ridge so the silhouette mimics an undercut even when the sides are still fully there.
The Visual Trick
The eye reads the sides as “shaved” because they sit so flat and close. The center ridge carries the texture and height, which creates that same contrast you’d get from an actual undercut. On short natural hair, that contrast often works better than trying to build a big, fluffy top.
- Keep the side braids narrow and close.
- Flatten the root line with a light gel, not a thick layer.
- Leave the center section fuller so the illusion holds.
- Skip oversized accessories; they break the clean outline.
26. Mermaid-Pattern Braid Hawk
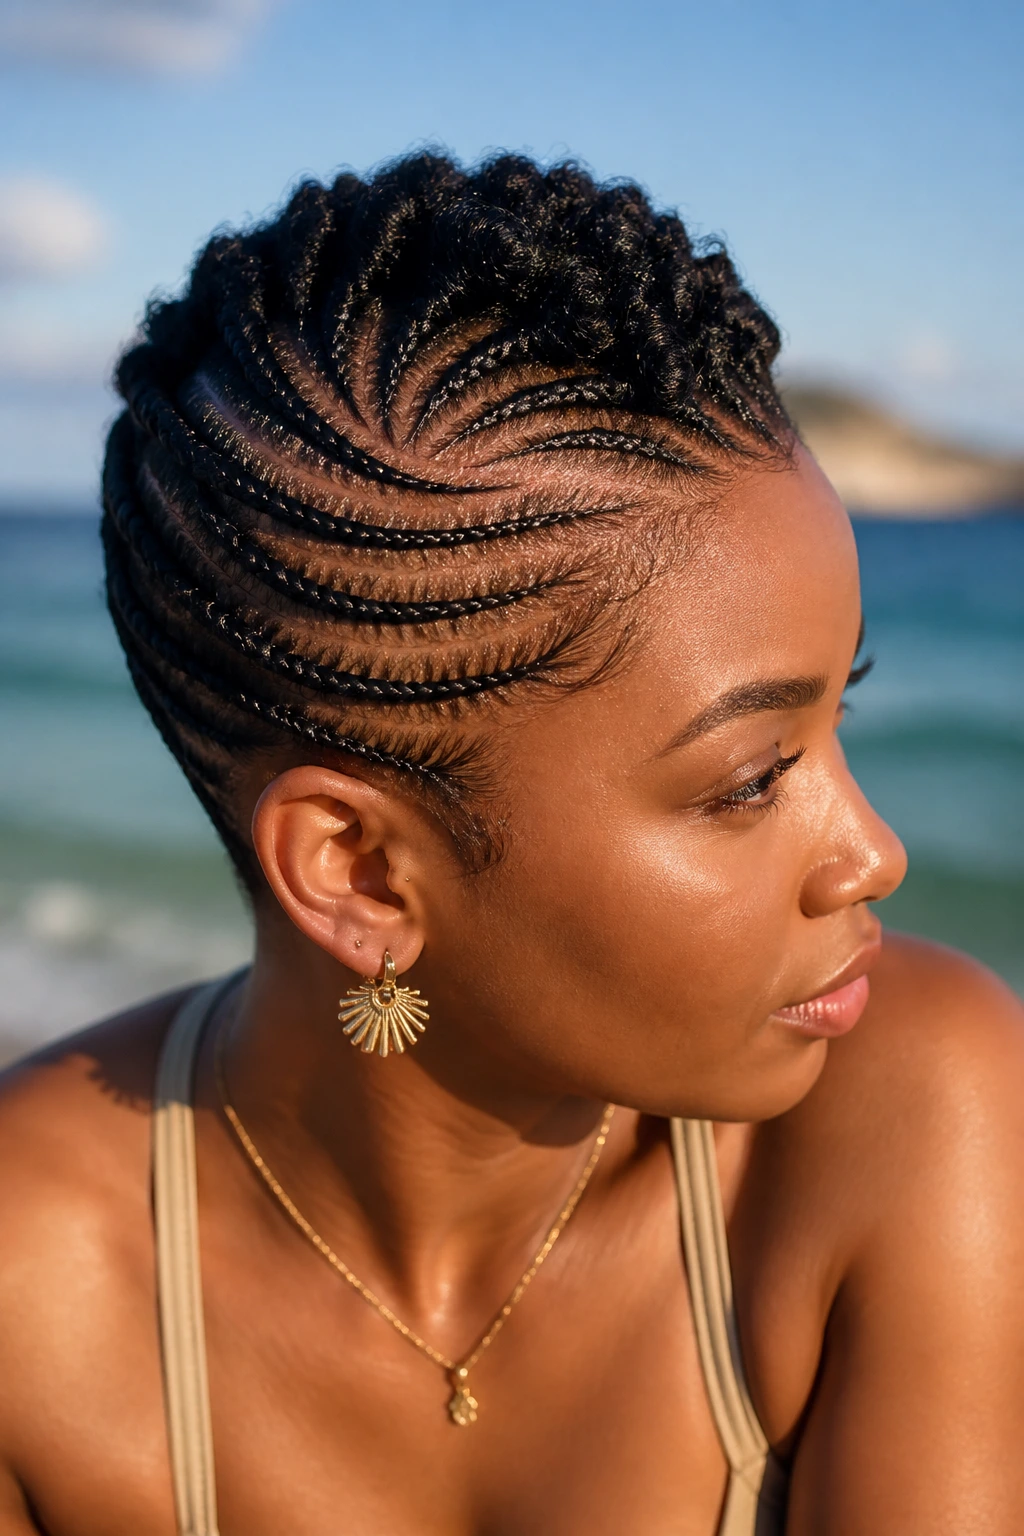
Mermaid-pattern braids use alternating part shapes and angled rows so the surface looks rippled instead of straight. On short natural hair, that ripple adds movement where length can’t.
The style is strongest when the parting changes direction every few rows. A straight braid set can look neat, but this one looks like it’s shifting across the head. The pattern matters more than the braid size, which makes it useful for shorter lengths.
If you want the effect to show, keep the rows slim and the center ridge clear. Thick sections swallow the pattern. Thin sections let the angles stay visible.
27. Tapered Crown Braid Hawk
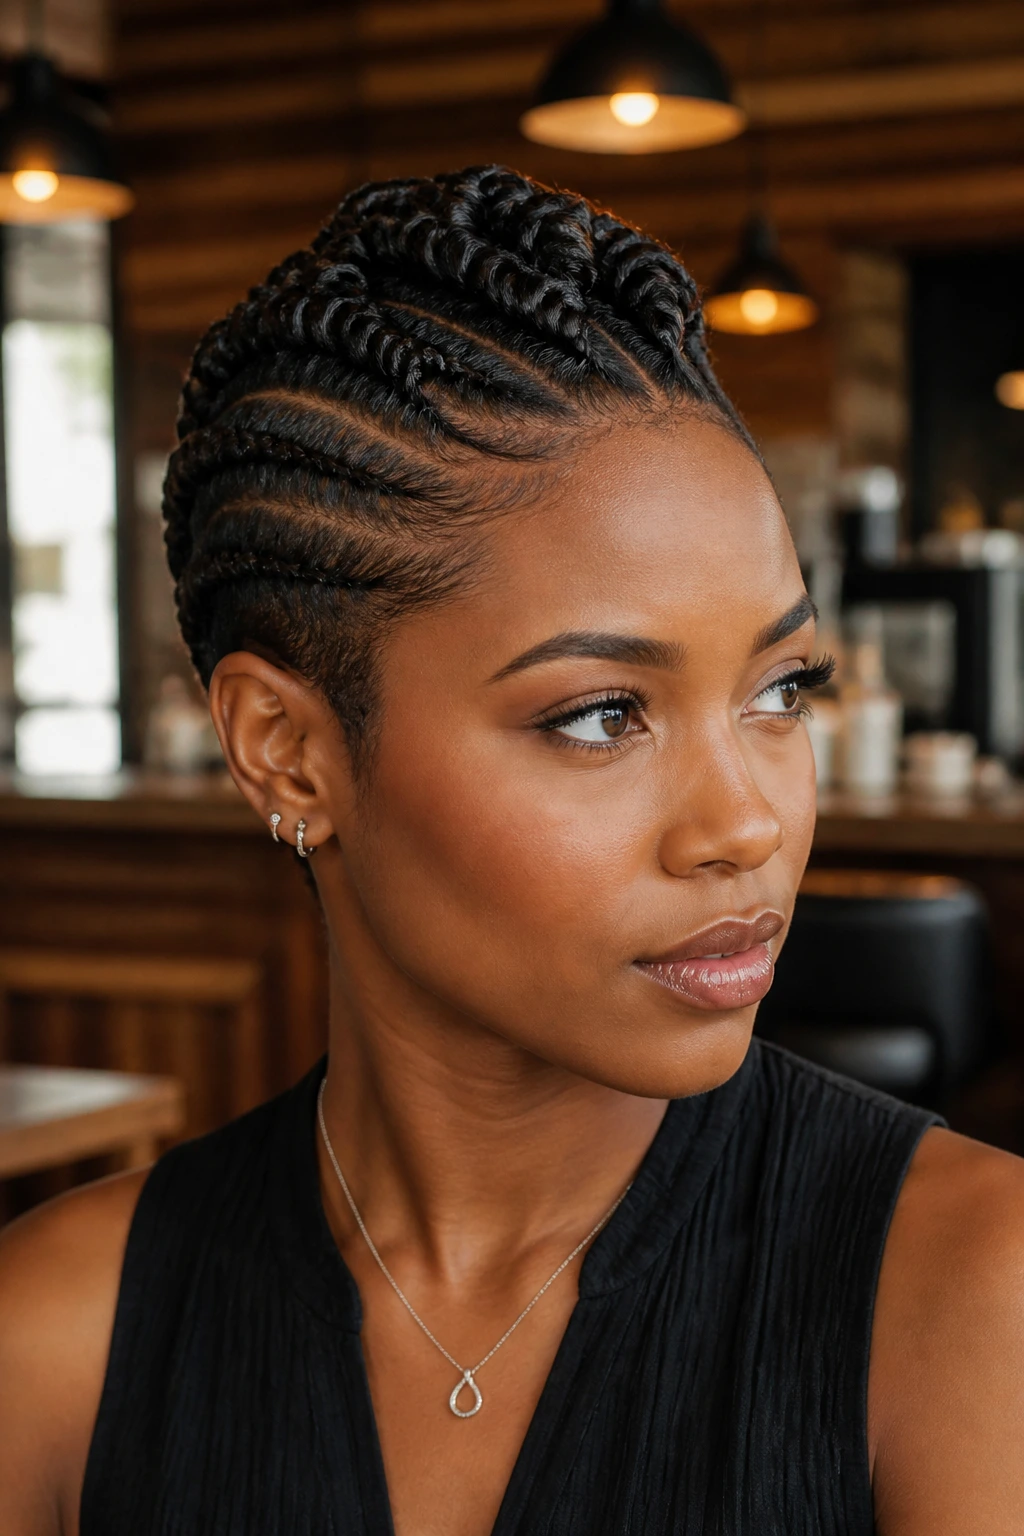
What makes a tapered crown braid hawk work is the way it narrows as it moves back. The front gets a little width and presence, then the braid tightens toward the crown so the style does not balloon out on short hair.
This is a strong pick if your hair is longer at the top and shorter on the sides. The taper lets the shape follow your actual growth pattern instead of fighting it. It also keeps the crown from looking boxy, which is a common problem on short natural textures.
How to Ask for It
Ask for a wider front section, then let the braid line taper narrower near the crown. Keep the sides sleek and the finish close to the head. If the braider wants to add hair, ask for a very light feed so the taper stays visible.
28. Defined-Ends Frohawk
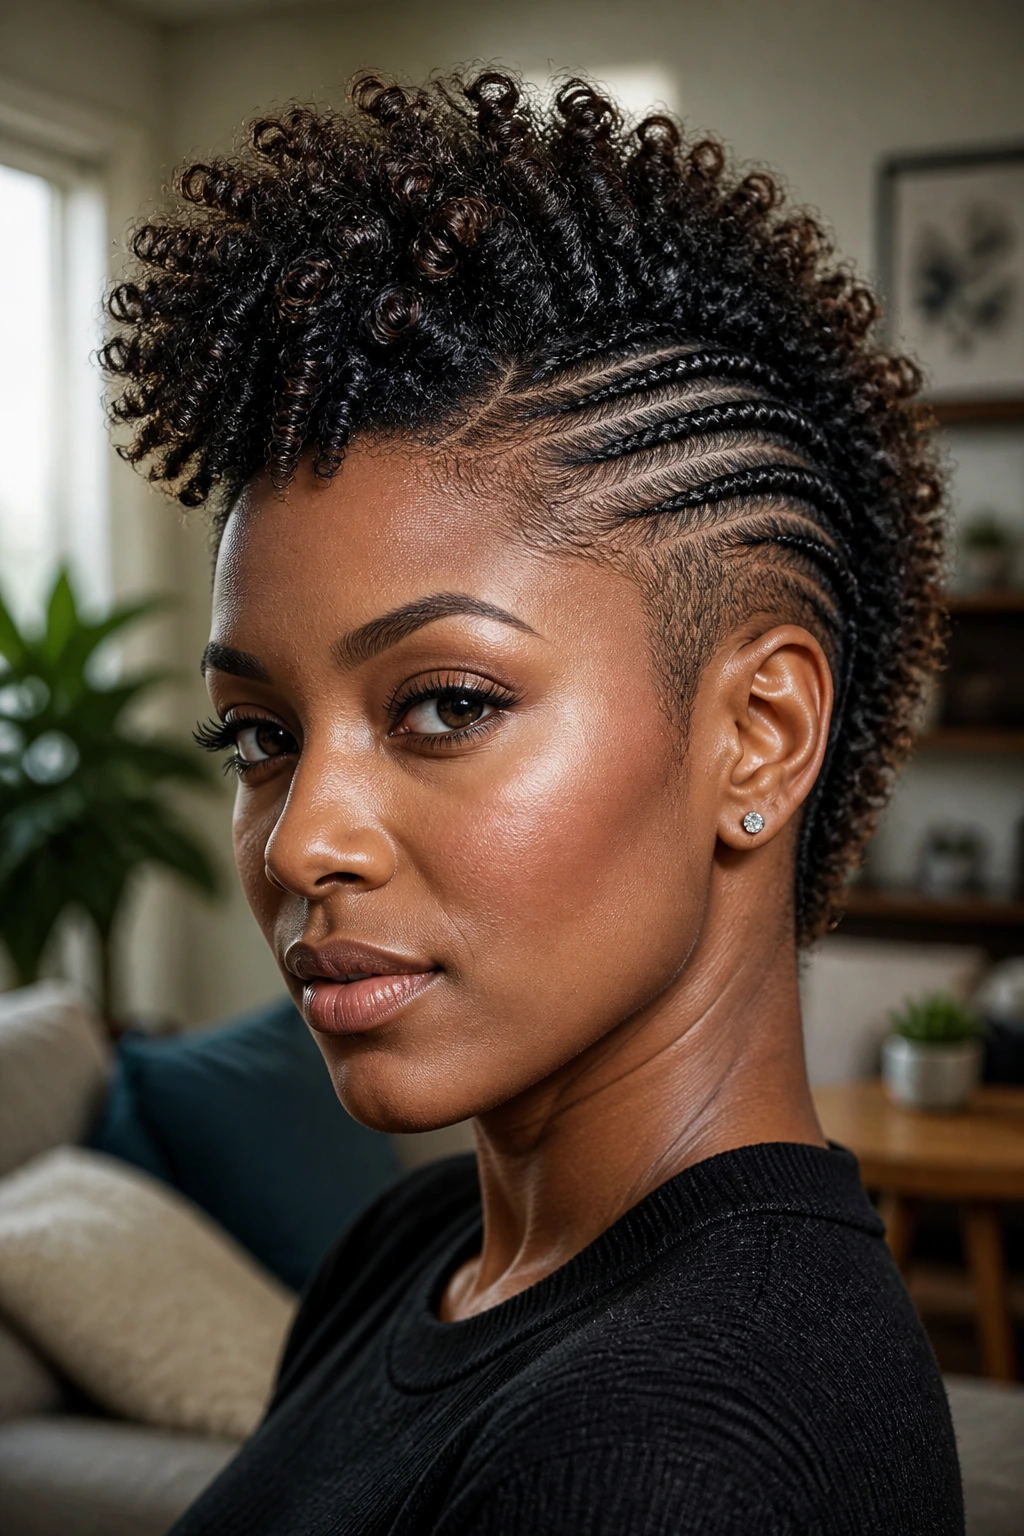
A defined-ends frohawk gives you the braid frame and leaves the ends with shape instead of forcing them into one uniform finish. The result is a mohawk that still looks soft at the edges, which short natural hair often wears better than a hard, polished finish.
This style is useful when your coils shrink a lot after styling. Instead of fighting shrinkage, define it. Keep the braid base neat, then separate the ends lightly with cream or mousse so they sit in visible curls or twists. That little texture at the ends keeps the style from looking too stiff.
- Best when your hair has uneven lengths.
- Works well with a side part if you want more movement.
- Easy to refresh by re-twisting just the ends.
- Strong choice for people who hate a helmet-like finish.
Why Mohawk Braids Work So Well on Short Natural Hair
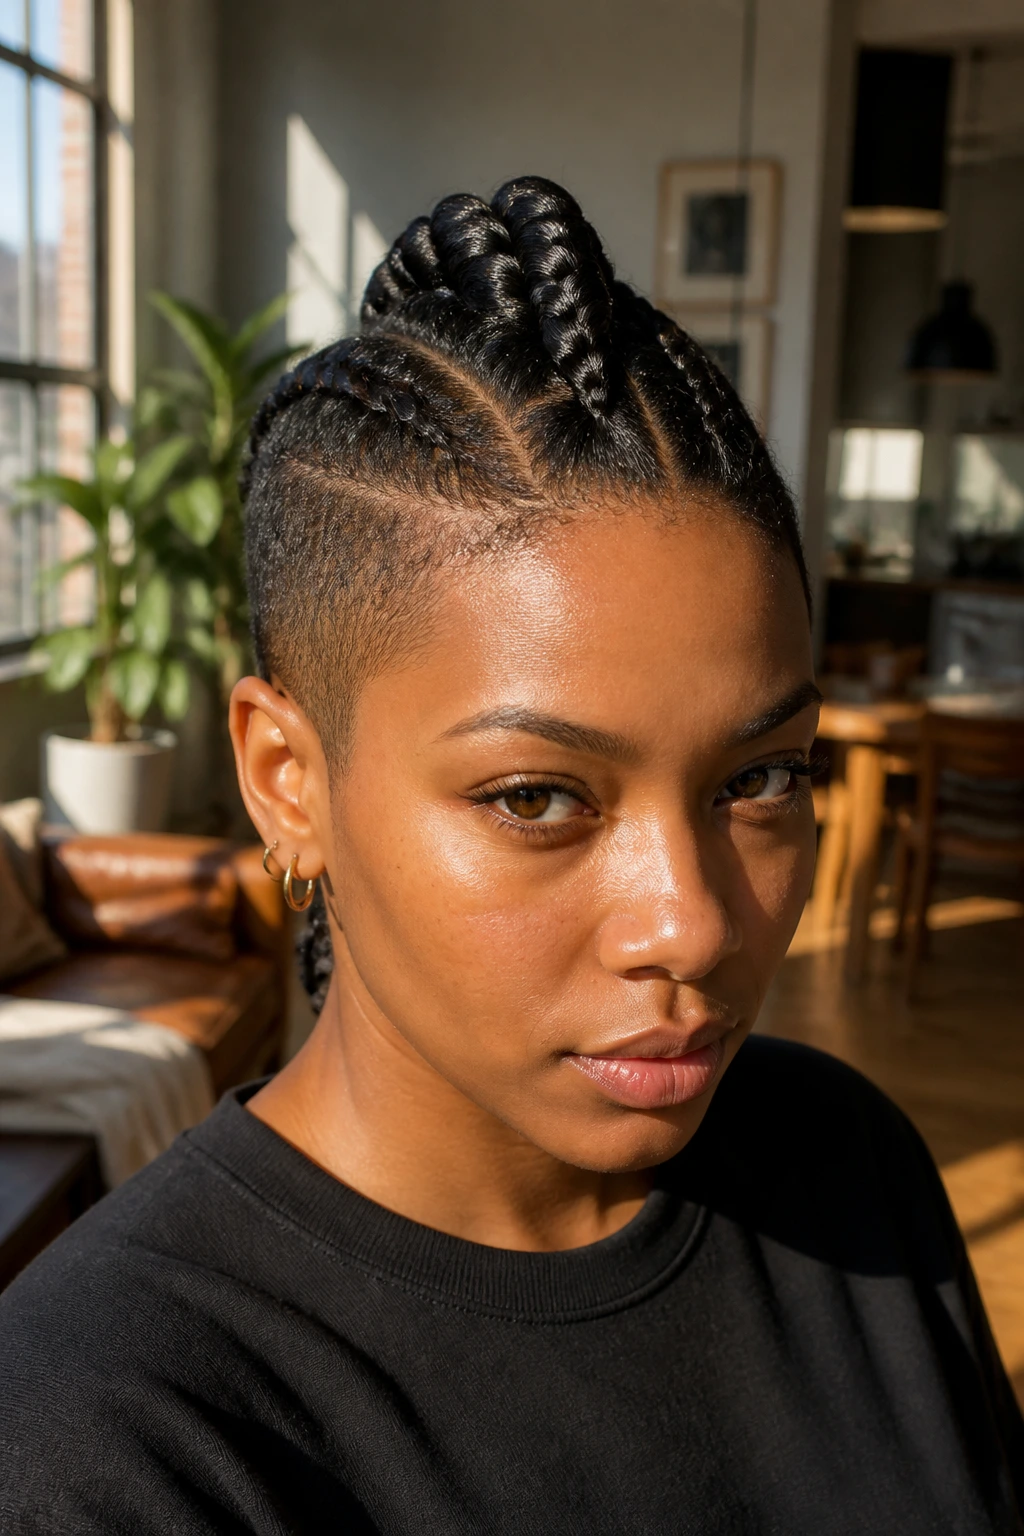
Short natural hair often has a shape problem before it has a styling problem. The curls are there, the density is there, the texture is there. What’s missing is a clean outline. Mohawk braids fix that by building a strong center line and pushing the sides into a controlled frame.
The center strip is doing a lot of visual labor. A narrow braid ridge stretches the silhouette up the head, which is why the style can look longer than the actual hair length. That trick works especially well on dense coils, where the texture wants to expand outward. The braid gives the hair somewhere to go.
The Shape Does the Heavy Lifting
If your hair is too short for hanging braids, that’s not a dead end. It just means the parts, angles, and finish matter more than the length. A side panel with crisp cornrows and a center section with a puff, twist, or feed-in ridge can look more polished than a longer style with sloppy sections.
Short Hair Likes Clean Lines
Short natural hair shows every decision. That can be annoying, sure, but it also means the good decisions show fast. Clean parts, low tension, and a steady braid size make the style read intentional immediately. If the sections are uneven, the whole hawk wobbles. If the sections are balanced, the style looks put together without needing much decoration.
You Do Not Need to Overbuild It
Heavy extensions, giant rows, and overpacked gels are the usual mistake. The shape is already strong. Let it stay that way. The best mohawk braid styles for short natural hair keep the design close to the head and let texture, parting, and a little lift do the rest.
Essential Tools for These Styles
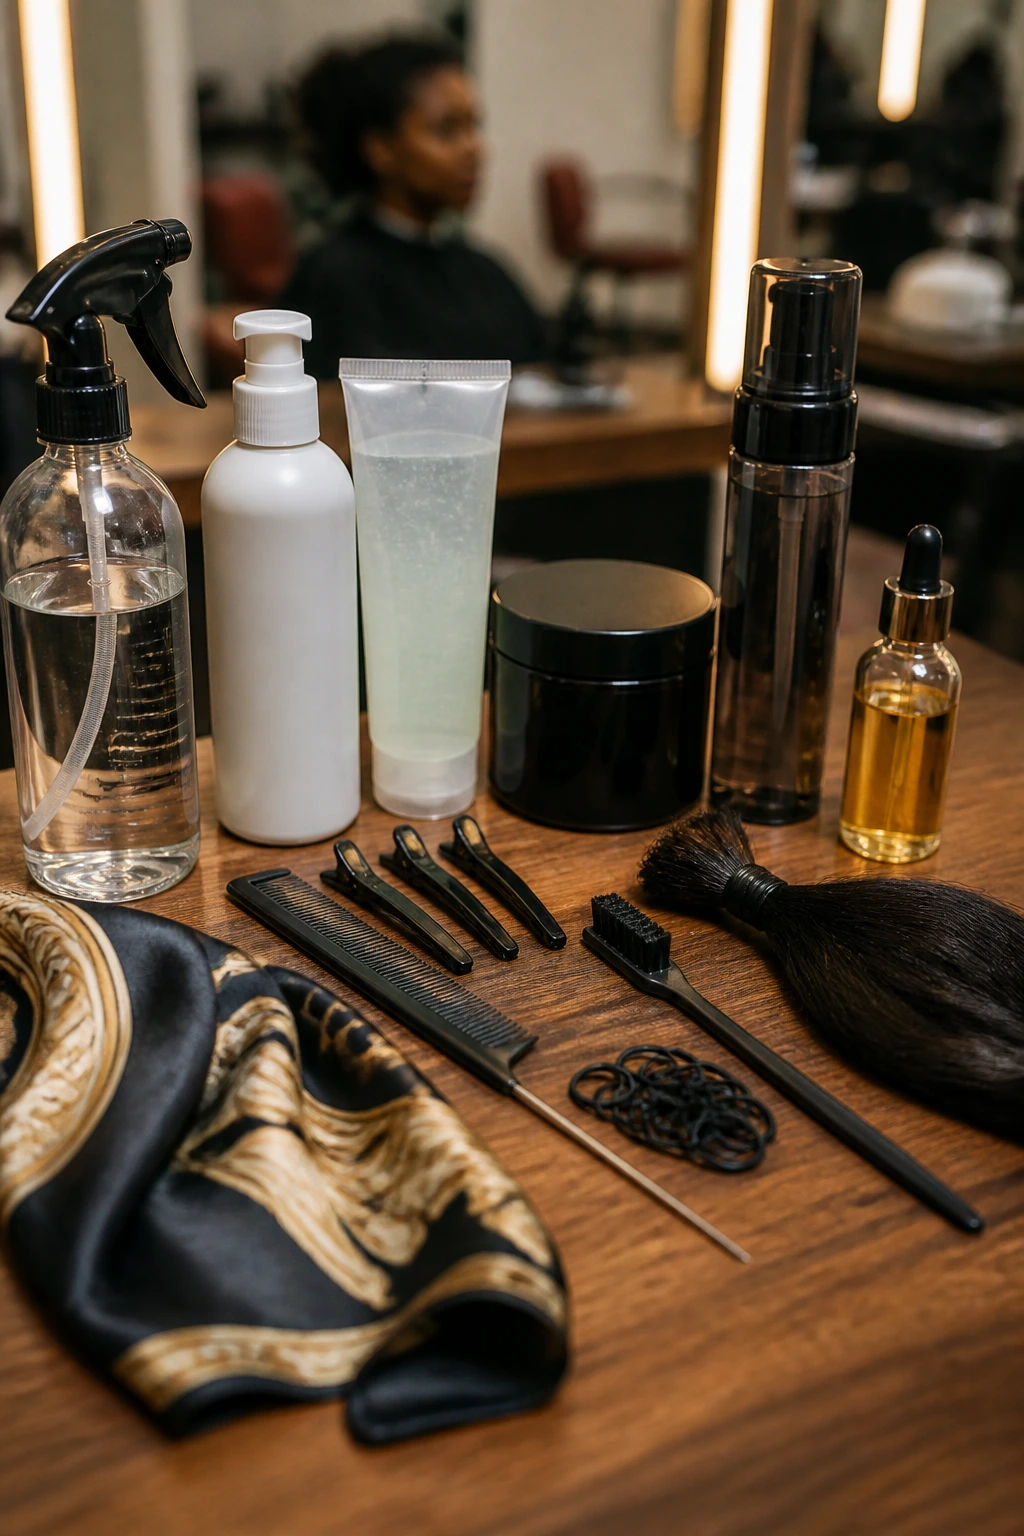
- Rat-tail comb: For clean center parts, curved rows, zigzags, and triangle sections.
- Spray bottle with water: A light mist helps short coils stretch just enough to braid without snagging.
- Leave-in conditioner: Keeps the hair soft so the braid grip is smooth, not scratchy.
- Styling gel or braid gel: Use it sparingly on the roots and part lines for hold.
- Mousse or setting foam: Handy for twists, puffs, and styles that need soft shine without crunch.
- Duckbill clips: These keep side sections out of the way while you work the center ridge.
- Edge brush: Good for smoothing the hairline, though you should keep the pressure light.
- Silk scarf or bonnet: Helps the parts stay neat overnight and cuts down on fuzz.
- Small elastics or covered bands: Useful for puffs, ends, or mini braid finishes.
- Optional braiding hair: Feed-ins, accent braids, or added length when your own hair needs a little help.
- Hair oil or scalp serum: A few drops on dry scalp, never a heavy soak.
How to Choose the Right Finish for Your Day
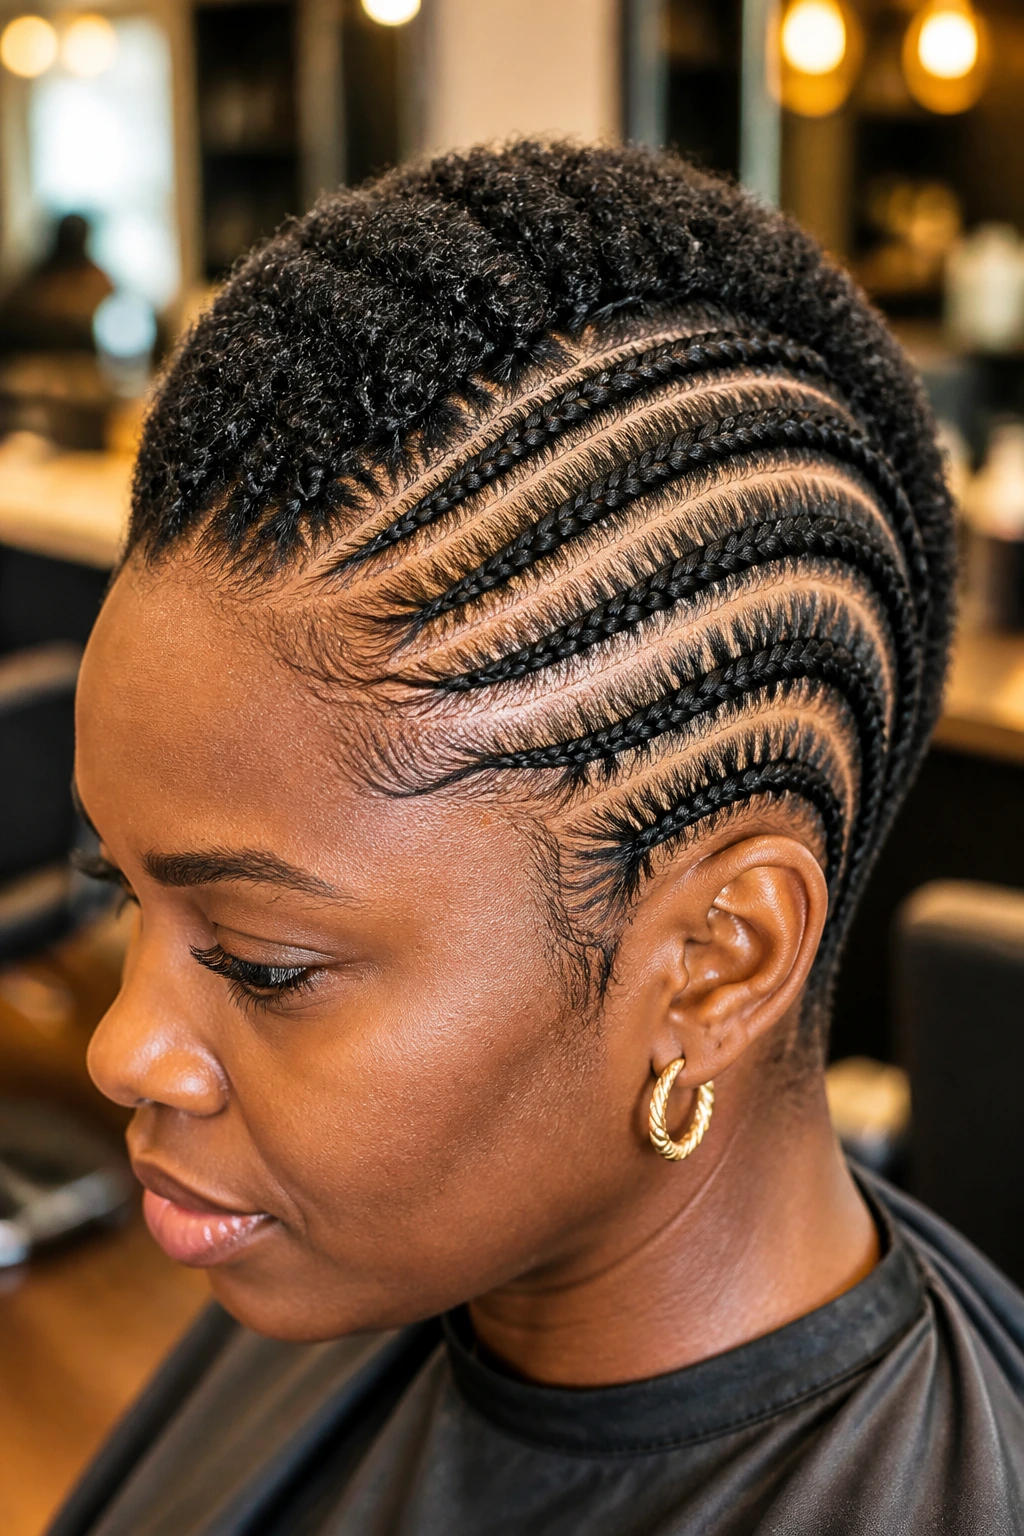
Not every mohawk braid style needs the same energy. A low-profile hawk with flat side rows can look work-clean and still feel like you made a choice. A braid ridge with cuffs or beads reads louder and takes better to casual clothes, graphic earrings, or a bold lip.
Work Clean: Keep the sides flat, the braid size small, and the finish matte. This is the version that sits nicely under a hat and does not fight with collars.
Weekend Texture: Leave the center section a little puffier and let the ends stay curly or coiled. That gives short natural hair movement without needing more length.
Dress-Up Detail: Add cuffs, jewel clips, or a colored feed-in piece at the front only. One accent is usually enough.
Short-Length Friendly: If your hair is closer to a TWA, choose styles that rely on parts and shape more than hanging ends. Flat twists, tight cornrows, and illusion hawks are the safest bets.
Smart Prep Before the First Parting Line
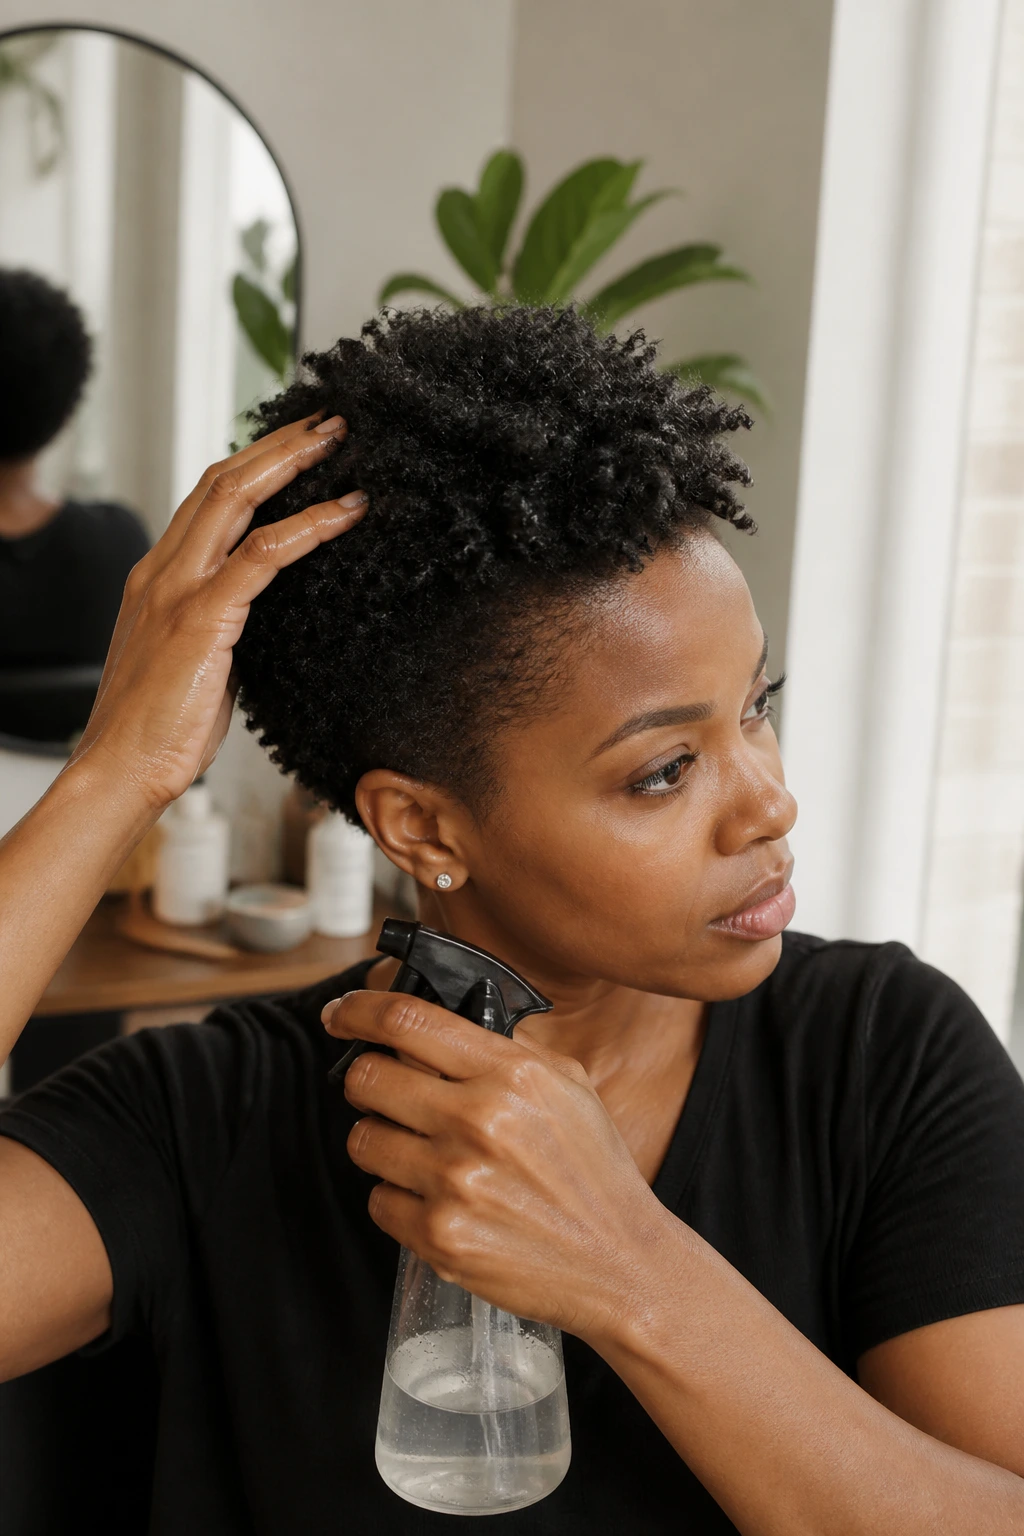
Short natural hair behaves better when it’s prepped with restraint. Start with clean hair that is fully dry or only slightly damp, because soaking wet coils slip all over the comb. A leave-in and a small amount of cream are enough; heavy butter can make the parts greasy and the grip weak.
Stretching helps, too. You do not need bone-straight hair, but a little banding, twist stretching, or low-heat blow-drying on cool or warm heat makes the sections easier to separate. If the hair is shrunken and springy, the parts collapse while you’re working. That is where frustration starts.
Moisture First: Apply leave-in to the lengths, not a pile at the roots. The scalp needs cleanliness more than slickness.
Parting Map: Decide where the mohawk ridge starts and ends before you braid. If the lines wander, the style can look lopsided.
Grip Check: Pull a small section gently between your fingers. If it slips, use a touch more product or stretch the section a bit more.
Tool Setup: Keep clips, comb, gel, and elastics within reach. Chasing tools mid-style is how clean parting gets ruined.
Common Mistakes That Flatten a Mohawk Braid
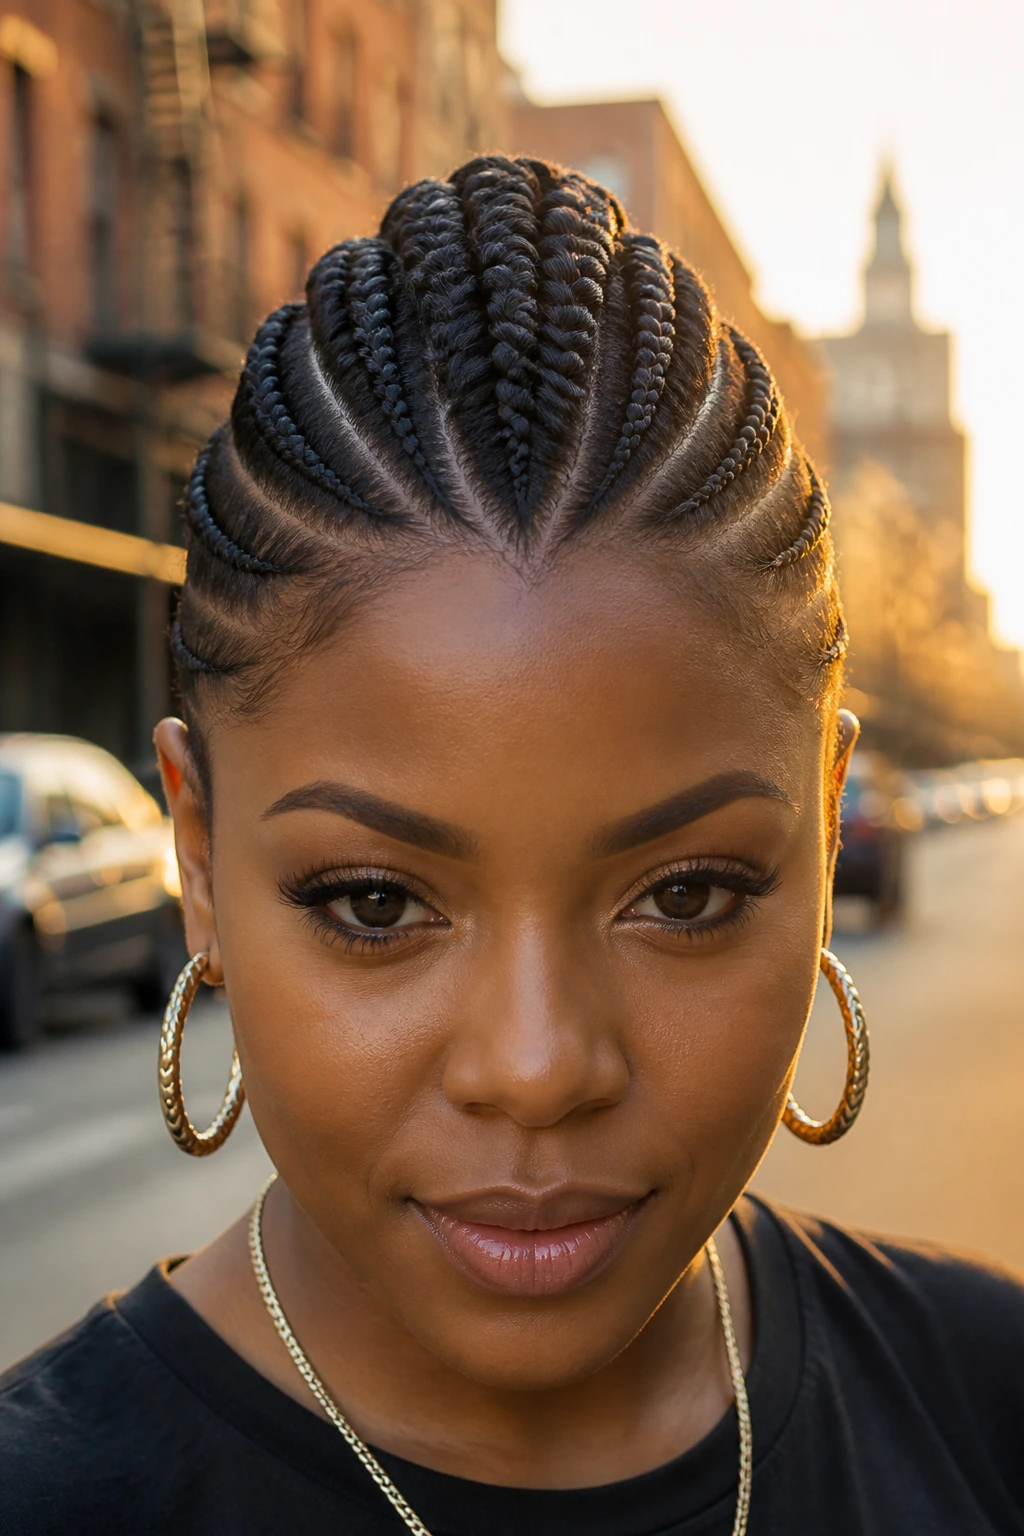
The first mistake is overloading the hair with product. Short natural hair does not need a thick layer of gel to hold a braid. It needs enough slip for parting and enough grip for the braid itself. If the scalp looks wet or crusty before you even finish the first side, you’ve gone too far.
Tightness is the second trap. A mohawk braid should sit close, not drag. If the temples hurt by the end of the install, the style will probably lift unevenly overnight and can irritate the scalp before you’ve enjoyed it. A snug braid is fine. A pulling braid is not.
Then there’s part size. Too-wide sections on short hair leave loose ends and fuzzy openings. Too-small sections can make the style crowded and overworked. The sweet spot is a clean middle strip with side rows that match the actual density of the hair, not the idea of the style in your head.
One more: skipping stretch or detangle time. Short coils tangle fast at the root. If you rush straight into braiding, the style eats time later in the form of uneven grips and frizz.
Variations and Alternatives to Try
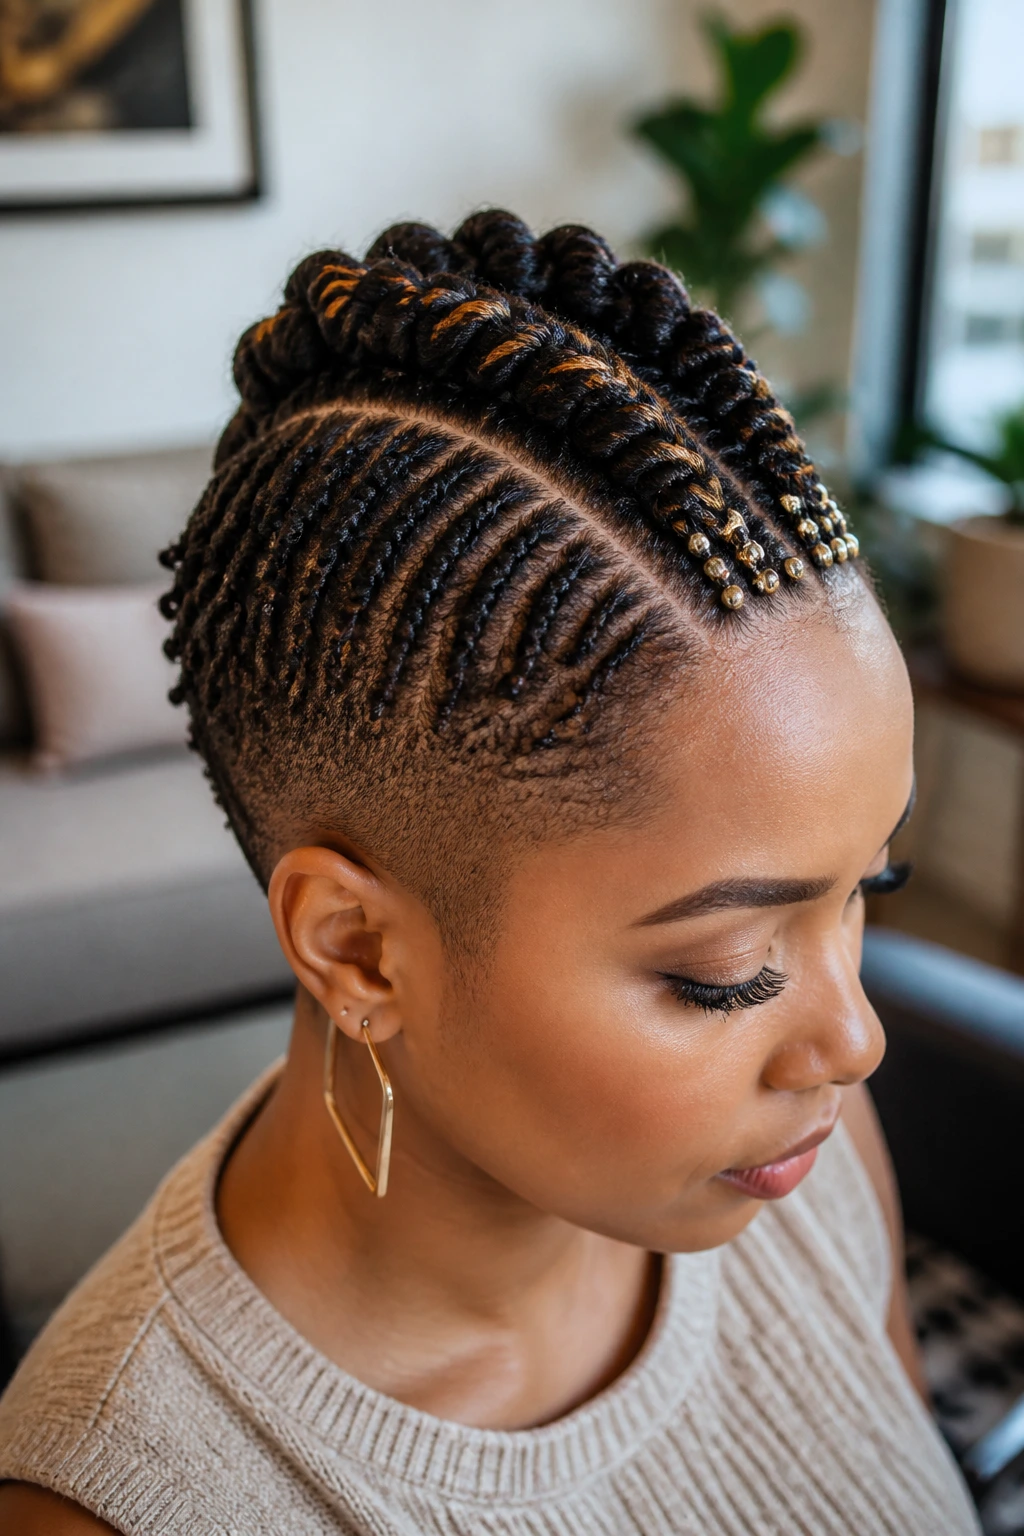
The Tiny-Twist Hawk: Swap braids for flat twists on the sides and a puff in the middle. This version is gentler on fragile edges and usually faster to redo.
The Feed-In Lift: Add braiding hair only to the center ridge. It gives height without turning the whole style heavy, which is a smart move on short hair.
The Accessory Hawk: Keep the braid pattern plain, then use cuffs, thread, or a single row of beads near the front. That keeps the structure clean while still giving you something to show off.
The Sensitive-Scalp Version: Use wider parts, lower tension, and fewer rows. The shape still reads as a hawk, but the style stays kinder to the scalp.
The Color-Pop Version: Add one accent shade in the top braid only. A little copper, burgundy, or honey can make the parting look sharper without needing extra braids.
How to Keep the Style Fresh Between Wash Days
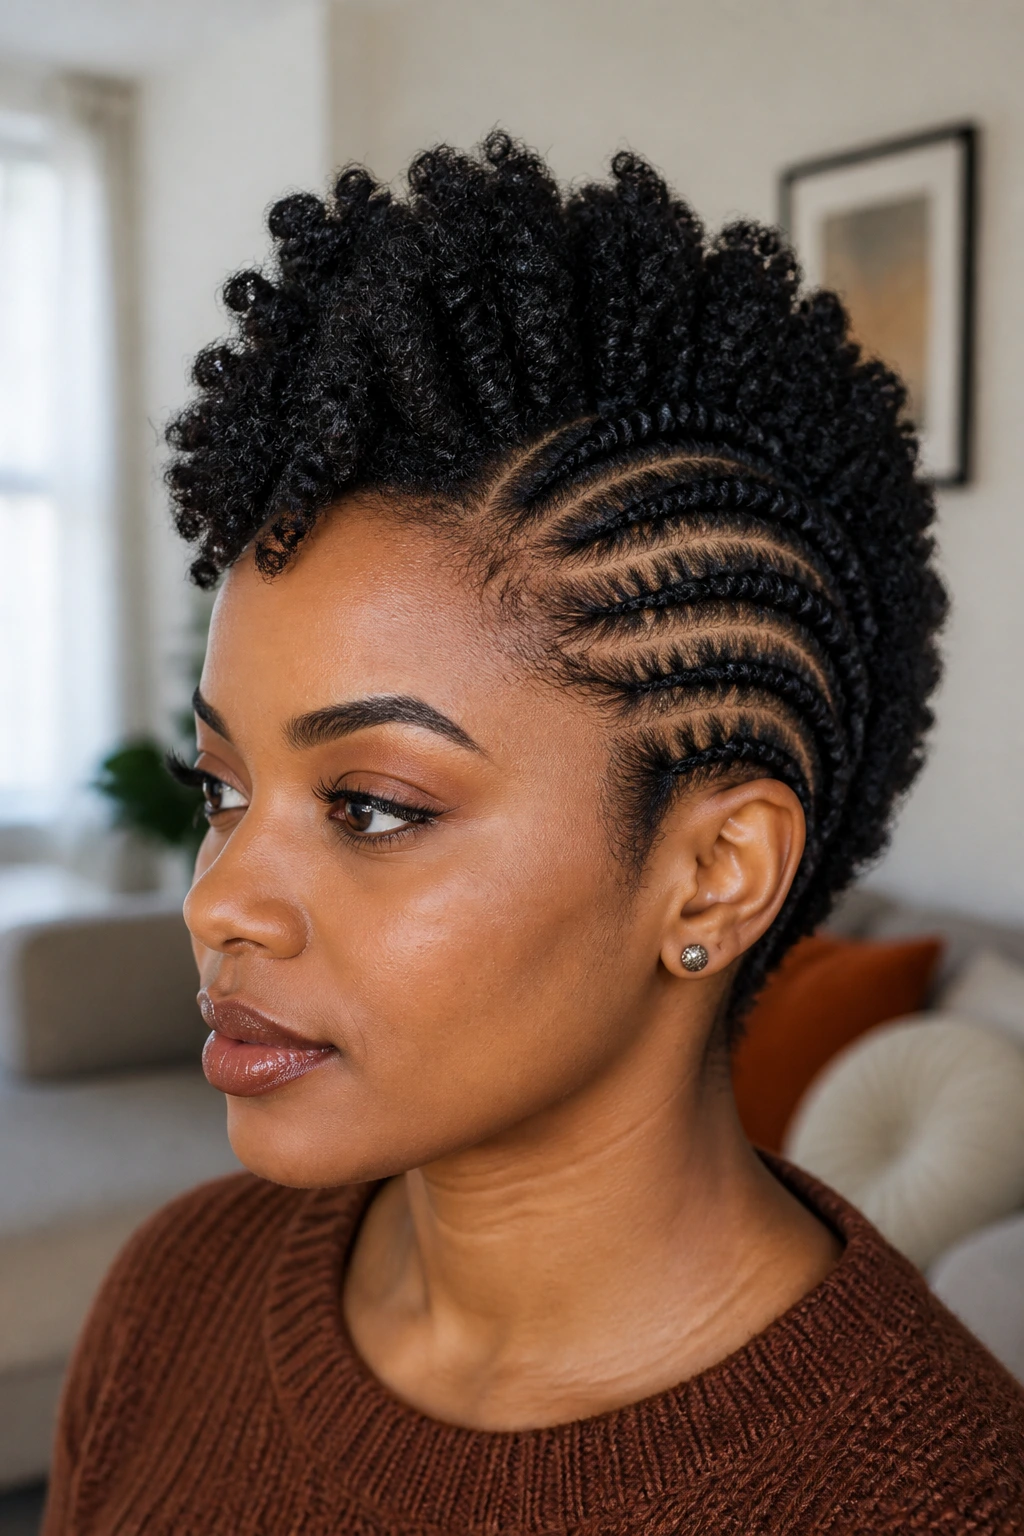
A mohawk braid style on short natural hair usually lasts longer when you treat the scalp and the shape as two separate jobs. At night, wrap the hair with a silk scarf or sleep in a bonnet that holds the side rows flat. If the center puff needs help, cover that with a second layer or tuck it gently so it keeps its lift.
For the scalp, a light mist or a diluted cleanser on the part lines works better than pouring product directly over the braids. Do not drench the style. That only leaves buildup in the roots and makes the parts feel gummy. If the scalp feels dry after two or three days, use a drop or two of oil on your fingertips and press it in where needed.
Styles with no extensions often look best for about 5 to 7 days before the parts start to fuzz out enough to bother you. Feed-in or accessory-heavy versions can last 1 to 2 weeks if the tension is light and you keep the wrapping consistent at night. If the front starts lifting, fix that section early instead of trying to save the whole head with more gel.
Frequently Asked Questions
How long does a mohawk braid style last on short natural hair?
Most short, no-extension styles stay neat for about 5 to 7 days if you wrap them at night. Feed-ins, beads, or tighter side rows can stretch that to 1 to 2 weeks, but once the part lines start fuzzing at the front, the style usually looks tired.
Can you do these styles on a TWA?
Yes, but choose the low-profile or illusion versions first. A TWA usually does better with flat twists, mini cornrows, or a center puff than with oversized braids that need more grip.
Do I need added hair?
No. Added hair helps when you want extra height or length, but many of these styles work on your own hair alone. If your hair is shorter than 2 inches in some areas, a few accent feed-ins can make the shape easier to hold.
What if my hair keeps slipping while I braid?
The problem is usually too much moisture or not enough stretch. Let the hair dry a bit, use less product at the root, and make the sections smaller. Slipping hair is annoying, but it usually means the prep needs adjusting, not that the style can’t be done.
Which styles are gentlest on the scalp?
Flat twists, low-profile hawks, and wider-part twist combos tend to feel softer than tight stitch braids or heavy feed-ins. If your scalp is tender, keep the front hairline loose and avoid pulling the crown into a hard point.
Can I wash my hair while the style is in?
You can, but be careful. Use a diluted shampoo on the scalp, rinse with a nozzle or gentle stream, and squeeze the braids with a towel instead of rubbing them. Air-dry or sit under a dryer until the roots are fully dry, because damp braids smell fast.
What products keep the parts neat without flaking?
A light braiding gel or edge control used in thin layers is safer than piling on thick pomades. If your hair flakes easily, choose water-based products and keep the scalp clean before styling.
How do I stop the braids from looking flat by day two?
Sleep in a scarf, fluff the center section gently with your fingers in the morning, and avoid pressing the style under tight hats for hours. Short hair loses shape fast when it gets crushed overnight, so the wrap matters.
Braids That Leave Short Hair Looking Intentional
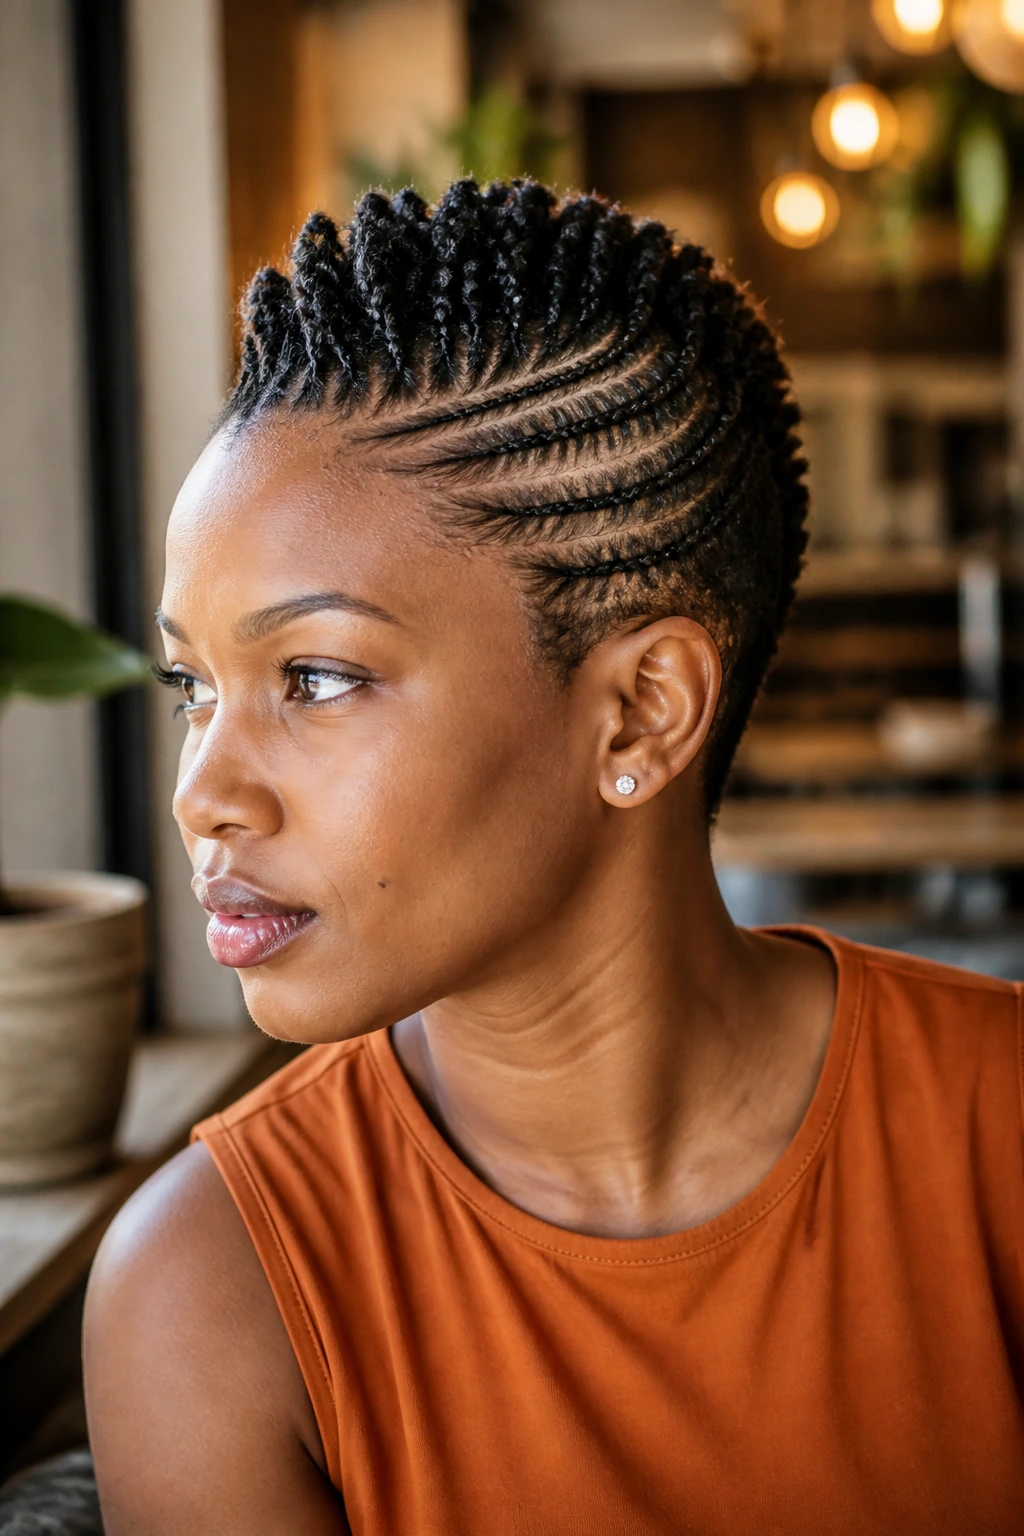
Short natural hair has a way of telling on lazy styling. That is exactly why mohawk braid styles are so useful. They give the hair a shape that reads on purpose from the first glance, even when the actual length is still modest and the curls want to spring back.
The best part is the flexibility. You can keep it sleek and low, bring in feed-ins for more height, add cuffs for a little noise, or let a puff sit at the crown and do the soft work. Once you understand how the center ridge and side panels play off each other, the options stop feeling narrow.
Pick the version that matches the length you have, not the length you wish you had. Start with a clean parting map, keep the tension honest, and let the braid pattern do the heavy lifting. The next time your short hair feels hard to style, start with a ridge down the middle and build outward.
