



Curly hair does something mohawks rarely get credit for: it builds its own height. A straight-hair mohawk usually needs teasing, spray, and a small amount of patience. Curly hair shows up with shape already in the room. The job is not to manufacture drama from nothing. The job is to keep the sides calm and let the curls stand where they want to stand.
That is why mohawk styles for curly hair can look so different from one another. A low taper can make a coil pattern look clean and sharp. A frohawk can look soft enough for brunch and cool enough for a concert without changing the cut much at all. If your curls shrink as they dry, good. That shrinkage is the architecture.
The styles below cover short hair, long hair, shaved sides, braided sides, polished formal looks, messy weekend looks, and a few that sit happily in the middle. Some need clippers. Some need only pins, gel, and a decent diffuser. All of them work because they respect the curl pattern instead of trying to iron it into obedience.
Why Curly Mohawks Work So Well on Natural Texture
-
The curls do the lifting for you: A coily or curly center strip already has the vertical movement a mohawk needs, so you spend less time teasing and more time shaping.
-
The sides stay calmer with less product: Once the perimeter is tapered, braided, twisted, or pinned back, the top can stay lively without the whole head turning into a puff cloud.
-
You can go subtle or loud with the same base cut: A few bobby pins and a light gel give a soft faux hawk; a skin fade and a defined ridge give a sharper edge.
-
Shrinkage becomes part of the silhouette: Instead of fighting shrinkage, these styles use it to keep the center ridge compact and lifted.
-
The look works across curl types: Loose 3A waves, springy 3C curls, and tight 4A coils all read differently, but the hawk shape still lands.
1. Clean Taper Curly Mohawk
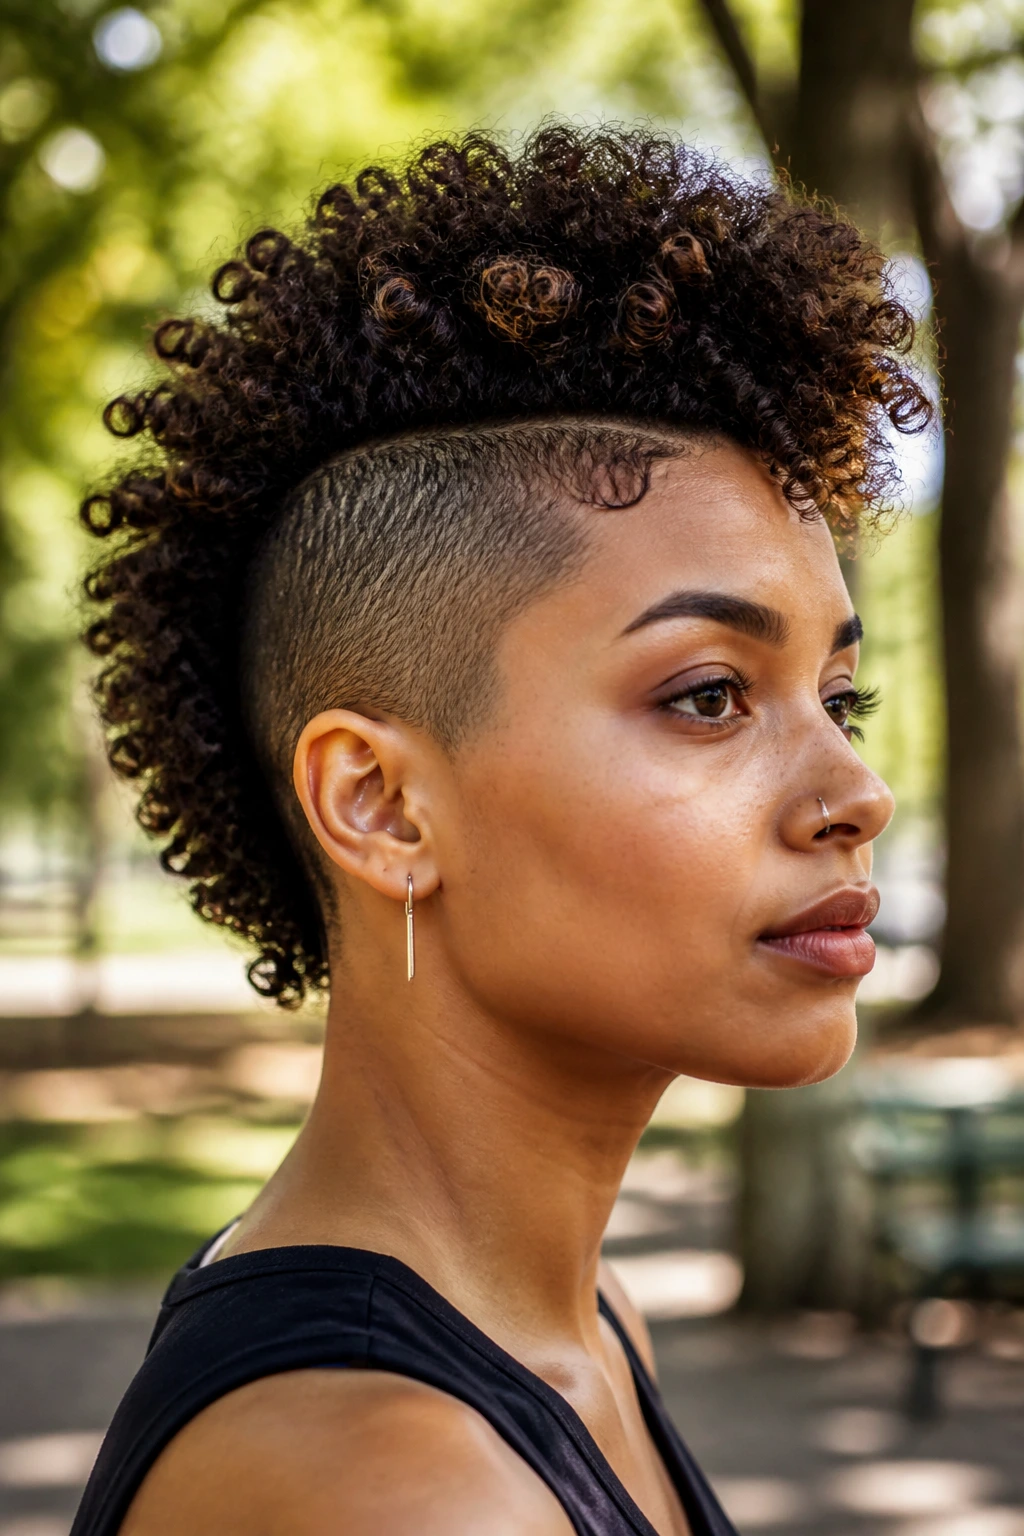
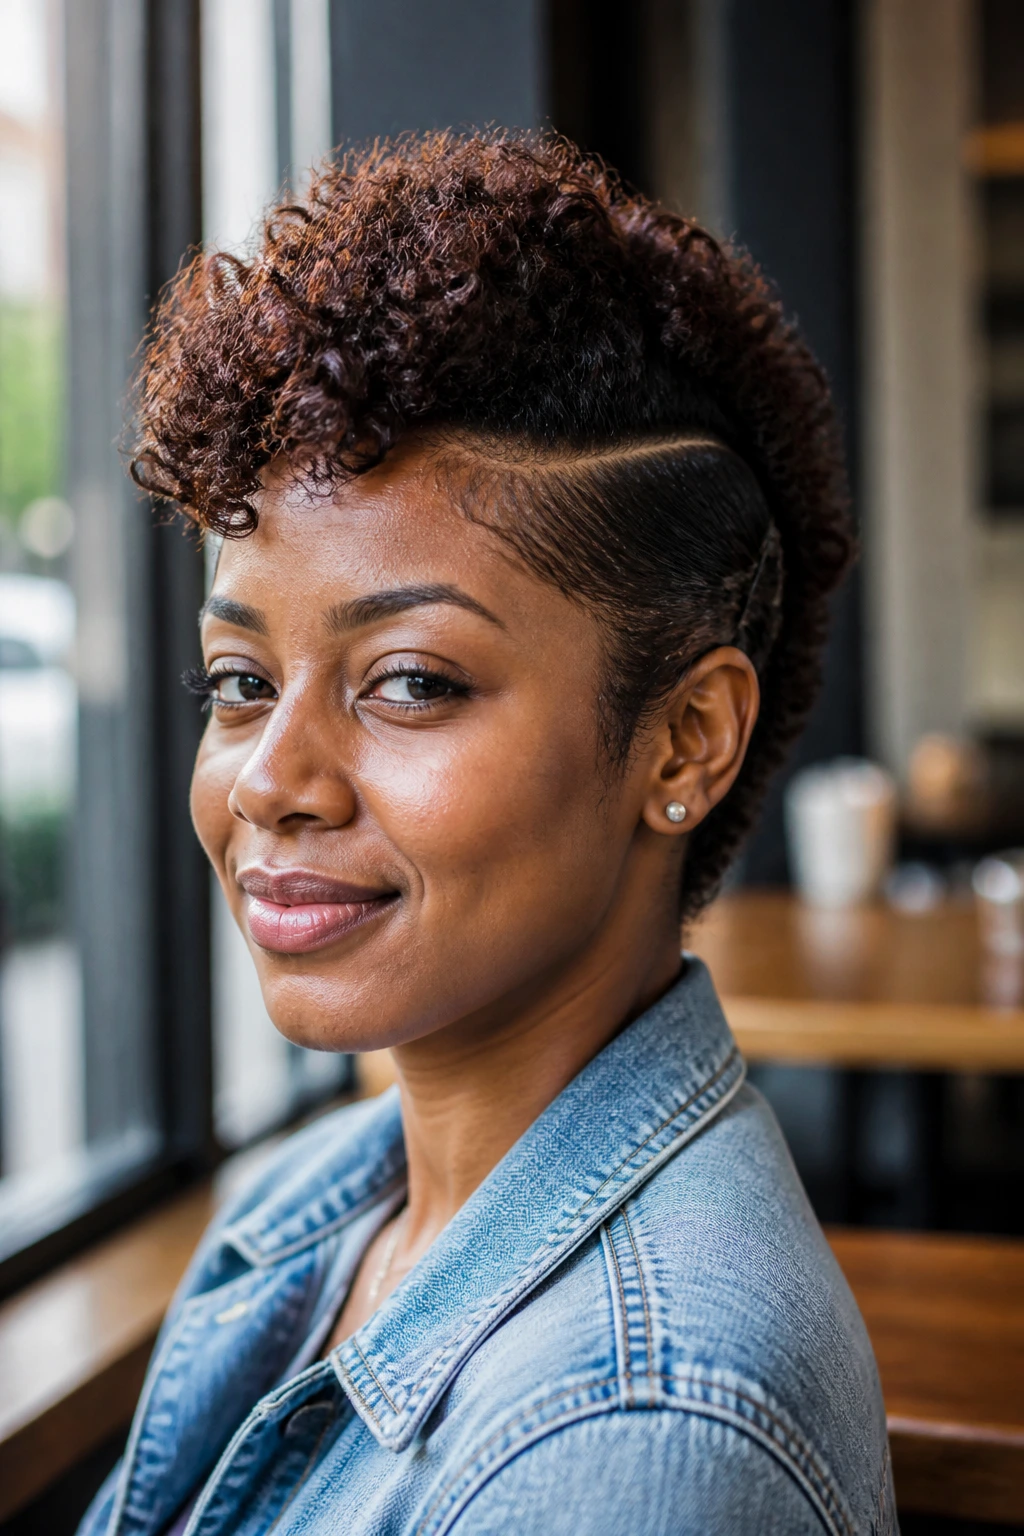
A clean taper gives this style its backbone. The sides stay short around the temples and nape, while the center keeps enough length—usually 3 to 5 inches—to show actual curl clumps instead of fuzzy volume. Ask for a soft taper rather than a blunt chop. That keeps the outline neat without making the whole head look boxy.
A pea-size amount of mousse at the roots and a diffuser on low heat will push the ridge up without turning it stiff. If your curls are dense, use your fingers to separate only the top layer after drying. Don’t rake through the whole section. That is how you lose the shape and end up with a rounded cloud instead of a mohawk.
2. Soft Faux Hawk
Want the mohawk shape without giving up the option to wear your hair down tomorrow? This is the one. You smooth or pin the sides back, leave the crown loose, and let the curls fall into a narrow ridge. No clippers. No commitment. Just a little control.
A side part helps here. Twist each side back in two loose sections, pin them flat behind the ears, then fluff the center with your fingers so it sits higher than the rest. The finished look works best when the curls are still a little damp and pliable. Once they dry, they hold the sweep better and look less like they were persuaded into place.
3. High-Crown Frohawk
The high-crown frohawk is for people who want volume to be the point, not the side effect. It keeps the crown full and lifted, then narrows toward the temples and nape so the shape reads as intentional. On tight curls, a pick at the roots does more work than a brush ever will.
Why It Works on Dense Curls
Dense curls need a frame. This one gives them one without crushing the pattern. If the hair is cut into layers, the top can stack upward instead of ballooning outward at the sides.
A satin scarf at night helps preserve that height. In the morning, a light mist of water and a few scrunches are usually enough to wake the shape back up.
4. Skin-Fade Curly Mohawk
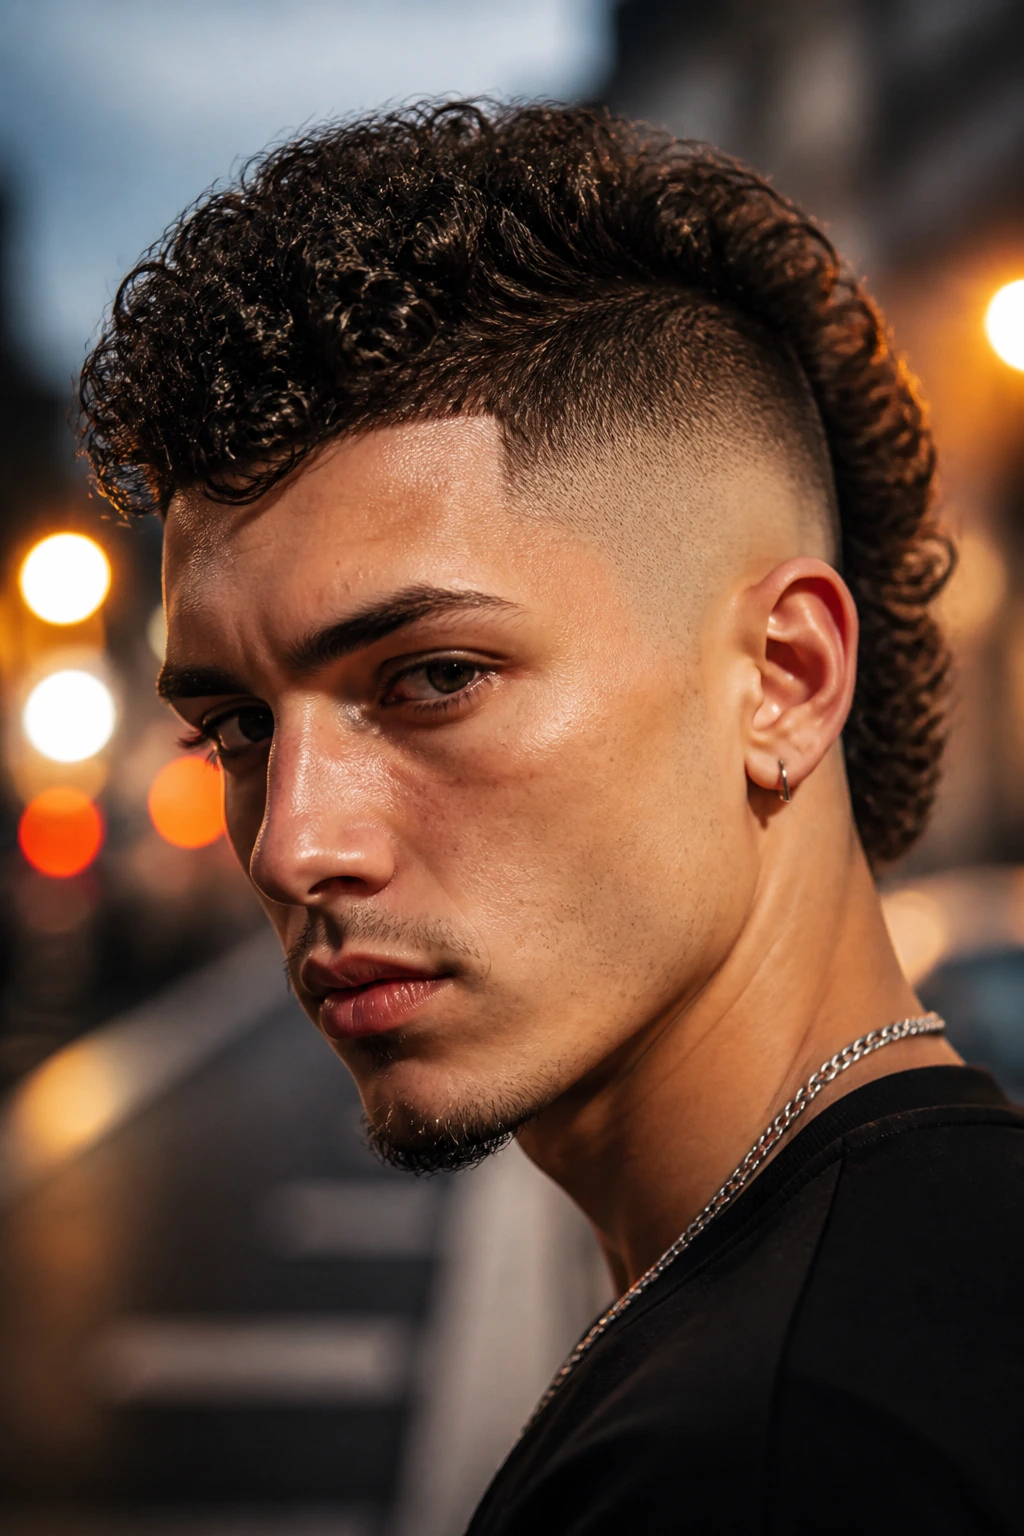
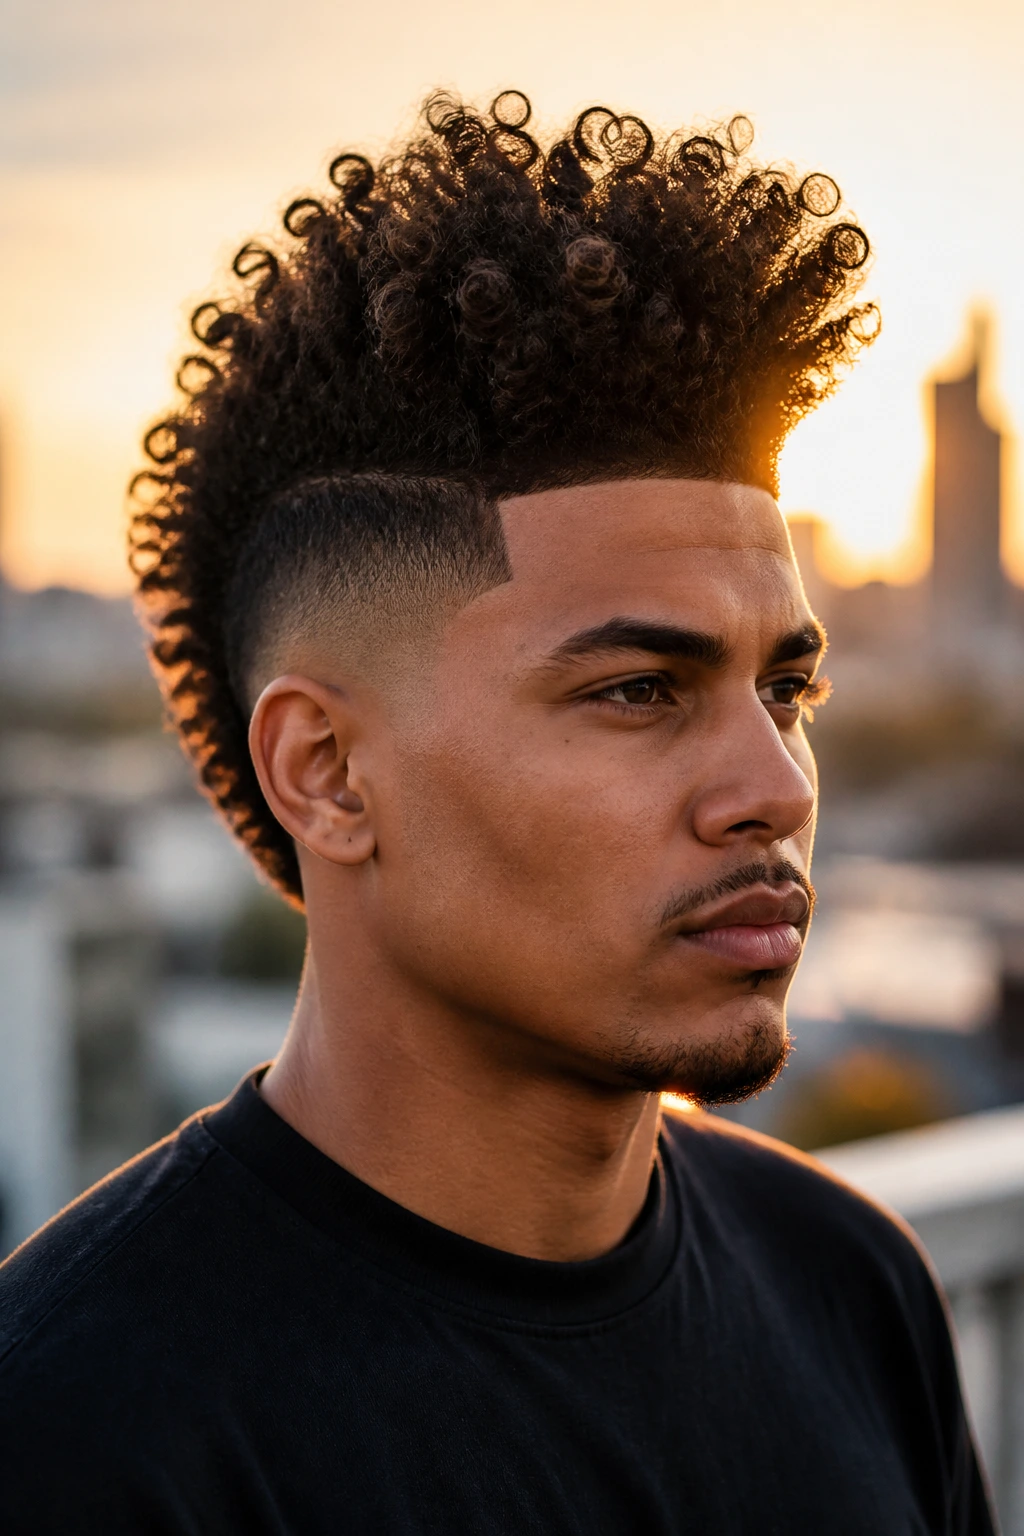
A skin fade is a sharp move, and curly hair wears it well when the top has enough length to balance the contrast. The fade should start low and climb cleanly so the top does not look like it is floating on a harsh wall. Ask for a gradual fade around the ears and a crisp line at the nape.
This version needs upkeep. If the fade grows out too much, the whole thing loses its clean geometry. A touch-up every 1 to 2 weeks keeps the sides looking fresh. On top, curl cream plus a light gel cast gives definition without turning the hair helmet-hard.
5. Braided-Sides Hawk
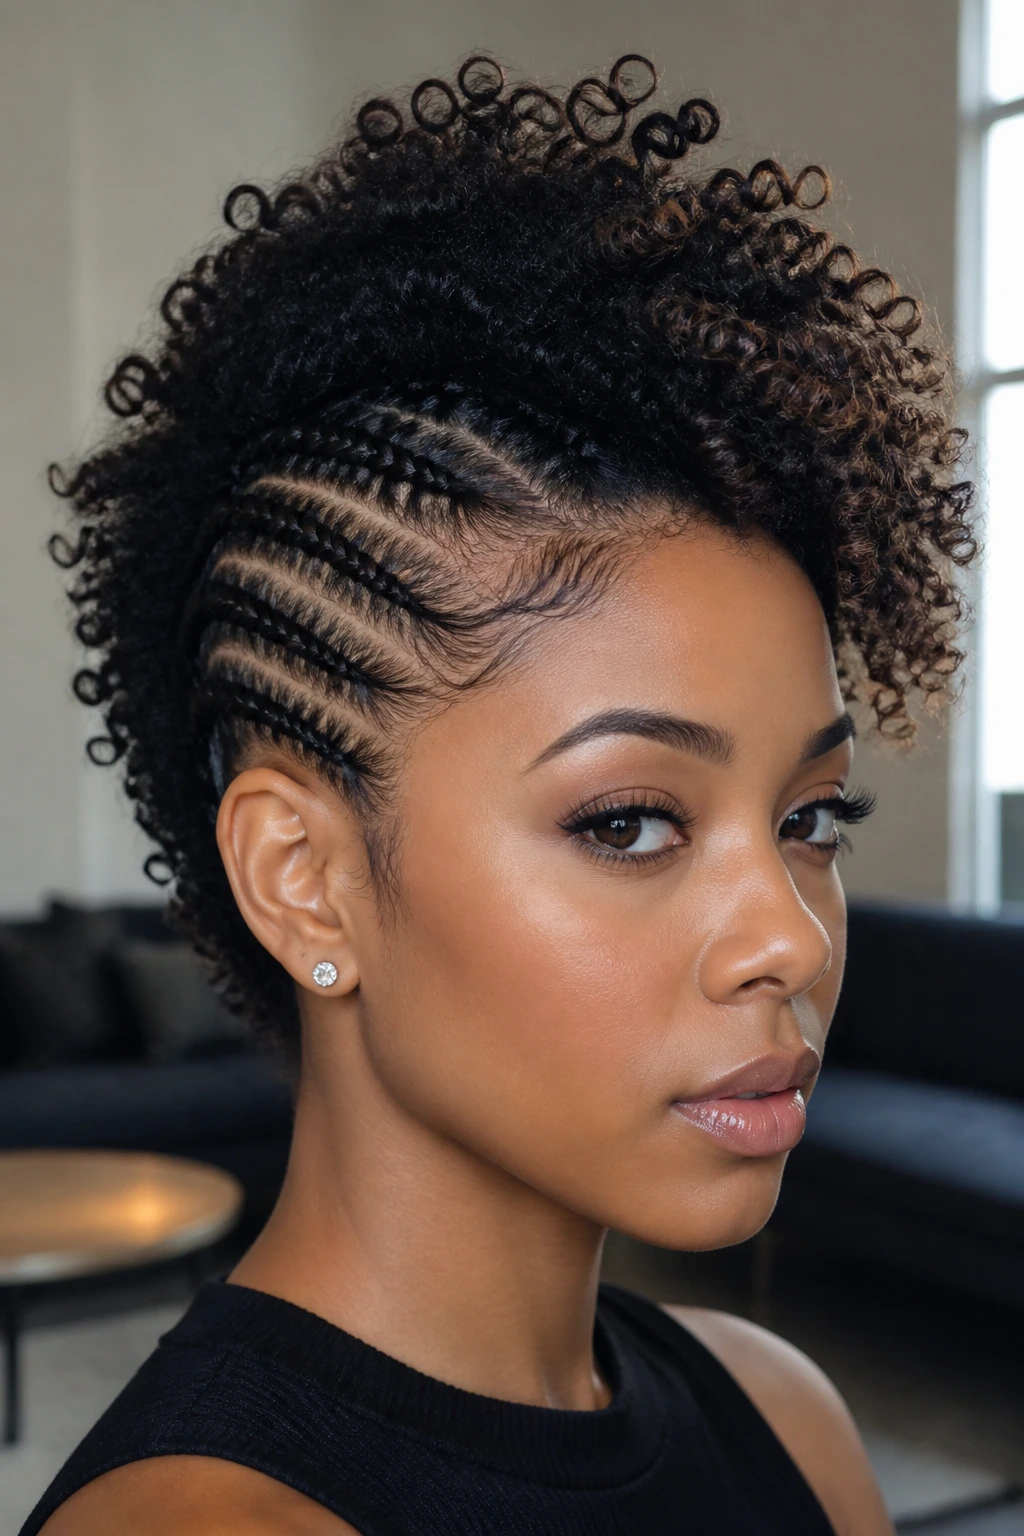
Braided sides change the whole mood. Cornrows, feed-in braids, or simple flat braids pull the hair back tight and let the center strip stay loud. The contrast between the sleek sides and the curly ridge is what makes this look hit.
- Keep the braids close to the scalp so they do not puff out by lunch.
- Use a lightweight edge control only at the hairline.
- Leave the center loose and moisturized so it doesn’t dry stiff.
This one is especially useful if you want a style that lasts more than a day. The braids keep the sides controlled while the center can be refreshed with a water spray and a little leave-in.
6. Flat-Twist Hawk
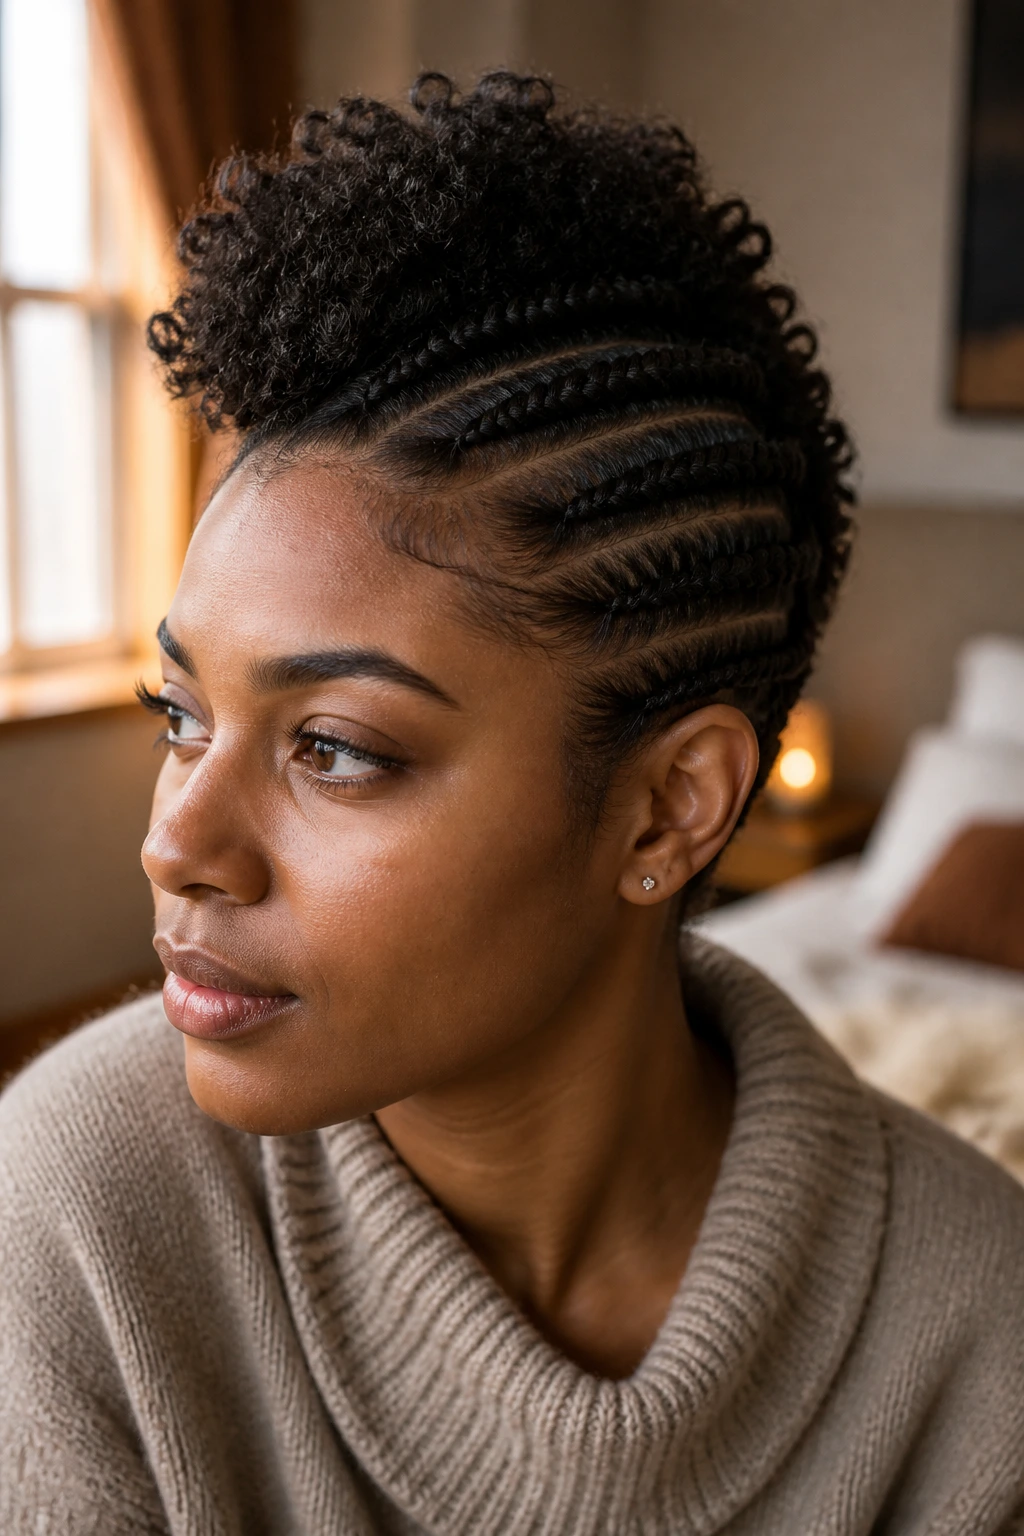
Flat twists are the quieter cousin of braids, and I like them for that reason. They sit lower, feel lighter, and give the sides a tidy rope-like texture that looks deliberate without shouting. The center can stay curly, brushed up, or lightly finger-coiled.
If your hair is medium length, part three or four rows on each side and twist them back toward the ridge. Finish the ends with tiny elastics or tuck them under with bobby pins. A twist-out the next day gives you a softer, fuller hawk if you want the look to loosen up.
7. Half-Up Puff Hawk
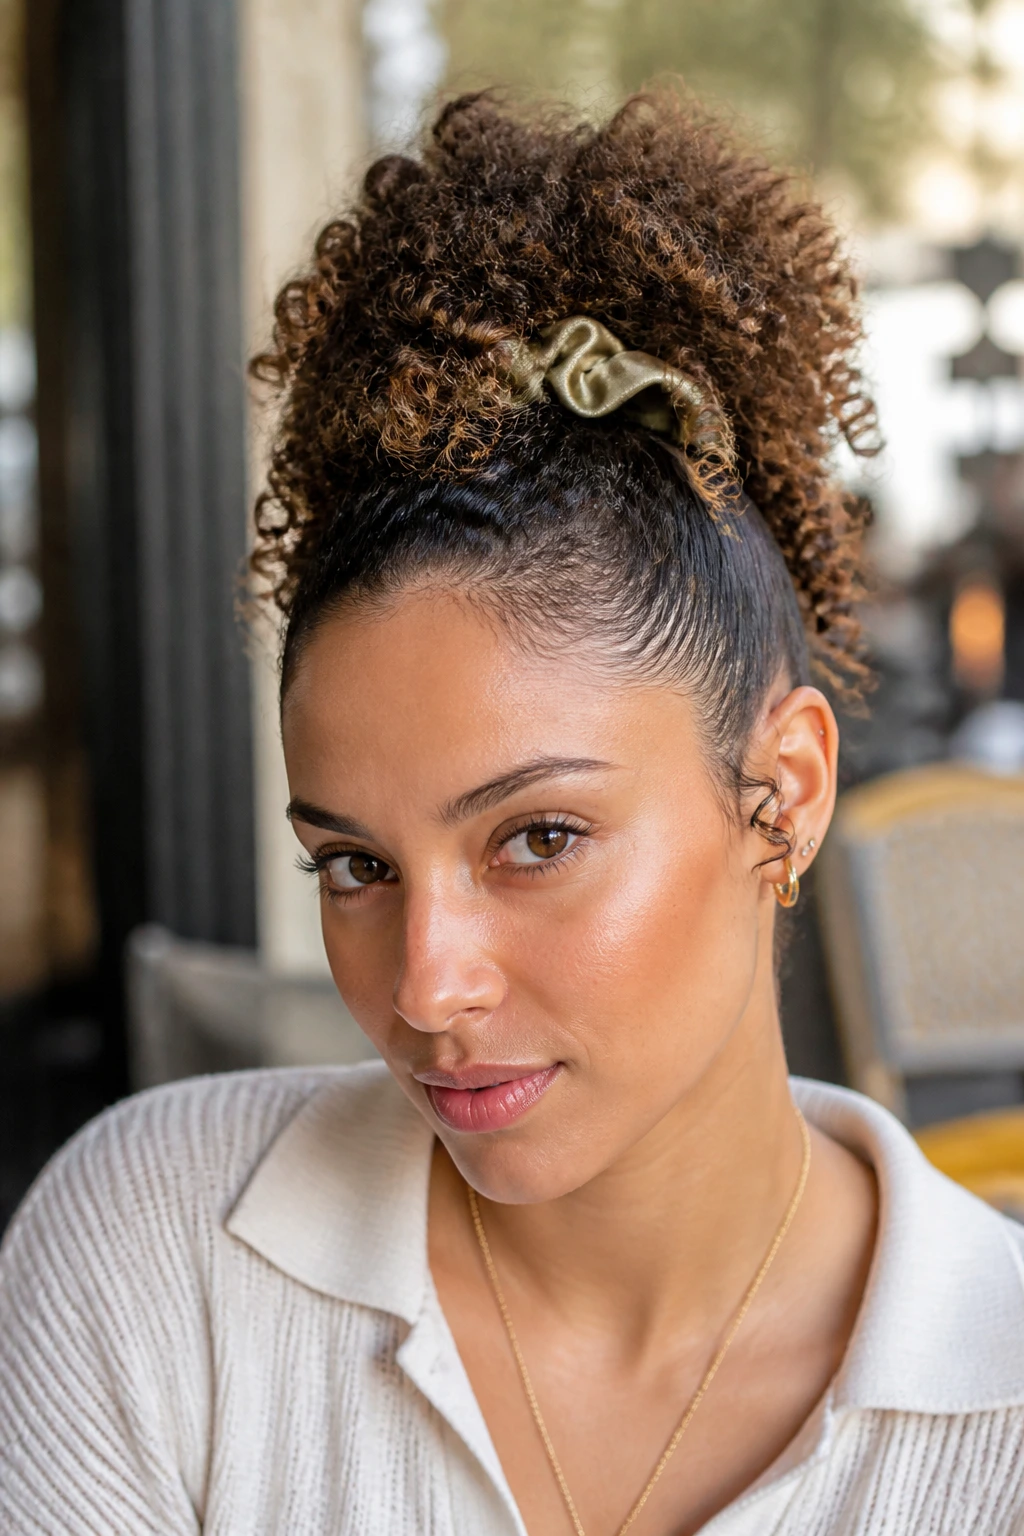
This is one of the easiest mohawk shapes to fake on long curly hair. Gather the top and middle into a high puff, smooth the sides back, and let the ends keep their spring. The hairline matters here, so use a soft brush and a tiny amount of gel, not a heavy paste that flakes later.
The best part is the volume at the crown. A satin scrunchie keeps the pony from denting the curls, and the loose ends around it make the silhouette look fuller than a strict ponytail ever would. It’s casual. Still sharp.
8. Short Crop Hawk
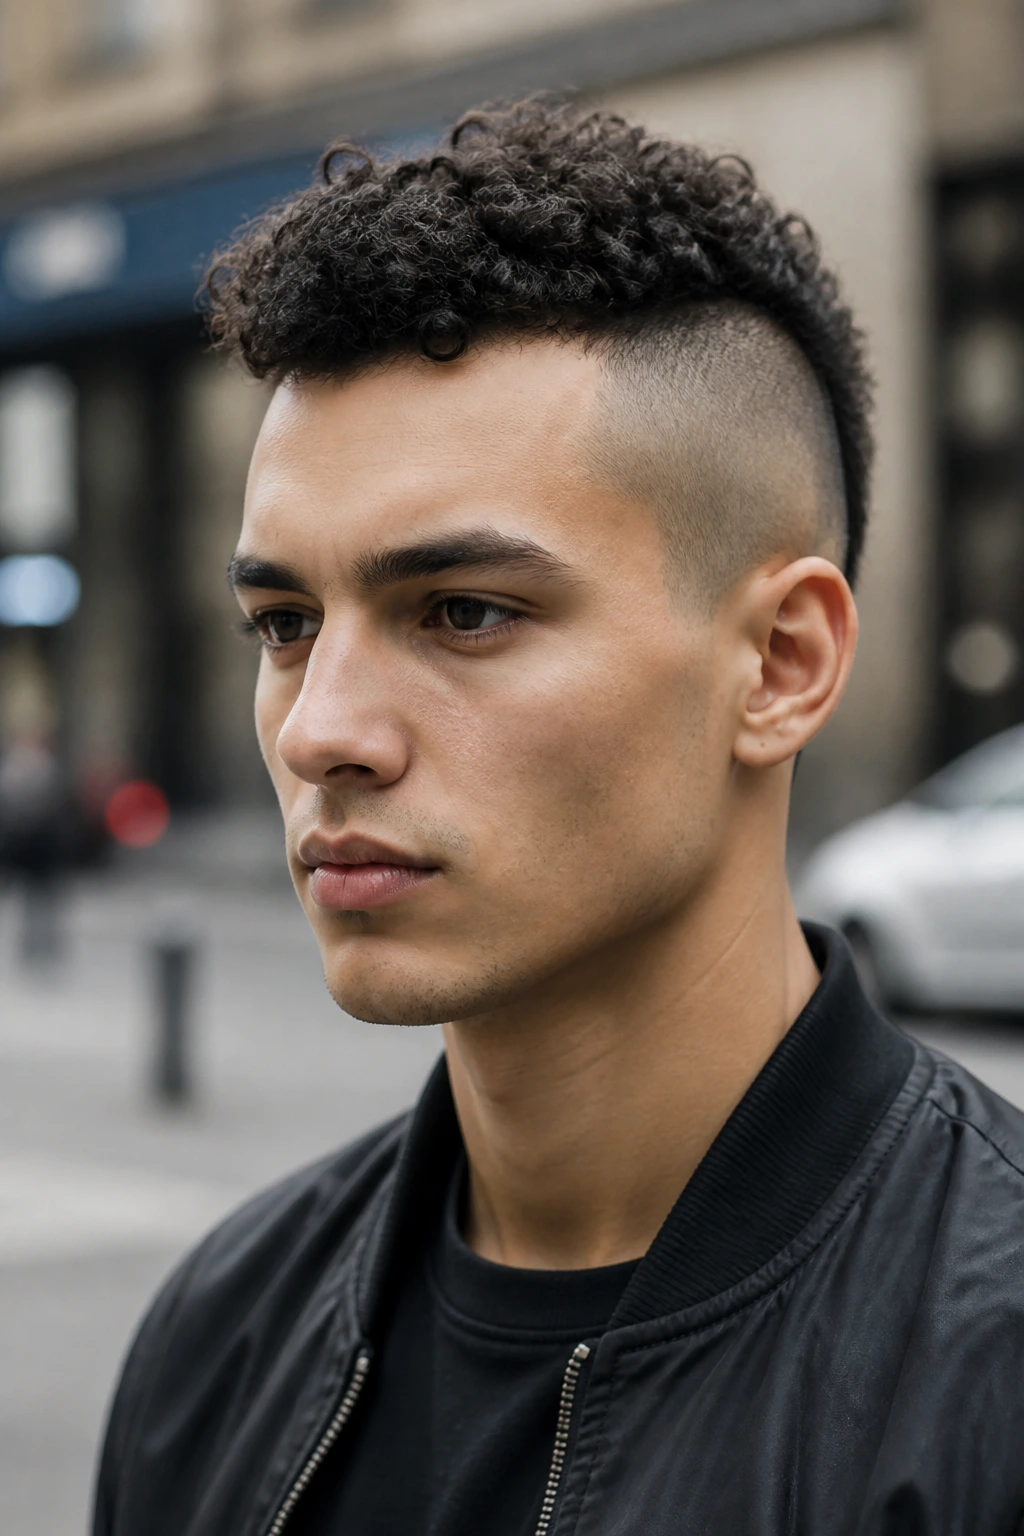
Short curls can absolutely do a mohawk. They just need a cleaner silhouette and a little root lift. Keep the sides close, let the top sit around 1 to 2 inches, and use curl cream more sparingly than you think. Too much product on short hair kills the shape fast.
Best For
- Loose curls that need a bit of direction
- Tight coils that naturally stand up
- People who don’t want a tall, theatrical ridge
A small diffuser helps, but finger-styling the top before drying is even better. Push the curls upward at the roots and let the length sit where it wants to. That’s the trick. Not much else.
9. Pineapple Hawk
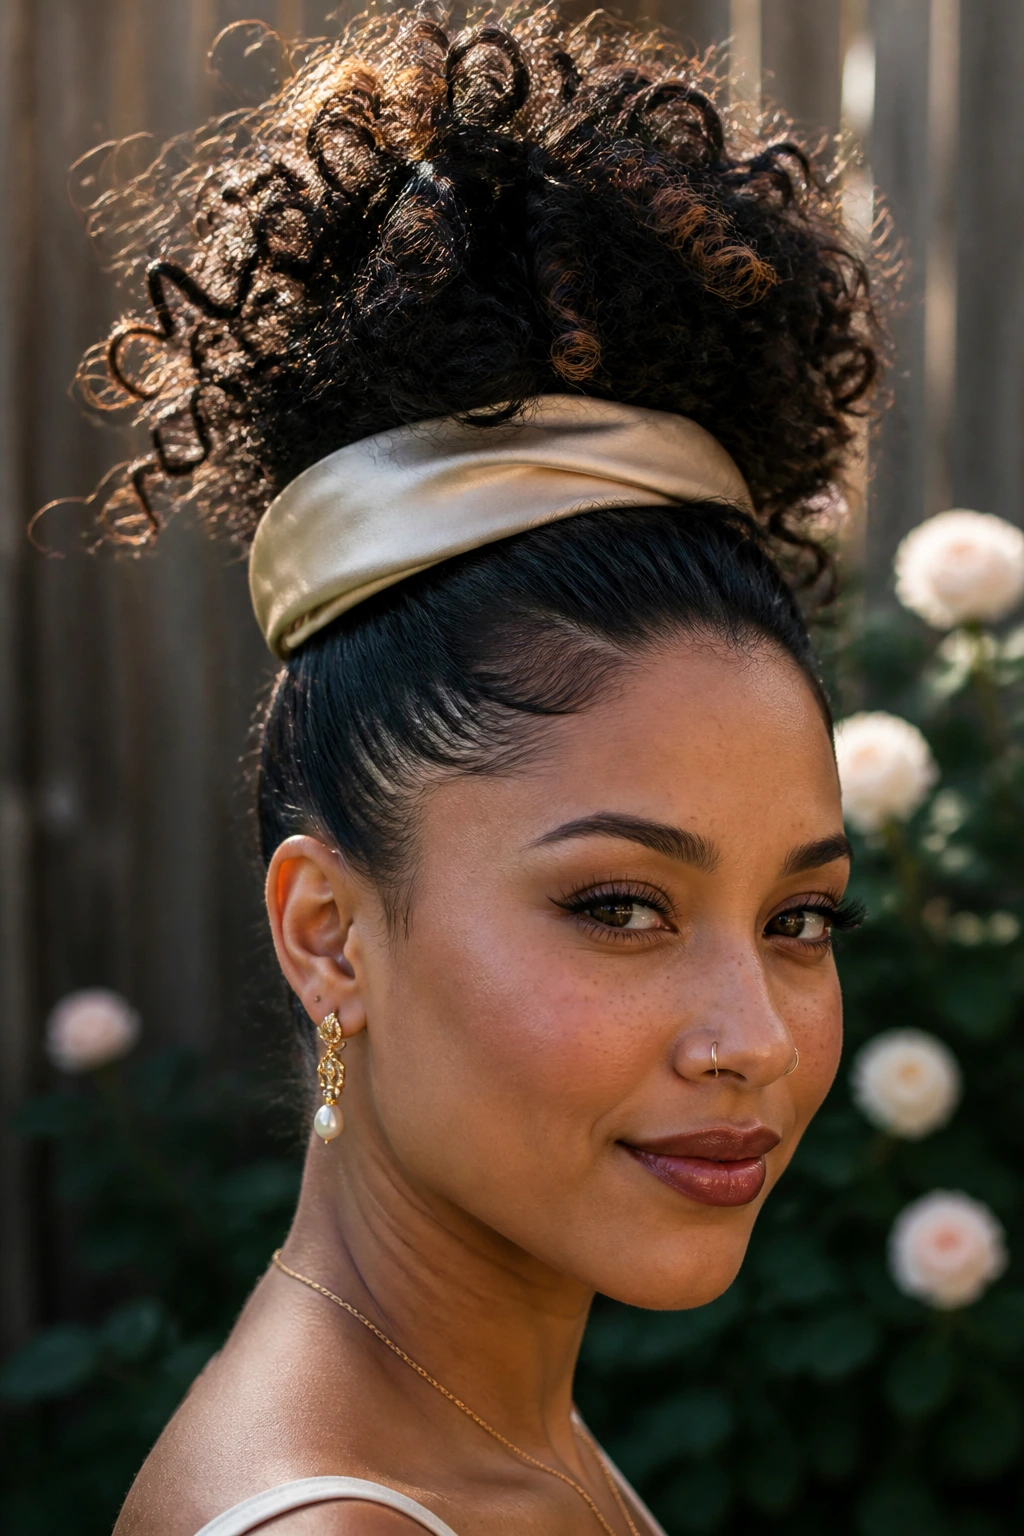
The pineapple hawk borrows from the nighttime pineapple shape and turns it into daytime style. The curls gather high at the center, while the sides stay smoothed back or lightly pinned. Long curls look especially good here because the ends can spill out in a loose plume.
Use a wide satin tie or a stretchy band that won’t snag. If the hair is too tight at the base, the top collapses into a lump. Leave a little room so the curls can fan out once you loosen them. This is one of those styles that looks better when it isn’t over-controlled.
10. Wet-Look Curly Mohawk
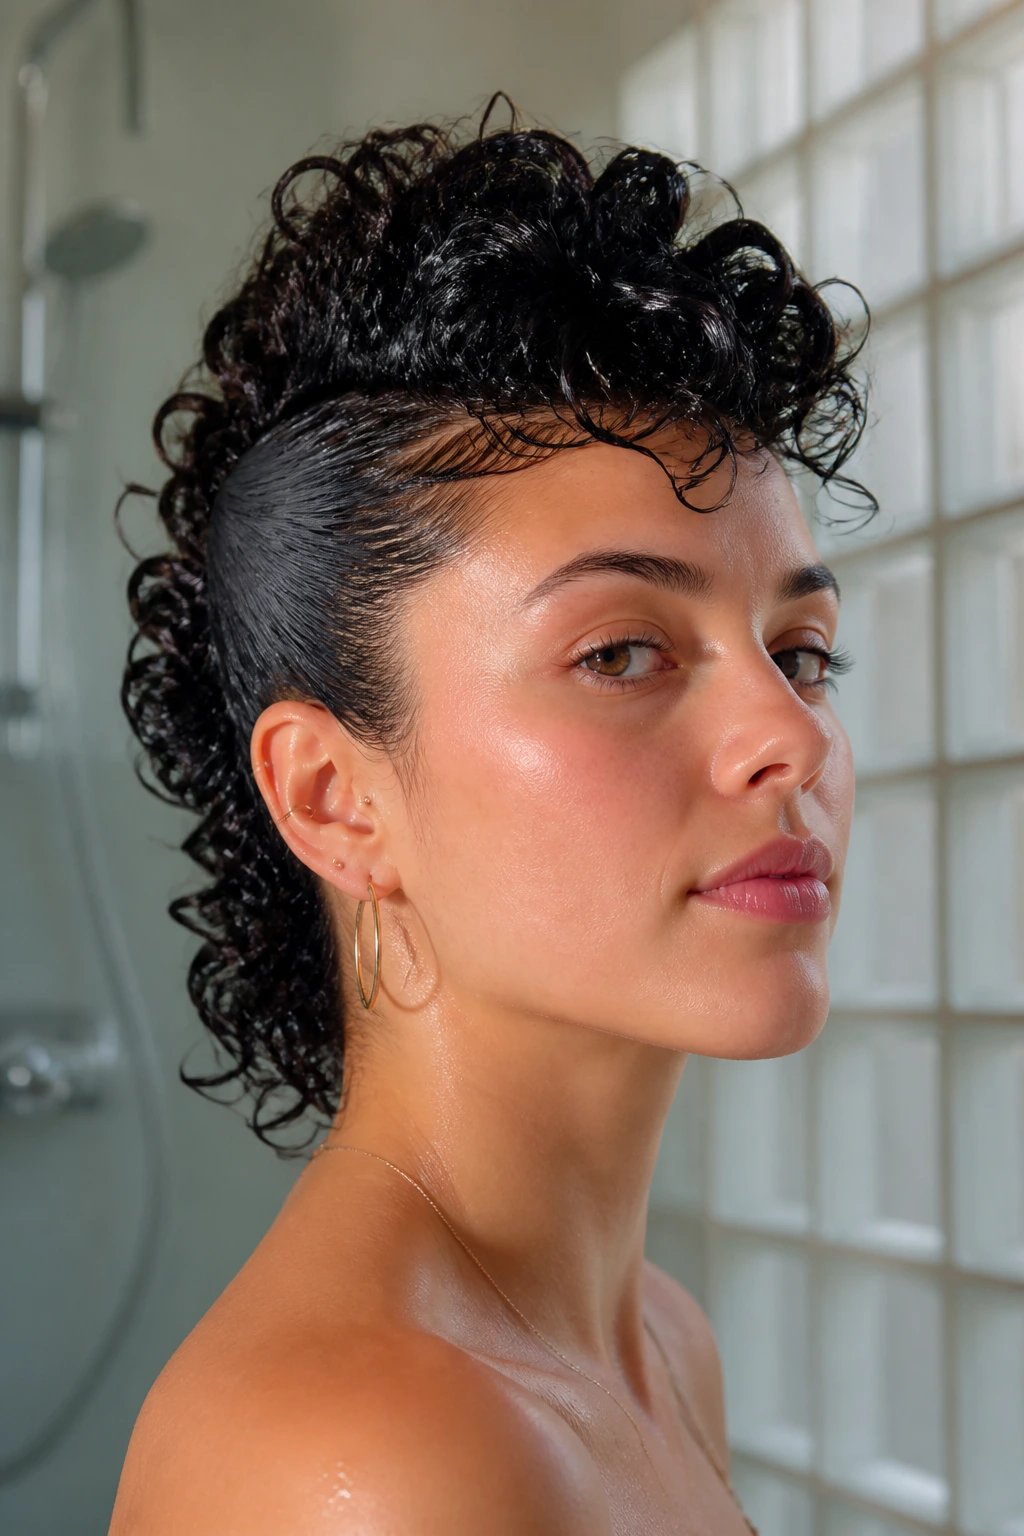
A wet-look curly mohawk is glossy, defined, and a little dramatic in the best way. Start on damp hair, work in gel from roots to ends, and comb the sides back until they stay put. The center should still look like curls, not like a glued-down stripe.
Drying matters more than product here. Diffuse on low or let it air-dry until the cast sets. If you touch it too early, you break the shine and end up with a patchy finish. A tiny drop of oil at the very end can soften the cast once the style is fully dry.
11. Bantu Knot Hawk
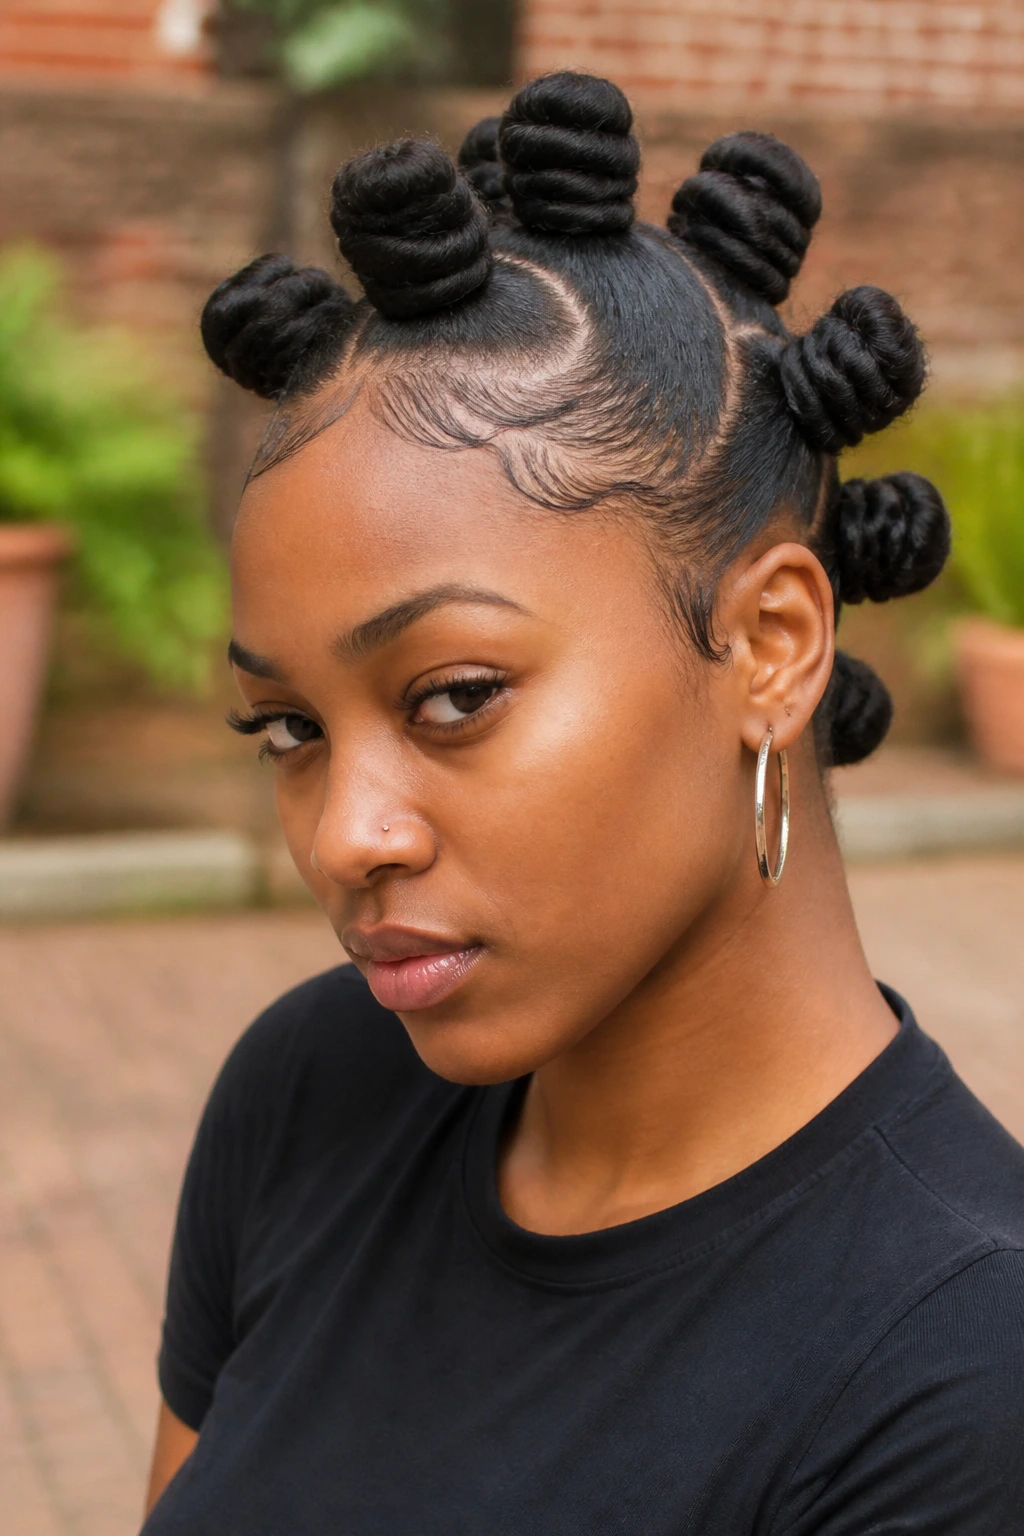
Bantu knots give the mohawk a sculptural feel. You can place the knots along the center line or use them on the sides and keep the top loose. Either way, the shape feels deliberate and a little playful. On curly hair, the knot pattern also leaves a great second-day texture if you take it down.
Keep each section about 1 inch wide if you want clean, even knots. Smaller sections create more definition; larger ones look softer and more relaxed. Tightness is the enemy here. A knot should sit secure, not pull at the scalp.
12. Loc Hawk
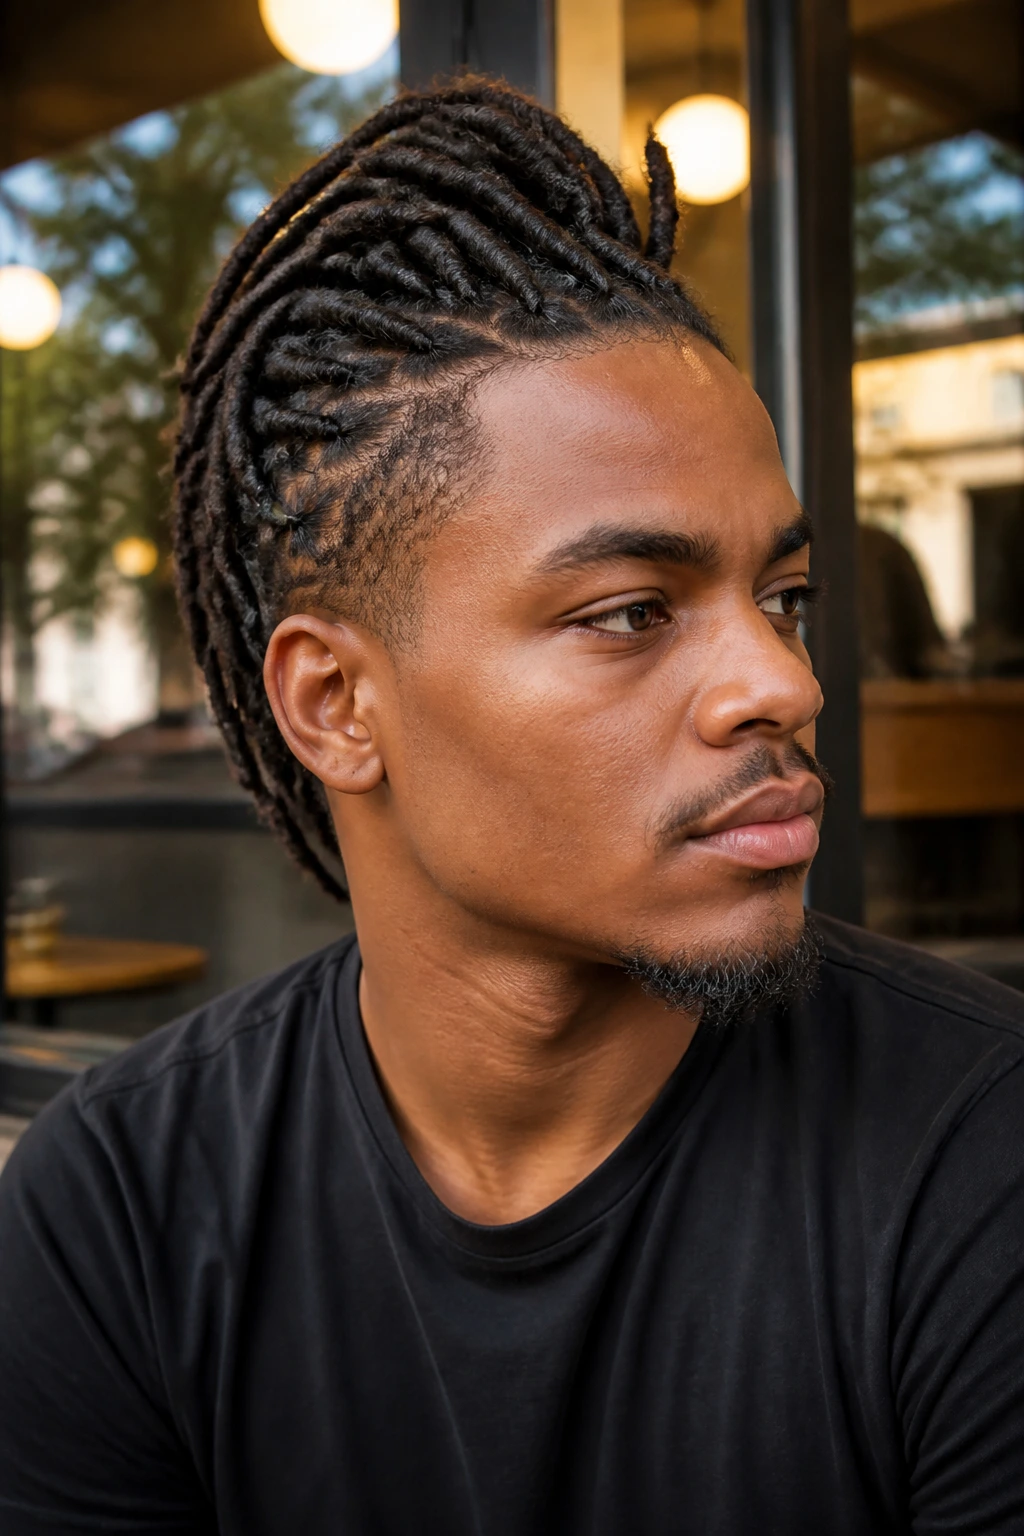
Locs have their own heavy texture, so this version needs shape control more than product. Sweep the locs toward the center ridge, pin the sides back, or let the side locs fall into a tapered line. The silhouette matters most.
If the locs are long, wrap or tuck the ends so the profile stays narrow. Shorter locs can be lifted with a few well-placed clips at the roots. A little sheen spray keeps the finish neat, but don’t drown the hair in oil. Locs get greasy fast when the product load is too high.
13. Bubble-Braid Hawk
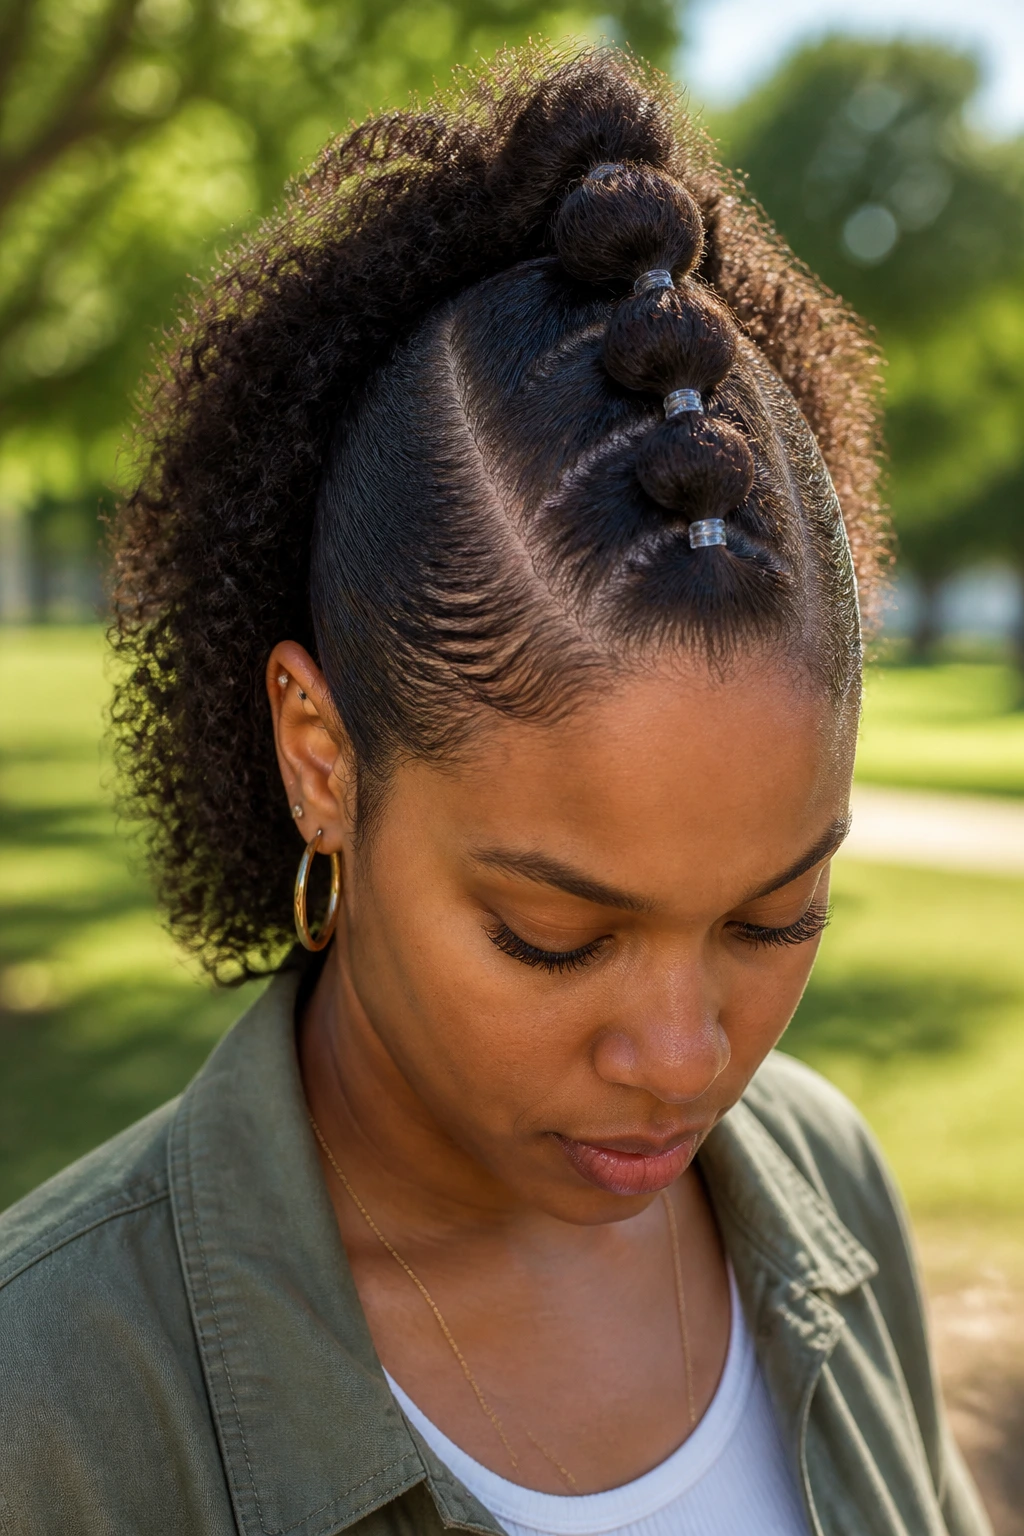
A bubble-braid hawk turns one center braid into a row of rounded sections. Secure the braid every 2 to 3 inches with small clear elastics, then gently tug each section outward so it forms a bubble. The curls or hair around it make the whole thing look fuller.
This is a fun choice when you want the mohawk shape but not the usual spiky ridge. It works on medium to long hair and reads especially well from the side. If your hair is fine, lightly backcomb the braid before adding the elastics. Not much. Just enough for lift.
14. Curly Bun Hawk
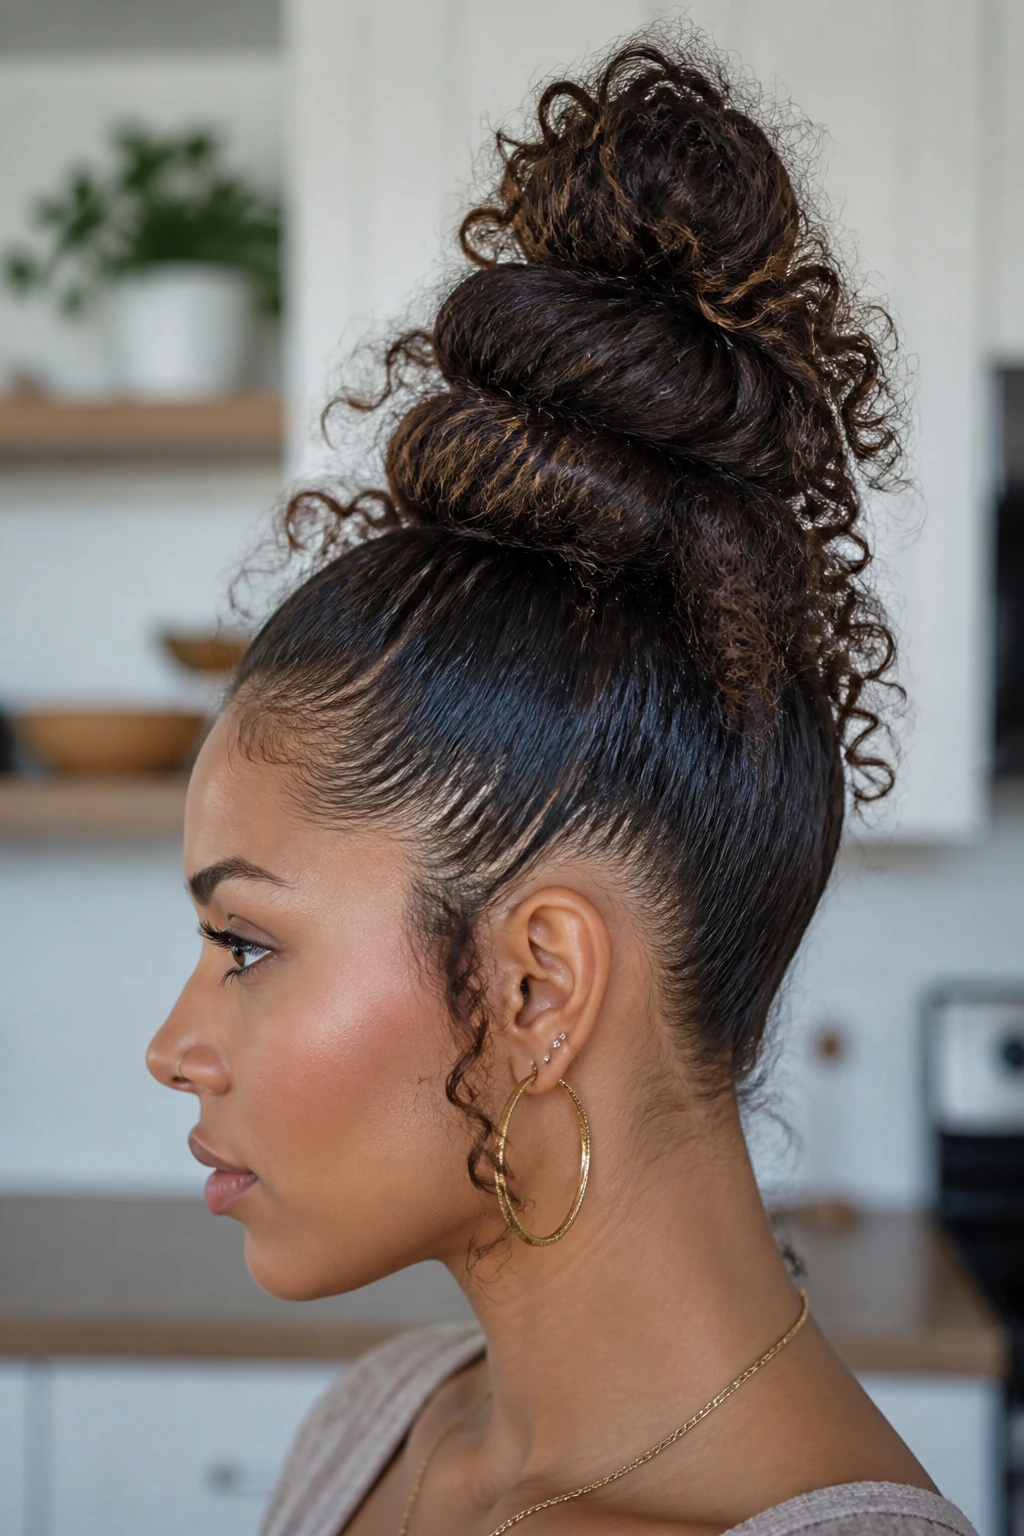
A central bun hawk keeps the shape close to the head while still giving you that vertical line. Pull the center section into one high bun or a few stacked knots, then smooth the sides back. The curls around the bun can stay loose for texture, which keeps it from looking too strict.
This style is good when you need your hair out of the way. It also handles humid weather better than a fully loose hawk. Secure the bun with a spin pin or two crossed bobby pins. A heavy elastic can flatten the base and make the whole shape sag by midday.
15. Asymmetrical Hawk
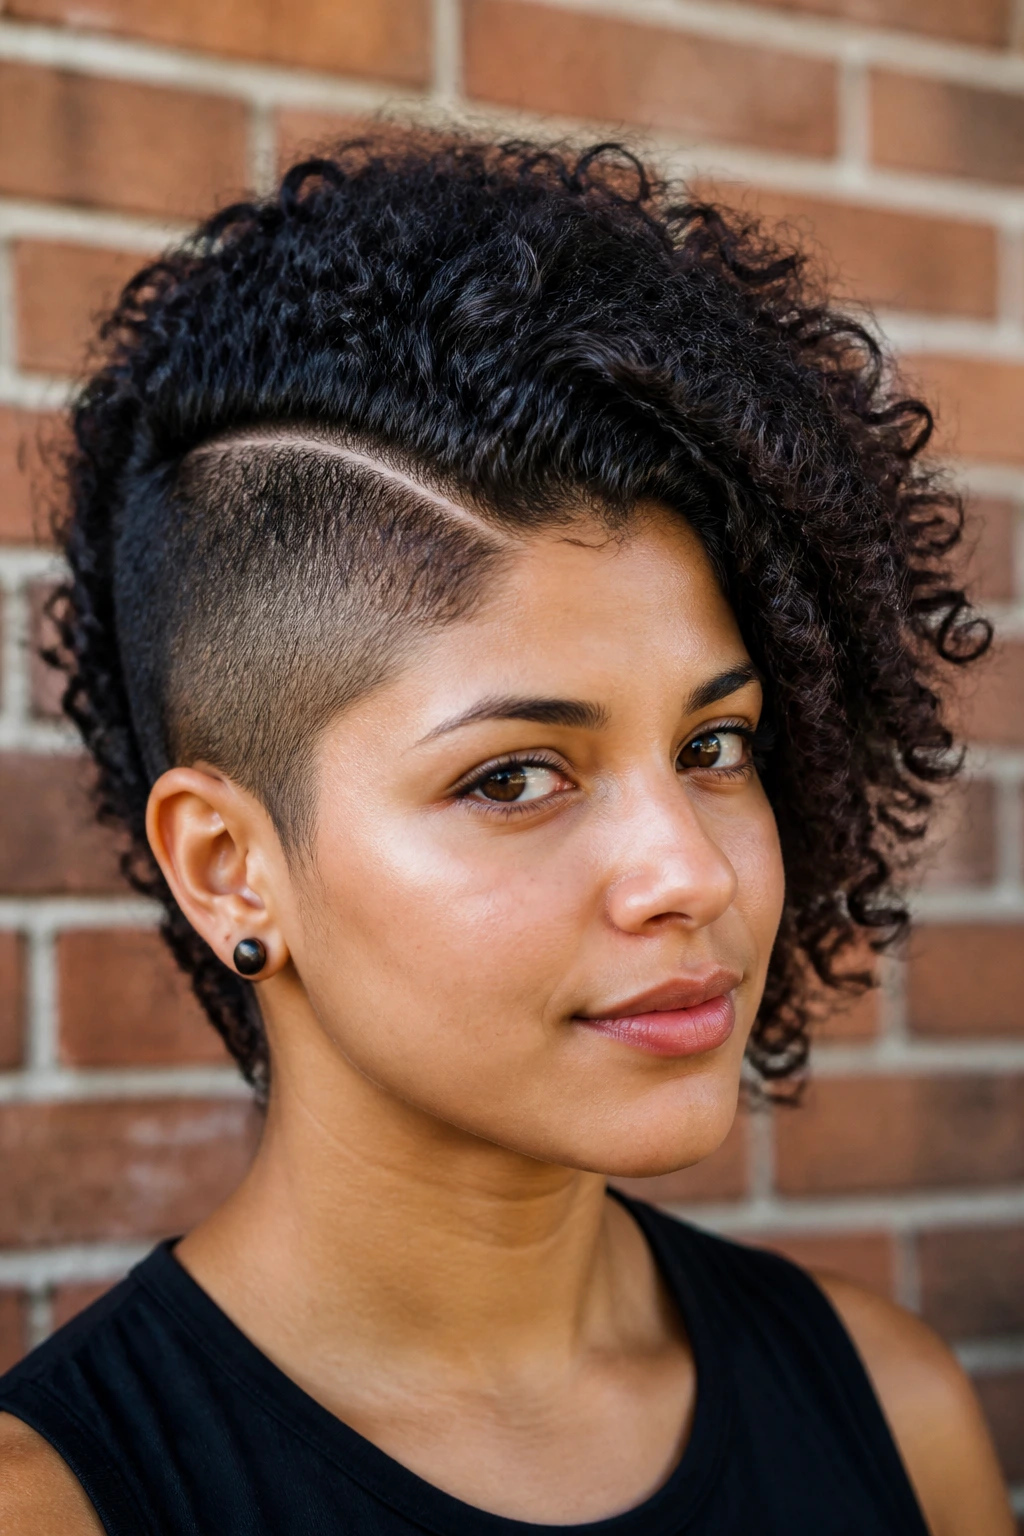
Asymmetry adds attitude without needing a lot of extra work. One side sits lower, or the ridge leans slightly off center, so the shape feels less formal and more human. If your curls already grow in uneven patterns, this cut can make that difference look intentional.
You do need balance. Leave the longer side 1 to 2 inches fuller so the line doesn’t collapse into lopsidedness. A side part can help guide the eye upward. That’s what saves the style from looking accidental.
16. Temple-Art Hawk
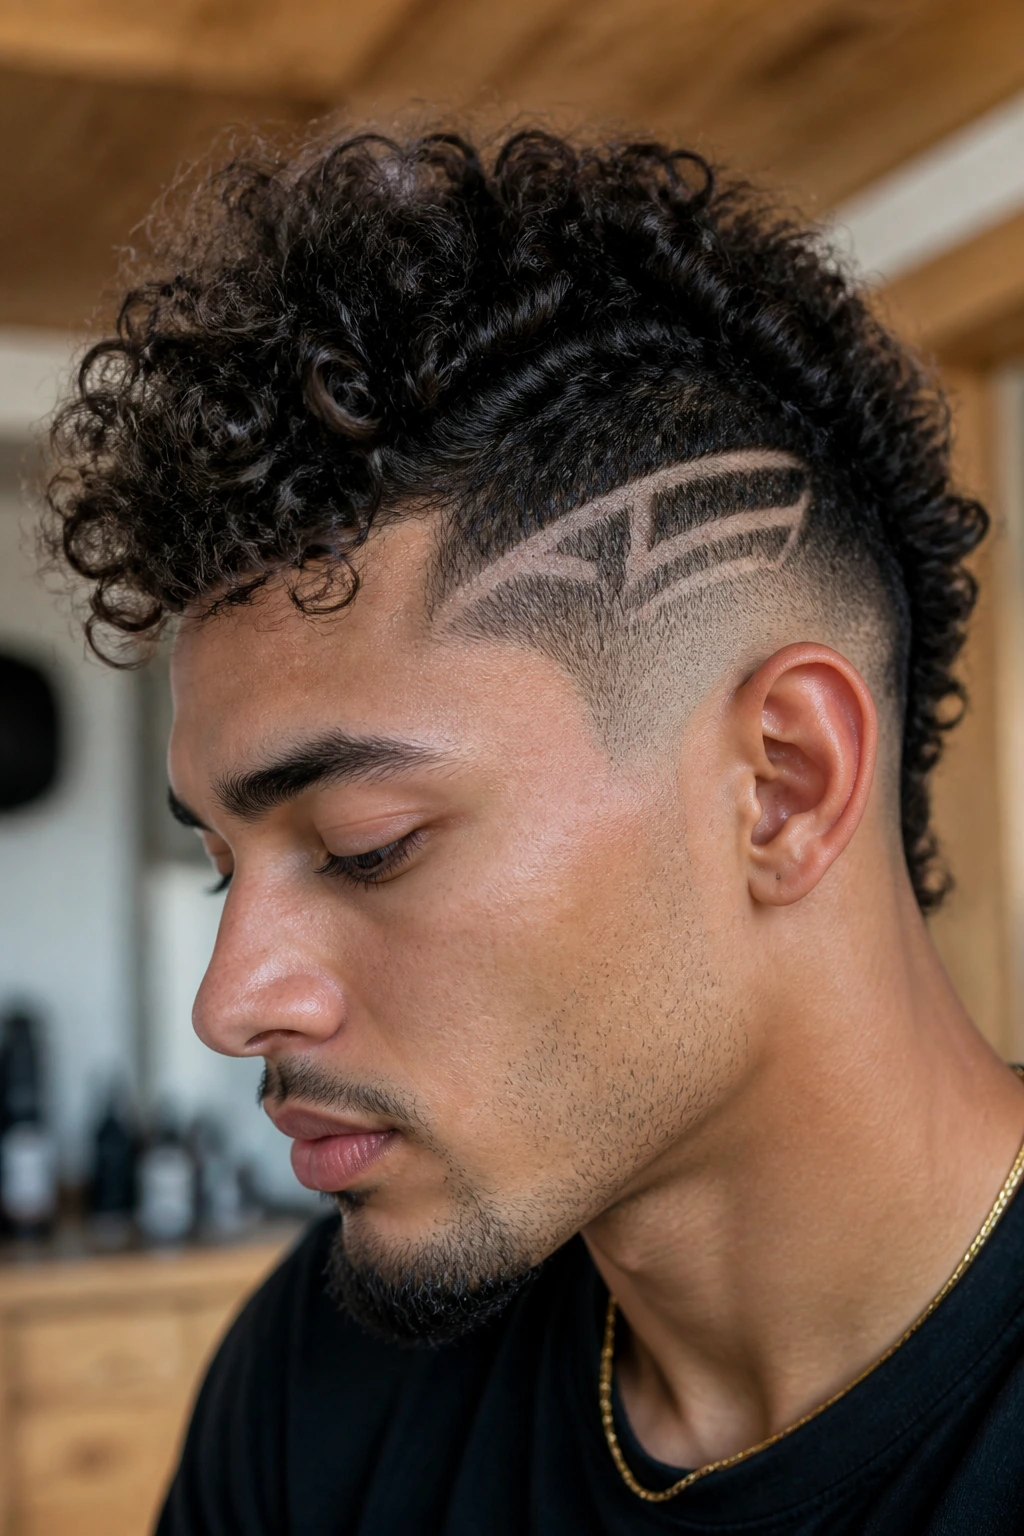
Temple art is for people who want the haircut to say something before the curls even move. Shaved lines, curves, or small geometric designs at the temples sharpen the outline and make the center ridge look even fuller. Keep the line work simple if you want it to age well between barber visits.
The design should sit where the ear and temple meet, not too high on the head. That placement gives the style contrast without crowding the face. If the hair grows quickly, the art will blur after a couple of weeks, so this is a look that likes maintenance.
17. Side-Part Hawk
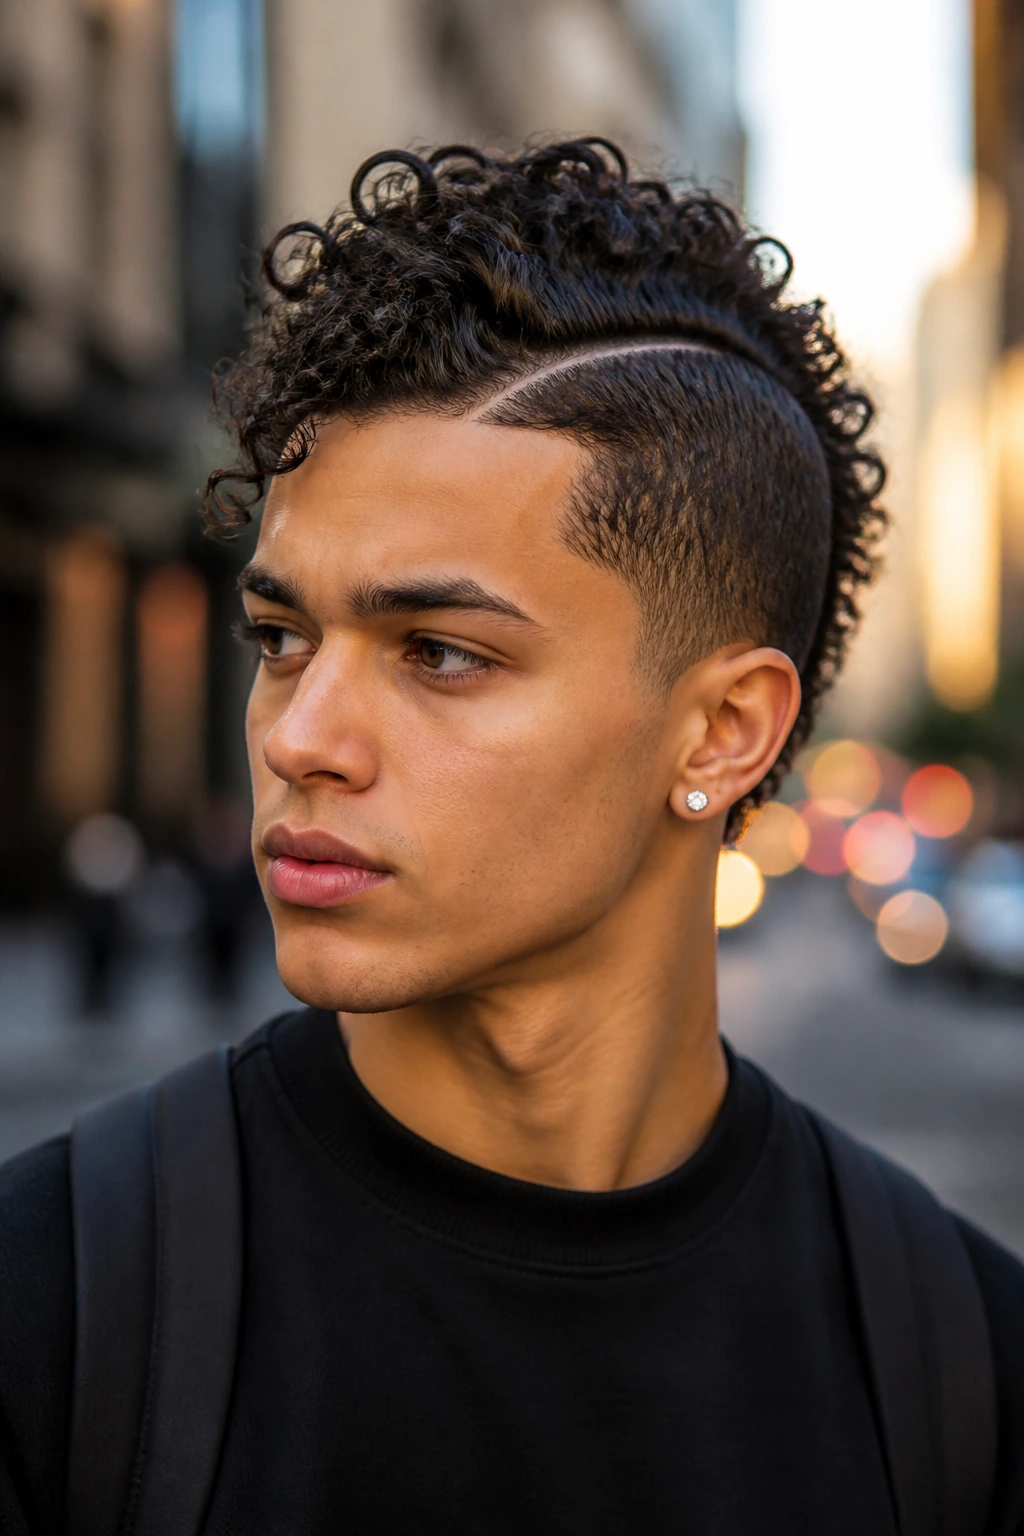
A side-part hawk feels a little easier to wear than a dead-center ridge. The part creates a diagonal sweep that makes the curls look longer and the top a little more elegant. On looser curls, this is often the version that looks most natural.
Use a rattail comb to draw the part while the hair is damp. Then direct the top upward with your hands instead of a brush, which can break the curl clumps apart. The whole style gets nicer when the center section sits just off-axis. Straight down the middle can feel stiff. This one doesn’t.
18. Ringlet Hawk
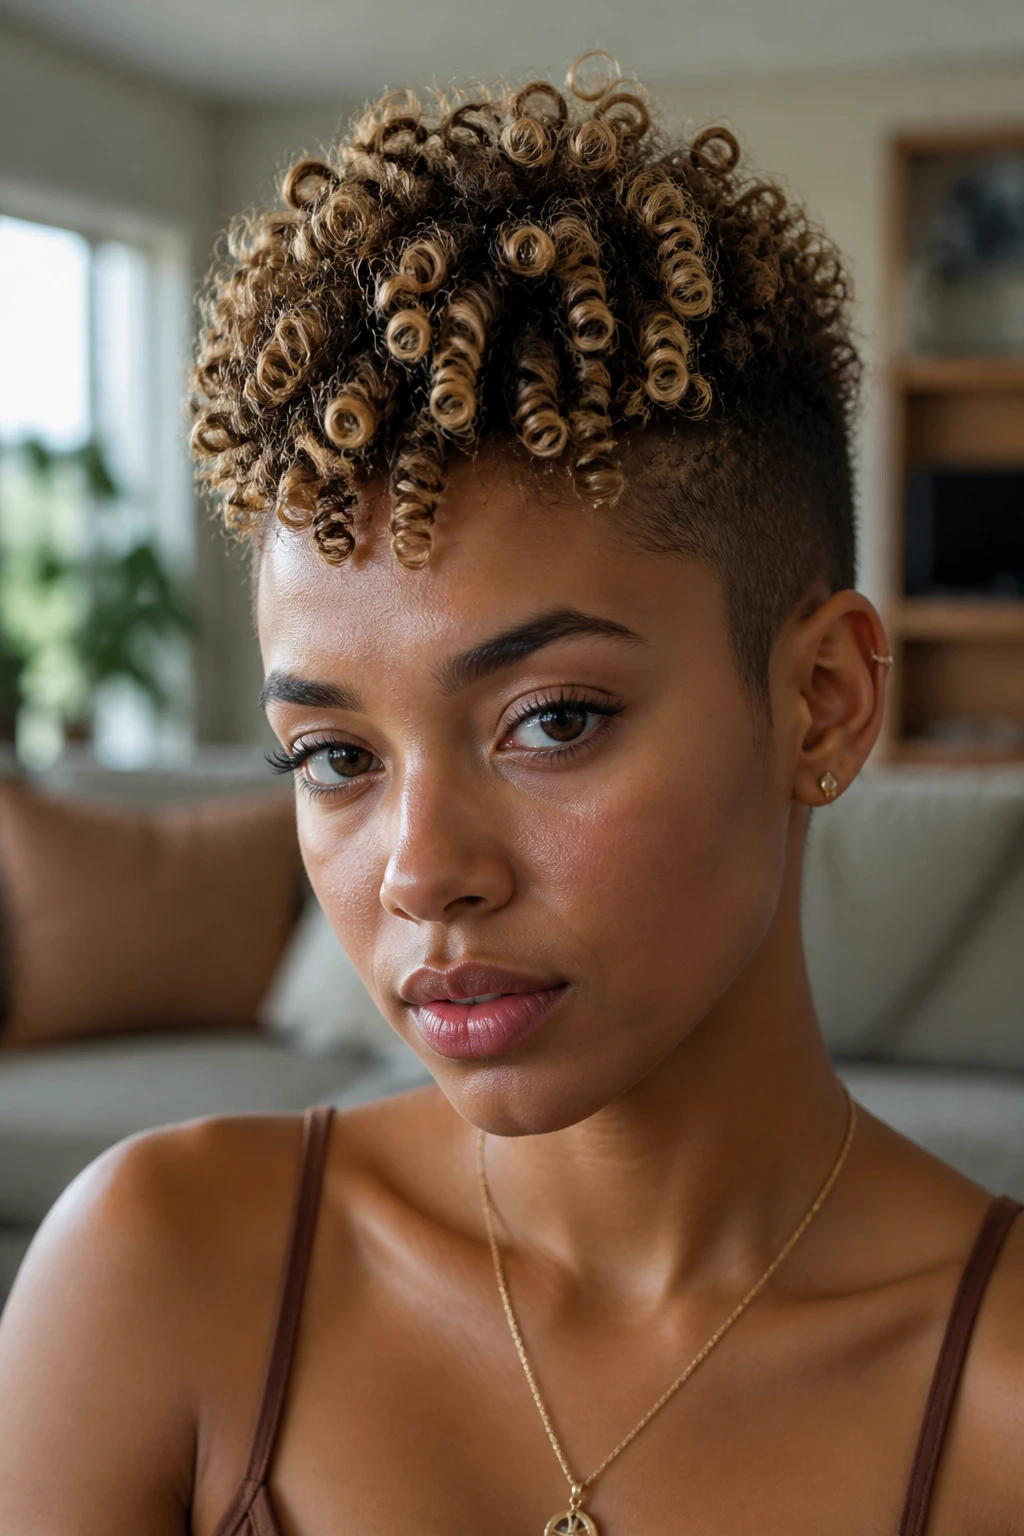
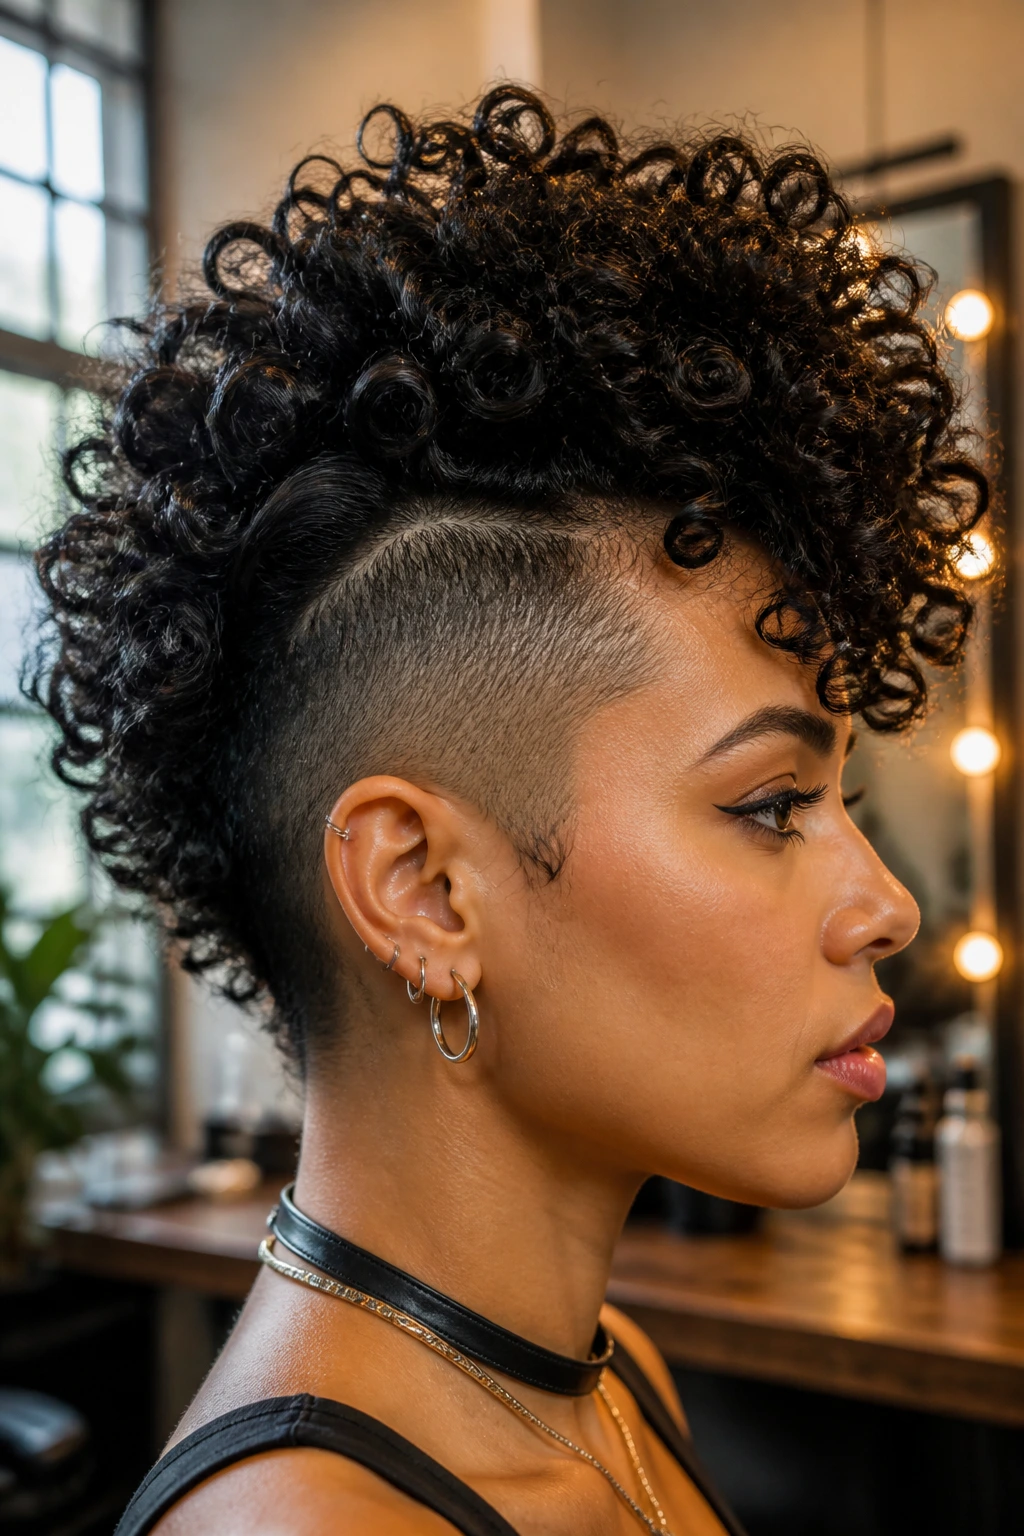
Ringlet hawks are all about definition. The curls are intentionally shaped into spirals with finger coiling, perm rods, or tiny flexi rods, then the sides are kept close so the center stands out. It’s a polished look, but not a flat one.
This is a smart choice for looser curls that need help forming a tighter curl pattern on top. If the hair is dry and frizzy, set it with a leave-in and a medium-hold gel before coiling. Let every section dry fully before separating. If you rush the dry time, the ringlets unravel and the whole point disappears.
19. Festival Hawk
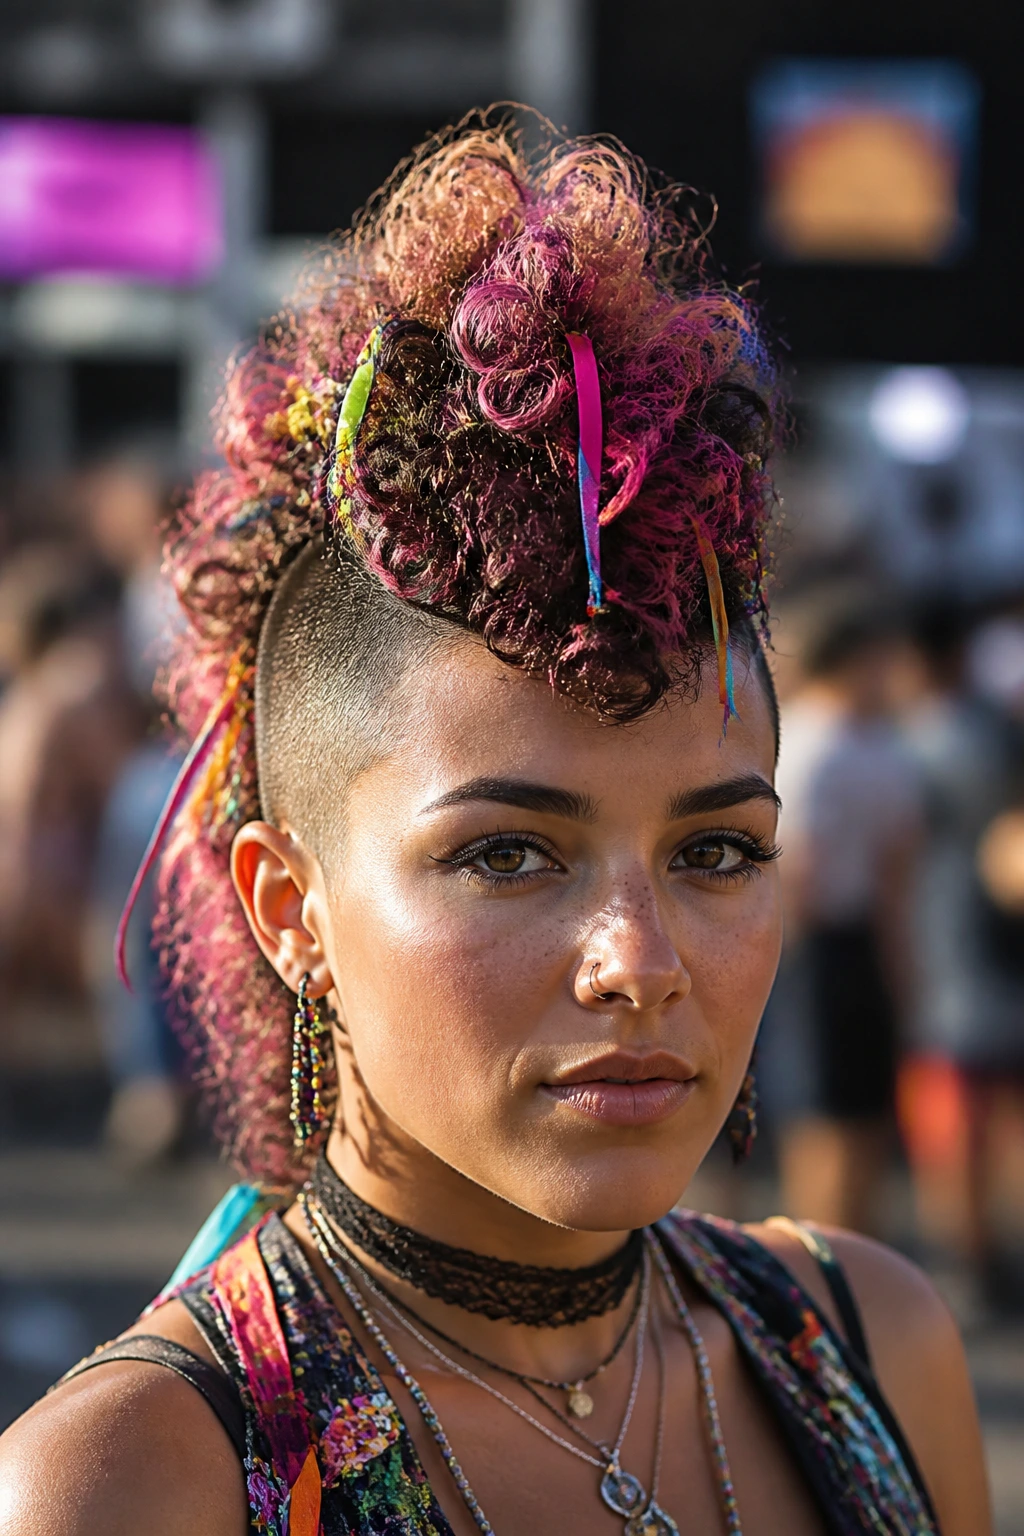
A festival hawk can be as decorated as you want. Think colored clips, glitter gels, ribbon woven through the center, or temporary color wax on the tips. The shape is the same basic mohawk silhouette, but the extras turn it into a statement.
Keep the styling base simple so the accessories don’t fight the hair. Smooth the sides, give the top enough definition to hold pins, and stop there. Too much product plus too many accessories makes the hair heavy, which is a bad trade when you’re standing outside for hours.
20. Bridal Hawk
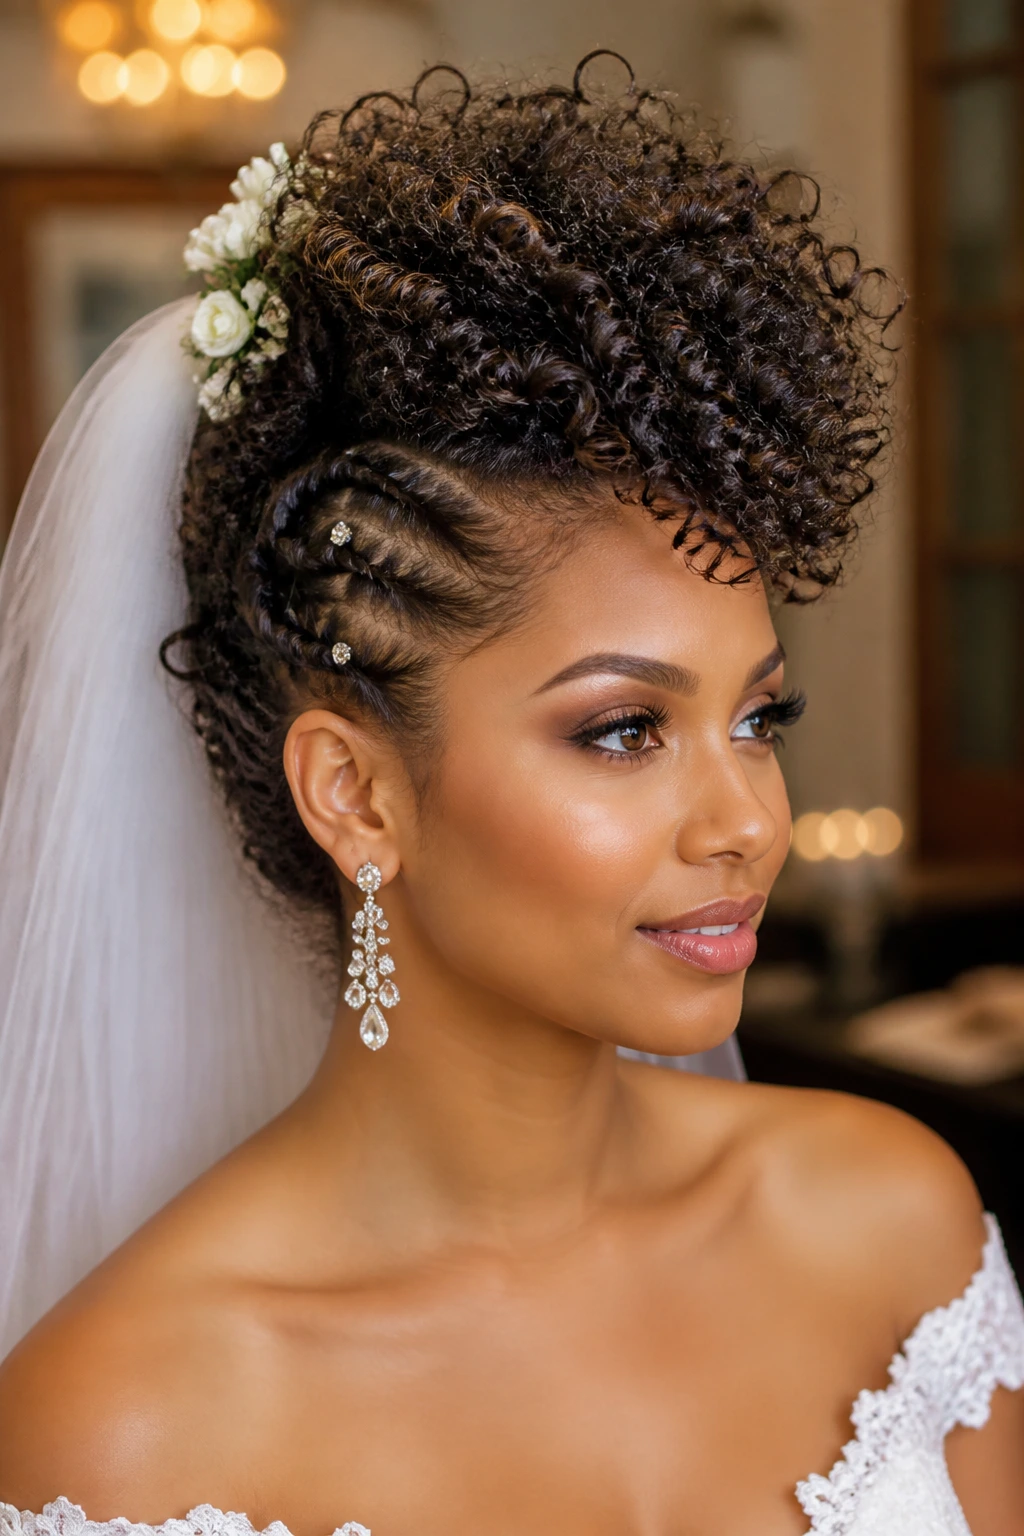
A bridal hawk does not have to be stiff to feel formal. The trick is control: polished sides, defined curls, and enough pins to keep everything from drifting out of place by the second dance. A comb, veil, or floral piece can sit right at the crown if the center section is anchored well.
Cross bobby pins in an X shape to lock the ridge in place. Use a humidity-resistant spray only on the outer layer, not all the way through the curls. Bridal hair should move a little when you turn your head. If it doesn’t move at all, somebody used too much spray.
21. Kids’ Curly Hawk
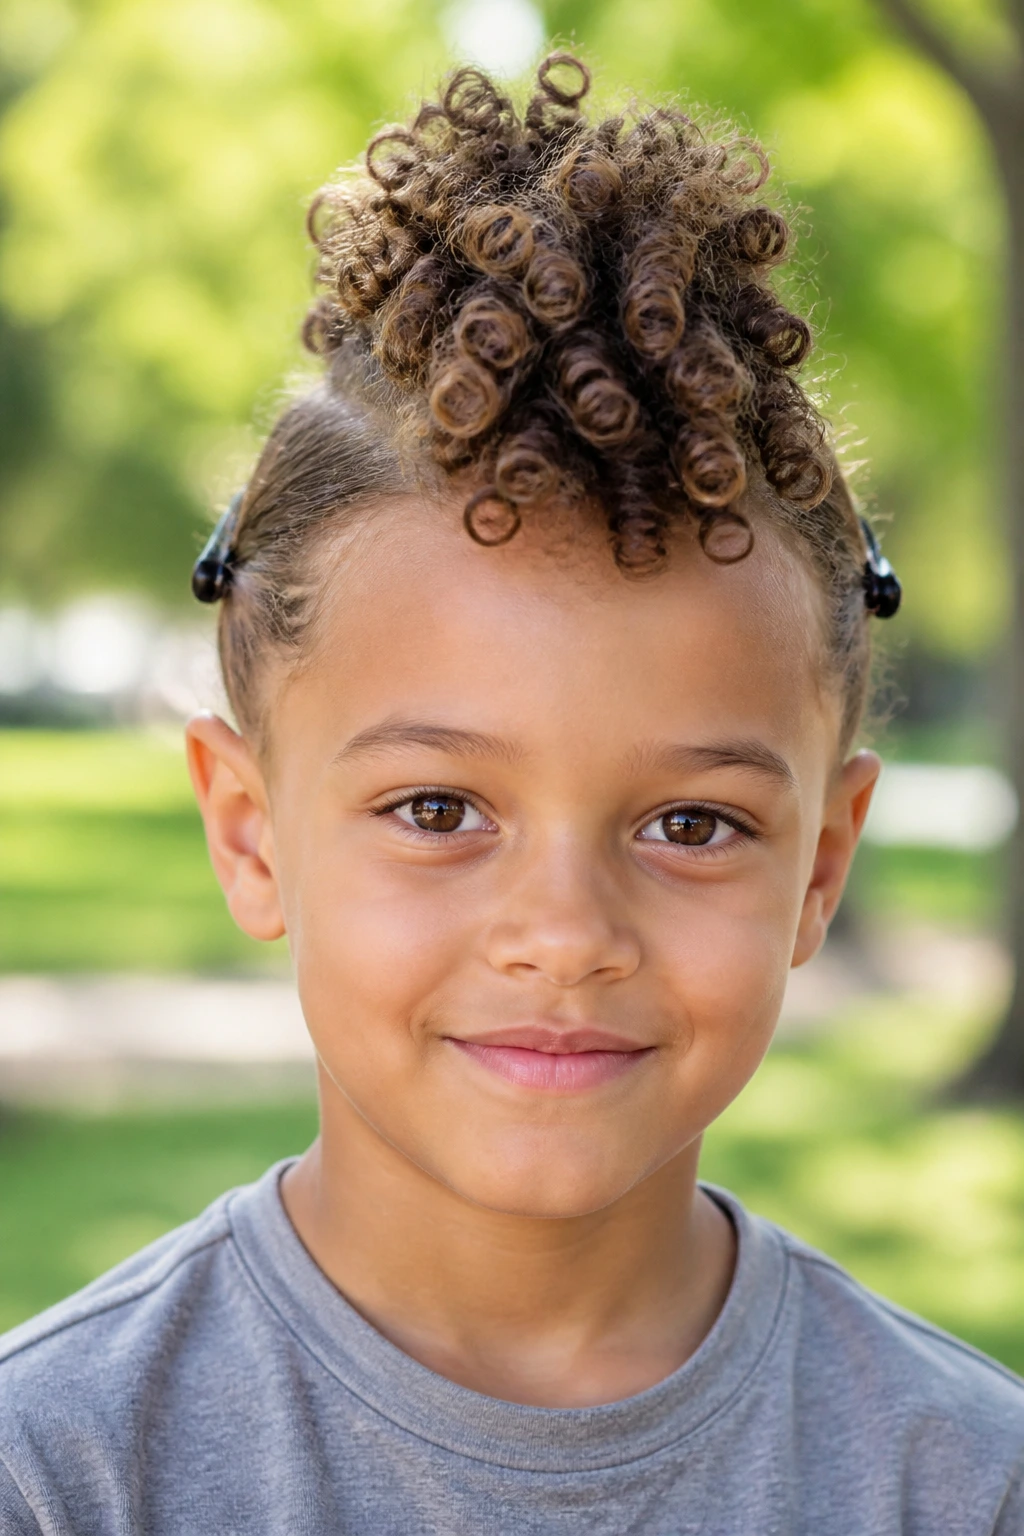
Kids’ versions of the mohawk need comfort first. The style can be soft, playful, and loose, with little bands or tiny clips holding the sides back and the curls left free in the middle. Tight edges and harsh gel are not the goal.
A small amount of water-based styling cream usually does the job. If the hair is tender, skip anything that pulls at the hairline. The best kid hawks look like the child could still run, nap, and forget about them without a full breakdown. That’s the standard I’d use.
22. Protective Hawk
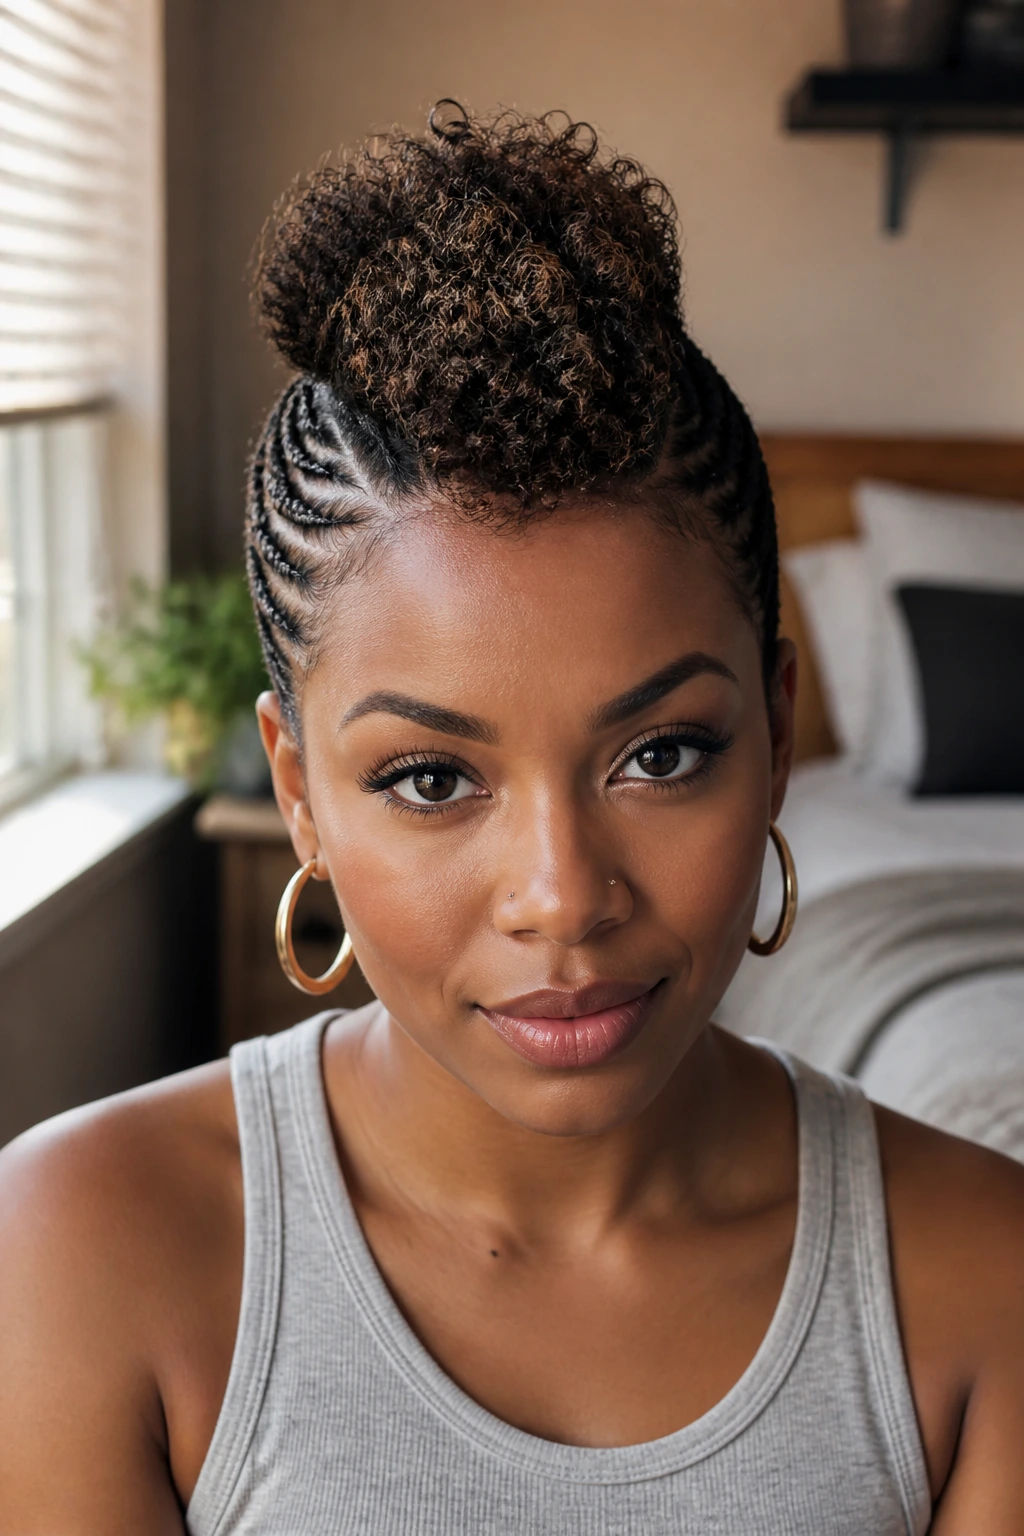
A protective hawk is built from braids or twists that shelter the strands while still keeping the center strip visible. It’s a good choice if you want a mohawk shape that lasts through a busy week and gives the ends a break. The center can stay curly, braided, or tucked, depending on the finish you want.
The key is tension. Pulling the sides too tight will show up fast around the temples and the ears. Keep the scalp comfortable, and use a light oil only where the hair feels dry, not all over the braids. If your head aches, the style is too tight. That’s not a styling problem; that’s a stop-now problem.
23. Groomed Frohawk
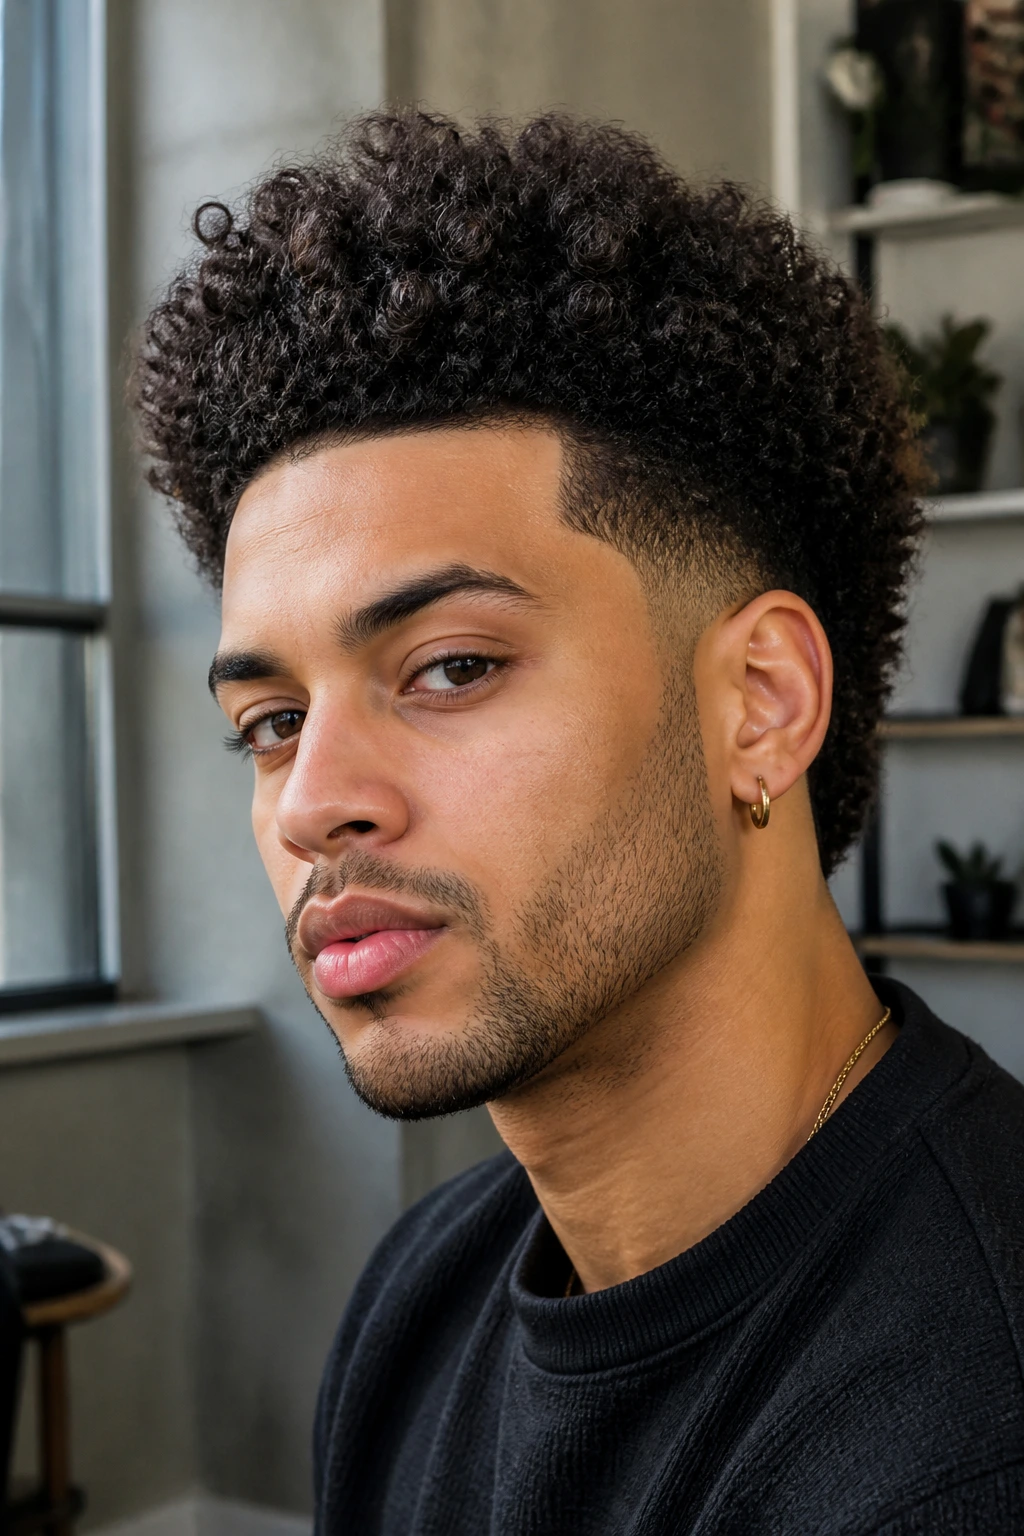
A groomed frohawk sits between polished and full. It keeps the center fuller than a fade style, but neater than a loose frohawk. Think clean edges, controlled volume, and curls that still look like curls instead of a carefully arranged sculpture.
This is the version to reach for when you want shape without drama. A bit of curl cream, a root lift at the crown, and a light brush at the sides will do most of the work. It’s also one of the easier styles to maintain during the week because you can revive it fast with a spray bottle and your fingers.
24. Pixie Hawk
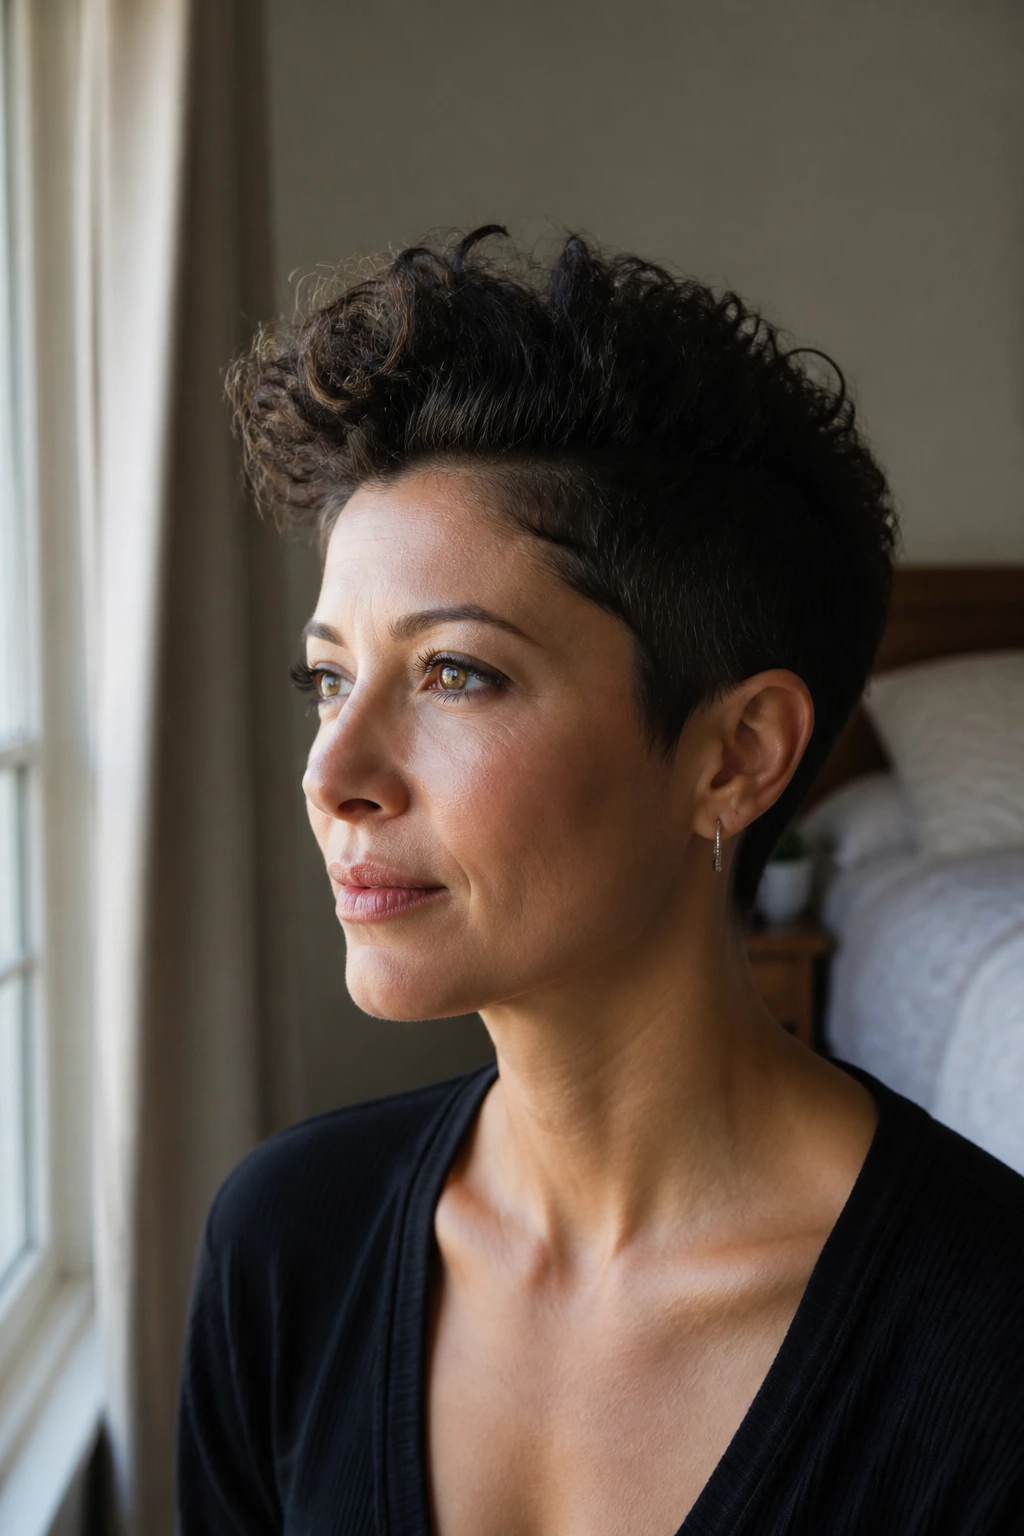
The pixie hawk is short, light, and sharper than people expect. The sides and back stay cropped close, while the crown keeps just enough length to bend upward and forward. It has the spirit of a pixie cut, but the middle line still gives it that mohawk edge.
This one works well when your curls are fine or when you do not want to carry a lot of length. Keep the top around 1.5 to 2.5 inches if you want actual movement. If it gets too long, the shape stops reading as a hawk and starts looking like a shag. That happens fast.
25. Barrel-Roll Hawk
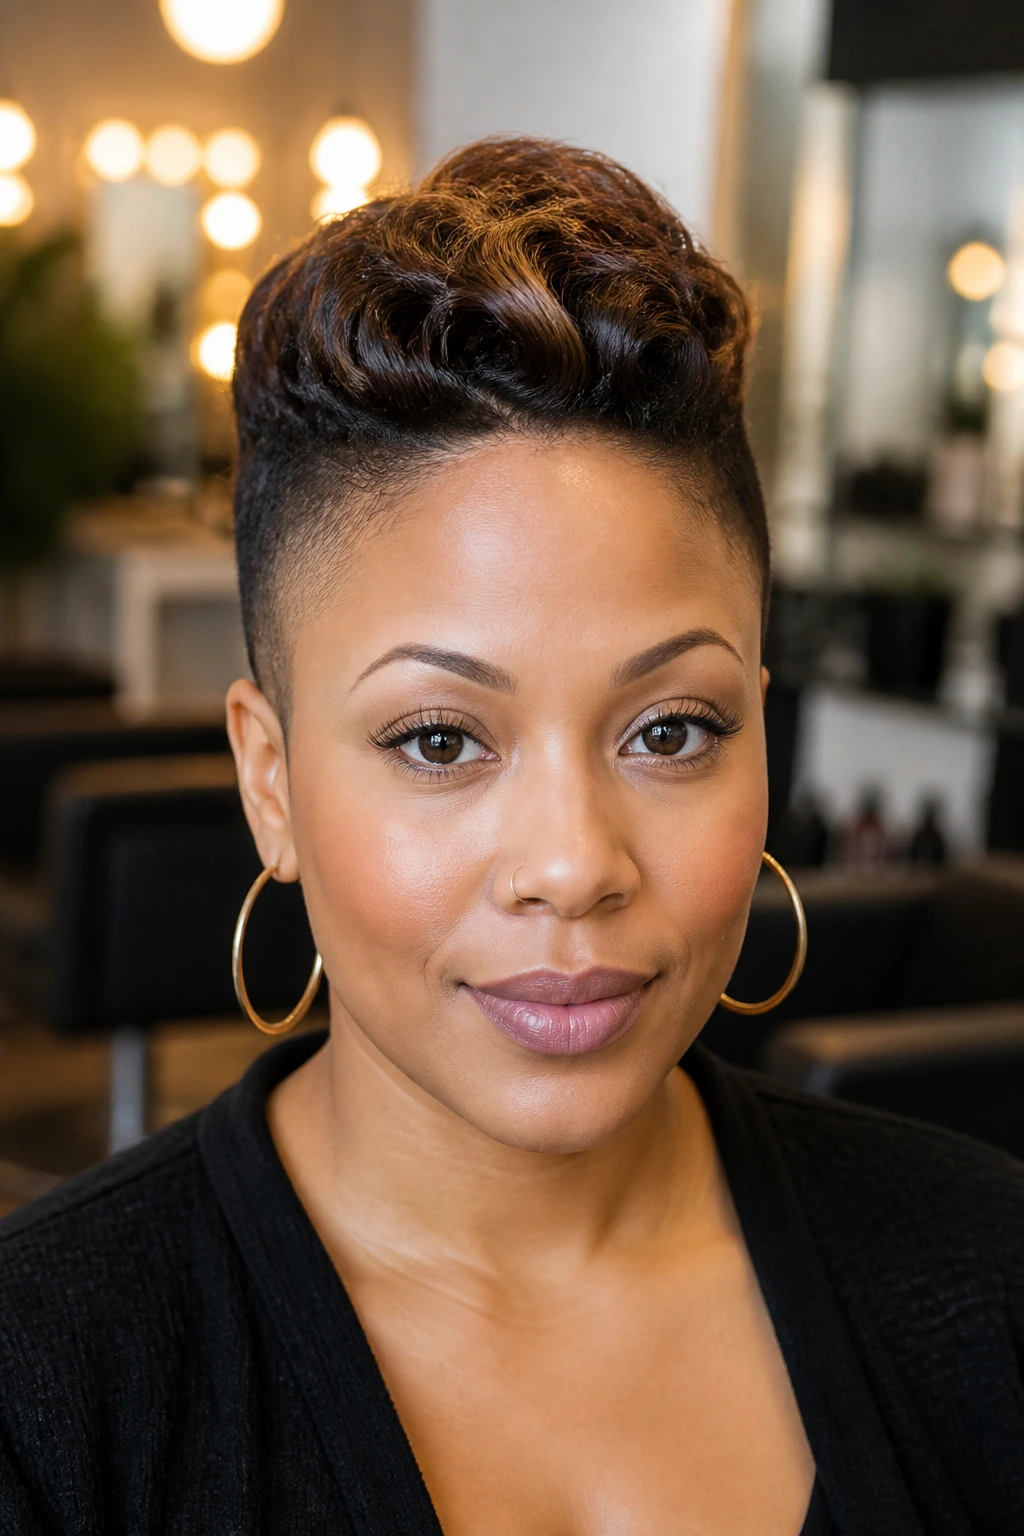
A barrel-roll hawk uses rolled sections, often at the front or along the ridge, to make the style look polished and slightly vintage. Each section is rolled back on itself and pinned close to the scalp, which gives the top a clean, raised line. The curls at the ends can stay soft.
Small sections are the difference between tidy and chaotic here. Aim for rolls about 1 to 1.5 inches wide, pin them securely, and check the back in a mirror before you walk out the door. One loose roll in the wrong spot can drag the whole style down.
26. Finger-Coil Hawk
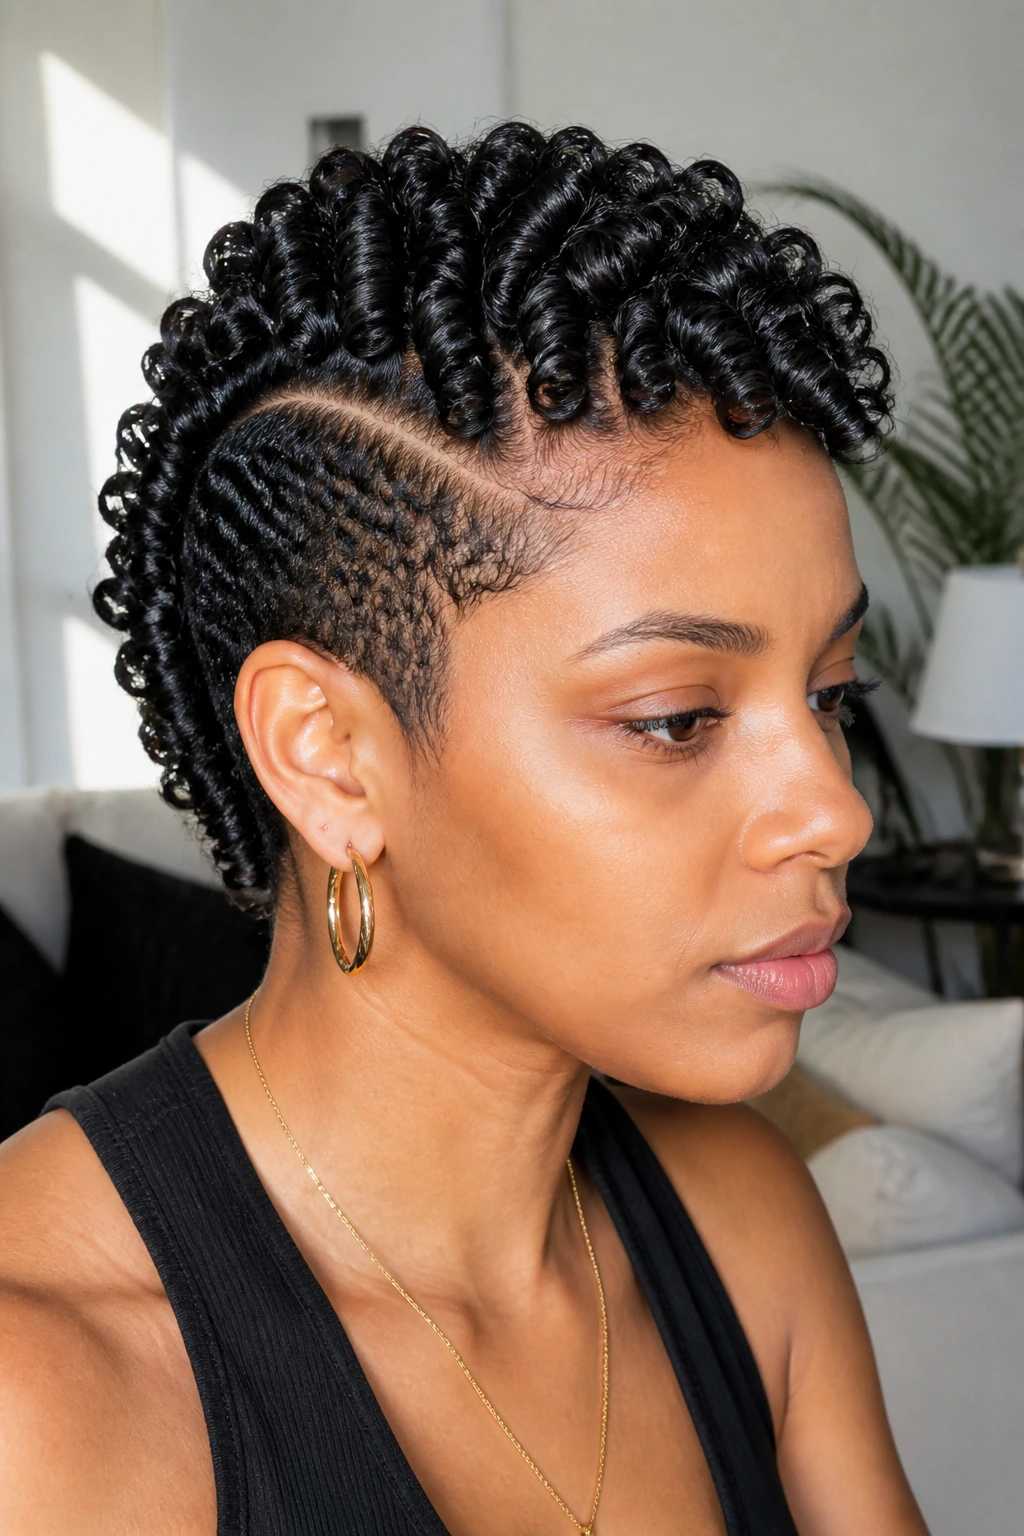
Finger coils give the mohawk a glossy, defined finish that looks almost carved. Each curl is shaped by hand in small sections, then dried so the pattern locks in. It takes time. There’s no polite way around that. But the result is worth it if you like detail.
Use a strong-hold gel and keep the sections small, around 1/2 inch if you want crisp coils. Let them dry completely before separating or touching. If they still feel cool and damp in the middle, they are not ready. That’s when frizz sneaks in.
27. Afrohawk
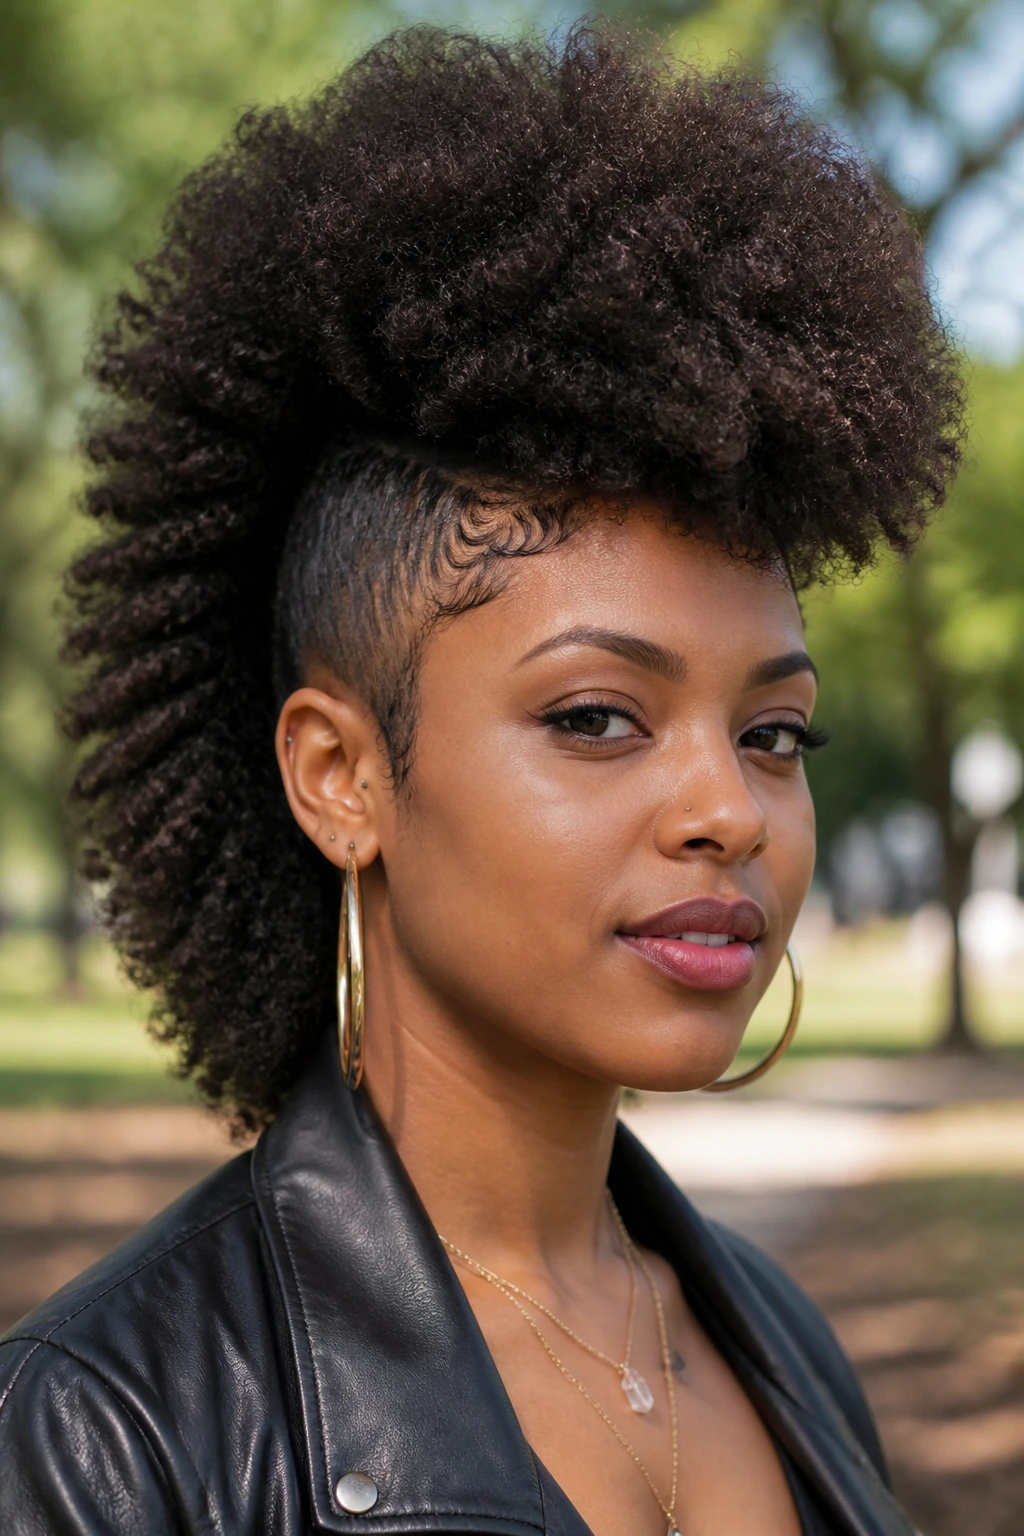
An afrohawk keeps the volume high and the edges rounded, almost like a sculpted afro narrowed into a mohawk outline. There’s no need to flatten the texture into submission. You shape it by lifting the center and controlling the sides, not by changing what the curls are.
I like this version when the goal is presence. It works best on dense coils that can hold height on their own. A pick at the roots and a little shaping with the hands is usually enough. If you overwork it, the silhouette gets fuzzy. Stop while it still looks bold.
28. Rolled-Back Hawk
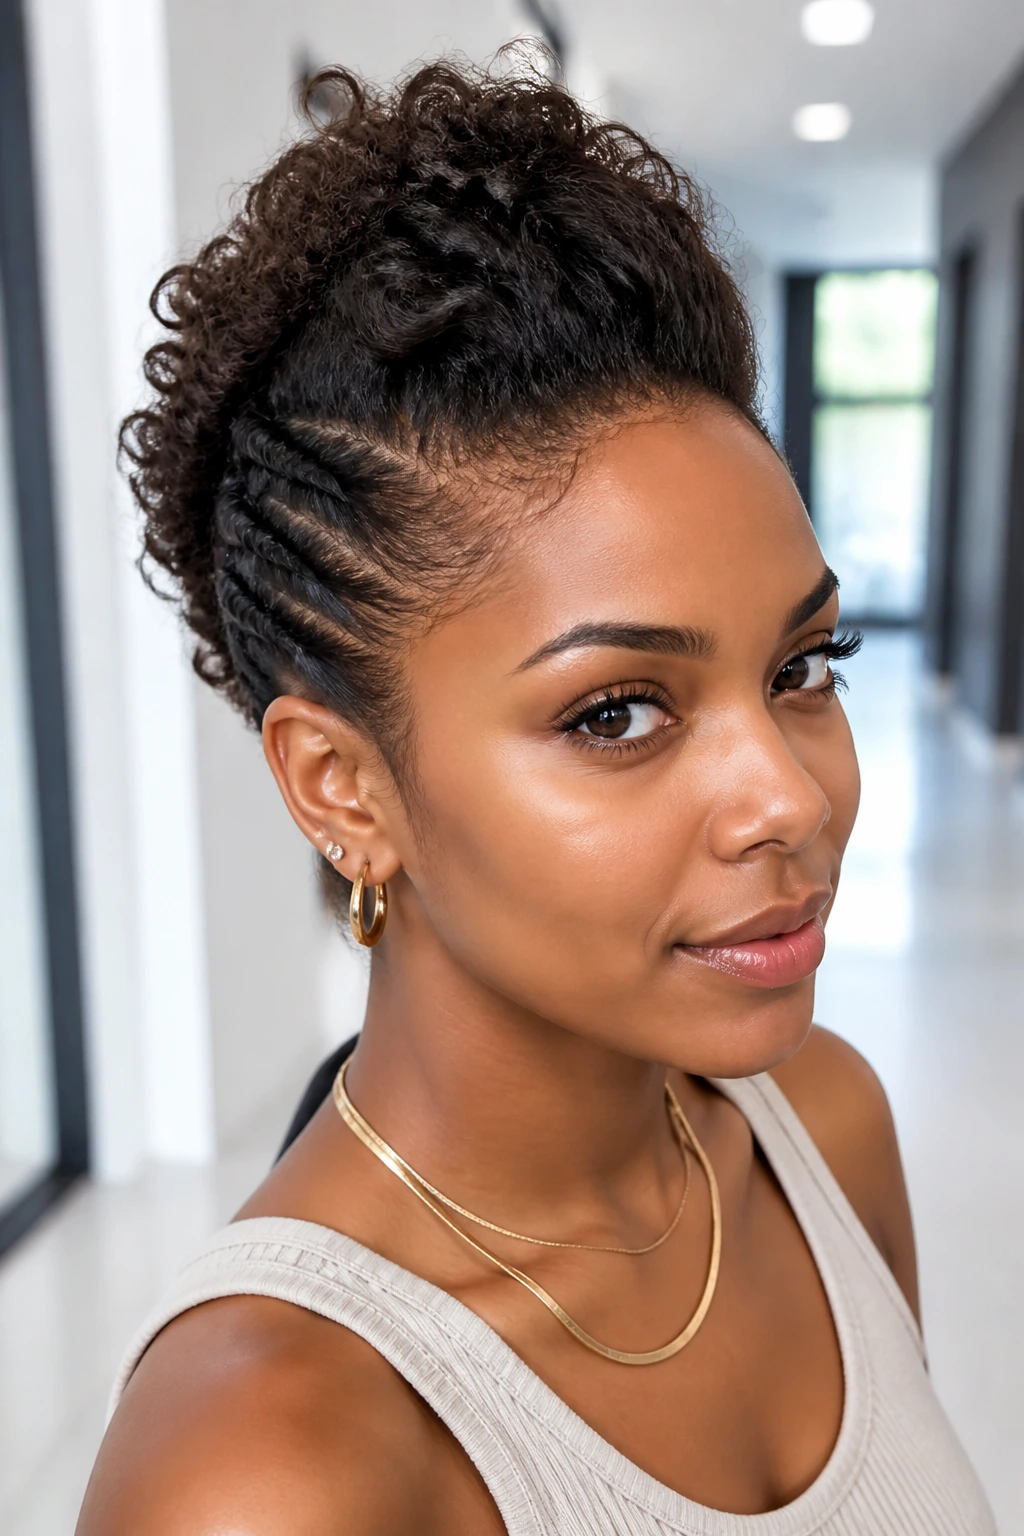
The rolled-back hawk uses the sides as part of the design. Twist or roll the side sections back toward the center line, then pin them flat so the ridge reads clean and continuous. The result is neat without being severe.
This style is especially helpful if the hair on the sides is long enough to get in the way but not long enough to braid easily. Use a few bobby pins crossed over one another every 2 inches. That spacing keeps the roll from popping loose. It is not a style you want to half-pin. Half-pinned hair slips.
29. Double-Bun Hawk
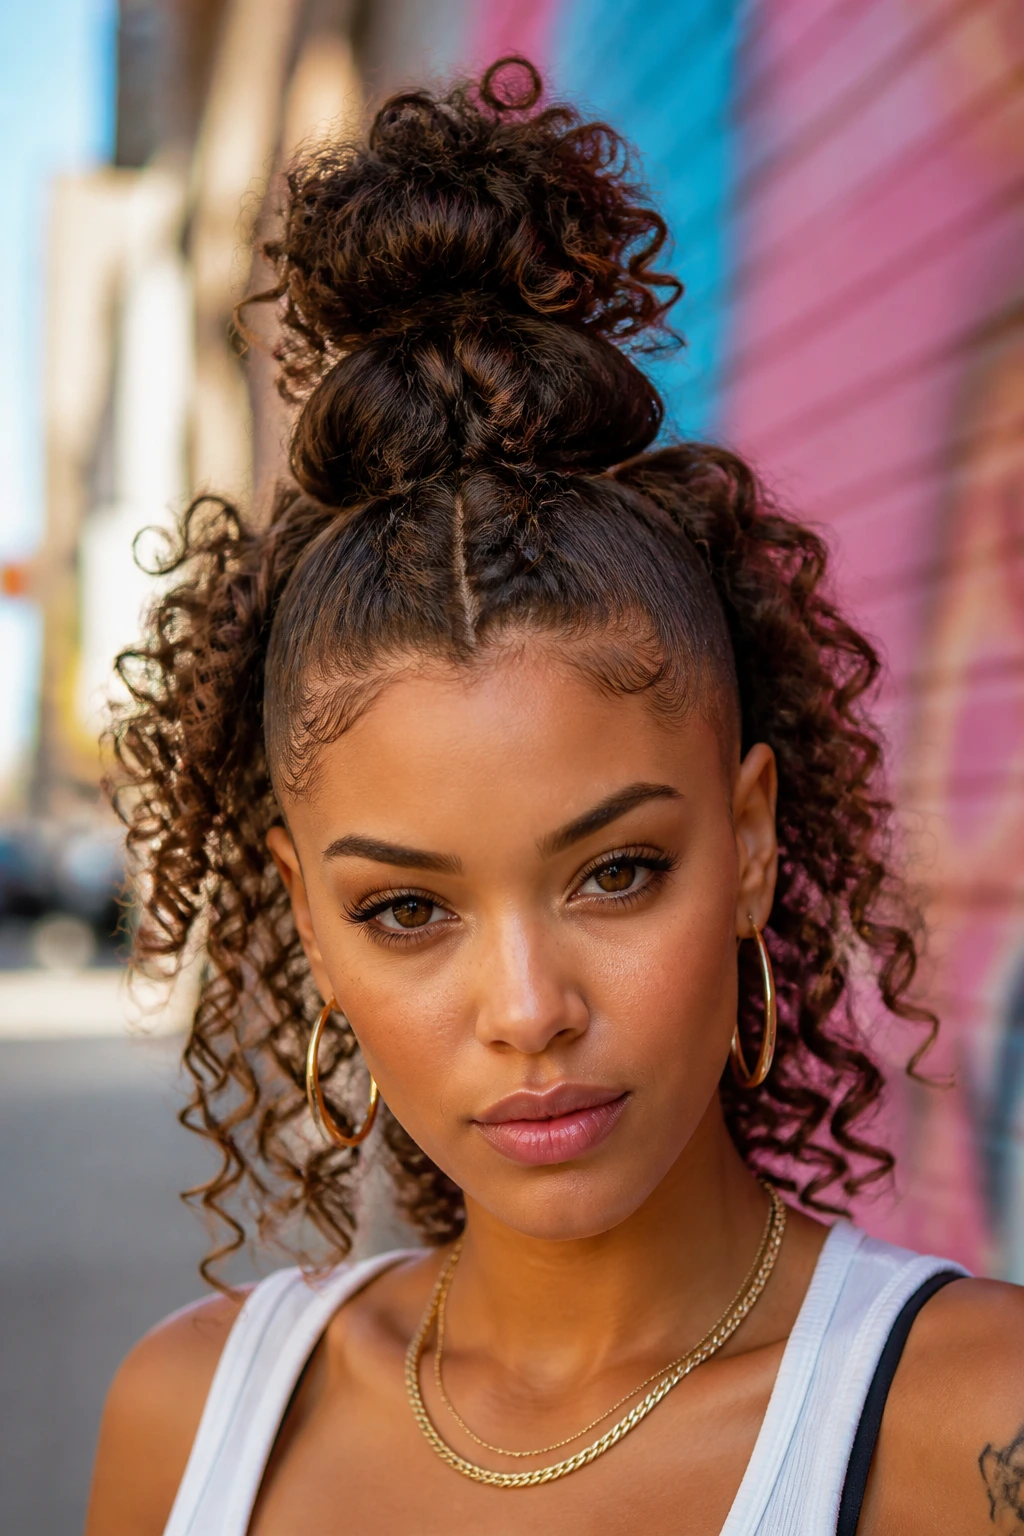
Two buns along the center line make the hawk look playful and modern. You can keep the buns stacked from front to back or place them close together for a shorter silhouette. The curls around them can stay loose so the whole style doesn’t feel too rigid.
This works well on medium-length hair that is too short for a single large bun but long enough to bundle in sections. Use matching elastics and keep the buns even in size. If one bun is much bigger than the other, the eye notices immediately. Small asymmetry can be cool. Unplanned asymmetry just looks unfinished.
30. Low-Key Hawk
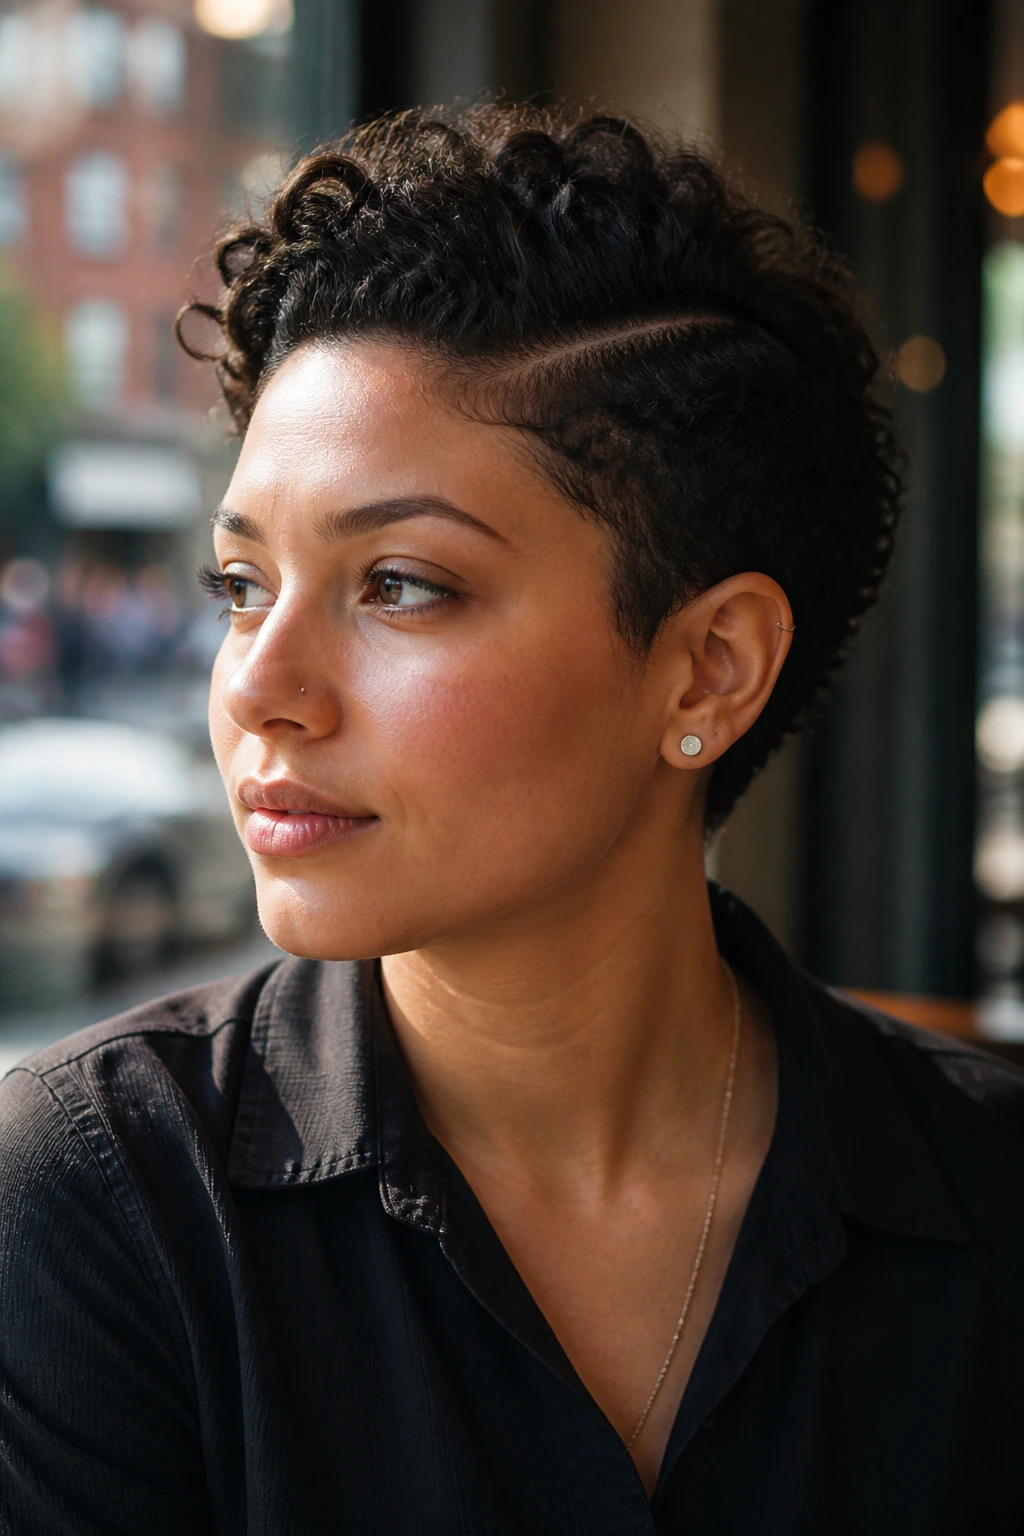
A low-key hawk is for people who like the idea of the style more than the height. The ridge is shallow, the sides are gently tucked, and the curl pattern does most of the talking. It is clean enough for conservative settings but still reads as a mohawk once you notice the shape.
A side part helps keep this one from looking flat. So does a light root lift at the crown, even if you never tease the hair. If you wear glasses, this is a friendly version because it avoids crowding the temples. Quiet does not mean boring. It just means the shape is doing its job without asking for applause.
31. Mullet Hawk
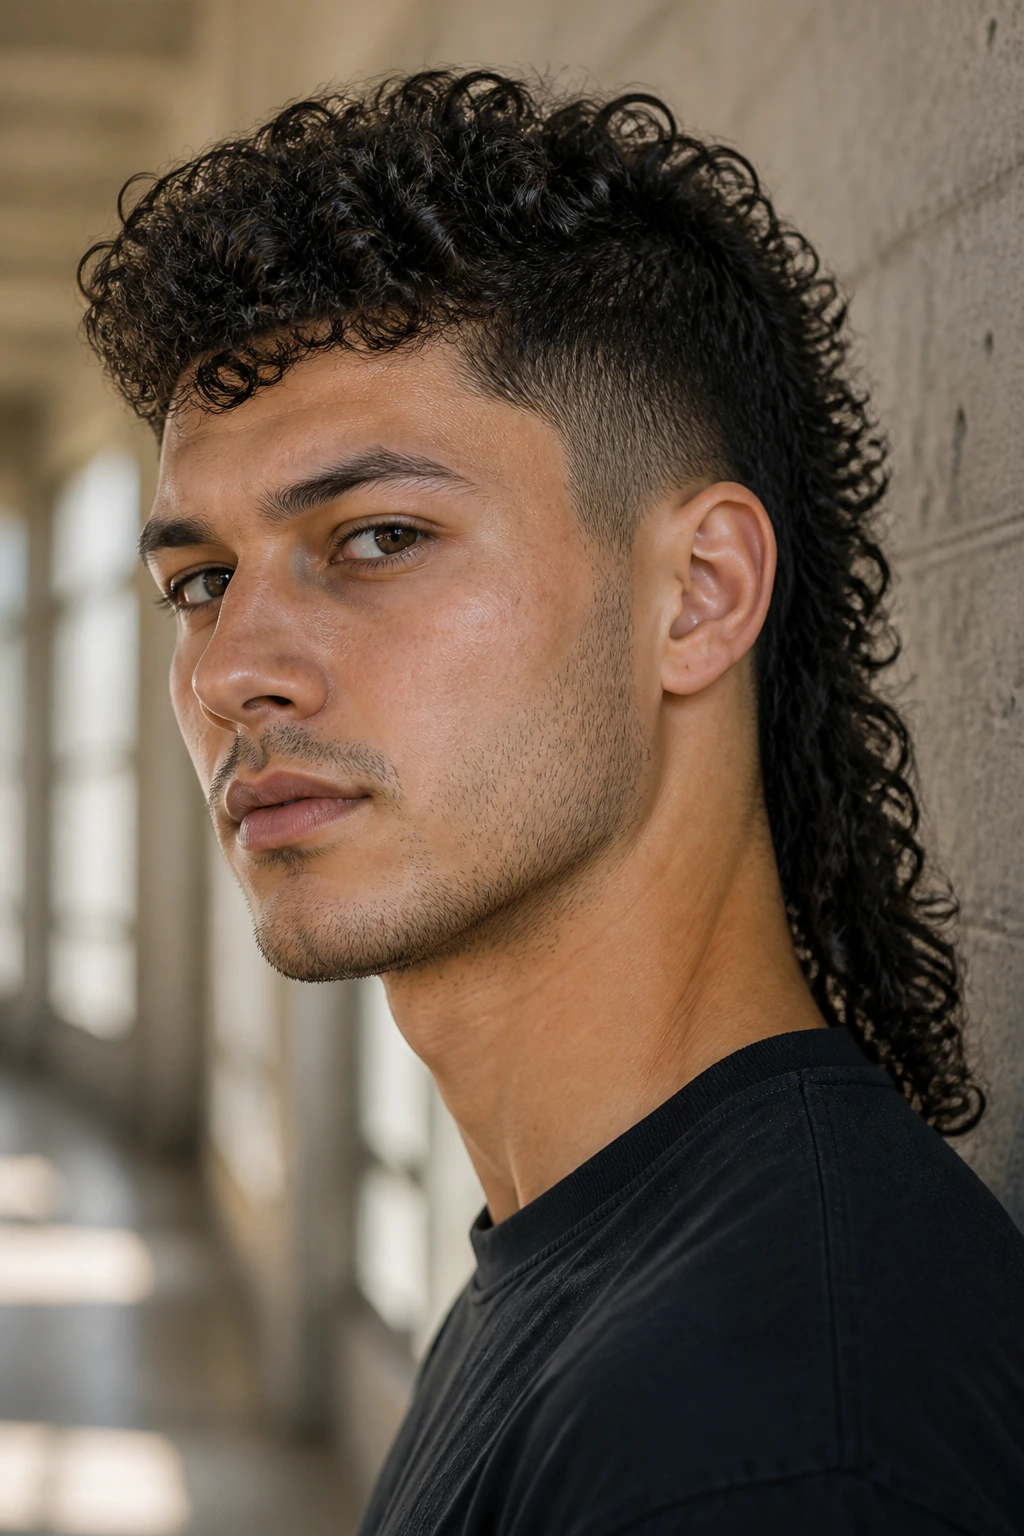
A mullet hawk leans into the contrast between short and long. The front and sides stay more controlled, while the back keeps extra length and movement. It is a little rebellious and a little retro, which is exactly why people remember it.
The cut needs a good balance point. Leave enough length at the nape so the back doesn’t collapse into a triangle, and keep the crown lifted so the style still reads as a hawk. If the back gets too heavy, trim it. The whole shape depends on tension between the front and the tail.
32. Cornrow Hawk
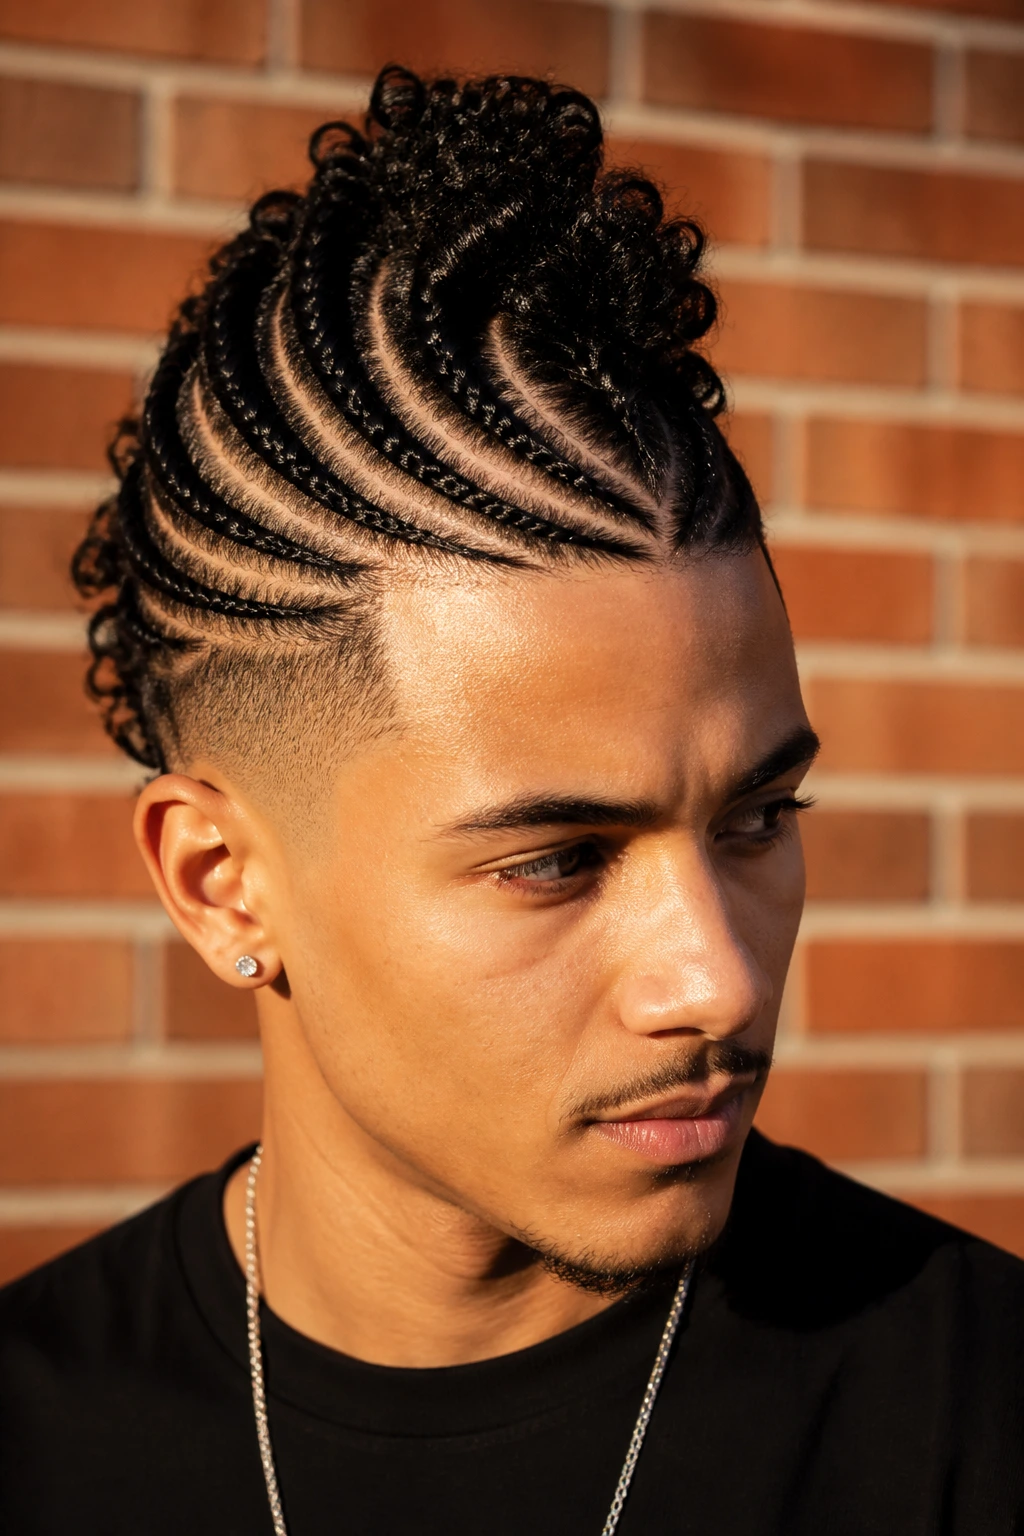
Cornrow hawks are the cleanest way to build a mohawk line with braiding. The cornrows feed toward the center ridge, which gives the style a neat spine and leaves the mohawk shape obvious even from across the room. The center can stay curly, braided, or tucked into one strong line.
This is a good option when you want control and structure. Ask for even row spacing so the braids do not crowd one another, and keep the tension gentle around the edges. A good cornrow hawk should feel secure, not tight. If the scalp hurts after an hour, it is too much.
What Makes a Curly Mohawk Hold Its Shape
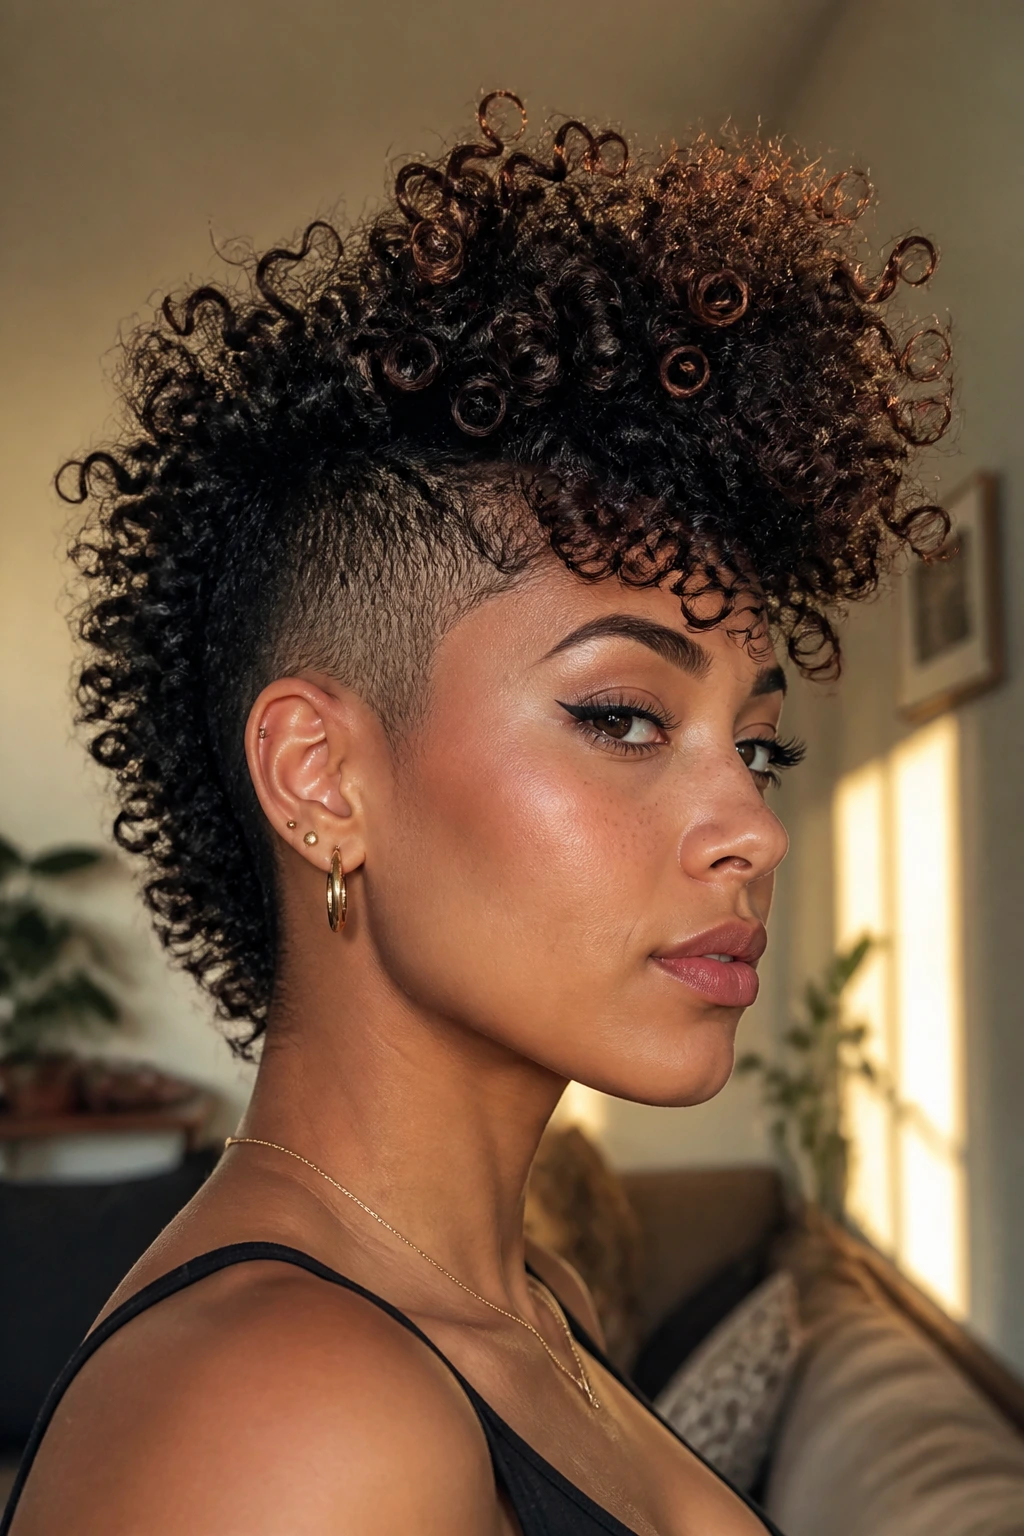
A curly mohawk holds shape for one simple reason: the cut and the styling have to agree with each other. If the sides are too bulky, the ridge never looks intentional. If the center is too short, the silhouette loses its spine. The style works when the haircut makes the job easier before product ever enters the room.
The cut does half the work. A low taper, fade, or tightly pinned side section keeps the eye moving upward. That is the part people miss when they ask for “just a mohawk.” On curly hair, the transition from side to center matters as much as the center itself. Clean edges make the curls look fuller. Messy sides make even good curls look unfinished.
The Drying Stage Matters More Than Most People Think
Wet curls lie. They always do. A mohawk that looks tall and tidy at the sink can fall flat once gravity and humidity show up. That is why drying in the right direction matters: diffuse upward, don’t blast the curls from the side, and let the set dry before you separate it.
If you use gel, let it form a cast first. Then break the cast with dry hands or a drop of serum. If you skip that wait, the curls go frizzy fast. A good curly hawk has a little structure in the morning and a little softness by afternoon. It does not need to stay frozen in place.
Product Balance Is the Difference Between Shape and Helmet Hair
Too much cream on the sides makes the hair collapse. Too much gel on the top makes the curls feel crisp and dead. The sweet spot is usually a lightweight leave-in under a medium-hold product, then a few strategic pins or bands to keep the outline where you want it. That’s it. You do not need a whole bathroom shelf.
The Tools That Make These Styles Easier
-
Rat-tail comb: Good for clean parts, temple lines, and sectioning the ridge without hacking at the curl clumps.
-
Wide-tooth comb: Best for detangling damp curls before shaping; it moves through hair without stripping the pattern apart.
-
Sectioning clips: Keep the sides and top separated while you braid, twist, or pin.
-
Bobby pins and hairpins: Needed for faux hawks, rolled styles, and bridal versions; crossed pins hold better than one pin alone.
-
Satin scrunchies: Useful for puffs, pony hawks, and pineapple shapes because they leave fewer dents.
-
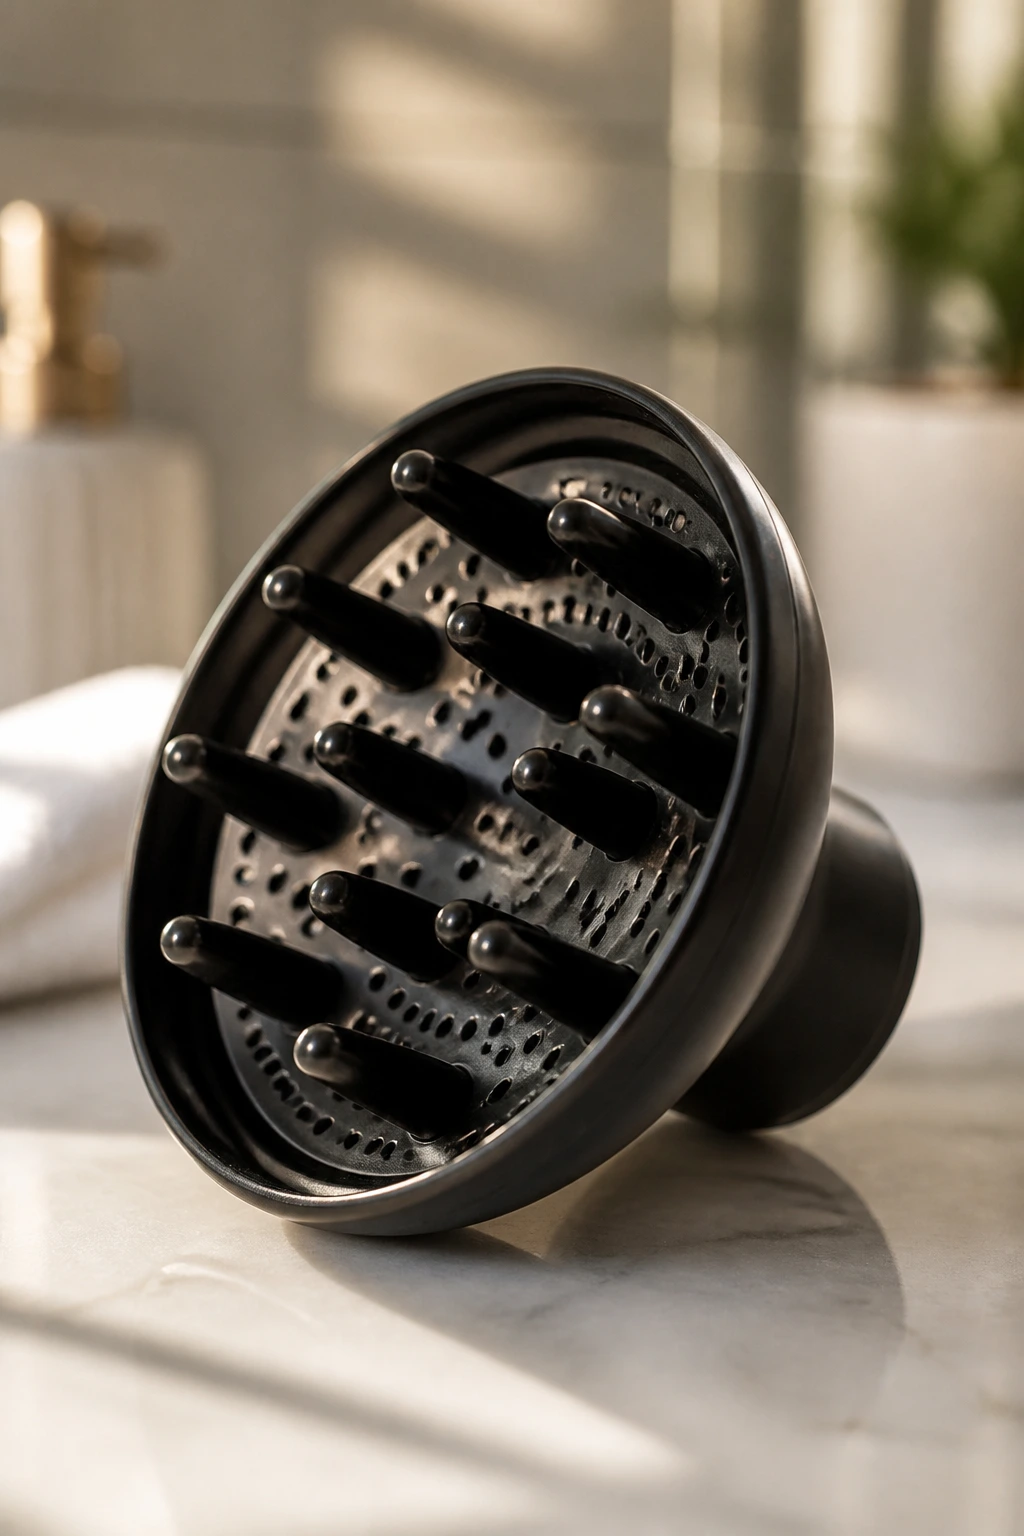
Diffuser attachment: Helps dry curls upward with less frizz than direct heat.
-
Edge brush or soft toothbrush: Smooths the perimeter without flattening the whole hairline.
-
Clippers with guards or a barber’s chair: Non-negotiable for fade, taper, and temple-art versions.
-
Hand mirror: You need to check the back ridge. Always. The crown can lie to you from the front.
-
Spray bottle: Water plus leave-in is enough for most refreshes; keep it light, not dripping.
Product Picks and Curl Prep That Pay Off

The best product choices for a curly mohawk are usually the ones that hold shape without turning the hair into cardboard. A lightweight leave-in, a curl cream, a mousse, and a medium-hold gel cover most of the bases. I’d rather see three good products used sparingly than one heavy cream layered all over the head. Heavy butter can be fine on very dry coils, but on fine curls it can flatten the hawk by noon.
What to Reach For
- Mousse: Great for fine or loose curls that need lift at the roots without weight.
- Curl cream: Best for softer definition and frizz control on medium to thick curls.
- Medium-hold gel: Gives a cast that keeps the ridge upright through a long day.
- Edge control: Use only where you want the sides to stay polished.
- Light oil or serum: Use a tiny amount after the style is dry to break the cast or add shine.
What to Avoid Overusing
Too much glycerin-heavy product can swell the hair in humid weather. Too much butter on the sides can make the shape sink. And heavy oils before the curl set is dry can make the ridge slide. If you live where the air feels thick enough to chew, favor stronger hold and lighter finish. If your curls are dry and coarse, a cream under gel usually gives a better result than gel alone.
A clarifying wash every couple of weeks helps too, especially if you use edge control often. Build-up at the roots is sneaky. The style starts looking dull, then it starts collapsing. That is usually not the haircut’s fault.
How to Wear a Curly Mohawk With Different Outfits and Face Shapes
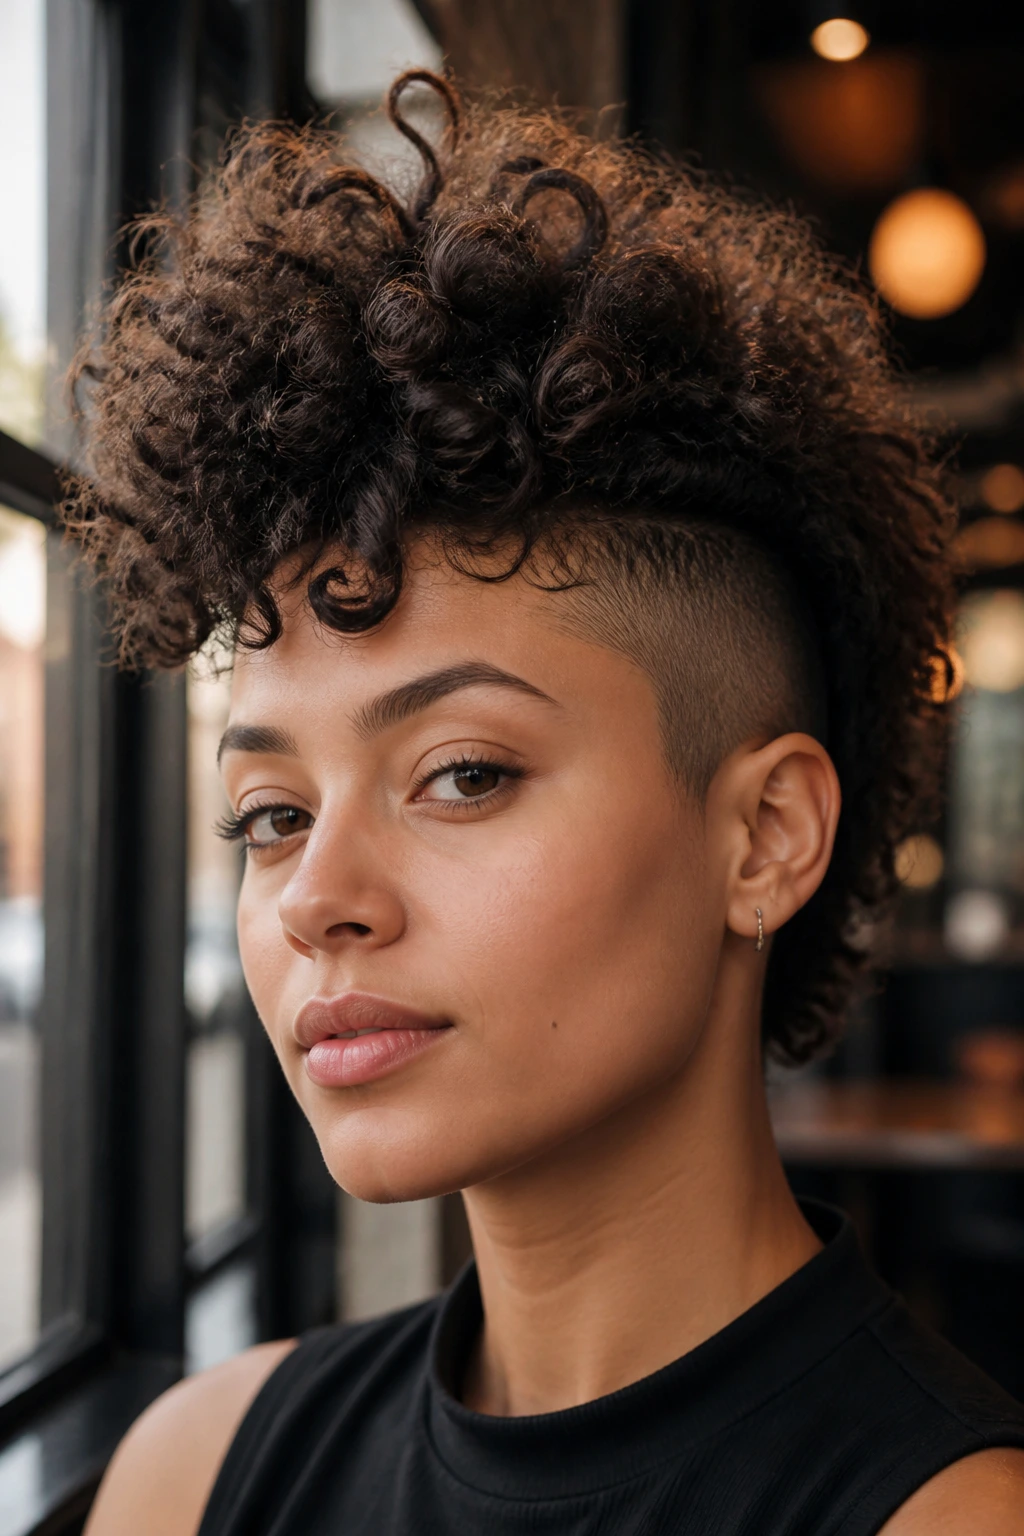
Shape: A taller ridge works well on rounder faces because it adds vertical line, while a slightly wider frohawk can soften a narrow face. If your face is long, keep the height moderate and let the side taper do more of the work. Glasses, jawline, and neckline all change how the silhouette reads, so look at the full frame, not just the hair.
Pairings: Hoop earrings and a clean neckline love a mohawk. So do structured jackets, high collars, and simple tees with a strong neckline. If the hair is full and textured, keep the clothes cleaner. If the hair is sleek and tight, you can afford a louder outfit. The balance matters more than the label.
Scale: Short hair does better with a tighter, narrower hawk. Long hair can handle puffs, buns, and ridge shapes that sit higher. If your hair is very dense, keep the center a little narrower than you think you need. Curly hair expands when it dries, and that extra inch can change the whole mood.
Best Setting: A low-key hawk reads well in office settings. A skin fade or temple-art version brings edge for nights out. Bridal and festival versions obviously play differently, but the same haircut can move between them with product and accessories. That is the fun part.
Extra Styling Boosters and Personal Touches
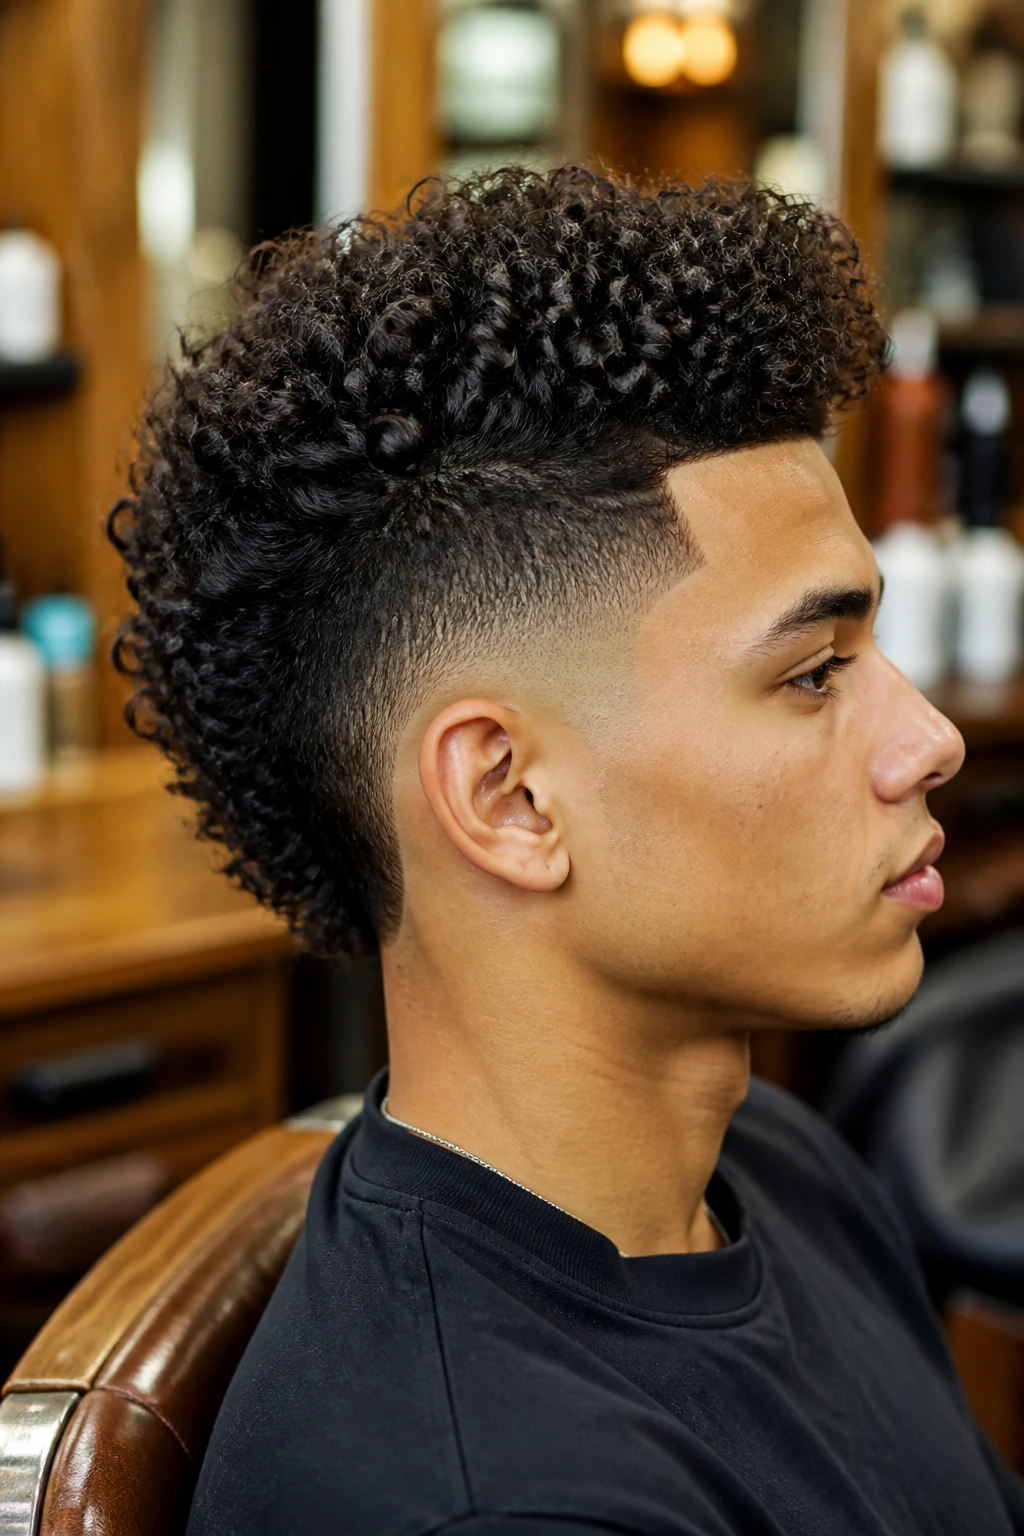
Lift at the Roots: If the center looks flat, do not pile more product onto the ends. Lift the roots with your fingers or a pick while the hair is almost dry, then let it set that way. Root support gives you more height than a second round of cream ever will.
Edge Detail: A sharp hairline changes everything. Use a tiny amount of edge control around the temples and front only, then leave the rest of the curl pattern alone. Overdoing the edges makes the style look too polished and can pull the eye away from the mohawk shape.
Accessory Move: Hair cuffs, little clips, colored pins, and ribbon all work if you keep the rest of the look simple. One or two accents are enough. Too many extras make curly hair look busy instead of styled.
Make-It-Yours: If your curls are fine, choose mousse and a narrower ridge. If they’re coarse or dense, choose cream plus gel and a taller silhouette. For a softer feel, leave a few wisps free at the temples. For a sharper look, tuck everything tight and let the center line do the talking.
Nighttime Care, Refreshes, and Long-Term Maintenance
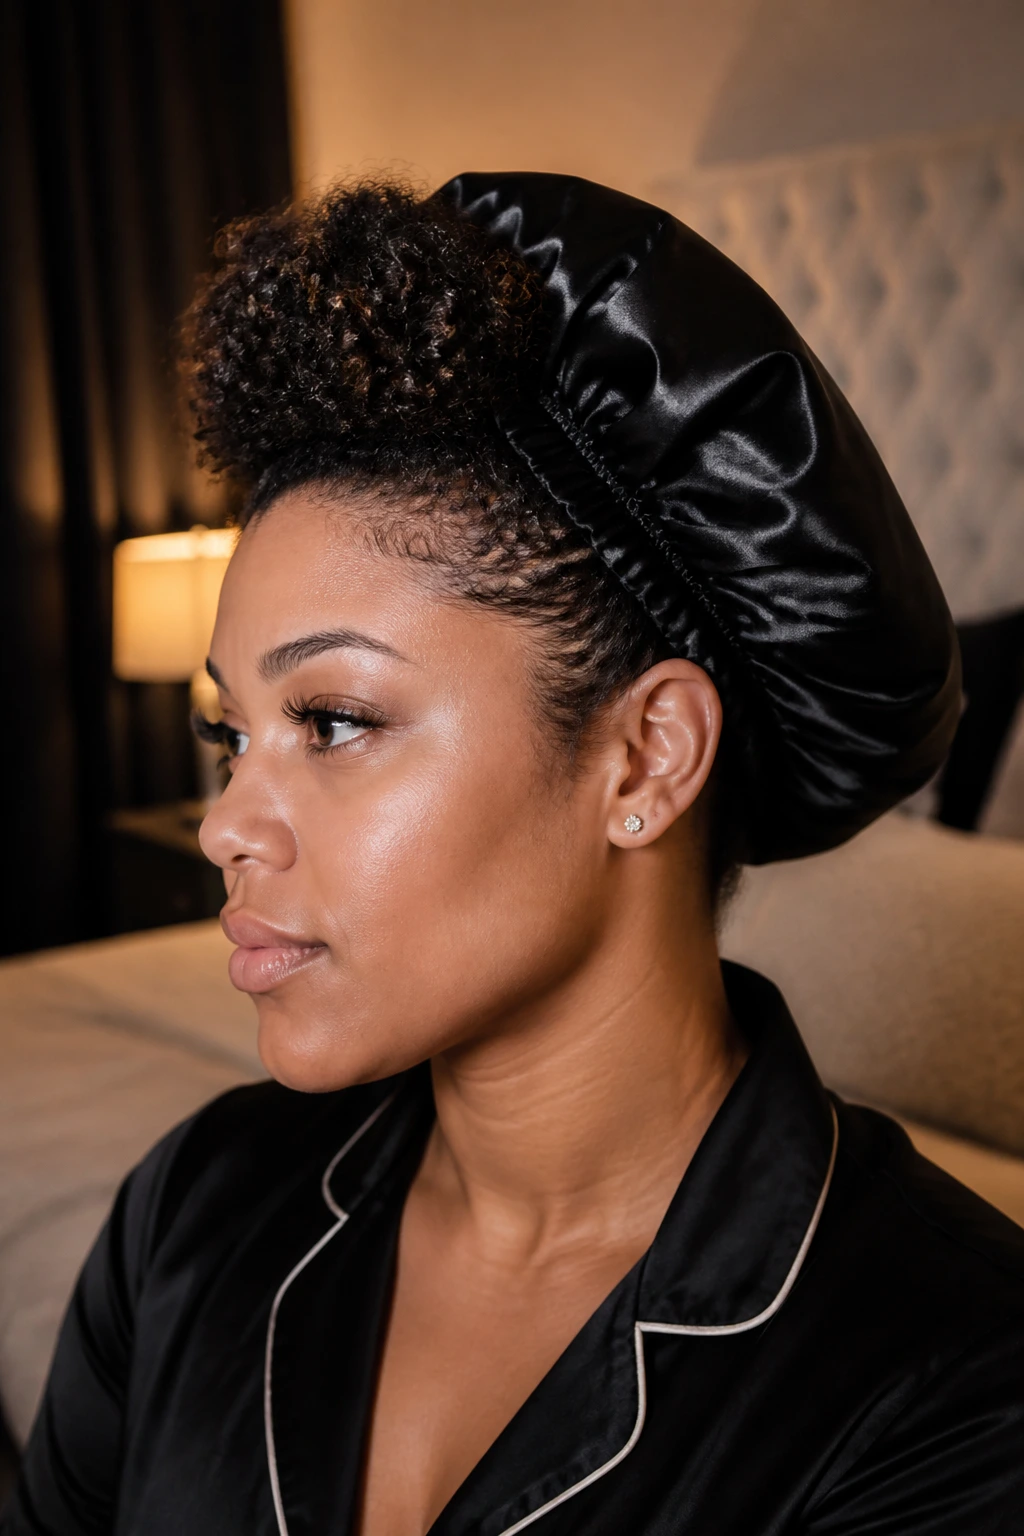
A curly mohawk lasts longer when you treat the style as something to preserve, not something to rebuild every morning. For loose styles, a satin bonnet or scarf is enough most nights. If the ridge is high, pineapple the center loosely and tuck the sides down so the shape doesn’t get crushed. The goal is to protect the outline while the hair rests.
For styles with braids, twists, or fades, the timeline is different. A braided-sides or protective hawk can hold 1 to 2 weeks if the scalp stays comfortable and clean. A fade-based hawk usually needs a clean-up every 1 to 3 weeks, depending on how fast your hair grows. If the sides start looking fuzzy before the top does, that’s your sign.
Morning refreshes do not need to be complicated. Mist the top lightly with water, smooth a little leave-in over the dry patches, then scrunch or finger-lift the curls back into shape. If the style has a gel cast, break it only after the hair is fully dry. If the ridge slept flat, a diffuser for 3 to 5 minutes can bring it back fast.
Variations and Adaptations to Try
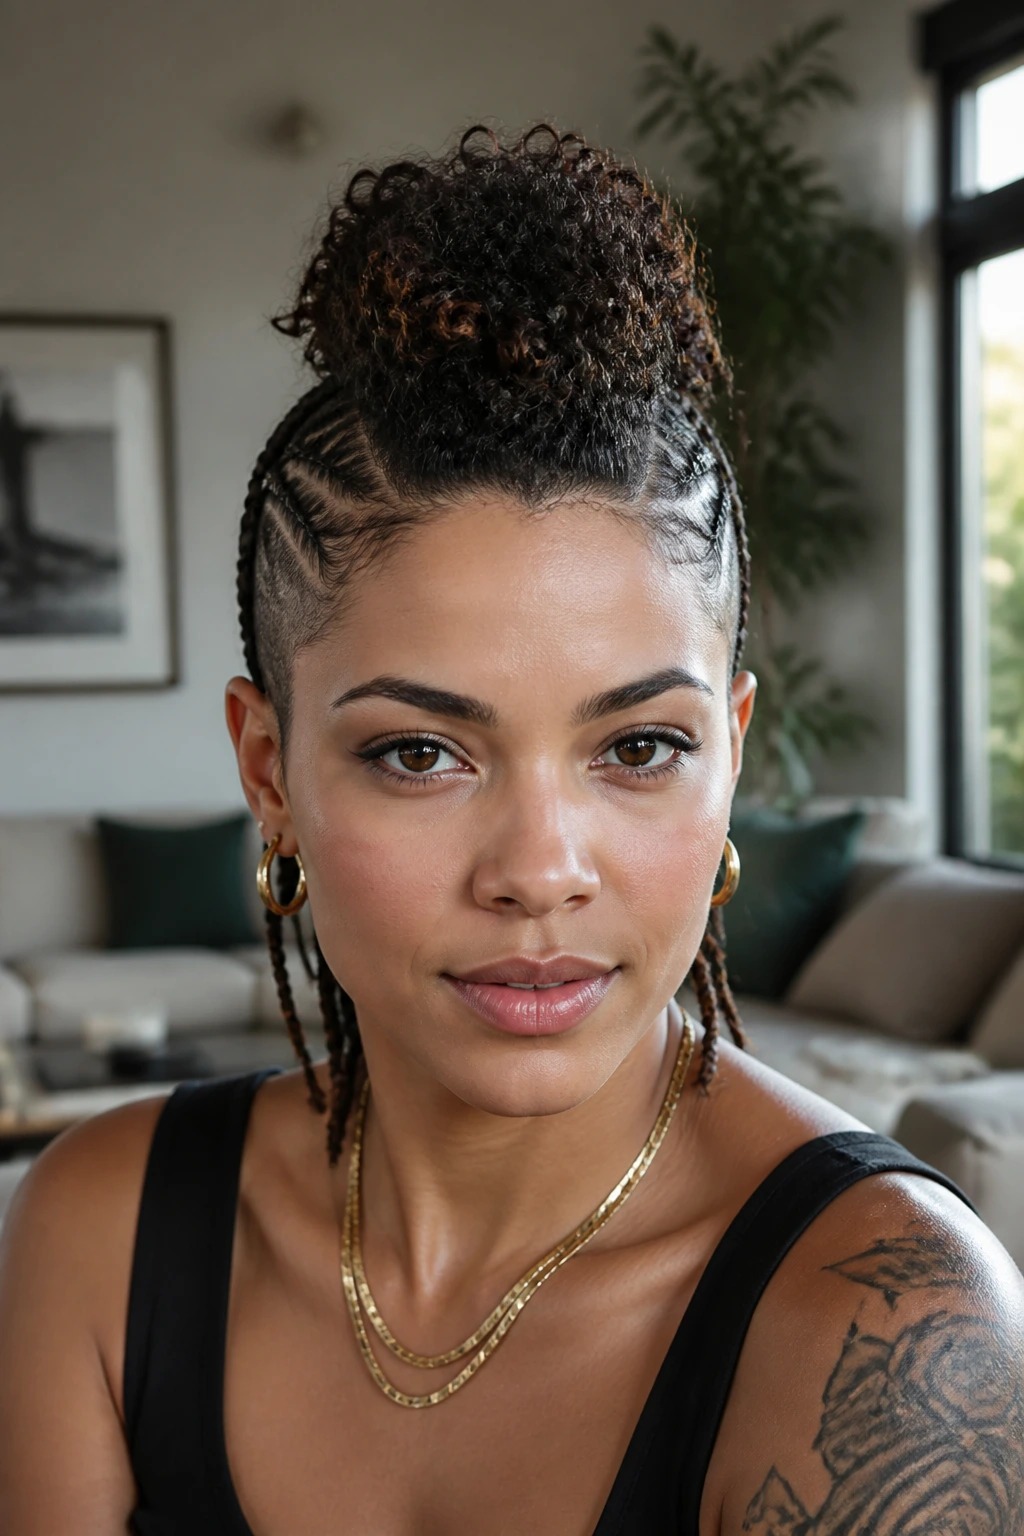
No-Shave Hawk: Keep the sides pinned, braided, or slicked back instead of clipped. This is the move if you want the shape without committing to a fade or undercut.
Fine-Curl Hawk: Use mousse, a narrow center ridge, and a low taper. Fine curls need support, not heavy cream, or the shape drops before lunch.
Coily Volume Hawk: Pick the roots, keep the center wide, and let the natural density do the rest. This version works best when you want the hawk to read big from every angle.
Humidity-Guard Hawk: Build a gel cast, dry completely, then finish with a tiny amount of serum on the outer layer only. This helps the style survive muggy air without turning sticky.
Formal Hawk: Smooth the sides tighter, define the curls on top, and keep accessories to one clean accent like a comb or pin. This is the version that can sit beside a blazer and not look out of place.
Color-Flash Hawk: Use temporary color wax, a few braided threads, or clip-in colored pieces through the ridge. Small streaks are enough. You do not need full rainbow energy for the style to look alive.
Common Mistakes That Flatten the Shape
-
Putting too much cream on the sides: The hair slides down instead of staying tucked. Use less product at the perimeter than you think you need.
-
Skipping the dry time: Damp curls look good for twenty minutes, then lose shape. Finish the set fully before you touch or separate anything.
-
Making the fade too high too soon: If the sides are shaved up to the crown, the style can look top-heavy. Keep the transition gradual unless you want a very sharp result.
-
Using a brush where fingers would work better: Brushes can break curl clumps apart on top. Fingers or a wide-tooth comb give a cleaner ridge.
-
Pulling the hairline too tight: If the temples sting or the edges look shiny and strained, the style is too tight. Back off. Your scalp will tell you before the mirror does.
-
Ignoring buildup: Gel, edge control, and spray can coat the hair fast. If the top starts looking dull or coated, clarify and reset the style instead of piling on more product.
Frequently Asked Questions About Curly Mohawks
Can you do a curly mohawk without shaving the sides?
Yes. A faux hawk, pinned hawk, or braided-side version keeps the mohawk silhouette without clippers. It’s a smart choice if you want flexibility or need a softer look for work.
What curl types work best with mohawks?
All of them can work, but dense 3C to 4C textures often give the strongest natural shape because they hold height well. Looser curls still look good; they just usually need more product and a little extra root lift.
How do I keep the center from puffing out too wide?
Keep the ridge narrower when the hair is damp, then dry it upward with a diffuser or pin it into the line you want. A wide center usually means the sides weren’t controlled enough or the product was too heavy.
What’s the best product for a curly mohawk in humidity?
A medium- to strong-hold gel over a light leave-in usually holds up better than cream alone. If humidity is intense, avoid loading the hair with heavy oils before the style is dry.
Can short curly hair pull off a mohawk?
Absolutely. Short hair often looks cleaner because the shape is tighter and the contrast is easier to see. A 1 to 2 inch top with a low taper can look sharper than a longer, looser style.
How do you sleep on a curly hawk?
Use a satin bonnet, scarf, or pillowcase and keep the center lifted loosely so it doesn’t get smashed. If the style has a strong ridge, pineappling the top while smoothing the sides is usually the easiest route.
Is a curly mohawk protective?
Some versions are, some are not. Braids, twists, and loc-based hawks can protect the hair well if they are not too tight and the scalp stays clean. Loose faux hawks are more about style than protection.
What if my curls frizz by midday?
That usually means either the hair was not fully dry or the hold product was too light for the weather. Refresh with a small mist of water, re-shape the ridge with your fingers, and use a little more hold next time.
A Curly Shape That Stays Interesting
Curly mohawks work because they let the hair do what it already wants to do: lift, bend, and move. The real decision is how sharp or soft you want the frame to be. A taper changes the mood. A fade changes it again. Braids, twists, buns, and pinned sides change it once more. Same curl pattern. Different attitude.
The best part is that none of these looks need to feel fake. If the cut respects the curl, the style keeps its own personality. Start with the version that fits your texture and your tolerance for upkeep, then sharpen the silhouette a little more the next time you sit in the chair.
