



Short natural hair gets treated like it has fewer options than longer curls, and that always makes me laugh a little. Short hair has more shape, not less. It shows every line you draw into it, every ridge you build, every tight curve along the sides, so a mohawk on natural hair can look sharper, cleaner, and more intentional than the same idea ever could on stretched lengths.
That’s why natural mohawk hairstyles for short hair keep working so well: they don’t need inches to make a point. They need direction. A good frohawk, faux hawk, or twisted ridge turns shrinkage into architecture. It makes the middle of the head the star and gives the sides a job to do, which is usually to stay close, stay neat, and get out of the way.
And short hair has one more advantage people overlook. It lets texture show off without turning into a headache. A 2-inch coil, a tiny flat twist, or a small puff can carry more attitude than a long style that’s trying too hard. The trick is picking the shape that matches your length, curl pattern, and patience level.
Why These Styles Feel Different on Short Hair
-
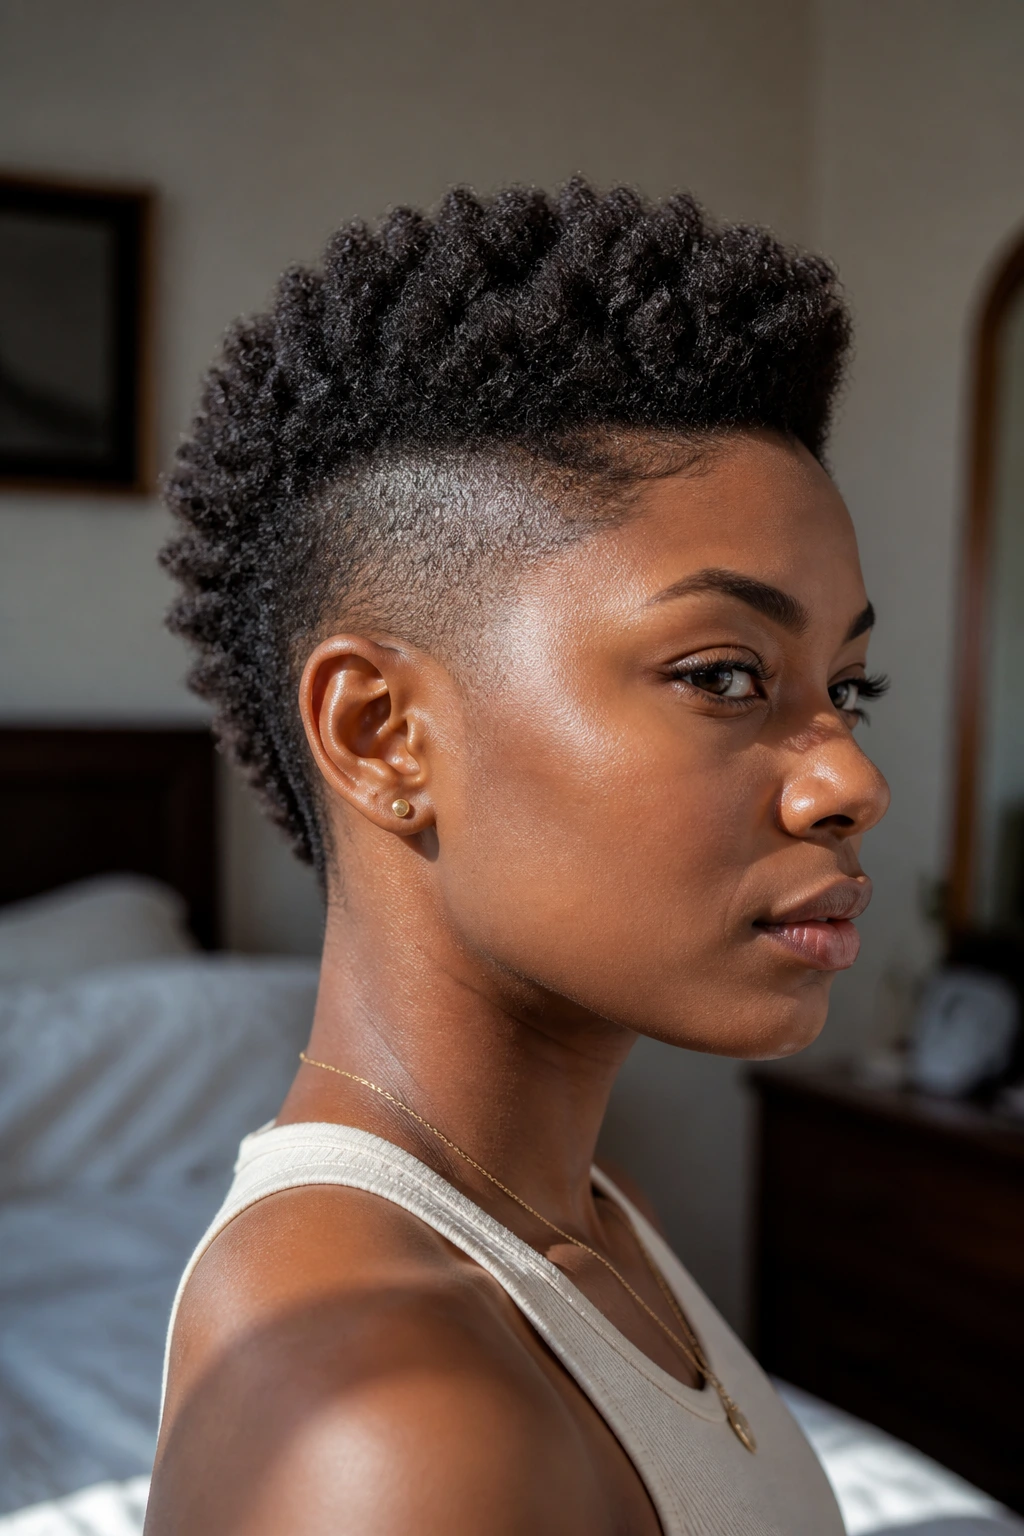
The silhouette reads fast: With short hair, the contrast between the lifted center and the tighter sides shows up immediately, so you don’t need extreme height to make the mohawk shape obvious.
-
Texture does the heavy lifting: Coils, curls, flat twists, and tiny braids create the ridge for you, which means you can skip heat and still get a clear shape.
-
They can be low-tension: A lot of these looks keep the hairline calm and the ends tucked, which matters if your edges are fragile or your hair gets dry easily.
-
They work with shrinkage, not against it: Short natural hair tends to shrink up and out. These styles use that to build volume in the middle instead of fighting for a stretched finish.
-
They dress up or down fast: The same base can look gym-simple with a scarf and bare edges, or polished with cuffs, a line part, and a strong lip color.
1. Tapered Frohawk With Defined Curls
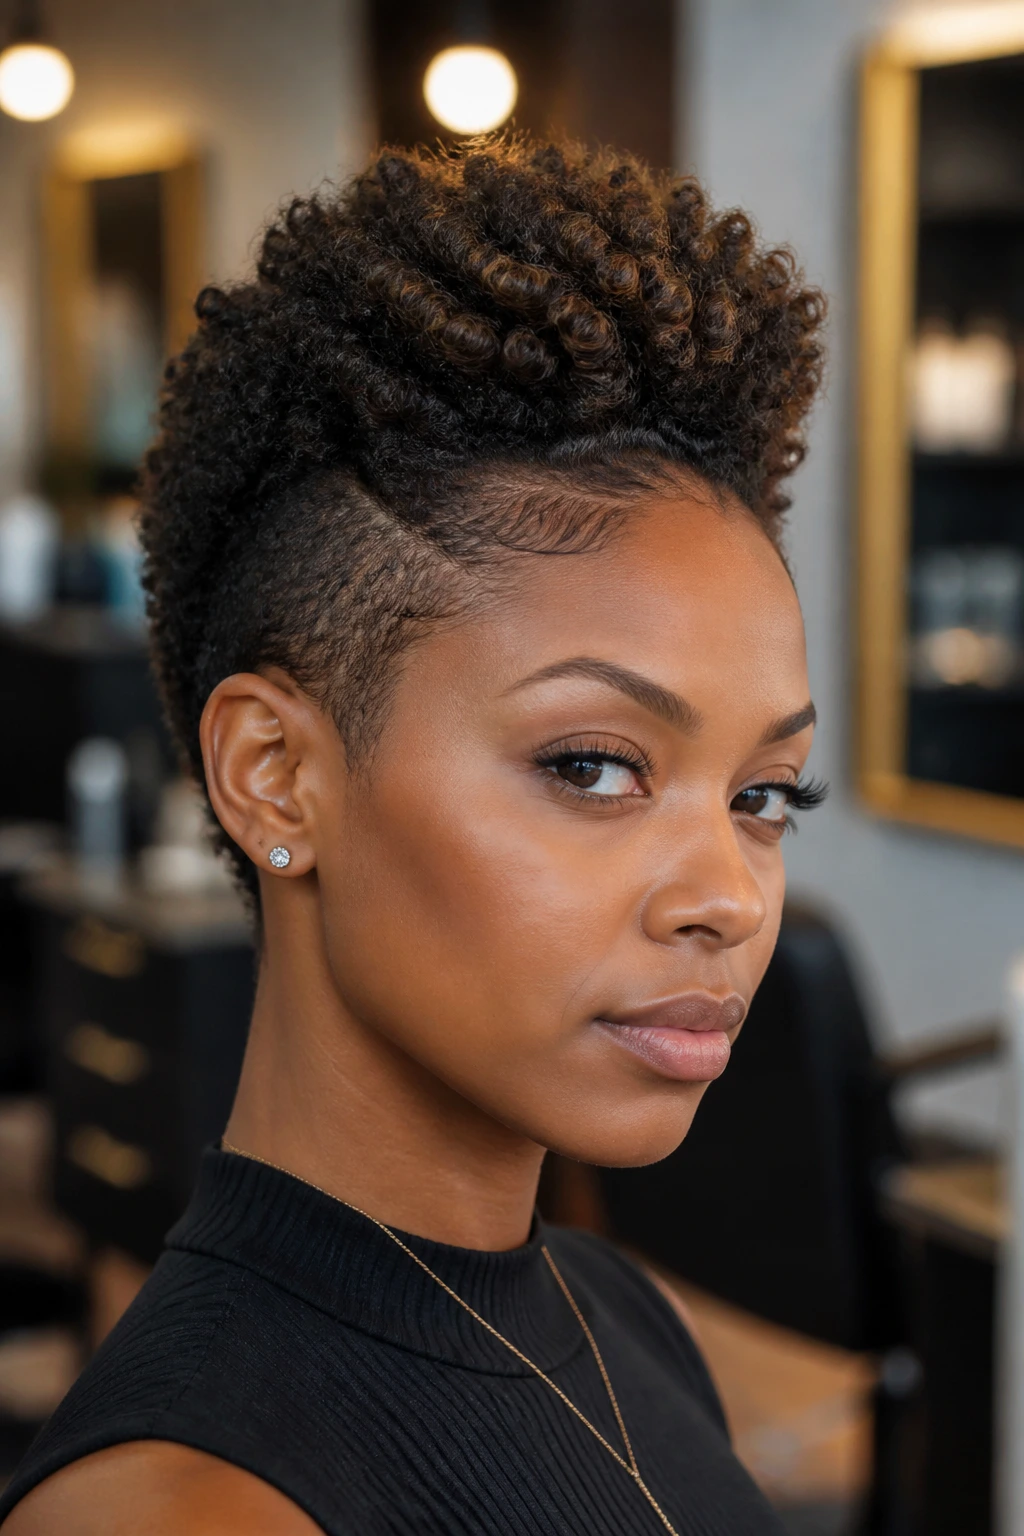
A tapered frohawk is the style I reach for when I want short curls to look clean without looking stiff. The sides stay brushed down close to the head, and the center ridge keeps its curl pattern, so the whole shape feels balanced instead of bulky. On hair with a little bend or coil, this one looks especially good because the curl clumps make the ridge read from across the room.
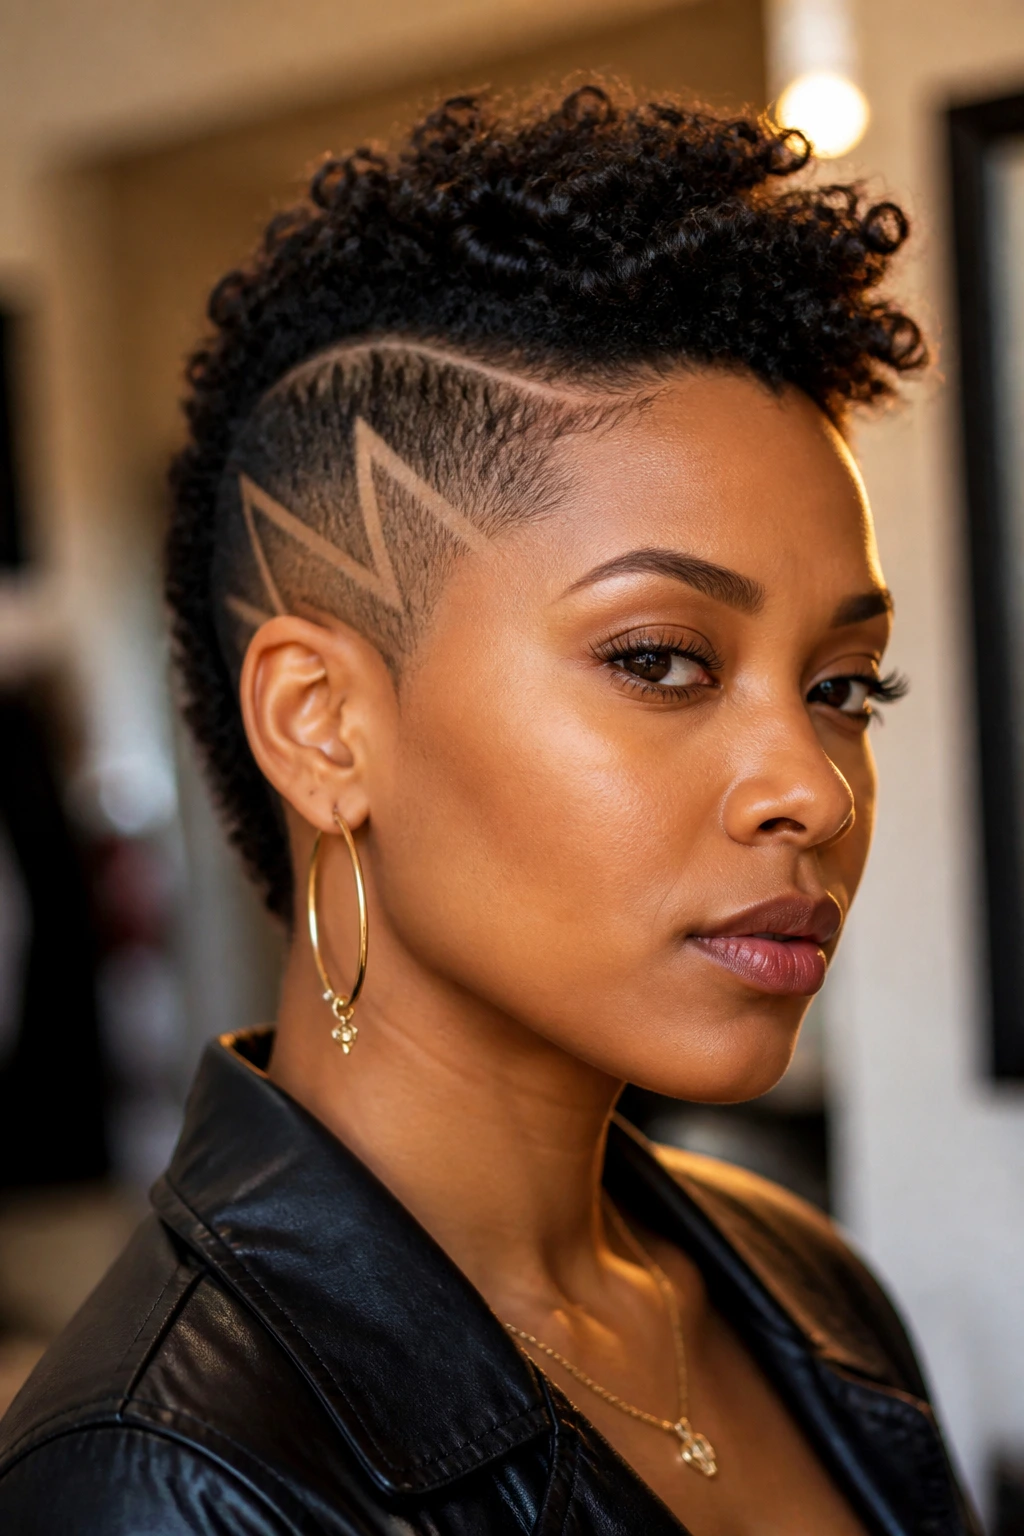
Why It Works
The taper gives you a built-in frame. That matters more than people think. Once the sides are compact, the eye has nowhere to go except the middle, and even a modest amount of height suddenly looks deliberate.
For the center, use curl cream on damp hair, then a light gel on the outer layer if you want the coils to hold their shape past lunch. A sponge can help on very short lengths, but finger-shaping usually gives a cleaner result.
Best Styling Notes
- Keep the sides brushed with a soft brush and a small amount of edge control.
- Lift only the roots in the middle if you want height without frizz.
- Let the curls dry fully before picking them apart.
Pro tip: If your hair sits at 2 to 3 inches, the ridge does not need to be tall. A compact frohawk with tight curls often looks better than a big one that starts collapsing by noon.
2. Finger-Coil Mohawk on a TWA
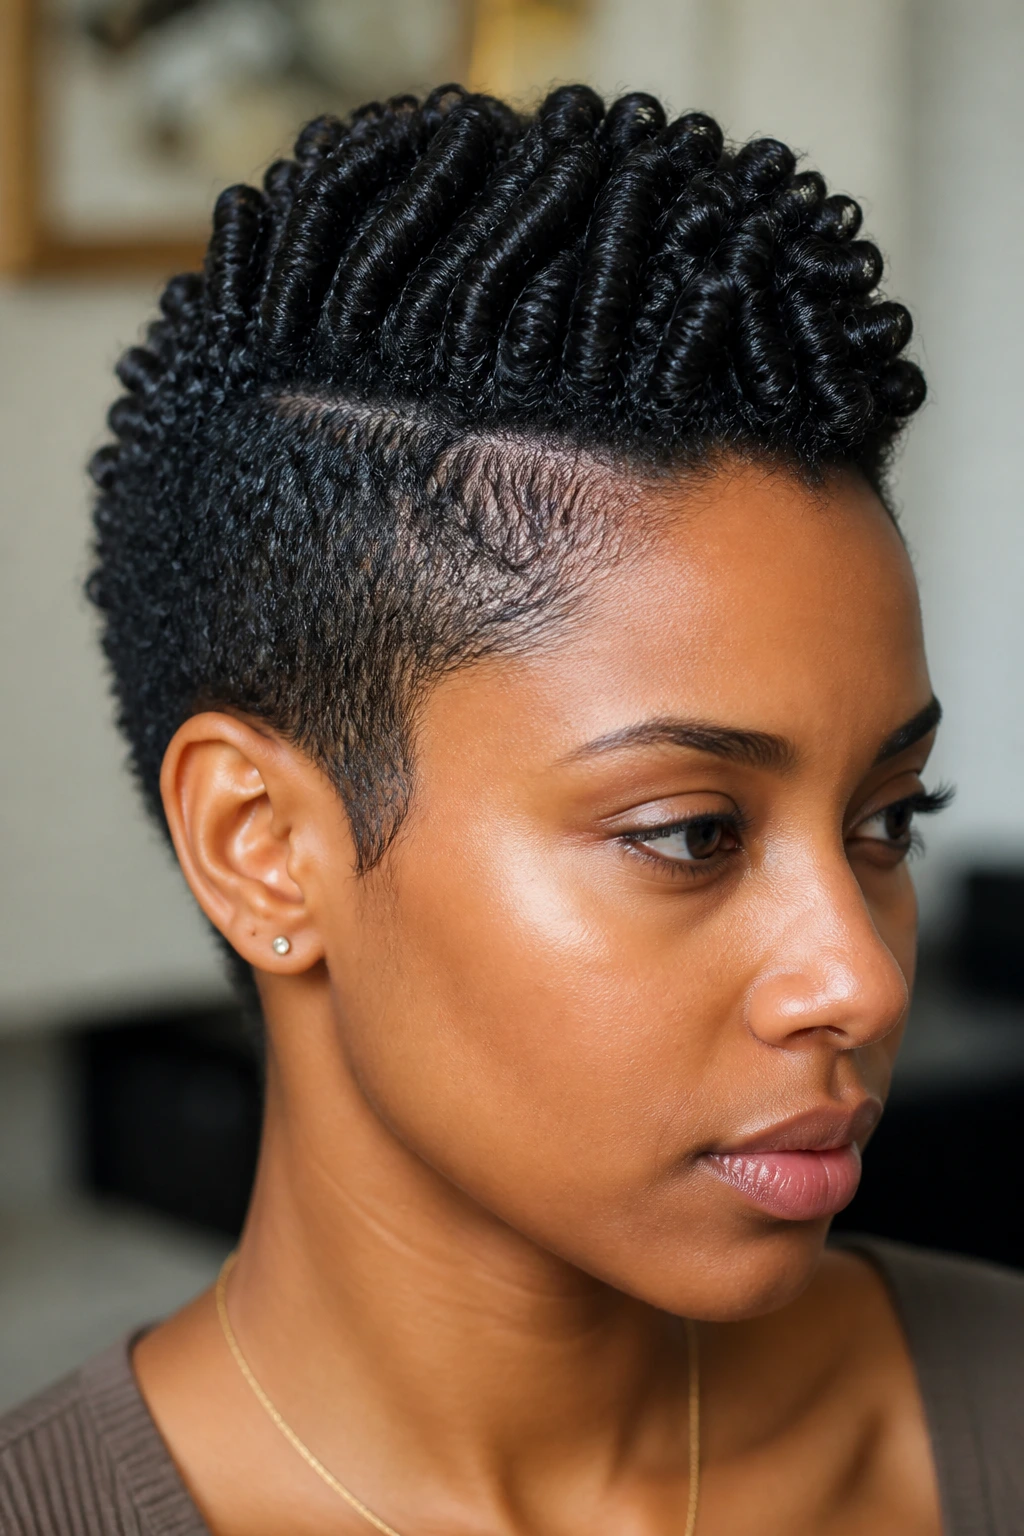
Tiny finger coils turn a TWA into something sculpted instead of fuzzy. This is one of my favorite natural mohawk hairstyles for short hair because it works even when the hair barely clears the scalp. You’re building a row of little spirals through the middle, then laying the sides smooth so the coils become the main event.
The look is neat, but not precious. It still has texture. It still feels like natural hair. And when the coils are evenly sized, the center ridge has a bead-like line that looks very controlled, which is the whole point on shorter lengths.
Start with damp hair, a leave-in that has slip, and a curl-defining cream. Use a rat-tail comb to map out the middle strip, then coil each small section around your fingertip until it springs back. Let it dry fully before separating anything. If you break the coil too early, it frizzes fast and loses the clean ridge.
3. Flat-Twist Mohawk With Sleek Sides
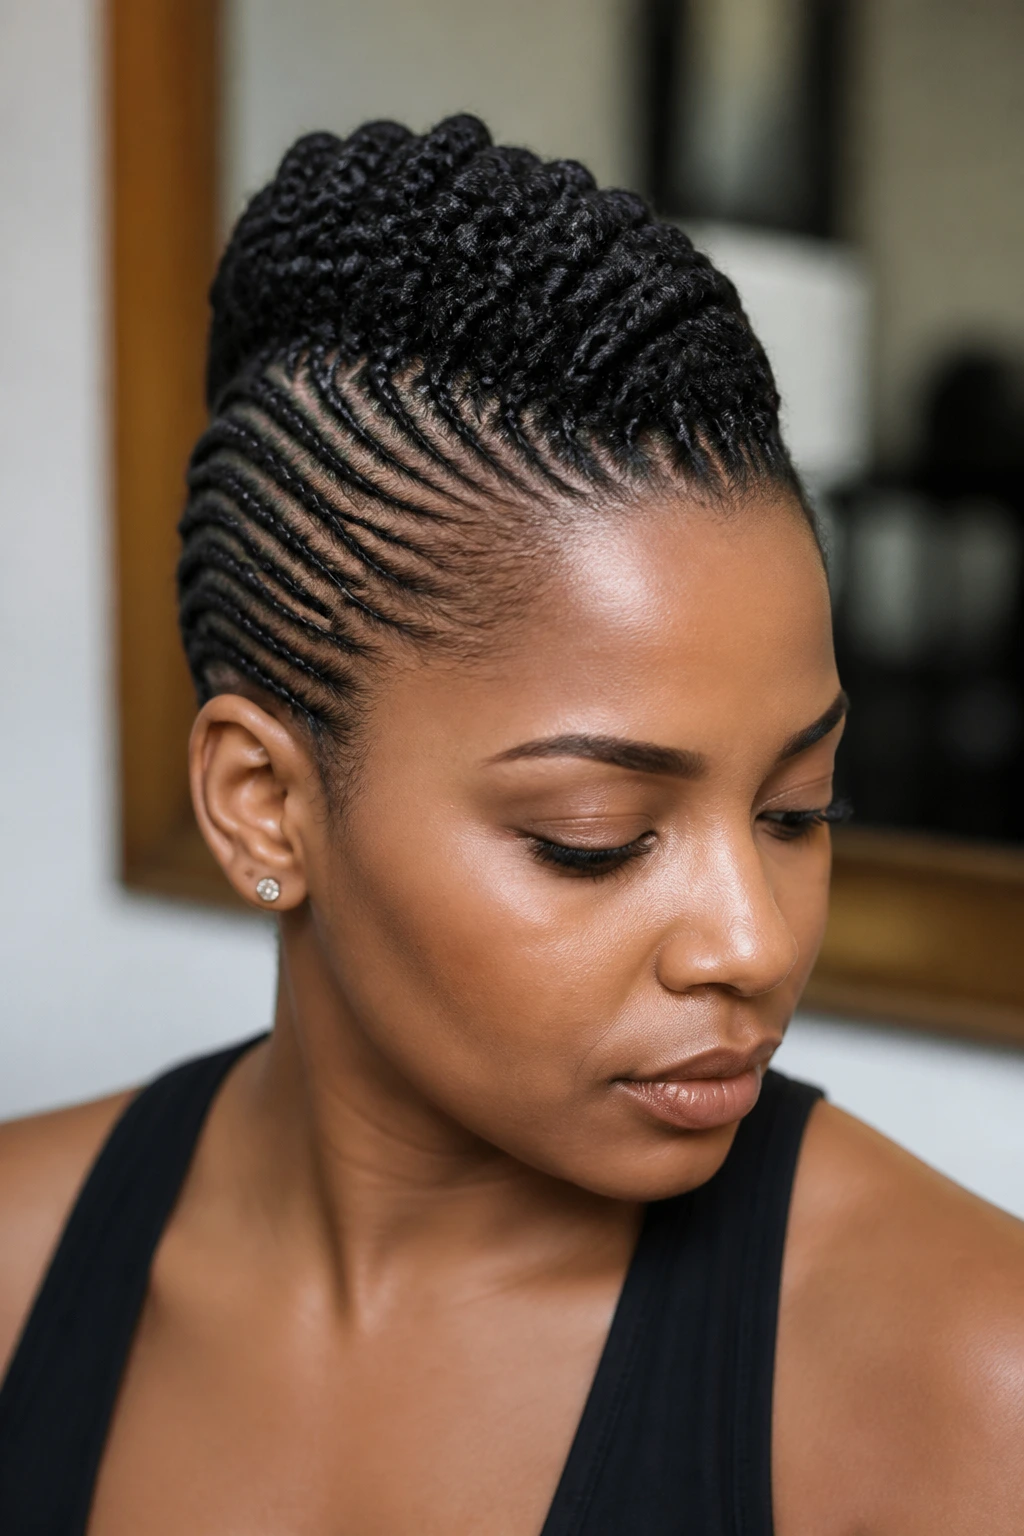
Flat twists are the quiet workhorse of short natural hair. They lay close, they hold shape, and they make the mohawk silhouette look more polished than chaotic. When the twists run along the sides and meet in the center, you get a nice ridge without relying on a ton of length.
How to Set the Shape
Part the hair so the center strip is a little wider than you think it needs to be. Too narrow, and the style can look pinched. Too wide, and the mohawk shape disappears. The sweet spot is usually about 2 to 4 inches across, depending on head size and density.
Use a creamy leave-in first, then a styling gel or twisting butter that gives grip. Flat twists do not like slippery hair. If the product glides too much, the twists puff up and the base loosens.
What to Watch For
- Keep the twists even in size so the ridge rises evenly.
- Tie a satin scarf around the sides for 10 to 15 minutes after styling.
- If you want more fullness, unravel the twist ends slightly once they dry.
Pro tip: Flat twists look best when the scalp parting is crisp. A rat-tail comb and a little patience matter more here than extra product.
4. Bantu Knot Mohawk for Short Hair
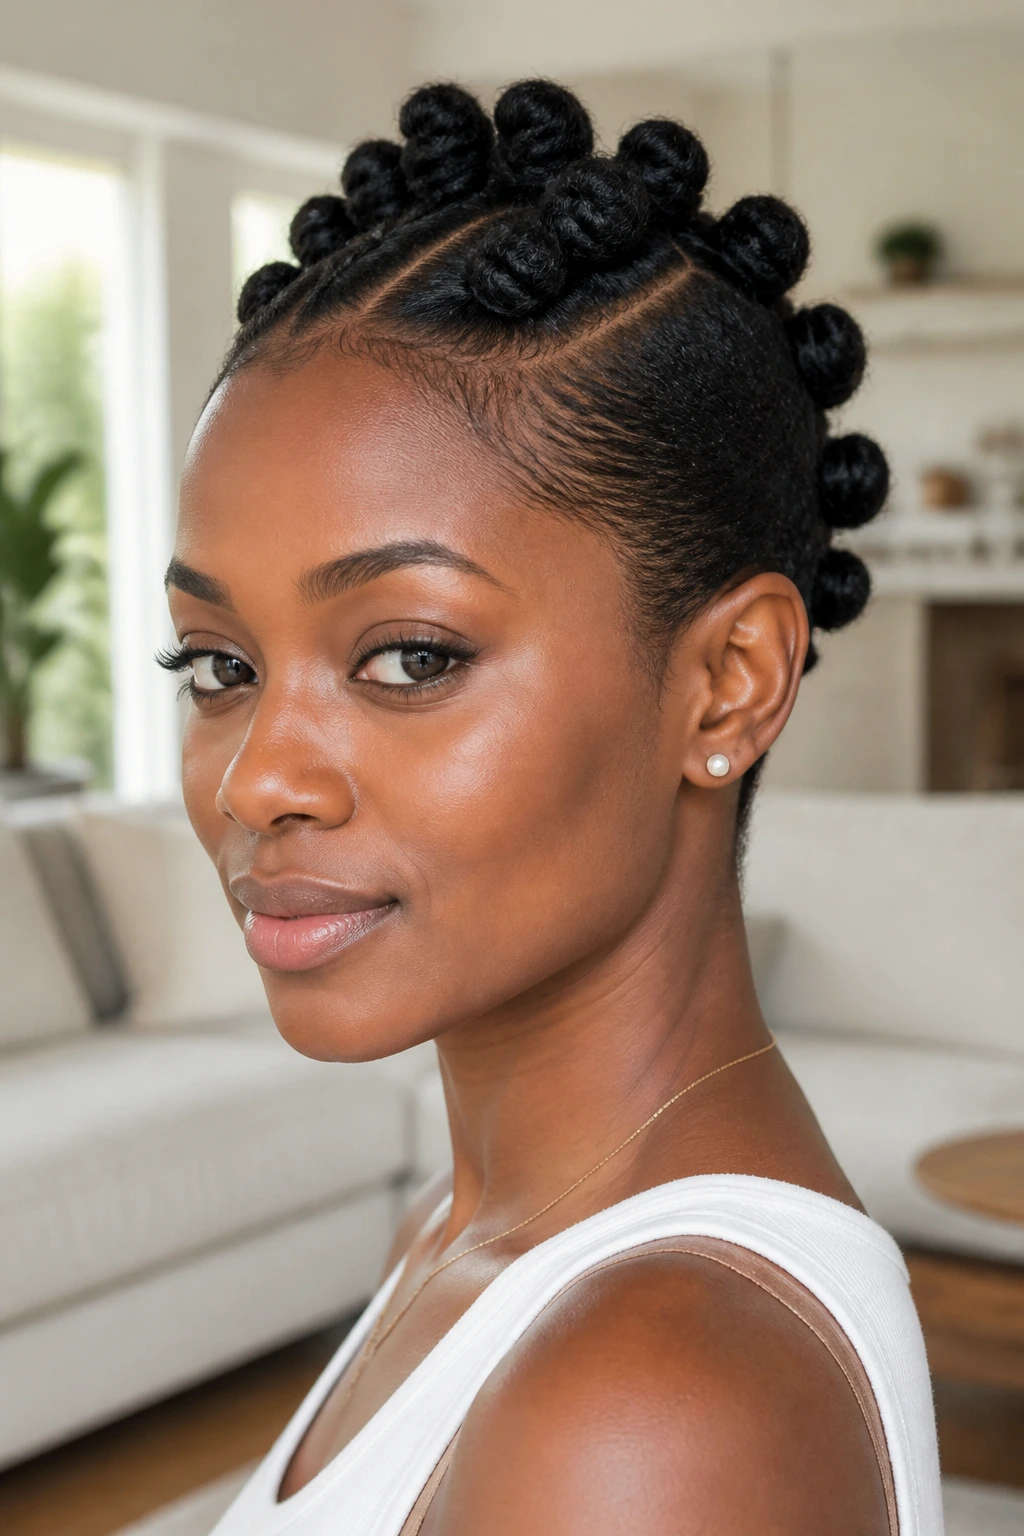
Bantu knots bring a bit of attitude to short hair, and the mohawk version gives them structure instead of scattering them all over the head. You place the knots along the center line, smooth the sides down, and let the knots sit like little sculptural bumps down the ridge. It’s playful, but not childish. There’s a clean geometry to it that I really like.
This style also buys you two looks in one. Wear the knots as-is for a crisp, compact mohawk, then unravel them once the hair is dry for a knot-out with soft definition. On short natural hair, that second look can be gold because it gives you more visual fullness without using heat.
Dampen the hair first, add a light cream or setting lotion, and twist each section until it wraps into a tight knot that sits flat. If the sections are too large, the knots slouch. If they’re too small, the style can feel fussy and take forever. Moderate size wins here.
5. Wash-and-Go Hawk With Sculpted Edges
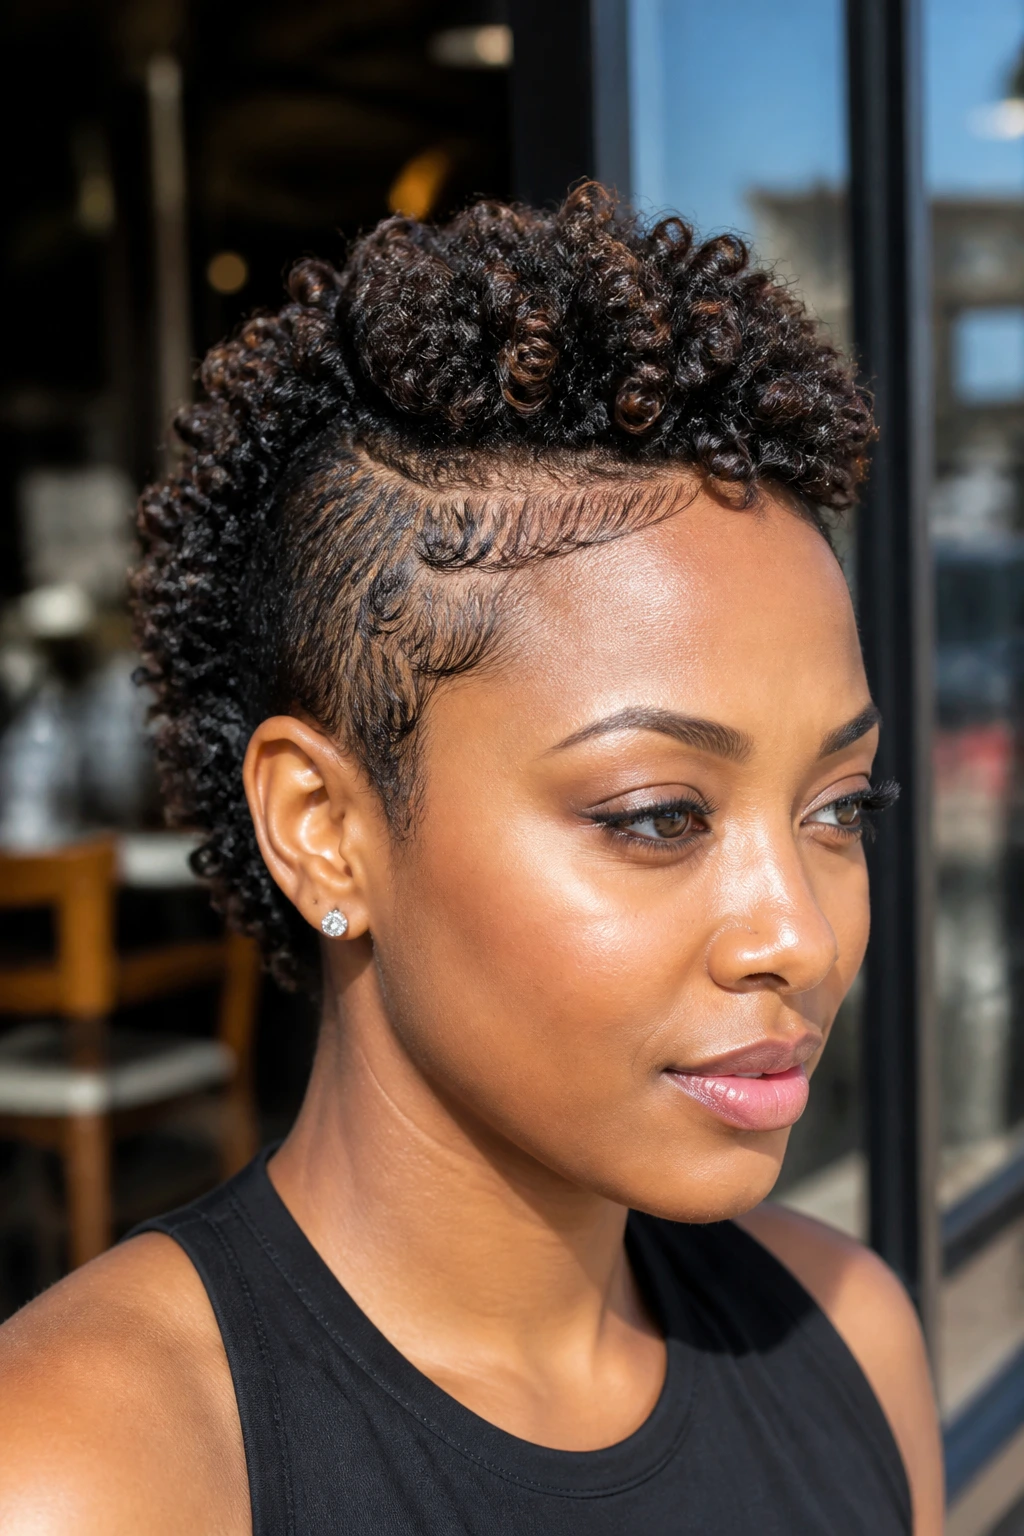
If your curl pattern already wants to clump, a wash-and-go hawk is the easiest way to let it do the work. The middle ridge stays soft, springy, and alive, while the sides get brushed down and held close. It’s one of the few styles that can look casual in daylight and still feel finished at night.
The biggest mistake people make is overloading the front with product and starving the center. Don’t. The sides need the hold, but the ridge needs movement. Start with wet or very damp hair, use a curl cream for moisture, then add mousse or gel in small sections through the middle. Scrunch the center upward. Smooth the sides downward with a brush and a pea-sized amount of edge control.
Let the hair air-dry if you can stand it. If not, diffuse on low heat until the cast forms and the roots are dry. If you touch it too early, the shape collapses. That part is boring, but necessary.
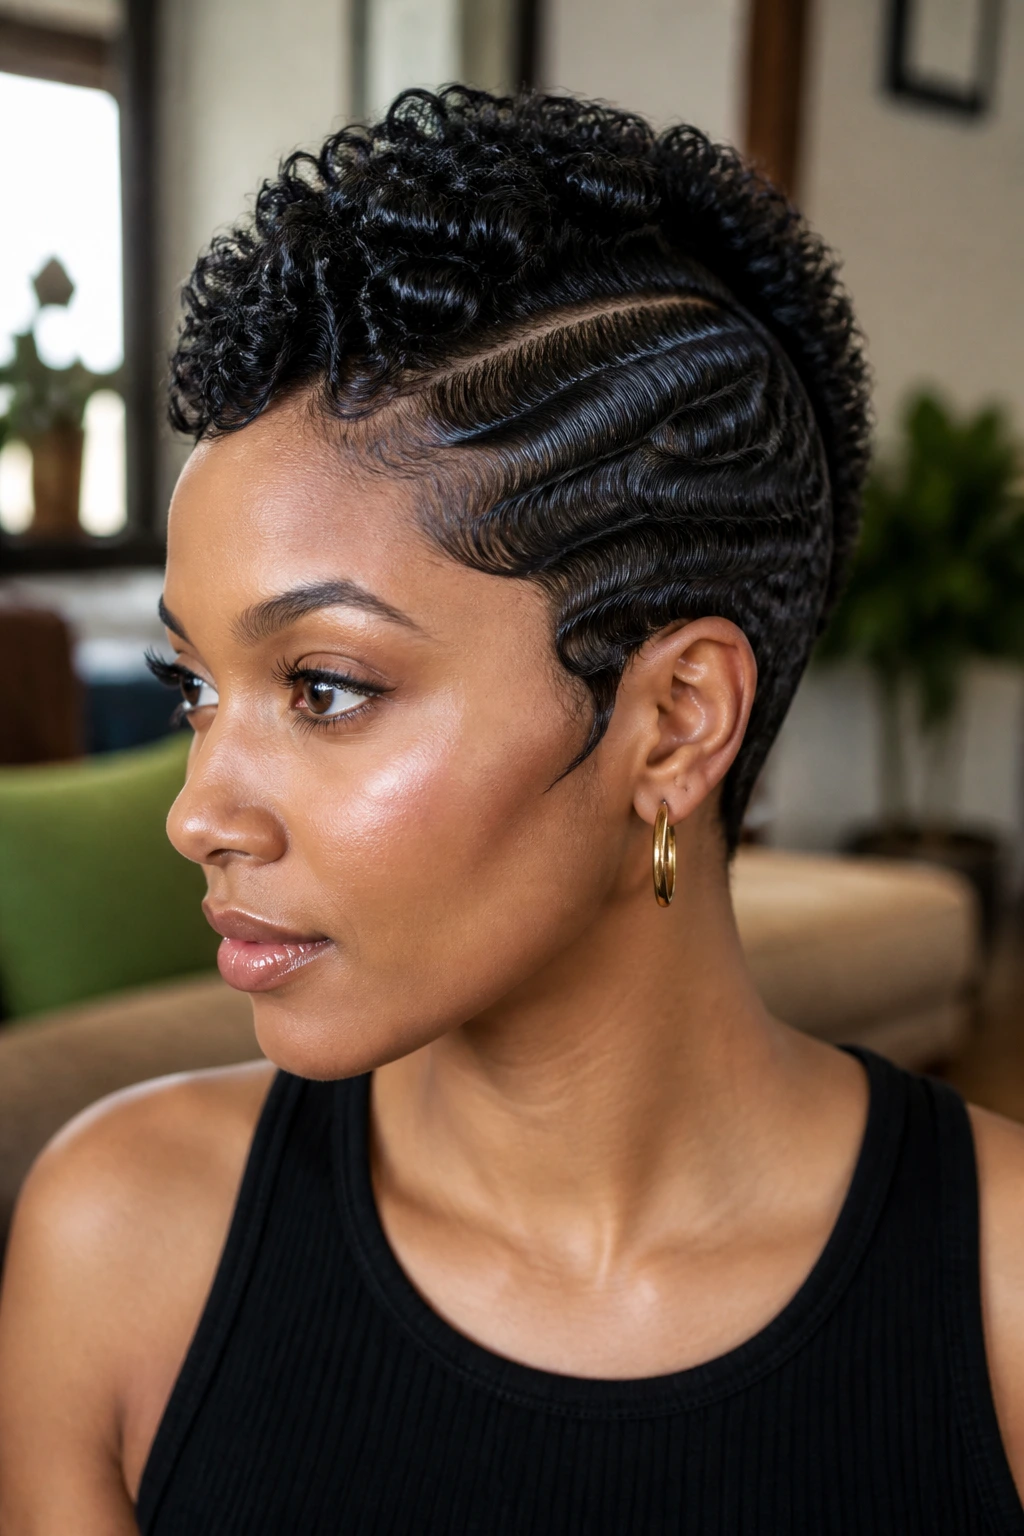
6. Side-Part Mohawk With Finger Waves
This is the dressier cousin in the group. Instead of a straight-up center ridge, you get a side part with sculpted waves or swoops feeding the eye toward the middle. It’s a smart choice for short hair because it adds motion without asking for a lot of length.
The sides are where the drama happens. A small brush, a little gel, and a firm hand can make finger-wave-style curves that hold the head shape nicely. The center can stay coily, brushed upward, or lightly twisted for contrast. I like this style when the outfit is doing something simple and the hair needs to carry more of the visual weight.
A fine-tooth comb helps here, and so does restraint. Too much gel gives you a crunchy helmet. Too little, and the waves puff out before you leave the house. Aim for a glossy, flexible hold, not a shell.
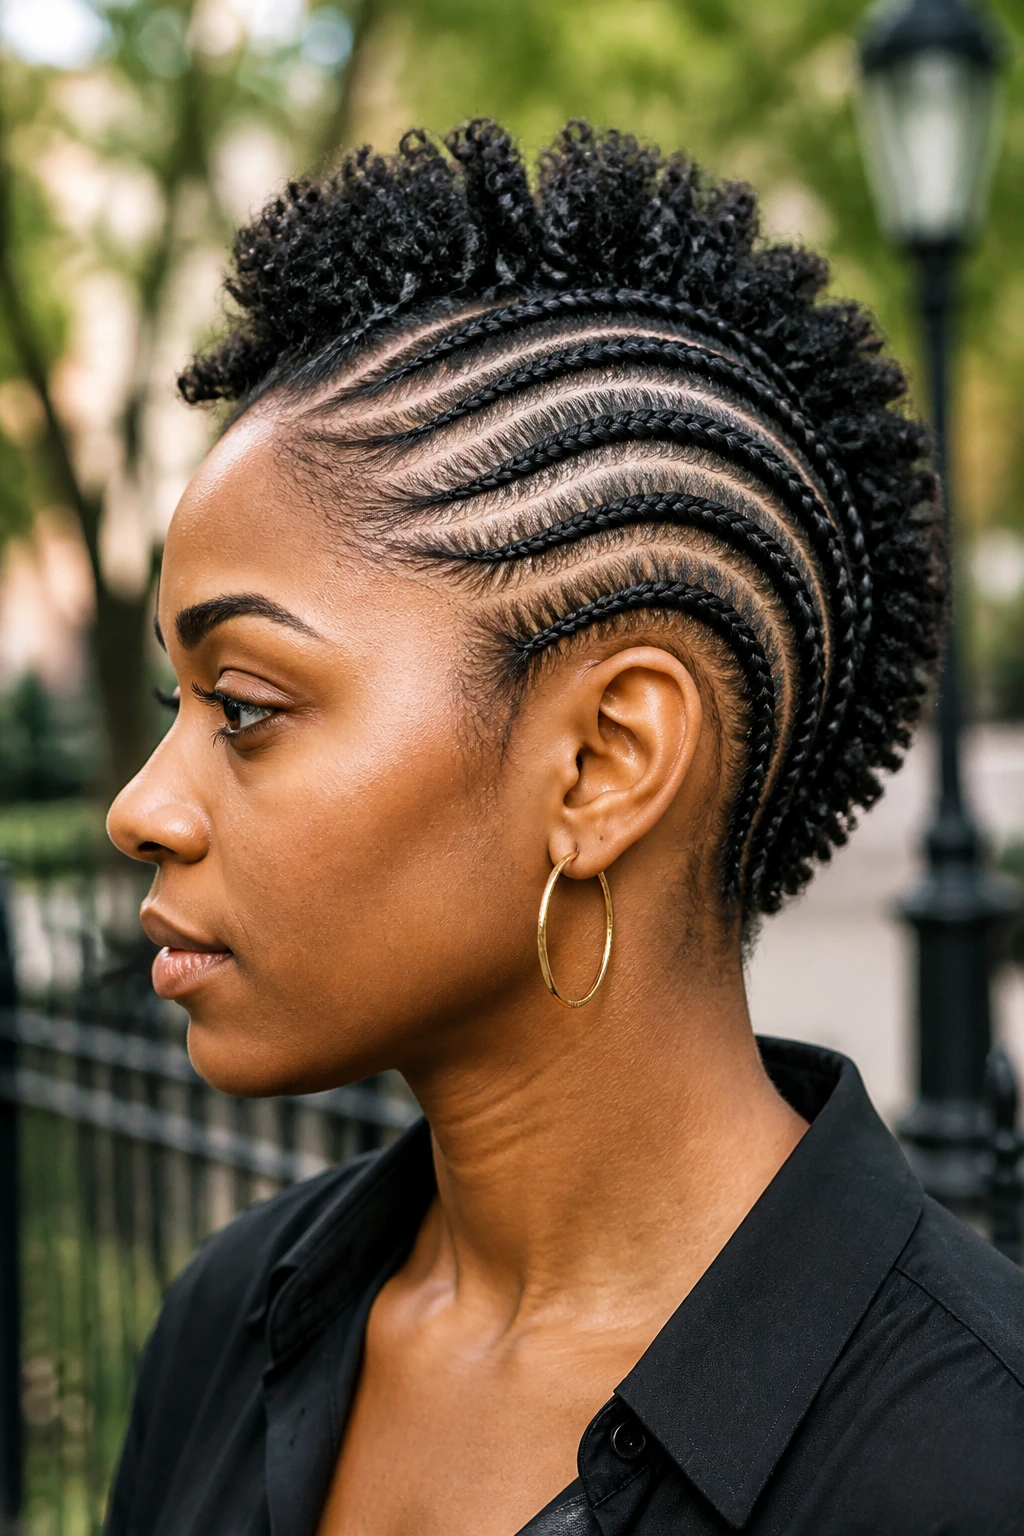
7. Curved Cornrow Mohawk
Curved cornrows make a mohawk feel intentional from the first braid. Instead of straight-back rows, the braids arc around the head and guide attention toward the center strip. On short natural hair, that curve matters. It gives the style movement even before the braids are finished.
This one is especially good if you want a protective style that still shows off the shape of the head. The braids can be narrow and close, or a little thicker if the hair is very dense. Either way, the center ridge stays open, which keeps the mohawk look obvious instead of muddy.
You’ll need clean parts, damp but not soaking hair, and a product with enough grip to keep the braid from slipping. If the hair is too short at the nape or temples, use tiny anchor braids first. That keeps the whole style from unraveling at the edges.
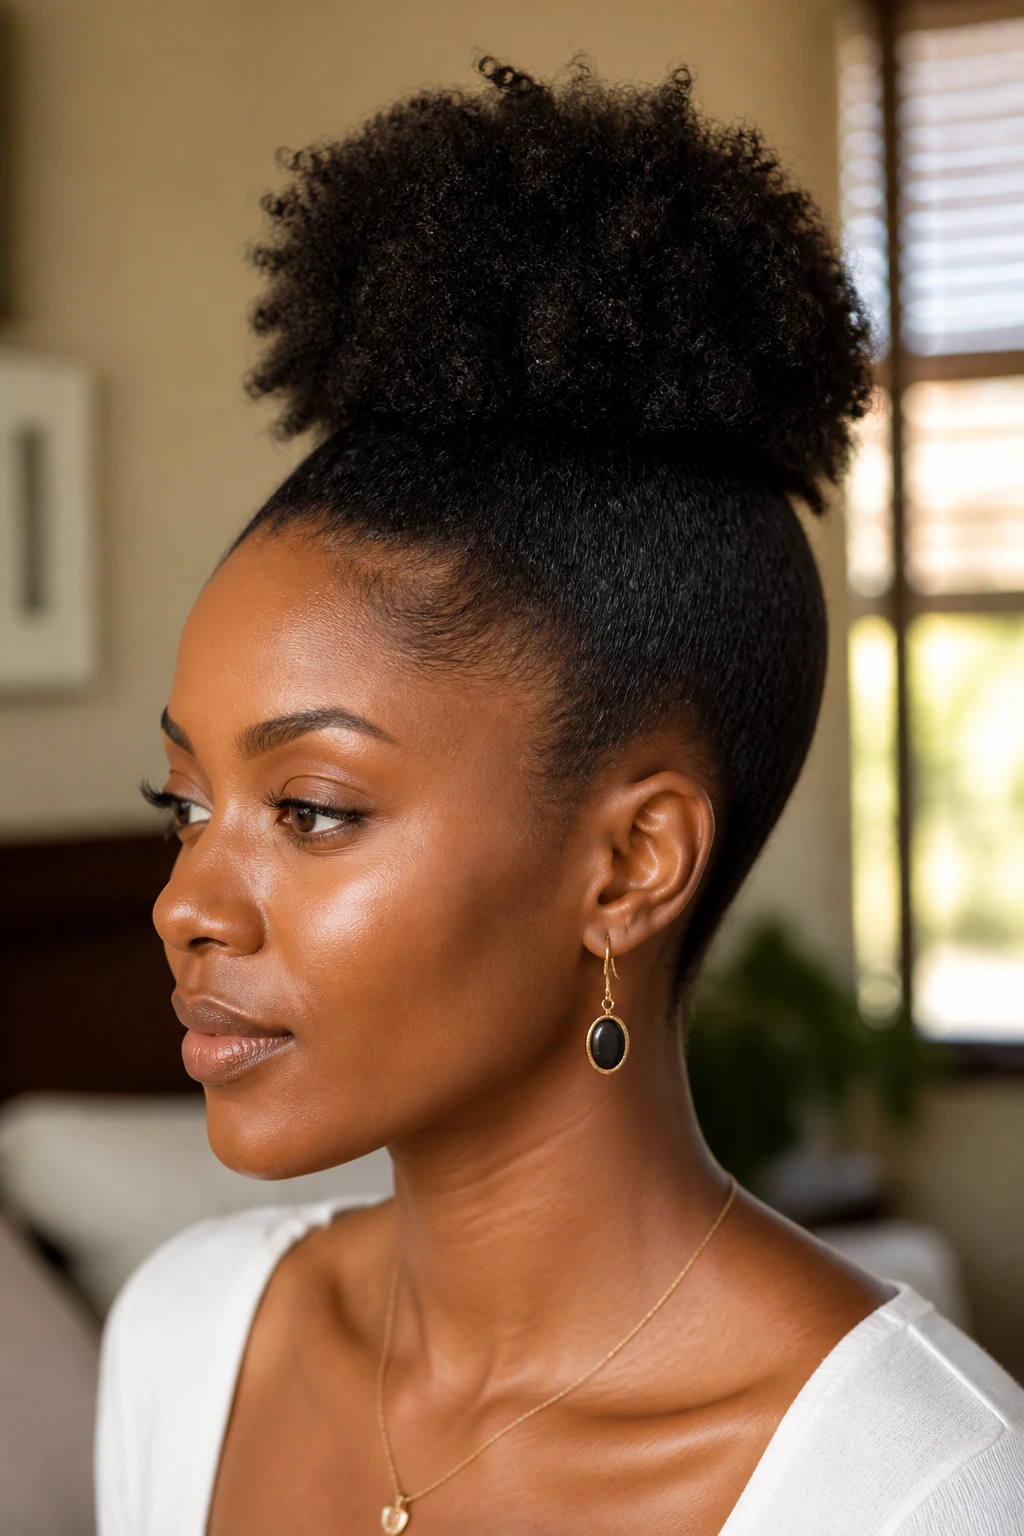
8. Single High Puff Mohawk
A single high puff mohawk is the style people dismiss until they see it done well. Then they usually change their minds. It’s simple: lay the sides down, gather the center hair up high, and let the puff sit right where the ridge should be. On short hair, the puff doesn’t need to be huge. It just needs to sit in the right place.
The magic is in placement. If the puff sits too far back, the style reads like a basic updo. Too far forward, and the balance gets awkward. Center of the crown usually does the job. Use a soft brush, not a hard one, so the hairline stays smooth without getting raw.
I like this for very busy mornings because it takes less setup than braids or twists. But it still gives you shape. A satin scarf for 10 minutes while you finish your makeup helps the sides lay flat and keeps the puff from dragging the whole look down.
9. Two-Strand Twist Mohawk
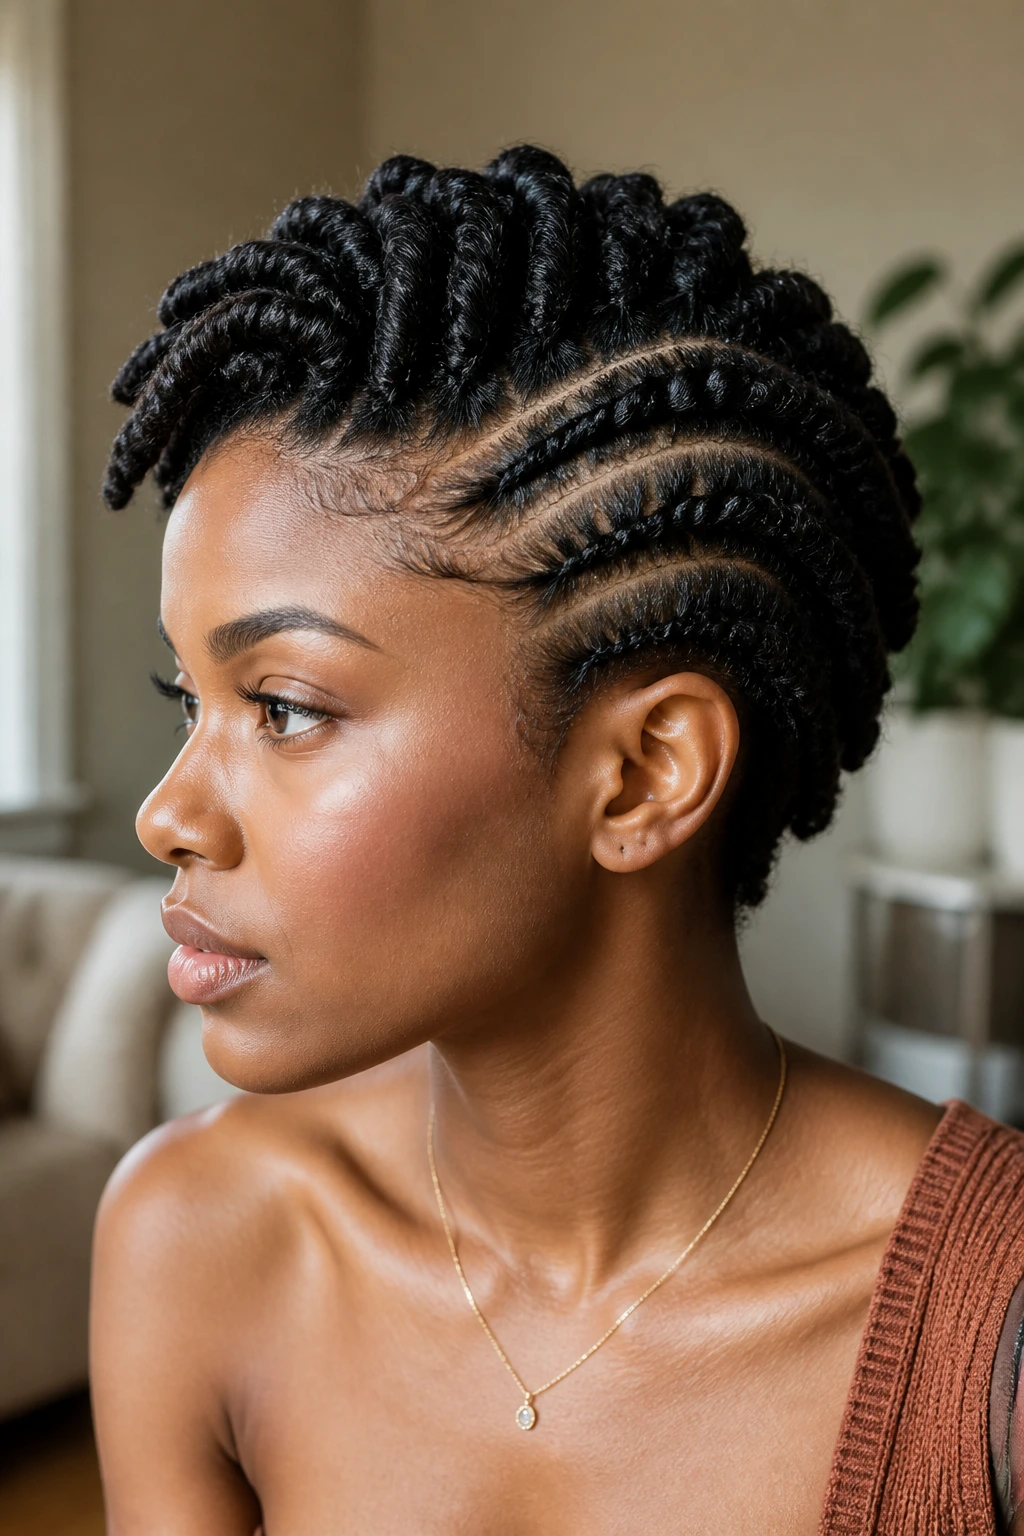
Two-strand twists are underrated in mohawk form. They give short natural hair enough structure to stay together, but they don’t feel heavy. The twists can run straight back, curve slightly, or stack in a central row depending on how much volume you want.
How to Use It
Twist on damp hair with a leave-in and a butter or cream that adds slip. Keep the parts medium-sized. If they’re too tiny, the style takes forever and looks sparse. If they’re too large, the ridge loses definition.
This style is a good middle ground. It protects the ends, gives a clear shape, and can be worn for several days without needing constant attention. If you unravel the twists later, you get a softer twist-out hawk, which is a nice second life for one style.
10. Starter Loc Mohawk
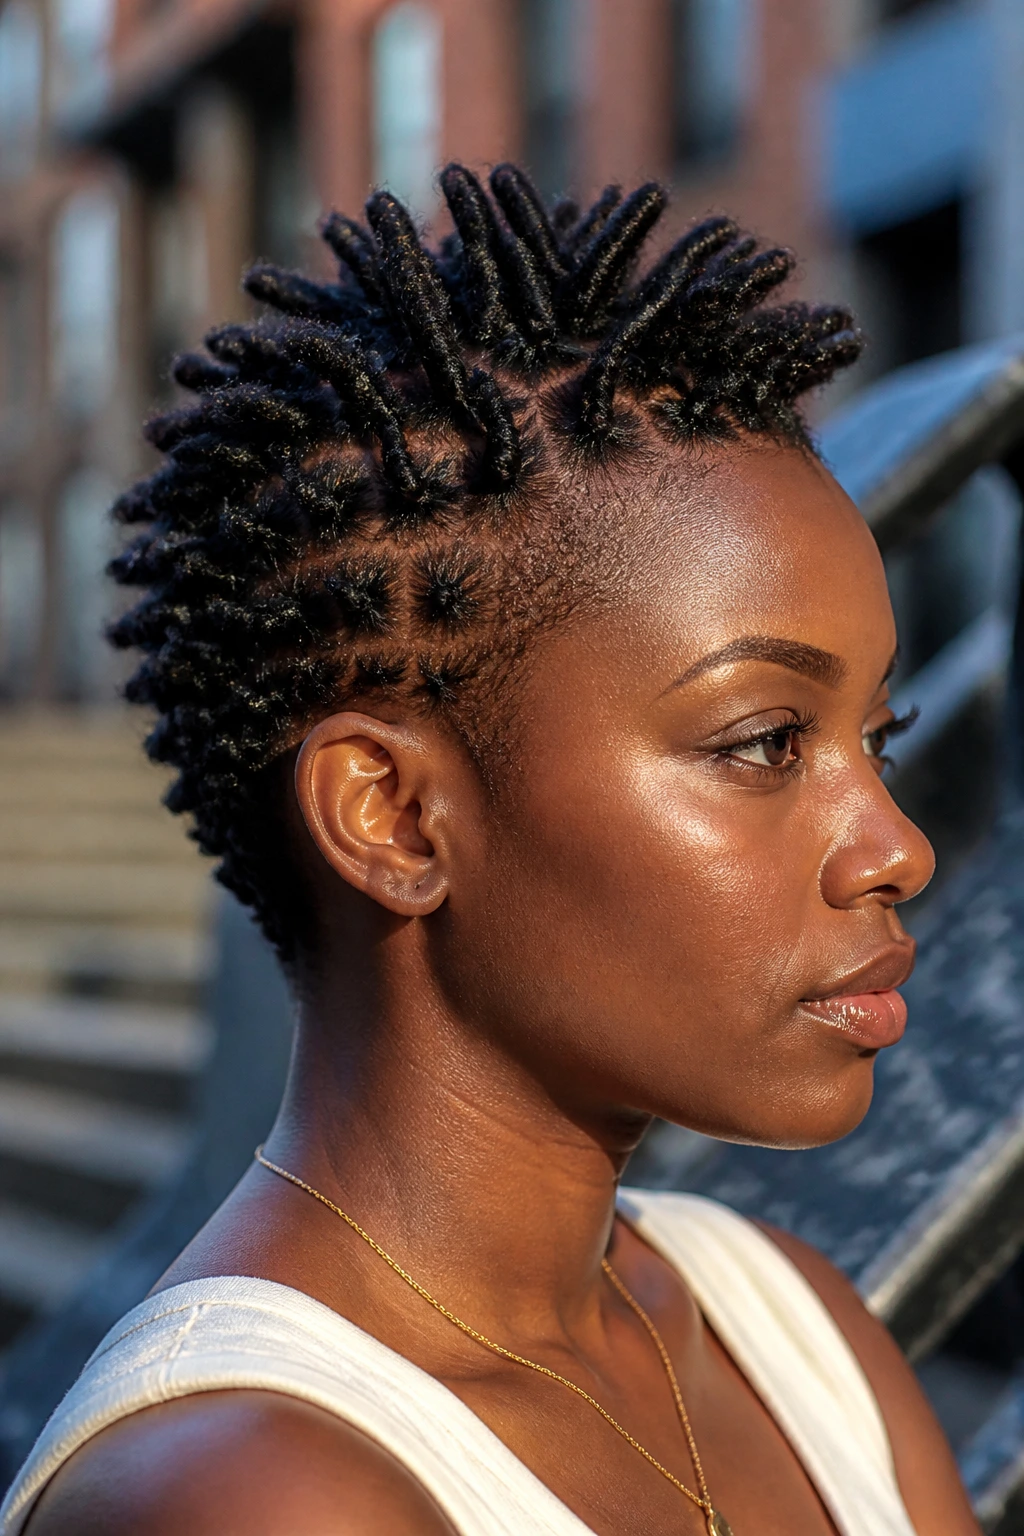
Starter locs already have a mohawk energy if you ask me. They stand up a little. They separate the head into visible lanes. Put the center locs in a ridge and keep the sides tidy, and the style looks purposeful without trying to overstyle what the hair is already doing.
This works well when the locs are short enough to be movable but long enough to tuck and pin. A center row can sit loose, or you can braid the sides back and let the locs on top fan slightly. It’s low-maintenance in the best sense of the phrase. You still need care, but not a lot of daily fiddling.
Use a light oil on the scalp and a water-based spray if your starter locs feel dry. Heavy cream can build up fast and make short locs look dusty. That’s the tradeoff. Keep it light, keep it clean, and the shape holds.
11. Mini Braided Mohawk With Beaded Ends
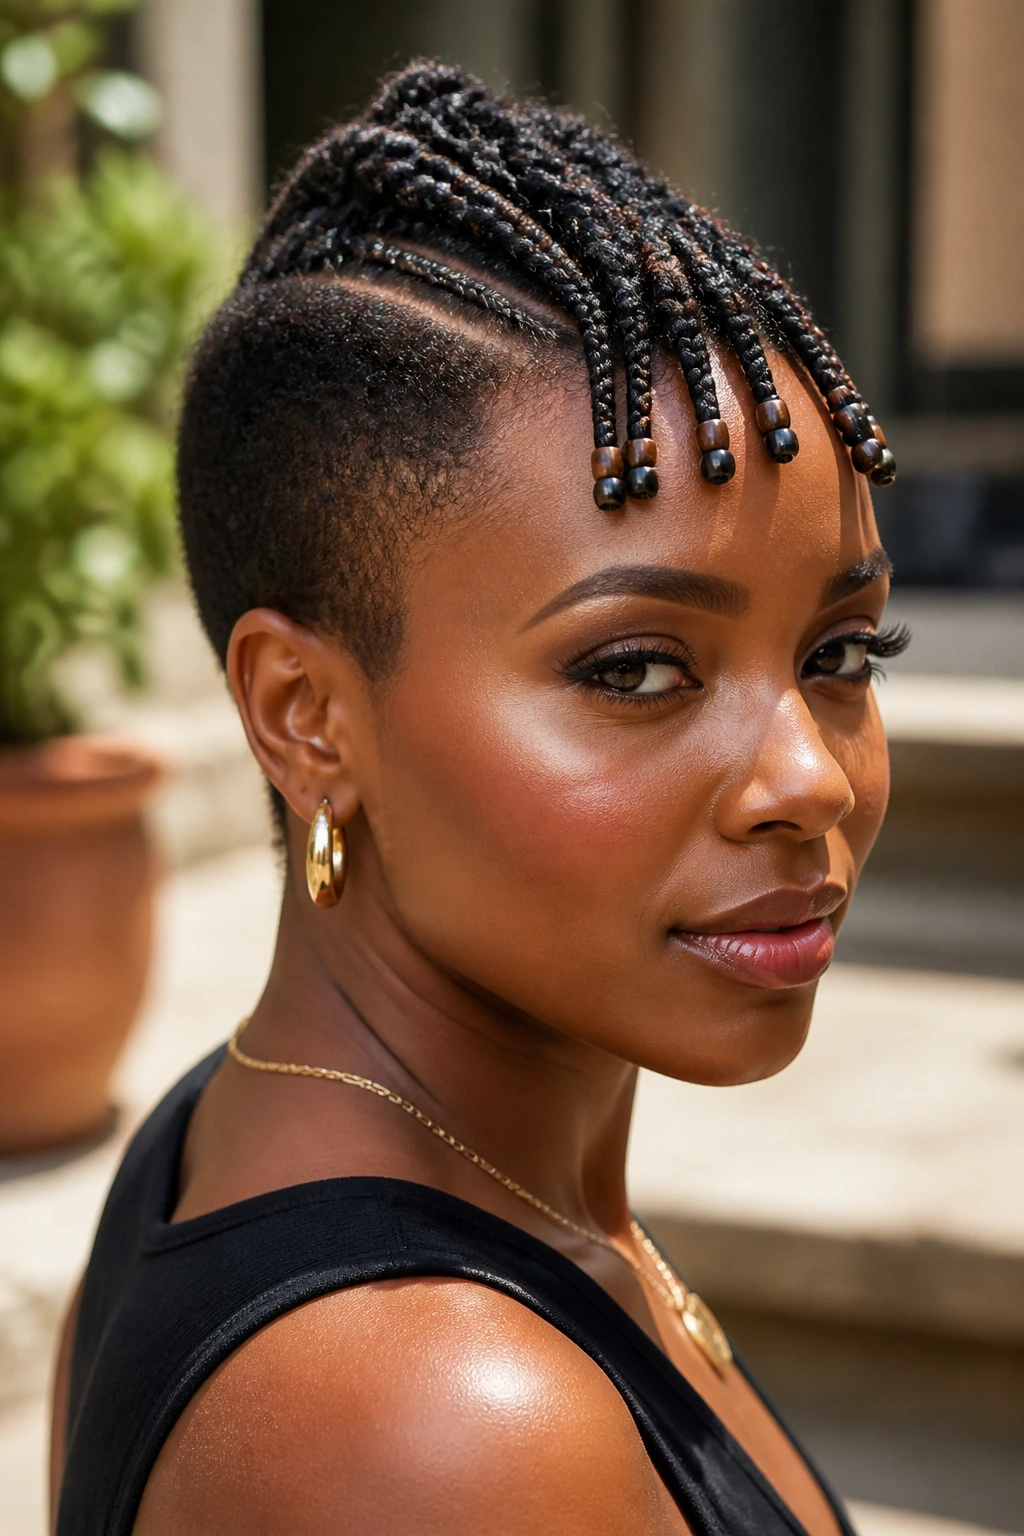
Tiny braids along a short natural mohawk bring precision to a style that can otherwise look too soft. They’re especially useful when you want the shape to last and you don’t want to rely on a lot of daily curl refreshing. A few rows of small braids down the center, maybe with beads or cuffs at the ends, makes the whole thing feel finished.
The key is not to overbraid the head. Short hair can only handle so much. Use enough braids to define the ridge, then stop. You want the eye to see the center strip, not get lost in a grid of tiny parts.
Beads are optional, and I’d use them sparingly. One or two well-placed beads at the ends of the braids is usually better than turning the whole thing into a sound effect. The style already has visual interest. It does not need to announce itself.
12. Curly Bang Mohawk
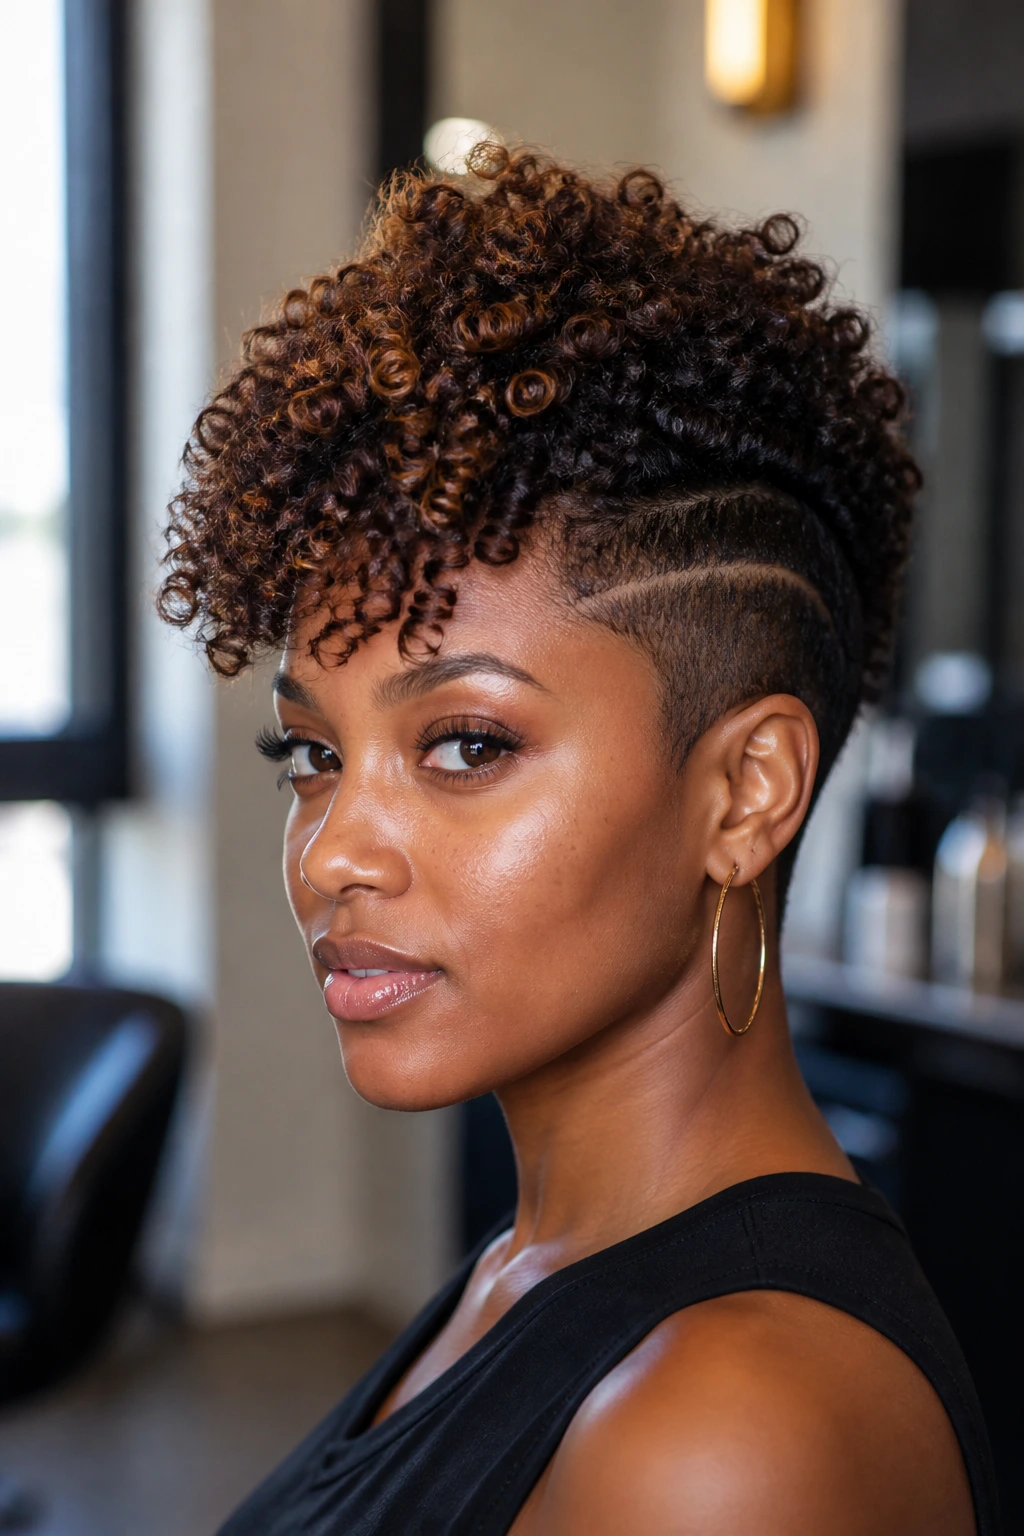
A curly bang mohawk softens the whole shape. Instead of pulling every bit of hair back, you leave a little fringe in front and let the center rise behind it. That front curl frame is useful if your forehead is on the shorter side or if you like the mohawk shape but don’t want the full face-open effect.
This style works best when the bangs are defined, not fluffy for the sake of fluff. Finger-coil the front or use a small wand on stretched ends if the texture needs help. Then let the middle rise with mousse, cream, or light twisting. The result feels playful without turning into costume hair.
If you’ve ever wanted a mohawk but worried it would look too severe, this is the one to try. It keeps the shape approachable. And, honestly, it photographs nicely from the side because the fringe gives the style a softer line.
13. Triple Puff Mohawk
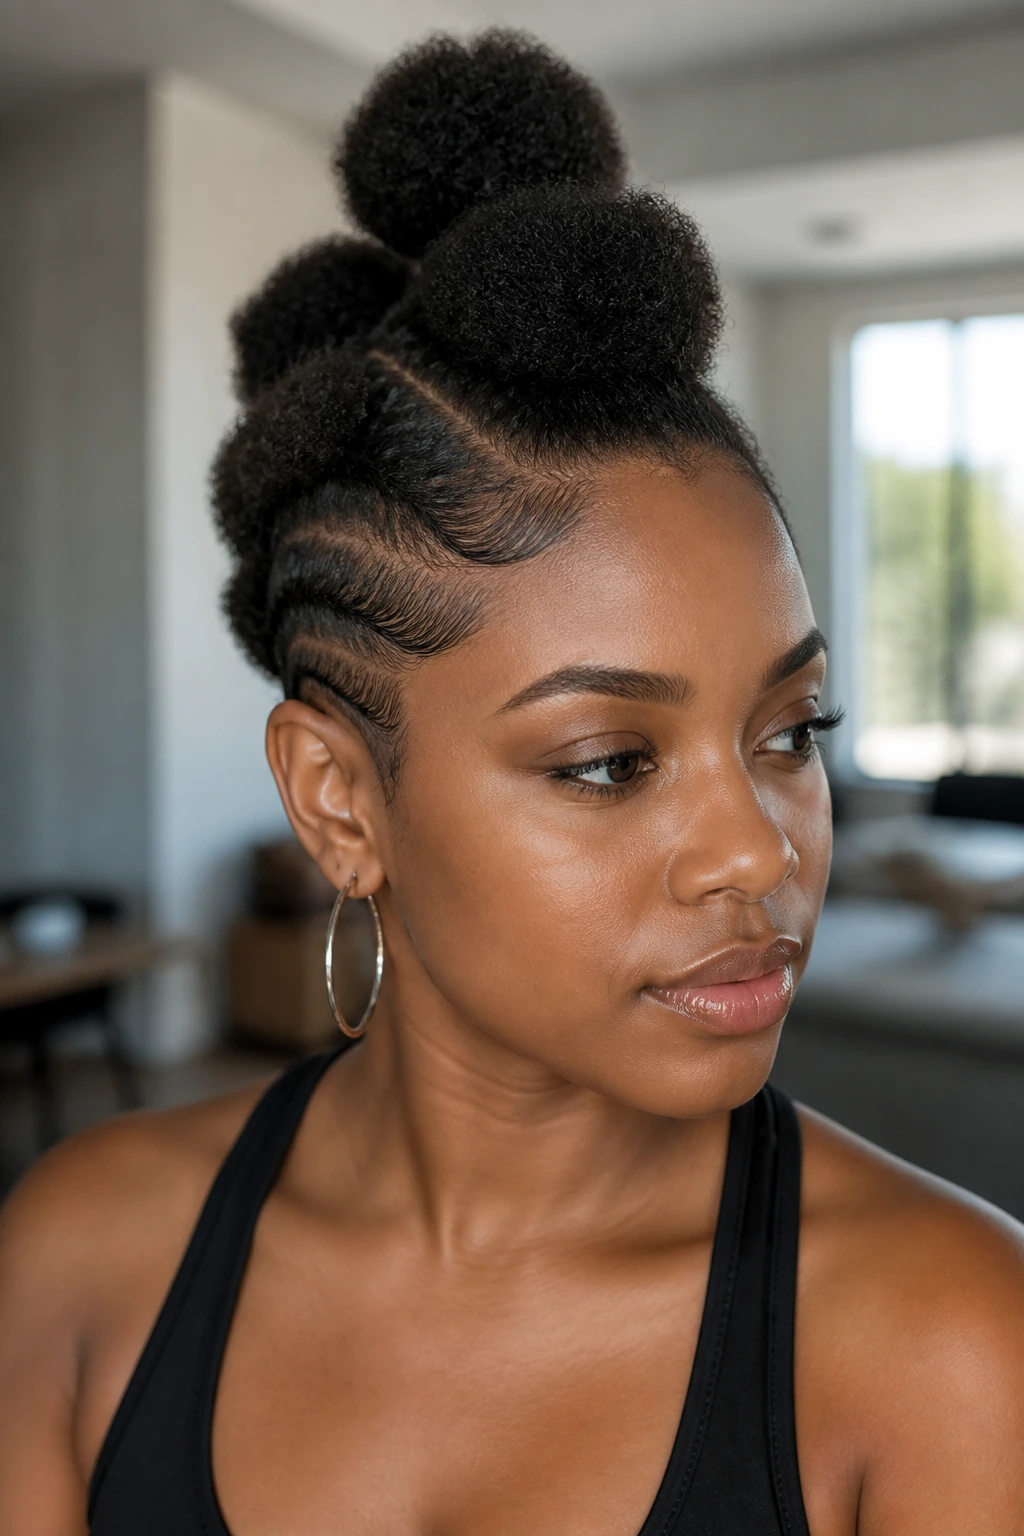
Three puffs down the center row bring more rhythm than a single puff ever could. On short hair, the sections don’t have to be big. In fact, small puffs often look better because they keep the style neat and stop the head from looking top-heavy.
I like this version for hair that has enough length to gather but not enough for a long braid or twist set. Each puff becomes a little anchor point. The sides stay smooth, the middle feels bouncy, and the whole thing has a playful, almost sculpted feel.
To build it, part the center into three zones: front, crown, and back. Secure each one gently with snag-free bands. Don’t crank them tight. That pulls the scalp and makes the style feel worse than it looks. A little lift at the roots is enough.
14. Faux Hawk With Gelled Sides
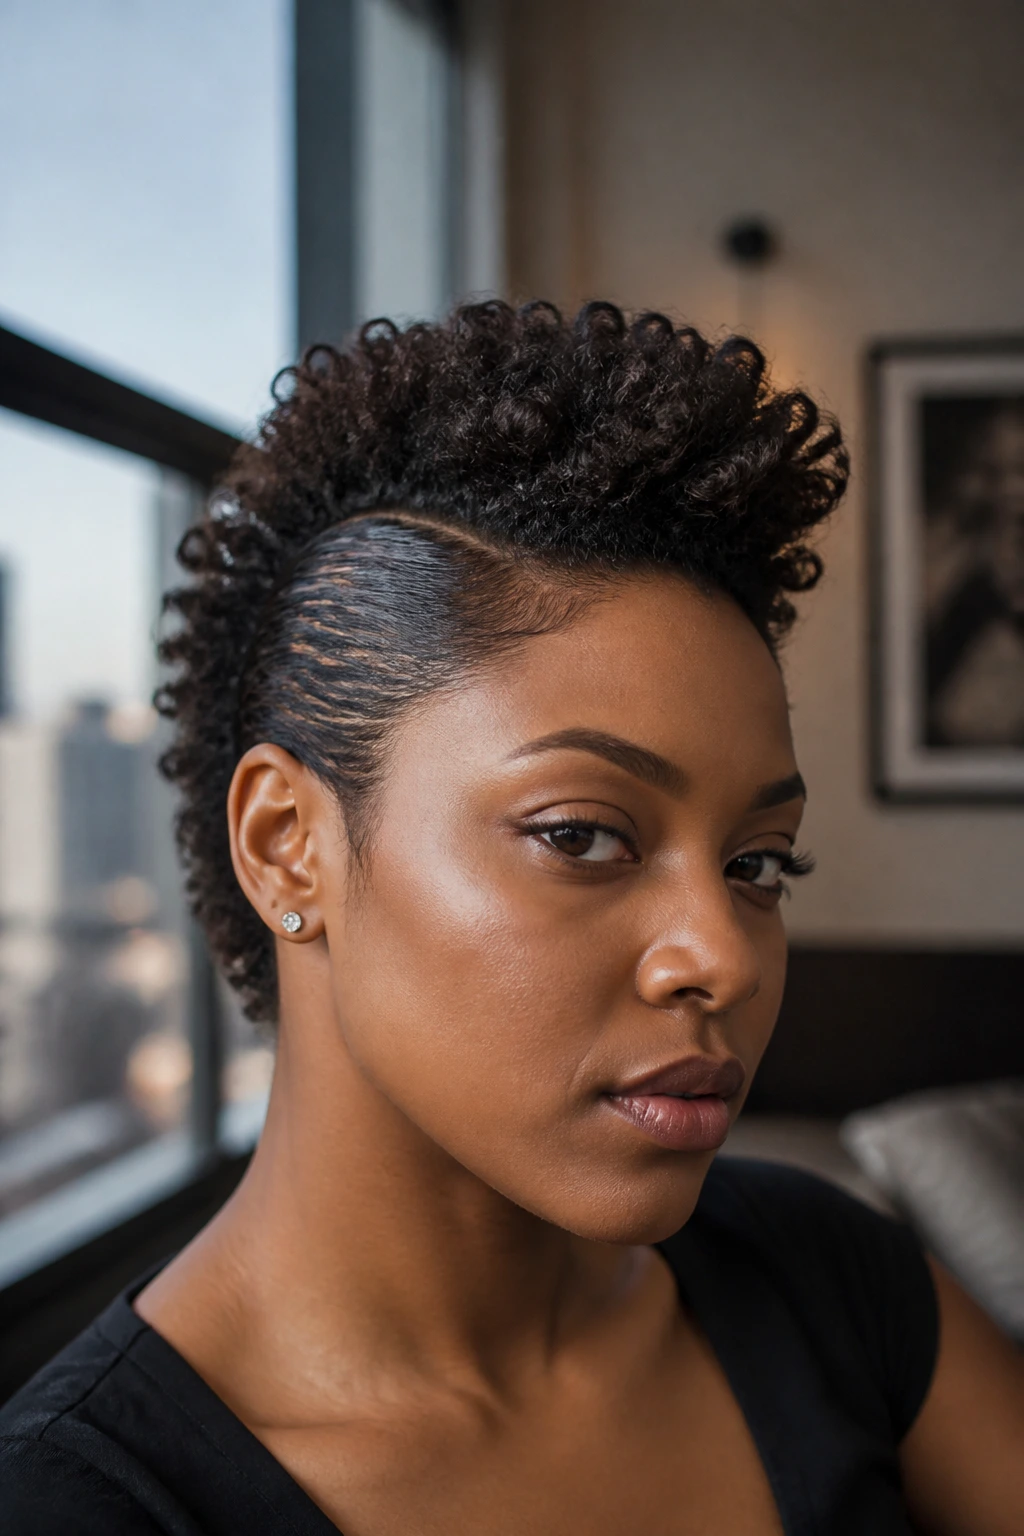
The faux hawk is the blunt instrument in this lineup, and I mean that as a compliment. It goes straight for the shape: sides slick, middle raised, no extra fuss. Short natural hair makes this easier than longer hair because you’re not wrestling with a huge amount of length.
You can keep the center curly, brush it into a ridge, or even pin it into a few small peaks. The sides need the most attention. Work gel in small sections, smooth with a brush, and press with a scarf for a few minutes so the shape sets before you move around.
This is one of the best looks for a night out, a photo shoot, or any day when you want the hair to look more sculpted than casual. It’s a little sharper than a frohawk, a little cleaner than a puff, and a lot simpler than it looks.
15. Side-Swept Coily Hawk
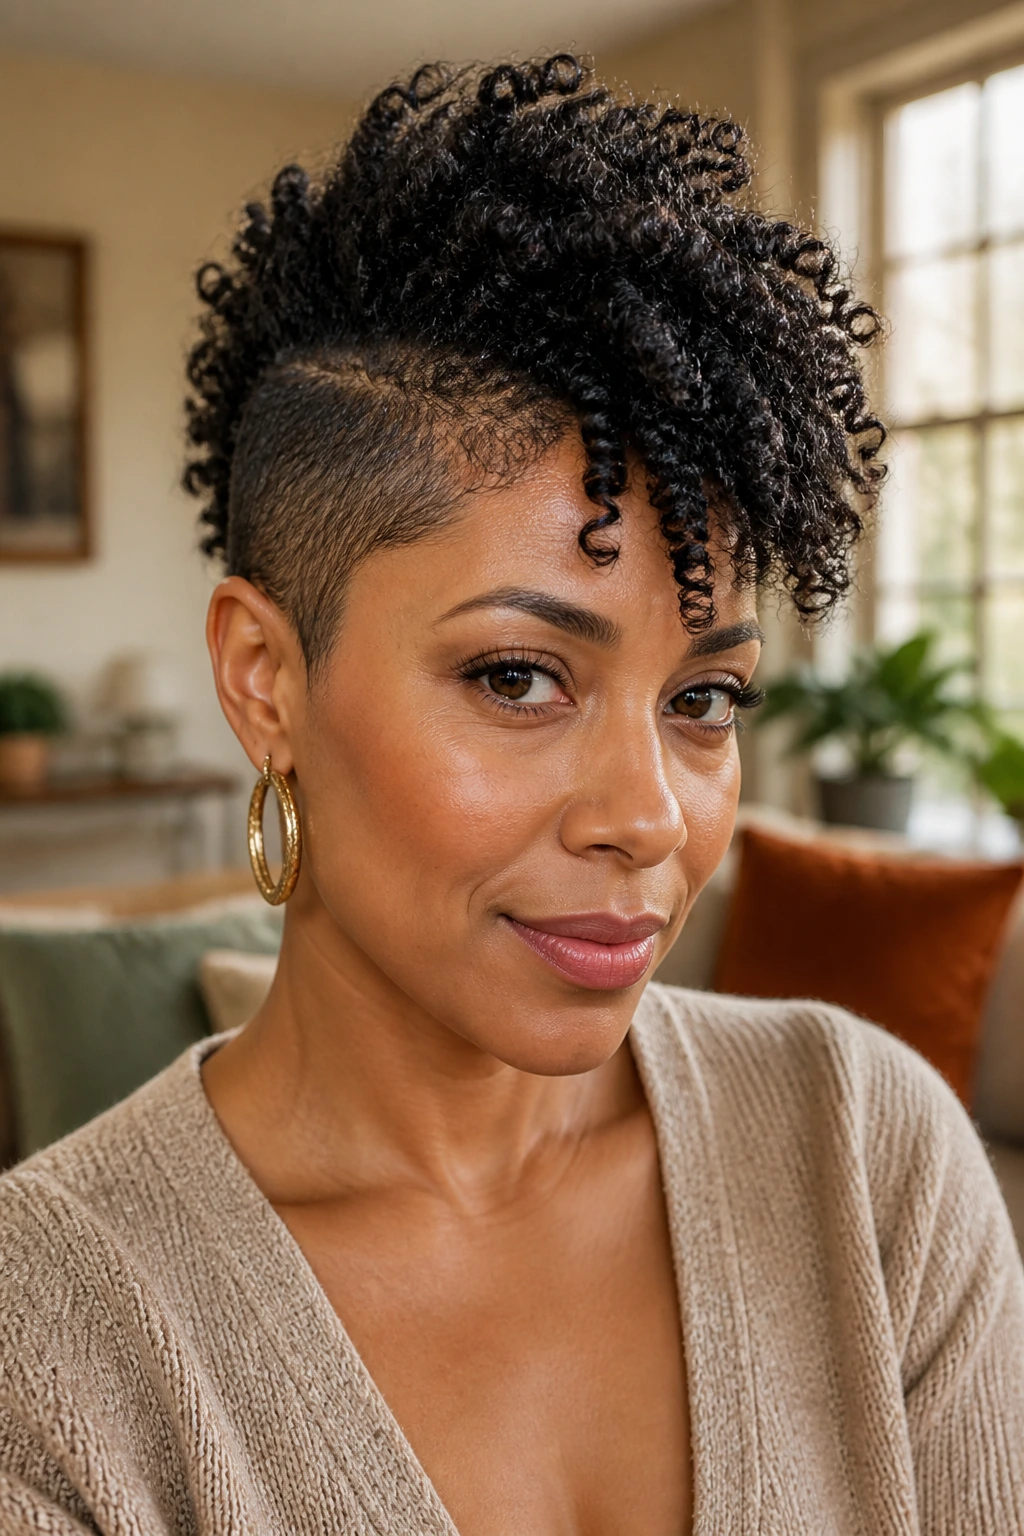
A side-swept coily hawk breaks the usual symmetry, which is part of why it looks so good. Instead of building a straight-up ridge, you guide the texture diagonally across the top. The movement is subtle, but on short hair it gives the style a lot of personality.
This works especially well when the curls or coils are dense at the crown. Sweep them over one shoulder line on top, keep the opposite side close, and let the curve do the work. It’s a nice option for people who want mohawk energy without the exact, centered look everyone expects.
Keep one side sleek and the other softly textured. If both sides are busy, the style loses its shape. A side-swept hawk should look a little off-center on purpose. That’s the whole charm.
16. TWA Mohawk With Tapered Fade
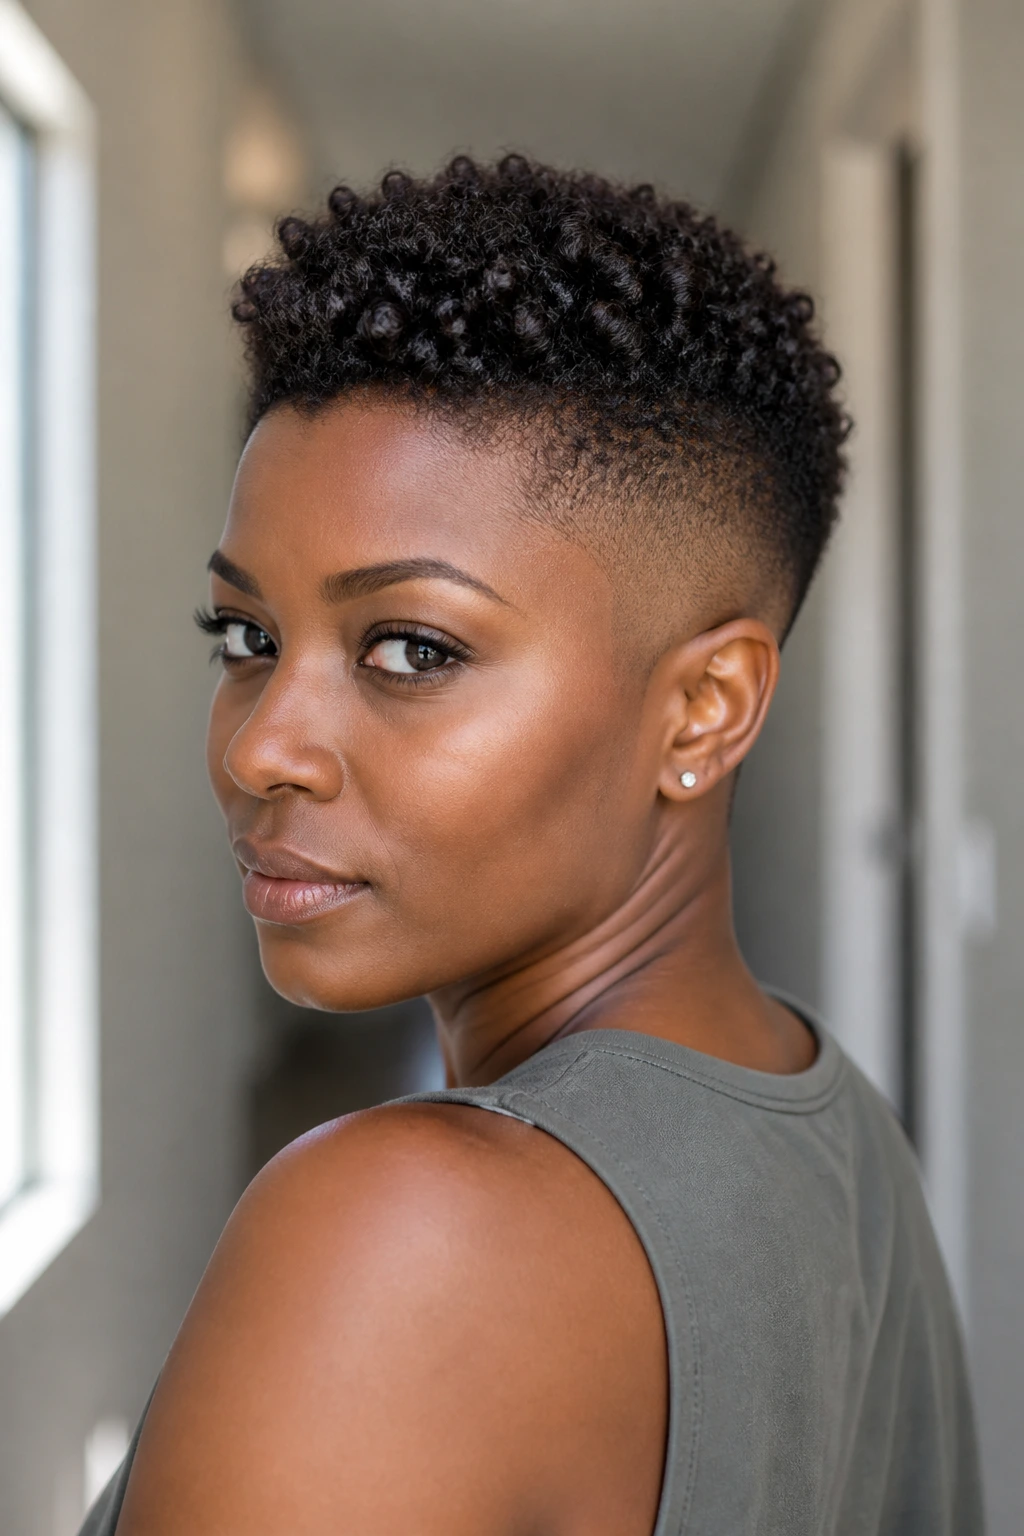
A tapered fade on a TWA changes everything. The haircut itself gives you the outline, so the styling only has to sharpen it. When the sides and back are cut close, the top reads like a built-in frohawk, even before you touch a comb.
This is one of those styles that looks expensive because the shape is already there. You can define the top with sponge work, finger coils, or a little curl cream and leave-in. The fade handles the edges. That means less daily effort and a cleaner profile from every angle.
If you like short hair that feels fresh but not high-maintenance, this is a strong choice. Keep the neckline tidy, shape the top lightly, and don’t drown it in product. The cut should do most of the talking.
17. Flat-Twist Out Mohawk
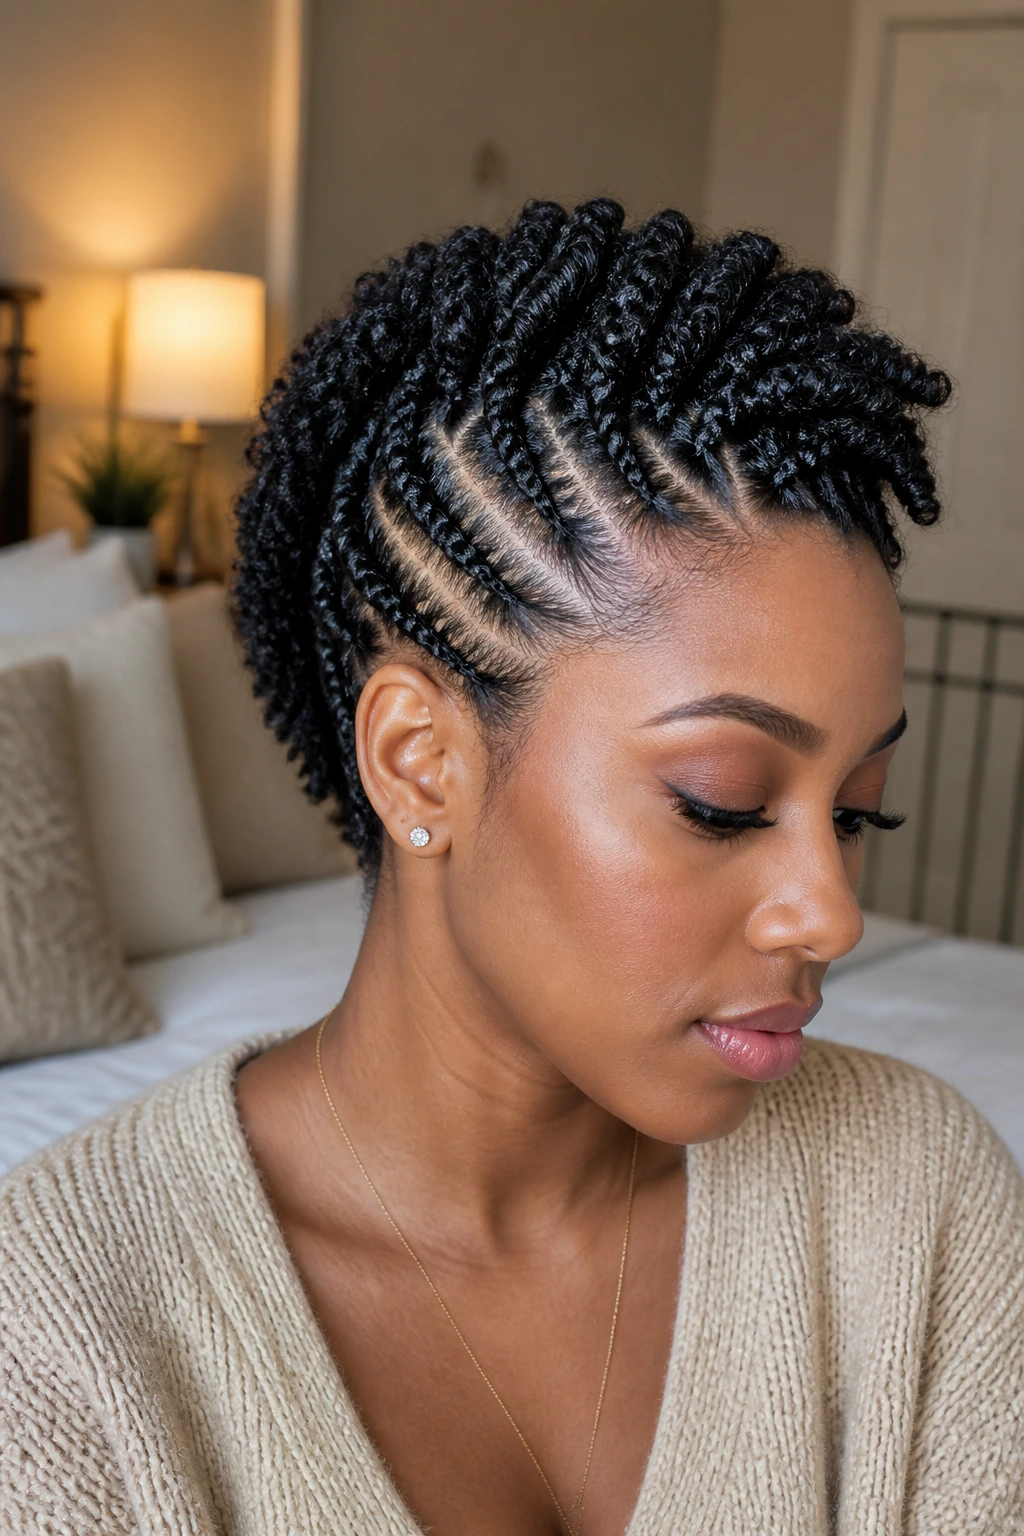
A flat-twist out gives you the softness of a twist-out with the structure of a mohawk. You set the hair in flat twists, usually down the center or in a curved pattern, then unravel them once they’re dry. What you get is a fluffy ridge with visible definition instead of a hard, stiff line.
Why It Feels Different
The ridge has more movement than braided styles, but more shape than a pure wash-and-go. That middle ground is useful on short hair because it keeps the hair from disappearing into shrinkage.
You do need patience. The twists should dry fully, or the result gets frizzy fast. If your hair is dense, give it a full night under a scarf or bonnet before you take the twists apart. Use a little oil on your fingers during the unraveling so you don’t rough up the curl pattern.
18. Rope Twist Mohawk
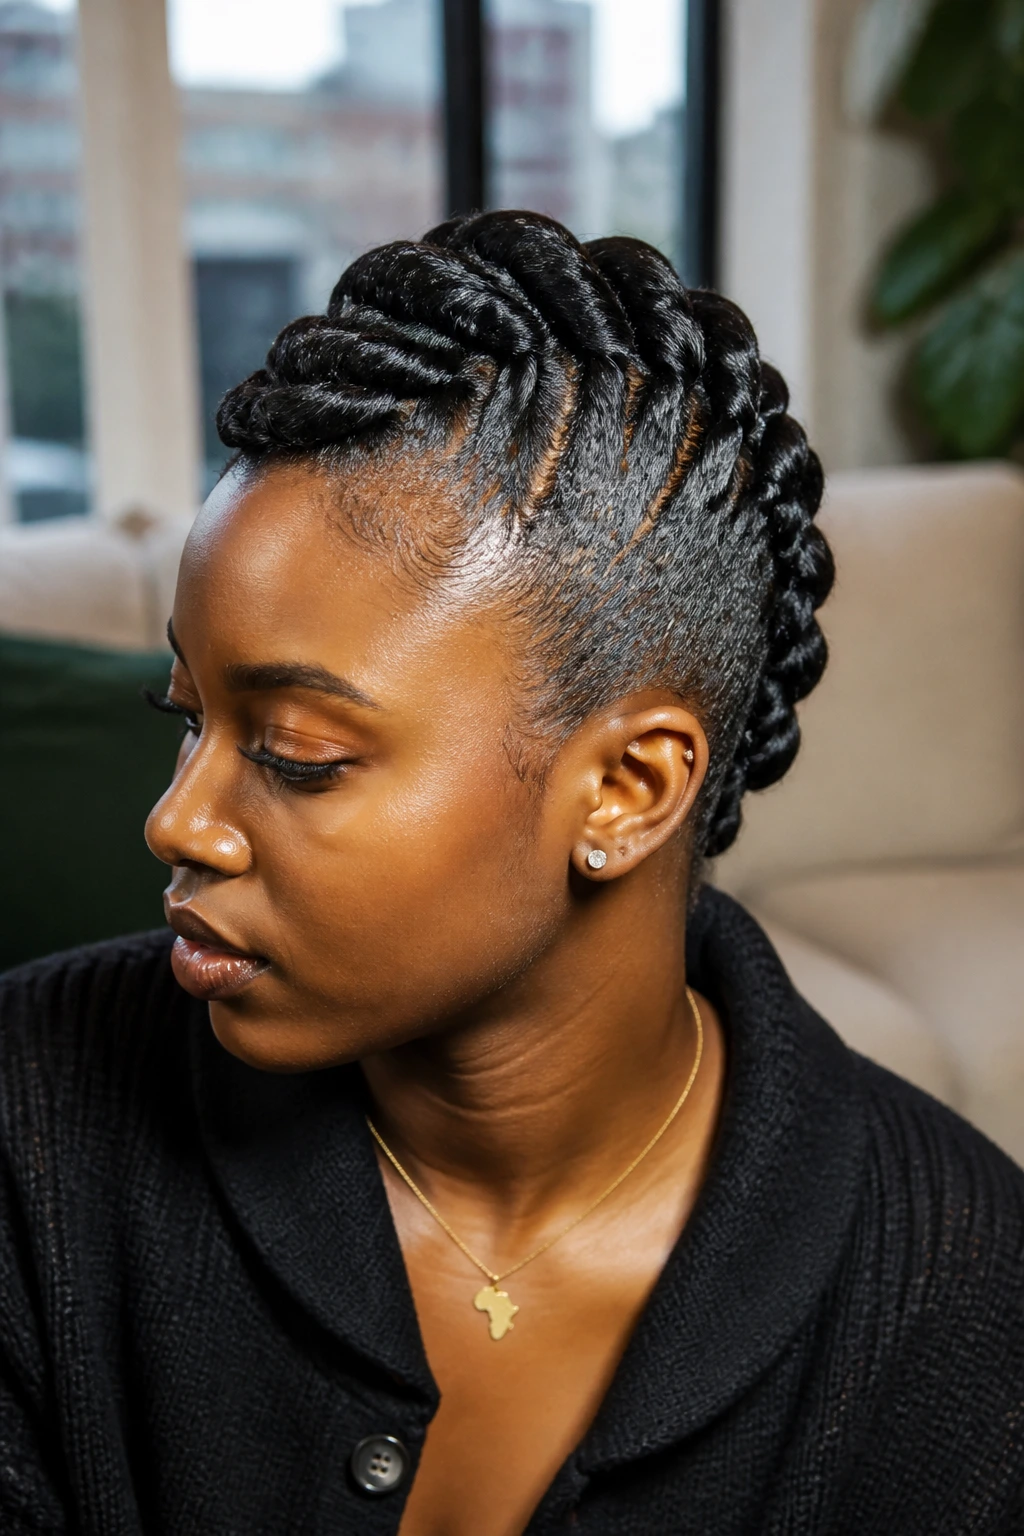
Rope twists bring a neat, slightly glossy finish that works well when you want the mohawk shape to stay contained. They’re tighter than chunky two-strand twists and less bulky than braids, which makes them a smart option for shorter lengths. The center ridge stays visible, but it doesn’t balloon out too much.
This style sits nicely between protective and decorative. It can look casual with a simple center row, or more styled if you lay the sides extra smooth and define the parting. On short natural hair, rope twists also help if the ends are prone to unraveling. They cling together better than some looser sets.
I’d use a cream with decent hold and keep the twist size consistent. Uneven sections show fast in rope twists. And if your hair is very soft or very slippery, set the ends with a tiny dab of gel so they don’t puff apart before the day ends.
19. Halo Braids Into Mohawk
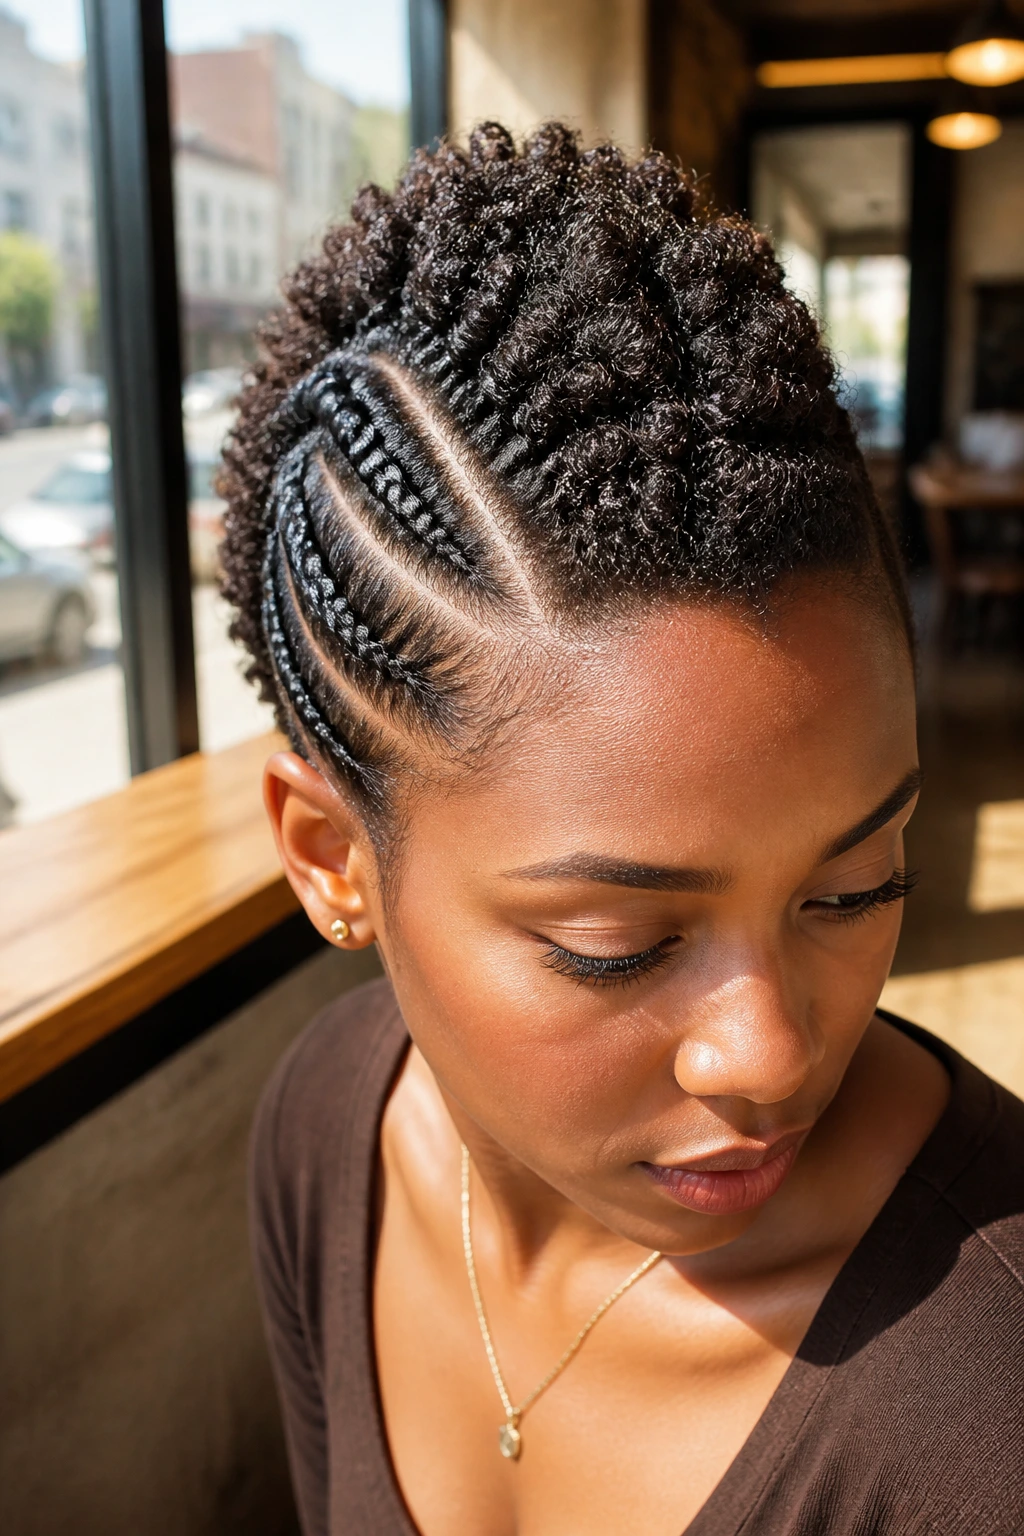
Ever seen a style that looks like it was drawn on with a comb? Halo braids into a mohawk do that. The braids sweep around the sides and feed attention into the center ridge, which can be left curly, twisted, or lightly puffed. The effect is elegant without getting fussy.
This is a useful choice for short hair because the braid path gives direction even when the hair itself is not long enough to do dramatic things on its own. You don’t need the halo to be perfect. You need it to guide the eye.
Keep the braids close to the scalp, and stop before the pattern gets crowded. Too many small braids can swallow the mohawk shape. A few clean lines are enough. Then let the middle do whatever texture it does best.
20. Fluffy Picked-Out Mohawk
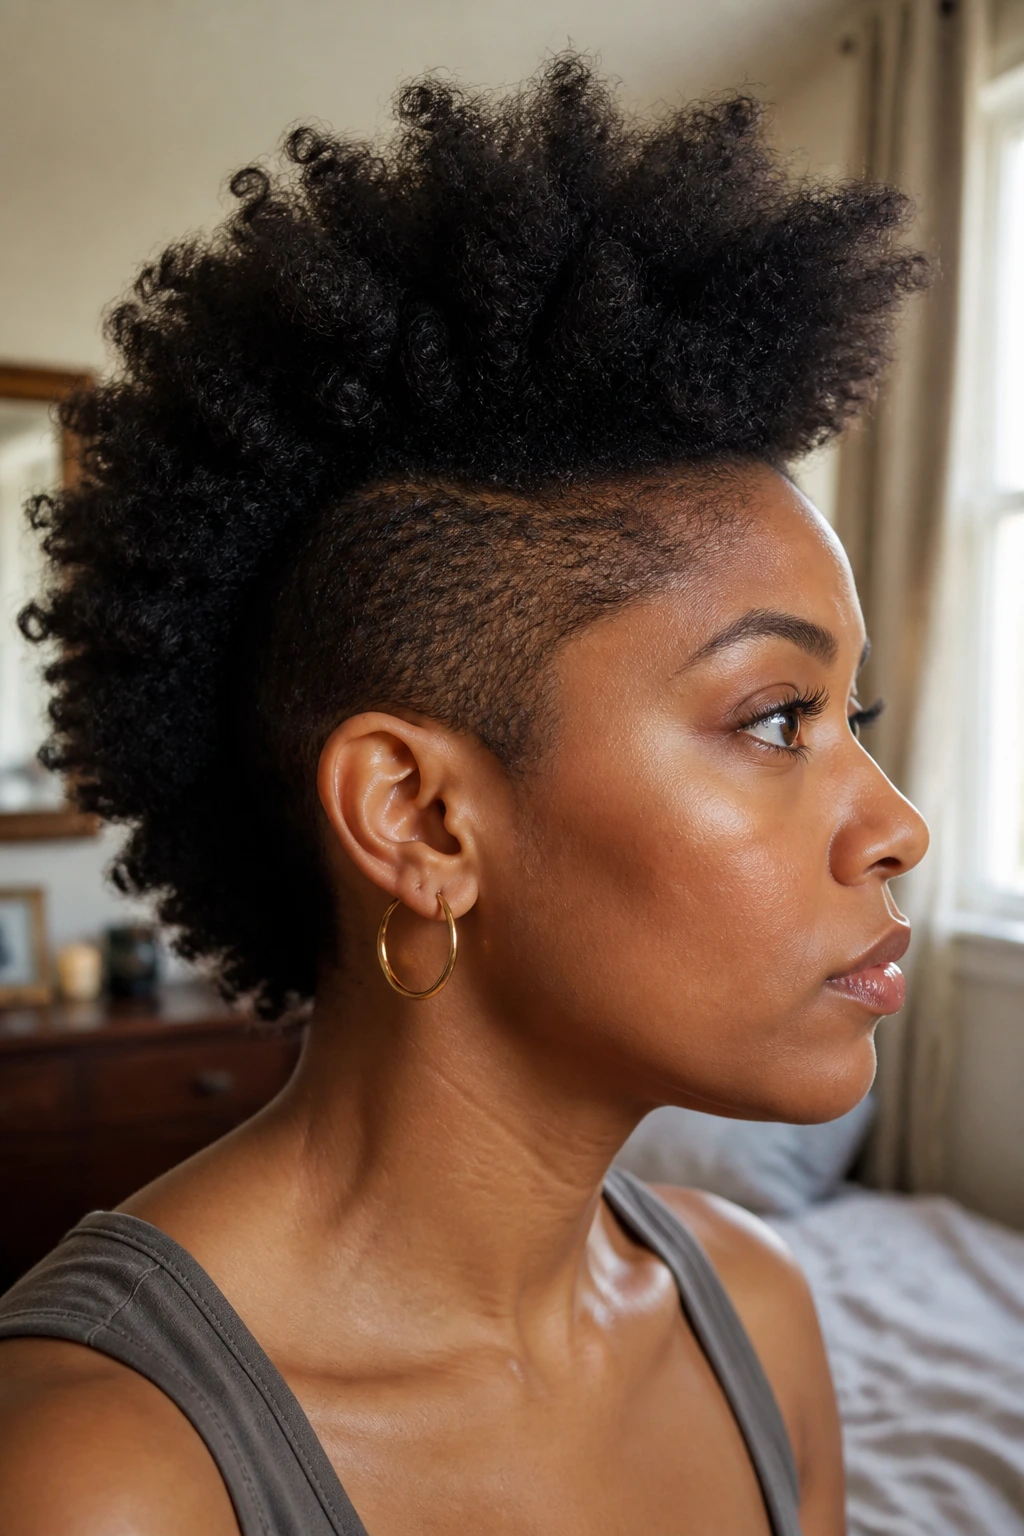
A picked-out mohawk is all about volume. You start with a defined base—twists, coils, or a dry set—then lift the roots with a pick and separate the ridge until it looks airy. On short hair, that fluff can be the whole point. It gives the mohawk a bigger presence without needing more length.
The danger here is over-picking. Once you get past the root and into the ends, the style turns messy fast. Keep the pick at the scalp, lift in small sections, and stop as soon as the ridge looks full enough. You want shape with air in it, not a cloud that lost its outline.
This is a strong option if your hair is dense and shrinkage-heavy. Short coils can disappear on their own; a careful pick brings them back into view. A little shine spray on the outer layer helps too, but only a little. Too much, and the volume drops.
21. Accessories-Heavy Mohawk With Clips or Cuffs
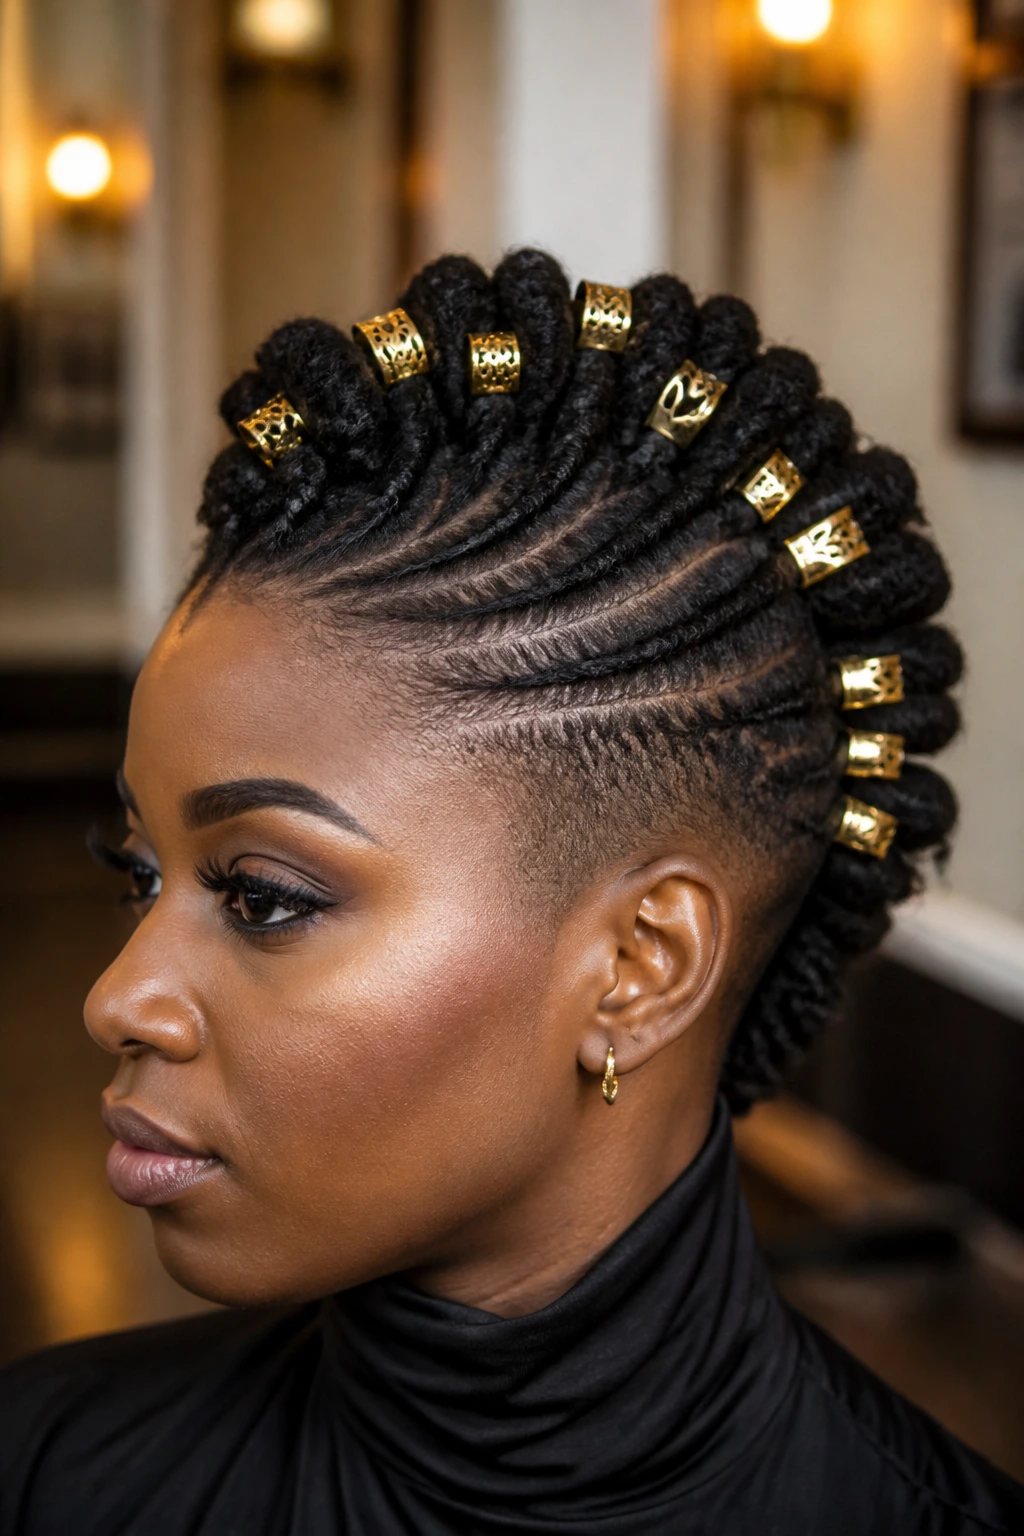
Sometimes the style itself is simple and the accessories carry the mood. Gold cuffs, colored clips, rhinestone pins, tiny shells, or one dramatic barrette can turn a plain mohawk ridge into something much more styled. Short natural hair is especially good for this because there’s less surface area to cover, so a few pieces go a long way.
I like this route when the base style is already neat but needs personality. A set of flat twists or a curl ridge becomes more interesting the second you add cuffs at even intervals. Keep the placement intentional. Random clutter is not the goal here.
If you’re using metal cuffs, make sure the hair section is firm enough to hold them without slipping. Very soft hair may need a tiny bit of gel or a tighter twist base. And if the accessories are heavy, skip the smallest sections. They’ll droop.
22. Roll-and-Pin Mohawk
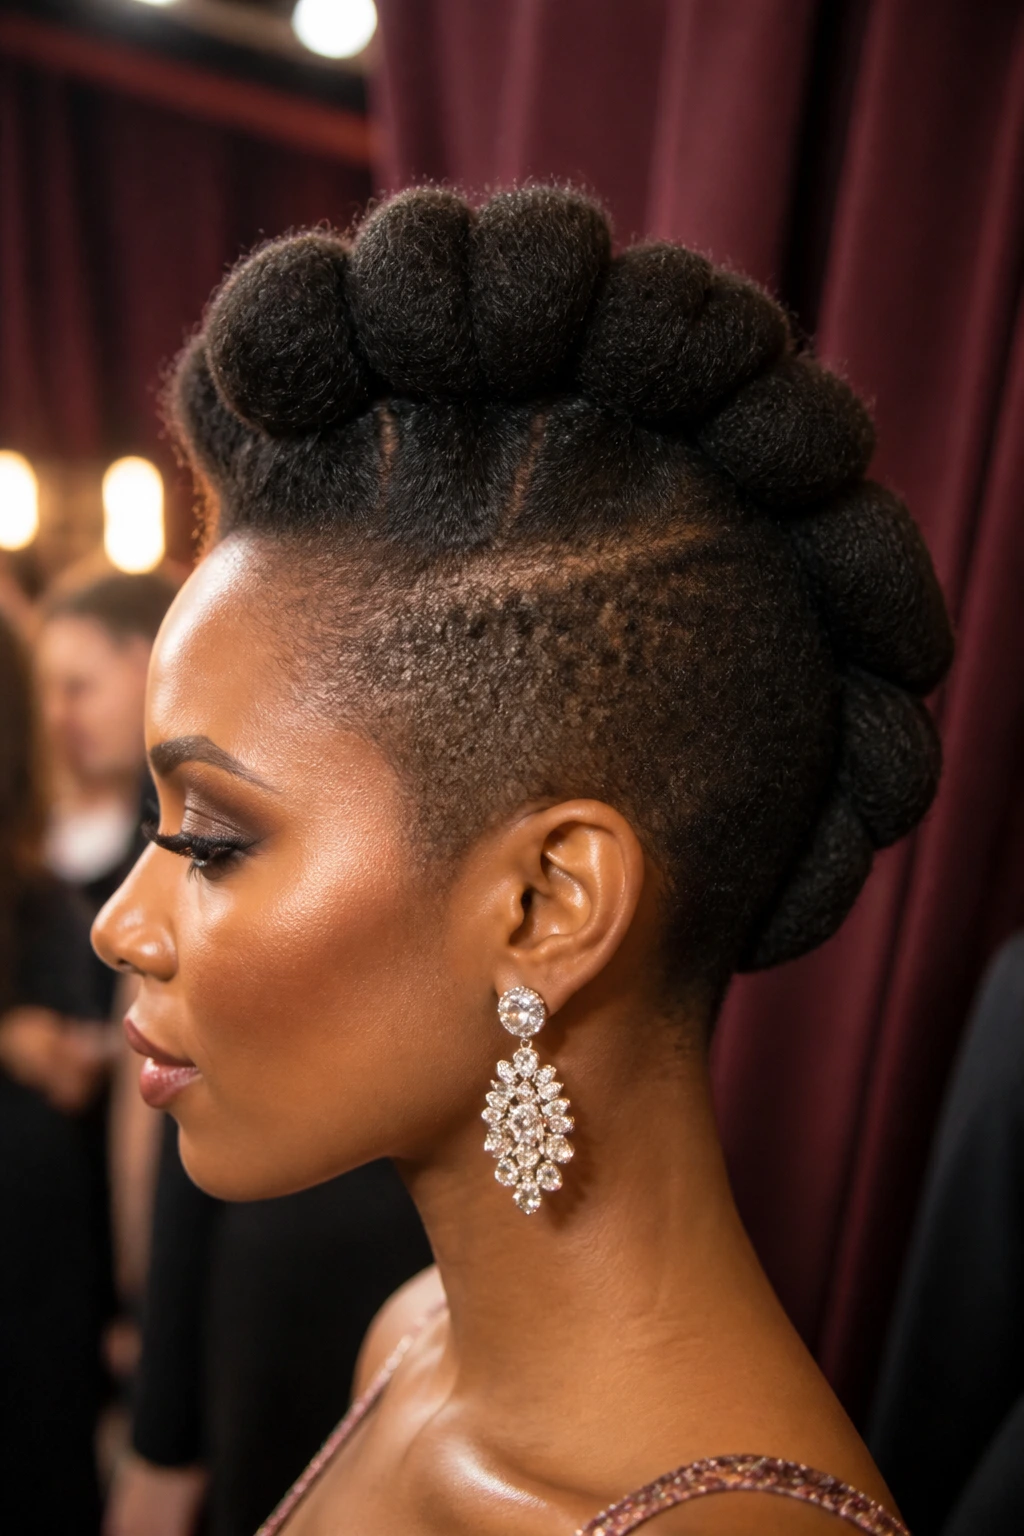
A roll-and-pin mohawk is one of the more sculpted looks in the bunch. You roll sections inward along the center line, pin them flat, and build the shape piece by piece. The result is tidy, architectural, and surprisingly forgiving on short hair because you’re not asking the hair to do a huge amount of lifting on its own.
This style works especially well for events where you want your hair to hold still. Weddings, formal dinners, stage appearances, that sort of thing. It also gives you control over the ridge height. Roll it tighter for a low profile, or leave the rolls a little looser for more texture.
Use bobby pins that match your hair color, or at least stay out of the way. The whole style depends on the pins staying hidden. If you can see every pin from the front, the shape is too loose. Tuck them under the rolls and press the style gently before you walk away from the mirror.
Why the Mohawk Shape Works on Short Natural Hair
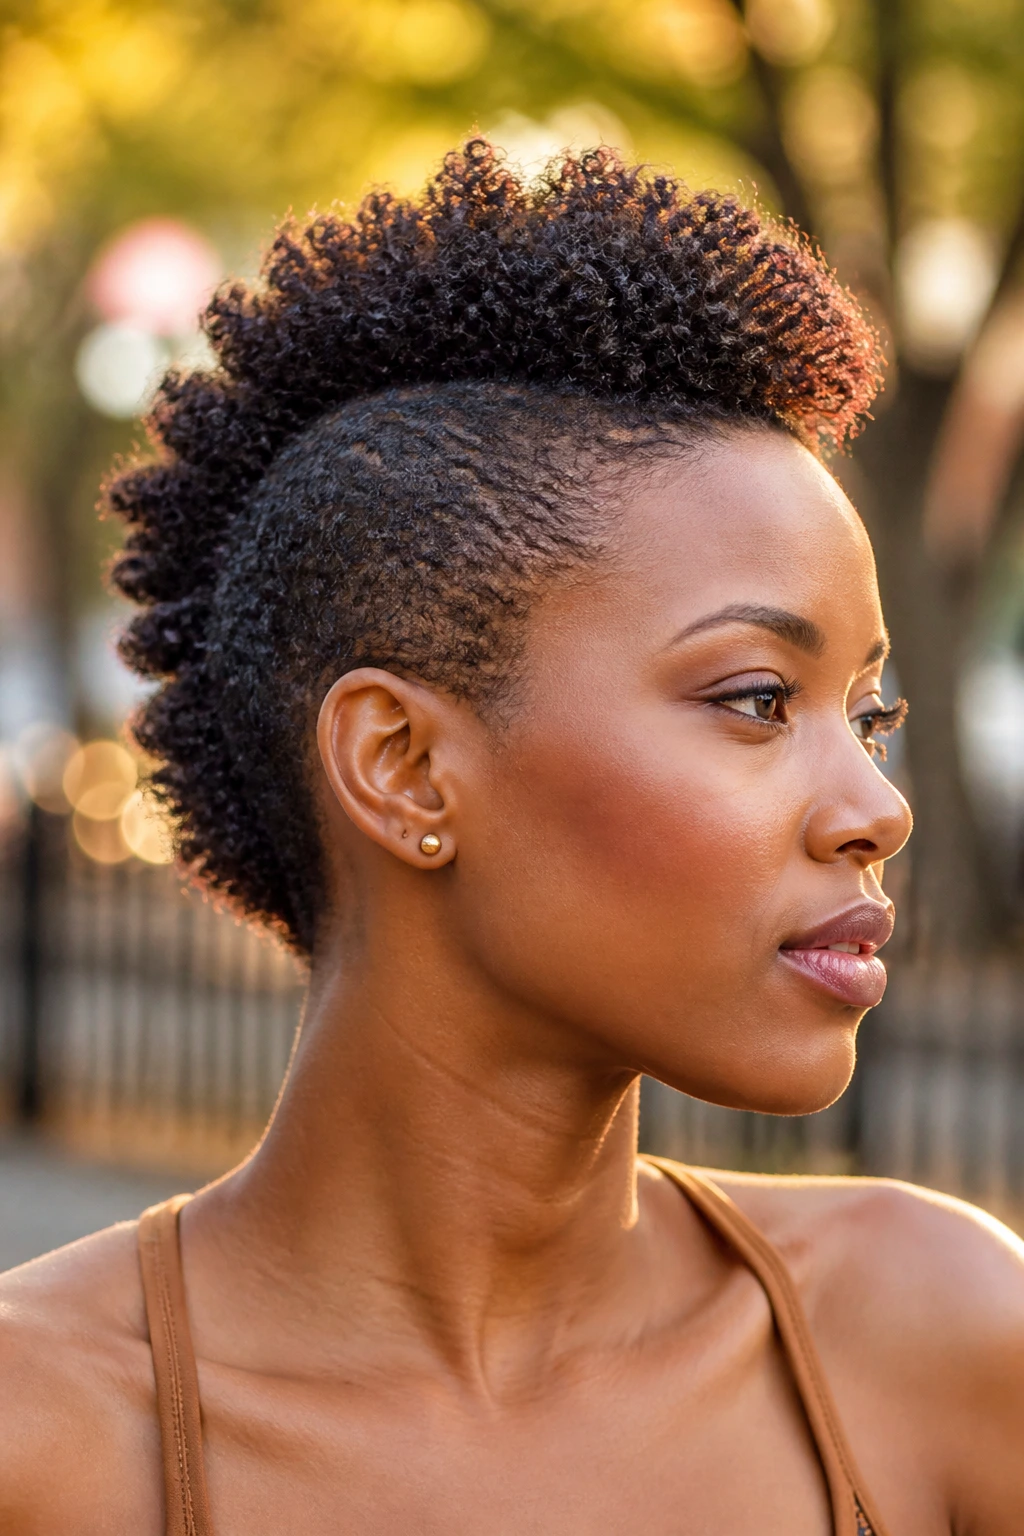
Short natural hair loves the mohawk shape because the style turns a limitation into a design choice. A mohawk takes the part of the head that already wants to stand up—the crown, the coils, the puff, the ridge—and gives it the room to do that on purpose. The sides are not “missing.” They’re part of the composition.
That matters for curl patterns that shrink a lot. A tight curl can disappear into a tiny silhouette if you leave it all the same length and direction. A mohawk breaks the head into zones, and that contrast is what makes the style readable. You get height in the center, calm along the sides, and a cleaner shape overall.
There’s also a face-shape payoff. A centered ridge can lengthen a round face. A softly curved hawk can soften sharp angles. A side-swept version can make a long face feel less stretched. The mohawk shape is not one look; it’s a family of shapes, and short hair handles those shapes better than most people expect.
Tools That Make the Style Easier
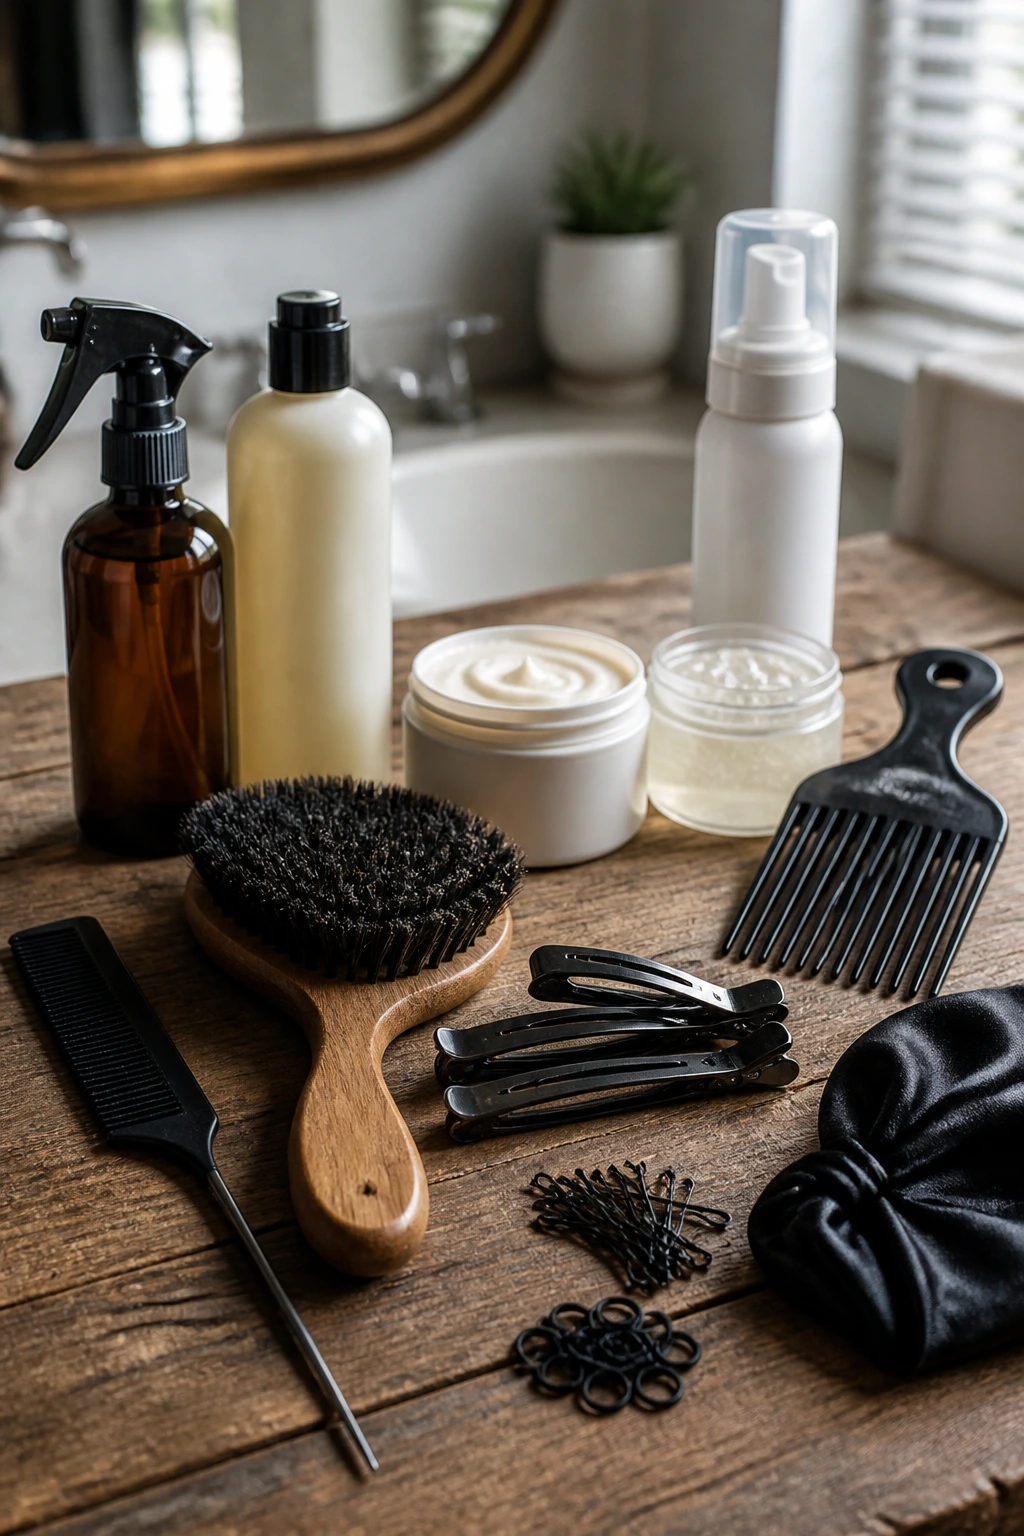
- Rat-tail comb: Best for crisp parts, center ridges, and braid lines that don’t wobble.
- Soft brush or boar-bristle brush: Helps smooth the sides without scraping the scalp raw.
- Duckbill clips: Keep the center strip separated while you work the edges.
- Spray bottle: Lets you dampen short hair evenly before twisting, coiling, or braiding.
- Leave-in conditioner: Adds slip so the curls and sections don’t snag while you style.
- Curl cream or twisting butter: Useful for definition in coil-based, twist-based, and puff styles.
- Alcohol-free gel or edge control: Gives hold on the sides without the flaky crust cheap formulas leave behind.
- Mousse: Helpful for wash-and-go hawks, twist-outs, and styles that need light hold.
- Bobby pins and U-pins: Essential for roll-and-pin and sculpted styles.
- Satin scarf or bonnet: Keeps the sides smooth and protects the ridge overnight.
- Hair pick: Good for building lift at the roots without breaking up the curl pattern.
- Small elastics: Use snag-free bands for puffs and mini sections; skip rough rubber bands.
Product and Prep Choices That Matter
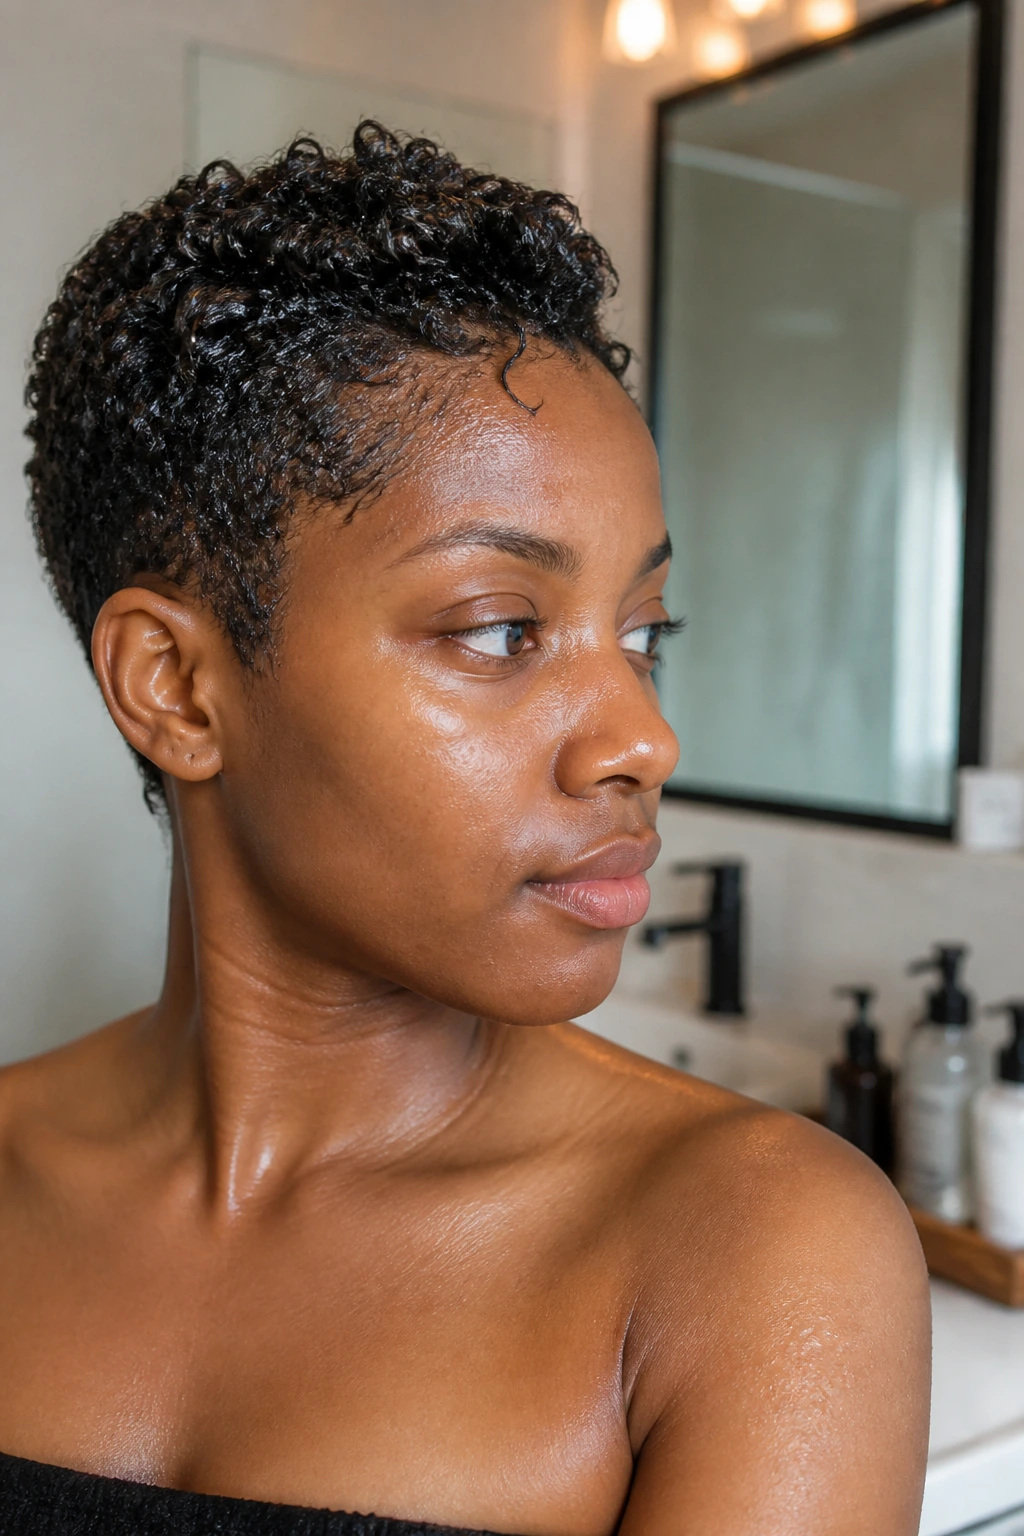
Clean, damp hair styles better than dry, dusty hair. That sounds obvious until you see how many people try to build a mohawk on hair that needs moisture and detangling first. If the strands are rough before you start, the sides puff back up and the ridge loses its line before the day is over.
I’m picky about product layering on short natural hair. A water-based leave-in first. Then a cream or mousse, depending on the style. Gel only where you need hold. If you put heavy oil under a firm gel, a lot of products will slide instead of setting, and the style feels greasy before it even dries.
For the edges, choose hold over shine. A glossy edge control that never sets is annoying. A firmer, alcohol-free product with a small brush usually does better, especially around the temples. And if your scalp is sensitive, test new products on a small patch first. Flaking, burning, or white residue will ruin even the neatest mohawk.
How to Wear These Looks
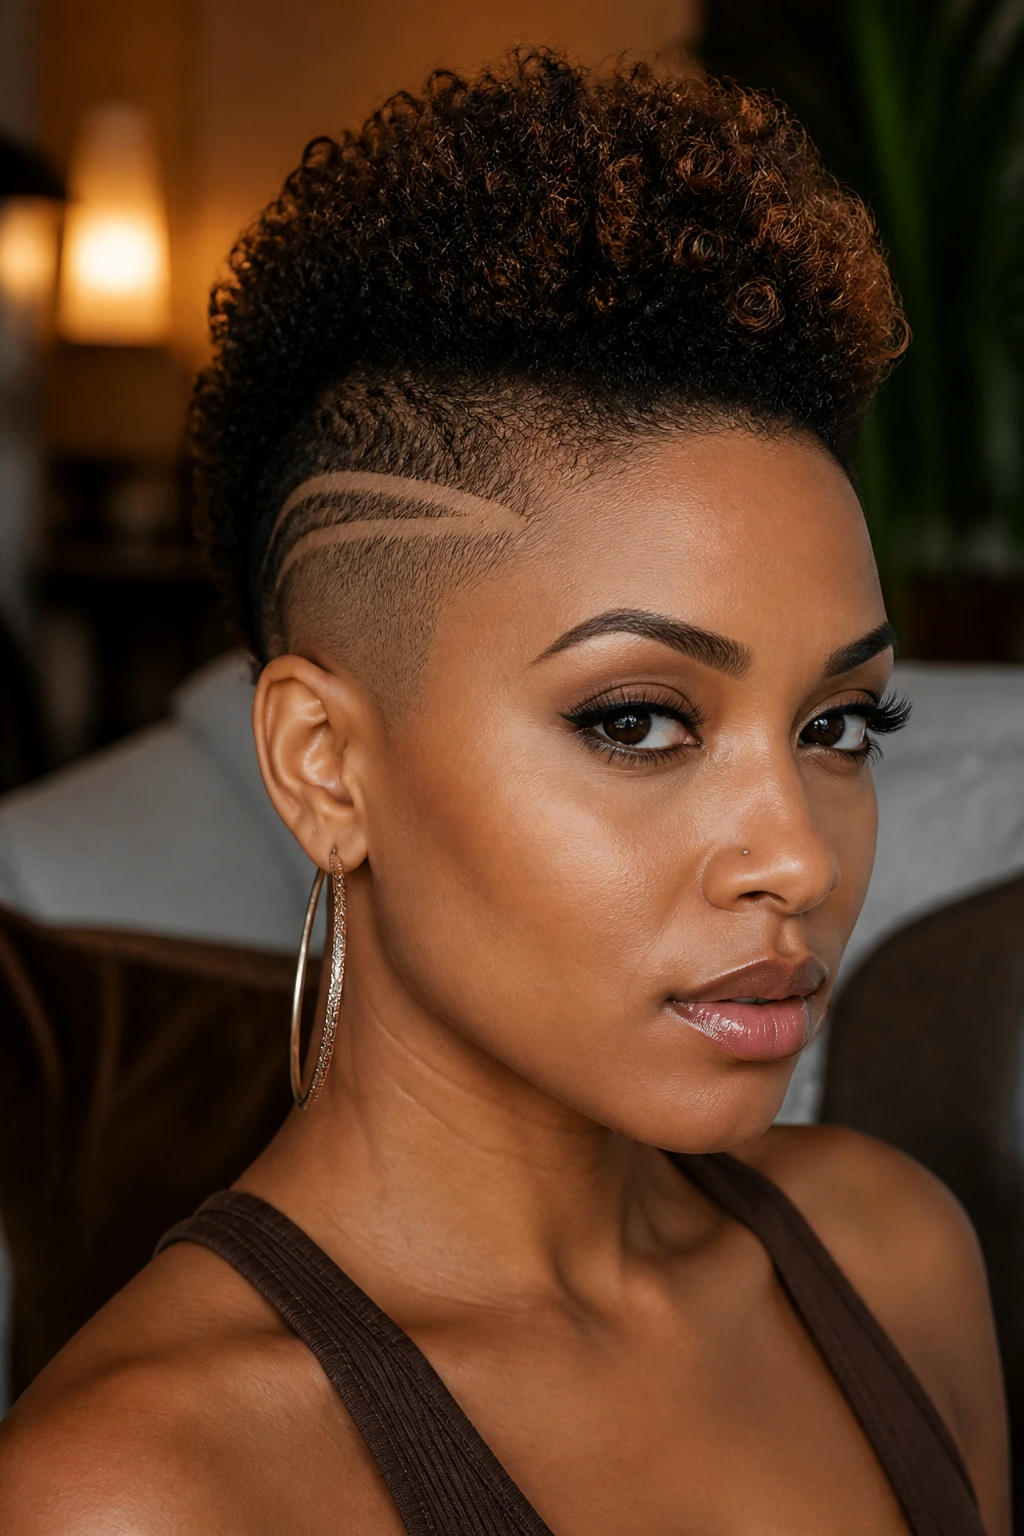
Silhouette: Keep the highest point where it flatters your face best. Rounder faces usually like a slightly taller ridge; longer faces often look better with a flatter, wider center line. The style should frame your face, not compete with it.
Accessories: Hoops, studs, hair cuffs, and a single strong clip can do more than a pile of extras. Short natural hair takes to accessories quickly because the style is close to the head, so one focal piece is usually enough.
Occasion: A flat-twist hawk or roll-and-pin look reads polished enough for formal settings. A puff, twist-out hawk, or picked-out ridge feels more relaxed. The same shape can move between them if you change the finish.
Scale: Don’t chase giant height on very short hair. A ridge that stands 1 to 2 inches above the scalp can still look bold if the sides are clean. Oversizing the top is how the style starts to wobble.
Extra Tips for More Hold, More Height, or More Shine
Shape Control: Work in sections instead of coating the whole head at once. Short hair responds better when you smooth, pin, or twist one lane at a time, because the products set before they migrate.
Volume: Lift the roots, not the ends. A pick at the base or a finger shake at the crown keeps the ridge lively without turning the texture into frizz.
Definition: If you want clearer curls or coils in the middle, use a cream first and a lighter gel or mousse on top. That combination gives more shape than cream alone, but it does not harden the hair the way a heavy gel can.
Make-It-Yours: Add cuffs, change the parting, or swap a center ridge for a side-swept curve. Tiny changes matter more than people think on short hair. A 1-inch shift in placement can change the whole vibe.
Night Care and Refreshing the Style
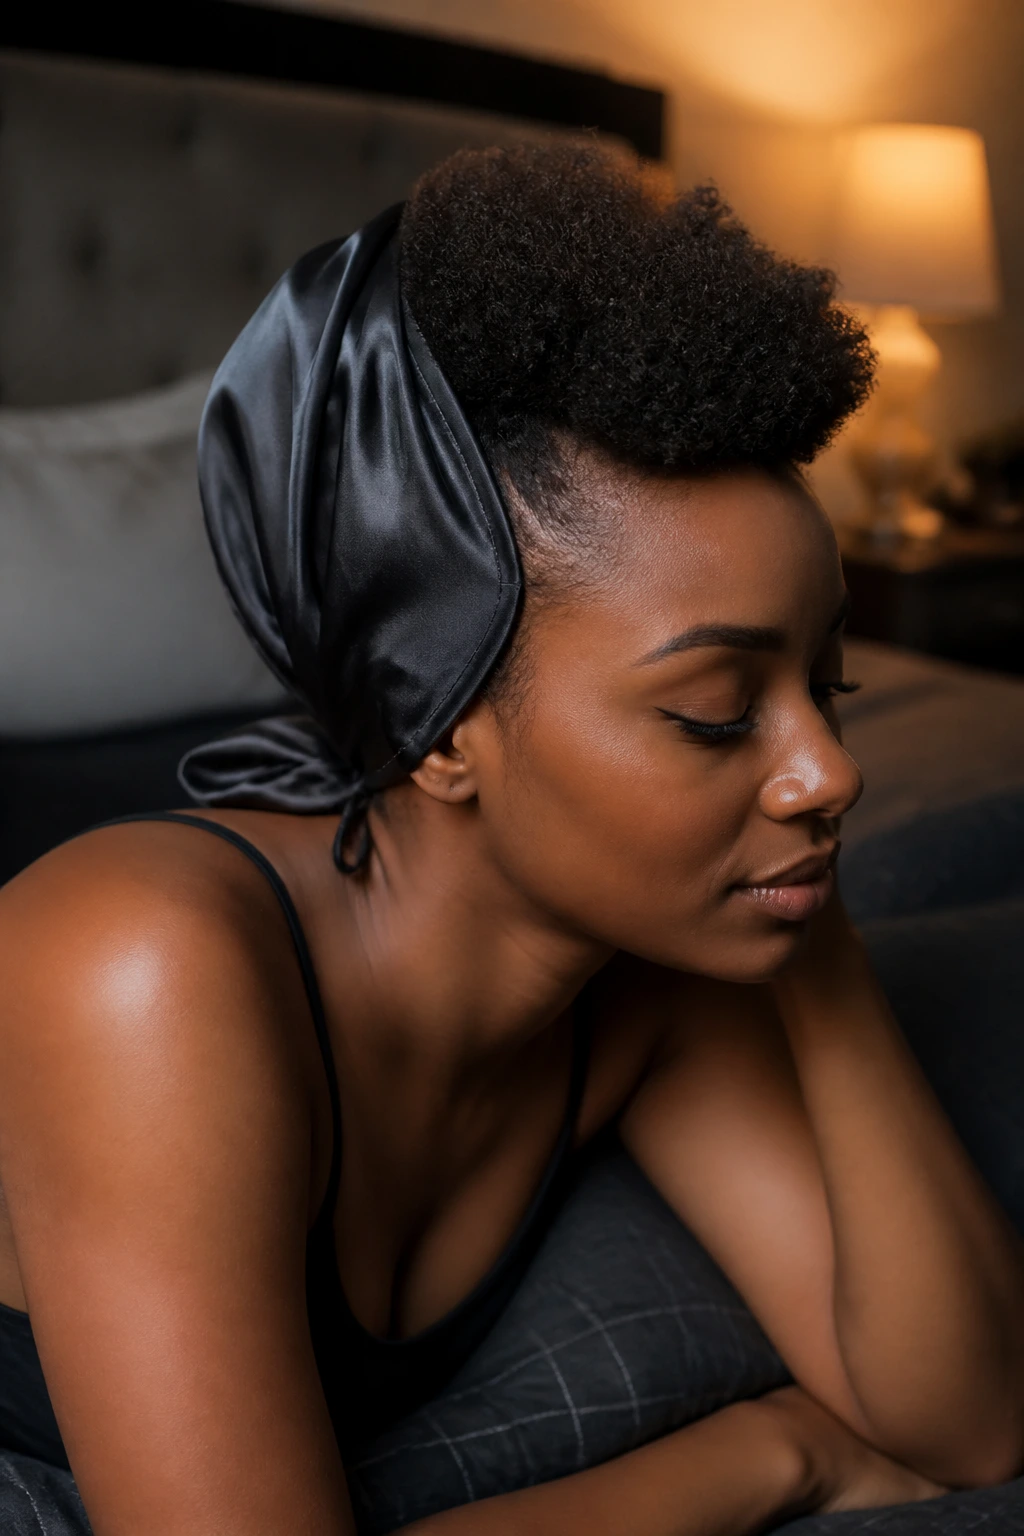
Most short natural mohawks look best for one to three days, depending on how much product, moisture, and pinning the style needs. Braids and twists last longer. Puff styles and wash-and-go hawks usually need more quick fixes. That is normal.
Wrap the sides with a satin scarf before bed, and keep the center inside a bonnet if the ridge is soft or curly. If the hair is very short, a full bonnet can flatten the shape too much, so a scarf plus a loose bonnet often works better than stuffing everything in hard. For styles with pinned sections, sleep on a satin pillowcase too, because pins can shift.
In the morning, refresh only what looks tired. A mist of water mixed with a little leave-in can wake up curls and twist-outs. A dab of edge control along the hairline can tighten the sides. Don’t pile more and more product on top of old product. That’s how the style gets gummy and dull.
Variations and Adaptations to Try

Lower-Profile Office Hawk: Keep the ridge close to the scalp, skip the beads, and use a side part instead of a tall center strip. It still reads as a mohawk, but it feels calmer and easier to wear with a blazer or collared shirt.
Big-Texture Weekend Hawk: Pick the crown, loosen the twist pattern, and let the middle get fluffy. This version works best on dense coils and looks especially good when the hair has a little stretch from a twist-out or braid-out.
Protective-First Version: Choose flat twists, rope twists, or curved cornrows and leave the ends tucked away. This keeps the style neat for longer and cuts down on daily manipulation.
Tiny-Length Version: If the hair is very short, go with finger coils, sculpted sides, or a TWA frohawk with fade. You do not need puffs or big braids to get the shape. A sharp line and a defined center are enough.
Accessory Pop Version: Add cuffs, clips, or a single bright barrette to one side. On short hair, one good accessory can do the work of five smaller ones.
Common Mistakes to Avoid
-
Pulling the sides too tight: If the hairline feels sore or looks shiny and stretched, the style is too tight. Back off. A mohawk should sit close, not yank at the temples.
-
Using too much gel at once: Heavy product can turn the edges white or make the ridge stiff and flaky. Use small amounts, layer them slowly, and let the style set before adding more.
-
Building too much height for the length you have: Short hair can hold shape, but it cannot fake inches forever. A compact ridge usually looks stronger than a puffed-up version that collapses after an hour.
-
Skipping moisture before styling: Dry short natural hair frizzes faster and breaks easier when you start parting and pinning. A light leave-in or mist makes the whole job easier.
-
Forgetting the night wrap: Even the best mohawk shape gets bent out of shape by friction. Satin is not optional if you want the style to survive.
Frequently Asked Questions
How short is too short for a natural mohawk?
If the hair can be brushed, coiled, or pinned in sections, it’s usually workable. Even very short TWA lengths can handle a mohawk shape if you lean on finger coils, sculpted sides, or a tapered cut.
What’s the easiest mohawk style for short natural hair?
A high puff, wash-and-go hawk, or TWA frohawk is usually the quickest. They use the hair’s own texture instead of asking for braids, lots of pins, or a long set time.
Can I do these styles on 4C hair?
Yes, and 4C hair often gives the most dramatic shape because the coils hold volume so well. The only catch is moisture: if the hair is dry, it shrinks hard and frizzes fast, so prep matters.
How do I keep the sides smooth all day?
Brush the sides in the direction you want them to stay, then secure them with a scarf for 10 to 15 minutes after styling. A small amount of edge control helps, but too much will flake or turn tacky.
Are mohawks bad for edges?
They can be if you pull the hairline too tight or style the same spot every day. Keep tension low, vary the parting, and give your edges a break between styles.
Can I sleep in a mohawk style?
Yes, though some versions sleep better than others. Flat twists, braids, and pinned looks hold up best; puffs and fluffy ridges need a scarf or bonnet and a quick morning refresh.
What if my hair collapses by midday?
The sides may be too heavy, the ridge too product-heavy, or the roots too wet when you styled it. Next time, use less product, dry more fully, and keep the center shape a little tighter at the base.
Can I add clip-ins or braided hair to these looks?
You can, especially for events, but keep the extra hair light. Short natural hair looks best when the added pieces support the shape instead of dragging it down.
The Shape I’d Reach For First
Short natural hair does not need to apologize for being short. It needs a shape that knows what to do with its texture, and a mohawk is one of the cleanest ways to get there. Some versions are soft and fluffy. Some are sharp and sculpted. Some hold for days. Others are morning-to-evening looks that just want a scarf and a good brush.
The best part is how much range lives inside one silhouette. A small change in parting, texture, or finish can take the same haircut from casual to polished without fighting the hair you already have. That’s the kind of styling I trust.
