



A sleek low ponytail has a funny reputation: people think it’s the easy option, the thing you do when you’ve run out of ideas. That’s not how it reads when it’s done well. A clean center part, a smooth crown, and a ponytail sitting right at the nape can look sharper than an elaborate updo that’s been fussed over for half an hour.
The difference is in the details people usually rush past. A boar-bristle brush changes the whole line of the head. So does the tension at the hairline, the way the elastic sits, and whether the ends look blunt, tucked, curled, or left glossy and straight. A sleek low ponytail can feel strict, soft, sculptural, glossy, modern, or quietly expensive. Same base. Different mood.
That’s why these 28 sleek low ponytails for women are worth saving instead of skimming. Some are office-clean and almost severe. Some soften the face with a side sweep or curtain bangs. Some lean into shine and polish. Others use a braid, ribbon, cuff, or tucked end to keep the silhouette tidy while adding a little personality.
Why This Collection Is Different
- Shape Comes First: Each style starts with the line at the crown and nape, because a low ponytail only looks polished when the top half behaves.
- Not All “Sleek” Means Flat: Some versions keep a soft lift at the crown or a little bend at the ends, which keeps the style from looking pressed into the skull.
- Accessories Do Real Work Here: Wraps, cuffs, ribbons, pins, and tiny braids aren’t afterthoughts; they change the mood and often help the ponytail hold better.
- Useful for Real Hair, Not Just Photo Hair: These styles work on fine hair, thick hair, curls, shorter lengths, and second-day hair when you prep them the right way.
- Built for Different Days: Some ponytails lean formal, some are easygoing, and some are a clean answer for sweaty commutes, long meetings, or events where you want your hair to stay put.
1. Glassy Center-Part Low Ponytail
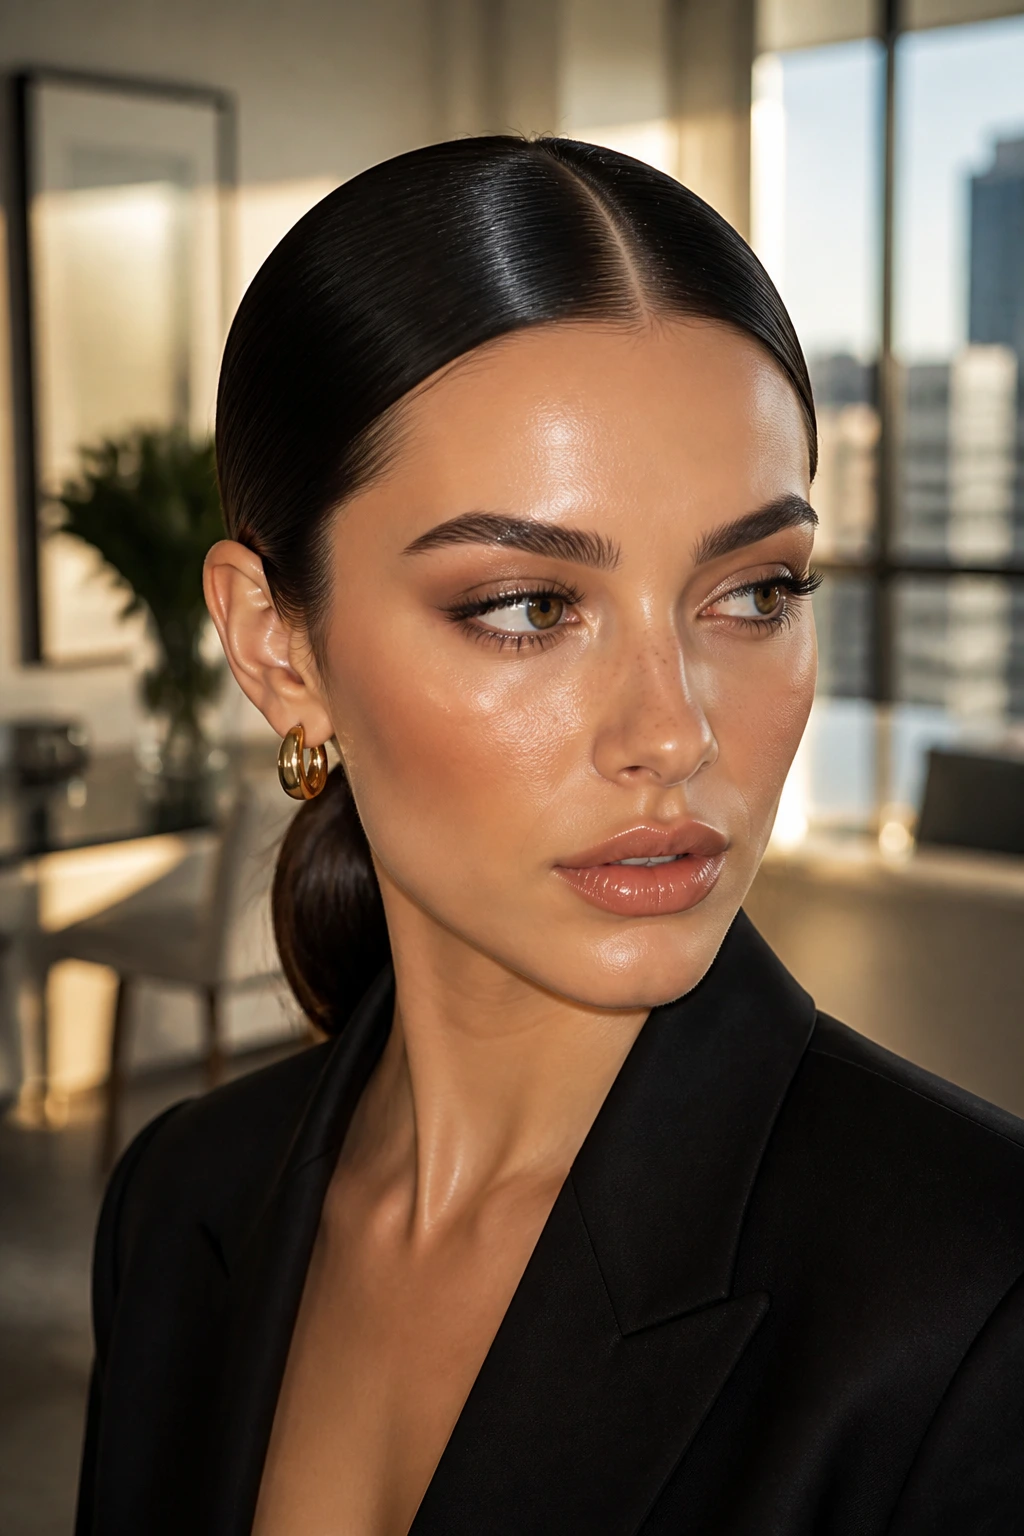
If you like a line so clean it almost looks drawn on, start here. The glassy center-part low ponytail is the one I reach for when the outfit already has strong shoulders, sharp tailoring, or a bold neckline. It keeps the face open and the hair obedient. No fuss. No stray fluff pretending to be texture.
The trick is not “more gel.” It’s targeted gel. Smooth a pea-size amount through the top and sides while the hair is still slightly damp, then use a fine-tooth comb to draw the part straight back from the nose to the crown. Gather the pony right at the nape and keep the elastic snug enough to stay put, not so tight that it distorts the shape.
A flat iron pass on the lengths helps, but don’t chase every inch into a poker stick. Leave the ends blunt and even. That little bit of movement at the bottom keeps the style from looking severe in a bad way.
What to Watch For
- Best on straight, wavy, or blow-dried hair that can take a smooth finish.
- Use a rat-tail comb for the part; finger parts look softer, but they also look messier.
- Finish with a mist of shine spray from about 10 inches away. Too close and the hair can look greasy by noon.
2. Deep Side-Part Low Ponytail with a Soft Sweep
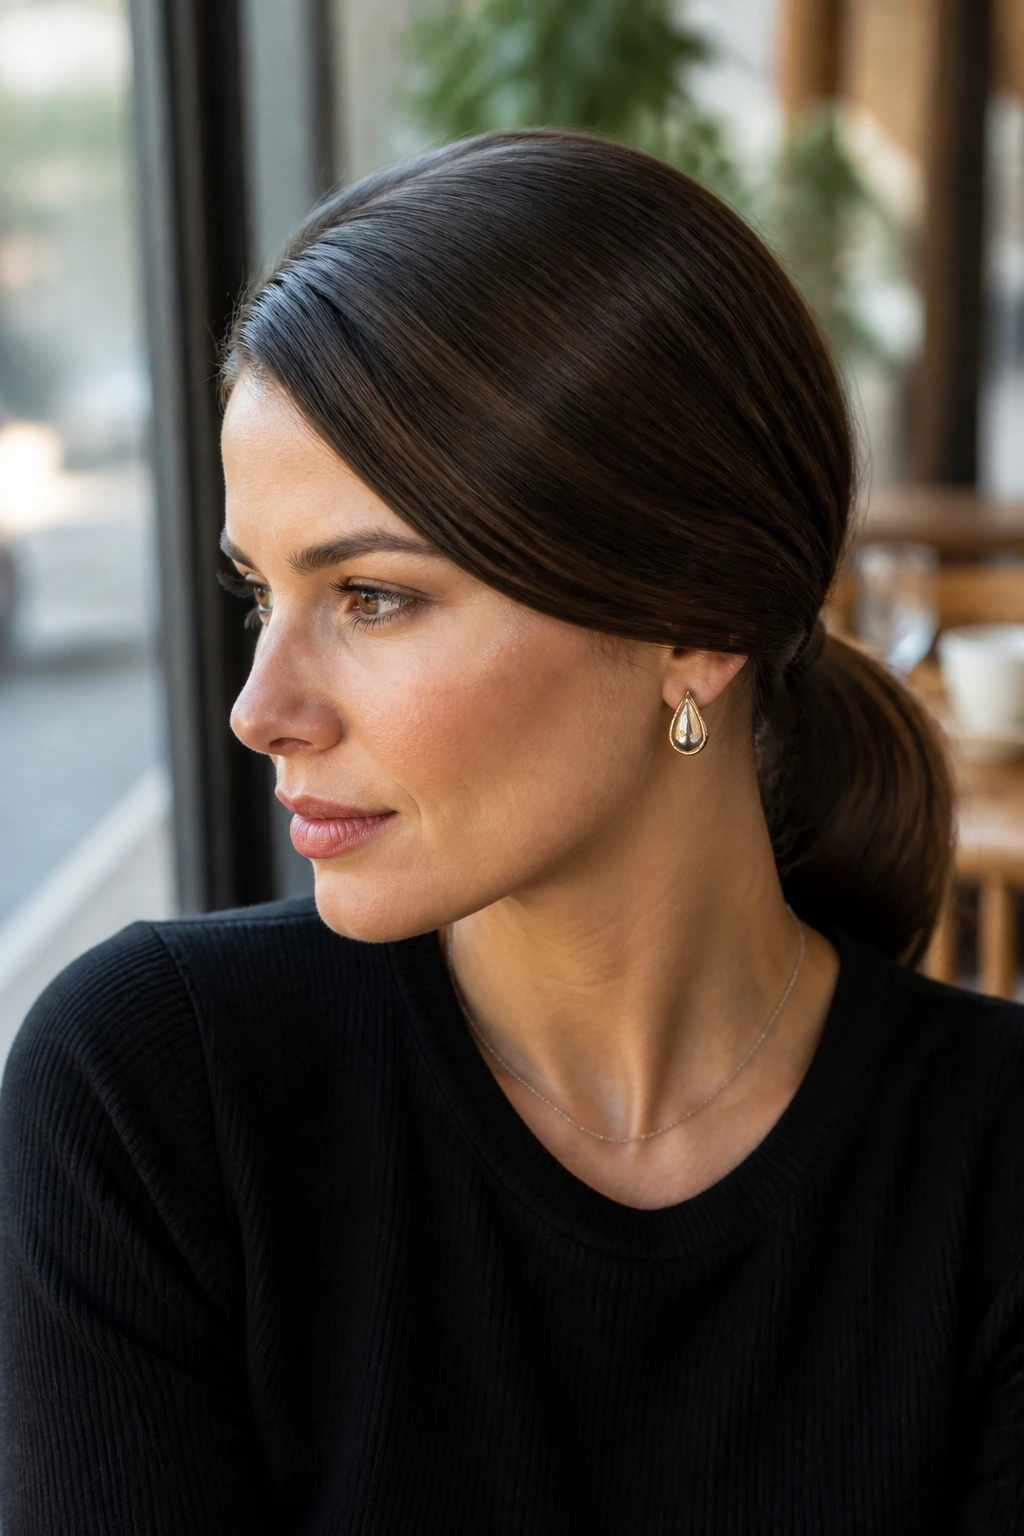
Why does a side part make such a difference? Because it shifts the whole face shape without asking the ponytail to do more work. A deep side-part low ponytail gives you that smooth, pulled-back base, but the front sweep adds a little movement near the cheek and temple. It reads less строгий, more deliberate.
This one is excellent when you want sleek hair that still has some softness around the eyes. Create the side part while the hair is damp, then brush the heavier side across the forehead in one clean motion before securing it low and close to the nape. I like to set the sweep with two crossed bobby pins hidden just behind the ear. They stop the front section from sliding back and ruining the shape.
The pony itself should be tidy, not puffed. If your hair tends to split at the crown, mist the roots lightly with water or leave-in spray before brushing. Dry hair fights you. Damp hair cooperates.
A small bend at the ends keeps this version from looking too rigid. One pass with a flat iron, turned just slightly under, is enough.
3. Wrapped-Elastic Low Ponytail
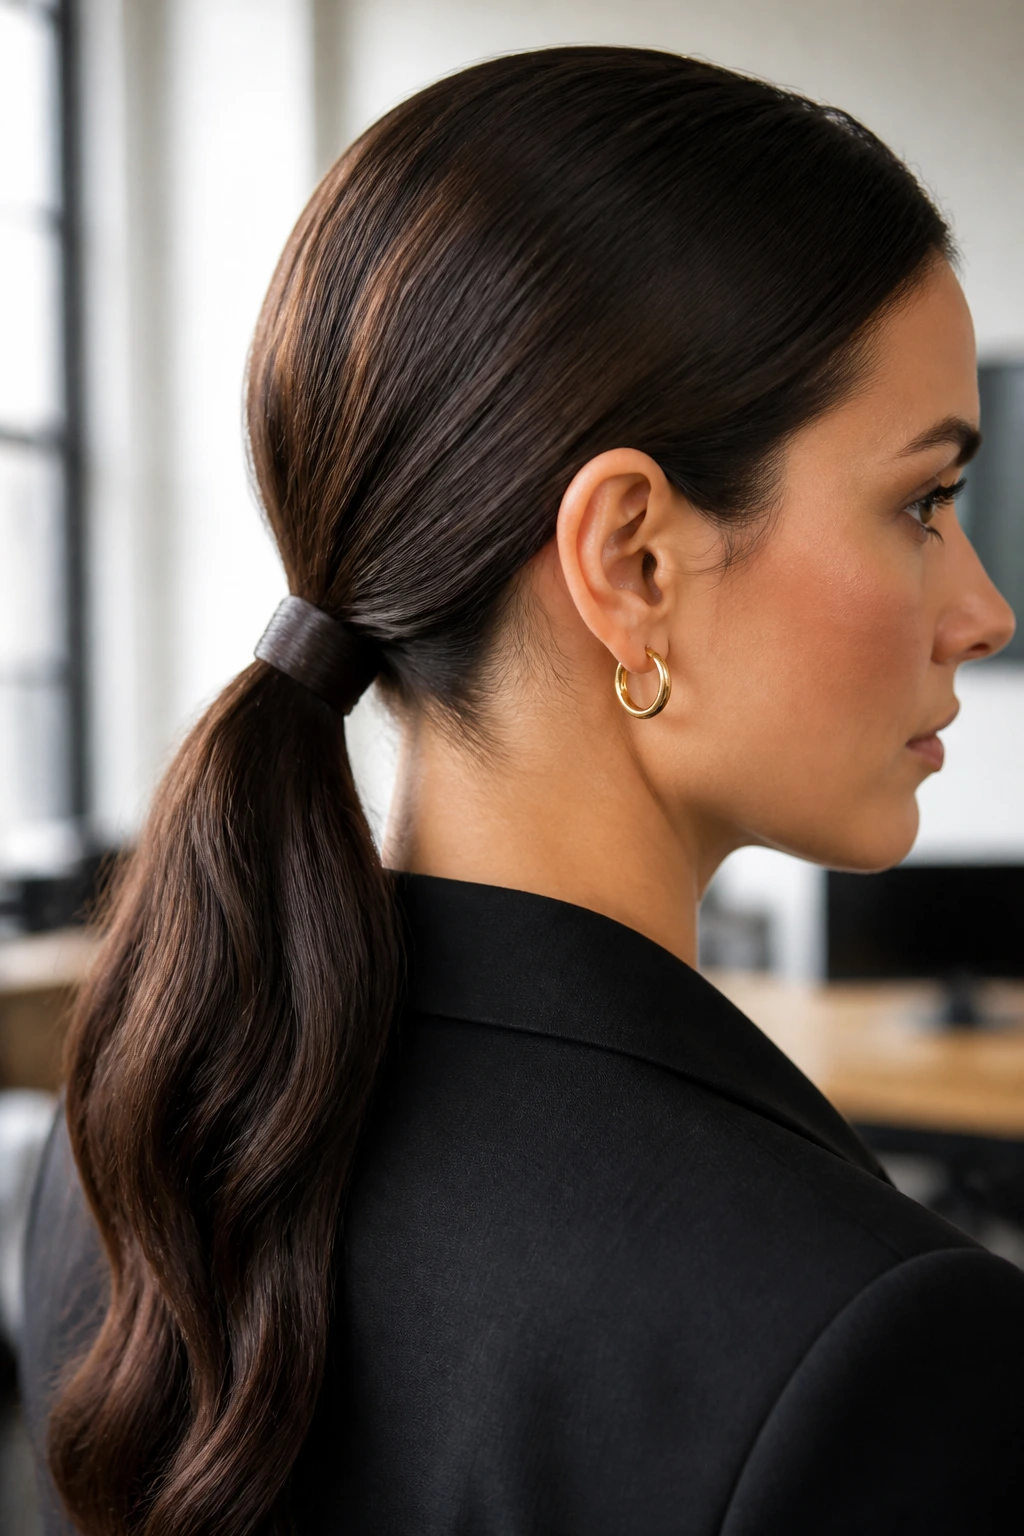
A wrapped elastic changes the whole story. Suddenly the style looks finished instead of “tied up and handled.” It’s one of the simplest ways to make a sleek low ponytail feel a little more polished without piling on accessories.
Here’s what matters: pull a narrow ½-inch section from underneath the ponytail, smooth it with a touch of serum, and wrap it tightly around the elastic until you cover it completely. Tuck the end under the base and pin it from below so the pin disappears into the hair. If the base feels loose, use a second bobby pin in the opposite direction. Small moves. Big difference.
I like this version for workdays and dinners because it doesn’t depend on perfect hair color matching. It works on highlights, root regrowth, and mixed tones as long as the wrap strand is cleanly smoothed. The contrast between a neat crown and a hidden elastic is what gives it that tailored look.
One warning: do not wrap hair that’s frizzy or dry and expect it to behave. A quick pass of smoothing cream on that section saves you from the fuzzy, unraveling look that shows up an hour later.
4. Tucked-End Low Ponytail
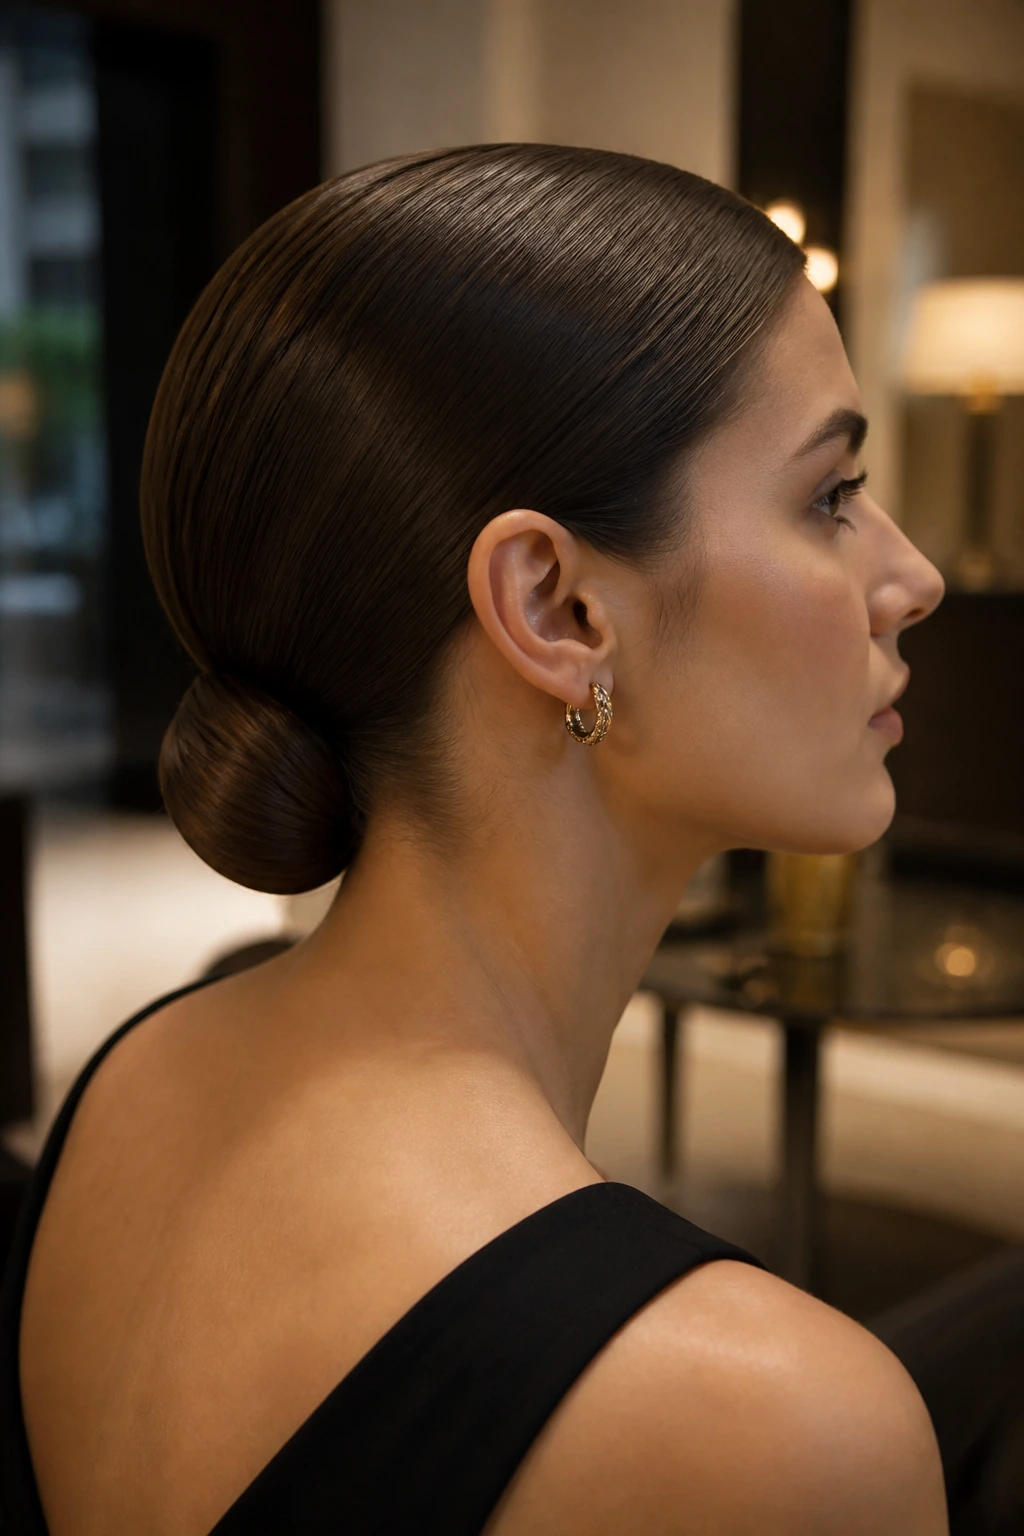
A tucked-end low ponytail is one of those styles that looks more complicated than it is. The silhouette is compact and elegant, with the ends folded under so the tail doesn’t hang loose. It gives off a slightly rolled, almost satin-like shape when the hair is long enough to hide the fold.
To get it, tie the ponytail at the nape, then fold the length upward and inward toward the base. Pin the tucked section underneath so the shape looks intentional, not collapsed. If your hair is layered, smooth the shorter pieces down with a little pomade before tucking; otherwise they’ll spring out and make the style look unfinished.
This works especially well when you want a low ponytail that doesn’t swing around on your collar or jacket. It sits neatly against the neck and keeps the profile clean from the side. The finish is more sculpted than casual.
A little shine spray on the outer surface helps the tucked fold look crisp. Skip heavy products near the ends, though. Too much weight and the fold can droop.
5. Wet-Look Low Ponytail
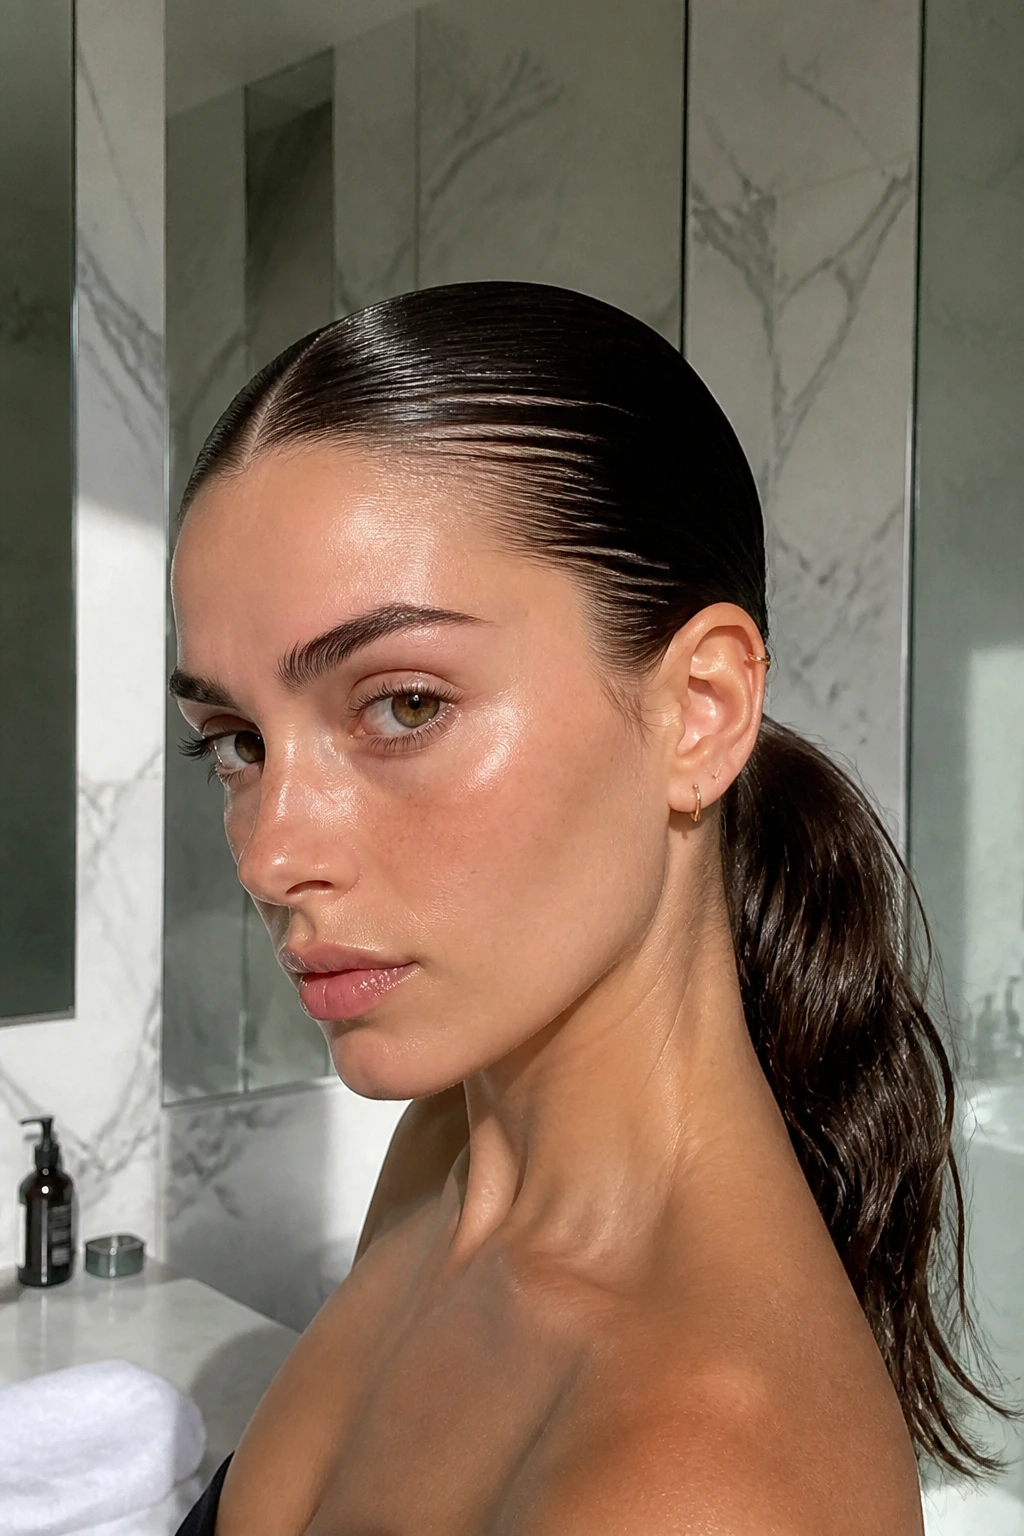
The wet-look low ponytail is for when you want sleek with attitude, not just neatness. It has that glossy, freshly-combed finish that sits somewhere between editorial and after-the-shower—except you’re controlling the shape on purpose. The hairline stays tight, the crown stays smooth, and the tail looks almost lacquered.
Start with damp hair and work in a generous but not sloppy amount of gel or styling cream from roots to mid-lengths. I’m talking enough to coat the surface, not enough to turn the hair into a helmet. Use a comb, not a brush, to set the part and direct everything back. A brush can break up the wet finish too much and create little frizz lines.
The ponytail can stay a little looser through the lengths, which keeps it from looking crunchy. That contrast is part of the appeal. Smooth top, slick base, controlled tail. Very different from a normal ponytail that just happens to be shiny.
Do not pile on more gel after it dries. That’s how the style starts looking flaky around the hairline. If you need extra polish, mist a tiny bit of water into your palms and smooth the surface once.
6. Bubble-Detail Low Ponytail
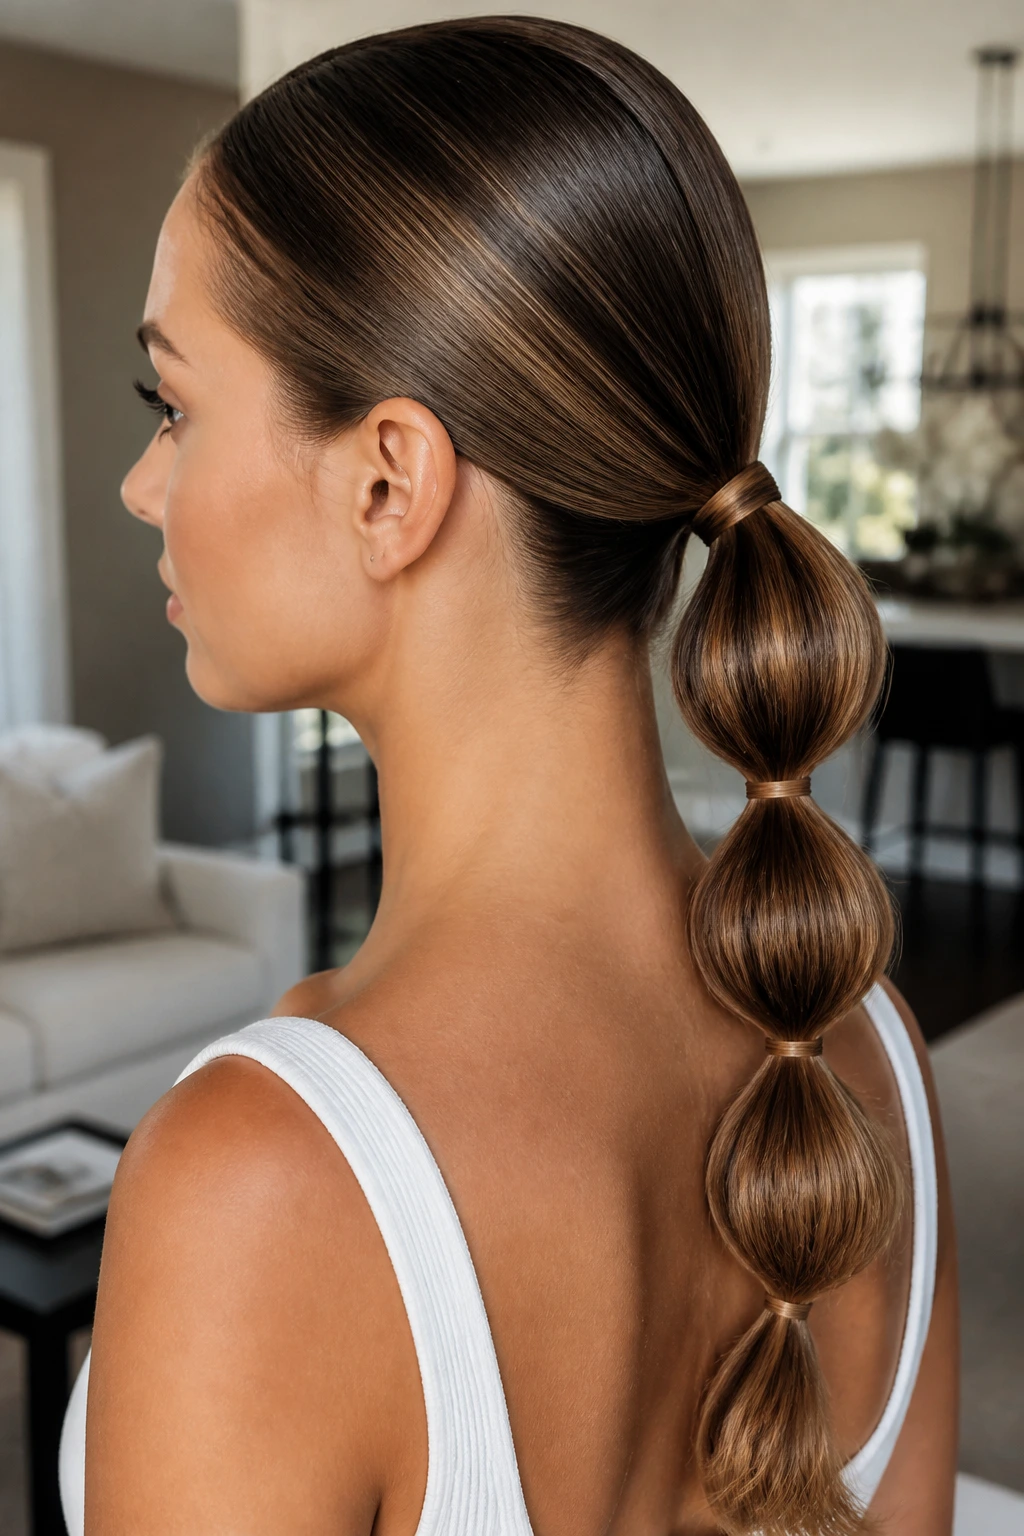
A bubble ponytail doesn’t have to be loud. Kept low and sleek at the crown, it becomes cleaner and more refined than the version that sits high and playful. The bubbles add structure, but the base keeps the style anchored.
Secure the ponytail at the nape, then add small clear elastics every 2 to 3 inches down the tail. Gently pull each section outward with your fingers to build the rounded “bubble” shape. The important part is to keep the top section tight and flat so the whole look still reads polished.
This is a smart choice when your hair is long and you want movement without letting the ends hang loose. It also works well with straight hair that tends to look flat in a normal ponytail. The bubbles create spacing and a little rhythm down the back.
Best Pairings
- Works well with center parts and smooth crowns.
- Try it with a fitted blazer, a simple dress, or a clean neckline.
- Use small elastics in a tone close to your hair color so the sections don’t break up the look.
7. Braided-Base Low Ponytail
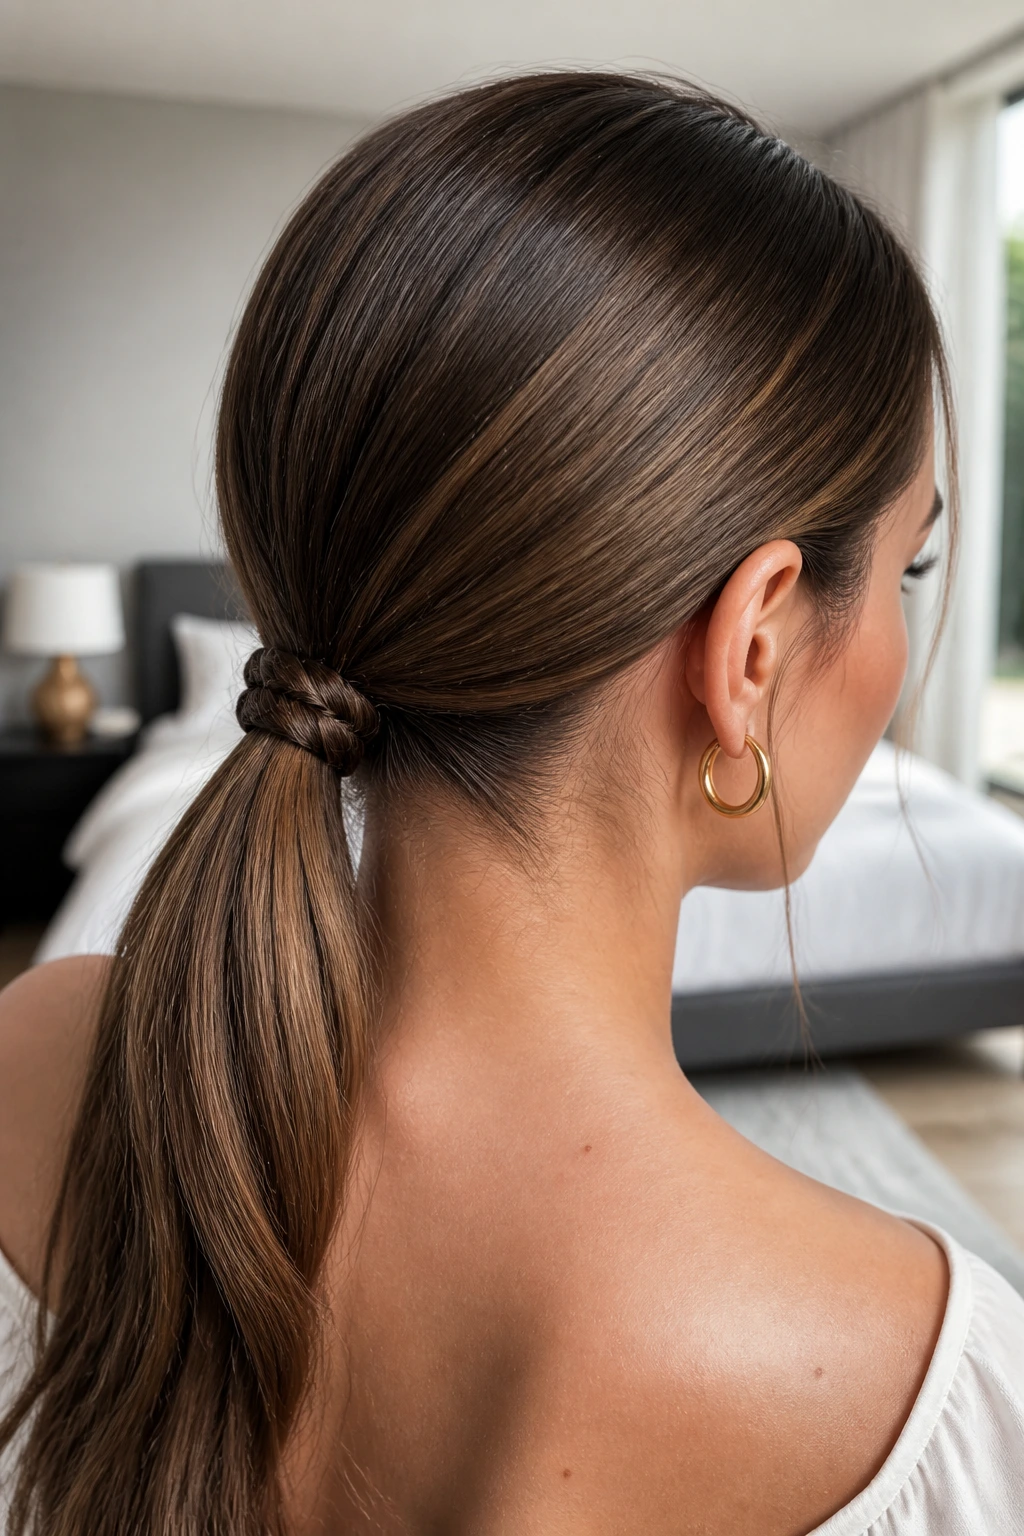
A braided base gives a low ponytail extra grip and a little visual texture right where the style needs it most. Instead of just tying the hair and calling it done, you build a small braid at the nape or along one side before gathering everything into the pony. It keeps the base tidy and adds interest without stealing the whole show.
The braid can be a skinny three-strand braid from one side of the hairline or a short braid centered at the nape. Either way, keep the rest of the crown smooth with a brush and a touch of cream. The braid is the accent. The sleek top is the point.
This version is useful when hair slips out of elastics or when you want a little personality without adding an obvious accessory. It also works beautifully on second-day hair, because the braid gives the roots something to hold onto. That matters more than people think.
A tiny detail I like: wrap one braid strand around the elastic so the base looks finished from every angle. It takes less than a minute and cleans up the whole silhouette.
8. Side-Swept Nape Ponytail
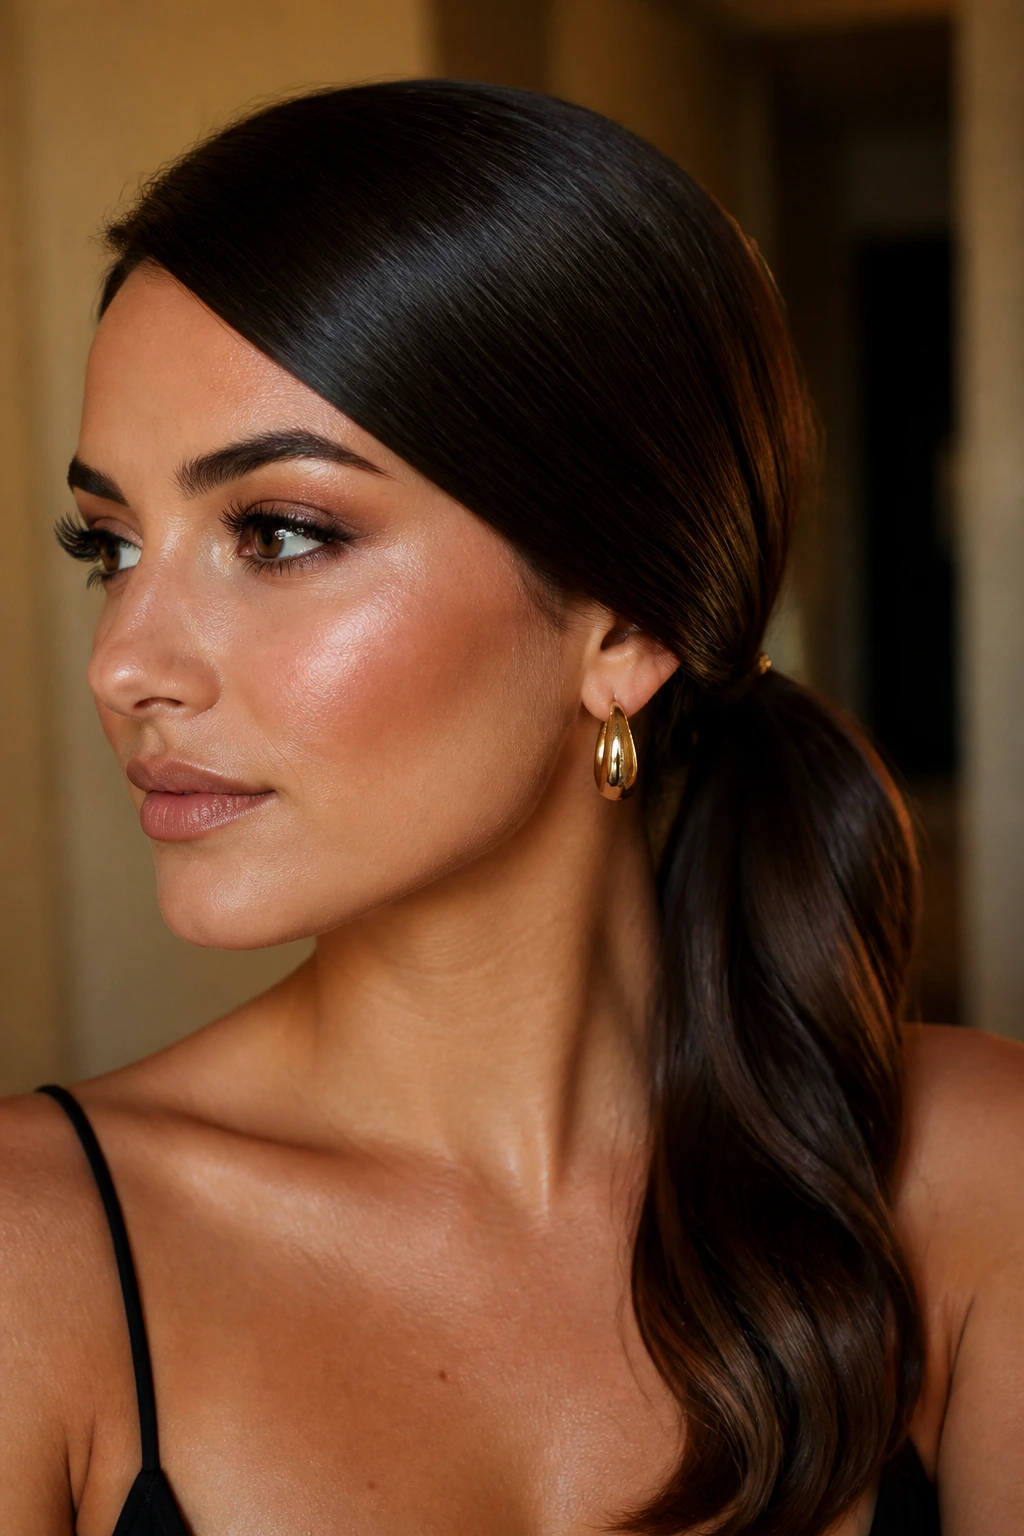
There’s a softer way to wear a low ponytail, and it starts by moving the whole shape off-center. The side-swept nape ponytail sits just behind one ear or slightly to one side at the base of the neck. That tiny shift changes the profile more than you’d expect.
Brush the hair into a deep side flow, then guide it toward the nape without flattening every ounce of shape out of it. A couple of hidden pins near the heavier side keep the sweep from falling apart. I usually pin in an X for security, because one pin alone tends to slide once the hair warms up.
The ponytail itself should still be sleek. The side sweep is the feature; frizz is not. If you have layers around the face, smooth them back with a dab of styling balm and let the natural curve of the head do the work.
This is one of my favorite options for earrings. A side sweep leaves room for a hoop, drop earring, or a sharp stud to show instead of getting buried under hair.
9. Low Ponytail with Curtain Bangs
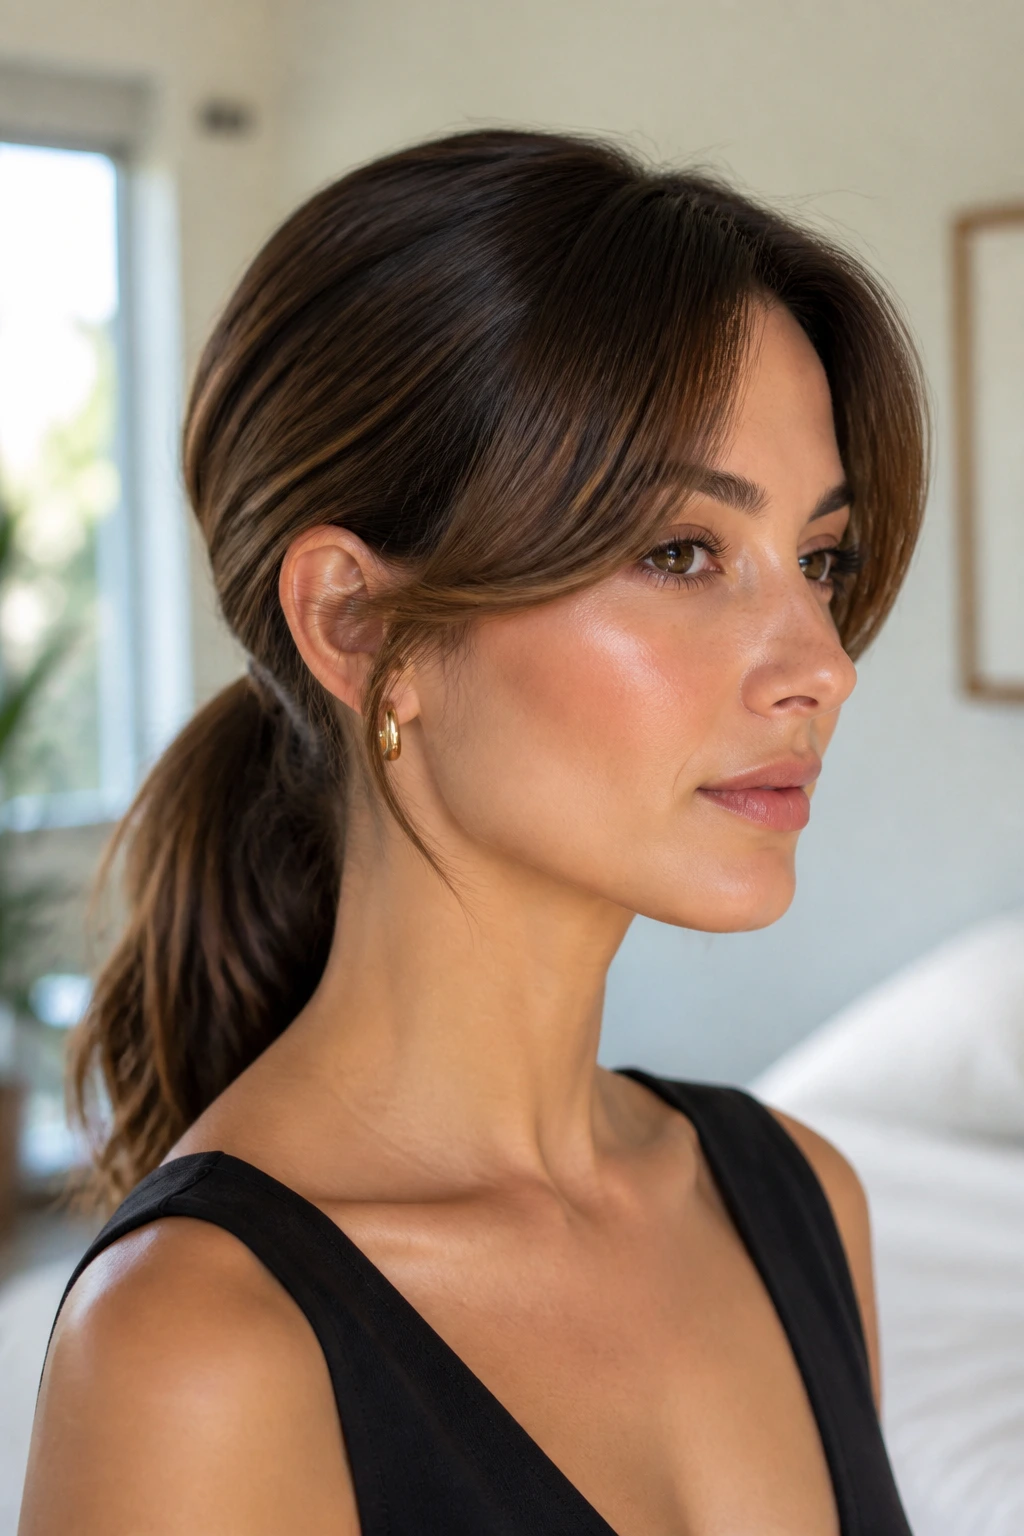
Curtain bangs and a low ponytail get along better than people assume. The bangs soften the forehead and temples, while the ponytail keeps the rest of the hair under control. The result is polished, but not stiff. It’s a smart compromise when you want your hair off your neck without losing all the face framing.
Keep the crown smooth and gather the pony low, then style the curtain bangs separately with a round brush or a quick bend from a flat iron. The key is not to overwork them. They should fall away from the face in a soft arc, not flare out like curtain rods.
If your bangs are freshly washed, they may want to split. A tiny bit of dry shampoo at the roots helps them sit without collapsing. If they’re on the longer side, they can be blended into the pony more easily, which gives the style a quieter finish.
This version does best when the rest of the hair is very neat. Messy bangs plus a messy ponytail just looks unfinished. One controlled piece is enough.
10. Rope-Twist Low Ponytail
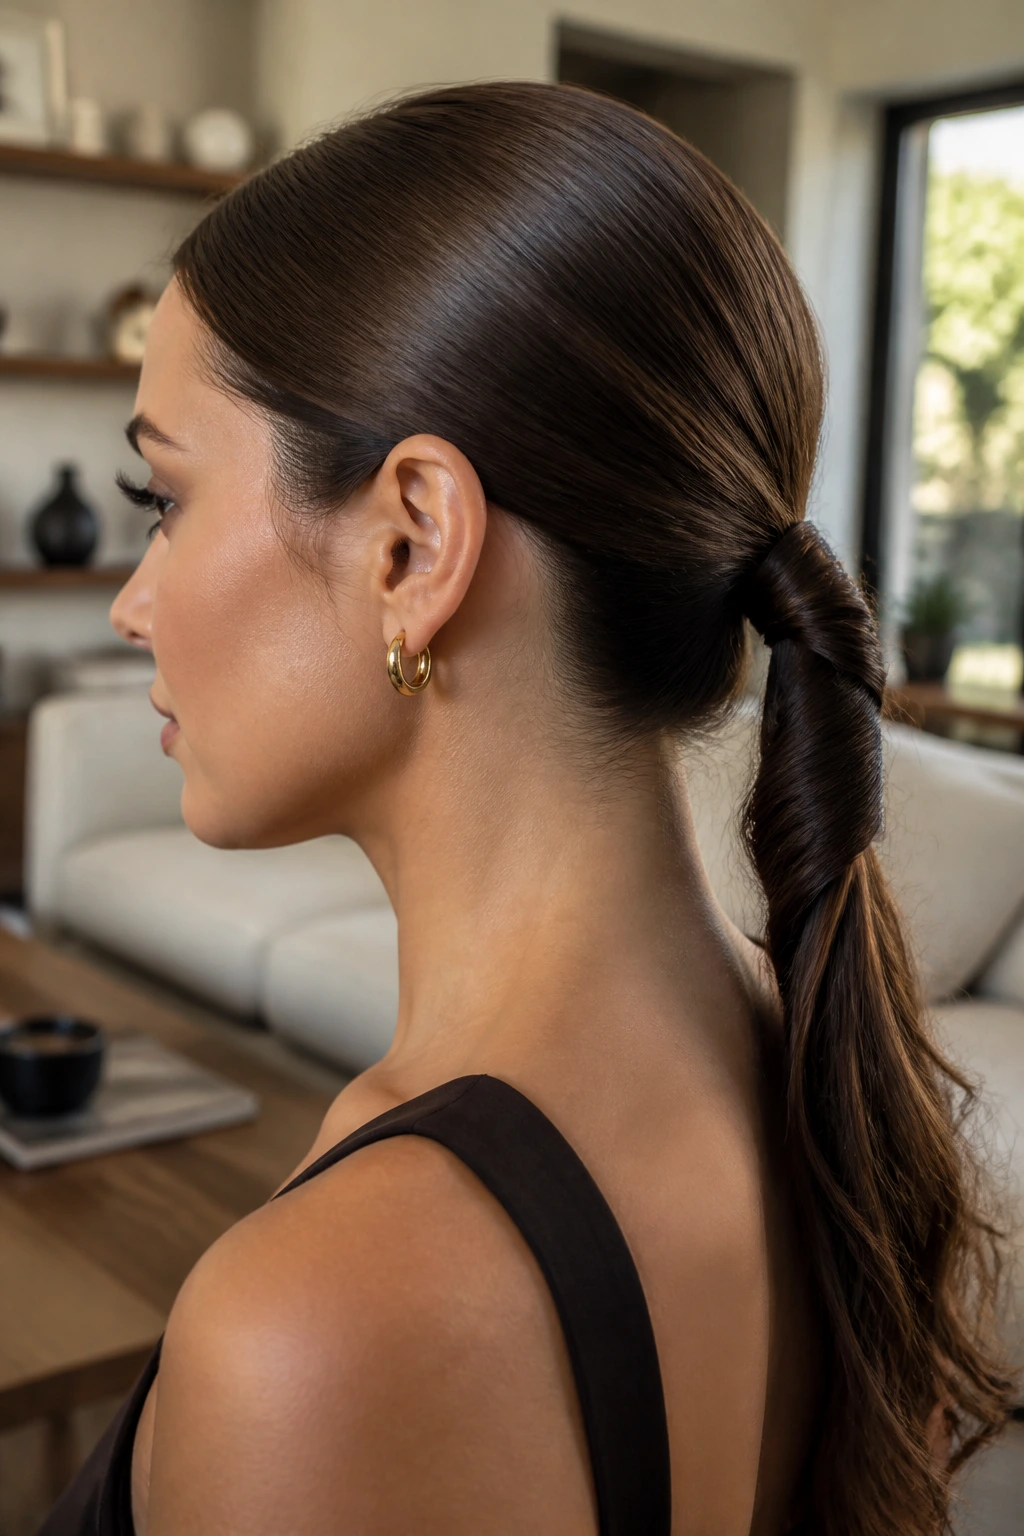
A rope-twist low ponytail feels more structured than a standard twist, and that’s the appeal. You split the hair into two sections, twist each one in the same direction, and then wrap them around each other in the opposite direction. The resulting coil has a clean, almost cord-like look.
It’s a good answer when a braid feels too obvious or too familiar. Rope twists are smoother on slippery hair, especially if your strands slide out of braids by lunchtime. Start with a brushed, sleek base and secure the pony low. Then twist the tail itself or use two front sections that feed into the pony. Either way, keep the lines tight.
I like this for medium to long hair because the twist shape reads best when it has enough length to show off. A dab of serum on the lengths helps the twist stay glossy instead of fuzzy.
Quick Build
- Part hair into two equal sections.
- Twist each one firmly in the same direction.
- Cross them over each other in the opposite direction.
- Secure the end with a small clear elastic.
11. Soft-Volume Crown Low Ponytail
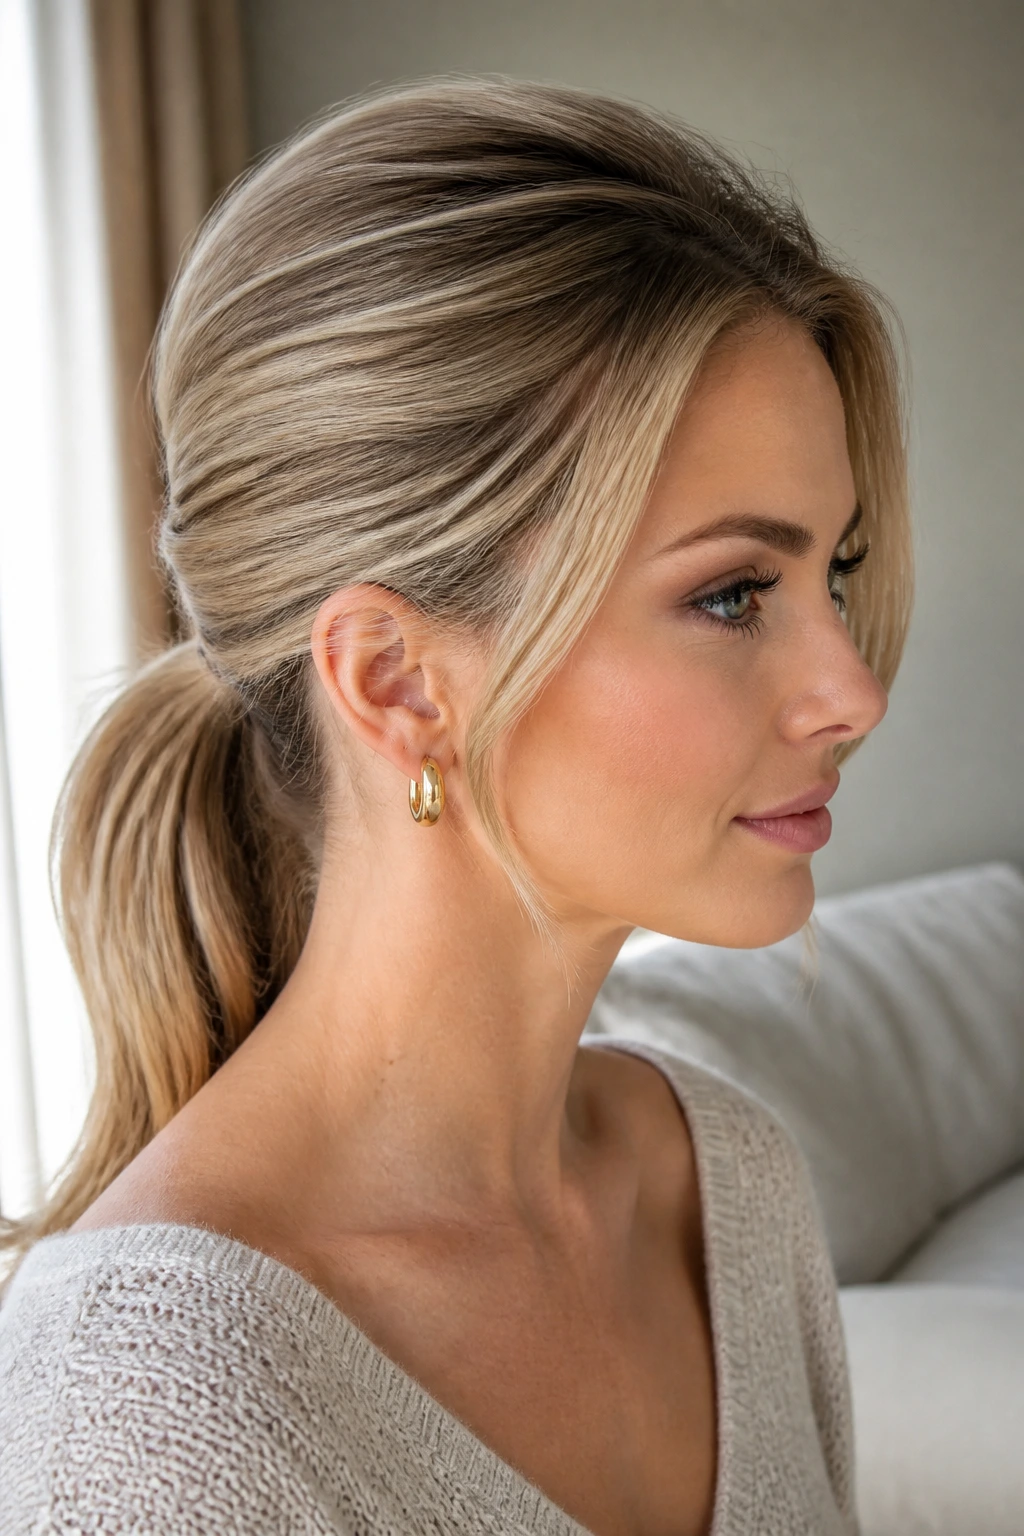
Not every sleek low ponytail has to be pressed flat from forehead to crown. A soft-volume version keeps the top smooth but adds just enough lift near the roots to avoid a helmet effect. It’s the one I’d pick if a dead-flat crown makes your face look longer or if your hair naturally collapses when brushed too tightly.
The trick is to lightly mist the roots with volumizing spray, then lift one-inch sections at the crown and backcomb them once or twice. Not a nest. Just enough cushion to hold shape. After that, brush the surface gently so the volume stays hidden underneath the smooth layer.
Gather the pony low and close to the neck, leaving the height only where you want it. The tail can stay straight or slightly curved under at the ends. That little softness up top keeps the style from feeling severe.
This is a nice option for thicker hair too, because the crown can absorb some weight without dragging the whole look down. It’s a cleaner style than high volume, but it still has life.
12. Blunt-Ended Straight Ponytail
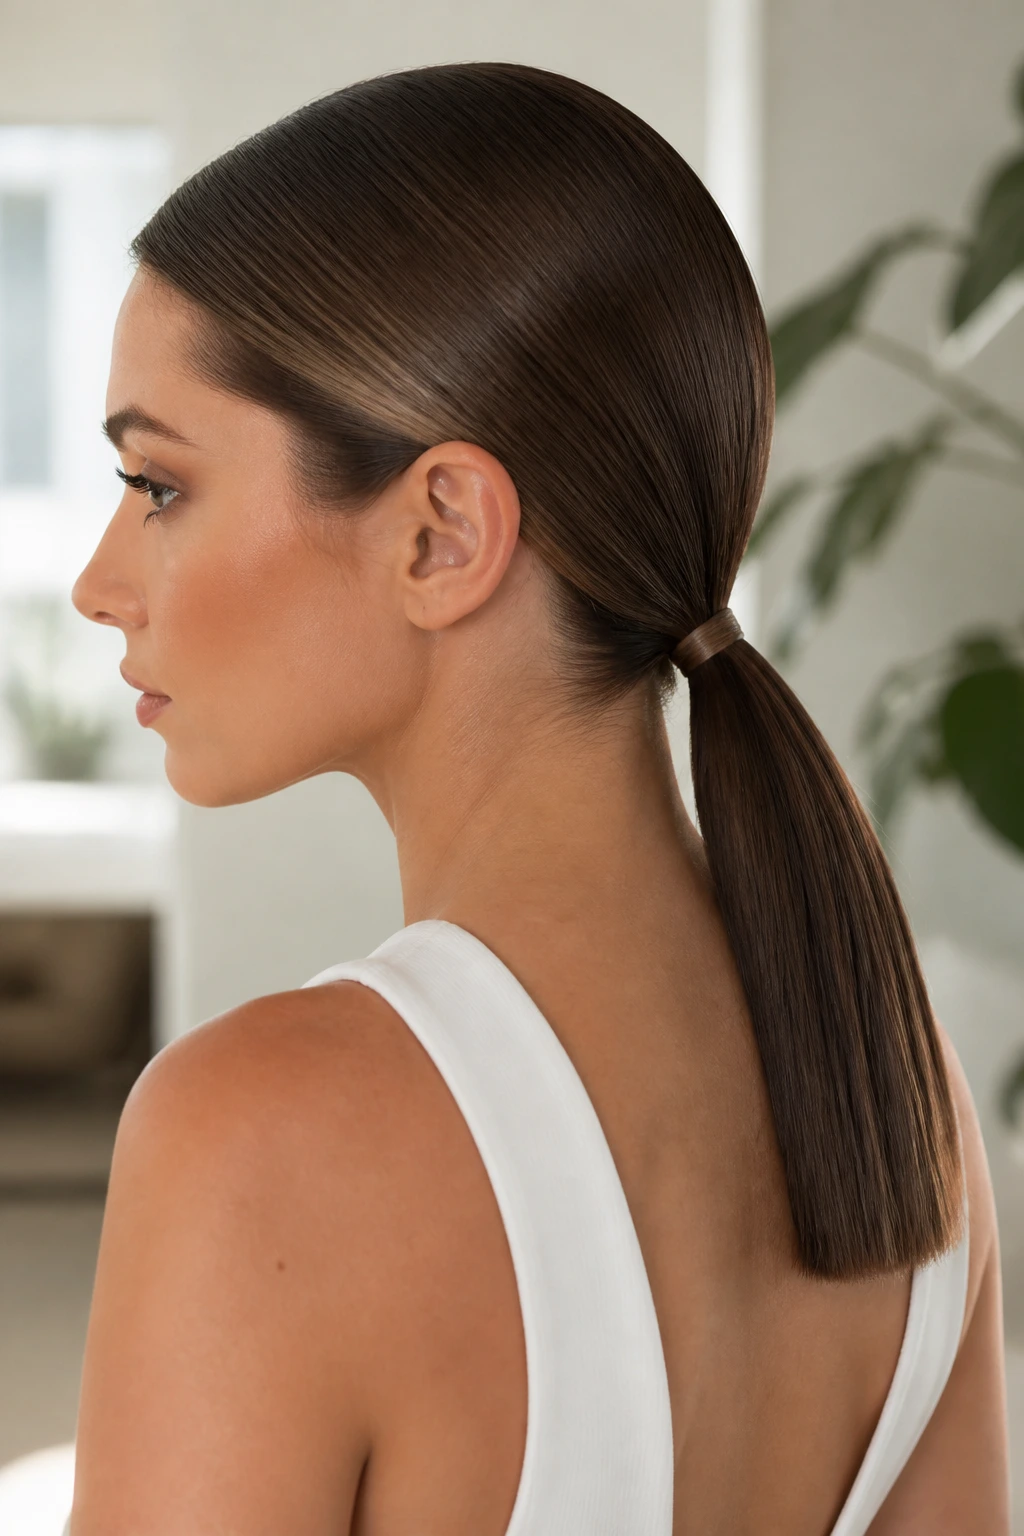
If you want the ponytail to look sharp, the ends matter as much as the crown. A blunt-ended straight low ponytail keeps the tail sleek from base to tip, with the ends cut or styled into a clean line. It has a strong graphic feel, which is why it looks so good with minimal clothing and strong accessories.
The best version starts with a precise blow-dry or flat iron pass. Keep the hair smooth, then make sure the pony sits low and centered. A blunt tail looks best when the hair is all going in the same direction—no stray bends, no flipped ends, no half-curled compromise.
If your ends are layered or uneven, use a flat iron to align them before tying off the pony. That way the finish looks deliberate rather than accidental. A tiny amount of serum on the very ends keeps the line sleek without making the crown greasy.
This style is one of the cleanest options for women with naturally straight hair or long extensions. It’s crisp. It’s direct. There’s nowhere for the eye to wander.
13. Ribbon-Tied Low Ponytail
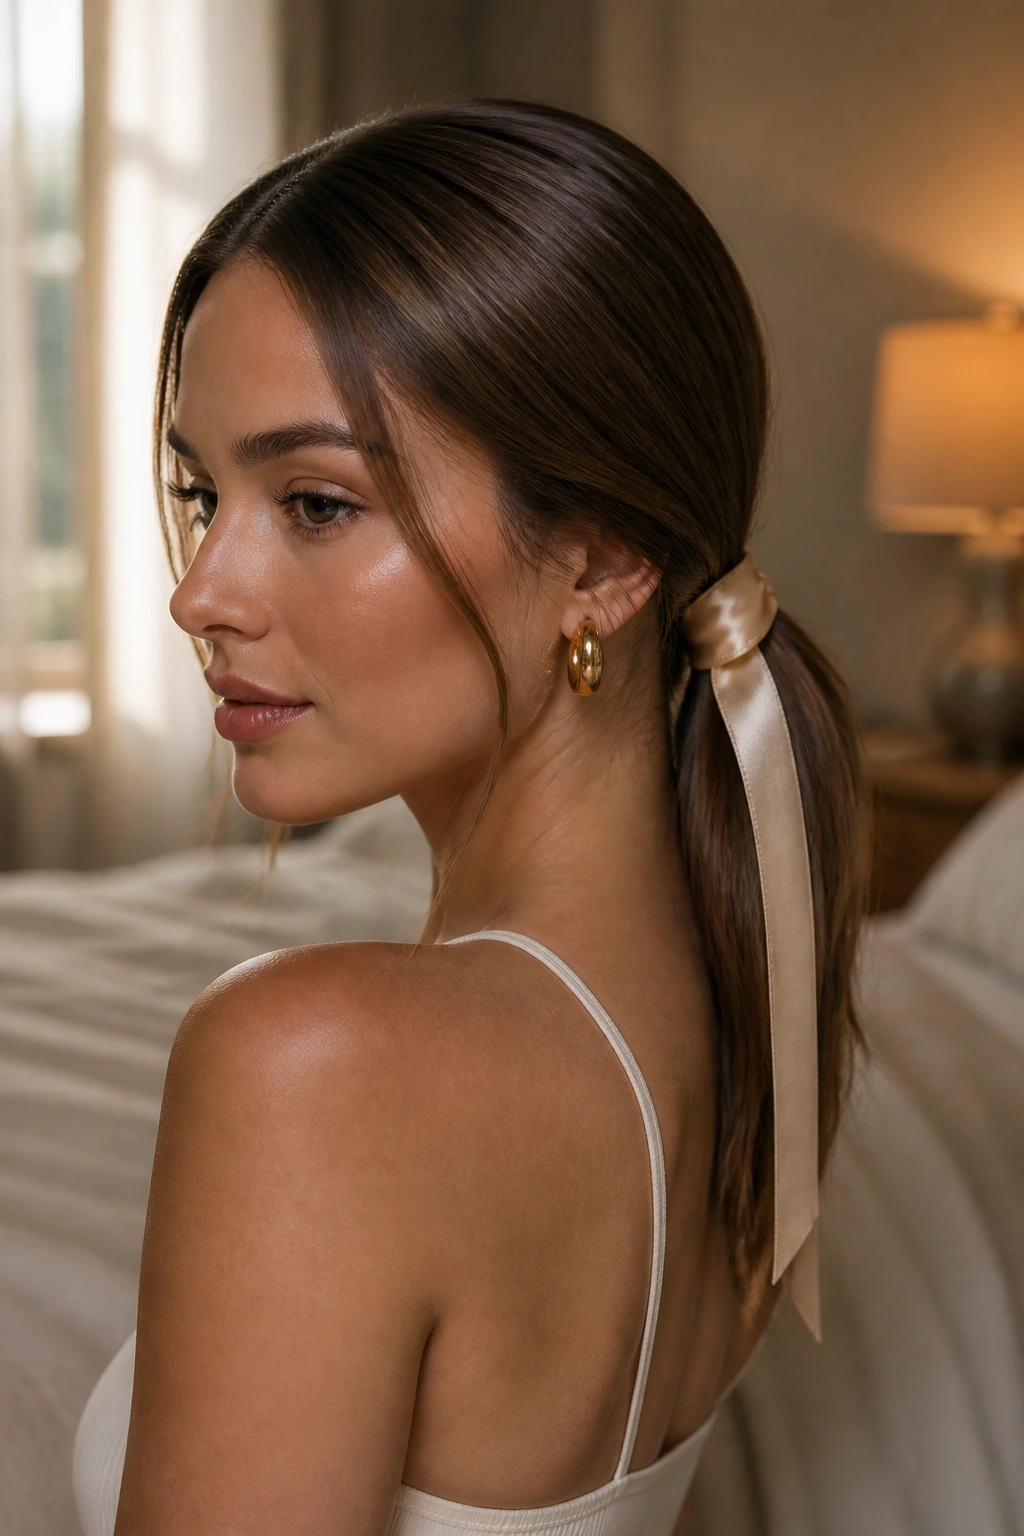
A ribbon changes the tone instantly. The sleek low ponytail becomes softer, a little more feminine, and less corporate in the best possible way. I like satin ribbons best because they sit flat, don’t shred the hair, and hold their shape without looking bulky.
Tie the ponytail with a clear elastic first, then knot the ribbon over it so the pony stays secure. Leave the ribbon tails long enough to show—usually 8 to 12 inches works well, depending on hair length and outfit. If the ribbon is too short, it looks like an afterthought. If it’s too wide, it starts to overpower the pony.
This works especially well with dresses, knit tops, or anything that already has a soft neckline. The ribbon gives the style some mood without asking the hair to do more than it needs to. And honestly, that’s usually the smart move.
A matte ribbon creates a calmer look. A satin one reflects more light and feels dressier. Pick based on the rest of the outfit, not on the hair alone.
14. Metallic-Cuff Low Ponytail
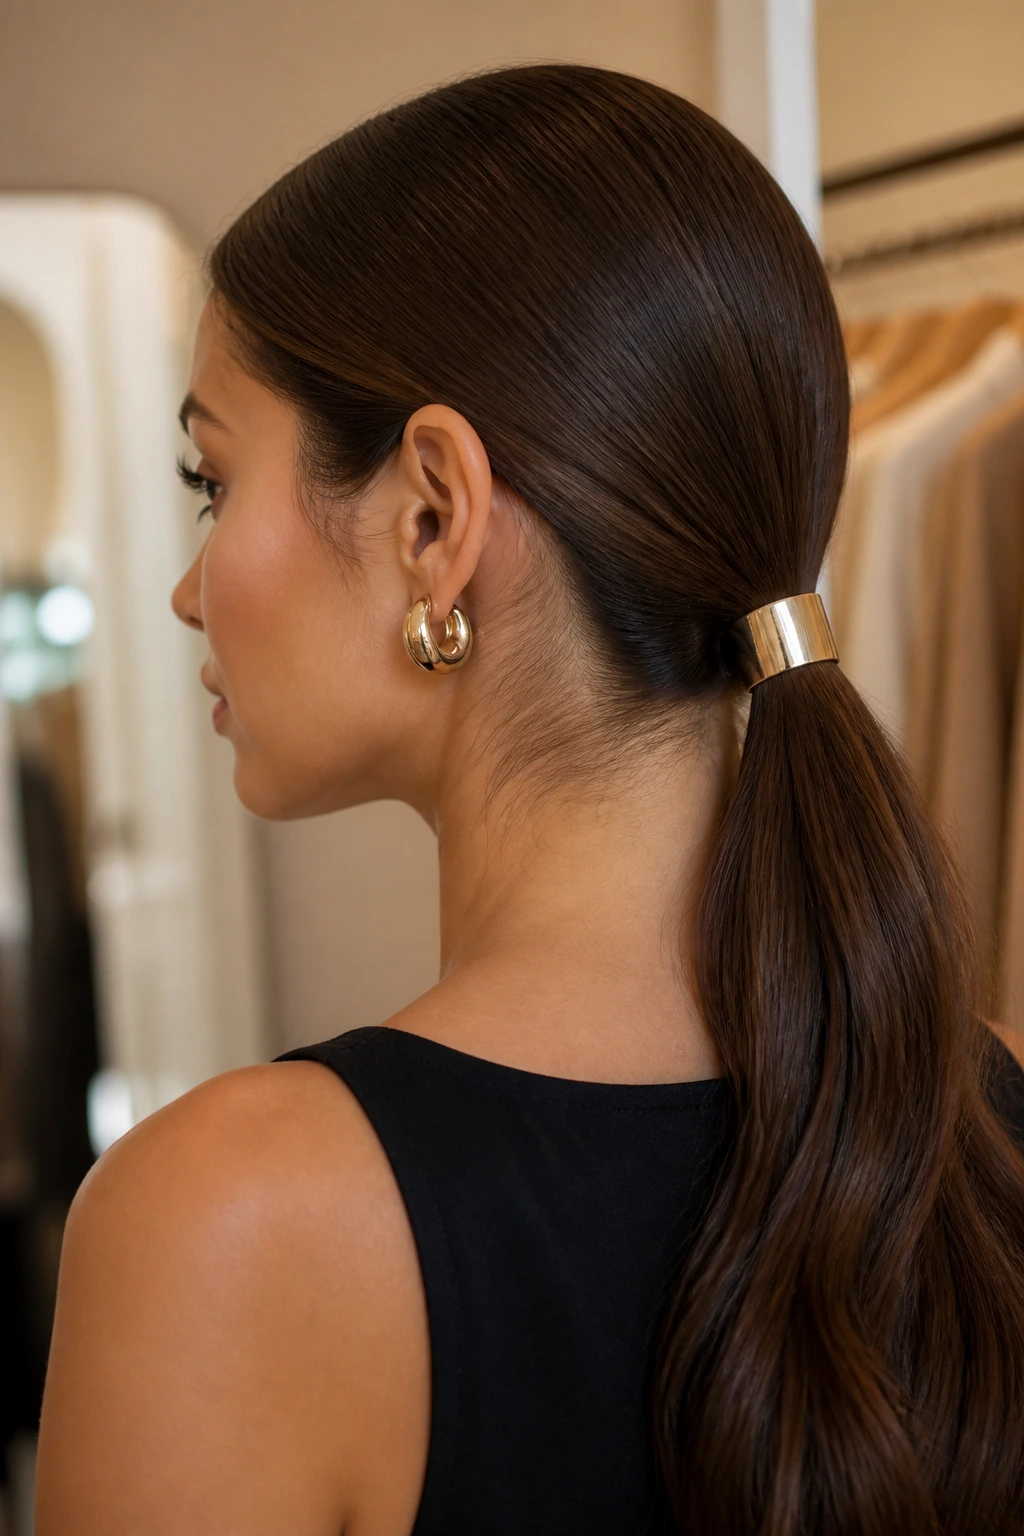
A metallic cuff makes the ponytail look finished in one second flat. That’s its job. The style itself stays clean and low, but the cuff adds a hard line or a polished ring at the base that pulls the eye straight to the nape.
Start with a smooth ponytail and secure it tightly. Then slide the cuff over the base or wrap it around the elastic, depending on the design. Most cuffs need a hidden anchor—one or two bobby pins under the pony to stop the metal from rotating as you move. Ignore that step and you’ll be fixing it all night.
This style loves simple clothes. Black, white, cream, navy, a strong blazer—those pairings let the metallic finish do its work without crowding the look. I’d keep the hair itself very straight here. Any roughness near the crown fights the clean accessory.
The cuff can be gold, silver, matte black, or brushed metal. The point is not flash. The point is shape. A good cuff acts like jewelry for the ponytail.
15. Sculpted Baby-Hair Low Ponytail
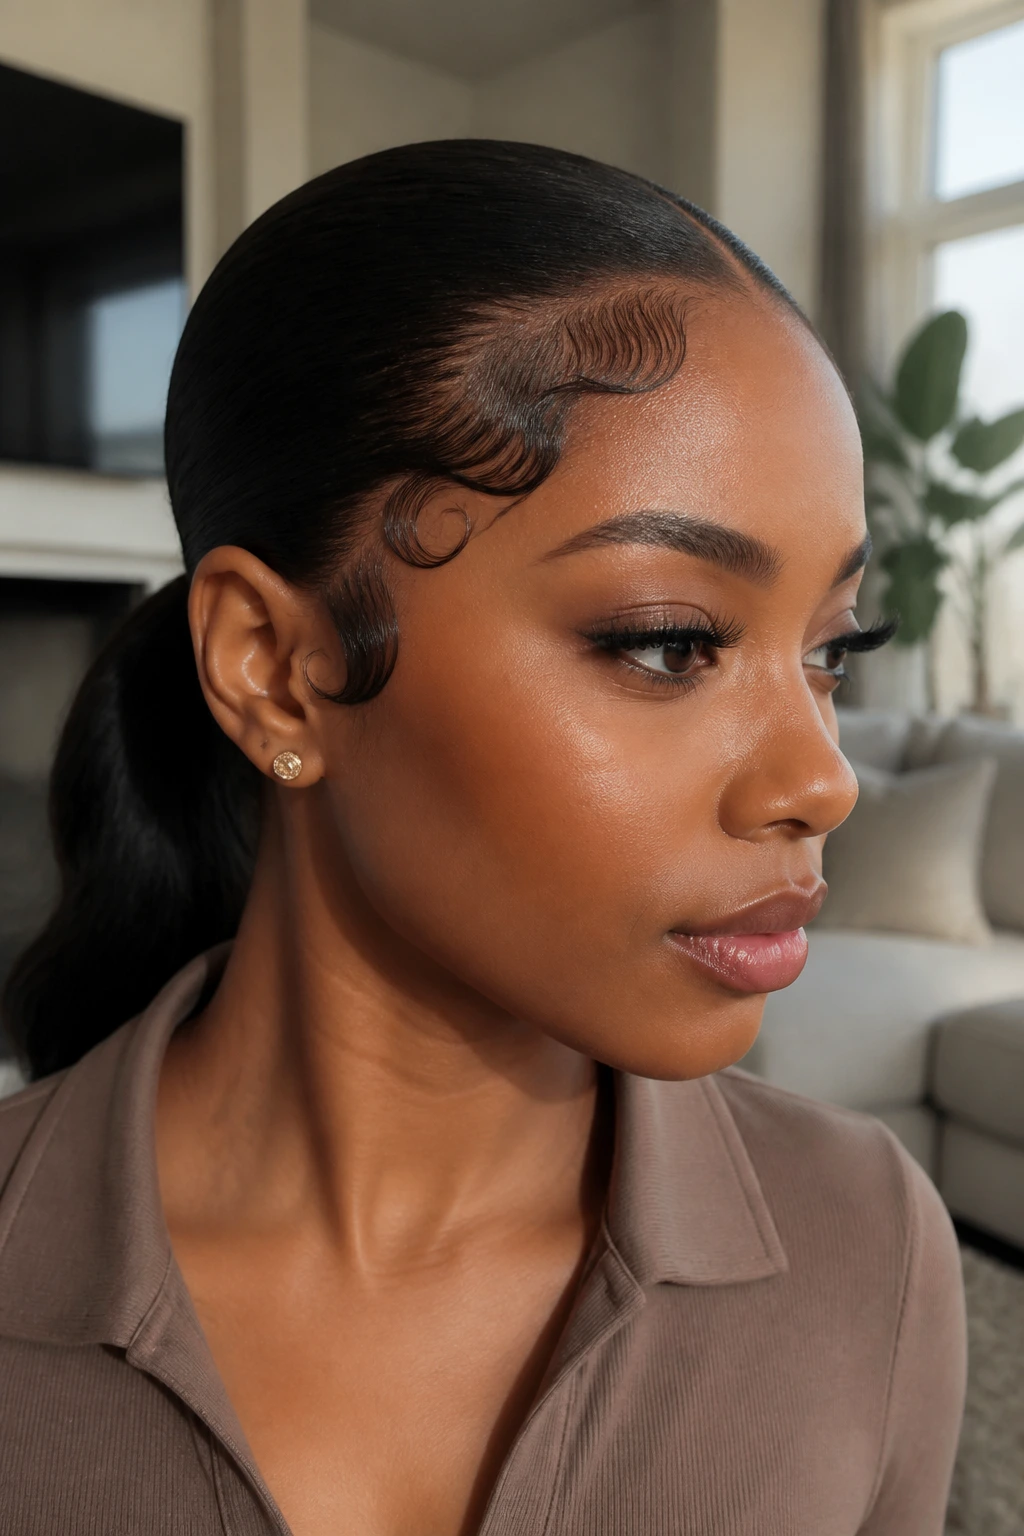
A sculpted baby-hair ponytail is sleek with a little attitude at the edges. The hairline gets shaped on purpose, usually with a small edge brush and a touch of gel, so the tiny front hairs curve and lay instead of sticking up. The effect is neat, controlled, and a bit more defined than a plain brushed-back look.
You do not need much product. Too much gel around the hairline can go stiff or flaky fast. Work in a small amount with the edge brush, shape the baby hairs in short curves or soft swoops, then smooth the rest of the top into the ponytail. The contrast between the sculpted hairline and the clean crown is what makes it interesting.
This style is especially useful on textured hair, where the hairline often needs a little extra direction to sit flat. But it works on straighter textures too, as long as you keep the details subtle. Think controlled, not cartoonish.
A tiny shine spray along the top layer can help the whole style look unified. Just keep it away from the face, or the hairline can start looking greasy instead of defined.
16. Low Ponytail with Hidden Pins
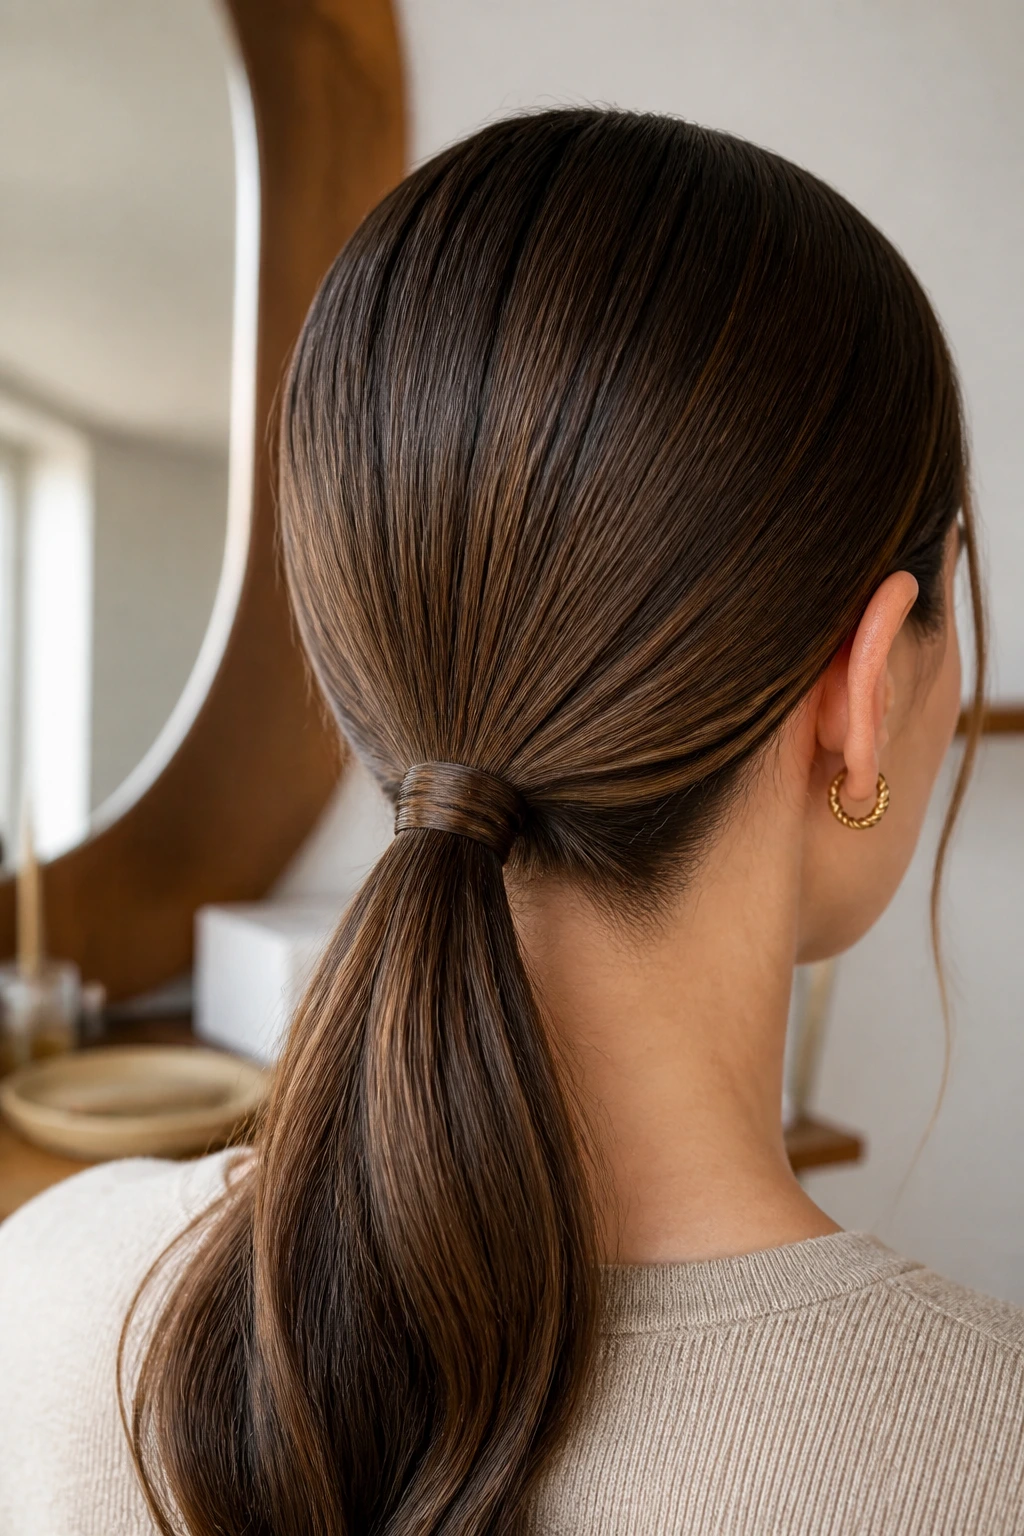
This one is for anyone who wants the ponytail to stay put while looking like it barely needs help. The hidden-pins version uses bobby pins under the base and inside the wrap so the style feels locked in without visible hardware. It’s one of the smartest low ponytail variations when hair is heavy, slippery, or layered.
Tie the pony at the nape, then slide two pins underneath the elastic from opposite directions to secure the base. If you’re wrapping a strand around the elastic, pin the strand from below so the pin disappears inside the pony. The whole point is to reinforce the style without cluttering the surface.
I like this for busy days because it holds its shape longer than a single elastic alone. That matters if your hair tends to slide down your neck or loosen as the day goes on. Tiny mechanical help. Big payoff.
A good hidden-pin ponytail should look clean from the back and smooth from the side. If you can see the pins, the placement needs adjusting. Push them deeper, not harder.
17. Face-Framing Strands Low Ponytail
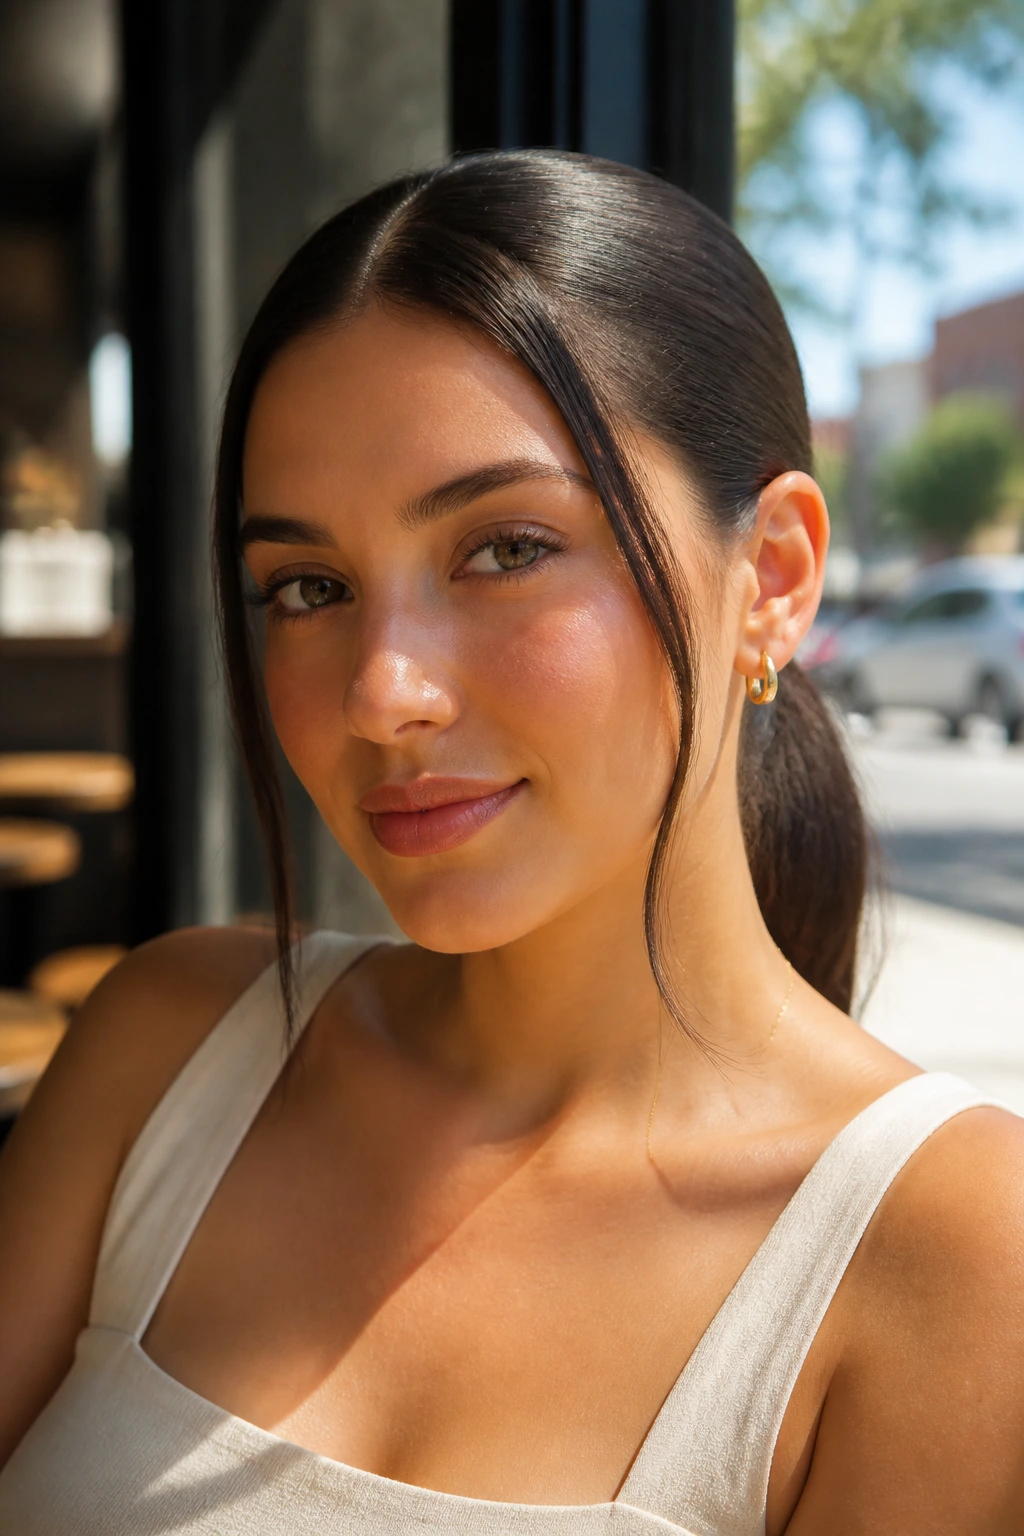
A few face-framing strands can change a sleek low ponytail from strict to flattering in a heartbeat. You pull out two narrow sections near the temples or cheekbones, keep the rest of the hair smooth, and let the pieces soften the outline around the face. That’s the whole trick.
The strands should be intentional, not random. Too many and the ponytail loses its sharpness. Too few and they can look like accident-frizz that escaped your brush. I usually leave out the front pieces before I gather the pony, then smooth them lightly with a flat iron or a round brush bend so they fall in a clean curve.
This version works particularly well when you want the hair off your neck but still want a little softness around the jawline. It also keeps the style from looking too severe in bright light, where every line gets louder.
If your hair is thick, keep the frame pieces thin. If it’s fine, make them slightly fuller so they don’t vanish against the rest of the style.
18. Twisted-Crown Low Ponytail
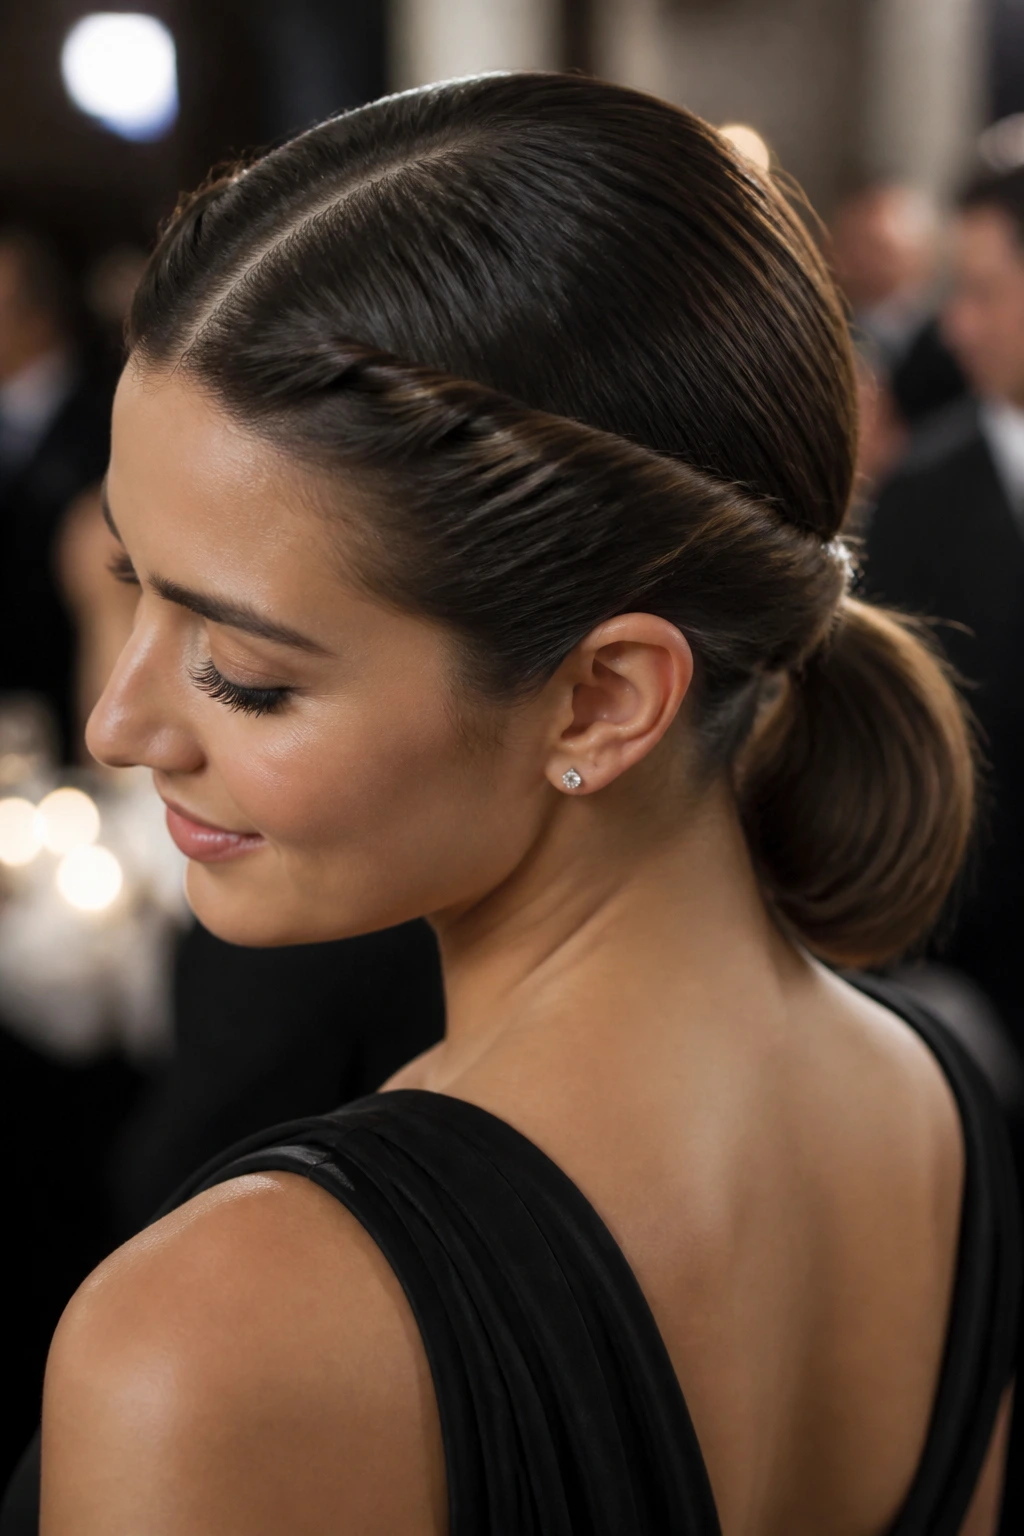
A twisted-crown low ponytail has the neatness of a pulled-back style with a little more shape at the top. Instead of braiding the front sections, you twist each side back toward the center before joining everything at the nape. The result is smoother and less busy than a braid, which I personally prefer when the outfit already has texture.
Twists work well because they flatten cleanly against the head. Start with a center or side part, twist each section back with a touch of cream, and pin them just before the ponytail base. Then gather the rest into a low pony and secure it tightly. If you want extra polish, wrap one twist around the elastic.
This style is a good bridge between casual and formal. It has enough detail to feel special, but not enough to fight with earrings or a dramatic neckline. The twists create a line that leads the eye back to the ponytail without shouting.
A light spray of flexible hold helps the twists stay smooth without turning hard. Hard hair looks obvious. Soft hold looks expensive.
19. Minimalist Short-Hair Low Ponytail
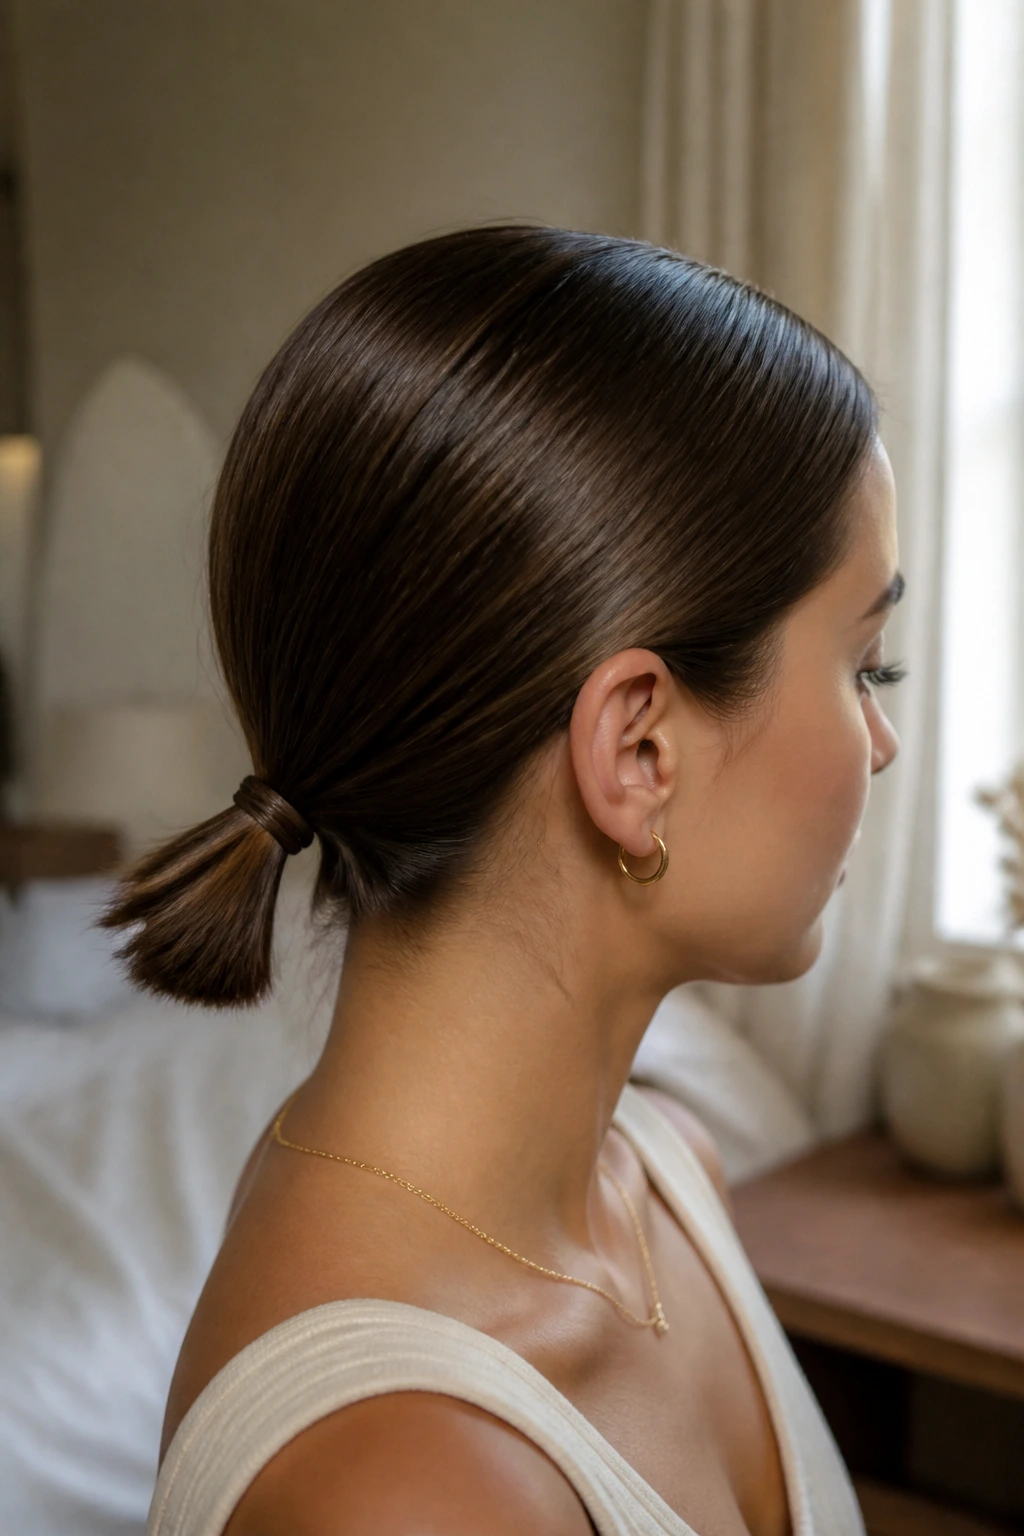
Shorter layers can still do a sleek low ponytail, but the shape has to be handled with a little more care. You’re not forcing a lot of length into place; you’re creating a small, tidy ponytail near the nape and smoothing the rest into the silhouette. It works beautifully on lobs, shoulder-length cuts, and grown-out layers.
The main challenge is the shorter pieces around the crown and sides. Use a styling cream or lightweight gel, brush them back in sections, and pin any stubborn layers under the pony with bobby pins that match your hair color. If the tail is short, let it sit naturally instead of trying to stretch it into a long shape it doesn’t have.
This version feels neat, not overreached. That matters. A short ponytail that’s trying too hard to look long usually ends up looking messy. A short ponytail that respects the length looks intentional.
I’d keep the base extra secure here, because shorter hair can slip loose faster. A small elastic and a second anchor pin usually do the job.
20. Low Ponytail with Flipped Ends
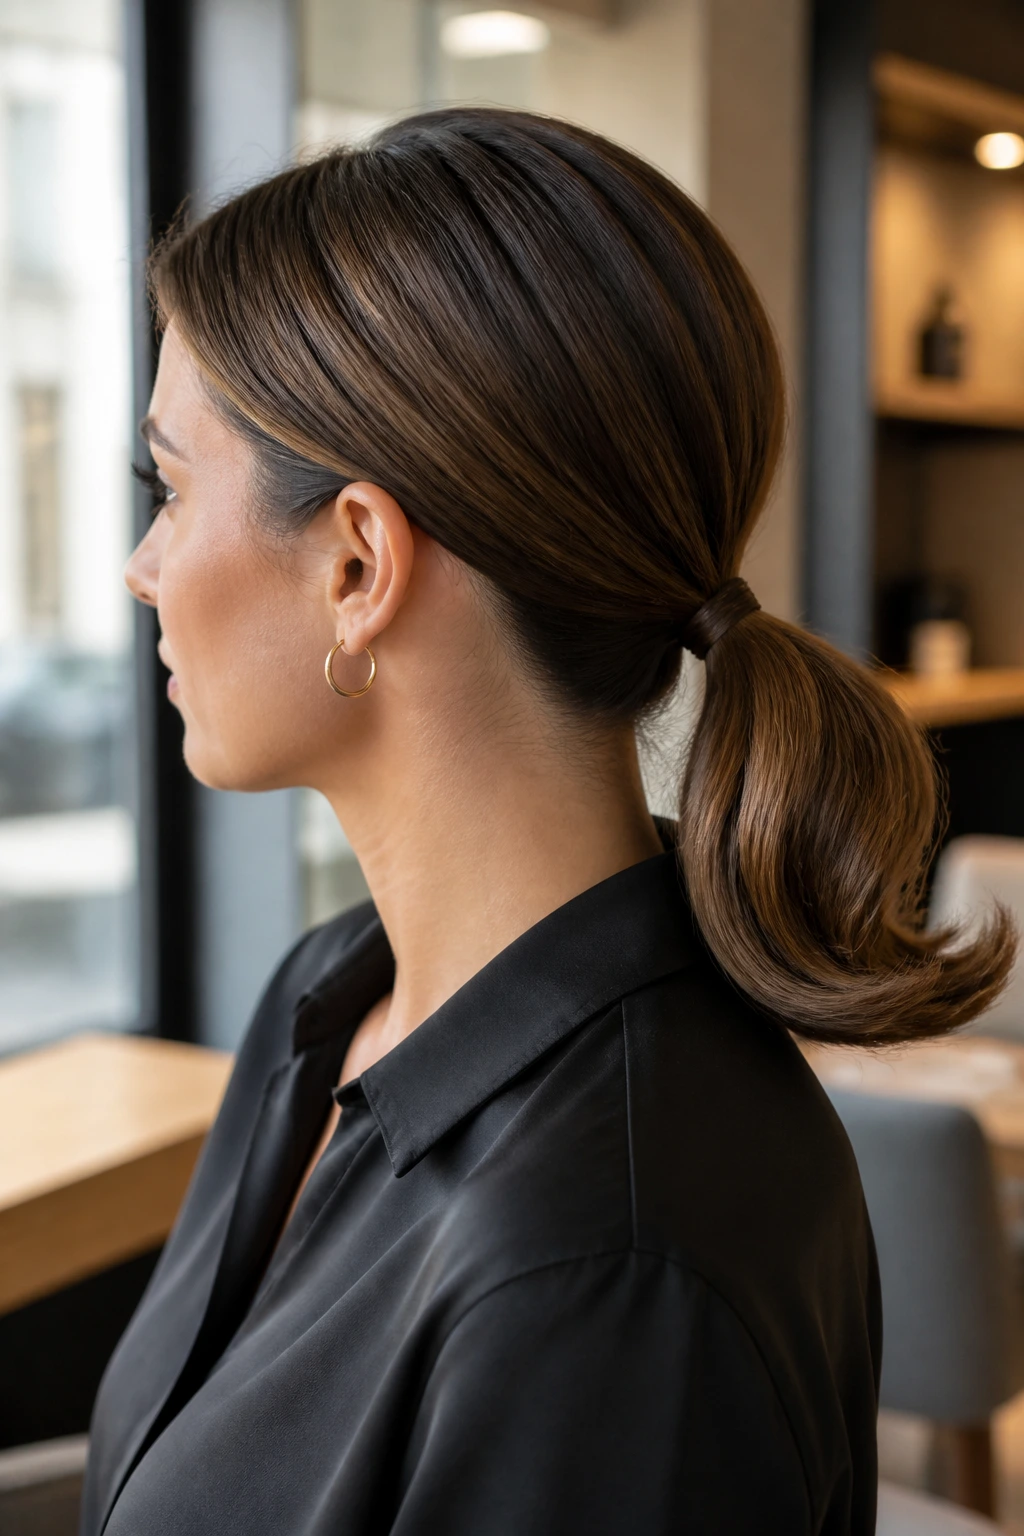
A flipped-end low ponytail has a tiny retro edge, and that’s what makes it fun. The top stays sleek and controlled, but the ends turn outward instead of lying straight down. It gives the style movement without adding volume where you don’t want it.
Set the ponytail low and smooth, then use a flat iron or round brush to bend the last few inches away from the neck. The bend should be soft, not a dramatic curl. If it’s too sharp, the style stops looking sleek. If it’s too subtle, you lose the point of the look.
This is one of my favorite ways to keep a ponytail from feeling too plain. The line stays polished, but the flipped ends add a little swing when you move. It’s subtle enough for the office and interesting enough for dinner.
A good rule: the smoother the top, the more the ends can do. If the crown already has texture, keep the flip minimal so the style doesn’t split into competing ideas.
21. Pearl-Accent Low Ponytail
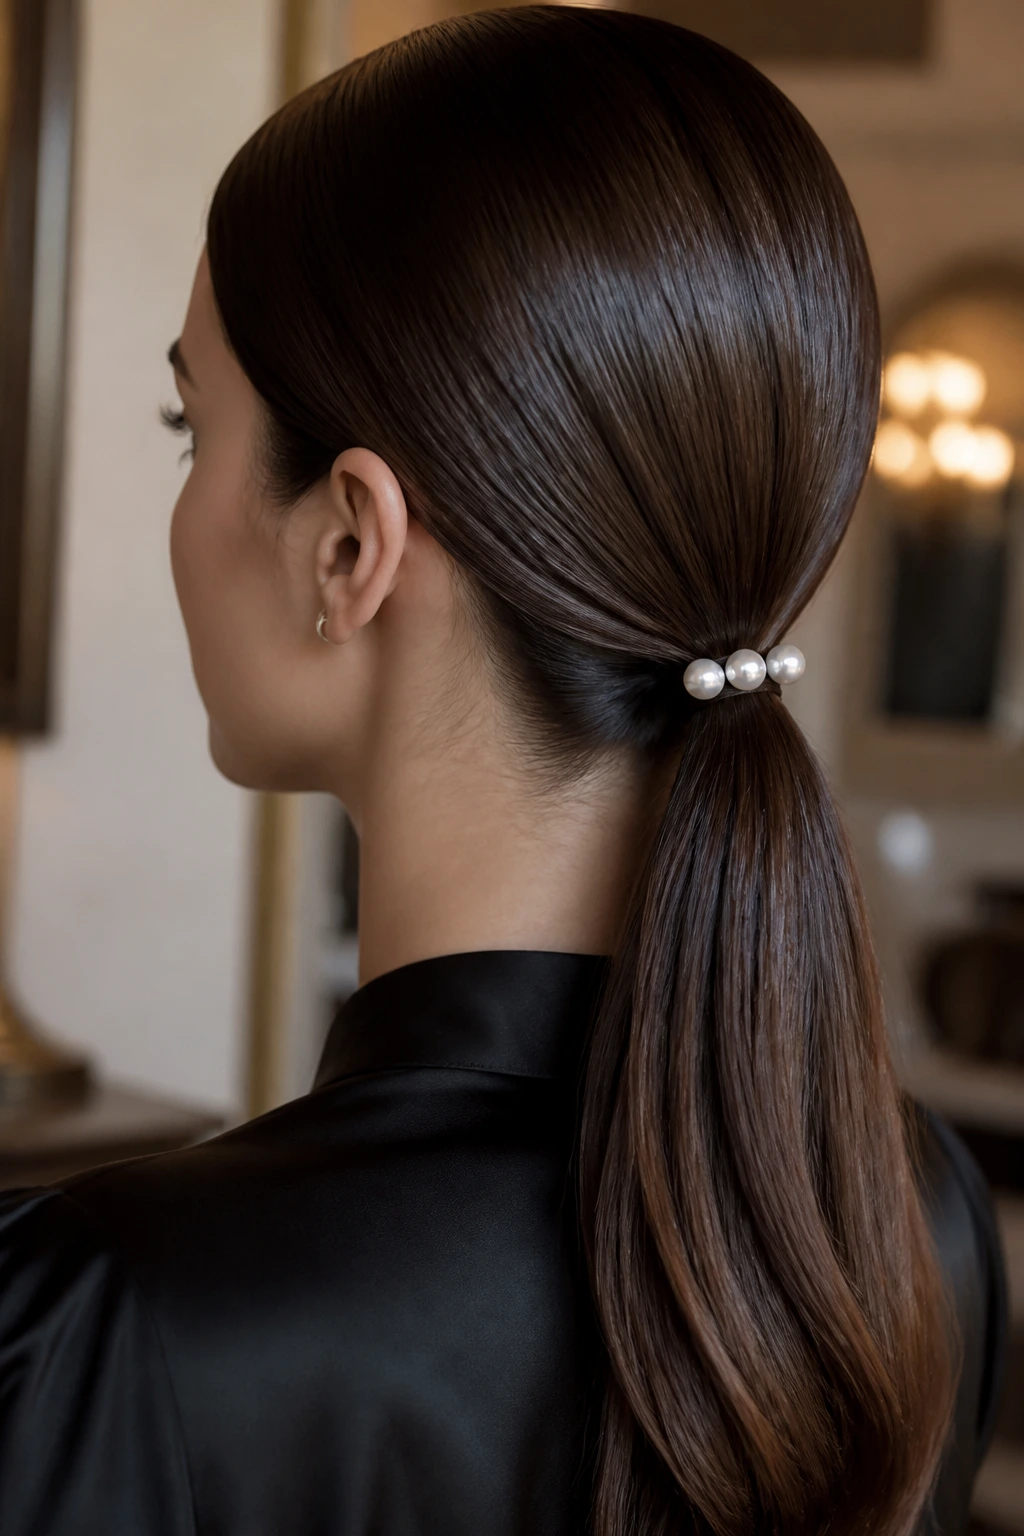
Pearls can be delicate or they can be too much. In a sleek low ponytail, I like them used sparingly—three small pins, maybe five at most, set near the base or along one side of the pony. That’s enough to read as intentional without turning the style into a costume.
The key is restraint. Keep the pony clean and low, then place the pearls where they echo the line of the nape. If they’re scattered randomly, the whole thing looks busy. Grouped tightly, they look considered. A black elastic and glossy hair make the pearls stand out even more, which is why this style works so well against dark clothing or a simple neckline.
Pearl accents are especially good when you want a low ponytail for an event but don’t want a full updo. They give the style a little brightness without disturbing the clean profile.
If your hair is very fine, use lighter pearl pins. Heavy ones can slide and drag the tail down. Tiny details matter here.
22. Sleek Low Ponytail for Thick Hair
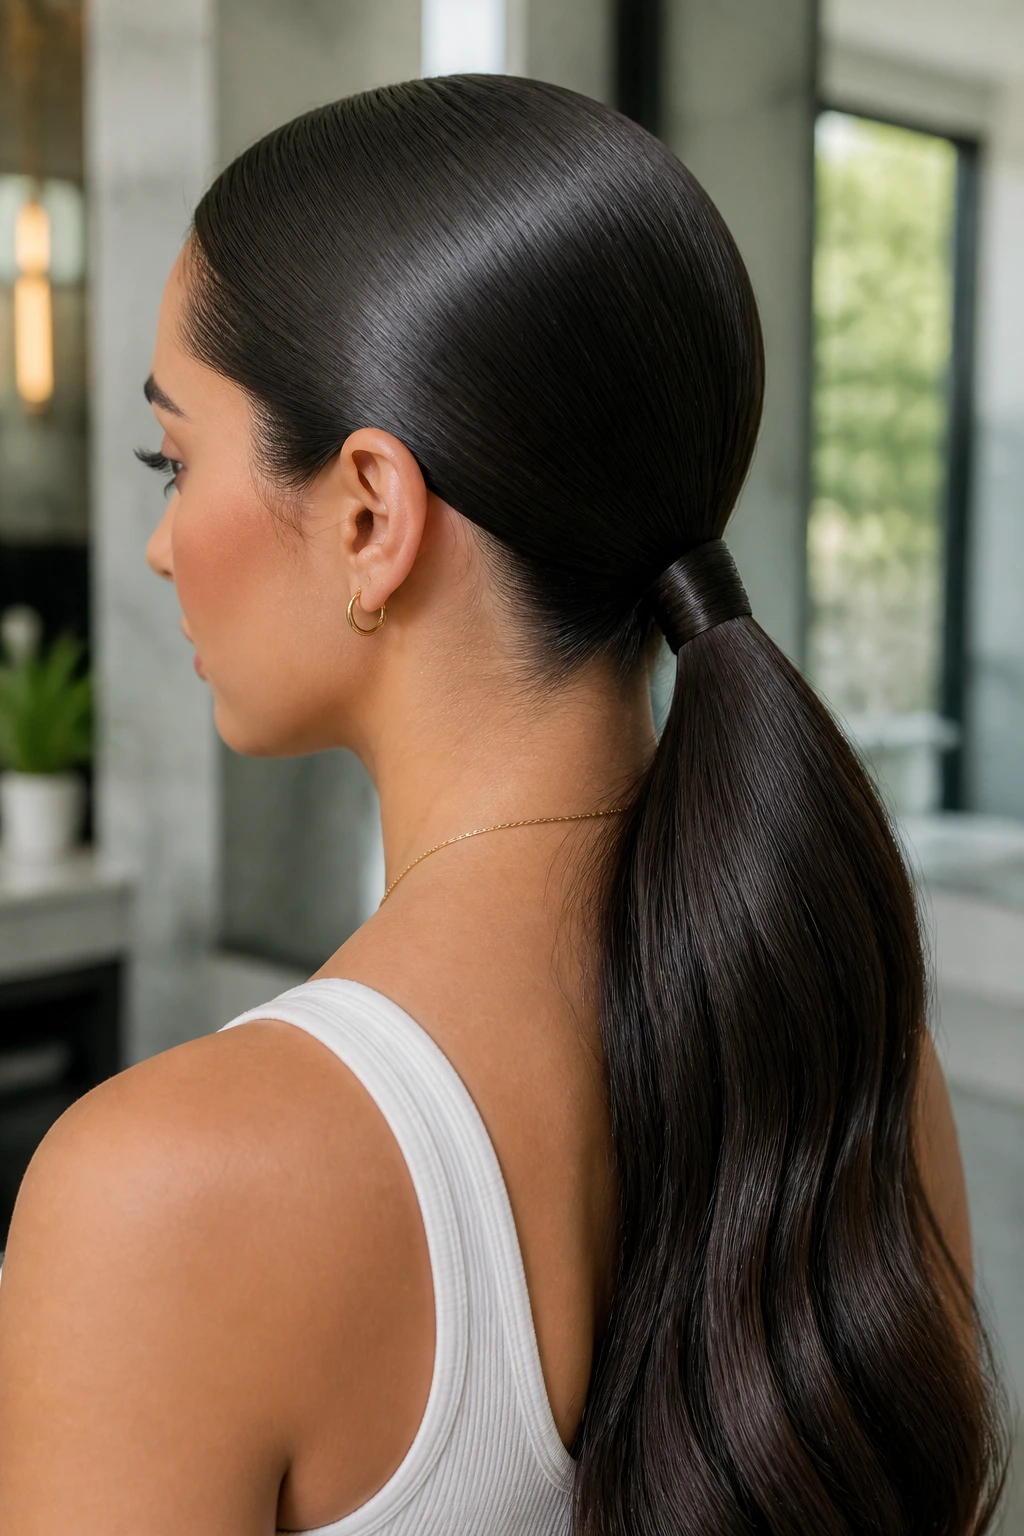
Thick hair can wear a low ponytail better than almost any other texture, but it needs a plan. Without one, the crown puffs, the elastic strains, and the base starts looking like it’s holding a small tent. Not the look.
Split the hair into two sections before gathering it if your hair is dense. Bring the top half back first, smooth it, then add the lower half and secure everything together. That trick cuts down on bulk and keeps the base flatter. Use a strong elastic and two hidden pins if needed. I’d also keep the pony slightly lower than you think you need; thick hair always settles.
A little smoothing cream goes a long way here. Too much product can make the hair heavy, but too little leaves the surface rough. Aim for controlled shine, not slick overload. That balance matters when there’s a lot of hair involved.
This version looks best when the tail is allowed to be full. Don’t fight the weight. Shape it.
23. Sleek Low Ponytail for Fine Hair
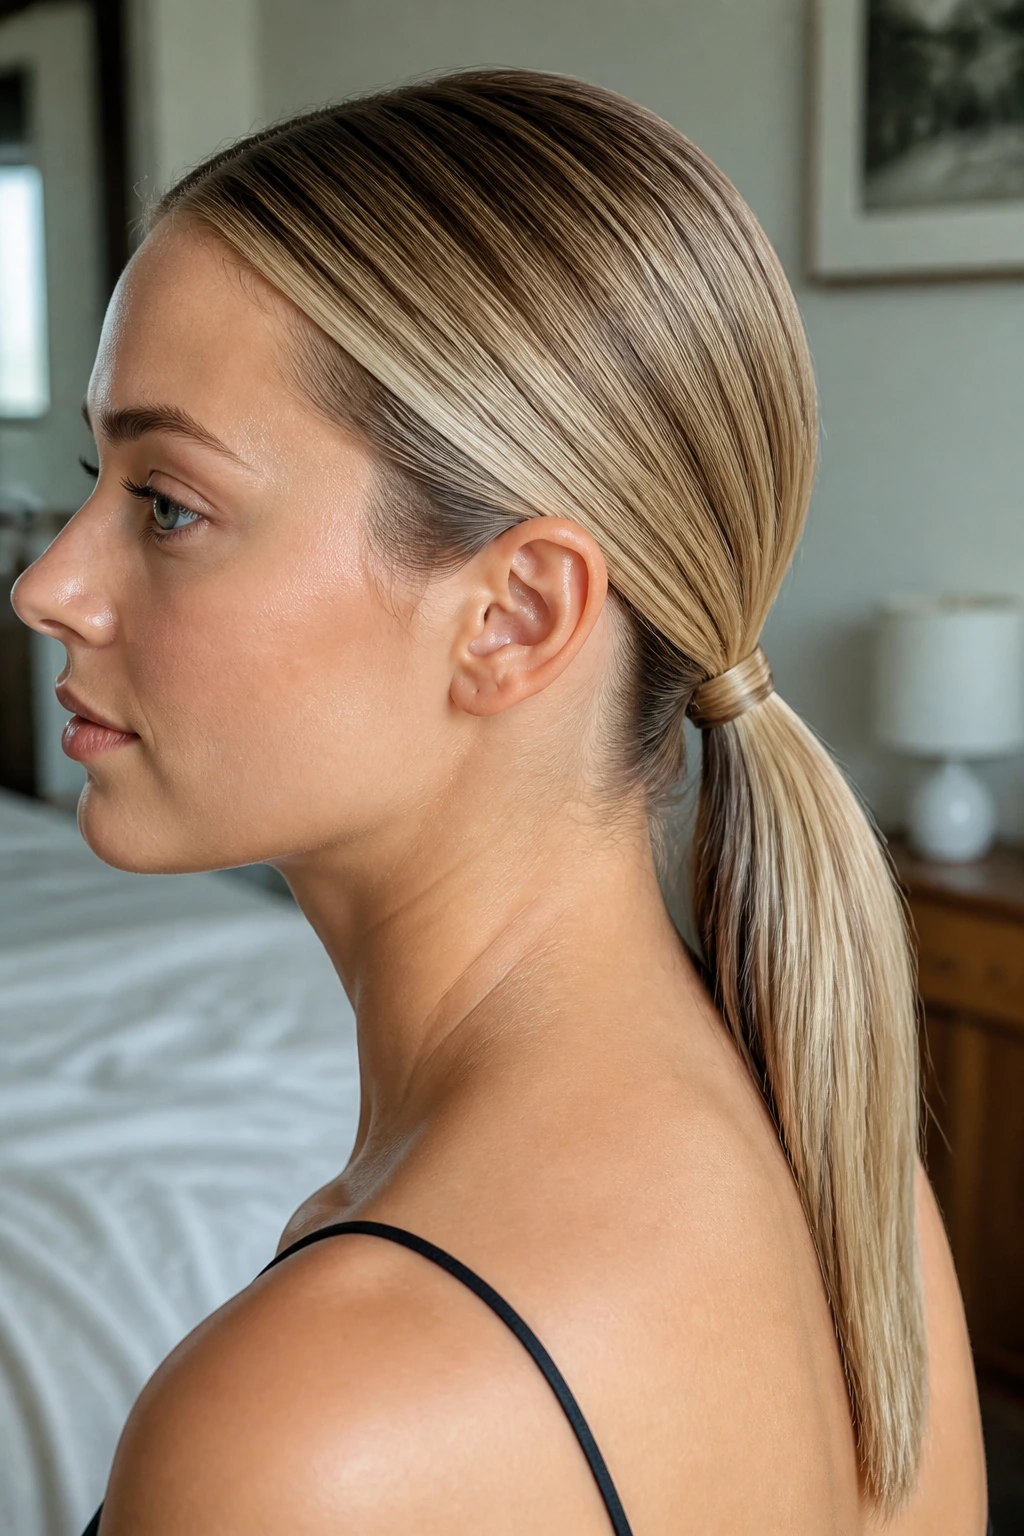
Fine hair needs a different kind of slick. If you load it with heavy cream, it collapses. If you skip product altogether, it slips and separates. The sweet spot is light hold at the roots and a smooth surface through the crown.
Start with a small amount of mousse or root spray at the top, then blow-dry the hair flat with a brush. A touch of dry shampoo can also give the roots enough grit to hold the pony in place. Gather the hair low and use a smaller elastic so the base doesn’t slide around. If the tail looks too thin, gently tease just the underside near the elastic for a touch of fullness.
I like this version because it doesn’t pretend fine hair should behave like thick hair. It works with what’s there. The shape stays neat, the pony sits close to the neck, and the surface can still look glossy if you use light products wisely.
One small warning: don’t over-brush after the style is set. Fine hair frays fast when you keep touching it.
24. Sleek Low Ponytail for Natural Curls
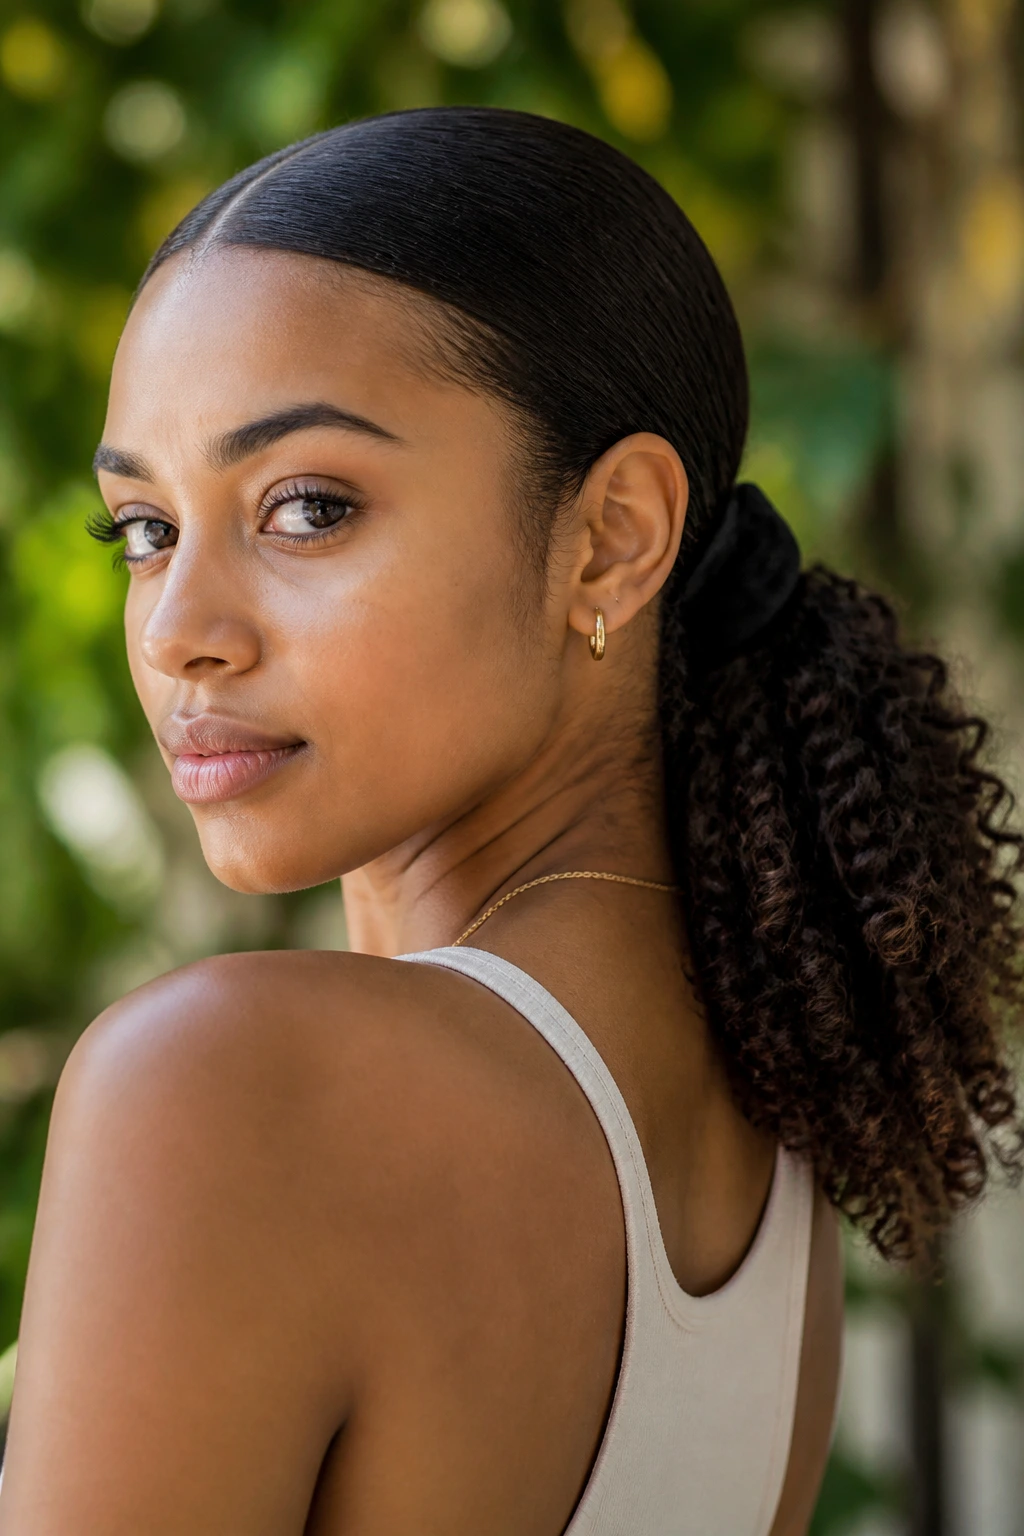
A sleek low ponytail on natural curls doesn’t have to mean flattening every trace of texture. You can keep the crown smooth and still let the tail hold some curl pattern, which gives the style depth without losing polish. That contrast is lovely when it’s done cleanly.
If you want the top very sleek, work in sections with leave-in conditioner and gel, then brush the hair back until the surface lies flat. For the ponytail itself, you can either stretch the curls slightly or let them remain textured, depending on the finish you want. A satin scrunchie or covered elastic helps prevent dents, and a little edge control around the hairline keeps the shape crisp.
This style is more durable than people expect because curls have their own grip. The key is controlling the top while respecting the body in the tail. For some women, that means a defined curl cascade; for others, it means a stretched, shiny tail. Both work.
The best version has no visible tension at the hairline. If the edges are shouting, the style is too tight.
25. Boardroom Low Ponytail
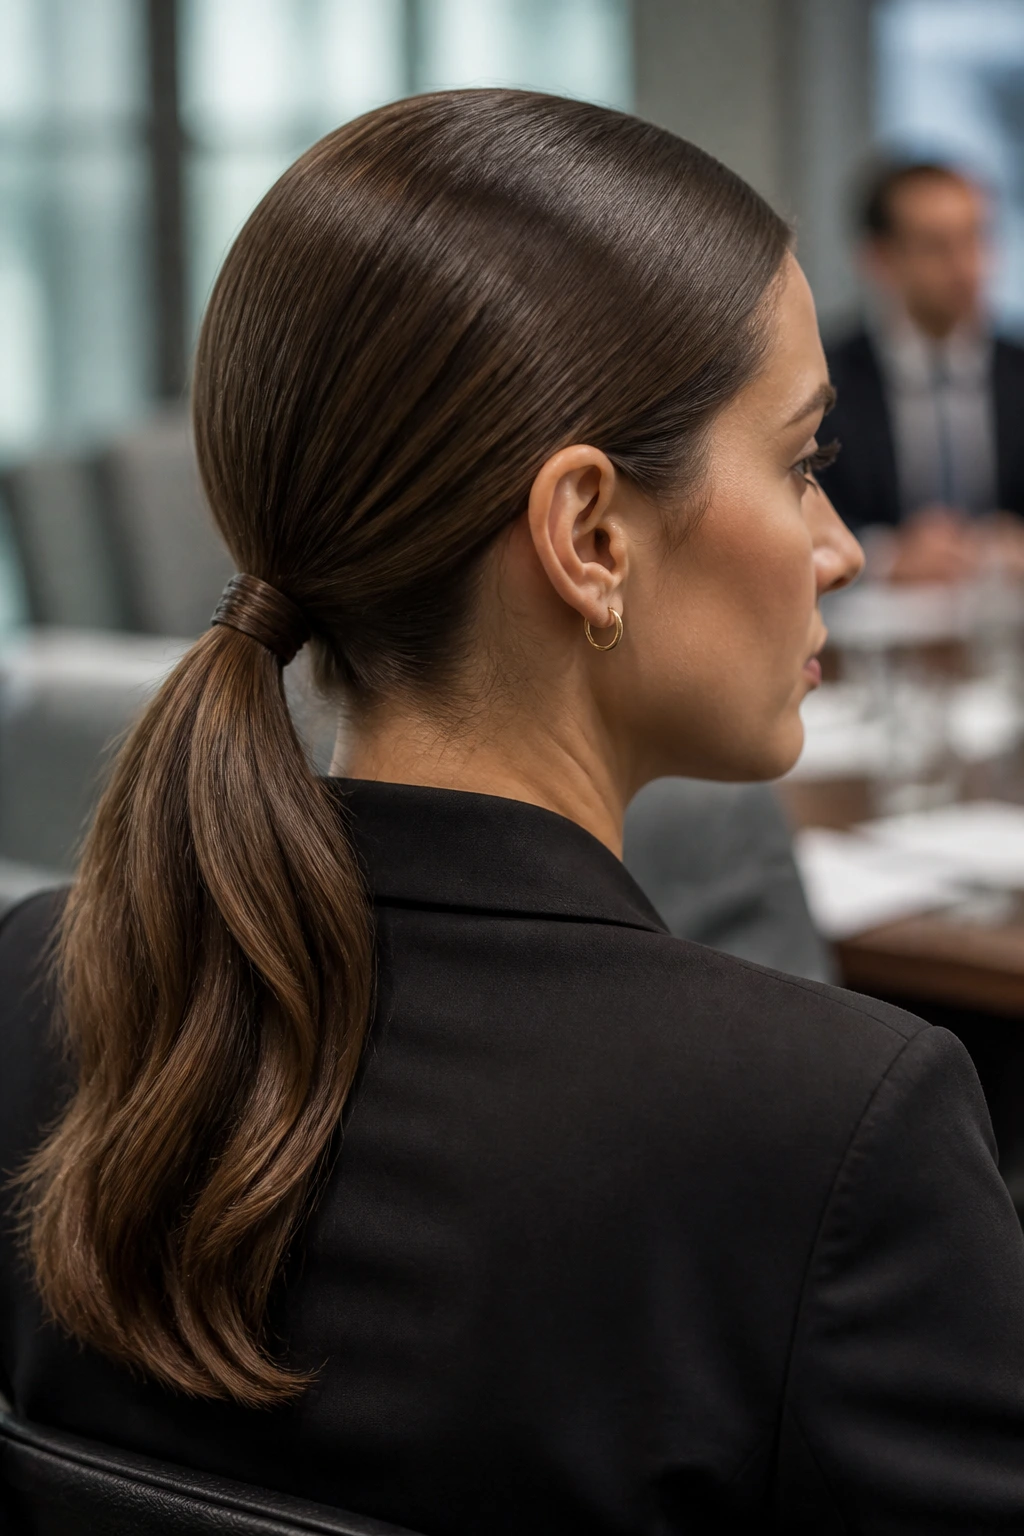
A boardroom low ponytail is stripped down on purpose. No obvious accessory. No loose front pieces. No shiny, wet finish. Just a clean part, a smooth crown, and a ponytail that sits low enough to stay out of your way during the whole meeting.
I’d choose a center or very slight side part, depending on what your face and outfit can take. Keep the hair brushed back evenly and secure it with a simple elastic that matches the color of your hair. If you need a wrap, make it thin and invisible. This is not the place for drama.
The boardroom version works because it looks controlled without being fussy. It pairs well with collars, blazers, and high necklines because the nape stays tidy and the shape doesn’t compete with clothing. That’s what makes it useful.
If you tend to get flyaways around the temples, smooth them with a tiny bit of cream on a toothbrush or edge brush. Tiny correction. Big visual payoff.
26. Event-Ready Glossy Low Ponytail
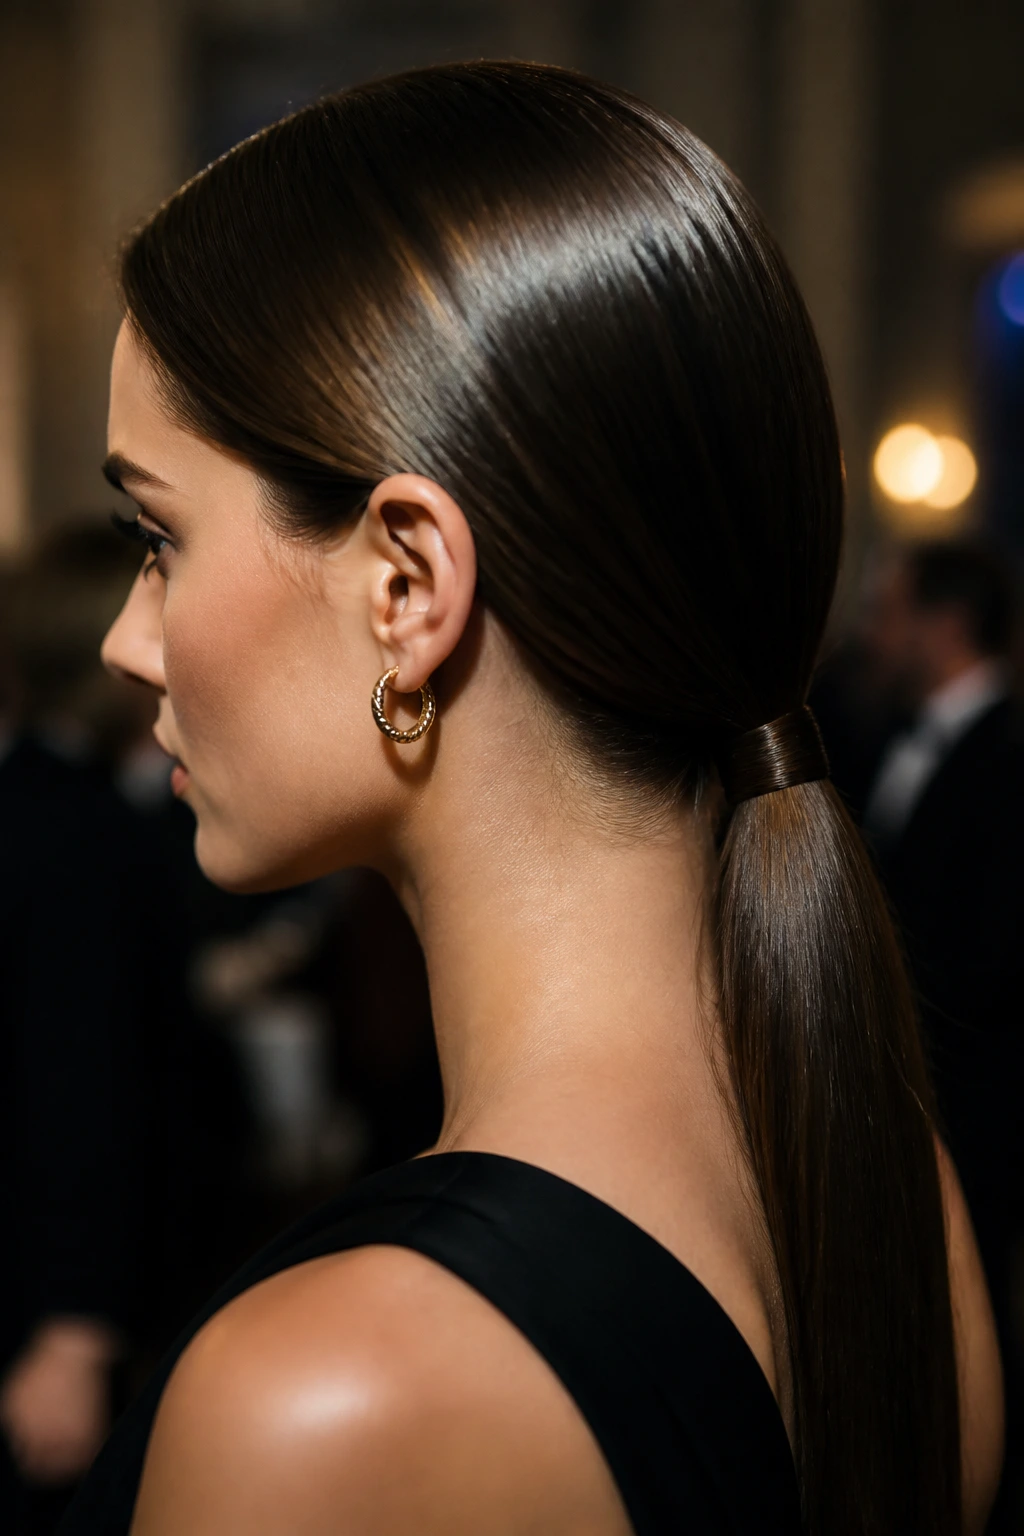
When the lights are low and the outfit needs hair that can hold its own, the glossy low ponytail is the answer. It has more shine than the boardroom version, more polish than the casual versions, and a cleaner silhouette than anything with loose movement at the crown.
Build the base with a precise part, then smooth the top until the surface reflects light in a single clean line. The tail can stay straight, tucked, or wrapped, but it should look deliberate all the way to the ends. A light shine spray gives the finish that reflective look without drowning the hair in product.
I like this one for dresses with clean necklines, strong earrings, or anything with a little structure in the fabric. The ponytail balances out that kind of outfit better than loose curls do, especially if you want your face to stay visible from every angle.
Don’t confuse glossy with greasy. There’s a difference, and it shows fast. Shine should sit on the surface, not collect at the roots.
27. Gym-to-Street Low Ponytail
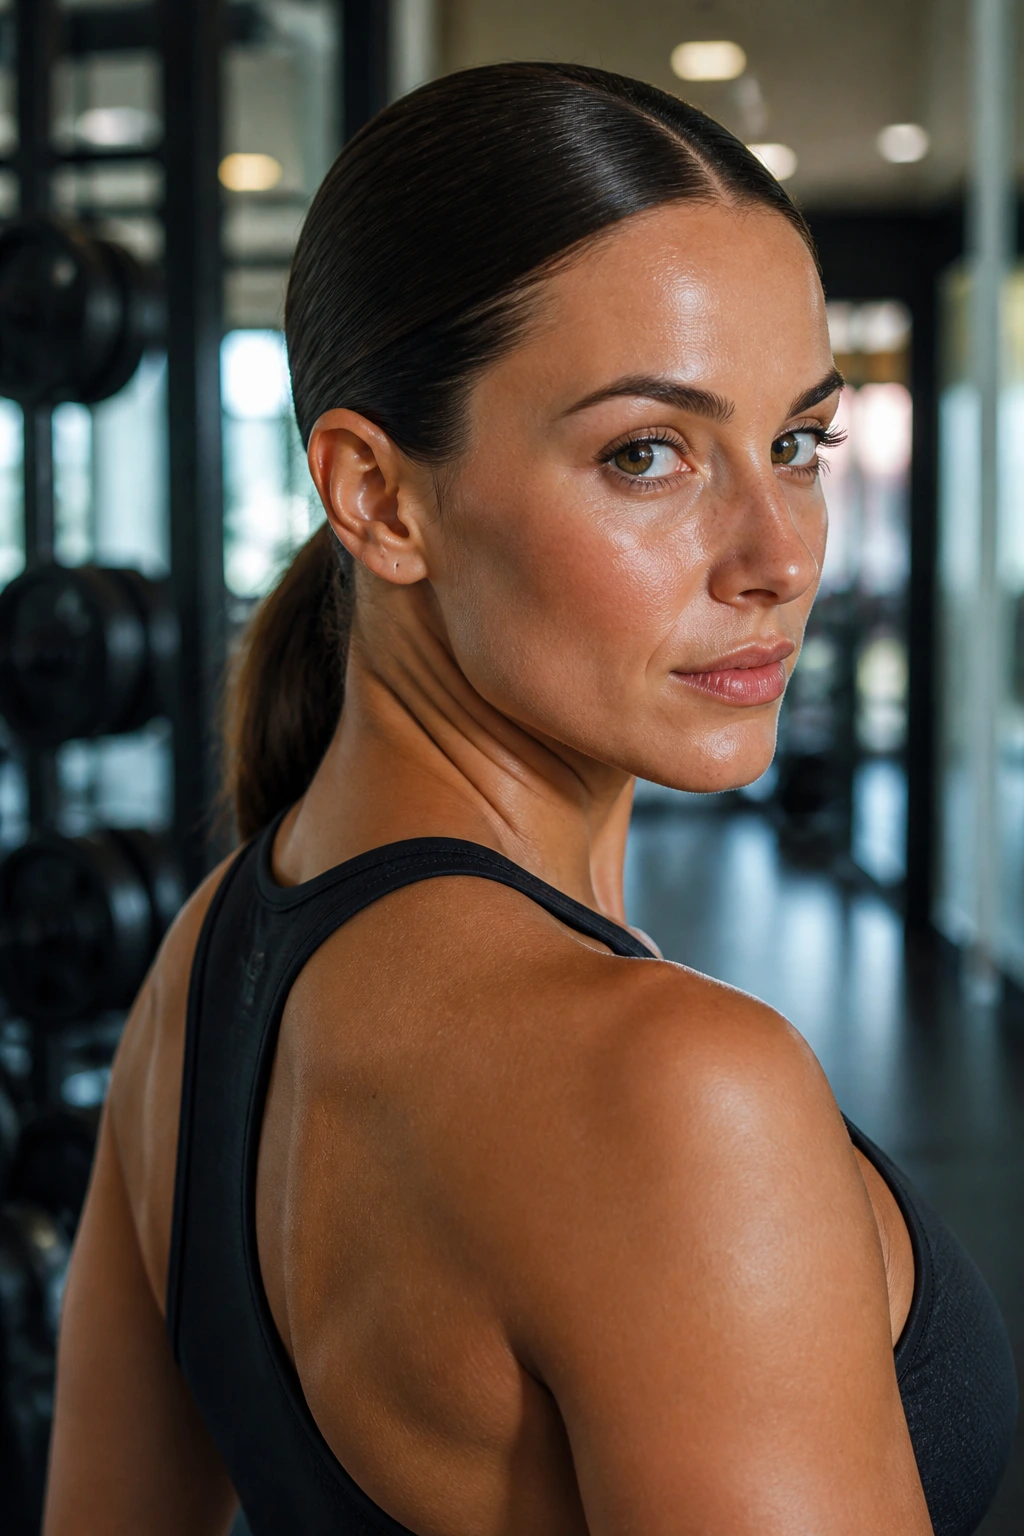
The gym-to-street low ponytail has one job: stay secure, then still look intentional when you leave the building. That means the base needs to be tight enough for movement, but the finish should still be smooth enough that you don’t look like you tied your hair in a parking lot.
Use a light styling cream or leave-in conditioner before pulling the hair back. It helps control frizz without making the hair limp. Secure the pony low with a strong elastic, then give the crown one last brush before you walk out the door. If you have baby hairs or sweat at the hairline, a quick dab of gel keeps the front from turning fuzzy.
This style is practical, but it doesn’t have to look plain. A wrapped elastic or tiny side part can make it feel finished in under a minute. That’s a useful thing on days when you need function first and polish second.
The good version feels snug, not strained. If your scalp hurts, it’s too tight.
28. Travel-Day Low Ponytail with a Flat Base
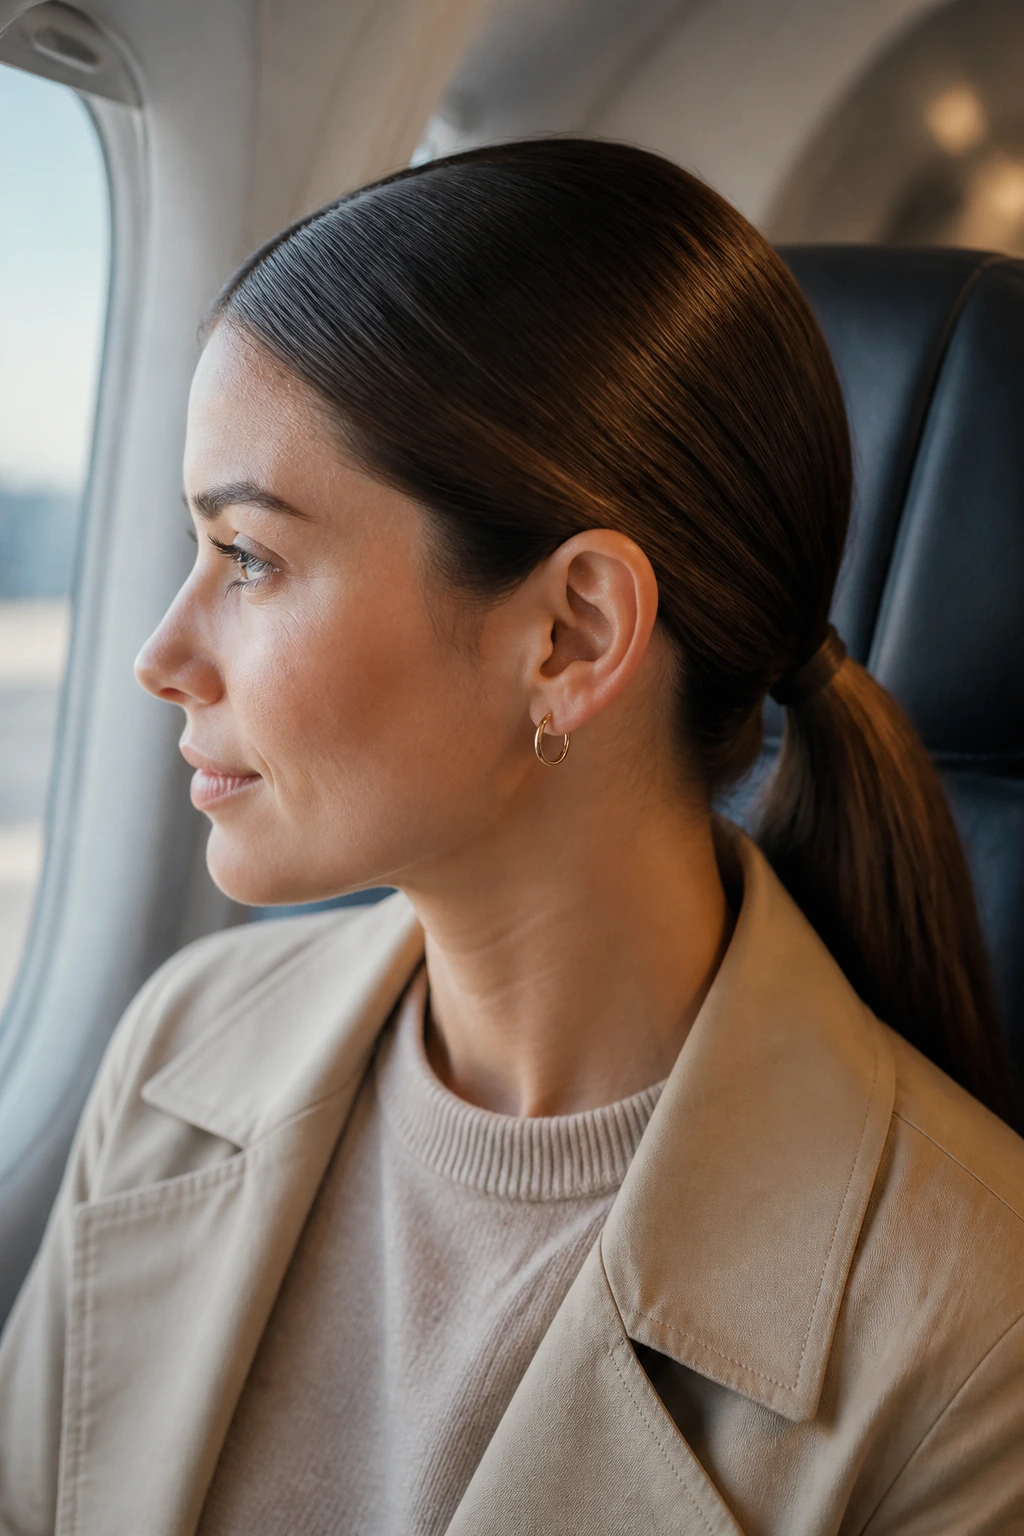
Travel hair has different rules. You want a low ponytail that won’t knot under a scarf, catch on a seatbelt, or give you a headache before the plane has even taken off. A travel-day version stays smooth at the base and keeps the tail tidy enough to survive a long stretch without much fuss.
Keep the pony lower than usual and use an elastic that won’t snag when you take off a hat or hoodie. A soft wrap over the base can help, but don’t overcomplicate it. The point is comfort. Use just enough smoothing cream to tame the crown and let the pony sit close to the neck so it doesn’t get whipped around.
I like this style because it behaves after you’ve been leaning against a seat, a neck pillow, or a car headrest. The shape is simple enough to refresh with your hands and a little water later, which is half the battle when you’re on the move.
If you know you’ll be reworking it later, keep the part clean and the base secure. That way the style still looks like a decision, not damage control.
Why a Sleek Low Ponytail Works So Well
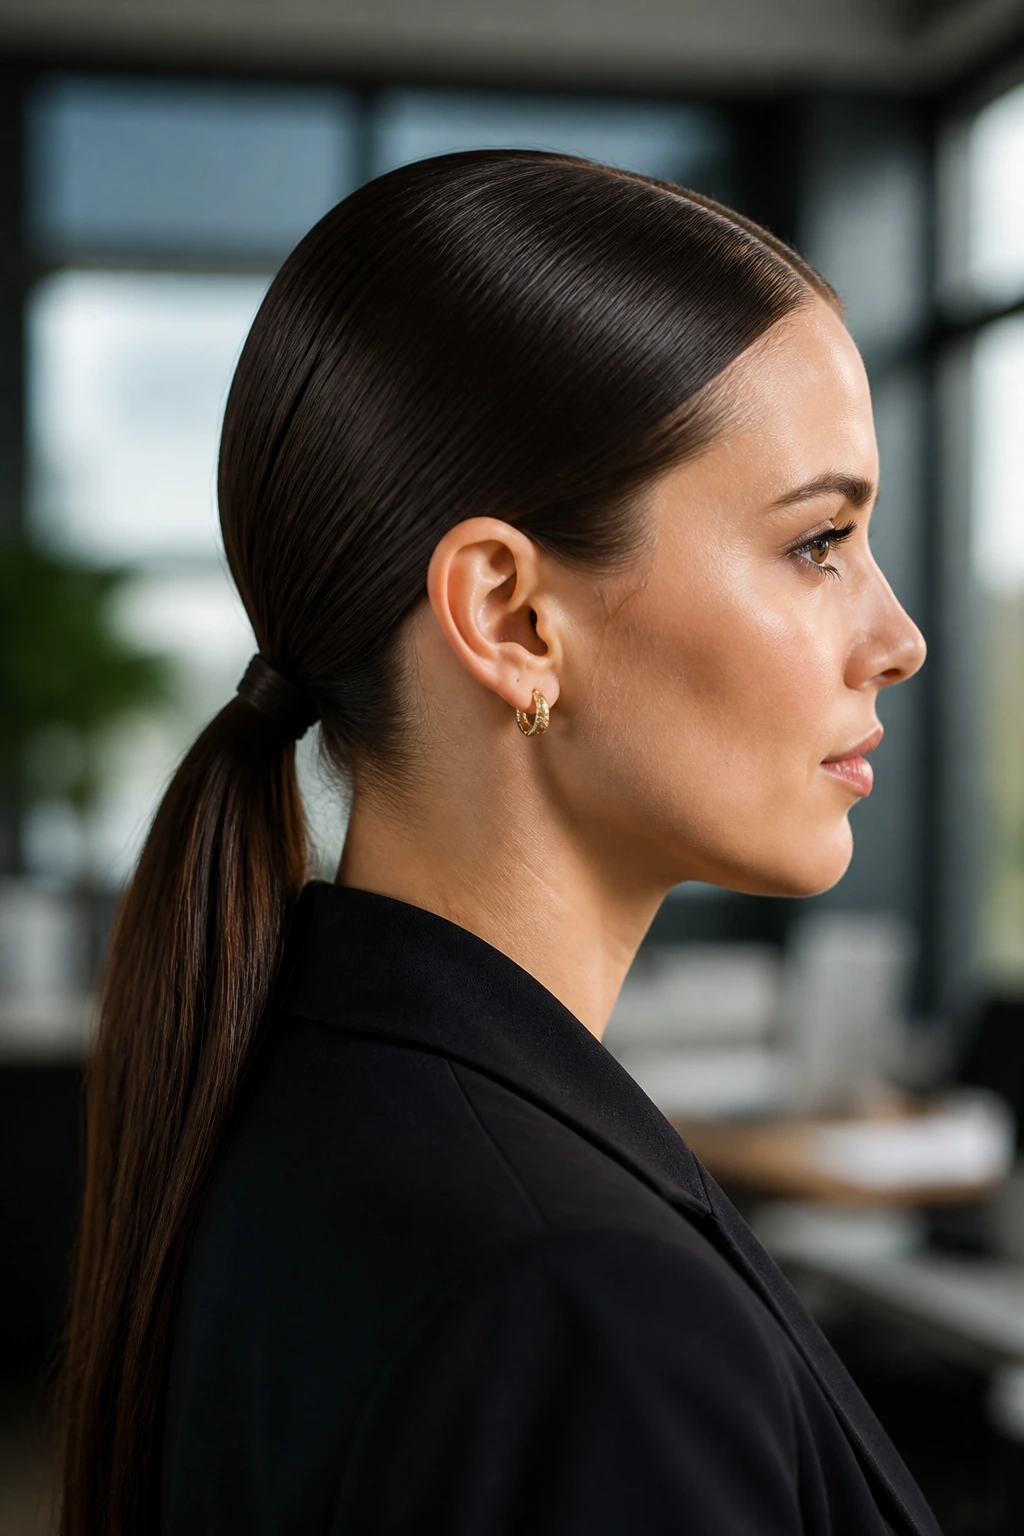
A sleek low ponytail is doing more than keeping hair off your neck. It changes the line of the whole head and lets the face, collar, earrings, and neckline take the lead. That’s why it can look severe, soft, modern, or dressy depending on where the pony sits and how smooth the crown is.
The nape matters more than most people think. A ponytail placed too high stops reading as “sleek” and starts feeling sporty. Too low and loose, and the style loses shape. Right at the neck, with the crown brushed clean and the part deliberate, is where the style settles into its best form. That’s the spot where the hair looks controlled without looking like it’s been pinned down in a panic.
There’s also a practical reason this style lasts. The hair is gathered close to the head, so it doesn’t swing around as much or fight the wind the way a loose blowout does. Less movement means fewer flyaways, and fewer flyaways mean less mid-day repair.
Essential Tools for These Ponytails
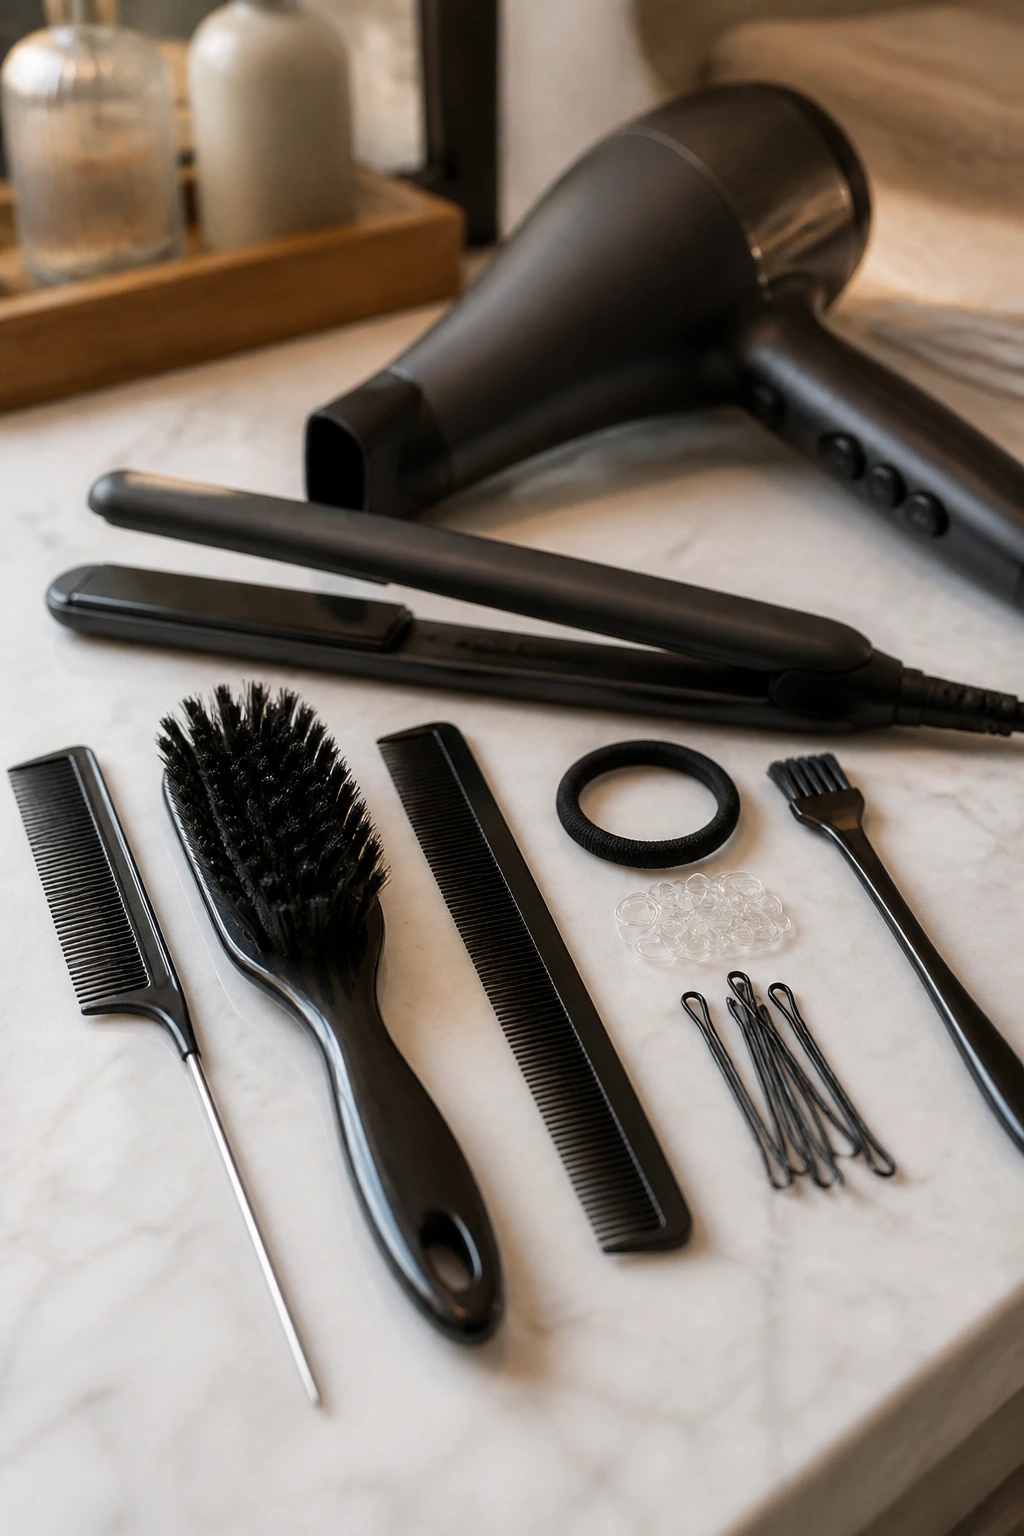
You don’t need a drawer full of gadgets, but the right few tools make a sleek low ponytail much easier to build cleanly.
- Rat-tail comb: Best for parts that run straight and sharp without zigzagging.
- Boar-bristle brush: Helps smooth the crown and distribute product without puffing the hair.
- Fine-tooth comb: Useful for wet-look finishes and tighter, flatter roots.
- Bobby pins in your hair color: Hide the wrap, anchor side sections, and lock the base.
- Small clear elastics: Great for bubble details, braids, and fine hair.
- Strong no-snag elastic: The main hold for thick hair or long wear.
- Edge brush or clean toothbrush: Good for baby hairs and a neat hairline.
- Flat iron: Useful for ends, face-framing pieces, and smoothing short layers.
- Blow dryer with concentrator nozzle: Helps get the crown flat before styling.
- Light serum or styling cream: Adds slip and shine without making the style greasy.
Smart Product and Prep Choices
The biggest mistake people make is treating every sleek ponytail the same. Fine hair, thick hair, curls, and layered cuts all need different prep. A product that gives one person a glossy finish can make another person’s hair slide apart in half an hour.
Start with the texture you actually have. If your hair is thick or frizz-prone, use a smoothing cream or gel at the crown and hairline, then brush it through before it dries. If your hair is fine, go lighter—root spray, mousse, or a dusting of dry shampoo usually gives better grip than heavy cream. Curly hair often needs leave-in plus gel at the top, even when you leave the ponytail itself textured.
Heat protection matters if you’re flat-ironing the ends or front pieces. I’d keep the pass count low: one or two smooth passes per section is enough for most hair. More passes don’t make the style better; they just dry the hair out and create the kind of frizz that refuses to sit down.
How to Keep the Shape Clean from Morning to Night
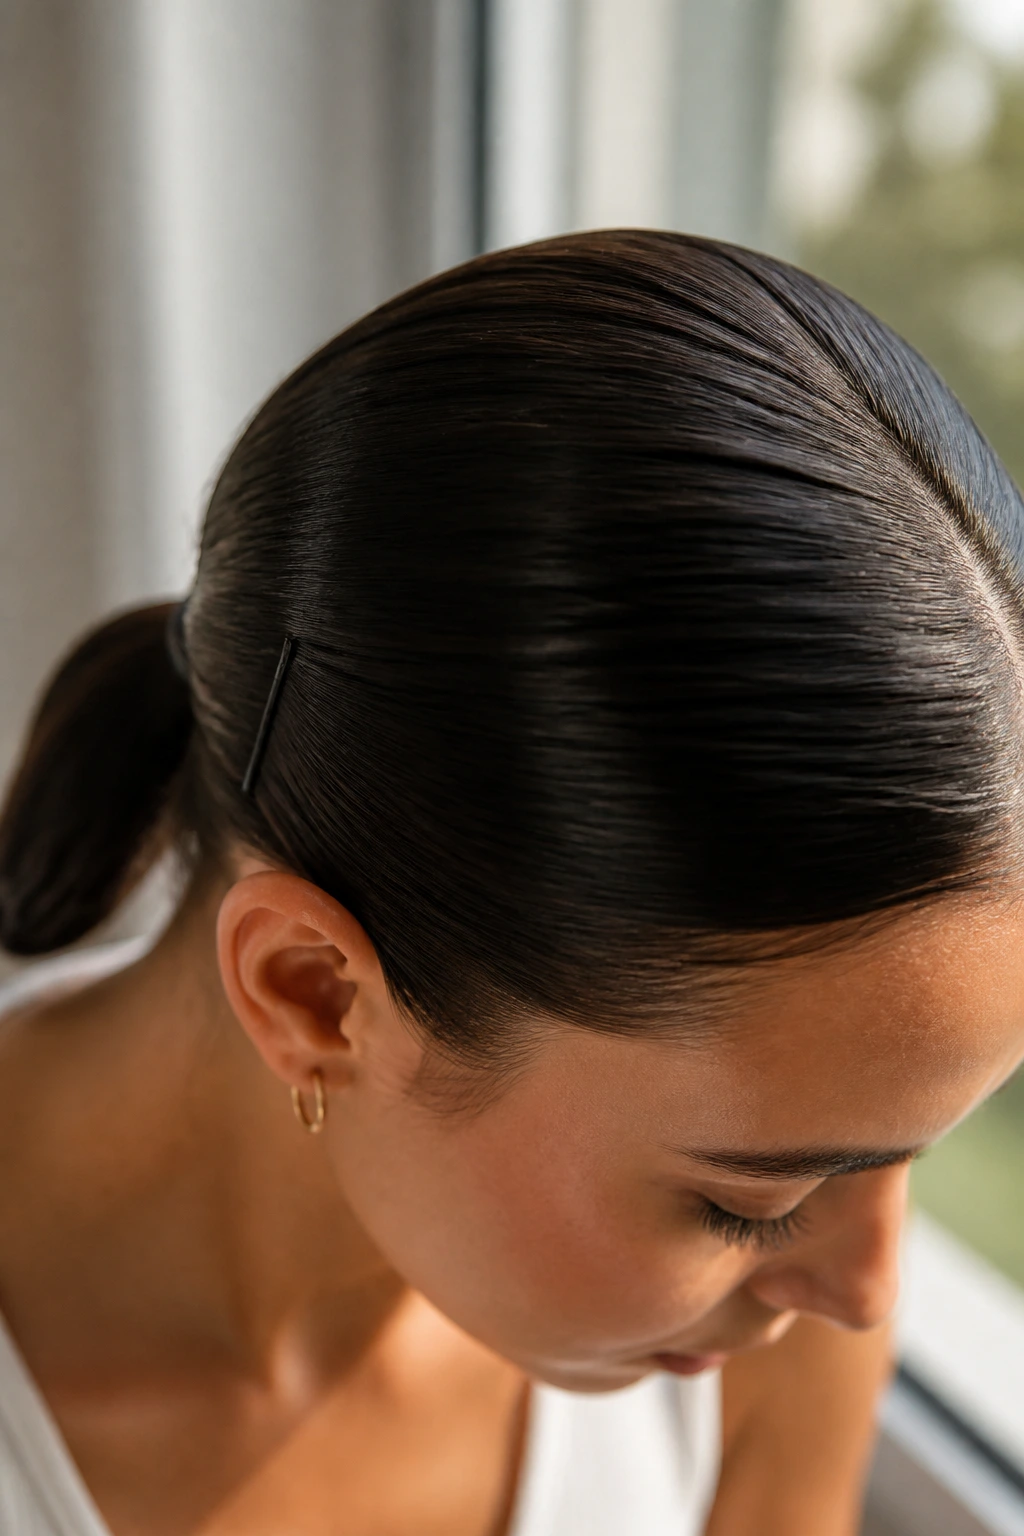
A sleek ponytail starts falling apart in one place first: the crown. That’s where the part widens, where humidity gets under the surface, and where your hands keep touching. Protect that area and the rest of the style usually behaves.
Use a small amount of product before you gather the hair, not after. If you add more gel to the surface later, you’ll often end up with flakes or patches that look dull. Better to smooth the top while it’s still manageable, then set it with a light mist of flexible hairspray from a distance.
Pins help more than people admit. A couple of hidden bobby pins near the elastic can keep the pony from sliding down as the day goes on. If your hair is heavy, anchor the base before you leave the mirror. That five-second step saves you from yanking the pony back up every hour.
Common Mistakes That Make the Style Look Sloppy
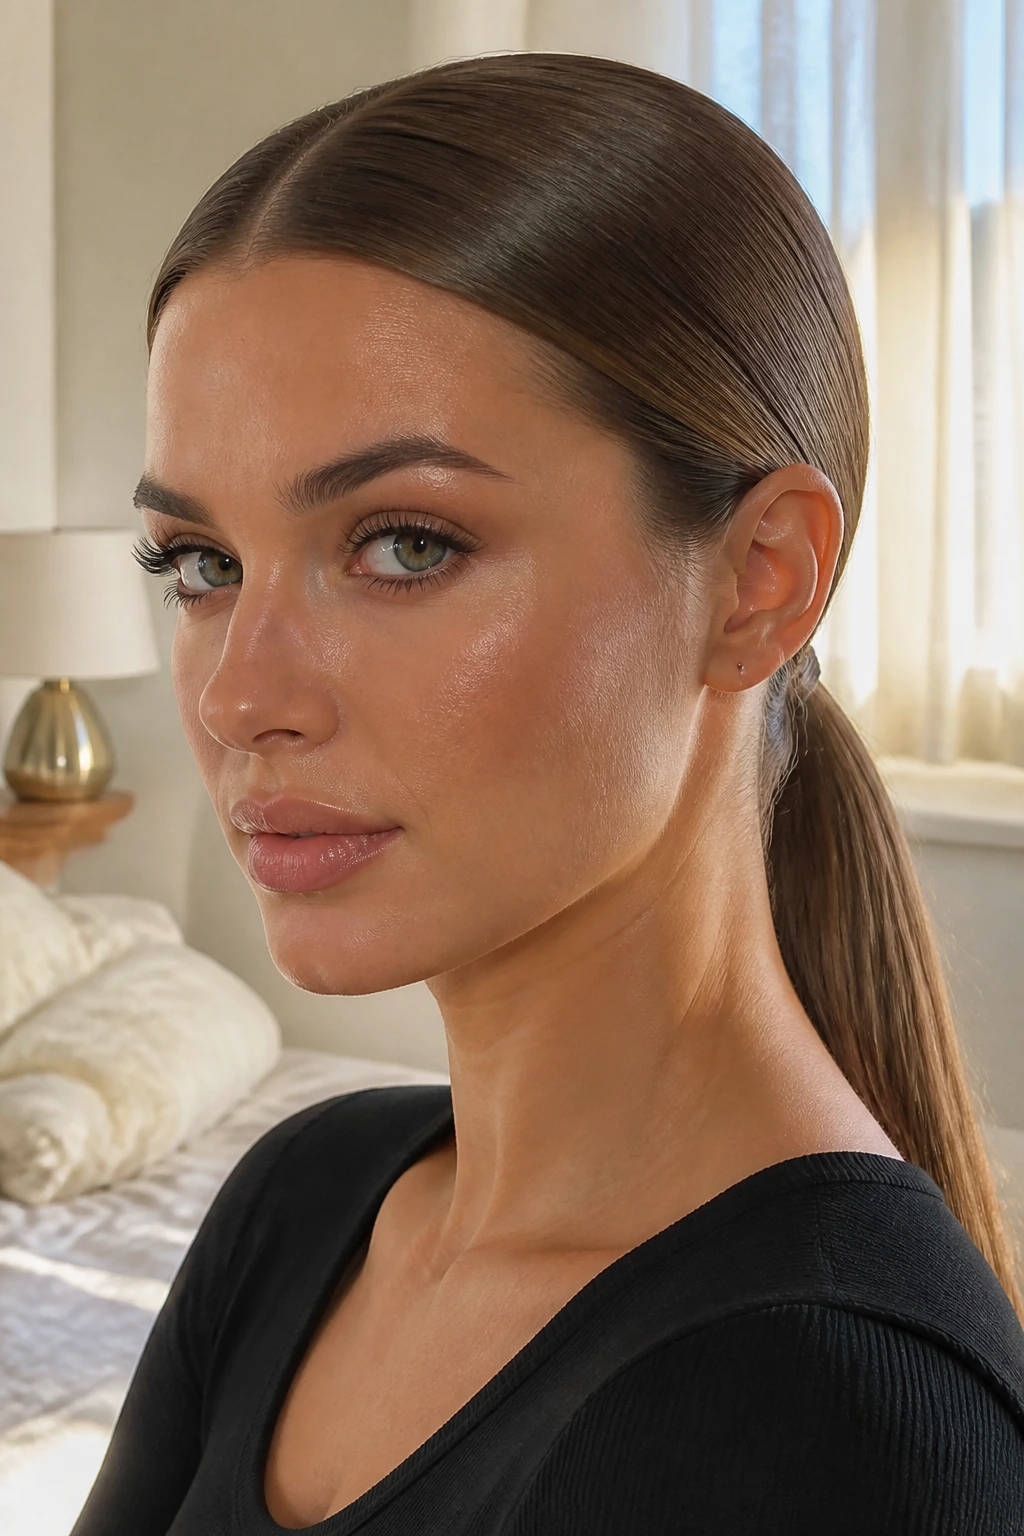
The first mistake is using too much product at the root. The hair goes from sleek to limp fast, and once it starts looking greasy, there’s no elegant fix. Use enough to smooth, not enough to wet the scalp.
Another common problem is placing the pony in the wrong spot. Too high and it looks athletic; too low and unbalanced, and the head can seem dragged backward. The sweet spot is the nape or just above it, depending on your neck length and the shape of your face.
People also forget to prep the ends. A smooth crown with fuzzy, bent, or puffy ends makes the whole style look half done. Flat iron, tuck, flip, or braid the tail—pick one direction and commit.
And then there’s the “I’ll fix it later” habit. You won’t. Once the ponytail is in and the hair has set, stray pieces only get worse when you keep touching them. Clean it once. Leave it alone.
Variations and Adaptations to Try
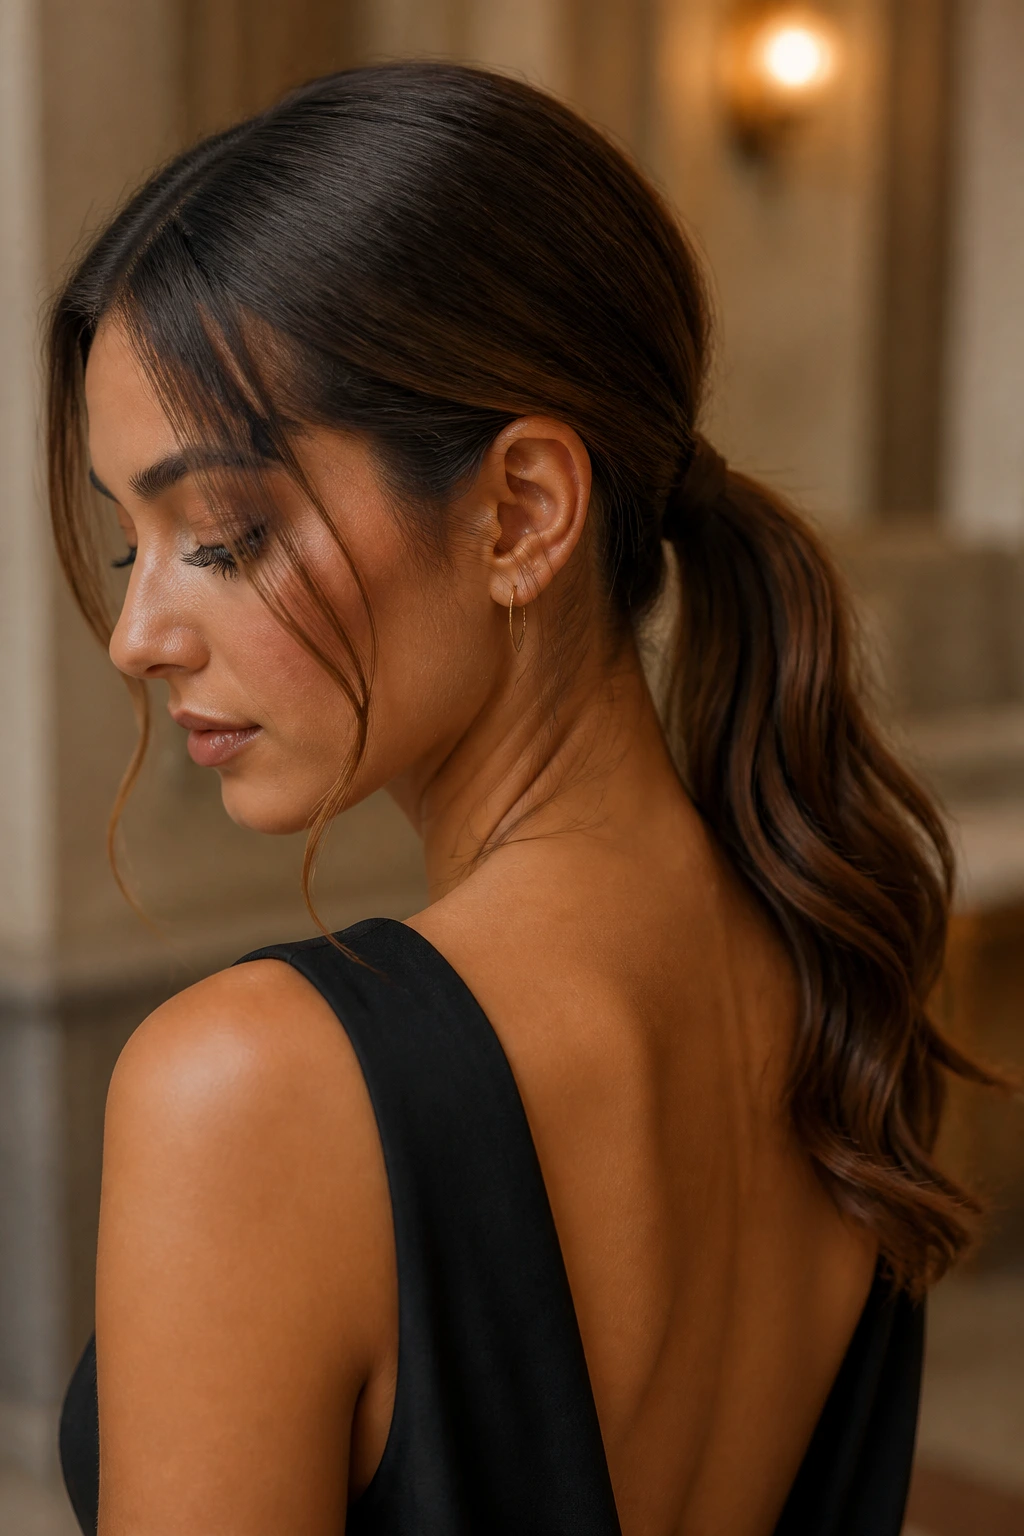
Soft Romantic Low Pony: Leave two face-framing pieces loose and bend them gently with a flat iron. It softens the look without pulling the style out of its sleek lane.
Extra-Gloss Finish: Add a little more shine spray on the tail and wrap the elastic with a polished strand. Use this when you want the ponytail to read dressy and reflective.
Natural Texture Version: Keep the crown sleek, but let the ponytail itself stay wavy or curly. That contrast keeps the look modern and saves time.
Short-Hair Hack: For shoulder-length hair or layers, use a smaller elastic and pin the bottom layers flat before tying the pony. It keeps the nape neat without pretending the hair is longer than it is.
Accessory Swap: Replace the wrap, ribbon, or cuff with a single sculptural clip. One strong detail is enough. No need to stack three things on top of each other.
Low-Tension Version: If you wear ponytails often, place the elastic a touch looser and use pins to support the base. Your scalp will thank you later.
Night Wraps and Next-Day Refresh
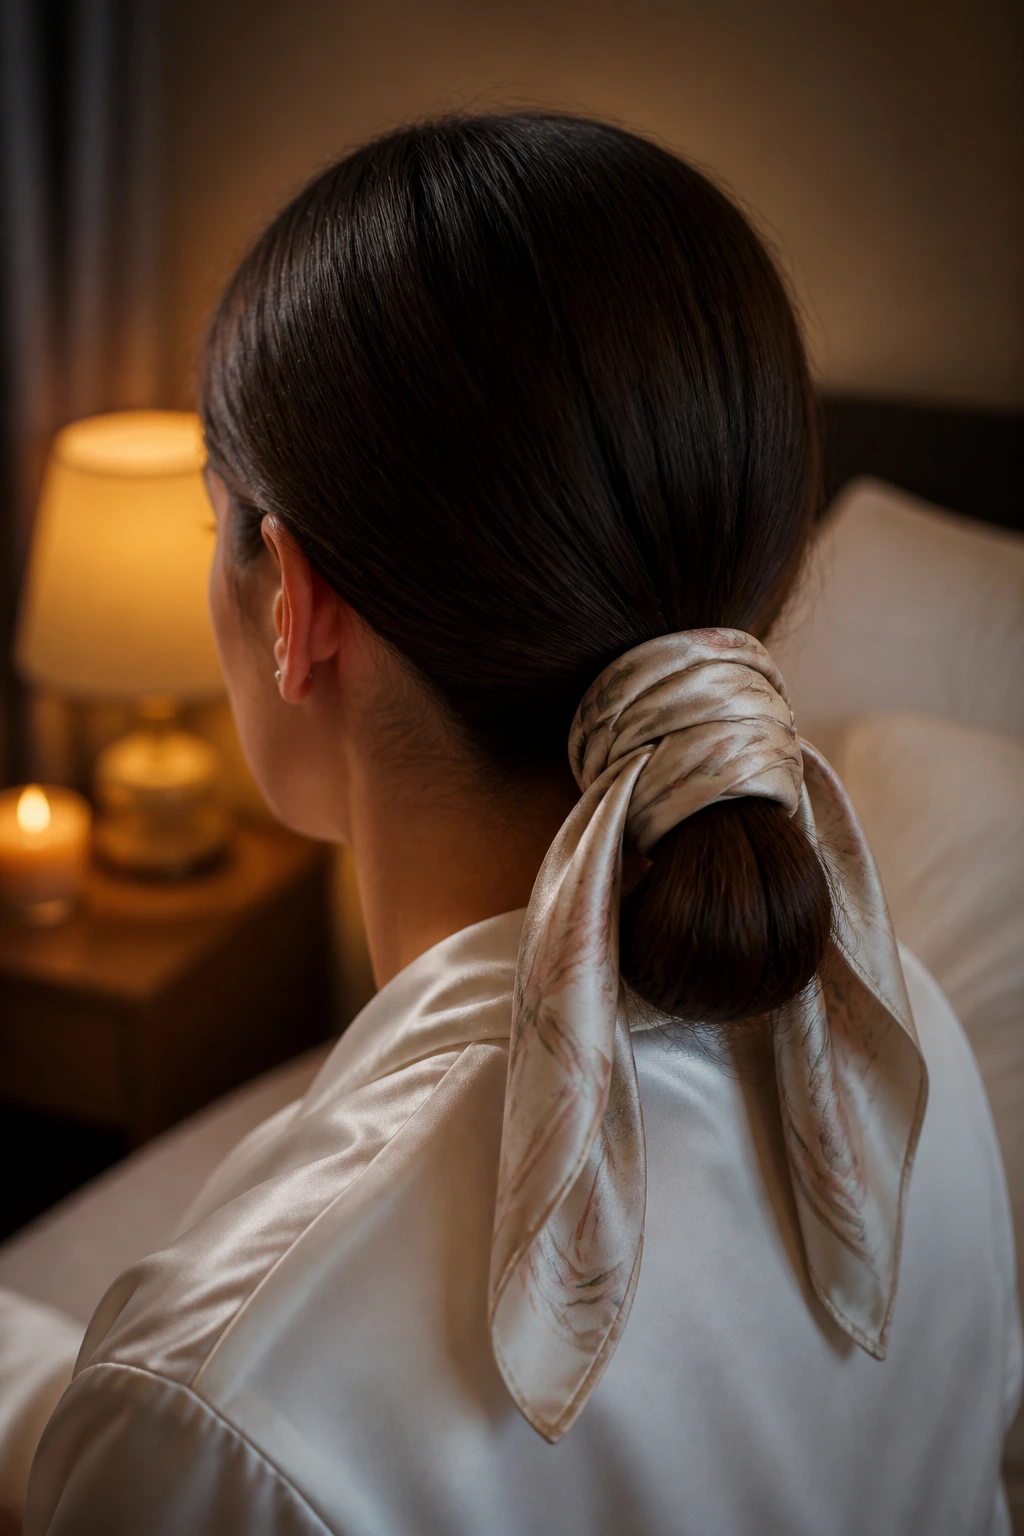
A sleek low ponytail usually survives a full day well, but sleeping on it is another matter. If you want the style to last into the next morning, wrap the pony loosely in a silk scarf or sleep on a silk pillowcase so the crown doesn’t fray against cotton. That’s the difference between waking up with a smooth shape and waking up with a fuzzy ridge where the part used to be.
The next-day refresh is simple. Smooth the hairline with damp hands or a tiny bit of leave-in spray, press the crown flat again with a brush, and check the elastic. If the ponytail has shifted, re-anchor it with one hidden pin instead of tearing the whole thing down and starting over. The less you disturb the surface, the cleaner it stays.
If the ends have gone dry, a drop of serum on the mid-lengths is enough. Don’t drench them. The style should still look clean, not newly oiled.
Frequently Asked Questions
How do I make a sleek low ponytail stay smooth in humidity?
Use a light anti-frizz cream before brushing the hair back, then seal the surface with flexible hairspray. Humidity usually attacks the hairline first, so smoothing that area well matters more than coating the whole ponytail.
Can I do this style on second-day hair?
Yes, and sometimes it holds better on second-day hair because there’s a little grit at the roots. A quick mist of water or leave-in spray at the crown helps the top lay flat again without soaking the length.
What’s the best part for a low ponytail, center or side?
Center parts look sharper and more modern; side parts soften the face and can feel easier if your hair naturally falls that way. Pick the one that suits your face shape and the clothes you’re wearing, because the part changes the mood fast.
How do I hide short layers that keep slipping out?
Use a small amount of styling cream on the loose pieces, then pin them under the pony before you secure the elastic. If the layers are very short, a tiny barrette near the nape can help keep them in place without being visible.
What should I use if my hair is very fine?
Light mousse, root spray, or dry shampoo works better than heavy cream. Fine hair needs grip and support, not weight, or the ponytail will slide down and flatten out.
Can natural curls look sleek without straightening everything?
Absolutely. Smooth the crown and edges, then decide whether you want the ponytail itself stretched or curly. A sleek top with a textured tail can look intentional and fresh, and it saves a lot of heat styling.
How tight should the ponytail be?
Secure enough that it won’t slide, but not so tight that it pulls at the scalp or dents the hairline. If your eyes feel tugged or your temples hurt, it’s too tight. That’s your cue.
What’s the easiest way to make the style look more finished?
Wrap a strand around the elastic, or add one accessory like a ribbon or cuff. One clean detail usually does more than extra spray or another round of brushing.
The Clean Finish
A sleek low ponytail doesn’t need to be dramatic to look good. It needs shape, restraint, and a little care at the crown. Once those pieces are in place, the style does what it’s supposed to do: make the face look clear, the neckline look intentional, and the whole silhouette look calmer.
That’s why I keep coming back to it. It works on ordinary days, formal days, and the in-between days when you want your hair under control but still want it to say something. Pick the version that suits your mood, keep the base clean, and let the details do the rest.
