



Bun hairstyles for first communion have a very specific job, and it’s harder than it sounds: they need to look neat in a church pew, stay put through kneeling and hugs, and still feel soft enough for a child who does not want her head pulled into a rigid little helmet. A bun that’s too high starts looking fussy. One that’s too loose starts shedding pins halfway through the photos.
The sweet spot is usually lower than people expect. Close to the nape, clean at the crown, with just enough softness around the edges to keep the face open and gentle. I’ve always preferred buns for this kind of day because they behave well around veils, combs, bows, and flowers. Loose curls can be lovely, but they move. A bun gives the whole style a spine.
There’s also a practical side that matters more than the pretty photos. First Communion hair needs to survive a full morning without constant touching, and a bun does that better than almost anything else. The trick is choosing the right shape for the child’s hair type, hair length, and accessory, then pinning it in a way that won’t make her wince when she turns her head.
Why You’ll Love This Collection
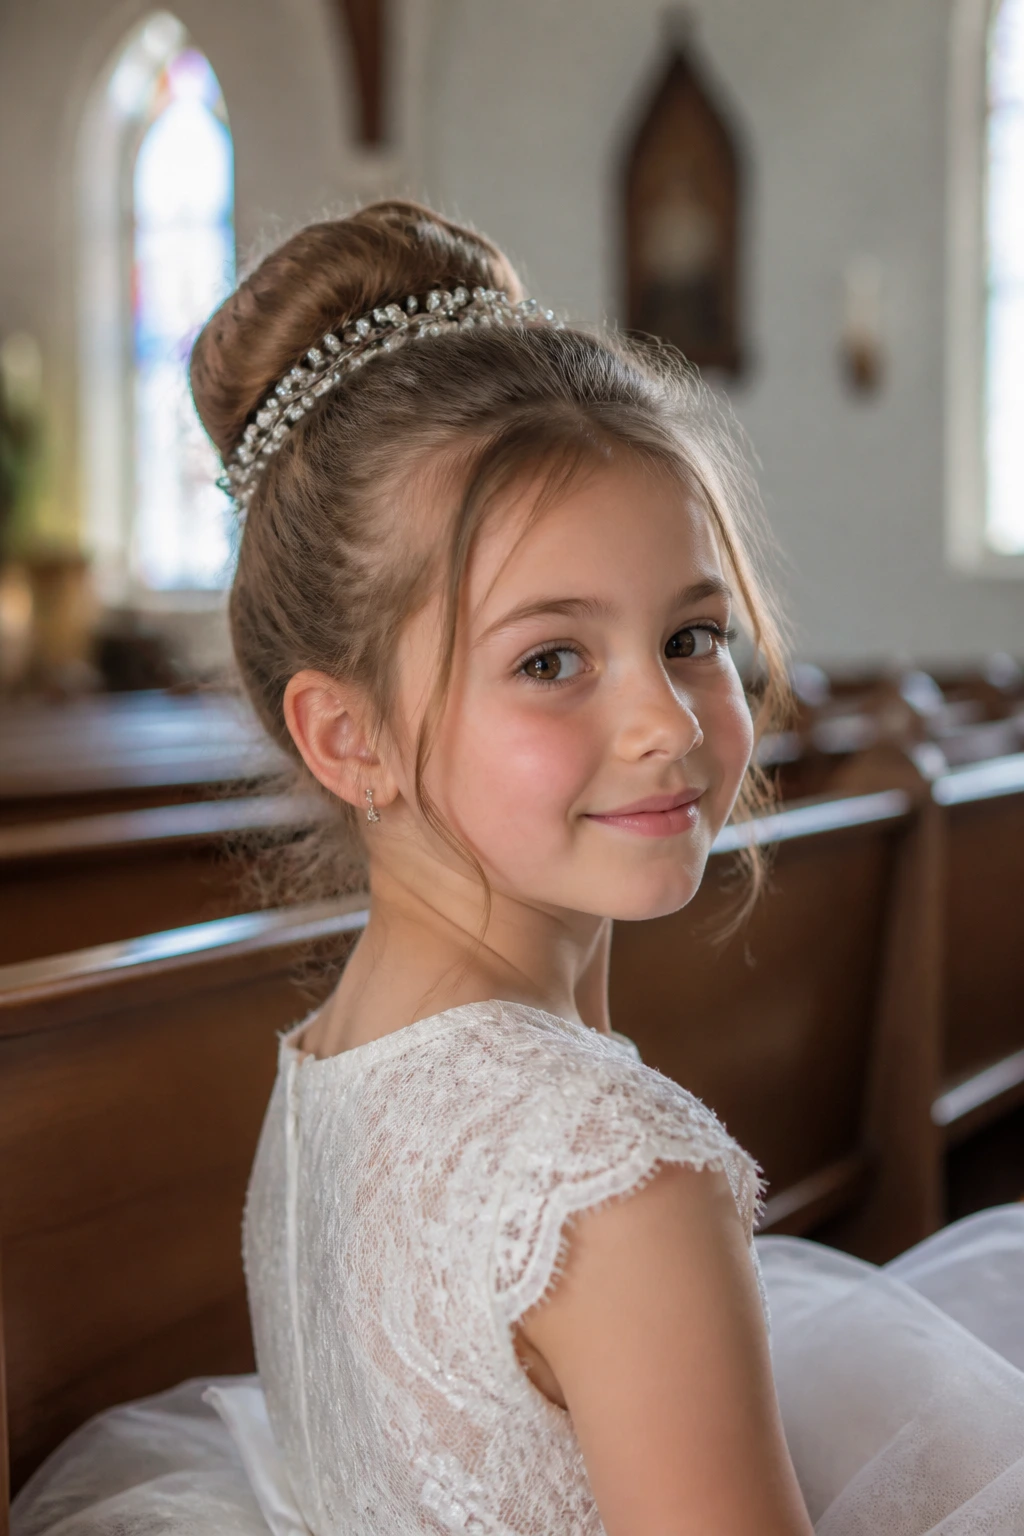
-
Ceremony-proof hold: These styles are built around the nape, the braid, or a wrapped base, so they stay steadier than loose waves when the child bows, turns, or leans in for pictures.
-
Veil-friendly shapes: A bun gives you a clean anchor point for a veil comb, a flower clip, or a small bow without making the accessory fight the hairstyle.
-
Works with real hair, not fantasy hair: Fine hair, thick hair, curly hair, and hair that slips out of everything can all be shaped into a bun if you pick the right structure.
-
Respectful without looking stiff: The best First Communion bun hairstyles feel polished and calm, but they still leave room for softness around the hairline and ears.
-
Easy to scale up or down: A small child with thin hair does not need the same bun size as a ten-year-old with long, dense hair, and these styles account for that.
-
Quick to retouch: A loose pin, a mist of hairspray, or one extra bobby pin at the base usually fixes the problem fast.
1. Smooth Low Chignon
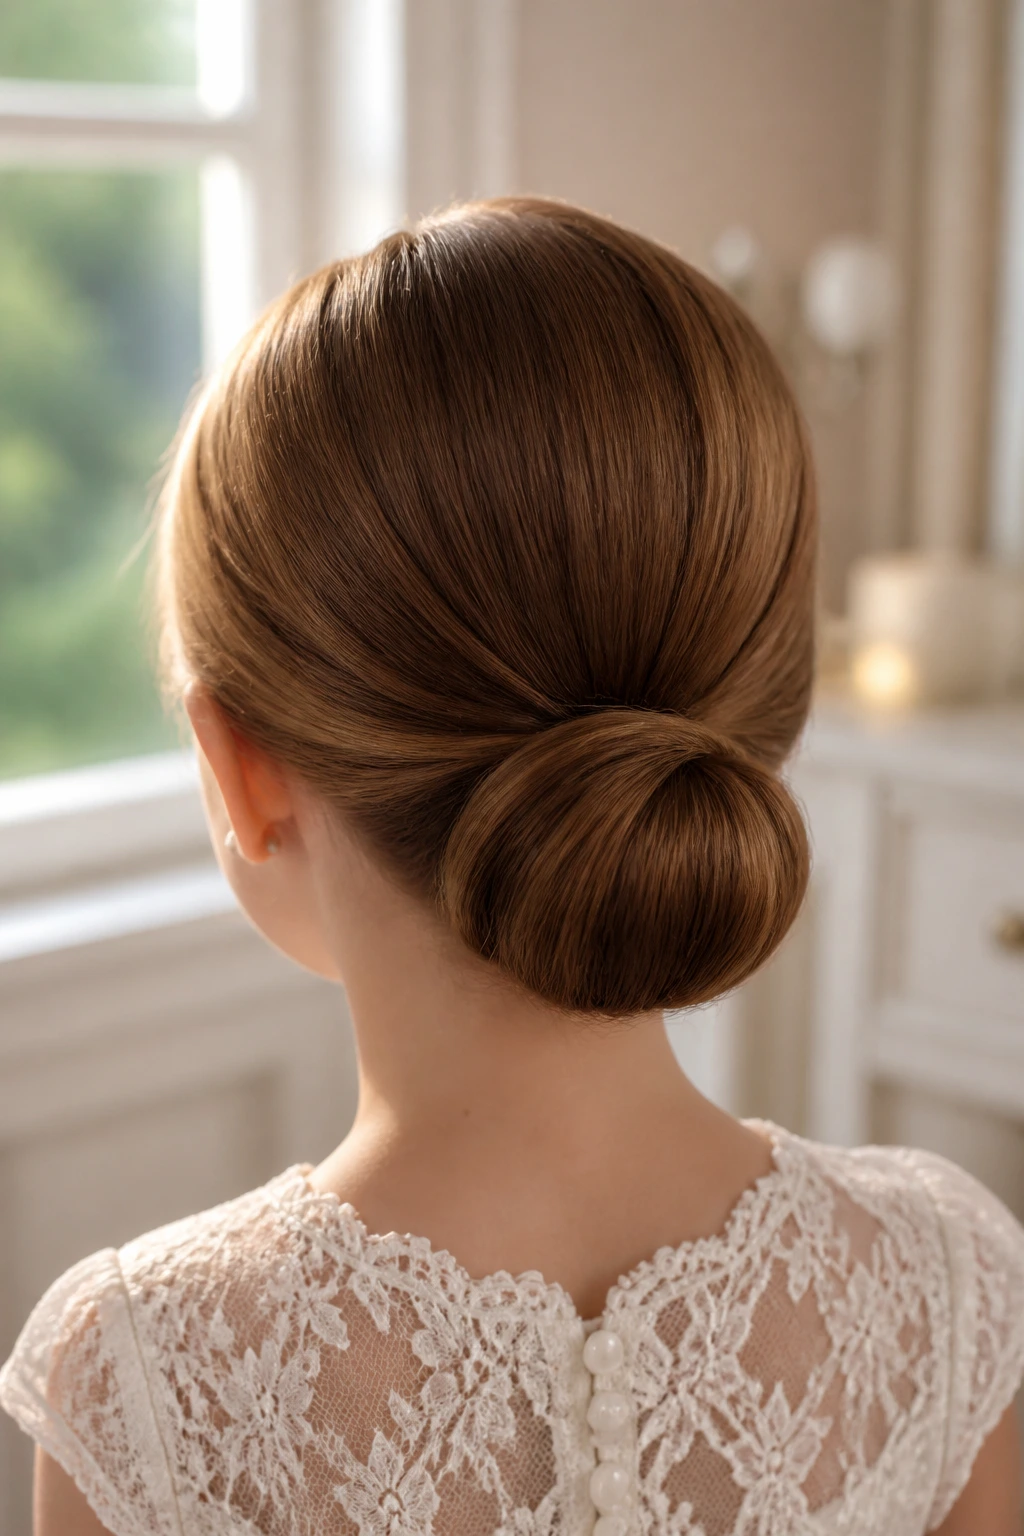
A smooth low chignon is the style I reach for when the dress already has lace, a tidy collar, or a veil that deserves to sit quietly instead of competing with the hair. The bun rests right at the nape, so it looks calm from the front and finished from behind.
What makes it work is the control. A clean center part or a soft side part, a little smoothing cream on the crown, and four to six pins crossed through the base keep the shape from shifting. If the child has fine hair, a tiny bun pad helps the shape read clearly in photos. If the hair is thick, flatten the base first and the bun stops looking bulky.
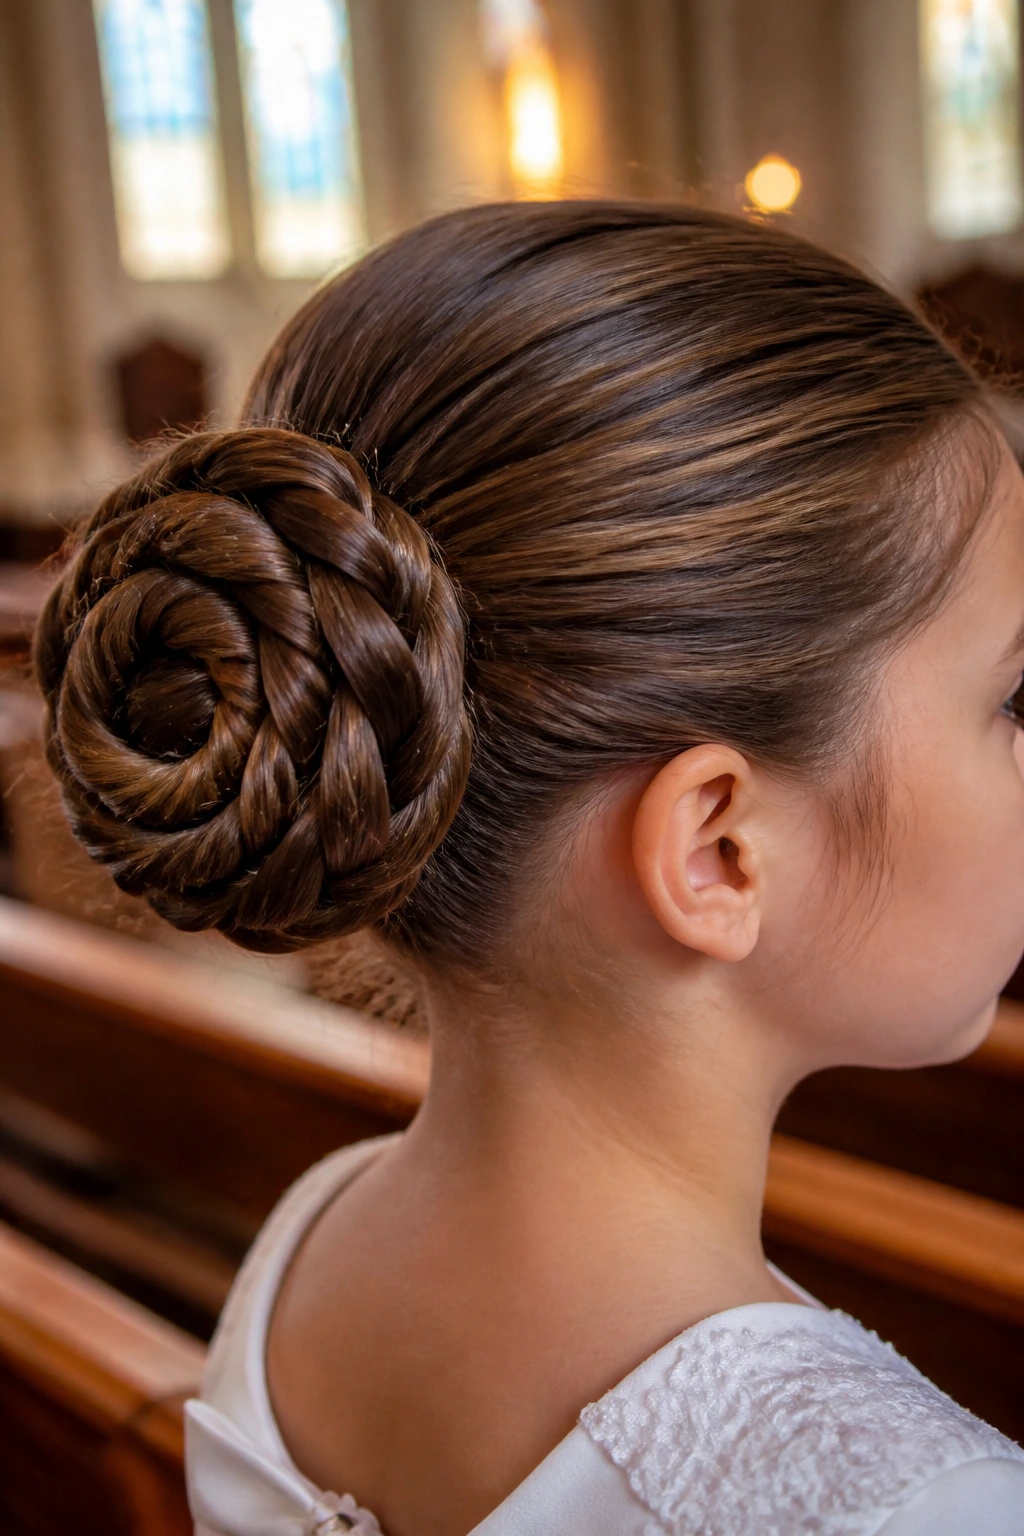
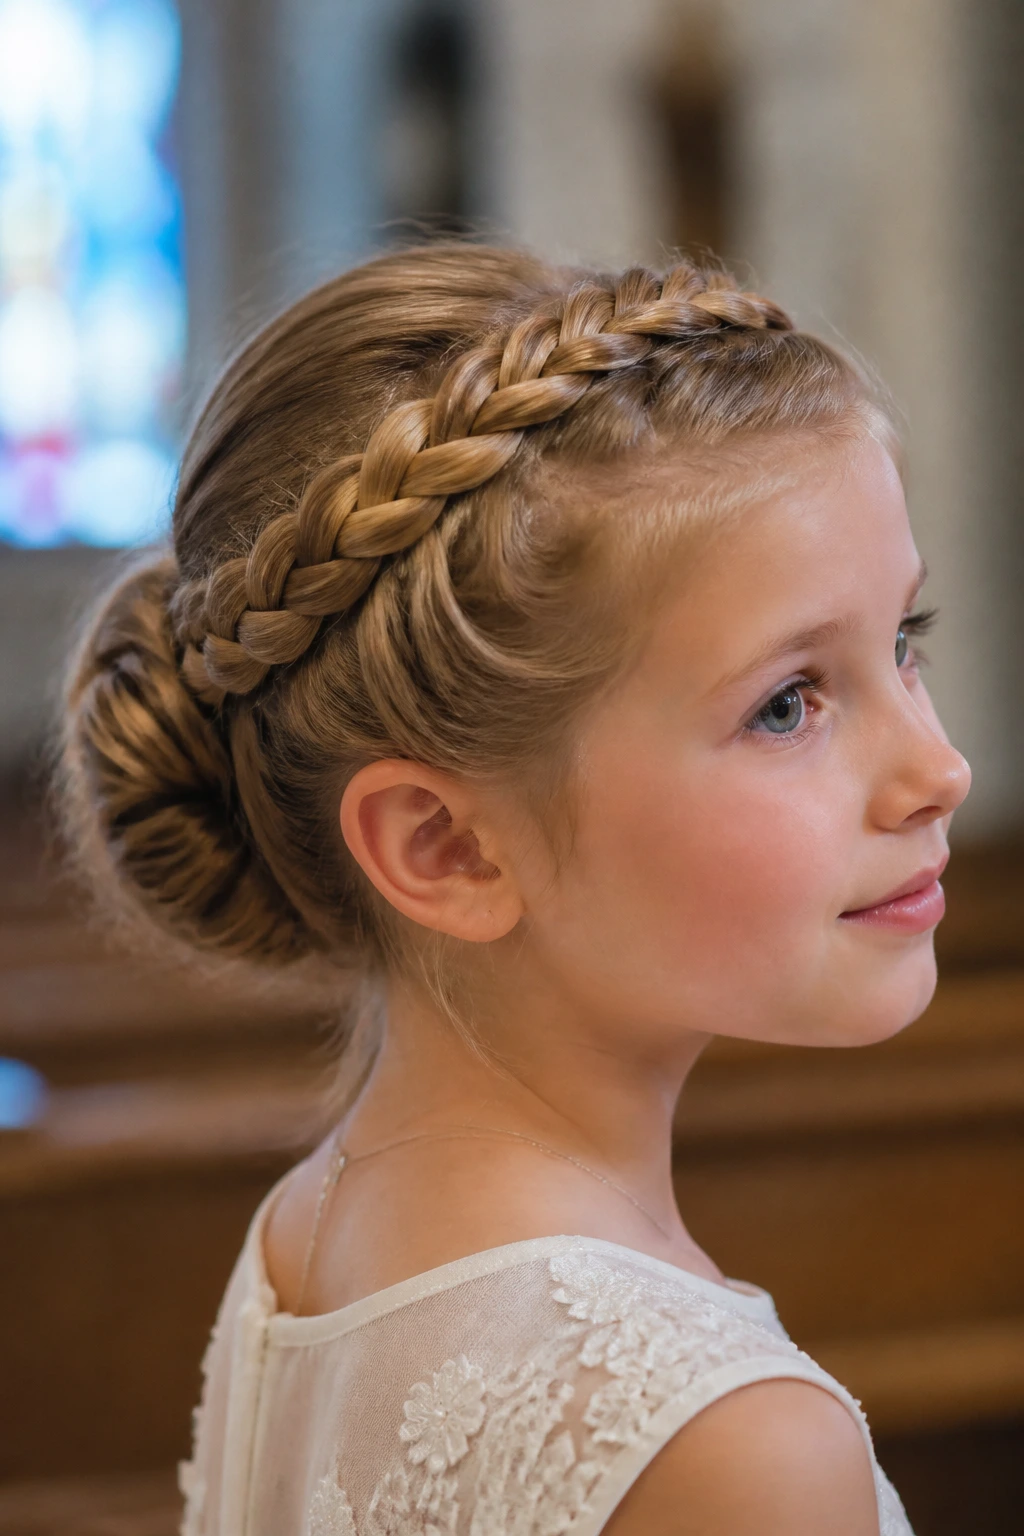
2. Braided Crown Bun
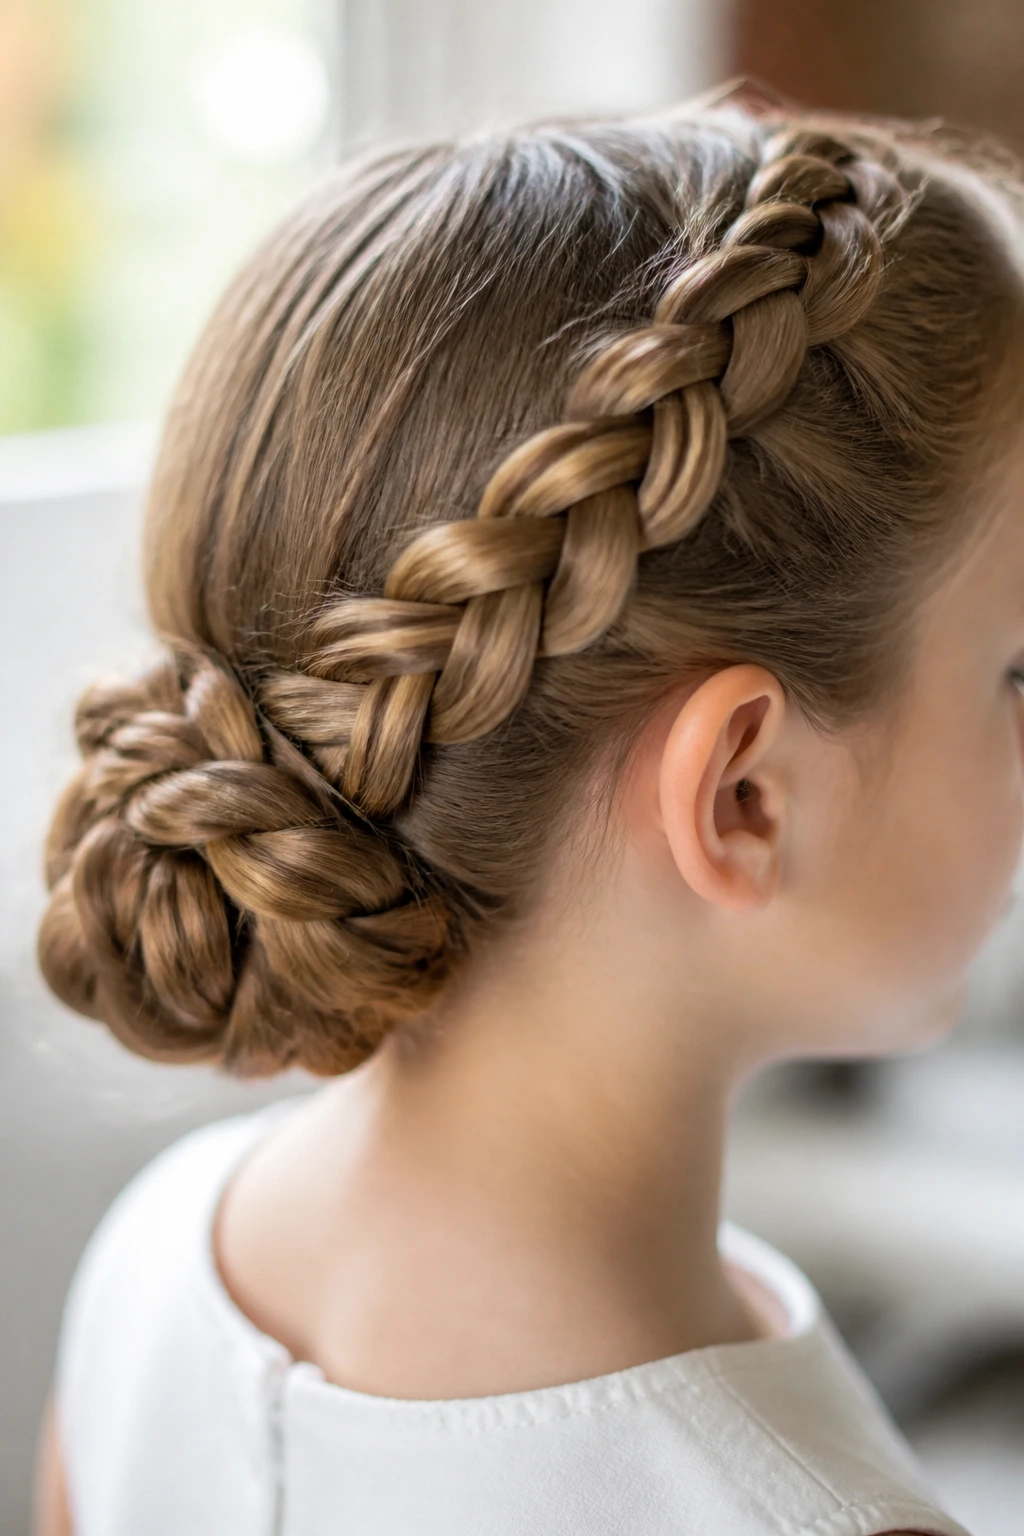
A braided crown bun has a little more detail, but it still stays respectful and sweet. The braid wraps from one side of the head toward the back, where it disappears into a low bun, so the style looks decorative without getting loud.
The braid adds grip, which is the part parents tend to appreciate once the hair has to last through a long morning. It also keeps shorter layers tucked in better than a plain twist. I like this one with a single pearl pin or a tiny flower comb tucked just above the bun. Too many extras spoil it.
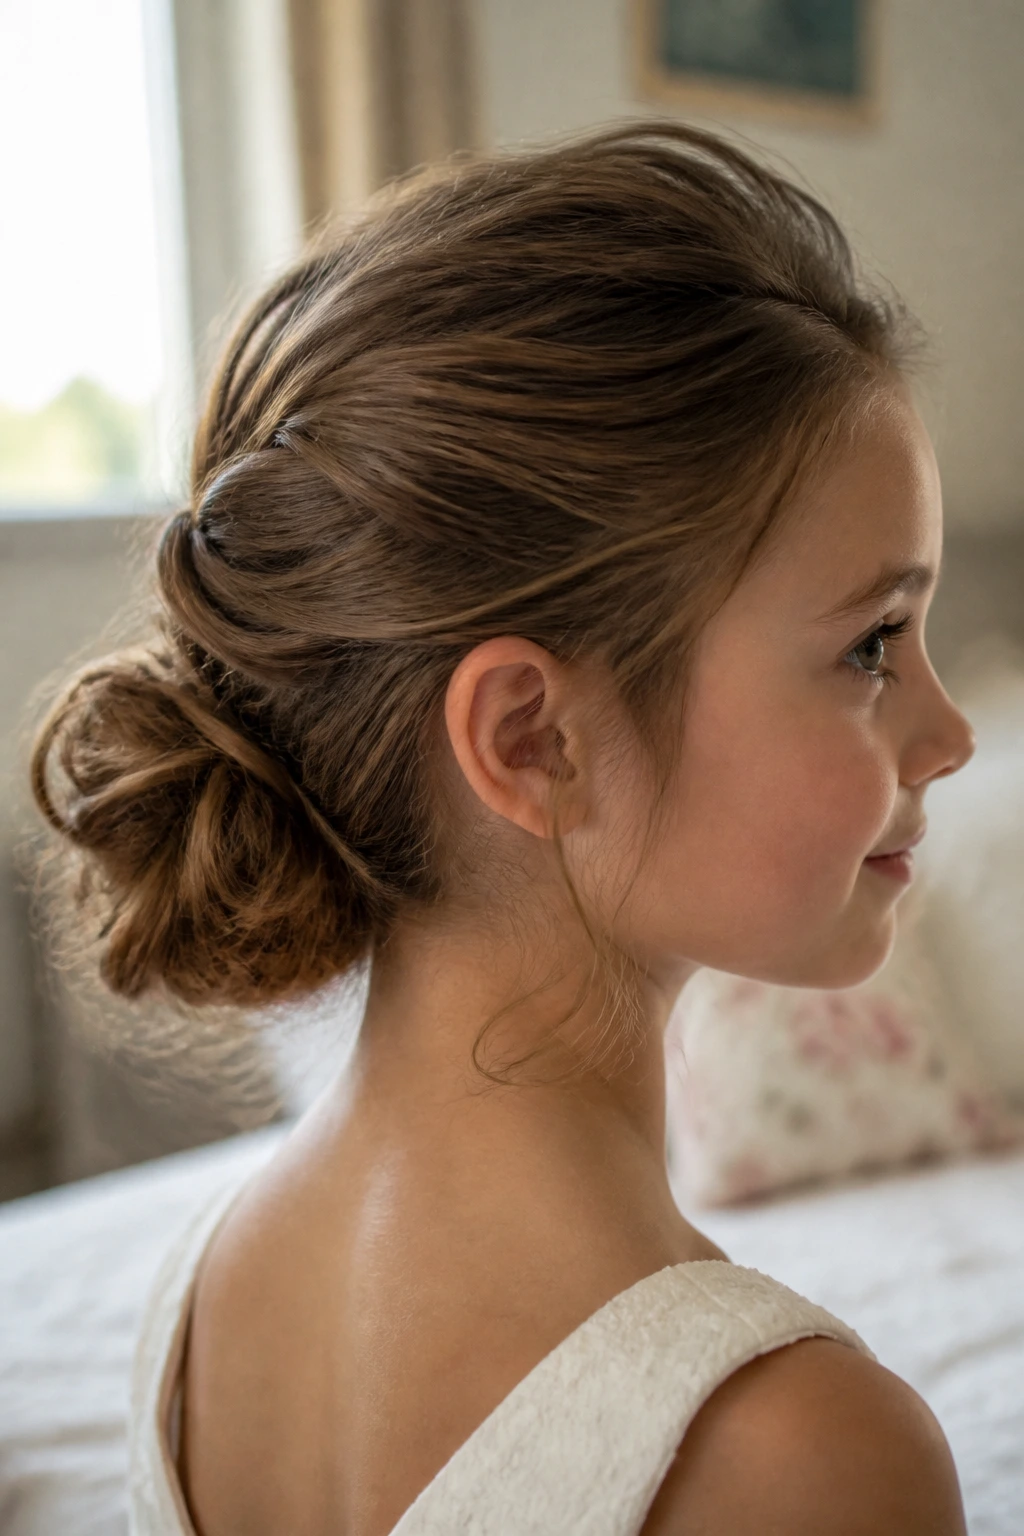
3. Side-Twist Bun
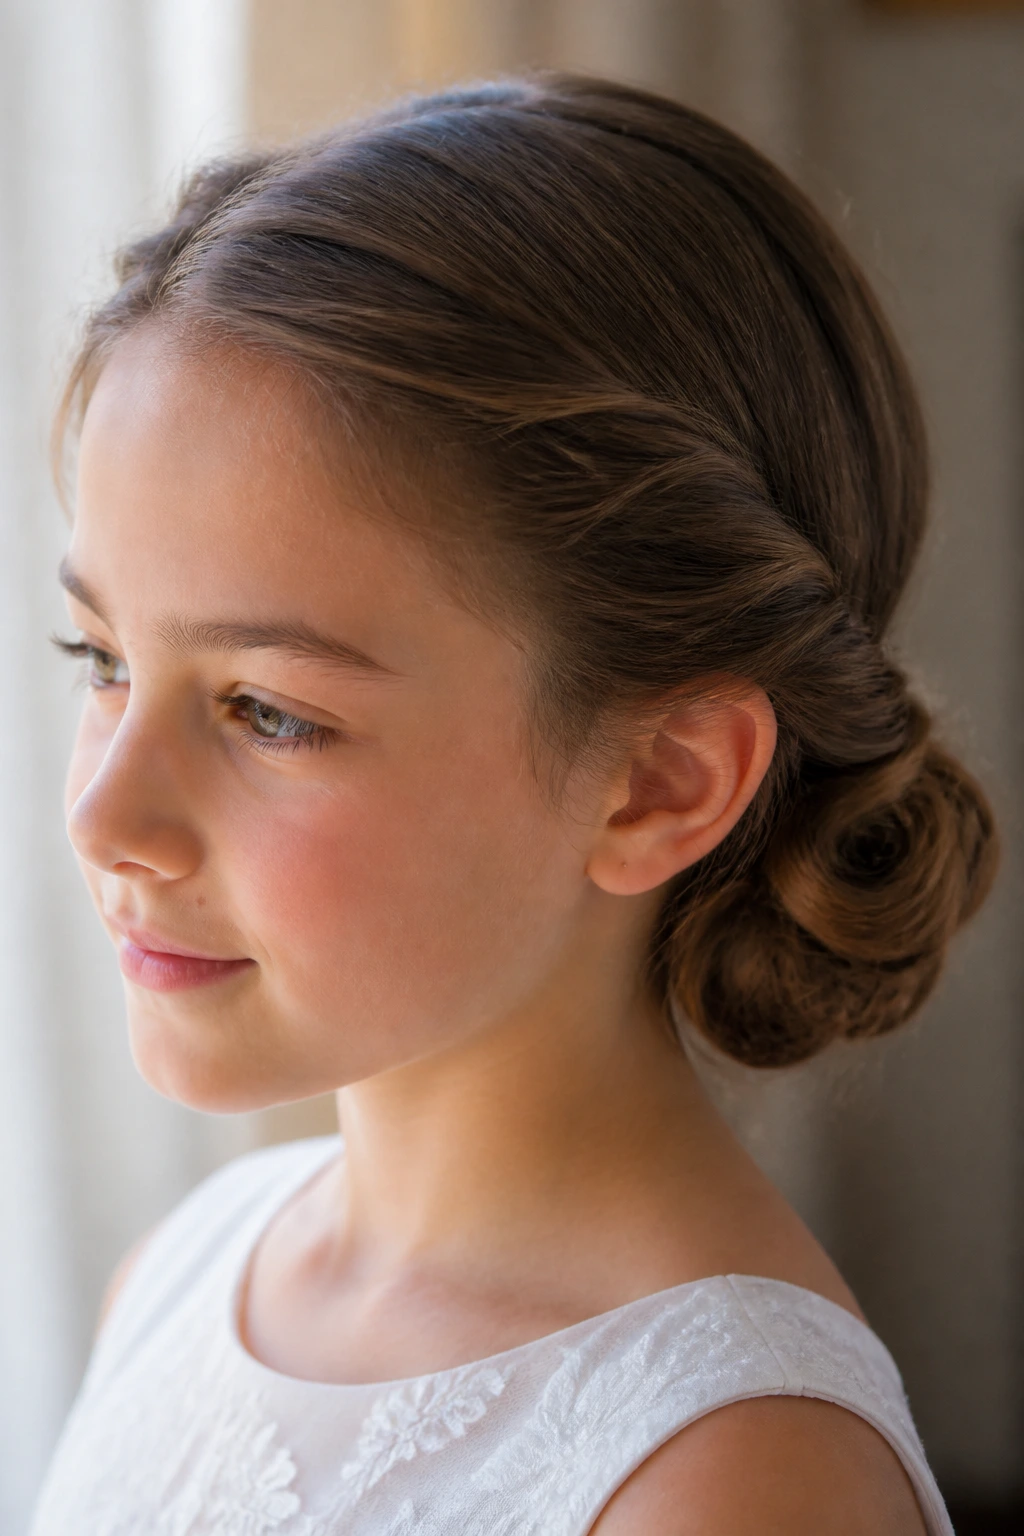
Not every First Communion bun has to sit dead center. A side-twist bun gives the style a softer line by guiding the hair from one side of the part into a low knot just behind the ear or at the nape.
That slight shift changes the whole feel. It can soften a round face, and it works especially well when the child has a side part already or wants one small accessory on the heavier side of the bun. Keep the twist smooth, but don’t sandblast every strand into place; a little softness at the hairline keeps it from looking severe.
4. Sleek Ballet Bun
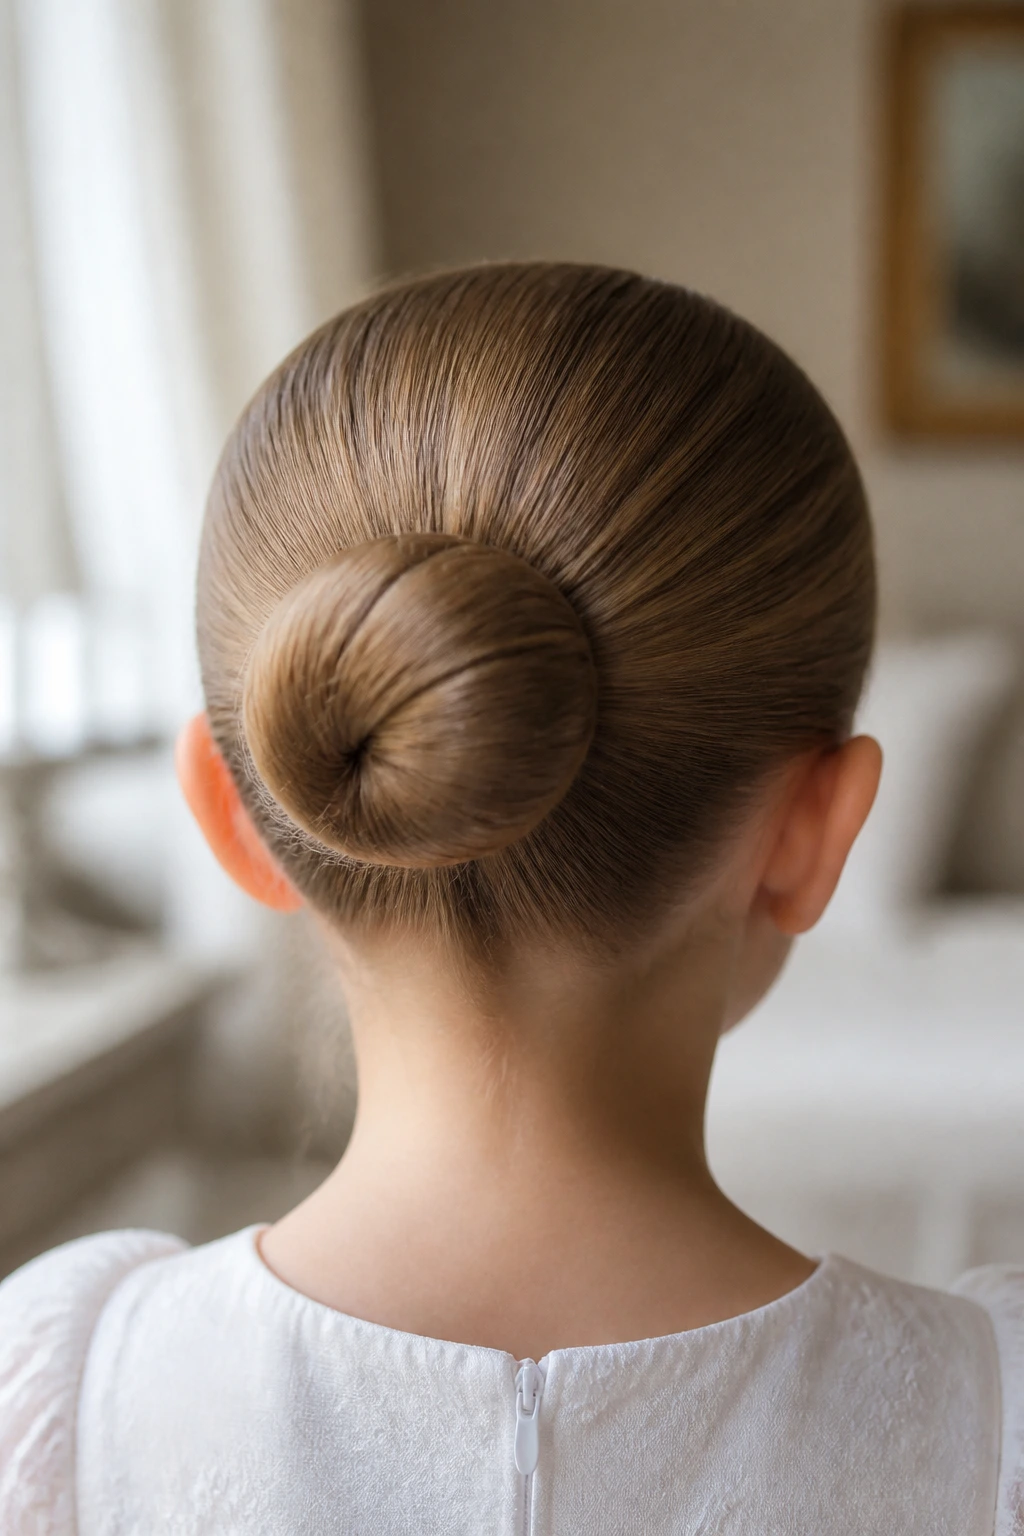
This is the polished cousin of the dance bun. A sleek ballet bun sits cleanly at the back of the head, with the crown smoothed flat and the bun wrapped tight enough to hold its shape without puffing out.
Why it’s such a good match
- Best for fine hair: A small donut or bun filler gives the bun more body without making it look oversized.
- Best with centered accessories: A veil comb or a small bow sits nicely right above the knot.
- Best when the dress is detailed: If the dress has embroidery, lace sleeves, or a busy hem, the hair can stay quiet.
Use a tail comb, a light gel, and a fine mist of hairspray at the end. That’s enough. Heavy product makes the hair look stiff in church light, and there’s no reason to go there.
5. Soft Floral Bun
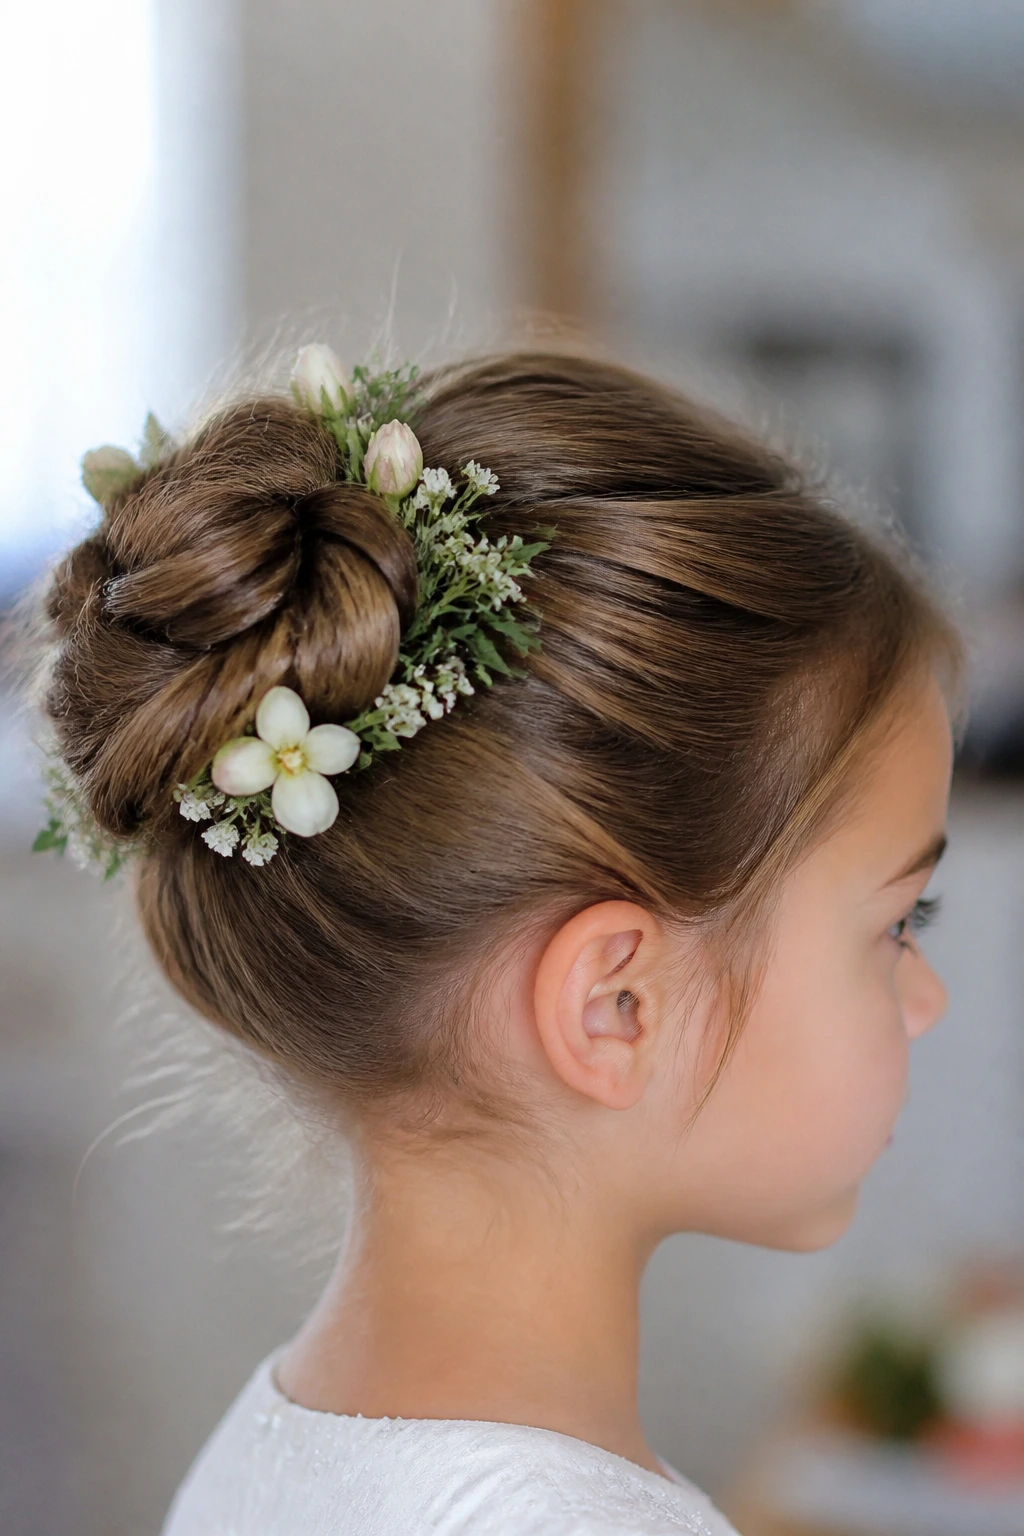
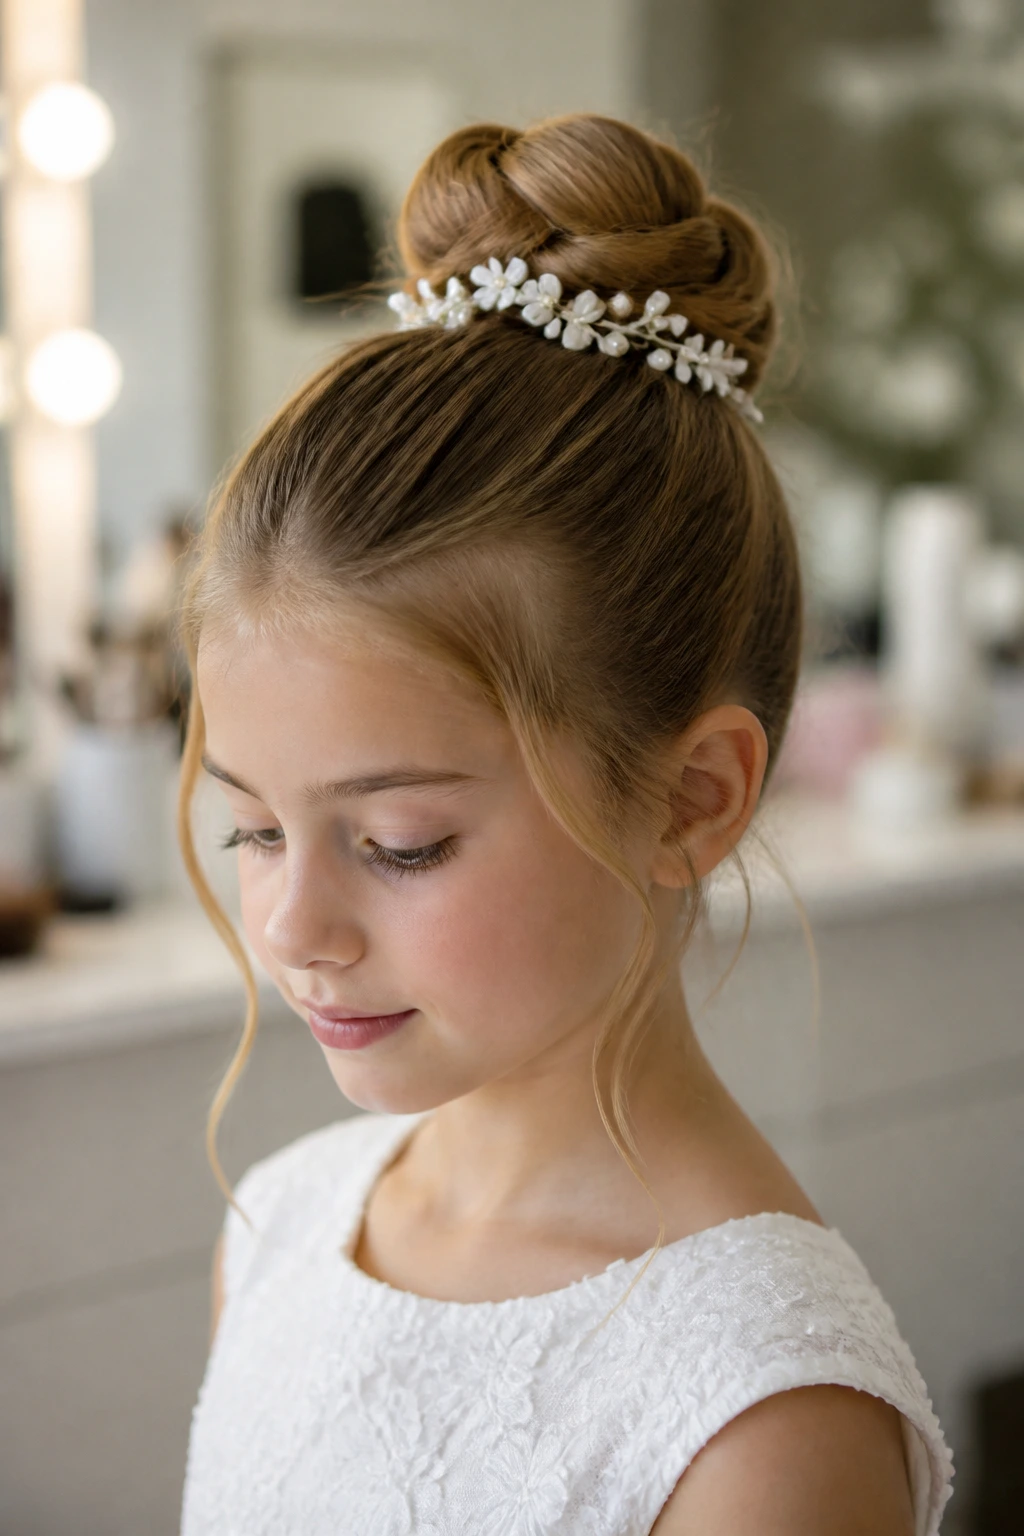
A few tiny flowers can turn a plain bun into something that feels ceremonial without drifting into wedding territory. I like this most when the bun itself is simple and the flowers do the talking.
Baby’s breath, spray roses, or a very small cluster of silk blooms all work, but the trick is restraint. Pin the flowers low and close to the bun so they look woven in, not perched on top like an afterthought. Fresh blooms need wire or floral tape around the stems; otherwise they droop halfway through the day, and that’s never as charming as people hope.
6. Double-Twist Knot
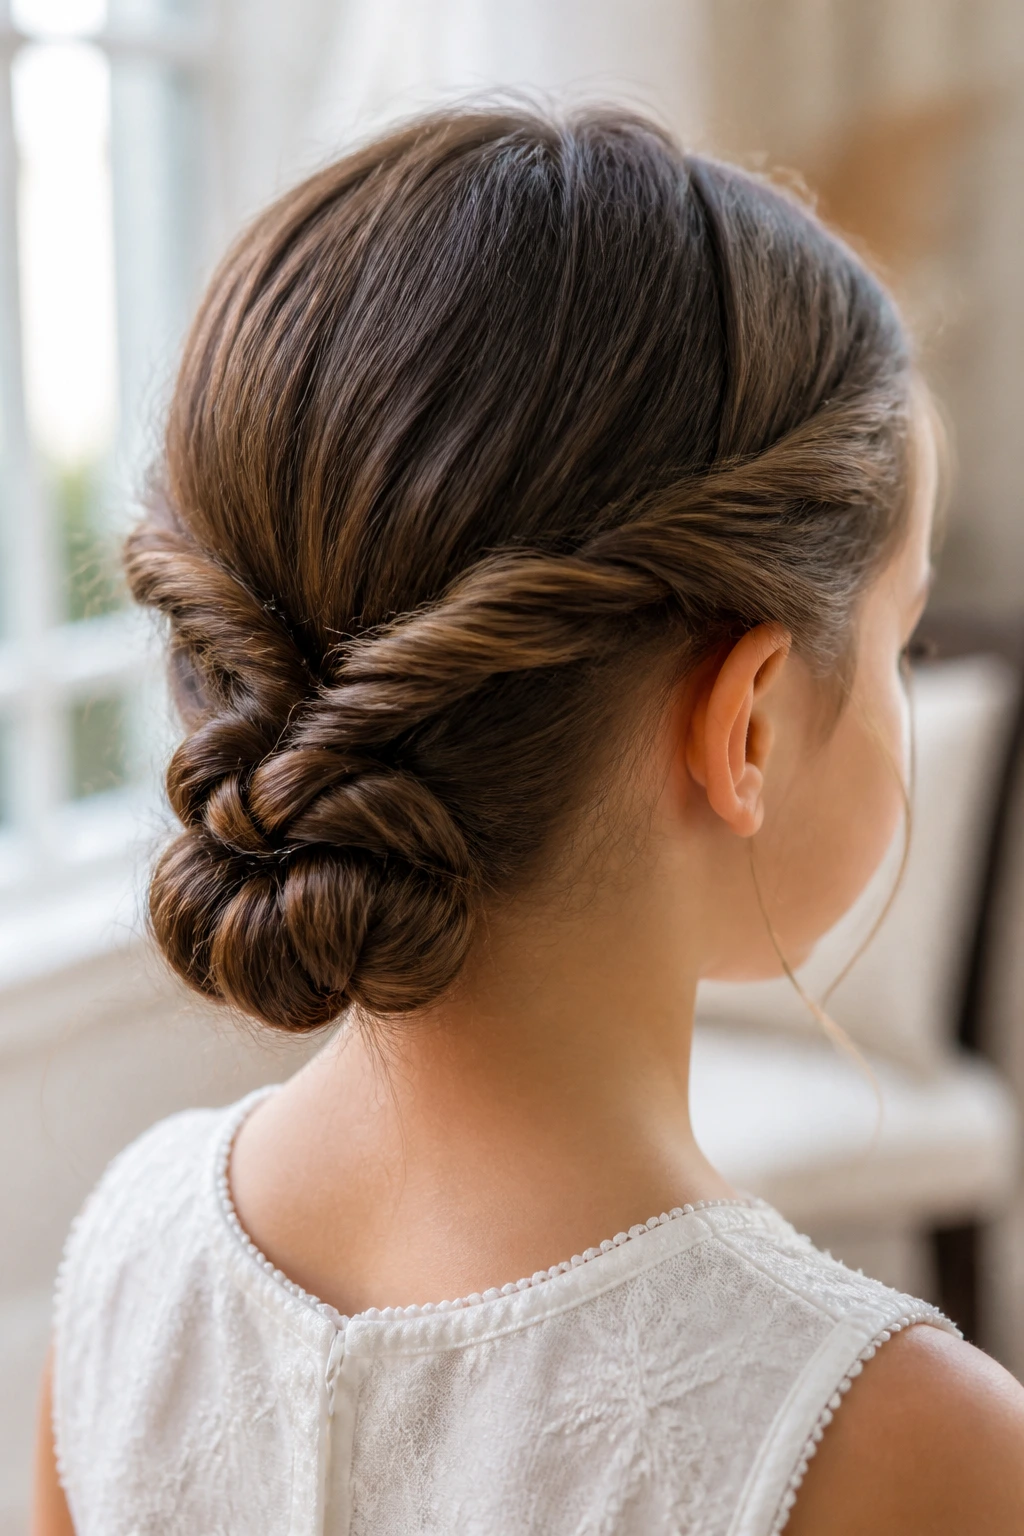
If the hair keeps splitting into layers, use two twists instead of one. A double-twist knot starts with the hair divided into two sections that are twisted separately, then wrapped together into a low bun.
It feels tidy, but not flat. The twists give the style enough texture to hold on slippery hair, and they’re forgiving when the child has layers that want to poke out at the ends. I like this one for medium-length hair that doesn’t quite have enough length for a big bun, because the twist structure makes the hair look fuller than it really is.
7. Ribbon-Wrapped Bun
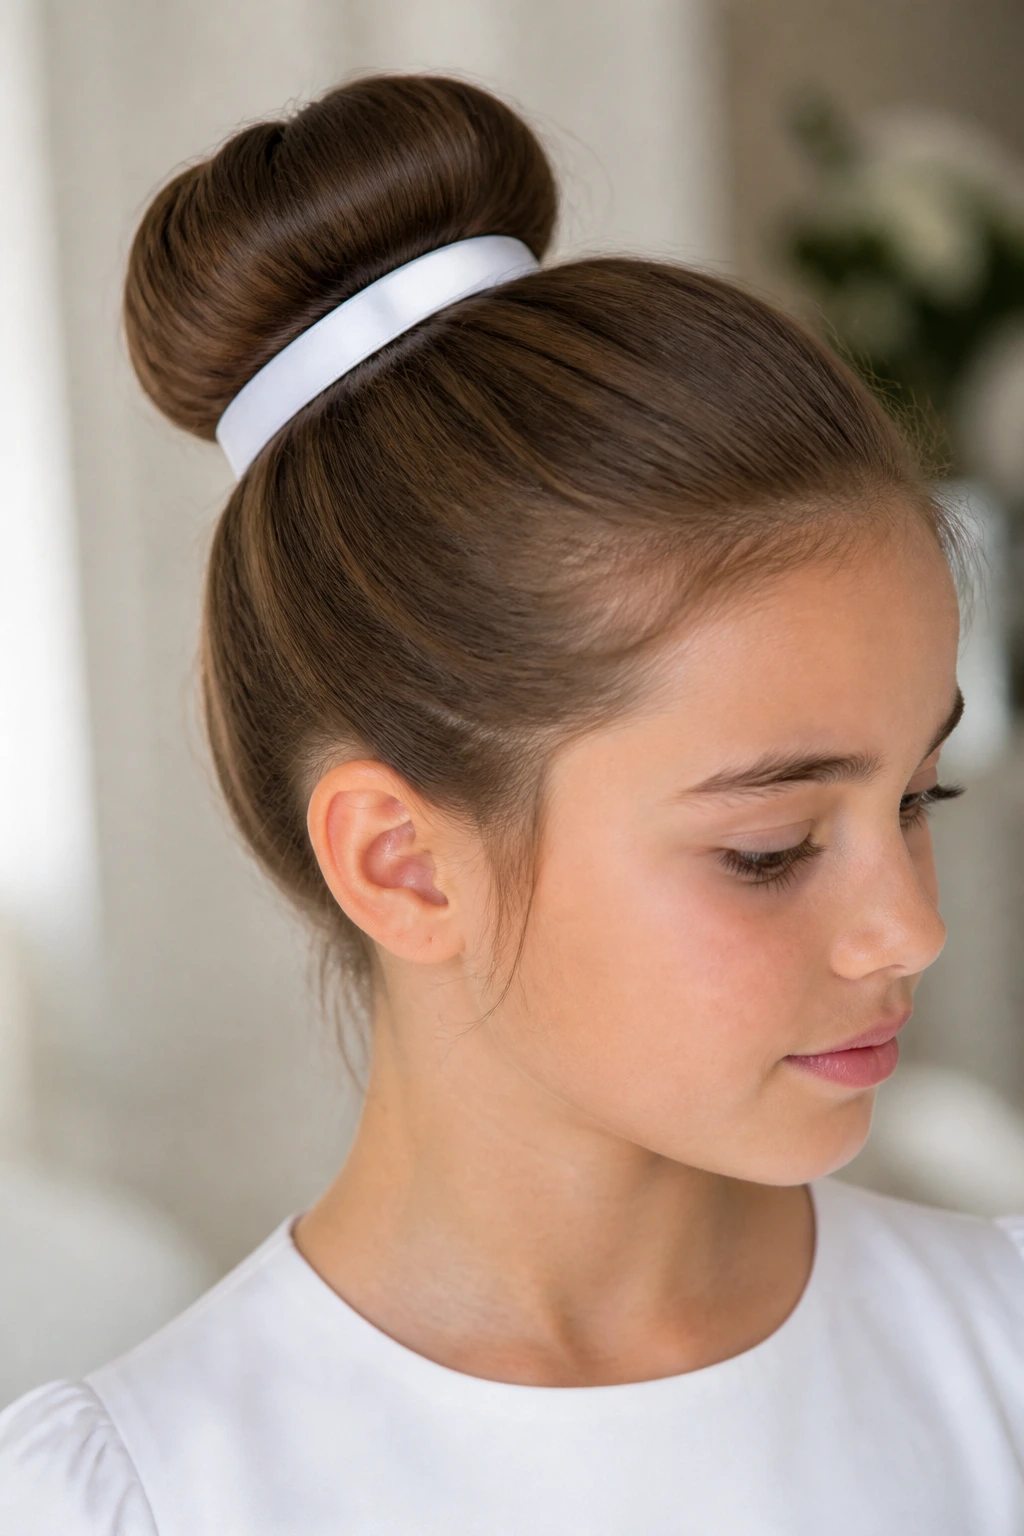
A ribbon-wrapped bun is one of those styles that looks sweet in the cleanest possible way. The ribbon does not need to dominate the hair; it just needs to echo the dress, the sash, or the color in the bouquet.
- Use a 1/4-inch to 1/2-inch satin ribbon so it lies flat.
- Tie or pin the ribbon under the bun first, then wrap it once or twice around the base.
- Hide the ends beneath the coil with two bobby pins.
I prefer matte satin over shiny plastic ribbon. It sits better in daylight and does not make the bun look like a gift box, which is the wrong mood entirely.
8. Curled Donut Bun
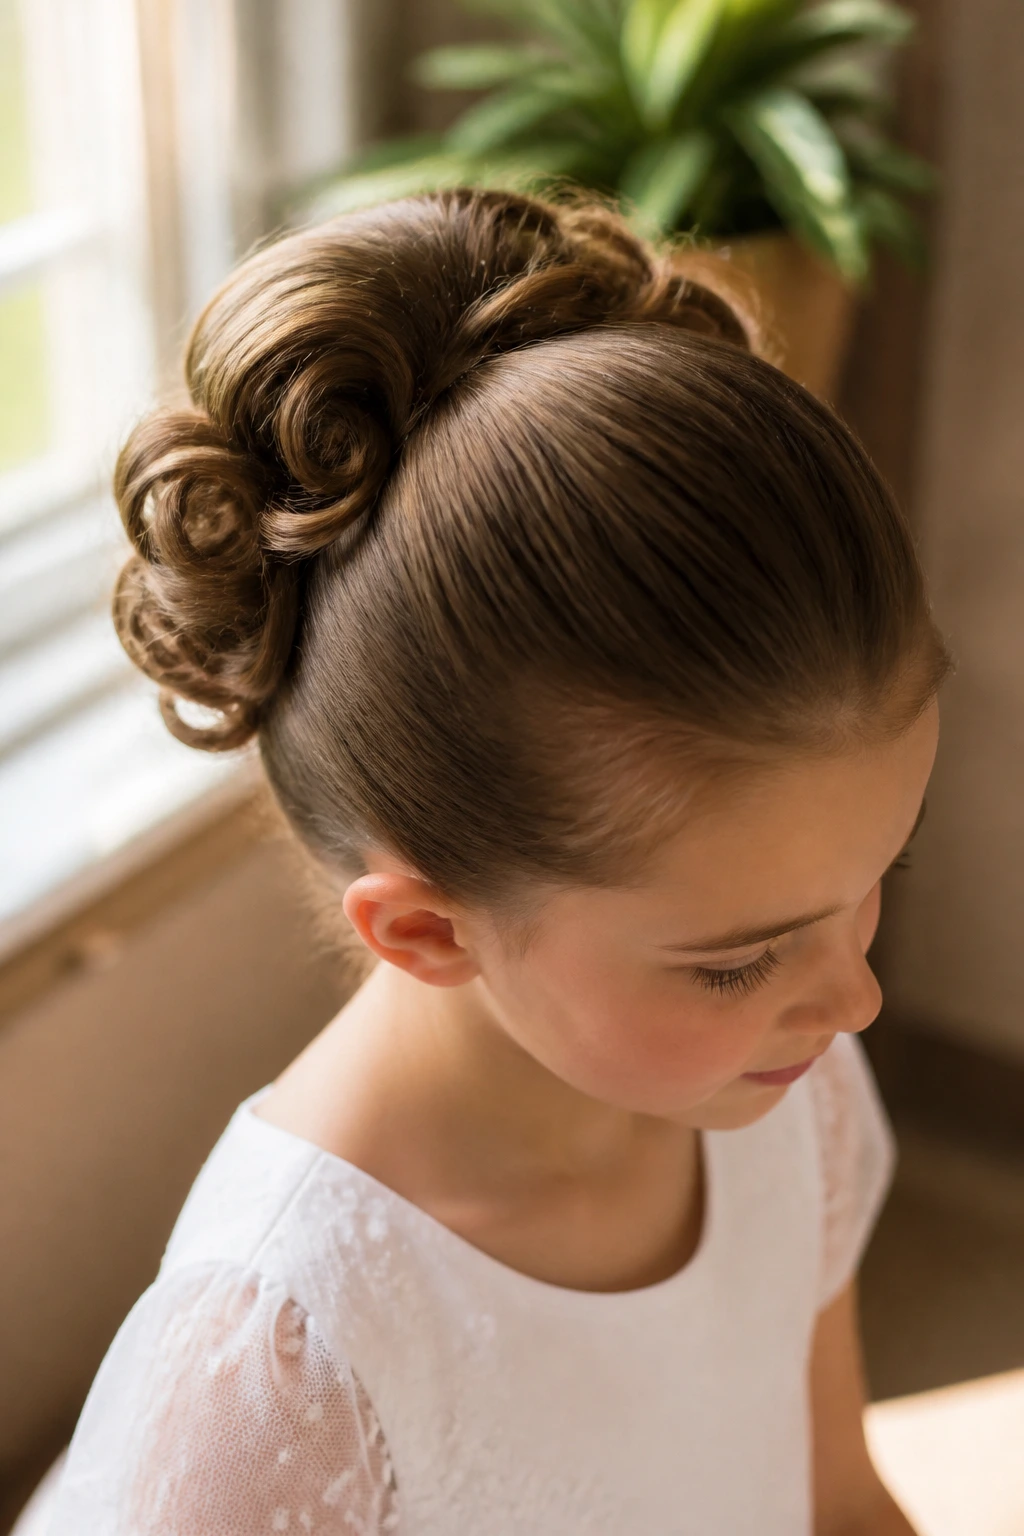
Curled ends give a donut bun a little more life. Instead of smoothing the hair into one plain loop, you curl the ends with a 3/4-inch or 1-inch iron, then pin them around the donut so the bun looks soft at the edges.
This works especially well on medium or longer hair because the curl pattern hides the joins. It’s also useful when the hair is fine but not too short, since the donut gives the bun a shape that doesn’t collapse the second the child sits down. Keep the top smooth and the bun low. The whole point is control with a bit of softness, not a puffy cloud.
9. Halo Braid Bun
A halo braid bun reads special the second you see it, but it still feels calm enough for church. A braid runs around the head like a crown, then gathers into a small bun at the back.
The braid is the part that does the heavy lifting. It gives the style a frame and helps keep shorter layers tucked in. Keep the halo low and flat so it won’t press awkwardly under a veil or headpiece. If the braid starts too high, the style can get bulky fast. That’s the line to avoid.
10. Textured Low Knot
Some children hate the feeling of hair plastered flat to the scalp, and this is the answer. A textured low knot uses a little mousse or dry shampoo at the roots, then a soft backcomb at the crown before the hair is gathered into a knot.
The surface stays neat, but it has enough grip to hold on straight or silky hair. I like this version when the hair tends to slide out of pins, because the texture gives the bobby pins something to catch. Leave the nape smooth, though. If the whole thing turns rough, the style stops feeling deliberate and starts looking unfinished.
11. Mini Bun with Face-Framing Pieces
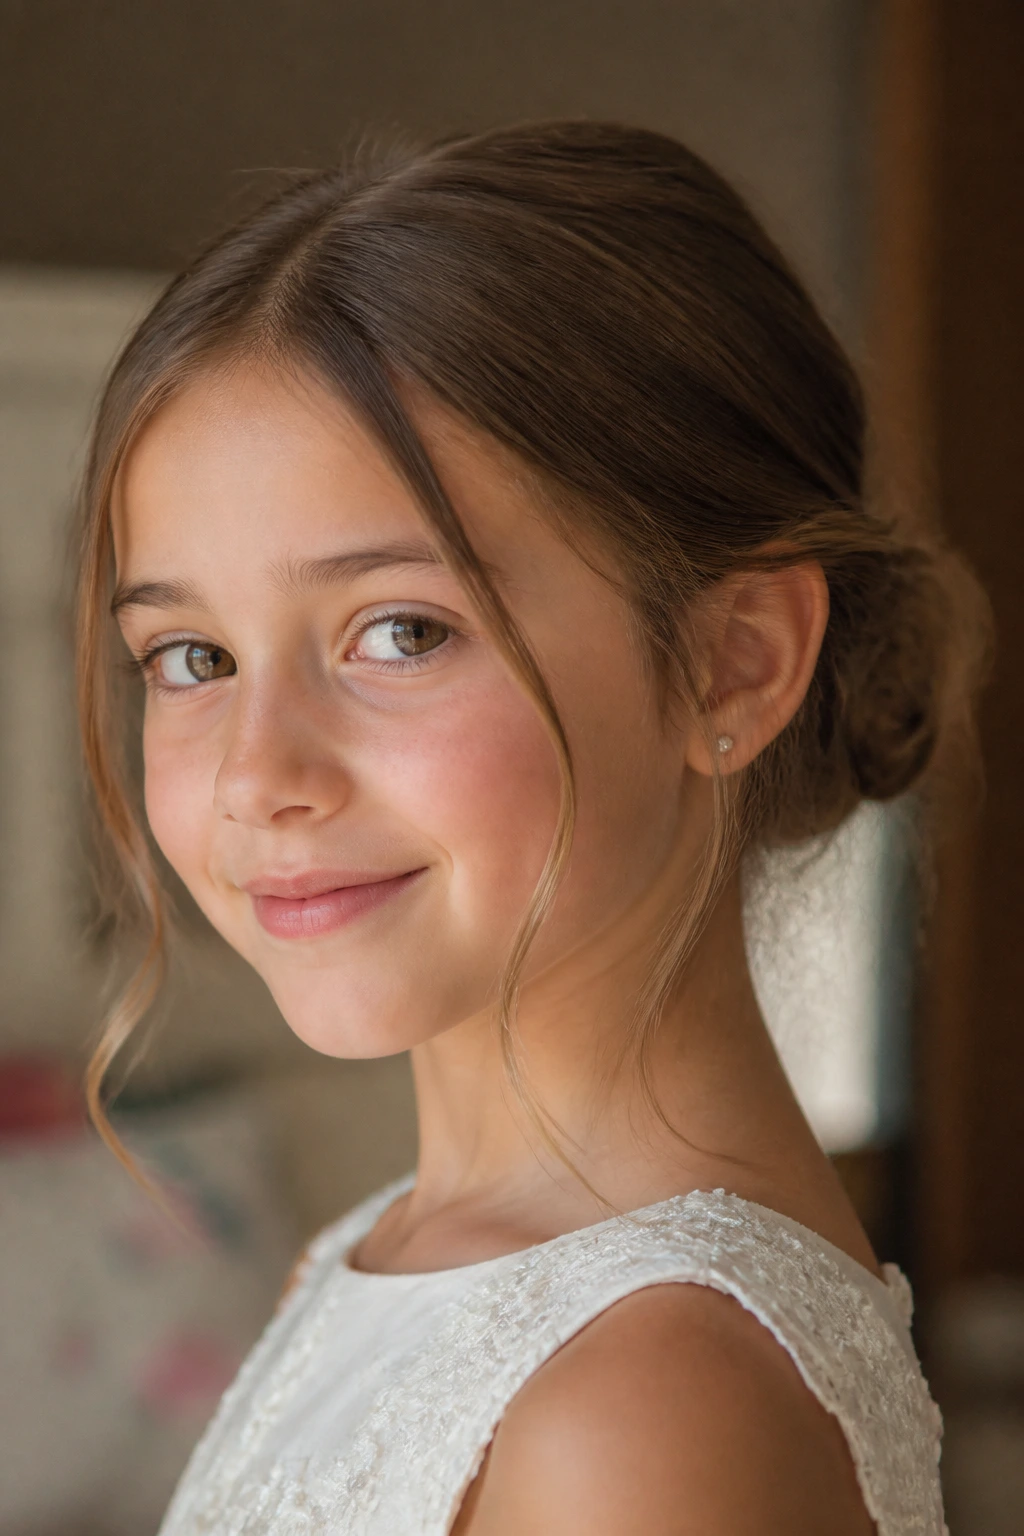
This one is gentler, and younger girls often wear it well. The bun itself stays small and low, while two thin pieces are left at the front and curled softly around the cheeks.
Those face-framing pieces should be short enough to stay out of the mouth and soft enough not to feel like a costume. I’d curl them with a 1/2-inch iron or a small hot brush, then touch them with a bit of hairspray so they don’t frizz into little ropes. The bun remains the anchor; the loose pieces just give the style a warmer edge.
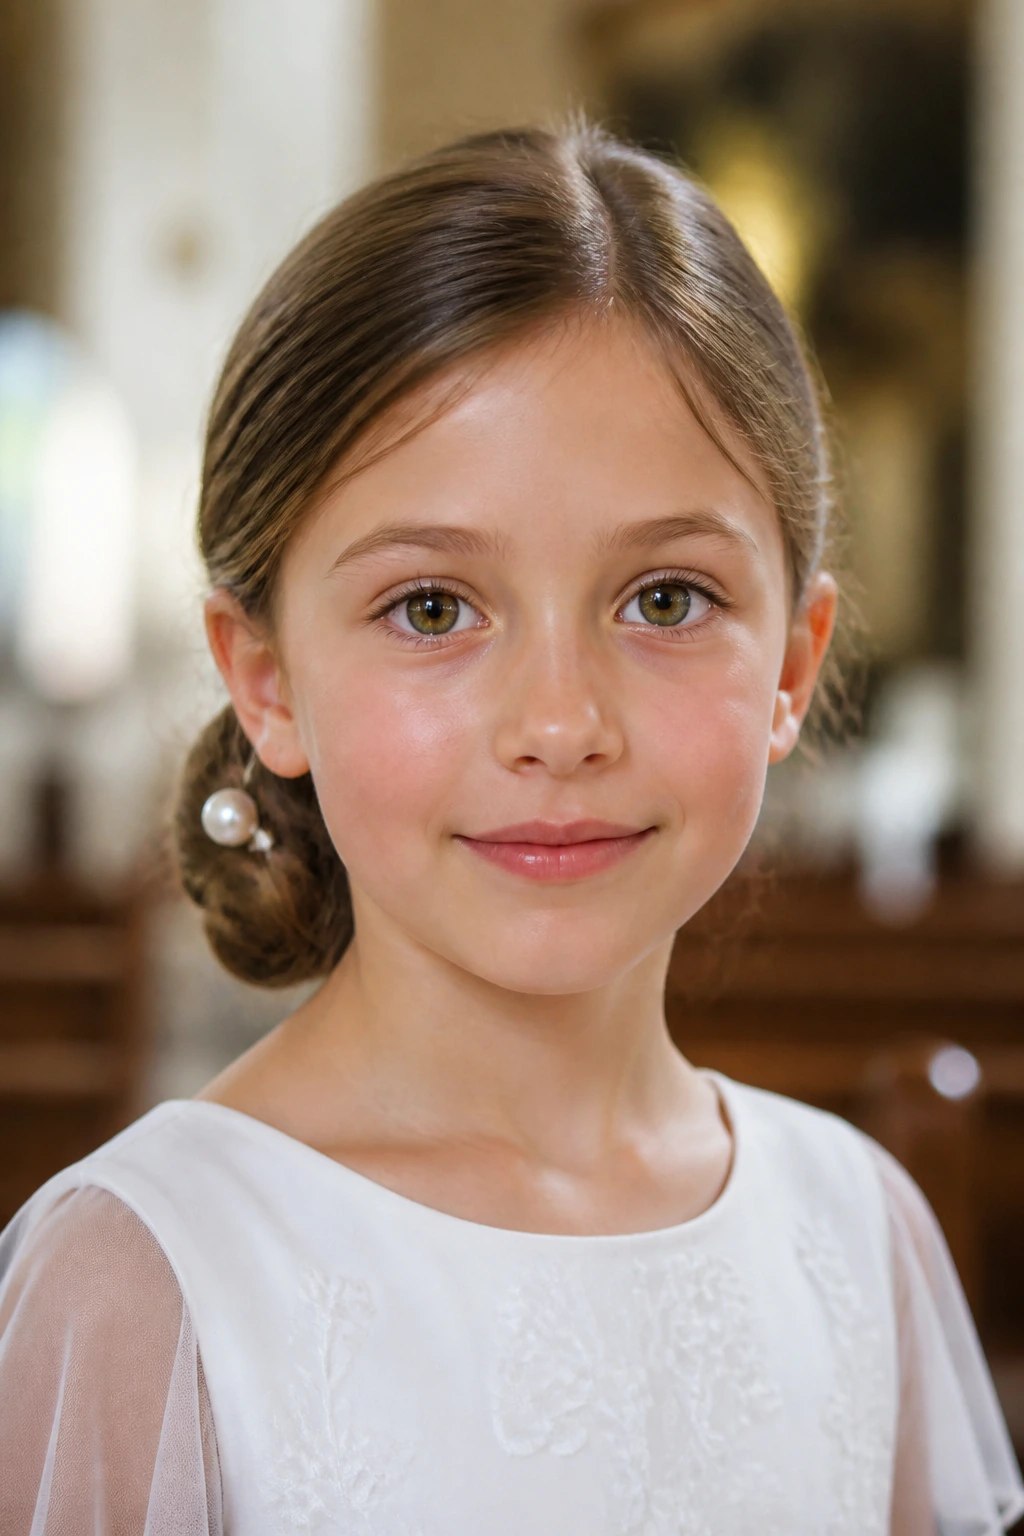
12. Pearl-Pin Bun
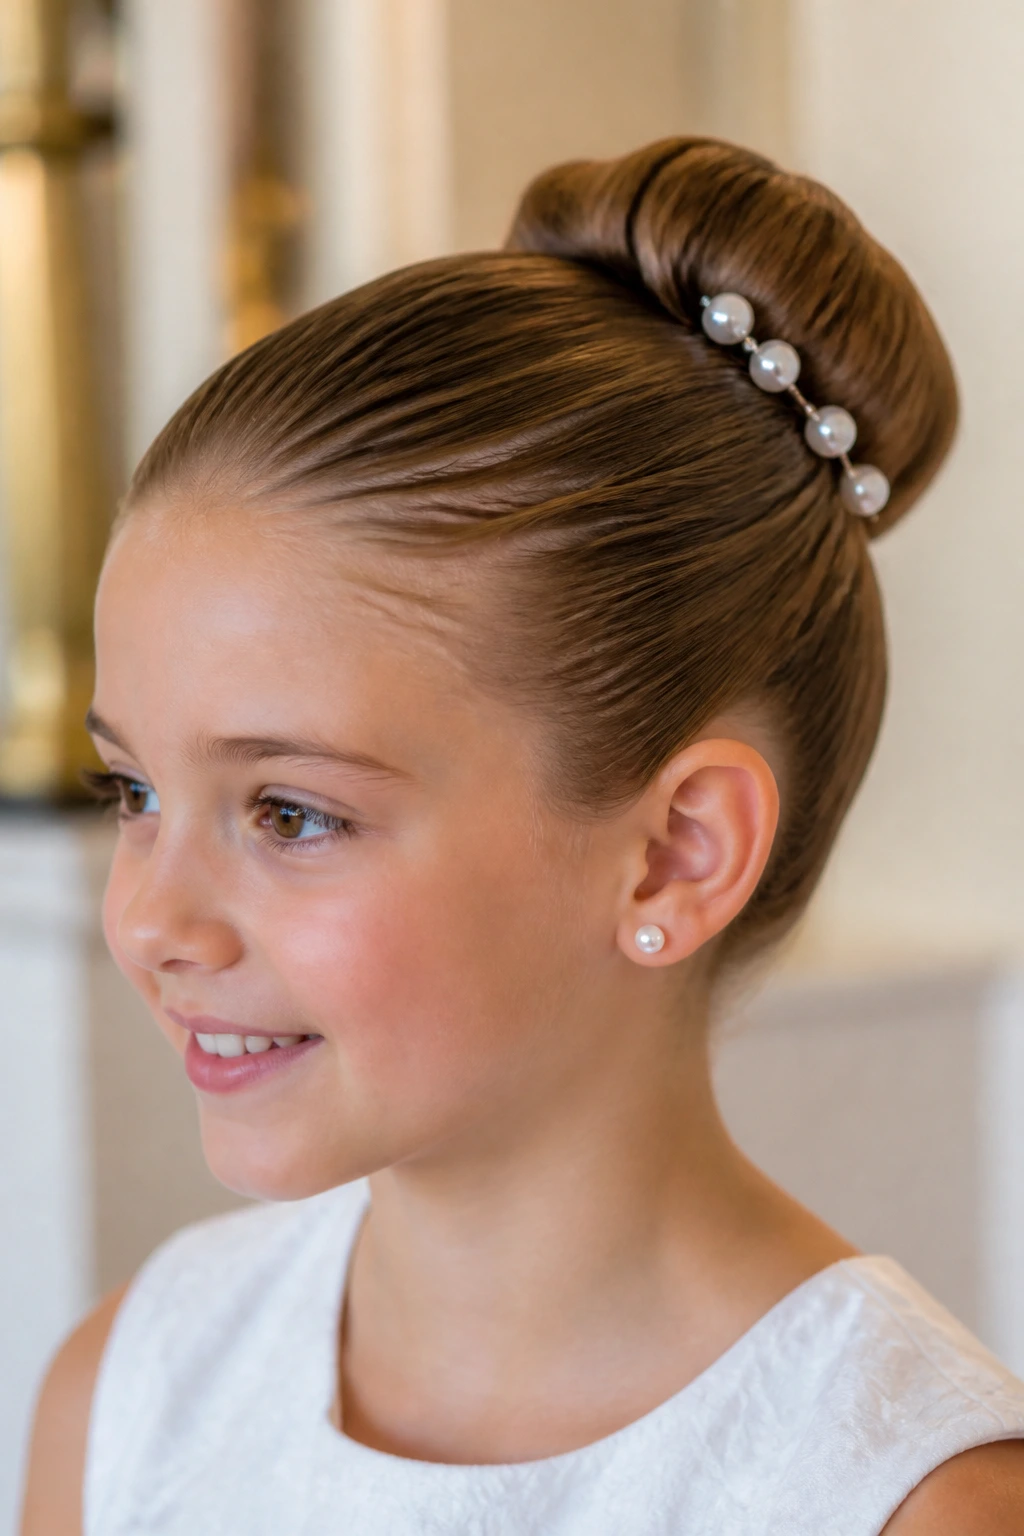
Pearl pins are the easiest way to make a bun feel ceremonial without piling on extra decoration. A cluster of three to five small pearl pins gives enough shine to register in photos while still looking restrained.
Place them along the outer curve of the bun, not scattered randomly across the head. That’s the difference between polished and fussy. Flat-backed pins are kinder too, especially for a child who leans against a car seat or turns her head a lot. Nothing should jab.
13. Fishtail Bun
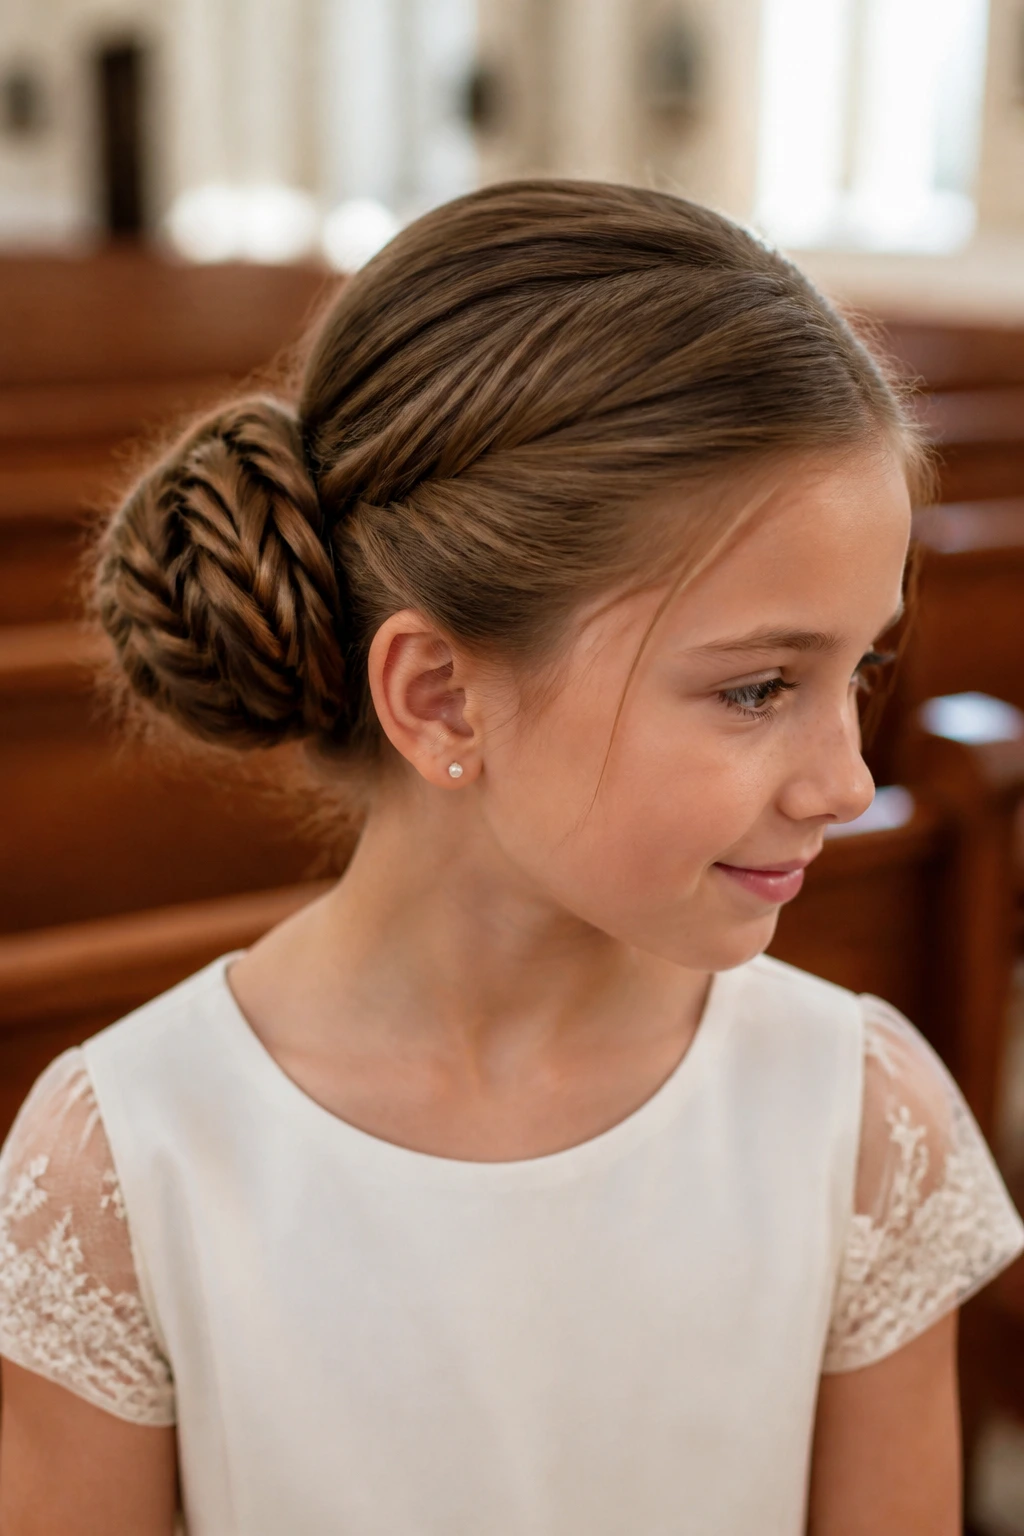
Fishtail braids have that tiny woven look that photographs cleanly from across a pew and up close. When you wrap a fishtail braid into a bun, the texture reads more intricate than a plain three-strand braid, but it still stays neat.
This is a nice choice for medium to long hair, especially if you want the style to feel special without adding extra flowers or bows. Keep the braid tight before you coil it, because loose fishtails can puff up in humidity. A light mist of hairspray at the end is enough. Heavy spray makes the braid look crunchy, and that’s never the goal.
14. Sock Bun
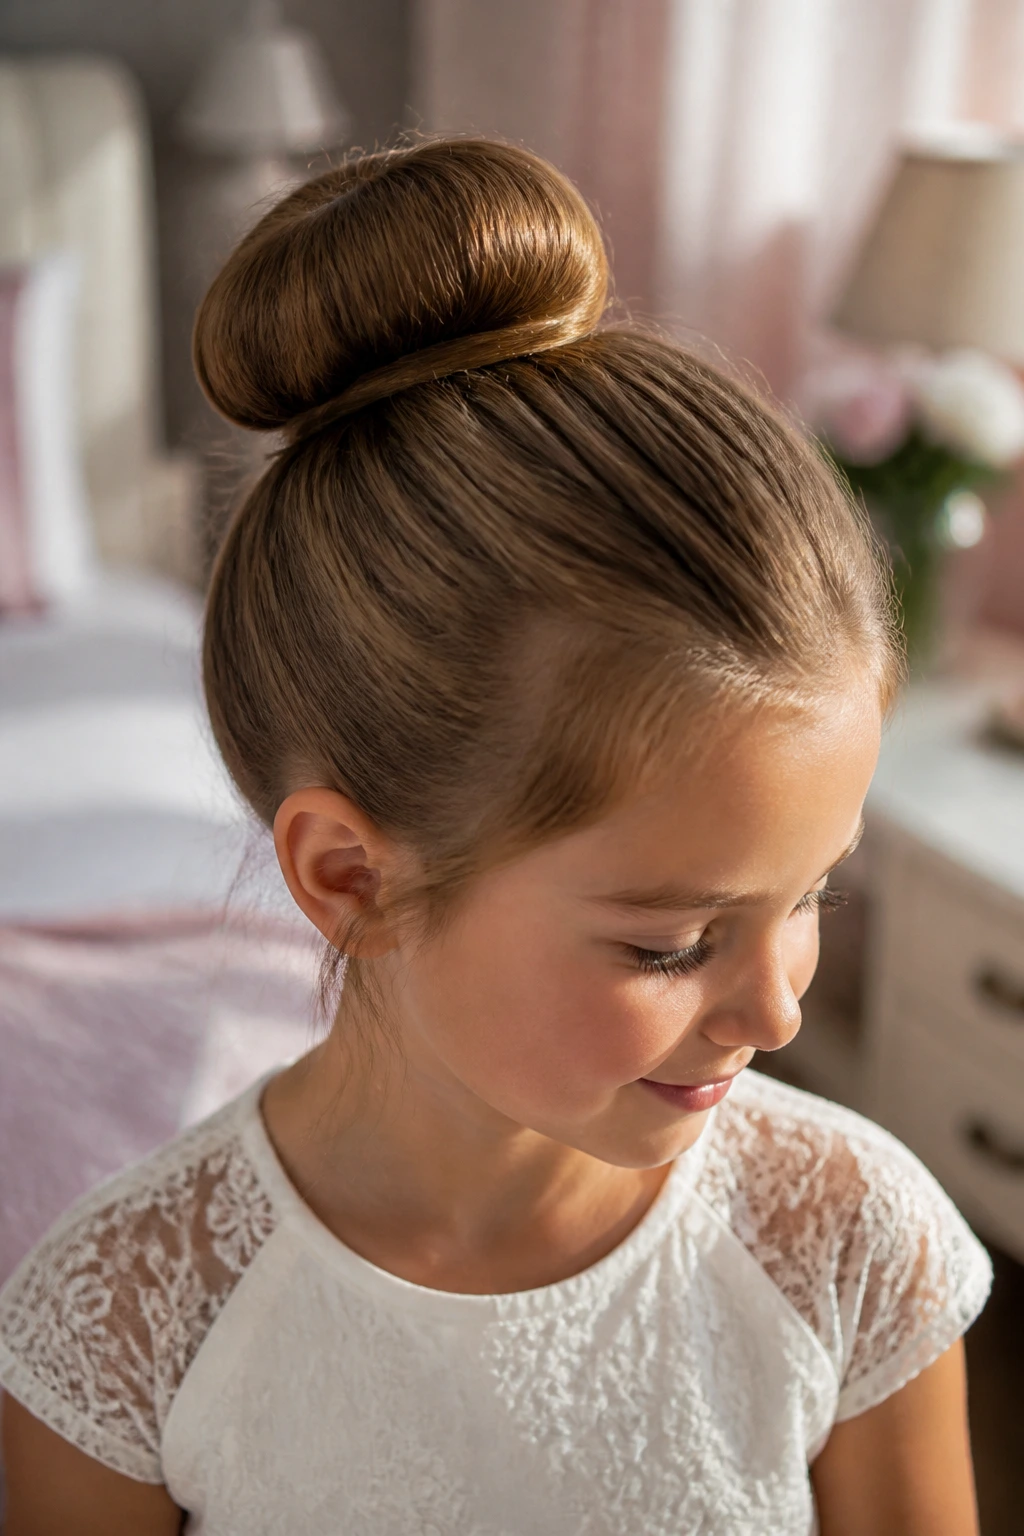
Fine hair can disappear into a plain knot, and a sock bun fixes that. A bun filler or rolled sock creates a fuller round shape, so the hairstyle looks intentional instead of tiny and lost.
The important part is matching the filler size to the child’s head. A huge donut on a small head looks cartoonish. Use enough padding to build a clean circle, then cover every bit of it with hair so the base disappears. If a little filler peeks through, the illusion breaks fast. Keep the bun close to the scalp and the crown smooth.
15. Soft Messy Bun
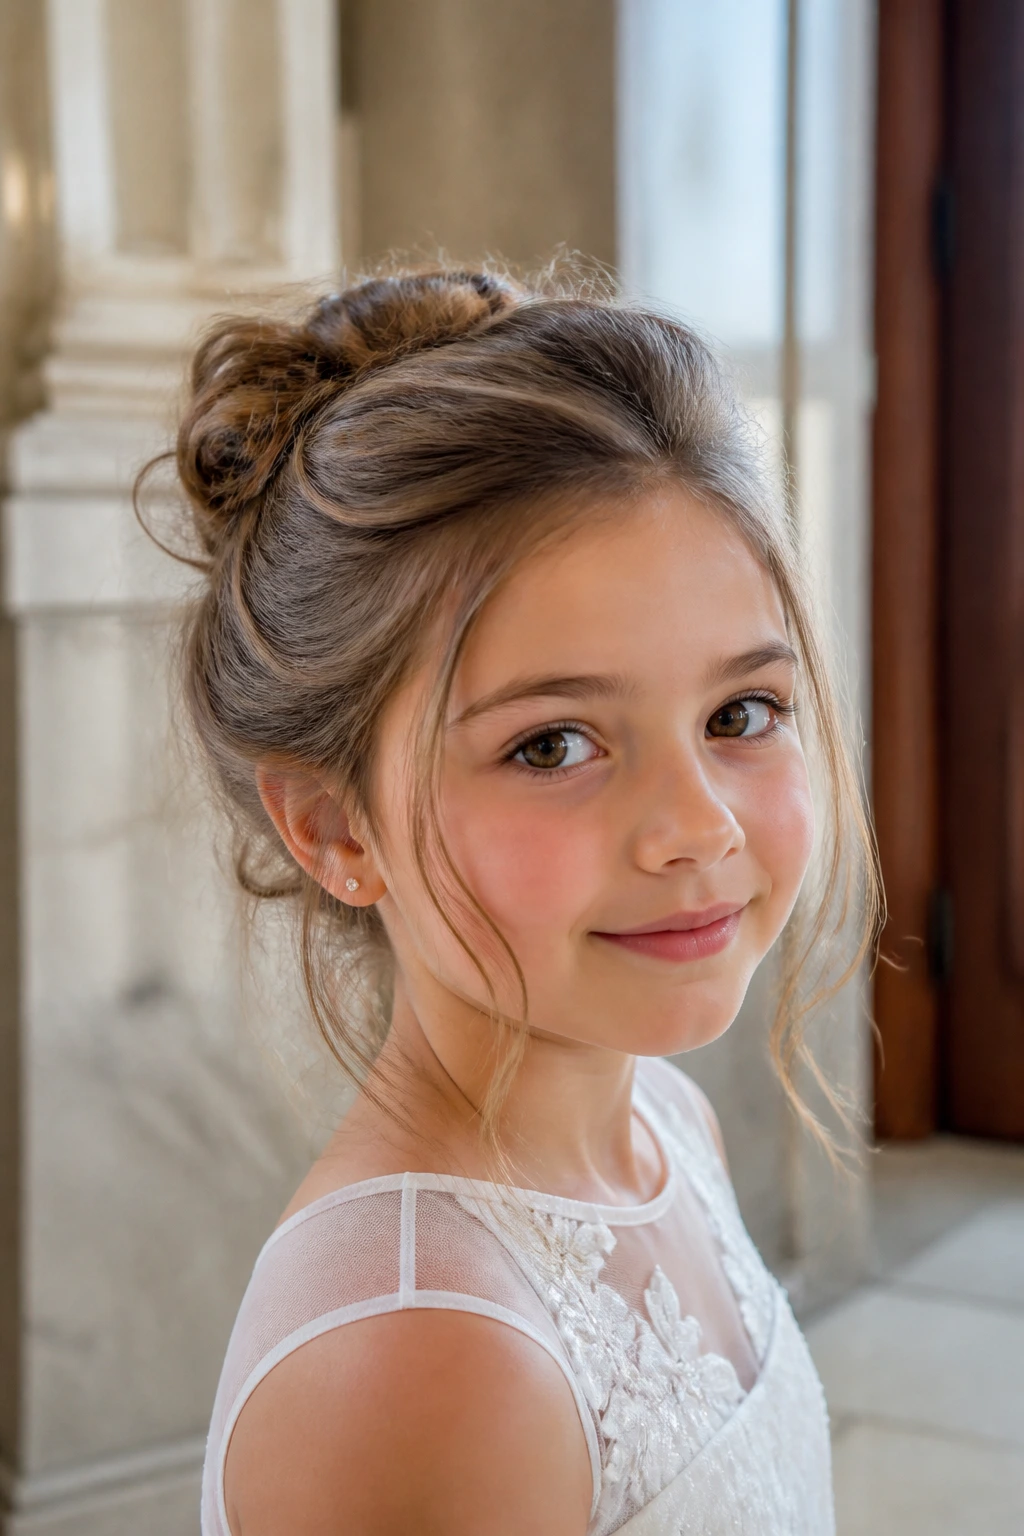
Messy does not mean sloppy here. A soft messy bun leaves a little movement around the edges, but the crown and nape still need to be secured like a proper special-occasion style.
This version is useful when the hair has natural wave or curl and looks strange when brushed too sleek. Let the texture live, pin the bun loosely enough to feel soft, then clean up the perimeter with a few discreet pins. I would skip heavy shine spray on this one. It can make the flyaways look greasy instead of soft, which is a bad trade.
16. Center-Part Twist Bun
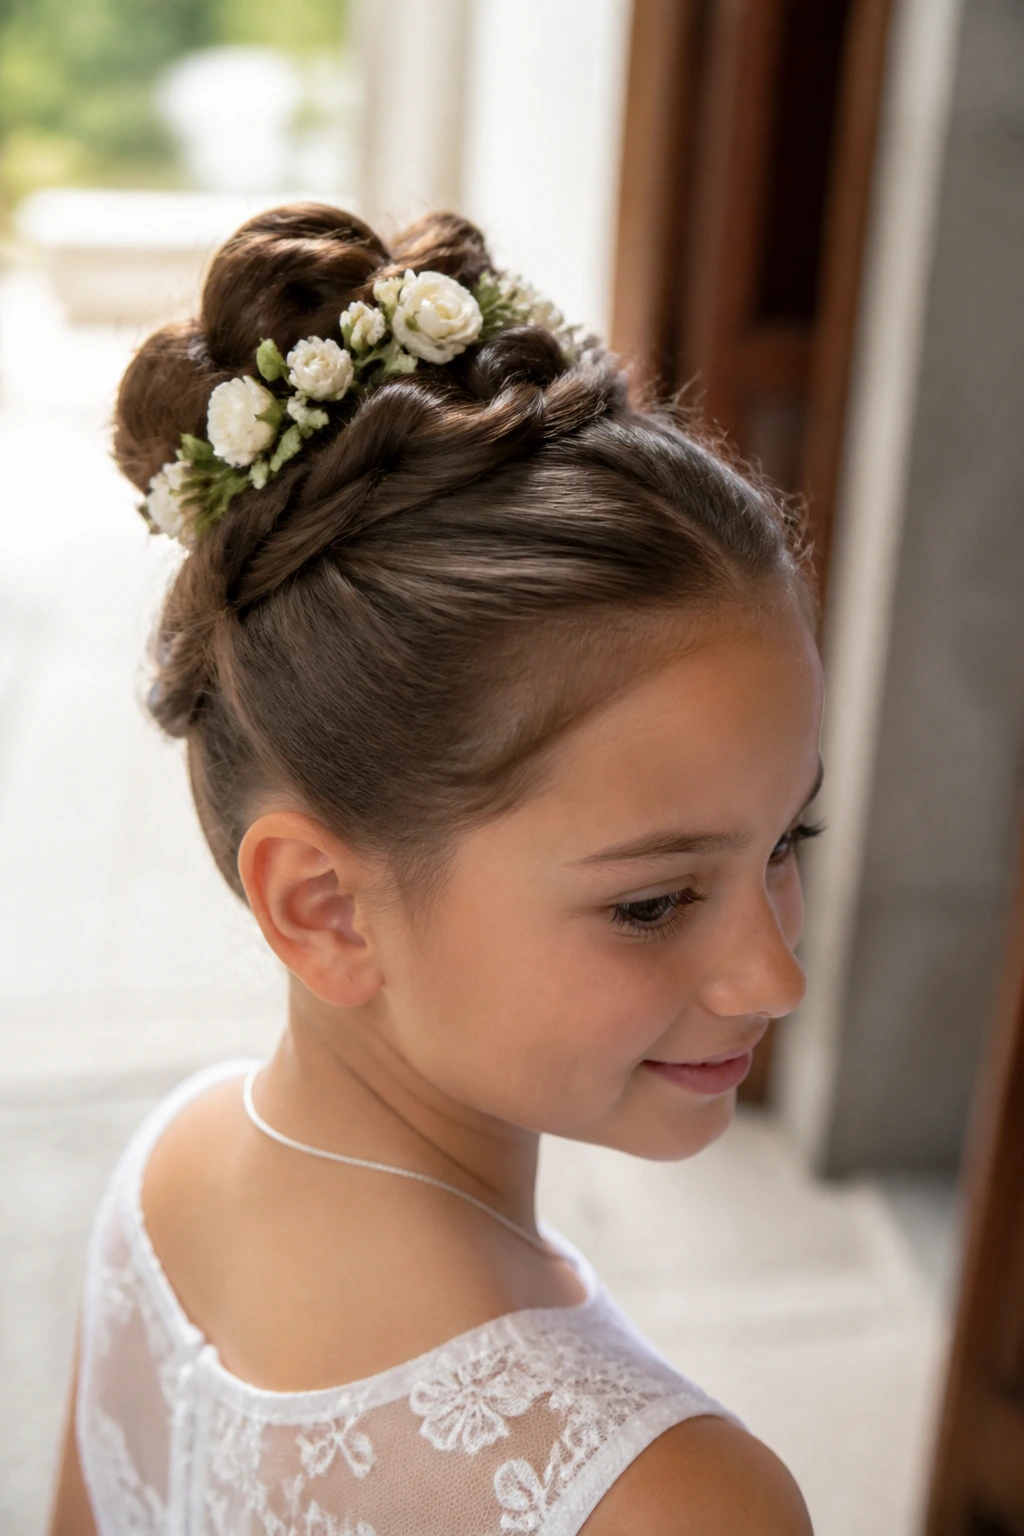
Symmetry does a lot of work in a communion hairstyle. A center-part twist bun starts with a clean middle part, then two twisted sections meet at a low bun right down the center back of the head.
It is a strong choice when the veil comb sits in the middle or when the dress is very simple and needs the hair to give the outfit some structure. The center part should be crisp, not jagged, so use a tail comb and set it before the hair dries fully if you’re working with damp strands. The result looks composed without feeling severe.
17. Veil-Ready Knot
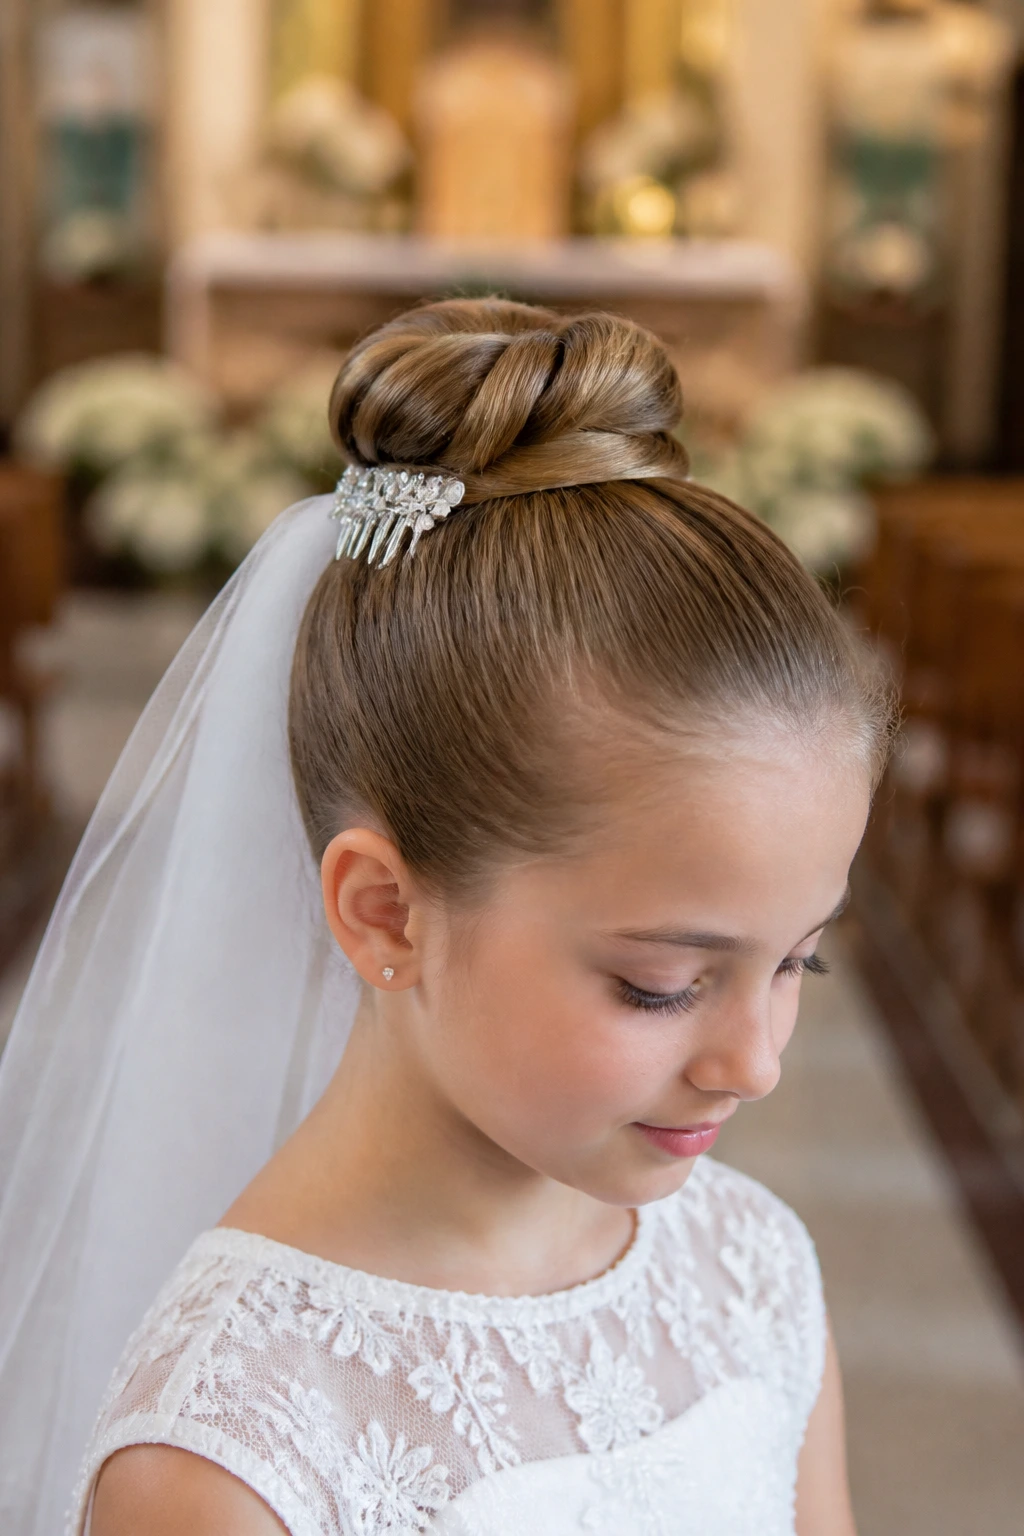
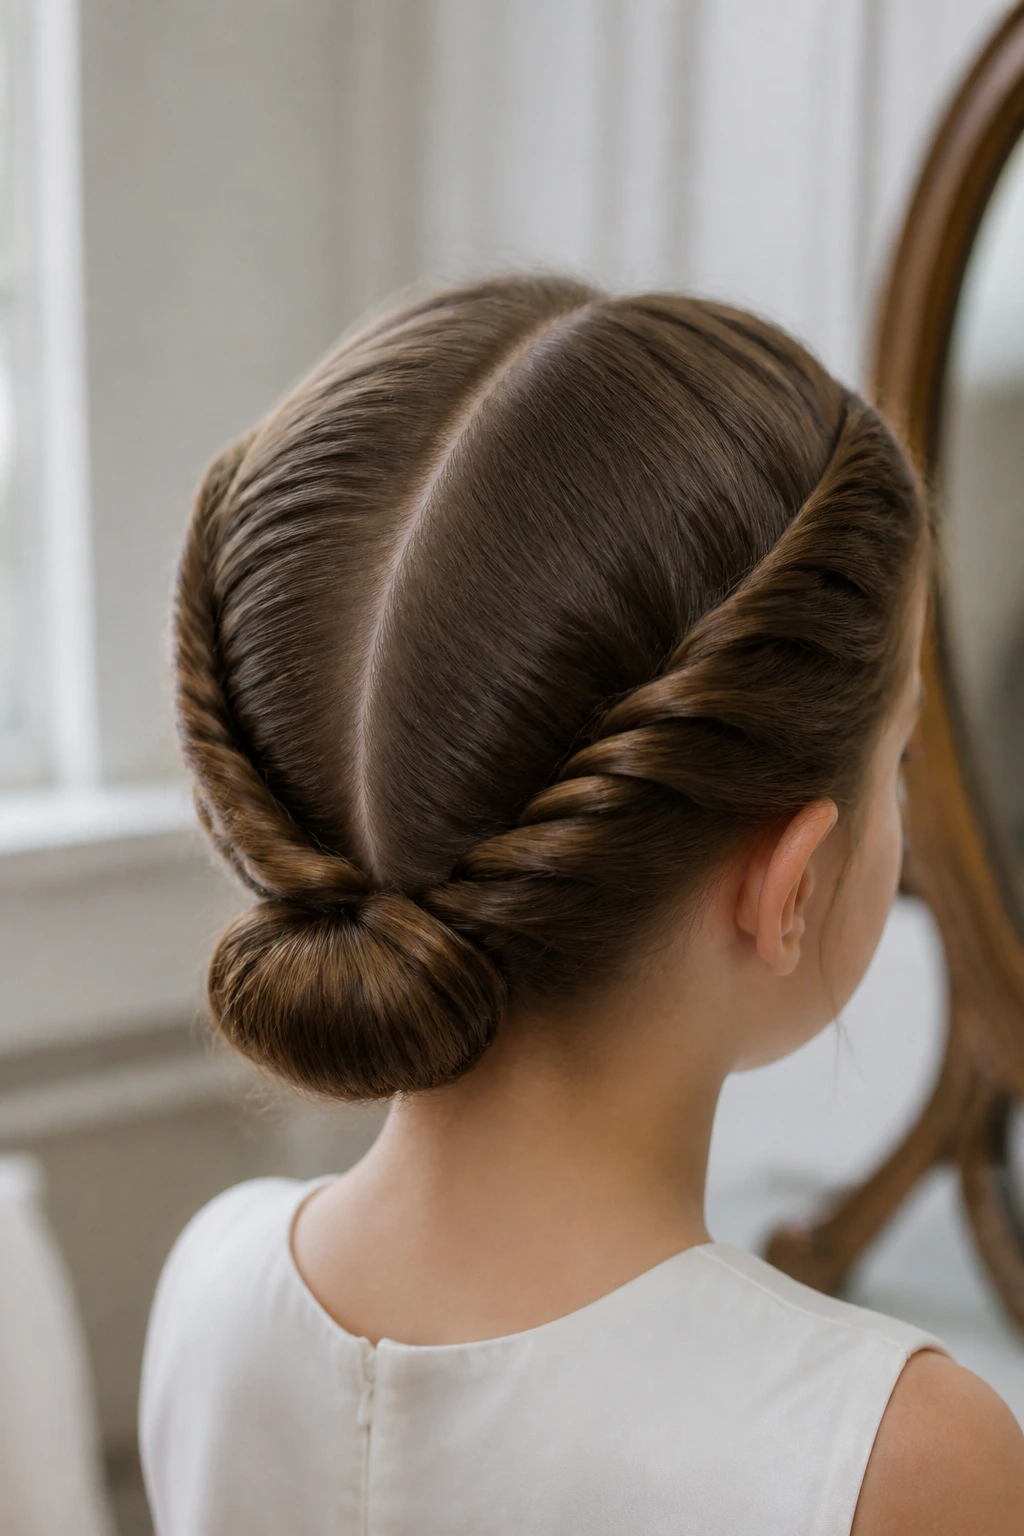
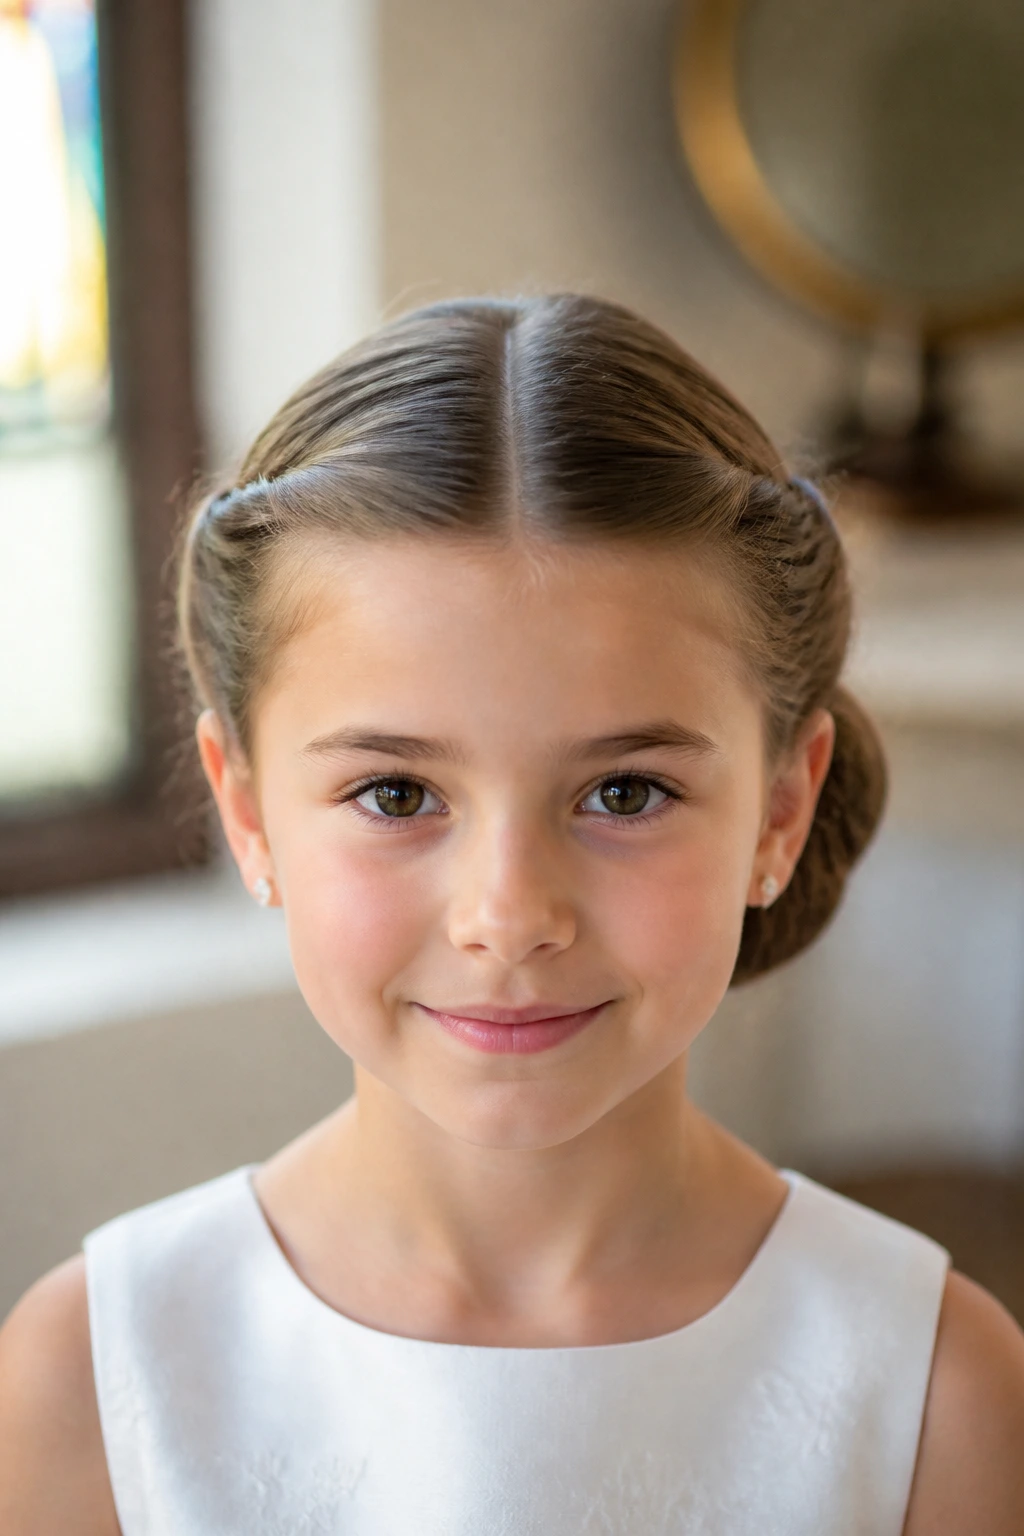
If there’s a veil involved, build the bun around the comb, not after the fact. A veil-ready knot leaves a flat landing zone above the bun so the comb can slide in without tilting sideways.
The trick is to keep the top smooth and the bun compact. Place the comb about 1 to 2 inches above the bun, then anchor it with hidden pins that cross beneath the comb teeth. That stops the veil from creeping upward during Mass. I like this style because it respects the veil instead of treating it like a last-minute add-on.
18. Bubble Braid Bun
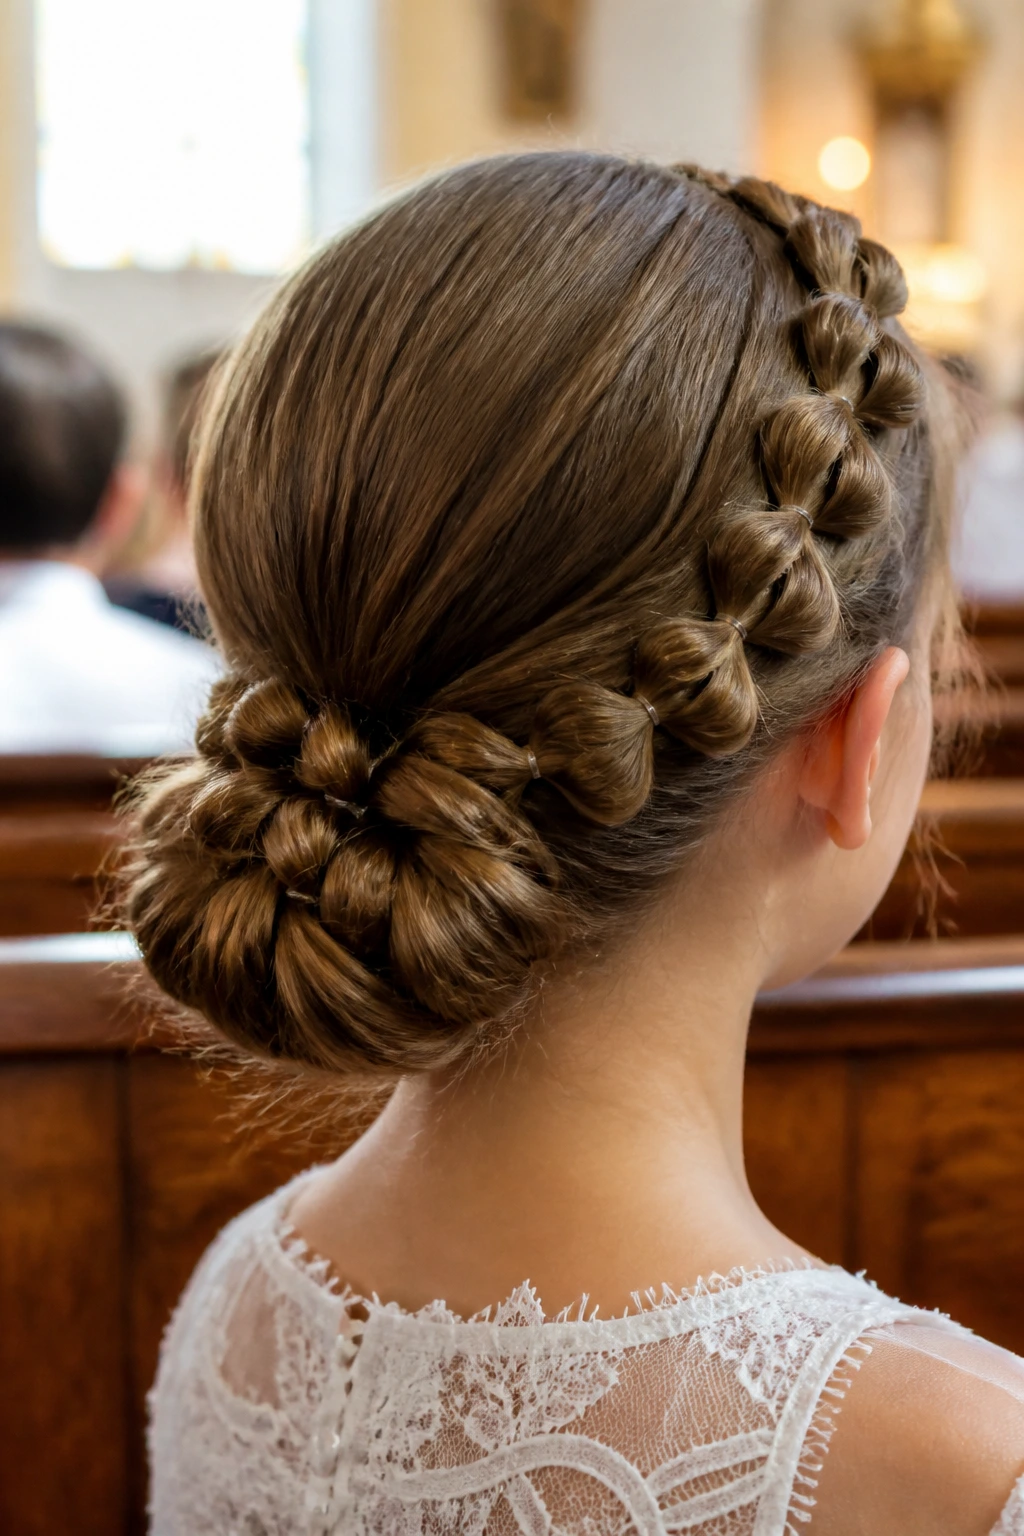
Bubble sections can be playful, but when the bubbles are small and regular, the style still reads polished. You create the bubble braid with tiny clear elastics, then coil the length into a bun at the nape.
This works well on long hair because the bubble detail adds shape before the bun even starts. Keep the sections even and about 1 to 1½ inches apart so the braid doesn’t look lopsided. It’s a nice option for children who want something a little different but still modest. Bigger bubbles turn the style into a party look fast, so keep them small.
19. Bow-Tied Braided Bun
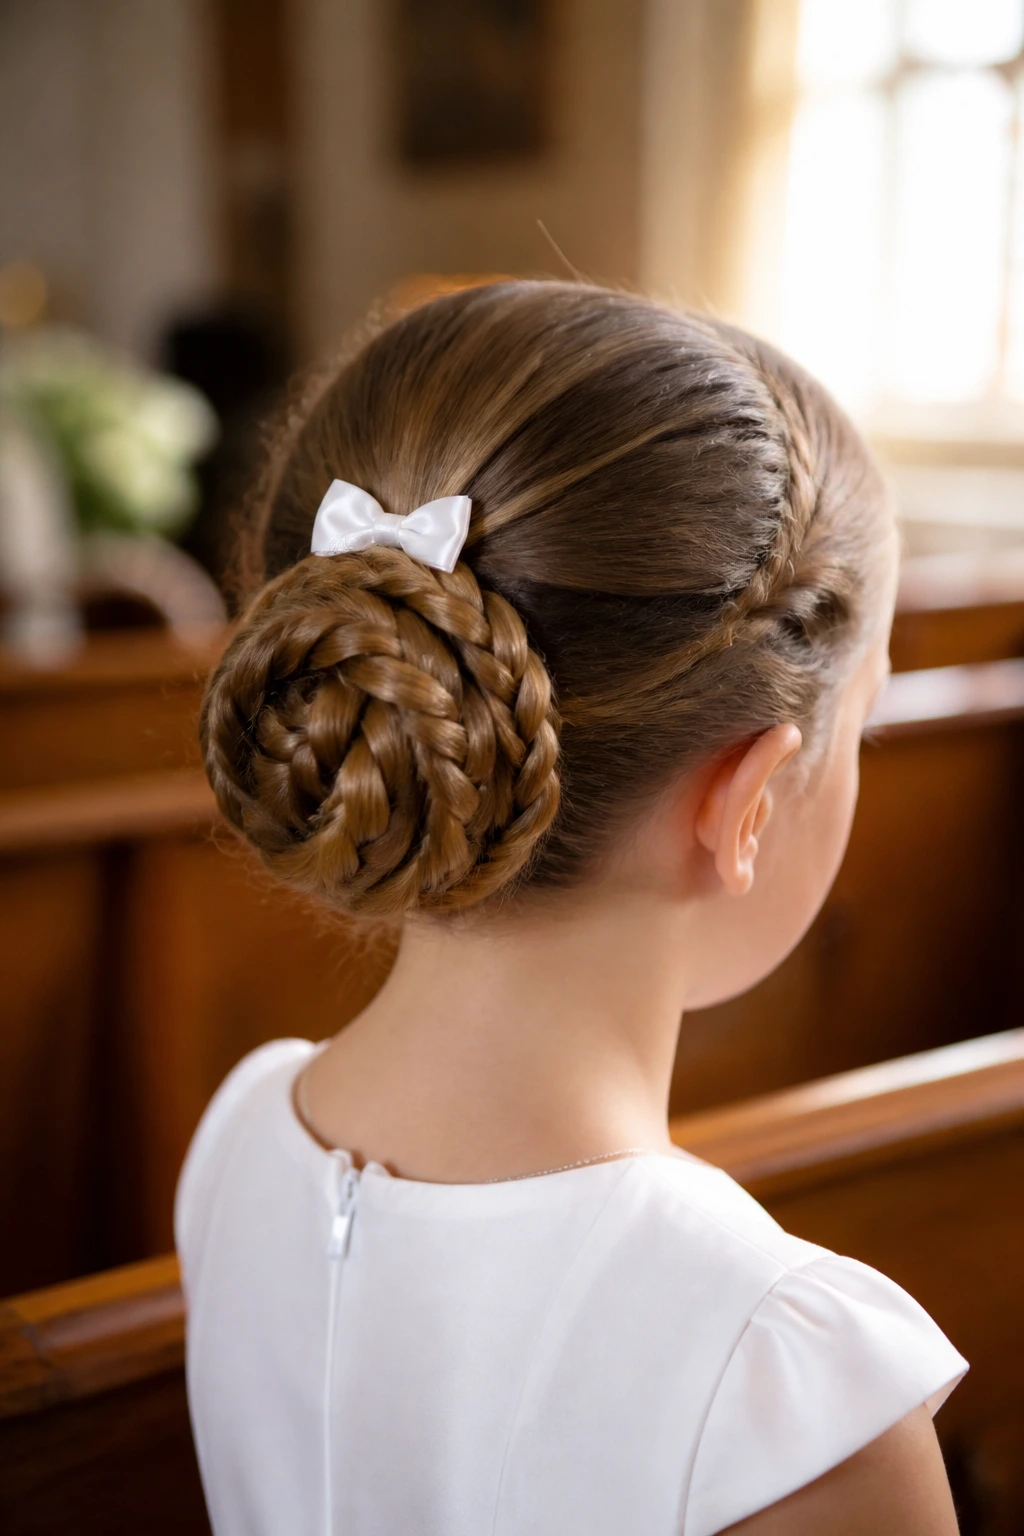
A bow is one of those details that looks sweet and controlled when it stays small. In this style, the braid becomes the base, and a narrow satin or grosgrain bow sits just above or just below the bun.
The best version uses a bow that measures around 1 to 1½ inches wide. Bigger than that, and the bow starts owning the entire hairstyle. I like it centered when the dress is simple, and slightly off-center when the bun itself sits low and soft. It’s a tiny thing. That’s the point.
20. Low Bun with Side Part
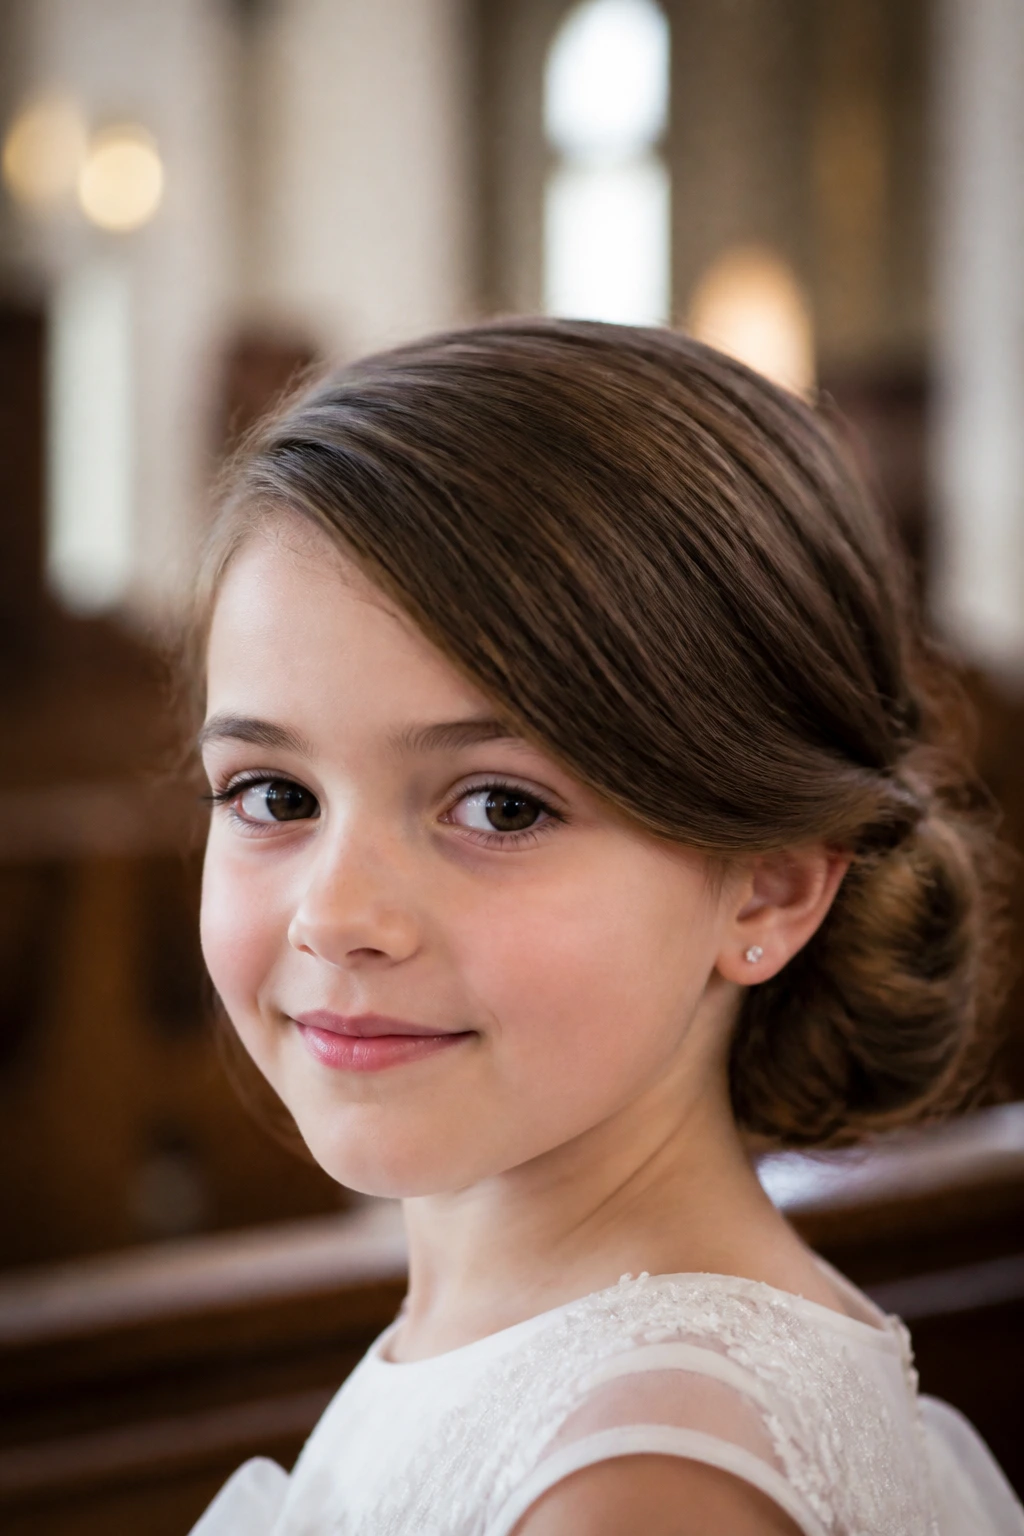
A side part changes the face shape almost immediately. With a low bun, it gives the style a little movement at the front while keeping the back clean and secure.
This is a strong pick if the child has a rounder face or if the dress neckline is plain and needs a touch of shape. Use the part to guide the front section over one brow just a bit, then let the bun sit at the nape. It keeps the look calm but not rigid. I prefer this to a dead-straight center part when the hair is very fine, because the side part can make the front look fuller.
21. Fresh Flower Woven Bun
Fresh flowers need a steadier base than people think. A woven bun with flowers placed into the braid or tucked around the coil keeps the blooms close and prevents them from drooping off to one side.
Use small flowers with firm stems, like spray roses or baby’s breath, and secure them with floral wire or hidden pins before you finish the bun. I would keep the color palette light and narrow — white, ivory, pale blush. A mixed bouquet shoved into the hair looks out of place for this kind of event. One flower family. Maybe two. That’s plenty.
22. Rope Braid Bun
A rope braid is tidy, fast, and oddly elegant when it’s wrapped into a bun. You twist two sections around each other instead of weaving three strands, so the result looks clean and a little glossy.
It’s especially good for layered hair because the twist structure holds the shorter pieces better than a loose braid can. Pin the rope braid flat against the head before coiling the ends into the bun. I like this when the morning schedule is tight, because it creates polish without requiring an elaborate set of sections.
23. Tucked Under Bun
This is the bun for a child who will not sit still. The hair is gathered low, rolled under itself, and pinned flat so the shape hugs the neck instead of sitting out in space.
That close fit makes it comfortable under collars, veils, and cardigans. It also keeps the style from feeling top-heavy, which can happen with padded buns on younger children. If the hair is slippery, a small elastic plus two hidden pins at the base is usually enough. Simple can be the right move when the child is active and the hair is fine.
24. Dutch Braid Bun
Dutch braids give you a visible pattern without making the style too sweet or too fussy. The braid sits raised on the scalp, which helps the whole bun look structured from the top down.
This one is especially useful for thicker hair because the braid controls bulk before the bun starts. You can build one central Dutch braid or two side braids feeding into a low knot. Keep the sections even and do not pull too hard at the loops; over-tightening creates a rigid look that can feel uncomfortable by the end of the day.
25. Curly Bun with Tendrils
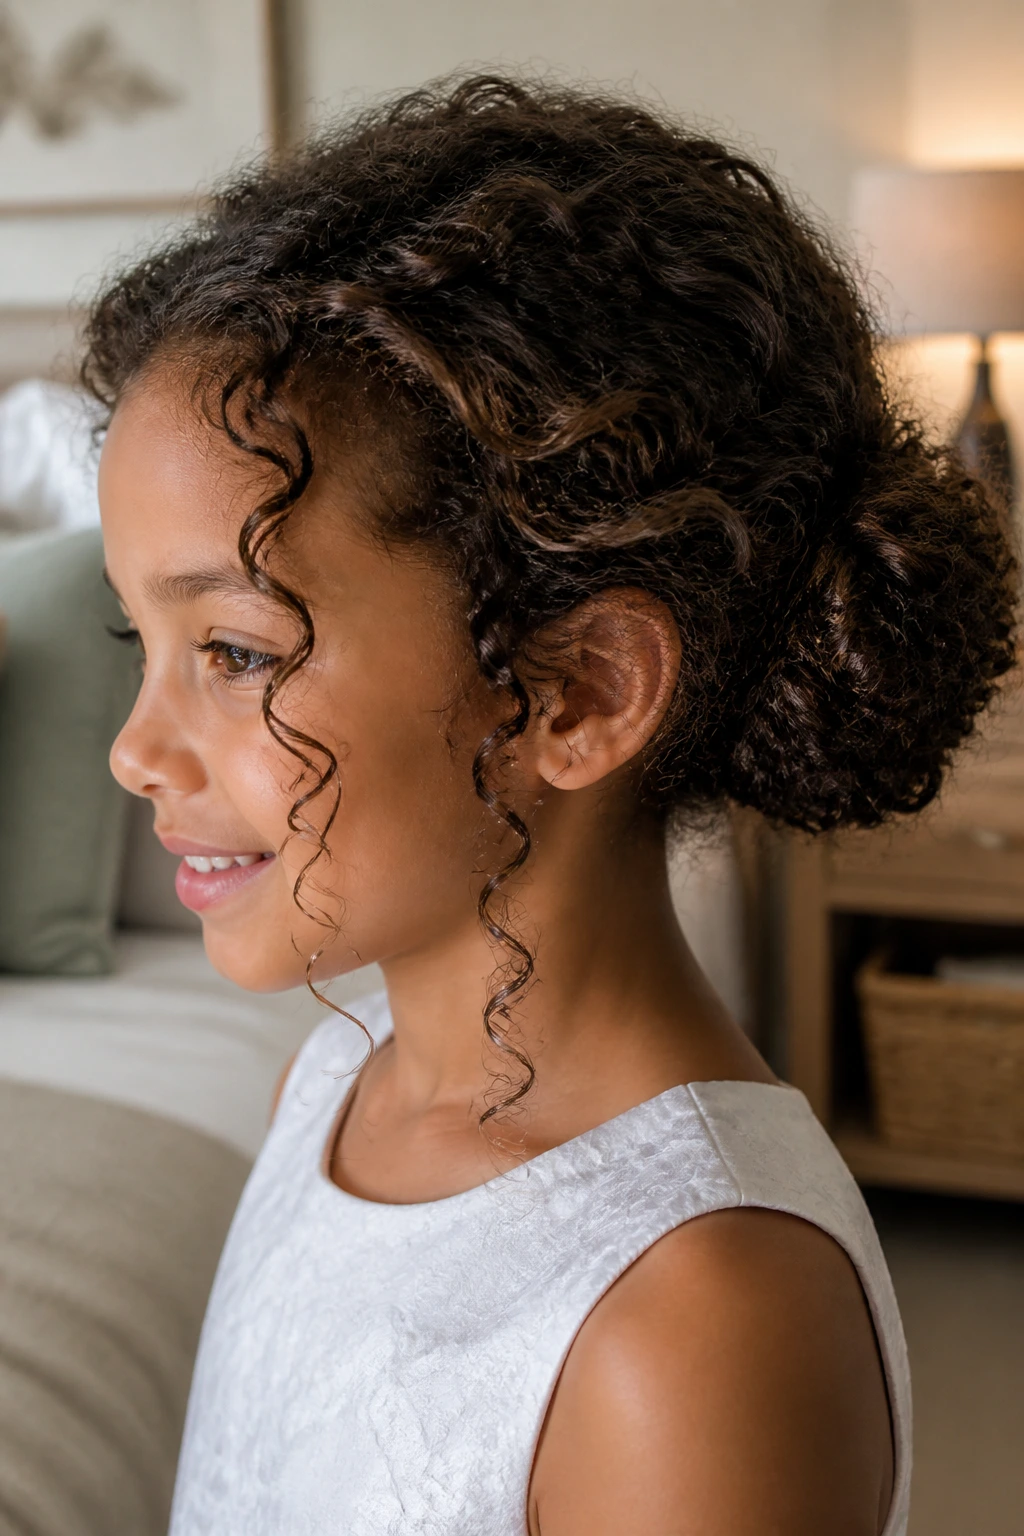
Curly hair deserves a bun that respects the curl instead of fighting it. That means using leave-in conditioner and a light gel, then gathering the curls into a low bun while leaving two soft tendrils at the front or sides.
Do not brush the curls dry. That’s how you get frizz and a puffed-out shape that won’t sit still. Use your fingers or a wide-tooth comb while the hair still has product in it, then pin the bun where the curls naturally want to gather. The tendrils give the style a gentler face frame, and the bun keeps the whole look grounded.
26. Knotted Bun with Headband
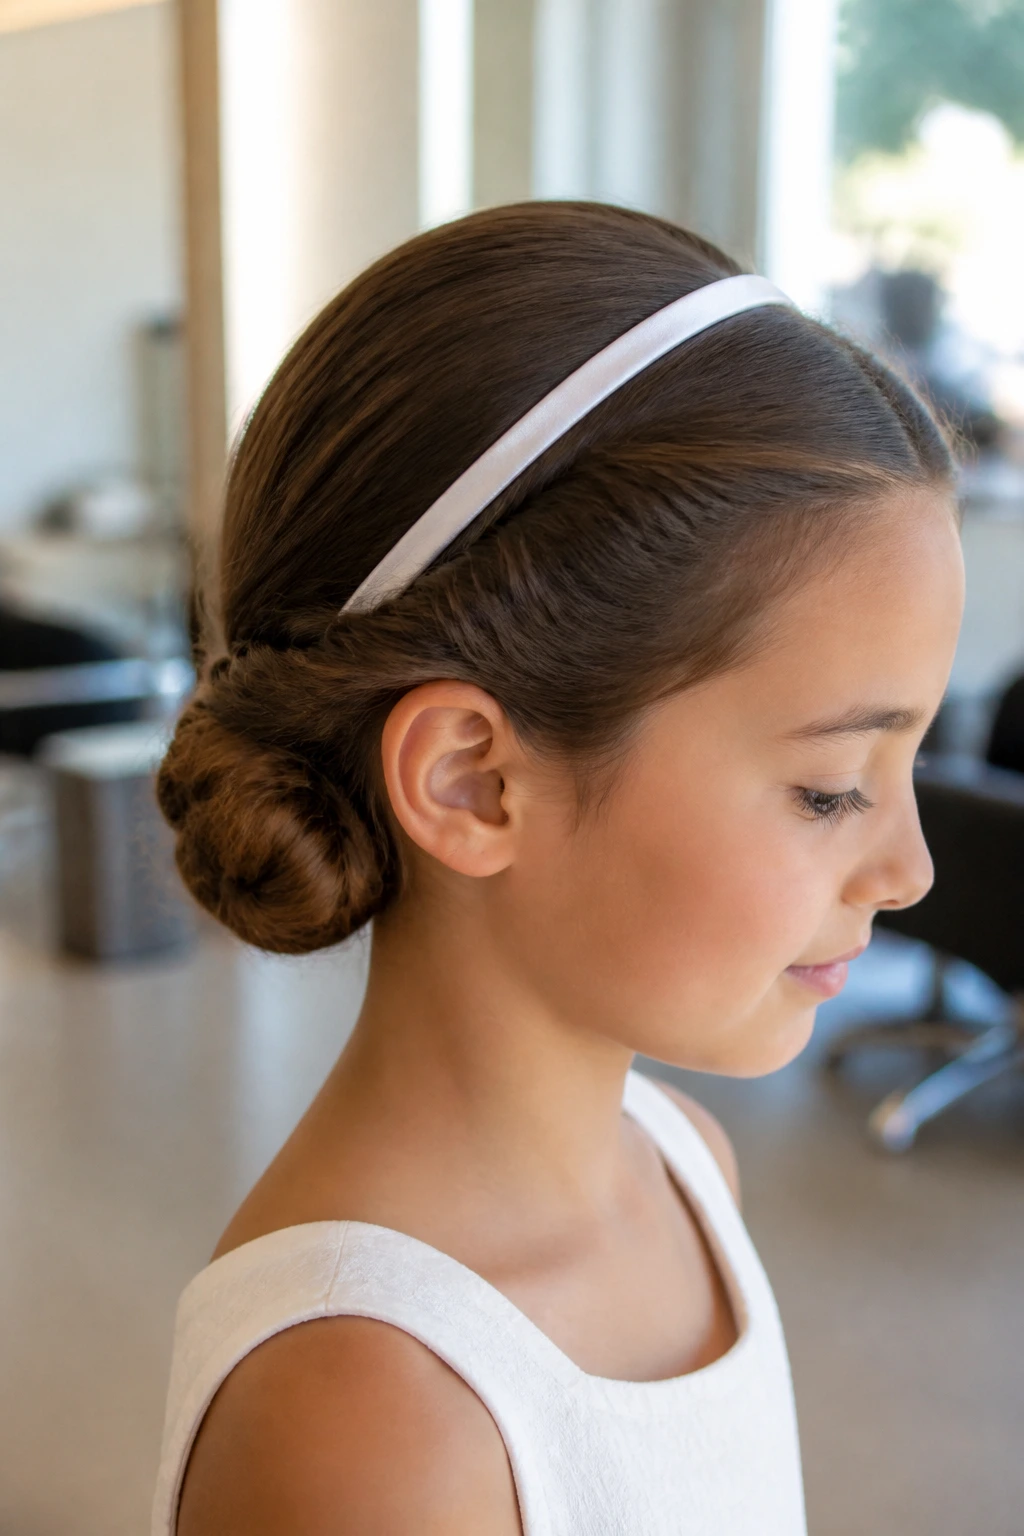
A slim headband can solve the front of the style in one move. A knotted bun with headband keeps the hair neat at the crown and gives the child a decorative line across the top without needing lots of pins near the hairline.
Choose a padded satin band, a narrow pearl band, or a soft fabric band that won’t dig in behind the ears. The bun itself should stay low and compact so the headband becomes the accent, not the bun. I like this option when the front hairline is uneven or the child has a few stubborn cowlicks that never behave.
27. Side Bun with Soft Volume
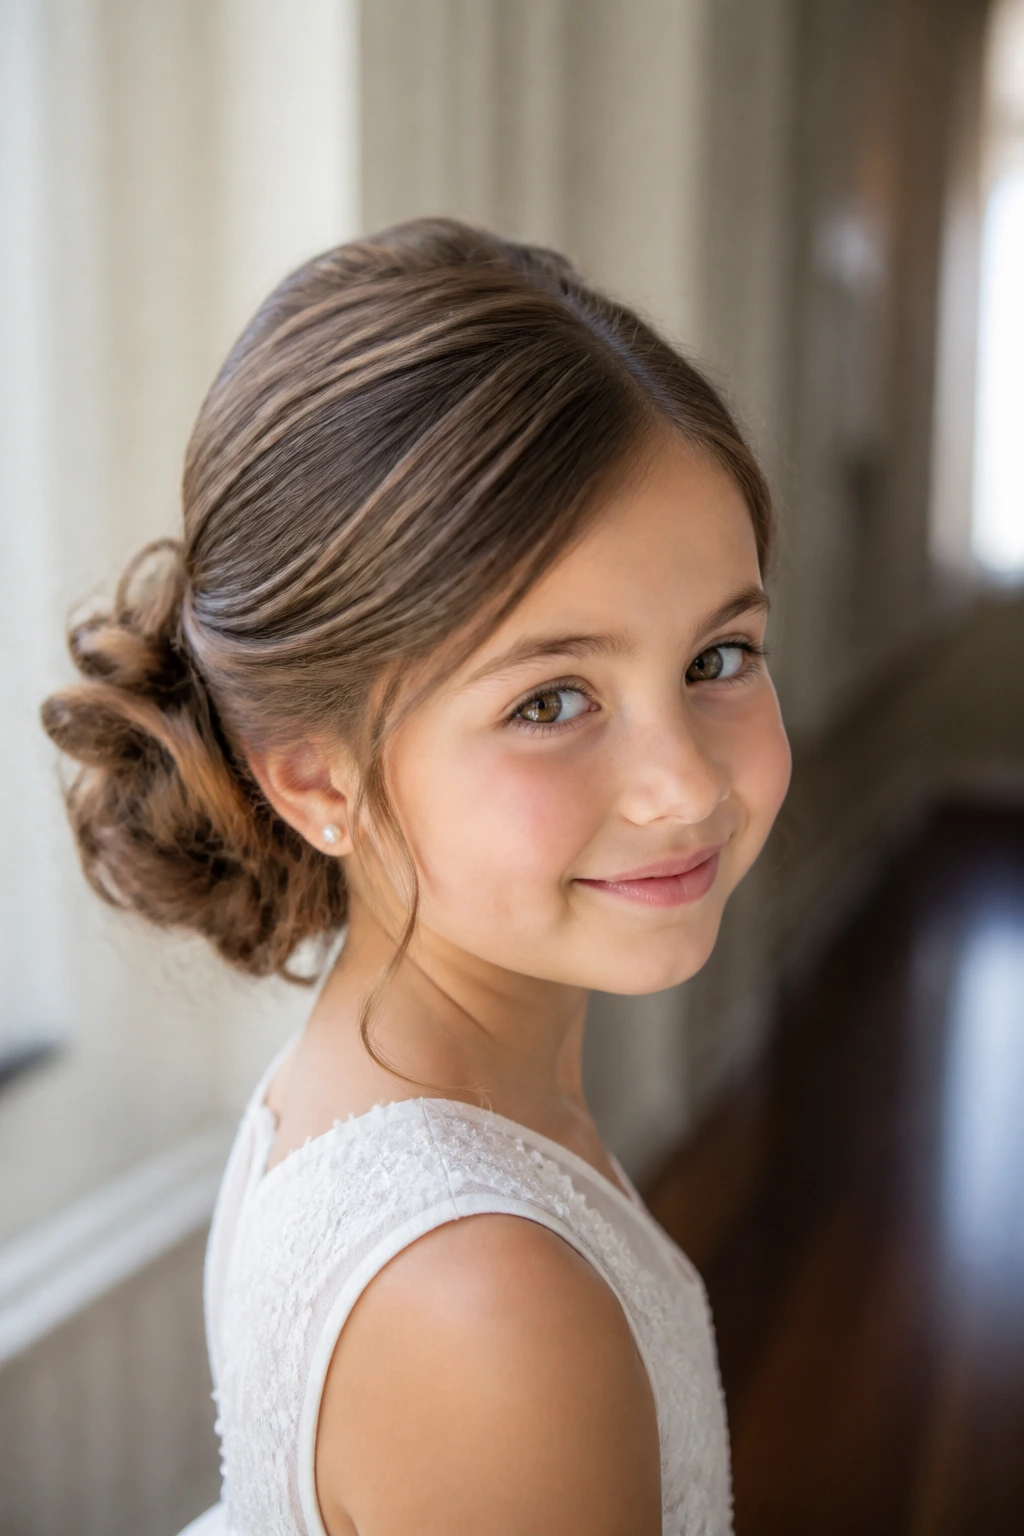
Placed just off center, a side bun can soften a plain dress without stealing the show. A little lift at the crown and a bun that rests near one side of the nape creates a shape that feels gentle instead of formal.
This is a good choice when the face is long or narrow, or when the child likes a bit of movement around the front. Keep the volume soft, not tall. A bumped-up crown can make a child look older than she is, and that tends to spoil the charm of the style. A little lift is enough.
28. Braided Pigtail Bun
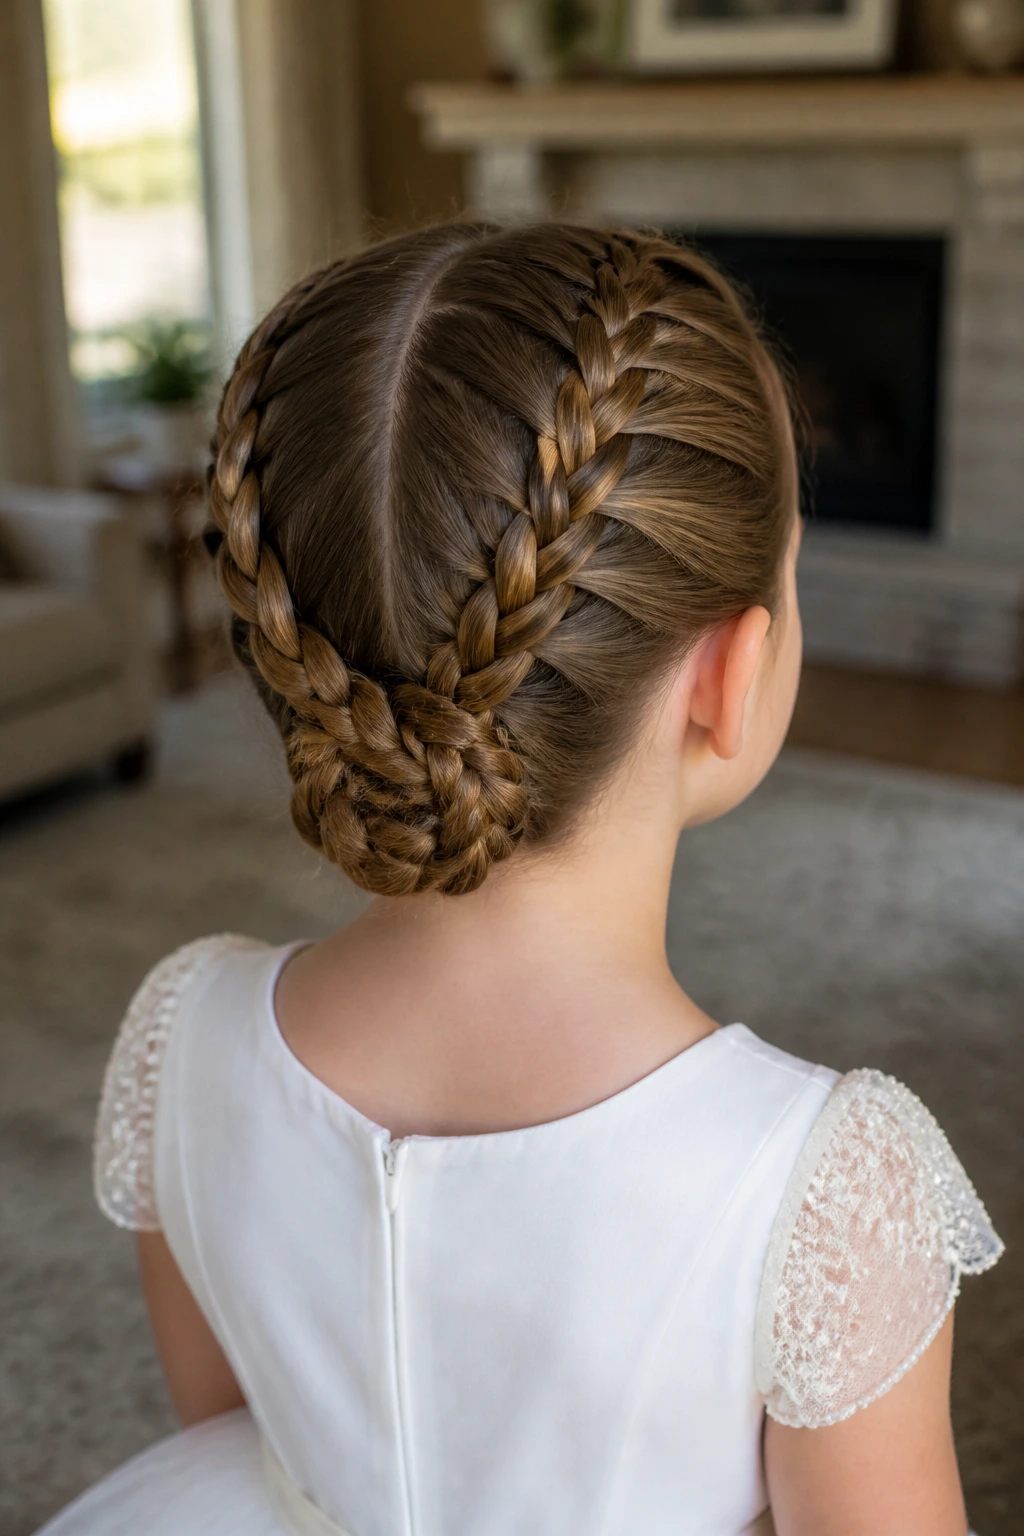
Two braids fed into one back bun can keep younger girls from fussing with their hair. The braids start at the temples or just behind the front hairline, then meet at the back and disappear into a single bun.
That split structure keeps the hair controlled around the face, which helps if the child has bangs or shorter layers that keep escaping. It also gives the style a neat, youthful energy without looking childish in a bad way. Keep the braids tidy and symmetrical, because uneven parts are the first thing people notice in this kind of style.
29. Middle-Part Ballet Knot
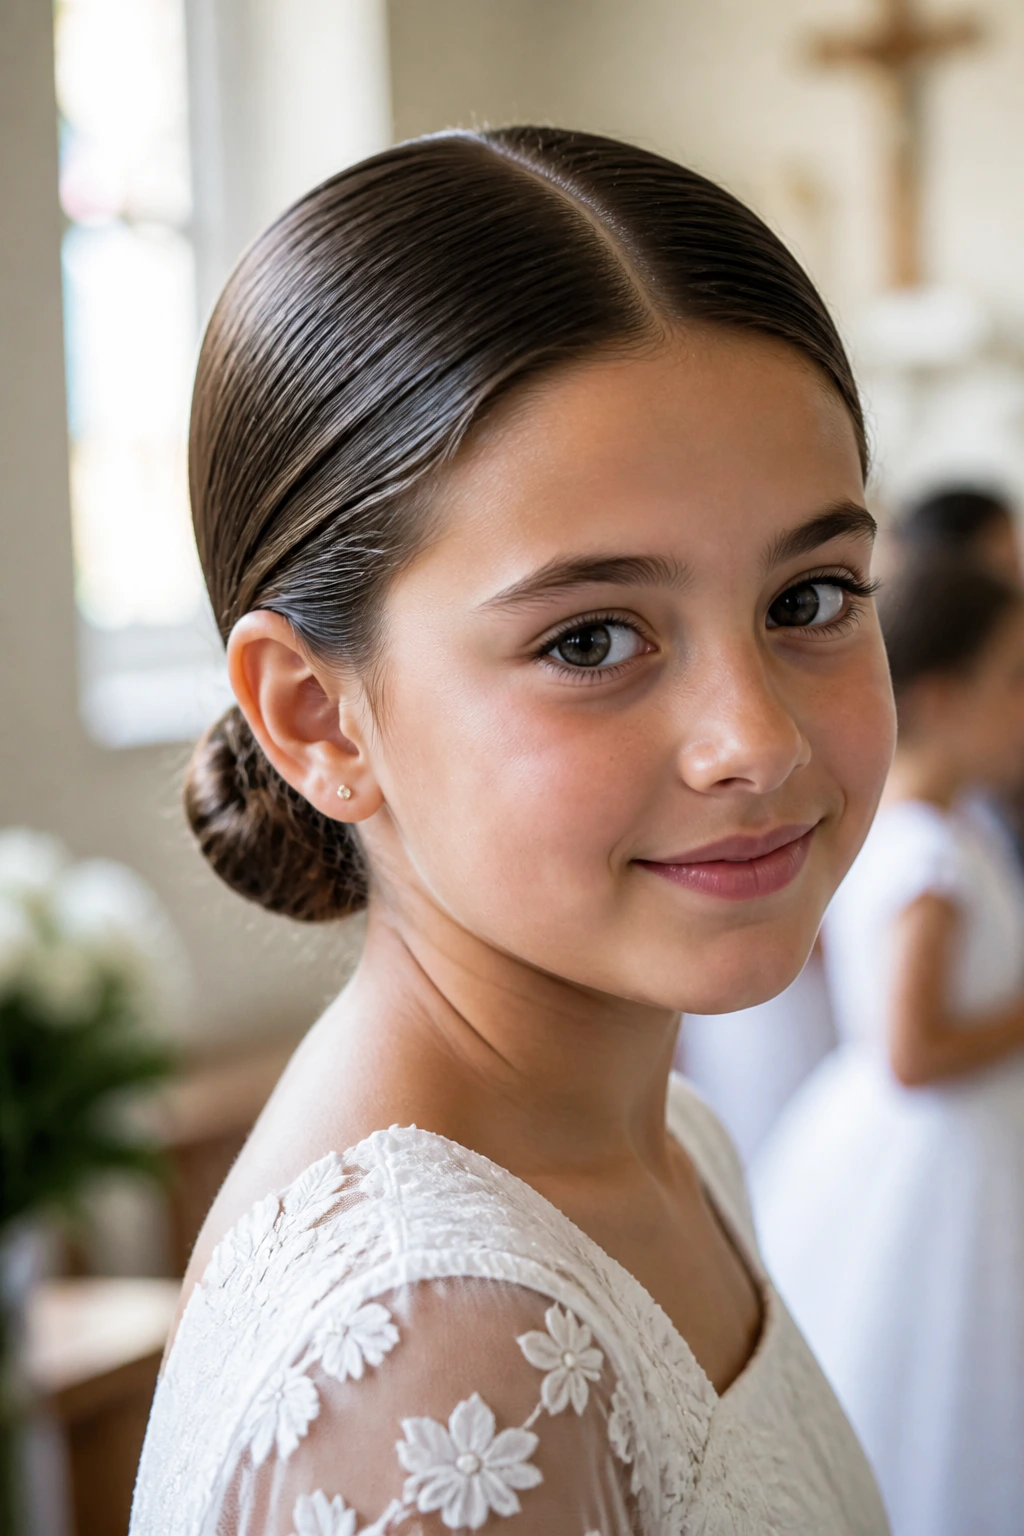
This is the cleaner, quieter version of the ballet bun. A middle part runs straight back, the crown stays smooth, and the bun sits low enough to keep the silhouette modest and neat.
The style works best when the hair is combed carefully and set with a light hand. Use just enough gel or smoothing cream to keep the front flat, then stop. Too much product creates a wet look that belongs nowhere near a First Communion outfit. A middle-part ballet knot is one of those styles that looks simple because it has been done carefully.
30. Floral Halo Bun
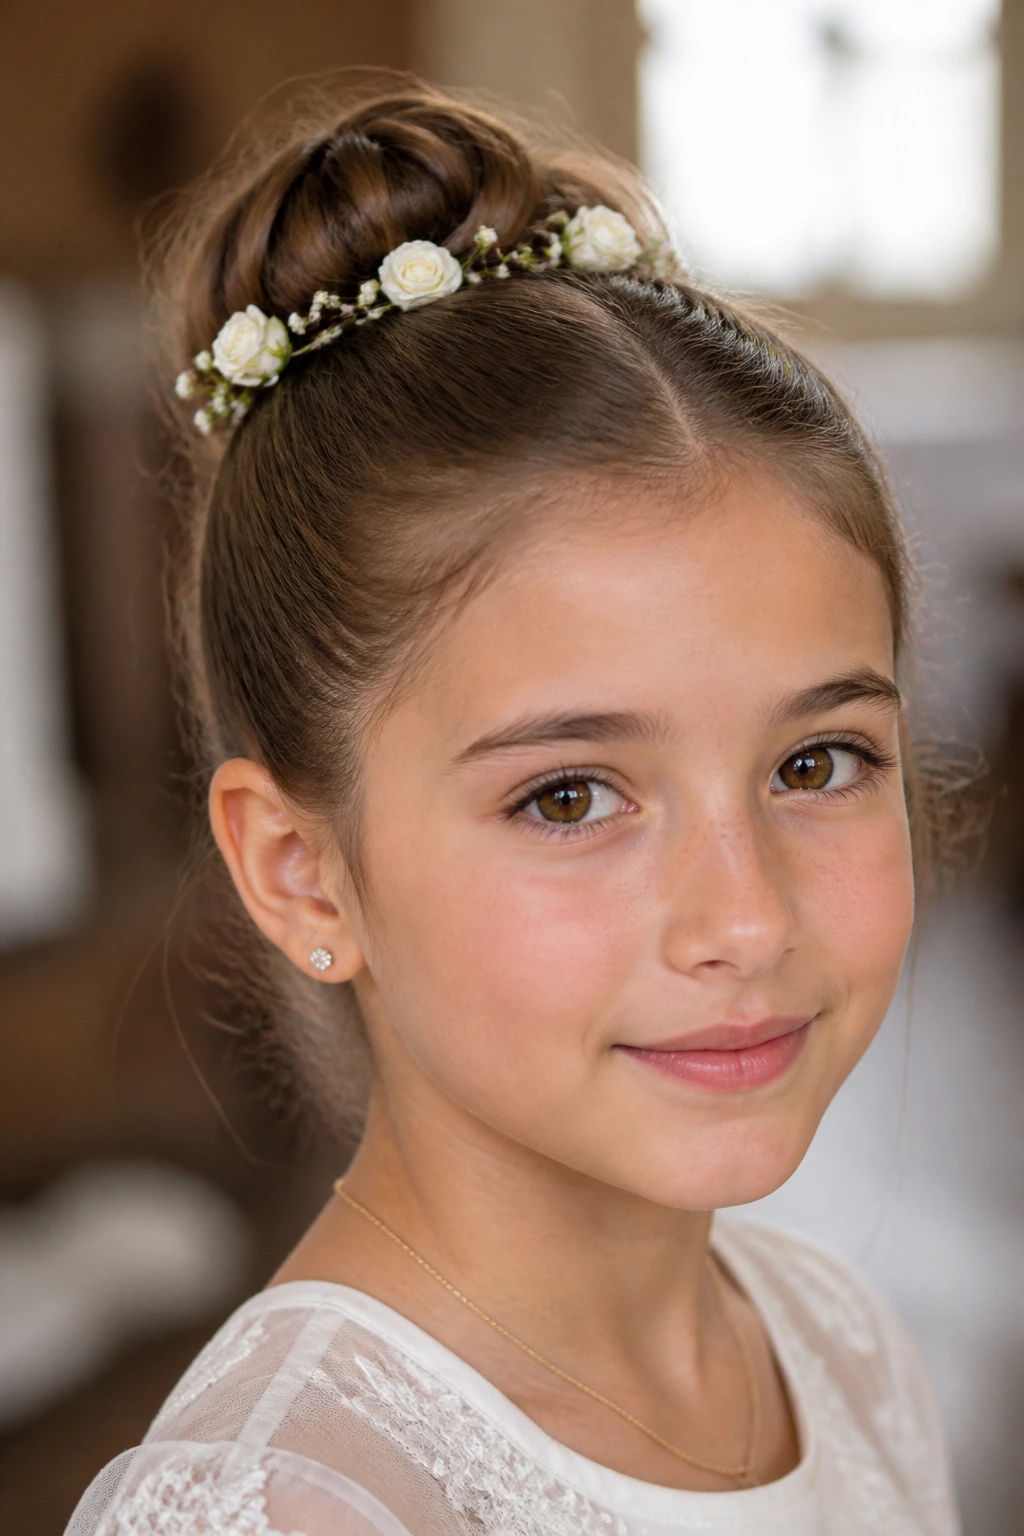
A thin wreath of flowers around a bun can be lovely, but it has to stay small. Tiny blossoms around the base of the bun create a halo effect without crowding the head.
Keep the flowers modest — three to five little blooms or a narrow floral band is plenty. The bun should remain the center of the style, not get swallowed by the decoration. I’d use this only when the dress is plain or the flowers are echoing a detail in the bouquet. When the dress already has a lot going on, the halo can drift toward too much.
31. Lace Clip Chignon
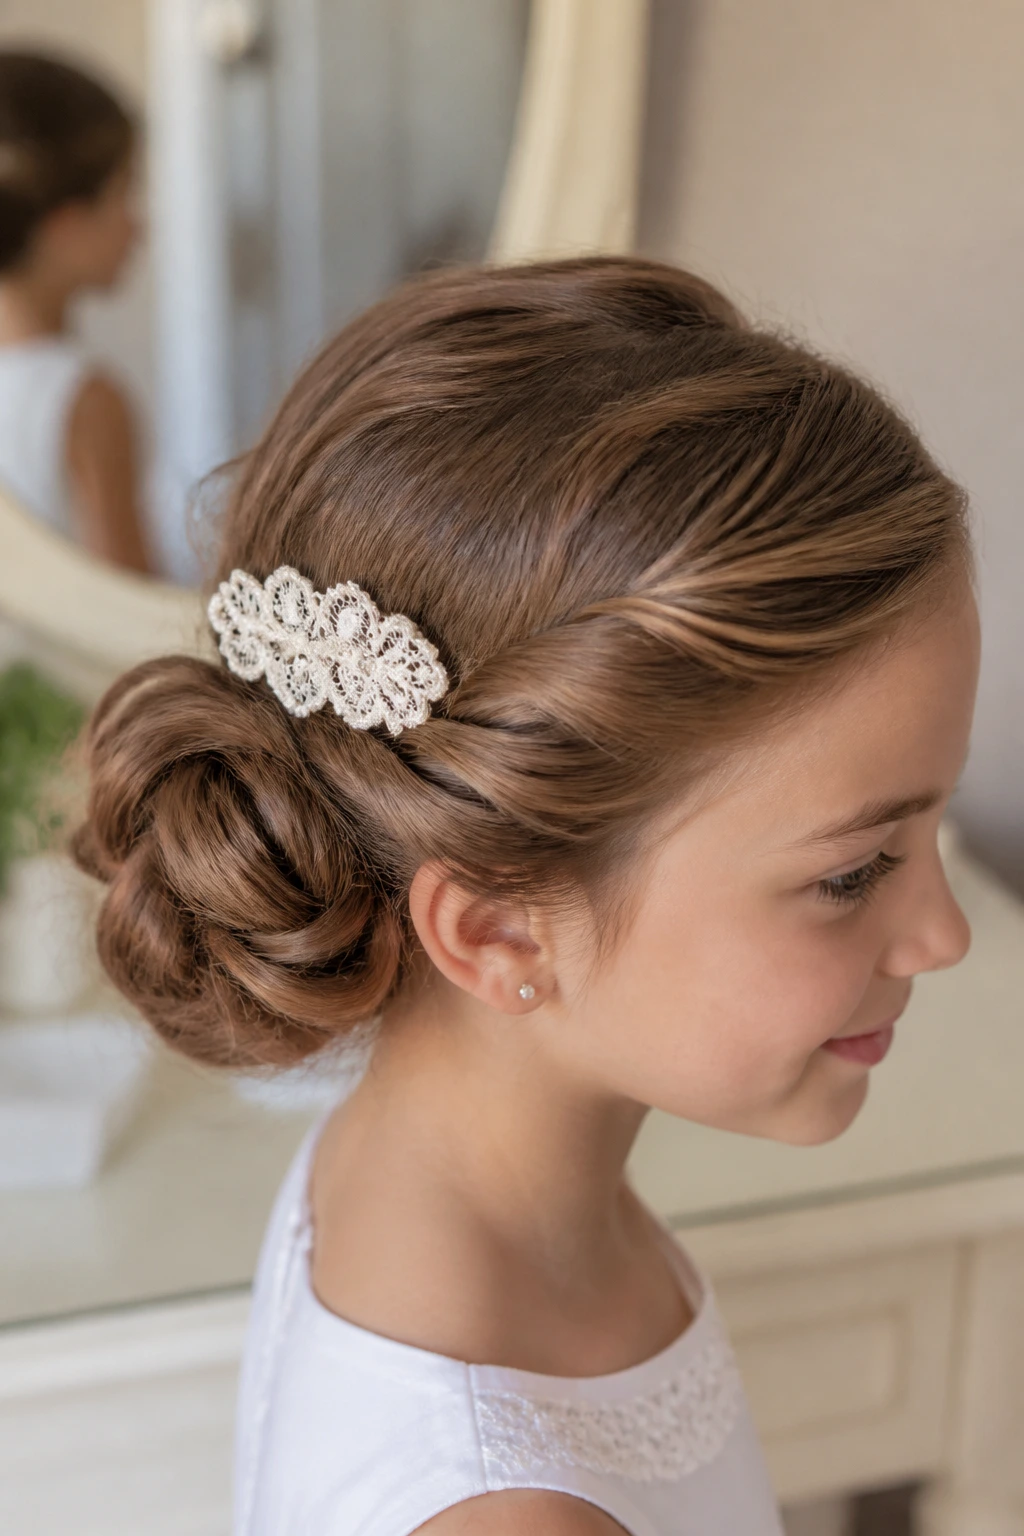
One lace clip is enough when the bun itself is tidy. A lace clip chignon pairs a smooth or softly twisted bun with a single clip that echoes the lace on the dress or veil.
The clip should lie flat and sit either just above the bun or slightly to one side, never perched high enough to wobble. This style is one of my favorites for children who do not want flowers or bows but still need one special detail. A good clip does the job quietly. That’s a refreshing change.
32. Petite Bun for Fine Hair
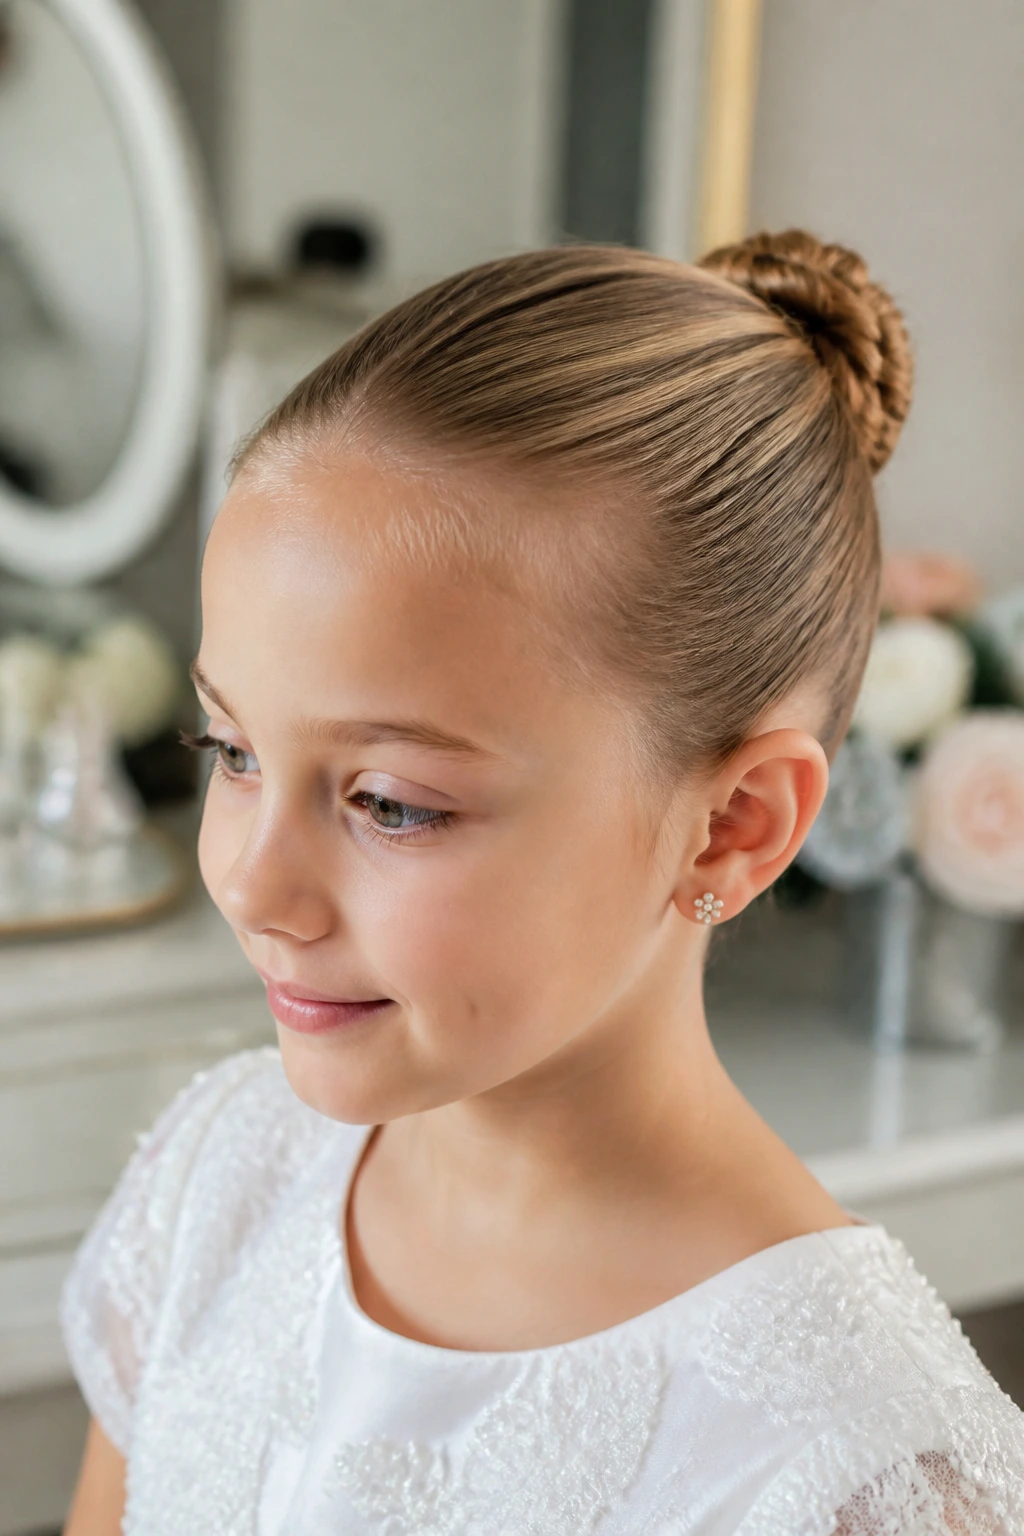
If the hair is fine, small wins. A petite bun for fine hair sits close to the head, uses a tiny elastic and a little padding if needed, and stays modest in size so the bun doesn’t look like it’s borrowing volume from somewhere else.
Dry shampoo or a light texturizing powder at the roots gives the pins something to catch. Without that grip, fine hair can slide out before the family has even left for Mass. I like this style because it respects the hair the child actually has. No fighting, no fake fullness, no giant bun that collapses halfway through the morning.
Why Bun Hairstyles Hold Their Shape Better for First Communion
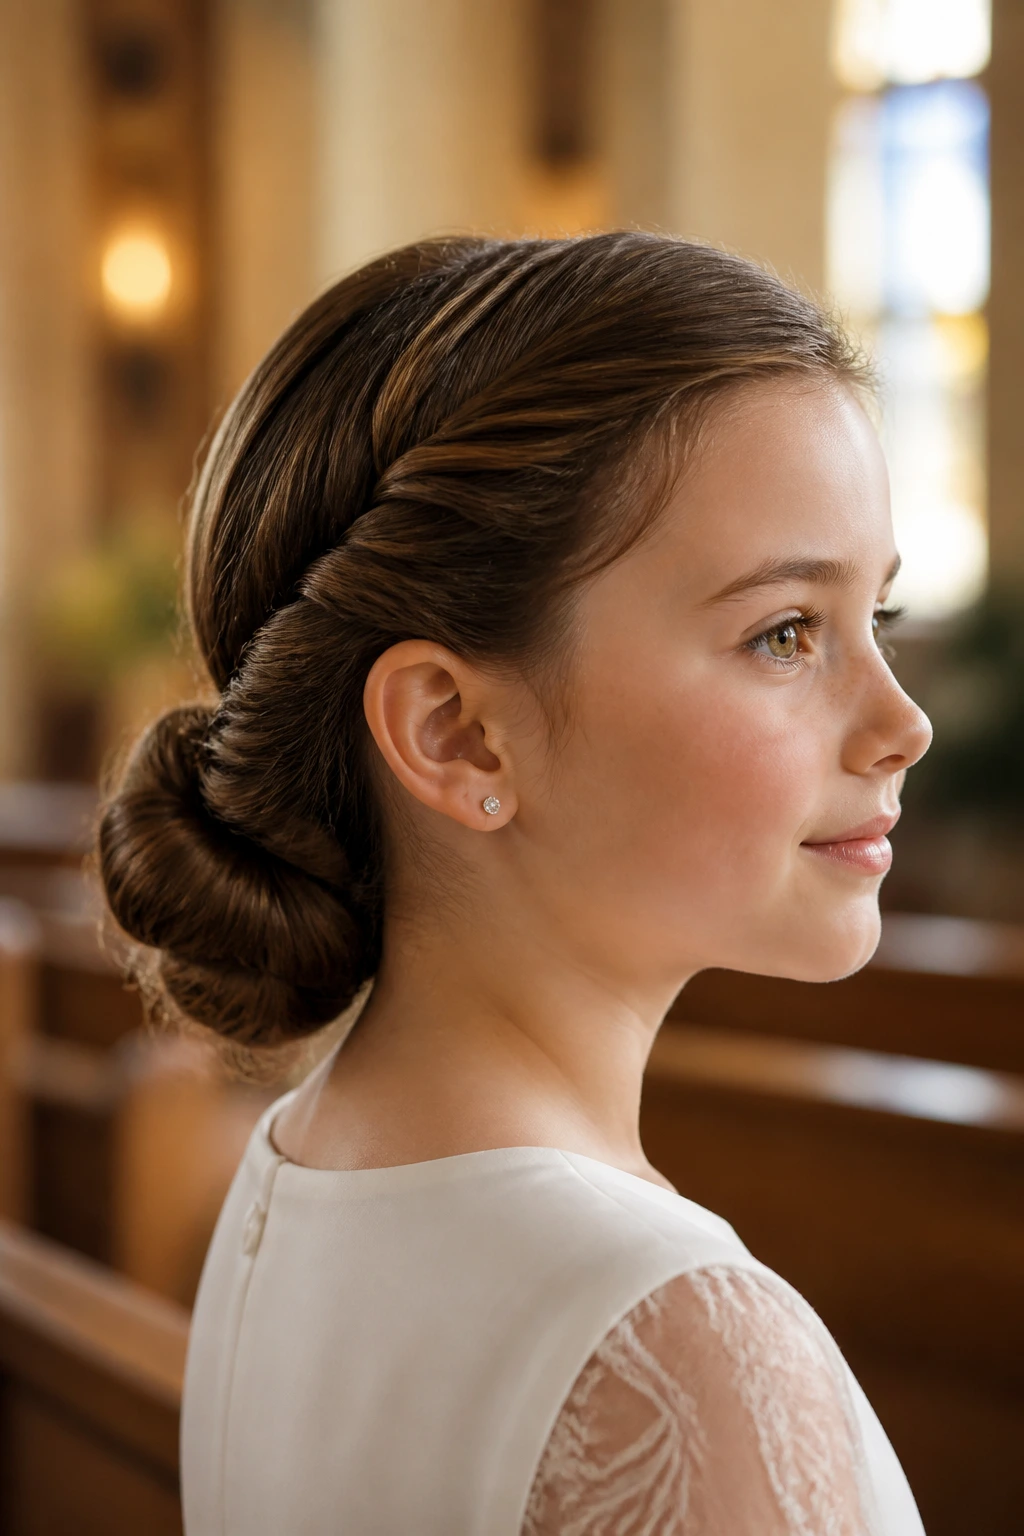
A First Communion morning usually includes more movement than people expect. There’s getting dressed, a walk into church, sitting, standing, kneeling, and then the part no one can avoid: the photo line where everyone wants “just one more” picture. Bun hairstyles handle that better than loose styles because the hair is gathered, pinned, and anchored close to the head.
The low nape placement matters more than most people realize. A bun that sits low can live under a veil comb or a headband without pushing the accessory upward. It also keeps the silhouette tidy from the back, which matters because the back of the head is what everyone sees when the child turns to walk, sit, or receive a hug.
I also like buns because they let the face stay open. That sounds small, but it matters on a day when the dress, the cross necklace, the veil, and the child’s expression are all part of the picture. Hair should frame the moment, not fight it. Loose curls can be beautiful, but they need more babysitting. Buns give you one less thing to chase.
Essential Tools for These Bun Hairstyles
- Tail comb: The pointed end makes clean parts and helps smooth the crown without tearing at the hair.
- Boar-bristle or paddle brush: Use the brush that matches the hair texture; a paddle brush tames length, while a boar-bristle brush smooths the surface.
- Small clear elastics: Good for braids, twists, and bubble sections without drawing attention.
- Bobby pins in two sizes: Short pins hold fine hair; longer pins anchor thicker buns and heavier accessories.
- U-pins: These are useful for buns that need a softer hold with less visible pinning.
- Light hairspray: A fine mist keeps flyaways down without turning the hair helmet-hard.
- Texturizing spray or dry shampoo: Best for slippery hair that needs grip before pinning.
- Small bun donut or padding piece: Helpful for fine hair or styles that need a rounder shape.
- Satin ribbon or slim bow: Works best when the accessory is narrow and easy to pin flat.
- Pearl pins, floral comb, or veil comb: Pick one main accessory and let the hairstyle support it.
Smart Hair Prep, Washing, and Accessory Choices
The cleanest First Communion buns usually start the day before. For hair that is fine or silky, I often prefer day-old hair because it has a little natural grip. Freshly washed hair can slide around in bobby pins like it’s trying to escape. If the hair is oily or heavy with product, a morning wash is fine, but the hair needs to be fully dry before you start pinning.
Product matters more than people think
A pea-sized amount of smoothing cream or gel at the crown is enough for most children. More than that starts to look shiny in a way that feels out of place for a church service. Use dry shampoo at the roots if the hair is slippery, and use texturizing spray only where the pins need grip. The goal is control, not stiffness.
Accessories should be tested, not hoped for
A veil comb, bow, pearl pin, or headband should be tried once before the event. You want to know whether the comb tilts, whether the headband pinches behind the ears, and whether the flower clip slides. Tiny failures matter here. A beautiful clip that slips after ten minutes is just a noisy problem.
Keep the child comfortable
If a style pulls at the temples, it’s too tight. If the bun makes the child want to scratch the back of her head, it’s too heavy. Comfort is not an afterthought on this kind of morning; it’s part of whether the style lasts through the ceremony.
How to Wear These Looks With a Veil, Bow, or Headband
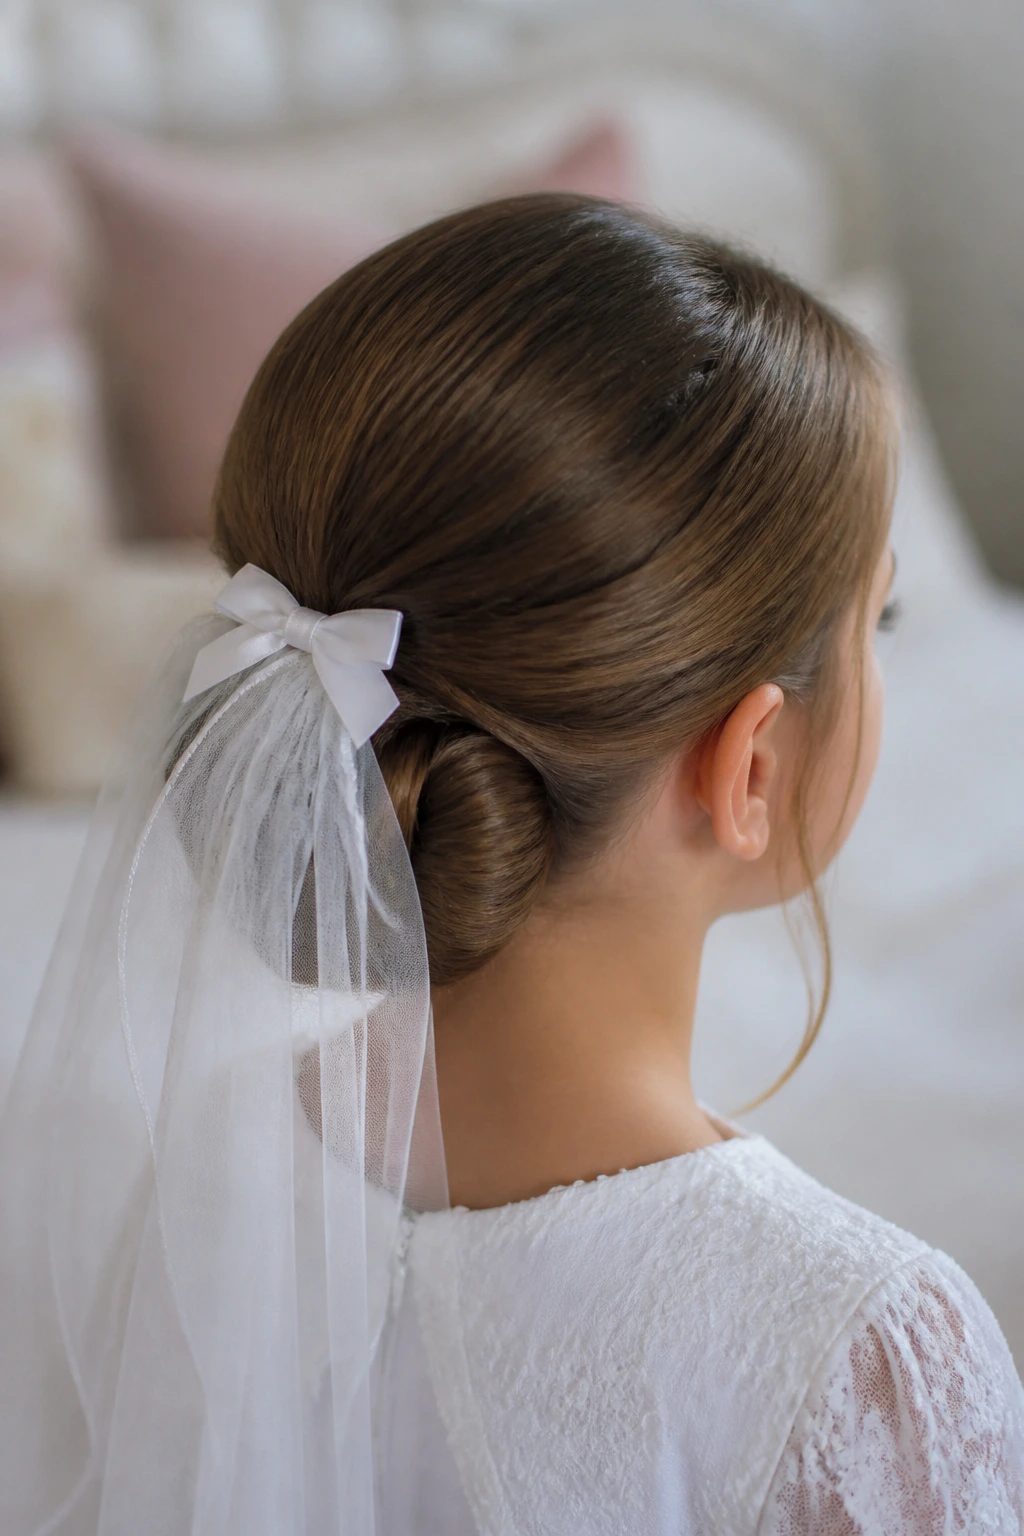
Presentation: Keep the bun low enough that the back of the head still looks clean when the child sits or bows. A bun that sits just above the nape usually gives the best balance: enough height to be seen, low enough to stay polite and steady.
Accessories: Pick one main accent and let it breathe. A veil comb, a 1-inch bow, three pearl pins, or a tiny floral cluster is usually enough. If you stack all of them together, the hairstyle starts to look crowded, and the bun gets lost under the extras.
Scale: Match the size of the bun to the child’s head and hair density. A small child with fine hair often looks best with a petite knot or small chignon. Bigger, thicker hair can carry a larger braided bun, but even then, the shape should stay tidy rather than ballooning out.
Comfort: Let the child turn her head, tilt back, and smile before you leave home. If she keeps reaching for the style, something is poking or tugging. Fix it then. Church pews and photo lines are not the place for an uncomfortable pin.
Additional Tips and Style Boosters
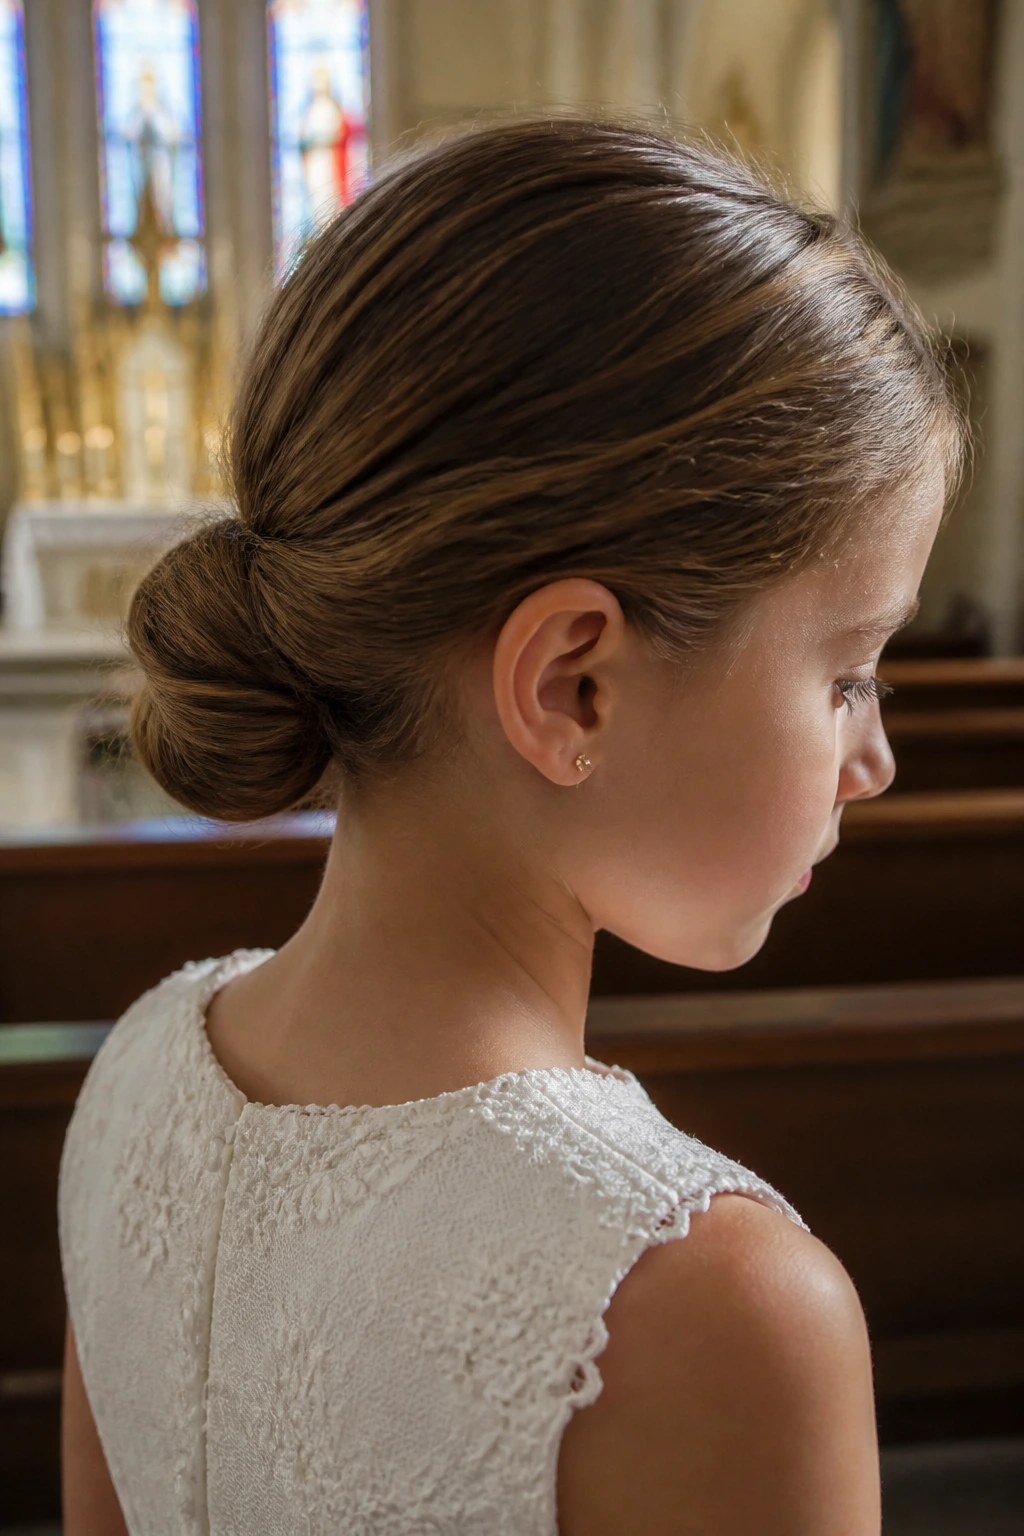
Texture Boost: If the hair is too silky, mist dry shampoo at the roots and through the mid-lengths, then wait five minutes before styling. That tiny pause gives the powder time to settle and makes the pins hold better.
Customization: A plain dress pairs well with pearl pins, a slim bow, or a tiny flower comb. If the dress already has lace, embroidery, or a sash, keep the bun cleaner and let the clothing do more of the talking.
Finishing Touches: Smooth the top with your hands, not a heavy layer of product. Warm a drop of shine serum between your palms and run it only over the outer surface if the hair looks dry. A little goes a long way.
Make-It-Yours: For a child who hates tight styles, loosen the crown by a quarter inch and add two extra pins at the nape. For thick hair, split the bun into two coils instead of one giant loop. For curly hair, keep the natural texture visible instead of brushing it into submission.
Touch-Up, Storage, and Make-Ahead Guidance
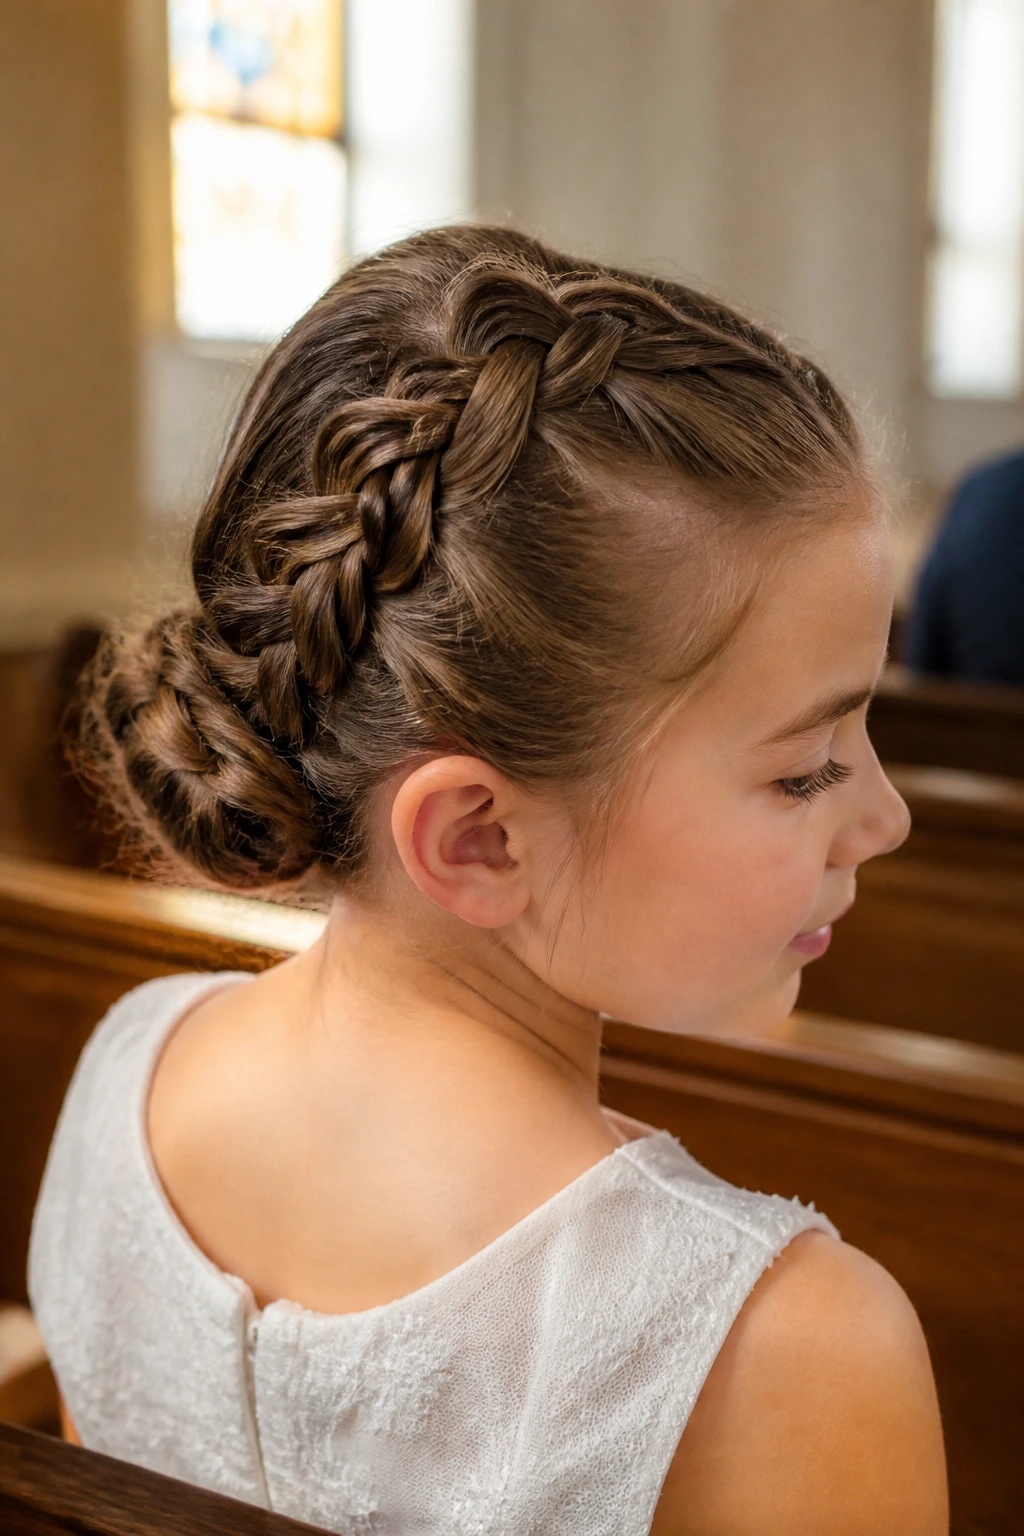
A communion bun is not something you want to invent ten minutes before it’s time to leave. Practice the style once, ideally a few days ahead, so you can see how the hair behaves with the actual part, the actual accessory, and the actual amount of product. Hair has a way of telling the truth when it’s pinned.
On the morning of the event, give yourself at least 45 to 90 minutes depending on hair length and texture. Fine hair usually goes faster, but it can need extra pinning. Curly or thick hair takes longer because you’ll spend more time smoothing, sectioning, and hiding the ends. If a veil or floral comb is involved, add another 10 minutes for testing the placement.
Keep a small touch-up kit in a zip pouch: 6 bobby pins, 2 U-pins, a travel-size hairspray, one small comb, and a backup elastic. That’s enough for most emergencies. If a bun loosens during the drive, smooth the crown with your hand, add one pin at the base, and stop. Over-fiddling makes the style worse.
Do not sleep in a tight communion bun unless the style is intentionally set for that. A bun worn too long flattens at the crown and starts to ache at the scalp. If you need to prep part of the style the night before, braid or section the hair loosely, then finish the bun in the morning. That keeps the shape fresh and the child much happier.
Variations and Adaptations to Try
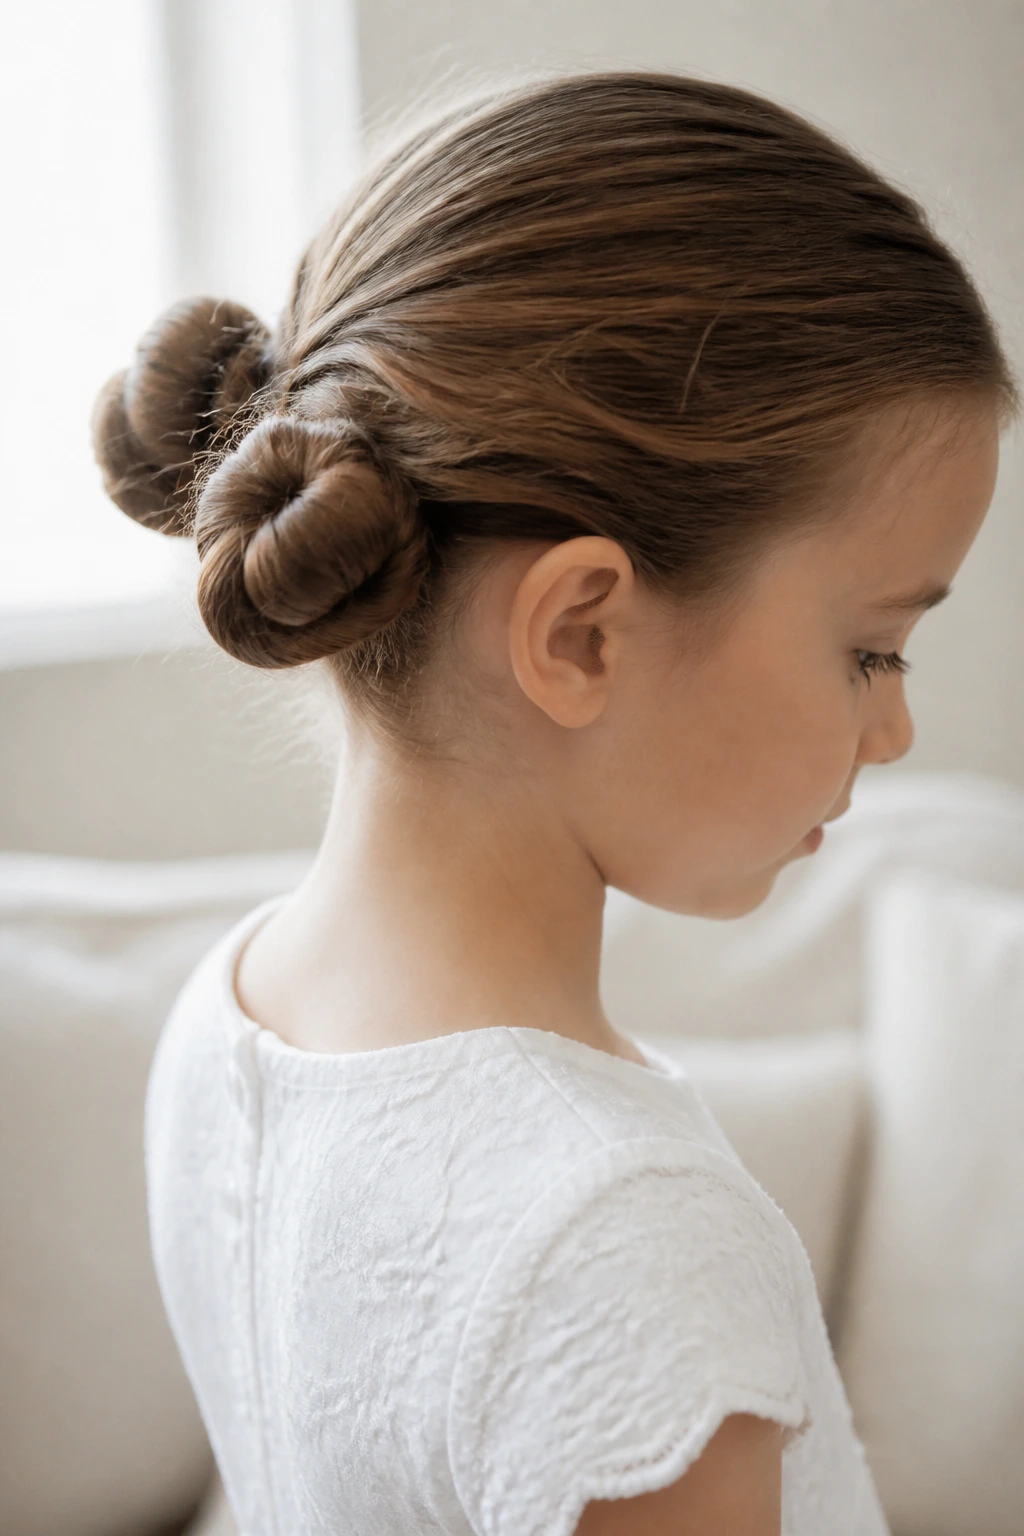
Fine-Hair Cushion Bun: Add a small bun donut or a hidden padding ring if the hair is too thin to create a visible knot on its own. This keeps the style from collapsing into a tiny coil that disappears in photos.
Curly-Hair Respectful Version: Leave more texture intact, use a stronger gel only at the front hairline, and tuck the curls into a low bun without brushing them out. This keeps the curl pattern alive and avoids the puffed-out look that comes from too much combing.
Short-Hair Faux Bun: Twist the hair into small sections, pin them into a low knot, and hide the ends under a tiny filler piece if needed. This works best when the hair reaches the nape, but a skilled pin job can stretch shorter lengths farther than you’d think.
Sensitive-Scalp Soft Hold: Swap tight elastics for softer ones, use fewer pins, and place the bun low enough that it doesn’t tug at the crown. This is the version to choose when a child cannot tolerate pulling or pressure behind the ears.
Minimalist No-Accessory Bun: Skip the flowers, bows, and glittering extras entirely. A clean chignon with a smooth part can look more polished than a decorated style if the dress already carries enough detail.
Sibling-Match Twist: Keep the same bun structure for sisters or cousins, then change only the accessory — one gets a pearl pin, one gets a ribbon, one gets a small flower. That creates a coordinated look without making everyone wear the same exact hairstyle.
Common Mistakes to Avoid
The biggest mistake is building the bun too high. A high bun can look neat in the mirror, then clash with a veil, poke a collar, or make the child look older than the outfit wants. Keep the shape lower unless you have a specific reason not to.
Another common problem is too much product. Heavy gel, thick hairspray, and sticky shine cream can make the hair look stiff, greasy, or crunchy under indoor lighting. Use the lightest amount that keeps the crown smooth, then stop.
Heavy accessories cause more trouble than they’re worth. A big floral crown, oversized bow, or thick clip may slide around once the child starts moving, and the bun underneath ends up carrying all the weight. One restrained piece usually looks better and lasts longer.
People also forget about comfort. If the style pinches at the temples or tugs at the hairline, the child will spend the morning touching it. That shows in photos. Test the hairstyle for a few minutes before you leave, and fix anything that feels sharp.
Skipping a rehearsal is another easy way to get stuck. Hair behaves differently when it’s clean, when it’s slightly dirty, when it’s humid, and when it has a veil comb in it. A ten-minute test run prevents an hour of guessing.
Frequently Asked Questions
Which bun is best for First Communion if the child has a veil?
A low chignon, veil-ready knot, or center-part ballet knot usually gives the cleanest anchor point. The comb sits more securely when the bun is close to the nape and the crown is smooth, not puffed up.
Should the hair be washed the morning of the ceremony?
Not always. Fine or silky hair often holds better on day-old hair, while oily hair may need a fresh wash and full dry time. The real rule is grip: the hair should be clean enough to look tidy and textured enough to stay pinned.
How do I keep a bun from slipping out?
Use an elastic at the base, then pin the bun in an X pattern so the pins cross inside the coil. A little texturizing spray at the roots helps, too, especially on hair that slides out of everything.
Can short hair work in a bun hairstyle?
Yes, if the hair reaches close to the nape or can be twisted into a faux bun. A small filler piece, a tucked-under knot, or a braid wrap can stretch shorter lengths farther than a plain bun would.
What accessories look best for First Communion buns?
Pearl pins, tiny flowers, satin bows, slim headbands, and lace clips all work well when they stay small. Heavy rhinestones and oversized crowns tend to overpower the hairstyle and the dress.
How tight should the bun be?
Snug, not painful. If the child feels pulling at the temples, has a red mark after ten minutes, or keeps reaching for the bun, it’s too tight and needs to be loosened.
Can curly hair be left curly in a communion bun?
Absolutely. A curly bun with tendrils often looks softer and more natural than forcing the texture flat. Use a leave-in and a little gel, then shape the curls into a low bun without brushing them out.
How long before Mass should the hairstyle be finished?
About 45 minutes to 1 hour before leaving is a safe window for most families. That leaves room for a pin that slips, a bow that needs shifting, or a flyaway that shows up in the last mirror check.
What if the hairline is full of baby hairs or cowlicks?
Don’t fight every little strand into perfect silence. Smooth the main shape, then tame the edges with a soft brush and a trace of product. A few natural hairs around the hairline can actually make the style look less stiff.
A Quiet Style That Holds the Day Together
The best First Communion bun is rarely the biggest one. It’s the one that looks calm from the front, stays tidy at the nape, and lets the child forget about her hair once the morning starts moving. That usually means a clean base, a sensible amount of product, and one accessory that knows how to behave.
I’d pick the style based on the hair that’s actually in your hands, not the photo you wish you had. Fine hair needs grip. Thick hair needs structure. Curly hair needs respect. Once you make that choice honestly, the rest falls into place faster than people expect.
Pick one bun, do one rehearsal, and keep the pin kit close. The morning goes smoother when the hairstyle has already proved itself.
