



A shoulder-skimming cut can turn awkward faster than people expect. The ends flip out, the sides puff at the jaw, and all that hair you wanted to keep starts acting like it has a mind of its own. A clean undercut fixes that in a way layers alone usually can’t. It removes bulk where the head widens, while leaving enough length on top to tuck, wave, braid, pin, or blow-dry into something with actual shape.
Undercut styles for medium length hair are worth a serious look because they sit in that sweet spot between long and short. You get edge without giving up the collarbone sweep. You get less puff at the sides, less triangle shape at the back, and a lot more control over how the cut falls when you wear it down, half-up, or slicked back on a lazy day.
Placement matters more than most people think. A nape shave behaves nothing like a temple shave. A hidden side panel changes silhouette in one direction, while a low, soft undercut changes it in another. Guard length matters too—3 mm reads crisp and graphic, while a longer #4 or #5 gives you a softer grow-out and less shock when you catch the back of your head in the mirror.
Why These 32 Cuts Earn Their Keep
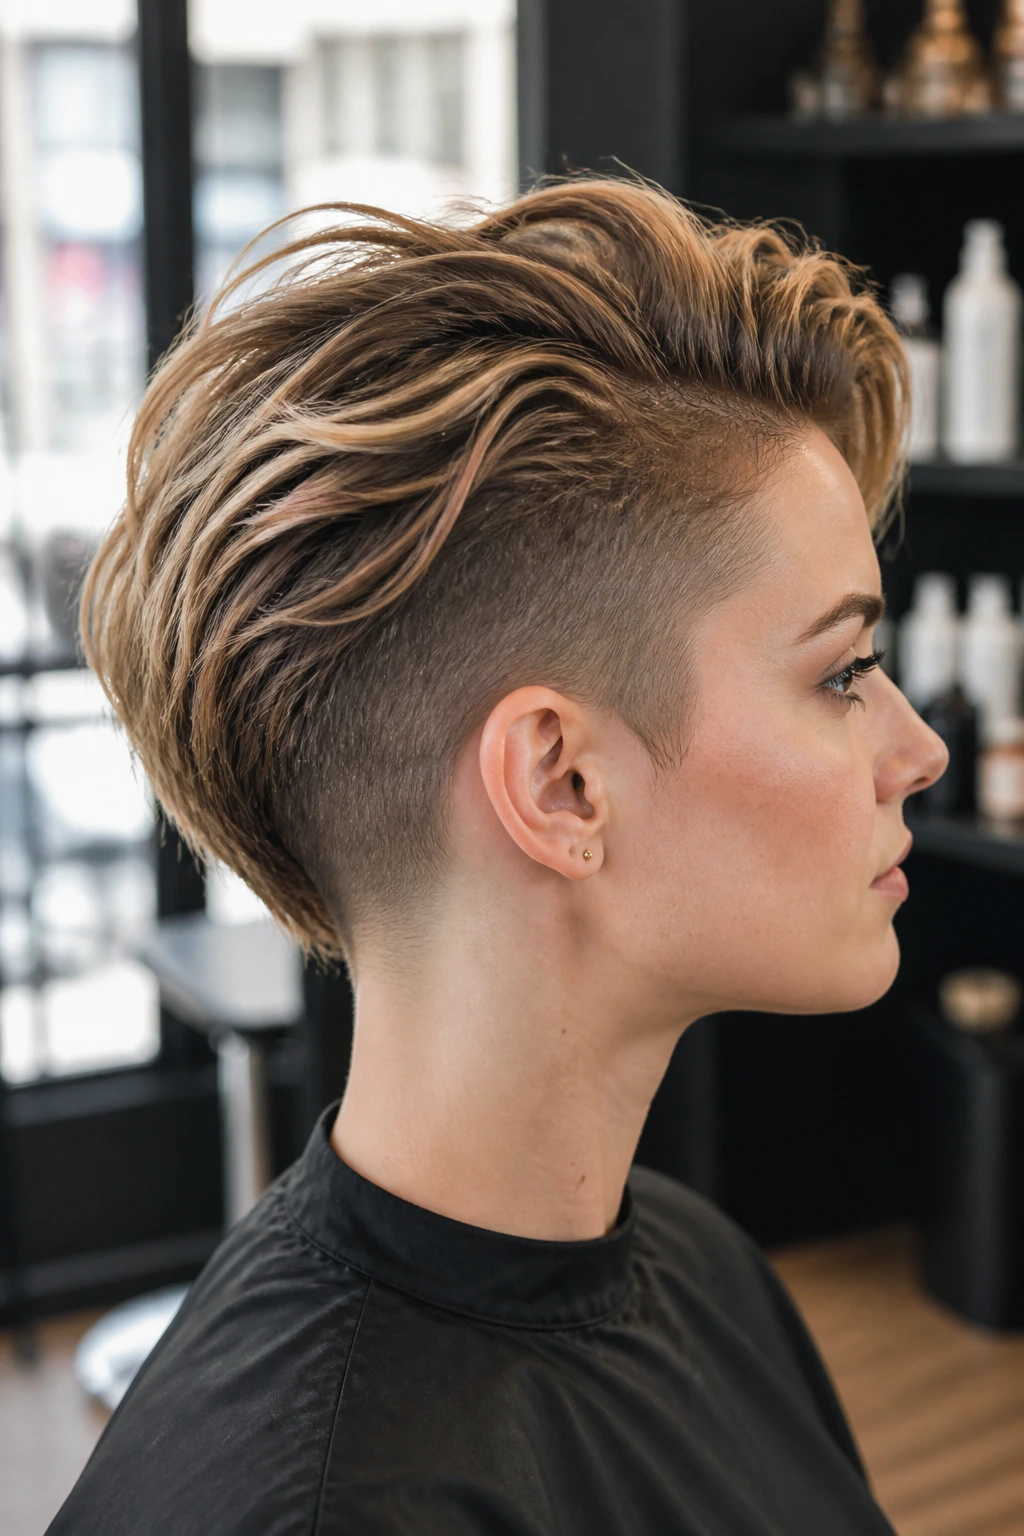
-
They remove bulk where medium hair gets heavy: The clipped section takes weight out of the nape, temple, or side panel, so the top can move instead of sitting like a block.
-
They still leave you styling options: You can wear these cuts down, tucked, waved, braided, or half-up without waiting for a full grow-out.
-
They work with different hair densities: Thick hair gets relief from the inside out, while finer hair can use the undercut to create lift and keep the top from collapsing.
-
They hide and reveal on your terms: A hidden undercut disappears under the top layer at work, then shows up when you tie your hair back or sweep it to one side.
-
They play well with texture: Straight hair gets cleaner movement, wavy hair gets less bell-shape at the ends, and curls get room to spring instead of stacking up.
-
They age better than a drastic chop: The grow-out is easier to manage when the undercut is placed with the hairline and parting in mind, not hacked in as an afterthought.
1. Hidden Nape Undercut Lob
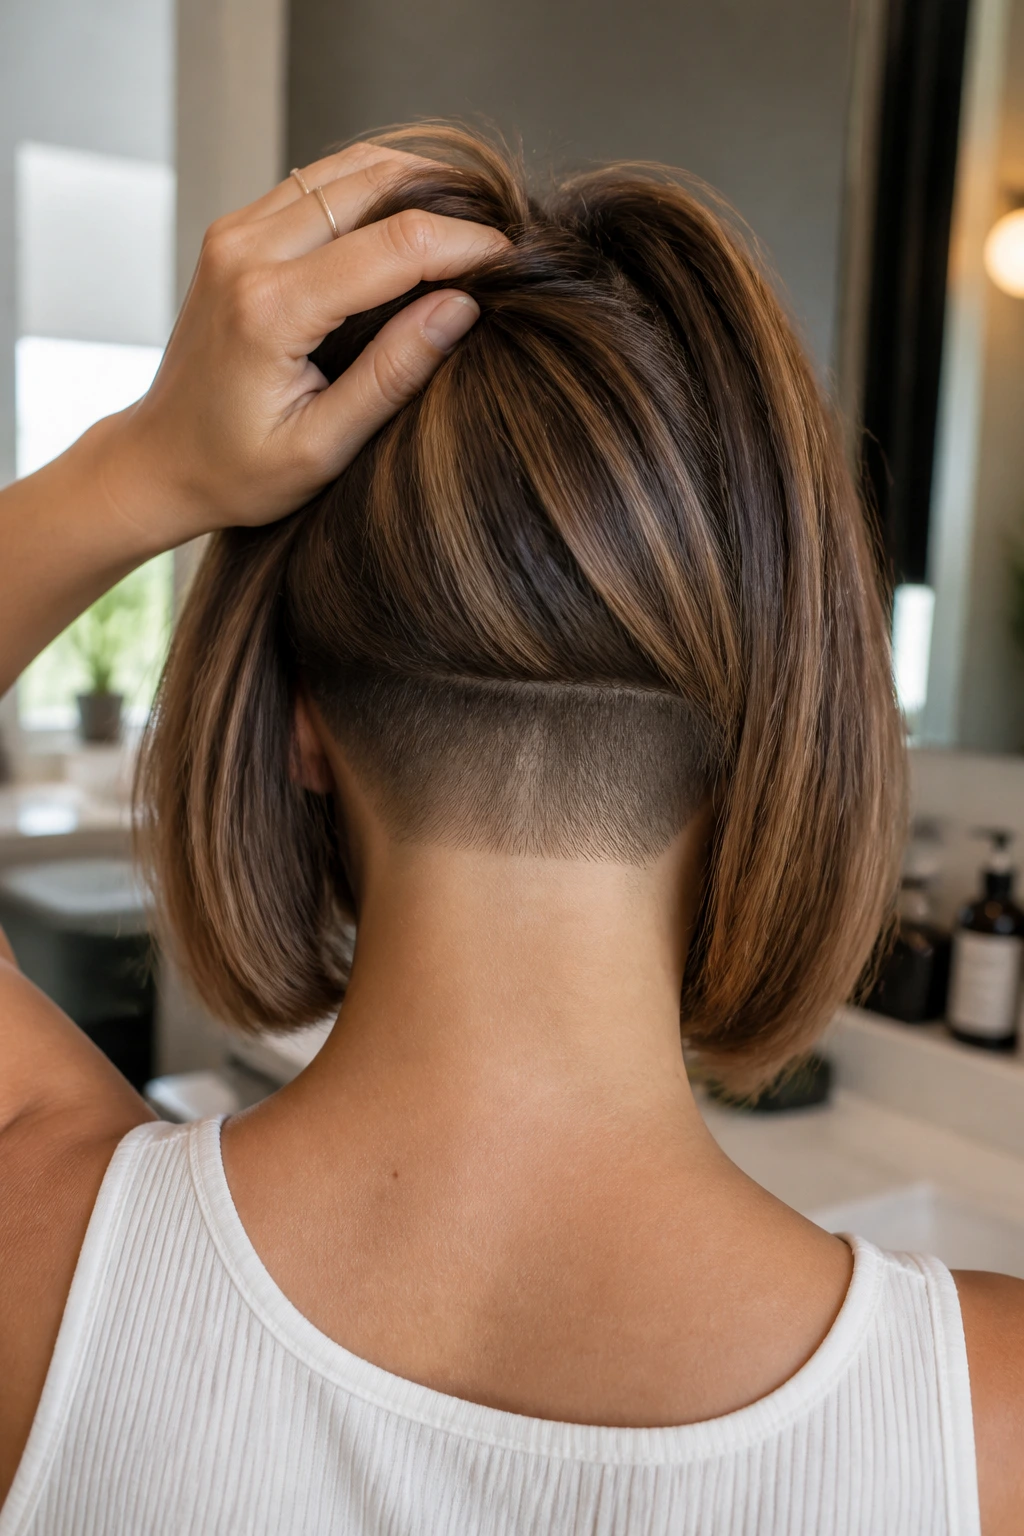
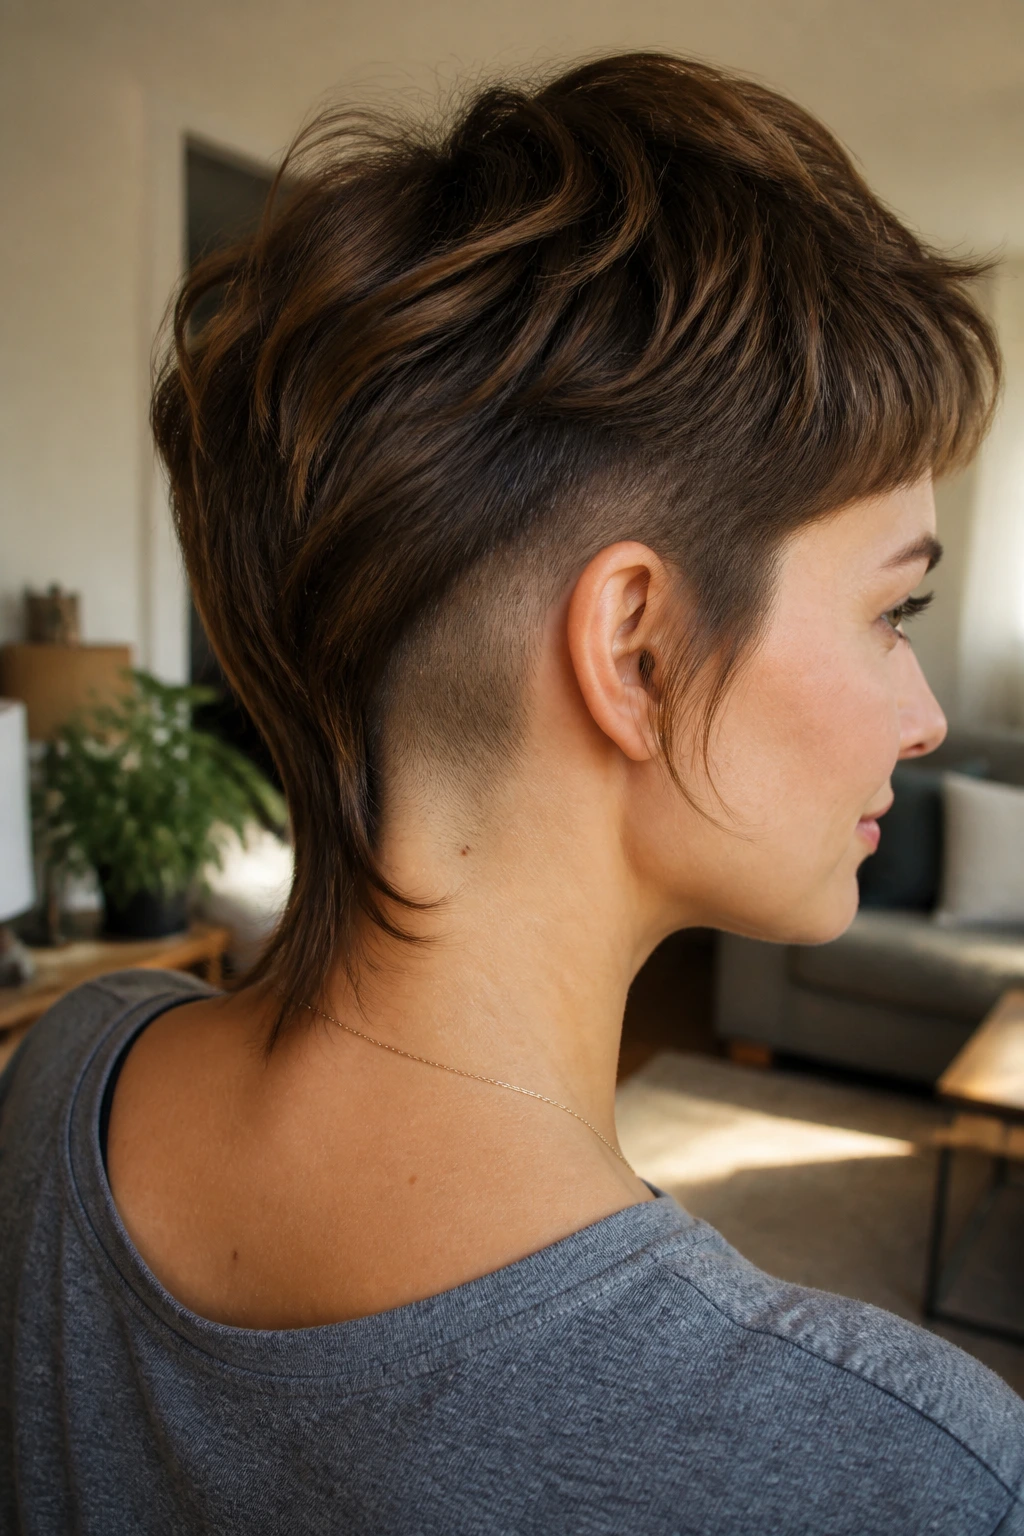
A hidden nape undercut is the cut I reach for when someone wants less bulk without advertising the fact. On medium-length hair, the top layer still skims the collarbone, but the underside at the nape is clipped down to a short strip—usually around a #2 or #3 guard. The result is calm, not dramatic. Hair lies flatter at the back, and the ends stop kicking out like they’re trying to escape.
Why It Works
The magic is in the placement. The visible length stays intact, so the style still looks like a lob from the front. From behind, though, the lower section no longer piles up under the top layer, which means less swell at the neckline and less friction against collars.
What to Ask For
- A soft, hidden undercut just above the hairline at the nape.
- A narrow strip if you want subtlety; a wider strip if your hair is thick.
- Keep the top at collarbone length so the contrast stays tucked away.
Best note: This is the style I’d pick if you wear your hair down most days but hate the way the back puffs up after a blow-dry.
2. Deep Side-Panel Undercut Bob
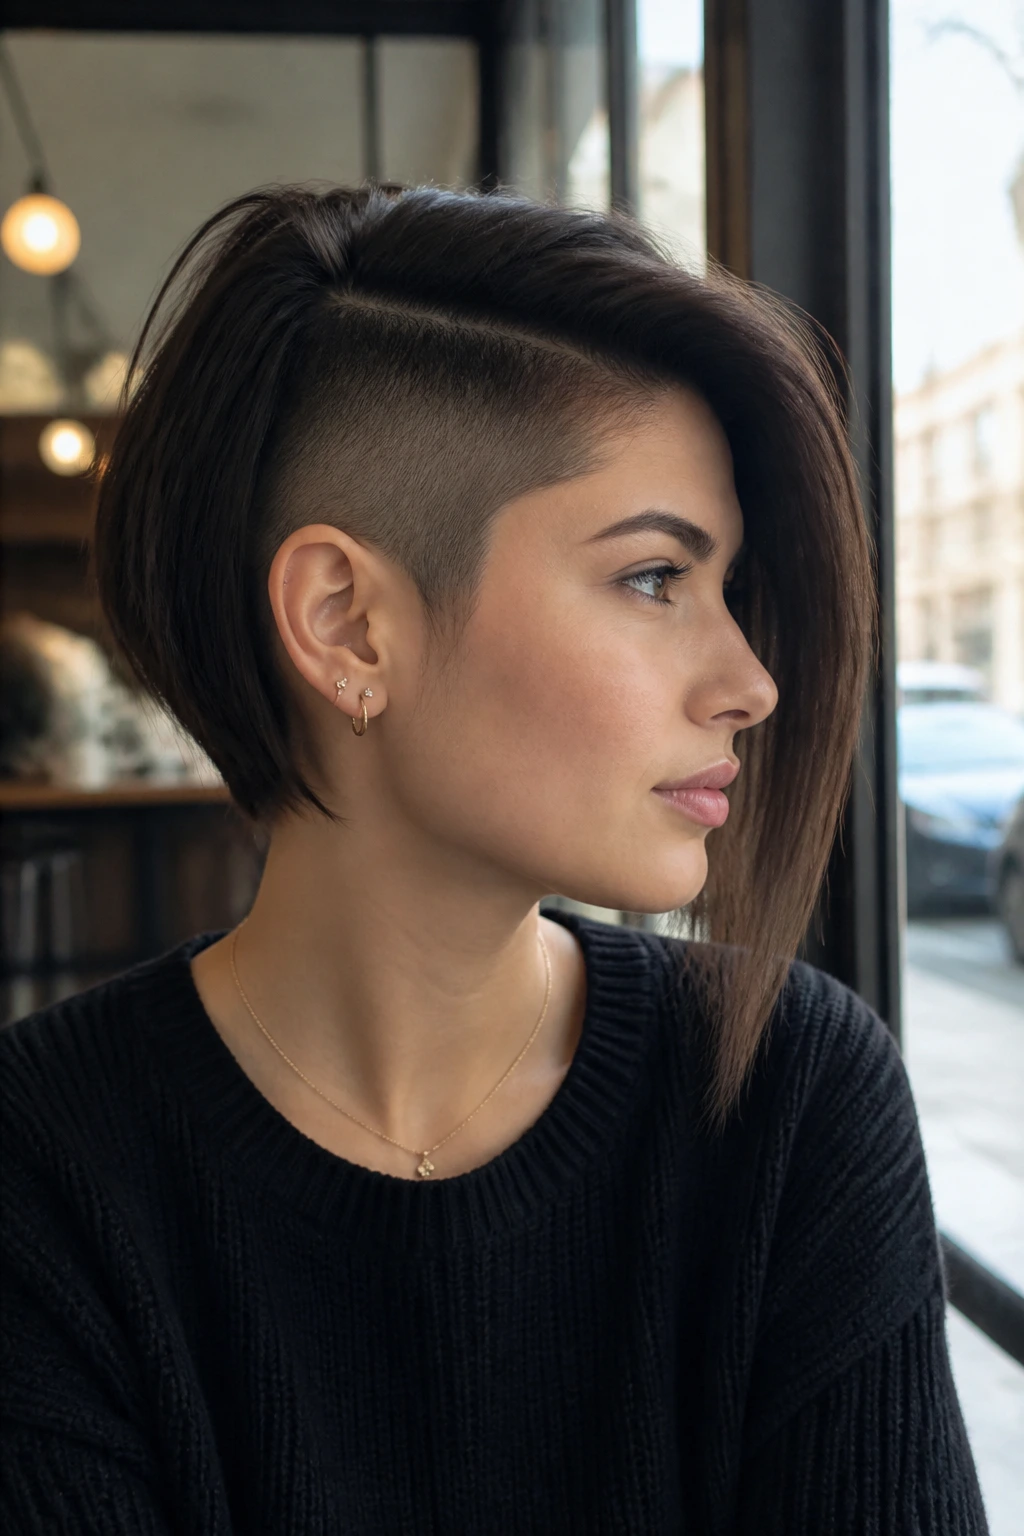
This one is sharper. A deep side-panel undercut removes a chunk of hair under one side part, usually behind the temple and above the ear, while the top layer stays long enough to sweep across and hide it. The cut has a clean, almost architectural feel, and it’s especially good if one side of your hair naturally balloons out more than the other.
The reason it works is simple: the side panel takes weight off the exact spot that makes medium hair look bulky when tucked behind the ear. You can wear it smooth, rough it up with matte paste, or blow it into a deep side part that shows just a flash of scalp when the hair moves.
If your hair is thick, this is one of the few undercuts that can actually change the shape instead of just changing the mood. Ask for a long top layer with a concealed panel underneath, then check it with your stylist in the mirror before they cut the second side. Half an inch makes a difference here.
3. Temple Undercut with Soft Waves
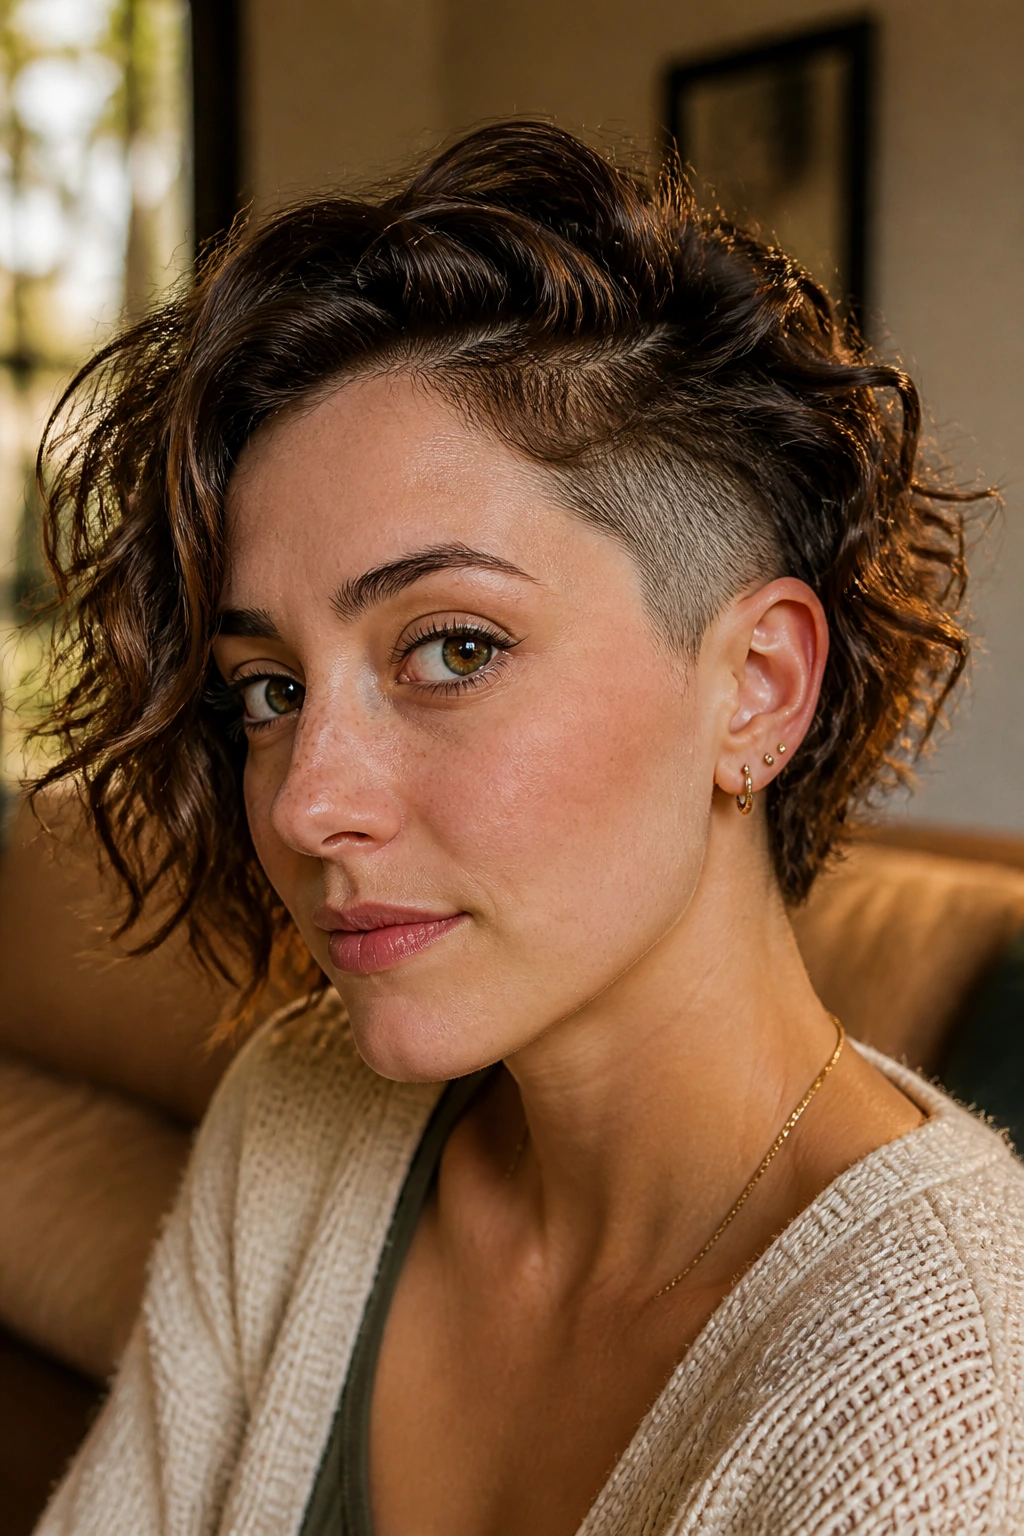
Why does a tiny shave at the temple look so much bigger once the waves start moving? Because it creates a sharp pause between softness and edge. The top stays medium length and wavy, usually with a loose 1-inch iron bend or a hand-scrunched finish, while the temple is clipped low enough to peek through when the hair is tucked or parted.
That contrast gives the face a little more structure, especially if your waves tend to expand around the cheekbones. It also keeps the cut from feeling puffy near the ears, which is a common problem when medium hair grows out and starts to stack sideways.
How to Wear It
- Wear the waves loose and slightly off-center.
- Tuck one side behind the ear to show the shave.
- Use a light sea-salt spray only at the mid-lengths and ends, not the root.
A temple undercut is one of those styles that looks quiet from the front and much bolder when you turn your head. That’s the fun part.
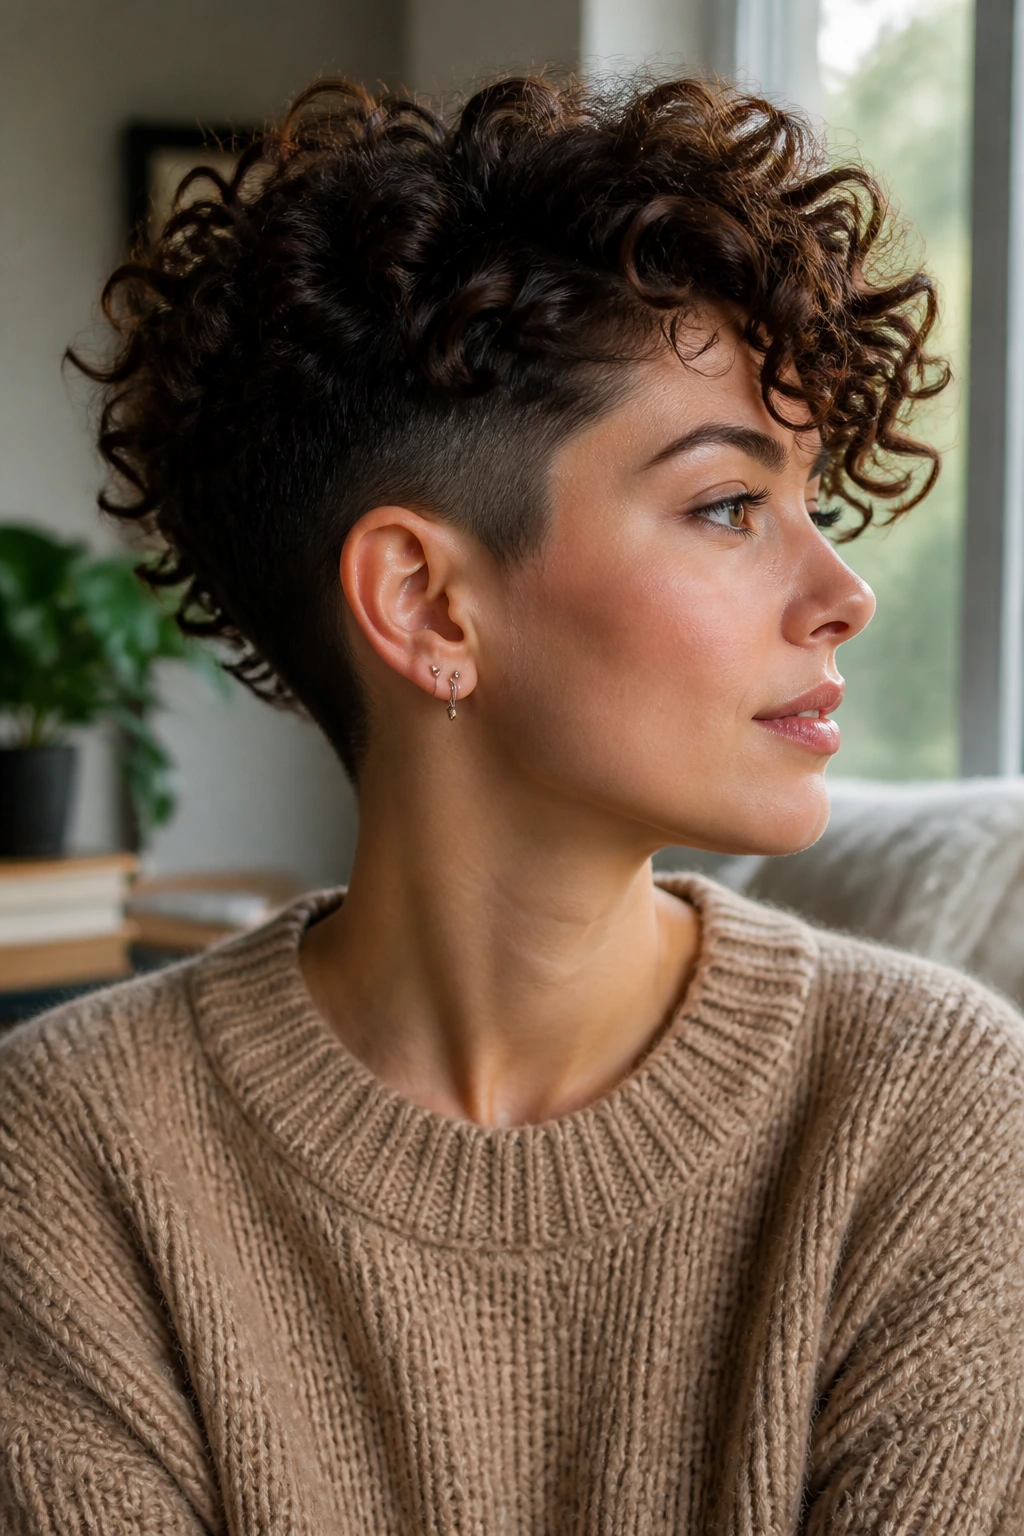
4. Curly Crown Undercut
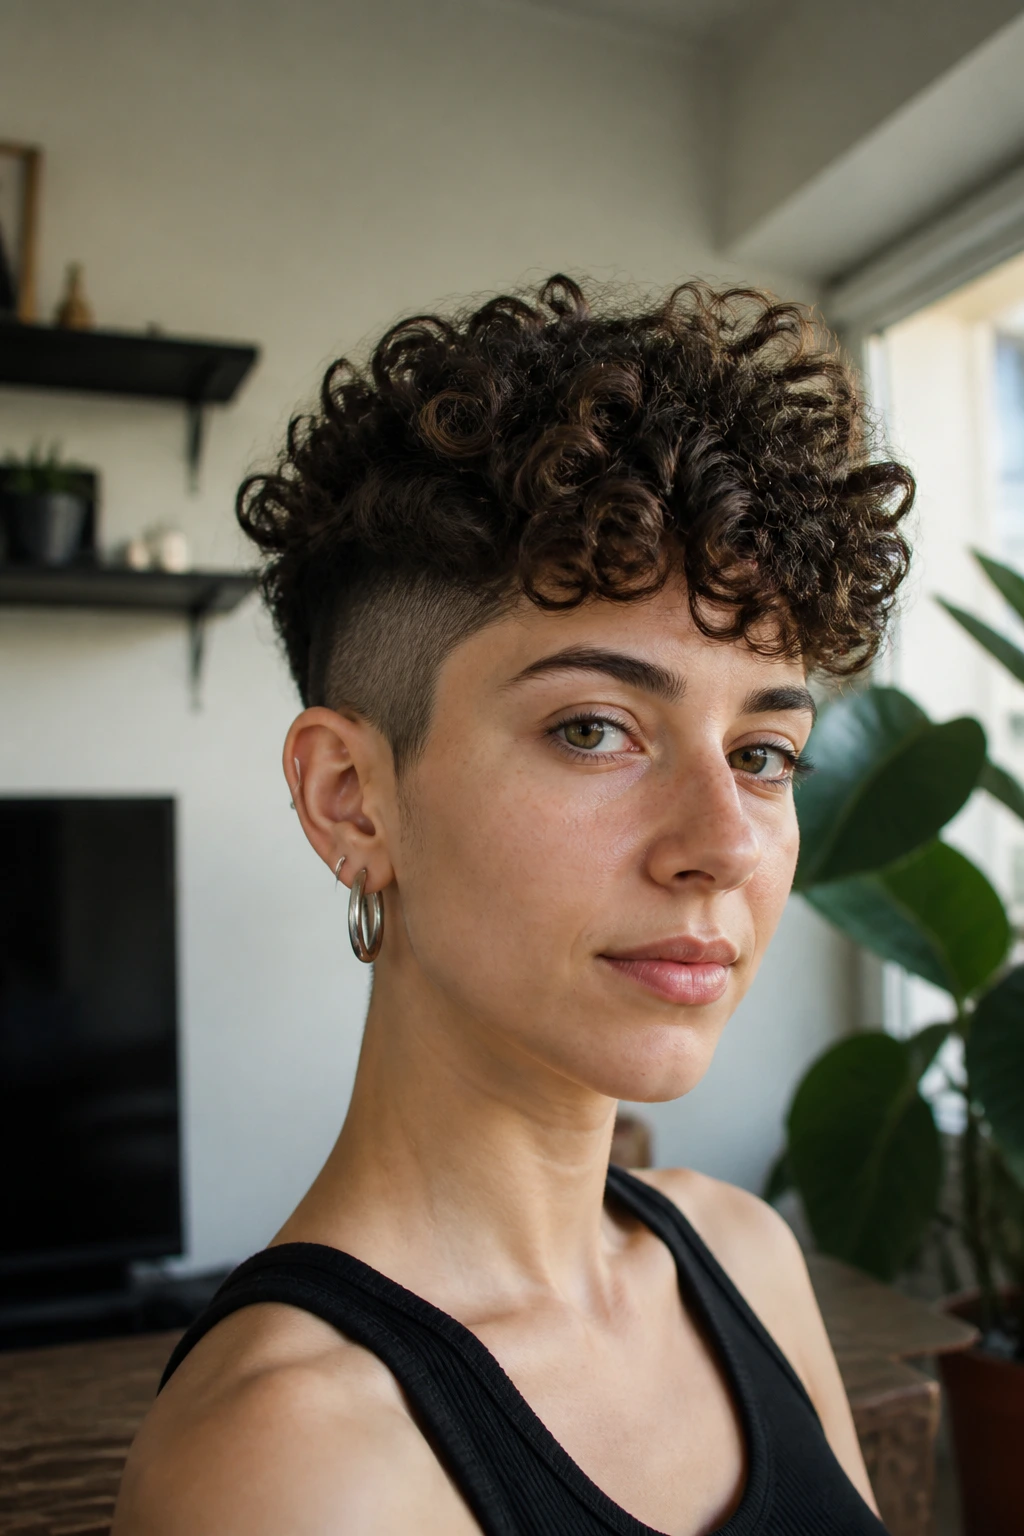
Curly hair can absolutely wear an undercut, and it often benefits from one more than straight hair does. The trick is to leave the crown and upper layers long enough for the curl pattern to spring, then remove bulk at the nape and lower sides so the whole shape doesn’t expand into a triangle. If your curls are dense, the difference is dramatic.
The first time people try this, they usually worry the cut will look too short. It doesn’t, as long as the top stays in the 4- to 6-inch range and the clipped section is hidden under the curl mass. Diffuse it upside down for a few minutes, then stop before the roots dry into a hard shell. Curls need a little softness to move.
A curl cream and a tiny bit of gel at the ends is enough. Skip the heavy butter-y stuff near the roots; it fights the undercut instead of helping it.
5. Curtain-Bang Shag with Nape Shave
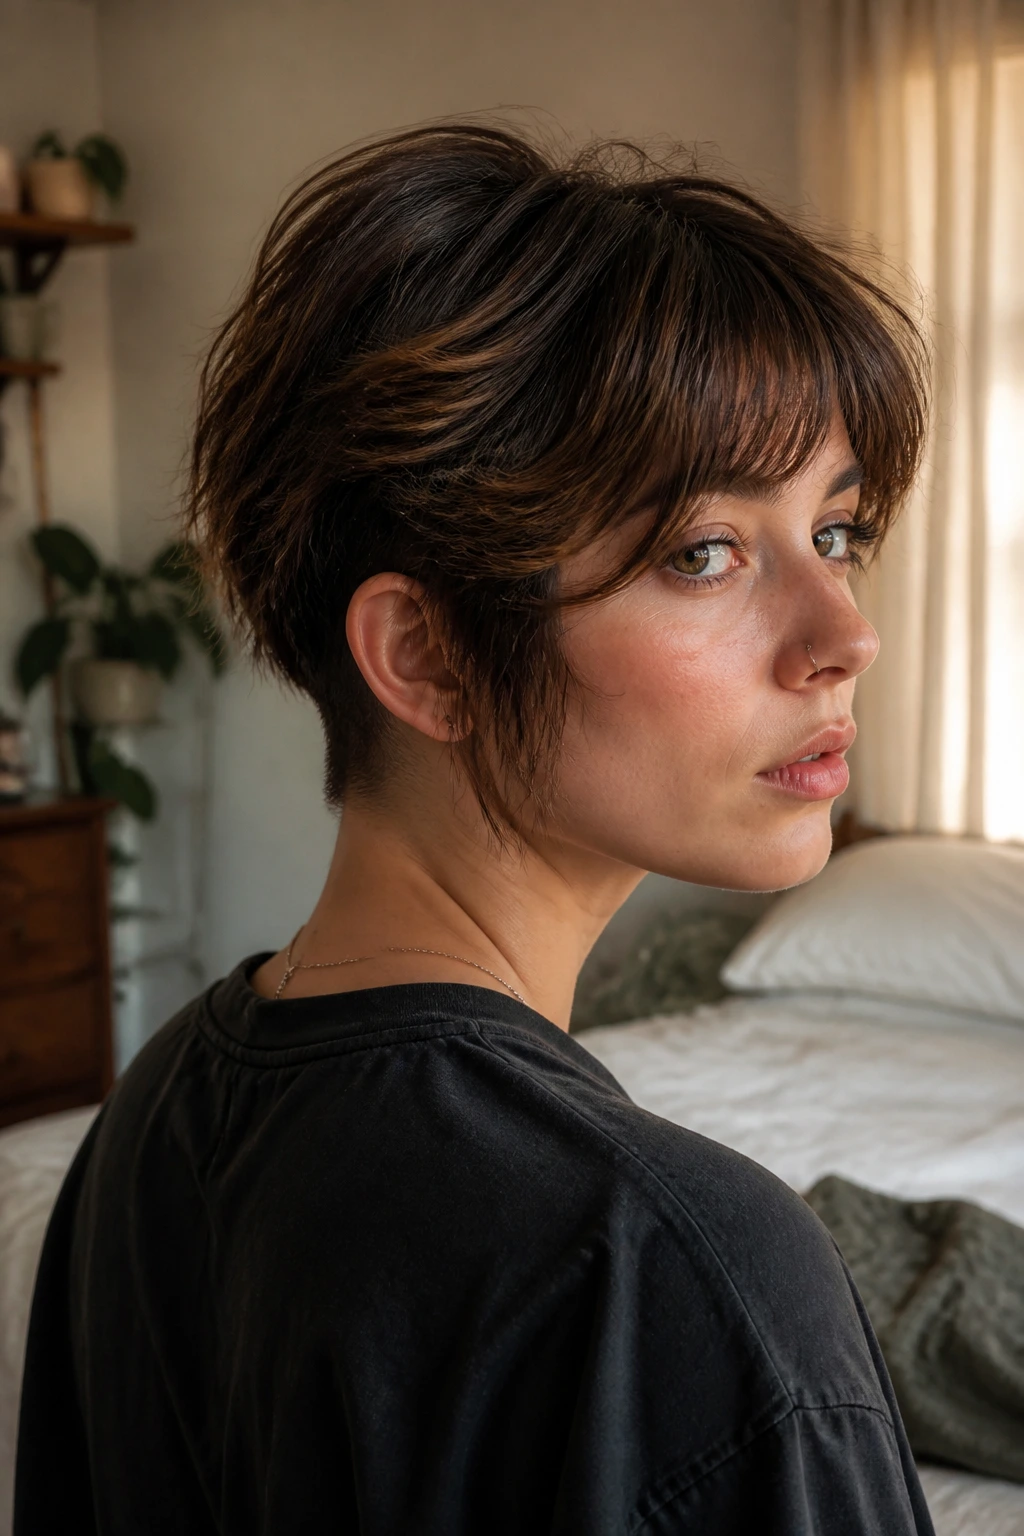
The shag wants motion. The nape shave gives it somewhere to go.
That’s the whole appeal here. Medium-length layers, curtain bangs that fall around the cheekbones, and a shaved nape that keeps the back from turning into a fluffy shelf. It’s the kind of cut that looks better when it’s a little bit undone. Actually polished shag cuts can feel too precious; this version has some bite.
The shape works best when the top layers are cut with some internal texture, not blunt chunks. Ask for a light razor or point-cut finish through the ends, then keep the nape undercut low and narrow. The front stays soft, the back stays lean, and the whole cut moves when you shake it out with your fingers.
Dry shampoo at the roots helps on day two, but use it sparingly. Too much and the bangs start to look dusty.
6. Pixie-Bob Undercut Hybrid
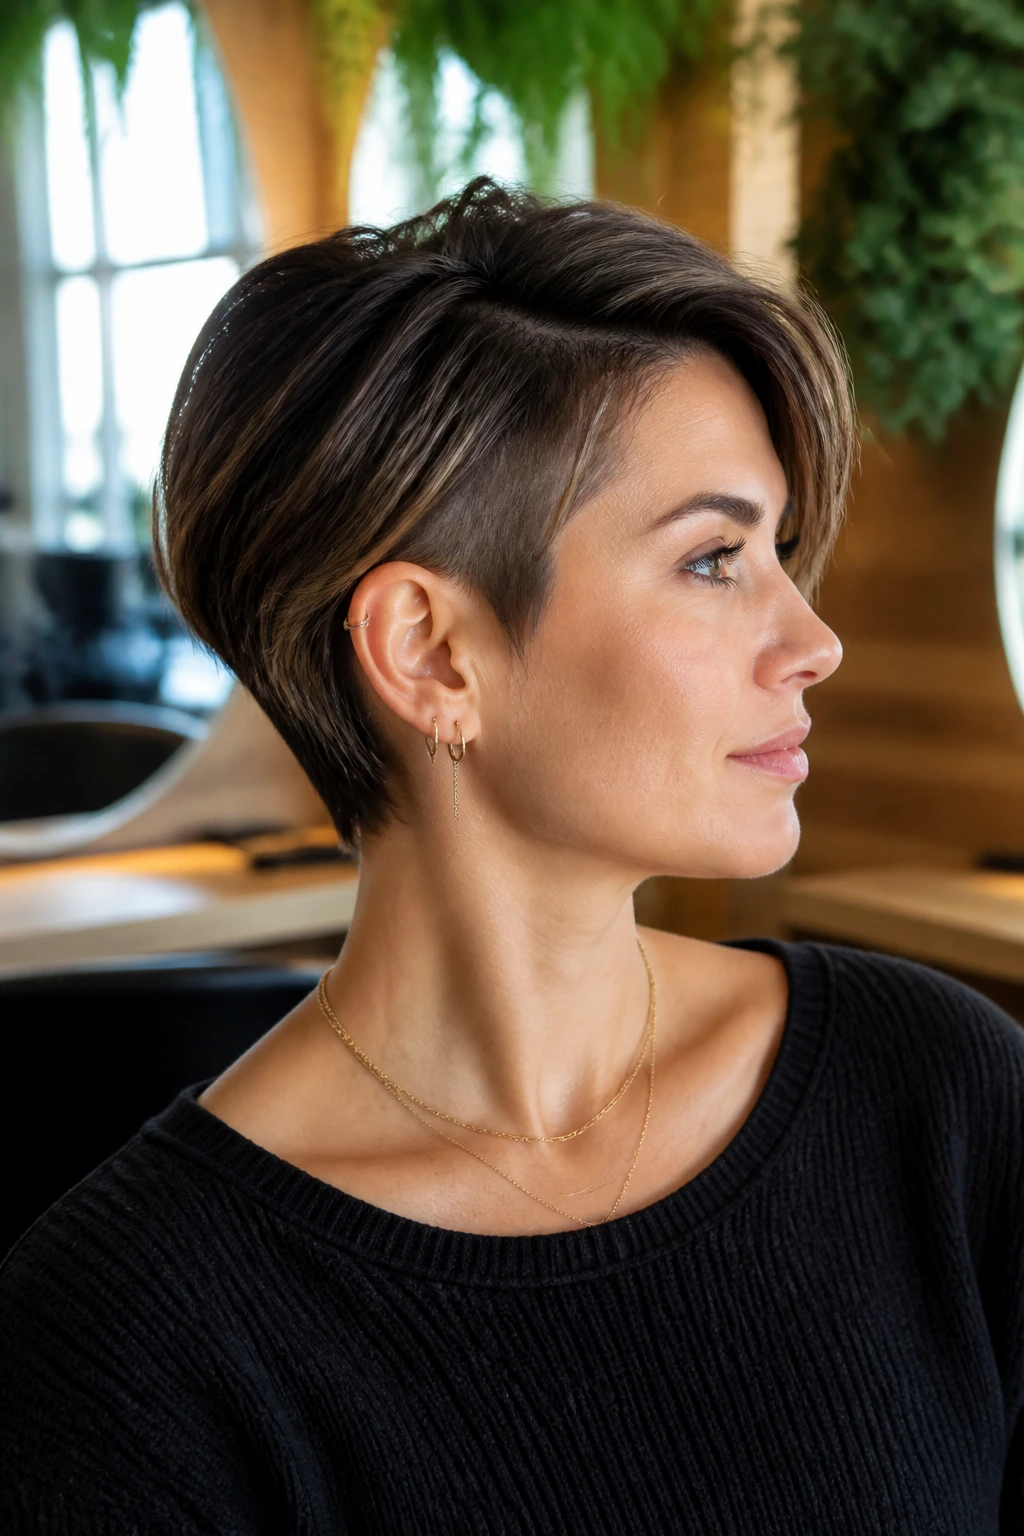
A pixie-bob hybrid lives in that useful middle ground where you want short-crop energy without losing the possibility of an ear-tuck or a small wave. The back and sides are tightened into an undercut, while the top and front remain long enough to read as medium length. It’s not a pixie pretending to be a bob. It’s its own thing.
How It Differs from a Regular Bob
A standard bob keeps the perimeter full all the way around. This version breaks that line underneath, which means the hair sits closer to the head and the profile looks cleaner from the side.
Best For
- Fine hair that needs shape without heaviness.
- Thick hair that turns triangular when it grows.
- Anyone who wants a quick morning style with a little edge.
Blow it forward with a paddle brush for a softer read, or push it back with a matte cream if you want the undercut to show more clearly.
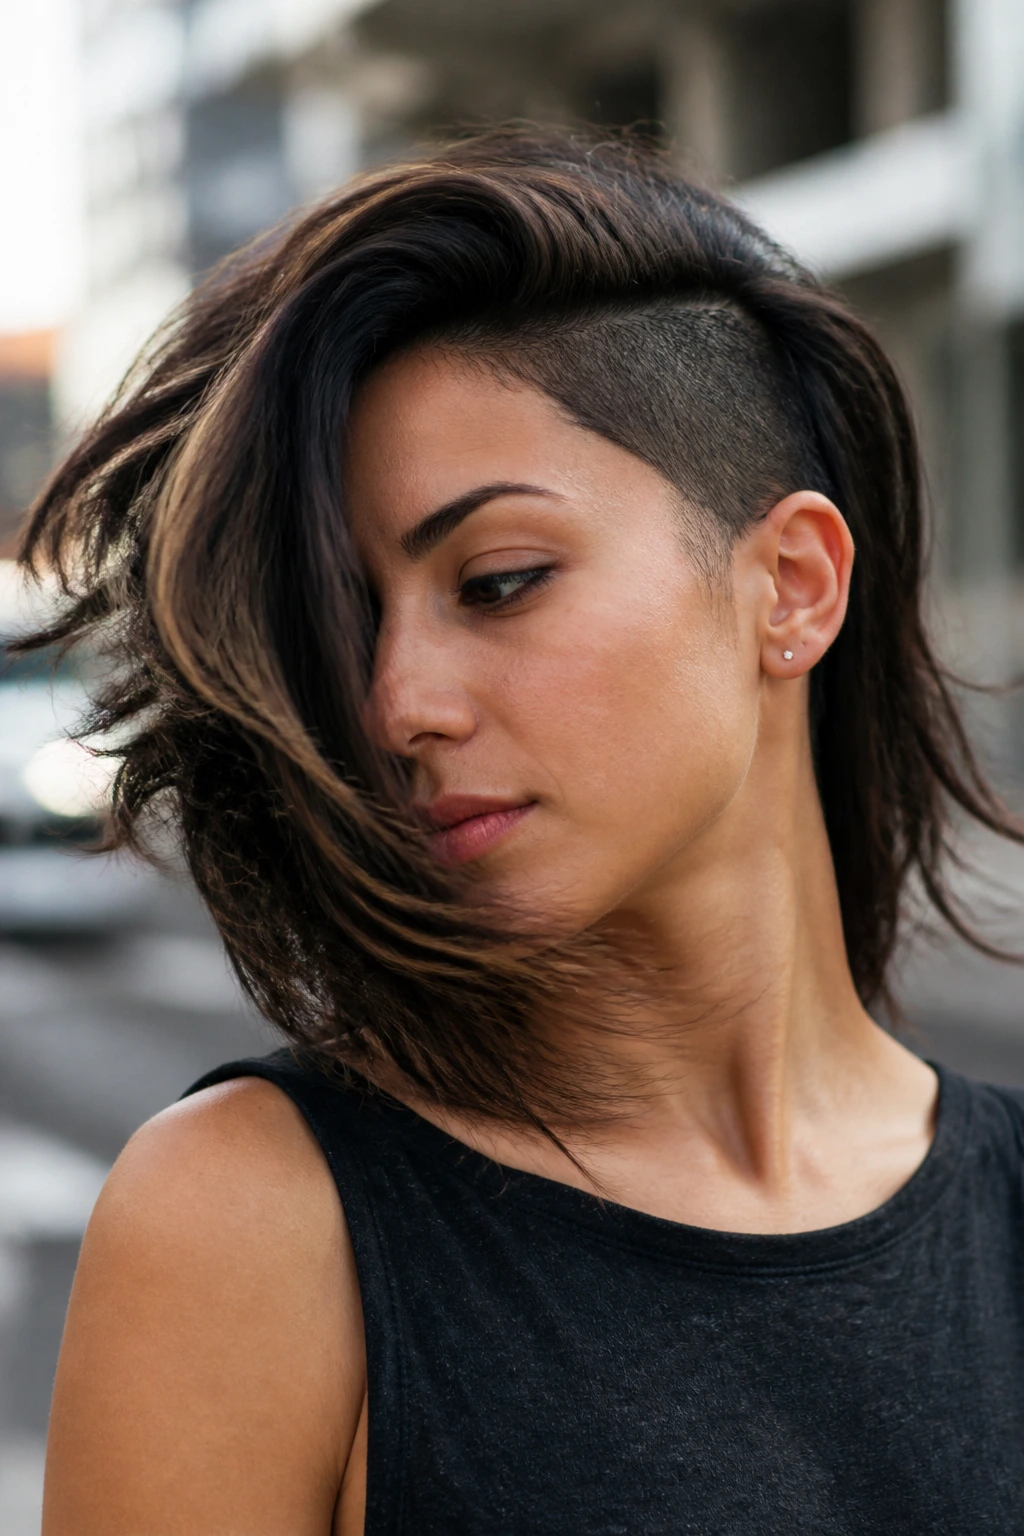
7. Asymmetrical Lob with One-Side Shave
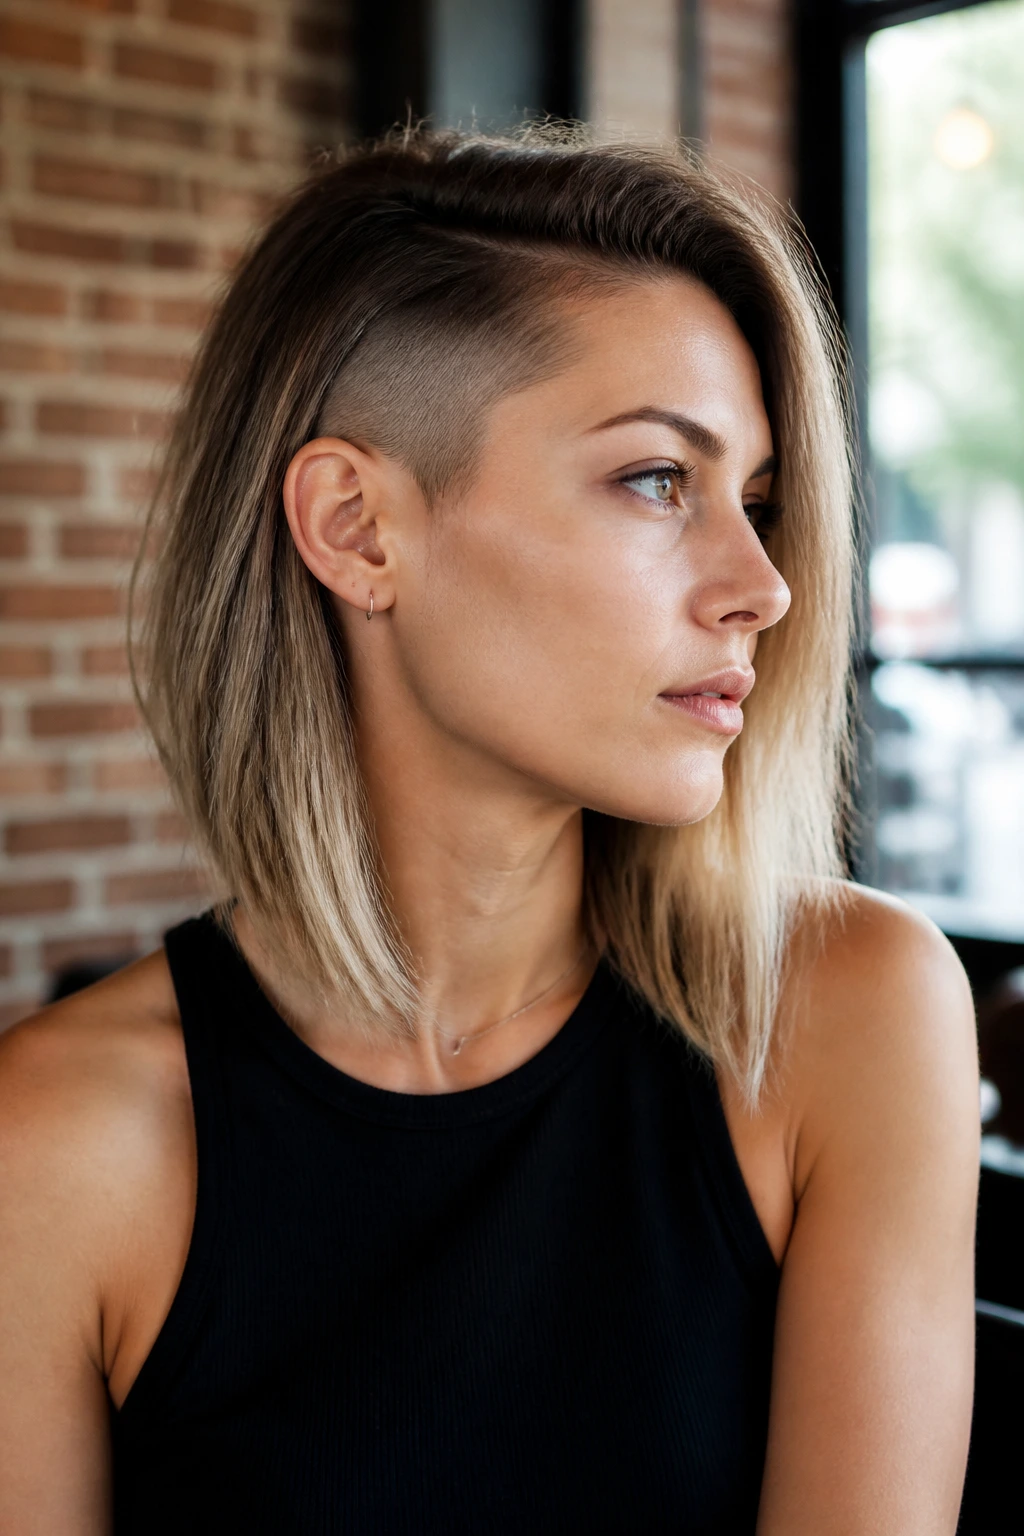
A one-side shave makes a lob feel deliberate instead of merely grown out. One side stays at collarbone length, maybe even a touch longer in front, while the opposite side is clipped low and tucked under the top layer. The imbalance is the whole point.
This style needs confidence, but not the loud kind people assume. The best version is controlled: a clean line, a smooth transition, and enough length on top to hide the shaved side when you want a quieter look. If your part naturally falls to one side, that’s the side to keep longer on top.
I prefer this with straight or slightly wavy hair because the contrast reads sharply. Curly hair can wear it too, but the top needs enough length to cover the shaved panel when the curls shrink. Otherwise the reveal becomes permanent, and not everyone wants that.
8. Slicked-Back Disconnected Lob
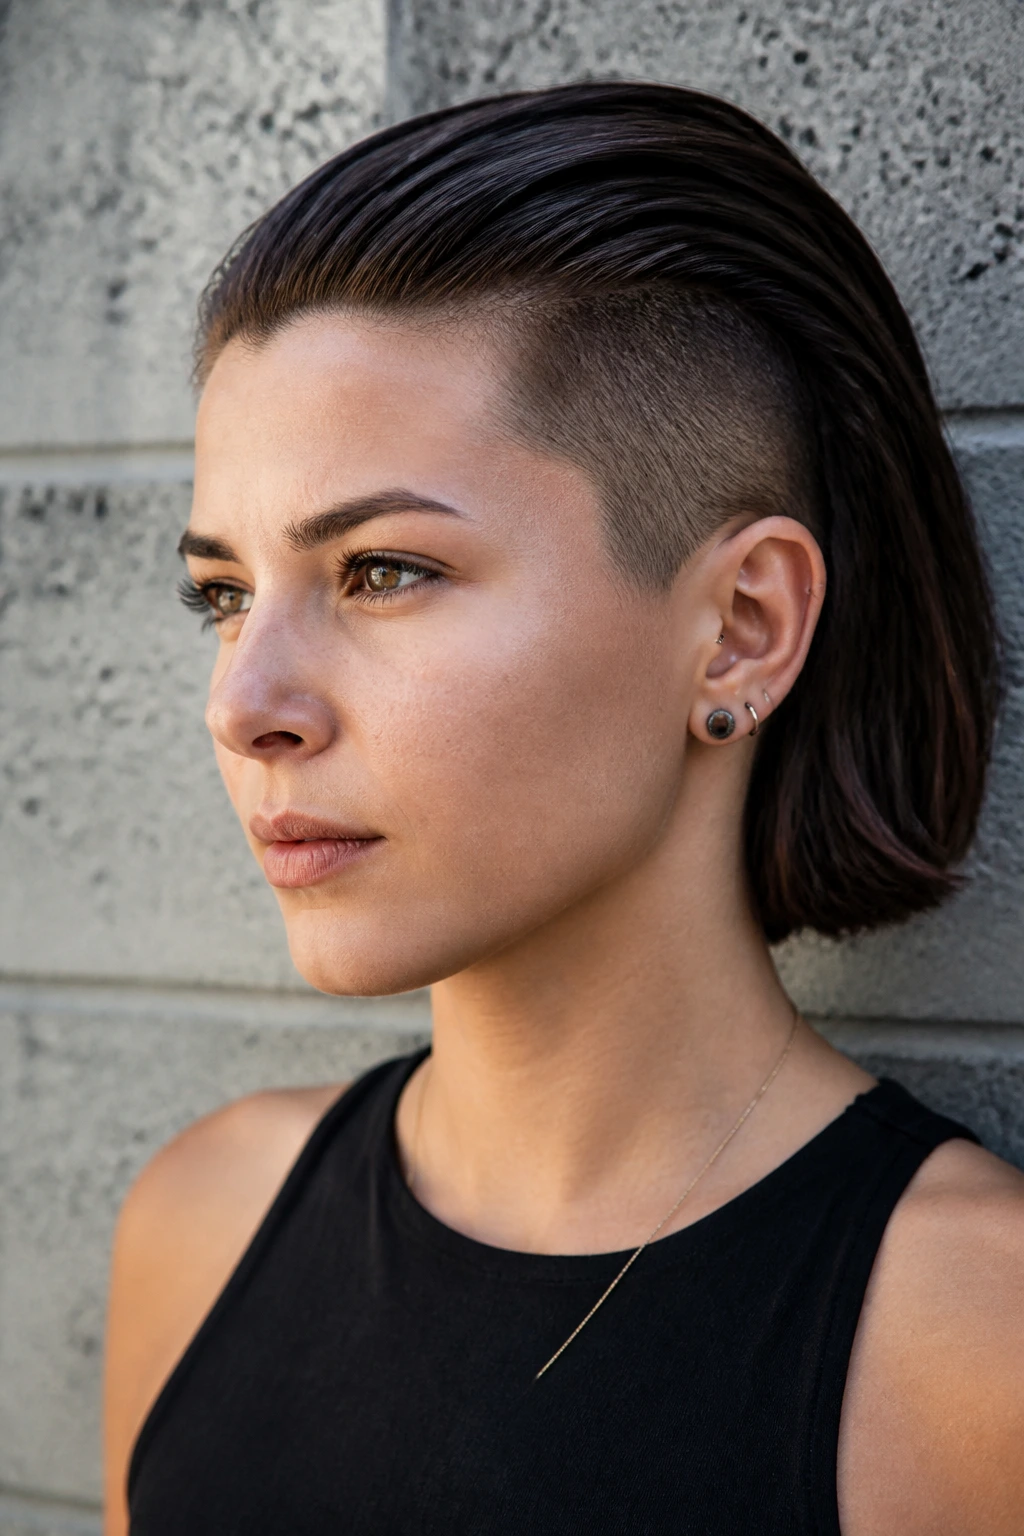
A slicked-back disconnected lob is one of the cleaner ways to make medium hair feel intentional on a rushed day. The sides and back are undercut, but the top remains long enough to comb straight back with gel or a wet-look cream. The result is sleek, controlled, and a little severe in a good way.
What makes it work is the disconnect. There’s no need to blend every inch of hair into one soft gradient. In fact, a crisp break between the clipped sides and the longer top makes the slick-back read more sharply. Use a fine-tooth comb, not a wide one, and work the product through damp hair from roots to ends. If the top dries before you comb it, you lose that glassy finish.
This is one of the best undercut styles for medium length hair if you like something that can move from day to night without a full restyle. It takes five minutes. Maybe six.
9. Medium Faux Hawk Undercut
The faux hawk on medium hair doesn’t have to shout. A softer version keeps length through the center of the head, trims the sides down with an undercut, and lets the top taper upward instead of standing in hard spikes. It gives you lift without turning the whole cut into a costume.
The shape works because the clipped sides create a visual lane for the center section to rise into. If your hair is naturally thick at the crown, this is one of the fastest ways to stop it from spreading outward. A matte paste or a light clay keeps the strip defined without making it crunchy.
Wear it swept up for a sharper look or brushed forward for something less aggressive. Either way, the side sections should stay short enough to disappear under the top when you pinch them down. That part matters. If the sides are too long, you lose the whole effect.
10. Soft Mullet with Shaved Nape
A soft mullet is having a sensible moment, which is not something I’d say about many cuts. The version with an undercut at the nape keeps the back from getting heavy and lets the longer top and front pieces fall with a little more shape. The difference between “fashionable” and “messy by accident” usually comes down to the bottom edge.
Keep the front and crown layered, but not ragged. The undercut should sit low enough to disappear when the hair is down, and the longer back section should land just past the nape instead of hanging in a blunt curtain. If your hair has a wave, even better. The cut comes alive when the ends move independently.
A bit of texturizing spray at the mids is enough. Don’t load the ends with oil, or the shape gets limp and the back collapses into one long stringy line.
11. Blunt Fringe with Hidden Undercut
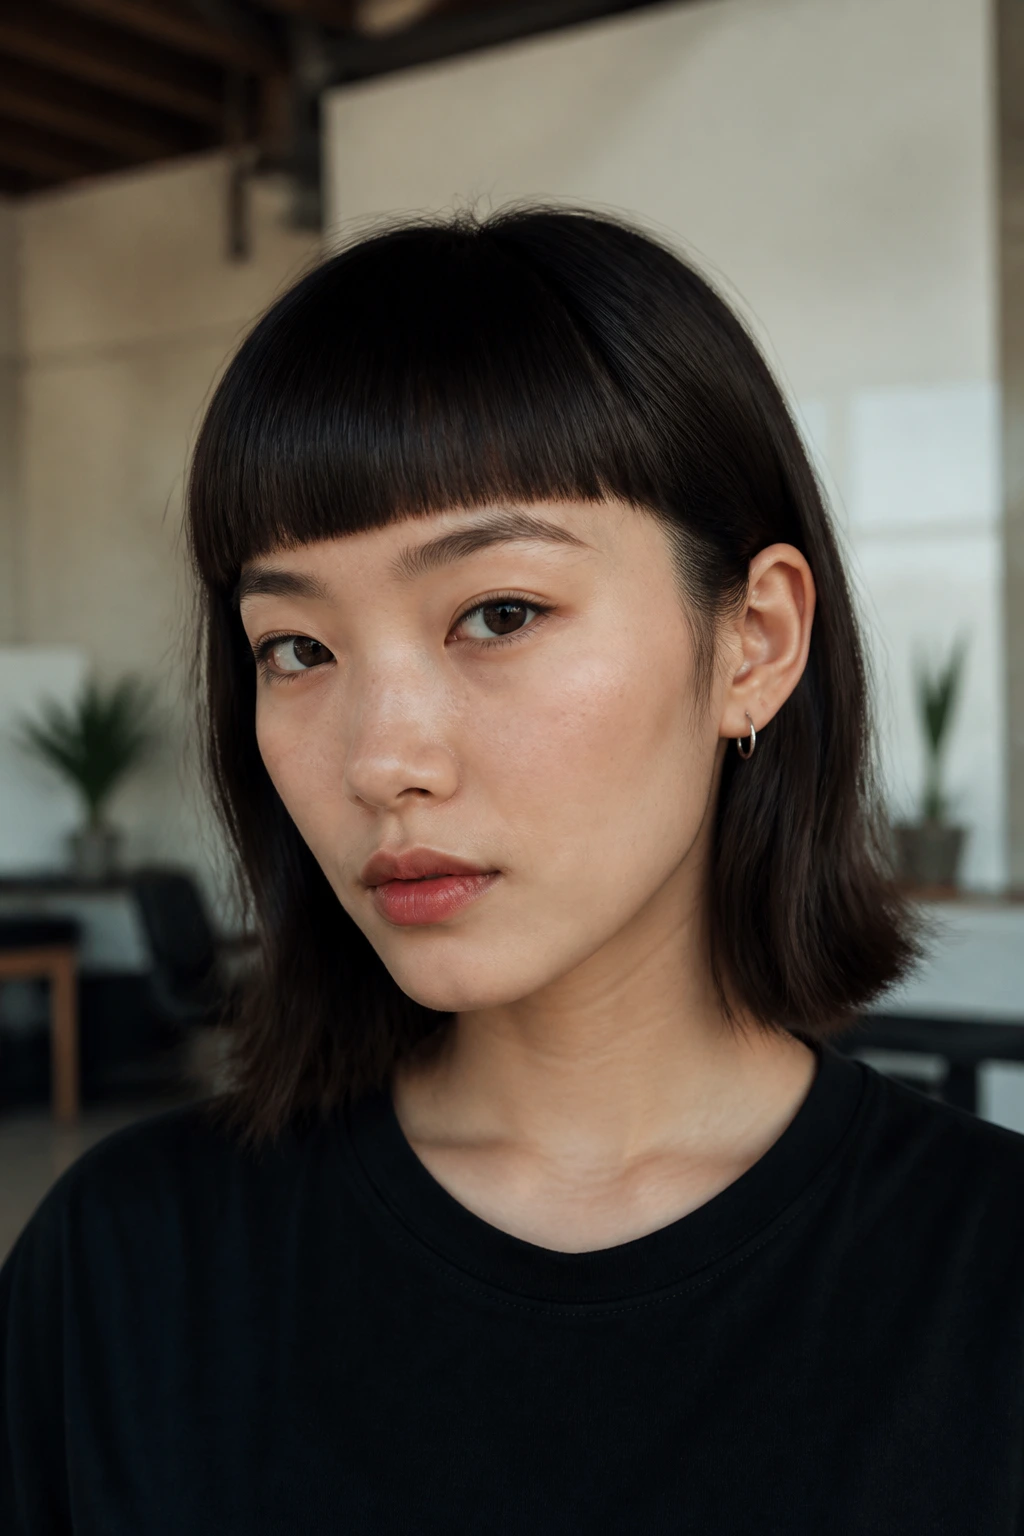
Blunt fringe and hidden undercut is a strong pairing because each part does the thing the other one won’t. The fringe gives you a clean line across the forehead, while the undercut removes the bulk that makes medium-length hair sit too low around the neck. It’s tidy from the front and lighter everywhere else.
This combination works especially well on straight hair. Straight strands show the crispness of the fringe and the hidden reduction underneath, so the cut looks expensive even when the styling is minimal. That said, if your hair grows forward at the crown, the fringe needs to be left slightly longer than you think. A too-short blunt fringe flares upward and starts arguing with the rest of the cut.
Keep the undercut shallow and concealed. You want the reveal to happen when hair is tucked or tied back, not all day long. That little bit of restraint is what makes the whole thing look smart rather than theatrical.
12. Layered Lob with a Side Shave
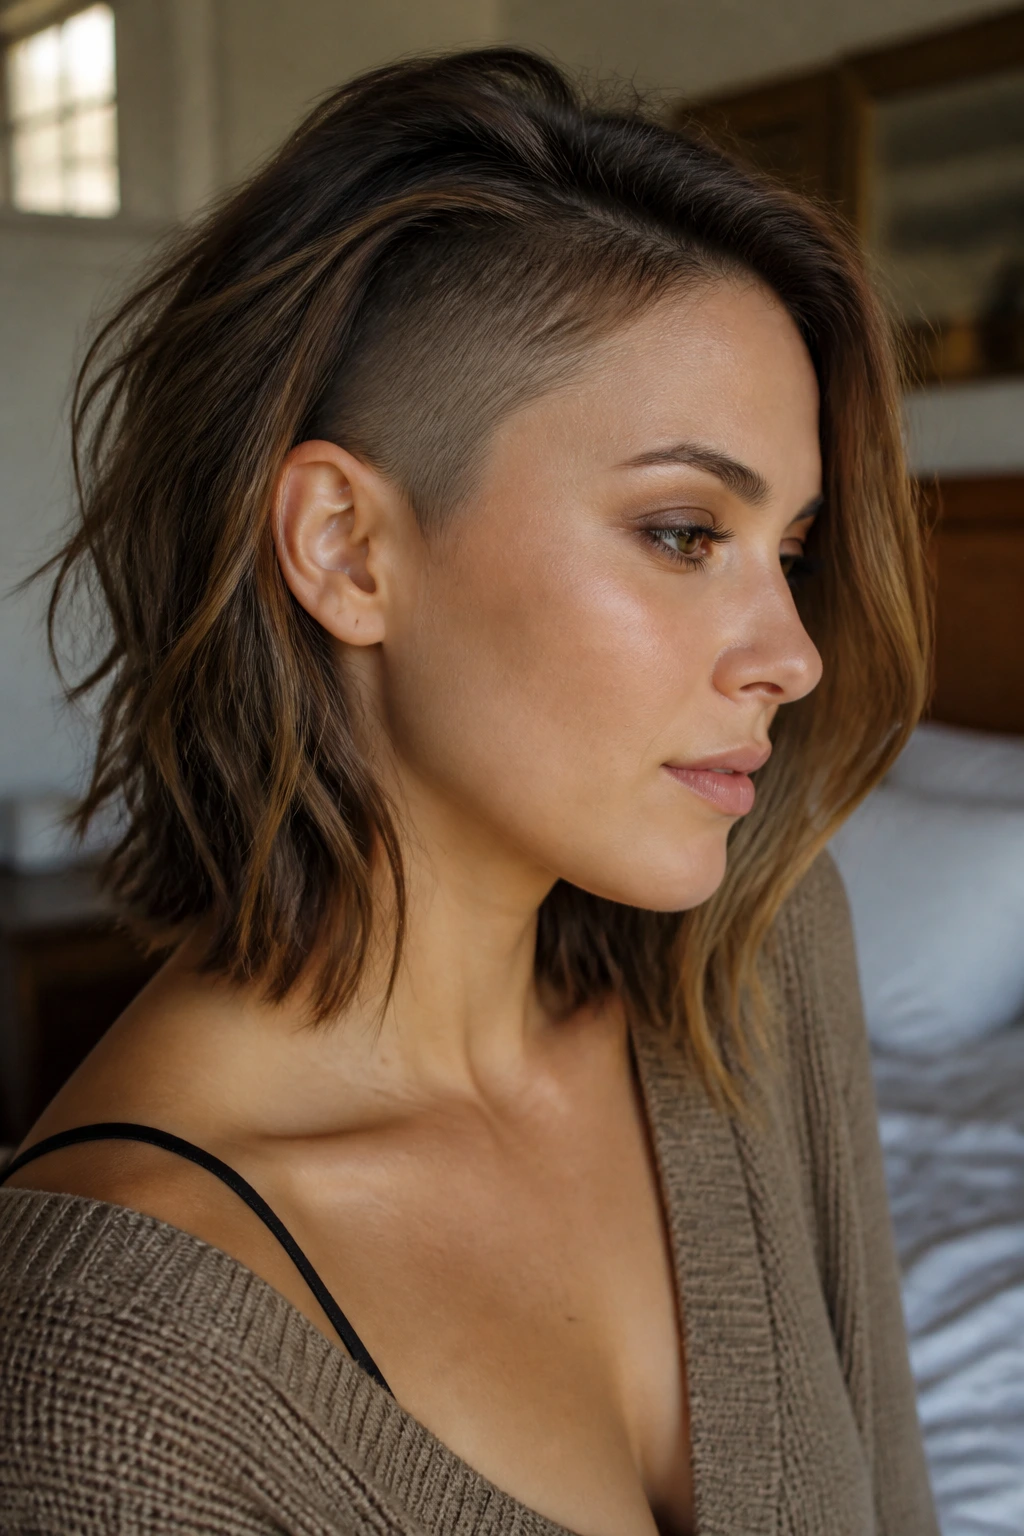
A layered lob with a side shave is one of the easier ways to step into undercut territory without going full rebellion. The top remains classic lob length, but one side has a concealed shave beneath the layers, usually under the temple or just behind it. When the hair falls naturally, the shape reads soft. When you tuck it back, the edge appears.
This is a good cut if you like options and hate commitment. You can lean into the asymmetry or hide it. That flexibility matters if your work life is conservative and your off-hours are not. The layers on top should be light enough to move but not so thin that the shaved side shows through when you don’t want it to.
A round brush and a blow-dryer nozzle are enough to shape it. If you want more volume, flip the part opposite the shave. It sounds simple because it is.
13. Beach-Wave Nape Cut
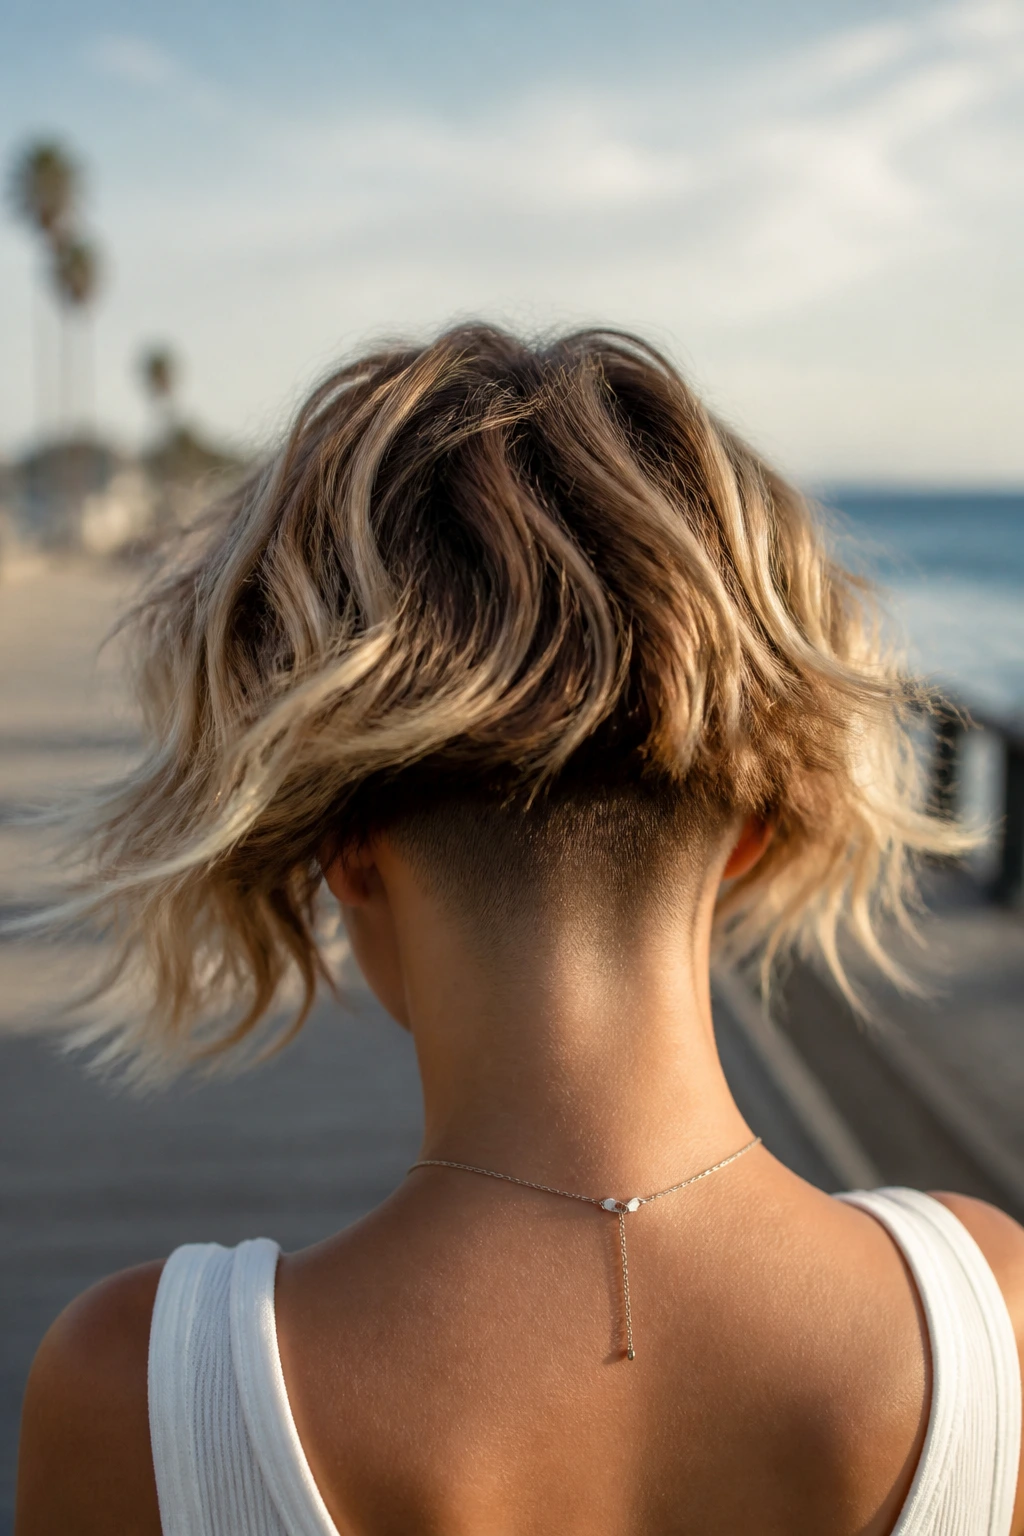
What does a beach wave cut gain from an undercut? A cleaner back line and less puff under the top layer. The waves still look relaxed and touchable, but the hidden nape reduction stops the hair from swelling at the collar. That matters more than people realize, especially when medium hair starts to turn into a wide shape at the bottom.
This cut is easy to live with because it doesn’t require perfect waves. Loose bends from a 1-inch iron, a braid-out, or even a rough air-dry with salt spray all work. The undercut does some of the visual work for you. Wear the top in a middle part if you want balance, or push it slightly off center if you want the nape to show when your hair shifts.
Keep the finish matte, not crunchy. Beach waves should move when you toss your head. If they don’t, the whole thing feels staged.
14. Long Fringe Sweep with Temple Detail
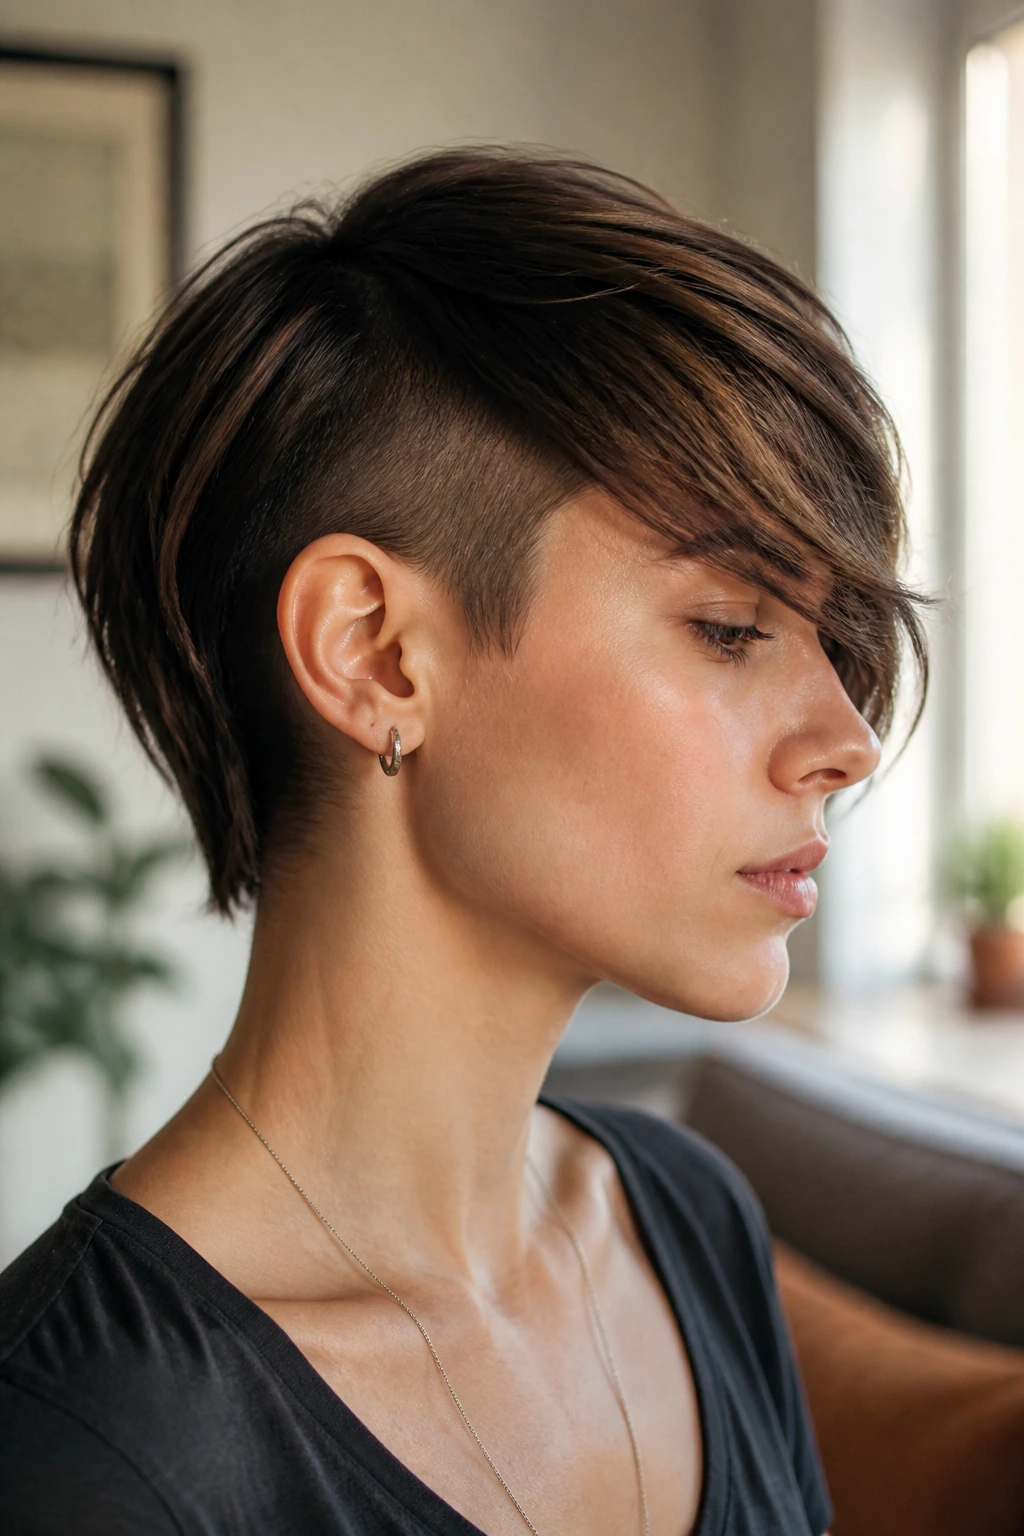
A long fringe sweep with temple detail looks especially good on medium hair because the fringe does one job while the undercut does another. The fringe falls across the forehead or cheekbone, and the temple shave stays hidden until you move the hair away from the face. It’s a cut with a slow reveal.
The key is to keep the fringe long enough to brush across one eye without hanging in your mouth. I’d aim for a length that sits just below the brow when dry, then have the stylist soften the ends so it doesn’t feel heavy. The temple shave can be narrow or wider depending on how much contrast you want.
This works on straight, wavy, and lightly curly hair, but the styling changes. Straight hair shows the angle more clearly. Wavy hair gives the cut a little softness around the temple. Curly hair can make the detail feel hidden until you pin one side back, which is half the fun.
15. Wolf Cut with Underlayer Removal
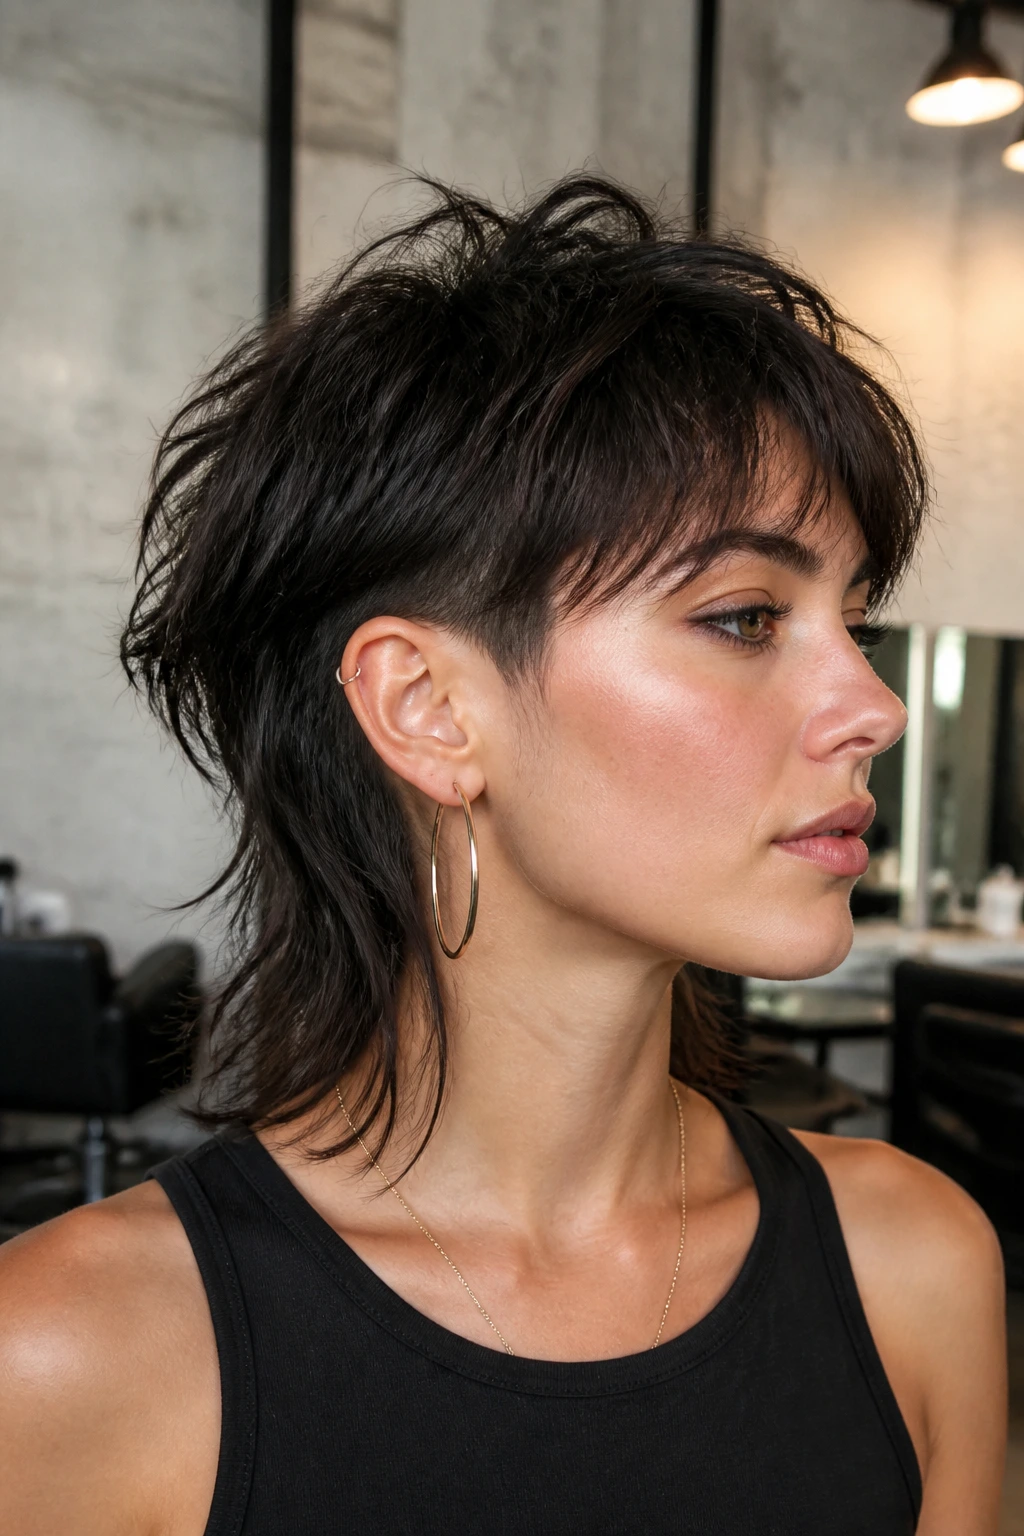
The wolf cut can go badly when there’s too much bulk at the base. That’s where the undercut earns its keep. By taking weight out of the nape and lower sides, the layered top gets room to sit in that messy, piecey shape without ballooning into a triangle. The cut keeps its attitude, but not the puff.
Why the Undercut Matters
The wolf cut depends on contrast: shortish layers near the top, longer movement at the bottom, and a slightly rough outline. If the bottom is too thick, the whole silhouette falls apart. A hidden undercut helps the layers stack more cleanly and gives the top a little lift.
Use texture spray at the mid-lengths, not the roots, and avoid heavy creams that drag the layers together. The appeal here is movement and separation. Too much smoothing ruins it.
16. Curly Wolf Cut with Shaved Nape
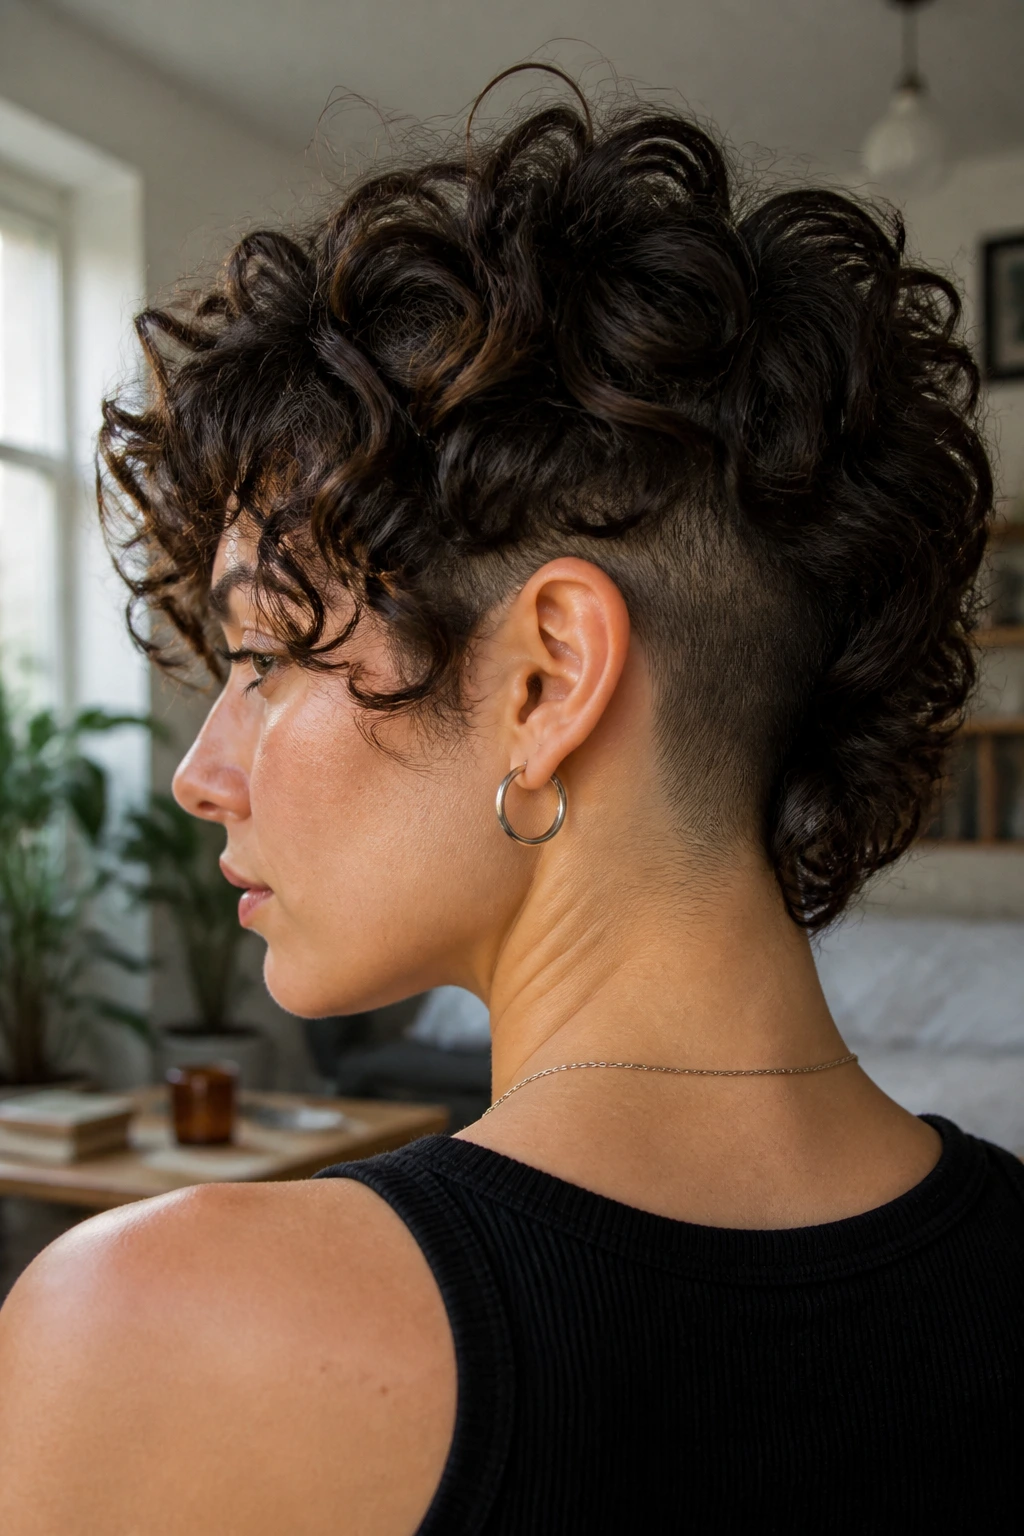
Curly hair and a wolf cut can get along just fine, but only if the lower bulk gets trimmed back. A shaved nape under curly layers prevents the back from turning into a dense hump, and it gives the top curls room to spring around the head instead of building into one big shape.
This version is less about sharp edges and more about balance. Leave enough length in the top layers to keep curl pattern intact, then remove the hidden weight underneath. The result is a curly silhouette with air in it, not a helmet. Use a diffuser on low heat, then stop touching it once the cast starts to form. Curly cuts hate being fussed with while they dry.
A curl-specific mousse at the roots can help, but keep it light. Overloading the hair defeats the whole point of the undercut.
17. Work-Appropriate Low-Profile Undercut
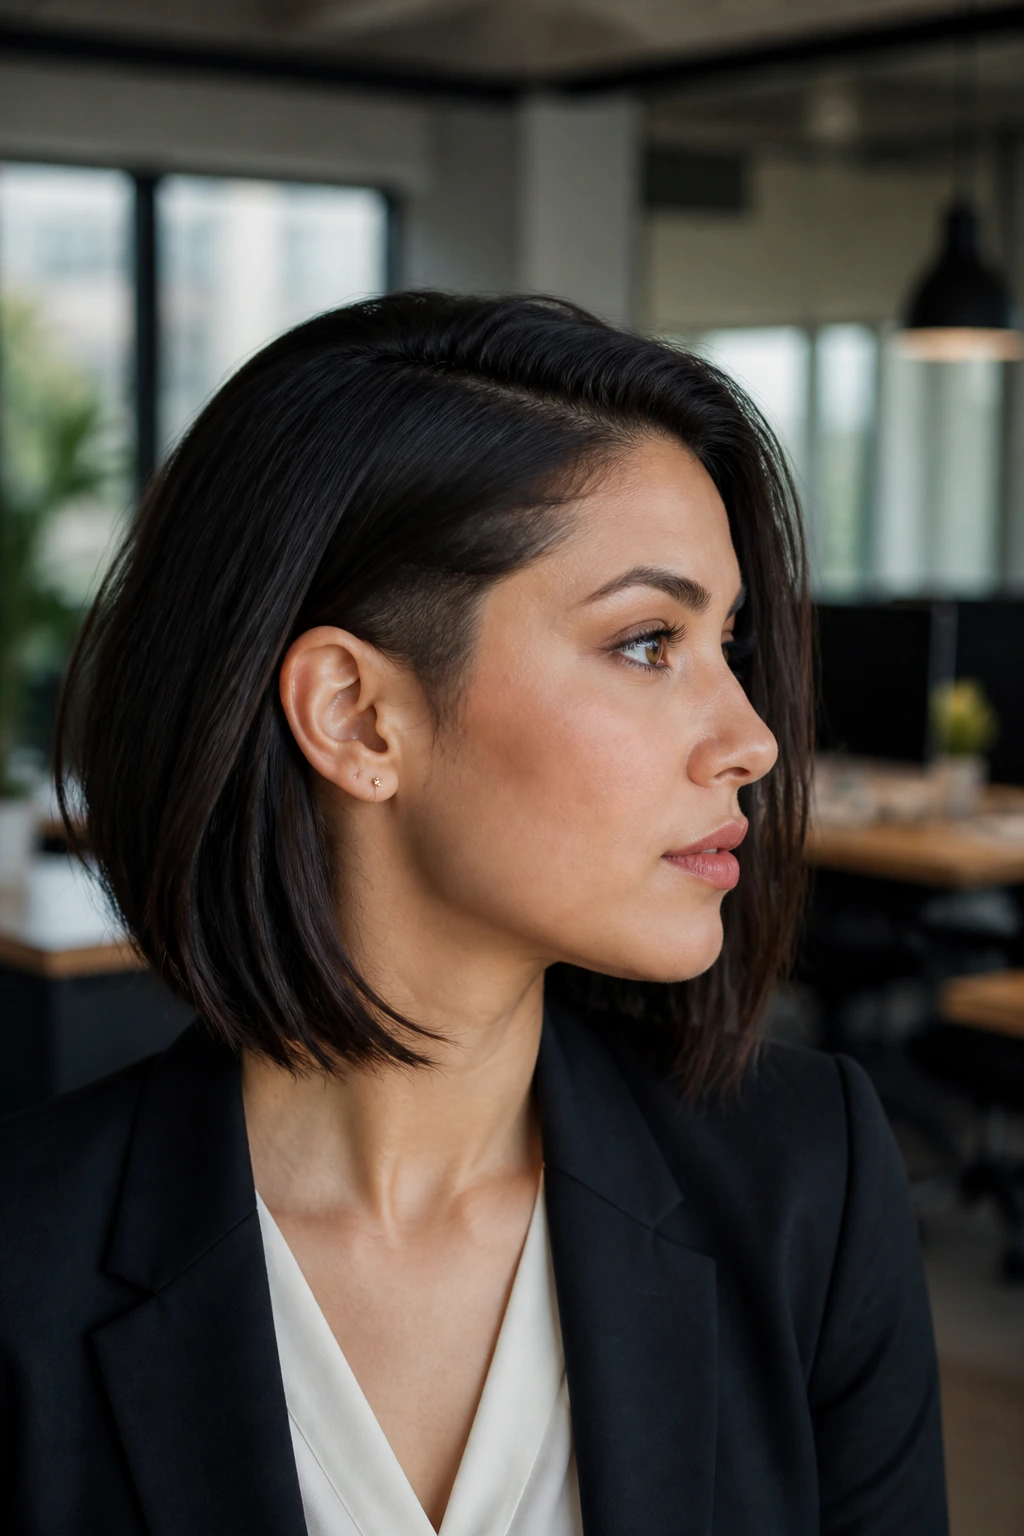
A work-appropriate undercut is just a smart one. The shave sits low and hidden, usually at the nape or under a side panel, while the top stays long enough to look like a standard medium cut when worn down. It’s the version people choose when they want less bulk without making the cut the main event.
The best thing about this style is control. You decide when it shows. Hair down? It disappears. Hair tied back? There it is. This is the one I recommend to first-timers who are curious but don’t want to stare at a dramatic grow-out for months if they change their mind.
Keep the guard longer than you think—#4 is often the friendliest starting point. You can always go shorter later. Going the other direction is much harder.
18. Braided Top and Shaved Sides
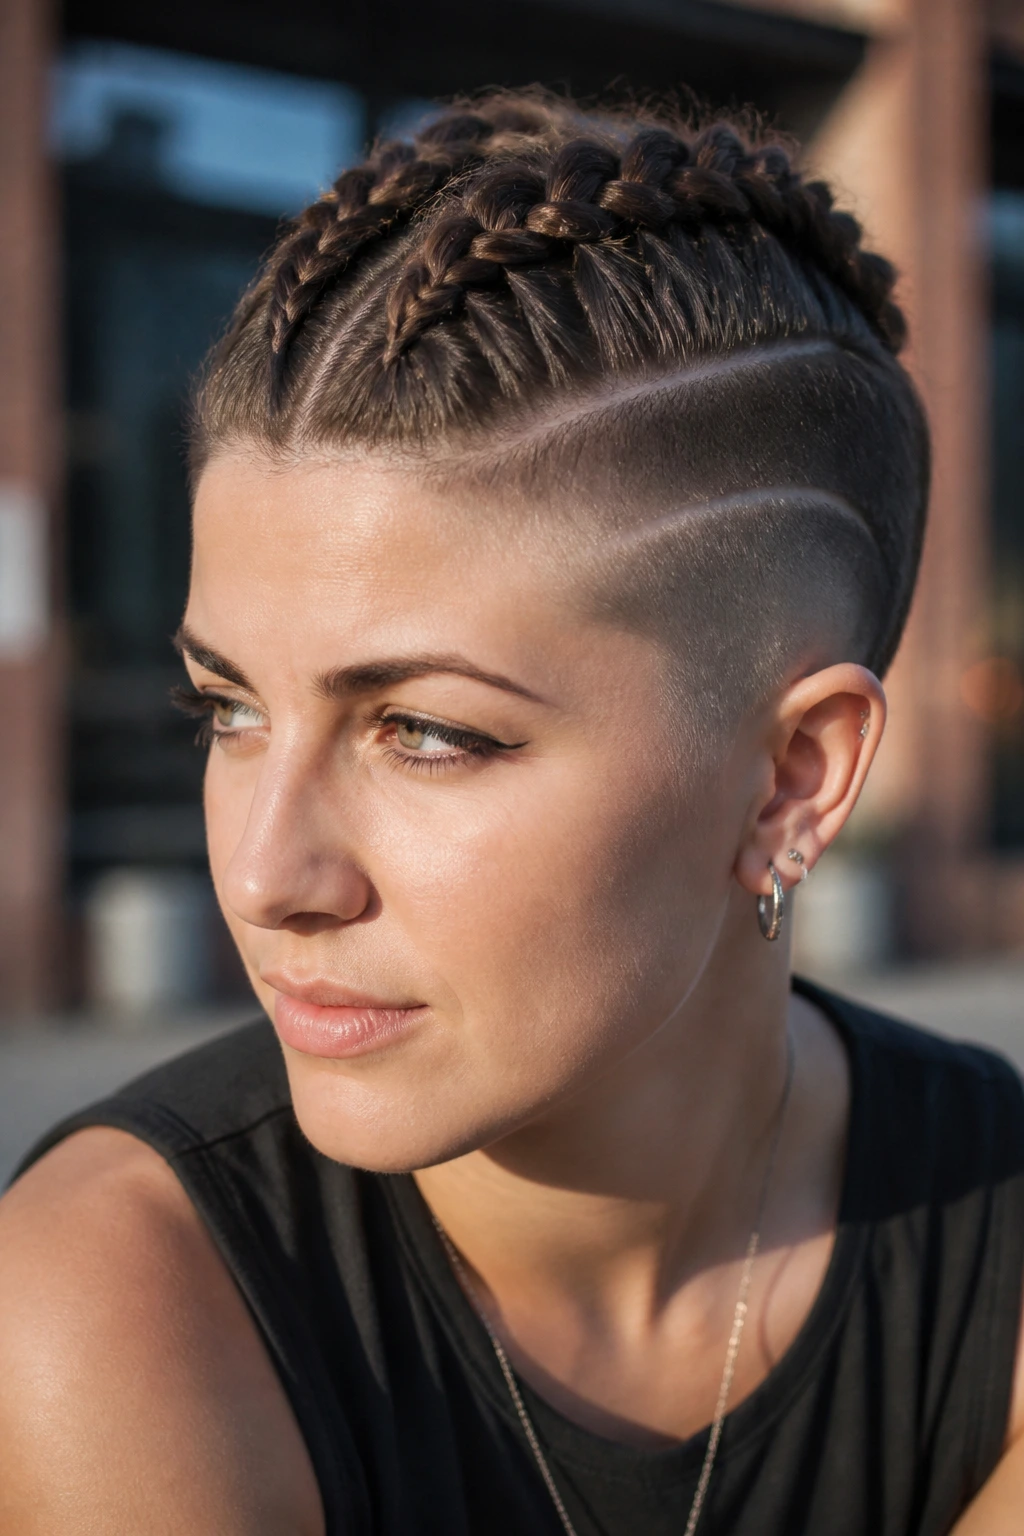
Braids make a shaved side look intentional fast. On medium-length hair, you have enough length on top for Dutch braids, small cornrow-inspired panels, or a single heavy braid that sits over the undercut and shows it only when you tilt your head. The clipped sides keep the scalp cooler and the braid crown lighter.
This style is practical if your hair gets sweaty at the gym or if you like a cut that changes shape depending on how you wear it. One day it’s down and hidden; the next day it’s pulled back and the undercut frames the braid. That flexibility is the whole draw.
If your braid starts at the hairline, leave the top slightly longer around the part so you don’t expose the short section too early. And if you’re adding styling gel, use a tiny amount. Too much and the braid goes stiff before you finish weaving it.
19. Half-Up Ponytail with Hidden Shave
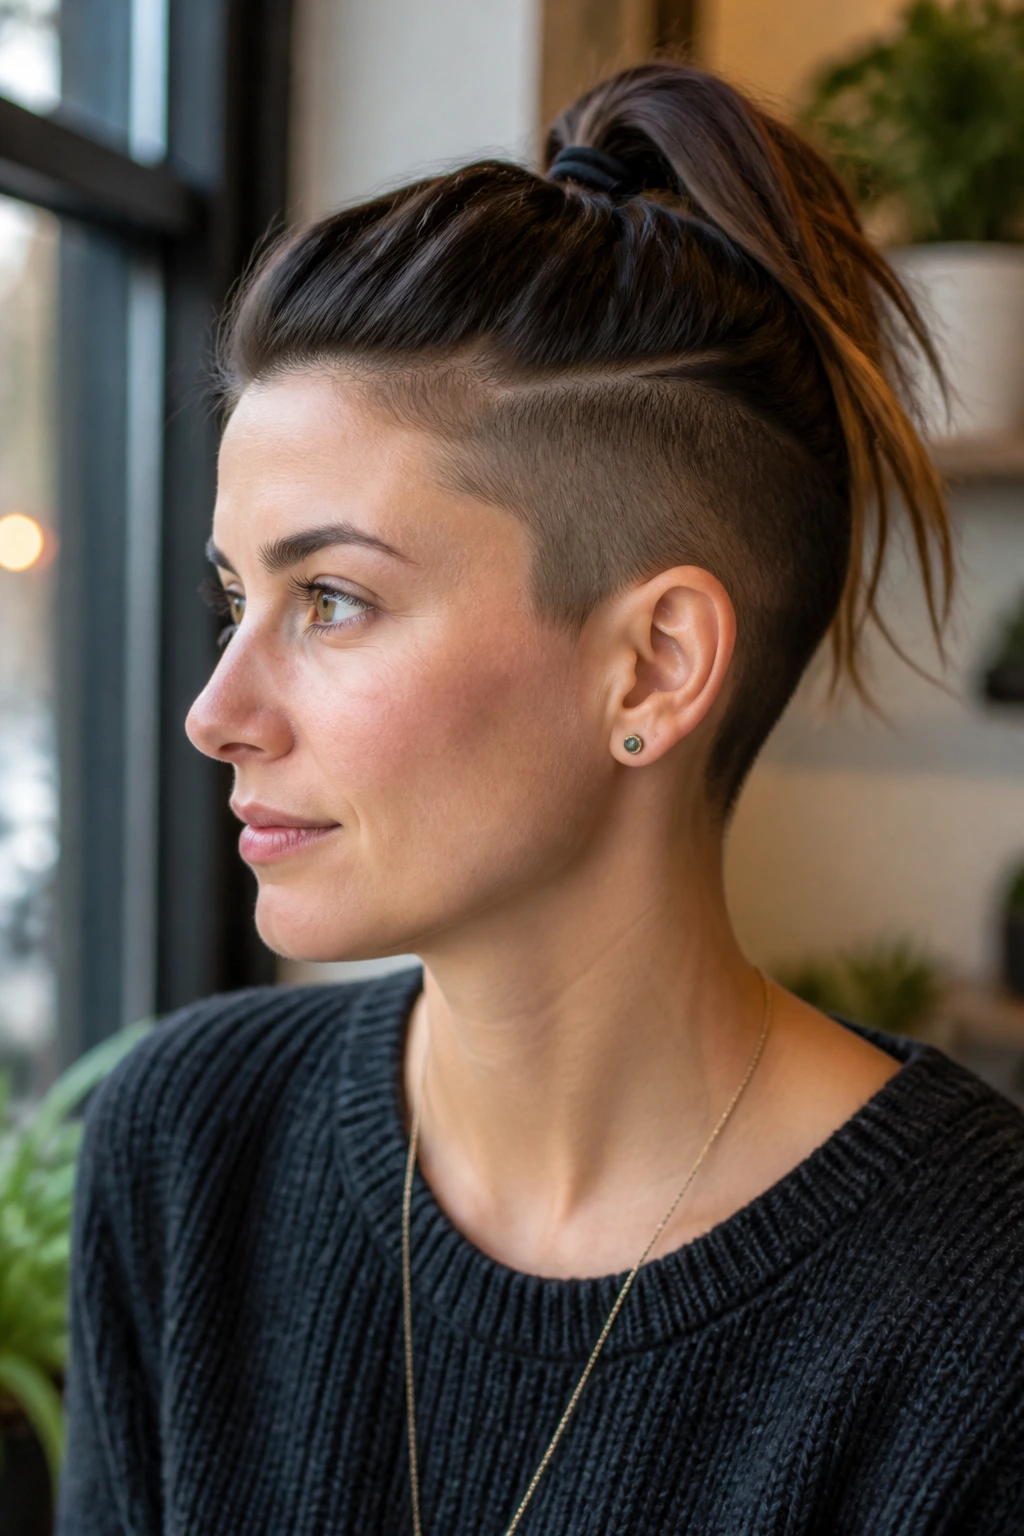
A half-up ponytail shows you exactly why hidden undercuts are so useful. The top section lifts off the head and leaves the lower clipped area visible, which changes the shape of the style without asking you to do much. It’s one of the easiest everyday ways to reveal the cut on purpose.
You need enough length on top to gather cleanly at the crown, but not so much that the ponytail collapses under its own weight. A small elastic works better than a thick scrunchie if you want the style to sit close and neat. If your hair is fine, a little dry texture spray before tying helps the ponytail stay lifted.
This look can feel casual or sharp depending on the finish. Smooth the top if you want polished. Pull a few face-framing pieces loose if you want something softer. The undercut underneath does the rest.
20. Rounded Taper Undercut
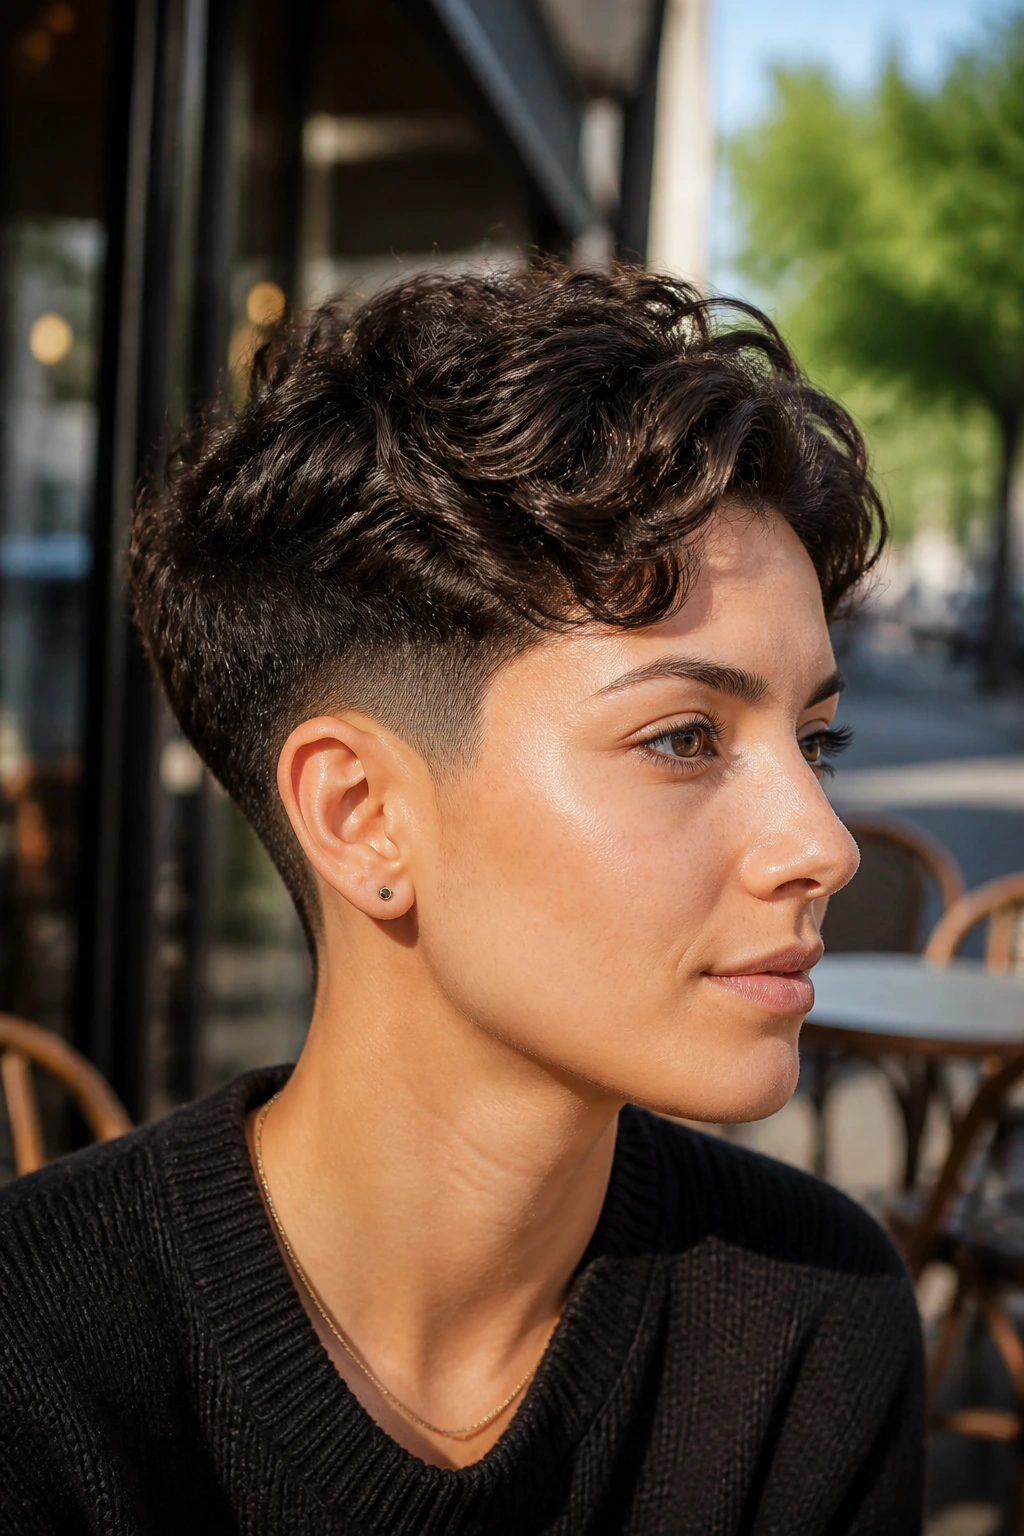
A rounded taper undercut softens the edges of the whole cut. Instead of a harsh clipped shelf at the bottom, the hair is tapered so the transition feels curved and clean. On medium-length hair, that means the shape hugs the head more naturally and grows out with less visible line.
This is a smart choice if you like the idea of an undercut but don’t want the cut to look visibly shaved from across the room. It’s also useful for people with hairlines that are uneven at the nape. A hard line can make those details stand out. A rounded taper smooths them out.
Use this with waves, straight hair, or softer layers on top. It won’t deliver the same graphic hit as a shaved panel, but it gives you better everyday wearability. There’s a reason some of the most useful cuts are the quiet ones.
21. Thick-Hair Bulk-Removal Undercut
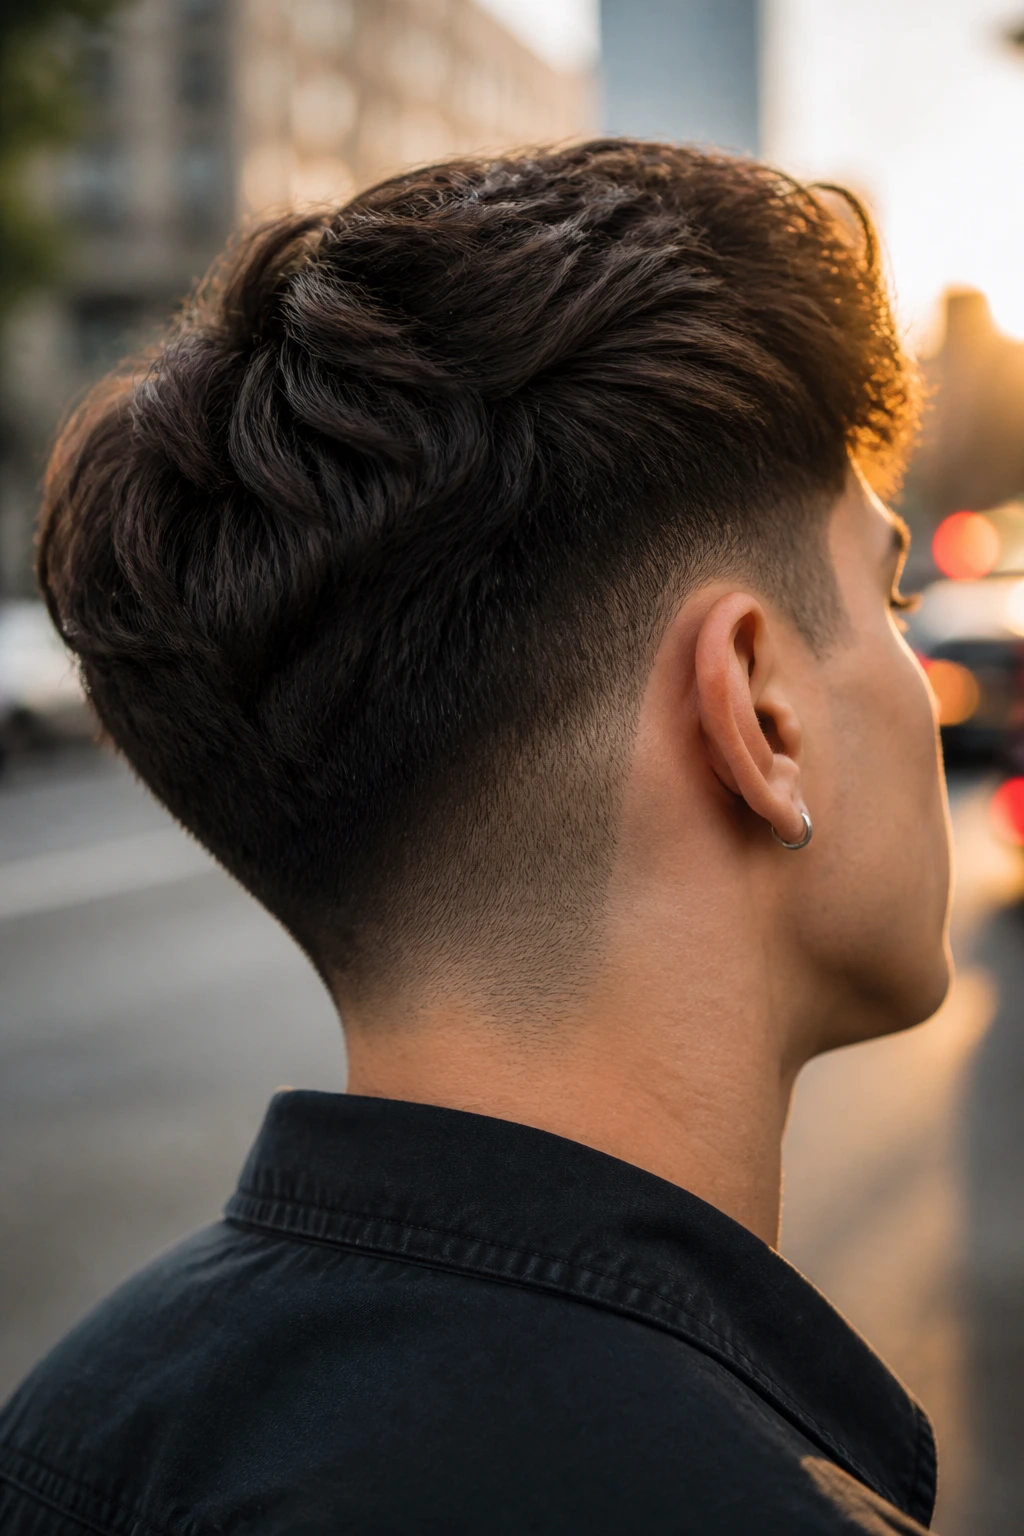
Thick hair doesn’t need a tiny undercut. It needs a serious one, placed where the bulk actually lives. Usually that means a wider strip at the nape and possibly a bit of the lower side, enough to take weight out without thinning the top layers that you still want to see.
The difference is obvious the first time you blow-dry it. Less time at the root. Less swelling at the neckline. Less need to fight the shape with a flat iron or heavy cream. Thick hair often looks best when the undercut is hidden and the top remains full, because the goal is relief, not exposure.
Be honest with your stylist about how much volume you hate. If the back of your head turns triangular by lunch, say so. That helps them choose the right width for the shaved section, which matters more than the exact guard length.
22. Fine-Hair Volume-Focused Undercut
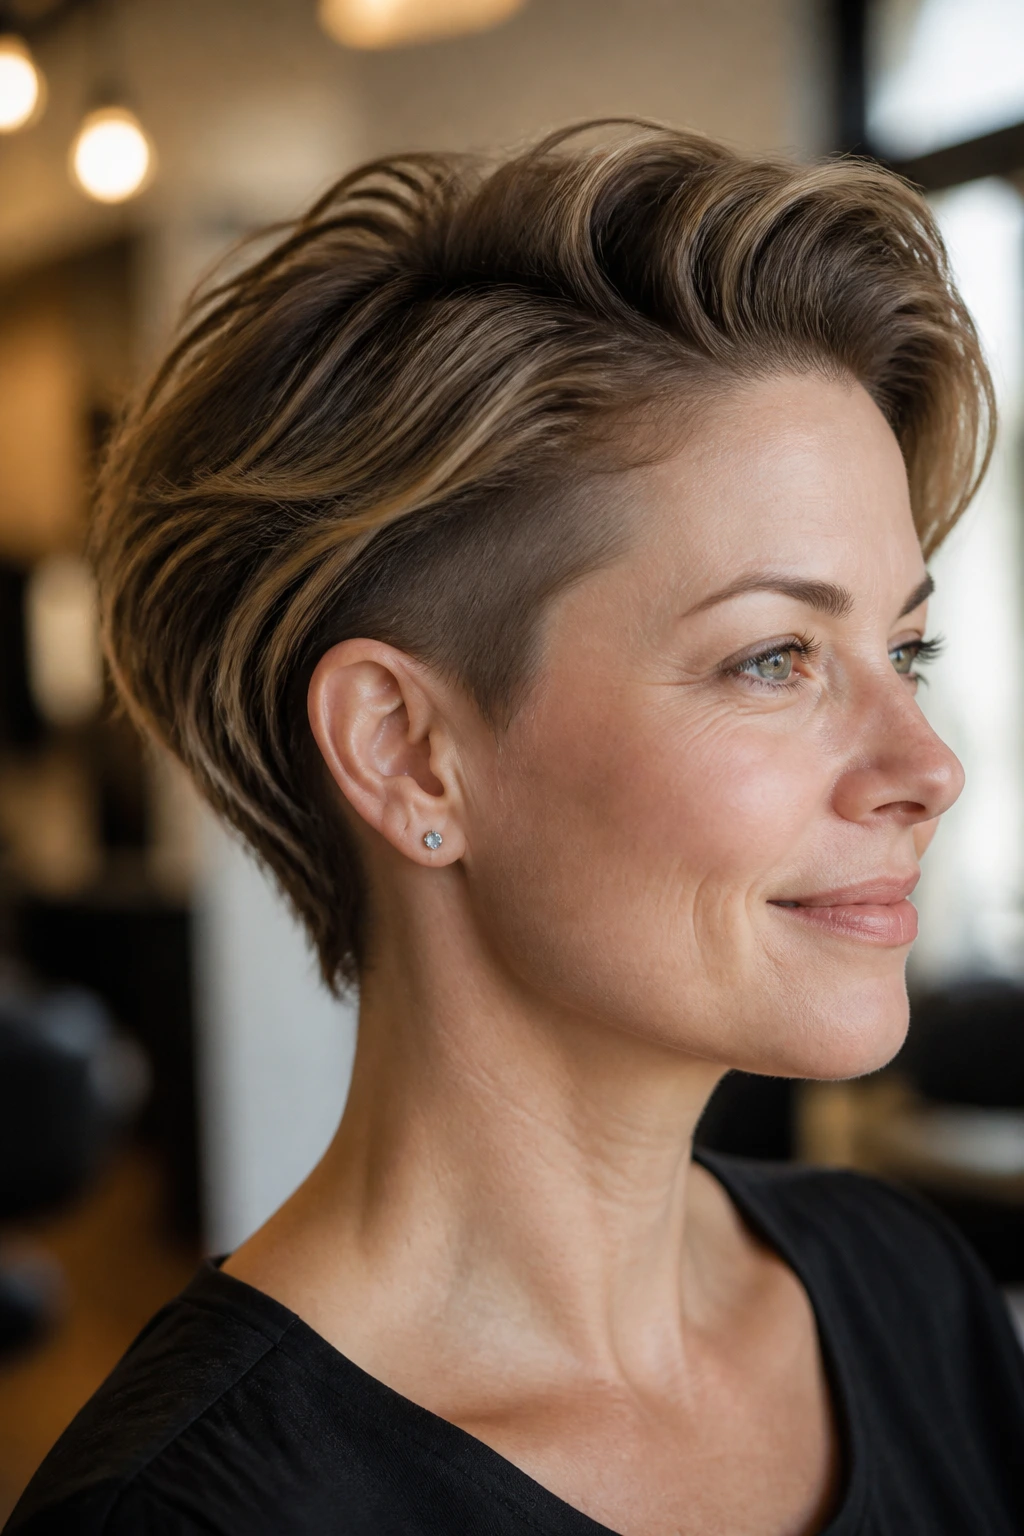
Fine hair can wear an undercut too, and sometimes it looks fuller because of it. The trick is to remove enough underneath to stop the hair from hanging flat, but not so much that the top layer loses presence. Medium-length fine hair often needs a little help staying off the scalp, and a carefully placed undercut can give it that lift.
The styling is different here. Use a root spray or mousse at the crown, then blow-dry with a round brush or your fingers lifted at the roots. Avoid heavy conditioners near the scalp; they collapse the very volume the cut is trying to create. The undercut should stay low and hidden so the top still looks dense.
This is a cut for people who want shape without seeing every strand. If the top has a slight bend, even better. Fine hair rarely needs more length. It usually needs less weight.
23. Color-Contrast Reveal Undercut
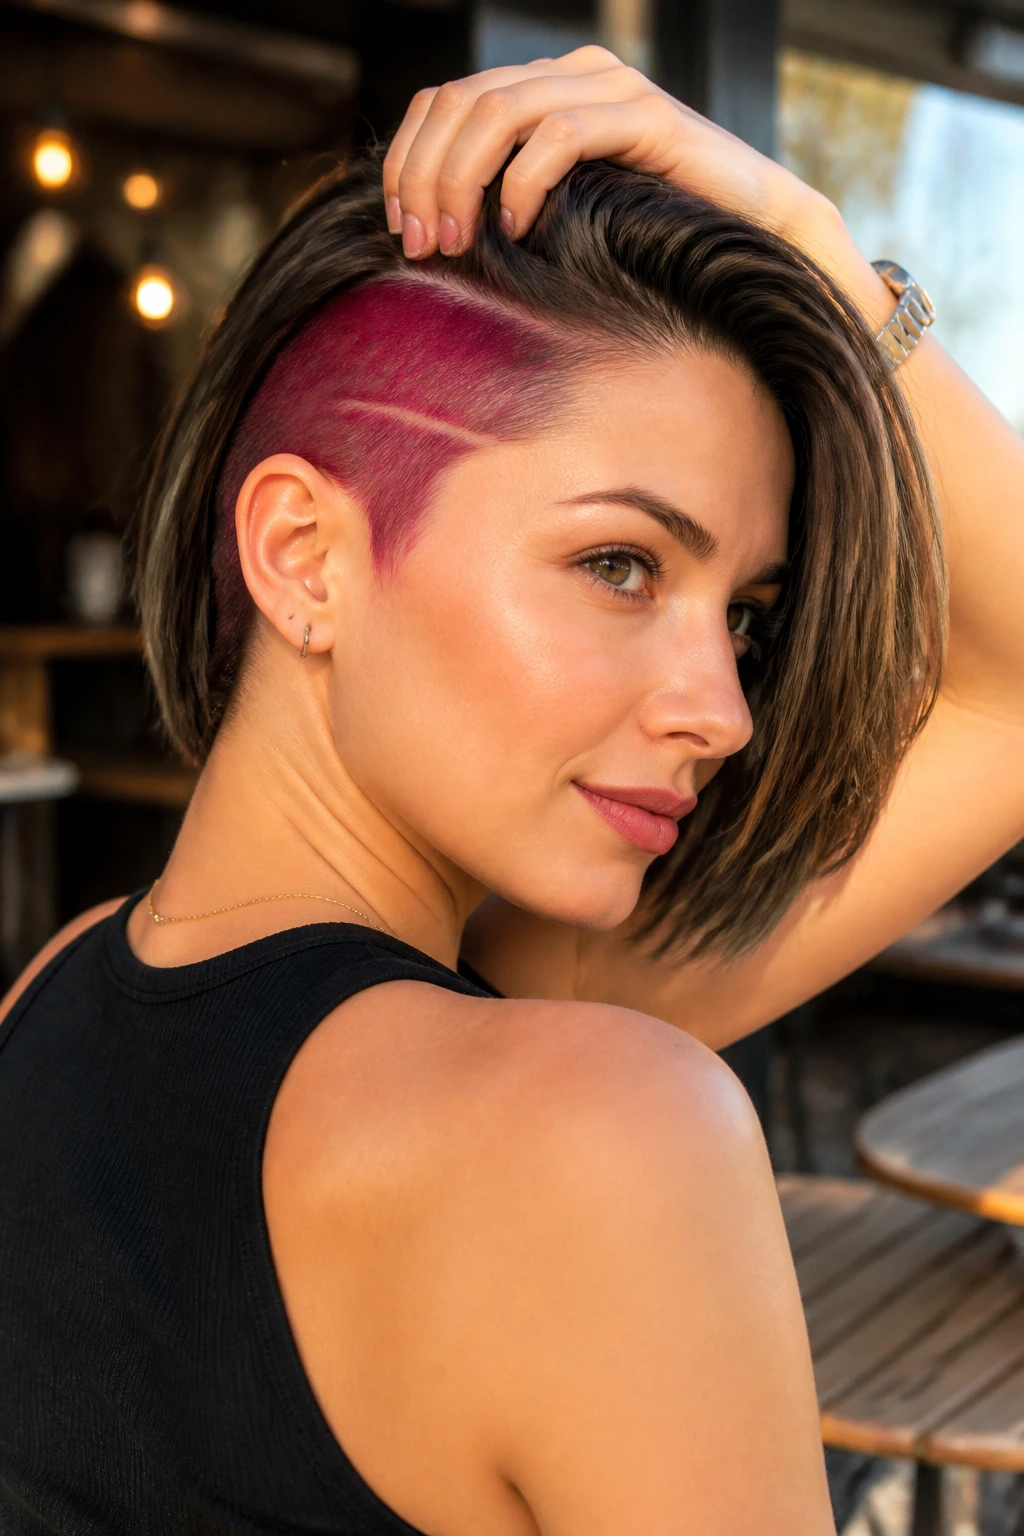
A color-contrast undercut is not subtle, and that’s the point. The hidden section is shaved and dyed a different shade—platinum, copper, dark navy, neon if you want to be fully unbothered—so the reveal happens when the top lifts, parts, or gets tied back. Medium-length hair gives you enough surface area to make the color show up without committing the whole head to it.
The style is strongest when the top layer has some movement. Straight hair can hide the color until the wind catches it. Wavy hair exposes it in flashes. Curly hair can make the reveal feel almost secretive, which is my favorite version. It’s part haircut, part surprise.
If you’re doing both color and shave, do the shape first, then the color. The clipped area is easier to maintain that way, and you won’t be chasing the dye up into longer strands.
24. Side-Tuck Undercut for Straight Hair
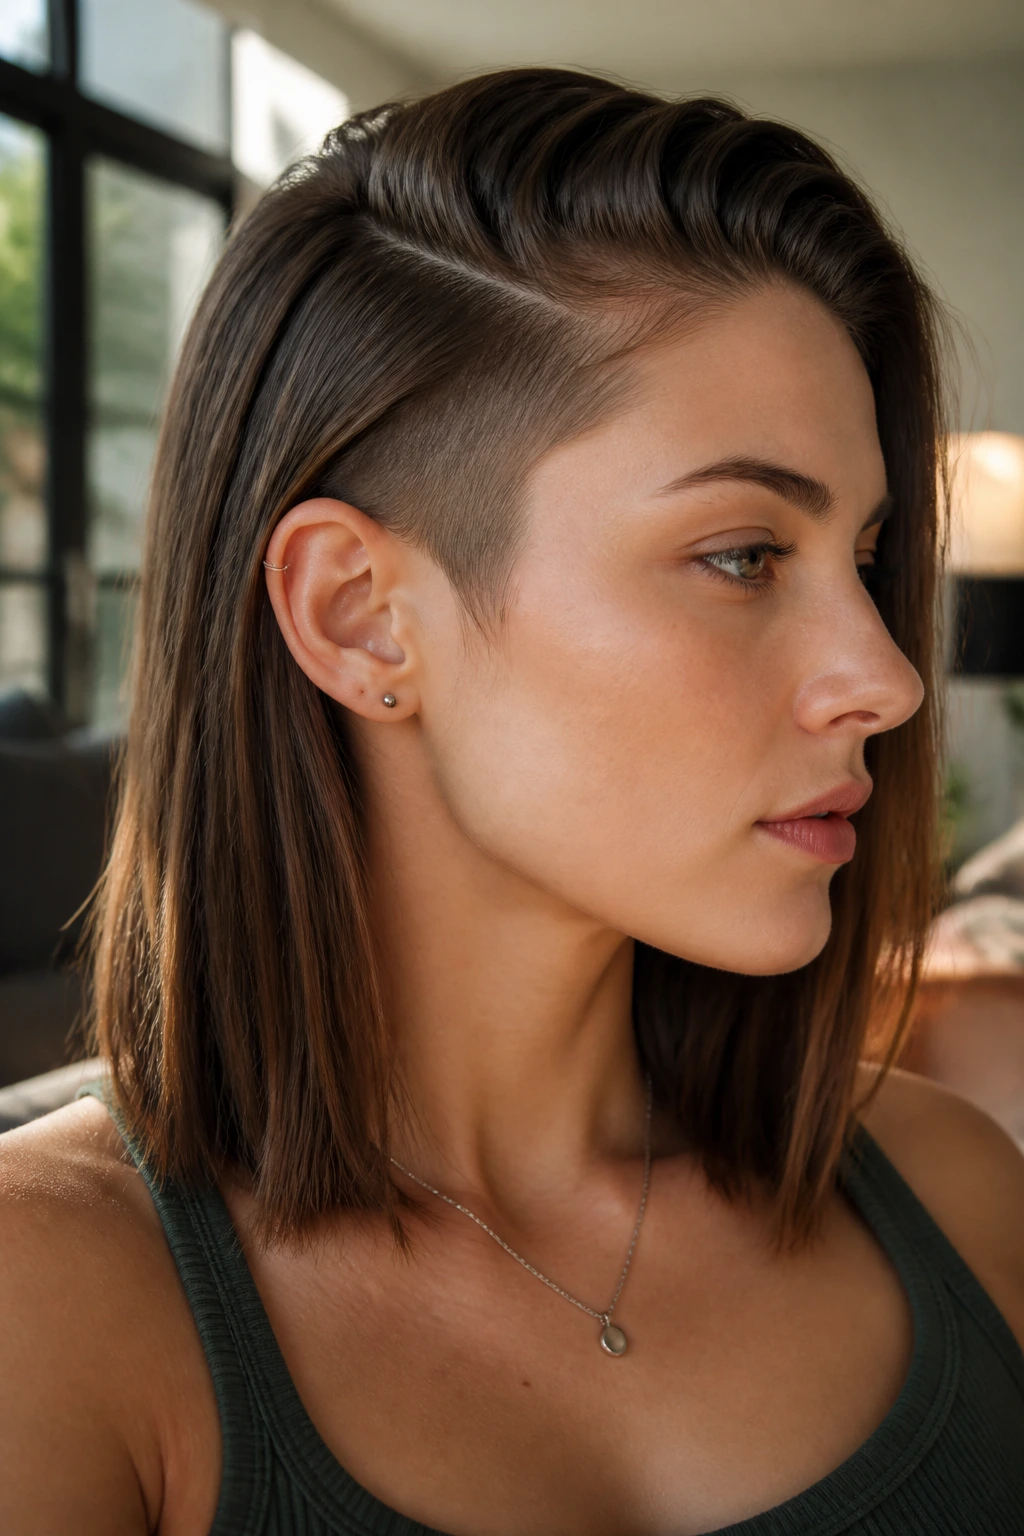
Straight hair is honest hair. It shows every line. That’s why a side-tuck undercut on straight medium-length hair looks so clean when it’s done well. One side is clipped down underneath, the top stays long and sleek, and the whole thing comes alive the second you tuck it behind the ear.
A flat iron pass can sharpen the finish, but don’t iron the life out of it. The best version still has a bit of movement at the ends. Use a light serum on the mid-lengths and a shine spray only on the outer layer. If you load up the roots, the hair collapses and the undercut loses its point.
This style works best when the part is deliberate. A sloppy part makes the cut look accidental. A crisp part makes it read like a choice, which is what you want.
25. Curtain Layers over a Hidden Shave
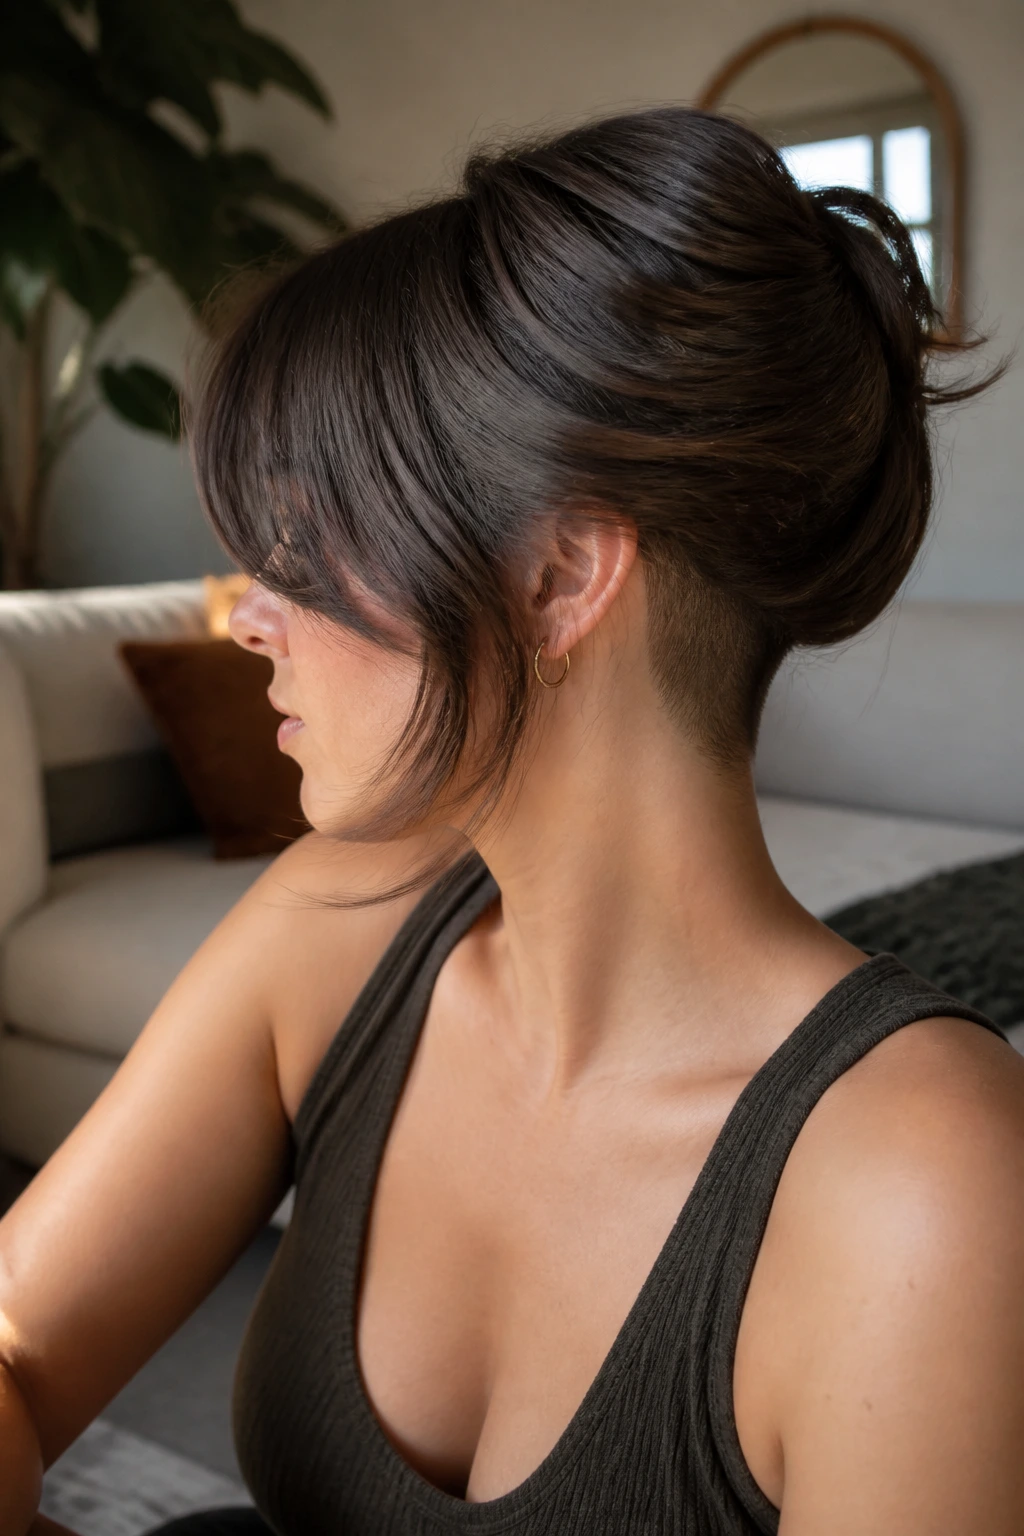
Curtain layers and a hidden shave are a quiet power move. The face-framing pieces stay soft and bend away from the cheekbones, while the shaved section sits underneath where only movement reveals it. On medium-length hair, that means you can get softness up front and relief at the back without turning the whole cut edgy.
The cut suits people who want their hair to look good in motion. Blow it forward, let it fall partway across the face, then tuck one side back and the undercut appears like a small surprise. That’s the appeal. It doesn’t need to dominate the look to matter.
This version is especially helpful if your crown tends to flatten. The hidden shave lightens the base, and the curtain pieces draw the eye upward. A round brush at the front and a rough dry at the back gives you exactly the right amount of contrast.
26. Center-Part Wavy Lob with Nape Detailing

A center part can make medium hair look sleek, but it can also expose every ounce of bulk at the neck. A nape undercut solves that problem while keeping the symmetry of the center part intact. The waves stay loose and balanced on both sides, and the hidden shave keeps the back line from flaring outward.
This is a calm cut with a clean finish. The waves should look relaxed, not beachy in a fussed-over way. A 1-inch curling iron works well if you alternate directions and break the curls apart with your fingers once they cool. The undercut underneath gives the hair room to settle without bunching up against the collar.
If your hair naturally parts in the middle, don’t fight it. The nape detail is there to make the natural part look more polished, not to replace it.
27. Glass-Hair Straight Cut with Clean Nape Line
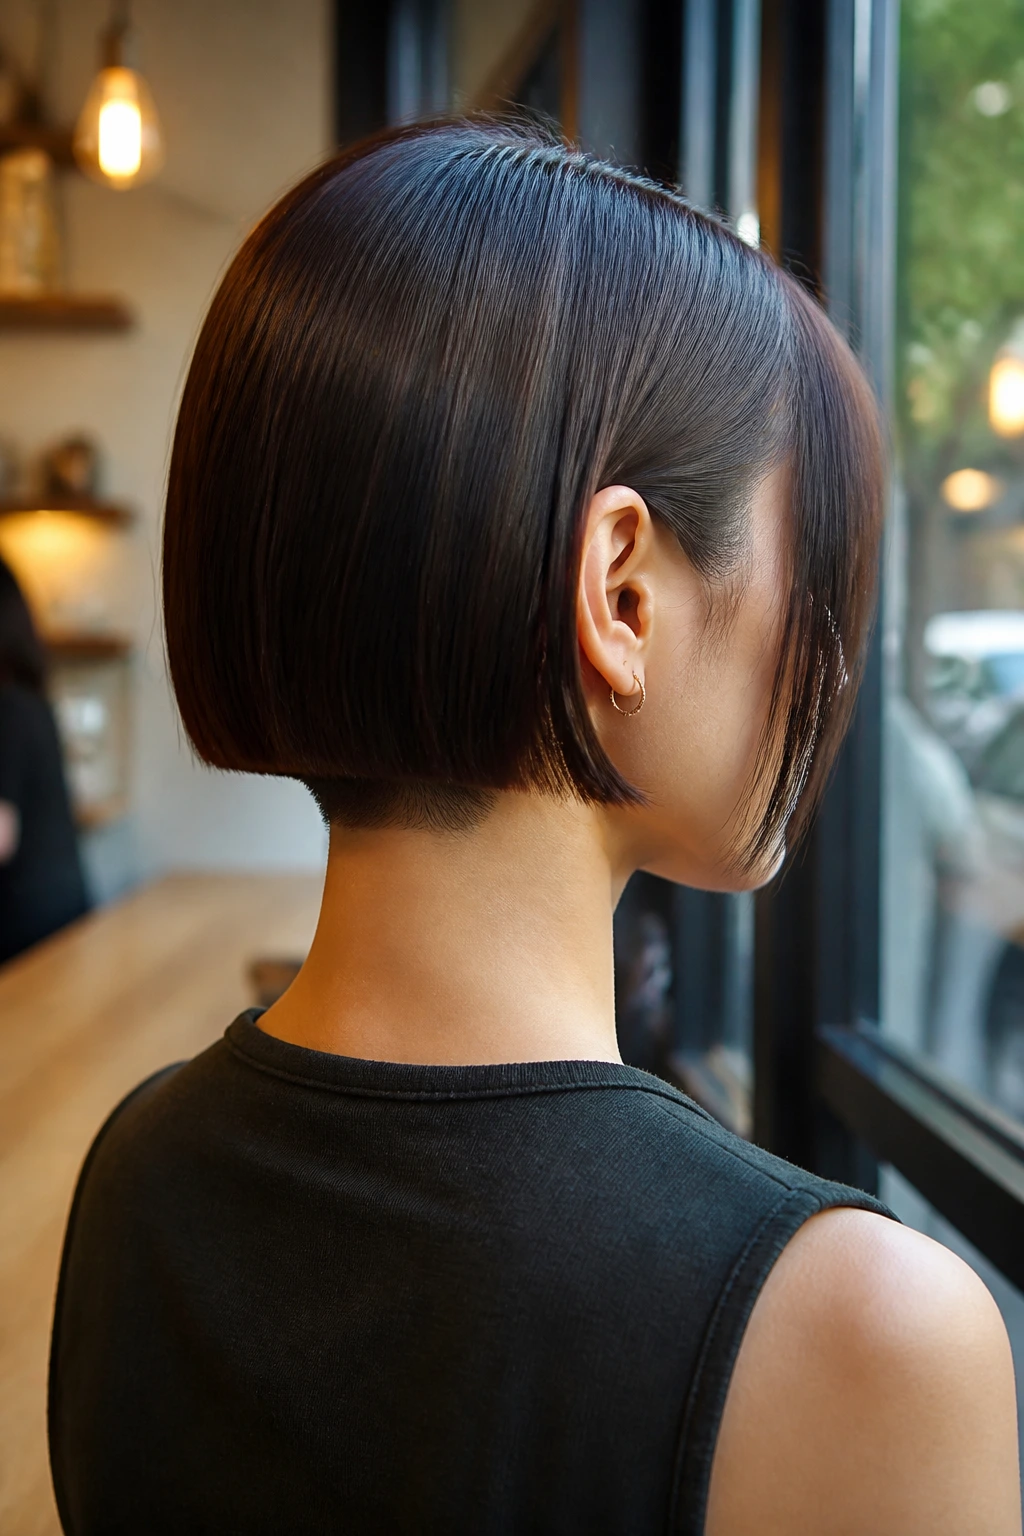
A glass-hair finish demands precision. The surface needs to be smooth, the ends need to sit clean, and the nape undercut needs to be razor neat so the silhouette doesn’t get fuzzy when the hair is tucked down. Medium-length straight hair can pull this off beautifully because the length gives the shine something to show off.
Why It Stands Out
- The undercut removes bottom bulk, which helps the top lie flatter.
- A smooth blow-dry with a nozzle creates that reflective finish.
- The clean nape line keeps the back from puffing out under coats or collars.
Use heat protectant first. Always. Then dry the hair in sections with a paddle brush, finishing with a cool shot to lock the cuticle down. The undercut is hidden, but it still matters, because the whole point of glass hair is control from root to tip.
28. Choppy Edgy Undercut with Jagged Ends
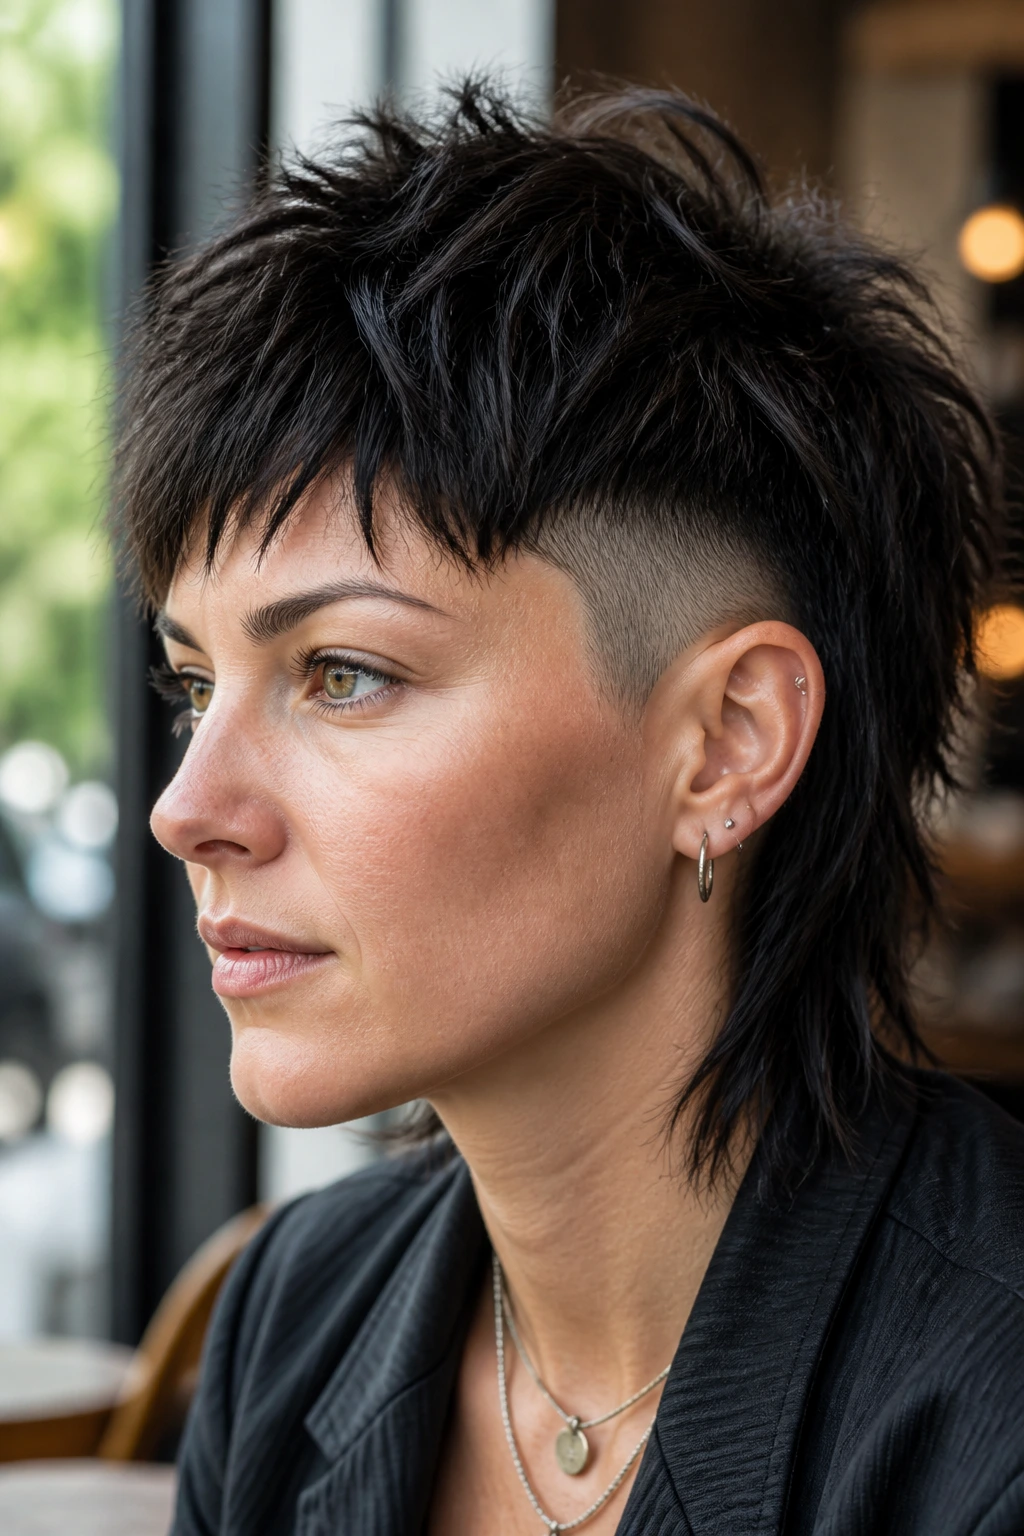
A choppy undercut with jagged ends looks best when it doesn’t apologize for itself. The top layers are cut unevenly on purpose, the ends are piecey rather than blunt, and the undercut underneath clears away the weight that would otherwise make the style look clumsy. It’s a good choice if your hair falls flat when it’s evened out too much.
This cut loves matte texture. Work a small amount of paste through the ends and pinch random sections apart. Don’t make every piece the same size. That’s how the style starts to look manufactured instead of lived in. If you want more lift, rough-dry the roots with your fingers and stop once the hair is about 80% dry.
The undercut gives the jagged top room to move. Without that hidden reduction, the cut can turn bottom-heavy fast.
29. Soft Feminine Undercut with Beveled Ends
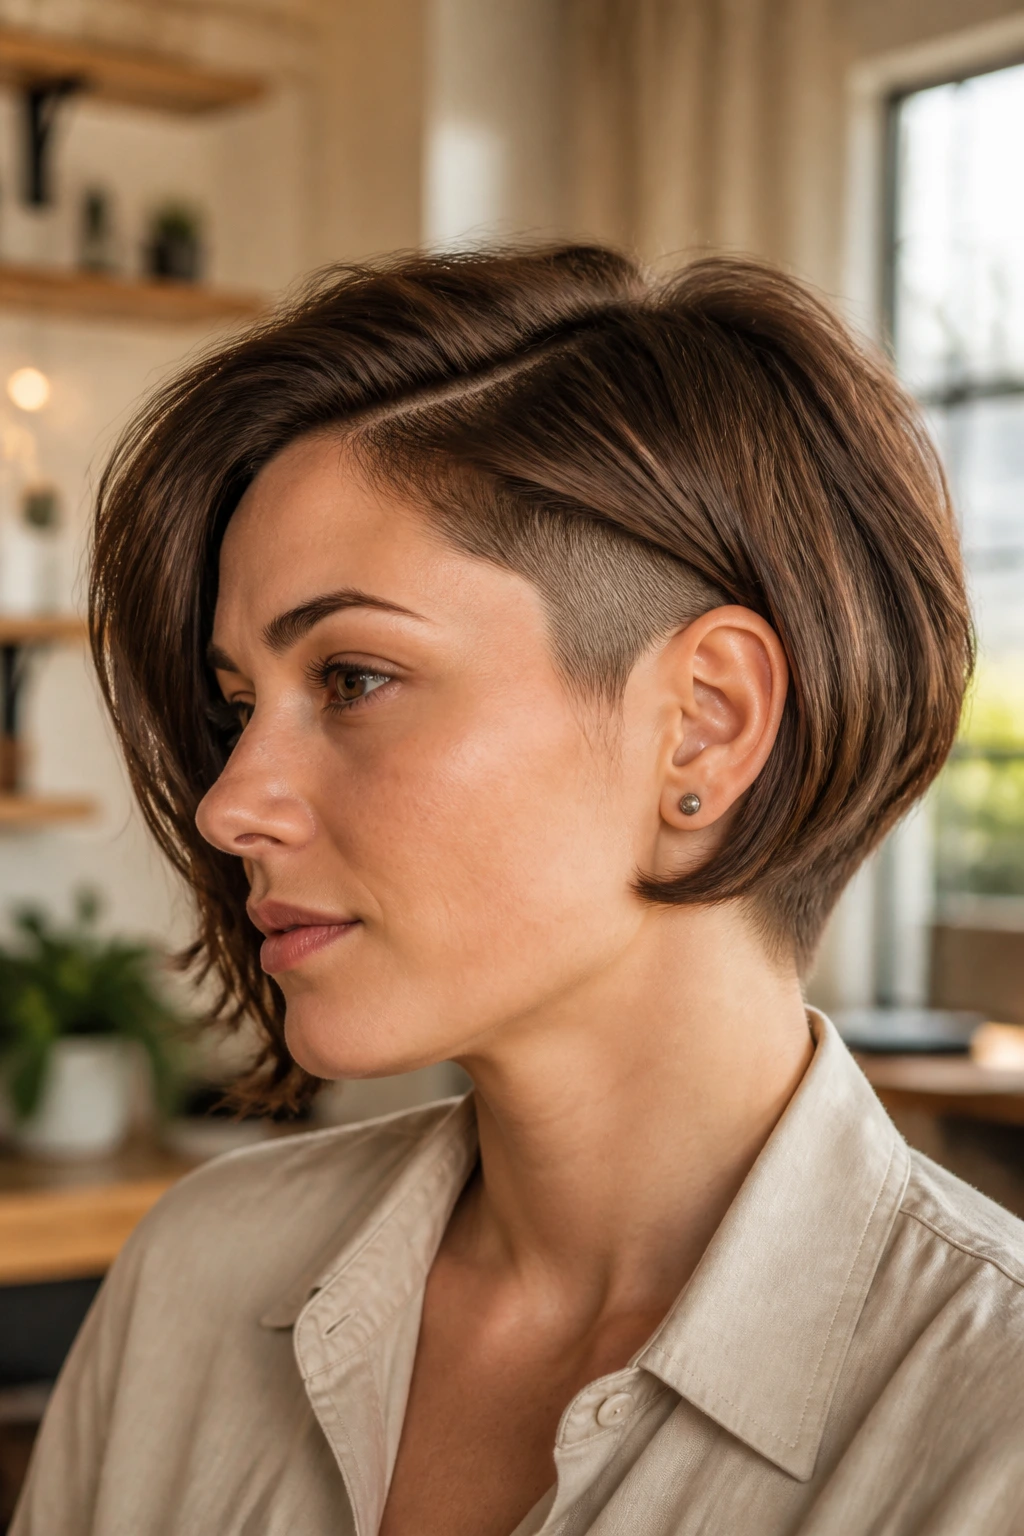
Not every undercut needs to look hard-edged. A soft, feminine version keeps the shave low and gentle, then bevels the medium-length ends so they curve instead of hanging straight. It still has an undercut, but the visual read is softer and more blended.
This style is useful if you want the benefits of less bulk without the visual shock of a sharp disconnect. The bevel at the ends matters more than people think; it keeps the perimeter from looking boxy. A round brush or even a large Velcro roller at the face frame can help the front sections arc away from the cheekbones.
I like this for people who wear earrings often or like a softer neck line. The undercut doesn’t need to be the star. It just needs to do its job quietly underneath.
30. Scissor-Soft Fade Undercut
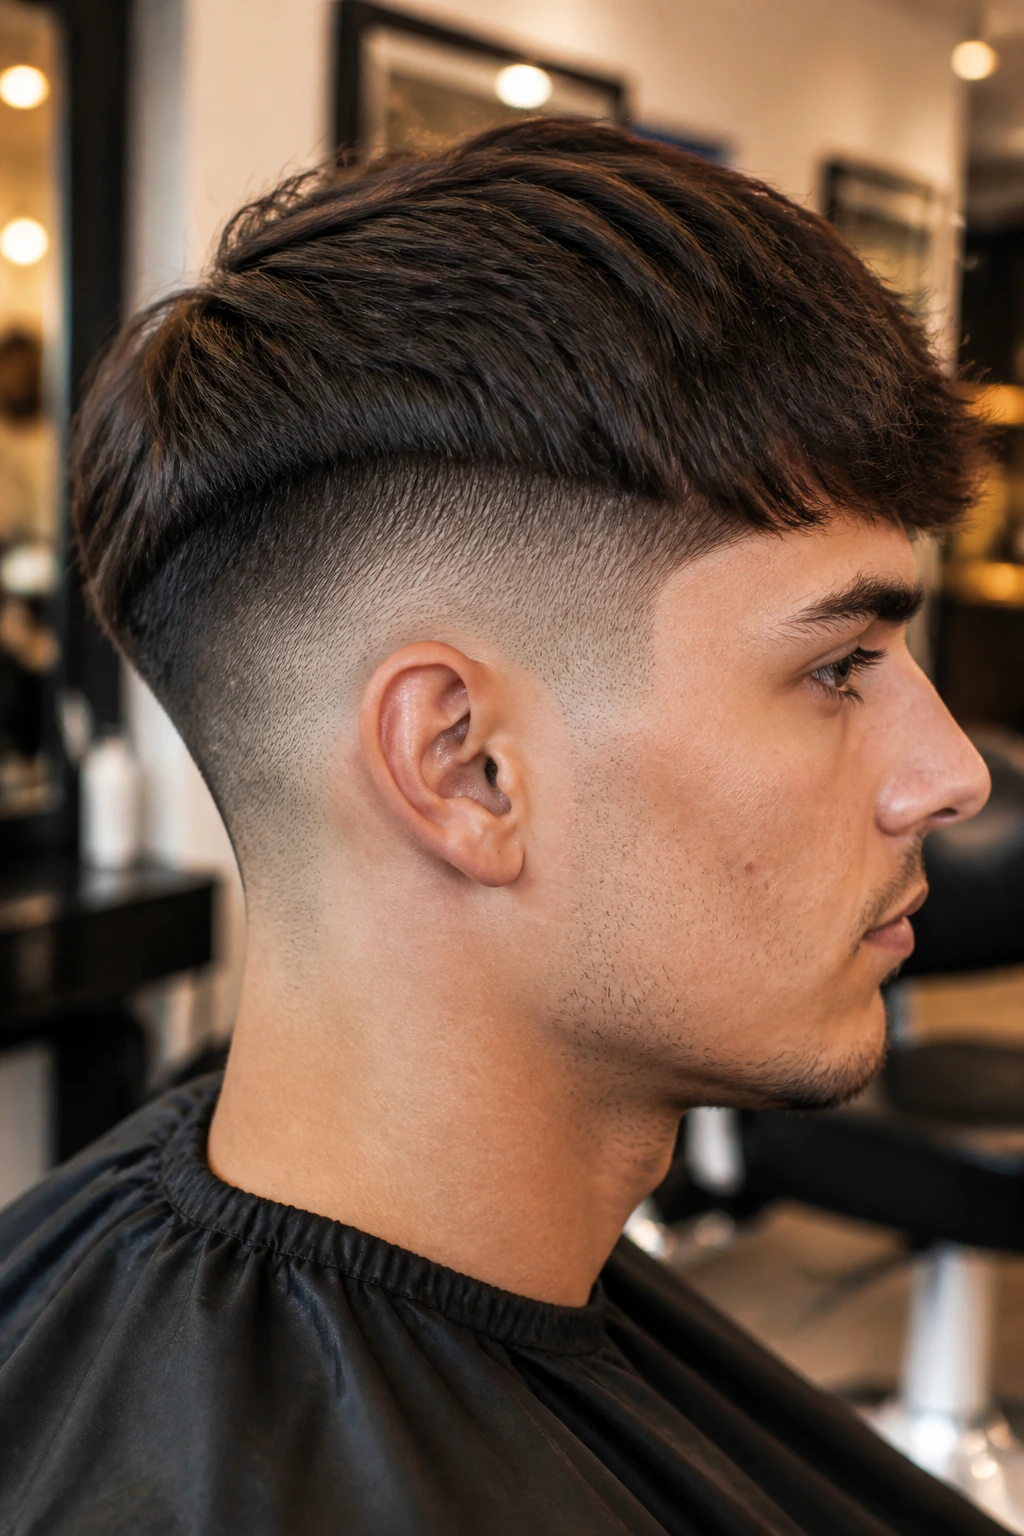
A scissor-soft fade undercut is the closest thing to a whisper in this whole bunch. Instead of a hard clipper line, the stylist uses scissors and comb work to remove weight gradually from the lower section, giving medium hair a gentler transition. It’s still an undercut in spirit, but the edge is softened enough that it grows out with less fuss.
This is a smart pick if skin-fade energy feels too sharp for your face or your routine. The hair still lies closer to the head, but the transition from short to long is less abrupt. That matters on medium-length cuts because the top already carries enough visual length; you don’t need the bottom shouting for attention too.
Use this if you want a shape reset rather than a visible statement. Sometimes that’s the better move.
31. Grow-Out Friendly Undercut
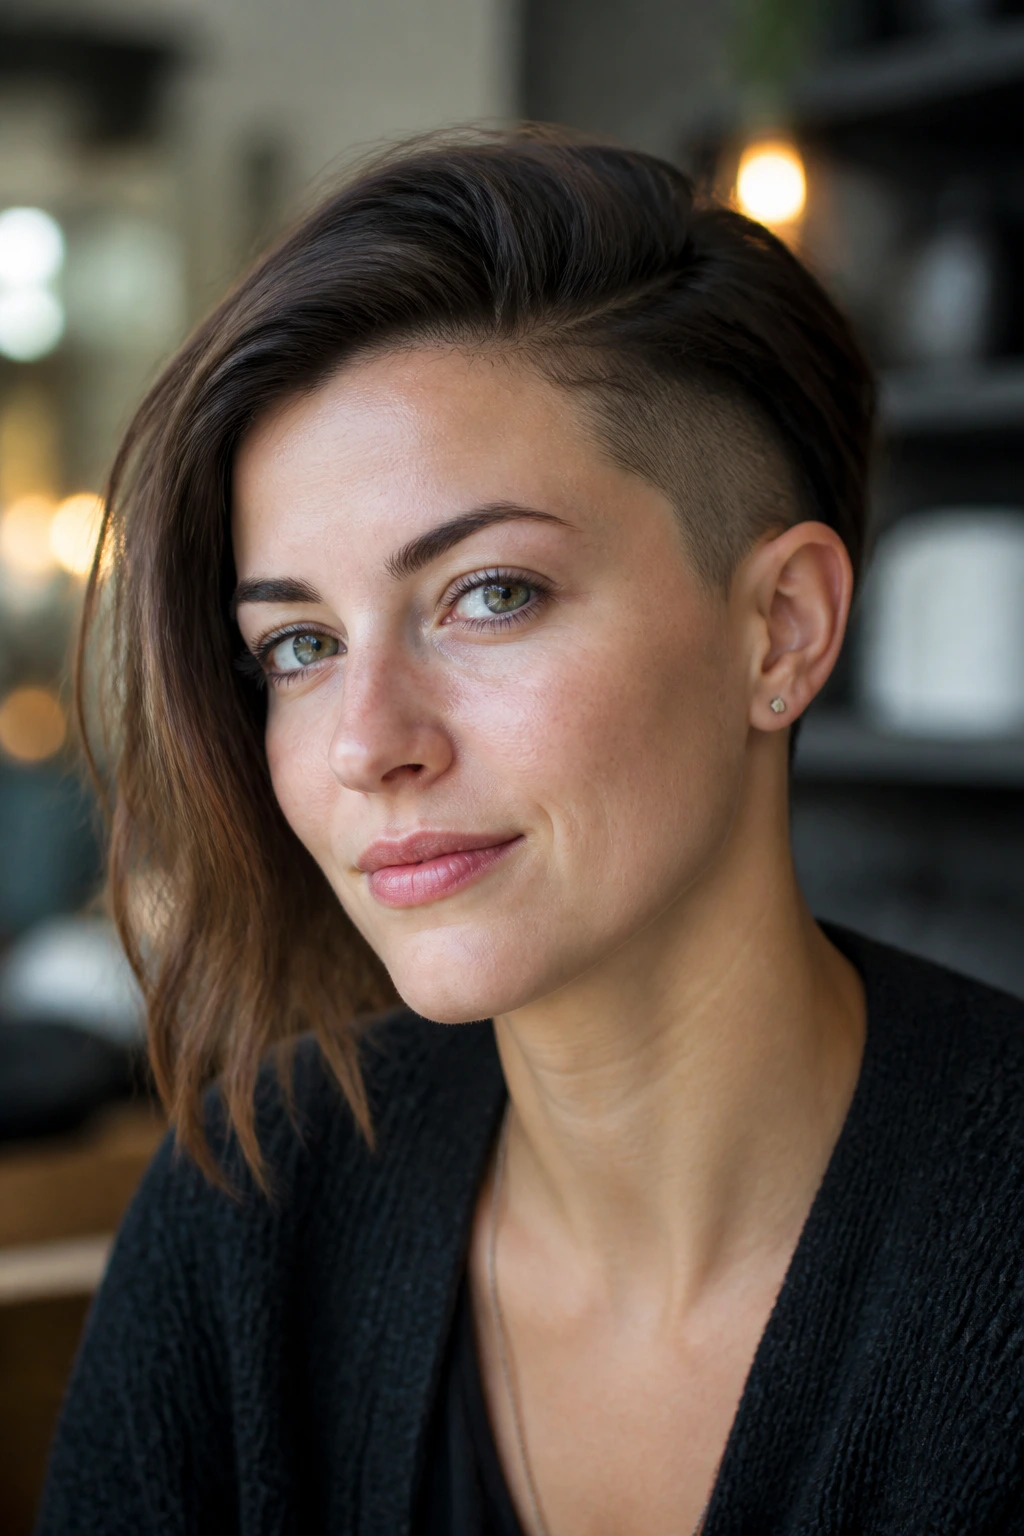
A grow-out friendly undercut is designed with the future in mind. The bottom section is clipped with a longer guard, the corners are rounded, and the top layer is left long enough to cover the shave as it softens. If you know you might want to back out later, this is the version to ask for.
The thing people don’t always expect is that a good grow-out cut looks better on day one than a reckless one does. It may feel less dramatic, but it keeps the outline from turning into a hard shelf after three weeks. Ask for a transition that follows your natural hairline instead of cutting straight across it.
This is the cut for cautious people. Not boring people. Cautious. There’s a difference.
32. Split-Dye Reveal with Shaved Base
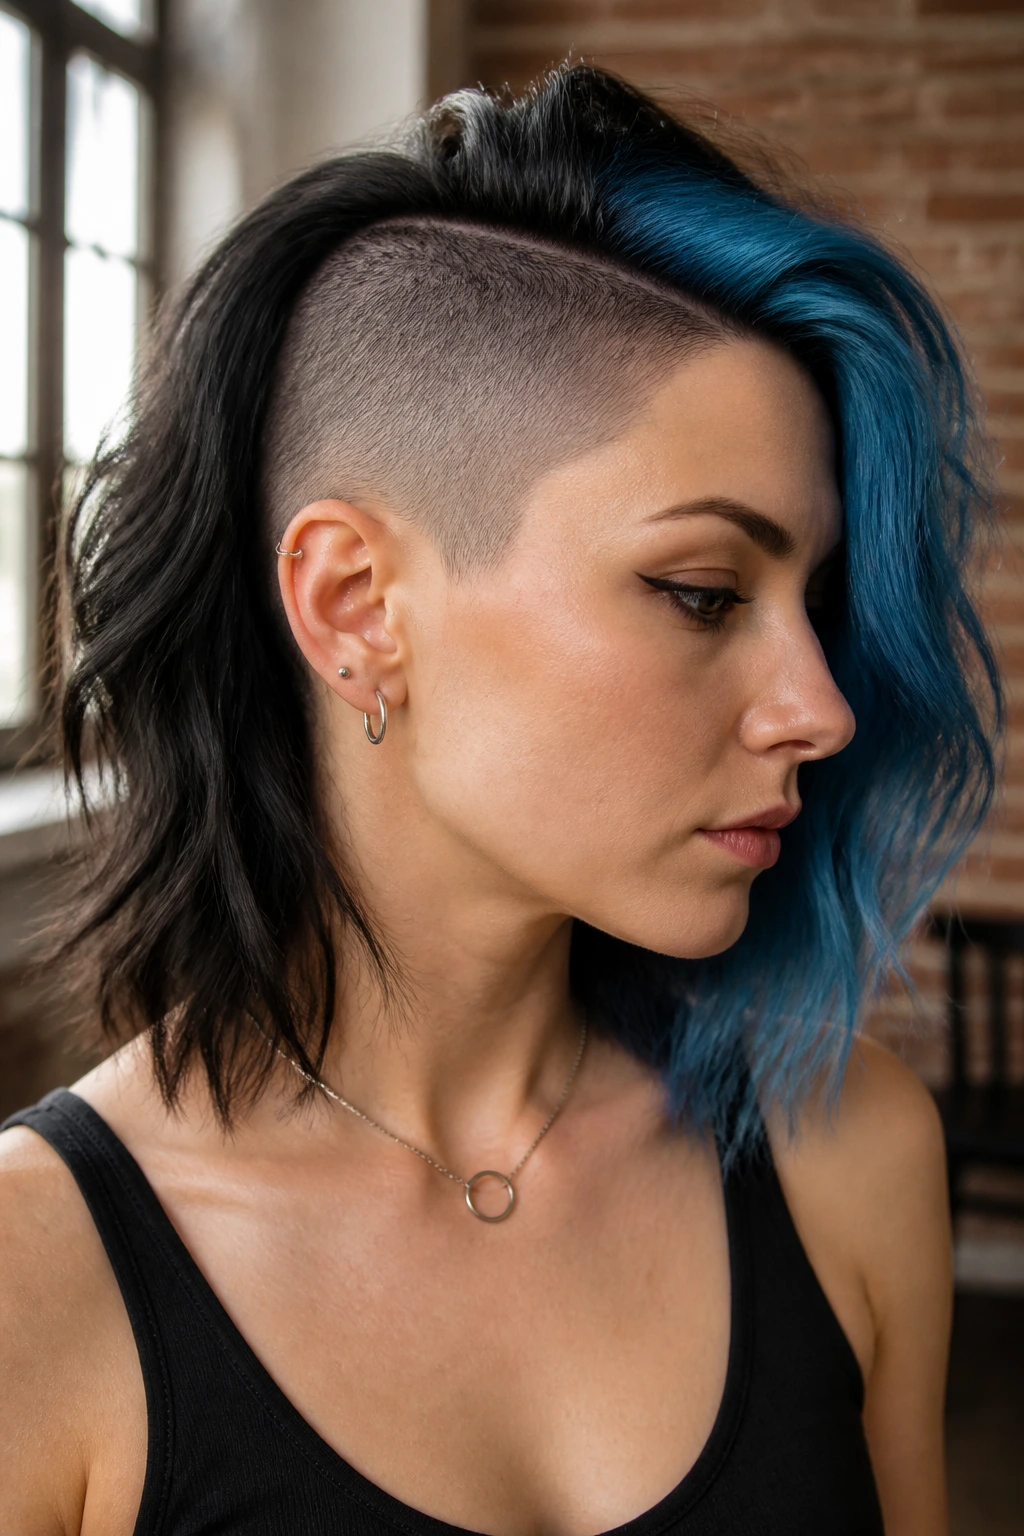
A split-dye reveal with a shaved base is the loudest option in the set, and it earns that volume by being deliberate. One side or one lower panel is shaved, then colored in a contrasting shade so the reveal changes depending on how the hair falls. On medium-length hair, the top gives you enough length to hide the color when you want, and enough movement to flash it when you don’t.
The style works best if the shape is clean. Messy lines plus strong color usually read chaotic. Sharp lines plus color read intentional. That distinction matters. You want the hair to look designed, not dropped into place by accident.
If you’re going this bold, keep the rest of the haircut disciplined. Strong perimeter. Controlled layers. A clear parting. The contrast will handle the drama on its own.
Why Medium-Length Hair Loves an Undercut
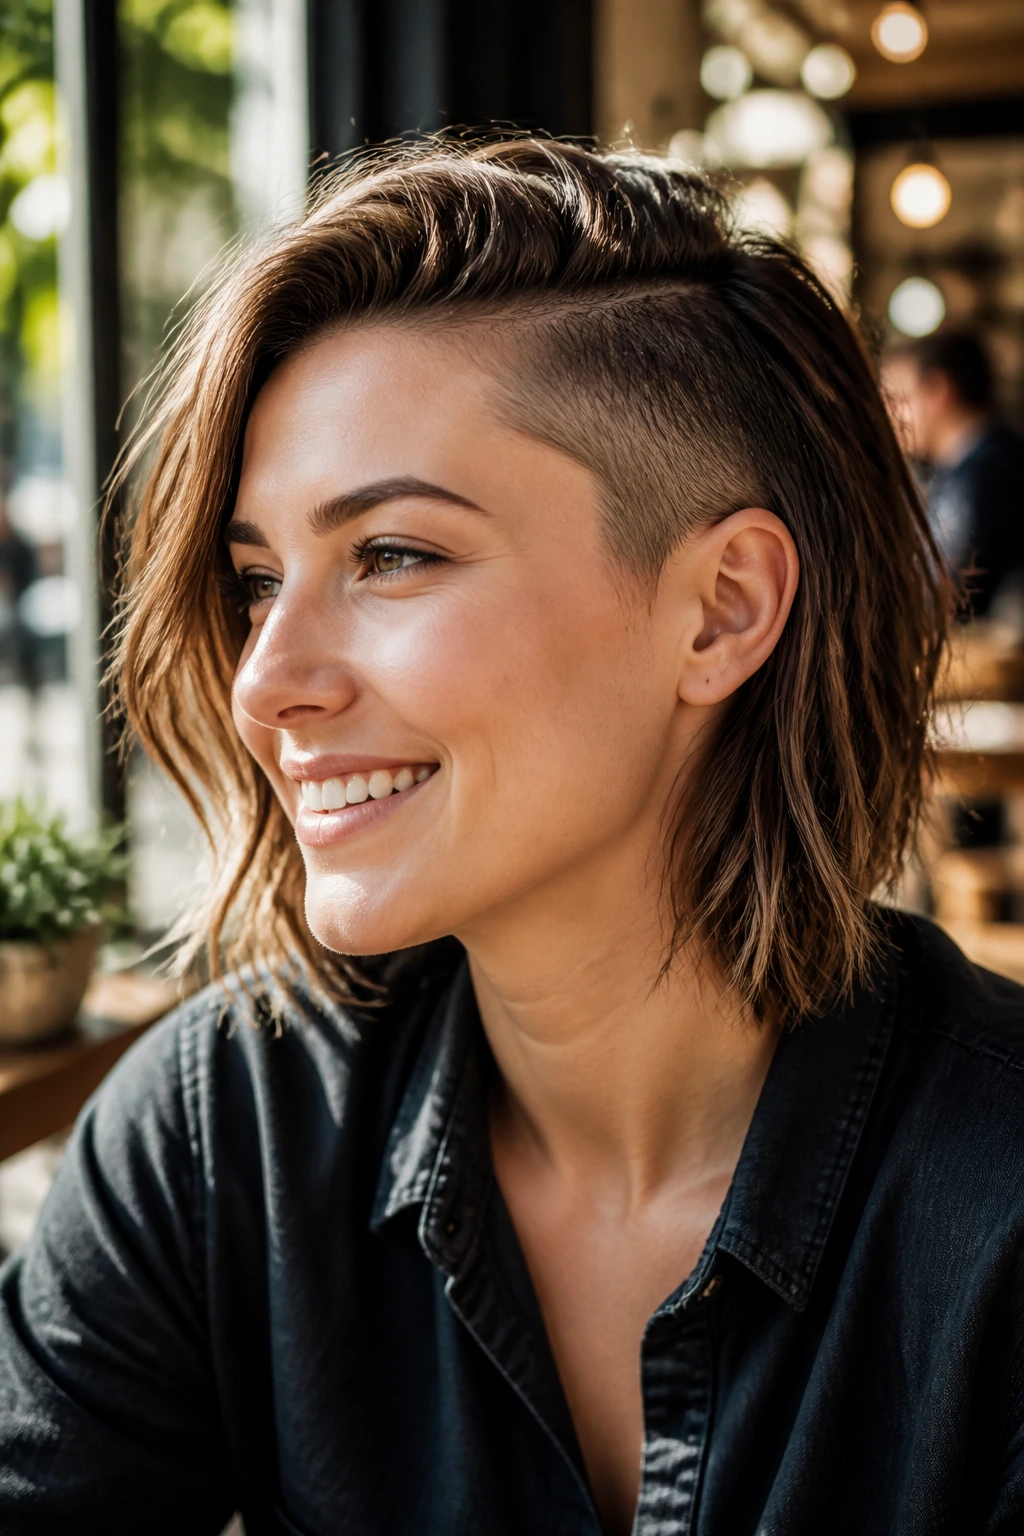
Medium hair can be the most stubborn length to wear when it’s cut with no underneath support. It’s long enough to get heavy, but not long enough to drape past everything and calm itself down. That’s why undercuts fit so well here. They take the pressure off the lower section, which means the top can move instead of forming a box.
The other advantage is flexibility. Short hair gives you one way to wear it. Long hair gives you more, but it also brings more maintenance. Medium length with an undercut sits in the middle and borrows the useful parts from both sides. You can hide the shave under layers, show it with a tuck, or build the whole look around it if you want to make a point.
Placement changes everything. A nape undercut changes the silhouette from behind. A temple shave sharpens the sides. A hidden panel just takes weight out where the bulk lives. That’s why two people can say they have an undercut and still look like they’re wearing completely different cuts. They probably are.
Essential Tools for Keeping the Shape
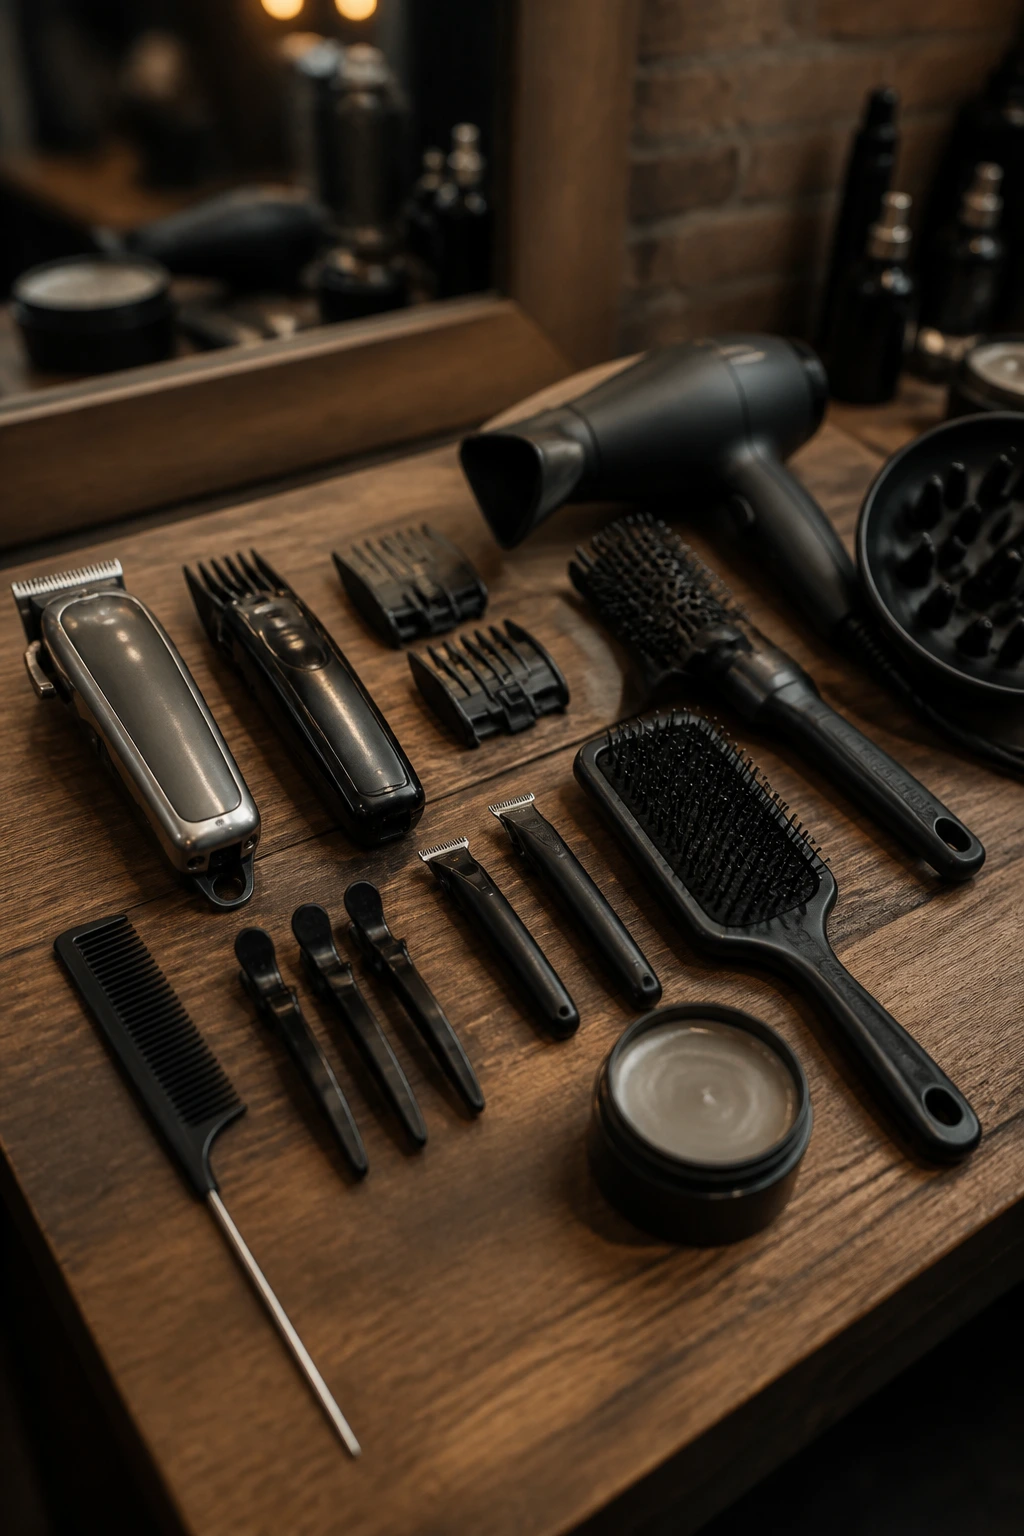
- Clippers with multiple guards: A #2, #3, or #4 guard gives you different levels of contrast, and the guard length matters more than people think.
- Detail trimmer: Useful for cleaning the neckline and making the hidden sections look intentional between appointments.
- Sectioning clips: They keep the top hair out of the way while you check where the undercut begins.
- Rat-tail comb: Good for drawing a straight part or lifting the top layer to check the reveal.
- Blow dryer with a nozzle: Helps the top lie smooth or build lift depending on the direction you dry it.
- Round brush or paddle brush: Use the round brush for bend and volume, the paddle brush for sleeker medium-length shapes.
- Diffuser: Worth it if your medium-length hair is wavy or curly and you want to keep the pattern intact.
- Matte paste, curl cream, or light gel: Pick the one that matches your texture instead of loading everything on at once.
- Hand mirror: Essential for checking the nape line at home; the back of an undercut can drift faster than you’d expect.
What to Tell the Stylist Before the First Clip
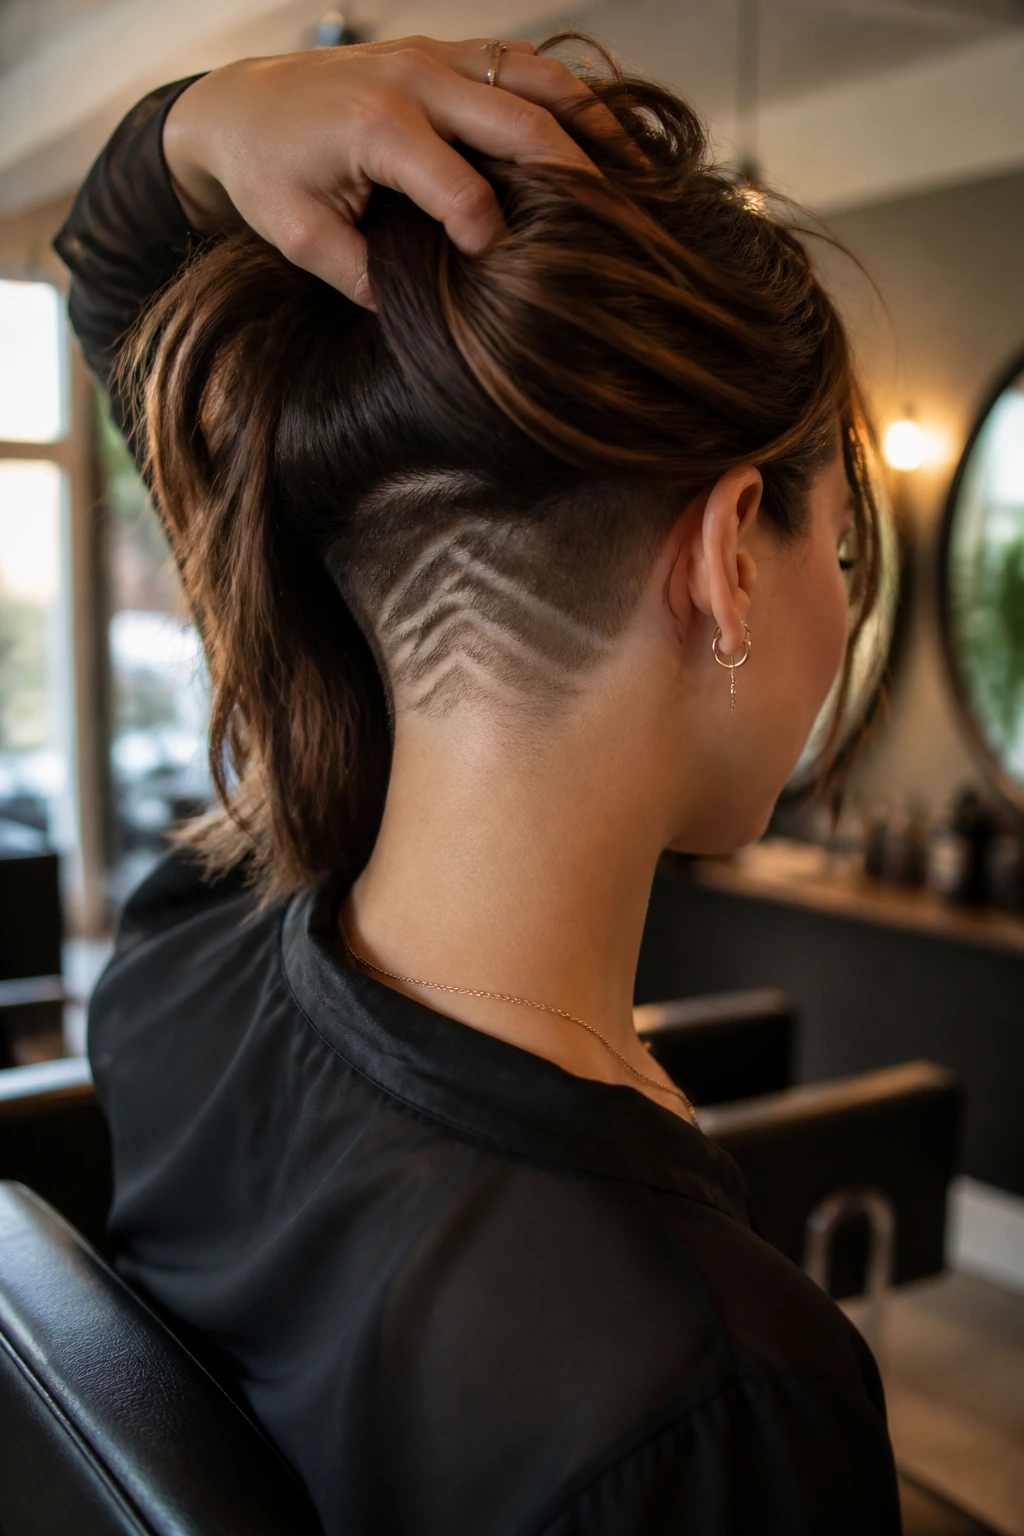
Start with placement, not length. That’s the mistake people make. Saying “I want an undercut” is vague; saying “I want a hidden nape shave that disappears when my hair is down” gives your stylist something usable. If you know your hair swells at the nape or flares at one side, say that too. Haircuts are shaped by trouble spots, not wishful thinking.
Guard length should be part of the conversation. A #2 looks much shorter than a #4, and the difference changes the whole tone of the cut. If you’re nervous, ask for the longer version first. You can always take more off later. You cannot put it back once the clippers have done their work.
Bring photos, but bring your own hair logic too. A photo tells the stylist the mood. Your hair tells them the reality. If your crown cowlick sticks up at 9 a.m., if your part is fixed, if one side grows denser than the other—say it. Those details decide whether the undercut looks clean or stubborn.
Styling Moves That Keep It Intentional
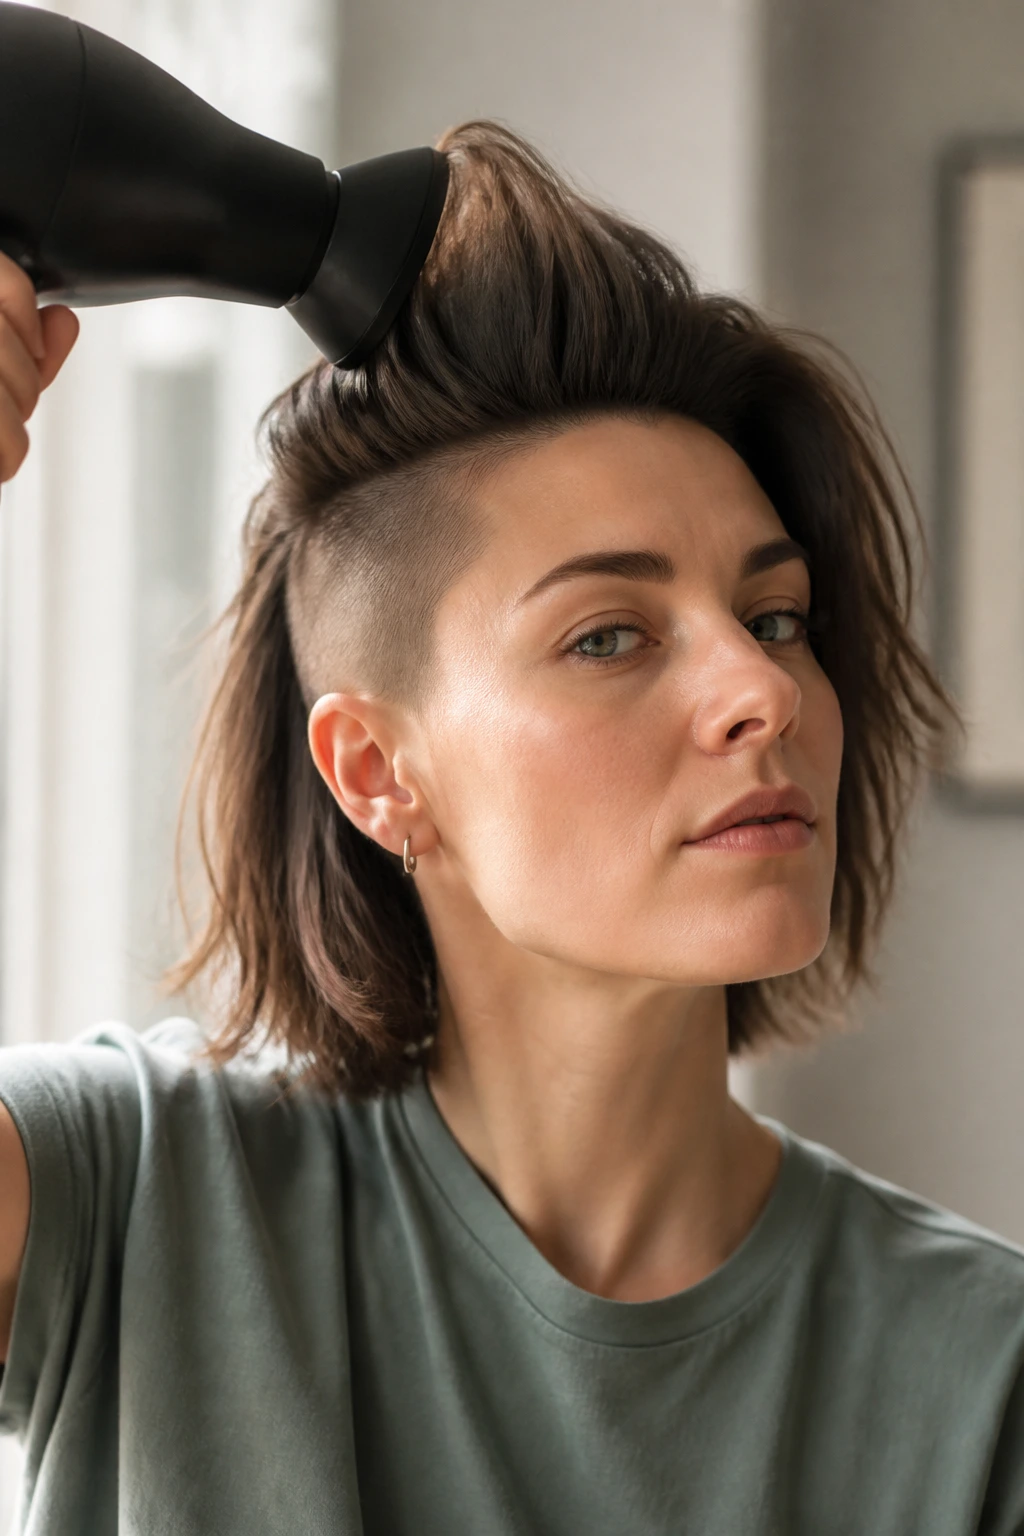
The easiest mistake with an undercut on medium hair is letting the top sit there with no direction. That’s when the cut starts to look like a compromise instead of a choice. A quick blow-dry with the nozzle pointed where you want the hair to fall changes the whole read. Dry the roots opposite the part if you want lift. Dry them down if you want sleekness. Small move. Big difference.
Product choice matters more than product quantity. A pea-sized amount of matte paste can define ends without turning them greasy. A light gel can smooth a slick-back without making the hair brittle. Curl cream helps wavy and curly cuts keep their shape, but too much of it weighs the top down and cancels the undercut’s lift. Use less than your instinct tells you. That’s almost always the better call.
Day-two hair is where these cuts often look best. A little dry shampoo at the roots, a mist of water on the front, and five seconds with your fingers can bring the shape back. No need to start over.
Keeping the Cut Sharp Between Appointments
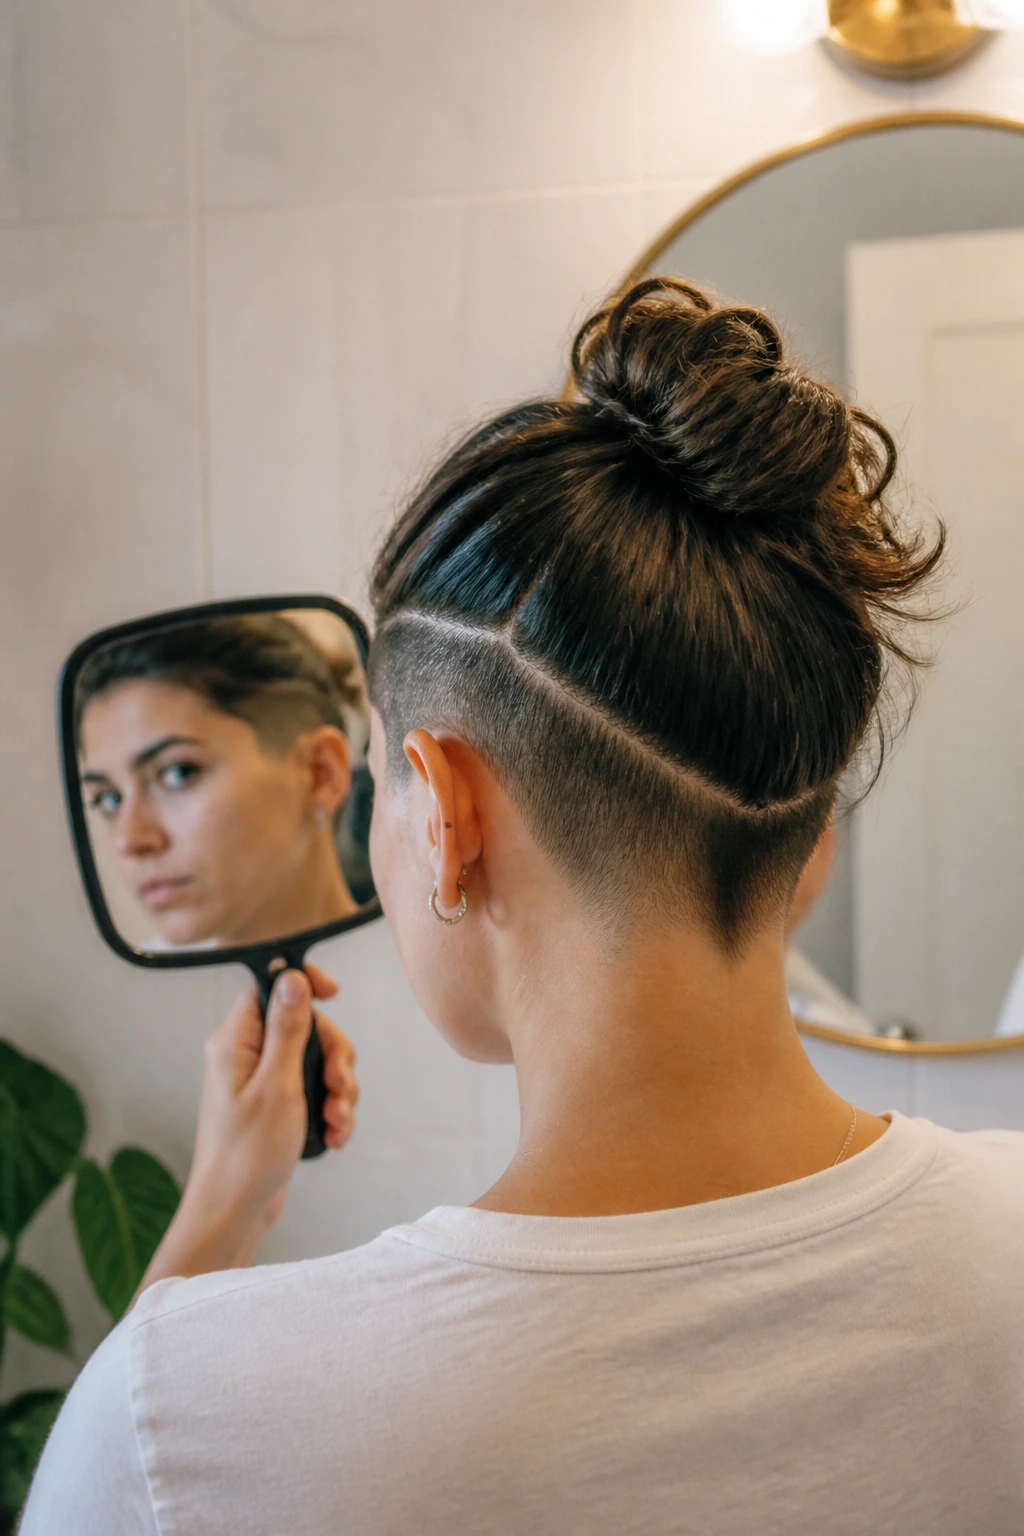
Hidden undercuts grow out gracefully for a while, then they don’t. The moment the shaved section starts catching on collars or showing a fuzzy edge at the neckline, it’s time for a tidy-up. For most nape or temple undercuts, a touch-up every 4 to 6 weeks keeps the line clean. If the undercut is more concealed and the top is layered well, you can sometimes stretch that to 6 to 8 weeks before the shape starts to read messy.
Do not try to fix a warped neckline with a giant at-home clipper session unless you know exactly how your head is shaped. One bad pass can push the line too high and turn a clean cut into a patch job. A detail trimmer is safer for small cleanups around the edges.
The grow-out phase is easier if the top stays shaped. Tiny trims on the ends of the medium-length section prevent the whole haircut from drifting into one long, unbalanced curtain. That’s the part people forget.
Common Mistakes That Make the Cut Look Accidental
-
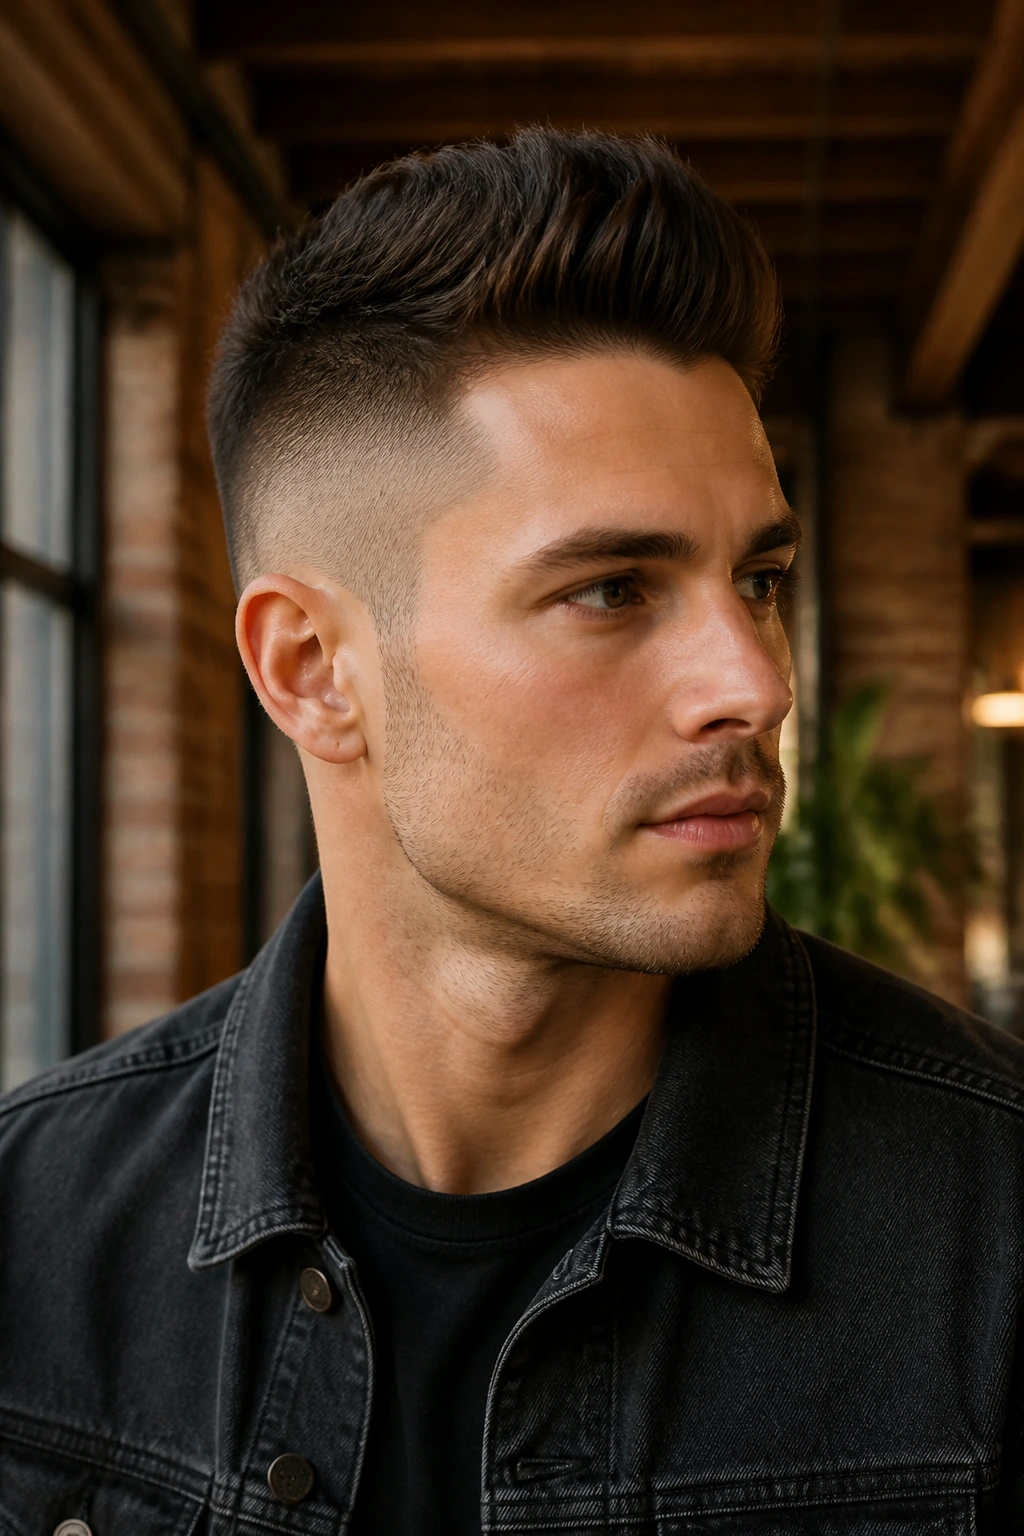
Taking too much off in the first pass: A too-wide or too-short shave can jump from subtle to obvious fast. The fix is simple: start with a longer guard and a narrower section, then go shorter only if the hair still feels bulky.
-
Ignoring the natural hairline: Cowlicks, whorls, and uneven nape growth can make a clean line look crooked if you cut straight across them. Work with the hairline instead of trying to bully it flat.
-
Letting the top get too thin: If the top layer is over-thinned, the undercut starts showing through in a patchy way. Keep enough density on top to cover the shaved zone when you want it hidden.
-
Using heavy product near the roots: Oils and thick creams make medium hair slump, which steals the lift the undercut is supposed to create. Keep heavier products on the ends and use root-friendly products lightly.
-
Forgetting the grow-out plan: A sharp undercut can look great on day one and irritating by week five if the shape wasn’t designed to soften. Ask for a rounder edge or a longer guard if you want a calmer grow-out.
Ways to Adapt the Cut to Texture, Face Shape, and Routine
The Office-Soft Version: Keep the undercut low, narrow, and hidden under the top layer. A longer guard and a side part make it easier to wear in conservative settings without losing the benefit of less bulk.
The Curl-First Version: Leave the crown and front long enough to preserve spring, then reduce only the underside. This keeps curls from getting crushed while still fixing the triangle shape.
The Thin-Hair Lift Version: Keep the shave subtle and the top layers full. Too much removal can make fine hair look see-through, so the goal is lift, not exposure.
The Sharp-Edge Version: Use a deeper side panel or temple shave, then keep the top sleek and controlled. This suits people who want the undercut to be visible on purpose.
The Low-Maintenance Version: Ask for a longer guard and a rounded perimeter. It grows out better, needs fewer edge cleanups, and still lightens the cut enough to matter.
Frequently Asked Questions
How short should the undercut be on medium-length hair?
A good starting point is usually a #3 or #4 guard if you want something soft, or a #2 if you want a clearer contrast. The right choice depends on how much bulk you’re trying to remove and how visible you want the undercut to be when the hair is worn down.
Will an undercut work on fine hair?
Yes, but it has to be placed carefully. Fine hair can go see-through fast if too much is removed, so keep the shave low and hidden and leave enough density on top to cover it when the hair is loose.
Can curly hair handle an undercut without looking lopsided?
Absolutely. Curly hair often benefits from a hidden undercut because it removes the weight that makes curls pile up at the sides and back. The top needs enough length to keep the curl pattern intact, though, or the cut can shrink up more than expected.
How often do I need to touch it up?
Most visible nape or temple undercuts need a tidy-up every 4 to 6 weeks. Hidden or grow-out-friendly versions can go a bit longer, but once the neckline feels fuzzy or catches on collars, it’s time.
What if I want to hide it for work?
Choose a low nape undercut or a concealed side panel. Those placements disappear under medium-length hair when worn down, then show only when you tuck, braid, or pull the hair back.
Can I get this cut if I part my hair the same way every day?
Yes, and the part actually helps. A fixed part can help determine exactly where the undercut should sit so the reveal looks natural instead of random.
What should I do if the grow-out starts looking boxy?
Ask for a small clean-up around the edges and a trim through the top layers, not another aggressive shave. A boxy grow-out usually means the perimeter got too square, not that you need to take more length off.
Do I need clippers, or can a stylist do this with scissors?
For a real undercut, clippers are usually the better tool because they remove bulk cleanly and consistently. Scissors can soften the transition, though, if you want a less severe result.
The Shape That Keeps Moving
Medium-length hair with an undercut has a useful trick that never really gets old: it changes how the whole cut behaves without forcing you into one look. Wear it down, and the shave stays hidden. Pull it back, and the shape wakes up. Let it wave, curl, or slick back, and the undercut keeps the bottom from swallowing the top.
The best version is the one that matches your texture and your patience. If you want something subtle, keep the shave low and soft. If you want edge, push the placement higher or more visible. Either way, the payoff is the same: less bulk, better movement, and a cut that feels designed instead of merely grown out.
