



Vintage waves have a funny little trick: they can look fussy from far away and almost calm up close. The shape does the work. A deep side part, a brushed-out bend, a smooth crown, and one clean curve over the cheekbone can turn ordinary hair into something that feels pulled from an old dressing room mirror, not a salon photo wall.
Wavy hairstyles with a vintage vibe work because they care more about direction than about curl count. That’s the part most modern styling advice skips. You do not need twenty tiny curls fighting for attention. You need the right bend in the right place, plus enough polish at the root to keep the style from drifting into “just waved hair.”
And the range here is wider than people expect. Short hair can do finger waves that sit close to the head like carved ribbon. Shoulder-length hair can give you brushed S-waves that swing without looking soft to the point of shapeless. Long hair can go glossy and expensive-looking, or loose and brushed, or pinned up with a few wave-framed tendrils left out on purpose. The styles below lean into all of that, with the old-school details that make them read as vintage instead of costume.
Why These Wavy Hairstyles With a Vintage Vibe Stand Out
-
They use shape, not just texture: A side part, a tucked end, or a lifted crown changes the whole mood more than another round of curling ever will.
-
They work on more than one length: Short bobs, lobs, mid-length layers, and long hair all show up here, so you can match the style to what’s already on your head.
-
They can look polished or lived-in: Some styles need a glossy finish and a brush-out; others look better with a little softness at the ends and less shine.
-
They suit real events: These waves can handle weddings, dinner dates, office parties, and regular days when you want your hair to look intentional without feeling stiff.
-
They travel well across textures: Fine hair, thick hair, and natural curls can all play here, as long as the set and finish are adjusted a bit.
-
They keep the old-school details that matter: Deep parts, pin curls, rolled fronts, and crown lift are the little things that make the look read as vintage at a glance.
1. Deep Side-Part Hollywood Waves
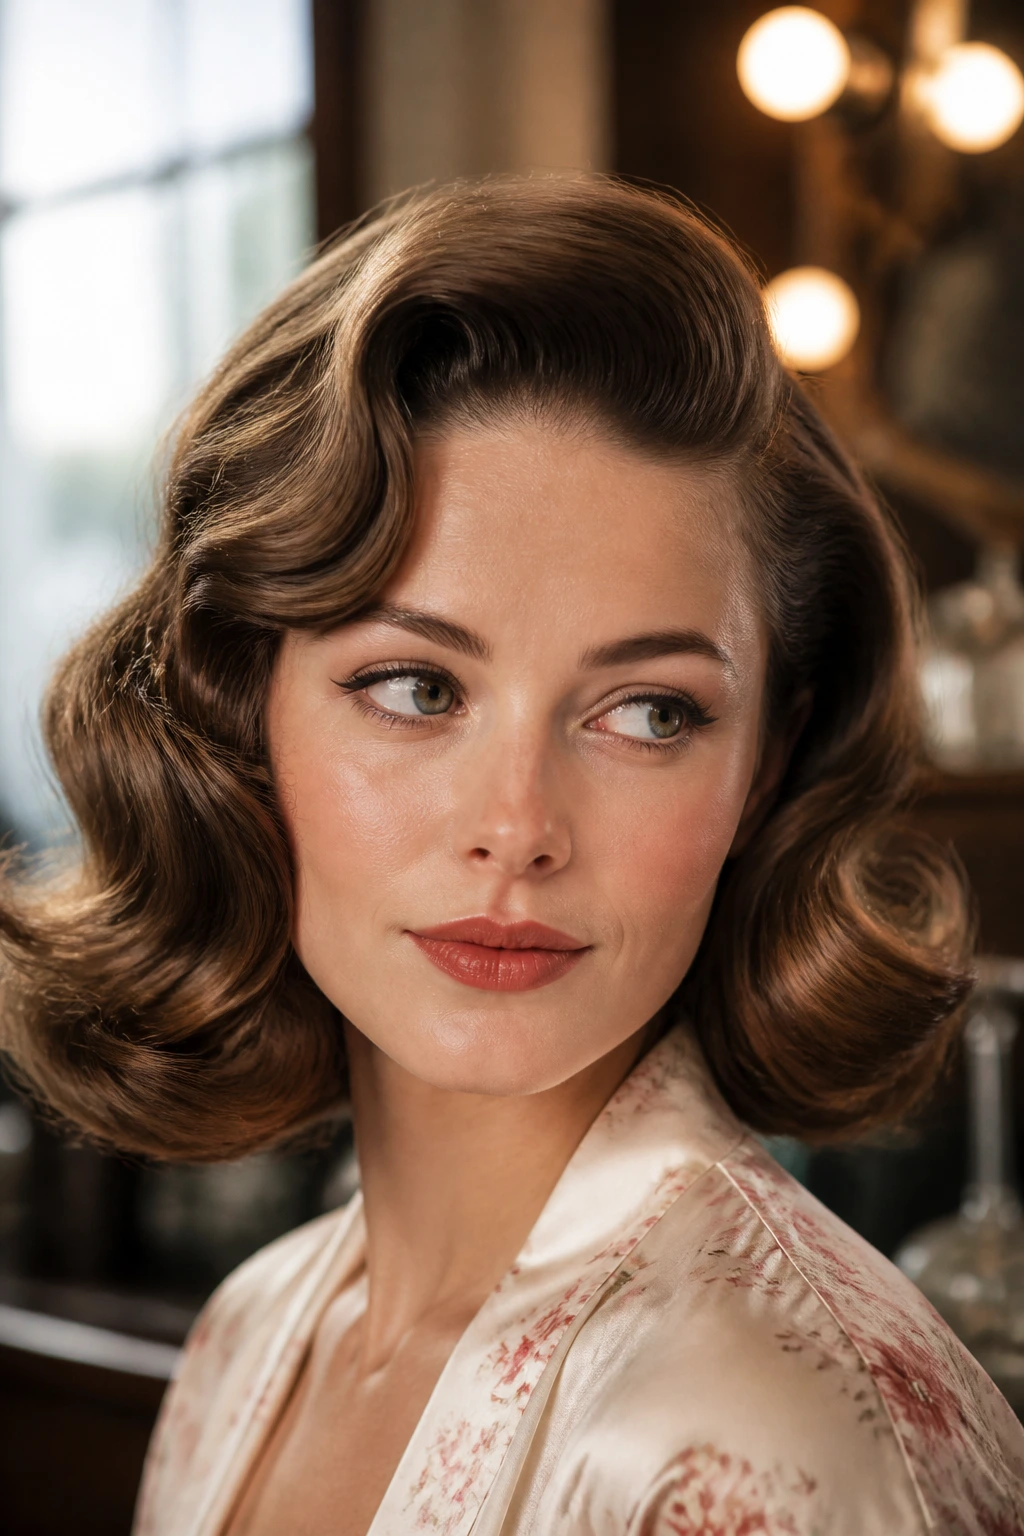
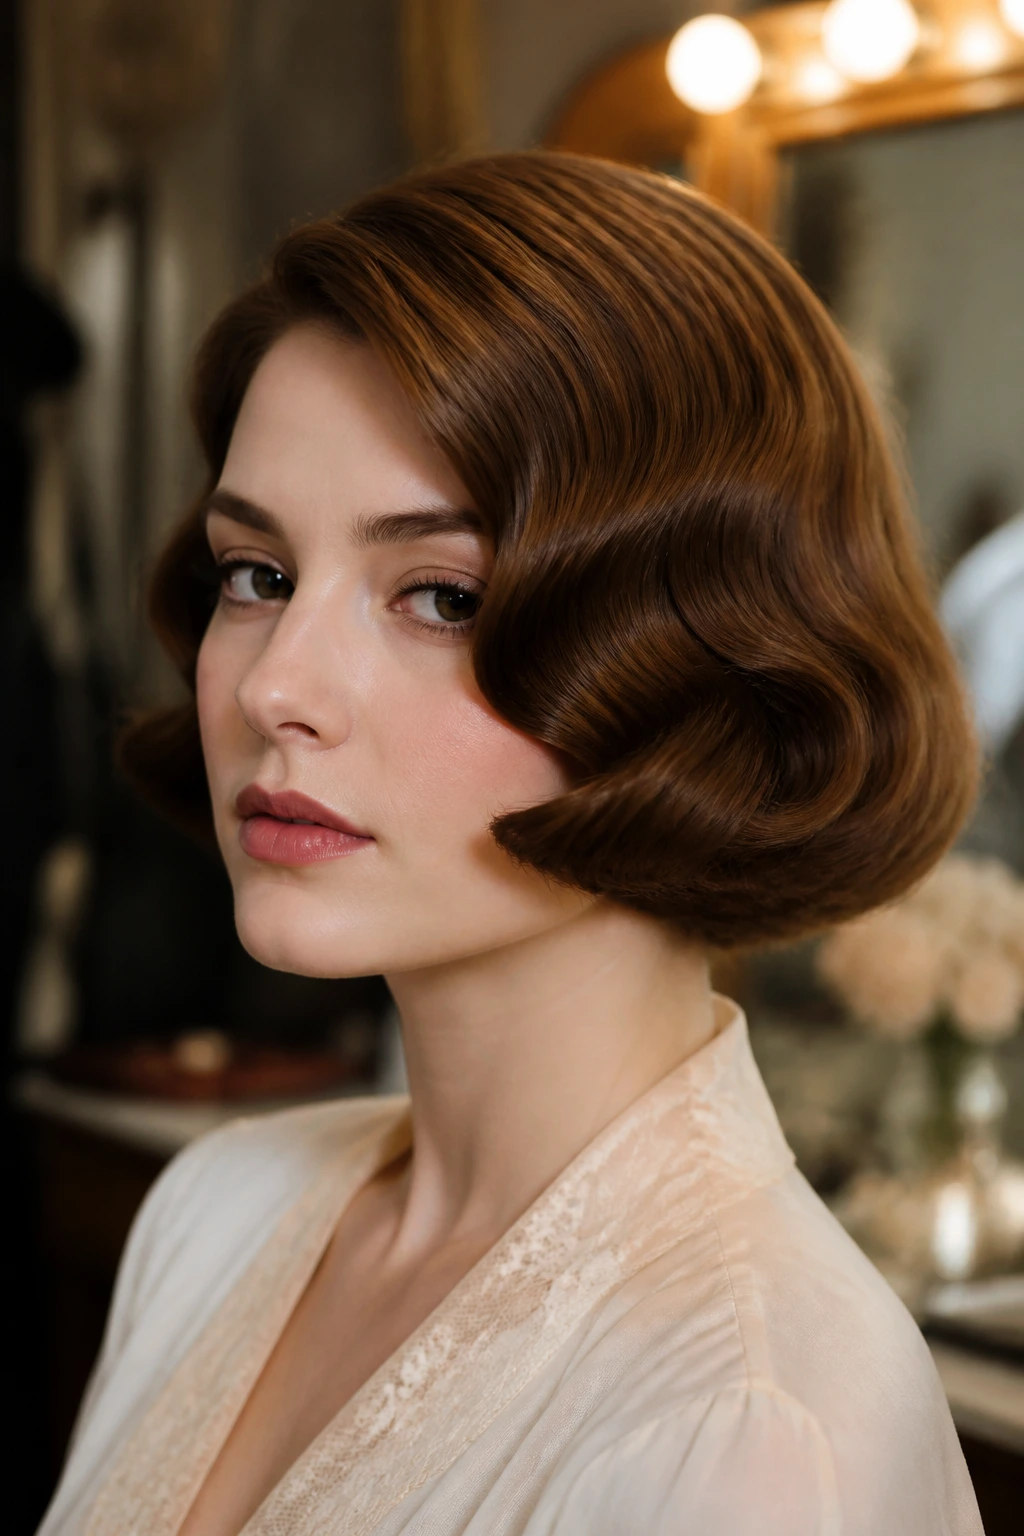
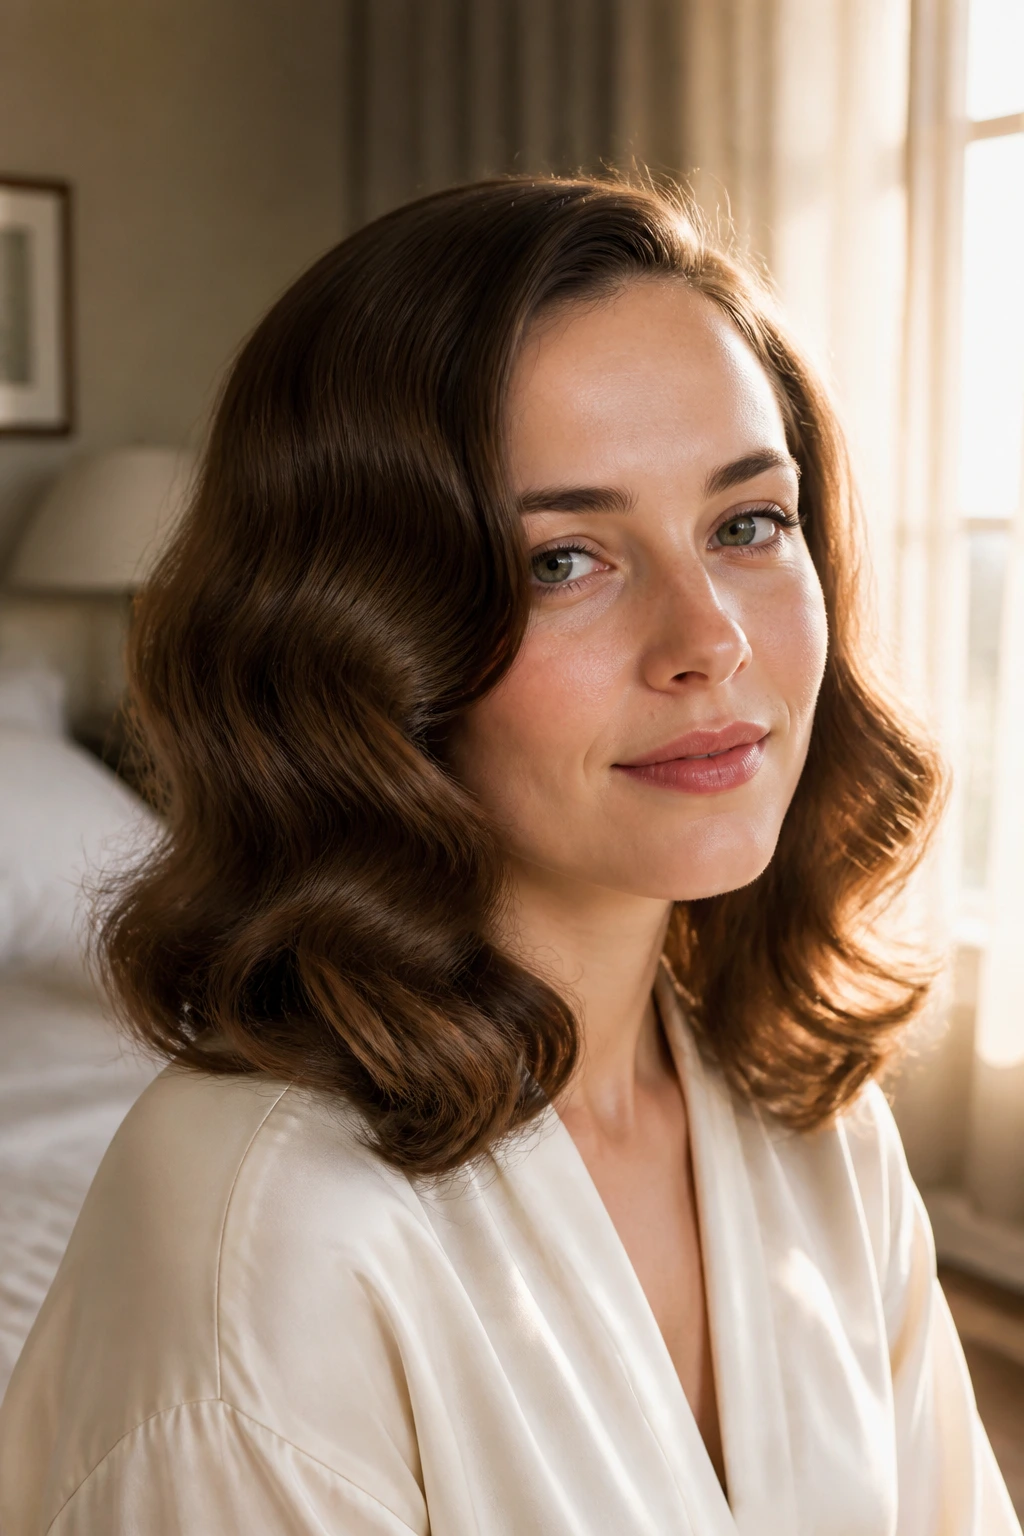
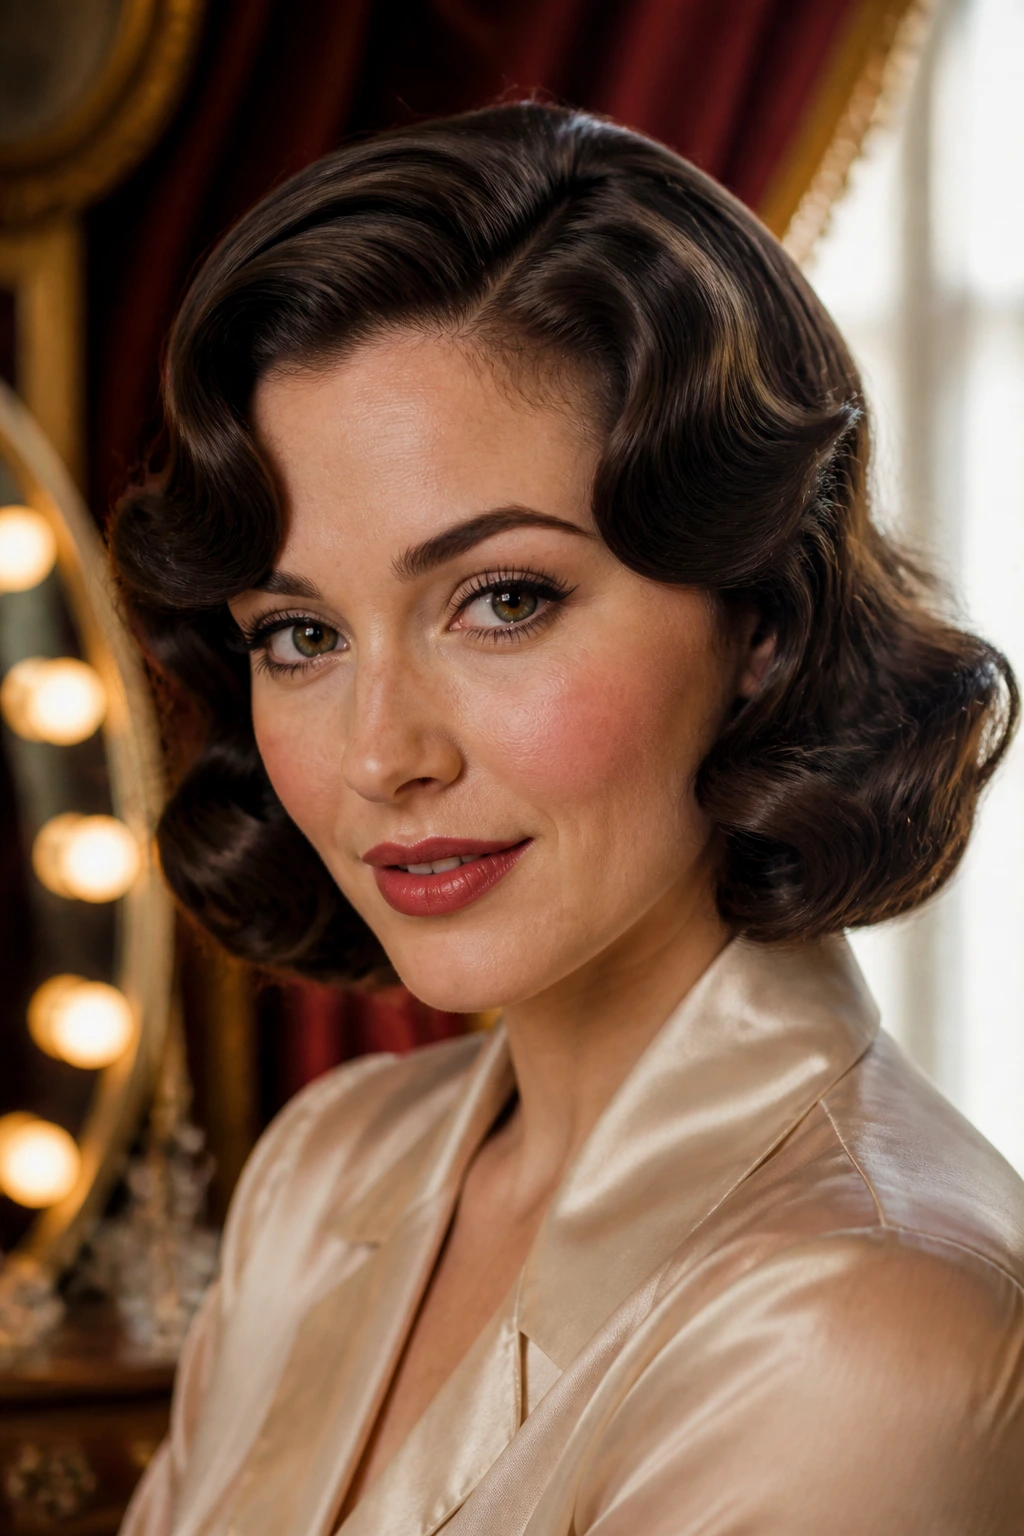
This is the style people picture first when they think of vintage glam. The wave starts low, usually around the cheekbone, then falls in one smooth direction with a side part that does most of the framing. It looks expensive because it is controlled. Not hard. Controlled.
The best version uses a 1¼-inch curling iron or hot rollers, then gets clipped flat while it cools so the bend stays clean instead of puffing out. Brush it out with a boar-bristle brush, tuck one side behind the ear, and finish with a light shine spray. If your hair is past the shoulders, this shape has room to drape. Shorter hair can still do it, but the curve will read sharper and closer to the face.
2. Short Finger-Wave Bob
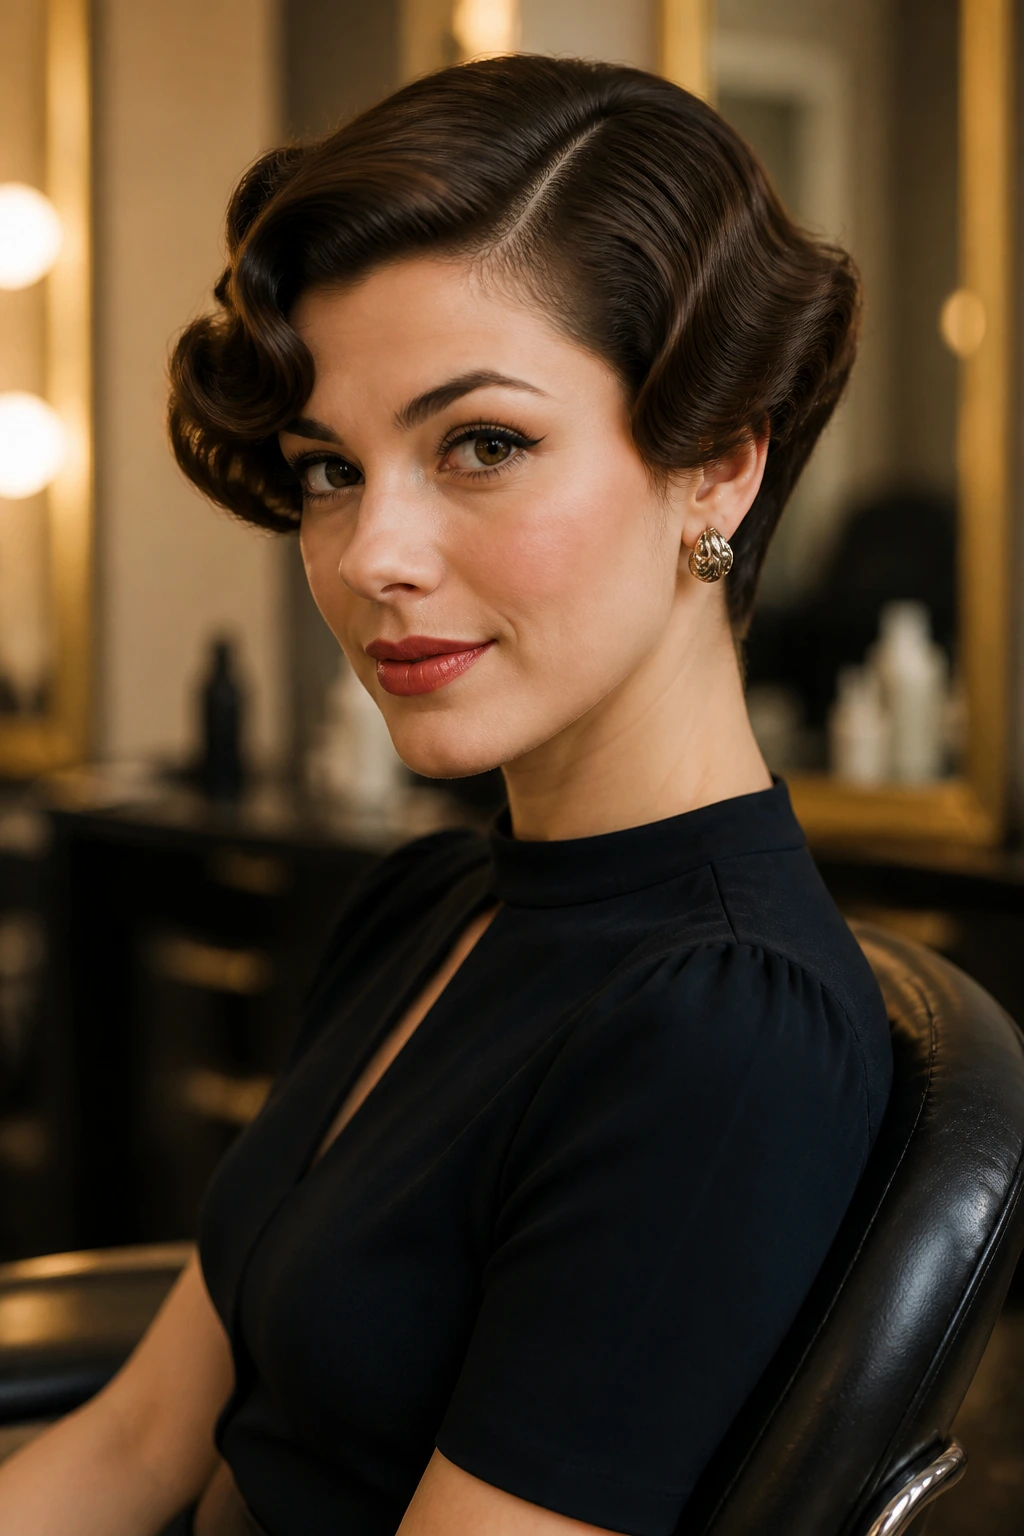
A finger-wave bob has a completely different attitude. It sits close to the head, with those neat S-curves laid into damp hair using gel and a tail comb. The result is sculpted, a little glossy, and far more precise than loose curling ever gets on short lengths.
This style loves a narrow section width. On thick hair, keep the parts under half an inch or the waves blur together before they dry. Duckbill clips help hold the ridges while the set dries, and a hood dryer makes the shape stay put faster than air-drying alone. It’s one of the few styles here that looks better when the roots are flat and the lines are crisp.
3. Chin-Length Marcel Bob
The Marcel bob is for someone who wants structure without the hard edges of finger waves. The movement is softer, but the shape still feels deliberate because the curve is set with heat and then brushed into smooth arcs. Chin length is the sweet spot; the hair lands exactly where the jawline can catch it.
A Marcel iron gives the most authentic result, though a flat iron can mimic the bends if you work in tiny sections and keep the wrist steady. The secret is not pulling the curl tight. Leave a little space between the clamp and the scalp so the top stays sleek. This one looks especially good with a red lip and a simple neckline. Fussy clothes fight it. Clean lines help.
4. Victory Roll Crown with Loose Waves
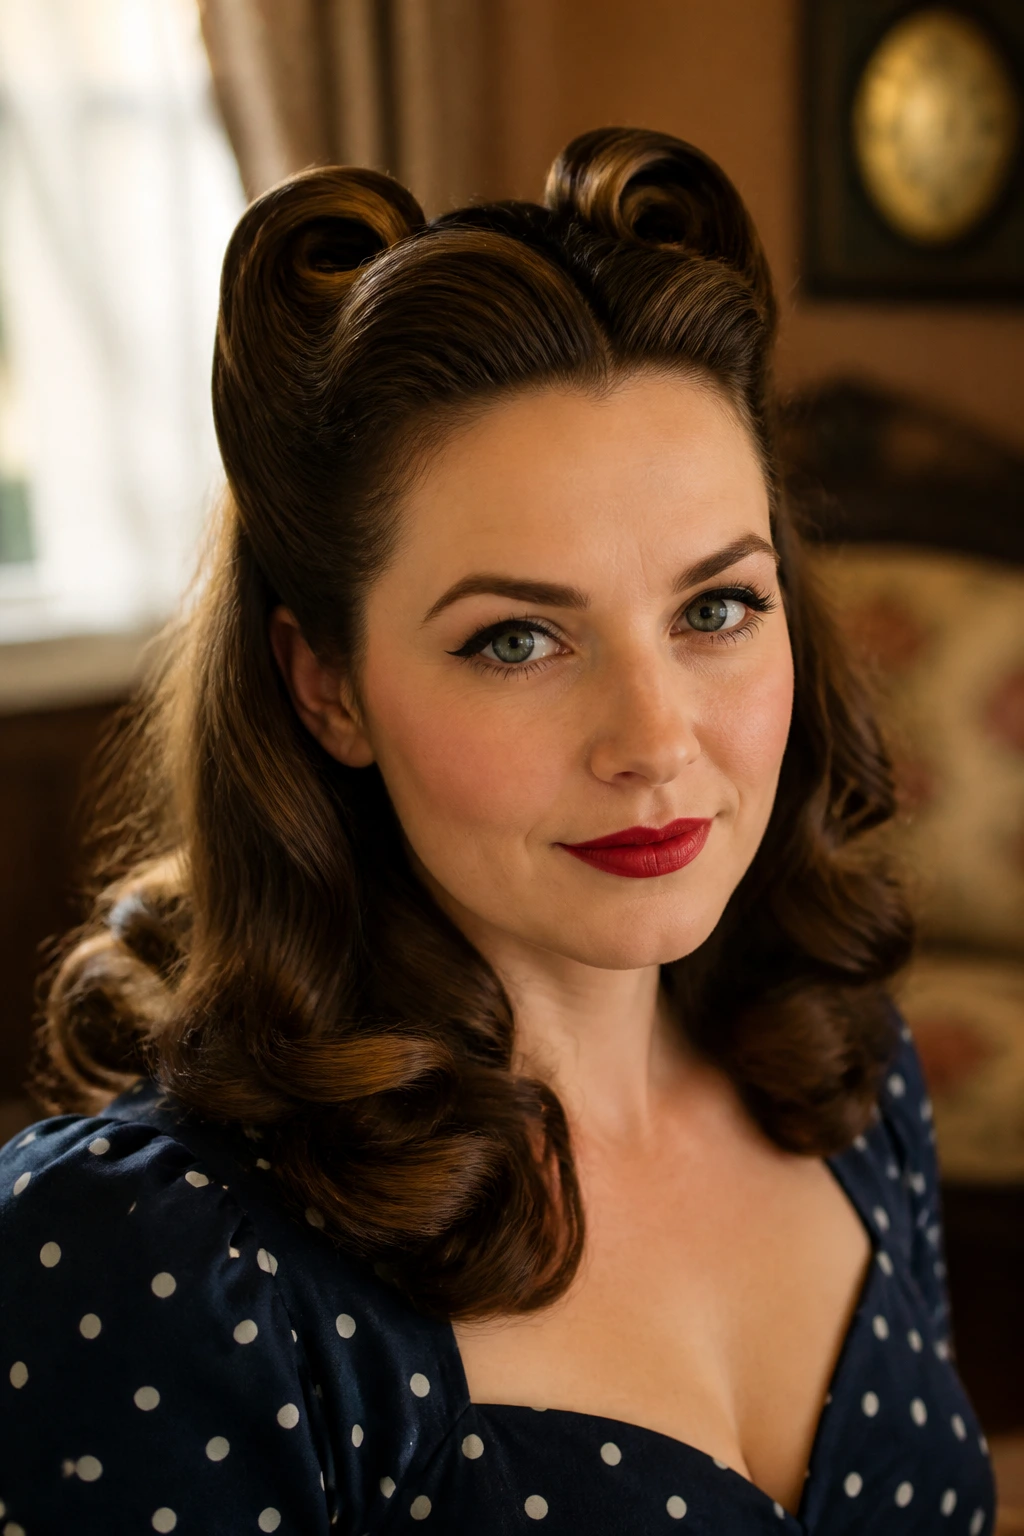
Victory rolls can turn a basic wave style into something with real personality. Two rolled sections at the front lift the crown, then the rest of the hair falls in soft, brushed waves. It’s playful, but not in a cartoon way. There’s enough structure to keep it from looking like a themed costume.
Use setting lotion or mousse at the roots, roll the front sections away from the face, and pin them until they cool completely. The lower half should stay looser, with the wave pattern bigger than the rolls so the whole thing doesn’t become too busy. This works well for medium to long hair, especially if you want the top half to carry the visual weight.
5. Side-Swept Brush-Out Waves
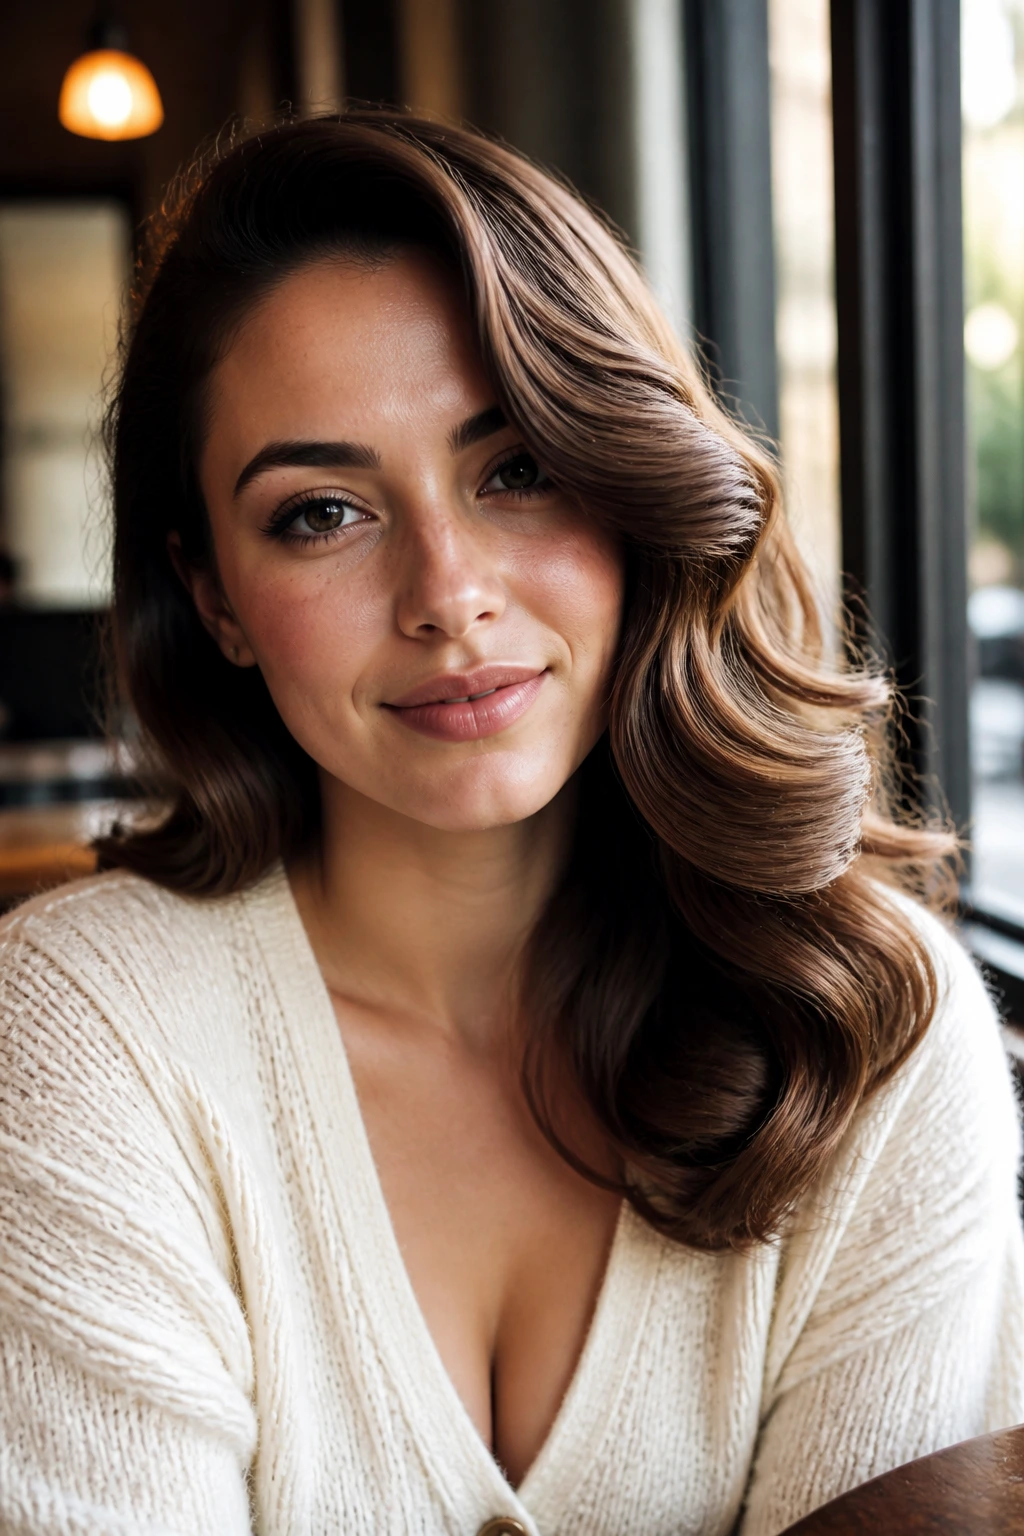
If you want vintage without a lot of ceremony, this is the one to reach for. The hair is curled, clipped to cool, brushed out, and then swept to one side so the movement lands across the face instead of falling straight down. It feels softer than Hollywood waves and less rigid than a formal set.
The trick is the brush-out. Use a paddle brush or boar-bristle brush, and stop before the wave disappears completely. You want a ribboned bend, not a fluffy cloud. A light smoothing cream on the ends keeps the style from fraying, especially around the collarbone where hair likes to kick out. This shape is forgiving on layered cuts. That’s part of why it works so well in real life.
6. Shoulder-Length S-Waves
Shoulder-length hair can do something lovely here because the ends have enough weight to settle into an S-shape, but not so much weight that the wave collapses. The style looks like it was set, even when you did not spend an hour pretending to be a 1940s movie extra.
Wrap mid-size sections around a 1-inch iron, but alternate direction every other section so the waves fold into each other instead of forming obvious curls. After cooling, finger-comb first, brush lightly second, and then stop. If you keep brushing, the S-wave turns into generic volume. This style is one of the best options for a soft daytime look that still carries a retro note.
7. Faux Bob with Curled Under Ends
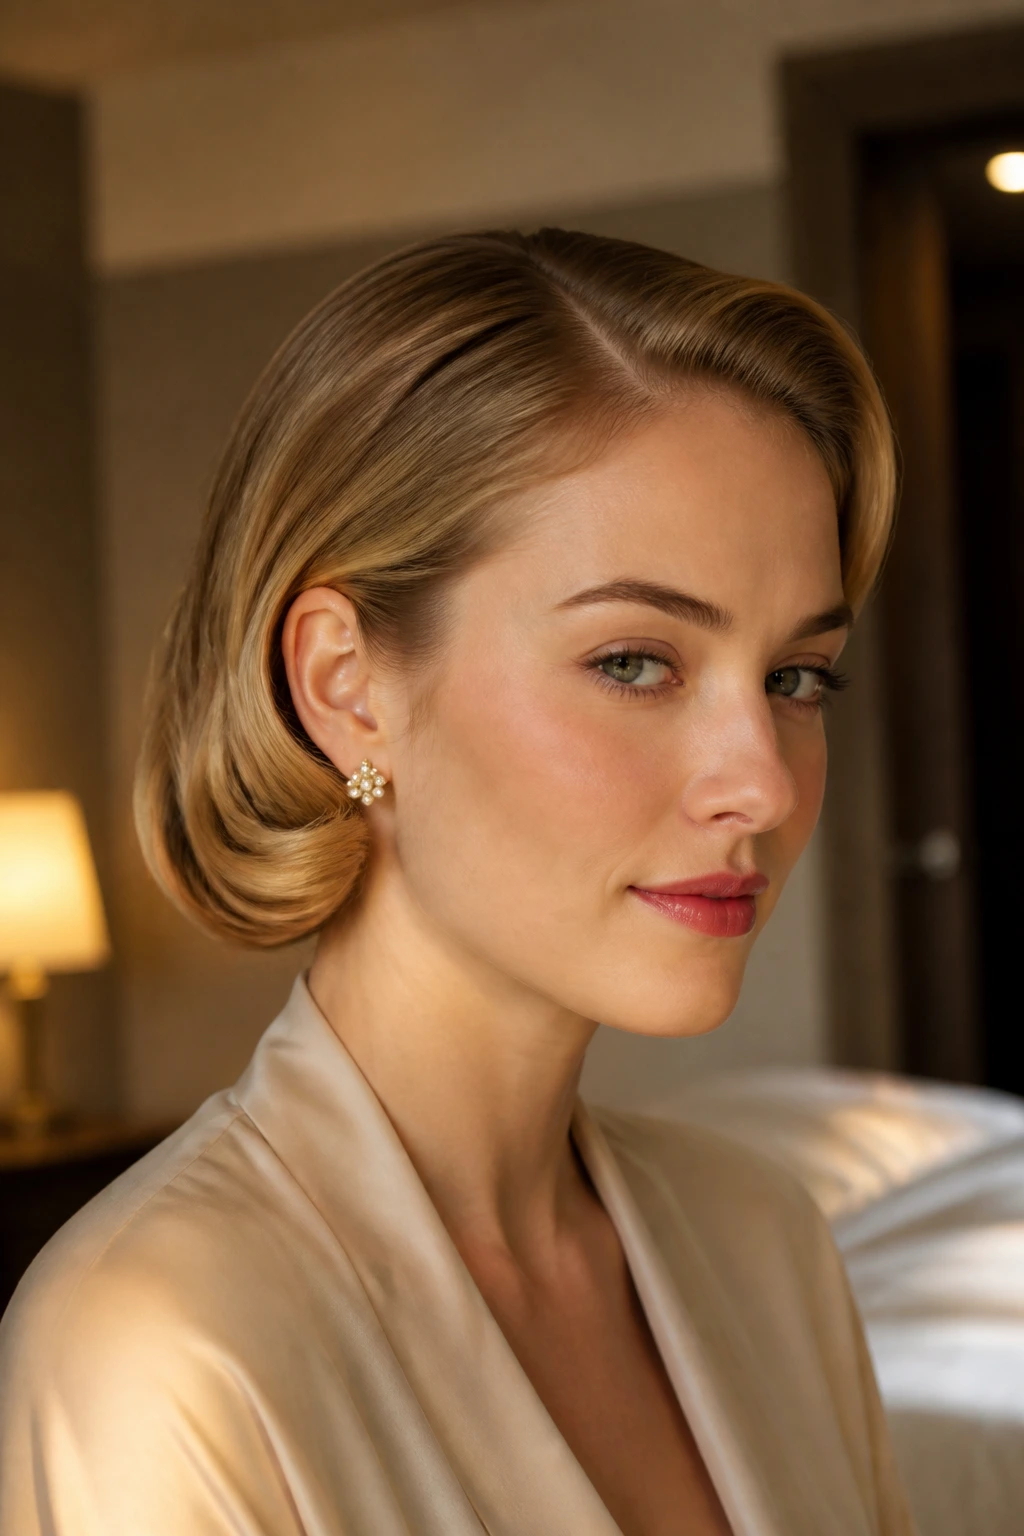
The faux bob has a nice little bit of drama to it. Longer hair is pinned under and tucked in so it reads as a bob, with the ends curled inward to create that rounded vintage finish. It’s a good trick when you want short-hair energy for one night without actually cutting anything.
The important part is hiding the fold. Use small bobby pins, anchor the tucked ends low against the nape, and smooth the outer layer before you secure it. Then curl the visible sections inward so the silhouette stays neat. This style works best when the hair has one clean part and not too much layered frizz. If you leave the texture too loose, the illusion falls apart fast.
8. Half-Up Ribbon Waves
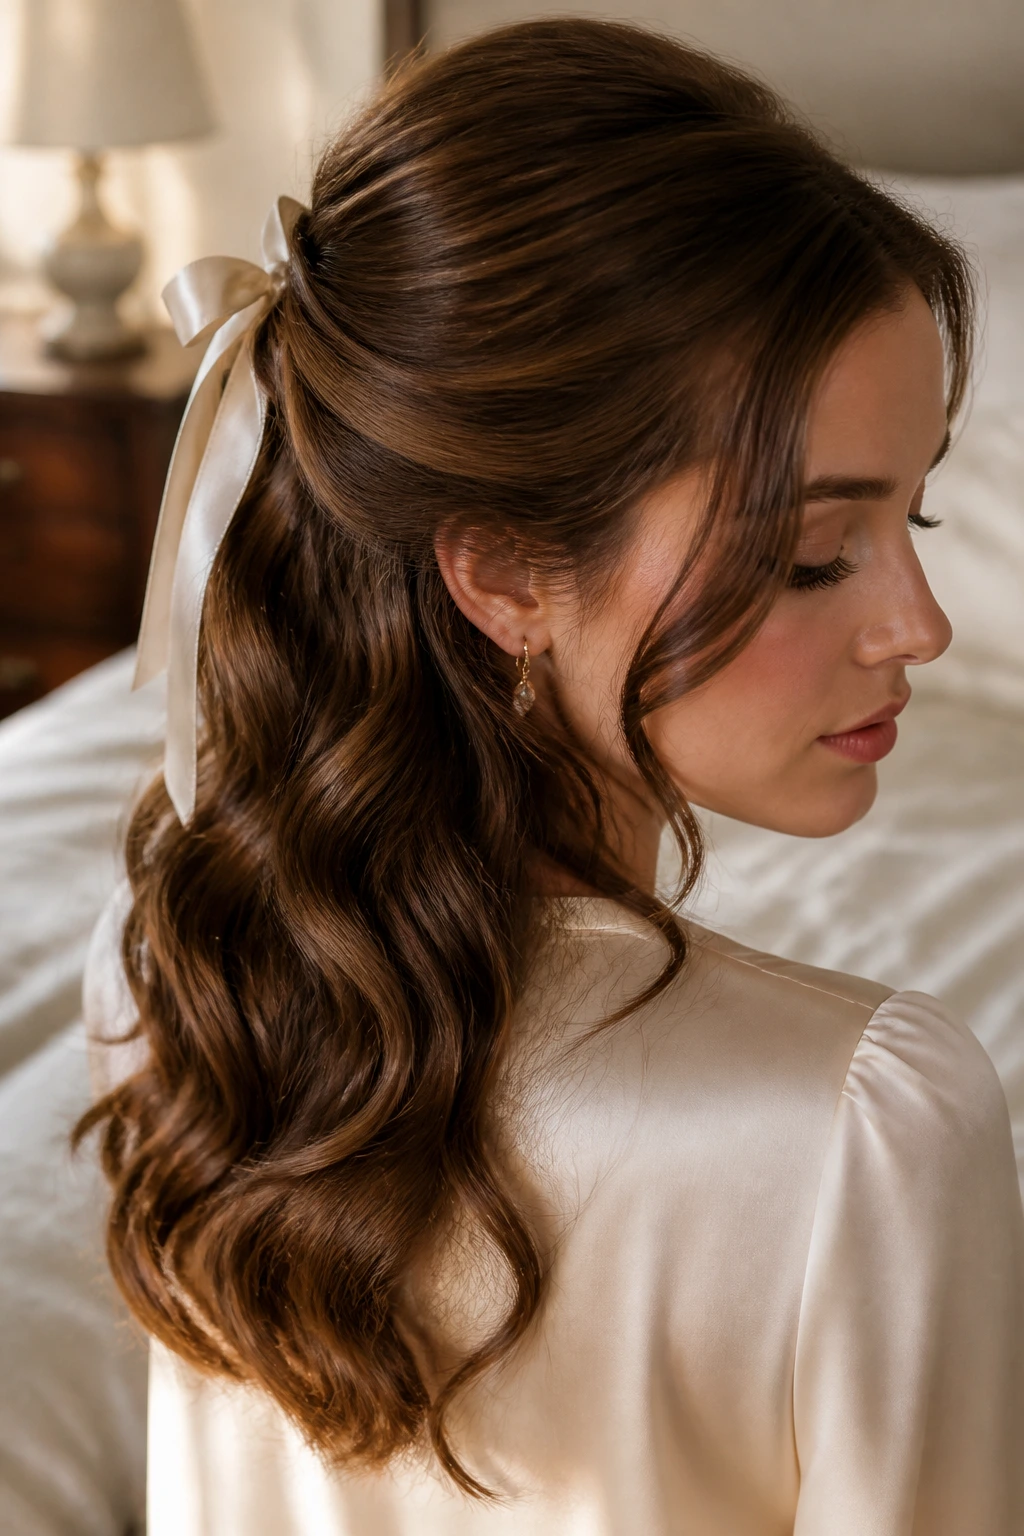
A half-up style with a ribbon has real old-photo charm, but it only works if the waves underneath are soft and glossy. Pulling the top half back exposes the part and crown, so those sections need a neat finish. The ribbon should feel like a detail, not the whole story.
Curl the lower half in large sections, brush them into loose bends, and secure the upper half with a satin ribbon or narrow bow at the back of the head. A pale ribbon reads sweet; a black one reads sharper. Either way, this style looks best when the waves are wide enough to move but not so loose that the style loses shape by lunch.
9. Pageboy Curve with Soft Ends
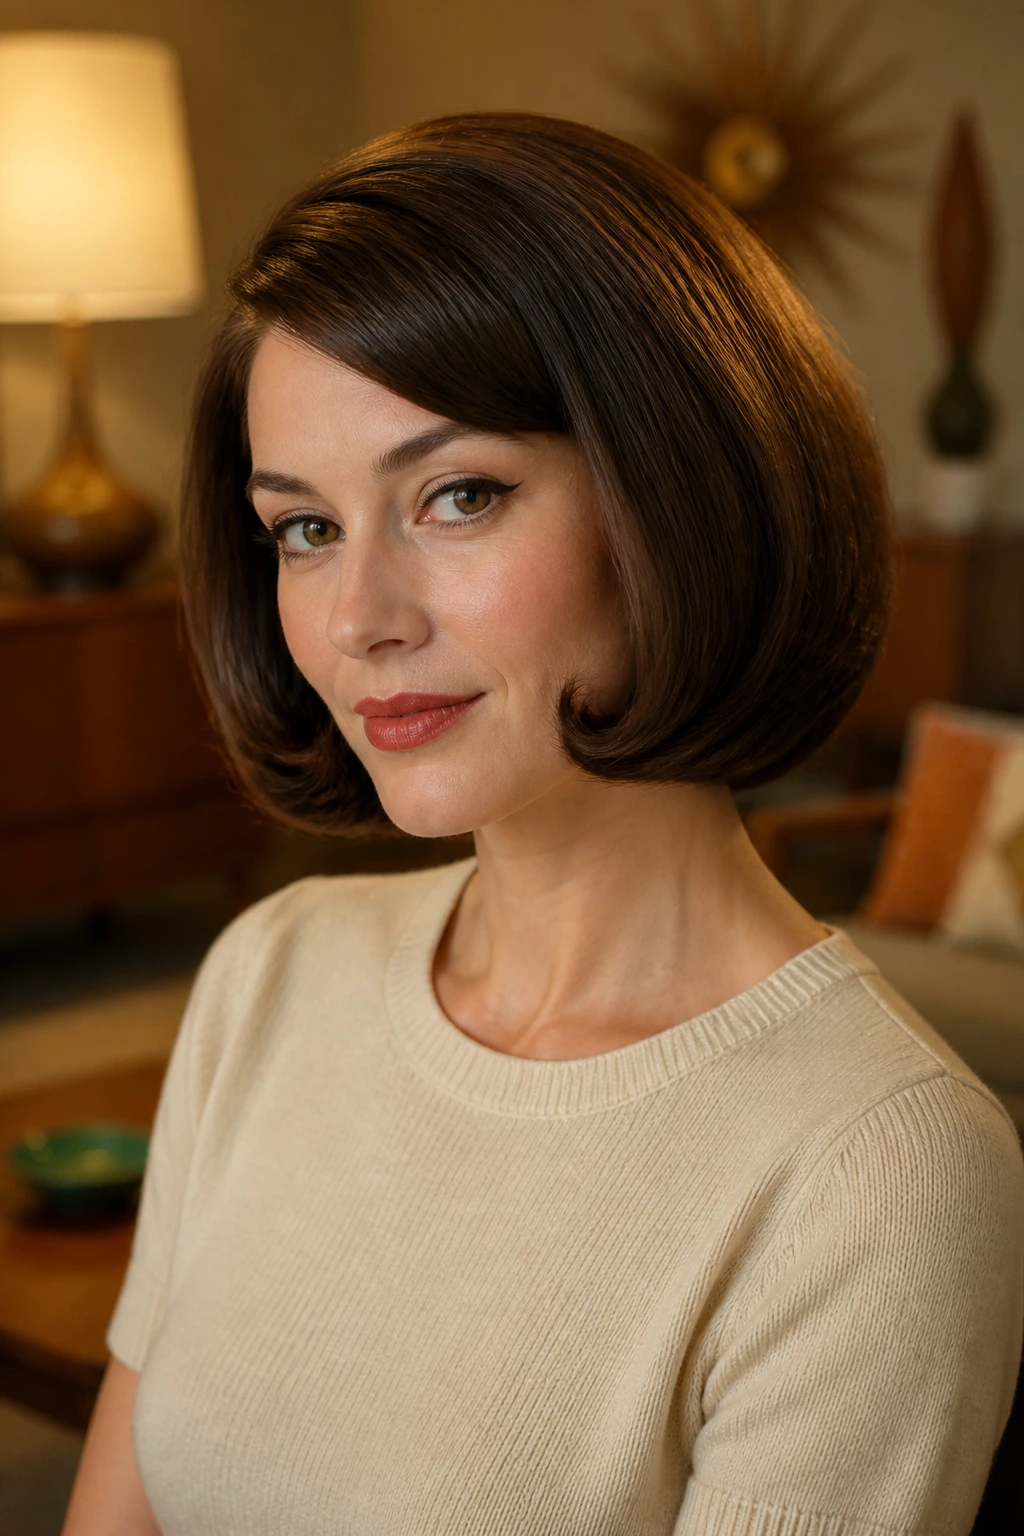
The pageboy has a rounded silhouette that feels very specific. Hair curves under at the ends, the crown stays smooth, and the shape hugs the head instead of exploding outward. The effect is tidy, almost architectural, and that’s exactly why it reads as vintage.
A round brush or large hot rollers can build that bend. Direct the ends inward while the hair is still warm, then clip the shape in place until it cools. If your layers are short, keep the ends polished with a tiny touch of cream. Too much product makes the curve look greasy; too little makes the ends flick out like they are trying to escape.
10. Teased Crown Old-School Waves
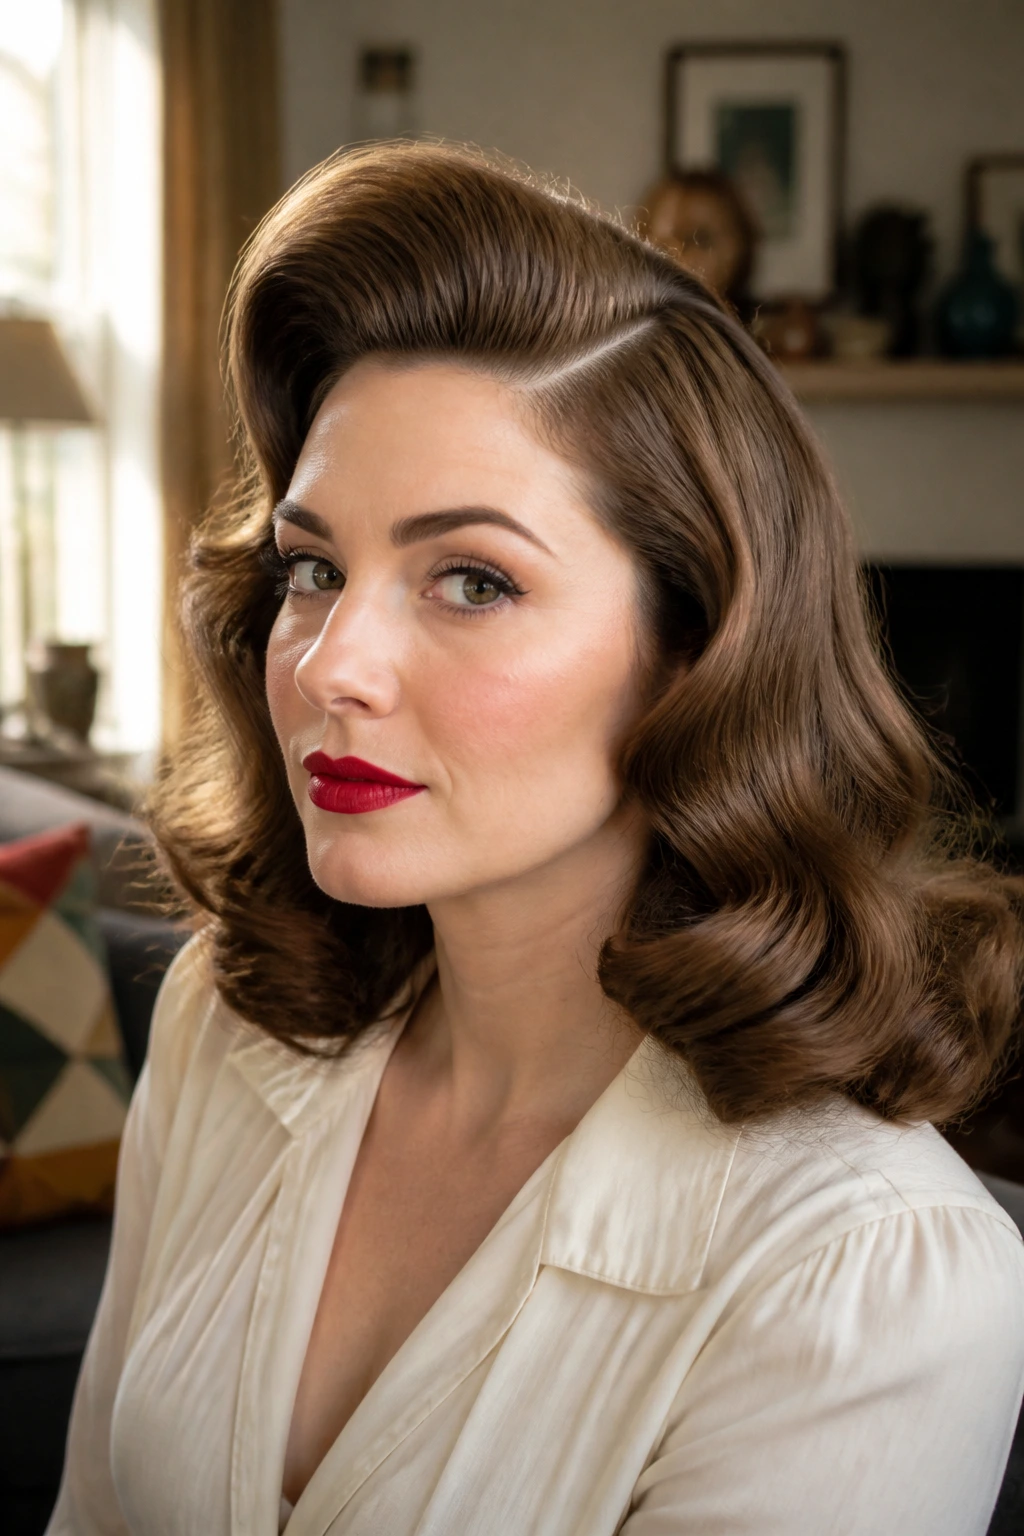
Some wave styles need a little height up top, and this is one of them. Teasing the crown gives the hair a lifted profile that feels more 1940s than modern beachy waves, which tend to lie flatter at the roots. The lift changes the whole face shape.
Use a fine-tooth comb to backcomb a thin section at the crown, smooth the top layer over it, and keep the wave pattern below broad and brushed. The goal is not a giant bump. The goal is a soft rise that makes the hair look set and dressed. A side part usually works better than a center part here because it keeps the shape from turning too symmetrical and flat.
11. Flapper-Inspired Bob with Tucked Sides
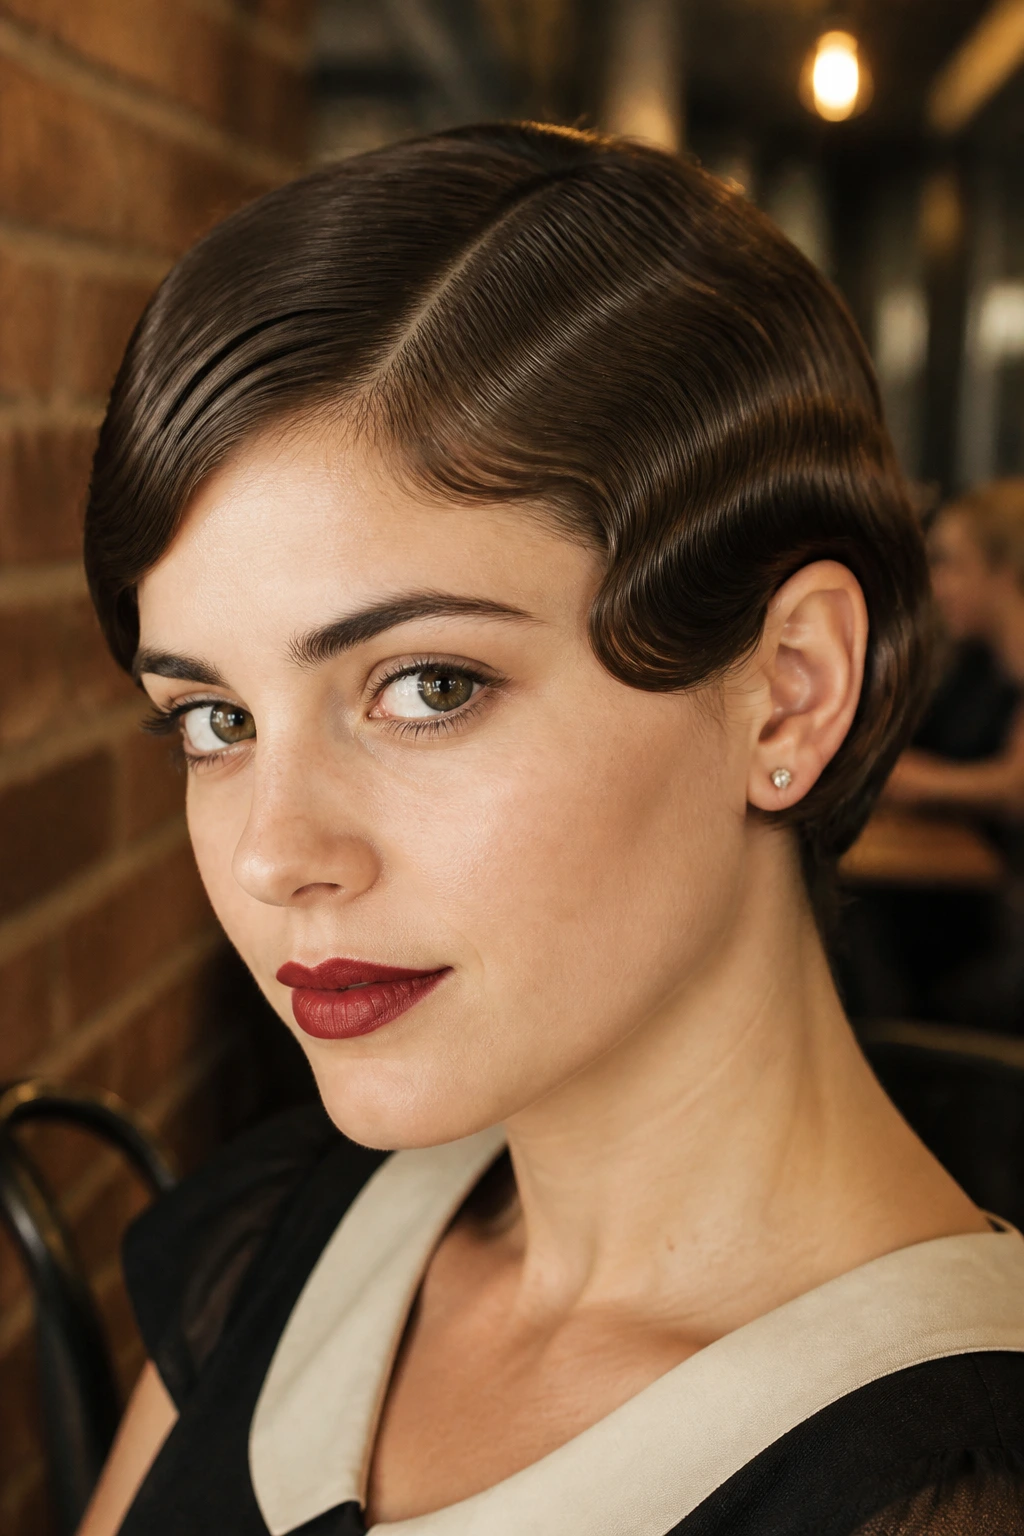
This one goes back to the shorter, sleeker end of the vintage map. A flapper-inspired bob is all about tucked sides, a close fit around the head, and wave ridges that sit neatly near the temple and ear. It feels sharper than a romantic curl and much more deliberate.
Mousse or setting lotion on damp hair gives the best foundation. Comb the sides into flat ridges, clip where needed, and let the ends curve under just enough to close the silhouette. The face-framing sections should stay clean. If they get puffy, the whole thing turns soft in the wrong way. This style suits sharp jawlines and simple outfits especially well. There’s nowhere for clutter to hide.
12. Long Barrel Waves with Gloss Finish
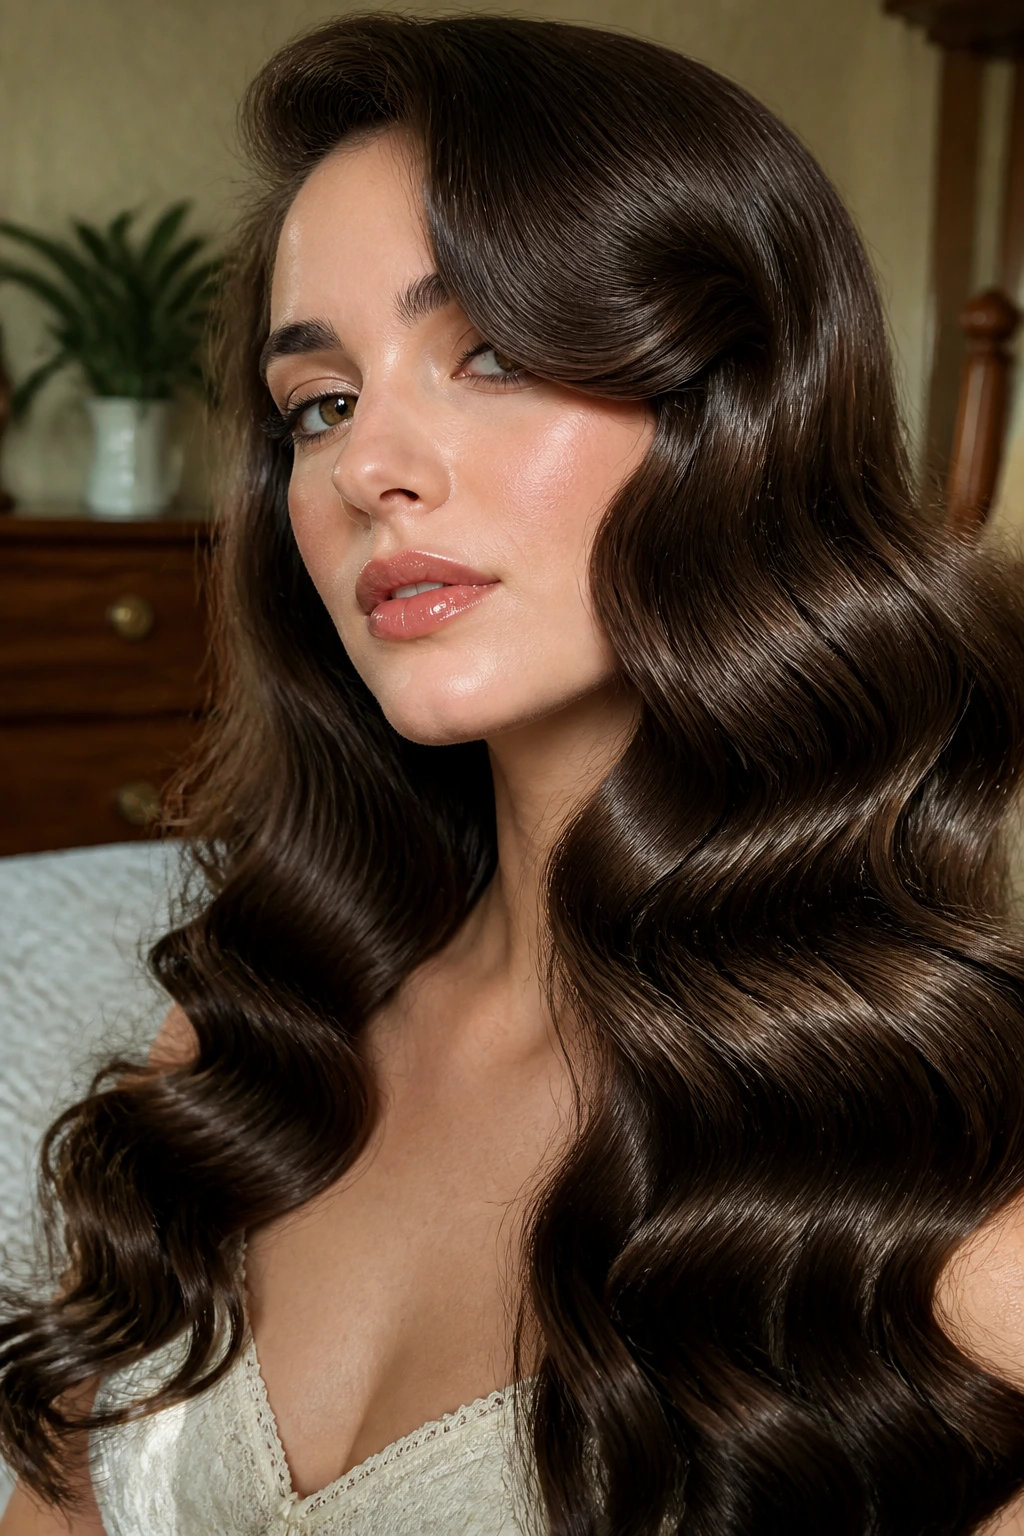
Long barrel waves can look vintage in a very smooth, almost expensive way. The waves are larger than Hollywood bends and less structured than finger waves, but the gloss finish gives them that old-school polish. This is a good choice when you want movement without sacrificing the length.
Use a larger iron, around 1½ inches, and set the sections in the same direction on each side so the wave pattern reads cleanly. Once the hair cools, brush from the bottom up so you don’t crush the shape at the crown. A shine spray works better than heavy serum here; heavy serum can make the ends hang in a limp, stringy way.
13. Bandana-Tied Pin-Up Waves
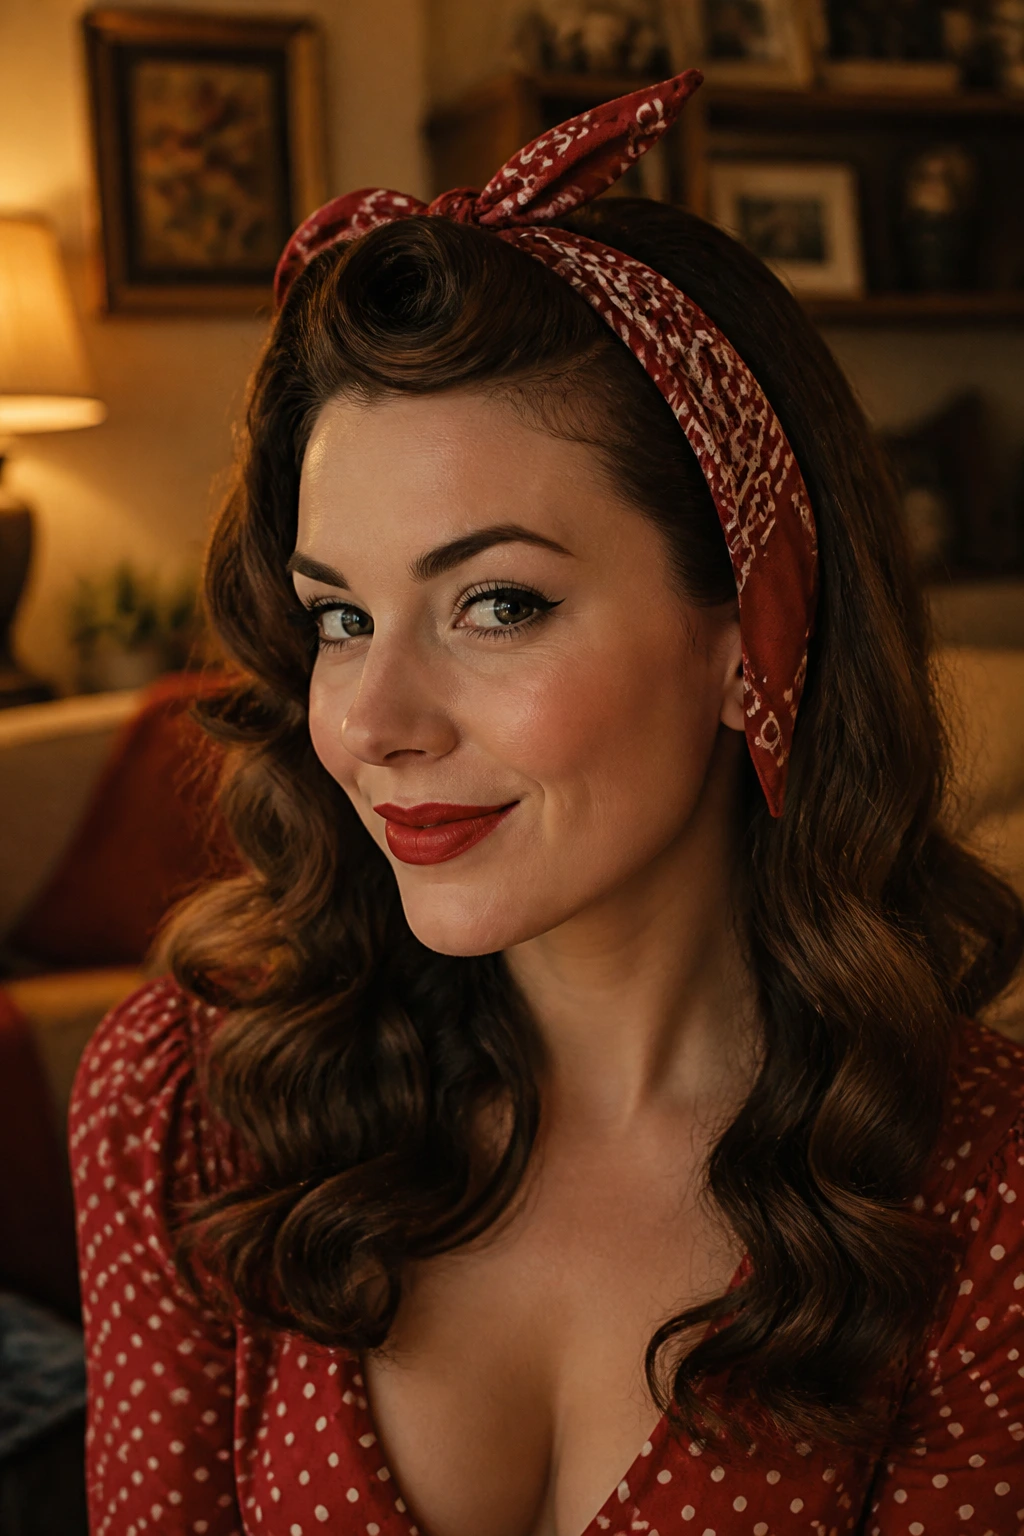
A bandana changes the whole mood of the style. The waves underneath can be soft and brushed, but the scarf at the front gives the look a pin-up edge that reads instantly. It’s one of the easiest ways to make a wave style feel vintage without needing a perfect set.
Fold the bandana into a narrow strip, tie it over a rolled front or a smooth crown, and leave the ends hanging or tucked under, depending on how polished you want it. The waves should stay visible around the shoulders so the scarf does not swallow the hairstyle. This works nicely on medium-length hair when you want a day look that can go straight into evening without much tweaking.
14. Pearled Side-Part Waves
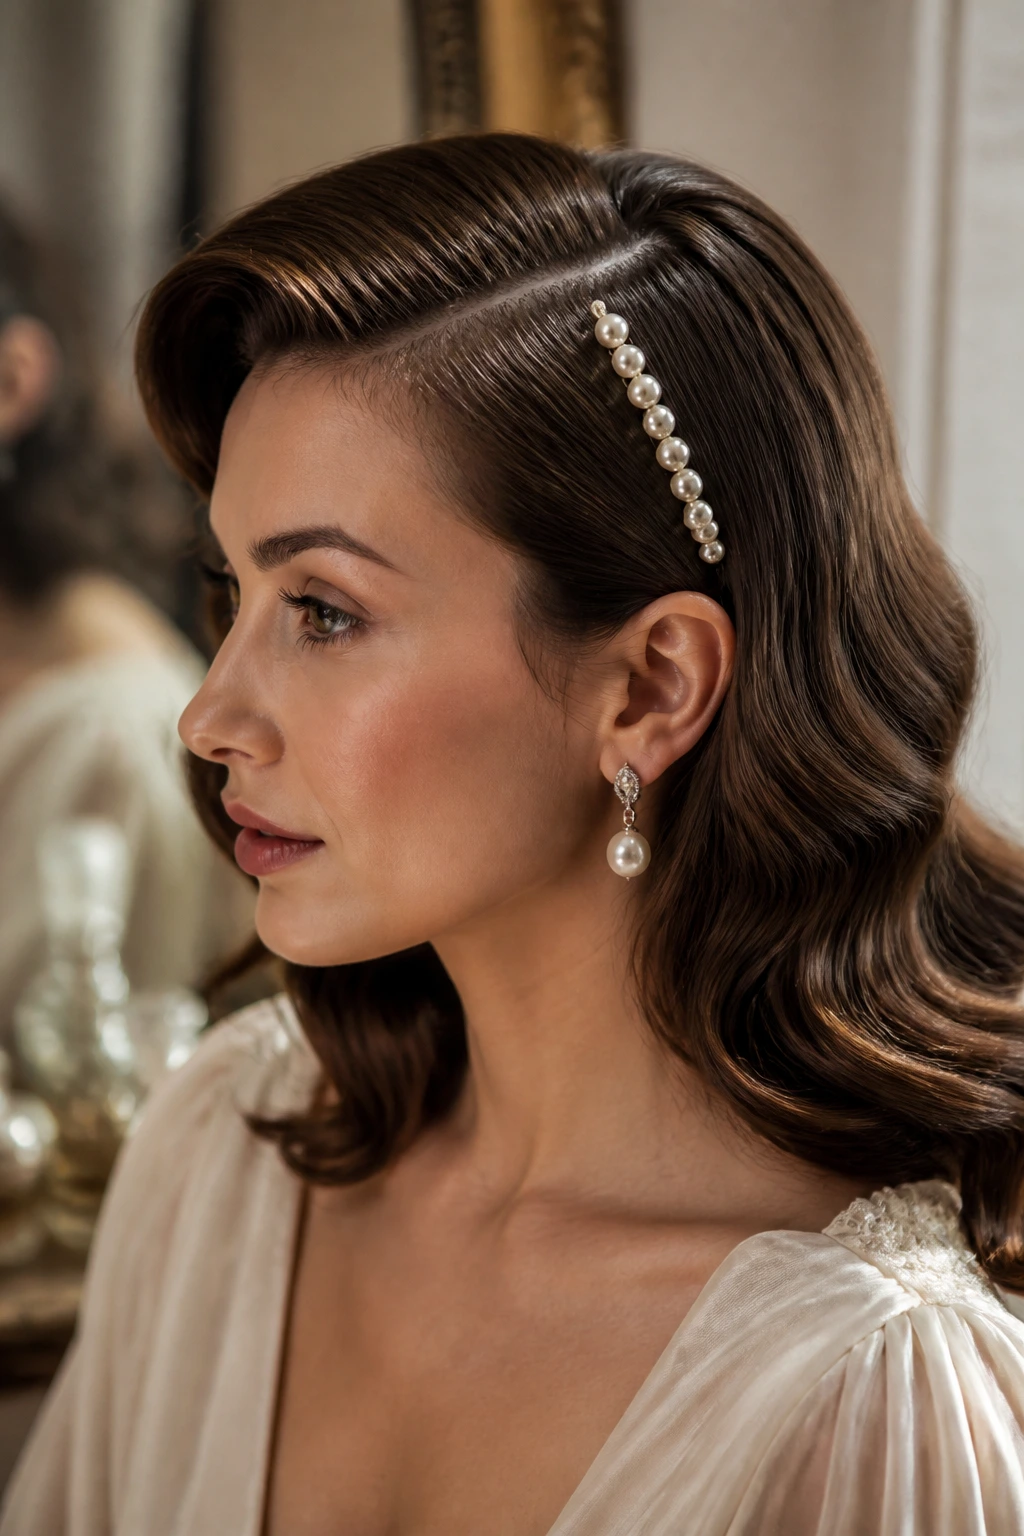
Pearl pins and side-part waves are a strong pairing because both rely on clean, controlled placement. The hairstyle itself can stay simple: brushed waves, one deep part, and a smooth surface at the top. The accessories carry the glam.
Place the pearl pins along the side part or just above the temple so they follow the wave direction instead of fighting it. That tiny detail matters. If the pins sit randomly, the style looks pasted on. If they trace the curve, the look feels intentional and old-Hollywood in the best way. Keep the rest of the hair relatively soft. Too much volume competes with the shine of the accessories.
15. Retro Ponytail with Rolled Front
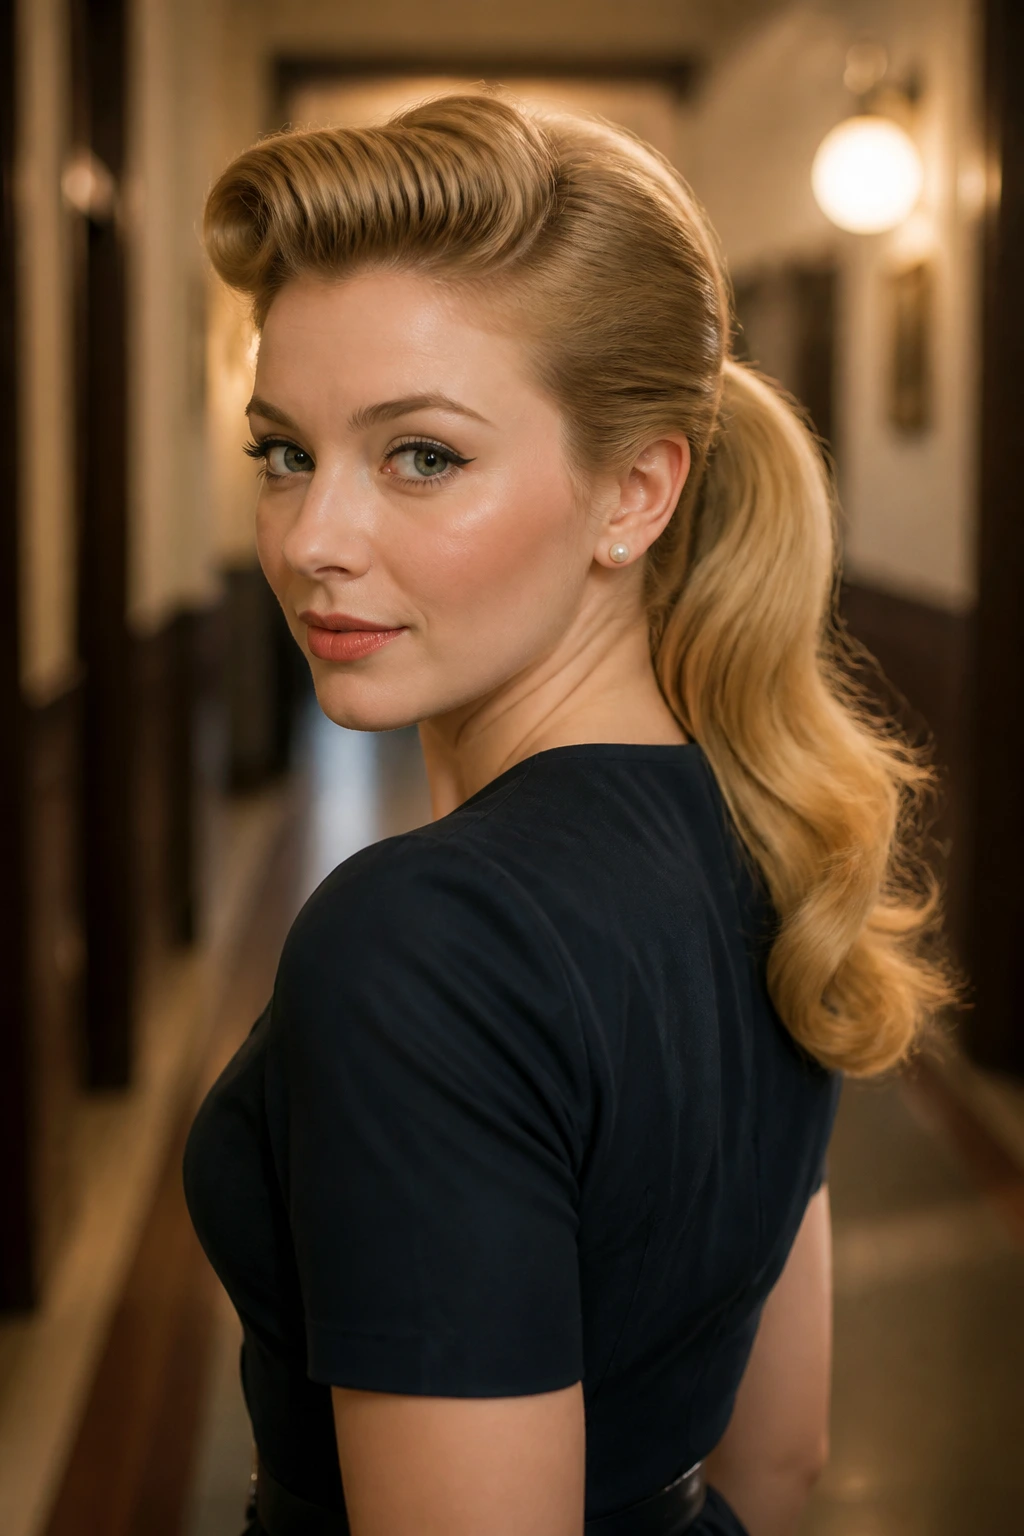
A ponytail can absolutely read vintage if the front is handled the right way. Roll or sweep the front sections back, keep the crown smooth, and let the ponytail itself hold loose, brushed-out waves down the back. The contrast is what gives it charm.
This style works best when the elastic sits low or mid-height, not up near the top of the head. A high ponytail pushes the look too modern. Wrap a small strand of hair around the base to hide the tie, and curl the tail in broad bends so it doesn’t look like a gym ponytail dressed in costume jewelry. Good for busy days. Better than it sounds.
16. 1940s Brushed Glam Waves
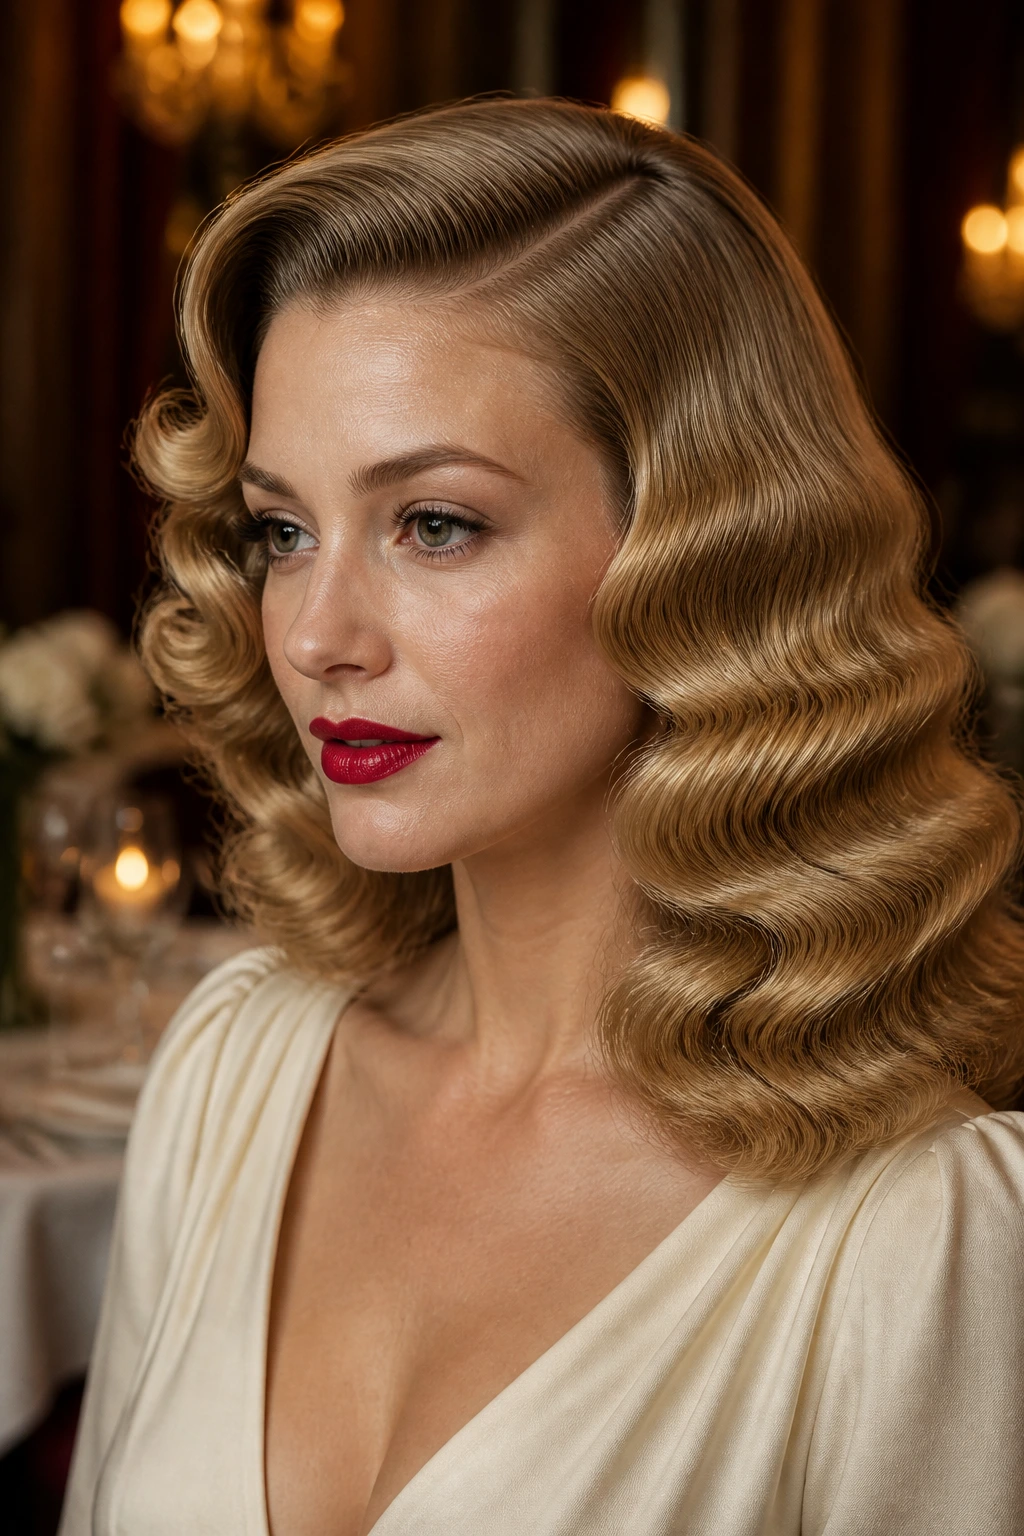
This is the style with the most sweep and one of the most flattering profiles in the whole group. The waves are brushed almost into a continuous ripple, which gives the hair softness at the sides and a little fullness through the body. The overall shape is glamorous without being fussy.
You need a solid set first. Hot rollers, pin curls, or a curling iron all work, but the cooling time matters more than the tool. Once the hair is fully cool, brush until the curls blend, then use a light mist of hairspray from a distance. If you spray too close, the finish gets sticky and the brush-out loses that airy movement. I’d use this for dinners, formal events, or any time you want hair that looks like it has some history.
17. Side Chignon with Face-Framing Waves
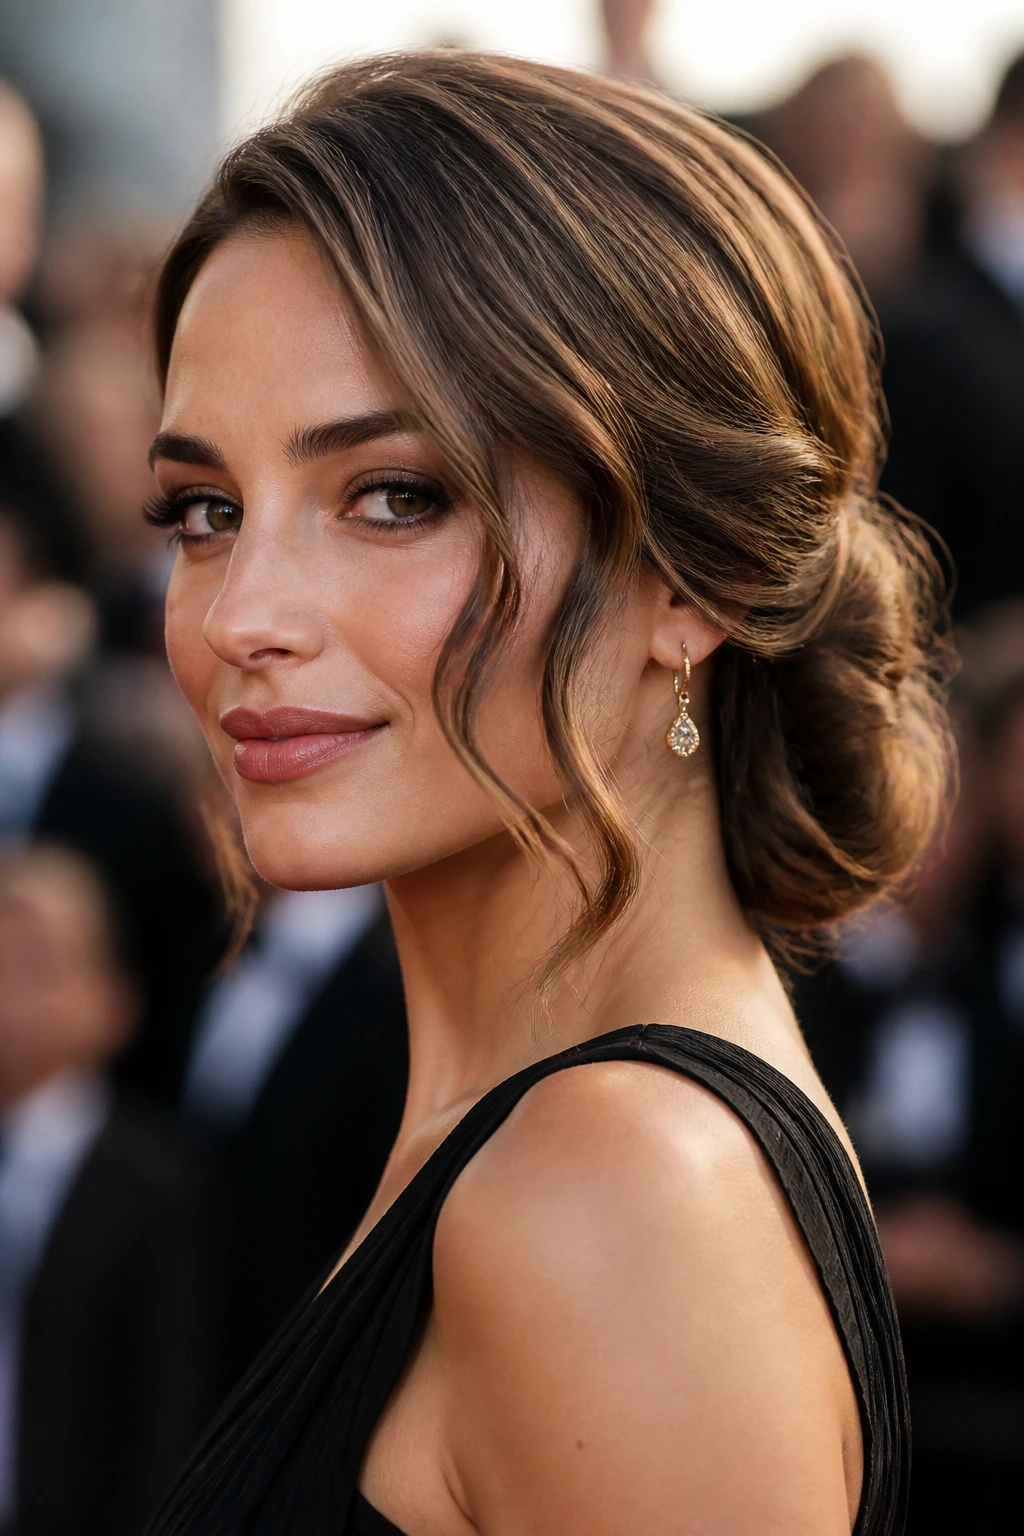
A low side chignon with a few wave-framed pieces left around the face has a quiet, polished feel. It’s not loud. That’s the charm. The waves around the face keep it from turning severe, while the tucked bun gives the style a dressed-up base.
Curl the front pieces away from the face, pin the rest into a loose chignon at the nape or just behind one ear, then loosen a few strands at the temples. The face-framing waves should be shaped, not wispy. If they break apart too much, they stop looking vintage and start looking unfinished. This is one of the strongest options for weddings and evening events because it holds shape and looks good from the side.
18. Curved Fringe and Soft Waves
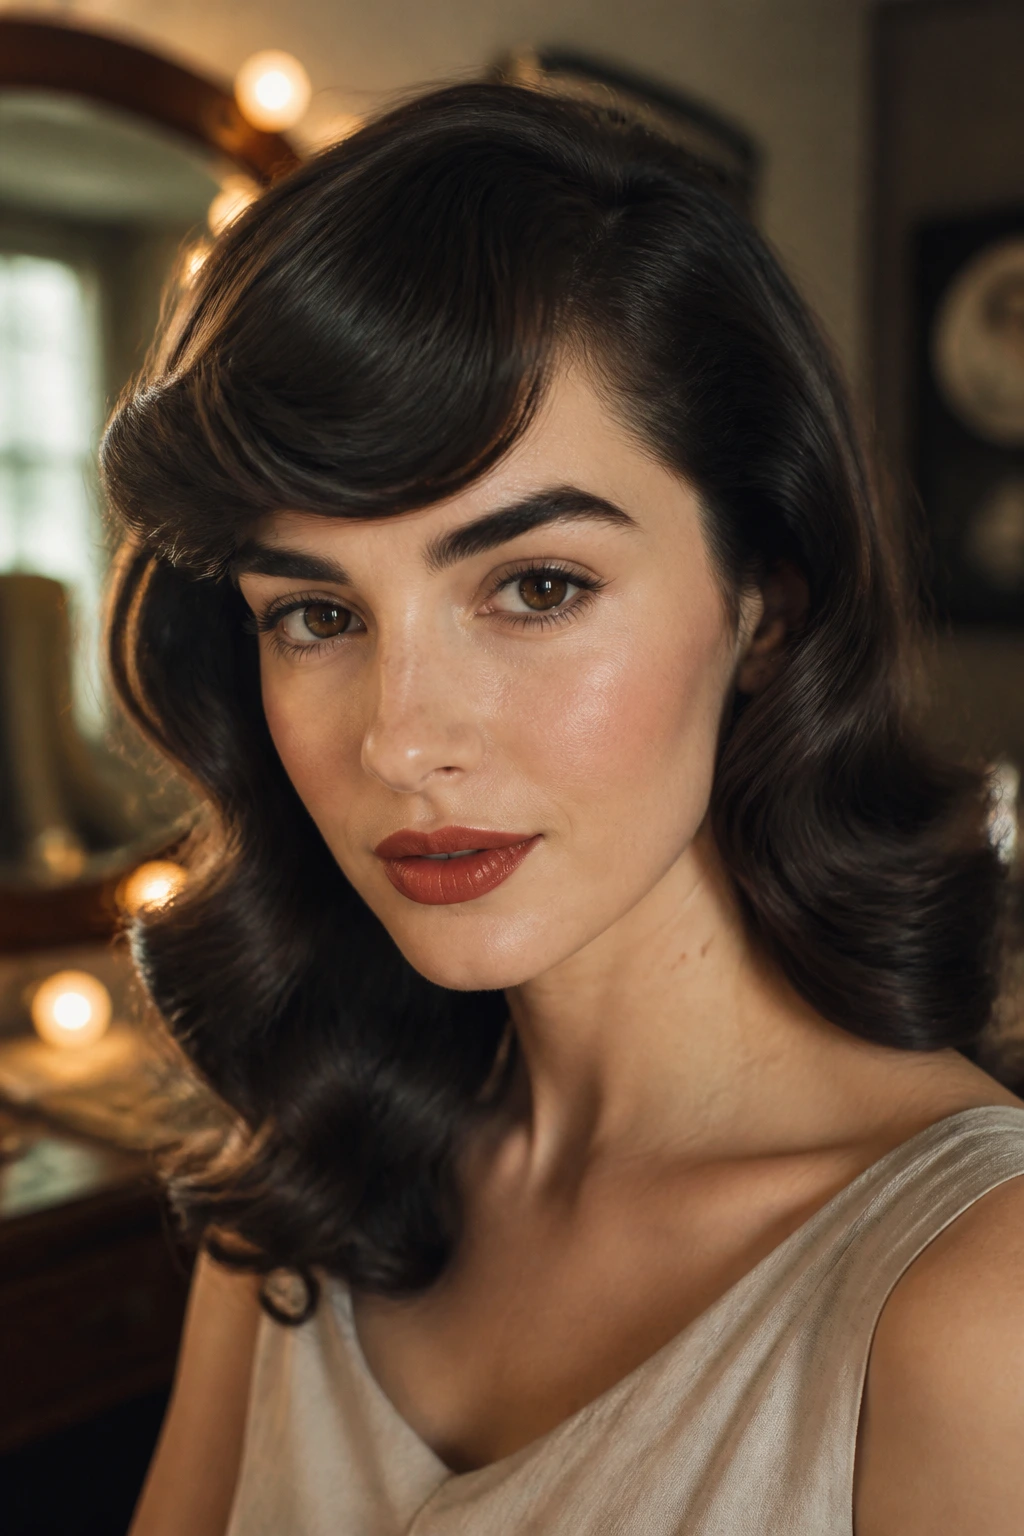
A curved fringe changes the tone of a wave style immediately. Instead of open forehead lines, you get a soft sweep across the front that nods to old movie styling. Pair that with medium waves through the lengths and the whole thing lands somewhere between classic and easygoing.
Keep the fringe polished with a round brush or a large roller, then let the rest of the hair fall in broad bends. The key is balance. If the fringe is too flat and the waves too loose, the haircut loses focus. If both are too styled, it can look rigid. One of my favorite things about this version is how it softens strong brows and longer faces without hiding much.
19. Finger Waves on Natural Texture
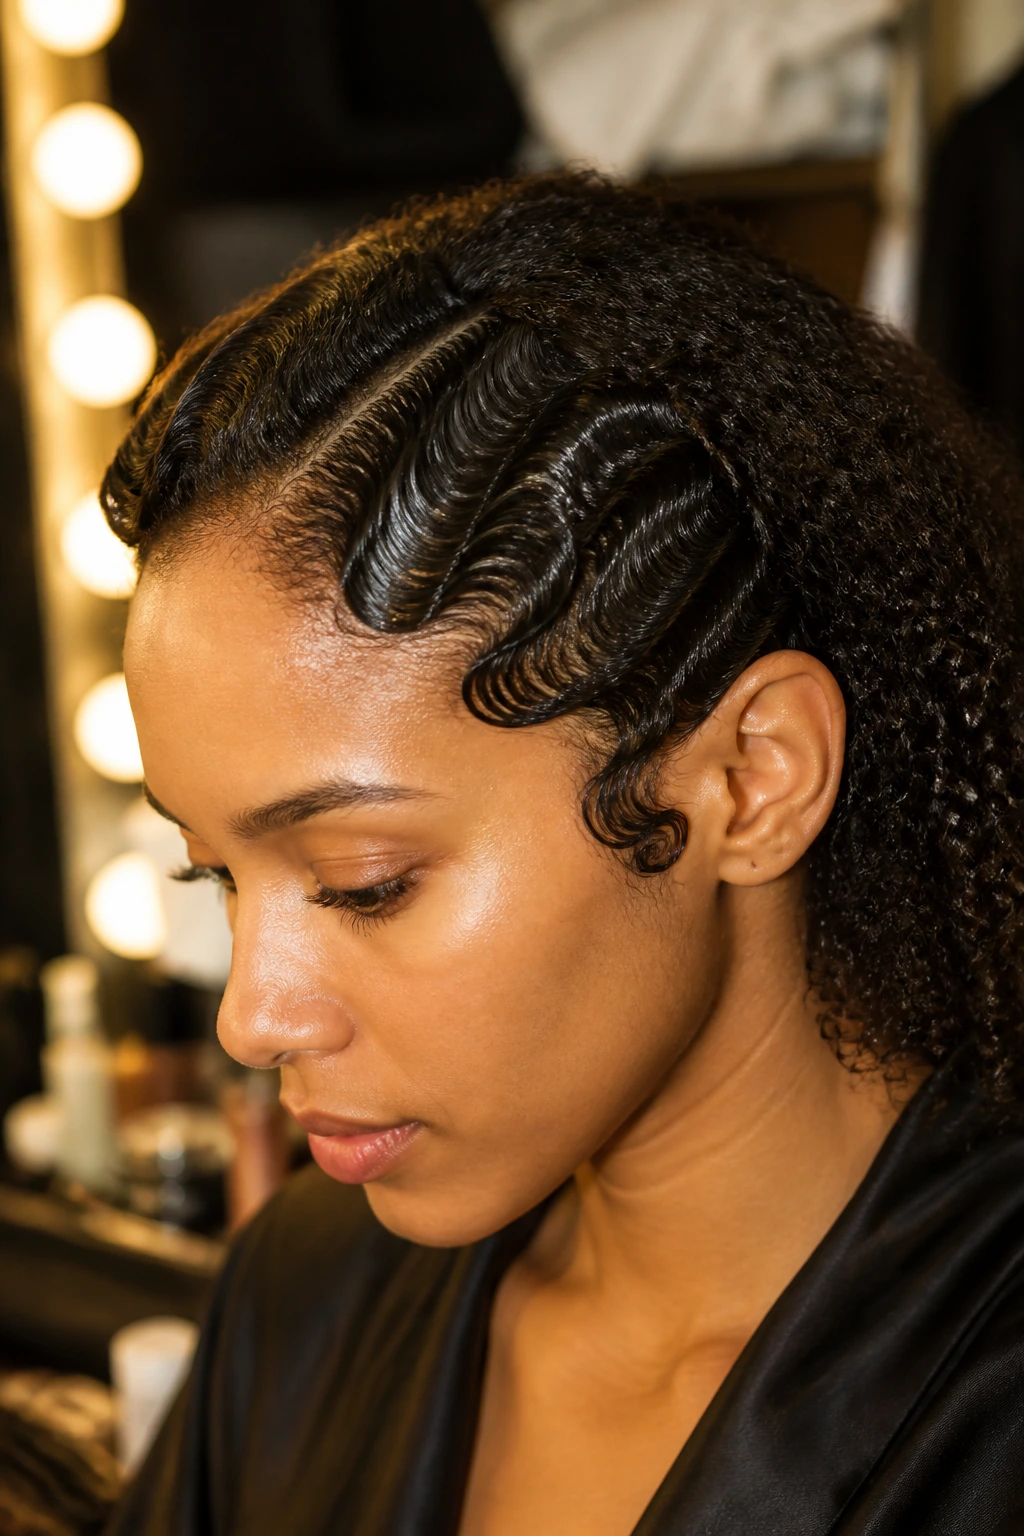
Natural texture and finger waves can be a beautiful match when the set is done with patience. The point is not to force the hair into a completely different personality. The point is to sculpt the front and let the rest follow with as much freedom as the style allows.
Use a strong-hold gel on damp hair, shape the front into ridges with a tail comb, and let the rest of the texture sit in a defined wave pattern or tucked style. Coily and curly hair often holds the front waves well, especially when the sections are narrow and the product is evenly distributed. This is one of those looks that feels strongest when it does not try too hard to be “smooth.” Let the hair keep some of its own texture. It makes the finish better.
20. Thick-Hair Long Waves with Strong Clamps
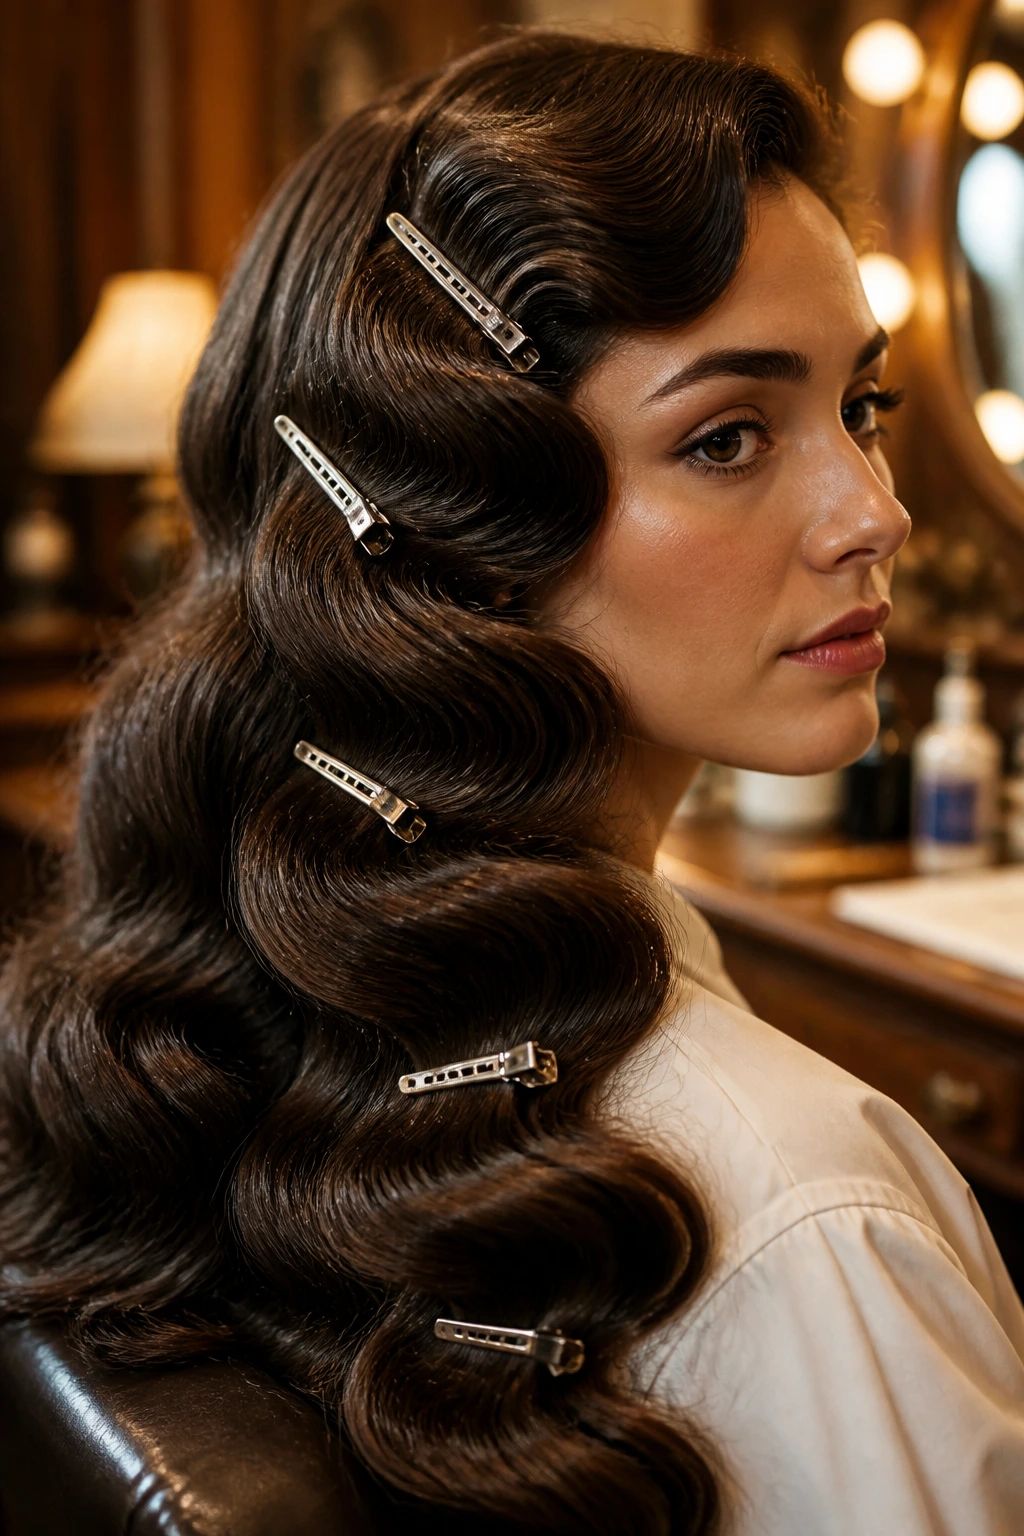
Thick hair needs a different plan. If you try to set it in large sections, the inside of the wave stays too straight while the outside gets overloaded with heat. Narrower sections, stronger clips, and longer cooling time solve most of that.
Use a 1-inch iron or hot rollers in smaller slices than you think you need, then clamp each wave flat while it cools. After the brush-out, don’t drown the hair in product. Thick hair can hold shape on its own, and too much spray makes it look heavy at the ends. This style gives long, vintage movement without the weight getting out of control, which is the real win.
21. Fine-Hair Lifted Waves with Velcro Roll Set
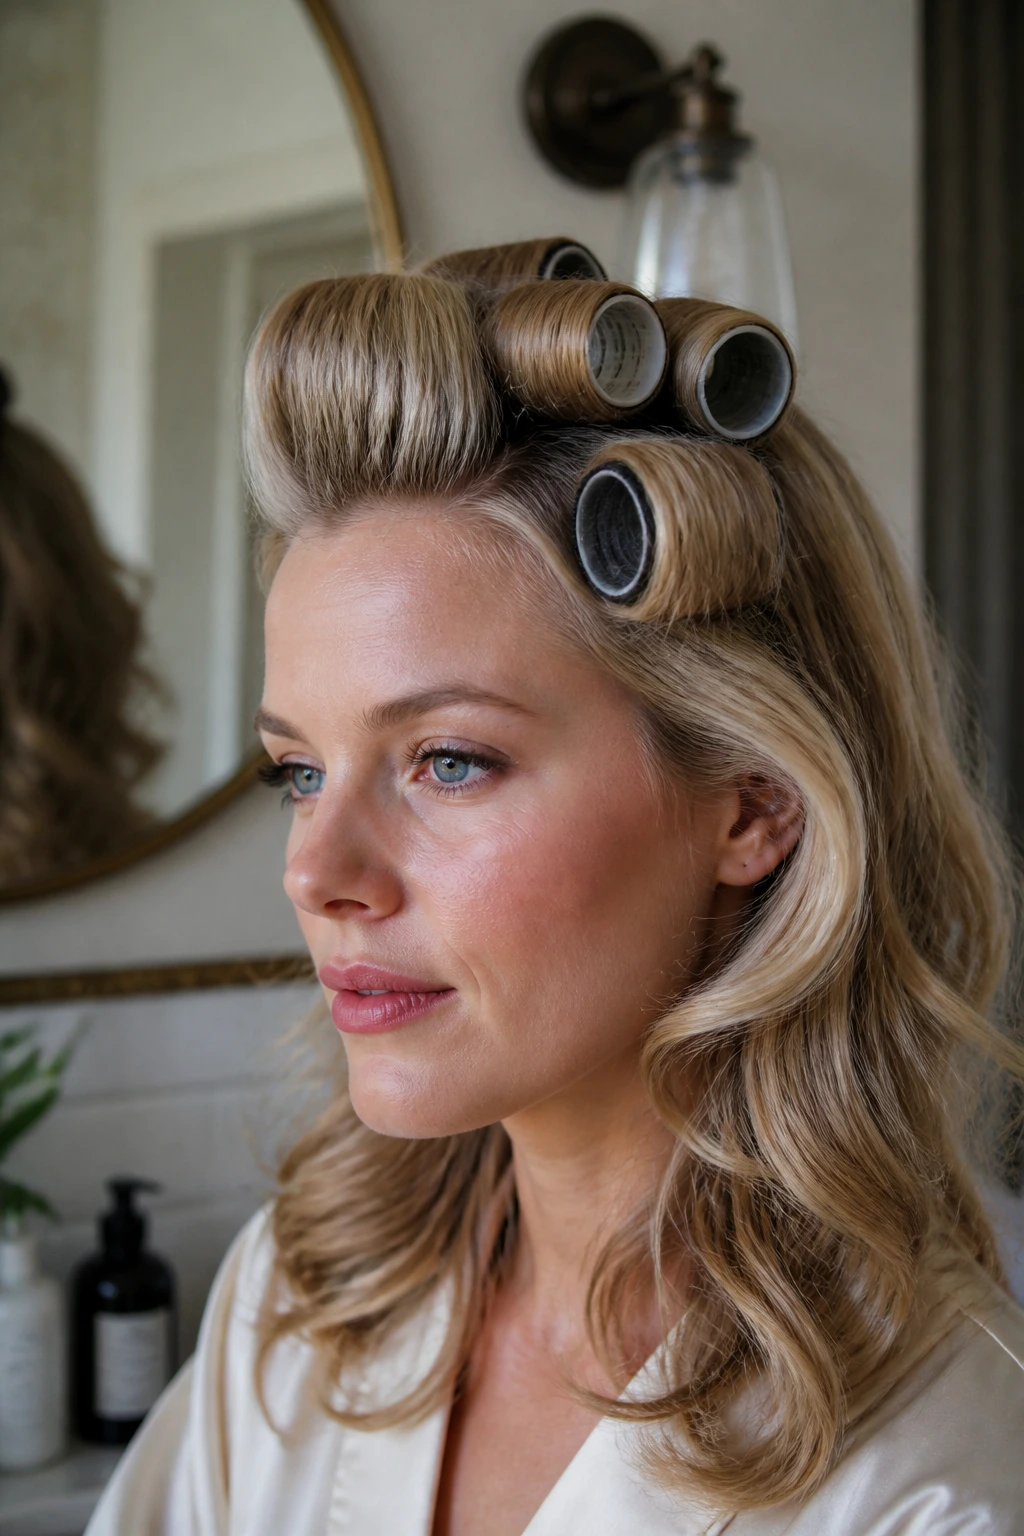
Fine hair can wear vintage waves beautifully, but it usually needs help at the root. Velcro rollers are useful here because they build lift without adding a ton of product. The wave pattern stays soft, and the crown gets the height that finer hair often loses.
Roll the top sections away from the face and leave them in until fully cool. Then take the rollers out, brush only lightly, and avoid loading the hair with heavy oils before you start. A volume spray at the roots and a light texture mist through the mid-lengths are enough. If you use the wrong products here, the hair collapses in an hour. If you use the right ones, the style can hold all evening and still move when you turn your head.
22. Matte, Undone Vintage Waves
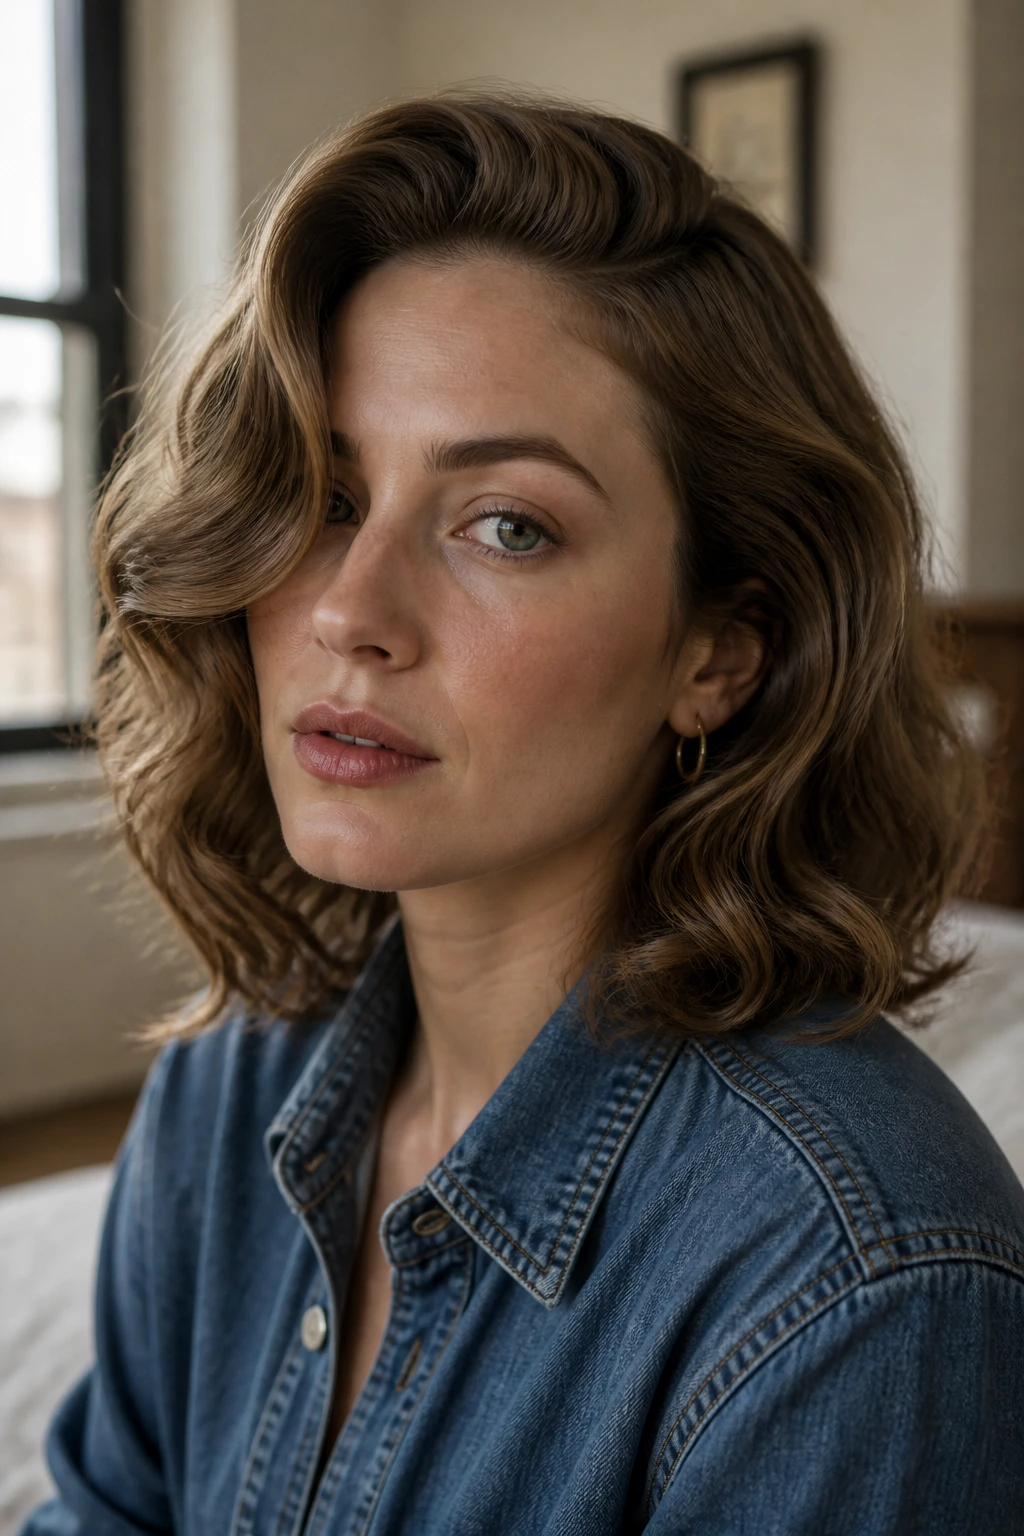
Not every vintage-inspired wave needs mirror shine. A matte finish can look more modern, more wearable, and a little less formal, while still keeping the side part and brushed curve that signal the era. The trick is to keep the shape disciplined even when the finish is soft.
Start with a curl set, brush it out gently, then use a tiny bit of dry texture spray at the ends rather than a glossy serum. You want separation, not fluff. This version works well when you’re wearing denim, knits, or anything that would feel strange beside a high-shine glam wave. It is the easiest style here to wear on an ordinary afternoon without looking dressed for a black-tie event.
23. Event-Ready Waves with a Comb Accent
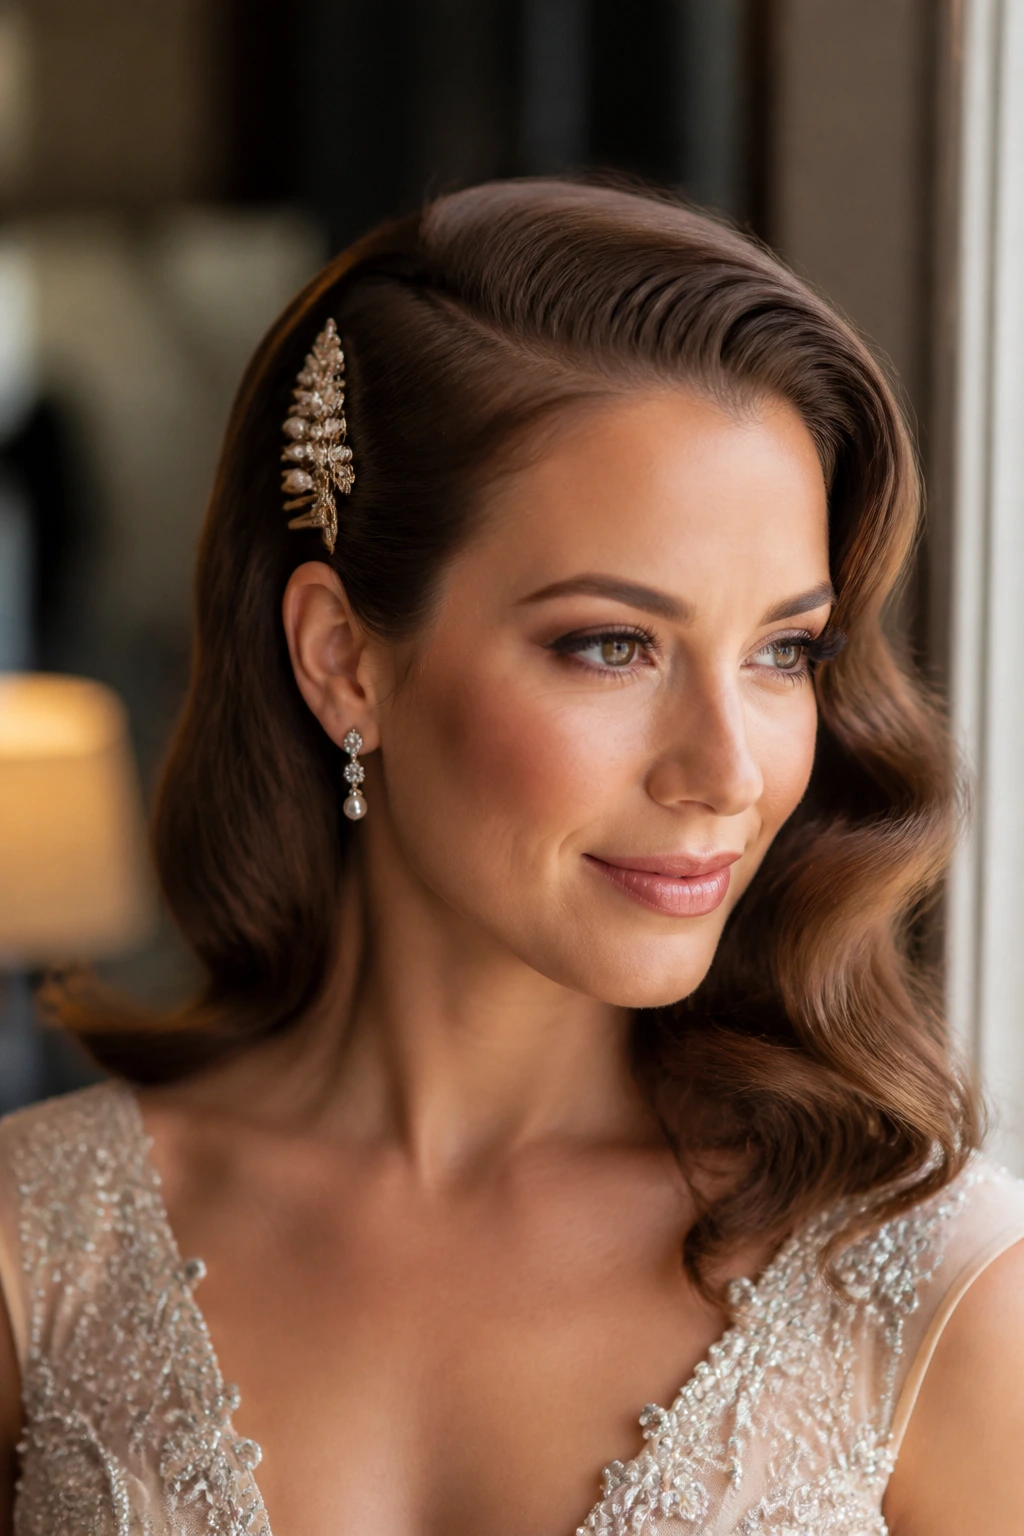
A decorative comb can make a simple wave style feel formal fast. Slide it into the side above the ear or just behind a rolled section, and the whole hairstyle sharpens. The waves themselves can stay soft and broad; the accessory does the punctuation.
Gold, silver, or pearl combs all work, but the placement matters more than the material. Set the comb where it can catch the direction of the wave instead of sitting on top of it. This style is handy when you want to dress up hair that is already curled and brushed out. You do not need a full redo. Sometimes one well-placed comb is enough.
24. Tucked-Behind-Ear Long Waves
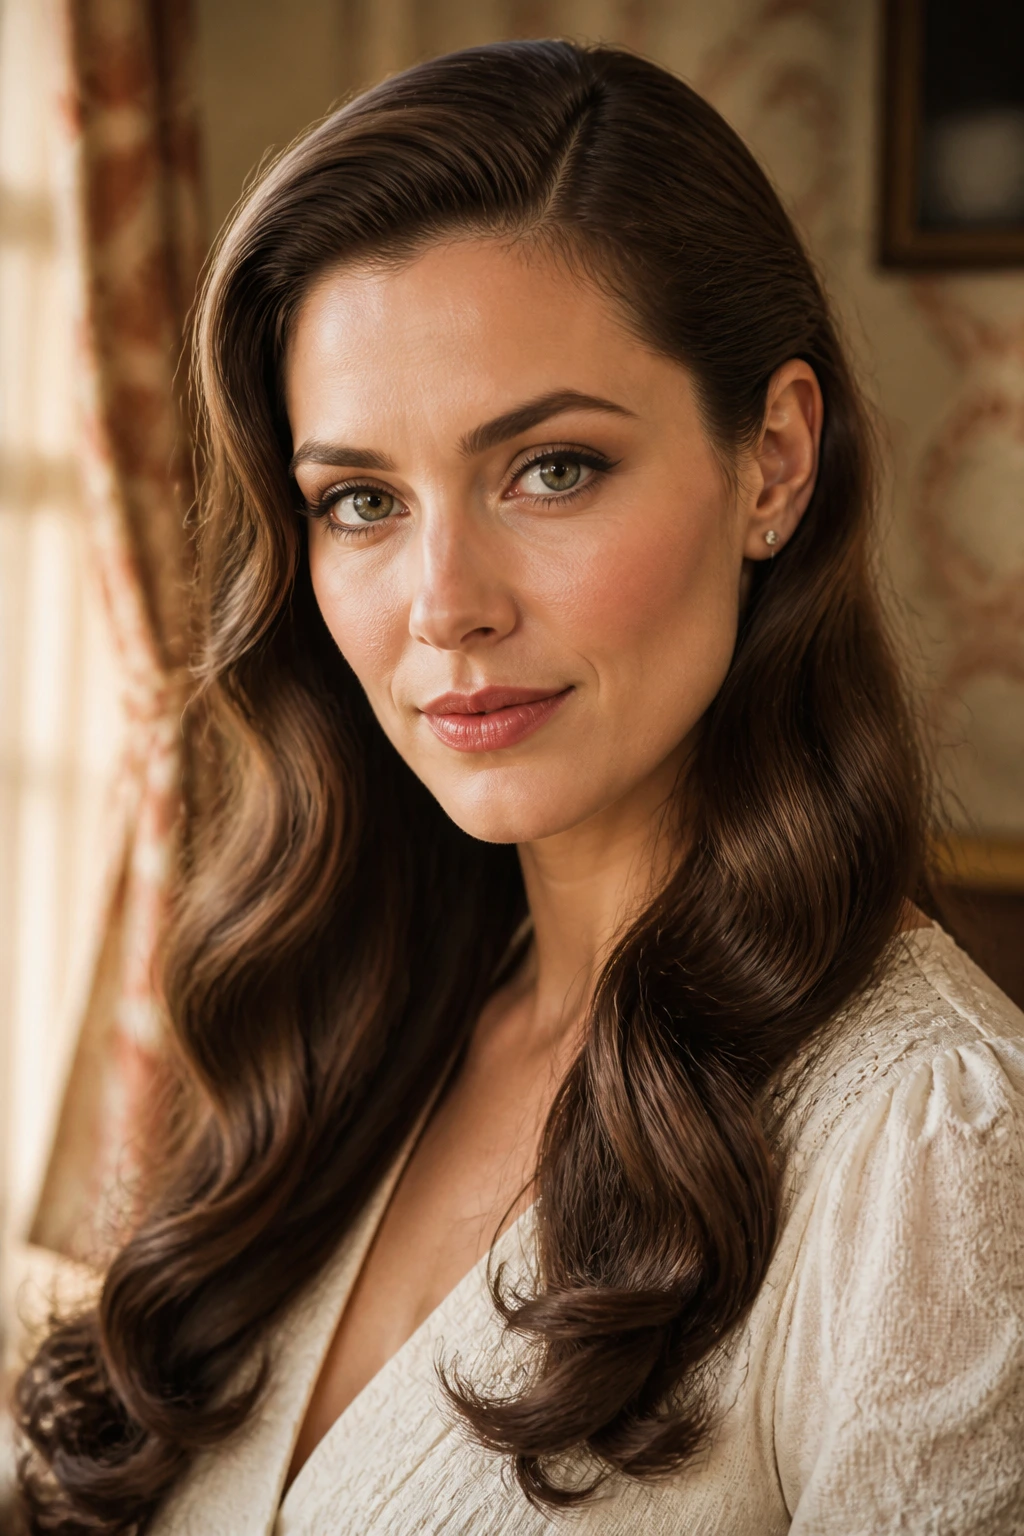
This is the quiet one in the group, and I like it for that reason. Long waves are brushed into a soft vintage pattern, then one or both sides are tucked behind the ears so the face opens up. The move is small, but it changes the line of the style completely.
Keep the front sections sleek enough to stay put, and use a little serum on the ends so the tucked side does not puff out. This works especially well with strong cheekbones or earrings you want to show off. It also helps bring some structure to long hair that might otherwise fall too heavily around the face. Simple. Clean. Still retro.
25. Sculpted Waves for Short Curly Hair
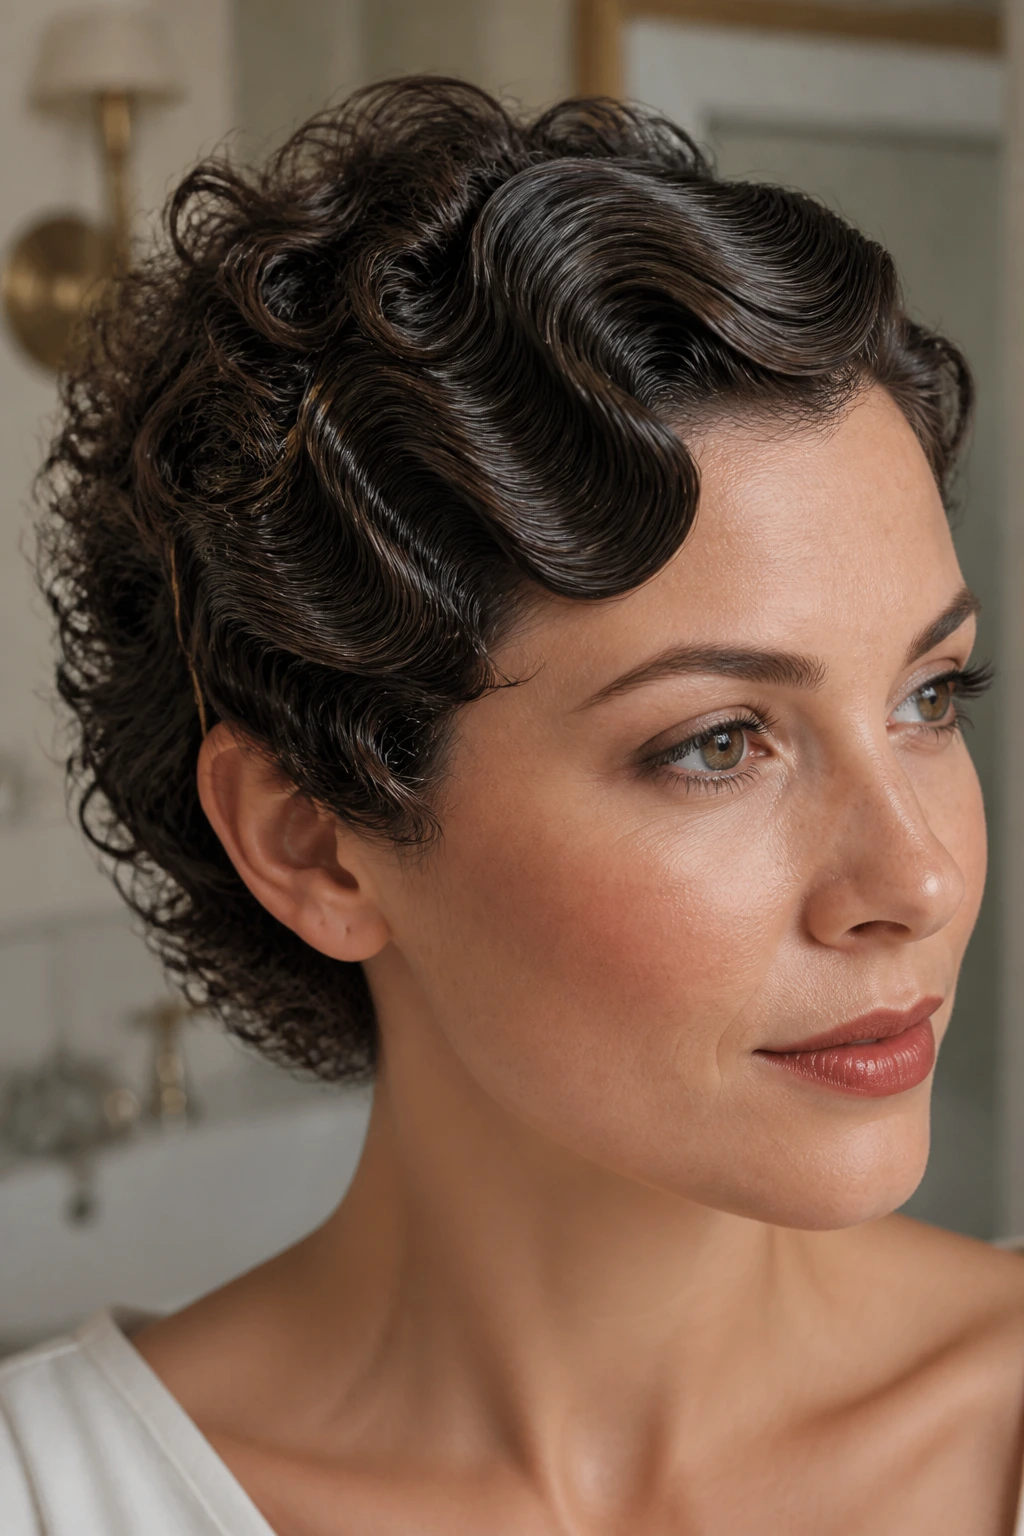
Short curly hair can do a version of vintage waves that feels fresh instead of forced. The shape comes from sculpting the front and upper sections while preserving the curve and spring of the natural texture underneath. It is a good reminder that “vintage” does not have to mean flat.
Use a cream or gel that defines without crunch, then coax the front into waves with your fingers or a comb while the hair is damp. Pin a few pieces in place until they set. The result should look shaped, not erased. If you over-smooth it, the style loses its edge. The best short curly versions keep a little personality in the finish, which is exactly what makes them interesting.
26. Monroe-Inspired Platinum Waves
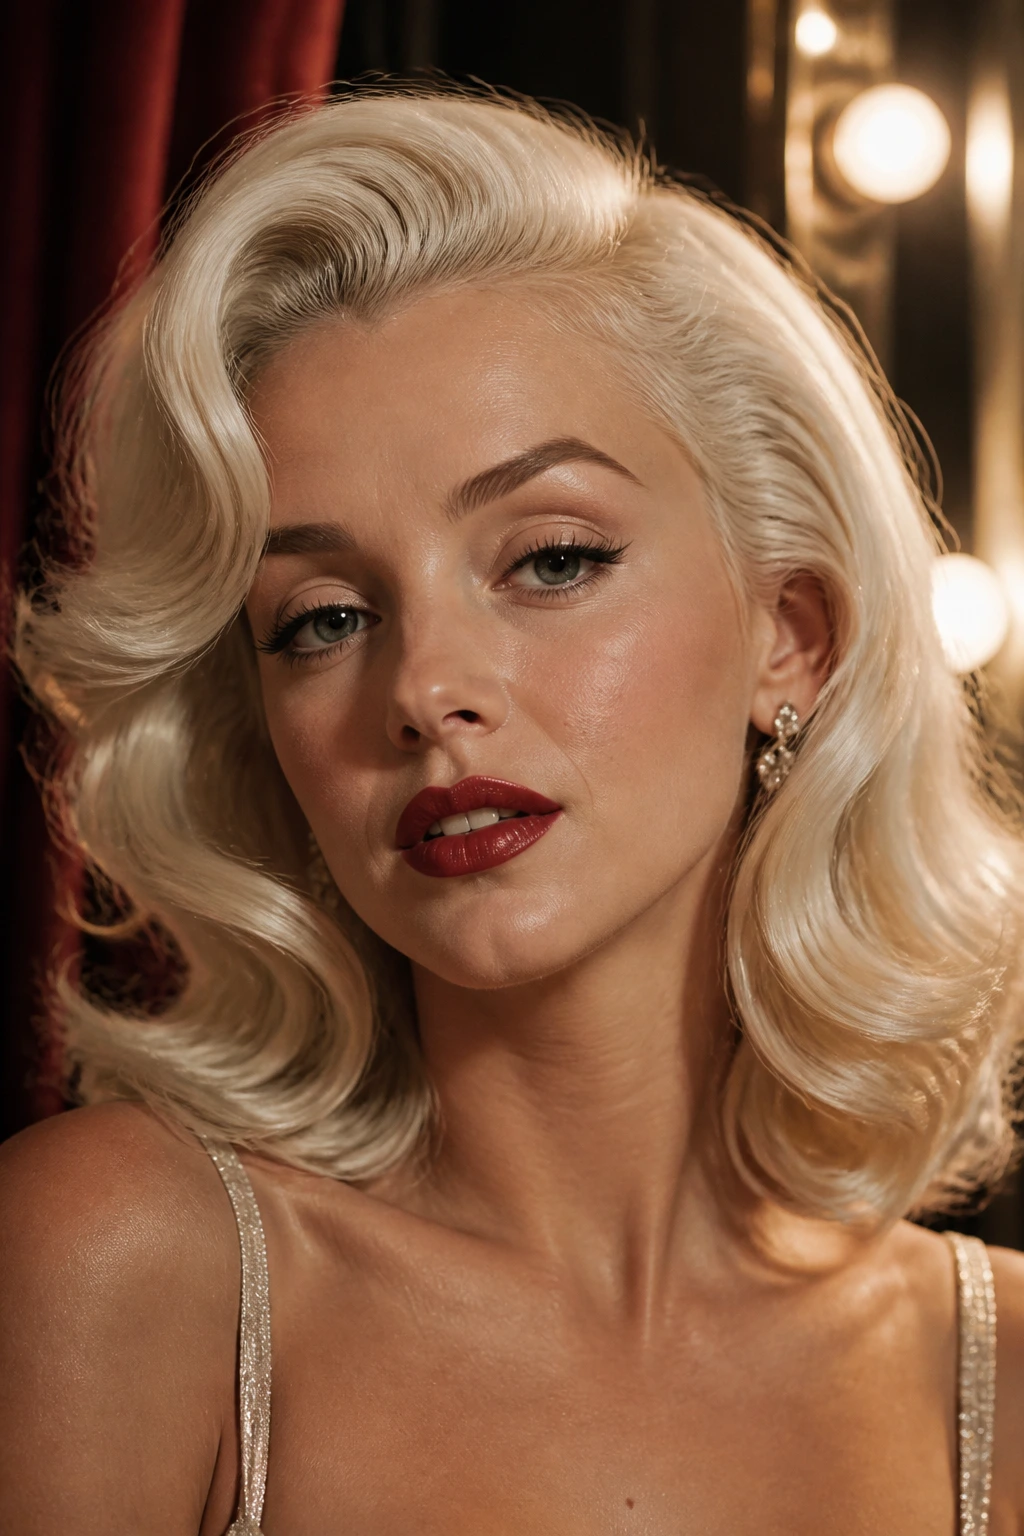
The Monroe-inspired wave is all about softness at the ends and a little lift through the front. On platinum or very light blonde hair, the shine shows each curve a bit more clearly, which can make the style read almost luminous under indoor light. It’s glamorous, yes, but the shape is the real draw.
Use medium sections and avoid over-clamping the wave. You want a round bend, not a sharp crease. A side part or a slightly off-center part usually looks better than a perfect middle line here because it keeps the shape from feeling too rigid. The color is part of the mood, but the wave pattern carries the style.
27. Center-Part Glam Waves
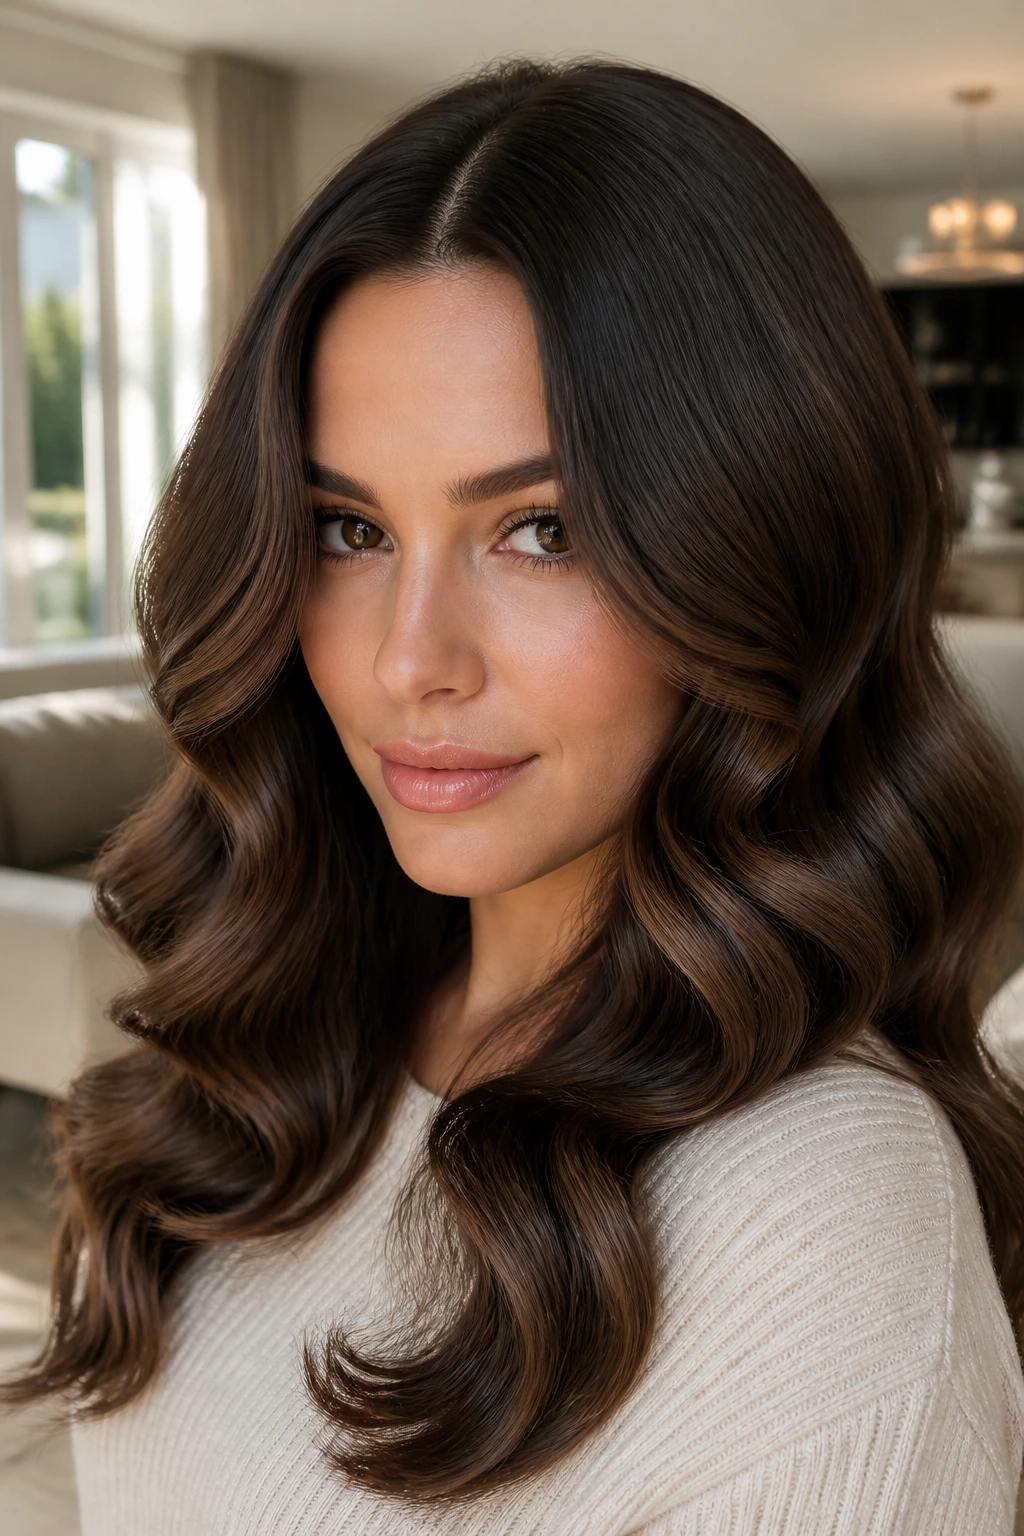
A center part can still feel vintage if the waves are large, smooth, and evenly balanced on both sides. It looks cleaner and a little more modern than a deep side part, but the old-school polish comes through in the brushed finish and the shaped ends. This is a good one when you want symmetry.
Set the waves away from the face on both sides, then brush them into parallel curves that fall evenly over the shoulders. Keep the roots sleek so the center line stays sharp. This style is flattering on oval faces and anyone who likes a more orderly look. It’s less dramatic than Hollywood waves, but it holds its own.
28. Soft Lob with Rolled Ends
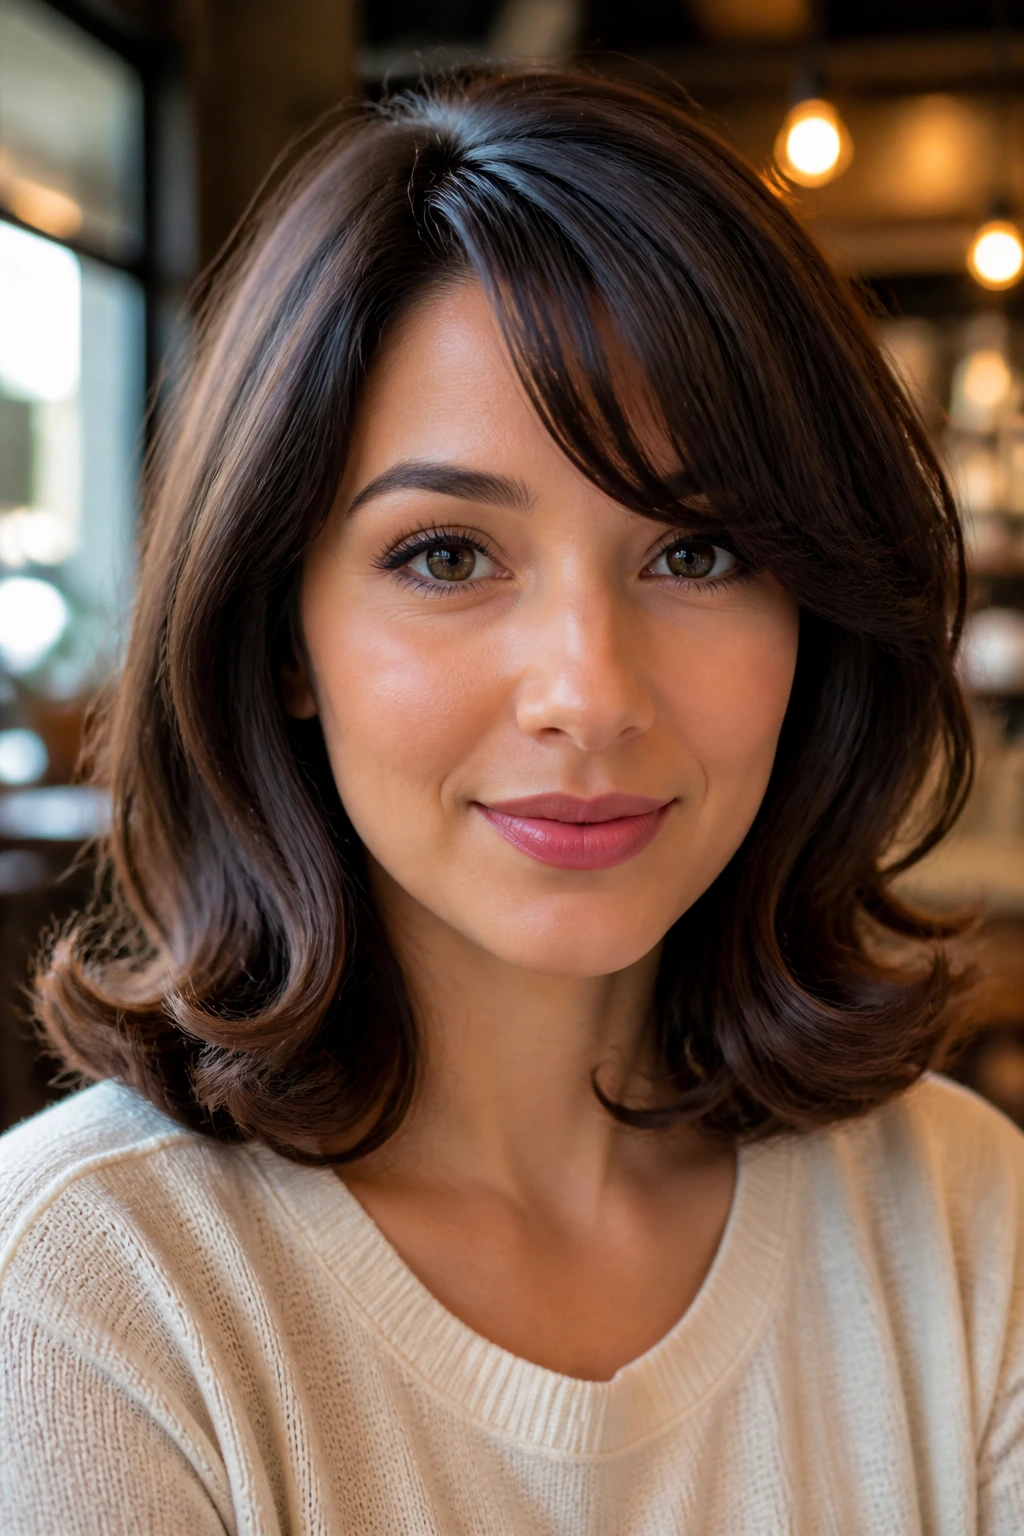
The lob is probably one of the easiest lengths to give a vintage feel. It has enough weight to hold a wave, but not so much that the ends drag the shape down. A rolled finish at the ends makes the whole cut feel deliberate instead of plain.
Curl the mid-lengths and then direct the ends slightly under with your brush or iron. Don’t chase perfect uniformity. A little variation makes the style feel more lived-in. This version works especially well with side-swept fringe, but it can also stay minimal and still read as retro. If you want a hairstyle that sits between office-friendly and date-night ready, this is a strong choice.
29. Crossover Pin-Curl Waves
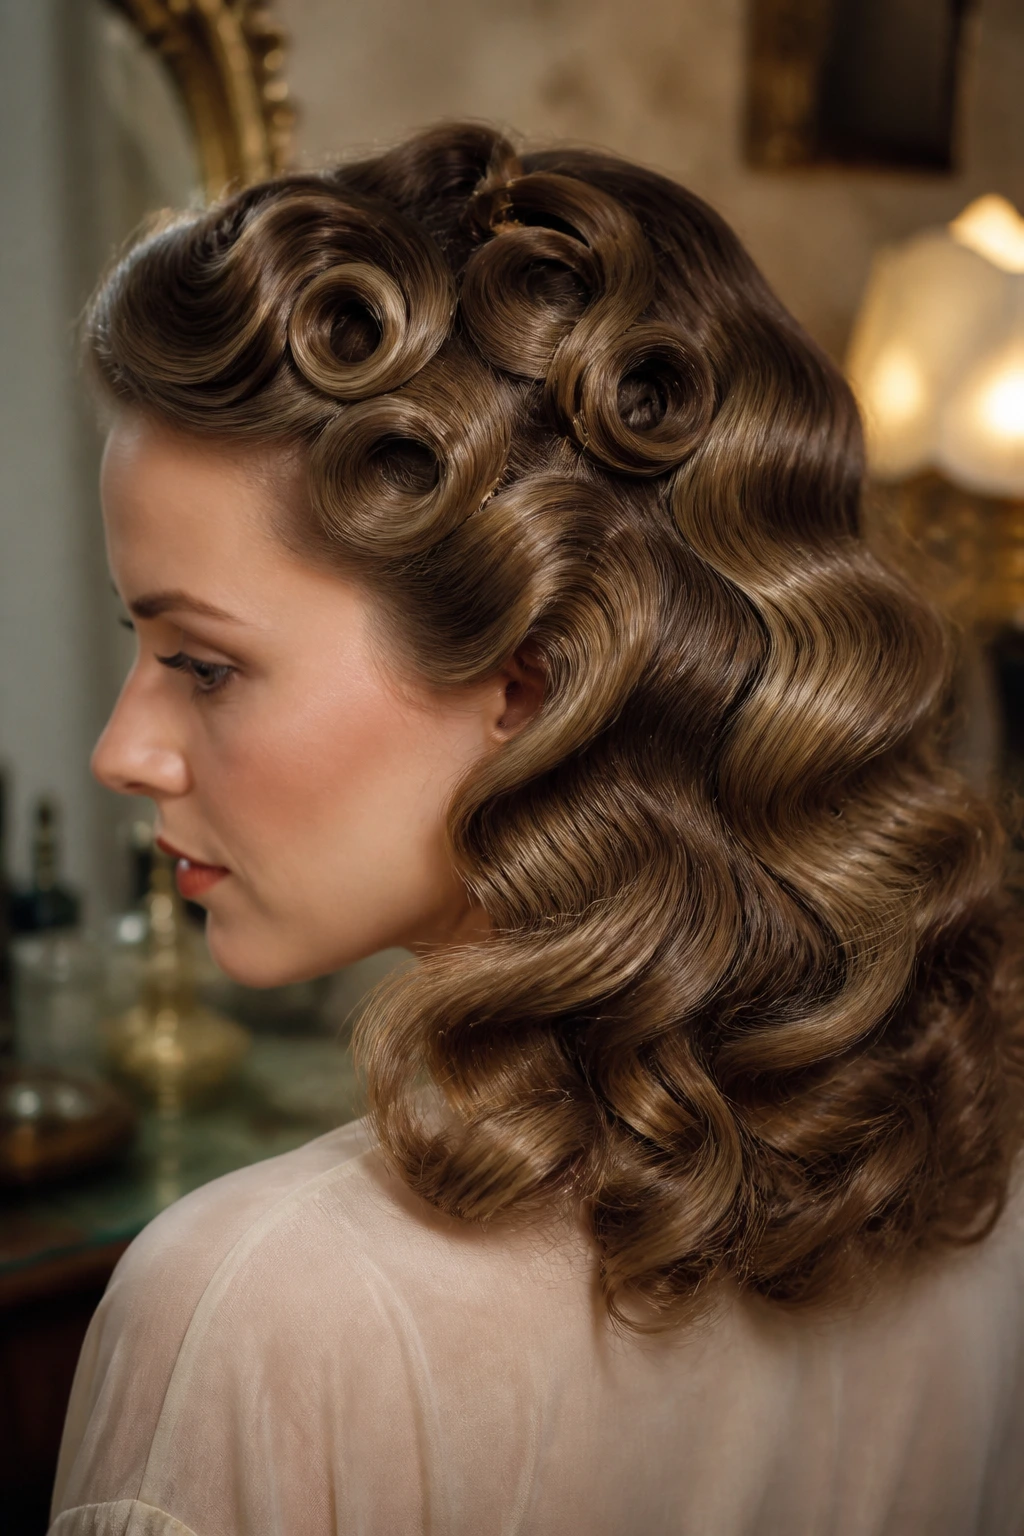
Crossover pin curls create a wave pattern with more texture and a little old-set charm. Instead of letting the curls sit in one line, cross sections over each other as you pin them, which builds that subtle ripple vintage styles are known for. The result is softer than a Marcel set and more patterned than a casual wave.
This method takes patience, but not fancy tools. Bobby pins, sectioning clips, and a tail comb are enough. Let the curls cool fully before brushing them out, or the shape will flatten. I like this style when the goal is something romantic and a little quieter than full glam. It’s the kind of detail most people notice only when they are close enough to touch the hair.
30. Outgrown Bangs with Retro Waves
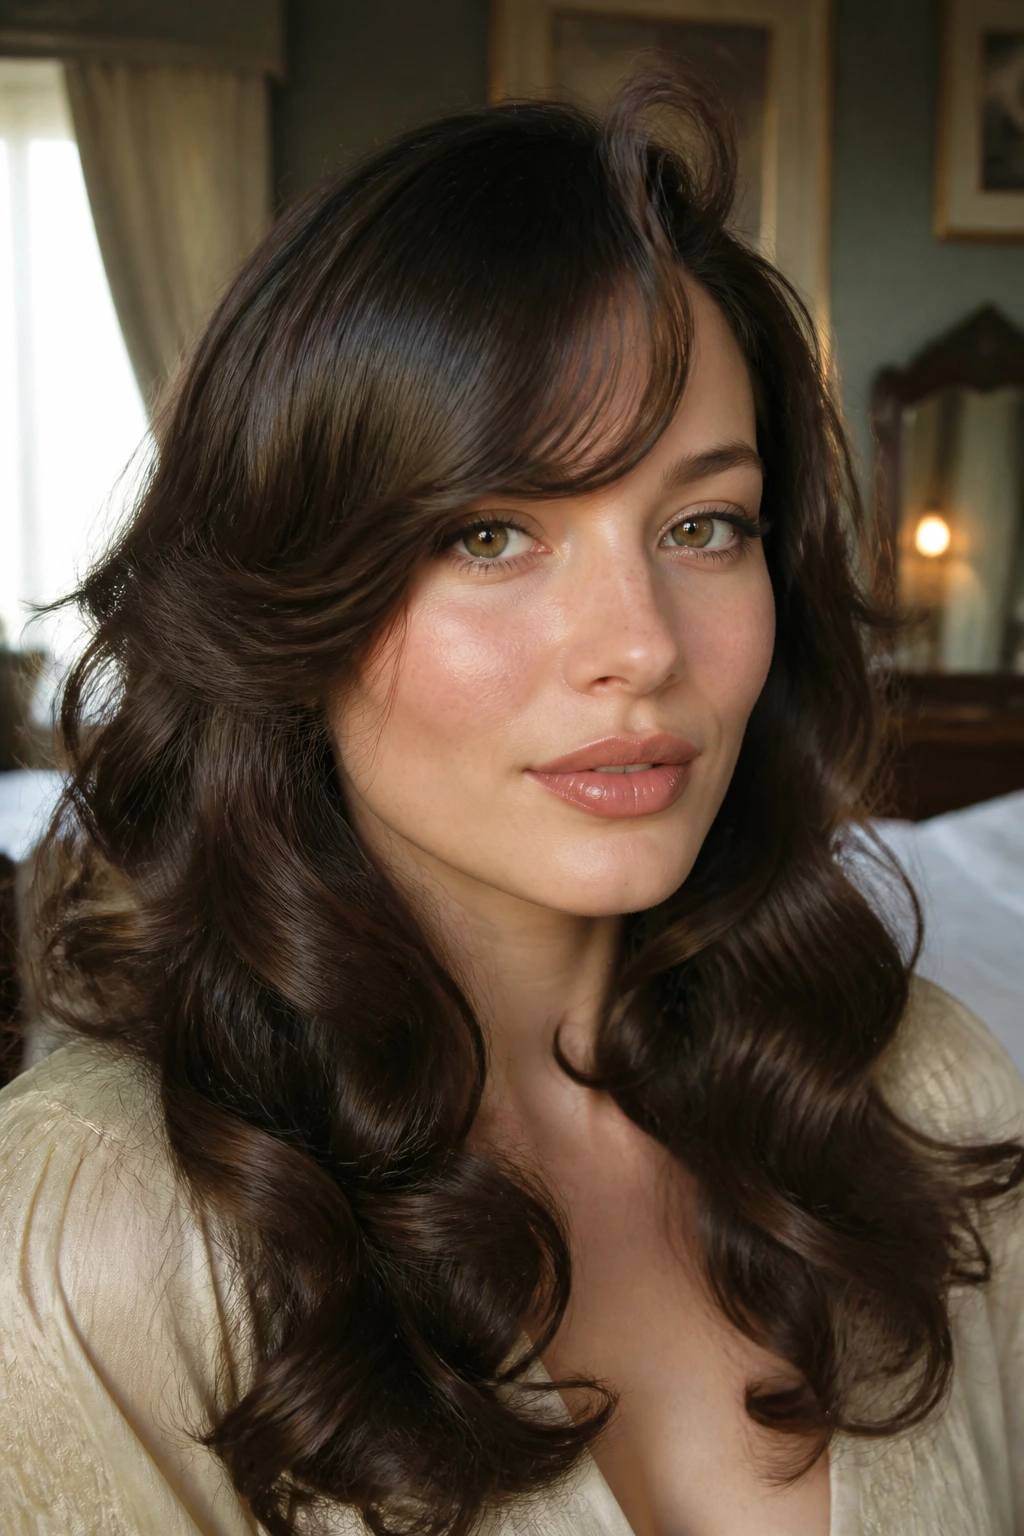
Outgrown bangs can be a headache in ordinary styling, but they fit into vintage waves better than you might think. The longer fringe can be swept to one side, curled under slightly, or rolled back into the front wave so it becomes part of the shape instead of sitting on top of it.
The key is blending. Set the fringe with the same direction and finish as the rest of the hair, then brush it into the front curve. If you leave the bangs too piecey, the style looks accidental. If you smooth them into the wave, the haircut starts to look intentional again. This one is especially useful if you’re growing out bangs and want a style that helps rather than fights the process.
31. Party-Ready Side Flip Waves
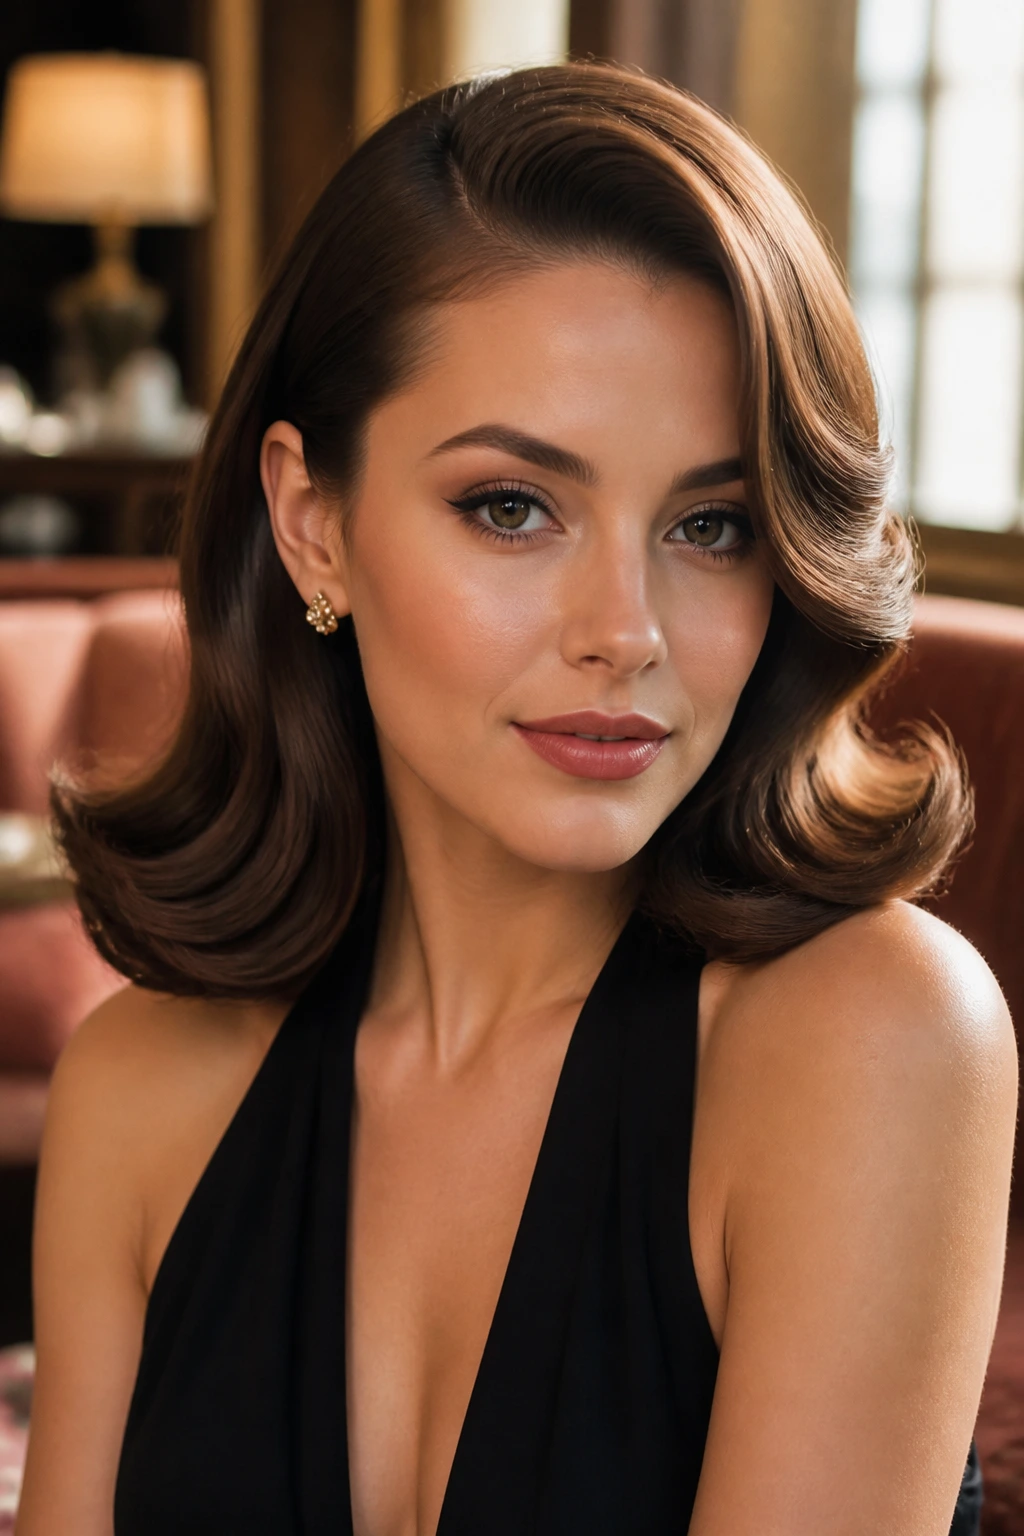
A side flip gives the whole style a little motion at the ends, which keeps it from feeling too formal. The front stays polished, but the wave flips outward at the shoulder or collarbone, adding a bit of swing. It’s a nice middle ground between structured vintage and something looser.
Set the hair with a large iron or rollers, then flip the last inch or two away from the face with a brush and a touch of heat. The flip should be clean, not beachy. That detail matters. This works especially well when you want your hair to move when you walk. A lot of old-school styles are about stillness. This one has a little swagger.
32. Low Knot with Wave-Framed Tendrils
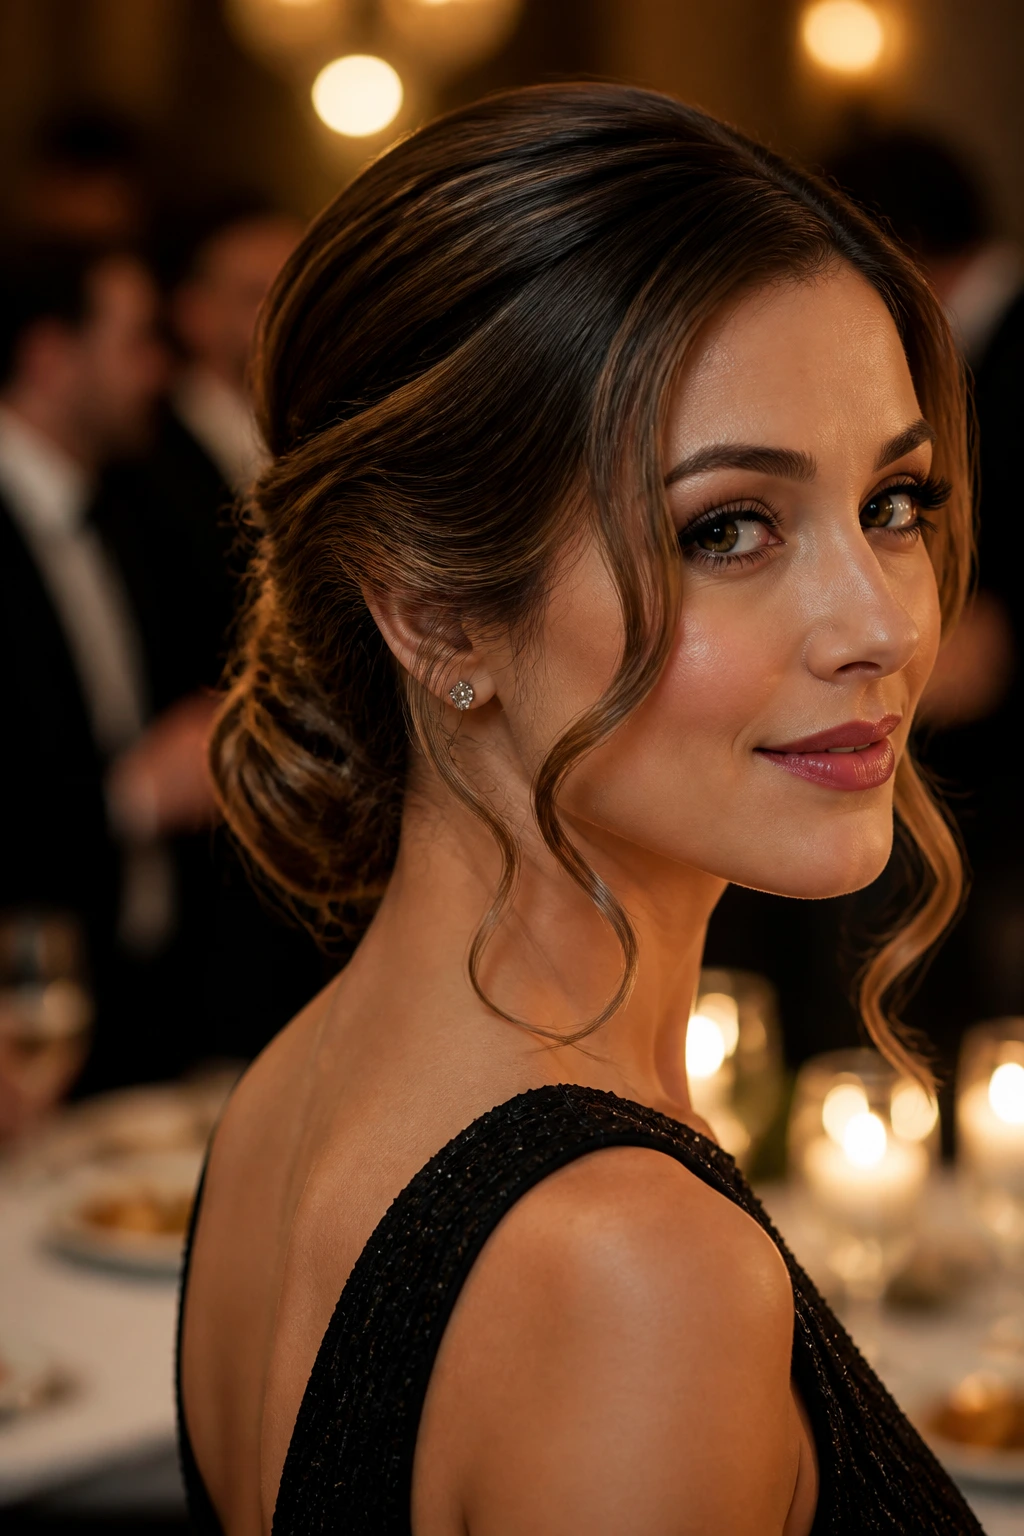
A low knot can still sit comfortably inside a vintage wave story if the front and sides are handled with care. Leave out two or three wave-framed tendrils, smooth the crown, and coil the rest into a neat knot at the nape. It has the discipline of an old-updo and the softness of brushed waves around the face.
The tendrils should not be random scraps. Curl or set them so they fall in a clean arc, then pin the knot low and tight enough that it does not sag. This is a strong option for formal dinners, weddings, or any setting where you want your hair off your neck but still want movement near the face. The contrast is what makes it work.
Why These Retro Waves Still Work on Real Hair
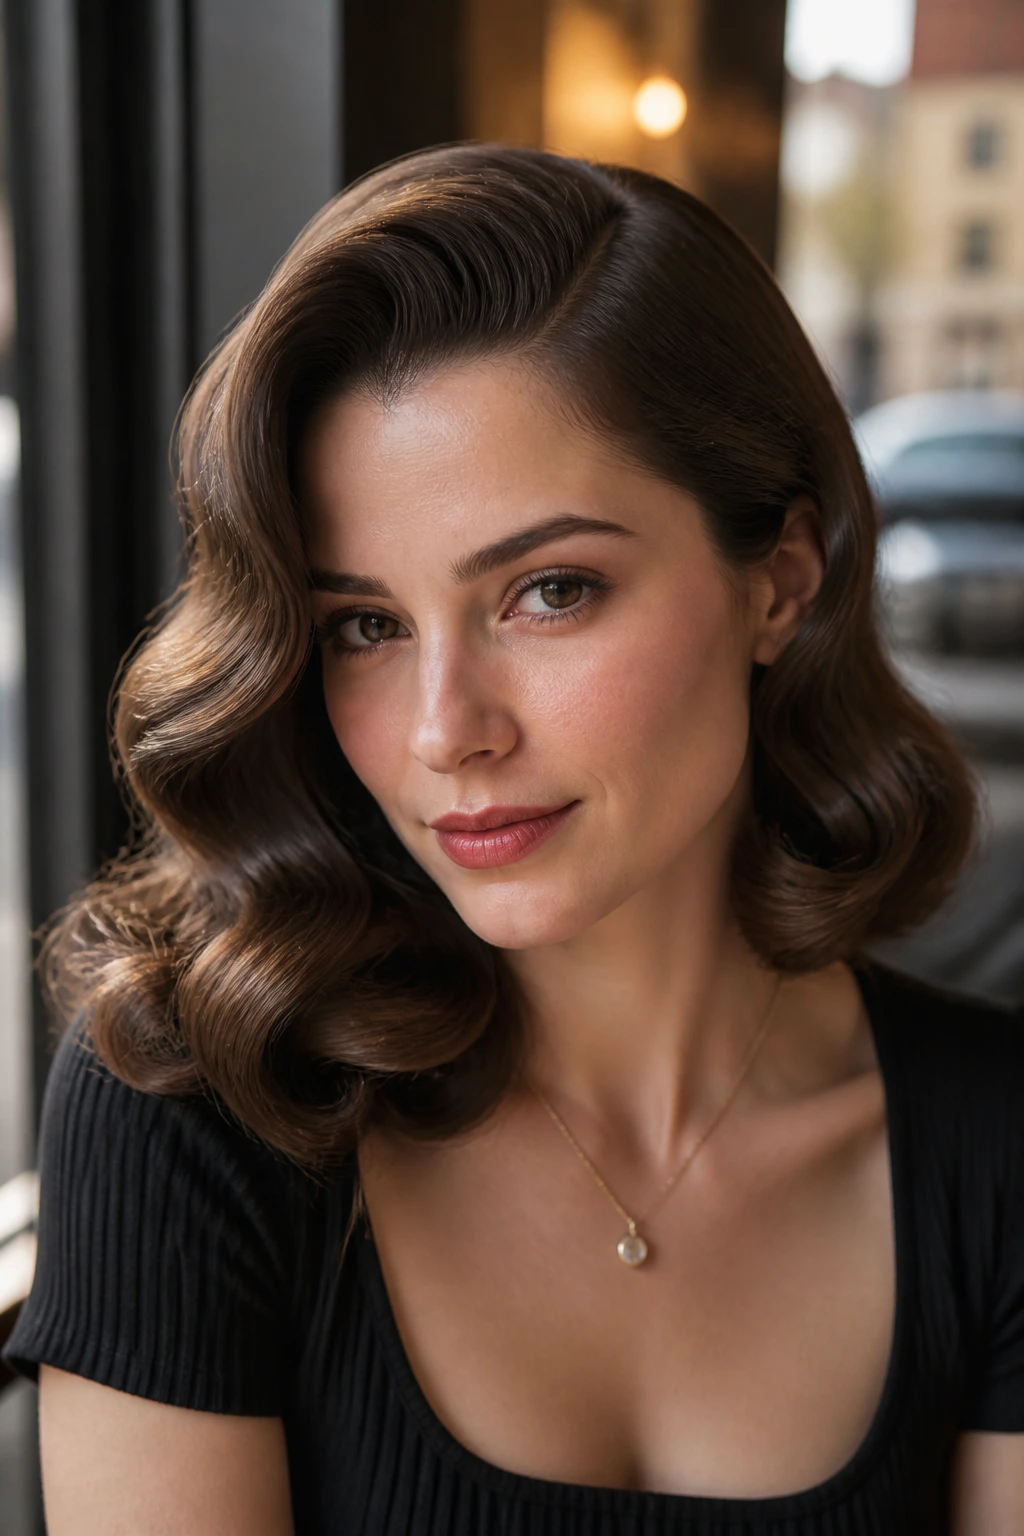
The styles above keep showing up in salons and bathroom mirrors for a reason: they solve problems modern beach waves often create. They give the hair a clear direction. They open the face. They can be adjusted for length, density, and texture instead of forcing every head of hair into the same loose curl shape.
A vintage wave is also easier to read from a distance. That sounds small, but it matters. A clean part, a smooth crown, and a wave that bends the same way on both sides will hold its shape in photos, under indoor lights, and after a few hours of wear. Messy can be lovely. But if you want the look to say “styled on purpose,” the older shapes are better at it.
How Hair Length and Texture Change the Final Look
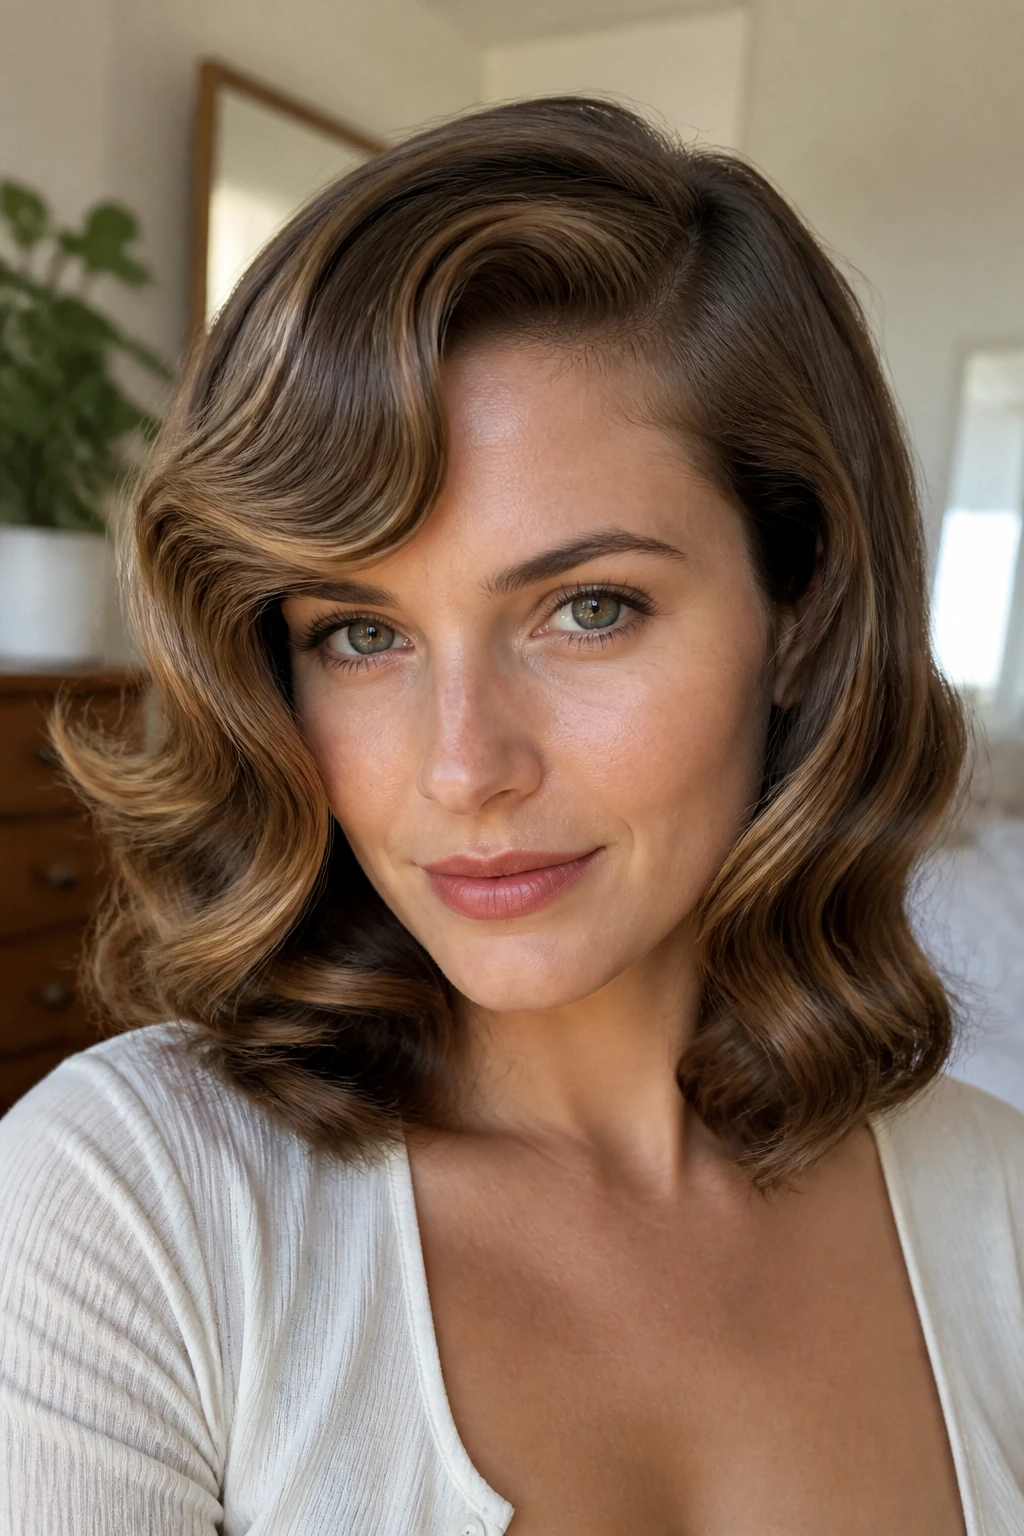
Short hair makes the line of the wave more obvious. There’s less length to hide mistakes, which is both annoying and useful. You see the set clearly, and that means finger waves, pageboy curves, and short Marcel shapes often look strongest at chin length or above.
Medium and long hair bring weight into the picture. That weight can help a brushed-out wave hang beautifully, but it can also flatten the crown if you use too much oil or too large a section. Fine hair usually needs extra root lift and lighter products. Thick hair wants more clips, more sectioning, and a longer cool-down before brushing. Natural texture needs the front and part line shaped first so the style reads intentional instead of improvised.
Essential Tools for These Hairstyles
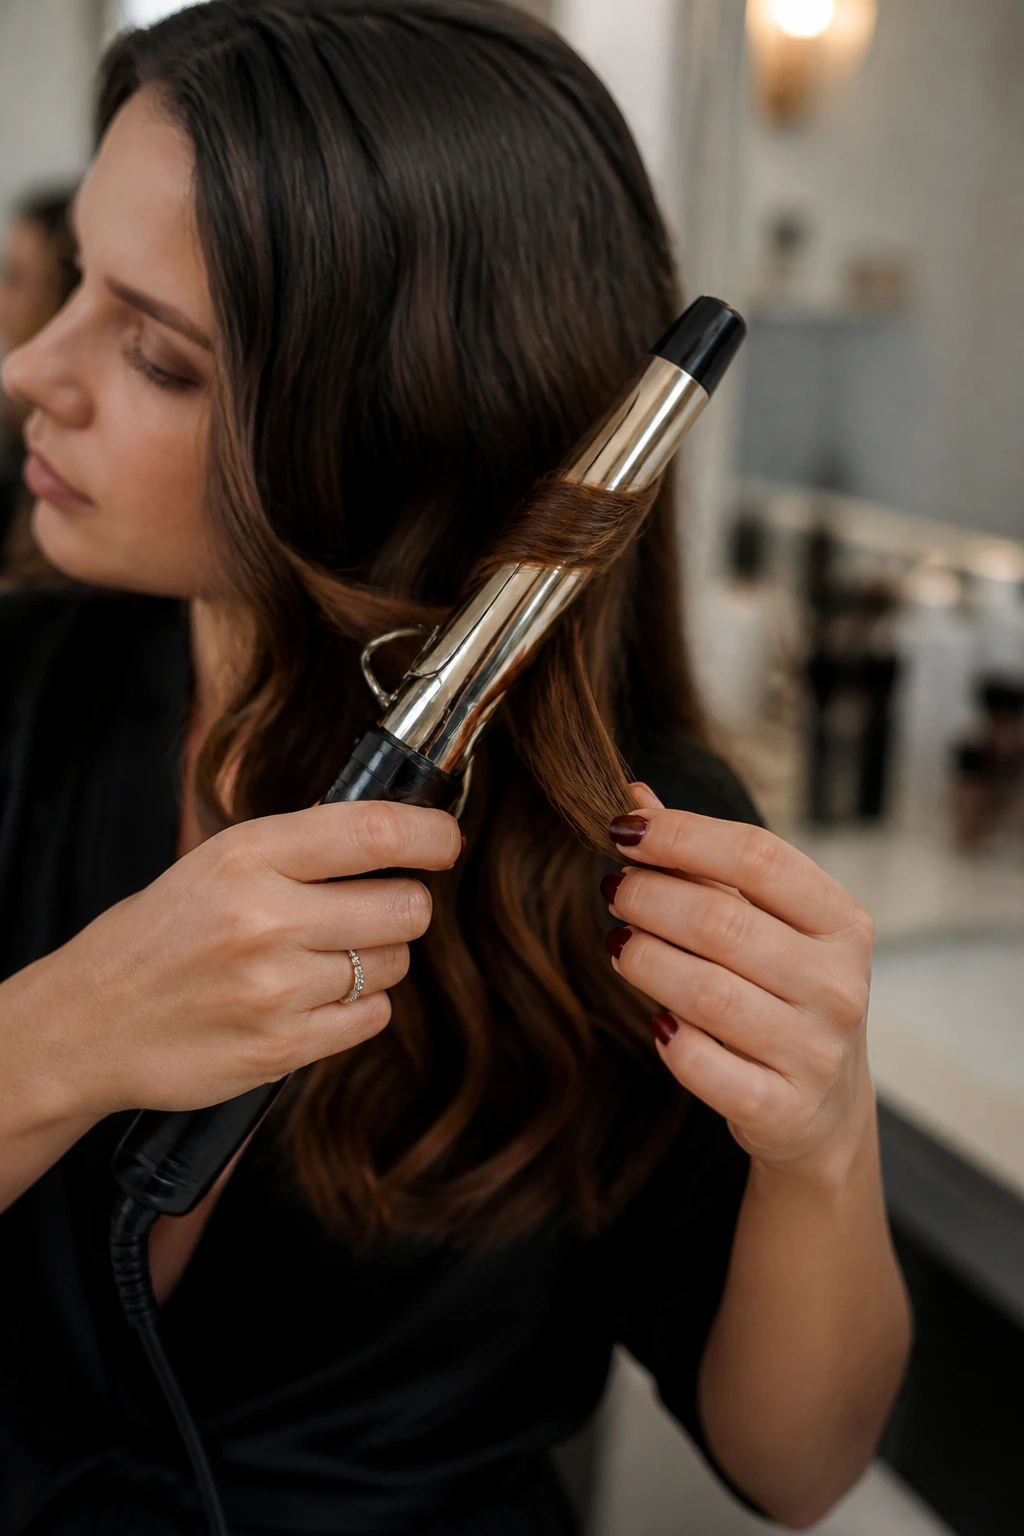
- 1-inch curling iron: Best for most medium wave sets and smaller vintage bends.
- 1¼-inch curling iron: Good for Hollywood waves and brushed glam styles with a softer curve.
- Tail comb: Needed for parts, finger waves, and clean sectioning.
- Duckbill clips: These hold each wave flat while it cools, which is where a lot of the shape comes from.
- Boar-bristle brush: Useful for brush-out styles because it smooths without tearing the set apart.
- Setting lotion or mousse: Gives damp-set styles enough grip to hold their pattern.
- Strong-hold hairspray: Choose one that sets the shape without turning the hair into a helmet.
- Shine spray or light serum: Helps polished styles look finished, but use a light hand.
- Velcro or hot rollers: Handy for root lift and bigger vintage bends.
- Bobby pins and small section clips: Necessary for rolls, faux bobs, chignons, and tucked styles.
Choosing Products That Match Your Hair Type
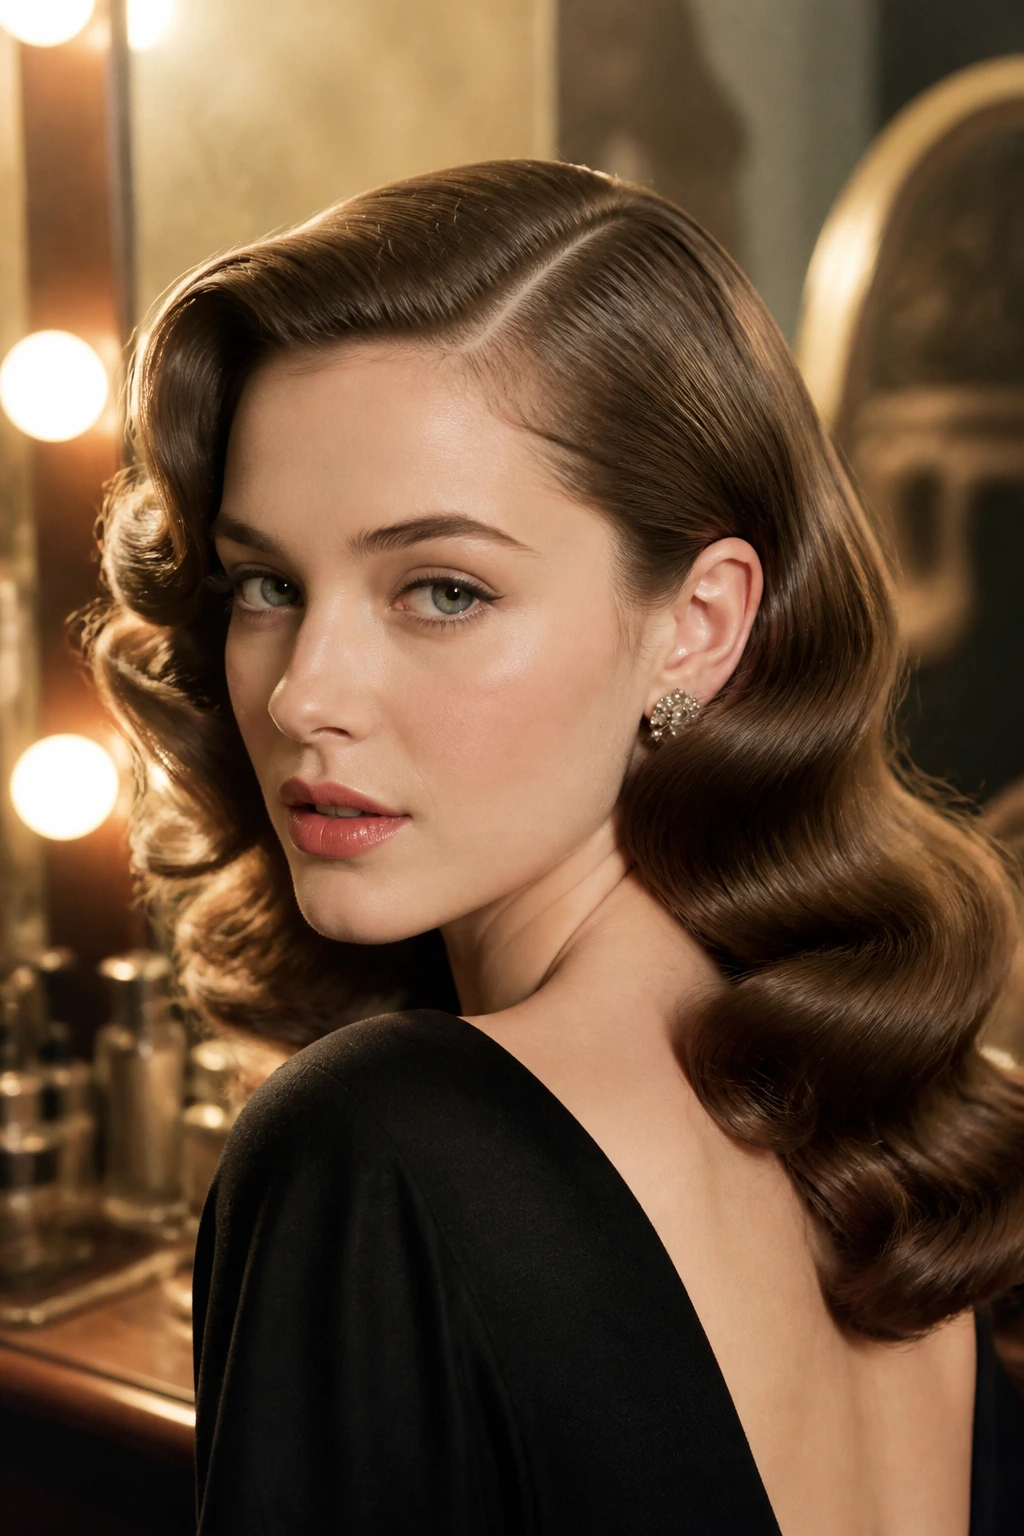
Product choice changes the final shape more than people think. Fine hair usually needs lighter mousse or volume spray at the roots and almost no heavy oil before styling. Thick hair can handle a little more smoothing cream, but it still needs a firm hold at the set stage or the wave pattern loosens too soon.
If your hair is slippery, look for products labeled strong hold or setting. If your hair tends to dry frizzy, use a cream with a little slip on the mid-lengths and save the hairspray for the finish. A glossy look comes from control, not from dumping serum over the whole head. That mistake makes the ends hang down and the roots collapse. The better move is small amounts in the right place: crown for lift, ends for polish, and almost nothing where you need body.
How to Wear These Styles Without Making Them Feel Costumey
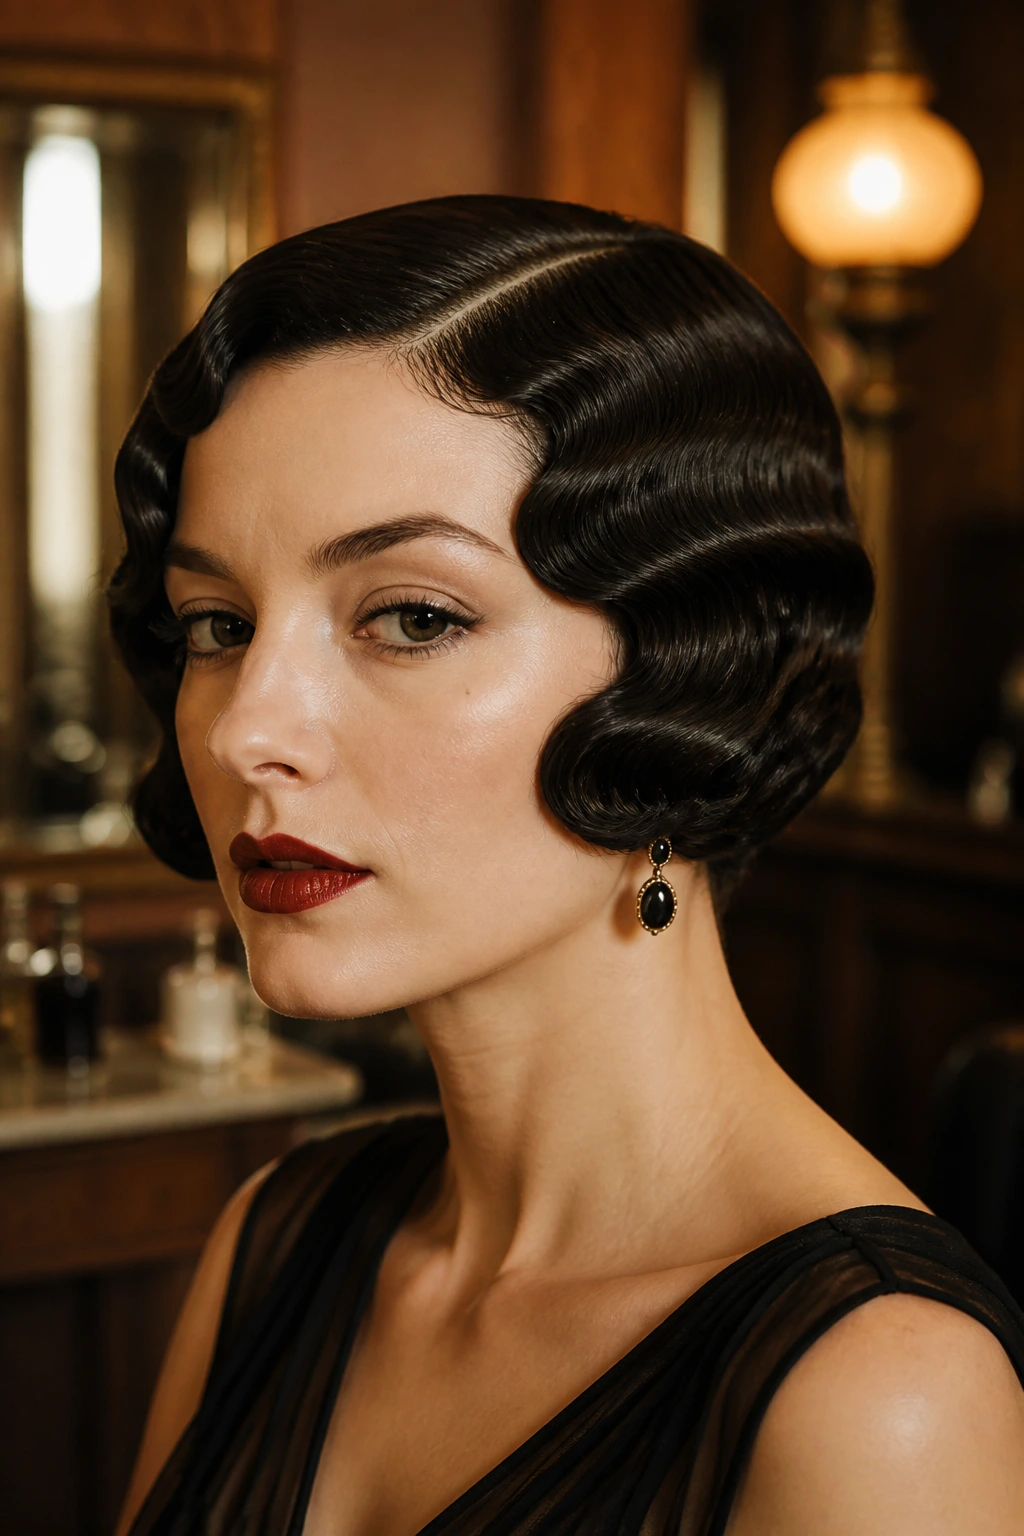
Presentation: Keep the hairline neat, the part clean, and the finish deliberate. That’s the difference between vintage and theatrical. A soft wave around the face is enough; you do not need ten accessories fighting for attention.
Outfit Pairings: Pair the more polished waves with simple necklines, satin, knit dresses, or tailored jackets. The shorter sculpted styles like bob waves and finger waves look strong with button-front shirts, crew necks, and earrings that sit close to the ear. Let the hair be the detail.
Accessories: Pearl pins, narrow ribbons, combs, scarves, and small barrettes all work, but use one main accessory. Two usually feels busy. A single comb near the temple or a satin ribbon at the back can pull the whole style into place.
Occasions: Dinner, formal events, photo shoots, date nights, office parties, and even a plain weekday when you want your hair to behave for once. These styles are useful because they can be dressed up or down without changing the basic set.
Practical Tips That Save the Style
Section Smarter: Smaller sections make cleaner waves. On thick hair, a section that looks “small enough” is usually still too big.
Cool Completely: Heat sets the bend, but cooling locks it in. Pin each wave and leave it alone until it’s fully cool to the touch.
Brush in Layers: Start with your fingers, then a brush, then stop and assess. If you brush too early or too hard, you erase the pattern you just built.
Use Less Product Than You Think: Heavy cream and too much hairspray will wreck a brushed-out wave faster than humidity will.
Match Finish to Shape: Polished Hollywood waves want shine. Finger waves and short sculpted styles need grip. Don’t force the same finish onto every style.
Common Mistakes to Avoid
The first mistake is making the curls too tight and too small. That creates a springy, modern texture that fights the vintage shape. If you want older-style waves, use larger sections and brush them into a pattern instead of leaving them as ringlets.
The second mistake is brushing before the hair is cool. Warm hair still remembers the curl, but not in a good way. It stretches, frays, and loses the ridge you were trying to build. Pin, clip, or roll, then wait.
Another common problem is loading the style with the wrong product. Heavy oil near the roots flattens lift. Too much gel on long waves makes the ends look wet and stiff. And if the part is crooked or the crown is bulky, the whole hairstyle can tip from vintage to messy in one glance. The fix is simple: cleaner sectioning, lighter product, and a better eye on the top of the head, where most styling mistakes show first.
Variations and Adaptations to Try
Heatless Ribbon Set: Wrap damp hair around a ribbon or soft band, let it dry fully, then brush into soft retro bends. This works well if you want less damage and a looser finish.
Short-Hair Sculpt: If your hair is above the chin, lean into finger waves, carved side parts, and tuck-under ends instead of trying to force long-glam movement.
Curly-Hair Vintage Frame: Shape the front, smooth the part, and let the back stay fuller. That keeps the natural texture while giving the style a vintage outline.
Low-Shine Everyday Version: Skip the gloss spray, use a touch of texture mist, and keep the waves a little looser. This is the easiest version to wear on an ordinary day.
Formal Pearl Finish: Add a comb, pearls, or a ribbon after the wave pattern is set. One accent is enough.
Keeping the Shape Overnight and Between Washes
A good vintage set can last longer than people expect if you treat it gently after styling. Let the hair cool completely before you touch it. That part matters more than the final spray. For overnight wear, wrap the hair in a silk scarf or sleep on a silk pillowcase so the brush-out does not frizz at the nape and temples.
If the style starts to drop, refresh the roots with a little dry shampoo and reshape the wave with damp fingers, not a full wetting. A light mist of water mixed with leave-in conditioner can wake up the ends, but do not soak the hair. For pinned styles, remove the pins only after the hair is fully dry. If you sleep in a loose roll or scarf, you can often get a second wear the next day with just a quick brush and a touch of spray.
Frequently Asked Questions
How do I make waves look vintage instead of beachy?
Vintage waves usually have a clearer part, smoother roots, and a brushed finish. Beachy waves stay more separated and casual, while vintage styles share the movement across the hair in a cleaner pattern.
Can I do these styles on fine hair?
Yes, but keep the products light and use root lift. Velcro rollers, mousse, and careful brushing work better than heavy creams, which can flatten the shape fast.
What if my hair is thick and keeps collapsing?
Use smaller sections, stronger clips, and more cooling time. Thick hair often needs longer to set, so don’t rush the brush-out.
Do I need a curling iron for every style?
No. Some of the best versions use hot rollers, pin curls, setting lotion, or even a heatless wrap. The important part is the wave pattern, not the tool.
Which parting looks most vintage?
Deep side parts give the strongest old-Hollywood feel. Center parts can work too, but they usually need extra polish and symmetry to keep the retro mood.
Are finger waves hard to do at home?
They take practice, mostly because the sections are small and the shaping is exact. A tail comb and a strong-hold product help a lot, and the first attempt is usually the clumsiest one.
Can I wear these styles with bangs?
Yes, especially if the bangs are long enough to sweep or curve into the front wave. Very short bangs are harder to blend, but longer fringe can be folded into the set neatly.
What’s the fastest style in this group?
A side-swept brush-out wave or a tucked-behind-ear long wave is usually quickest. You set the curls, brush them out, and stop before the shape gets too perfect.
A Little Old-School Glam Goes a Long Way
The nicest thing about these styles is that they do not demand a costume to make sense. A deep part and a clean wave can sit beside a plain sweater and still look deliberate. A short finger-wave bob can feel sharper than a trendy tousled cut. A ribbon, a pearl pin, or a rolled front gives the whole shape enough history to stand on its own.
If you’re choosing one, start with the hair you already have rather than chasing a style that needs three extra hands and a lighting rig. That’s where these old shapes shine. They adapt. They flatter different lengths, and they reward small details more than brute force. The best version is the one that fits your texture, holds through dinner, and still looks good when you catch your reflection later on.
