



A good 1960s hairstyle on an older woman does not need to look stiff, lacquered, or trapped in a yearbook photo. The best 1960s style hairstyles for older women use one smart idea — lift at the crown, clean lines around the face, and ends that either flip or tuck with purpose — and then stop before the whole thing turns into a helmet.
That shape matters more than nostalgia. A little height at the top can lift the whole face line, while a neat curve at the ends keeps hair from looking stringy or flat against the neck. If your hair has gotten finer, if your part has widened, if your gray has changed the way light sits on the strand, these old-school shapes can work harder than a trendy cut with no structure at all.
I like the versions that breathe. Not the stiff, shellacked ones that crunch when you touch them. The useful 1960s looks have a soft shell around the outside and a bit of engineering underneath — rollers, teasing, pinning, a side part, maybe a scarf or comb if you want it. The styling is visible, but it doesn’t need to shout.
Why These Retro Shapes Still Feel Right
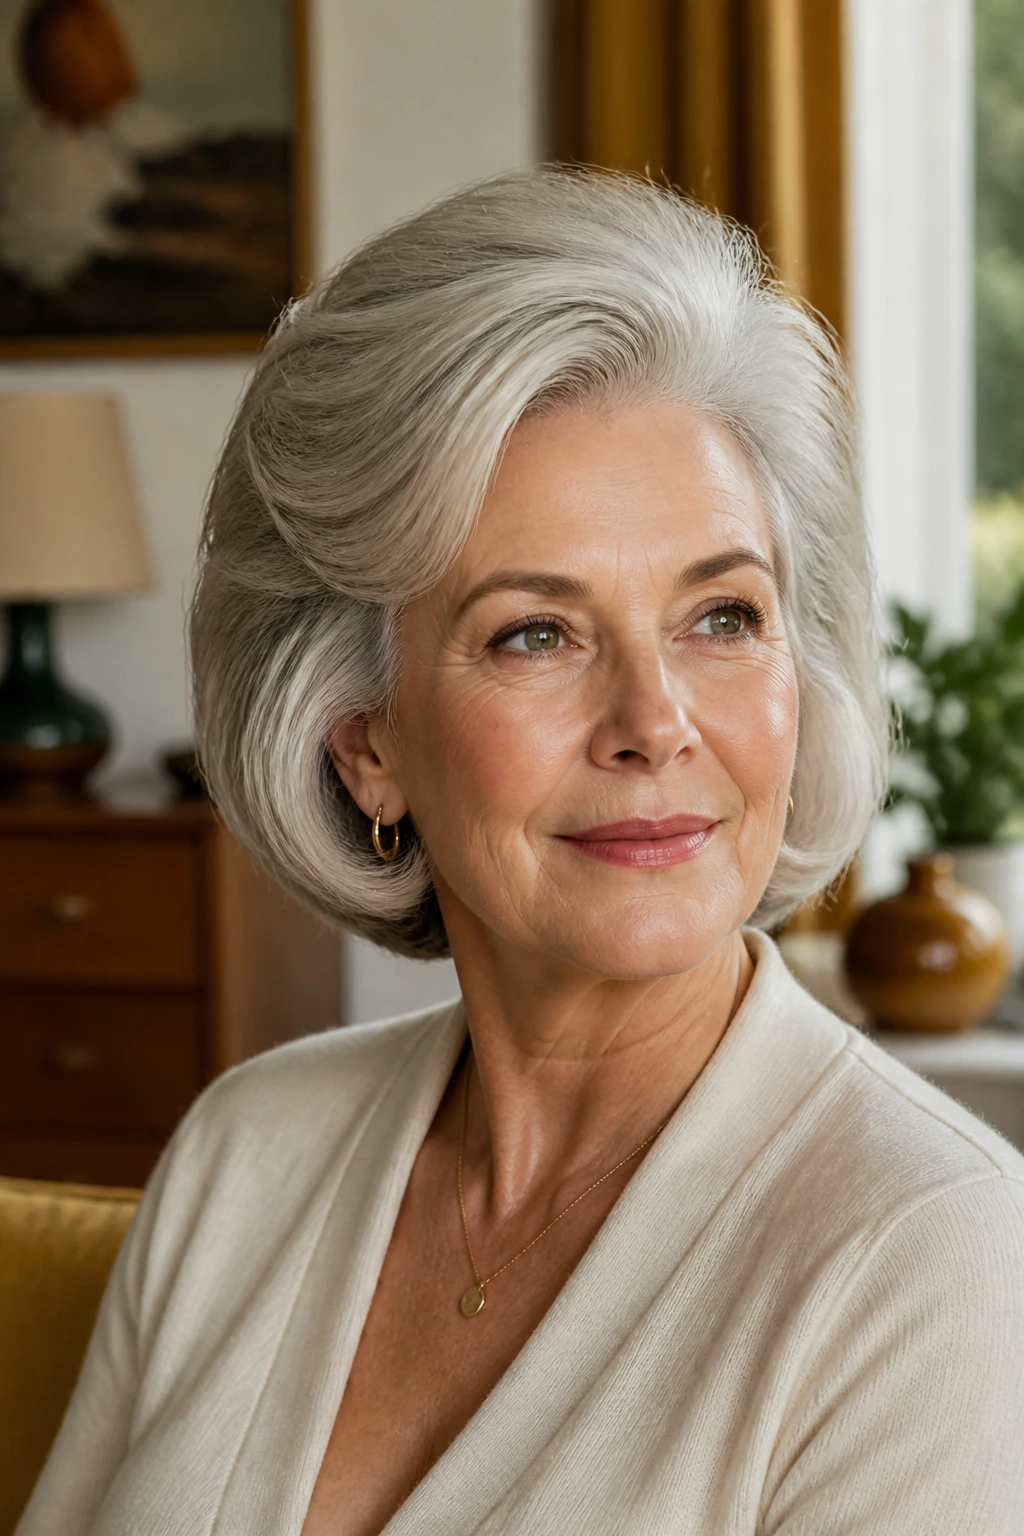
- The crown lift changes the silhouette fast: A touch of height at the top pulls the eye upward and gives the face a longer, neater line without needing extra length.
- Clean ends make thinning hair look tidier: Rolled-under bobs, soft flips, and tucked sides keep wispy ends from hanging in a sad little line.
- Gray hair shows the shape better: Silver and white strands catch the light on curves and pin curls, which makes the outline easier to see from across a room.
- Fine hair gets help from structure: A root-lift spray, a 1-inch roller, and a light backcomb at the crown can create shape that blow-drying alone usually misses.
- These looks travel well across occasions: A soft bouffant can look right with a cardigan or a satin dress, which is more useful than styles that only make sense under stage lights.
- Accessories fit naturally here: A narrow headband, a silk scarf, or one good comb pin can finish the look without making it fussy.
1. Soft Bouffant With a Deep Side Part
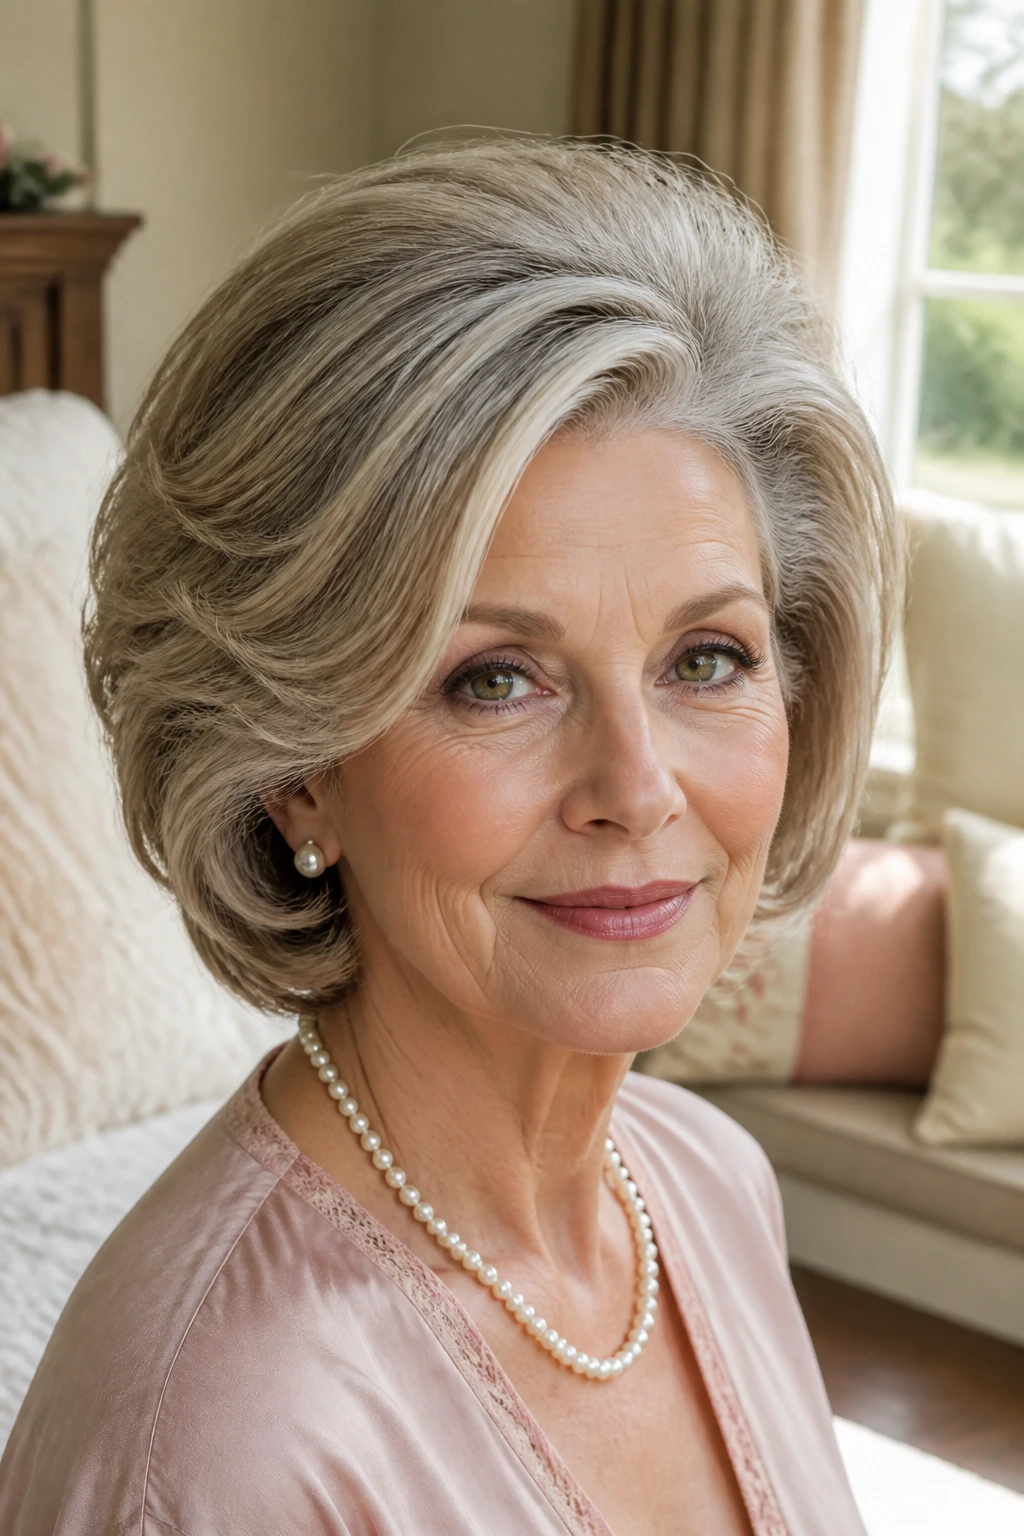
The soft bouffant is the style that keeps the whole set from feeling like costume hair. A modest crown lift, a deep side part, and smooth sides give the face a cleaner frame while still keeping the 1960s shape obvious.
Why it flatters mature hair
The deep side part does a lot of quiet work. It helps hide widening at the part line, and it lets the front sweep fall in a way that feels soft rather than severe. I prefer this version over a huge teased mound, because it keeps the structure where it belongs — just above the crown, not at the ceiling.
A small round brush, root-lift mousse, and a few minutes of backcombing at the crown are enough. Finish with a brush over the surface so the tease stays underneath. That’s the trick. You want the volume to read as shape, not as a nest.
- Use 1 to 2-inch sections when setting the top for better control.
- Tease only the crown and the upper back area.
- Smooth the outer layer with a boar-bristle brush.
- Keep the side sweep low and polished near the temple.
Best detail: If the bouffant starts looking puffy instead of lifted, brush the sides down first and only then adjust the height.
2. Chin-Length Flip Bob
A chin-length flip bob is the fastest way to say “1960s” without needing a lot of product or a complicated pin set. The ends curl outward just enough to catch the eye, while the body stays neat and controlled around the jaw.
This cut loves movement. A 1-inch curling iron or a round brush and a hot dryer can give the ends a clean outward bend, and that bend is what keeps the whole shape from feeling flat. If your jawline is one of the places you like to define, this cut does the work for you.
It also plays well with glasses. The curved end keeps the line below the frames, which prevents the haircut from competing with your face. Keep the top smooth, then let the flip happen only at the bottom inch or so. Too much curl and it starts reading as 1980s; too little and it loses the point.
My preference: leave the flip softer in back and a little sharper near the front. That small imbalance feels more natural than making every strand bend the same way.
3. Low French Twist With a Smooth Finish
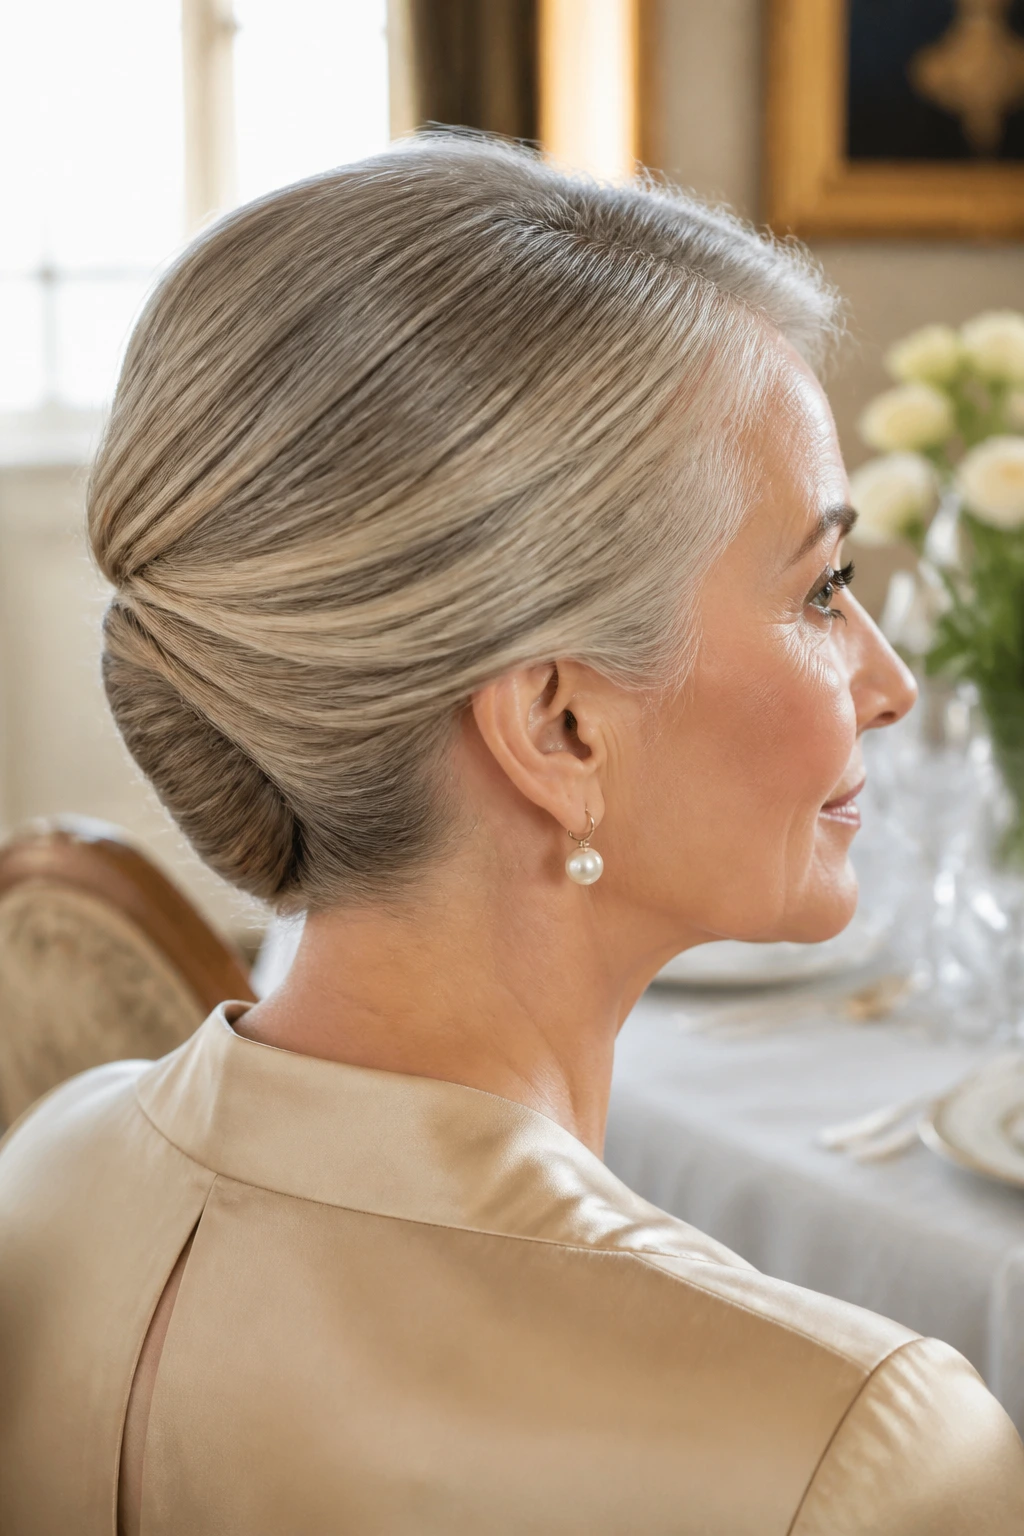
Why does a low French twist still look so good on mature hair? Because it clears the neck, keeps the shape vertical, and avoids the heavy bulk that can sit too low on the head.
The part that matters most
Start with hair that has a little grip. Second-day hair, a light mist of setting lotion, or a touch of dry shampoo at the roots makes pinning easier. Gather the hair low, twist it upward, and tuck the lengths inward so the center seam sits neatly in the back. A French twist looks elegant when the surface is smooth and the pins are hidden; it looks careless when the twist is loose and the ends poke out.
Use a tail comb to keep the front clean. One soft side part and a narrow roll at the temple can make the twist feel less severe. That matters if you wear earrings or if your face reads more angular. The style should frame, not harden.
How to style it
- Smooth the hair with a paddle brush first.
- Pin the twist in small sections instead of trying to force it with two giant pins.
- Leave the top slightly lifted for a 1960s feel.
- Mist lightly at the end; don’t drench it.
The low French twist is the one I reach for when the outfit needs polish and the hair needs to stay out of the way. It does its job without asking for attention.
4. Crown-Teased Half-Up Style
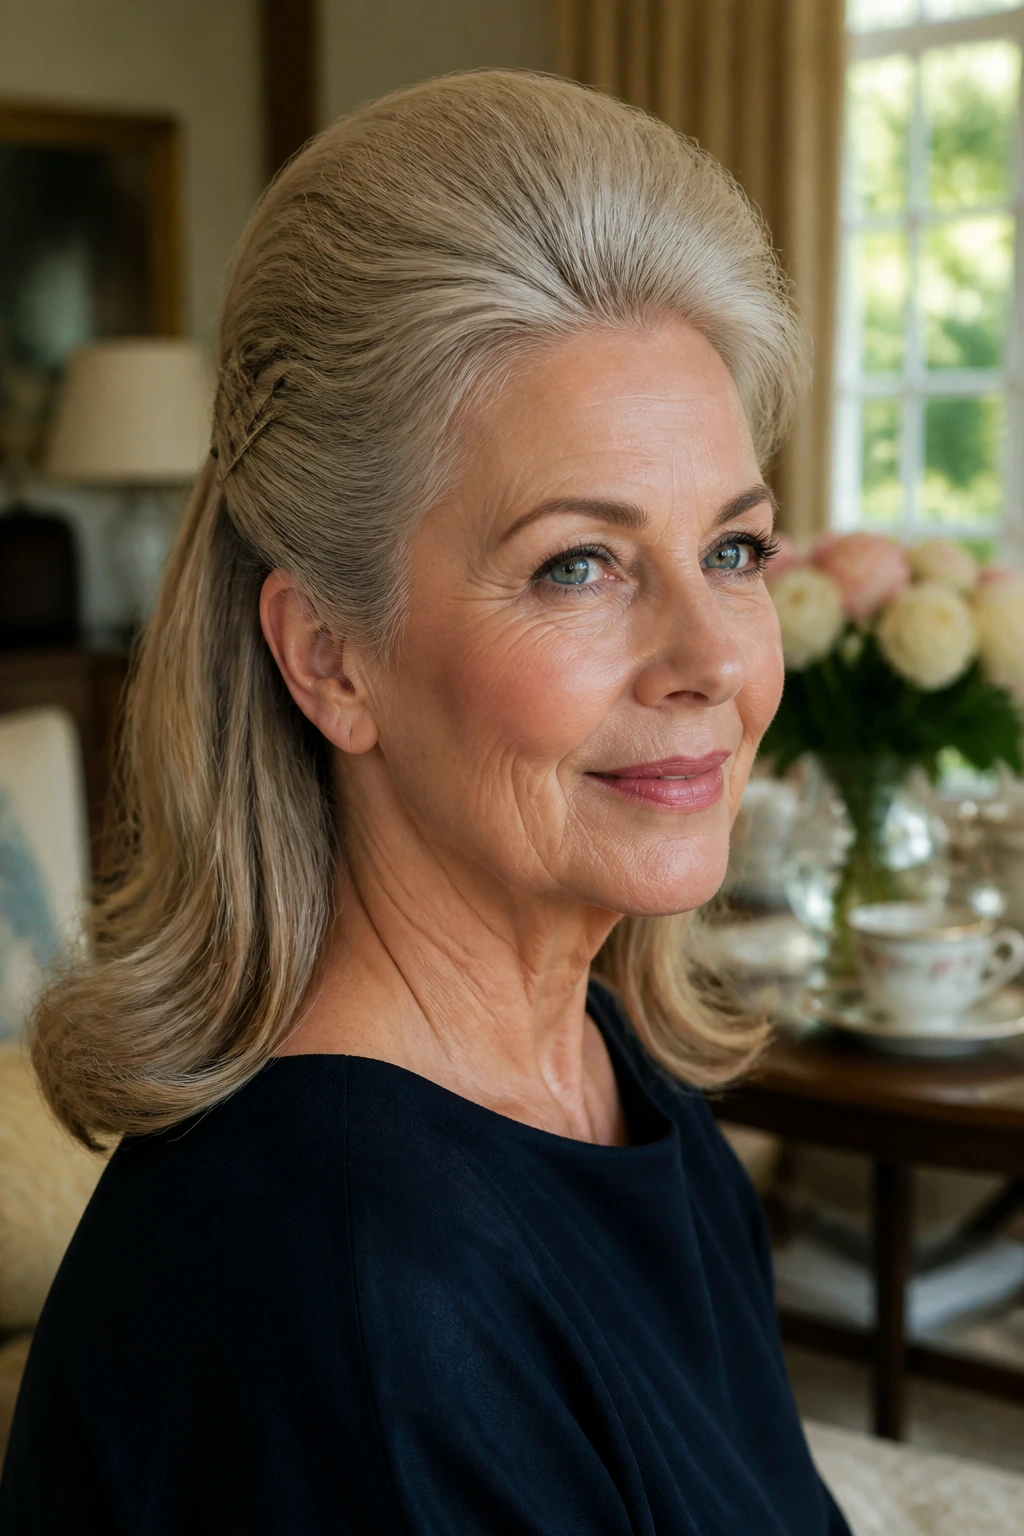
Some days you want the height, but not the full updo. This is where the crown-teased half-up style earns its keep. It gives you the 1960s lift up top and leaves enough length down below to keep the look soft.
The trick is placement. Pull only the top third of the hair back, tease lightly at the crown, and secure the section with two crisscrossed pins or a small barrette. If you grab too much hair, the style loses its floating quality and starts to look heavy. If you grab too little, it collapses by lunch.
I like this for shoulder-length hair that has a bit of body but no interest in staying curled all day. The loose ends can be straightened, softly waved, or flipped under, depending on the rest of the cut. A little height at the top is enough. You do not need a skyscraper.
- Best with hair that reaches the collarbone or just below.
- Works especially well when the top is smooth and the bottom has movement.
- Add a narrow headband for a sharper 1960s line.
- Keep the back section loose enough to swing.
5. Classic Pageboy Curve
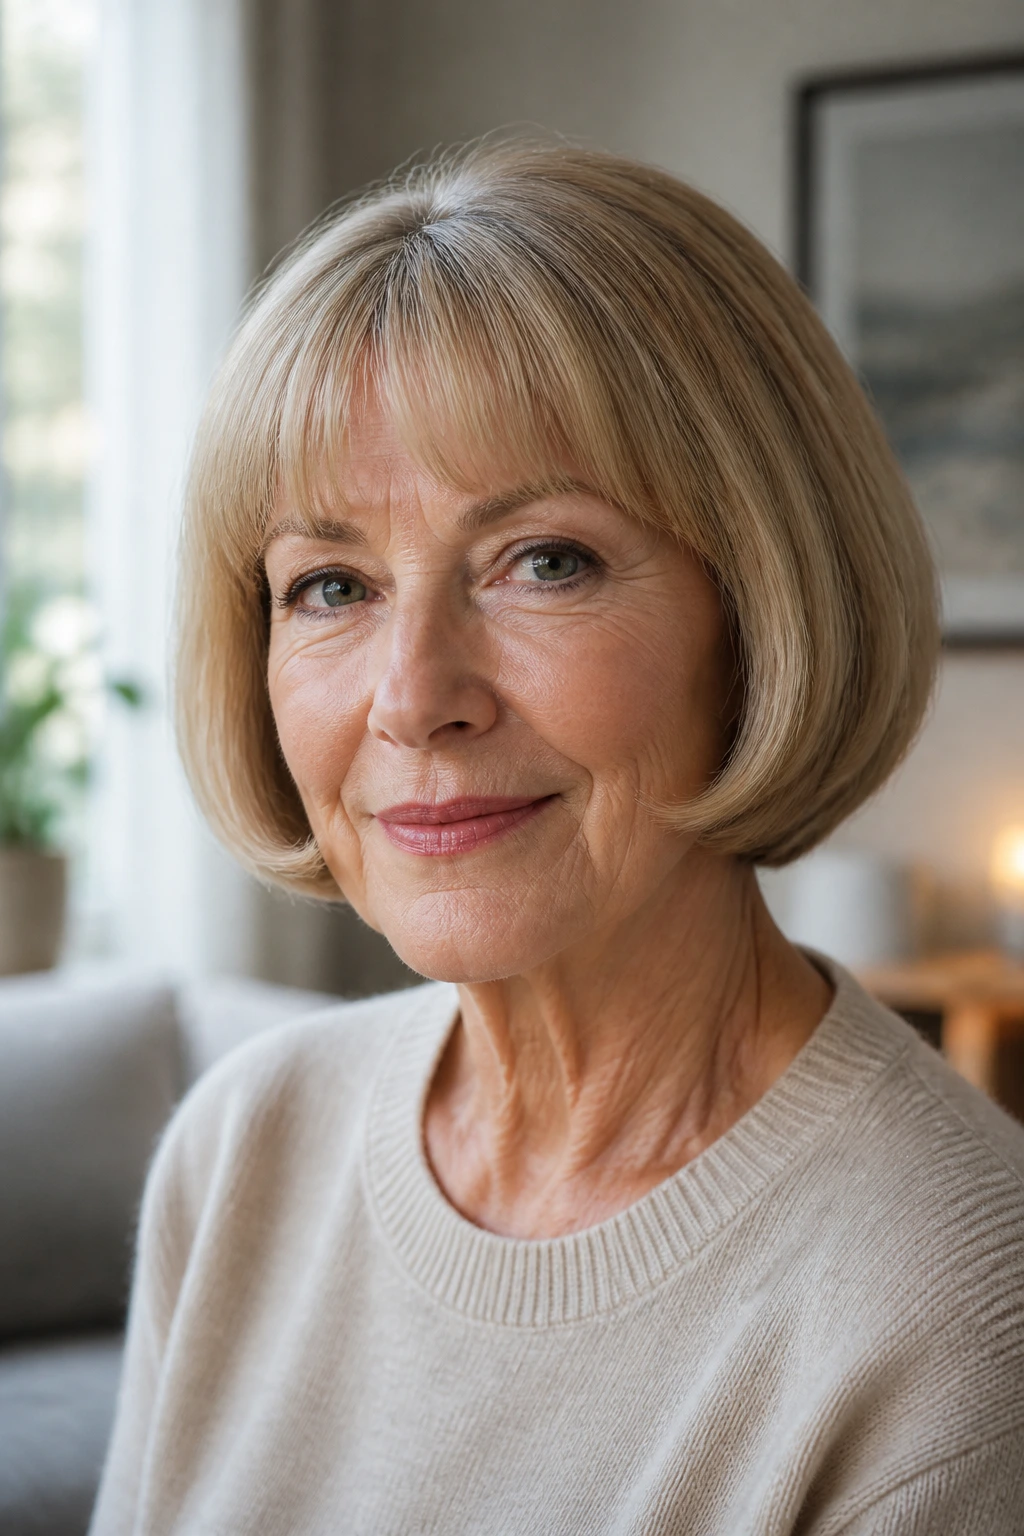
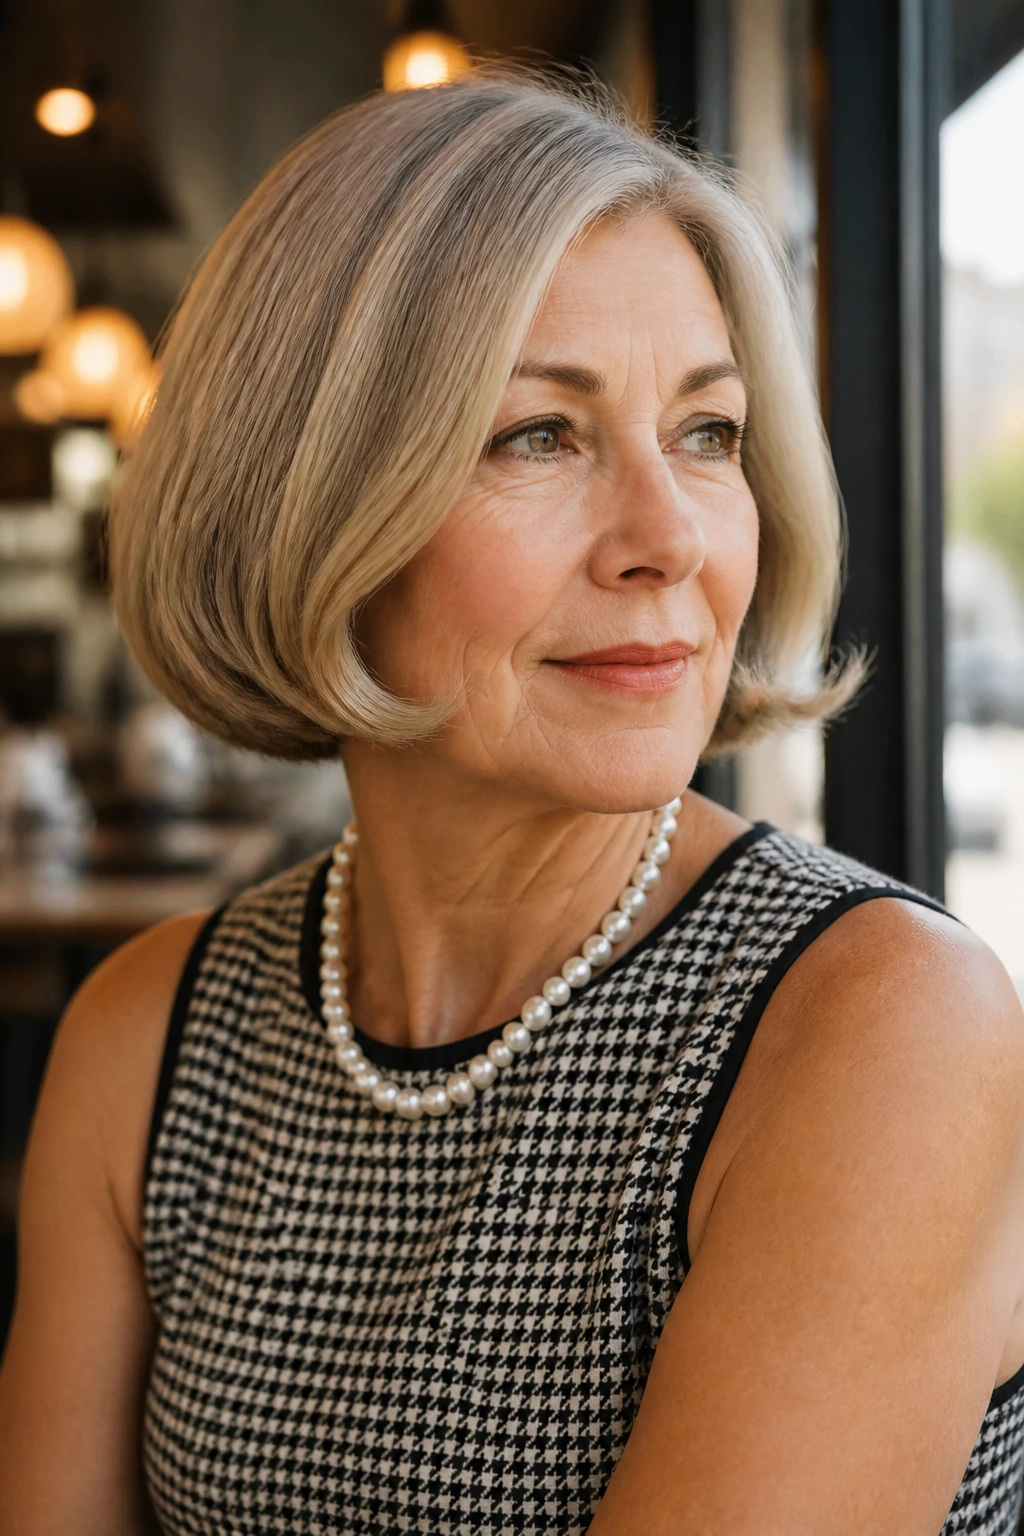
The pageboy gets dismissed too fast, which is a shame. A clean pageboy curve looks sharp, calm, and expensive in the best old-fashioned sense — the hair bends under in one smooth sweep and the line stays near the jaw.
This is a gift for straight hair and for anyone who likes order. The style avoids the frizz halo that can happen when hair gets finer with age, because the ends are gathered into shape instead of left to wander. If the cut is good, the pageboy can do half the styling work before you even pick up a brush.
A round brush and a dryer are enough, but I like setting the ends with large Velcro rollers for 10 to 15 minutes if the hair tends to fight back. That extra hold keeps the under-curve from collapsing the second you step outside. Keep the fringe soft, if you wear one. Blunt bangs can make the look feel harder than it needs to be.
This style is precise. That’s the point.
6. Pin-Curl Set With Brush-Out Shine
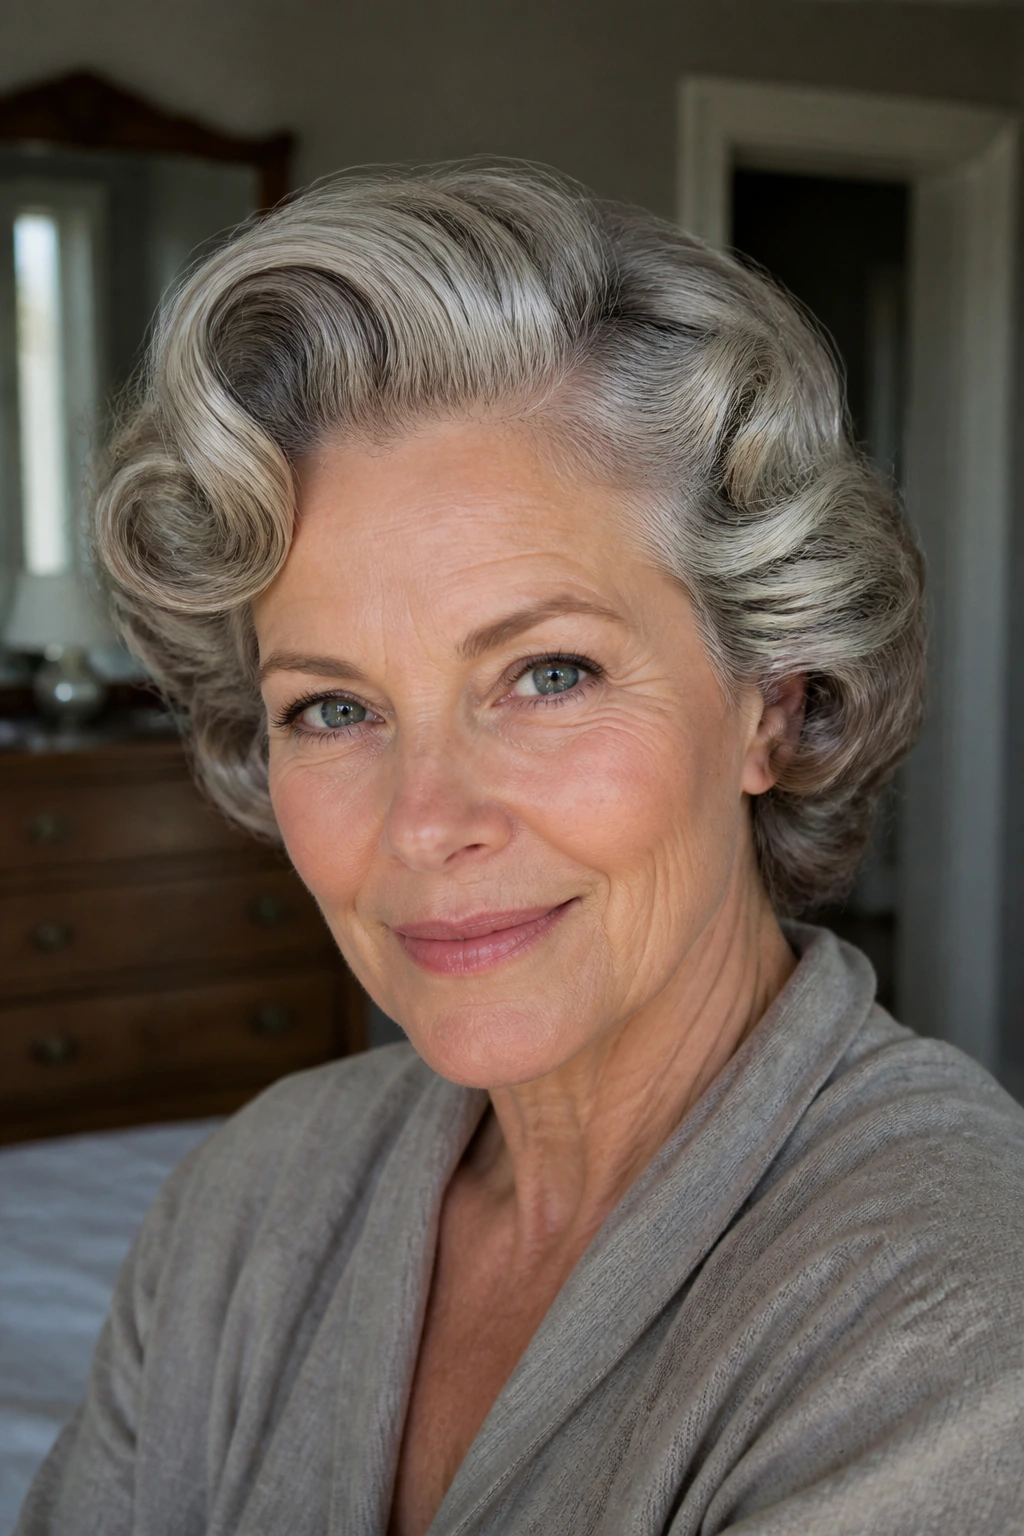
Pin curls still earn their place because they create shape from the inside out. A curling iron gives you a curl; a pin-curl set gives you a hair pattern that can be brushed into waves, bends, or a full soft set.
Why it outperforms a quick iron curl
A pin-curl set stays more flexible. You can brush it into loose, glossy movement, or keep it tighter if you want a dressier finish. Gray hair often takes this style well because the bends show clearly and the shine comes from the brush-out, not from a heavy serum.
Set the curls while the hair is damp, not wet. Use a setting lotion or foam and clip each curl flat against the scalp. When the hair is dry, let it cool completely before brushing. That cooling time is not optional. It’s what makes the set hold its shape instead of sagging into a fuzzy wave.
How to wear it
- Brush out gently with a soft-bristle brush.
- Push the front into a side sweep or a slight wave at the temple.
- Leave the ends rounded, not puffy.
- Finish with a light spray, not a wet coat.
Pin curls take more patience than a hot iron. They also pay you back with a better silhouette.
7. Cropped Cap With Lift at the Front
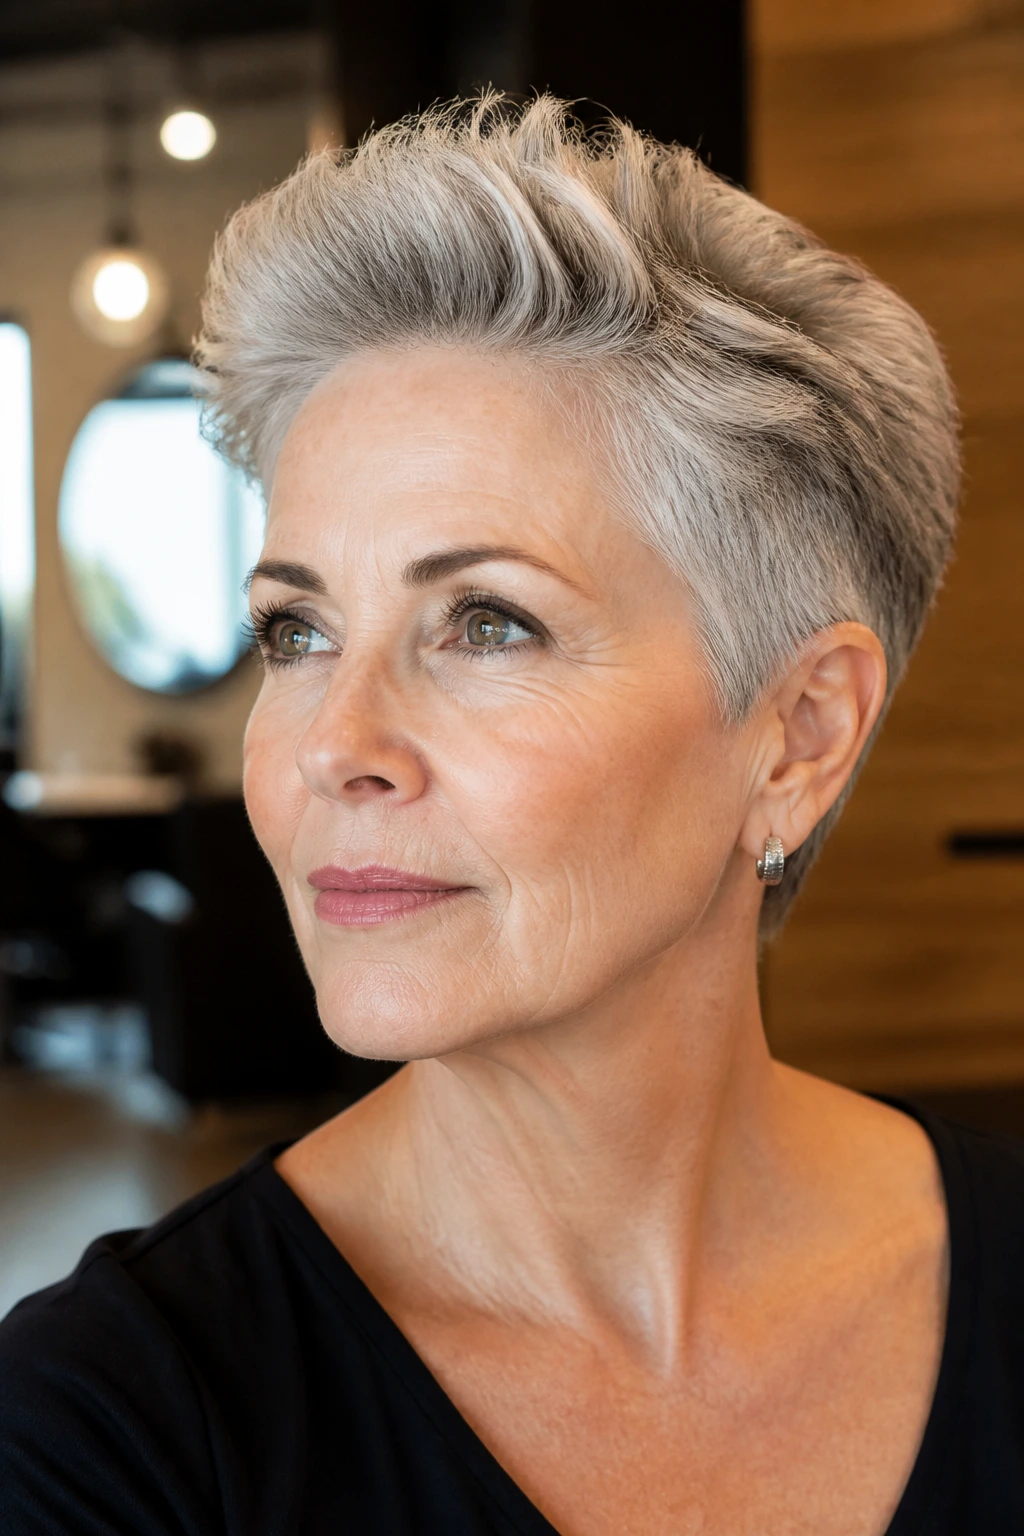
Short hair does not need to sit flat just because the cut is short. A cropped cap with lift at the front borrows the neatness of a 1960s shape and trims away the fuss.
The lift belongs in the front third of the hair, not all over the head. That keeps the style from turning into a round puffball. Use mousse at the roots, blow-dry with a small brush, and direct the front upward and slightly back. The sides should stay tidy and close to the head.
This one is smart for women with fine hair that loses shape quickly. The cropped length keeps the ends honest, and the front lift gives enough style to feel intentional. I also like it with silver hair because the shape becomes the decoration. You do not need a lot else.
- Best when the cut is tapered at the nape.
- Use a pea-sized amount of styling cream on the ends only.
- Keep the crown lift soft, not stiff.
- Pair it with a side part if your face needs a little length.
8. Silk-Scarf Chignon
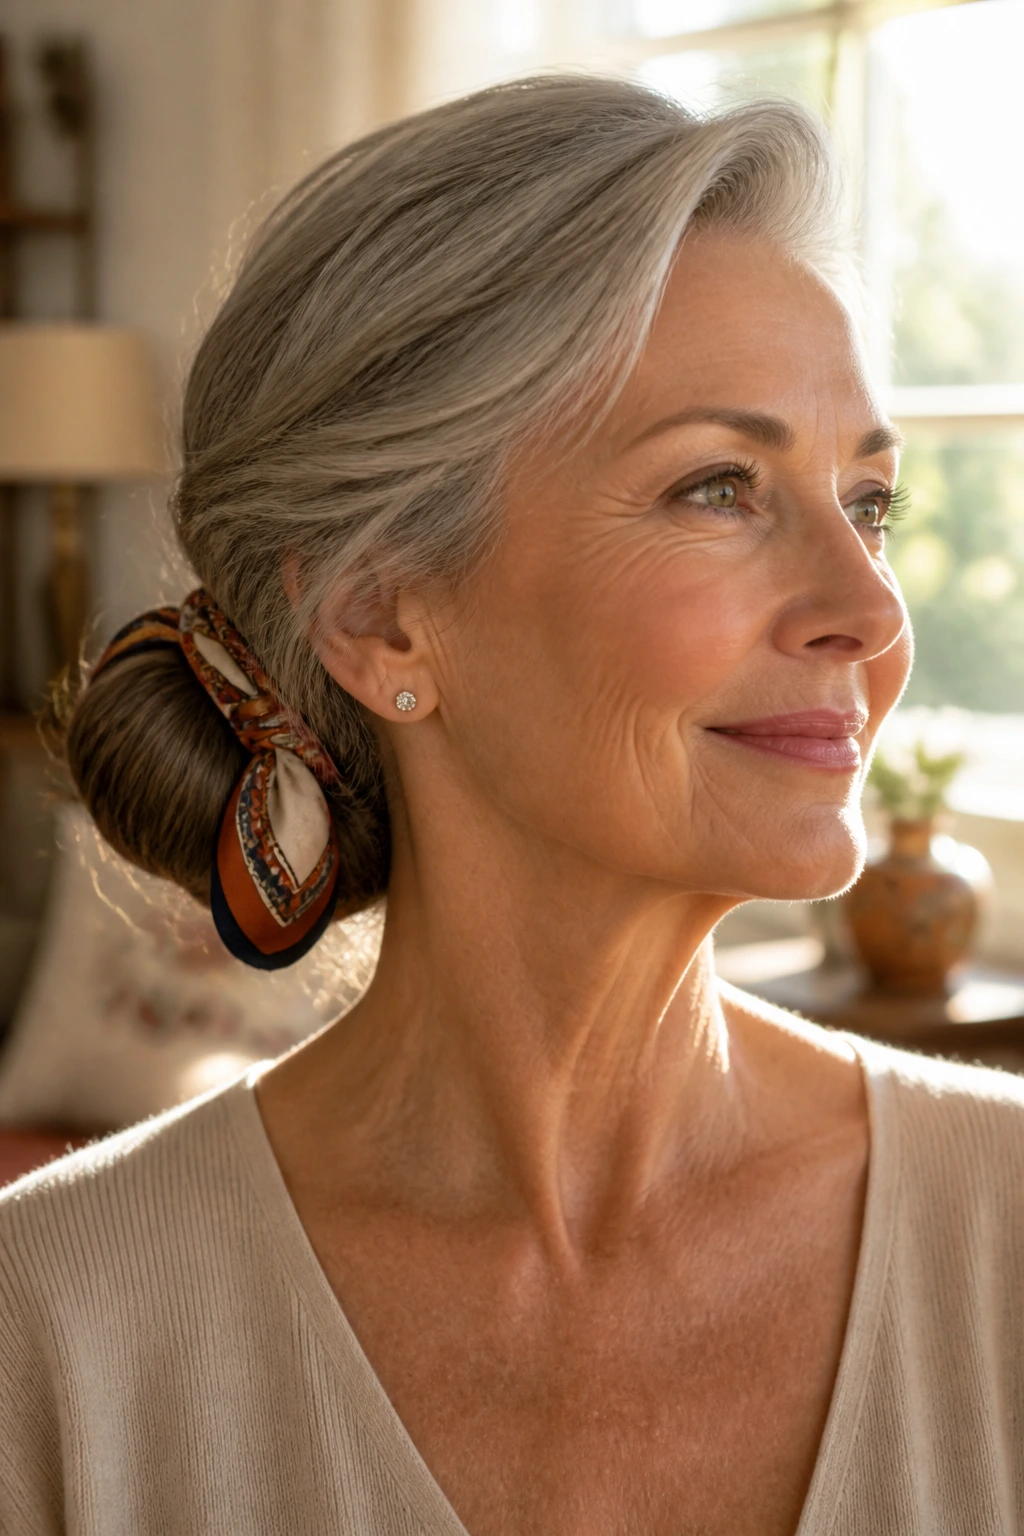
A silk scarf changes the mood of a chignon instantly. Without it, you get a neat low bun. With it, the whole thing picks up a little 1960s cheer and looks like it belongs near a convertible, a cardigan, and a lipstick tube in a handbag.
Do the bun first. Keep it low and smooth, then wrap a narrow scarf around the base or tie it just above the bun with the ends tucked to one side. I like scarves that have enough body to hold a knot but not so much bulk that they sit like a towel. Satin and silk both work. Cotton can look too casual unless the rest of the outfit is very plain.
This style is kind to humid days because it keeps the hair contained. It also works when you don’t want the neck exposed by a severe twist. The scarf gives you color and a little softness around the face.
If you wear earrings, keep them small. The scarf already brings enough attention.
9. Side-Swept Beehive Lite
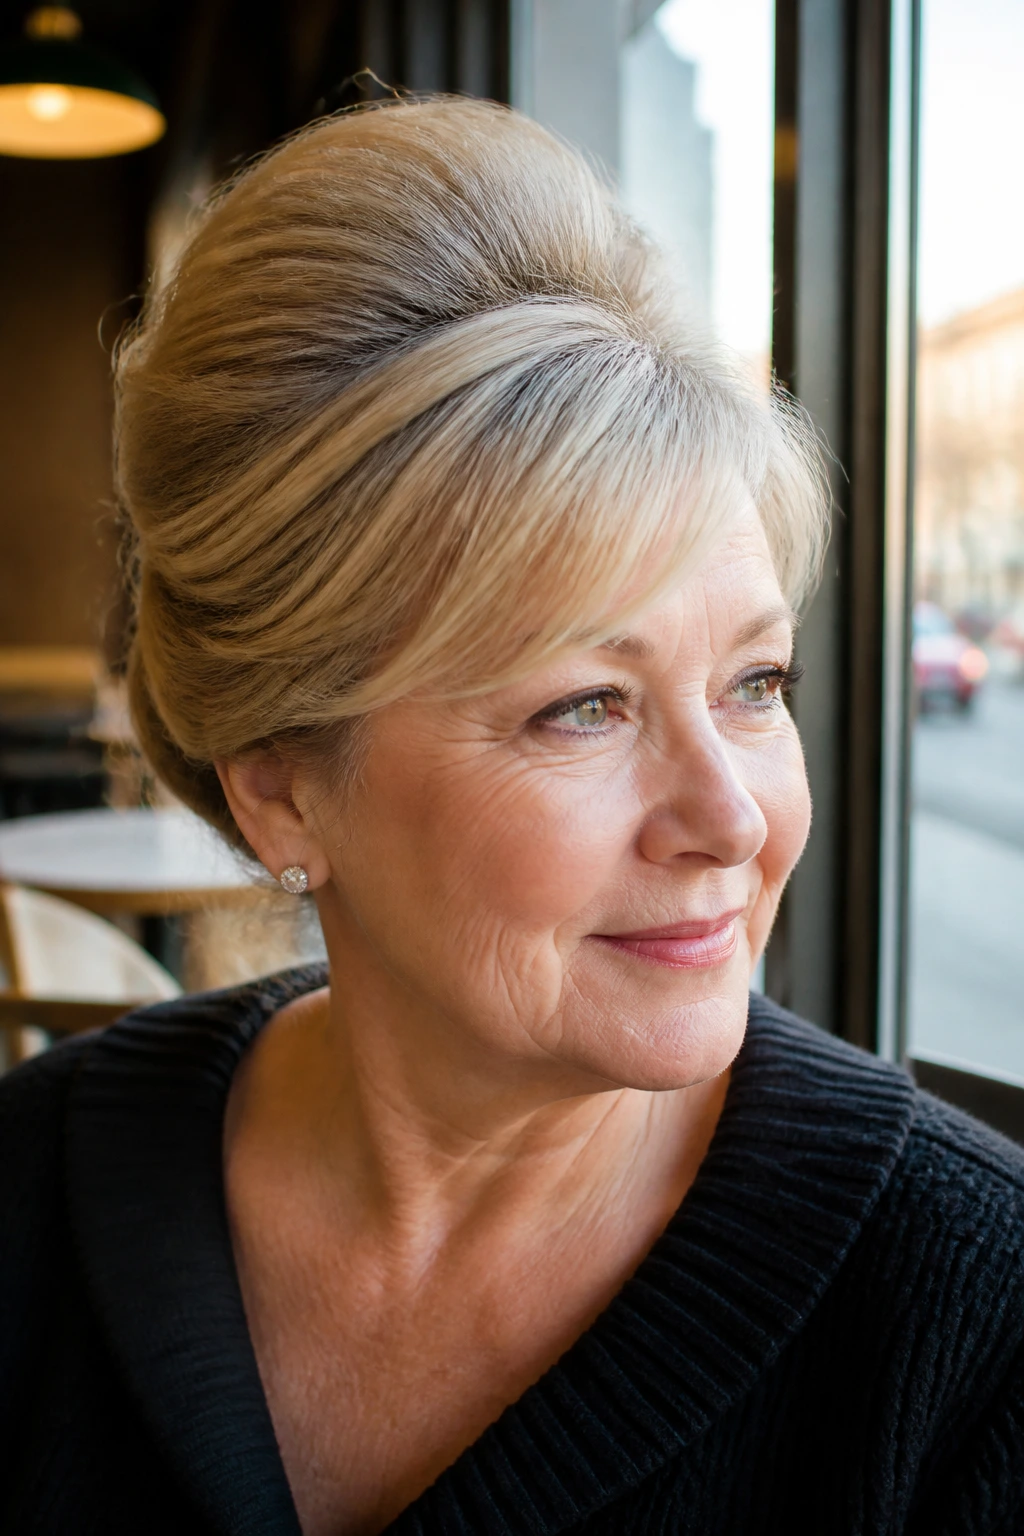
The phrase “beehive” scares people off, which is fair. Nobody needs a hair tower so tall it needs its own weather report. The side-swept beehive lite keeps the spirit — crown lift, neat sides, shape with attitude — and leaves the drama at the door.
Start with a side part. Then tease only the upper crown and smooth the surface over it. Pull the front section diagonally across the forehead so the lift falls to one side instead of sitting dead center. That diagonal line is what makes the style feel more modern and less rigid.
What makes it different
- The height is modest.
- The front sweep softens the forehead.
- The sides stay closer to the head.
- The back can be pinned or left in a low roll.
I like this on hair that is medium in density and slightly coarse, because it can hold the shape without constant rescue. If your hair is fine, keep the tease narrow and use pins at the back to support the lift. A little height goes a long way here. Seriously.
10. Sculpted Shell Roll
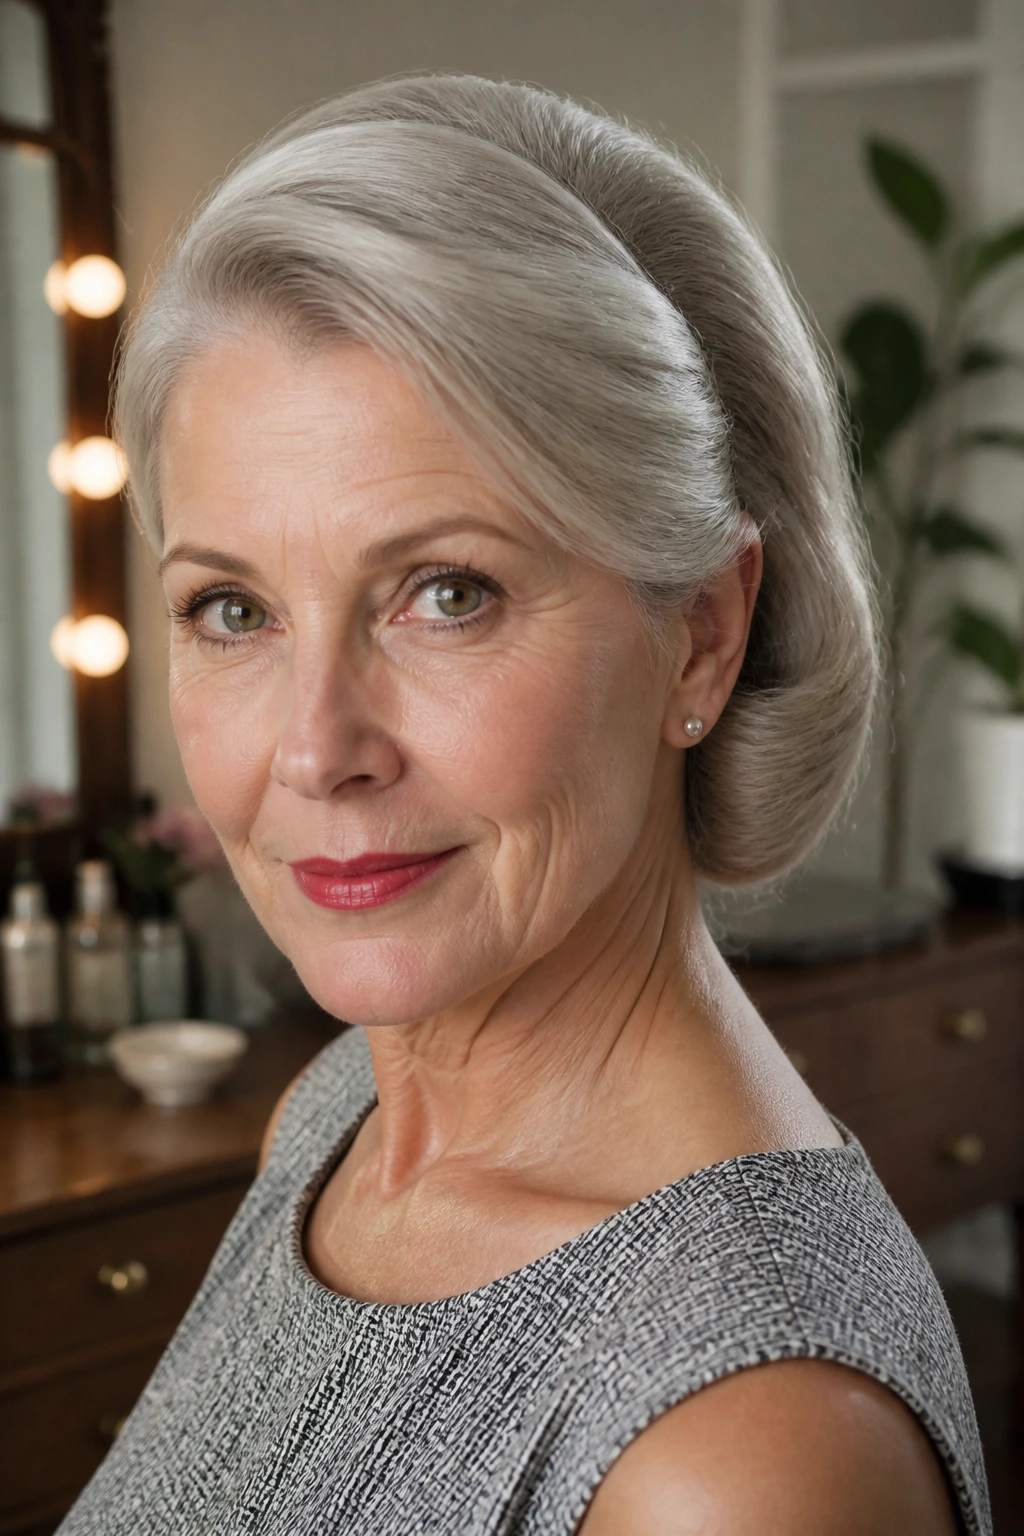
A shell roll sits somewhere between a French twist and a low bun, and that middle ground is exactly why it works. The hair folds inward in a smooth curve, creating a shape that feels polished without looking overworked.
The surface should be controlled, but not frozen. I prefer a side part and a small amount of height at the crown, then a gentle roll that curves into itself at the back. The style is especially useful for shorter lengths that won’t reach the seam of a traditional twist. With enough pins, even shoulder-length hair can fake a fuller shell.
Use a fine-tooth comb to guide the direction. If the hair is slippery, add a little setting spray before pinning. If it’s dry and coarse, a drop of smoothing cream on the outer layer helps the surface lie flat. The goal is a clean arc. No bumps. No sagging seam.
This is one of those styles that looks calm in photos and in motion. That’s not a small thing.
11. Tucked-Under Bob With Soft Fringe
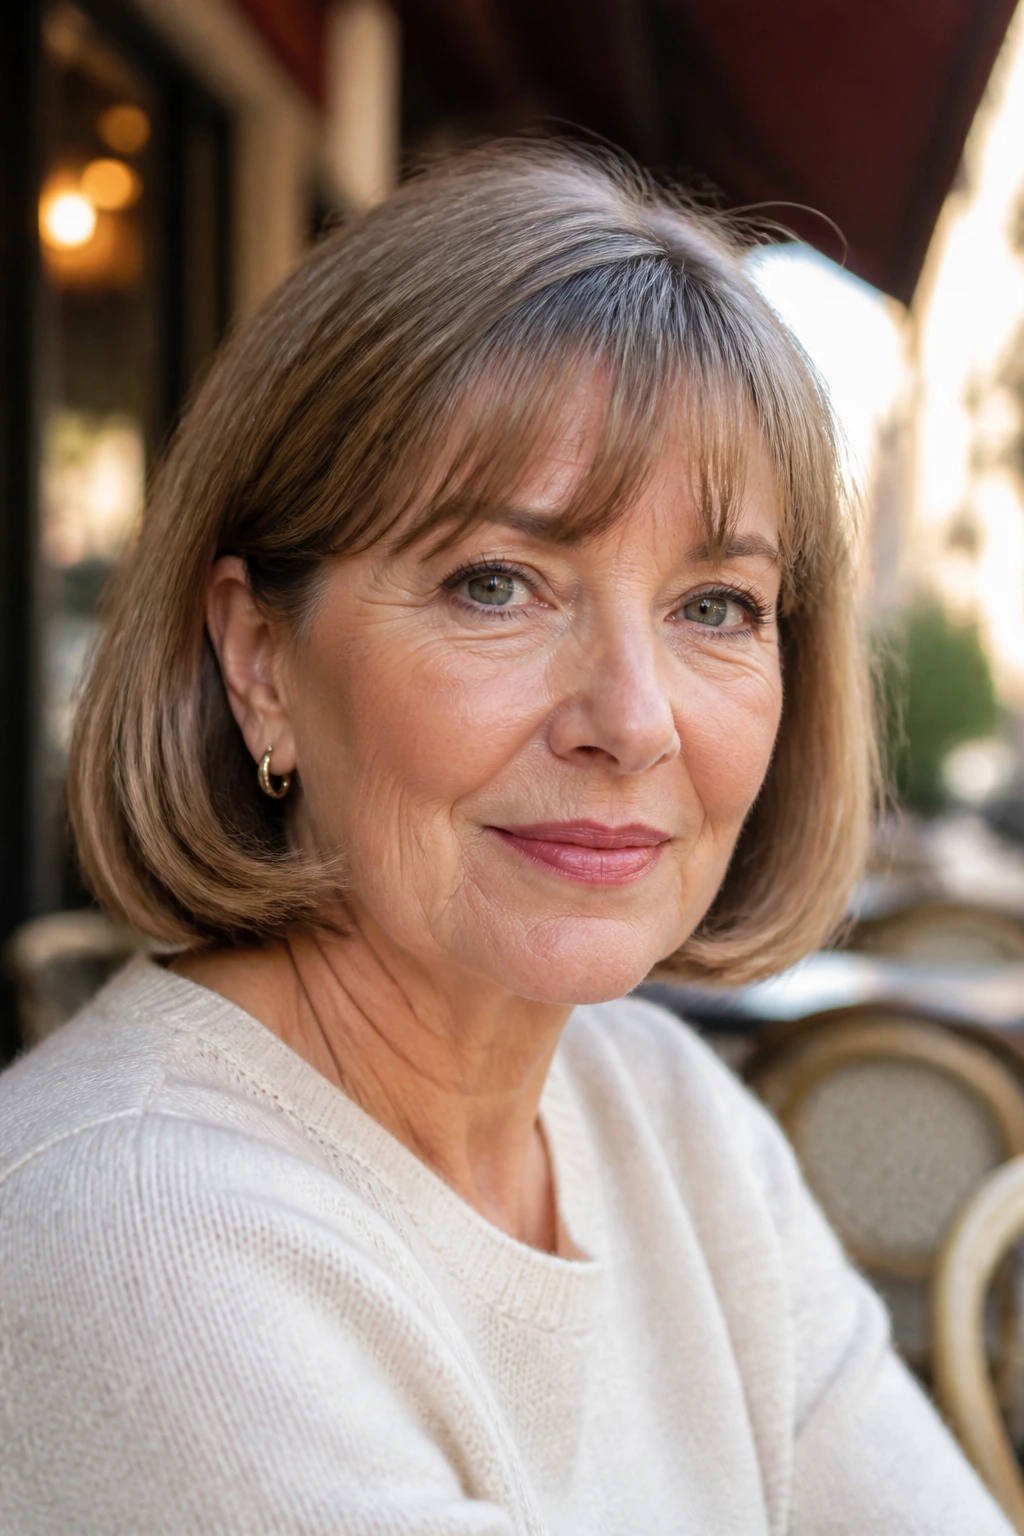
The tucked-under bob is the workhorse of the group. It’s practical, neat, and easy to live with, but it still carries a 1960s line because the ends curve inward instead of hanging blunt and flat.
Soft fringe changes the mood. A little fringe can hide forehead lines, break up a strong part, and make the whole cut feel less severe. I prefer a fringe that brushes the brows or stops just above them. Too short and the style turns fussy. Too long and it disappears.
This look belongs to women who want something that can survive errands, lunch, and dinner without a complete reset. A round brush, a medium-hold spray, and a five-minute pass with a flat brush are enough to keep the curve clean. If you have gray hair, the tucked-under shape shows off the sheen on the bend.
It’s not flashy. That’s exactly why it lasts.
12. Side-Swept Glam Waves
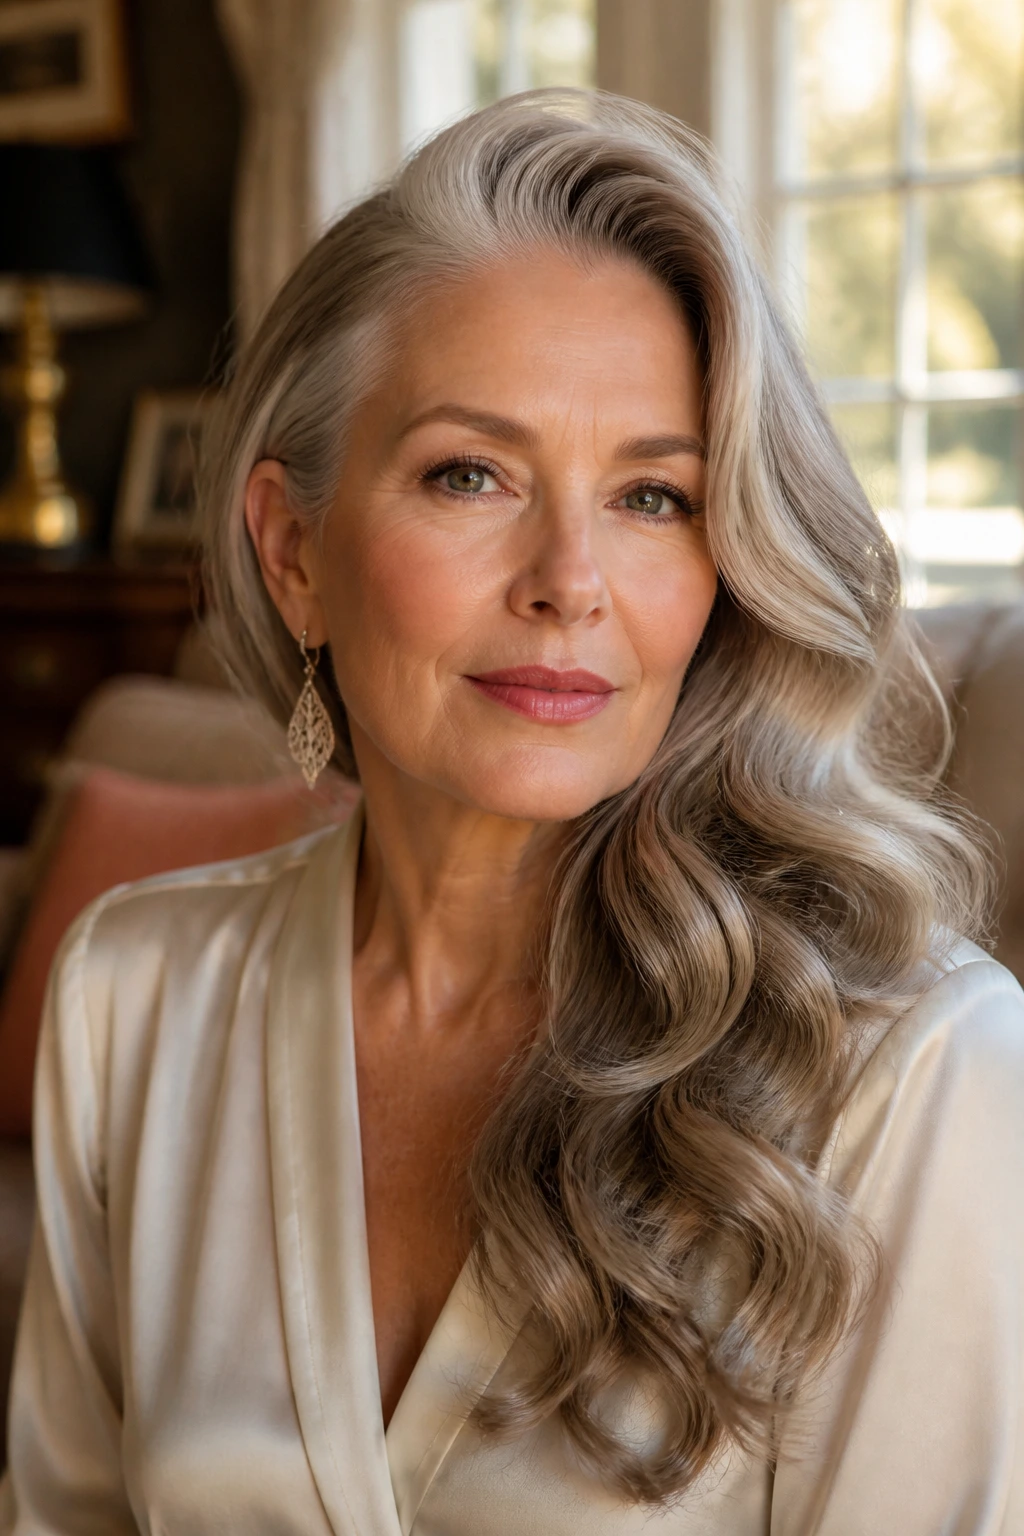
Longer hair can still wear a 1960s shape without getting swallowed by it. Side-swept glam waves let you keep length while borrowing the curve and volume that make the decade recognizable.
The side part is doing real work here. It gives the front a lifted slope, and it keeps the wave pattern from splitting the face down the middle. Set the hair in large sections with a 1.5-inch iron or big rollers, then brush the waves into one soft direction. You want a ripple, not a tight curl pattern.
How to keep it from looking dated
- Leave the root area smooth.
- Brush the waves only after they’ve cooled.
- Keep the ends polished, not frizzy.
- Add a side sweep over one eye if the hair is long enough.
This is the one I’d pick for an evening event if the goal is retro without cosplay. It has a little drama, but the movement stays soft.
13. Roll-Back Twist
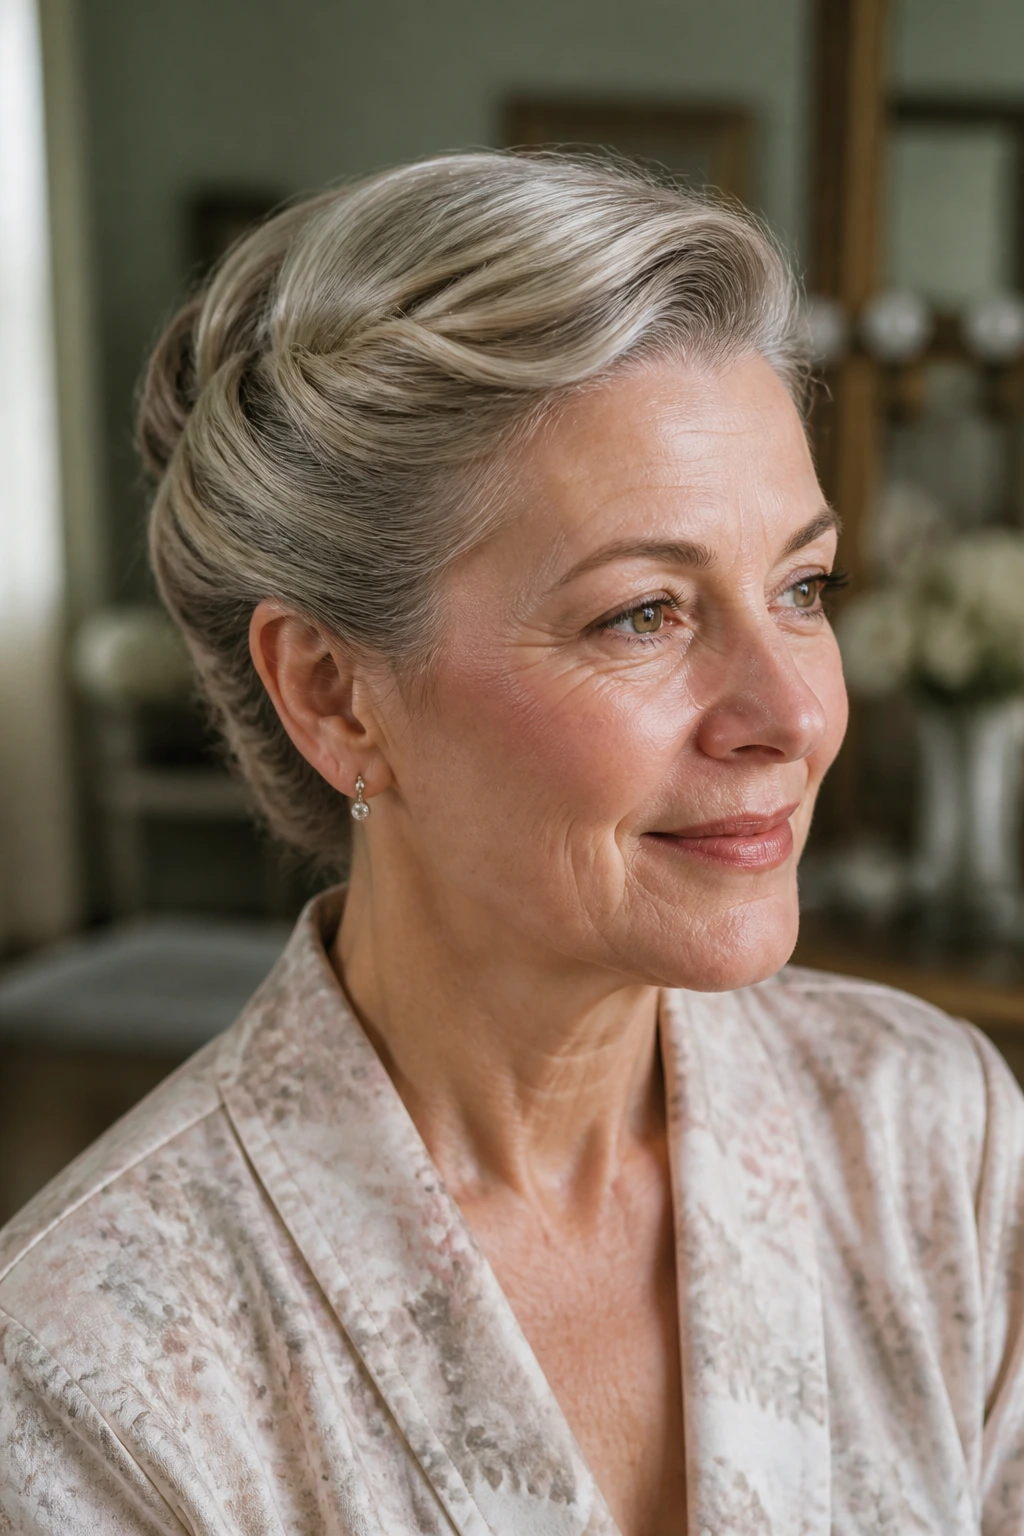
Why do rolled-back twists keep showing up in vintage hair sets? Because they solve a basic problem: how to control the front without making the whole head look pinned down.
The hair at the temples rolls backward and tucks into the rest of the style. That can be a half-up look, a full updo, or a low twist depending on length. The shape gives the face room and keeps the front from drooping into the eyes. A soft side part helps, but the main line is the backward roll.
Use small sections and pin each one as you go. One giant twist rarely holds as well as three small ones that meet in the back. If your hair is fine, mist the roots first so the roll has grip. If it’s thick, clip the rolled section for a few minutes before pinning the next one.
It’s a quiet style. It still reads as dressed up.
14. Retro Ponytail With Crown Height
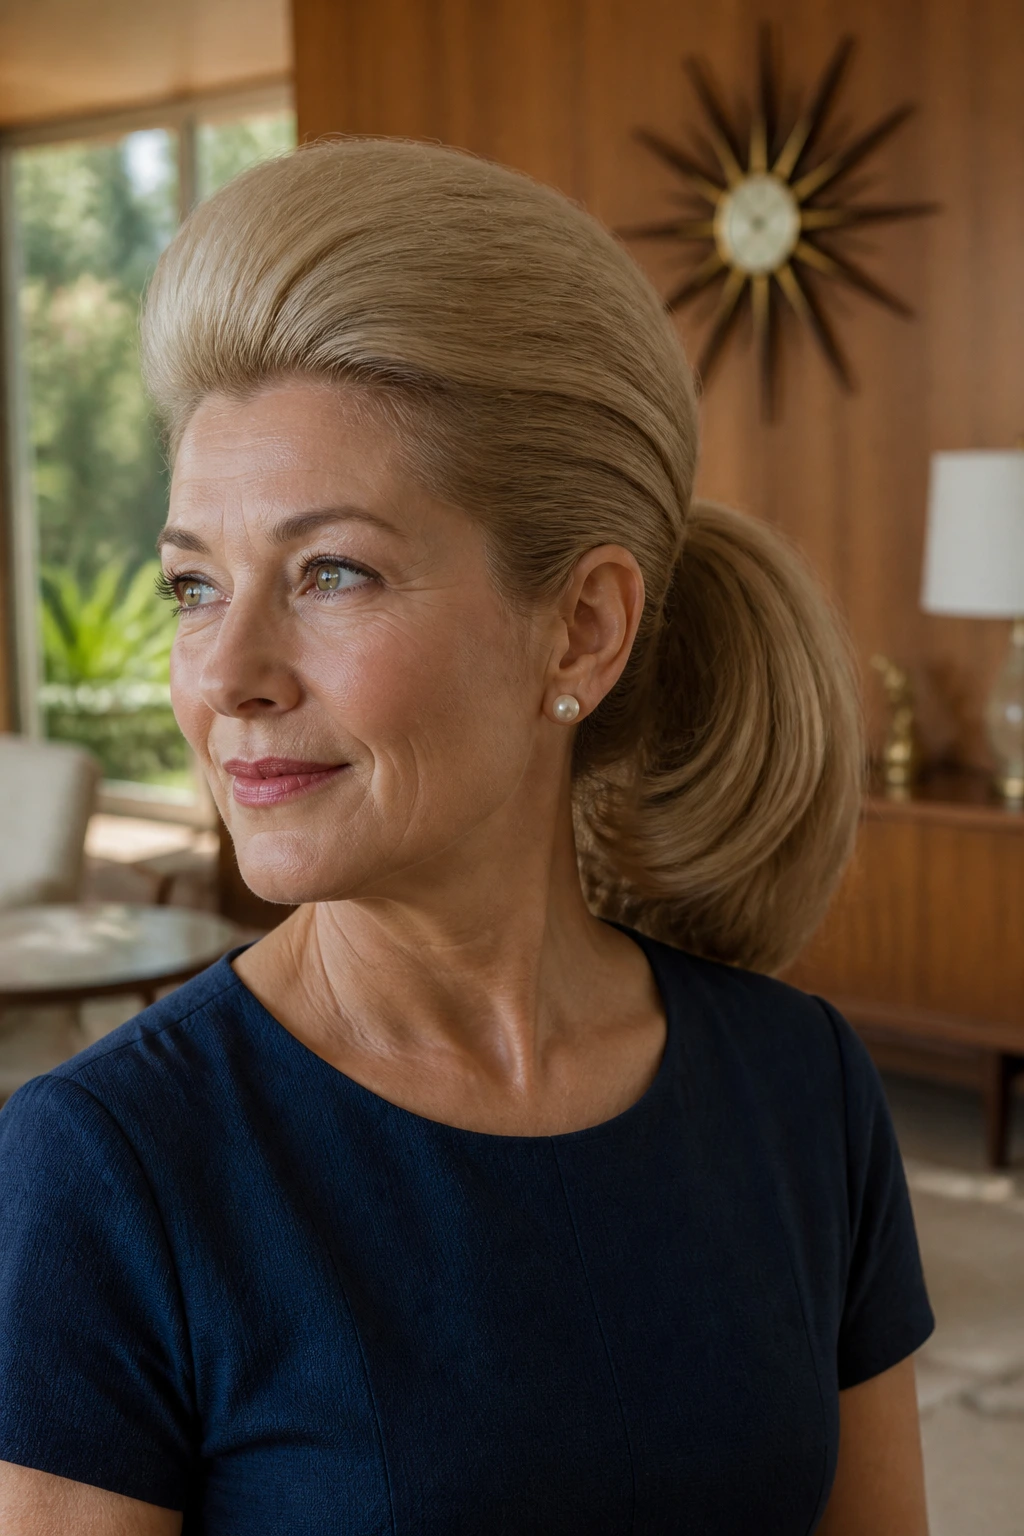
A ponytail can absolutely live in this collection. It just needs crown lift and a cleaner finish than the gym version people default to.
Tease the crown lightly, smooth the top layer, and gather the ponytail low or mid-height depending on your neck and outfit. Wrap a small strand around the elastic so the base looks finished. If the hair is shoulder-length or longer, curl the ends slightly inward or outward, but keep the body controlled. That’s the part that makes it feel 1960s instead of purely casual.
I like this style for days when you want movement without having to commit to a full set or an updo. It keeps the face open, and the crown lift prevents the profile from going flat. If you wear bangs or a side fringe, this style can be especially flattering because it gives the front something to do.
One clean ponytail. That’s enough.
15. Feathered Shoulder-Length Flip
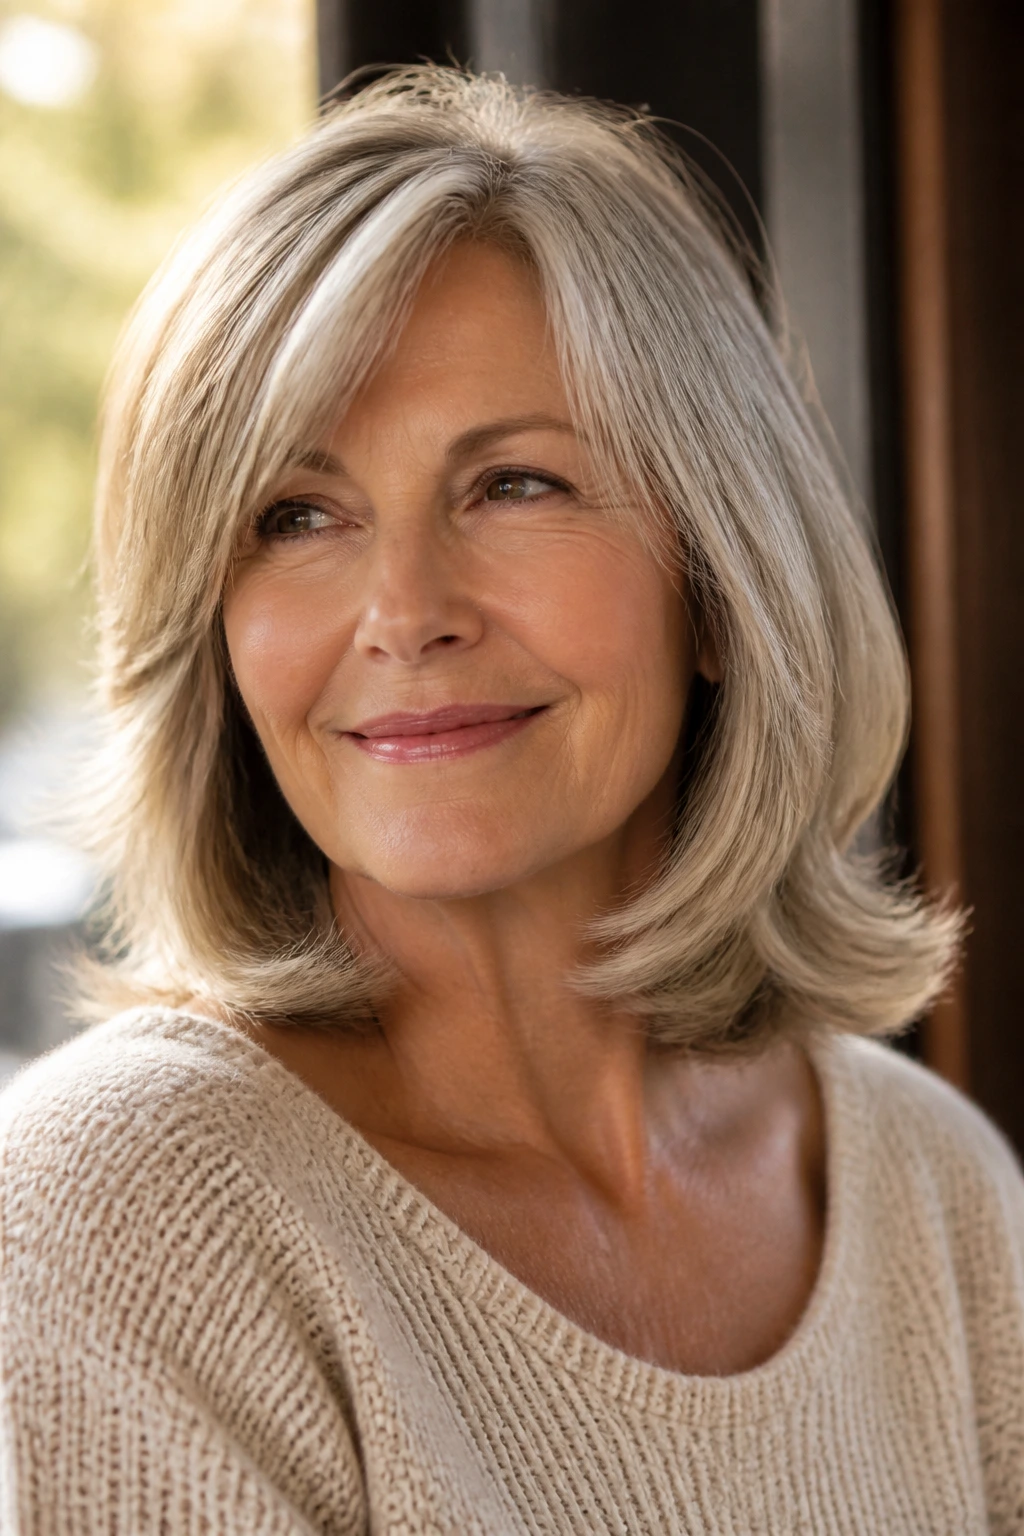
Shoulder-length hair with a feathered flip can feel airy without drifting into a later decade. The trick is in the ends: soft outward movement, not shaggy layers all over the place.
Blow-dry the roots smooth, then angle the ends with a round brush or a medium barrel iron. Keep the flip light. If every section bends out hard, the style looks busy. Feathering should suggest movement, not announce it from down the block.
This cut is useful for women who want volume but don’t want teasing. It sits comfortably with cardigan collars, boat necks, and simple earrings. The shoulder length also gives the hair enough weight to hold shape, which makes maintenance easier than on very short cuts.
I’d choose this if you like a little swing when you turn your head. It has that.
16. Elegant Low Bun With Rolled Sides
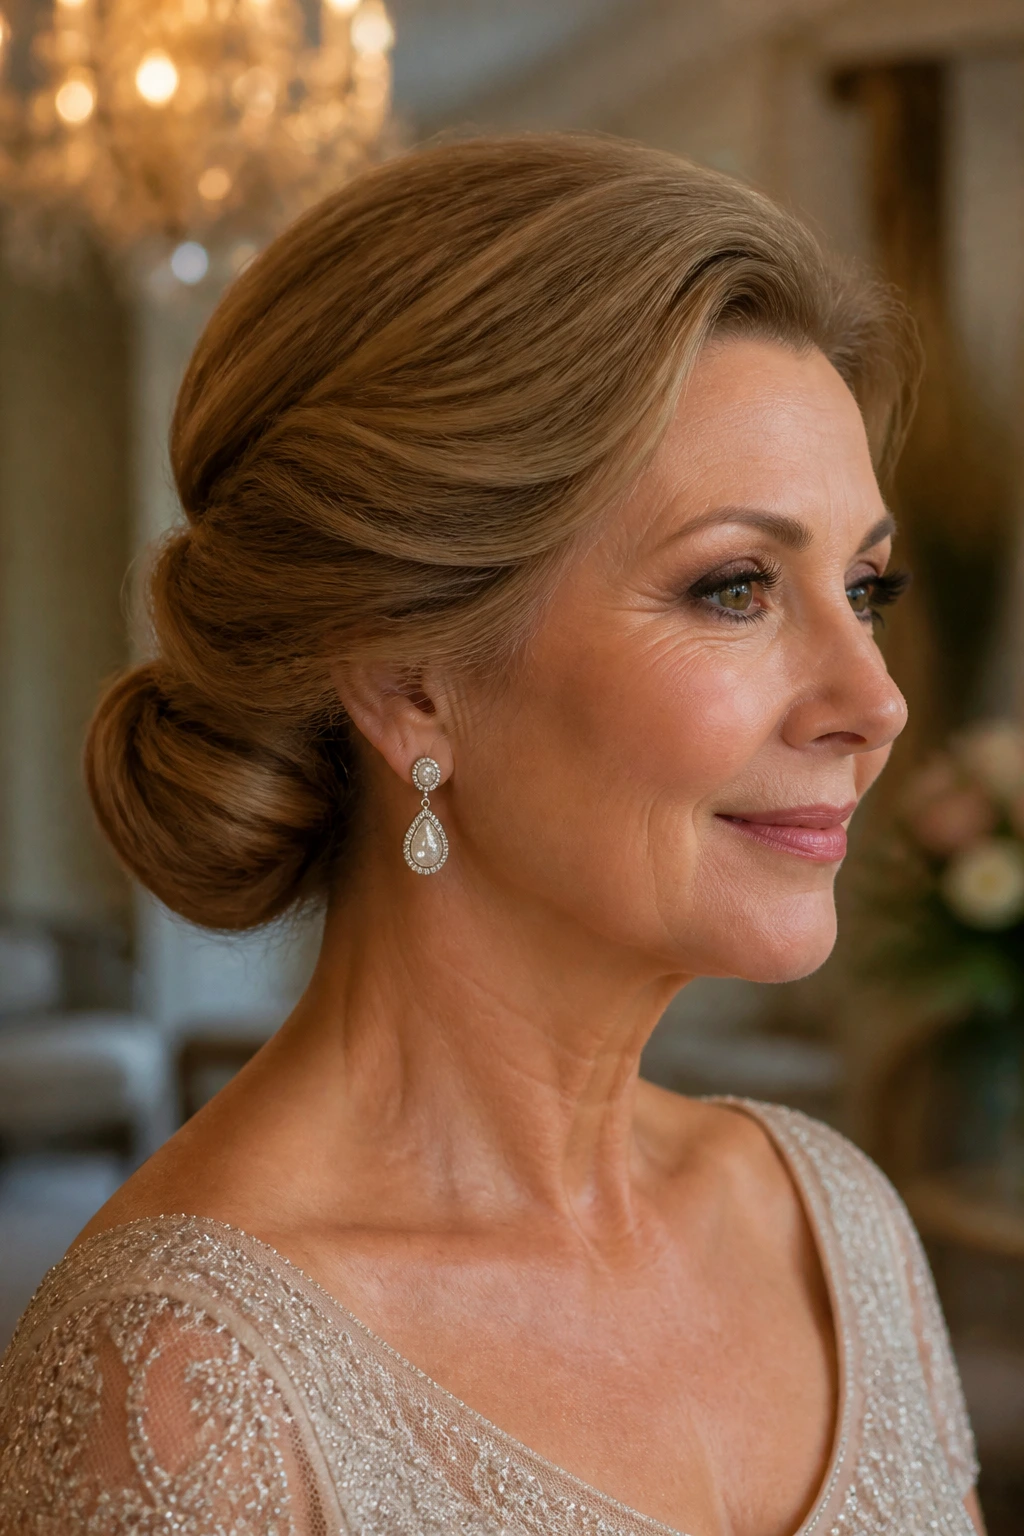
A low bun can look plain. Rolled sides fix that. They bring in the 1960s outline, give the bun a more finished shape, and help the style sit closer to the nape instead of floating awkwardly high.
Think of this as a refined cousin of the chignon. The sides are rolled backward, the bun sits low, and the crown stays modestly lifted. A touch of volume at the top keeps the shape from flattening the face. If you have finer hair, a small padding piece or a teased base under the crown can help the bun look fuller without stuffing it.
This is one of my favorites for formal occasions because it looks deliberate from every angle. The front is smooth, the sides are controlled, and the back has enough curve to keep the silhouette interesting.
If you want it softer, leave one side just a bit looser near the temple. That tiny imbalance keeps it from looking severe.
17. Headband Crown Volume
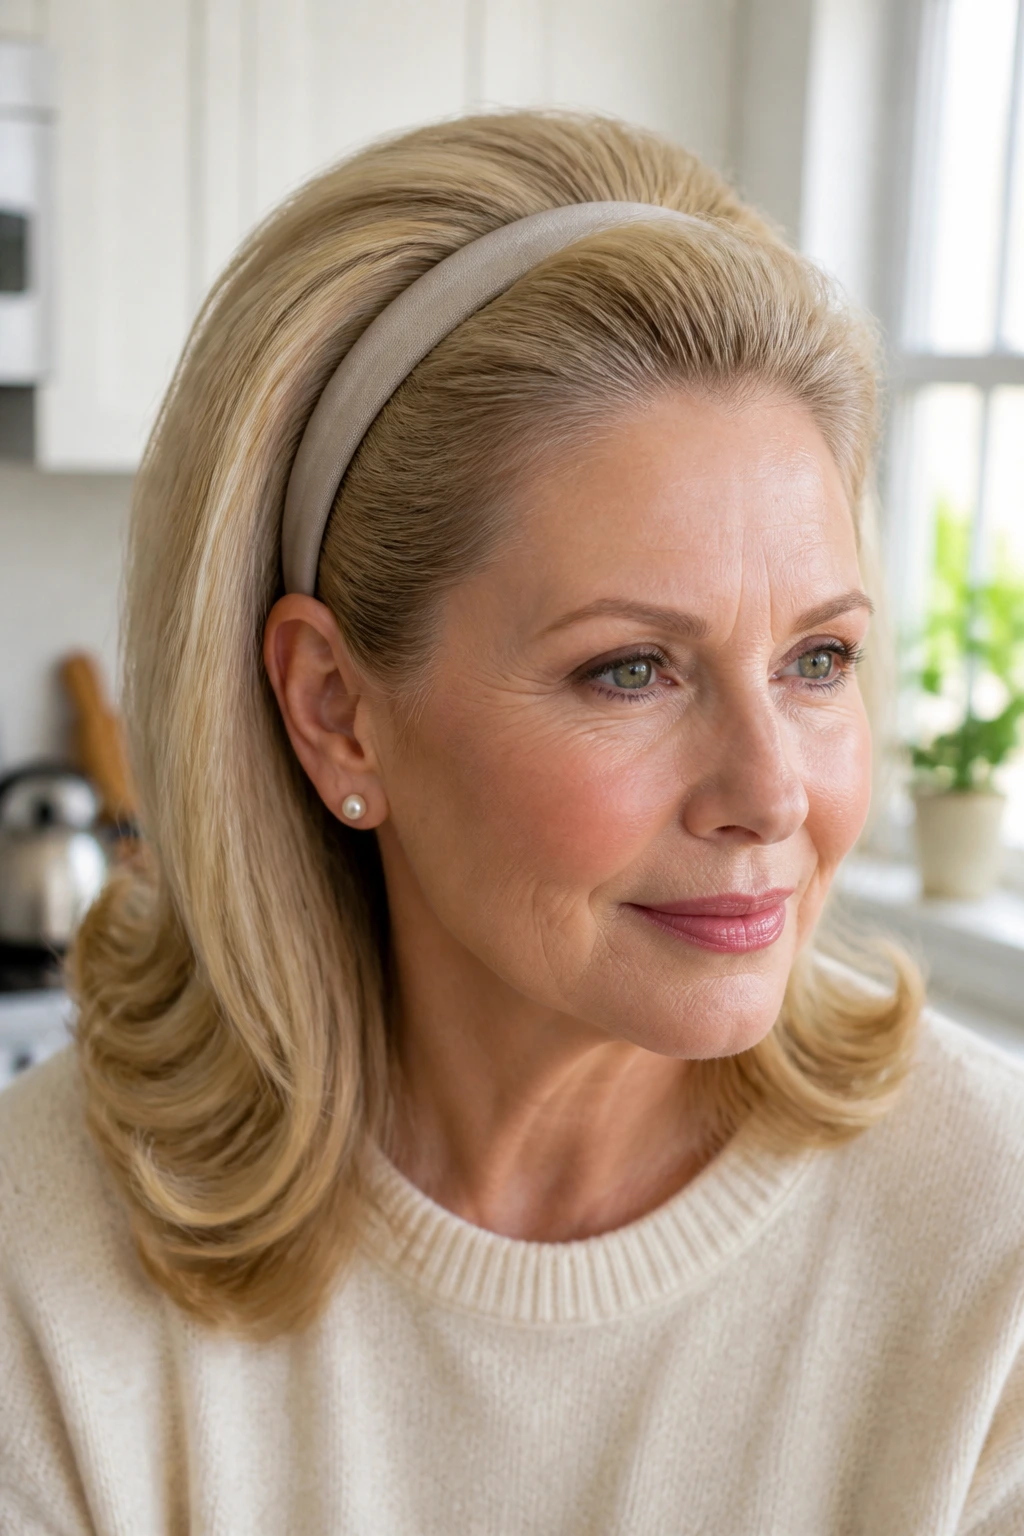
A headband can do more than hold hair back. In a 1960s set, it can create the whole shape. The band nudges the hair upward, and that slight push gives you crown volume without endless teasing.
Why it’s so useful
This style is a gift for growing-out bangs, fine hair, or days when the front refuses to cooperate. Place the headband just behind the hairline, then gently puff the crown over it. Let the lengths fall smooth or lightly flipped. The band should look like part of the styling, not like an emergency fix.
A narrow fabric band reads softer than plastic. Satin feels dressier. If you want a sharper retro line, choose a solid color that echoes your outfit or your lipstick. If the hair is very short, a padded band can help keep the shape in place. If it’s longer, use the band only as a cue and let the rest of the hair do the work.
This is one of the fastest styles in the set. That alone earns it a place.
18. Curled Pixie With Front Volume
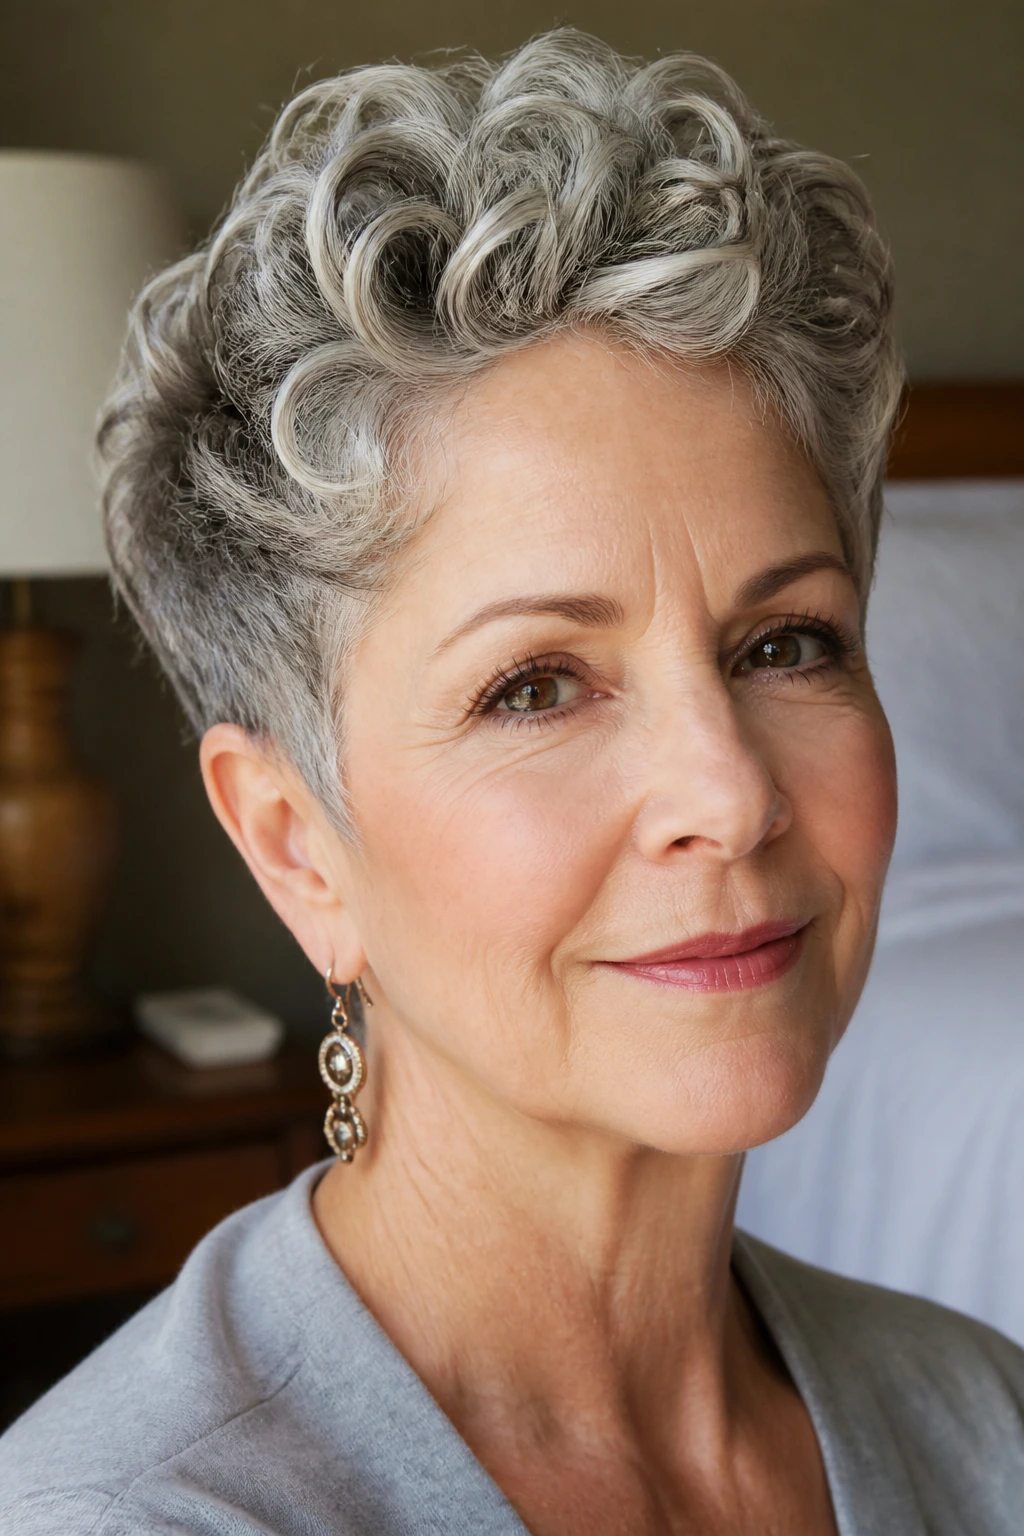
Can a pixie wear 1960s shape? Absolutely. It just needs lift in the front and a little direction at the sides so it reads sculpted rather than cropped by accident.
Use a small round brush or a finger wave motion with your blow-dryer nozzle to push the front up and slightly over. A light wax or cream on the ends can separate the pieces without making them sticky. The top should have a bit of height, and the sides should lie close enough to keep the outline clean.
This style suits women who wear short hair because they like the ease, not because they want to disappear into it. The little front lift adds energy. It also works well with statement glasses, since the hair stays out of the frame.
Keep the product light. Short hair shows every heavy layer of product, and that’s where the style can go wrong fast.
19. Half-Up Bouffant With Loose Length
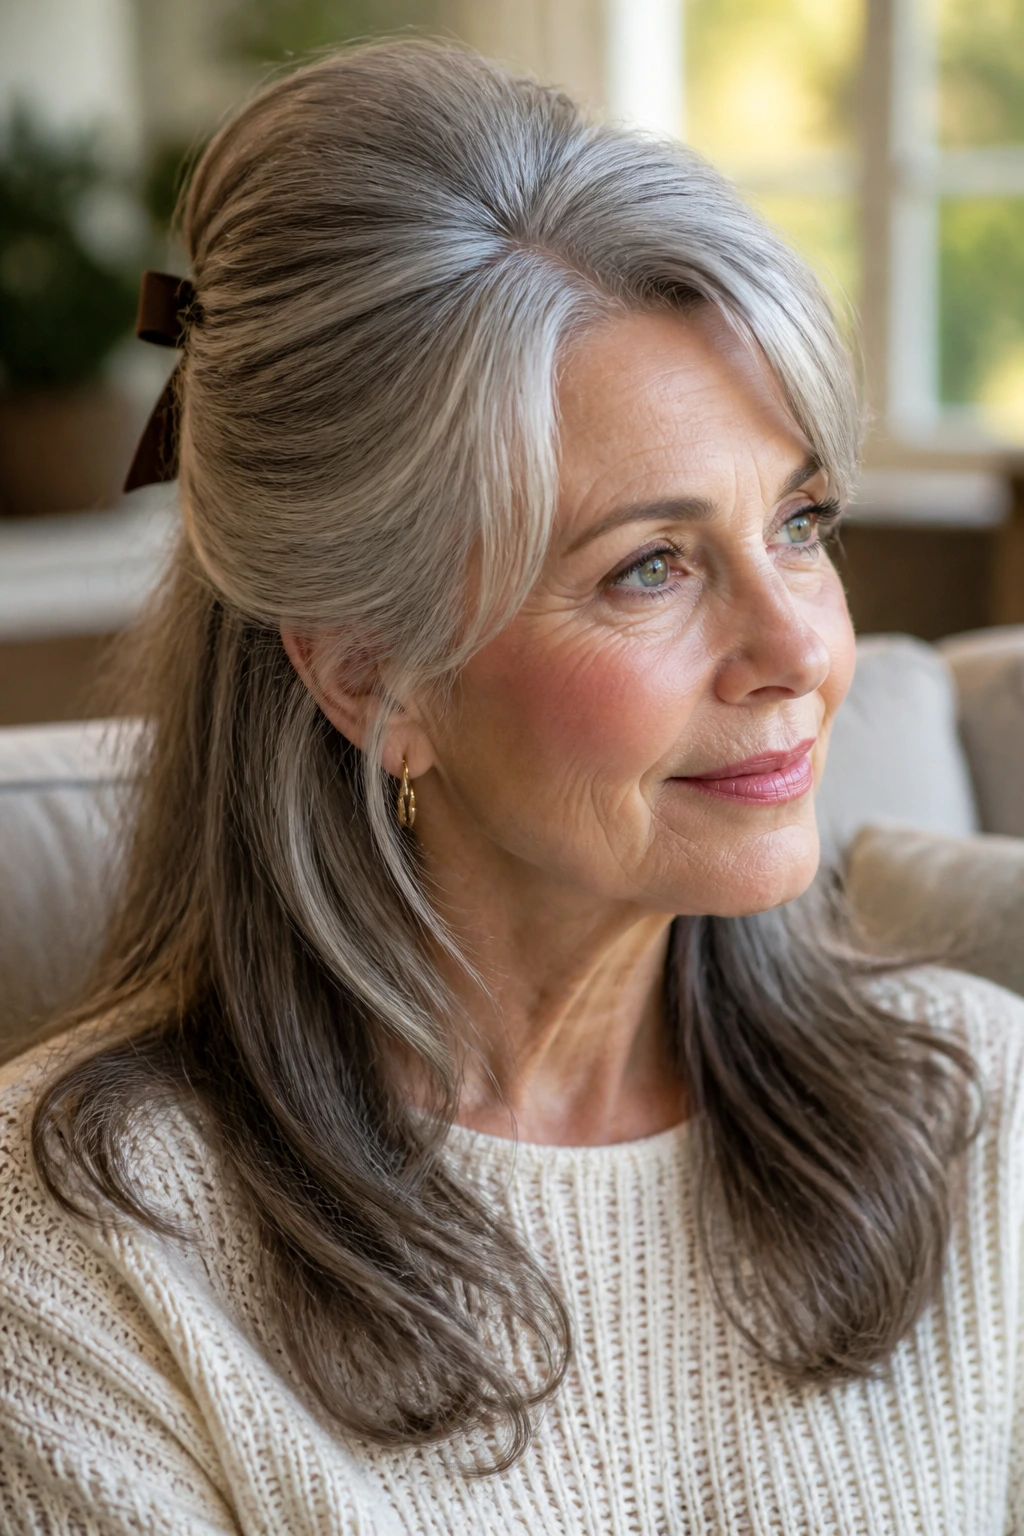
This is the style for anyone who likes movement and still wants the crown to behave. The bouffant at the top gives the 1960s cue, while the loose length keeps it from feeling stiff or over-set.
Pull the top section back from temple to temple, tease the root just enough to create shape, and secure it with pins underneath. Leave the lower hair free. You can smooth it, curl it, or leave it straight if the cut already has decent shape. The contrast between the lifted crown and the loose bottom is what gives this look its life.
A few useful details
- Works best on medium to long hair.
- Great when the face needs a little lift but not a full updo.
- A side part softens the front.
- A small ribbon or barrette can finish it.
I like this style because it lets the hair move. That matters.
20. Rolled Ends With Side Fringe
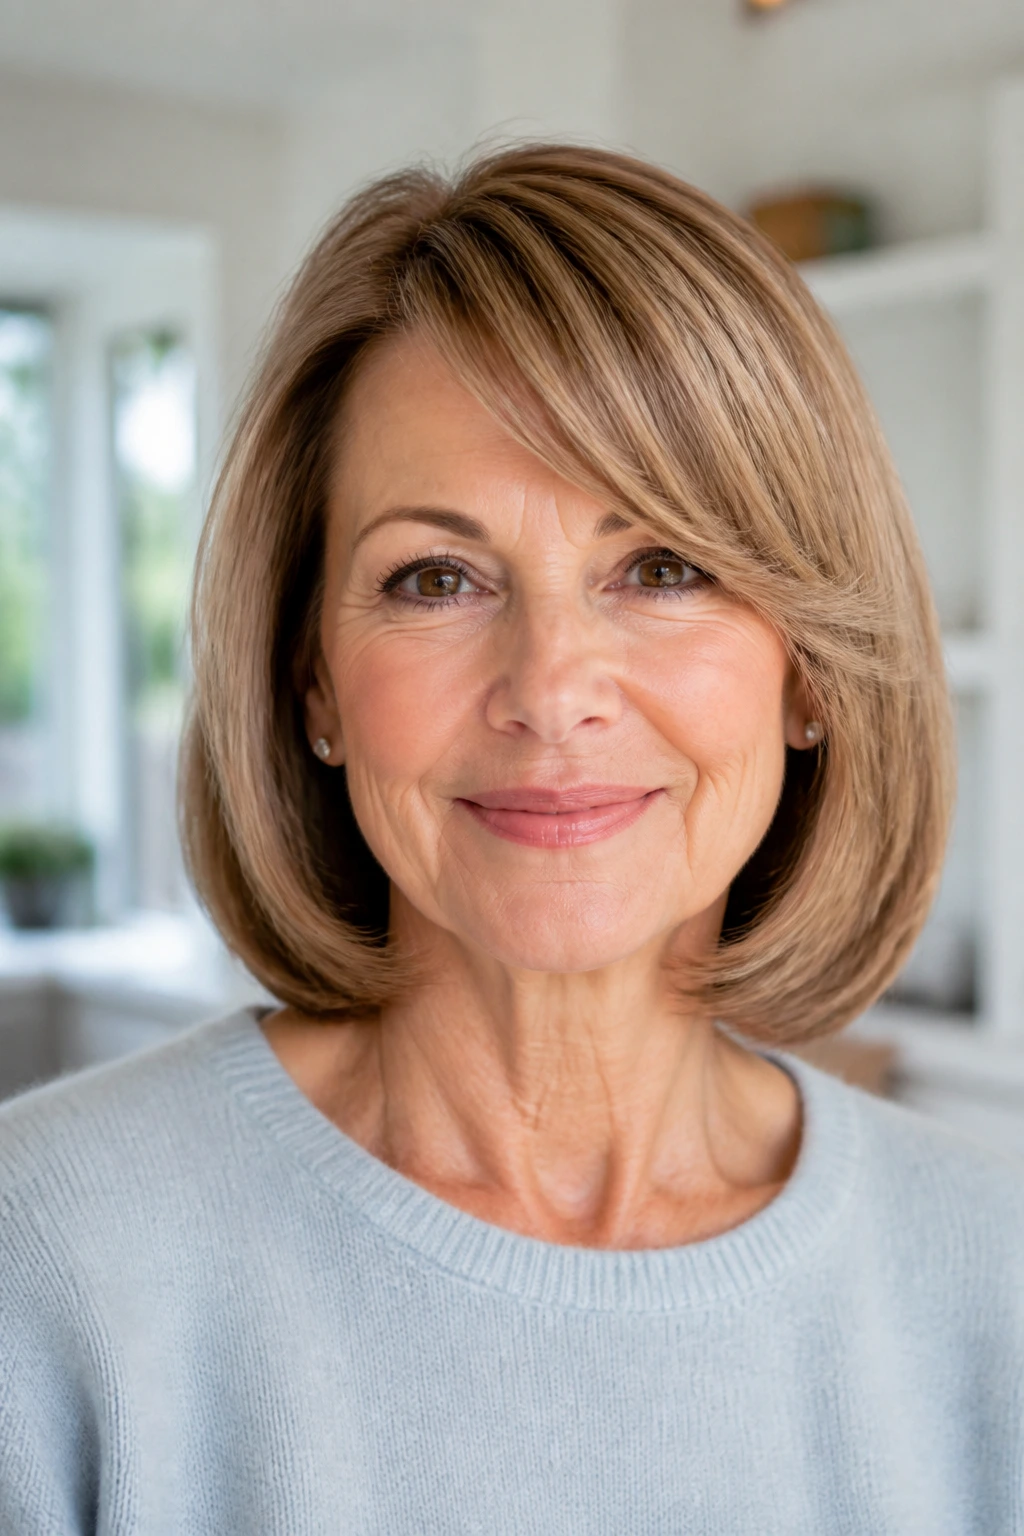
Rolled ends with a side fringe is one of those deceptively simple styles that looks more put together than it should. The fringe softens the forehead, and the curled-under ends keep the silhouette tidy.
It works especially well on bobs and lobs. Blow-dry the fringe in the direction you want it to fall, then use a round brush to fold the rest of the ends under. The curve should be smooth, not bulbous. If the hair is layered, keep the shortest pieces under control with a touch of mousse before drying.
This look is good for everyday wear because it doesn’t ask for much after the set is done. It also pairs nicely with glasses, since the side fringe breaks the line without stealing focus from the frames.
A clean bend at the bottom and a soft sweep at the front. That’s the whole idea.
21. Decorative-Comb French Twist
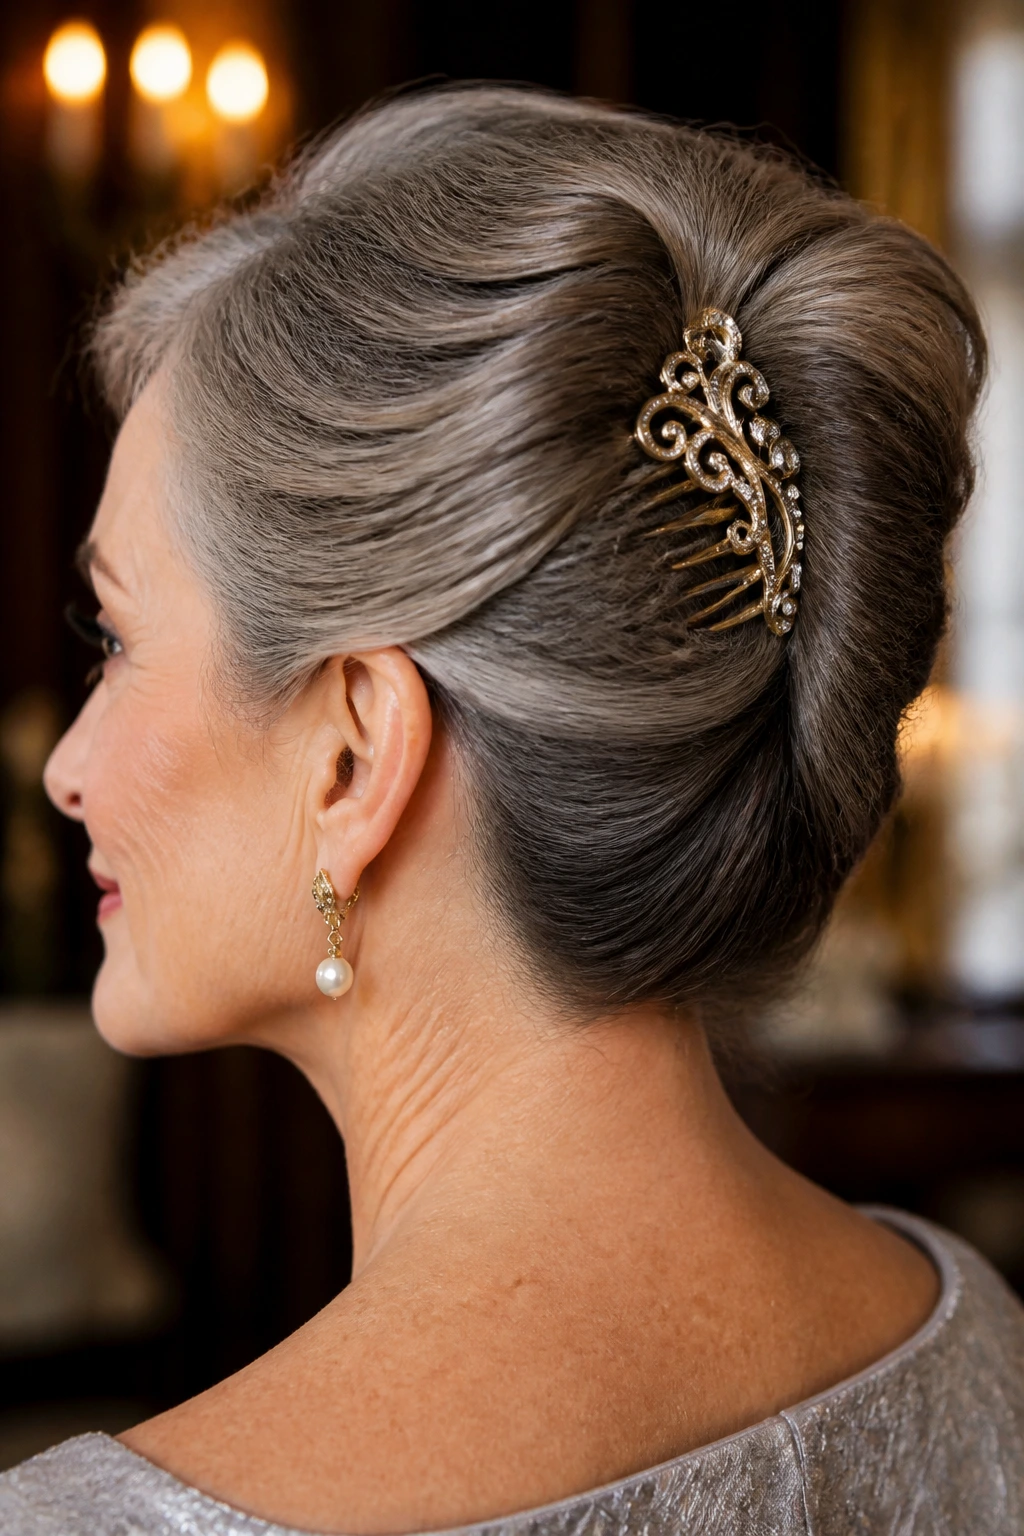
Take the French twist and add one decorative comb. That’s all it needs to move from “nice” to “finished.” The comb also gives you a practical anchor point, which helps if your hair is slippery or fine.
The twist itself should stay neat and compact. Once it’s pinned, slide the comb into the side or just above the seam, where it can catch the twist without fighting the shape. Avoid oversized combs that sit too high. They pull the eye away from the clean line of the style.
I like this version for formal events because it keeps the old-school feel but gives you one obvious focal point. Pearl combs, tortoiseshell, and simple metal designs all work. Anything too wide or glitter-heavy starts to overpower the hair.
The best part? One comb can do more than a pile of extra pins.
22. Soft Marcel Waves
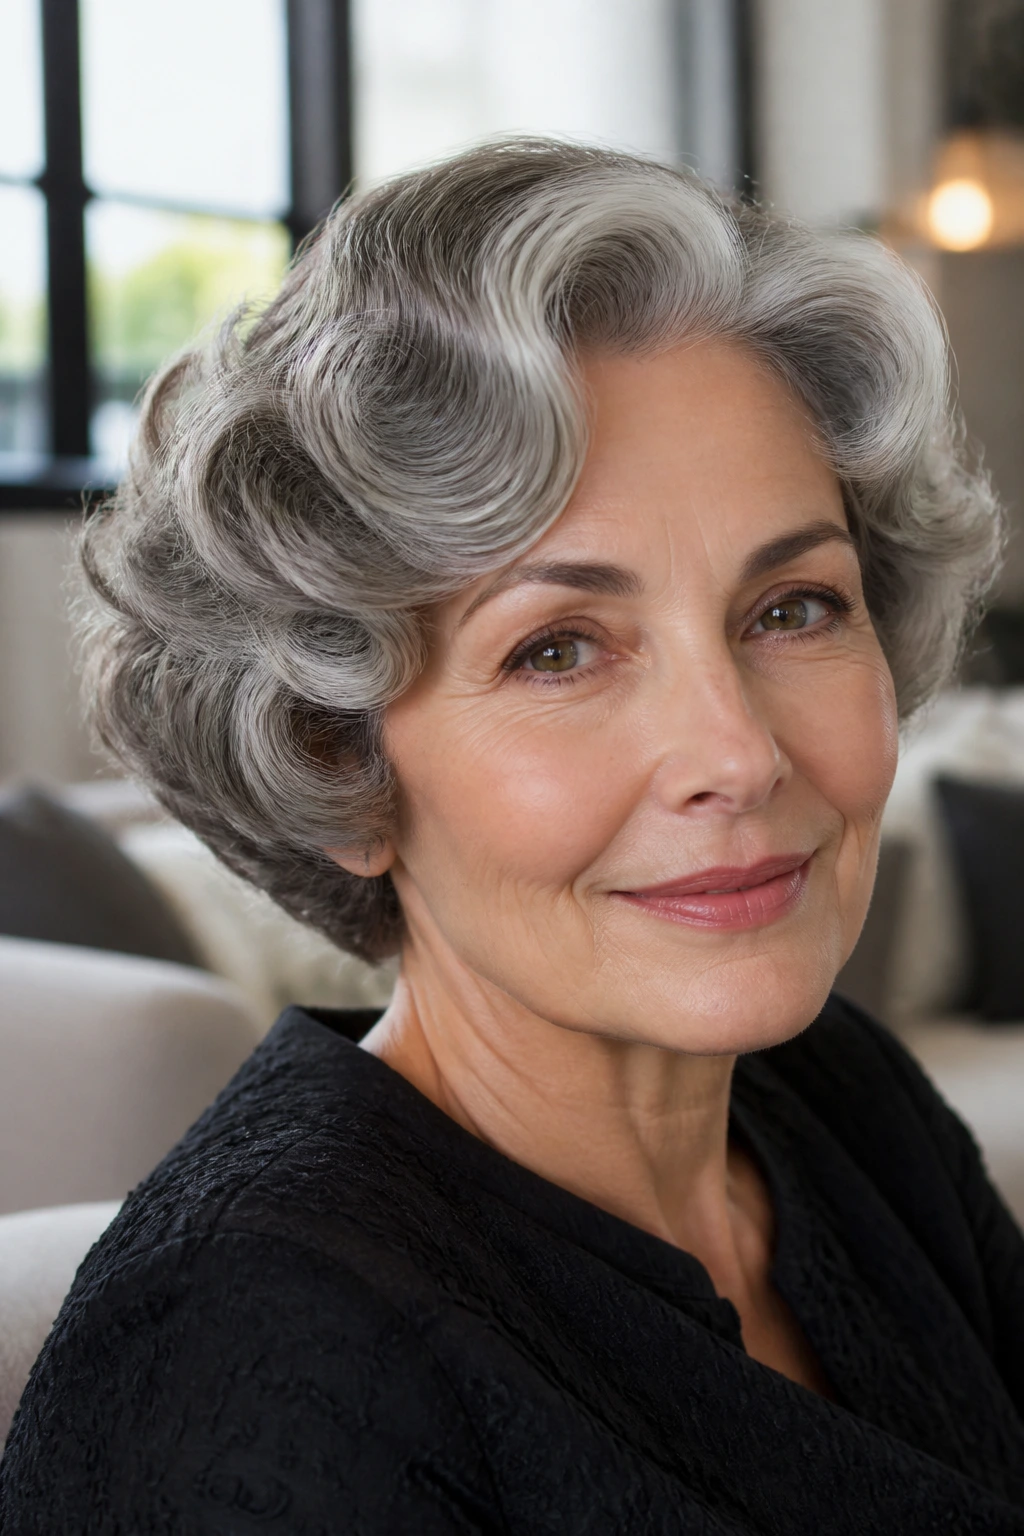
Soft Marcel waves are where the 1960s line gets its prettiest texture. The wave pattern is flatter and more sculpted than a beach curl, which is exactly why it suits older women so well. The face gets framing without puff.
These waves need direction. Use a curling iron to create consistent bends, then clip or pin each section while it cools so the shape settles in place. After that, brush lightly. The goal is a smooth wave with visible ridges, not a fluffy curl. Silver hair looks especially striking with this treatment because the wave catches light along each ridge.
What to keep in mind
- Use medium sections, not tiny ones.
- Brush only after the hair cools.
- Keep the roots smooth and the wave pattern mid-length.
- Finish with a flexible spray.
This style takes a little more time than a simple bend, but the result has a real sense of line. It feels dressed without being loud.
23. Shoulder-Length Retro Bend
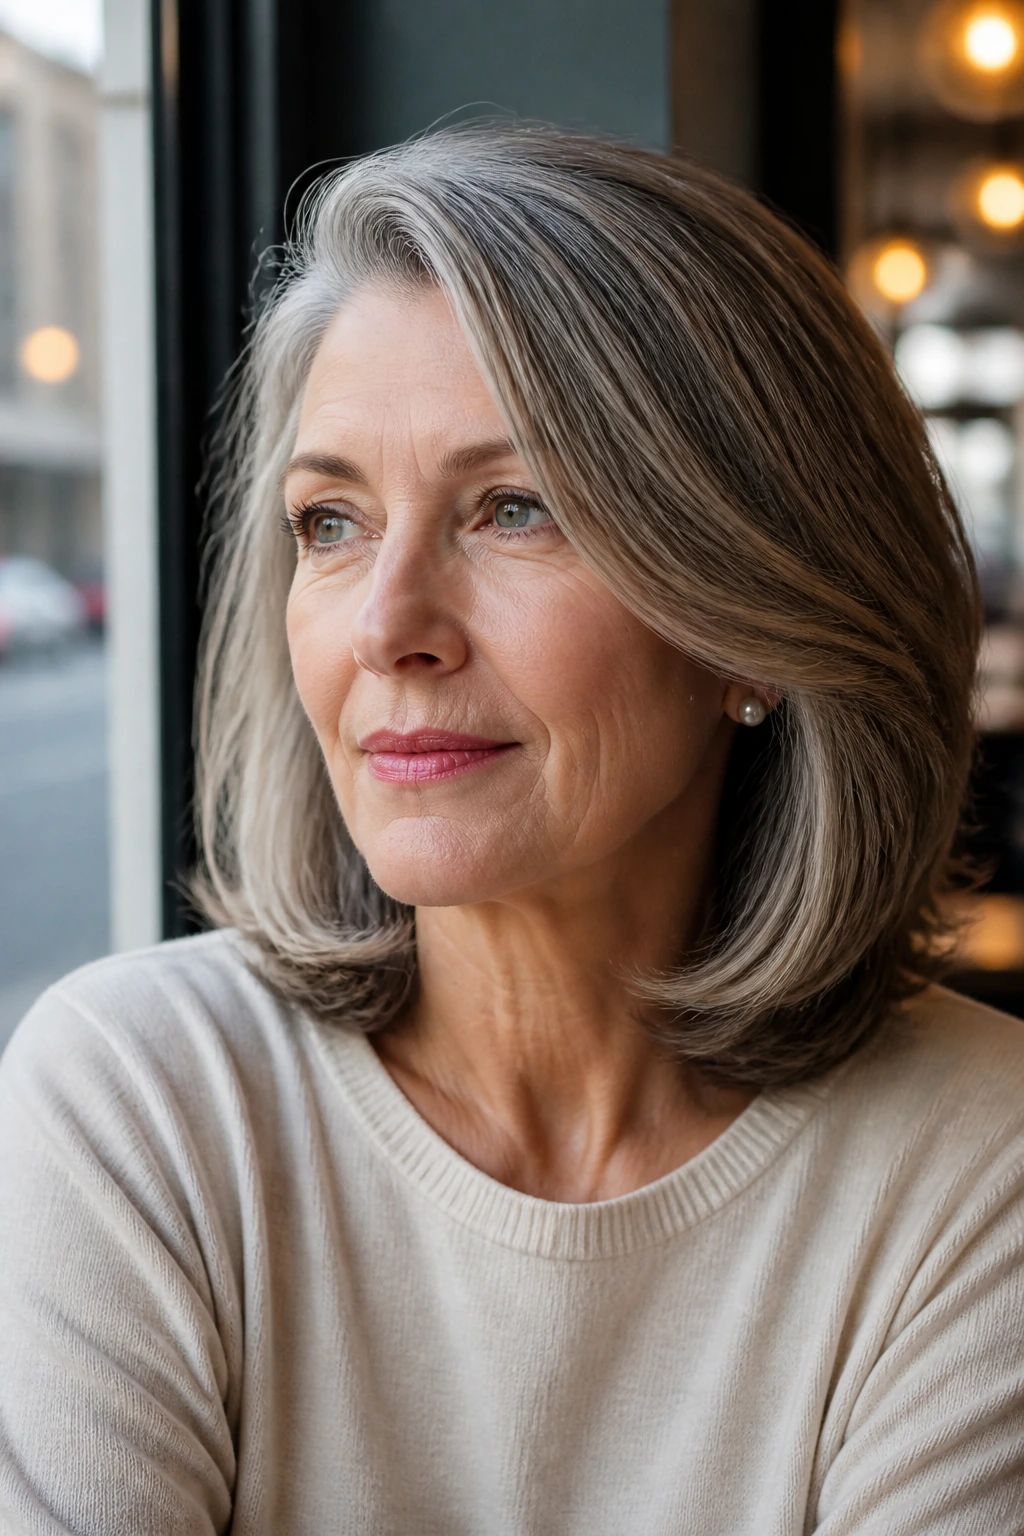
A shoulder-length retro bend is the least fussy style in the whole set, which is why it deserves the last spot. It gives you the 1960s vibe through shape alone: a side part, smooth roots, and ends that curve or turn just enough to catch the eye.
Why it’s such a useful fallback
If your hair won’t hold a full set, this is the one to try. Blow-dry with a medium brush, direct the ends under or slightly out, and add a little lift at the crown if the top has gone flat. That’s enough. No teasing marathon. No pin-heavy afternoon.
It suits women who want retro style without spending the whole day on it. It also works with almost any outfit because the structure is quiet. If you need a shape that can move from errands to dinner and still look intentional, this is the one I’d reach for first.
The bend is subtle. That’s what keeps it modern.
Why These Shapes Age Well Without Looking Stuck in the Past
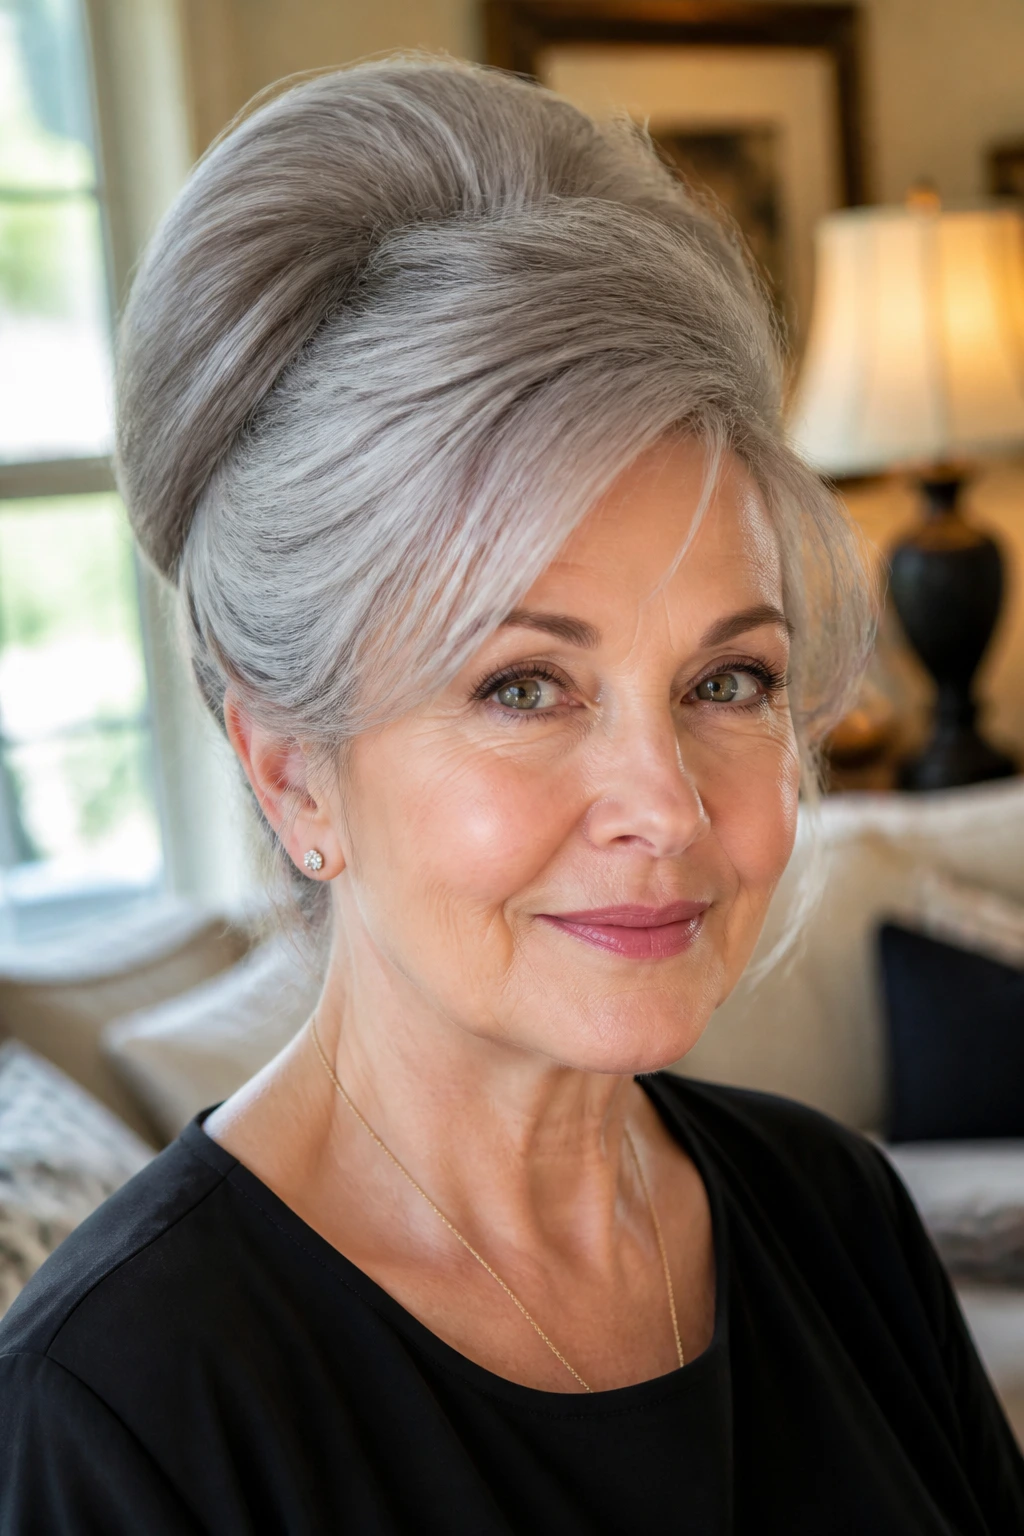
A lot of 1960s hair looks dated for one reason: people copy the volume but not the balance. They pile lift on the crown, leave the sides too stiff, and forget that the ends matter just as much as the top. The result feels theatrical. The better version feels designed.
Older faces usually benefit from a shape that opens the forehead a little, keeps the jawline visible, and avoids swallowing the neck in too much hair. A bouffant, pageboy, or low twist can do that because the eye reads the outline first. That outline is the whole trick. Clean at the temples, shaped at the crown, calm at the ends.
Silver and gray hair make this even easier. The shine shows on curves and waves, and a defined part line keeps the style from floating away. On darker hair, the shadow at the root can deepen the lift and make the shape read faster. Either way, the architecture is doing the work.
I also think these styles age well because they leave room for personality. One comb, one scarf, one side sweep — enough. You do not need to recreate a prom photo to borrow a good silhouette.
The Tools That Make Retro Styling Easier
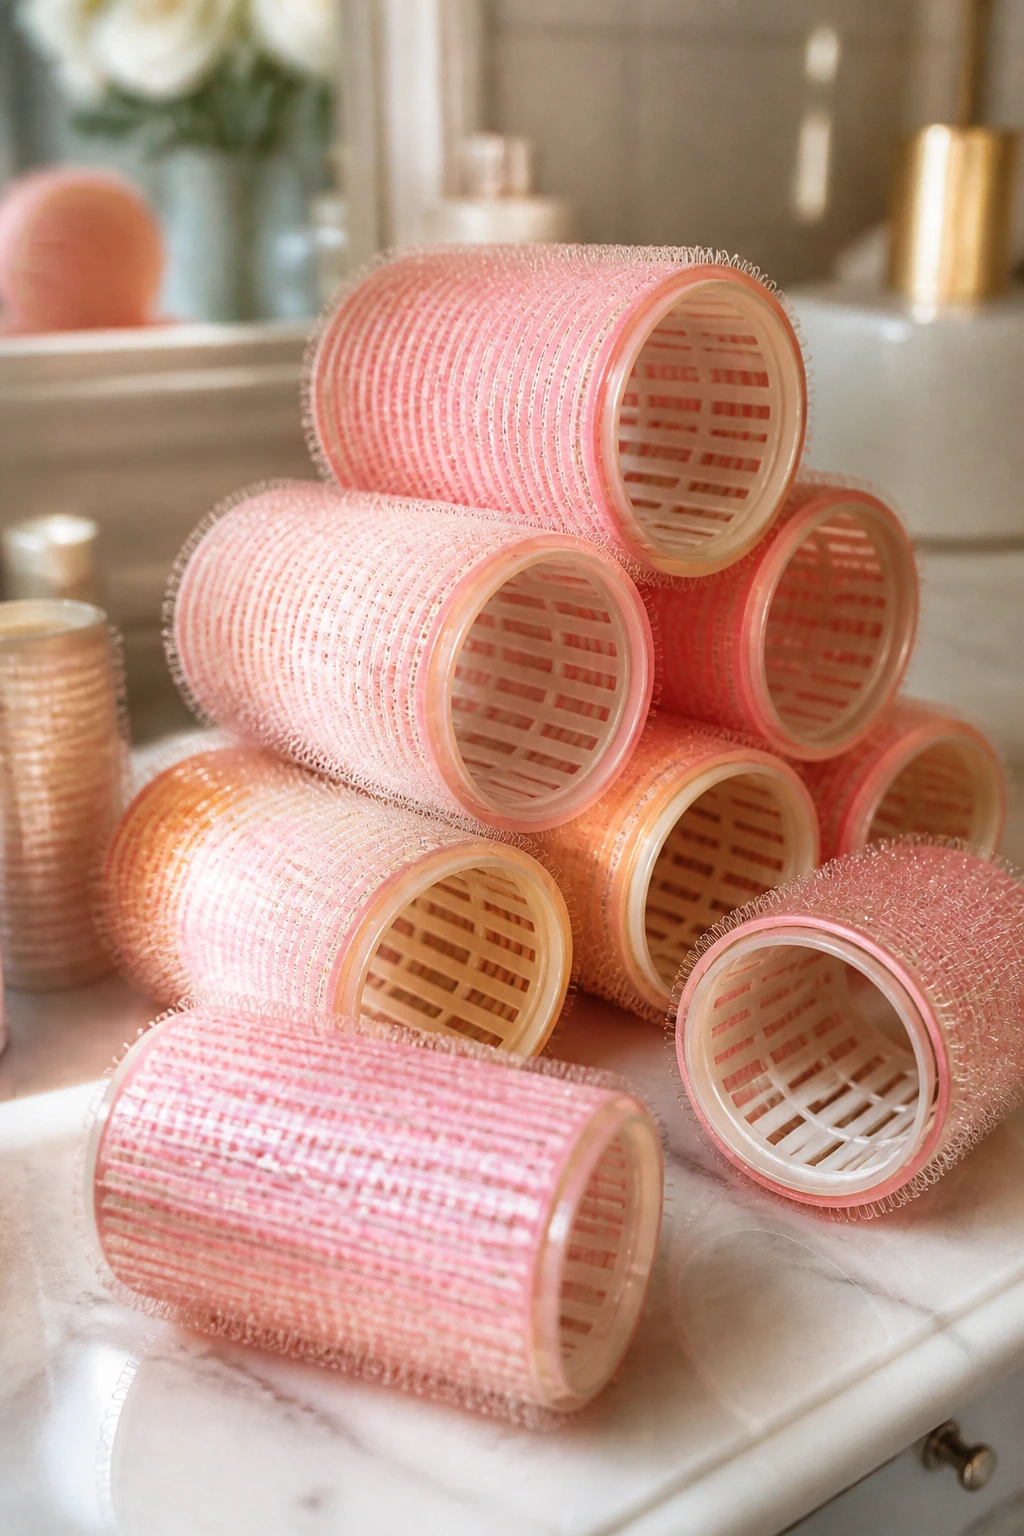
A few tools make the whole category less annoying and much more consistent.
- Rat-tail comb: Best for clean parts, sectioning, and lifting the crown without grabbing too much hair.
- Teasing brush or fine boar-bristle brush: Helps build crown volume and then smooth the top layer over it.
- 1-inch curling iron: Useful for flips, pin curls, and tighter bends around the ends.
- 1.5-inch curling iron: Better for looser waves and brushed-out glam shapes.
- Velcro rollers: Great for setting the crown, sides, or ends while you finish makeup or dressing.
- Duckbill clips: Hold sections flat while they cool, which helps the shape last.
- Bobby pins: Stock both short and long ones; the long kind is better for twists and shell rolls.
- Sectioning clips: Keep the rest of the hair out of the way while you work one part at a time.
- Paddle brush: Useful for smoothing the outer layer before pinning or twisting.
- Boar-bristle brush: The brush I reach for when I want the surface to lie down without erasing the shape underneath.
- Root-lift mousse or setting lotion: Gives fine or slippery hair a little grip before drying.
- Flexible-hold hairspray: Keeps movement while holding the structure; avoid the cement version unless you want helmet hair.
- Heat protectant spray: Needed any time you use a curling iron or hot rollers.
- Silk or satin scarf: Helps preserve a set overnight and can double as part of the look.
- Narrow headband or decorative comb: Useful when you want one focal detail and no more.
Smart Product Picks for Hold, Shine, and Grip
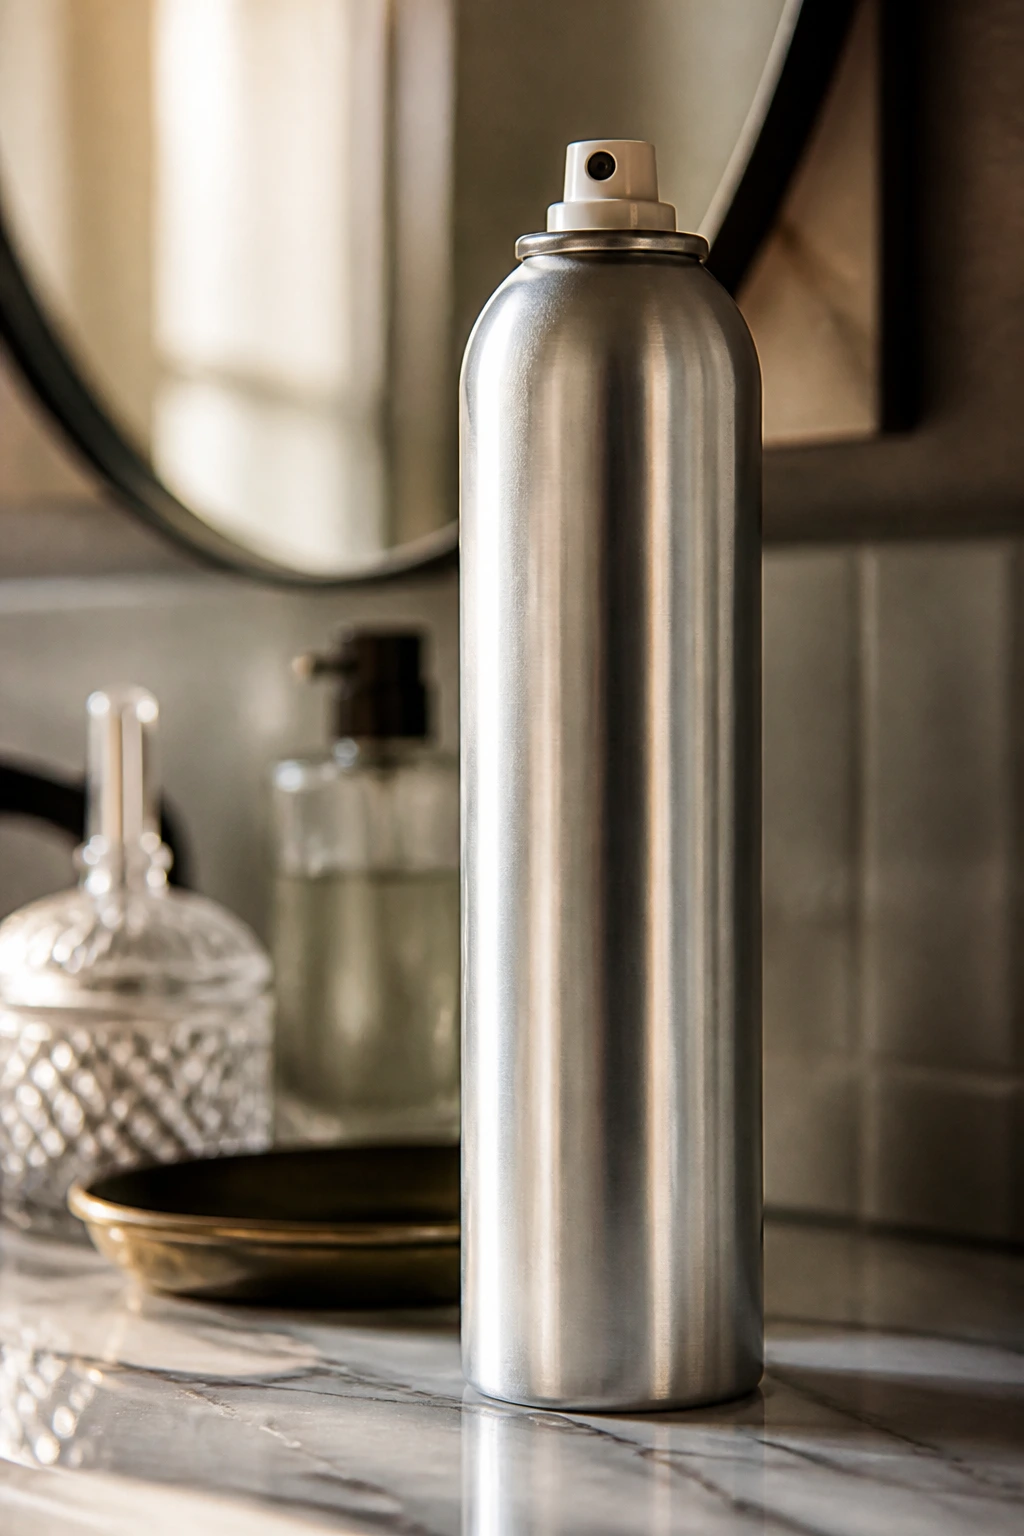
If you want these styles to hold, the product choice matters more than the brand name. Fine hair usually wants foam mousse or a light root spray before blow-drying, because those products add grip without making the strands clump together. Thick or coarse hair often behaves better with setting lotion and a brush-out, since it needs a little more control before the shape is pinned or rolled.
Hairspray comes in two camps: firm and flexible. I prefer flexible for most of these looks because the 1960s shape should have some movement at the ends. A hard spray can freeze the outer layer so aggressively that the whole style starts to crack when you brush it. Use the firmer stuff only on a twist, shell roll, or day-long event where you need every pin to stay put.
Shine products deserve caution. A pea-sized amount of smoothing cream on the ends can make gray hair look polished, but too much oil at the roots kills volume in a hurry. Dry shampoo can help even clean hair by giving the crown a little grit. That’s a useful trick if the hair is freshly washed and sliding everywhere.
For heat styling, a heat protectant with a light mist is enough. Heavy creams make the hair too soft for set styles. If your hair is very fine, the answer is usually less product, not more. If it is coarse, the answer is often more sectioning, not more spray.
How to Wear These Looks With Glasses, Earrings, and Collars
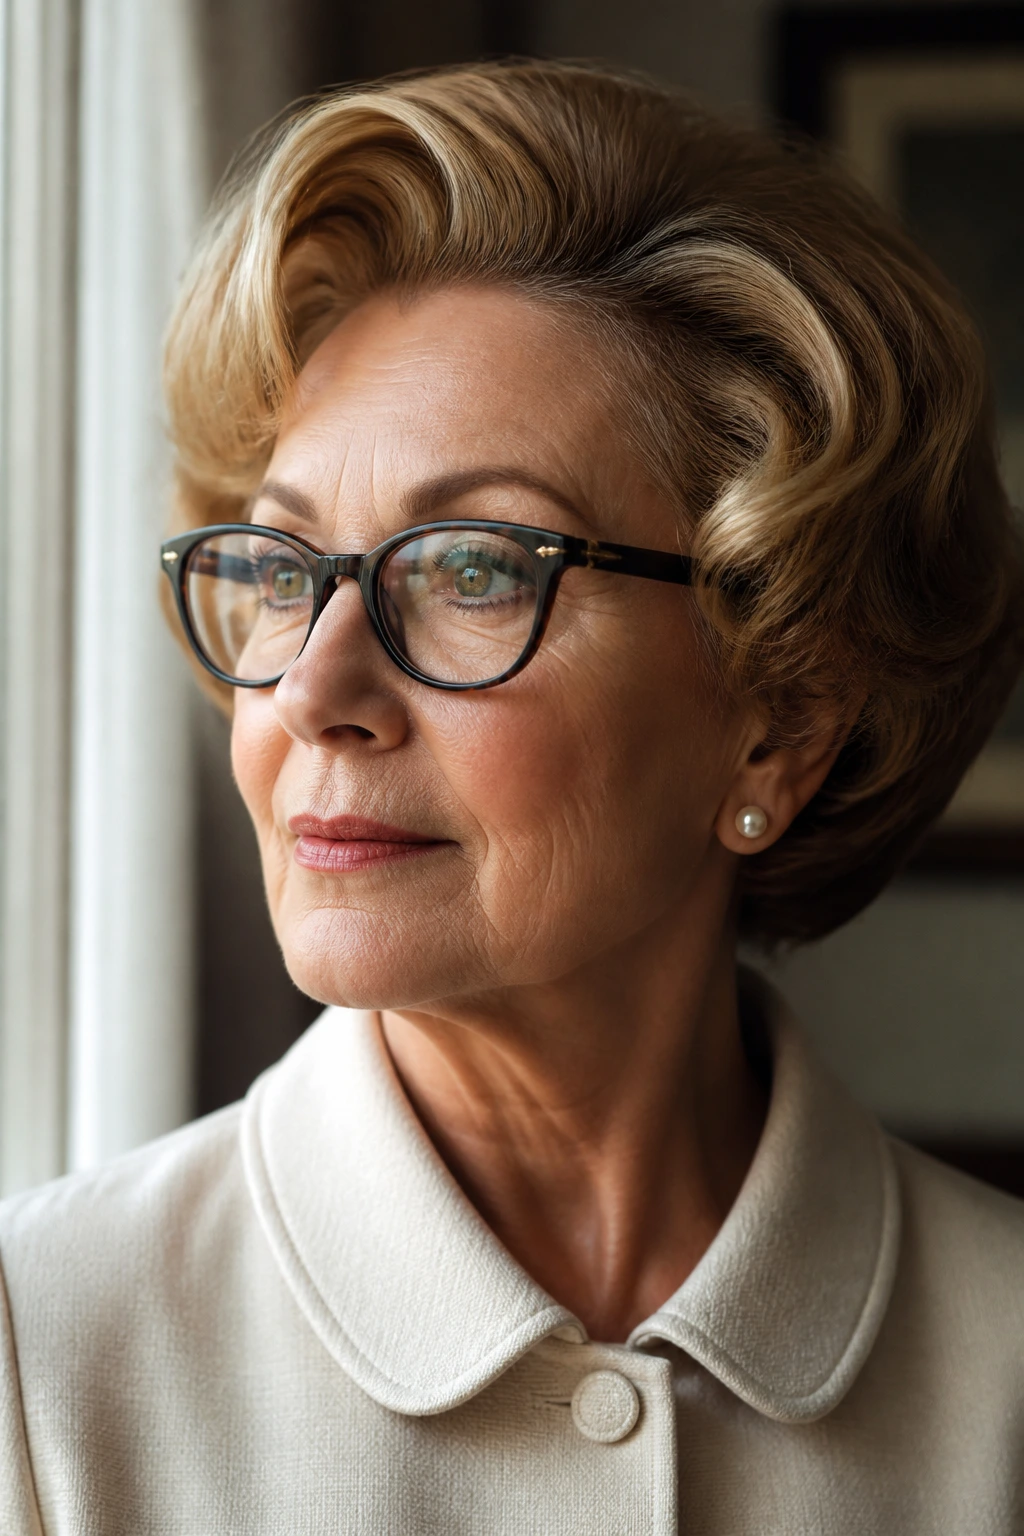
Presentation: Keep one focal point in the silhouette. If the crown is lifted, keep the sides calm. If the sides are rolled, leave the top smoother. A 1960s hairstyle looks strongest when one part of it leads and the rest supports it.
Accents: Small to medium earrings work best with most of these shapes, especially pearl studs, small hoops, or a single drop earring. Glasses look better when the front of the hair is tucked slightly back or swept to the side, because a fringe that lands directly on the frames can get busy fast. Scarves, combs, and narrow headbands belong here too, but pick one.
Best For: These looks suit lunches, family gatherings, weddings, portraits, church, concerts, and any day when you want hair that stays out of your face but still looks considered. The low buns and twists handle formal settings. The bobs and flips are better for everyday wear. The half-up shapes sit nicely in the middle.
Beauty Pairing: A defined lip and clean brows suit most of these styles. Cat-eye liner, if you like it, leans right into the decade without needing any extra costume elements. Keep makeup crisp rather than heavy. The hair already provides the old-school cue.
Small Tweaks That Keep the Shape Soft
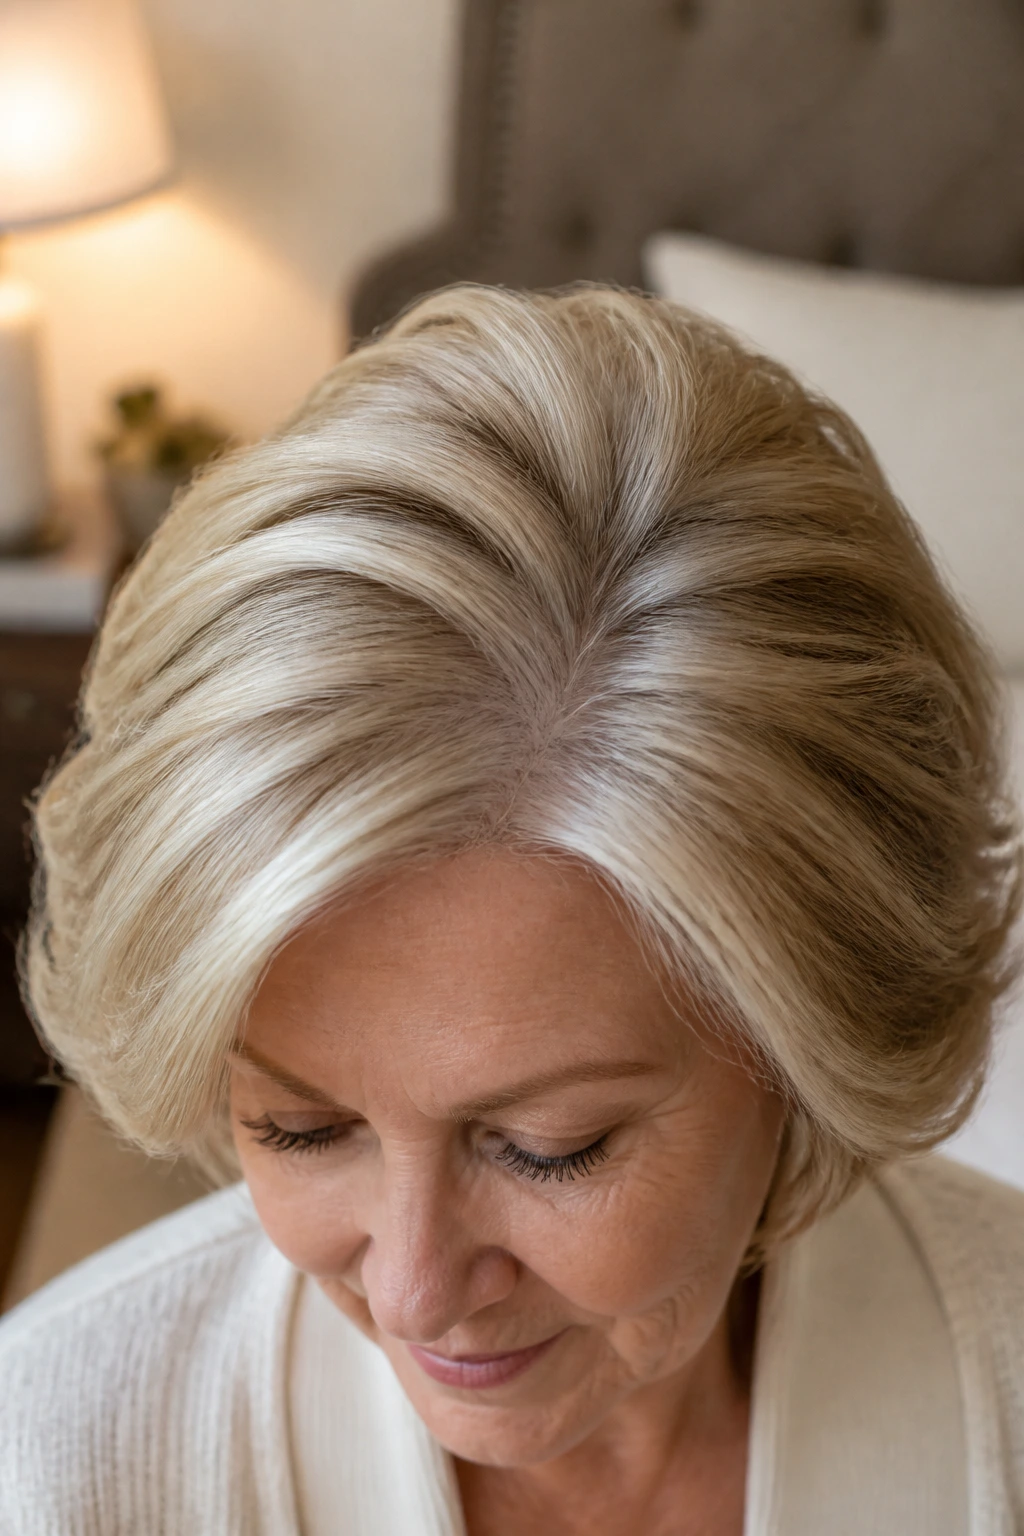
Root Lift: Start with your head tipped forward for the first minute of blow-drying, then smooth the crown back into place with a round brush. That gives lift without a stiff line at the root.
Softness at the Ends: If the flip or curl looks too sharp, brush the last inch with a paddle brush after it cools. That breaks the curl just enough to make it wearable.
Color Contrast: Silver hair, salt-and-pepper hair, and highlighted hair all show 1960s shapes differently. Strong contrast at the part and crown makes the lift more visible, while softer color blends make brushed waves read smoother.
Accessory Trick: A tiny comb, a satin ribbon, or a barrette placed a little off-center often looks better than a large ornament placed exactly in the middle. The slight imbalance feels more natural.
Make-It-Yours: If you like more volume, keep the crown set and use a wider brush. If you dislike volume, flatten the top more and let the shape live in the ends instead. Same decade. Different mood.
Overnight Care and Midweek Refreshes
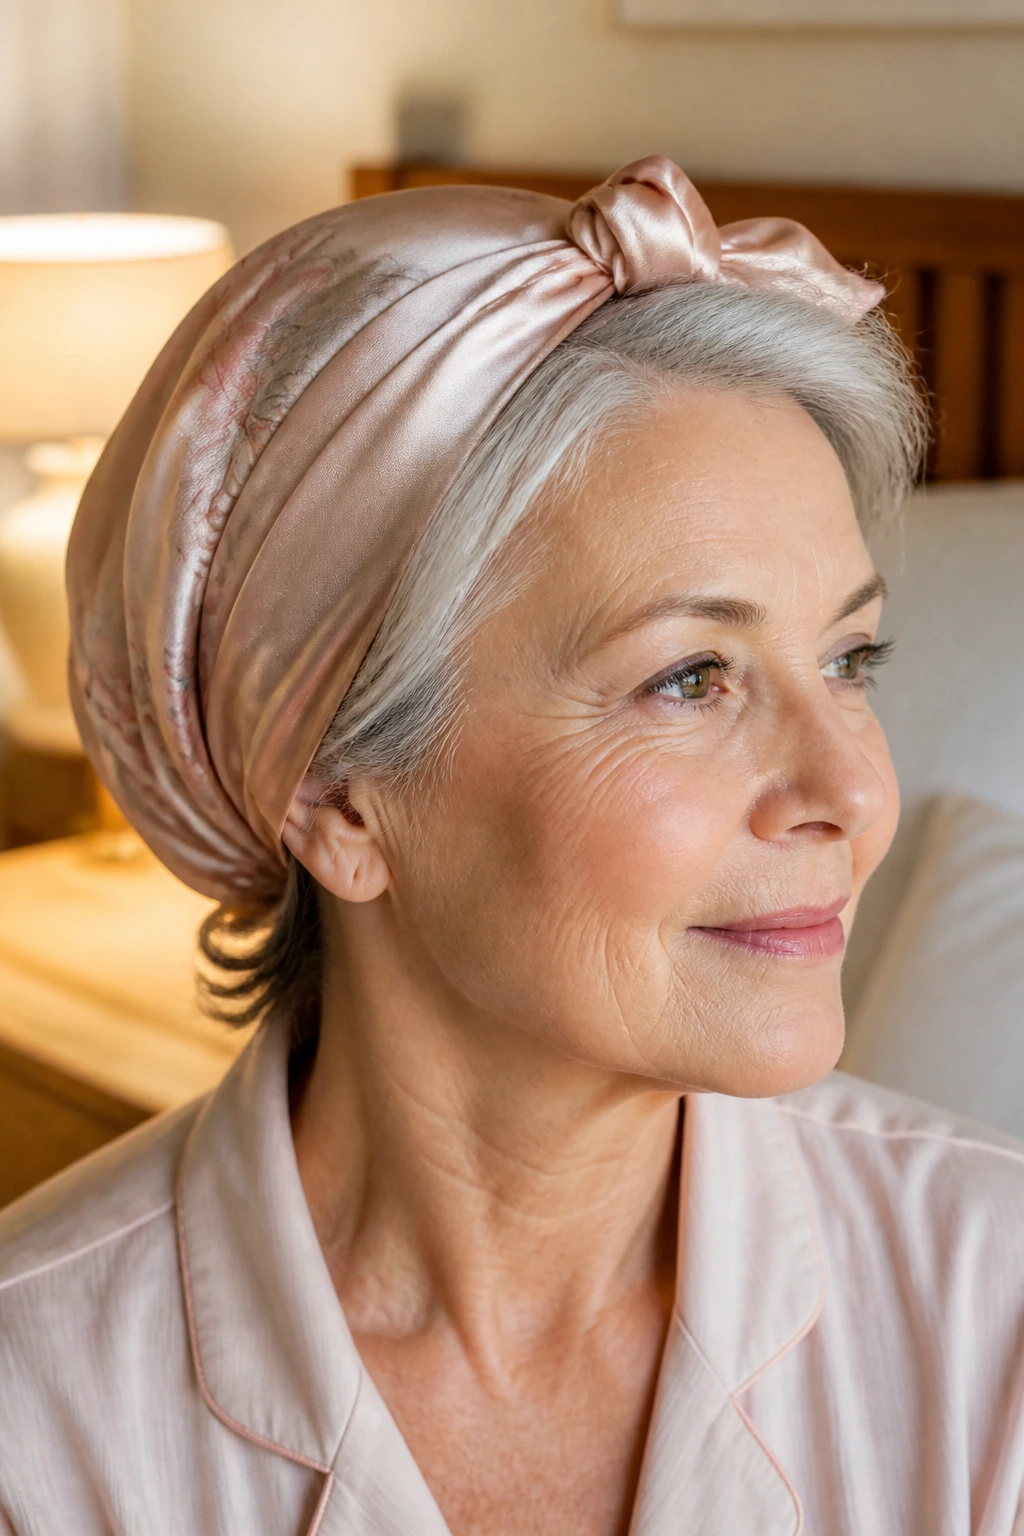
If you’ve gone through the trouble of setting a retro style, don’t flatten it against a cotton pillowcase and hope for mercy. A silk or satin scarf does a lot here. Wrap the hair gently around the crown for styles with lift, or secure a chignon and twist with a scarf that holds the perimeter without crushing the pins. A satin pillowcase helps too, especially if you move around in your sleep.
For a bouffant, pageboy, or flipped bob, pin the front sections in place before bed if you want the shape to survive into the next day. A light mist of water on the ends in the morning, followed by a quick pass with a brush or a curling iron, usually resets the curve. Don’t soak the hair. Just wake it back up.
Twists and low buns can last longer, sometimes two days if the pins are solid and the style wasn’t overloaded with product. Loose waves and brushed-out pin curls usually want a refresh sooner. If the crown starts sagging, lift it with a comb at the root and a little dry shampoo at the base. That’s the whole rescue mission.
Wash-and-reset schedules depend on hair type, but the practical rule is simple: if the roots are greasy or the set is losing shape, start over rather than layering more spray on top of a tired style. That buildup is what makes retro hair go dull and heavy.
Common Mistakes That Flatten Retro Hair
Teasing everything instead of only the crown: The hair starts looking puffy at the sides and thin at the top. Keep the backcombing narrow and hidden under the outer layer.
Making the crown too high: A tall bouffant can tip into costume territory fast. Stop when the shape lifts the face, not when it starts competing with it.
Using too much heavy cream or oil at the roots: The style slides down in an hour. Put richer products only on the ends, and keep the roots light.
Skipping the cool-down time: If curls or roller sets are brushed out while still warm, they fall flat. Let the shape cool all the way before you touch it.
Leaving the sides too loose: Loose sides make the head look wide and the style unfinished. Even soft looks need some control at the temple and cheek line.
Choosing the wrong pin size: Tiny pins cannot hold a French twist or shell roll for long. Match the pin length to the weight of the hair, and use more of them than you think you need.
Variations for Short, Fine, Gray, and Thick Hair
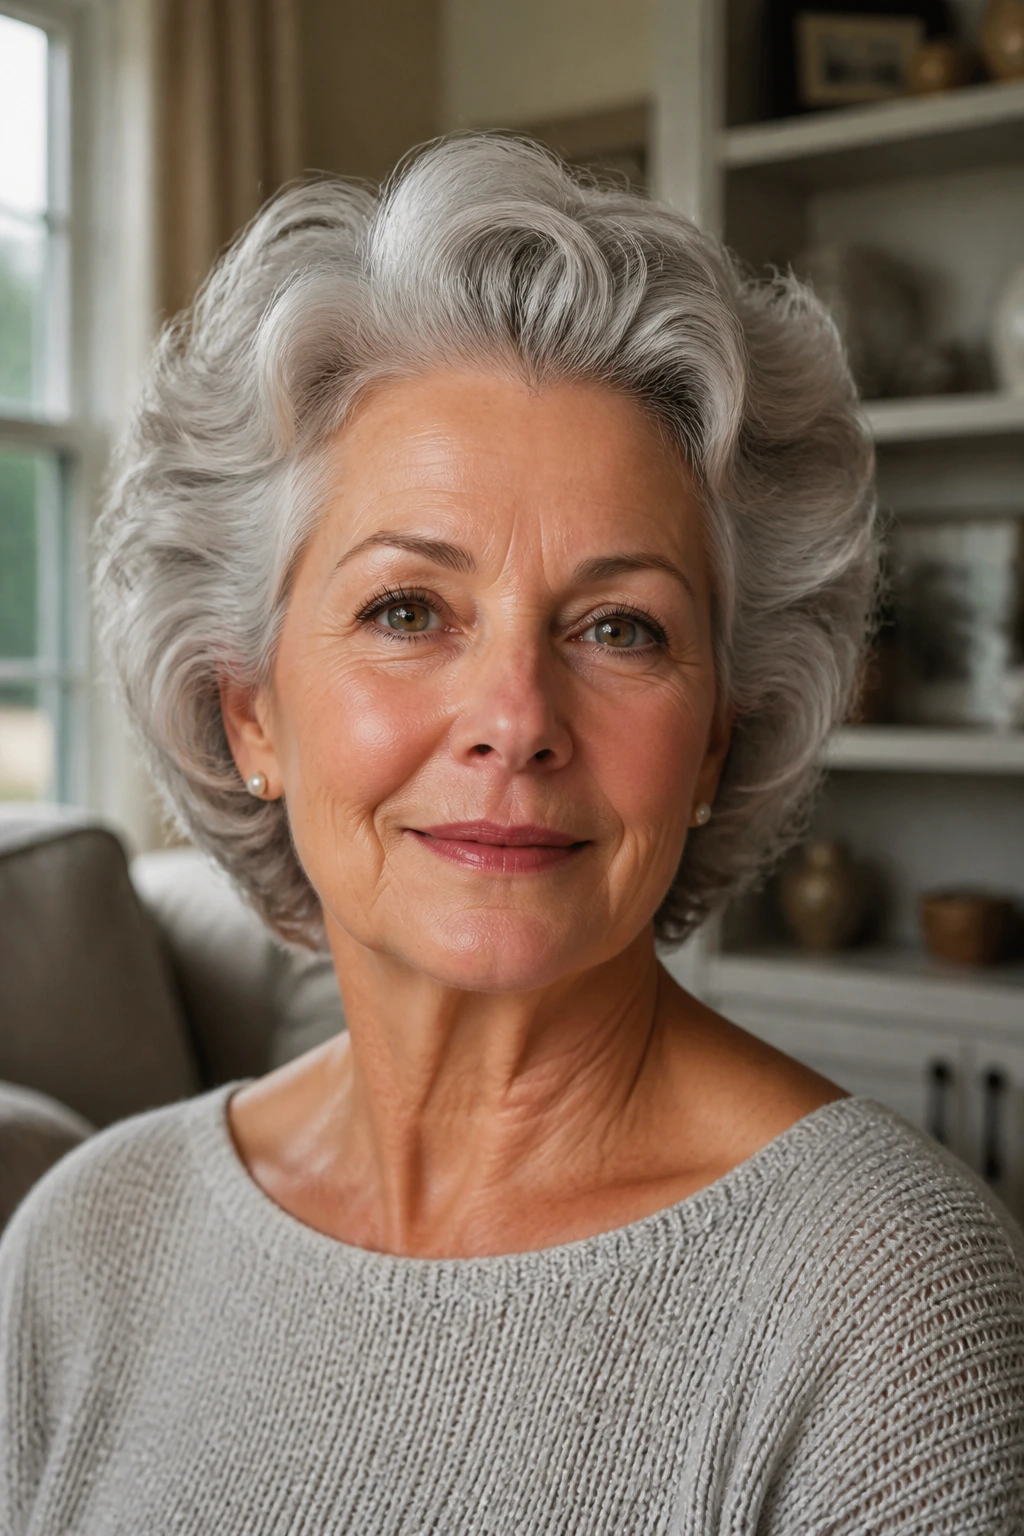
The Silver Halo Set: Best for gray or white hair that shows every curve. Use large rollers at the crown and brush the ends into a soft halo rather than tight curls. The shine does the rest.
The Fine-Hair Lift: Best for hair that falls flat by noon. Use mousse at the roots, set the top in small Velcro rollers, and keep the sides smooth. Less product, more support.
The Thick-Hair Tame: Best for dense hair that wants to explode outward. Set the hair in larger sections and use pins to anchor the shape before brushing the surface smooth. The goal is control, not volume for its own sake.
The Short-Hair Pin Sweep: Best for pixies and cropped cuts. Push the front upward, sweep one side across the forehead, and pin one side back with a decorative comb. Tiny changes, big payoff.
The Heat-Free Weekend Set: Best when you want the 1960s look without hot tools. Dampen the hair slightly, set it in pin curls or rollers, let it dry fully, then brush into the shape you want. It takes patience. It also saves the ends.
The Soft Formal Version: Best for weddings, dinners, and dressier events. Take any of the twists, buns, or shell rolls and leave one temple section a little softer. That small bit of looseness keeps the style from feeling too fixed.
Frequently Asked Questions
Which 1960s style flatters thinning hair best?
A crown-teased half-up style, soft bouffant, or headband crown volume usually gives the most lift without exposing too much scalp. Keep the tease narrow and avoid over-smoothing the front, which can make the hair look thinner than it is.
Can short hair really wear 1960s styles?
Yes. A cropped cap with front lift, curled pixie, or shell-like short roll can carry the decade’s shape without needing much length. The silhouette matters more than the length.
What if my hair won’t hold a curl?
Set it while it is still slightly warm from the dryer, clip it until fully cool, and use setting lotion or mousse before heat styling. A hot iron alone often gives a curl that looks good for twenty minutes and then gives up.
Are rollers better than a curling iron?
For volume and hold, rollers usually win. For speed and a more defined bend at the ends, a curling iron is faster. I’d use rollers for the crown and iron only on the parts that need rescue.
Can I wear these styles with glasses?
Absolutely, and a side part helps a lot. Keep the fringe soft and make sure the hair at the temples doesn’t crowd the frames. That small detail keeps the whole look cleaner.
How do I keep a bouffant from looking stiff?
Don’t spray the top layer too early, and don’t build the height too high. Brush the surface lightly after teasing, let the sides stay smooth, and leave a little bend at the front.
Do gray and silver hair need different products?
Not different in a dramatic way, but gray hair usually benefits from shine spray or a light smoothing cream on the ends because the texture can feel drier. Avoid heavy oils near the roots; they flatten the shape fast.
What’s the easiest style in this group for everyday wear?
The shoulder-length retro bend and the tucked-under bob with soft fringe are the least fussy. They need shape, not perfection, and they still read as 1960s from across the room.
A Shape That Still Holds Its Own
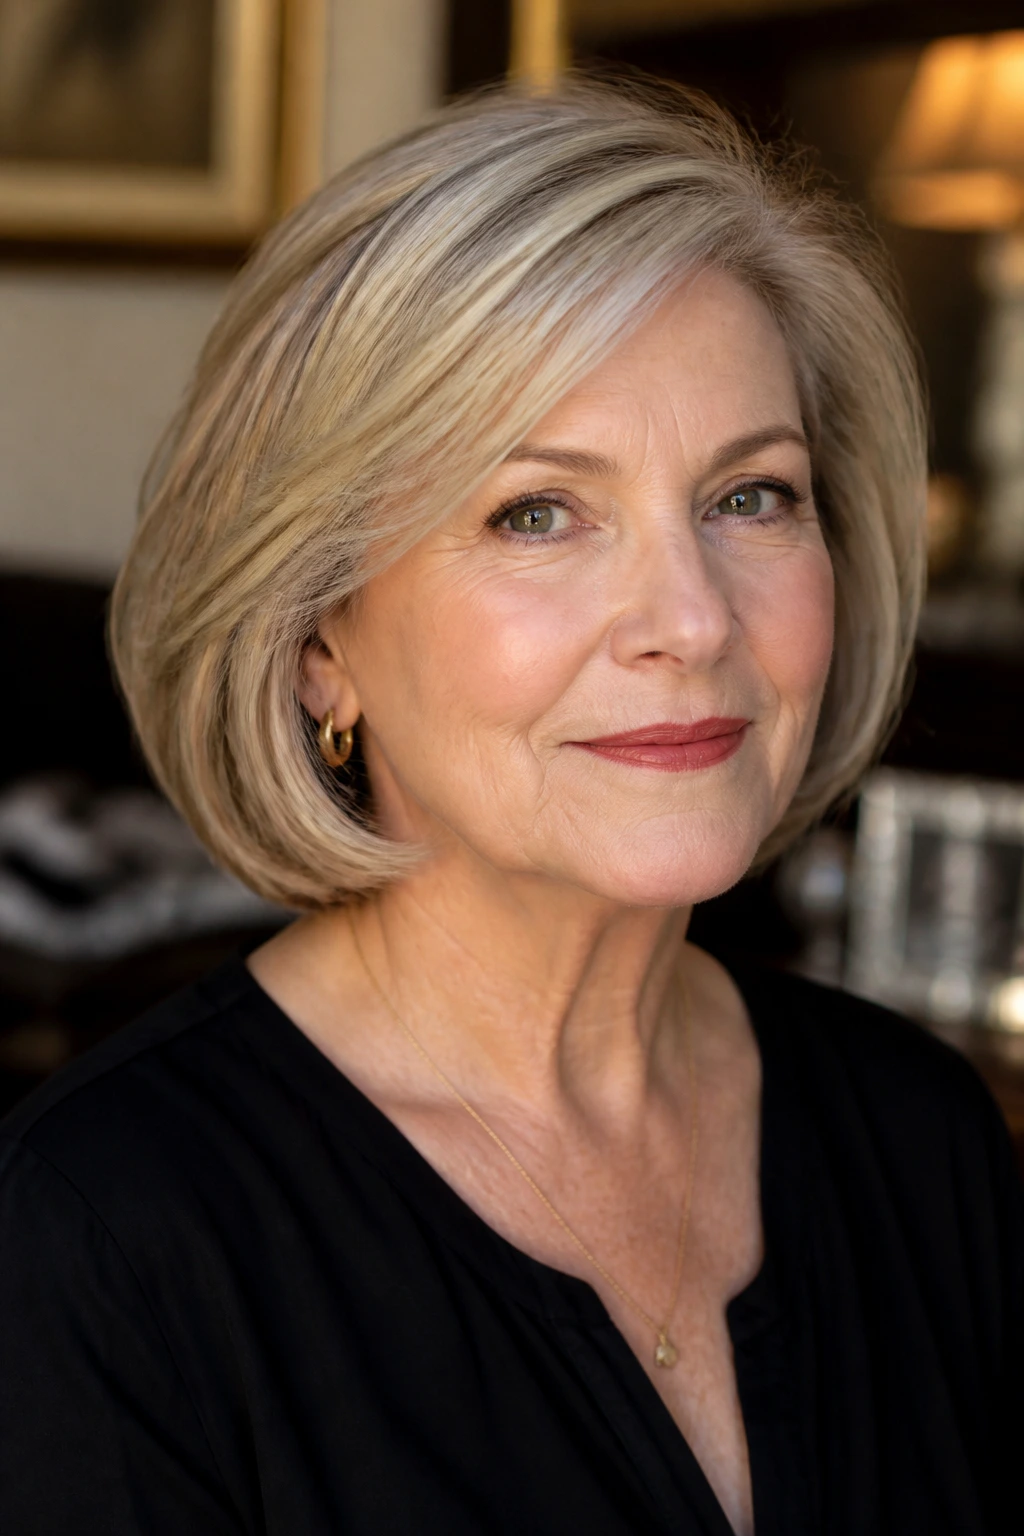
The nice thing about these styles is that they don’t ask you to look like a costume version of yourself. They ask for a little lift, a clean line, and enough control to make the shape visible. That’s a fair trade. And on mature hair, it’s often a smarter one than chasing long, flat layers that never quite decide what they want to be.
Pick one look and make it yours. Maybe it’s the soft bouffant on a week when you want polish, maybe it’s the tucked-under bob for daily wear, maybe it’s a scarf-wrapped chignon when you want the hair off your neck and still want the room to notice. The decade gives you structure. You bring the judgment.
If you get the silhouette right, the rest falls into place.
