



Twist hairstyles for natural hair have a rare kind of practicality: they can look finished on day one and still make sense after sleep, humidity, a rushed morning, and the little bit of frizz that shows up around the hairline when real life happens. That’s the charm. Not the studio-perfect version. The version that still feels like you after three days and a satin bonnet.
I’ve always thought twists sit in a sweet spot that braids sometimes miss. They’re gentler than styles that ask for a lot of gripping at the scalp, and they’re more forgiving than a wash-and-go when you want length, shape, and fewer hands in your hair. The best twist styles for natural hair also let shrinkage work with you instead of against you. Coily hair twists into ropey definition. Looser textures get a little swing. Dense hair gets structure without needing a helmet of product.
The trick is choosing the right twist for the job. Tiny twists behave one way. Chunky twists behave another. Flat twists, twist buns, passion twists, Marley twists, and all the in-between styles each solve a different problem: time, tension, length, styling mood, or how much you want to touch your hair that week. Some of them are low-key and neat. Some read dressy. Some are the kind of style you throw on with hoops and a sharp lip and call it done.
Why These Twist Looks Stay in the Rotation
-
Low-Tension Shape: Twists keep hair grouped in sections, so the style can look polished without pulling every strand tight at the root.
-
Works on Short and Long Hair: A cropped TWA and waist-length coils can both wear twists well; the section size changes, but the idea stays the same.
-
Easy to Refresh: A mist bottle, a little leave-in, and a quick palm-roll at the frizzed ends can buy you another few days without a full redo.
-
Good for Busy Weeks: Some of these styles take 20 minutes. Others take a while, but they hold long enough to earn the time.
-
Accessory-Friendly: Beads, cuffs, scarves, pins, and headwraps don’t fight with twists the way they can fight with loose curls.
-
Flexible Vibe: The same basic twist pattern can read casual, office-clean, or event-ready depending on parting, size, and where you pin the ends.
1. Mini Two-Strand Twists With a Sharp Center Part
Mini twists are the quiet achiever of natural-hair styling. They sit close, show off your parting, and give tight coils a neat rope-like finish that doesn’t need much fuss after installation. A sharp center part keeps them from looking fluffy or vague, which matters if you like a style that reads clean from the front.
They work especially well on short-to-medium natural hair that wants definition more than volume. Use a watery leave-in, then a small amount of cream or gel on each section. Too much product weighs the twists down and makes them separate at the roots faster. If you want longevity, keep the sections small and twist with even tension from root to end.
2. Medium Twists That Hit Right at the Shoulders
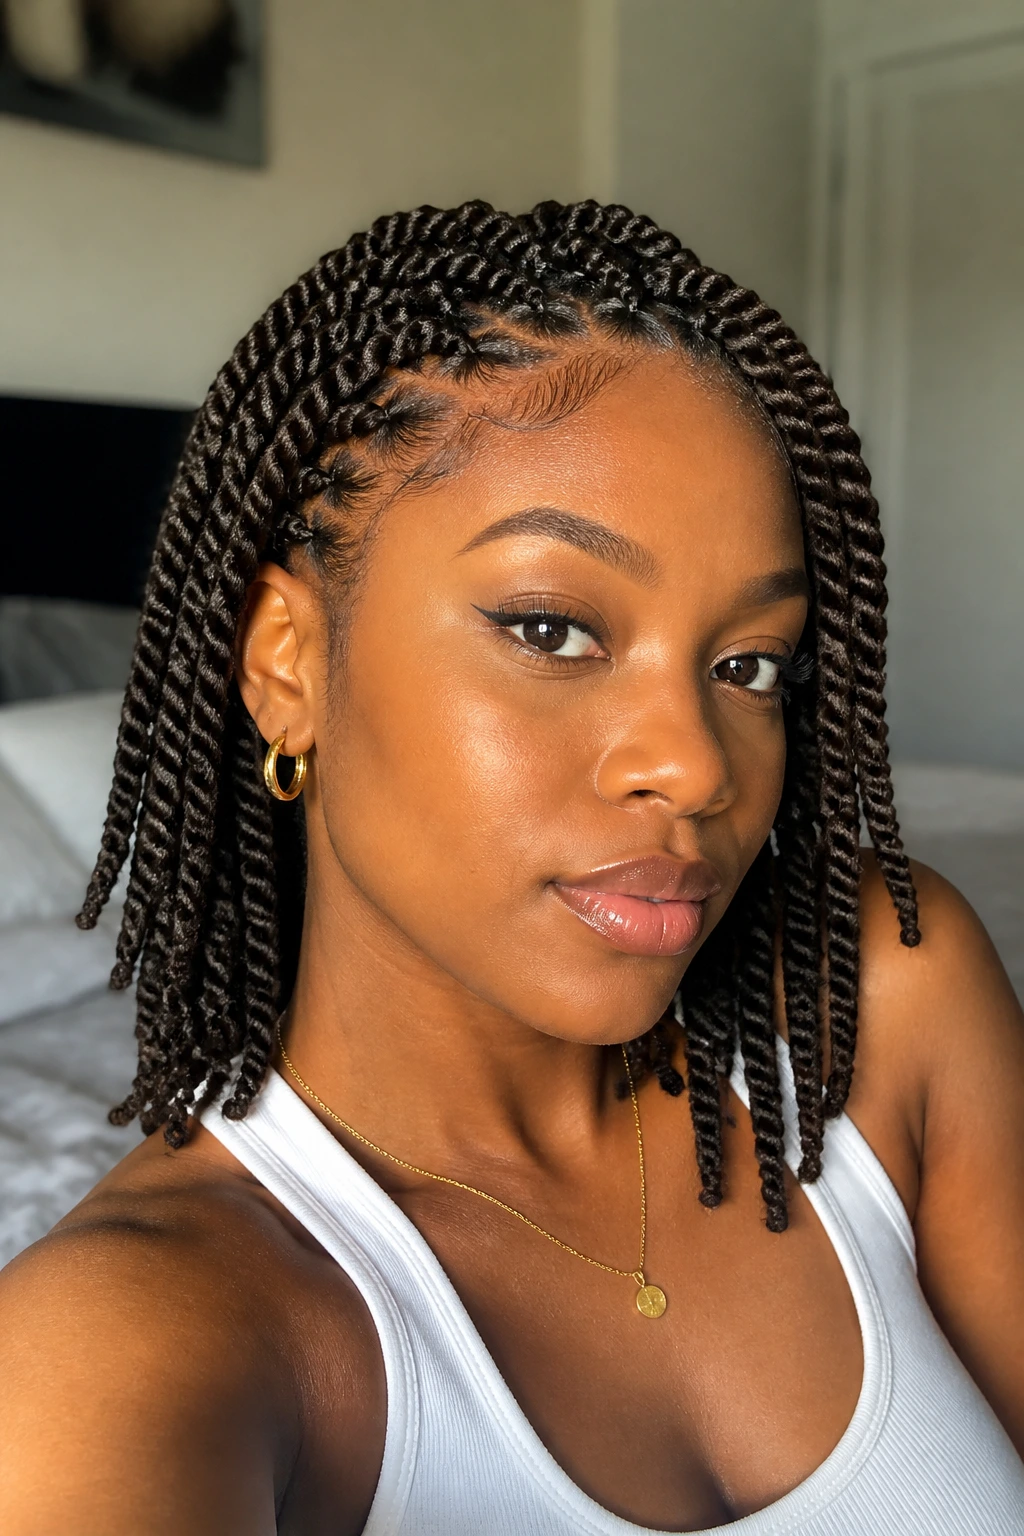
Medium twists are the style I recommend when someone wants movement without sitting in the chair forever. They’re big enough to install in a reasonable stretch, but not so chunky that they collapse after one night of sleep. On shoulder-length hair, they land with a nice little swing.
The parting can be straight rows or soft brick-lay sections, depending on how polished you want the finish. I like this size for hair that has medium density because it keeps the head from looking overworked. If your strands are very fine, make the sections a touch smaller. If your hair is thick, keep the roots neat and don’t overload the ends with product.
3. Jumbo Twists for Fast Styling Days
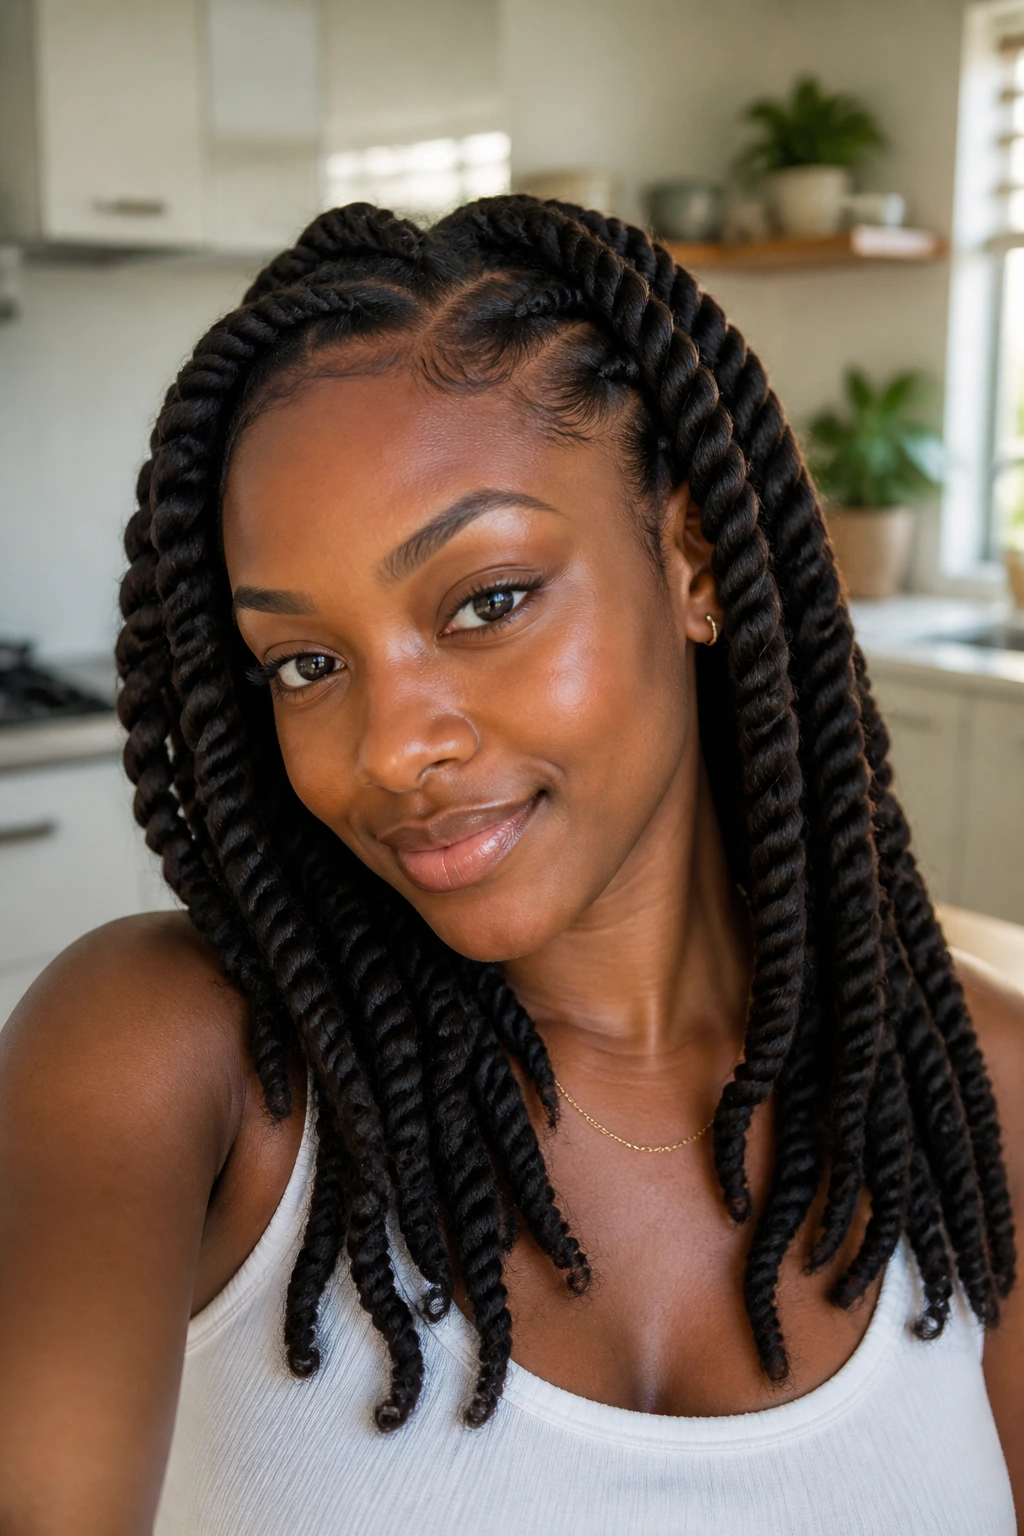
Jumbo twists are for the morning when you want the style to be done before your coffee gets cold. They use fewer sections, so the scalp shows more and the install moves fast. The tradeoff is simple: less time in the chair, less time on the head. That’s not a bad deal if you like a chunky, bold outline.
These twists look best when the hair has a little stretch first. A simple braid-out, banding, or blow-dry on low heat helps the twists hang instead of shrinking into little springs. Use a lightweight cream and a touch of mousse at the roots. Heavy butter turns jumbo twists fuzzy sooner than people expect.
4. Straight-Back Flat Twists Into a Low Puff
Straight-back flat twists are one of those styles that makes the front of the hair look instantly tidy. They lie close to the scalp, keep the crown controlled, and then release into a low puff at the nape. The shape is practical and pretty without trying too hard.
This one works well if your hairline likes a gentle touch. Flat twists distribute tension better than a bunch of tiny individual twists at the front, and that makes them easier to wear for longer stretches. The low puff gives you volume without asking the ends to sit under constant manipulation. A little edge control goes a long way here, but don’t drown the hairline in it.
5. Crown Halo Twists That Leave the Face Open
A crown halo is for the days when you want your face to be the main event. The twists trace around the head like a soft halo, then pin or tuck away at the back. It reads elegant, but not stiff. And because the front stays open, earrings and brows get to do some work too.
I like this style on medium to long hair, though you can fake the fullness with added hair if needed. Keep the front sections smaller and neater than the back sections. That tiny choice matters. It keeps the halo from sagging into your eyes by midday. If you want a slightly softer line, leave a few face-framing pieces out in front.
6. Twist Bob With Soft Curled Ends
The twist bob has a clean, compact shape that feels sharp without being severe. Ends curled with flexi rods or perm rods give it that little bend at the bottom that keeps the bob from looking blunt. It’s one of the few twist styles that looks especially good at chin length because the shape does so much of the work.
This is a good pick when you want neatness and movement in the same style. The curled ends matter more than people think; they keep the silhouette rounded and light. If your hair is prone to frizz at the ends, set them with mousse after twisting, then let them dry fully before you take the rods out. Rushing that part makes the whole bob look half-done.
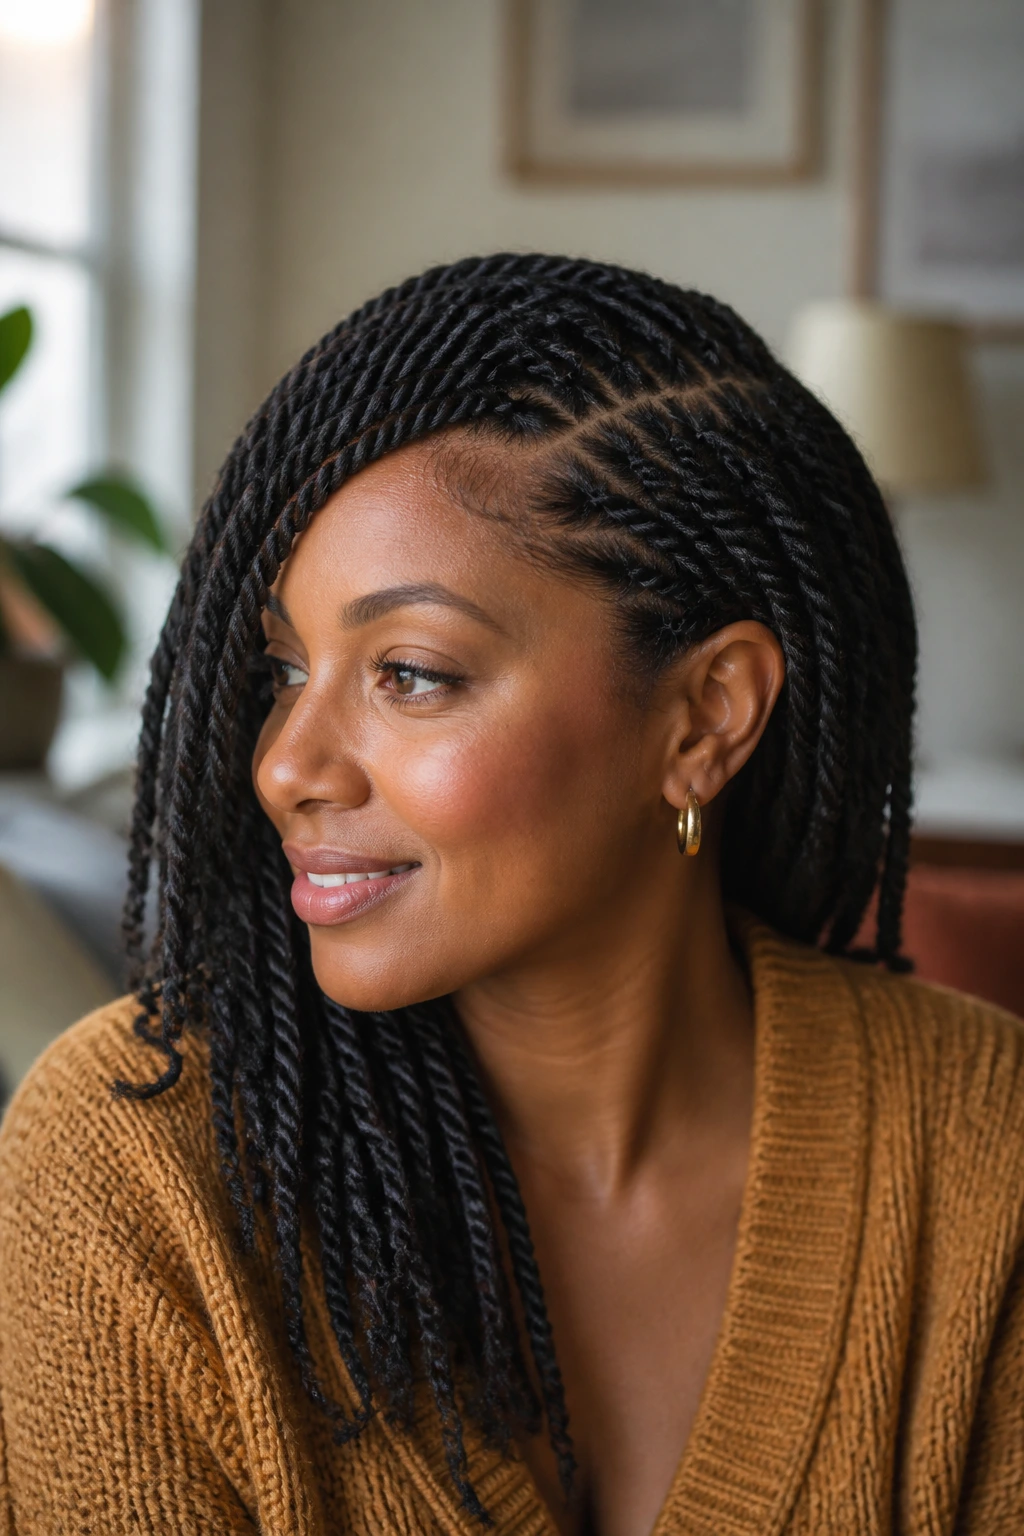
7. Side-Swept Rope Twists for an Easy Shape
Side-swept rope twists change the mood of the whole head without adding extra steps. A deep side part and a little directional sweep give the style softness at the front and movement through the lengths. It’s a useful shape if your face likes a line that isn’t too centered or symmetrical.
The best thing about this look is how simple it is to maintain. Once the part is set, you can keep the twists tucked to one side with a couple of discreet pins or a soft barrette. If the hair tends to puff at the crown, stretch the roots slightly before twisting. That helps the sweep hold instead of flipping back up in the morning.
8. Half-Up, Half-Down Twists With Visible Length
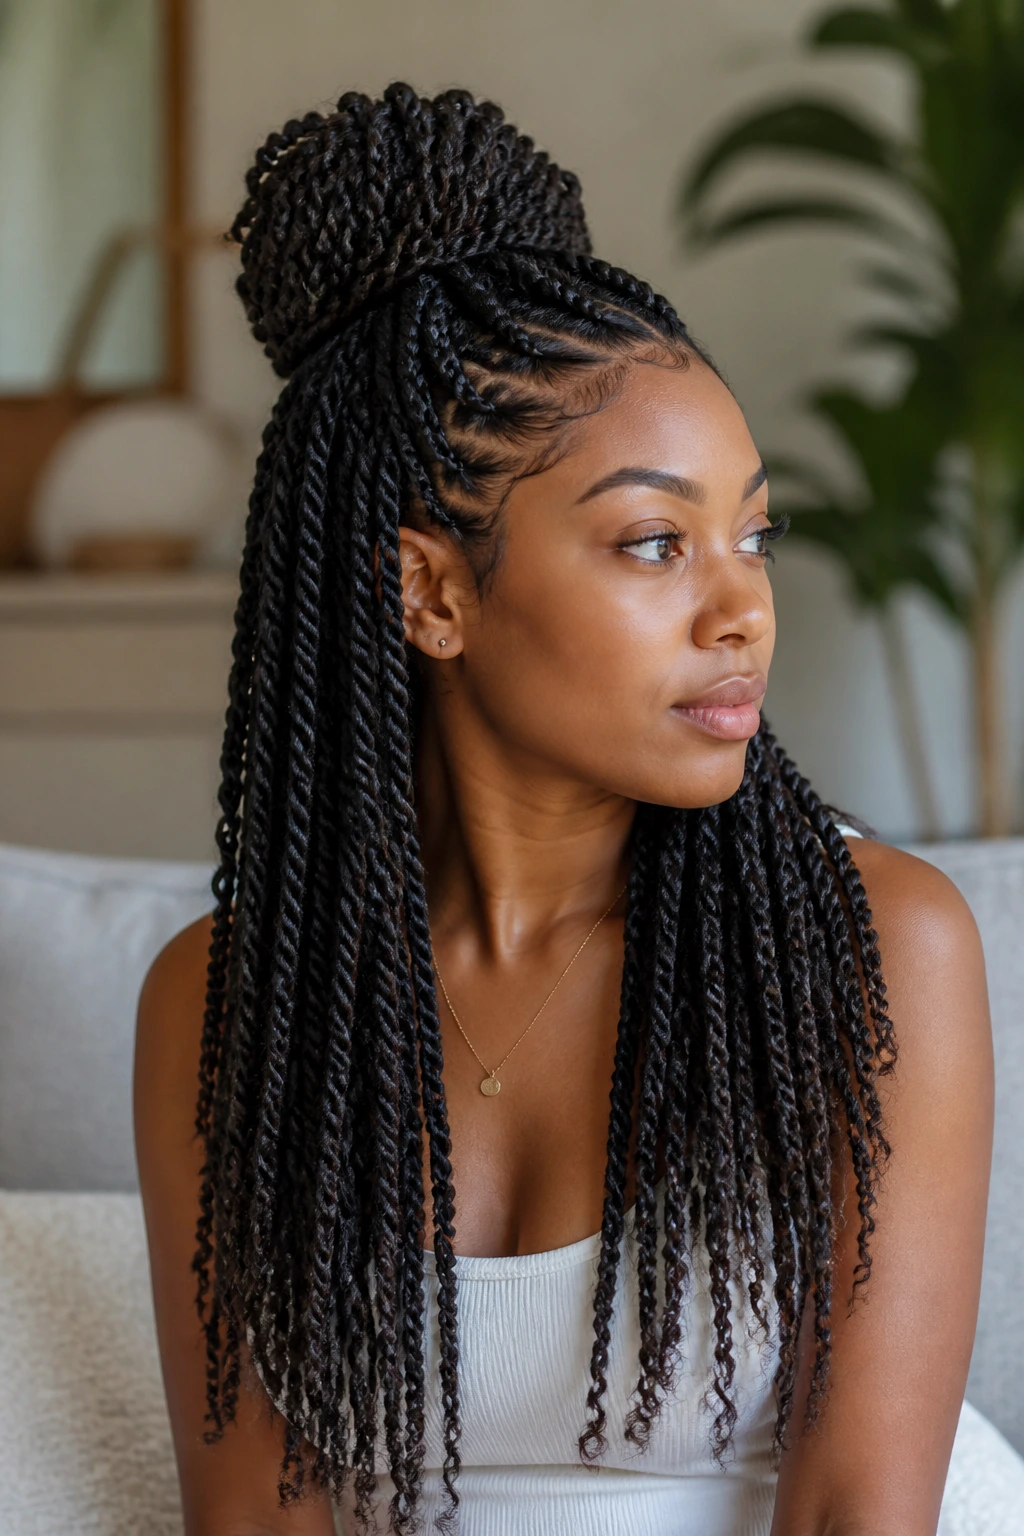
Half-up, half-down twists are a good answer when you want the length to show but don’t want hair in your face all day. The top section gets gathered into a puff, knot, or small bun, while the rest hangs loose. It gives you shape at the crown and movement at the shoulders.
This style works best when the twist size is medium. Too tiny, and the top section can look sparse once you pull it up. Too large, and the back loses softness. I like to secure the top with a snag-free band and then wrap one small twist around the base to hide the elastic. It’s a tiny detail, but it makes the style look finished.
9. High-Puff Twists That Lift the Crown
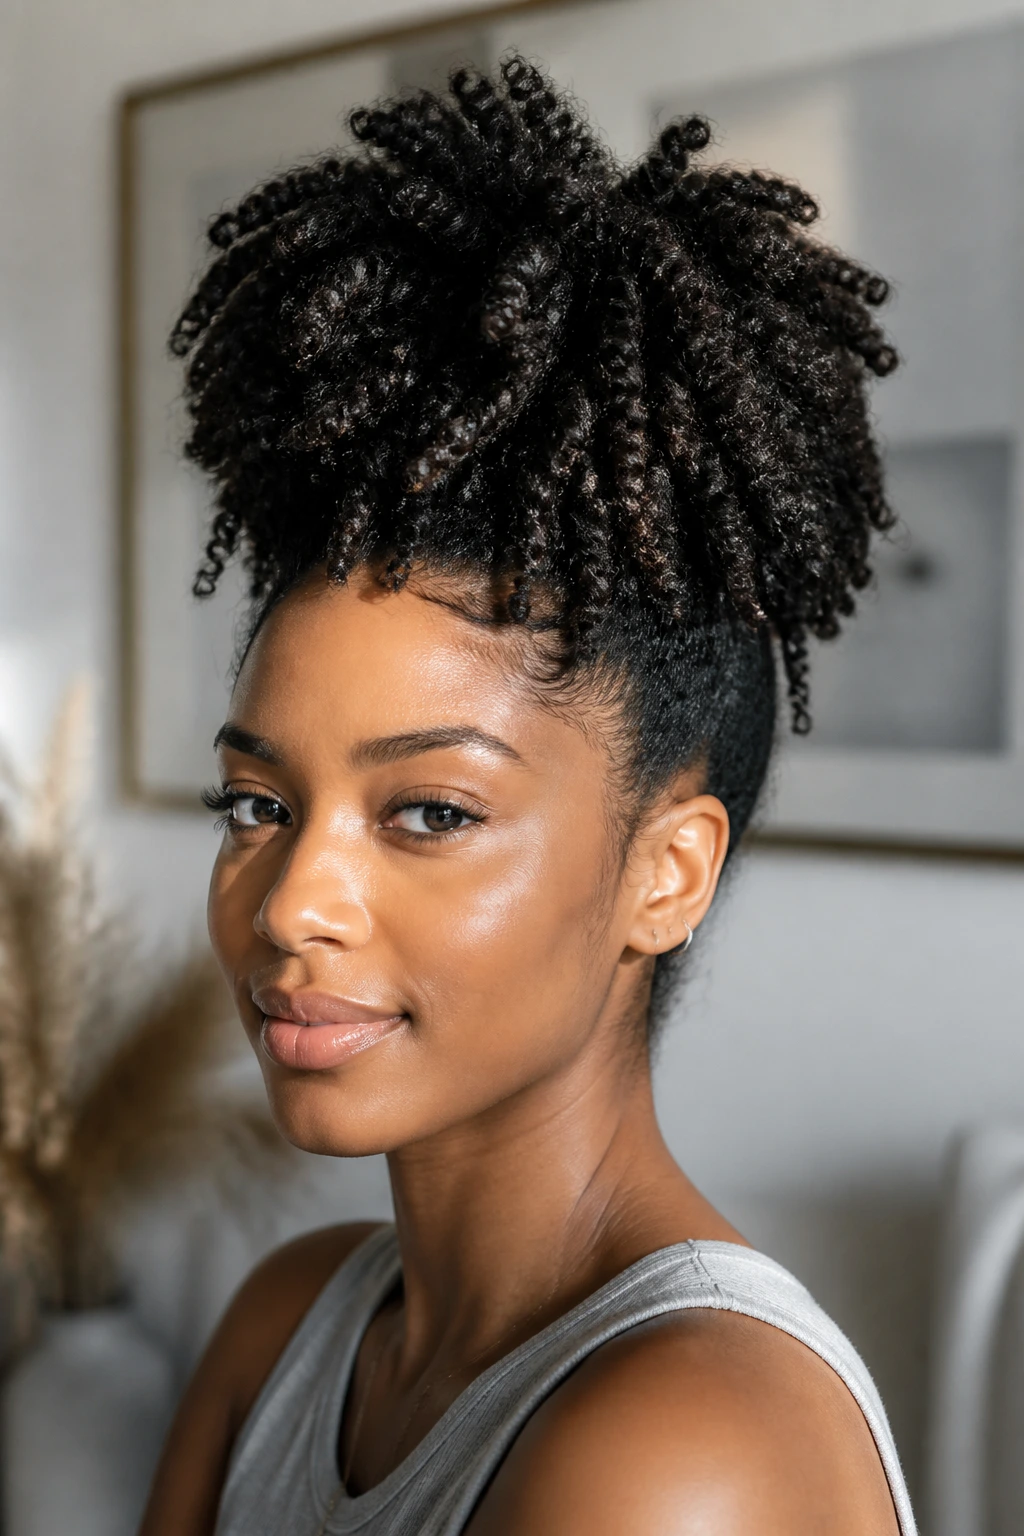
A high-puff twist style uses the twists to build height instead of length. Gather them loosely at the crown and let the ends fall where they may. The shape gives the face a nice lift and keeps the neck clear, which is useful when you want hair out of the way but still want to keep the texture visible.
The key is not to over-tighten the base. If the front feels pulled back hard, the style starts working against you fast. Use a soft, wide band and smooth the perimeter with your fingers first, not a brush loaded with product. If the twists are already frizzing a little, the puff is forgiving. That’s part of the appeal.
10. Twisted Low Bun That Sits Flat and Neat
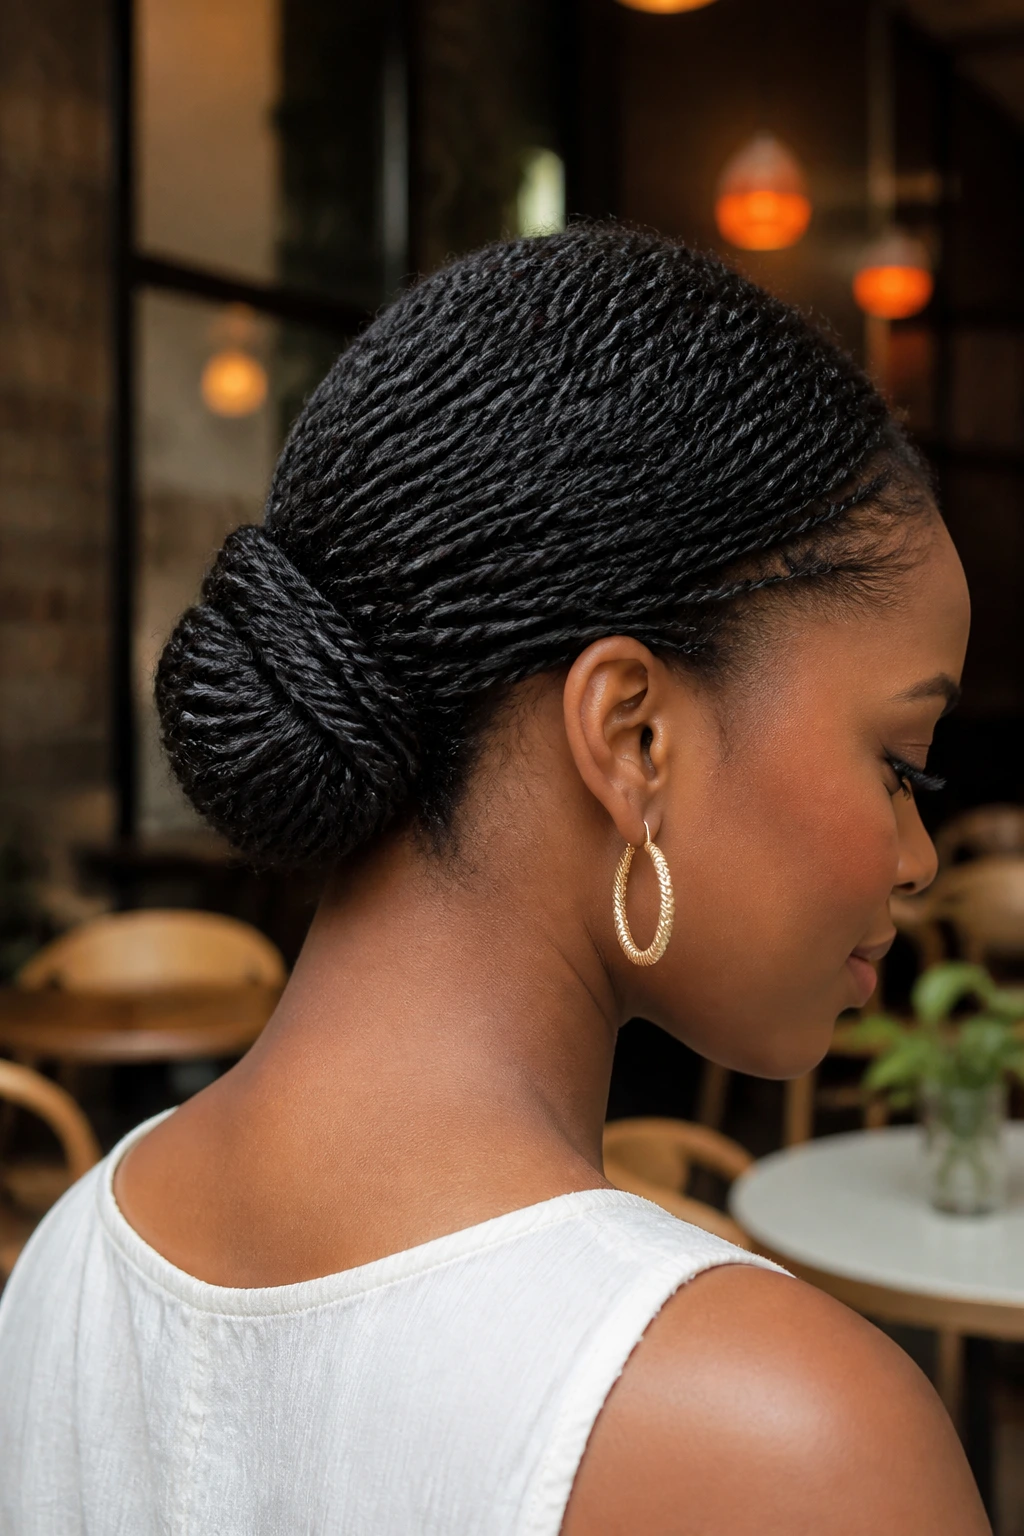
The low bun version is the one I’d choose for a day that wants polish without drama. Gather the twists at the nape, coil them into a bun, and pin from underneath so the shape sits flat. It’s tidy, stable, and easy to wear with collars, scarves, or earrings that would get lost in bigger hair.
What makes this work is the balance between smooth roots and controlled ends. Keep the front close, but not slicked hard. If the twists are long, fold them under before pinning so you don’t end up with a lumpy bun that sticks out at odd angles. A few U-pins placed in a crisscross pattern help more than one giant clip ever will.
11. Space Buns Built From Clean Twists
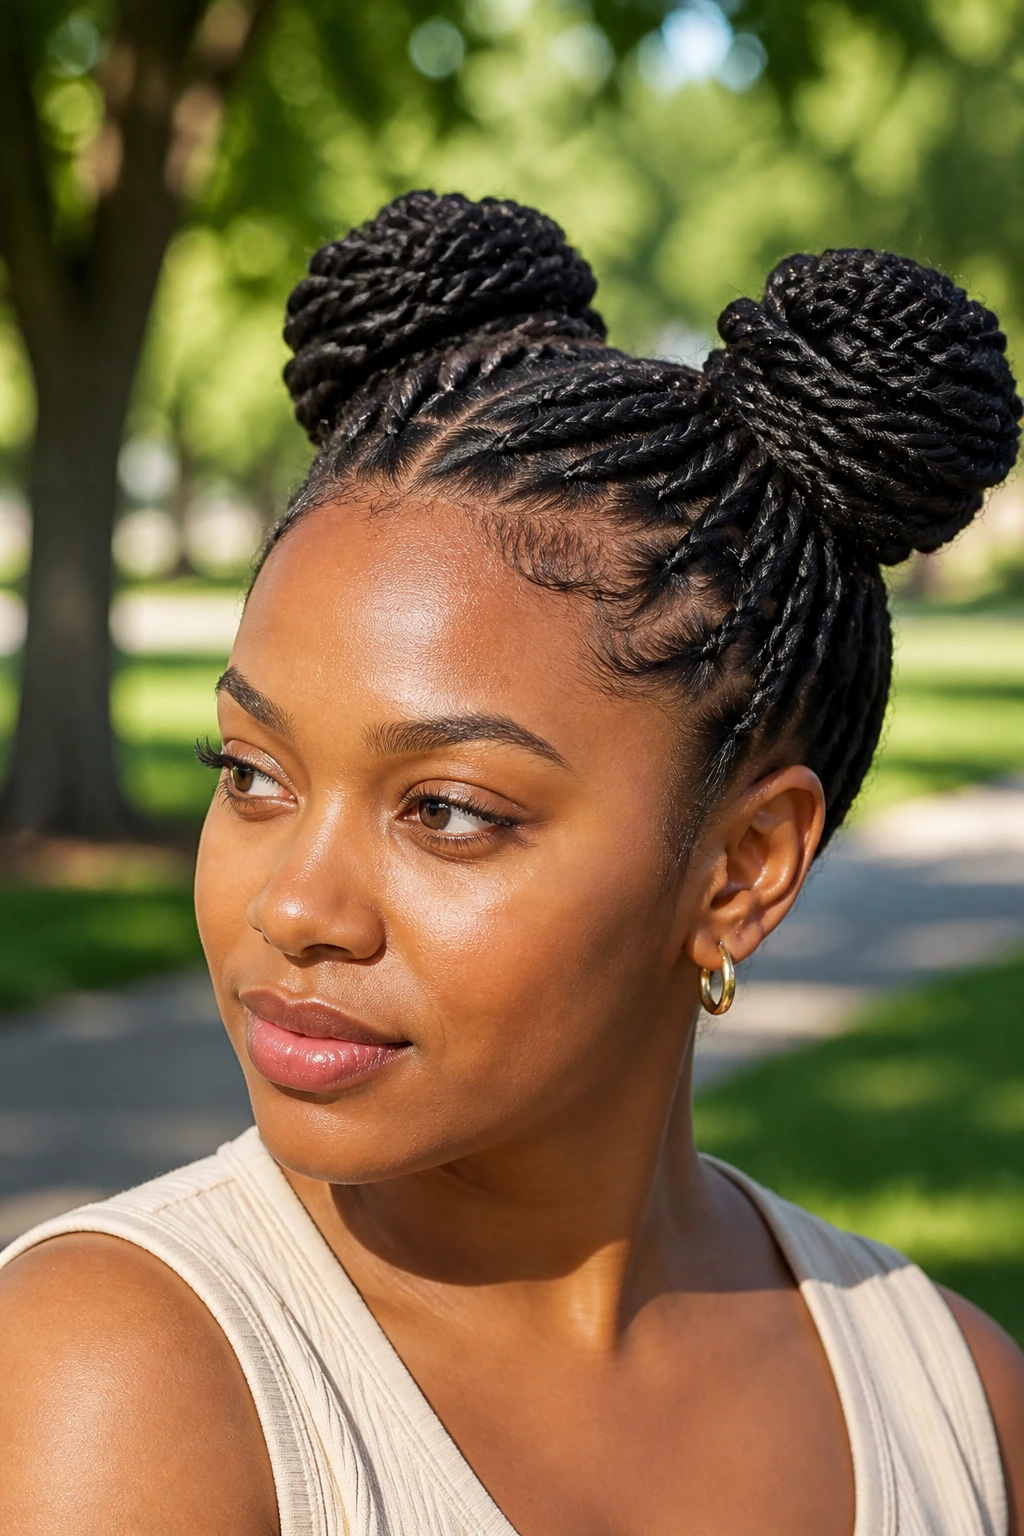
Space buns can read playful or grown-up depending on how neat you make the base. Two even sections, each twisted into a bun at the crown or slightly above the ears, give you a style with a bit of bounce. If you keep the parts clean, the look feels intentional instead of costume-y.
This style is best on medium-length twists that can wrap around once or twice without fighting the band. It’s also a nice option when the hair is a little older and you want to use that extra texture to your advantage. Keep the buns loose enough to avoid pulling at the roots. Tight buns on twists can feel like a headache waiting to happen.
12. Tapered Twists for a Short Natural Cut
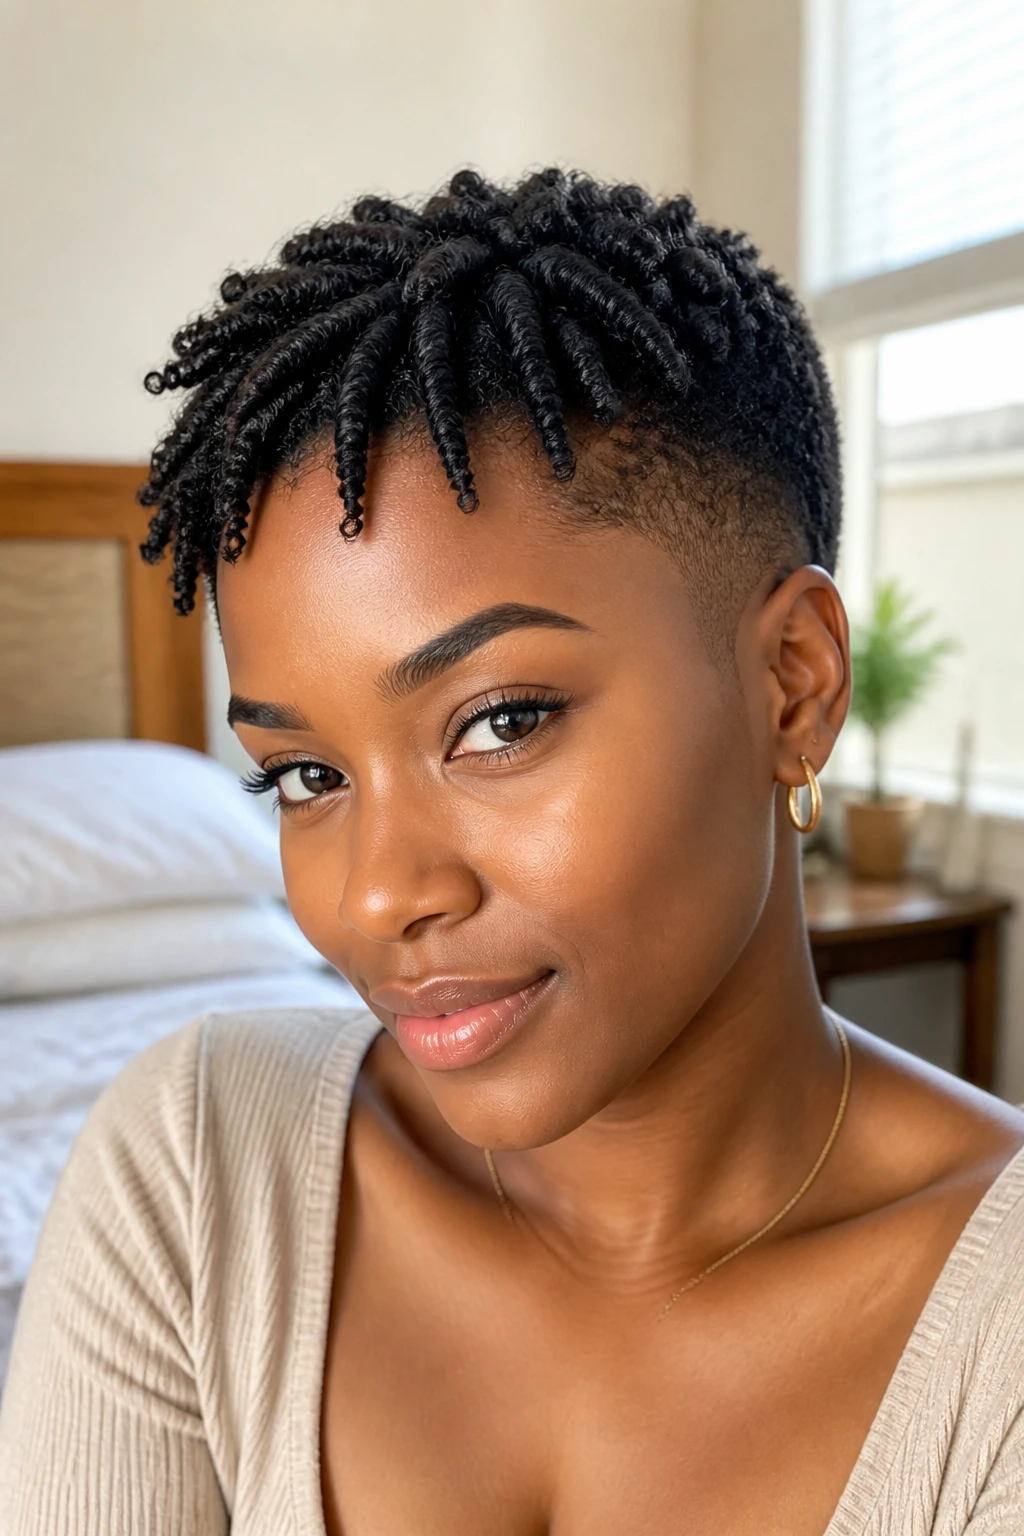
Tapered cuts do something lovely with twists. The shorter sides keep the shape sharp, while the longer top can get a little more movement and height. The contrast is what makes the style interesting. It doesn’t need a lot of accessories because the cut itself does the work.
On a tapered shape, sectioning matters more than length. Smaller twists at the front keep the line neat, and slightly chunkier twists near the crown help the top show up. I’d use a light cream and a firm but flexible gel on the first inch of each twist so the style doesn’t puff up around the edges. The cut is already doing enough. Don’t fight it.
13. Passion Twists With a Loose, Swingy Finish
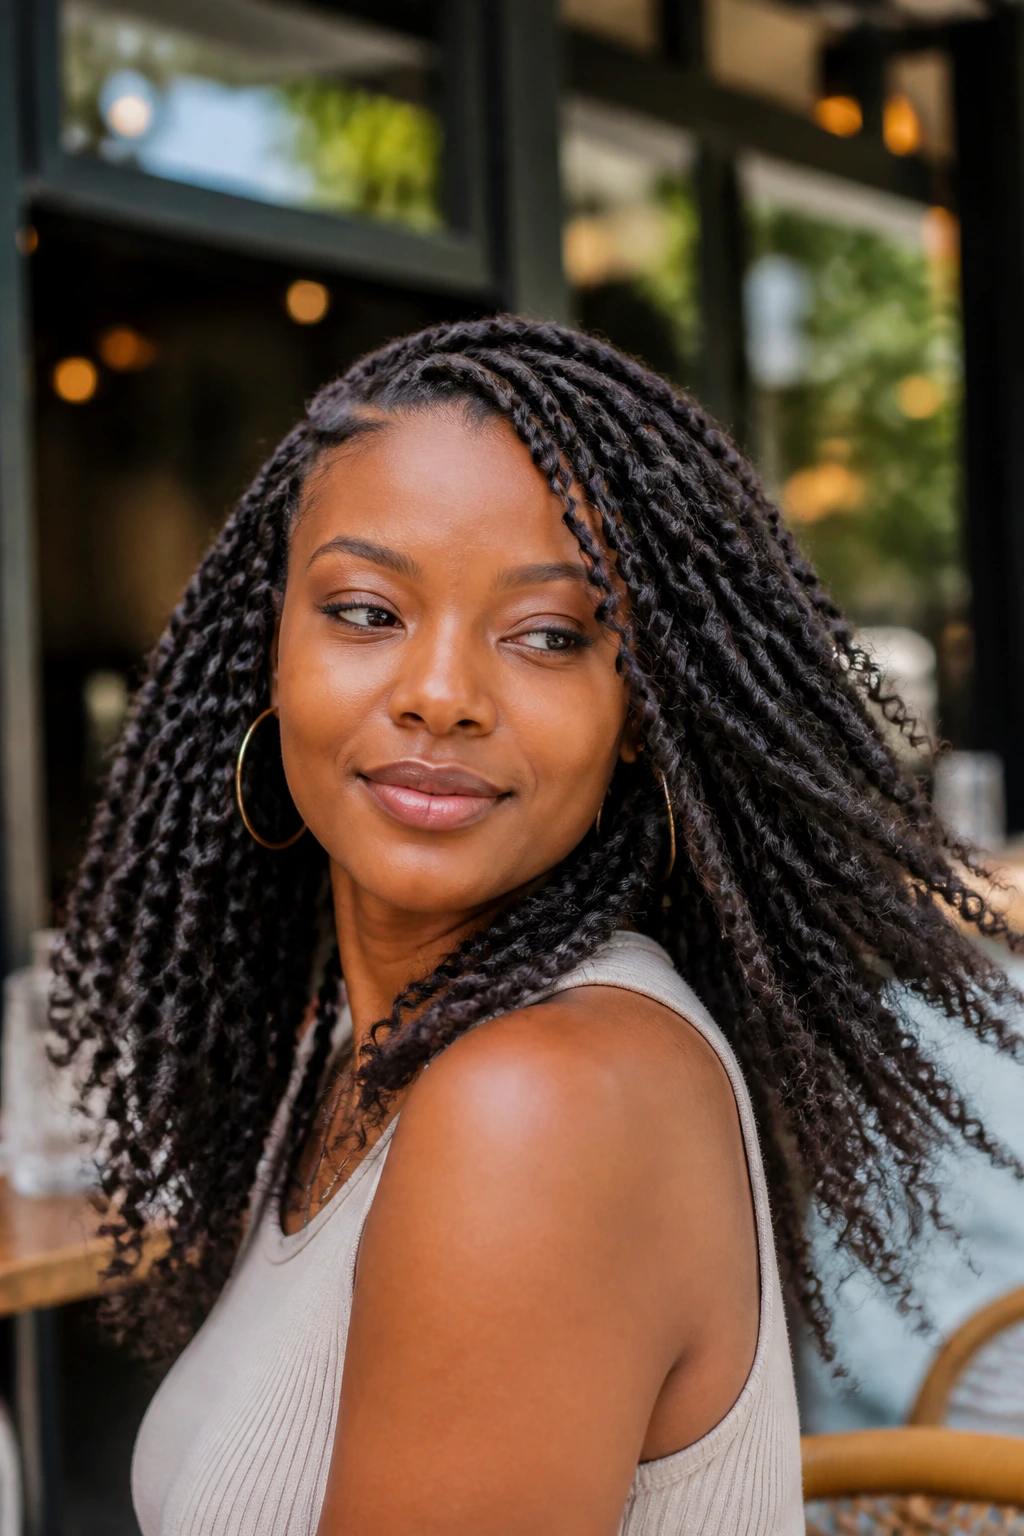
Passion twists bring a softer, less rigid finish because the synthetic hair is usually more textured and relaxed around the ends. They have movement built in. The style looks good when it’s a little undone, which is rare and helpful because not every hair day needs precision.
They take longer than simple two-strand twists, but they buy you more wear time if installed well. Start with hair that’s clean, moisturized, and not dripping wet. That damp-to-dry middle ground helps the added hair wrap smoothly. If you want the most natural-looking finish, keep the sections medium and let the ends stay slightly loose.
14. Marley Twists With a Matte, Fuller Look
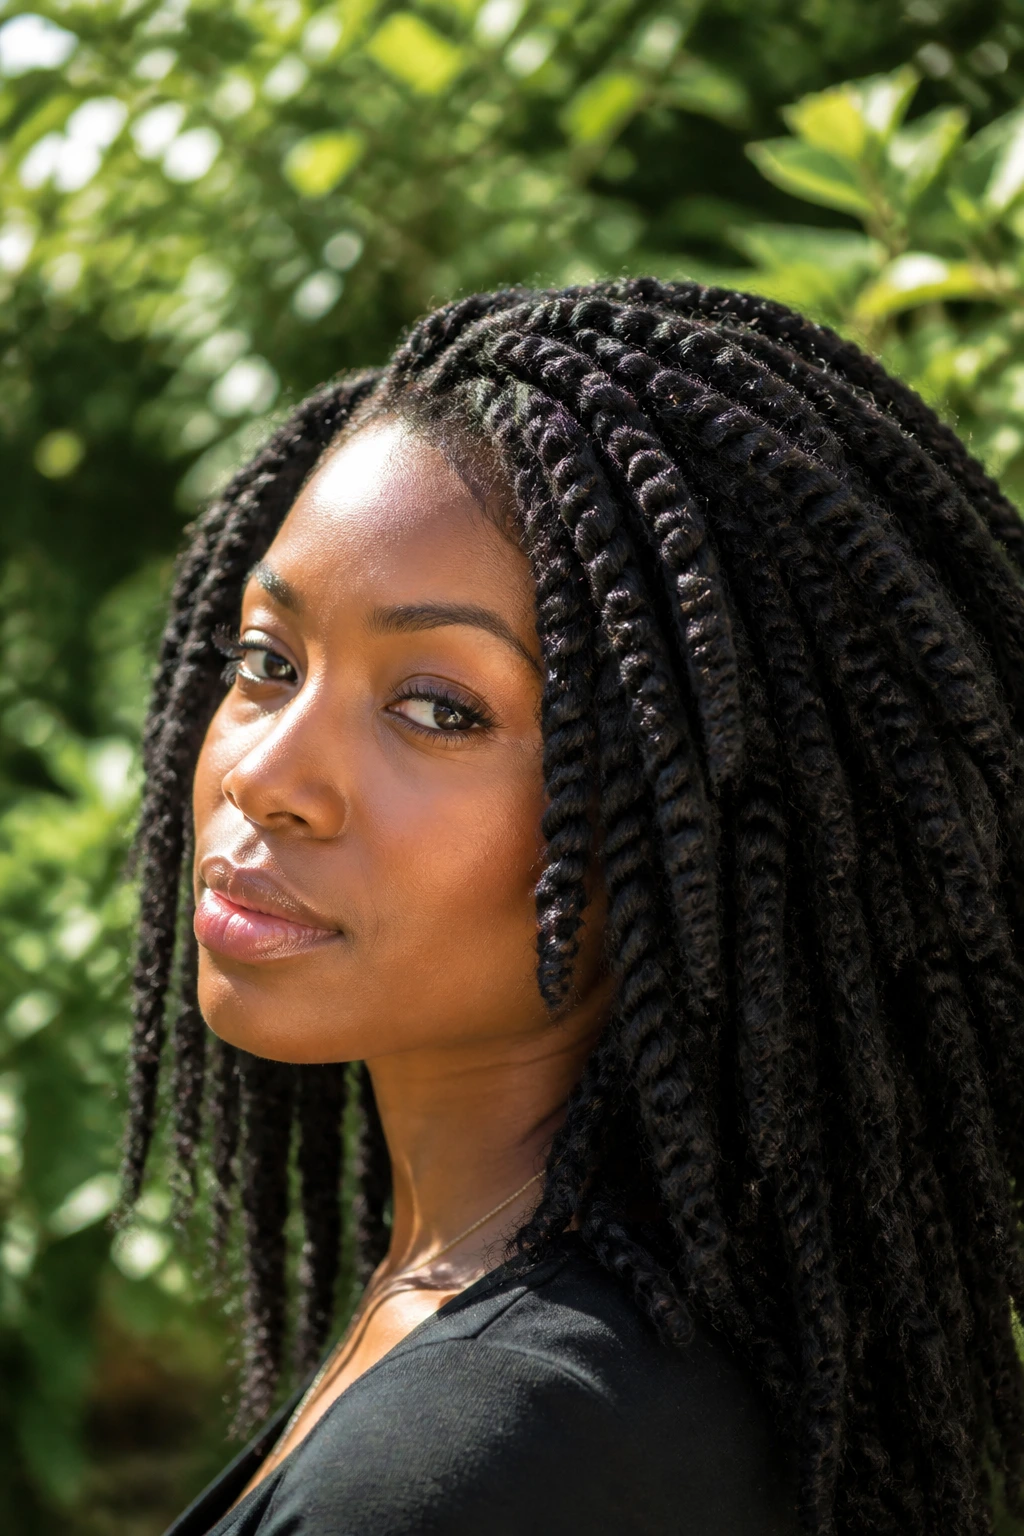
Marley twists have a soft, matte texture that blends nicely with coily natural hair. They look fuller than silkier synthetic options, and that’s exactly why people like them. The finish doesn’t shine much, but it reads rich and earthy in a way that works beautifully with thicker textures.
This style is a good choice when you want dimension without a glossy finish. The added hair usually needs to be pre-separated so it doesn’t look too thick at the start and too fuzzy at the end. I’d keep the parts simple, because the texture is already doing enough visual work. On a very dense head, Marley twists can feel heavy, so don’t go too large.
15. Havana Twists for Bigger Sections and Faster Install
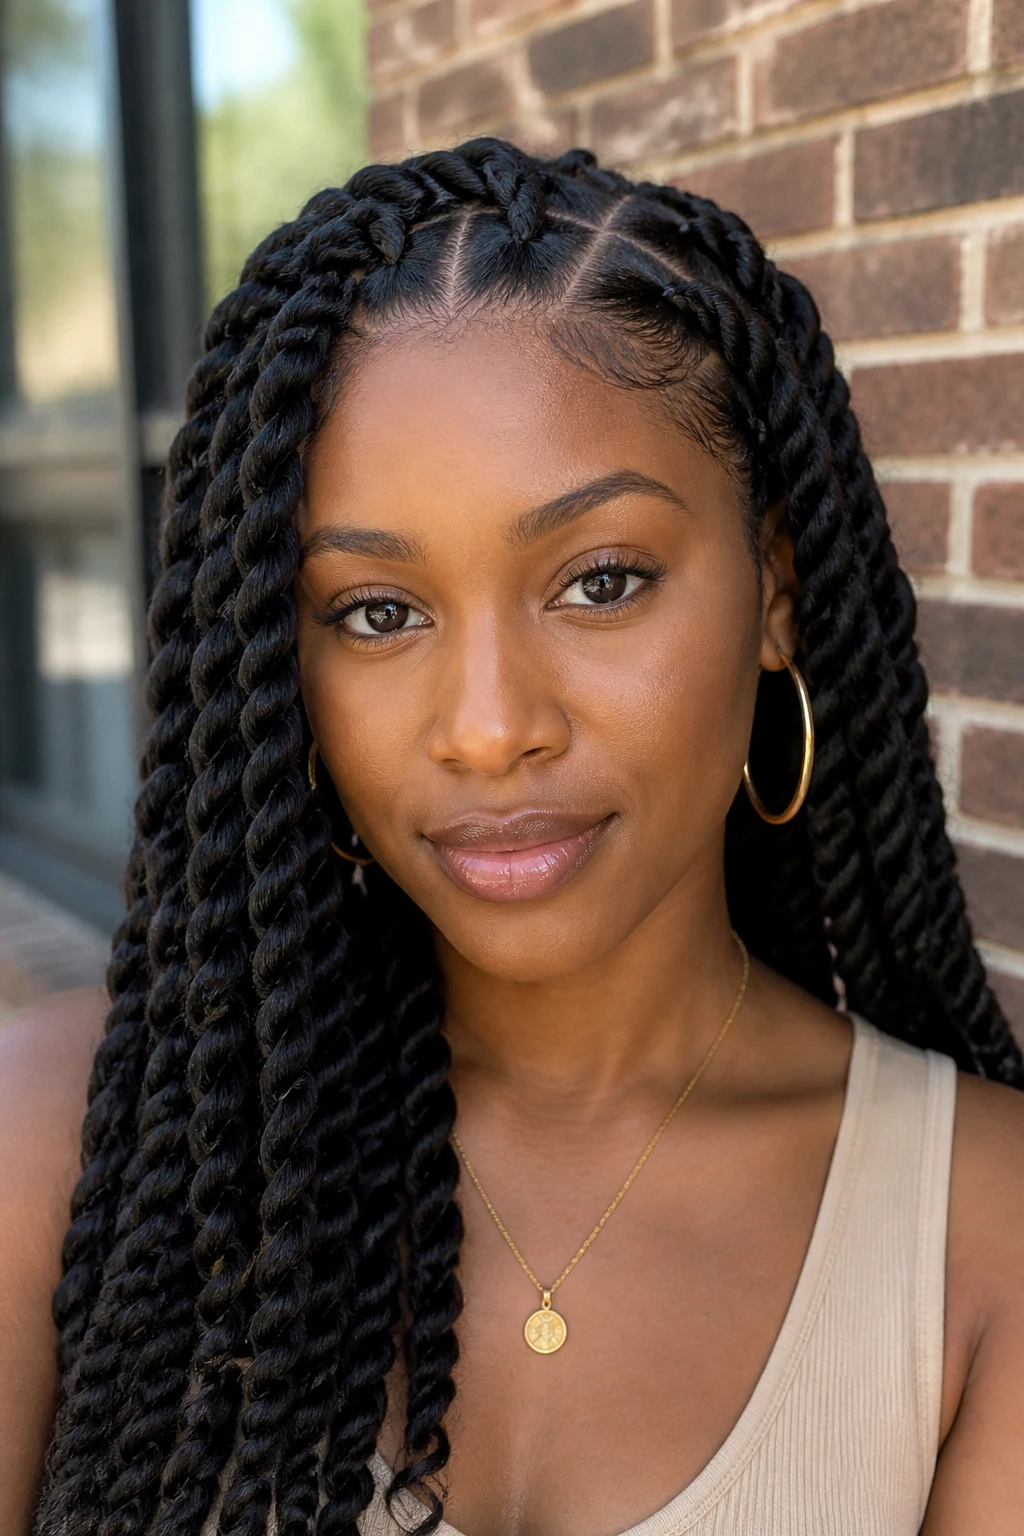
Havana twists are the larger, softer cousin in the twist family. They use chunky sections and a fuller feel, so the install moves faster than with mini or medium twists. If you like a style that looks substantial from the side, this is one to keep in mind.
Because the twists are bigger, the scalp prep matters. Clean parts and smooth roots make the whole look feel controlled instead of bulky. Havana twists also work well when you want a style that can be dressed up with cuffs or worn plain without looking unfinished. They’re sturdy, but not stiff. That balance is the reason they’ve stayed around.
16. Feed-In Flat Twists That Melt Into One Line
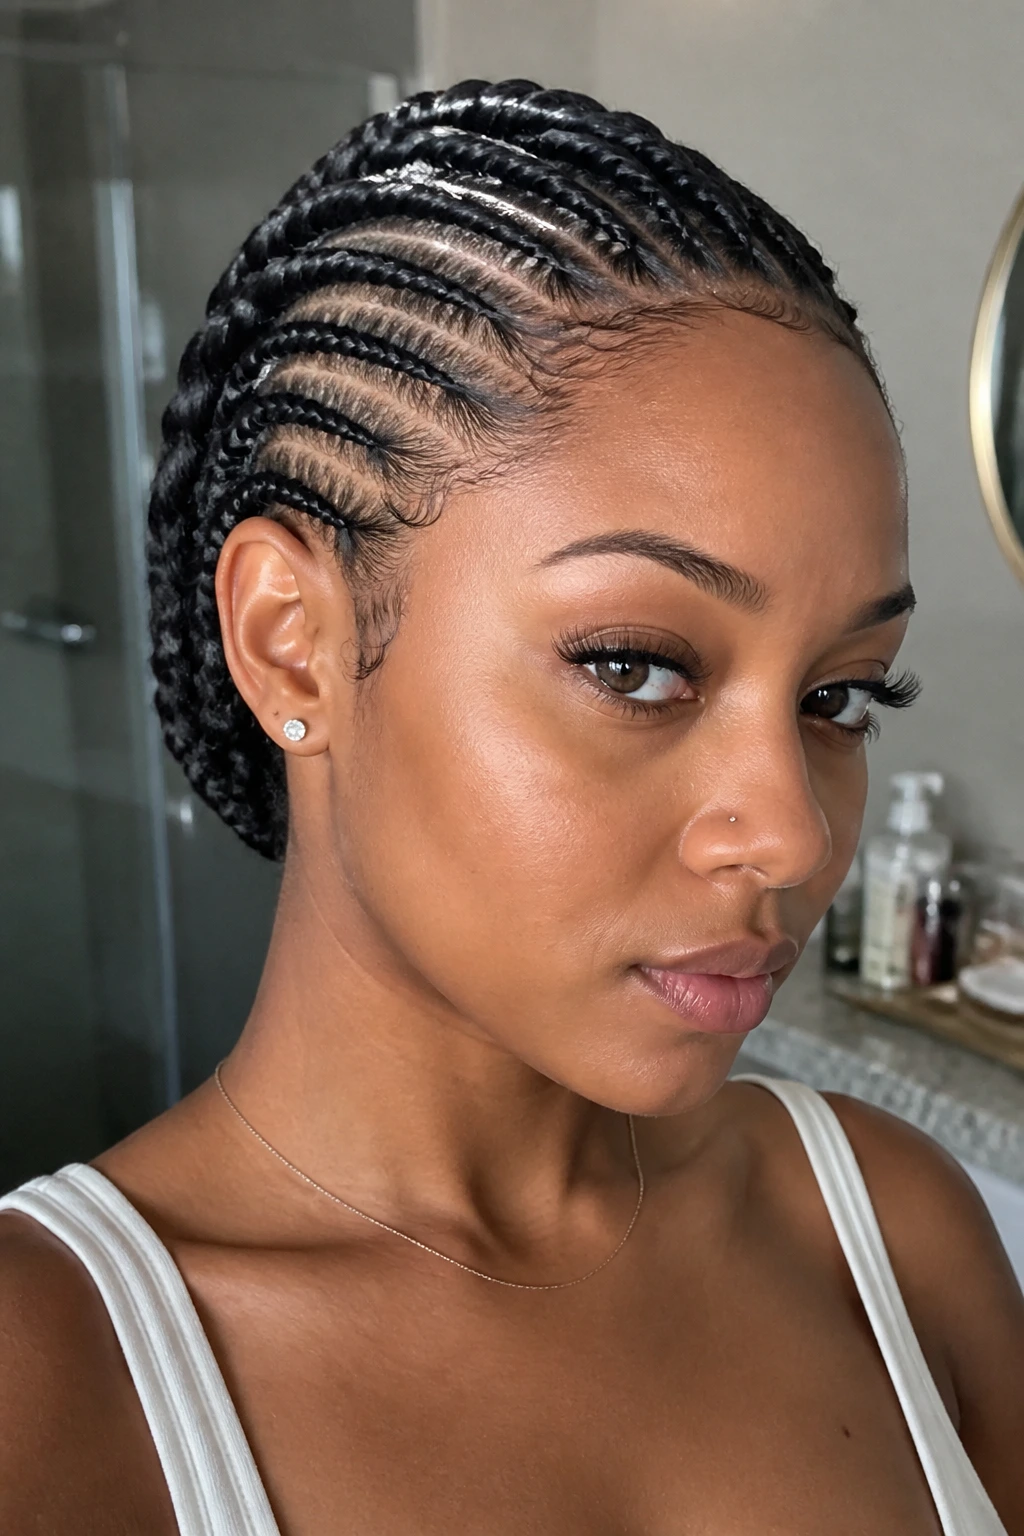
Feed-in flat twists have a clean, almost braided finish because the added hair grows into the style gradually. You don’t get a hard bump where the hair starts. Instead, the twist builds in a smoother line from the root down, which makes the scalp pattern look more fluid.
This is the style to choose when you want the front of the head to look sleek without feeling glued down. Add hair in small amounts and keep your grip even. If the additions jump too fast, the twist starts looking lumpy. The feed-in method also helps if your natural hair is shorter at the front and you want the twist to carry more length visually.
17. Triangle-Part Twists for a Sharp Scalp Pattern
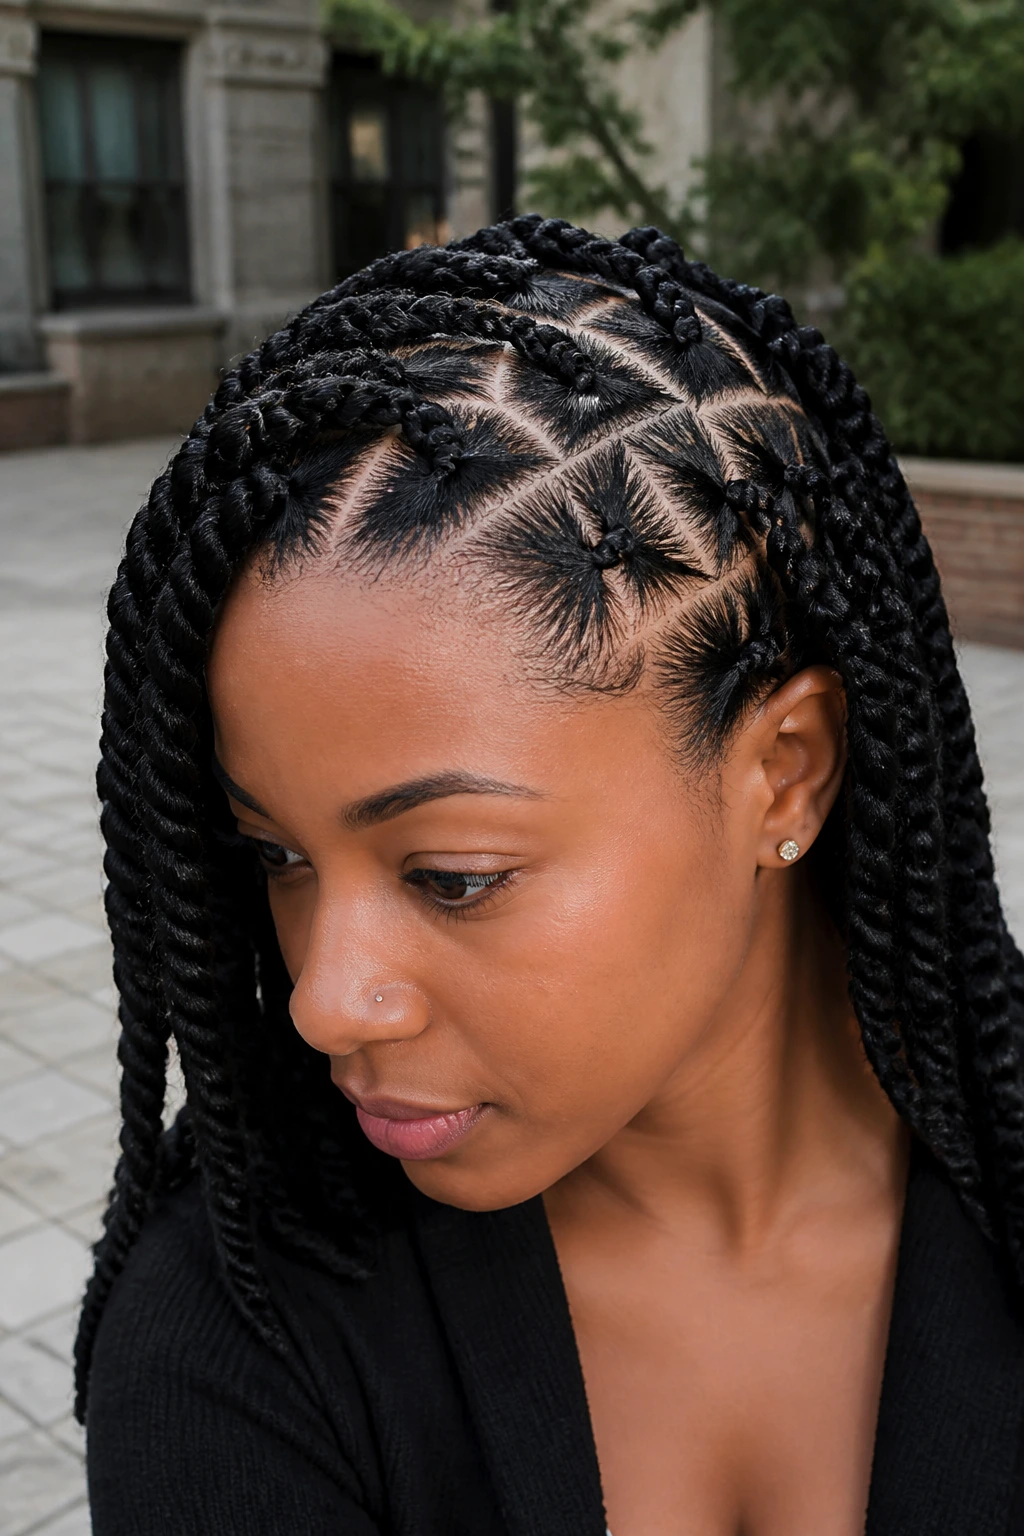
Triangle parts give the style a little edge without needing color or accessories. The parting itself becomes part of the design. Once the twists are in, the triangles show through at the scalp and make the whole head look more deliberate.
I like triangle parts most on medium-sized twists. On tiny twists, the pattern can disappear. On jumbo twists, the triangles can feel too bold unless that’s the look you want. Keep the triangles even and pointed cleanly toward the parting lines. It takes a little more time than straight sections, but the result has more personality.
18. Zigzag-Part Twists That Add a Little Edge
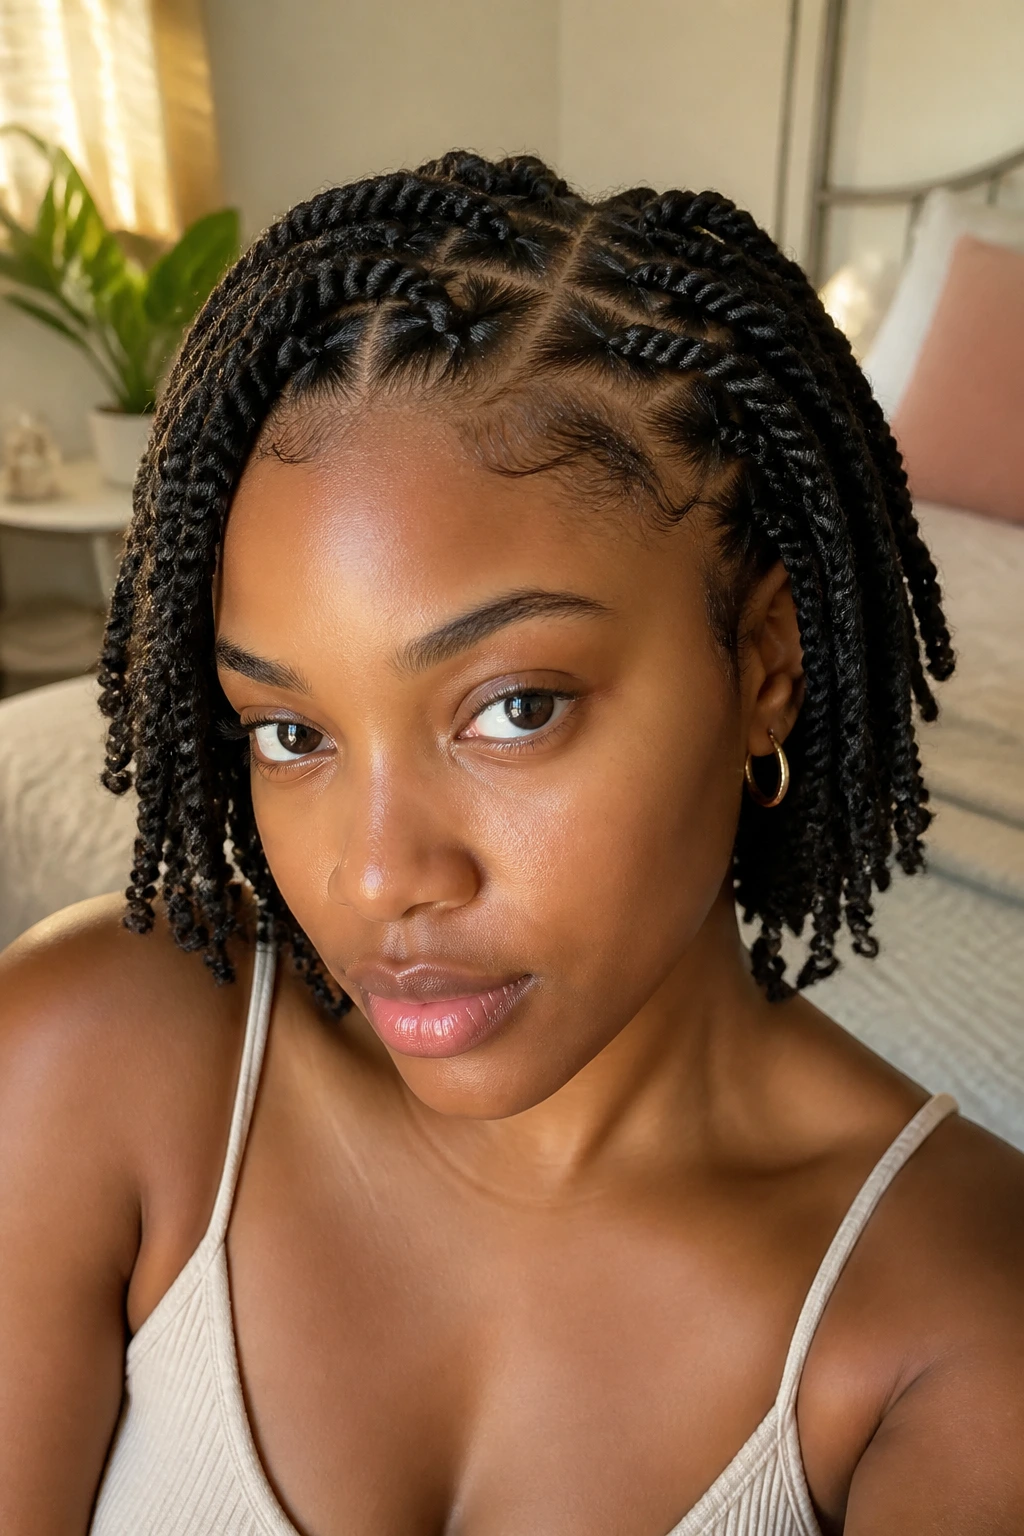
Zigzag parts are for people who like a little movement before the twisting even starts. The scalp pattern gives the style texture from the root, so even a simple twist shape feels less expected. It’s one of my favorite choices when straight rows feel too plain.
The trick is to make the zigzags neat enough to read on purpose. Wobbly parts look accidental. Clean corners look stylish. I’d keep the twists themselves medium or small so the parting gets to show. A style like this doesn’t need extra decoration, though a few cuffs near the front can look sharp if you’re in the mood.
19. Beaded Twists for a Playful Finish
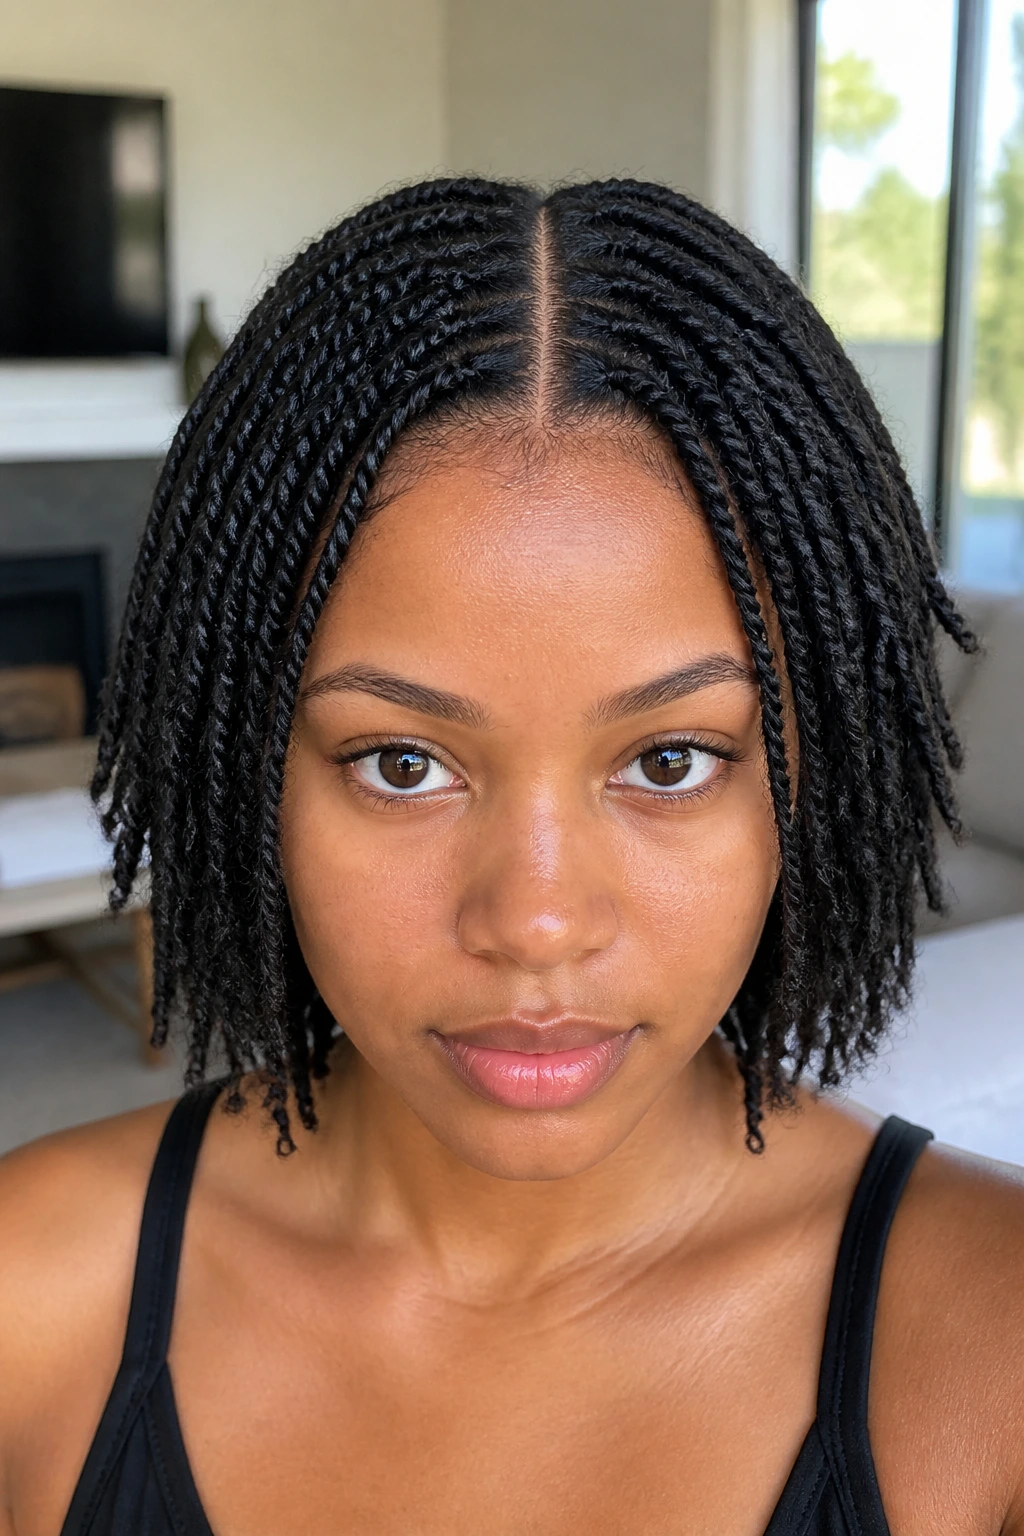
Beads change the whole personality of twists. Add them to the ends, and the style gets a little sound, a little weight, and a little movement when you walk. It’s not childish unless you want it to be. On the right cut and parting, beads can look sleek and modern.
This style works best when the twists are not too thick at the ends. Otherwise the beads slide awkwardly or feel heavy. Seal the ends well before adding them so the hair doesn’t unravel under the weight. I’d use the beads sparingly on fine hair and more generously on dense hair that can carry the look.
20. Twists Finished With Gold Cuffs and Rings
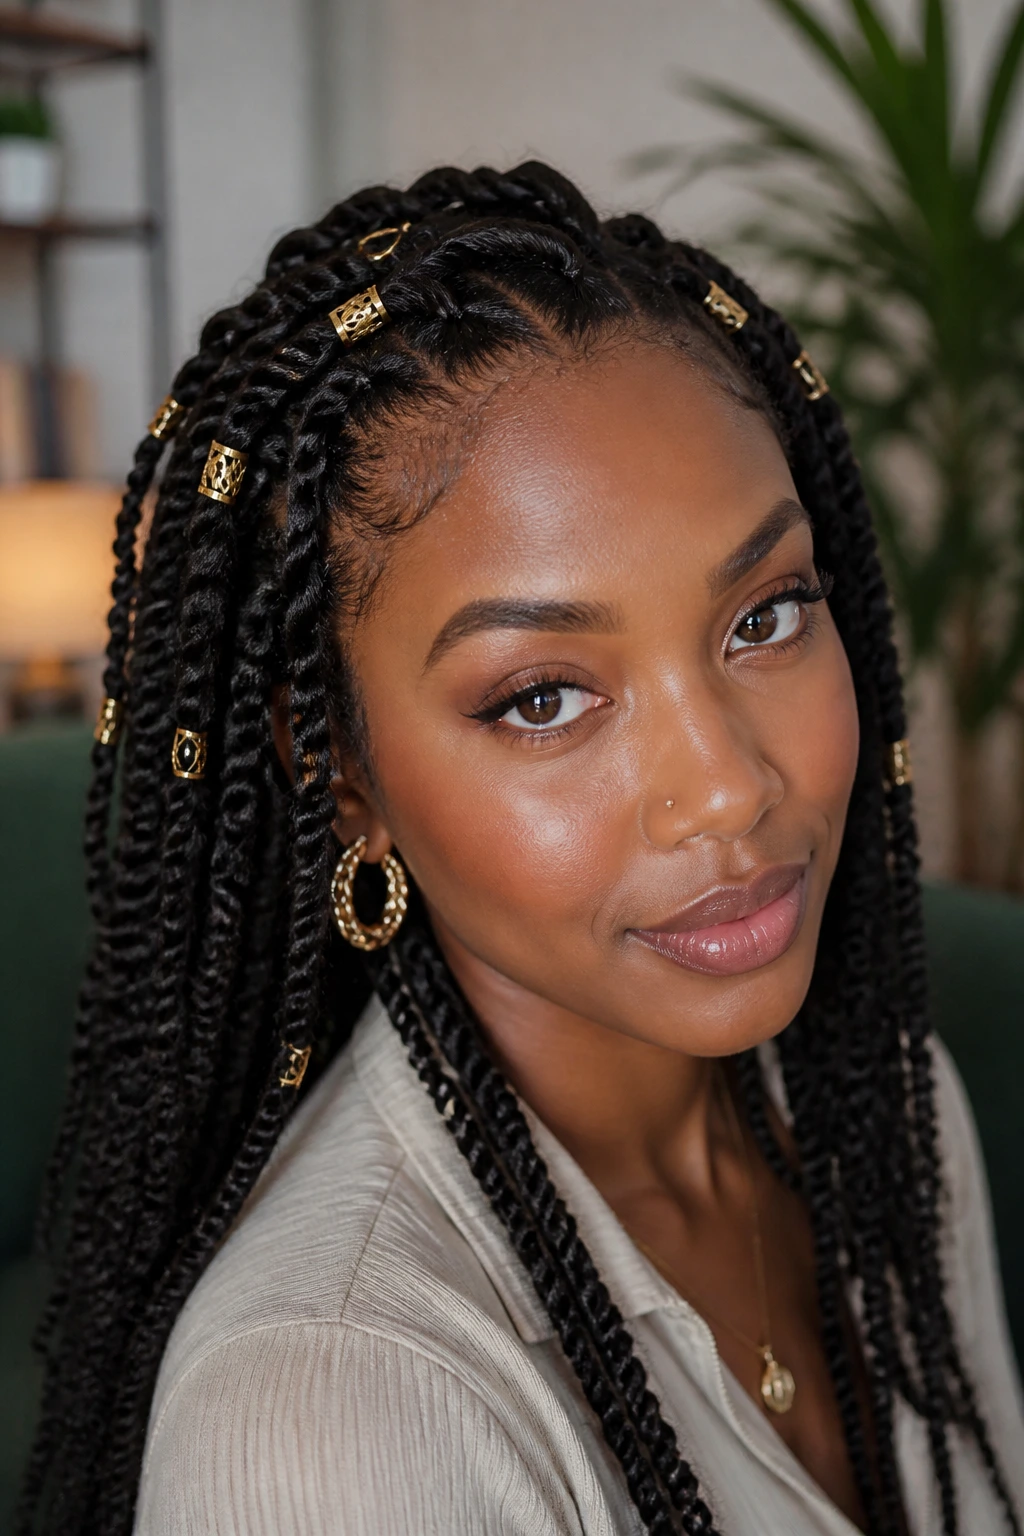
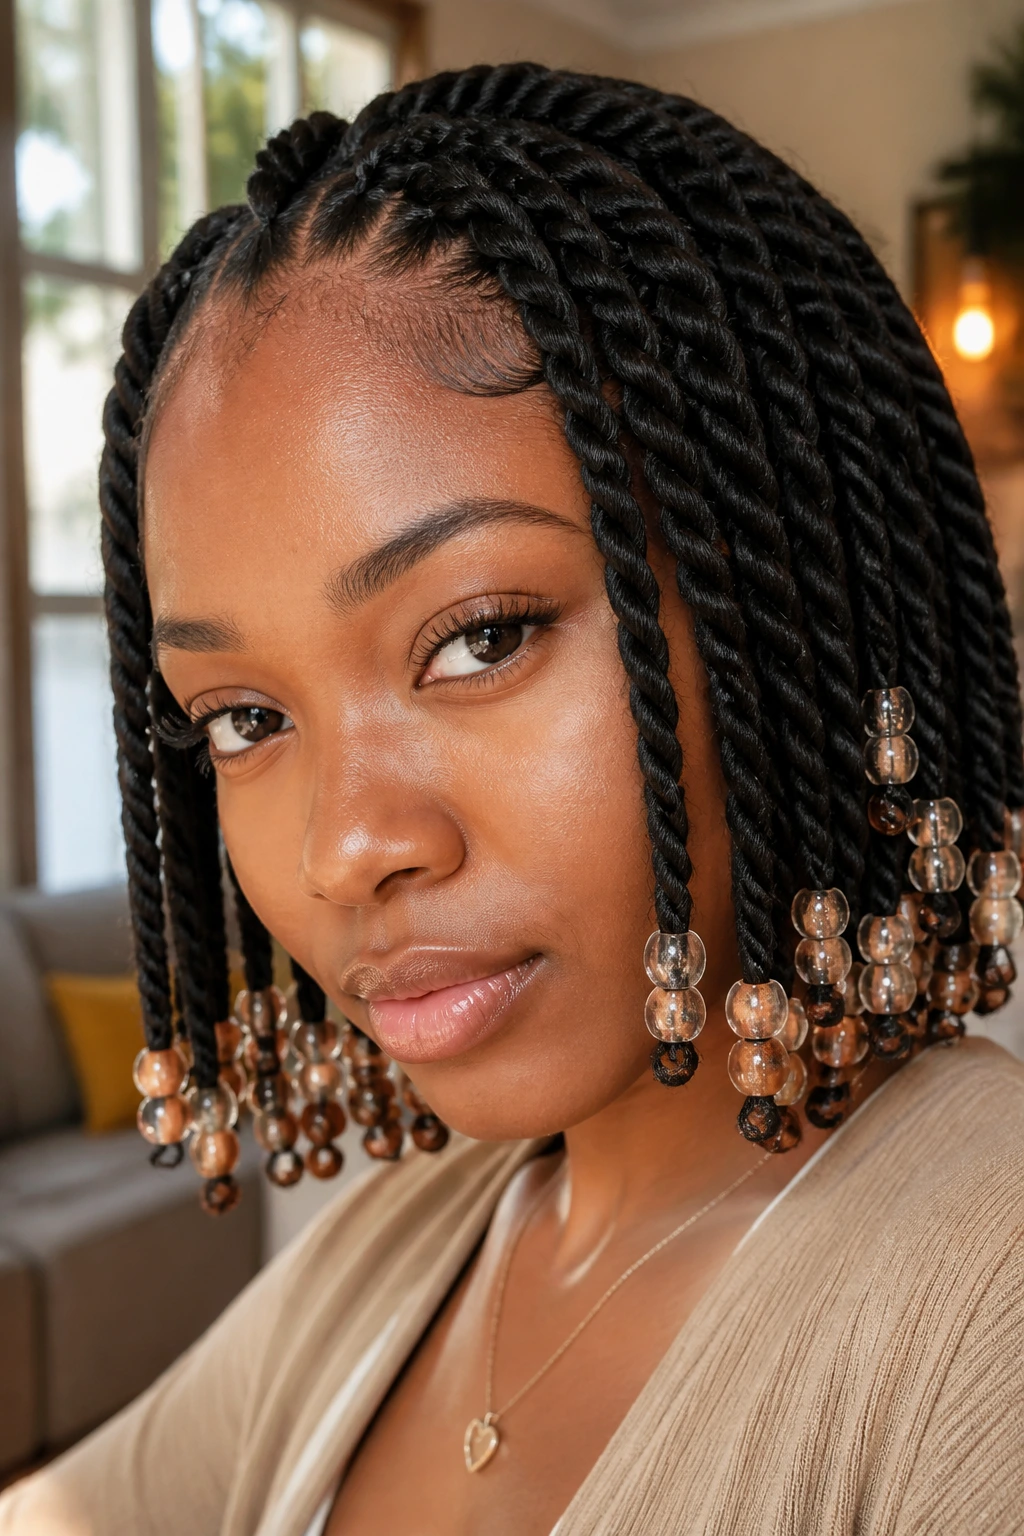
Gold cuffs are the fast route to making plain twists feel finished. You don’t need a complicated install; you need clean parts and a few well-placed accents. A handful of cuffs near the front or at the mid-lengths can do more than a pile of accessories scattered everywhere.
This is the style I reach for when the twists themselves are nice but a little plain. The metal catches the eye, which helps if the hair is dark and the twist pattern is subtle. Clip cuffs on after the hair is dry so they don’t slide. Too much product near the cuff can make the metal slip around by lunch.
21. Twisted Mohawk With Sleek Sides
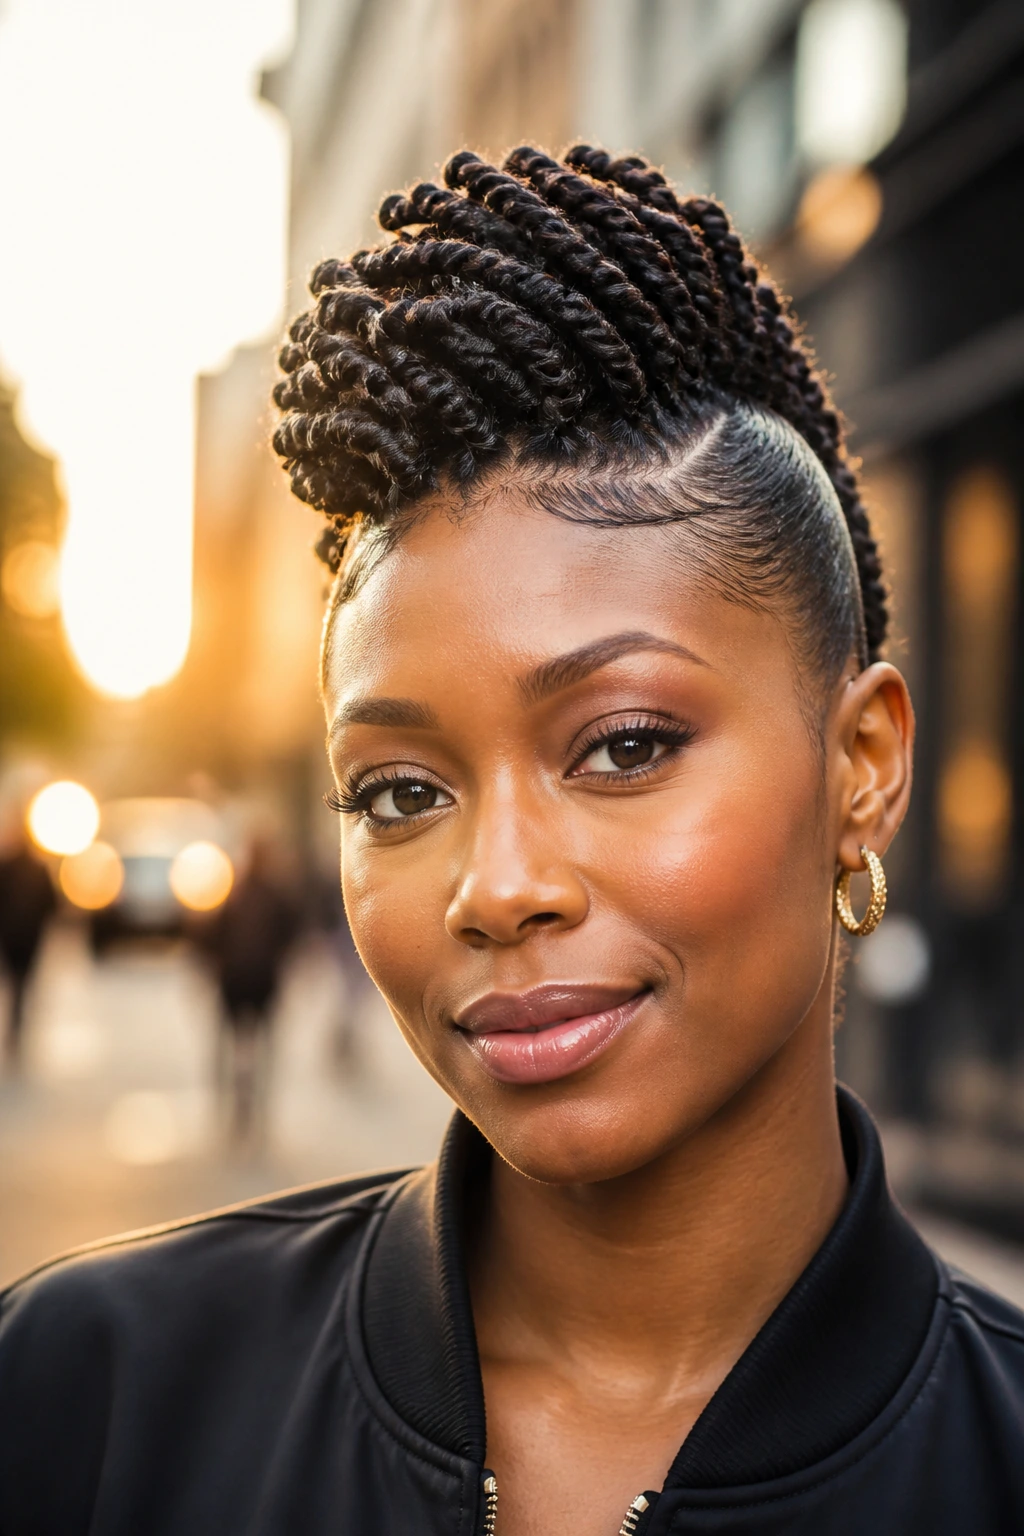
A twisted mohawk gives you structure and attitude without committing to a full cut. The sides are smoothed down or flat twisted tight, while the center section is left fuller and raised. The contrast is what makes it sing. It’s neat at the temples and louder through the middle.
The shape works especially well when you want height without piling all the hair on top of your head. Keep the side tension controlled. That part gets uncomfortable quickly if you go too hard. The center twists can be larger than the side work, which keeps the mohawk line visible and keeps the style from collapsing into the sides.
22. Side-Braid and Twist Combo for Mixed Texture
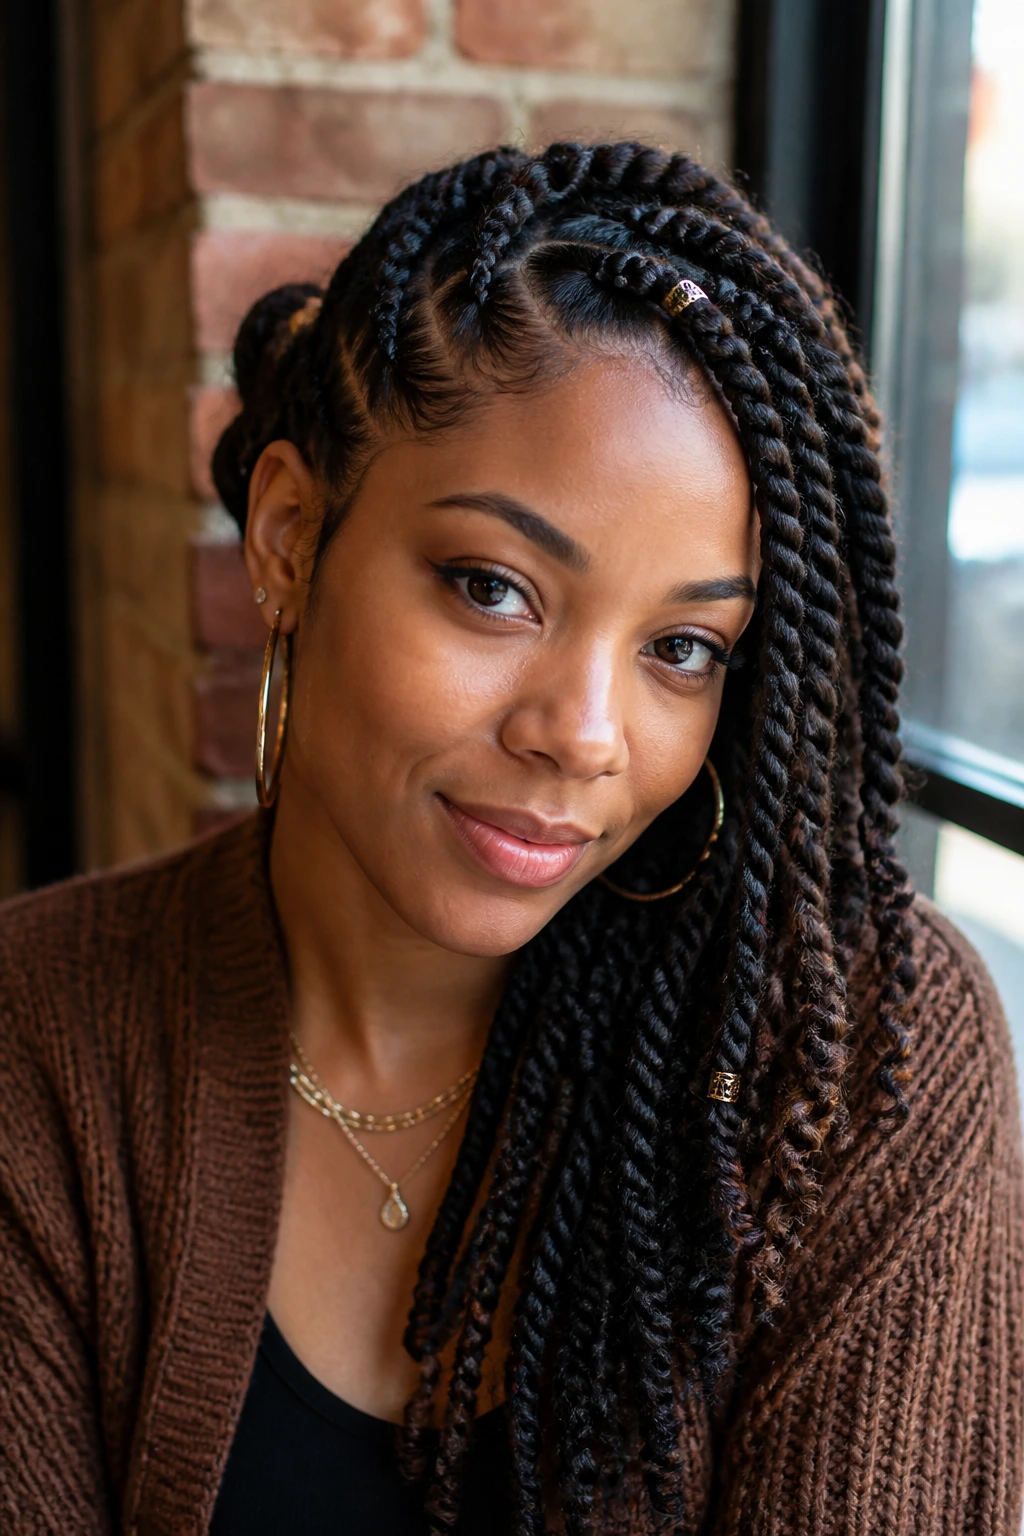
A braid-and-twist combo is a good answer when you want a little more grip at the roots. Braid the base for control, then twist the length for softness. The mix of textures gives the style more detail without making it fussy.
This is smart for hair that slips out of twists fast at the root. The braid gives the section a firmer start. After that, the twist can move more freely. It also works well on hair with different curl patterns on the same head, because the braid anchors the looser sections before the twist takes over. Practical. Useful. Not flashy, and that’s the point.
23. Twists With Curly Ends Left Free
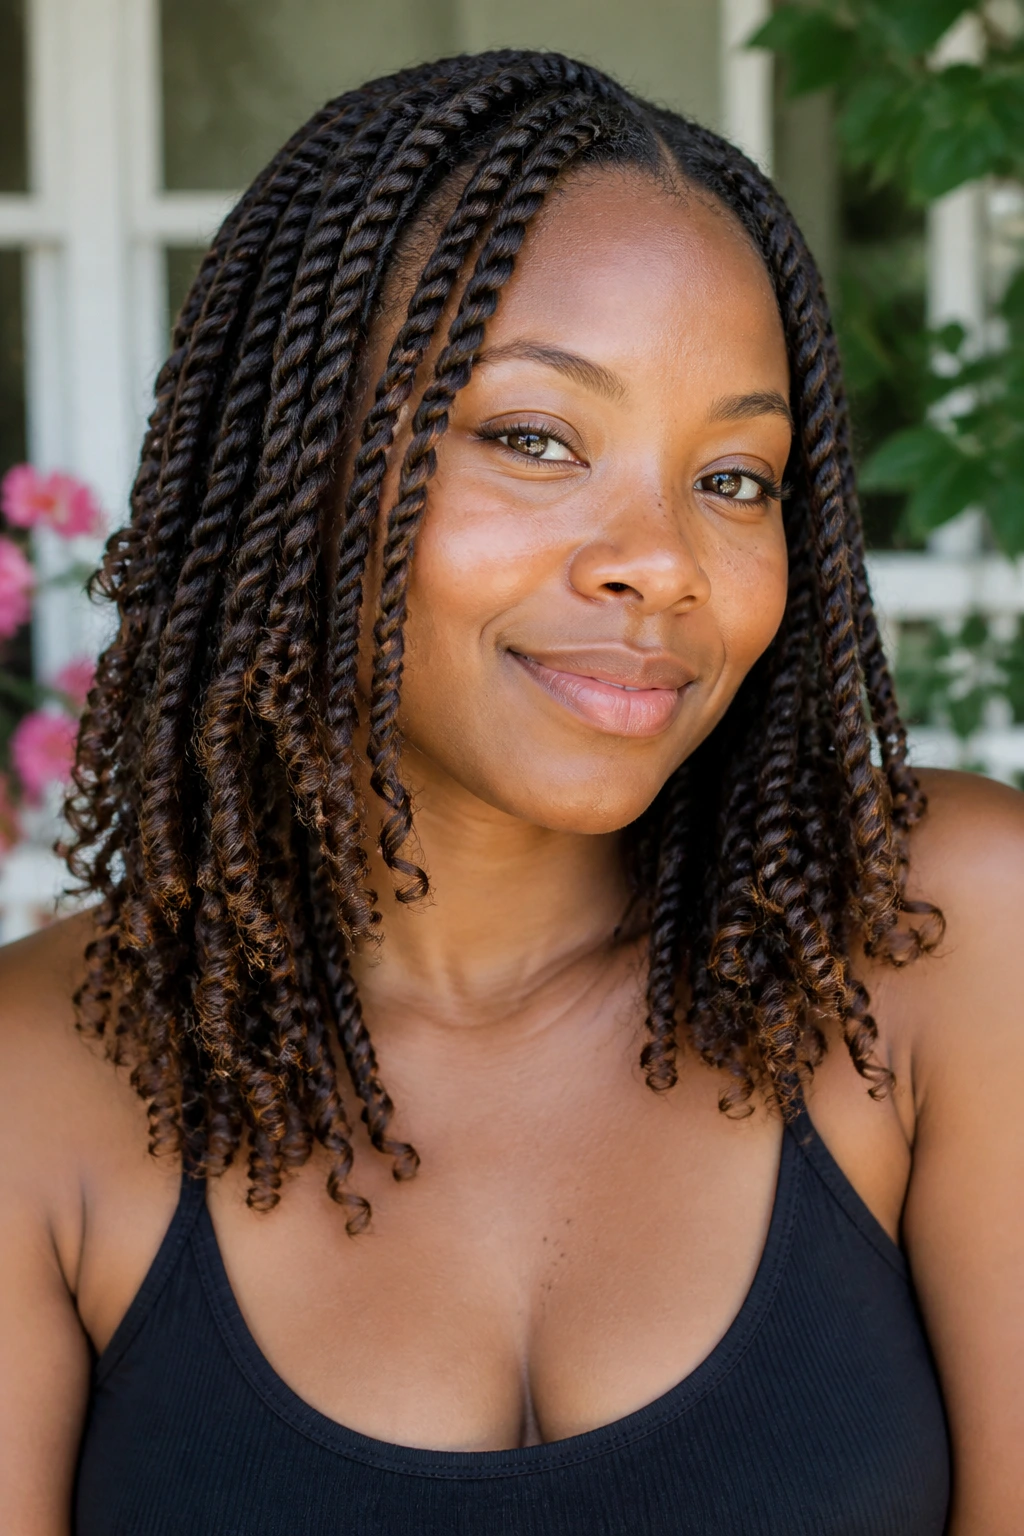
Leaving the ends curly changes the whole feel of the style. Instead of a clean rope from top to bottom, you get twists that soften out at the bottom, almost like they’re exhaling. The result looks airy and a little less formal.
Set the ends on small flexi rods or finger-coil them if the hair is short enough. That tiny extra step makes the finish look intentional. I like this style when the hair is medium length and needs some bounce at the bottom to stop it from looking boxy. If the ends are left too straight, the effect falls flat.
24. Twists Under a Headwrap for Busy Days
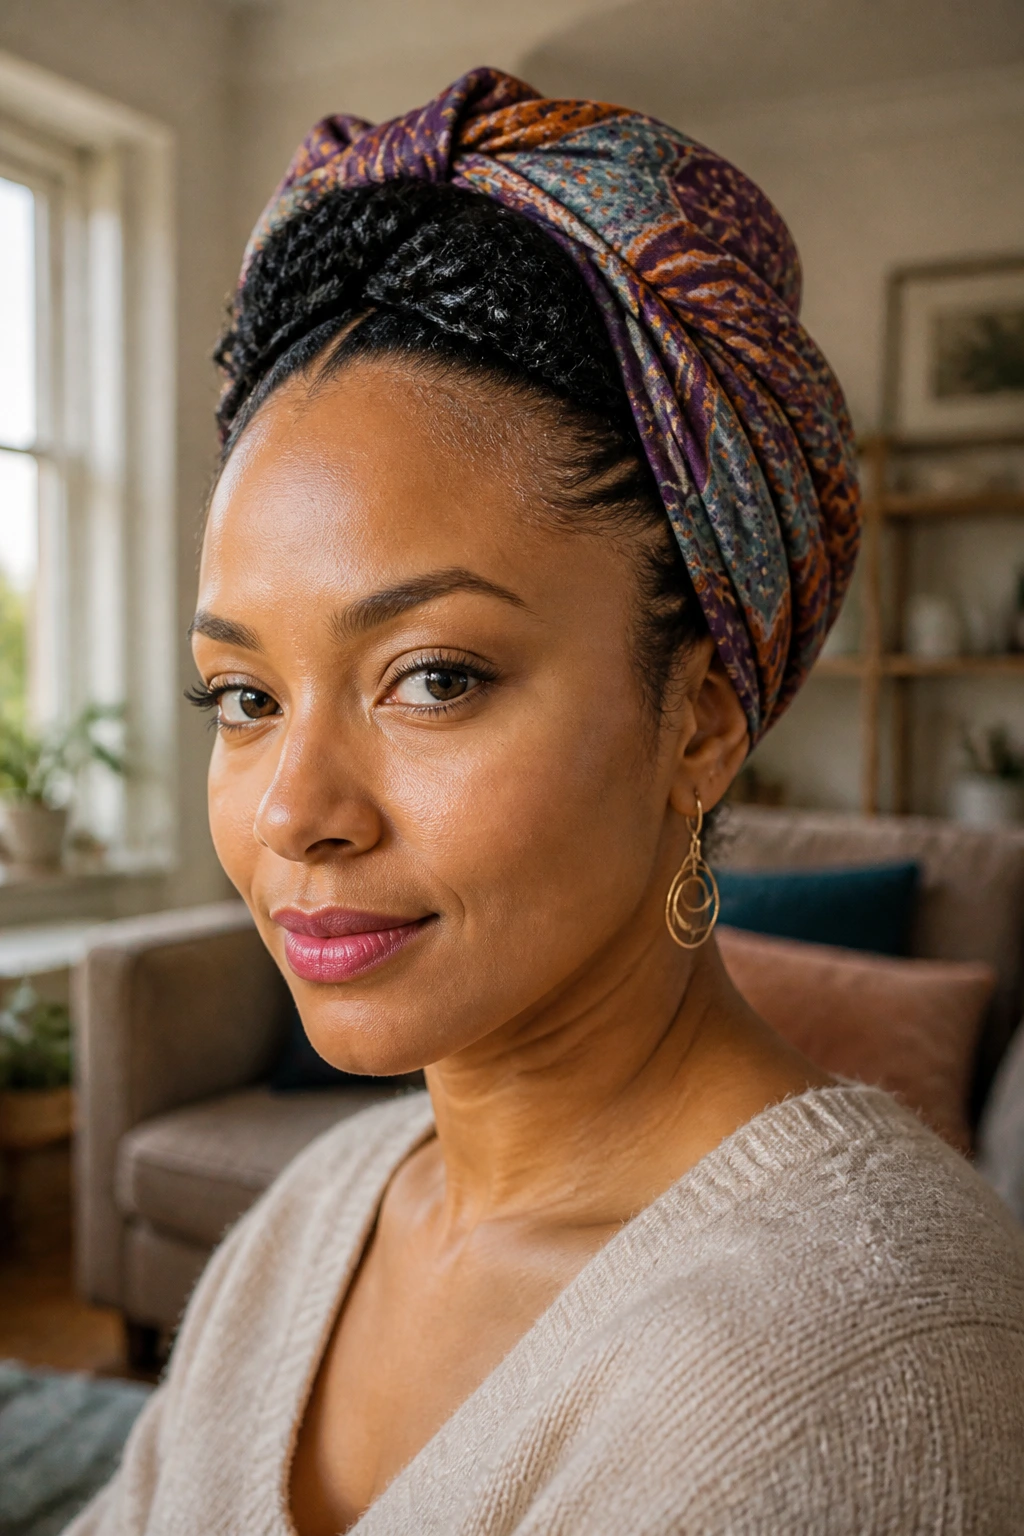
Some styles are partly about the hair and partly about not having to deal with the hair. Twists under a headwrap do both. The twists give you a base, and the wrap turns the whole look into something neat enough for errands, travel, or a day when you’d rather be done with styling before the second cup of coffee.
Keep the twists smooth at the crown so the wrap sits well. A bulky knot underneath will print through the fabric, and that’s annoying. I like a soft cotton or satin-lined wrap because it protects the edges better than a rough scarf. If the style is a little old, the wrap hides a lot without pretending to be magic.
25. Boho Twists With Wispy Curly Pieces
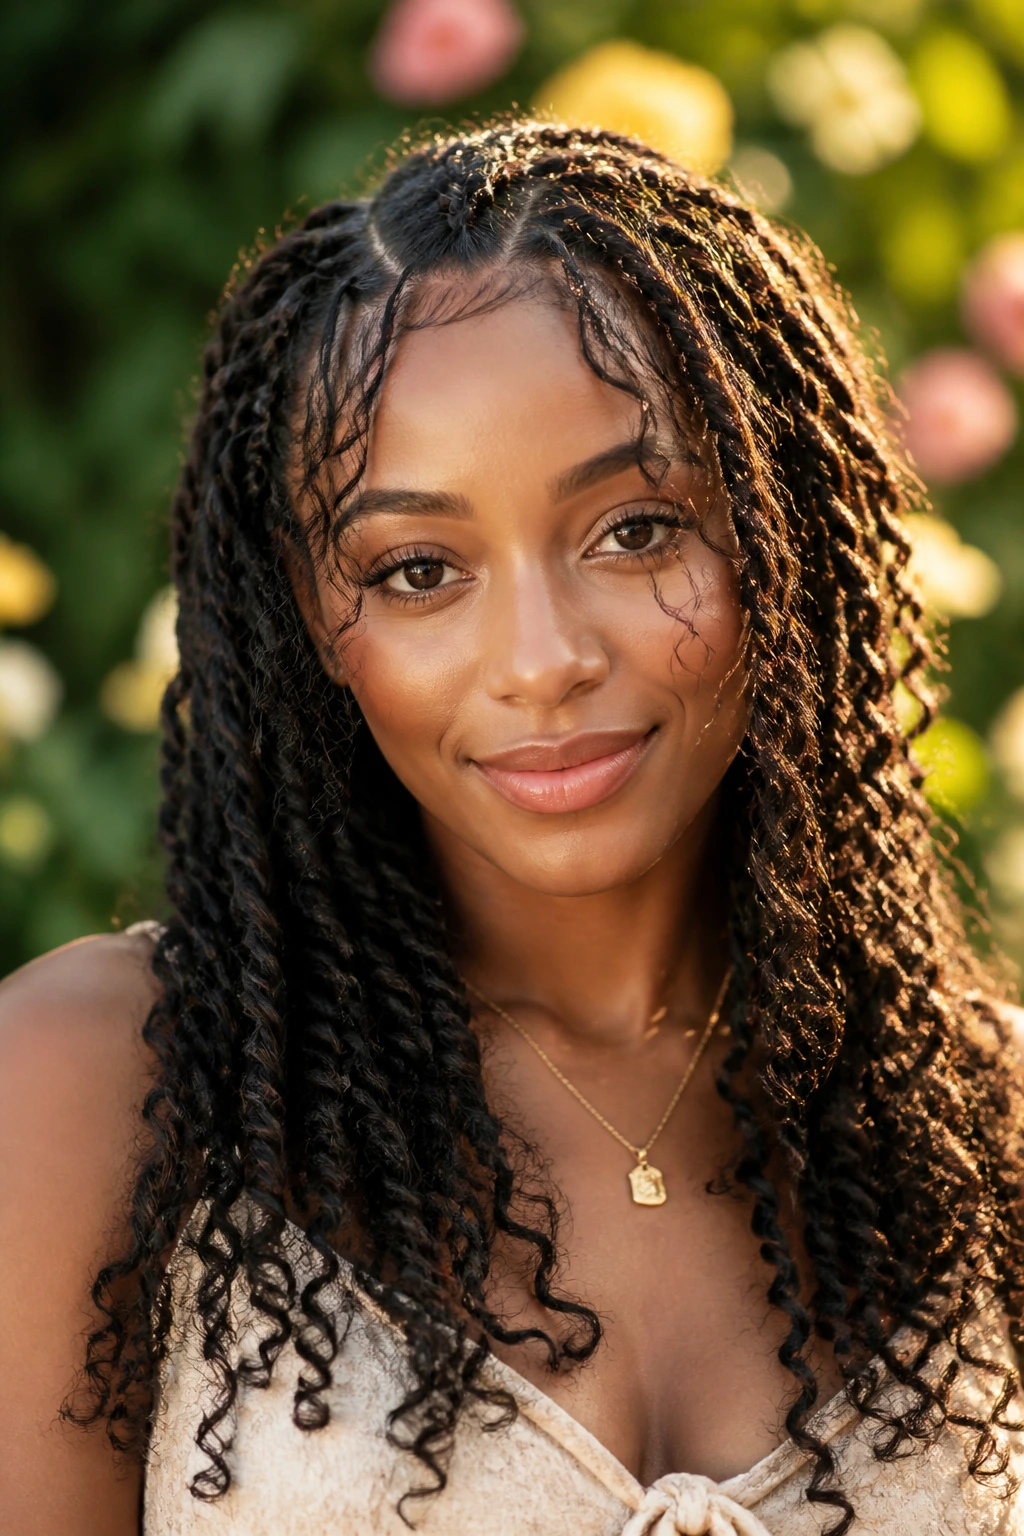
Boho twists are all about controlled looseness. A few curly strands are left out through the lengths, so the twists don’t read too perfect. That little bit of movement keeps the style from feeling heavy or overworked.
Use this look when you want softness and don’t mind a little daily upkeep. The curly pieces need moisture and light separation, or they’ll matte together. I’d keep the number of loose curls modest. Too many, and the style loses shape fast. Too few, and it just becomes regular twists with a stray texture issue. The middle ground is where this style lives.
26. Long Layered Twists With Face-Framing Pieces
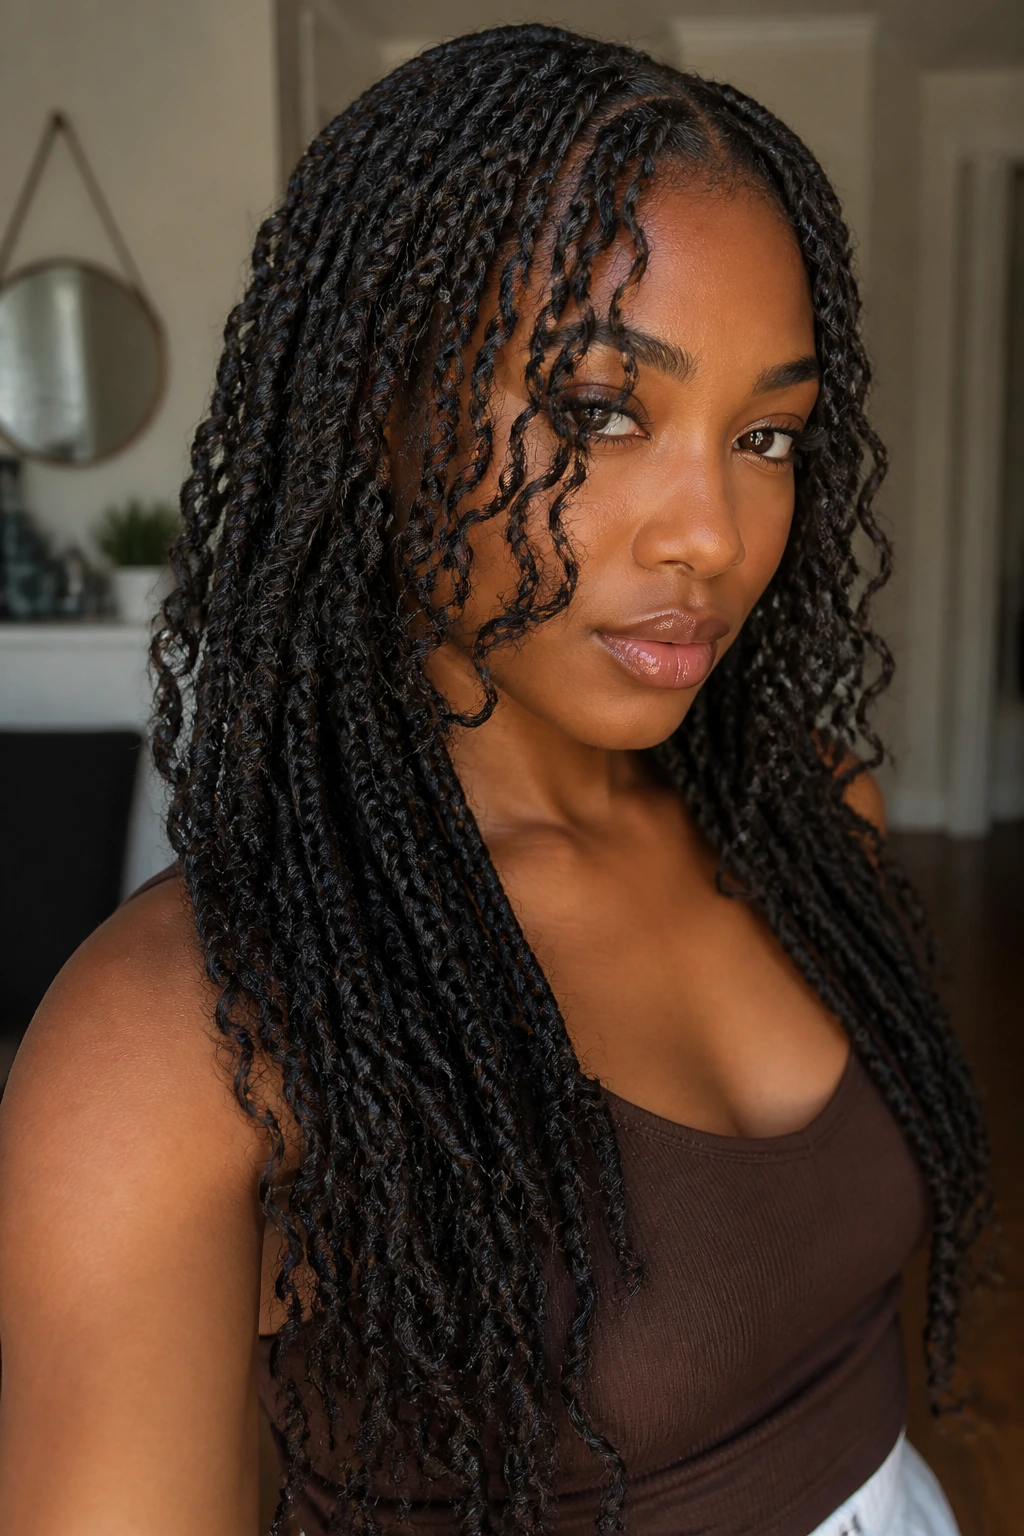
Layered twists work well when the hair is long enough to show some shape through the middle and the ends. A few shorter pieces around the face prevent the style from hanging like one solid curtain. The result feels lighter and more dimensional.
This style is a good fit for long natural hair that needs movement, not just length. Ask for or create slightly shorter front pieces, then keep the rest of the twists staggered. That way, the front opens the face instead of swallowing it. It’s a small adjustment, but on long hair, small adjustments are everything.
27. Tucked-In Twists Rolled Into a Low Chignon
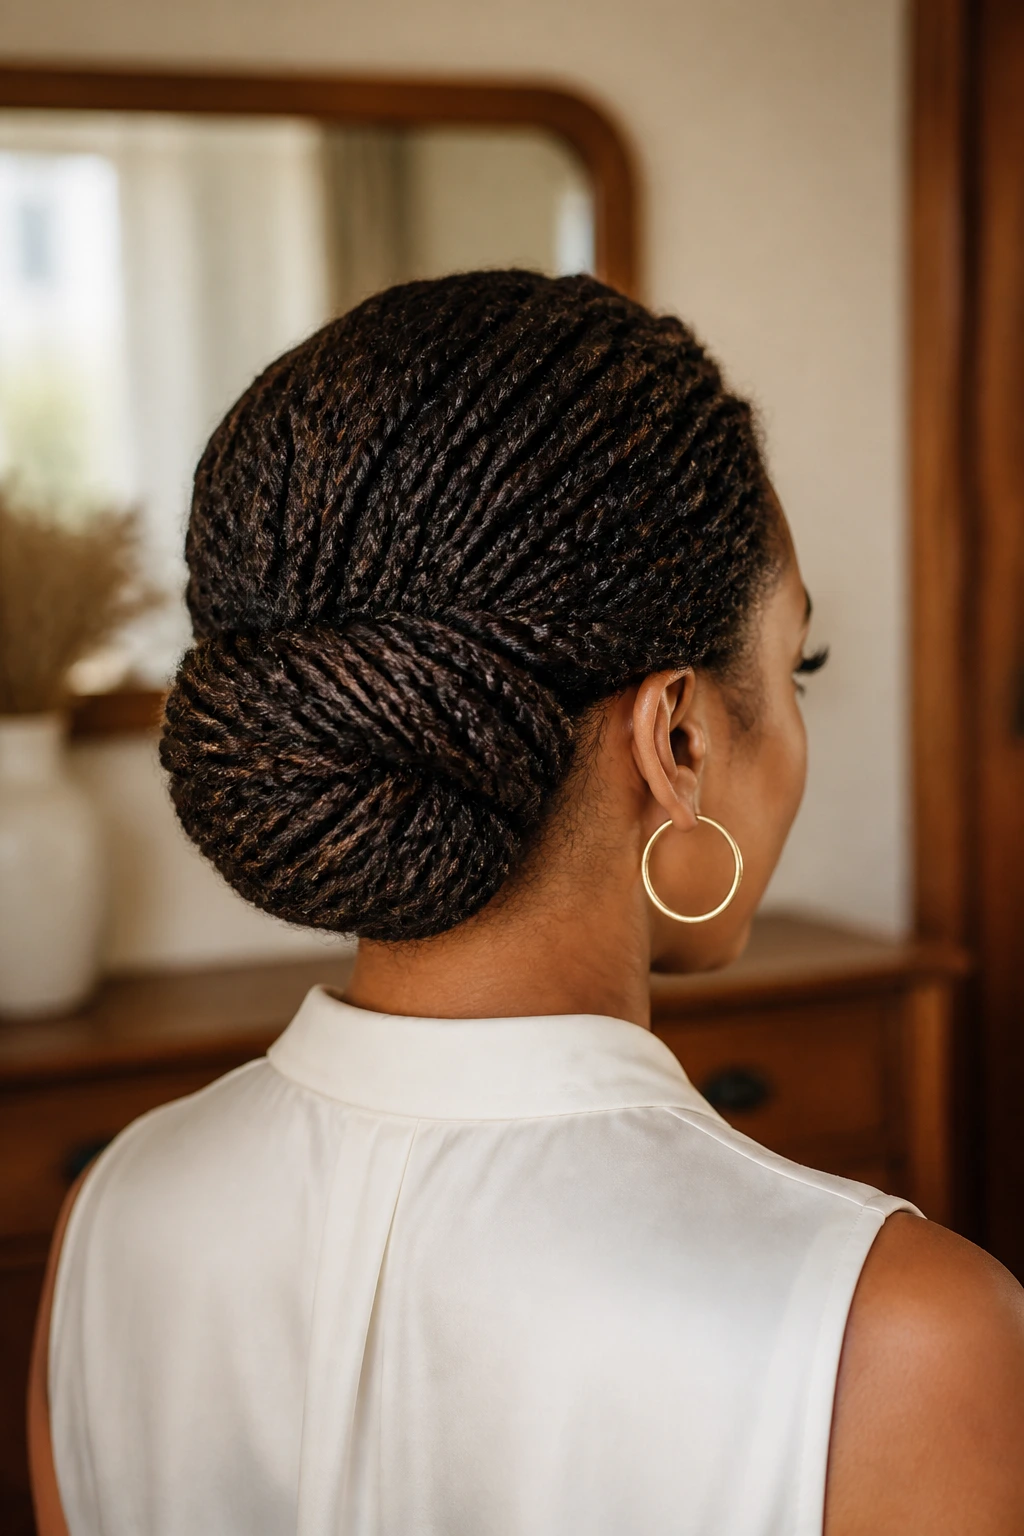
A tucked-in chignon turns twists into something more formal without losing the texture. The ends disappear into the roll, which keeps the neck clean and the profile smooth. It’s a useful shape for weddings, interviews, or any time you want the hair to look composed.
Pinning matters here. Don’t rely on one elastic and hope for the best. Fold the twists in sections and anchor them from the underside so the bun stays centered. If the twists are very long, make a soft loop first, then tuck the ends under. That keeps the bun from bulking up in one direction.
28. Twists Pinned Into a Soft French Roll
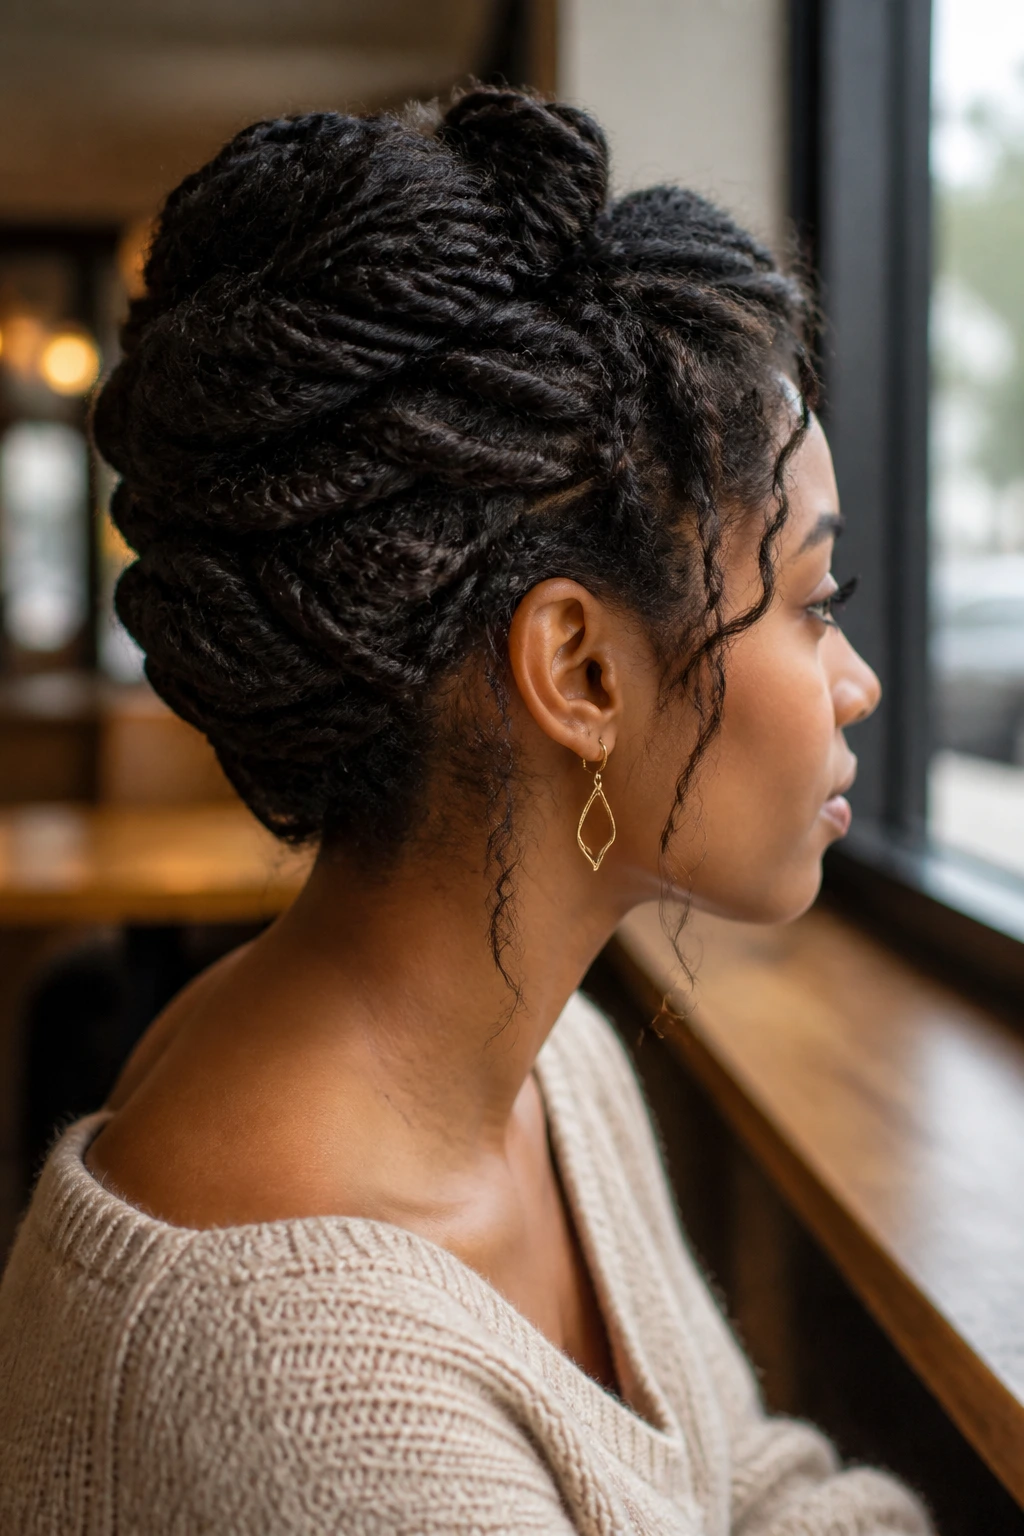
A French roll made from twists has a slightly looser feel than a classic roll because the texture adds body. That body helps the style stay put without needing a dozen pins, which is a small mercy on a long day.
The hair should be stretched enough to roll cleanly. If it’s too shrunken, the roll gets lumpy. I’d use a few medium twists rather than a sea of tiny ones; the larger sections hold the roll shape better. Leave one or two face-framing pieces if you want it to feel less severe. Otherwise, the roll can read a little too formal for everyday wear.
29. Mini Twists on a TWA
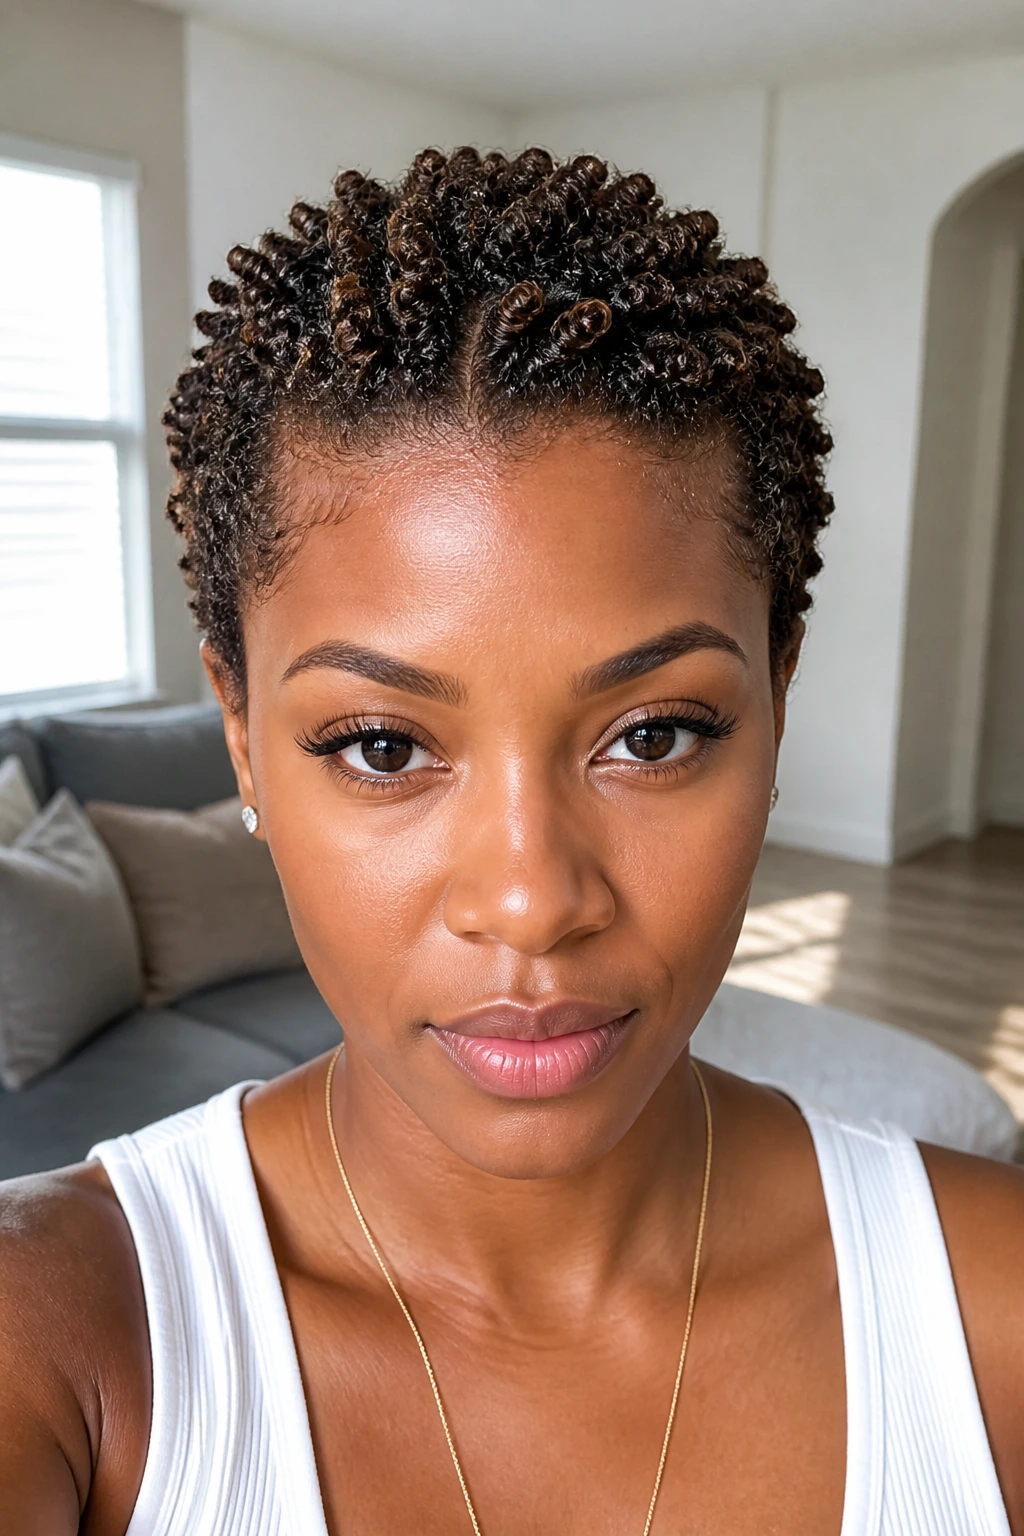
A TWA with mini twists is tiny, tidy, and full of texture. Because the hair is short, the twists sit close and show off the natural coil pattern instead of hiding it. It’s one of the best ways to get definition on short hair without using heat or pulling for length.
The main rule is to keep the sections even and smaller than your first instinct says. Short hair pops loose faster if the parts are too big. A light leave-in and a little gel at the root are usually enough. The style may not last as long as longer twists, but on a TWA, the shape is the whole payoff.
30. Chunky Twists for Thick, Dense Hair
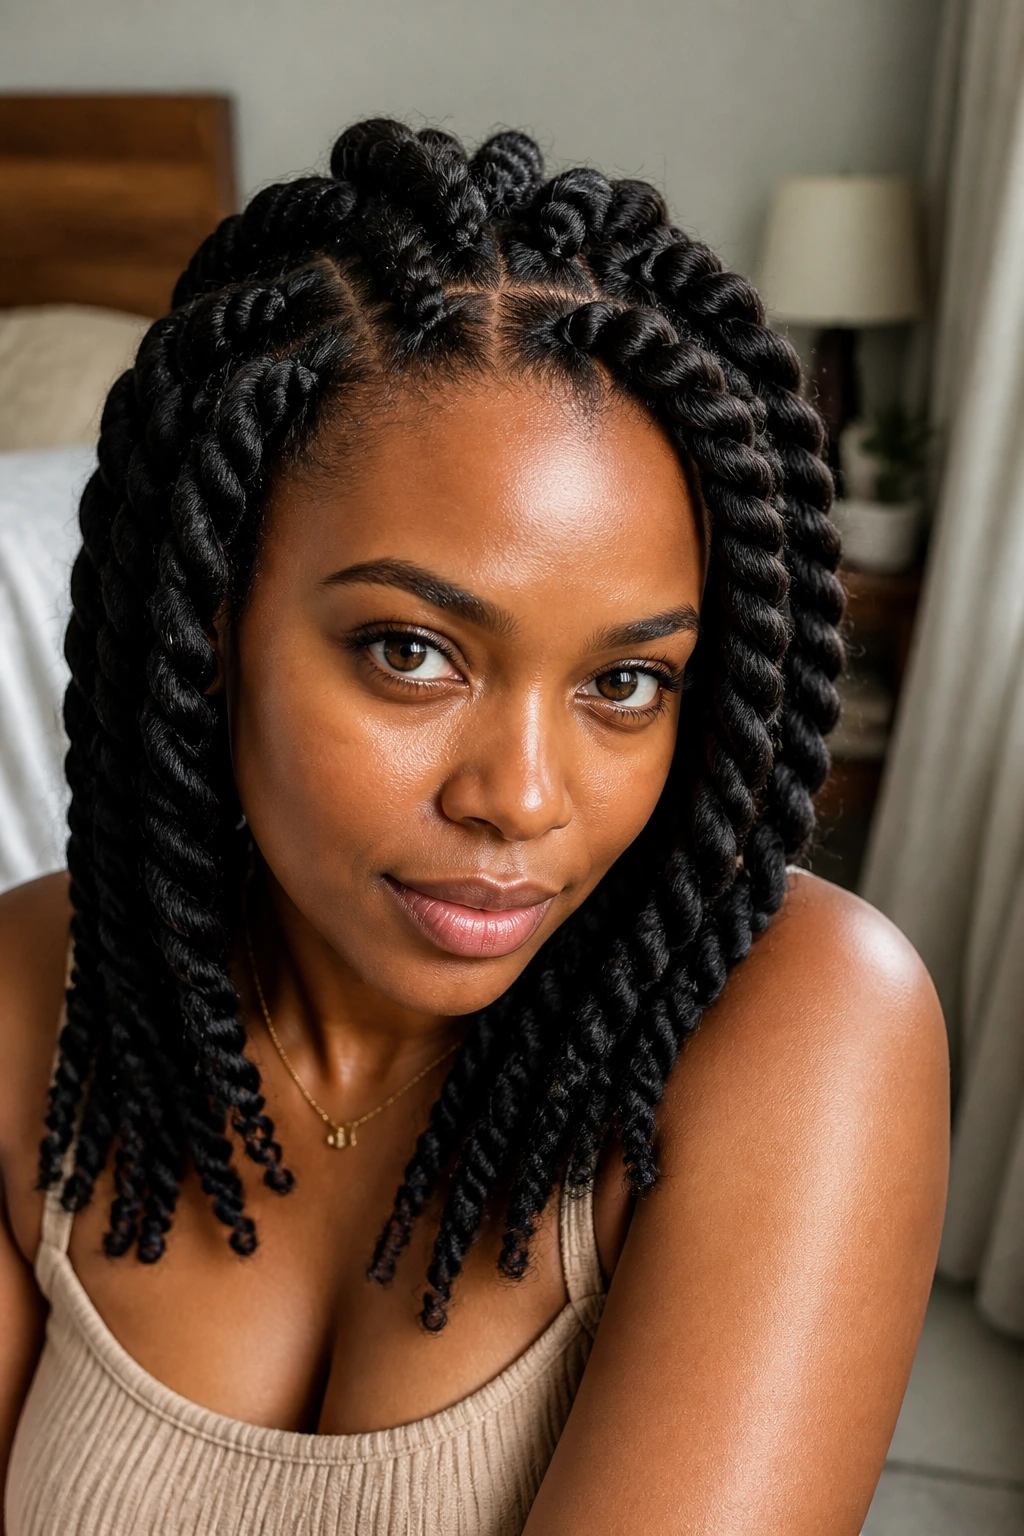
Chunky twists make dense hair look purposeful instead of overwhelming. They move faster to install, and they can show off volume in a way that smaller twists sometimes hide. On very thick hair, this size also keeps the style from taking all day.
The catch is weight. Thick hair can make chunky twists feel heavier at the scalp if they’re pulled too tightly. Keep the root tension steady and the section sizes balanced. I like this style with a side part or a few front pieces left out, because it breaks up the bulk and keeps the shape from feeling blocky.
31. Blowout Twists for Extra Length and Hang
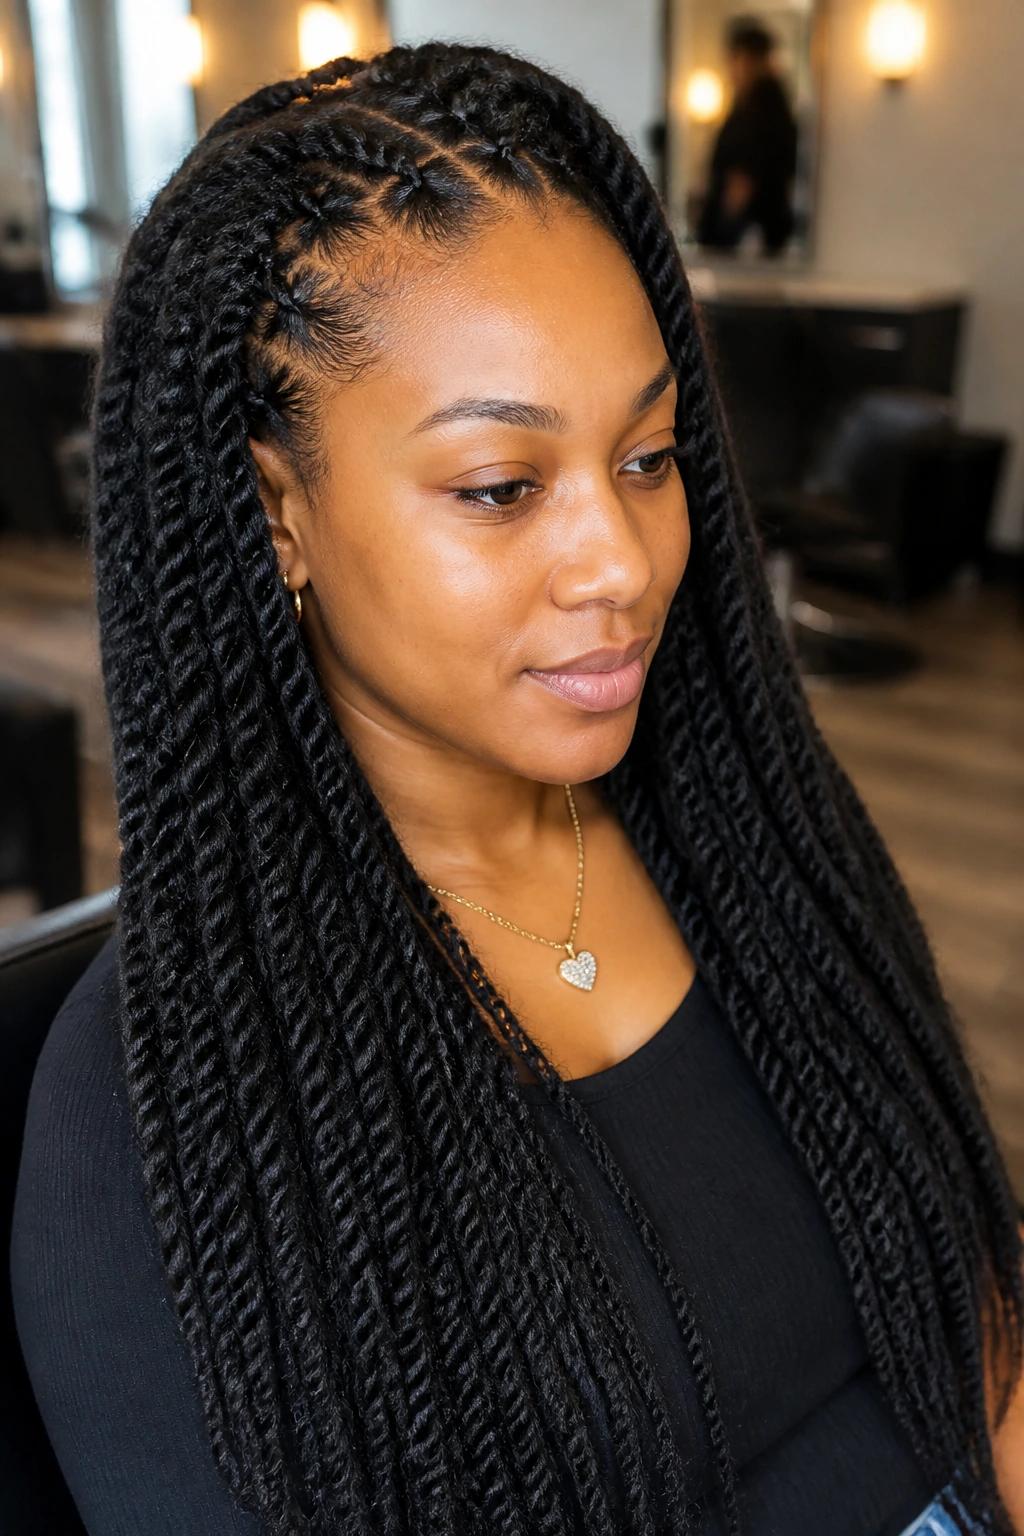
Blowout twists are for the hair that needs a bit of stretch before it behaves. A low-heat blow-dry, or a tension stretch without heat if you prefer, gives the twists more hang and less shrinkage. That changes the whole silhouette. The hair looks longer. The twists fall cleaner.
This style is useful when you want to show length, especially on medium and long natural hair. Use a heat protectant if you blow-dry. Keep the heat low and the airflow moving. Overdrying the hair makes it brittle, and brittle hair doesn’t twist as neatly. Stretching is the point; frying the ends is not.
32. Wet-Set Twists for a Softer, Fuller Finish
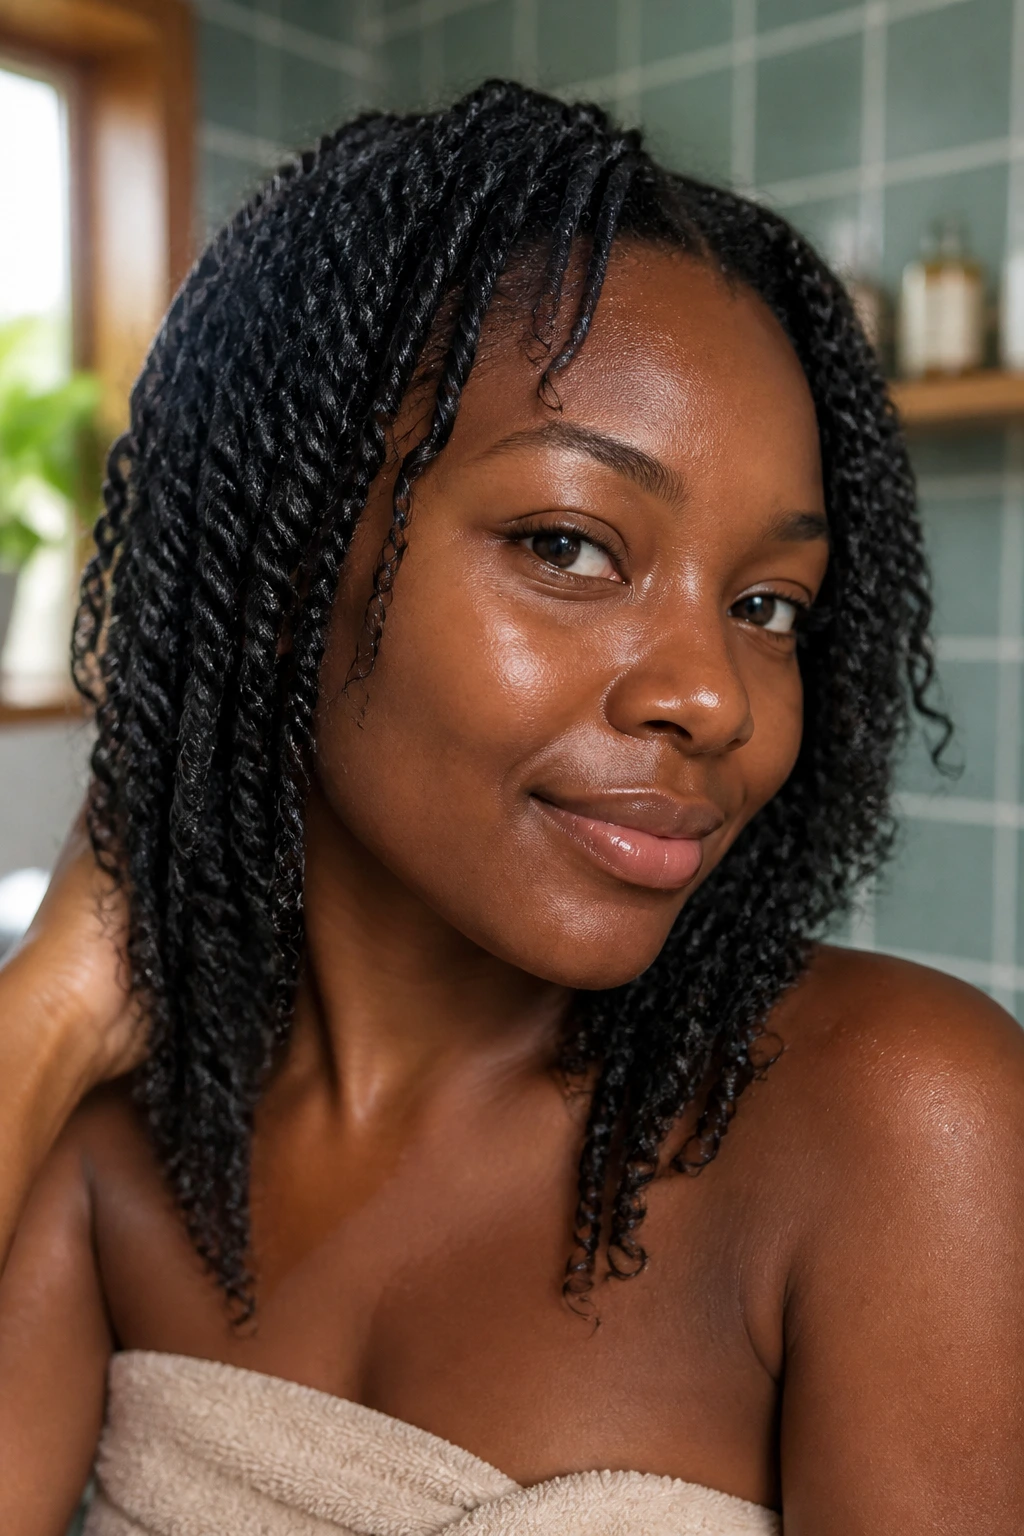
Wet-set twists are softer at the start and fuller once dry. The hair holds shape while it dries, and the finished look usually has a little more body than a dry-set style. It’s a good move when you want plush twists instead of sleek ones.
The important part is drying all the way through. If the interior stays damp, the style can flatten and smell musty. I’d avoid thick sections here for that reason. Smaller or medium sections dry more reliably. This is one of those styles that rewards patience on the front end and saves you fuss later.
33. Deep Side-Part Twists for More Face Framing
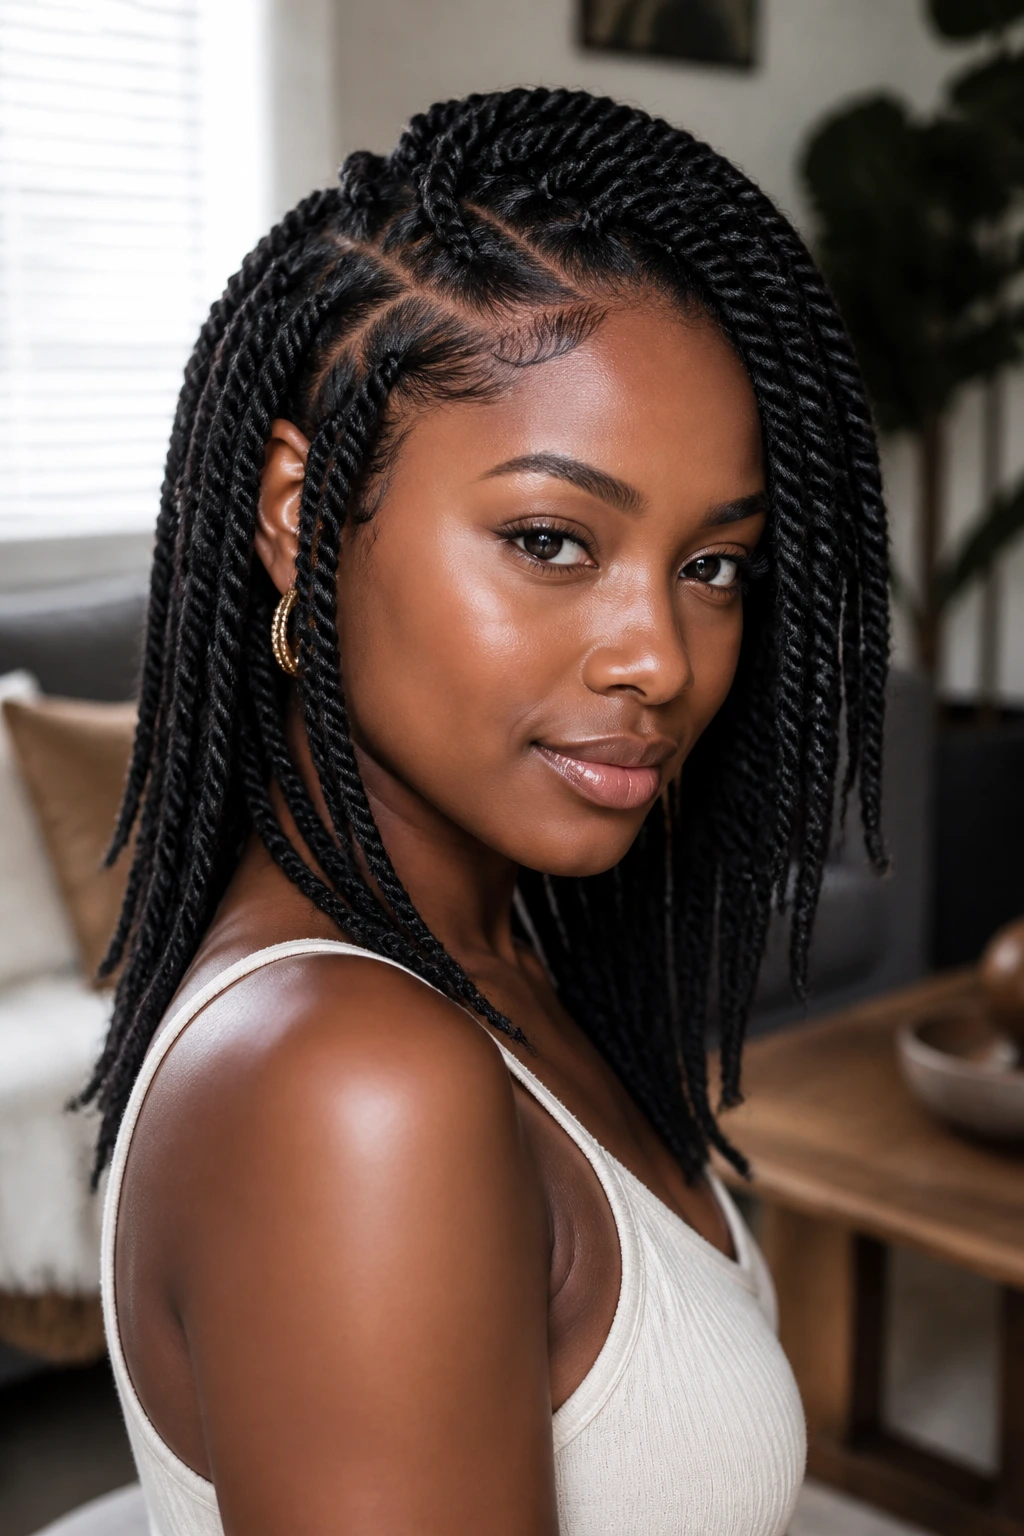
A deep side part can make even a simple twist style feel more styled. It pulls the hair across the forehead line, opens one side of the face, and gives the twists a little motion before the ends even start moving. The shape is flattering in a direct, easy way.
This version works well on medium to long twists, especially if the front edges are slightly shorter than the rest. That difference helps the part fall naturally. If your hair wants to slide back to center, set the part while the hair is damp and let it dry in place. Fighting a stubborn part later is a waste of time.
34. Twists Built Into a High Ponytail Base
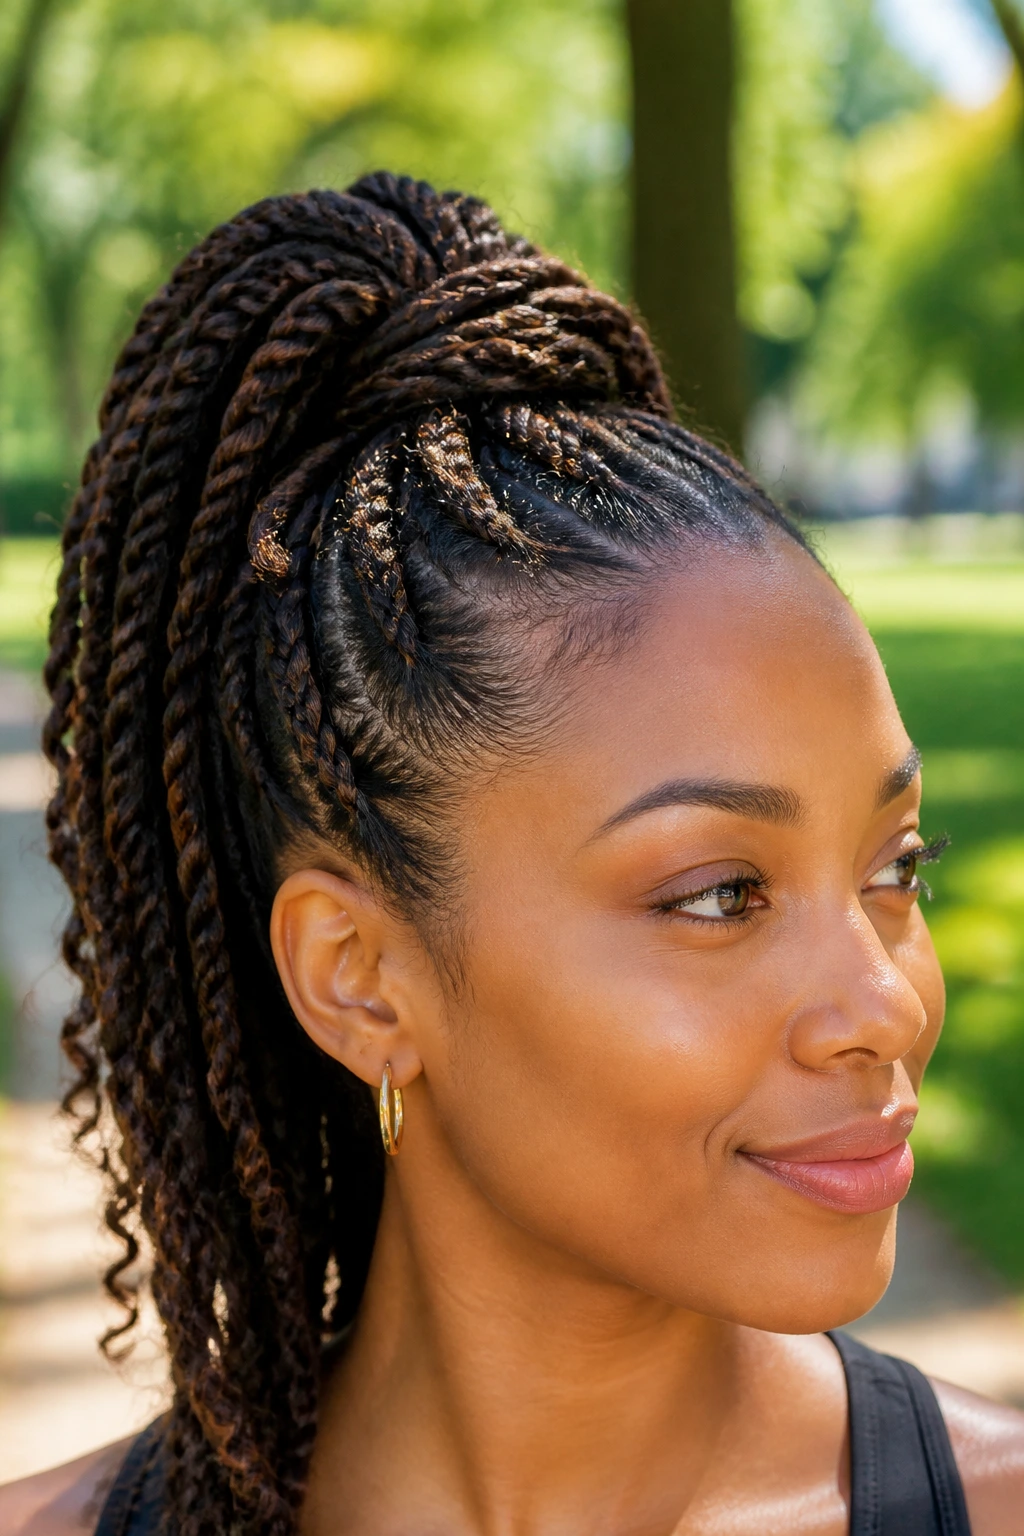
A high ponytail base gives twists a lifted, athletic shape. The ponytail sits at the crown, so the twists cascade from up high instead of hanging from the nape. It’s a clean way to keep hair out of the way while still keeping the style visible.
Use a strong but gentle band and keep the base secure without flattening the top too much. If the front is slicked hard, the style loses some of its softness. A wrapped twist around the elastic finishes it neatly. This one is especially good for long twists that need to move, because the height keeps them from feeling heavy.
35. Low Side-Bun Twists With a Loose Shape
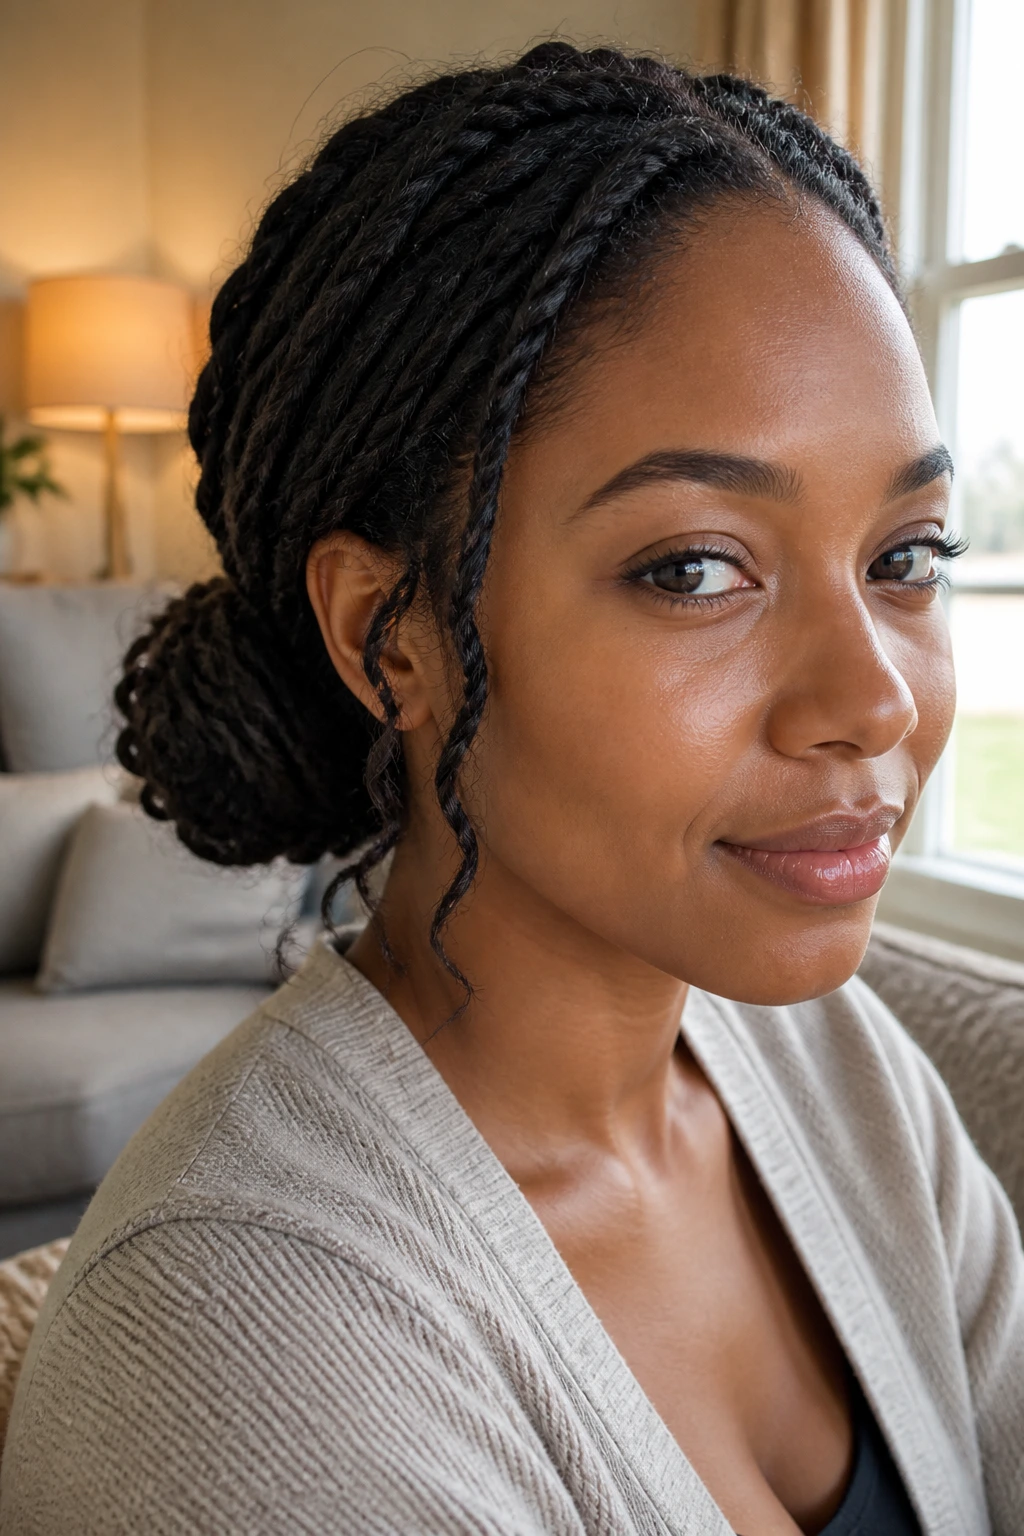
A low side bun feels a little softer than the standard low bun. The bun sits off to one side, which makes the profile more relaxed and less buttoned-up. It’s the style you reach for when you want structure but don’t want to look severe.
The side placement matters. Too far back, and it becomes a regular bun with a crooked opinion. Too far forward, and it can block the face. I like it when a few twists are allowed to fall loosely around the ear. That small looseness keeps the look from feeling too controlled.
36. Asymmetrical Twists for a Modern Outline
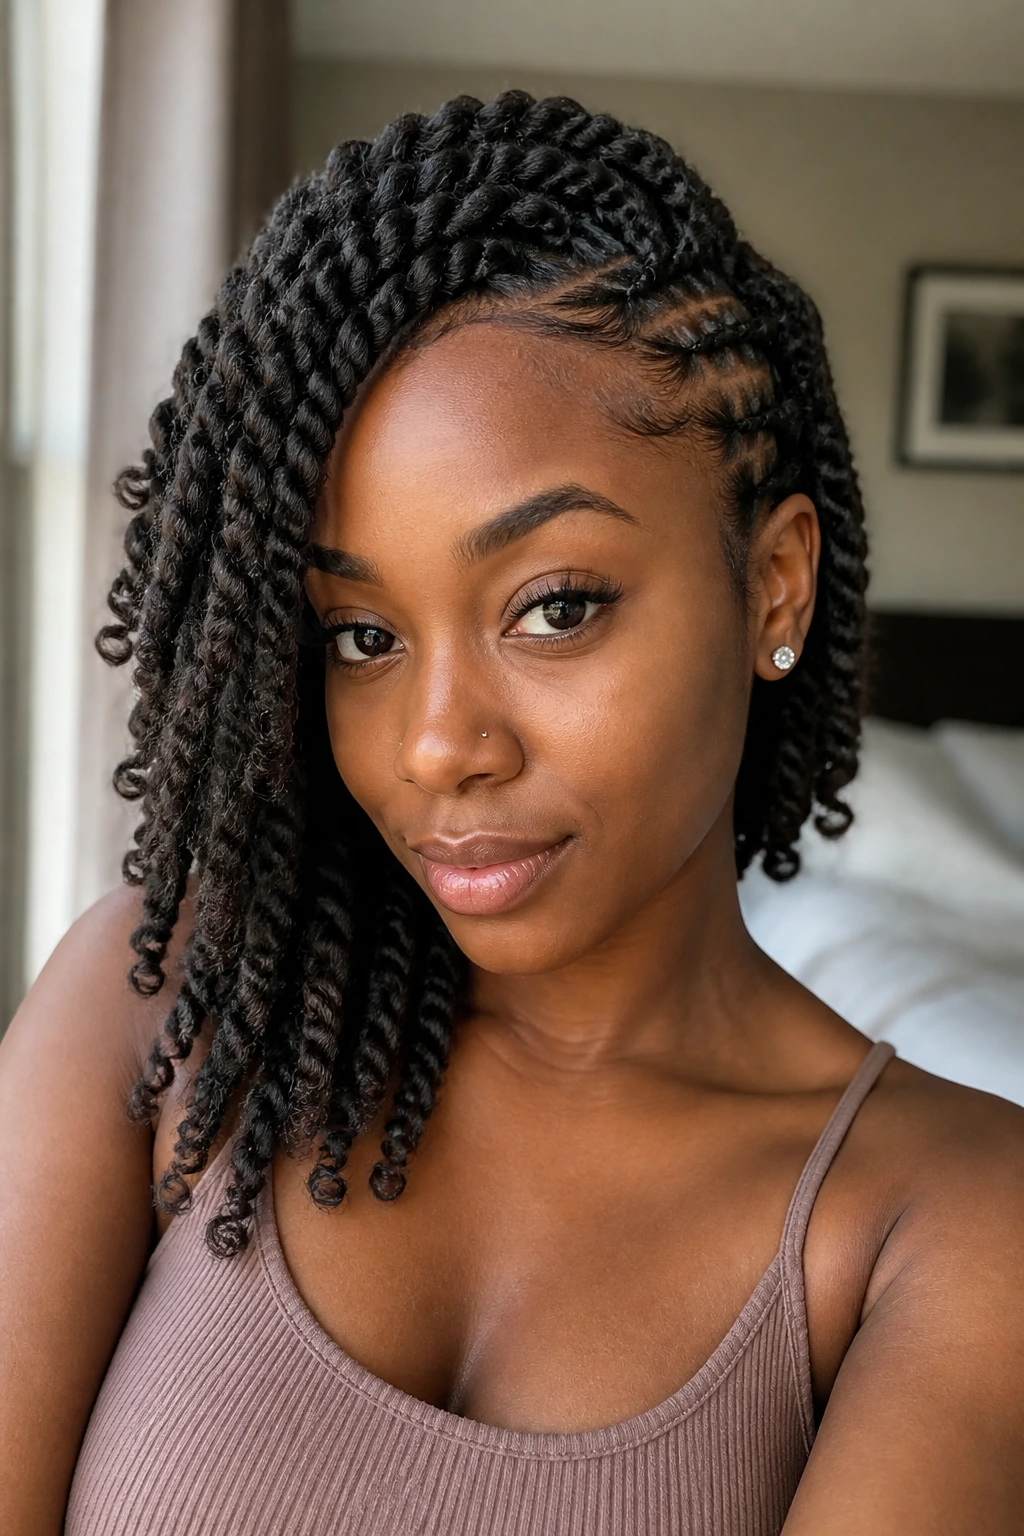
Asymmetry is an easy way to make twists feel current without adding extra work. One side can be fuller, longer, or swept more dramatically than the other. The imbalance gives the whole head more energy.
This style works best when the parting and length differences are deliberate. Nothing should look accidental. If one side is shorter, keep the twist size smaller there so the shape doesn’t feel lopsided in a bad way. This is a strong choice if you like styles that look a little more editorial but still wearable on a normal Tuesday.
37. Twists With Colored Ends or Ombre Hair
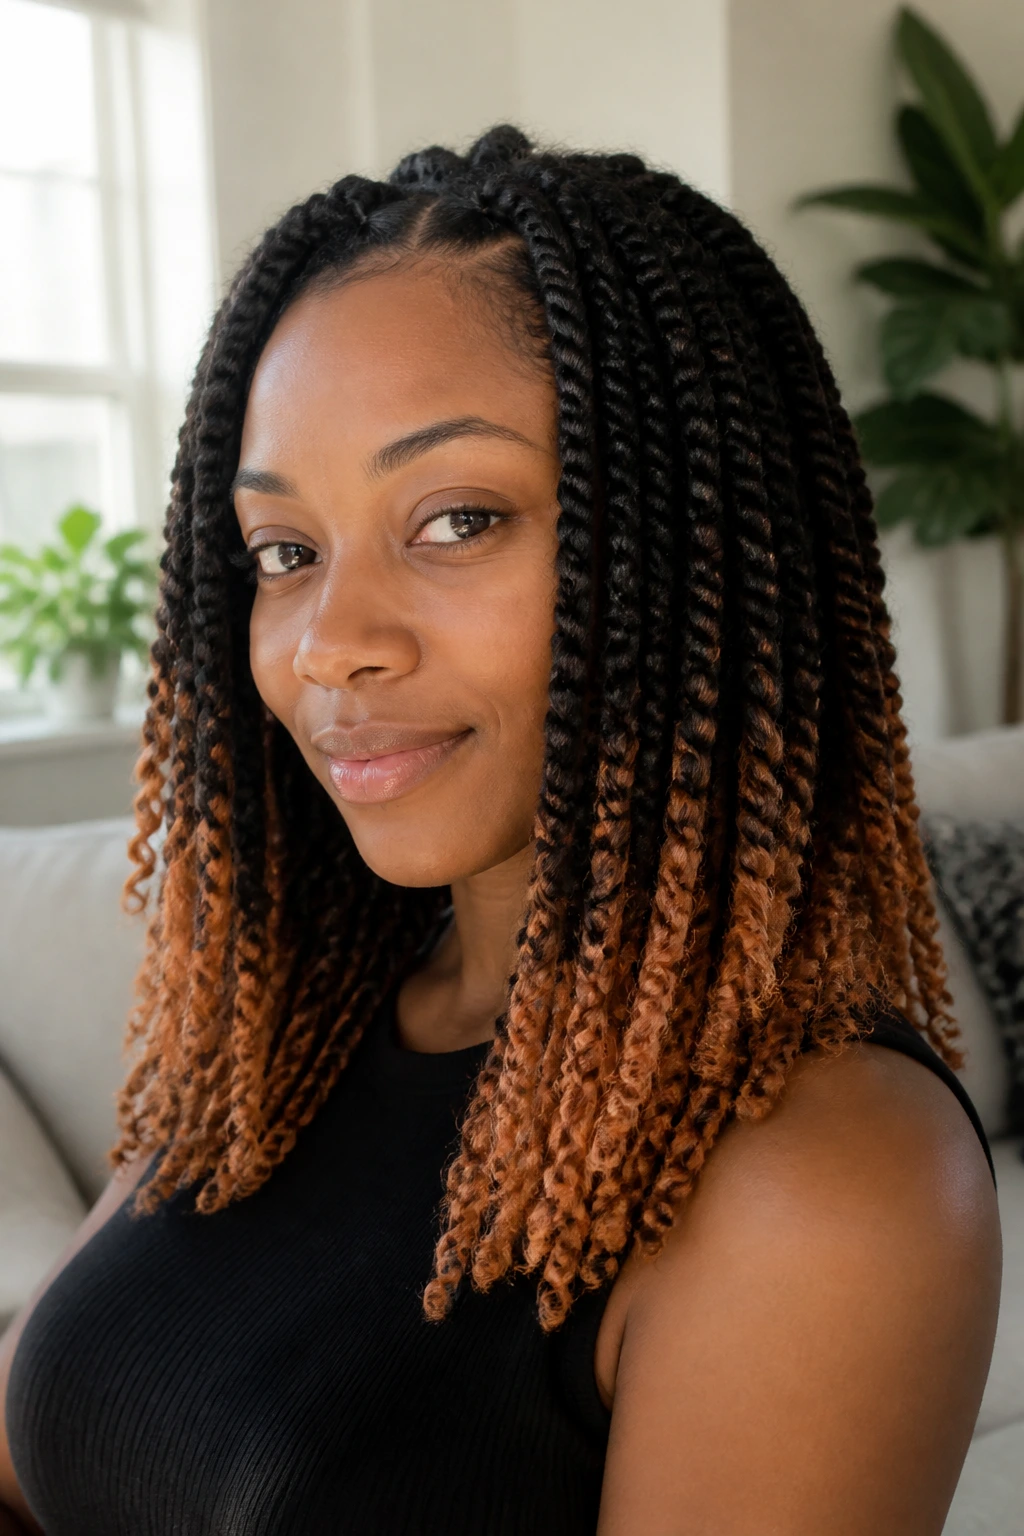
Color at the ends changes the way the twists read from across a room. You don’t have to color the whole head. Sometimes a warm brown, copper, or honey-toned end is enough to make the twists look lighter and more dimensional. Ombre extensions do this well if you want a lower-commitment version.
This is where texture and color work together. On dark hair, lighter ends show the twist pattern more clearly. Just keep the added color subtle enough that it doesn’t fight the base. If the ends are synthetic, choose a shade that looks like it could have grown there. Loud contrast can work, but it changes the mood fast.
38. Twist Pigtails That Stay Light and Youthful
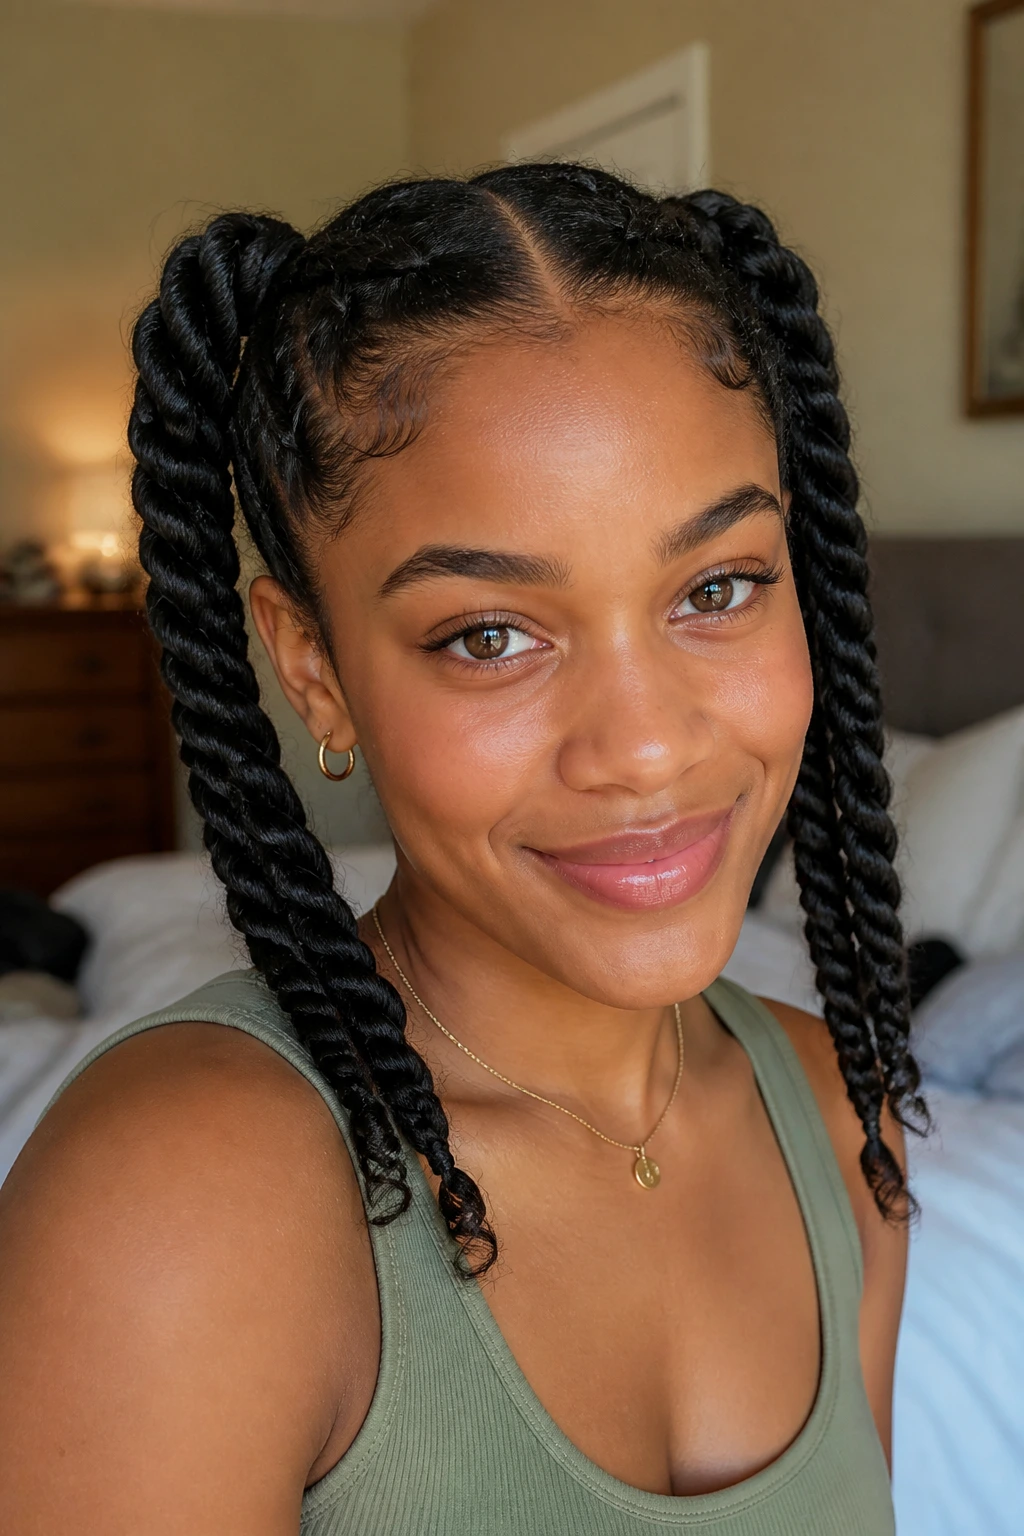
Twist pigtails are cheerful without being childish if the parting is neat and the twists are clean. Two low or mid-height sections keep the style balanced and easy to wear. It’s a good option when you want the hair off the face but don’t want a bun.
This style works best with medium twists. Tiny ones can make the pigtails feel too thin, and jumbo twists can tip the shape into costume territory unless that’s what you want. Secure the base loosely, then let the ends hang. The style should feel playful, not tight.
39. Crisscross Twists at the Hairline
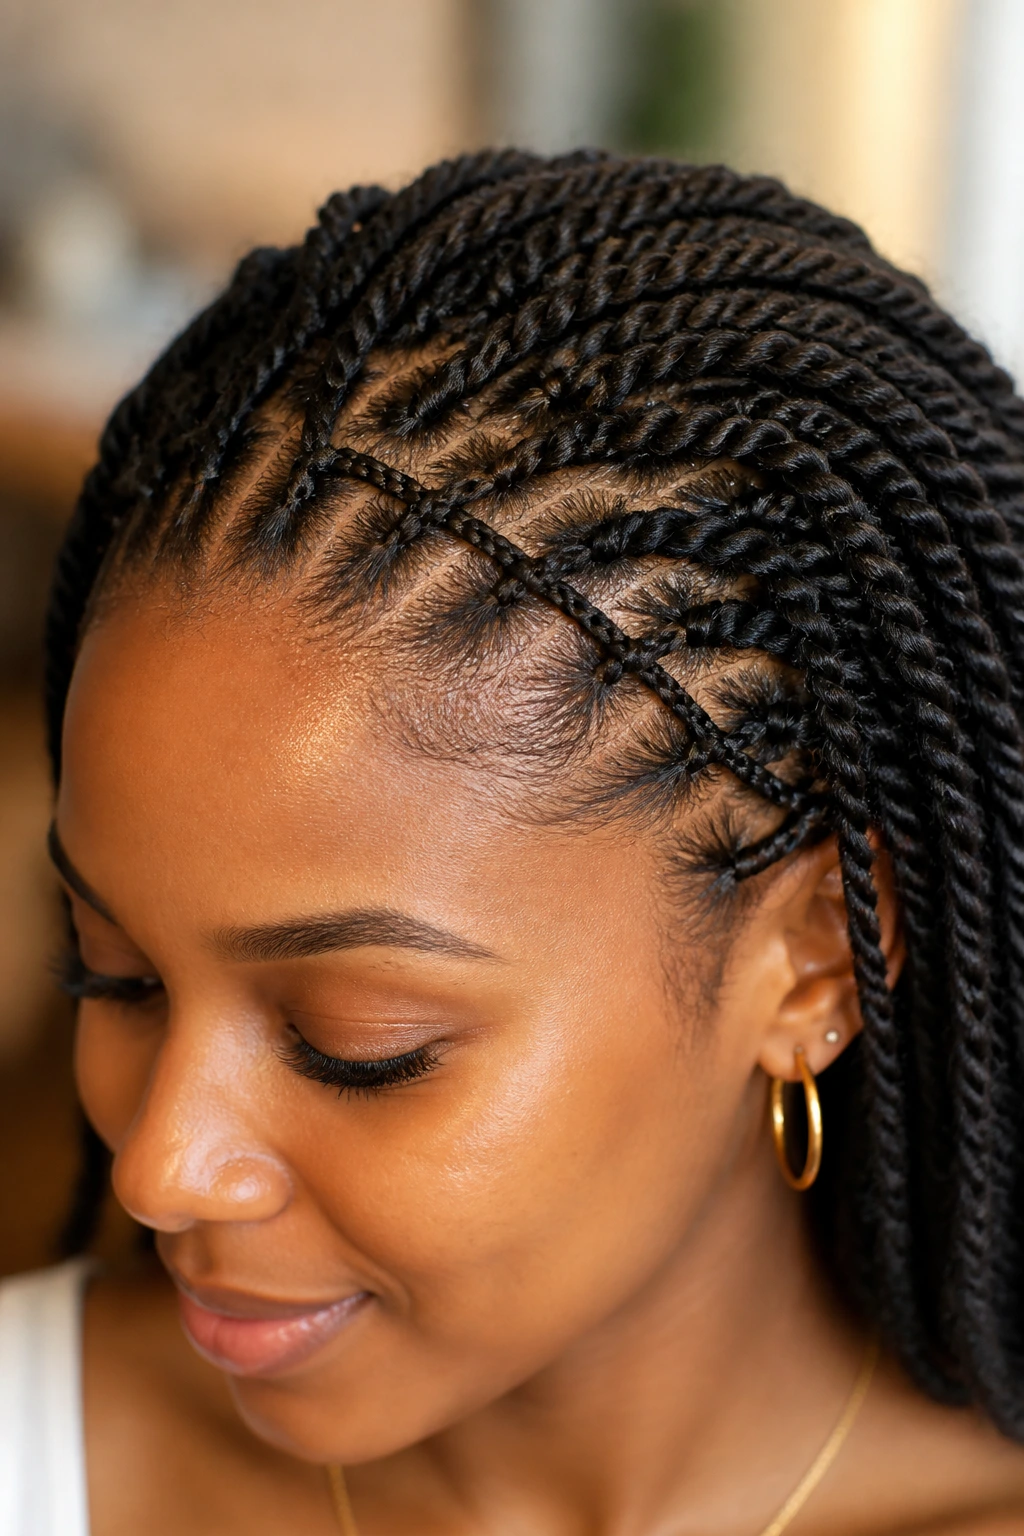
Crisscross detailing at the front gives the hairline more structure and a little visual surprise. The front pieces overlap in a pattern before they twist back, which makes the style feel more finished from the start. It’s a smart move if you like neat edges and a bit of geometry.
Keep the pattern small enough that it doesn’t overwhelm the rest of the head. A little crisscrossing goes a long way. This style pairs well with medium or large twists behind it, because the front can handle a little extra detail while the back stays simple. If you’re going to spend time anywhere, spend it here. The front is what people see first.
40. Accessory-Heavy Twists With Scarves, Pins, and Beads
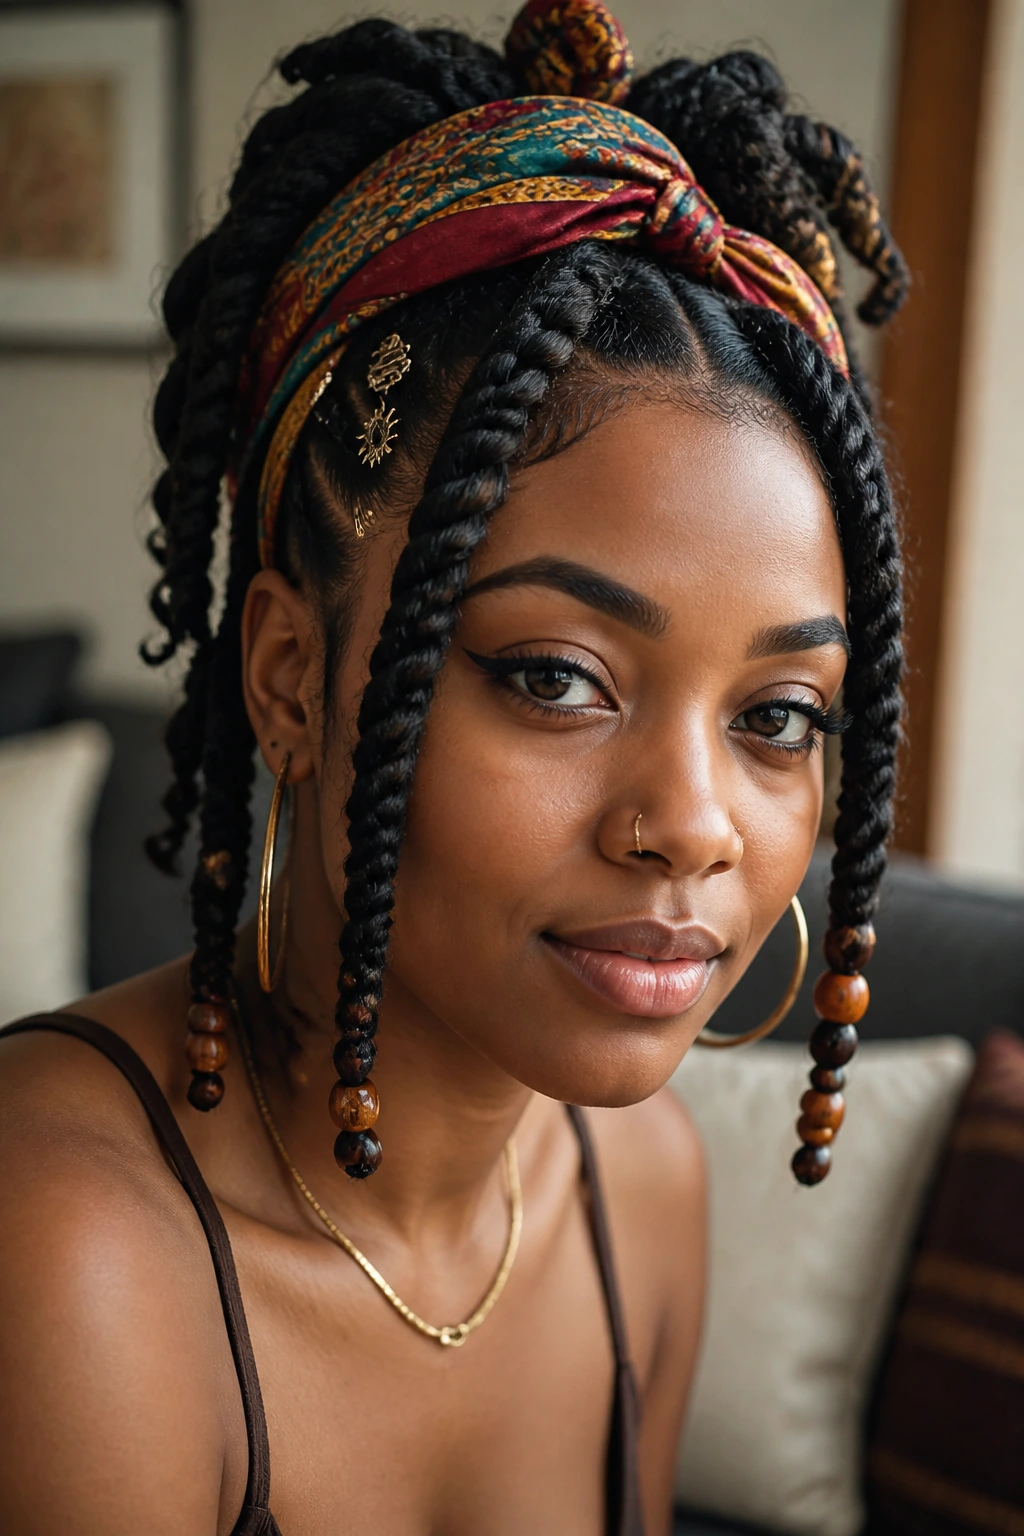
Accessory-heavy twists are for the days when the style itself is only half the point. A scarf at the base, a few pins along one side, beads at the ends, or cuffs scattered near the front can turn simple twists into a full look. The trick is restraint. Pick one main accessory and let the others support it.
I like this approach when the twists are a few days old and need a reset without a full takedown. Accessories hide wear, shift the mood, and make the style feel planned again. Use them to direct the eye, not to cover chaos. That’s the line. Cross it, and the style starts looking crowded.
Why Twist Styles Work So Well on Natural Hair
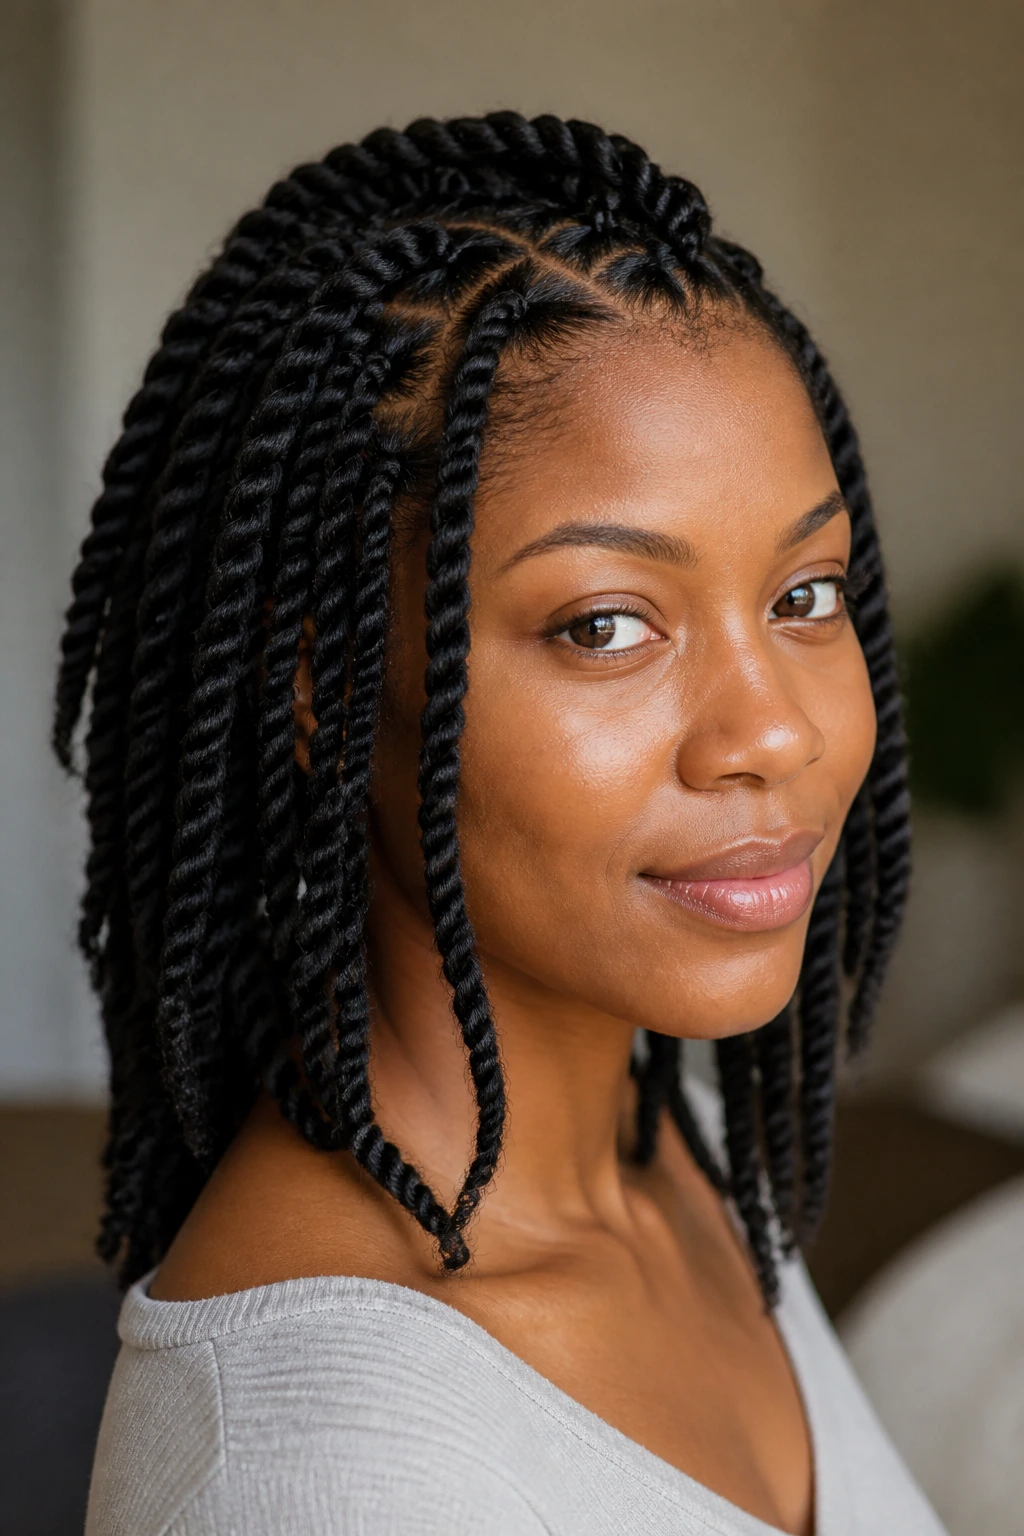
Twists hold their own because they respect the way natural hair actually behaves. Coils like to group, shrink, and catch on themselves if they’re left loose and dry. Twisting changes that. It gives the hair a lane to stay in, which means fewer single strands rubbing against jackets, pillowcases, seatbelts, and your own hands.
There’s also the moisture angle, and it matters more than people like to admit. When hair is sectioned and tucked into a twist, it’s easier to keep a leave-in where it belongs and harder for the ends to dry out first. That doesn’t make twists magic. It does make them sensible. The style works because the hair spends less time being manhandled.
The best part is how many directions the style can go. You can go tiny and neat. You can go chunky and quick. You can add hair, leave it natural, pin it up, curl the ends, or hide it under a scarf on a tired Thursday. That range is why twists stay useful long after a trend has moved on.
Essential Tools That Make Styling Easier
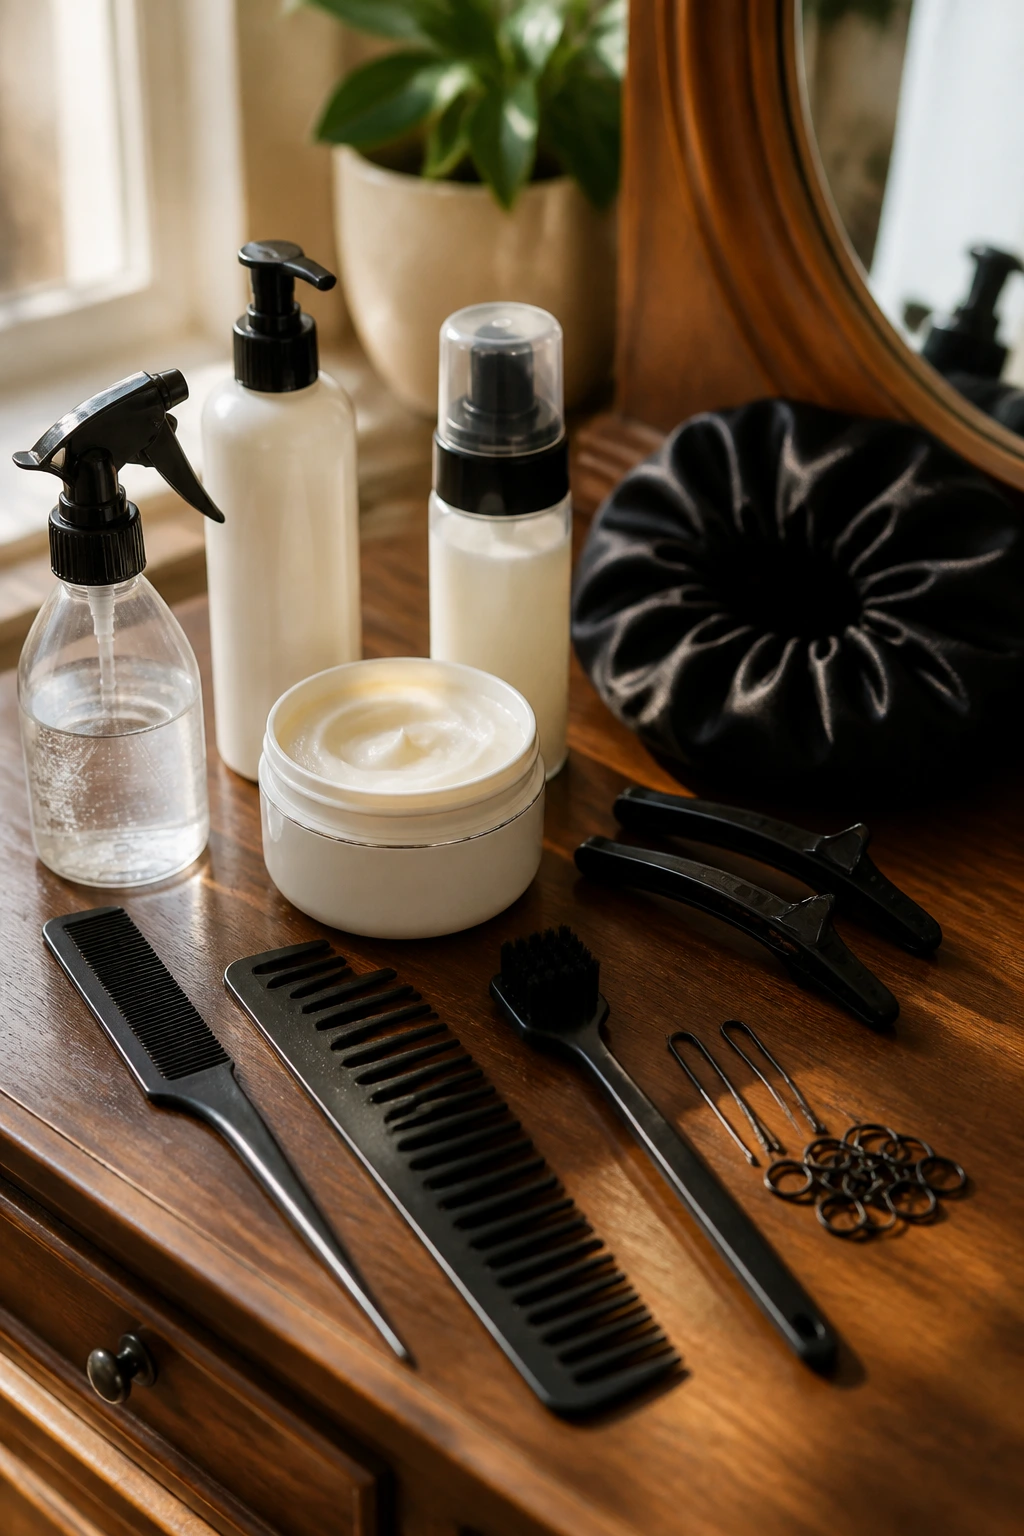
You do not need a salon drawer full of gadgets, but a few basics save a lot of grief.
- Rat-tail comb: Clean parts live or die by the tip of this comb.
- Wide-tooth comb or detangling brush: Use it on damp, conditioned hair before sectioning.
- Sectioning clips: Duckbill clips or alligator clips keep the hair from slipping back into the part.
- Spray bottle: A mix of water and leave-in makes twist sections easier to work with.
- Leave-in conditioner: Choose something light enough to spread evenly without piling up.
- Styling cream or butter: Use a small amount for slip and hold; more is not better here.
- Edge brush: Handy for smoothing the front without flattening the whole style.
- Mousse or setting foam: Great for frizz control and for setting curled ends.
- Satin bonnet or scarf: You’ll need it every night if you want the style to last.
- U-pins, bobby pins, or small elastics: Useful for buns, crowns, and pinned-up looks.
- Optional extension hair: Marley, Havana, or synthetic twist hair for fuller or longer styles.
Product Picks That Actually Matter Before You Start
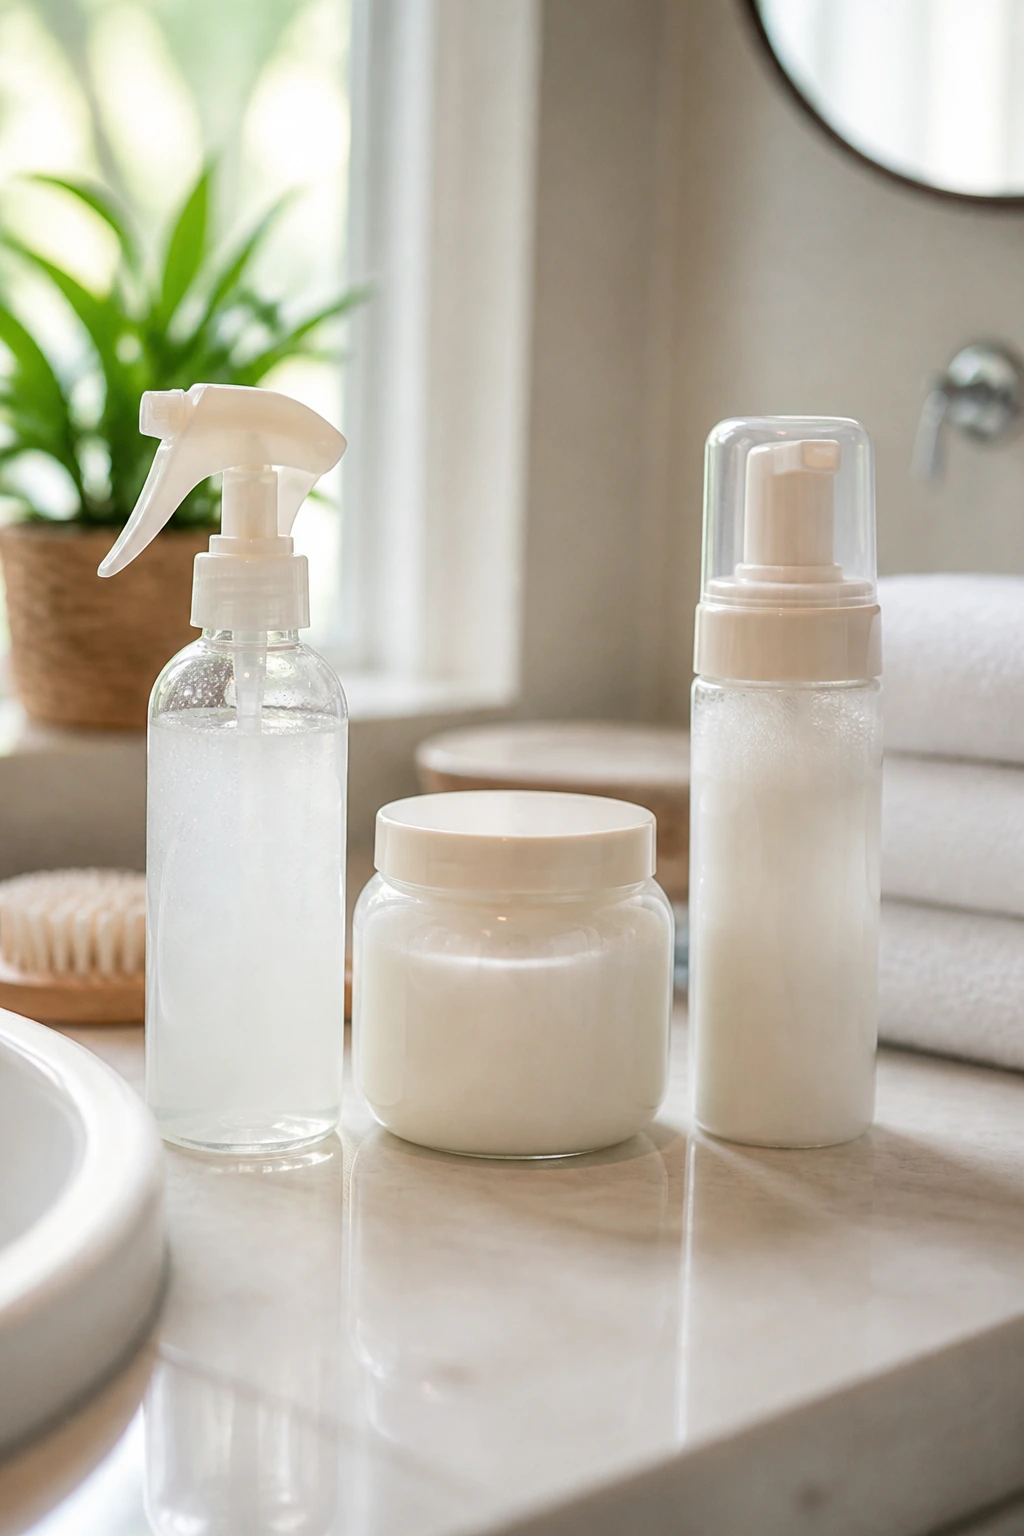
The product shelf can get noisy fast, so keep the logic simple. Start with clean, moisturized hair. Use a water-based leave-in first because it spreads better through coils than a thick cream dumped straight onto dry strands. Then decide whether you need a cream, a light gel, or a mousse depending on the style.
For small twists, I’d lean lighter. A heavy product mix makes the twists limp and prone to buildup. For larger twists or styles with added hair, you can get away with a little more cream because the structure is doing some of the work. If the hairline is sensitive, skip greasy edges and go for a soft hold product that doesn’t crust up.
Synthetic twist hair deserves its own note. Marley, Havana, and passion-twist hair each behave differently in the hand. Pre-separated hair saves time and makes the finished twist look cleaner. If the hair feels too shiny and fake for your taste, rub it gently between your palms or choose a more matte texture. Small choice. Big difference.
How to Wear These Styles With Outfits, Earrings, and Scarves
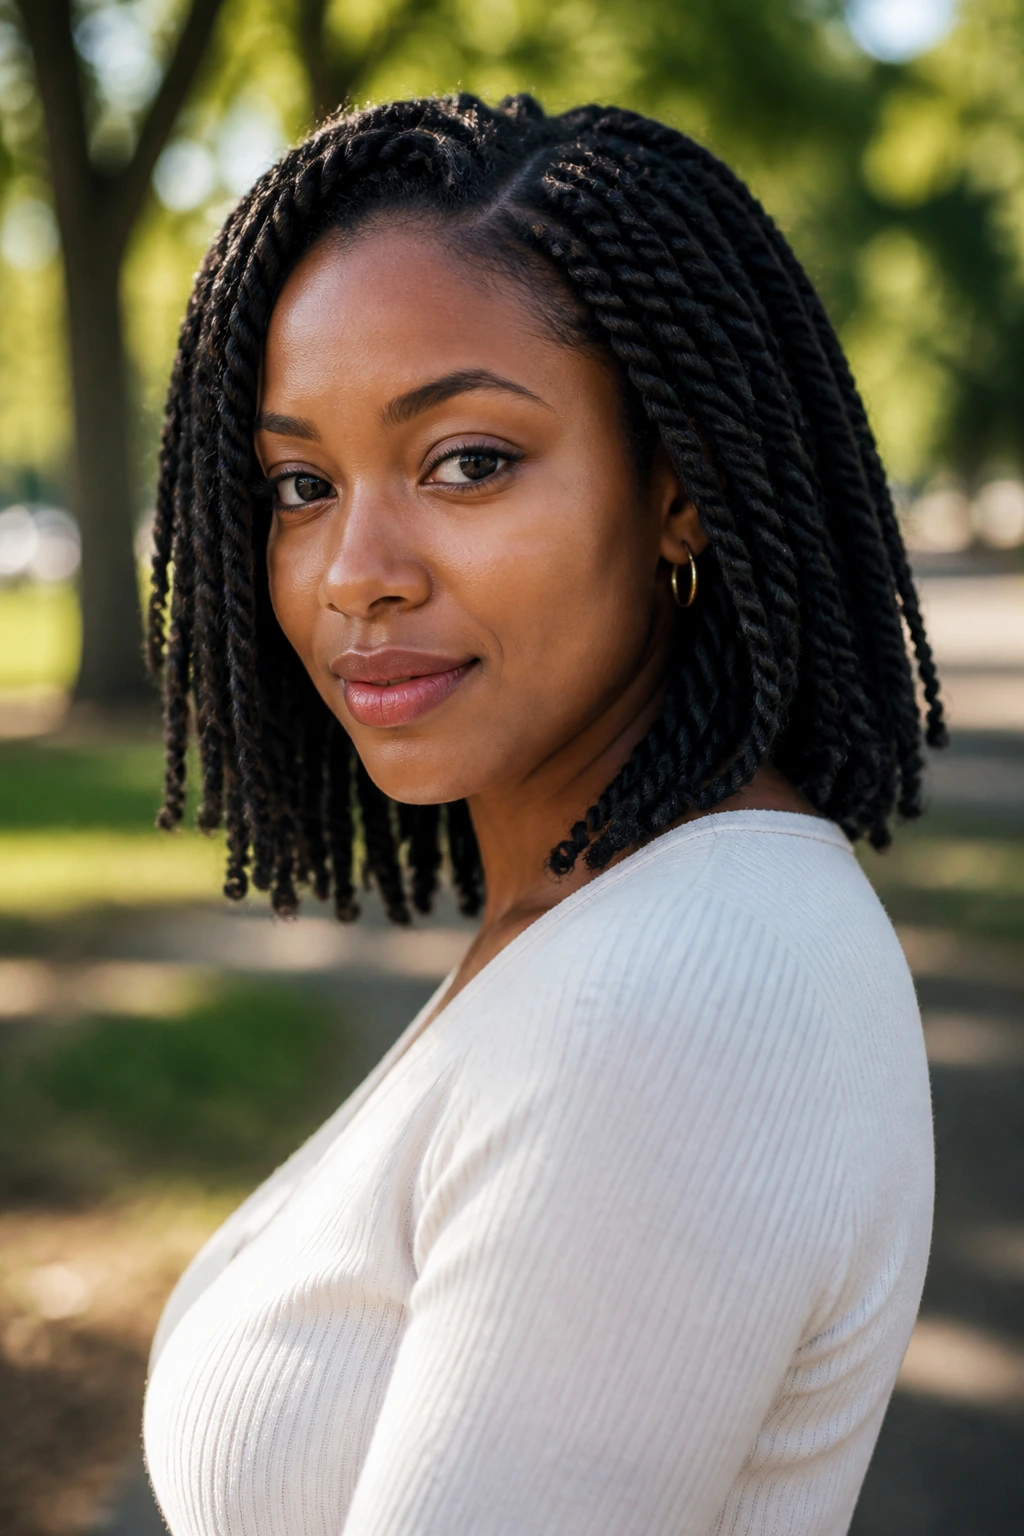
Presentation: Let the parting do some work. A center part feels calm and neat, a deep side part feels softer, and triangular or zigzag parts bring more edge. If the style has a crown, bun, or twist-out finish, keep the front neat enough that the shape reads on purpose.
Accessories: Big hoops, small gold cuffs, wooden beads, satin scarves, and headwraps all work here, but not all at once. Twists already carry texture, so one strong accessory is usually enough. I’m partial to hoops with shoulder-length twists and a scarf with bun styles because the silhouette stays clean.
Scale: Tiny twists read more refined, medium twists read balanced, and jumbo twists read bold from across the room. Choose the size the same way you’d choose a coat: not by mood alone, but by how much visual weight you want to carry. Dense hair can hold more size. Fine hair often looks better with a little less bulk.
Best Moment: Some twists belong in the office. Some belong at brunch. Some belong under a hat on a rainy day. A style with clean parts and tucked ends leans polished; a style with curly ends, beads, or boho pieces leans looser and more casual.
Extra Tips for Shine, Stretch, and Hold
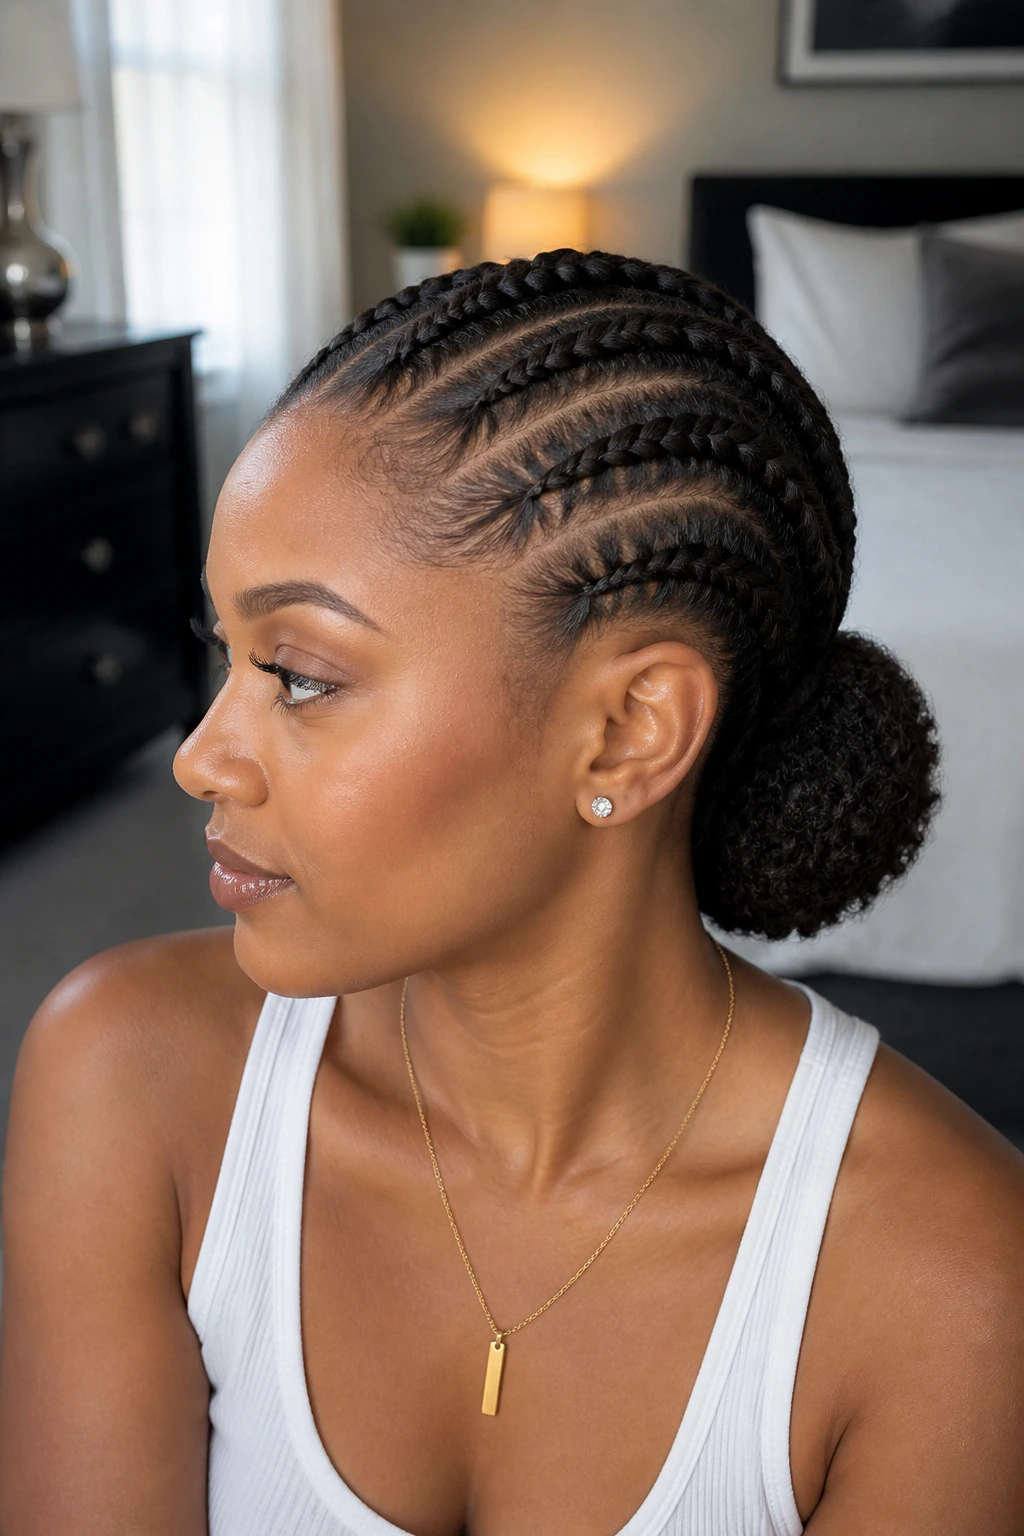
Moisture Boost: Start with damp, not soaking wet, hair, then work in a leave-in that has enough slip to detangle without leaving the strand slippery. If the hair is dry at the ends, twist the last inch with slightly more product than the rest.
Shape Boost: Stretch the hair before twisting if you want length and less shrinkage. Banding overnight or blow-drying on low heat makes a noticeable difference in how the twists hang. Don’t skip this if the style tends to balloon up on you.
Accessory Upgrade: Add beads, cuffs, or a scarf after the hair is fully set. Wet product and metal cuffs are a bad mix. They slip, stain, or just look messy.
Make-It-Yours: If you prefer a softer line, leave out a few front pieces. If you want more control, part in triangles or straight rows. If your hair is very dense, use fewer, larger sections. If it’s fine, use smaller sections so the twists don’t look sparse.
Nighttime Care, Refreshing, and How Long Each Style Lasts
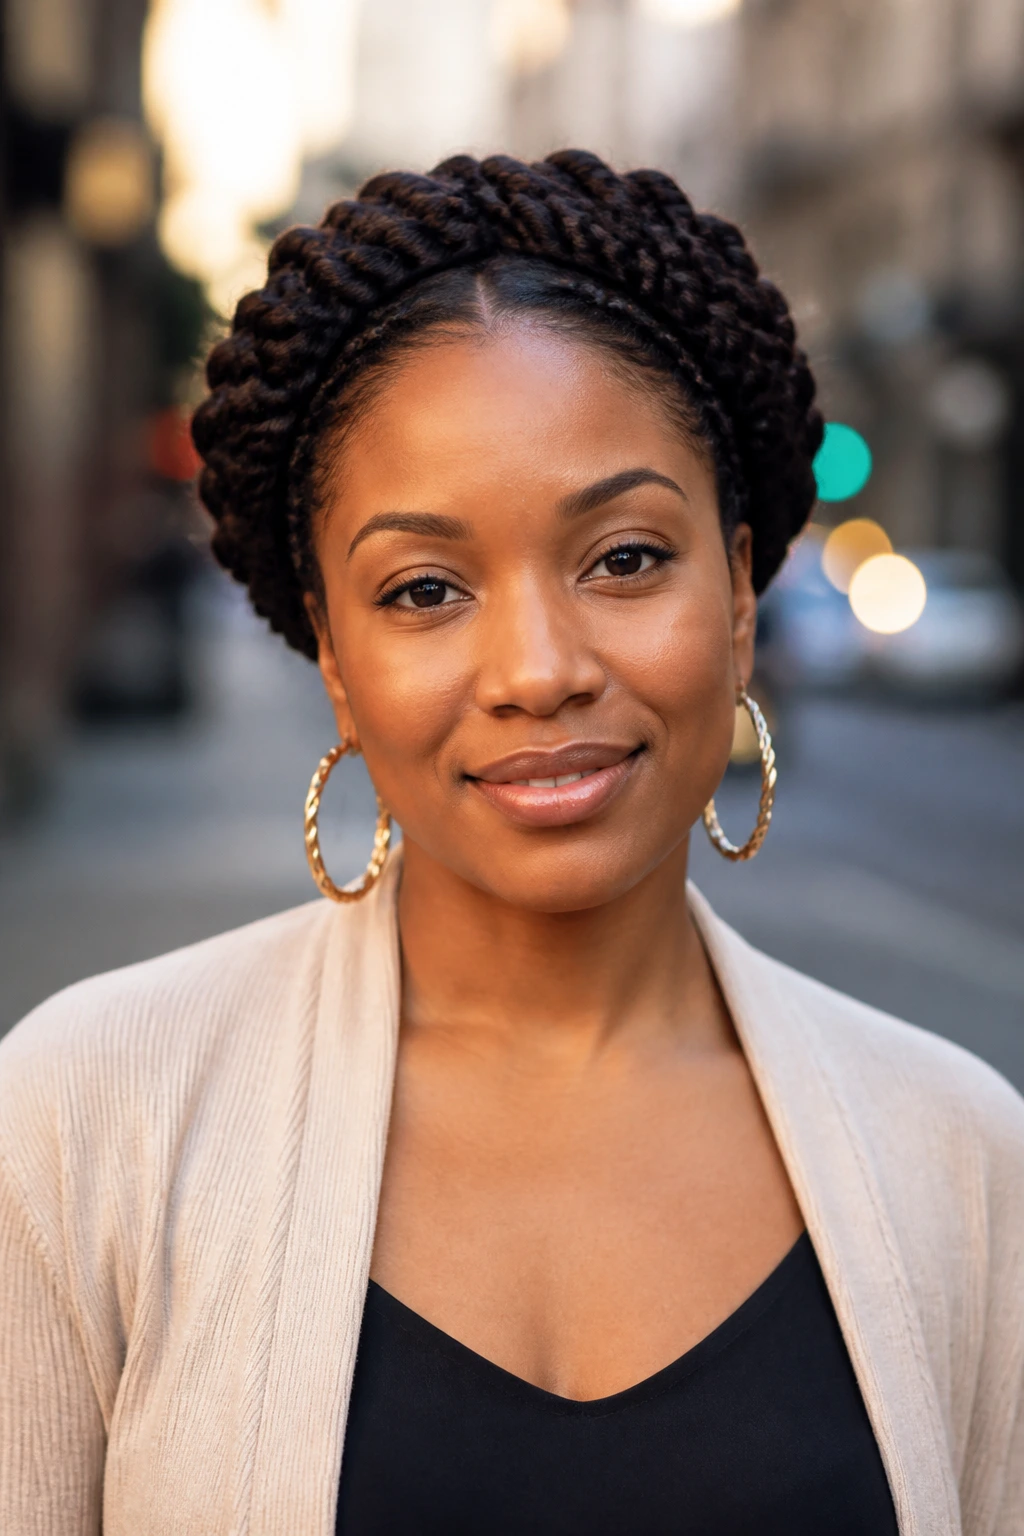
Twists last longer when they’re treated like a style, not a hostage. At night, a satin bonnet or scarf keeps the friction down. If the style is bulky, pineapple it loosely before bed or lay it flat in sections so the roots don’t get crushed. A cotton pillowcase is the enemy here. It steals moisture and roughs up the surface.
How long they last depends on the size and the type. Mini twists can stay neat for 2 to 4 weeks if the scalp stays clean and the ends don’t unravel. Medium twists usually look best for 1 to 2 weeks before they need a reset. Jumbo twists and high-ponytail styles often want a refresh after 5 to 10 days. Extension styles like passion, Marley, or Havana twists can last longer, sometimes 2 to 6 weeks, but only if the scalp stays comfortable.
For refreshing, use a light mist of water and leave-in on the mid-lengths, not a heavy spray that floods the roots. Smooth fuzzy spots with damp hands, then add a tiny bit of mousse at the ends if needed. If the scalp feels coated, don’t keep layering product. Wash or cleanse it instead. Build-up is how a neat twist style starts looking tired.
Variations and Adaptations to Try
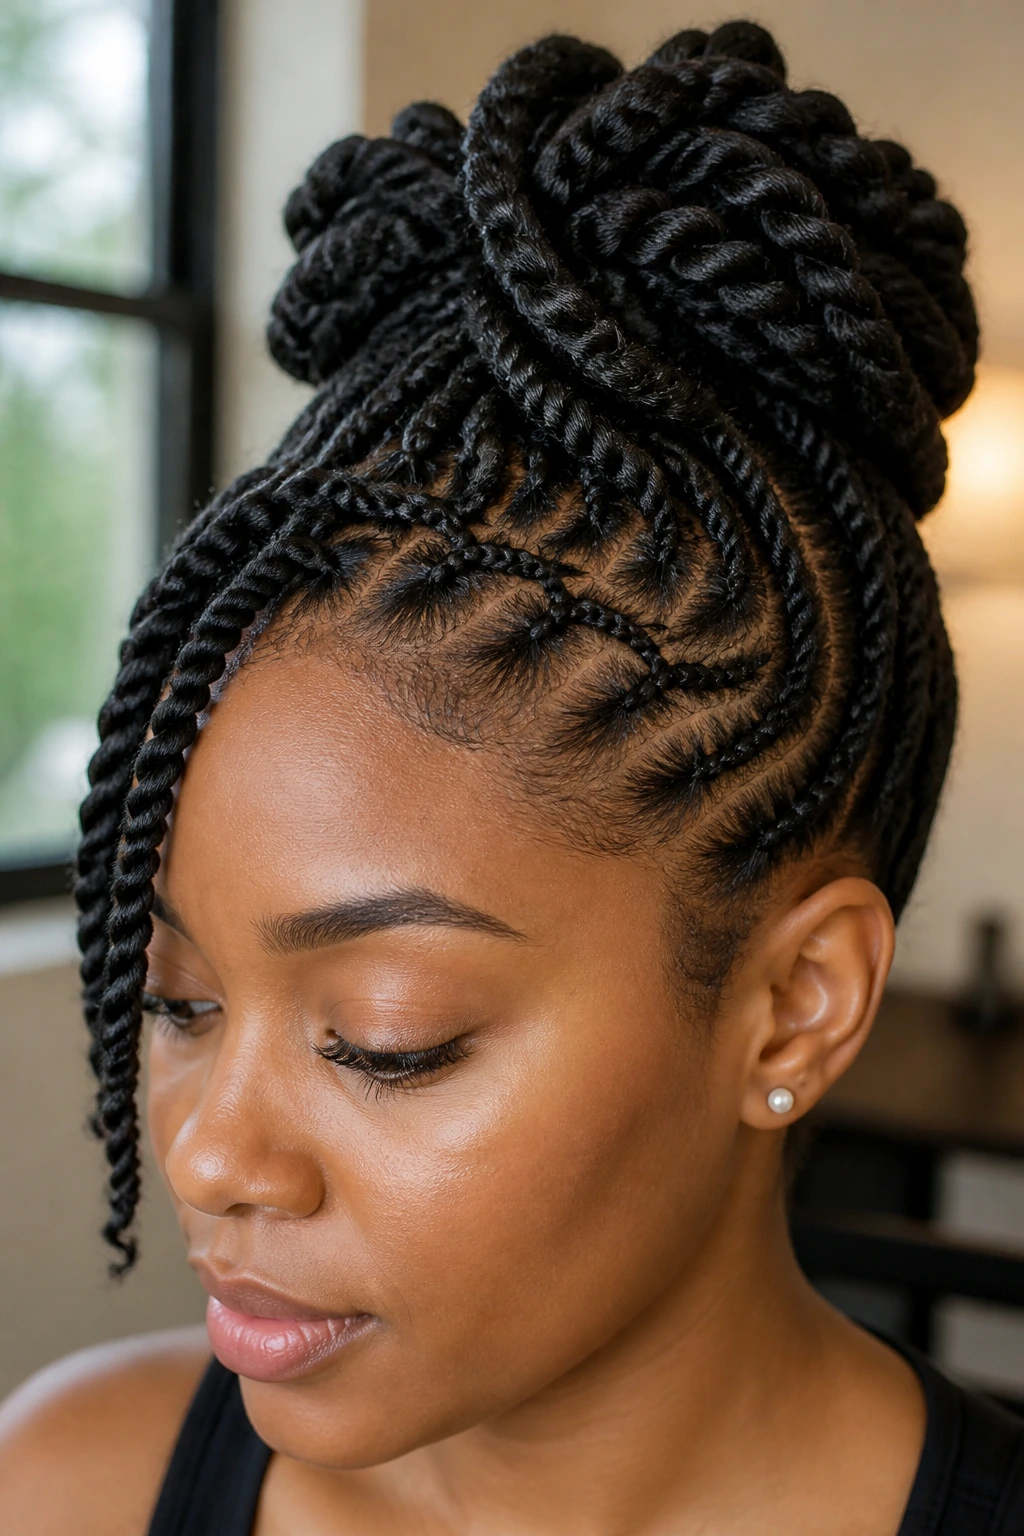
Short-Hair Twist Set: Use smaller sections and a lighter product mix so the twists don’t droop. This version works well on TWAs, cropped cuts, and hair that shrinks hard.
Extension-Added Version: If you want more length or fullness, add Marley, Havana, or passion-twist hair. Pick a matte texture if you want it to blend with coily natural hair, and keep the install tension gentle at the root.
Low-Tension Version: Keep the parts clean but the grip soft, especially around the edges and crown. This is the one to choose when your scalp gets sore from tight styling.
Event-Ready Polish: Combine clean parts, tucked ends, and one statement accessory like cuffs or a satin wrap. The style reads dressier when the front is smooth and the back is contained.
Kid-Friendly Quick Version: Go for medium or chunky sections and keep the style light. A simple half-up, half-down or pigtail shape is easier to maintain and less fussy than tiny sections.
Heatless Stretch Version: Band or braid the hair the night before, then twist in the morning. You’ll get a little more length and a cleaner fall without putting heat on the strands.
Common Mistakes That Make Twists Frizz Fast
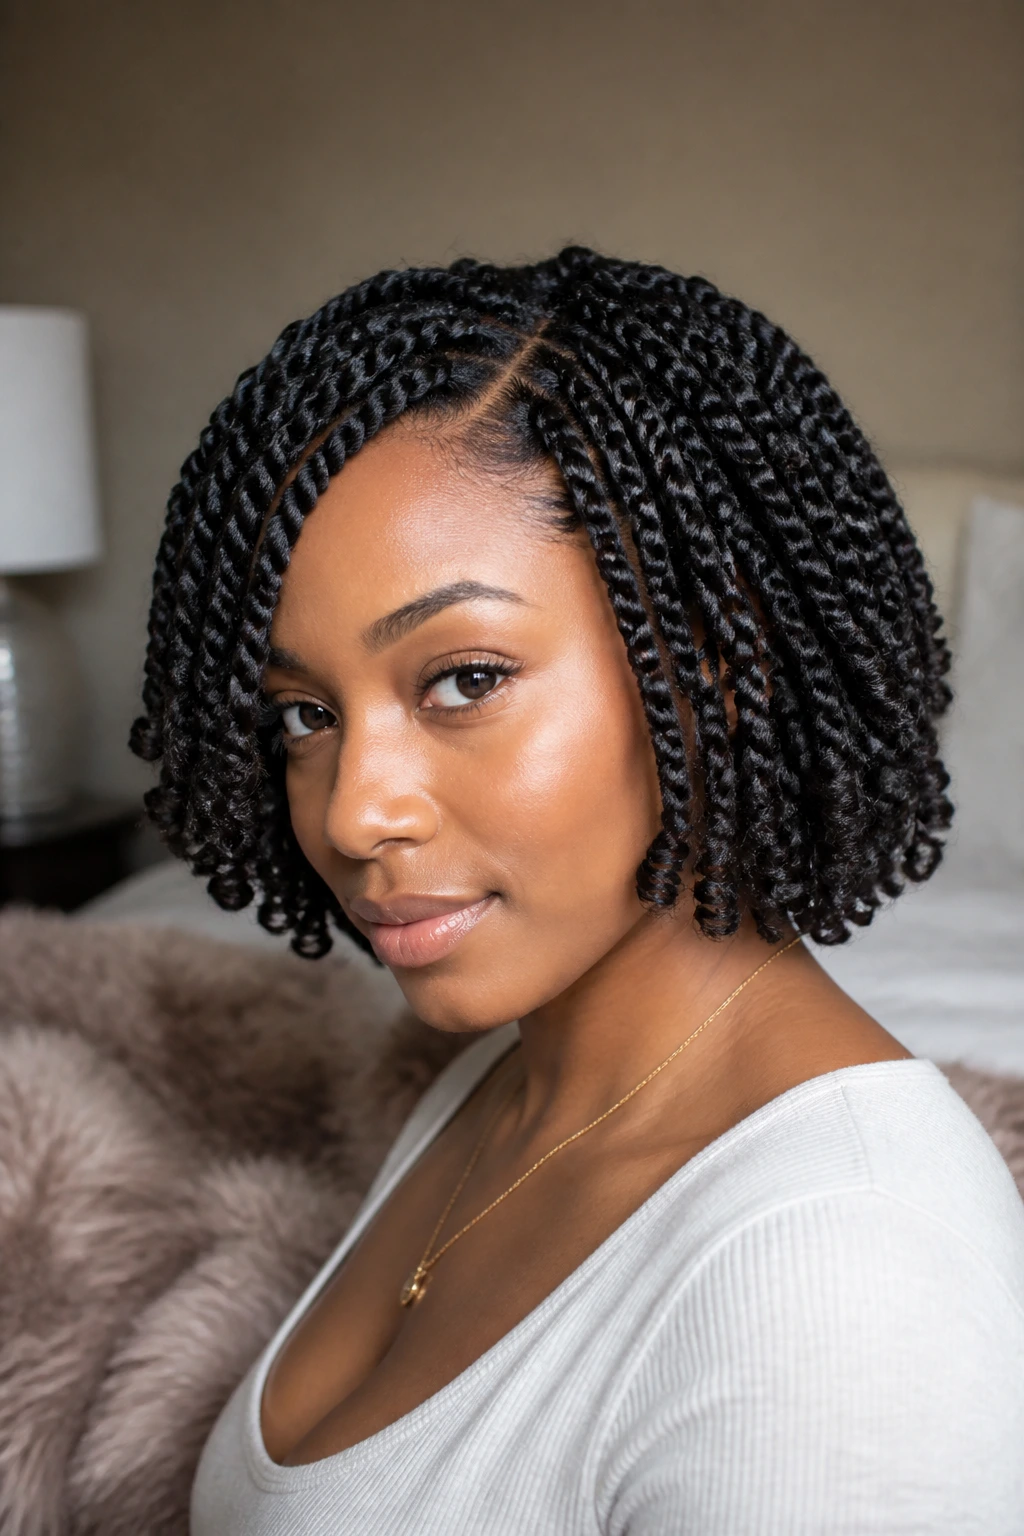
The first mistake is using too much product. Heavy cream on every section can look good for about an hour, then the twists start separating, attracting lint, and feeling greasy at the roots. Use enough to coat the hair, not enough to leave it shiny and wet-looking.
Another common problem is twisting hair that isn’t properly detangled or sectioned. The twist may look fine in the mirror and then puff out at random points because the strands were fighting each other from the start. Detangle in sections. Clip the rest away. It takes longer upfront and saves you from a rough finish.
Tension is the next big one. Tight edges, tight napes, and twists pulled hard at the scalp can look neat but feel bad fast. If your scalp is sore, that is not a “breaking in” period. That is a warning sign. Loosen the root, especially around the temples and hairline.
The last problem is forgetting the ends. Ends that aren’t sealed, curled, or tucked unravel quicker than the rest of the style. A tiny bit of mousse, a neat palm-roll, or a flexi rod set keeps them in line.
Frequently Asked Questions About Twist Hairstyles
How long do twist hairstyles last on natural hair?
It depends on the size and the amount of product used, but smaller twists often last 2 to 4 weeks while medium twists are usually best for 1 to 2 weeks. Bigger styles can look good for a shorter stretch and may need refreshing sooner.
Can I do twists on short natural hair?
Yes. Short hair can hold mini twists, tapered twists, and TWA twists very well if the sections are small enough. The key is keeping the roots neat and not trying to force length that isn’t there yet.
Should I twist on wet, damp, or dry hair?
Damp hair is the sweet spot for most people. Wet hair takes too long to dry and can lead to a flat, musty finish, while dry hair can be harder to detangle and shape. Slightly damp hair gives the best balance of control and drying time.
What’s better for twists: gel, cream, or mousse?
Cream gives slip, gel helps with root hold, and mousse helps with set and frizz control. Many styles do best with a light cream at the base and a small amount of mousse on the finished twists. Heavy layers of all three usually create build-up.
How do I keep twists from unraveling at the ends?
Make the last inch of each twist a little tighter, then smooth it with your fingers or set it with a tiny bit of mousse. For longer styles, curled ends, knots, or tucked ends usually stay in place better than loose ones.
Can I wash my hair while it’s in twists?
Yes, especially with medium or larger twists. Use a diluted shampoo on the scalp, rinse carefully, and squeeze out excess water with a microfiber towel. Mini twists can wash too, but they take longer to dry and need a gentler hand.
Are twists considered a protective style?
They can be, but only if the install is low tension and the hair is kept moisturized and clean. A style that pulls at the edges or stays in too long without care stops being protective pretty quickly.
What if my twists start frizzing after a few days?
A little frizz is normal. Smooth the frizzy spots with damp hands and a touch of mousse, then leave the rest alone. If the whole style is puffing up, the sections may have been too dry, too large, or overloaded with product.
The Styles Worth Repeating
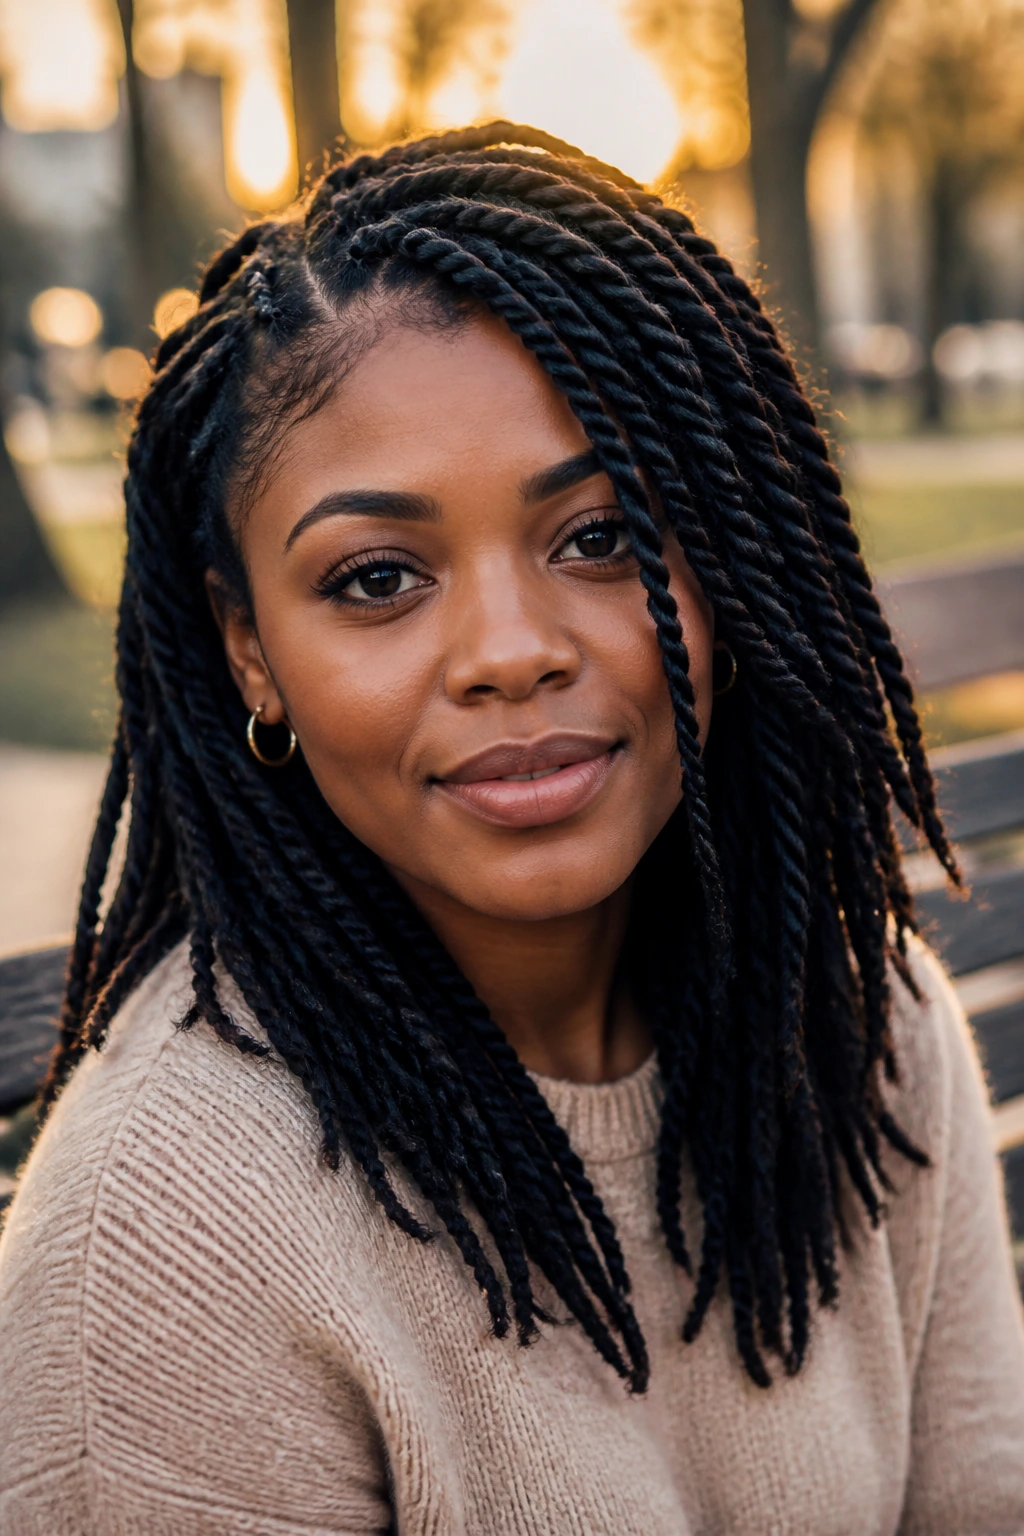
The strongest twist styles are the ones that fit your hair instead of bullying it into shape. That’s the quiet secret. Clean parts help, sure. Product choice matters. But the real difference comes from choosing a size, finish, and amount of tension that your hair can live with for more than one good photo.
If you’re building a rotation, start with one style that gives you structure and one that gives you movement. Maybe mini twists for the weekday grind, then a crown halo or twisted bun when you want a cleaner line. Or go the other way: keep a chunky, fast install in your back pocket and save the detailed styles for when you have the time and patience for them. That mix is what keeps twist hairstyles for natural hair useful long after the novelty wears off.
