



Long hair looks easy until you have to pin it up. Then the whole personality of the hair changes. A style that sits neatly on collarbone-length hair can sag, slide, or puff out in strange places once there’s enough length to pull against the scalp. That’s why updos for long hair need structure, not just a hair tie and a hopeful mirror check.
The trick is to stop thinking of these styles as “putting hair up” and start thinking of them as building small architecture. Where does the weight sit? What’s carrying the tension? Which sections are meant to be smooth, and which ones are meant to stay loose on purpose? Get those three questions right, and long hair starts behaving.
There’s also a nice side effect: long hair gives you room to do real shape-shifting. You can make it sharp and glossy, soft and undone, braided and intricate, or casual enough for a sweatshirt and sneakers. The length does the heavy lifting if you give it a plan. And that’s exactly what these styles are good at.
Why These Long-Hair Updos Earn Their Keep
-
They use the weight instead of fighting it: Long hair can pull a style down, so these looks spread the tension across pins, braids, loops, and wrapped sections rather than dumping everything into one elastic.
-
They give you real range: Some of these are clean enough for a ceremony, others are loose enough for errands, and a few sit in that useful middle ground where you look done without looking stiff.
-
They work with different hair moods: Freshly washed hair, day-two texture, thick lengths, slippery straight strands, and big curls all need different handling. These styles aren’t built the same way, and that matters.
-
They survive a long day better: A good long-hair updo should still look intentional after a commute, a few hours outside, or a full stretch at a desk. If it collapses at lunch, it was never a real style to begin with.
-
They let you cheat a little: A tucked end, a wrapped elastic, a braid hidden under a bun—those small moves make a big difference. The eye reads polish, even when the structure underneath is working hard.
1. Sleek Low Chignon
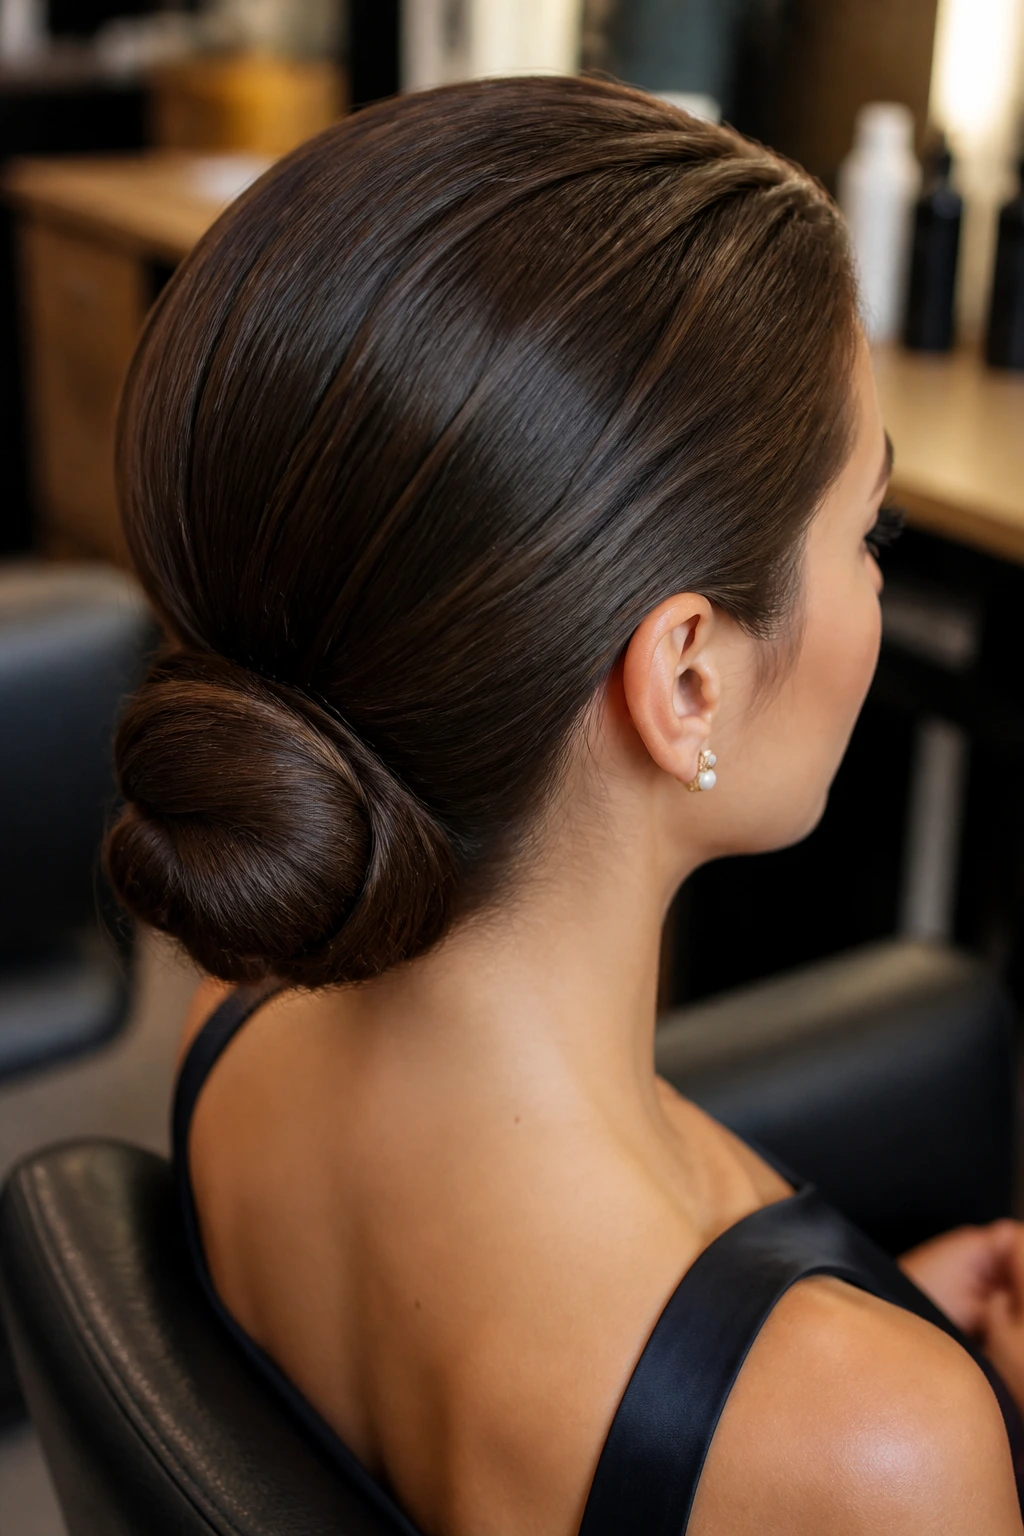
A low chignon is the style I reach for when long hair needs to look calm, not fussy. It sits at the nape, keeps the silhouette narrow, and handles weight better than a bun that’s perched high and trying to defy gravity. On very long hair, the trick is to fold the length once before you start twisting, so you are not stuffing six feet of hair into a tiny knot and hoping for the best.
Why it works
The low position keeps the center of gravity close to the neck, which makes the whole style feel steadier. Smooth it first with a brush, then twist the length into a loop and pin the fold with 4 to 6 bobby pins in a crisscross pattern. That little pin map matters. One lonely pin will slide; several pins holding at different angles actually lock the shape.
For extra hold, mist the hair lightly with texturizing spray before you start. Clean, slippery hair tends to fight this style unless you give it some grit. If your hair is thick, split the tail in half and wrap each half around the base in opposite directions. It feels more deliberate, and it spreads the bulk out.
Best when you want a polished finish
This one works for office days, dinner, or anything where you want the back of your head to look neat from every angle. Leave the front smooth or pull two narrow face-framing pieces loose if you want a softer line. The chignon should sit like it belongs there. No wobble. No fluff. Just a clean knot that knows what it’s doing.
2. Rope-Braid Crown Knot
A rope-braid crown knot has a little drama, but not the kind that looks overworked. You start by twisting two sections into rope braids along the sides of the head, then bring them together at the back and coil the ends into a knot. Long hair gives this style the length it needs; shorter hair often runs out of braid before the crown has enough shape.
The best part is the texture. Rope braids lay smooth, but they still look dimensional because the twist catches light differently than a regular three-strand braid. If your hair is layered, keep the twists tight at the roots and let the ends disappear under the knot. That hides the choppier pieces and keeps the crown line neat.
Use clear elastics to secure the braid ends before wrapping them. If you skip that and try to pin loose ends directly, they’ll peel apart by evening. This style looks especially good with second-day hair because the slight roughness helps the braid stay stacked instead of slipping flat.
3. Wrapped High Bun
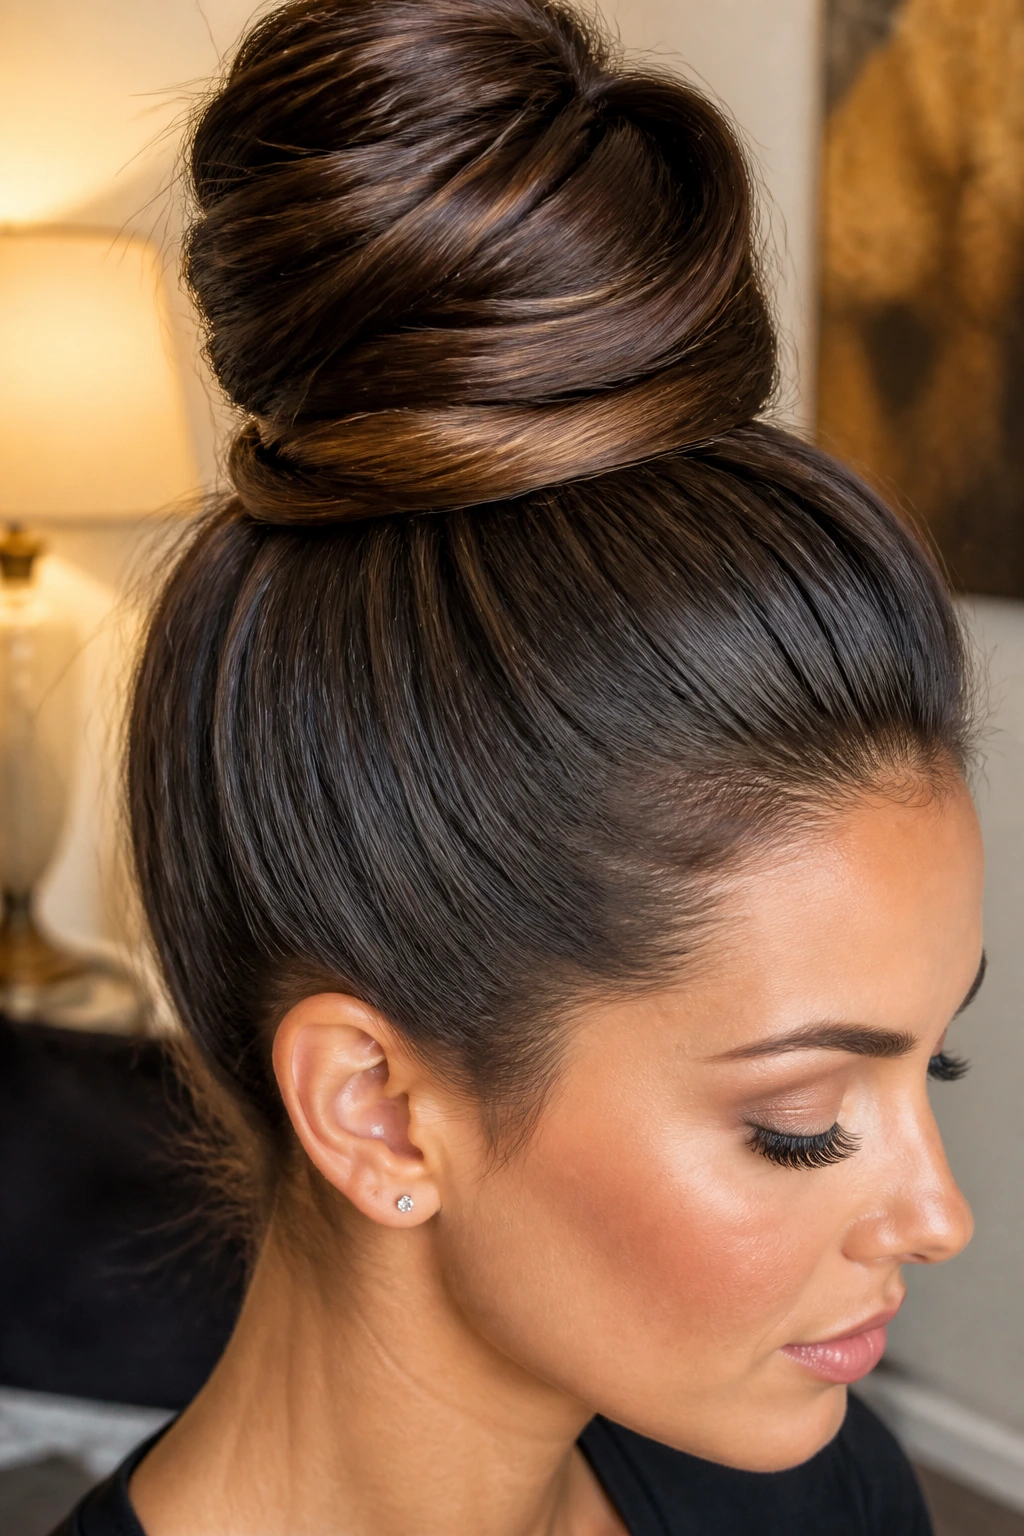
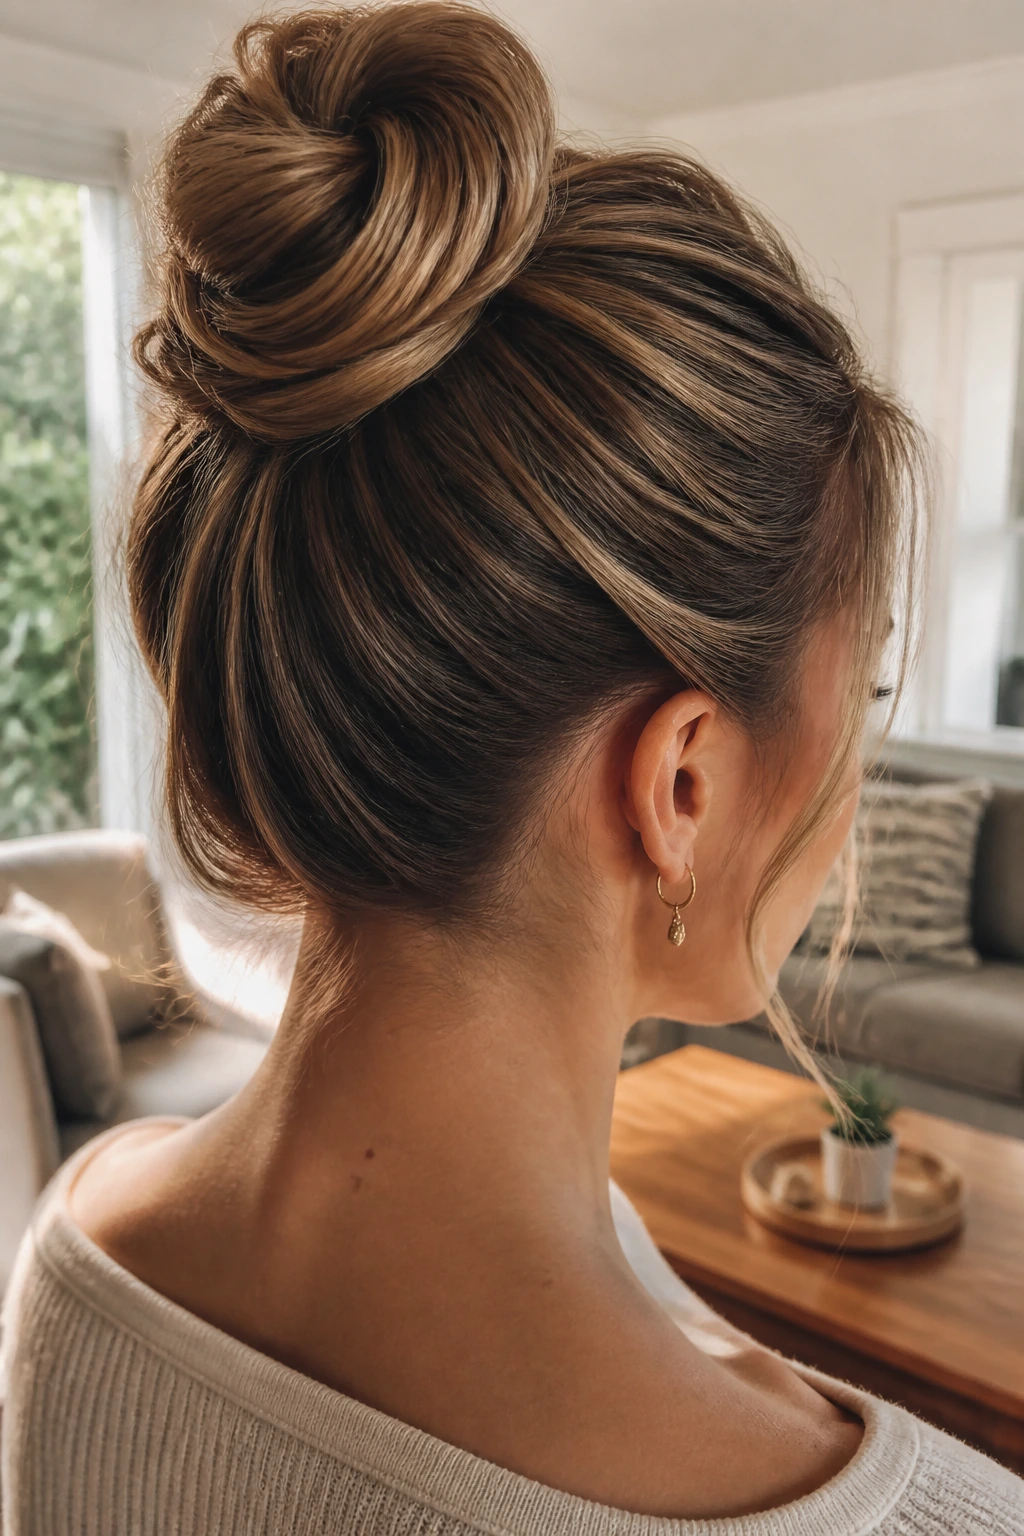
A wrapped high bun is the classic ballerina shape, but long hair makes it bigger, denser, and far less delicate than the version on shorter hair. That’s a good thing. The extra length gives the bun a fuller dome, which looks especially strong on thick hair or heavy layers.
The move that saves this style is wrapping the hair in one direction only. If you keep changing direction, the bun gets bulky in the wrong spots and starts to tilt. Gather the hair high, twist the ponytail once, then coil it around the base and pin as you go. If the ends stick out, tuck them under the bottom layer instead of chasing them with one more elastic.
A donut form can help if your hair is medium-thick and you want more height with less pinning. For very thick hair, I’d skip the donut and work with the hair’s own volume. It holds better and looks less boxy. This is one of those styles that gets stronger with a little imperfection at the edges.
4. French Twist Roll
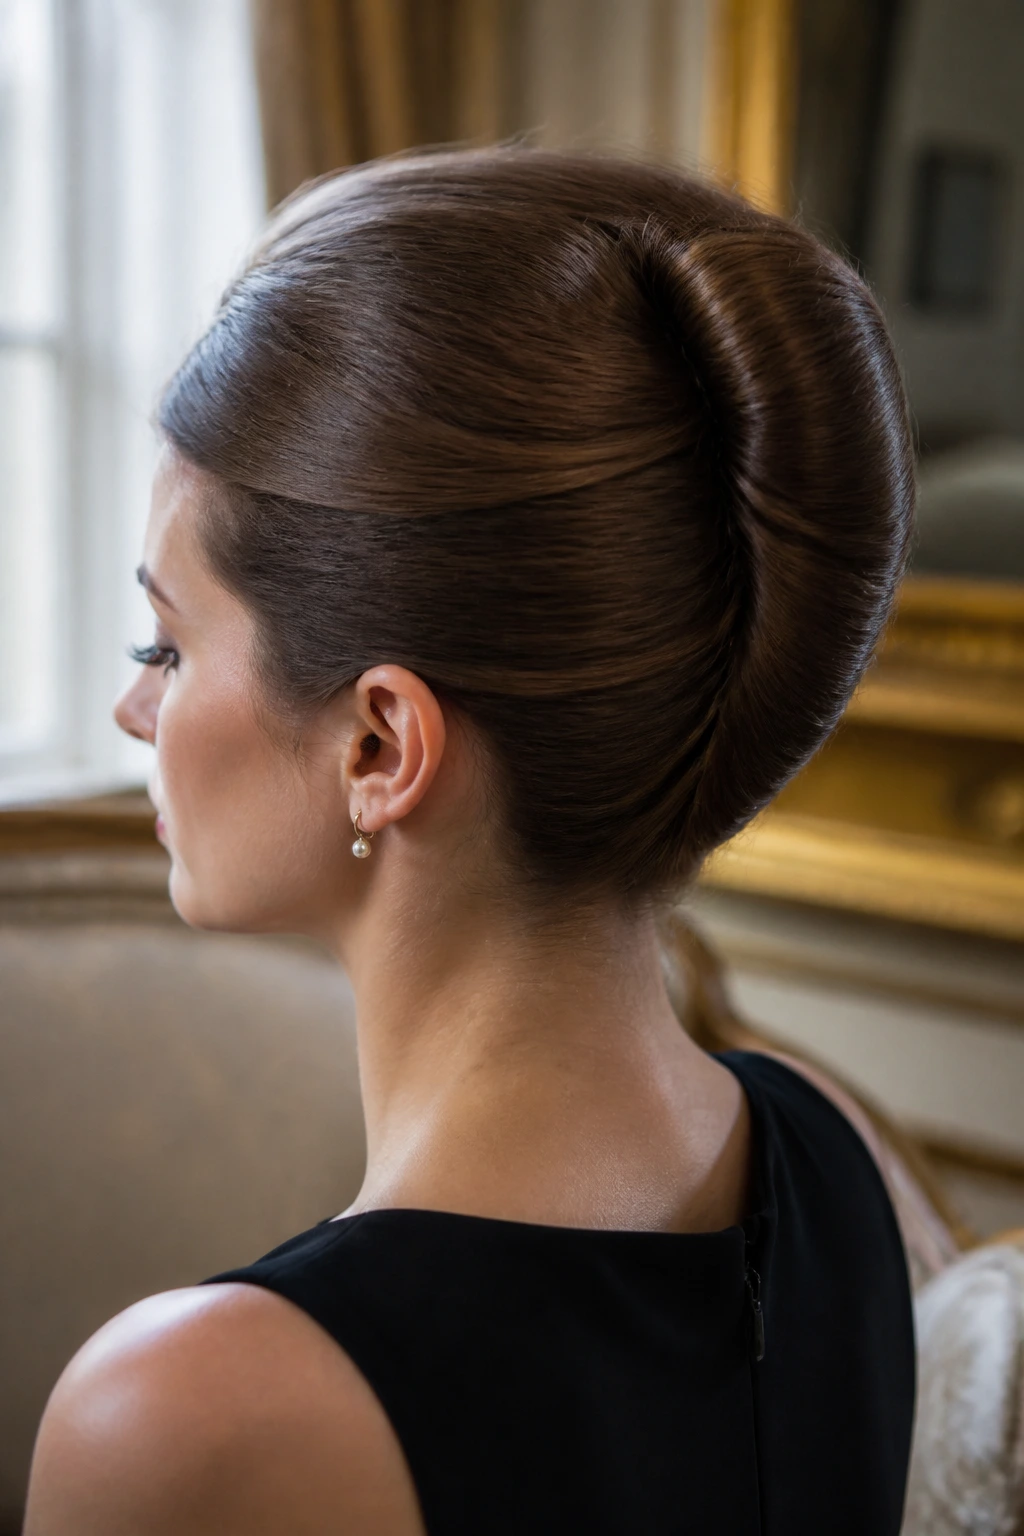
The French twist roll is the most elegant shape in the whole bunch, and long hair gives it that delicious vertical line down the back of the head. It’s narrower than a bun, which is why it works when you want the hair off the neck but don’t want a round lump sitting there all night. The trick is to keep the twist tight at the base and smooth as it climbs.
A tail comb helps here. Use it to build a clean center section before sweeping the length to one side and rolling it upward. Pin the roll with long U-pins, not tiny decorative pins that can’t handle the weight. If your hair is very dense, make a tiny hidden braid at the base first. It gives the roll something to bite into.
This style has a formal, slightly old-school feel, but it does not have to look severe. Leave a soft bend near the front if you want it to feel a little less stern. Straight hair shows the structure best, though wavy hair makes the roll look fuller with less effort.
5. Bubble Ponytail Updo
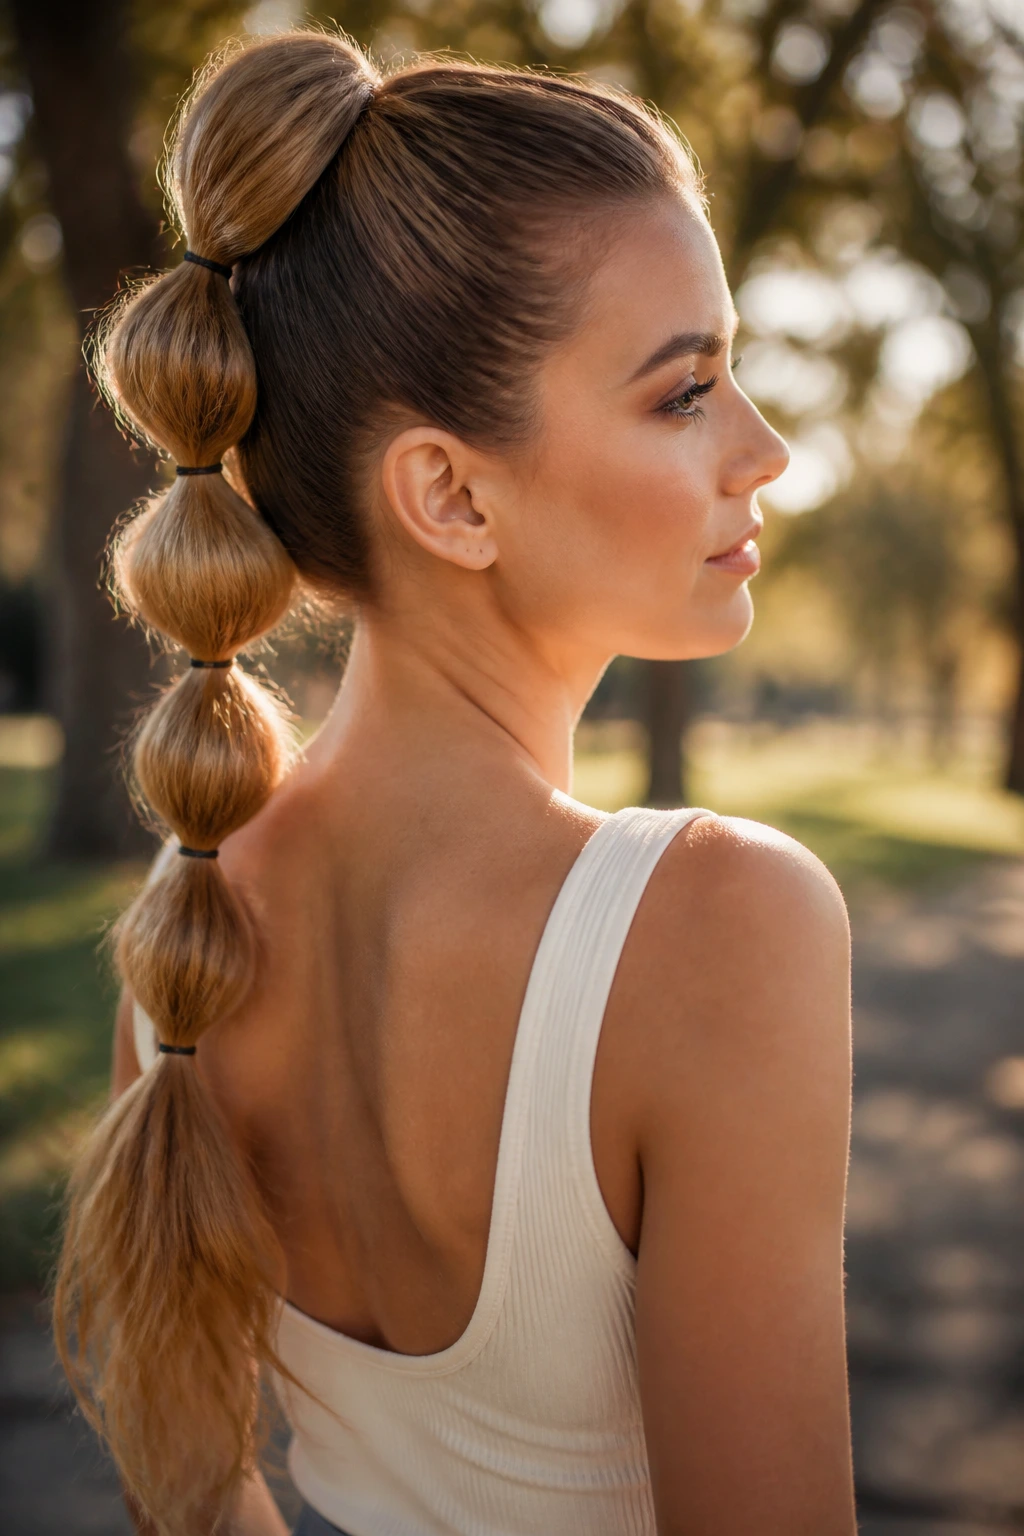
A bubble ponytail updo is what happens when a regular ponytail gets smarter. Instead of just tying the length back and leaving it there, you add elastics every few inches, puff each section slightly, and pin the tail back into a decorative fold or loop. On long hair, the bubbles have enough length to look intentional rather than stubby.
The spacing matters. Put each elastic 2 to 3 inches apart for long, sleek hair. Closer spacing can make the style look cramped. Farther apart and the bubbles sag. A quick tug on each segment creates that rounded shape, and a light mist of hairspray keeps the sections from collapsing into each other.
This is a strong choice when you want something playful but still controlled. It reads modern without being precious. If your hair is very straight and slippery, curl the tail slightly at the ends before you start. That small bend helps the bubbles keep their shape and makes the finish look less rigid.
6. Messy Knotted Bun
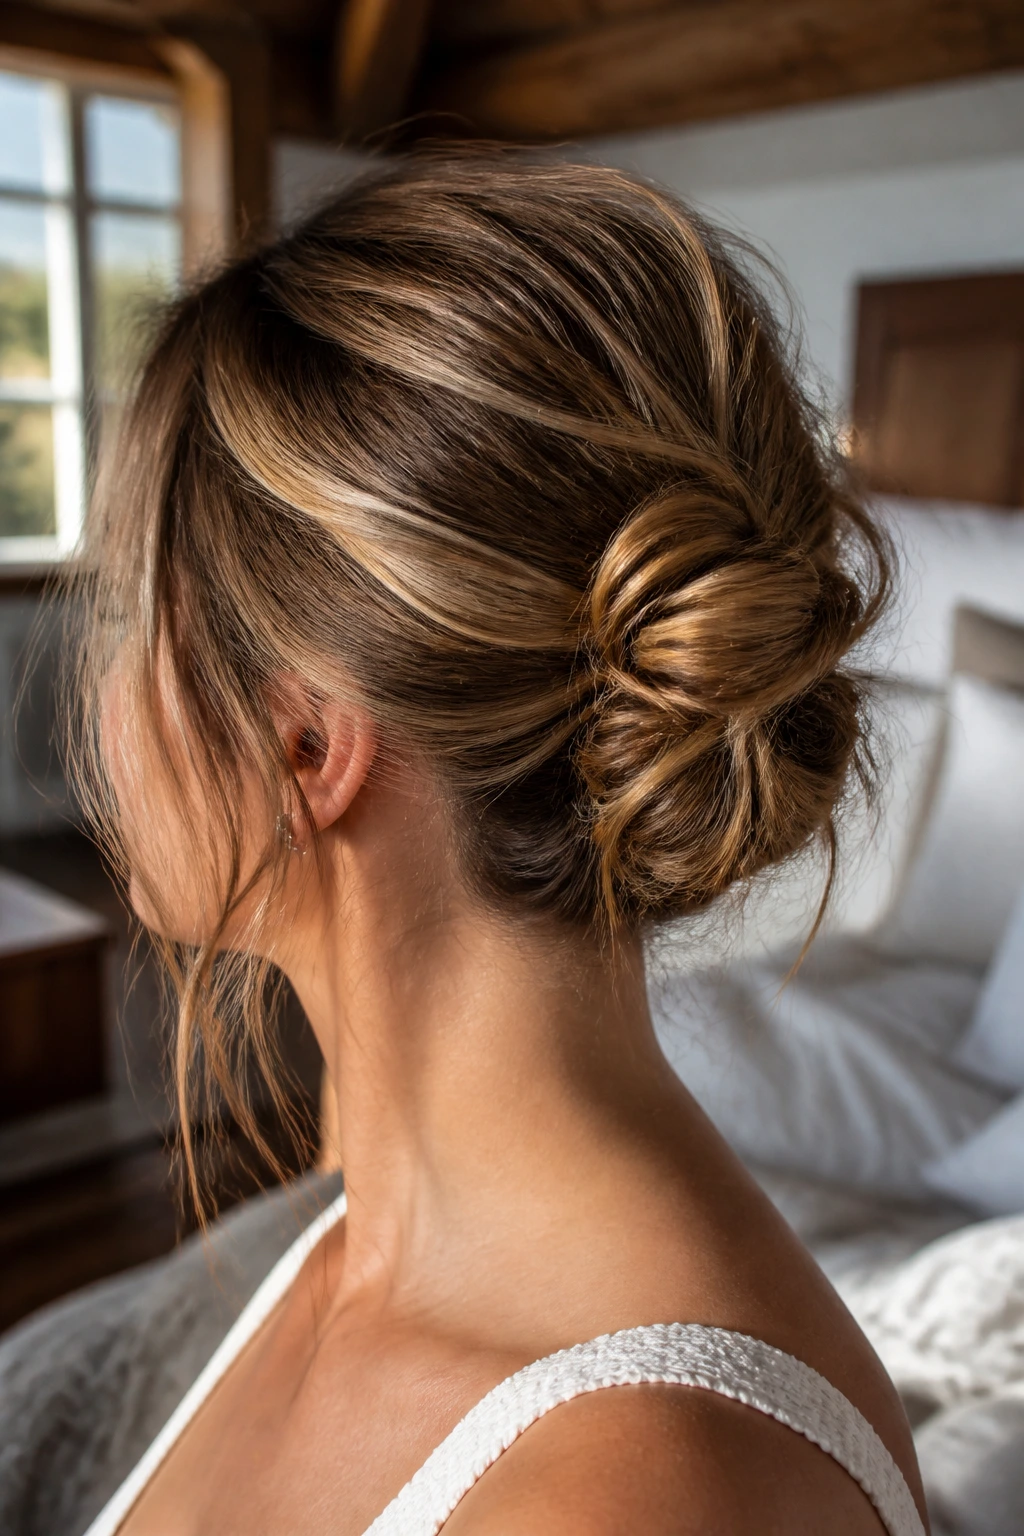
A messy knotted bun should look like you threw it together in five minutes, but the good versions are more deliberate than that. With long hair, the knot can get too bulky if you use every inch of length, so I like to split the tail into two pieces, knot them once, and then tuck the ends around the base instead of winding them endlessly.
That leaves the bun with movement. A few loose strands near the ears help too, but don’t let the “messy” label fool you into abandoning structure. You still need one anchor elastic and at least 4 pins pushing inward from different directions. Otherwise the bun will loosen and flatten at the same time, which is a bad combination.
This is the style for day-two hair, quick dinners, and weekends when you want your hair up but don’t want to look like you fought with it. It’s forgiving. That’s the whole point. If your layers are short, let a few pieces escape on purpose; it makes the bun feel airy instead of unfinished.
7. Halo Braid Bun
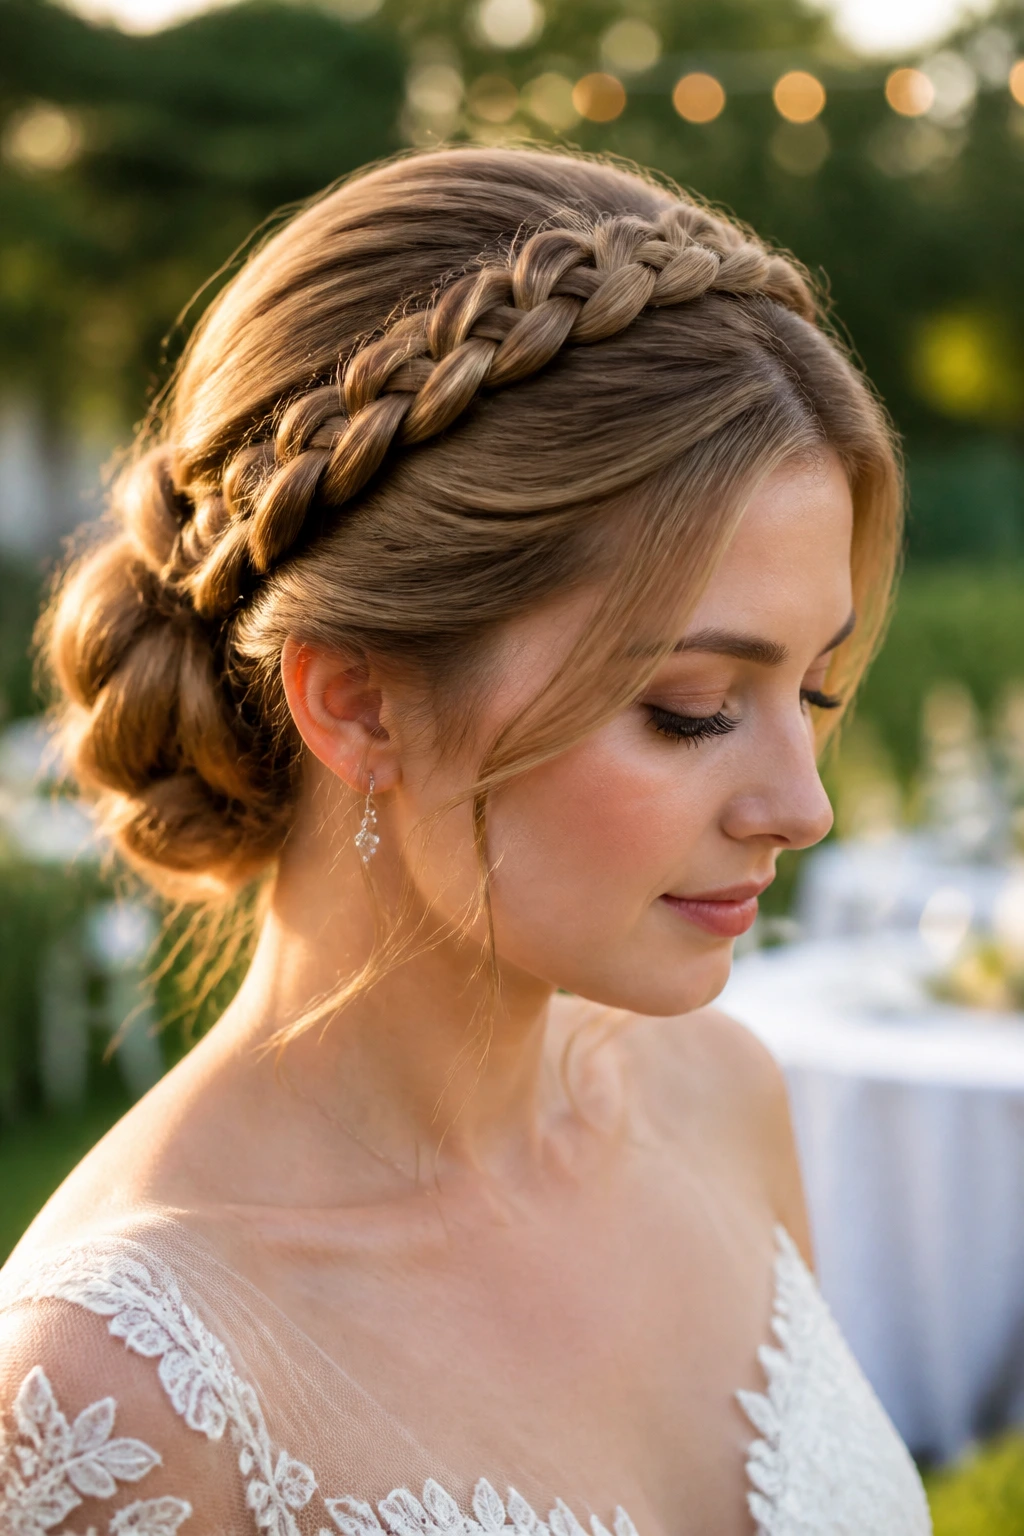
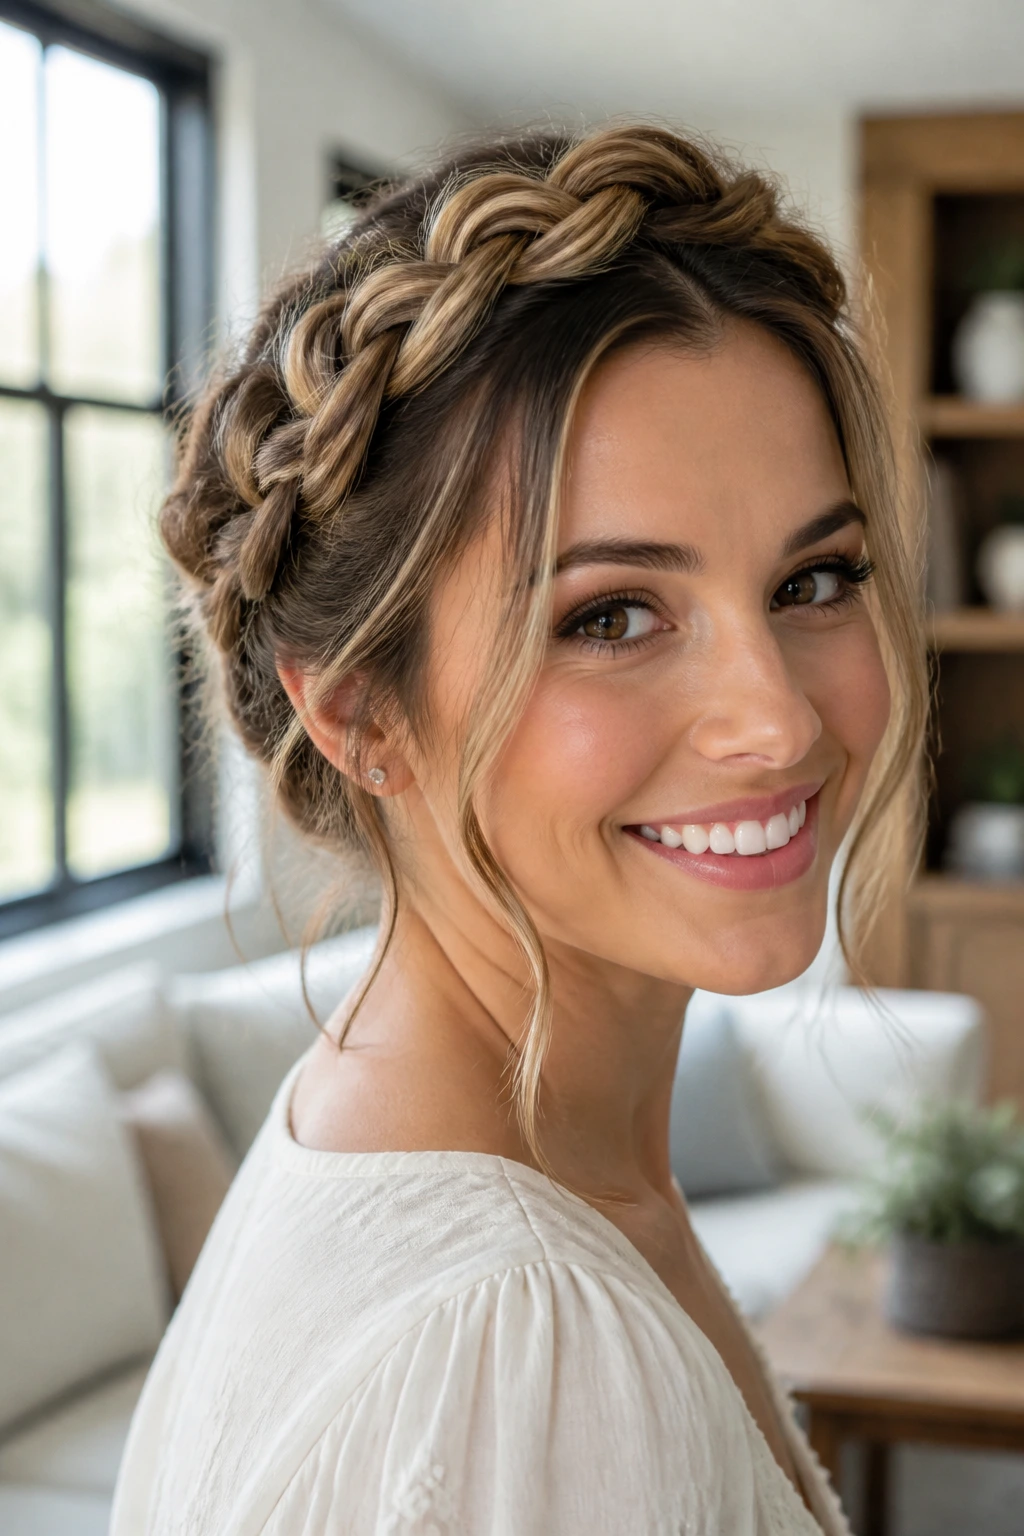
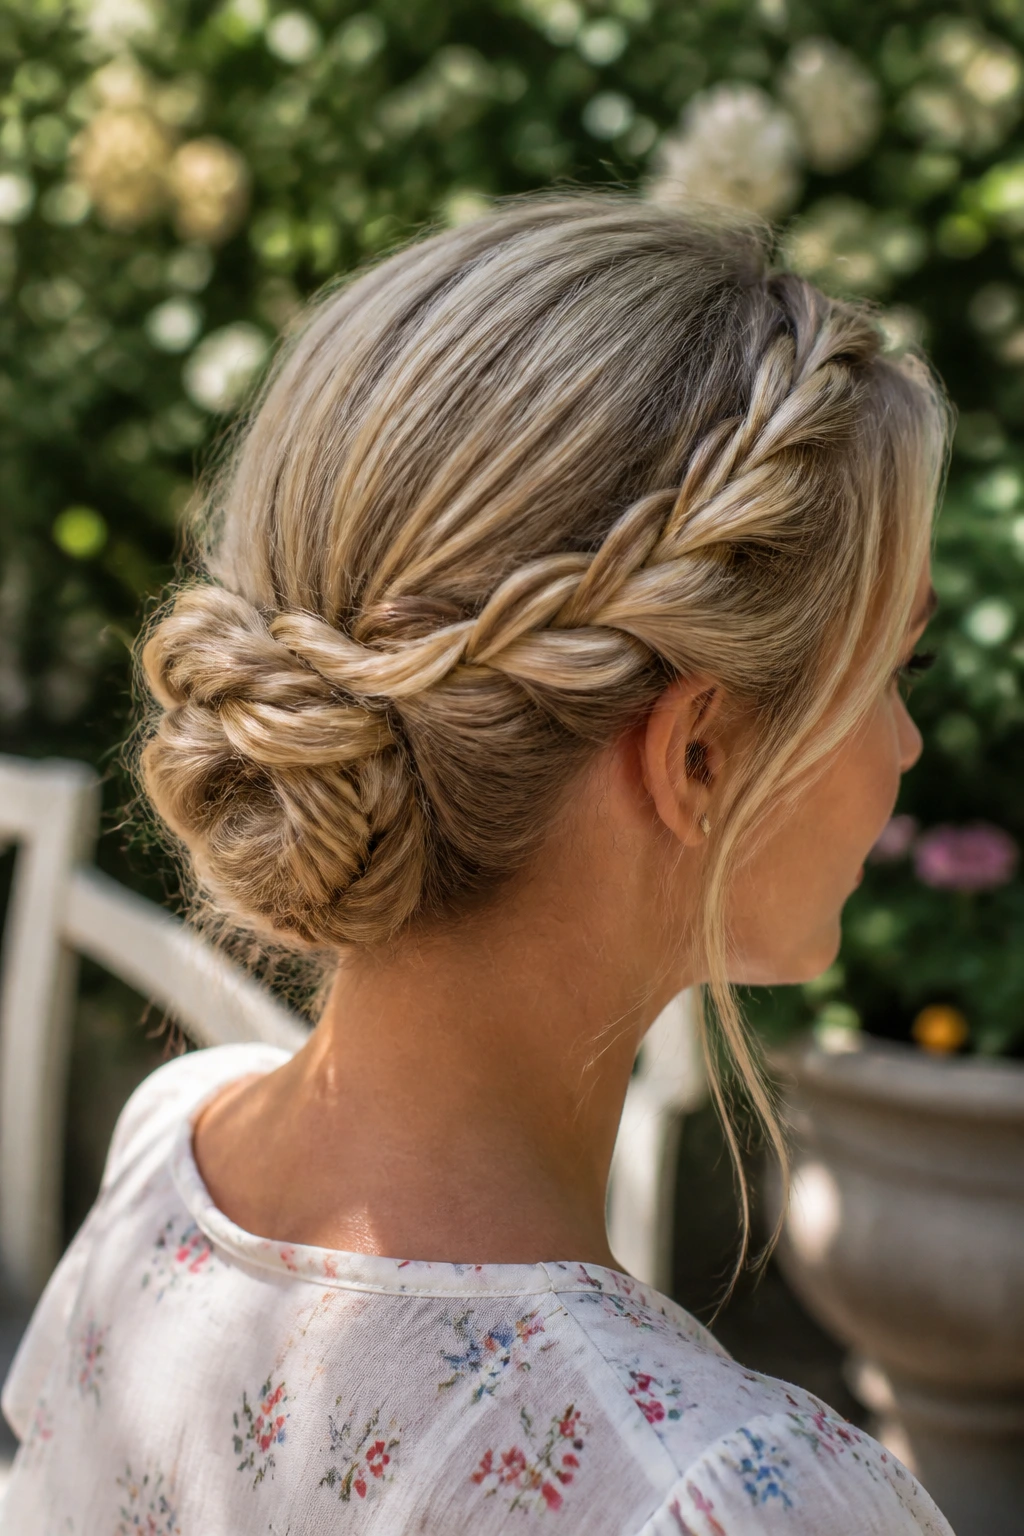
A halo braid bun gives you two things at once: a braid that frames the head like a crown and a bun that collects the leftover length at the back. It looks complicated, but on long hair the braid actually helps control the hair before it ever reaches the bun. That is the smart part. The braid does the sorting for you.
Start with a Dutch or French braid near one temple and wrap it around the head. When you reach the opposite side, gather the remaining length into a low bun and pin it into the braid tail. The braid should sit close to the scalp, not float away from it. If it puffs, the whole style starts looking less clean.
This one shines on hair with some texture. A little grip helps the braid stay visible, and long lengths give the bun enough body so it doesn’t look thin at the ends. I like this style for weddings and longer events because it keeps the front polished while still giving you something interesting at the back.
8. Gibson Tuck
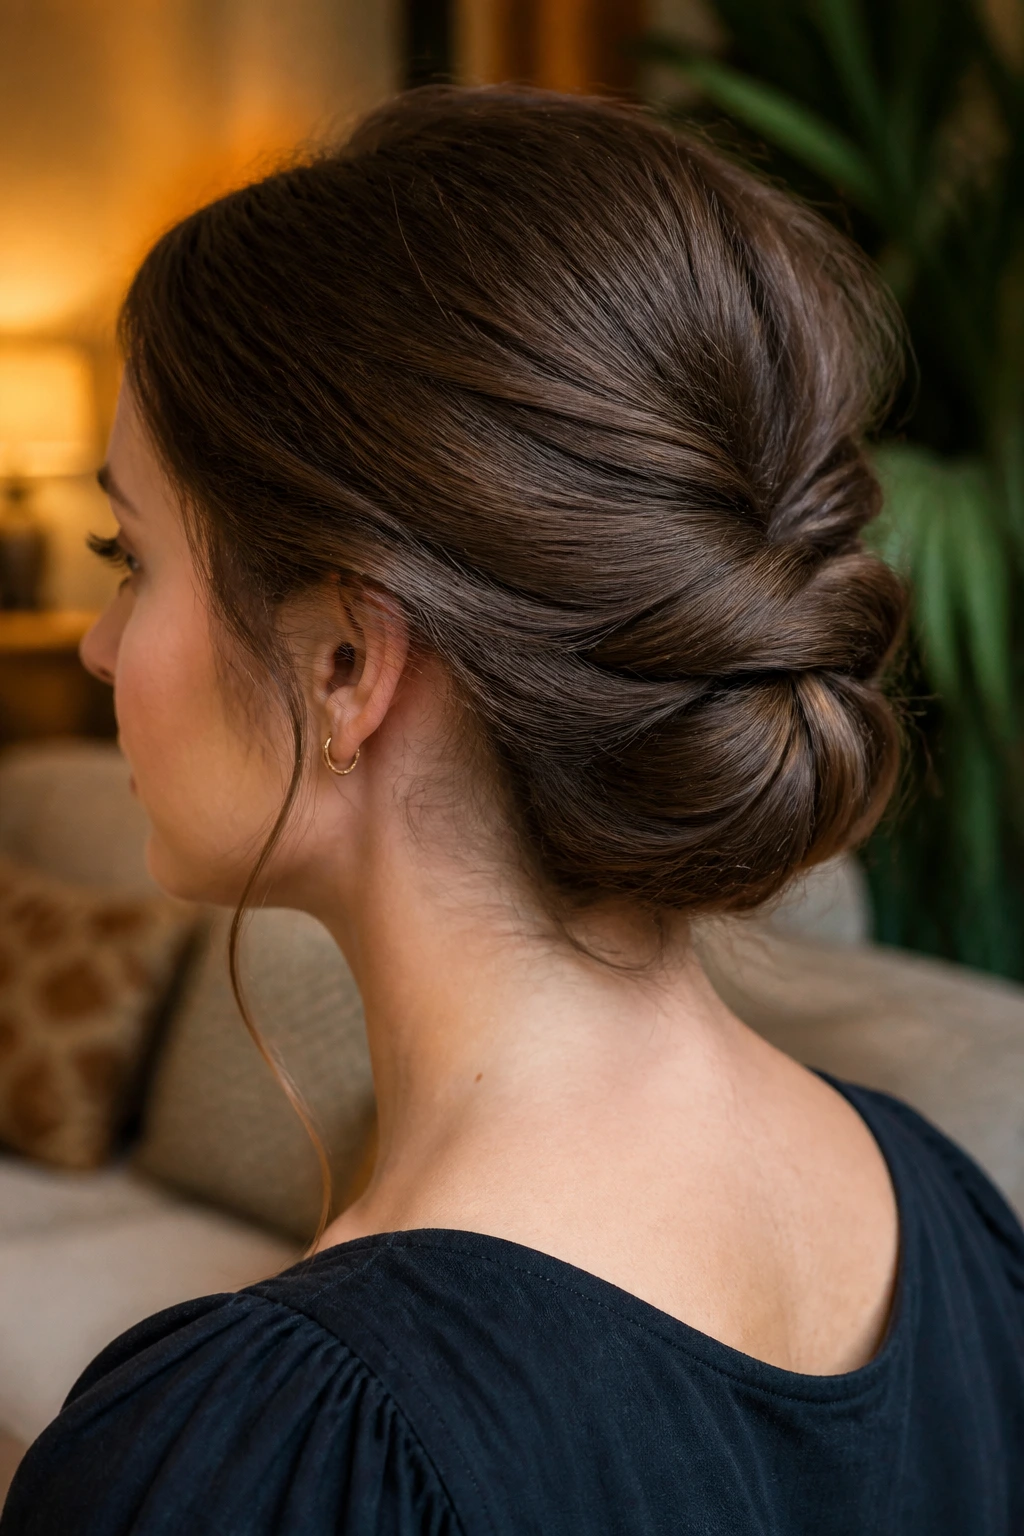
The Gibson tuck is a vintage shape that feels quietly clever. You create a loose pocket or roll at the back of the head and tuck the length underneath it, almost like folding the hair into itself. On long hair, the roll needs to be deep enough to hide the tail, which is why a little pre-twist helps.
If your hair is smooth, rough up the underside of the section before you tuck it. A touch of texturizing spray or dry shampoo gives the hair something to grip. Otherwise the fold can slide open, and the style loses its neat outline. This is one of those updos that looks delicate but behaves better when the hidden parts are slightly messy.
The Gibson tuck is a nice choice when you want soft lines instead of sharp edges. It sits well with dresses that have a high neckline or collar because it doesn’t compete for space. The shape also flatters long layers better than a tight bun does. Nothing gets crammed. Everything gets folded.
9. Double-Twist Low Bun
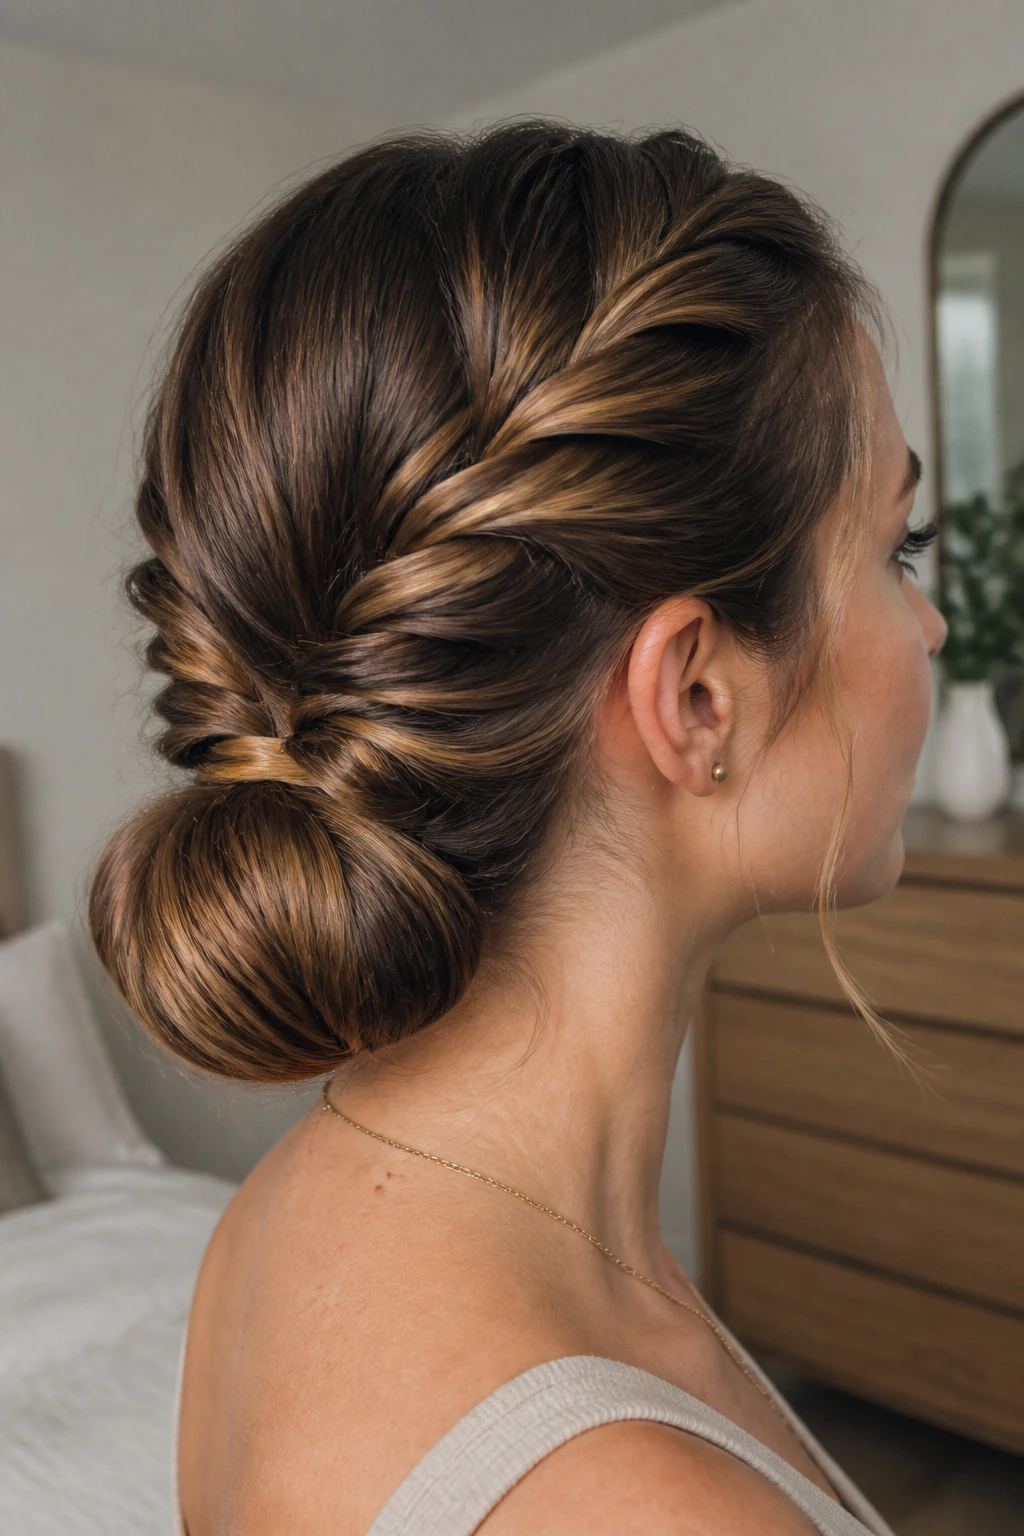
A double-twist low bun is built for long, thick hair that needs more than one anchor point. Split the hair into two sections, twist each one toward the center, and then wrap them together into a low bun at the nape. That split keeps the weight from dragging the bun into a lopsided shape by the end of the day.
This style is especially useful when your hair is dense enough to feel heavy before you even pin it. Twisting in two parts reduces bulk, which means the bun sits flatter against the head. If you have a lot of layers, tuck the shorter pieces into the center of the bun first. That’s where they’ll stay hidden instead of poking out at the sides.
It has a clean, almost tailored feel. Not stiff. Just controlled. I like it for hair that needs to stay put through wind, heat, or a long commute, because the doubled structure holds better than a single roll or single twist.
10. Braided Ponytail Fold
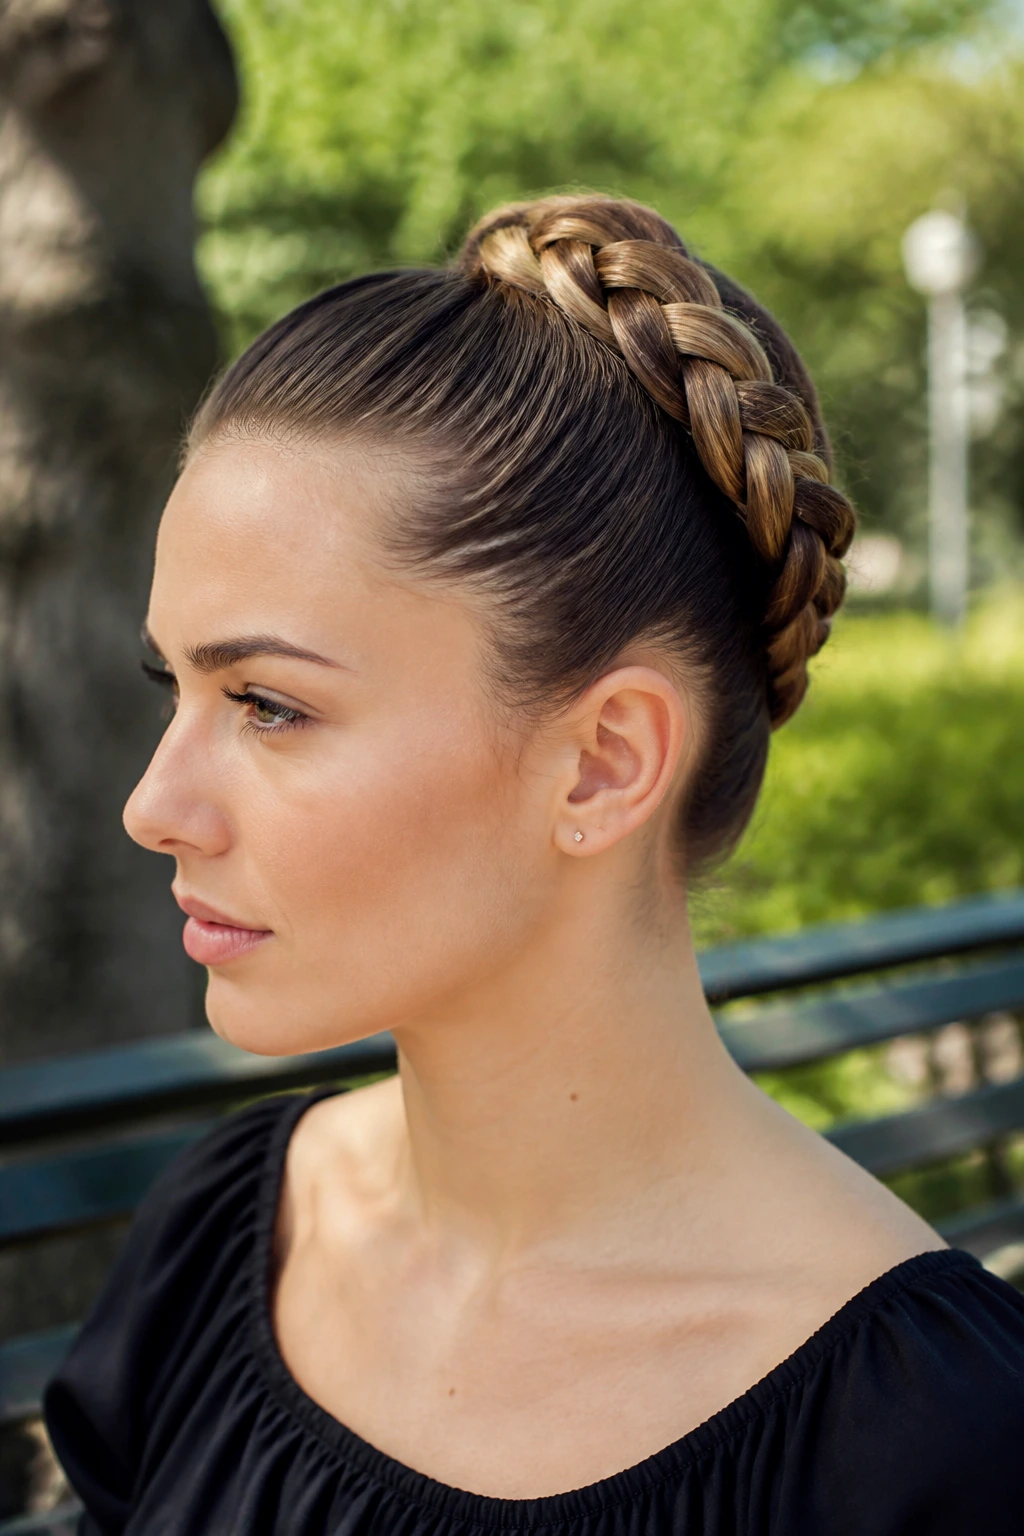
This is the style you want when you like a ponytail but want more shape than a simple tie gives you. Braid the length first, secure the end with a small elastic, then fold the braid upward or inward and pin it to the base. Long hair gives the braid enough length to create a visible fold, which makes the finished shape look intentional instead of improvised.
A regular three-strand braid works fine, but a rope braid looks cleaner if you want a smoother finish. The fold should sit snugly against the head, not hang like a loop. A loop that swings is just a loose braid with a pin problem. Two pins on each side of the fold usually solve it.
This one is good when you need something practical but not plain. It also handles slightly frizzy ends well because the braid hides them. If your hair is very thick, braid only the top half and leave the last third loose before folding; the style stays lighter and the fold won’t feel like a rope around the base of your skull.
11. Side-Swept Rolled Updo
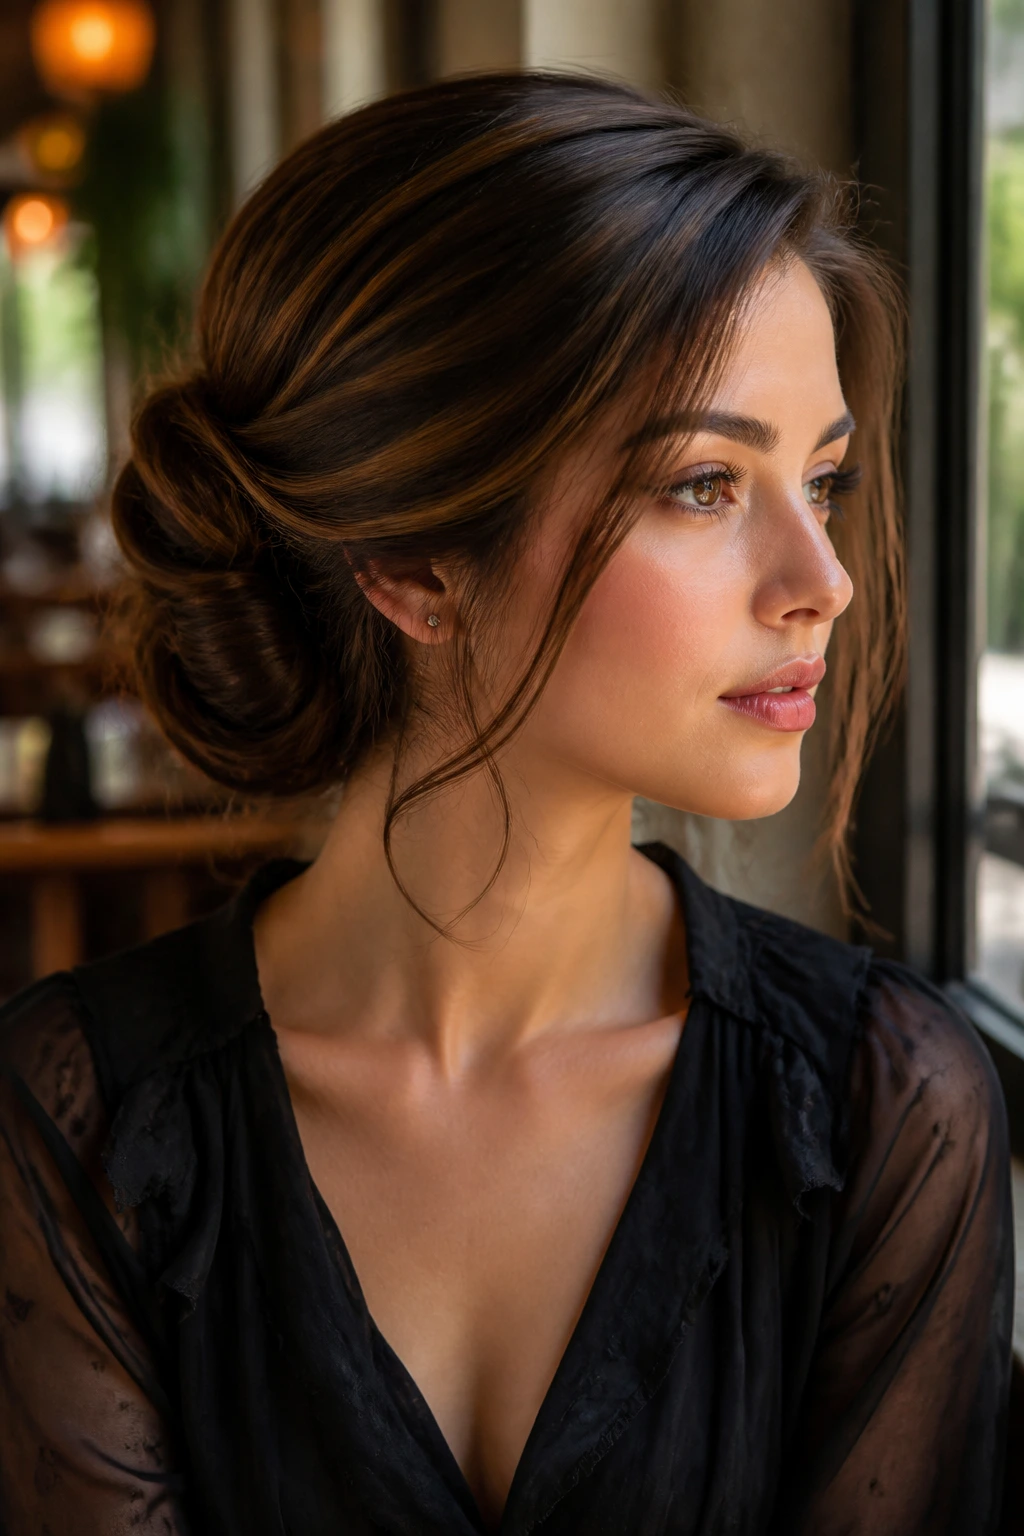
A side-swept rolled updo has a softer line than a center-back bun, and that shift changes the whole mood. You sweep the hair to one side, roll it inward, and pin it slightly off-center so the shape follows the curve of the neck. Long hair makes the roll feel fuller, which is useful because a tiny roll can look lost on a lot of length.
This is a strong option when you want the front to feel romantic but still need the back pinned down. Leave one side a little lower than the other. That asymmetry is the point. It gives the eye something to follow and keeps the style from looking too stiff or too bridal unless that’s what you want.
If you have heavy hair, anchor the side sweep with one hidden pin before you start rolling. That one small step stops the whole style from drifting backward. People skip it, then wonder why the roll slowly migrates to the center by dinner.
12. Infinity Braid Bun
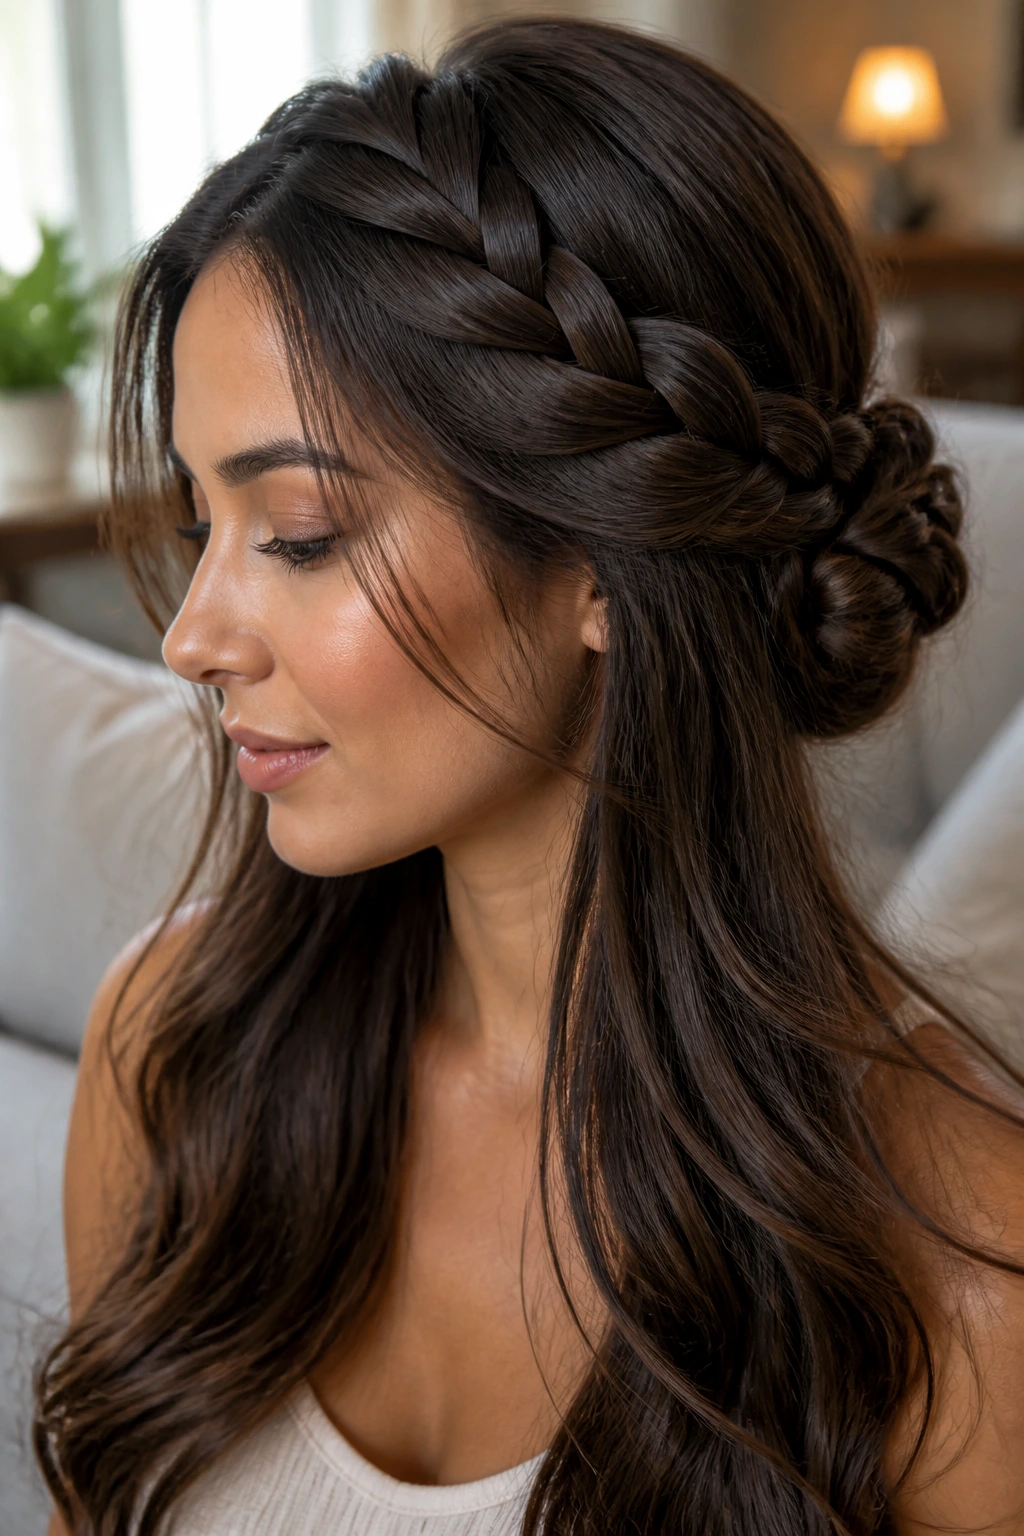
The infinity braid bun has that intricate, woven look that makes people assume you spent an hour on it. Long hair is the reason it works. You need enough length to create the looping braid path and still have enough tail left to coil into the bun. Shorter hair tends to run out halfway through the pattern.
The braid itself is the attraction here, so keep the base smooth and the sections clean. If the braid is sloppy at the start, the loops blur together and the whole point disappears. Once the braid is finished, wrap the tail into a bun at the back or tuck it under the braid path. A few hidden pins will hold the bun without breaking the visual line.
This is one of my favorite styles for long hair that’s fine but abundant. It creates the illusion of extra complexity without depending on huge volume. A little shine spray across the finished braid helps the woven pattern stand out. Not too much. Just enough to catch the light on the curves.
13. Top Knot With Tendrils
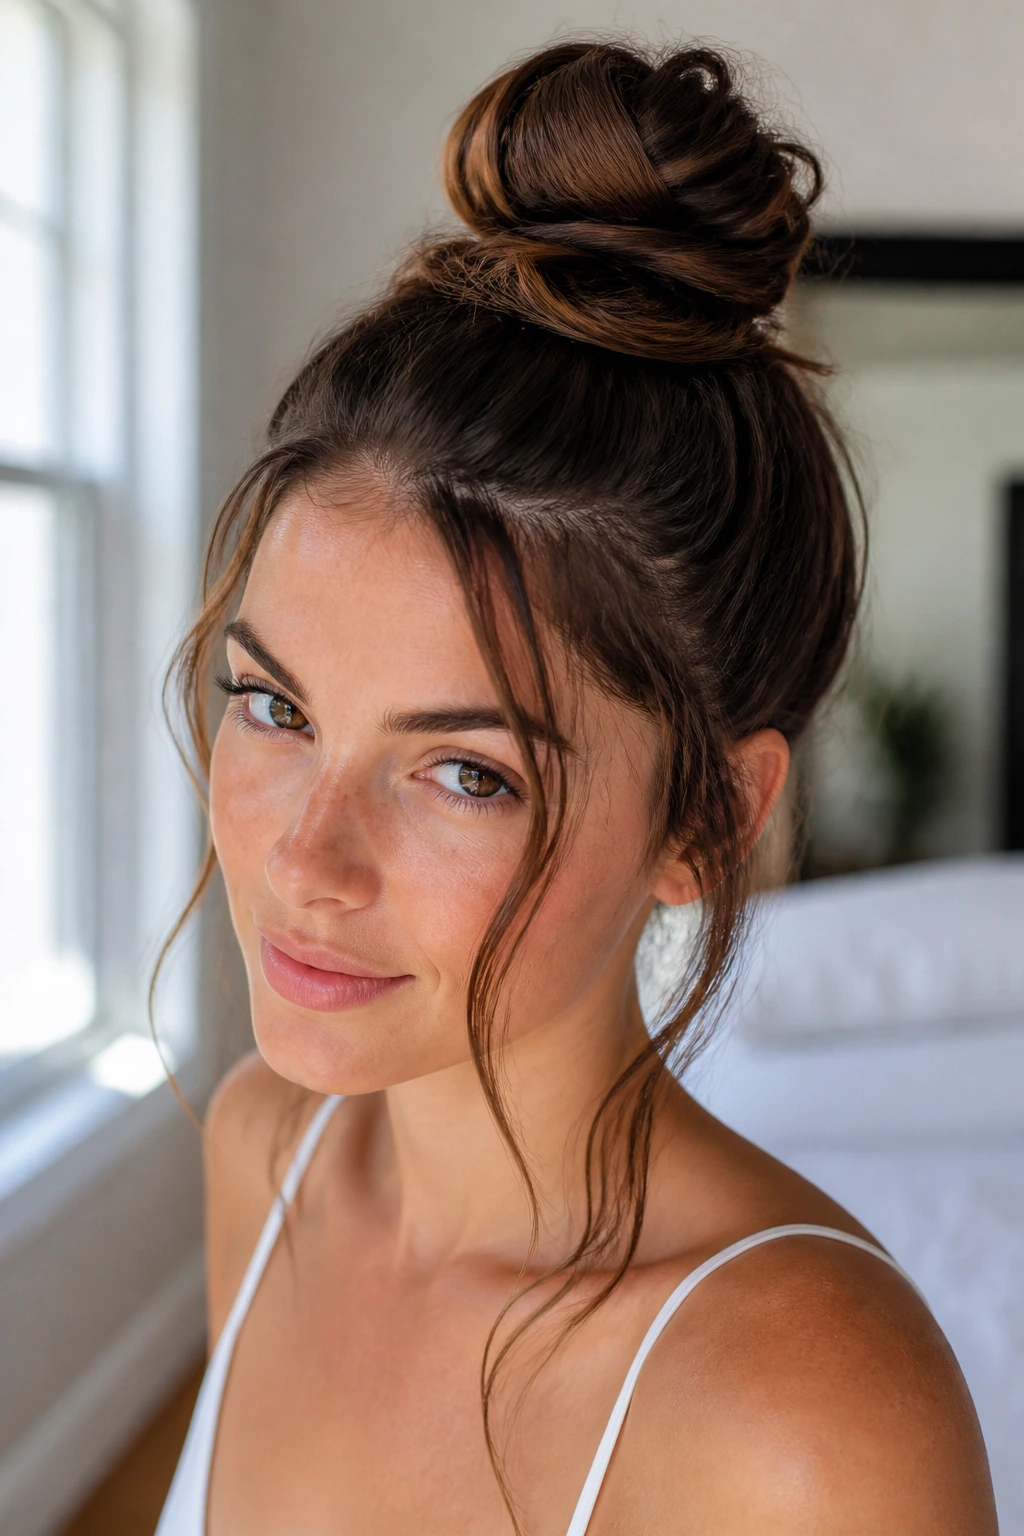
A top knot with tendrils is the high-updo version of not trying too hard, except it still needs a plan. Gather the hair high, twist it into a knot, and leave a few narrow strands out at the front or temples. Long hair makes the knot dense, so I usually wrap the tail twice and stop there rather than building a giant tower that tips over.
The tendrils matter more than people think. Keep them thin and shape them with a curling iron or flat iron so they bend softly instead of hanging like forgotten pieces. A good top knot should feel airy around the face and firm at the crown. If the knot is too tight, you lose the relaxed look; if it’s too loose, the whole style deflates.
This style works best on hair that has a little texture from the start. Day-two hair is easier than slippery clean hair. If the crown is flat, tease a small section at the base before gathering everything up. You do not need much. A quarter-inch of lift is enough to stop the knot from sitting low and sad.
14. Low Braided Crown Chignon
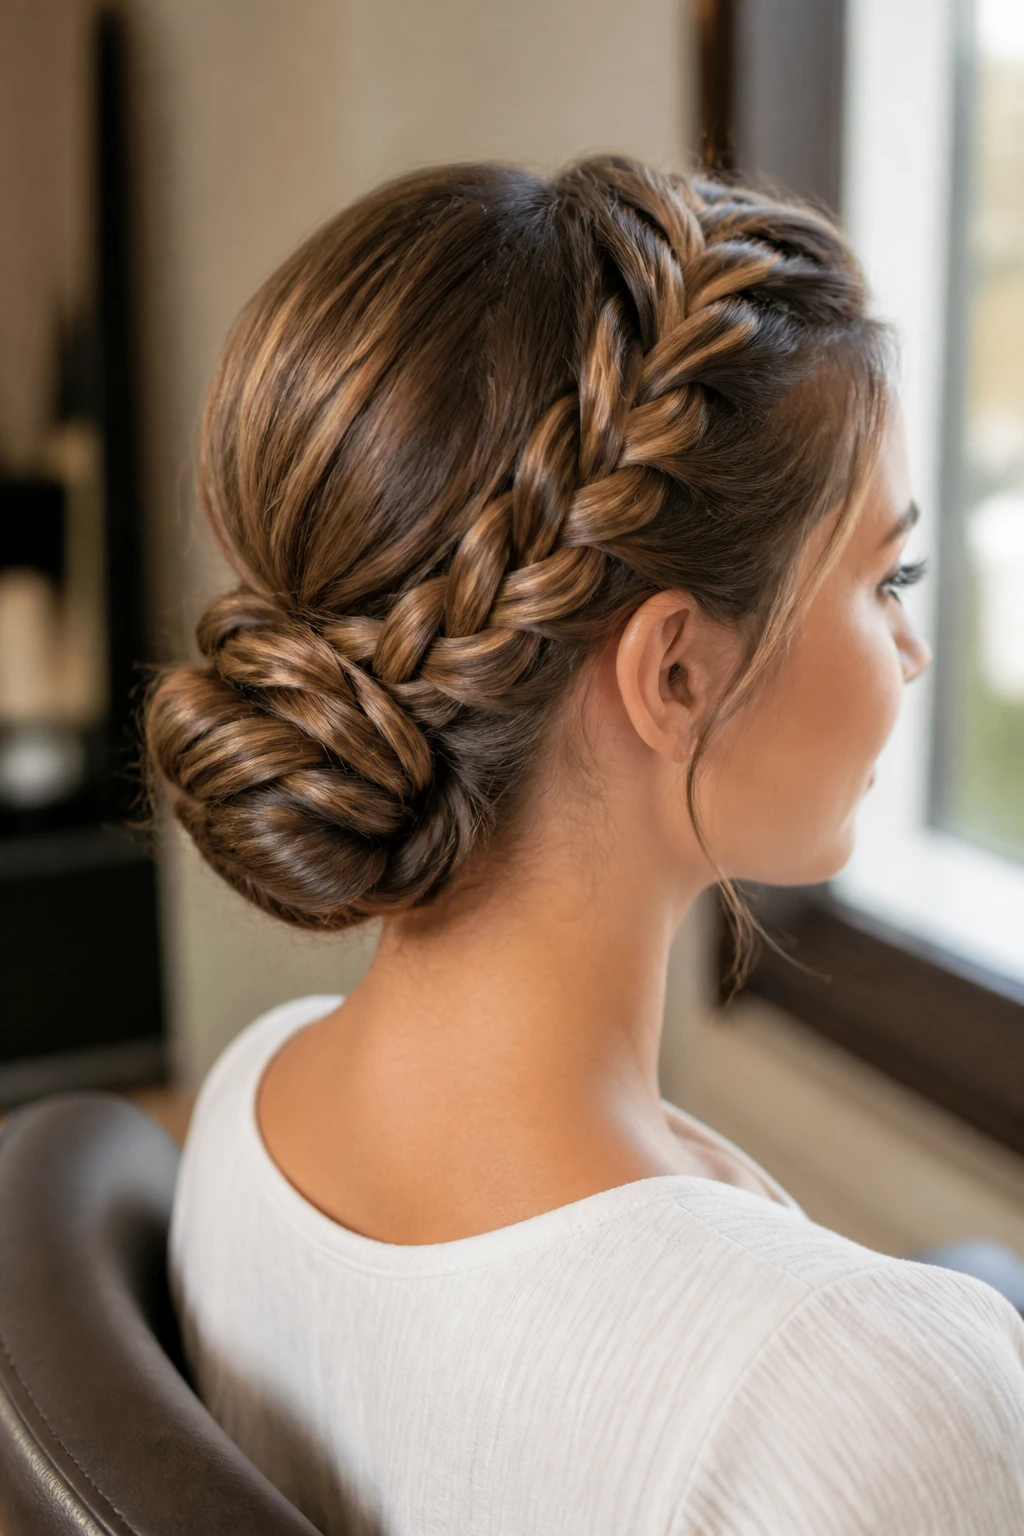
The low braided crown chignon combines the neatness of a chignon with the frame of a crown braid. Start the braid near the front hairline, wrap it around the head, and bring the tail to the nape where it joins a coiled knot. On long hair, that extra braided length gives the crown more presence and helps the bun feel anchored instead of tacked on.
What I like here is the balance. The braid handles the top and sides, while the chignon keeps the back tight. It’s a useful style when your hairline tends to show flyaways, because the braid covers them before they become a problem. Keep the braid close to the scalp and the chignon compact. The more consistent the tension, the cleaner the shape.
If you want a softer version, pull the braid outward slightly after it’s pinned, then leave the bun a touch looser. The style will still hold, but the line around the head feels less severe. That tiny looseness makes a big difference if you’re wearing it with a softer dress or blouse.
15. Banana-Clip French Twist
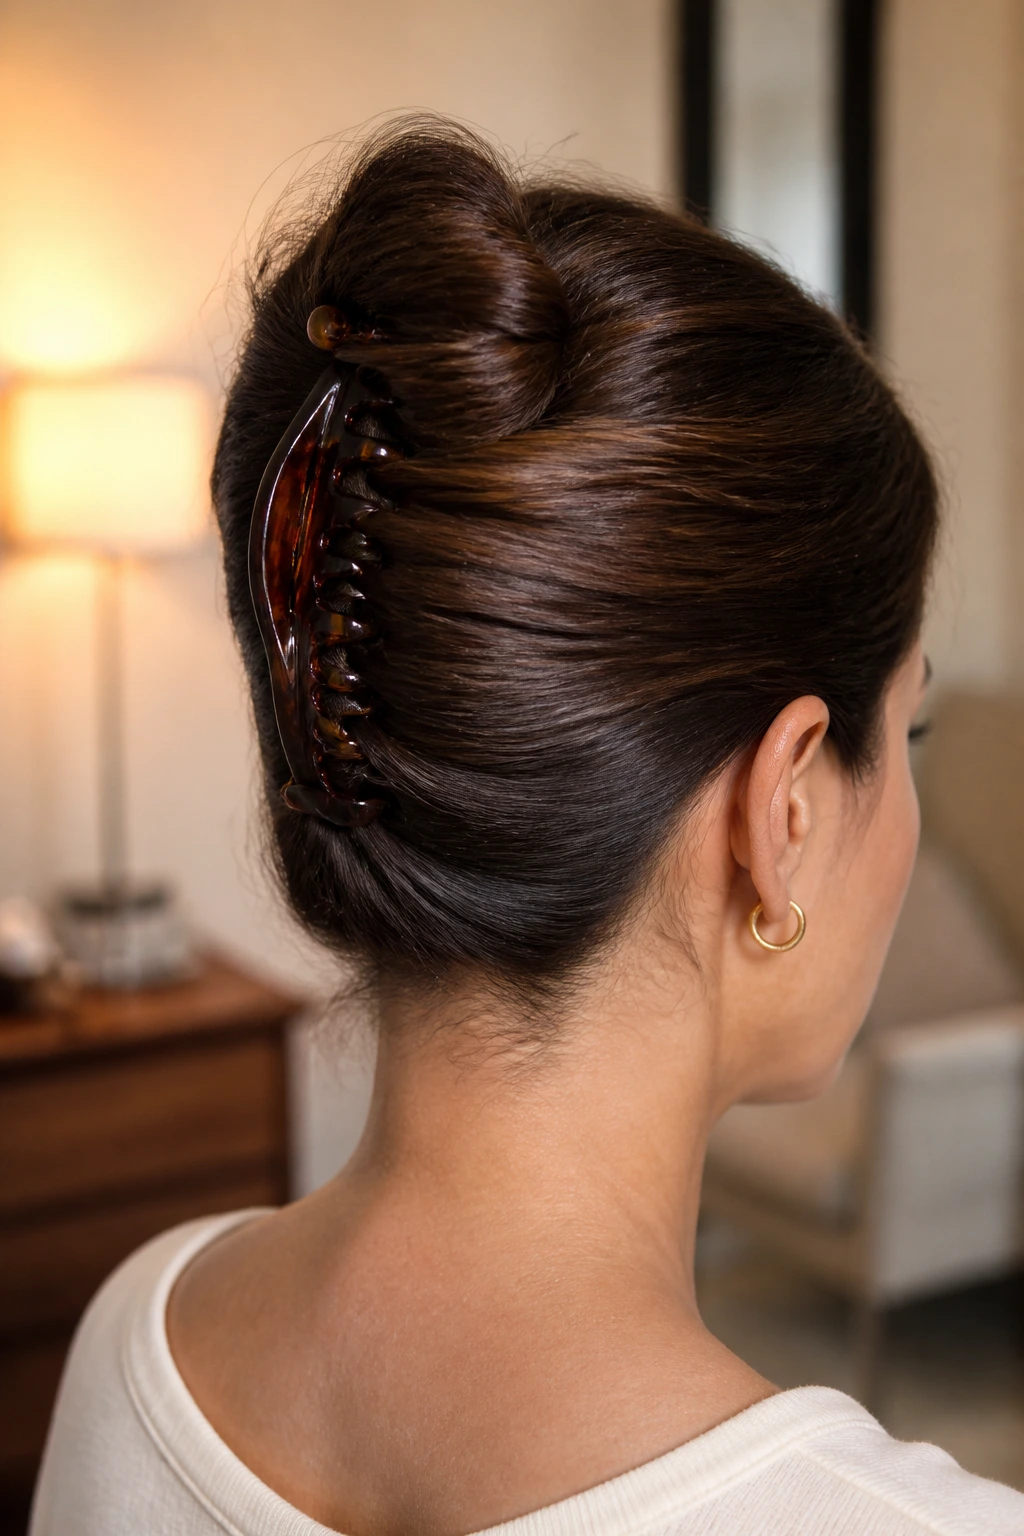
A banana-clip French twist is one of those old-school styles that deserves a better reputation. The clip gives long hair a wide grip area, which means it distributes the load better than a tiny claw clip or a weak barrette. That’s why it works so well on hair that would otherwise flatten under its own weight.
Brush the hair back, twist it upward like a classic French roll, and open the banana clip along the twist so it catches the full length. The shape should stay vertical and narrow. If the clip is too small, the ends spill out; if it’s too loose, the twist slides. I like this style best when the hair has been misted lightly with dry shampoo first. The added grip keeps the clip from skating around.
It’s a fast style, but not a lazy one. There’s a difference. The end result looks smoother than a messy clip-up and takes about half the effort of a full pin set. Handy when you want long hair off your neck without committing to a full event-style updo.
16. Dutch Braid Into Bun
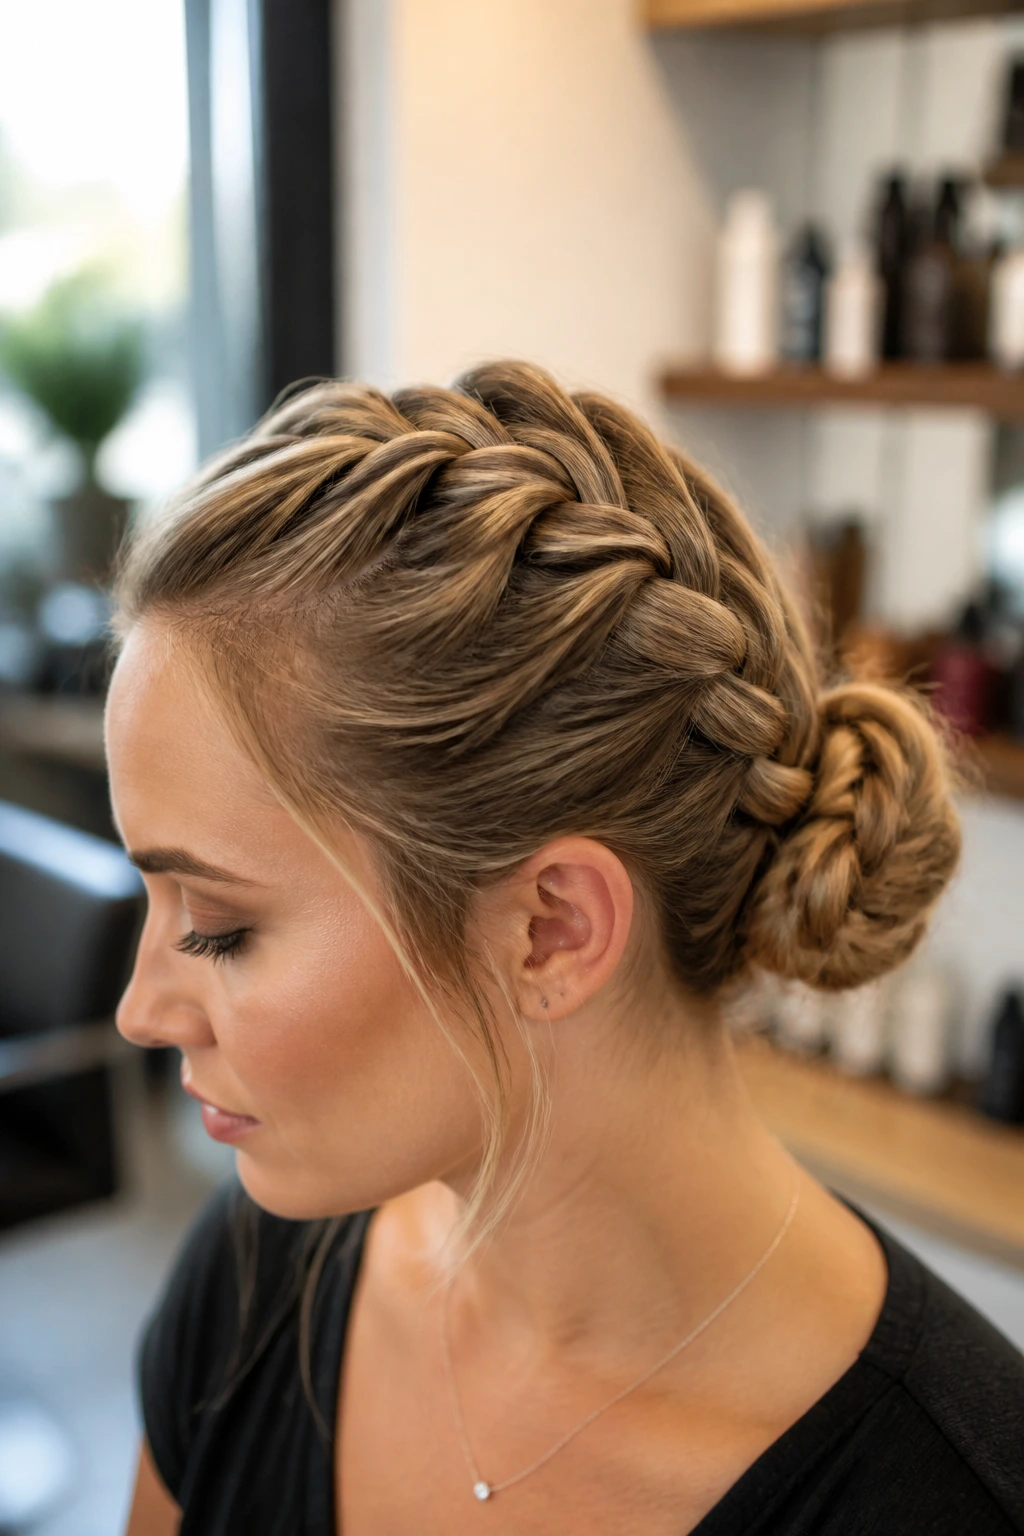
A Dutch braid into a bun is one of the most reliable long-hair updos in the whole bunch. The braid starts at the crown, stays visible because it sits on top of the hair, and feeds directly into a bun at the nape or back of the head. That visible ridge helps the style hold shape, especially when the rest of the hair is heavy.
It’s a sturdy choice for active days or humid weather because the braid creates structure before the bun even begins. If your hair is layered, keep the braid tight for the first few inches, then loosen it slightly once you reach the back. That keeps the top controlled while letting the bun stay soft enough not to look severe.
The only real mistake here is making the braid too loose at the scalp. Then the whole style drifts and the bun ends up sitting lower than you planned. Use both thumbs to keep the braid snug as you go. It should feel secure before you even finish the bun.
17. Curly Pineapple Puff
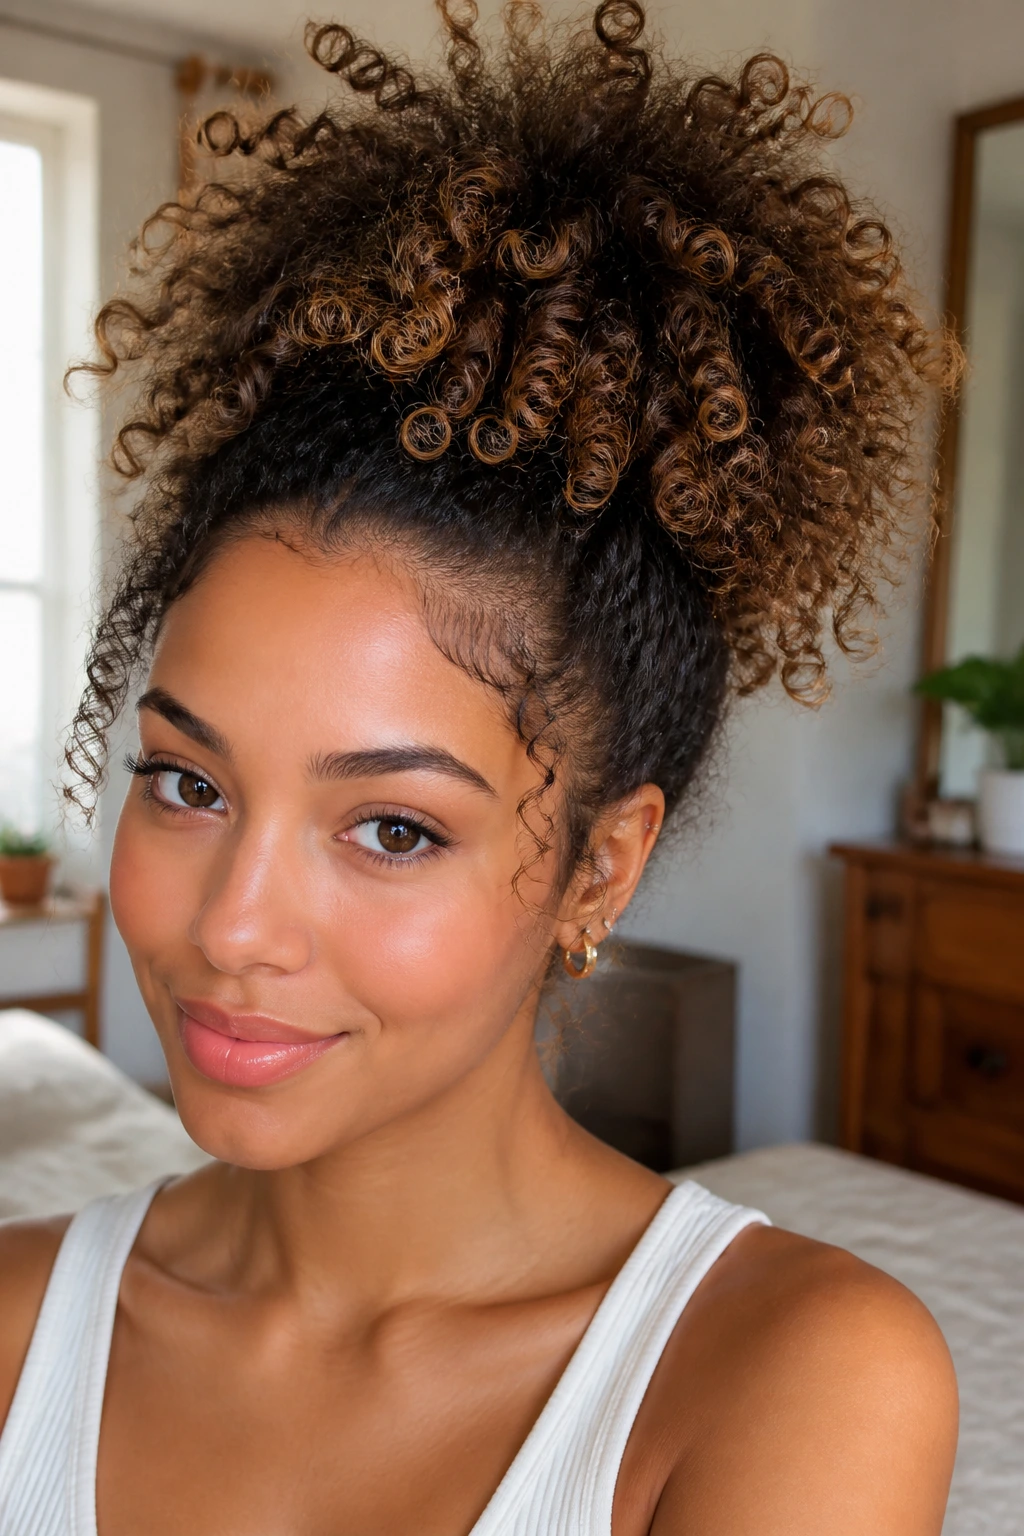
The curly pineapple puff is one of the few updos that respects curls instead of flattening them into submission. Gather the curls high on the head, let them fan upward, and secure them with a soft elastic or wrap. Long curly hair gives this style plenty of height and movement, so the finish looks playful rather than messy.
The goal is not sleekness. The goal is shape. Keep the sides smooth enough that the puff sits in the right place, then let the curls do their own thing on top. If the elastic leaves a dent, use a satin scrunchie or a stretchy coil tie instead. Tight elastics can leave a line that’s stubborn to remove, especially on coily texture.
I like this one on wash-and-go hair that still has bounce. It also works as a protective style for a long day because the ends stay together and the curls aren’t pulled taut. If you need more polish, pin the front curls back in small sections and leave the crown full.
18. Woven Low Knot
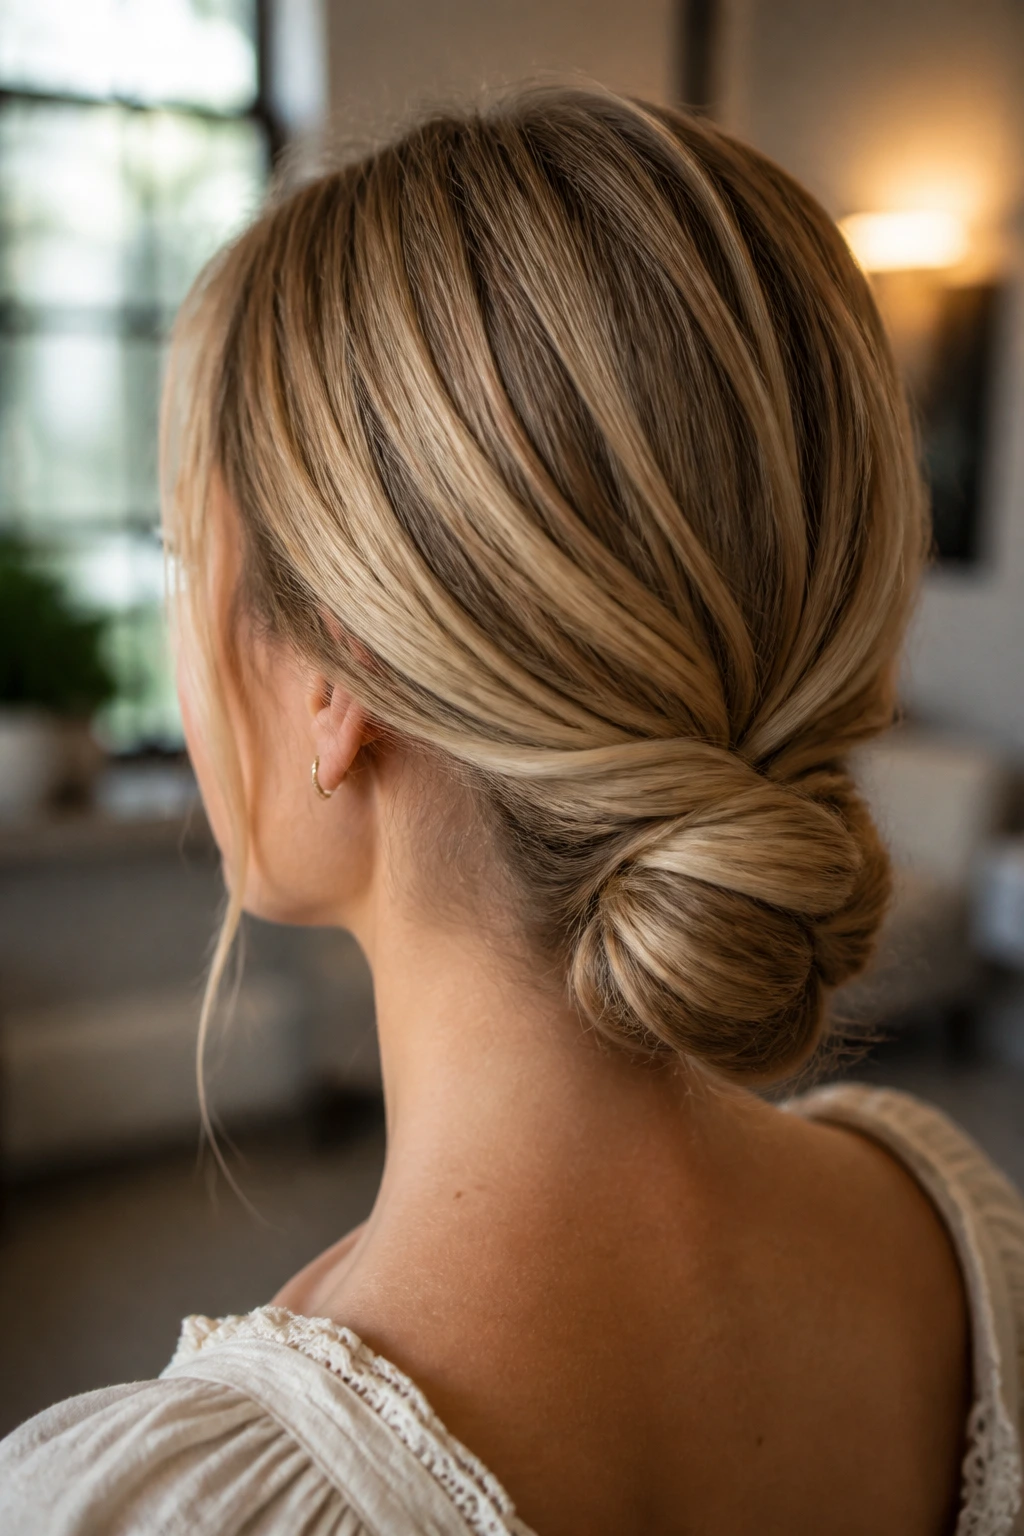
A woven low knot takes a few sections of hair and crosses them over each other before tucking them into a knot at the nape. The result looks layered and controlled, almost like the hair was braided without actually being braided. Long hair helps because the overlapping sections have enough length to wrap cleanly instead of running out halfway through.
The key is section size. Keep each panel about 1 to 2 inches wide, then smooth it before crossing it over the base. If the sections are too wide, the knot gets chunky. Too narrow, and the pattern disappears. This is one of those styles where the back of the head matters more than the front, so don’t obsess over perfect face framing. Get the woven shape right first.
It’s a good middle-ground style: polished, but not stiff. I’d choose it for a dinner or formal work event when a bun feels too plain and a braid feels too casual. The woven lines give the knot enough detail to stand on its own.
19. Fishtail Crown Pony
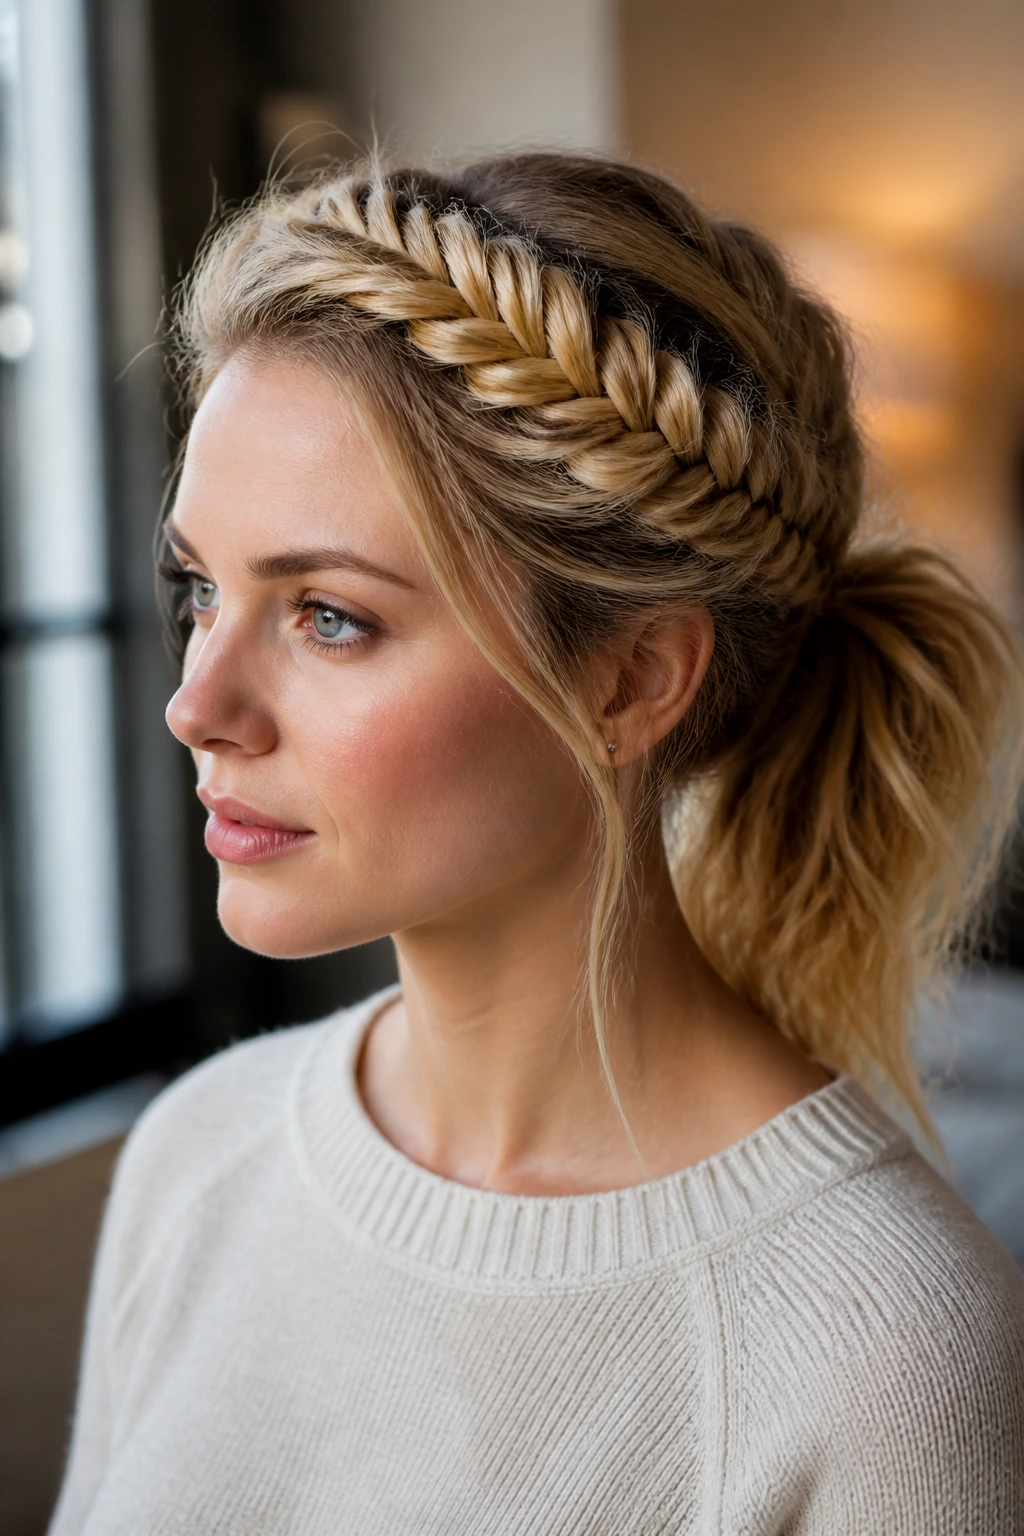
The fishtail crown pony starts with a braid that traces the head like a crown, then ends in a ponytail that can be curled, tucked, or wrapped. Long hair gives the fishtail enough tail length to show off the pattern, which is the main reason this style feels richer than a regular crown braid.
A fishtail braid does not need to be perfectly even to look good. In fact, a tiny irregularity often makes it better because the pattern gets more visible. Still, keep the top section neat and use a small elastic at the end so the ponytail base stays tight. If you want more finish, wrap a thin strand around the elastic and pin it underneath.
This one sits nicely between casual and formal. The crown braid carries the detail, while the ponytail keeps the overall shape relaxed. On very long hair, I like to curl just the last six inches of the ponytail. The ends move better that way and keep the style from looking heavy at the bottom.
20. Faux Bob Tuck
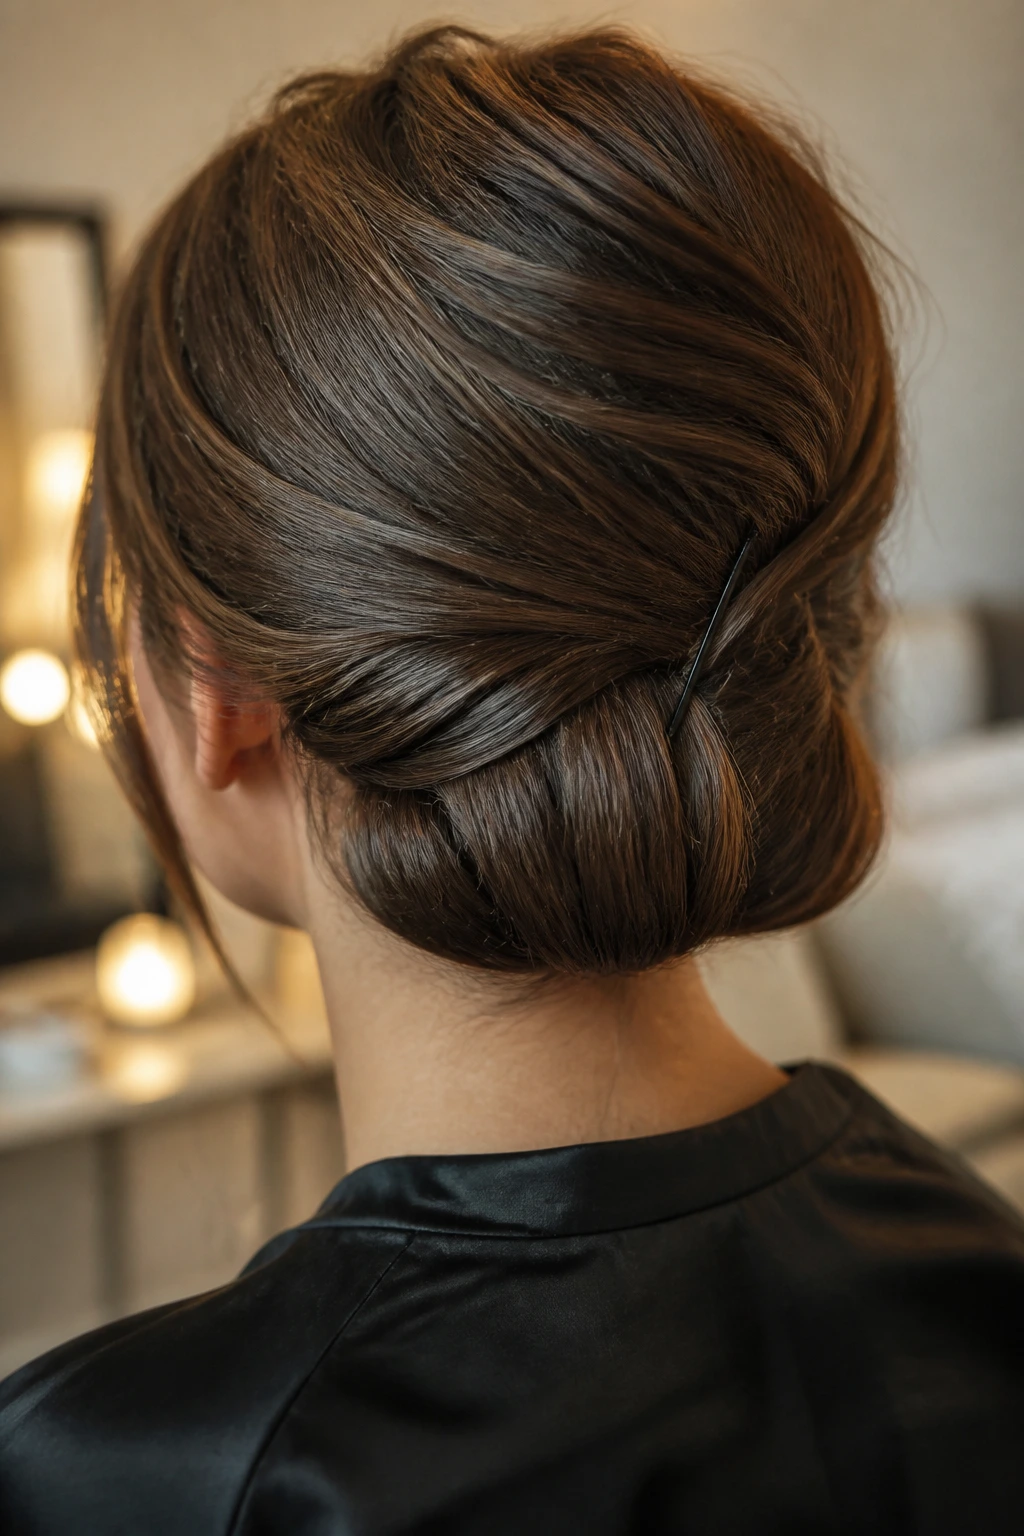
A faux bob tuck is exactly what it sounds like: long hair pinned under itself so it looks shorter than it is. That old movie-star trick still works because hair loves to create the illusion of a different length when it’s folded and secured close to the neck. With very long hair, you need a generous tuck pocket, so don’t try to make it too tiny.
Set the hair in loose bends first if it’s very straight. Those bends help the tucked sections sit together instead of sliding apart. Then roll the ends under and pin them flat against the nape. Use more pins than feels necessary. A faux bob is only convincing if the hidden parts stay hidden.
This is one of my favorite choices when you want long hair off the shoulders but don’t want a bun or ponytail in every photo. It also lets statement earrings do their job. A faux bob can look very sharp from the front and almost mysterious from behind, which is a fun combination.
21. Corset-Braid Updo
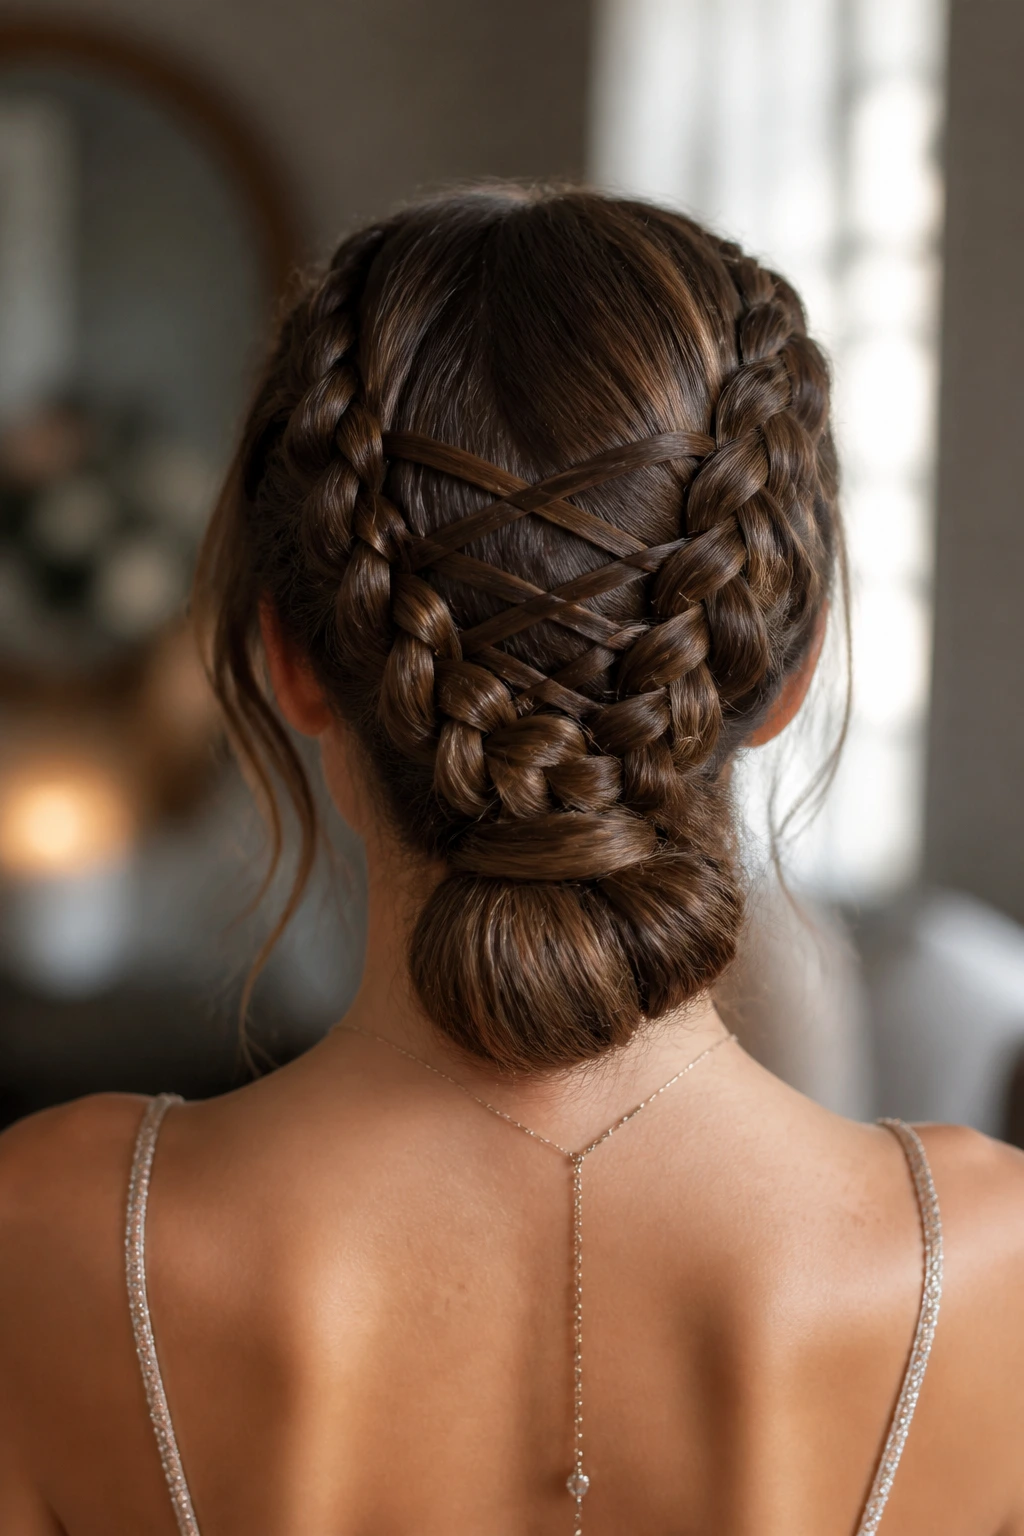
A corset braid updo is one of the more decorative looks here, and the lacing effect gives long hair a way to show off its length without leaving it down. You create two parallel braids or twist sections, then thread a smaller strand across them like lacing on a corset. The leftovers can be tucked into a bun or gathered low at the back.
The visual detail is the reason this style works. It draws the eye down the back of the head, which is where long hair can feel a little heavy if left untouched. The lacing breaks that mass into smaller pieces. Keep the cross-strands snug, not tight. If you pull too hard, the whole design compresses and loses the airy spacing that makes it interesting.
It’s a style for when you want people to notice the back of your hair. It does take patience. But the finish is worth it if you like styles that read a little intricate without becoming stiff.
22. Half-Up Bouffant Twist
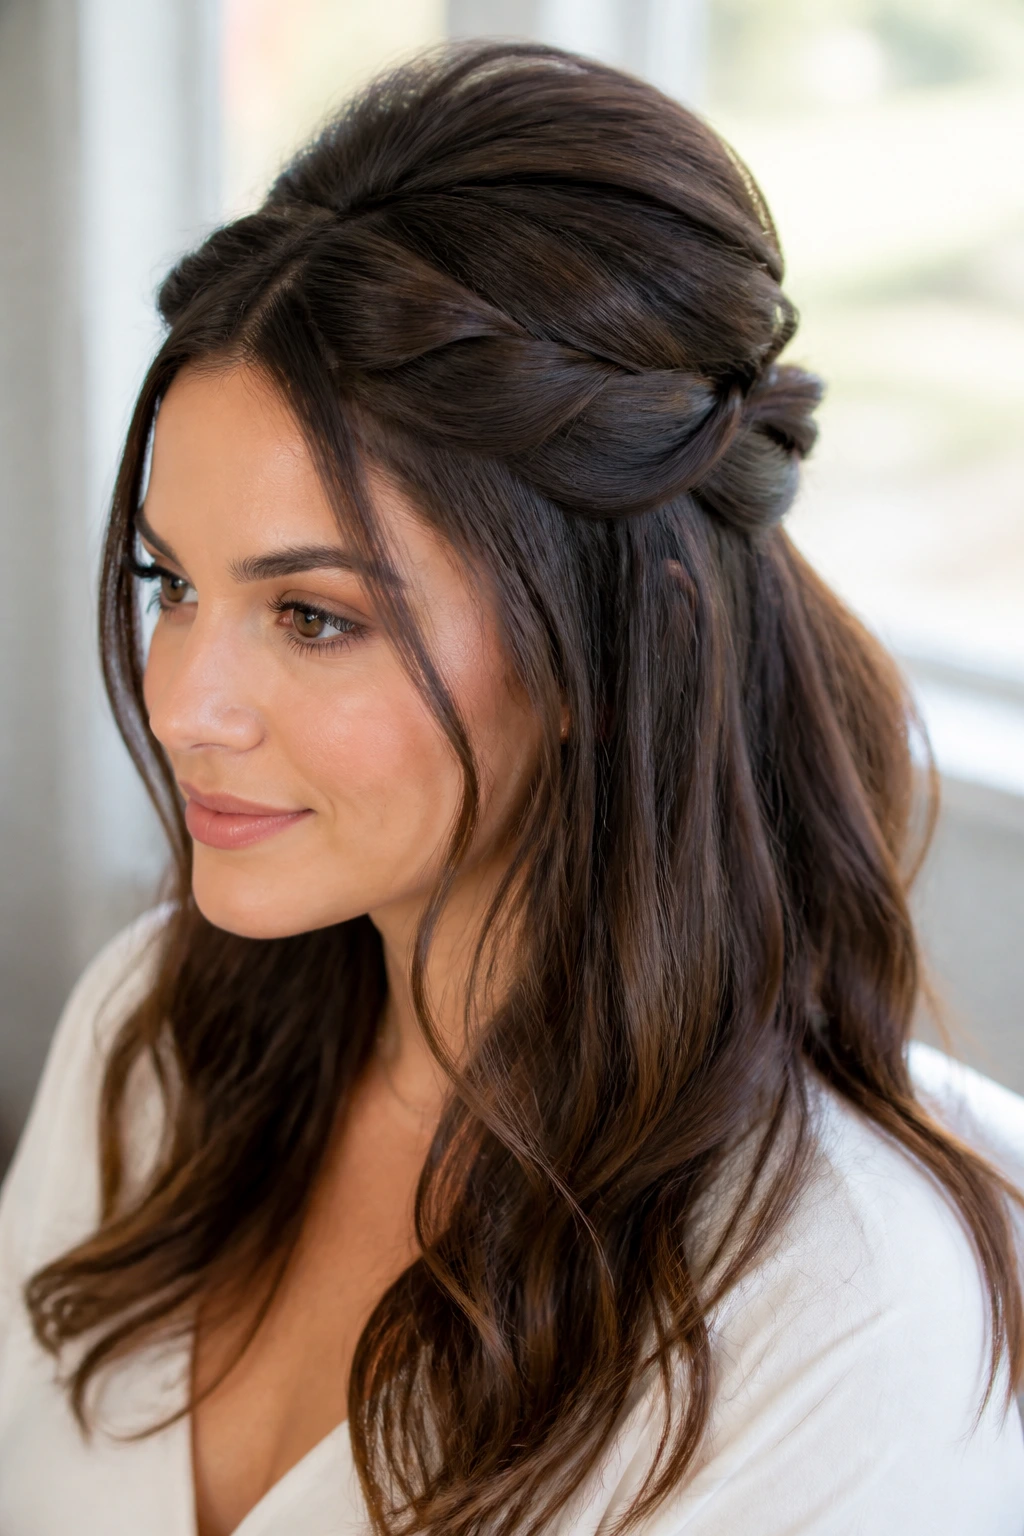
A half-up bouffant twist gives long hair a lifted crown and lets the length stay loose below. The bouffant part adds a little height at the top, which keeps the style from flattening the head. Then the twisted half-up section anchors the upper layers so the rest can fall naturally.
This one is useful when you want some control without pinning everything away. Start by teasing a small section at the crown, smoothing the top layer over it, and twisting the sides back into a pin or small knot. The bottom half should stay loose and move freely. If your hair is very long, you can curl the lower half just a little to keep it from looking heavy and straight all at once.
It’s softer than a full updo, but it still feels deliberate. That makes it good for daytime events, lunch dates, or any situation where a full bun would feel too formal and a full down style would keep falling into your face.
23. Scarf-Wrapped Bun
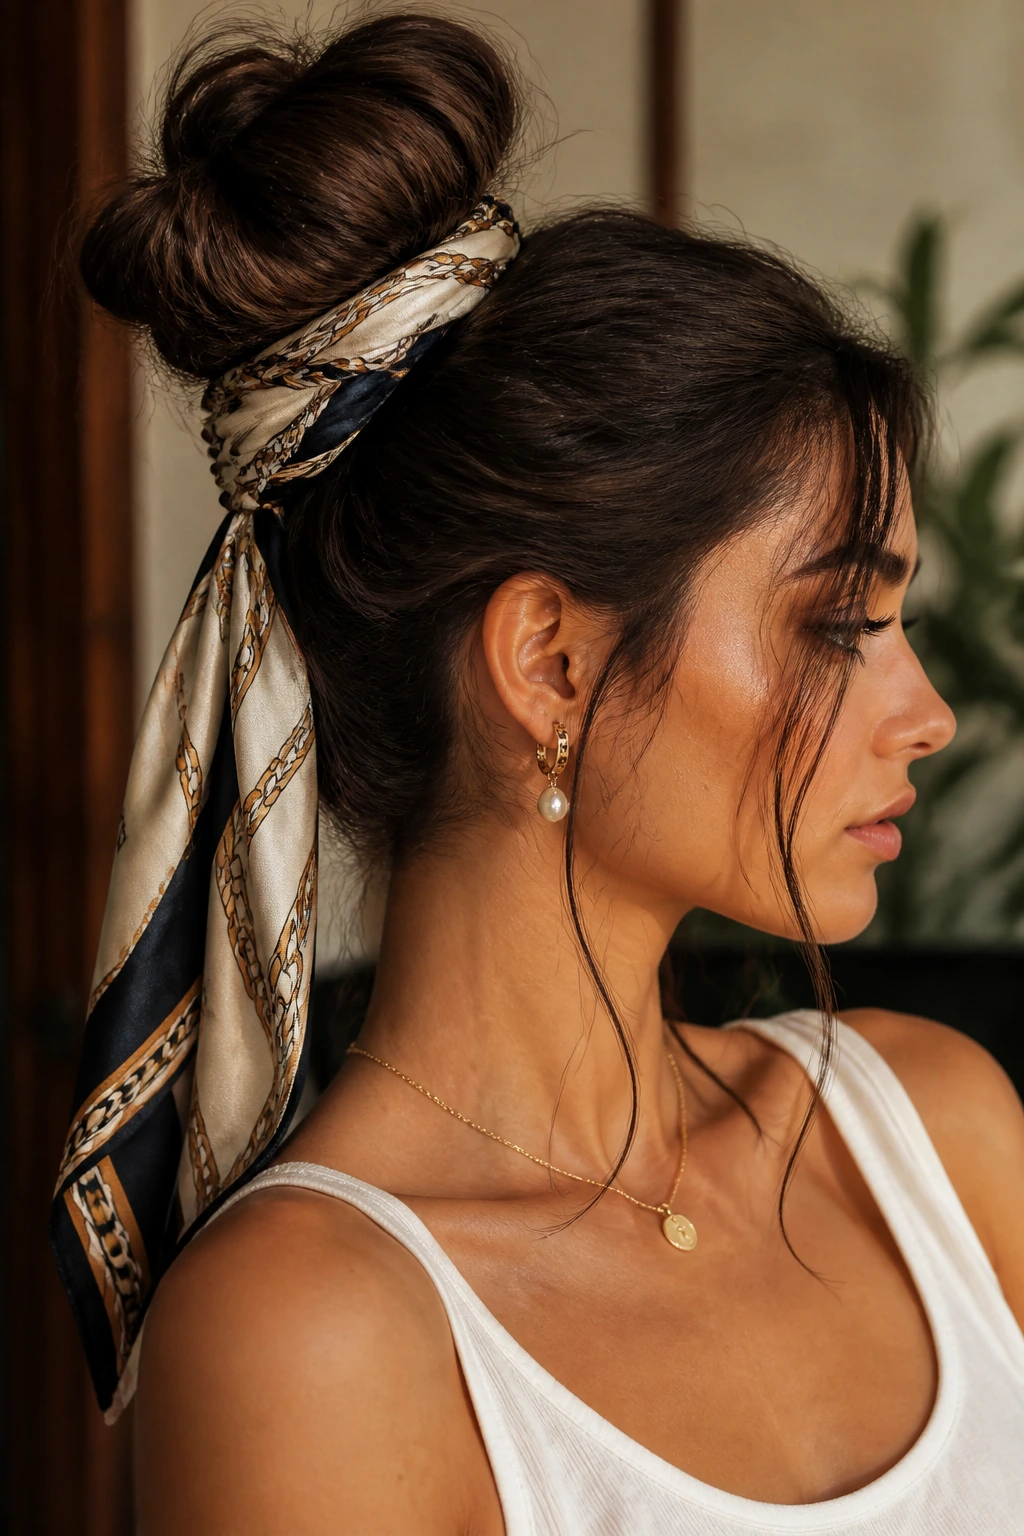
A scarf-wrapped bun is the easiest way to make a basic bun look styled on purpose. The bun itself can be simple—low, high, messy, or braided—but the scarf changes the mood completely. Long hair helps because it gives the bun enough size for the scarf to wrap around without slipping into the center.
Use a silk or satin scarf if you want shine, or a cotton one if you want a more casual finish. Tie the bun first, then wrap the scarf around the base once or twice and knot it off to the side. Let one tail hang if you want movement. If your hair is very thick, keep the scarf narrow so it doesn’t create too much bulk around the head.
This is a smart style for second-day hair, because the scarf disguises the rougher roots and the bun doesn’t need to be perfect. It also gives you a fast color accent without any permanent commitment. Easy win.
24. Twisted Halo Pony
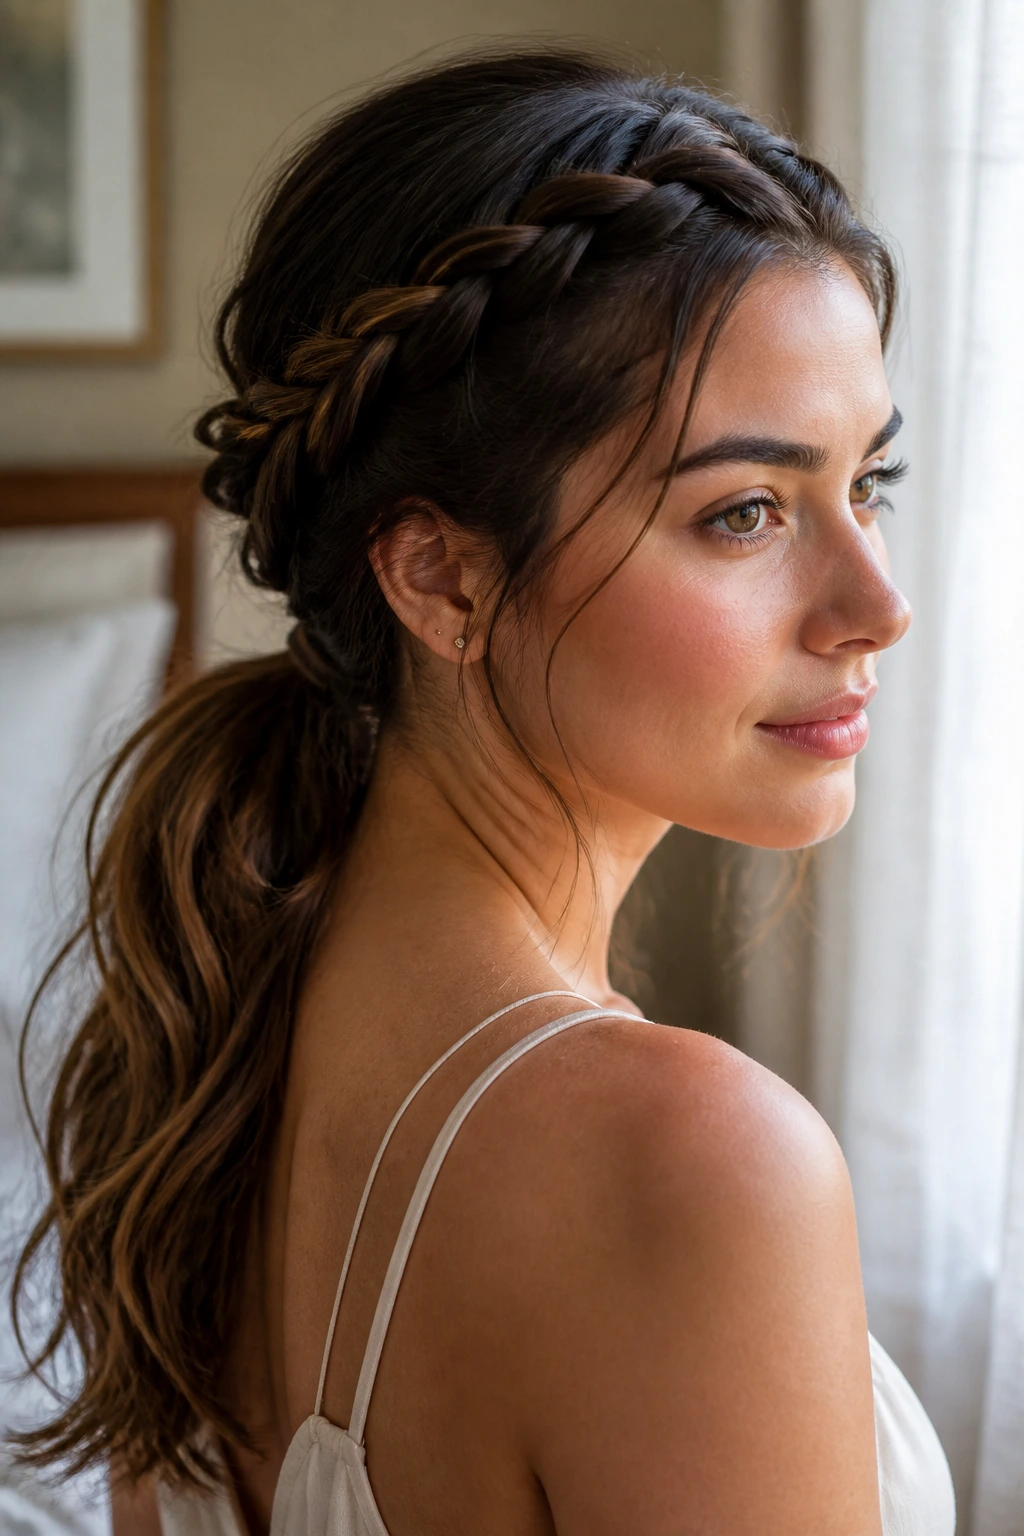
The twisted halo pony takes the visual line of a halo style and sends it into a ponytail instead of a bun. Twist sections along both sides of the head, guide them back around the crown, and gather them into a pony at the nape or mid-back. Long hair gives the ponytail enough length to balance the twist so it doesn’t feel top-heavy.
The beauty of this style is that it looks more finished than a simple pulled-back pony without requiring a full braid. The twists keep the hairline neat, and the ponytail stays loose enough to move. If your hair is layered, keep the twists tight near the temple and pin them before they meet the pony. That stops the shorter layers from popping out.
It’s a good option when you want a softer look than a bun but still need hair off your face. I’d choose it for a dress with an open back or a neckline that needs room. The twist line frames the head well from the side.
25. Voluminous Donut Bun
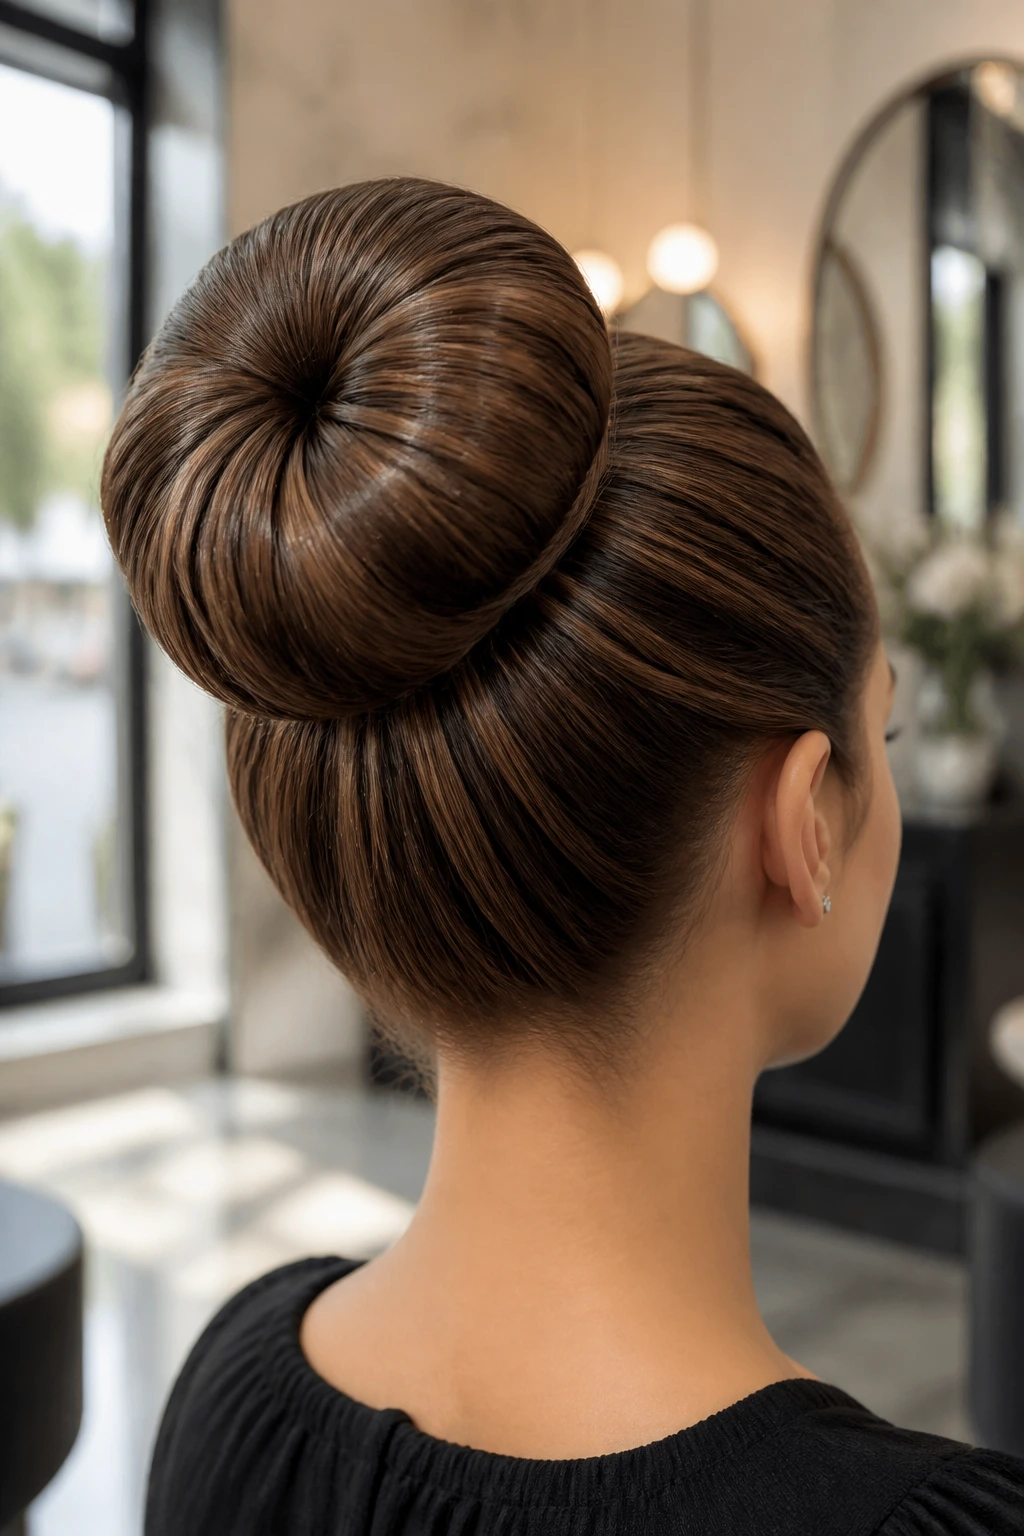
A voluminous donut bun has one job: make long hair look intentionally full. A bun form or sock bun base gives the shape height and roundness, and the hair wraps around it in a smooth shell. On long hair, the extra length makes the bun look properly stuffed instead of thin and patched together.
The form matters most here. Pick one that matches your hair density. If the donut is too big, the bun gets airy and unstable; too small, and the hair feels crammed. Spread the hair evenly around the form, then tuck the ends underneath and pin them flat. A quick mist of hairspray before the final wrap helps the outer layer stay smooth.
This style is a strong pick for events where you want a neat, lifted shape that still has some size to it. It reads tidy from the front and fuller from the back. That back view is the whole appeal.
26. Rolled Under Ponytail
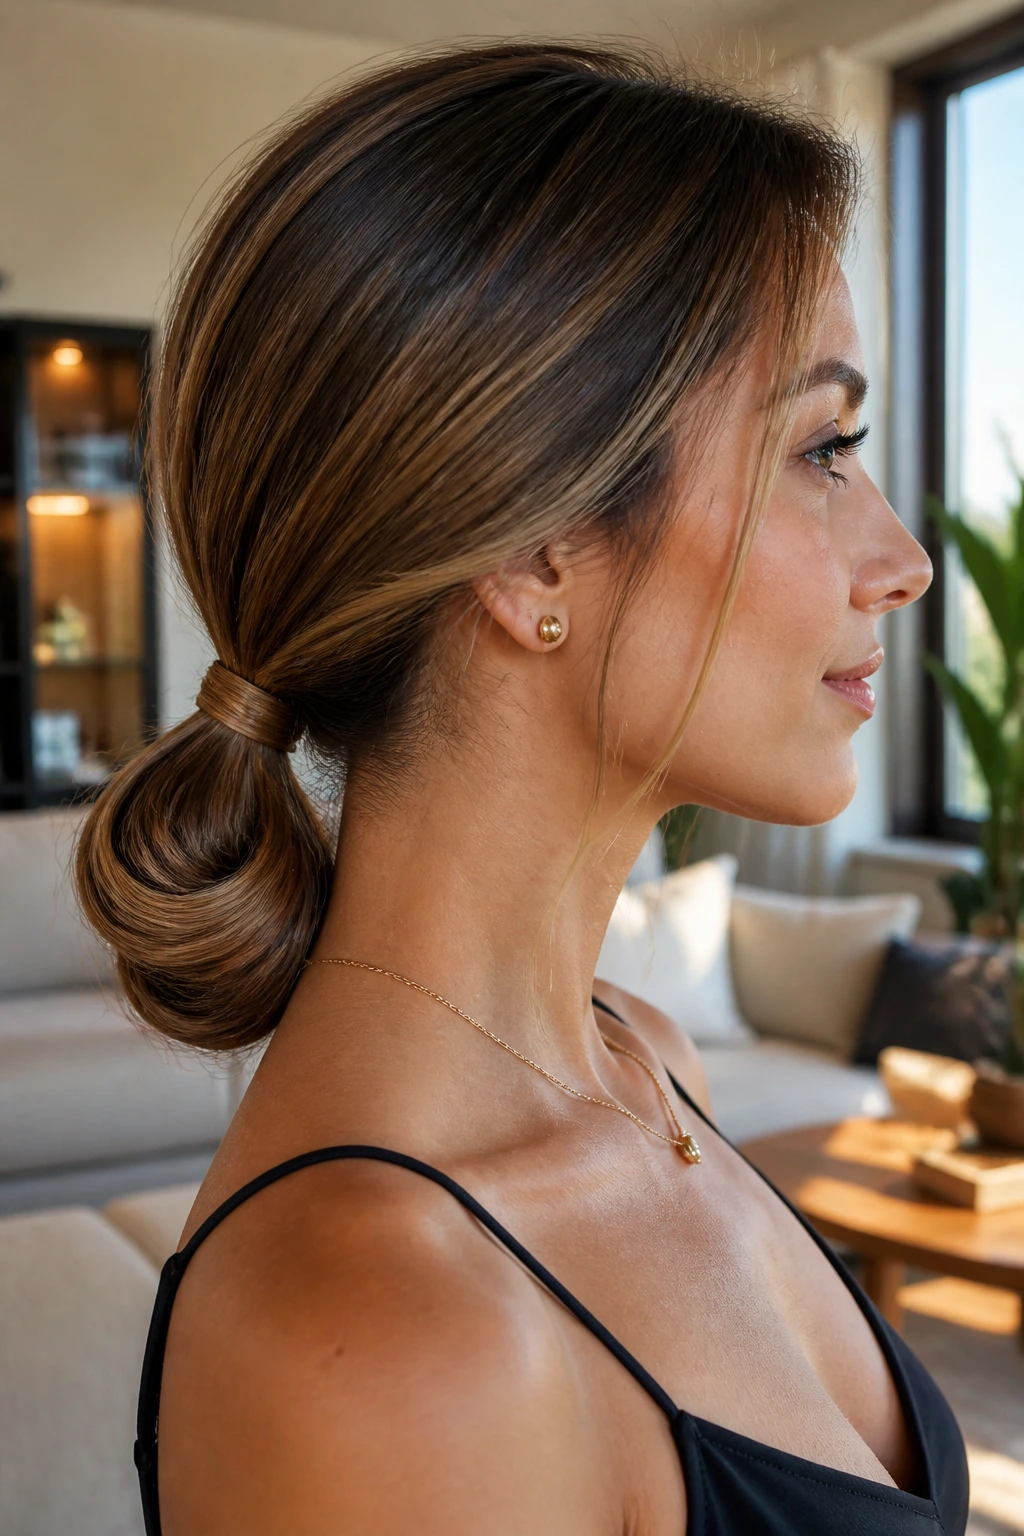
A rolled under ponytail looks simple, but it has enough polish to beat a plain pony in almost any setting. Gather the hair into a mid or low ponytail, create a small gap above the elastic, and flip the length through so it rolls under itself. Long hair gives the rolled section enough weight to hang straight instead of kicking out.
You can stop there or turn the rolled tail into a tucked loop with a few pins. If your hair is thick, split the tail into two parts before rolling so the base does not bulge. A smooth top section helps this style look more intentional. If the crown is flat, a little root lift before the tie makes the whole thing sit better.
This is a good “I need my hair up but I still care what it looks like” style. It’s quick, easy to refresh, and kinder to long hair than a tight elastic pulled all the way through.
27. Braided Space Buns
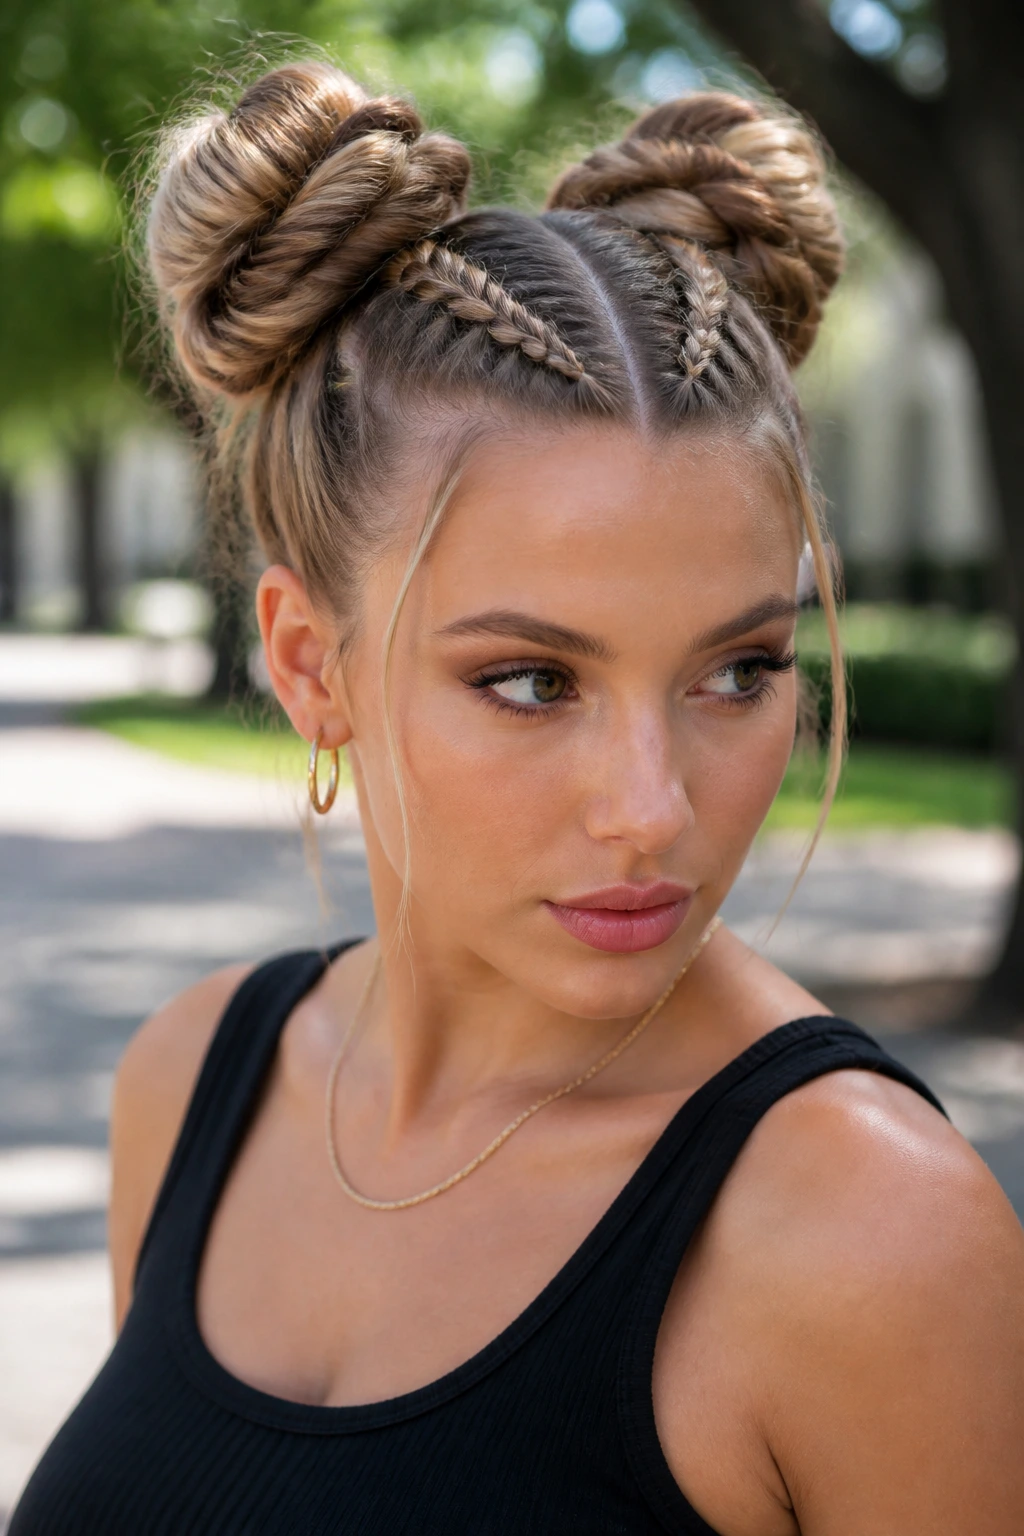
Braided space buns are playful, but they are not childish if you keep the braids clean and the buns balanced. Split the hair into two sections, braid each one, then coil each braid into a bun above or behind the ears. Long hair gives both buns enough length to look full, which is the main reason this style works.
The symmetry matters. Check the height of each bun before you pin anything down. If one side sits higher, the whole style looks accidental. A small mirror on the side helps here. Also, keep the braids snug at the roots and slightly looser through the tail for a softer finish. That contrast keeps the style from feeling too stiff.
I like this style when the goal is energy. It works for festivals, travel days, or any time you want your hair to stay up while still looking like you made a choice. If your hair is very long, wrap the braid tails twice before pinning so the buns feel compact.
28. Office-Ready Low Knot
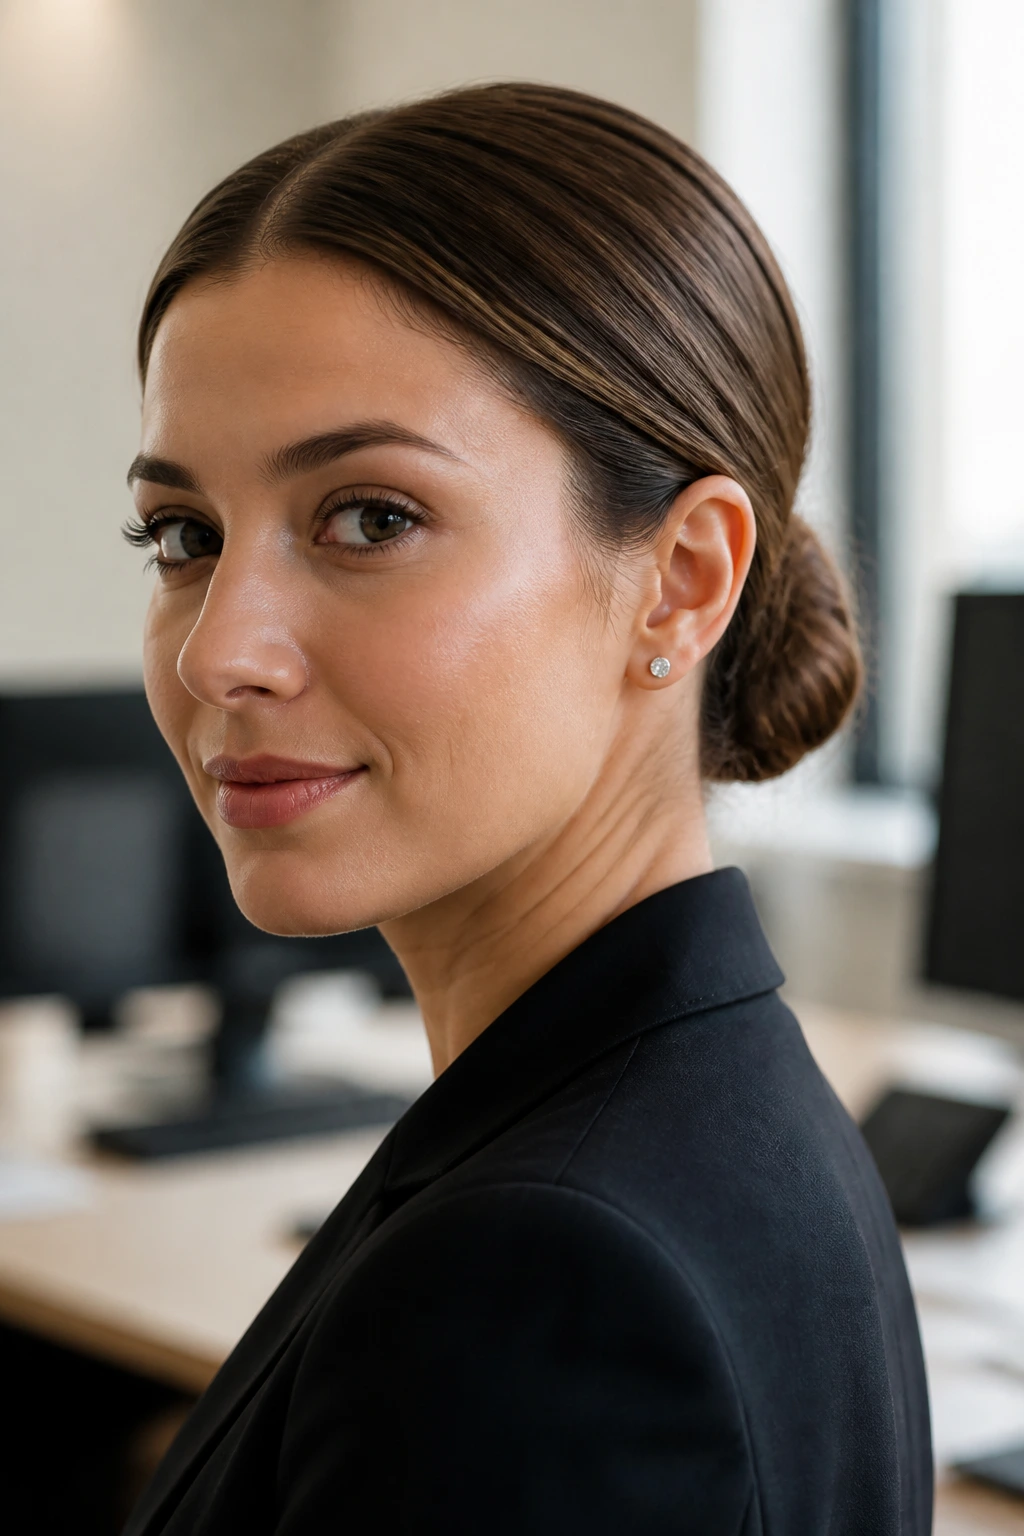
An office-ready low knot is the restrained cousin of the messy bun. It sits low, uses a clean center part or a brushed-back front, and keeps the finish neat enough to survive a full day without constant mirror checks. Long hair can make this style look bulky if you toss it together, so sectioning matters.
Start with a low ponytail, twist the tail tightly, and wrap it into a compact knot. Don’t overbuild the bun. A big office knot can look like you’re carrying a pillow on the back of your head. Keep the outline narrow and smooth the sides with a brush or a light touch of cream. If there are flyaways, use a toothbrush-sized brush and a tiny bit of hairspray to lay them down.
This is the style I’d pick for days when you need to look put together fast. It’s practical, but it also has a calm sort of authority. The kind that doesn’t shout.
29. Romantic Loose French Roll
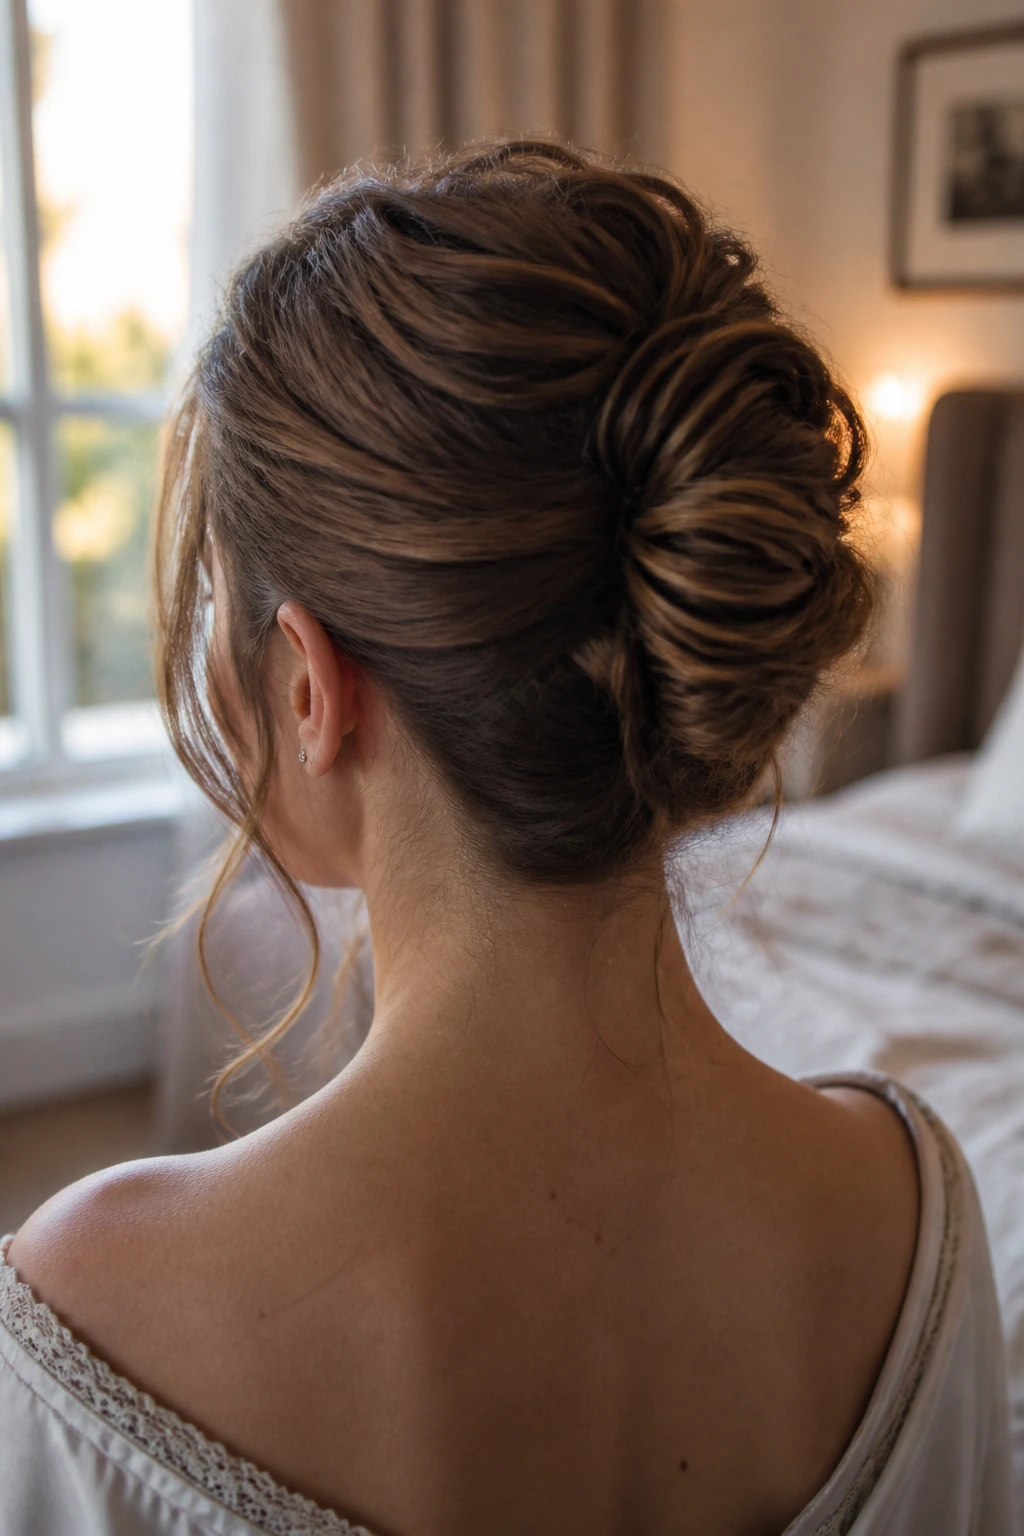
A romantic loose French roll takes the rigid French twist and softens the edges. You still roll the hair upward at the back, but you leave a little room in the twist and allow a few strands to escape around the face and neck. On long hair, that looseness keeps the roll from looking too heavy or too formal.
The important part is restraint. Loose does not mean floppy. The roll still needs a spine of pins along the seam so it does not unravel. I like to pinch the top of the roll after it’s pinned and gently widen it by a half inch, just enough to create a fuller curve. That tiny looseness gives the style its romantic feel.
This works beautifully with soft waves or hair that has been curled lightly before styling. Straight hair can do it too, but the roll will feel sharper. If you want a gentler finish, leave the ends slightly textured rather than slicking every piece into place.
30. Four-Strand Bun
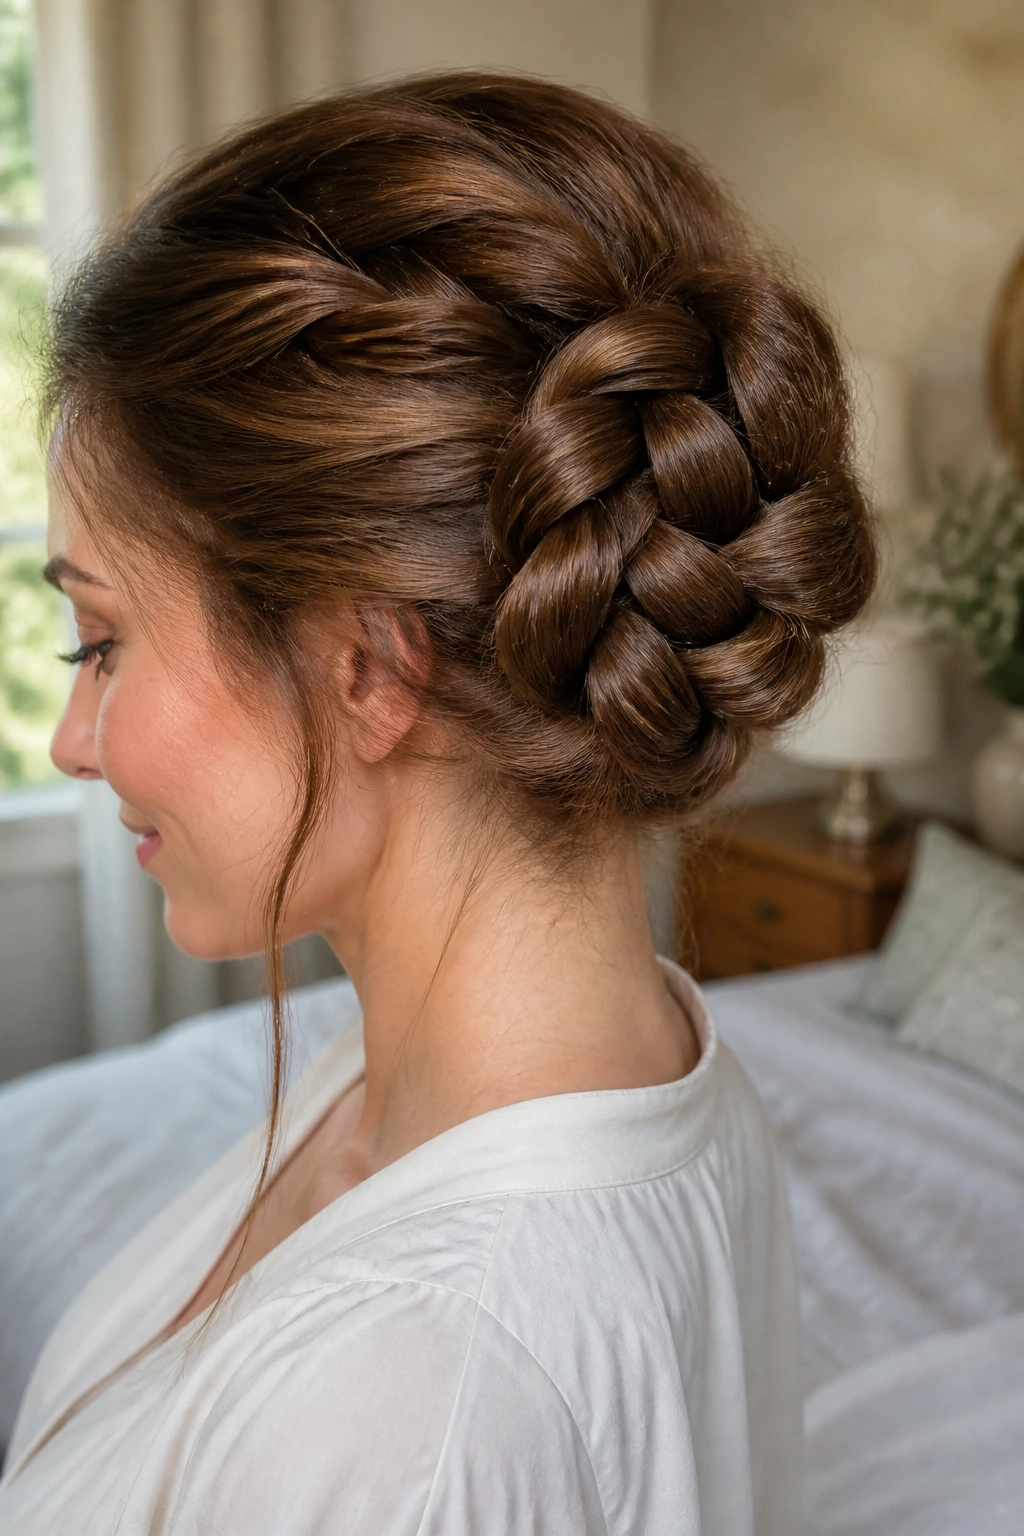
A four-strand bun is one of those styles that looks more complex than it really is. The extra strand gives the twist a thicker, rope-like appearance, and on long hair that texture reads beautifully at the back. Once the braid is done, coil it into a bun and pin the shape into a compact circle.
The reason to use four strands instead of three is simple: more surface variation. The braid catches light from different angles, which keeps the bun from disappearing into one smooth blob. If your hair is fine but long, this is a useful trick because it makes the style appear fuller without stuffing it with pads.
You do need a little patience here. Keep the tension consistent as you braid, or the pattern will distort. Once the bun is formed, press it flat lightly with your palm before pinning. That helps the braid sit against the head instead of blooming outward.
31. High Pony Wrap
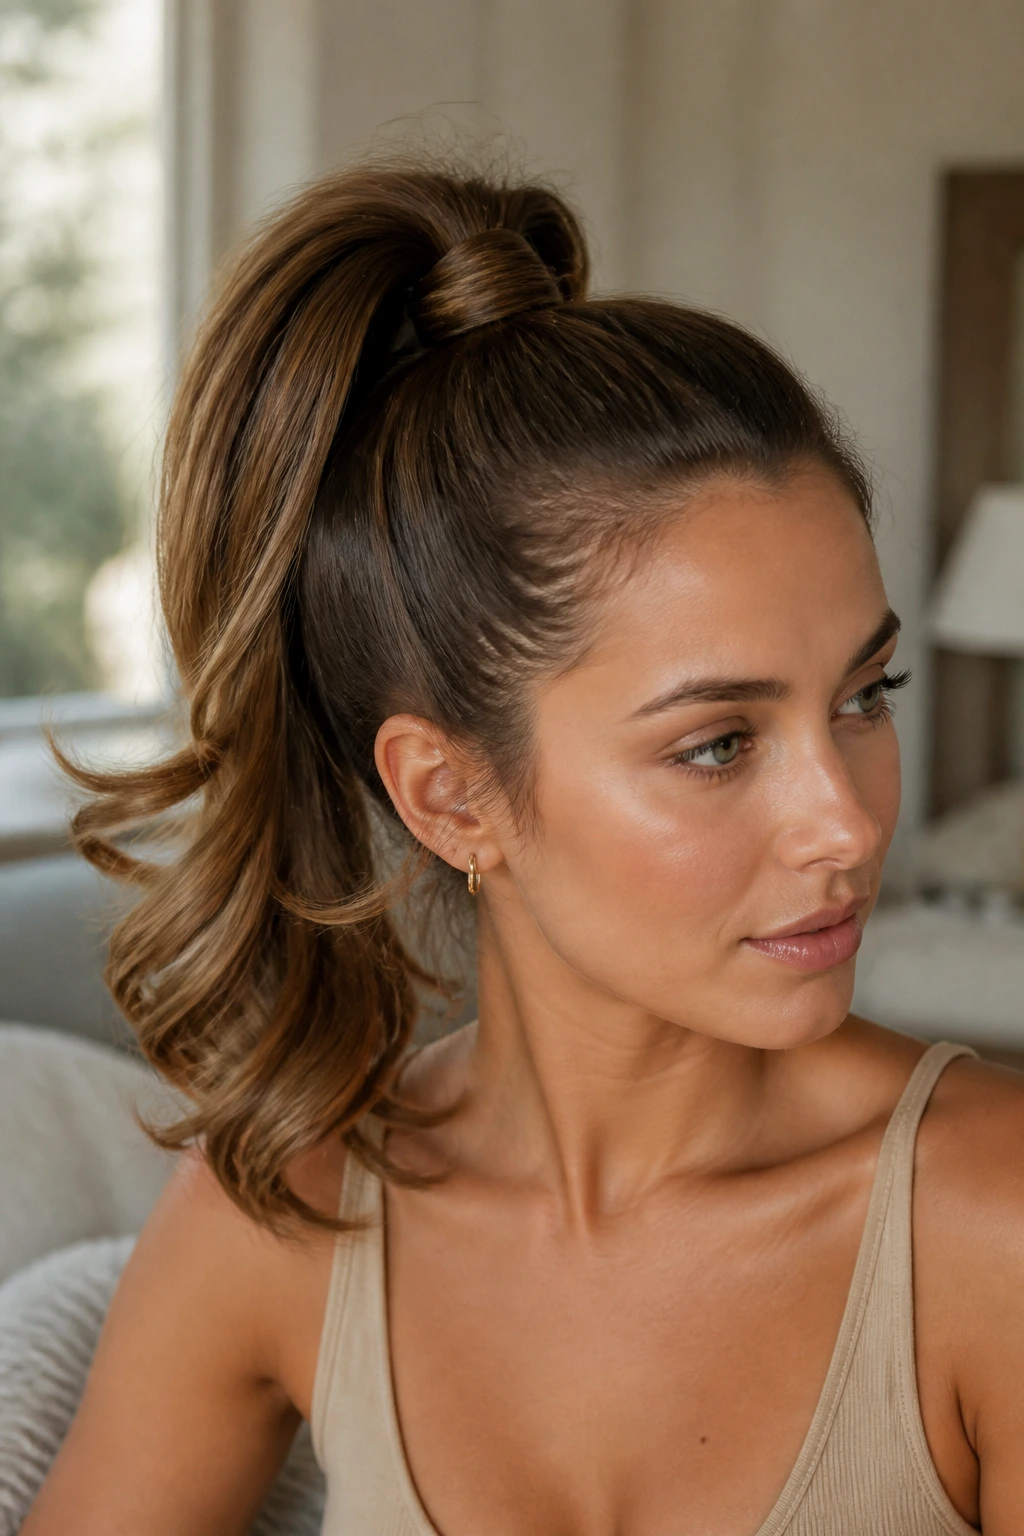
A high pony wrap starts as a ponytail, then turns into a refined knot by wrapping a section of hair around the elastic. It’s the cleanest way to make a pony look finished instead of tossed back. With long hair, the wrapped base looks especially smooth because there’s enough tail to cover the elastic completely.
Pull the hair high and secure it with a strong elastic. Then take a 1-inch section from underneath the ponytail, wrap it around the base, and pin it underneath. If you want more polish, curl the tail ends slightly so they fall in a controlled way. That little bend keeps the ponytail from looking severe.
This style is useful when you want height and movement at the same time. It opens up the face, gives a bit of lift at the crown, and still feels fast. A high pony wrap is one of those styles that can go from gym-adjacent to dinner-appropriate just by smoothing the top and hiding the elastic well.
32. Coiled Nape Knot
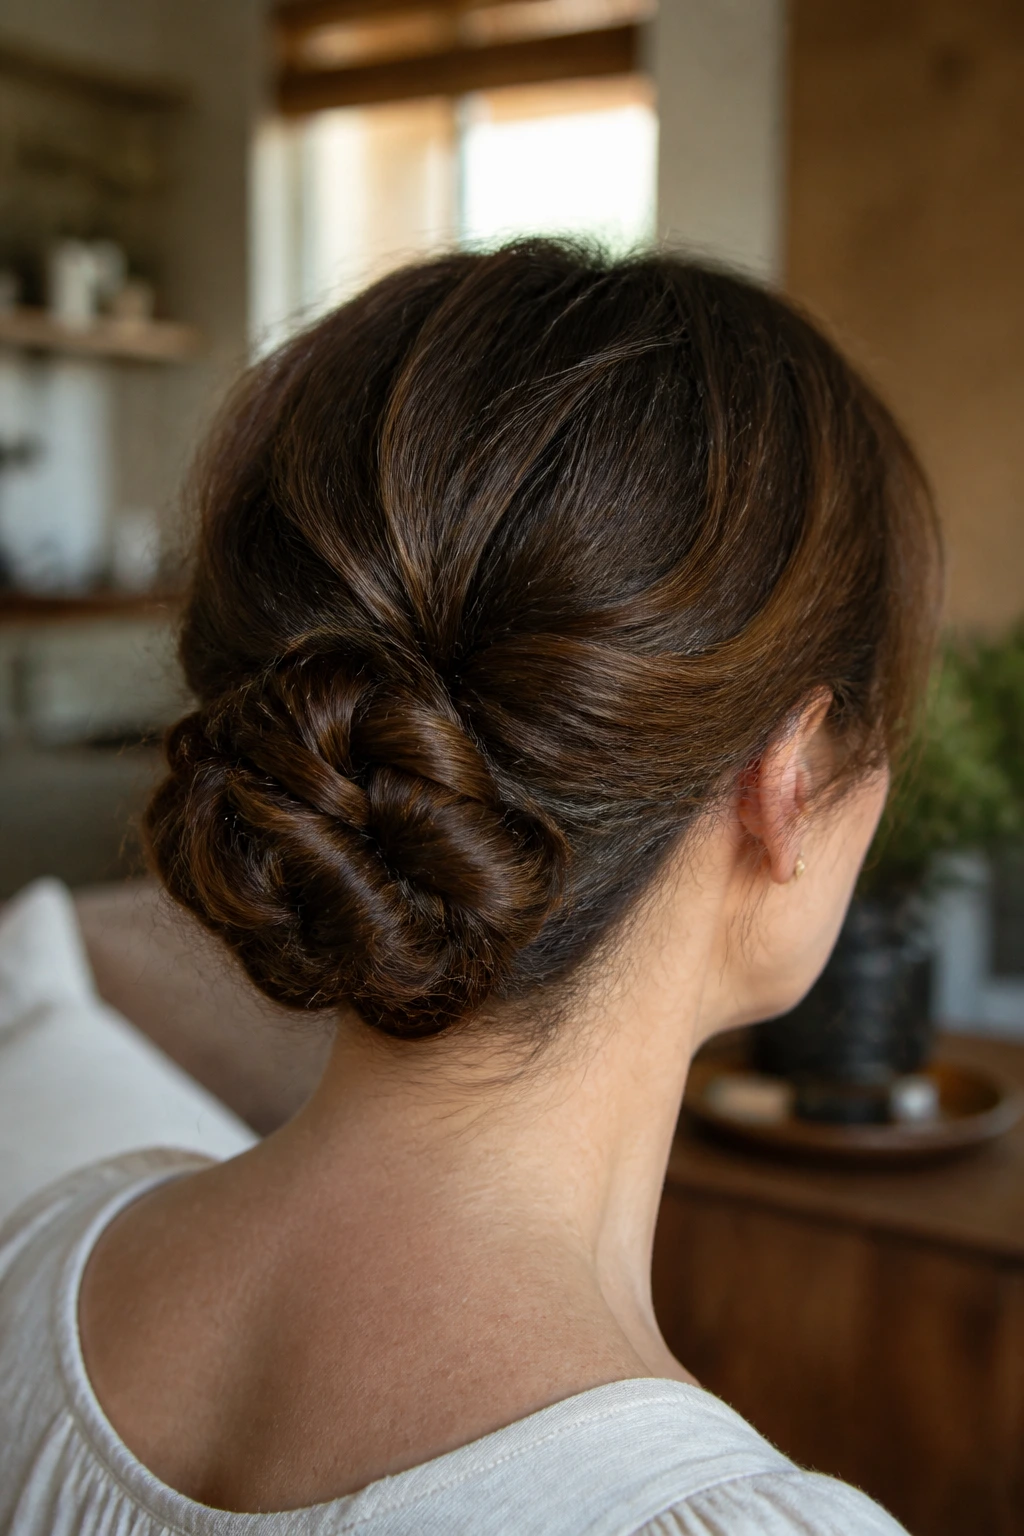
A coiled nape knot is a low style built from repeated small coils rather than one big twist. That makes it a good option for long hair that feels too heavy for a single wrap. Divide the tail into smaller sections, coil each one into a loop at the nape, and pin the coils together so they form one compact knot.
The coils give the bun a layered texture that looks intentional even if the hair is not perfectly smooth. I like this style for thick hair because the smaller coils spread the volume out. If the knot starts to look too flat, gently lift the outer edge with the tip of a tail comb. A few millimeters of lift can change the shape without blowing it apart.
This style is neat but not severe. It sits close to the neck and stays comfortable for long wear. That matters more than people admit. A style can look good for ten minutes and still be a bad choice if it digs into your head all afternoon.
33. Crown Twist Chignon
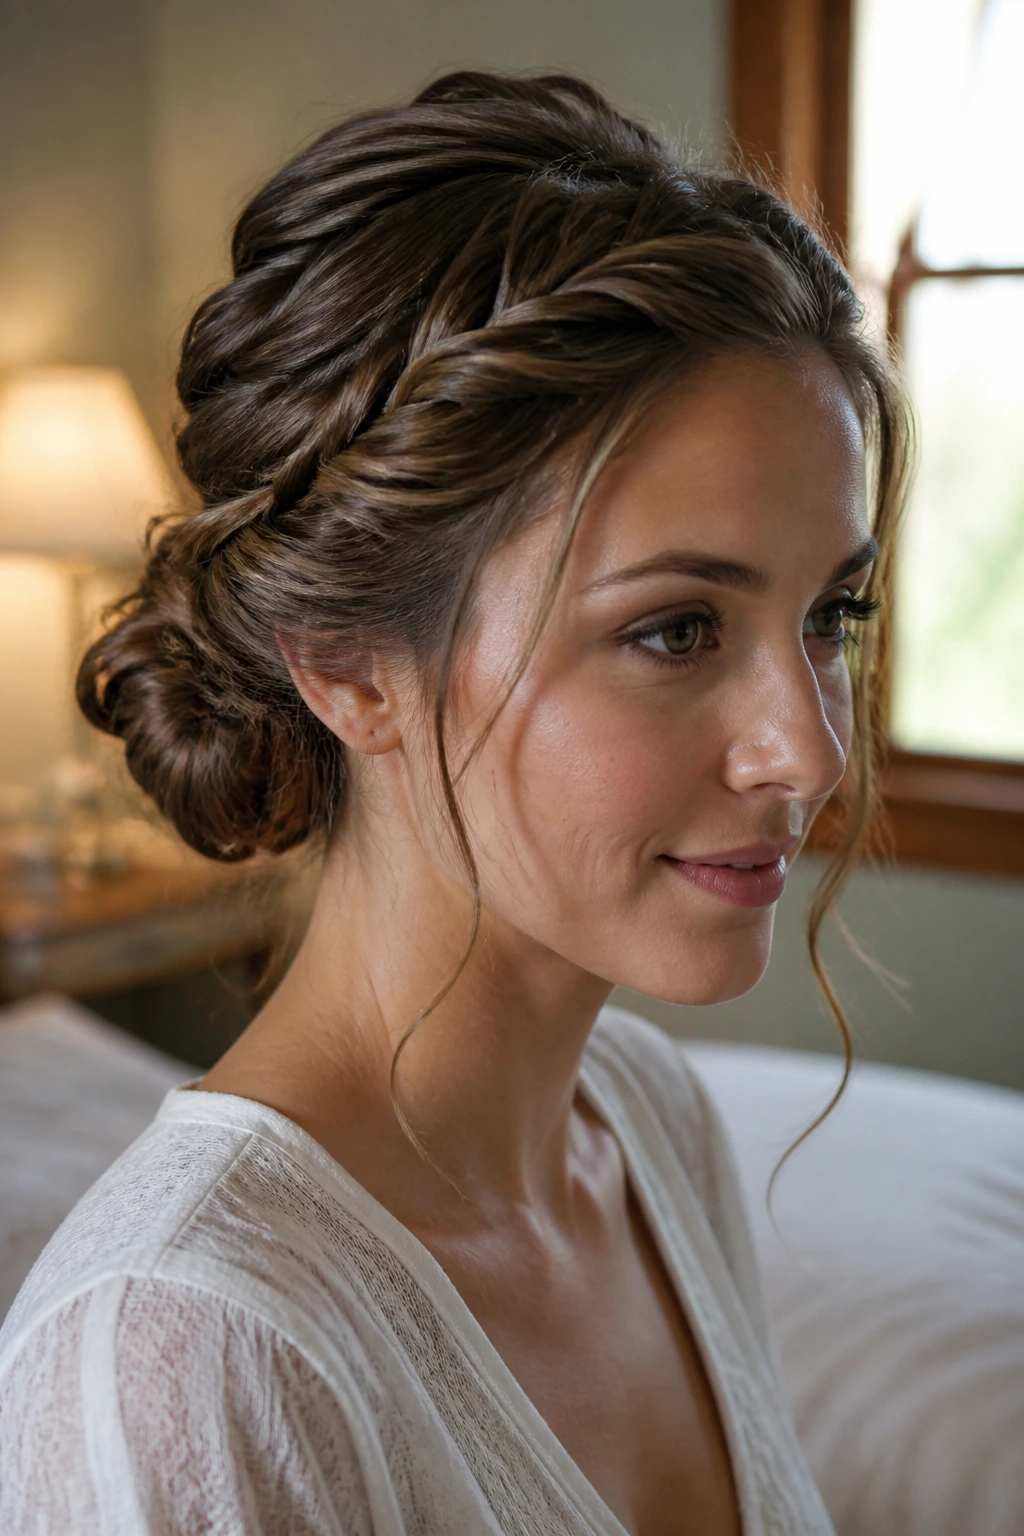
A crown twist chignon uses twists around the front and sides to build a soft frame, then closes the shape with a low chignon at the back. Long hair gives the twists enough length to cover the hairline without pulling tightly. That makes it a nice option for people who want a controlled shape without a hard part or a severe slick-back.
The twist should start near the temple and move diagonally back. Keep it close to the scalp, then pin the end into the chignon. If the twists are too chunky, they overpower the bun. If they’re too small, they disappear. Aim for a section about the width of two fingers on each side, then adjust from there.
This style works especially well with a subtle side part or a softly centered crown. It also plays nicely with earrings because it leaves the face open but still gives the hair some structure around the edges.
34. Pull-Through Braid Bun
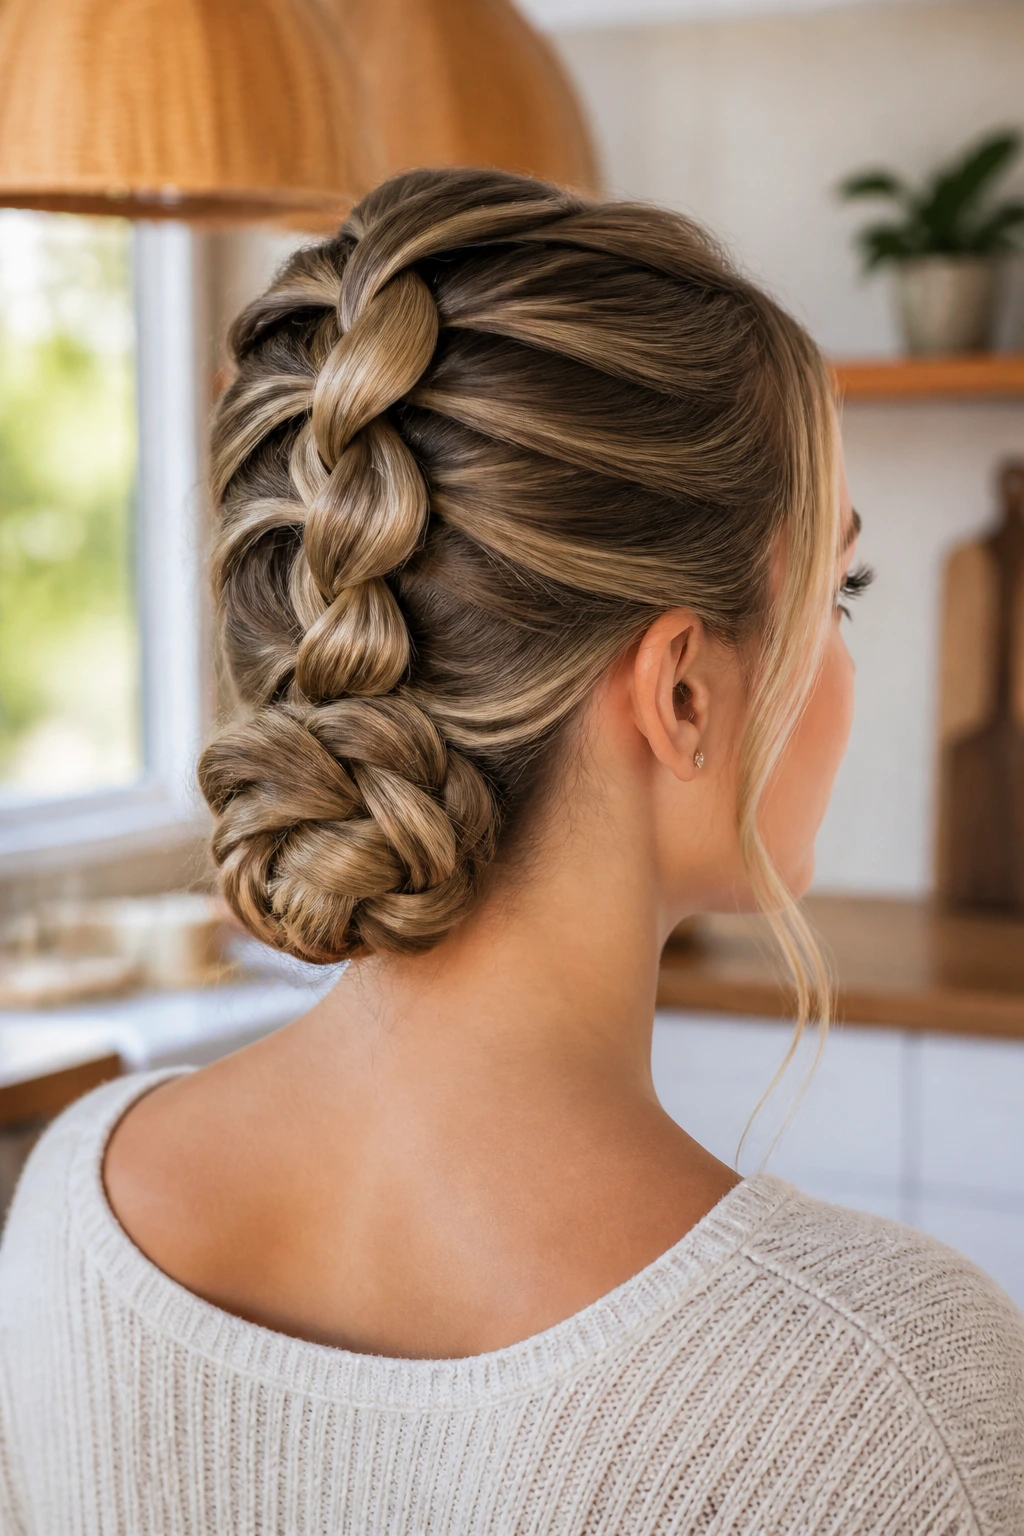
A pull-through braid bun is a smart trick for long hair that needs more texture than a plain bun can give. You build the braid using a series of ponytail loops, then tuck the tail into a bun or coil at the end. The effect is bold and layered, with a lot of visual depth created by the stacked sections.
This style is helpful when your hair is thick or blunt-cut, because the pull-through sections create the look of many pieces without demanding actual braid skill. The pattern should stay centered and even. If one loop is larger than the others, the braid starts leaning to one side. Keep the elastics snug and consistent. That consistency is what makes the braid look clean.
For the bun, tuck the remaining tail under the braid base and pin the ends flat. This style holds best when the hair has some grip, so day-two texture helps. It’s a solid choice if you want a statement updo without the elegance of a classic twist.
35. Undone Side Bun
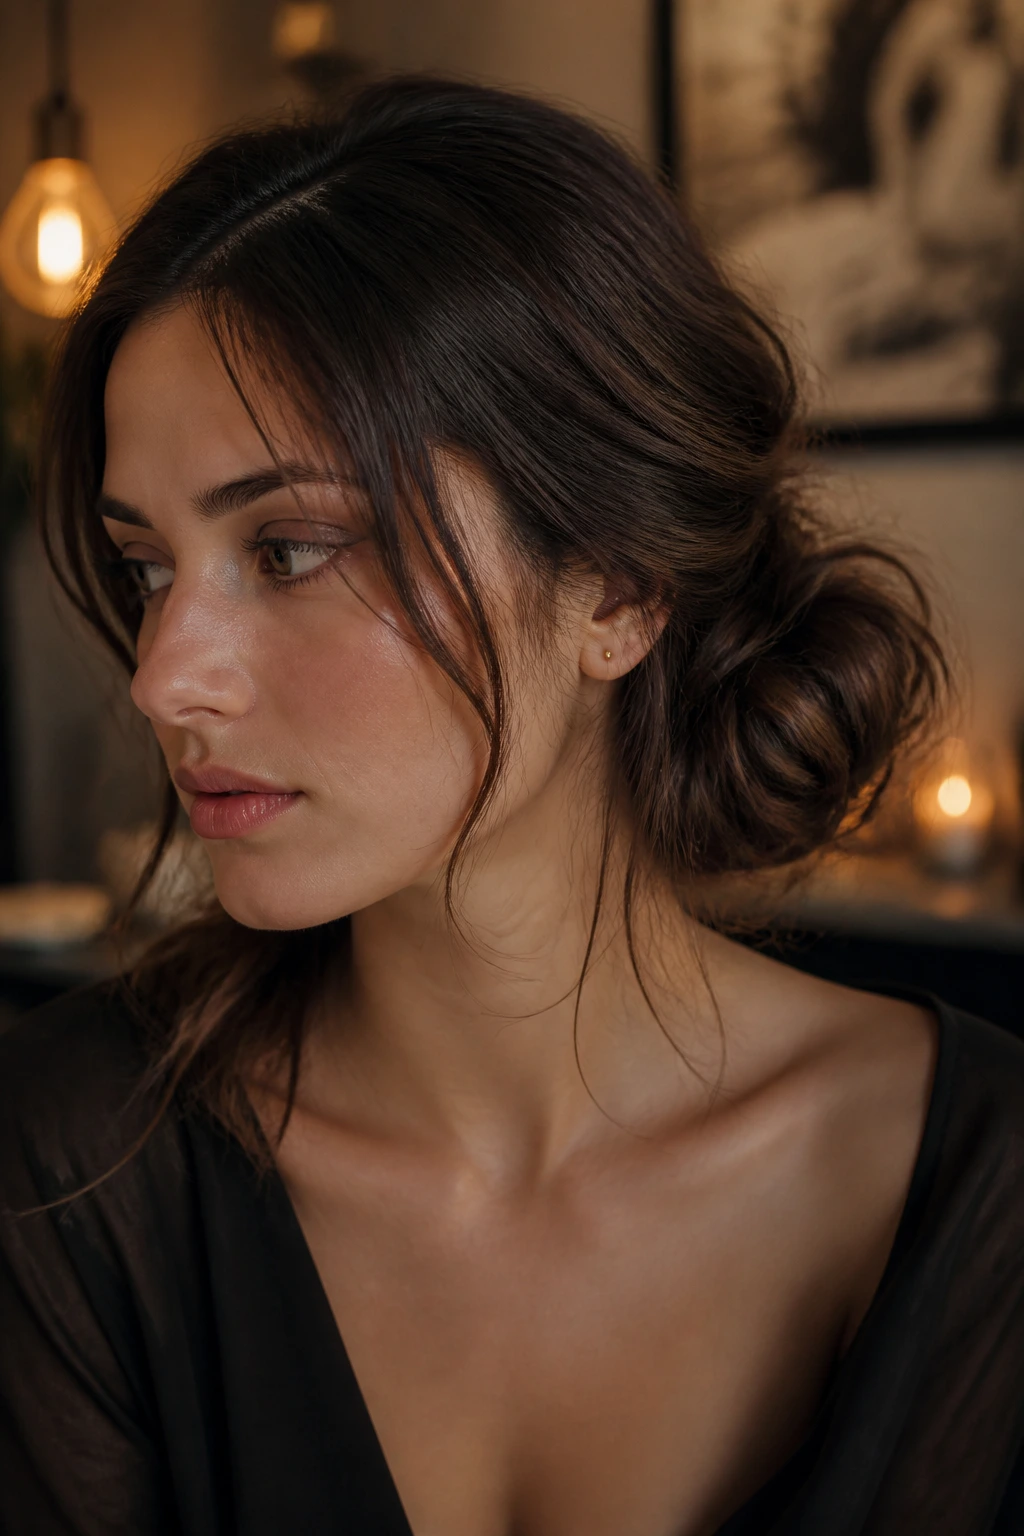
An undone side bun is what happens when a side knot decides to relax a little, but not so much that it falls apart. Gather the hair low and off to one side, twist it loosely, and pin it into a bun that sits near the jawline or just below the ear. Long hair gives the bun a soft, full shape without making it look too round.
The side placement changes the whole feel. It creates a slight imbalance that looks romantic rather than neat. Leave a few pieces loose around the face, but keep the bun itself anchored with pins hidden underneath. If it starts looking too puffy, press the outer edge gently with your hand and smooth the top with a brush.
This style is good for evenings, soft dresses, and any situation where you want the hair to feel gentle instead of severe. It’s also forgiving if your hair is layered or a little frizzy. In fact, a tiny bit of texture helps it look better.
Why Long Hair Needs a Different Structure
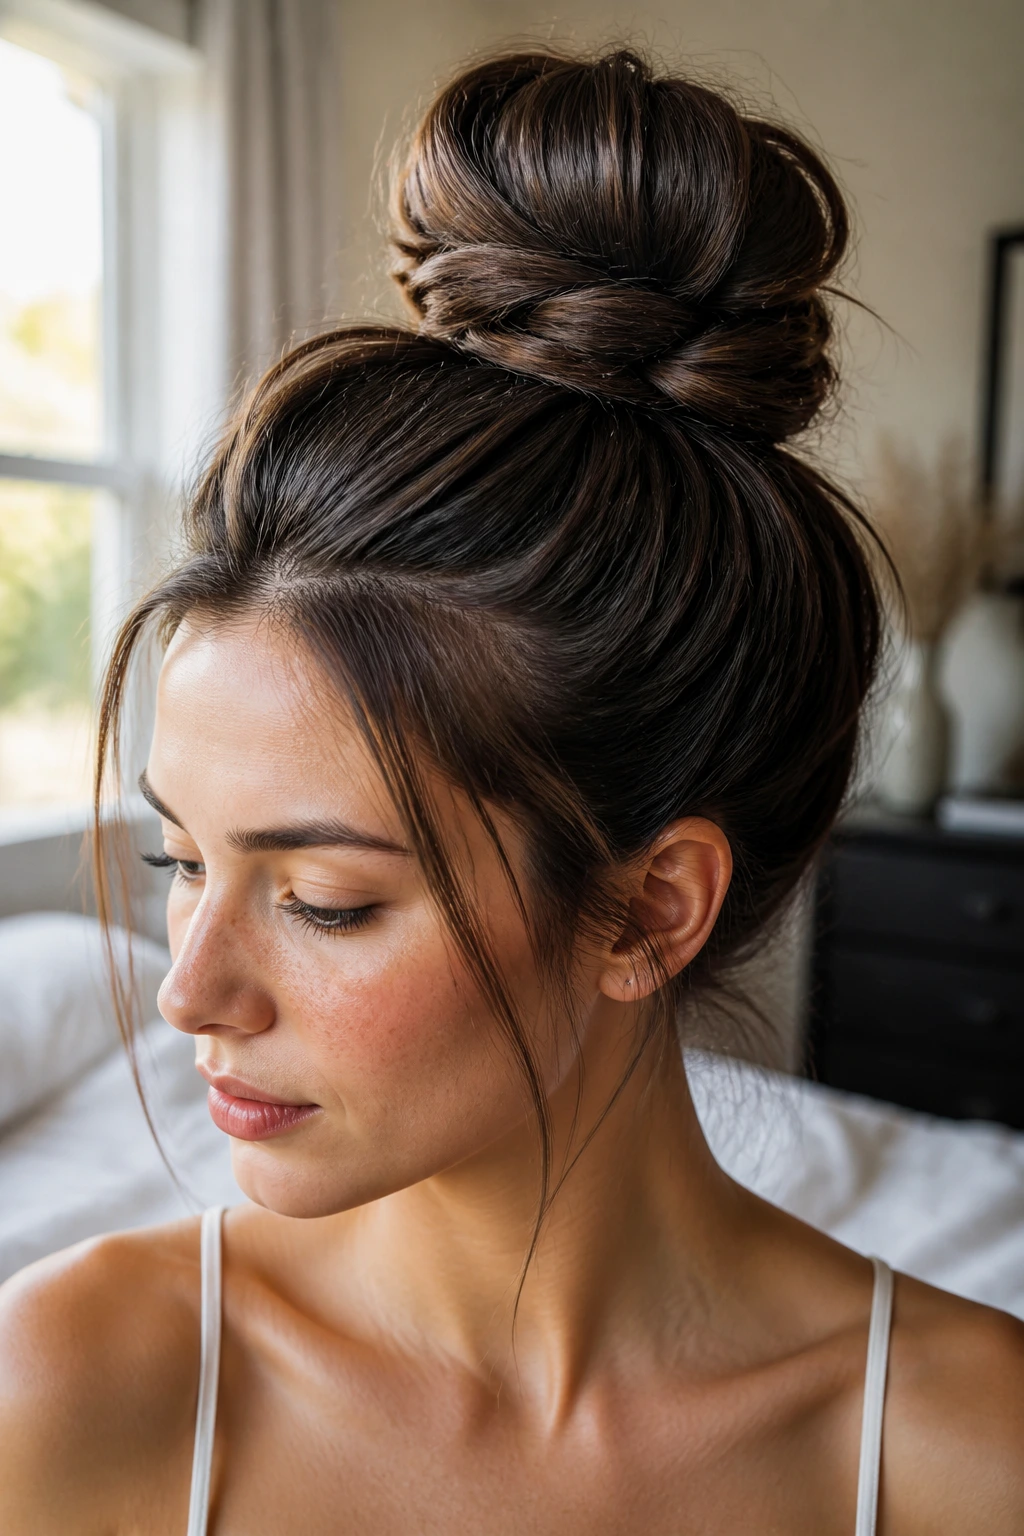
Long hair has a habit of telling the truth. If the base is weak, the style collapses. If the pins are lazy, the ends slide out. If the hair is too clean, the whole thing slips around like satin on glass. That is why long-hair updos need a different approach than shorter styles. You are not just gathering length. You are managing weight.
The first thing to understand is leverage. The farther the hair hangs from the anchor point, the more force it puts on the base. A low bun behaves differently from a high one for exactly that reason. A style at the nape has less pull trying to unseat it. A style at the crown needs stronger pins, more grip, and a little more texture at the roots.
Texture matters more than shine here, at least at the start. Clean, slippery hair can look beautiful down, then become a little stubborn when pinned up. Dry shampoo, texturizing spray, and a soft roughing of the roots give the pins something to catch. That’s not a beauty trick. It’s physics with nicer packaging.
Long layers make things even more interesting. They can sneak out of a bun if you let them, but they can also add softness if you place them on purpose. The best long-hair updos are usually not the ones with every single strand trapped. They are the ones where the loose pieces look chosen.
Pins, Combs, and Sprays That Actually Matter
-
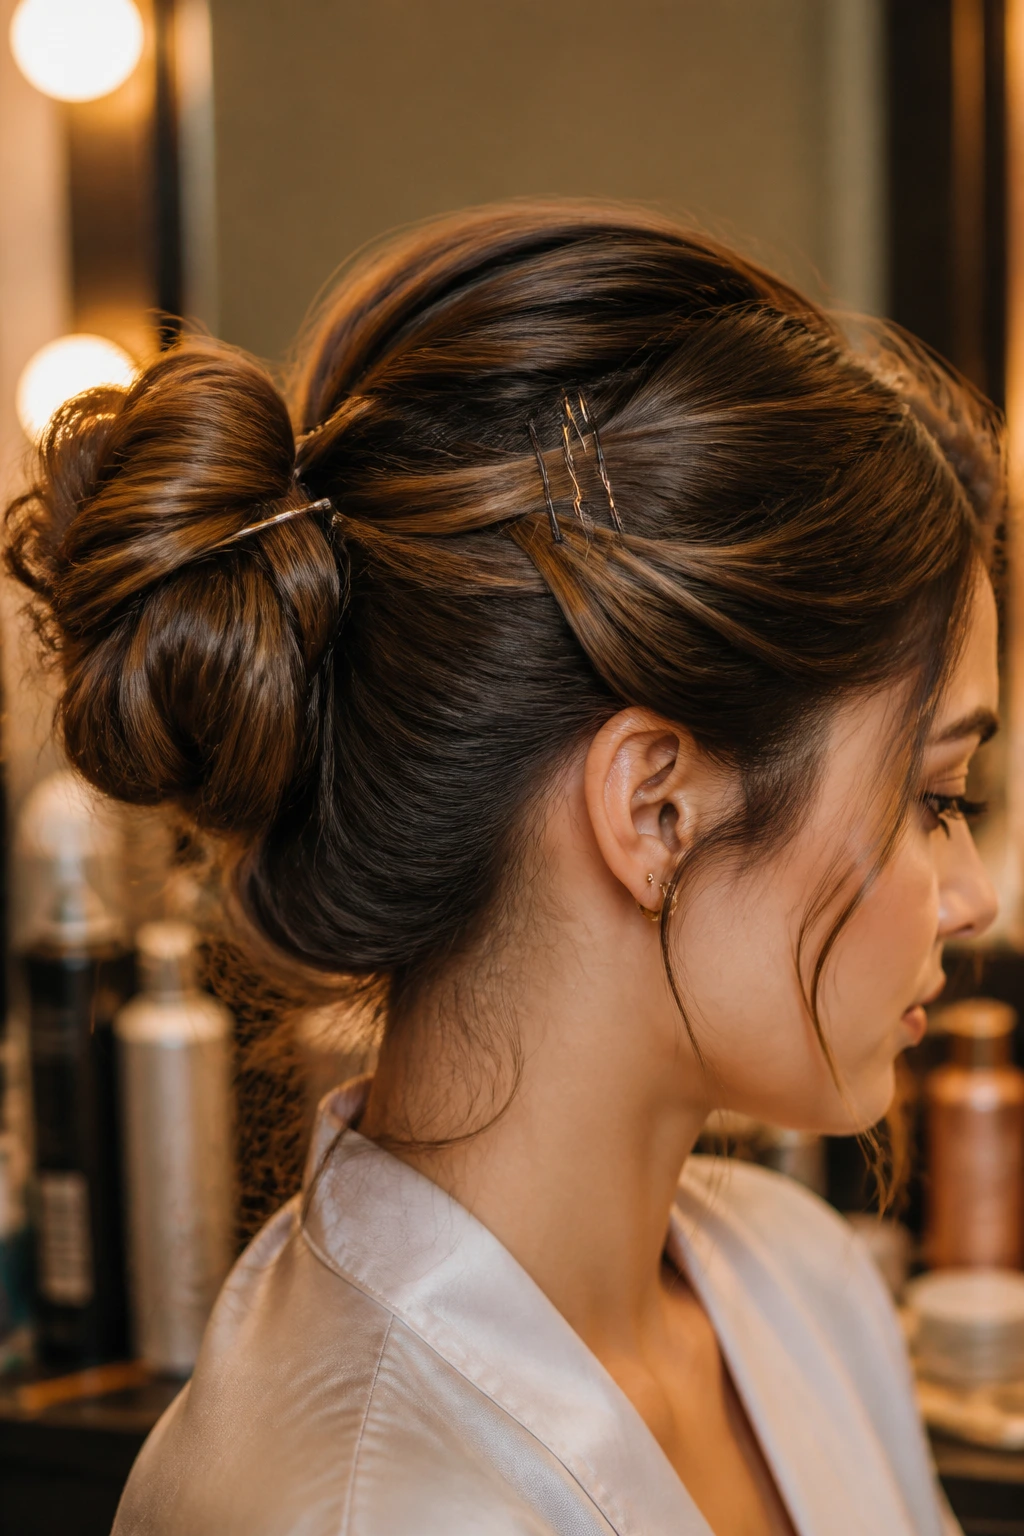
Bobby pins in two sizes: Short pins are fine for flyaways, but long pins do the heavy lifting in buns, twists, and French rolls. You want both.
-
U-pins: These are worth having for thicker buns and twist styles because they slide around less than a standard bobby pin and grip more hair.
-
No-snag elastics: Clear or matte elastics hold better at the base of braids and ponytails. Cheap, shiny rubber bands can snag ends and break up the finish.
-
Tail comb: The pointed end is useful for clean sections, parting the crown, and lifting tiny pieces when you need more shape near the scalp.
-
Boar-bristle or smoothing brush: Great for slick styles. It lays down the top layer without making the hair look overworked.
-
Texturizing spray: This gives slippery hair some bite. A few light passes at the roots and mid-lengths can save a style that keeps slipping.
-
Strong-hold hairspray: Use it after the shape is set. Spraying too early can make the hair stiff before the pins are in place.
-
Mini claw clip or banana clip: Helpful for quick twists and styles that need a wider grip than an elastic can give.
-
Hair net, optional: Not glamorous, but very useful under formal buns if you want a compact shape that stays put.
How to Choose the Right Updo for Your Hair Texture and Plans
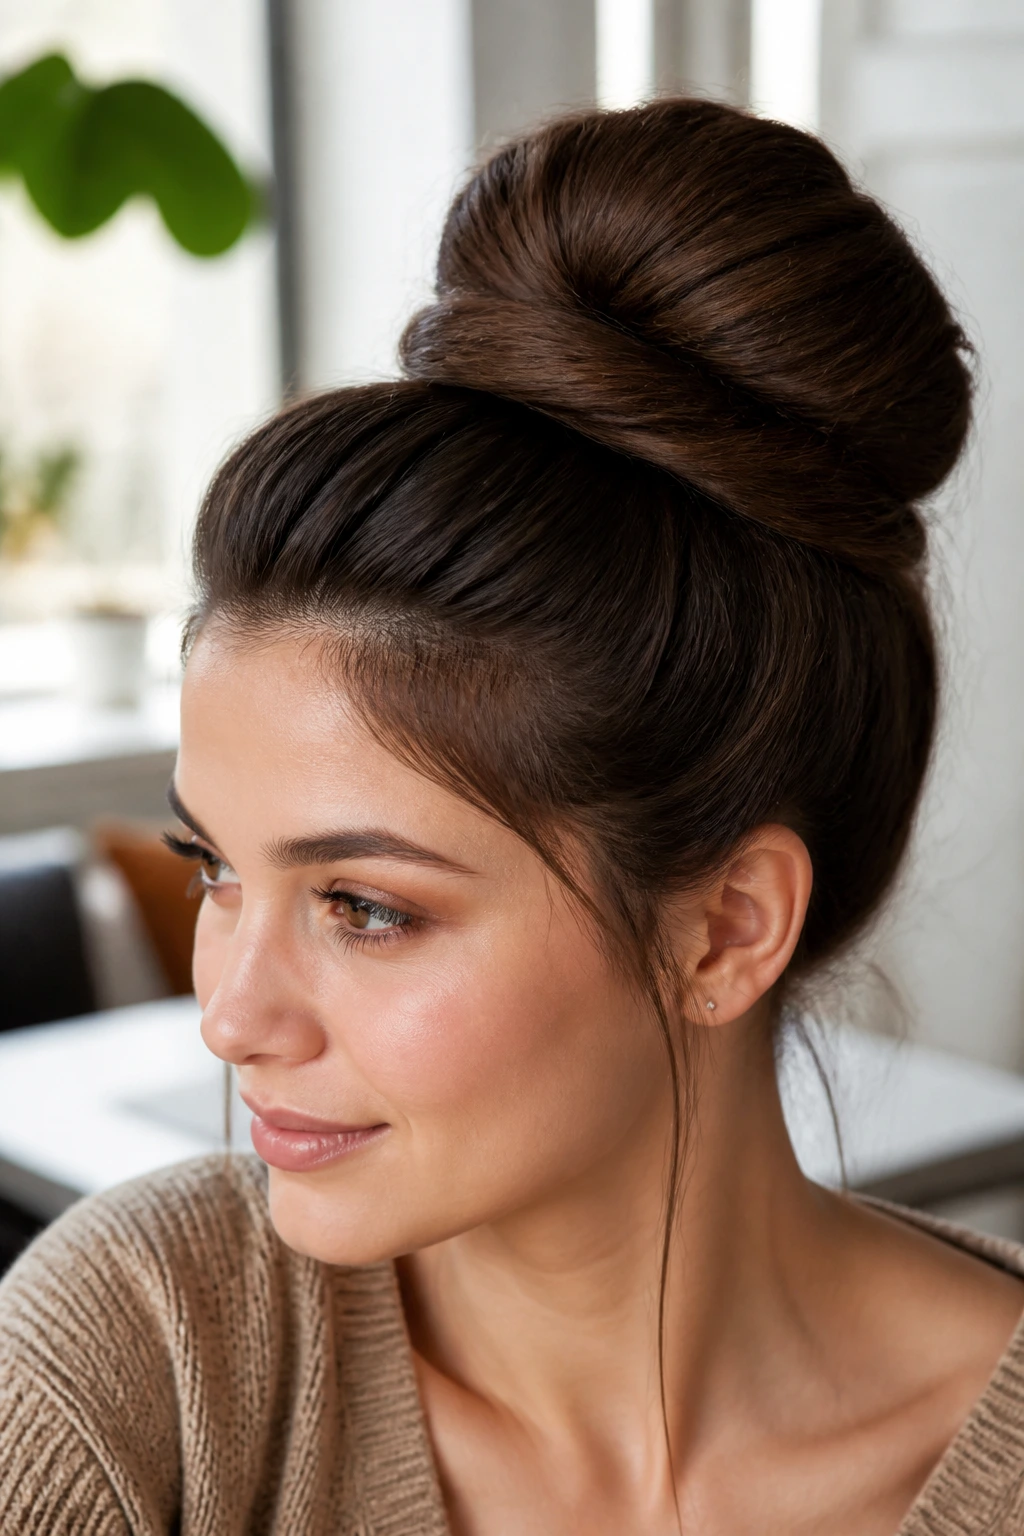
A good updo is the one that matches the hair you actually have in front of you, not the hair you wish you had that morning. Thick hair needs styles that split weight into sections: double twists, low knots, braided buns, and any version with a wider base. Fine hair does better with styles that create the illusion of fullness—bubble ponytails, donut buns, and gentle twists with a little tease at the crown.
Straight hair usually wants extra grip. Day-old texture, dry shampoo, or a light mist of texturizing spray helps the pins hold. Curly hair behaves better when you let some of the curl pattern stay visible, because forcing curls into a sharp, smooth roll often creates frizz where you do not want it. A pineapple puff, loose chignon, or twisted halo tends to work with the hair instead of flattening it into submission.
Event matters too. If you need a style to survive wind and a long day, choose braids, low buns, or wrapped knots. If you want softness for dinner or a photo-heavy event, leave out a few face pieces and soften the crown. If you’re standing under warm lights or outside for hours, skip anything that depends on perfect sleekness. It will not stay perfect. Better to choose a shape that still looks good when it loosens a little.
Small Moves That Make an Updo Hold Better
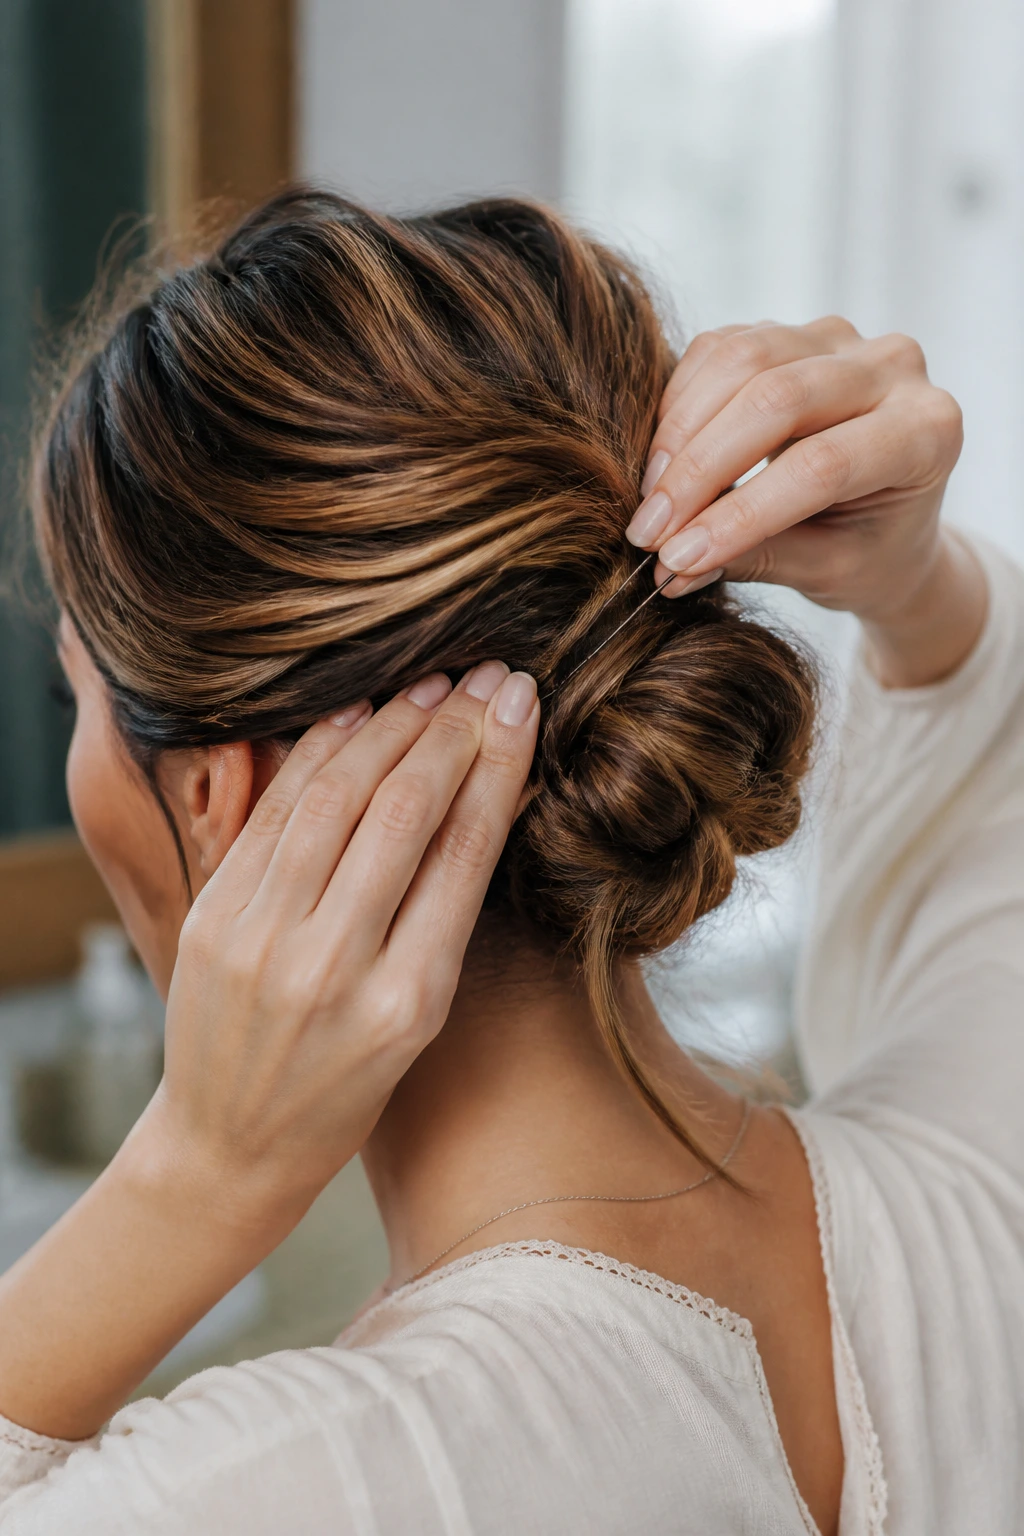
A lot of long-hair styling problems are solved before the first pin goes in. Start with dry hair that has a little grip. That may mean styling the hair on day two or adding a quick pass of dry shampoo at the roots if the hair is freshly washed. Clean hair is fine. Silky, floating hair is not.
Pin direction matters more than most people think. Slide bobby pins in against the direction of tension so they catch hair on both sides, not just one. If a pin goes in and immediately feels loose, pull it out and try again at a slightly different angle. Lazy pin placement is why styles sag at the crown and split at the nape.
One more thing: do not try to make every strand obey. Use a brush for the main surface, then leave the tiny flyaways alone until the end. If you attack them too early, they frizz up and spread. A tiny toothbrush with hairspray, used at the very end, is often better than flooding the whole head with product.
Common Mistakes That Make Long-Hair Updos Collapse
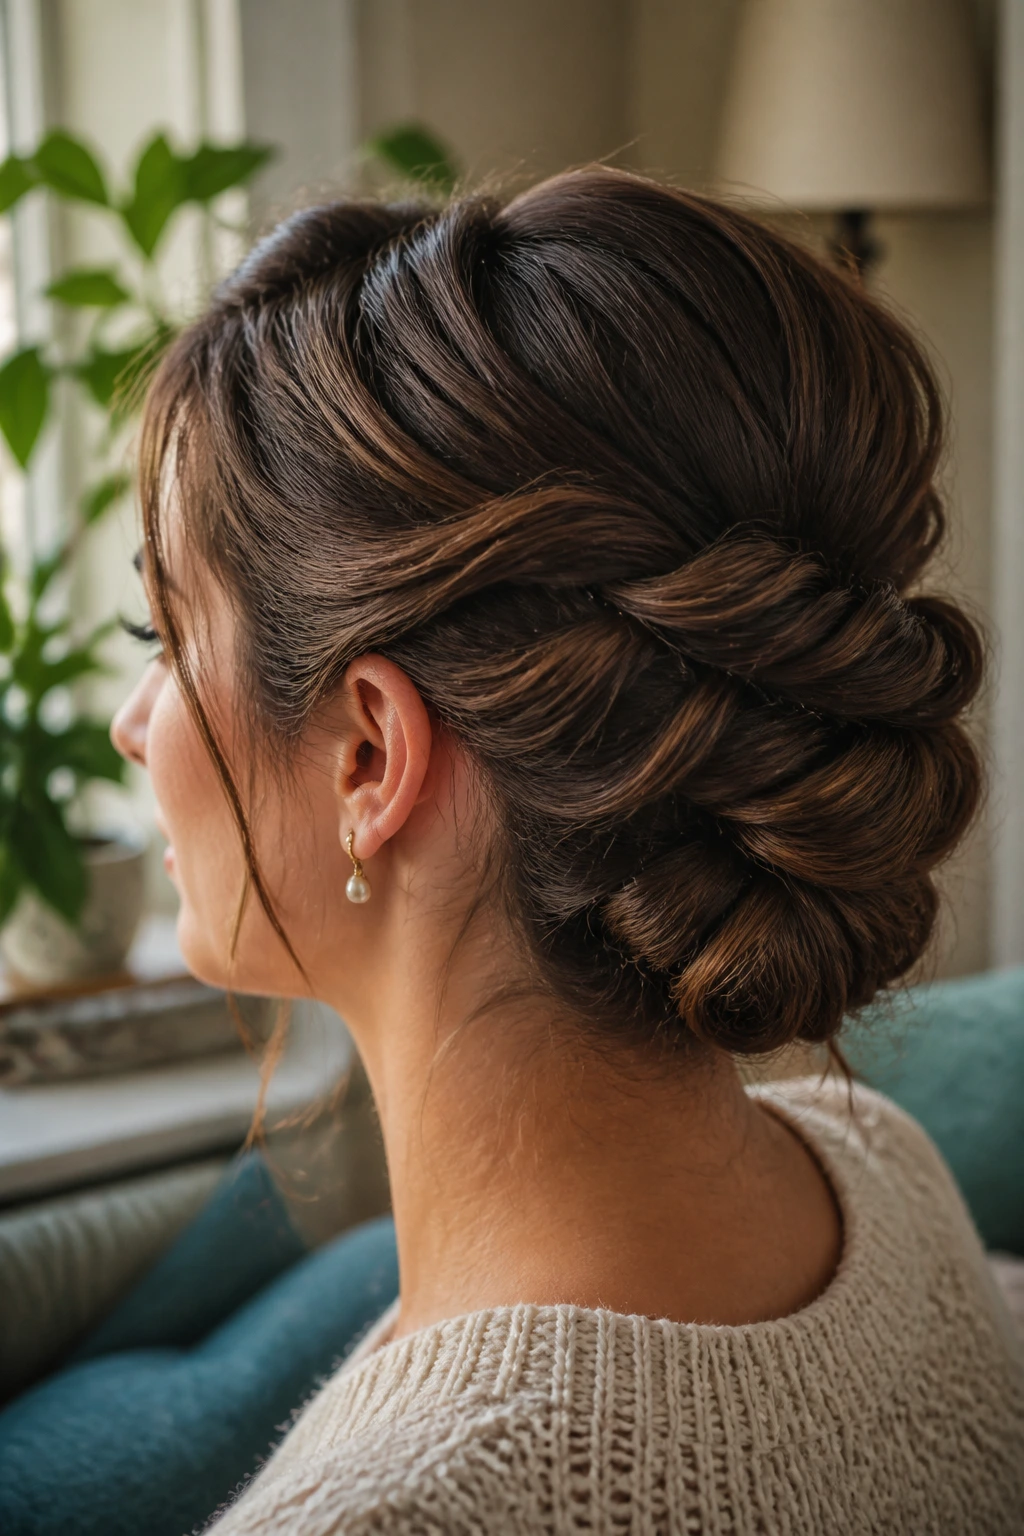
The first mistake is starting with hair that’s too smooth. Freshly washed, slippery hair can look gorgeous, but it often refuses to stay where you pin it. The fix is simple: add texture at the roots with dry shampoo or spray before you start.
Another problem is building a style with one elastic and too few pins. Long hair needs more support than that. If the style feels sturdy for only a few minutes, it needs a second anchor point or a pin pattern that crosses through the base.
People also make the bun too big too fast. A giant knot on heavy hair can tilt backward and pull at the scalp. Split the length, twist it in sections, and keep the mass close to the head. That gives you shape without a headache.
Skipping sectioning is another one. If you just grab everything and twist, the style ends up lumpy in the wrong places. A clean part, even a rough one, gives the updo a map.
And then there’s the urge to keep fixing it. Pin. Step back. Touch it once. Pin again if needed. Constant fussing breaks the shape and creates more flyaways than you started with.
Ways to Make These Styles Softer, Sleeker, or More Formal
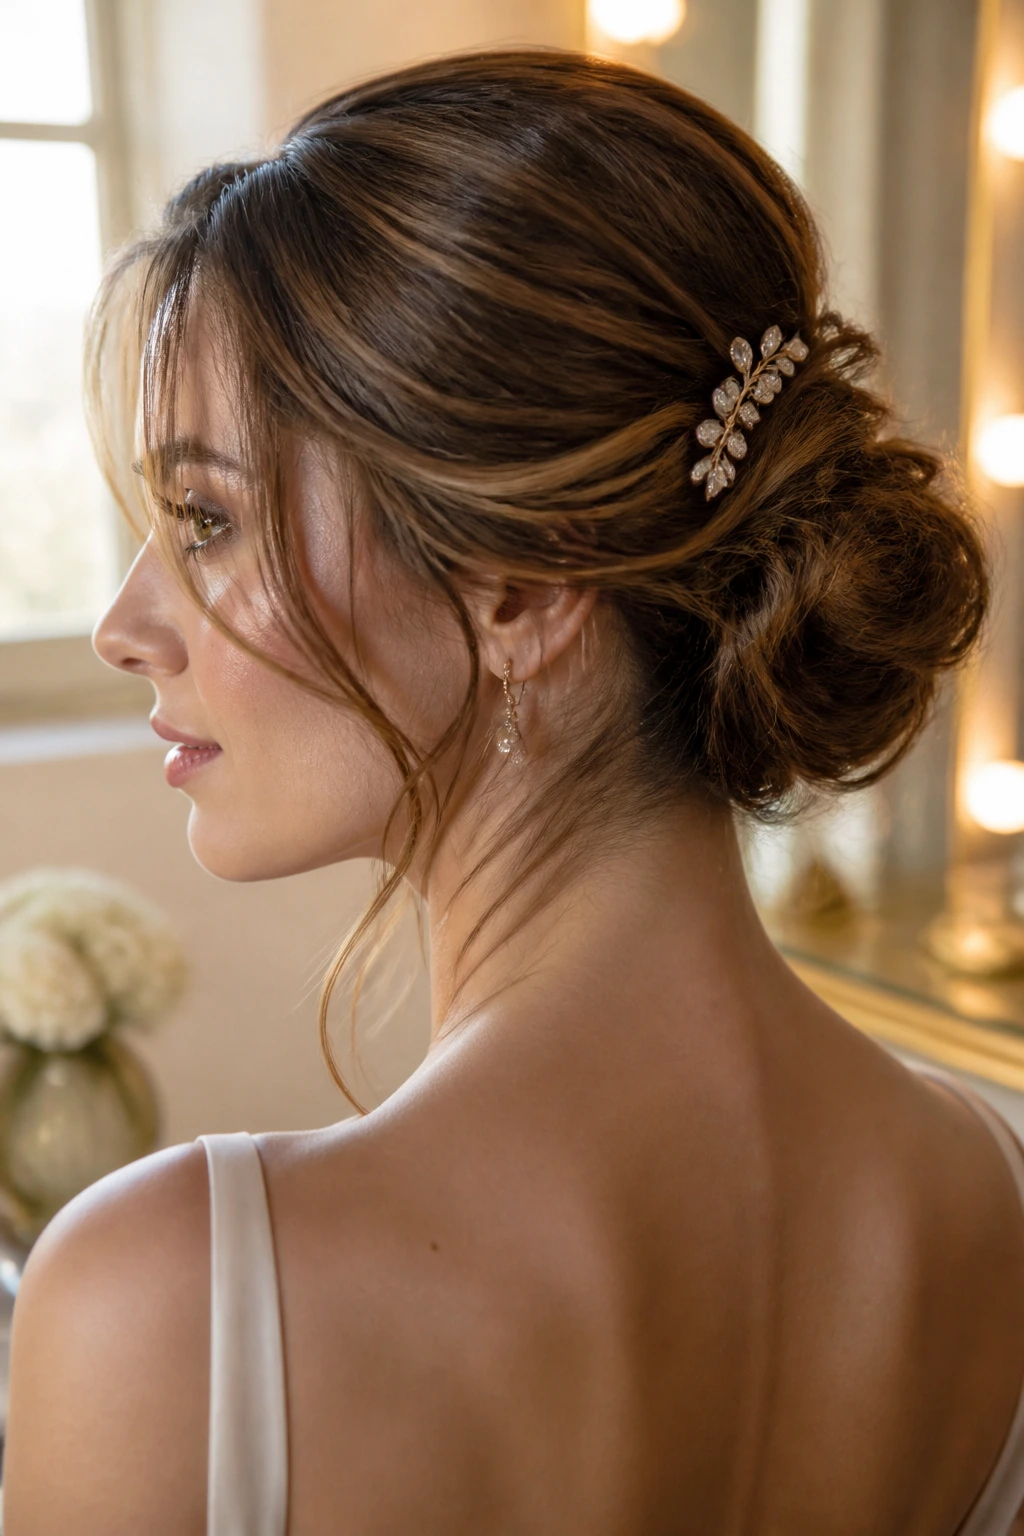
Softer finish: Pull a few strands loose around the temples and widen braids by a quarter inch after they’re pinned. That one move turns a structured style into something gentler without destroying the shape.
Sleeker finish: Use a smoothing brush and a pea-sized amount of styling cream only on the top layer. Keep product away from the ends unless you want them to look heavy and piecey.
More formal: Add a side comb, pearl pin, or a single metallic clip near the base of the bun. One accessory is enough. More than that and the hairstyle starts competing with itself.
Better for thick hair: Divide the tail into two or three sections before wrapping. That keeps the bun from becoming a giant lump and helps the pins reach the center.
Better for fine hair: Use a donut form, hair padding, or a loose backcomb at the crown. Fine hair often needs shape more than it needs length, and the extra lift makes the style read fuller from every angle.
How to Keep an Updo Comfortable Through a Full Day
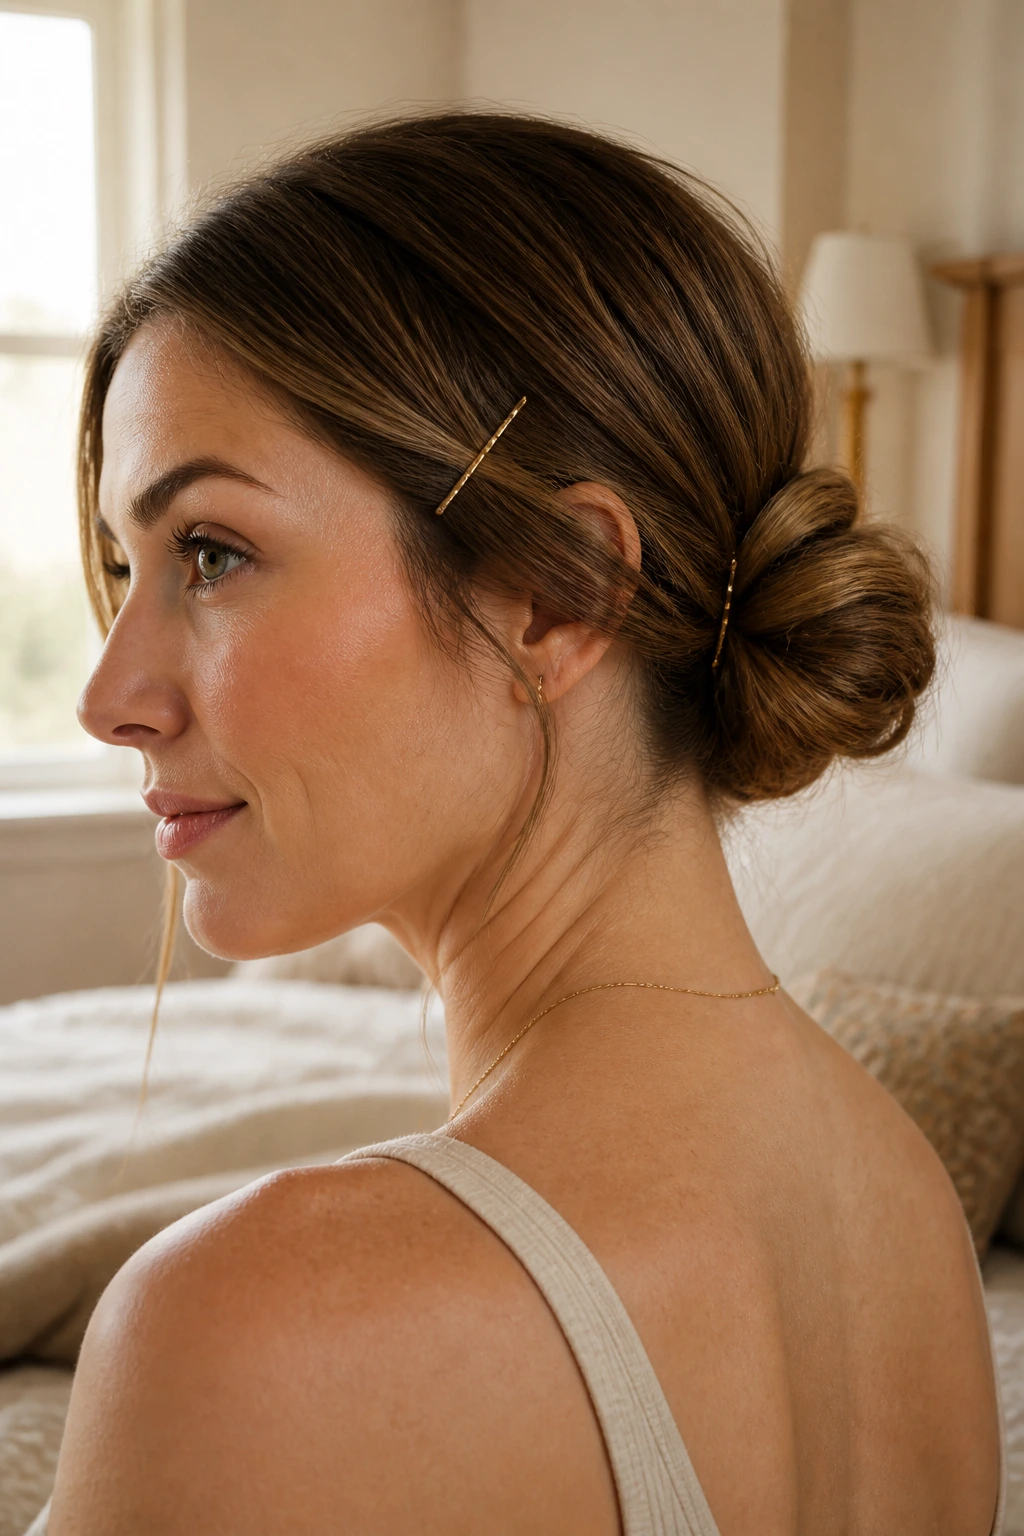
A style can be secure and still be miserable. If you feel pain at the pin points after ten minutes, something is wrong with the placement. The pins should support the hair, not dig into the scalp. Reposition them lower or spread the tension out across two pin clusters instead of one crowded spot.
If you plan to wear the style for hours, check the weight of the bun or knot before you leave the mirror. A style that feels too tight at home usually feels worse later. Leave enough looseness to let the scalp breathe, especially around the temples and nape. That is the difference between wearable and annoying.
Overnight care matters too. If you sleep in a looser version, use a silk or satin pillowcase so the shape doesn’t rough up too badly. Remove pins carefully the next morning and finger-comb the roots before trying to restyle. Tugging through a tight knot is how ends break and layers fray.
Frequently Asked Questions
Which updos hold best on very long, thick hair?
Low chignons, double-twist buns, Dutch braid buns, and coiled nape knots tend to do the best job because they spread the weight across more than one anchor point. Thick hair needs a wider base, not just stronger pins.
Is it better to style long hair when it’s clean or a little dirty?
A little texture usually helps. Freshly washed hair can work if you add dry shampoo or texturizing spray first, but day-two hair tends to grip pins more easily and behaves better in braided styles.
How do I keep bobby pins from sliding out?
Slide them in with the wavy side against the scalp and catch a bit of base hair on both sides of the pin. If the pin still slips, the section is probably too silky or the angle is wrong.
Can layered hair still do these updos?
Yes, but you may need to pin the shorter pieces first or leave a few face-framing pieces out on purpose. Layers can look very soft in braided crowns, loose buns, and French rolls if you plan for them instead of fighting them.
What if my hair is so long that the bun feels too heavy?
Split the tail into sections before wrapping it, or choose a style that keeps the hair lower on the head. High buns and heavy top knots put more strain on the scalp, so low knots and French twists usually feel better.
Do I need curling iron work before every updo?
No. Straight hair can be styled into a clean bun or roll without heat. Curling helps when you want a softer, fuller finish or when the ends need a little bend to sit neatly.
How can I make a formal updo look less stiff?
Loosen the crown by a small amount, soften the front pieces, and avoid over-spraying the whole style. The shape should still hold, but a few softer edges keep it from looking helmet-like.
What’s the fastest updo here for a rushed morning?
The banana-clip French twist, rolled-under ponytail, and office-ready low knot are the quickest. They need fewer sections and fewer pins, which makes them easier when time is tight.
Little Styling Moves That Change the Finish
Texture boost: Mist the roots with dry shampoo before you touch the hair, even if the hair isn’t oily. The powder gives long lengths a little grit, and that grip is what keeps the pins from slowly creeping loose.
Smoother finish: Run a tiny bit of styling cream over the top layer with your hands, then brush once. That keeps the surface calm while leaving the inner structure free to hold. Too much cream makes the style collapse, so go small.
Polished detail: Wrap one thin strand around the base of a ponytail or bun and pin it underneath. It’s a tiny move, but it hides the elastic and makes the style look finished instead of functional.
Make-it-yours: Fine hair usually likes donut buns and bubble ponytails. Thick hair does better with low knots, double twists, and braid-based styles. Curly hair often looks best when you preserve some of the curl pattern instead of forcing it flat.
Keeping the Style Fresh Overnight
Long-hair updos tend to hold better if you don’t tear them apart at the end of the day. Remove the visible pins first, then slide your fingers into the base and loosen the hidden ones one at a time. If you yank, you’ll rough up the outer layer and create more flyaways than you had going in.
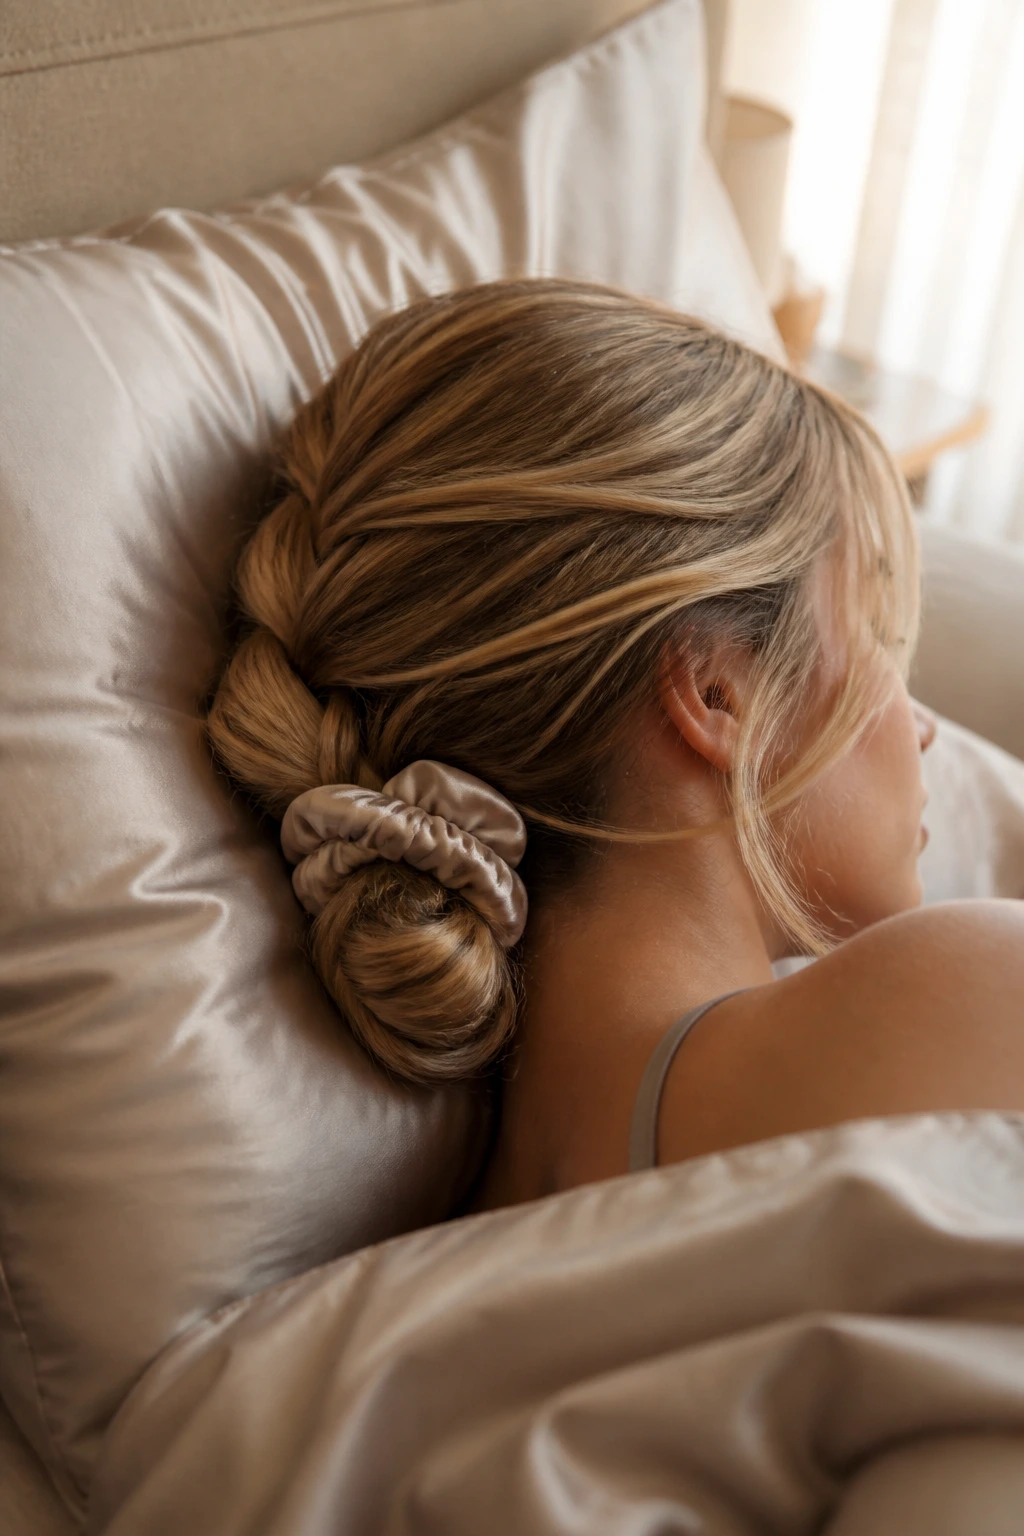
For overnight wear, a loose braid, soft bun, or scarf-wrapped version usually survives best. Use a satin scrunchie or soft elastic instead of a tight rubber band if you need to sleep in it. When you wake up, mist the roots lightly with water or dry shampoo and reshape the front with your hands before adding any extra pins.
If the style is meant to last into the next day, refresh the crown and the base before chasing the ends. The top line is what people notice first. Clean that up, and the rest usually looks good enough to keep going.
More Ways to Wear These Styles
- Bridal-soft version: Choose French rolls, low chignons, and halo braids with a few loose pieces around the face.
- Workday version: Keep the lines clean with office knots, sleek buns, and wrapped ponytails. Less movement, more control.
- Sporty version: Braided buns, Dutch braid updos, and double-space-bun styles stay put when you’re active.
- Texture-first version: Let curls, waves, and small flyaways stay visible so the style doesn’t lose its shape to over-smoothing.
- Accessory version: A scarf, comb, or single statement pin can change the mood of the same basic bun without adding much time.
Final Pin
Long hair gives you more to work with, but it also asks for better planning. That’s the trade. Once you understand where the weight lives, which styles need texture, and how to hide the boring mechanics under a clean finish, these updos stop feeling fussy and start feeling useful.
The best part is that you do not need one magic style for everything. A low chignon, a braided bun, a twist, and a playful pony give you four very different answers to the same problem. Pick the one that matches your hair’s mood that day, pin it with a little patience, and let the length do what it does best.
