



Short curly hair updos are one of those styles people call impossible right up until they stop trying to make the hair behave like something it isn’t. A chin-length curl cut will never act like a long, straight ponytail. Good. That’s the point. The best pinned styles work because they respect the curl pattern, the shrinkage, and the little pockets of grip that curls naturally create.
And once you stop fighting that texture, everything gets easier. A short curly bun can look deliberate instead of improvised. A half-up twist can look polished instead of half-done. Even the messier styles have a clean shape when the pins are placed where the curl wants to bend, not where a slick blowout would sit.
The details matter more here than with longer hair. A matte bobby pin grabs differently than a shiny one. A puff at the crown behaves differently from a low knot at the nape. Two curls left loose near the cheekbone can change the whole read of a style. That’s why the right updo on short curly hair feels less like a compromise and more like a very good decision.
Why These Updos Earn Their Keep
-
They use curl texture as the structure: Short curls already have bend and spring, so these styles rely on that built-in grip instead of forcing a smooth base that slips apart by lunch.
-
They work with short lengths, not against them: A neck-skimming bob, a curly shag, and a pixie grow-out all need different pinning patterns, and these styles give you options that don’t demand extra inches you don’t have.
-
They cover the awkward in-between stage: If your curls sit somewhere between bob and shoulder length, these updos turn the “too short for a ponytail” problem into shape and volume.
-
They hold better with less product: A light mousse, a touch of gel at the hairline, and the right pin placement usually beat a heavy cream that makes everything slide.
-
They can look casual or dressed-up fast: Swap a plain elastic for a pearl pin, add a side part, or leave two curls out at the temples and the whole mood changes.
-
They are kinder to the curl pattern: Twists, tucks, and soft pins keep the natural curl shape visible, which is far nicer than brushing everything into a flat shell.
1. Mini Pineapple Puff
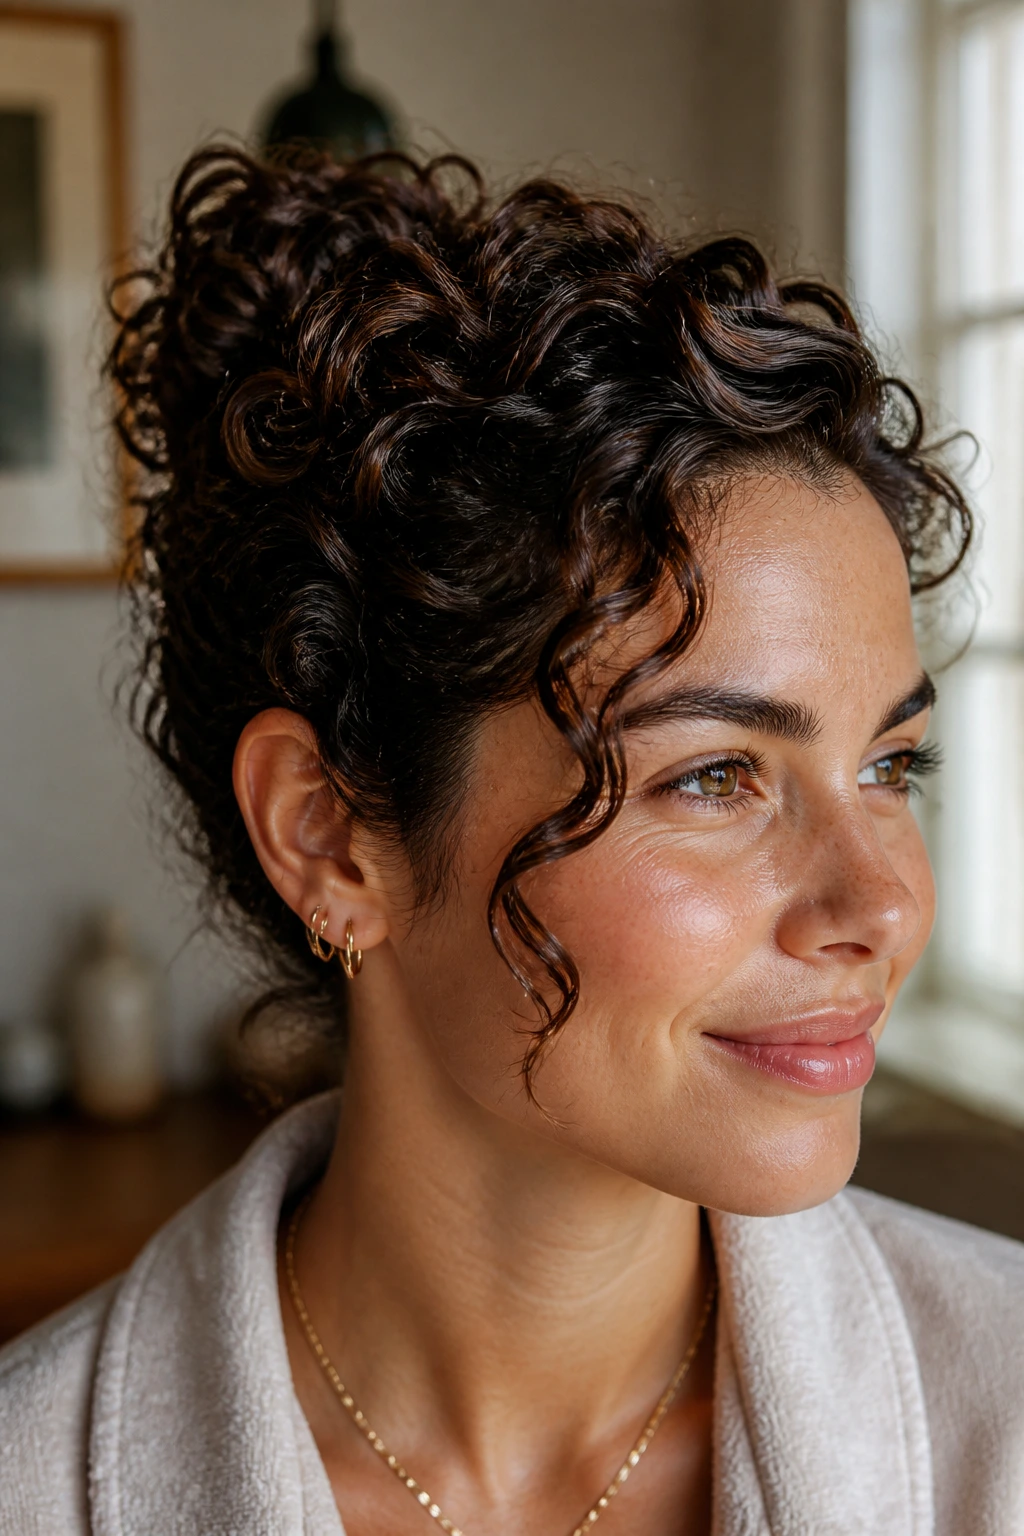
This is the style I reach for when the curls are short but still have enough lift to sit high. The hair gathers at the crown, the sides stay smooth, and the ends make a little puff instead of a long ponytail. It looks intentional, not like you ran out of length halfway through.
The trick is placement. Bring the hair up with your hands, not a brush, and secure it with a small elastic that won’t snag. Then fan the curls around the base so the puff has shape. If your layers are shorter, pin the loose pieces under the elastic with two crossed bobby pins. That tiny cross matters. One pin alone tends to slide.
This style works best on second-day curls or on hair that has been refreshed with a mist of water and a pea-size amount of leave-in. Too much slip and the puff loses its hold. Too little moisture and the curls feel frizzy at the crown, which is a different kind of mess entirely.
2. Low Coil Chignon
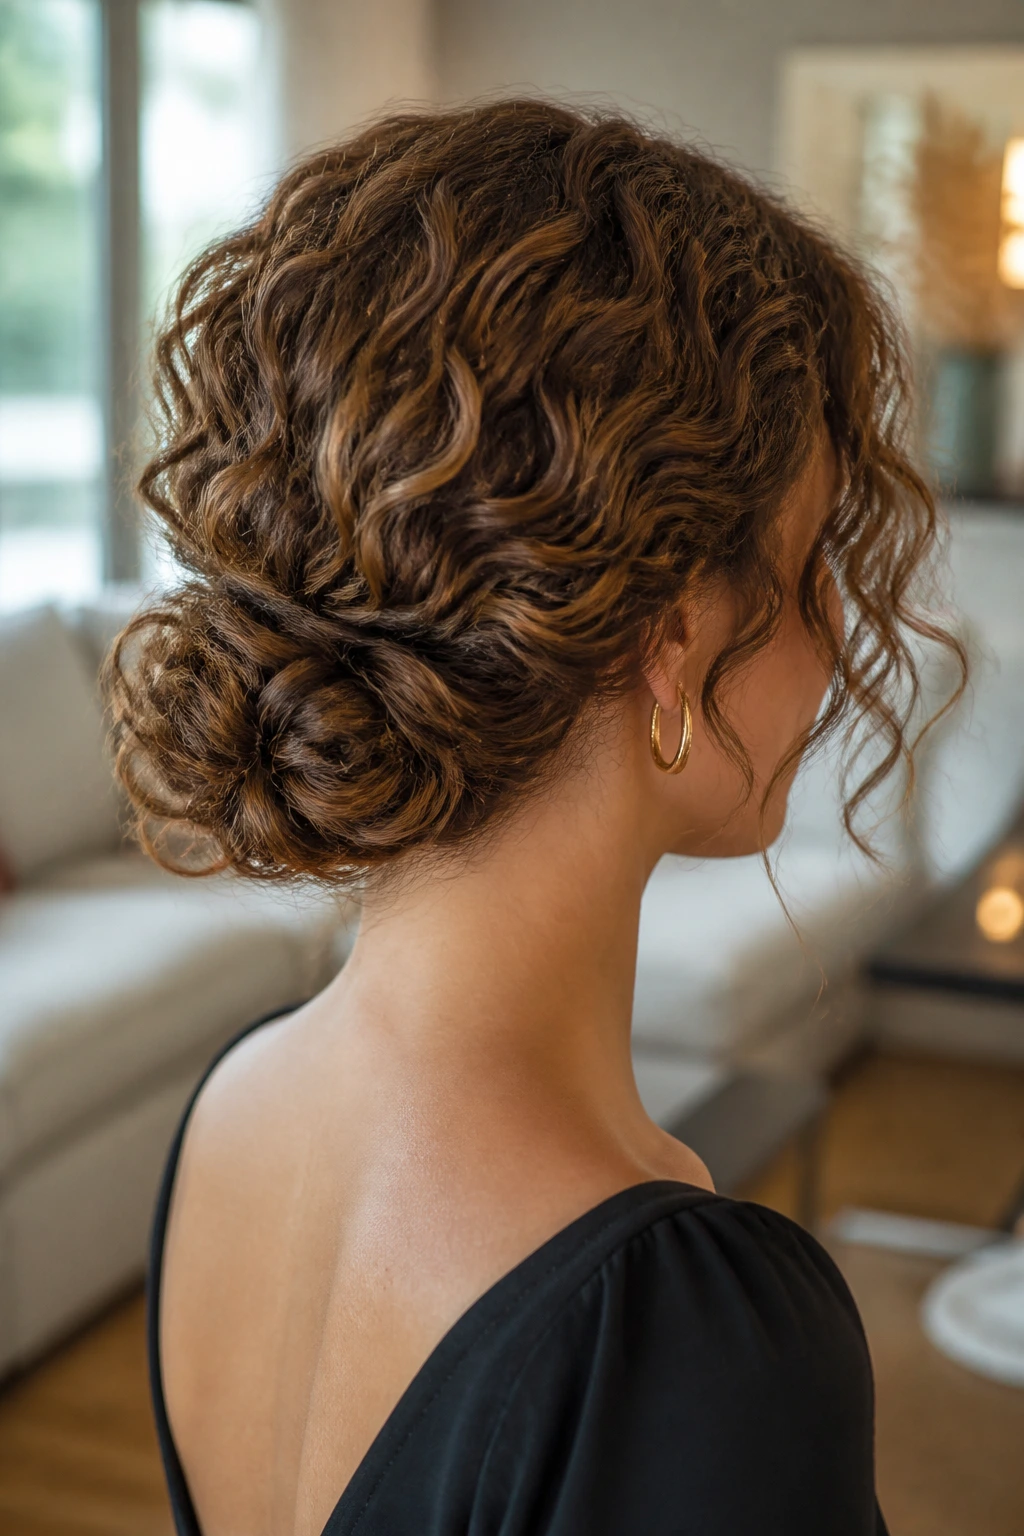
A low coil chignon gives short curly hair that neat, tucked look without flattening everything into a hard shell. It sits near the nape, where short curls can actually gather into something that looks like a real knot. The finish is soft and compact, with just enough texture to keep it from feeling severe.
Start by dividing the back section into two or three loose twists. Wrap each twist around itself, then pin the coil into a low cluster. Use U-pins if your curls are dense; they hold a curved shape better than a single straight pin. If your hair is fine, two or three crossed bobby pins can do the job, but place them under the coil so they disappear.
What I like here is the balance: polished from the front, textured from the side, and stable enough to last through a dinner, a workday, or a long car ride with the windows down.
3. Twisted Crown Half-Up
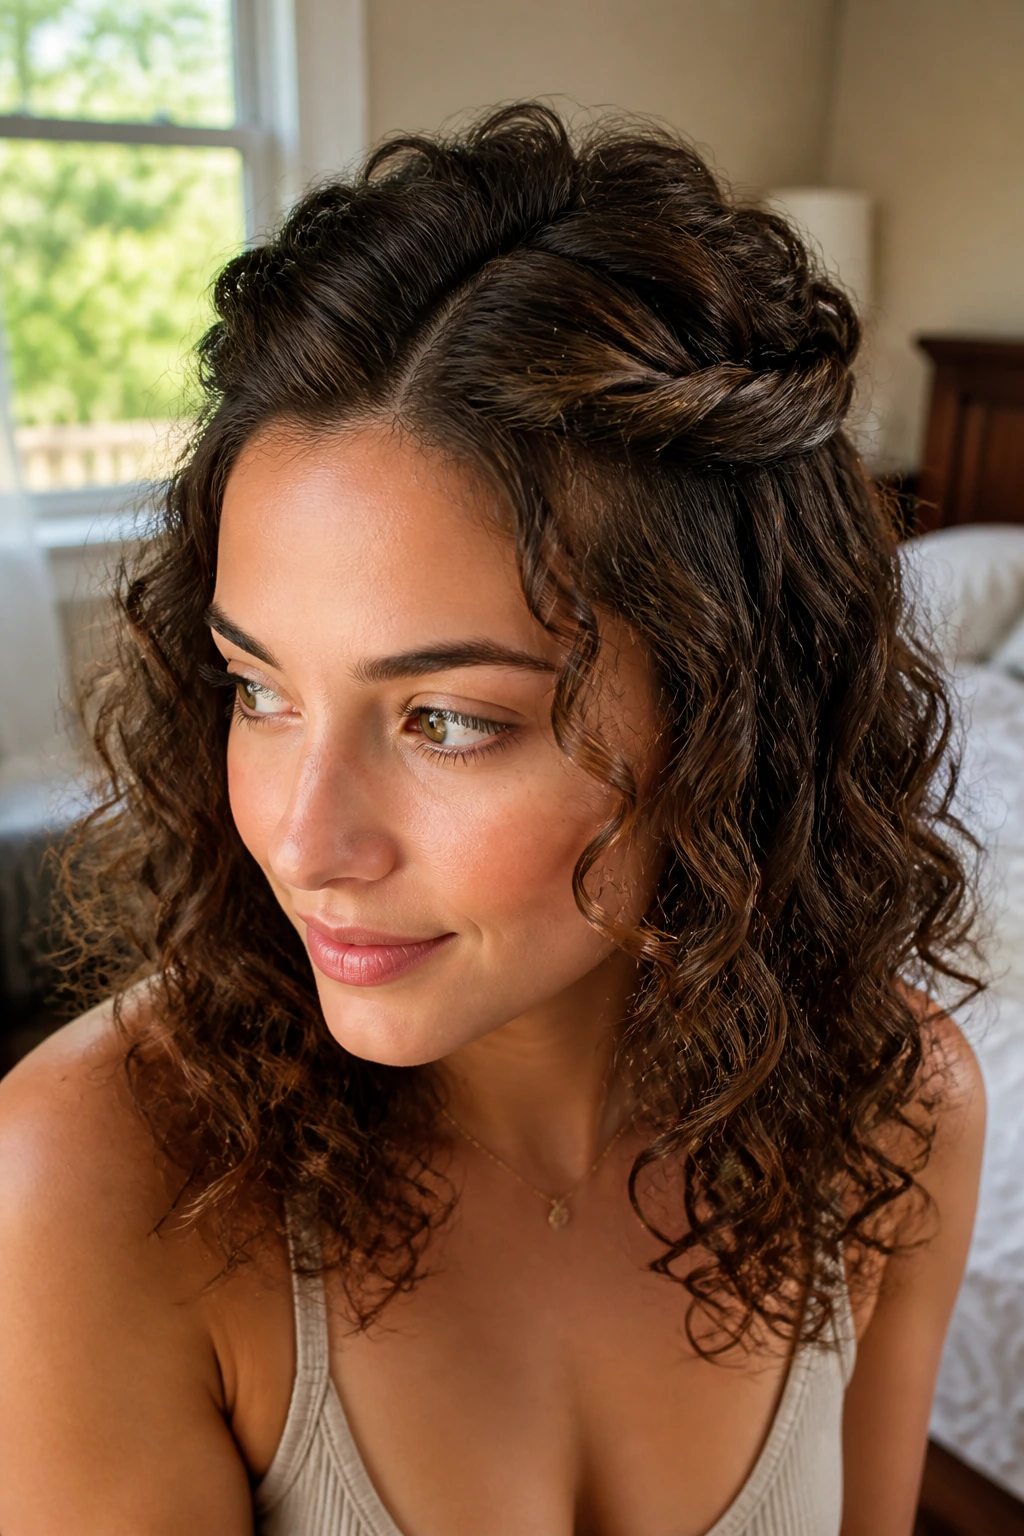
Short curly hair sometimes looks best when you leave most of it alone. This style proves it. Two side sections twist back from the temples and meet near the crown, leaving the rest of the curls loose so the shape doesn’t feel cramped.
The look is useful because it gives you control without swallowing the whole cut. If your layers are too short for a full updo, this one still gives you lift at the top and keeps the front off your face. Pin each twist with the curved side of the bobby pin facing down toward the scalp. That direction helps the pin catch the hair instead of skimming off it.
A small claw clip can replace the pins if your hair is thick enough to fill it. I prefer pins for finer curls because they disappear more easily. Leave one curl at the temples if you want softness, or pull both sides tight if you want the crown to look cleaner.
4. Side-Swept Roll and Pin
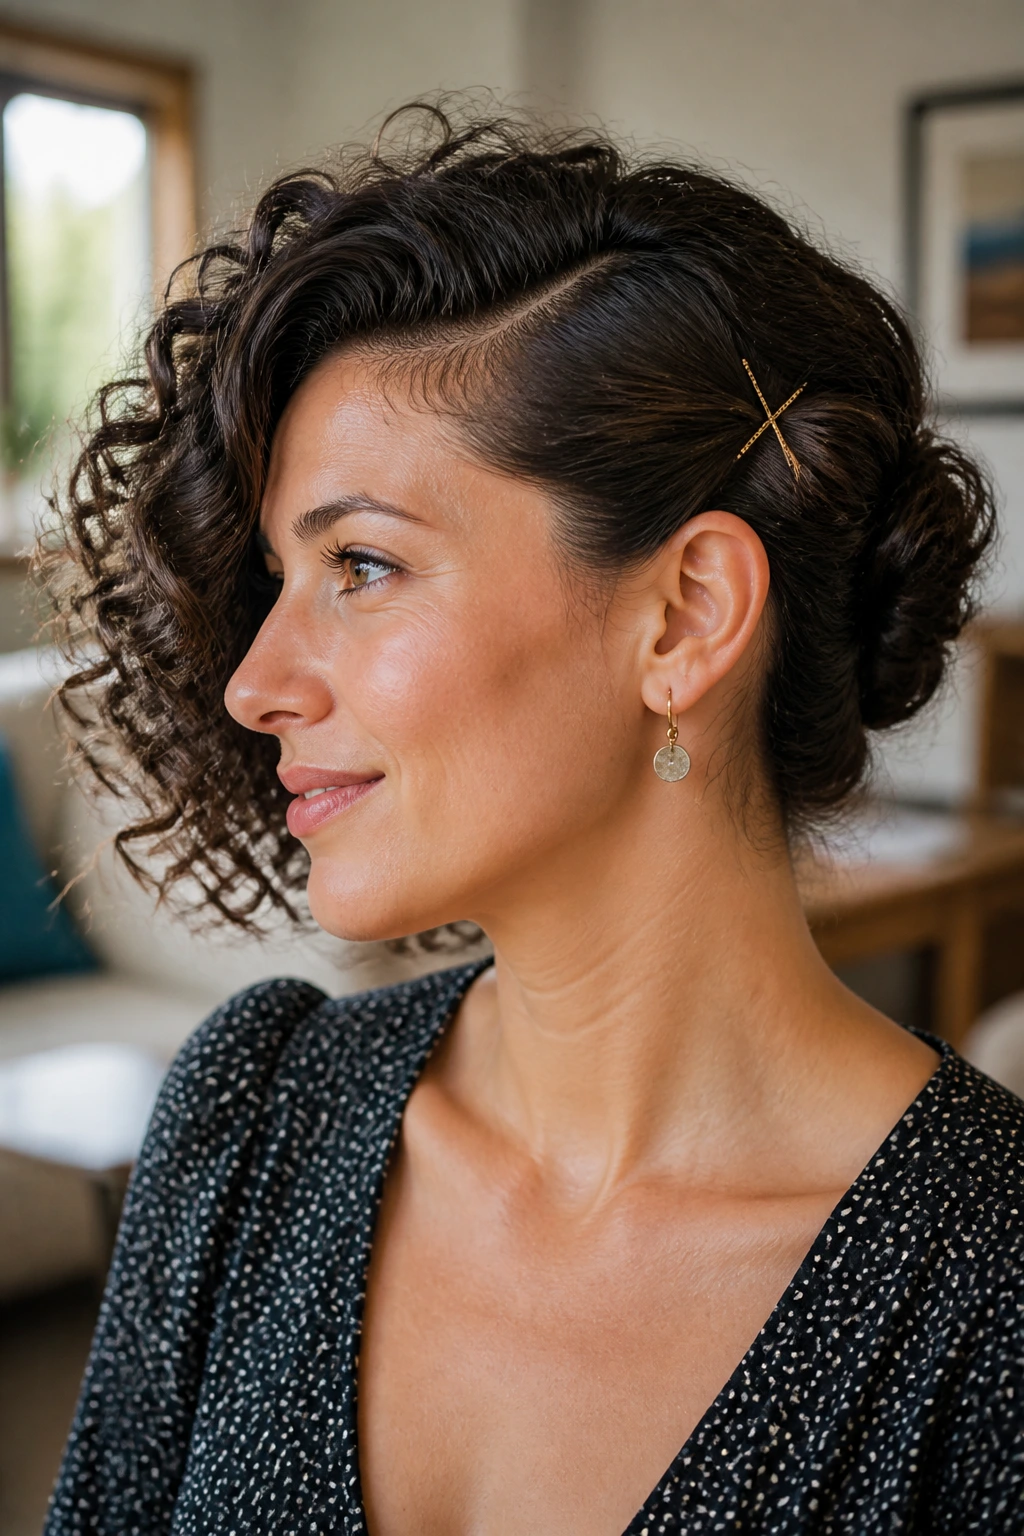
A deep side part changes everything here. One side gets rolled back in a loose sweep, then pinned low behind the ear, while the other side keeps its curl volume. The result is a shape with a little drama and a lot of ease.
This works especially well when one side of your haircut is longer than the other, which happens more often than people admit. Instead of forcing symmetry, let the longer side do the visual work. Roll the hair backward with your fingers, tuck the ends under, and secure the roll with two pins placed in an X. If you want a smoother finish, smooth only the top layer with a touch of gel. Leave the underneath texture alone.
It’s a clean style, but not a stiff one. That matters. Curly hair looks better when the movement is still visible.
5. Curly Faux Hawk
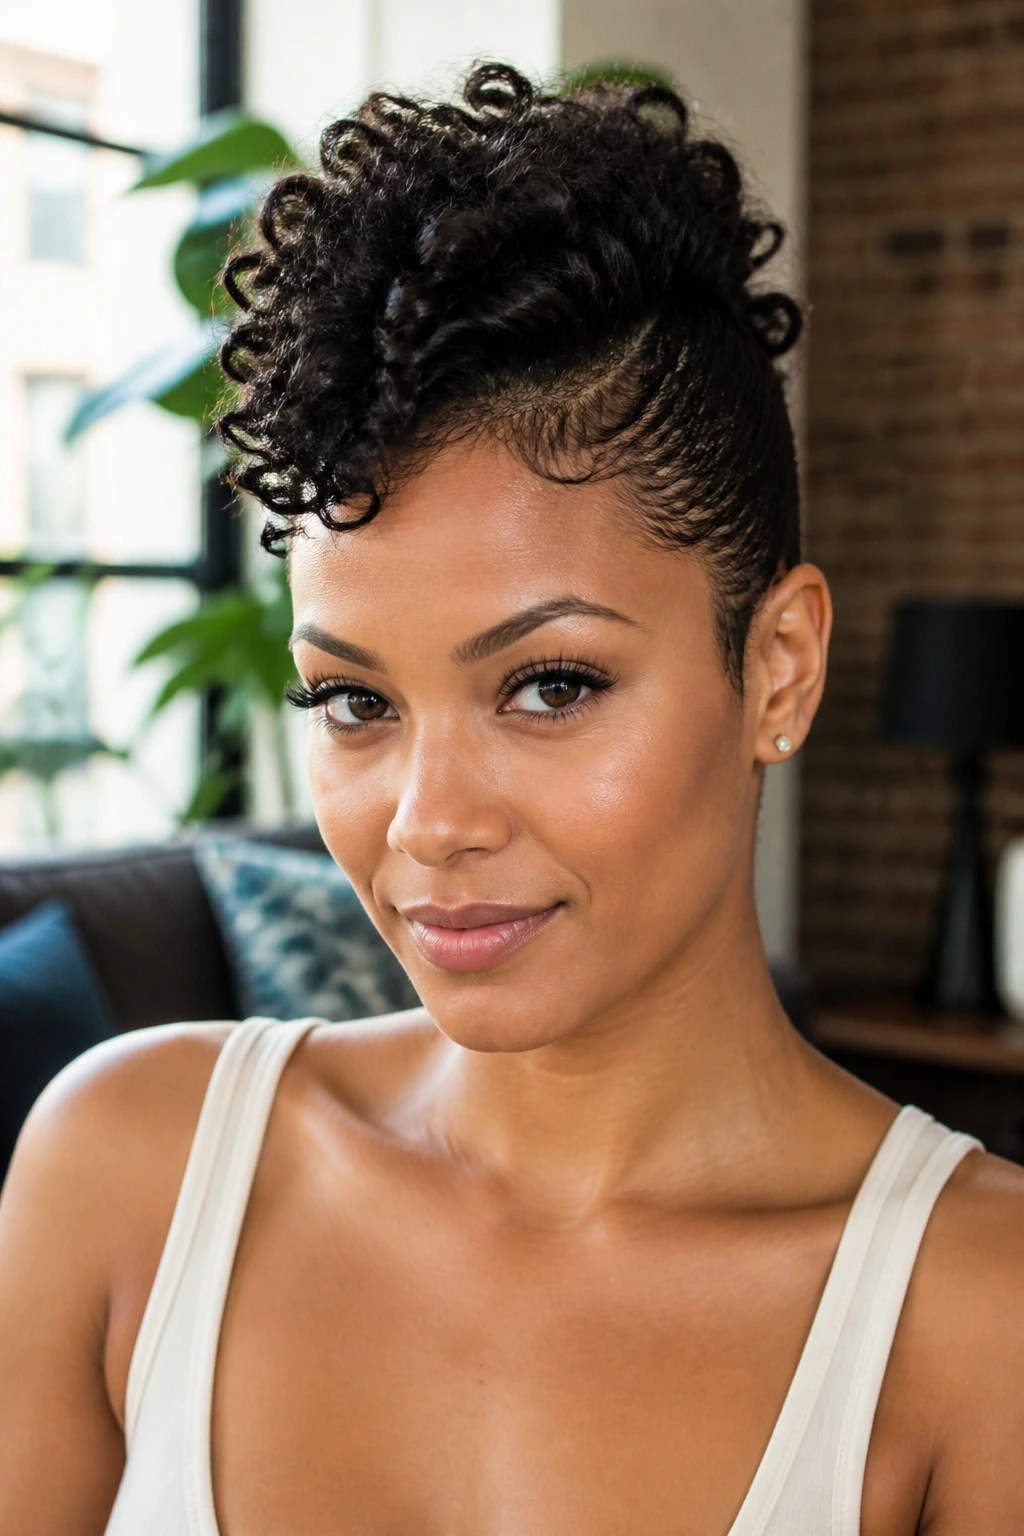
If you want a short curly updo that has attitude, this is the one. The sides get pinned down tight, the center strip stays high, and the whole thing reads as a curly ridge running from forehead to nape. It’s sharper than a puff and less fussy than a full bun.
The structure is simple. Flatten the sides with your palms and a little gel, then pin them back in small sections. Don’t try to make one giant smooth panel. That usually fails. Four to six small pins on each side hold better and hide more easily in dense curls. Once the sides are anchored, lift the center curls with your fingers so they form height rather than a flat mound.
This style is especially good for tighter curls and coils, because the center strip already has enough spring to stand up. The sides may need a mist of water first if they’ve dried in a weird shape. Short hair doesn’t forgive rough handling, so go gently.
6. Double Space Buns
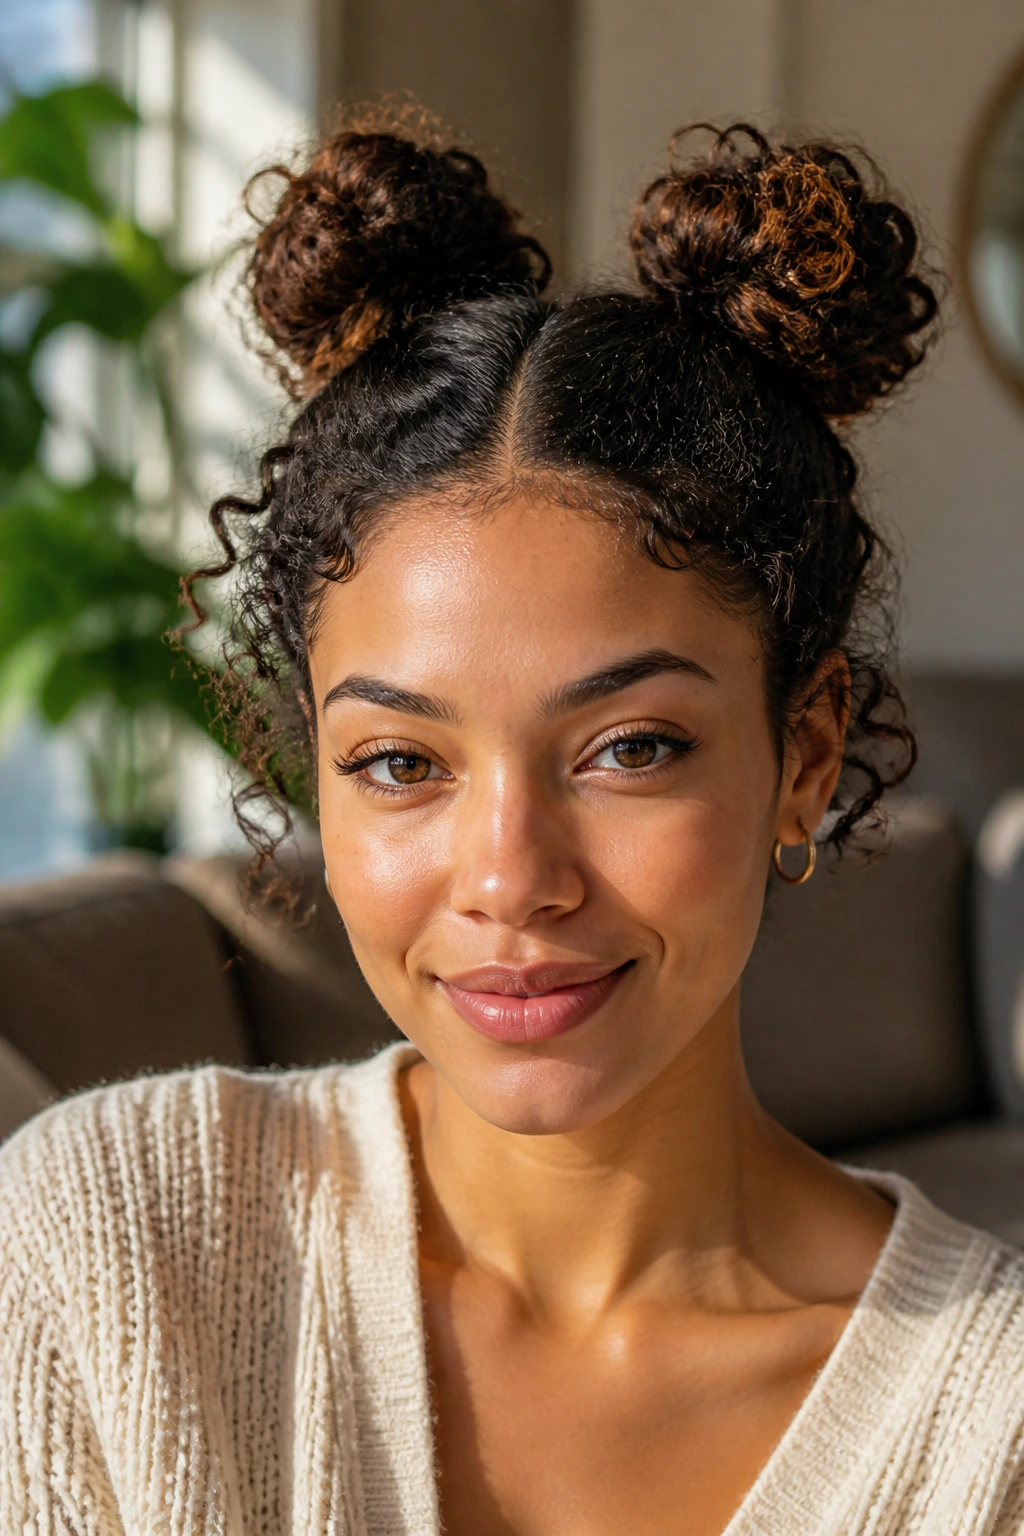
Two mini buns can be a lifesaver when your curls are too short for one big knot. They don’t need to be identical. In fact, the slightly uneven versions often look better because they preserve the texture instead of trying to copy a cartoon-perfect shape.
Part the hair down the middle. Gather each side into a small bun high on the head or a little above the ears, depending on how much length you have. Use tiny elastics first, then wrap the ends around the base and pin them in place. If the ends refuse to stay tucked, twist them once before pinning. That extra twist gives the bun a bit more hold.
This style works best when the hair has enough density to make the buns look full. Fine curls can still do it, but you may want to fluff the base gently with your fingertips so the buns don’t look pinched.
7. Mini French Roll
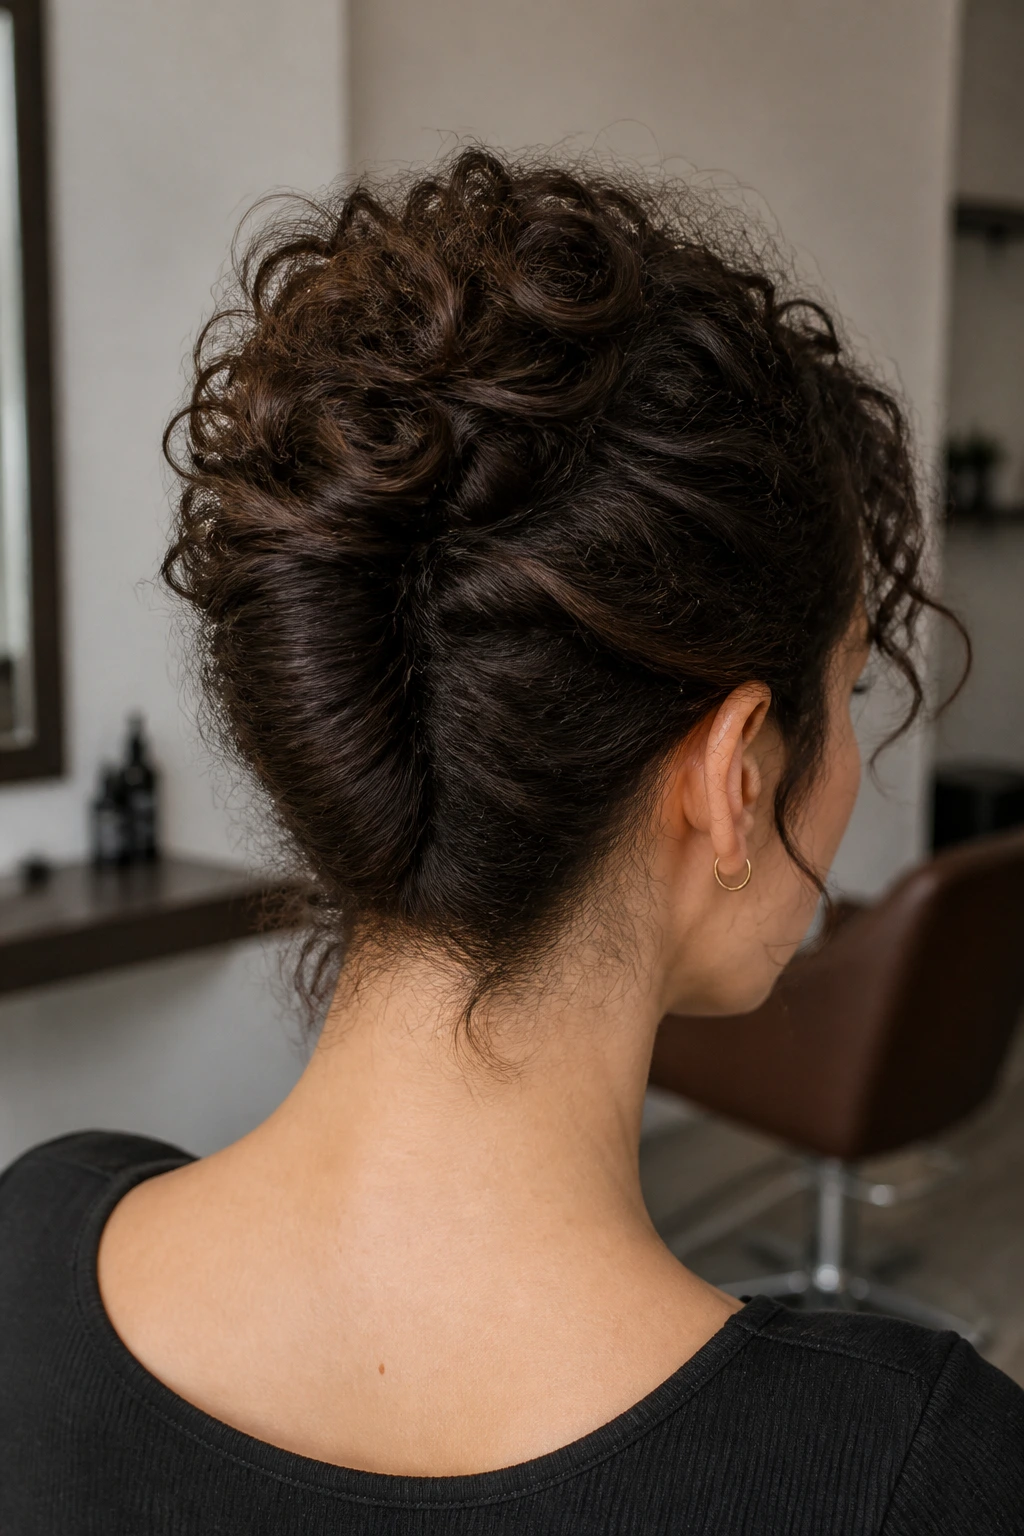
A full French roll can be too much ask for short curls. A mini version, though, is a different story. This one folds the back section inward and upward, creating a narrow roll that sits close to the head without erasing the curl pattern at the top.
I like this style for neck-length curly cuts and grown-out pixies, because it gives shape where the hair is longest and leaves the front soft. Gather the back section, twist it inward, and pin along the seam of the roll. The key is to keep the roll low and narrow. If you try to make it too wide, the curl ends pop out at the sides and the whole thing looks awkward.
A little styling foam at the roots can help if your hair is slippery. Use just enough to give the section some grip. Too much and the roll gets crunchy. Nobody needs that.
8. Nape Knot with Hidden Pins
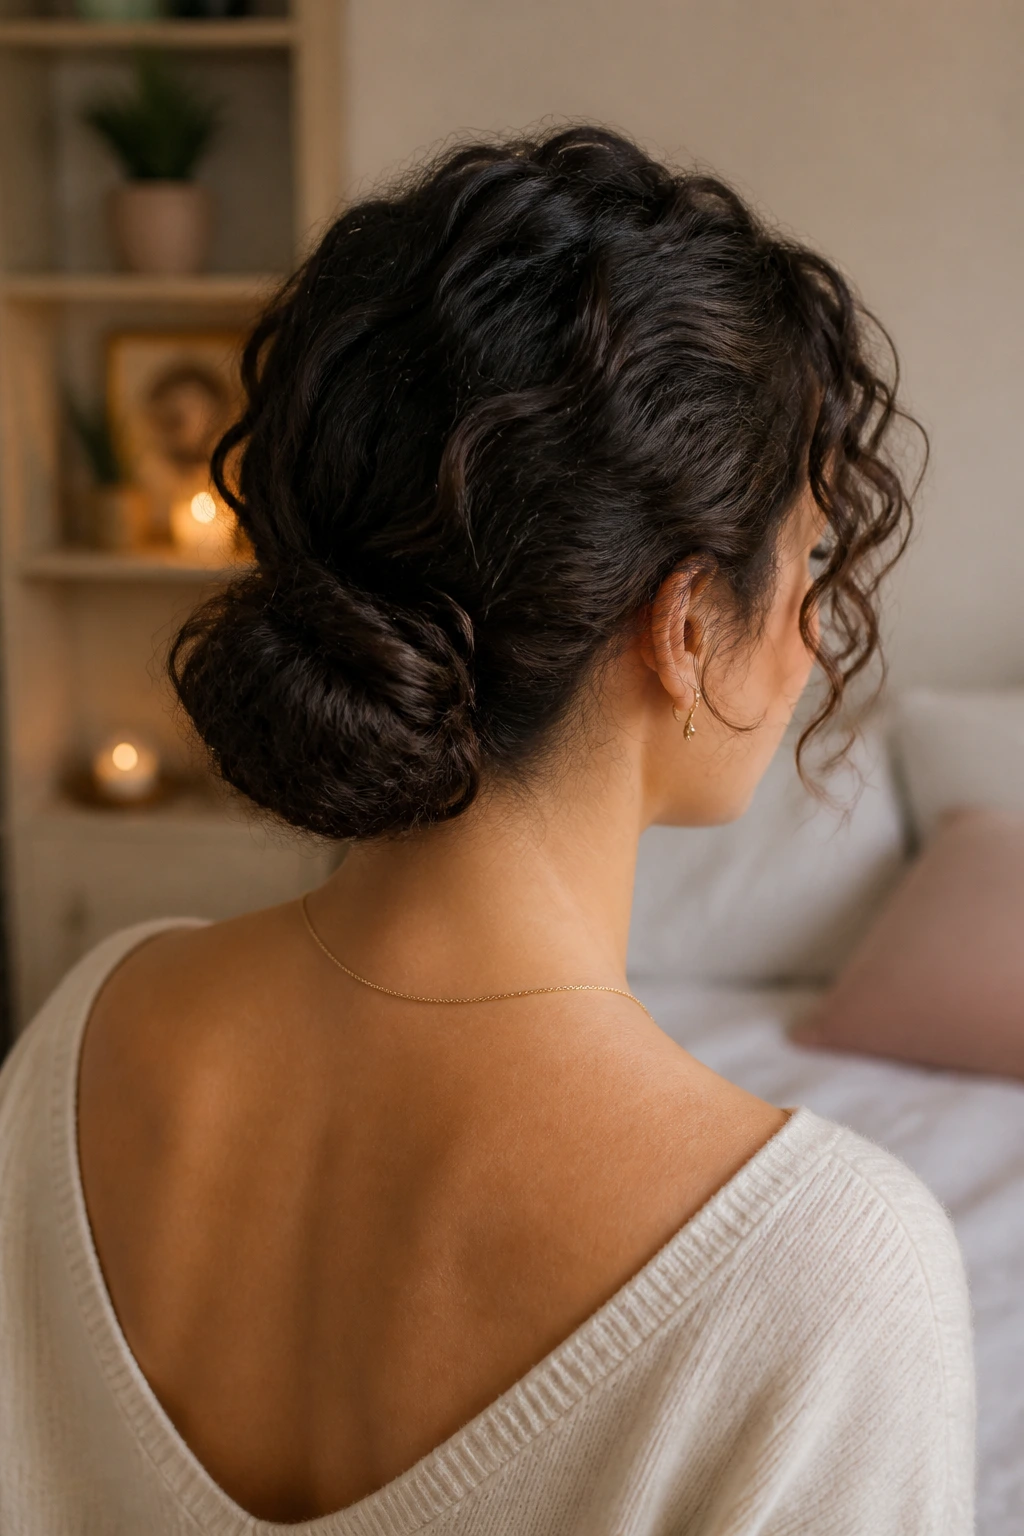
This is the sort of style that looks casual until you notice how neatly it sits. The hair gathers low at the nape, twists into a knot, and gets pinned underneath so the pins disappear into the curl mass. From the front, you mostly see shape. From the back, you see a tidy coil with texture.
The best version starts with slightly stretched curls. Freshly shrunken hair can be too bouncy to tuck cleanly. Pull the hair back with your hands, twist once, then wrap the ends around the base and tuck them under the knot. Use U-pins if the knot feels dense, because they hold curved bundles better than a single bobby pin. Cross two pins where the twist meets the scalp. That stops the knot from rotating.
It’s a quiet style, but not boring. There’s a difference. Quiet styles leave room for the curl pattern to do its work.
9. Halo Twist with Face-Framing Curls
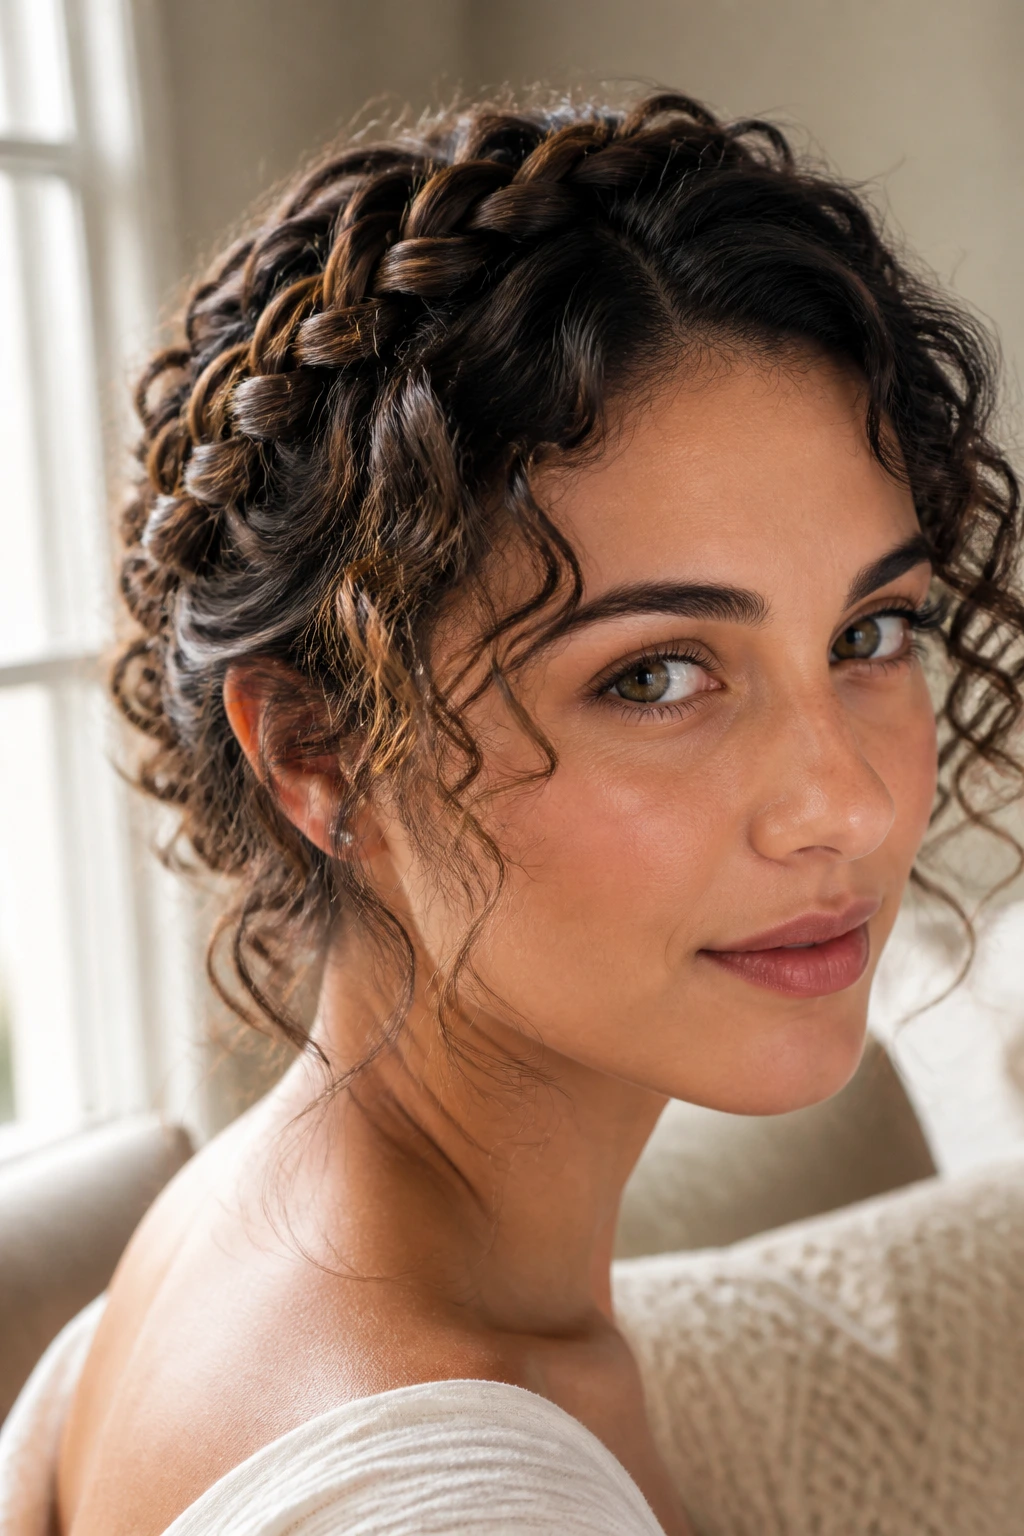
Picture a soft crown made from twists instead of braids. That’s the shape here. Two side sections travel around the head like a halo, while the front keeps a few loose curls around the cheeks and temples. The effect is gentle and a little romantic without getting precious about it.
This is one of the better short curly hair updos when you want the hair off your neck but don’t want to lose all the movement around your face. Twist each side section backward, guide it around the head, and pin the ends behind the ears or at the back of the crown. Leave the front curls out if you want softness. Pull them all the way back if you want a more contained line.
A detail that matters: don’t over-tighten the twists. If they’re pulled too hard, they spring open and look thin. Keep them snug, not strained. Curly hair tells on tension fast.
10. Topknot with Loose Tendrils
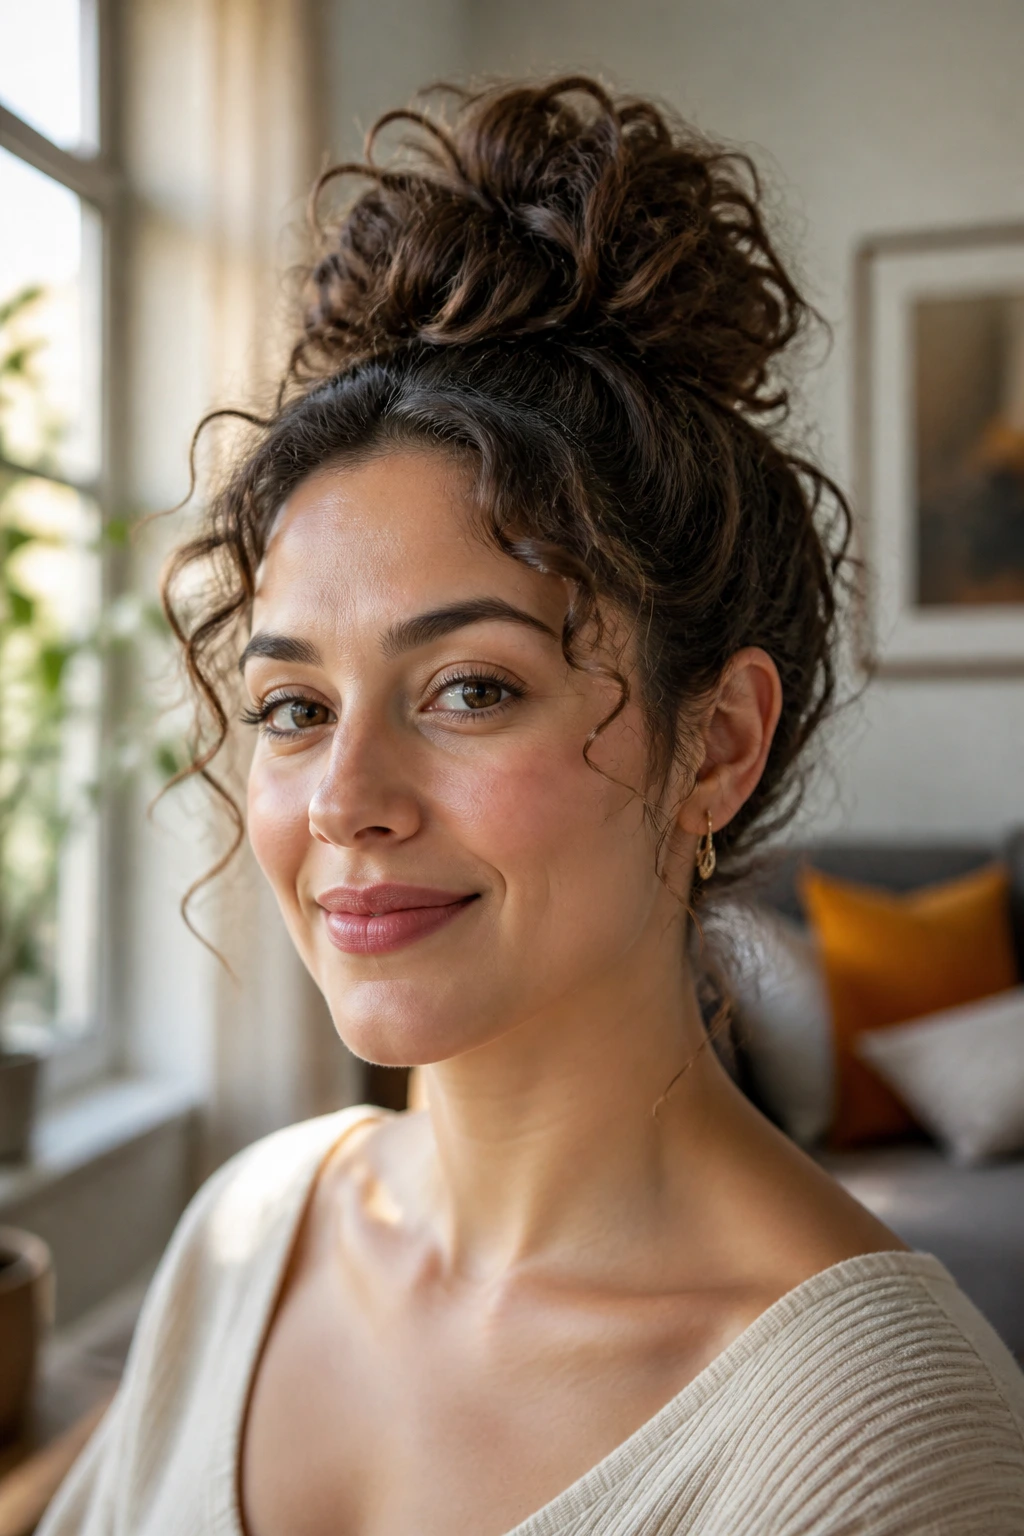
A true high topknot on short curls is usually a mini version of the long-hair style, and that’s fine. The charm is in the height, not the size. A few loose tendrils at the sides keep the look from feeling severe.
Gather the highest section you can safely lift without yanking the roots. Secure it with a small elastic, twist the tail around the base, and pin the bun in place with two or three bobby pins. Leave the lower curls alone. They can sit free at the neck or be tucked loosely behind the ears.
This one is especially useful for washday curls that have too much volume to lie flat but still need to stay off the face. It’s quick, and it survives a surprising amount of movement if you anchor the base well. The loose tendrils soften the silhouette, which helps when the updo is small and the head shape is doing most of the visual work.
11. Flat-Twist Crown Bun
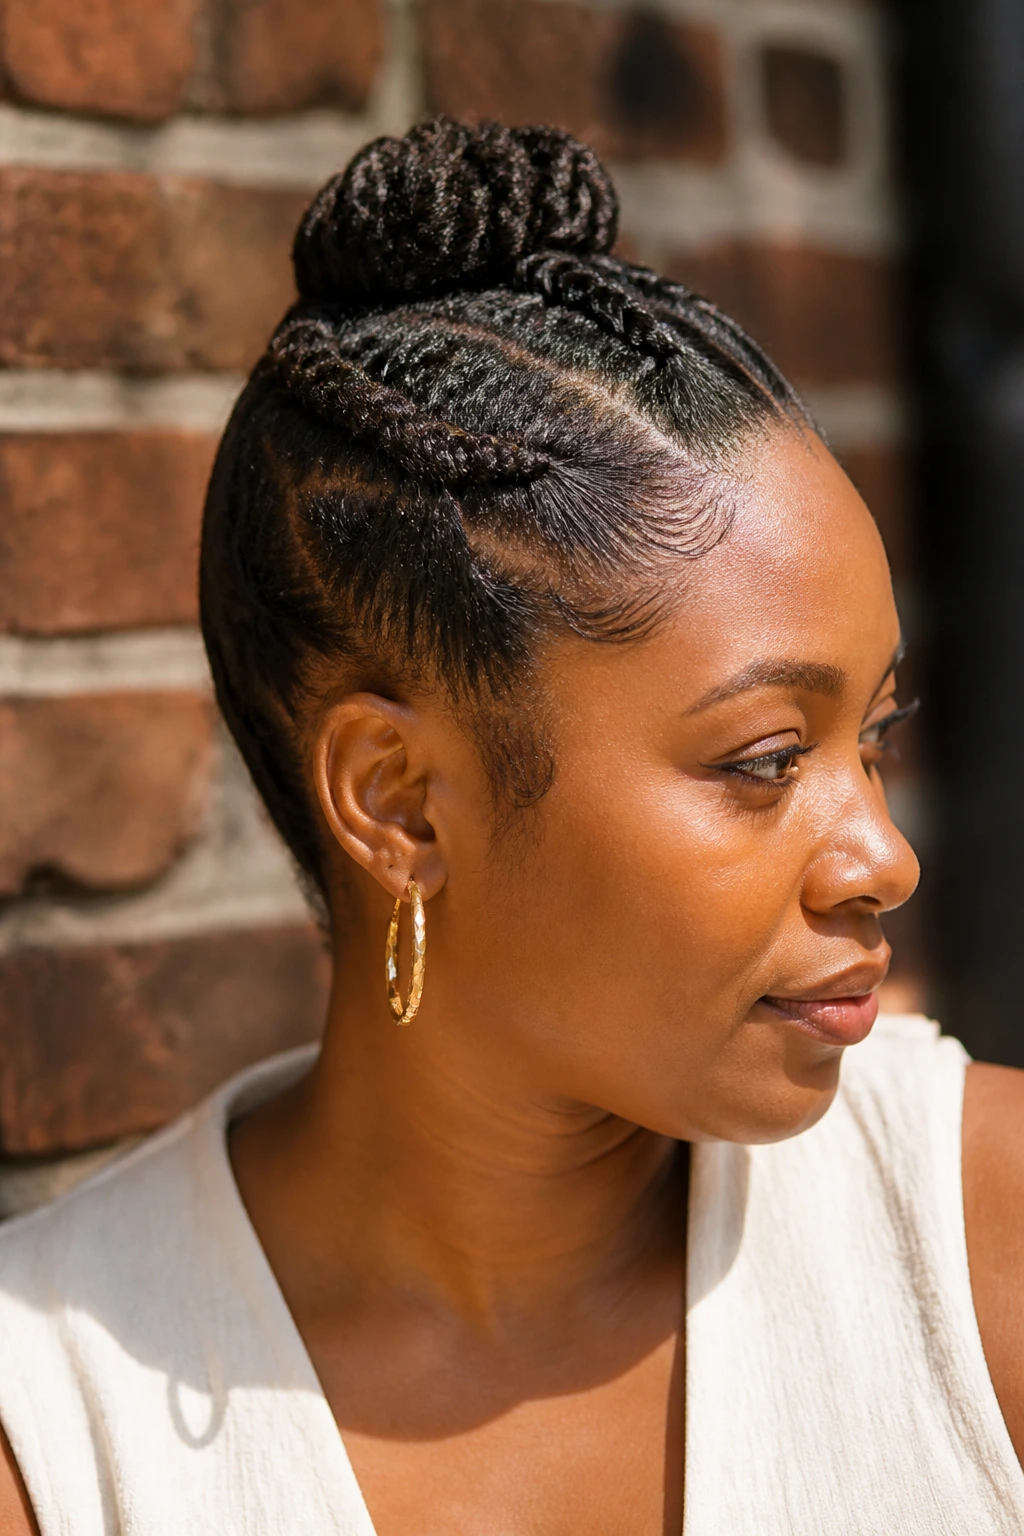
This style has a little more structure than a simple twist, and that’s the appeal. Two flat twists begin at the hairline, travel back along the head, and meet at the crown or upper nape, where the remaining hair gets tucked into a small bun. It feels tidy, but not tight.
Flat twists are useful on short curls because they hold the edges in place and create a clean path for the rest of the style. Apply a thin line of gel along the parting, then divide the hair into two sections. Keep each twist close to the scalp as you work backward. When the twists meet, gather the ends into a bun or coil and pin them down.
I prefer this for coily textures and dense curls. The structure keeps the style from puffing out at the sides after an hour or two. If your hair is fine, use fewer products and more pins; if it’s thick, do the reverse. One style, two very different approaches.
12. Vintage Pin-Up Roll
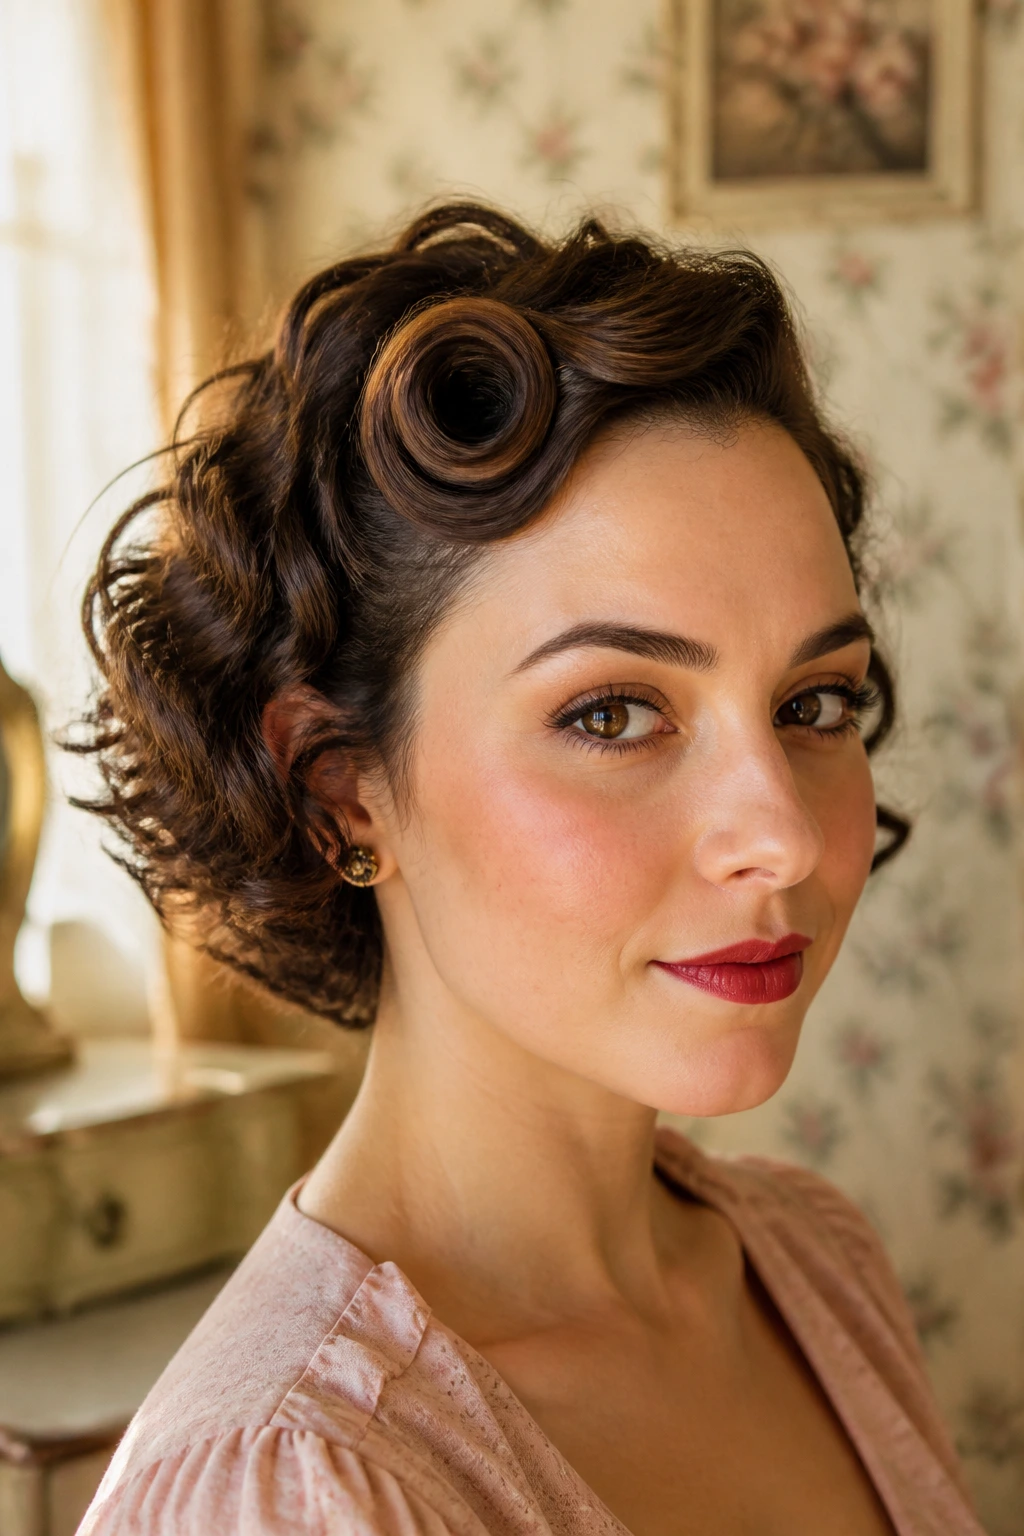
There’s something satisfying about a roll that sits near the forehead or temple and gives short curls a little old-school polish. It’s a small gesture, not a full retro costume. That’s what makes it wearable.
Take a front section, smooth the outer layer with your fingers, and roll it inward or to the side, depending on where you want the emphasis. Pin the roll flat against the head and let the rest of the curls stay loose or gather into a small back knot. The front roll becomes the detail. It does not need to dominate the whole style.
This one is especially useful when the back of your hair is too short for a full updo but the front has enough length to shape. It also hides awkward grow-out around the hairline, which is more common than people admit. A small decorative clip works well here, but only if it doesn’t snag the curls underneath.
13. Scarf-Wrapped Puff
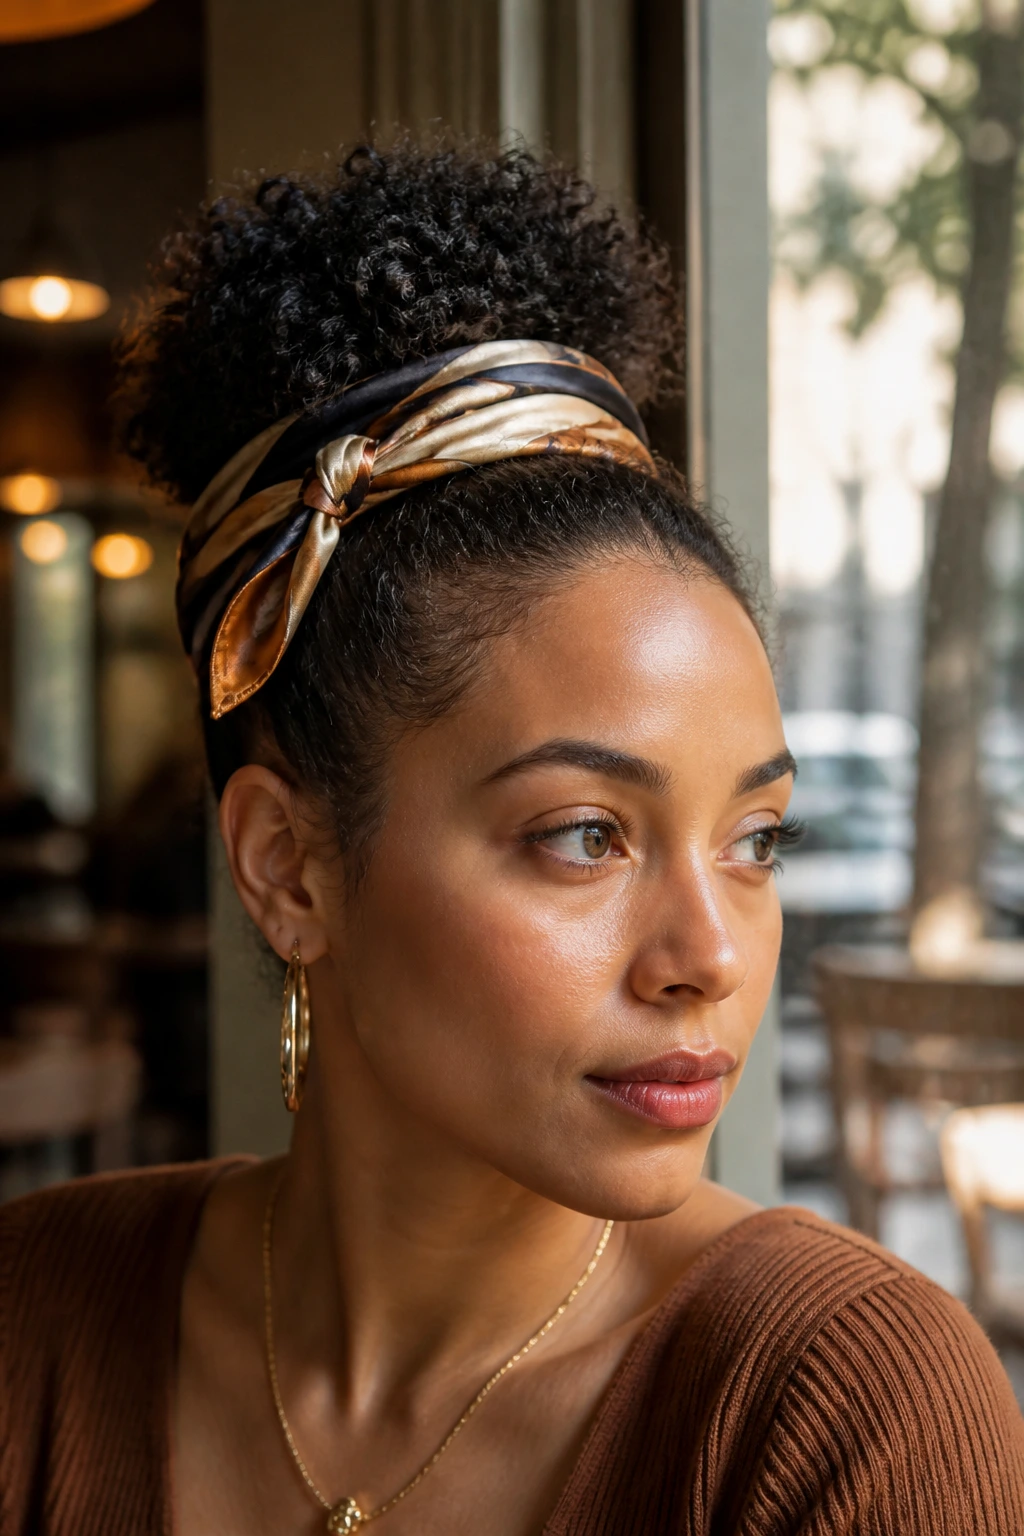
A scarf can rescue a style that’s started to frizz or one that needs a cleaner finish without more pins. Wrap it around the base of a puff, knot it at the side, or fold it into the hairline to frame the crown. The curls stay visible, but the scarf gives the whole look a defined edge.
I like silk or satin scarves here because they slide less and create less friction around the hairline. Cotton can work, but it tends to grab and flatten the front. Gather the curls into a puff first, then place the scarf where the elastic sits or slightly above it. If you want a fuller crown, fluff the top after tying the scarf so the hair doesn’t look squeezed.
This is one of the easiest ways to turn a simple curly puff into something that feels deliberate. And when the weather is dry or the curls are poofing in different directions, the scarf gives you control without having to start over.
14. Rope-Twist Crown Bun
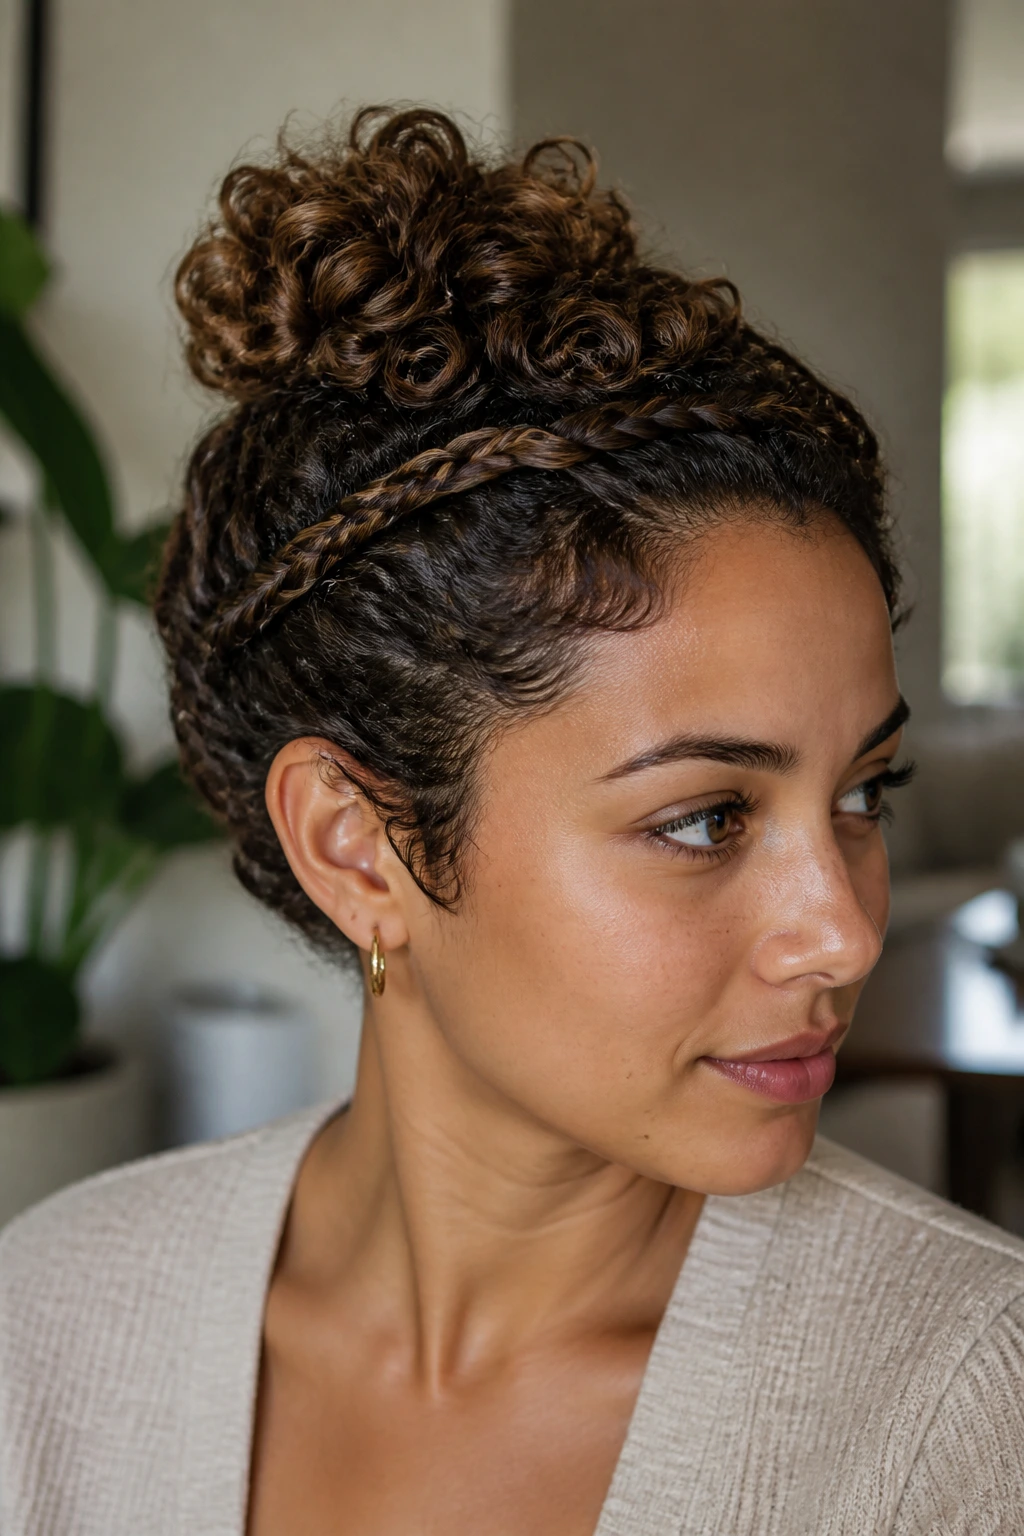
Rope twists have a cleaner line than loose twists, which makes them useful for short hair that needs a bit more discipline. The two sections are twisted around each other, then guided toward the crown and tucked into a compact bun. The result is neat, textured, and a little more formal than a basic twist-up.
The rope twist holds especially well on day-two curls because the hair has enough friction to stay together. Separate the section into two strands, twist each one in the same direction, then wrap them together in the opposite direction. That cross-action keeps the twist from unraveling. Once you reach the crown, coil the ends and pin them under the bun.
If your curls are loose, a touch of mousse can help. If they’re dense, skip the extra product and use more pins instead. The twist itself gives you enough visual detail; you do not need to pile on more.
15. Bubble Ponytail for Short Curls
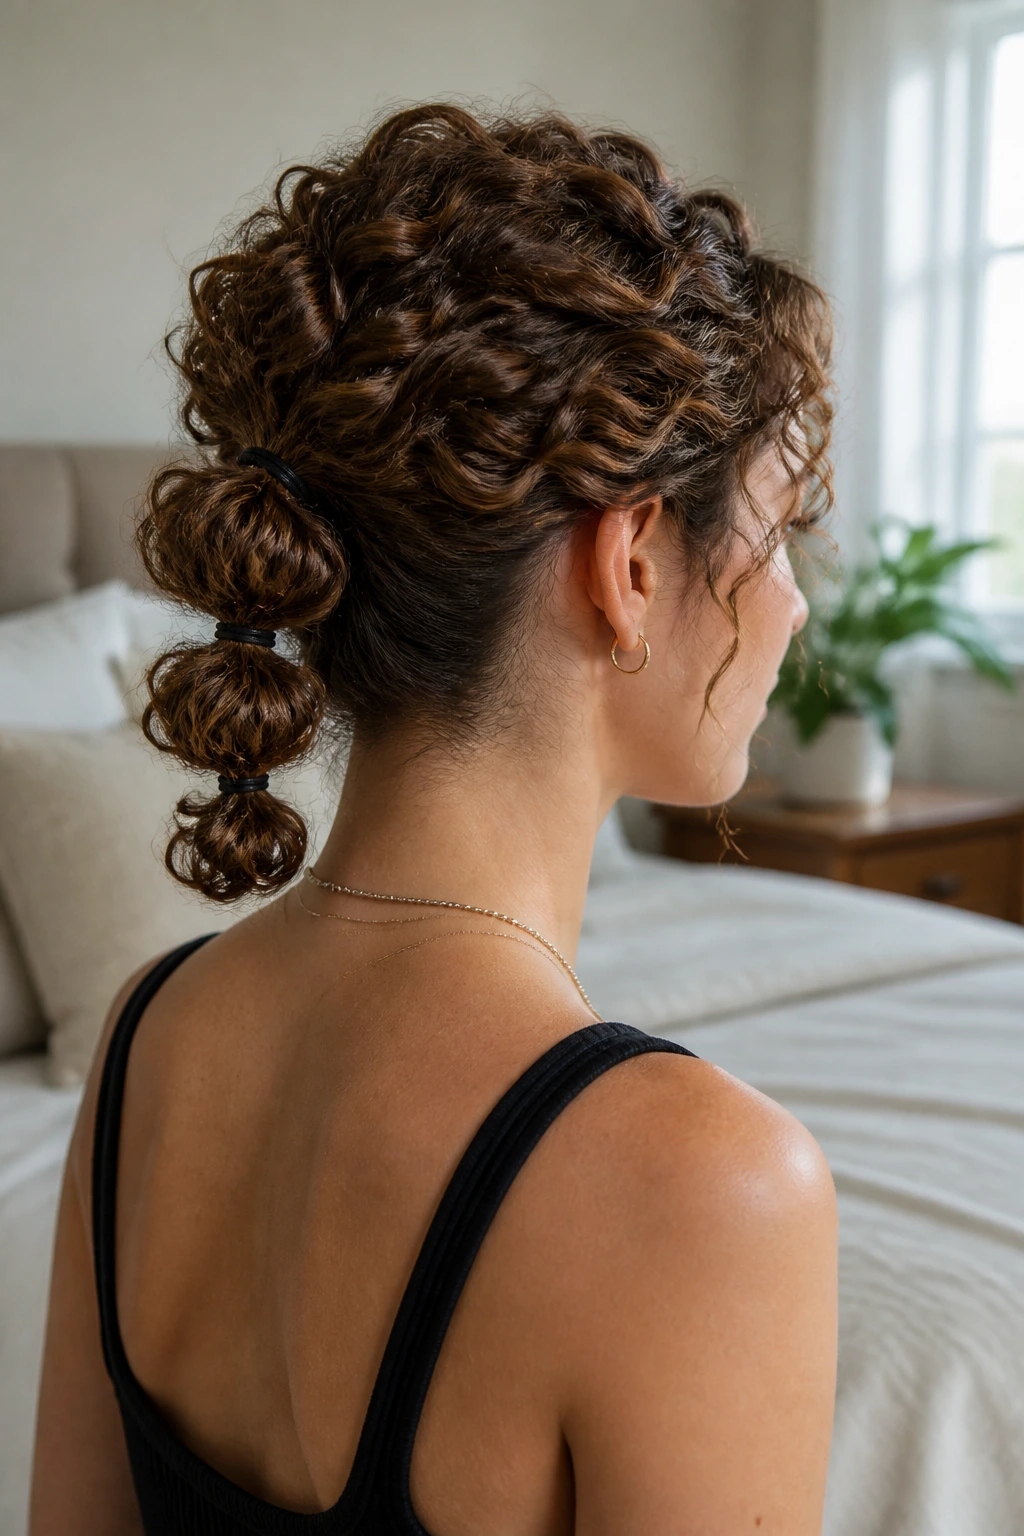
A short curly bubble ponytail does not need to look like the long version from social media. In fact, the smaller scale often looks better. The hair gets gathered into a short puff or pony, then divided into one or two “bubbles” with tiny elastics spaced a few inches apart.
This style is a good answer when your curls are too short for a real ponytail but long enough to gather into sections. After securing the base, place another elastic a short distance down the tail. Gently tug each section outward so it forms a rounded bubble. If the ends are short, tuck them back into the top bubble and pin them under. That keeps the style from looking chopped off.
It’s playful and practical. Also, it holds better than people expect, because the elastic sections reduce the weight pulling on the base. On curly hair, that matters a lot. The texture fills out the bubbles without much effort.
16. Side Bun with a Deep Part
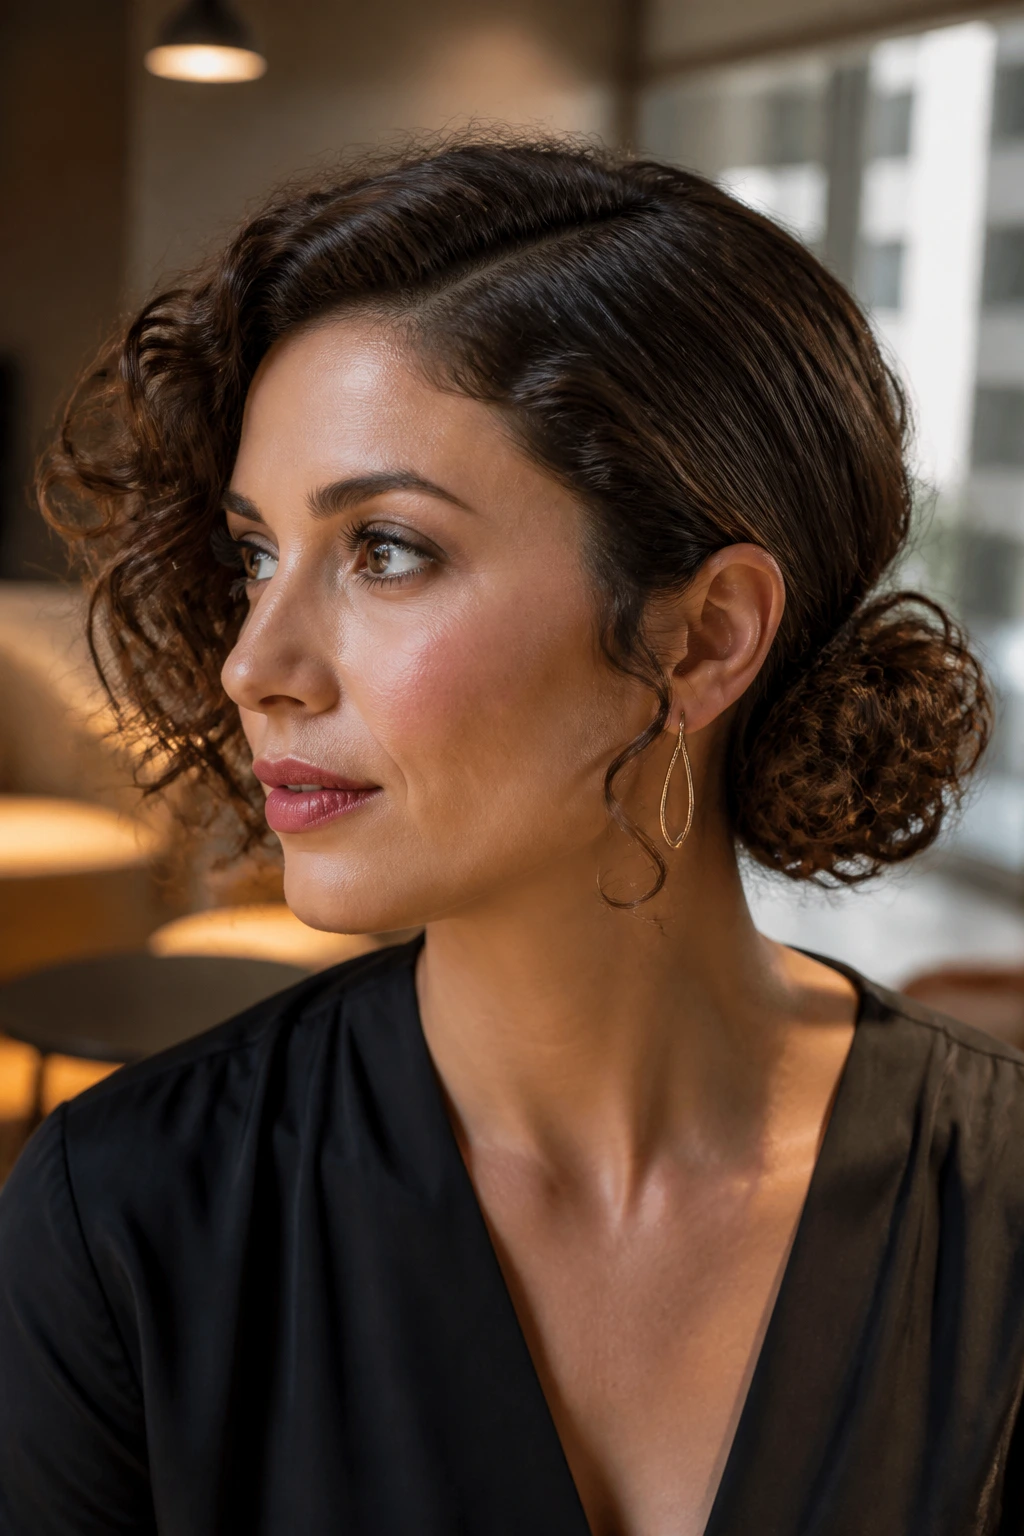
A deep side part gives a low side bun more personality than the plain centered version. One side sits sleek against the head, while the bun gathers just behind the ear on the heavier side. The shape feels a little grown-up, which sounds dull until you see how good it looks with curls.
Sweep the hair into the lower side, twist it once, and build the bun close to the scalp so it does not sag. Pin the underside first. Then pin the outer curve. That order keeps the bun from flattening while you work. If the curls around the face are short, let one or two of them fall loose instead of forcing them into the bun. The asymmetry helps the cut look intentional.
This is a strong option for work dinners, formal lunches, or any day when you want the curls to stay present but not in your mouth.
17. Rope-Twist Nape Knot
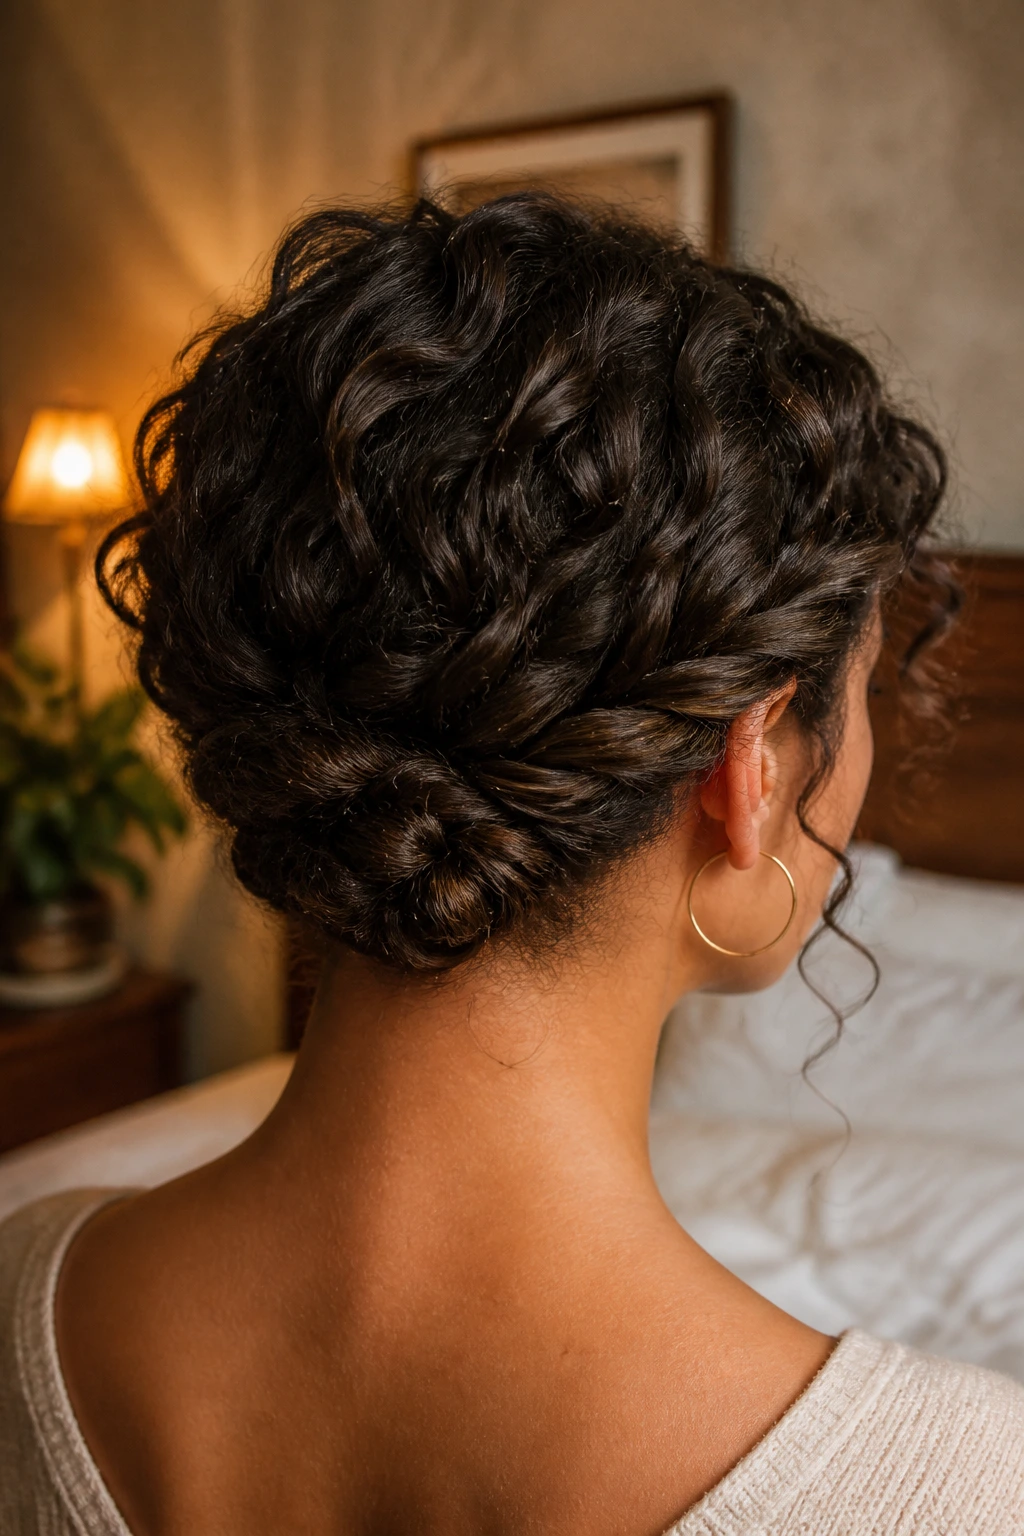
This one sits lower and feels more compact than the crown version. Two rope twists travel back along the sides, meet at the nape, and wrap into a knot that hugs the neck. It’s tidy without being severe, and short curls usually cooperate better here because the center of gravity stays low.
The rope twist gives the knot a little body, which helps if your hair is layered. Once the twists arrive at the nape, fold the ends into a small coil and pin them in a half-circle around the knot. If the knot feels too loose, add one pin vertically through the center. That one pin often makes the difference between a style that lasts and one that slowly drops.
This is the kind of updo that looks more complicated than it is. I like that. It keeps the process simple while still giving you a finished shape.
18. Curly Mohawk Updo
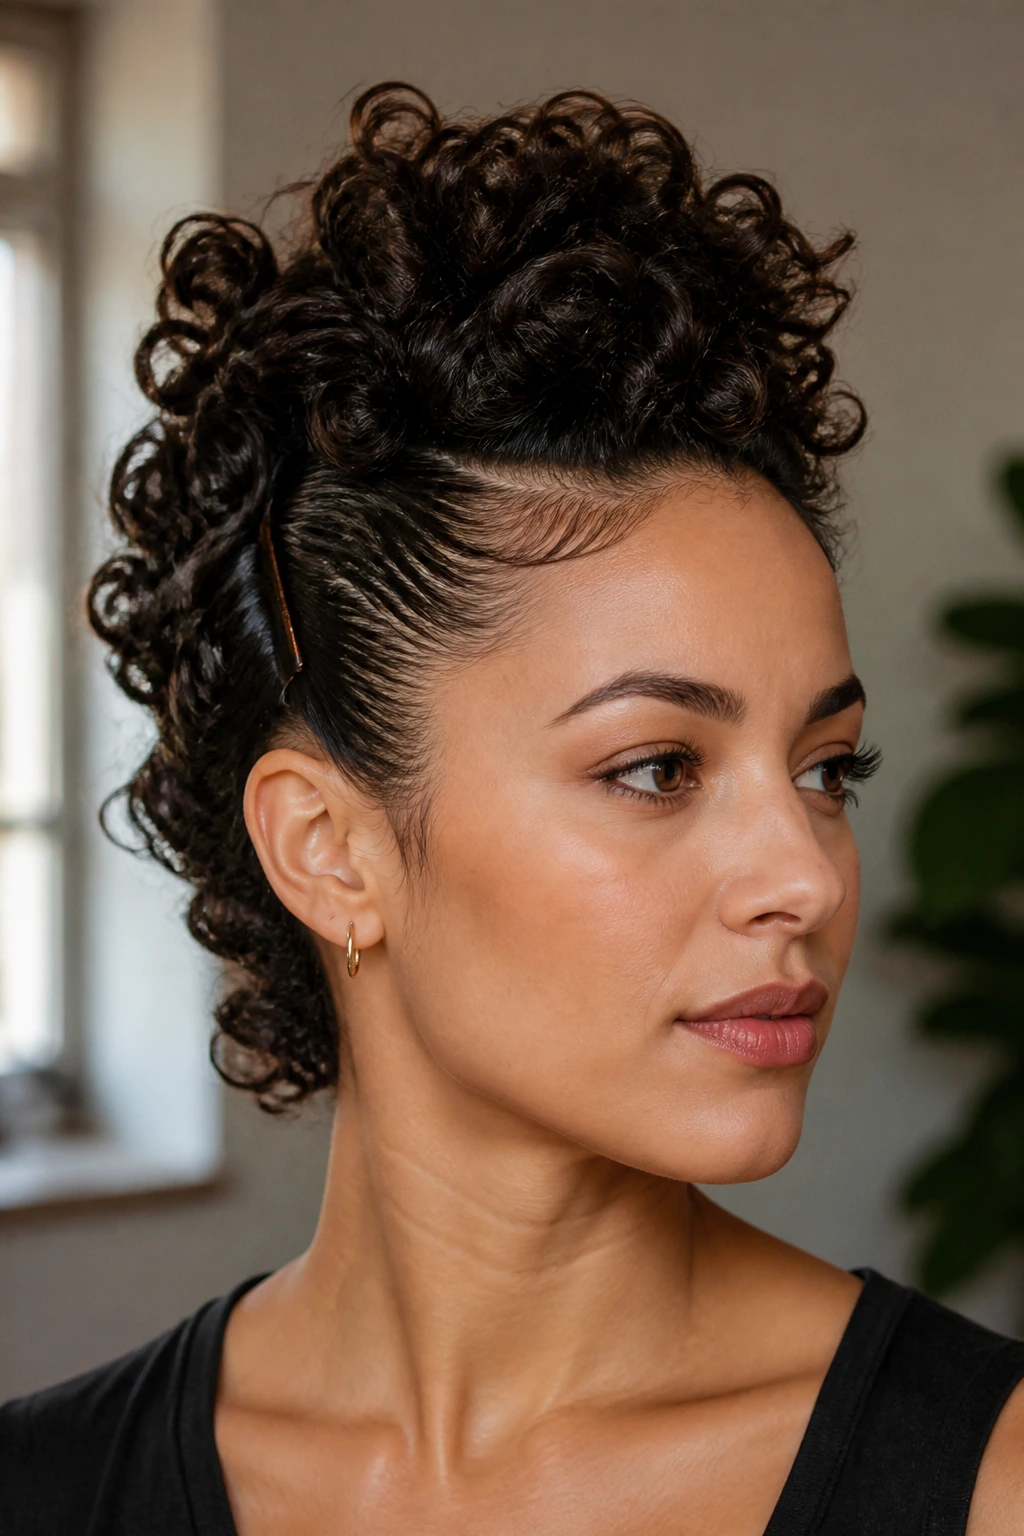
If the faux hawk is the neat version, the curly mohawk is the louder cousin. The sides are pinned or slicked down, and the center section stays tall and textured from forehead to crown. It has edge, but the curl pattern keeps it from looking harsh.
This works best when the middle section has enough density to build a ridge. If your hair is very fine, tease the roots lightly with your fingers before pinning the sides back. Do not backcomb aggressively unless you want a nest you’ll regret later. The point is lift, not damage. Use pins at the temples and near the ears to anchor the sides, then shape the center with your palms.
A small amount of gel at the hairline gives the mohawk cleaner edges. A few loose curls at the crown can make it look less rigid. That little mess in the center is part of the charm.
19. Nape Shell Twist
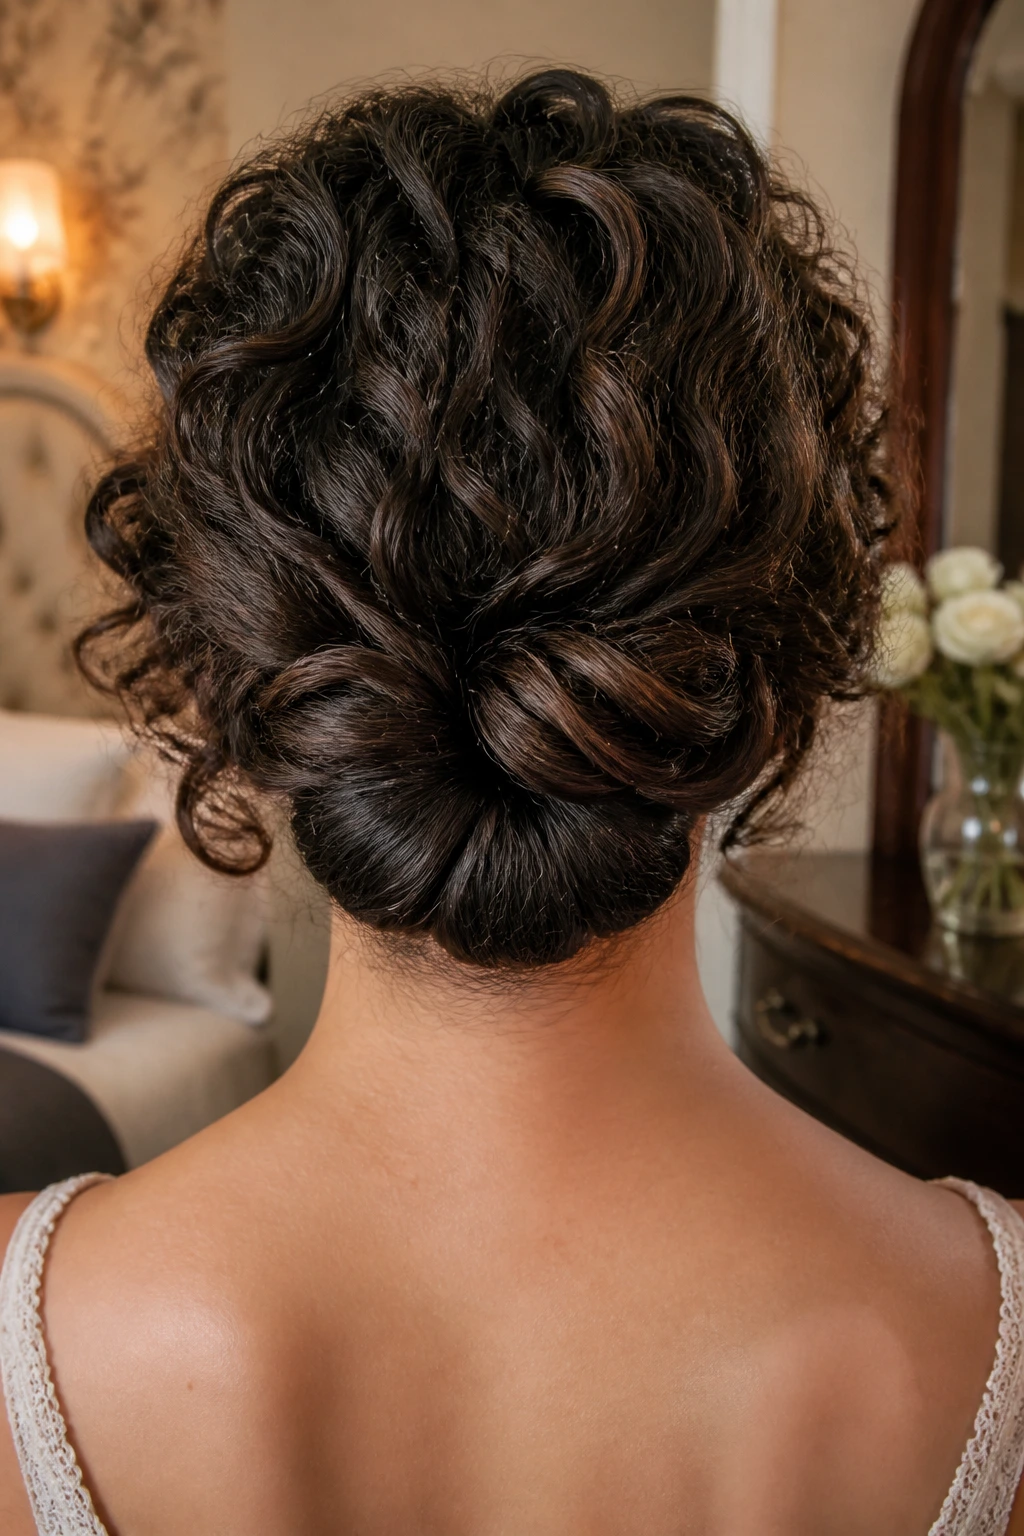
This style borrows the shape of a shell without becoming a stiff French roll clone. The curls are gathered low, folded inward, and pinned into a curved shell shape that sits flat against the nape. It’s elegant in a low-key way, which I find more useful than styles that look like they’re trying too hard.
Short curly hair does well with this because the ends can disappear into the fold rather than fighting for space. Start with a low gathering point, twist the hair upward, and tuck the ends under the roll. Use pins along the curve, not just at the center, so the shell holds its shape. If the outer layer is frizzy, smooth only the top section with a tiny bit of cream. Leave the inner curls alone so the shell still has texture.
This is a solid choice for formal events, especially if you want the back of the hair to look neat without flattening the whole head.
20. Pin-Curl Halo
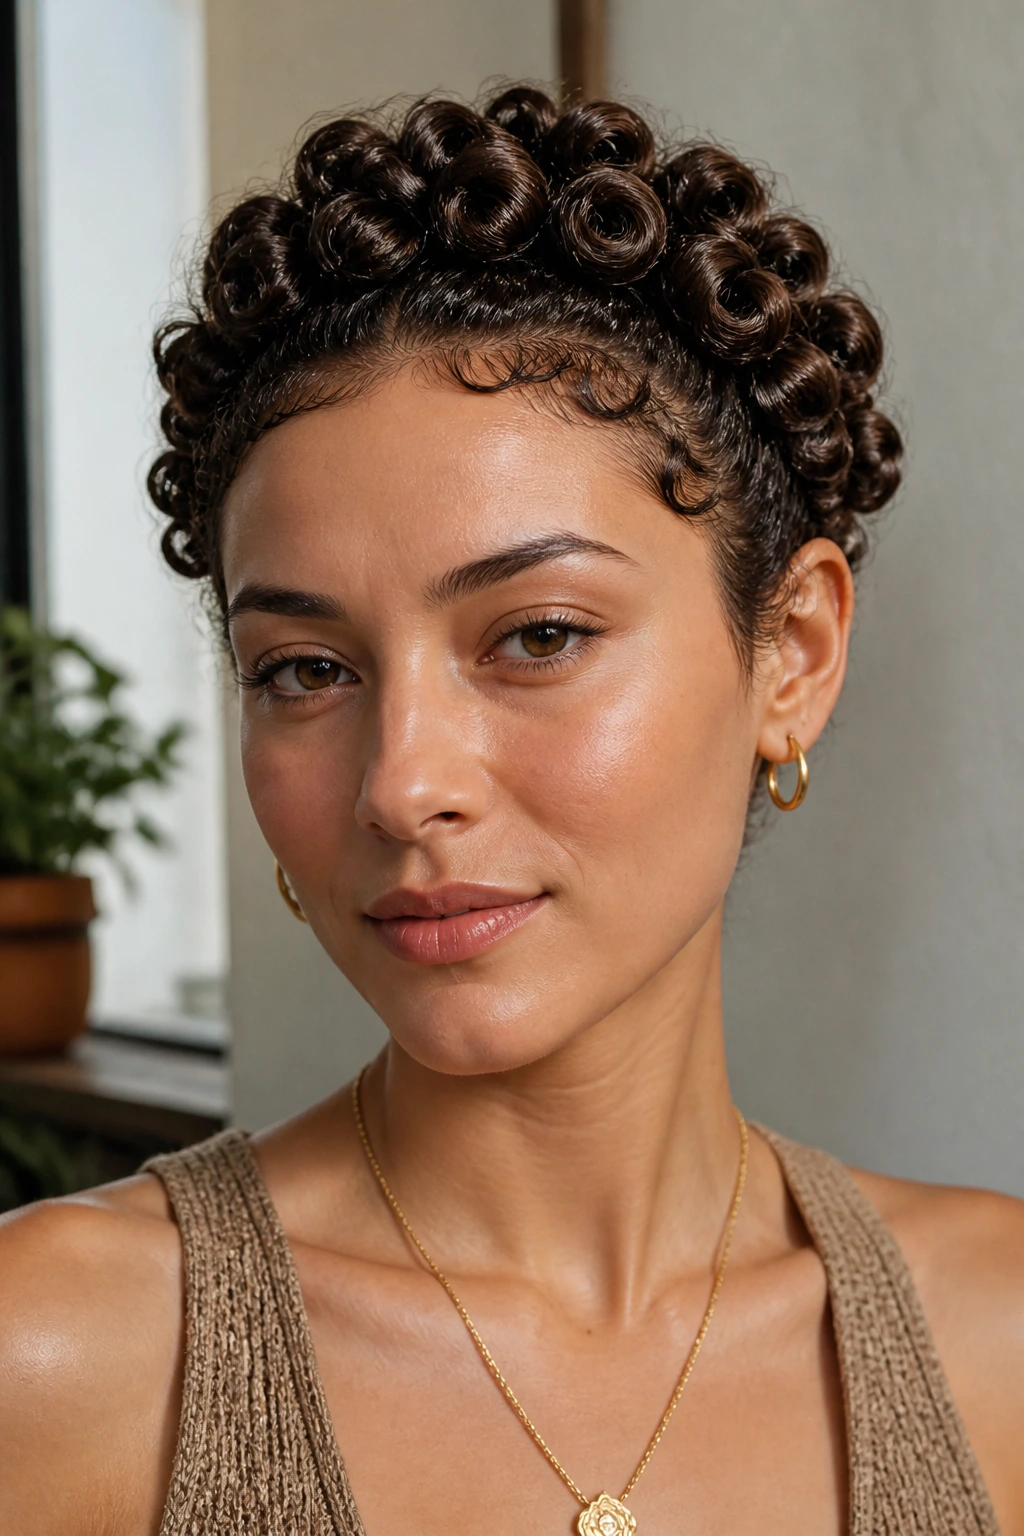
A pin-curl halo is one of the smartest choices for very short curly hair because it turns the lack of length into a feature. Small sections are rolled and pinned around the head in a circular path, creating a sculpted halo that sits close to the scalp. It feels deliberate, almost architectural.
The style takes a little patience, but not much skill. Roll each small section inward, pin it flat, and work around the crown until you’ve built the circle. The pins should follow the curve of the curl, not fight it. That’s the whole game here. If you have very tight coils, you may not need to roll much at all; a small tuck and pin can mimic the same shape.
It’s a smart way to handle borderline-short lengths or layers that refuse to stay in a bun. The halo keeps the volume where it belongs and gives the short pieces a job.
21. Twisted Nape Tuck
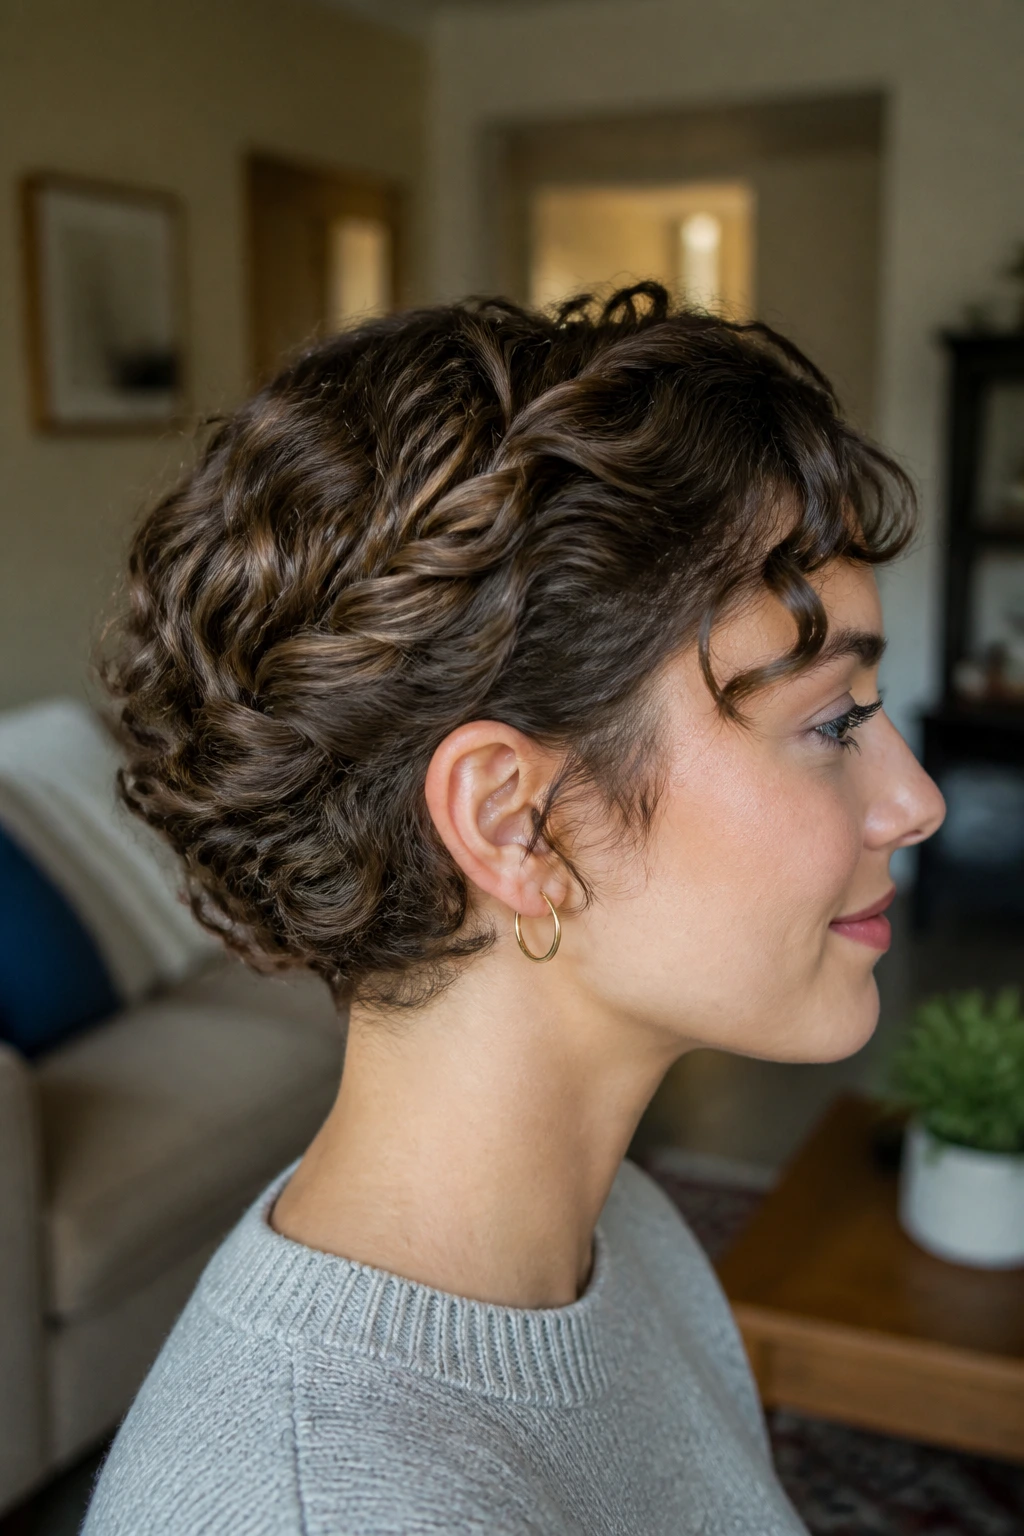
This is one of the easiest styles in the bunch, which is why it gets worn so often in real life and not just in photos. Two side sections twist back toward the nape, the ends get tucked under the lower curls, and the whole thing settles into a soft, low shape.
The beauty is in the restraint. You don’t need a full bun, and you don’t need every strand to cooperate. Just twist, tuck, and pin. If your hair is layered, pin the shortest pieces first so they don’t pop out later. A couple of small pins crossed under the tuck usually hold well enough for a normal day. For longer events, add one more pin where the twists meet.
This style looks especially good when the curls around the face are left slightly loose. It keeps the shape soft and stops the whole thing from looking overworked.
22. Asymmetrical Sculpted Updo
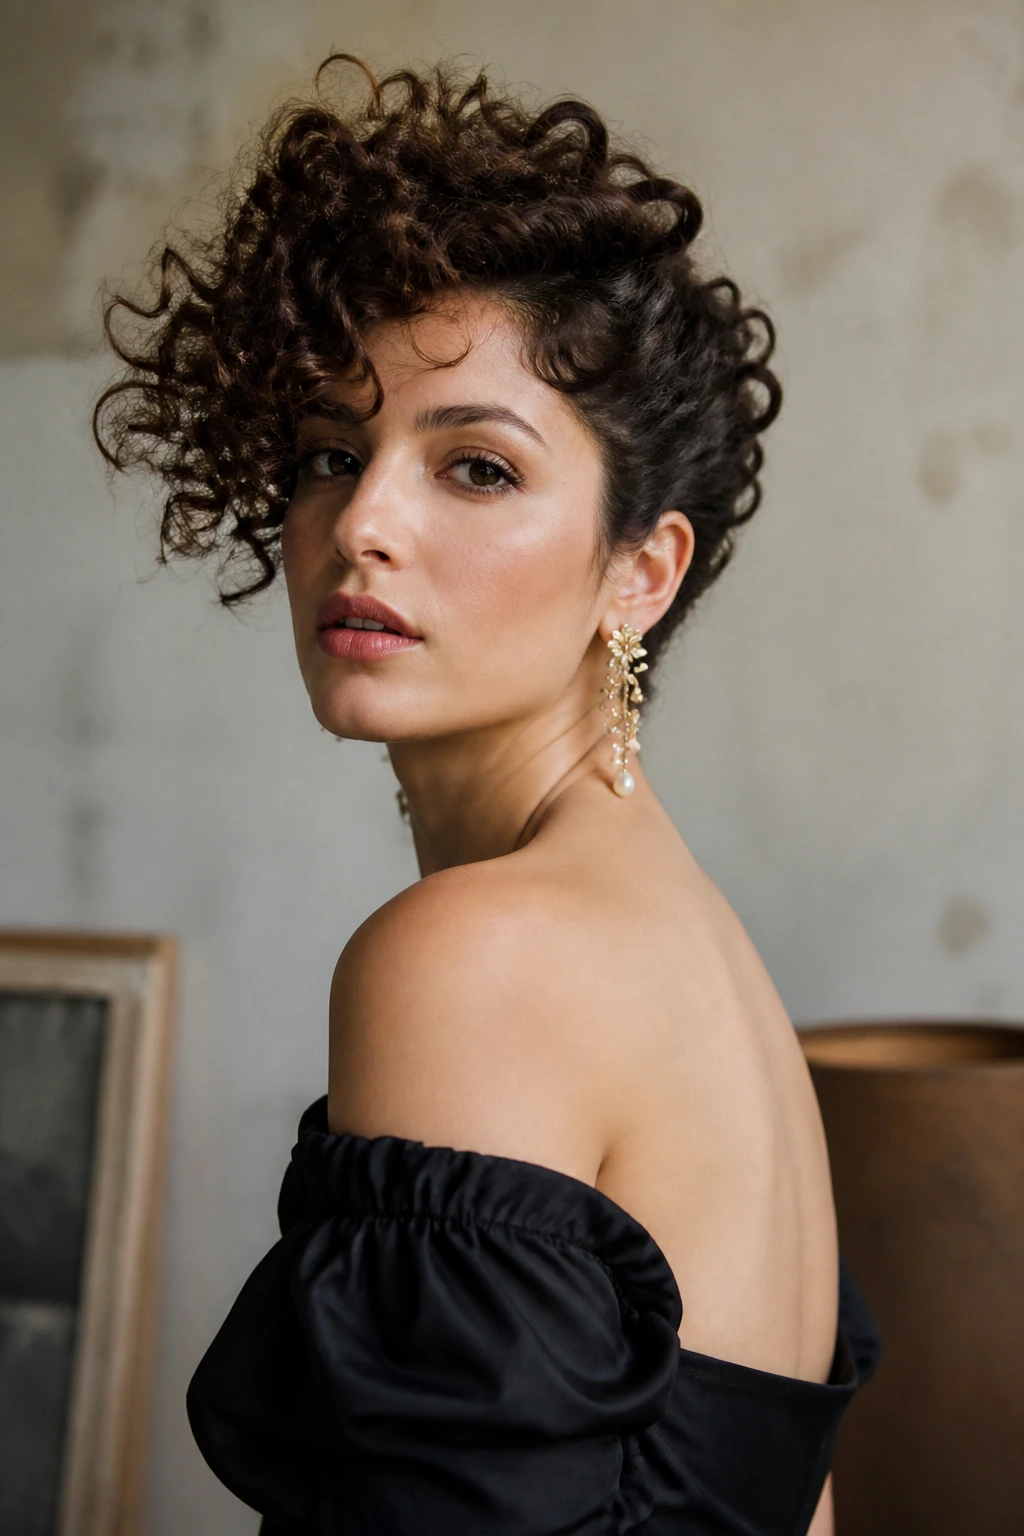
Some styles want to be centered. This one does not. The curls get swept mostly to one side and pinned into a sculpted mound or roll that sits off-center, which gives short curly hair a more editorial shape without needing extra length. It’s the kind of updo that makes layered cuts look purposeful.
The asymmetry lets you work around uneven curl lengths. Put more volume on the side with better length, then pin the shorter side closer to the scalp. That way the eye reads the shape, not the missing inches. A statement earring helps here, but the hair should still do the work. Leave a few curls at the front if you want the side shape to feel less severe.
It’s a good option when you want something dressier than a puff and less classic than a bun. A little off-center movement makes curly hair look alive.
23. Headband Tuck
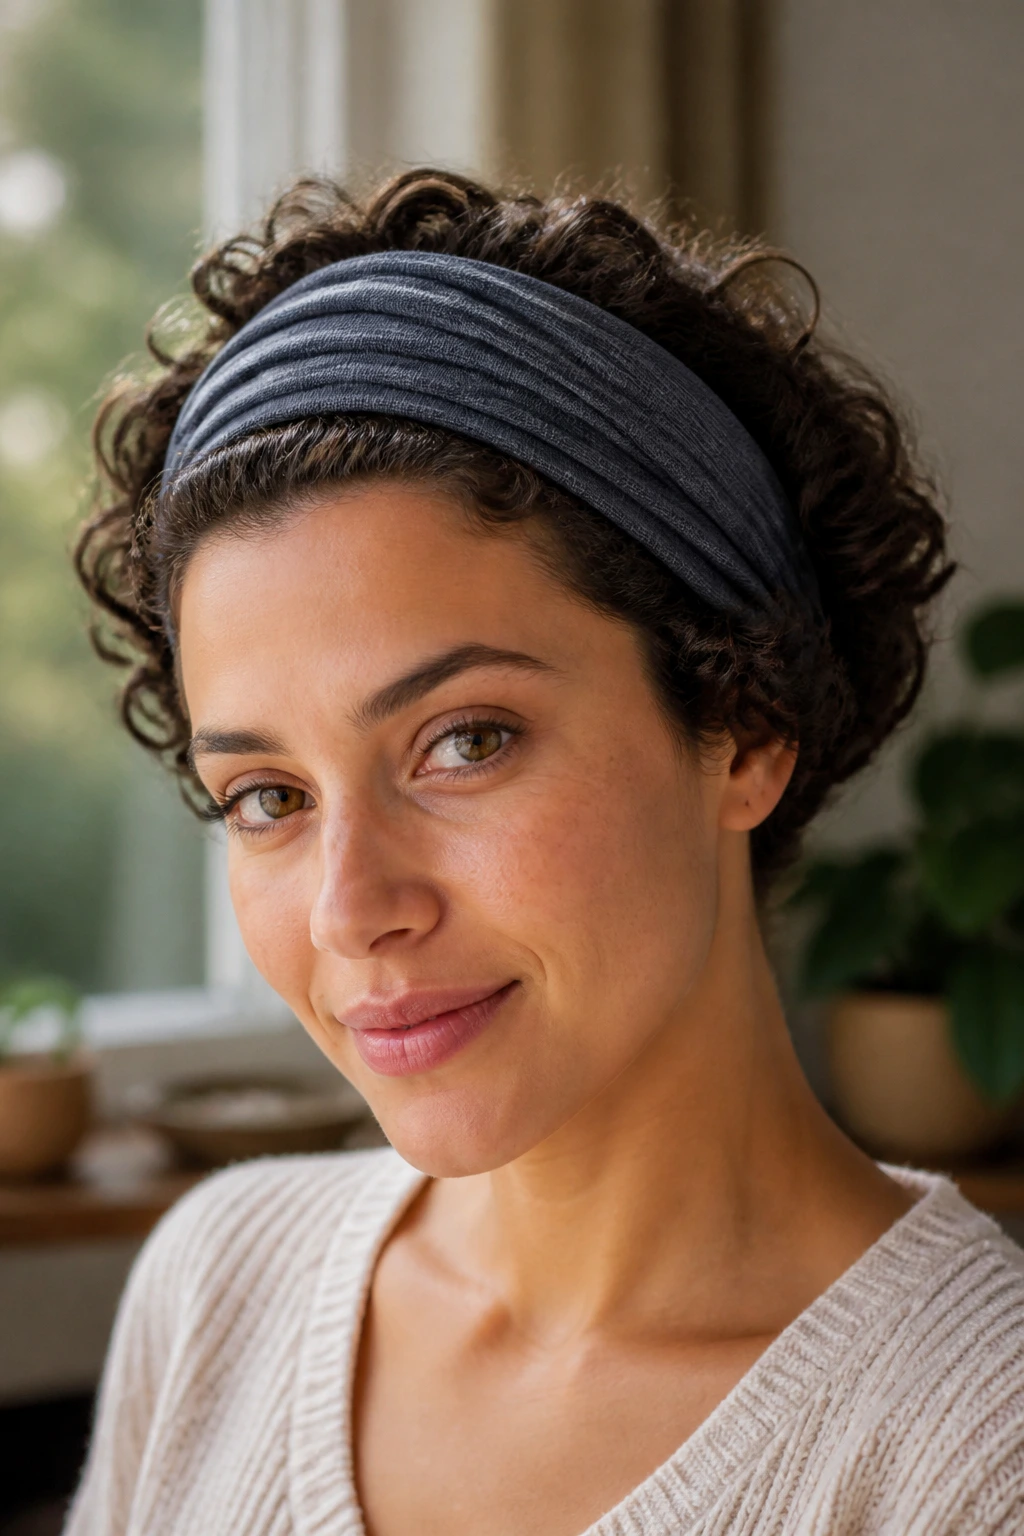
This one is honest about being easy, and I respect that. A stretchy headband creates the anchor, and the curls get tucked into it along the sides and back until a soft rolled shape appears. It works especially well on slippery curls that don’t want to stay pinned in the first place.
Place the headband over the hairline, then tuck sections up and under the band one by one. If the hair is short, tuck smaller pieces. If it’s a little longer, tuck larger sections and let the ends form a fuller roll at the back. You can stop there or add a few pins where the tuck feels loose. That’s usually enough.
This is one of the better styles for busy mornings, humid days, or hair that just needs to be off the face without a full production. It’s not fancy. It’s useful. Sometimes that’s the better thing.
24. Bantu Knot Crown
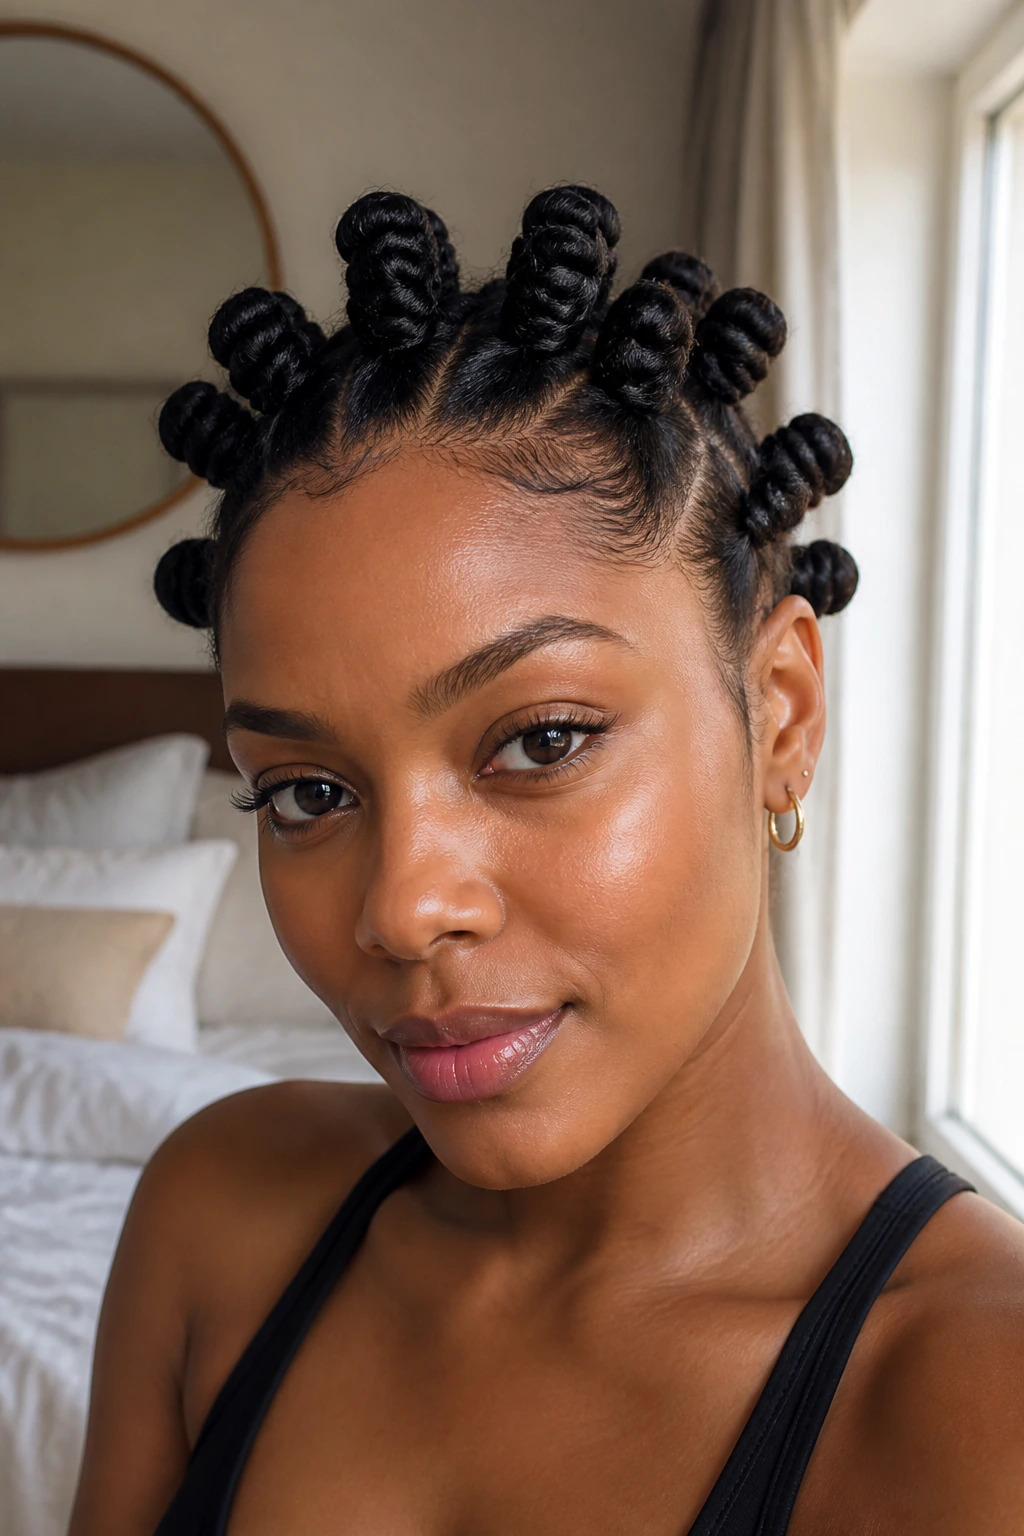
Bantu knots make a strong case for short curly hair because they turn the length limitation into design. A ring of small knots around the crown or hairline creates shape, texture, and a nice bit of tension without needing a ponytail at all.
Separate the hair into small sections, apply a little gel if your texture needs it, and twist each section until it coils into a knot. Pin or tuck the ends under the knot, depending on the length. For a crown version, leave the knots around the perimeter and keep the center fuller. For a fuller look, make the knots across the top and sides and leave a few curls loose.
This style is protective, sculptural, and a little bolder than the others here. It suits coily textures especially well, since the knots hold their own shape. And yes, it can be dressed up. Add a few metallic pins between the knots and the whole thing shifts fast.
25. Faux Bob Roll
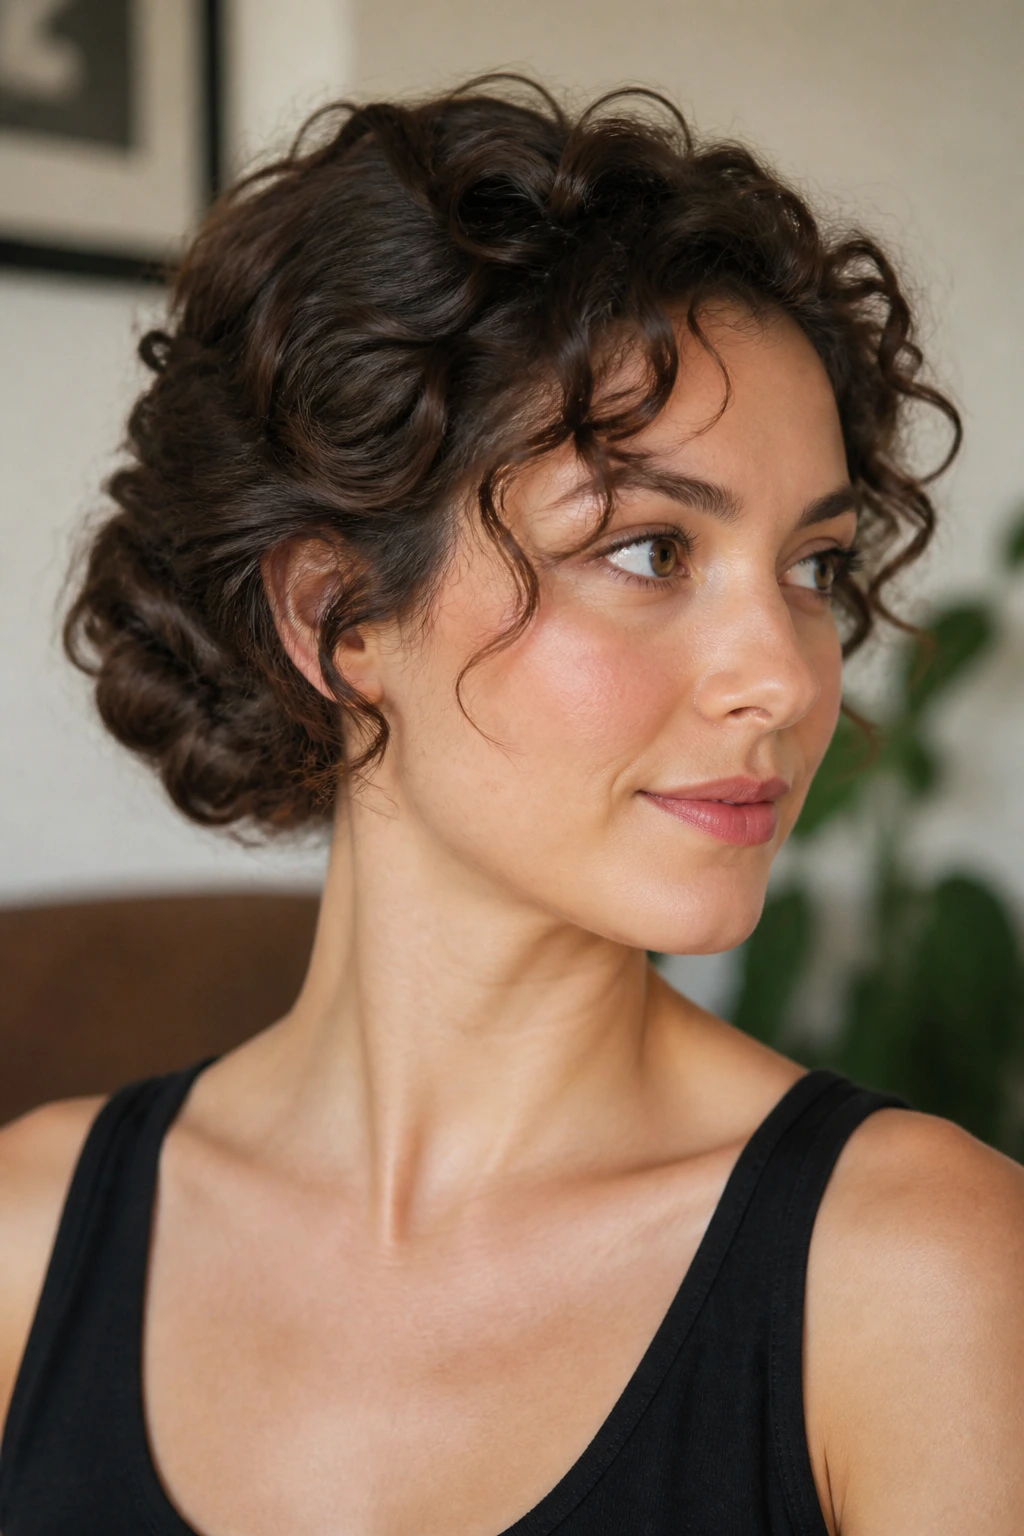
A faux bob on short curly hair sounds backwards until you see it. The hair gets tucked inward so the ends disappear, which creates the illusion of a shorter, smoother shape. On already short curls, that means the style becomes a neat, rolled updo that sits close to the head and doesn’t fight the haircut.
Start by gathering the lower section and folding the ends upward and under. Pin along the folded line so the curl ends stay hidden. The front can stay loose or be swept back into the roll, depending on how much face framing you want. The trick is not to flatten the top. Keep a little lift at the crown so the style doesn’t look pressed down.
I like this one for events where you want the hair to look tidy and a bit unexpected. It’s also a clever way to tame layers that won’t stay in a bun but can tuck under a roll.
26. Braided Accent Chignon
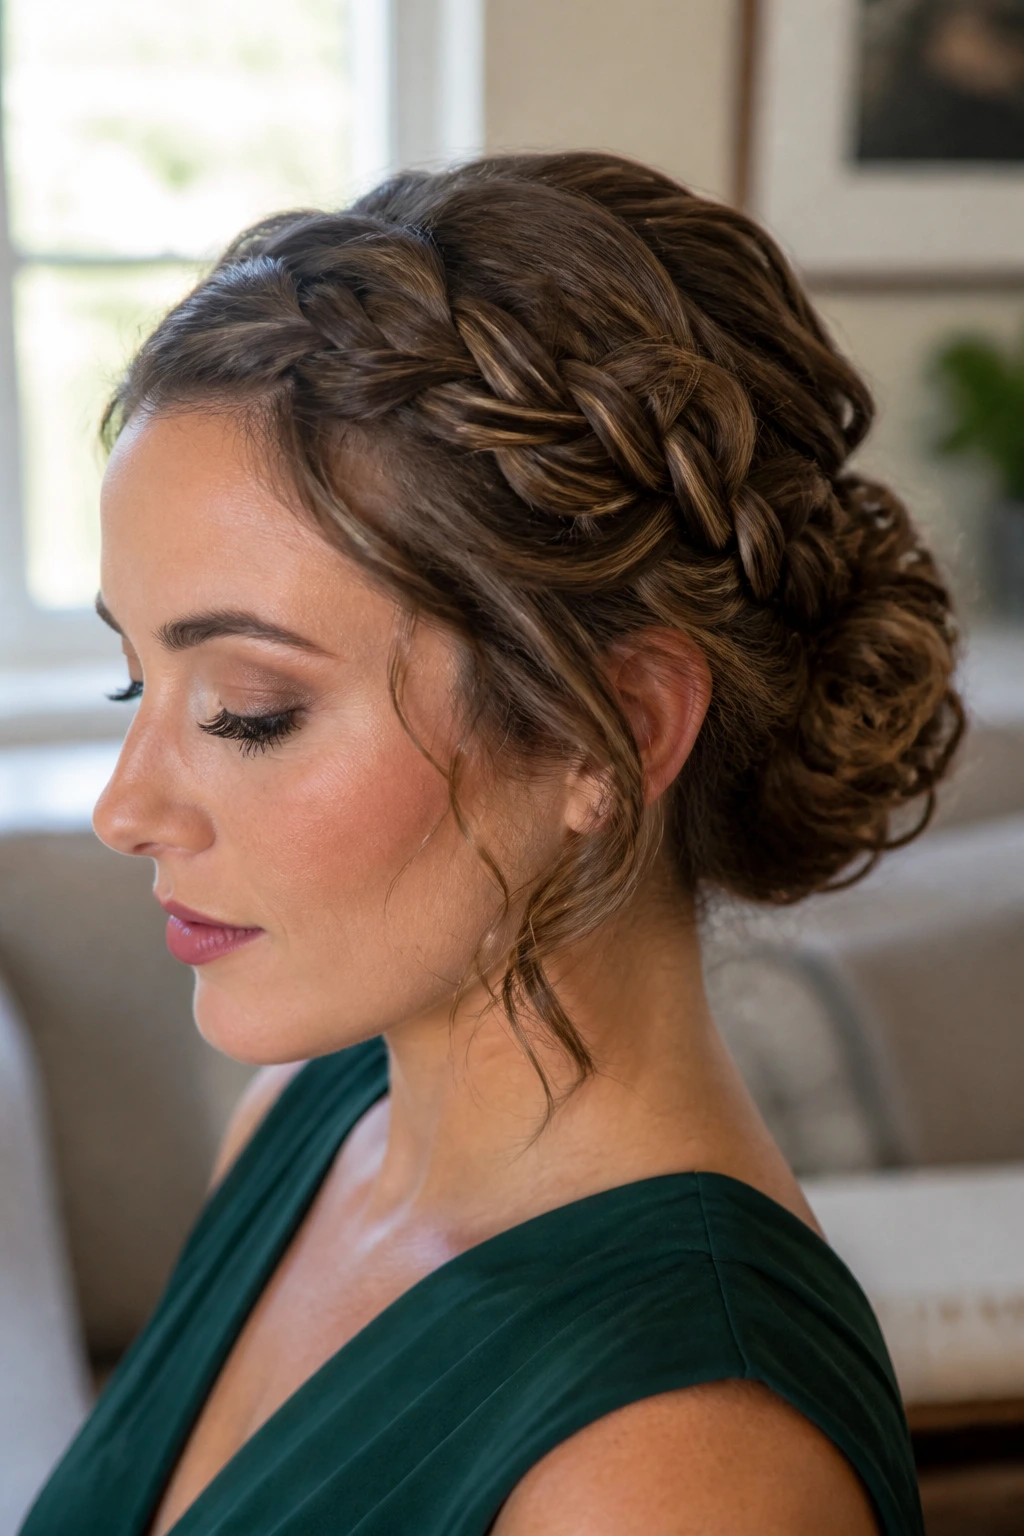
If your curls have just enough length for a short braid, this style uses that braid as the anchor instead of asking the whole head to behave. One or two small braids along the hairline or temple get swept into a low chignon, which gives the style control and a nice bit of texture contrast.
The braid does not need to be tight. In fact, a slightly loose braid often blends better with curly hair because it doesn’t create a sharp line next to the curl. Once braided, wrap the rest of the hair into a compact chignon and pin it down. If your layers slip out, tuck them under the braid base. That’s usually enough to hold them.
This is a good option if you want something that feels more constructed than a plain bun but less styled than a full formal updo. A braid accent gives you that middle ground.
27. Claw-Clip French Twist
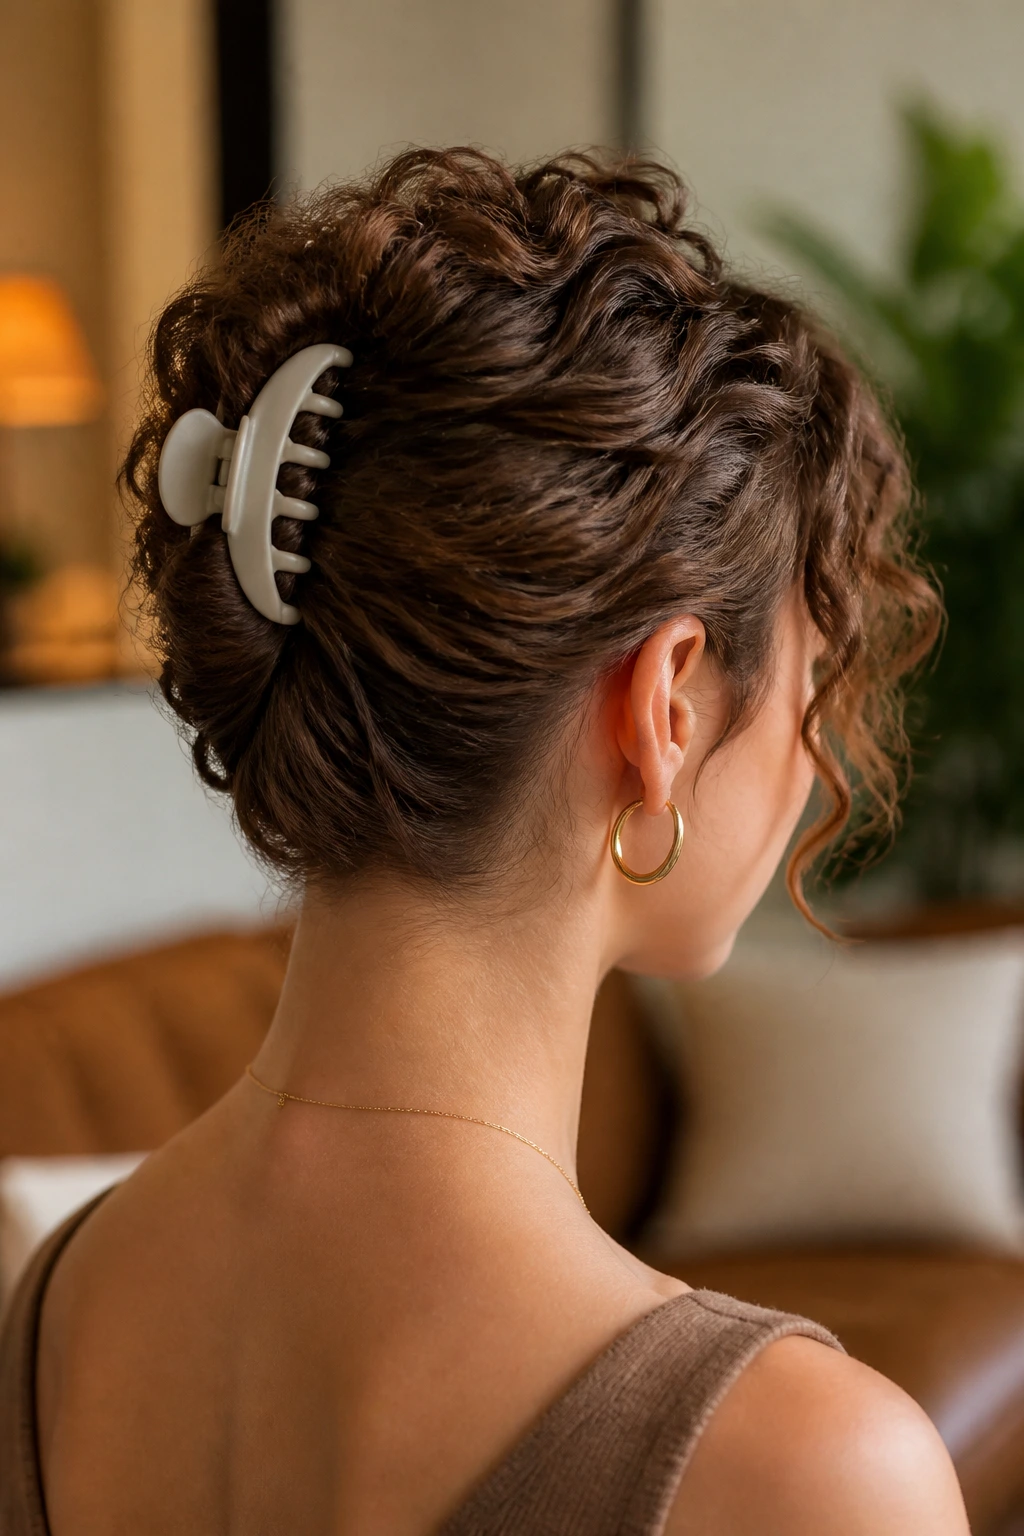
A small curved claw clip can pull off a short curly French twist when pins alone feel annoying. Twist the hair upward, tuck the ends, and secure the fold with the clip, then add one or two pins if the sides need help. That’s it. No ceremony.
The best part is speed. The clip grabs the twisted mass, and the curl texture keeps it from slipping right out. If your hair is very thick, choose a clip with a strong spring and enough teeth to bite into the hair. Tiny fashion clips look cute and fail fast. Ask me how I know. Bigger is better here, within reason.
This is the style for days when you want a clean updo but can’t be bothered with a dozen pins. It also makes a useful base if you want to switch from casual daytime hair to something neater before dinner.
28. Scattered Bobby-Pin Sweep
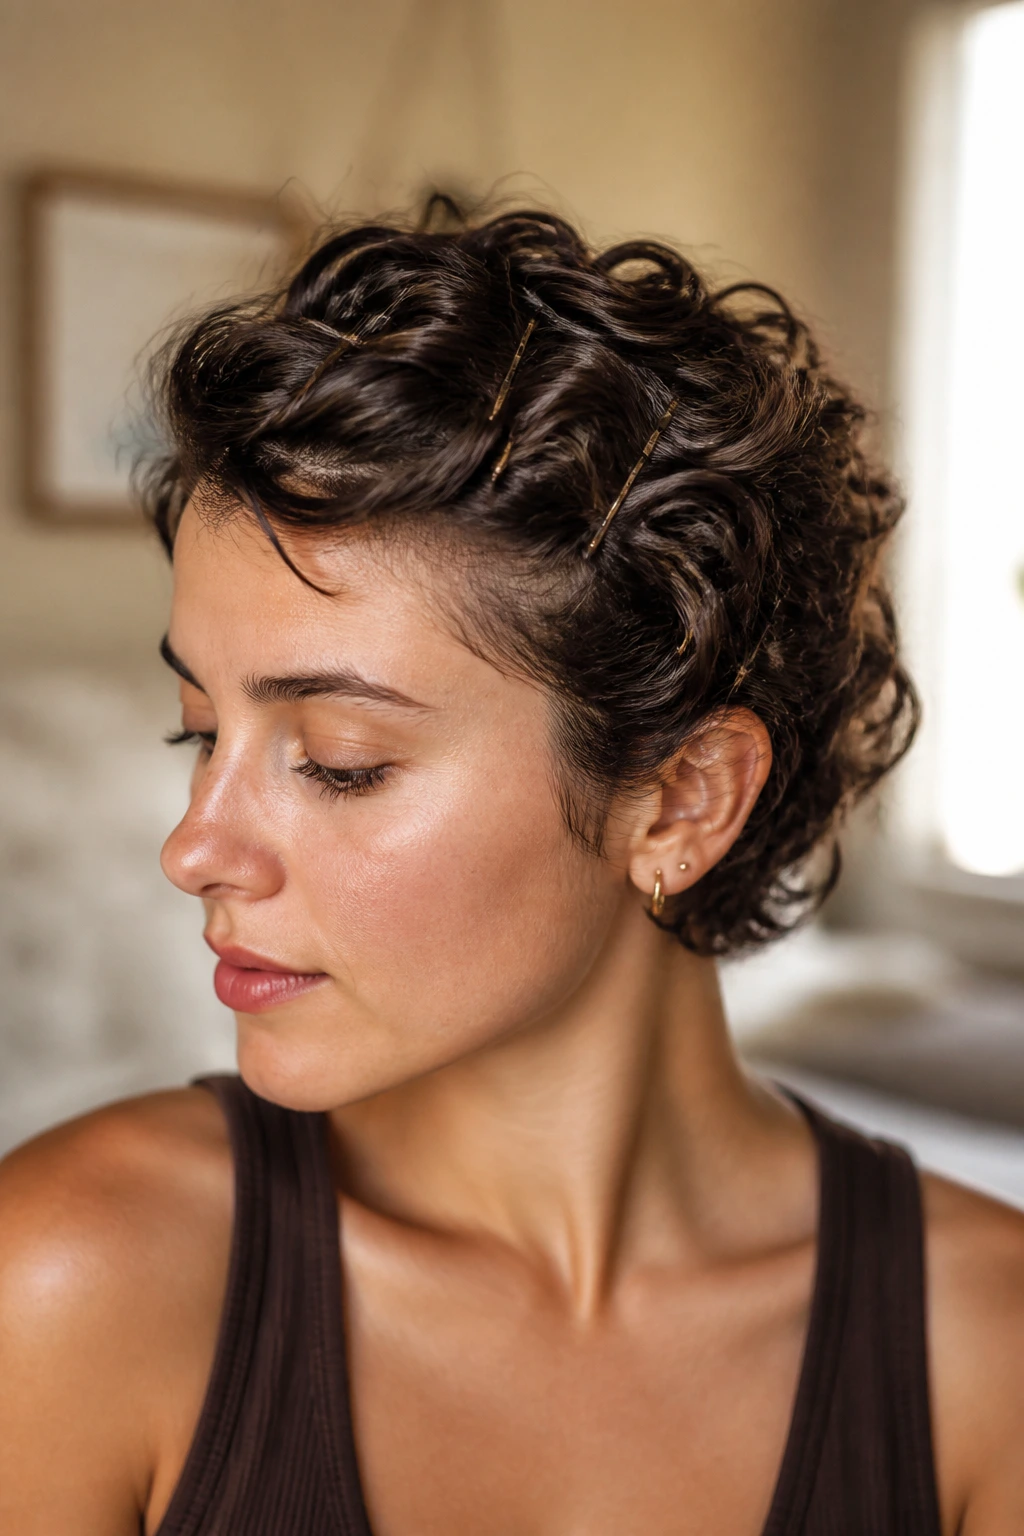
Not every updo has to look like it was built in one piece. The scattered pin sweep lets the curls move diagonally or upward across the head and stay there with visible pins that become part of the design. It’s loose, modern, and very good for very short curls that only need direction, not a full bun.
Sweep the hair toward one side or toward the crown in small sections. Pin each section where it lands, using the pins almost like stitches. You are building a shape from many small anchors instead of one big knot. That approach is better for short layers, because each section gets its own pin and its own job. If you want the pins to disappear, match them to the hair color. If you want the style to feel more decorative, use gold or silver pins and let them show.
I love this one for textured hair that refuses to sit in a traditional bun. It looks deliberate because it is deliberate. The design is the pinning.
Why Short Curly Hair Holds Better When You Work With the Curl Pattern
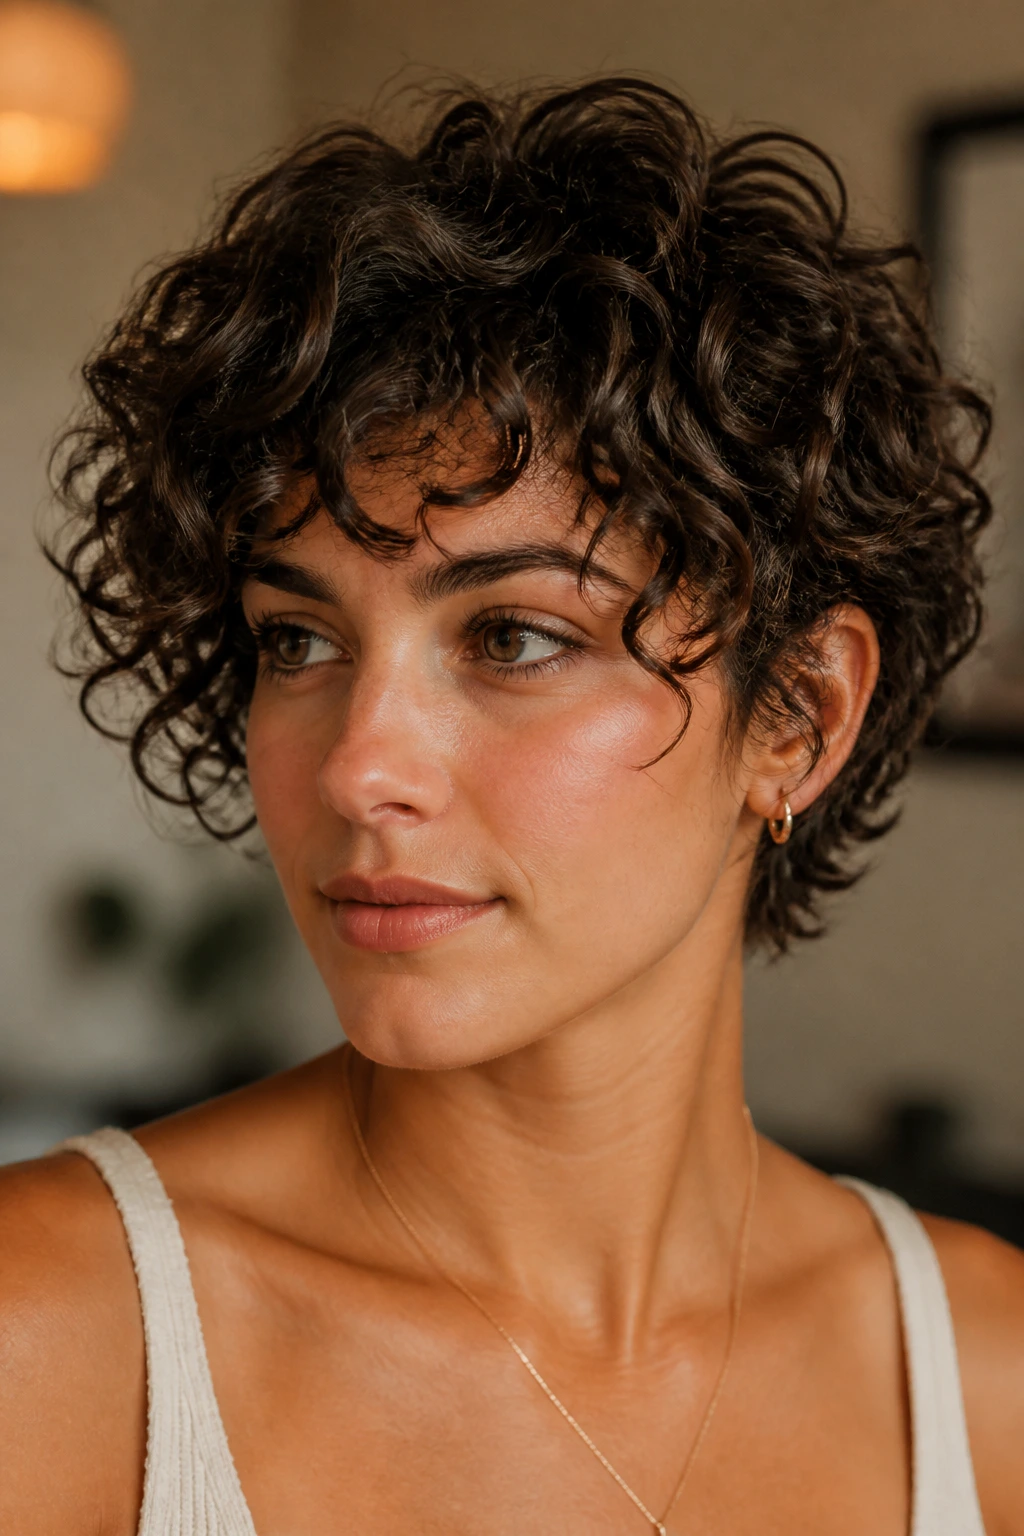
Short curly hair updos hold best when you stop trying to smooth every bend out of the way. Curls grip other curls. They catch pins. They swell a little, then settle. That natural movement is your friend, especially if the hair sits somewhere between ear length and shoulder grazing and keeps changing shape every time you turn your head.
The biggest mistake people make is adding too much slip. A heavy leave-in, a slick oil, or a thick cream can make the hair slide right out of a pin. A lighter product mix tends to hold better: a bit of mousse at the roots, a touch of gel at the edges, and enough moisture to keep the texture from looking dusty. That’s usually the sweet spot.
There’s also a length trick hiding in plain sight. Short hair often works better in sections than in one big sweep. Two twists, three pins, a tucked coil, a mini bun — those small anchor points hold better than one heroic attempt at a single knot. The style looks stronger because the hold is distributed. Not glamorous. Effective.
Essential Equipment for These Styles
-
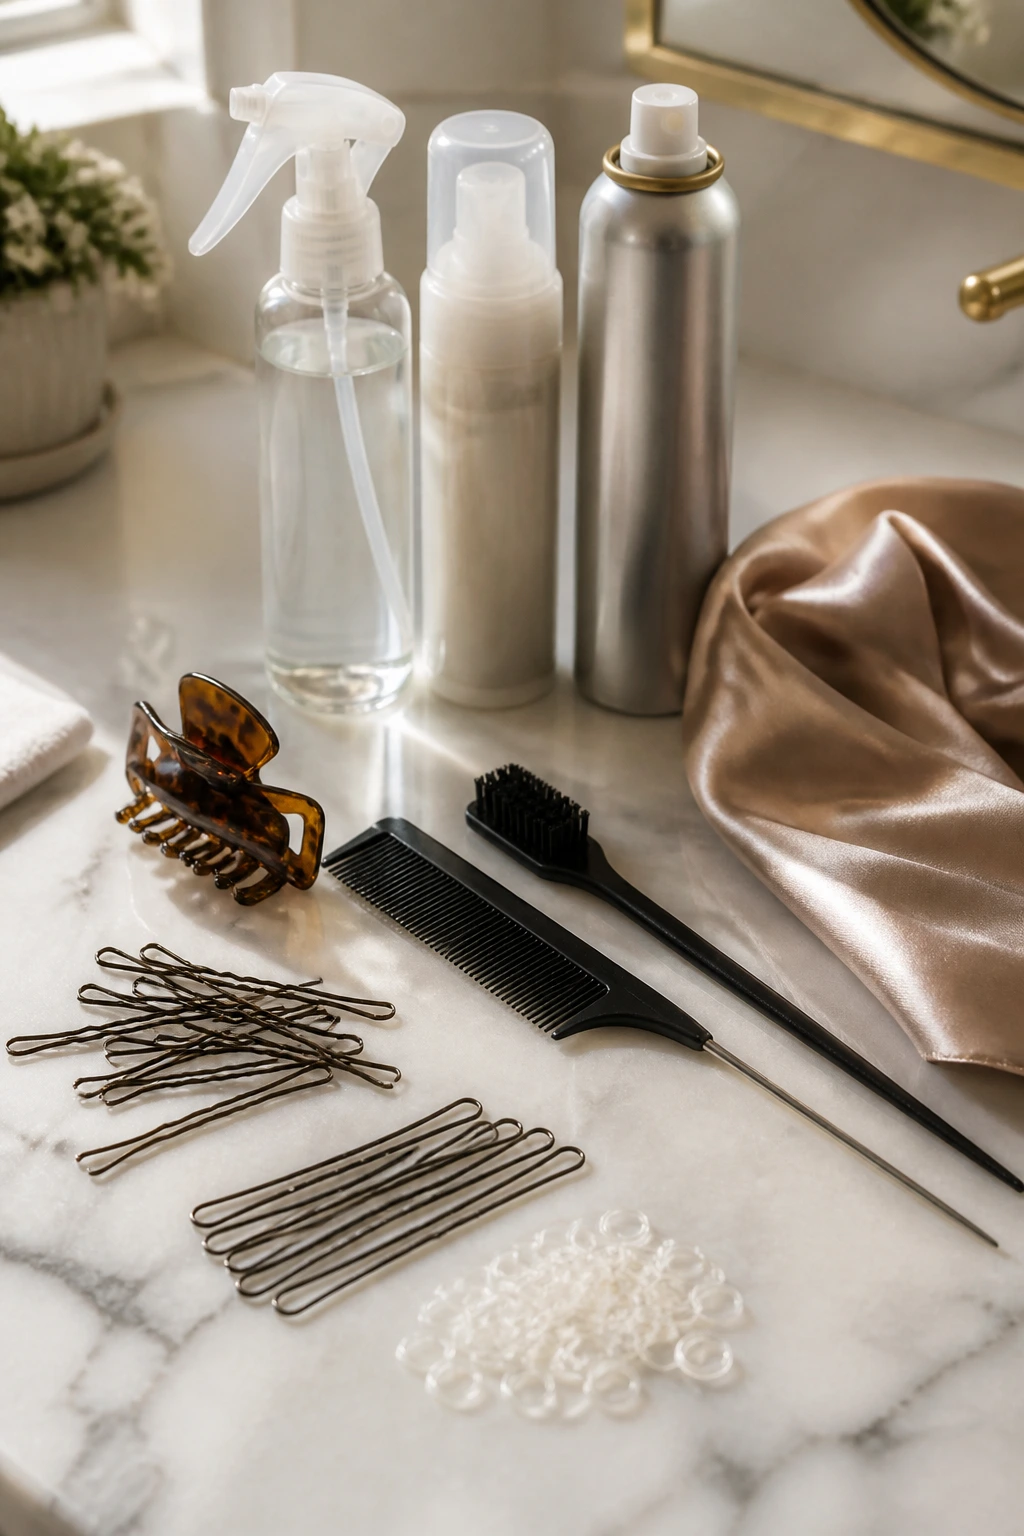
Snag-free bobby pins: Matte pins grip short curls better than shiny ones, especially once you’ve used a little leave-in or gel.
-
U-pins: These are handy for coils, chignons, and nape knots because they hold curved shapes without flattening them.
-
Small clear elastics: Use these for mini puffs, bubble ponytails, and anything that needs a tiny base before pinning.
-
Small claw clip: A strong mini clip can save a French roll or twist when you want speed more than perfection.
-
Fine mist spray bottle: Lightly dampening the hair gives you control without soaking the curls.
-
Rat-tail comb or clean parting comb: Useful for neat sections, side parts, and crown twists.
-
Edge brush or soft toothbrush: Good for smoothing the hairline without brushing out the curl pattern.
-
Light mousse or foam: Gives short curls grip and a little memory before pinning.
-
Flexible-hold hairspray: A light mist helps the finished style stay put without making it brittle.
-
Satin scarf or bonnet: Essential if you want the style to survive sleep without getting wrecked.
Picking Pins, Elastics, and Curl Products That Don’t Slip
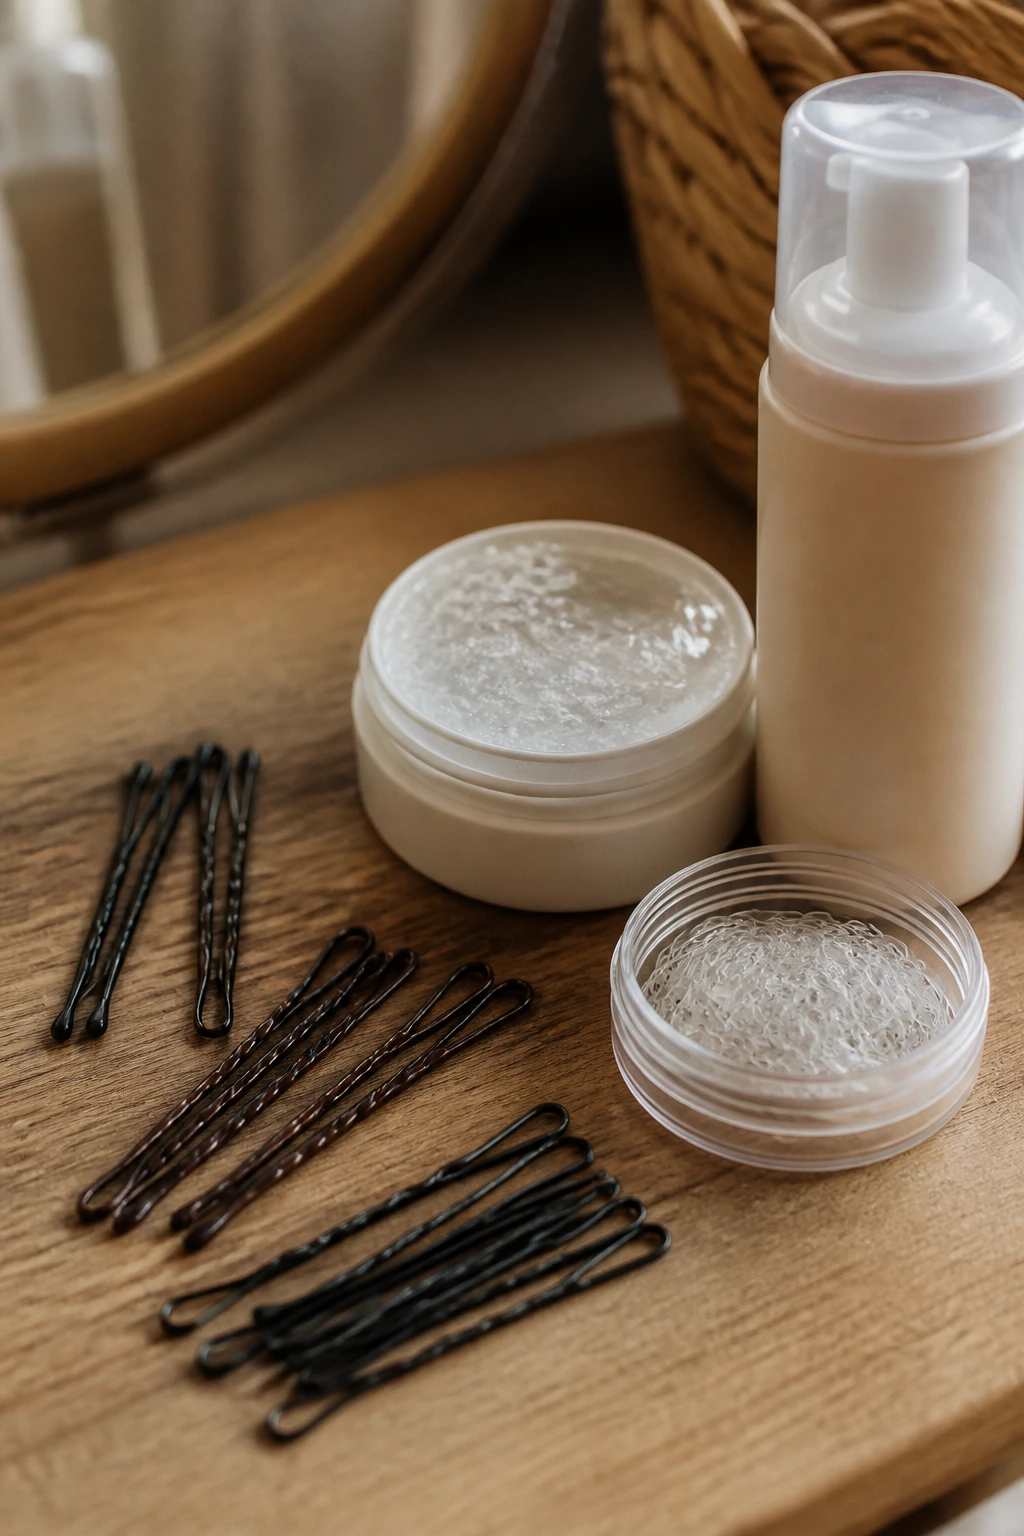
The cheap little accessories matter more than people think. A bobby pin with a smooth coating may look nicer in the package, but on short curly hair it can slide the minute the hair has a touch of product on it. Matte pins with a bit of texture tend to grab better. I also like pins that are not flimsy. If they bend when you open the package, they’ll bend in the hair too.
For elastics, size and strength matter more than color. Tiny clear elastics are useful when you need a base for a mini bun or bubble ponytail, but they should still stretch back into shape after one use. If they crack or lose tension, toss them. A weak elastic creates the exact sort of loose base that short curls escape from.
Product choice is about slip versus grip. If your curls are silky or freshly washed, a mousse or foam usually helps the most because it adds hold without coating the hair. If your hair is drier or more coily, a small amount of gel at the hairline can keep the front neat while the rest stays textured. Heavy oils belong at the ends after the style is done, not all over the roots before you pin anything.
How to Wear These Updos Without Losing the Shape
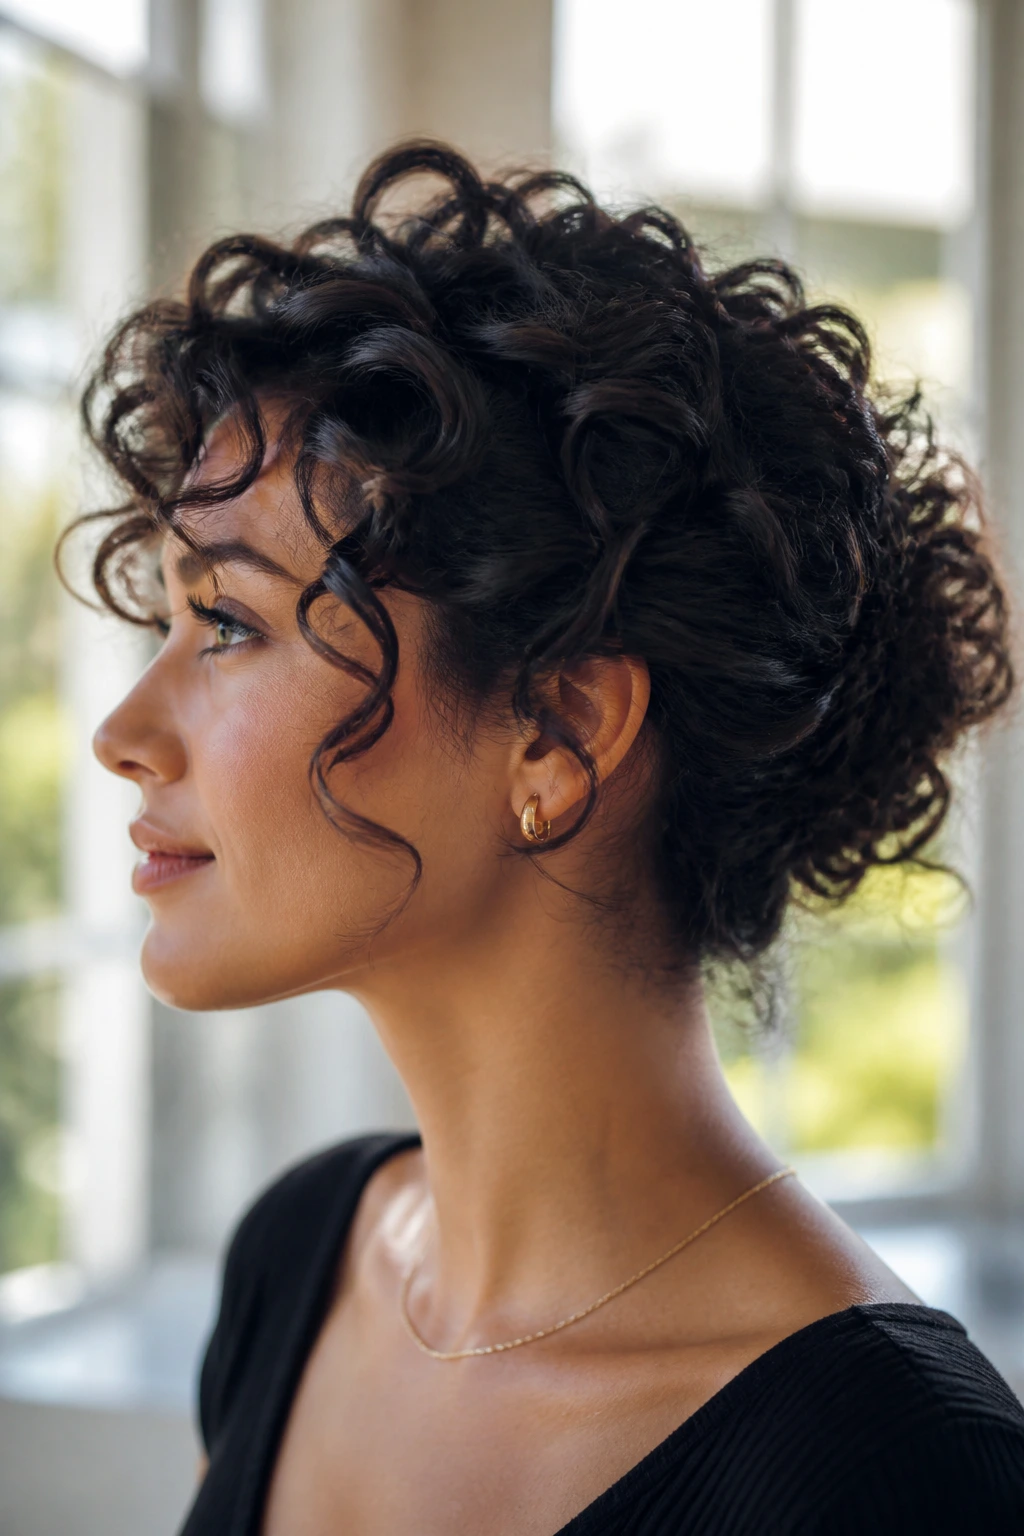
Presentation: Short curly updos look better when the silhouette is easy to read from the side. Let one curl frame the face, keep the crown lifted where the style needs height, and avoid pressing the whole shape flat with your palms. A little texture at the surface makes the style look lived in, not collapsed.
Accompaniments: Earrings and necklines matter more than people admit. A high faux hawk or topknot leaves room for hoops, while a low chignon looks cleaner with a collar, a blazer, or a dress that has some shoulder structure. A scarf or headband can pull the whole look together when the hair itself is simple.
Fit: Fine curls usually need smaller sections and more pins. Dense curls can handle bigger twists, stronger elastics, and a little more product. If your hair is layered, styles that keep the shortest pieces near the front or crown tend to hold better than styles that force everything into one back knot.
Mood: Use the same haircut differently. A half-up twist can read soft in the daytime and sharp at night if you swap a plain elastic for a metal clip or a few pins. That flexibility is one of the quiet advantages of short curly hair. You are not locked into one answer.
Additional Tips and Styling Boosters
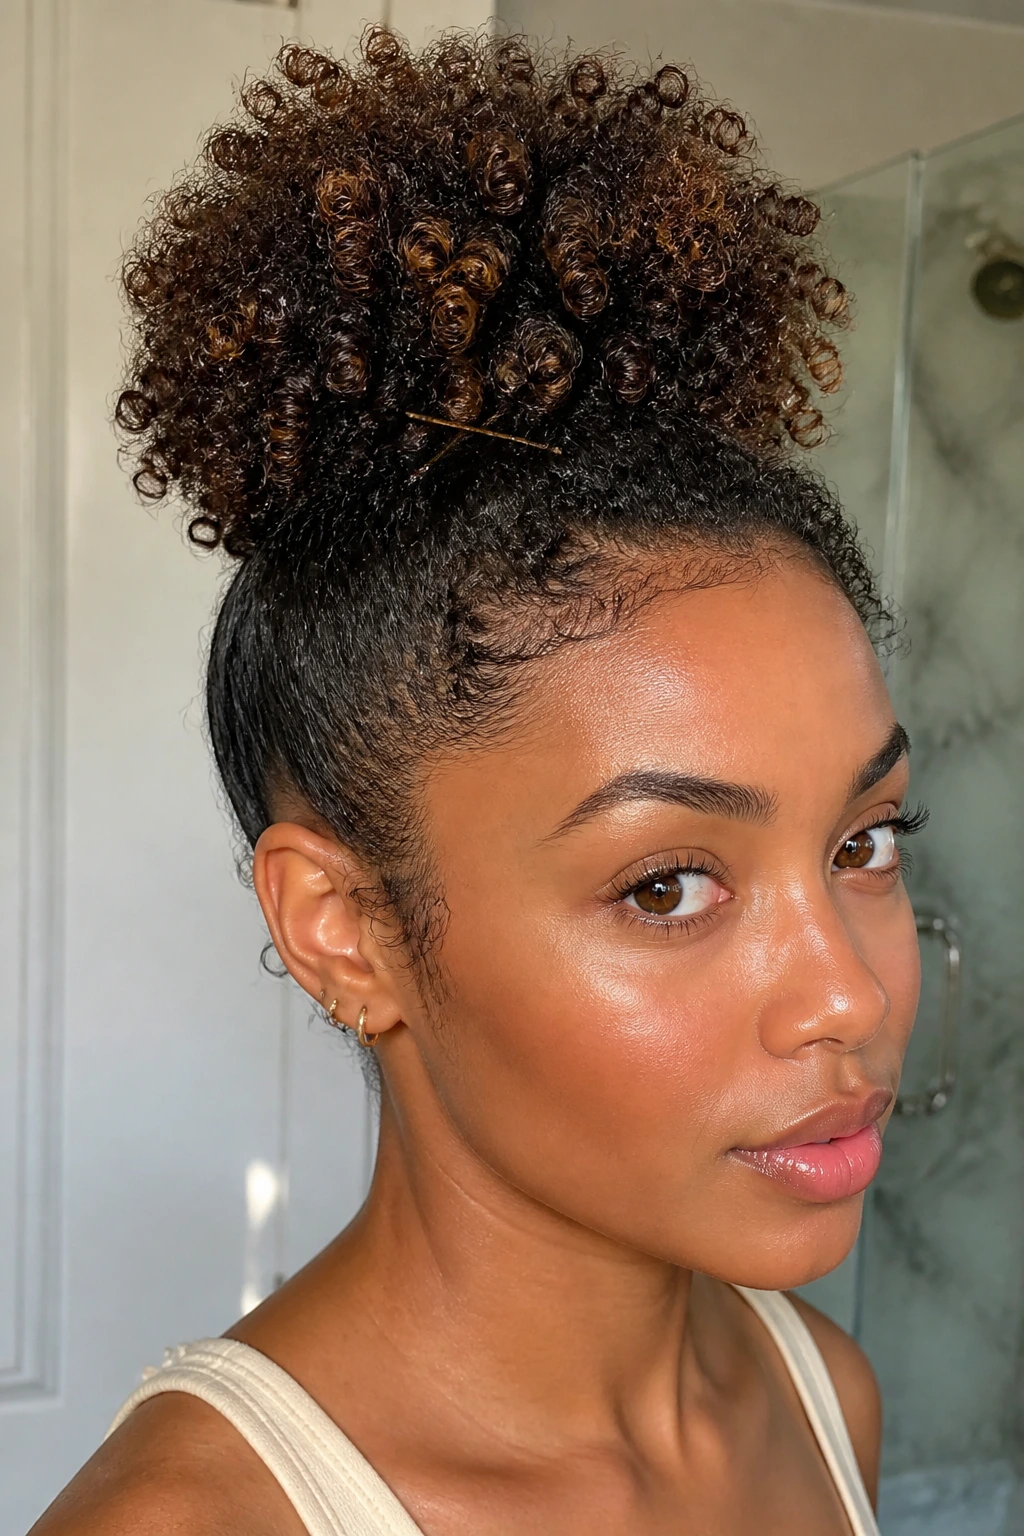
Texture Boost: If the crown looks too flat, lift only the roots with your fingertips after the style is pinned. Do not rake through the curls. That’s how you get frizz at the very moment you want shape.
Customization: Add a small braid, a scarf knot, or a single jeweled pin near the temple if the style needs one focal point. One accent is usually enough. More than that and the curls start to disappear under the accessories.
Finish: A light mist of flexible hairspray from about 10 inches away is usually enough. Spray the pins, not the whole head, if you want hold without stiffness. Curly hair updos look better when they can still move a little.
Make-It-Yours: Fine hair likes smaller sections and matte pins. Thick hair usually needs stronger elastics and U-pins. Very tight coils can skip the smoothing products almost entirely and lean into twist-and-tuck shapes. If your hair is drier, seal the ends after the style is done, not before.
Make-Ahead, Overnight Care, and Refreshing the Style
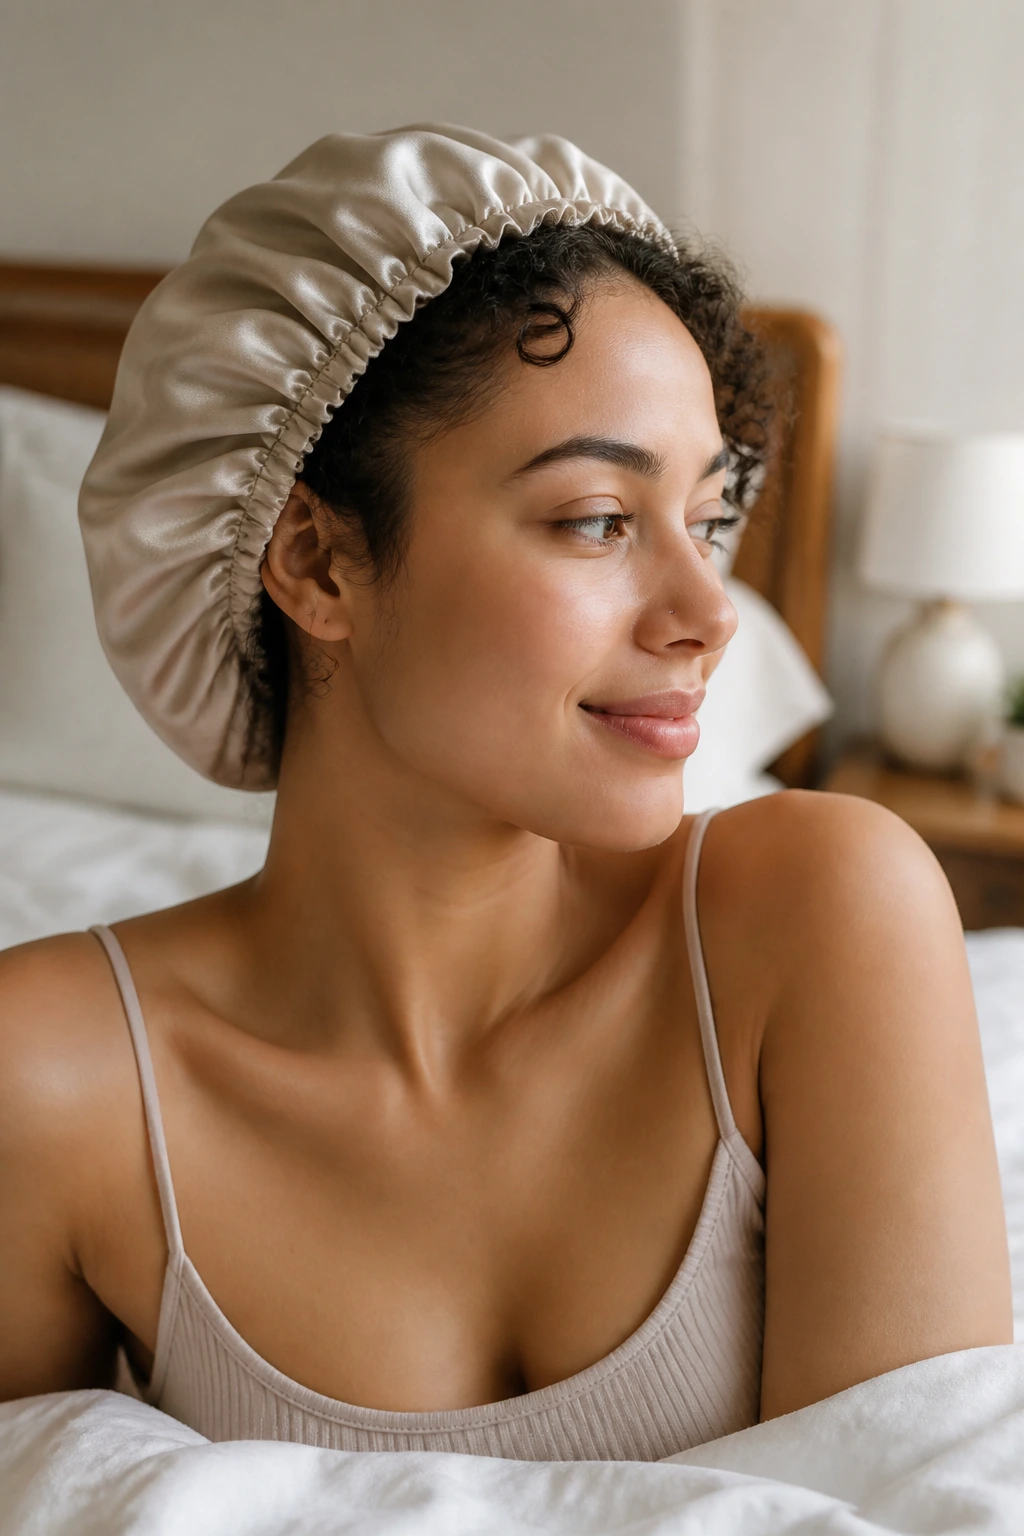
Most short curly updos do their best work within one day, but plenty of them can be carried into the next morning if you protect the shape. A satin bonnet or scarf helps the most. If the style is a puff, topknot, or twist, wrap the loose curls gently so they do not get flattened by the pillow. A satin pillowcase helps too, though I still trust a scarf more for preserving the pin placement.
If you’re styling for an event, build the shape about 30 to 45 minutes before you leave. That gives the curls time to settle and tells you which pins need a quick adjustment. A style that looks flawless the second you finish can loosen a bit after a short wait, and that’s useful. Better to catch it before you walk out the door.
To refresh a style, mist the loose pieces lightly, smooth the hairline with clean hands, and replace any pin that’s popped free. If a bun has gone flat, lift the outer edges with your fingertips instead of rebuilding the whole thing. Most styles here can be revived in under 5 minutes if you don’t overdo the water. Soaking the hair defeats the point.
Variations and Adaptations to Try
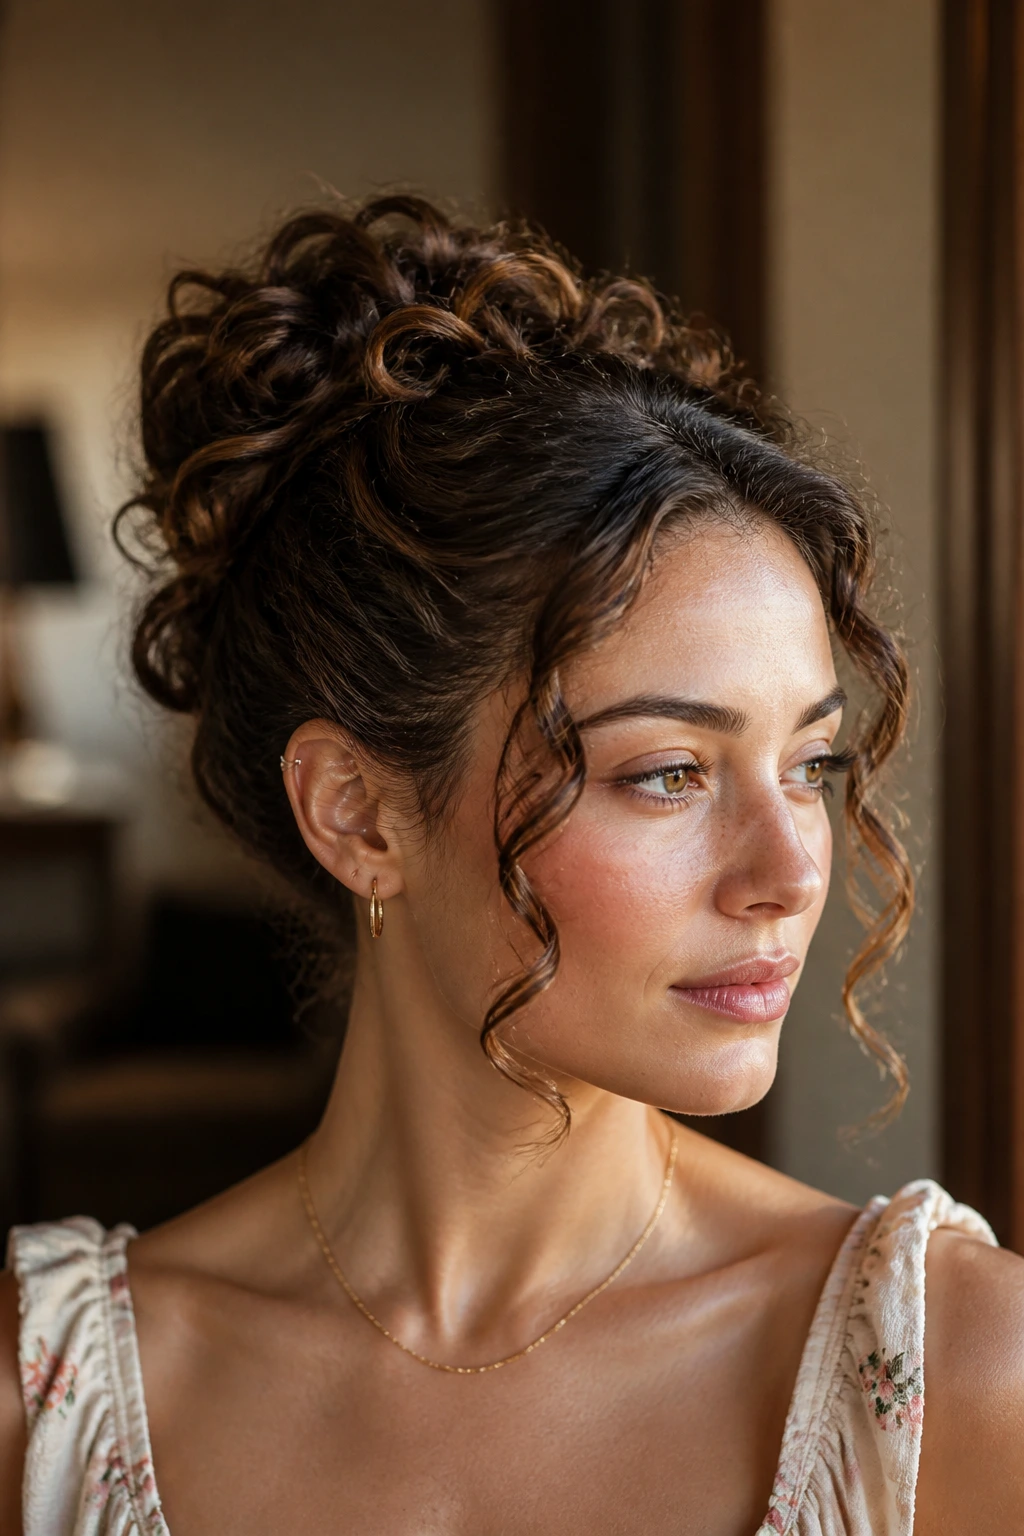
Fine-Curl Reinforcement: Use smaller sections, two extra pins, and a little mousse at the roots. Fine curls often need more anchors and less product slip, so the style holds better when you keep the base light and the pinning frequent.
Thick-Curl Armor: Swap in U-pins and stronger elastics. Thick or dense curls can handle more tension, but they also need more support at the nape and sides so the style doesn’t sag after an hour.
No-Heat Morning Reset: Refresh damp curls with a spray bottle, finger-coil any flattened sections, and pin them while the hair is still slightly pliable. This works well when the hair already has a curl pattern and just needs a reset, not a full wash.
Accessory-Heavy Evening Version: Add pearl pins, a satin bow, or a slim barrette to a low bun, faux bob, or side roll. Use one decorative element, not five. The hair should still be the main thing you notice.
Protective Stretch Version: Choose flat twists, rope twists, or tucked nape styles that keep the ends protected. This is a smart choice when you want the style to last and the curl pattern to stay less disturbed.
Soft Romantic Version: Leave two face-framing pieces out and keep the crown airy rather than tight. The shape reads gentler and works especially well with layered bobs and looser curls that like to move.
Common Mistakes to Avoid
-
Using too much slip before you pin: Heavy cream, oil, or wet hair that’s dripping can make short curls slide right out of the style. Use a mist, not a soak, and keep slick products off the roots until the shape is locked in.
-
Forcing the hair into one big knot: Short curls often do better in two twists, three tucks, or several pin points. If you try to build one oversized bun, the shortest layers escape first and the style starts to look tired within an hour.
-
Pinning in the wrong direction: A bobby pin works better when the wavy side faces the scalp and the open end catches the hair. If the pin just sits on top of the curl, it will wander.
-
Over-smoothing the curl pattern: Brushing everything flat can leave you with a slick shell at the top and frizz at the ends. Use your fingers or a wide-tooth comb only where you need control.
-
Skipping the hidden base pins: One visible pin may look neat, but it usually does not hold. Crossed pins at the base of a twist or knot are what keep the style from shifting.
-
Sleeping on the style without protection: Satin matters. A bonnet, scarf, or pillowcase cuts down on friction, and friction is what breaks the shape apart overnight.
Frequently Asked Questions
Can short curly hair really go into an updo?
Yes, as long as you define “updo” by shape, not by length. Short curly hair often makes better mini knots, twists, puffs, and pinned rolls than full ponytails, and those styles can look cleaner because the curl texture fills them out.
What length counts as short for these styles?
Anything from pixie grow-out to chin-length curls and many neck-skimming cuts can work. Some styles need enough length to tuck at the nape, while others, like the faux hawk or scattered pin sweep, work with very little length.
Is day-two hair better for updos?
Usually, yes. Day-two curls often have a little more grip, which helps pins stay put. If the hair feels dry, mist it lightly first, then add a small amount of mousse or gel only where you need control.
How do I keep bobby pins from showing?
Match the pin color to your hair when you can, but placement matters more. Slide pins into the base of the twist or underneath the curl fold, and cross two pins when the section needs extra support. Pins hidden in the underside of a coil tend to disappear best.
What if my hair is too slippery for pins?
Start with a small amount of mousse or foam at the roots and a touch of gel at the hairline. Then pin small sections instead of large ones. Short curls usually hold better when you give each section its own anchor point.
Can I do these styles without heat?
Absolutely. Most of them work better without heat because the curl pattern gives the style texture and body. If you need a little more definition, refresh with water and finger-coil the loose pieces instead of reaching for a flat iron.
Which styles work best for fine curly hair?
Twisted crown styles, low nape knots, headband tucks, and scattered bobby-pin sweeps usually hold well on fine curls. They rely on structure and pin placement rather than sheer volume, which fine hair often doesn’t have in large amounts.
Which styles work best for thick or dense curls?
Curly faux hawks, side buns, rope-twist crowns, and mini pineapples handle thick curls well because they can support more body. Use stronger elastics and more pins at the base so the style doesn’t sag.
Pinned, Not Flattened
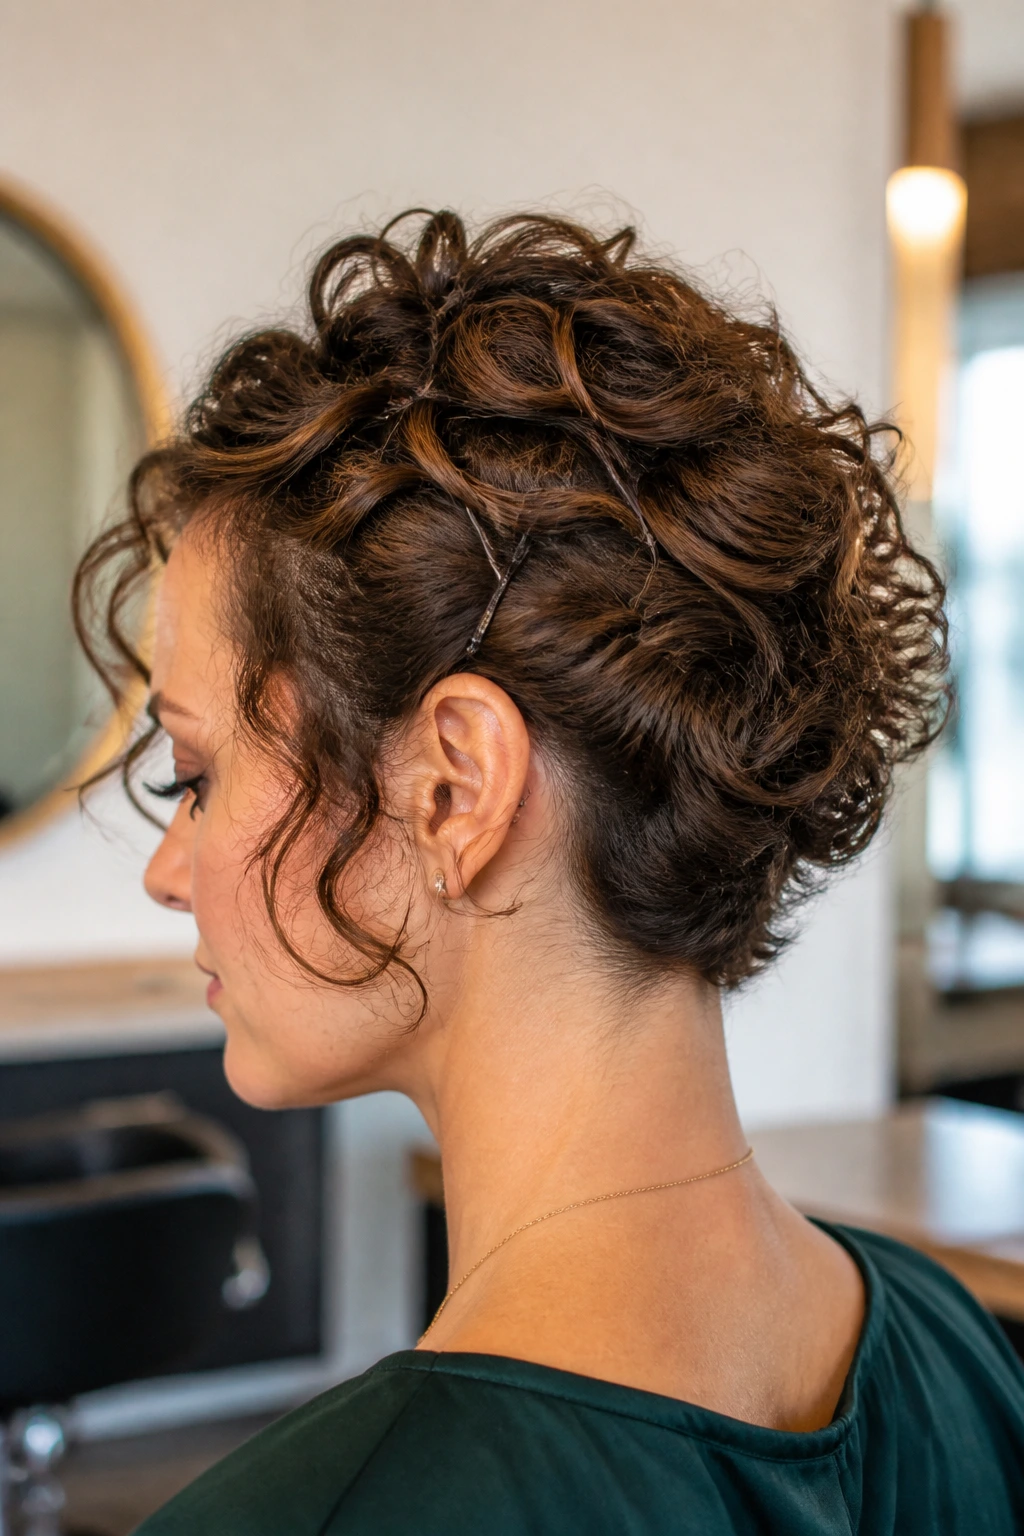
Short curly hair does not need to imitate long hair to look finished. The best updos for this length use the curl’s own shape — the bends, the spring, the texture that refuses to lie flat for long anyway. That’s the whole advantage.
Once you get comfortable with twists, tucked ends, and a pin or two in the right place, the styling gets easier fast. Some days call for a soft nape knot. Some call for a faux hawk with a little attitude. Some only need a headband and three pins. That range is the fun part.
And if a style falls out a little, so what? Re-pin it. Shift the part. Leave a curl loose. Short curly hair always gives you another angle to try.
