



Curly hair already has structure. It’s built in. That’s why a good updo on curls can look finished in a way straight hair sometimes has to fake with teasing, spray, and a lot of prayer. The best updo hairstyles for curly hair don’t try to flatten that texture into obedience. They use it like scaffolding.
The styles that fail usually make one mistake: they treat curls like a problem to smooth away. Bad move. A coil, a twist, a puff, or a pinned roll can hold its own shape for hours if you give it the right anchor points and leave a little room at the hairline. Tight, shiny, shellacked styles can look neat for ten minutes; curly updos that respect shrinkage and volume tend to look better after a few real-life hours.
There’s a sweet spot here, and it’s not mysterious. You want enough tension to keep the shape from collapsing, but not so much that the curls lose spring or the scalp starts protesting. Once you understand that balance, the whole category opens up—formal styles, fast daytime fixes, protective looks, even the kind of messy bun that somehow still reads intentional.
Why These Curly Updos Earn a Spot in Your Rotation
-
Built-in volume: Curly texture gives you body before you even pick up a pin, so these styles look fuller with less product and less teasing.
-
Shape without precision stress: A few strategic bends and tucked ends are often enough; curls hide small imperfections that would show instantly on straight hair.
-
Better second-day use: Many of these looks are easier on hair that’s not freshly washed, since a little natural grit helps pins stay put.
-
Less need for heat: These styles lean on twists, knots, buns, and braids instead of flat ironing or curling iron reset work.
-
Flexible for different lengths: Some work on shoulder-length curls, others need more length, but almost all can be adjusted with pin placement and product choice.
-
Useful beyond special occasions: The same updo can look polished enough for dinner and relaxed enough for errands if you soften the front and leave the crown a little less perfect.
How to Pick the Right Updo for Your Curl Pattern and Length
Thicker, springier curls usually hold better in styles that build from the inside out: low buns, braided crowns, twisted halos, and pinned rolls. Those shapes use the texture itself as grip. If your curls are dense, don’t fight the volume. Work with it and stop trying to make a bun the size of a plum when your hair naturally wants to make a peach.
Looser curls and waves often do best in styles that borrow a little structure from the front and sides—think side parts, half-up knots, claw-clip twists, and wrapped bases. A looser pattern can slip more easily, so a small amount of mousse or light gel at the root line helps more than a heavy cream does.
Shorter curls need tucks, clips, and flat sections. If your hair barely reaches the nape, styles that depend on a big coil of length will get frustrating fast. Go for pinned crowns, mini buns, or a headband roll. Longer curls can handle more dramatic shapes, but they also need more thought about weight. Big buns can sag if the base is too loose.
And if you’re choosing under pressure—morning rush, event in three hours, humidity doing its worst—pick the style that matches your texture first, not the style that looks prettiest on a mannequin head. That’s how you avoid rebuilding it twice.
1. The Pineapple Puff With Face-Framing Tendrils
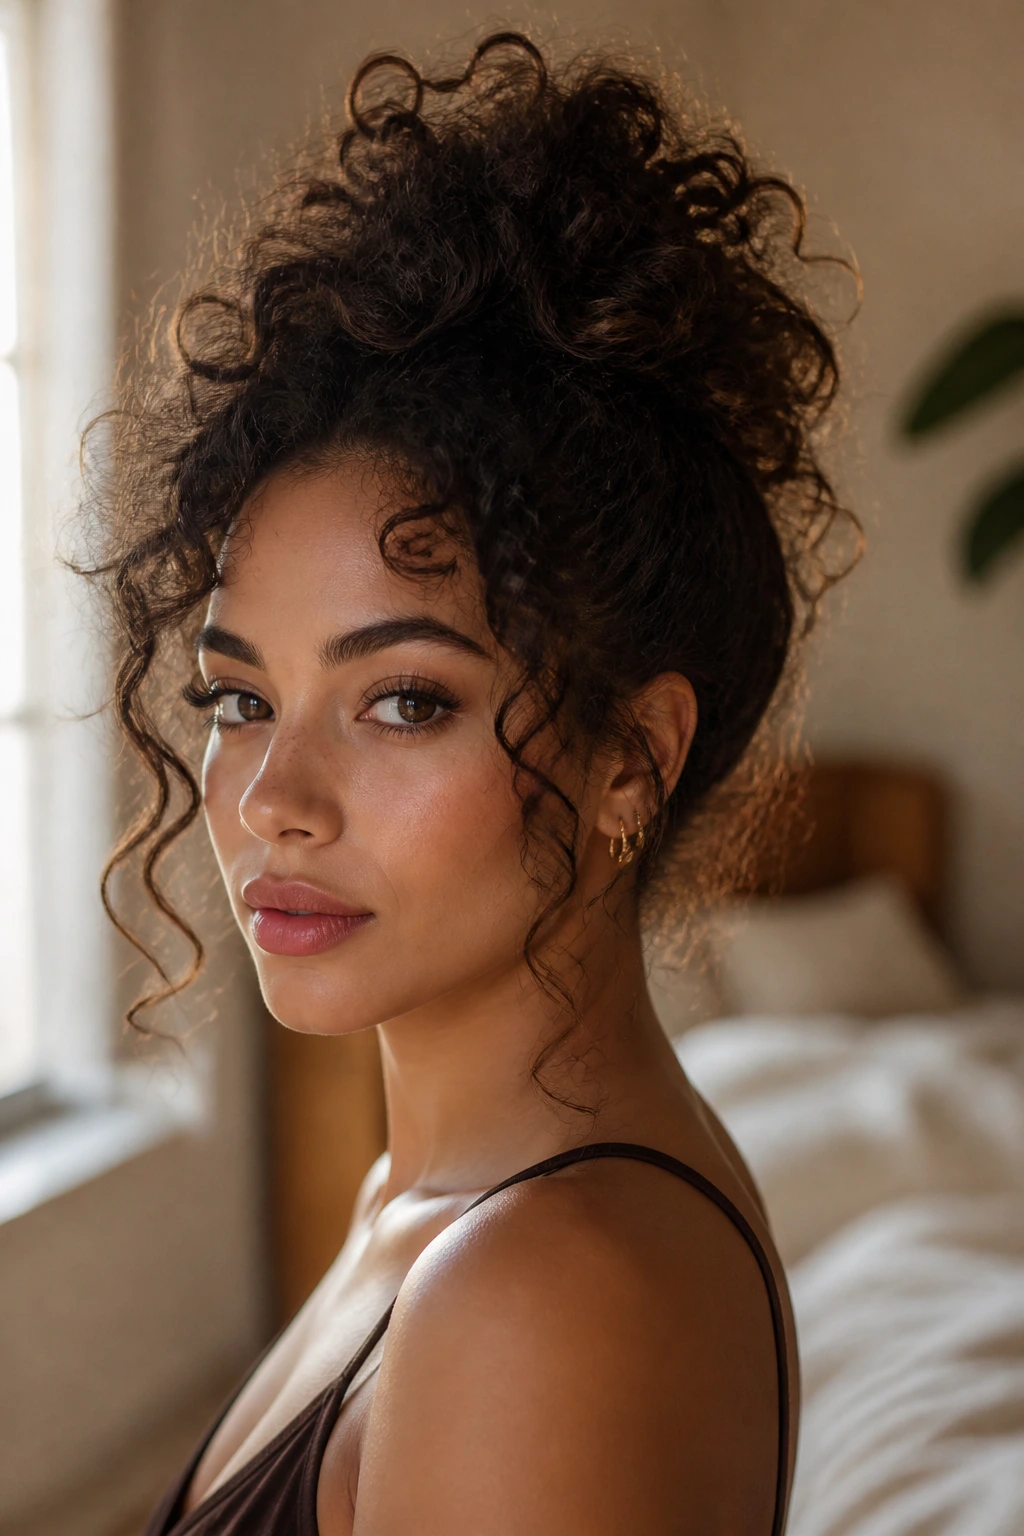
The pineapple is the curly updo people reach for when they want speed, but it earns its keep because it makes the most of natural lift. Gather the curls high at the crown, keep the elastic loose enough that the roots don’t crease hard, and let the ends spill out in a soft halo. A couple of tendrils at the temples keep the shape from looking like you rushed through it in a parking lot.
Why it works
The height at the crown lets the curl pattern stack on itself instead of fighting gravity. That means more volume with less manipulation. If your curls are dense, this can look almost sculptural. If they’re finer, the puff still reads full because the base sits where the head naturally gives you the most lift.
- Best for second-day curls, shoulder-length or longer hair, and fast mornings.
- Use a satin scrunchie or a soft coil tie so the base doesn’t leave a sharp line.
- Add 2 to 4 bobby pins at the sides only if the puff starts drifting backward.
- A tiny touch of edge gel around the hairline keeps the front tidy without sealing the whole style shut.
Best trick: Flip your head over before you tie it off. The curls fall into a cleaner dome, and you avoid the flat patch that shows up when you gather everything upright from the start.
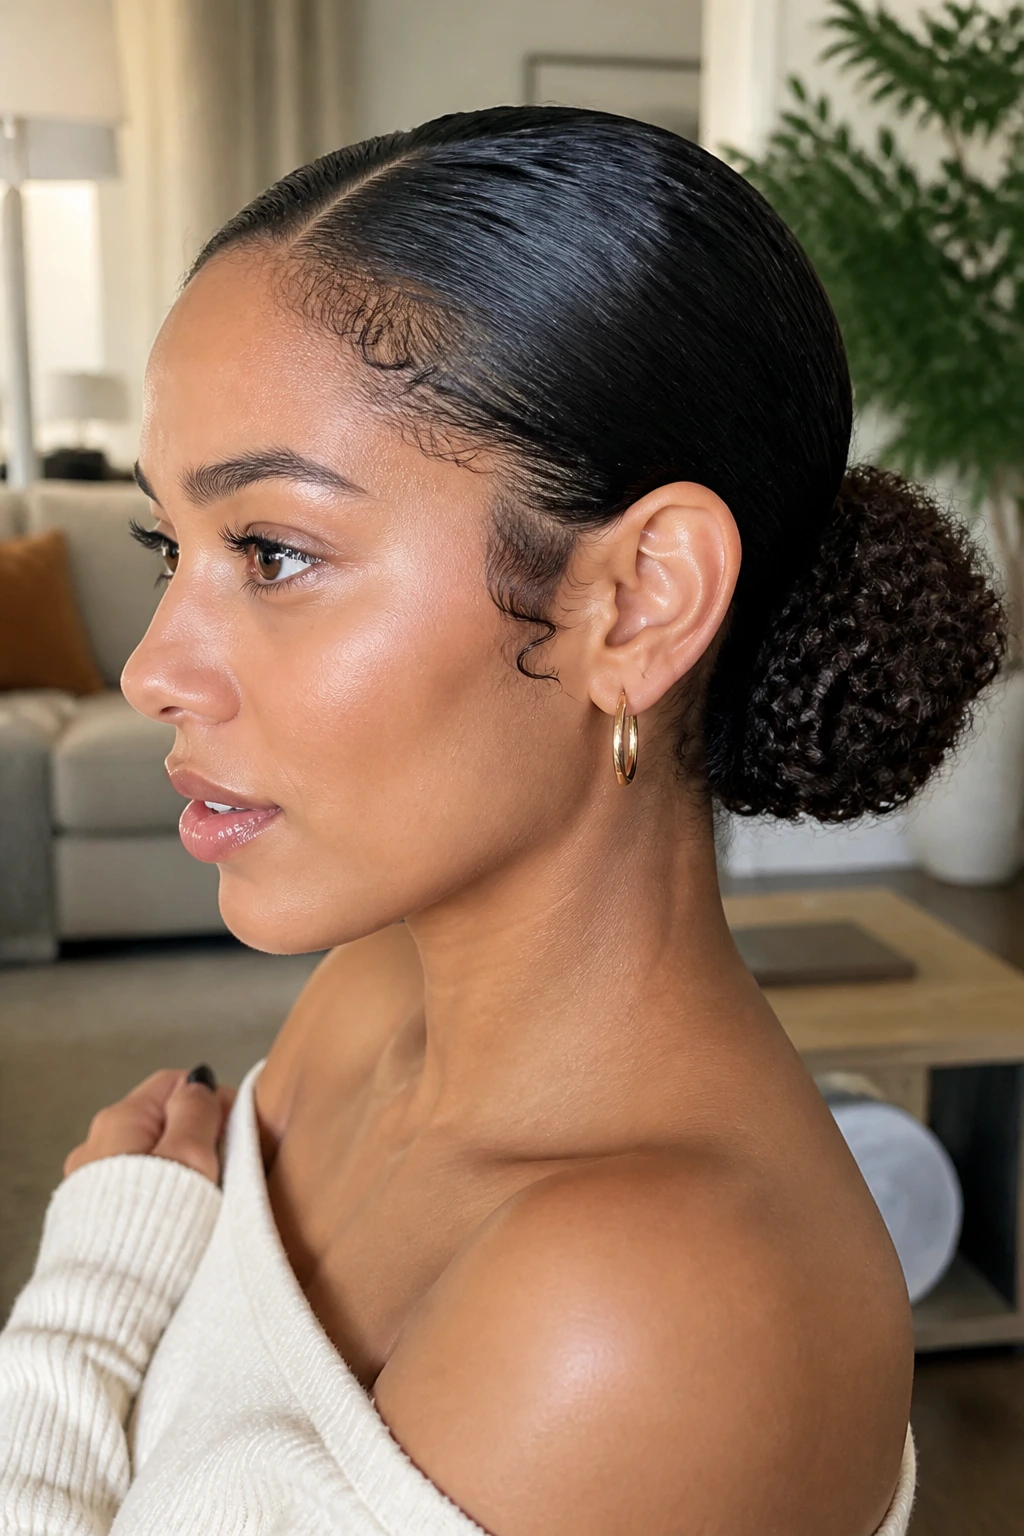
2. The Sleek Low Curly Bun
Sleek does not have to mean stiff. A low curly bun works because you smooth the perimeter and leave the bun itself textured, which keeps the whole thing from turning into a hard little ball at the nape. Brush the top and sides only, then twist the length into a loose coil and pin it into place with U-pins or long bobby pins.
The best version has a shiny crown, a soft bun, and just enough curl left near the bun’s edges to keep it from looking overworked. If you press every strand flat, the style gets smaller and less interesting. If you leave too much loose hair, the bun slides.
Use a medium-hold gel or foam along the hairline, not through the entire head. That gives you control without making the curls crunchy from midshaft to ends. This style is especially useful when you want a polished finish but you do not want to spend half an hour smoothing every curl into obedience.
For a cleaner look, part the hair first—center or deep side—and build the bun low and slightly off-center at the nape. That tiny shift makes it look deliberate instead of default.
3. The Twisted Halo Crown
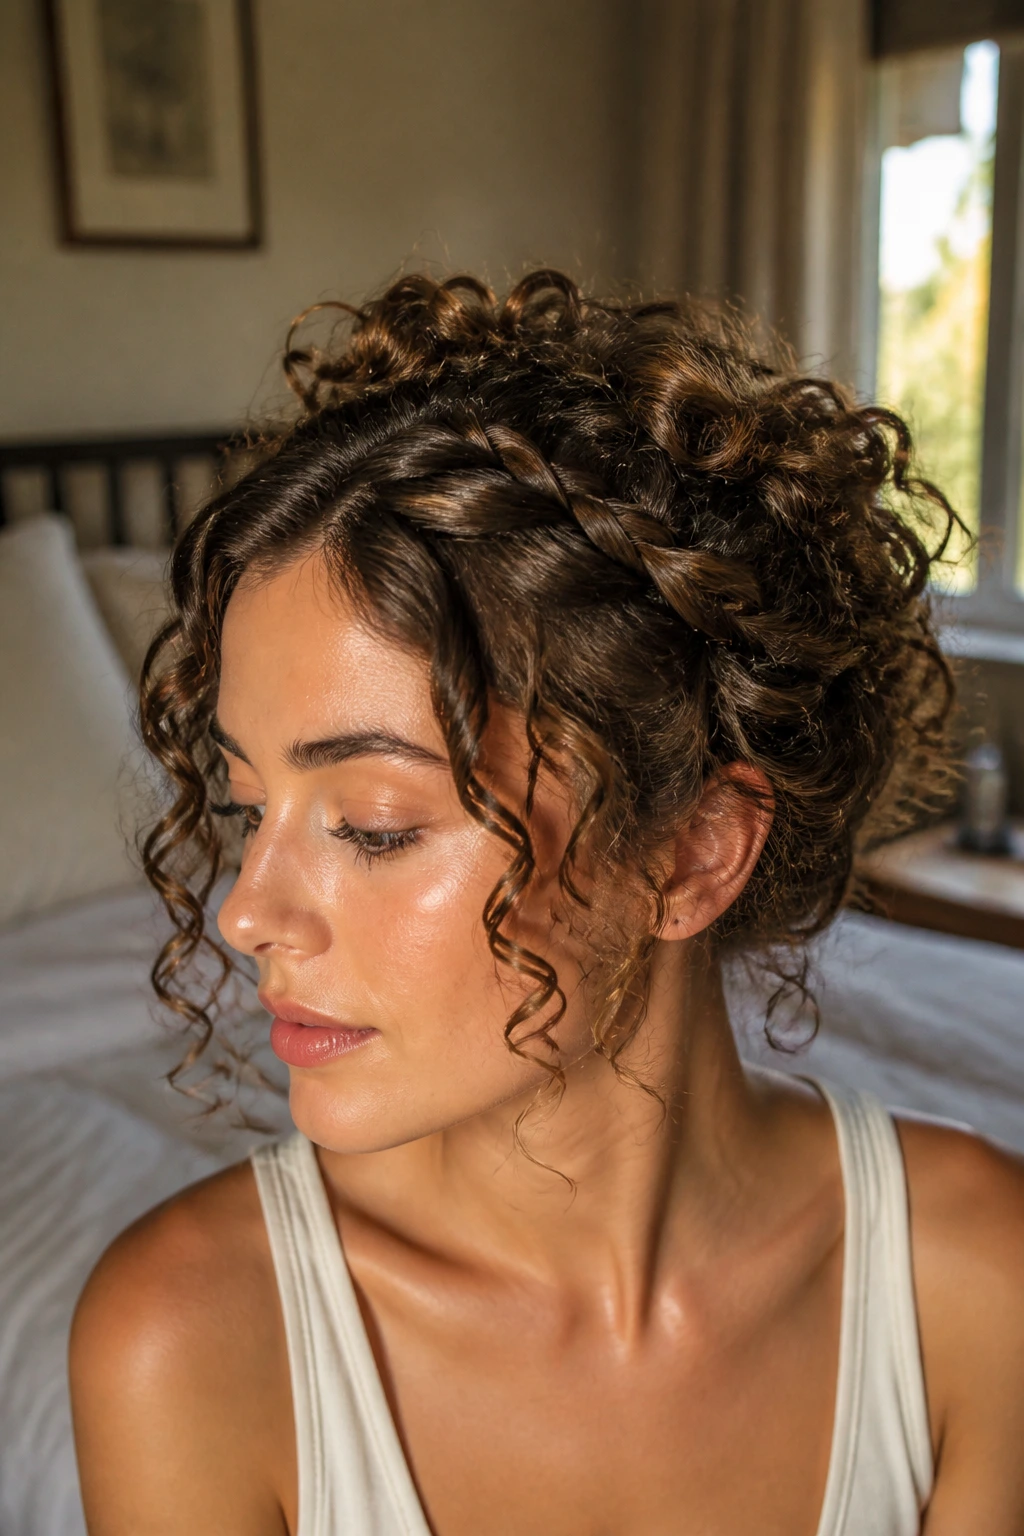
Need an updo that keeps the curls off your neck but still leaves the hairline soft? The halo crown is one of the smartest moves in the whole category. Split the front sections, twist each side back along the hairline, and pin them where they meet at the back. The curls at the crown stay lifted, and the twists create a frame instead of a hard edge.
The trick is not to make the twists too tight. Tighter twisting can flatten the curl pattern and make the style look narrow. A looser twist holds better anyway, because the texture has something to grip. If your hair is layered, tuck the shorter pieces under the twist before you pin; that keeps the ends from poking out like little springs.
How to pin the halo
Use two pins in an X at each joining point if the style keeps slipping. Straight pins disappear into curls too easily, but crossed pins hold the seam in place. If you have thick hair, pin the twists in two spots on each side: one near the temple and one closer to the back of the ear.
This style works especially well on day-two curls that still have shape at the front. Freshly washed hair can be too slippery. The whole thing reads soft, controlled, and slightly romantic without being precious.
4. The Braided Mohawk Puff
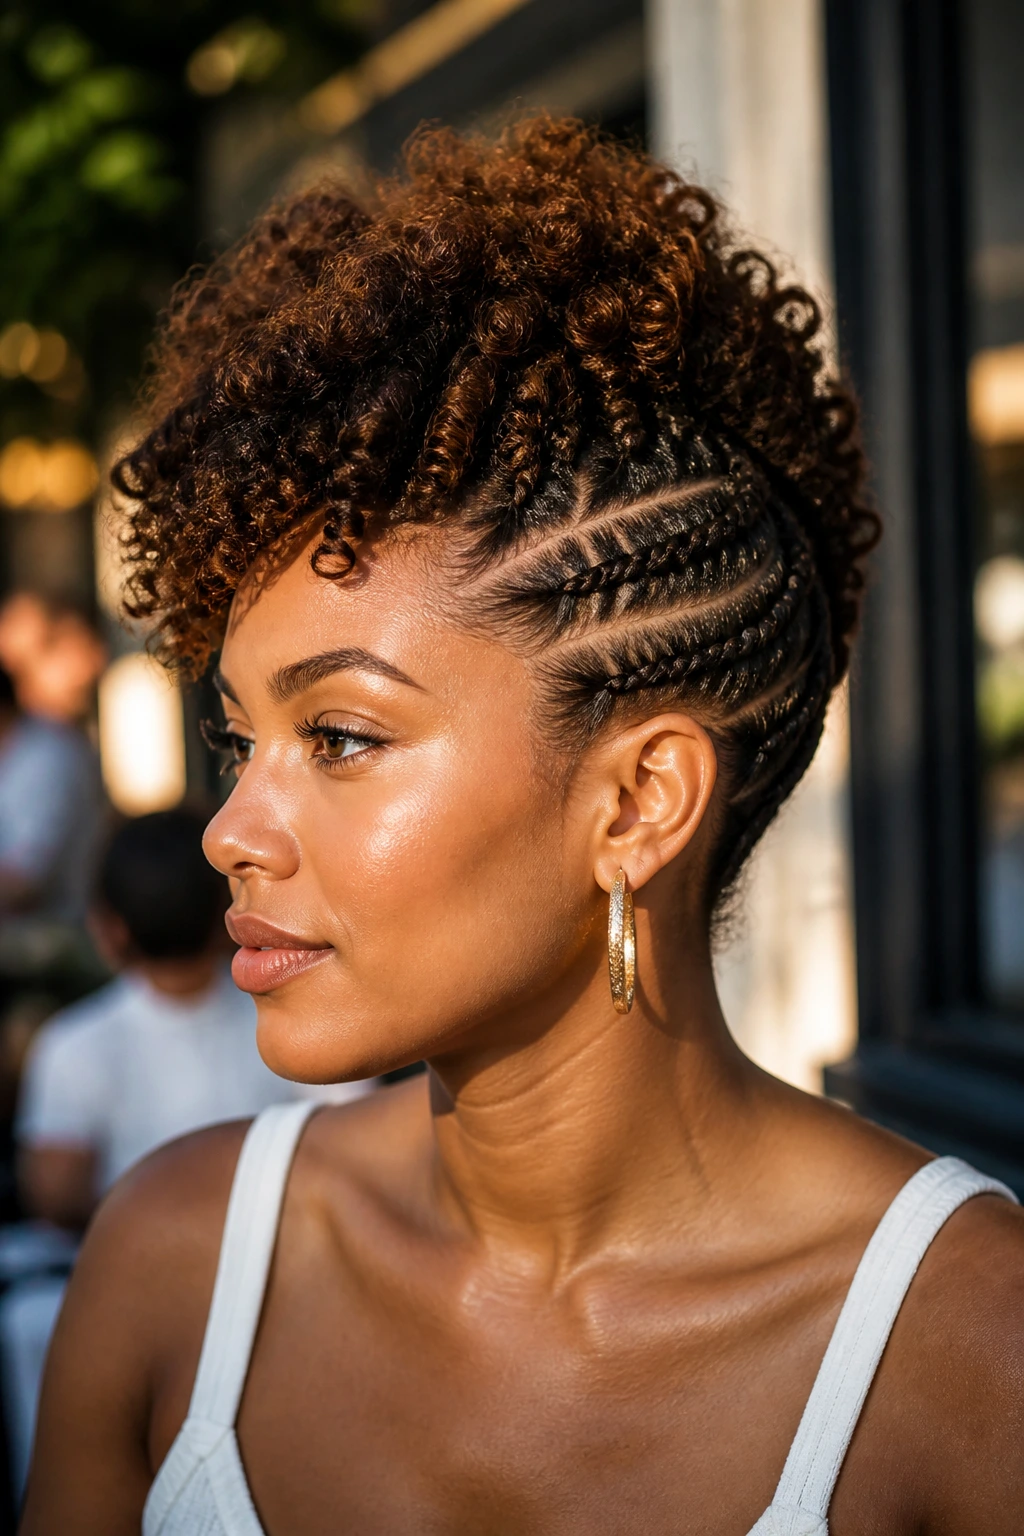
If you want height without committing to a full updo, this is the style that gives you drama fast. Braid or flat-twist the sides up toward the middle, then let the center section stay full and curly so it rises like a mohawk. It sounds bold because it is bold, but the actual structure is simple.
The braided sides keep the hair close to the head, which makes the middle volume look even bigger. That contrast is the whole point. On type 4 curls, the central puff can look almost architectural. On looser curls, the shape reads more playful and less severe.
- Use small clear elastics only if the braid ends are short and slippery.
- Pin the sides upward before you touch the center.
- A touch of mousse at the roots helps the mohawk section keep lift.
- Best for medium to long hair with enough length on top to form a ridge.
The style is also forgiving when your curl pattern is uneven. If one side is tighter than the other, the braid hides that discrepancy. Good. Let the braid do the boring work.
5. The Loose Curly Chignon at the Nape
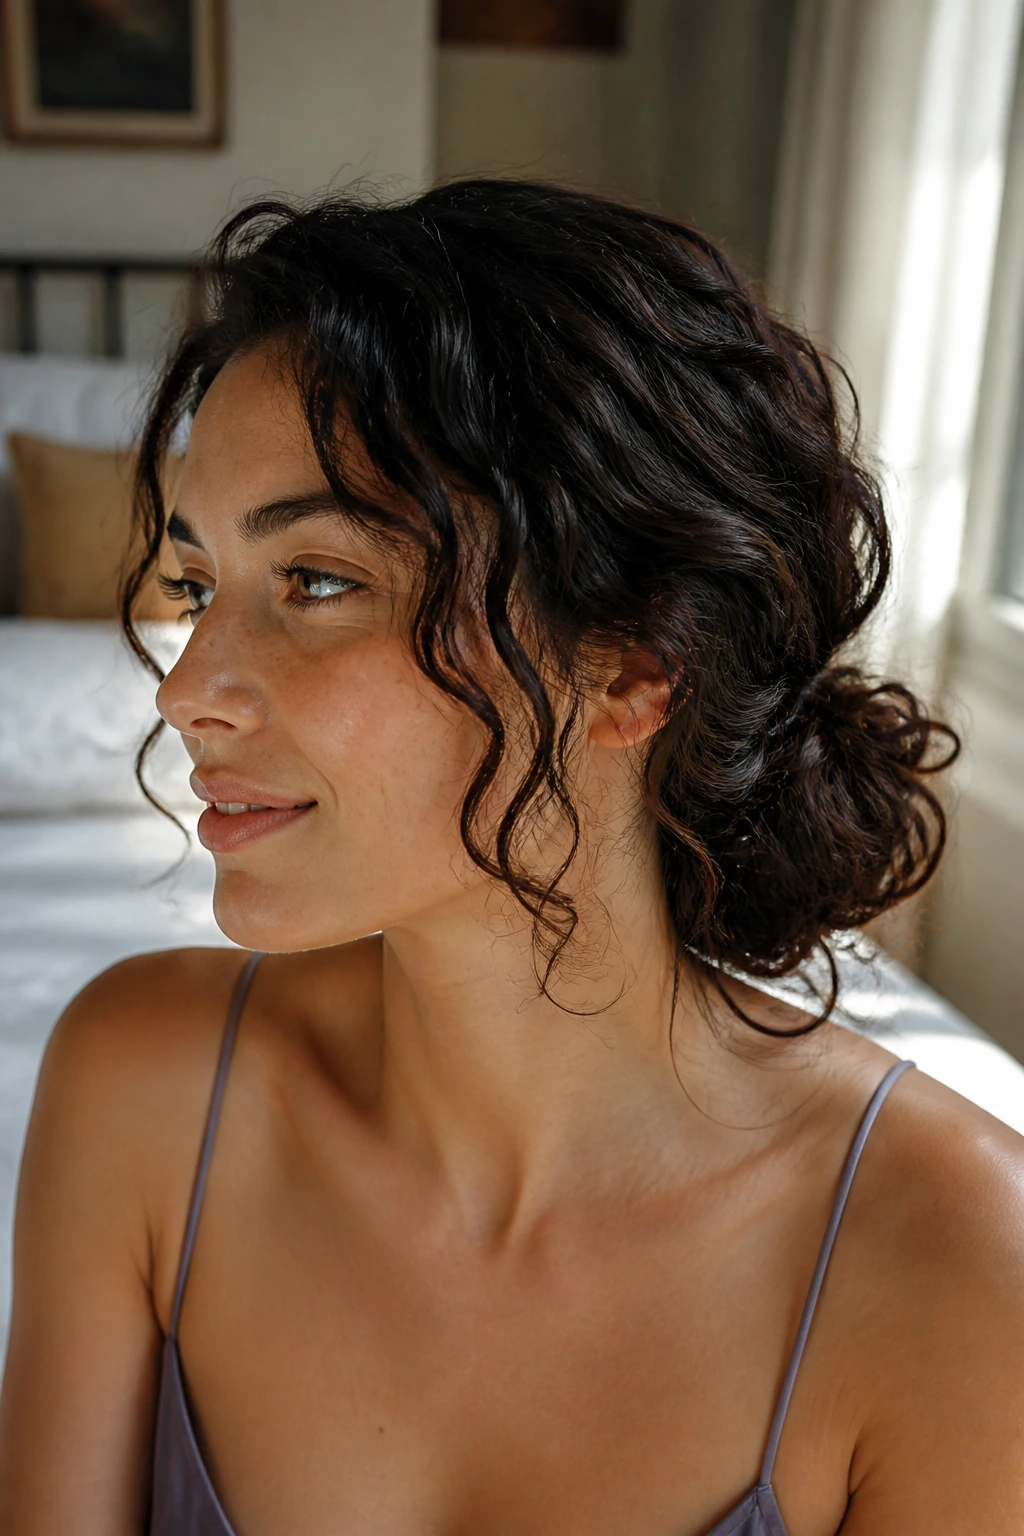
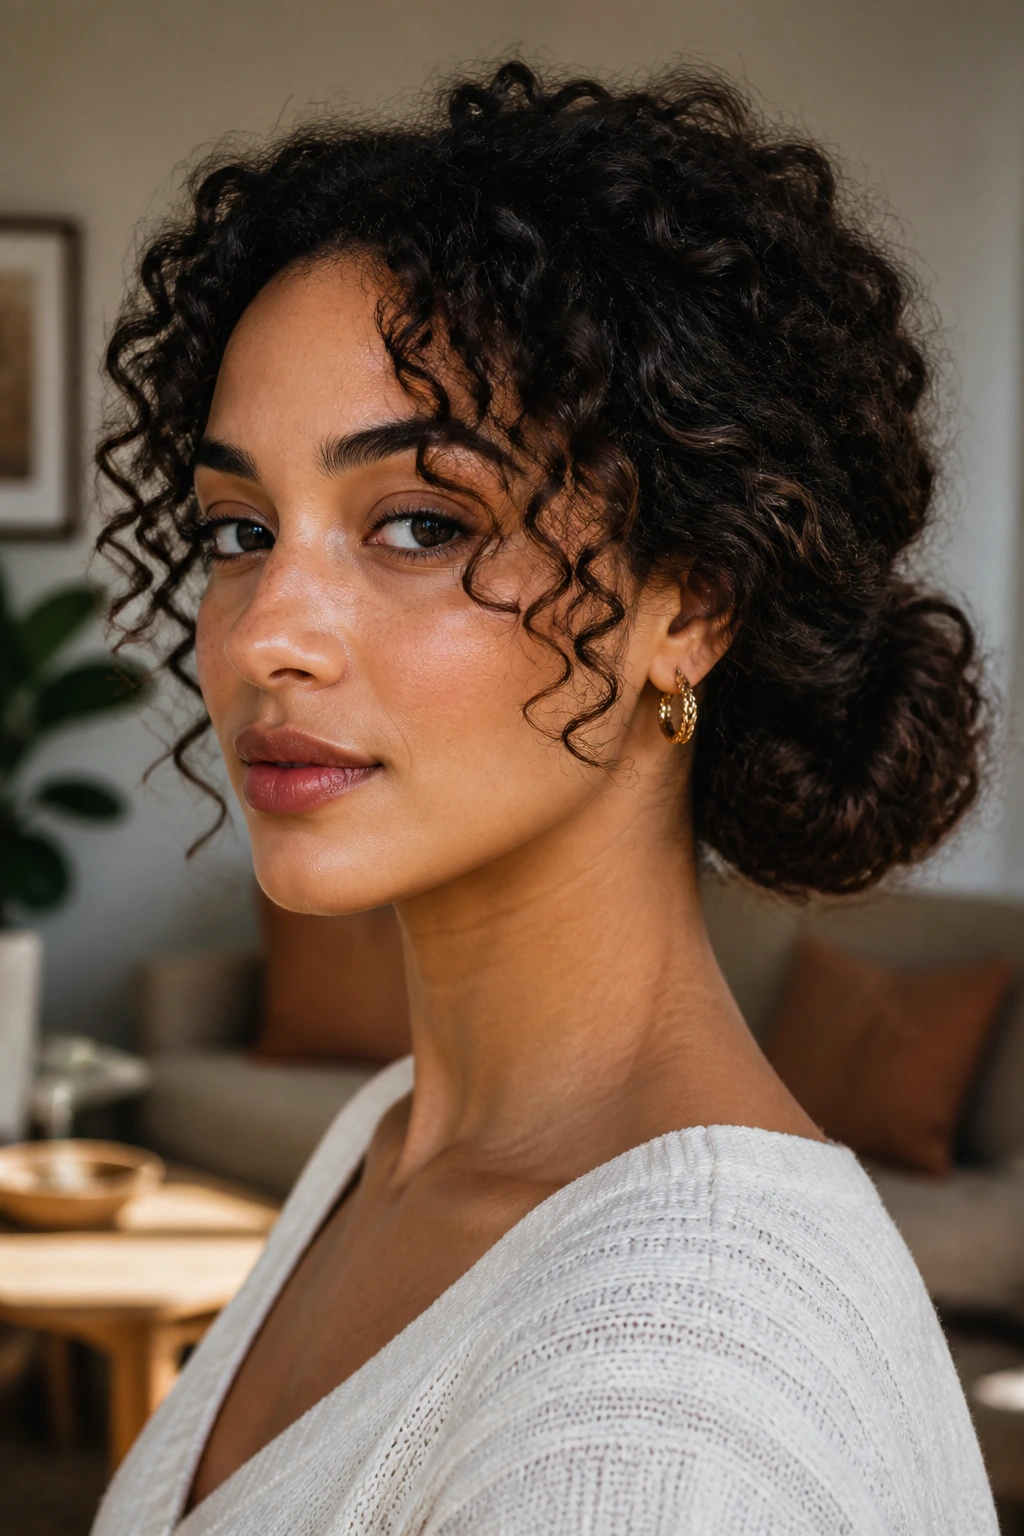
A loose chignon is what curly hair does when it wants to look grown-up without losing its texture. Gather the hair low, twist it into a soft knot, and pin it at the nape so the bun sits slightly offset instead of dead center. The curls should still have visible shape. If the bun looks too polished, you’ve gone too far.
What makes this version worth wearing is the way the curls spill into the twist. Don’t try to force every strand into the same direction. Curly hair looks better when the coil catches a few different bends. That variation gives the bun depth, especially if you leave one or two small spirals loose at the back.
A side part works beautifully here, but a center part can look elegant too if the front sections are tucked cleanly. The low placement is the selling point. It keeps the neck clear and lets earrings or a high collar do some of the visual work.
This is one of the better options for thick hair, because the bun’s weight sits lower and doesn’t pull as hard on the crown. If your hair is finer, backcomb only the inner base—not the whole head—so the bun has something to grip without turning puffy at the surface.
6. The Half-Up Top Knot With Cascading Curls
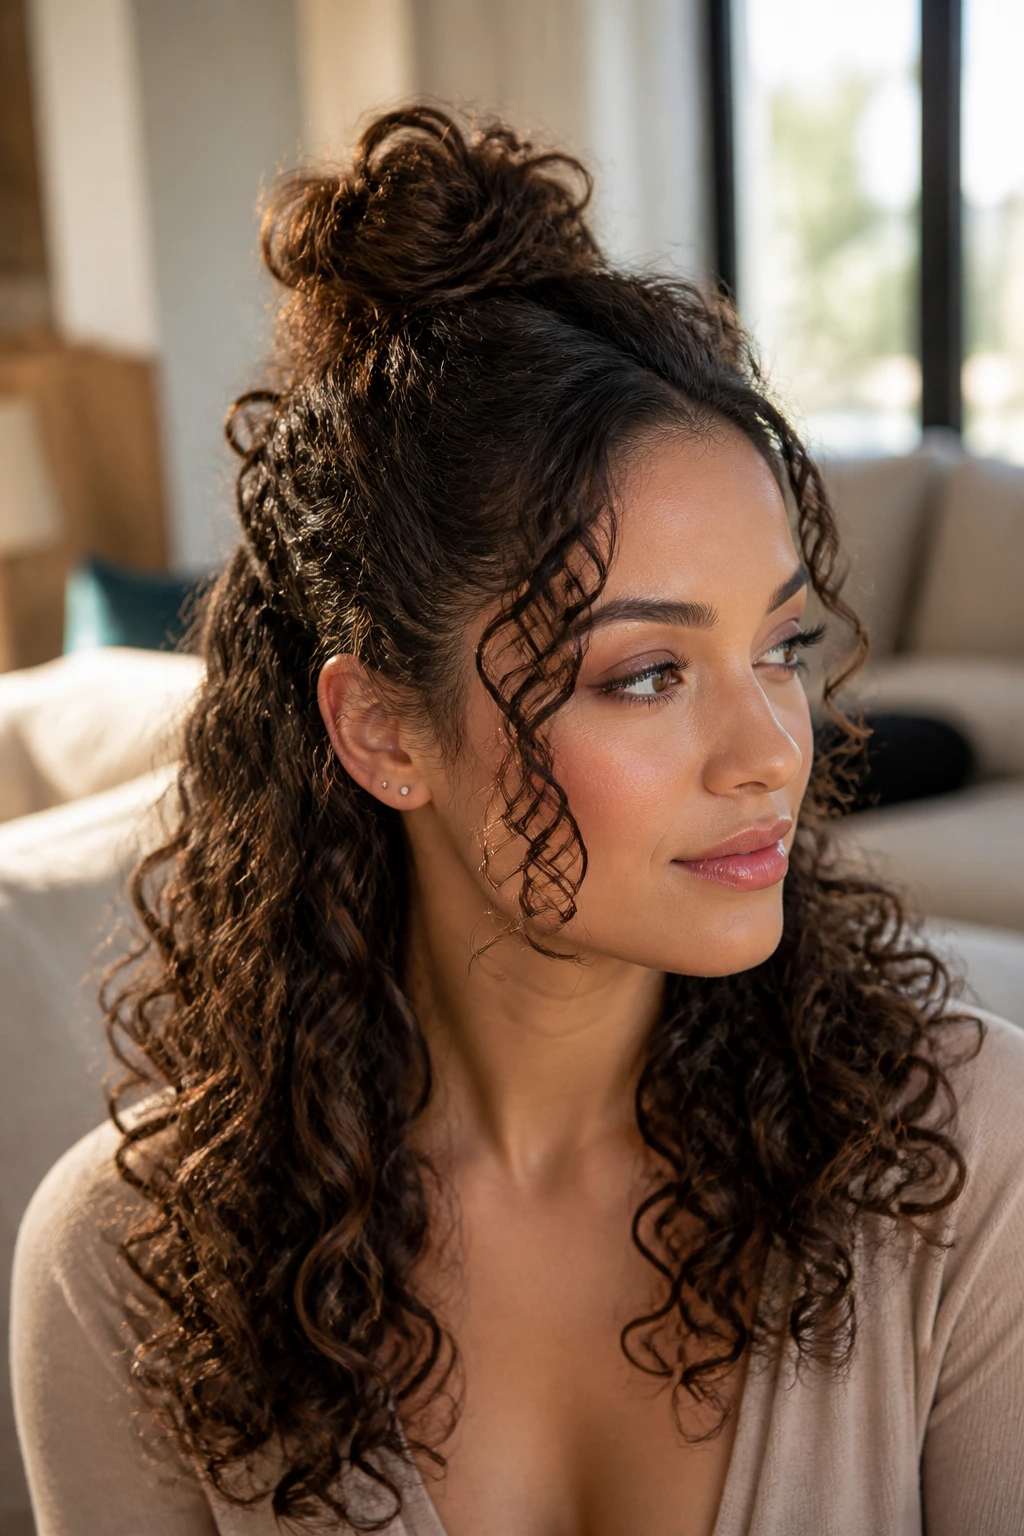
Unlike a full bun, this style leaves the length visible, which is useful when you want structure but don’t want to hide your curls. Pull the top section into a knot, secure it just behind the crown, and let the rest fall. The result is part updo, part loose style, and that balance is why it works so often for curly hair.
It’s the easiest way to get lift around the face without committing to an all-up look. If your hair is shoulder length or longer, this can be done in less than ten minutes. The top knot should be small enough to sit neatly, but not so tight that it tugs the roots flat. Keep some texture in the knot itself. A little mess is the point.
Best for
- People who want their length to show
- Medium to long curls
- Days when you need quick lift at the crown
- Hair that’s too short for a full bun but long enough to gather on top
A few curl-defining creams at the ends can keep the loose section from frizzing out by midday. And if the knot feels too severe, pull a couple of front spirals loose. Small change. Big difference.
7. The Double Mini Buns
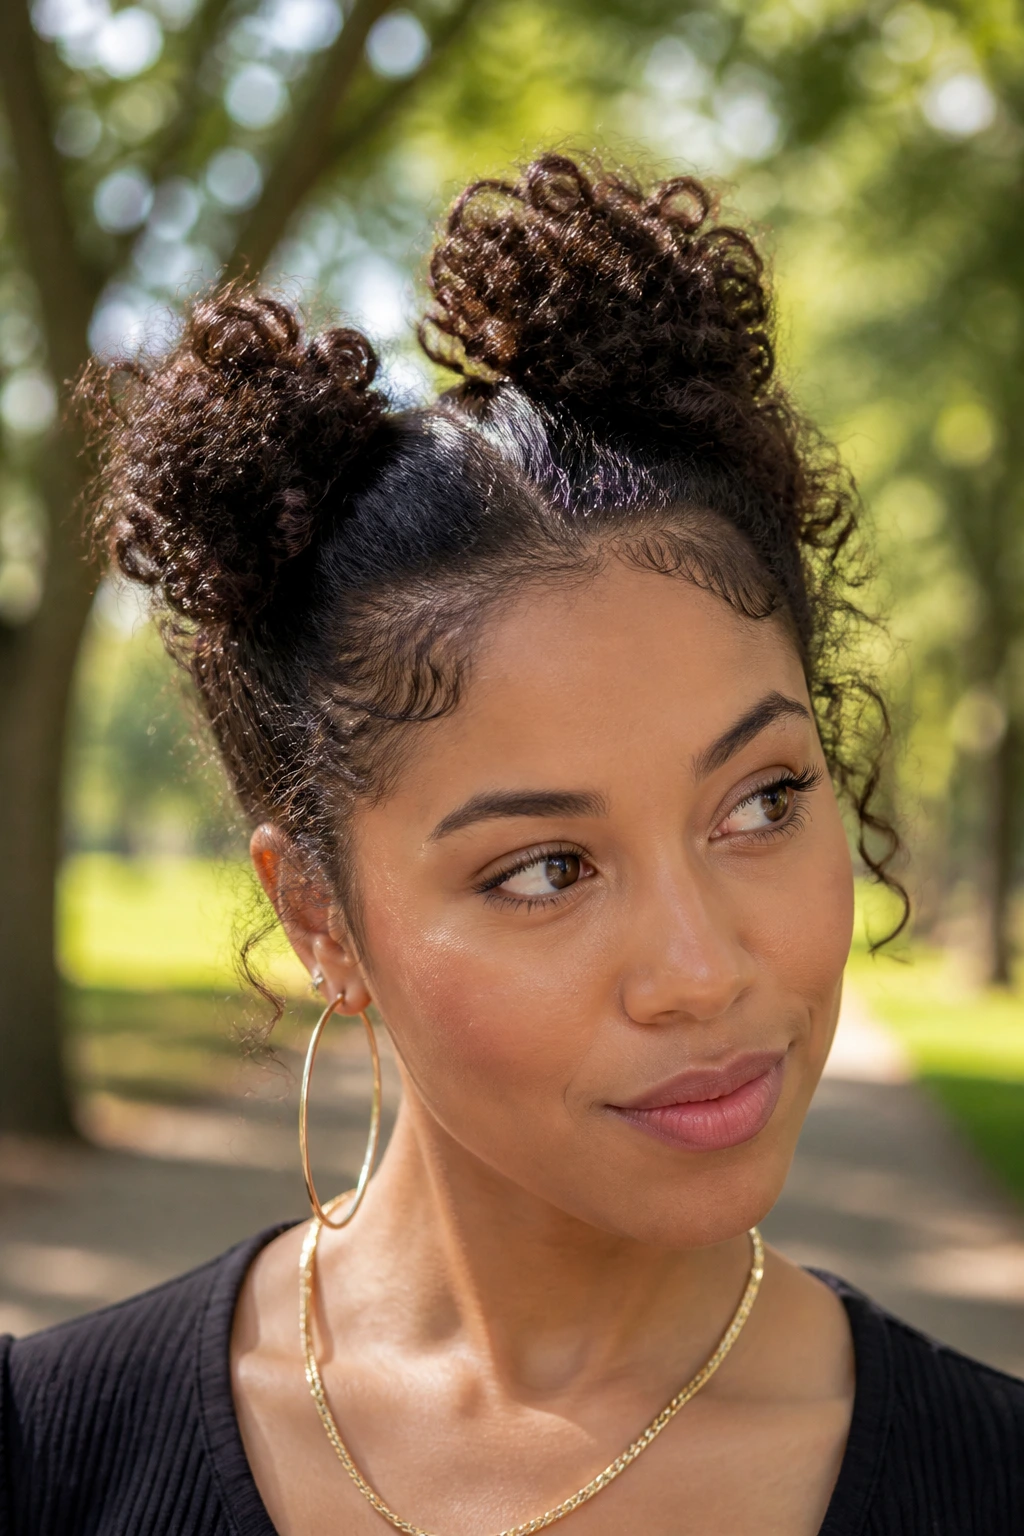
Two buns are practical in a way that usually gets overlooked. They spread the weight out, which matters if your hair is dense or long. Part the hair down the middle, gather each half into a small bun, and keep them slightly off-center so they look intentional rather than cartoonish.
This style works best when the buns aren’t identical twins. Let one sit a fraction higher if your face shape likes extra lift, or keep both low if you want a softer line. The curls should still show at the edges of each bun. That’s what keeps the style from looking too rigid.
Small pins are your friends here. A lot of people try to anchor both buns with one elastic each and call it done. Then one side starts collapsing while the other sits there smug and untouched. Use two pins per bun if the hair is dense, and set them through the base, not the outer curl.
This is a fun style for weekends, festivals, or any day you want a little personality without a lot of styling time. It’s also one of the better ways to break up bulk in very thick hair.
8. The Side-Swept Rolled Bun
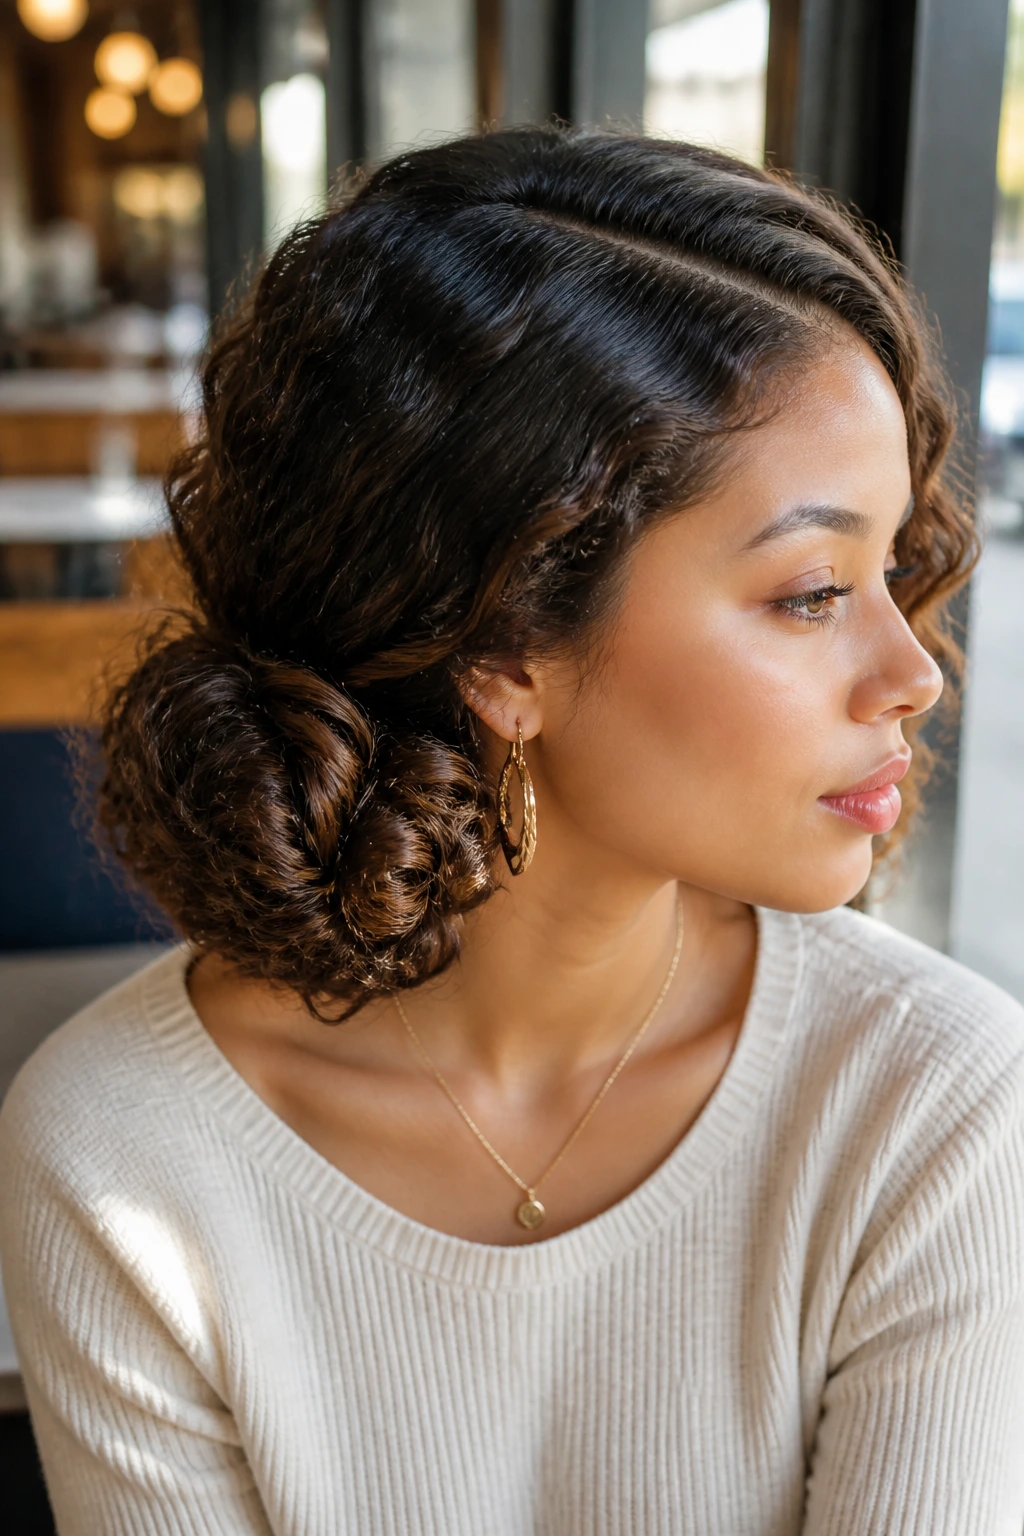
A deep side part changes everything. It turns a simple low bun into something that looks thought through. Sweep the hair to one side, roll the length into a bun just behind the jawline, and pin the whole shape so it sits low and slightly forward. That asymmetry gives curly hair a softer, more deliberate line.
The roll matters because it keeps the curl pattern visible. A tight coil would make the style shrink too much and lose the shape you paid for. Keep the bun compact enough to hold, but leave the outer layer loose so the curls can show their own bends.
This style is especially good when you want one side of the face open. Think earrings, a strong lip color, or a collar that needs room. It also plays well with layered curls because the shortest pieces can be tucked along the side part instead of fighting to stay in a center seam.
If the bun wants to sag, place one pin under the roll and one pin across the base in a cross. Simple fix. Much better than trying to force a third elastic on a shape that already wants to stay put.
9. The Braided Low Bun
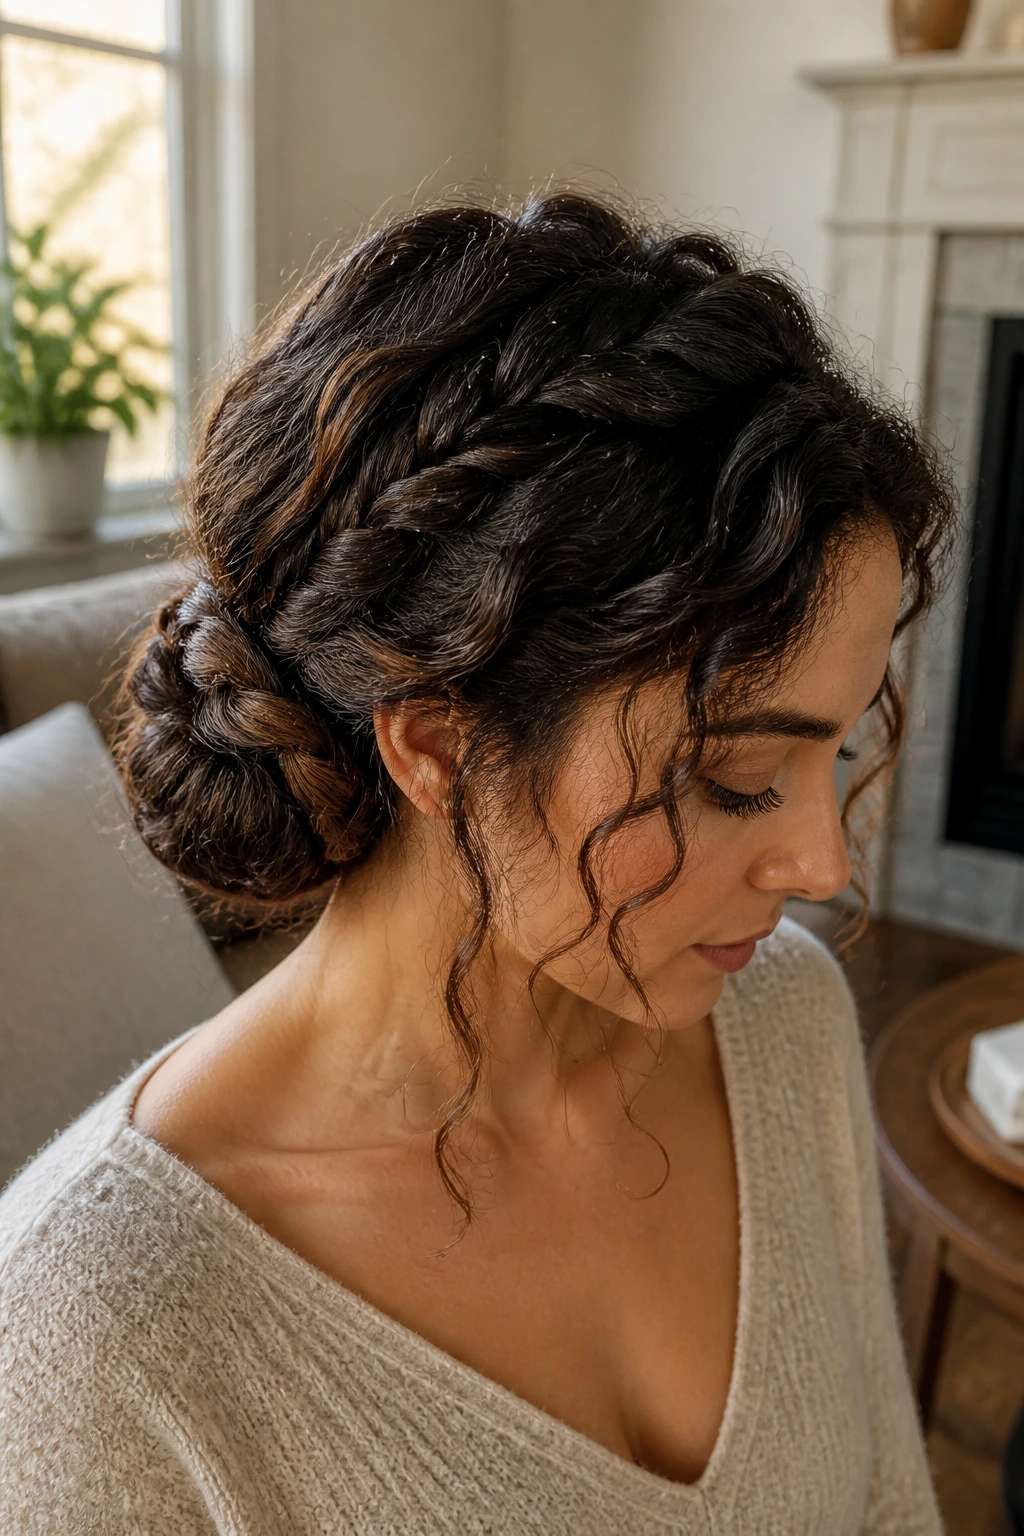
A braid before the bun is the difference between “I threw my hair up” and “I styled my hair.” Start with a low ponytail, braid it loosely, then wrap the braid into a bun and pin the ends underneath. The braid gives the bun a rope-like texture that curly hair wears well, especially when the curls have a little lived-in frizz.
The interesting part is that the braid doesn’t need to be perfect. In fact, a slightly loose braid works better because it gives the bun more surface area to grip. Tight braids can look narrow and flatten the texture you want to keep visible.
This is a useful shape for long curls because it controls length without sacrificing fullness. If your hair is layered, braid the ponytail just enough to keep the shorter pieces from escaping. If the layers are really short, you can braid only the tail and then tuck the ends into the bun with pins.
The style reads more polished than a plain coil, but it isn’t fussy. That balance is why it shows up so often in wedding photos, office settings, and any event where you want your hair to stay in place while you stop thinking about it.
10. The Bubble Ponytail Updo
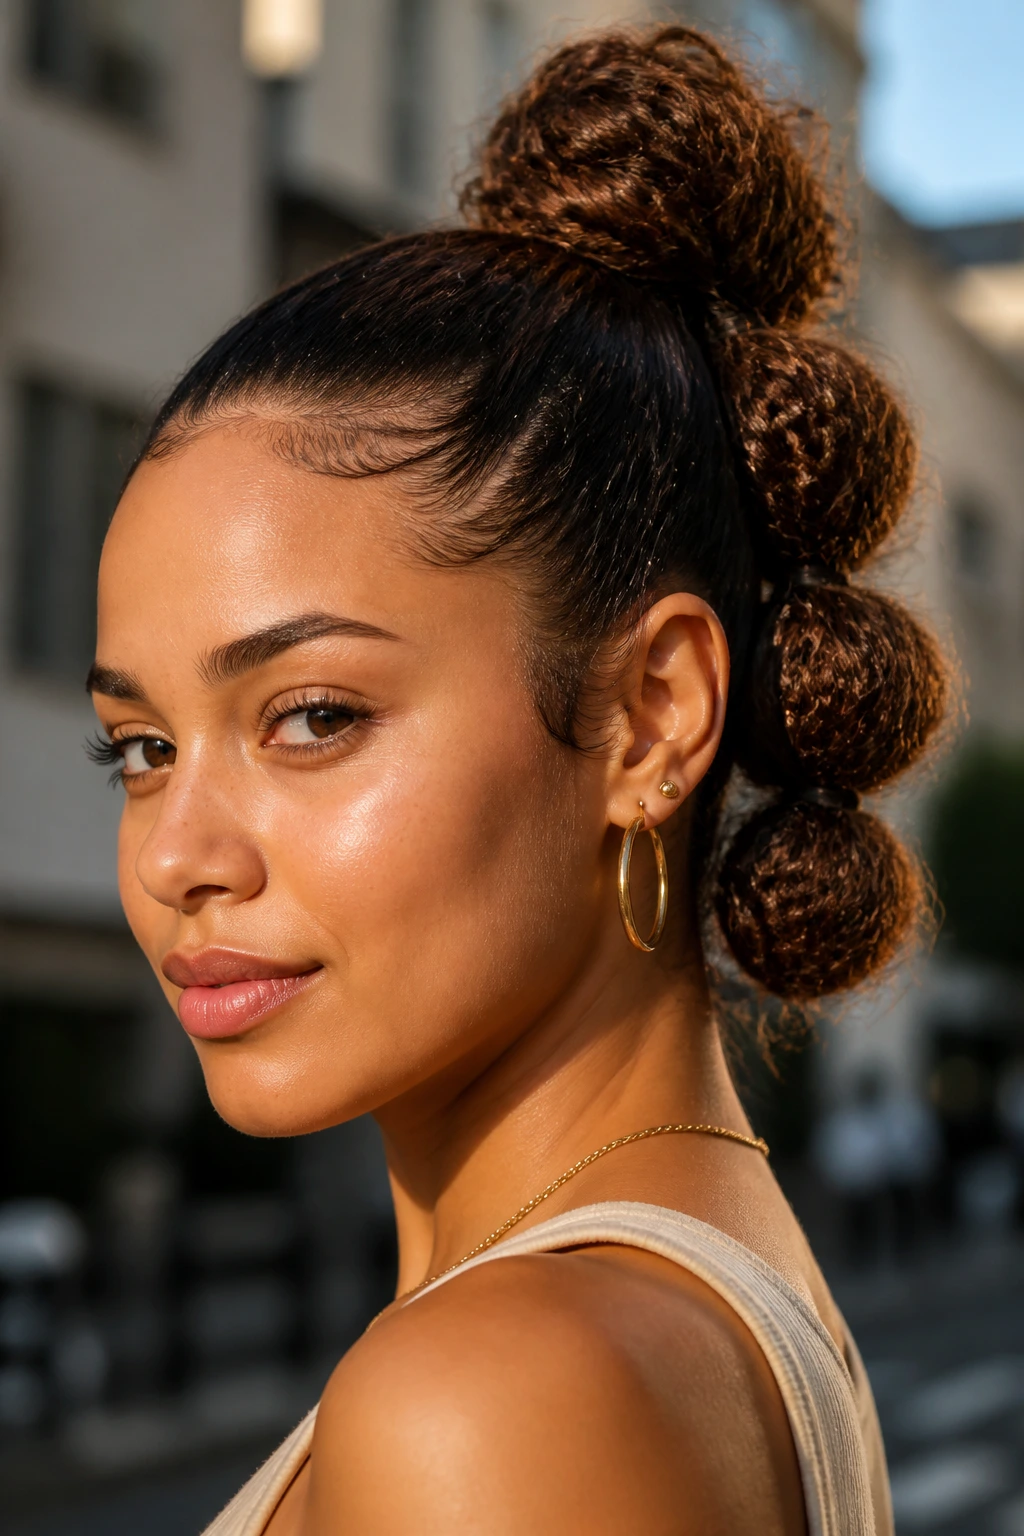
Want a style with shape, but not one that disappears into the back of the head? The bubble ponytail gives you structure in sections. Secure a ponytail, add elastics every few inches, then gently pull each section outward to form rounded bubbles. For curly hair, those bubbles pick up the texture and look fuller than they would on straight strands.
If you have enough length, tuck the ends into the last section and pin them under so the whole thing reads as an updo rather than a simple ponytail. If the hair is medium length, stop the bubbles higher and let the ends stay visible. Both versions work. The difference is in how formal you want it to feel.
What to watch for
- Use snag-free elastics so the bubbles don’t fray the curl pattern.
- Keep the sections even enough to read cleanly, but not so even that it looks rigid.
- A touch of shine serum on the outer layer can keep the bubbles from puffing out too much in humidity.
- This style looks best when the root section is smooth and the bubble sections stay textured.
It’s a good pick when you want movement. Every section catches light differently, and curls make that effect richer, not louder.
11. The Curly French Twist
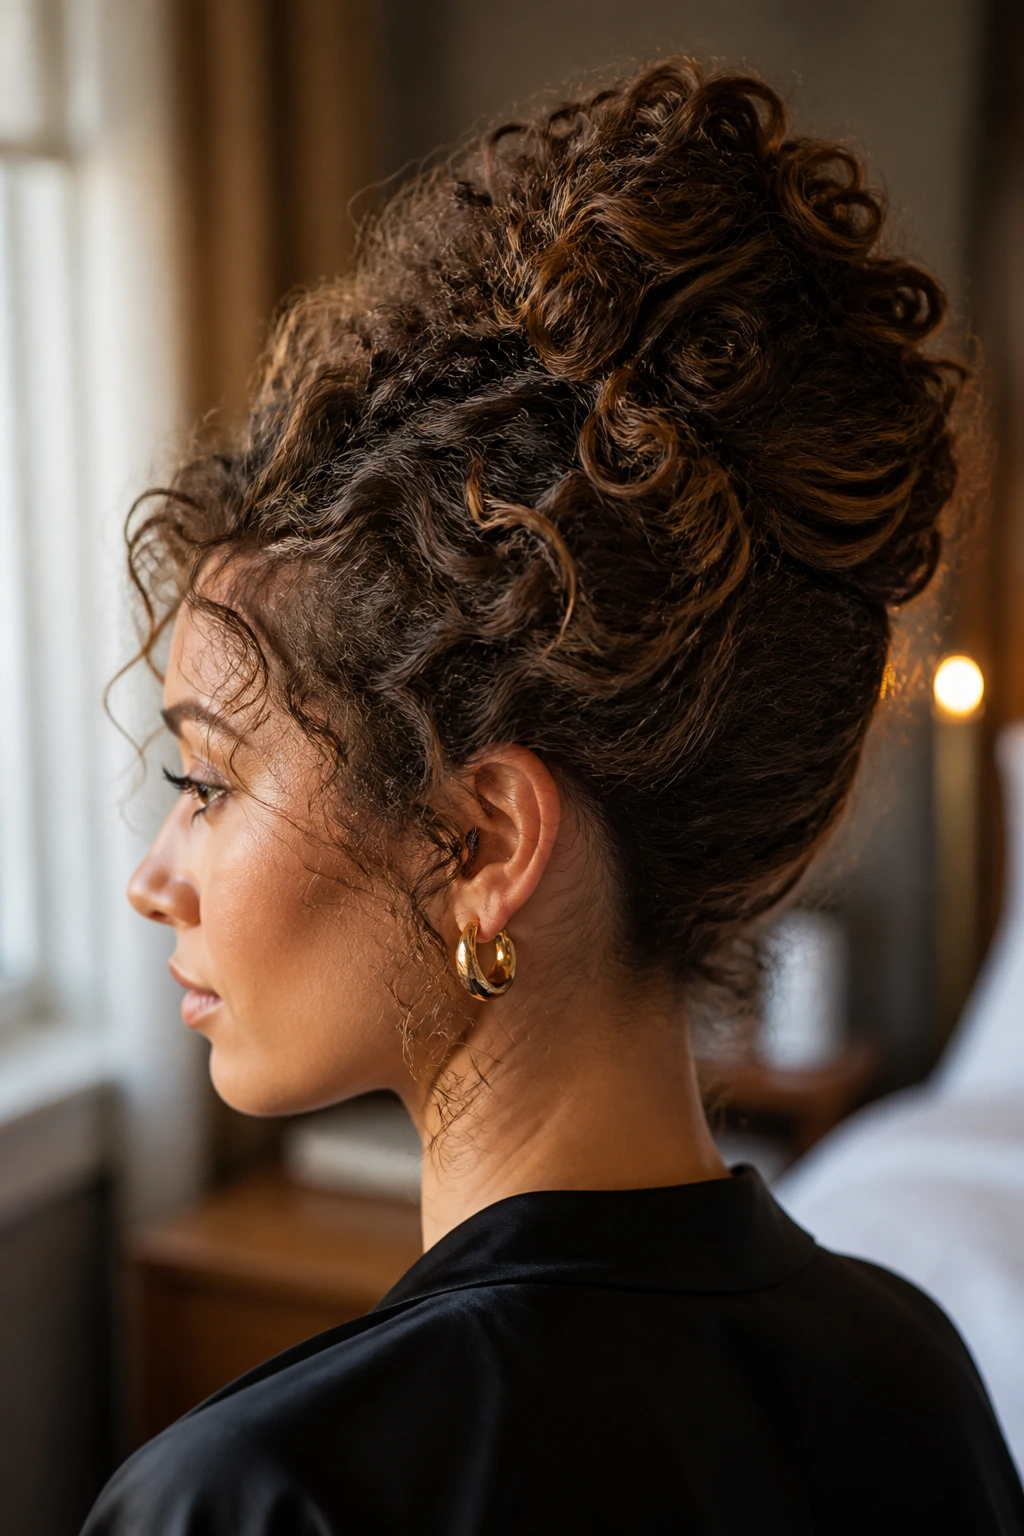
A French twist on curly hair has a different mood than it does on straight hair. It’s less shellacked, more dimensional. Sweep the hair upward, roll it along the back of the head, and tuck the ends into the twist. The curls create a little built-in texture, so the style can look elegant without becoming brittle-looking.
The biggest mistake is trying to smooth curly hair as if it were silk. It isn’t silk. Leave some lift at the crown, especially if your roots tend to lie flat after washing. That lift keeps the twist from looking pasted to the scalp. A slight looseness around the top actually helps the shape last longer, because the hair has room to settle.
Use a few long pins instead of a dozen tiny ones. Long pins anchor the spine of the twist better. Tiny pins disappear into curls and tempt you into overpinning, which never ends well. If the style feels loose after you’ve pinned it, resist the urge to keep adding more and more hardware. Re-pin the base once, cleanly.
This is one of those styles that looks more complicated than it is. Which is nice. People like that.
12. The Claw-Clip Twist
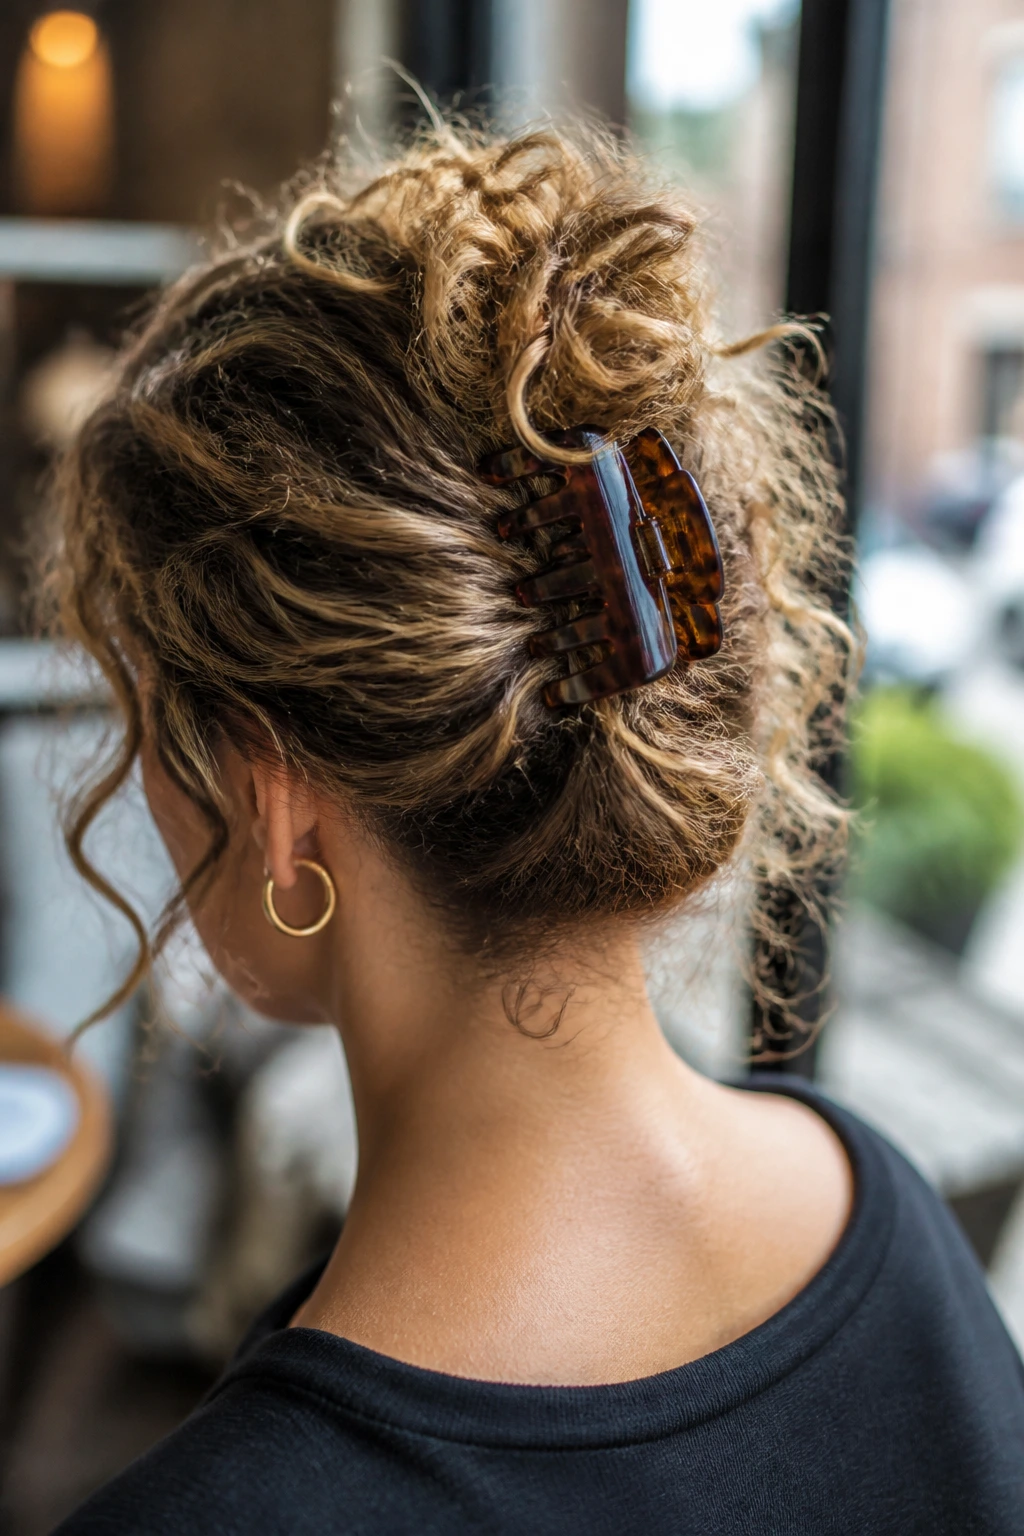
Fast does not have to mean lazy. The claw-clip twist is one of the quickest curly updos you can do, and when it’s built well, it looks intentional instead of rushed. Gather the hair at the back, twist it upward or inward, fold the ends, and clip the center of the twist with a sturdy claw clip. The curls should spill over the clip in a controlled way.
Not every clip works here. Cheap plastic clips with weak teeth slide right out of curly hair, especially if your hair is thick or silky at the roots. Look for a larger clip with strong spring tension and enough width to catch the twist, not just the surface layer.
This style is best when you want movement and easy removal. No tight elastic. No hard crease at the crown. It’s also useful on days when your curls are a little too soft to hold a more structured bun but you still want them off your neck.
If the clip alone feels risky, secure the twist with one hidden pin first, then set the clip over it. That tiny bit of extra anchoring makes the whole thing calmer.
13. The High Curly Bun With a Wrapped Base
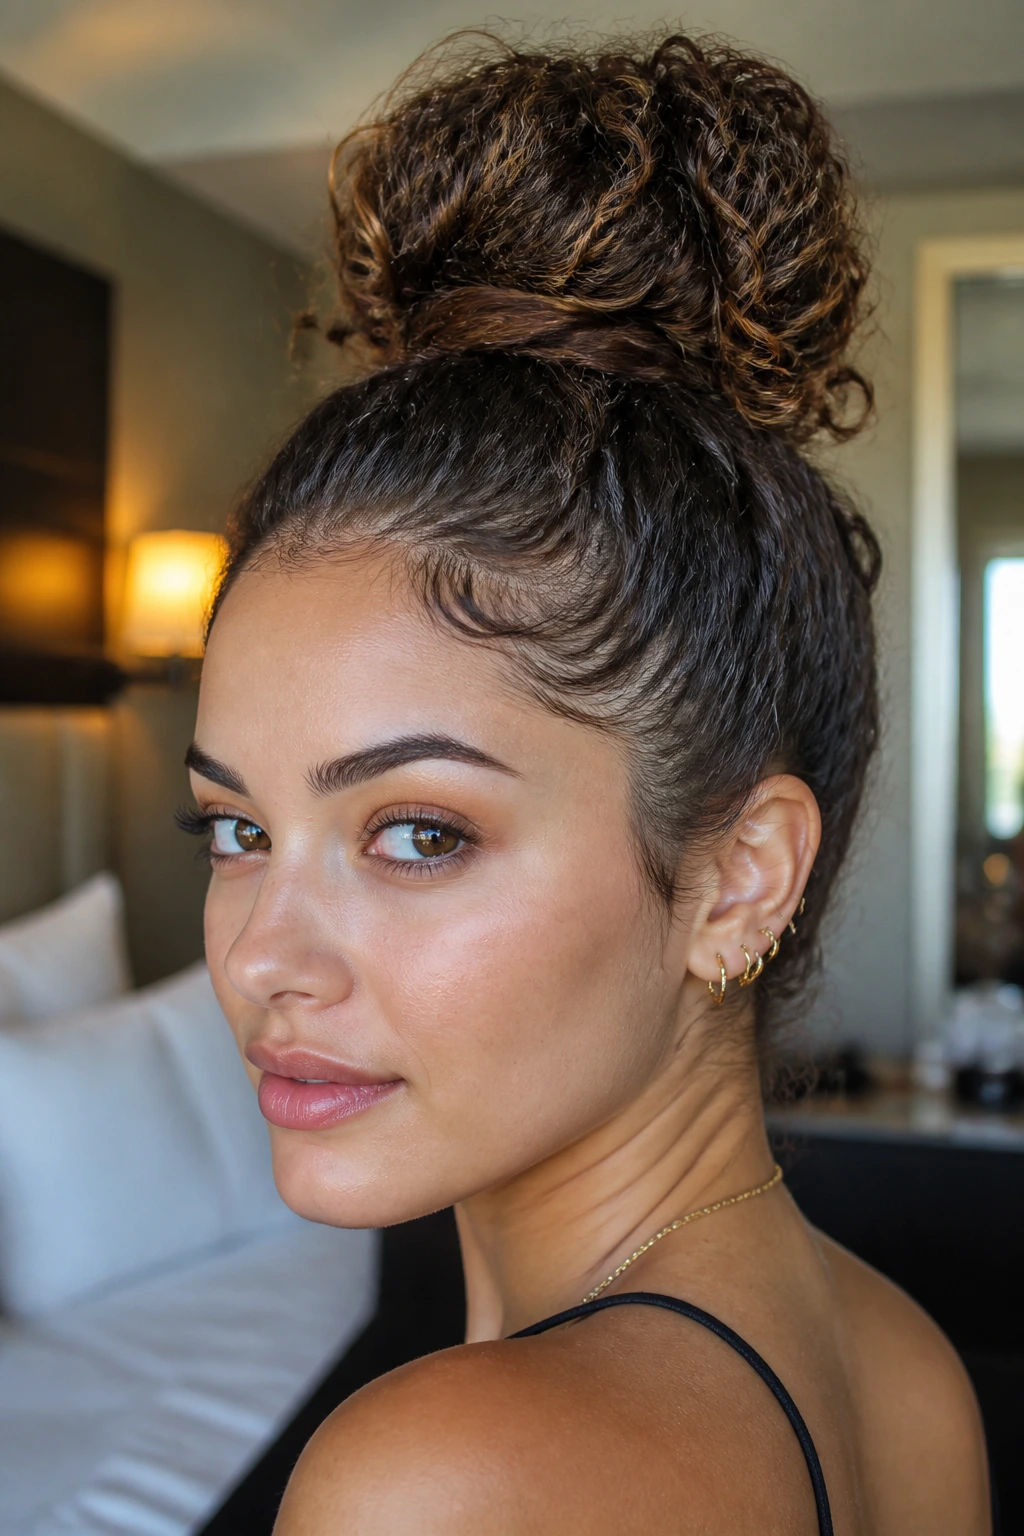
This is the cleaner, more dressed-up cousin of the pineapple. Gather the curls high, coil them into a bun, then wrap a small section of hair around the base so the elastic disappears. The wrapped base matters. It gives the style a finished look and keeps the bun from reading like a gym tie-up.
What makes this bun work on curly hair is the height. High placement uses the texture’s own body to build volume without teasing. If the bun feels too bulky, don’t crush it smaller. Instead, shape it with your hands and pin the outer edges so the bun keeps its roundness.
A light mist of flexible-hold spray at the crown can help, but keep it away from the ends unless you want them to stiffen. Curly ends are better left soft. They catch the eye and stop the bun from looking too tight.
This style is especially good for longer hair that tends to bunch at the nape. Moving the bun higher spreads the weight out and gives the face more open space. It’s practical, but it still looks polished enough for an event.
14. The Crown Braid Into a Puff
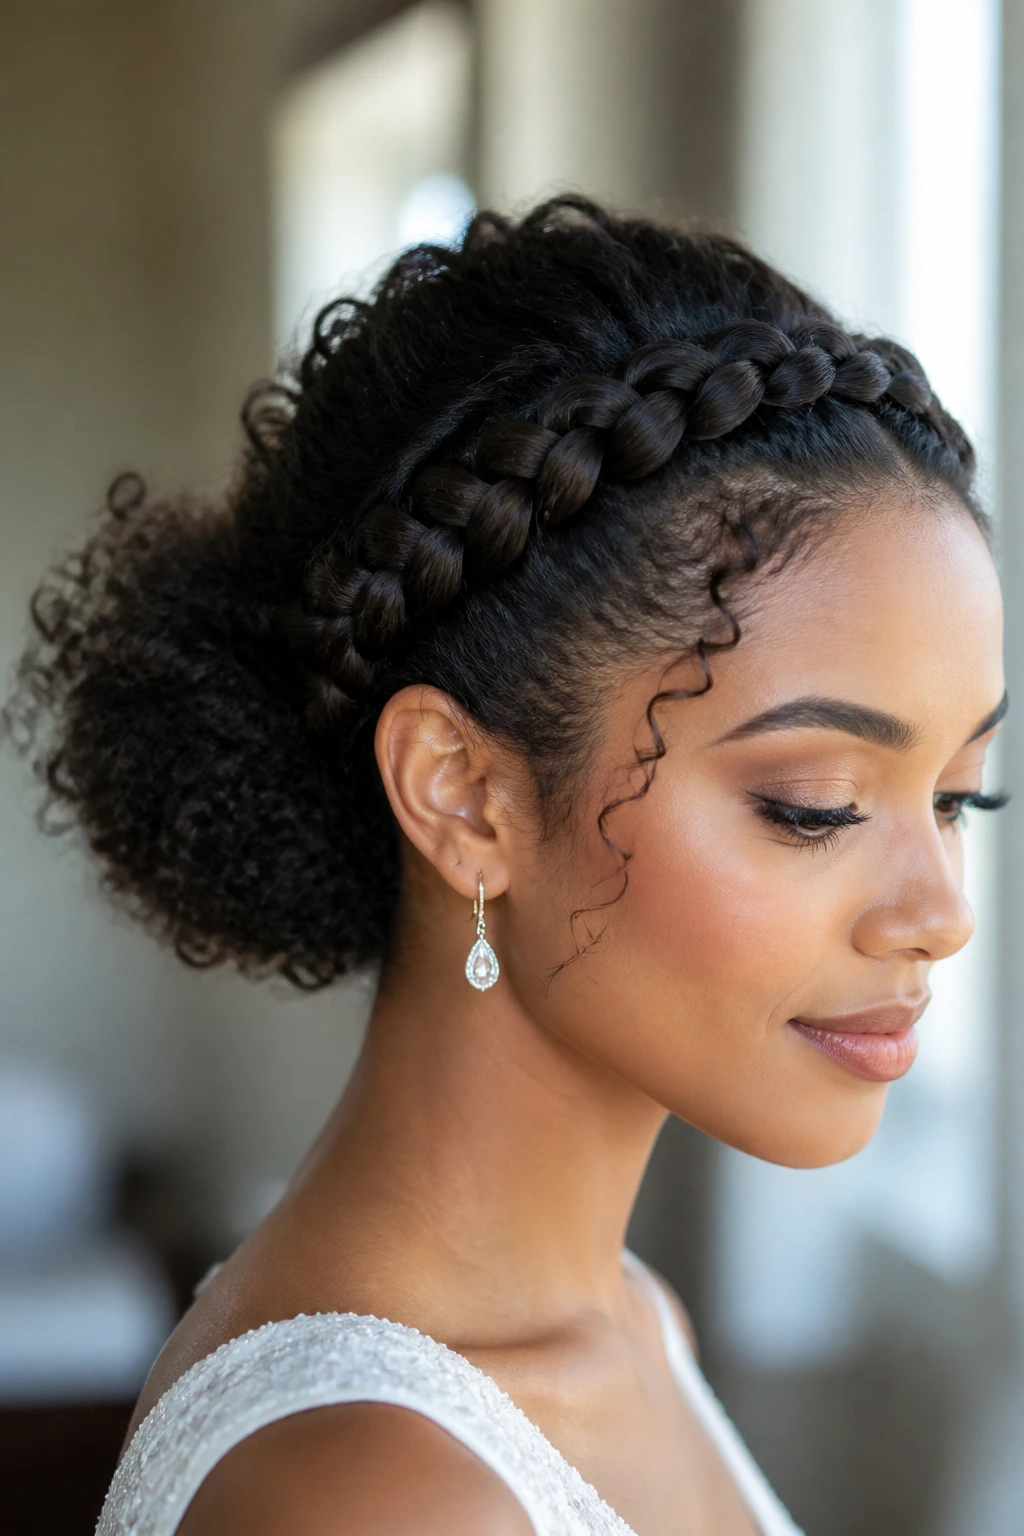
Take the romantic shape of a crown braid and let the back stay full. That’s the basic idea here. Braid along the hairline from temple to temple, then gather the remaining curls into a puff, bun, or tucked roll at the back. The braid gives the front structure; the puff keeps the style from feeling too controlled.
This is one of the best shapes for people who like their curls visible but don’t want them falling into their eyes all day. The braid controls the front, and the back can stay gloriously textured. If your hair is thick, the puff can sit high and rounded. If it’s finer, keep the back closer to the nape so the braid and puff feel balanced.
Best use cases: weddings, gallery openings, dinners, or any day when you want the style to look deliberate.
Best products: a little curl cream on the loose sections and a touch of gel where the braid begins.
Best pins: long bobby pins hidden under the braid line.
The style reads slightly regal without tipping into costume territory. That’s a fine line. This one stays on the right side of it.
15. The Knotted Ponytail Updo
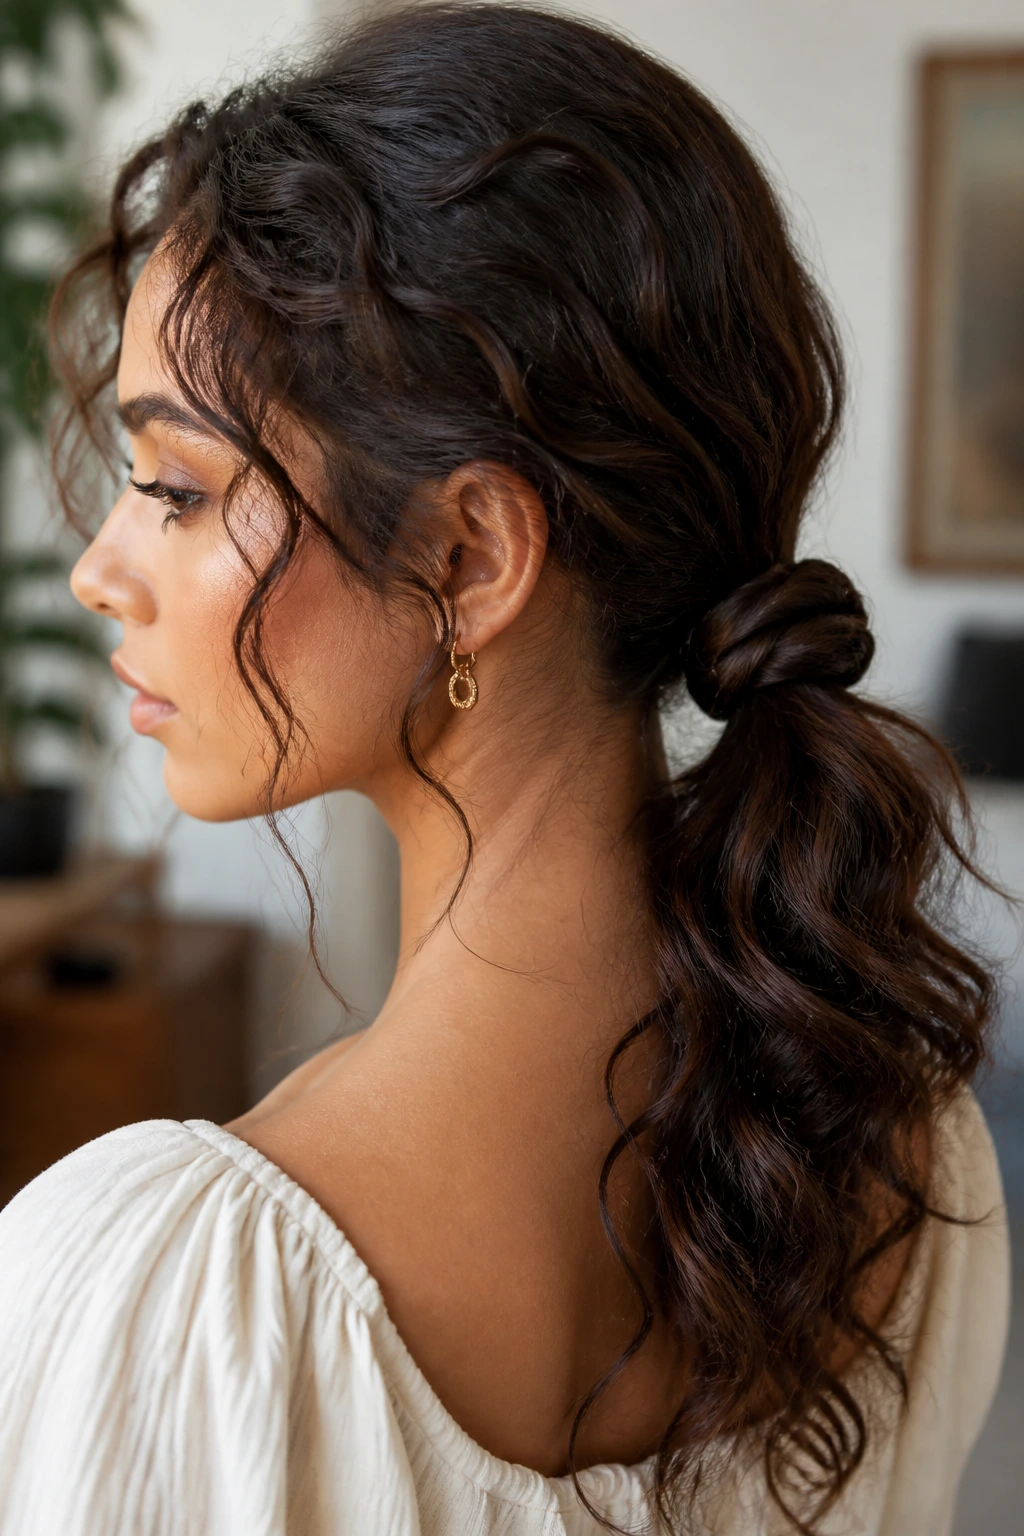
A knot gives curly hair something to do besides sit there. Pull the hair into a low ponytail, split the tail into two sections, and tie them into a loose overhand knot before pinning the ends under the base. That sounds more technical than it is. It’s basically a fabric-like knot made out of curls.
The shape works because the knot creates a visible center line, which makes the style look designed instead of accidental. If the curls are long enough, the knot can sit neatly and still leave plenty of texture around the edges. If the hair is shorter, keep the knot loose and use pins as backup rather than asking the elastic to do everything.
This is a good option when you want something different from a standard bun but don’t want a style that needs constant rescue. It also handles second-day hair well, since a bit of texture helps the knot grip. If you want the front cleaner, smooth only the top section and leave the lengths alone.
A knotted ponytail can look a little artsy, a little undone, and that’s part of the appeal. It isn’t trying to be perfect. Better.
16. The Flat-Twist Updo
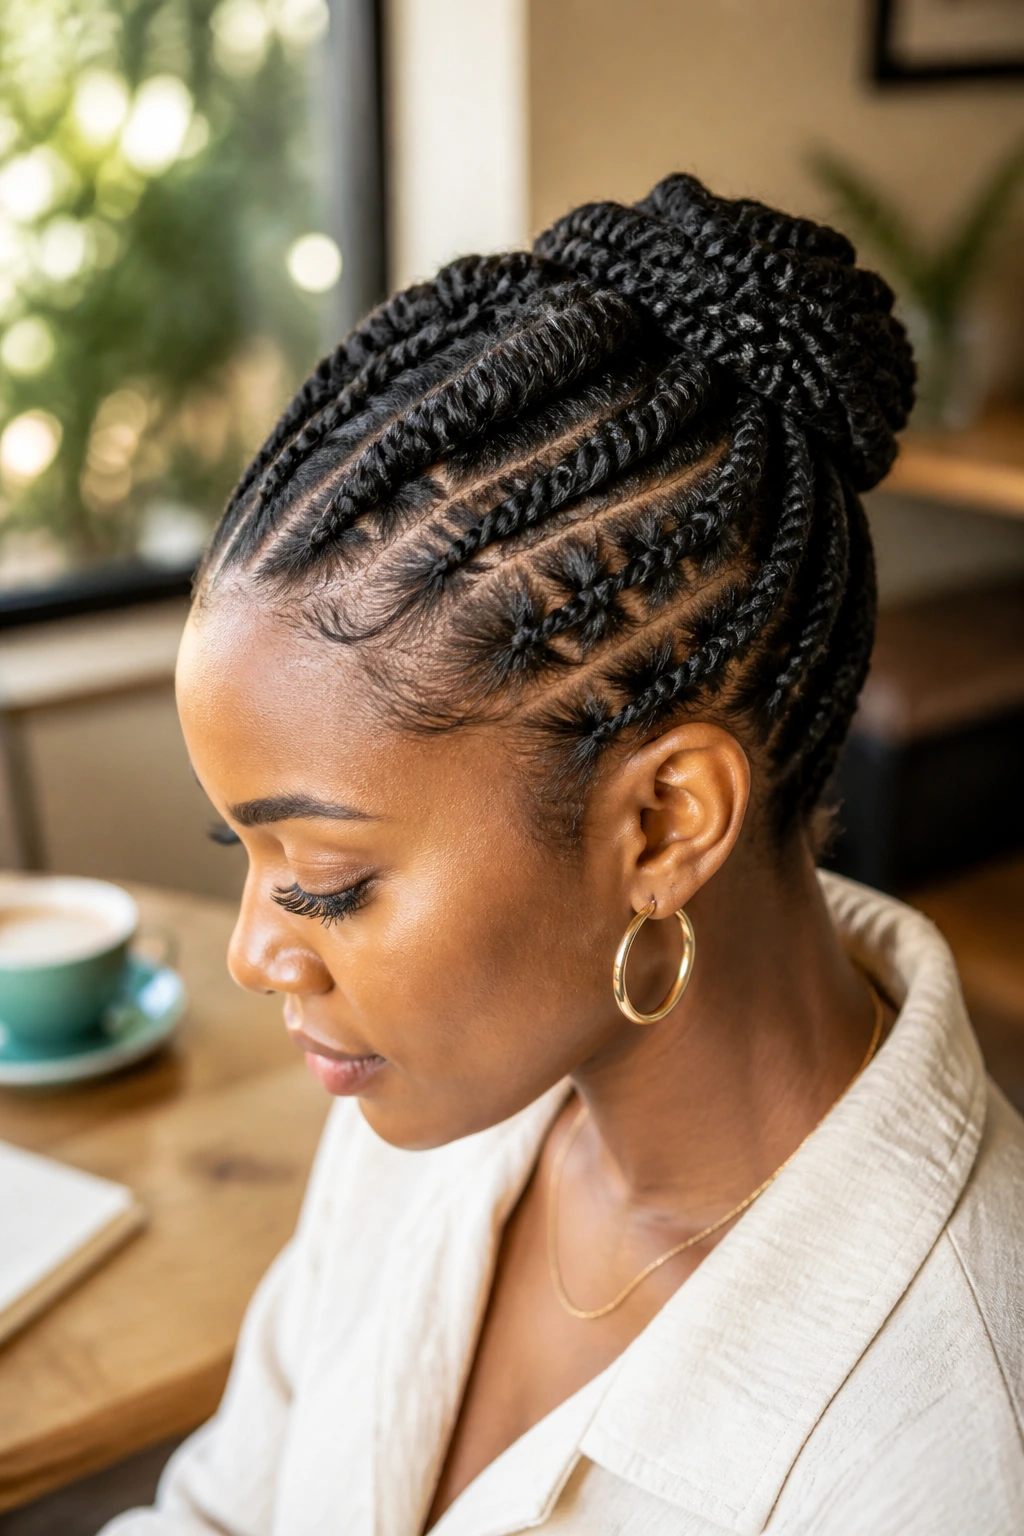
Flat twists are one of the most useful shapes for curly hair because they keep the scalp flat while the rest of the texture stays alive. Part the hair into two, three, or four sections, twist each one close to the head, and pin the ends into a tucked shape at the back or crown. The result is secure, low-tension, and easy on the edges.
If you’ve ever had a style that looked beautiful but felt too tight by noon, flat twists are the answer. They spread the tension along the scalp rather than concentrating it in one spot. That matters. A lot. Especially if you wear updos often.
What makes it different
- It keeps the front close to the head without needing heat.
- It can serve as a protective style for a day or two.
- It works on dense hair because each section carries its own weight.
- It looks neat even when the curl pattern is not uniform.
The ends can be tucked into a bun, pinned into a coil, or hidden under a scarf. Whichever finish you choose, the twist itself is the backbone. Keep it firm, not tight, and the style will sit comfortably.
17. The Tucked Roll Updo
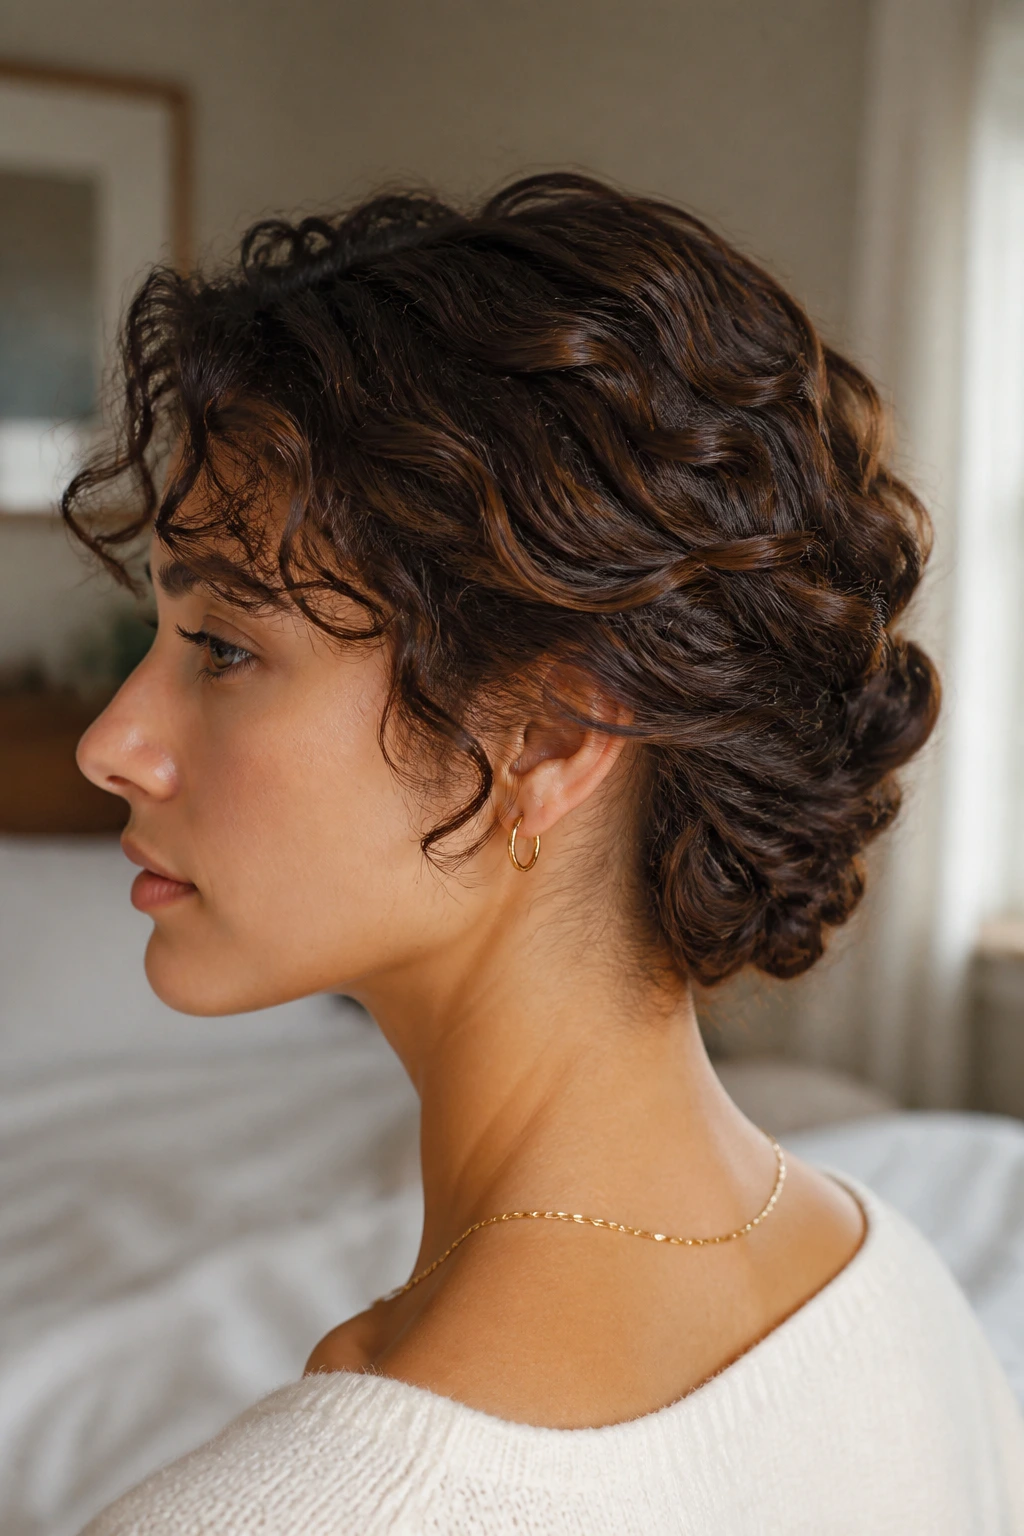
The tucked roll is one of those old-school shapes that curls make look fresher than you’d expect. Pull the hair back, roll the ends inward toward the nape or crown, and pin them so the shape forms a soft ridge. You’re not making a shell. You’re making a curve.
This style is especially useful if your hair has layered ends that refuse to stay hidden in a plain bun. The tuck corrals those pieces into one direction and keeps the outline smooth. It works well with a deep side part or a softly brushed-back front, depending on how formal you want it to feel.
The rolling motion is the real trick. Do not fold the hair into a tight knot first. Roll it. That keeps the curls aligned and helps the style look gentle instead of compressed. If the hair is very thick, split it into two rolls that meet at the center and pin them together.
It’s a quiet style. Not plain. Quiet. And that’s useful when the outfit or makeup is already doing plenty of work.
18. The Curly Space Buns Pair
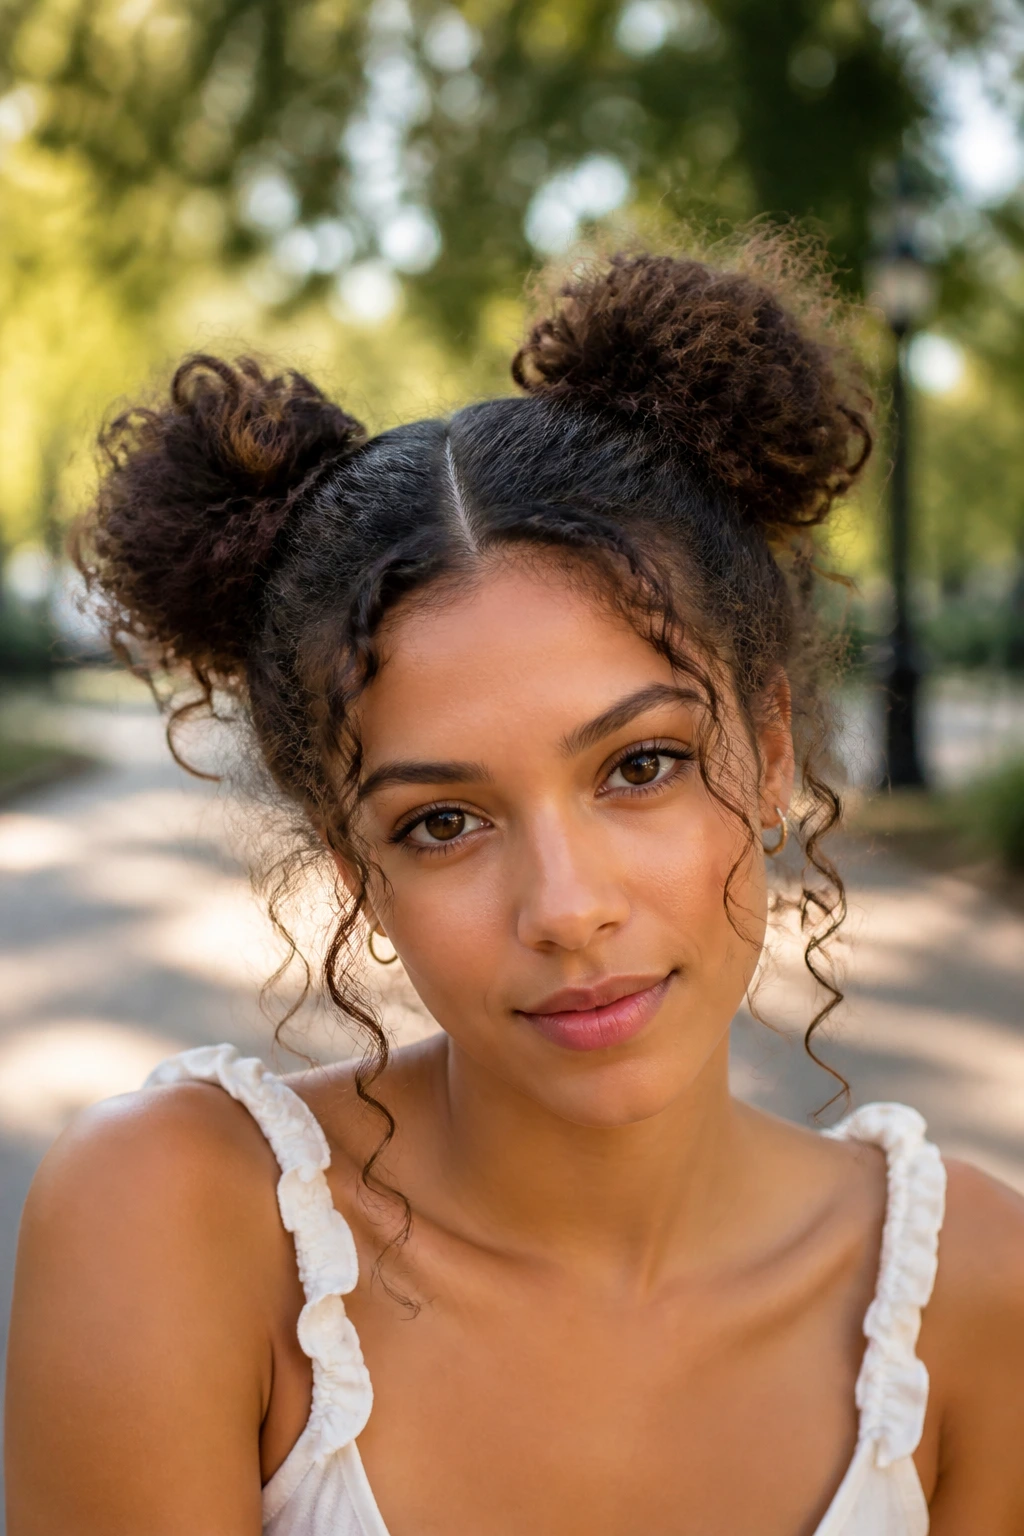
Space buns can look cartoonish or stylish, depending on placement and proportion. On curly hair, they lean stylish if you keep them soft, slightly round, and not too tiny. Part the hair in the center, form two buns high or mid-height, and let a few curls escape around the face and neck.
The biggest decision is placement. High buns read younger and more playful. Lower buns sit a little more adult and can look almost sculptural when the curls are dense. If you want the style to feel less costume-like, keep the buns slightly imperfect and let texture show at the base.
- Best for medium to long curls.
- Stronger on hair that has a bit of texture or second-day grit.
- Works well with accessories like tiny pins or narrow ribbons.
- Good for concerts, casual events, or a day when you want a shape with personality.
Space buns are also forgiving if one side has more volume than the other. Curly hair rarely gives you mirror-image symmetry, and that is fine. Let each bun be its own thing.
19. The Faux Hawk With Pinned Sides
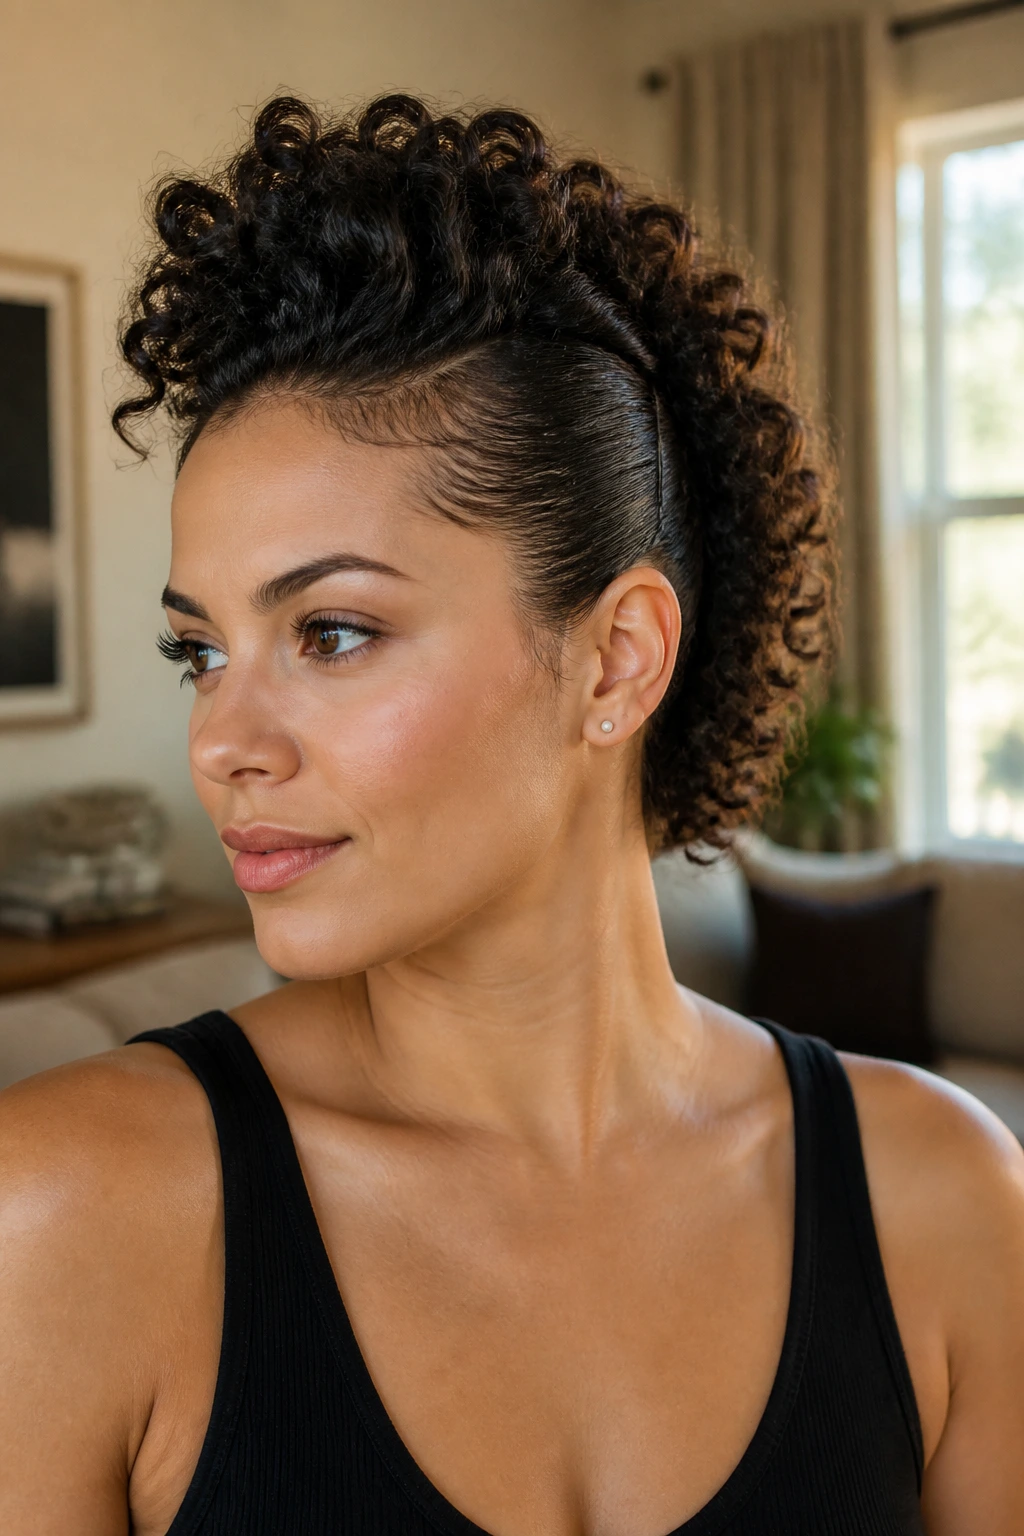
If you want edge without cutting your hair into one, this is the style. Pin or braid the sides flat, then leave a central ridge of curls running from forehead to nape. The profile looks sharp, but the texture keeps it from feeling harsh. Curly hair makes a faux hawk look richer because the ridge has actual body.
The style works because it creates contrast. Tight sides. Full center. That contrast does the visual heavy lifting. If your hair is very thick, you may need to divide the sides into two anchor points per section so the pins don’t strain. If it’s finer, a little root lift in the center helps the ridge stand up instead of collapsing backward.
This is one of the better choices when you want something that holds through motion. It stays on better than a loose top knot, and it looks deliberately styled even when a few curls come loose. That is part of the appeal. A faux hawk can handle a little mess.
Use it when you want the style to feel sharp but not severe. That balance is hard to fake.
20. The Rolled Headband Updo
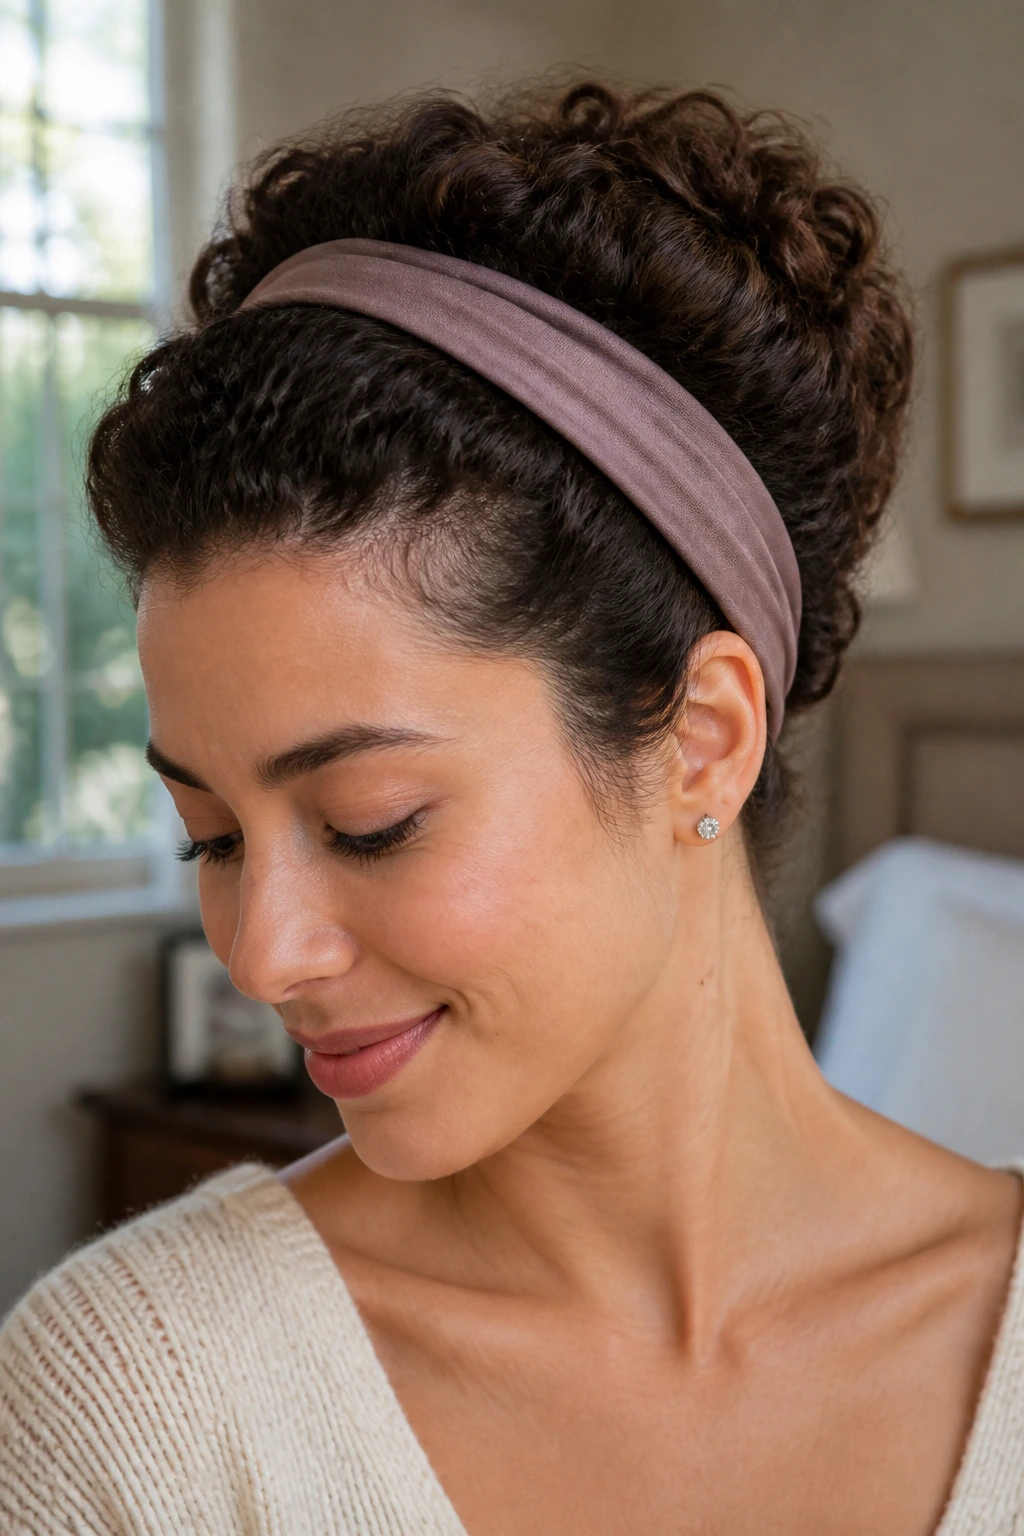
A headband can do more than hold flyaways. In this style, it becomes the anchor for a full roll. Slip on a stretchy headband, tuck sections of hair around and under it, and roll the curls inward until the ends disappear. The final shape sits close to the head and looks almost like a soft vintage tuck.
This style is especially kind to medium-length curls. You don’t need enough length for a big bun, only enough to wrap under the band. It also works well if the roots are a little oily, because the headband gives the shape extra grip. If you need more hold, place a few pins behind the ears before you begin rolling.
The fabric matters. A smooth elastic band with a decent stretch tends to stay put better than a stiff decorative one. If the band keeps sliding, it’s too loose or too slick for your texture.
The result can be surprisingly elegant. Not fussy. Just tidy, rounded, and a little old-Hollywood if you pair it with a side part and a soft lip color.
21. The Scarf-Tied Pineapple Bun
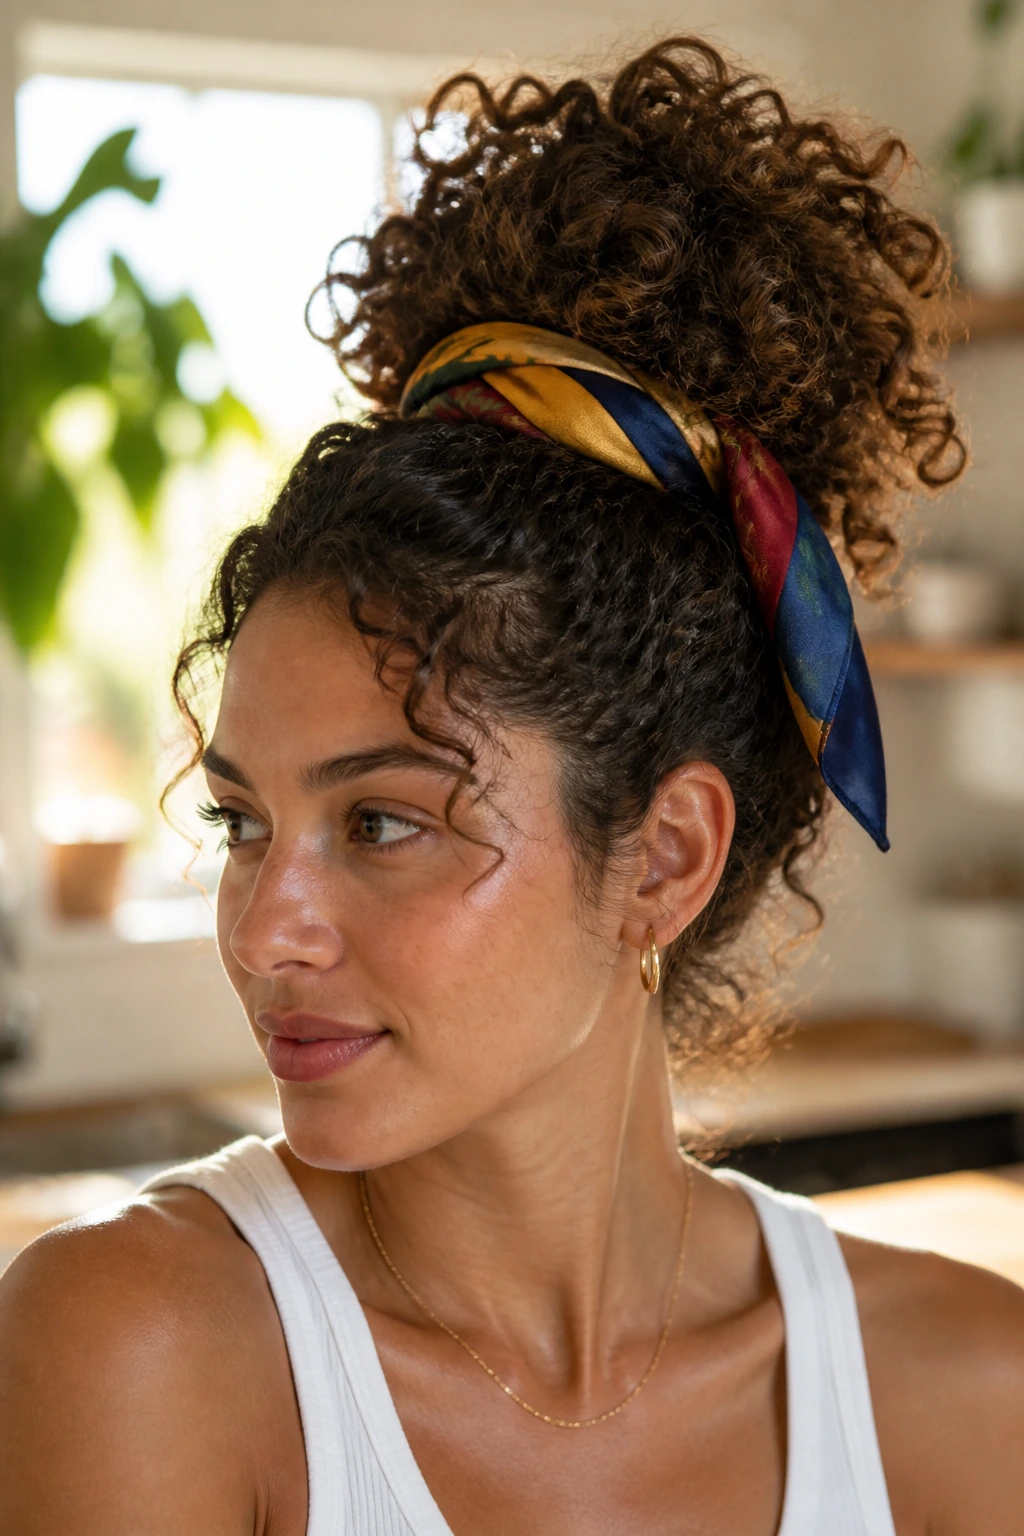
This is the pineapple’s dressier cousin. Pull the curls high, twist them into a rounded bun or puff, and tie a silk scarf around the base or over the top as both decoration and support. The scarf does two jobs at once: it hides the elastic and adds a visual line that makes the whole style feel finished.
The scarf can also help tame the perimeter if your curls tend to pop out at the edges. Tie it snugly enough to stay, but not so tight that it smashes the crown. A thin silk or satin scarf is easier to manage than a stiff cotton one, which can feel bulky and snag textured hair.
This version is useful when you want the ease of a pineapple but need it to read a little more polished. It’s also a practical choice on days when the top layer needs help staying in place. The scarf acts like a soft frame around the shape.
Choose a scarf that doesn’t vanish into your hair entirely. A clean color contrast helps the style look intentional. One bright strip can do more than ten pins.
22. The Low Side Bun With a Deep Part
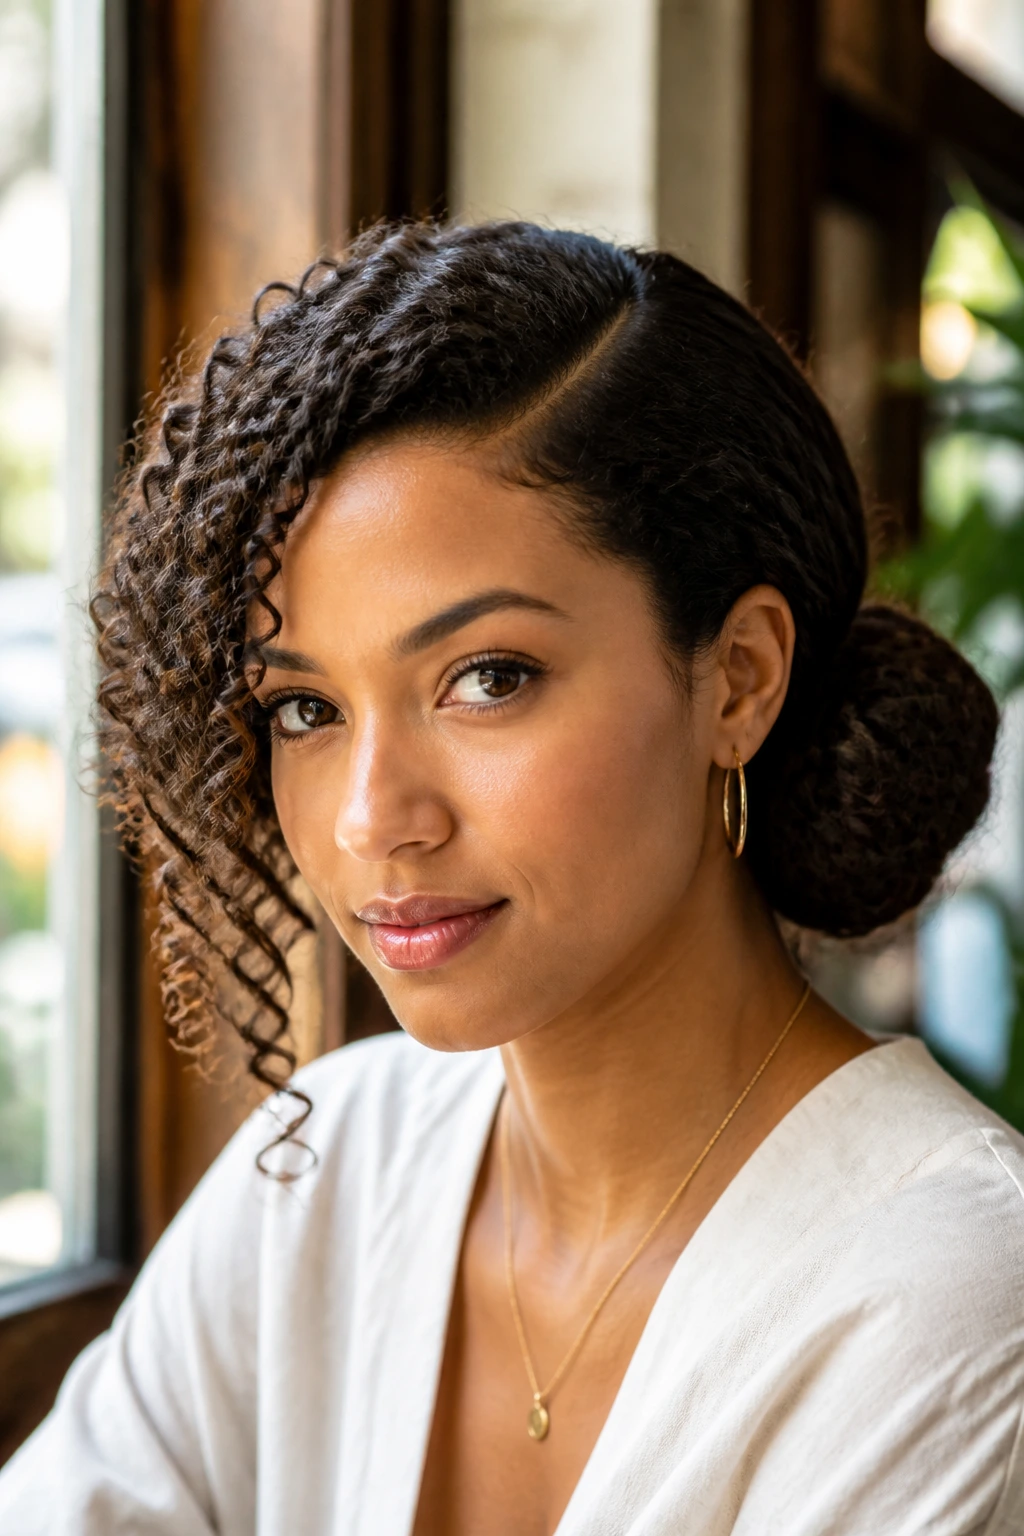
A low side bun is the sort of style that quietly solves a lot of problems. It opens one side of the face, softens the neckline, and gives curly hair a shape that feels controlled without being severe. Make a deep part, sweep the hair low to one side, coil it into a bun behind the ear or just below the jaw, and pin it so the bun sits slightly forward.
The deep part matters more than people think. It changes the whole mood. With curly texture, that sweep creates a visible line that makes the bun feel elegant even when the curls stay loose at the edges. If your hair is layered, let a few shorter curls fall near the temples rather than trying to pin every piece flat.
This style works especially well with statement earrings or a higher neckline. It also holds up nicely if the bun is built around a soft braid or twist first. That extra structure helps the side placement stay secure.
Some updos need drama to work. This one doesn’t. It just needs clean placement and a bun that sits where the eye naturally wants to go.
How to Prep Curly Hair Before You Pin It
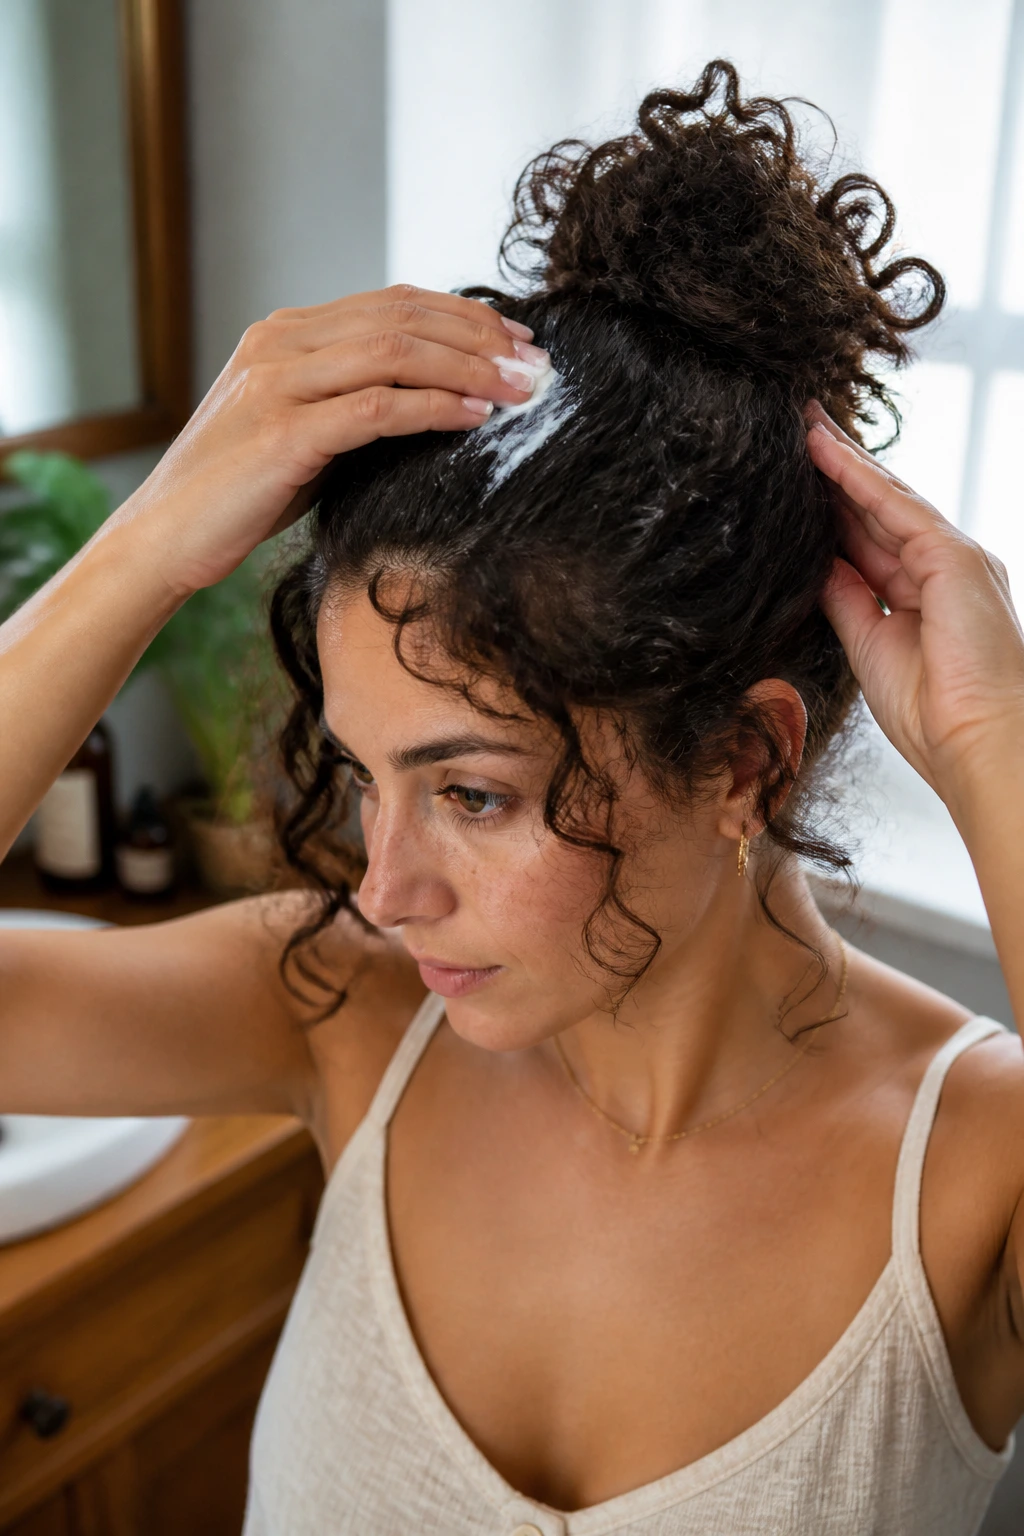
Curly updos start before the styling starts. If the hair is too wet, the pins slip and the shape collapses as the curls dry. If it’s too dry and flaky, the style can look frizzy before you’ve even finished the second side. The sweet spot is hair that’s fully dry or mostly dry, with just enough product left in it to give grip.
Second-day hair often wins. It has a little friction, a little memory, and fewer slippery roots. If your hair is freshly washed, rough-dry the roots first with a diffuser on low heat or let the crown air-dry and use a tiny amount of mousse where you need hold. Don’t coat the whole head in heavy product unless you want the style to feel weighed down.
Detangling matters too, but don’t overdo it. Use a wide-tooth comb or your fingers and stop when the knots are out. You want the curl pattern mostly intact. Brushing curls smooth can make an updo look clean for five minutes and frizzy for the next five hours. That’s not a good trade.
Sectioning helps more than people expect. Divide the hair before you start pinning, and the finished shape will look cleaner with less effort. A center part, side part, or simple back section gives the style a spine. Without that, everything turns into a vague puff and you end up fighting the mirror.
Essential Tools That Make Curly Updos Easier
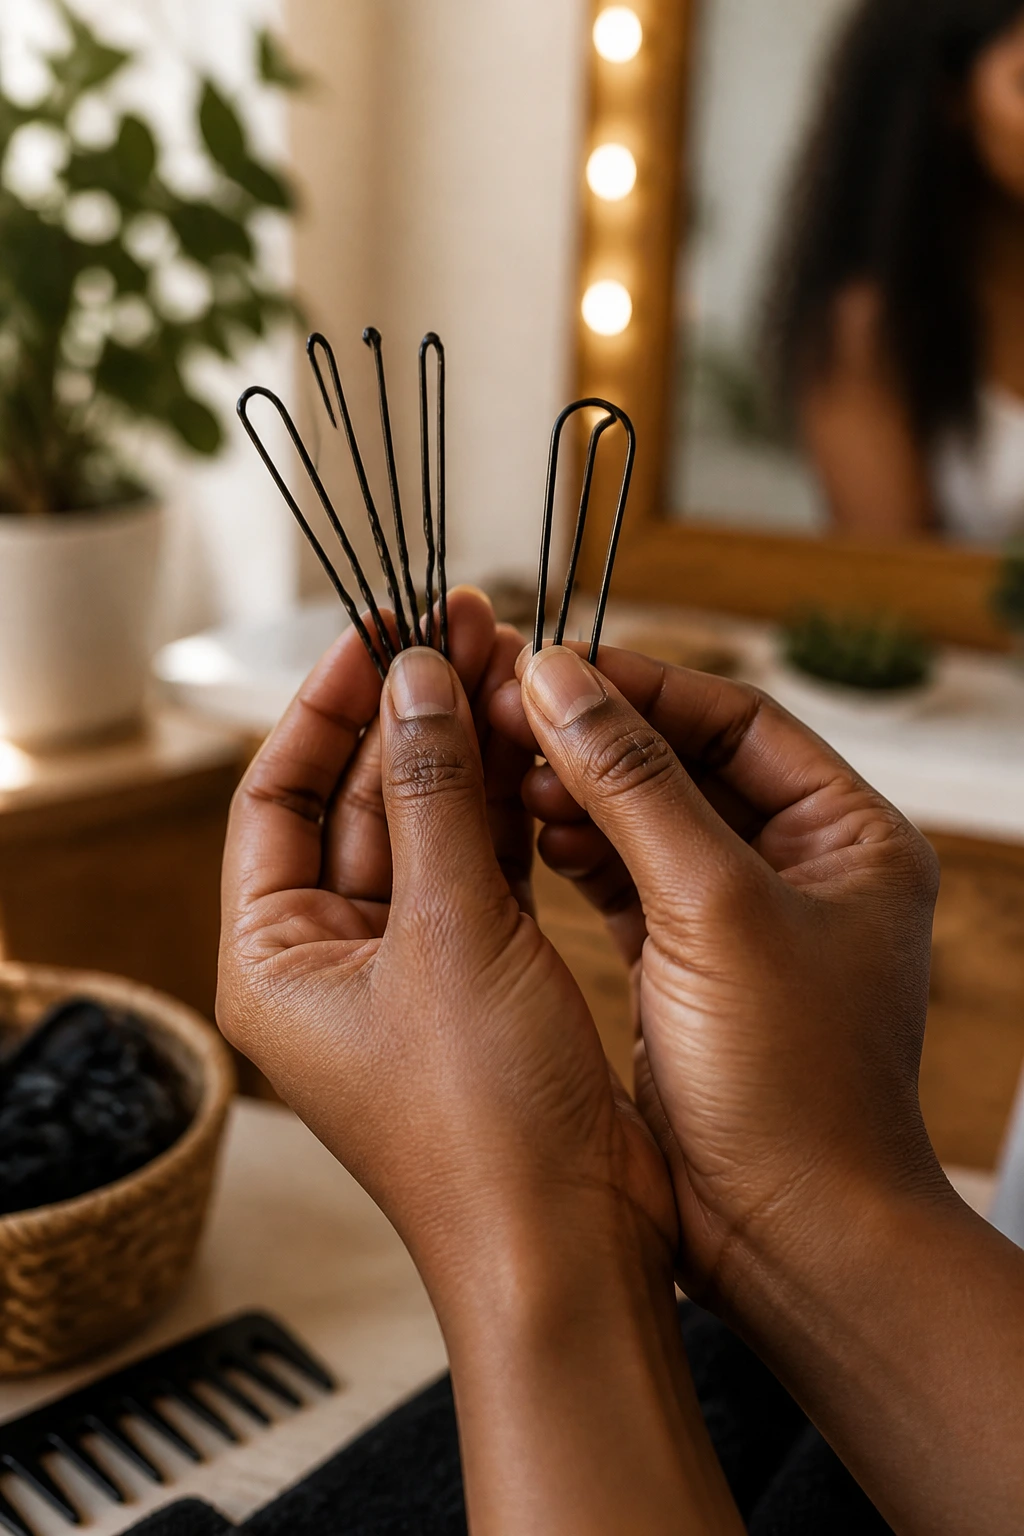
- Long bobby pins: Better than short ones for anchoring bun bases, twists, and hidden seams.
- U-pins or hair pins: Useful for thick curls because they hold a coil without flattening it.
- Coil or satin scrunchies: These reduce dents and don’t snag like rough elastics can.
- Snag-free elastics: Necessary for ponytails, bubble sections, and mini buns.
- Rat-tail comb: Helps make clean parts and separate sections without tearing through curls.
- Edge brush or soft toothbrush: Good for smoothing the hairline with a small amount of gel.
- Claw clip with a strong spring: Helpful for fast twists and medium to thick hair.
- Lightweight gel or foam: Adds grip at the perimeter without turning the whole head crunchy.
- Satin scarf or bonnet: Useful for preserving shape and reducing friction overnight.
A lot of curly updos live or die by the pins. Weak ones slide out. Bent ones snag. If you wear these styles often, buy pins that actually grip, not the flimsy kind that feels like wire after two uses. It’s boring gear, but boring gear is usually the good gear.
Practical Tips for Hold, Shape, and Frizz Control
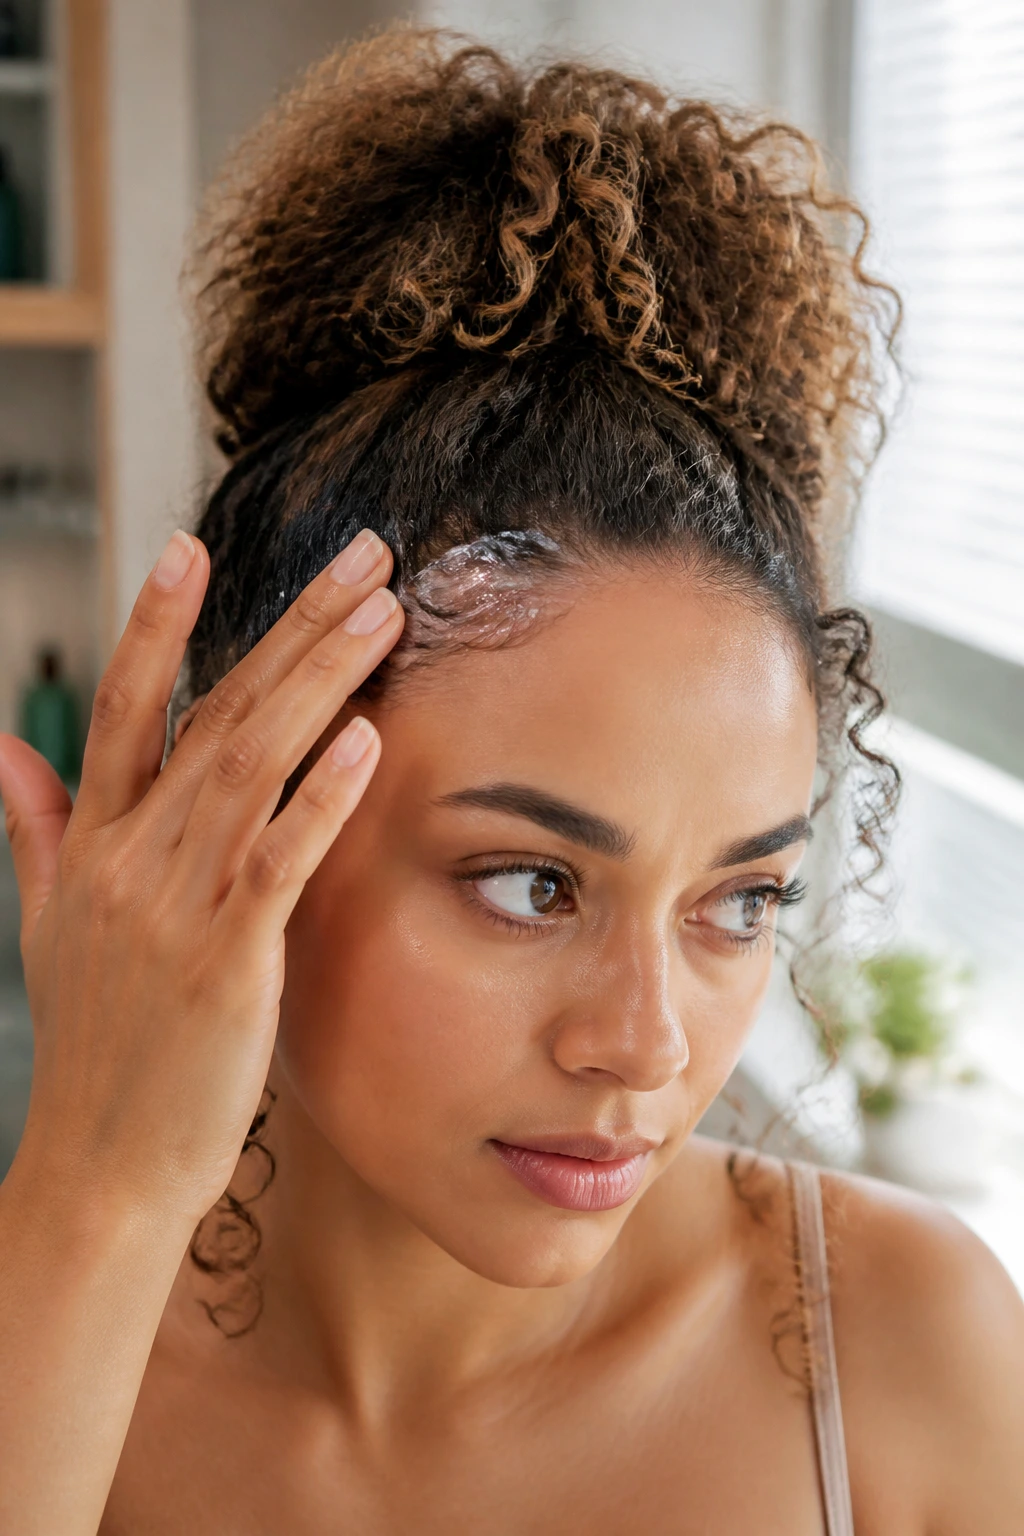
Use product where the style needs memory, not everywhere. A little gel at the hairline, a foam at the roots, or a mist of flexible spray over the finished shape usually does more than soaking the whole head in hold. Too much product can make curls stiff, which is one of the fastest ways to make an updo look tired.
Anchor the base first. Whether you’re doing a bun, a twist, or a braided crown, pin the point where the weight sits before you fuss with the outer shape. That one habit keeps the style from sagging halfway through the day. It also saves you from overpinning the visible layer, which is how a lot of curly styles start looking busy in the wrong way.
Let a few pieces stay imperfect. A tiny curve near the temple or a soft curl at the nape keeps the style from reading overdone. People often think the goal is total control. It isn’t. The goal is clean structure with enough movement that the hair still looks like hair.
Match the accessory to the curl density. Fine curls need lighter clips and smaller elastics. Dense curls need stronger claws, longer pins, and a little more patience. If the accessory is fighting the hair, the style will lose. Every time.
Common Mistakes That Make Curly Updos Slip or Puff Out
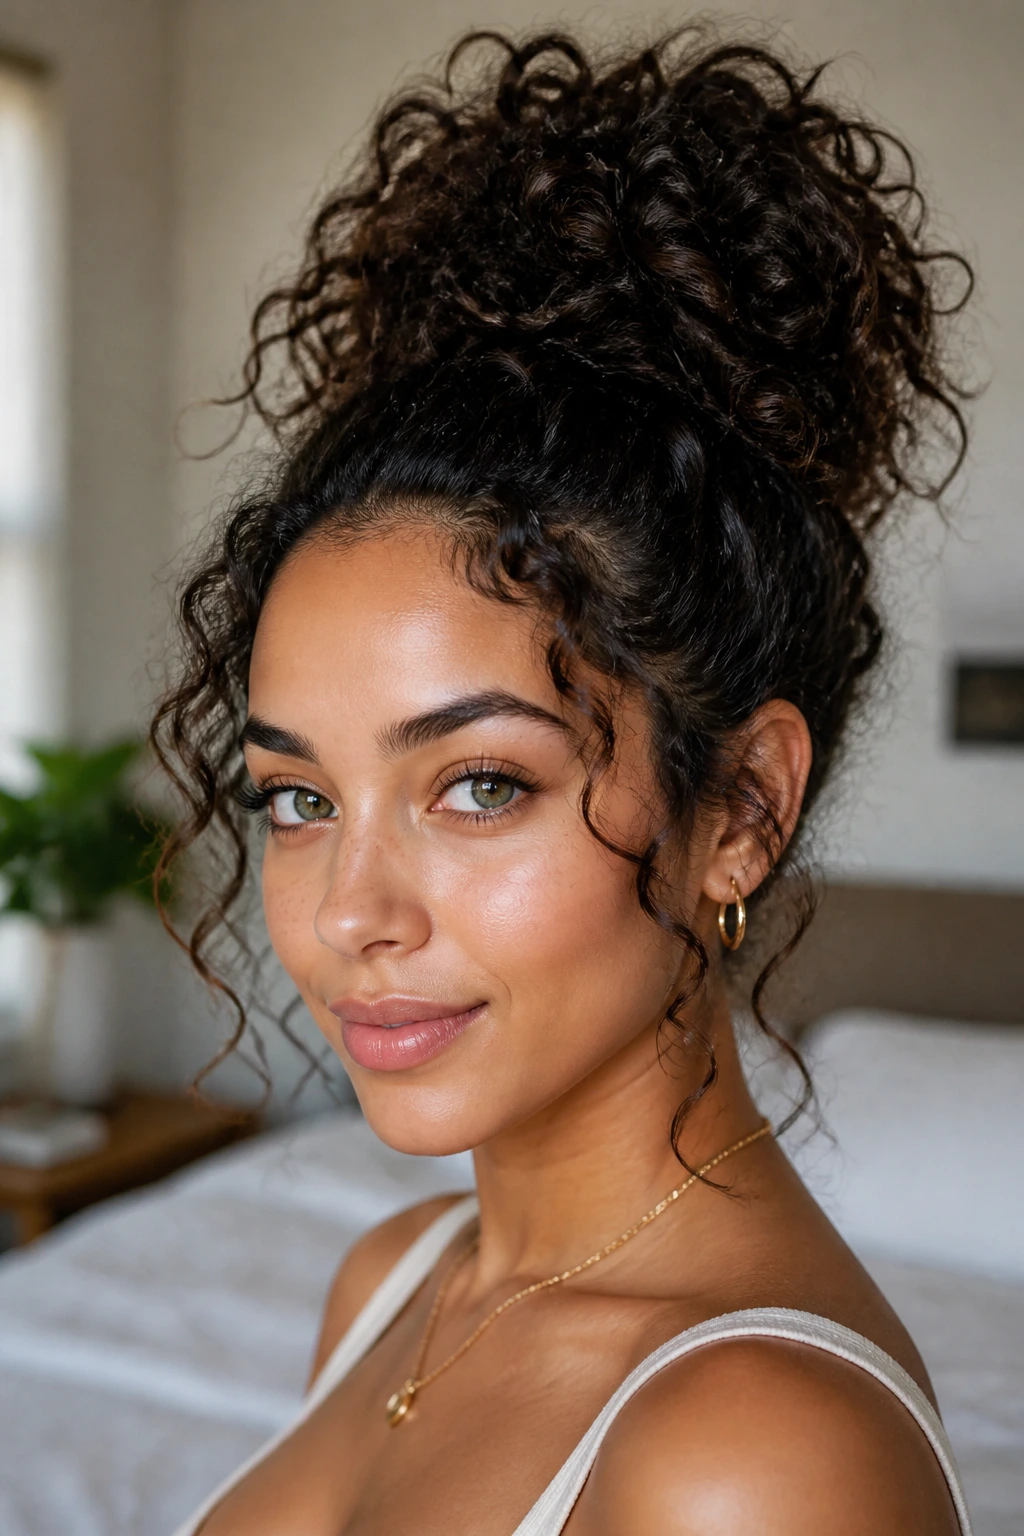
Pulling everything too tight at the start. The style looks neat for a few minutes, then the scalp starts to hurt and the curl pattern flattens. Leave a little slack when you gather the hair, then tighten only where the pin or elastic actually needs to sit.
Trying to smooth away all texture. Curly hair gets frizzy when it’s overhandled. A dry brush, heavy brushing at the crown, or too much gel can turn the surface fuzzy and the ends stiff. Smooth the perimeter, not the whole head.
Using the wrong pins. Tiny, weak bobby pins slide out of dense curls fast. If the style keeps falling apart, the problem may not be your technique. It may be the hardware. Longer pins, crossed pins, and U-pins hold more reliably.
Building the style on soaking-wet hair. Wet hair can feel cooperative at first, then the shape shifts as it dries and the pins loosen. Dry or mostly dry hair holds a better outline and frizzes less.
Ignoring shrinkage. Curly hair shortens once it’s gathered. If you build a bun too small, it can disappear. If you build a crown braid too close to the scalp, it can feel tighter than you intended. Leave room for the curls to move.
Variations and Adaptations to Try
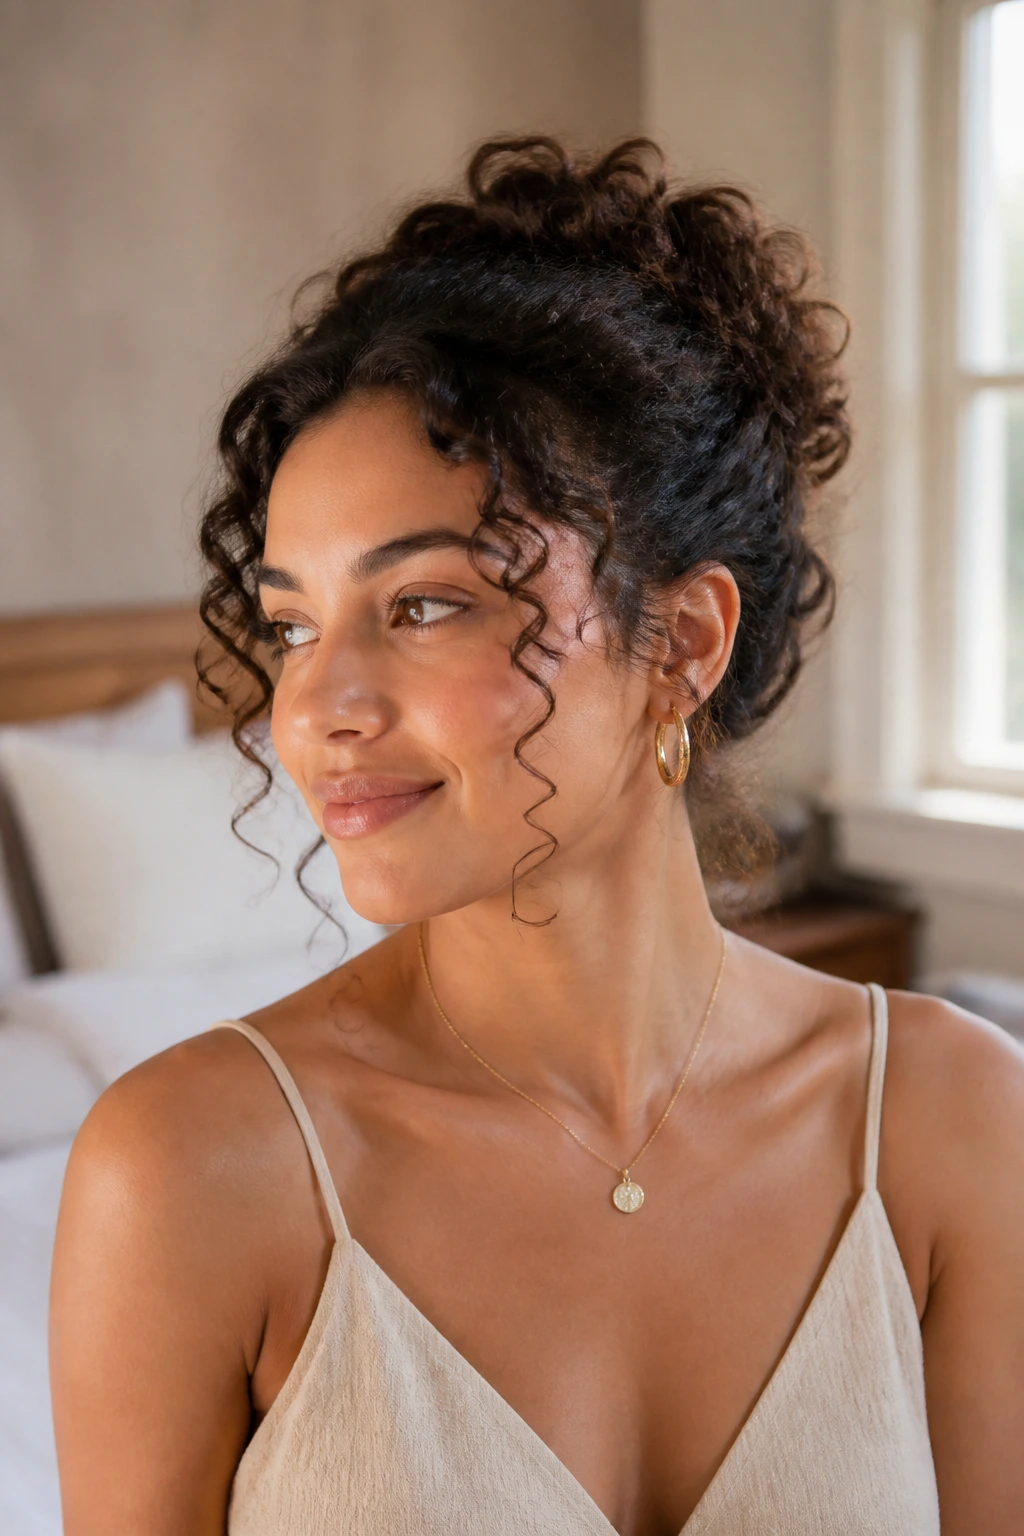
The Soft Romantic Version
Leave two small front spirals out on purpose and keep the bun or twist looser at the back. This works well for weddings, dinners, or any look that benefits from softness around the face. The trick is to stop pinning before the shape turns rigid.
The Protective Low-Tension Version
Choose flat twists, crown braids, or a tucked roll, and keep the hairline smooth without pulling it tight. This is the version to reach for when your scalp needs a break. It also tends to last longer because there’s less strain on the roots.
The Office-Safe Sleek Version
Use gel only at the perimeter, make a clean part, and keep the bun or twist low and centered. This version looks polished without the wet-plastic finish that ruins a lot of slicked-back styles. It’s calm, neat, and easy to wear all day.
The High-Drama Version
Go for faux hawks, double buns, or a high wrapped bun with extra height at the crown. This is where curly hair has some fun. Keep the sides controlled and let the center volume stay generous.
The Quick-Exit Version
Use a claw clip, a simple twist, or a pineapple puff if you need something that can come down fast without leaving a mess of tangles. Good for days when you know you’ll be taking your hair down again in a few hours.
How to Keep the Style Alive Overnight
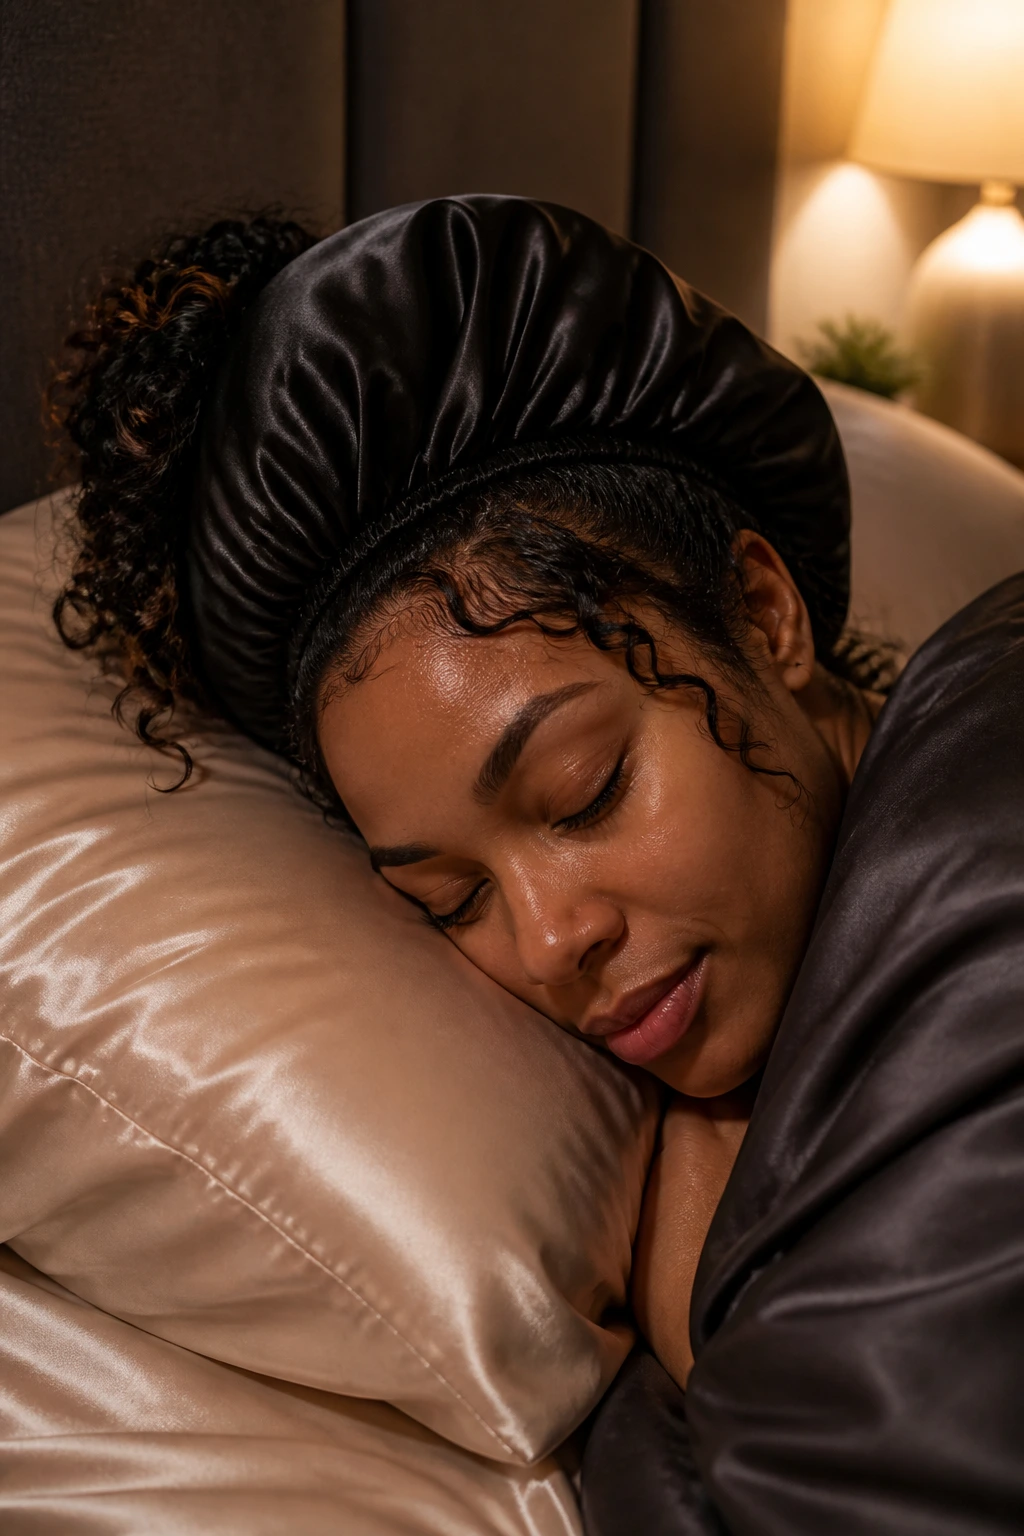
Some curly updos survive the night better than others, but none of them like friction. If you want the style to last, sleep on a satin pillowcase or cover your hair with a satin scarf or bonnet before bed. That cuts down on roughness at the crown and keeps the ends from fuzzing up while you sleep.
High styles like pineapples, buns, and space buns usually need a little reshaping in the morning. A couple of pins, a quick spritz of water, and a fingertip of curl cream at the loose sections can bring them back. Low buns, twists, and braided crowns tend to hold longer because the weight is lower and the structure stays compact.
Take out metal clips before bed if they press into your scalp. Leave braids and flat twists in place if they’re comfortable and not pulling. If the style feels tight before you sleep, it will feel worse in the morning, so loosen it a touch before you call it done for the day.
For refreshes, avoid soaking the whole style. Mist the frizzy spots, smooth the hairline, and re-pin only the part that moved. A full reset usually makes the style worse, not better.
Frequently Asked Questions
Which curly updo works best for short hair?
Short curls usually do better with styles that rely on pinning and folding rather than wrapping a lot of length. Flat twists, claw-clip twists, mini buns, and headband rolls are the most forgiving because they don’t need a long tail to build shape.
How do you keep a curly updo from getting frizzy?
Use product at the perimeter, not all over, and stop touching the style once it’s pinned. Frizz usually starts where the hair was handled too much or where the ends were left exposed to dry air for hours. A light spray and a satin scarf overnight help more than heavy product does.
Do you need to straighten curly hair first for an updo?
No. Straightening usually works against the whole point. Curly hair has enough structure to hold buns, twists, and crowns on its own, and straightening often makes pins slip because the texture that helps hold the style is gone.
What if my curls are fine and slippery?
Start with a little mousse or lightweight texturizing spray at the roots and work on second-day hair if you can. Fine curls need less product weight and more grip, so a strong elastic, a few long pins, and a clean base matter more than extra smoothing.
How many pins do I actually need?
More than you think at first, then fewer once you learn where the style really holds. A low bun might need four to six pins, while a braided crown or flat twist could need closer to eight if the hair is dense. Use enough to secure the base, then stop. Overpinning makes the style harder to refresh.
Can these styles work for type 4 curls?
Yes, and some of them work especially well. Flat twists, braided mohawks, low buns, and crown styles are strong choices because they use the texture’s density as part of the shape. You may need bigger pins and a little more prep at the roots, but the structure is there.
What’s the best style for humid weather?
Low buns, braided crowns, and tucked rolls usually hold up better than styles that leave a lot of loose curl exposed. Humidity loves to puff out the perimeter, so the more the hair is secured close to the head, the better the shape tends to last.
Can I wear the same updo for two days?
Usually, yes, if the style is built with a strong base and preserved overnight. Low styles hold longer than high ones, but even a pineapple or top knot can survive a second day with a quick refresh. The key is to fix the base, not redo the whole head.
The Styles Worth Reaching For Again
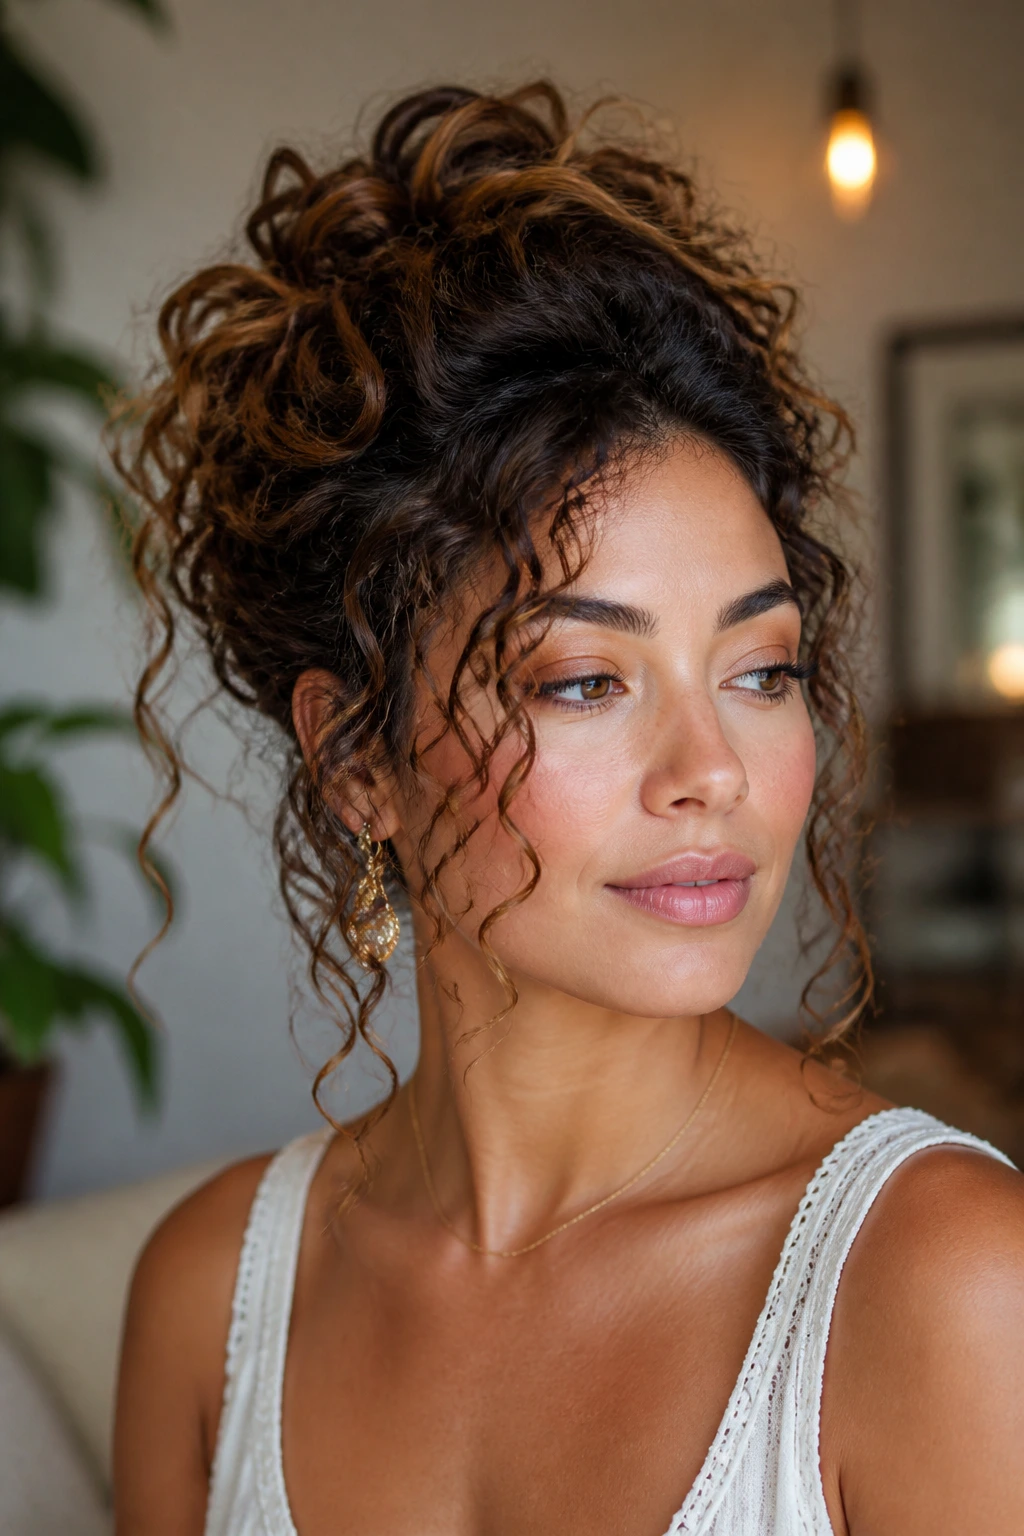
Curly hair does not need to be tamed before it can be styled. It needs room, direction, and a few pins that know what they’re doing. Once you stop treating texture like an obstacle, the whole category of updos gets easier to wear and a lot more interesting to look at.
The best looks in this list share the same quiet advantage: they let the curls keep some of their own voice. A tight bun, a loose crown, a high puff, a side roll, a braided base—each one changes the silhouette, but none of them asks the hair to become something else.
That’s the part worth remembering the next time you’re standing in front of the mirror with one hand full of pins. Start with the curl you already have. The shape usually follows.
