



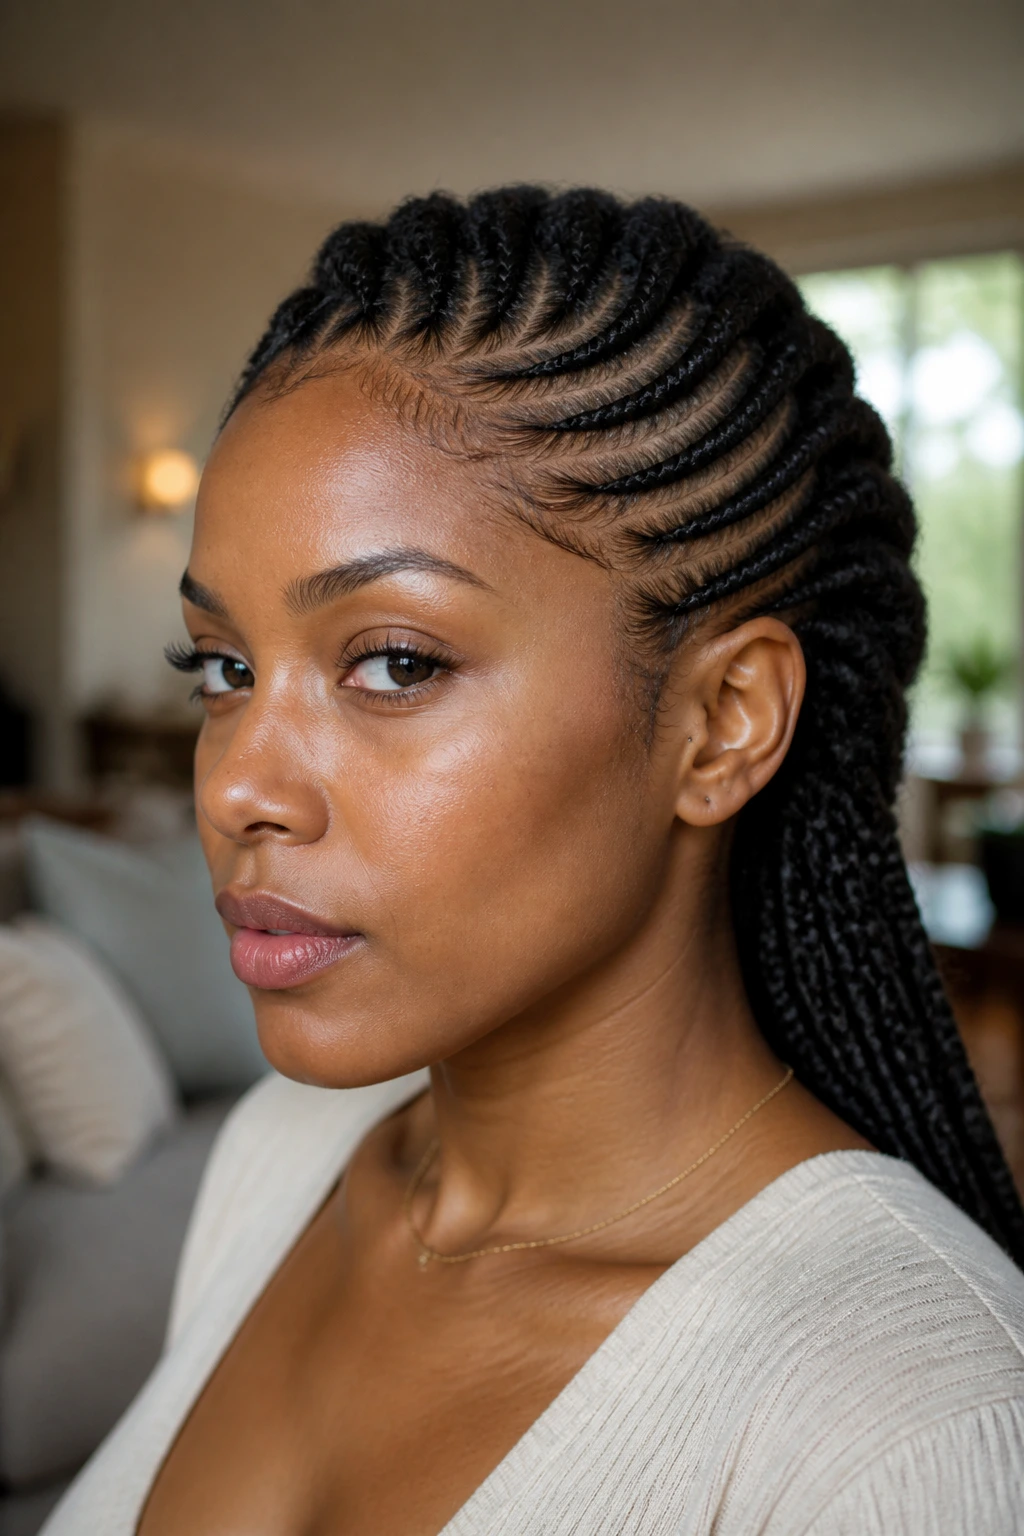
Side cornrow braid styles have a trick that center-part braids don’t: they pull the eye sideways, which makes the whole head look shaped before you’ve added a single bead, bun, or curl.
On natural hair, that matters. Texture brings volume, shrinkage, lift at the roots, and the occasional rebellious puff right where you wanted a smooth line. A good side braid pattern works with all of that instead of pretending the hair is bone-straight and obedient. The braid path does half the styling work. The rest is in the parting, the tension, and knowing when to stop tugging at the hairline.
If you’ve ever had a braid style look crisp in the mirror and then collapse around the temple by day three, you already know the difference between a cute idea and a style that can live in real life. These are the kinds of side cornrow braid styles I reach for when I want shape, not fuss; movement, not bulk; and enough structure that the style still looks intentional after sleep, humidity, and a long day of touching your own hair.
Why These Side Cornrow Braid Styles Stand Out
-
The side sweep does the shaping for you: A braid path that moves from temple to nape softens the face without needing curls, layers, or a dramatic cut.
-
They work with natural texture instead of against it: Stretched coils, shrunken roots, and dense edges all behave better when the braid direction follows the head’s natural curve.
-
There’s room for small changes: One curved part, one extra row, or a different finish at the ends can take the style from school-day neat to event-ready fast.
-
They give you more control over the hairline: A side pattern lets you keep the front soft while still tucking away the rest, which is why so many people return to it.
-
They hold up better than they look like they should: A clean side cornrow can survive sleep, wind, and a busy week if the base is prepped correctly and the tension stays honest.
1. Diagonal Sweep Cornrows That Follow the Cheekbone
This is the braid pattern I recommend when someone wants a clean look without a heavy crown. The rows start near one temple and angle back along the cheekbone, which gives the whole style a lifted, pulled-together shape before you even think about accessories.
Why It Works
The angle does something subtle but useful: it frames the face without boxing it in. If your hair is medium density and lightly stretched, the diagonal line sits close to the scalp without looking flat or severe. Keep the rows slim and consistent, and the whole style reads crisp instead of fussy.
- Best on stretched 3c to 4c hair that’s been detangled all the way to the ends.
- Use 3 to 5 slim cornrows so the curve stays visible.
- Keep the first inch near the temple soft if your edges are sensitive.
Fast note: if one row starts wider than the others, your eye goes straight to the mistake. Even spacing matters more here than in almost any other side style.
2. Two Thick Side Cornrows Into a Full Puff
Want a style that still looks finished when the puff gets bigger by the day? This is the one. Two thick rows sweep from the front toward the back, then leave the remaining hair free for a rounded puff that adds volume without turning into a mess.
The contrast is the whole point. The braids give structure at the front, and the puff does what natural hair does best: it shows off texture. I like this look on hair that has been stretched with bands or a gentle blow-dry, because the braid base lays flatter and the puff sits higher.
It’s a good choice for active weeks, especially if you don’t want to think about your ends every hour. Put the puff where it naturally wants to sit, not where a photo says it should sit. That little difference changes everything.
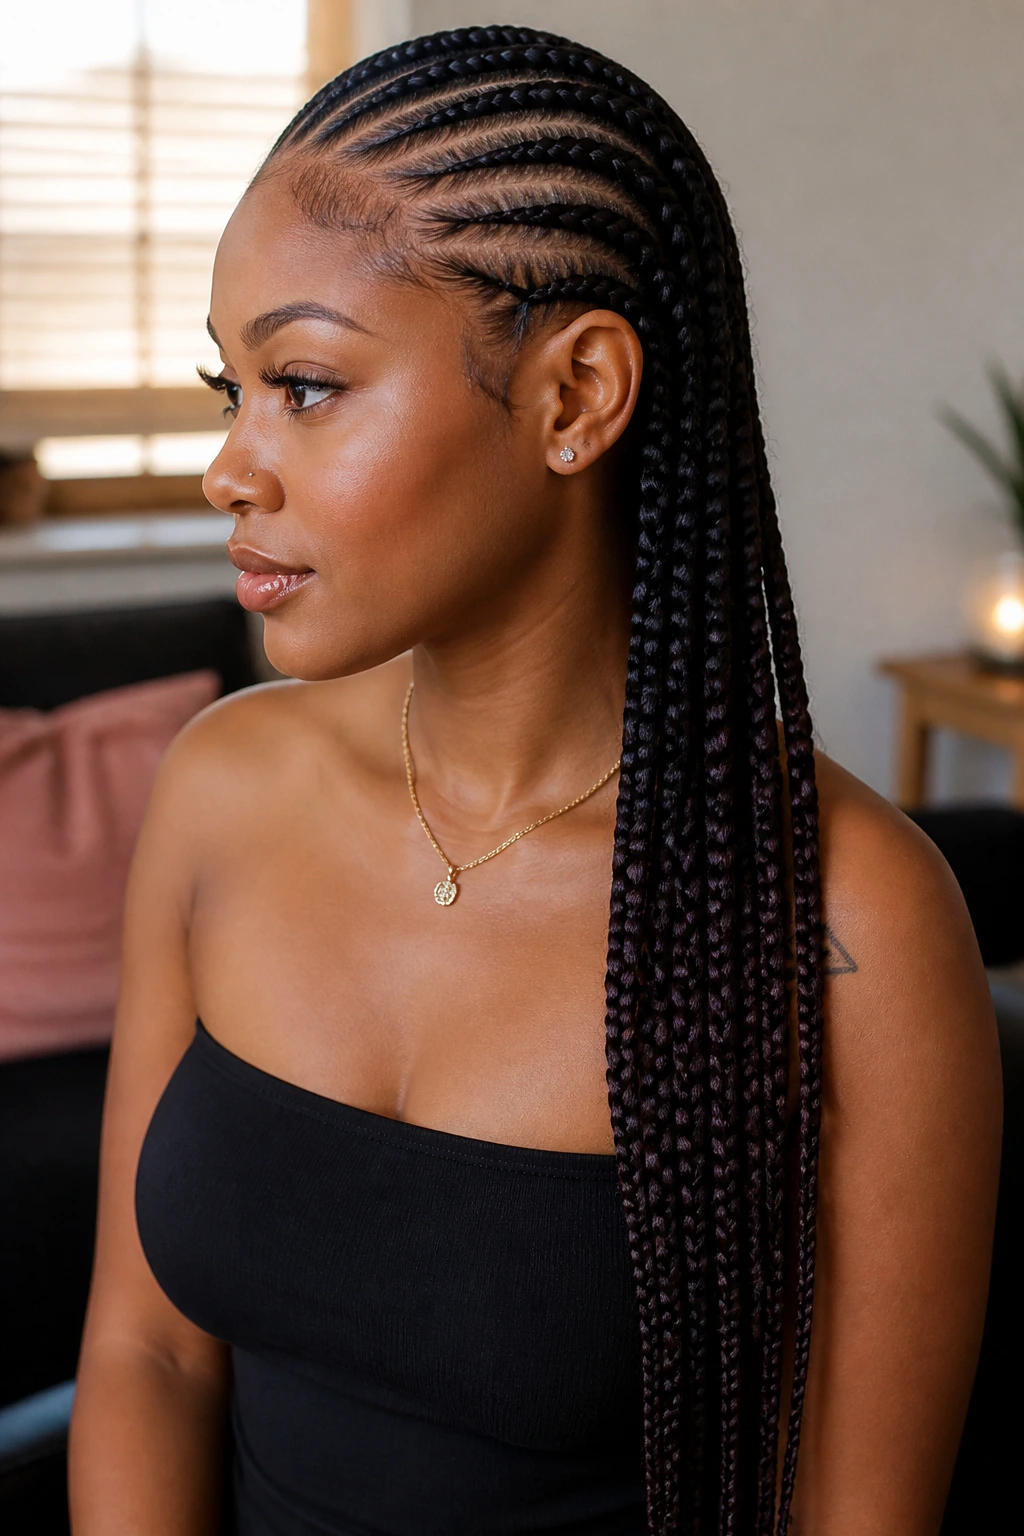
3. Feed-In Side Cornrows with a Long Tail
Feed-in braids make the side sweep look fuller without loading the scalp with one chunky lump at the front. The braid starts thin, then grows gradually as hair is added in small pieces, which keeps the line smooth and the finish much more polished.
What Makes It Different
The gradual build is kinder to the hairline than a sudden, thick start. It also gives you more length if you want the braid tail to fall over the shoulder or tuck into a bun later. Add the extension hair in two or three small additions, not all at once, or the braid will feel stiff and bulky.
This style is especially useful when your natural length is uneven or when shrinkage makes the back feel shorter than the front. A long feed-in tail gives you a little drama without needing a full head of added hair.
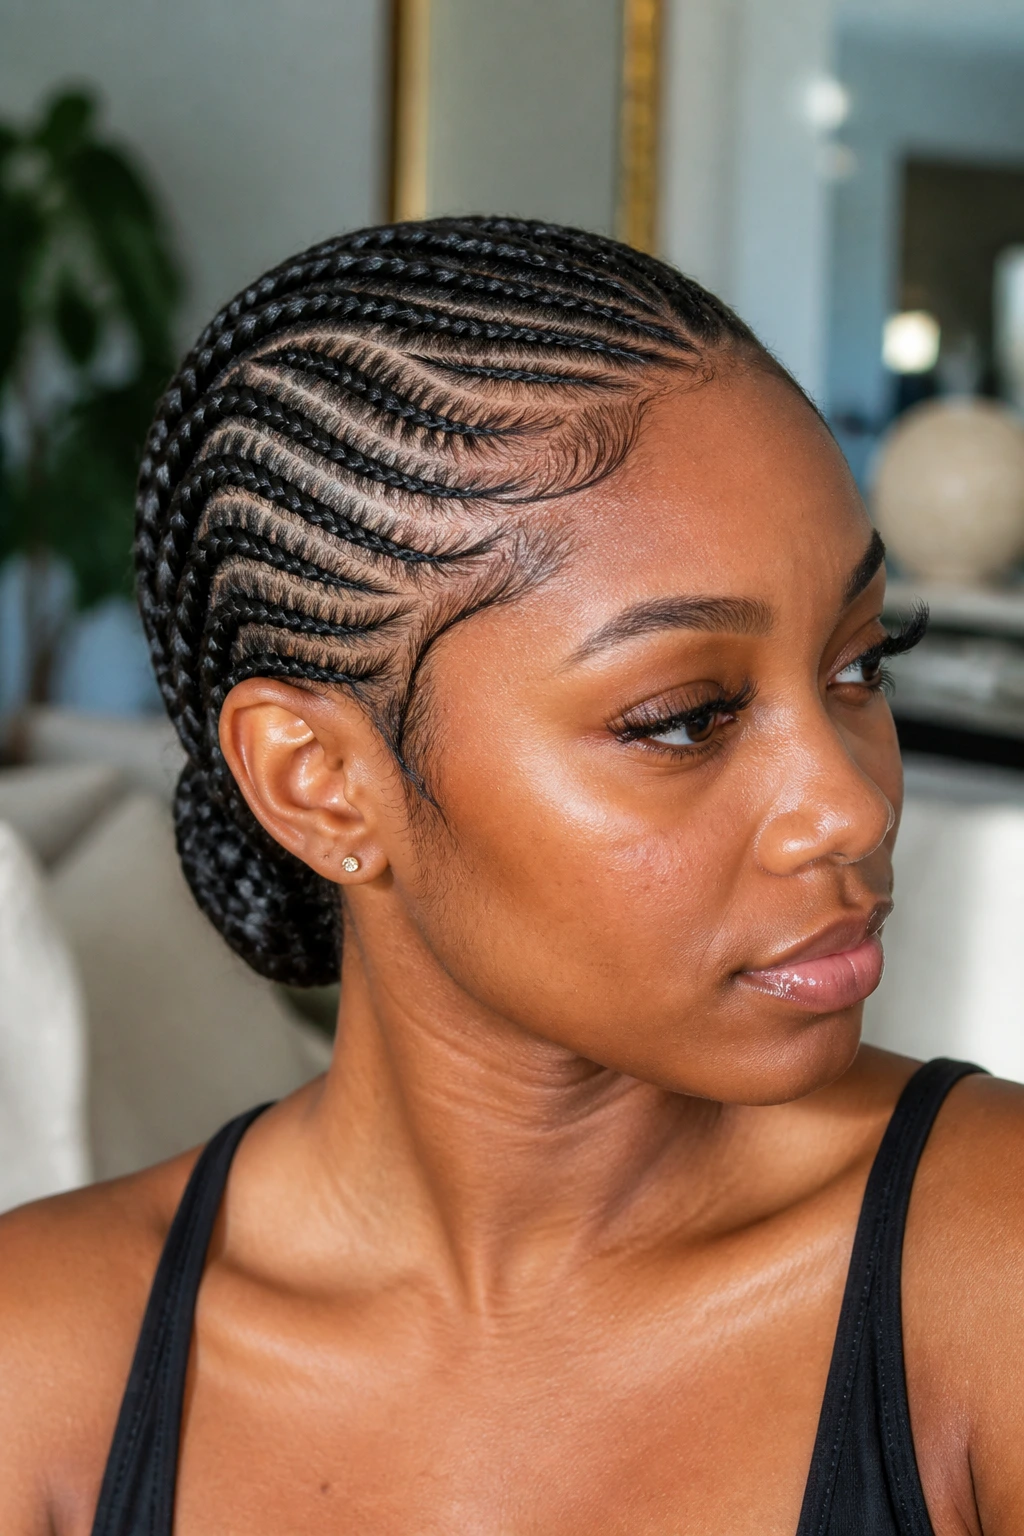
4. A Low Side Bun That Disappears Under the Braids
There’s a reason I keep coming back to this one: it’s neat, low, and doesn’t fight the shape of the head. The side cornrows sweep down toward the nape, then disappear into a bun that sits just off-center, which looks more thoughtful than a plain top knot.
Compared with a high bun, this version keeps the line of the braids visible longer. That matters if you like scalp detail and want the styling work to show. The bun itself should be smooth but not tight enough to leave a sore spot the next morning.
Use pins that match your hair color if you can. A bun this clean should not be held together by visible hardware unless you want that look on purpose.
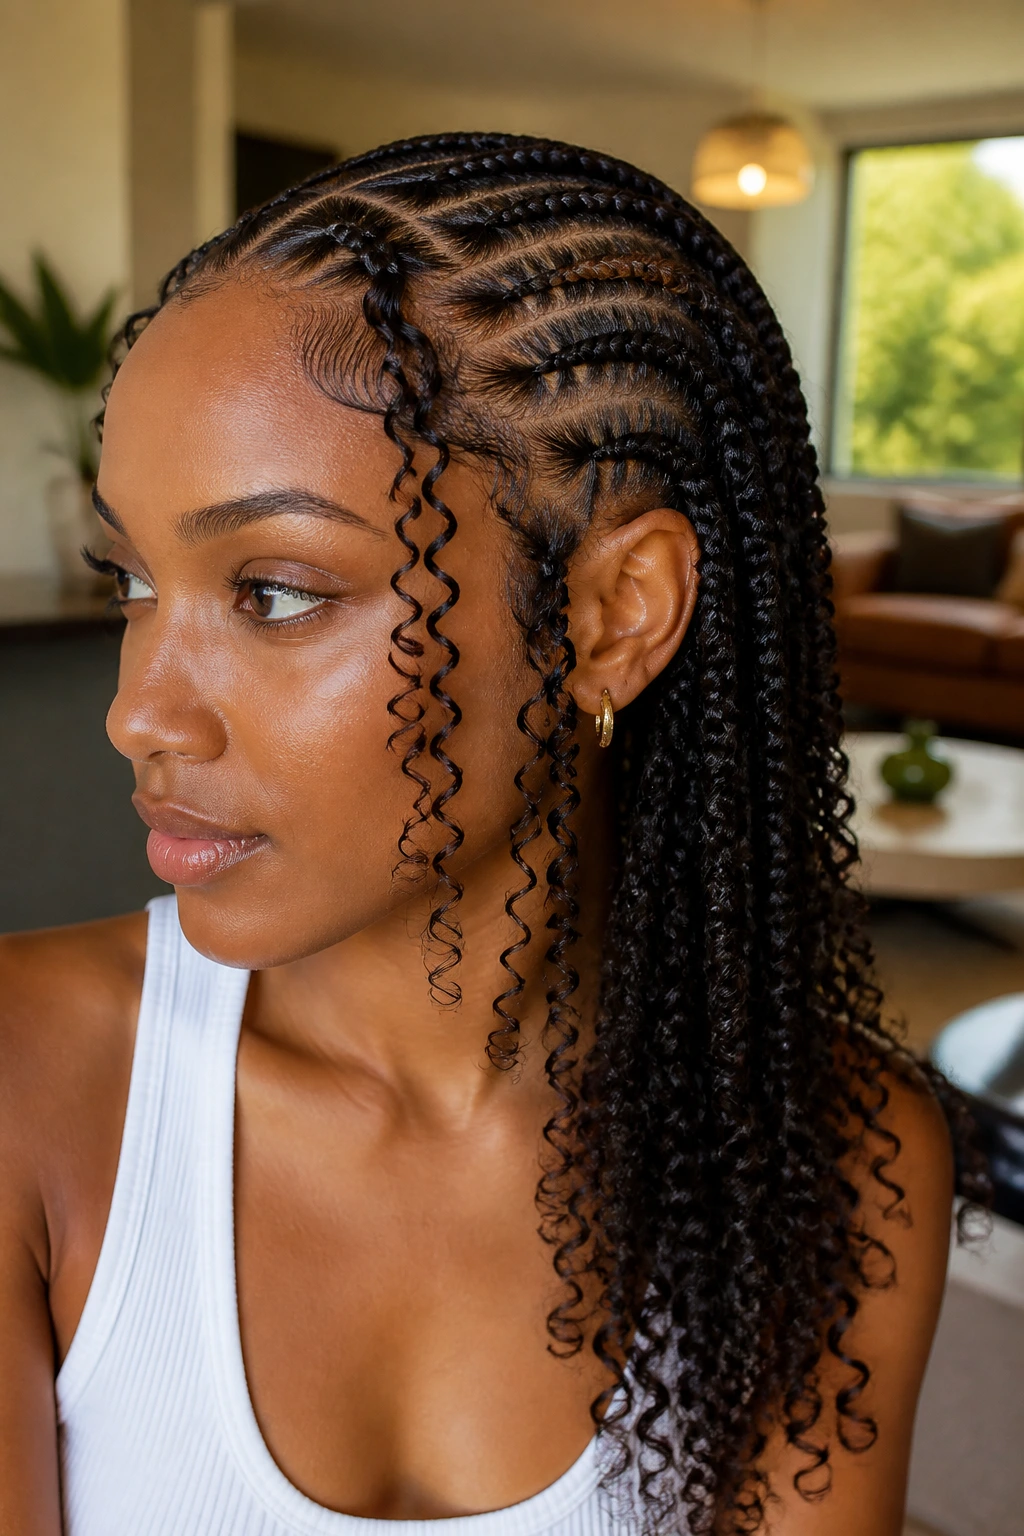
5. Curly Ends That Break Up the Braid Line
The braid stops, and then the texture opens up. That’s the appeal here. You get the precision of cornrows near the scalp, then a soft tangle of curls, coils, or rod-set ends that moves every time you turn your head.
This style works because the eye loves contrast. Tight rows on top, soft movement at the bottom. It’s especially good if your natural hair holds a twist-out or flexi-rod set well, since the ends can stay lively instead of going limp after an hour.
If you want the curls to stay bouncy, set them on hair that’s fully dry before you take the rods out. Damp curls stretch and frizz faster than people expect. A little mousse goes a long way; a heavy cream does not.
6. A Crown Sweep with a Soft Arc
This style curves the cornrows across the top of the head like a quiet crown, but without the stiff, halo-like look that can make some braid styles feel dated. The arc gives the head a smoother outline, which is useful if your hair tends to puff out at the crown.
Why It Feels Balanced
The soft curve is flattering because it breaks the straight line from forehead to nape. If your face is round, the arc gives length. If your face is long, the side sweep brings more width without making the style bulky.
I’d keep the rows medium width here — not tiny, not jumbo. The arc needs enough mass to read clearly, but too much thickness and the braid pattern starts to look heavy on one side.
7. Half-Up Side Cornrows with a High Puff
This is one of those styles that looks busier than it actually is. The front and side rows stay sleek, then the back hair is gathered up into a high puff that sits above the crown line and adds height where the braids are keeping things controlled.
It works because it gives you two textures in one style. The braids hold the shape, and the puff keeps the look from feeling too strict. If you’ve got thick hair and don’t want it fully tucked away, this is a smart compromise.
The one thing I’d watch is the placement of the puff. Too low, and the style feels droopy. Too high, and it starts fighting the braid sweep. Aim for a spot that follows the head’s natural curve, not a spot copied from someone else’s photo.
8. The Side Cornrow Faux Hawk
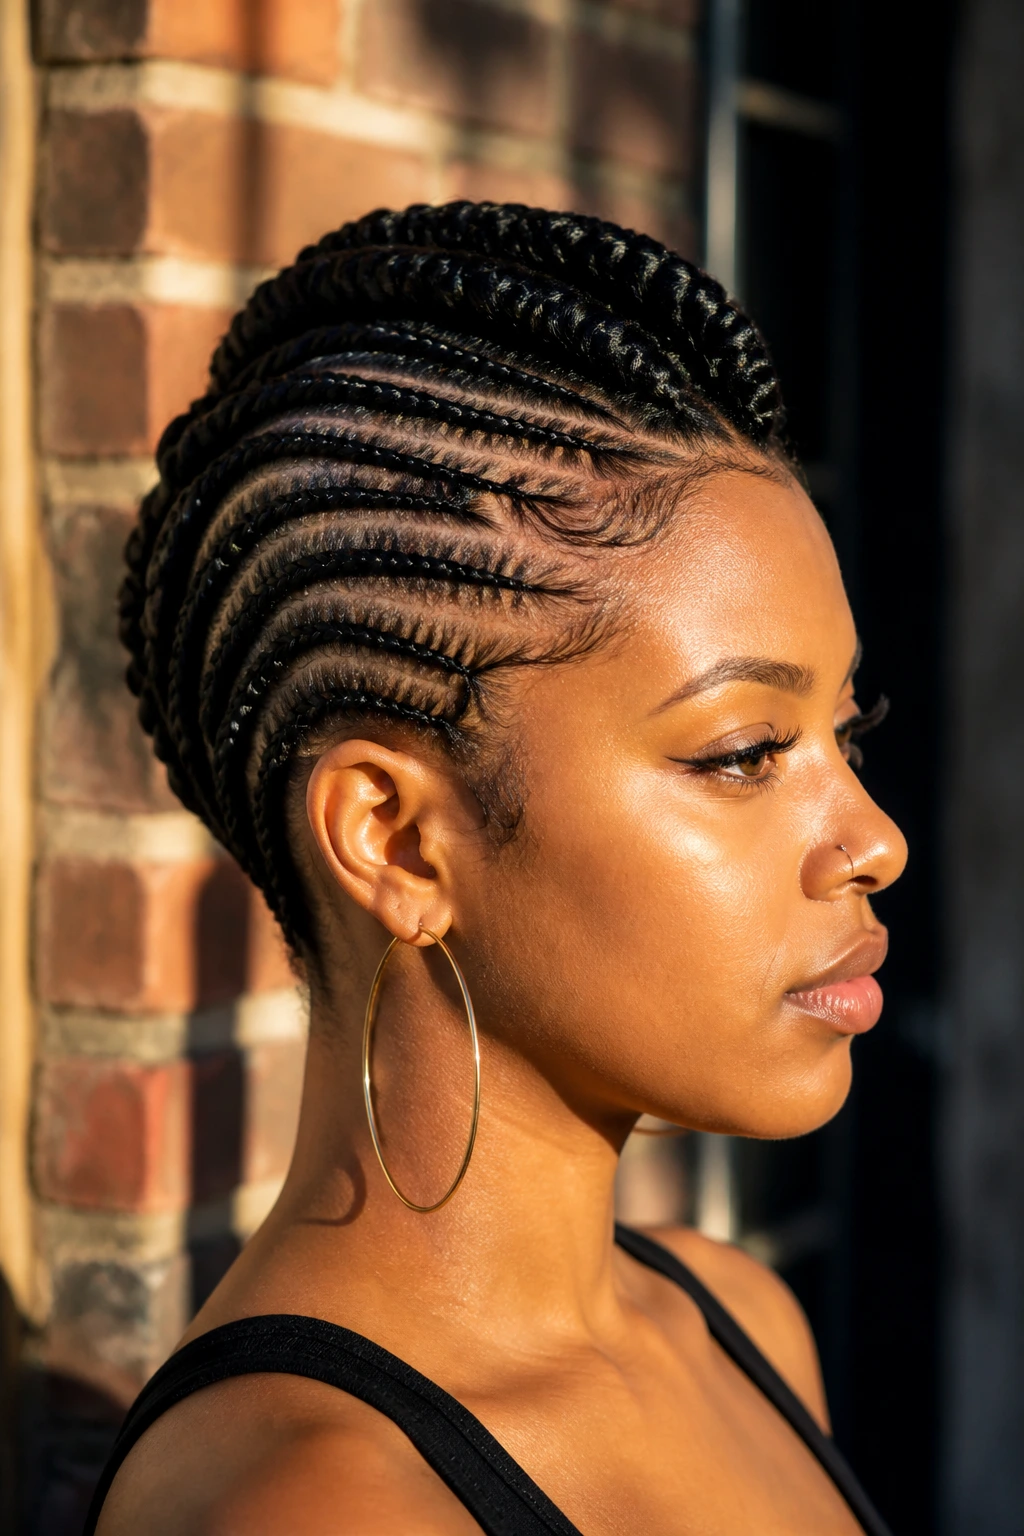
A side sweep can get a little sharper if you build a raised ridge down the middle and keep the sides braided tighter. That’s the faux hawk version, and it has real attitude without needing a mohawk cut or shaved sides.
Best For
- Hair that can hold a firm part without collapsing.
- People who like a stronger silhouette.
- Short to medium natural hair that needs height more than length.
The ridge should feel structured, not cartoonish. If you braid the center too wide, the look turns bulky fast. I prefer this style when the hair is stretched and the braid rows are narrow enough to show the shape of the head underneath.
9. A Short Braided Bob with Beads at the Ends
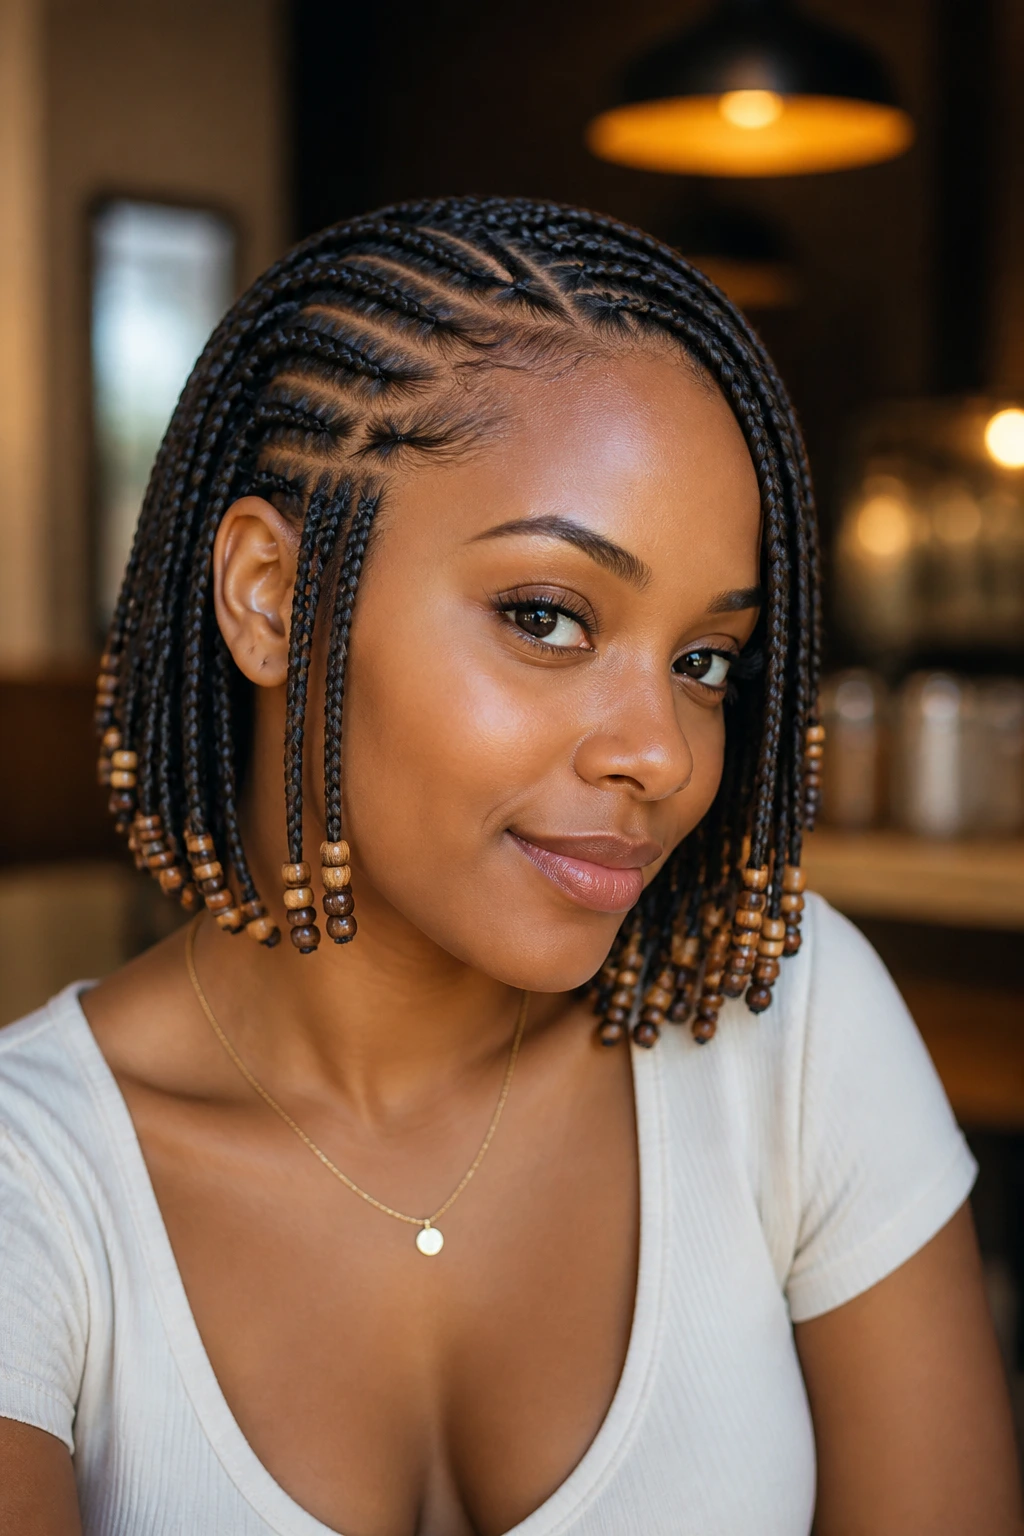
Short side cornrows with bead-tipped ends have a nice little rhythm to them. The rows start close to the scalp, then stop around jaw length or just below, where the beads add weight and a small click of movement.
The trick is not overdoing the decoration. A few beads near the ends are enough. If every row is loaded, the style starts rattling around instead of moving gracefully. Keep the parting neat and the bead color simple if you want the pattern to do most of the talking.
This is a good option when your hair is not long enough for a big bun or puff but still needs a style with presence. It also grows out in a way that feels forgiving, because the shorter length hides a little root puff better than longer braids do.
10. Triangle-Part Side Cornrows for a Sharper Grid
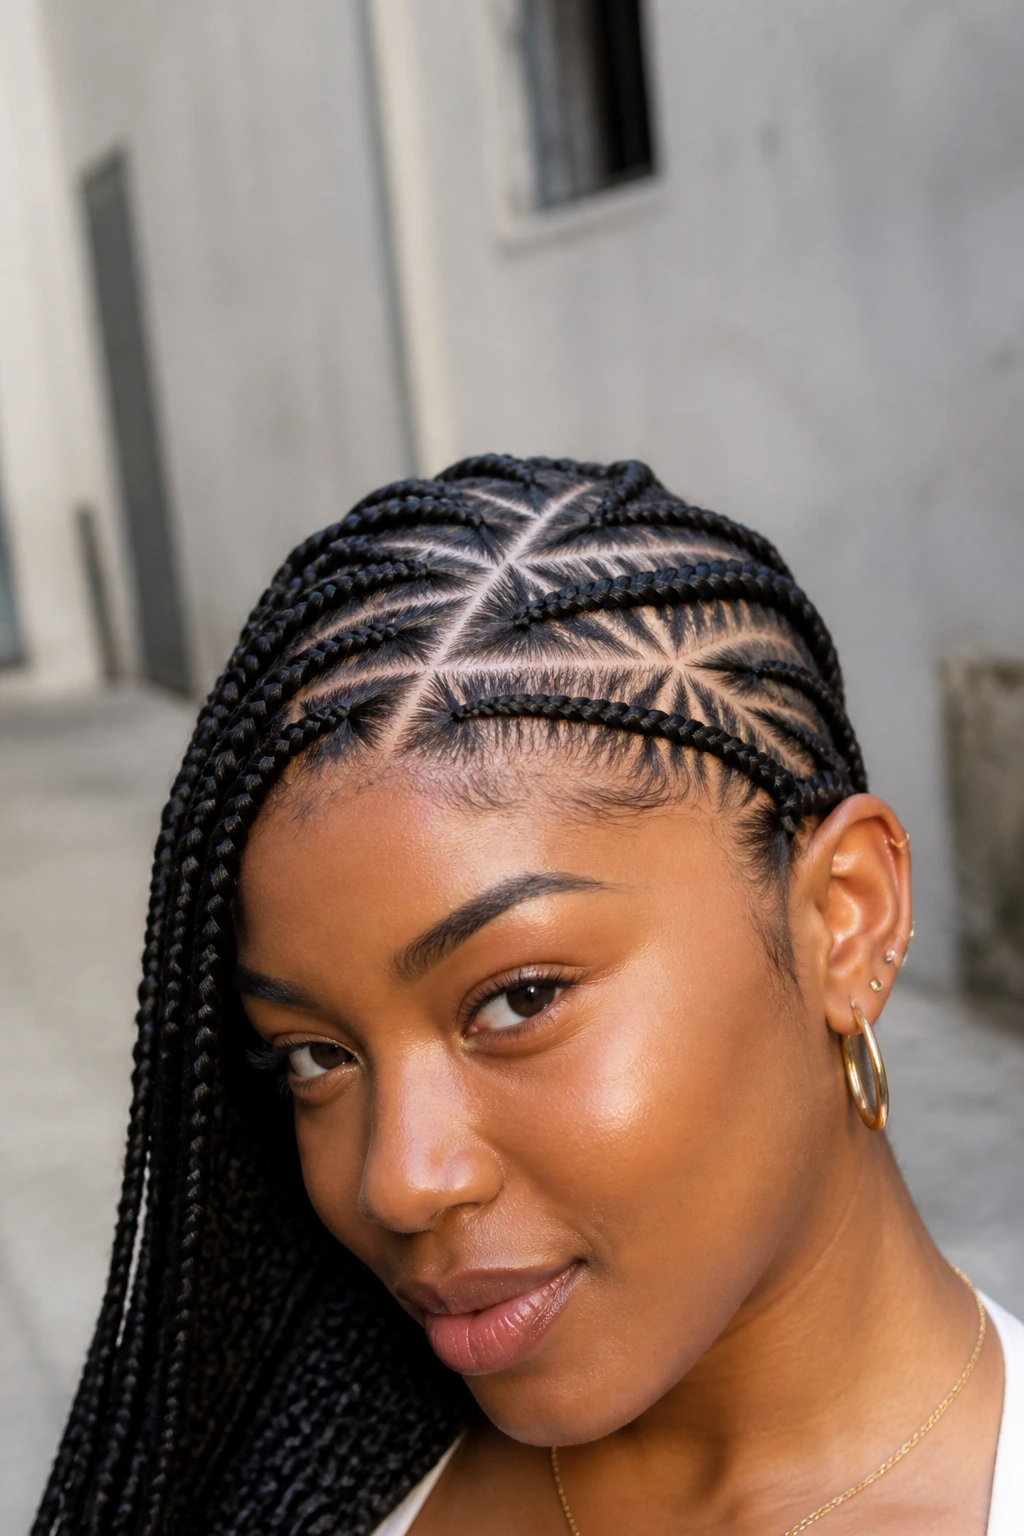
Triangle parts change the whole mood of the braid. Instead of neat squares or plain straight sections, you get little angular panels that make the side sweep look sharper and more deliberate.
The shape matters more than people think. Triangle parts create movement even before the braiding starts, and they keep the scalp from looking flat. If your hairline is already strong and your edges are in good shape, this parting pattern can look stunning in a very clean, graphic way.
It’s not the fastest choice. Triangle sections take patience, and if your hands get sloppy halfway through, the grid shows it instantly. But if you like detail, this one gives it back in full.
11. Cornrows and Flat Twists Mixed in One Head
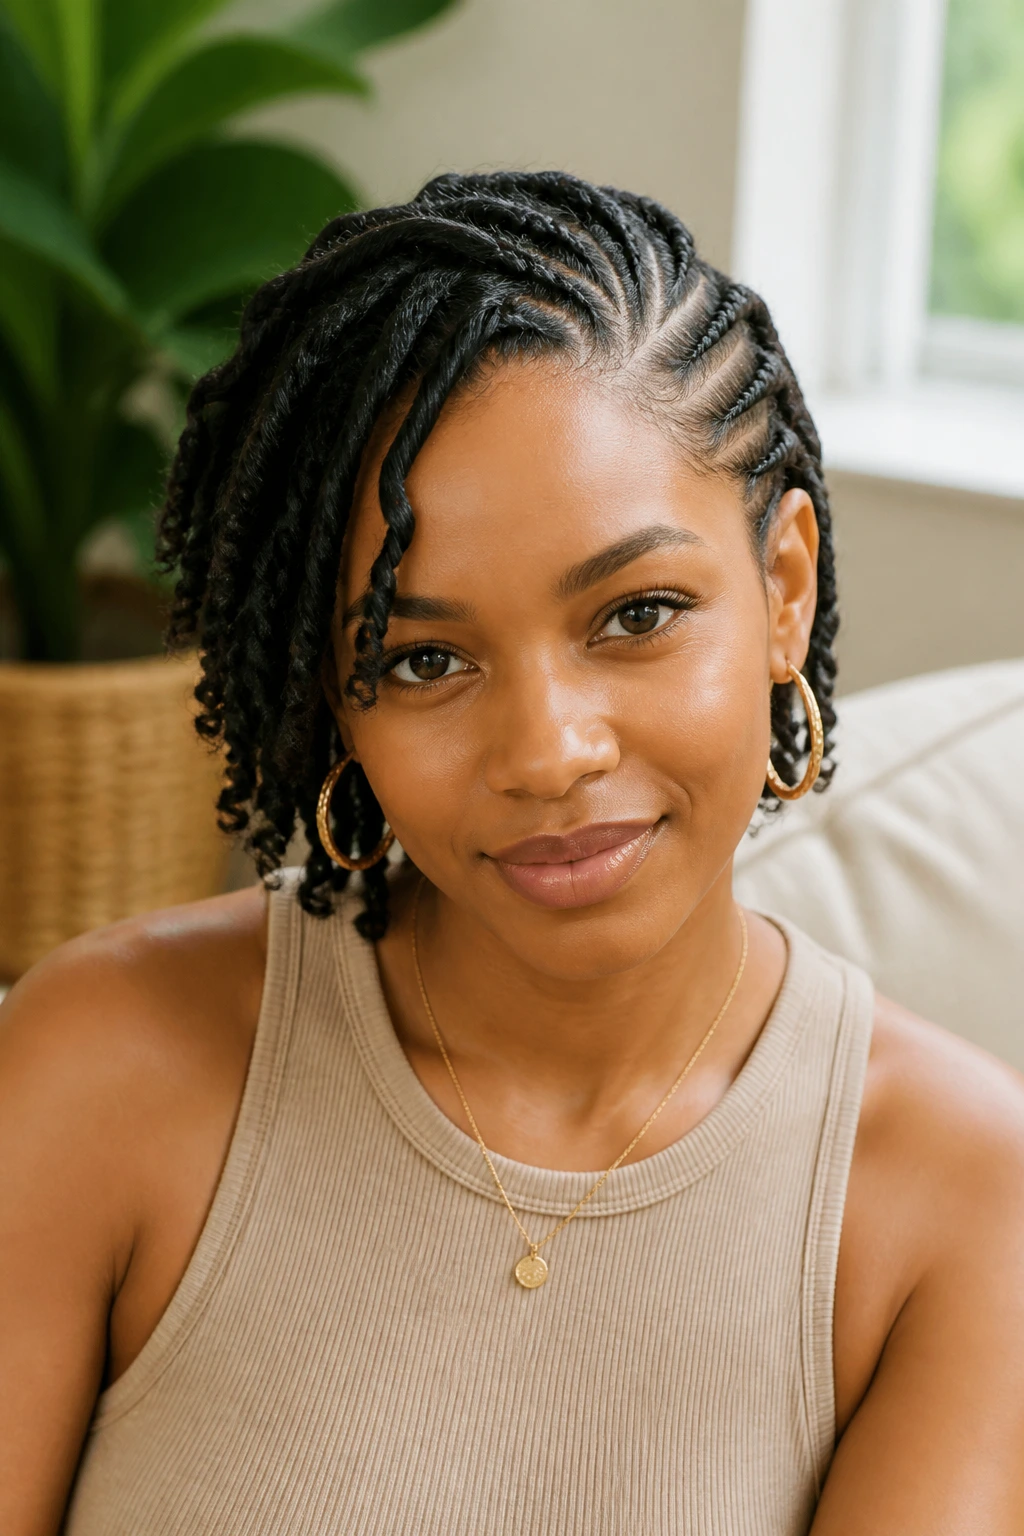
Cornrows have a tighter, more locked-in look; flat twists feel softer and a little looser. Put them together and you get a braid style that looks mixed on purpose instead of accidentally unfinished.
I like this combination when the scalp is sensitive or when you want less tension around the front. Flat twists can take the pressure off the hairline while the cornrows behind them keep the style anchored. The result is less rigid than all-cornrow styling, which can be a relief if your head has had enough pulling.
It’s also a nice way to play with texture. The twist sections catch light differently, and they soften the hard edge of a braid line that might otherwise feel severe.
12. A Tucked Side Bun That Keeps Everything Off the Neck
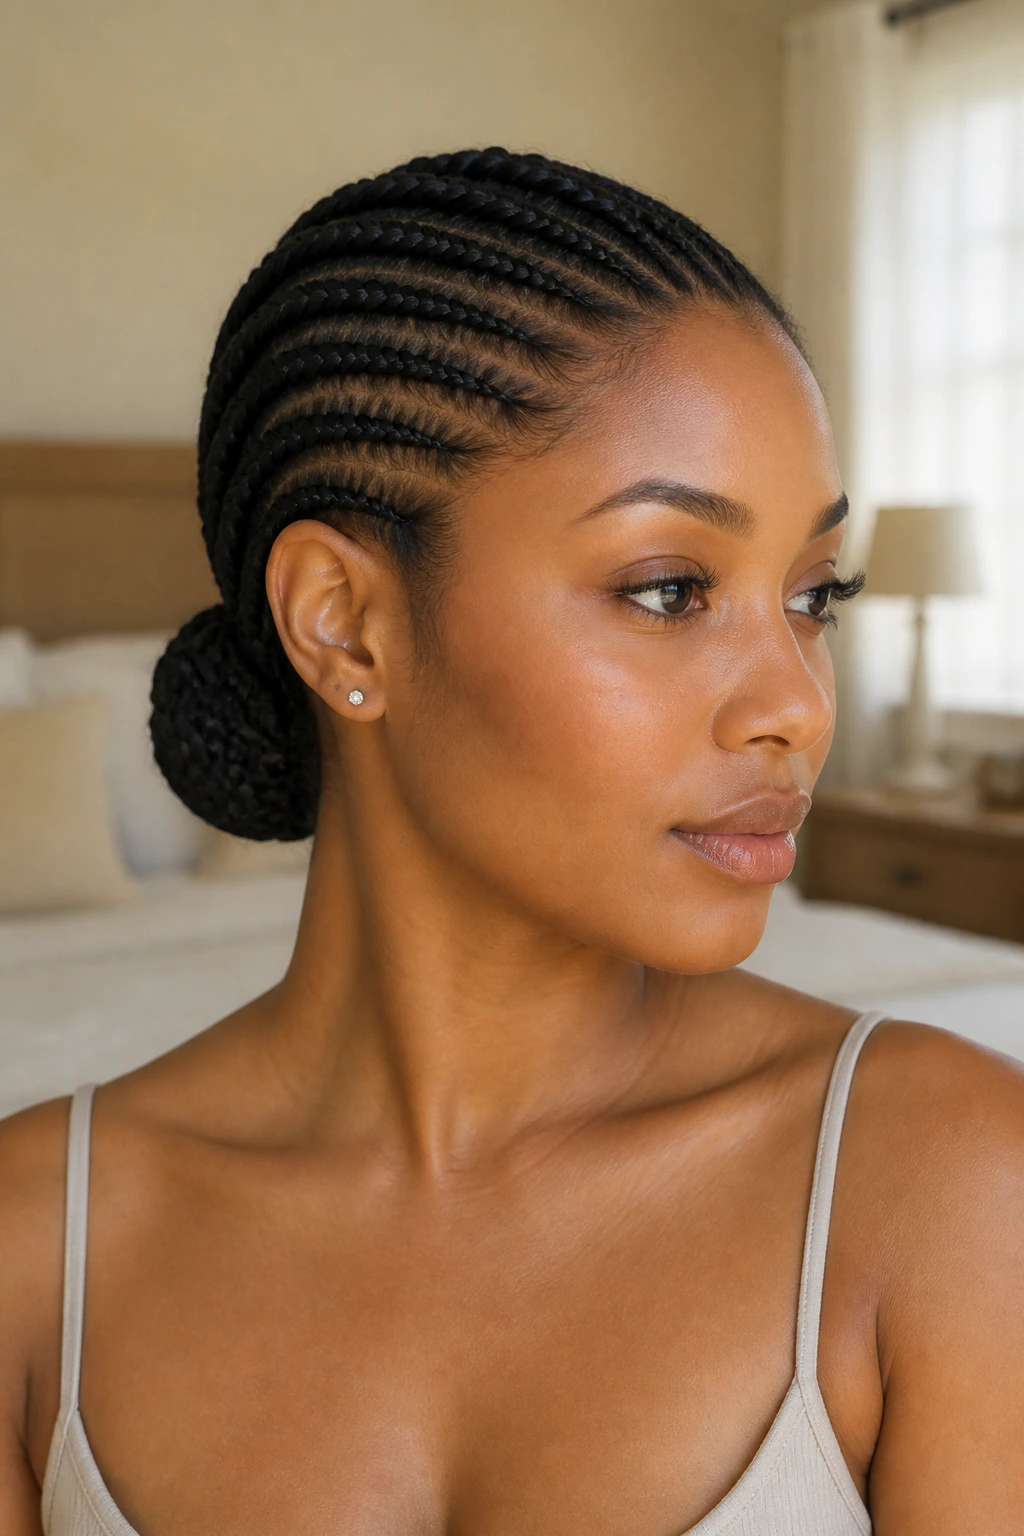
Hot neck, sweaty scarf, too much hair on your shoulders? This style answers all of that. The cornrows sweep sideways and then disappear into a tucked bun that sits low enough to stay out of the way but still high enough to show the braid path.
The beauty here is restraint. Nothing dangles. Nothing swings around and gets caught on collars or earrings. It’s the kind of style I’d choose for a long day when I want the hair to disappear a little, but not in a boring way.
Use a strong but flexible hold spray only on the outer surface if you need flyaways to settle. Don’t saturate the bun itself. A wet bun tends to lose the very shape that makes this style work.
13. Zig-Zag Parts with Slim Cornrows
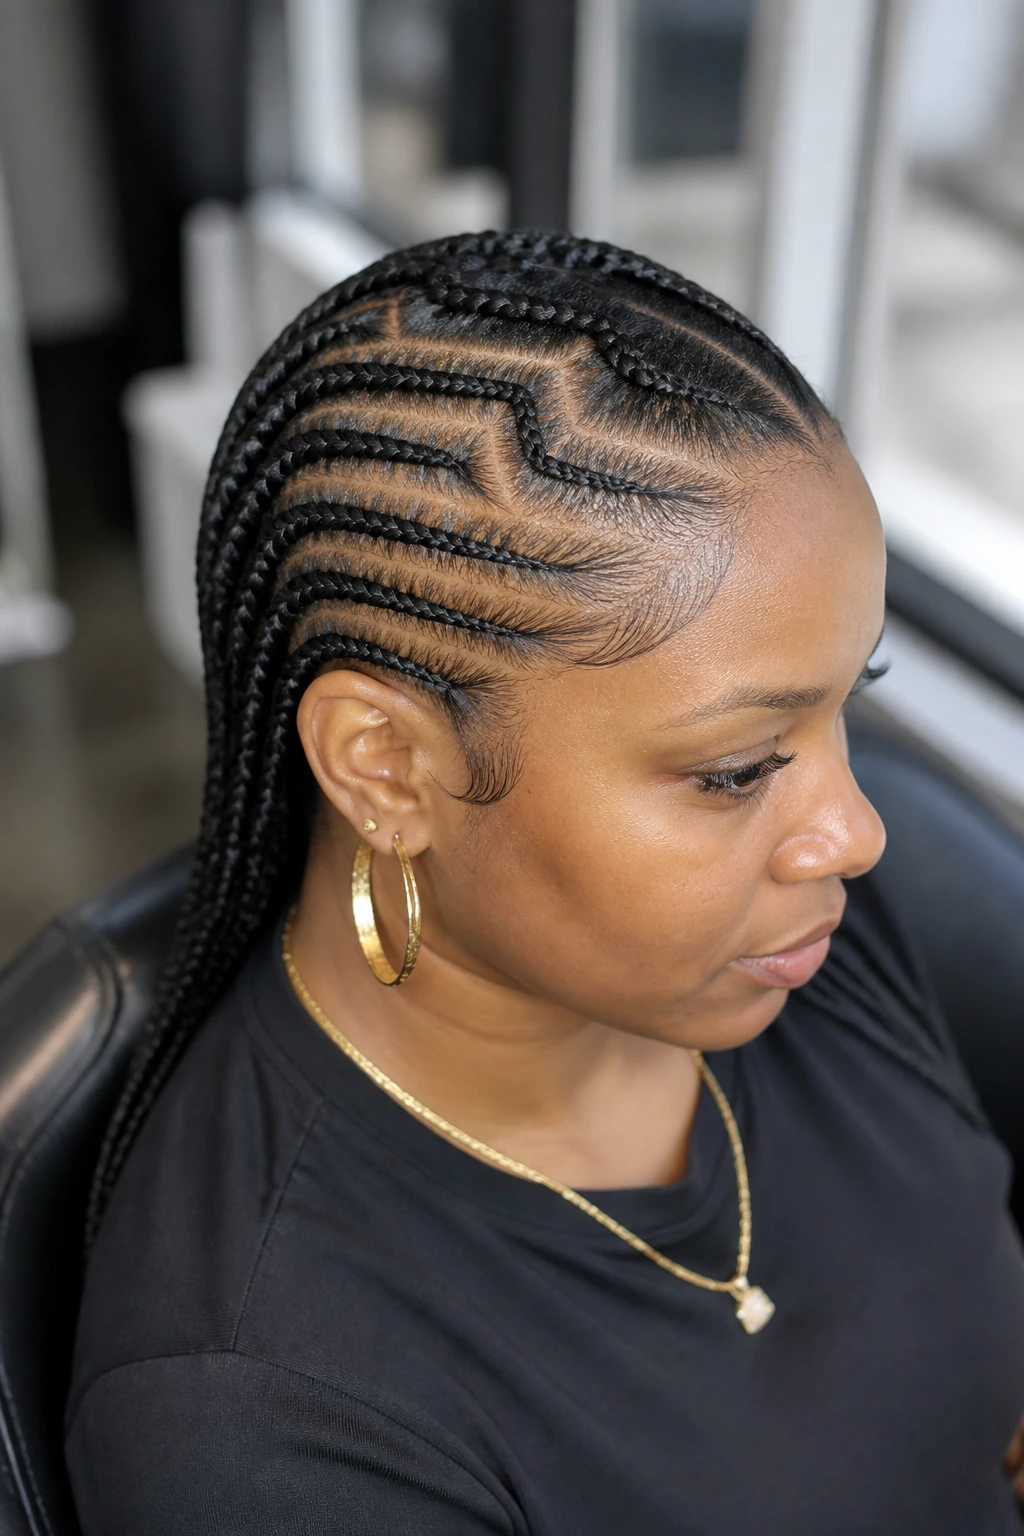
A zig-zag part gives side cornrows a little attitude before the first braid even starts. The line snakes across the scalp, and that small change makes the whole pattern feel more energetic than a straight part ever could.
What to Watch For
- Keep the zig-zag shallow if you want the style to stay wearable.
- Use a rat-tail comb with a fine point; blunt parting tools make the line fuzzy.
- Match the braid size to the part size so the pattern doesn’t look crowded.
The fun part is that the braid itself can stay simple. The parting does the talking. If you want one detail that makes people lean in a little closer, this is it.
14. Thin-and-Thick Layers for Extra Depth
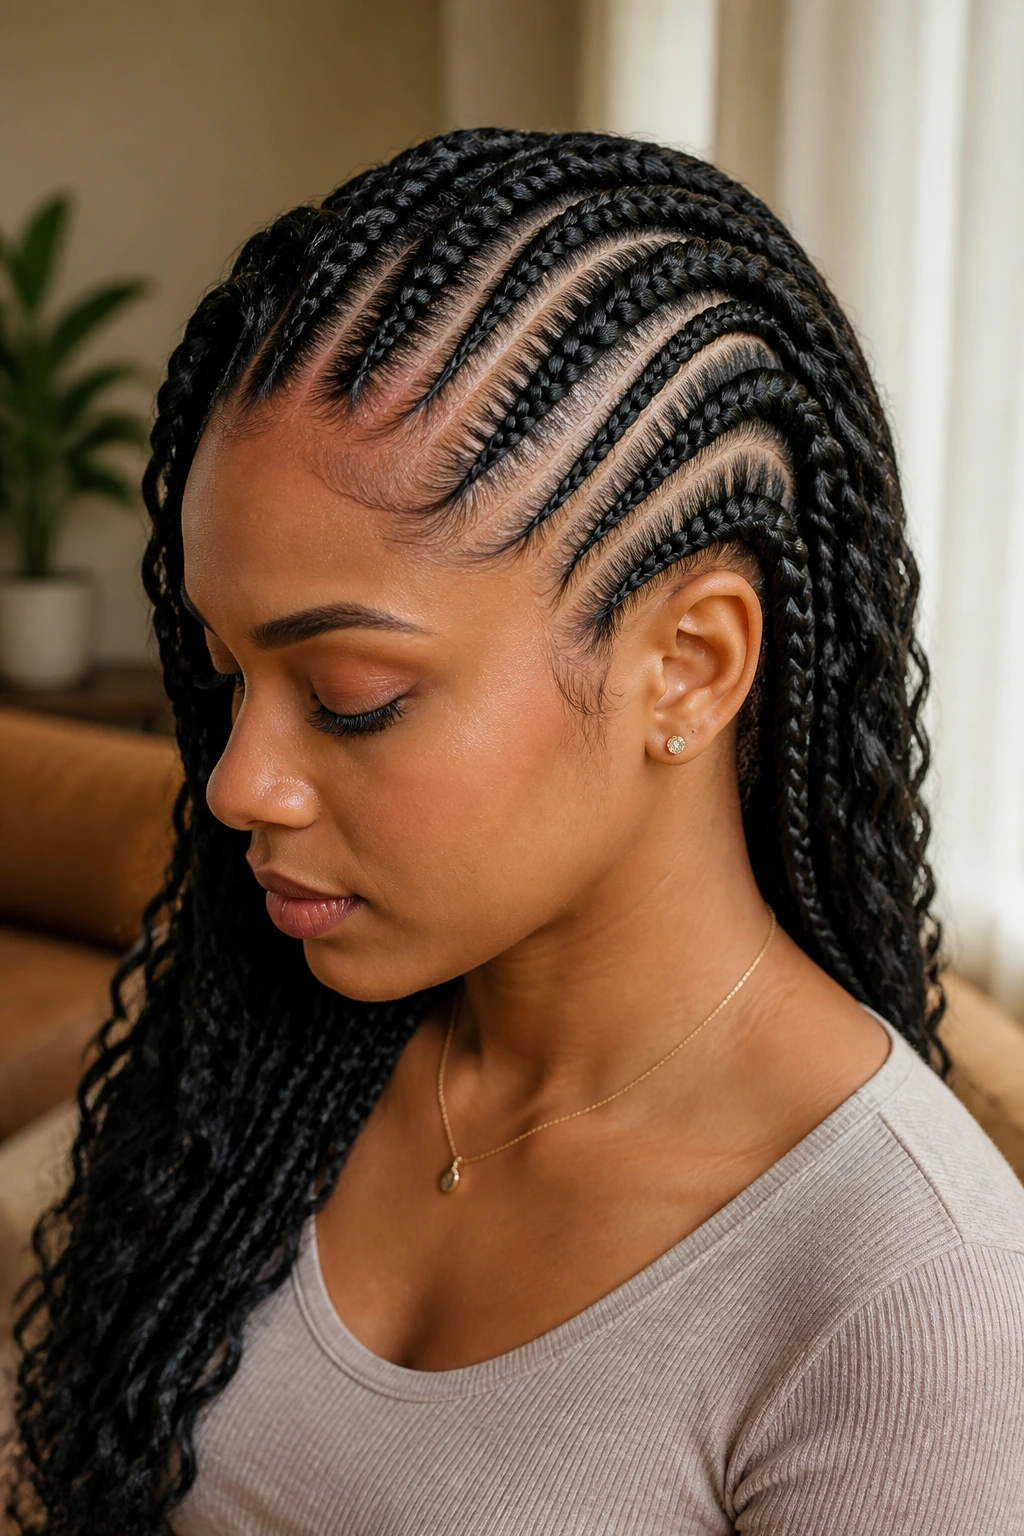
Some braid styles look better when every row is exactly the same width. This is not one of them. A thin row next to a thicker one creates depth, and side cornrows benefit from that extra rhythm because the diagonal path already has motion built into it.
I prefer this style when the hair is dense and a little hard to flatten. The thicker rows anchor the style, while the finer rows keep the pattern from feeling heavy. You can think of it like a braid version of layering clothes: one piece carries the shape, the other keeps it interesting.
The key is restraint. Don’t make every row dramatically different. A small variation in width is enough. Too much contrast and the braid line starts looking like it was improvised mid-way through.
15. Side Cornrows with Hidden Ends
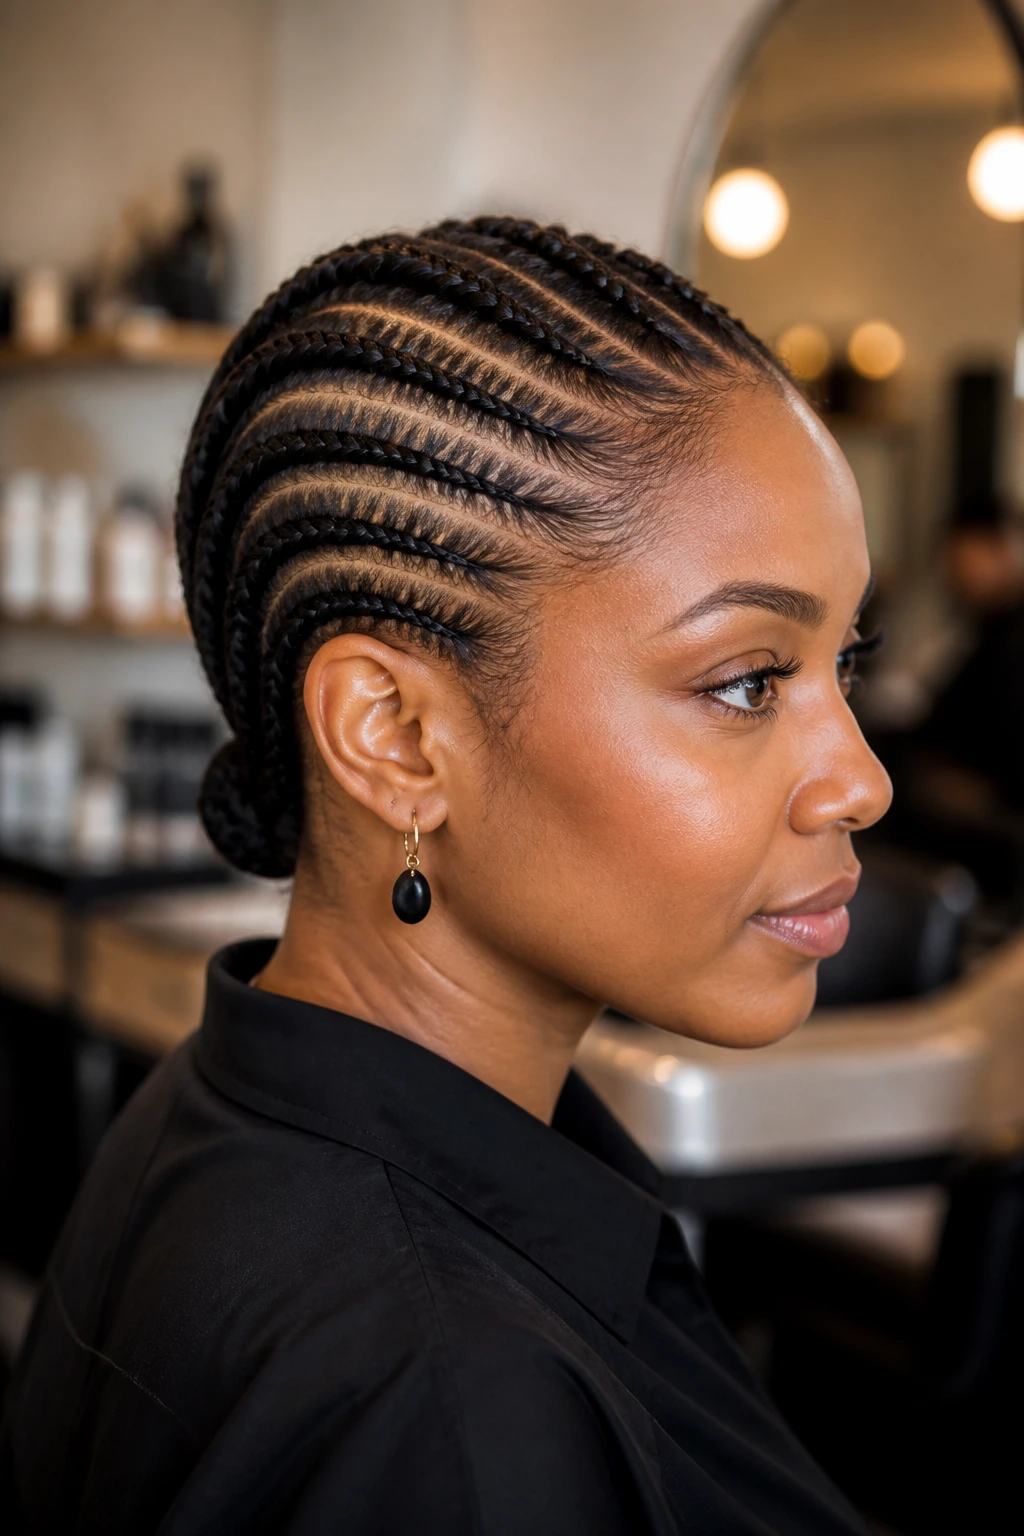
What if you want the braid pattern to do its job without showing off the tail? Hidden ends are the answer. The rows sweep to one side and then tuck under themselves or disappear into a wrapped section, so the finish looks clean and almost architectural.
This works especially well if you don’t like loose ends brushing your shoulders. It also helps when you want the style to read a little more formal. The hidden finish turns the hair into a shape instead of a set of hanging pieces.
If you’re tucking ends under, make sure the base is secure but not jammed tight. A hidden end should vanish. It should not feel like a knot hiding a grudge.
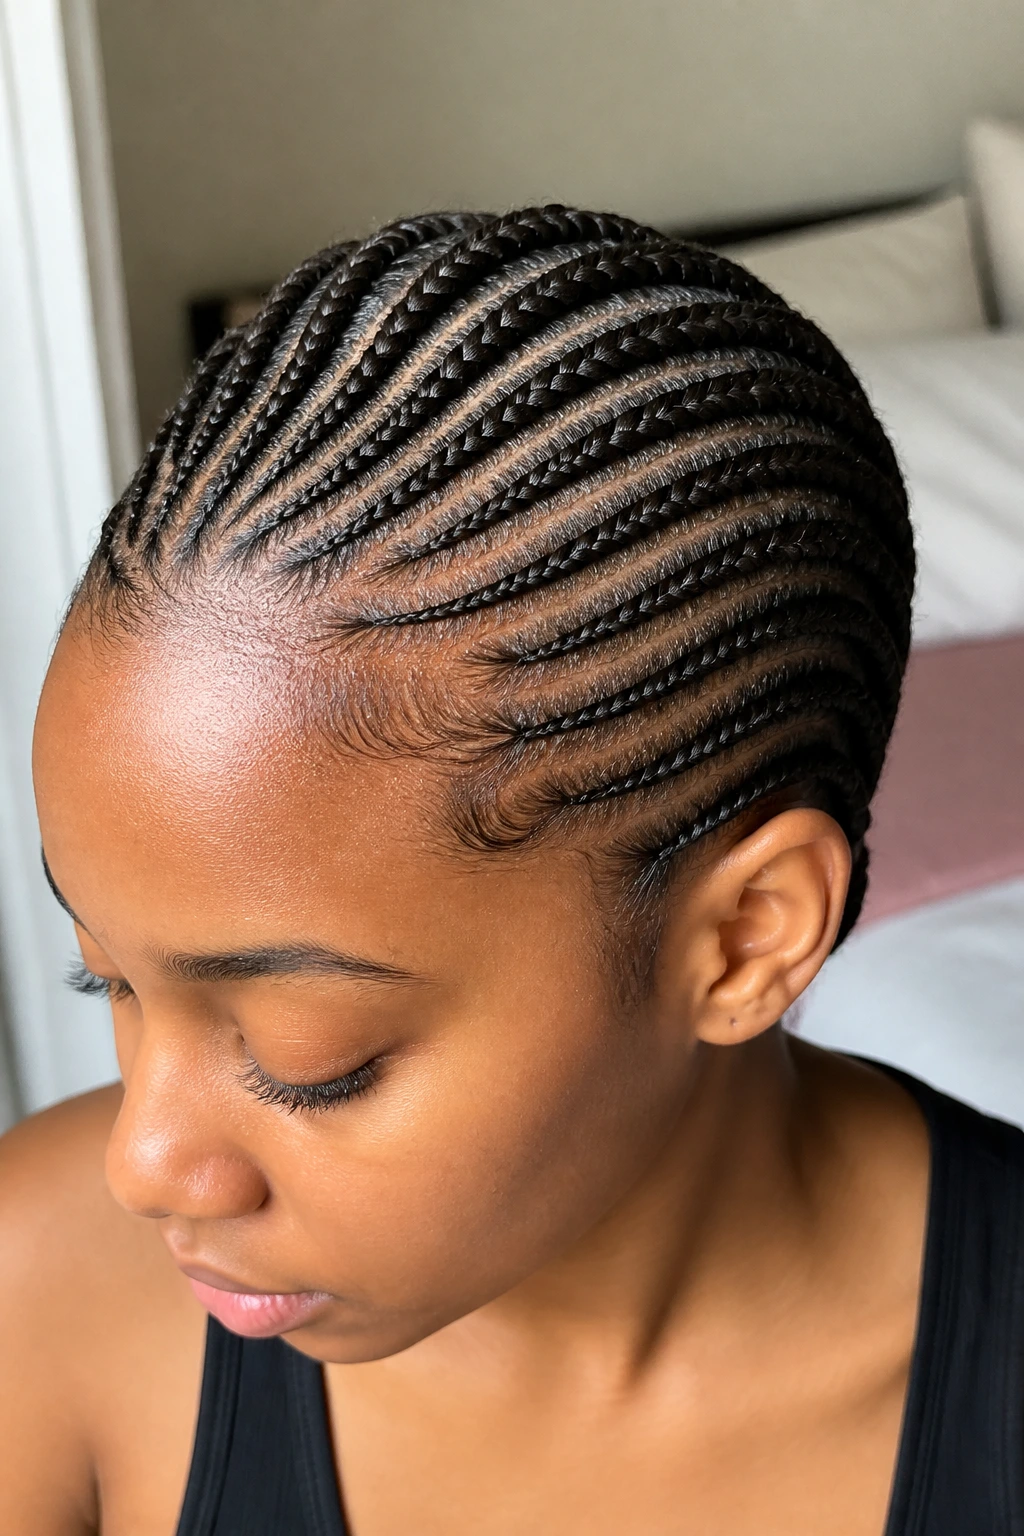
16. Extension-Free Side Cornrows for Short Natural Hair
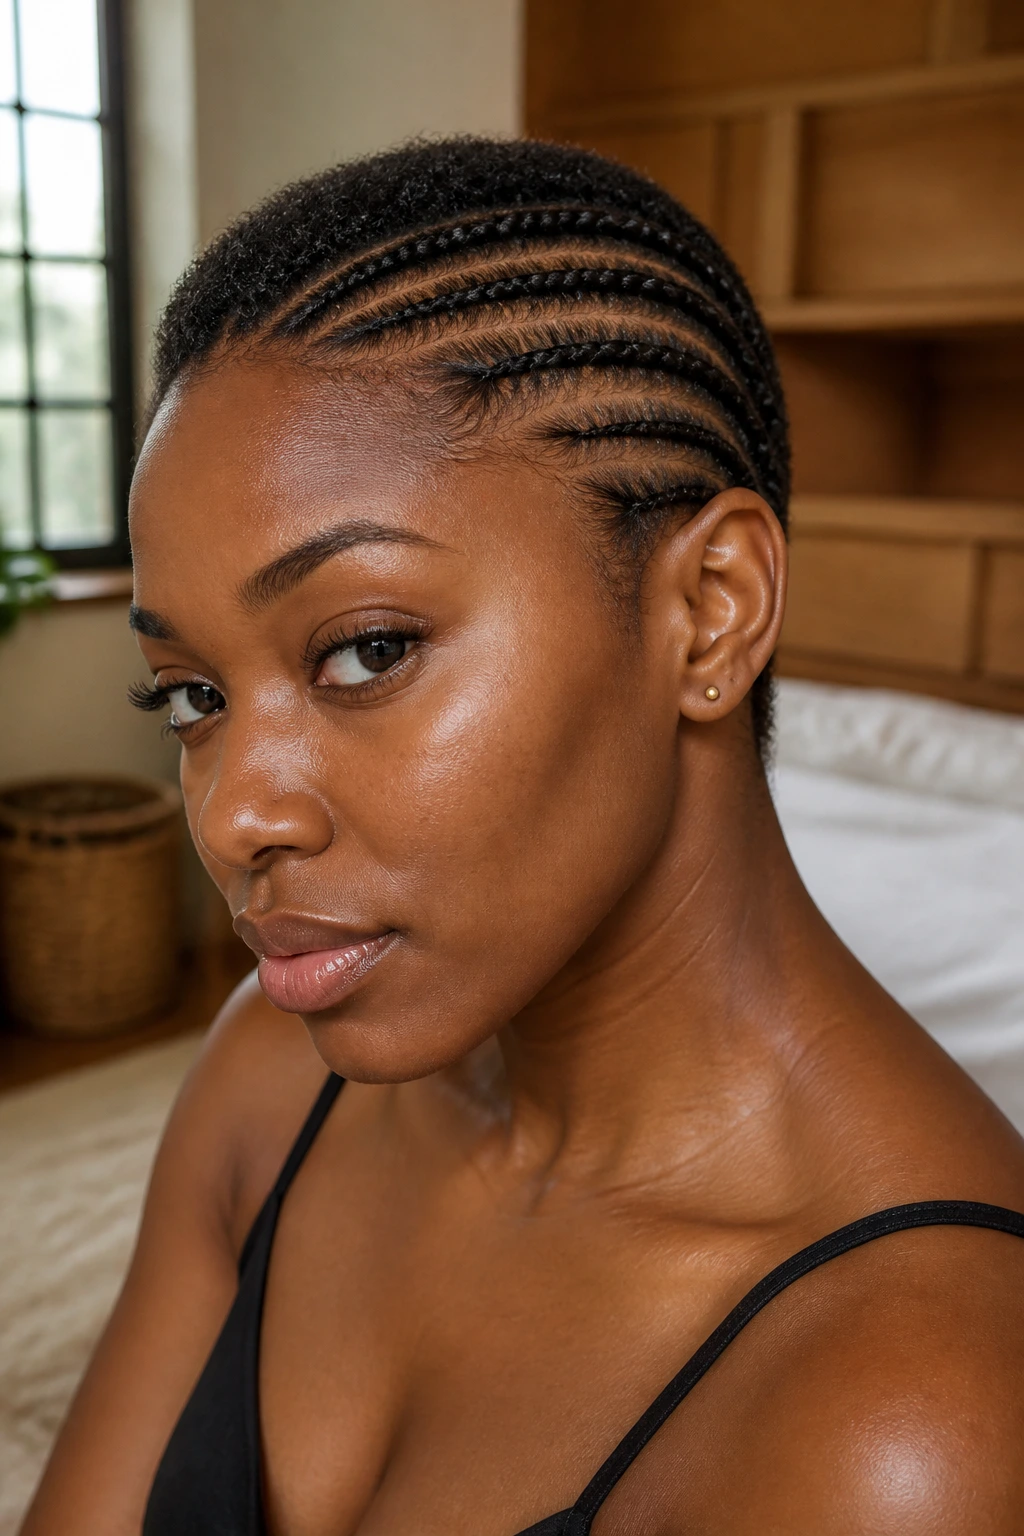
Short hair can absolutely carry side cornrows, and I’m always a little suspicious of people who act like you need long lengths for the style to count. You don’t. You need clean sectioning, a bit of grip, and the patience to work with the shrinkage instead of against it.
Best For
- TWA and short cropped coils.
- Hair that has been lightly stretched but not blown out bone-straight.
- People who want a low-maintenance style with less added weight.
Keep the sections small and the product light. Too much gel on short hair makes the roots slippery, which means the braid lifts instead of staying snug. Short styles hold better when the base is dry, detangled, and handled in smaller bites.
17. Side Cornrows into Bantu Knots
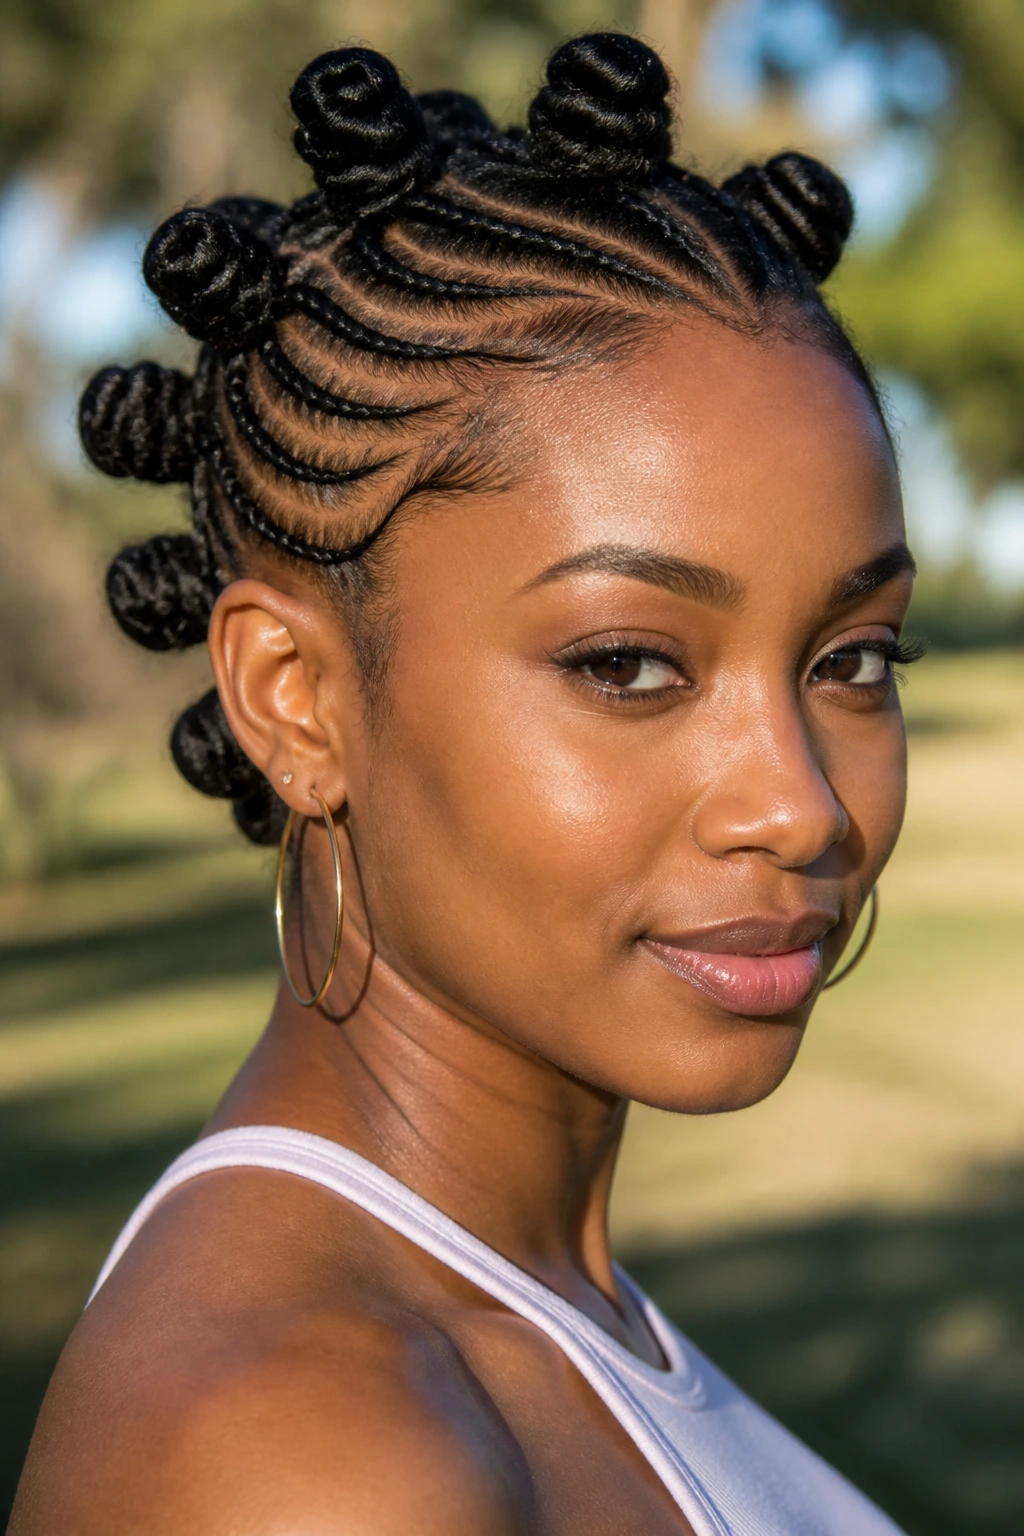
This one has personality. The front or side rows lay down the path, and the remaining hair gets twisted into compact Bantu knots that sit like little sculpted coils along the sweep.
The look is playful, but it’s not childish unless you want it to be. With smaller, tighter knots and clean parting, it can feel sharp and modern. With bigger knots and a softer braid line, it turns gentler and more playful.
I like this on medium-density hair because the knots have enough body to stay round. If your hair is very fine, the knots can look a little flat unless you add a bit of padding or use smaller sections.
18. A Braided Ponytail That Starts on One Side
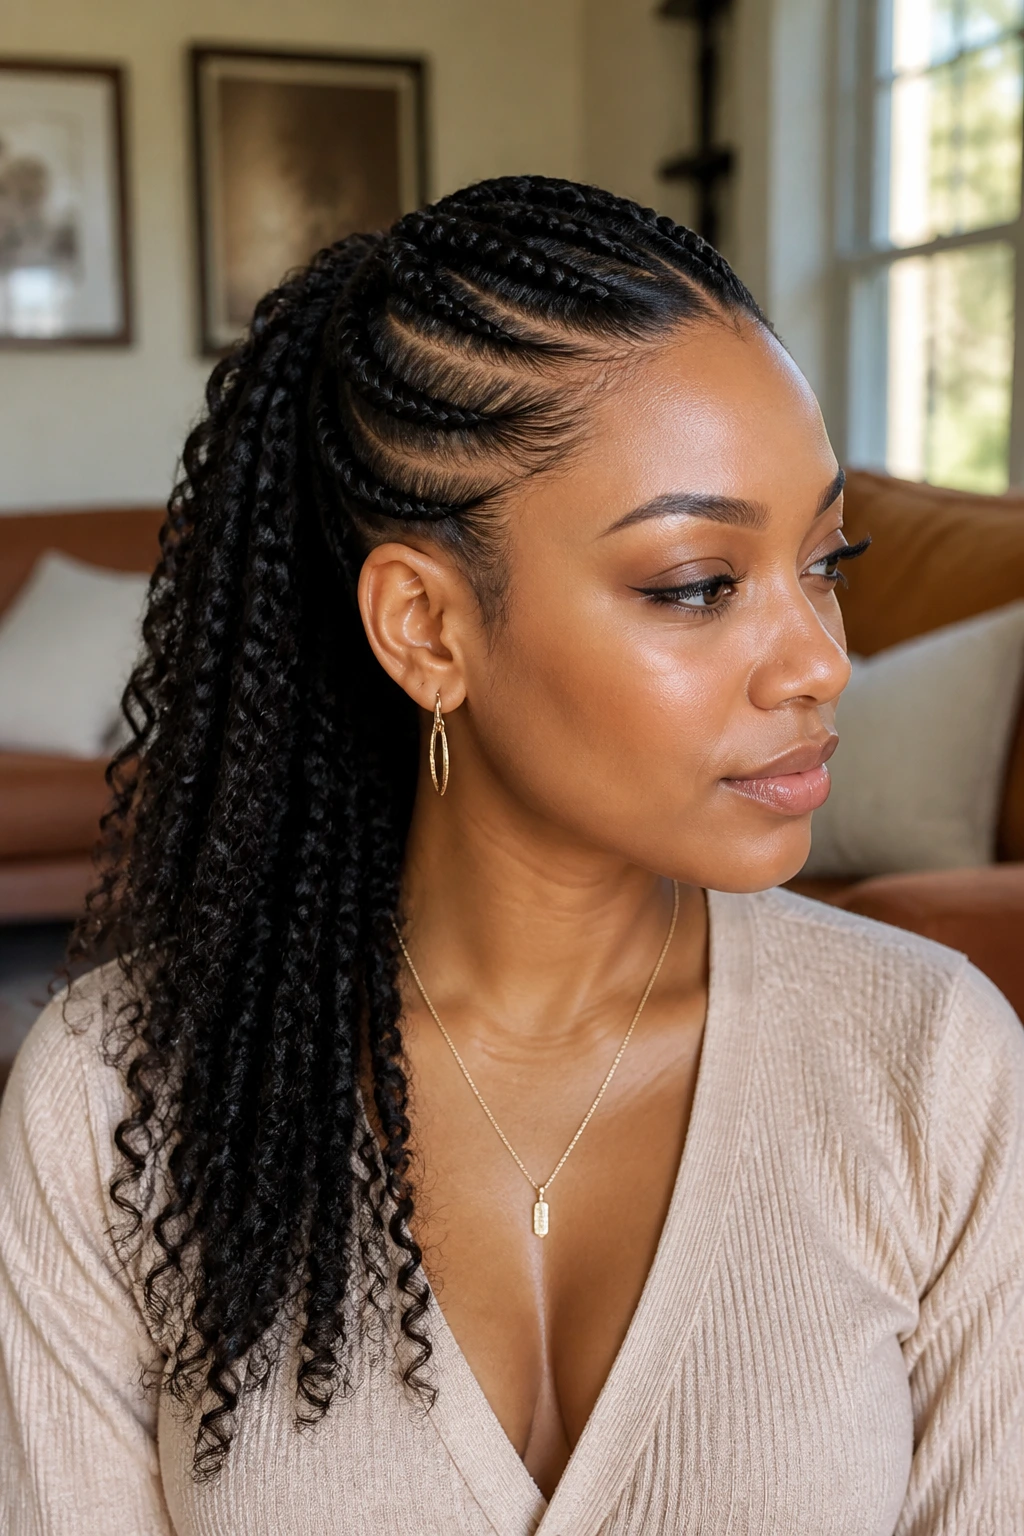
The side braid path feeding into a ponytail gives you structure at the front and motion at the back. It’s cleaner than a loose ponytail and less formal than a bun, which makes it one of the easiest styles to wear almost anywhere.
The ponytail can sit low or mid-height, depending on how much of the braid path you want to show. A lower ponytail looks calmer and more polished. A higher one brings more energy, especially if the tail is thick and stretched.
What I like here is the easy day-two behavior. The braid line usually stays neat longer than the tail, so if the ends puff up a bit, the style still has shape where it matters most.
19. Side Cornrows Finished with Gold Cuffs
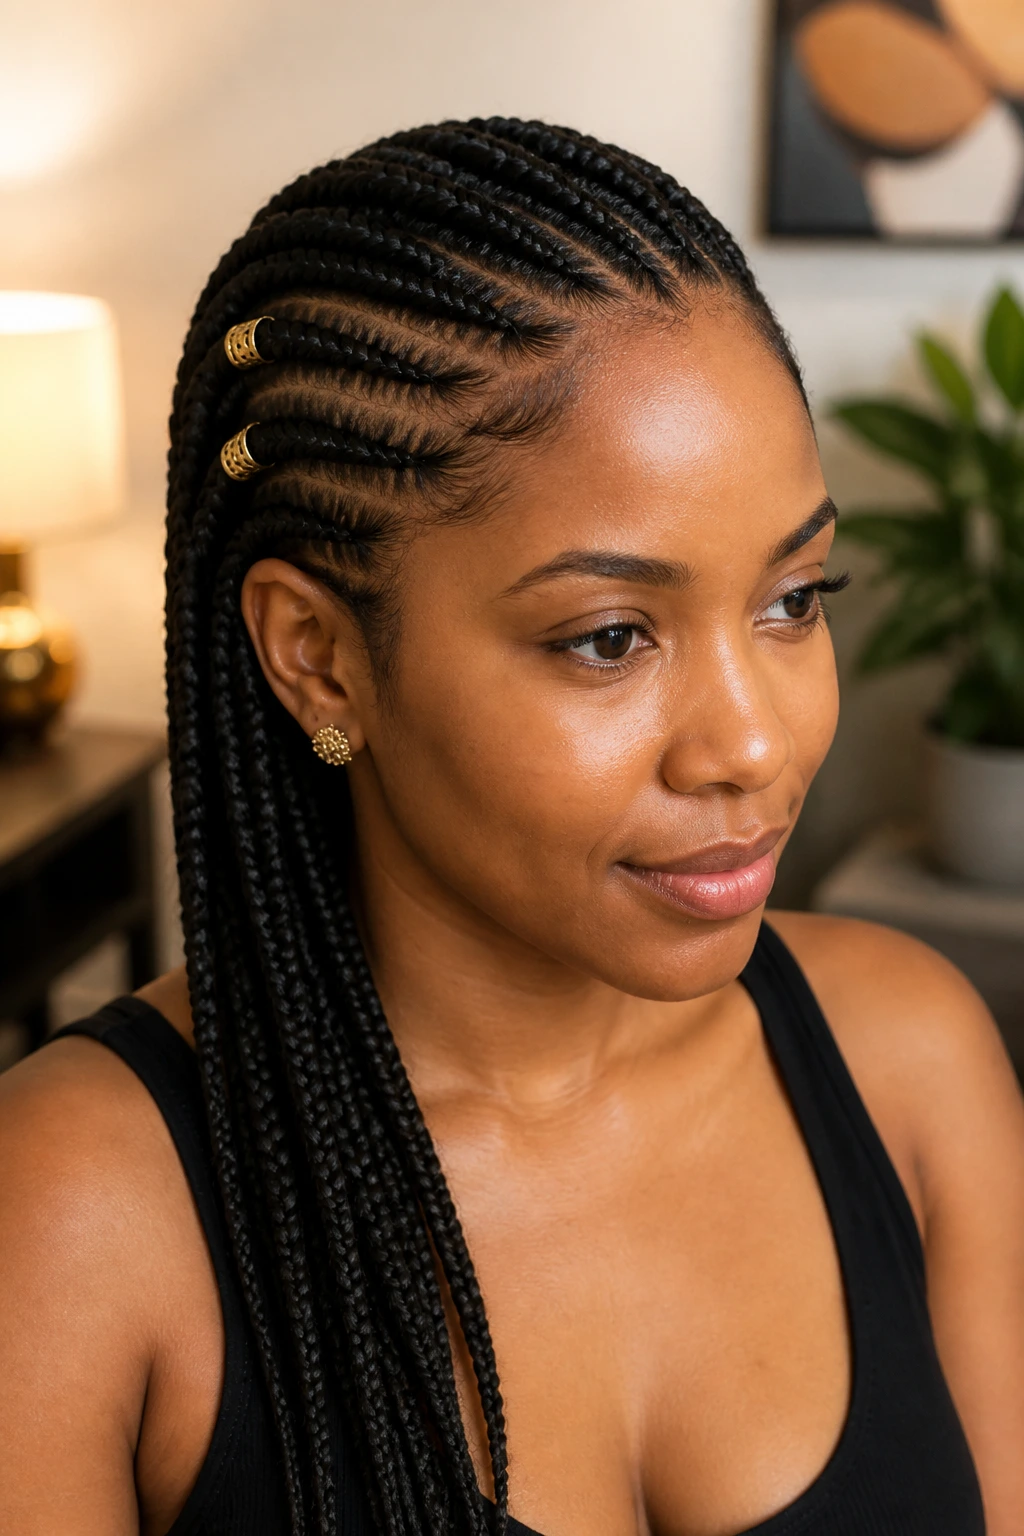
Gold cuffs can rescue a simple braid pattern from looking too plain. A few cuffs placed near the ends or at the bend of a curved row give the style a bit of shine without drowning the braid in hardware.
The better move is usually fewer cuffs, placed with intention. One at the end of a long row, one near the curve, and maybe one more on the longest tail. That’s enough to catch the light and keep the whole style from feeling cluttered.
Tiny Detail, Big Difference
If your braid line is already strong, cuffs should support it, not compete with it. Choose a finish that matches the tone of your outfit or jewelry, then stop there. Three accessories can look deliberate; ten can look like a craft box exploded.
20. Side Cornrows Pulled into a Low Puff
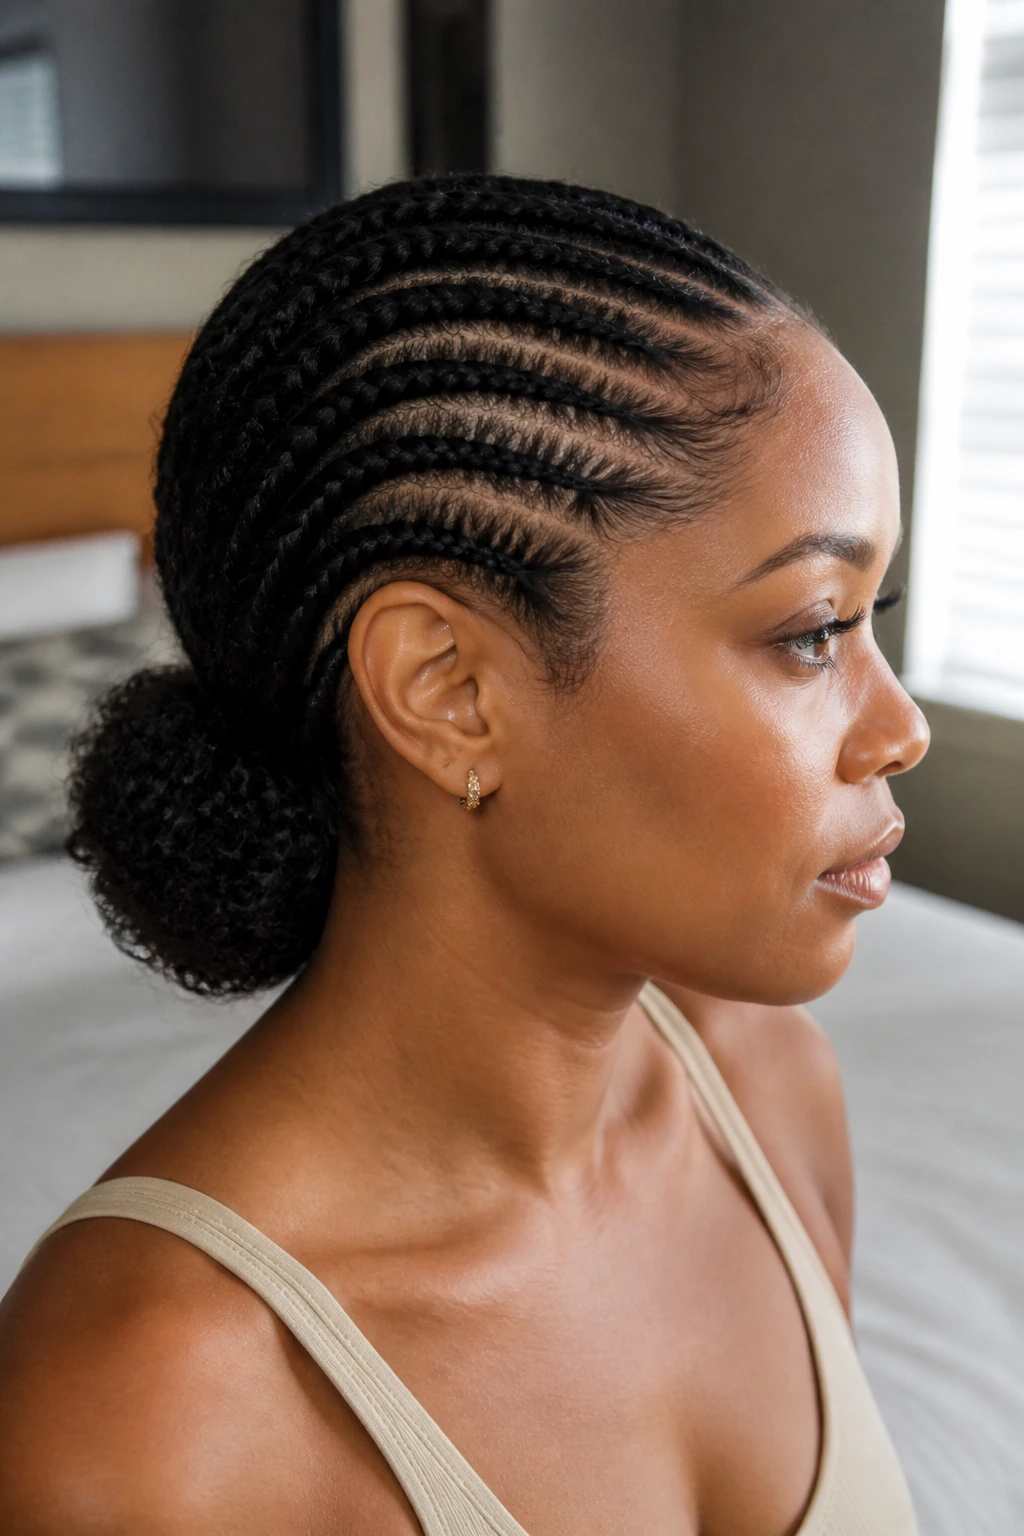
This version feels fuller than the tucked bun but less formal than the ponytail. The cornrows steer the hair toward the nape, where it opens into a low puff that keeps the texture visible and the shape soft.
Why do I like it? Because the puff doesn’t sit in the way. It stays out of your face, but it still gives the style a round finish that feels alive instead of pinned down. If your natural hair has a lot of shrinkage, the low puff also hides the exact point where the braids end.
A light foam or wrap lotion at the roots can help the puff stay rounded. Just don’t drown it. Too much product will make the base heavy, and a low puff looks best when it feels airy.
21. A Lemonade-Style Sweep Across the Head
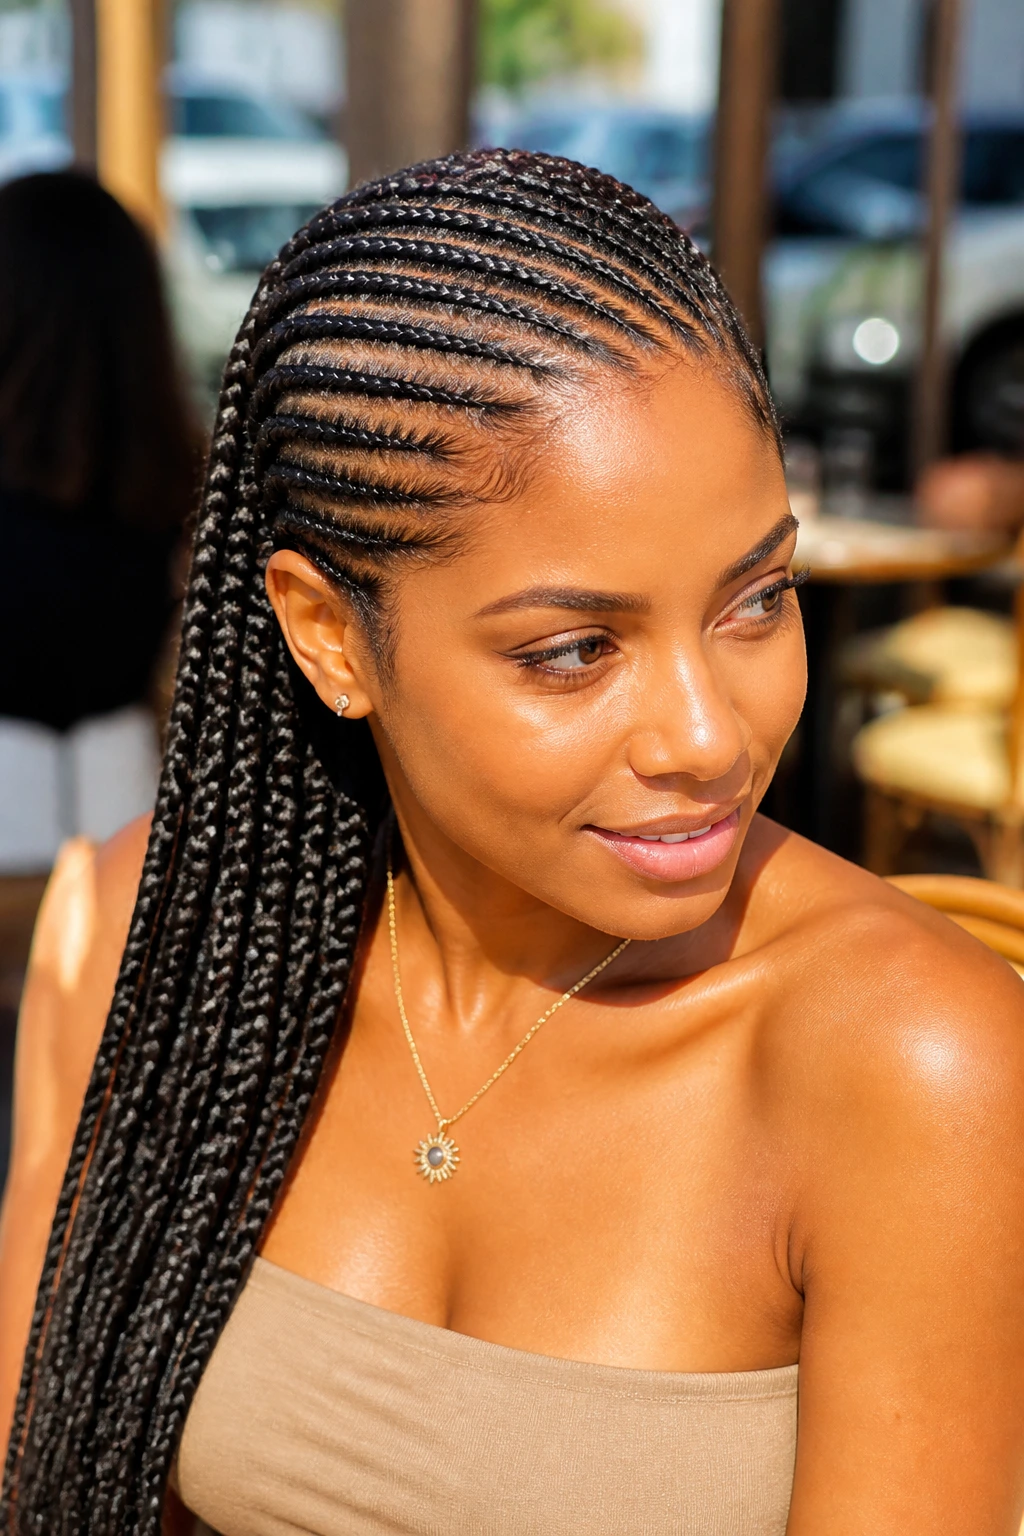
This is the more dramatic cousin of the diagonal sweep. The braid line leans harder to one side, usually with long rows that run close to the scalp and sweep all the way across before settling into a tail or tucked finish.
The look is bold because the direction is so clear. There’s no ambiguity about where the style is going. It moves across the head with purpose, which is why it suits people who like a braid style that reads from across the room.
If you go this route, keep the scalp parting neat and the rows consistent. A lemonade-style sweep can tolerate a little frizz. It cannot tolerate sloppy sections. The whole point is the line.
22. Side Cornrow Halo Braids with Loose Ends
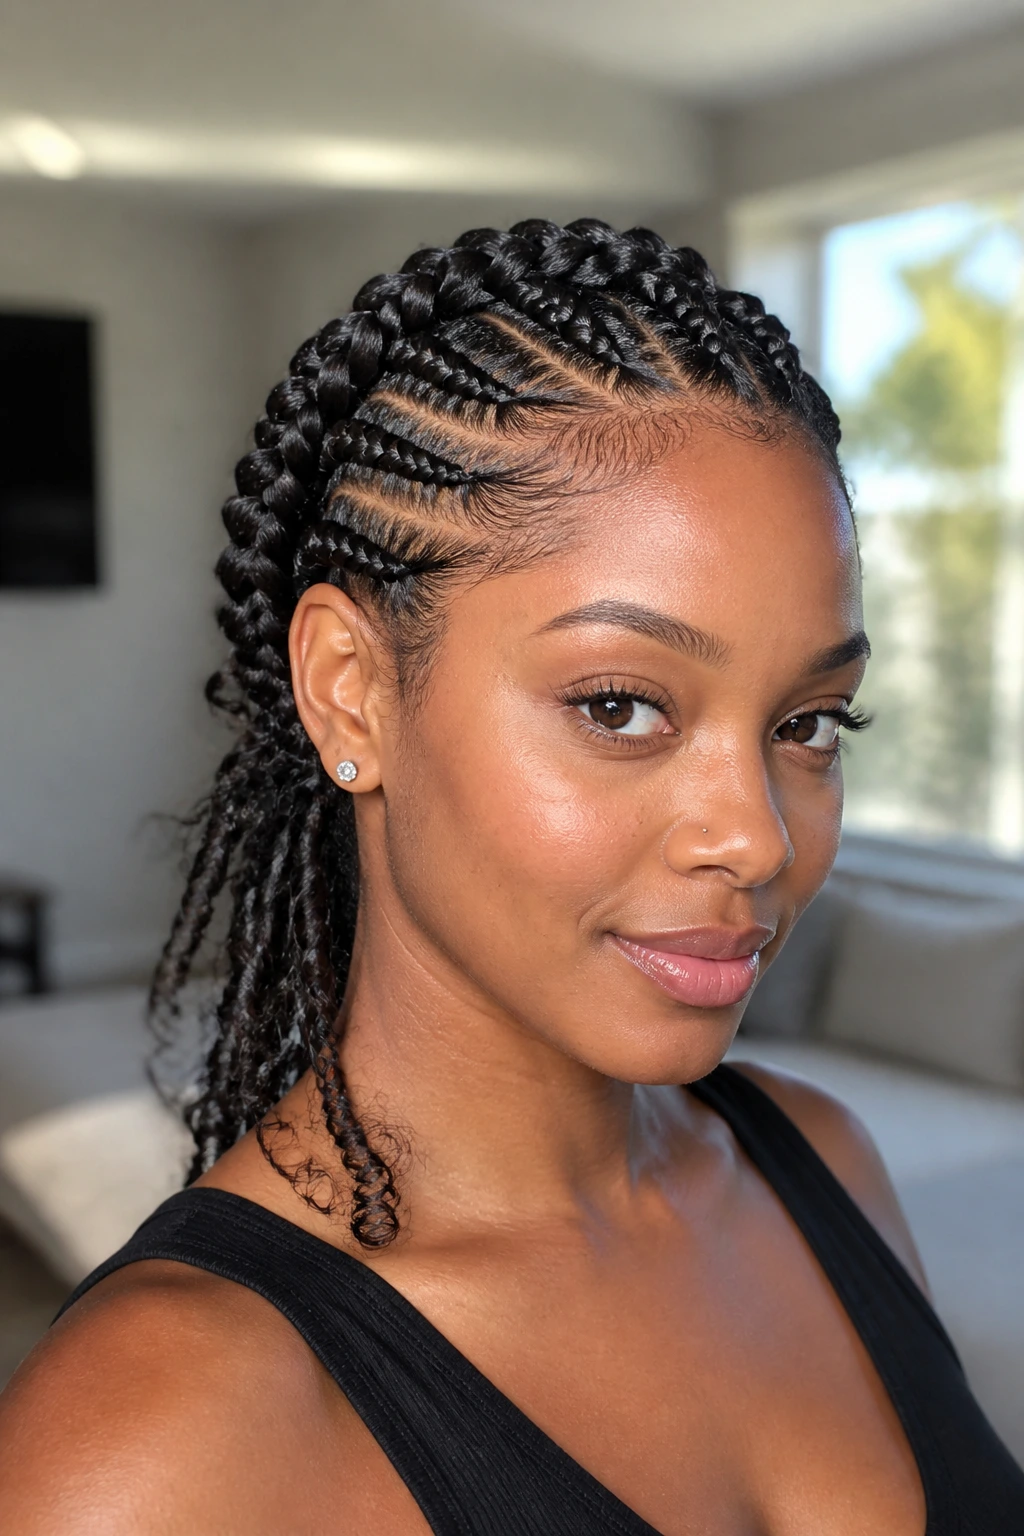
Halo braids don’t have to stay fully closed. When the side sweep wraps around the head and leaves a few ends loose near the back or shoulder, the style gets softer and less costume-like.
That’s what makes this version useful. Full halos can sometimes feel too fixed, especially on dense natural hair. Letting the ends release gives the whole look a little movement, and the braid path still keeps the face framed.
This is a nice option for medium-length hair that needs a polished shape but not a fully tucked finish. The loose ends can be curled, twisted, or left straight, depending on how much texture you want at the finish.
23. Braided Space Buns Fed by Side Cornrows
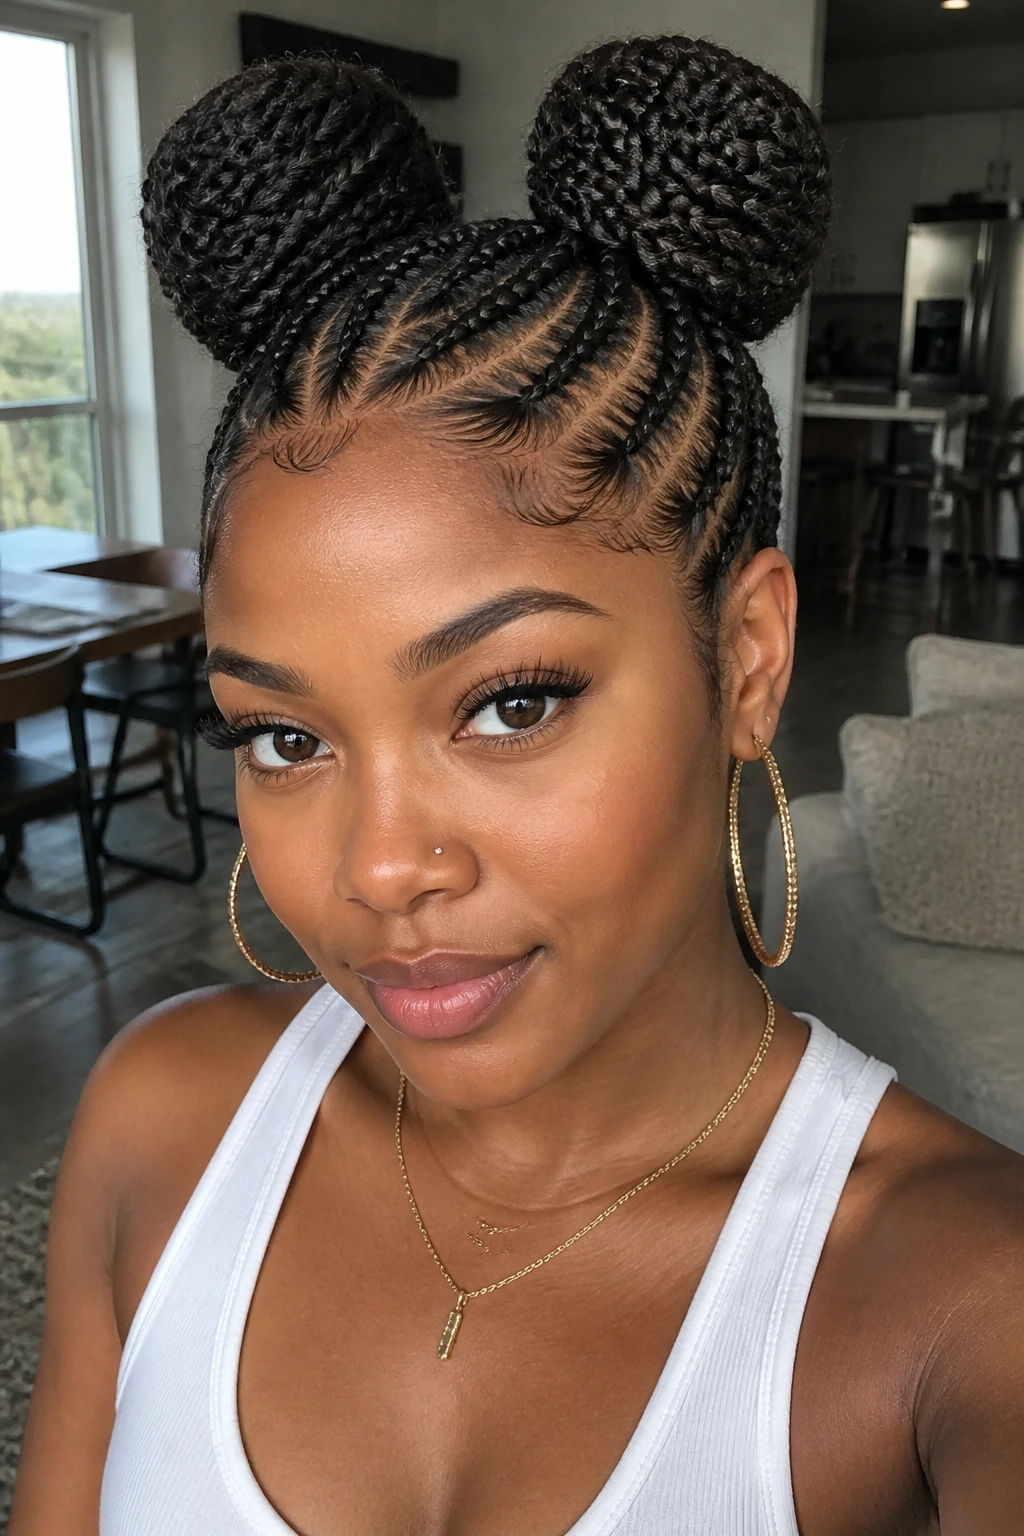
A side braid can feed into one or two space buns without losing its shape. The rows create the path, and the buns give the style that round, playful finish people usually want for weekends, concerts, or just a day when plain hair feels boring.
What keeps this from looking childish is the braid work at the base. If the parts are clean and the buns sit evenly, the style reads more styled than silly. If the buns are too loose or too high, it starts drifting into costume territory fast.
I’d keep the buns compact and the side feed-in rows slightly slimmer than you think you need. That gives the buns room to breathe and keeps the head from looking top-heavy.
24. A Raised Center Ridge with Side Feed-Ins
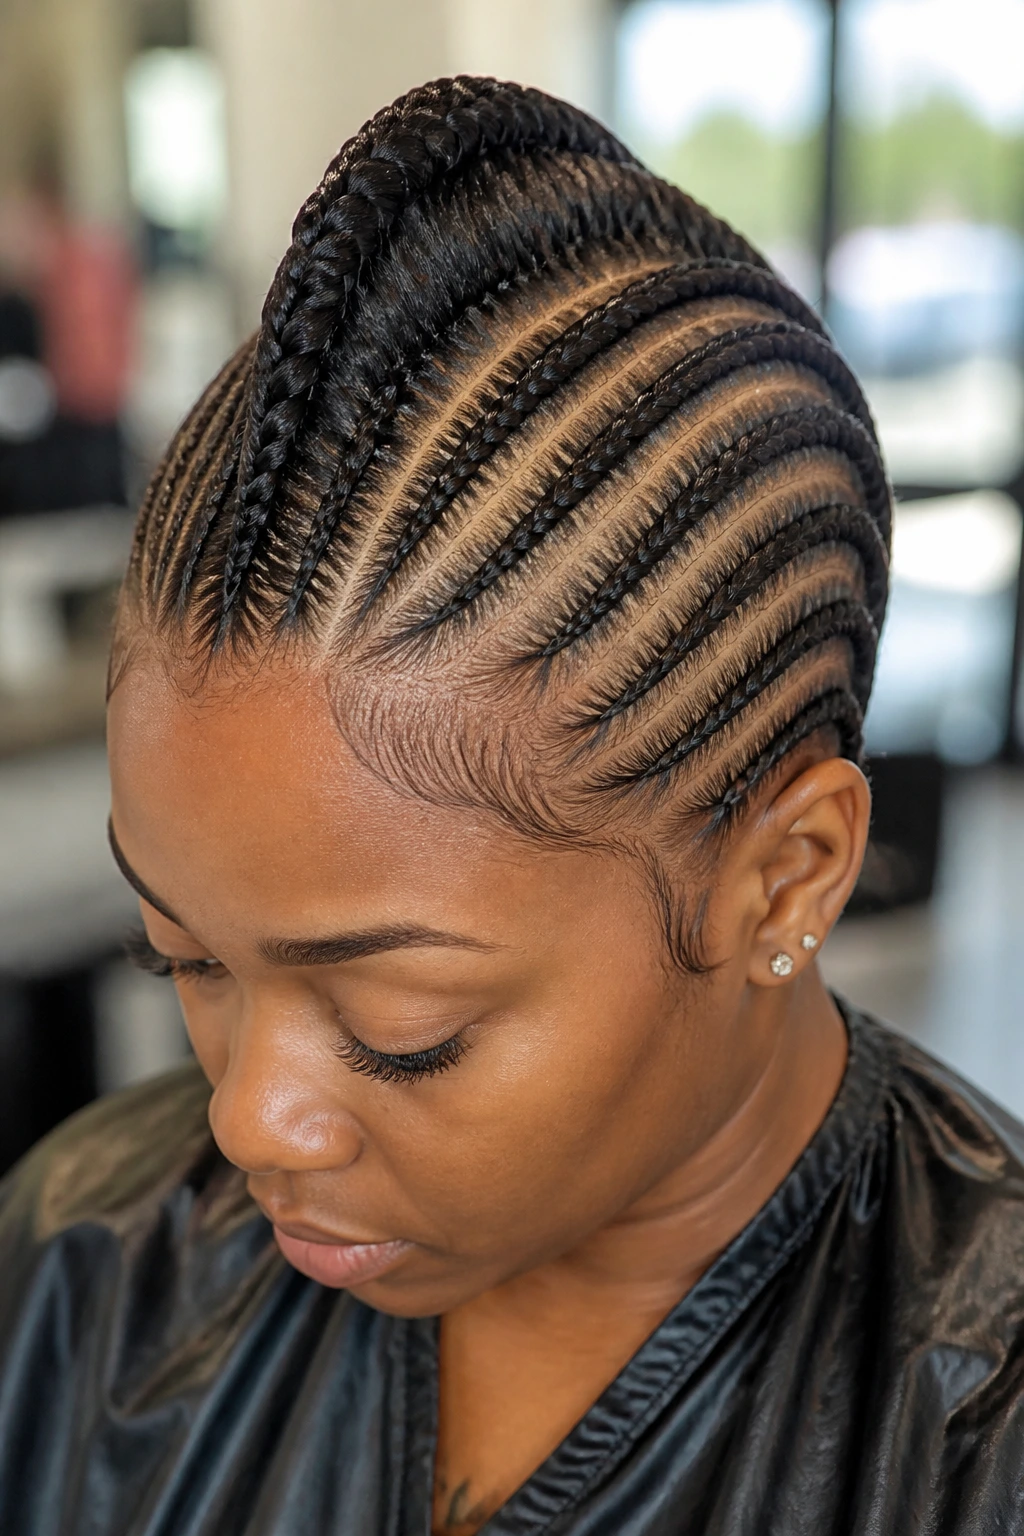
This one is for people who want a more sculpted silhouette. The side cornrows move toward the center, where they support a raised ridge or mohawk line that runs from front to back.
The ridge gives height; the side braids give control. Together they create a shape that feels bold without needing extra length. It’s especially useful on hair that’s dense enough to hold a lift but not so long that it collapses under its own weight.
A little mousse at the ridge can help it stay defined, but the structure really comes from the braid placement. If the rows feed in evenly, the ridge stands on its own.
25. Side Cornrows Wrapped in Thread
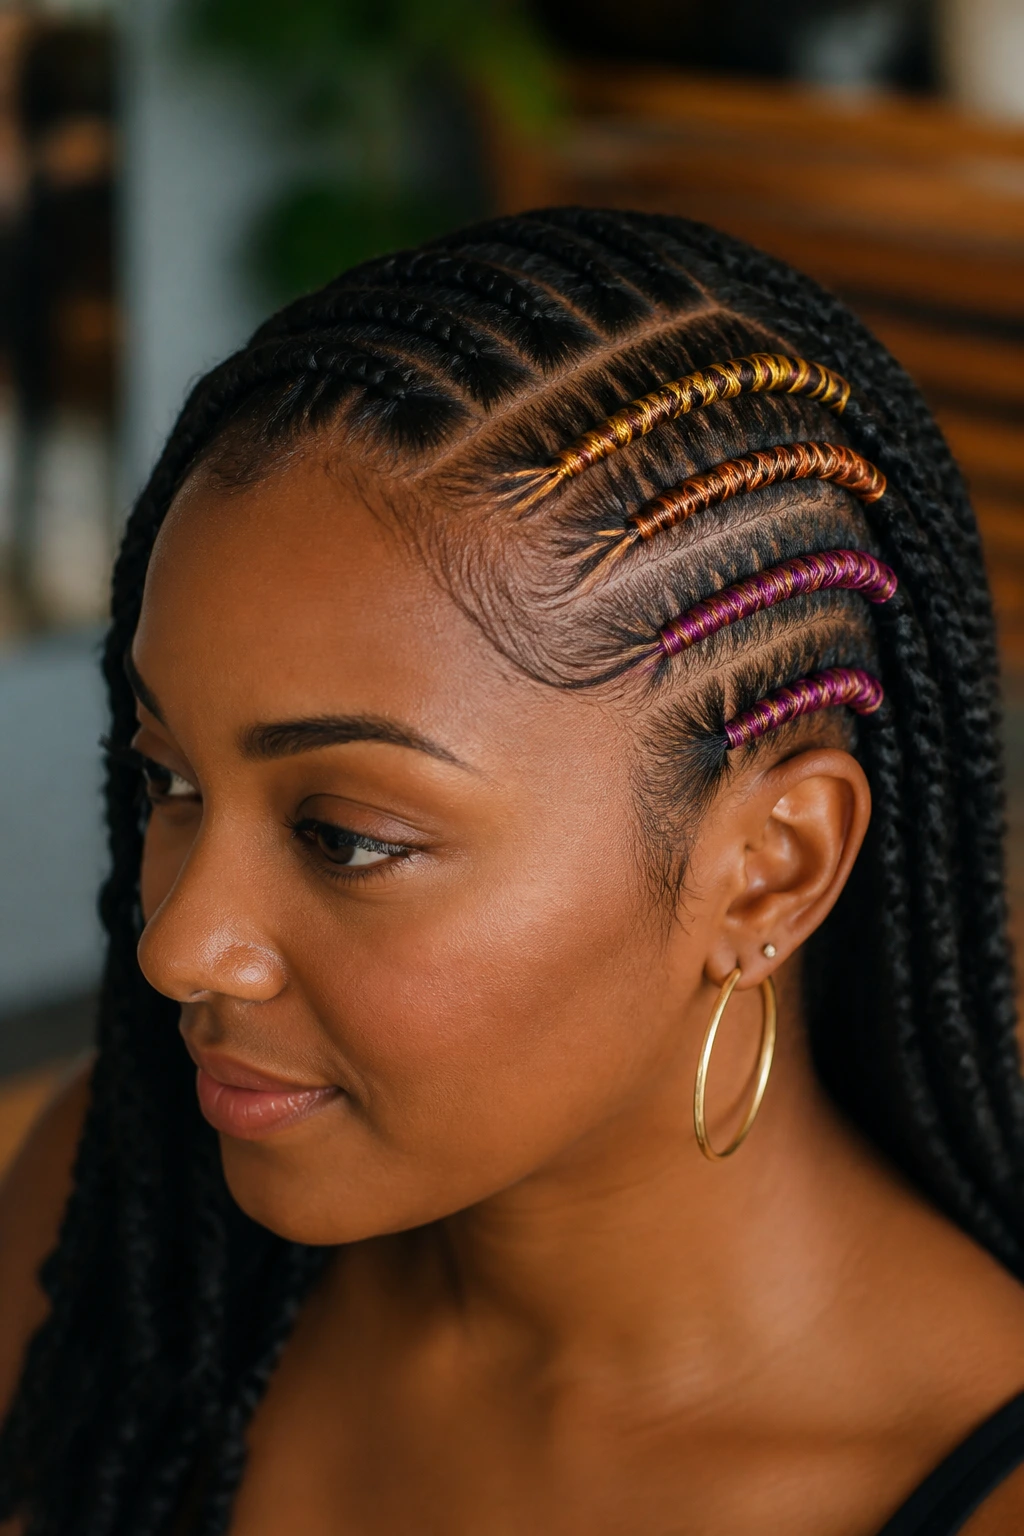
Thread wrap changes the mood fast. The braid stays the same, but the wrapped sections add color, texture, and a little bit of shine that feels more personal than a plain cuff ever could.
Why It’s Worth Trying
- Thread can be matched to jewelry, nails, or clothing.
- A single wrapped row gives more impact than wrapping everything.
- It’s easier to remove than glued-on decoration.
Keep the thread wrap smooth and not too tight, or it will start fraying and pulling against the braid. I prefer wrapping only 2 to 4 sections, then leaving the rest clean. That balance keeps the style from becoming visually noisy.
26. Curved Part Lines That Make the Pattern Flow
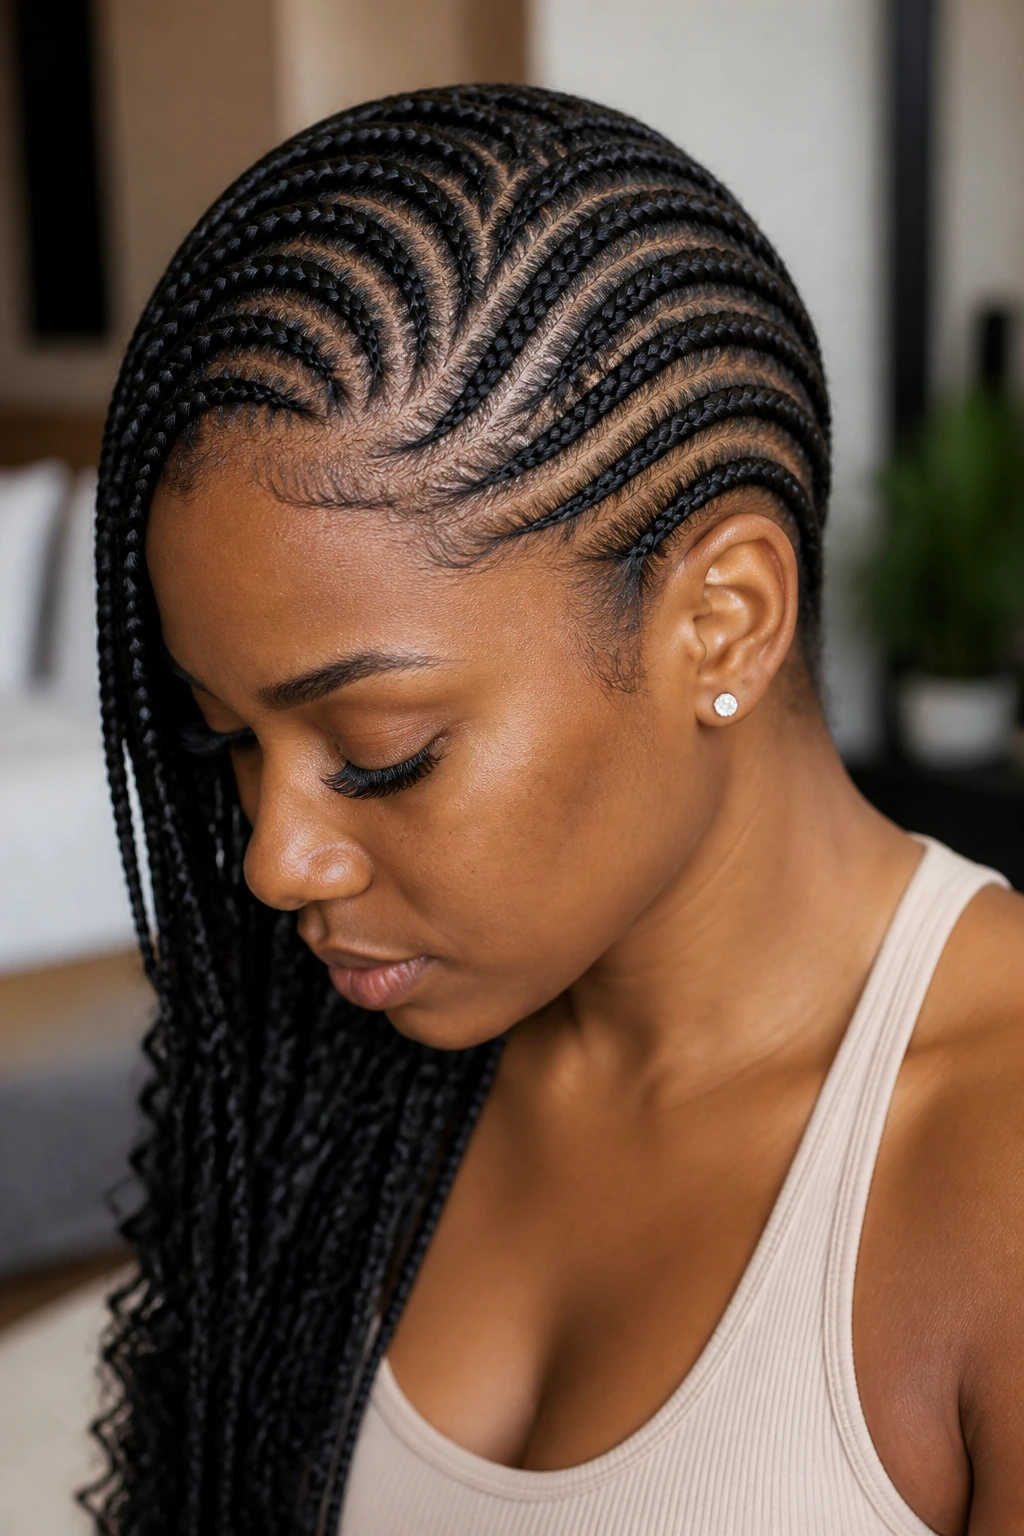
Straight parts are fine. Curved parts are better when the goal is a side sweep that feels softer and more organic. The part line itself bends gently before the braiding starts, and that bend helps the whole style look less rigid.
What to Watch For
- Use a tail comb and mark the curve lightly before you commit.
- Keep the curve shallow if your hair is fine; sharp curves are harder to keep neat.
- Match the curve to the direction of the braid so the pattern looks intentional.
This is one of those details people notice even when they can’t name it. The curved line makes the style feel designed, not just placed on the head.
27. Shell-Trimmed Side Cornrows for a Finished Look
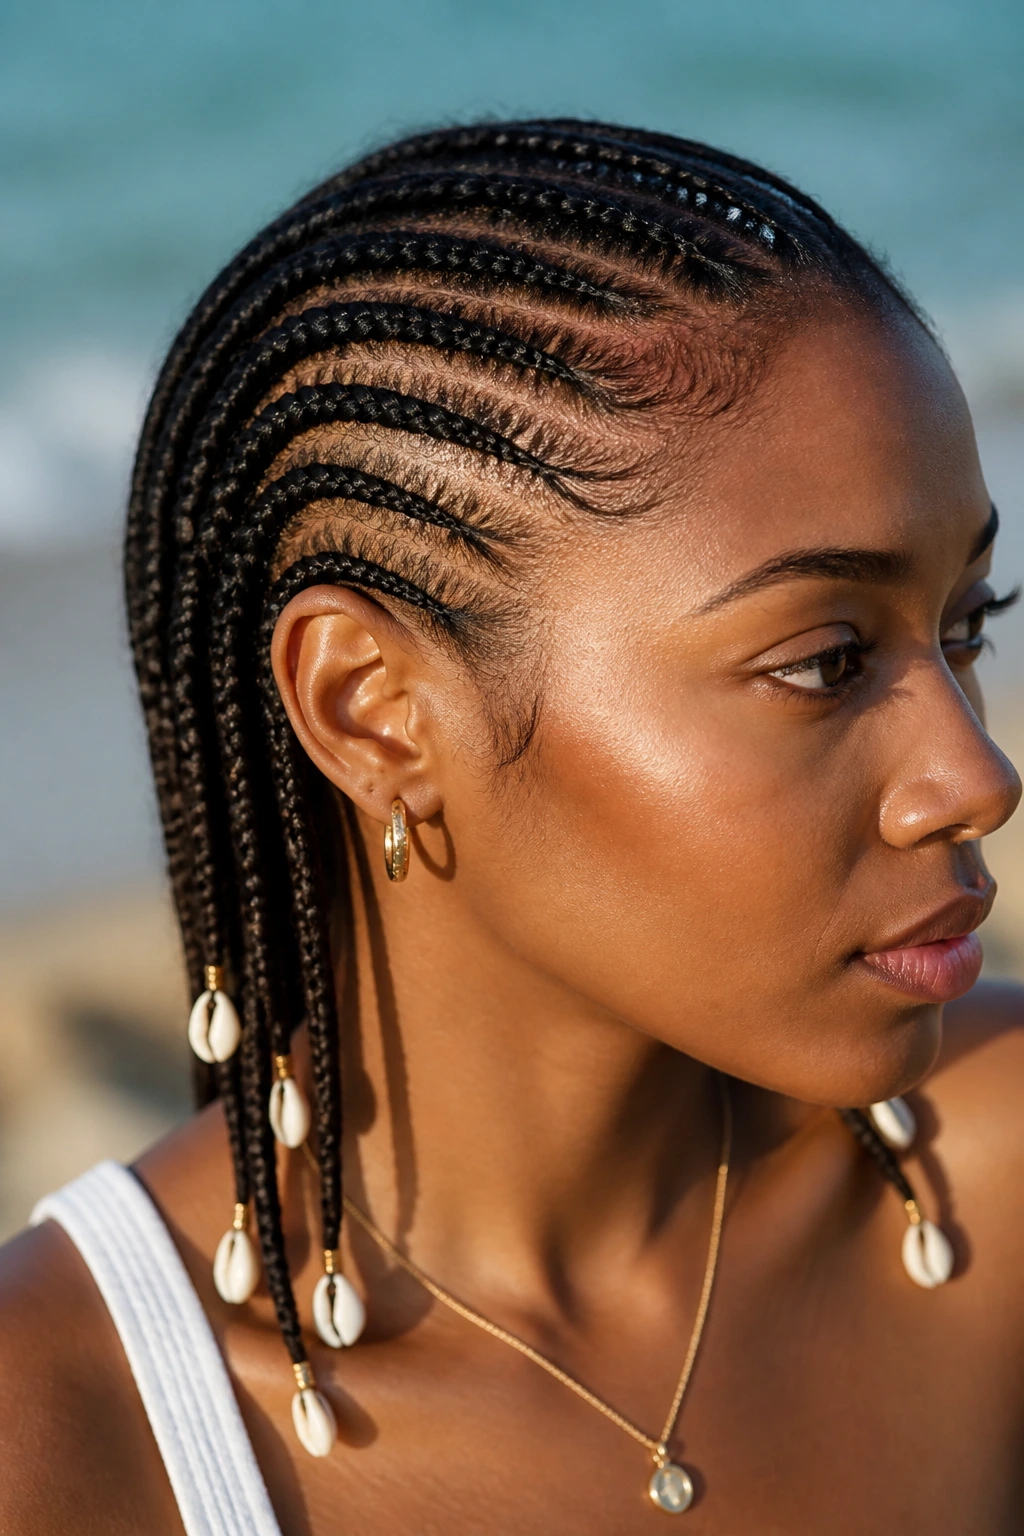
Shells give side cornrows a little beach-bright finish, but only if you use them sparingly. One or two shells near the ends or at the longest curve of the braid is enough. Too many, and the style turns busy fast.
The braid pattern should still be the star. Shells are a trim, not the whole outfit. I like this style when the rows are clean and the finish is simple, because the shells add just enough texture to make the braid line feel special without changing the structure.
It’s a good final option if you want the style to feel personal. A side cornrow with shells has memory in it — not in a sentimental way, just in the sense that somebody chose where each little piece went.
How to Make Side Cornrows Sit Right on Natural Hair
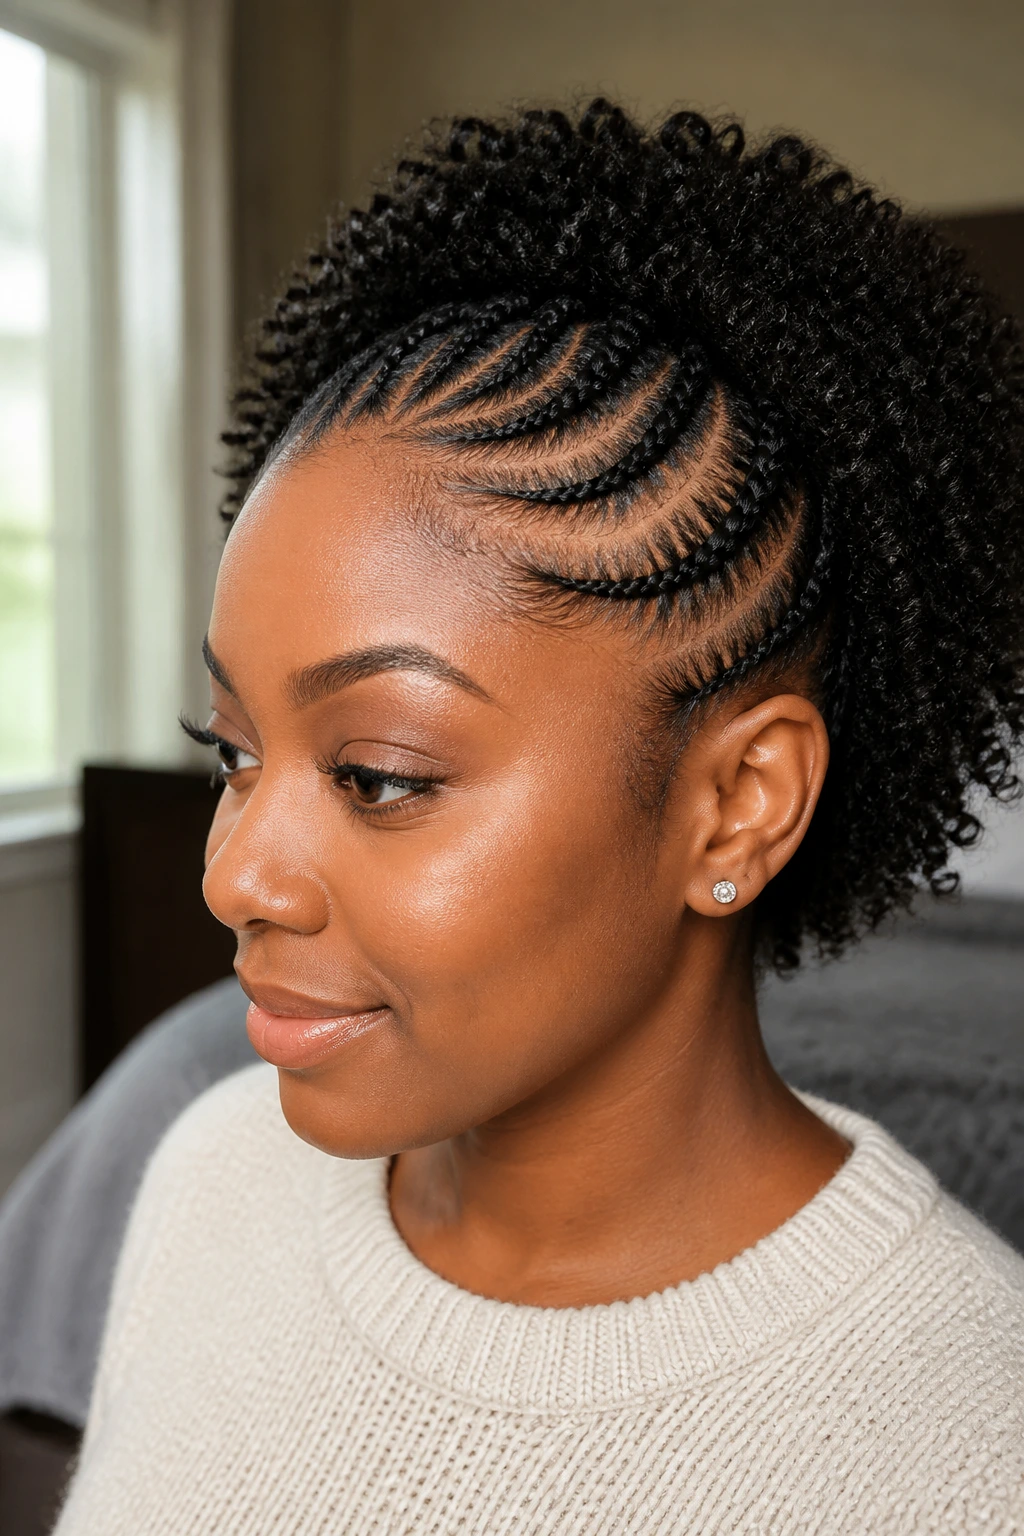
The nicest side braid pattern in the world can fall apart if the base is too slippery, the sections are uneven, or the tension is trying to do too much work. For natural hair, the prep matters as much as the braid itself.
Start with hair that is detangled and lightly stretched. Not blown out to the point of being flat, just stretched enough that the parting lines show clearly and the braid doesn’t keep springing back while you’re working. A clean middle or side part, a rat-tail comb, and clips to hold the rest out of the way save more time than fancy product ever will.
My own rule is simple: use enough hold to grip, not enough to coat. A small amount of braiding gel at the roots, a light leave-in on the lengths, and mousse over the finished style is usually plenty. If your hands are sliding, stop and reset the section. Forcing the braid through slippery hair only makes the tension messy.
If you’re getting the style done by someone else, speak up about the hairline. Say you want soft tension at the temples and a firm but not painful base through the side rows. A good braid style should feel snug, not like it’s arguing with your scalp.
The Tools That Make the Parting Cleaner
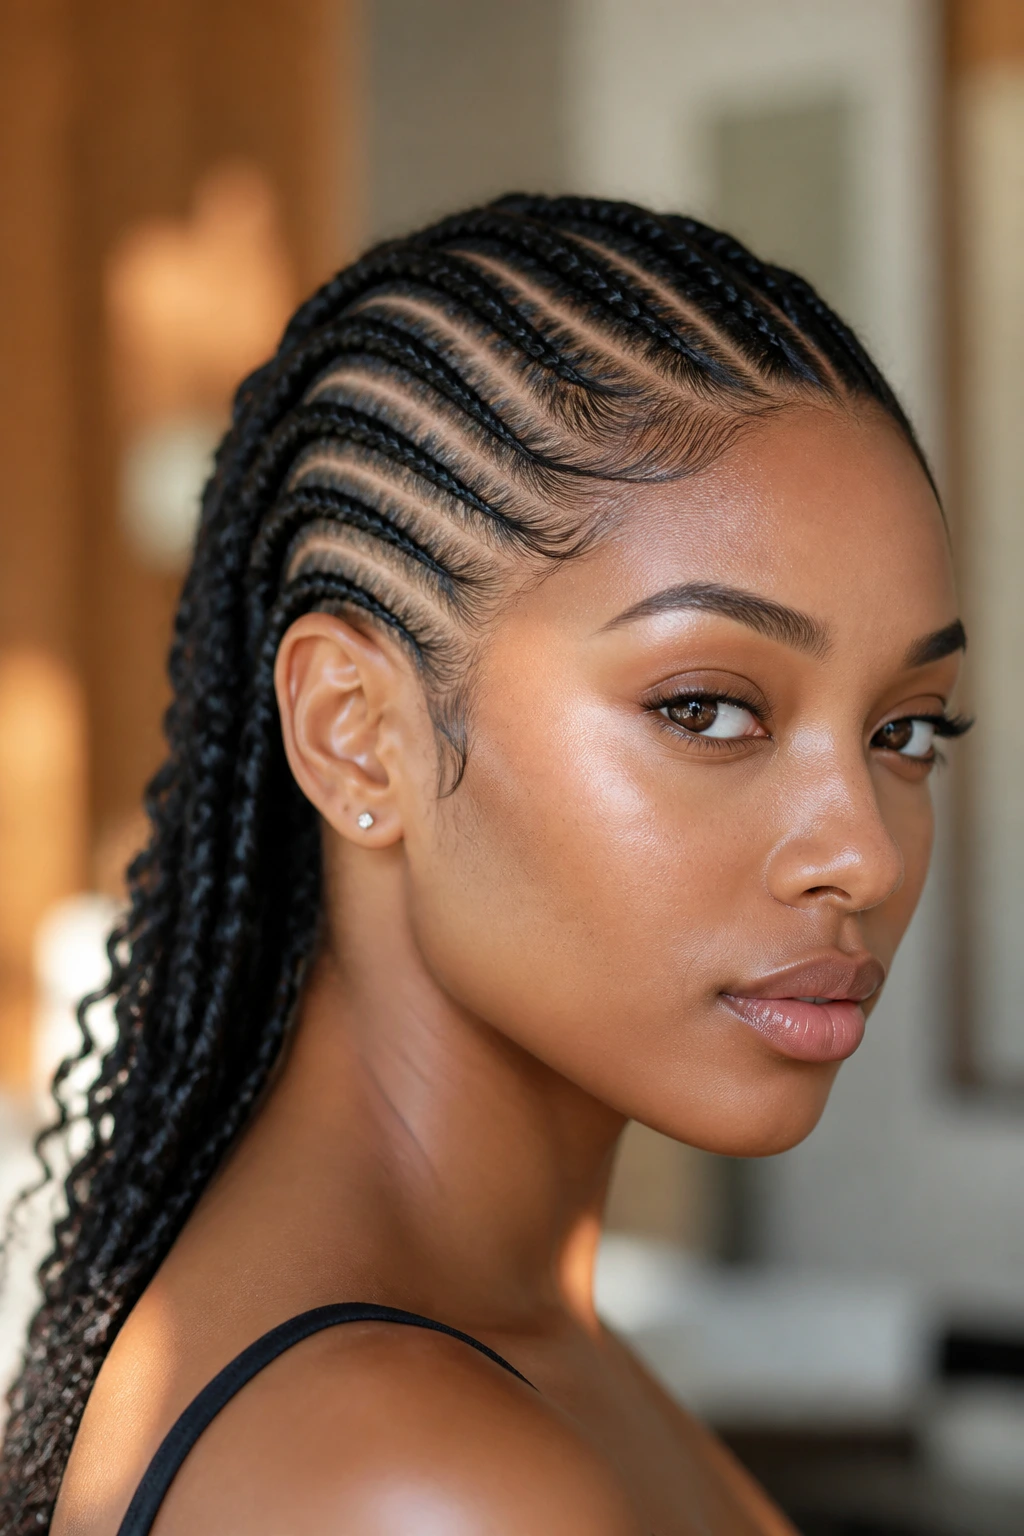
You do not need a drawer full of hair gadgets for side cornrows. You need a few tools that keep the part straight and the braid line clean.
- Rat-tail comb: The tail is what matters here. It gives you the sharp parting line that side cornrows depend on.
- Sectioning clips: These keep the unbraided hair from sneaking back into the section while you work.
- Spray bottle with water: Use it lightly if the hair needs a little control, but don’t soak the roots.
- Leave-in conditioner: A light one helps the lengths stay soft without making the base greasy.
- Braiding gel or edge control: Use a small amount only where you need hold. Heavy buildup is a mess waiting to happen.
- Mousse or foam wrap lotion: Good for smoothing finished braids and settling flyaways without stiffness.
- Duckbill clips: Useful when you’re braiding your own hair and need to keep sections separated.
- Satin scarf or bonnet: Not glamorous, but essential if you want the style to stay neat.
If you like accessories, keep them simple: a handful of cuffs, a packet of beads, or thread in one color. The braid already has shape. The extras should support it.
Smart Prep Before You Braid
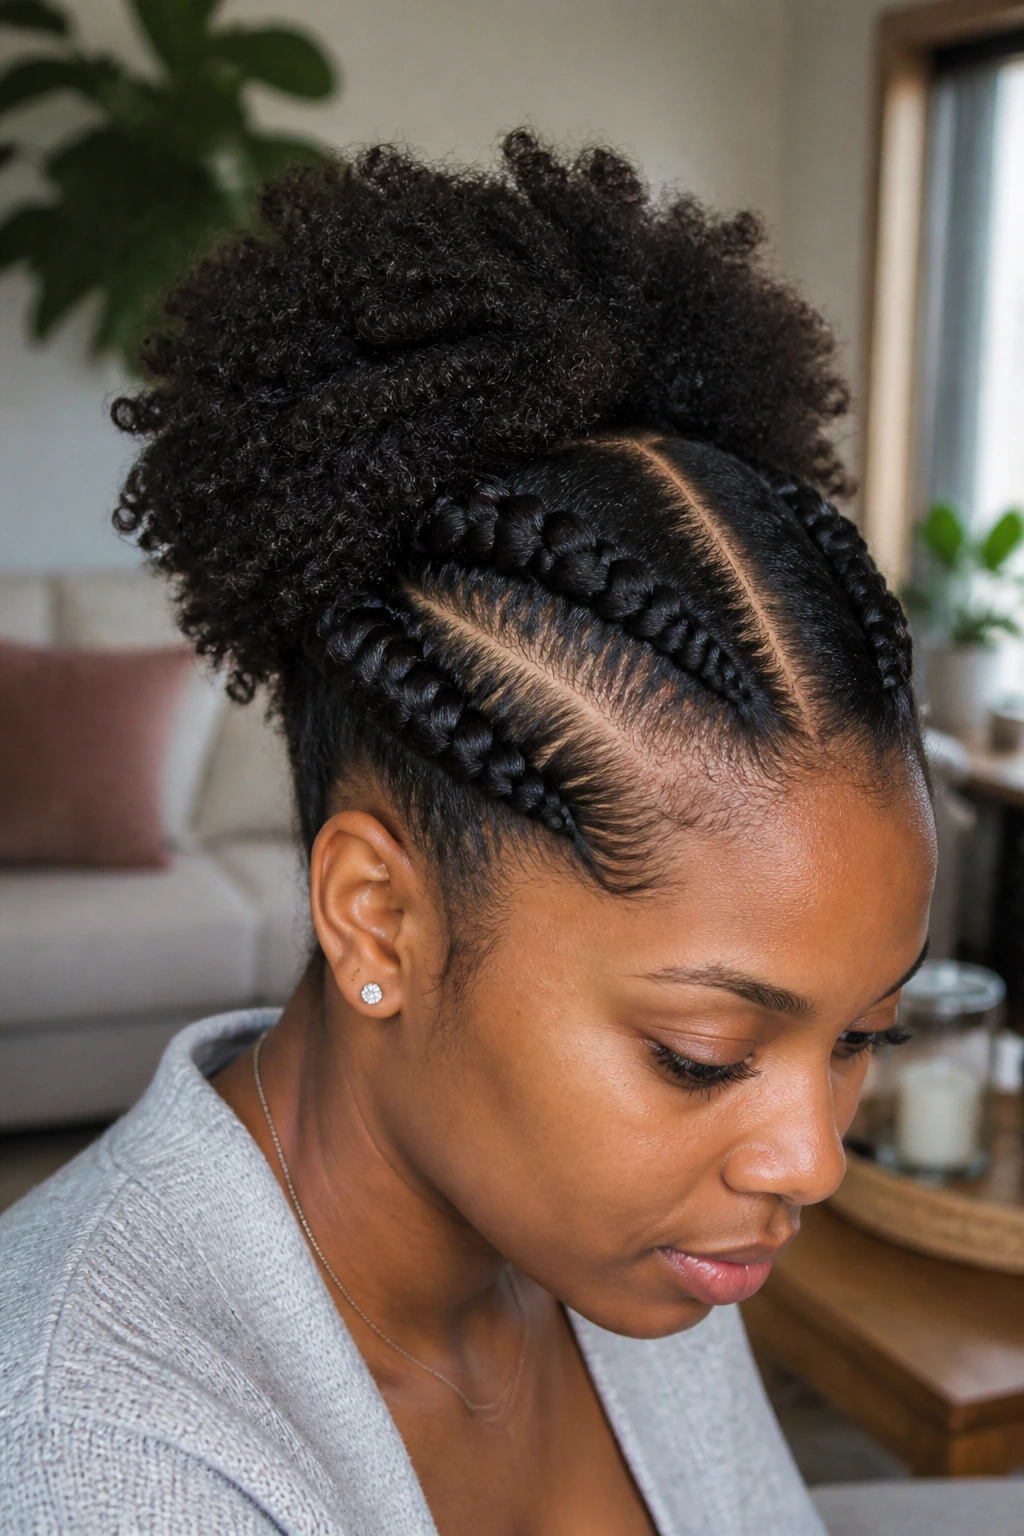
The cleaner the prep, the cleaner the side sweep. That’s not a cute saying; it’s the whole deal. Natural hair behaves better in cornrows when the strands are detangled, stretched, and not overloaded with product.
Wash if you need to, but don’t rush straight from a soaking-wet wash into braids unless you’re certain the hair will dry fully and evenly. Damp roots can make the pattern slip, and braids that stay wet too long start smelling wrong fast. I usually prefer hair that’s freshly washed, fully dried, then lightly moisturized and stretched before parting.
A small detail that pays off: section from the side the braid will travel toward. If the style sweeps left, make your first clean part so the rows naturally want to go that direction. Fighting the hair’s lay is a good way to end up with a crooked part and sore hands.
Common Mistakes That Make Side Cornrows Look Worn Too Soon
The first mistake is starting too tight at the temple. People think a tight braid looks neat longer, but the opposite usually happens. The scalp gets irritated, the edge area pushes back, and the style looks stressed before the week is out. Keep the first inch soft enough that the hairline doesn’t feel pinched.
Too much product is another mess. A thick layer of gel or wax leaves white flakes, especially when the hair starts to dry and move. Use small amounts in the root area and smooth the rest with mousse, not paste.
Uneven section size is the quiet killer. One row wider than the others makes the side path wobble visually, and once you notice it, you can’t unsee it. If the sectioning looks off, stop and re-part. The extra minute is cheaper than living with a crooked braid for two weeks.
Sleeping without a scarf is the fastest way to turn a neat sweep into a fuzzy one. Satin or silk is not optional if you want the braid line to stay calm overnight. The style will still frizz a little. It just won’t unravel before breakfast.
Ways to Change the Look Without Starting Over
Bead-Trimmed Sweep: Keep the braid pattern simple, then add beads only to the longest ends. It’s an easy way to make a plain side sweep feel dressed up without changing the parting.
Twist-Feed Switch: Replace the frontmost row with a flat twist or two, then keep the rest in cornrows. The softer texture at the temple is kinder to sensitive edges and gives the style a little variation.
Mini-Row Short Hair Version: If your hair is short, shrink the sections and make the braid pattern tighter to the head. The smaller rows hold better and make the style look intentional instead of forced.
Thread-Wrapped Accent: Wrap one or two braids with thread that matches your clothes or jewelry. A little goes a long way here. The goal is accent, not costume.
Braid-to-Puff Finish: Keep the side rows sleek, then let the remaining hair expand into a puff or low pony. This works when you want the front controlled and the back full.
How to Keep Side Cornrows Fresh Through the Week
The first thing to protect is the parting. A satin scarf or bonnet at night keeps the rows from lifting and the roots from fuzzing out in every direction. If your ends are loose, pin them gently or tuck them before you wrap so they don’t rub against your pillow.
In the morning, don’t drench the style to revive it. Use a little mousse on your palms, smooth it over the frizzy spots, and let the braids dry before you head out. Too much water wakes up the roots and can make the style puff faster, especially on dense hair.
For scalp care, a light scalp cleanser or a diluted wash through the parts every 7 to 10 days is usually enough if you’re wearing the style without extensions. If the scalp feels itchy sooner, address the itch; don’t wait just because the calendar says the style should still be fine. A style that hurts or smells off is asking to come down.
Most side cornrows without added hair look best for about 1 to 2 weeks. With extensions and careful wrapping, some people stretch them longer, but the sweet spot depends on how fast your hairline puffs and how much tension you started with. A fresh braid style should age gracefully, not cling to its own last good day.
Questions People Ask Before They Braid
Can side cornrows work on short natural hair?
Yes, and they often look sharper on short hair than people expect. The trick is keeping the rows small enough to grip the hair cleanly and using light product so the roots don’t slip while you braid.
Should the hair be blown out before side cornrows?
Not always, but some stretch helps. Lightly stretched hair gives cleaner parts and a flatter braid base, while fully blown-out hair is useful if the style needs a smoother finish or extra length.
Do side cornrows damage edges?
They can if the braid starts too tight or if the style is worn too long without rest. Soft tension at the temples, careful parting, and a decent nighttime wrap go a long way toward keeping the hairline comfortable.
How long do side cornrow styles usually last?
Without extensions, I’d think in terms of 7 to 14 days. With extensions and solid maintenance, longer is possible, but the style should still look good when the roots start to soften, not only on day one.
Can I wash my hair while wearing side cornrows?
Yes, but keep it gentle. Focus shampoo on the scalp and let the water rinse through the braids instead of rubbing the rows themselves. Squeeze out excess water with a towel and dry fully so dampness doesn’t linger at the base.
What if my braid starts frizzing at the temple first?
That’s common. Smooth the area with a small amount of mousse and rewrap it at night, but if the frizz comes from tension or a poor part, the fix is usually a redo, not more product.
Are added beads or cuffs okay for everyday wear?
They are, as long as the weight stays light. A few cuffs or beads can make the style feel finished, but too many metal pieces tug at the braids and can make sleeping more annoying than it needs to be.
The Shape That Still Feels Fresh
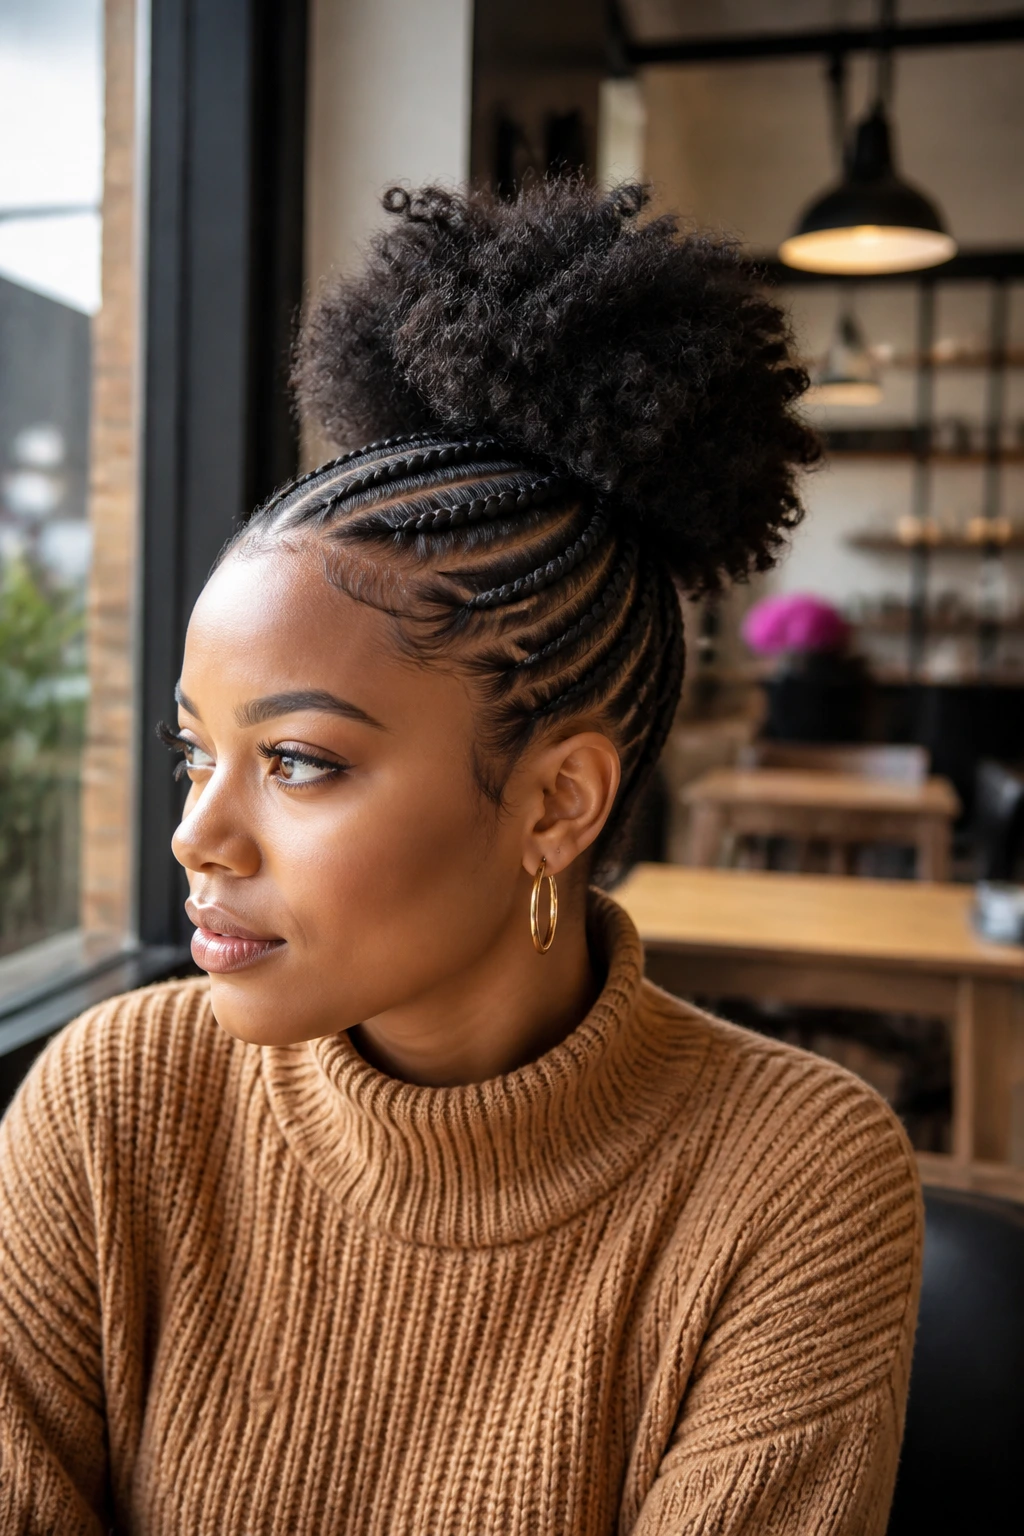
Side cornrows work because they give natural hair direction without trying to flatten its personality. That’s the part I like best. The braid path sets the shape, and the texture gets to keep some freedom, which is a nicer bargain than many styles offer.
Pick the version that fits your hair’s length, density, and patience level, then keep the tension sensible and the parts clean. A good side sweep does not need to scream for attention. It just sits there looking composed while the rest of the room catches up.
