



Long hair on a wedding day is a gift, and it is also a little bit of a menace. It can fall in a glossy sheet that looks expensive in the mirror and then slide flat the second you add a veil, a hug, or a warm room. Bridal hairstyles for long hair have to do more than look pretty for one photo. They have to hold a shape, survive movement, and still feel like you when the ceremony is over and the dancing gets messy.
That’s why the best wedding hairstyles for long hair aren’t just “down” or “up.” They’re built with intention: a braid that acts like scaffolding, a chignon that hides pins in plain sight, a wave set that cools before it’s touched, a ponytail that gets wrapped so the elastic disappears. Long hair gives you room to play, but it also gives gravity more to work with. Ignore that, and the style sags. Respect it, and the whole look lands.
The styles below lean into that reality. Some are soft and romantic. Some are crisp and polished. A few are the kind of thing you choose because you want your hair off your neck and your earrings visible. All of them make sense on long hair, which is a bigger deal than it sounds. The difference between “nice hair” and a bridal look usually comes down to where the shape is anchored, how much texture is built in, and whether the front pieces are doing a job or just hanging there.
Why These 17 Styles Earn a Spot on the Mood Board
-
Veil-Friendly Shapes: Several of these styles leave a clean lane for a comb, a clip, or a cathedral veil without forcing the whole hairstyle to collapse the moment the veil comes off.
-
Long-Hair Structure: Thick length needs more than hairspray; these looks use braids, twists, pins, and hidden anchors so the style still reads from the front at hour six.
-
Texture Choices That Matter: The list covers sleek, waved, braided, curled, and pinned finishes, which means you can match the hair you have instead of fighting it with a style that was never going to sit right.
-
Accessory Room: Pearl pins, fresh flowers, combs, satin ribbons, crystal clips, and statement earrings all have a home somewhere here, not just a random afterthought.
-
Trial-Run Friendly: Each idea can be tested with the same iron size, product set, and pinning method you’d actually use on the wedding day, which makes the trial useful instead of decorative.
-
Reception Survival: A style that looks good at 2 p.m. and still has shape after the first dance is worth more than one that only behaves under perfect lighting.
1. Soft Hollywood Waves
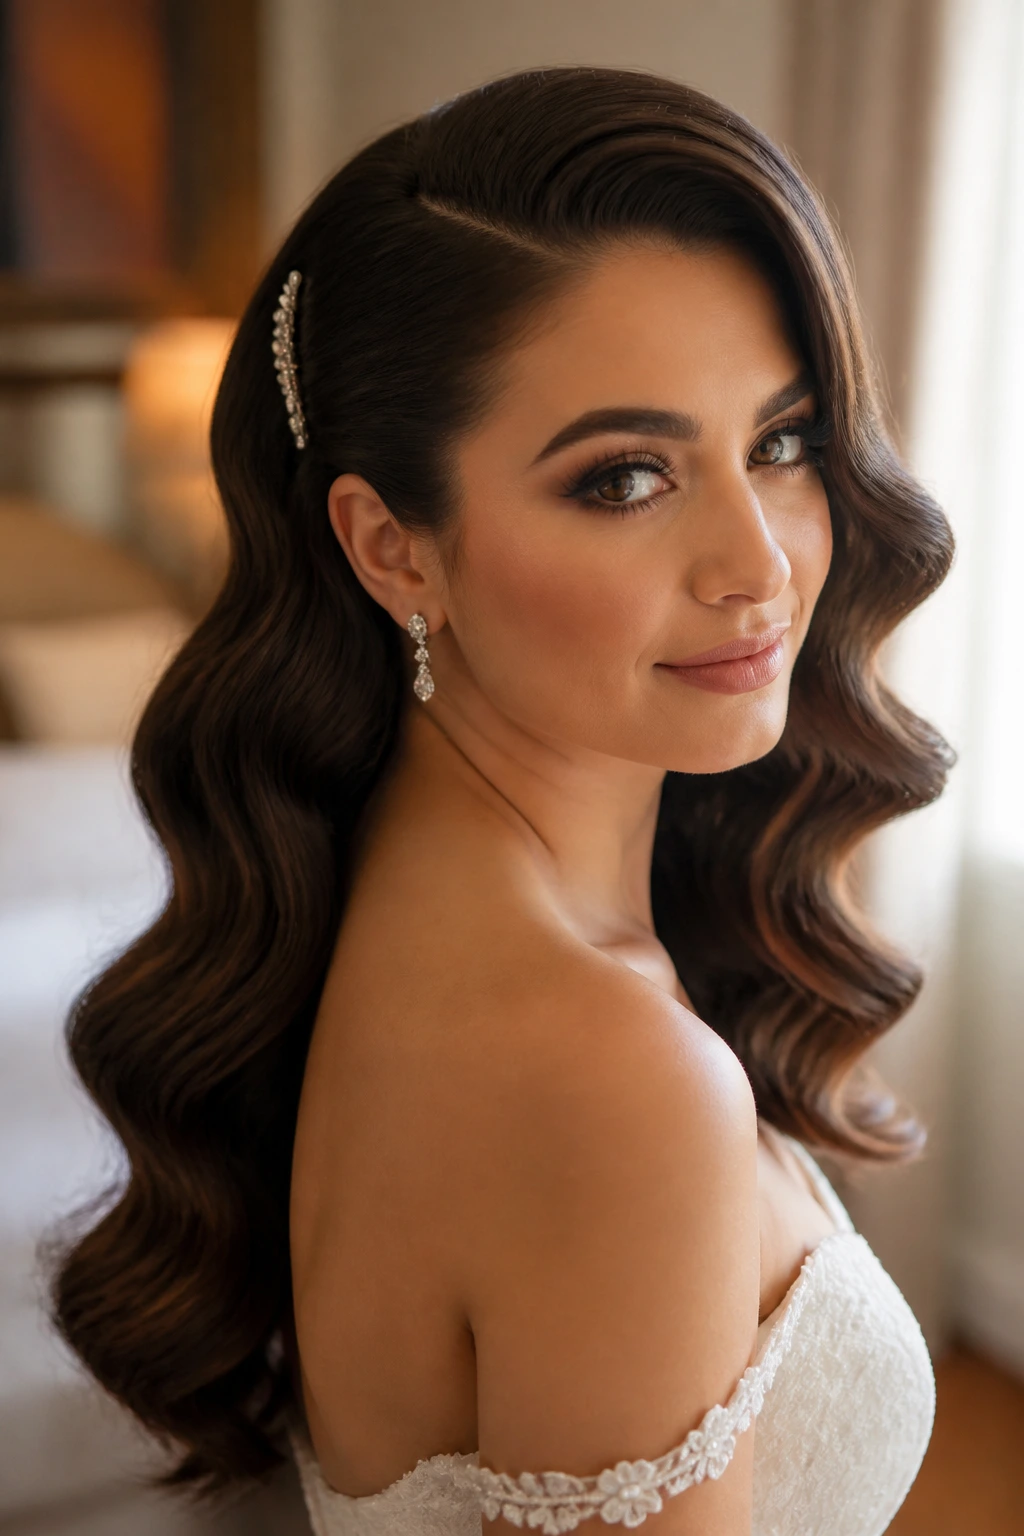
Soft Hollywood waves on long hair are not about curling every inch until it resembles a prom photo from another century. The good version has weight at the ends, a deep side part, and a wave pattern that moves in one direction instead of ballooning out on both sides. It looks deliberate. Not stiff. Not sugary. Deliberate.
The trick is cooling. Curl 1- to 1¼-inch sections away from the face with a 1¼-inch iron, pin the curls flat against the head, and let them set for 10 to 15 minutes before brushing them out. That waiting period matters more than people think. If you skip it, long hair drags the curl pattern downward and you get loose bends by the time you reach the car.
This style works especially well with off-the-shoulder gowns, satin dresses, and necklines that benefit from movement around the collarbone. A crystal comb can sit above the ear without stealing the show. If your hair is dense, mist the underside with texturizing spray before the final brush-through so the wave has some grit and does not slide apart halfway through the evening.
Best on: medium to thick long hair, especially if you want a clean front view and a softer back.
Watch for: overbrushing. If the waves turn into one giant fluffy cloud, stop. Brush just enough to join the curls, then leave the shape alone.
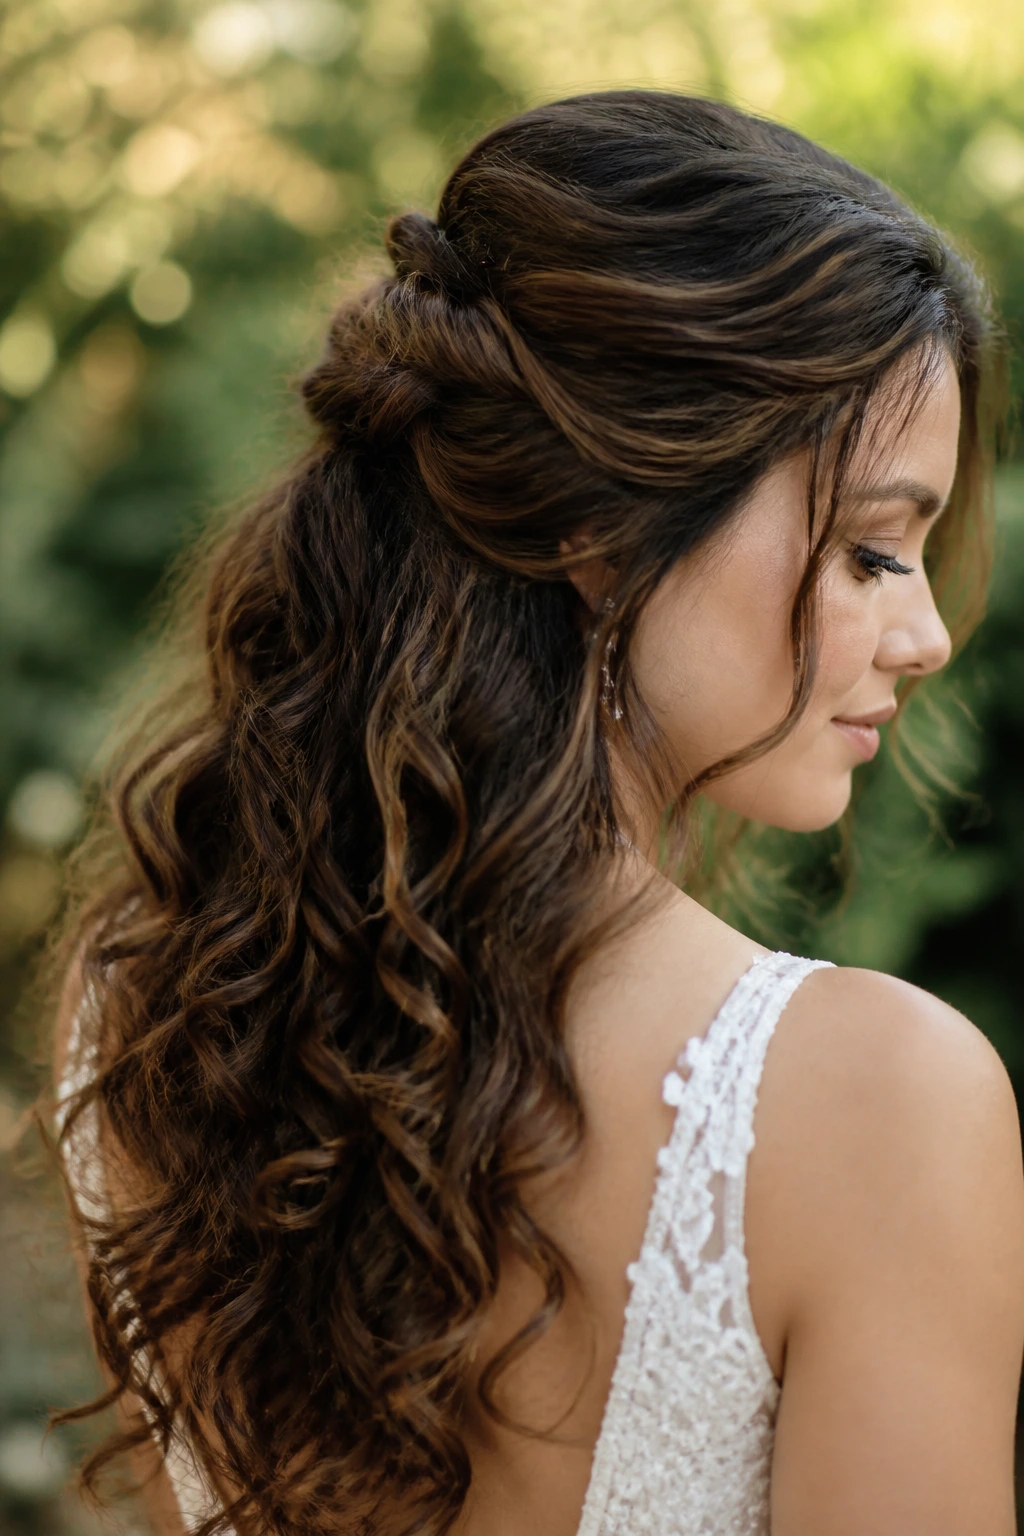
2. Half-Up Twist with Pearl Pins
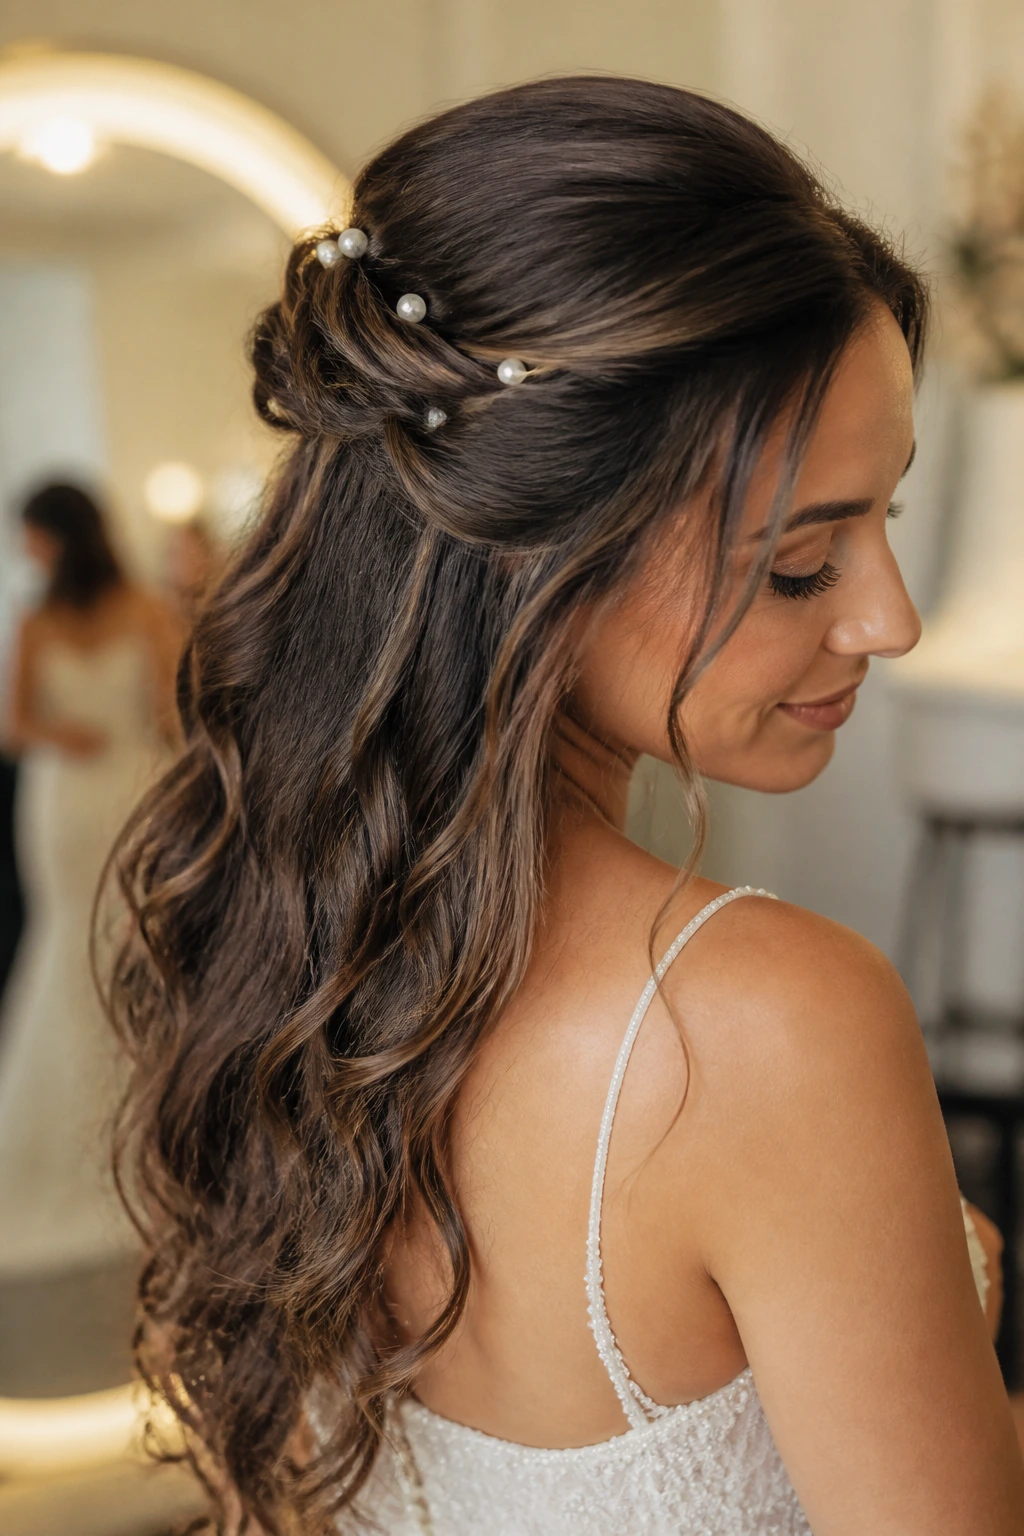
Want to keep the length visible without letting every strand hang in your face? This is the style that solves that. A half-up twist with pearl pins gives you the lift of an updo near the crown and the softness of loose hair through the back. On long hair, that balance matters. Too much hair left down, and the front goes flat. Too much pinned up, and the style starts to feel severe.
Start with a loose wave or bend through the ends, then take two sections from the temples and twist them back so they meet at the center. Secure with two or three pins rather than one big clip. Long hair gets heavy fast, and tiny pearl pins spread the weight better than one chunky accessory fighting the whole section.
I like this style most with dresses that have a low or open back. It keeps the shoulders clear without taking away the drama of long length. The pearls do a lot of work here, too; they read bridal without making the whole look precious. If your veil sits low, pin it below the twist so the comb does not sit on top of the accessory and wobble.
Why it holds: the twist creates tension, and tension gives pins something to bite into.
Tiny detail that helps: leave the crown slightly lifted before pinning. Flat roots make the style look older than it is.
3. Sleek Low Chignon with Face-Framing Pieces
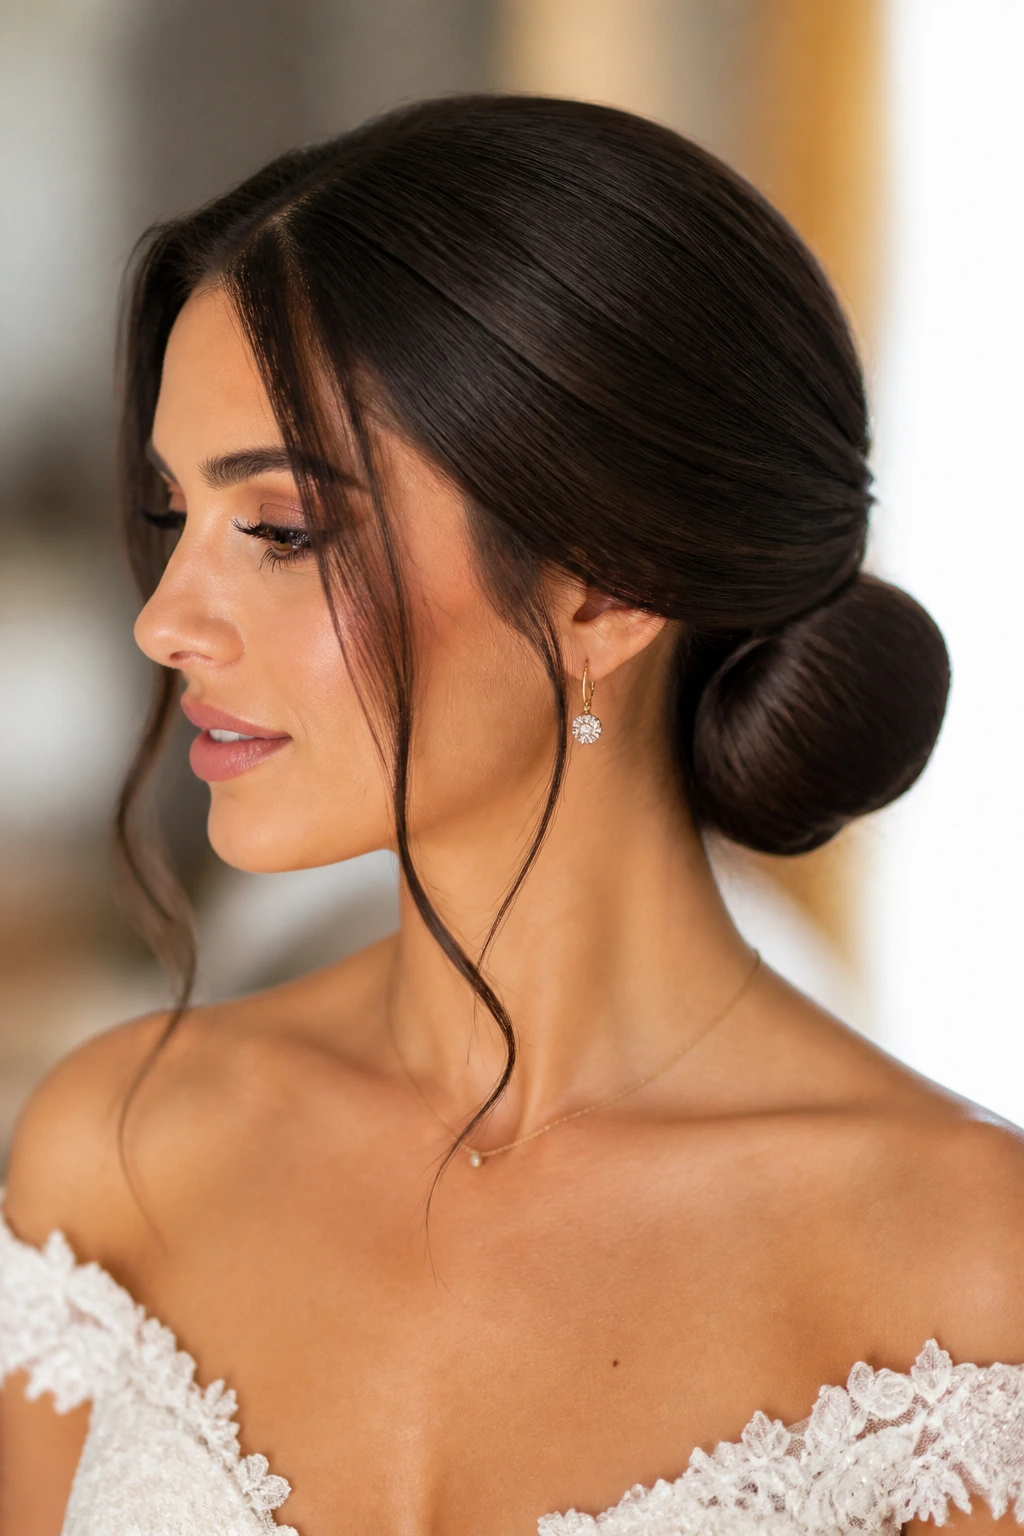
A sleek low chignon can look almost unfairly polished on long hair. The reason is simple: long length gives the bun more material to tuck, fold, and shape, so the finished knot can sit dense and neat instead of wispy. Add two face-framing pieces, one on each side, and the whole thing softens without losing structure.
This is the bride’s answer to a gown with a strong neckline, a high collar, or a dramatic back. It also plays nicely with statement earrings, which can get lost when hair is too busy. The front should be smooth, not shellacked. I’d rather see a little natural movement in the crown than a helmet of spray that cracks when you smile.
If your hair is very long, pre-bend the ends with a curling iron before twisting them into the bun. Straight ends poke out and make the chignon look rushed. Use U-pins for the bulk and regular bobby pins to clean the edges. That two-pin approach is boring, maybe, but it works better than pretending one kind of pin will solve everything.
Best with: silk gowns, bateau necklines, and earrings that deserve room.
A small warning: don’t pull the face-framing pieces too short. If they stop at the cheekbone and split awkwardly, the style looks accidental instead of intentional.
4. Side-Swept Braid into Curls
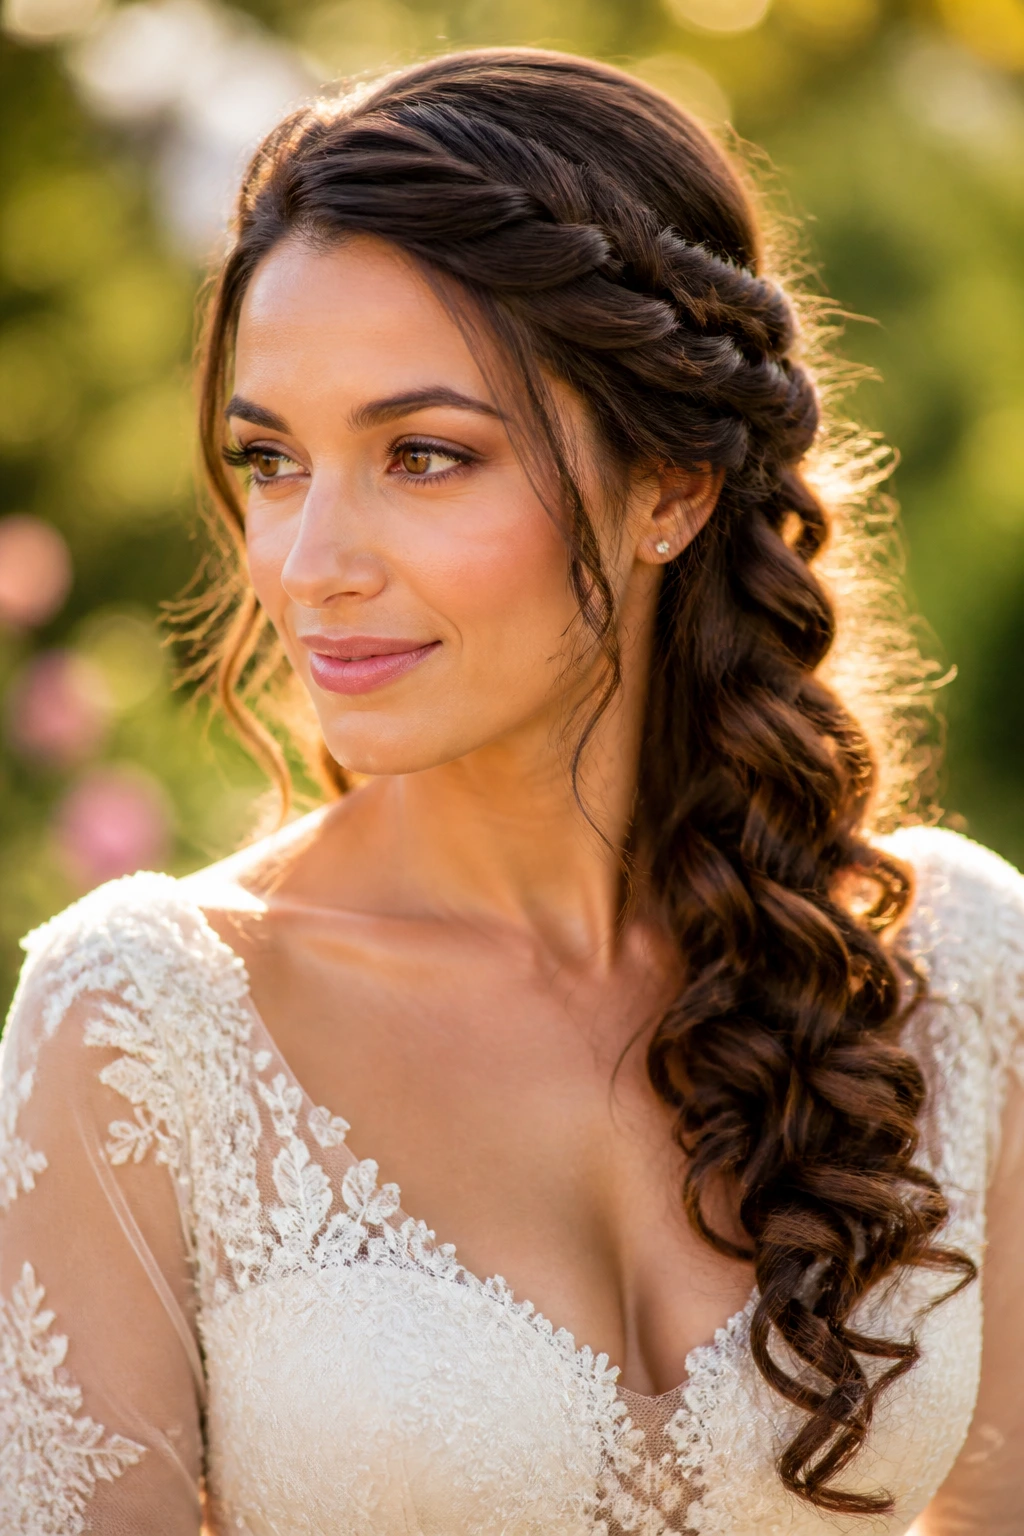
A side-swept braid into curls is one of those looks that reads soft in photographs but behaves like it has a job. That braid gives the style a spine. The curls flowing off the shoulder do the romantic part. On long hair, the combo is practical because the braid controls the top section while the length still gets to move.
Braid one side from the temple or just above the ear, then let it merge into curled lengths over one shoulder. Keep the braid a little looser than you think you need. Tight braids look snatched at first and then start to pull as soon as the hair settles. Looser braids also hide small pin placements better, which matters if you’re tucking a veil or hair vine into the same area.
This is especially useful for outdoor ceremonies. Wind can make loose hair feel chaotic, but the braid keeps the top from flying apart. If you want more detail, pull a few links of the braid gently after it’s secured. Not too much. Just enough to soften the line and make the braid look fuller.
- Works well with lace sleeves and one-shoulder gowns.
- Holds up better than a fully loose curl style.
- Needs a few hidden pins under the braid tail so it does not slide forward.
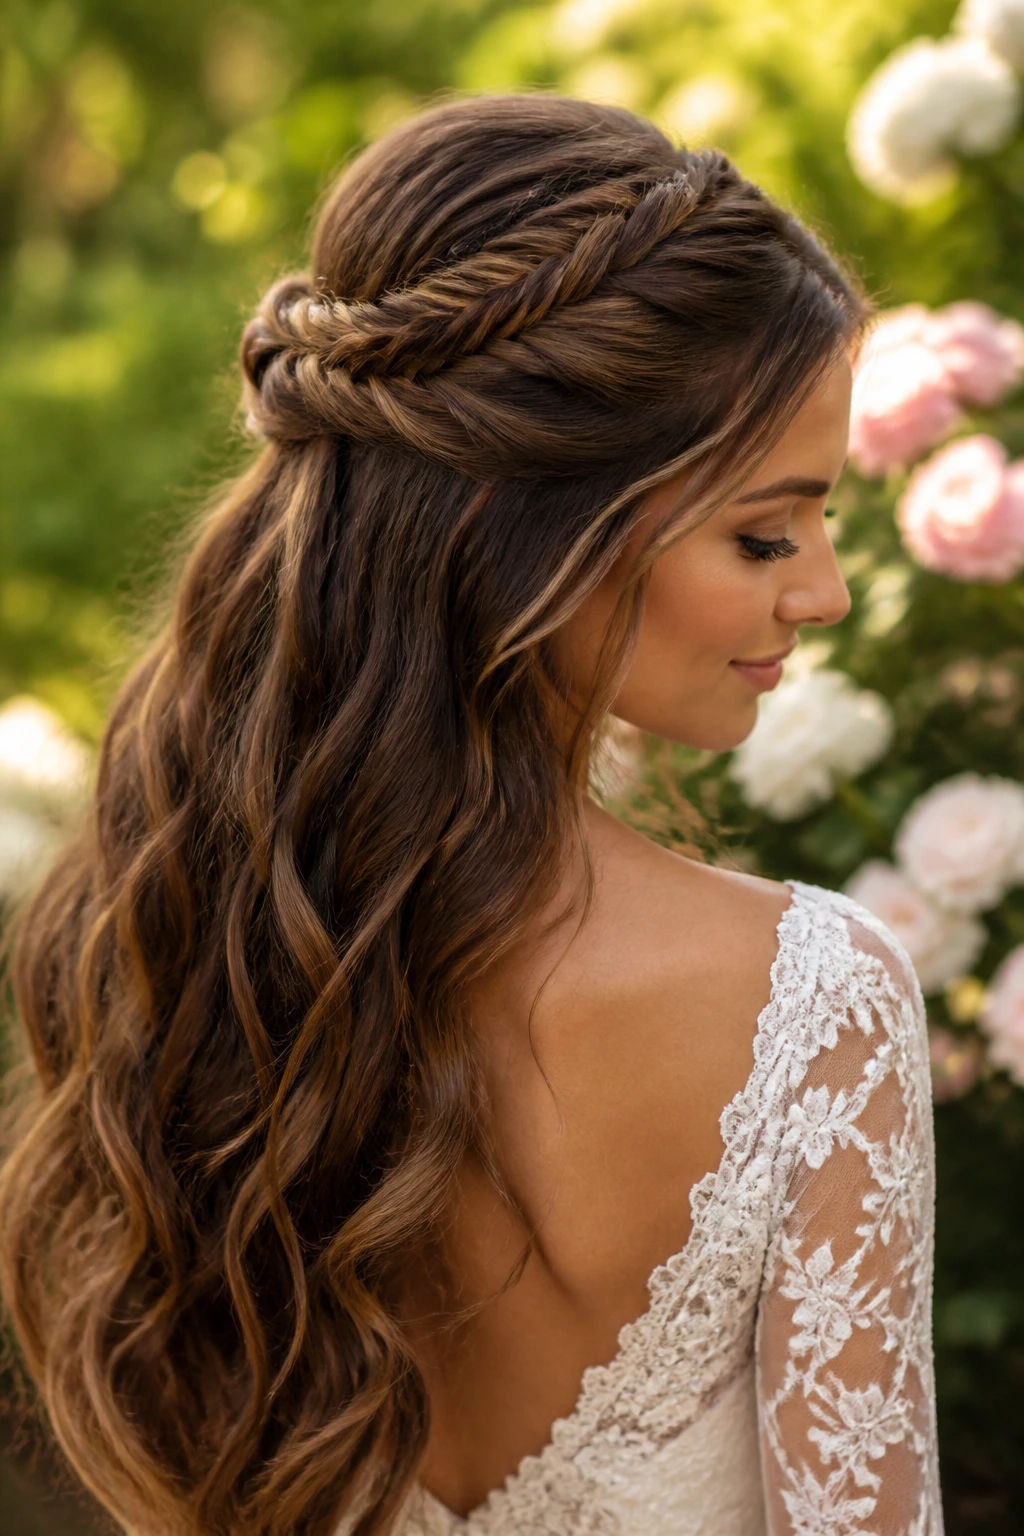
5. Fishtail Half-Up for Long Hair
Fishtail braids look complicated even when they are not, which is part of their charm. On long hair, a half-up fishtail makes the length feel dressed up without swallowing the whole head in braid. You get texture at the top, movement below, and a shape that feels a little more editorial than a basic twist.
The tension is the whole story here. A fishtail that is too tight becomes thin and rope-like. A fishtail that is too loose looks unfinished. Split the braid into two main sections, then take tiny outer pieces and cross them over with steady hands. The smaller the pieces, the more detailed the braid looks. If your hair is silky, prep with dry texture spray first so the sections do not slip through your fingers.
I like this on brides who want a softer boho look but do not want full-on festival hair. It pairs well with leafy hairpieces, delicate combs, and dresses that have a bit of texture in the fabric. The braid gives the style a point of interest near the crown, which means the back can stay loose without feeling empty.
Where this style shines
It shines when the dress has lace, embroidery, or a relaxed shape. The braid keeps the top half neat, and the long tail still gives you that bridal sweep down the back. If you are wearing a veil, place it just under the braid base so the braid can stay visible after the ceremony.
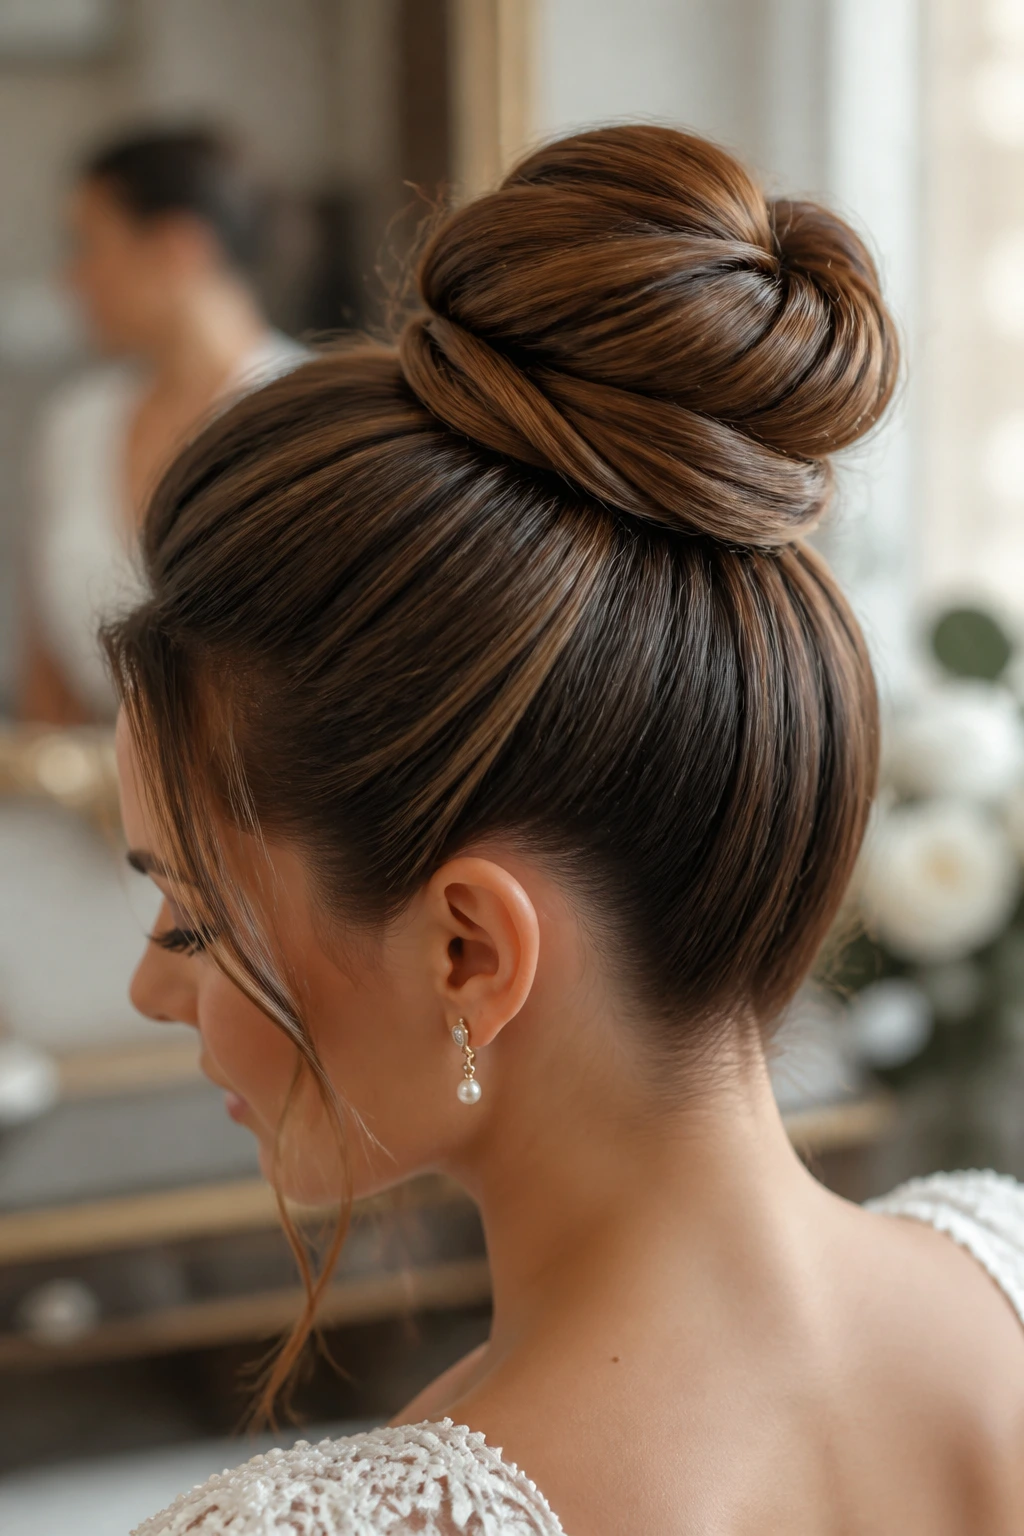
6. Polished High Bun with Wrapped Base
A high bun on long hair can go one of two ways: sleek and elegant, or too big for the head and oddly dated. The polished version sits high enough to lift the face, but not so high that it starts looking like a sock bun from a different decade. The base should be wrapped, not ballooned.
Long hair makes this easier than people expect because the extra length gives you more material for a dense wrap. Smooth the hair into a high ponytail first, then split the tail into two sections and coil them around the base. If the hair is very thick, build the bun in layers instead of trying to force the whole tail into one shape. That’s how you end up with a lumpy knot and a headache by cocktail hour.
This style is smart for warm ceremonies, long veils, and dresses that show the shoulders or upper back. It also keeps makeup and highlight visible, which sounds shallow until you see the photos. Then it makes sense. A little shine spray over the finished bun keeps the surface from looking dry under flash, but don’t overdo it or the hair starts to look greasy at the root.
Pro note: secure the bun with pins that cross through the base, not just the surface. Surface pins hold for ten minutes. Crossed pins hold for hours.
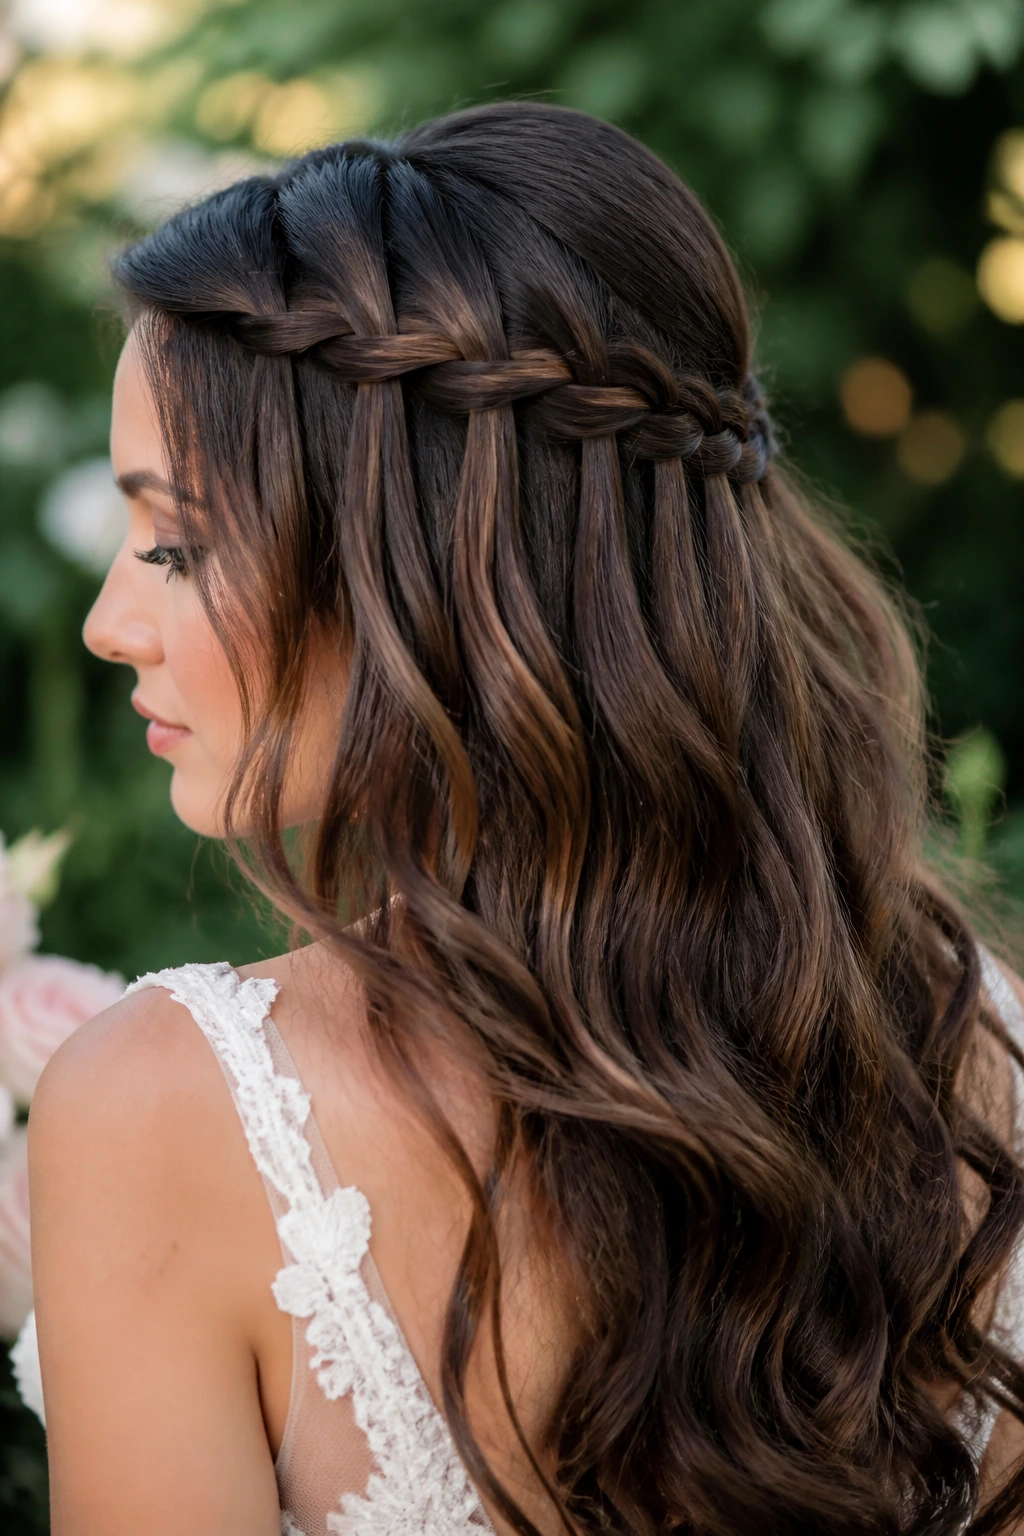
7. Waterfall Braid into Loose Length
If you want braid detail without giving up the long hair you grew out for this exact day, a waterfall braid is one of the best compromises. It draws the eye across the head like a ribbon and then lets the length fall free beneath it. That little bit of movement near the top keeps the style from feeling flat.
The braid works best when the hair has a slight bend, not stick-straight ends. Straight hair makes the dropped sections look thin and sharp. A few loose waves through the lower half give the style a much softer finish. Keep the braid section around the crown taut enough to hold shape, then let the cascade pieces drop evenly. If the drops are uneven, the whole thing can look like it started as a braid and gave up halfway through.
I reach for this style when the dress is romantic but not fussy. It has enough detail for a bridal look without fighting with a heavy neckline or a big necklace. A tiny comb tucked where the braid begins can look beautiful, but keep it small. The braid itself is the star.
A one-sentence truth: this is not the style for someone who hates touch-ups. The braid will stay, but the loose length still needs a few bobby pins hidden at the sides if you want it to keep its shape through photos and wind.
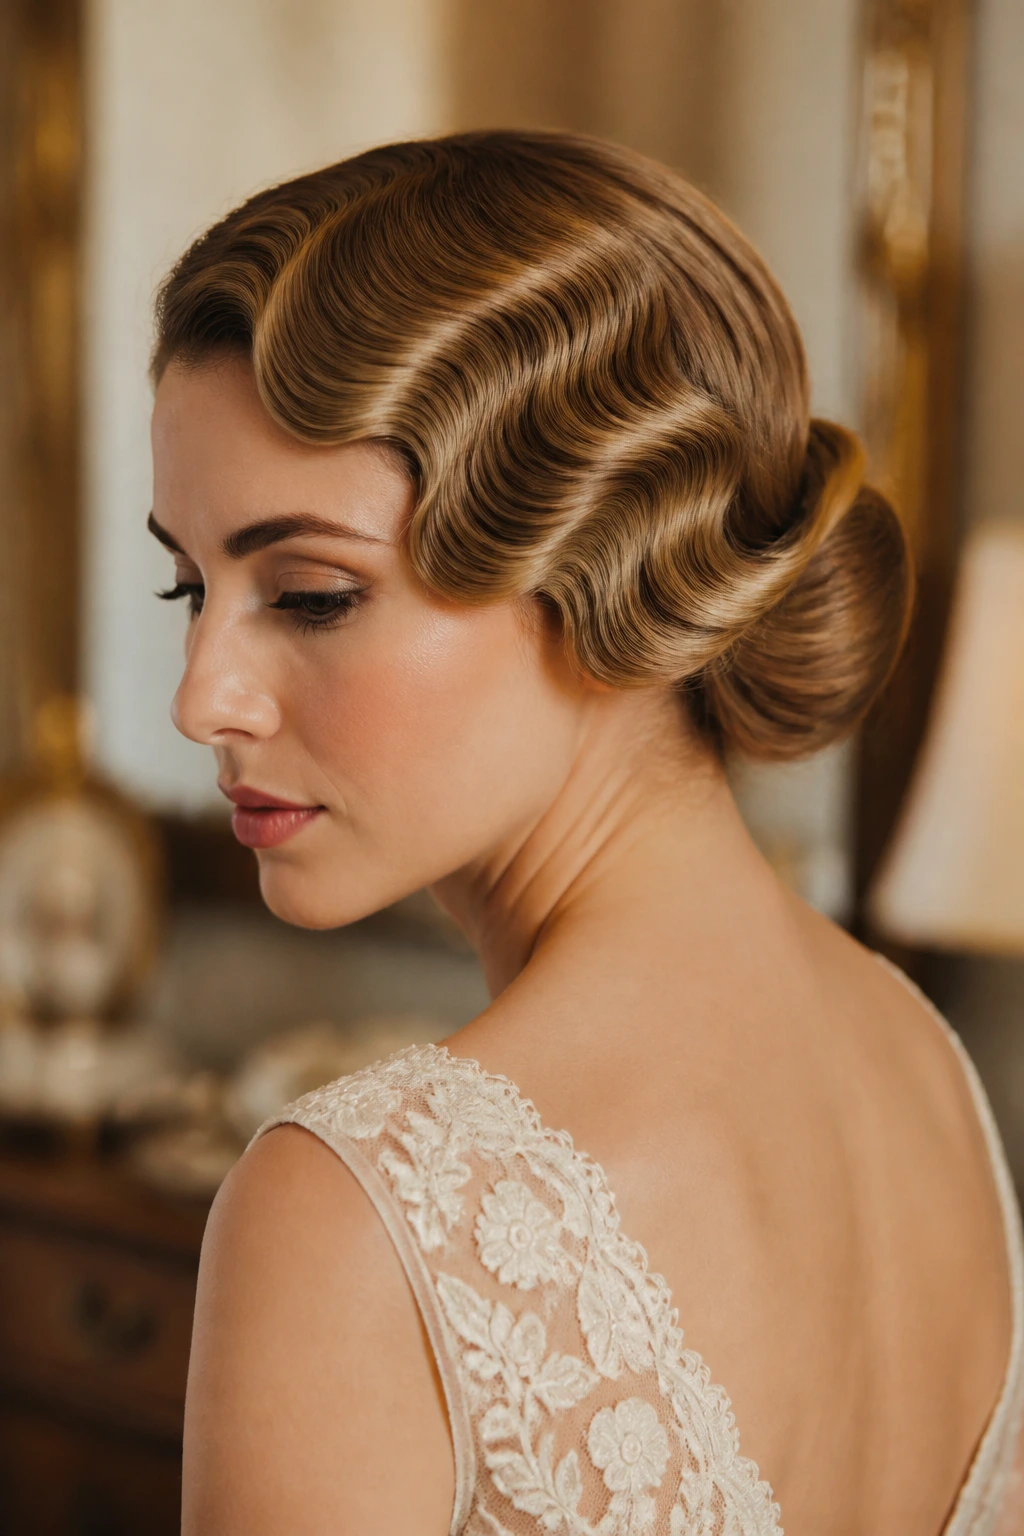
8. Vintage Finger Waves and Roll
Finger waves on long hair are not the easiest option, and that is exactly why they feel special. They bring a sharp, old-Hollywood shape that stands apart from the usual soft curl or braid. The finished look is sculpted near the face and smoother through the crown, which makes it a strong choice for brides who want elegance with edge.
This style depends on setting, not just styling. The hair has to be damp enough to mold but not dripping, and the wave pattern needs to dry completely before it gets touched. Long hair often needs the back gathered into a low roll or tucked section so the style doesn’t turn into a loose pile of waves with no structure. It is one of the few looks on this list that benefits from a stylist who knows how to place clips and not just curl hair.
It pairs best with satin, beaded detail, or a dress that has a clean shape. Birdcage veils and finger waves are old friends. Pearl earrings work too. Big, busy accessories usually fight the line of the waves, which is a shame because the whole point is that the hair already carries the visual weight.
- Best for a formal ceremony or evening reception.
- Needs strong-setting lotion or gel at the front.
- Works well when the rest of the hair is tucked low and neat.
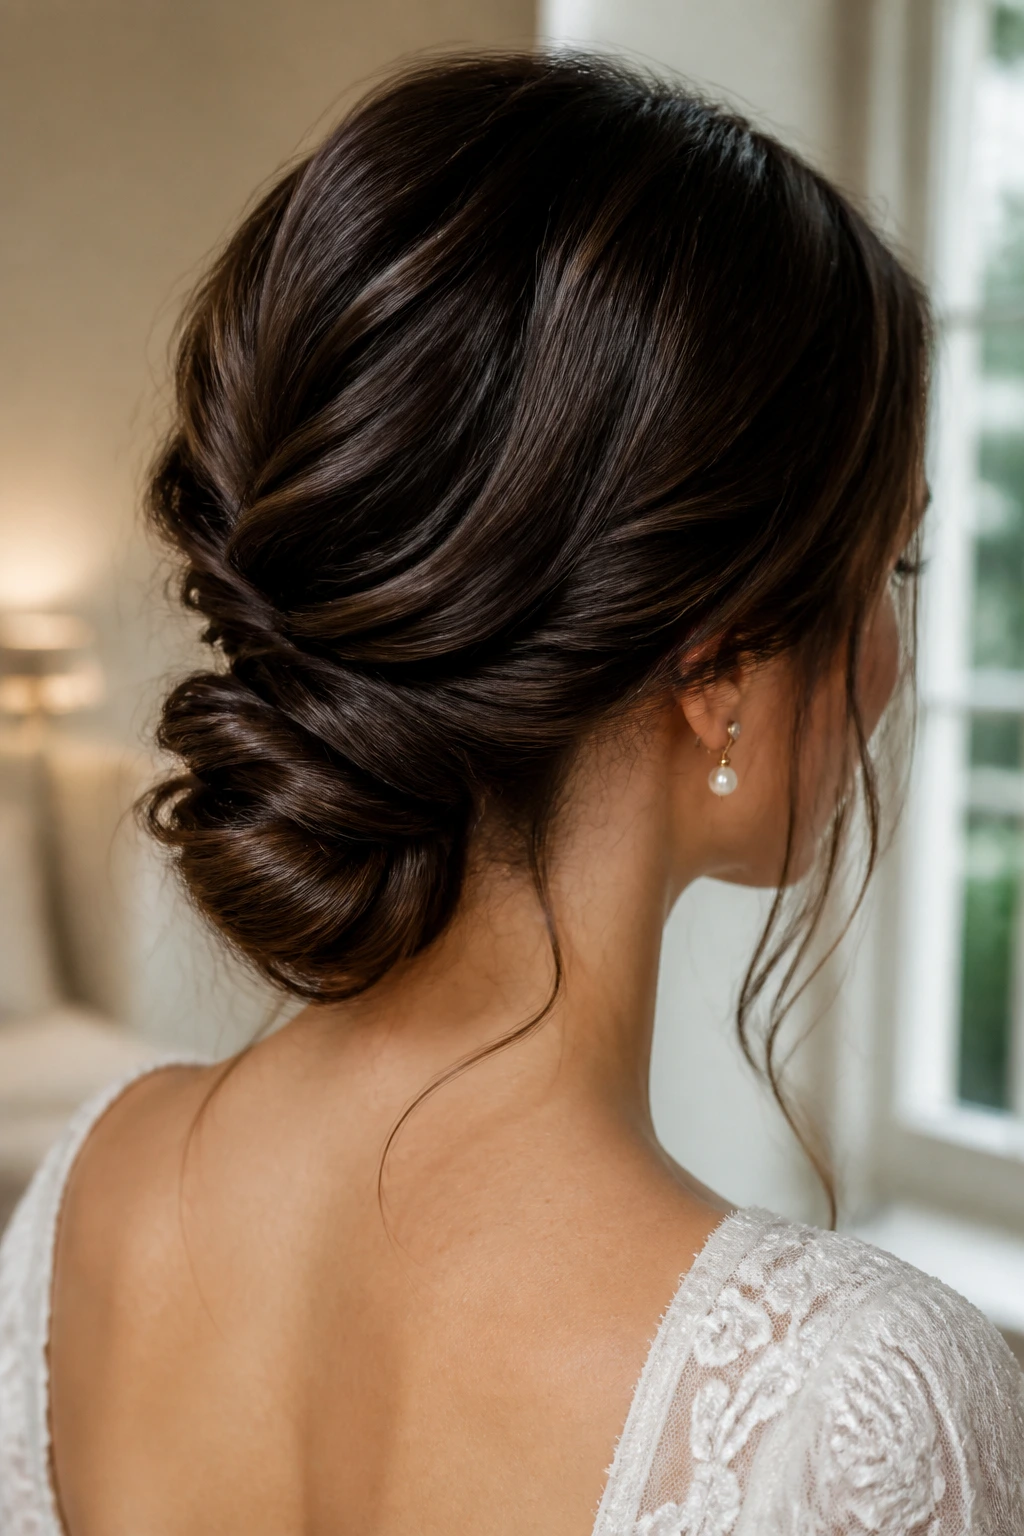
9. Twisted Low Knot
A twisted low knot has the relaxed confidence of a chignon without the stiffness that sometimes comes with a fully polished bun. On long hair, it shows off texture instead of hiding it. That’s the appeal. The twists create shape, and the knot keeps the hair anchored low at the nape where it won’t interfere with a veil or a raised collar.
I like this style for brides who want something tidy but not severe. It has a softer line than a classic ballerina bun and a little more movement than a tightly folded knot. Start by creating a gentle bend through the ends, then divide the hair into two or three sections and twist each one before wrapping them into the knot. Different-sized twists keep it from looking too perfect, which sounds strange, but perfect can get boring fast.
A few face-framing pieces make the whole thing less formal. Just keep them deliberate. Random wisps at the temples look unfinished, especially with a formal gown. This is one of those styles that looks expensive when the edges are smooth and the knot is tucked in cleanly.
Best with: long sleeves, square necklines, and quieter jewelry.
Small caution: if the knot sits too far below the nape, it can be flattened by the back of the dress. Bring it up a little so the silhouette stays visible.
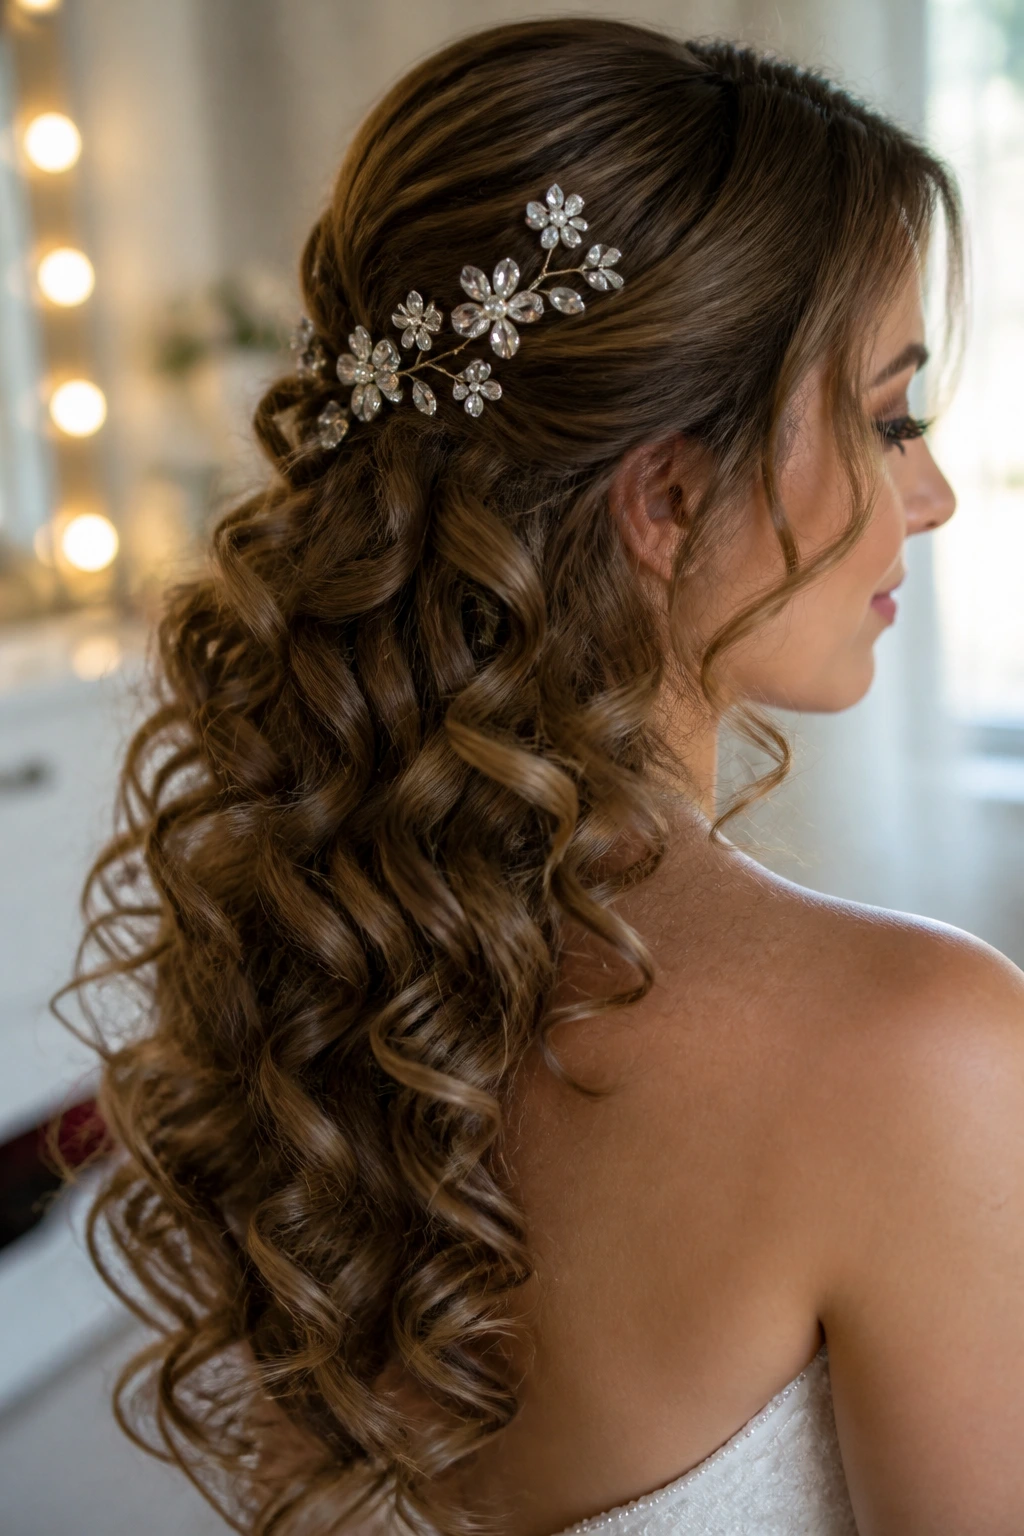
10. Loose Barrel Curls with Crystal Pins
Loose barrel curls are the bridal style people think they know until they see the better version. The difference is in the structure. On long hair, those curls need to be set with a large barrel iron, pinned while they cool, and then shaped so they don’t all fall in the same direction like a single heavy curtain.
A few crystal pins do a lot here. Place them where the hair naturally sweeps back from the face, not scattered randomly through the lengths. That gives the style a bridal signal without overdecorating it. The pins also help anchor the front so the hair doesn’t keep sliding forward in photographs.
This is one of the easiest styles to adapt to different dresses. It works with a strapless bodice, a detailed back, or a simpler gown that needs hair to do a bit more work. If your hair tends to lose curl fast, use a light mousse on damp hair before blow-drying, then a setting spray before the iron. Skip heavy oil near the roots. It kills the lift.
A quick note: the prettiest barrel curls on long hair are never rushed. If you brush them out while they’re still warm, you lose the roundness and end up with soft bends that flatten fast.
11. Halo Braid Crown
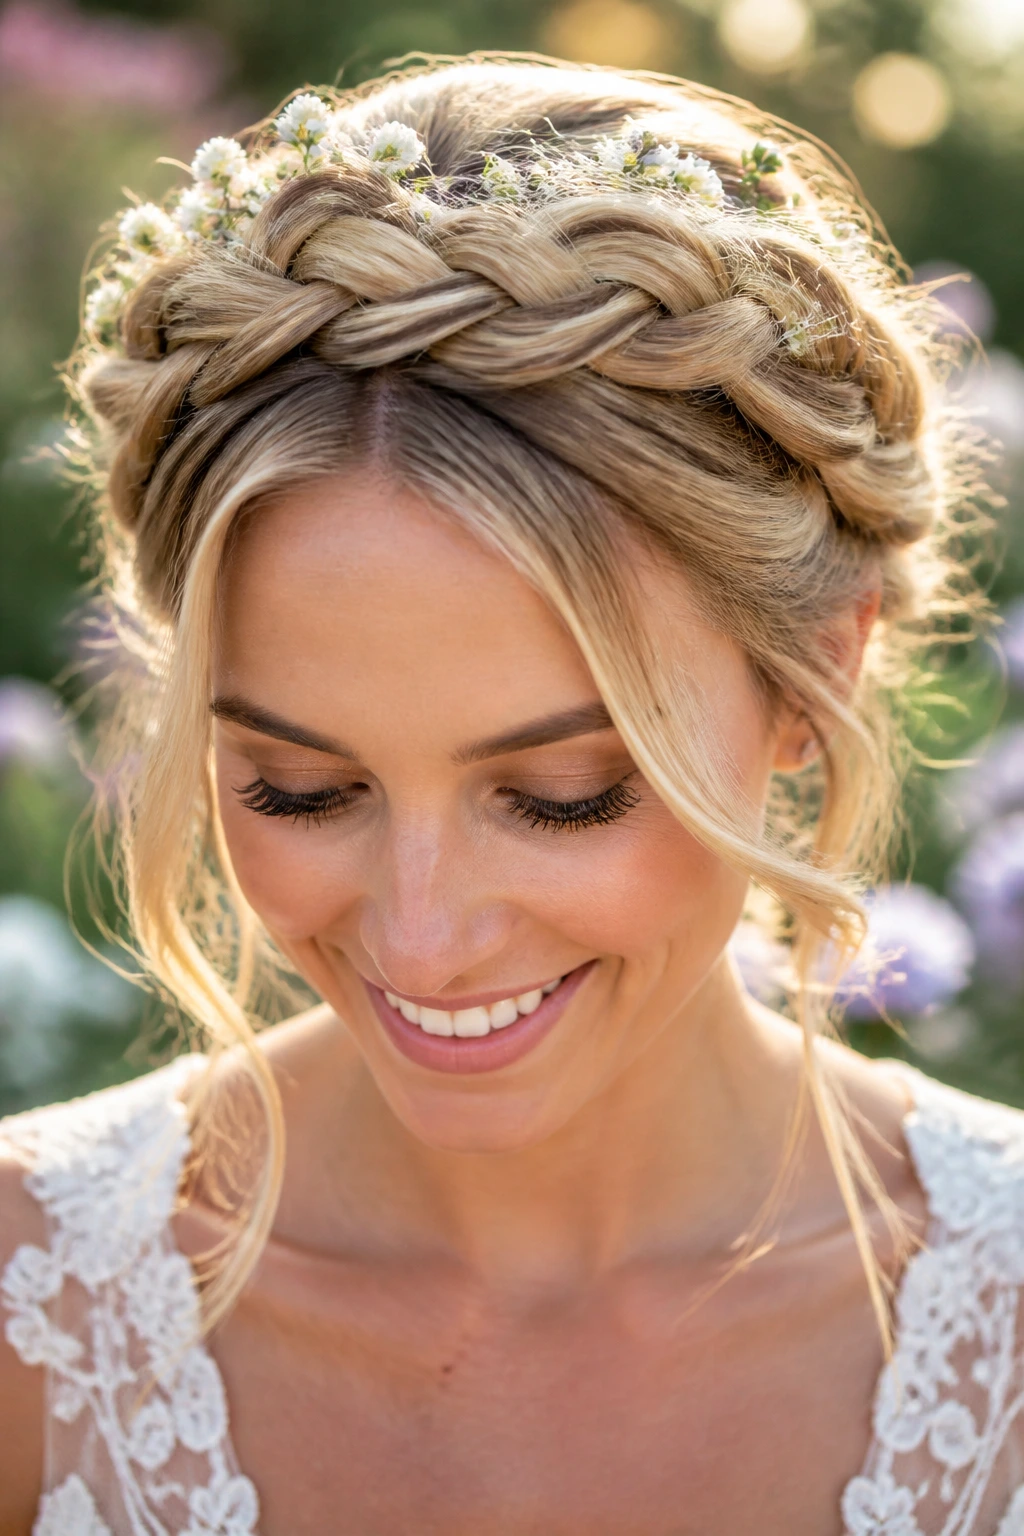
The halo braid is one of those styles that looks almost calm from a distance and then reveals a lot of handwork up close. On long hair, it wraps the braid around the head like a crown, which means the style stays contained and the face stays open. That’s a useful combination on a wedding day. You get romance without hair constantly slipping into your mouth.
This look is especially good for brides who want a boho feel but don’t want loose sections wandering everywhere. It keeps the shape near the crown and works well with fresh flowers, tiny pins, or a narrow veil tucked at the back. The braid should be smooth enough to read cleanly but not so tight that it turns severe. A little pull on each braid loop gives it fullness and keeps the style from looking flat against long hair.
If your hair is very thick, braid each side separately and join them at the back instead of trying to wrap one braid around the whole head. That makes the shape easier to control and easier to pin. A full halo done on long, dense hair can get heavy. Beautiful, yes. Heavy too.
Best for: outdoor ceremonies, natural textures, and dresses with soft fabric rather than hard lines.
12. Curled Ponytail Over One Shoulder
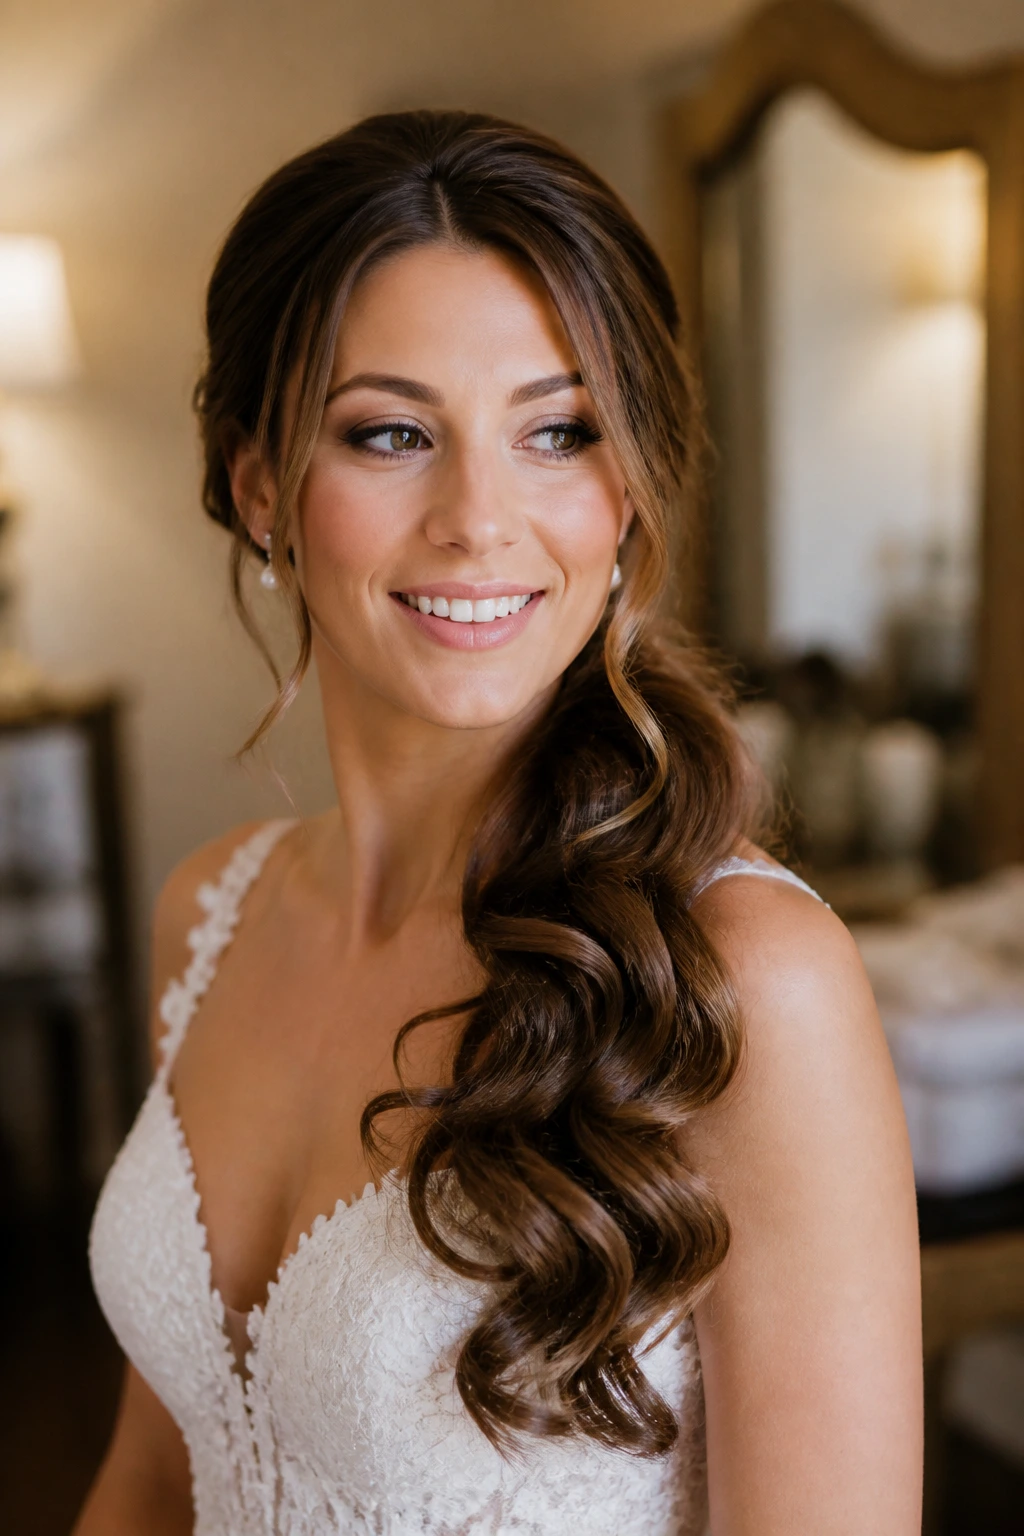
A curled ponytail over one shoulder is a clean answer to brides who want their length visible but under control. It feels modern without getting cold. The ponytail gives the style a single strong line, and the curls keep it from looking like it belongs in a gym, which is the only real danger here.
The key is placement. Sit the ponytail low enough that it can fall over one shoulder comfortably, but high enough that the base doesn’t get buried under the dress collar. Once the ponytail is secured, wrap a small section of hair around the elastic so the tie disappears. Then curl the tail in larger sections, not tiny ones. Bigger curls move better down the shoulder and look cleaner in profile.
This style is strong for brides wearing one-shoulder gowns or dresses with clean, architectural lines. It leaves the neckline open and keeps the long hair from overpowering the dress. If you want a little softness around the face, leave one or two thin pieces in front and curl them away from the cheeks. Not too much. The point is to frame, not to hide.
A sentence worth remembering: a bridal ponytail works when it looks intentional from the front and expensive from the side. If either angle fails, the style feels like a compromise instead of a choice.
13. Textured French Twist with Soft Ends
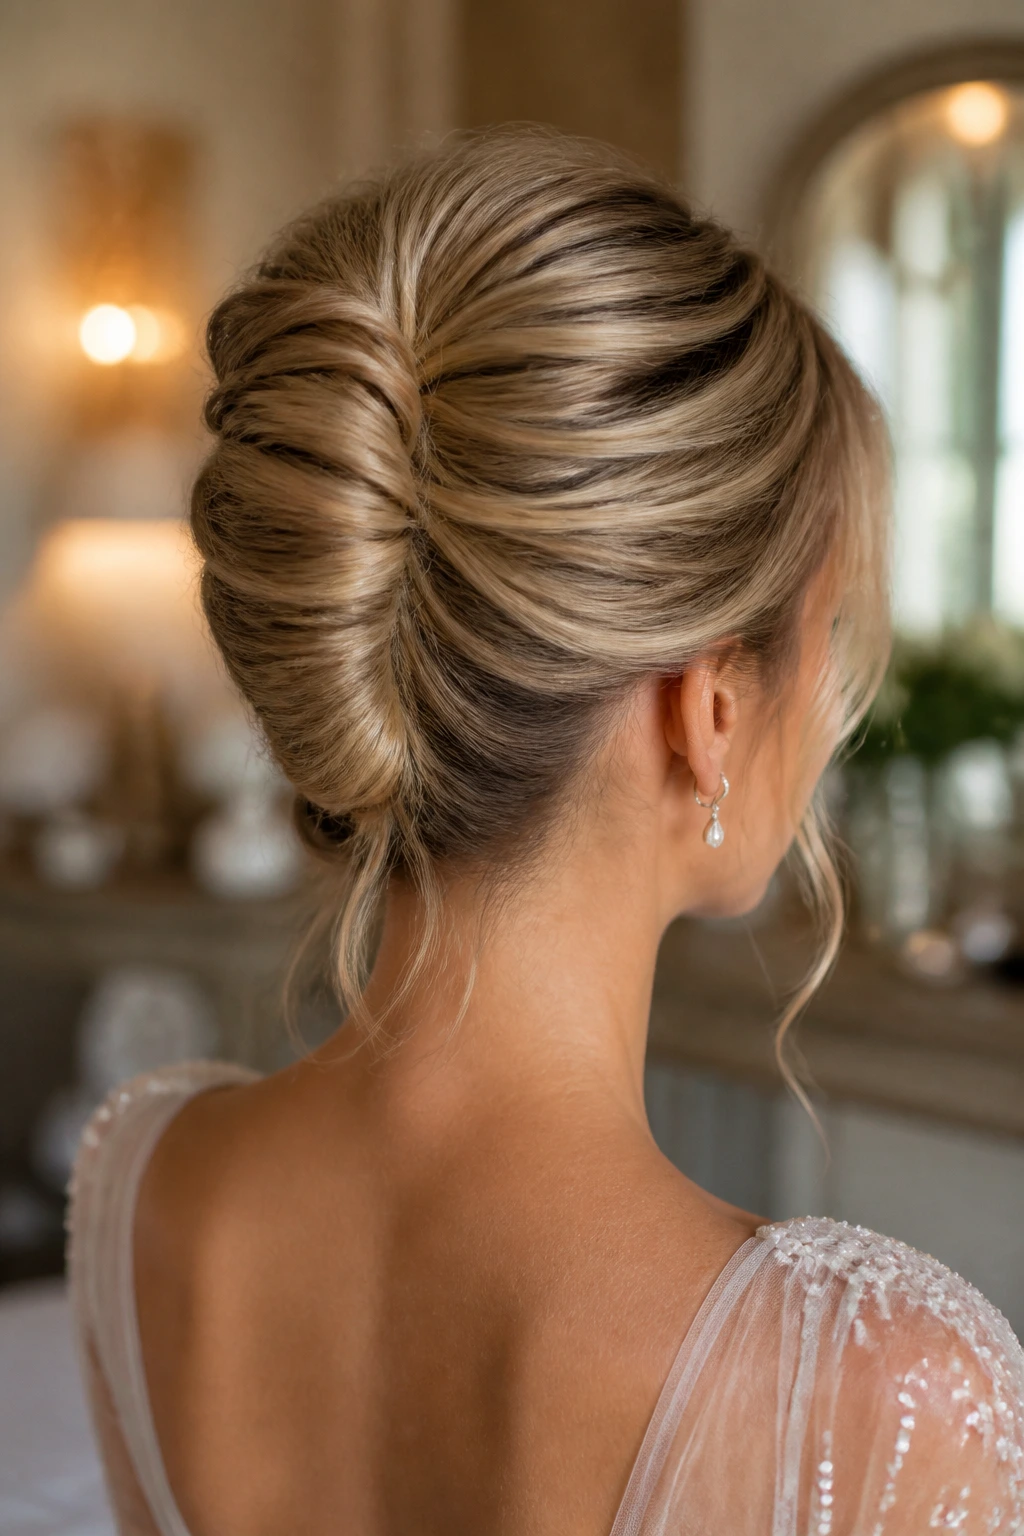
The French twist is the quiet overachiever of bridal hair. On long hair, it can look impossibly neat if the finish is smooth, or a little more relaxed if you leave the ends and crown textured. That second version is the one I prefer for weddings. It keeps the classic shape but doesn’t feel sealed in glass.
A textured French twist gives you height through the back, a visible vertical line, and room for a comb or pin on one side. The length gets folded upward, then tucked in a way that hides the pins and keeps the style compact. Long hair helps here because there’s enough material to build the twist without it looking flimsy. If your hair is layered, leave a few of the shorter ends soft around the nape so the style doesn’t look too sharp.
This is a good match for structured dresses, crepe fabrics, and brides who want the back of the gown to stay visible. It’s also one of the more comfortable updos once it’s pinned correctly. No heavy bun sitting against the head. No dangling ends. Just a clean, lifted shape.
The thing that sells it
A little texture through the crown makes the French twist feel current. Without it, the style can tip into costume territory fast.
14. Bouffant Half-Up with Cascading Waves
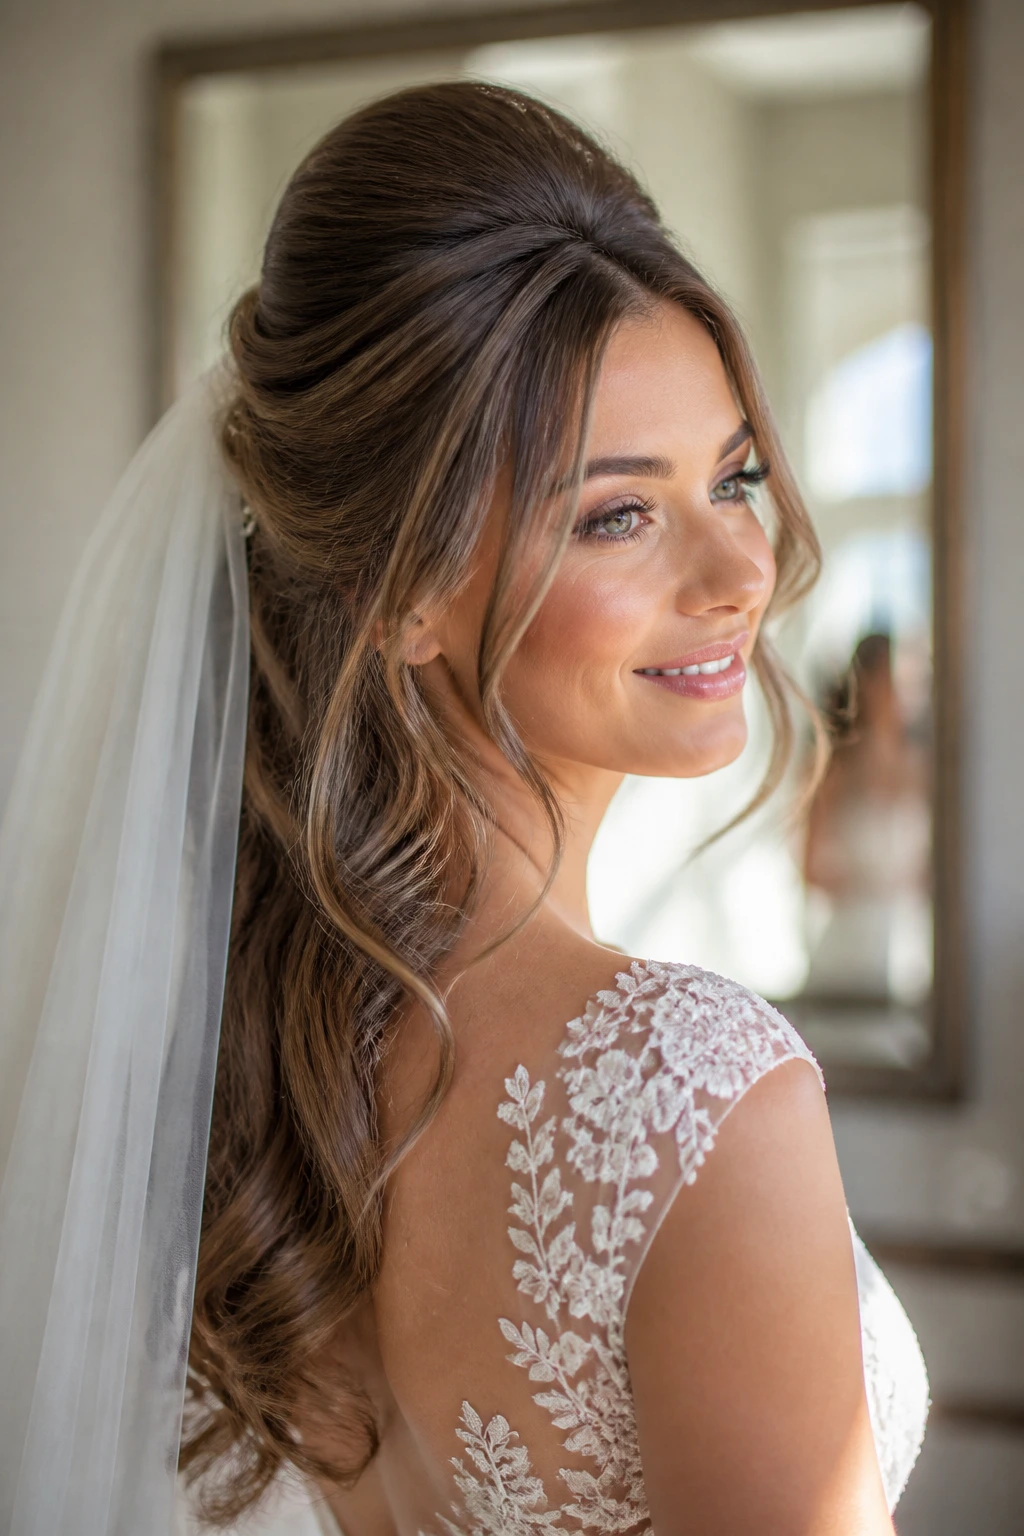
A bouffant half-up style gives long hair the lift it often needs on camera. Fine hair can sink. Heavy hair can drag. A little volume at the crown fixes both problems. The shape rises at the top, then drops into soft waves that move down the back of the dress instead of hanging like a curtain.
The bouffant portion should not be cartoonish. You want lift, not a bubble from the side of a nightclub poster. Tease gently at the crown, smooth the top layer over it, and secure the half-up section with pins or a small clip. The cascading lengths can be curled with a 1¼-inch barrel so they hang in balanced pieces rather than tight ringlets.
This style loves a veil that sits below the bouffant or at the crown edge. It also works well with floral clips, because the lifted top gives the accessory a visible perch. If you have a round face, the crown height helps lengthen the look. If you have a long face, keep the lift moderate and allow more width through the sides so the style doesn’t stretch the face further.
One honest note: this style needs a trial. The difference between flattering volume and too much height is small, and once hair gets pinned, it is annoying to adjust on the fly.
15. Braided Bun with Tendrils
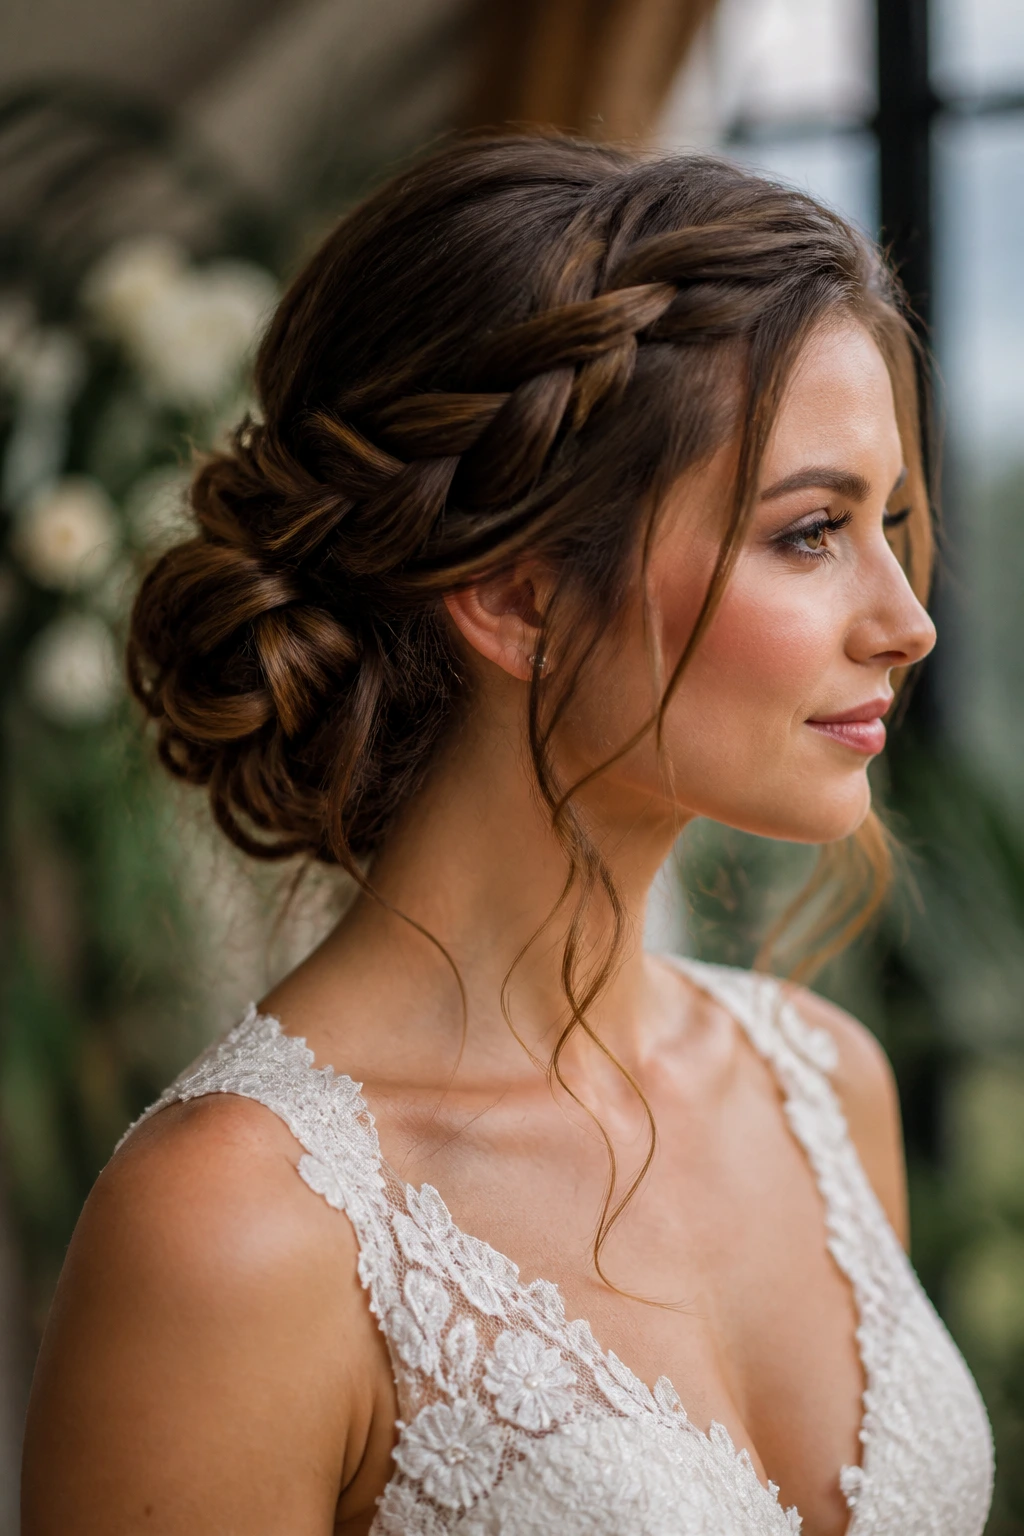
A braided bun is the practical choice when you want detail, security, and a finish that can take a hit. The braid gives the bun texture. The bun keeps the length off the neck. The tendrils soften the edges so it doesn’t look severe in photos. On long hair, this style has enough material to feel substantial without needing fake fullness.
Start by braiding one or more sections, depending on how dense the hair is, then wrap them into a low or mid-height bun. The braid should be visible somewhere in the finished shape. If it disappears completely, you lose the point. Leave a couple of tendrils at the front and maybe one at the nape if the dress allows it. Curl them lightly and let them fall where they want, then pin only if they start drifting into the cheeks.
This is a smart style for long weddings, humid venues, or brides who know they’ll be moving a lot. It is also one of the easiest styles to refresh. If a strand loosens, tuck it back into the braid path and nobody notices. Braids hide a lot. That is one of their best tricks.
Best with: lace details, garden settings, and dresses that need a little softness at the neckline.
16. Bubble Ponytail with Satin Ribbon
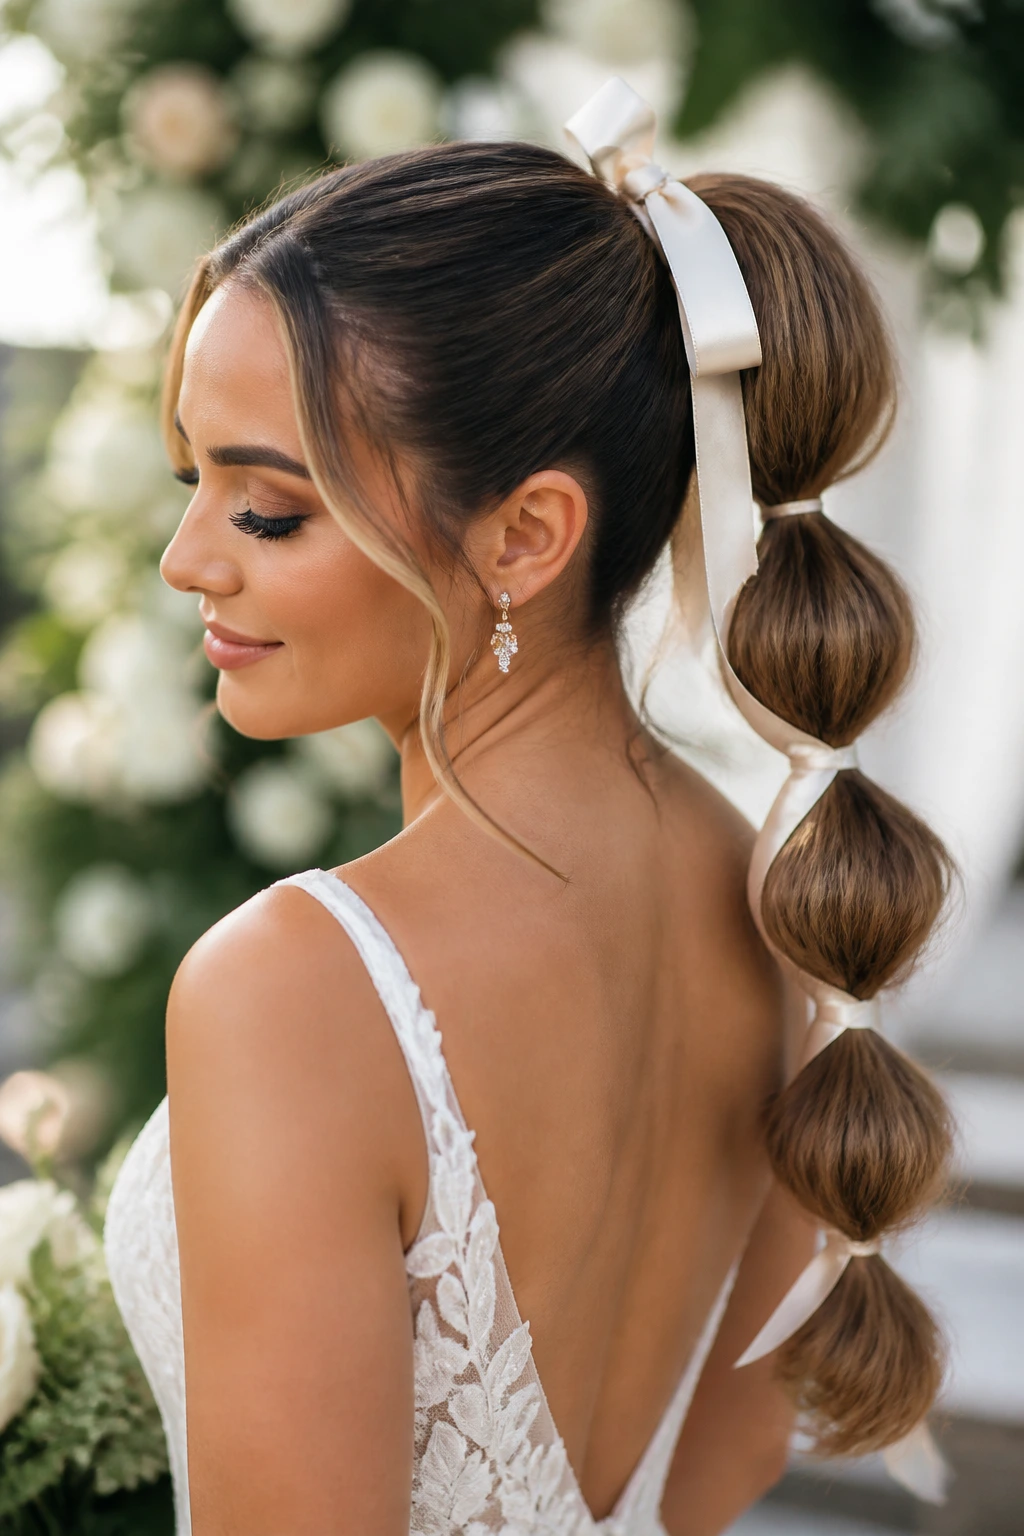
A bubble ponytail sounds playful because it is, but on long hair it can also look surprisingly polished. The shape comes from sectioning the ponytail with small elastics and gently pulling each segment into a rounded bubble. Add a satin ribbon at the base or woven through one side, and the style becomes bridal without losing that modern edge.
This is a very good option if you want long hair on display but need it controlled. The bubbles give you structure all the way down the length, which means the ponytail does not collapse into one heavy tail by the second hour. Long hair makes the bubbles fuller, so the shape reads well even from across the room.
The ribbon does a lot of work too. It softens the elastic points and gives you a color cue that can match the dress trim or bouquet ribbon. Keep the bubbles even, though. Uneven sections can look accidental, especially on very straight hair. If the hair is slippery, prep it with texture spray before the first elastic so the bubbles hold their shape instead of sagging.
A blunt little truth: this is not a shy hairstyle. It suits a bride who wants the hair to be part of the statement, not just background.
17. Center-Parted Sleek Ponytail with Tucked Ends
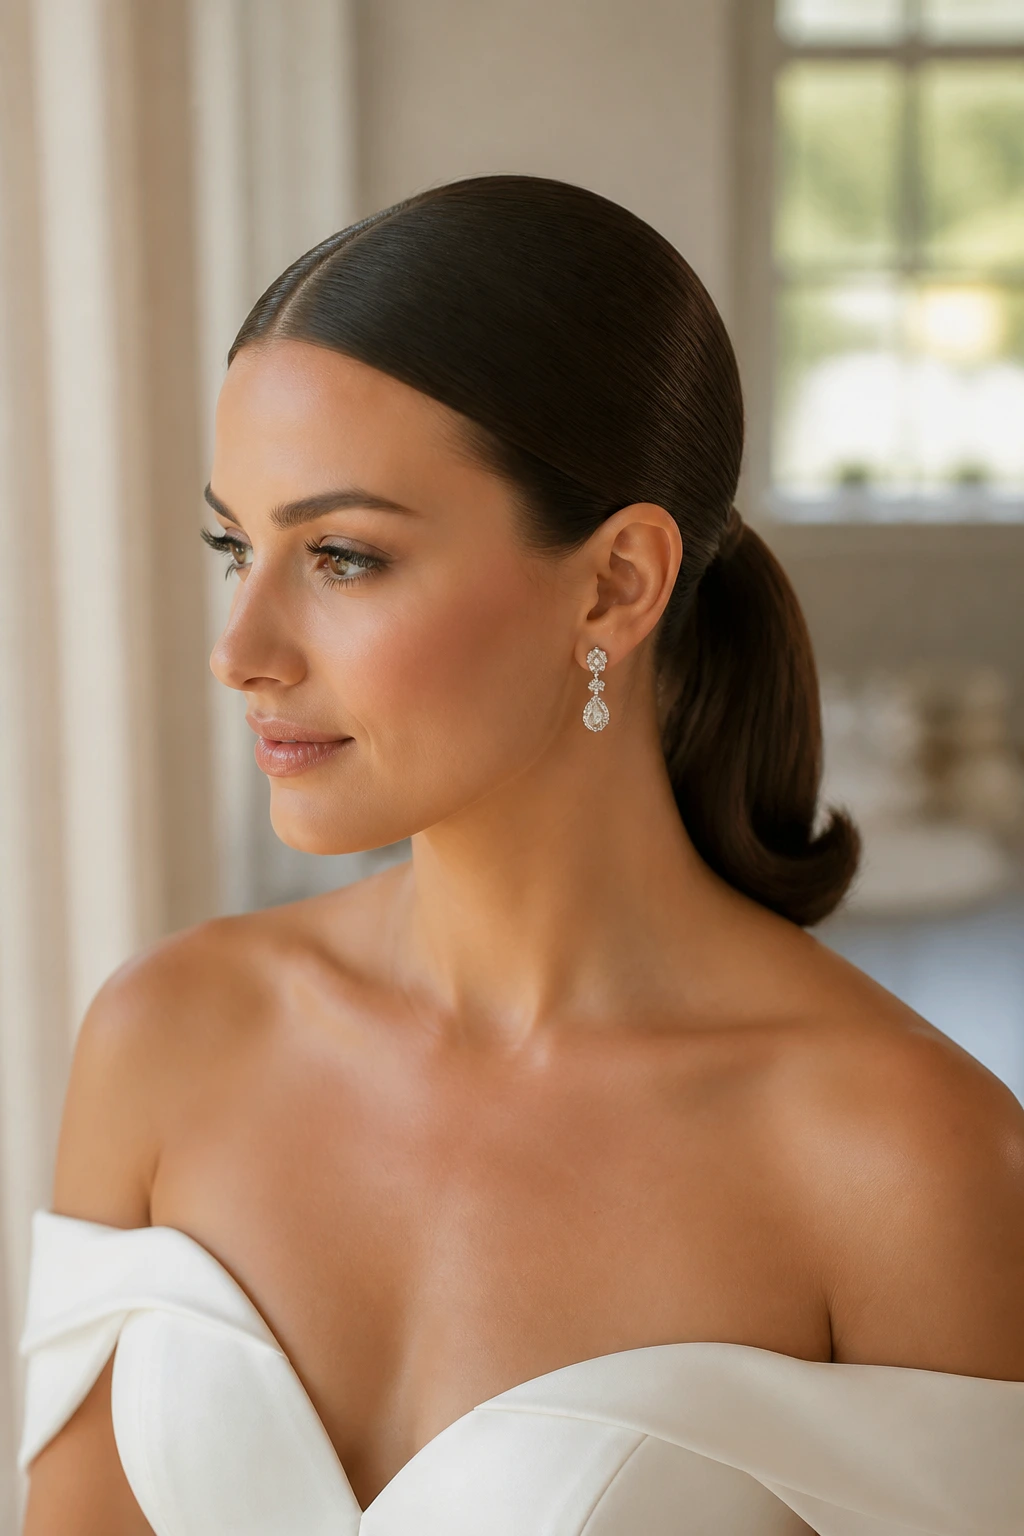
A center-parted sleek ponytail is the cleanest style in this collection, and that is exactly why it works. Long hair can look heavy if it hangs everywhere. Pulling it into a smooth ponytail creates a line, and the center part gives the whole look symmetry. Tucking or curling the ends keeps the finish from reading too casual.
The style is strongest when the crown is flat, the part is precise, and the ponytail sits low or mid-height depending on the dress. Wrap a small strand around the elastic so the base disappears. Then decide what to do with the tail: leave it straight for a sharp look, bend the ends under for a softer one, or curl the lower half into a gentle wave if you want movement. All three work. The key is consistency.
This suits minimalist gowns, modern tailoring, and statement earrings that deserve a clear line from shoulder to jaw. It also has one practical advantage people forget: it keeps hair away from the neck, which matters if the event is warm or long. If your hair is very thick, use two elastics stacked one above the other so the ponytail does not slip. One elastic on a lot of hair can feel like a polite suggestion.
If you like crisp lines, this one is hard to beat. It is restrained, but not dull, and on long hair that restraint reads as confidence.
Why Long Hair Needs a Different Wedding Approach
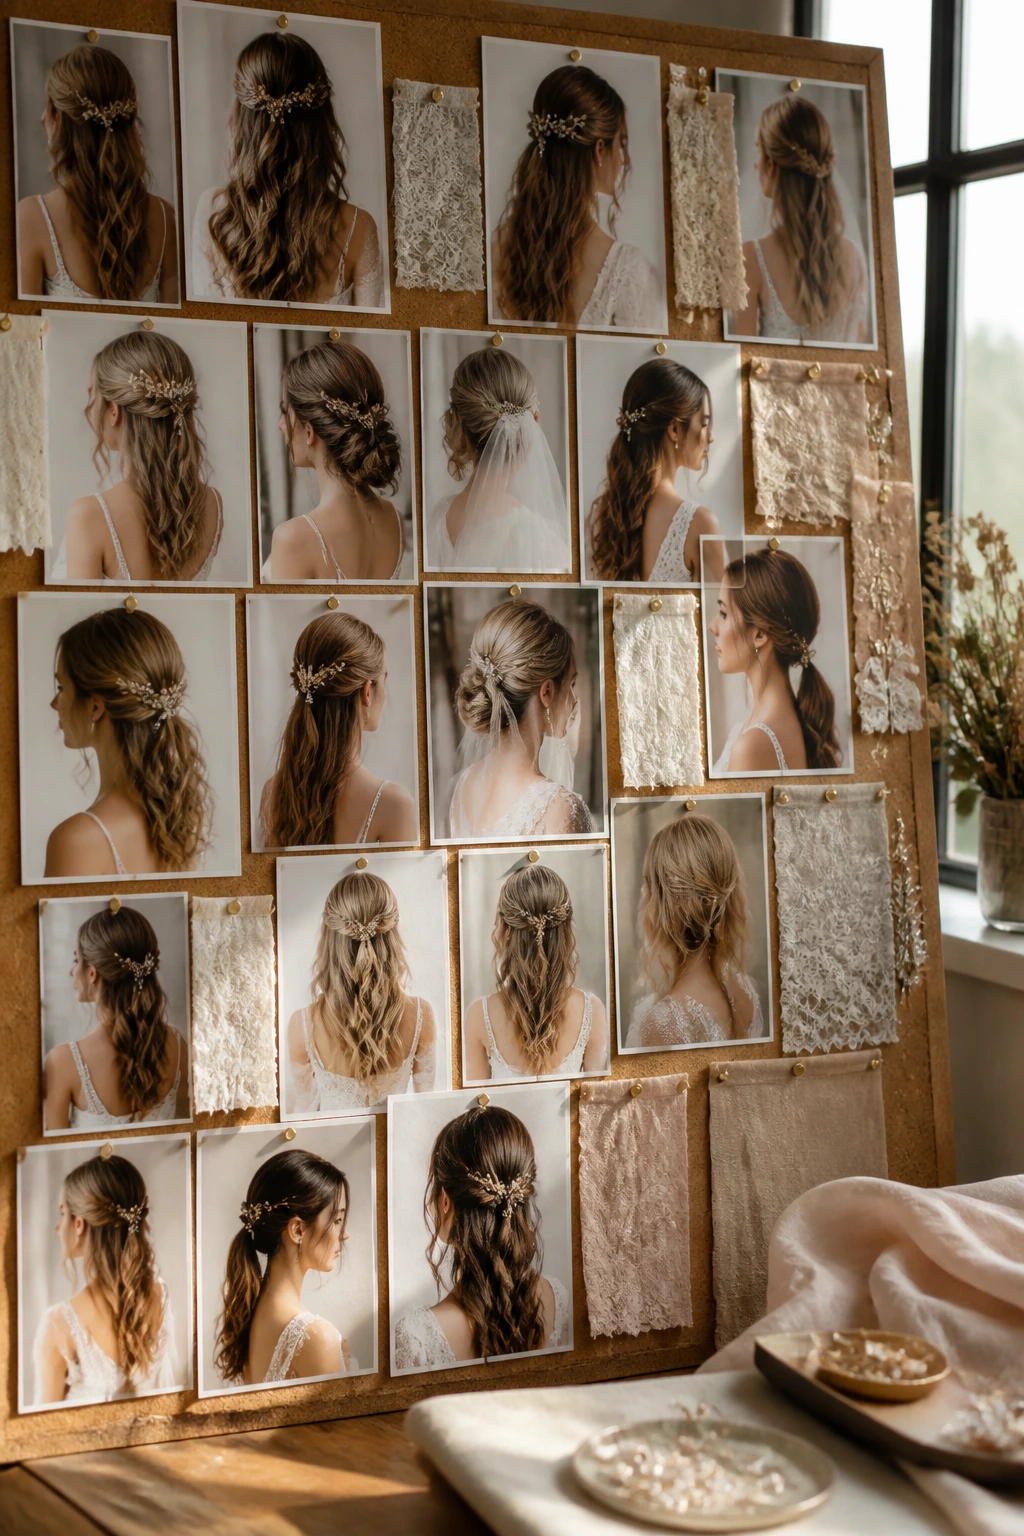
Long hair is not just “more hair.” It behaves differently. There’s more weight at the ends, more leverage pulling on pins, and more surface area for curls to unwind if the foundation is weak. That is why a style that looks secure on shoulder-length hair can sag on someone with hair that reaches the middle of the back.
The other issue is slip. Long hair often has more length rubbed by conditioner, oil, and everyday handling, which leaves the outer layer smoother than you want on a wedding day. Smooth hair is lovely for shine. It is not always lovely for pin grip. The fix is not roughing it up until it feels like straw. The fix is adding the right amount of texture at the root, the mid-lengths, or the section you plan to anchor.
Where the structure comes from
For bridal hairstyles for long hair, structure usually comes from one of three places: a braid, a hidden ponytail base, or a pinned section that crosses over itself. That’s why the styles above feel sturdy. They are not relying on wishful thinking and extra spray. They’re built on something that can hold the weight.
Pins, Combs, and Sprays That Earn Their Space
A bridal style lives or dies on tiny tools. People talk about “the look” like it happens by magic, then act surprised when the hair falls out of the shape by dinner. No. The pinning matters. The spray matters. The comb matters. Cheap tools can still work, but the wrong tool in the wrong place causes more trouble than no tool at all.
Bobby pins should match the hair color and be strong enough to resist bending when you slide them in. U-pins are excellent for buns and knots because they catch more hair without leaving a hard dent. Teasing combs help at the crown, but a tail comb is better for clean parts and sectioning. A 1¼-inch curling iron handles most bridal waves on long hair, while a 1-inch iron gives tighter bends that hold longer when you need structure.
On the product side, I’m picky about three things. Heat protectant comes first, always. Texturizing spray gives grip where smooth hair would slide. Strong-hold hairspray belongs at the end, not as a substitute for preparation. If you use spray as your base, the hair gets sticky in the wrong places and soft in the places that need support.
- Bobby pins: for small anchor points and invisible finishing.
- U-pins: best for buns, rolls, and twisted knots.
- Tail comb: clean parting and section control.
- Curling iron or wand: choose the barrel size that matches the style’s shape.
- Heat protectant spray: use before any iron, every time.
- Texturizing spray: especially useful for silky or freshly washed hair.
- Strong-hold hairspray: lock the shape after pinning, not before.
- Mini clip set: keeps curled sections out of the way while they cool.
Smart Prep for Bridal Hair: Wash Day, Blowout, and Product Choices
Hair prep is where most wedding styles are either rescued or ruined. The style itself matters, sure, but the prep decides whether pins grip, curls set, and roots keep the shape you wanted. Clean hair sounds romantic. In practice, freshly washed hair can be too slippery, too soft, and too determined to slide out of every clip you own.
For many long-haired brides, the sweet spot is hair washed the day before and styled with a little natural bend left in it. Very fine hair sometimes does better on the same day if it has been prepped with mousse and dried well, while coarse or curly hair often behaves better when it has one day of natural oil to soften the cuticle. That’s not a rule carved in stone. It’s a starting point.
What to put where
Apply heat protectant from mid-lengths to ends, and use a lighter product at the roots if your scalp gets oily fast. A volumizing mousse at the crown can help a half-up or bun hold its shape. Smooth serum belongs only on the ends when they look dry; too much near the root kills volume and makes the style slide. If your hair is the kind that forgets a curl by lunch, work a little setting lotion or light mousse into damp hair before the blowout.
A good blow-dry matters more than people want to admit. Blow-dry the roots in the direction you want them to sit, not randomly. If the front needs lift, angle the nozzle upward and clip the crown while it cools. If you are going sleek, use a paddle brush and direct the airflow down the hair shaft. Rough drying saves time. It also makes the finished style fight back.
How to Match the Style to Your Dress, Veil, and Jewelry
The hairstyle should not compete with the dress. That sounds obvious until you see a giant braid next to a dress full of beading and a veil with lace trim and earrings that could hold up a curtain. Something has to give.
Presentation: If the dress has a strong neckline, pick a style that clears the collarbone or the upper back. High buns, low chignons, and sleek ponytails give the fabric room. If the dress is soft and draped, waves and half-up styles can echo that movement without stealing the whole show.
Accessories: Veils behave best when they have a clear landing spot. A low veil can sit under a bun, knot, or twist. A cathedral veil often looks cleaner with a style that has a compact base. Hair vines and pearl pins belong where the eye already wants to rest, usually at the twist point, braid base, or side sweep.
Scale: Long hair can carry big volume, but not every bride wants big volume. If your dress is already dramatic, scale the hair down a touch and keep the shape clean. If the gown is simple, the hair can do more of the visual work.
Comfort: Earrings that tug, sections that scratch the neck, and pins that dig into the scalp will show up in your face by the tenth photo. If something feels wrong during the trial, it will feel worse on the day.
Extra Tricks That Make the Style Hold Better
The little things matter. They are the difference between a style that holds shape and one that gradually forgets what it was trying to do.
Root Lift: Clip the crown after blow-drying for 10 to 15 minutes, then remove the clips only when the area is cool. That sets the lift without making the hair stiff.
Humidity Plan: If the weather is damp or the venue runs warm, add a light anti-frizz cream to the ends and a stronger finishing spray at the final pinning stage. Do not saturate the whole head. You want control, not a shell.
Accessory Test: Put the veil, comb, flowers, or headband in during the trial, not just at the ceremony. Some clips need a flatter anchor; others push the style apart if they are too bulky.
Touch-Up Kit: Pack a few bobby pins, a travel hairspray, a tail comb, and one or two small elastics. Put them in a zipper pouch and hand them to someone who knows where you are, because you will not want to hunt for them while someone is asking for a toast.
After-Ceremony Reset: If you want to remove the veil and loosen the look for the reception, ask your stylist where to hide the release points. A style can be built to transform in two minutes instead of being ripped apart and rebuilt under pressure.
Common Mistakes That Flatten Bridal Hair
One mistake shows up over and over: too much softness, not enough structure. A style can be lovely in a mirror and useless on a moving body. If the braid is loose but unsupported, or the curls are pretty but not pinned while cooling, the hair loses shape by the time you start taking photos. The fix is simple. Add a hidden anchor, then set the style properly.
Another problem is using fresh, slippery hair with no grip. It feels clean and pretty at first. Then the bobby pins slide out like they’ve been greased. If your hair is naturally silky, work in texture spray or a little mousse before styling. If your stylist likes to start on squeaky-clean hair, ask them to rough it up a bit first. A tiny amount of grit helps.
Too much product at the root is another classic fail. Heavy serum or too much smoothing cream flattens the crown and turns volume into a wet-looking patch. Keep shine products on the ends and the surface only. The roots need air.
And then there’s ignoring head weight. Thick, long hair can pull hard on a high bun or ponytail if the base is not secured with crossed pins or more than one elastic. If the style hurts during the trial, it will hurt longer on the wedding day. Pain is not a glamorous tradeoff.
- Flat crown = not enough lift or poor blow-dry prep.
- Sliding pins = hair too clean or too smooth.
- Sagging curl pattern = curls were brushed out before they cooled.
- Headache by noon = style is too tight or too heavy at the anchor point.
Variations and Adaptations to Try
Natural-Curl Bridal Finish: If your long hair already has curl or wave, skip the full iron pass and work with the texture you have. A curl cream, diffused dry, can look better than forcing the hair into a polished shape it does not want. Braids and half-up twists are especially friendly here because they let the natural pattern stay visible.
Extension-Boosted Volume: Clip-in extensions can make a half-up crown, a bubble ponytail, or a low chignon look fuller without making the style seem fake. Match the texture before installation so the pieces blend into the ends instead of sitting like a separate layer. If you use extensions, plan the trial with them in place. Do not improvise that part on the wedding day.
Soft-Minimalist Version: If you hate ornament, strip the look back to clean shapes: a sleek ponytail, a polished low knot, or a center-parted wave with no visible accessory. The beauty comes from the line of the hair, not from extra sparkle.
Flower-Forward Garden Style: Fresh flowers can replace combs or pins in softer styles like the halo braid, waterfall braid, or half-up twist. Keep the blooms small and wired securely so the weight does not drag the section down.
Veil-First Adaptation: If the veil is the star, choose a style with a compact anchor point underneath. Low buns, low knots, and tucked twists give the veil a clean foundation and make removal easier later.
Prepping, Preserving, and Refreshing the Style Through the Day
Wedding hair is not a one-and-done thing. It has a life cycle. There’s the prep, the hold, the first wave of photos, the ceremony, the dinner, the dancing, and then whatever happens after the third hug and the first hour under warm lights.
For most brides with long hair, styling happens best about 2 to 4 hours before the ceremony. That leaves enough time for curls to cool, pins to settle, and a few tiny corrections before the dress goes on. If the style is a high bun or sleek ponytail, the timing can be a little tighter. If it’s loose waves, give yourself more breathing room so you are not brushing them out while still damp from product.
If you need to refresh the look between ceremony and reception, focus on the front and the part line first. That’s where wear shows fastest. A quick mist of hairspray, one or two hidden pins, and a finger-smooth of the face-framing pieces can bring the style back to life without rebuilding it. For the next day, a silk pillowcase or satin scarf keeps the hair from snagging if you’re sleeping on the style before taking it down.
Bridal Hair FAQ
Should bridal hairstyles for long hair be built on freshly washed hair?
Usually not, at least not for styles that need grip. Hair washed the day before often holds pins and curls better because there’s a little natural texture left behind. Very fine hair can be an exception if it’s prepped with mousse and styled carefully.
What style holds best if my hair is very thick?
Low buns, braided buns, and twisted knots tend to handle thick long hair better than styles that rely on loose pinning. They spread the weight across a wider base, which keeps the style from collapsing in the middle.
Can I wear a veil with loose waves?
Yes, but the veil needs a proper anchor. The comb should sit into a secure section near the crown or just below it, and the top of the wave pattern should be pinned enough that the veil does not tug the curl apart when removed.
Do I need extensions for these looks?
No, but they can help if you want more fullness in braids, buns, or ponytails. Long hair already gives you a lot to work with. Extensions are about density, not necessity.
Which style is easiest to refresh after the ceremony?
A curled ponytail, half-up twist, or low knot is usually the easiest to touch up fast. You can smooth the top, tighten one pin, and keep moving. Full down styles take more time to revive.
What if my hair is fine and falls flat?
Use texture spray at the roots and mid-lengths before styling, and avoid heavy conditioner near the scalp on wash day. Half-up shapes and bouffant lifts tend to give fine hair the most visible structure.
Can curly hair be styled without straightening first?
Absolutely. In fact, curly hair often looks better when the style respects the curl pattern instead of flattening it. Braids, low knots, and pinned half-ups work especially well because they let the texture stay part of the shape.
How far ahead should I test the style?
At least once, and ideally with the dress neckline, veil, and accessories in place. A bridal trial is not just about whether the hair looks nice. It is about whether the whole setup sits where it should and stays there.
A Finish That Stays With You
Long hair can do a lot on a wedding day, but it needs a plan. The best bridal hairstyles for long hair are the ones that balance movement and control: enough softness to feel like a bride, enough structure to survive the day. That is why braids, low buns, ponytails, and pinned waves keep showing up again and again. They are not filler choices. They’re built for real life.
Pick the silhouette first, then the details. If the dress is heavy, keep the hair cleaner. If the neckline is quiet, let the hair carry more texture. If the veil matters most, give it a firm anchor and stop treating the hairstyle like an afterthought. The prettiest bridal hair is the kind that still looks deliberate when the music gets loud and the night runs long.
