



Shag haircuts for medium length thin hair work best when they do one thing well: they make the hair move without making the ends look eaten away. That sounds obvious until you’ve sat in a chair, watched a stylist get enthusiastic with the texturizing scissors, and realized the bottom half now looks like a broom that’s been left outside in the rain. The right shag doesn’t do that. It builds lift where the hair needs help most, then leaves enough weight at the hem so the whole cut still reads as hair, not wisps.
Thin hair is tricky in a very specific way. It usually doesn’t need more stuff in every direction. It needs shape. A little bend around the face. Some air around the crown. A perimeter that doesn’t collapse by lunch. Medium length is a sweet spot because it gives you room for layers without losing all your density to gravity, and that’s why shag variations can work so well here when they’re cut with restraint instead of scissors-happy chaos.
The cuts that hold up tend to borrow from old-school feathering, curtain bangs, and soft wolf-cut energy, but they stop short of shredding the ends to bits. That restraint matters. The best versions still tuck behind the ear, still survive a messy bun, and still look deliberate on day two. Those are the shags worth saving.
Why This Collection Feels Different
Built for low density, not against it: These styles keep enough weight at the bottom so thin hair doesn’t turn transparent at the ends after a single blow-dry.
Movement where it matters: The best layers sit around the cheekbones, jawline, and collarbone, where they create lift without exposing too much scalp at the crown.
Bang options with a job to do: Curtain bangs, bottlenecks, and side-swept fringe all pull attention forward and upward, which helps medium-length thin hair look fuller around the face.
Works on both heat-styled and air-dried hair: A cut that only looks good after a 20-minute round-brush session is a pain. These versions can still behave when you rough-dry, scrunch, or let the waves do their own thing.
Less “piecey mess,” more shape: The useful shag on fine strands keeps internal layers soft and the perimeter honest. Too much slicing, and the hair starts looking hollow. No one needs that.
1. Collarbone Curtain Shag
This is the shag I’d hand to someone who wants movement without drama. The length sits around the collarbone, the curtain bangs split softly in the middle, and the layers fall in a way that makes fine strands look like they have more life than they do. It’s one of the safest shag haircuts for medium length thin hair because the perimeter stays long enough to keep the ends from going see-through.
The trick is where the shortest pieces begin. Ask for the first face-framing layer to hit around the cheekbone or lip line, not up near the temples. That keeps the front soft instead of sparse. The rest of the cut should taper gently, not disappear in a cloud of razor-thin ends.
A light mousse at the roots and a quick bend with a 1.25-inch curling iron is usually enough. You do not need perfect curls here. A slight turn at the ends and a center part that opens the bangs enough to show the forehead is the whole point.
Best for: people who want a low-risk shag that still reads modern. It’s especially good if your hair tends to lie flat at the sides but still has enough length to hold a bend.
2. Airy Razor Shag with Clean Ends
A razor can be your friend or your enemy. On thin hair, there’s a narrow line between “soft and airy” and “why do my ends look translucent?” This version lives on the right side of that line when the cut keeps the ends clean and uses the razor only to feather the interior.
What makes it work
The blade should never carve every section into the same shredded finish. The perimeter needs some bluntness, even if it’s softened a little at the corners. That blunt edge gives medium-length hair a thicker-looking outline, which is exactly what fine strands need.
A good razor shag also has better swing than a scissor-heavy cut. The hair moves in a loose, swung-out way around the neck and jaw, not in a stiff curtain. That matters on straight or slightly wavy hair, where a heavy cut can fall flat fast.
If your hair breaks easily, ask for scissors instead of a razor and let the stylist use point-cutting on the ends. Same shape. Less risk.
3. Feathered Shoulder Shag with 70s Movement
If you’ve ever liked the look of a blowout that flips away from the face in soft layers, this is your cut. The shoulder-brushing length keeps enough bulk to look full, and the feathering gives it that slightly lifted, brushed-out finish that thin hair rarely gets on its own.
The 70s part of this look is not costume-y if it’s done well. It’s just a series of soft layers that move back from the face instead of hanging in one flat sheet. That’s the whole trick. You want the hair to fan out a little near the cheekbones and then sit with a little bend around the shoulders.
A round brush and a dryer with a nozzle make this easier, but the cut still works if you air-dry halfway and then just smooth the front pieces. That’s the kind of practical detail that makes a shag worth wearing instead of just admiring in the mirror.
- Ask for feathering around the front, not over-thinning through the ends.
- Keep the back length grazing the shoulders.
- Use a light hold spray, not a stiff hairspray.
- Turn the ends away from the face for a softer outline.
4. Soft Wolf Cut with Kept-Weight Ends
Unlike the full wolf cut, this version doesn’t ask thin hair to do too much. The layers are still choppy and lived-in, but they’re softened and stretched out so the cut doesn’t collapse into a ragged shape after a day or two. Medium length helps here because the hair has enough room to show texture without going stringy.
This is the one for people who like a little edge but don’t want the haircut to scream about it. The top stays a bit shorter, the middle gets movement, and the ends remain thick enough to support the shape. You can wear it with a center part, a loose side part, or tucked behind one ear, and it still looks intentional.
The caution is simple: don’t let the shortest layers get too high. On thin hair, that can leave the crown puffy while the ends go hollow. Keep the cut soft. Think murmur, not shout.
5. Side-Swept Fringe Shag for a Lighter Forehead Line

Some people know they want a shag but hate the idea of a full curtain bang. Fair. A side-swept fringe gives you that same soft frame without sitting directly in the middle of your forehead every morning. It can also be a smart move if your hairline is a little sparse at the temples, since the diagonal line helps disguise that transition.
The rest of the cut should stay medium-long and lightly layered, with most of the action around the cheekbone and jaw. That keeps the fringe from looking isolated. If the haircut is only bangs and flat lengths, it feels disconnected. The whole point is for the front to flow into the body of the cut.
This style works especially well if you wear glasses or tuck one side behind your ear. The fringe doesn’t fight with the frames, and the angled shape keeps the face open. Easy. Useful. No fuss.
6. U-Shaped Shag with Face-Framing Pieces
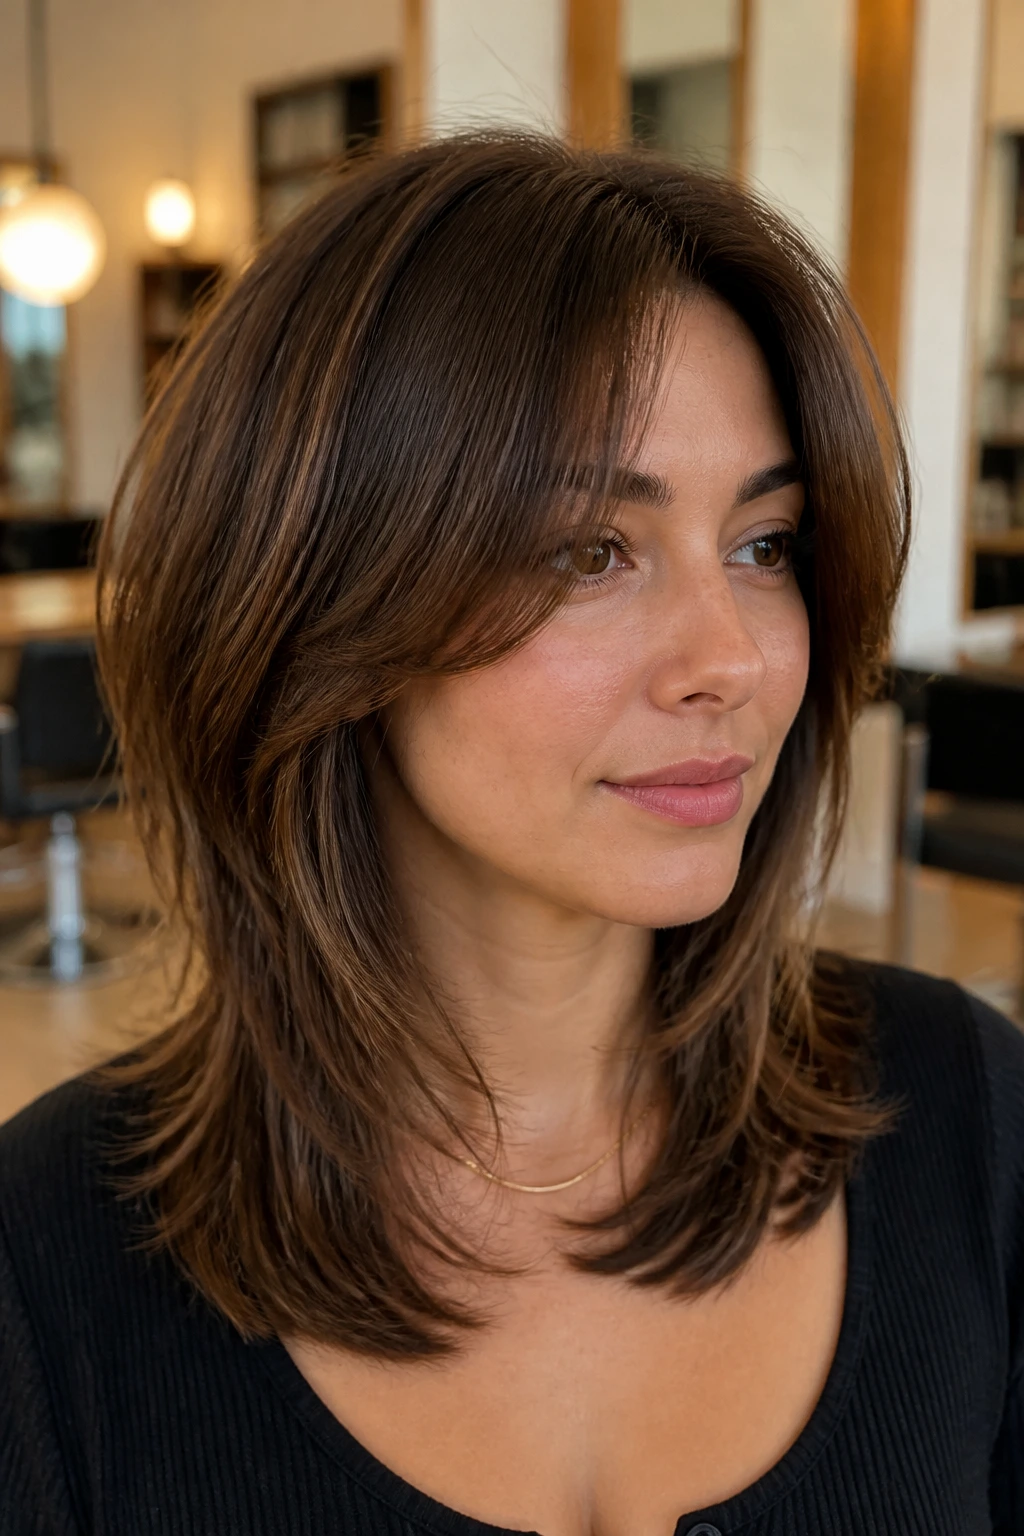
A blunt bottom edge can make thin hair look like it was cut on purpose, but a U-shape gives the ends a little more softness without sacrificing density. The center hangs slightly longer, the sides curve up toward the front, and the face-framing layers drop in like soft rails along the jaw and collarbone. It’s a small shift, but on fine hair it matters.
This cut is a good match if you want your hair to still look like hair when you pull it forward over both shoulders. The shape creates the illusion of thickness because the center stays full and the side pieces build a frame around it. No weird gaps. No ragged outline.
Ask your stylist to keep the layering subtle below the chin. If they start shaving away weight too early, the U-shape loses its point. The better version has a smooth, almost lazy curve that makes the ends look denser than they are.
7. Choppy Lob Shag with Micro-Layers
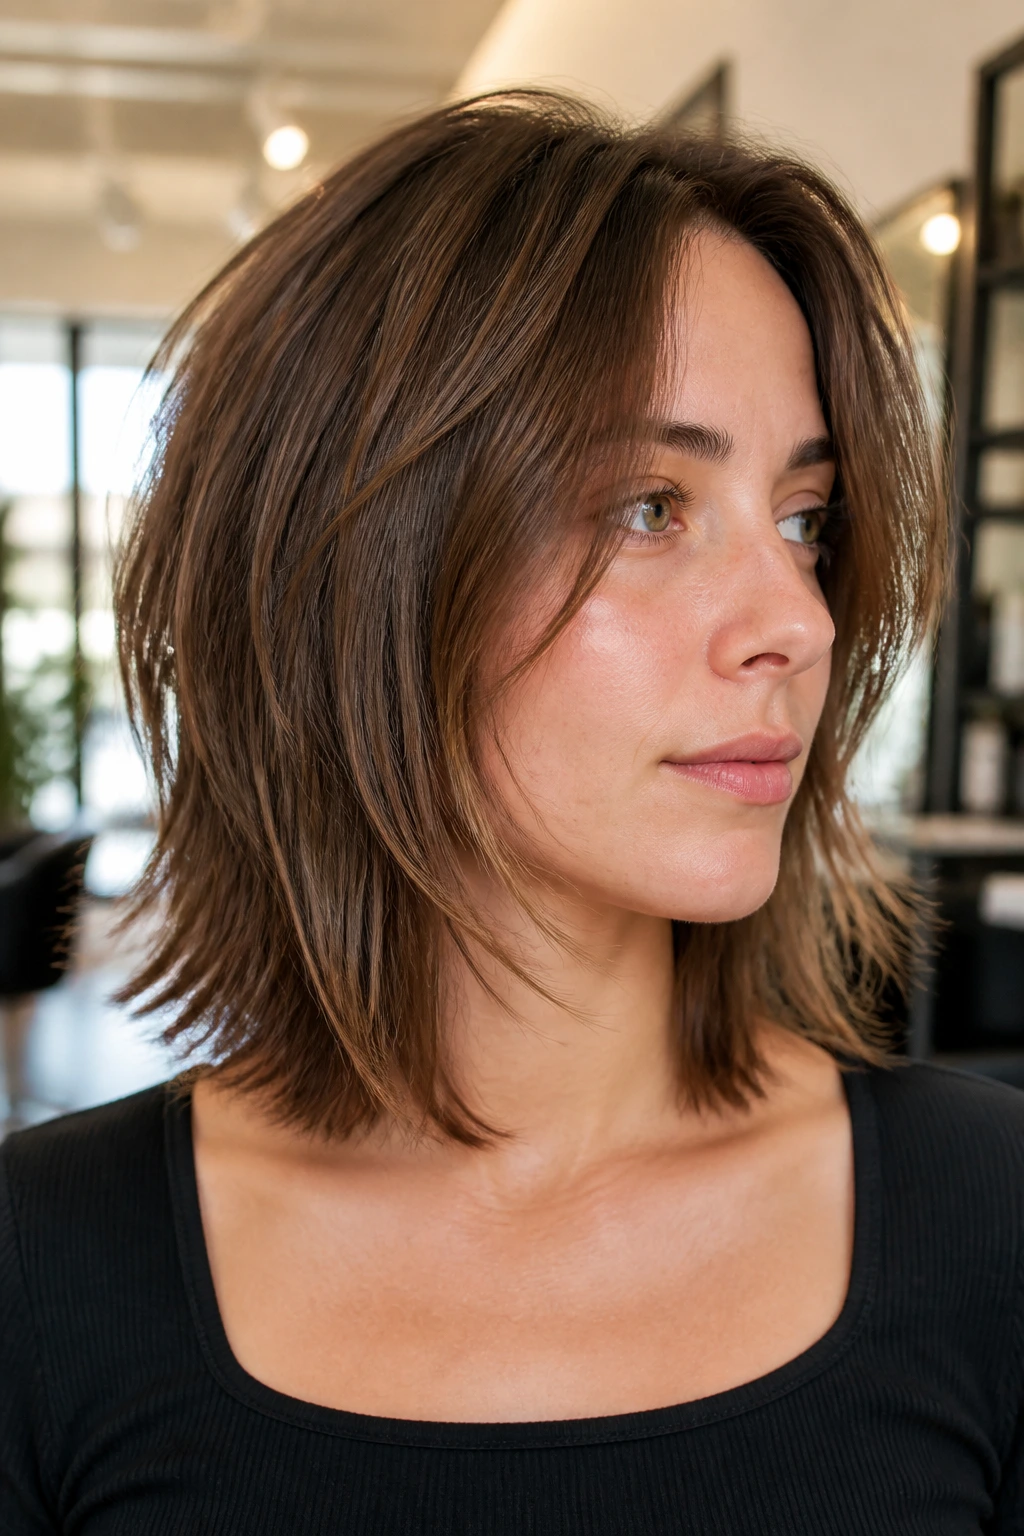
Here’s the deal: a lob and a shag do not have to fight each other. This cut keeps the length at the upper shoulder to collarbone area, then adds tiny internal layers that give movement without blowing up the shape. On thin hair, that matters because you get texture without paying for it with a see-through outline.
A choppy lob shag is one of the easiest cuts to wear straight, slightly waved, or tucked under with a round brush. It’s also one of the least fragile-looking options here, which makes it a smart pick if your hair is fine but not especially dense. The perimeter still looks deliberate. The layers do the work quietly.
If you like clean lines and want a little edge, this is your version. It doesn’t lean full-on 70s. It doesn’t lean full-on mullet. It sits in the useful middle, where the cut can grow out without turning into a mess.
8. Bottleneck Bang Shag That Opens at the Cheekbones

The bottleneck fringe is a sneaky little thing. It starts narrow near the center, widens around the brows and cheekbones, then softens into the rest of the cut. On medium-length thin hair, that shape can make the front look fuller without the heavy weight of a blunt bang.
Why the fringe matters
Thin hair often looks best when the front has a little structure, because the eye goes there first. Bottleneck bangs do that without covering too much of the face. They also blend into shag layers more cleanly than a straight-across fringe, which can be unforgiving on fine strands.
How to wear it
Let the fringe sit a touch longer than you think you want. Around eyebrow to lash level is usually the safe zone, because short fringes can expose thin density too much. Blow-dry the center straight down, then bend the sides away from the face with a small round brush. That little opening around the cheekbones makes the whole haircut look more dimensional.
9. Invisible-Layer Shag for People Who Hate Choppy Ends

Not everyone wants to see the layers. Some people just want the hair to stop lying flat. This version keeps the shag structure hidden inside the haircut, so the perimeter looks clean while the interior carries the movement. It’s a smart move if your strands are fine and you’ve had one too many over-texturized cuts.
The effect is subtle, which is the point. The ends still look thick enough to have shape, but the hair gains enough lift at the mid-lengths to avoid that flat, helmet-like fall some medium cuts get. From the outside, it reads as polished. Up close, it’s doing a little more work than it lets on.
Ask for long internal layers and a lightly broken-up face frame, not a shredded finish. If you want the haircut to grow out gracefully, this is one of the easiest versions to live with.
10. C-Curl Shag with Rounded Ends
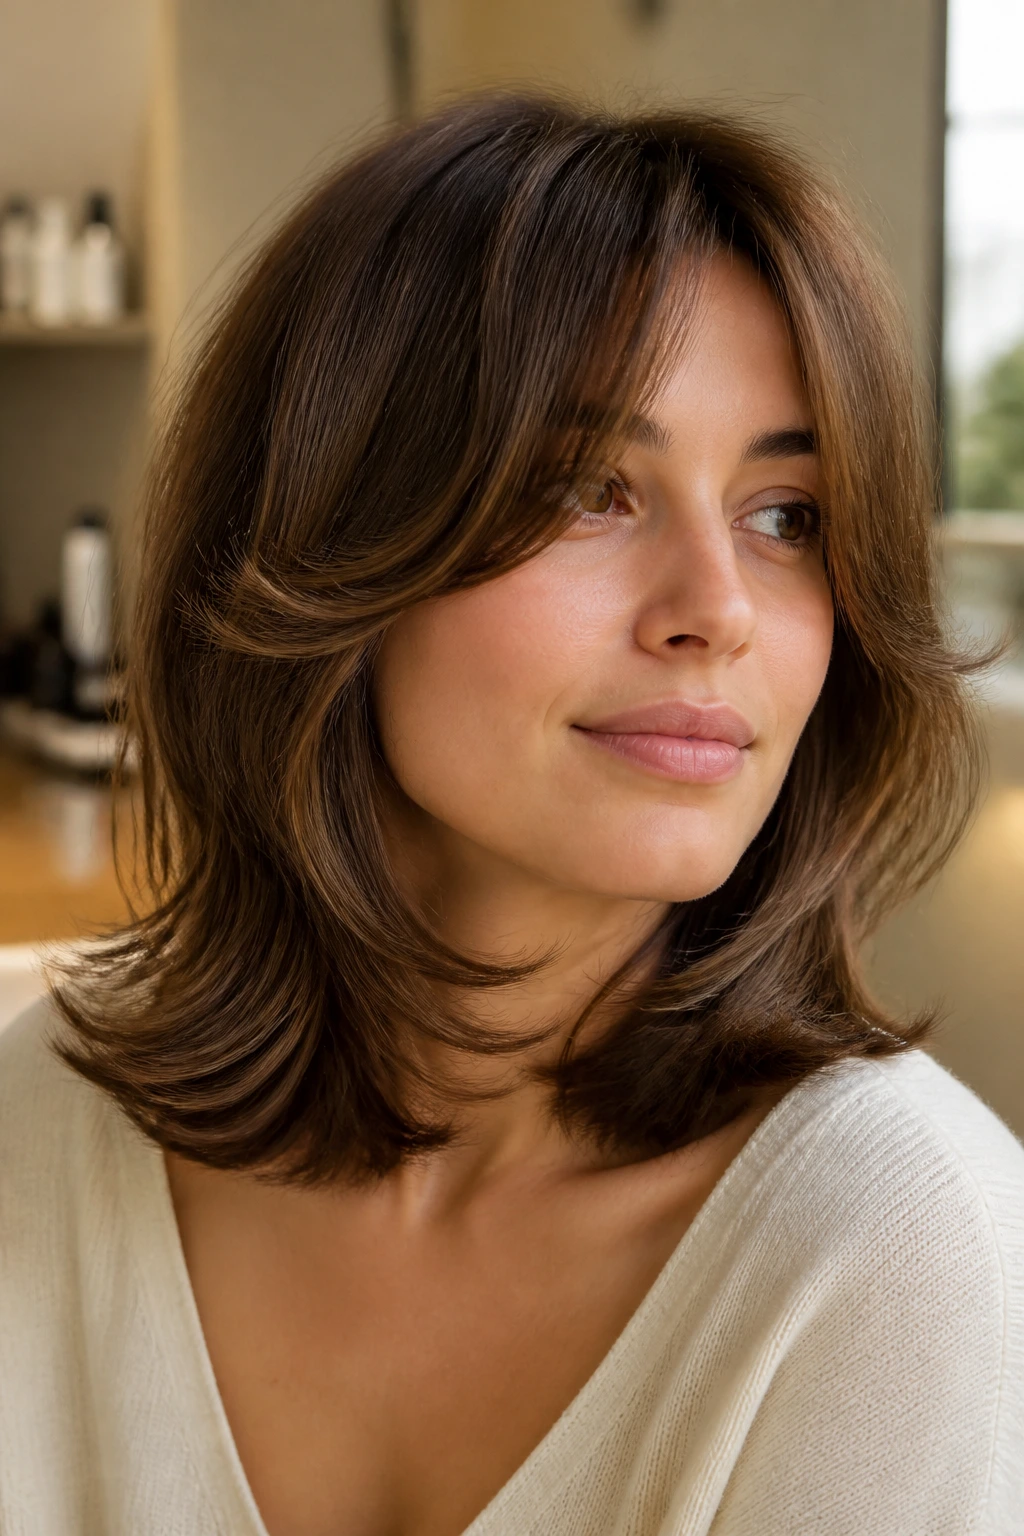
If you blow-dry your hair, or even if you just like to bend the front pieces under with a brush, this cut earns its keep fast. The C-curl shape curves the ends inward or outward in a soft arc, which makes medium-length thin hair look more plush than a stick-straight outline ever will.
The reason it works is simple. Curves create the illusion of body. A straight line across fine hair can look sparse, especially when the ends are a little chipped or over-layered. A rounded edge is kinder. It gives the eye something fuller to read.
This cut is especially good for people who like a little salon finish without daily effort. A quick wrap around a brush, a few seconds of heat, and a cool shot are enough to set the bend. Done.
11. Air-Dry Shag for Natural Waves

Some shags only come alive with a dryer and a round brush. This one doesn’t. It’s shaped to let natural wave pattern do the heavy lifting, which is a relief if you don’t want to wrestle fine hair into submission every morning.
The layer placement should follow the wave, not fight it. Ask for softer steps around the face and a little length left in the back so the ends don’t fray out when the hair dries on its own. If the layers are too short, wave patterns separate and the cut starts looking busy instead of full.
How to make it behave
Work a small amount of mousse into damp roots, then use your hands to twist the front pieces away from the face. Don’t rake through the hair a dozen times. That only stretches the waves and makes thin hair look flatter. Let it dry with a little bend and a little mess. That’s the whole point.
12. Textured Blunt-Base Shag
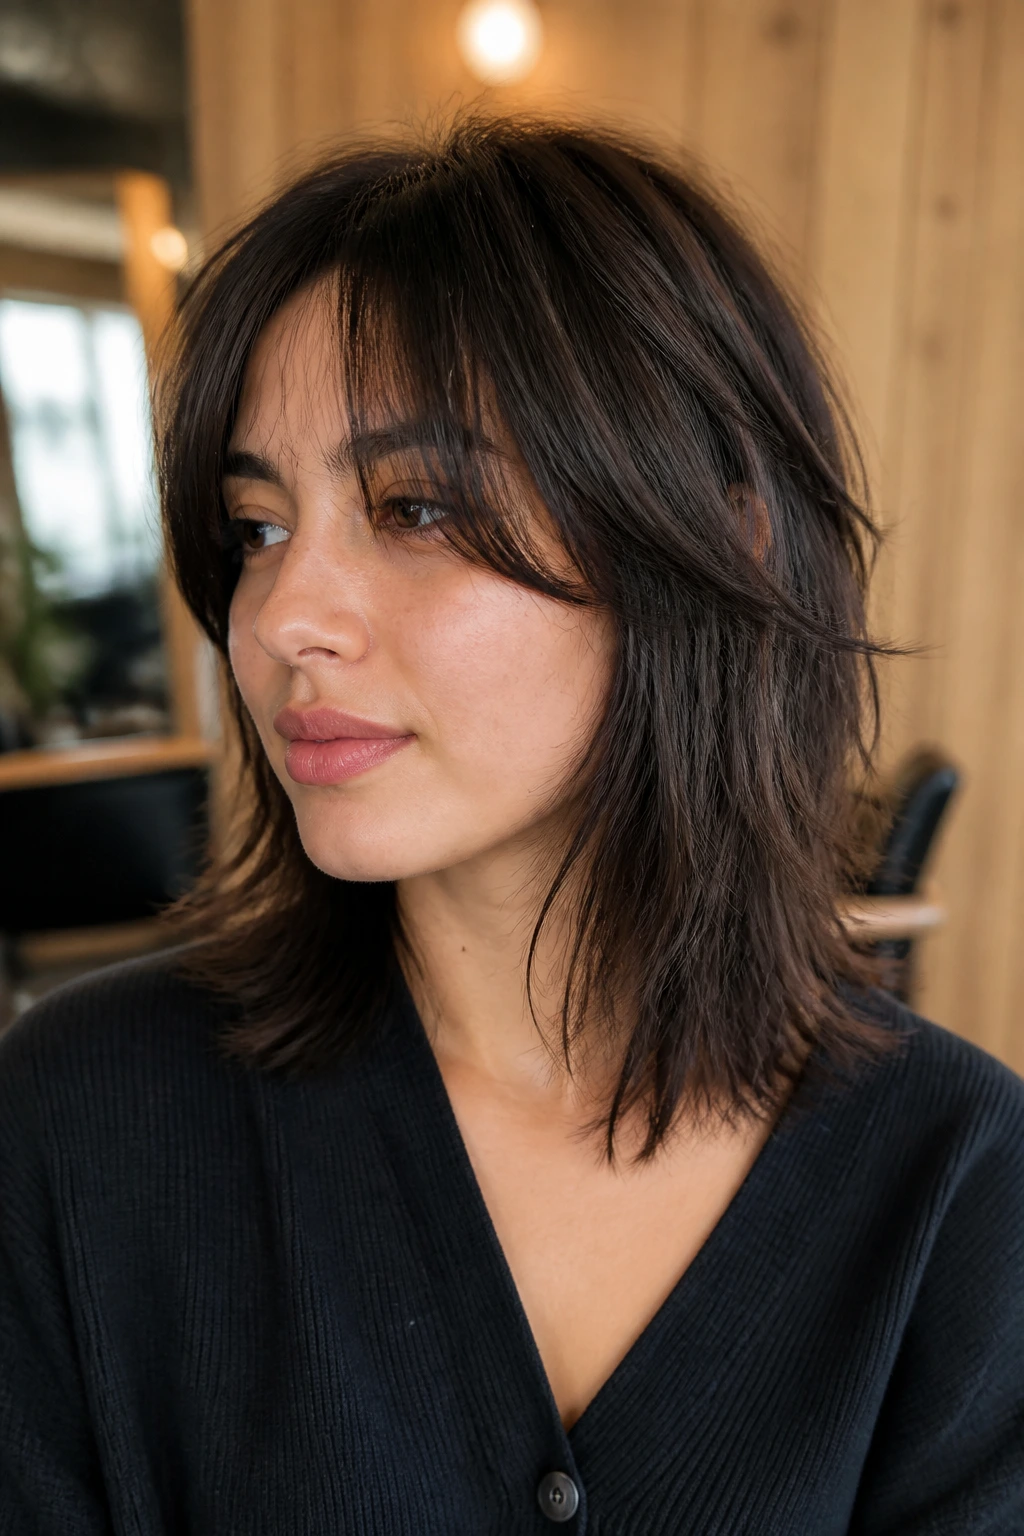
This is one of my favorites for fine hair because it keeps the outline solid. The base stays blunt, which means the ends still look thick, while the interior gets enough movement to stop the cut from feeling heavy or boxy. That combination is hard to beat on medium-length hair with lower density.
A lot of people hear “shag” and think they need visible choppiness all the way through. Not true. Sometimes the smartest move is leaving the bottom edge clean and using only a few interior layers to create bend. The result feels lighter without looking thin.
If your hair is naturally straight, this shape can be a little more flattering than a fully feathered shag because it doesn’t depend on texture to do the entire job. It holds its own on a plain blow-dry. That’s useful. Not every haircut should require a styling ceremony.
13. French-Girl Shag with Cheekbone Bangs
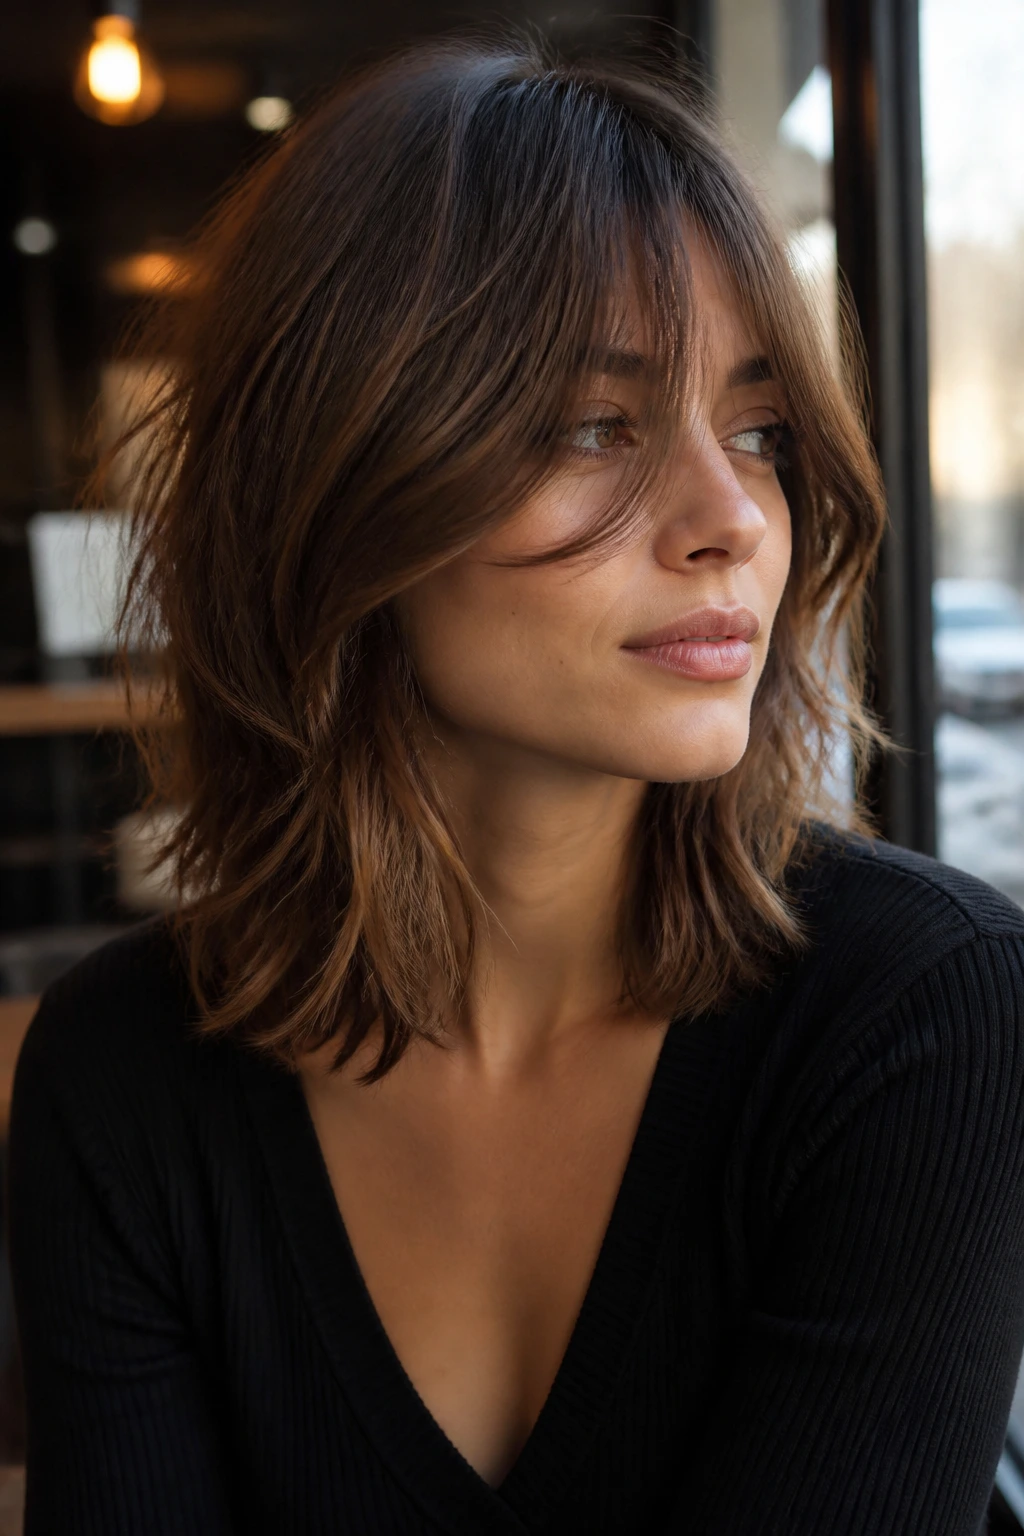
This version is softer than it sounds. The cheekbone bangs are long enough to sweep across the face, and the layers fall in a loose, unfussy way that gives the whole cut a lived-in feel. On thin hair, that softness keeps the look from tipping into stringy territory.
The charm here is in the rough edges that aren’t too rough. You want a little bend, not a lot of grit. A touch of volumizing spray at the roots and a brush through the fringe can make the haircut look like it’s been worn for years, which is half the appeal.
It’s also a nice choice if you dislike the feeling of a lot of hair sitting on your face. The bangs frame without pinning you in. If you’ve ever had fringe that felt like a curtain you were trapped under, this is the cleaner, lighter version.
14. Piecey Crown-Volume Shag

Need lift at the top without turning the rest of the hair into scraps? This is the one. The crown gets subtle internal layers that help it rise off the head, while the rest of the cut stays long enough to protect the ends from going flimsy.
The mistake people make with crown volume is cutting too high and too short. That can leave you with a pouf on top and nothing underneath. Not the goal. The better version uses small, controlled layering that creates lift at the roots but keeps the sides and bottom full enough to balance it.
Use root spray on damp hair, then blow-dry the crown in the opposite direction of your part. Once it cools, flip it back. That little trick does more for thin hair than piling on product ever will.
15. Long-Front Shag with Swept Sides
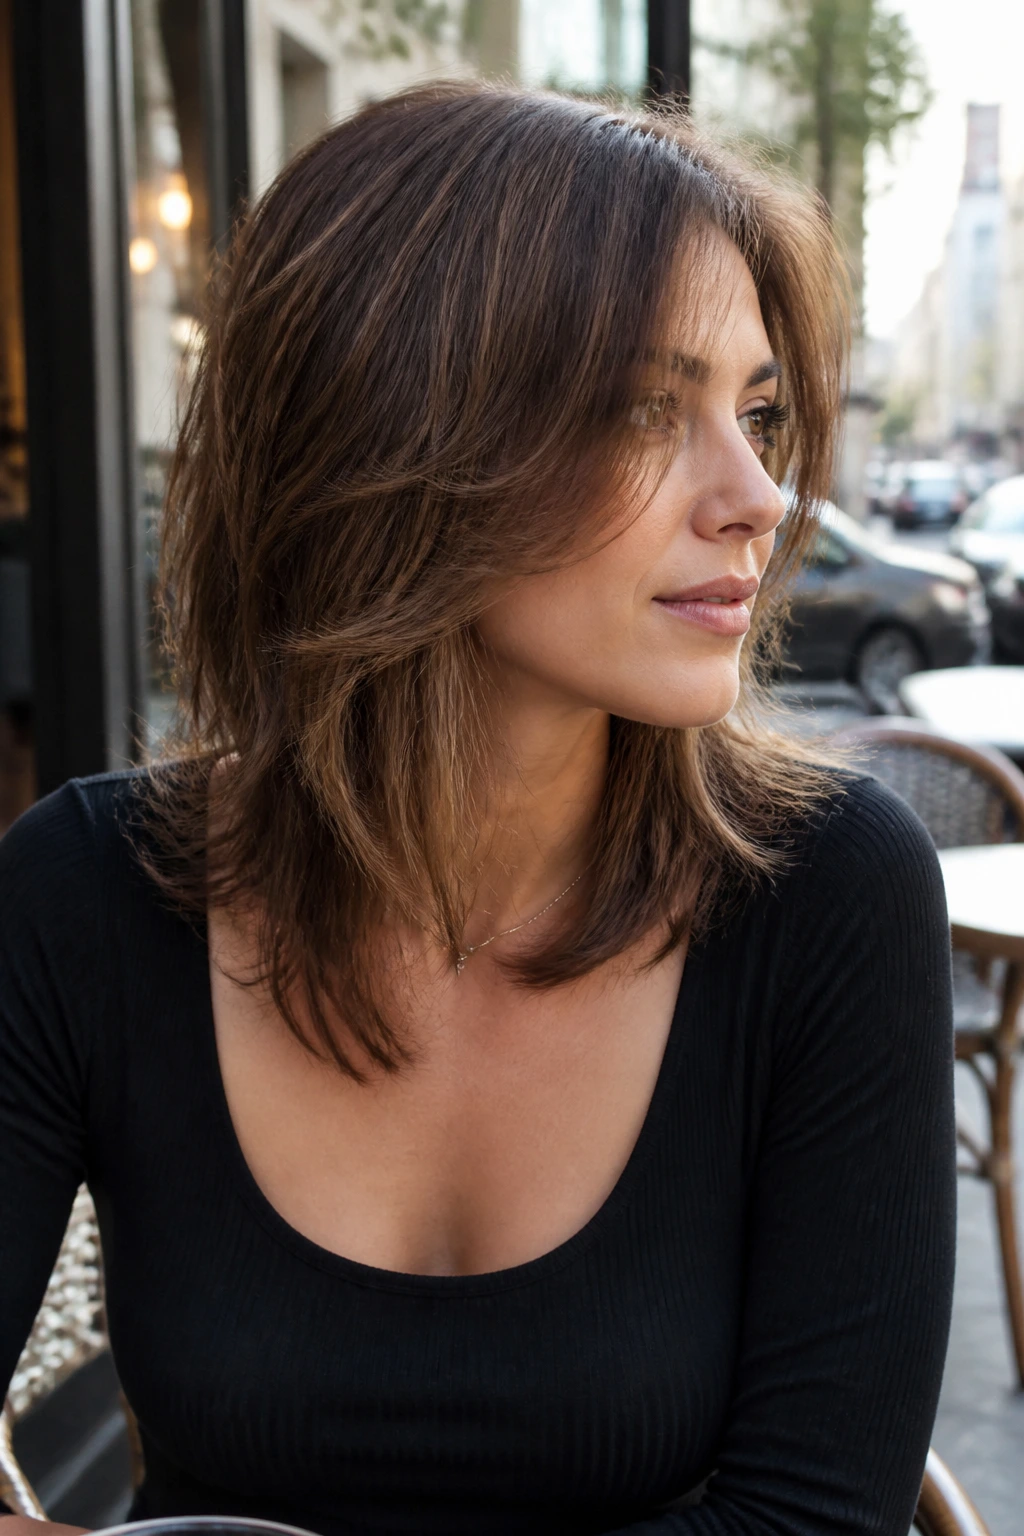
This cut leans into length at the front, which is useful if you want face-framing without committing to bangs. The front pieces sweep down past the cheekbones, sometimes grazing the collarbone, while the back stays slightly shorter or more layered to create movement. It’s a graceful shape on thin hair because it avoids the chopped, broken feeling some shags can get.
The longer front also makes the haircut easier to grow out. When the layers are too short, fine hair can get fuzzy as soon as it loses its initial shape. Longer front sections hold up better, especially if you like to tuck them behind the ears or clip them back on one side.
This is the cut for someone who wants a little softness around the face but still wants the option to disappear into a ponytail on a bad day. Practical matters.
16. Minimalist Shag with Micro Bangs
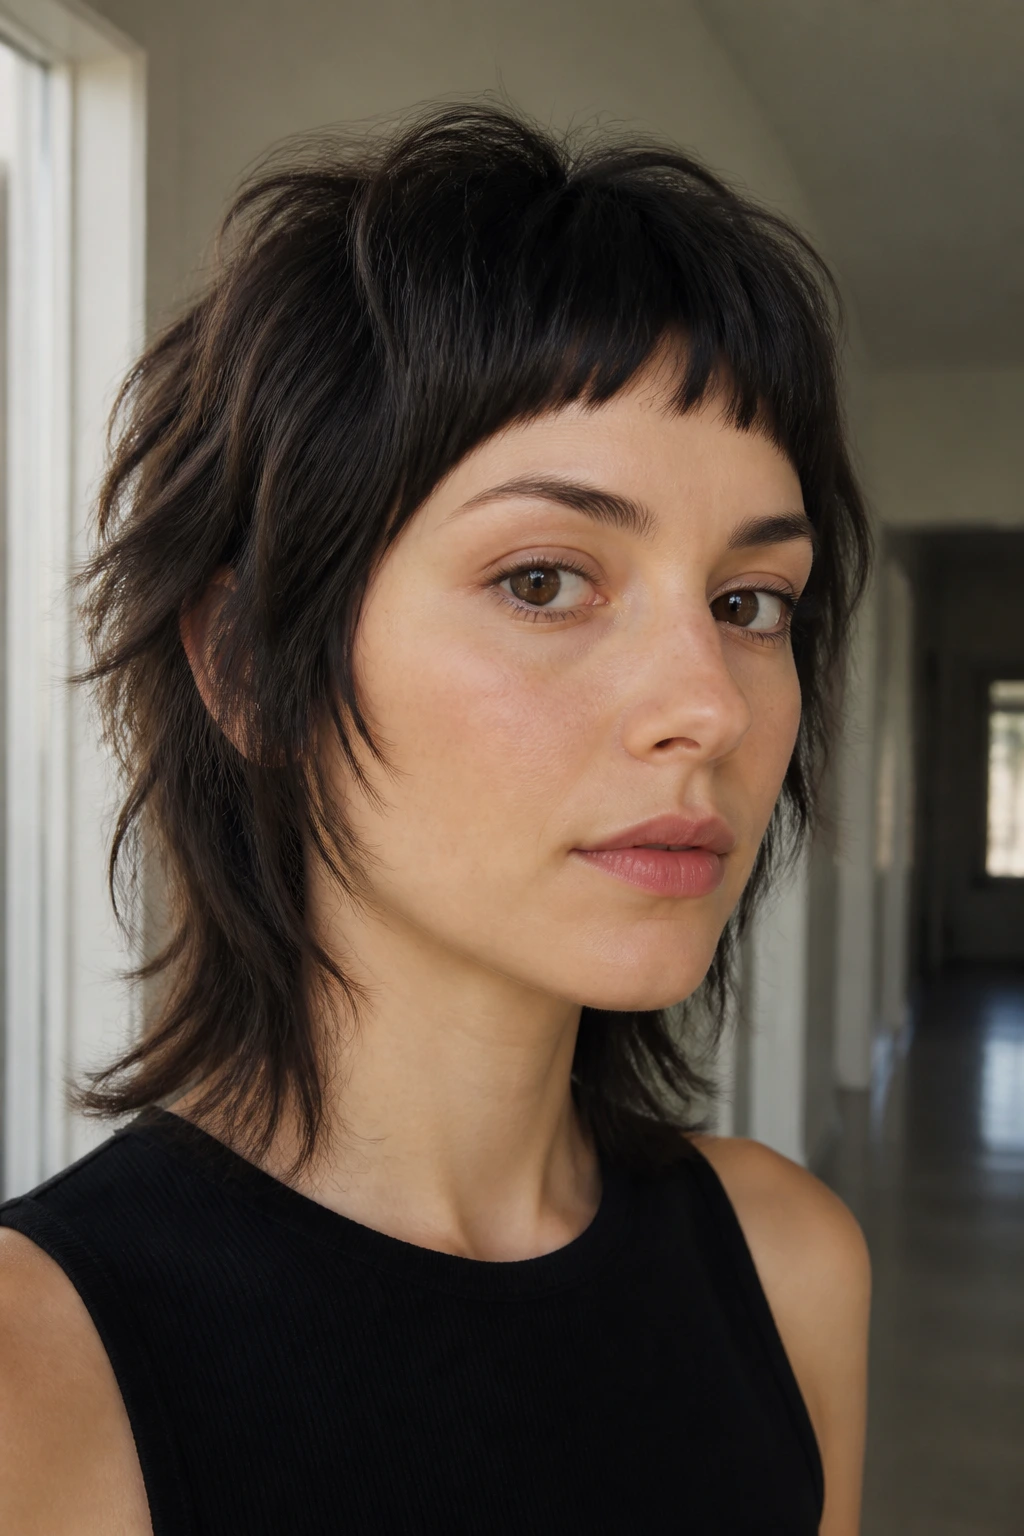
This one is for people who like a sharper look. The bangs are short, the rest of the cut stays restrained, and the layers are kept light so the shape doesn’t get too messy. On medium-length thin hair, it can look very fresh, but only if the front has enough density to support the fringe.
Be honest about your hairline here. If the front is sparse, a tiny bang can expose more than it hides. If the front is full enough, though, it creates a strong focal point and makes the rest of the hair look more deliberate by comparison.
I’d only choose this if you don’t mind trims every few weeks. Micro bangs grow fast in the eye, and on thin hair they can lose their crispness quickly. Cute when fresh. Less cute when they hit the middle of the forehead at the wrong angle.
17. Rounded Shag with Soft Ends

This is the shag that plays nicely with everyday life. The layers are there, but they’re rounded out so the silhouette stays smooth instead of ragged. The ends are softened, not shredded, which is exactly what medium-length thin hair often needs to look full from root to tip.
It works especially well if you wear your hair loose most days and want a cut that doesn’t demand a styling tool in your hand before coffee. The roundness gives you movement around the jaw and shoulders, and the soft ends keep the hair from looking chopped apart.
If I had to point to one version here that feels easiest to live with, it would be this one. It doesn’t chase a trend. It just keeps the shape flattering when the hair is clean, day-old, or tucked into a scarf.
Why Shag Layers Work on Medium-Length Thin Hair
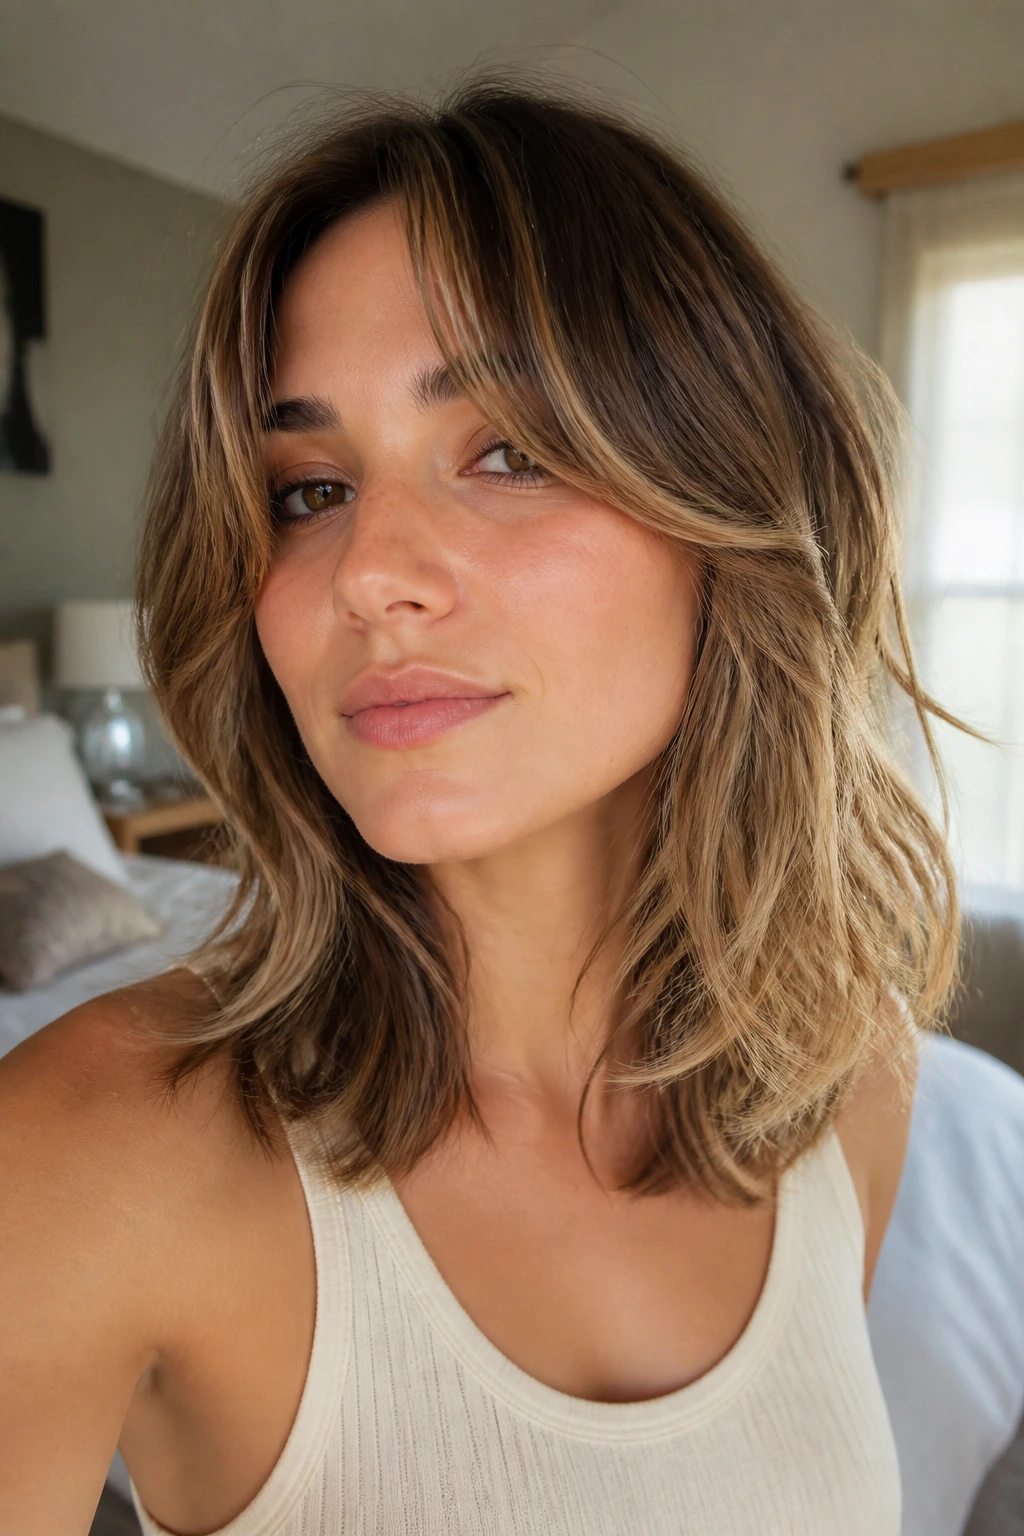
The reason shag layers help medium-length thin hair is not magic. It’s geometry. Thin hair usually loses the battle at the bottom first, where the weight of the length pulls everything straight and flat. A shag redistributes that weight. It puts some motion up top, some shape around the face, and enough length at the perimeter to keep the outline from going transparent.
That balance matters more than people think. If you remove too much weight, the hair may look bigger for one blow-dried afternoon and then collapse into stringy pieces by the next wash. If you leave everything blunt with no movement, the cut can look dense but lifeless. The shag sits between those two problems and handles them better than a lot of one-length cuts.
The smartest shags for thin hair are usually the ones with longer layers, not the ones with the most layers. That’s the part most salon chatter gets wrong. You do want lift, but you also want the cut to hold enough substance that the ends don’t look picked apart. When the layers start around the cheekbone or collarbone, the shape opens up without making the lower half look empty.
Face-framing is another reason this cut works. Thin hair can feel sparse when it hangs straight down from the part, but a few angled pieces near the cheekbones make the whole head look fuller because the eye has more to track. It’s a small visual cheat. A good one.
Essential Tools for Styling These Cuts
-
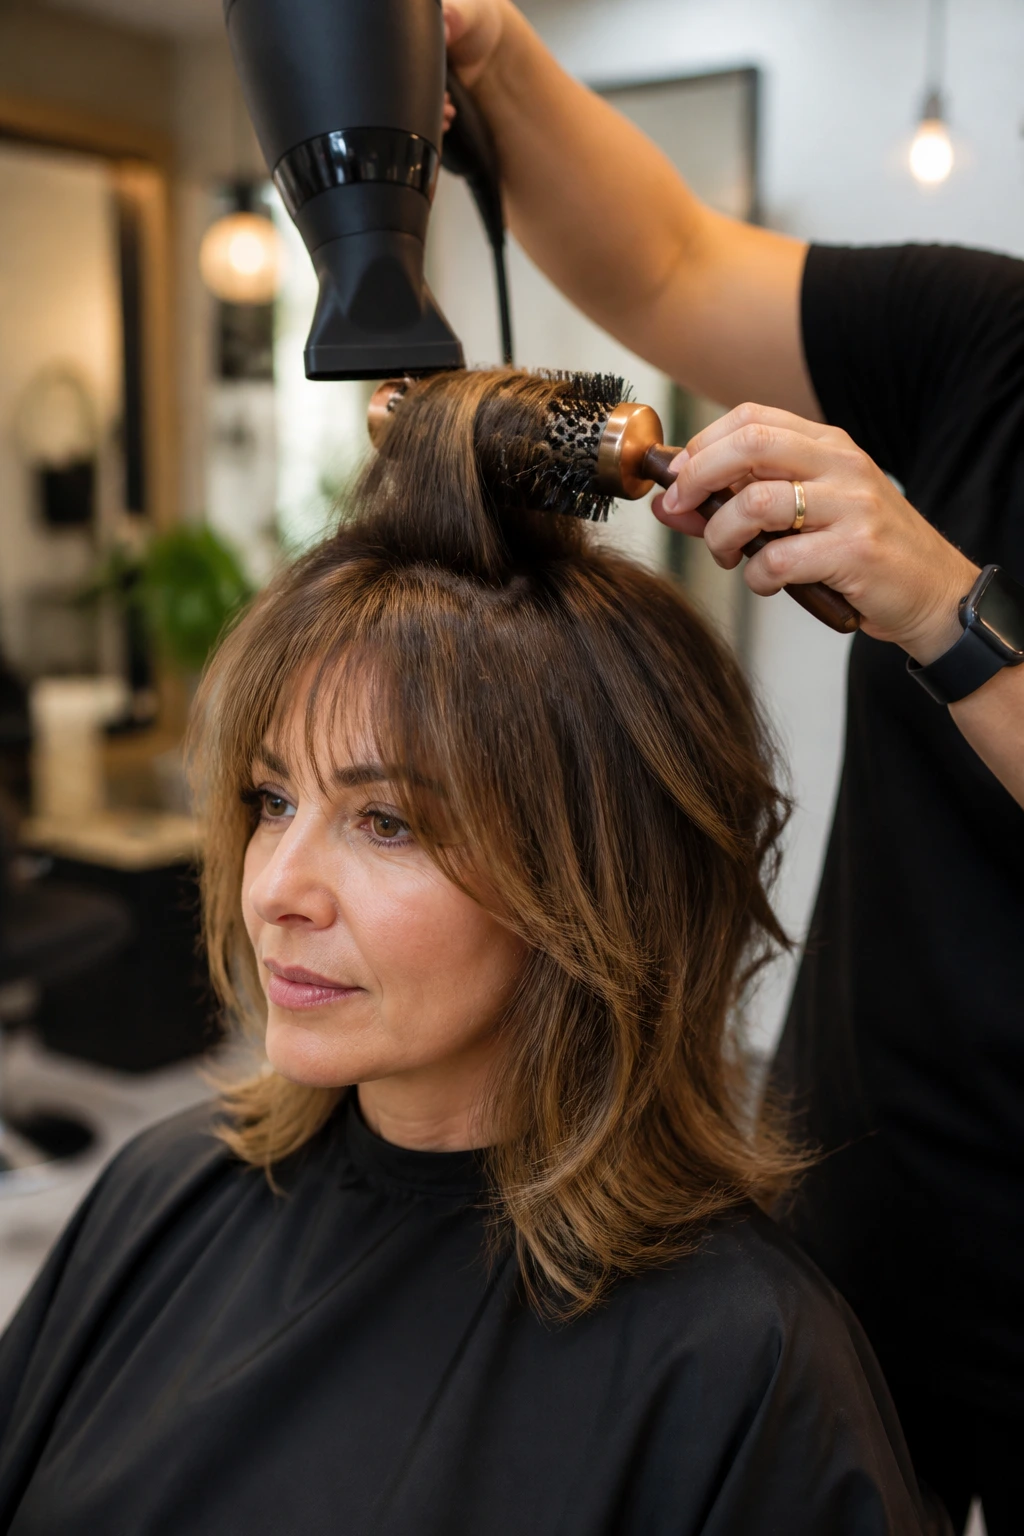
Blow dryer with a concentrator nozzle: Directs air where you need it, which matters when you’re trying to lift roots without blasting the whole cut flat.
-
1 to 1.25-inch round brush: Good for putting a bend into the front pieces and flipping the ends under or away from the face.
-
Lightweight mousse: Adds grip at the roots and mid-lengths without leaving thin hair sticky or stiff.
-
Root-lifting spray: Best used on damp hair at the crown and along the part line for extra height.
-
Texture spray: Helps the layers separate a little so the shag doesn’t sit like one smooth sheet.
-
Small flat iron or curling wand: Useful for shaping a few face-framing pieces when you don’t want a full blowout.
-
Wide-tooth comb and clips: Handy for sectioning. Thin hair tangles less than dense hair, but clean sections still make styling easier.
-
Dry shampoo: Works as a second-day texture booster, not just a grease fixer. On fine hair, that grit is often the point.
Smart Salon Notes and Product Picks
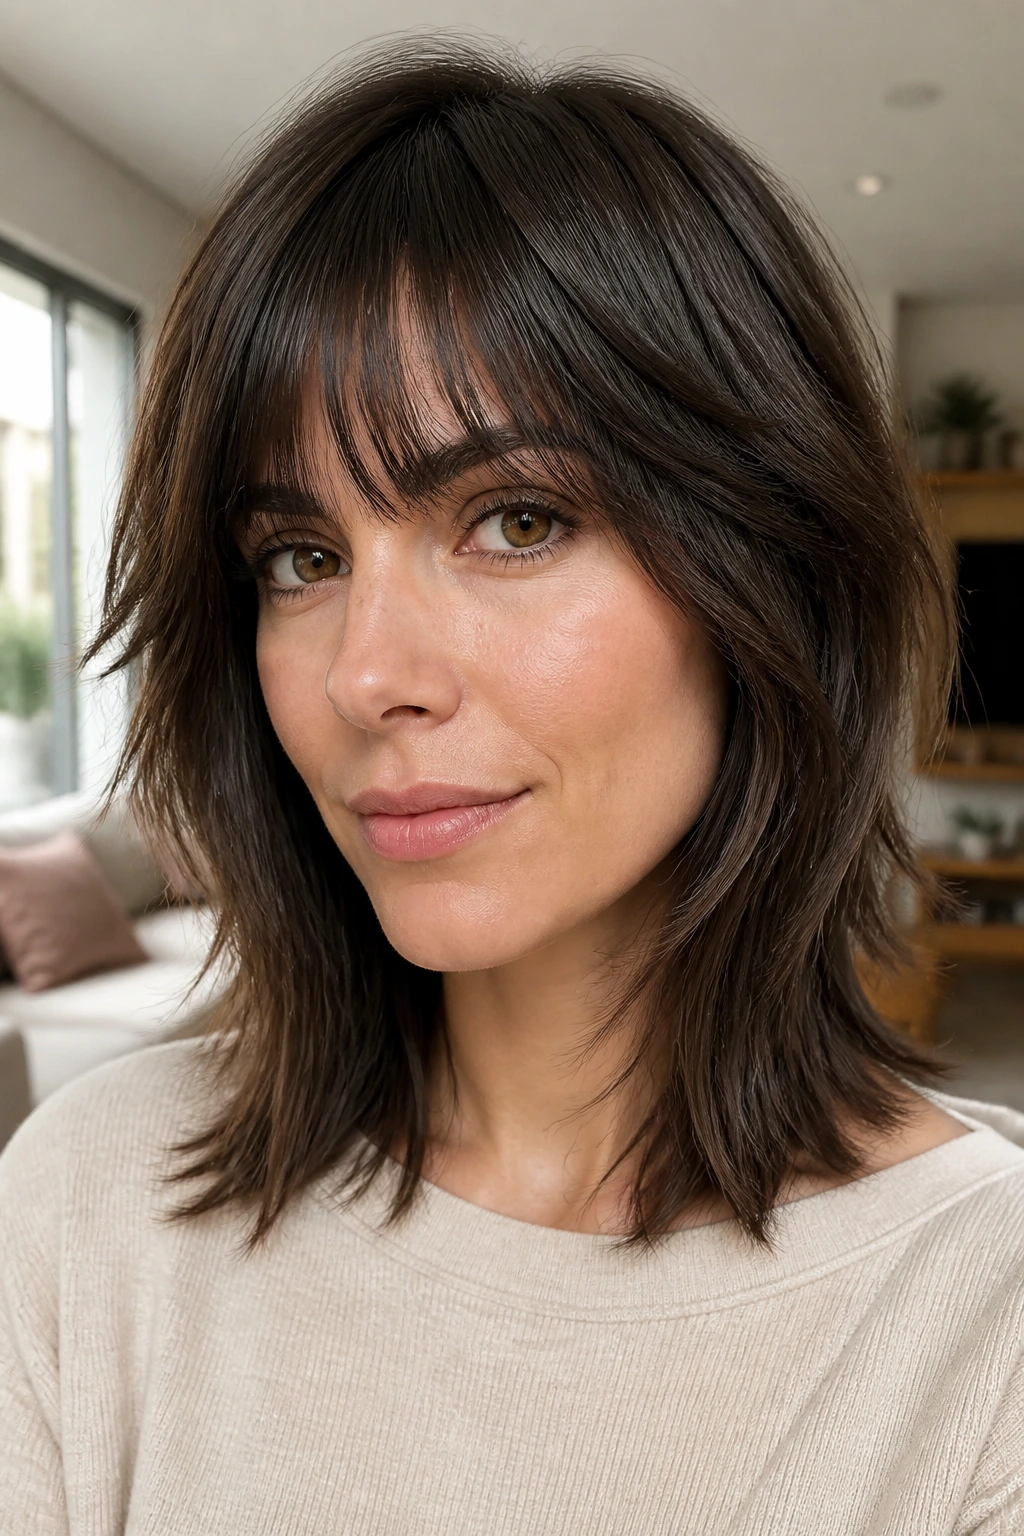
If you’re taking this to a stylist, bring photos of hair that looks close to your own texture. Same color, same density, same bend if you can find it. A shag on thick wavy hair behaves differently from one on finer straight hair, and the difference shows up fast once the cape comes off.
Say what you want in plain language. “I want layers, but I don’t want the ends to look thin.” “I want movement around the face, but I need the bottom to stay full.” Those lines are useful because they force the cut to solve your actual problem instead of chasing a trend. If your stylist reaches for thinning shears near the perimeter, ask what they’re removing and why. On thin hair, that question is fair.
Product-wise, look for lightweight mousse, not thick creams that drag the hair down. Texture spray should feel airy, not salty and sticky. If your hair is really fine, a pea-sized amount of leave-in conditioner on the very ends is enough; anything more can flatten the style. And if your scalp gets oily fast, dry shampoo on clean hair before bed can help the roots stay lifted through the next morning.
How to Style These Shags Without Cranking Up the Heat
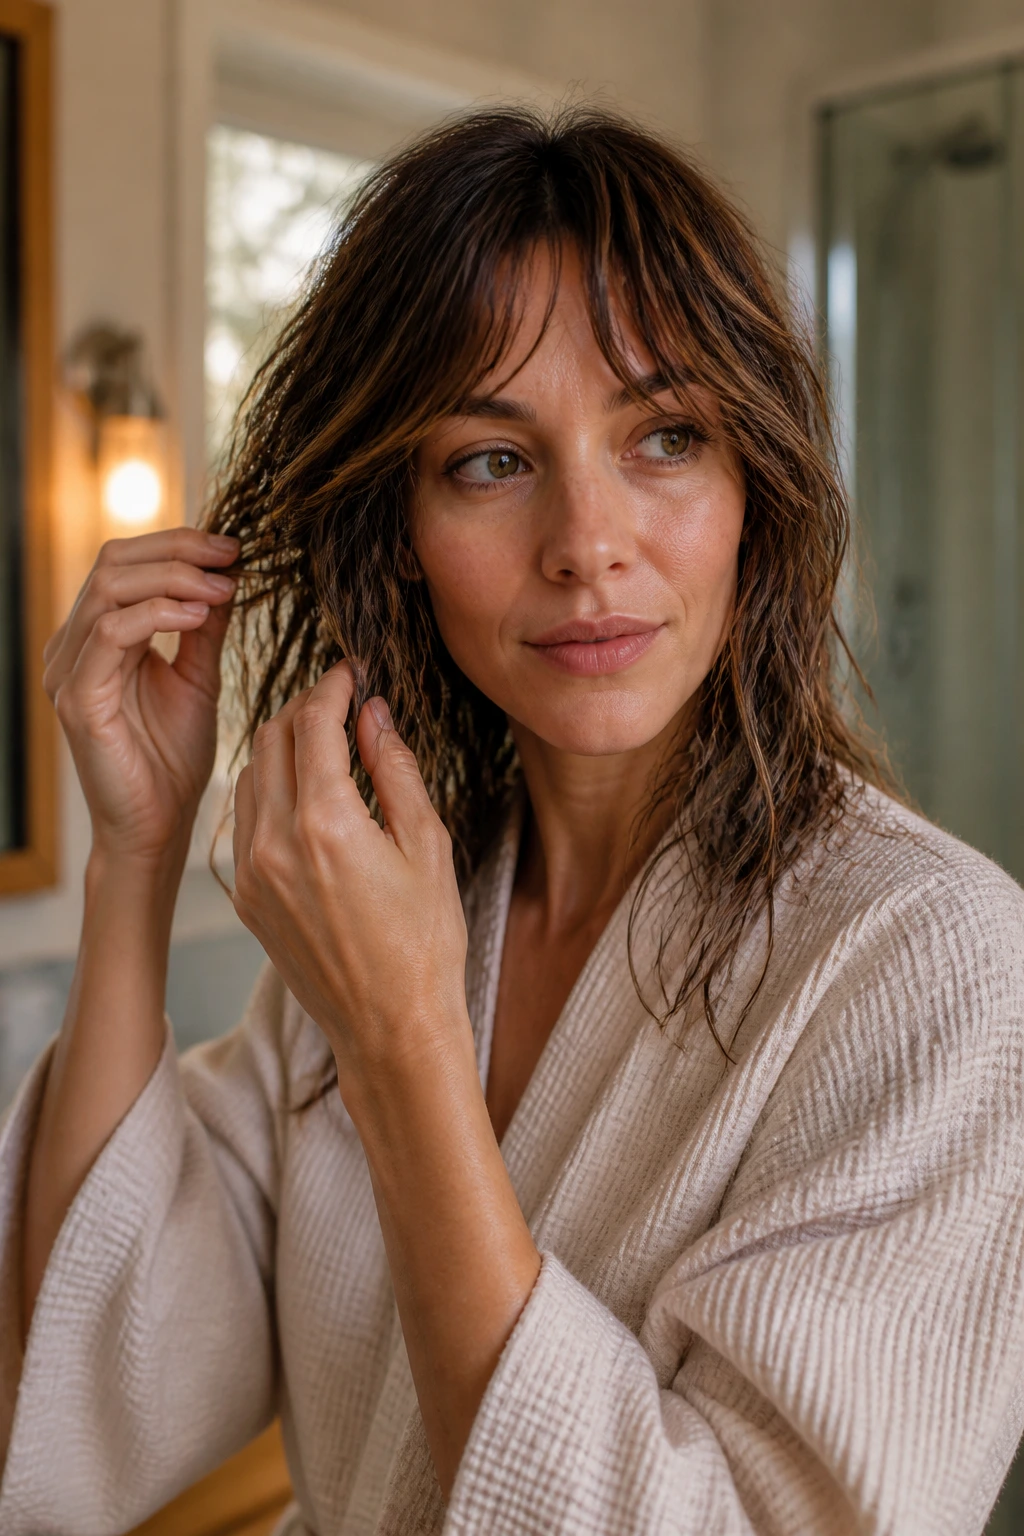
The easiest way to ruin a good shag is to overwork it. Too much brushing, too much oil, too much hot air in one spot, and the movement gets ironed out. A little restraint goes a long way here.
Blowout shape
Start with damp hair and work mousse through the roots. Rough-dry until the hair is about 80 percent dry, then use the round brush only on the front pieces, crown, and ends that need a bend. You do not need to polish every inch. The shag should still look a little loose.
Air-dry shape
If your hair has a wave, scrunch in a lightweight mousse or foam and let the layers sit where they want to sit. Twist the front sections away from your face while they dry. That gives the cut a little direction without making it stiff. The hair should dry soft, not crunchy.
Day-two refresh
Mist the roots with dry shampoo, then lift the crown with your fingers and let it sit for a minute before touching it again. If the face-framing pieces have gone flat, wrap just those sections around a brush or a small iron for 10 seconds each. That tiny bit of re-shaping wakes the whole cut up.
Small Moves That Make the Cut Look Fuller
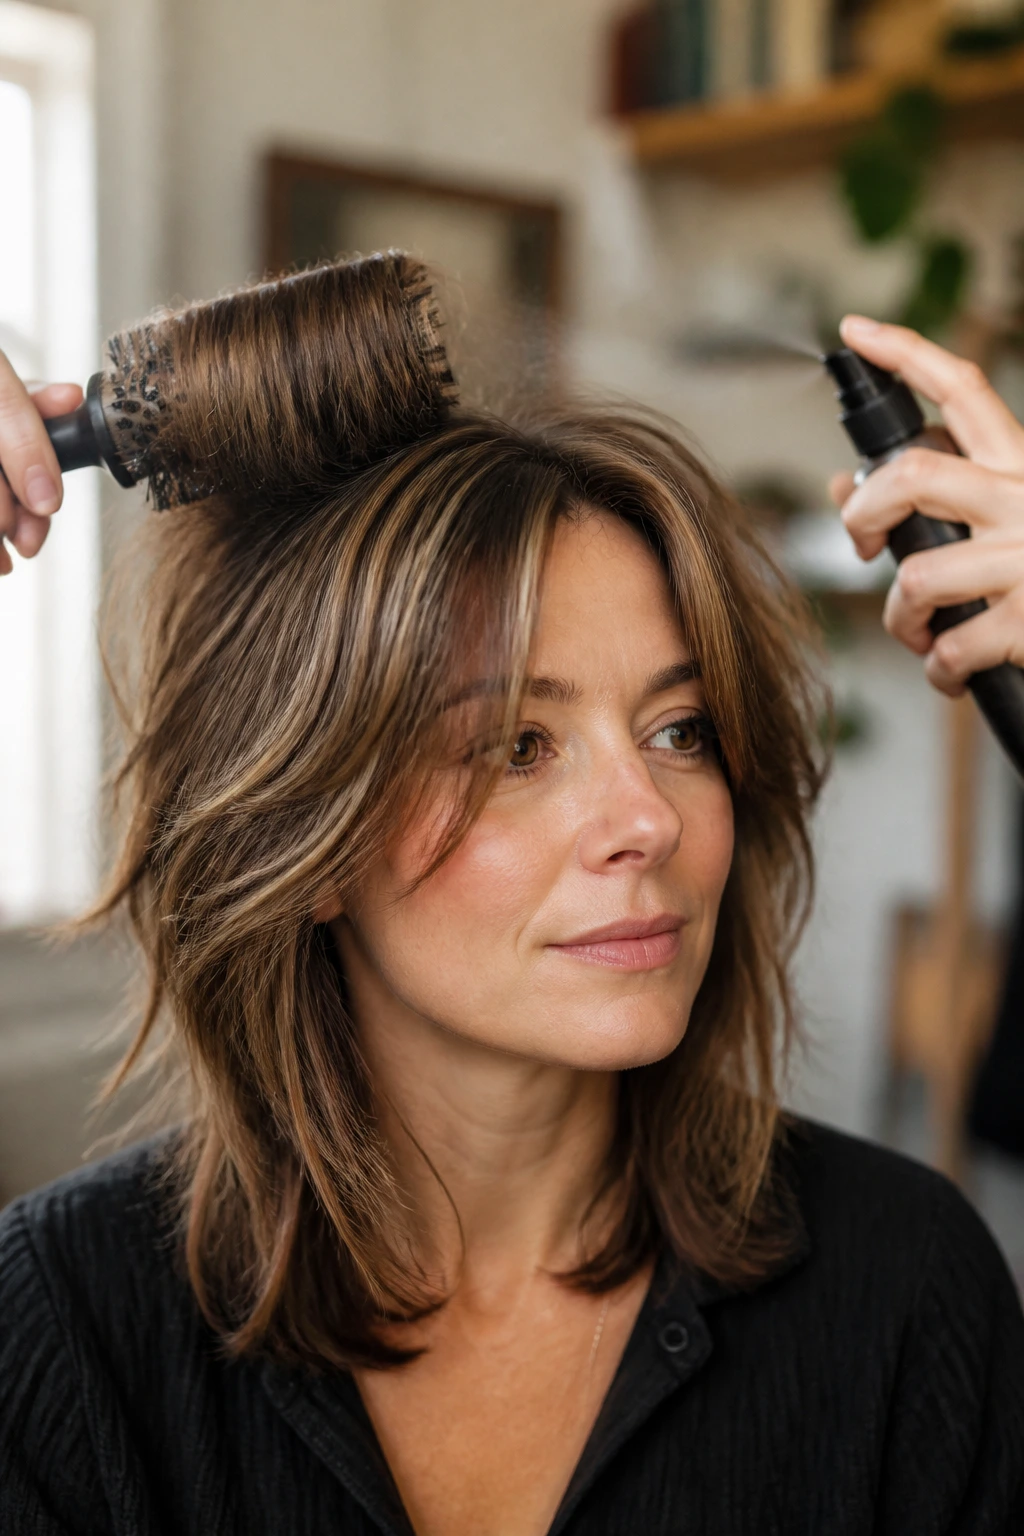
Volume Boost: Blow-dry the crown in the opposite direction of your part first, then flip it back once it cools. That reset gives the roots a better chance of staying up.
Texture Upgrade: Use texture spray only on the mid-lengths and ends. If you spray the roots heavily, thin hair can start looking dusty instead of full.
Fringe Fix: If your bangs separate too much, dry them side to side with a brush, then let them fall. That tiny zigzag of airflow helps them sit with more body.
Make-It-Yours: If your hair is poker-straight, keep the layers longer and use one curved pass with a flat iron. If your hair has a wave, keep the shaping softer and let the cut do less of the work.
Maintenance, Trims, and Grow-Out Guidance

Shags live or die by the shape at the front. If you want the cut to stay clean, plan on fringe trims every 4 to 6 weeks and full shape trims around 8 to 10 weeks. Thin hair shows uneven grow-out fast, especially around the cheekbones and collarbone, where the front pieces start to drift into awkward territory.
The grow-out phase can be kind if the layers were kept long. That’s another reason I like restrained shags on medium-length hair. The cut can slide into a lob, a soft layered medium cut, or a longer face-frame without looking broken. If the layers are too short, the transition gets fuzzy and the ends start to hang in odd little wisps.
For daily upkeep, don’t overload the hair with oils or serums. Use just enough to keep the ends from fraying, and keep heavier products away from the roots. A clarifying shampoo every so often can also help thin hair regain some lift if it starts feeling coated.
Variations and Adaptations to Try

The Fine-Straight Version: Keep the layers longer and the ends slightly blunt. This gives the hair a thicker edge while still adding movement through the interior.
The Wavy Air-Dry Version: Let the natural bend lead the cut. Ask for softer face-framing and avoid over-texturizing the bottom so the wave pattern doesn’t fall apart.
The Low-Maintenance Fringe-Free Version: Skip bangs and use longer front pieces that sweep away from the face. It’s the easiest choice if you hate trimming bangs every month.
The Round-Face Balancer: Leave the front pieces longer and keep volume slightly higher around the crown. That adds length to the silhouette and keeps the sides from puffing out too wide.
The Edgier City-Shag: Push the texture a little more, but stop before the ends look shredded. This version wants texture spray, a center part, and a slightly imperfect finish.
The Soft Professional Version: Keep the perimeter clean, the layers subtle, and the fringe long enough to tuck back. It reads polished at work and loose on weekends, which is honestly the most useful haircut category of all.
Common Mistakes to Avoid

The first mistake is over-layering the crown. The symptom is easy to spot: the top gets puffy while the bottom goes see-through. The fix is to keep the shortest pieces longer and let the lift come from styling, not from cutting half the hair off the top.
The second is texturizing the ends until they look weak. Fine hair doesn’t need to be thinned out just to prove it’s layered. If the bottom starts looking wispy or uneven in daylight, the cut has gone too far. Ask for cleaner ends and softer point-cutting next time.
A third problem is cutting bangs too short on the first pass. Thin hair often shrinks in a weird way once it’s dry, and short fringe can land higher than you wanted. Better to start longer, then trim up after the hair has lived in the cut for a few days.
And then there’s using heavy styling cream everywhere. That flattens the roots and clings to the ends. On medium-length thin hair, lightweight mousse at the base and a small amount of product on the ends is usually enough. More is not better here. It usually just gets limp.
Frequently Asked Questions

Will a shag make thin hair look even thinner?
Not if the layers are kept long enough and the perimeter stays honest. A badly cut shag can absolutely do that, but a soft shag with face-framing and moderate layering usually makes the hair look fuller because it adds movement without stripping away too much weight.
Should thin hair get curtain bangs?
Yes, if the front has enough density to support them. Curtain bangs are one of the easiest ways to make medium-length thin hair look fuller around the face, but they work best when they start a little longer and blend into the sides instead of sitting like a separate piece.
Is a wolf cut too much for medium-length thin hair?
The dramatic version can be too aggressive. A softer wolf-inspired shag with longer layers and kept-weight ends is a better bet because it still gives you edge without making the bottom look sparse.
What should I ask my stylist for?
Use plain words: longer layers, soft face-framing, and a perimeter that stays full. If you want bangs, mention where you want them to start and how much forehead you want to show. The clearer you are about keeping the ends thick, the better the result usually is.
Can I air-dry a shag and still get volume?
Yes, if the cut was shaped for it and you use a little mousse or foam at the roots. Twist the front pieces away from your face while they dry, and resist the urge to keep touching the crown. That’s where most of the lift gets lost.
How often should a shag be trimmed?
Bang-heavy versions usually need a fringe trim every 4 to 6 weeks, while the full shape can go about 8 to 10 weeks between cuts. If the layers start looking separate instead of blended, that’s your cue to book sooner.
What’s the best parting for this kind of cut?
A center part works well for curtain and bottleneck bangs, while a soft side part can give extra lift on flatter roots. The better choice is usually the one that lets the front pieces fall into the face instead of hanging straight down like curtains on a rod.
Can I wear this haircut up?
Absolutely, and that’s one reason these cuts are practical. The layers give you enough softness around a ponytail, clip, or half-up style that the haircut still looks intentional when it’s not fully down.
Bring This to the Salon Chair
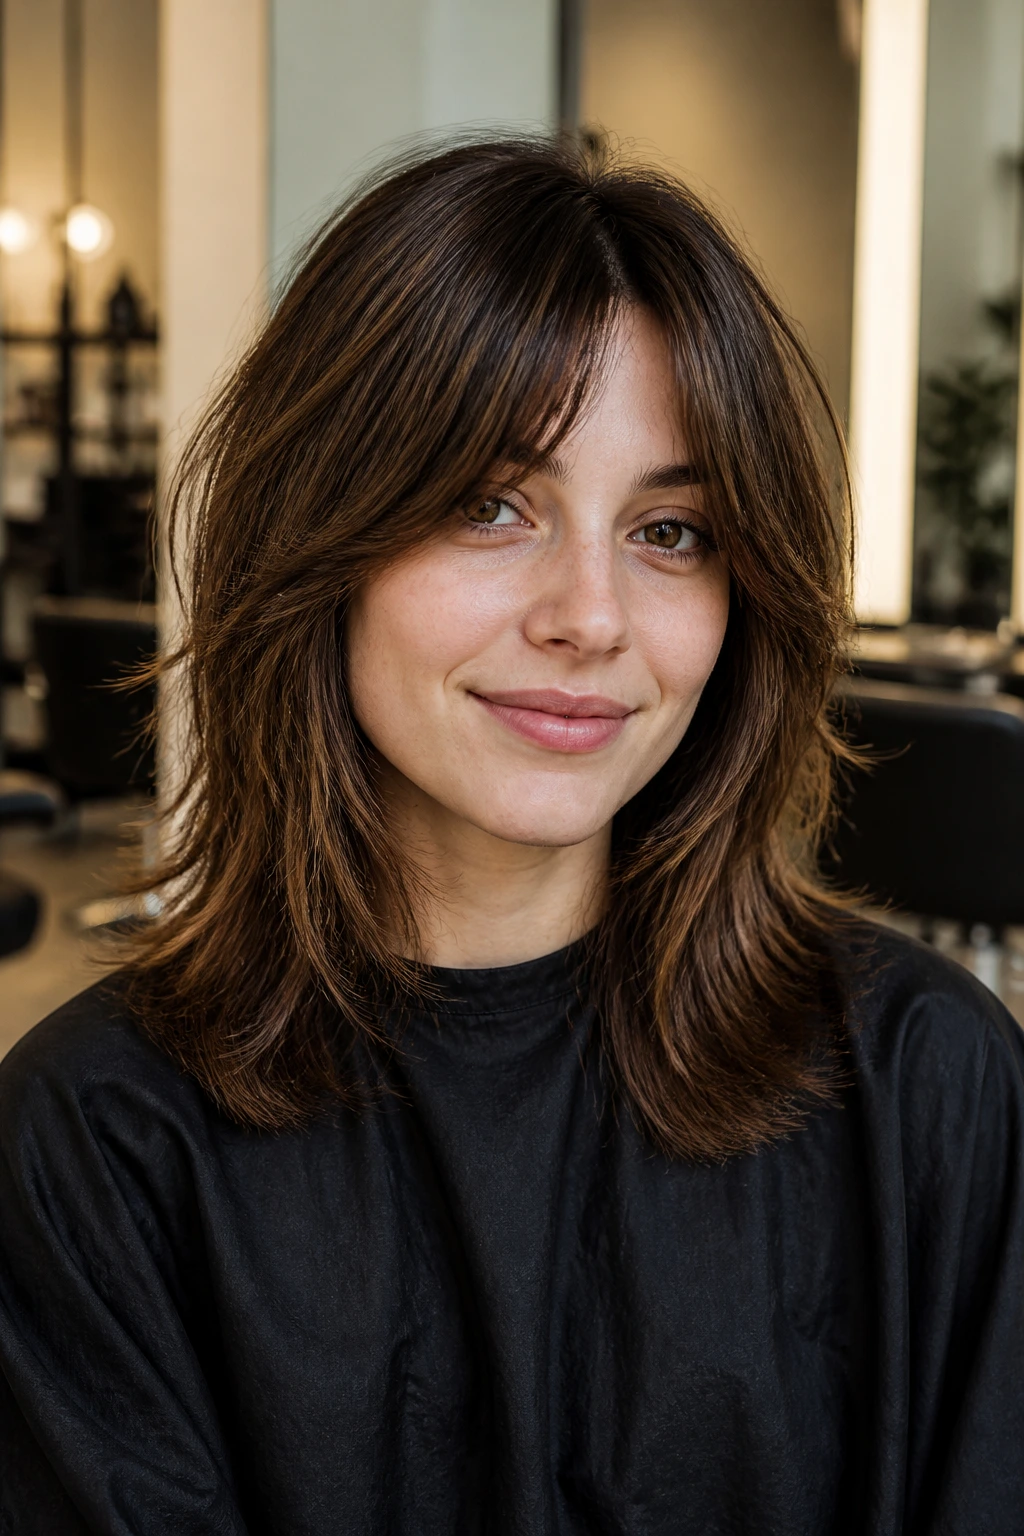
The best shag for medium-length thin hair is rarely the wildest one on the mood board. It’s the one that keeps the ends thick, lets the face-framing do some of the visual work, and gives you movement without making your hair look half-missing by week two.
If you’re choosing between two versions, pick the one with a little more length and a little less shredding. Fine hair usually looks better when the cut respects its density instead of trying to force drama into every strand. A good shag should make your hair move. It should not make you babysit it.
Take the photo that looks most like your texture, keep one hand on the scissors metaphorically, and ask for shape that still has weight. That’s the cut that will hold up when you walk out of the salon and, more importantly, when the real day starts.
