



A shag haircut can rescue a flat, awkward, grown-out head of hair faster than almost any other cut. Done well, it keeps the ends light, gives the crown somewhere to go, and lets the face frame do a lot of the talking. Done badly, it looks like someone got scissor-happy near the mirrors and walked away too soon. The difference is placement. Always placement.
After 40, hair often changes shape in small ways that feel annoyingly personal: the crown can sit flatter, the temples may show more scalp, curls can lose spring in odd places, and thick hair can suddenly feel like it lives in your neck. A good shag haircut for women over 40 works with those changes instead of pretending they aren’t there. It can soften lines around the jaw, bring life back to the top, and make a simple air-dry look intentional instead of accidental.
The best part is that a shag does not have to mean wild, rocker, or over-textured. Some of the prettiest versions are quiet. A collarbone shag with curtain bangs. A silver shag with a soft fringe. A shoulder-length cut with invisible layers that move when you turn your head. The right version gives you shape without demanding a 40-minute styling routine every morning, and that is where this cut earns its keep.
Why These 17 Shag Haircuts Earn Their Keep

Movement without fuss: The layers in a shag break up heavy lines, so hair moves even when you only rough-dry it for five minutes.
Length stays usable: You do not have to go short to get lift; several of these cuts keep enough length for a ponytail, clip, or tucked-behind-the-ear day.
The fringe does real work: Curtain bangs, bottleneck bangs, and side-swept pieces pull attention to the eyes and cheekbones instead of the jaw or neck.
Gray hair looks more dimensional: A layered shape keeps silver, white, or salt-and-pepper hair from reading as one big flat sheet.
Fine hair gets lift; thick hair gets release: The same family of cuts can add body to limp strands or remove bulk from dense ones, depending on where the layers land.
Grow-out is kinder: Because the perimeter keeps a line, these cuts do not fall apart the minute they gain an inch.
Why Shag Haircuts Still Work When Hair Changes
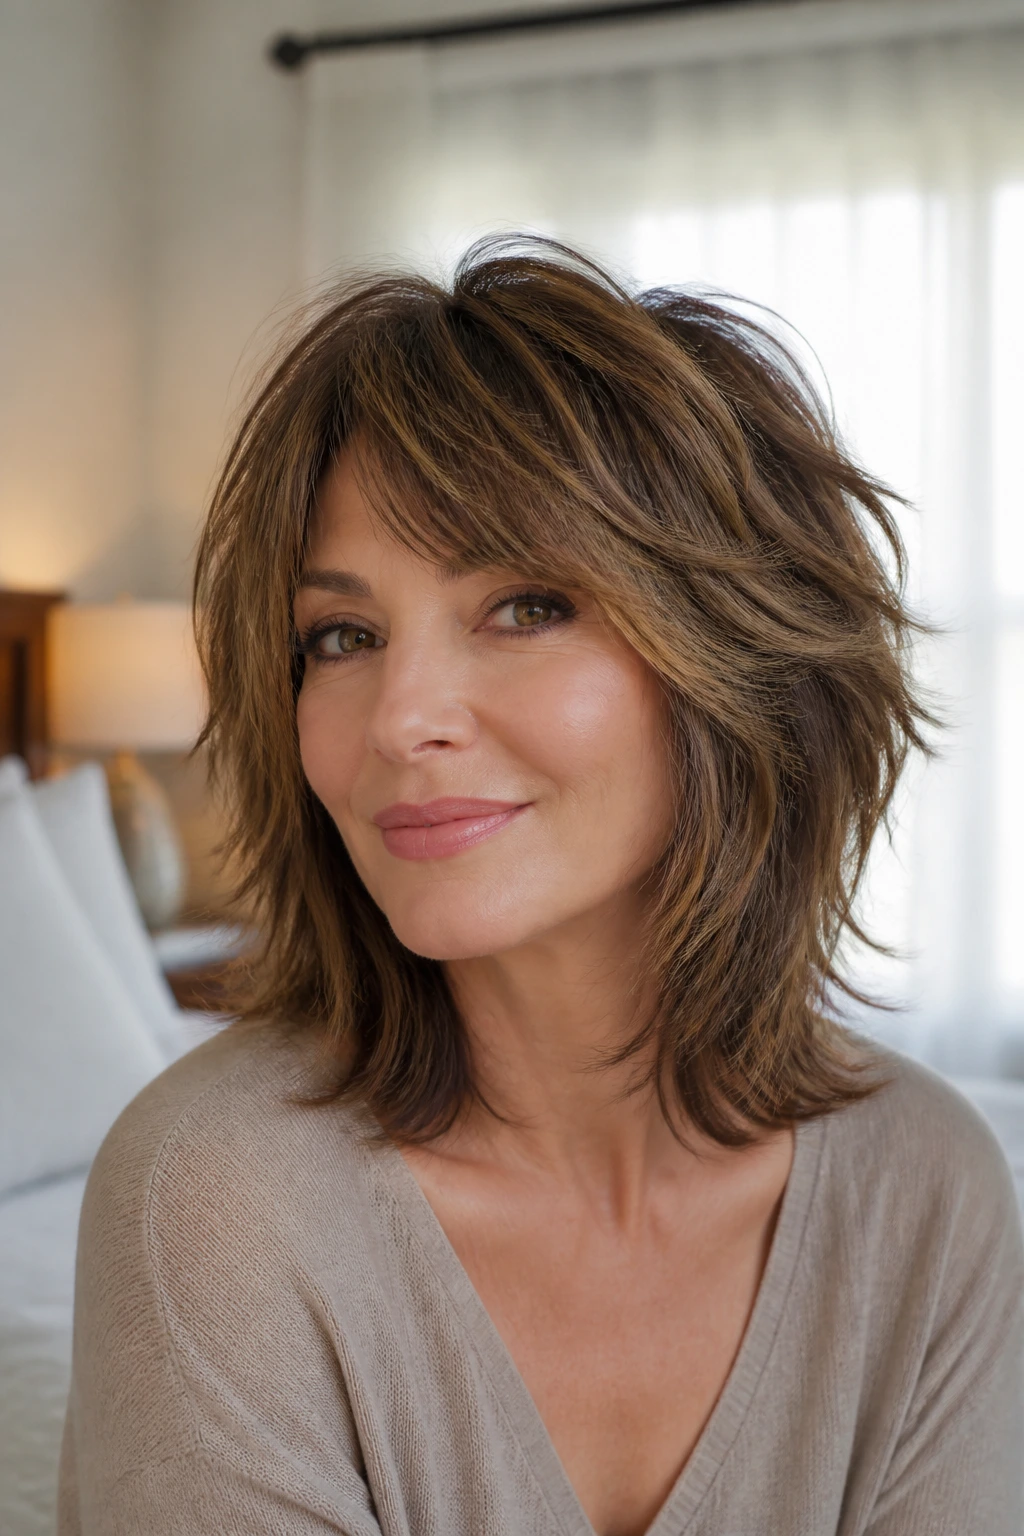
A shag is not magic. It is geometry.
The shape matters because hair after 40 often wants different things than hair in a teenager’s photo shoot. The crown usually needs lift. The face frame needs to soften, not drag down. And the ends need enough texture to move, but not so much that they look wispy and exhausted. That is the balancing act, and a good shag handles it with fewer styling products than people expect.
Crown lift without helmet hair
The trick is to keep the shortest pieces high enough to build volume at the top, but not so short that the cut pops up like a helmet. In practice, that usually means the shortest layers begin around the cheekbone, temple, or upper crown, depending on length and density. If you have fine hair, that placement can make the top feel fuller in a way a blunt cut never will.
A cleaner outline keeps the cut grown-up
A lot of people hear “shag” and think of a wildly chipped perimeter. That is one version. Not my favorite. The better versions keep a clear outline at the bottom, then layer inward so the movement comes from inside the shape. That’s the difference between a cut that looks stylish and one that just looks thinned out.
Fringe placement does more than most people realize
A curtain bang that starts too short can pull the eye upward and make the rest of the cut look chopped. One that hits around the cheekbone or just below the brow softens the face without stealing the show. If you wear glasses, that placement matters even more, because the bang should land near the frames, not fight them.
1. Collarbone Curtain Shag
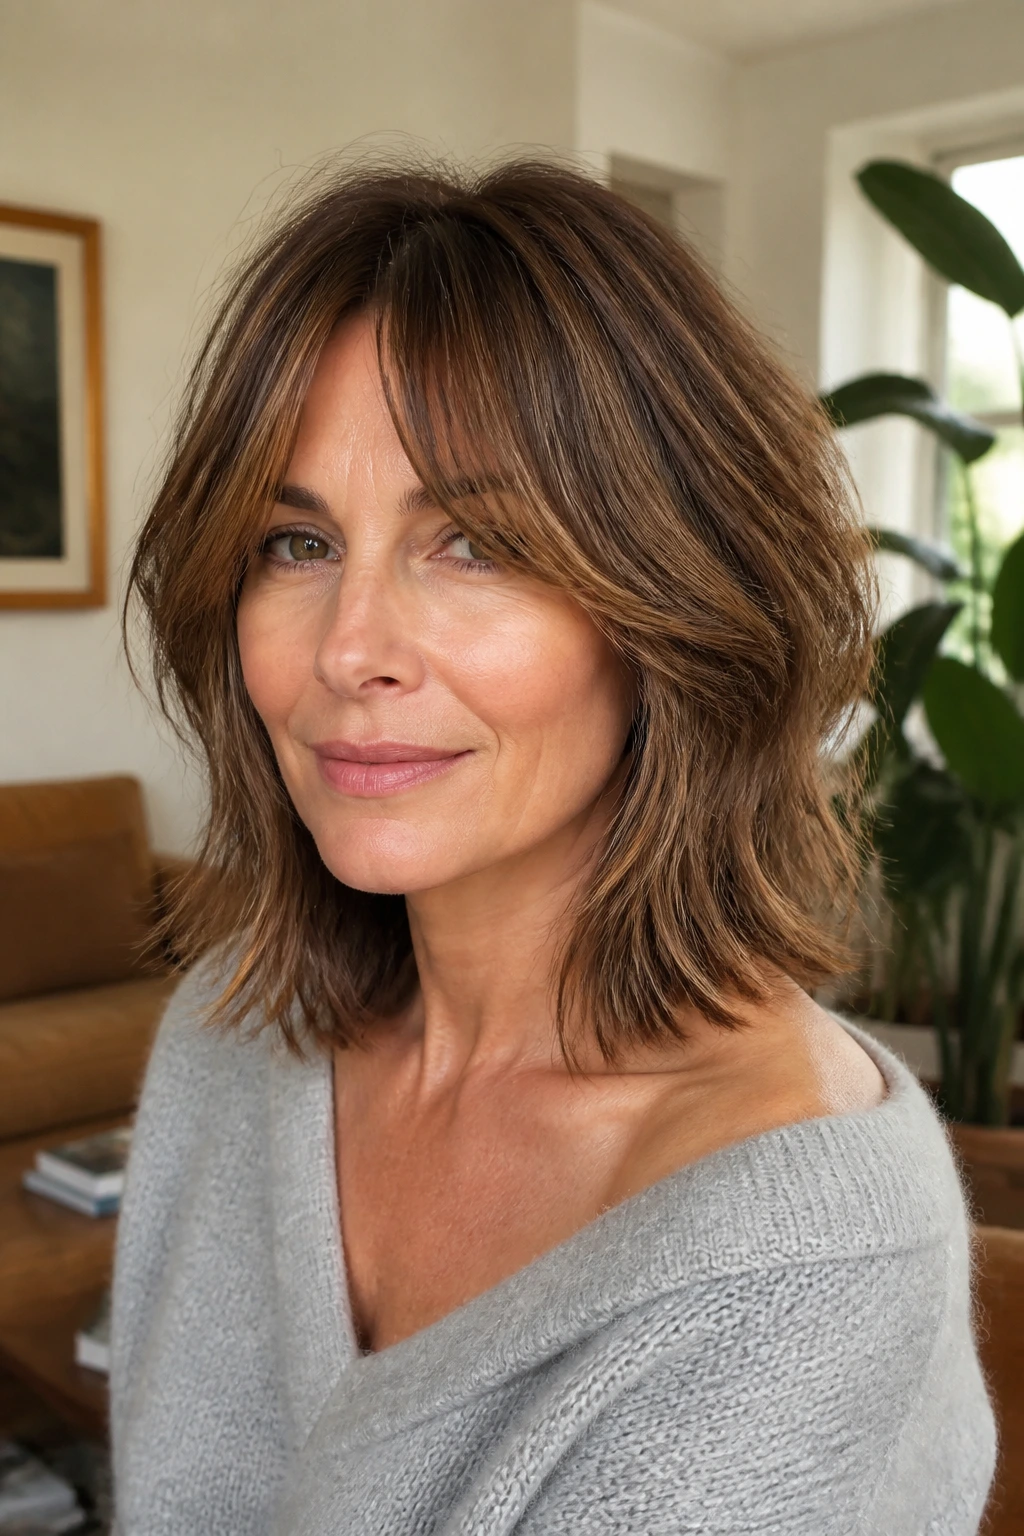
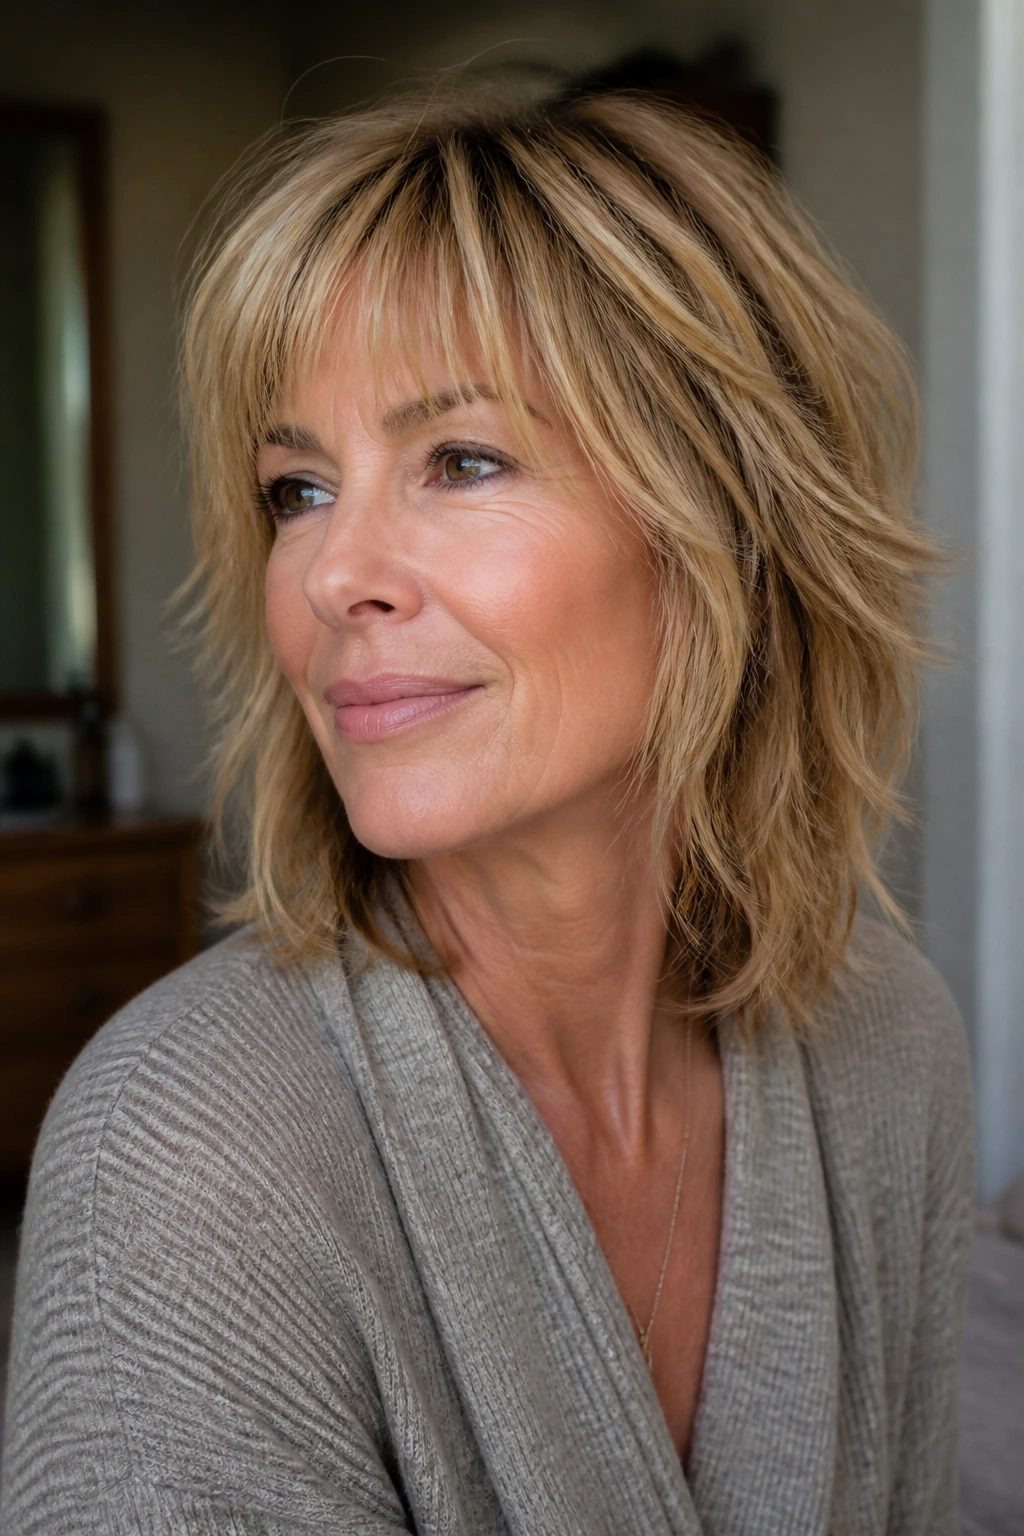
This is the shag I recommend most often when someone wants movement but does not want to feel “short-haired” overnight. The length stays around the collarbone, which gives you enough weight for a tidy shape, while the curtain bangs split softly and fall away from the center of the face. It is flattering on straight, wavy, and slightly frizzy hair because the layers have room to move without turning into a puff.
Ask for the shortest face-framing pieces to hit around the cheekbone, with the longest ends grazing the collarbone. That placement keeps the cut relaxed, not severe. On a blowout day, the ends flick under. On an air-dry day, they bend just enough to look like you meant it.
If you like a cut that works with a blazer as easily as with a denim jacket, this is the one. It does not scream for attention. It just makes your hair behave better.
2. Jaw-Skimming French Shag

A jaw-skimming shag has a little more bite. The shape sits above the shoulders, with the perimeter brushing the jawline and the interior layers carrying the movement. It has that French-girl energy people talk about, though I think the useful part is simpler: it opens the neck, lightens thick hair, and makes earrings show up.
What to ask your stylist for
- Length: Keep the base at the jaw or just below it so the shape stays crisp.
- Layers: Ask for soft internal layers, not aggressive thinning at the ends.
- Fringe: A wispy fringe or short curtain bang keeps the cut from feeling boxy.
- Finish: Point-cutting through the ends gives a little separation without frizzing the whole head.
This shape works best if you like a dry texture spray and do not mind a little piecey movement. It can look stunning on silver hair, too, because the shorter length lets the color read as bright and clear instead of heavy.
3. Long Feathered Shag

Long hair does not have to live in one heavy curtain. A long feathered shag keeps the length, but the weight is broken up through the crown, mid-lengths, and front. The result is softer than one-length hair and less fussy than a layered cut that has been shredded to bits. That last part matters. Too many long shags lose their shape because the layers are cut too high. Don’t let that happen.
The shape works best when:
- the shortest layers begin around the chin or collarbone,
- the back stays long enough to keep a ponytail,
- and the face frame bends inward instead of kicking away from the face.
This is the version for someone who still likes to wear hair down most days but wants it to move when they walk. It also plays well with wave patterns that need a little encouragement, not a full styling session.
4. Razor Midlength Shag
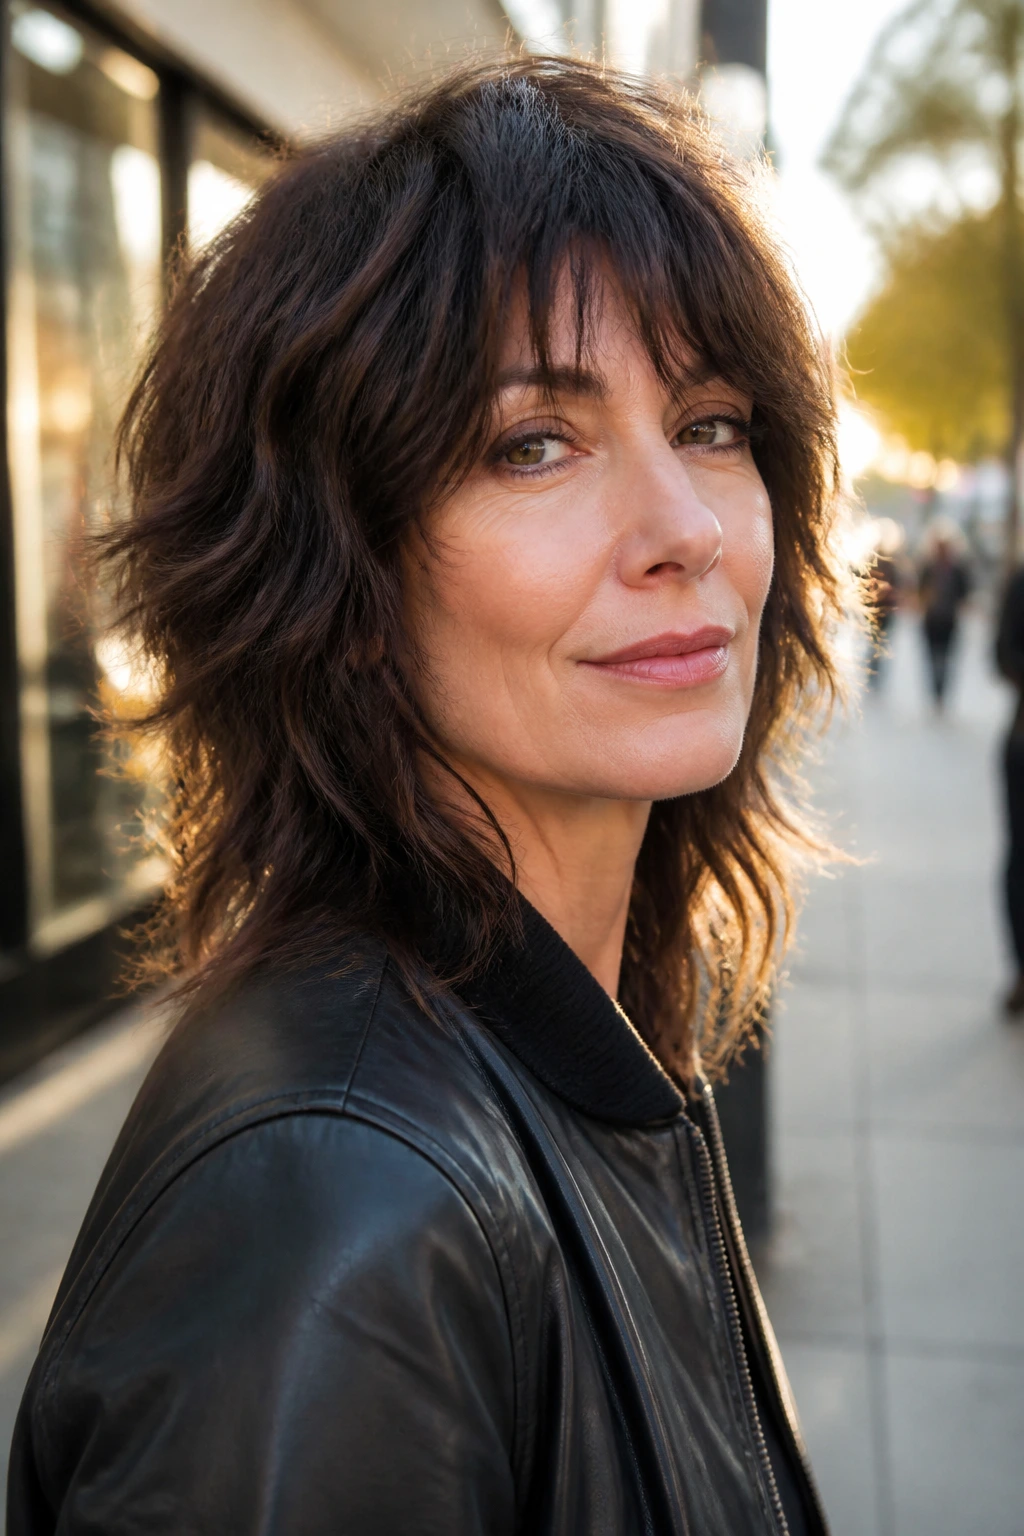
A razor midlength shag has a sharper edge than a scissor-cut version. The ends are softer, yes, but they also have more separation, which can be useful if your hair tends to sit flat and stubborn. The razor gives the cut that slightly airy, broken finish that looks best when the hair bends naturally around the face.
Not everyone should choose this. If your hair is already fragile, very porous, or prone to snapping, a razor can make the ends look too light. But on healthy medium-density hair, it can make the difference between “layered” and “alive.”
I like this cut on straight hair that refuses to hold round-brush curl. The razor texture gives it enough grit to keep a bend, even if you only rough-dry it with a little mousse. Clean, but not stiff. That’s the sweet spot.
5. Curly Crown Shag
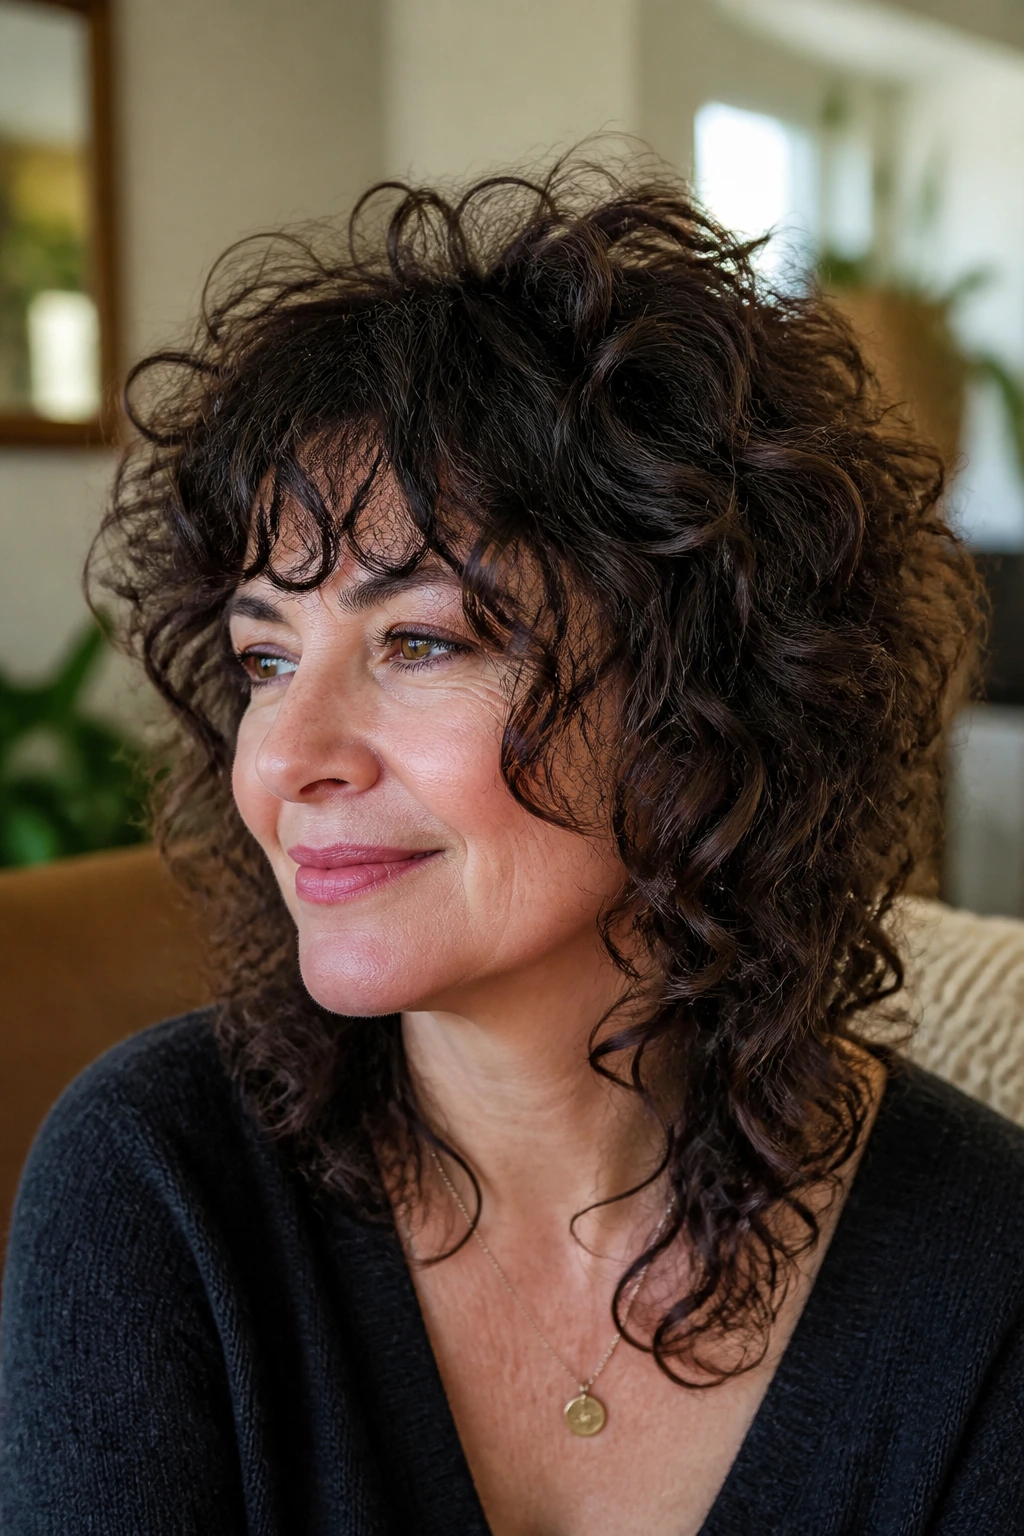
Curly hair needs a different plan. A curly shag is not about chopping random pieces out of the shape and hoping for the best. It is about preserving curl groups while lifting the crown so the top does not collapse into a triangle. The best version is usually cut dry, curl by curl, with the perimeter left long enough to keep the curl pattern from springing too high.
If your curls are loose, the shorter layers can start around the cheekbone. If they are tighter, the layers may need to sit lower so the curl clumps do not separate too much. That part depends on shrinkage, and shrinkage is no joke. A two-inch snip can turn into four inches fast.
The cut looks especially good when the front is slightly longer than the sides. That keeps the face frame soft and keeps the hair from building a mushroom shape around the temples. Curly shags can be a mess if they are over-layered. When they’re done right, they are the opposite.
6. Silver-Forward Shag
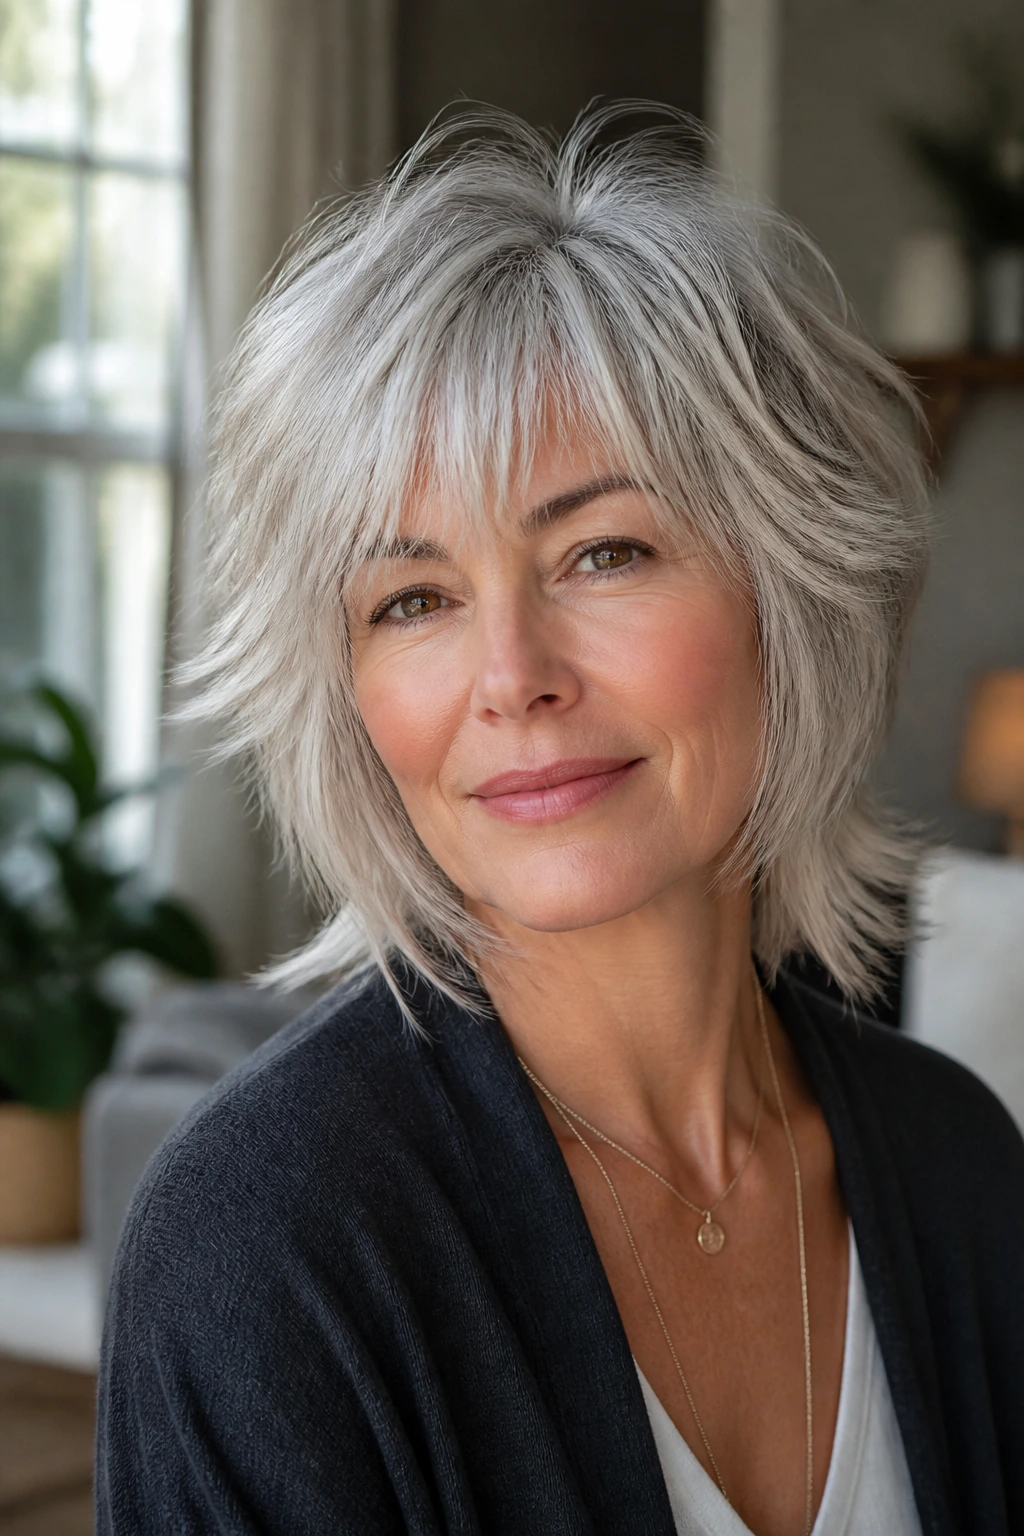
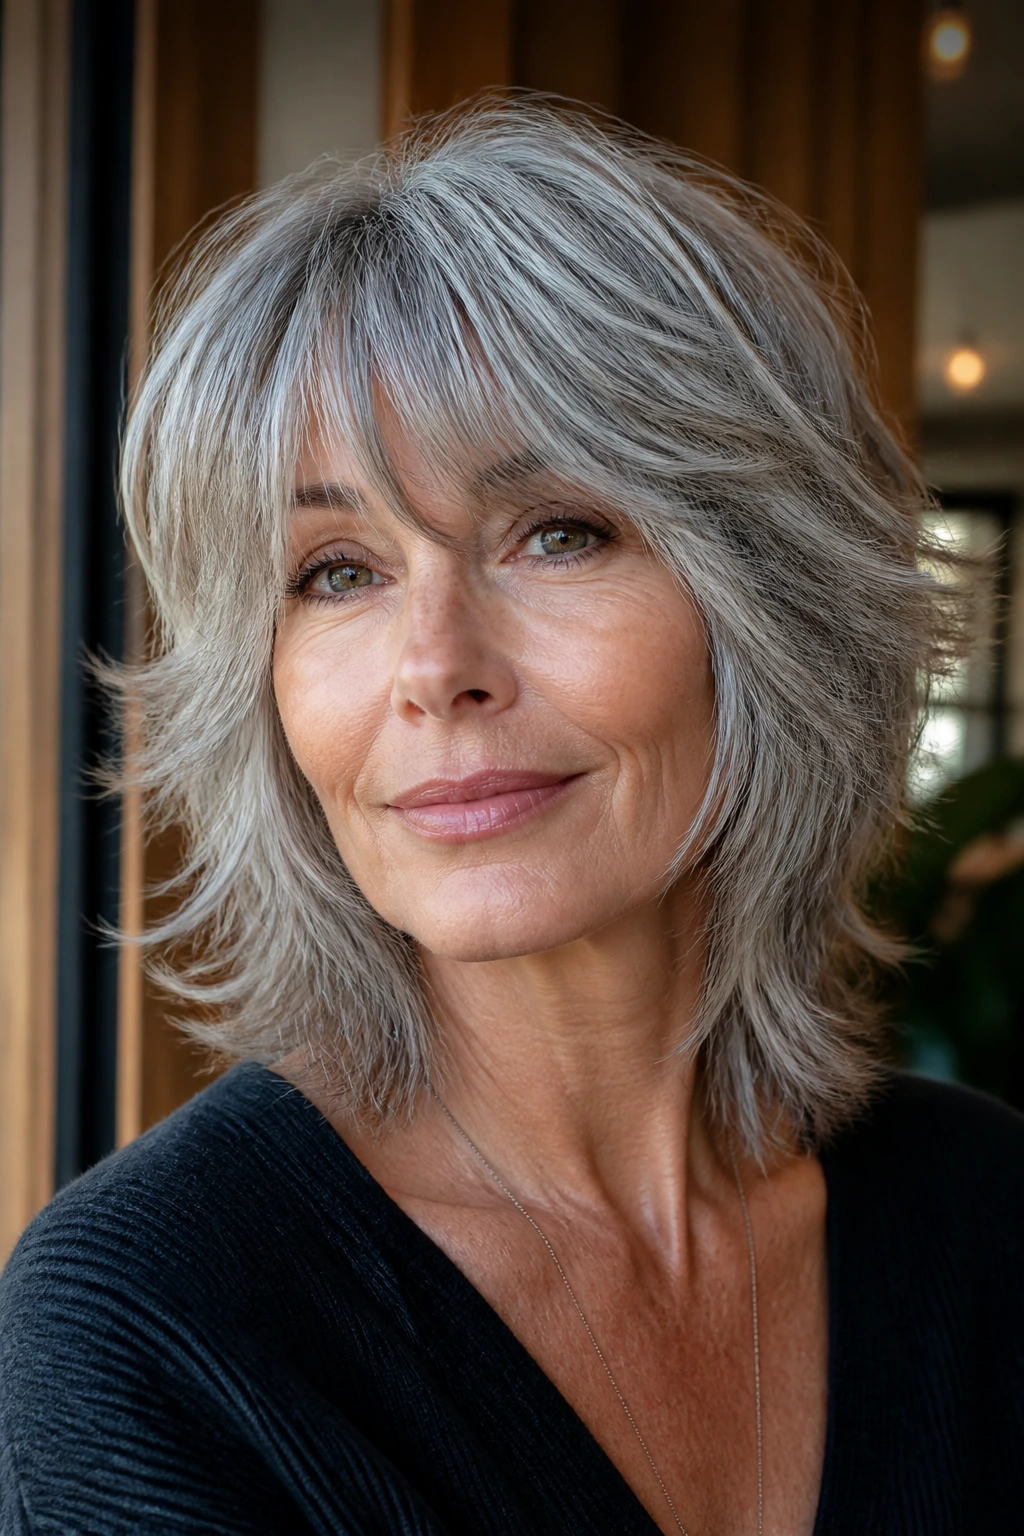
Gray and silver hair tends to show every line, so the cut has to earn its place. A silver-forward shag does that by keeping the shape clean around the perimeter and letting the fringe and crown do the softening. Too many layers can make silver hair look frayed. The better move is controlled movement: enough texture to catch the light, not so much that the cut looks thirsty.
A soft fringe is especially helpful here. It breaks up forehead length and gives the bright silver at the temples somewhere to settle. If your hair has a mix of white, silver, and darker strands, the layers help each shade show up instead of disappearing into one solid block.
I would pair this with a gloss or shine cream rather than a heavy matte paste. Gray hair can take a product quickly, and once it looks coated, the cut loses that crisp metallic sheen. Keep it light. Keep it clean.
7. Bottleneck Fringe Shag
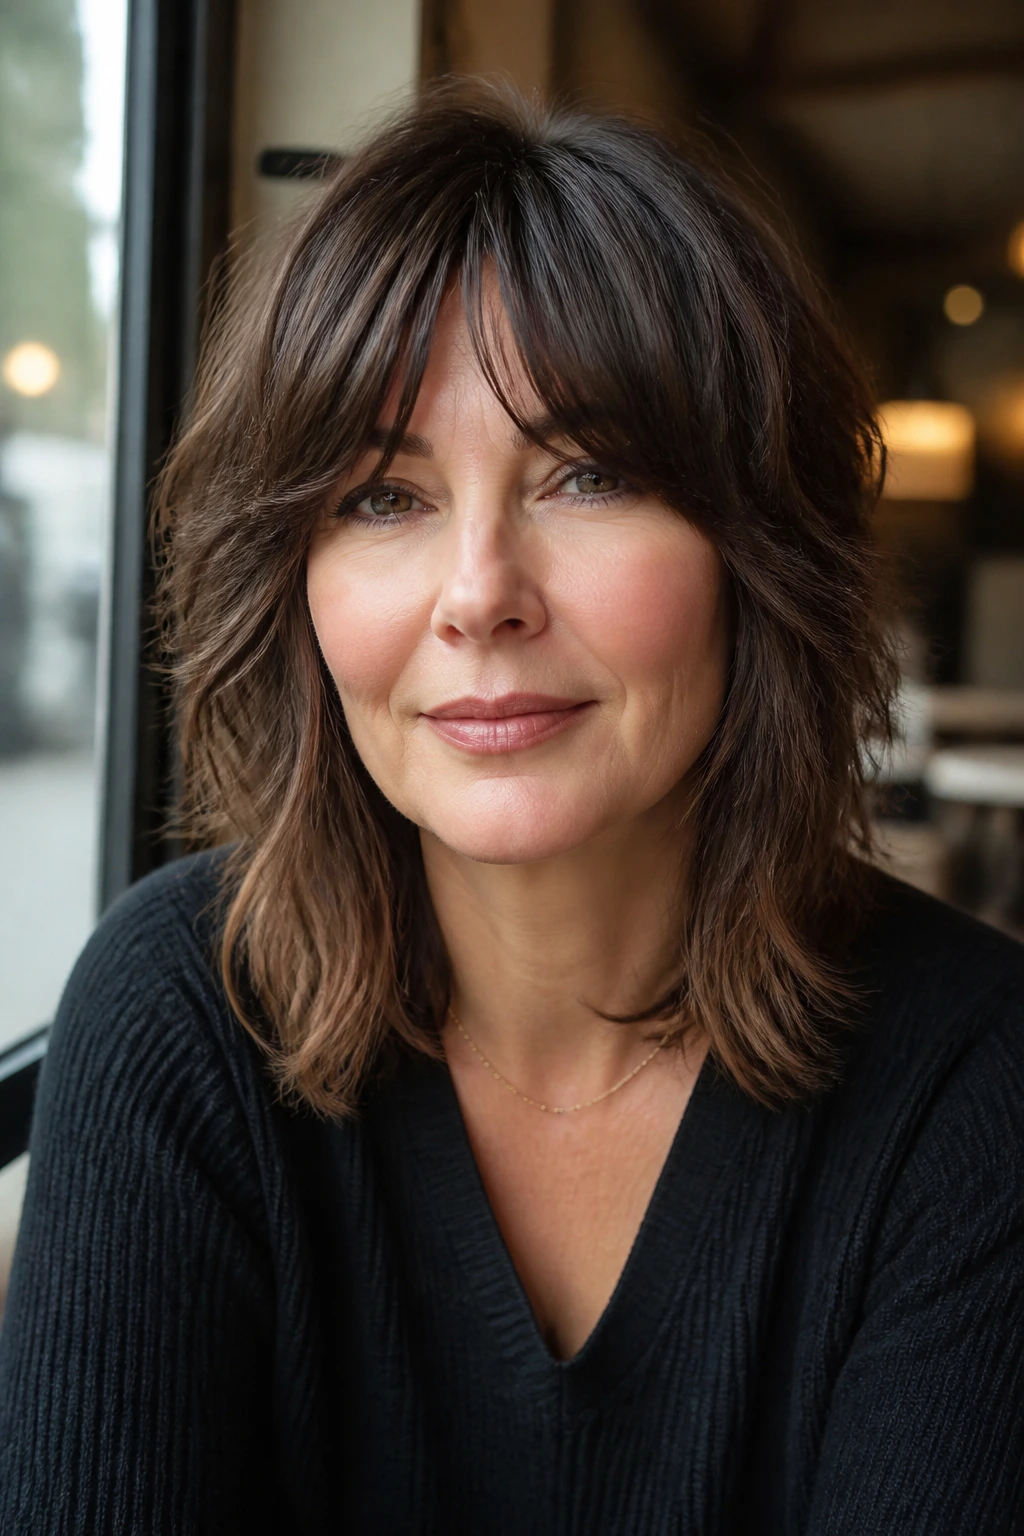
A bottleneck fringe is one of my favorite bangs for grown-up shags because it does a little bit of everything without looking too styled. It starts narrow near the center of the forehead, then opens wider near the temples and cheekbones. That shape flatters the face, softens the brow, and sits more kindly under glasses than a blunt fringe does.
The cut itself can be collarbone length or a little shorter, but the fringe is the part that changes the mood. With a bottleneck bang, the shag feels less retro and more current. The eyes stay open. The cheekbones get some help. And if the fringe grows out, it slides into a curtain shape without a dramatic awkward stage.
This is a smart choice if you want a little frame around the face but do not want to be trimming bangs every two weeks. It behaves.
8. Shoulder Flip Shag
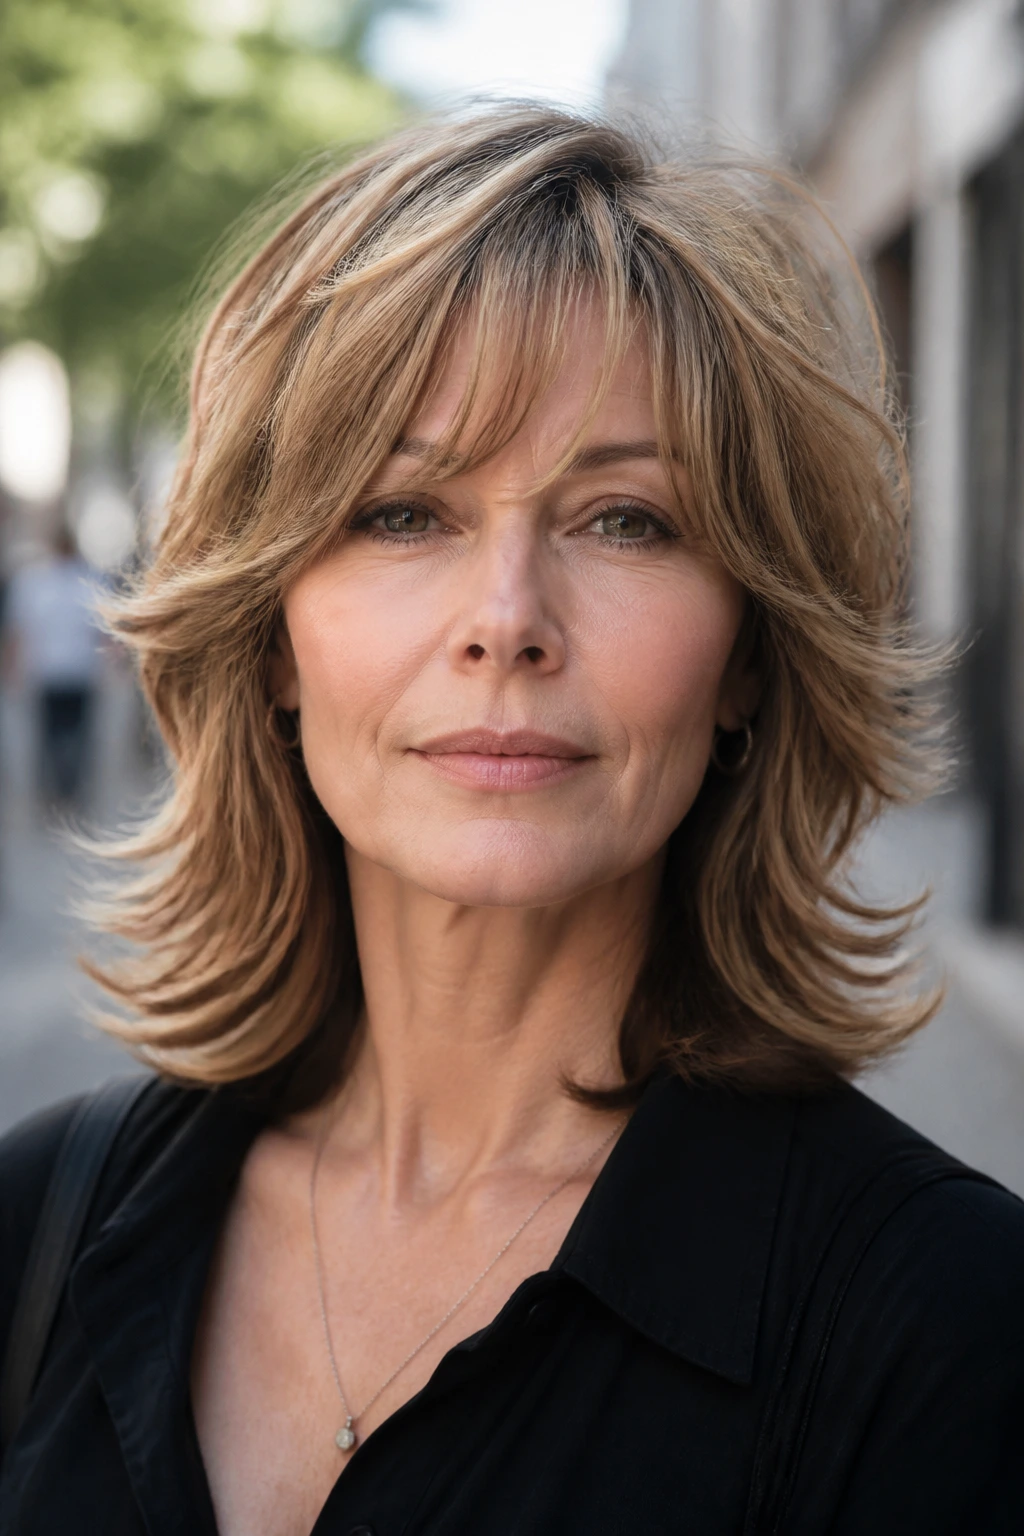
This one is for the woman who likes hair that moves when she turns her head. The shoulder flip shag sits right at that annoying-but-useful length where hair often kicks out at the ends. Instead of fighting that natural bend, the cut uses it. The layers are placed to encourage a soft flip around the shoulders and collarbone, which means the shape looks alive even without a full blowout.
A little extra length in front keeps the cut from looking puffy. The back can stay tidy and slightly shorter to give a clean line through the nape. That combination keeps the overall shape from turning into a triangle, which is the risk with shoulder-length layers.
If your hair tends to puff at the ends, ask for the layers to be concentrated higher up, not all the way through the bottom. You want movement. You do not want the bottom to go stringy.
9. Pixie-Shag Hybrid
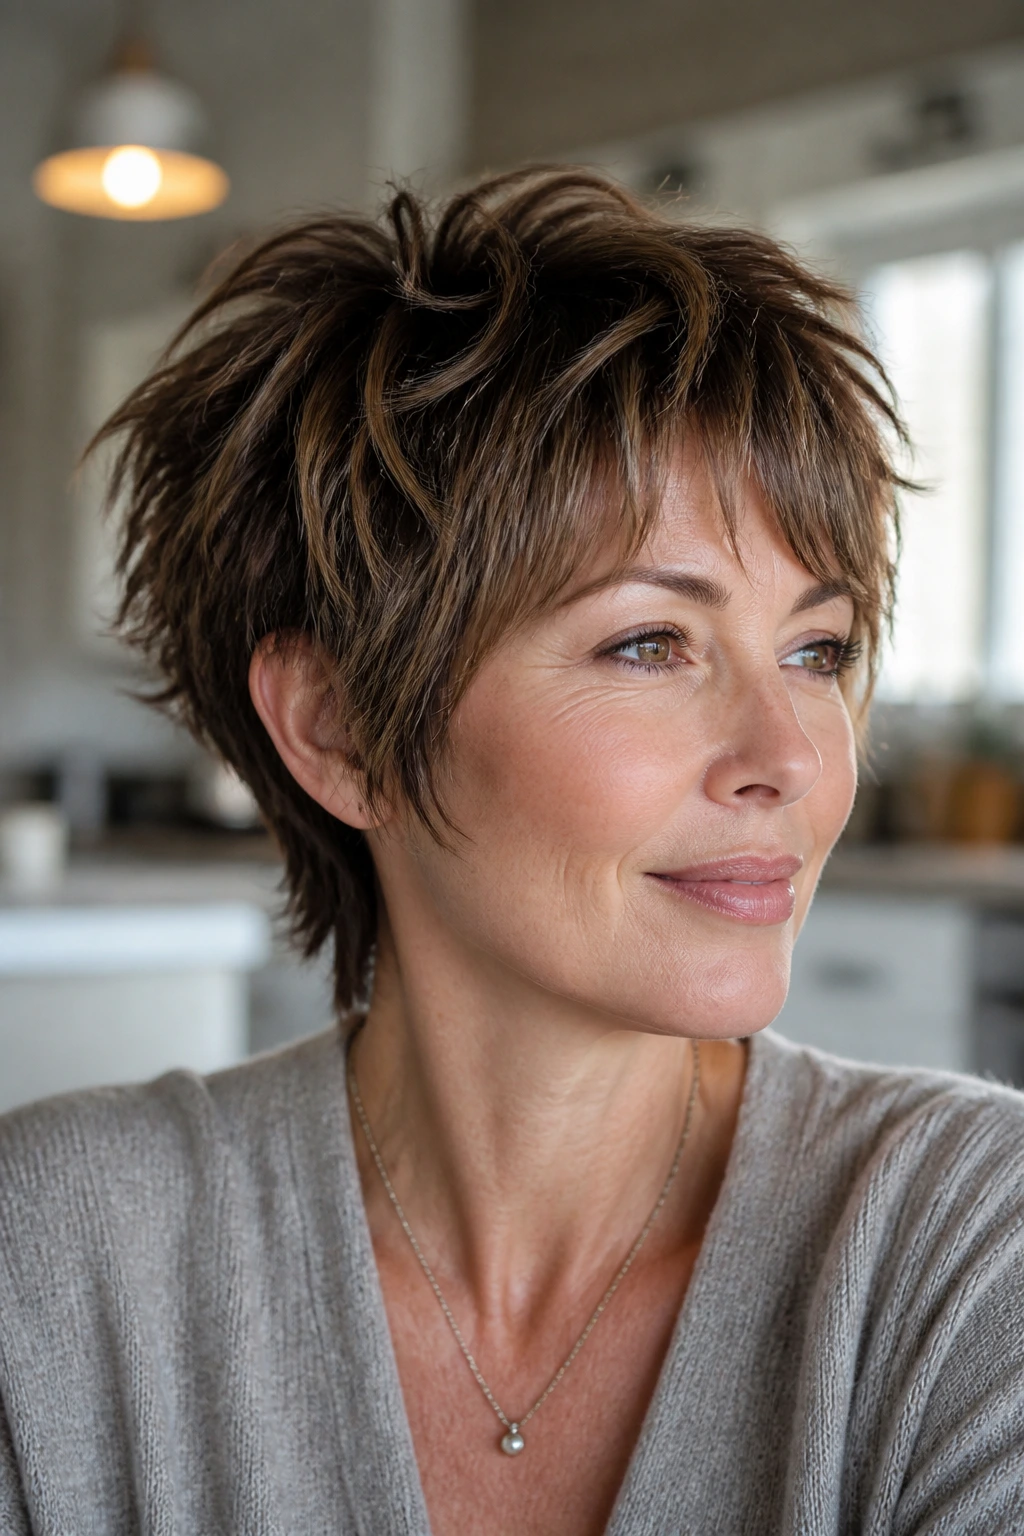
Short hair can still have personality. A pixie-shag hybrid keeps the sides and nape short, then leaves the top and crown shaggy enough to move around. It is one of the best cuts for fine hair that needs lift without the maintenance of a fully sculpted pixie. The top can be tousled with a dab of styling cream, or brushed forward for a softer look.
Best for people who want:
- a shorter cut that still has some fringe,
- faster drying time,
- and enough texture to avoid that helmeted pixie look.
The key is not to overcut the top. Leave enough length on the crown to create a little bend, and keep the sideburns soft so the cut frames the face instead of cutting it off. This is a sharp look, but not a severe one.
10. Soft Mullet Shag
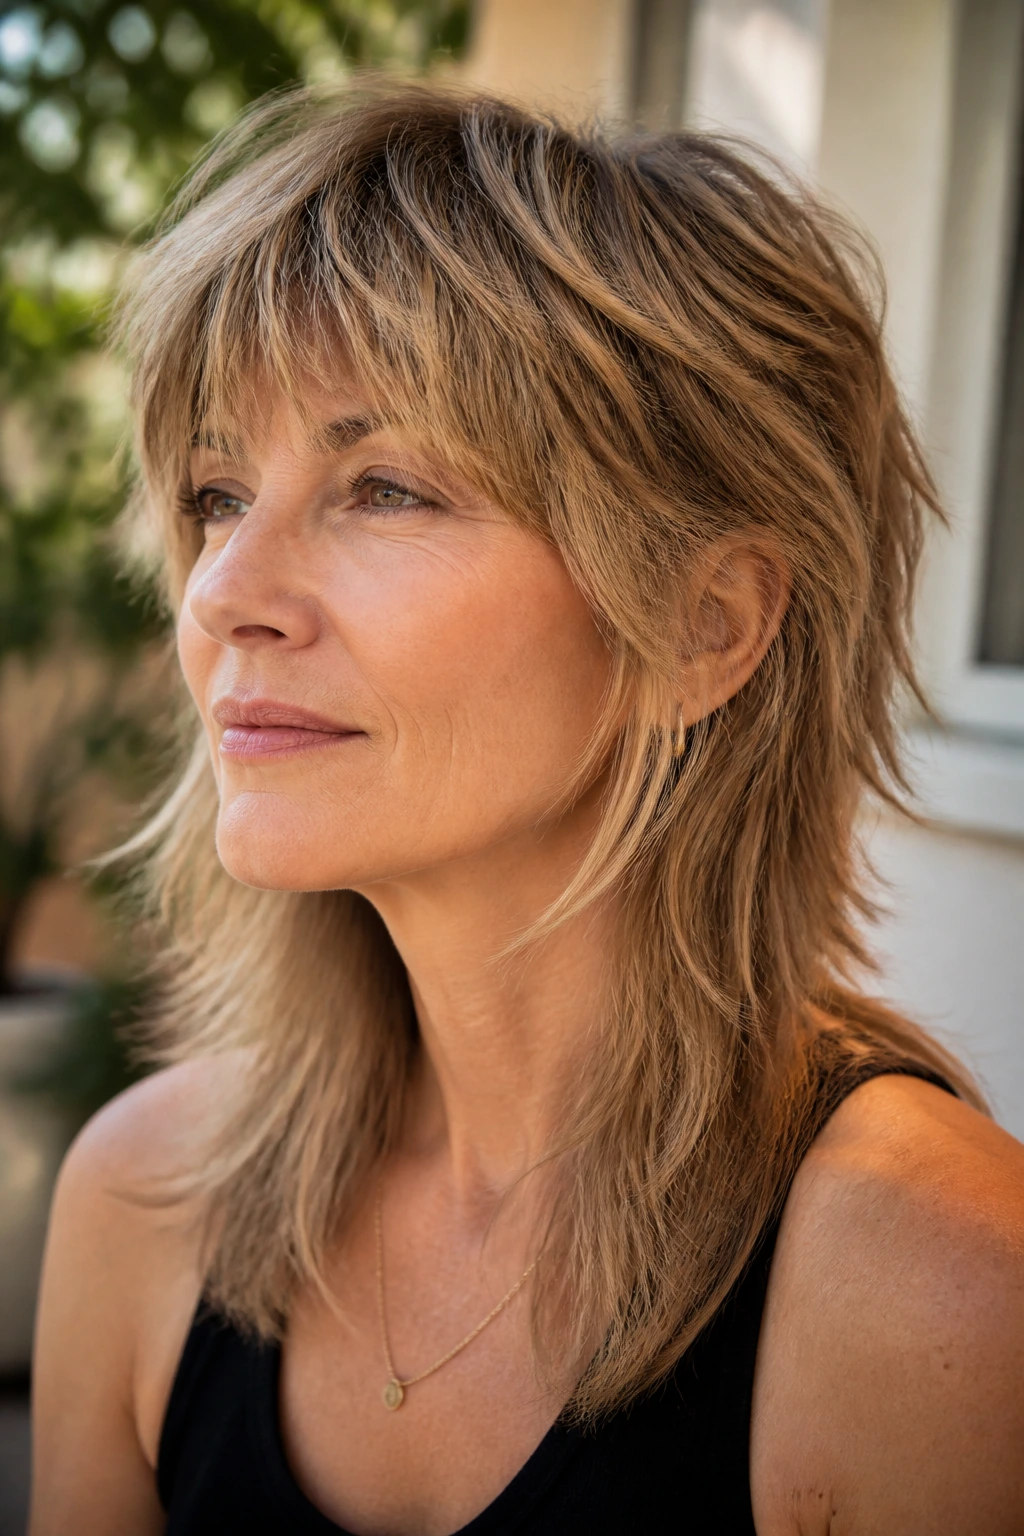
Yes, I know the word sounds bold. And yes, some people still hear it and think of something too edgy for real life. The soft mullet shag is not that. It keeps a longer back section and a shorter front layer set, but the transition is gentle and wearable. Think of it as a shag with a little extra attitude, not a costume.
This cut works when you want movement and shape, especially if your hair is dense or naturally wavy. The longer back keeps the silhouette modern, while the front pieces frame the cheekbones and jaw. If the top is cut too short, the whole thing can tip into retro territory. Keep the crown airy and the difference between front and back subtle.
It is a fun cut for someone who is bored with safe. That said, it still needs a careful hand. A good soft mullet shag should feel intentional in daylight, not dramatic for the sake of it.
11. Invisible-Layer Lob Shag
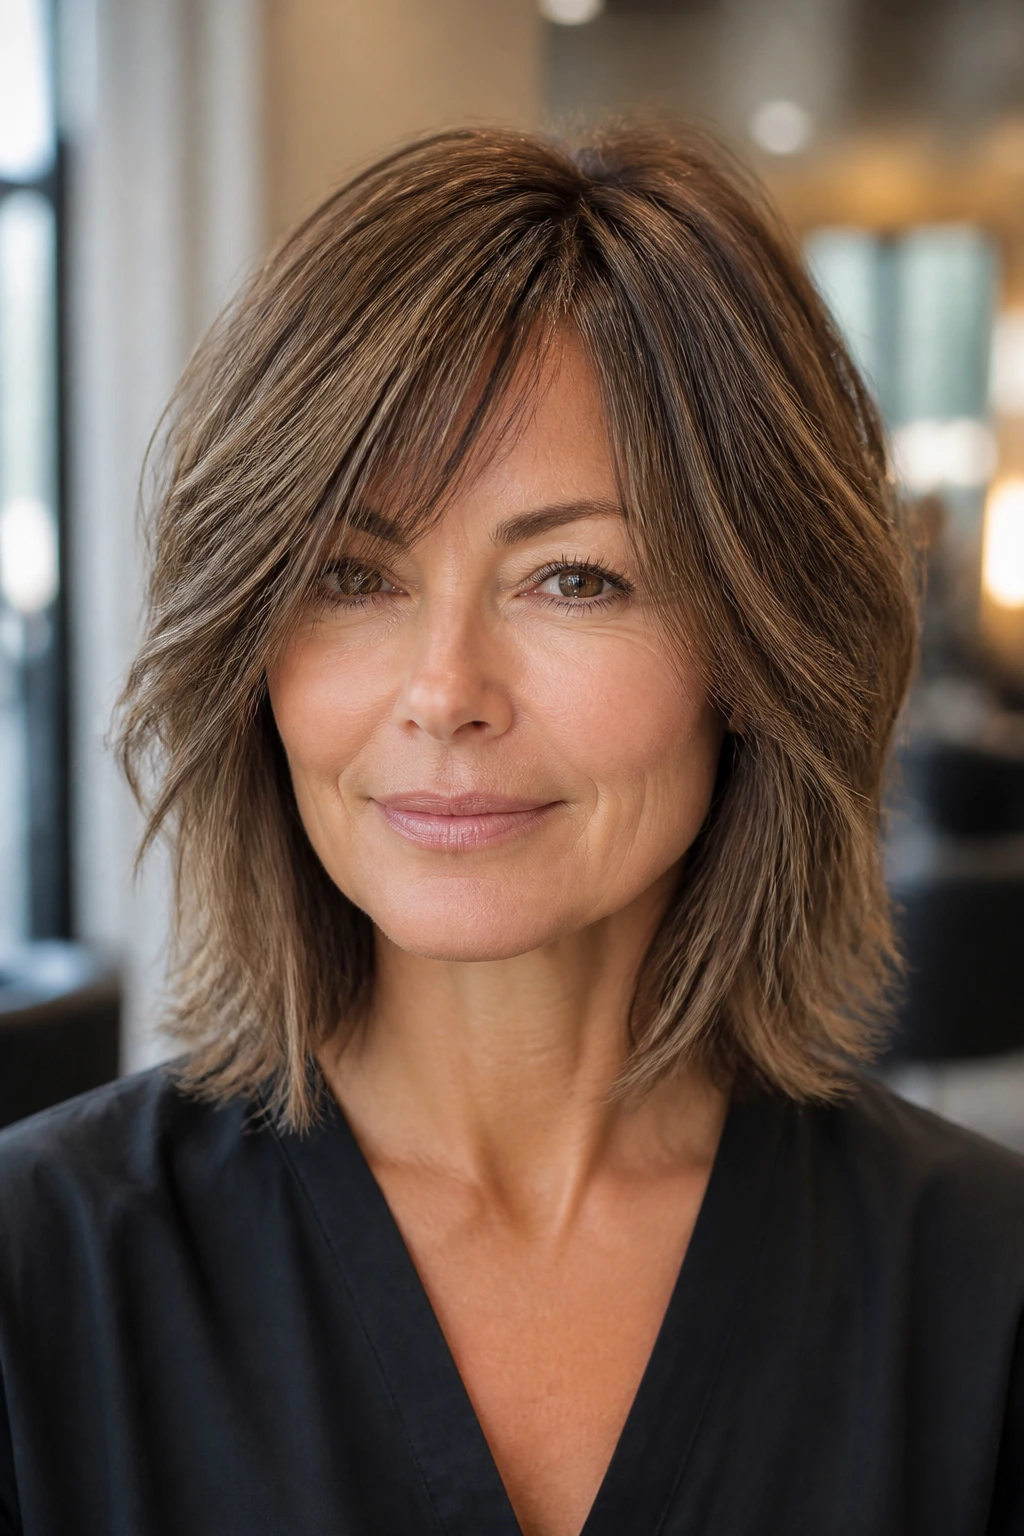
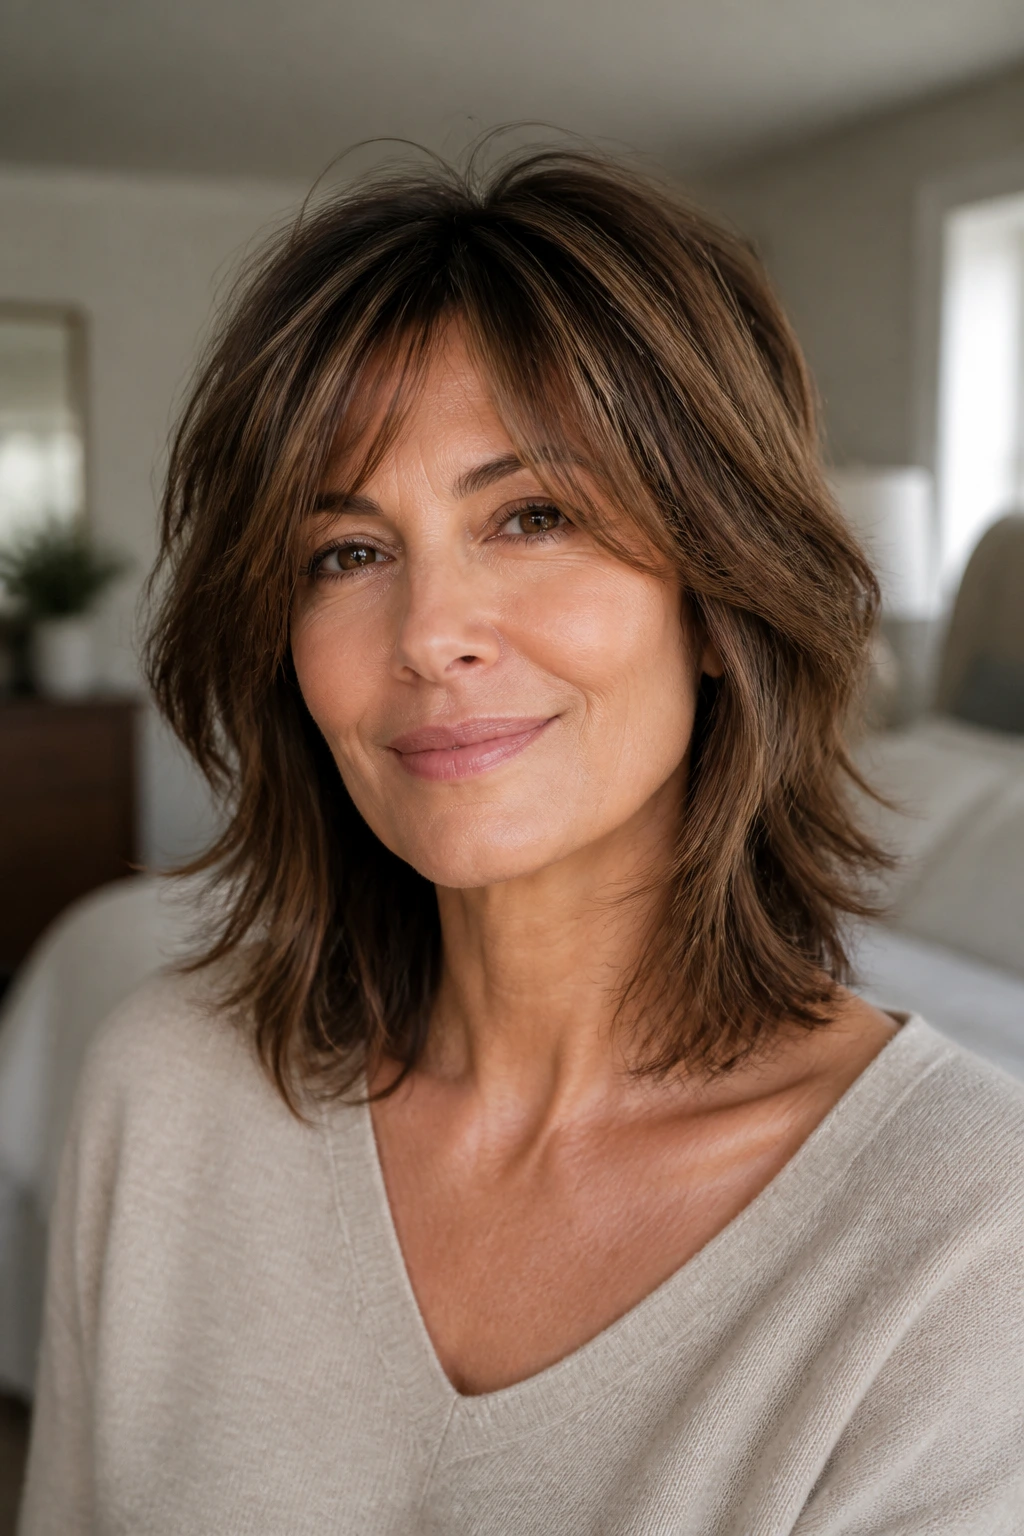
This is the shaggiest shag that still looks like it behaves in a meeting. The visible outline stays lob-like — clean, shoulder-grazing, easy to tuck back — while the layers live mostly inside the shape. That means you get movement without obvious choppy ends. For a lot of women, especially if they wear hair down four or five days a week, that balance is gold.
The beauty of invisible layering is that the haircut looks calm from the front and lively when you move. It is not one of those cuts that announces itself from across the room. The payoff shows up in the swing of the ends and the way the crown lifts after a quick blow-dry.
This is probably the safest shag in the group, which sounds boring until you realize how often boring is the thing that gets worn.
12. Side-Swept Wave Shag
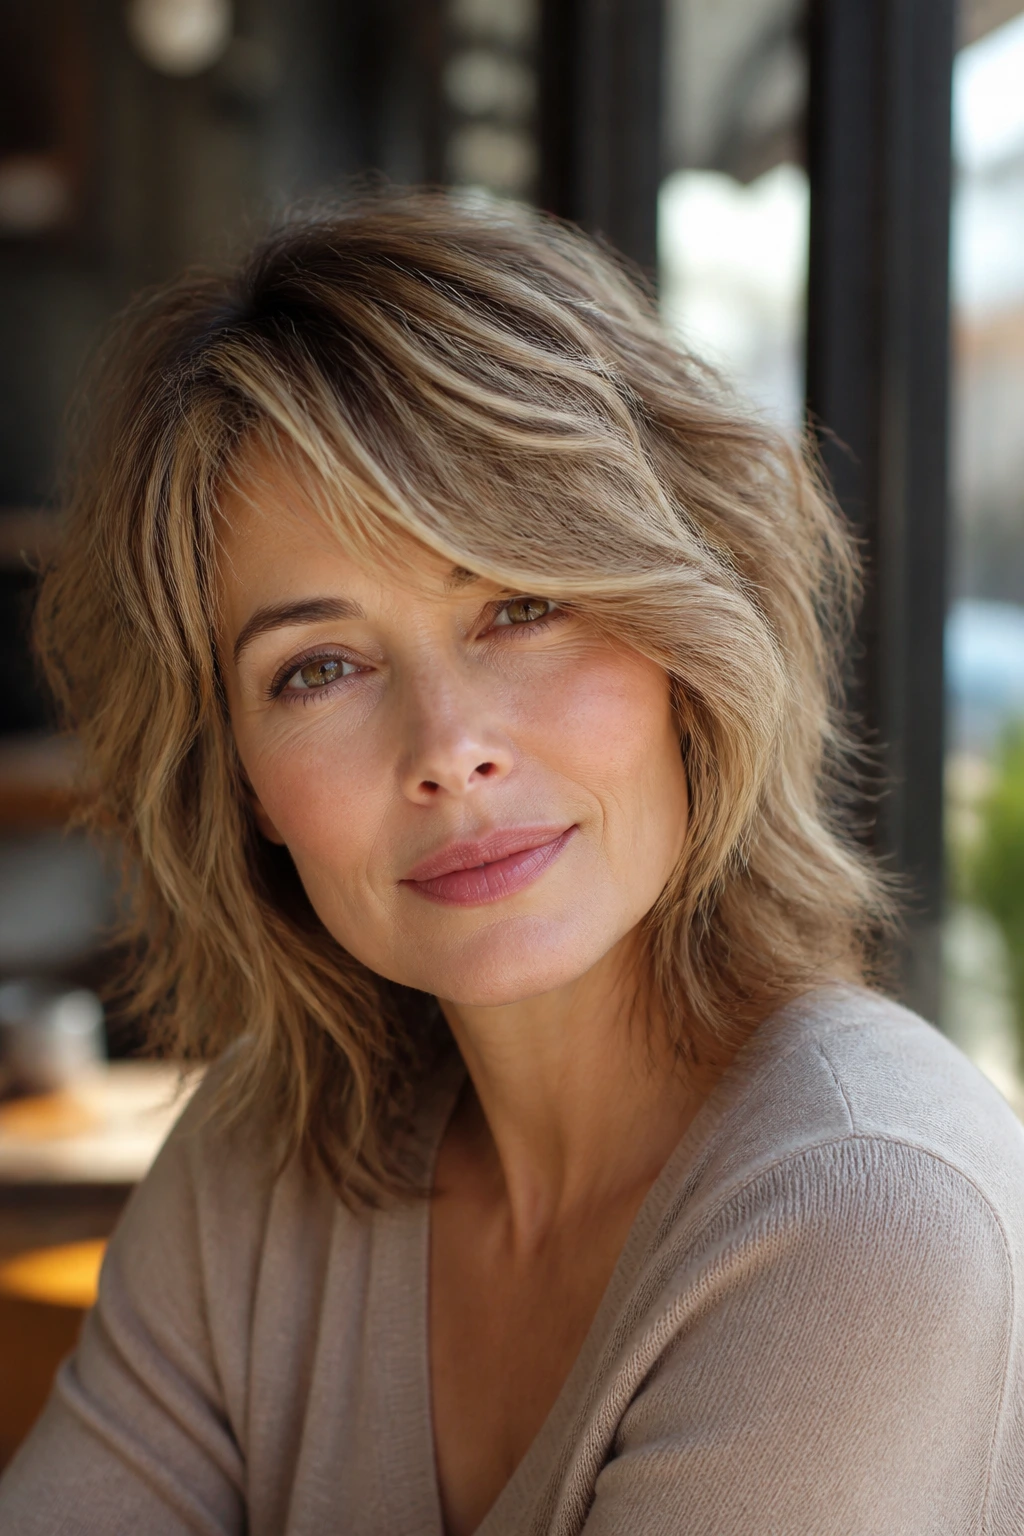
A side part changes the whole attitude of a shag. With a side-swept wave shag, the part creates instant lift at the crown and lets the fringe fall diagonally across the forehead. That diagonal line is useful if your face is long, narrow, or just feels a little too open in the center with a middle part.
The waves do not need to be polished. In fact, too much polish steals the charm. A soft bend through the mid-lengths, plus a sweep that lands around the eyebrow or cheekbone, gives the cut a relaxed shape that still looks finished. If your hair is wavy by nature, this is an easy win.
It also works well for growing out bangs. The side sweep disguises the awkward middle stage while the rest of the layers keep the head shape from going flat.
13. Airy Fine-Hair Shag
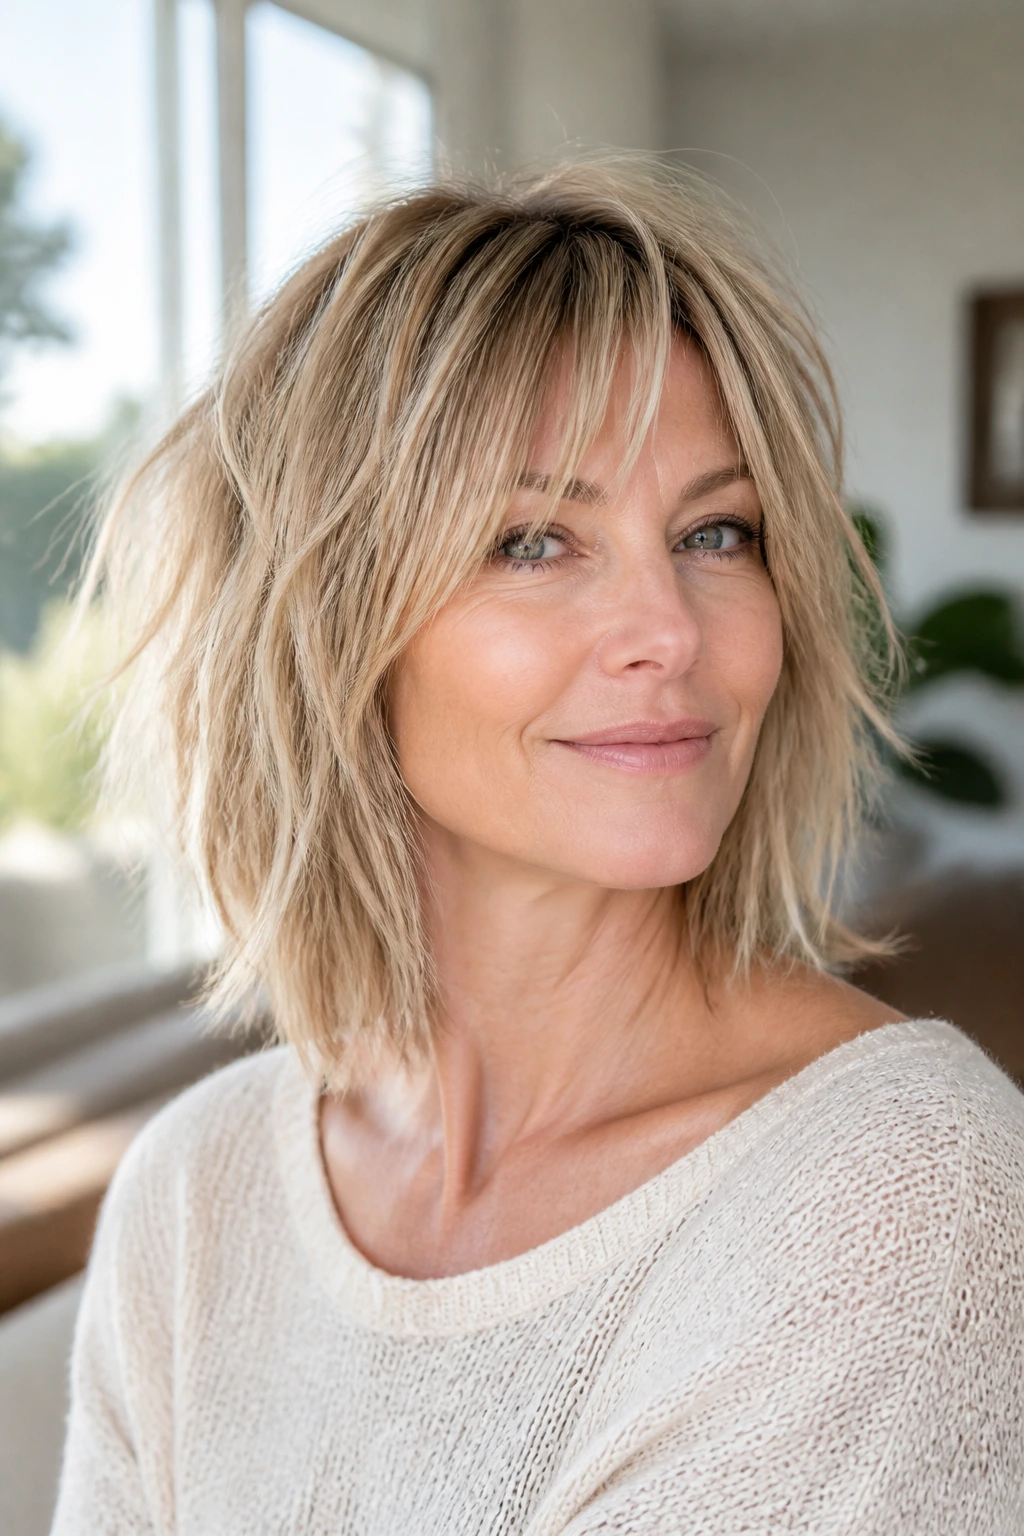
Fine hair needs restraint. Not less shape — restraint. The airy fine-hair shag keeps enough internal layering to create lift, but the perimeter stays full enough that the ends do not look see-through. That line matters. If a stylist takes too much out of the bottom, fine hair starts to look tired at the first wash.
Ask for these things:
- light point-cutting instead of heavy razor work,
- layers that begin no higher than the cheekbone,
- and a clean, blunt-ish edge at the longest point.
A little volumizing mousse at the roots helps, but the cut is doing the real work here. I would avoid too much texture paste on this type of shag; it tends to separate fine strands and make the whole thing look stringy. Keep the finish soft and touchable.
14. Heavy-Density Debulking Shag
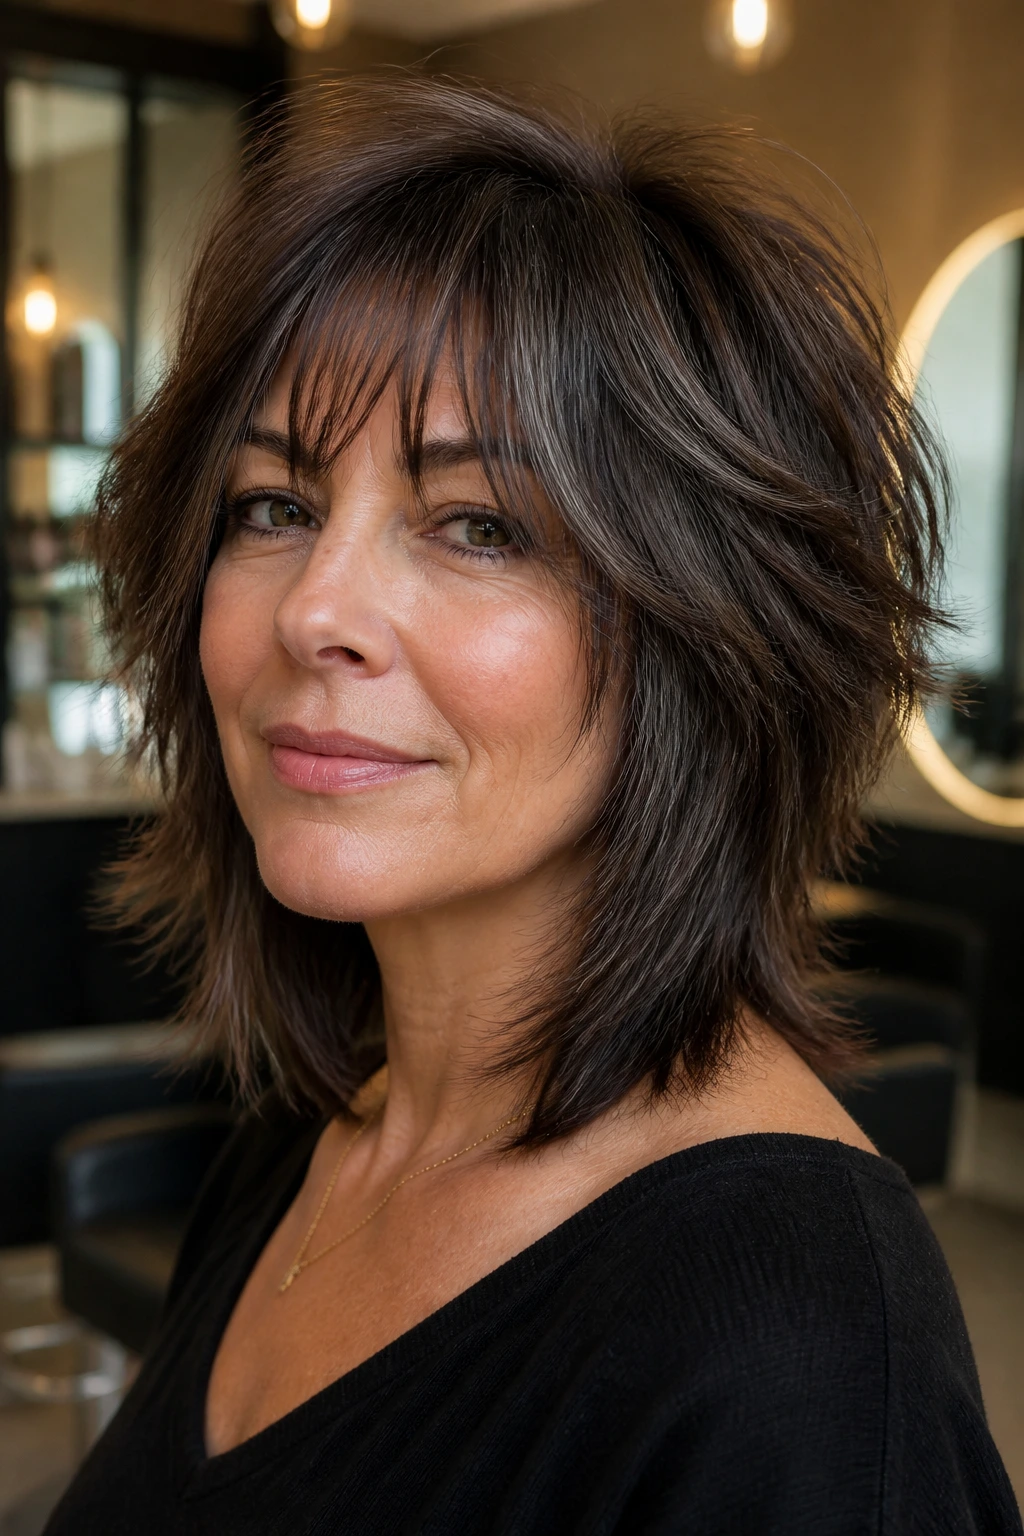
Thick hair can carry a beautiful shag, but only if the bulk is removed in the right places. The goal is not to thin everything. The goal is to let the head breathe. A heavy-density debulking shag uses long layers, internal weight removal, and careful shaping around the face so the cut does not turn into a triangle by noon.
If your hair puffs out at the sides or feels like it sits on your shoulders in one solid mass, this is the cut to study. The shortest layers should be placed with purpose, usually around the chin or cheekbone, while the bottom remains long enough to hold the overall shape. A good stylist will leave enough density in the ends to keep the cut from looking frayed.
This cut is one of those rare cases where less bulk and more hair can feel like the same thing. The shape opens up. Your neck is happier. The blow-dry takes less time. That’s a useful haircut.
15. Blowout Brushed Shag
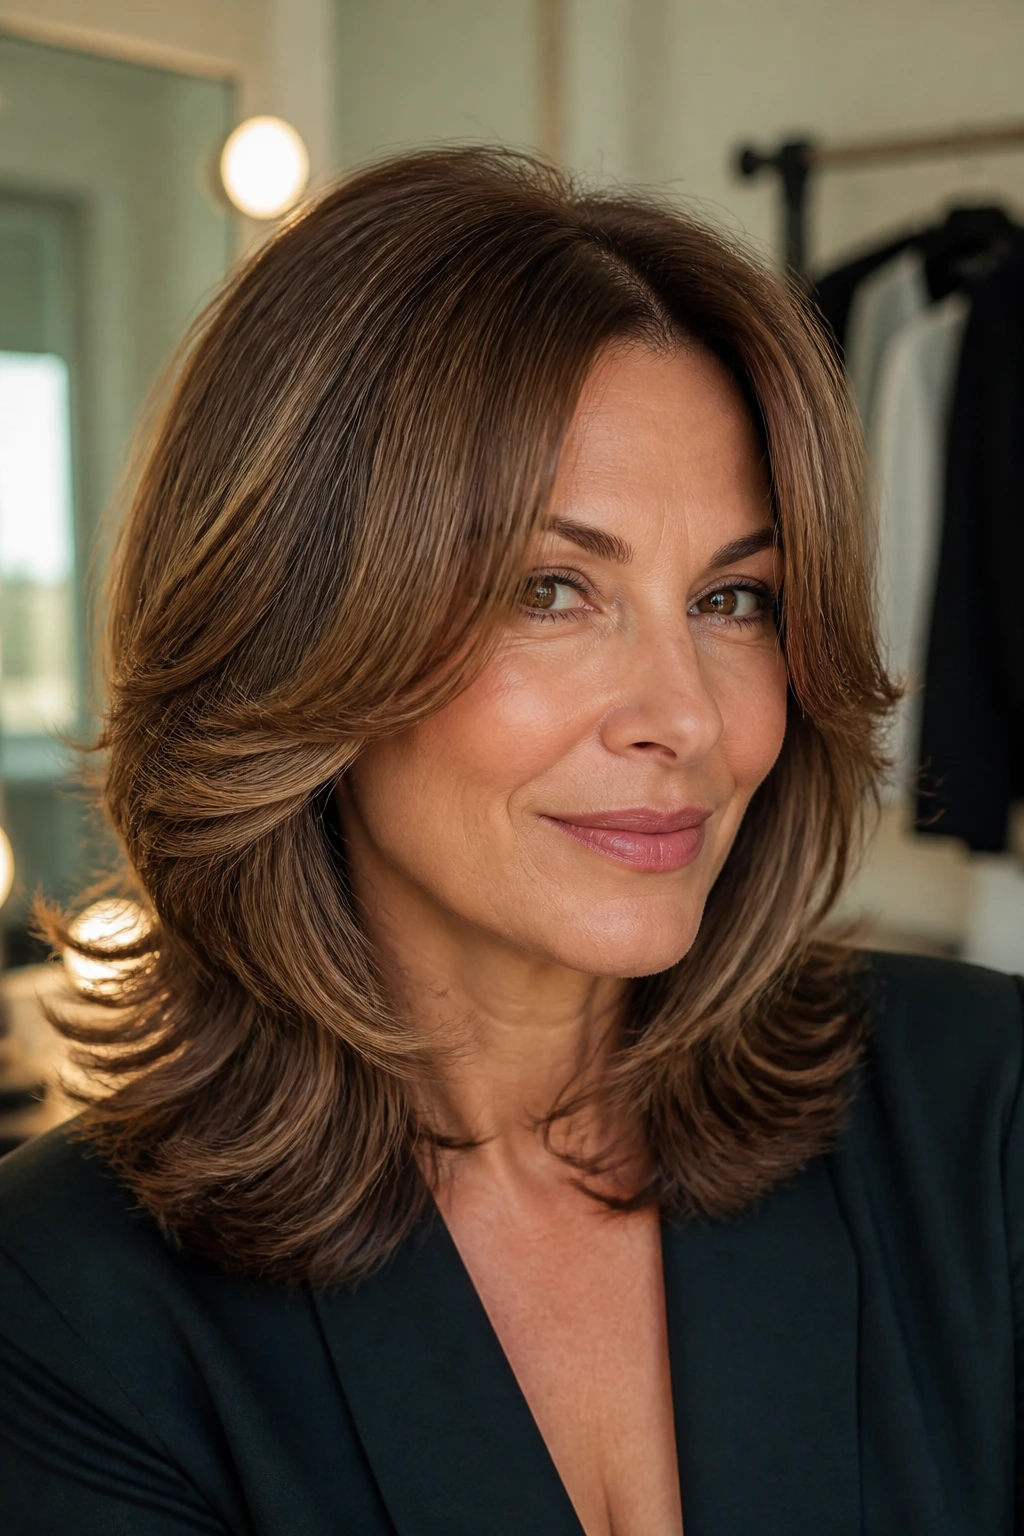
Some shags are made to look a little rough around the edges. This one is not. The blowout brushed shag leans polished, with soft swoops at the front and a rounded finish through the ends. It is the shag I’d choose if I wanted movement but also wanted my hair to look good with a blazer, lipstick, and not much else.
The styling is the whole point. Use a round brush or a blow-dry brush to bend the face-framing layers away from the cheekbones, then brush the ends under just enough to keep the outline neat. If your hair is medium to thick, this shape can hold without much product. If it is finer, a little root mousse gives the crown somewhere to stand.
It is a good reminder that a shag does not have to look undone. It can look smooth and still have life in it.
16. Wash-and-Go Natural Shag
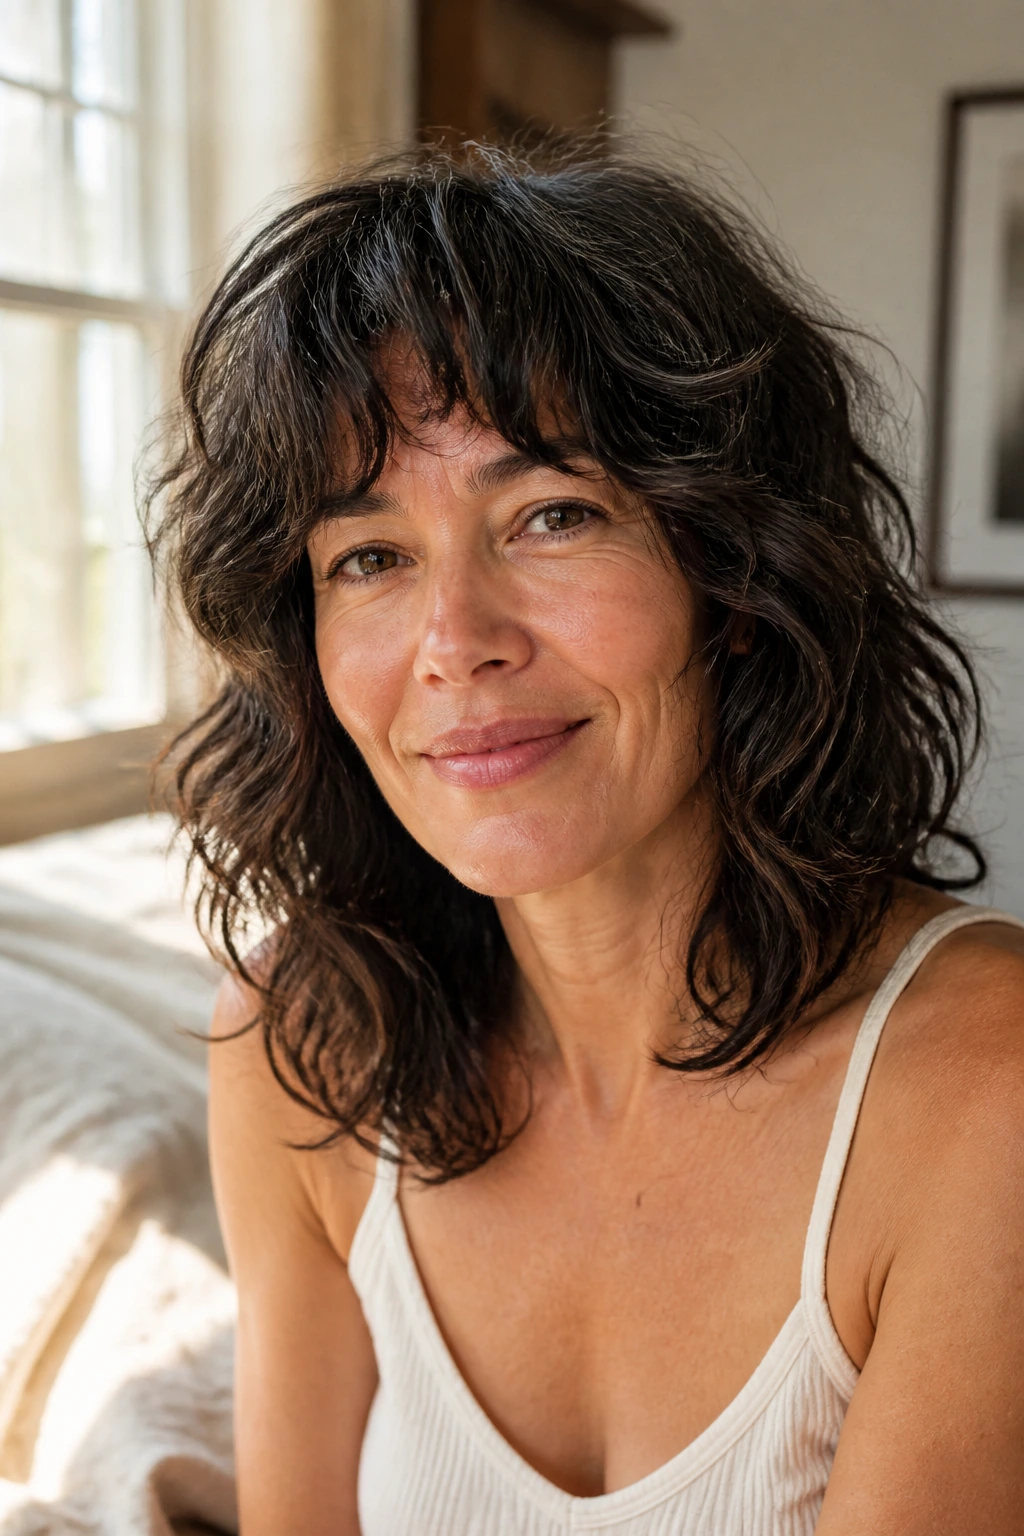
Some cuts are born for a full styling session. This is not one of them. The wash-and-go natural shag is built for people who want to squeeze out water, add a bit of cream or mousse, and leave the house while the hair still has a little dampness at the ends. The layers are placed so the hair falls into shape as it dries, instead of requiring a brush and a prayer.
Wavy and lightly curly hair love this kind of shag. The cut gives the bends somewhere to land, which means the shape often looks better with a little imperfect texture. If your hair frizzes in humidity, the answer is not always more heat. Sometimes it is a better cut and a lighter hand.
This version is especially kind to busy mornings. It gives you the look of effort without the actual labor, and I’m not going to pretend that does not matter.
17. Deep Side-Part Glam Shag
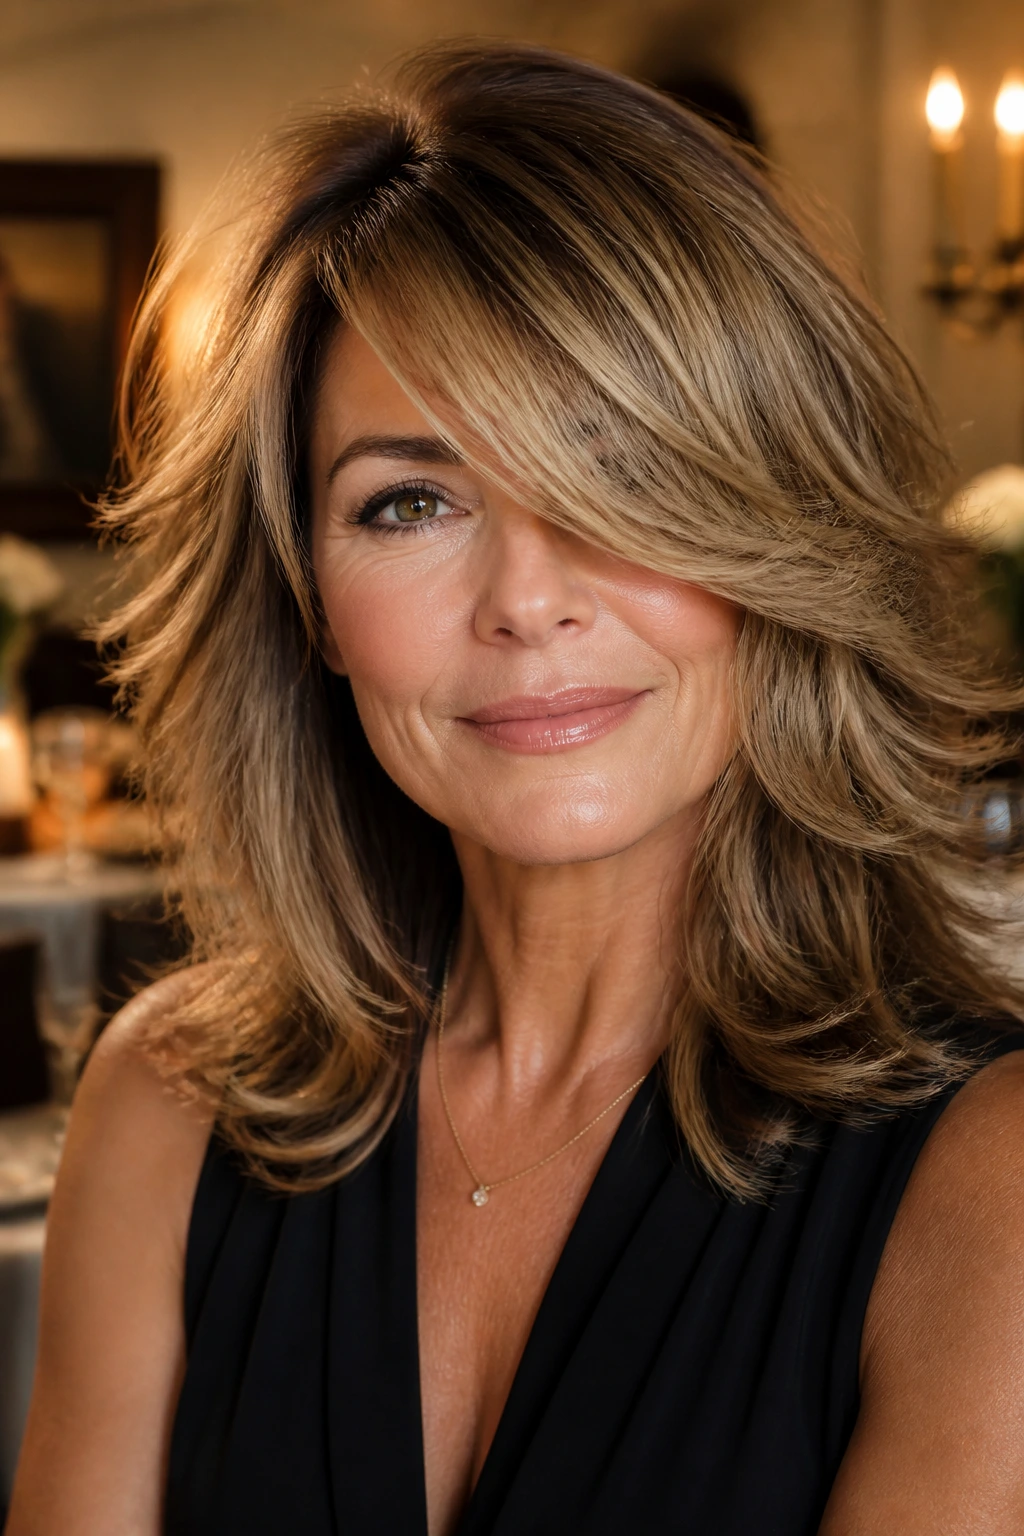
A deep side-part glam shag is the fancy cousin in the family. The part is moved far over, the fringe sweeps dramatically across the forehead, and the layers are styled with a soft bend that gives the whole shape a little shine. It is a gorgeous choice if you want your hair to feel a touch more dramatic without going full evening updo.
The side part adds lift immediately, especially at the crown. The longer front piece can skim the cheekbone and jaw, which does nice things for square or heart-shaped faces. If your hair is straight, a blow-dry with a large round brush will keep the swoop smooth. If it’s wavy, a touch of bend through the mid-lengths makes the style feel less formal.
This is the shag that can walk into dinner and not look overdone. That’s rare. Useful, too.
How to Bring the Right Photo to the Salon Chair
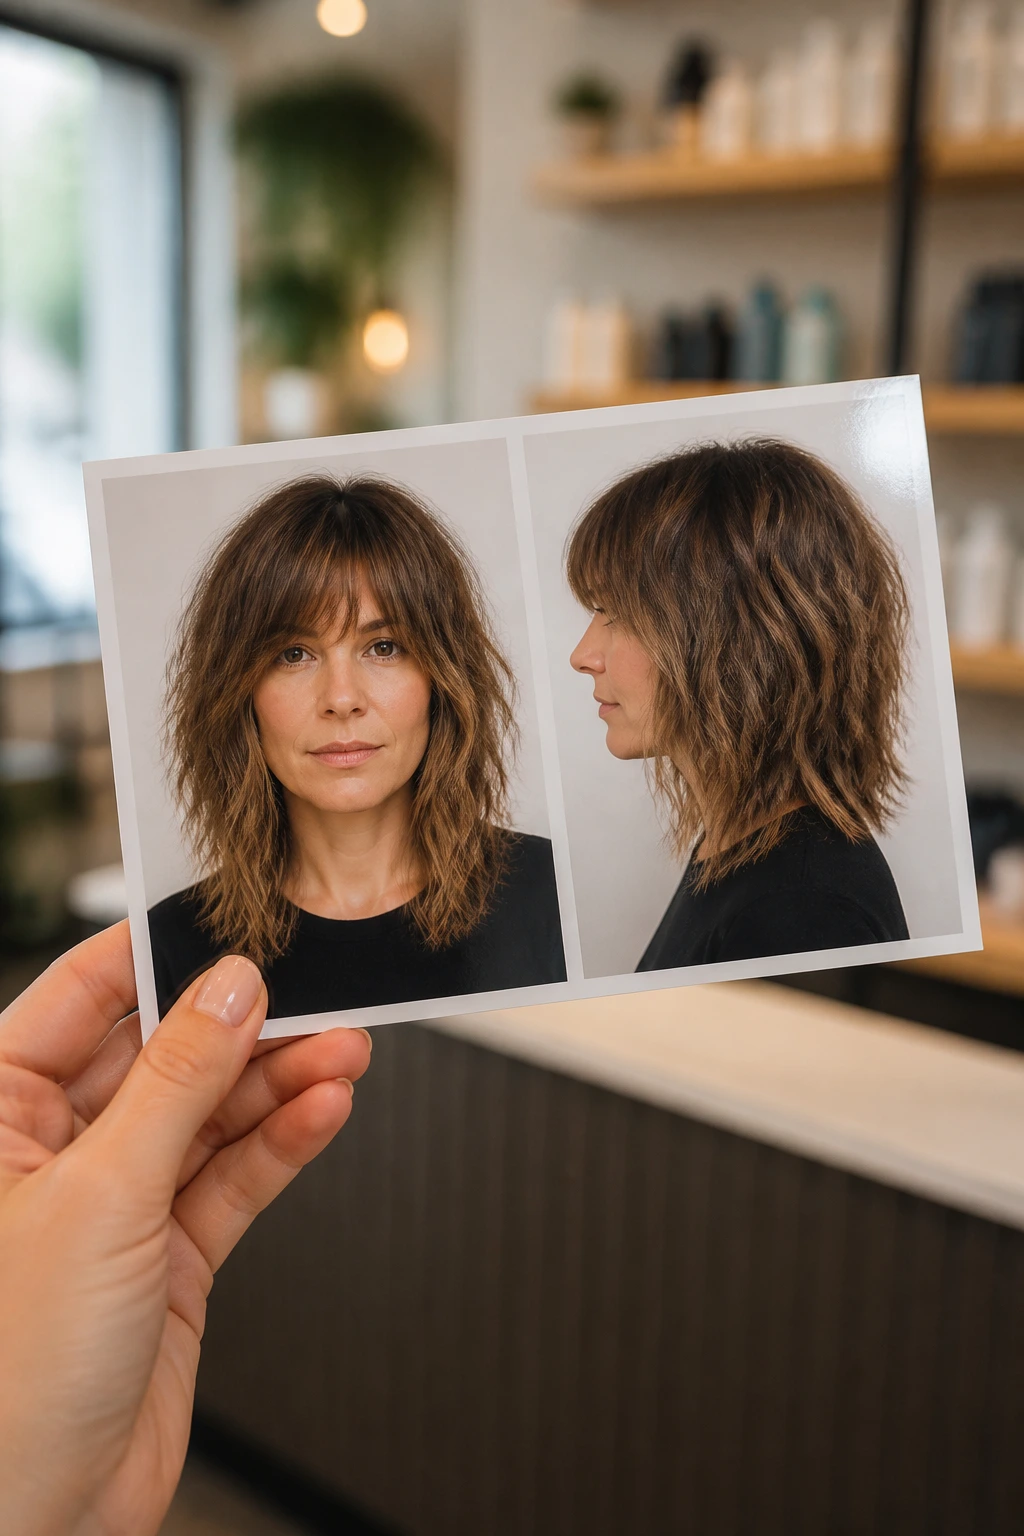
A screenshot is not enough. Not even close.
Bring two or three photos that show the cut from the front and the side, because a shag lives and dies by silhouette. The front tells your stylist how much fringe you want. The side shows where the shortest layers start and how much weight stays in the bottom. If you only bring one smiling front-facing shot, you are asking for a gamble.
Say what you like about the photos, not just what you want copied. That matters. Tell the stylist whether you like the fringe, the neck length, the amount of volume at the crown, or the way the ends move. And say what you do not want. If you hate spending time with a round brush, say so. If your hair frizzes at the first sign of humidity, say that too. Silence is how people end up with a cut that looks gorgeous in the chair and wrong in real life.
The details worth mentioning
- Your natural part: If you always part on the same side, do not pretend you will change.
- Your styling routine: Five minutes, fifteen minutes, or nothing beyond finger-drying.
- Your weak spots: Flat crown, cowlick at the hairline, frizzy ends, or heavy sides.
- Your tools: Diffuser, round brush, straightener, or none of the above.
Essential Tools for Styling a Shag at Home
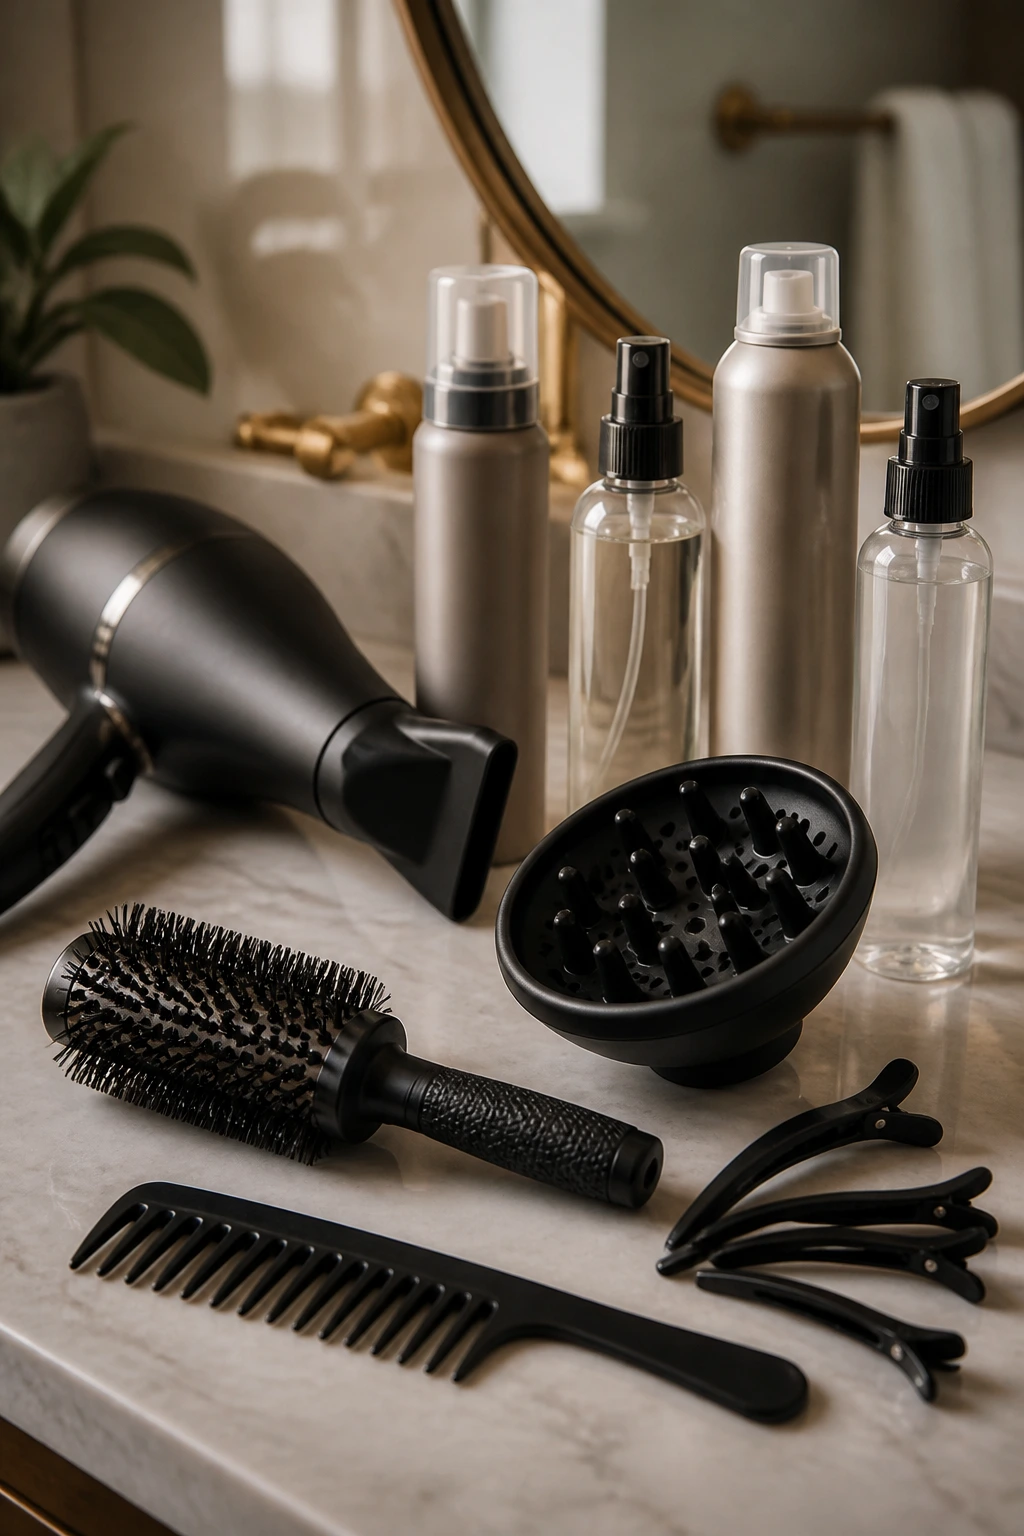
A shag does not need a suitcase of products, but a few things make life easier.
- Blow dryer with a nozzle: The nozzle matters because it lets you aim airflow at the roots instead of puffing everything around.
- 1.25- to 1.5-inch round brush: This size gives a bend without turning the ends into tiny corkscrews.
- Diffuser: If your shag is curly or wavy, this helps the shape dry without getting blown into frizz.
- Wide-tooth comb: Good for distributing conditioner and for gently separating curls without ripping them apart.
- Duckbill clips: Useful for setting the crown or pinning the front while it cools into shape.
- Light mousse or volumizing foam: Best at the roots on fine hair; use a small amount so it does not go crunchy.
- Texturizing spray: Good for second-day lift and for making the layers look separated instead of limp.
- Flexible-hold hairspray: Keeps movement in the hair. Hard-hold spray can make a shag feel stiff and dated.
- Heat protectant: If you use a brush, flat iron, or curling iron, this is not optional.
How to Wear a Shag on Busy Mornings and Polished Days
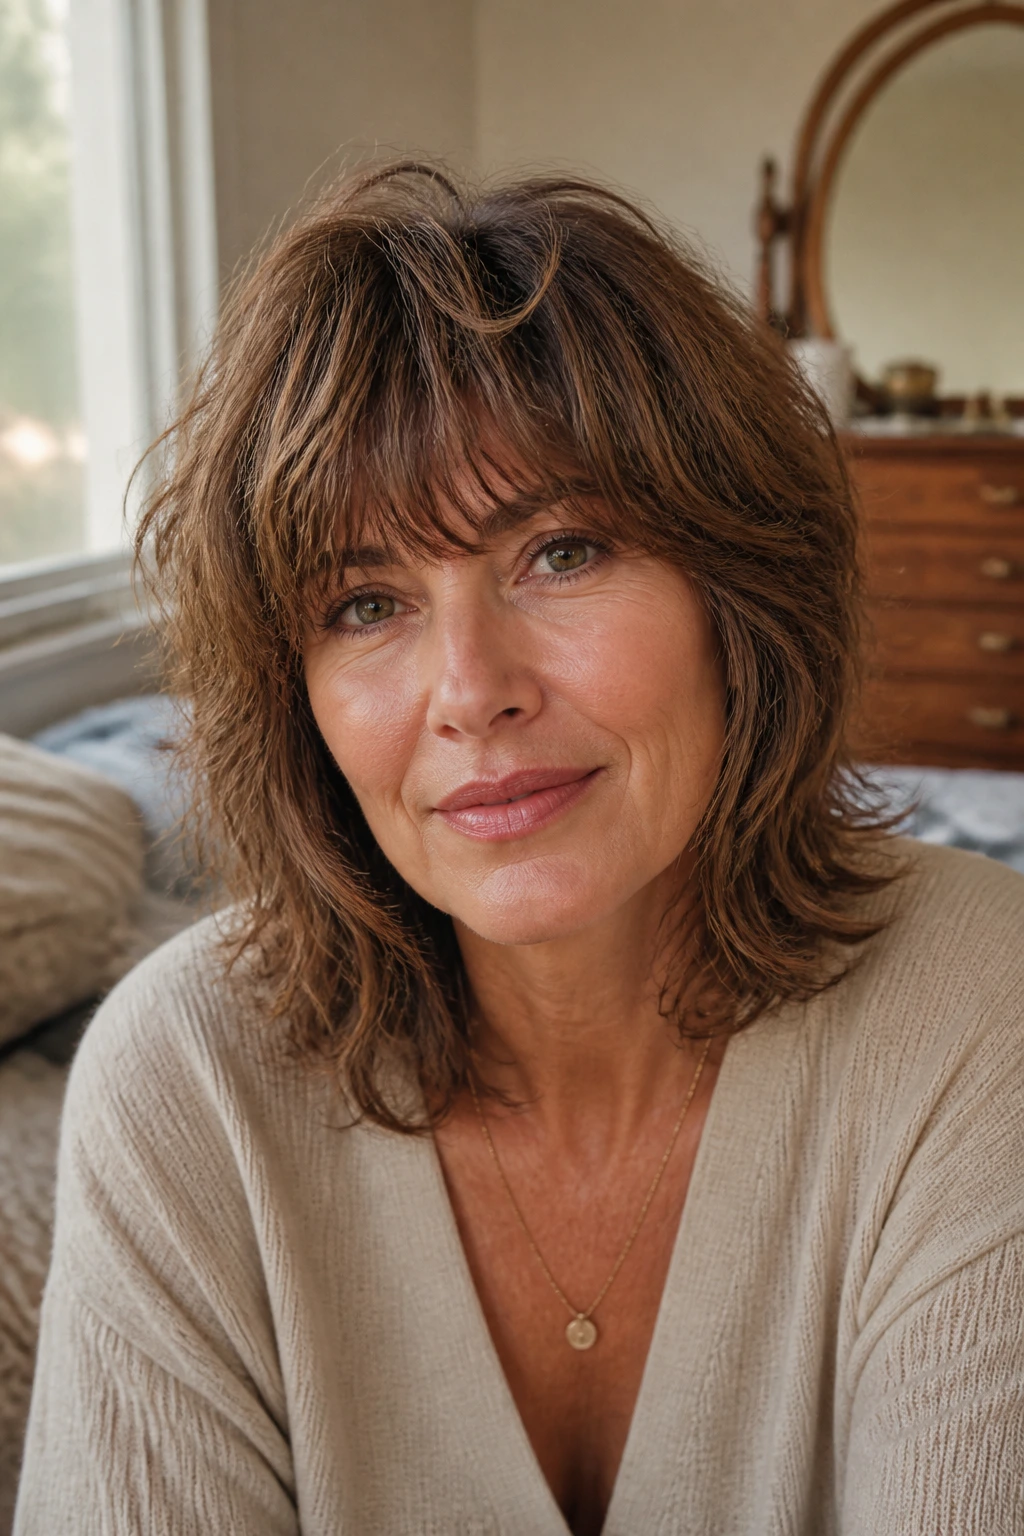
The same cut can look casual or sharp depending on how you finish it.
Air-Dry Days: Work a small amount of mousse or curl cream through damp hair, then scrunch the mid-lengths and leave the crown alone. If your hair is straight, tuck a clip at the front for 10 minutes so the fringe doesn’t dry flat against the forehead.
Polished Days: Rough-dry the roots first, then use a round brush on the front pieces and crown. You do not need to curl every section. Two or three well-placed bends are enough to make the shape read as intentional.
Second-Day Hair: This is where shag cuts tend to shine. A light mist of water at the crown, a puff of dry shampoo near the roots, and a few squeezes of texturizing spray through the ends can wake up the whole head. If the fringe has gone odd, dampen only the fringe and dry it in the direction you want.
Glasses Days: Keep the fringe soft and the temples lighter. If the bangs hit the top of the frames, they can either look chic or drive you nuts. The sweet spot is usually just above or just below the frame line, not right on it.
Small Tweaks That Change the Whole Cut
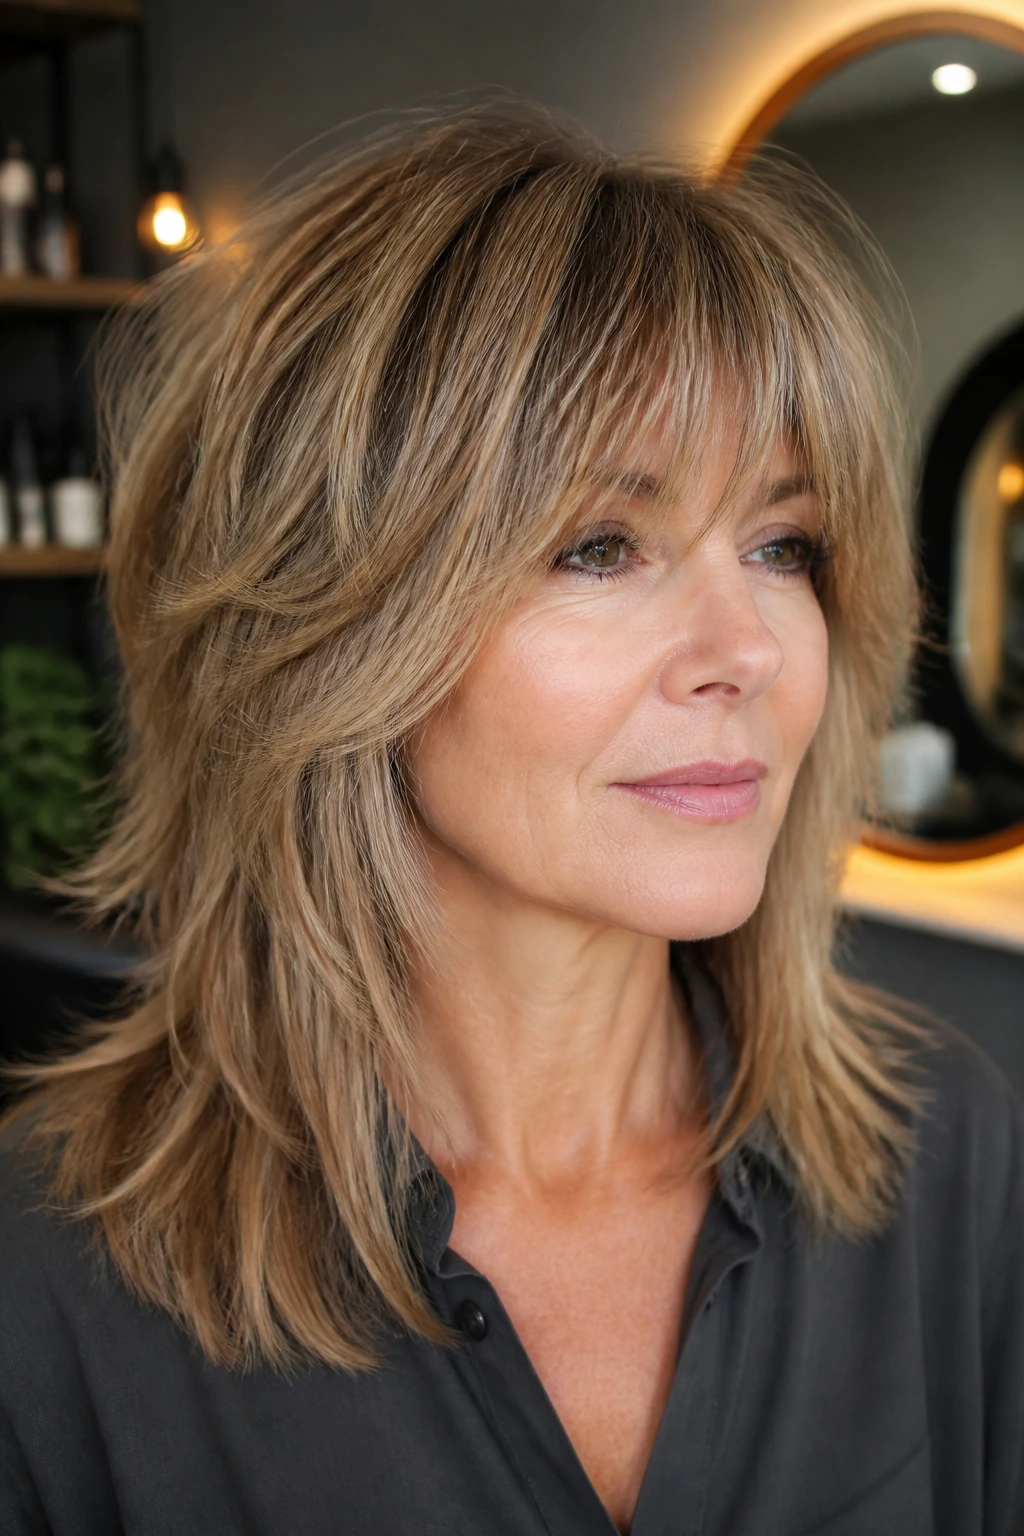
A shag is not one thing. Tiny changes make a big difference.
Longer Fringe: If you want less commitment, keep the bang pieces longer so they can split into a curtain or sweep sideways. That also helps the cut survive grow-out without a weird gap in the middle.
Shorter Crown Layers: Use this if the top falls flat by noon. Shorter crown layers create lift, but they need to be balanced with enough weight in the bottom or the shape goes puffy.
Softer Ends: Ask for point-cutting at the perimeter if you want the edge to move more gently. This is helpful on finer hair, where blunt ends can look heavy but over-thinning can look ratty.
Deeper Side Part: A side part changes the whole visual weight of the cut. It adds lift at the crown and can make a medium-length shag look a little dressier with zero extra effort.
Face-Framing Angle: More angle around the face softens strong jawlines. Less angle keeps the shape cleaner and a little more modern. That is a salon-chair conversation worth having before the scissors come out.
Common Mistakes That Make a Shag Look Off
The first mistake is cutting too much into the ends. When the perimeter gets thinned out too aggressively, the haircut starts to look frayed after one wash. The fix is simple: keep some density at the bottom and let the texture live inside the cut.
Another one is placing the shortest layers too high. That can make the top puff out while the sides collapse. If you have fine hair, this is especially unforgiving. Ask where the shortest layer will land before anything is removed. Cheekbone and chin are safer starting points than random guesswork.
Heavy bangs with a shag can also backfire. A thick, blunt fringe changes the shape from soft and lived-in to blocky, which defeats the point. If you want bangs, ask for curtain, bottleneck, or soft side-swept fringe, then keep the density light enough that the front moves with the rest of the cut.
A fourth mistake is using too much texturizing spray. A little gives separation. A cloud of it makes the hair feel dusty and rough. If your strands start to feel sticky or dry at the ends, back off and use a flexible hairspray instead.
Finally, people often ignore their natural part and cowlicks. A shag has to work with the way your hair falls. If the crown splits in one spot no matter what you do, fight that and you’ll be annoyed every morning. Shape the cut around it instead.
Variations and Adaptations to Try
The Curly-Crown Version: This variation keeps the top rounded and the curl groups intact, with longer pieces around the perimeter so the shape doesn’t spring too short. It is a good choice if your curls need lift more than they need length.
The Gray-Glaze Version: Pair a silver or salt-and-pepper shag with a shine treatment or gloss between cuts. The haircut does the movement; the gloss keeps the color bright and stops the gray from reading dull.
The Office-Safe Version: Keep the outline clean, the fringe soft, and the layers invisible from the front. It looks polished in a low bun or clip, but still has enough shape to fall nicely when worn down.
The Edge-Forward Version: Ask for stronger separation through the ends, a deeper side part, and a slightly shorter crown. This one has more attitude. It works best if you like your hair to have a little grit and motion.
The Fine-Hair Version: Use fewer layers, start them lower, and keep the perimeter fuller. That gives the illusion of body without making the ends look see-through.
The Thick-Hair Version: Focus on internal debulking and long layers, not slicing away at the bottom. Thick hair needs space to move, not an over-thinned outline.
Keeping the Shape Between Cuts
Shorter shag haircuts usually need a trim every 6 to 8 weeks if you want the fringe and crown to stay tidy. Shoulder-length shags can stretch to 8 to 10 weeks, and longer versions often hold shape for 10 to 12 weeks if the layers were placed well. Past that, the fringe starts to lose its logic and the ends can go heavy.
Between cuts, treat the fringe like its own small project. A quick dry trim around the eyes or a careful bang refresh can keep the whole haircut looking deliberate. If you are trimming at home, take tiny snips. Tiny. One bad afternoon with scissors can change the mood of the whole cut.
Washing habits matter too. If your shag is fine or oily at the roots, a lightweight shampoo and a dry shampoo on day two can help keep the crown lifted. If your hair is dry or curly, stretch the washes and lean on leave-in cream at the ends. The cut will last longer if you stop trying to force it into a shape that does not match your texture.
Sleeping with the hair in a loose clip or a soft scrunchie can also help preserve the bend. And if the front pieces flip awkwardly in the morning, mist them with water, reset the part, and let them dry for five minutes before touching anything else. That tiny pause saves a lot of fuss.
Frequently Asked Questions
Will a shag haircut make my hair look thinner?
It can, if the layers are cut too high or the ends are thinned too much. A well-placed shag keeps enough density at the perimeter to hold shape while still creating movement inside the cut.
Can I get a shag if my hair is straight?
Yes. Straight hair often benefits the most from a shag because the layers add bend and lift that the hair does not make on its own. A blow-dry with a round brush or a bit of texturizing spray usually helps the shape settle in.
Do shag haircuts work with glasses?
They do, but the fringe has to be placed with the frames in mind. Curtain bangs, bottleneck bangs, and soft side-swept pieces usually sit better than a blunt fringe that lands right on the top edge of the glasses.
How often should I trim a shag?
Shorter shags need more frequent shaping, usually every 6 to 8 weeks. Longer versions can go a bit longer, but the fringe and face frame still need regular attention or they start to drift.
What if my hair is very thick?
Then the stylist should focus on removing bulk from inside the shape, not chopping away at the bottom. Thick hair needs room to move, but the perimeter still has to keep enough weight to look healthy.
Can curly hair wear a shag without becoming a triangle?
Yes, if the cut is planned around curl pattern and shrinkage. Dry cutting or curl-by-curl shaping helps preserve definition, and the crown layers should be placed so the top lifts without widening the sides.
How do I ask for a shag without getting a mullet?
Ask for a shag with a clear perimeter, soft face framing, and controlled layering through the crown. If you want the back to stay similar to the front, say that out loud. The words “soft,” “blended,” and “perimeter” matter here.
What should I do if the fringe separates weirdly?
Mist the bangs lightly, comb them side to side, then dry them in the direction you want while they are still damp. A tiny bit of light cream or pomade at the very ends can help, but too much product makes the problem worse.
A Cut That Grows Up With You
A good shag haircut for women over 40 is not about trying to look younger. That’s the wrong goal, and a little silly besides. The real win is better shape: hair that sits with more ease, frames the face with more purpose, and stops demanding a fight every morning.
The best version for you might be soft and collarbone-length, or short and sharpened at the jaw, or curly and rounded with a lifted crown. Pick the shape that works with your texture, your styling habits, and the amount of fuss you are willing to tolerate. That’s where the good cuts live — in the honest match between hair and life.
