



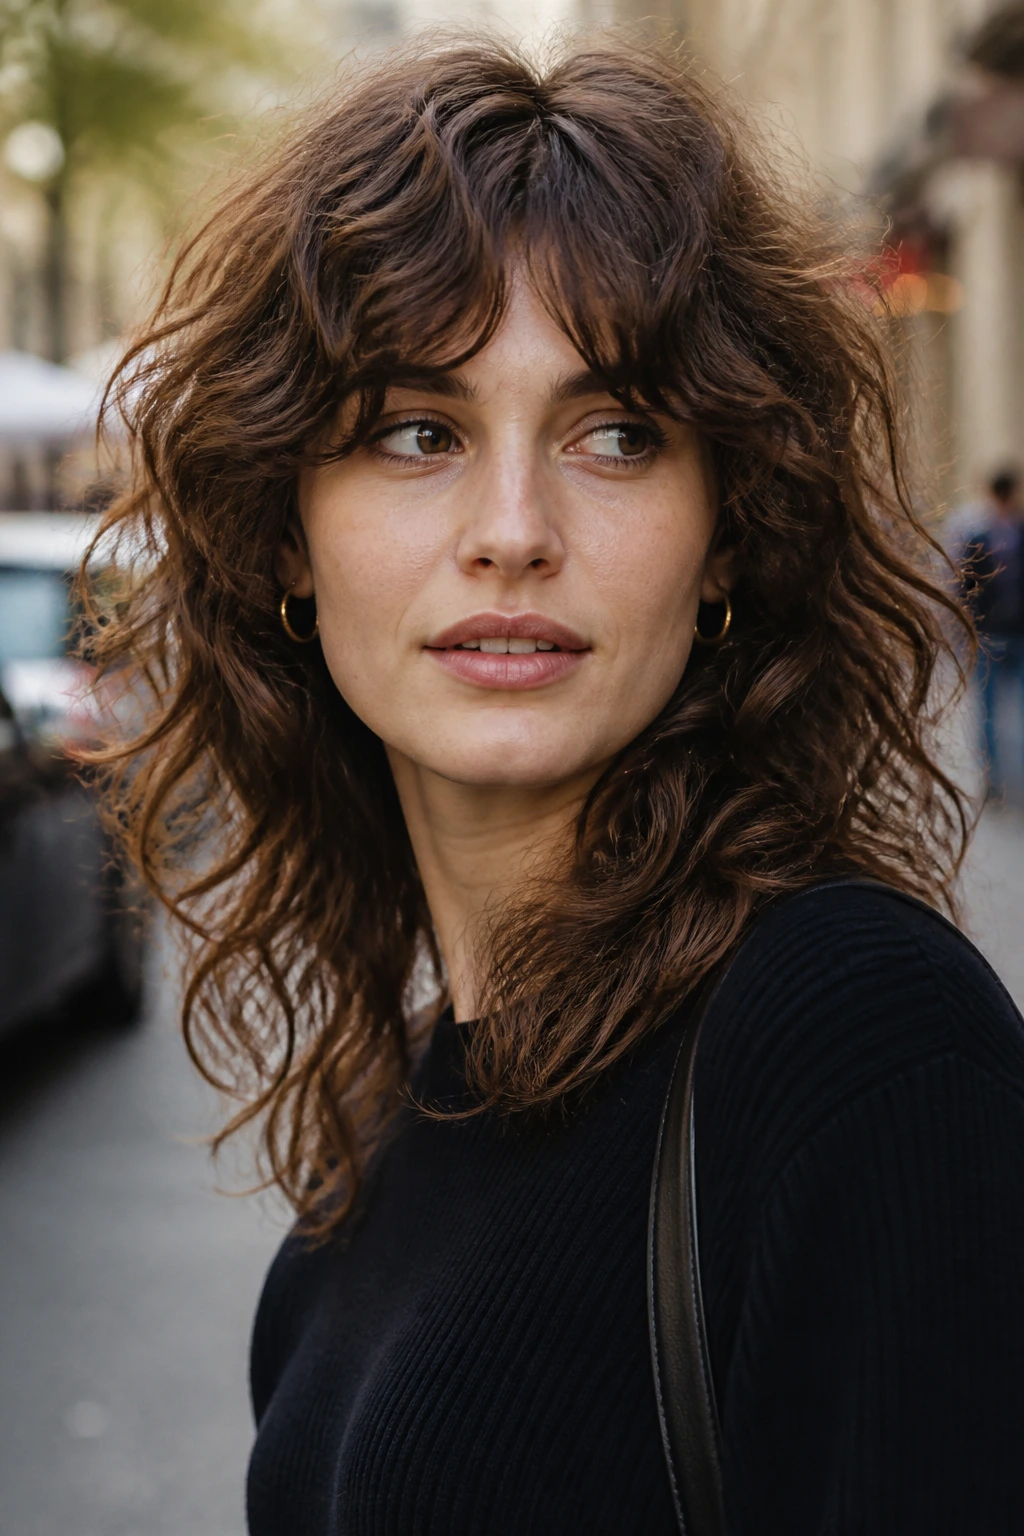
Medium-length curly hair is where a shag either looks deliberate or looks like somebody got impatient with the scissors. Shag haircuts for medium length curly hair work because they remove weight without stealing movement, and that matters more on curls than on almost any other texture. A blunt line on curly hair can feel heavy at the ends; a good shag lets the curls spring up, separate a little, and show off their shape instead of sitting there like a curtain.
The catch is shrinkage. A curl that lands at the jaw when wet may bounce up to the cheekbone once it dries, and if a stylist forgets that, the fringe can end up too short and the layers can disappear into frizz. The best curly shags keep an anchor somewhere near the collarbone or upper chest, then build motion around the face, the crown, and the interior so the cut still has a shape when the curls have a mind of their own.
There are a lot of ways to wear this cut, and that’s the fun of it. Some versions lean soft and round. Others push into wolf-cut territory. A few are tidy enough for a conservative office; a few look like they were made for a leather jacket and a late train home. The differences live in the fringe, the crown, and how much bulk gets left at the ends.
Why These 28 Shags Work So Well on Medium Curls
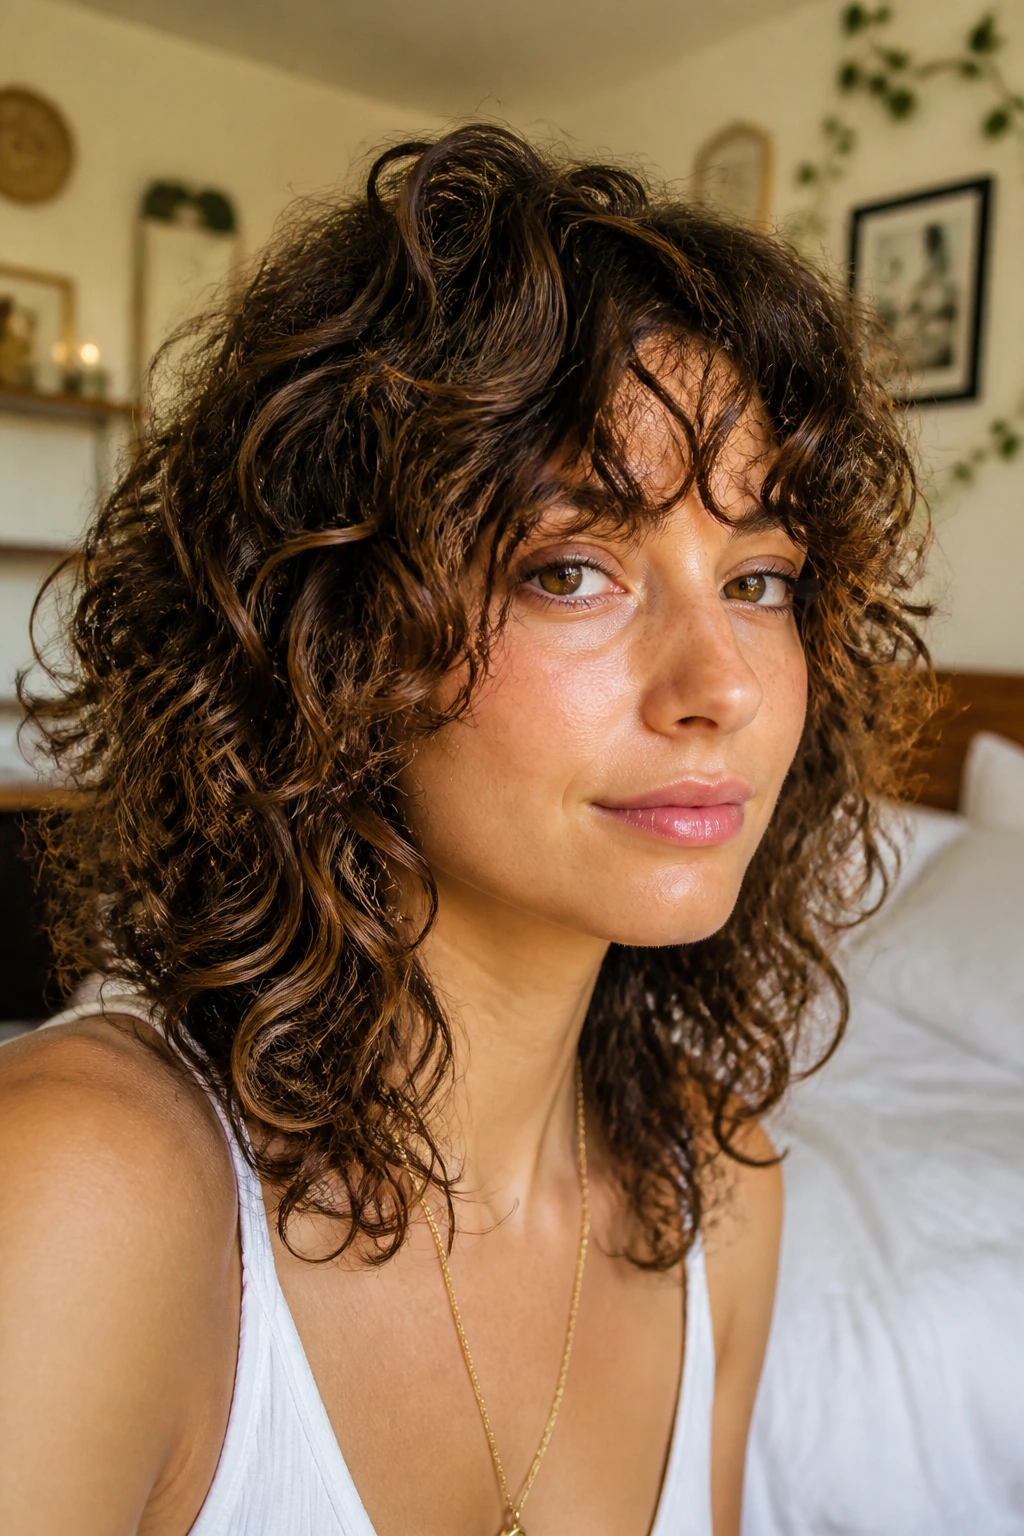
- Curl pattern first: each version is built around how curls actually fall, not how they look blown out on a straight-haired head.
- Length stays useful: medium length keeps enough weight for definition while still giving layers room to move.
- Bang options are flexible: curtain pieces, bottleneck bangs, side-swept fringes, and bang-free shapes all show up here.
- Density gets treated honestly: thick curls need weight removed in different places than fine curls, and these cuts split those jobs up.
- Styling effort varies on purpose: some are made for diffusing, some for air-drying, and some sit in the middle with almost no fuss.
- Grow-out is less painful: the shapes here can be trimmed into something else without waiting forever for a full restart.
1. Curtain-Bang Curly Shag
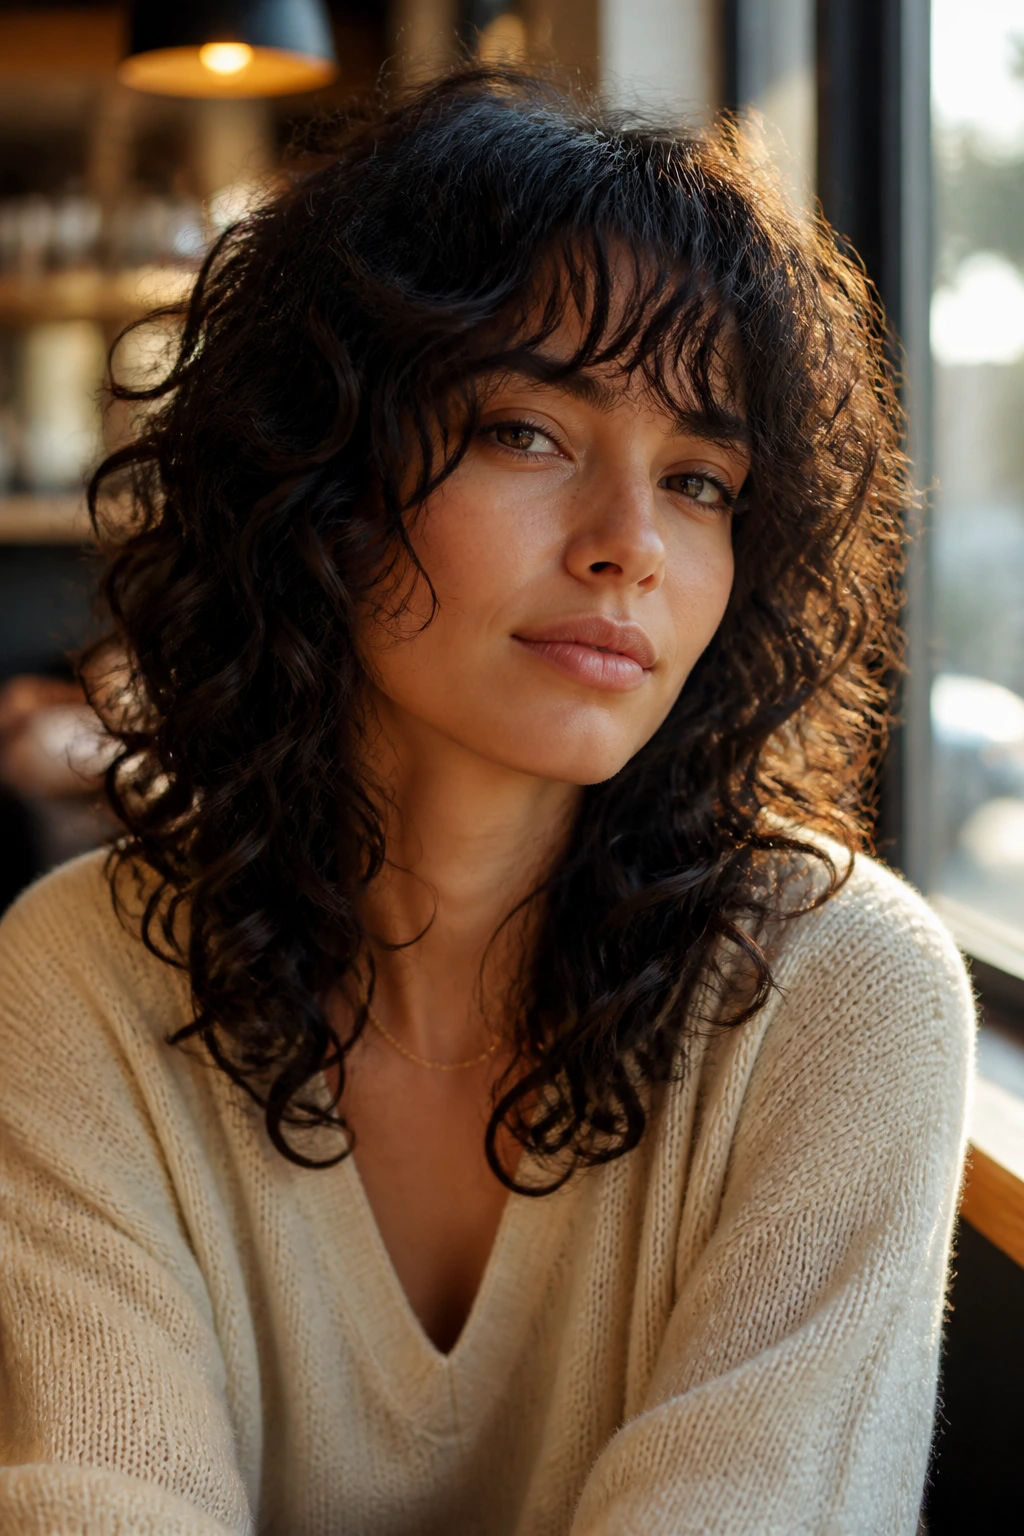
A curtain fringe on curly hair has a lovely little drama to it. The center opens softly, the sides drop into the cheekbones, and the rest of the layers fall in loose, stepped pieces that keep the cut from feeling heavy. On medium length curls, this version is one of the easiest ways to get movement without losing length.
Why it works: the bangs frame the face without boxing it in, and the layers below them keep the silhouette light. Ask for the shortest pieces to land around the bridge of the nose when dry if your curls are springy, or a touch longer if your pattern is tight. That extra quarter-inch matters more than people think.
Best for: oval, heart, and longer faces that want some softness around the front.
Styling note: a small amount of gel at the fringe, then finger-coil the front pieces while they’re wet. It keeps the curtain shape from splitting into random wisps.
2. Rounded Halo Shag
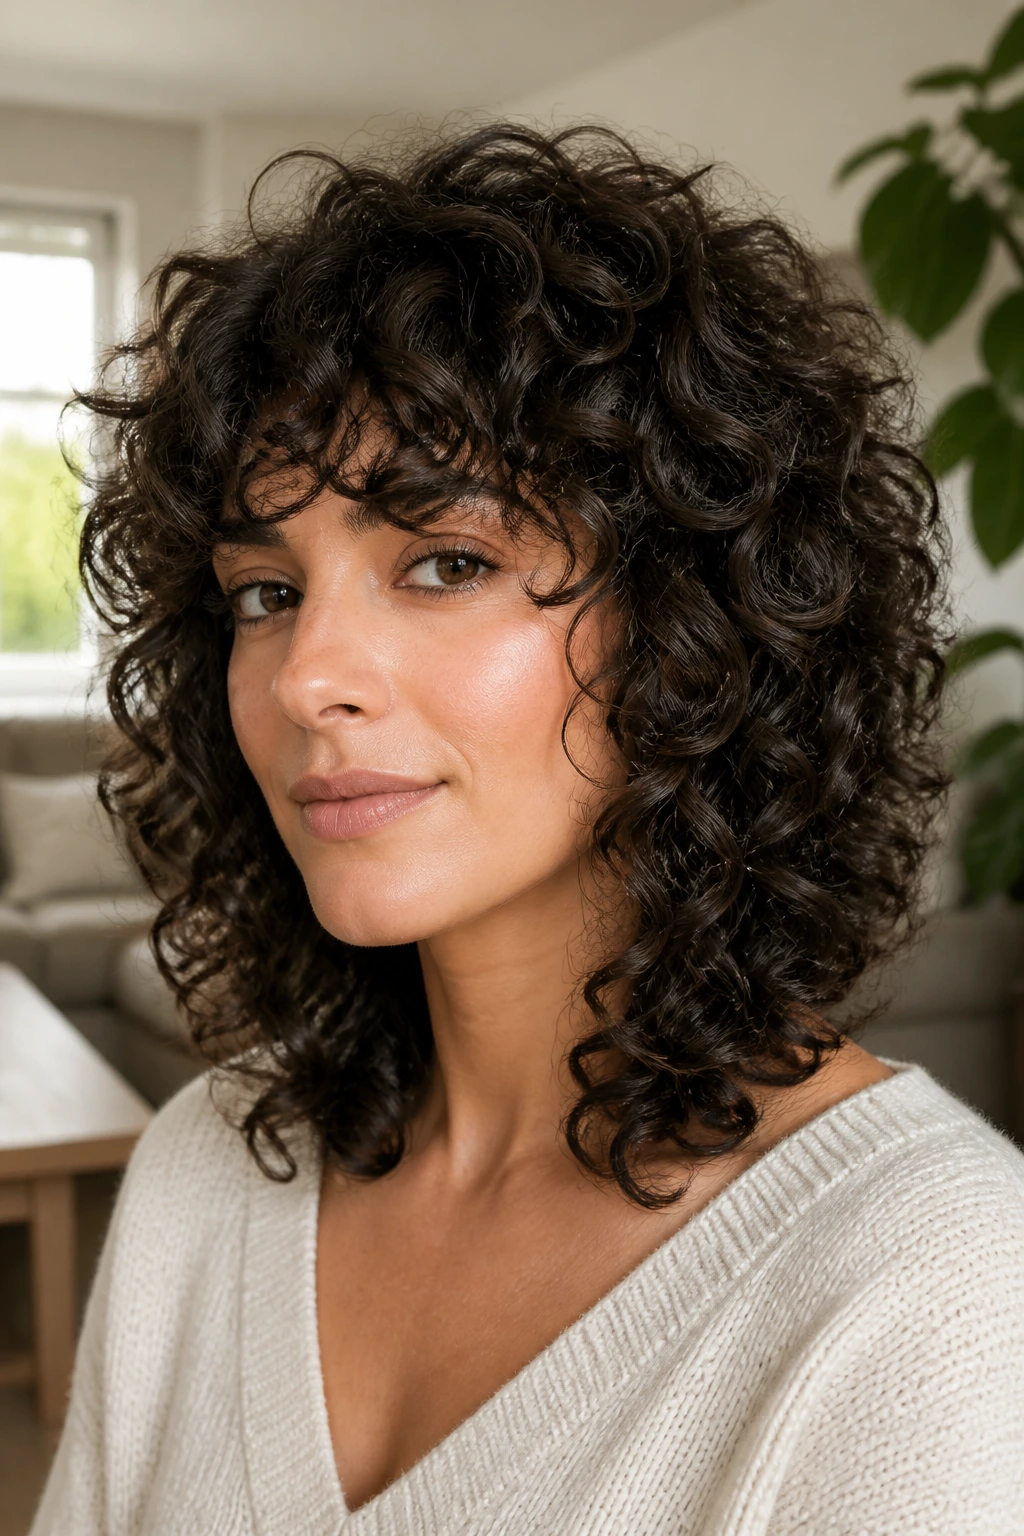
A rounded halo shag keeps the outline soft and circular instead of building sharp corners. The result is a shape that sits close to the head at the top, then blooms outward through the sides in a controlled way. It’s one of the few curly shag haircuts that can make thick hair look lighter without making it look thin.
The trick is in the perimeter. You want the outer line to stay full enough to hold the curl pattern, while the interior layers take out the bulk that causes the dreaded triangle. If your curls puff widest at the sides, this cut redirects that width upward and inward.
Best for: dense curls, especially 3A to 3C textures that need shape more than they need more volume.
Styling note: use root clips at the crown while the hair is damp. That keeps the top from drying flat, which is the quickest way to ruin the halo effect.
3. Soft Wolf Shag
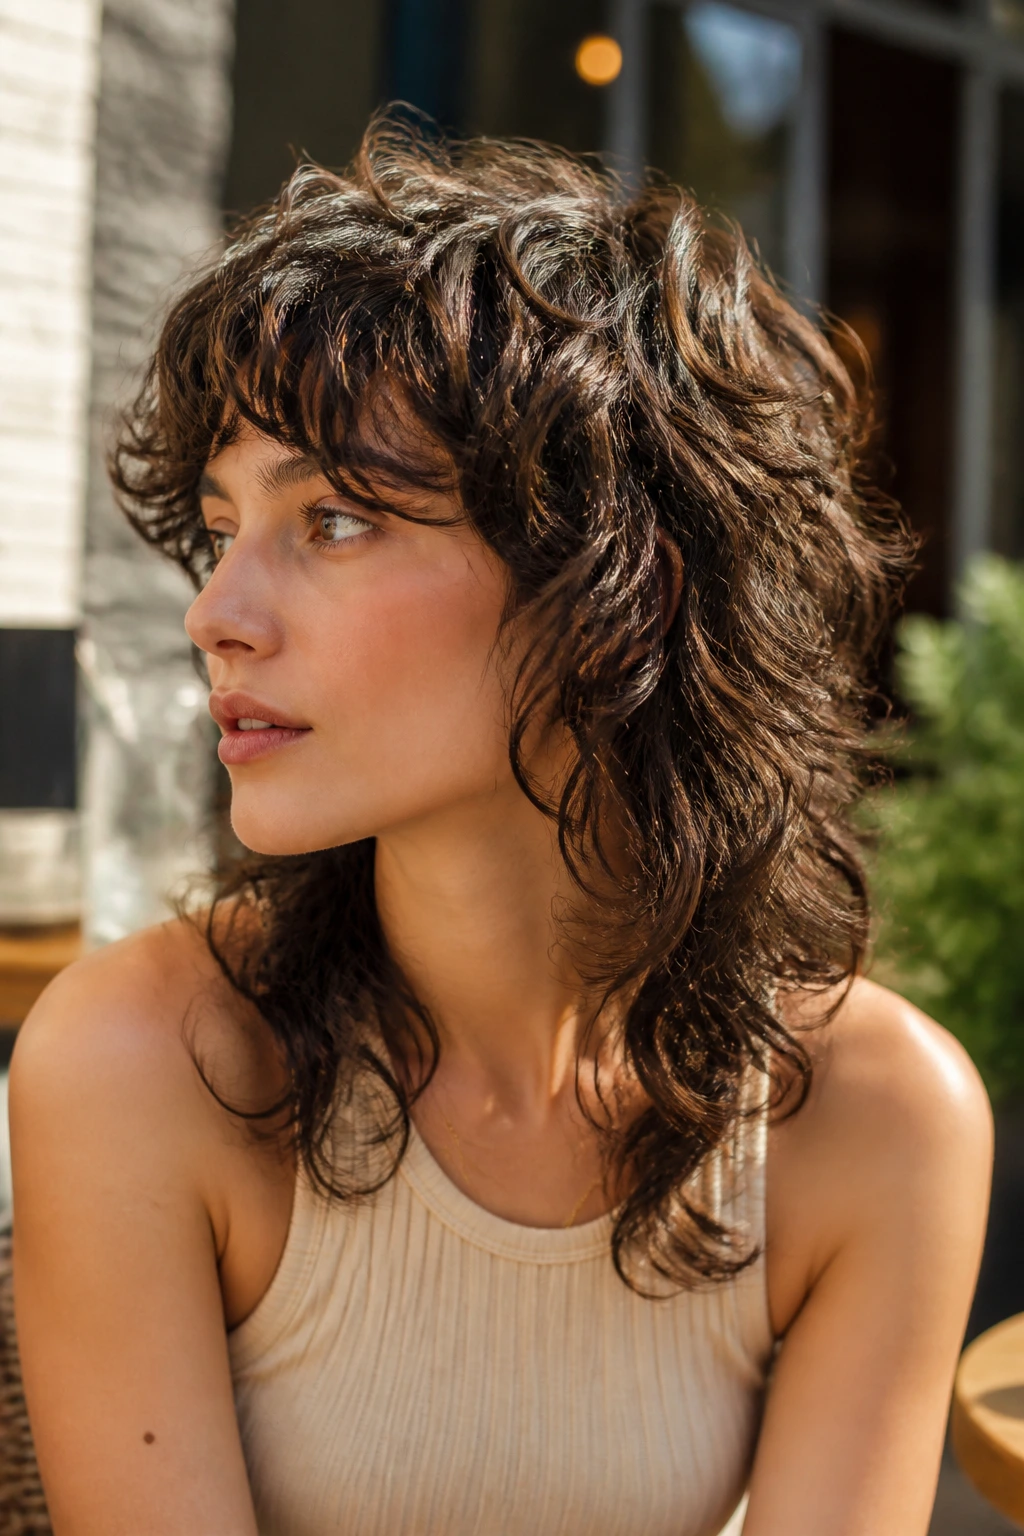
A soft wolf shag gives you the attitude of a wolf cut without the extra sharpness that can make curls look too shredded. The crown sits a little shorter, the back keeps more length, and the transition between the two stays gentle enough that medium curls can still clump well. It’s edgy, but not theatrical.
This version works because it keeps the energy near the top and the face while leaving enough weight at the bottom for the curls to settle together. If a full wolf cut feels too lean or too close to a mullet, this is the calmer cousin that still has a point of view. I like it on people who want movement first and polish second.
Best for: thicker curls and people who don’t mind a little mess in the shape.
Styling note: scrunch in mousse first, then a pea-size amount of cream only on the ends. Too much cream steals the separation and turns the layers into one fuzzy mass.
4. Deep Side-Part Shag
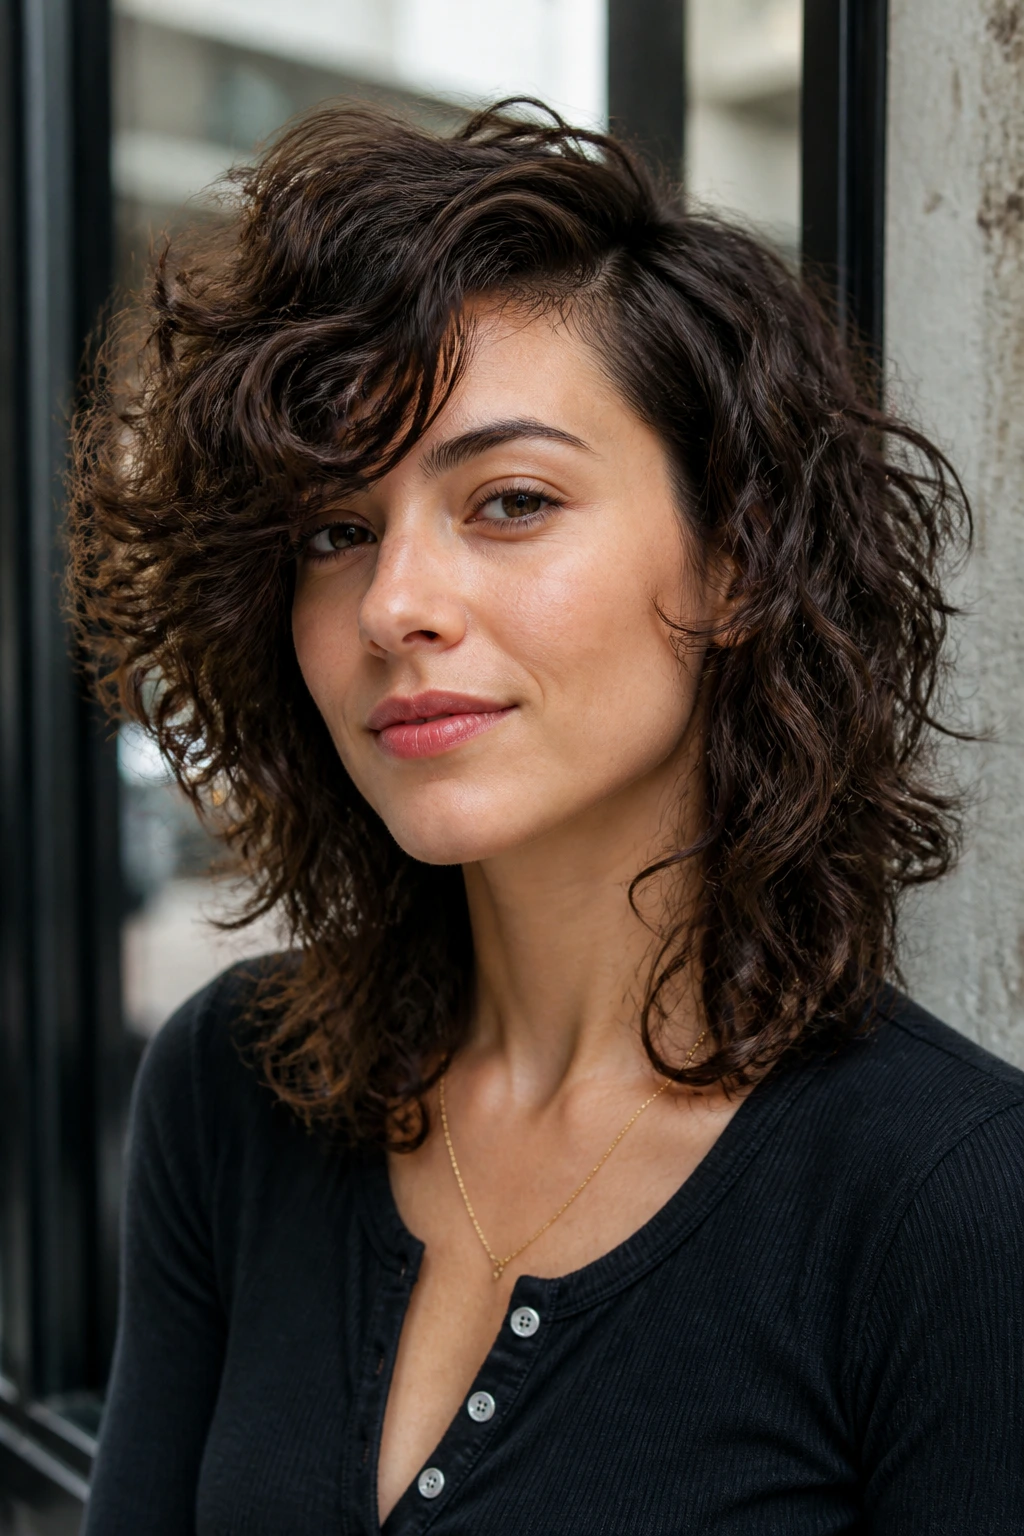
A deep side-part shag changes the whole mood of medium curls with one move. Suddenly the volume sits to one side, the fringe sweeps across the forehead, and the cut feels less symmetrical and more alive. On hair that naturally falls one way anyway, this can look much more intentional than fighting for a middle part.
The best part is that it helps curls with uneven shrinkage. One side can be a little flatter, the other can stack more height, and the haircut still looks balanced because the part itself is doing some of the work. That is a gift if you have a stubborn cowlick or one side that always seems to do its own thing.
Best for: round faces, flat roots, and anyone whose curls refuse to obey a center part.
Styling note: dry the part in place with a diffuser for a minute or two before you start flipping your head around. If you move it too soon, the roots remember the wrong direction.
5. Dry-Cut Curl-by-Curl Shag
This is the one I trust most when curl patterns are mixed. A dry-cut curl-by-curl shag lets the stylist see how each section behaves before the scissors touch it, which is a big deal when the crown is loose, the sides are springy, and the nape does something entirely different. Wet hair lies.
The cut looks especially good on medium length curls because the stylist can place layers where the curls actually land, not where they pretend to land when stretched. If you’ve ever left a salon with a fringe that only made sense when the hair was soaking wet, this is the fix. It takes longer, yes. Worth it.
Best for: people with inconsistent curl patterns or a mix of waves and spirals.
Styling note: ask for the perimeter to stay long enough that the hair can still be pinned up. That’s the part people forget and regret later.
6. Choppy End Shag
A choppy end shag keeps the energy at the bottom of the cut. Instead of a soft blunt line, the ends are point-cut or lightly textured so the curls separate at the hem rather than collapsing into one thick shelf. On dense medium-length curls, that small change makes a huge difference.
You can spot a good version from the way the ends move. They should look airy, not shredded, and the line should still feel full when you shake the hair out. If the ends go too thin, the cut starts looking wispy in the wrong way. Nobody wants see-through tips on curly hair.
Best for: thick, heavy curls that build bulk at the bottom.
Styling note: use a gel with a firm cast, then don’t touch the ends until they’re fully dry. That keeps the choppy shape from fuzzing up before it has a chance to set.
7. Collarbone-Grazing Shag
If you want a shag that still feels conservative, start here. The collarbone-grazing shag keeps the length long enough to tuck behind the ears or pull into a loose clip, while the interior layers add movement where the hair would otherwise just hang. It’s the calmest version on this list, and I mean that as a compliment.
What makes it work is the balance. The overall shape stays clean, but the layers around the face and crown keep the cut from turning into a solid sheet of curls. For people trying a shag for the first time, this is a smart starting point because it doesn’t ask you to give up much length.
Best for: work settings that lean tidy, or curlies who are cautious about major changes.
Styling note: a side part can make this cut look more expensive than it has any right to. A middle part keeps it softer.
8. Bottleneck Bang Shag
Bottleneck bangs on curls are sly little things. Narrow at the center, wider near the temples, they avoid that heavy fringe block that can make curly bangs look boxed in. Paired with shag layers, they create a front shape that opens the face without eating up the whole forehead.
The reason this version works so well on medium hair is that the bangs have room to blend. There’s enough length below them for the cut to feel connected, not chopped into separate zones. If your curls are tight, though, ask for the shortest pieces to be left longer than you think you need. Short bangs on curls are a gamble.
Best for: people who want fringe but not a full curtain.
Styling note: encourage the bangs to dry where you want them by clipping them slightly forward while the rest of the hair dries back. It helps the shape settle without kicking sideways.
9. Face-Frame Cascade Shag
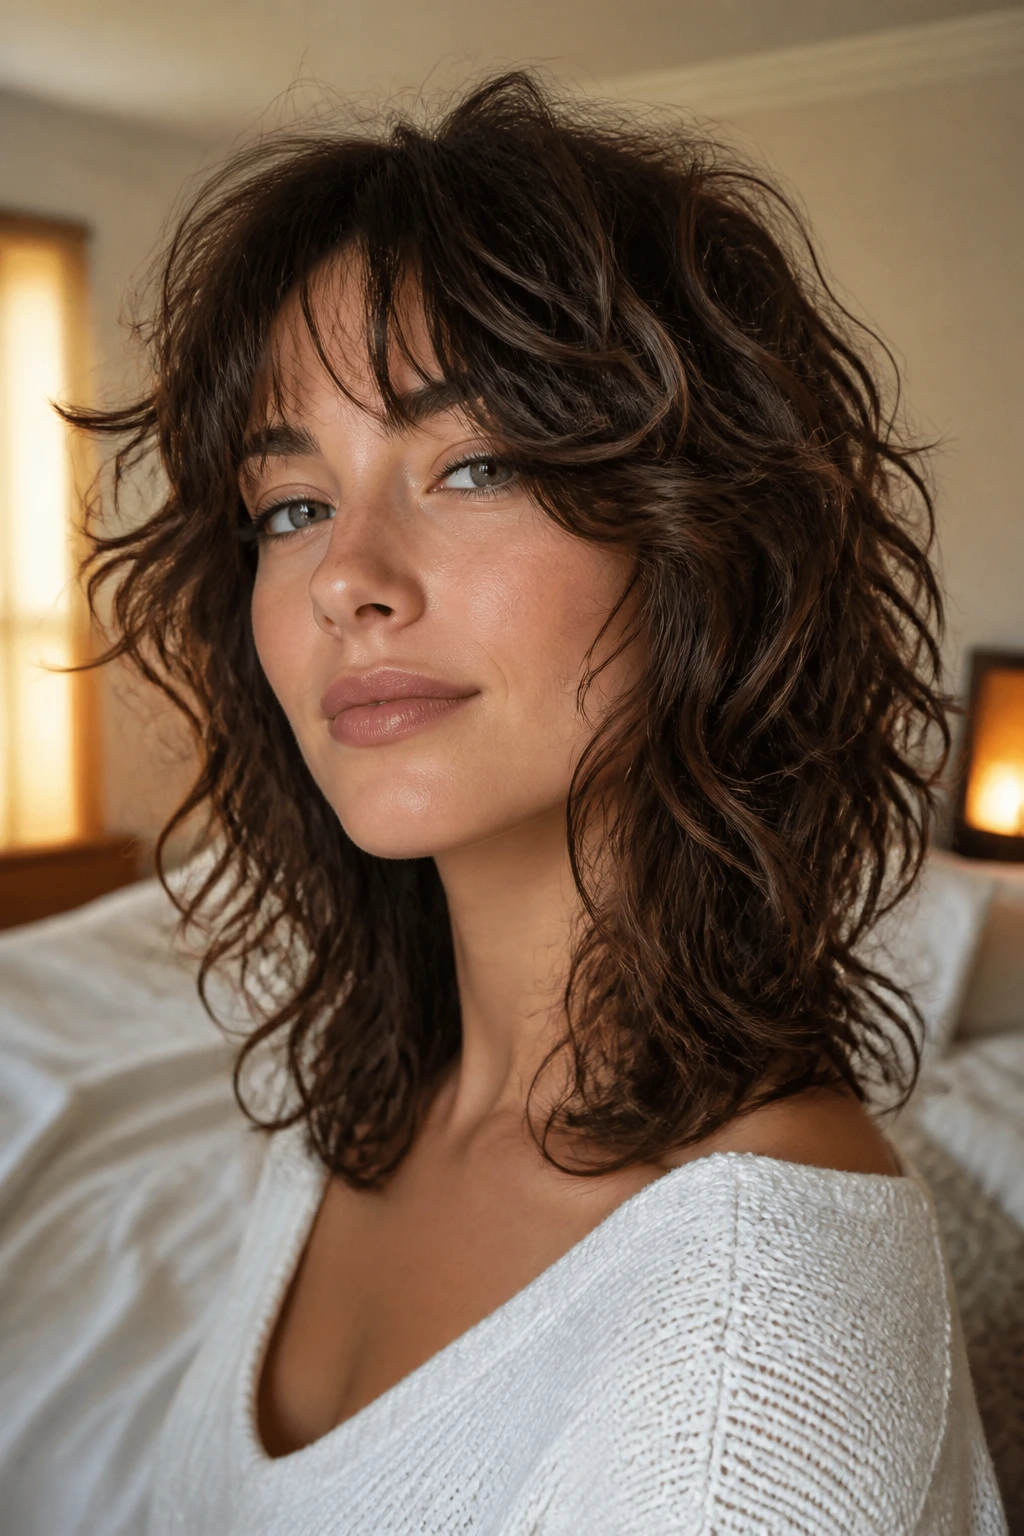
The face-frame cascade shag steps layers downward from the cheekbones to the collarbone, almost like the curls are falling in little stages. It’s a flattering shape because the front gets the most attention, but the rest of the cut still has enough texture to keep moving. No dead ends. No helmet.
This is one of my favorites for rounder faces, because the diagonal flow pulls the eye down and lengthens the silhouette. It also works beautifully on medium curls that need a bit of visual structure near the face but don’t want bangs. If you like hair that looks styled even when you’ve done very little, this cut earns its keep.
Best for: round, square, and full faces that benefit from vertical movement.
Styling note: when you diffuse, direct the front pieces slightly forward first, then let them fall back. That keeps the cascade from flipping straight out at the cheek.
10. Grown-Out Fringe Shag
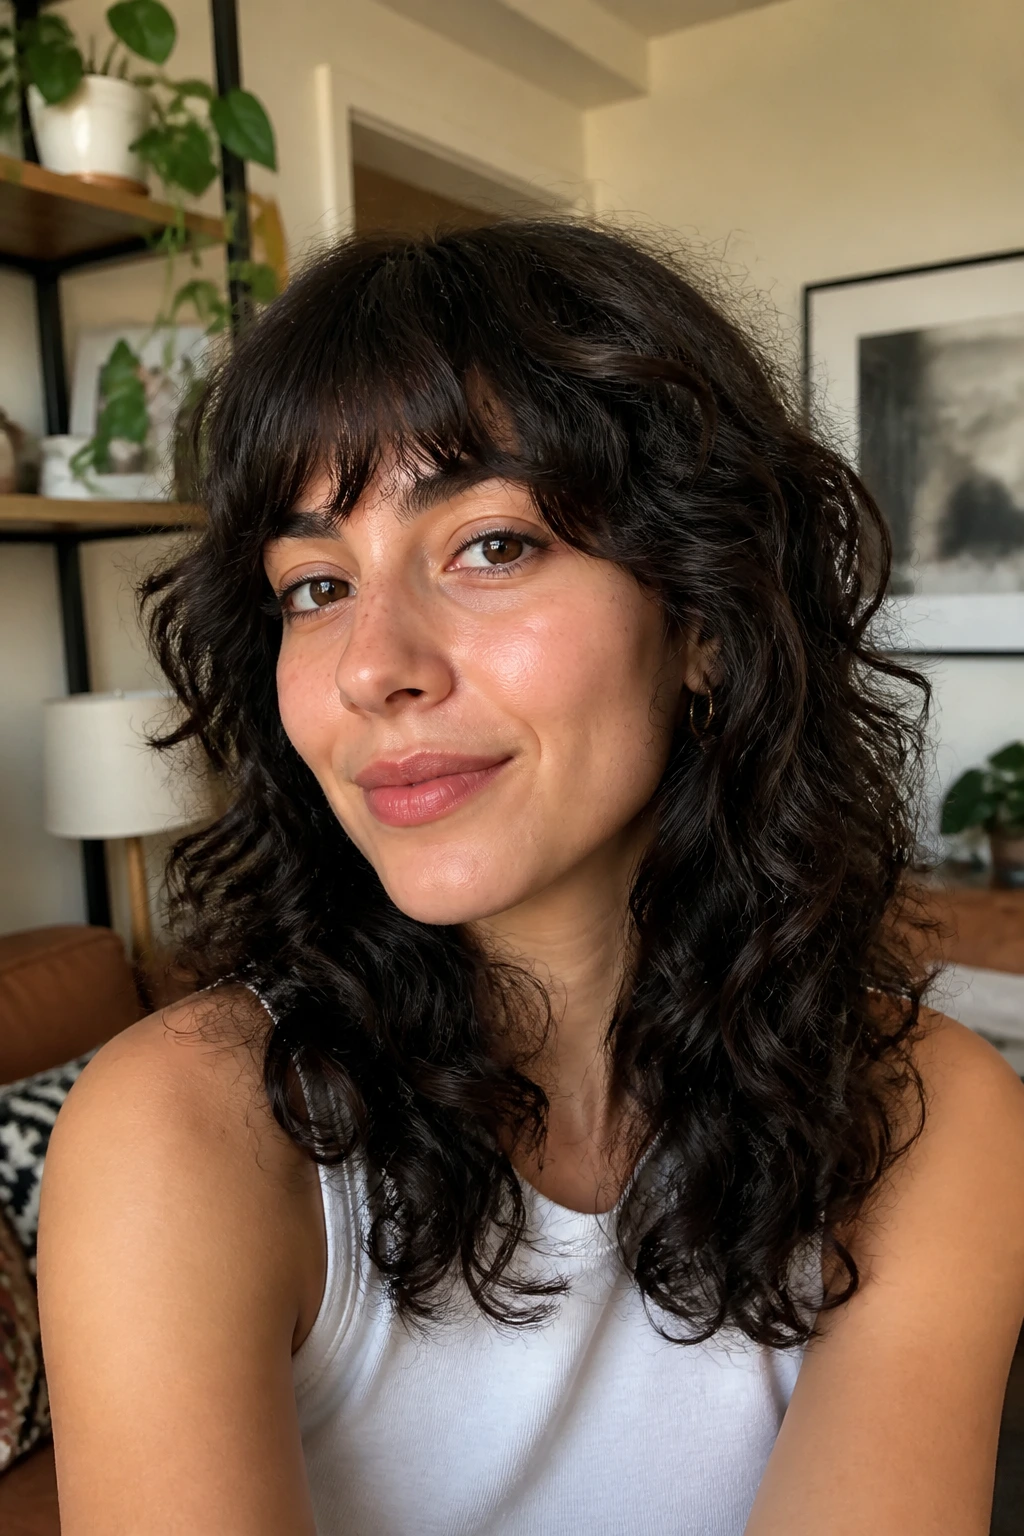
A grown-out fringe shag is for anyone who likes the idea of bangs but not the maintenance. The fringe skims the eyebrows or just below them, then blends into the rest of the layers so it doesn’t read as a hard line. On curls, that softness matters. A lot.
The cut grows out gracefully because the fringe is already part of the overall shape. You don’t have to wait months for it to stop looking like an accident. In medium length curly hair, that’s a practical win. It also gives you the option to tuck the front behind your ears on the days you can’t be bothered.
Best for: low-maintenance curl routines and first-time fringe wearers.
Styling note: keep a tiny spray bottle nearby. A mist on the fringe is often enough to reset the front without redoing the whole head.
11. Retro 70s Curly Shag
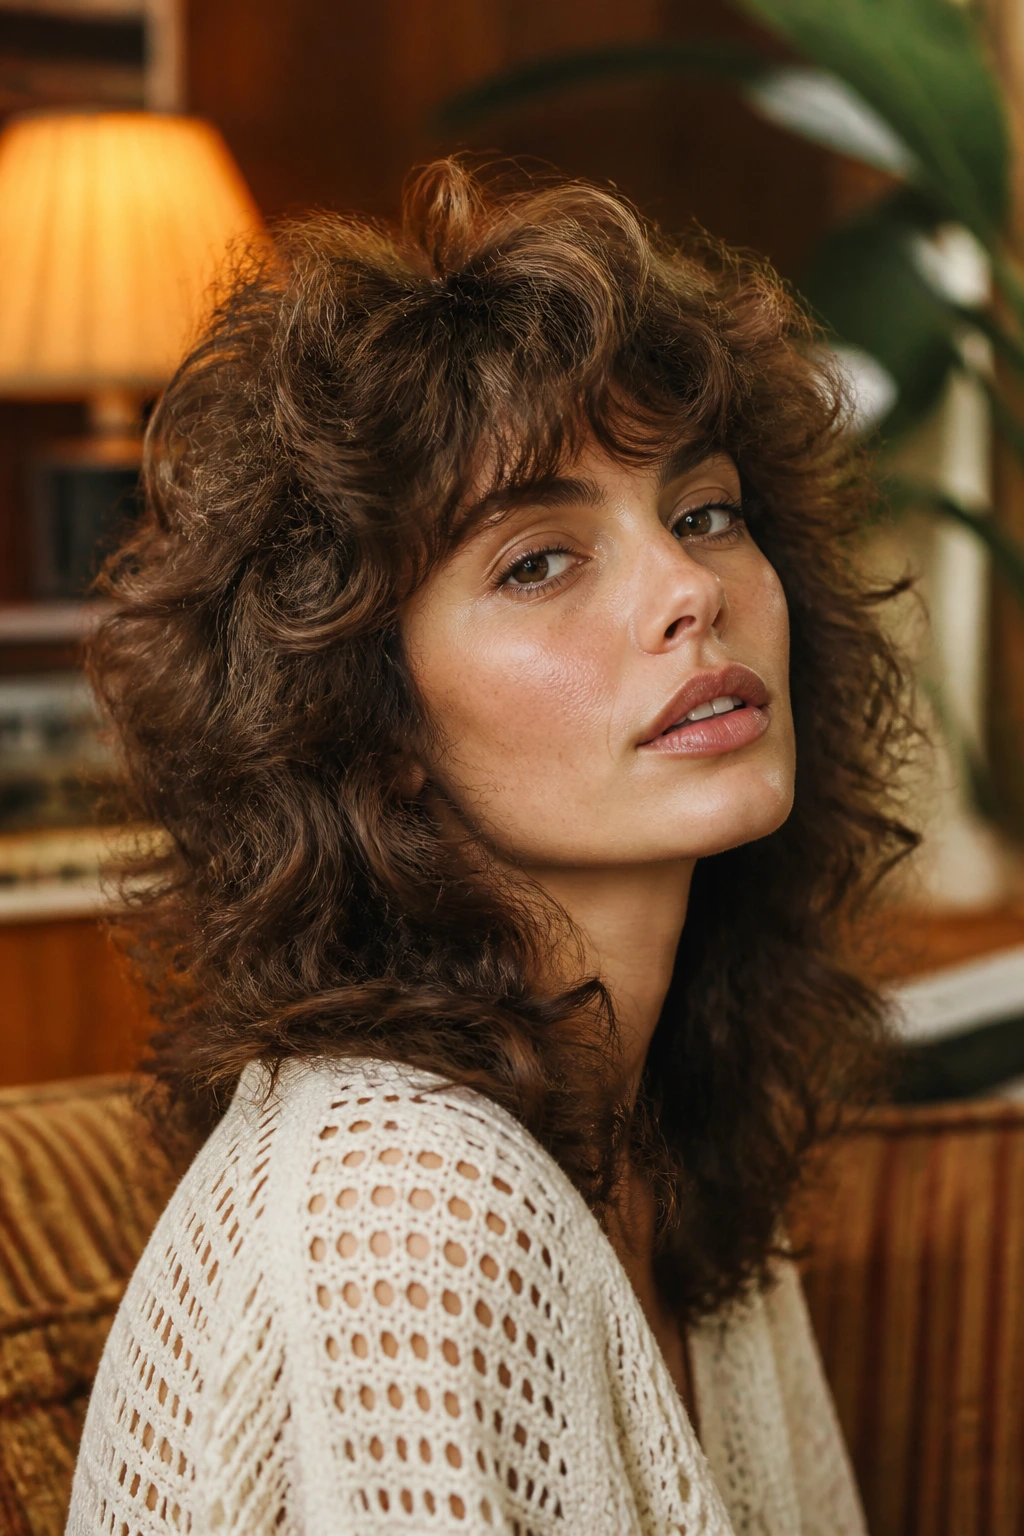
The retro 70s version leans into lift, feathering, and a little bounce at the ends. It’s the shag that looks happiest with a round brush in one hand and a diffuser in the other, though curly hair does not need to be blown to death to get the effect. The shape feels spirited. A little glamorous. A little unruly.
The biggest clue is volume at the crown and movement around the cheeks. The layers are more visible than in softer shags, which makes this a good choice if you want the haircut to announce itself. I’d call it a good option for 2C and loose 3A curls that enjoy being pushed a bit.
Best for: people who like visible shape and a touch of vintage drama.
Styling note: flip your head for the first minute of diffusing, then upright for the rest. That helps the roots lift without making the ends chaotic.
12. Razor-Soft Shag
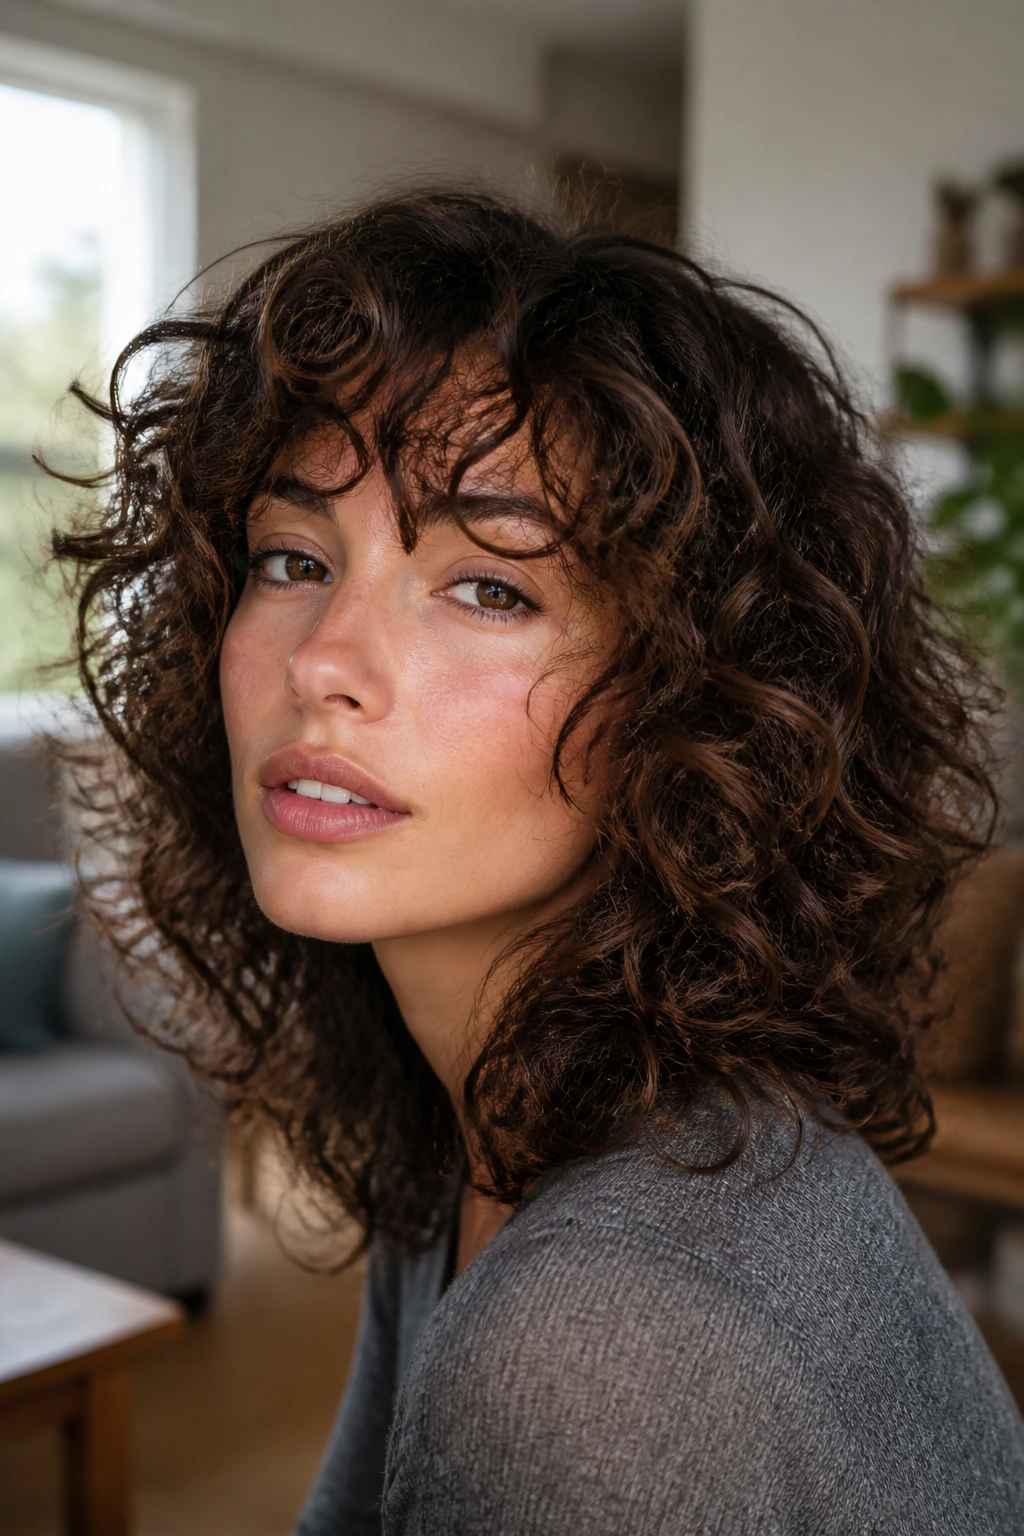
A razor-soft shag can be gorgeous on coarse curls, but only if the hands doing the cutting know what they’re doing. The whole point is to soften the edges and remove the chunky look that thick curls can develop at the perimeter. Done well, it gives the haircut a feathered, airy finish.
Done badly, it makes frizz. There’s the catch. Razor work on curly hair needs a light touch because the cuticle can get roughed up if the stylist goes too far. Ask about the technique before you agree to it, and if your curls already frizz when you look at them sideways, this may not be the cut to gamble on.
Best for: coarse curls with strong density and good moisture retention.
Styling note: use a leave-in with slip, then seal the ends lightly with serum. Not a lot. Just enough to keep the softer edges from puffing.
13. Crown-Heavy Volume Shag
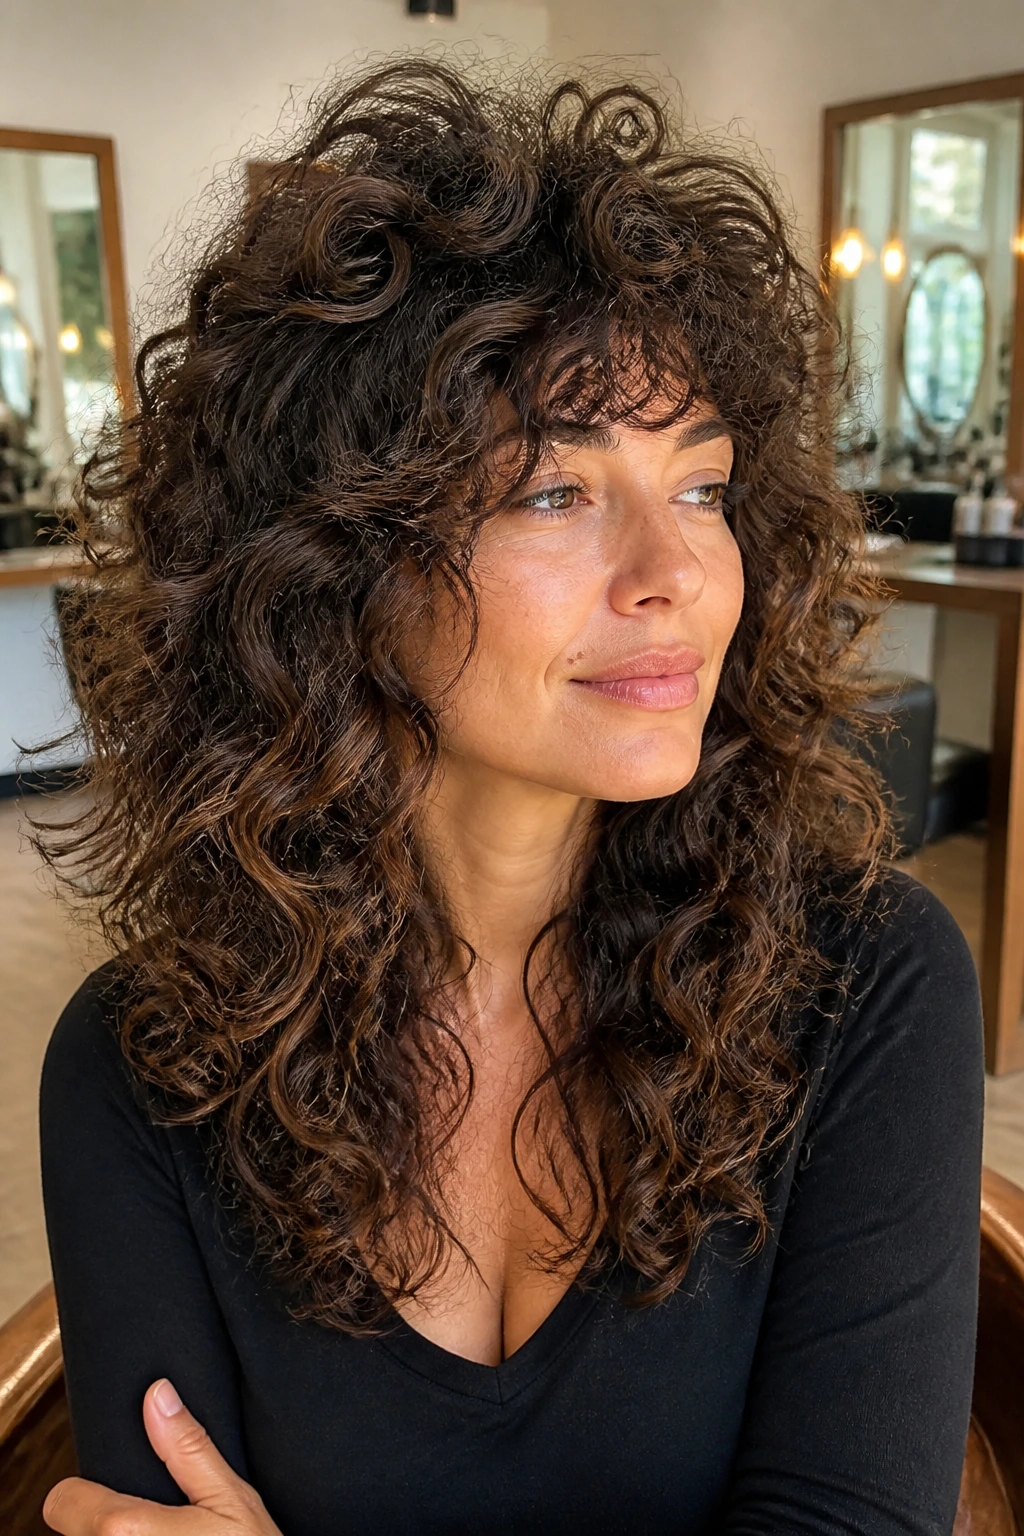
This is the cut for curls that flatten at the roots and then suddenly explode at the bottom. A crown-heavy volume shag shifts the attention upward, with shorter layers near the top and a longer, softer body underneath. The head gets shape instead of a bell.
It works because the top isn’t weighed down by too much length. The curls at the crown can spring up, stack, and show off that nice lifted profile medium curly hair can hold when it’s been cut well. If your hair tends to sit flat in the first hour after wash day, this cut gives you more to work with.
Best for: limp roots, strong curl patterns, and anyone who wants more height.
Styling note: root clips are not optional here. Leave them in until the hair is nearly dry, then shake the roots out gently with your fingers.
14. Minimal-Layer Shag
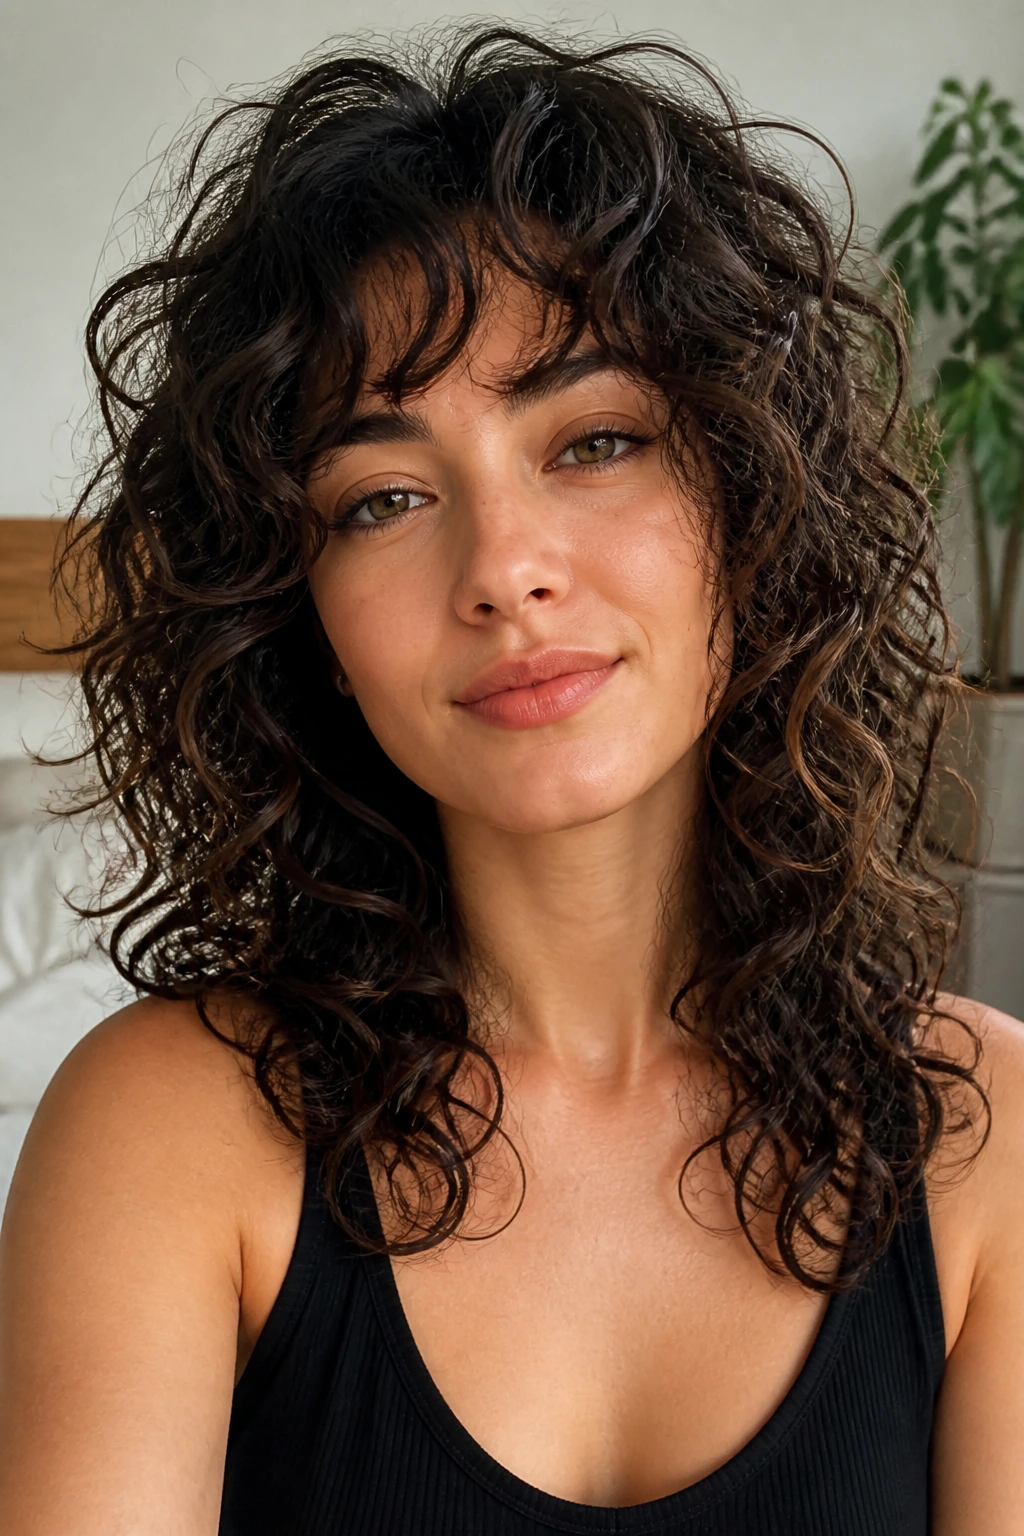
A minimal-layer shag is the answer for people who like the idea of movement but panic at the words “lots of layers.” The interior is shaped, yes, but the cut keeps the changes subtle so the overall mass still feels full. It is the least choppy shag on the list.
On fine curls, that restraint matters. Too many short layers can turn medium-length hair into a puffy halo with not enough substance at the bottom. This version keeps the structure visible while protecting the density. That’s a smart trade if your curls collapse fast or feel fragile when they’re overcut.
Best for: finer curls, looser waves, or anyone worried about losing fullness.
Styling note: choose mousse over heavy cream. Fine curls often need lift, not more weight.
15. Tapered Nape Shag
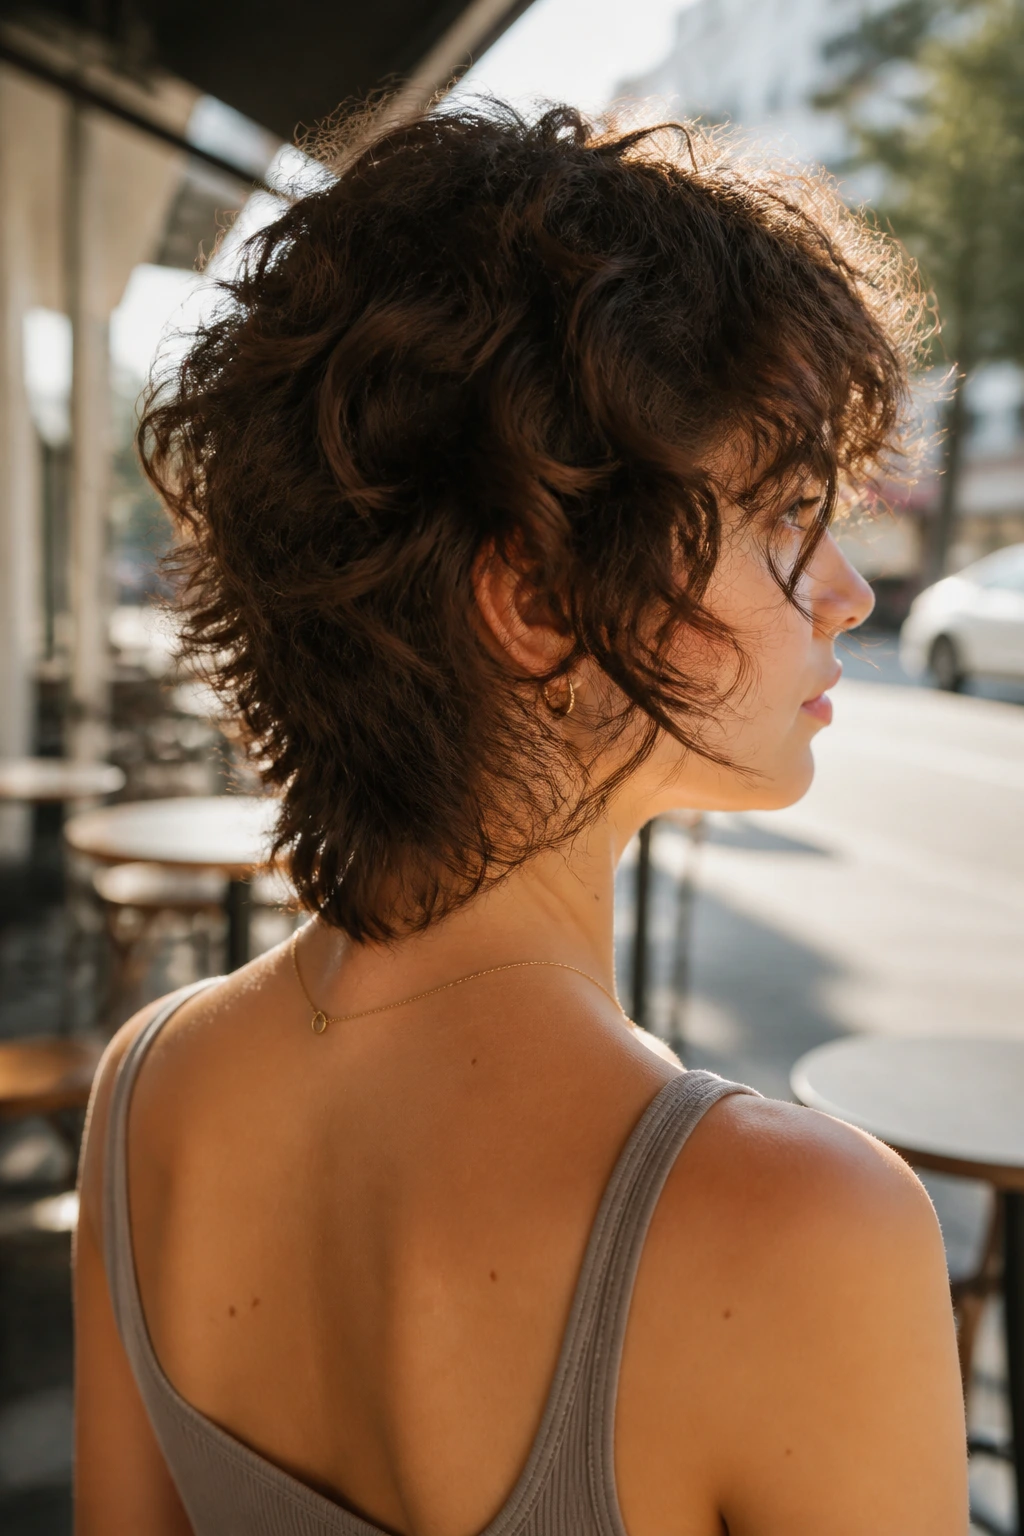
A tapered nape shag takes bulk out of the back of the neck and leaves the front and top freer to move. On thick curly hair, that one adjustment can make the whole cut feel lighter in heat and much easier to wear down. The shape stops sitting like a wool hat.
I like this version for people whose curls collect into a dense mound at the back even when the front looks fine. The taper keeps the neckline neat, while the shag layers prevent the front from getting too short or fussy. If you wear jackets, collars, or scarves a lot, the nape taper matters more than you’d expect.
Best for: dense curls and hot-weather wear.
Styling note: make sure the stylist leaves enough length at the nape that the curls still form. Too much removal back there can make the cut look oddly scooped.
16. Asymmetric Curly Shag
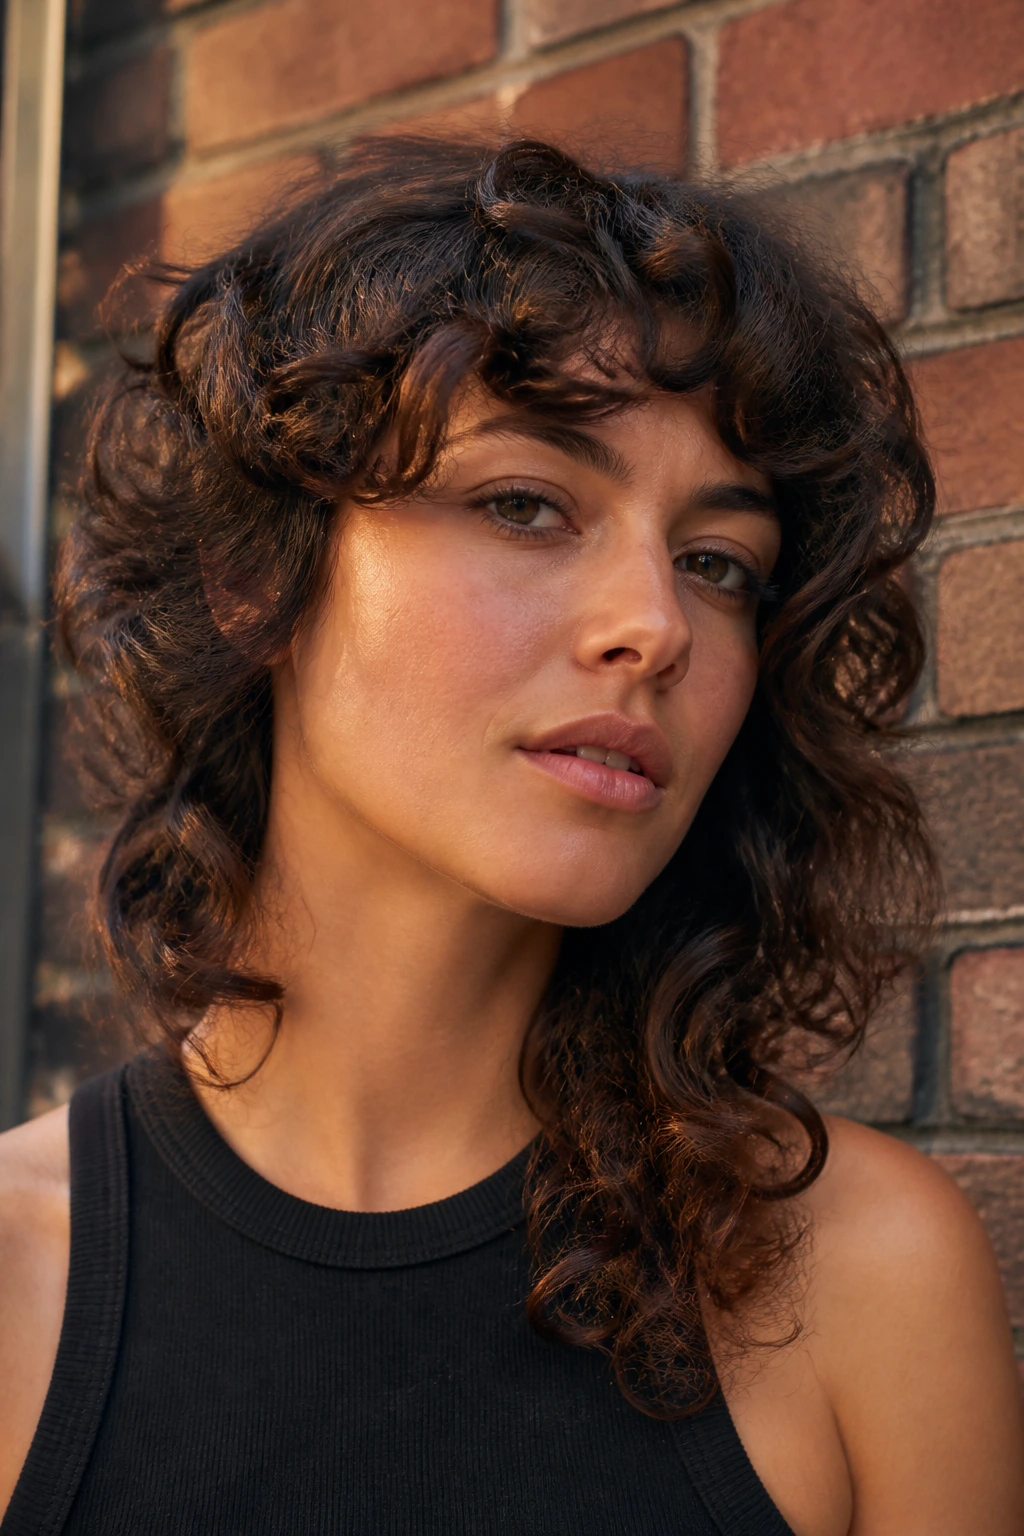
An asymmetric curly shag has just enough imbalance to feel modern without tipping into costume. One side may sit a touch longer, or the face-framing pieces may fall a little more heavily on one side. That tiny offset gives the curl pattern something interesting to do.
This cut is best when you want a little personality baked into the shape itself. It also flatters heads with strong side growth patterns, because you’re working with the asymmetry instead of pretending it doesn’t exist. The best asymmetrical shags don’t scream. They look like they were meant to be that way.
Best for: readers who like a sharper, more editorial look.
Styling note: keep the shorter side from getting over-diffused. A little over-lift there can make the imbalance too obvious.
17. Bright-Front Shag
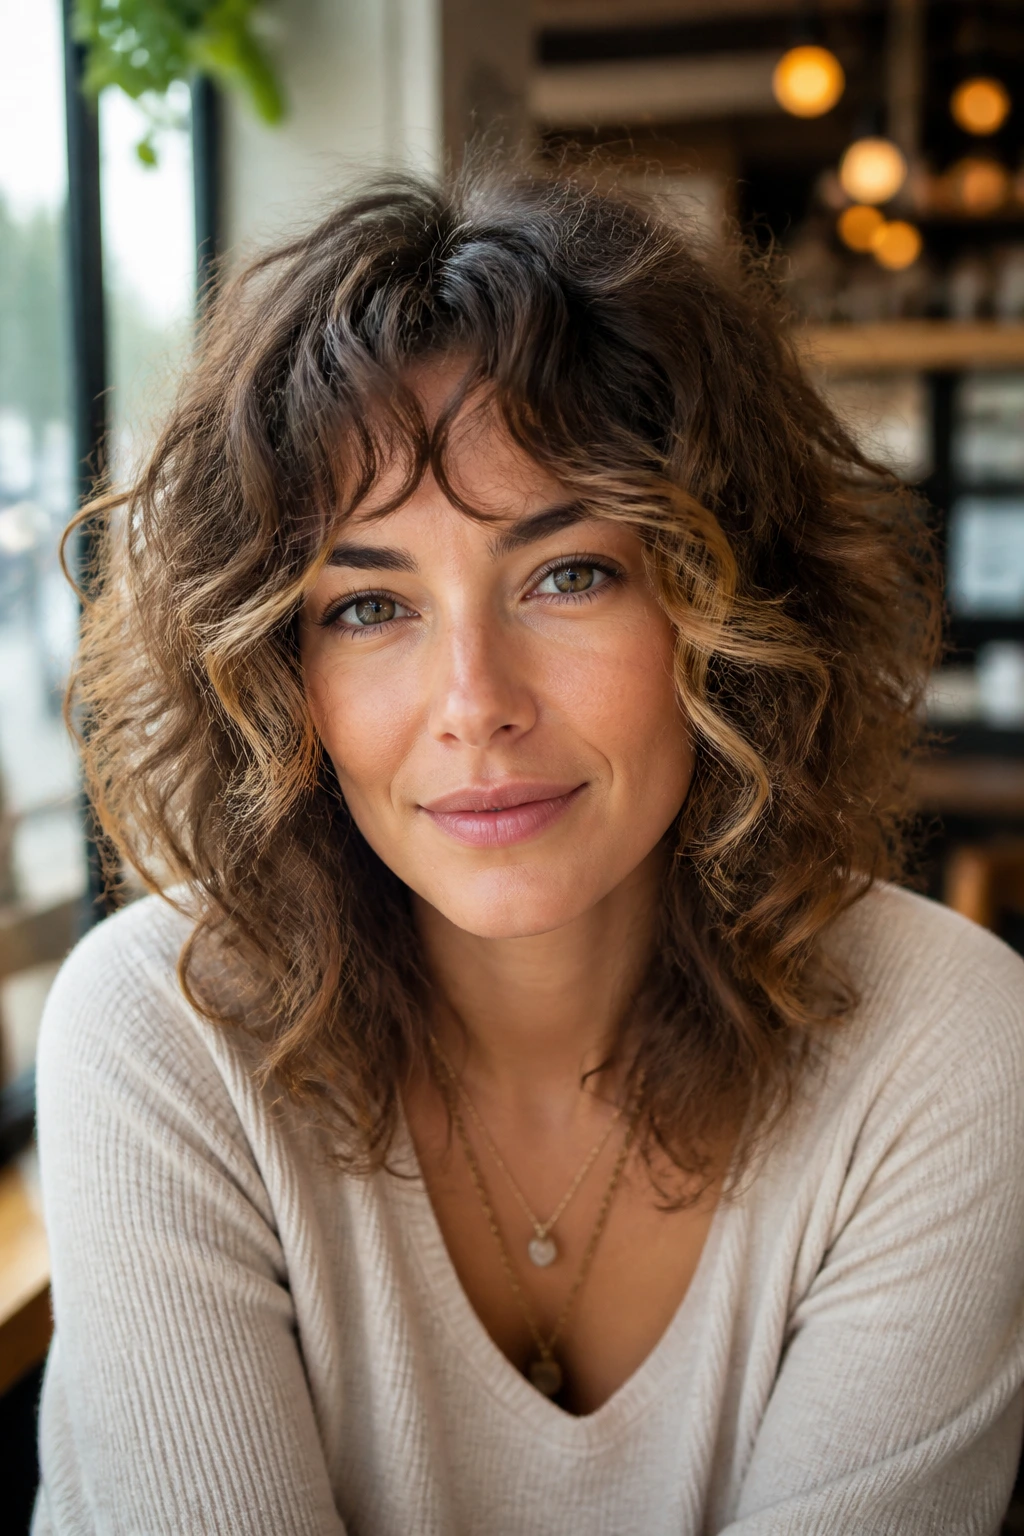
A bright-front shag isn’t only about color, though a few lighter face-framing pieces can make the layers pop if you like that look. The haircut itself puts attention on the front sections, with cleaner, more visible framing around the eyes and cheekbones. It’s the sort of cut that makes curls look animated even when the rest of the hair is playing it cool.
The reason it belongs here is simple: medium curly hair can carry stronger front layers without losing too much length. That means you can create contrast near the face and still keep the back soft. If you do add highlights, keep them around the front two to four inches. More than that and the cut starts competing with the color.
Best for: people who want the front of the haircut to do the talking.
Styling note: a tiny bit of shine cream on the front pieces keeps them from frizzing away from the rest of the shape.
18. Wash-and-Go Shag
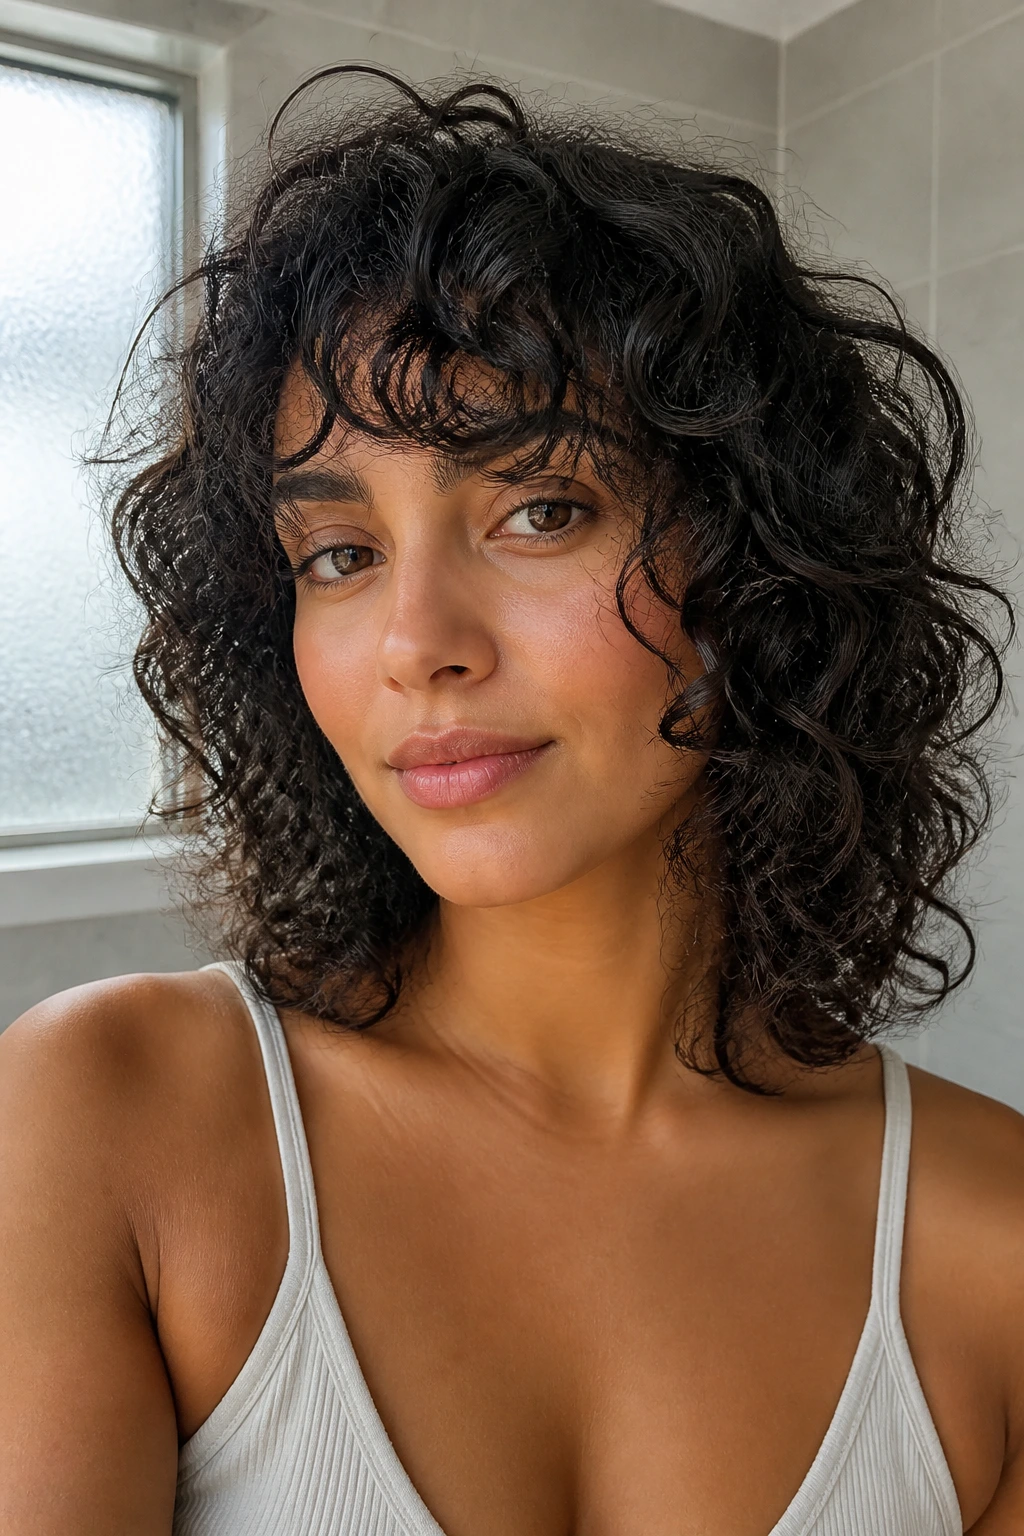
A wash-and-go shag is built for the person who wants to leave the house before the diffuser gets warm. The layers are placed so the curls fall into their shape with a minimum of handling, and the perimeter stays long enough that the ends don’t puff off into space. It’s a lazy-day haircut in the best sense.
The secret is restraint. No tiny chopped-up layers everywhere. No fringe that demands perfect styling. Instead, the cut gives you enough movement that air-drying still looks intentional. You still need product. You just don’t need a complicated routine.
Best for: busy schedules and people who air-dry more than they diffuse.
Styling note: put gel on soaking-wet hair, scrunch once, and leave it alone until a cast forms. Constant fiddling ruins the shape.
19. Modern Mullet Shag
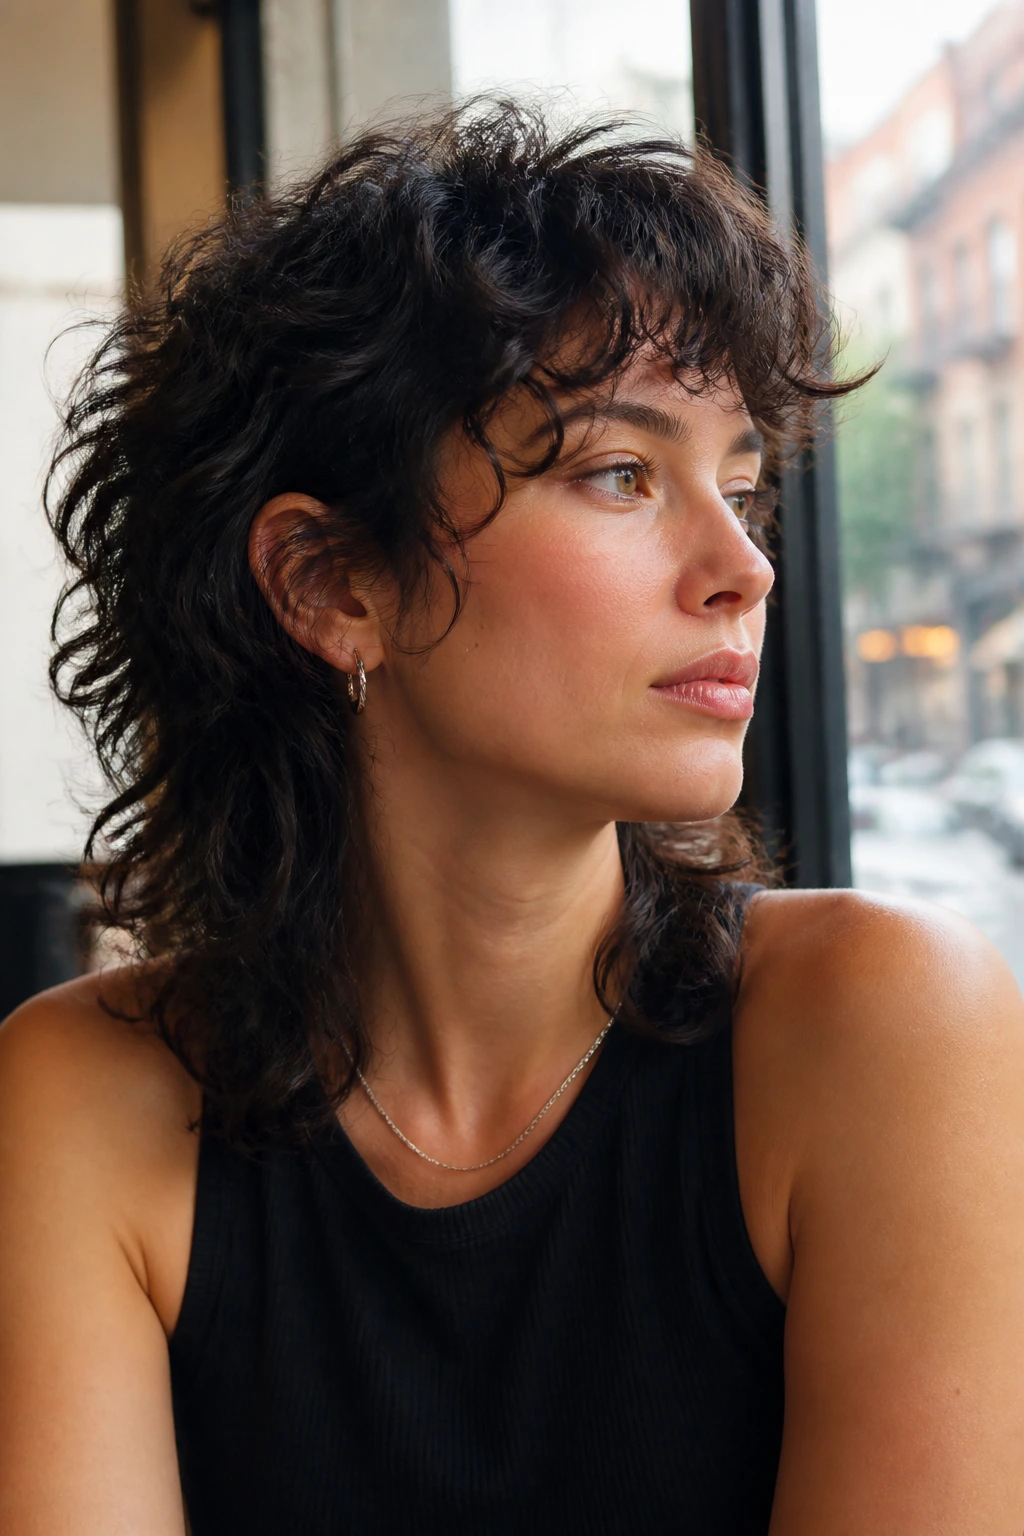
A modern mullet shag pushes a little harder than the soft wolf version. The top and front carry a bit more shape, the back hangs slightly longer, and the whole thing feels sharper. On medium curly hair, that contrast can be exciting without becoming extreme.
The key is moderation. If the difference between the crown and the ends gets too dramatic, curls stop clumping in a useful way and start looking disconnected. Keep the transitions smooth, and the style stays wearable. I’d choose this when the goal is fashion first and safe choices second.
Best for: confident dressers and curls with enough density to hold contrast.
Styling note: use a diffuser to lift the crown, then let the ends stay a little looser. The contrast is part of the point.
20. Curly Lob Shag
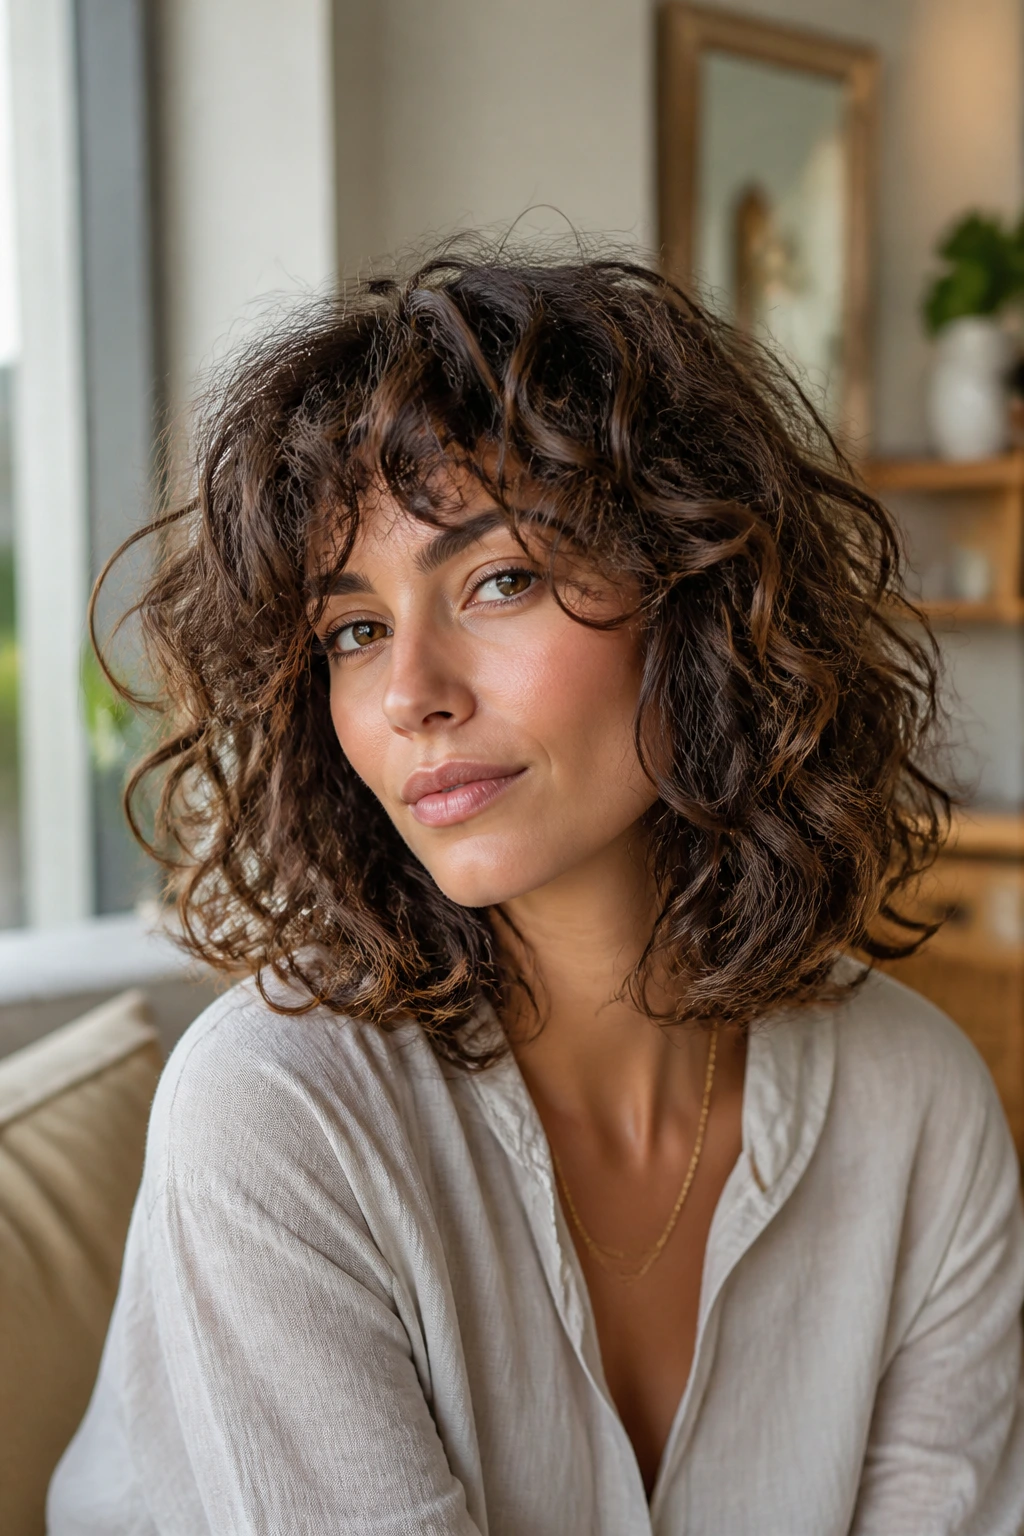
A curly lob shag sits in that sweet spot between a long bob and a true shag. The length usually lands around the collarbone, with layers that are noticeable but not jagged. It’s a clean way to test the shag shape without committing to a lot of chop.
This version works especially well on looser curls that need motion more than they need heavy reshaping. The perimeter still has enough length to tuck behind the ear or pin half-up, which makes it practical. If you want to dip your toe into layers, this is the least intimidating entry point on the list.
Best for: first-time shag wearers and curl patterns that don’t need aggressive layering.
Styling note: keep the underside hydrated. Lob lengths show dryness faster than shorter cuts do, and frizzy ends make the shape look ragged.
21. Piecey Fringe Shag
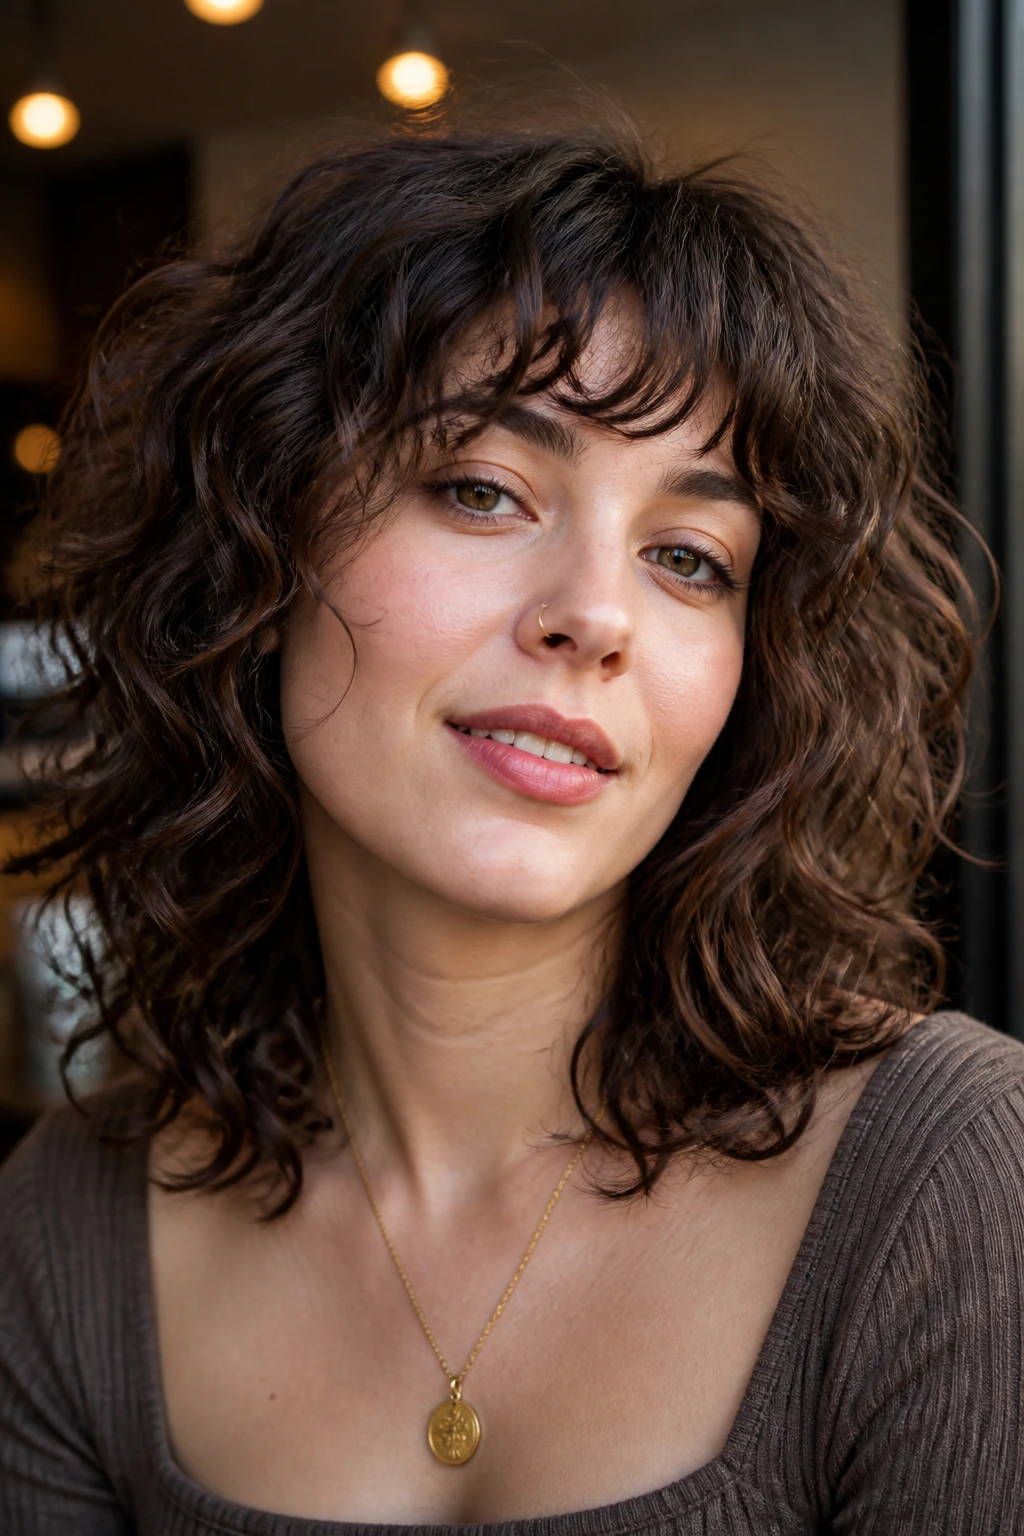
A piecey fringe shag gives you bangs in little separated bits instead of one solid curtain. On curls, that can be a lifesaver. The forehead gets softness, the face gets framing, and the fringe never looks like one heavy line that shrinks into itself.
This cut relies on definition. A light gel or curl cream on the fringe helps the pieces stay visible, especially if your hair likes to expand as it dries. I like this look when the rest of the cut is more relaxed and the front needs a little extra structure. It’s playful without being precious.
Best for: people who want fringe texture, not fringe bulk.
Styling note: twist the fringe in small sections while it’s wet, then release it when fully dry. That’s usually enough to keep the pieces separate.
22. U-Shape Shag
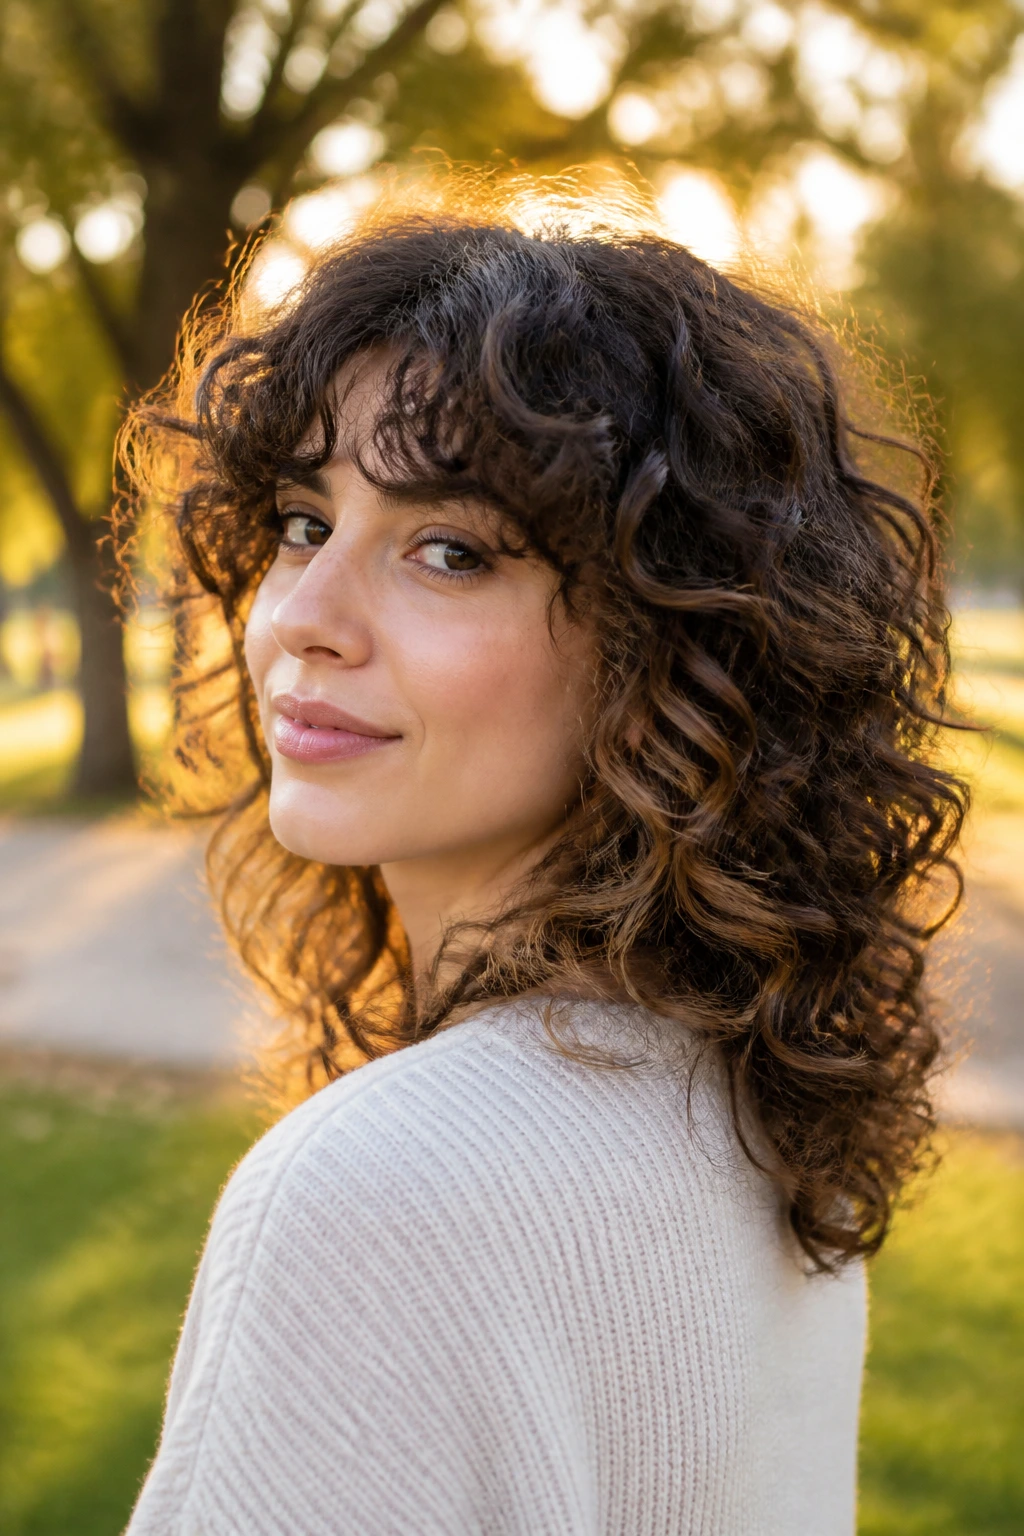
A U-shape shag keeps the perimeter gently rounded in the back, then layers the inside so the haircut doesn’t become too heavy. It’s a good compromise for anyone who likes length in the back but still wants movement around the face and crown. The silhouette stays soft from every angle.
This shape is especially useful if you wear your hair half-up a lot. The U gives you a neat back line, while the interior layers stop the top from looking flat or bulky when it’s down. It’s a very practical cut, which sounds boring until you realize boring haircuts are often the ones people wear the longest.
Best for: medium curls that need structure and length at once.
Styling note: if the back starts to flip oddly, a tiny trim at the hem usually fixes it faster than more product.
23. Internal-Layer Shag
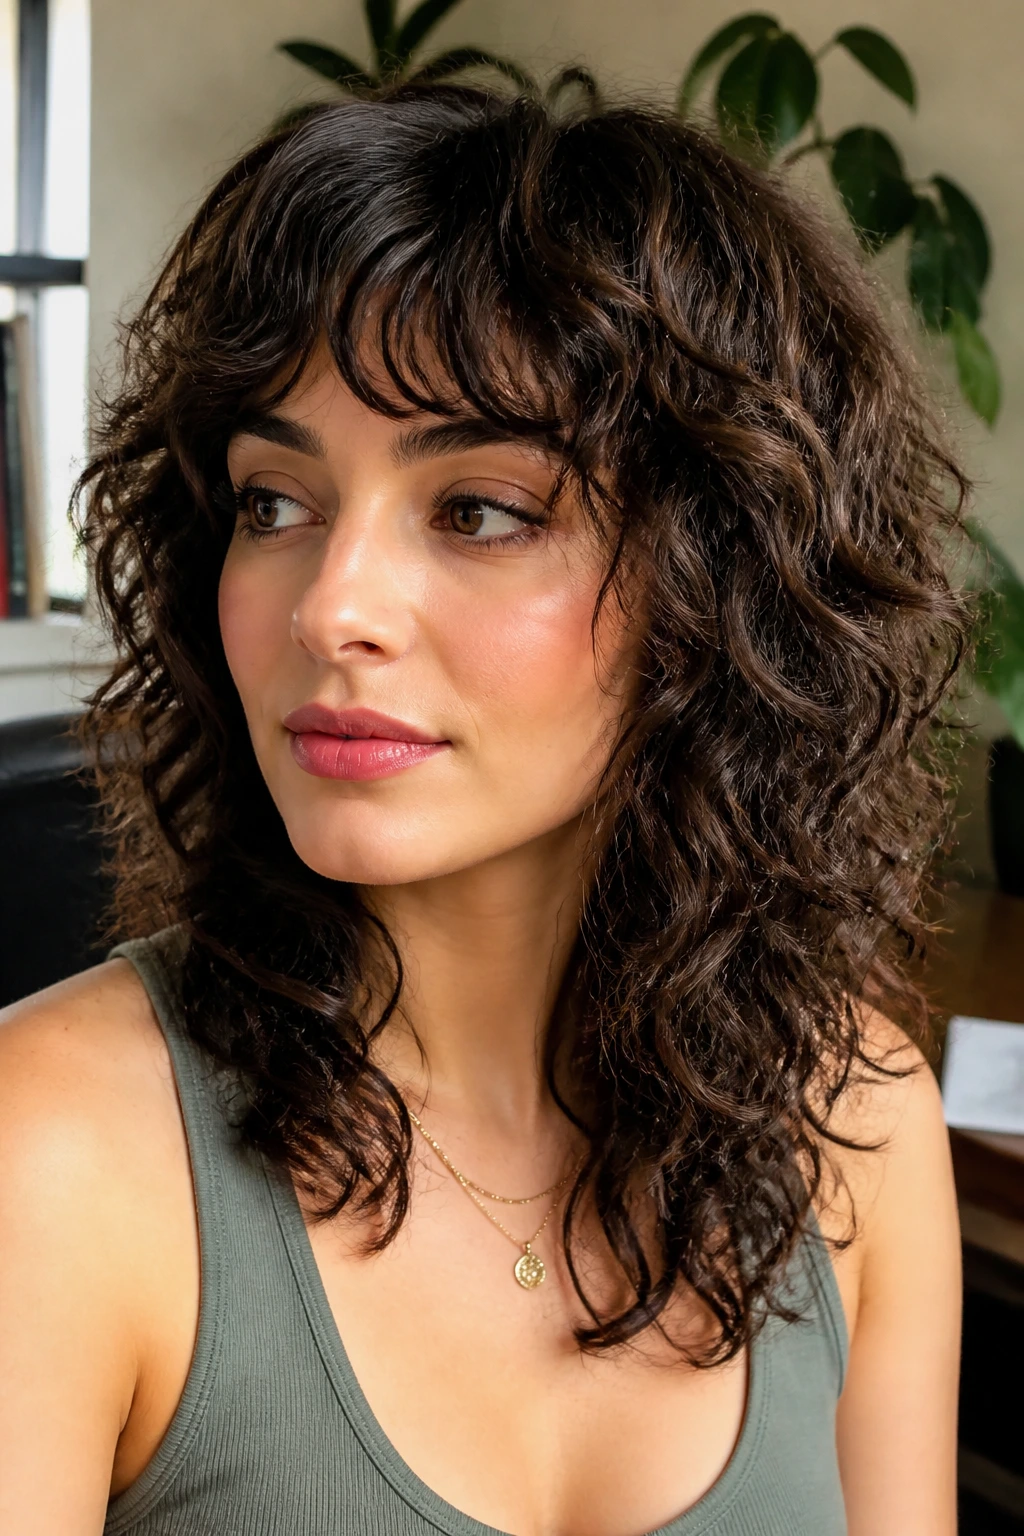
An internal-layer shag hides the weight removal inside the haircut instead of chopping the outside into obvious steps. The outer shape looks fuller and cleaner, but the curls inside have room to move and separate. This is the quiet sibling of the louder shags.
It’s one of the best choices for dense hair that wants less bulk but not a visibly shredded finish. You get motion without broadcasting every layer to the room. I’m partial to this one on medium curls because it behaves well in a half-up style and still looks polished on day two.
Best for: thick hair, low-frizz textures, and people who prefer a smoother outline.
Styling note: use a lightweight mousse at the roots and a gel only through the middle lengths. Heavy product at the ends makes the hidden layers disappear.
24. Glam Shag
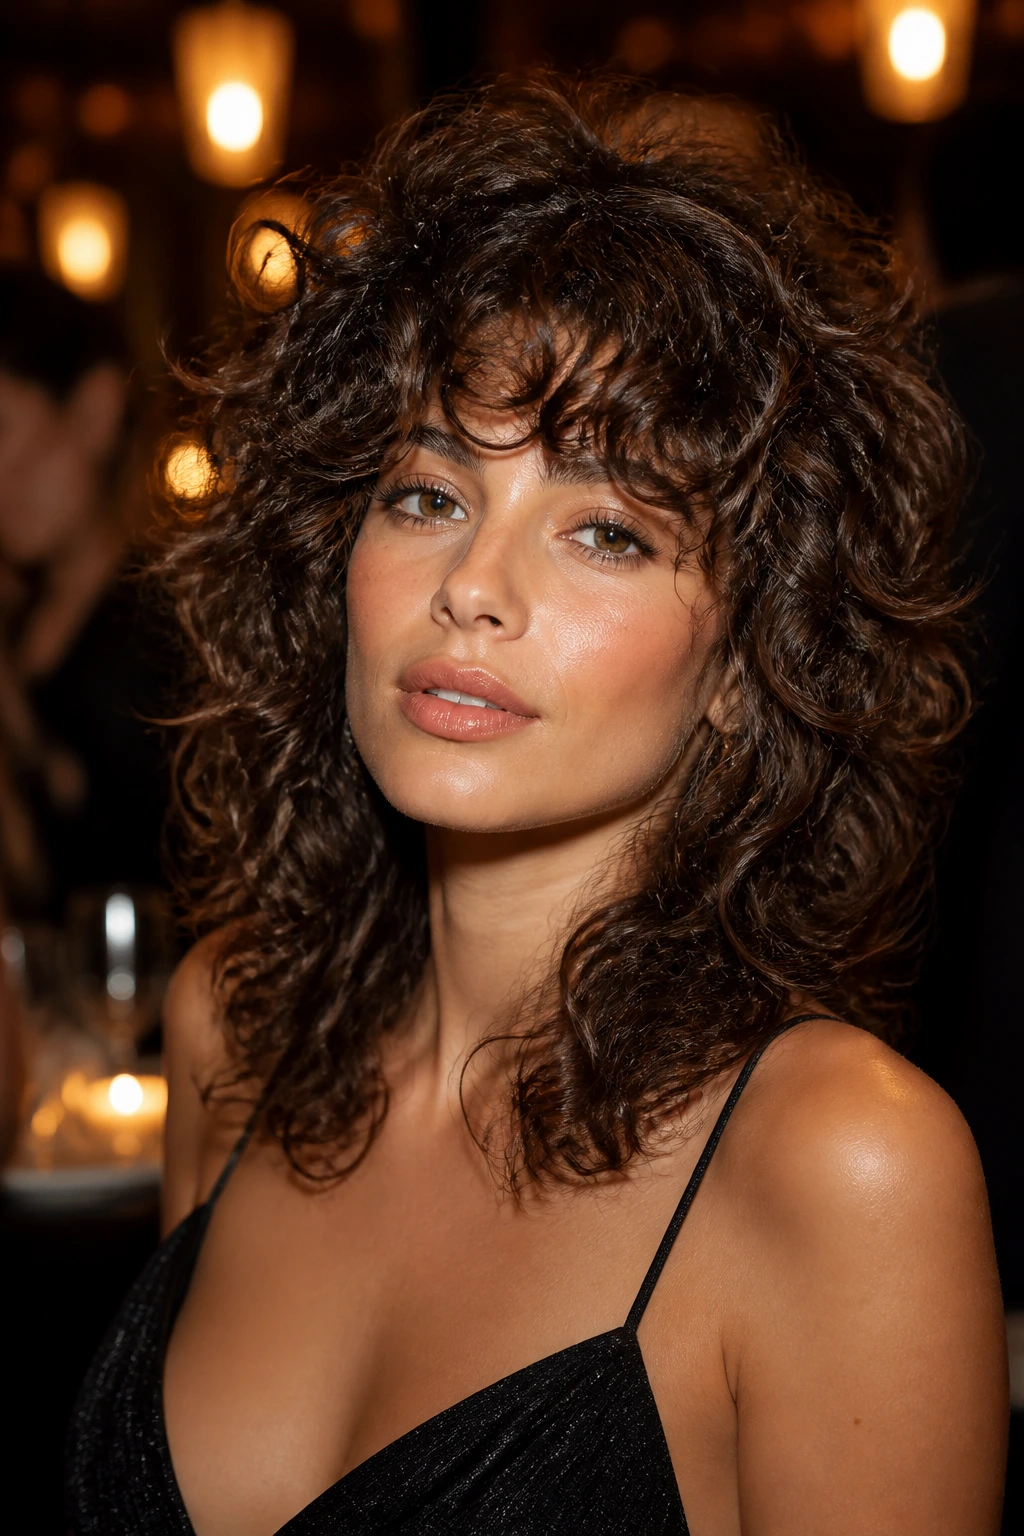
The glam shag is what happens when a shag decides to go out. The curls are defined, the crown has lift, and the ends are shaped enough to catch the eye without looking stiff. It’s more polished than most of the cuts here, which makes it a good fit if you like to wear your medium curls with a little shine.
This look depends on a strong curl pattern or a styling routine that supports one. A diffuser, a decent hold product, and a little patience make a big difference. If you brush the curls out, you’ll lose the point. If you leave them too wet and touch them too soon, you’ll lose the glamour. Balance. Annoying word. Useful cut.
Best for: evenings, events, and curl patterns that photograph with structure.
Styling note: finish with a small amount of gloss serum on the outer layer only. Too much turns curls limp.
25. Air-Dry Shag
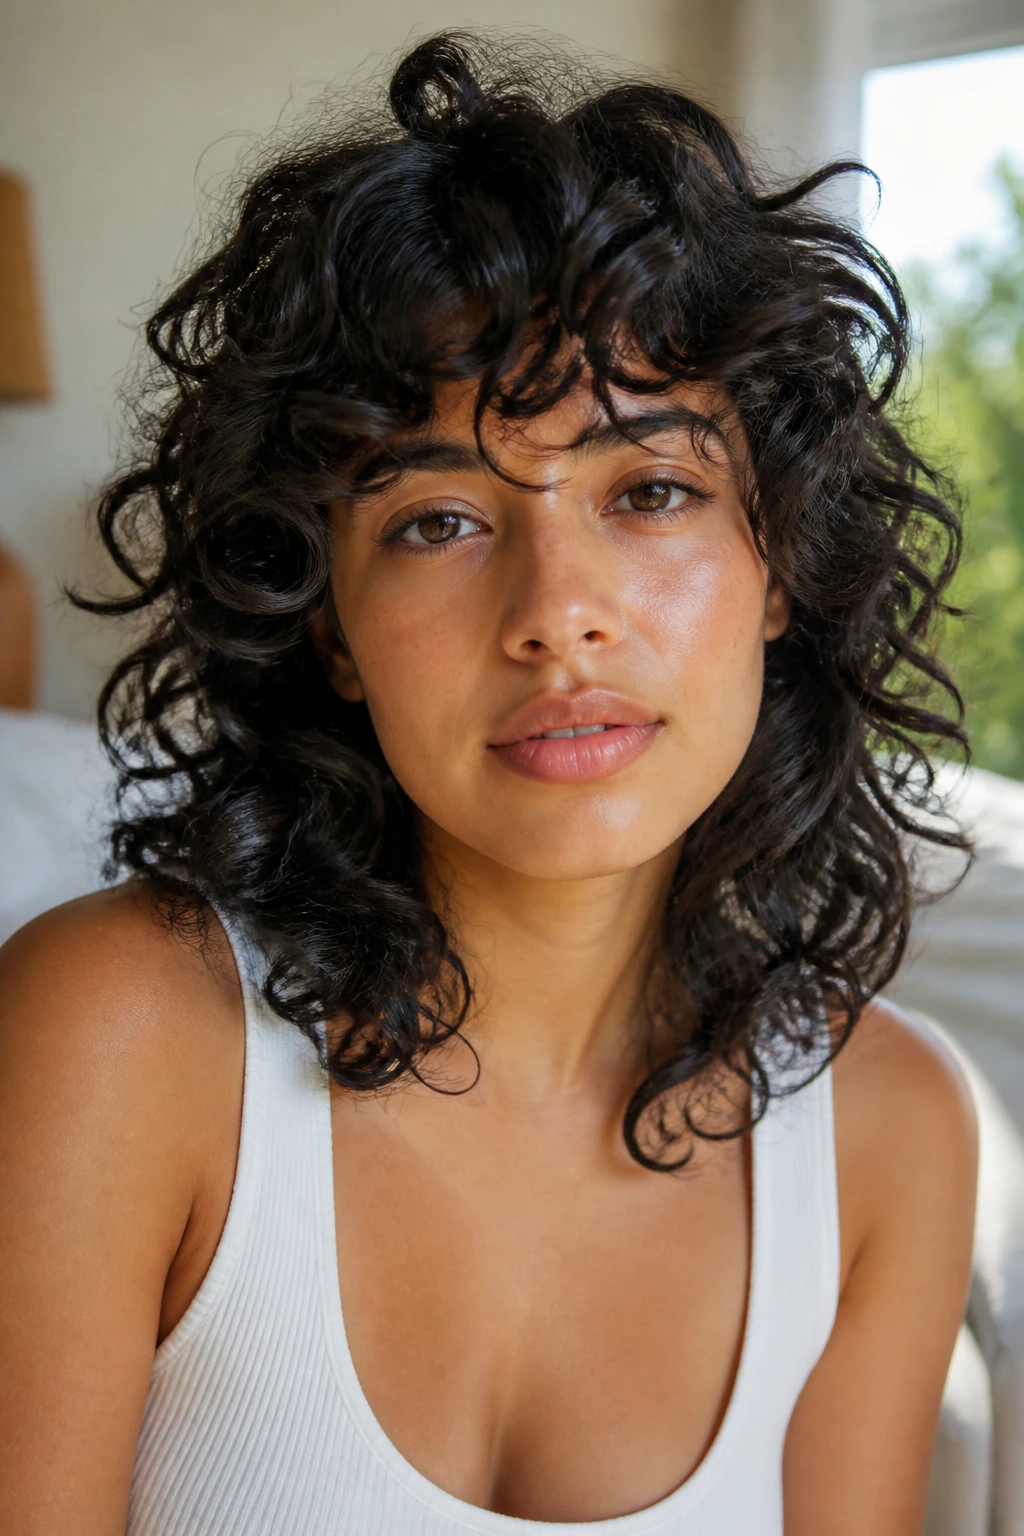
An air-dry shag has to be cut with real respect for shrinkage, because the whole point is that it still looks good when you do almost nothing. The layers should fall in a way that keeps the shape visible without heat, and the fringe should land long enough that it doesn’t disappear the minute it dries.
The cut works because it reduces the need for hands-on styling. That does not mean no styling. It means the haircut carries more of the load. If your routine lives and dies by towel-drying, scrunching, and walking away, this is one of the safest shag directions to ask for.
Best for: people who hate hot tools or live in a rush.
Styling note: a microfiber towel or cotton T-shirt is enough. Regular terrycloth roughs up the curl clumps and muddies the layers.
26. Side-Swept Bang Shag
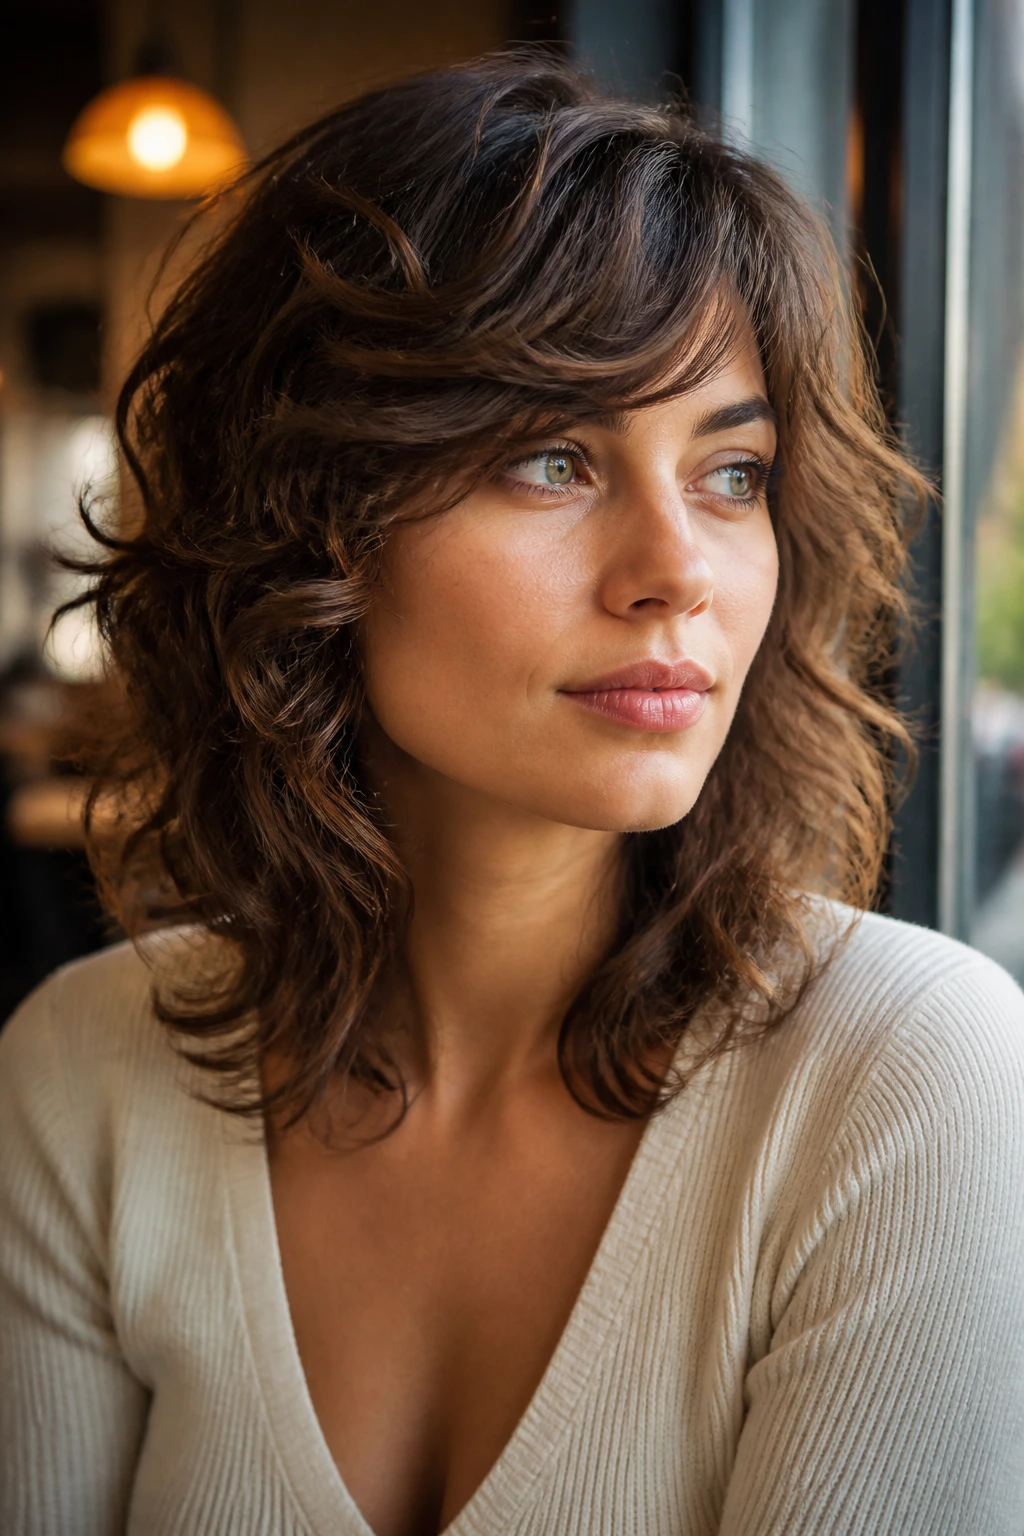
A side-swept bang shag is friendly in a way straight-across fringe rarely is on curls. The bangs fall diagonally, blend into the front layers, and grow out with less drama. That makes it easier to wear every day, especially if your forehead is more moderate than broad or if your hairline has a stubborn cowlick.
The side sweep also gives the cut movement when the rest of the hair is wearing a looser, more relaxed shag shape. It’s less theatrical than curtain bangs and less commitment-heavy than a full fringe. Sometimes that’s exactly what a haircut needs to be.
Best for: cowlicks, grow-out phases, and readers who want softness without a center part.
Styling note: direct the bangs while they’re damp, not dripping. Wet curls can look obedient for about thirty seconds and then do whatever they like.
27. Soft Wolf-Bob Shag
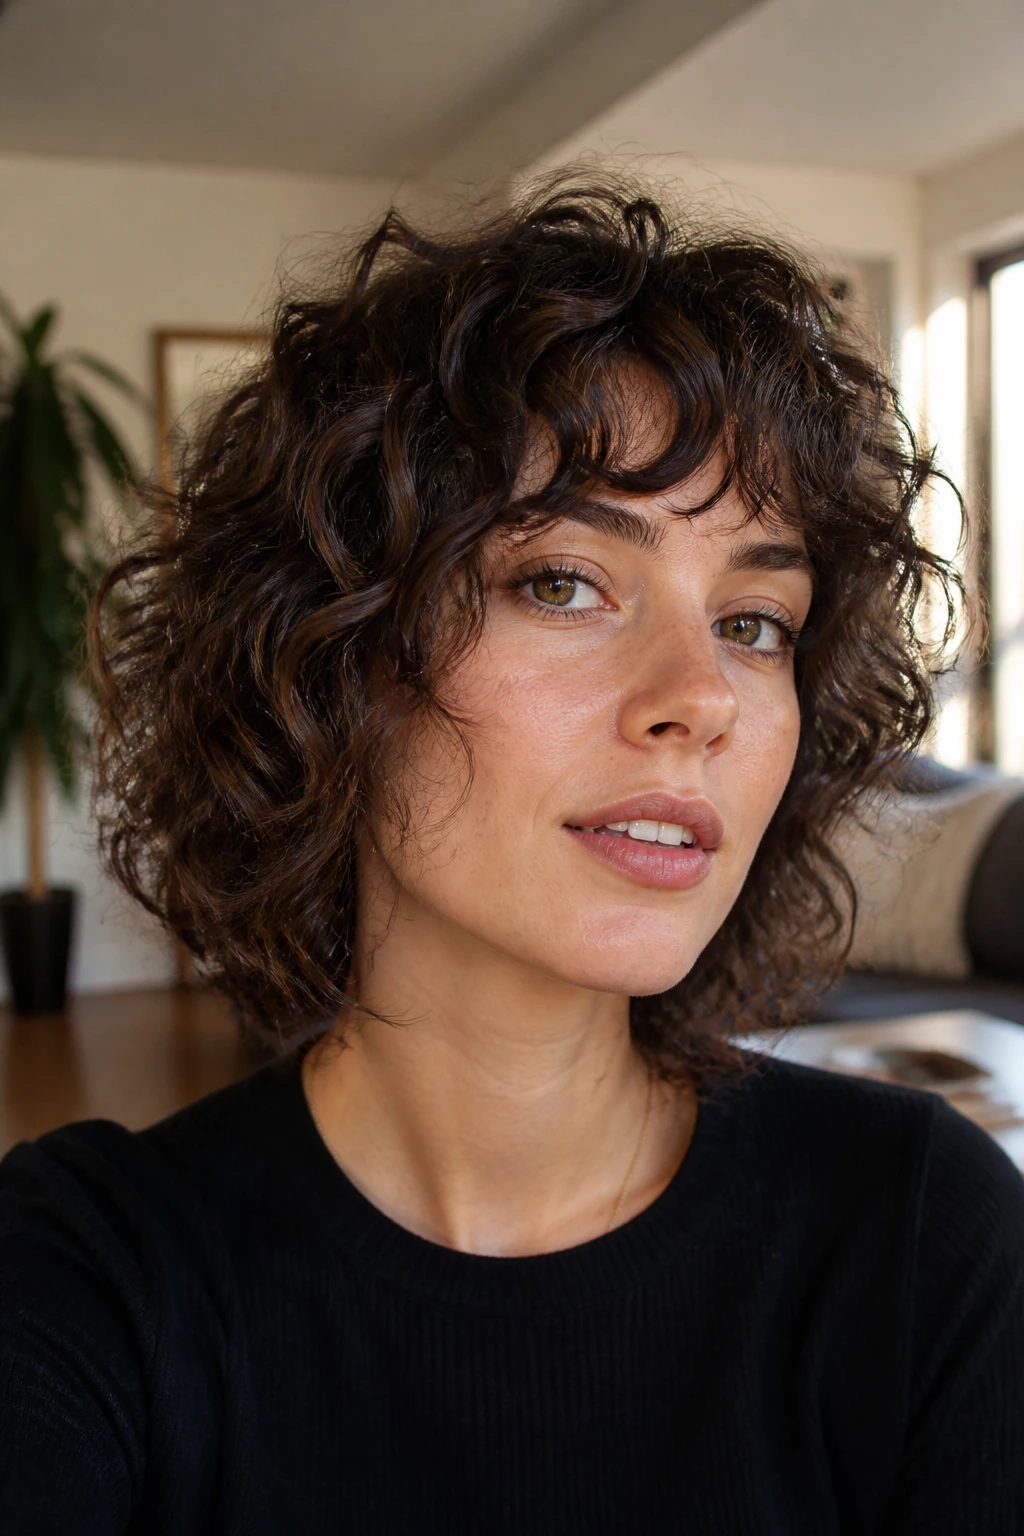
A soft wolf-bob shag sits shorter than some of the other looks here, but it still lives in medium-length territory because the front and back keep enough reach to move. The shape borrows the choppier crown of a wolf cut and the cleaner overall feel of a bob, then blends them so curls don’t get boxy. It’s cheeky, but it’s not a stunt.
This is the cut for someone who wants a little edge without losing everyday wearability. It can also rescue curls that have been overgrown and shapeless, because the shorter internal layers create a fresh outline fast. If a standard shag feels too soft for you, this is the harder-edged cousin worth considering.
Best for: medium-density curls that can handle a bit of lift.
Styling note: keep the bottom perimeter long enough to graze the neck. That’s what keeps it from tipping into short-bob territory.
28. Graduated Layer Shag
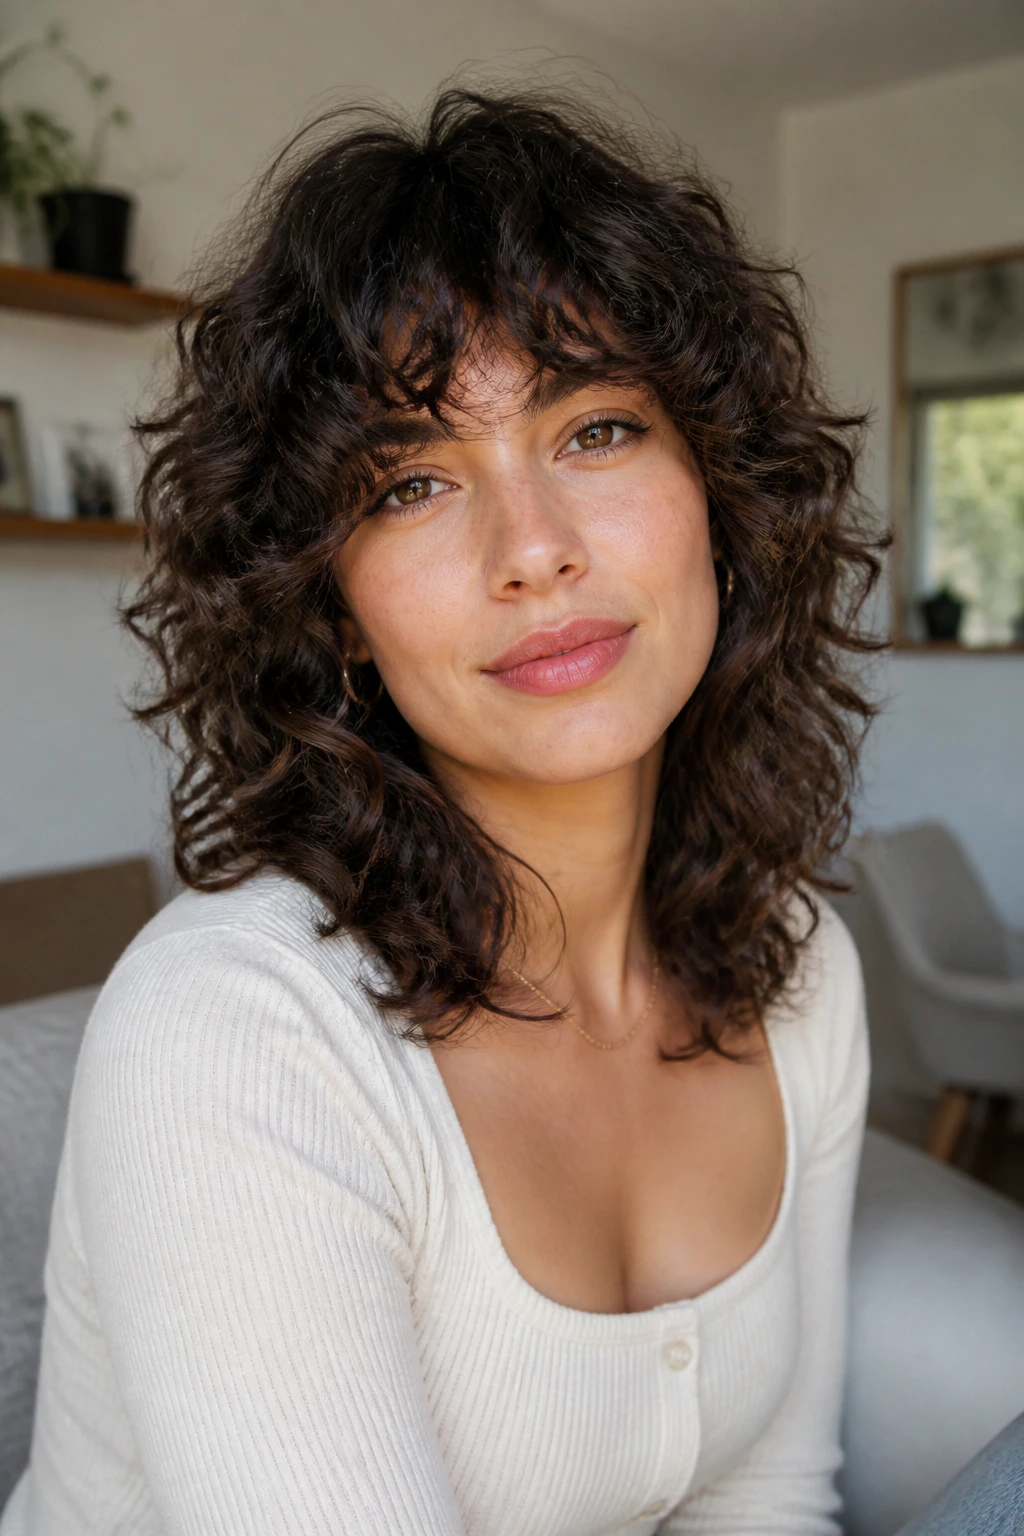
A graduated layer shag builds the movement in a slow slope: shorter near the crown, longer as the eye moves down. The layers are not abrupt. They’re stepped enough to show shape, but soft enough that the cut doesn’t read as choppy from across the room. On medium curly hair, that kind of control is gold.
It’s a smart finish for anyone who likes the shag idea but hates harsh disconnects. The curls keep their density, the crown gets life, and the ends still feel attached to the rest of the haircut. When this one is done well, it looks like the hair grew that way and got lucky.
Best for: people who want movement without a visibly razor-cut finish.
Styling note: ask your stylist to check the shape from the front, side, and back before they stop. Graduated cuts can look fine from one angle and lopsided from another.
Why Medium-Length Curly Hair Loves a Shag
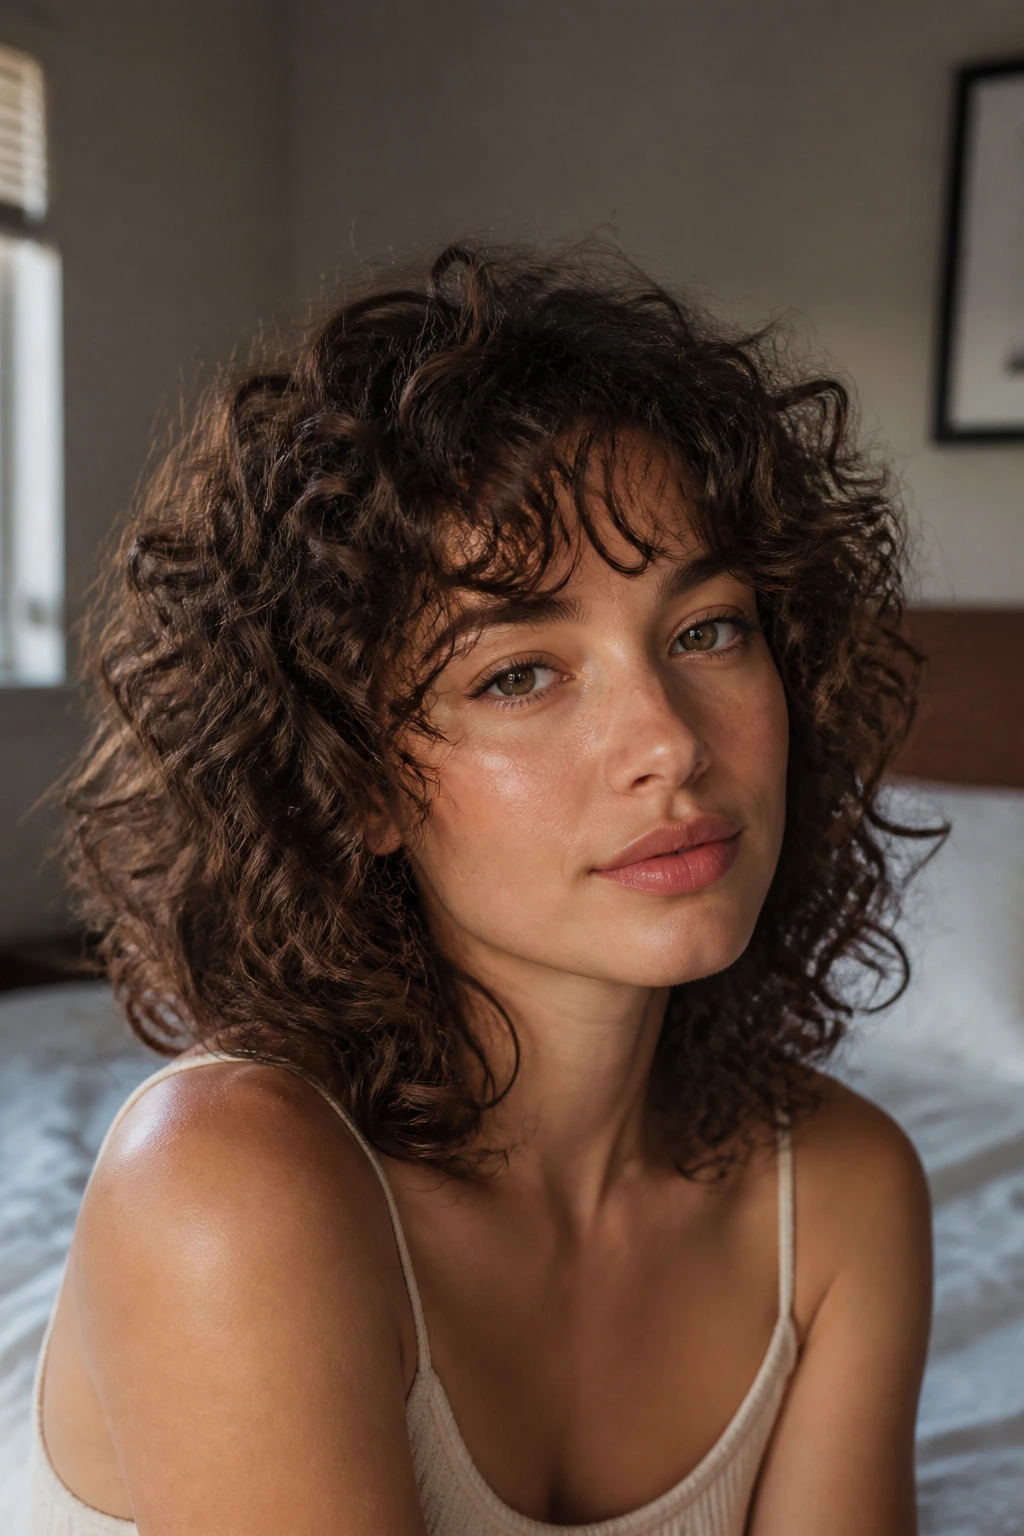
Medium-length curls sit in a useful middle ground. They’re long enough to show a layer pattern, but not so long that weight drags every curl straight down. That matters because a shag relies on movement. If the hair is too heavy, the layers disappear. If it’s too short, the shape can turn fuzzy fast.
The other reason this length works so well is shrinkage. Medium curls can be cut with room to bounce, which means the stylist can shape around the natural pattern instead of fighting it. A curl that wants to spring up near the cheekbone can be left a touch longer and still look right after drying. A curl that hangs flatter can be given more structure near the crown.
There’s also a practical side. Medium shags can be worn down, pinned back, clipped half-up, or tucked under hats without fighting the whole day. That flexibility is why the cut has such staying power. It gives curls room to be themselves, and that’s usually when they look best.
Essential Tools for These Looks
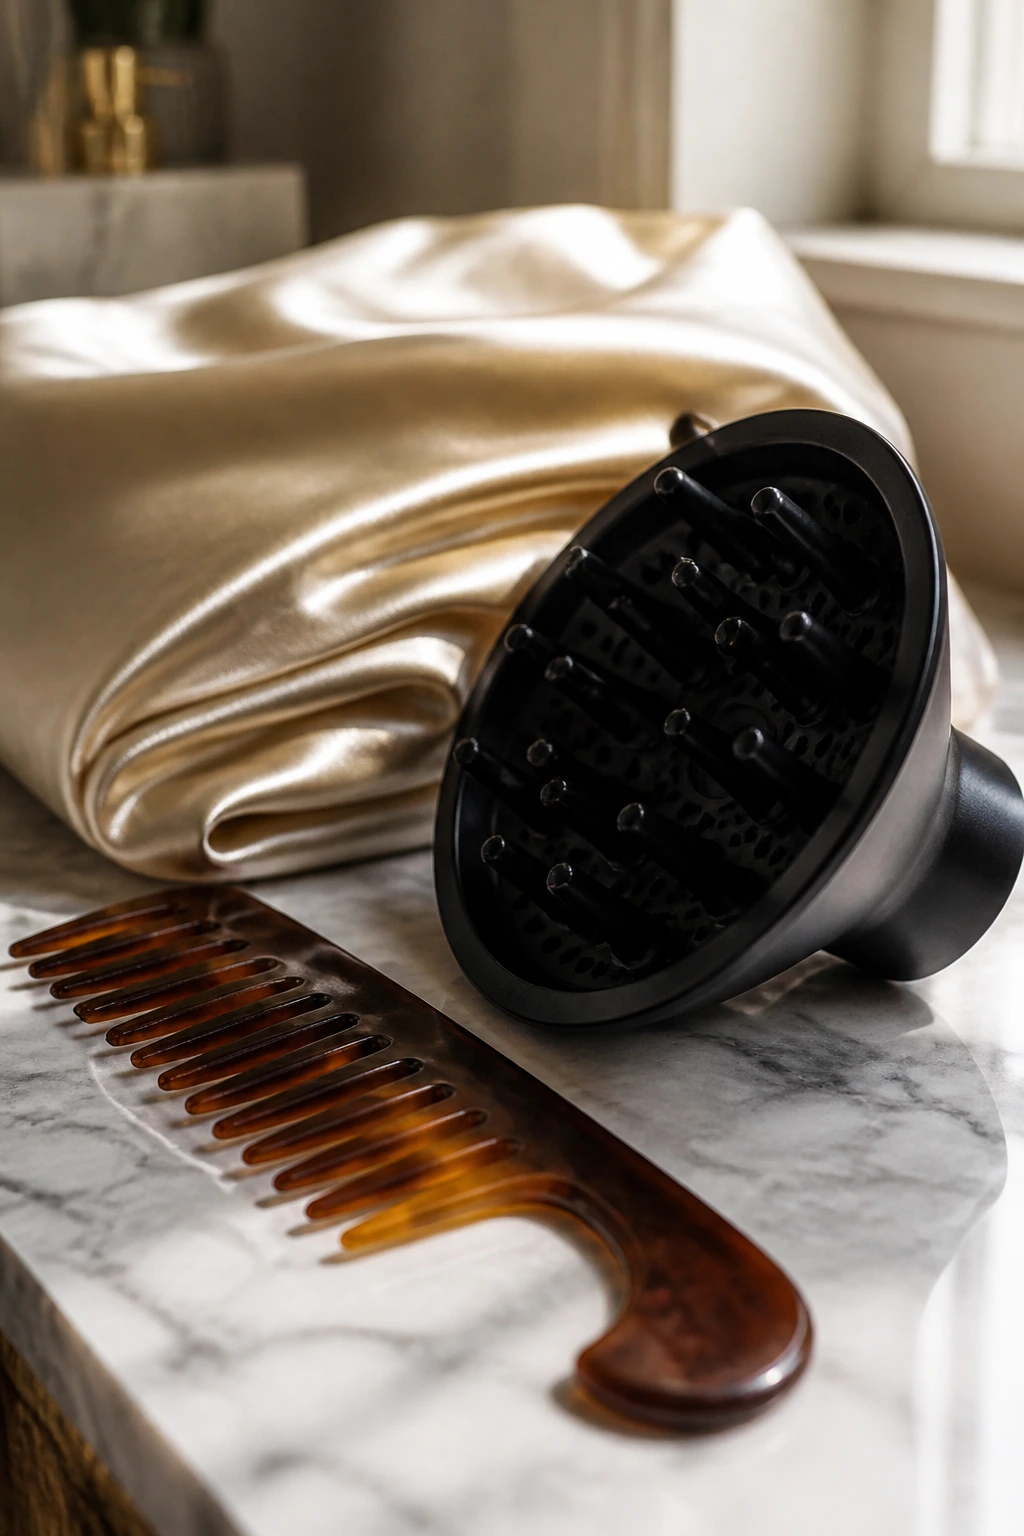
- Wide-tooth comb: detangles curls without ripping apart the clumps the shag depends on.
- Sectioning clips: keep the crown, sides, and fringe separate while you style or diffuse.
- Spray bottle: useful for reviving the front pieces without soaking the whole head.
- Diffuser attachment: helps the layers hold their shape while drying with less frizz.
- Microfiber towel or cotton T-shirt: rough terrycloth can puff the cut out before it sets.
- Curl cream: adds slip and softness, especially on the face-framing layers.
- Gel or mousse: gives the shag enough hold that the layers stay visible instead of fuzzing out.
- Root clips: lift the crown while the hair dries so the top doesn’t collapse.
- Satin pillowcase or bonnet: cuts down on overnight friction, which is brutal on shaggy layers.
- Hand mirror: sounds basic, but checking the back and sides matters when the cut has lots of movement.
How to Ask for the Right Version at the Salon
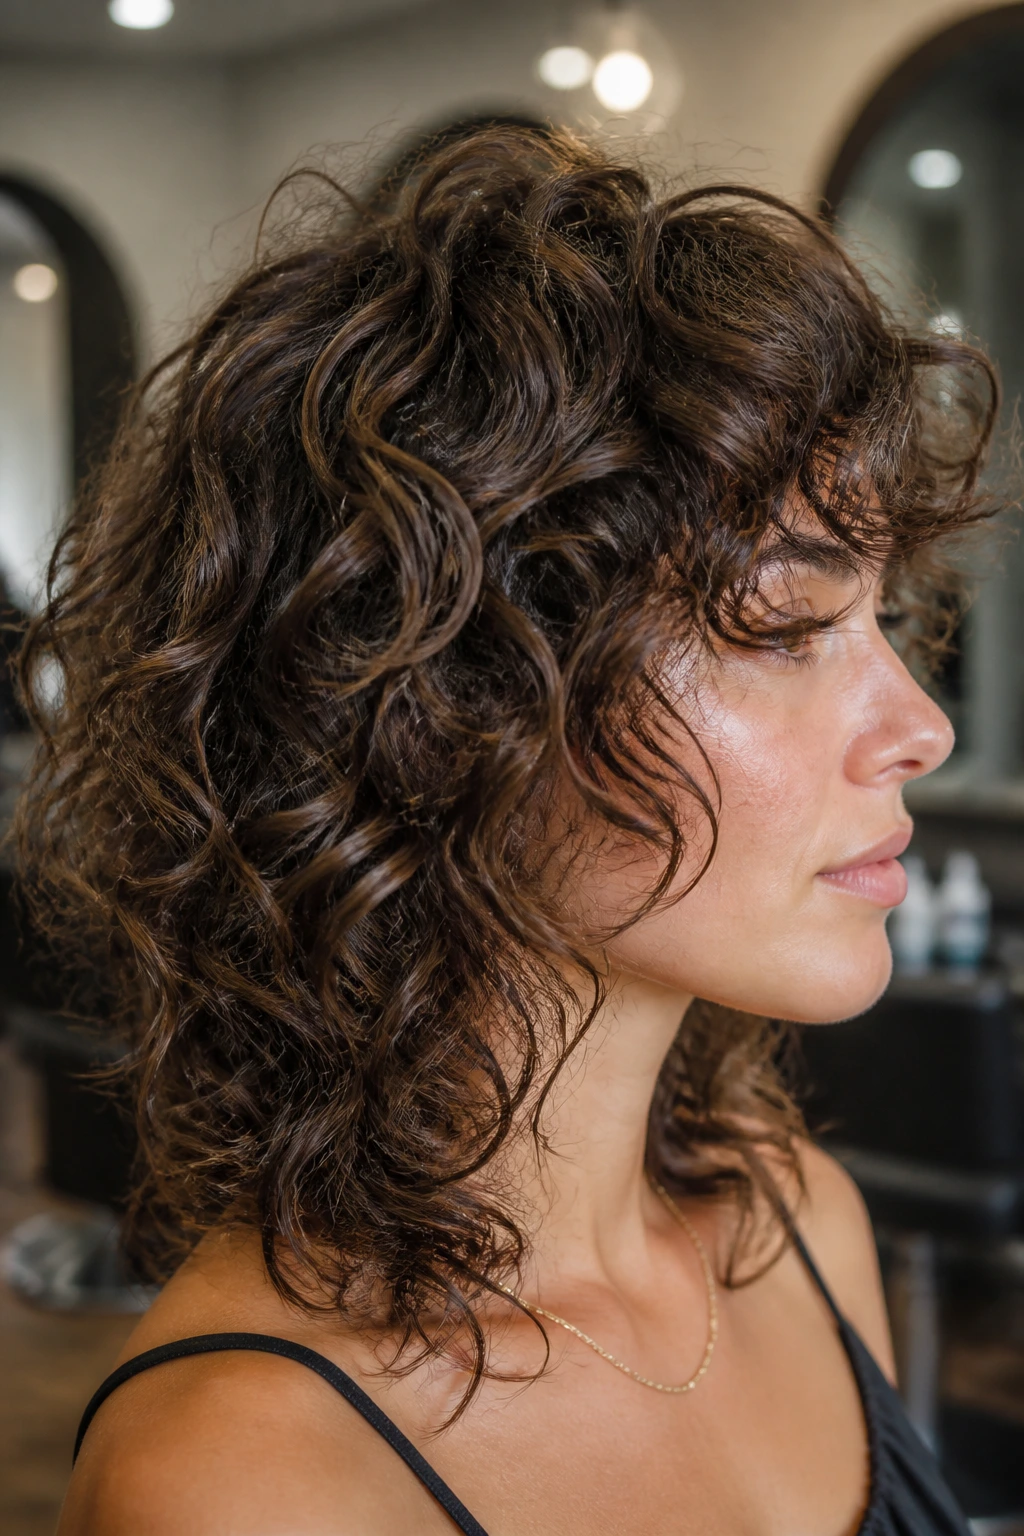
Bring photos. Front, side, and back if you can find them. One picture of a curly shag with a middle part does not tell the whole story, because the bangs, crown height, and perimeter length can all be wildly different. I’d rather see a messy phone folder than a vague description that ends in regret.
Say the words that matter: dry cut, preserve the perimeter, remove bulk from the interior, keep the layers long enough to shrink. If you want fringe, say whether you want it to brush the brows, split in the middle, or fall to one side. If you do not want bangs, say that plainly. Some stylists hear “shag” and start reaching for scissors around the forehead like they’re decorating a pie crust.
Also talk about your curl pattern honestly. If one side is tighter, say so. If the back shrinks more than the front, say that too. A good shag on curls is built around the way your hair behaves, not the way a magazine model’s hair behaves after three hours, a hot tool, and a wind machine.
Styling Moves That Keep the Layers Visible
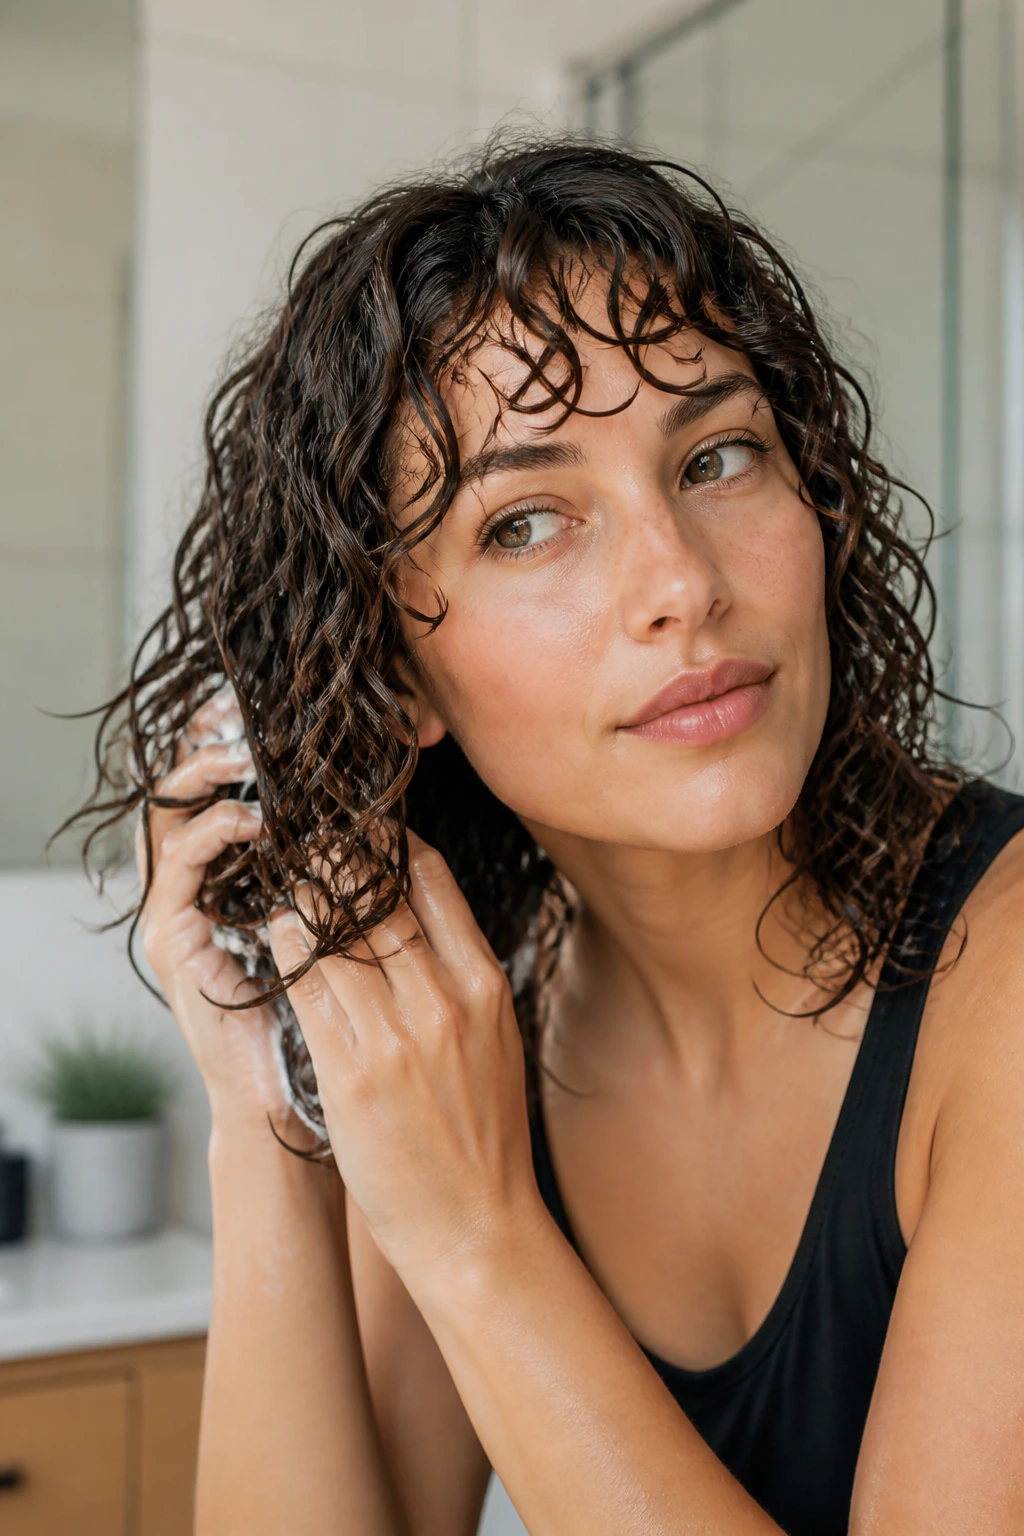
The layers only matter if you let them show. That means product goes on while the hair is wet, not after it has started frizzing. Start with a leave-in or curl cream if your hair gets dry, then add a light gel or mousse for hold. Scrunch upward. Don’t rake the curls apart too much. The clumps are part of the shape.
Diffusing helps, but the method matters. Low heat, low speed, and a patient start at the roots keeps the crown from collapsing. If you’re air-drying, root clips give the top a better chance of staying lifted while the perimeter dries. Either way, don’t touch the hair until a cast forms. The cast is doing work.
Second-day refresh is where many shags either stay cute or go limp. A tiny mist of water, a dab of gel diluted in your palms, then scrunch the ends and front pieces back into place. That’s usually enough. You do not need to start over because one curl got weird in your sleep.
Common Mistakes That Flatten a Shag
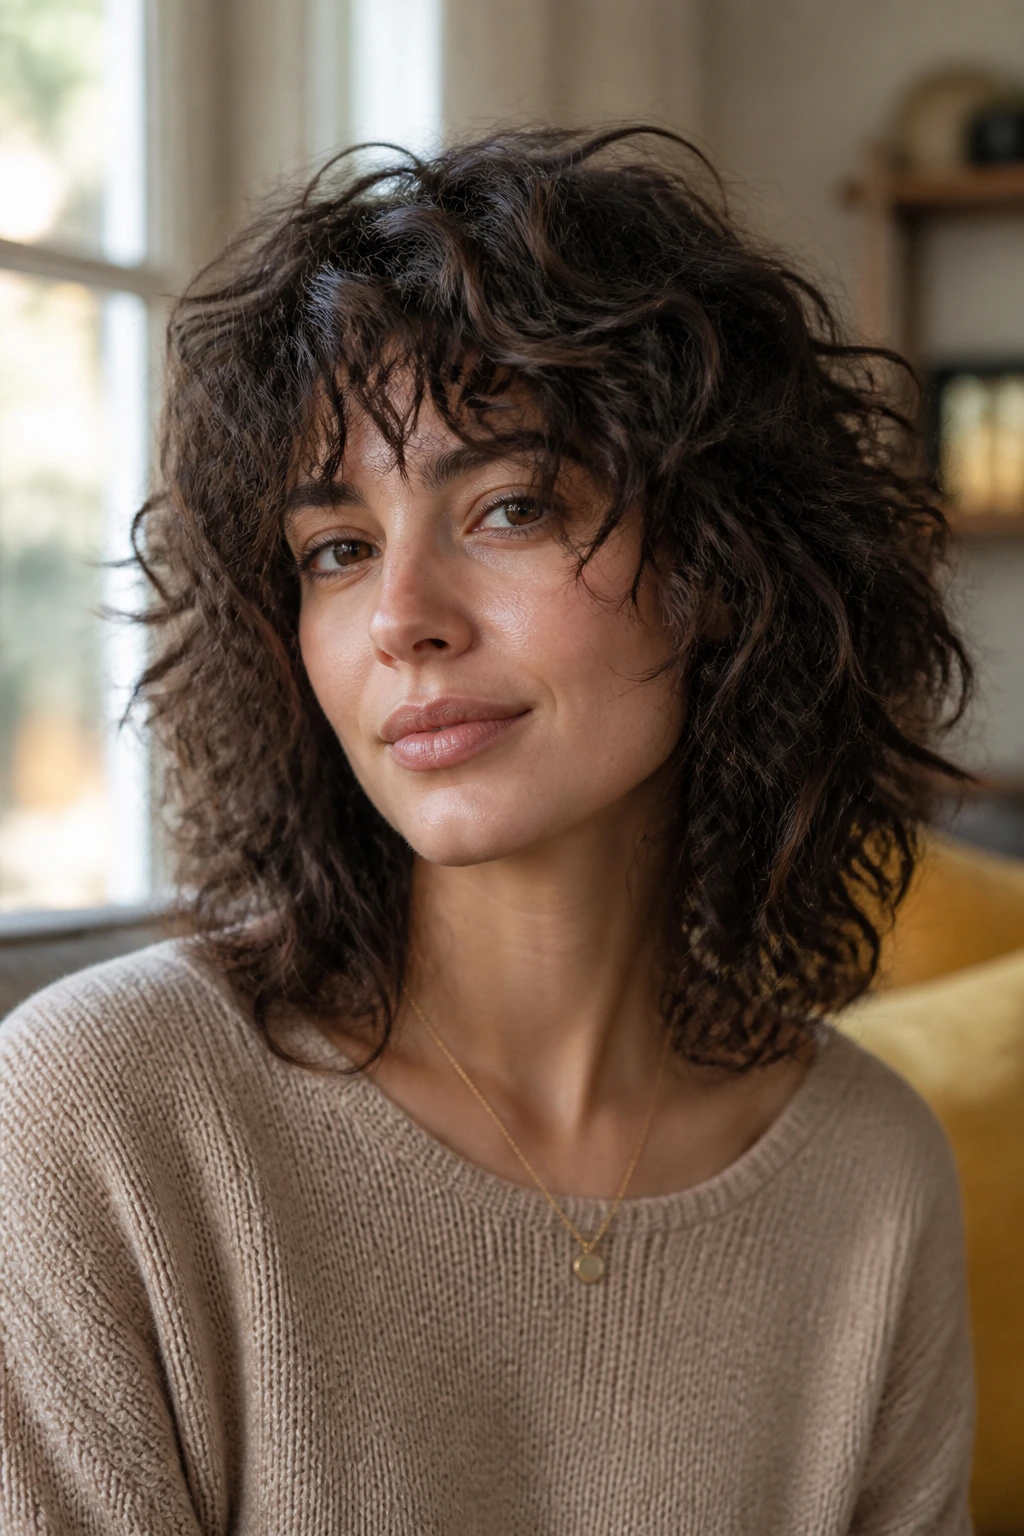
- Cutting too many short layers at the crown: the top balloons and the rest of the cut looks sparse. Ask for lift, not a patchy crown.
- Forgetting shrinkage on bangs: curly fringe can jump an inch or more, and short bangs are hard to forgive. Leave them longer on the first cut.
- Over-thinning thick curls: you lose shape and gain frizz. Bulk should be removed selectively, not aggressively.
- Using heavy cream on fine curls: the layers collapse into one soft blob. Swap some of that cream for mousse or a lighter gel.
- Brushing dry curls after the cut: the whole shag loses its separation and turns puffy at the edges. Detangle wet, style wet, leave dry hair alone.
- Ignoring the back shape: a cut can look lovely from the front and lumpy from behind. Check the silhouette in a mirror before you leave the chair.
Variations and Adaptations to Try
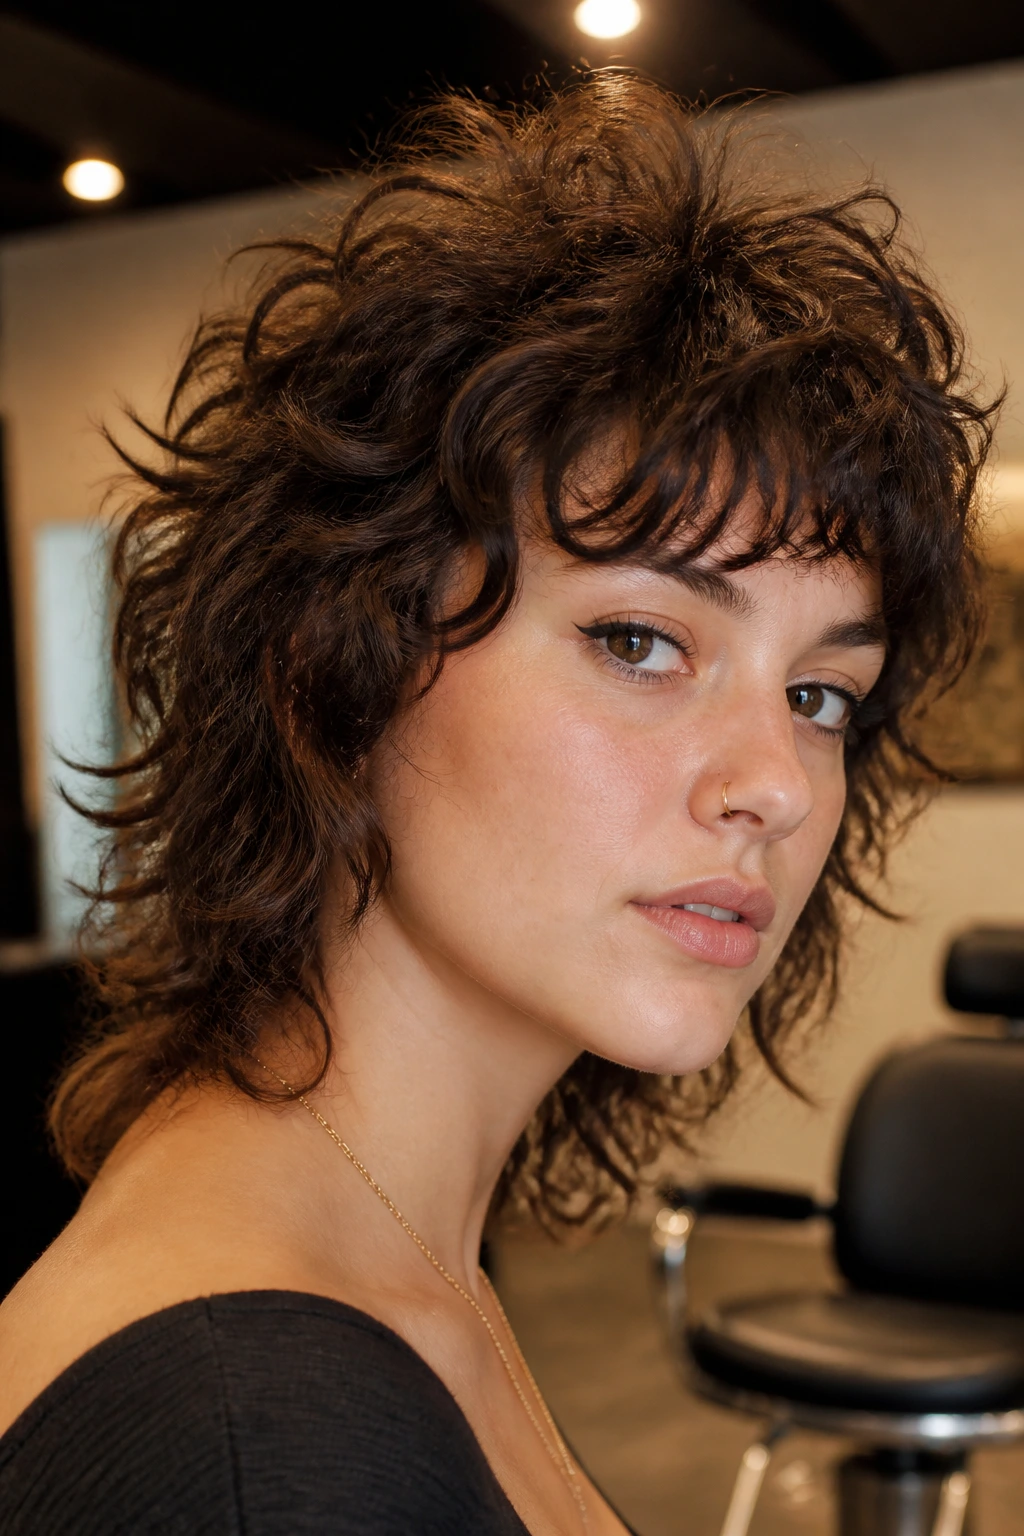
Fine-Curl Feather Shag: keep the layers longer and the fringe light so the hair doesn’t lose body. A mousse-based styling routine works better than heavy cream here, because fine curls need support more than softness.
Thick-Hair Bulk-Release Shag: ask for interior weight removal and a tapered nape. The goal is to make the hair move, not to make it smaller everywhere. Thick curls need room, not punishment.
Bang-Free Grow-Out Shag: skip the fringe entirely and lean on face-framing layers instead. This is the easiest option if you’re growing out bangs or you know you’ll get tired of forehead hair in three weeks.
Low-Heat Air-Dry Shag: choose longer layers and a softer perimeter so the cut still looks intentional without a diffuser. Pair it with gel and root clips, then leave it alone while it dries.
Edge-Up Shag: push the crown higher, shorten the top layer a touch, and let the back keep a little length. It reads sharper and more fashion-forward, especially on dense curls with good bounce.
Keeping the Cut in Shape Between Appointments
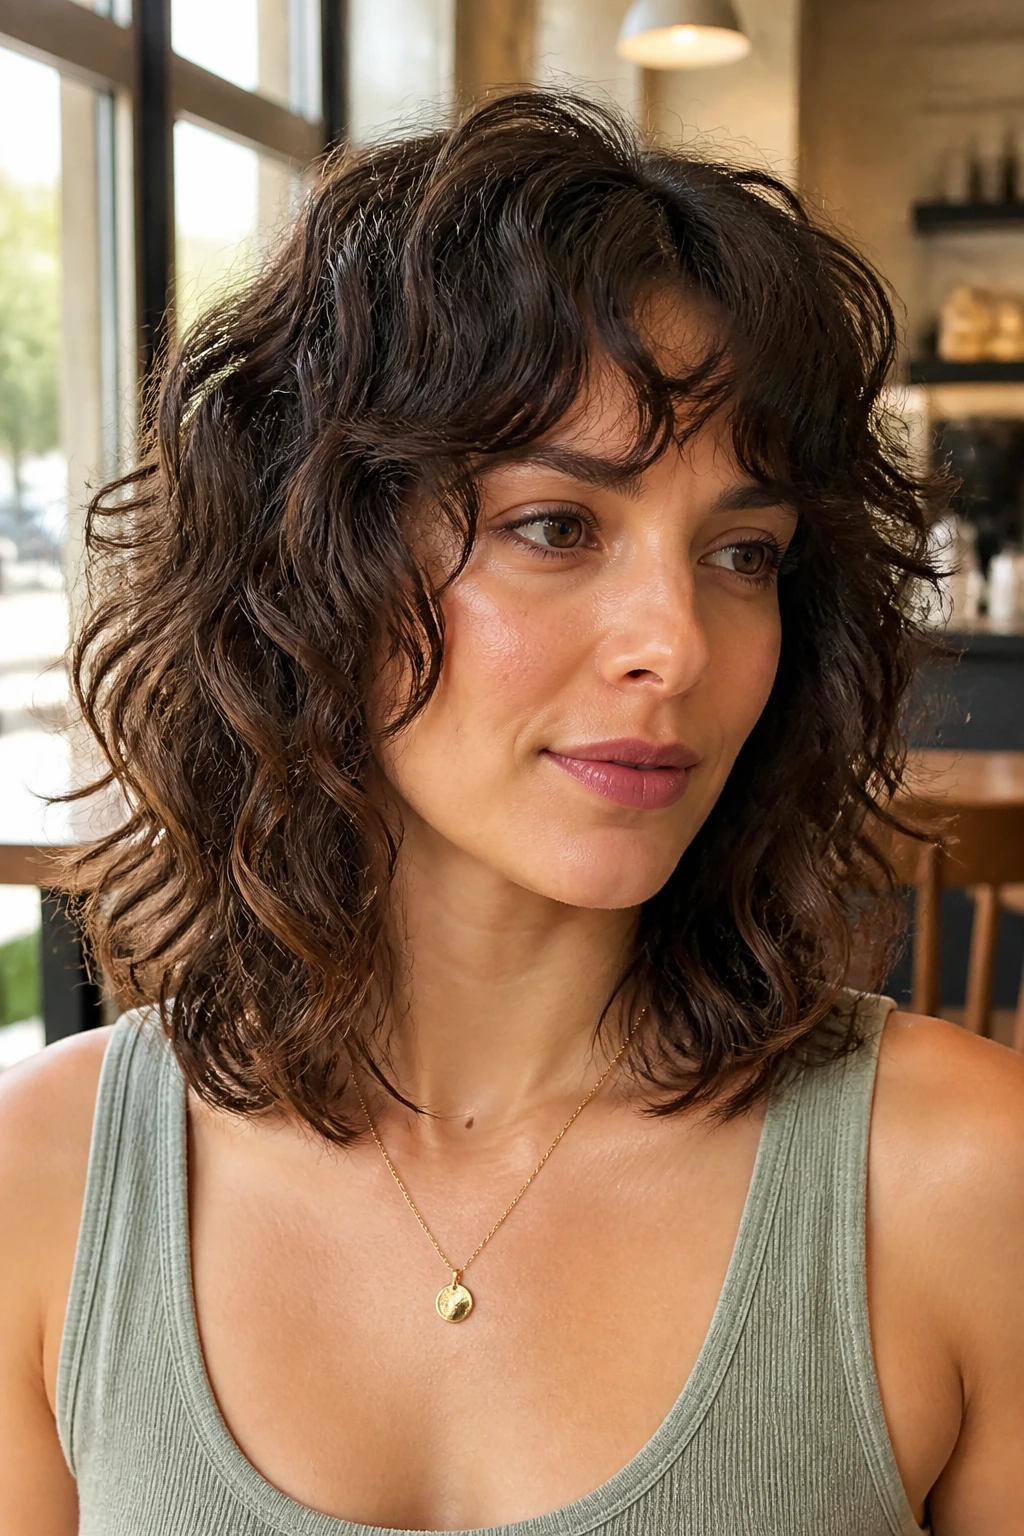
Medium-length curly shags usually need a tidy-up every 8 to 12 weeks if you want the layers to keep their shape. Bangs or fringe may need a small trim sooner, around 4 to 6 weeks, because curl shrinkage makes the front look shorter faster than the rest. Don’t wait until the whole cut feels shaggy in the wrong way.
At home, the biggest enemy is friction. A satin pillowcase helps. So does a loose pineapple or clipping the top layer up before bed, but don’t tie it so tight that you leave a dent across the crown. In the morning, a quick mist and scrunch is usually enough to wake the layers back up.
If the shape starts to drift, don’t overcorrect with more product. A curl that needs more cream may actually need a trim at the ends or a reset at the roots. That’s the part people skip. Haircuts are not just about the first day out of the salon; they’re about how the shape behaves after two, three, and six weeks of normal life.
Frequently Asked Questions About Curly Shags
Can shag haircuts work on loose waves, or do they need tight curls?
Loose waves can wear a shag well, especially if the layers are kept a little longer and the perimeter is not overcut. The trick is to preserve enough weight so the waves don’t scatter into fluff.
Should curly shag haircuts be cut wet or dry?
Dry cutting is usually safer because it shows the true curl pattern and shrinkage. Wet cutting can work, but only if the stylist knows exactly how much your hair bounces once it dries.
How do I keep my shag from turning into a triangle?
Ask for interior weight removal, not just shorter layers on top. Triangle hair usually happens when the bottom is too heavy and the crown has been thinned in the wrong places.
Can I wear a shag if my curls are fine?
Yes, but keep the layers longer and the fringe light. Fine curls can go see-through fast if the haircut gets too chopped up.
What products help a curly shag look defined instead of frizzy?
A light leave-in plus gel or mousse is a strong combination. The exact product matters less than the hold, because the layers need to set before they frizz apart.
How often should I refresh the cut?
Most medium curly shags look best with trims every 8 to 12 weeks. Fringe or shorter face-framing pieces may need a touch-up sooner.
Can I grow out a shag without an awkward phase?
Mostly, yes. The layered shape softens well into a longer cut if the perimeter stays healthy and the fringe is blended instead of cut too bluntly.
What if one side of my hair curls tighter than the other?
Tell your stylist before the cut starts. A good shag can be adjusted for asymmetry, and pretending both sides behave the same usually leads to uneven shrinkage later.
Keeping the Curl and the Shape Working Together
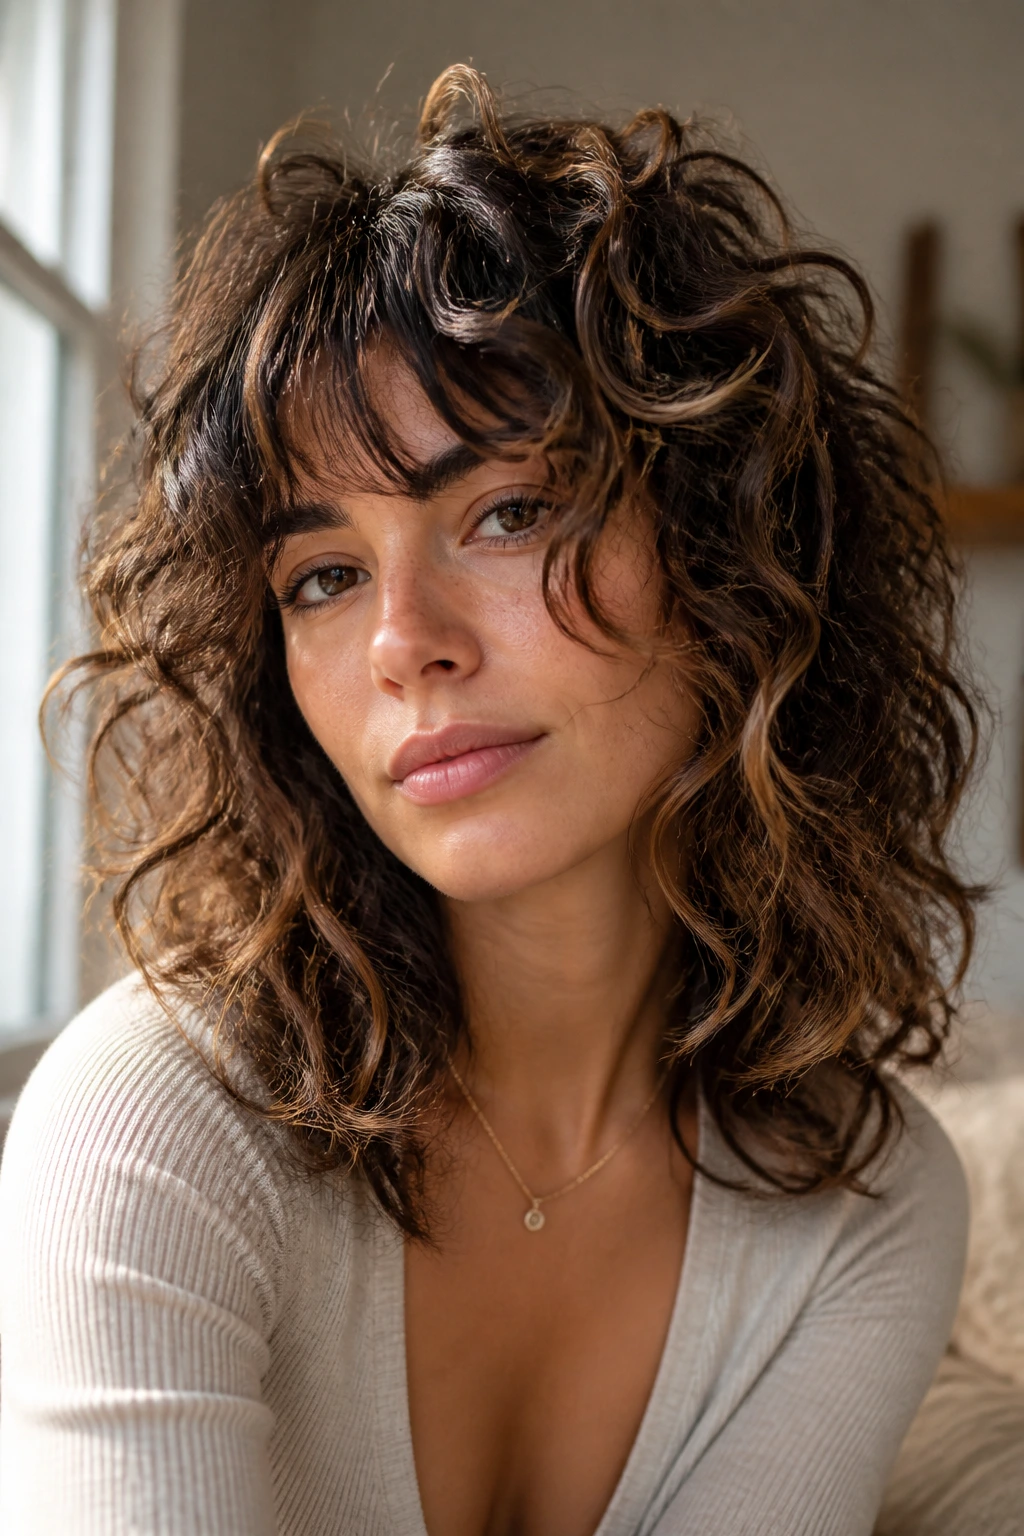
The best shag on medium-length curls is the one that makes your natural pattern easier to live with, not harder. That’s the whole point. The cut should give you movement at the crown, shape around the face, and enough length at the ends that the curl still feels like itself.
Pick the version that fits your mornings. Pick the one that fits your face. And if your hair needs a little extra honesty from the scissors, say so before the first layer comes off. A curly shag done well has a way of looking relaxed even when every piece has been considered, and that’s the look worth chasing.
