



Short layered cuts with choppy shag texture have a very particular kind of energy. When they’re cut well, they look like the hair is moving even when you’re standing still. When they’re cut badly, they can turn stringy at the ends, bulky at the crown, and strangely nervous around the face. That’s the whole game here: the difference between intentional texture and accidental damage is usually only a few thoughtful snips.
I like this family of cuts because it solves a problem that shows up in real life, not just in salon photos. Hair gets flat. Hair gets puffy. Hair grows out at the nape before it does anything useful around the cheekbones. A short shag with choppy layers handles those complaints better than a blunt bob or a tidy little crop, because the cut is built around movement first and neatness second. That’s a useful trade.
And the range is wider than most people expect. Some versions sit right at the jaw and feel sharp enough to wake up the whole face. Others lean soft and airy, with curtain fringe, fuzzy ends, and enough interior layering to keep thick hair from turning into a block. Some are made for curls, some for fine hair, and some for the person who wants five-minute styling and still wants to look like they meant it. The shape changes fast depending on where the weight lives, and that’s where the fun starts.
Why These Short Shag Cuts Keep Getting Saved
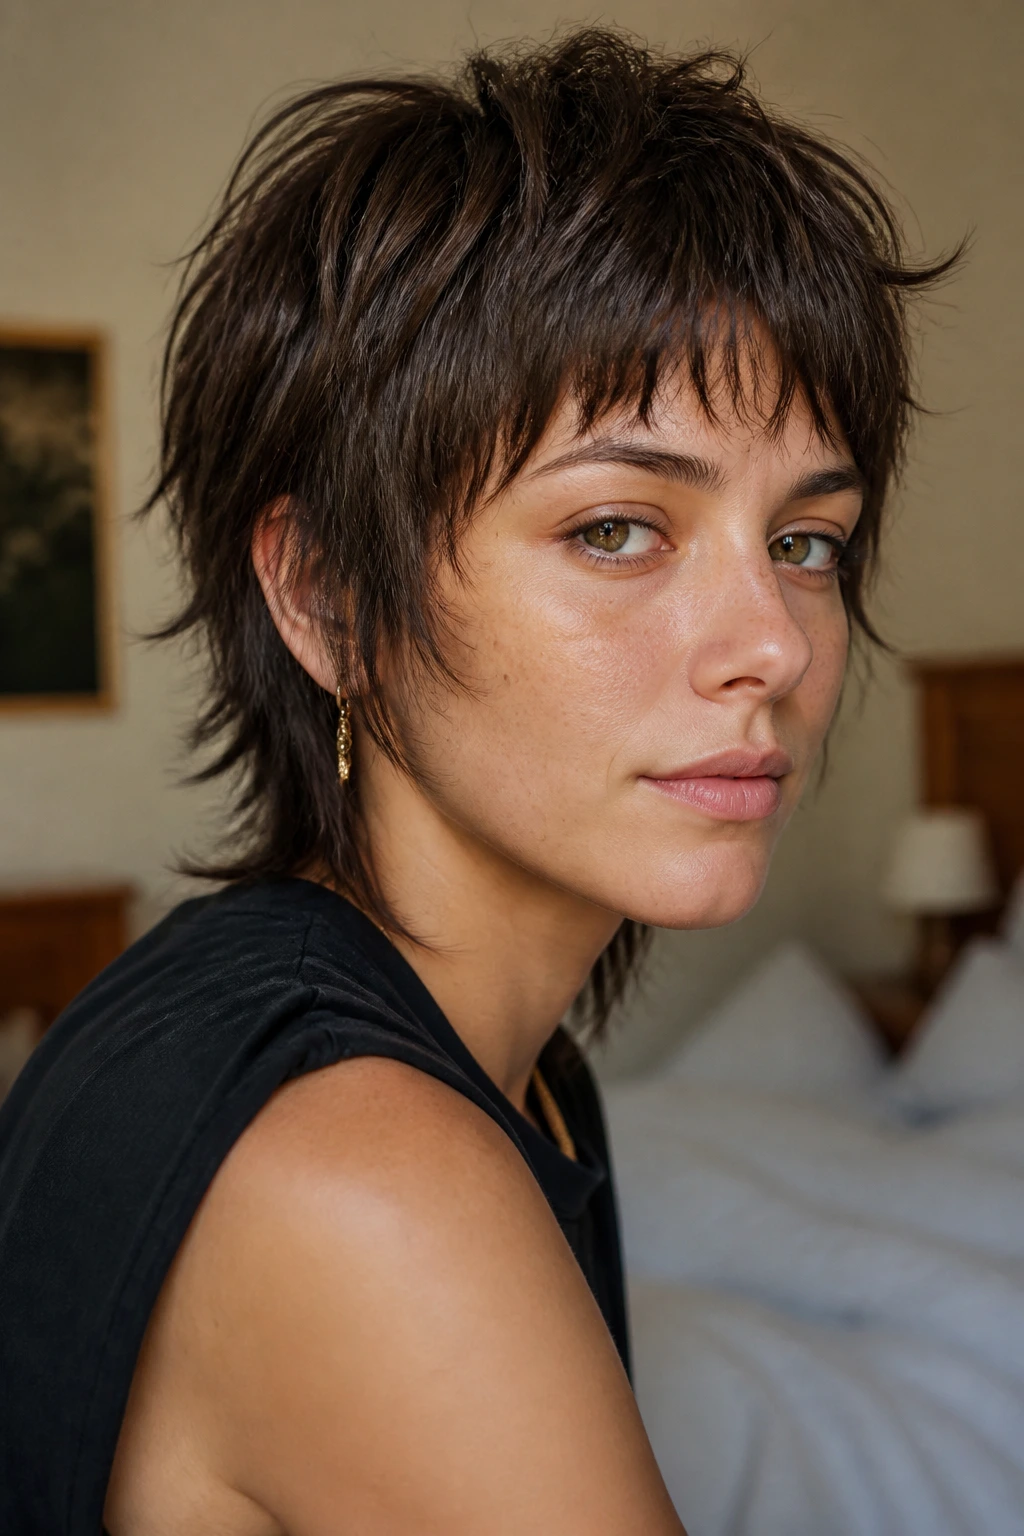
- Texture Without Bulk: Choppy layers stop short hair from sitting like a helmet, especially when the ends need movement more than length.
- Fast Styling: Most of these cuts can be revived with a little mousse, a diffuser, or a rough blow-dry in under 10 minutes.
- Grow-Out That Doesn’t Panic: The uneven perimeter softens as it grows, so you do not get the hard shelf line that a blunt cut throws at you.
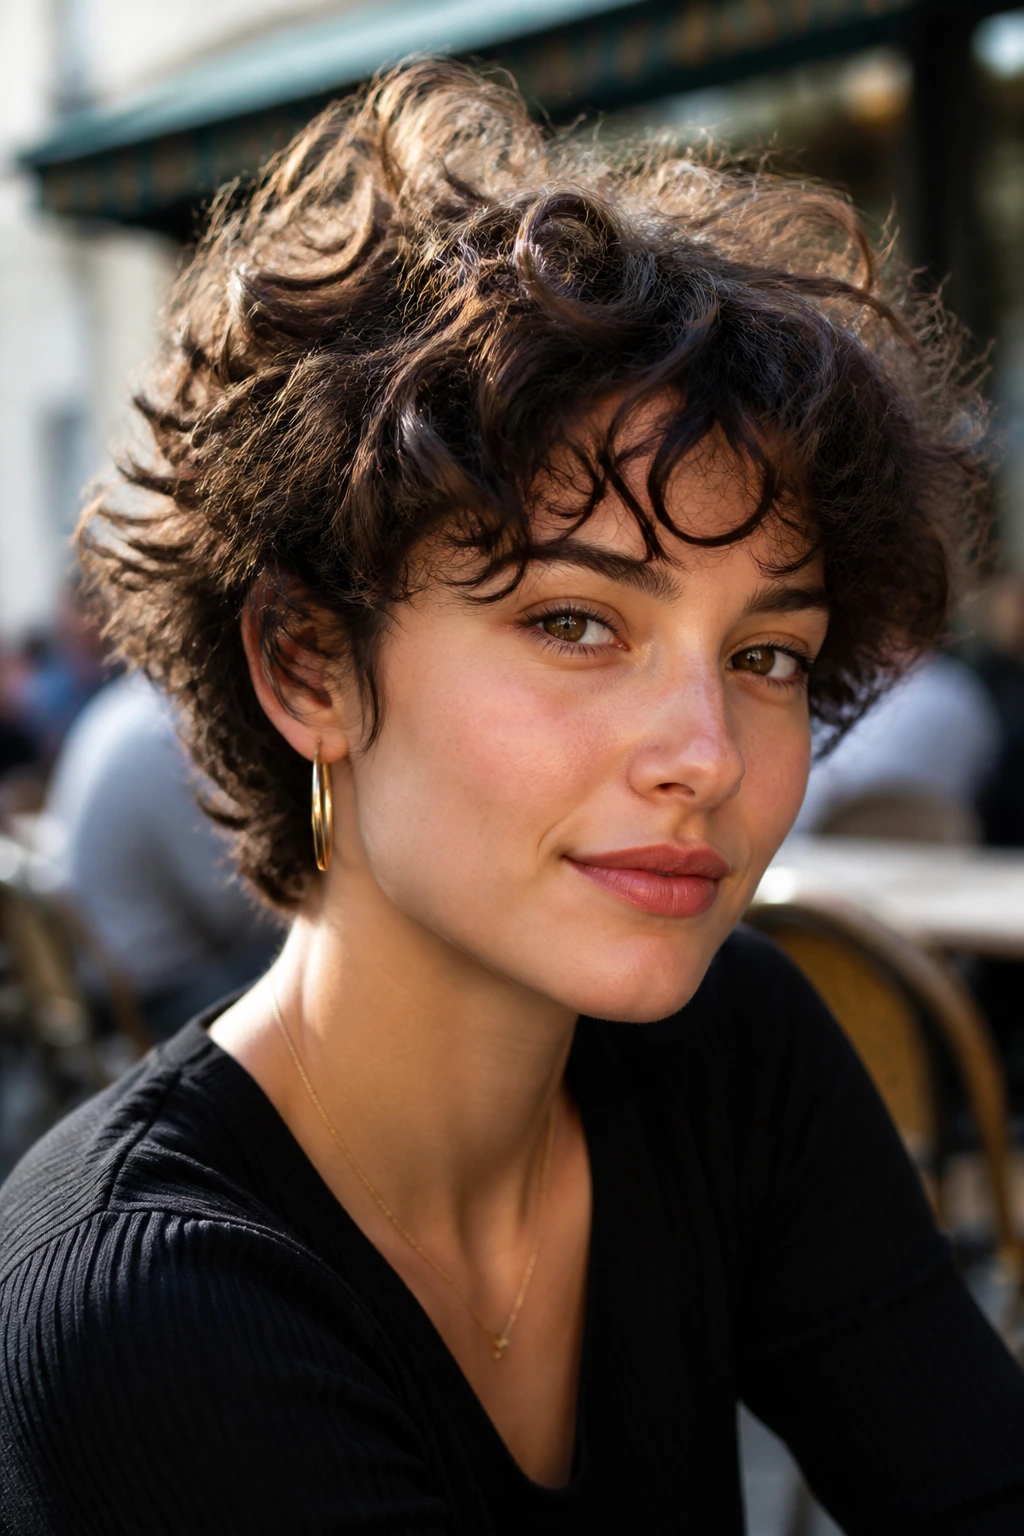
- Fringe Flexibility: Curtain bangs, bottleneck fringe, side-swept bangs, and no bangs at all can all work with the same shag base.
- Built for Real Hair: Fine, thick, straight, wavy, and curly textures all get something useful out of the right version of this cut.
- Less Fuss at the Ends: The choppy finish breaks up the line, which helps the cut move instead of sticking out in one flat shape.
1. Jaw-Length Razor Shag
This is the cut for someone who wants the jaw to do the talking. The perimeter sits right at or just below the jawline, then the interior is chipped away so the ends separate instead of forming one hard line. It has bite. It also has a little attitude, which is exactly why it works so well on straight or slightly wavy hair that tends to fall flat after a fresh blow-dry.
Why It Works
A jaw-length shag gives you enough length to tuck behind the ears, but not so much that the shape starts dragging. The shorter perimeter keeps the weight from collapsing, and the razor finish softens the edges so the cut feels lived-in instead of severe. If your hair flips out at the ends, this cut uses that flip instead of fighting it.
- Best for: straight to wavy hair, medium density, strong cheekbones
- Ask for: a jaw-skimming perimeter, short internal layers, and soft face-framing pieces
- Style with: vent brush, heat protectant, and a matte paste on the ends
My take: keep the front a touch longer than the nape if your jaw is square. The balance is better, and the cut looks less boxy when it grows.
2. Chin-Length Curtain-Bang Shag
If you want the shag texture without the sharper edge of a razor crop, chin length is the sweet spot. The ends brush the chin, the bangs split away from the middle, and the whole cut opens the face instead of crowding it. It’s softer than the jaw-length version, but it still has enough chop to keep it from reading as a regular bob.
The curtain fringe matters here. Without it, the cut can look too tidy. With it, the front pieces bend toward the cheekbones and then drift away, which gives the face a little shape without hiding it. I like this one on people who want movement but do not want to look like they’re wearing a deliberate “edgy” haircut.
The styling trick is easy: dry the bangs first, then pinch the ends of the front sections between your fingers and twist them away from the face. That tiny bend makes more difference than another layer ever will.
3. Bixie Shag With Choppy Crown
Want pixie ease without committing to a full cropped cut? This is the one. A bixie shag sits between a bob and a pixie, but the shag layers keep the crown from going flat and the sides from feeling too neat. The result is short, airy, and a little messy in the good way.
How to Wear It
This cut needs lift at the roots and softness at the ends. That means a root spray or light mousse on damp hair, then a quick blast with your fingers or a small round brush. If you smooth every strand into place, you lose the point. The charm is in the separation.
- Ask for more length on top than at the temples
- Keep the nape soft, not shaved clean
- Use a pea-sized amount of paste only on the very ends
The bixie shag is also one of the best cuts for people who hate hair in their face but still want something with shape. It gives you structure without the commitment of a close crop.
4. Soft Mullet-Edge Shag
This is the version for people who like a little disconnection but do not want a hard mullet. The top stays light, the sides stay short, and the back keeps just enough extra length to make the shape swing when you turn your head. It looks especially good when the neckline is slightly tapered instead of chopped straight across.
I reach for this cut when the hair has too much width in the middle and not enough movement at the crown. That combination happens more often than people think. A soft mullet-edge shag fixes it by moving weight higher up and leaving the bottom a little freer, so the silhouette feels lively rather than bulky.
It’s not the quietest cut in the room. Good. Short shags should never be too polite.
5. Rounded French-Girl Shag Bob
This one has a softer outline than the sharper shags, and that matters. The cut still has layers, but the perimeter curves gently around the head instead of jutting out at the corners. Think bob shape first, shag texture second. That balance keeps it from feeling too wild if you need something that can be worn to work and still air-dried with a bit of attitude.
The charm is in the finish. A slight bend at the ends, a touch of separation around the face, and a fringe that doesn’t sit heavy on the brow can make the whole cut look expensive without trying too hard. I know that sounds like a slippery phrase, but here it means the cut holds its shape in a believable way.
If your hair is fine, ask for internal layers rather than aggressive thinning. You want the curve to stay full. That’s the point.
6. Tapered Nape Shag With Fringe
This cut is neat where it needs to be and messy where it gets to be. The nape is tapered close enough to keep the neckline clean, while the top and front stay shaggy and piecey. It’s a smart choice if you wear collars, jackets, or turtlenecks often, because the back won’t bunch up into a fluffy mess.
The fringe changes the mood. A blunt mini fringe makes the cut feel sharper. A soft, broken fringe makes it gentler. Either way, the nape taper keeps the haircut from ballooning at the bottom, which is a real problem with short layers on thick hair.
Best for:
- Dense hair that swells at the neck
- People who want a tidy back and a looser front
- Anyone who hates hair sticking to a collar
A good tapered nape is one of those details people may not notice first, but they notice the effect. The whole cut sits better.
7. Curly Shag Crop
Curly hair and shag texture get along when the layers respect the curl pattern instead of arguing with it. This crop works because it removes weight where the curls stack up, then leaves enough length for the curls to spring instead of puffing into a triangle. Cutting it dry or nearly dry usually gives the clearest read on where the shape wants to live.
The biggest mistake with curly shags is taking too much off the top and not enough through the sides. That creates a round puff on top and a heavy edge underneath. A better cut lets the curls stack in soft tiers, so the silhouette stays airy.
Diffuser? Yes. Rough blow-dry? Usually no. And if you use a cream, keep it light; heavy product makes short curls separate in clumps that look greasy by afternoon.
8. Fine-Hair Feathered Shag
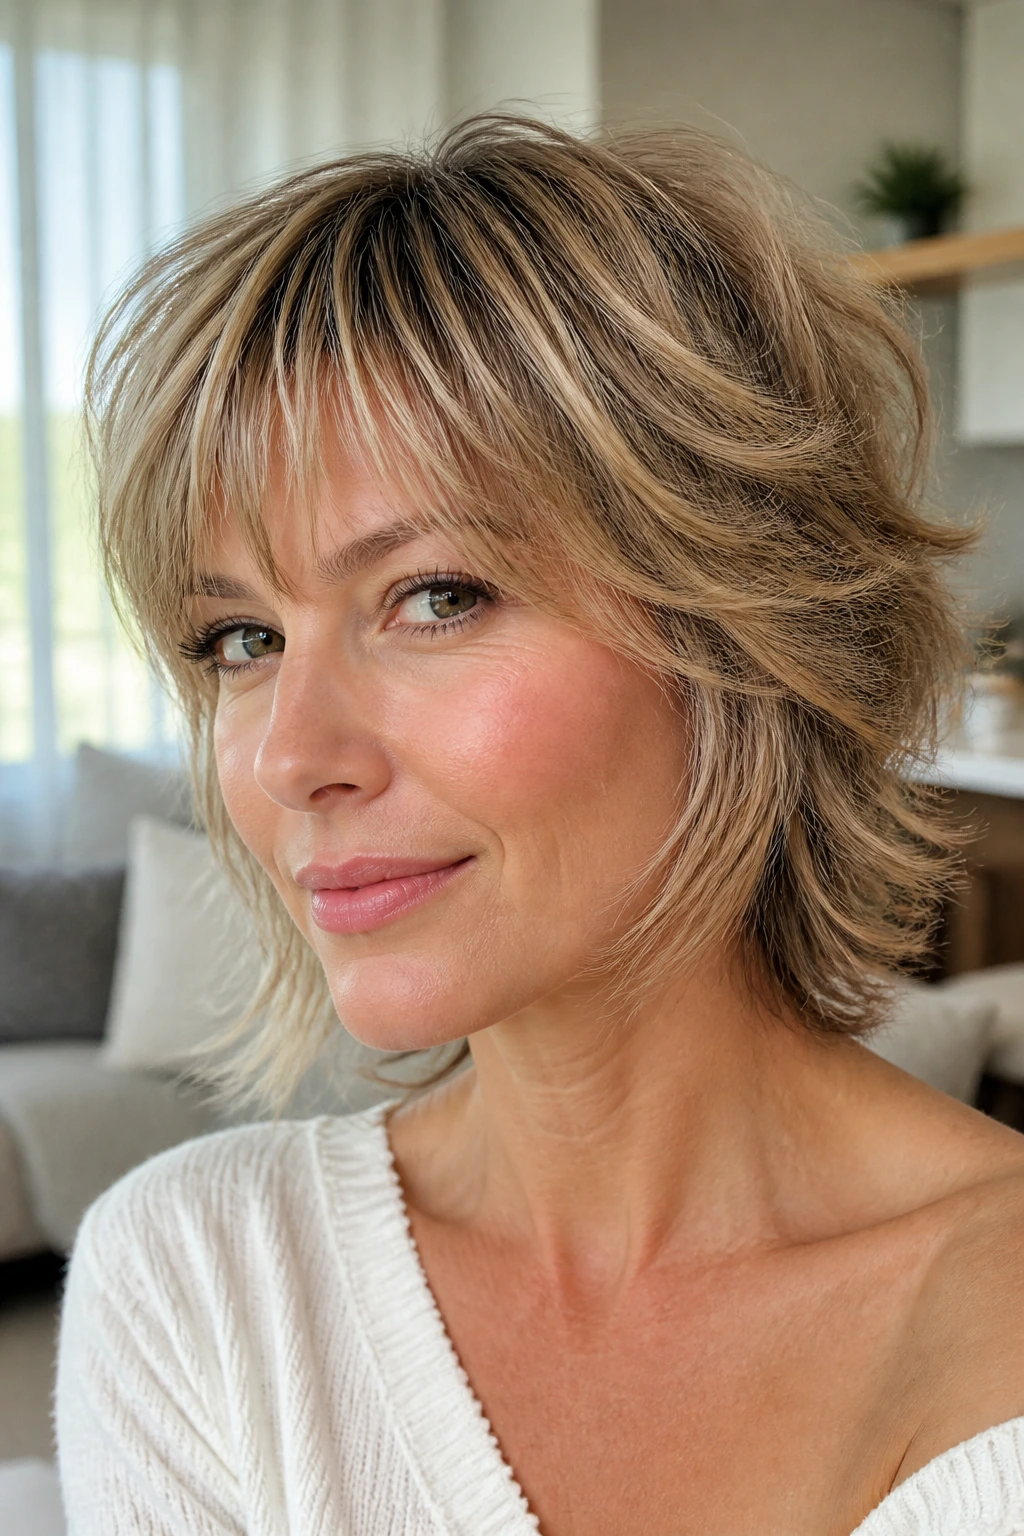
Fine hair needs movement, but it does not need to be thinned to within an inch of its life. This is where a feathered shag earns its keep. The layers are soft and airy, yet the perimeter stays full enough to keep the cut from going see-through. That balance is harder to get than it sounds.
I like this version because it creates the illusion of volume without asking the hair to do too much. The shorter pieces around the crown lift the top, while the ends stay a little wispy. If the cut is too aggressive, fine hair starts looking separated in a sad way. This one should look feathered, not hungry.
A little mousse at the roots and a dry texturizing spray at the mid-lengths can make this cut come alive. Do not drown it in oil. Fine hair remembers.
9. Thick-Hair Debulked Shag Bob
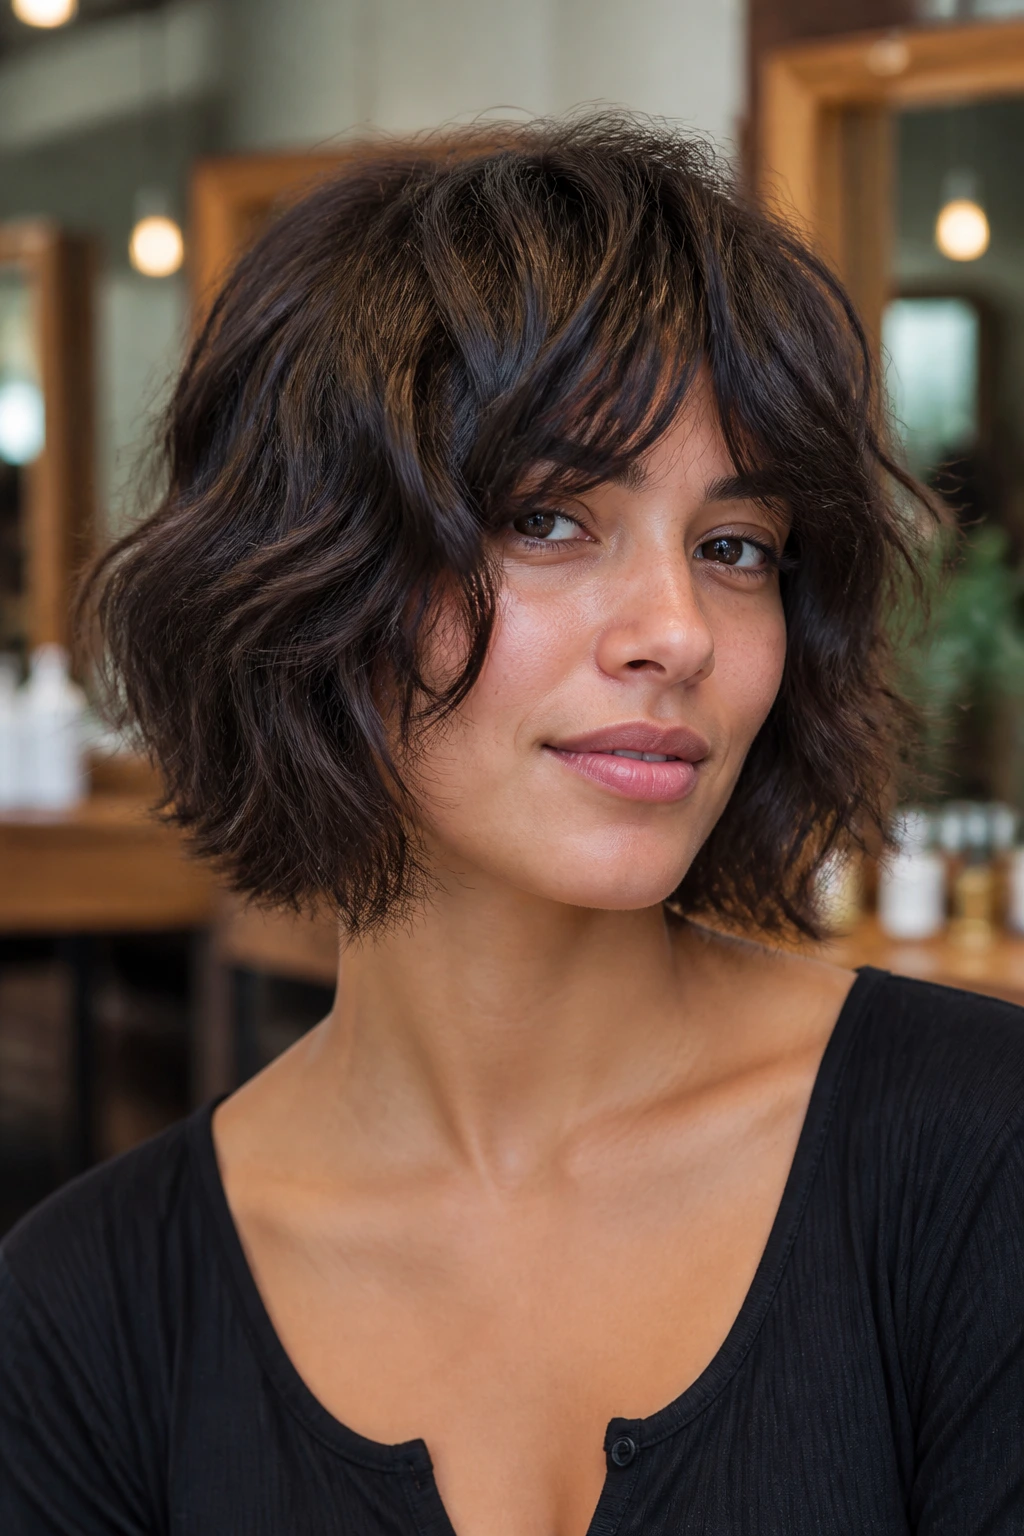
Thick hair does not need more haircuts; it needs smarter ones. This shag bob earns its place by removing weight from inside the shape instead of just hacking at the surface. The perimeter stays controlled, the interior layers stop the bulk from stacking up, and the whole cut sits closer to the head without looking flat.
If you have thick hair, you already know the bad version of this haircut: too many short layers, too much puff at the crown, and that stubborn wedge of volume at the sides. Avoid that. Ask for internal shaping and a perimeter that still has enough weight to hold the line.
I’d style this one with a blow-dryer and fingers first, then use a small amount of paste only after the hair is dry. Thick hair can swallow product fast, and once it goes heavy, the choppy texture disappears.
10. Side-Swept Pixie Shag
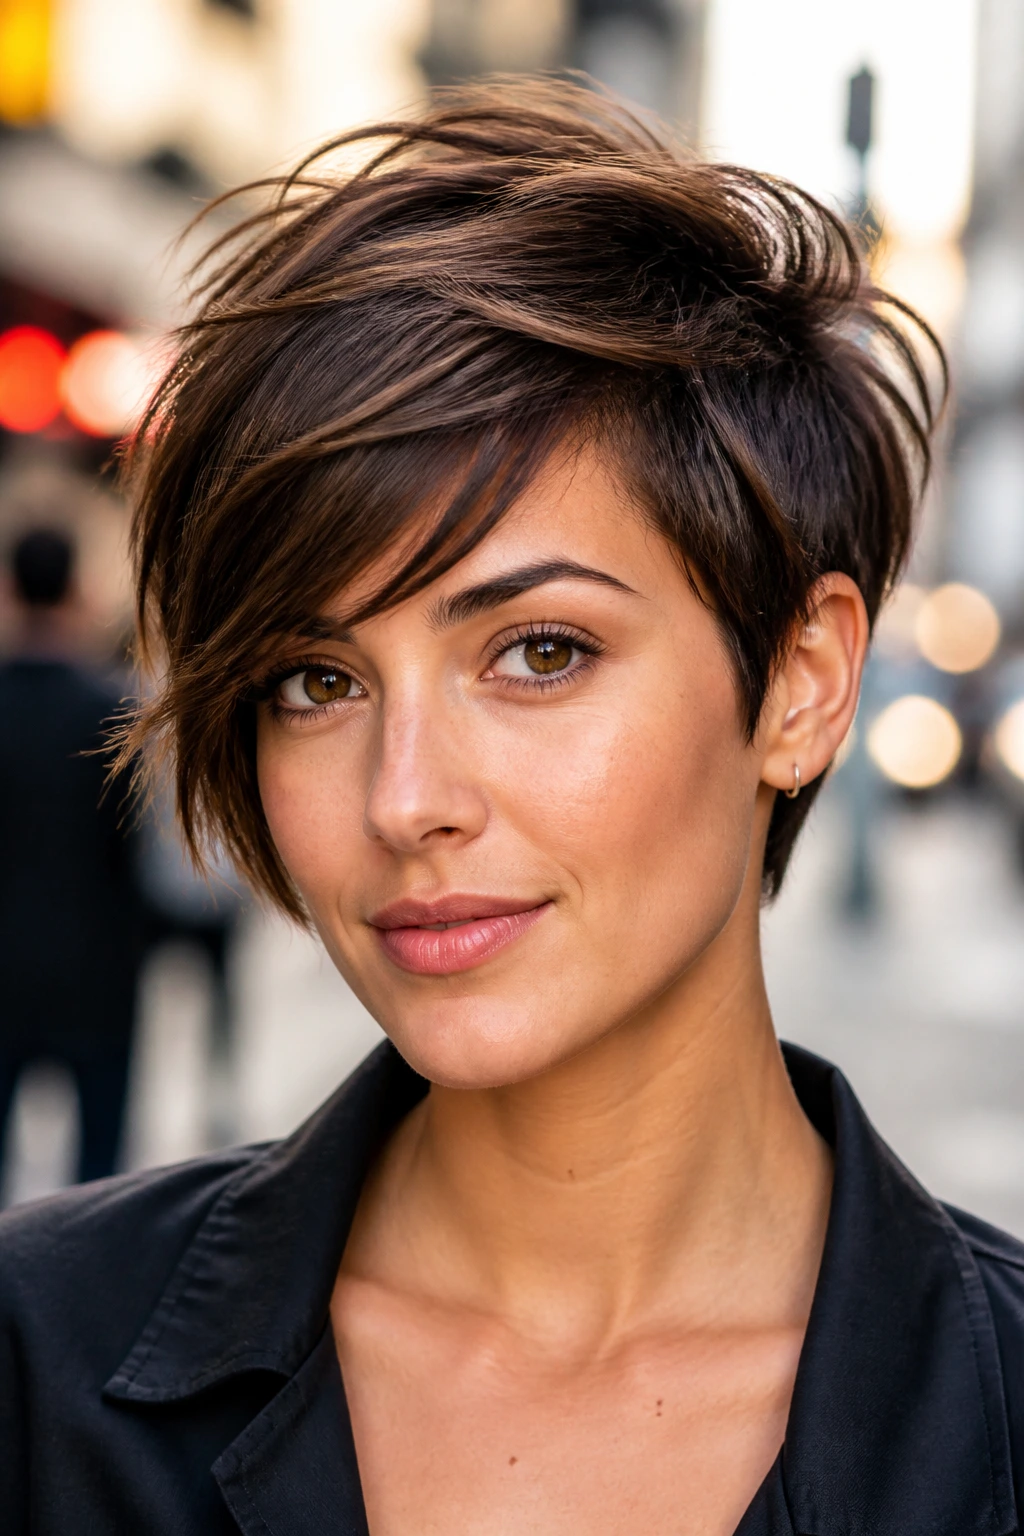
This cut is for people who like short hair but do not want the symmetry of a classic pixie. The fringe sweeps to one side, the crown stays lifted, and the neckline tapers just enough to keep the shape crisp. It has a little swing to it, which keeps the look from turning severe.
The side-swept fringe does useful work here. It breaks up the forehead, softens the top edge, and gives the cut a path to follow when you’re styling in a hurry. A quick blow-dry with fingers or a small round brush is usually enough. If you want a tidier finish, tuck the heavier side behind one ear and let the other side fall forward.
It’s one of the easiest cuts to live with if you wear glasses. The side sweep plays nicely with frames instead of fighting them.
11. Asymmetrical Shag Bob

There’s something pleasingly direct about an asymmetrical shag bob. One side sits slightly longer, the other is tucked in tighter, and the shag layering keeps the whole thing from looking too geometric. It’s not a dramatic, runway-only haircut. It’s a practical way to make short hair feel less expected.
The asymmetry works best when the difference is clear enough to notice but not so extreme that it becomes a costume. A subtle one- to two-inch variation is usually enough. The longer side can fall toward the cheekbone or jaw, while the shorter side opens up the neck and ear.
I like this cut on people who want their hair to do something interesting without needing a lot of styling. The shape gives you built-in movement. That’s the whole point.
12. Micro Bob With Jagged Ends
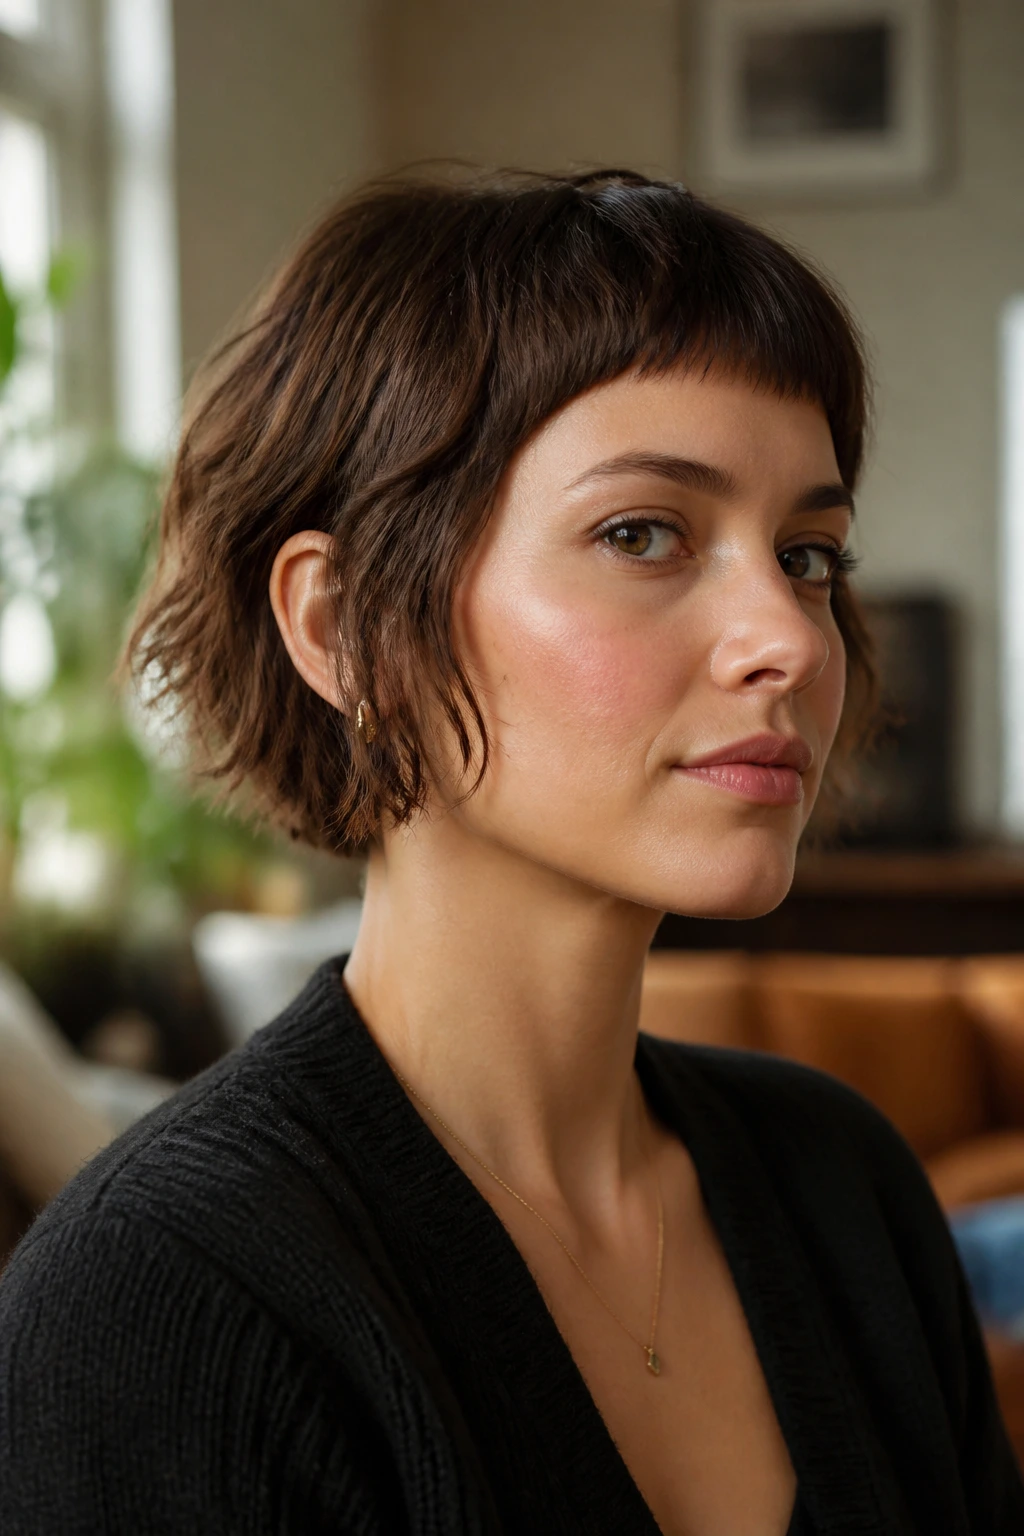
A micro bob with jagged ends looks crisp at first glance, but the texture keeps it from feeling stiff. The length sits just under the ears or around the upper jaw, then the ends are broken up so the shape flicks instead of sitting in a hard line. It’s tiny, tidy, and a little rebellious.
What to ask for
- A compact perimeter that stays short around the sides
- Choppy ends rather than blunt, heavy corners
- Slightly longer front pieces if you want softness near the face
This is a good cut if you like the idea of short hair but do not want a full pixie. It gives you neck exposure, easy washing, and just enough texture to keep the silhouette interesting. The jagged finish matters more here than in longer shags. Without it, the cut reads too neat and loses its edge.
13. Collarbone Shag Lob
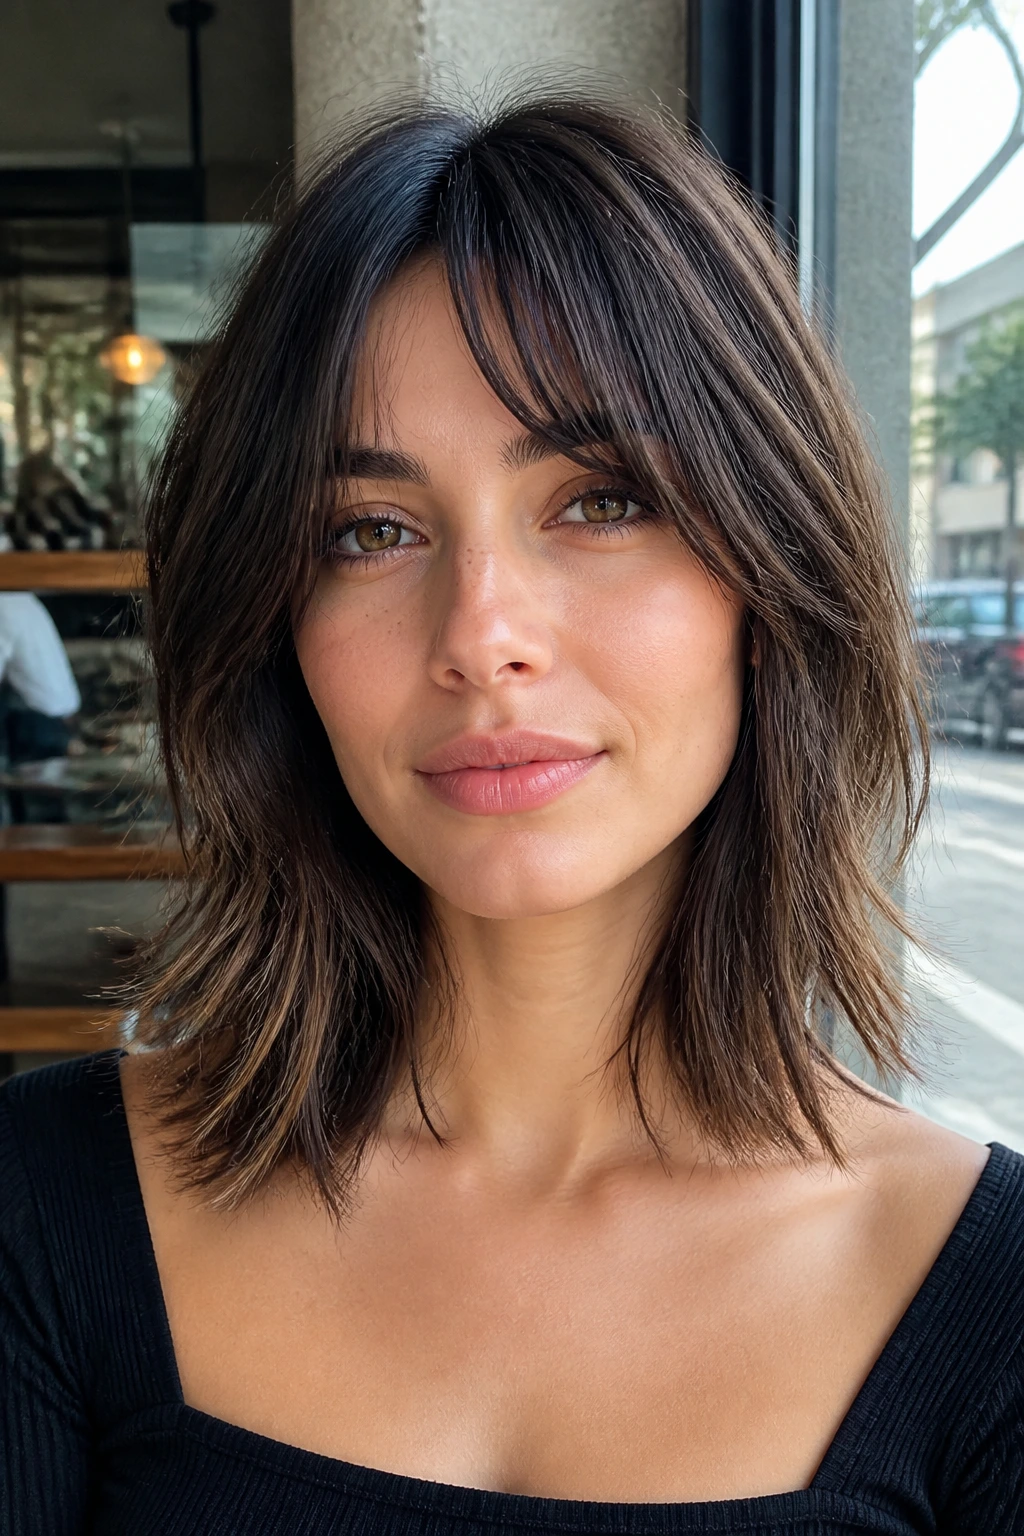
Yes, the collarbone lob is longer than the other cuts here, but it earns its spot because it’s the easiest bridge for people who aren’t ready to go chin-length. The layers are still short enough to create that choppy shag texture, but the overall length gives you room to tie it back, bend it with heat, or let it air-dry into something softer.
The best thing about this version is how forgiving it is. You can wear it straight and polished, or rough it up with sea-salt spray and make it feel more undone. I’d call it the diplomat of the group. It gets along with most hair types, most face shapes, and most levels of styling patience.
If your hair is thick, keep the layers around the collarbone from stacking too abruptly. If it’s fine, keep some weight at the bottom so the cut does not evaporate.
14. Undercut Textured Shag
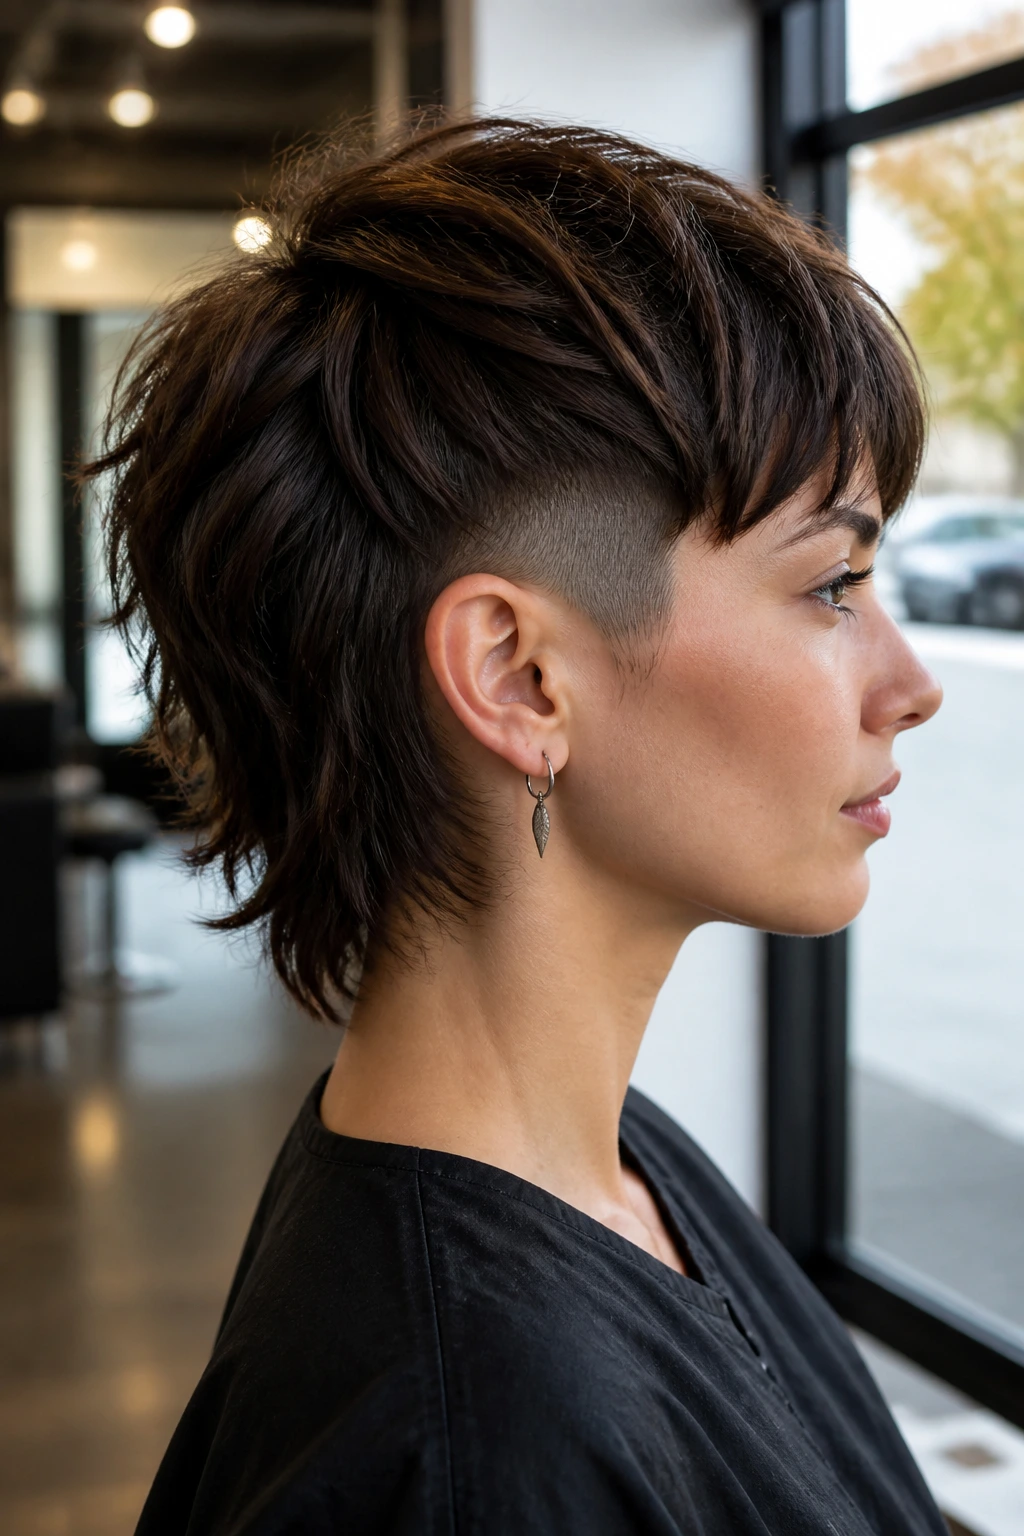
A hidden undercut changes everything. It takes bulk out from underneath, especially at the nape and behind the ears, while the top layers stay shaggy and mobile. The visible effect is subtle unless the hair is lifted, which is exactly why I like it for dense or stubborn hair.
This cut is useful when the top looks fine but the underside keeps swelling out. An undercut solves that without having to over-layer the whole head. The result is cleaner around the neck and lighter through the back, but the top still has enough body to move.
You do need a stylist who understands placement. A bad undercut can show through too soon. A good one hides under the overlying layers and makes the cut easier to live with on humid days.
15. Air-Dried Wavy Shag
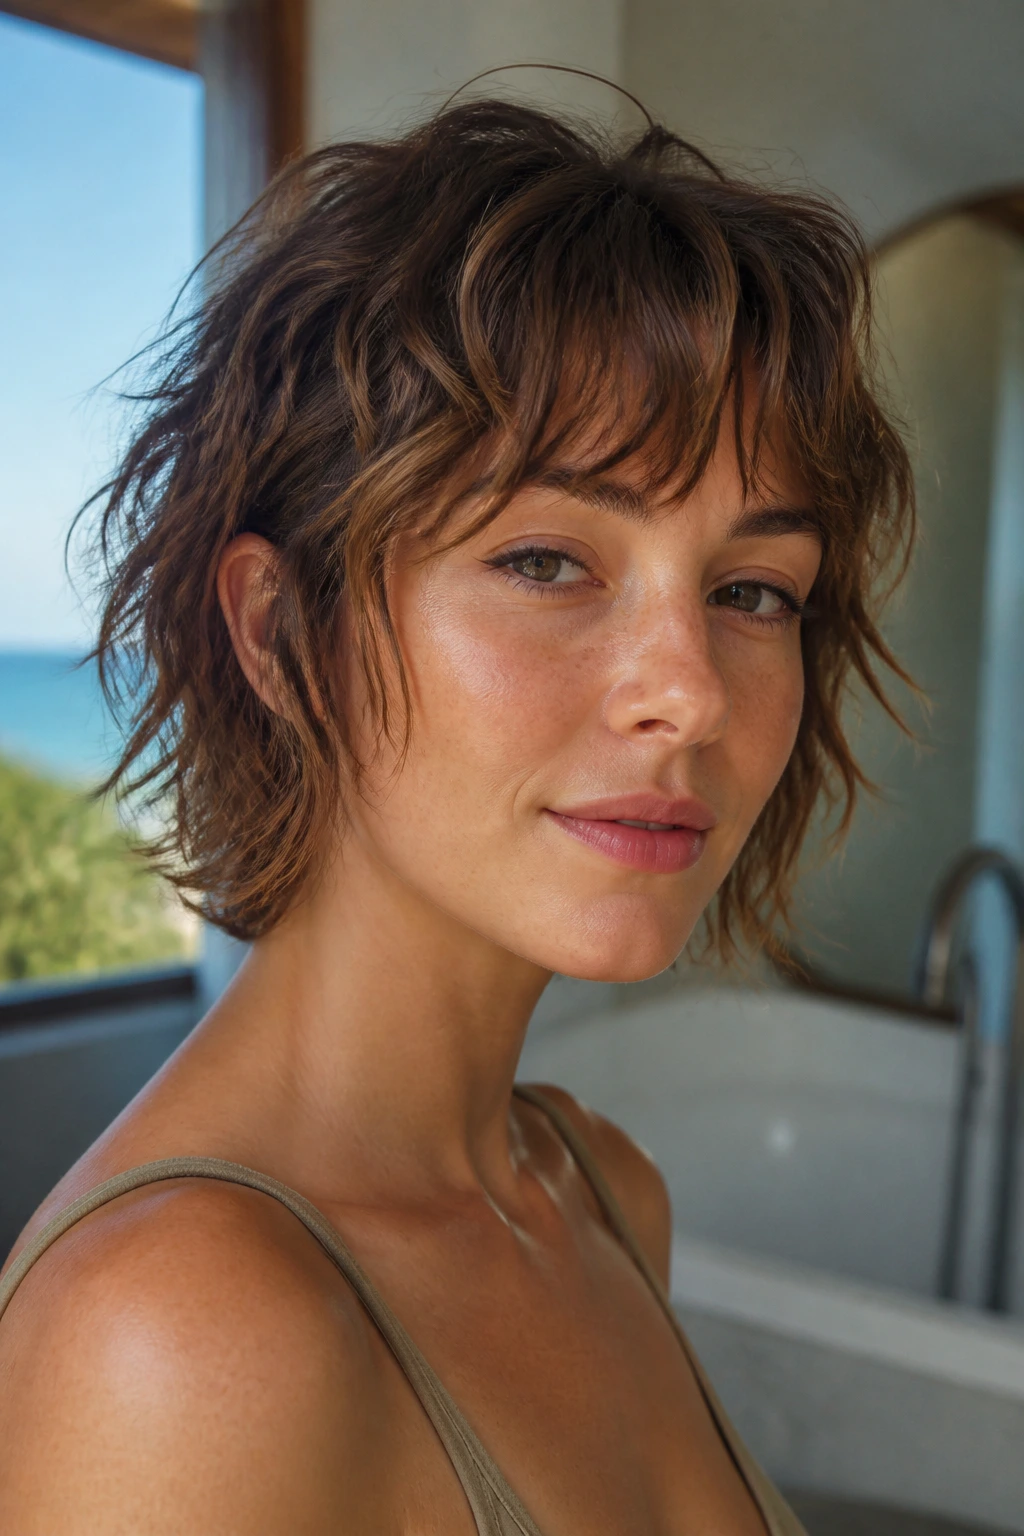
If your hair already wants to wave, this cut gives it a shape worth showing off. The layers are placed to let the wave pattern rise and fall instead of collapsing into one heavy line. It’s one of the few short cuts that can look better at noon than it did at 9 a.m., which is rare and welcome.
The trick is not to cut too bluntly at the ends. Wavy hair needs room to bend, and a shag shape gives it that. I’d ask for face-framing pieces that start high enough to show movement but not so high that they frizz away. Then scrunch in a light mousse and leave it alone.
How it wears
- Looks best with a natural bend
- Needs very little brushing once dry
- Can be refreshed with water and a dab of cream on day two
This is a good one if you’re tired of forcing waves into a neat bob shape.
16. Punky Spiky Shag
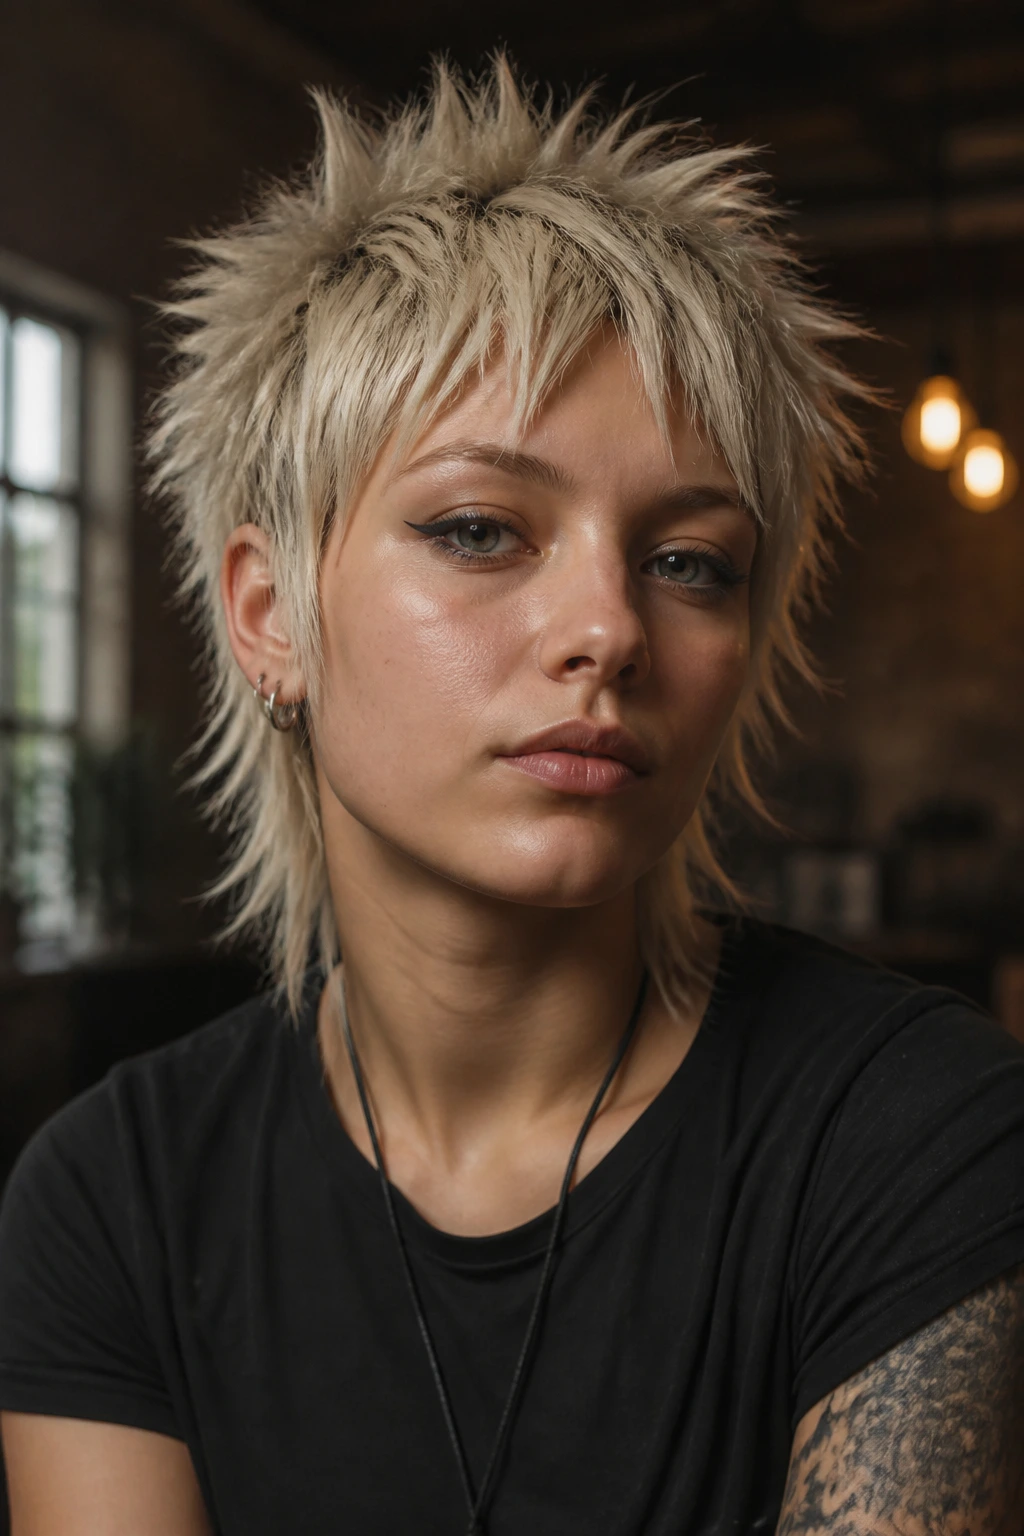
This is the loud cousin in the family. The layers are shorter, the ends are more separated, and the styling leans matte instead of glossy. It works because the shape has enough structure to support the attitude. Without the cut structure, spiky texture just looks random.
I like this on shorter hair with a strong natural crown, because the volume can be turned upward rather than outward. A small amount of molding paste, worked through dry hair, gives the ends direction without making them crunchy. The key is restraint. Too much product and it collapses into waxy clumps.
If you want this cut to feel intentional, keep the sides a little tighter and the top more lifted. That contrast is what makes the shape read as bold rather than unfinished.
17. No-Bang Layered Shag

Not everyone wants fringe in their eyes. Fine. This version keeps the forehead open and lets the layers do the work elsewhere. The front pieces skim the temples and cheekbones, while the top and back carry the shag texture. It’s a smart option if your cowlick fights bangs or if you like to change your part often.
Without bangs, the cut needs good face framing. That means the shortest pieces should start high enough to create movement near the eyes, not just at the chin. Otherwise the whole thing can feel like a plain layered bob. A little lift at the crown and a bend near the cheekbones fix that fast.
This is also one of the easiest shag styles to grow out. No fringe maintenance. No daily battle with the forehead.
18. Bottleneck Fringe Shag
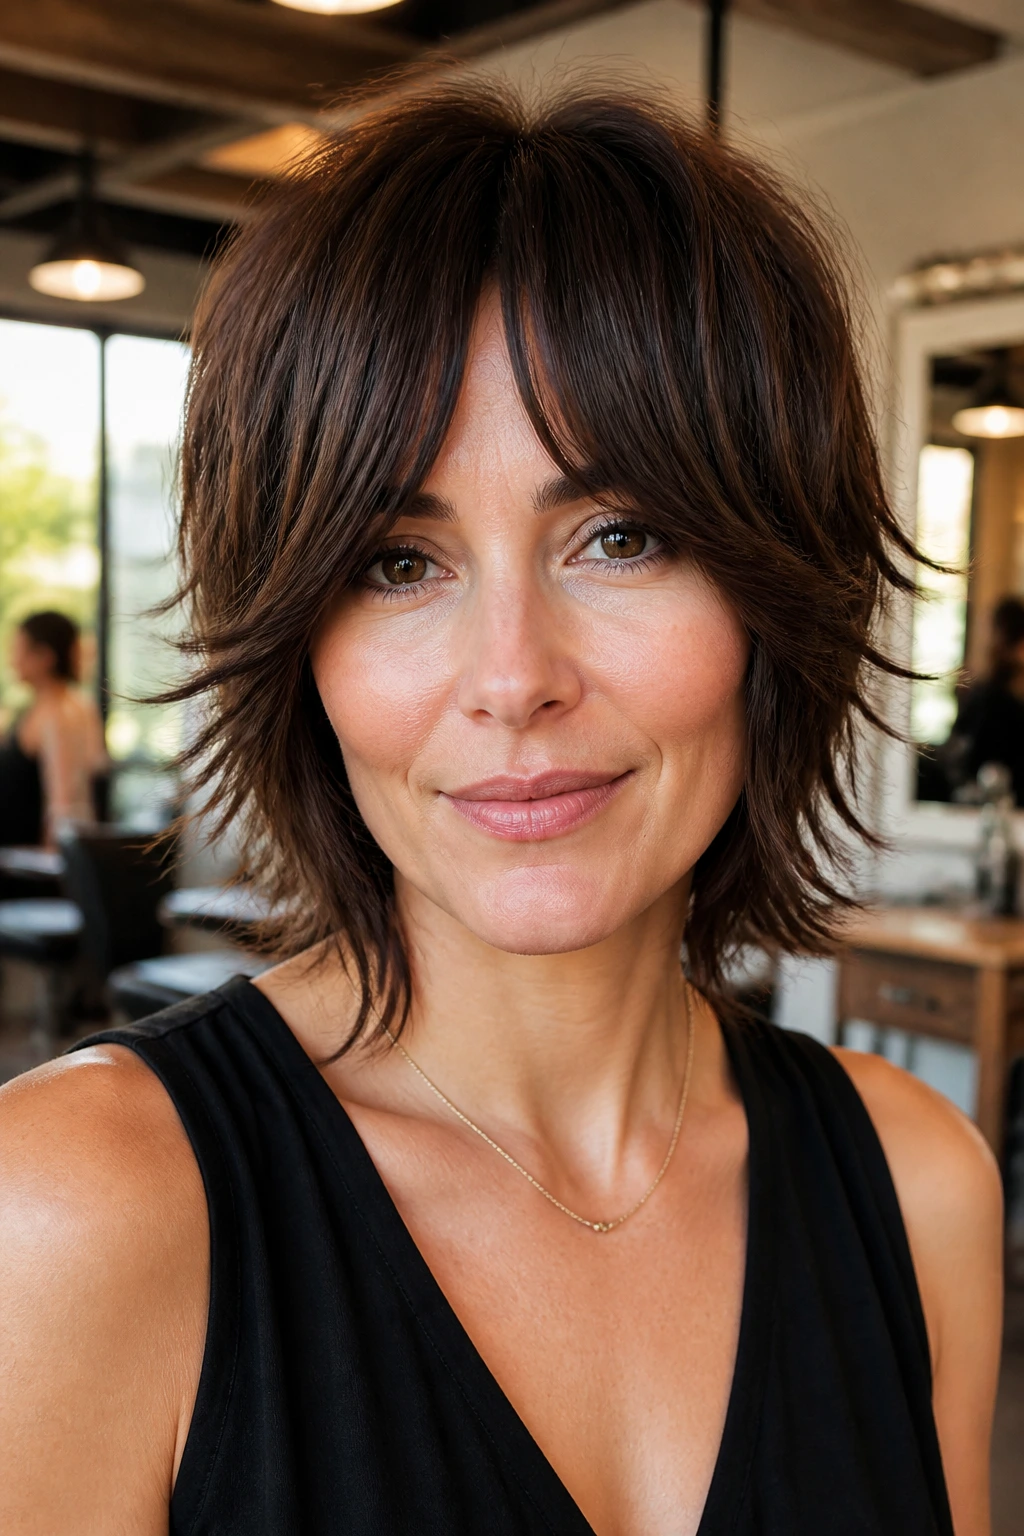
A bottleneck fringe starts narrow in the center and opens wider near the eyes, which makes it look softer than a full curtain bang and less blunt than a straight fringe. On a short shag, it gives the face a frame without stealing all the attention. That matters.
The cut works especially well when the fringe blends into cheekbone-length layers. You want the transition to feel gradual, not like a separate accessory sitting on top of the haircut. If the fringe is cut too heavy, the whole shape loses air. If it’s too wispy, it disappears.
I’d use this version for people who want a little forehead coverage but still want to see movement in the front. It’s one of the most wearable fringe choices in the group.
19. Silver-Soft Shag for Gray Hair
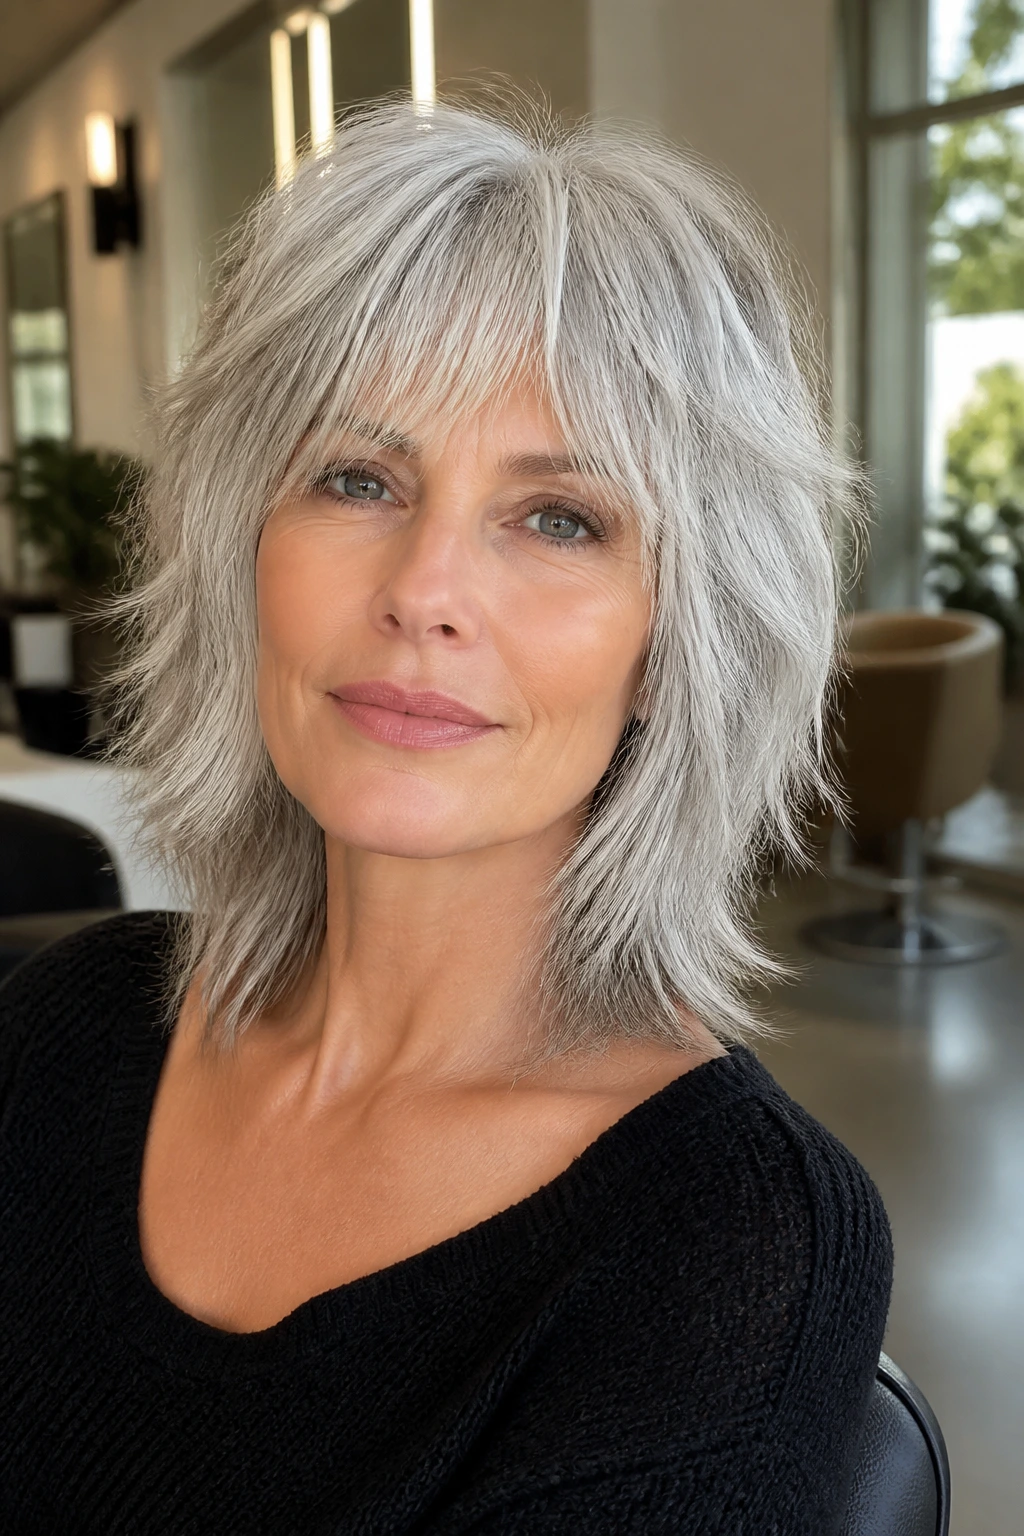
Gray hair often has a different feel under the fingers — a little wirier, a little more prone to puffing at the ends, and sometimes less cooperative than pigmented hair. This shag is built for that reality. The layers are soft enough to keep silver strands moving, but not so thin that the cut turns frayed.
I love this look when the natural sparkle of gray hair gets a little help from shape. Short layers catch the light, sure, but the real win is how the cut prevents the outline from going heavy. That keeps silver hair looking bright instead of dull and helmet-like.
Use a moisturizing leave-in, but keep it light. Gray hair can soak up too much product and lose its lift. A touch of shine serum on the ends is enough.
20. Sleek-to-Ruffled Shag

This is the shapeshifter in the set. Blow it smooth and the cut looks polished, with just enough edge at the ends to keep it from turning formal. Scrunch it after a rough dry and it turns softer, more broken up, and a little more relaxed. The same cut, two moods.
That flexibility makes it useful if your week swings between neat and messy. I like the version with a controlled top section and slightly roughed-up ends, because it keeps the structure visible. If the whole head is too ruffled, the cut loses its line. If it’s too sleek, you miss the shag texture.
This one rewards a light hand. A small round brush, a flat iron bend at the ends, or a quick mist of texture spray can change the whole read without re-cutting anything.
21. Round-Face Balancing Shag Bob

Round faces usually look best with shapes that add a little length and break up width at the cheeks. This shag bob does that by keeping the sides slightly longer than the widest part of the face and letting the layers fall in vertical pieces instead of one fluffy ring. It’s a simple idea, but it works.
The fringe matters here too. A curtain or bottleneck shape is usually kinder than a blunt straight-across bang, because it keeps the center open and draws the eye downward. The overall effect is more lift, less width. That’s the whole trick.
If you’re worried about looking too round, skip the heaviest side volume near the cheekbones. Keep the height up top and the ends soft around the jaw.
22. Square-Jaw Softening Crop

A square jaw can carry a short cut beautifully, but it needs pieces that soften the corners instead of emphasizing them. This crop does that with rounded layering around the temples and mouth-level strands that move away from the jaw, not straight into it. The effect is less boxy, more fluid.
I’d avoid an overly blunt perimeter here. Choppy ends are your friend, but they should be feathered enough to keep the jawline from reading as hard-edged. A side part can help too, because it breaks up the symmetry that makes square jaws feel more rigid in a short haircut.
This is one of those cuts that looks better when it’s not overthought. A little bend, a little separation, and a shape that doesn’t sit perfectly still.
23. Grown-Out Shag With Soft Ends

This is the cut for people who want their hair to keep looking good even when they miss a trim. The layers are placed so the shape relaxes as it grows instead of turning into a heavy shelf. The ends stay soft, the crown stays lifted, and the whole thing gets a little more relaxed with time.
That’s what makes it useful. A lot of short cuts demand constant maintenance. This one lets you stretch the interval a little without looking ragged. I still wouldn’t call it zero-effort, because short hair never is, but it is one of the kinder options in the group.
If you want longevity, ask your stylist to keep the perimeter forgiving and the shortest layers not too extreme. Tiny, aggressive layers grow out fast. Soft ones age better.
What Makes a Choppy Shag Look Intentional
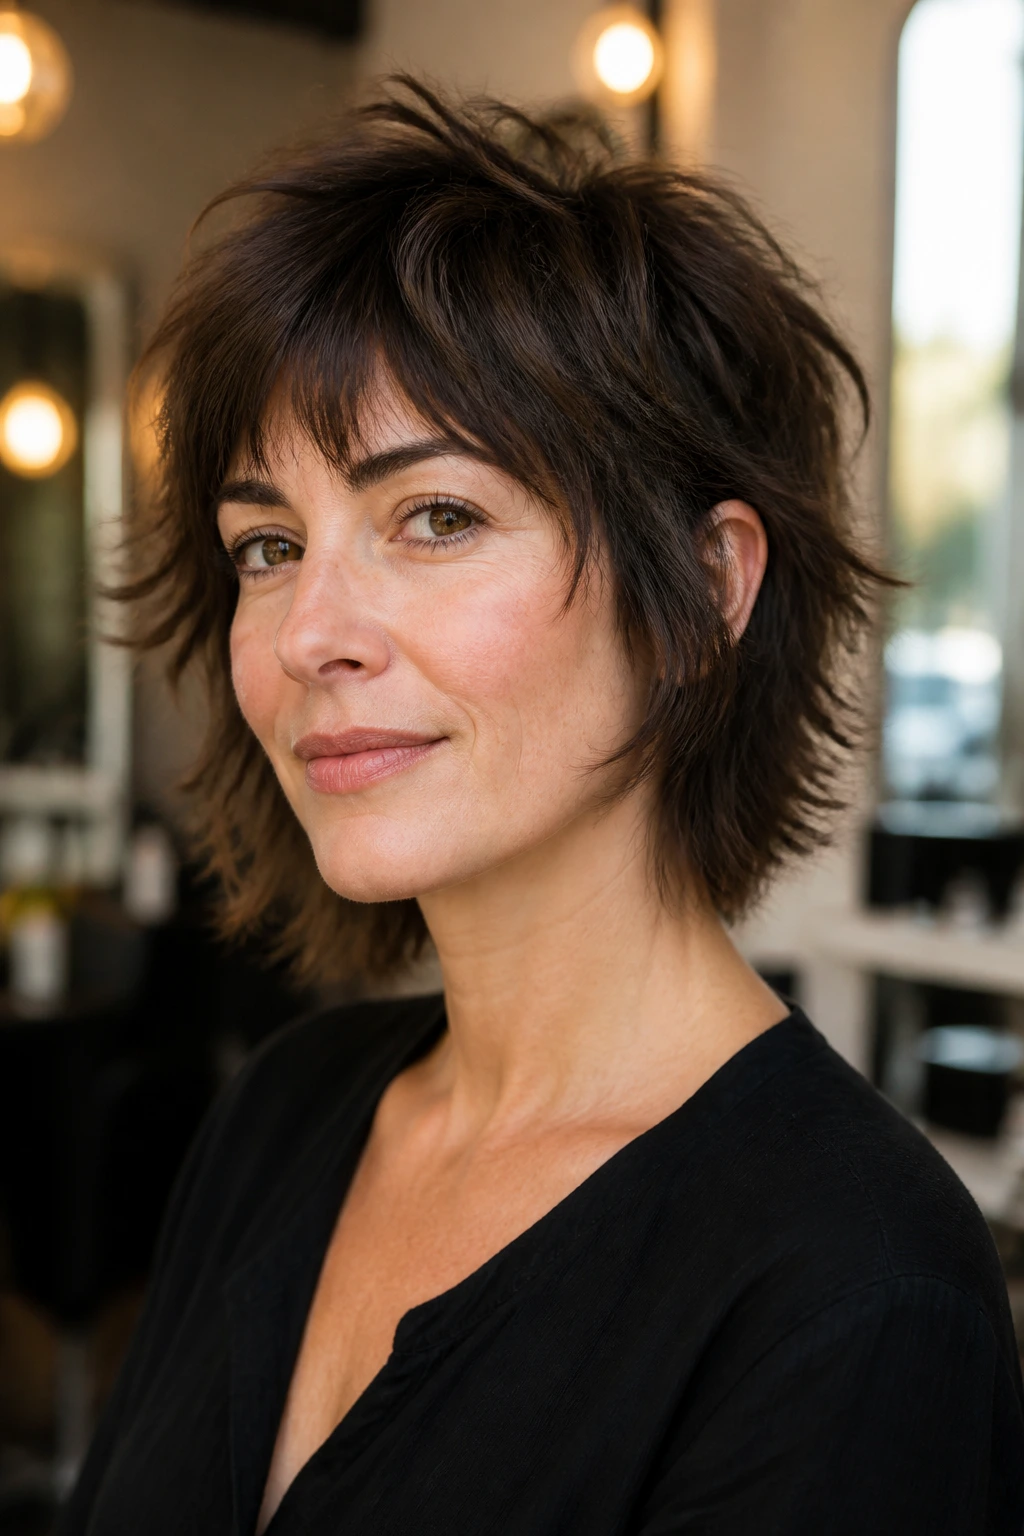
A good shag is not random layering with a trendy name attached. The shape needs a perimeter, a weight line, and a place where the movement begins. If those three things line up, the cut looks lively. If they don’t, it just looks thinned out.
The perimeter is the edge you see first. That edge can be blunt, soft, or slightly broken, but it should still have a job to do. When the bottom line disappears completely, the hair starts to float apart in a way that feels unfinished.
Where the weight should stay
The best short shag cuts keep a little density at the ends and remove bulk from the interior. That lets the hair swing without losing its outline. A stylist who knows point-cutting, slide-cutting, or careful razor work can make the layers move while keeping the silhouette intact.
Why the crown matters
A flat crown ruins the whole thing. Short shag texture needs lift higher up, or the ends do all the work and the cut looks bottom-heavy. Even a small amount of crown layering can change how the haircut sits after a day of wear, which is why the top section should never be an afterthought.
How to Ask Your Stylist for the Right Layers
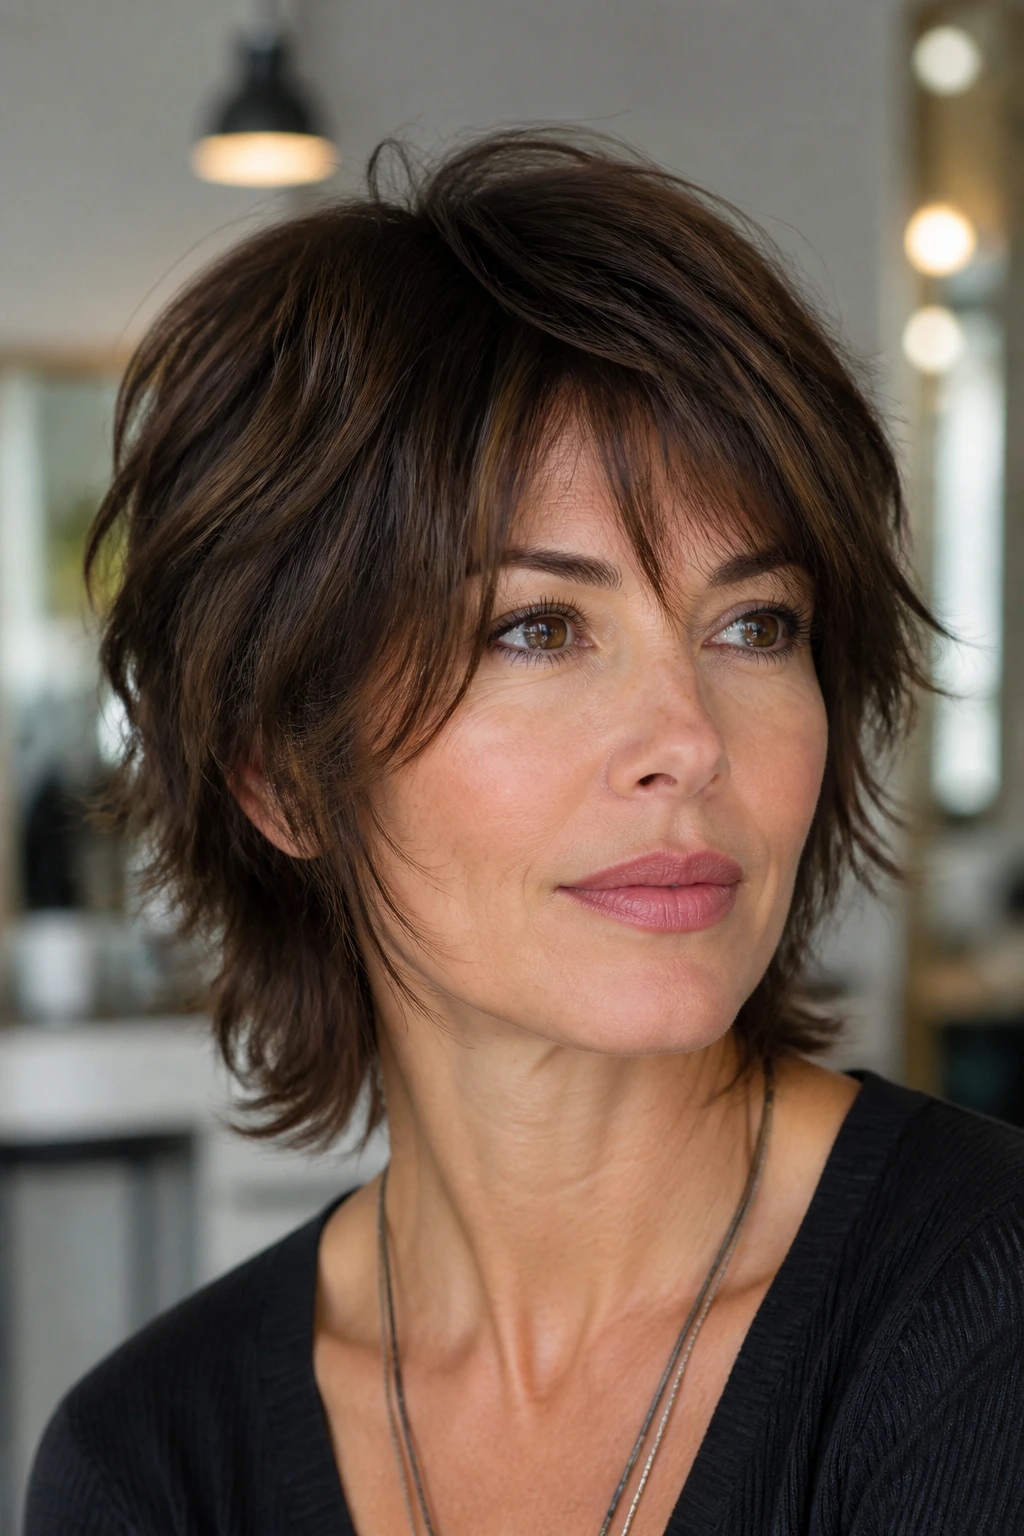
Bring photos, yes, but bring the right photos. A picture of a cut on dense wavy hair won’t translate well to fine straight hair, and that mismatch causes more disappointment than bad scissors ever do. Look for the same hair texture, the same density, and roughly the same face shape before you show up.
Then say where you want the shortest layers to live. Near the cheekbones? Around the crown? Through the nape? Those details matter more than saying “choppy” and hoping for the best. If you wear your hair air-dried, say so. If you heat style every time, say that too. The right shag is built around your routine, not someone else’s photo.
A few useful phrases:
- “Keep the perimeter strong so it doesn’t look wispy.”
- “I want internal layers, not a lot of thinning at the ends.”
- “My hair swells at the nape, so please take weight out there.”
- “I want the fringe to hit around the cheekbones, not the brows.”
If your stylist reaches for thinning shears before talking about density, pause. The wrong thinning can wreck a short shag faster than anything.
The Tools That Actually Help These Cuts Behave

You do not need a mountain of gadgets. You need the right few.
- Blow-dryer with a narrow nozzle: Helps direct the root lift and keeps the ends from getting blasted in every direction.
- Diffuser attachment: Worth it for waves and curls, especially if you want the texture to dry without puffing up.
- Vent brush or small round brush: Good for short layers that need a bend, not a full salon blowout.
- Texturizing spray: Adds separation to the ends once the hair is dry; use it lightly.
- Volumizing mousse: Best on damp roots for fine or straight hair that needs a little memory.
- Heat protectant: Non-negotiable if you bend pieces with a flat iron or brush-dry often.
- Matte pomade or paste: Use this on dry ends, and only a little.
- Wide-tooth comb: Better than a fine comb for keeping waves and curls from getting pulled flat.
Smart Product and Photo-Prep Tips
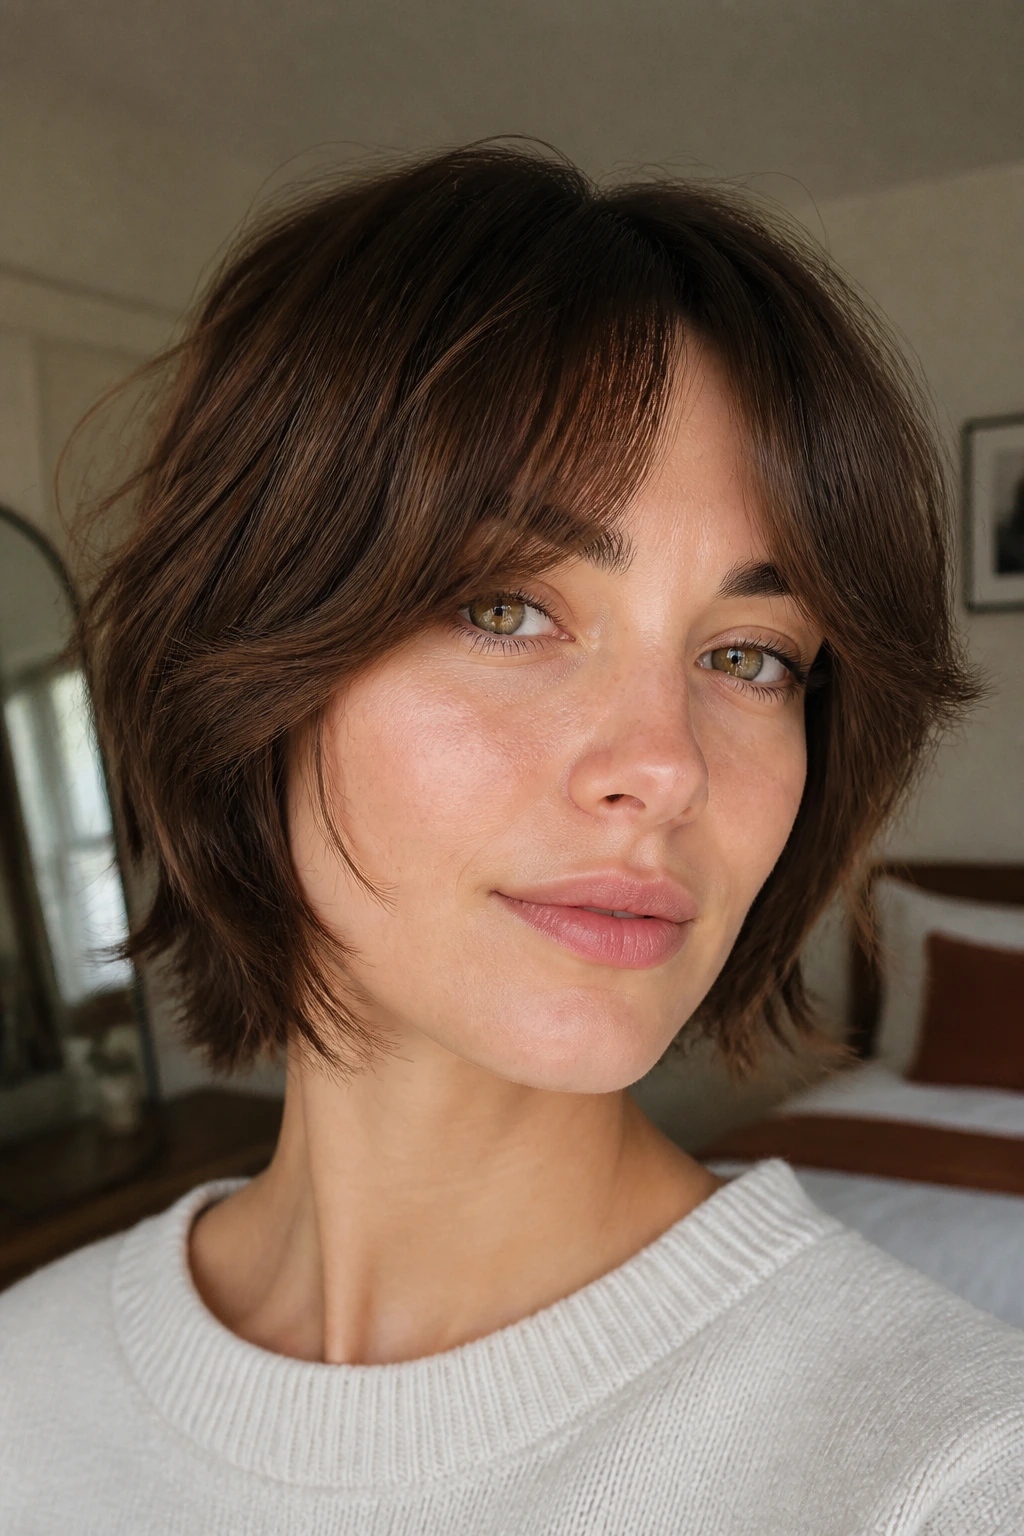
Shop for products based on how your hair actually behaves, not on what sounds fancy in the bottle. Fine hair usually likes mousse, spray, or a light foam more than creamy leave-ins. Thick hair tends to need something with grip, like a paste or a texture spray that does not vanish after ten minutes. Curly hair usually needs moisture first, then shape, not the other way around.
If you’re bringing haircut photos to the salon, look for the ones that show the side view and the back. A shag lives and dies by its silhouette. One head-on shot with perfect lighting can hide a bad nape, and that matters a lot on short hair. I’d rather see a slightly messy profile photo than a polished front shot with no clue where the weight falls.
A few shopping rules that save regret:
- Buy travel sizes first if you’re testing a new texture spray.
- Avoid heavy oils near the roots on fine hair.
- Choose heat protectant with a lightweight finish if you style daily.
- If your hair is color-treated and dry at the ends, add a separate leave-in only to the last third of the length.
How to Style the Shape So It Looks Deliberate
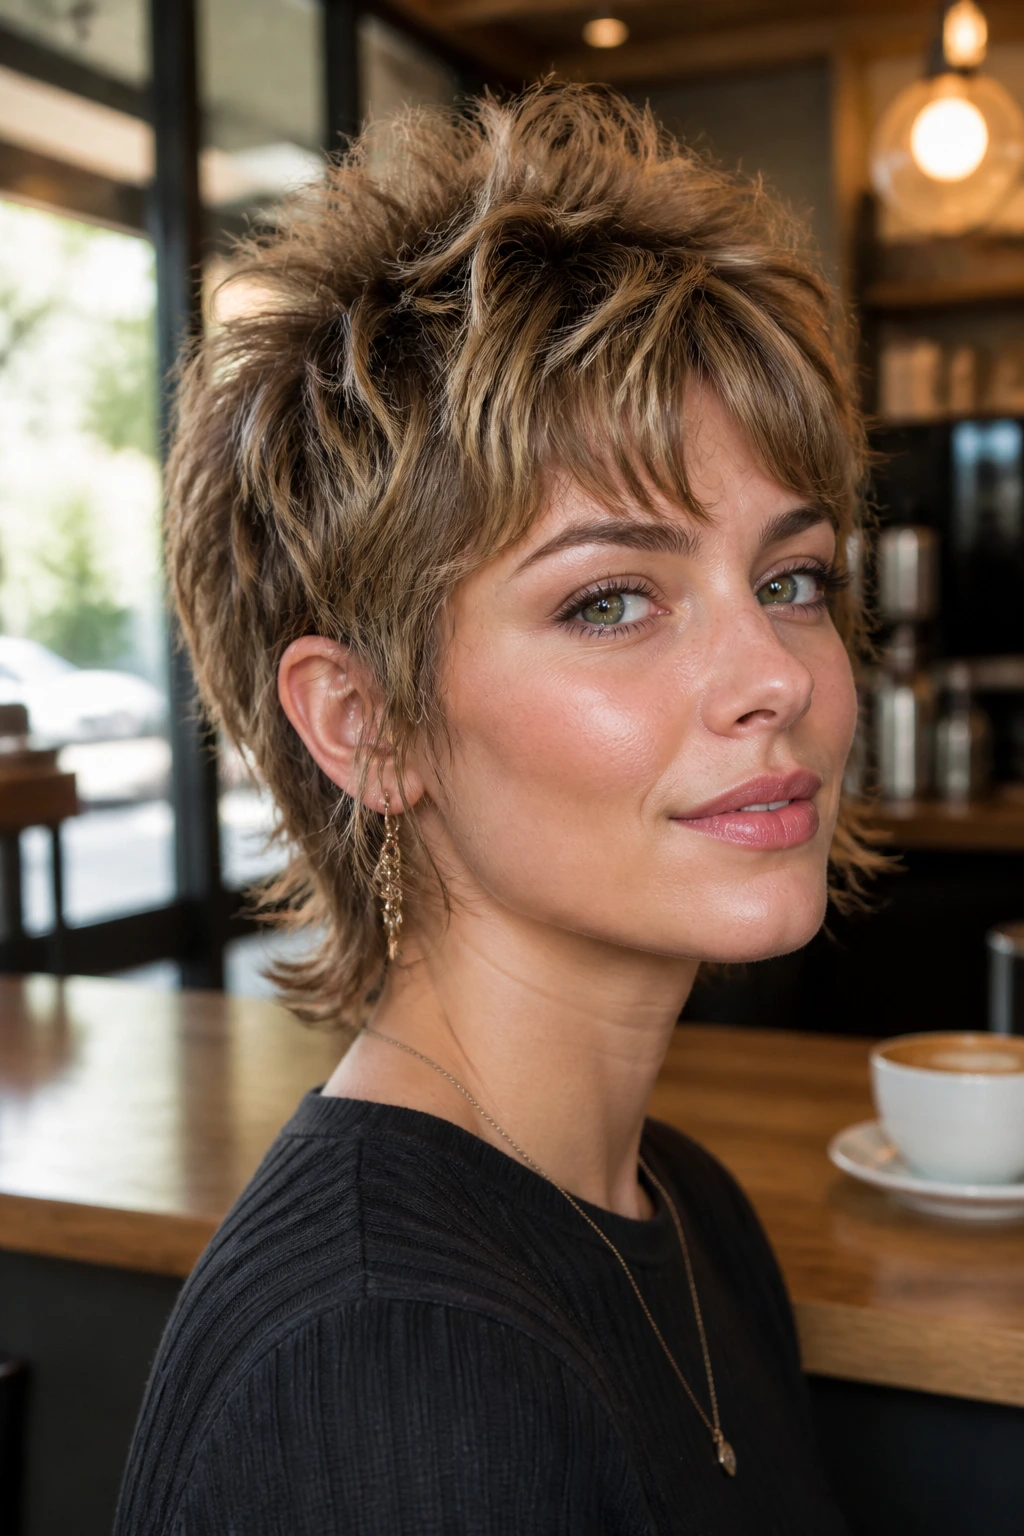
Presentation: Start by deciding whether the cut should read soft, sharp, or piecey that day. Air-drying with a little mousse gives a looser finish, while a brush-dry with a bend at the ends makes the layers look cleaner and more defined.
Accompaniments: Short shags play well with glasses, hoops, open collars, and anything that keeps the neck visible. A chunky scarf can hide the neckline work, so if you love scarves, choose a cut with more lift at the crown.
Proportion: If the hair is short at the sides, keep a little height on top. If the fringe is heavy, lighten the ends. If the layers are very choppy, the finish should stay soft enough to avoid a jagged look from ear to ear.
Finish: Matte paste makes the edges look broken up and modern. A tiny bit of shine cream smooths the front pieces if you want a less gritty result. Don’t use both with a heavy hand. The cut will go limp fast.
Additional Tips and Texture Boosters

Lift: For fine hair, flip the head upside down for 20 to 30 seconds while blow-drying the roots, then return upright and finish with fingers. That tiny bit of change in direction gives the top more life than brushing every strand into place.
Separation: Work a pea-sized amount of paste through the very ends after the hair is dry. Pinch, twist, and leave some pieces alone. The shag should look separated, not slicked into little ribbons.
Softness: If the cut feels too sharp, rub a drop of lightweight serum between your palms and press it only onto the outer layer. That calms the frayed bits without erasing the shape.
Make-It-Yours: Want more polish? Tuck one side behind the ear and leave the other loose. Want more edge? Push the crown upward with dry texture spray and skip the brush entirely. The same haircut can move several ways.
Keeping the Shape Between Salon Visits

Short shags do not need daily rescue, but they do need a little attention. After a cut, the first 72 hours usually decide how cooperative the shape will be, so avoid piling on heavy oils or washing again the next morning unless you truly need to. Give the haircut a chance to settle.
On day two and day three, dry shampoo at the roots can keep the crown from collapsing. If the ends start looking dull, mist them with water and scrunch in a tiny bit of leave-in or mousse. That’s usually enough to bring the texture back without re-wetting the whole head.
Trim timing
- Jaw-length and shorter cuts: every 5 to 7 weeks
- Bob-length shags: every 6 to 8 weeks
- Collarbone shags: every 8 to 10 weeks
Bangs need their own schedule. Curtain fringe often wants a tiny clean-up before the rest of the cut does, especially if it starts brushing the eyes. A satin pillowcase helps the shape keep its edges from getting battered overnight, and it’s one of those boring purchases that earns its keep fast.
Common Mistakes That Flatten the Texture
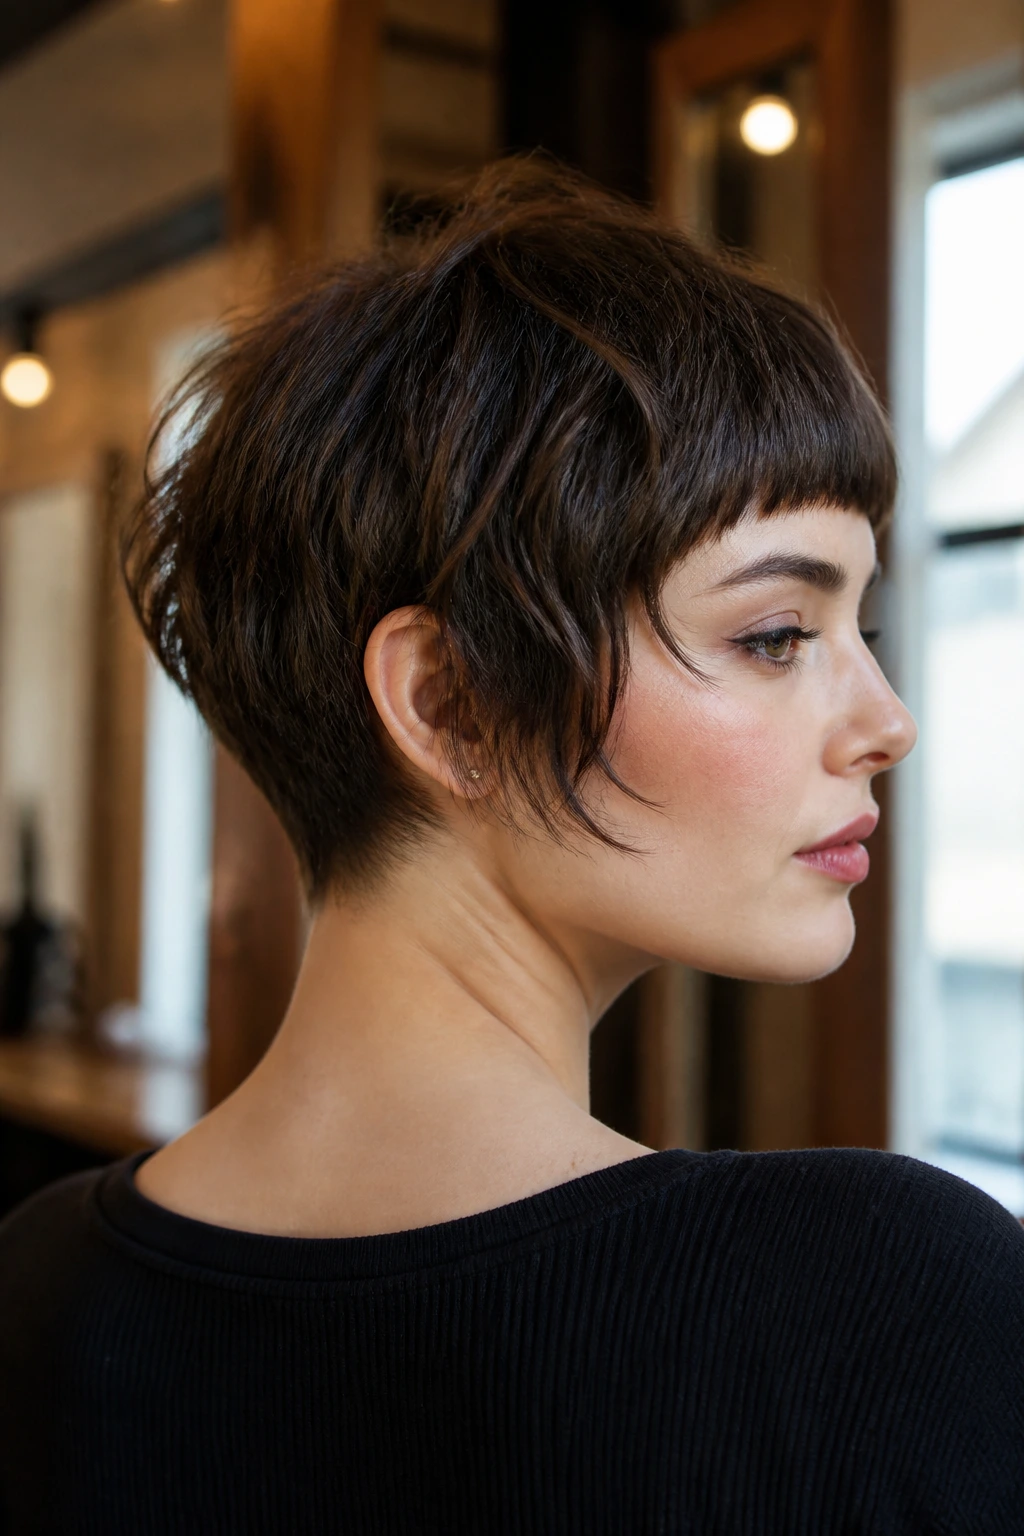
The first mistake is thinning too aggressively. Short hair has less room to hide a mistake, and over-thinning turns the ends wispy before the cut has a chance to move. The fix is simple: ask for interior layering and softness at the ends, not all-over reduction.
The second mistake is letting the fringe take over the haircut. Heavy bangs can swallow a short shag whole, especially on fine hair. If the bangs are wide and dense, the rest of the cut needs more movement to balance them. Otherwise the face gets boxed in.
The third mistake is overusing smoothing products. A cream-heavy routine can make the hair look shiny and collapsed, which is the opposite of what this texture needs. Use lighter products at the roots and save any richer cream for the ends only.
The fourth mistake is skipping the crown. If the top is flat, the haircut loses its lift and the layers below start looking like a separate problem. Ask for shape where the hair needs it most, not just where the stylist can reach fastest.
The last one is waiting too long between trims. Short shag layers have a shelf life. Once the perimeter starts to collapse, the cut stops looking airy and starts looking tired.
Variations and Adaptations to Try

Air-Dry Soft Shag: Skip the brush and work a light mousse through damp hair, then scrunch and let the cut dry on its own. This version suits waves and loose curls that already want to bend.
Blowout Shag: Use a round brush at the crown, then bend only the ends under or away from the face. This gives you a smoother finish while keeping the texture visible.
Curl-First Shag: Ask for the cut to be shaped around your natural curl pattern, not stretched straight. It’s the safest route for curls that shrink a lot as they dry.
Fine-Hair Lift Shag: Keep the perimeter a little fuller and use root spray instead of heavy creams. The goal is volume that lasts past lunch.
Thick-Hair Relief Shag: Add internal debulking and a slightly tighter nape. That keeps the haircut from puffing out at the back or sides.
Frequently Asked Questions
Will a short shag work on straight hair?
Yes, but the cut has to be planned with enough internal layering to create movement. Straight hair often needs a little brush work or a texture spray so the layers don’t sit too clean and lose the choppy effect.
Do I need bangs for a shag to look right?
No. Bangs change the mood, but they are not required. A no-bang shag can still read clearly if the front pieces start high enough to frame the cheekbones and crown.
Can fine hair wear short layered shag cuts without looking thin?
It can, if the layers are soft and the ends keep some weight. The mistake is over-thinning. Fine hair needs lift, not a see-through perimeter.
How often should I trim a short shag?
Most short versions need a trim every 5 to 8 weeks. If you have fringe, you may want a small bang cleanup sooner so the front does not cover your eyes.
What if my hair is curly and shrinks a lot?
Ask for the cut to be shaped on dry or mostly dry curls. That gives the stylist a better read on where the curl sits once it springs back up.
Can I style these cuts without heat?
Yes. Mousse, scrunching, and a little finger-twisting around the front pieces can do a lot. Heat just gives you a cleaner bend; it is not required every day.
How do I fix a shag that was thinned too much?
You usually need time and a strategic trim, not more thinning. Ask your stylist to clean up the shape, keep the perimeter stronger, and add only enough weight back to stop the ends from looking feathery in a bad way.
What’s the fastest way to make a short shag look fresh in the morning?
Wet the front lightly, scrunch in a pea-sized amount of mousse or cream, and hit the roots with a quick blast of warm air. Five minutes can be enough if the cut was built well in the first place.
The Shape That Keeps Hair Moving

A good short shag does not need to shout. It just needs the right geometry. When the crown has lift, the ends have separation, and the perimeter still knows where it lives, the haircut can handle a messy morning, a damp afternoon, and a week that gets a little out of hand.
That’s why these cuts stay useful. They give you motion without asking for perfection. Bring a photo that matches your hair type, ask where the weight should sit, and keep the texture products light enough that the layers can still breathe. That combination is what keeps the cut from slipping into that awkward middle ground between stylish and overworked.
If you choose one of these shapes and let it grow with a little patience, it keeps paying you back. That’s a pretty good trade for a haircut.
