



A good bun can rescue a rough hair day in five minutes, but only if it looks chosen, not improvised. The trick with easy bun hairstyles for women is never the knot itself; it’s the base, the tension, and where you hide the elastic. Get those three things right and even a plain twist can look polished enough for work, dinner, or a last-minute Zoom call.
Hair that’s slightly lived-in usually behaves better here than squeaky-clean hair. Freshly washed strands slide around, especially if they’re fine or silky, and that’s how a bun starts sagging before lunch. A little dry shampoo at the roots, a few crossed pins, and a pinch of patience make more difference than expensive tools ever will.
The range is bigger than most people think. Some of these styles sit low and neat at the nape, some are high and tidy, some lean soft and undone, and a few are useful when your hair is curly, short, thick, or just being difficult. Read them the way a stylist would: not as one “bun,” but as a whole drawer of fixes.
Why These Bun Hairstyles Work on Real Hair
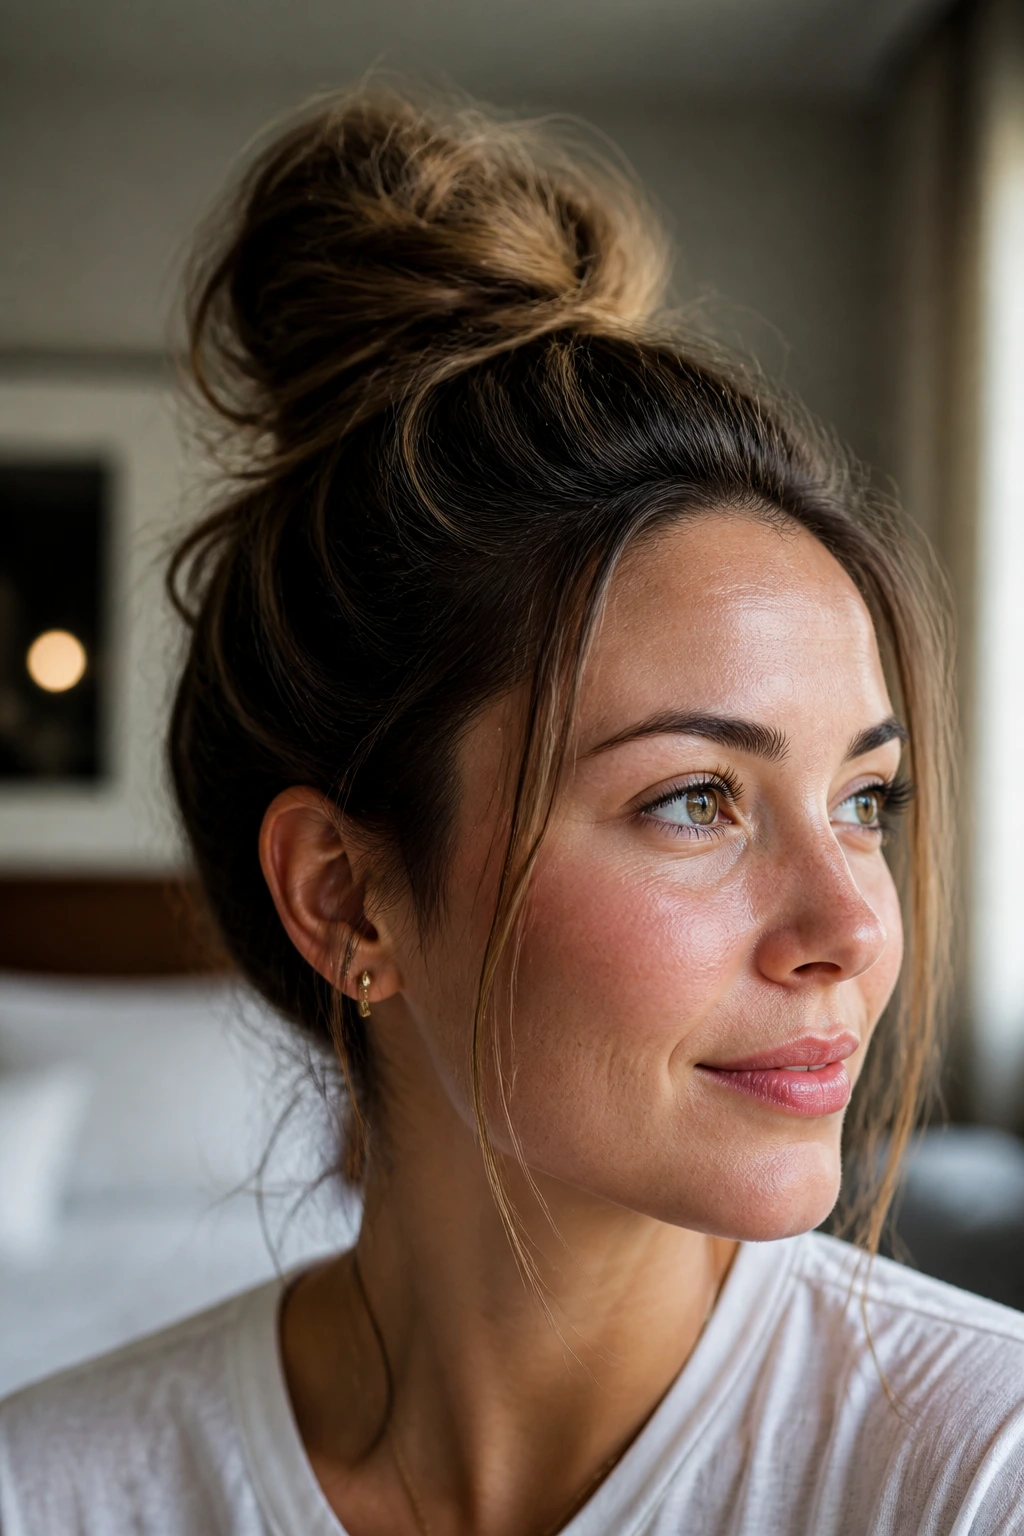
- Second-day texture helps: Hair that’s been washed once or twice already has more grip, so the bun stays put instead of sliding out of your hands.
- Pin placement matters more than pin count: Two bobby pins crossed in an X hold a twist better than six pins shoved randomly into the surface.
- The base changes the whole look: A low bun reads calm and clean, while a high bun reads sharper and more lifted from the profile.
- You can dress them up or down fast: Swap a plain elastic for a satin scrunchie, pearl pin, or scarf and the same bun suddenly feels finished.
- Different hair textures need different pressure: Fine hair likes smaller sections and texture spray; thick or curly hair usually needs a looser wrap and stronger anchoring at the scalp.
1. The Clean Low Bun
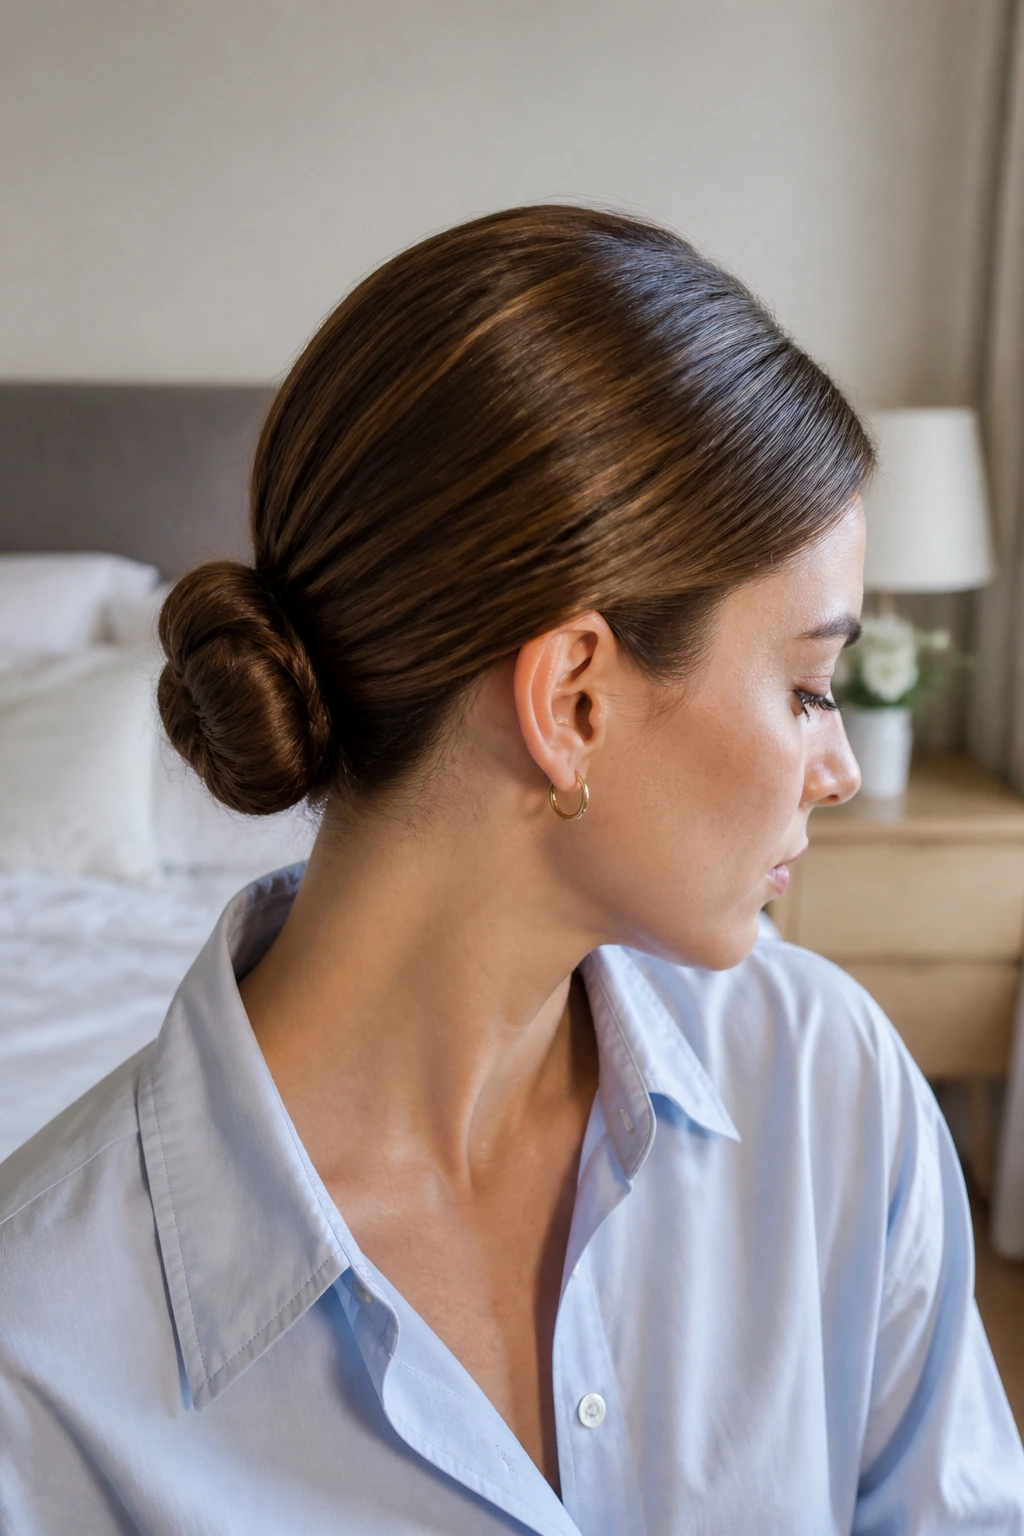
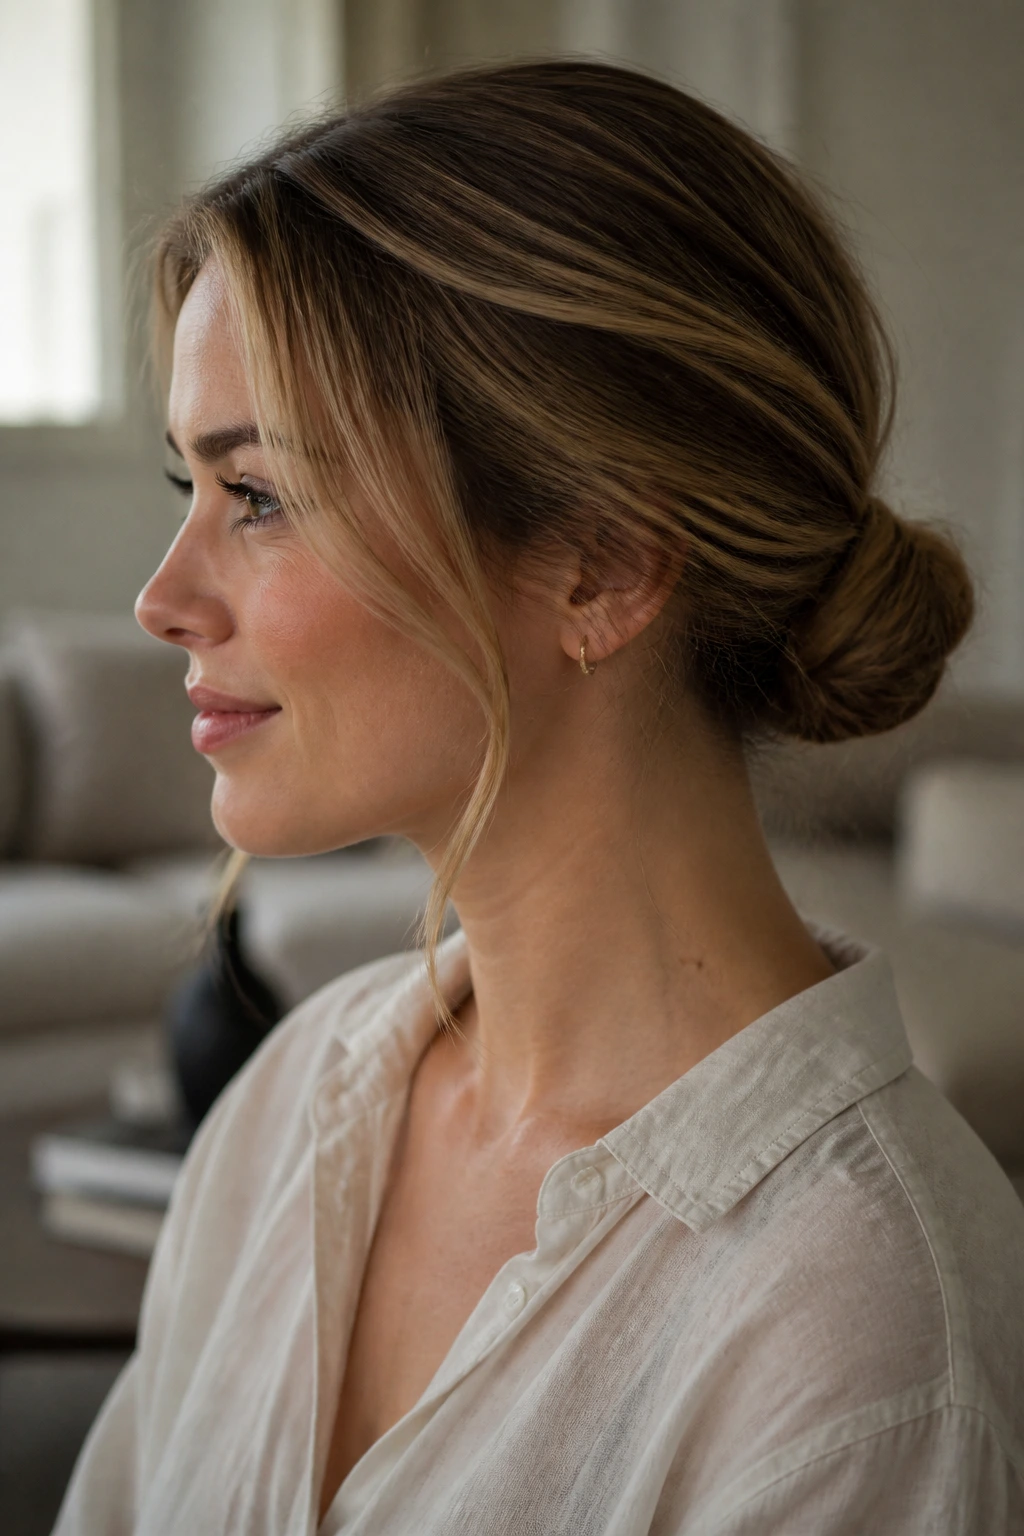
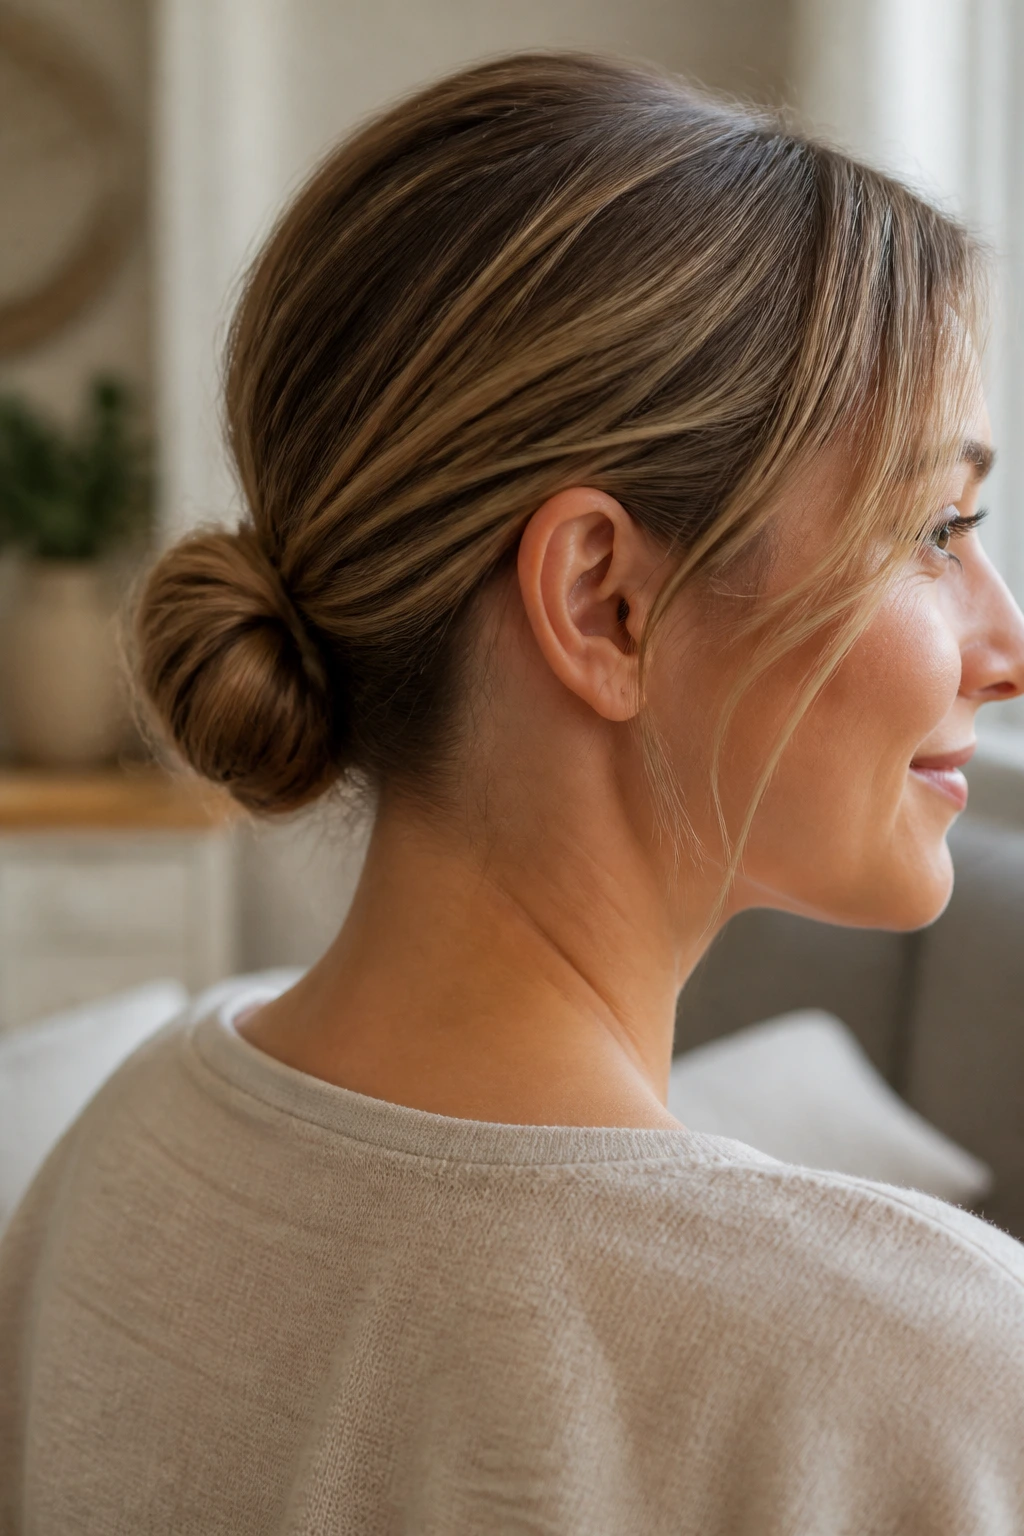
A clean low bun sits right at the nape and has a calm, no-fuss shape that works with collared shirts and earrings. Brush the hair smooth, gather it low, twist the length once, then tuck the tail under and pin it flat against the head. If your hair slips, dust the roots with dry shampoo first; that little bit of grit makes the whole thing behave.
Best detail: keep the bun flatter than you think. A low bun looks sharper when it hugs the neck instead of puffing away from it.
2. The Five-Minute Messy Bun
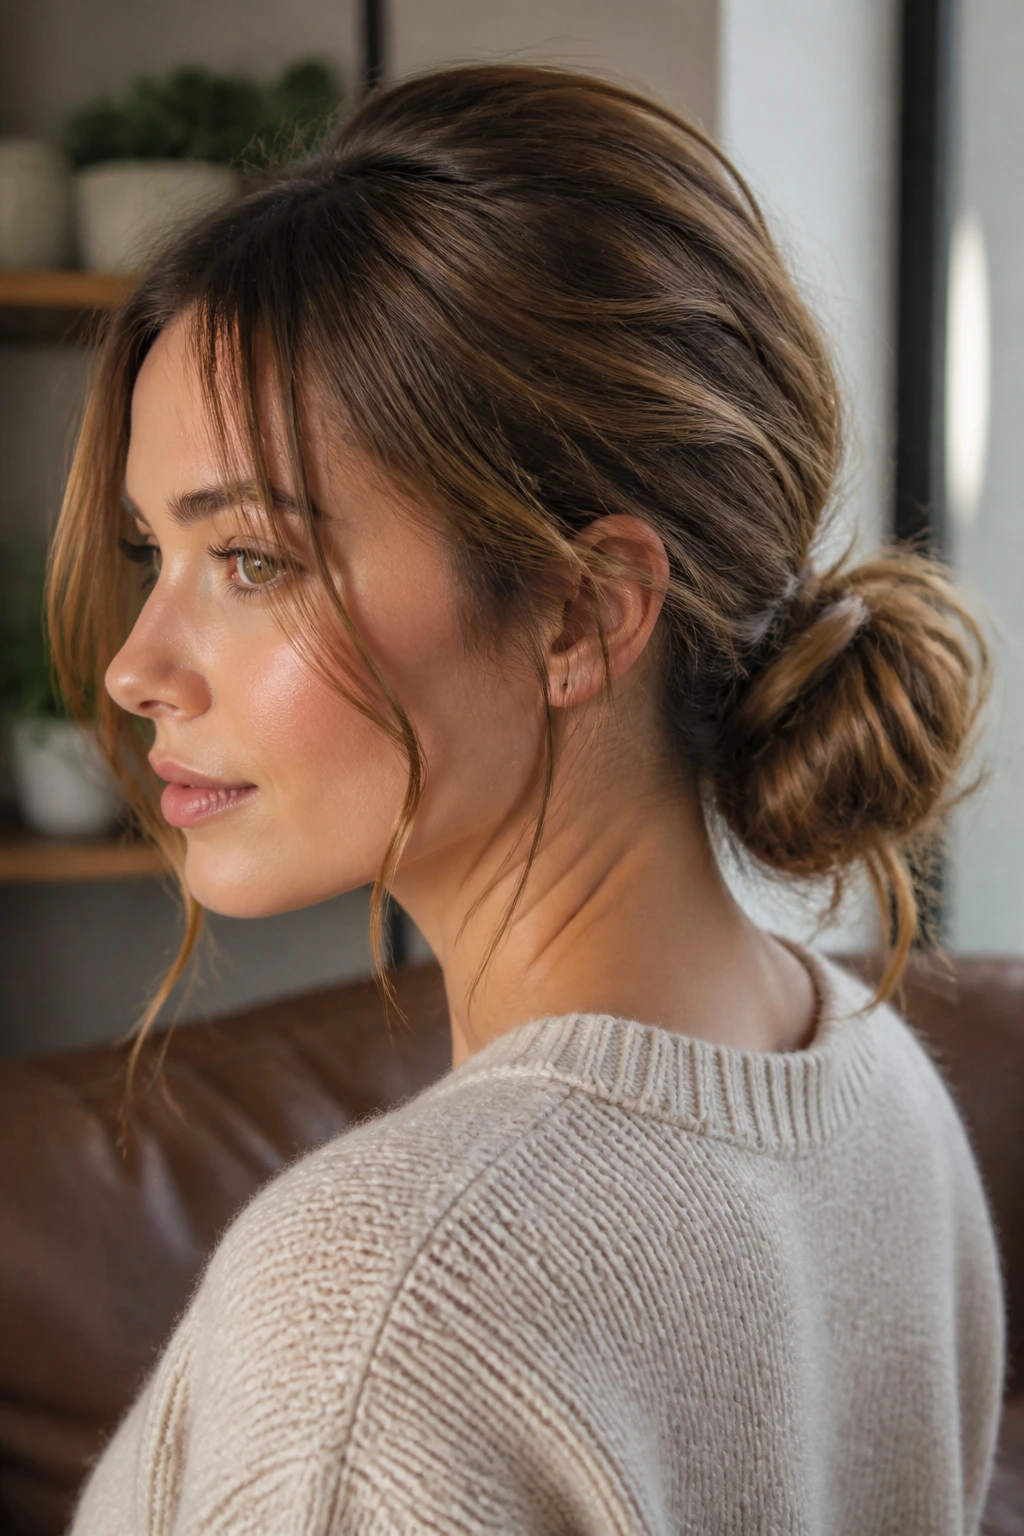
Need something that looks relaxed but still intentional? Pull the hair into a loose ponytail, stop the last loop of the elastic halfway through, and fan the loop apart with your fingers. Tug a few pieces at the crown and around the temples, but leave the base snug so it doesn’t deflate by afternoon.
This one shines on day-old hair. If the ends are extra smooth, mist them with texturizing spray before you twist, then pinch the bun open just a little so it looks soft rather than sloppy.
3. The Sleek High Bun
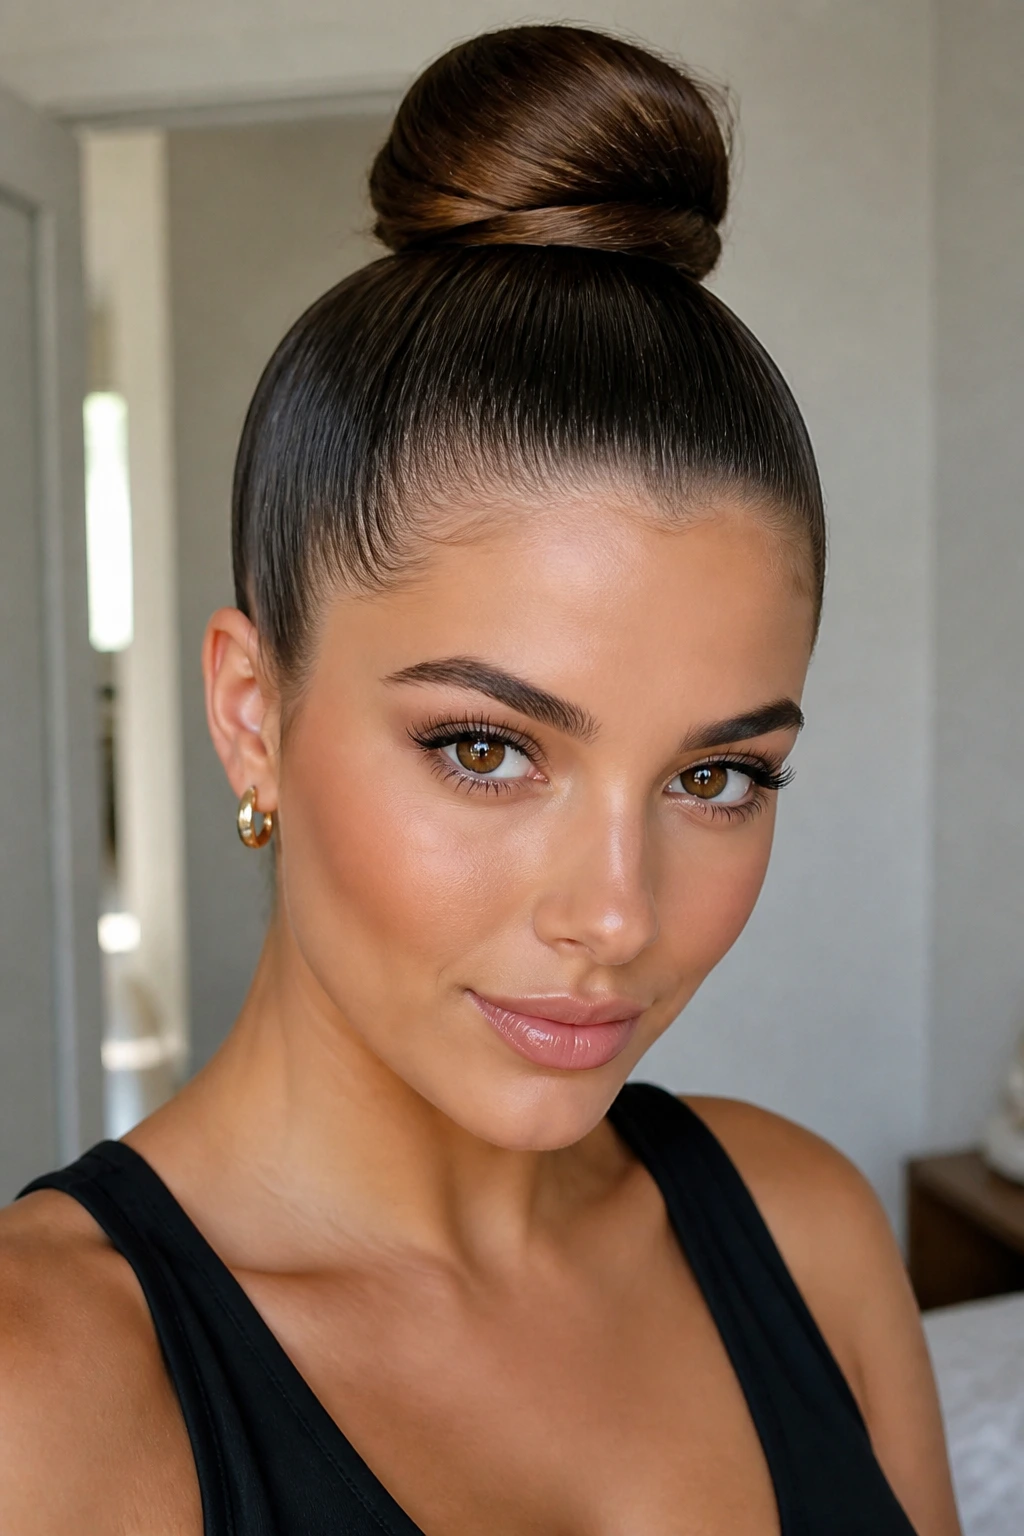
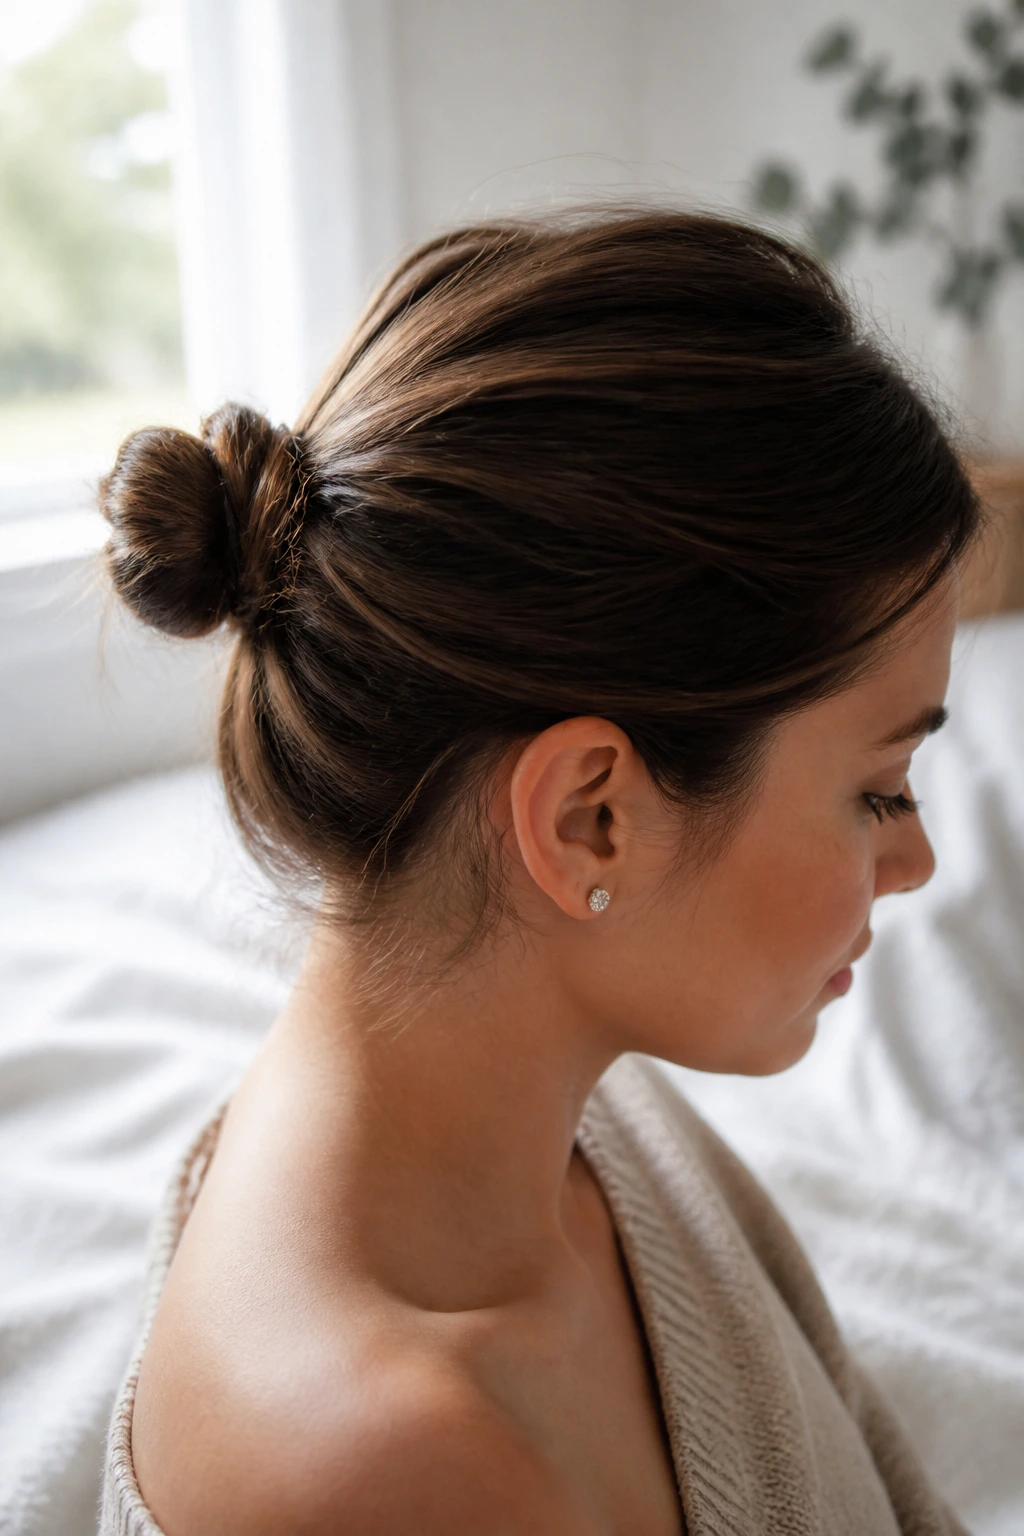
A sleek high bun is all about the crown. Brush the hair up to the highest point you can comfortably wear, secure it tight, then wrap the tail around the base and smooth the top with a tiny amount of gel or edge control. A toothbrush or small spoolie helps tame the baby hairs along the hairline without making the whole style look wet.
This bun gives a lifted profile and keeps hair off the neck completely. If the bun feels bulky, split the tail in two and wrap each side in the same direction before pinning.
4. The Braided Bun
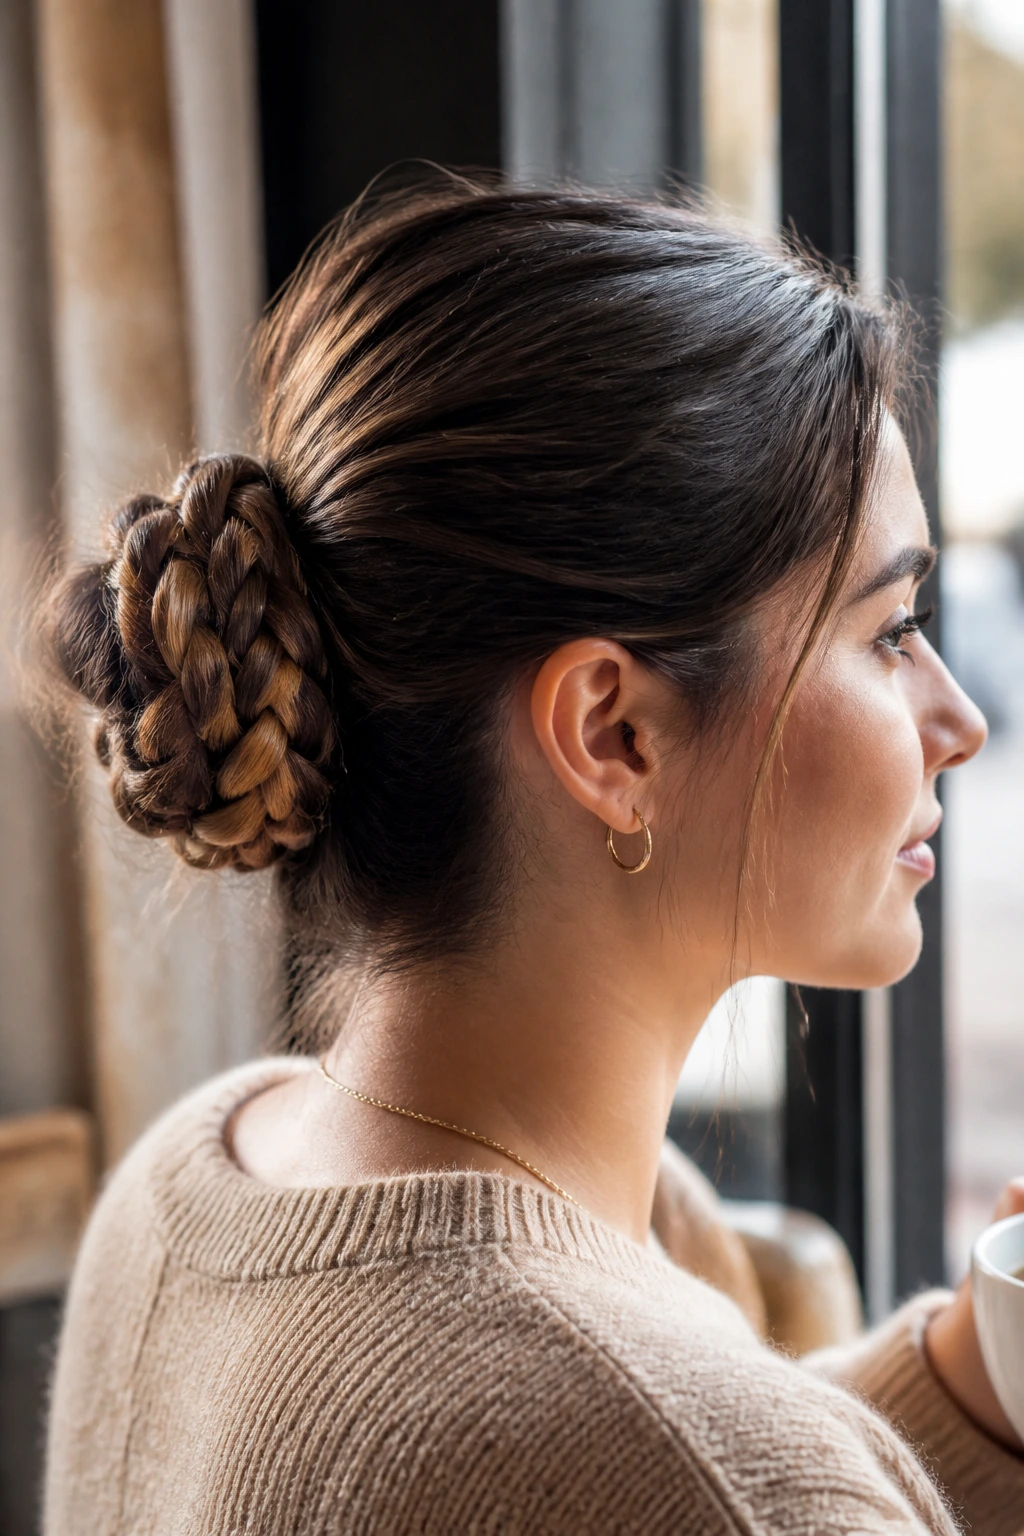
Braid the ponytail first, and the bun instantly gets more grip. A simple three-strand braid wrapped into a coil is enough; you do not need anything fancy. Pin the braid at three points — top, side, and bottom — so the coil sits tight instead of spinning loose.
This is one of the best choices for slippery hair because the braid gives the pins something to catch. It also hides frayed ends better than a plain twist.
5. The Twisted Low Bun
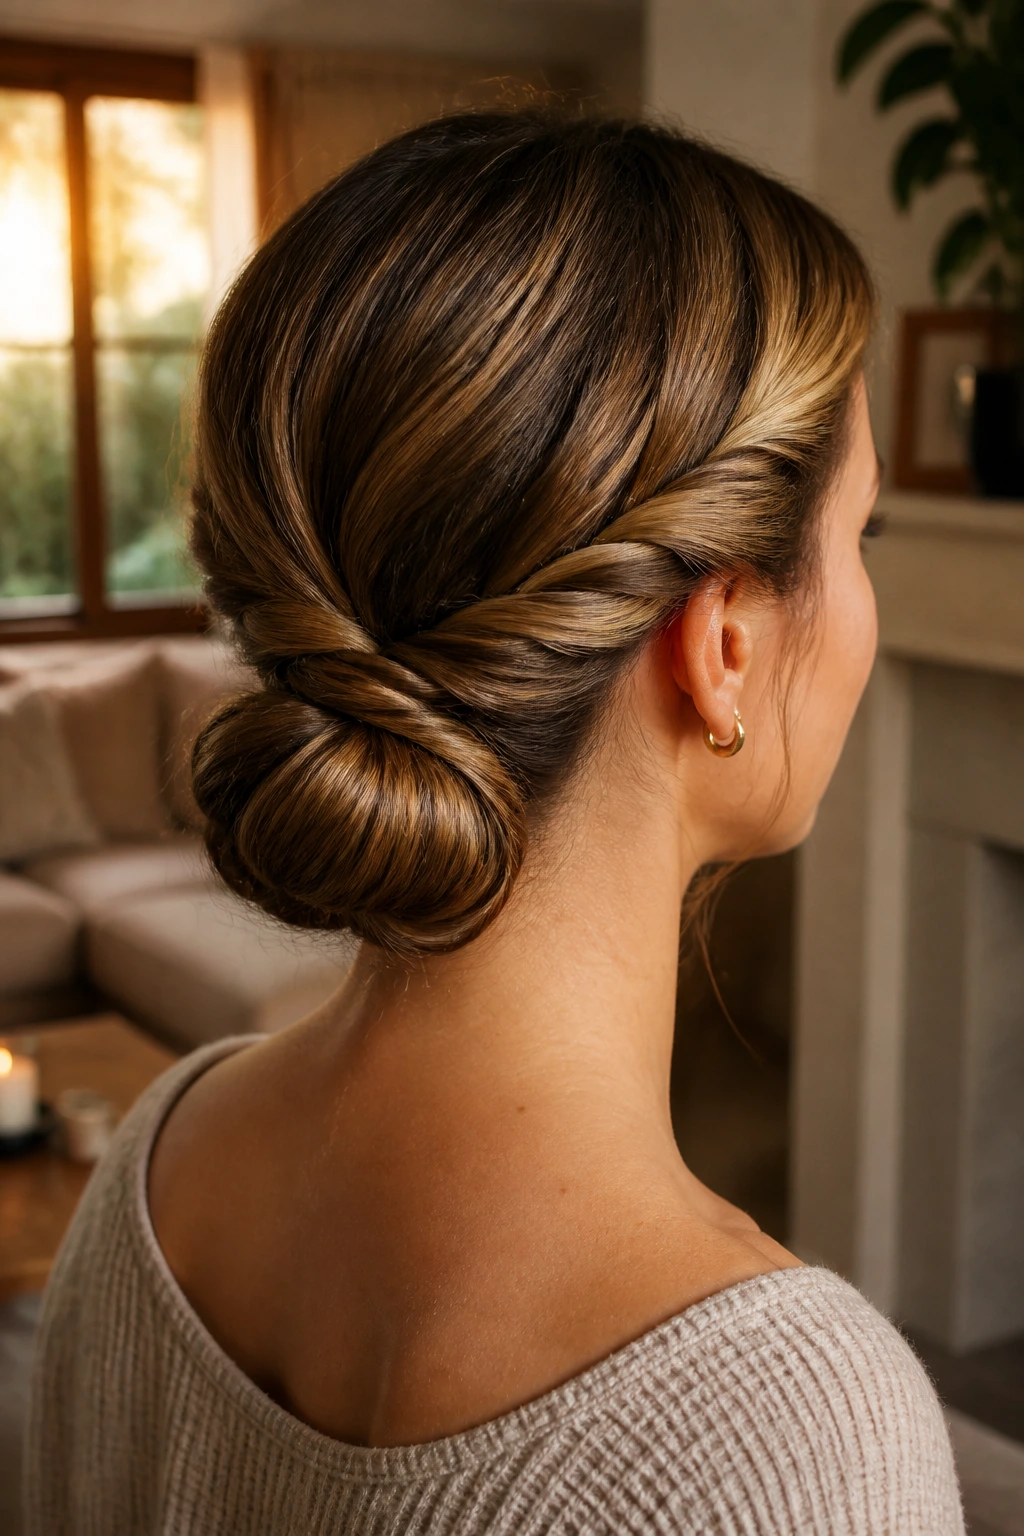
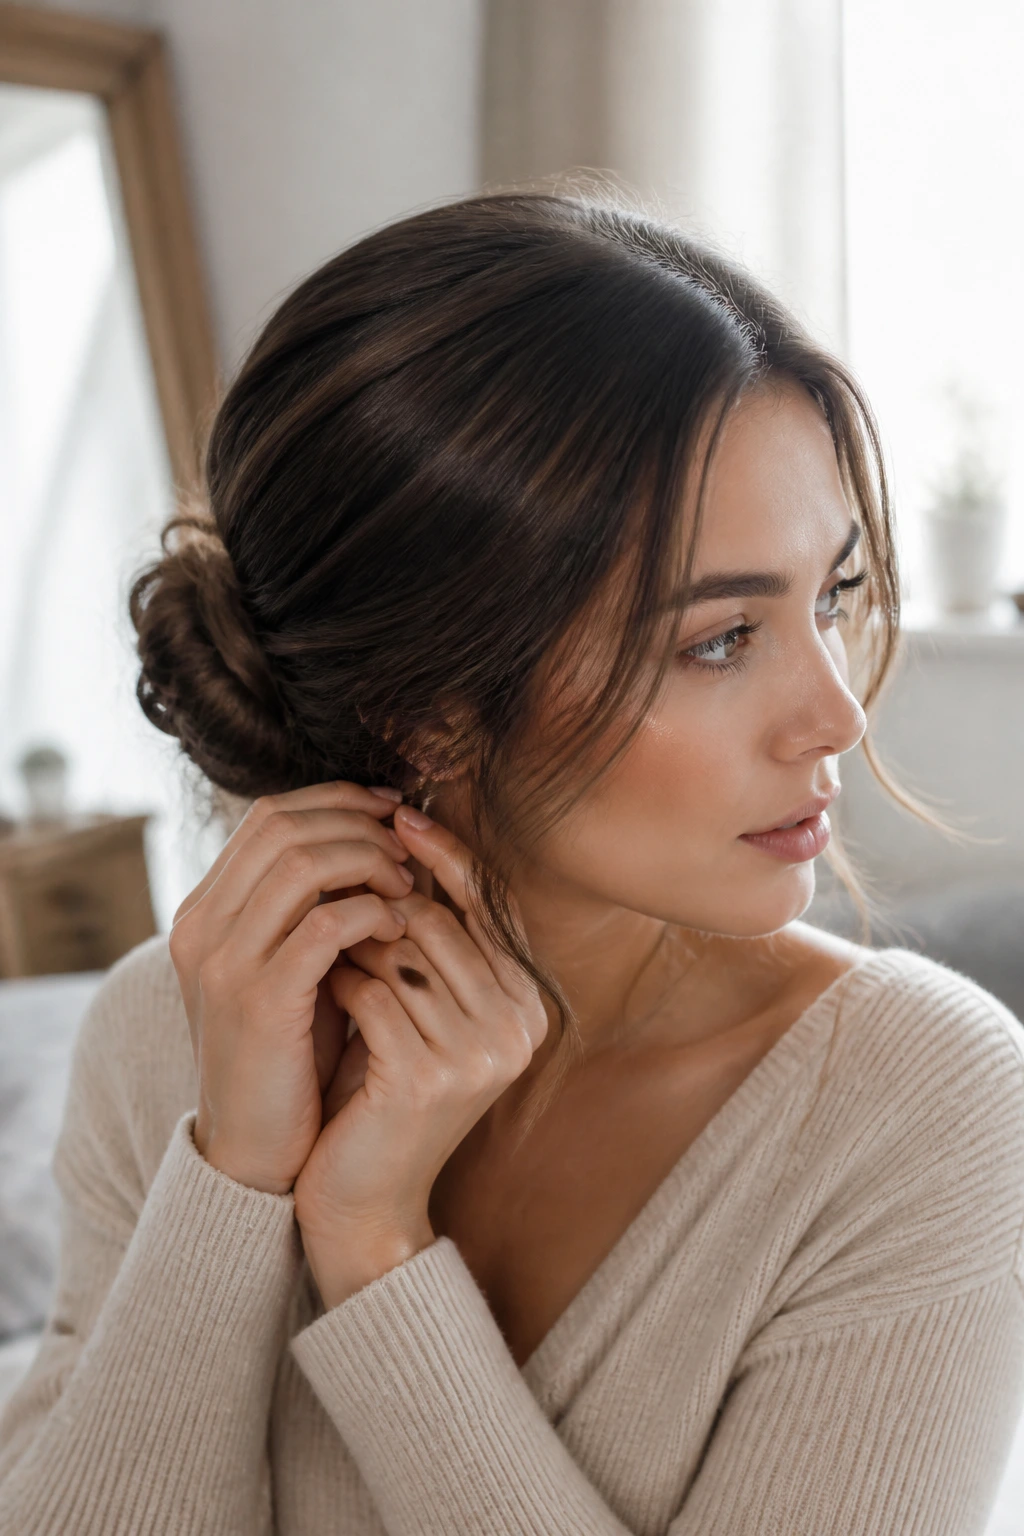
The twisted low bun looks like you spent more time on it than you did. Split the hair into two sections, twist each one away from the face, then cross them at the nape and pin the ends under the roll. The movement in the twist keeps the style from looking flat.
If your hair is layered, leave the shortest pieces smooth at the sides and let the longer lengths form the bun. It keeps the shape tidy without fighting every little flyaway.
6. The Side Bun
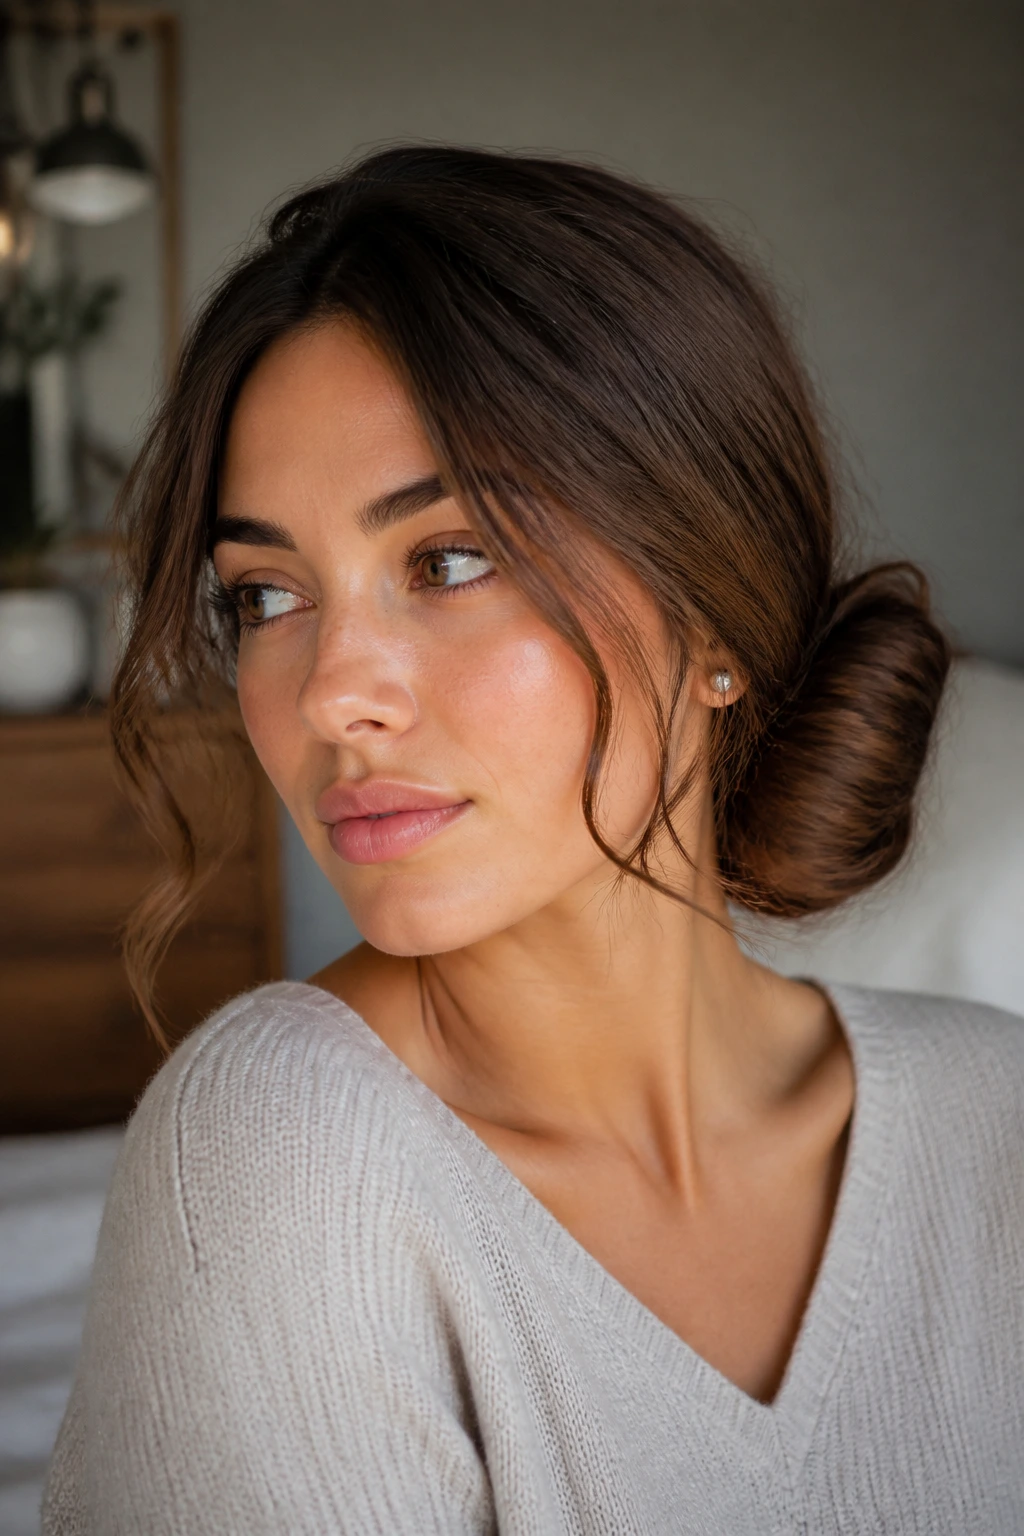
A side bun shifts the knot just behind one ear, which gives the style a softer line than a center-back bun. Gather the hair a little off-center, roll it into a low coil, and pin it where the skull starts to curve toward the neck. The asymmetry is the whole point.
This version looks especially good with one statement earring or a neckline that needs some breathing room. Keep the bun compact, though; a side bun that gets too wide starts to look accidental.
7. The Half-Up Bun
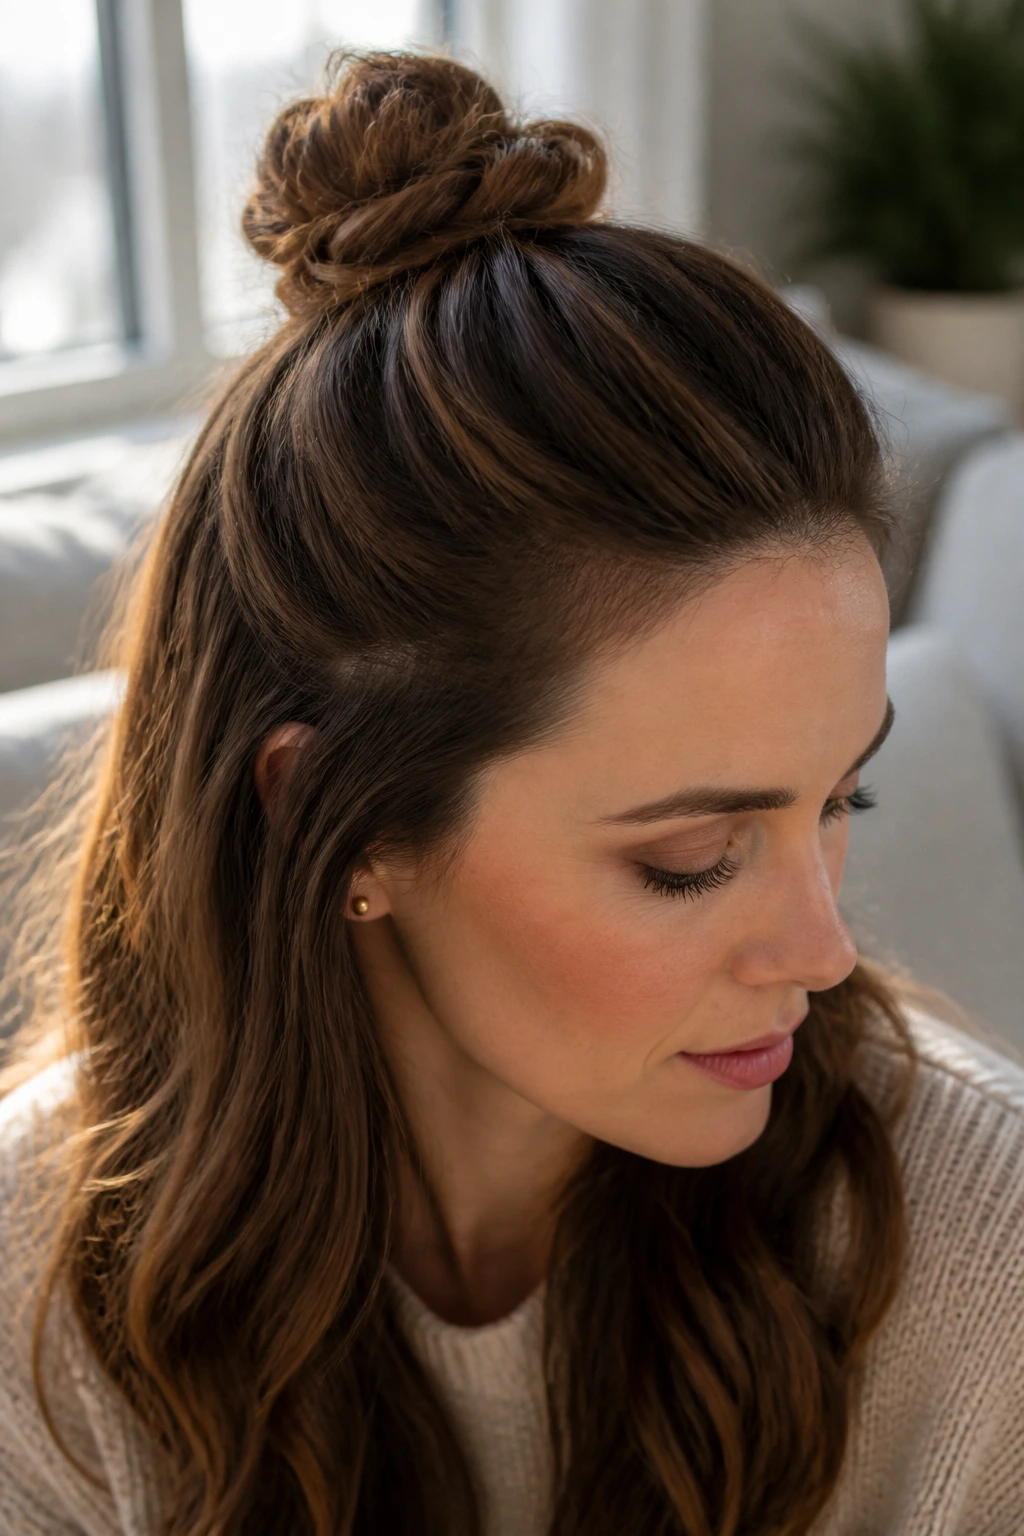
The half-up bun solves the “I want my hair up, but not all the way up” problem. Take the top third of the hair, twist it into a small bun at the crown, and leave the rest loose. It gives lift at the top without pulling every strand away from the face.
For straight hair, a little texture spray helps the half-up section hold. For curly hair, skip the brush and use fingers so the curls don’t puff out too much at the root.
8. The Sock Bun
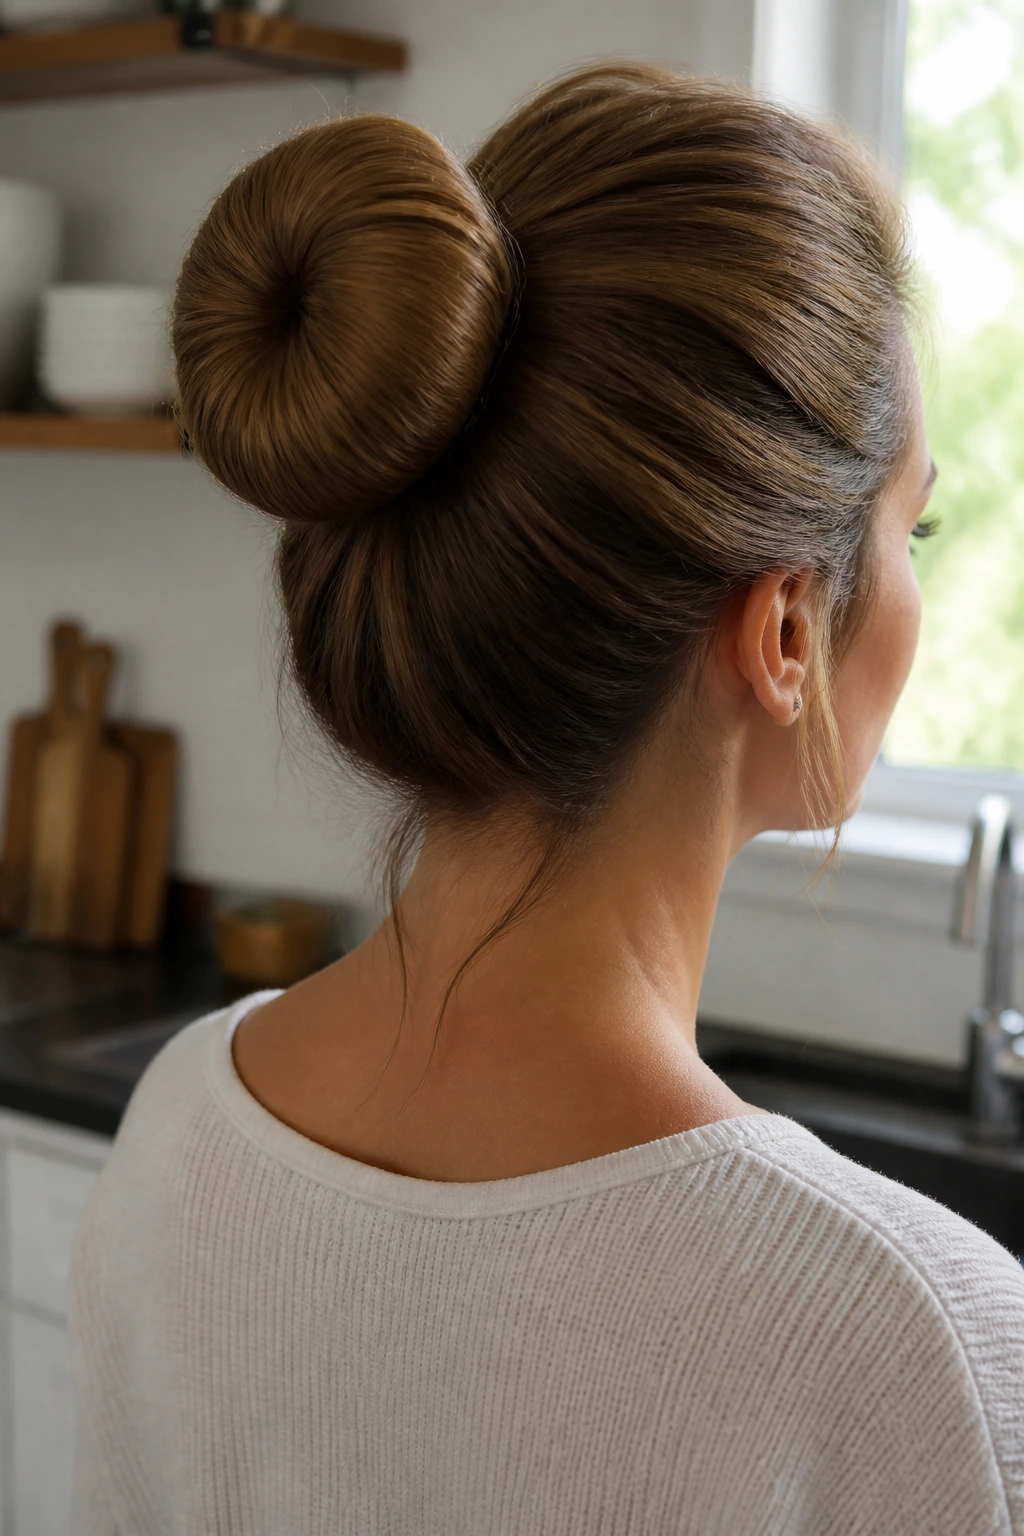
A sock bun or donut bun gives a full, round shape with almost no effort. Slide the ponytail through a bun donut, spread the hair evenly around it, then roll the ends down and in until the padding disappears. Once the hair covers the form, pin any loose edges underneath.
It’s a smart fix for fine hair that needs bulk. If the ring shows through, your hair is probably too thin across the top, so use a smaller donut or wrap a second thin layer over the first.
9. The Knot Bun
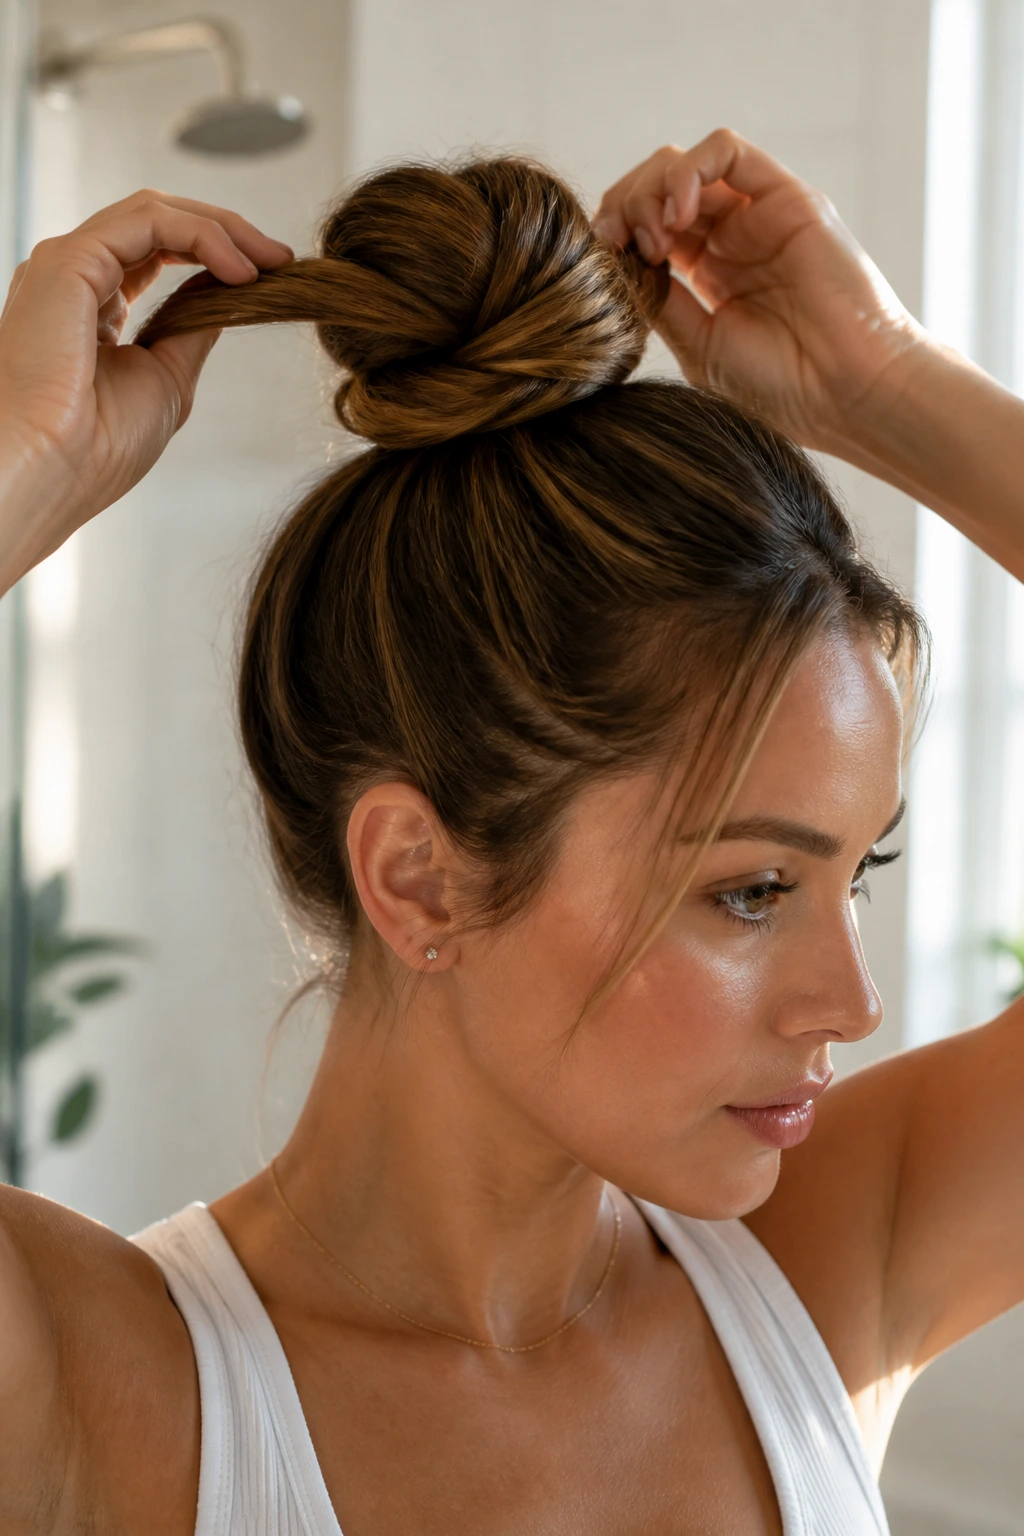
The knot bun is exactly what it sounds like: one neat knot, then a few pins to keep it from untying itself. Pull the ponytail halfway through the elastic, twist the remaining length, and loop it across the base so it resembles a soft knot rather than a coil. It works best when the tail isn’t overly long.
This one looks nice when you want structure without much polish. Leave the bun slightly imperfect at the edges — that’s the whole appeal.
10. The Space Buns
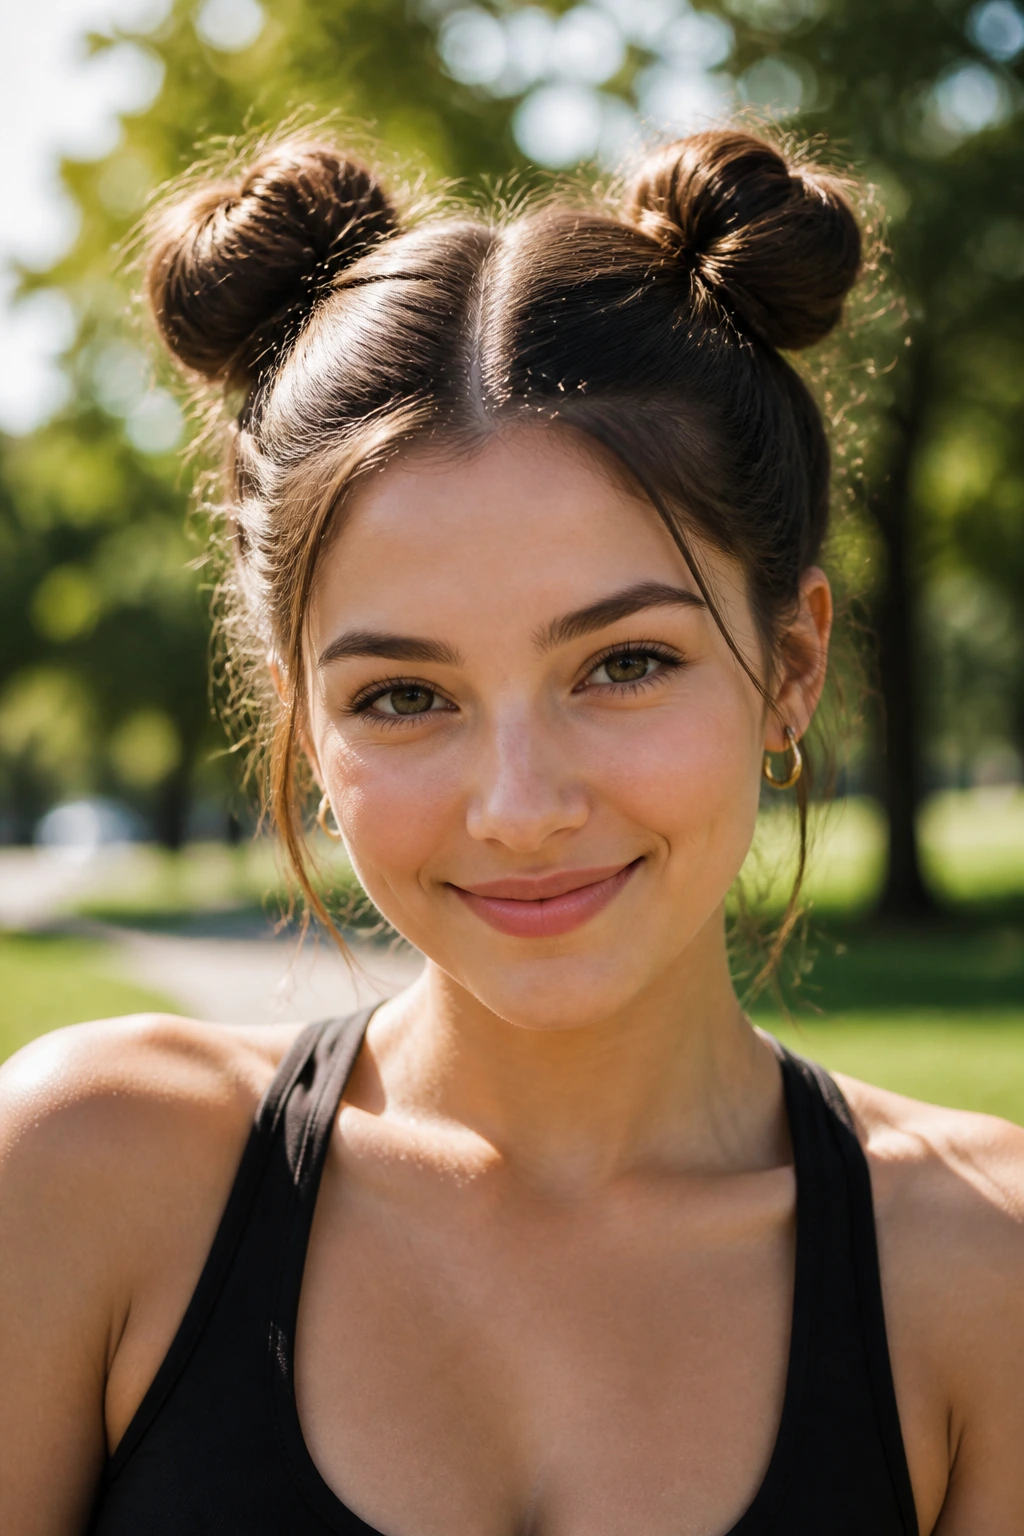
Space buns are two small buns set high and balanced on either side of the head. Part the hair straight down the middle, make two ponytails, then twist and pin each one into its own little coil. Keep them closer to the temples for a wearable version, farther out if you want something playful.
They work especially well on medium-length hair because the buns don’t need to be huge. If the sections feel uneven, pull them snug before you pin, then adjust the shape with your fingers.
11. The Top Knot
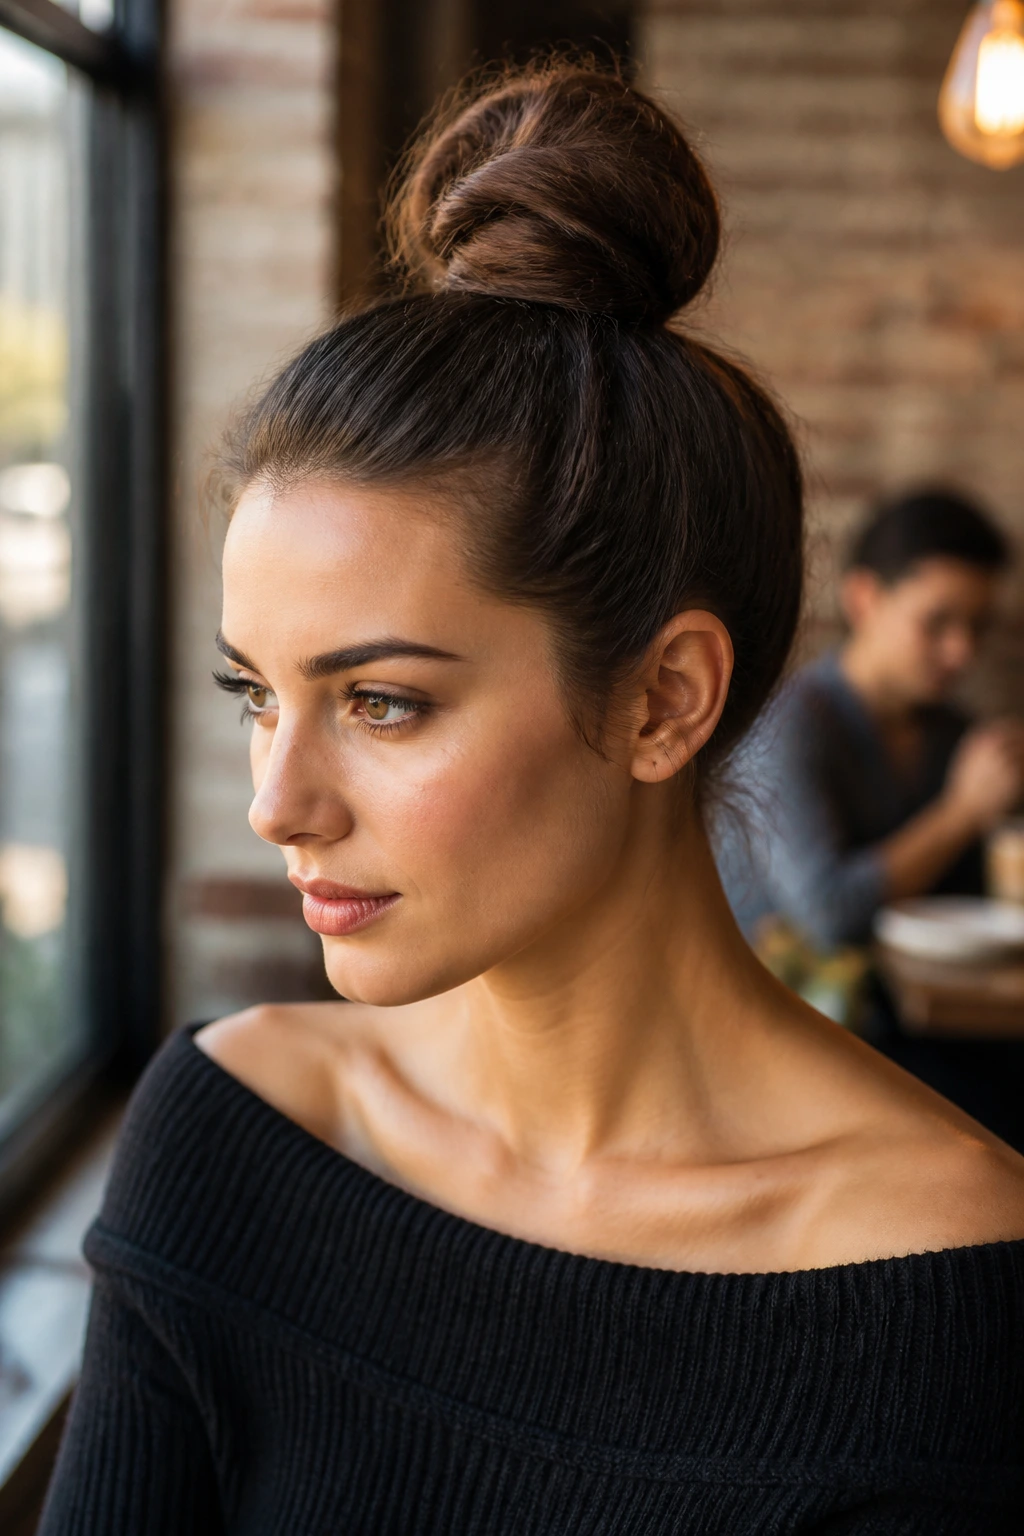
The top knot sits at the highest point of the head and keeps the neck totally clear. Gather the hair into a high ponytail, twist the length around the base, and pin the coil in a tight circle. The bun should feel anchored to the crown, not perched on top like a loose scoop.
If you have thick hair, divide the tail into two halves before wrapping. It reduces bulk and keeps the knot from tilting backward.
12. The Chignon
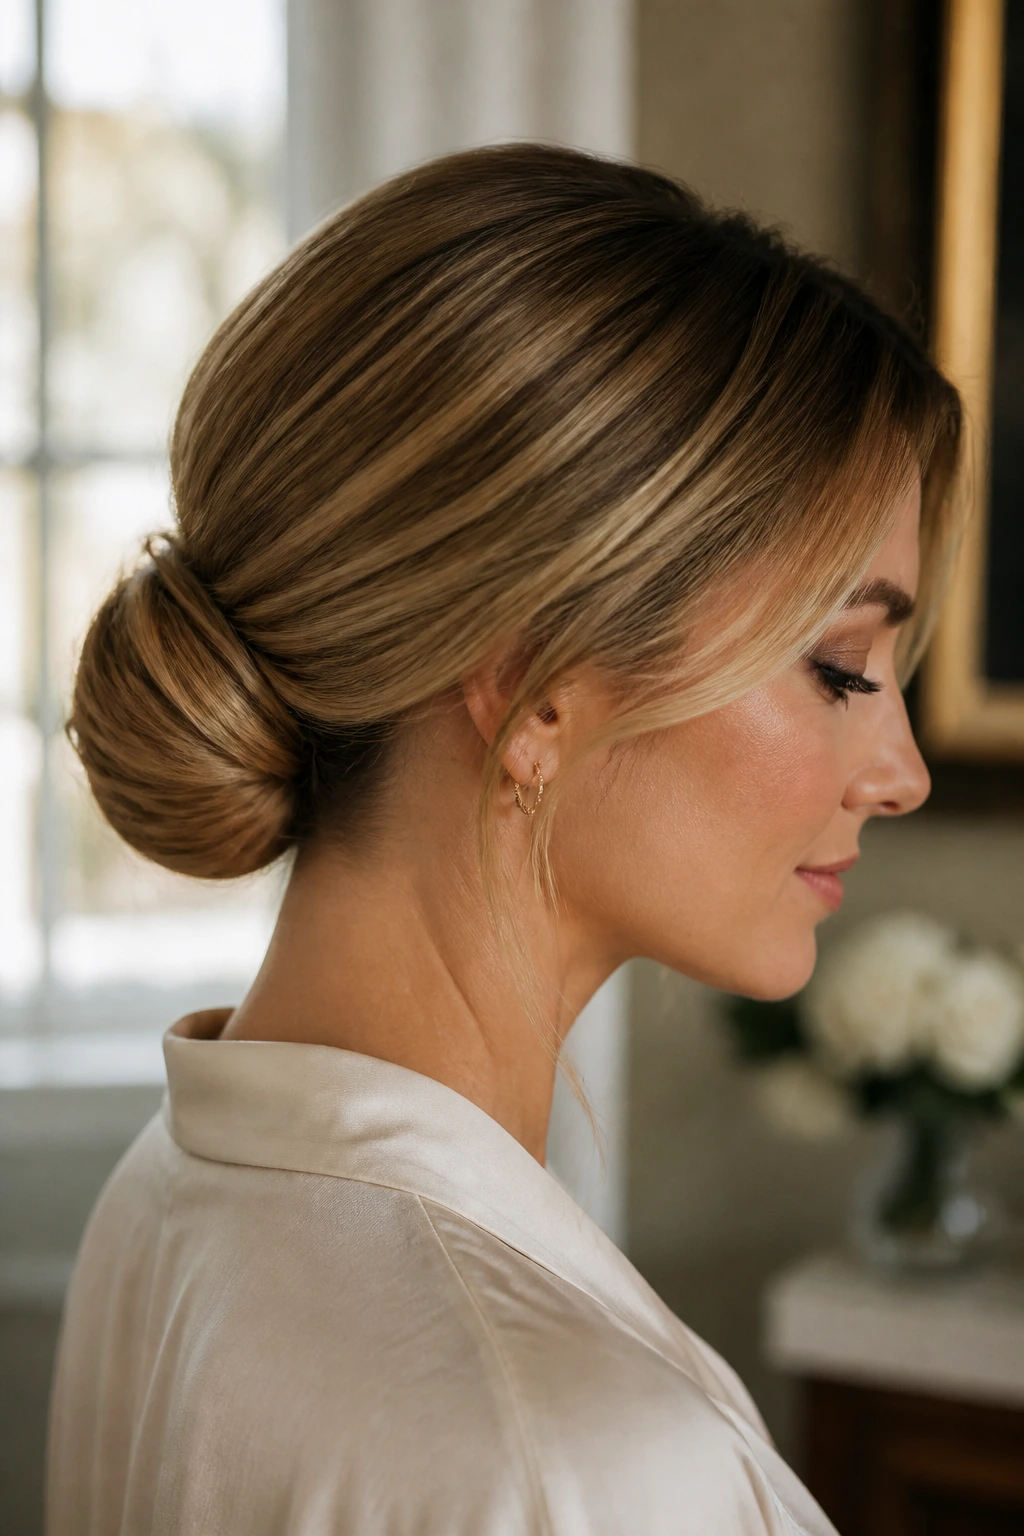
A chignon is the more refined cousin of the low bun. It usually lives at the nape, gets tucked under itself, and has a smoother outline than a messy knot. Wrap the tail inward and hide the ends underneath the roll so the surface stays clean.
This one is worth using when you want a bun that looks finished from the side. A single decorative pin at the base is enough; too much shine up top can make it look overworked.
13. The Rolled Bun
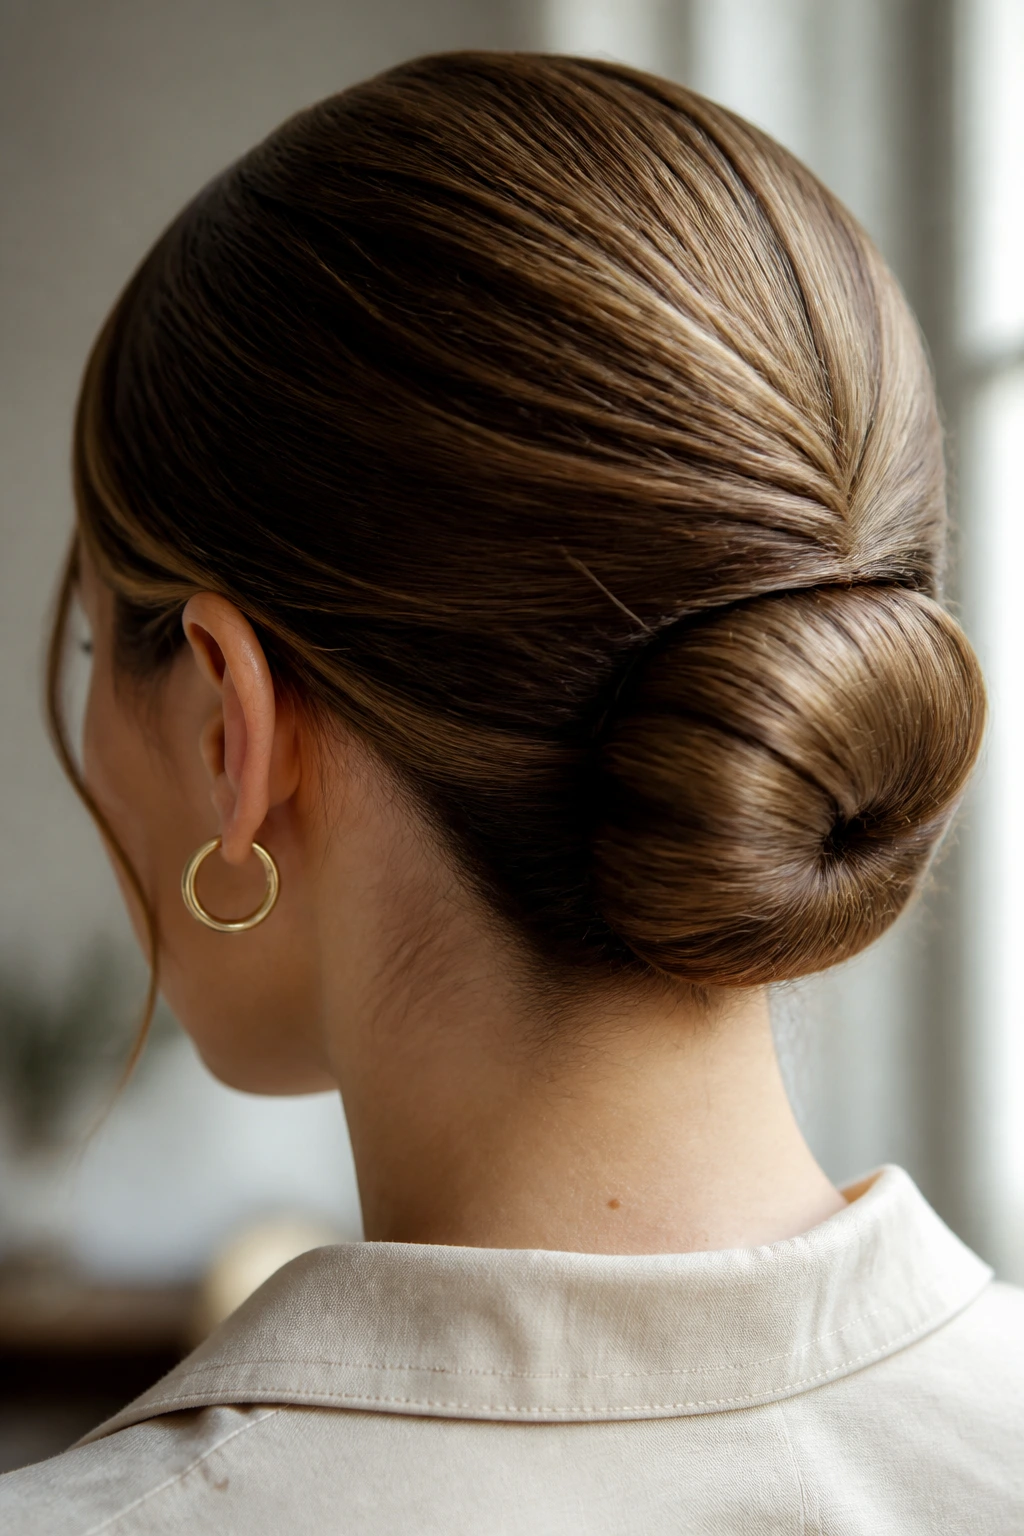
The rolled bun is one of those styles that sounds fussy and ends up being easier than expected. Sweep the hair into a low ponytail, roll the length upward against the head, and pin along the seam as you go. The roll should be snug enough to hold shape but not so tight that it pulls the scalp.
It’s a good pick for medium-length hair because there’s enough length to create the roll without a giant tail hanging out. A light mist of hairspray across the top helps keep the surface smooth.
14. The Dutch-Braid Bun
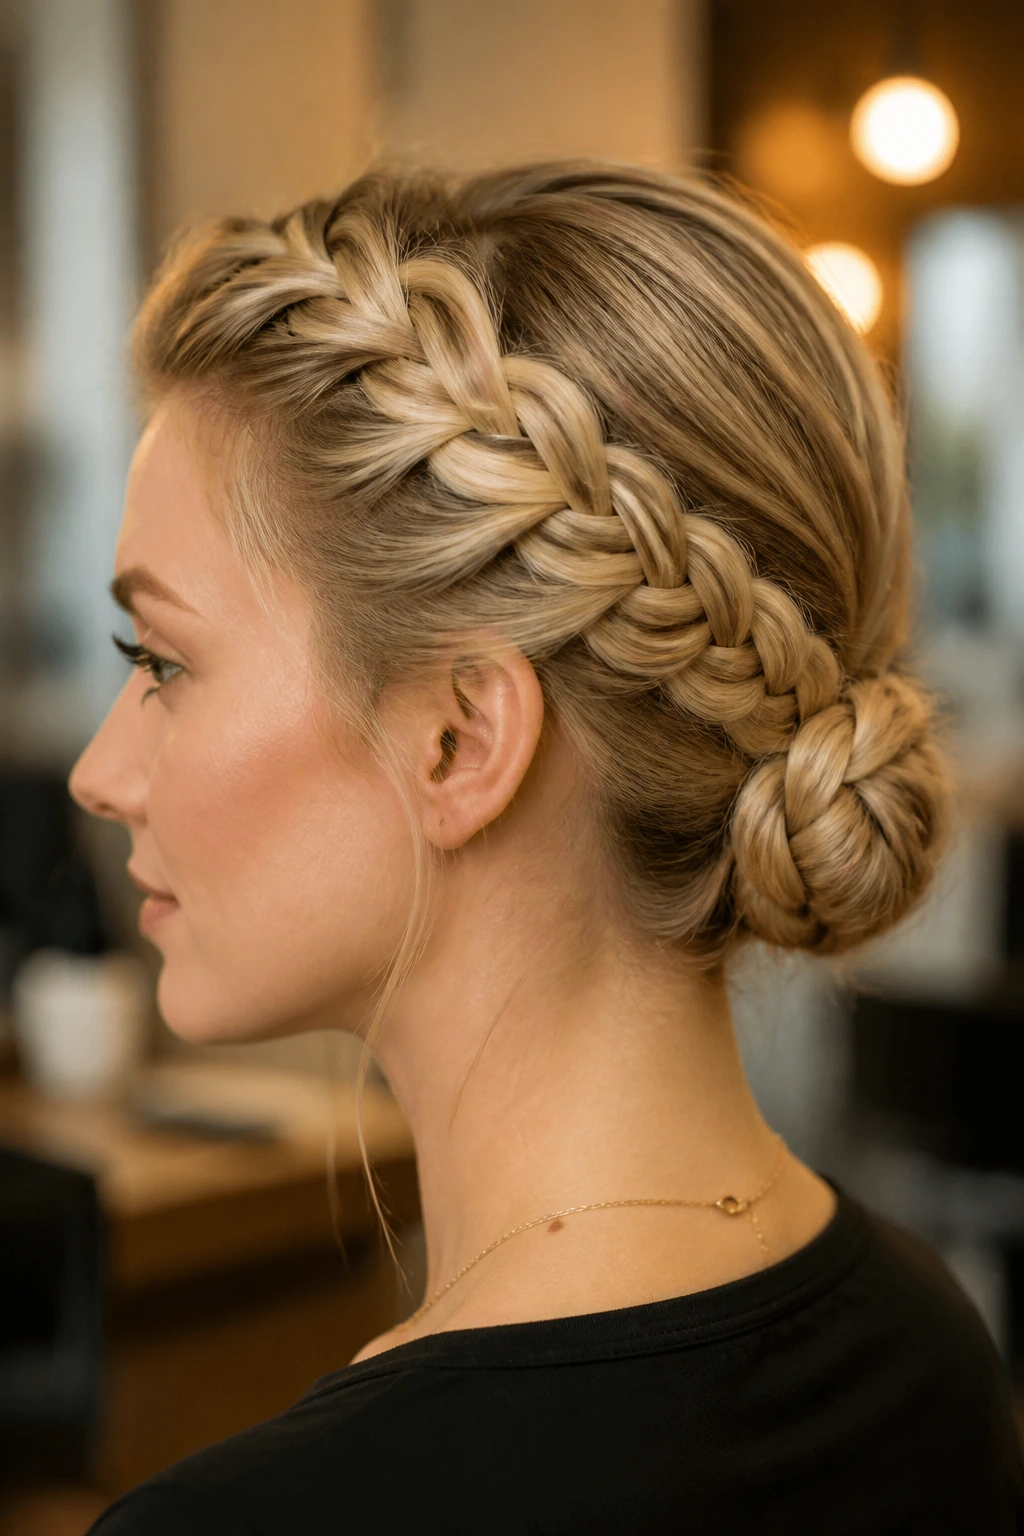
A Dutch-braid bun starts with a braid at the hairline, which gives the whole style a stronger frame. Braid down the center or along one side, gather the rest of the hair into a bun at the nape, and wrap the braid tail around the base. The braid is doing the heavy lifting here.
This is a nice option when you want the front of the style to stay neat all day. If the braid looks too tight, gently pull the outer loops apart with your fingertips so it has a little softness.
15. The Fishtail Bun
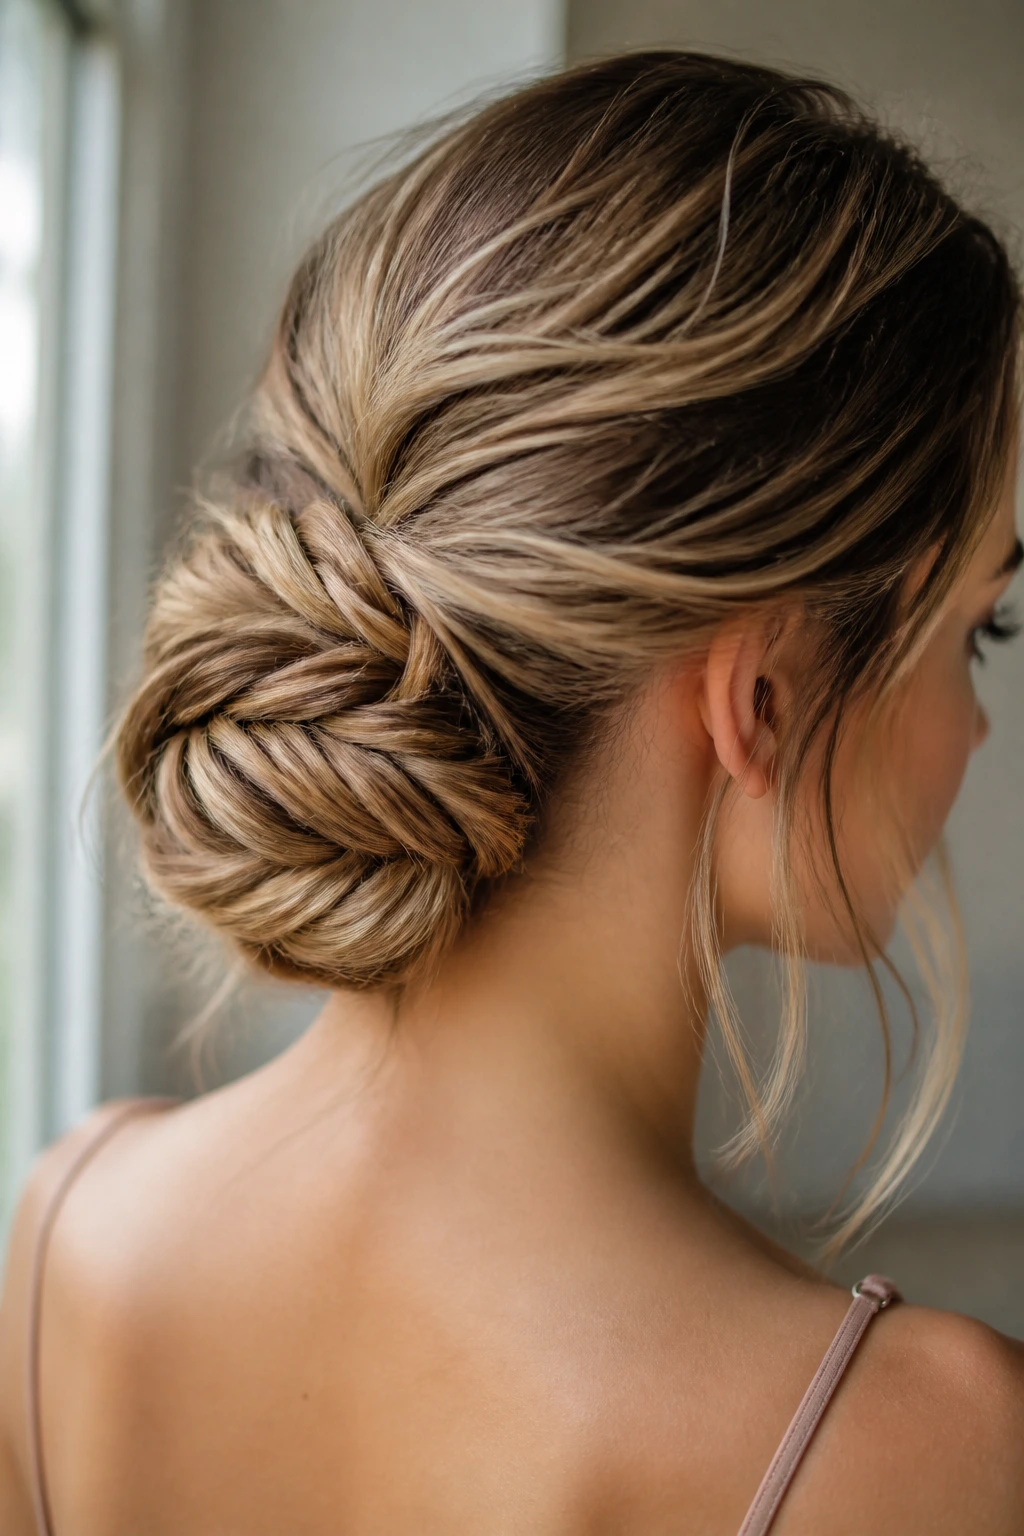
A fishtail bun has more texture than a plain braid bun, and that texture is what makes it interesting. Build a fishtail braid first, then coil it into a bun and pin it in place. The narrower braid pattern creates tiny ridges that catch light and make the style look more detailed.
It works best on longer hair because a short fishtail can look stubby once it’s wrapped. If the braid is thin, stretch it out a bit before you coil it so the bun looks fuller.
16. The French-Braid Bun
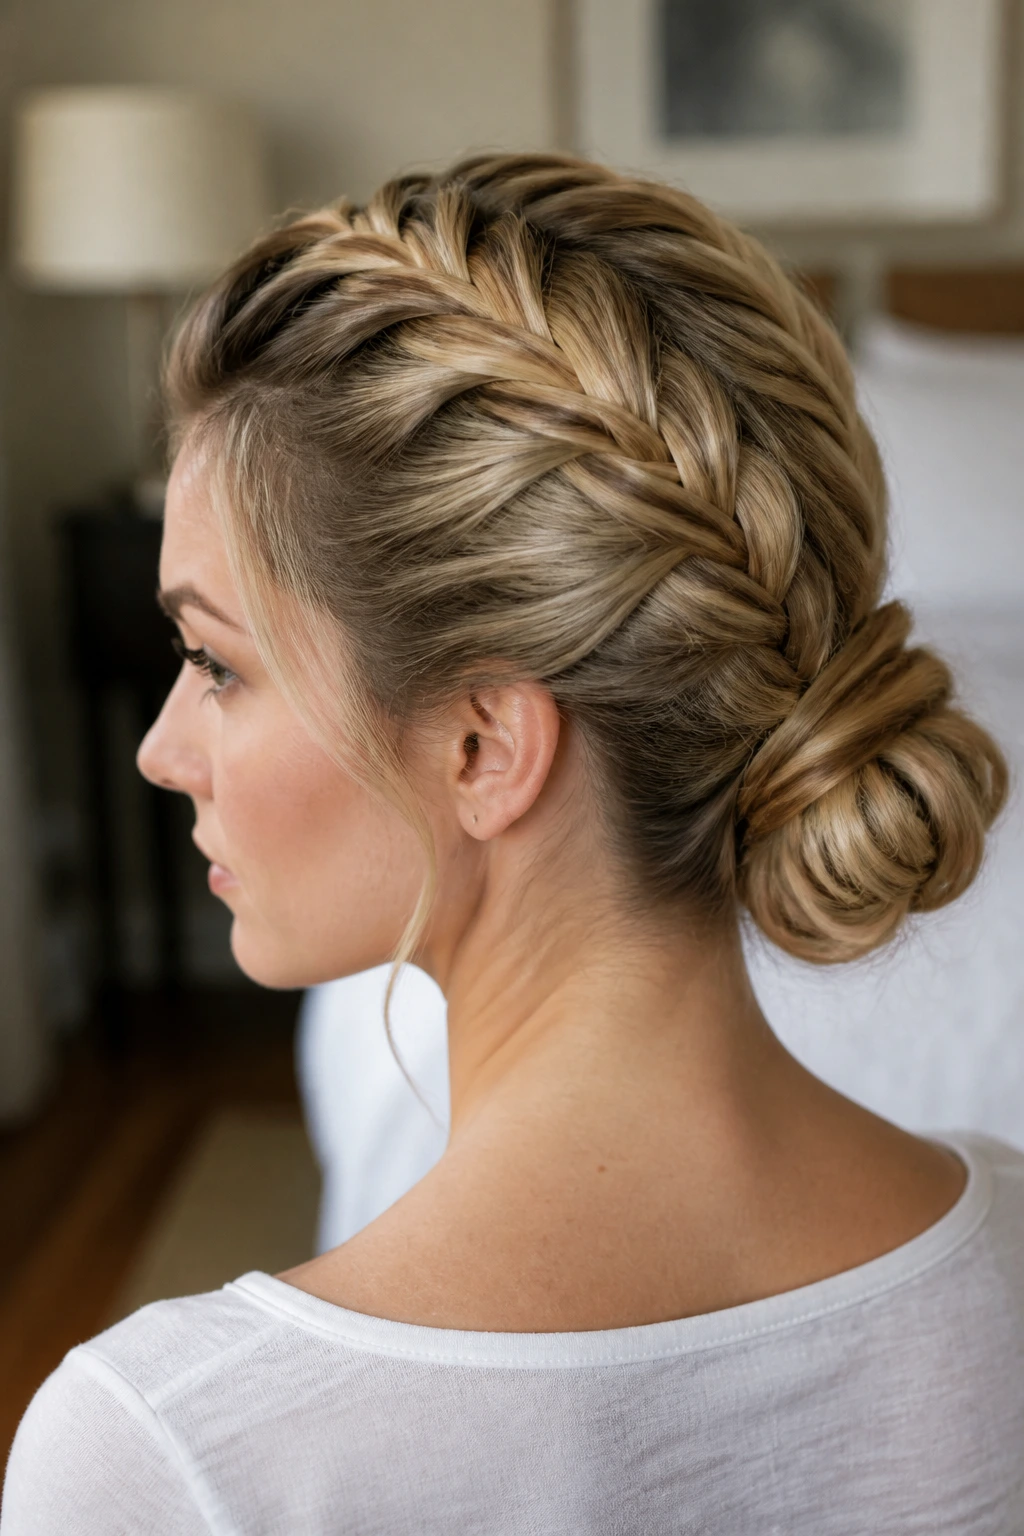
The French-braid bun keeps the front of the hair controlled while the bun stays soft in back. Braid from the crown down to the nape, finish with a ponytail, then wrap the tail into a bun. It’s tidy without feeling severe.
This is one of the easiest ways to keep flyaways from creeping out around the hairline. If your braid starts to loosen, pin the top three inches first, then secure the bun itself.
17. The Ballet Bun
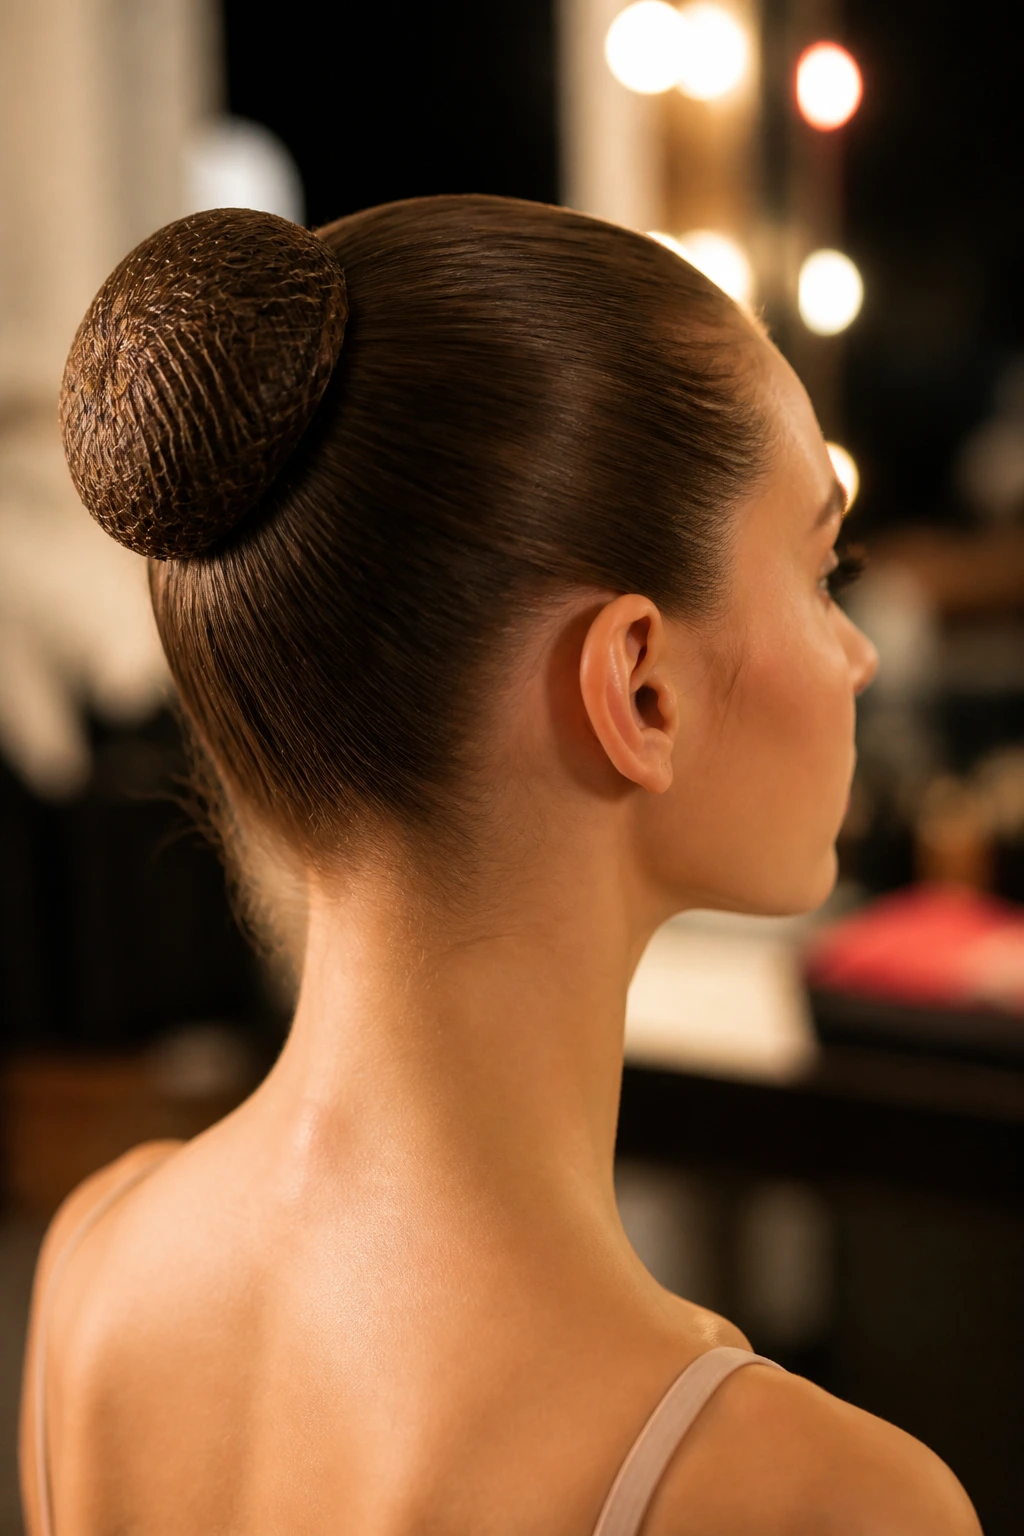
The ballet bun is smooth, compact, and serious about staying in place. Comb the hair tight, build a centered bun, and use a hair net or extra pins to flatten the outline. There’s no room for loose ends here.
It looks best when the bun sits centered at the back of the head, not too high, not too low. If you need the style to survive a long day, this is one of the most dependable choices in the whole lineup.
18. The Gibson Tuck Bun
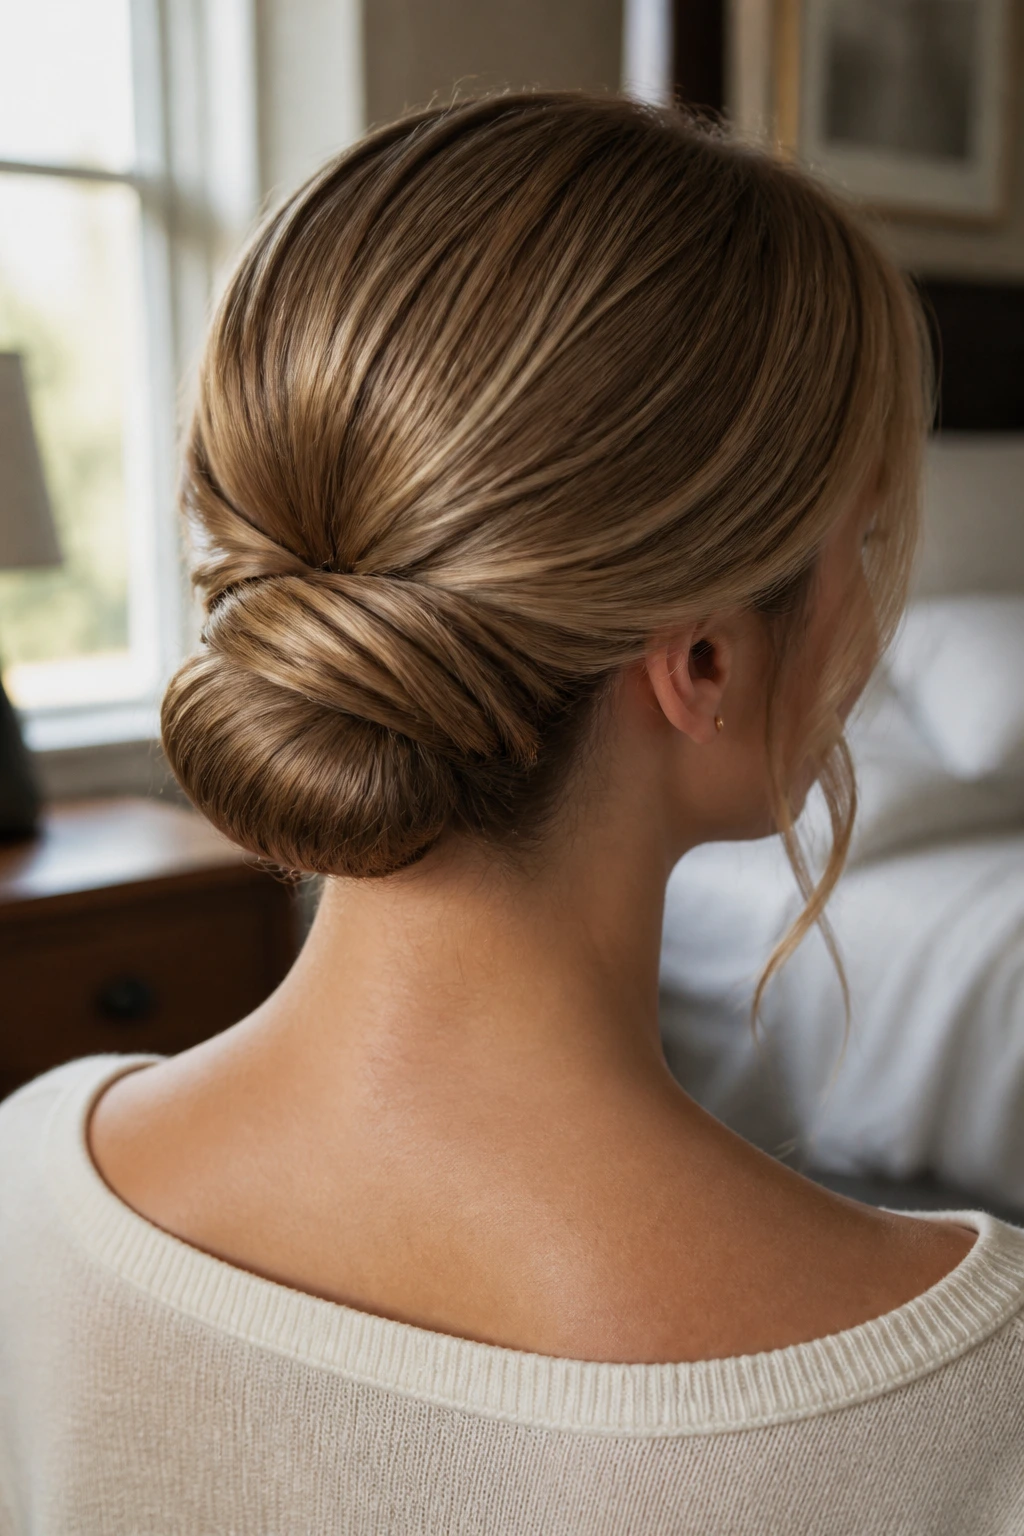
The Gibson tuck bun gives you a soft, rolled shape at the nape with almost no visible ends. Make a low ponytail, create a small opening above the elastic, and tuck the hair up and through that gap. Then fold the remaining length inward and pin it flat.
This style works well on shoulder-length hair because the ends tuck in more easily. If the roll feels loose, use two small pins at the sides before you hide the center.
19. The Rope-Braid Bun
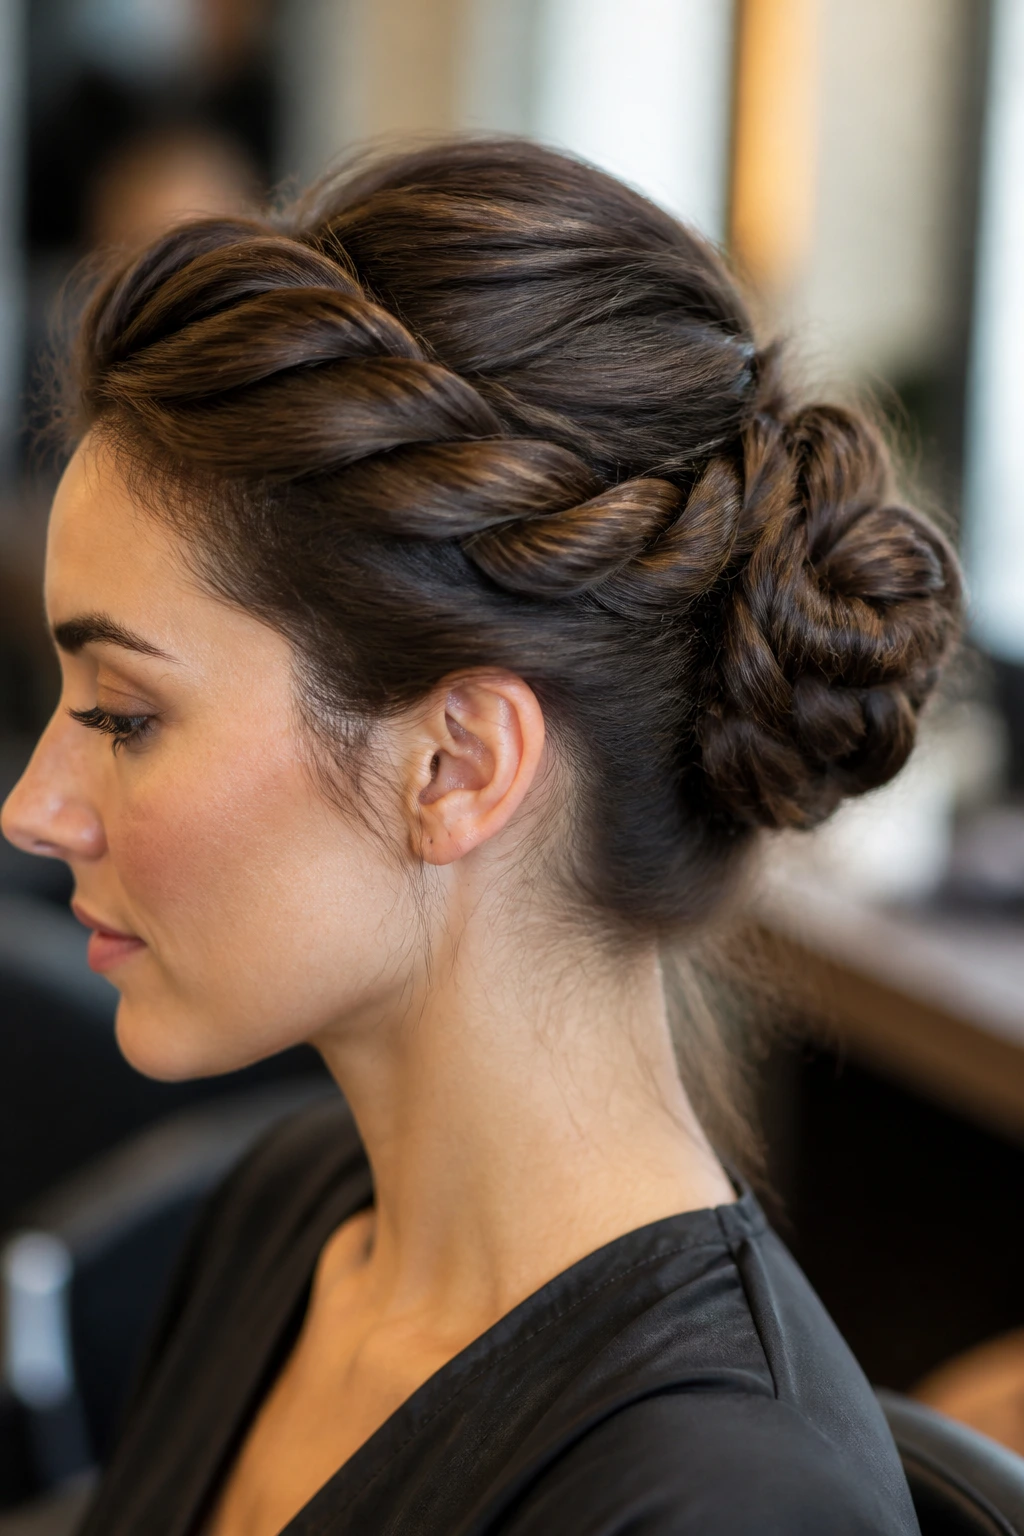
Twist two sections of hair in the same direction, then twist them around each other in the opposite direction for a rope braid. Once the braid is secure, coil it into a bun and pin it close to the scalp. The rope texture gives the style a clean but not fussy look.
This bun is especially good when you want something with visible pattern but no tiny braid work. The twist needs tension, though — too loose and the braid puffs up before you can wrap it.
20. The Woven Bun
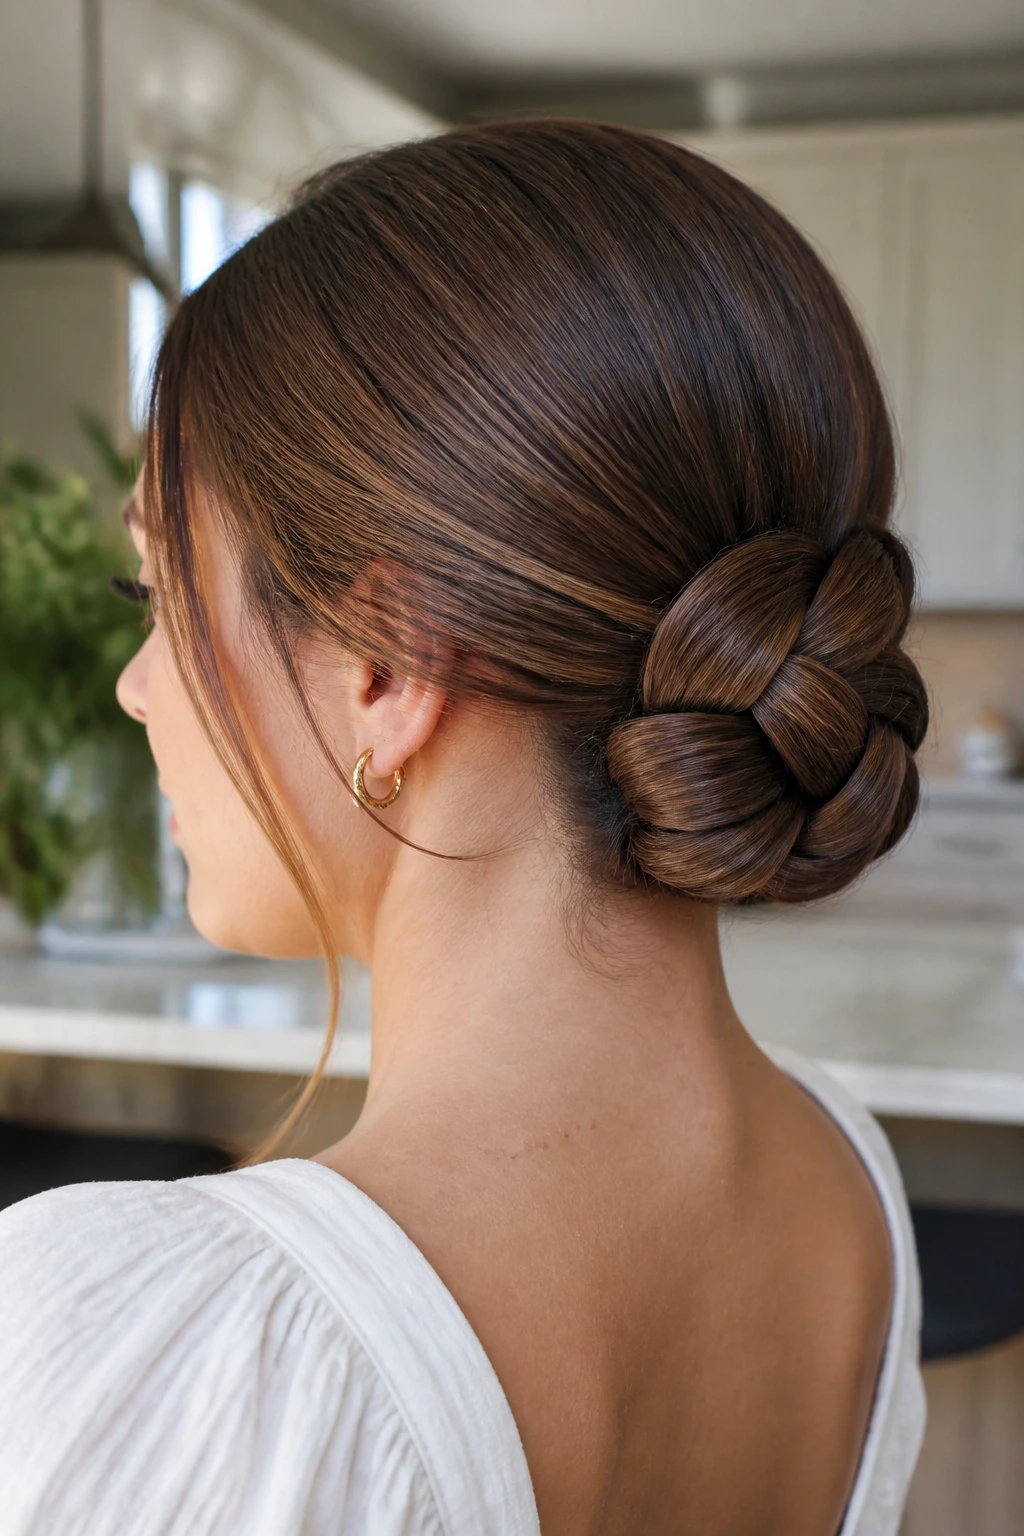
The woven bun looks more detailed than it actually is. Divide the ponytail into four sections, cross them over one another around the base, and keep tucking each piece under the last until the bun forms a tight weave. It sounds like more work than it is.
Use this when you want a bun that feels a little architectural. The trick is to keep each section flat as you lay it down; if the pieces twist, the whole shape gets messy fast.
21. The Scarf-Wrapped Bun
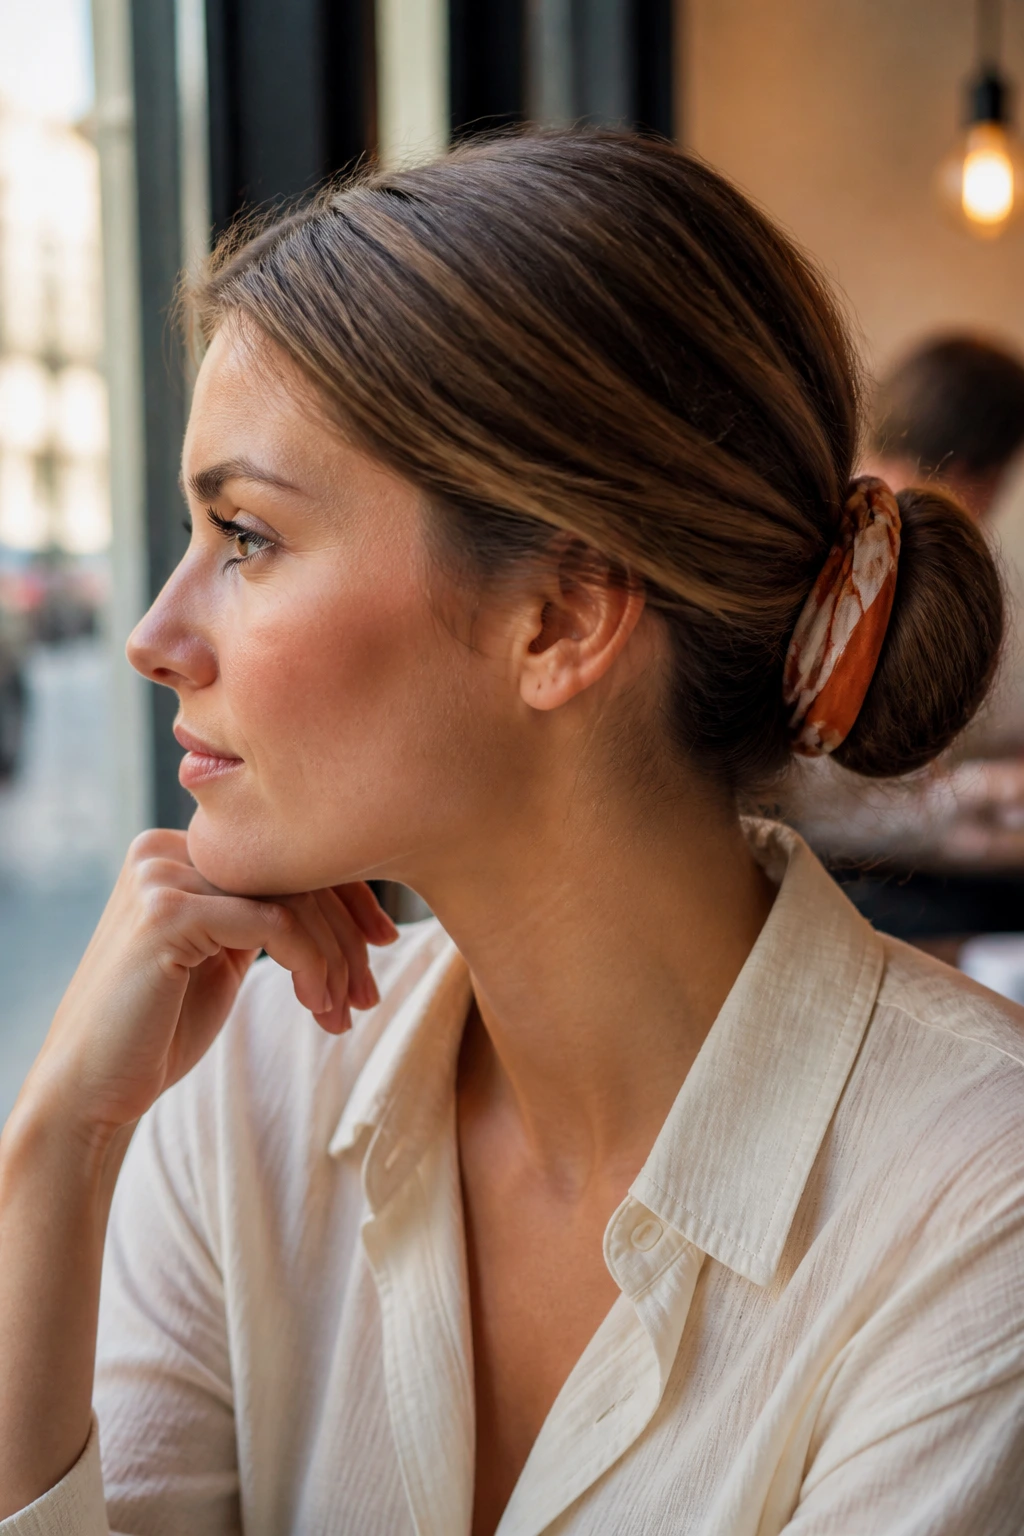
A scarf-wrapped bun solves two problems at once: it secures the hair and adds color. Build any low or mid bun, then tie a thin silk scarf around the base or wrap it through the bun once before knotting it off. Keep the fabric snug, not strangling.
This is a good move on a plain outfit or when you want the bun to look finished without more pins. A narrow scarf stays put better than a giant square that wants to slide around.
22. The Claw-Clip Bun
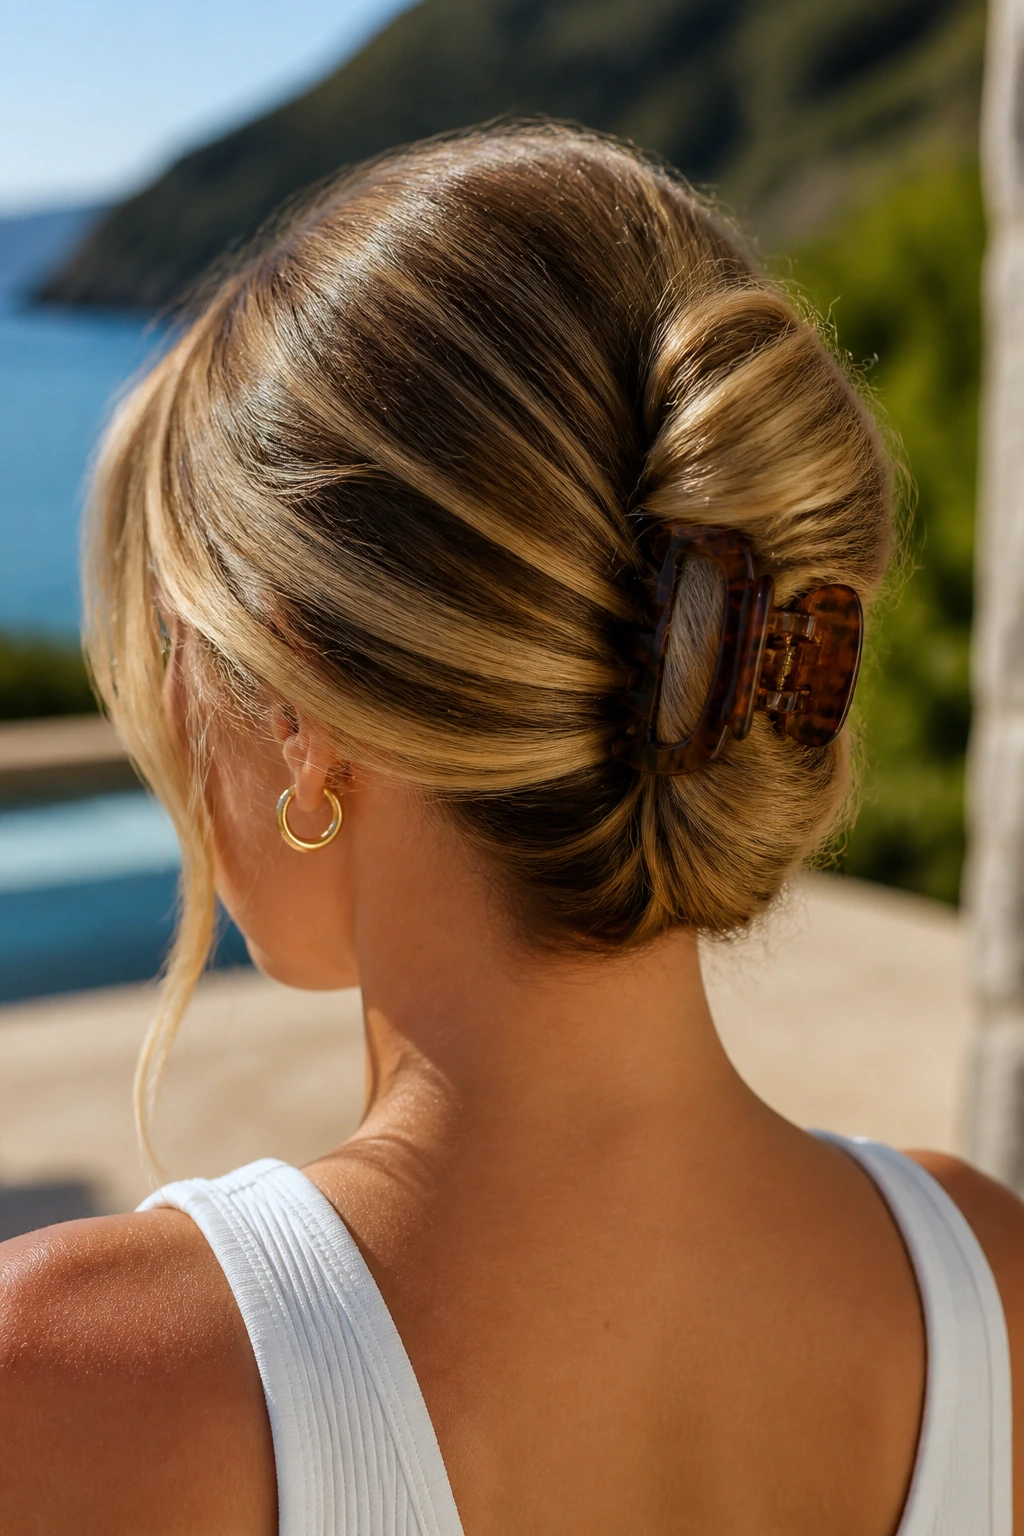
The claw-clip bun is the fastest style on the list, and yes, it can still look deliberate. Twist the hair upward, fold the length into a compact coil, and clip it vertically at the back or slightly off-center. For thicker hair, a medium-to-large clip grips better than a tiny one that barely closes.
This is a smart option when you need your hair up but don’t want the tension of a tight elastic. If the ends stick out, tuck them under the clip instead of trying to hide every single piece.
23. The Crown-Braid Bun
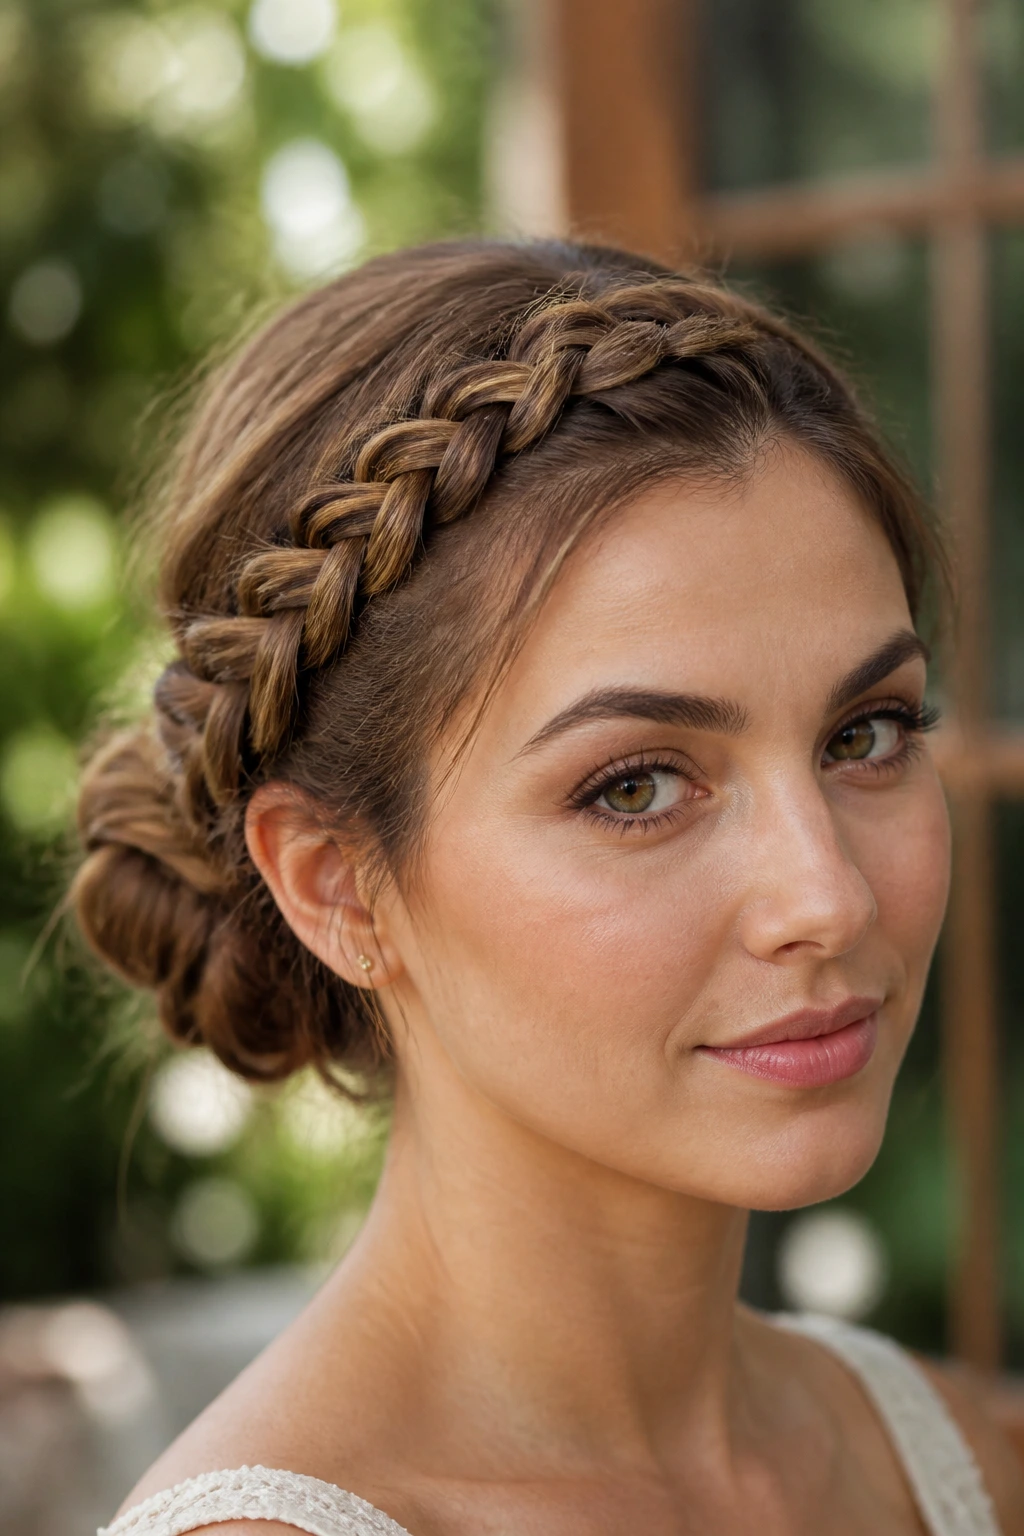
The crown-braid bun starts with the braid, not the bun, and that gives it a soft frame around the face. Braid along the hairline from one side to the other, collect the loose ends, and twist them into a bun at the back. It keeps the front neat while the rest stays controlled.
Use this style when you want something a little more dressed up without going full formal. It’s also a handy fix for grown-out bangs, because the braid keeps shorter pieces from dropping into your eyes.
24. The Donut Bun
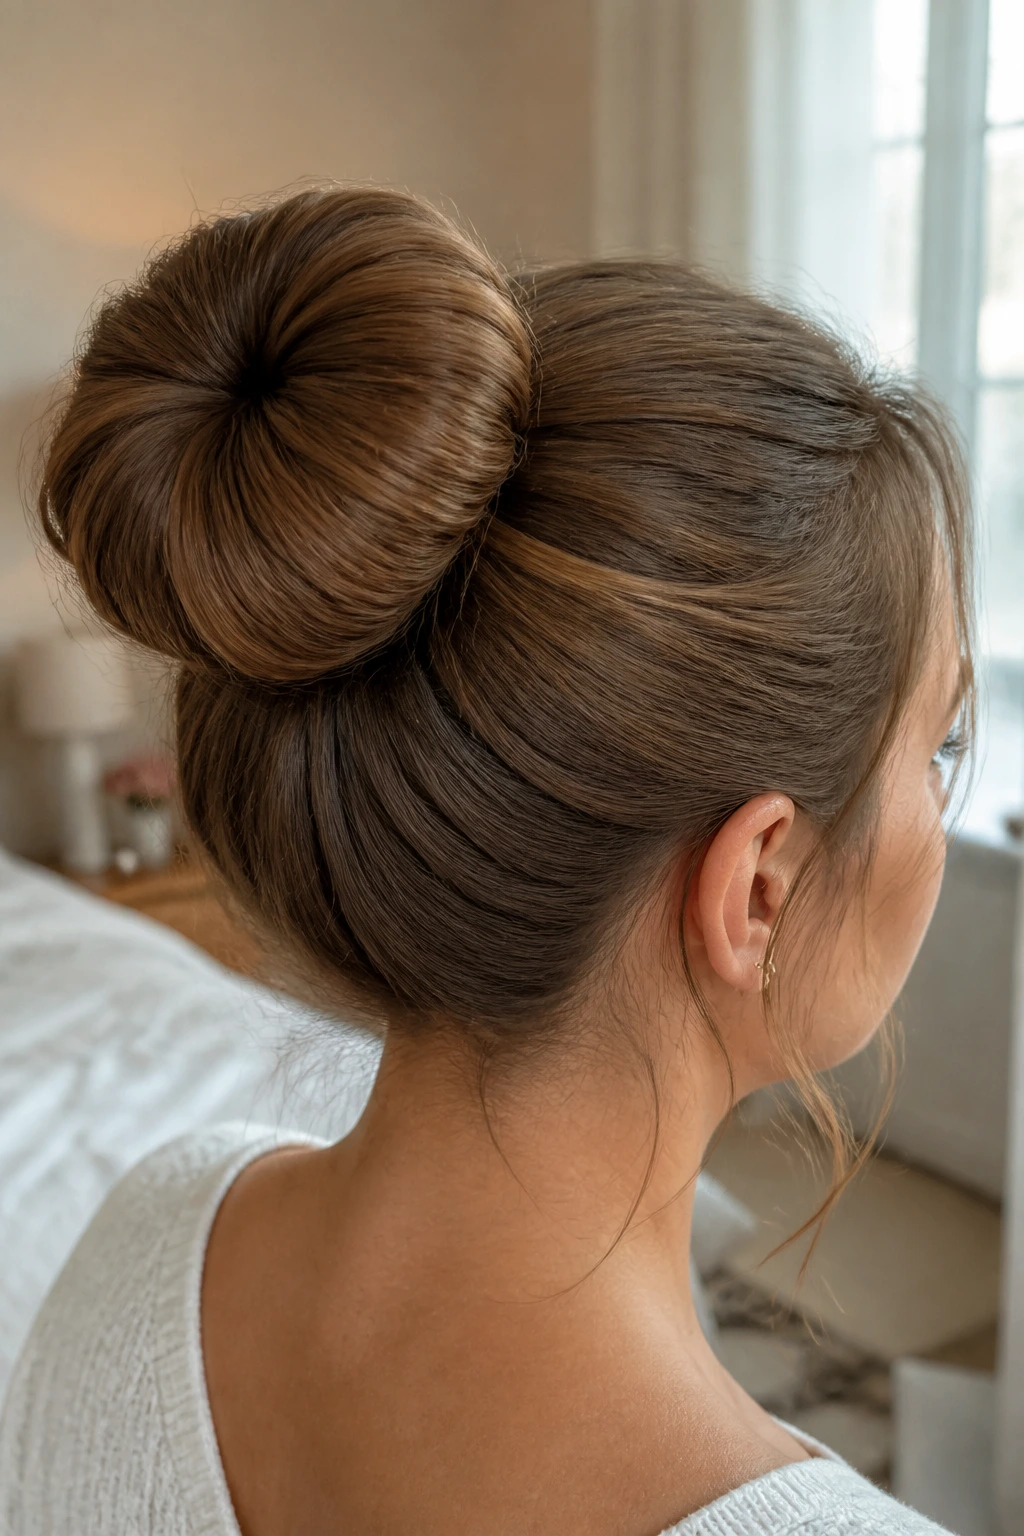
The donut bun uses padding to make the bun round and full. Pull the hair through the donut, spread it evenly, then roll the donut down until the padding disappears beneath the hair. Tuck every little tail under the edge before you pin.
This style is one of the easiest ways to fake a fuller bun on fine hair. If the bun looks lopsided, the hair wasn’t spread evenly at the start — stop, redistribute it, and roll again.
25. The Short-Hair Faux Bun
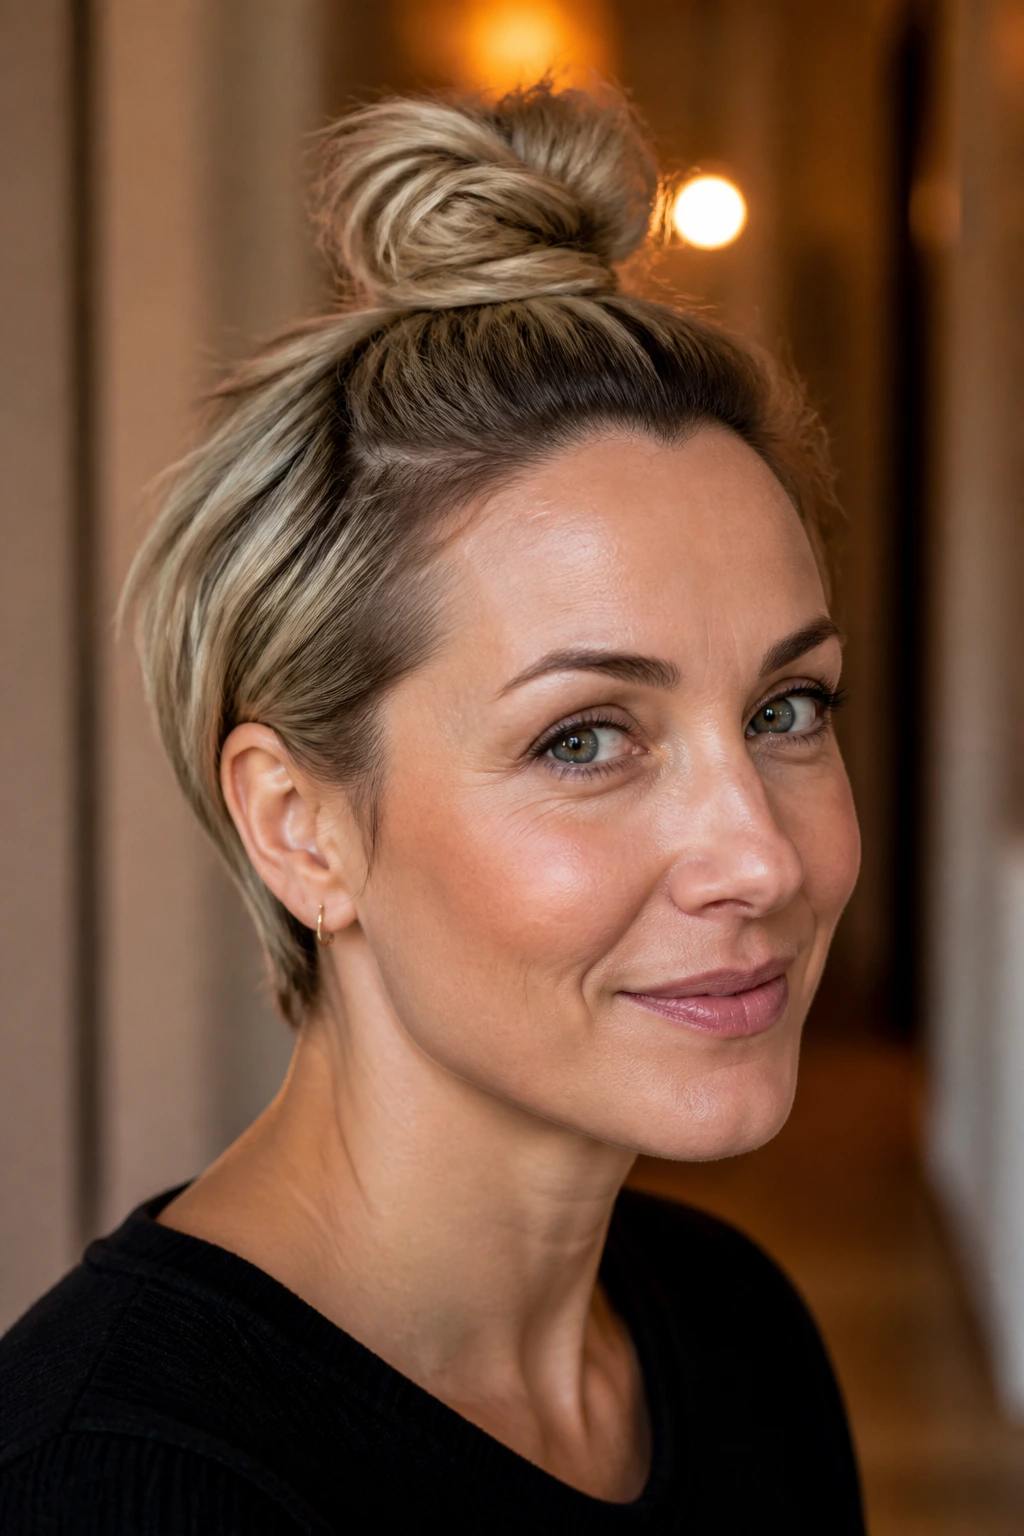
Short hair can do bun styles too, though it usually needs a little cheating. Pull the top and sides into a tiny ponytail, twist the ends into a compact knot, and pin the loose pieces under themselves. If your bob doesn’t reach, fold the ends into a mini roll and let the shape stay small.
This works best when you accept the size you actually have instead of trying to force a bigger bun. A few hidden pins are usually enough, and a texture spray keeps short layers from escaping.
26. The Curly Pineapple Bun
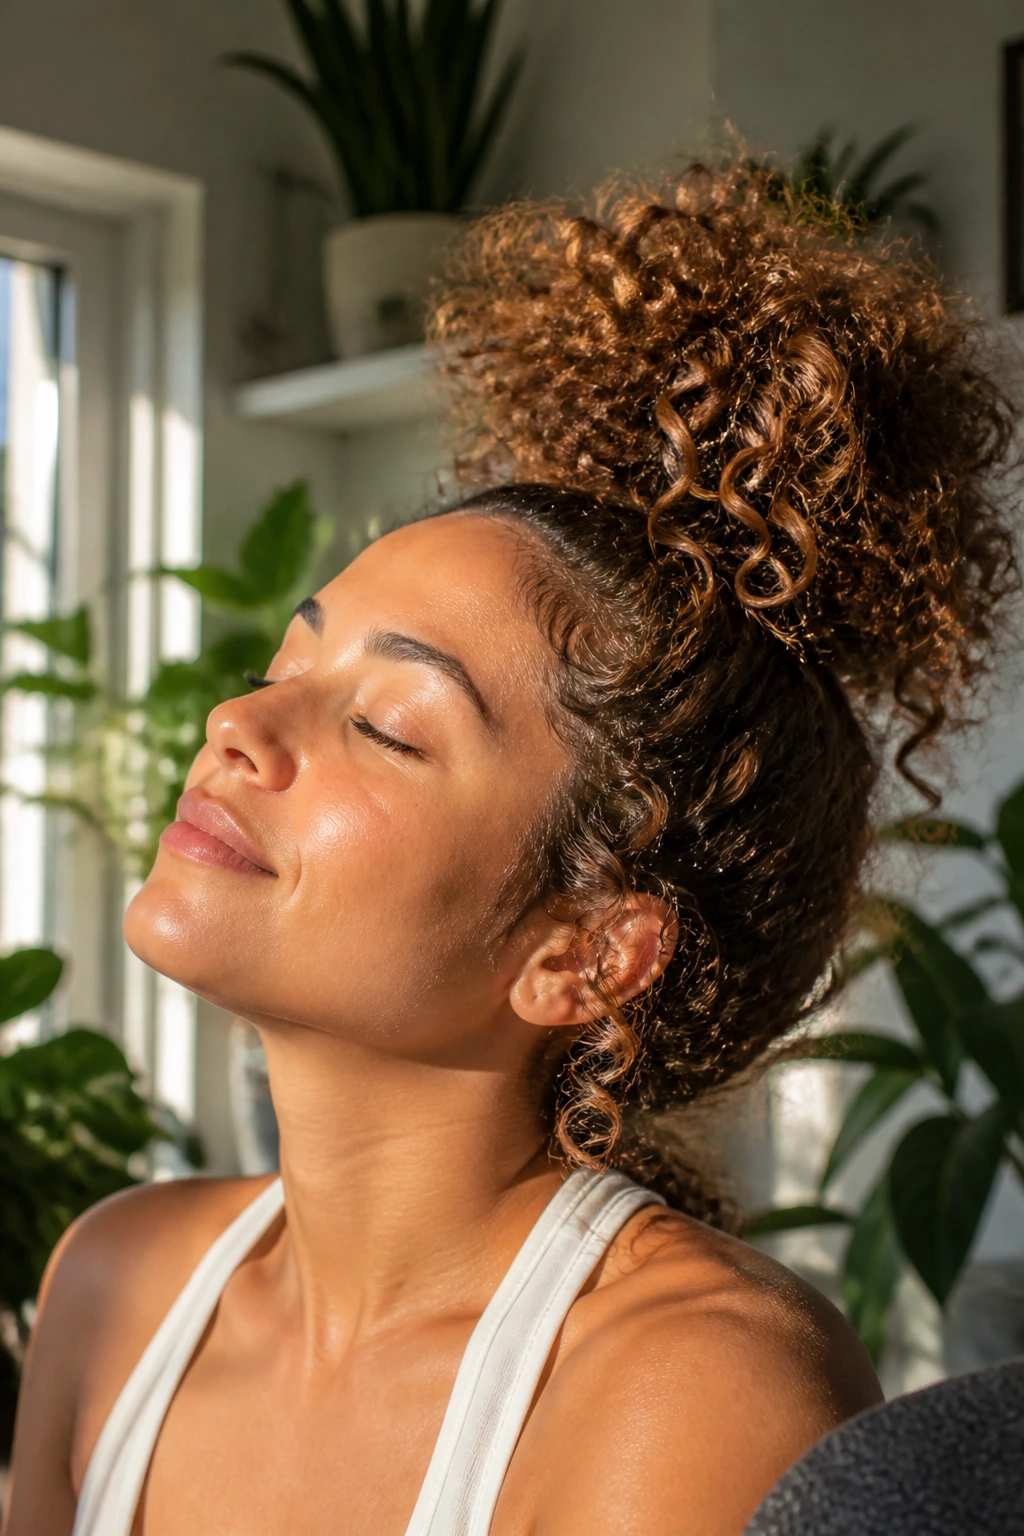
A curly pineapple bun keeps the curl pattern intact instead of flattening it. Flip the head forward, gather the curls high and loose, and secure them gently so the hair stacks upward rather than being brushed smooth. Leave the bun soft so the curls don’t get crushed.
This is the one to choose when you want lift without losing texture. Do not brush curls out for this style; finger separation gives a better shape and keeps the bun from turning into a puffball.
27. The Low Tuck Bun
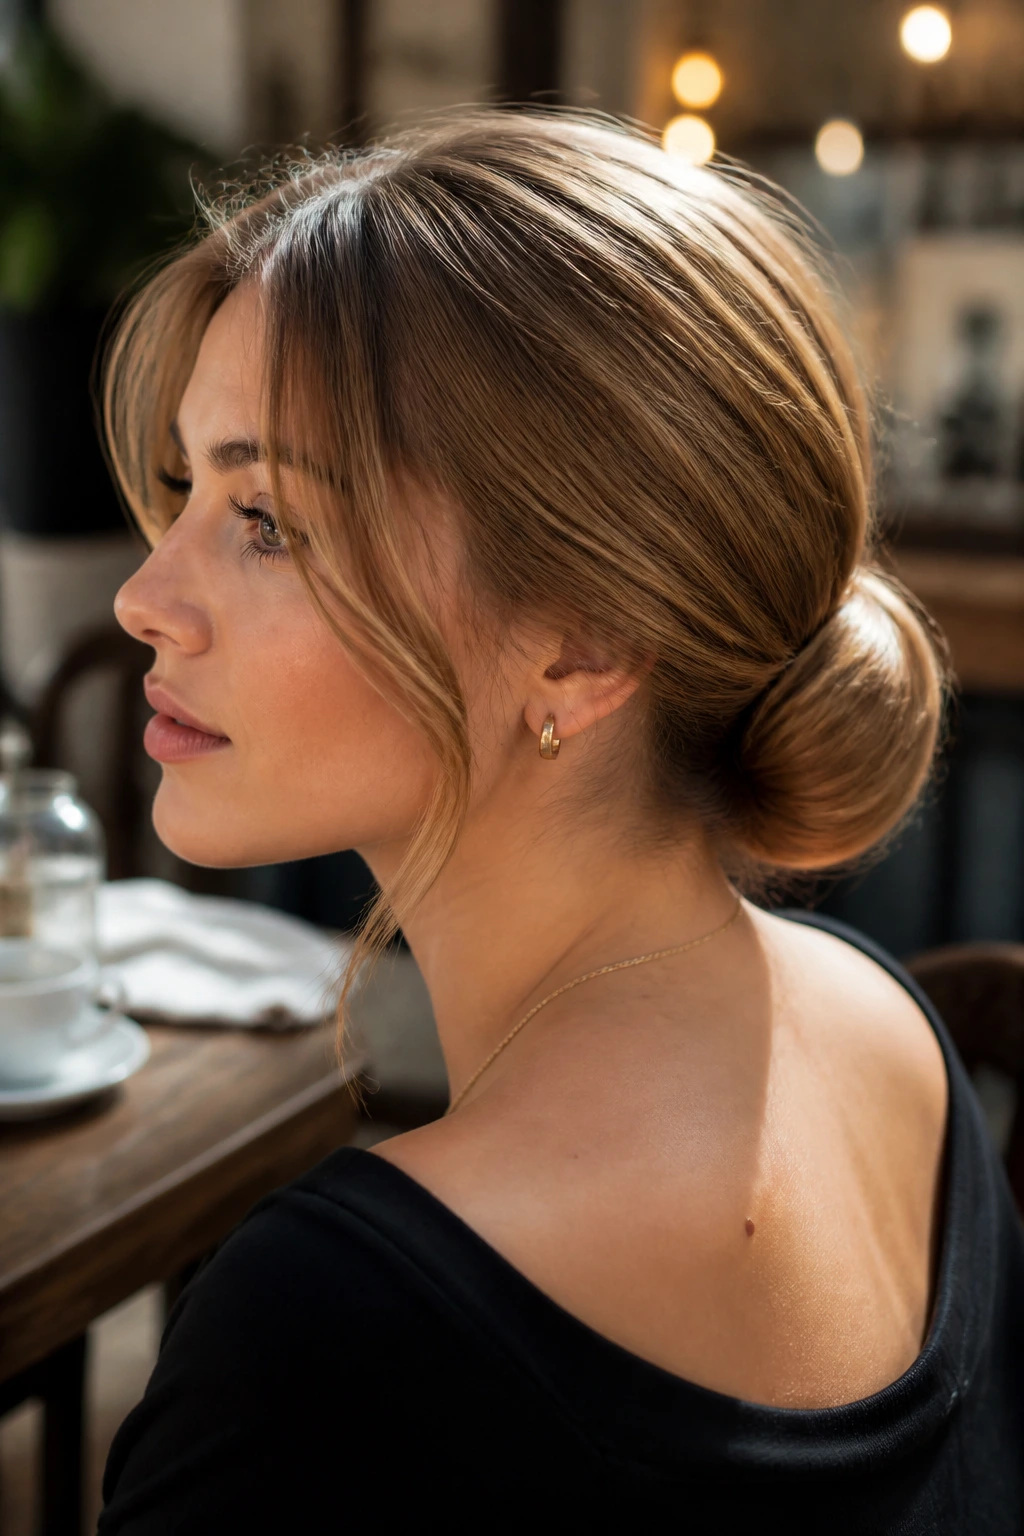
The low tuck bun is all about tucking the ends under in a clean, simple fold. Make a low ponytail, twist once, fold the ends upward into the center, and pin them beneath the base. The result is soft and neat with almost no visible tail.
It works well for shoulder-length or medium hair because the ends disappear without much fuss. If your layers keep sliding out, cross the pins over each other instead of pushing them straight in.
28. The Asymmetrical Bun
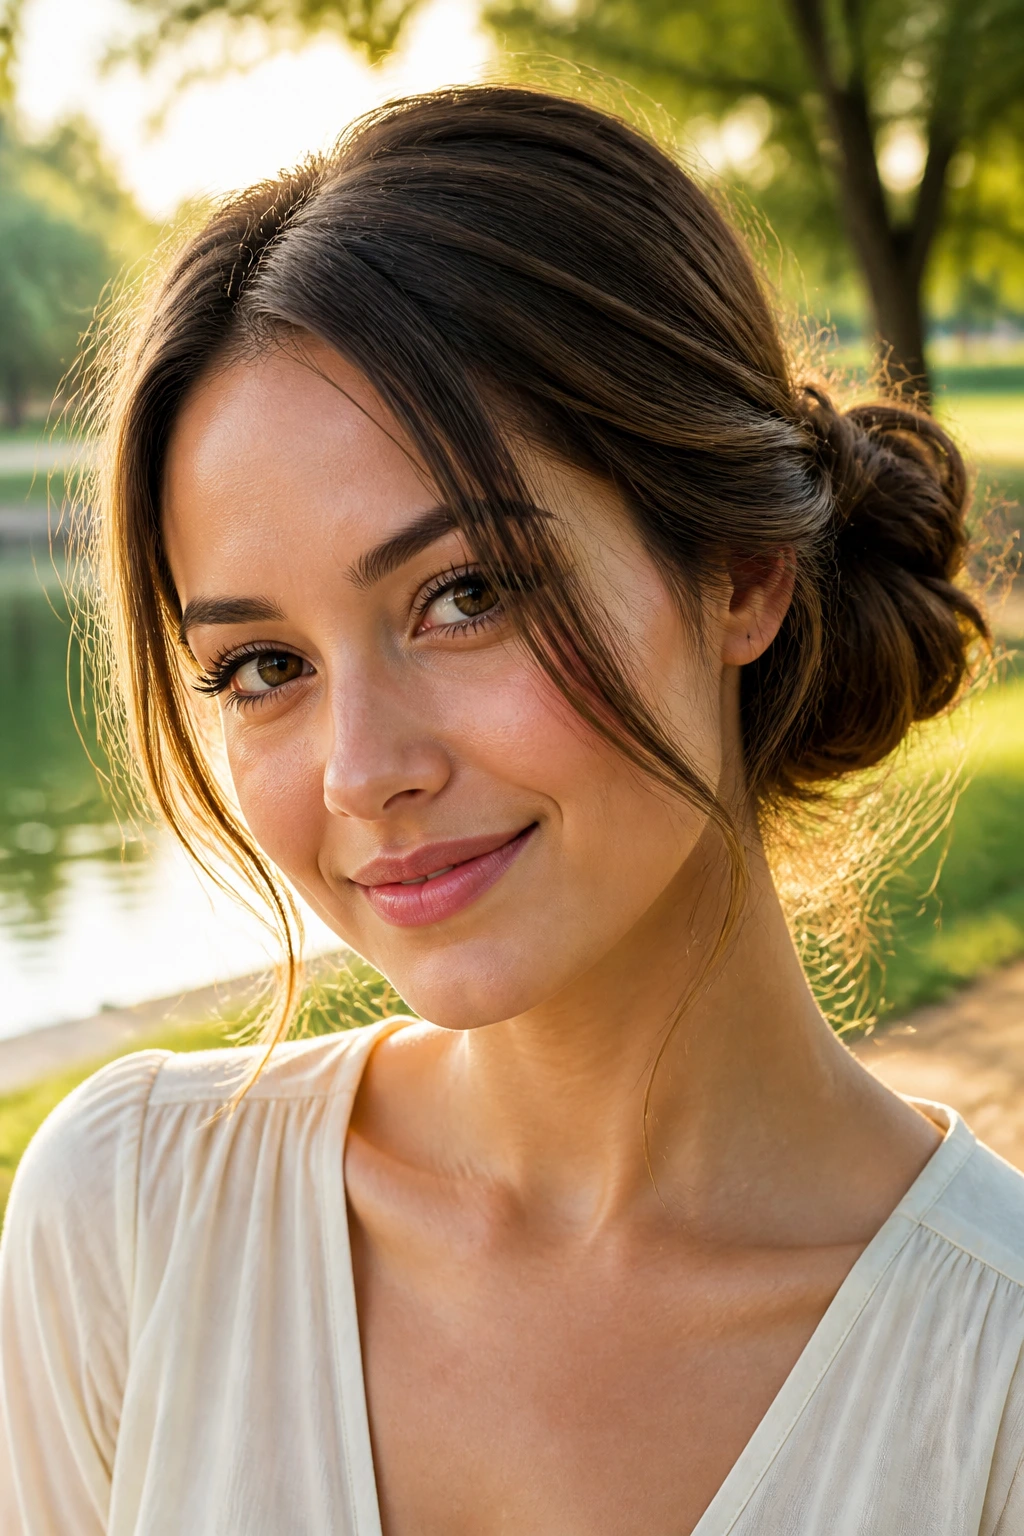
An asymmetrical bun sits slightly to one side or slightly higher on one side than the other. That off-balance placement makes the style look more relaxed and less formal. Gather the hair just off center, twist it into a bun, and leave the shape a little soft on the side that faces the camera.
This bun is useful when your part is already off center and you want the style to match it. The key is to make the asymmetry look intentional, not like the ponytail slipped while you were pinning it.
29. The Wrapped Pony Bun
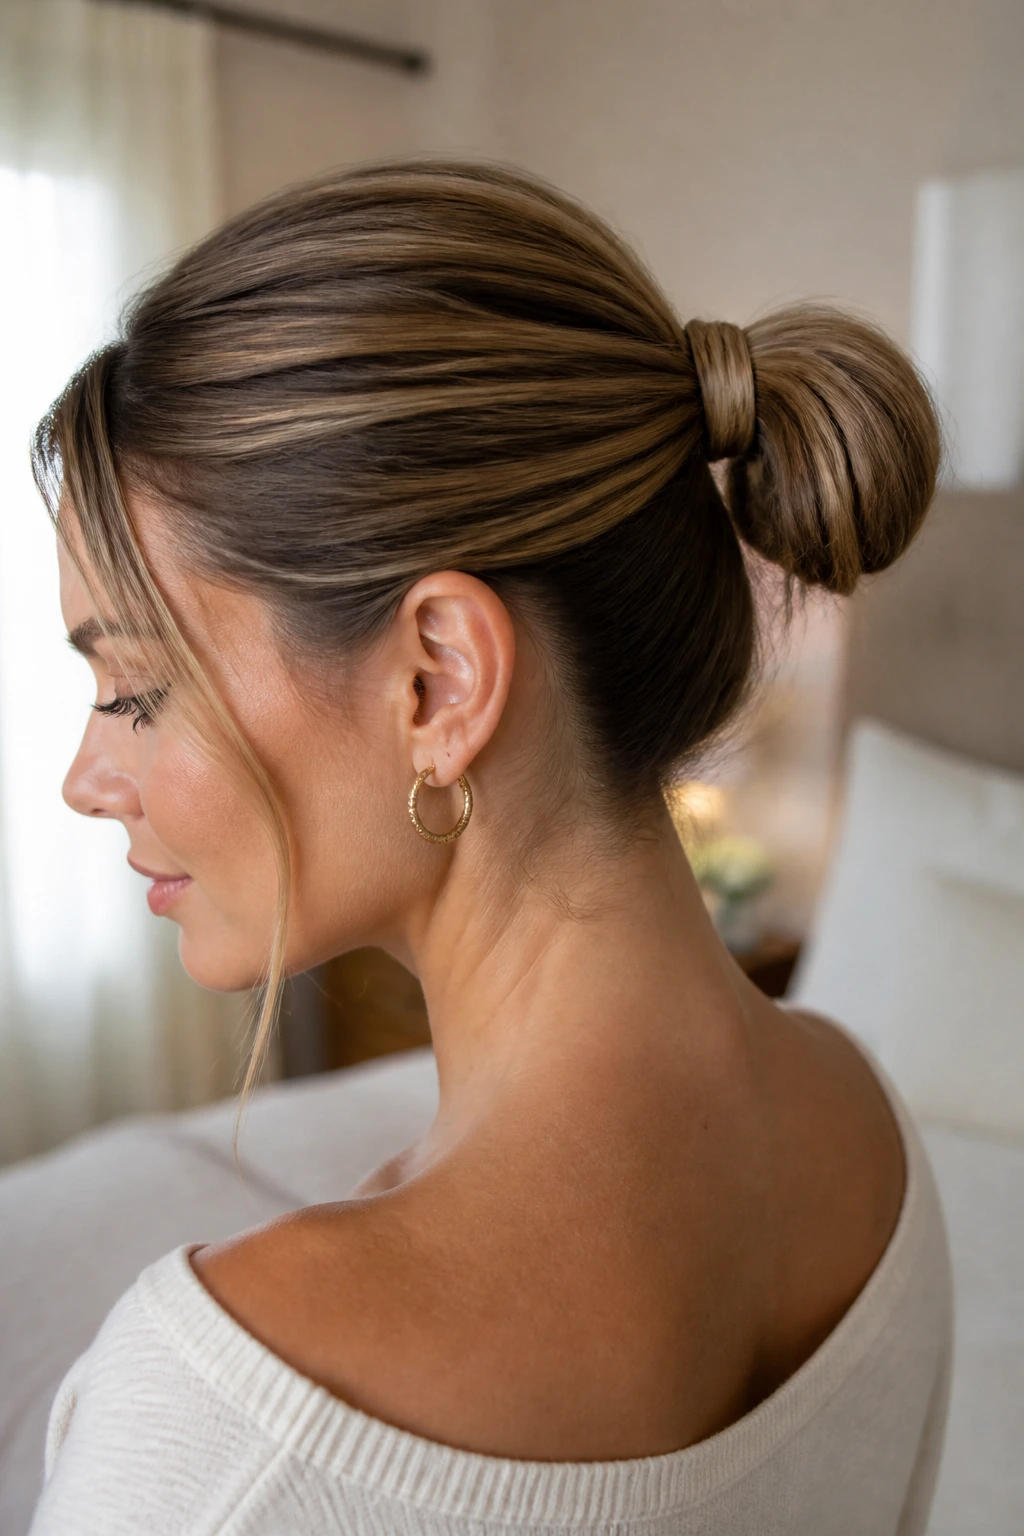
Start with a ponytail, then wrap a thin strand of hair around the elastic before forming the bun. That one covered band makes the style look cleaner right away. After the base is hidden, coil the rest into a small bun and secure it underneath.
It is a simple trick, but it changes the finish a lot. If the wrapped strand keeps unraveling, seal the end with one hidden pin instead of spraying the whole head.
30. The Teased Volume Bun
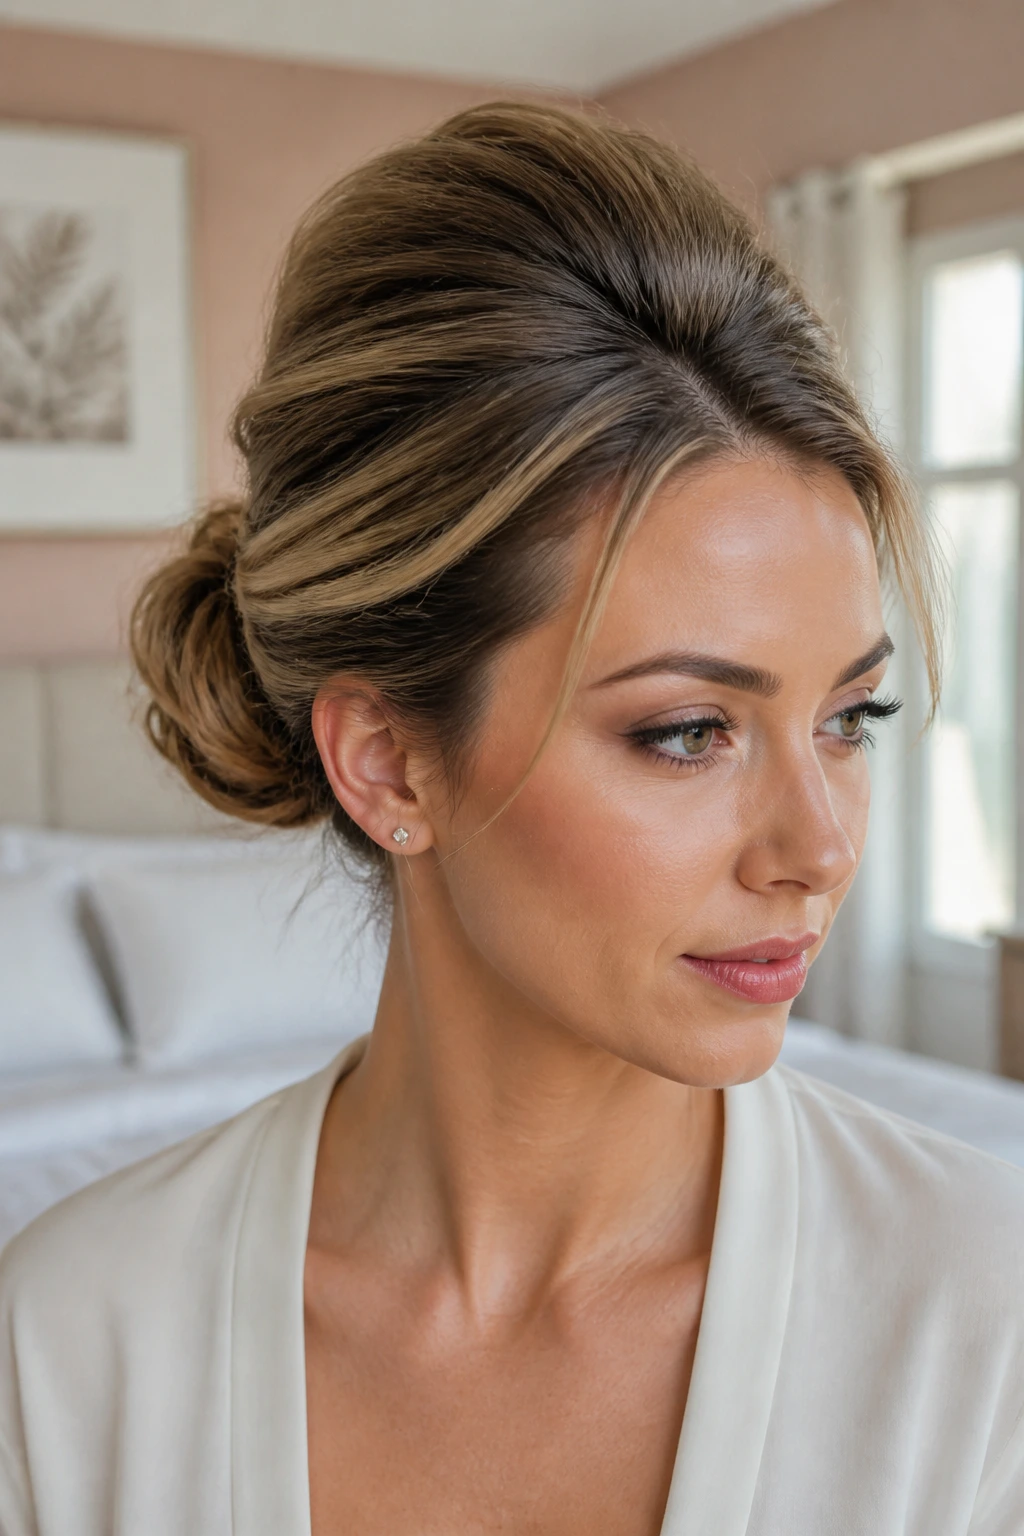
The teased volume bun gives you height at the crown before the bun even starts. Backcomb the roots lightly at the top, smooth the outer layer over the teasing, then form a bun at the back or slightly high. The lifted crown makes a small bun look bigger without extra padding.
This is a good fix for fine hair that tends to collapse flat. Don’t tease the whole head — only the roots that need lift, or the bun can get rough and puffy in the wrong places.
31. The Wet-Look Bun
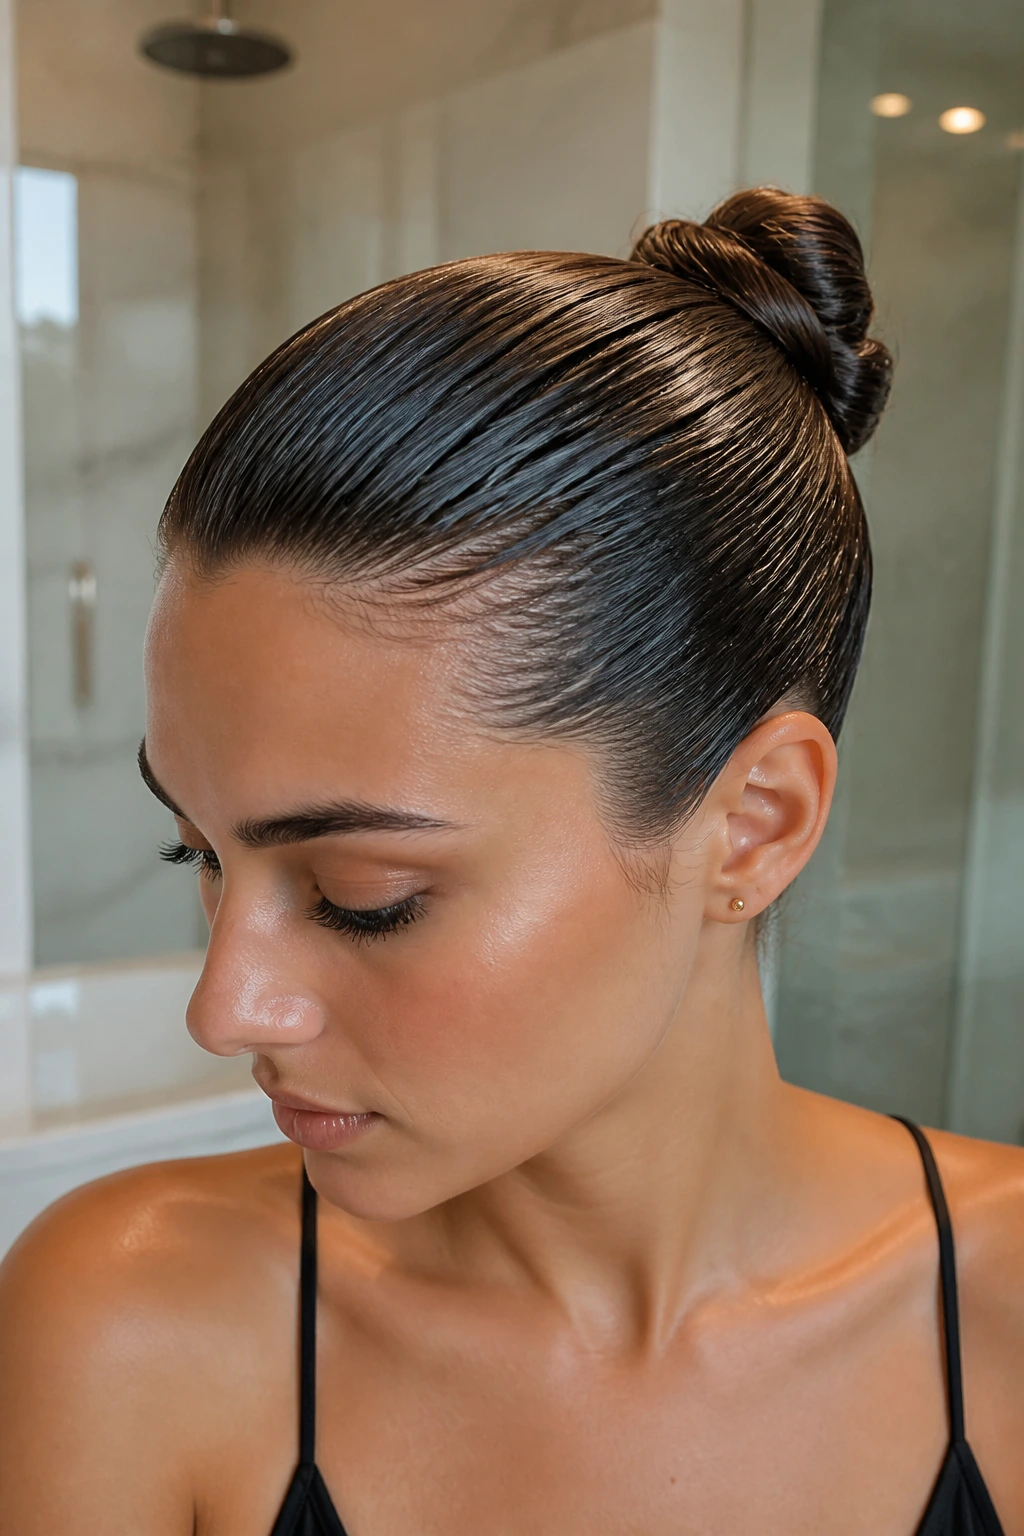
The wet-look bun is sleek, glossy, and very controlled. Apply gel to damp or slightly damp hair, comb it into place, and keep the surface tight as you build the bun. The finish should look smooth and deliberate, not crunchy.
This style is strong when you want a clean line and no loose flyaways. A little product goes a long way here; too much gel drips into the bun and makes the ends look stringy.
32. The Mini Bun
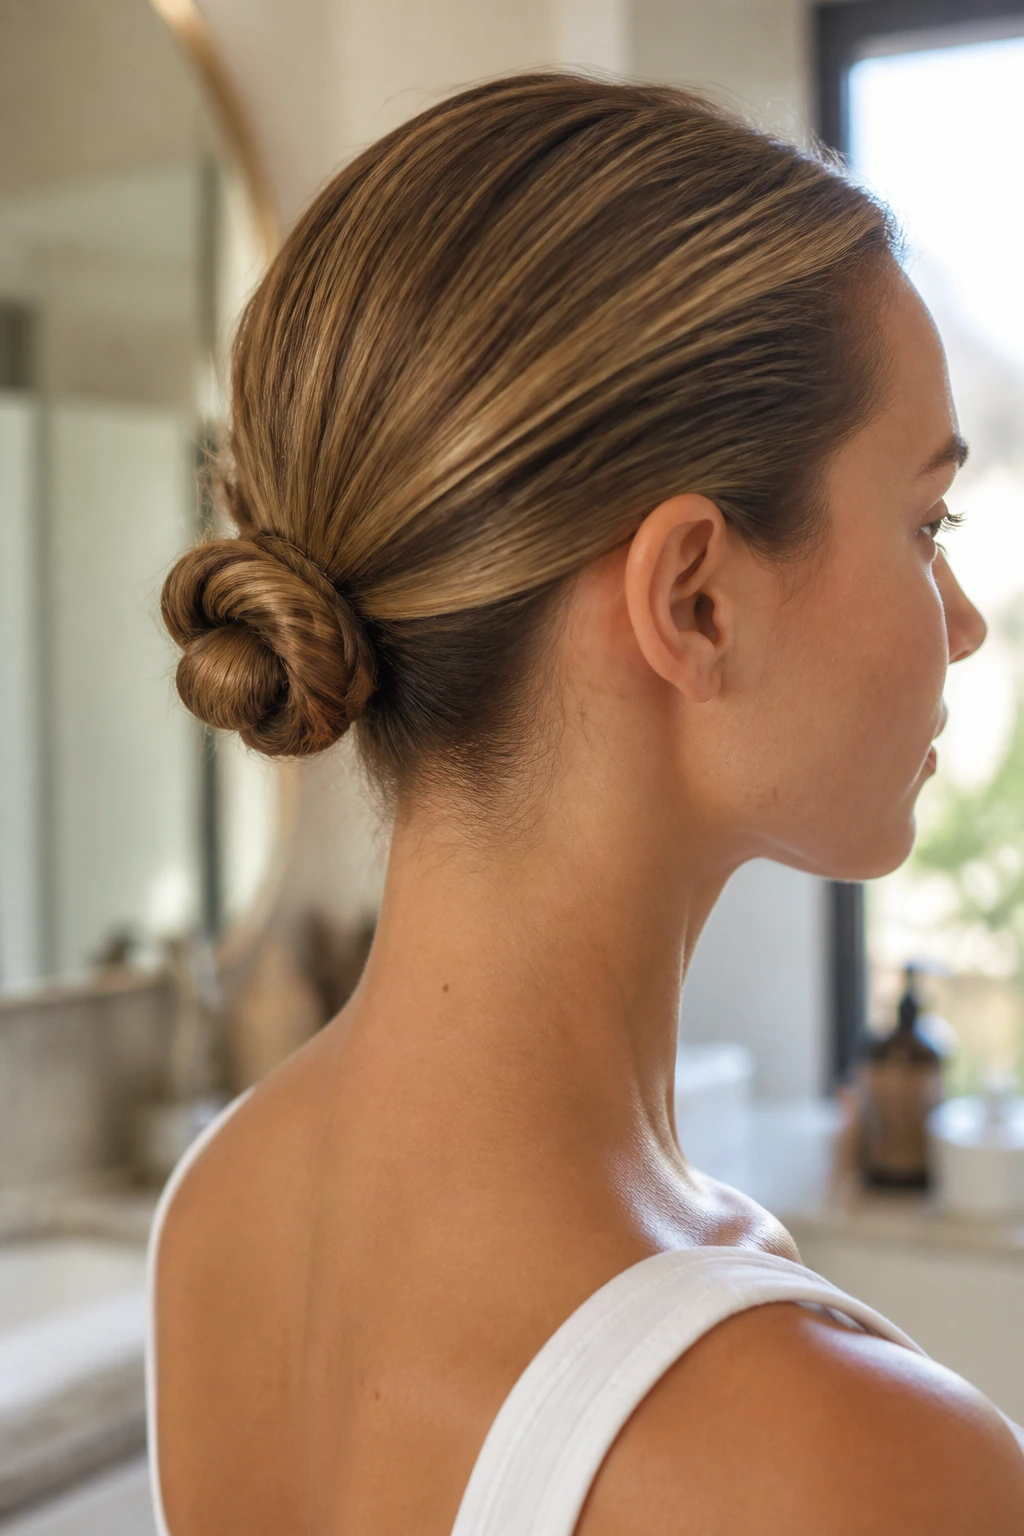
The mini bun is smaller than most buns on purpose, which makes it useful for fine hair or shorter lengths. Pull the hair into a small knot near the center back, twist the tail around itself once or twice, and pin it so it stays compact. It does not need to be full to work.
This style is especially handy when you want your hair up but don’t have enough length for a big coil. Keep the proportions small, and it reads as neat instead of unfinished.
33. The Bubble-Wrapped Bun
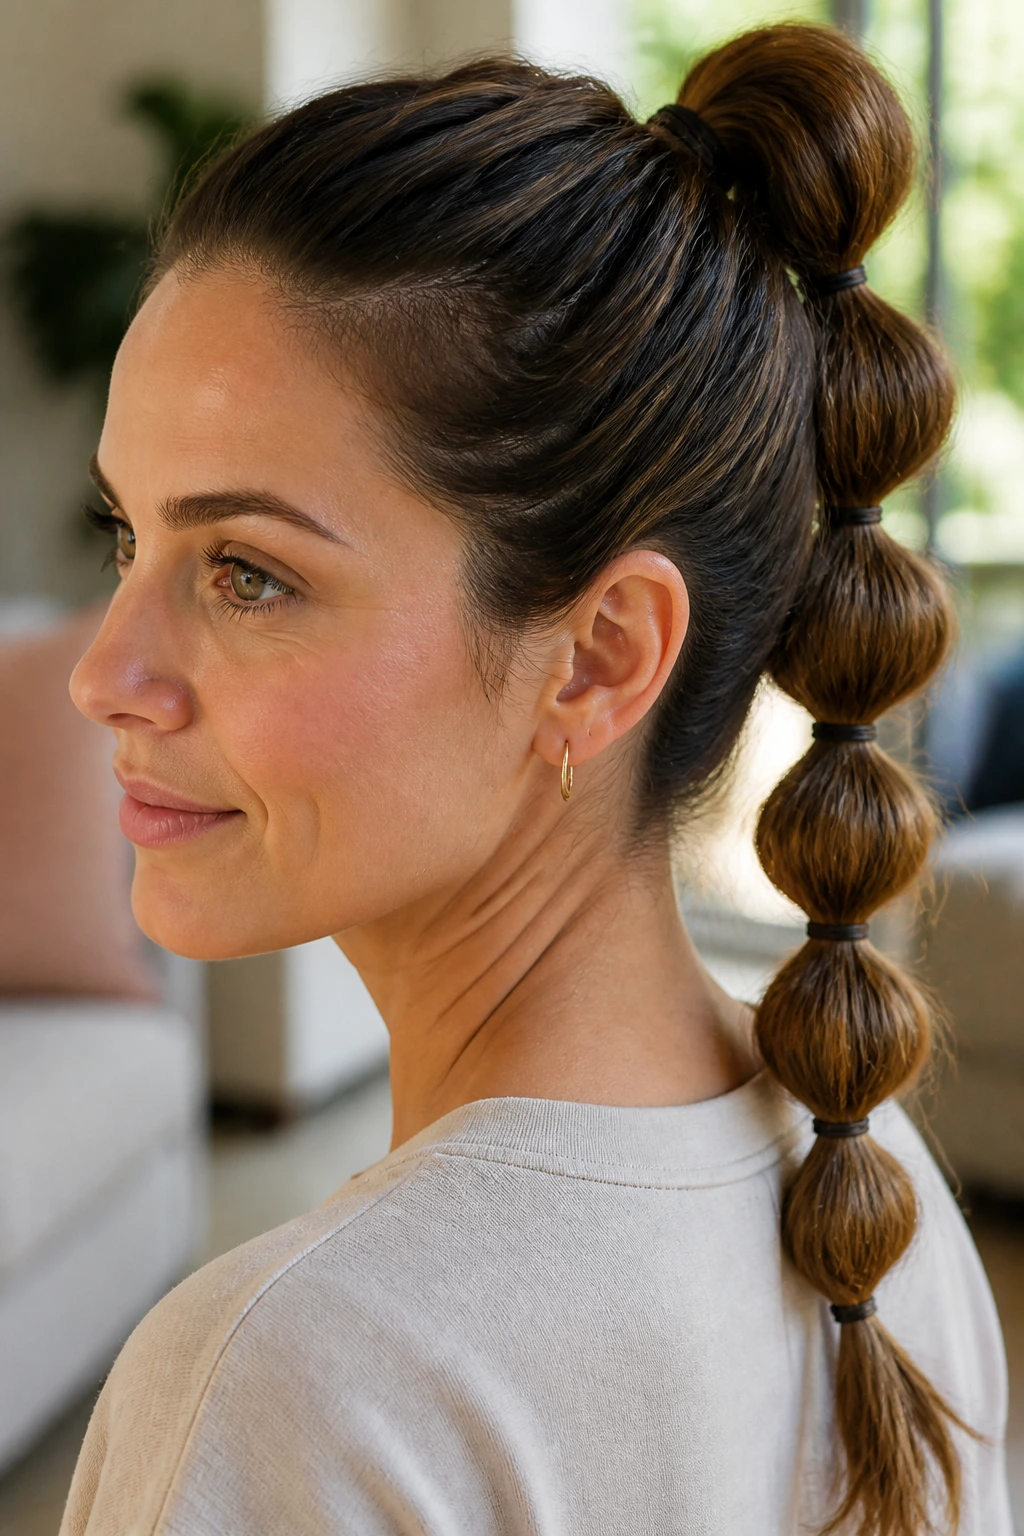
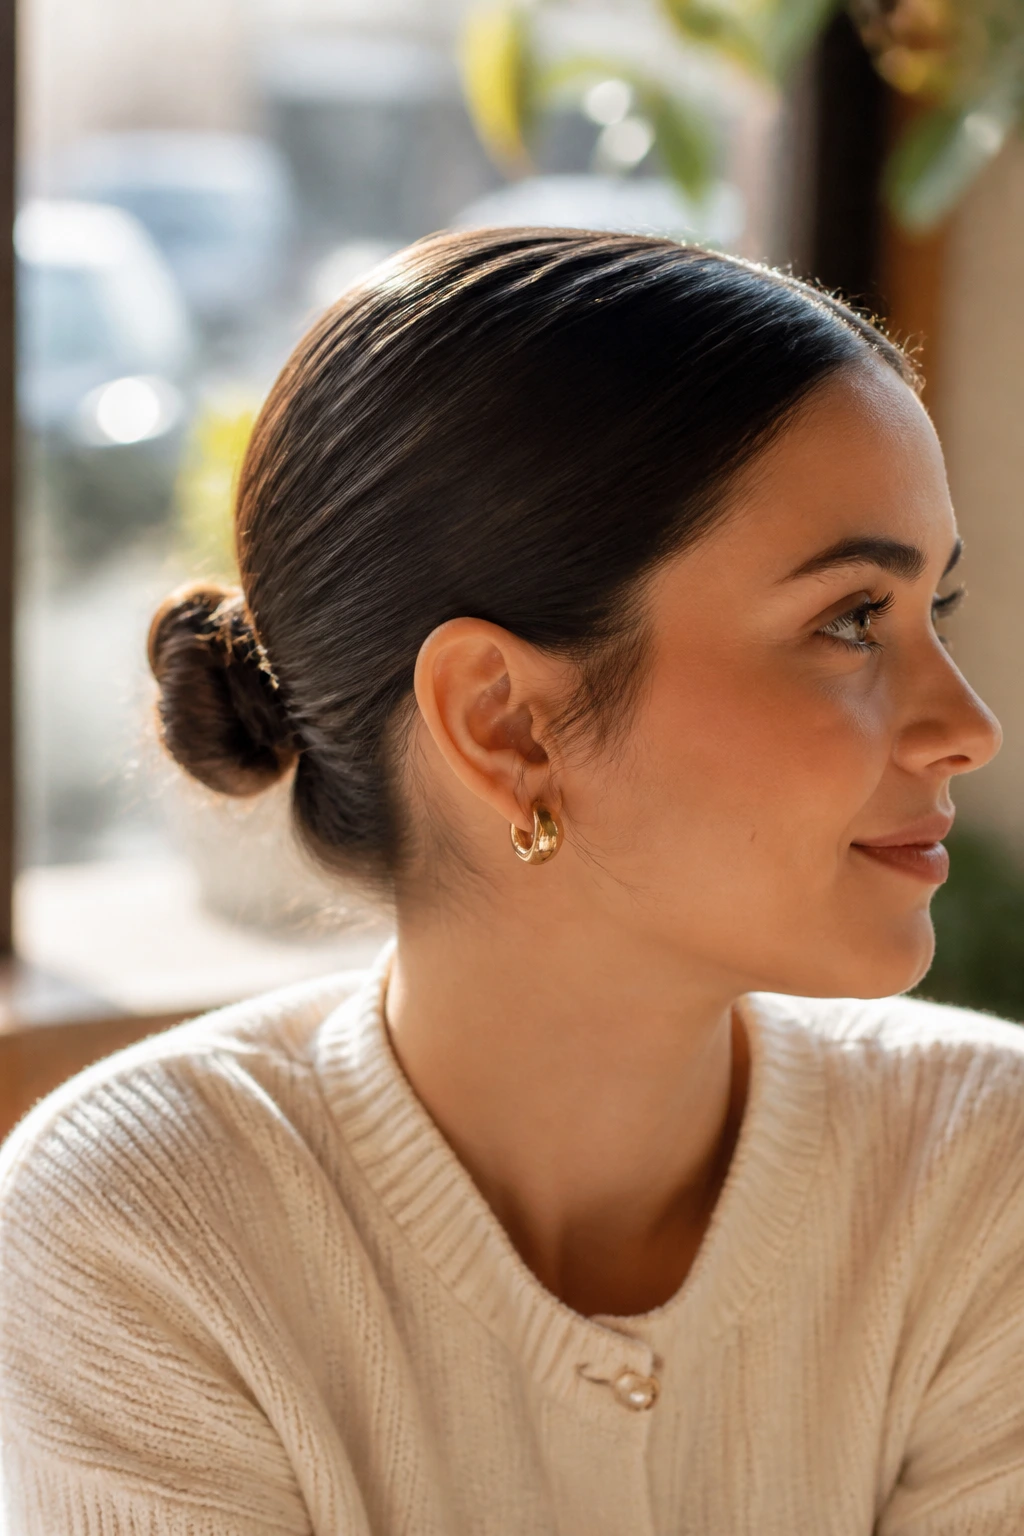
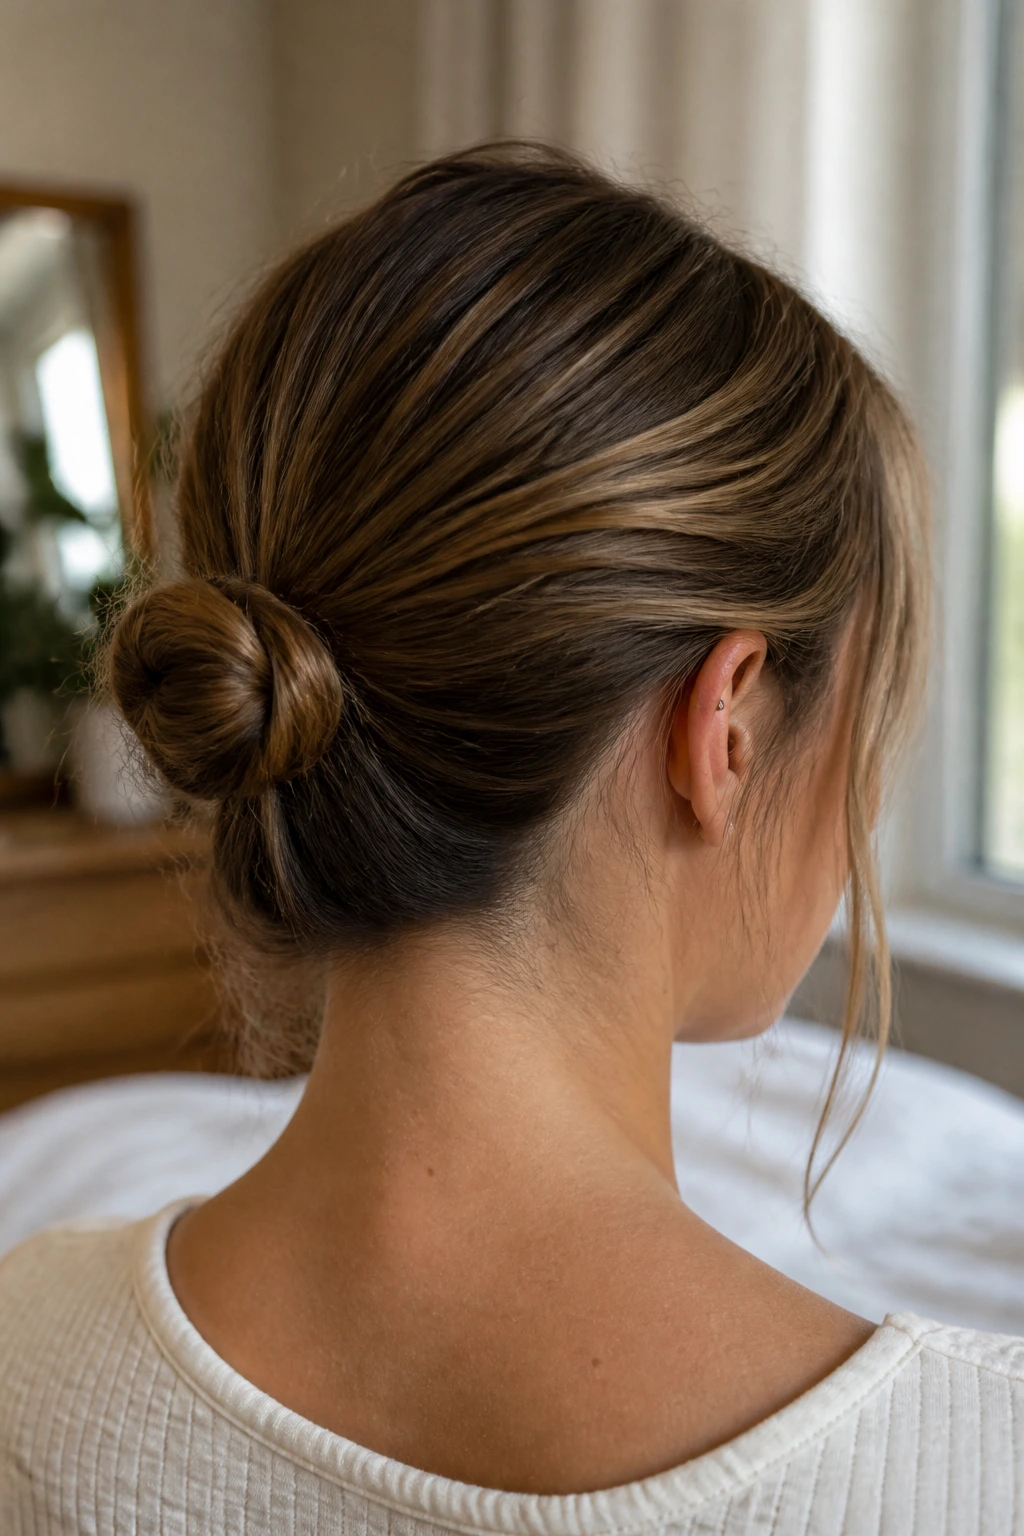
A bubble-wrapped bun borrows from the bubble ponytail idea. Add a few tiny elastics down the tail before wrapping it into a bun, then let the small sectioned bumps show through the coil. The result has more shape and texture than a plain twist.
It’s a fun way to make a simple bun look more styled without changing the basic technique. If the bubbles feel too busy, use just two or three elastics and keep them hidden near the base.
34. The Protective Twist Bun
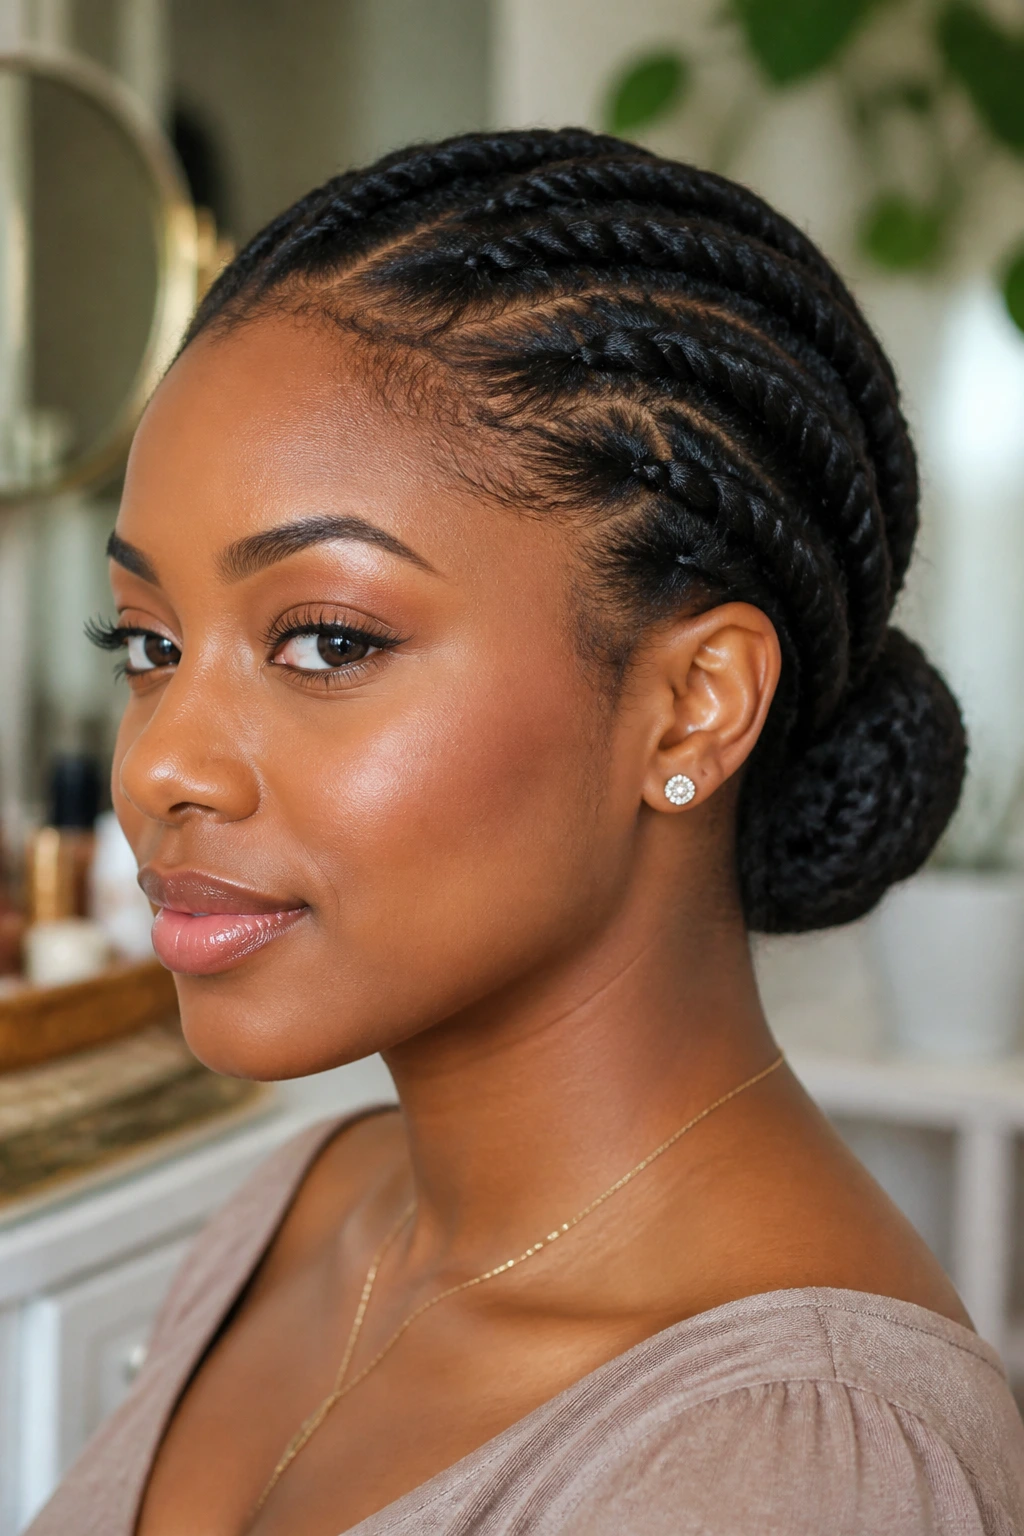
The protective twist bun is gentler on hair because it relies on twists instead of rough back-and-forth pulling. Part the hair into sections, flat-twist or rope-twist each one, then gather the twists into a low bun and pin the ends under. It keeps the tension spread out.
This works well when you want a bun that does less damage to delicate ends. Keep the twists loose enough that the scalp doesn’t feel tight, but not so loose that the style unravels.
35. The Formal Knot Bun
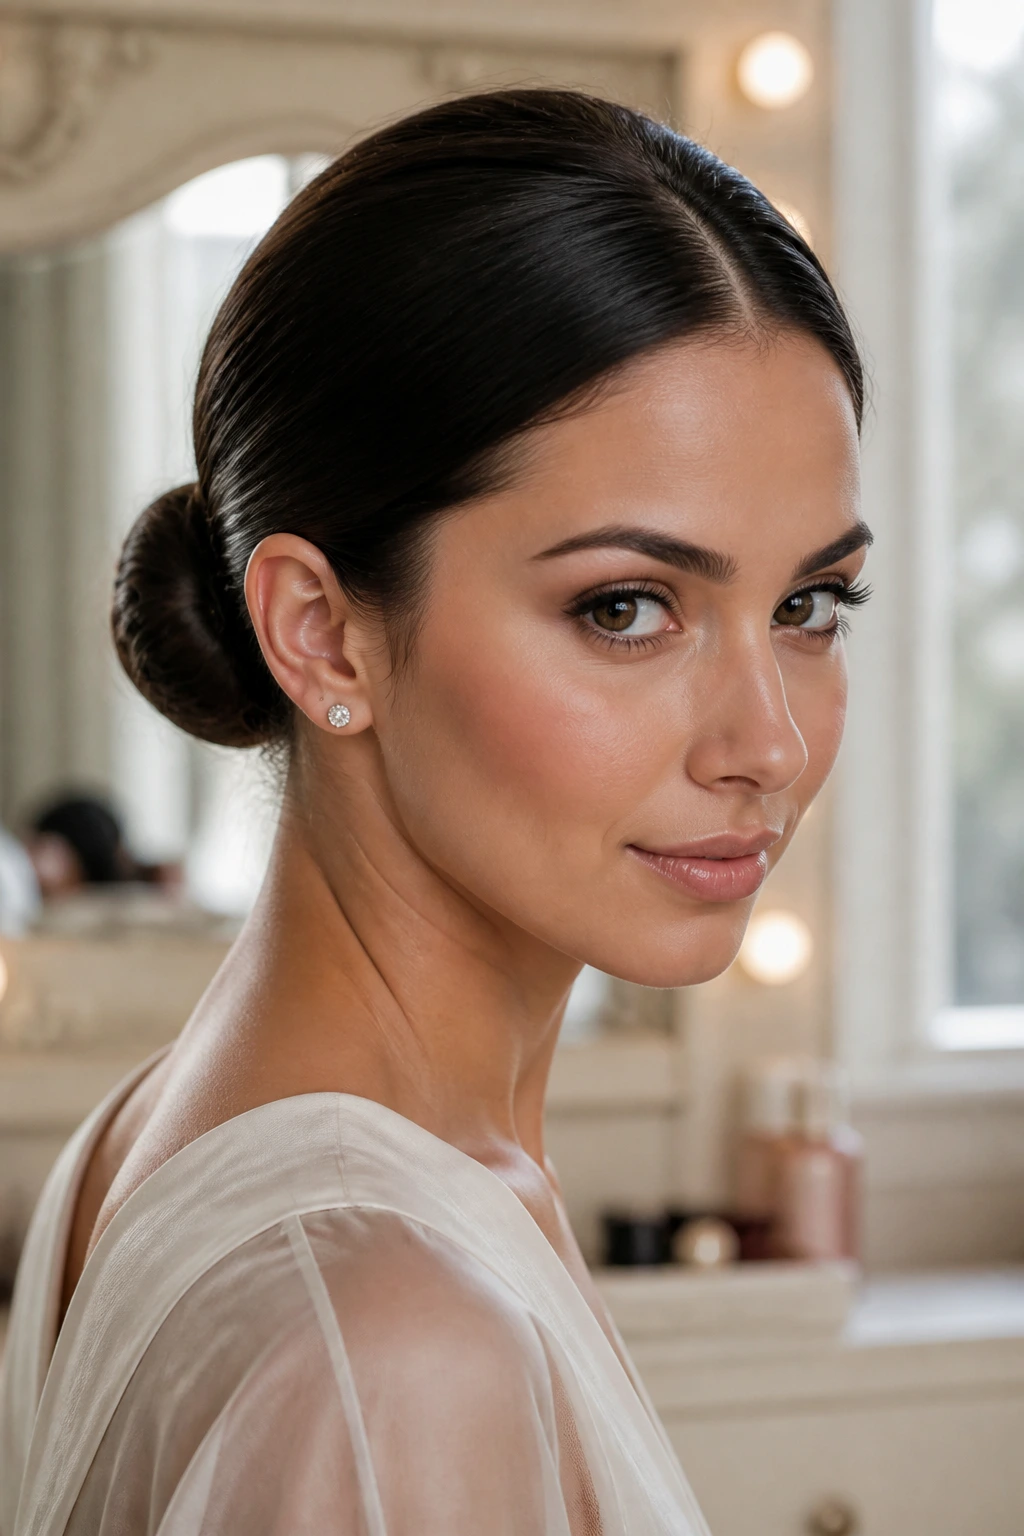
The formal knot bun is the one you reach for when you need a bun that looks polished from every angle. Smooth the hair back, form one clean knot at the base, and tuck the remaining ends under so no loose tail is visible. Add a second hidden pin under the center if the hair is heavy.
It’s restrained, neat, and easy to dress up with a narrow clip or pearl pin. The finish should look deliberate and compact, not overbuilt.
A Small Kit That Covers Almost Every Bun
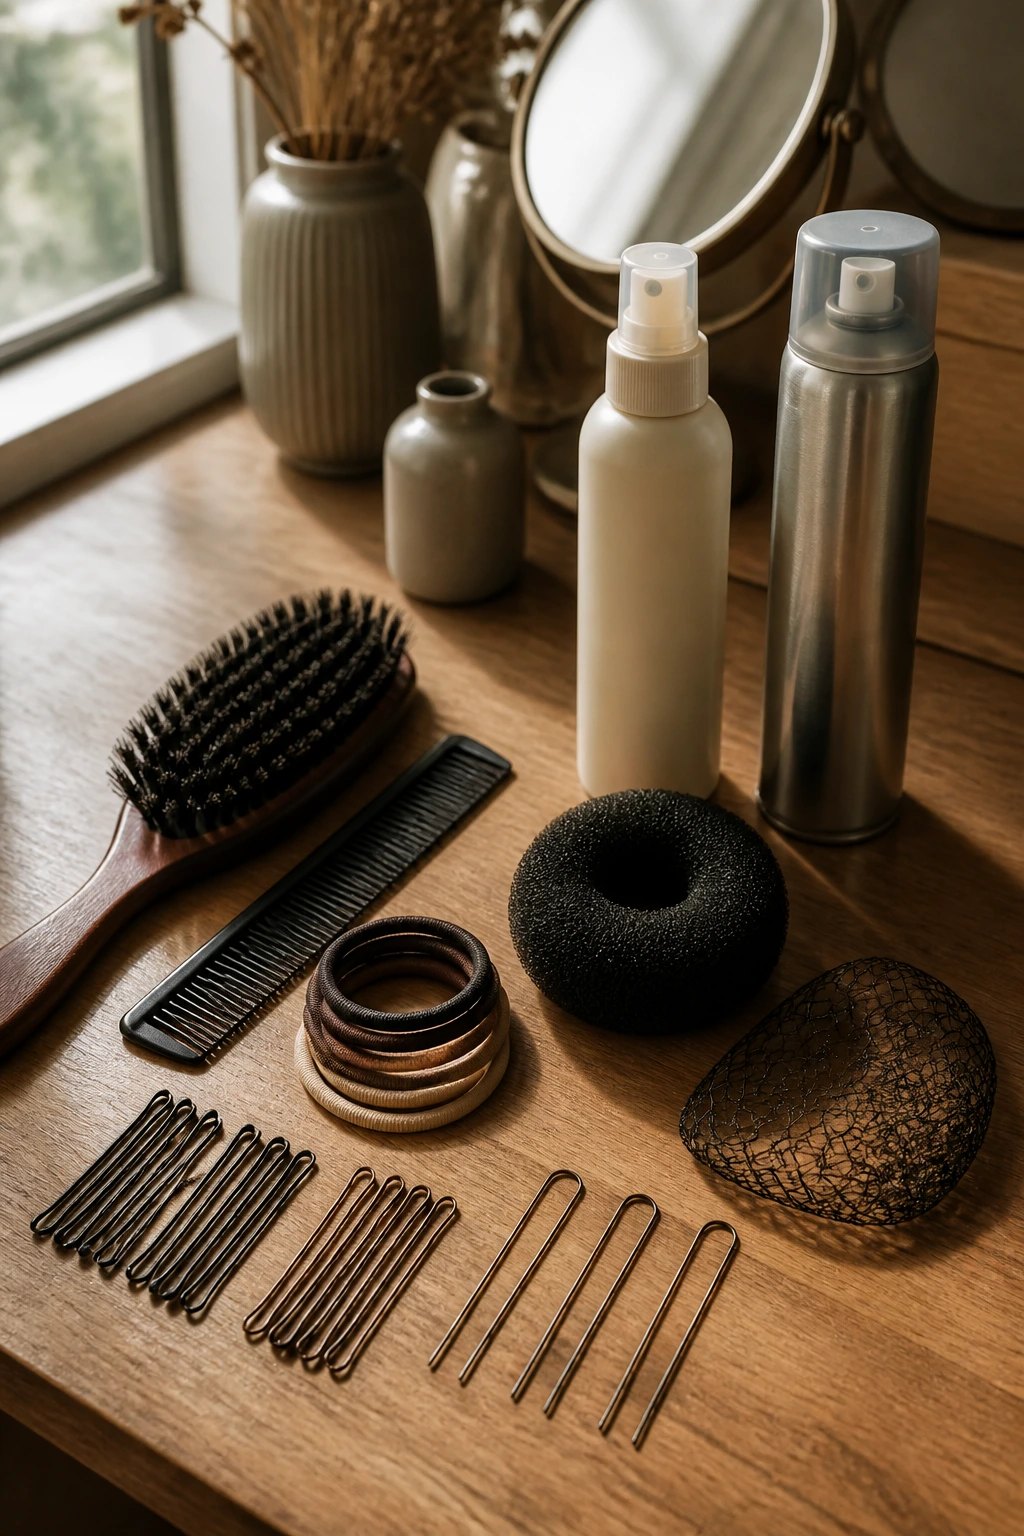
- Boar-bristle brush: Smooths the surface better than fingers alone, especially for sleek low and high buns.
- Fine-tooth comb: Useful for clean parts, tight crowns, and polishing the top layer before pinning.
- Elastic hair ties: Keep a few in neutral shades; thin ones are better for small buns, stronger ones for thick hair.
- Bobby pins: Choose both standard and extra-long pins so you can anchor fine hair and heavy hair without fighting the style.
- U-pins: These are helpful for fuller buns and chignons because they support the shape from underneath.
- Dry shampoo or texturizing spray: Adds grip at the roots and gives slippery hair something to hold onto.
- Hairspray: A light mist controls flyaways; a stronger spray helps when the style needs to last all day.
- Hair donut or bun form: Optional, but handy when fine hair needs more bulk or you want a rounder finish.
- Hair net: Especially useful for ballet buns and sleek formal styles.
- Small mirror: A second mirror makes the back of the bun much easier to pin neatly.
Smart Prep for Better Grip and Less Slip
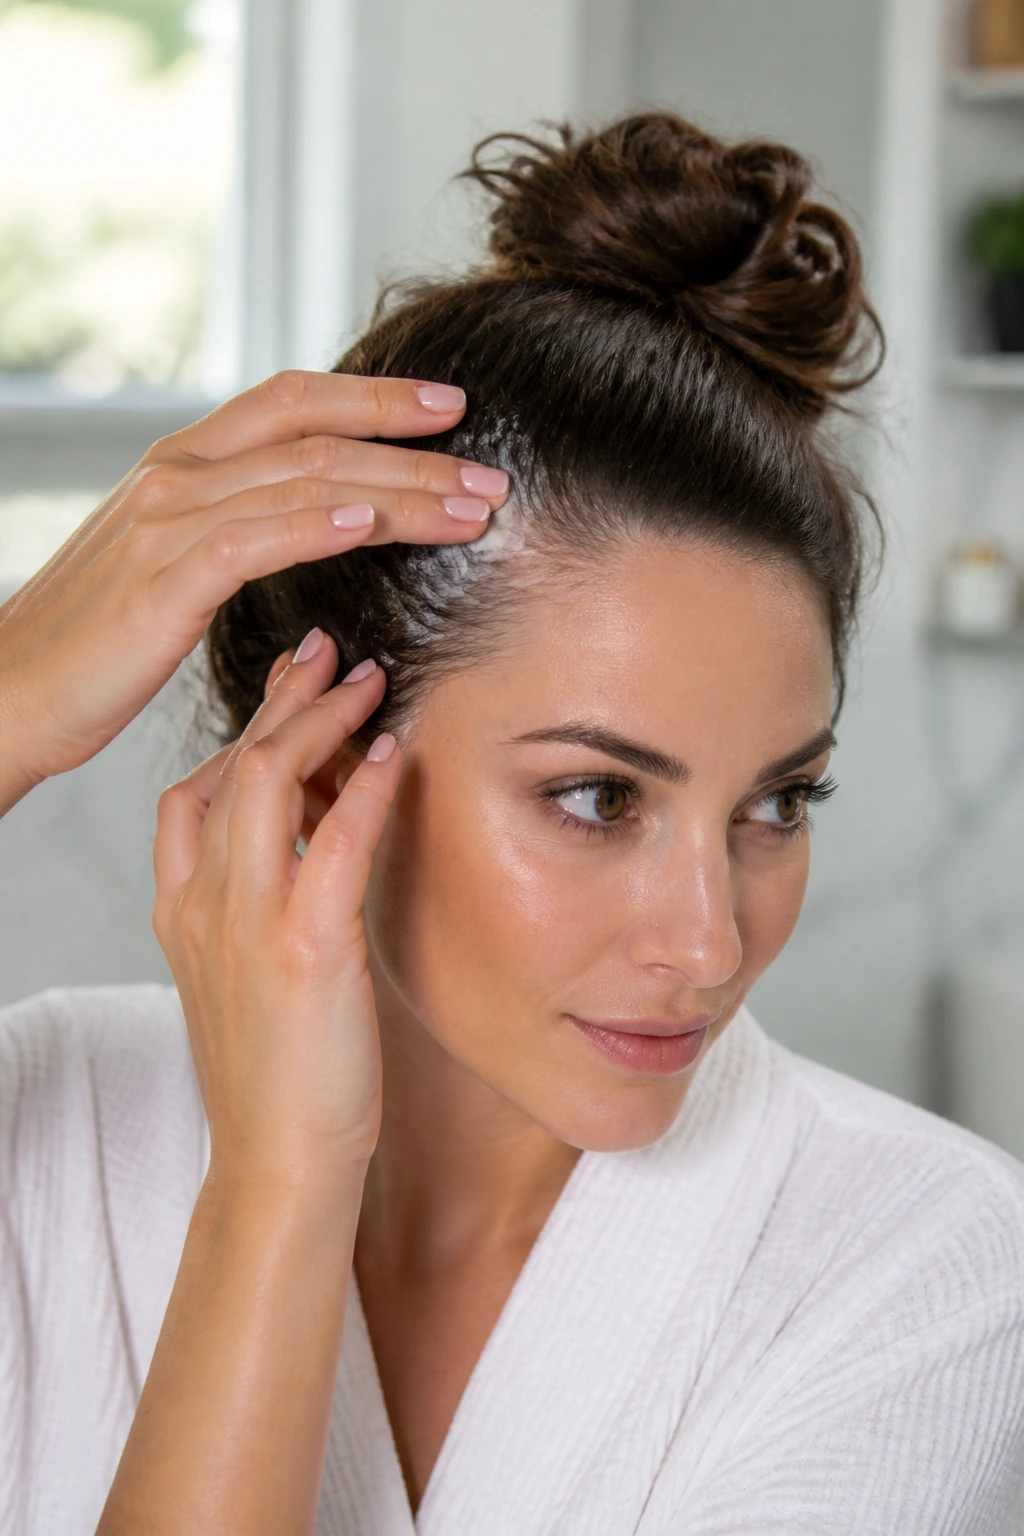
Freshly washed hair can be hard to pin because it slides. If your hair is fine or silky, work with it after it has had a little time to lose that slippery feel, or add dry shampoo at the roots and mid-lengths before you start. One or two sprays is enough; you want grip, not chalk.
Brush the top smoother than the ends. That little contrast helps the style look neat without flattening every bit of texture out of it. And if your hair is curly, don’t fight the curl pattern into a perfectly straight sheet — that usually ends in frizz.
A tiny amount of styling cream on the palms can calm the hairline, but keep oils away from the elastic area. Oily roots make pins slide. Dry roots hold.
The Styling Habits That Make a Bun Look Intentional
Placement matters first. A bun that sits too far back can look sleepy, while one that sits too high can look like it’s trying to escape. Start by deciding whether you want the shape low, centered, or lifted, then build the rest around that point.
Pin from the inside out. Slide bobby pins into the bun where the hair meets the scalp, not just across the outside surface. That’s where the support comes from. If a bun is heavy, cross two pins in an X at each anchor point.
Leave one thing imperfect on purpose. Maybe it’s a soft face-framing piece, maybe it’s a little volume at the crown, maybe it’s a scarf, a braid, or a wrapped elastic. One controlled detail keeps the style from looking too rigid.
Common Mistakes That Make Buns Fall Flat
- Starting with hair that’s too clean: Satin-smooth roots cause slipping. A little dry shampoo or texture spray fixes it fast.
- Using one pin where three are needed: If the bun sways when you turn your head, it isn’t pinned at the scalp. Add support under the knot, not just around it.
- Pulling too hard at the crown: A bun can get tight enough to hurt without actually getting more secure. Tightness and hold are not the same thing.
- Ignoring hair length and weight: A large bun on a short bob or a tiny knot on very thick hair will fight you. Match the size of the bun to the hair you actually have.
- Loading on too much product: Heavy creams and oils make the bun slide apart. Keep the finish light and use spray only where you need control.
Easy Variations for Fine Hair, Thick Hair, Curls, and Short Cuts
The Fine-Hair Lift: Use a smaller bun form, tease the crown lightly, and keep the bun compact. A large, airy knot tends to collapse on fine hair; a smaller shape often looks fuller.
The Thick-Hair Split: Divide the tail into two or three sections and wrap them separately. Thick hair looks better when the bulk is managed in stages instead of all at once.
The Curly Respectful Version: Leave the curl pattern mostly intact and twist, don’t brush. That keeps the bun from turning into a puffed-out cloud.
The Short-Hair Cheat: Work with a mini twist or half-up bun and let the shape stay small. Trying to force short layers into a giant bun usually makes the pins show.
The Accessory Switch: A scarf, barrette, or pearl pin can change a plain bun in seconds. One accessory is enough; more than that starts to crowd the shape.
How to Keep Bun Hairstyles Fresh Through the Day and Overnight
A bun usually looks its best for the first few hours after styling, then settles into a softer version of itself. That isn’t a bad thing. A clean low bun can still look neat after a long day if the base stays anchored and the flyaways are handled lightly.
If you need the style to survive overnight, a loose low bun is kinder than a tight top knot. Sleep on a satin pillowcase or wrap the hair with a scarf, then re-pin the bun in the morning instead of rebuilding the whole thing. That saves time and keeps the ends from getting rough.
By day two, a small refresh is usually enough. Tap a little dry shampoo into the roots, smooth the hairline with clean fingers, and add one more pin if the bun has loosened. By day three, if the style feels gritty or the scalp is tired, take it down, brush it out, and start over. Hair likes a reset.
Frequently Asked Questions About Bun Hairstyles
Which bun is best for fine hair?
A sock bun, donut bun, or teased volume bun usually gives fine hair the most shape. They create the look of fullness without forcing the hair to do all the work on its own.
What bun works best on thick hair?
Low buns, twisted buns, and braided buns tend to behave well with thick hair because they distribute the weight. If the bun feels heavy, split the tail before wrapping so the shape doesn’t tilt backward.
Can I do bun hairstyles on short hair?
Yes, but the bun will be smaller and more tucked in. Short hair usually does better with mini buns, faux buns, or half-up versions where the style matches the length instead of fighting it.
How do I stop a bun from slipping?
Start with a little texture at the roots, then pin at the base of the bun where it meets the scalp. If the bun still slides, use crossed bobby pins instead of one straight pin.
What makes a bun look polished instead of messy?
A clean part, a controlled base, and one intentional detail usually do the trick. That detail might be a wrapped elastic, a braid, or a smooth hairline, but the bun itself should still feel anchored.
Can buns damage hair?
They can if they’re pulled too tight or worn the same way every day. Vary the placement, keep the tension moderate, and avoid yanking pins straight out of the same spot each time.
How do I tame flyaways without making the bun stiff?
Use a small amount of hairspray on a brush or toothbrush, then smooth only the top layer and hairline. Heavy spraying across the whole bun tends to make it crunchy and dull.
What if my bun collapses halfway through the day?
Don’t start over unless you have to. Add one elastic or two crossed pins at the base, tighten the outer coil a little, and smooth the crown by hand. That usually fixes the shape in under a minute.
The Styles Worth Reaching For Again
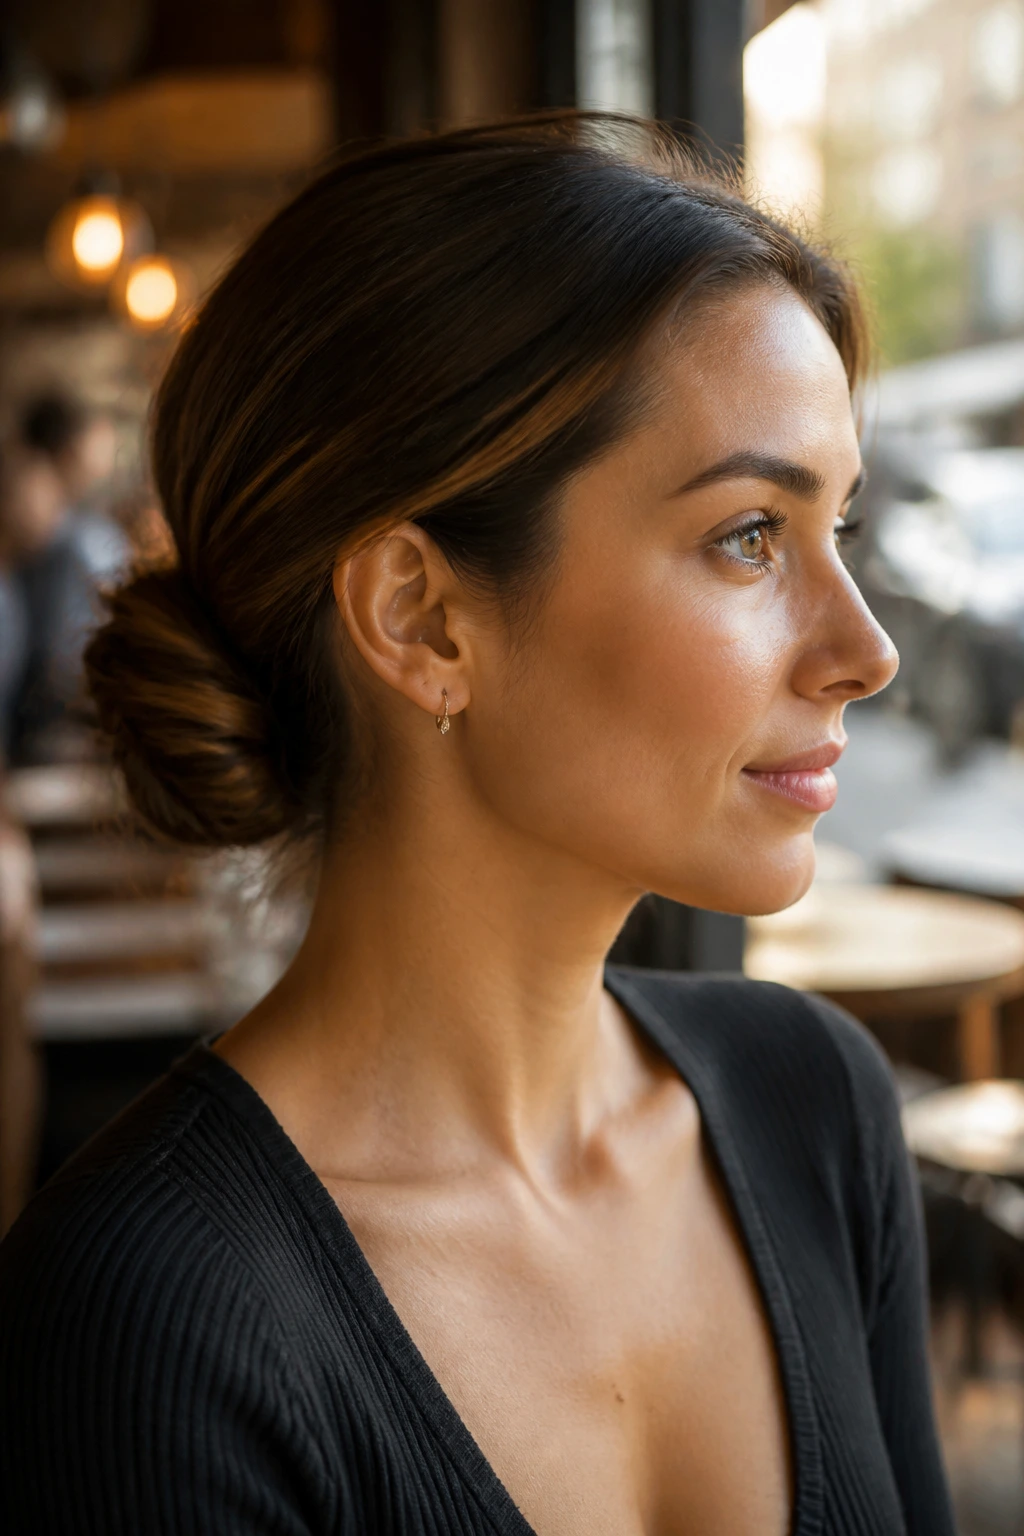
A bun works best when it suits the day you’re actually having, not the imaginary one where your hair behaves perfectly and you have twenty spare minutes. Some days call for a low knot that barely announces itself. Other days want braid texture, a scarf, or a high wrap that keeps every strand off your neck.
The useful part is that these styles are all built from the same small set of moves: gather, twist, tuck, pin. Once those four actions feel familiar, you stop treating buns like backup plans and start using them the way they should be used — as quick, tidy, shape-savvy styles that hold their own.
Pick one, wear it out, and then keep the pins where you can find them. That’s usually where the good hair days start.
