



Easy messy buns have a funny reputation: people call them lazy, then spend ten minutes trying to make one look like they didn’t spend ten minutes on it. The good ones do one simple job well — get hair off your face, leave a little movement around the hairline, and survive the parts of the day that actually matter, like wind, a hoodie, or a long stretch under a headset.
Messy does not mean sloppy. A bun that falls apart before lunch is a failed bun. A bun that’s pulled so tight it gives you that tired, dragged-back look is no better. The sweet spot sits in the middle: loose enough to breathe, anchored enough to last, with texture doing the decorative work instead of a ton of product.
If your hair is fine, thick, curly, short, or somewhere awkwardly in between, there’s a version that works without forcing your strands into a shape they refuse to hold. Some need one elastic and two pins. Some need dry shampoo at the roots. All of them rely on the same idea — build a little structure, then let the ends stay imperfect.
Why These Easy Messy Buns Earn a Permanent Spot in the Rotation
-
Fast enough for real mornings: Most of these styles can be built in under two minutes once your hands know the motion, which matters when you’re half awake and looking for something that still looks deliberate.
-
Friendly to second-day hair: Slight oil at the roots gives pins and elastics something to grip, so a bun often holds better after a day or two than it does on squeaky-clean hair.
-
Built for different textures: Fine strands, thick hair, curls, and shorter layers all need a slightly different approach, and these styles account for that instead of pretending hair behaves the same way everywhere.
-
Easy to dress up or down: A messy bun can sit next to a T-shirt, a blazer, a hoodie, or a dress without changing the whole personality of the look.
-
Low-tool, low-drama styling: Most of these buns only need a tie, a few pins, and maybe one product that gives grip. No elaborate setup. No special tricks hidden behind a wall of hairspray.
-
Less tension, less regret: The best versions lift the hair without yanking at the scalp, which makes a difference when you’re wearing one for hours and still need your head to feel like it belongs to you.
1. The Five-Second Twist Bun
A good emergency bun should look like you meant it, even if you made it while answering a text. Start with a low ponytail, twist the length once, then fold it back on itself so the ends peek out a little. Pin through the seam, not the fluffy outside, and you get that loose shape without the whole thing sagging by noon.
If your hair is slippery, dust the roots with dry shampoo first and wait half a minute before twisting. That tiny pause helps the powder grab. The point is a bun that looks slightly imperfect on purpose, not a knot that looks half finished.
2. Low Knot Bun with Face-Framing Pieces
This is the bun I’d hand to anyone who wants soft around the face but doesn’t want to wrestle with a full updo. Keep the knot at the nape, leave out two front pieces, and angle them so they start closer to the cheekbone than the jaw. That one small choice makes the shape feel lighter.
A medium elastic and two bobby pins are usually enough here. If the tendrils are too straight, bend the ends with a 1-inch iron or twirl them around your fingers while they’re still warm. Loose around the face, anchored at the back — that’s the whole trick.
3. High Topknot Bun with Loose Ends
High buns can look stiff fast, so the little bit of mess is what saves this one. Pull the ponytail to the crown, twist it once, then wrap it loosely so the ends fan out instead of disappearing neatly into the center. It should sit high enough to lift the face, not so high that it feels like a ballerina rehearsal.
This style works well when the day is warm or your hair wants volume at the roots. If the bun leans backward, add one pin at the base and one on the far side to stop it from rolling. A topknot gets better when the wrap is loose, not when it’s packed down.
4. The Scrunchie Bun
A fabric scrunchie changes the feel of a bun immediately. Loop the hair once through a ponytail holder, twist the length around, then secure it with a scrunchie instead of a tight elastic. The result looks softer, leaves less of a dent, and is kinder to ends that get cranky under tension.
I like this one for hair that’s a little dry at the ends because the scrunchie cushions the wrap. Choose a scrunchie with a bit of body; the flimsy ones collapse too fast. If your hair snaps easily or hates a hard elastic, this is the gentler option that still gives shape.
5. Braided Messy Bun
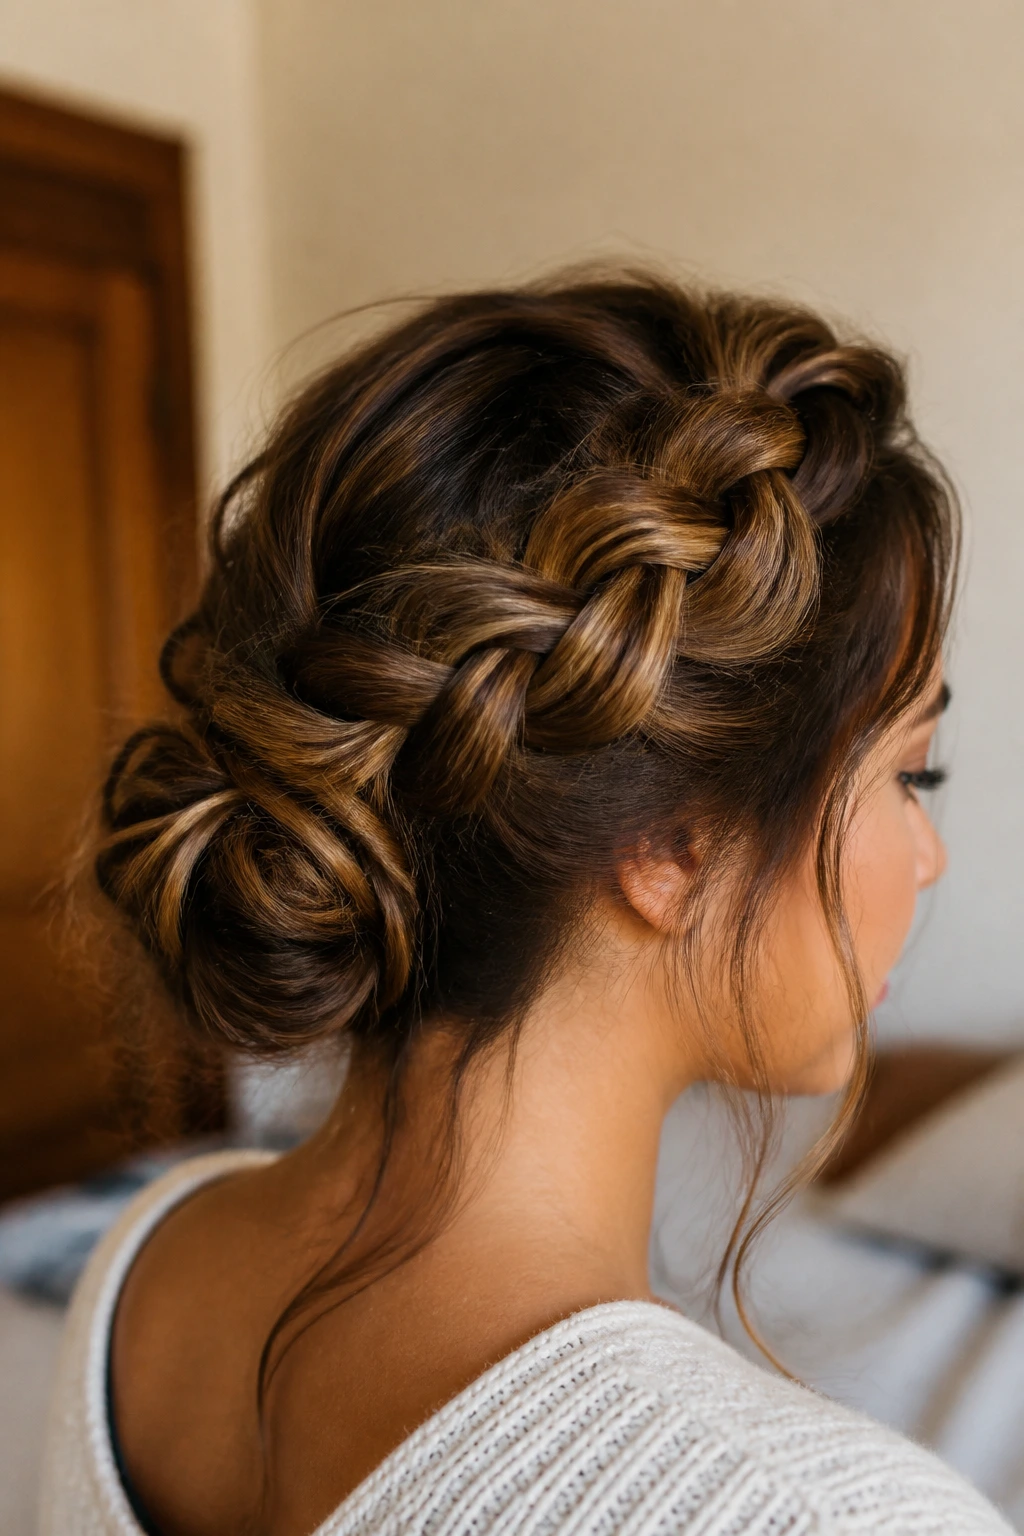
A loose braid gives a bun some texture without making it feel styled to death. Pull the hair into a low or mid ponytail, braid it loosely, then pancake the braid by tugging the sides with your thumbs before wrapping it around the base. The braid should still look chunky. If it looks neat, you braided it too hard for this look.
This version is especially good for layered hair or thicker ends that won’t tuck cleanly on their own. One or two extra pins around the seam keep the braid from rolling loose. The braid is doing the structural work; the mess is doing the visual work.
6. Claw-Clip Bun
A claw clip bun is what I reach for when I want my hair up without committing to a full knot. Twist the hair upward, fold the length back on itself, then clip the fold vertically so the teeth catch the middle of the twist. The ends can spill out a little — that’s fine. That’s the point.
Why the clip matters
A medium clip usually handles shoulder-length to long hair better than the tiny decorative ones that look cute and then give up. If your hair is very thick, make the twist tighter at the base before clipping; if it’s fine, rough up the roots first so the clip doesn’t slide.
- Clip the hair when it’s already slightly textured, not glassy clean.
- Aim the clip so it bites into the twist, not just the outer shell.
- Keep one spare pin in your bag; clips loosen as the day goes on.
7. Half-Up Messy Bun
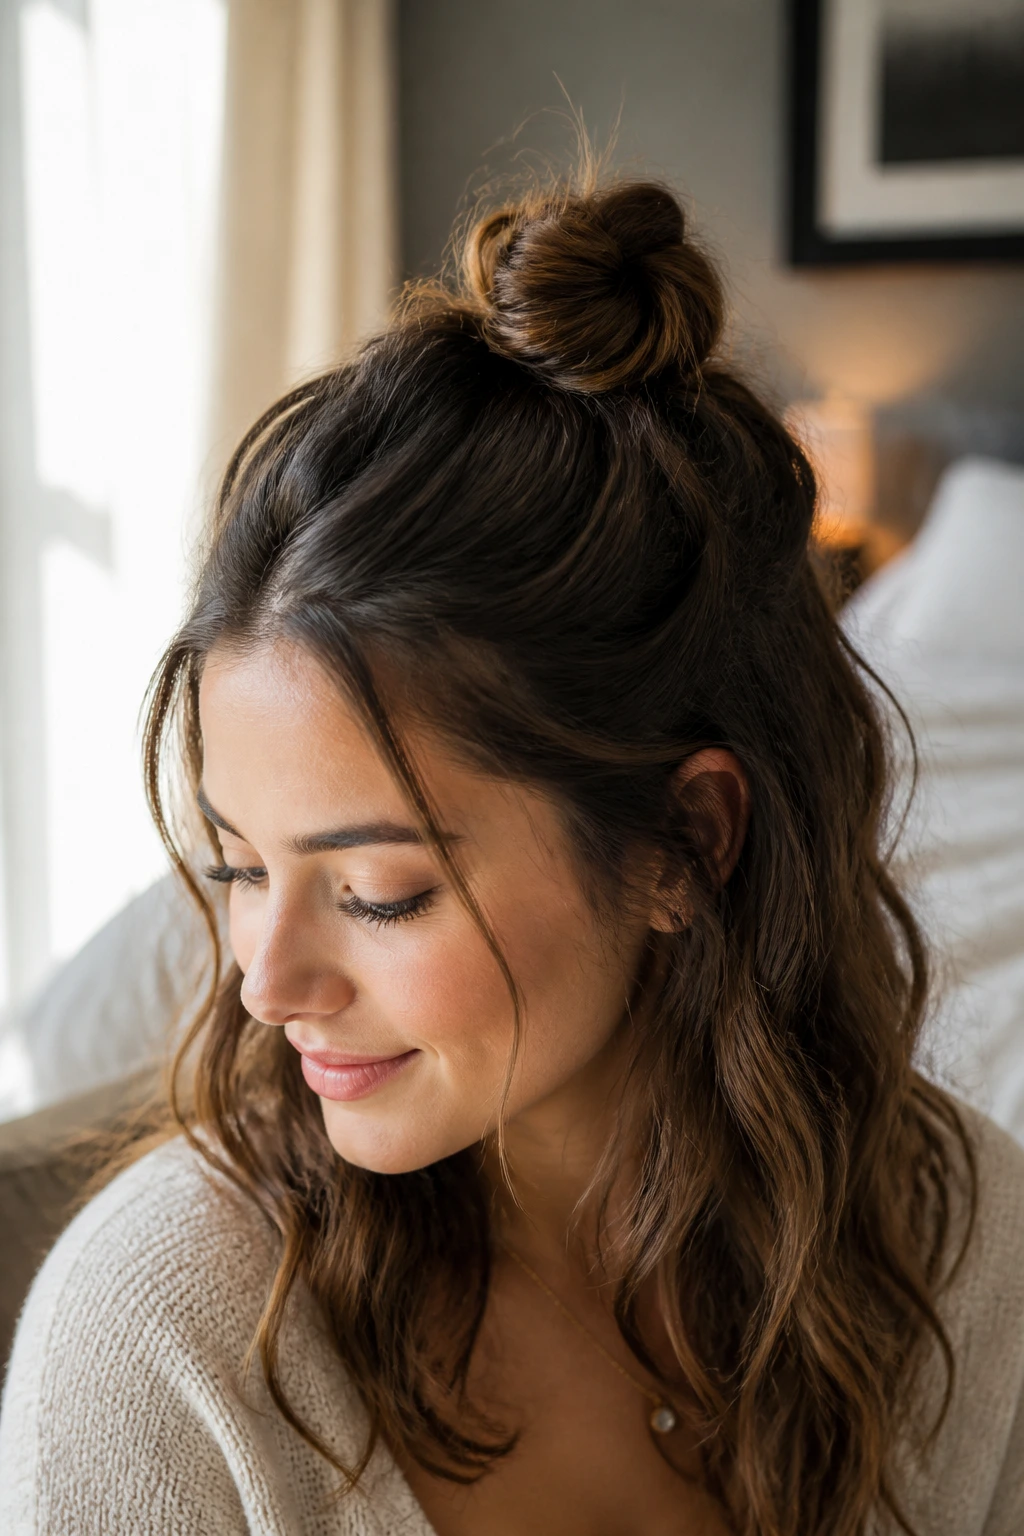
Half-up buns give you the lift of an updo without losing all the length. Gather the top section from temple to crown, twist it into a small knot, and leave the lower hair down with a little movement. It’s a good choice when you want to show off texture at the ends or keep the neck cool without pulling everything back.
The key is to keep the bun small enough that it doesn’t fight the rest of the hair. If the crown section is too big, the style starts to look bulky. A half-up bun works when the top is loose and the bottom still has room to breathe.
8. Side-Swept Messy Bun
A side bun changes the whole mood with almost no extra effort. Shift the base just behind one ear, gather the hair low and to one side, then pin it so the knot sits a little off-center. The asymmetry makes the shape feel softer and a bit more interesting than a center knot.
This one plays well with side parts and with earrings that need some space to show. If the bun looks too neat, tug one section at the crown and another at the side before you leave the mirror. Off-center is what keeps this from feeling formal.
9. Rope-Twist Bun
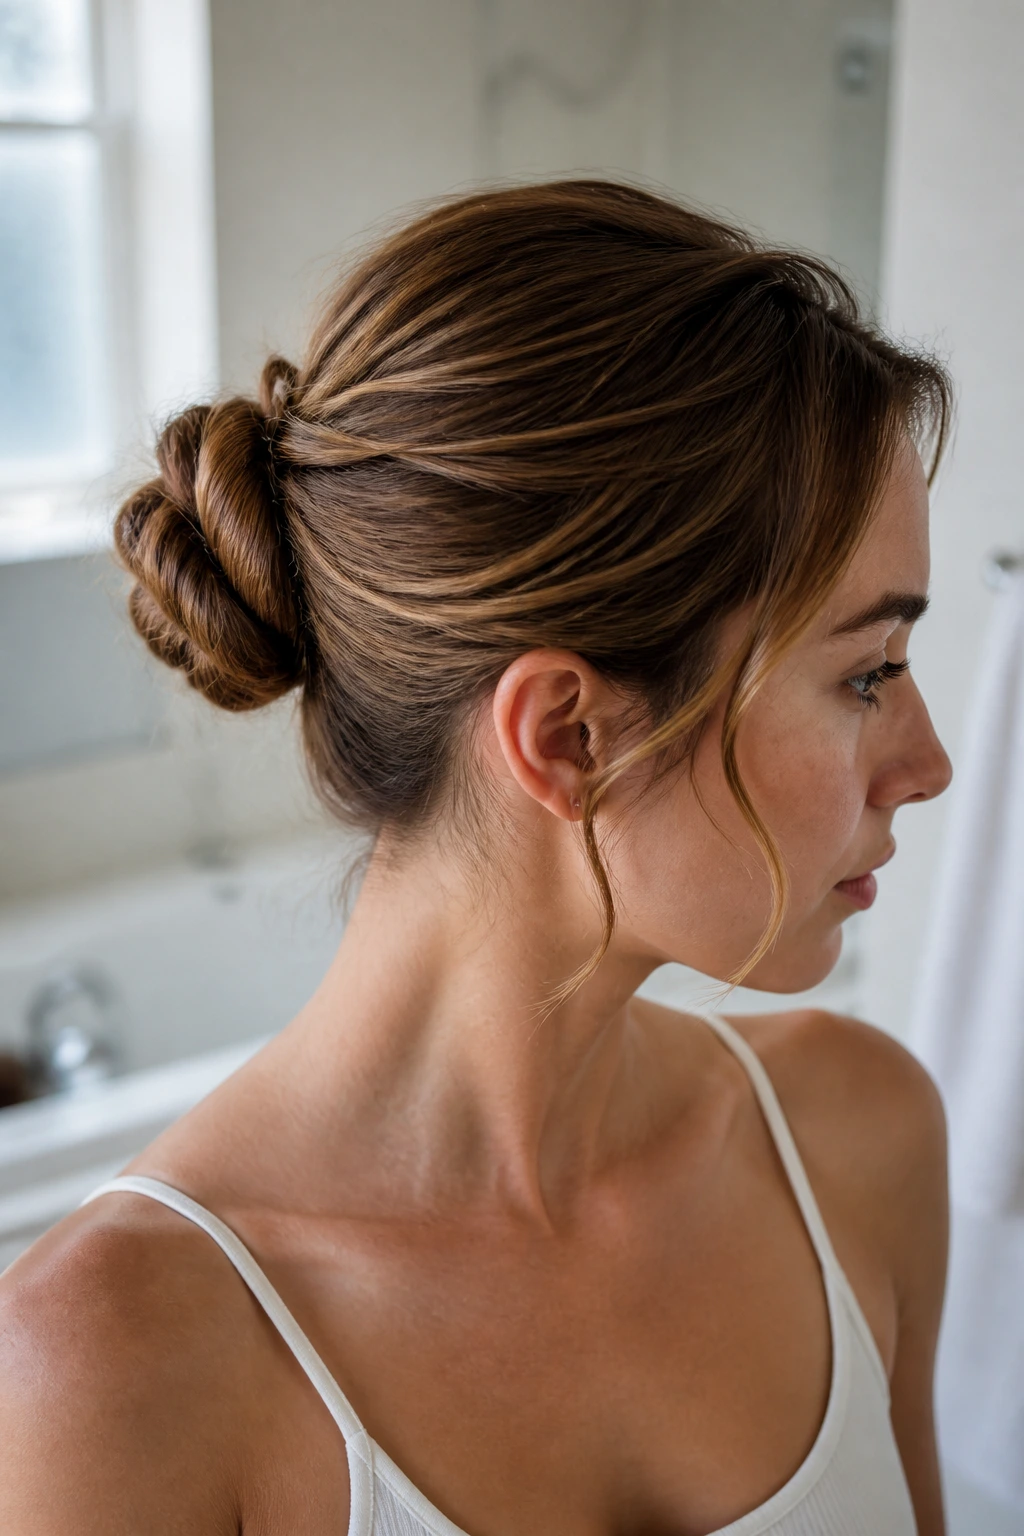
A rope twist gives straight hair a little more grip than a plain twist does. Split the ponytail into two sections, twist each section in the same direction, then twist them around each other in the opposite direction before coiling the rope into a bun. The result is compact, sturdy, and less likely to unravel than a simple wrap.
I like this on hair that slides apart when you try to pin it. It also works nicely on layered cuts because the rope catches the shorter pieces. If regular twists fall apart on you, the rope method buys you extra hold.
10. Curly-Hair Pineapple Bun
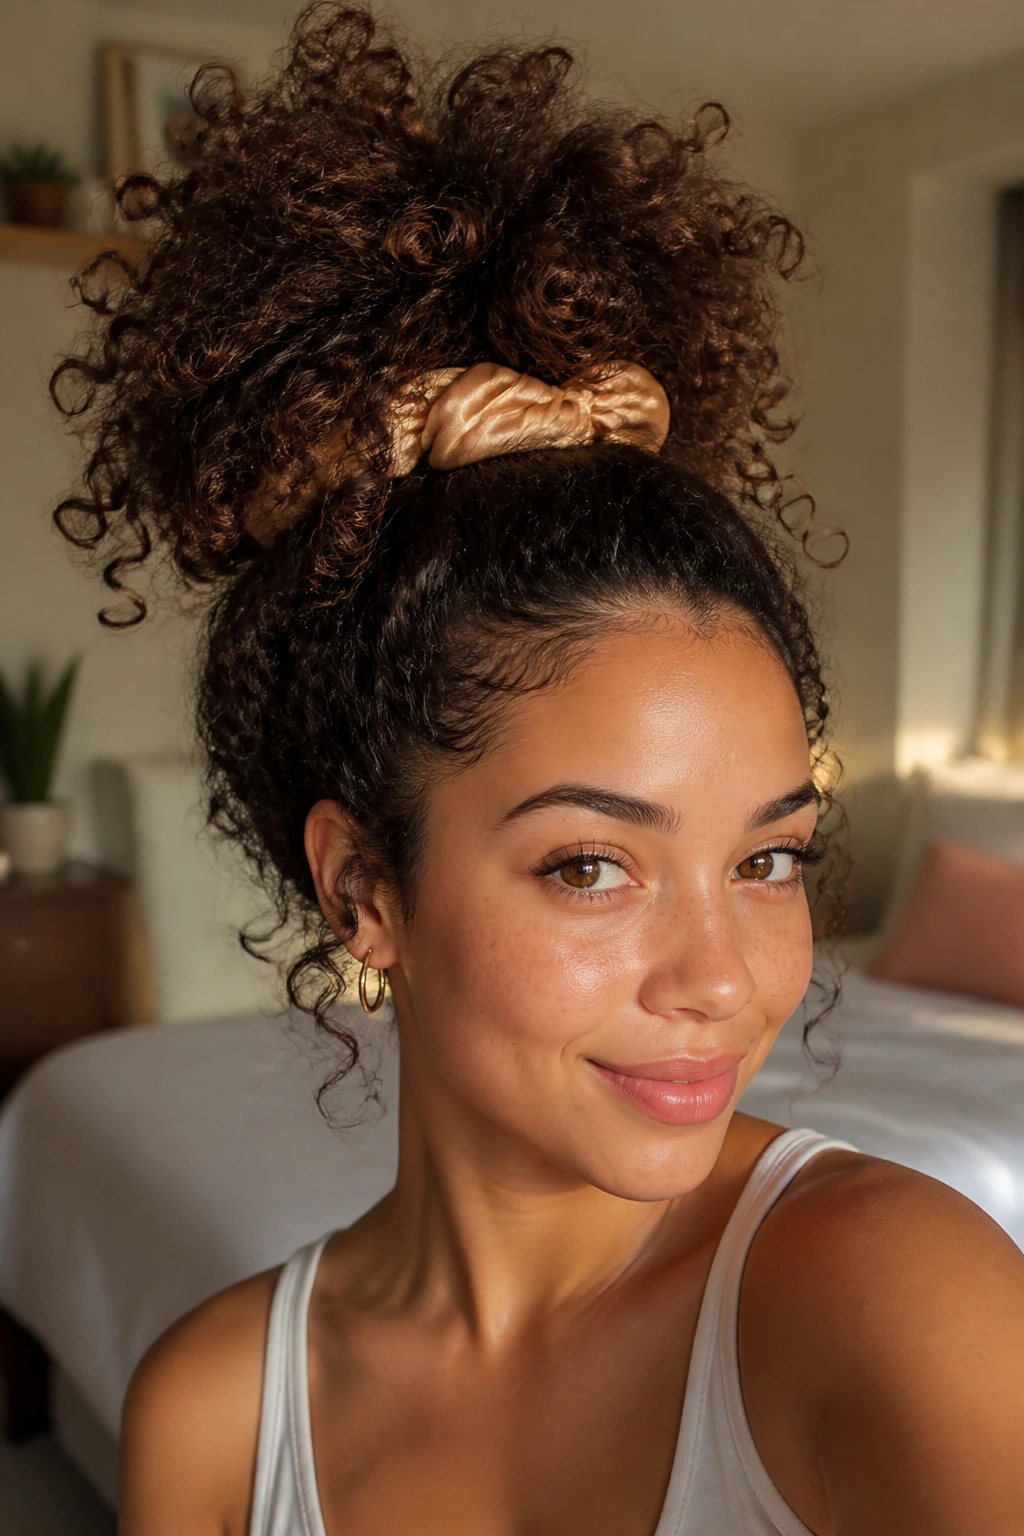
Curly hair does not need to be brushed into submission for a bun to work. Gather the curls high or mid-height with a satin scrunchie, keep the hold loose enough that the curl pattern survives, and let the ends puff out naturally. The shape should feel soft, not pressed flat.
The best part is that this style protects curl definition while keeping hair off the neck. If the roots need a little lift, lightly mist them with water and a bit of leave-in before you gather the hair. For curls, the bun should follow the shape of the hair, not flatten it into a different one.
11. Fine-Hair Teased Bun
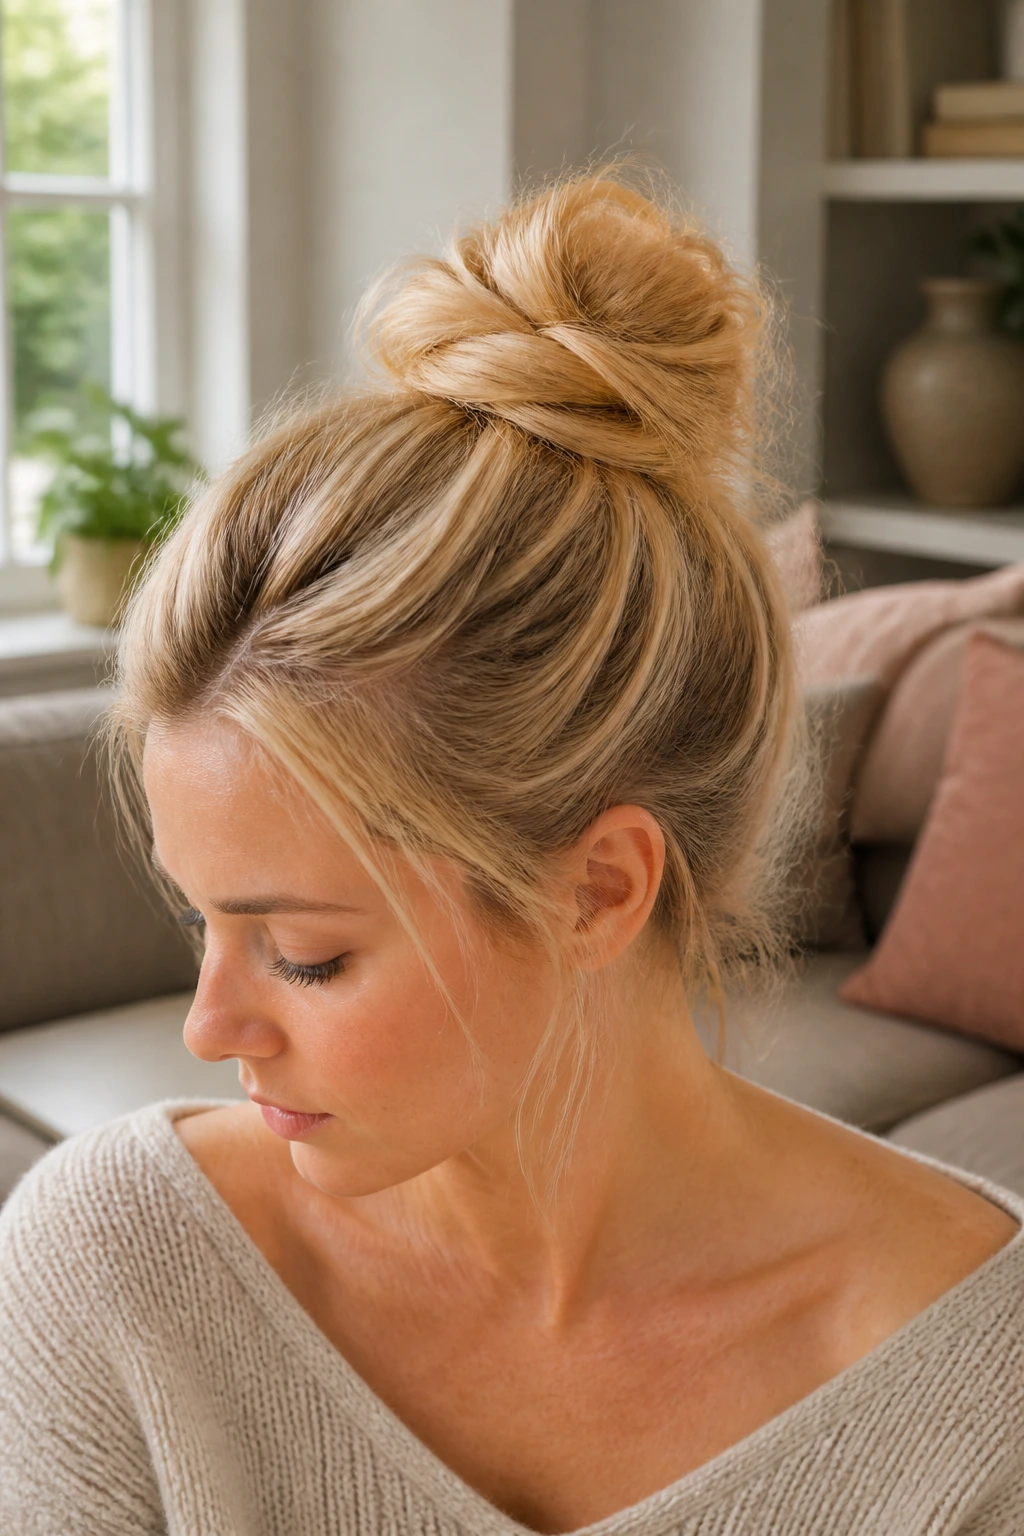
Fine hair usually needs a rough base, or the bun collapses the minute you turn your head. Backcomb a two-inch strip at the crown, add a little dry shampoo or texture powder at the roots, then gather the hair into a small to medium bun. Keep the shape compact. A giant bun on fine hair tends to expose the gaps.
Why fine hair needs a rougher start
Fine strands slide against each other. A little grit gives them something to hold. Use two or three pins crossed at the base instead of one loose pin, and stop smoothing once the shape is set. If you keep chasing every flyaway, you’ll flatten the volume you just built.
12. Thick-Hair Coil Bun
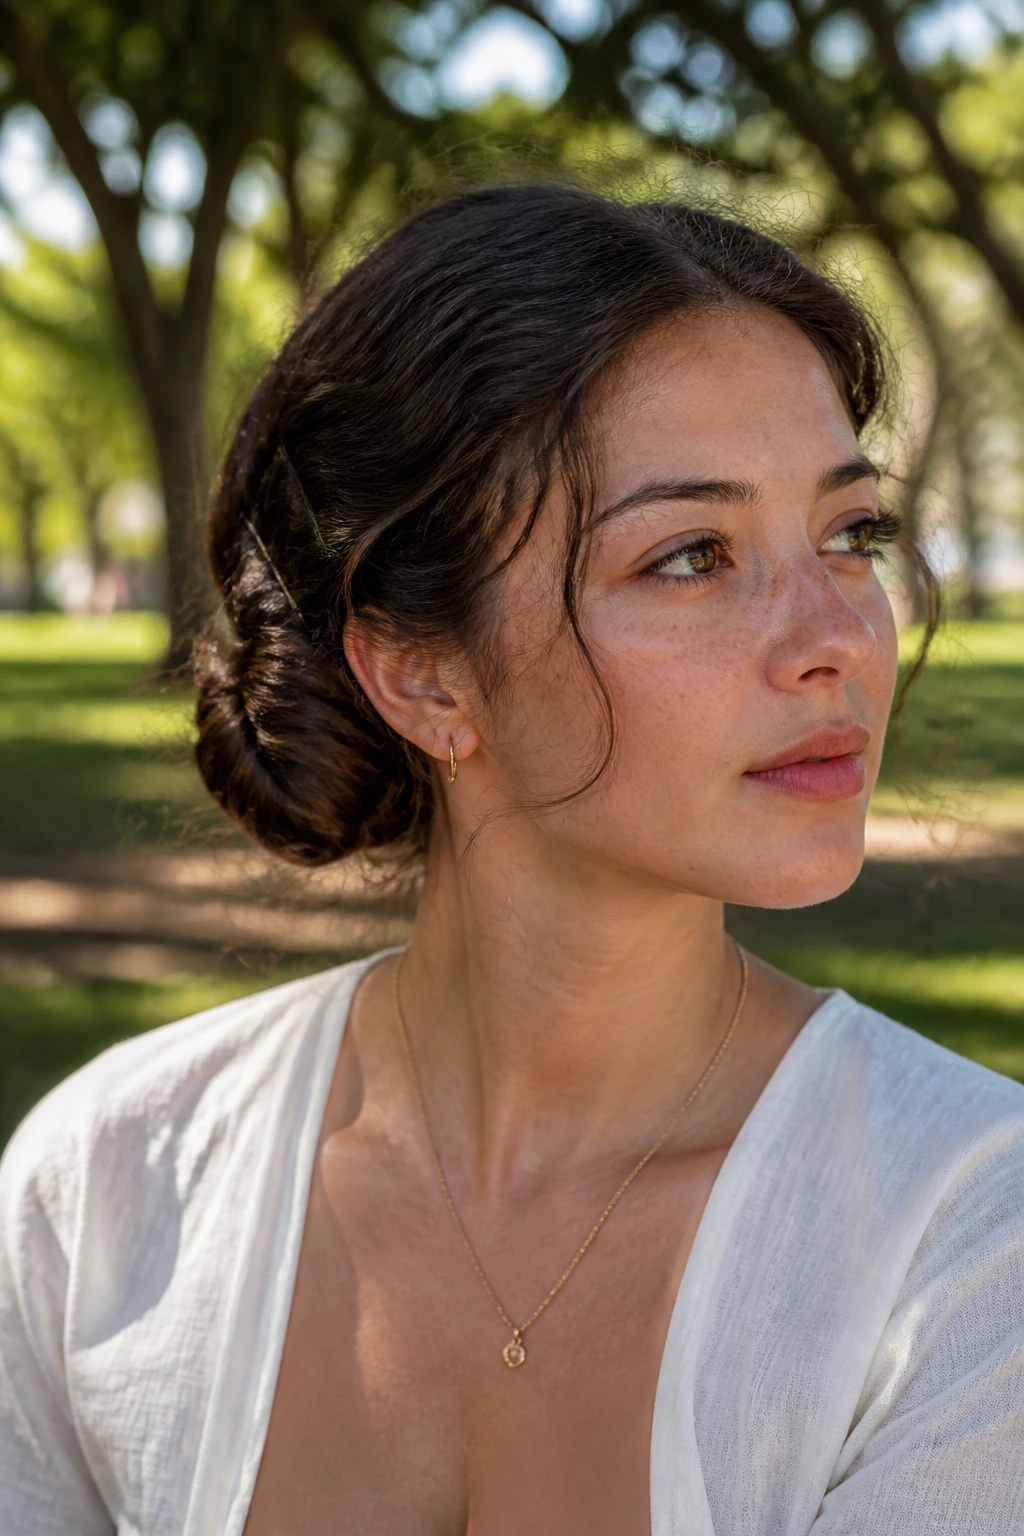
Thick hair usually does better when you stop trying to force it into one giant wrap. Split the ponytail into two sections, coil each section around the base separately, then pin the coils down with U-pins or long bobby pins. That split gives you control and keeps the bun from turning into a heavy lump.
This is one of those styles where more structure is not a bad thing. Thick hair needs anchor points. If you feel the bun slipping, don’t add more shine product — add another pin.
13. Short-Hair Faux Bun
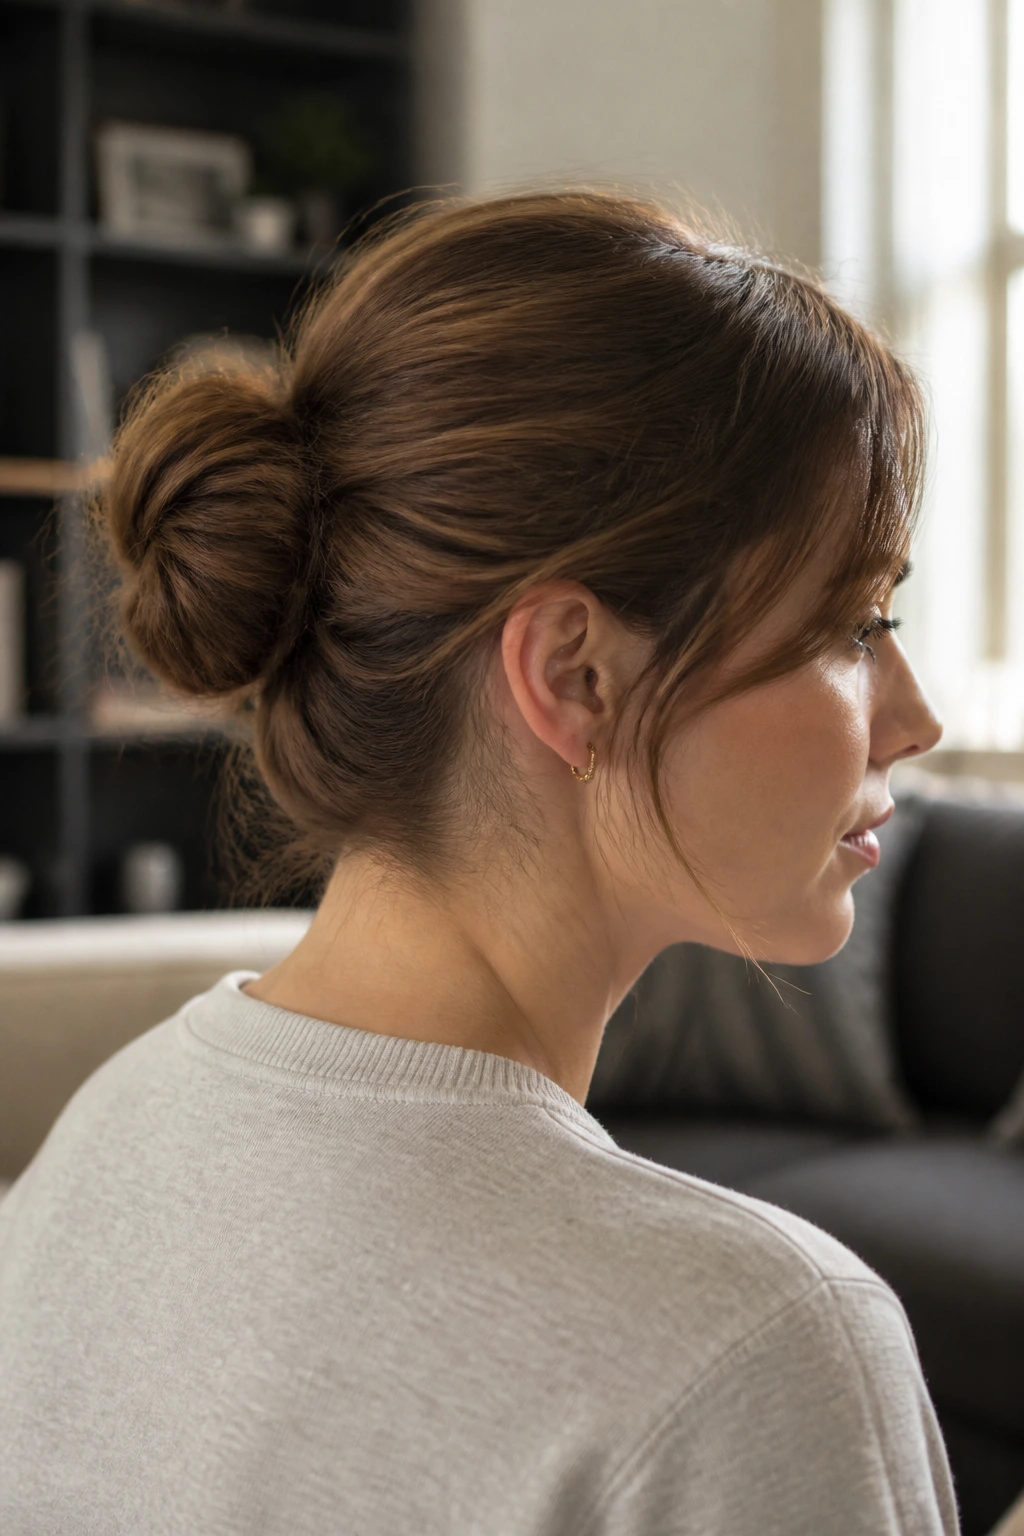
Shorter layers can still fake a bun if you build it in pieces. Twist small sections back from the temples and nape, tuck the ends inward, and pin them into a compact knot near the back of the head. The trick is not perfection. It’s hiding the ends well enough that the shape reads as a bun from a normal distance.
A few mini elastics can help if the hair keeps sliding apart. This style works especially well on bobs and long bobs that barely miss bun length. Short hair needs a clever pinning plan, not a bigger elastic.
14. Long-Hair Wrapped Bun
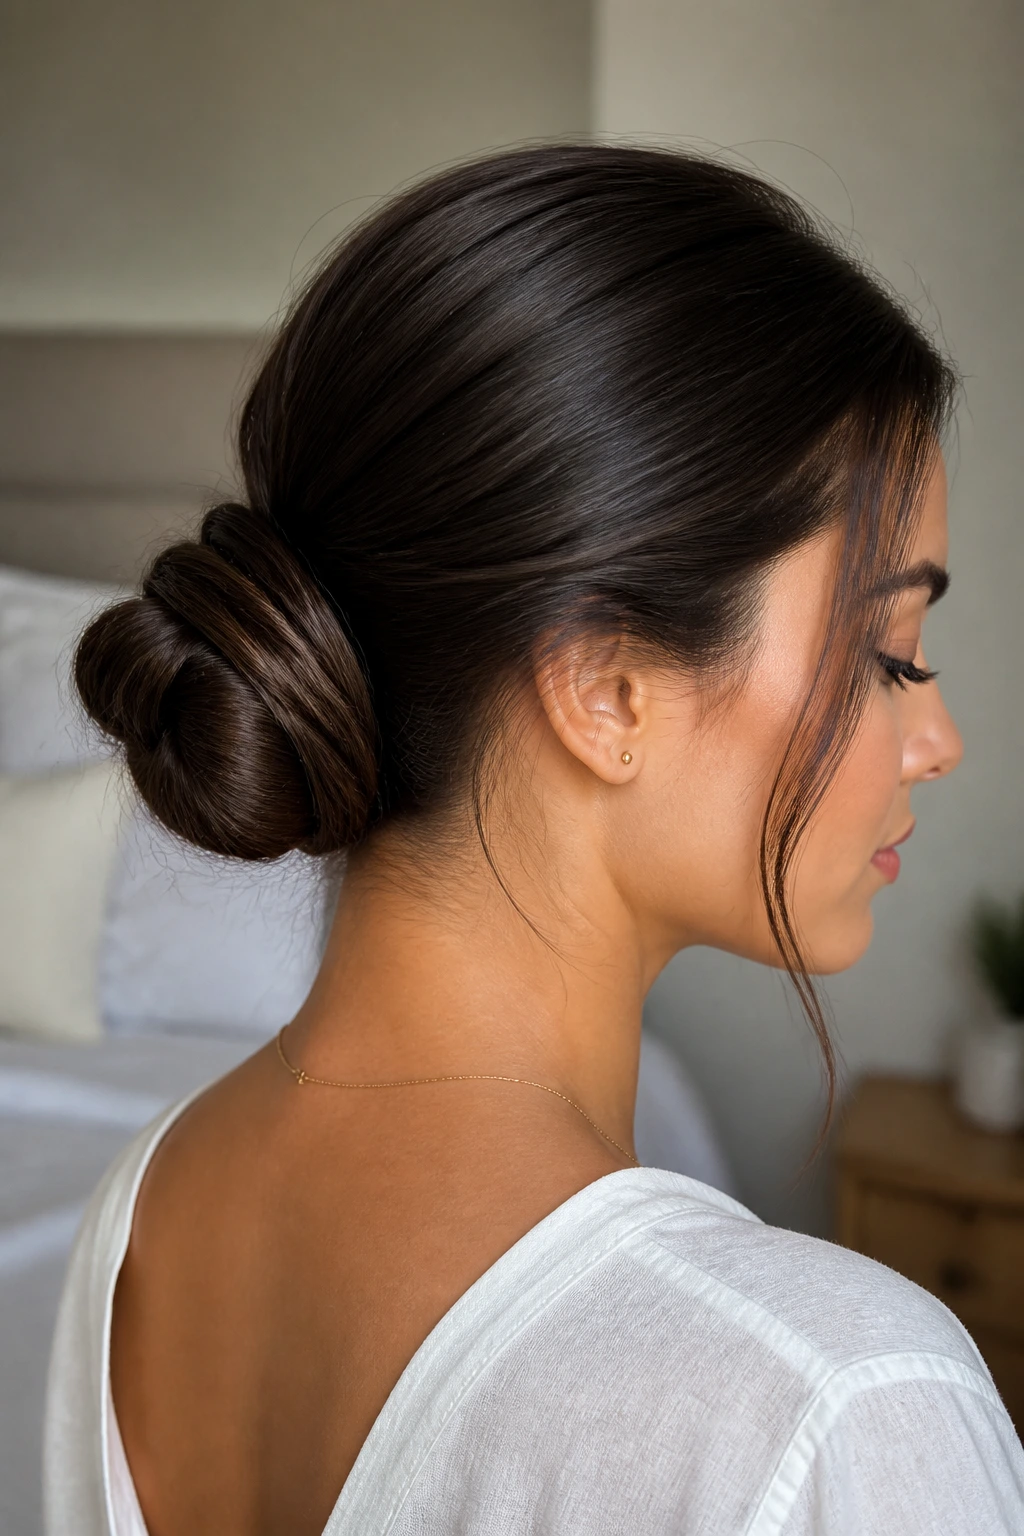
Long hair loves to turn a bun into a rope if you let it. Gather the lengths into a ponytail, then wrap the hair around the base twice instead of once, tucking the ends under with U-pins. This keeps the bun from sprouting a wild tail halfway through the day.
If your hair is extra long, split the ponytail before wrapping so each half lies flatter. That keeps the knot from stacking up too high. The longer the hair, the more important it is to hide the ends cleanly.
15. Knotted Scarf Bun
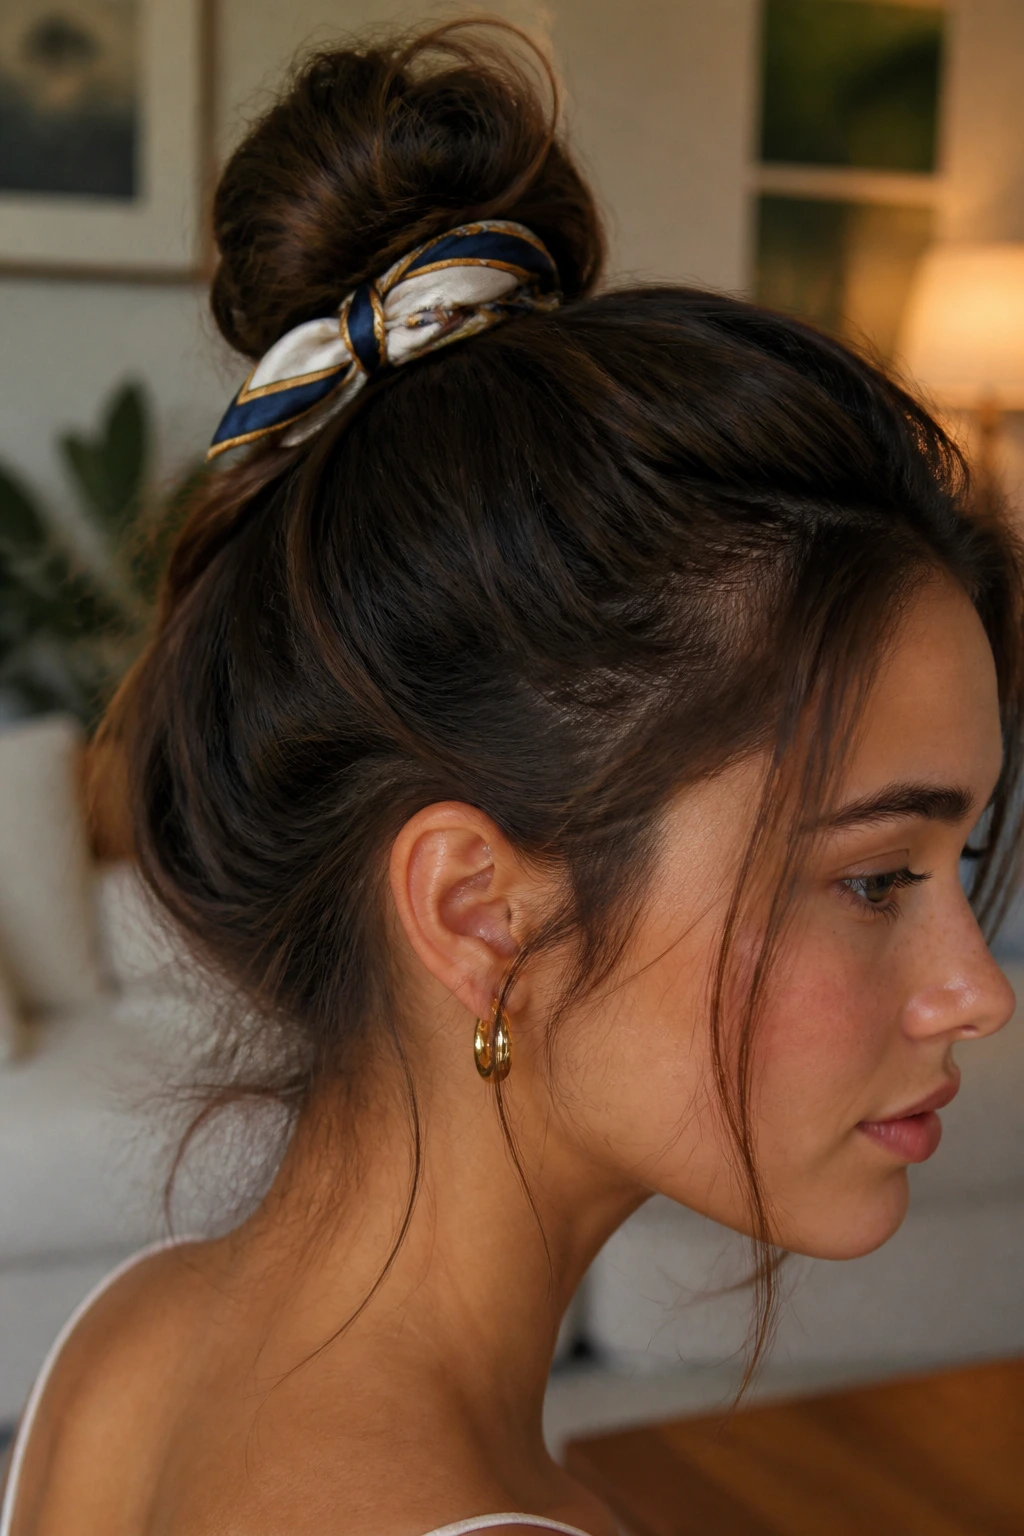
A scarf changes a basic bun from practical to deliberate in about ten seconds. Tie the hair up first, then thread a narrow scarf through the elastic and knot it around the base so the fabric sits as part of the bun, not as an afterthought. Silk or satin scarves glide better than stiff cotton ones.
This is one of my favorite ways to use color without adding another hair product. Pick a scarf with enough length to tie securely but not so much bulk that it overwhelms the knot. A scarf should frame the bun, not bury it.
16. Hat-Ready Low Bun
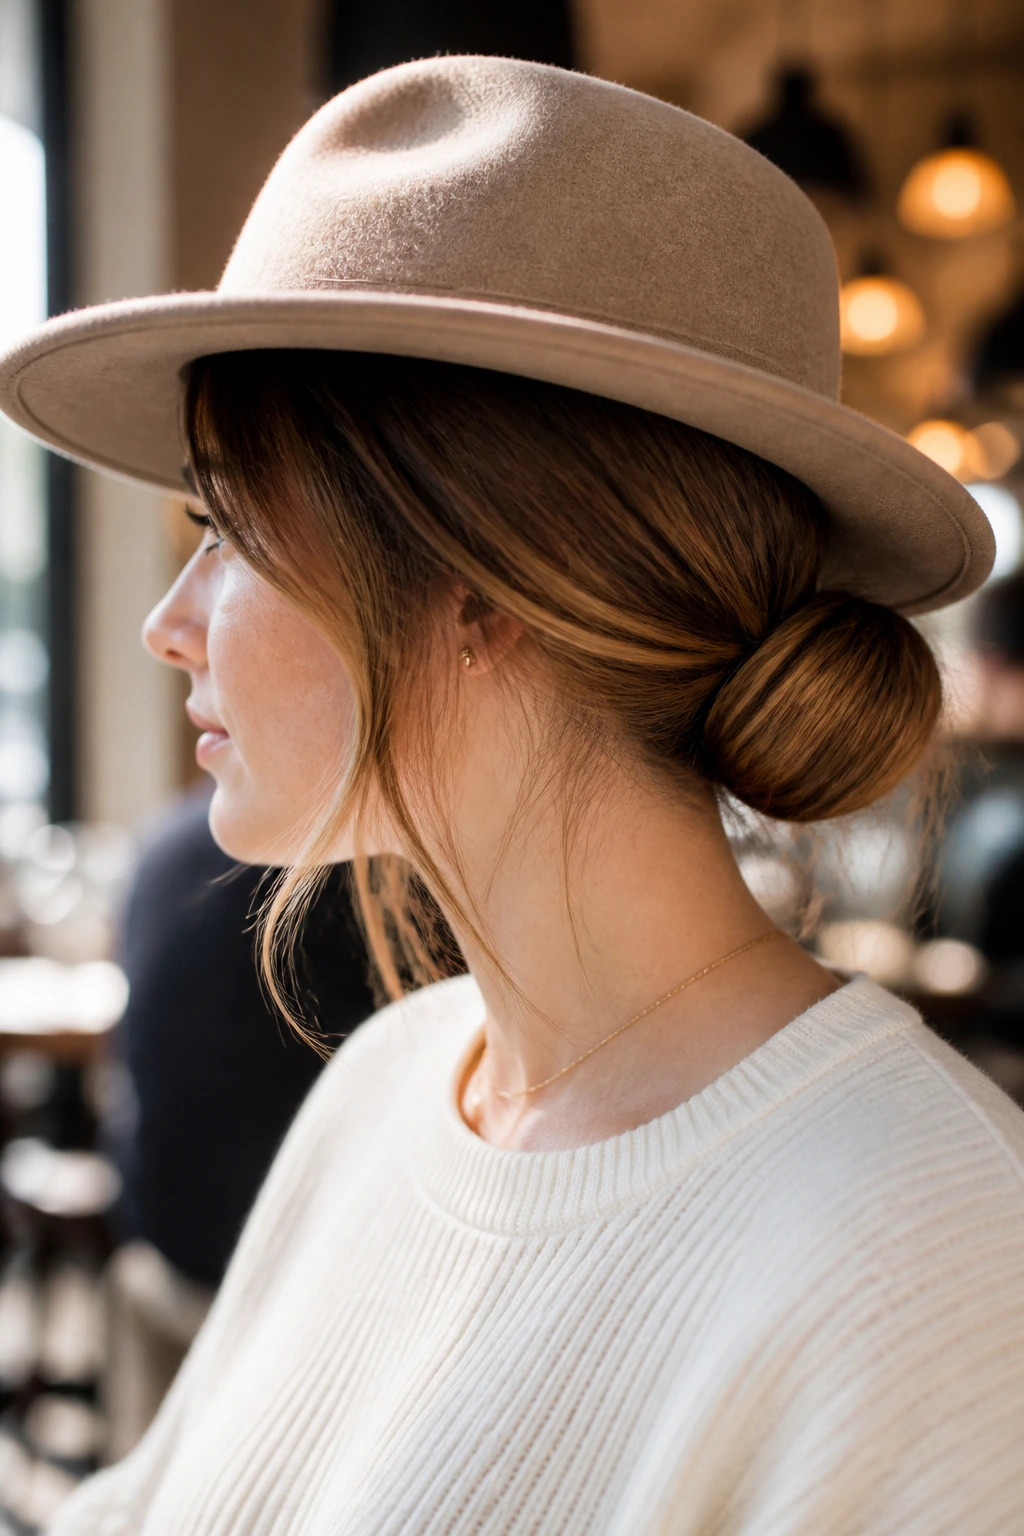
Some buns are made to fit under a hat, and this is the one. Keep the knot low and flat at the nape, with very little crown volume so the hat doesn’t sit lopsided. Smooth the top just enough that the shape lies down cleanly, then let the bun take the bulk.
This works best when you want your hair to stay out of the way but still look finished after the hat comes off. Use a soft elastic and one or two pins so the knot doesn’t press into the scalp under the brim. Flat at the top, compact at the base — that’s the whole game here.
17. Rainy-Day Protective Bun
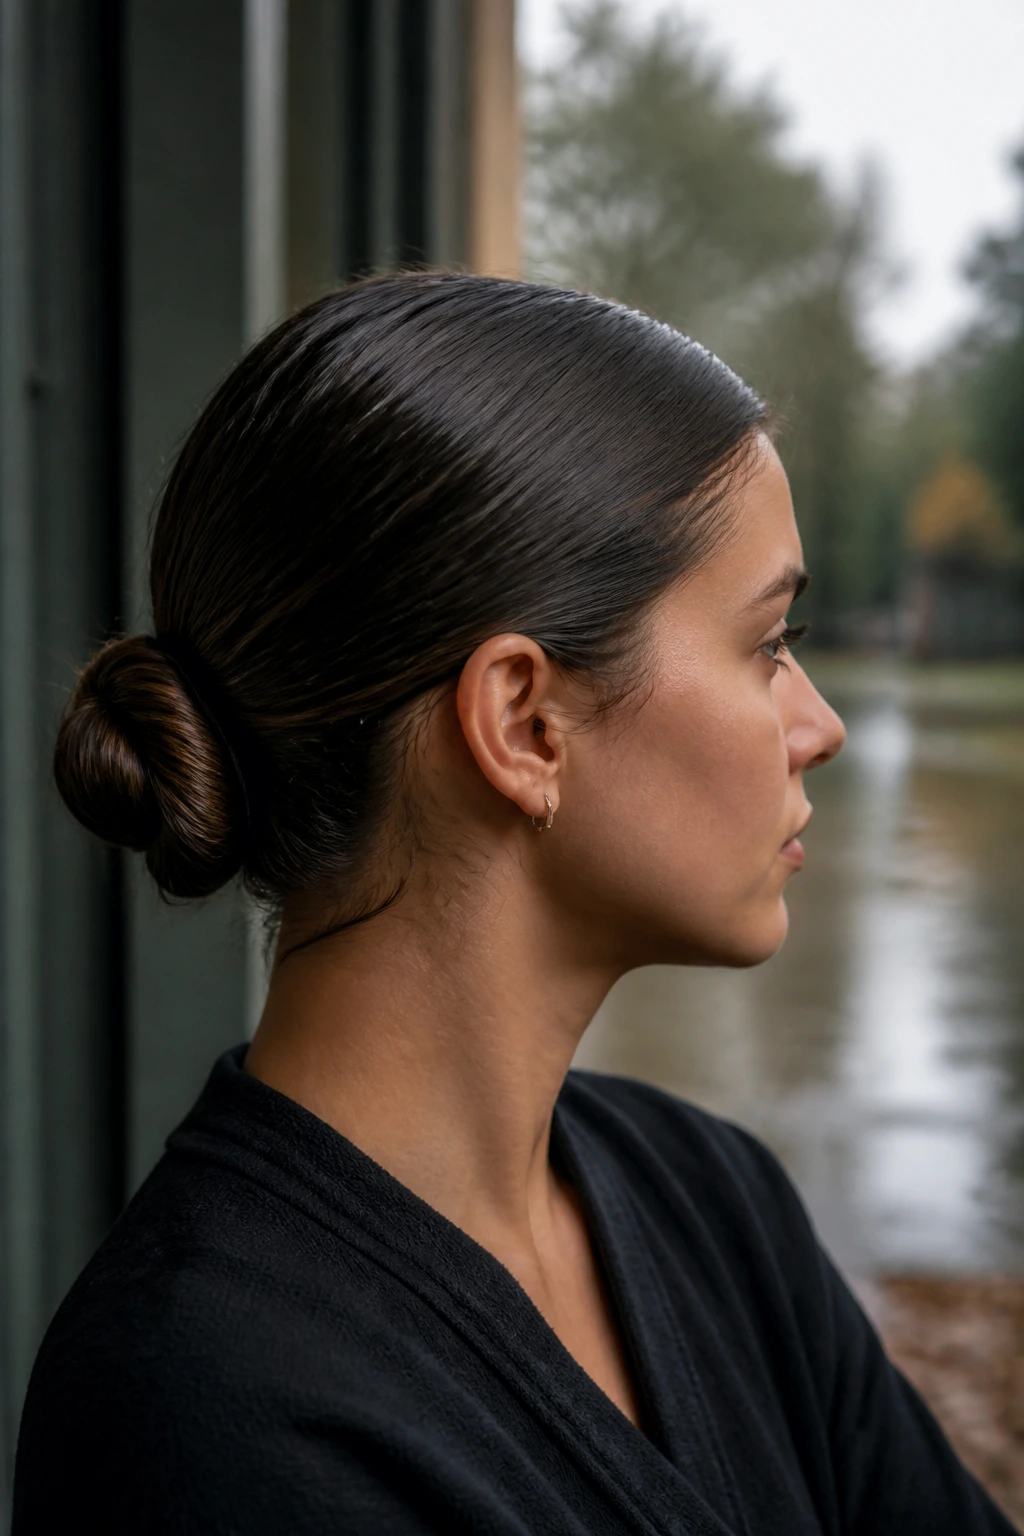
Humidity and wind can turn a careful style into a puffball, so this bun leans on control more than decoration. Smooth a pea-sized amount of cream or serum over the outer layer, gather the hair low, and tuck the ends under tightly enough that they’re not catching moisture from the air. Keep the product light. Too much and the bun droops.
A low, protected knot handles wet weather better than a fluffy topknot because it exposes less surface area. If you’re stepping out into damp air, use pins in an X shape to lock the seam. The goal is not glossy perfection. The goal is less frizz when the weather gets rude.
18. Gym-Ready Secure Bun
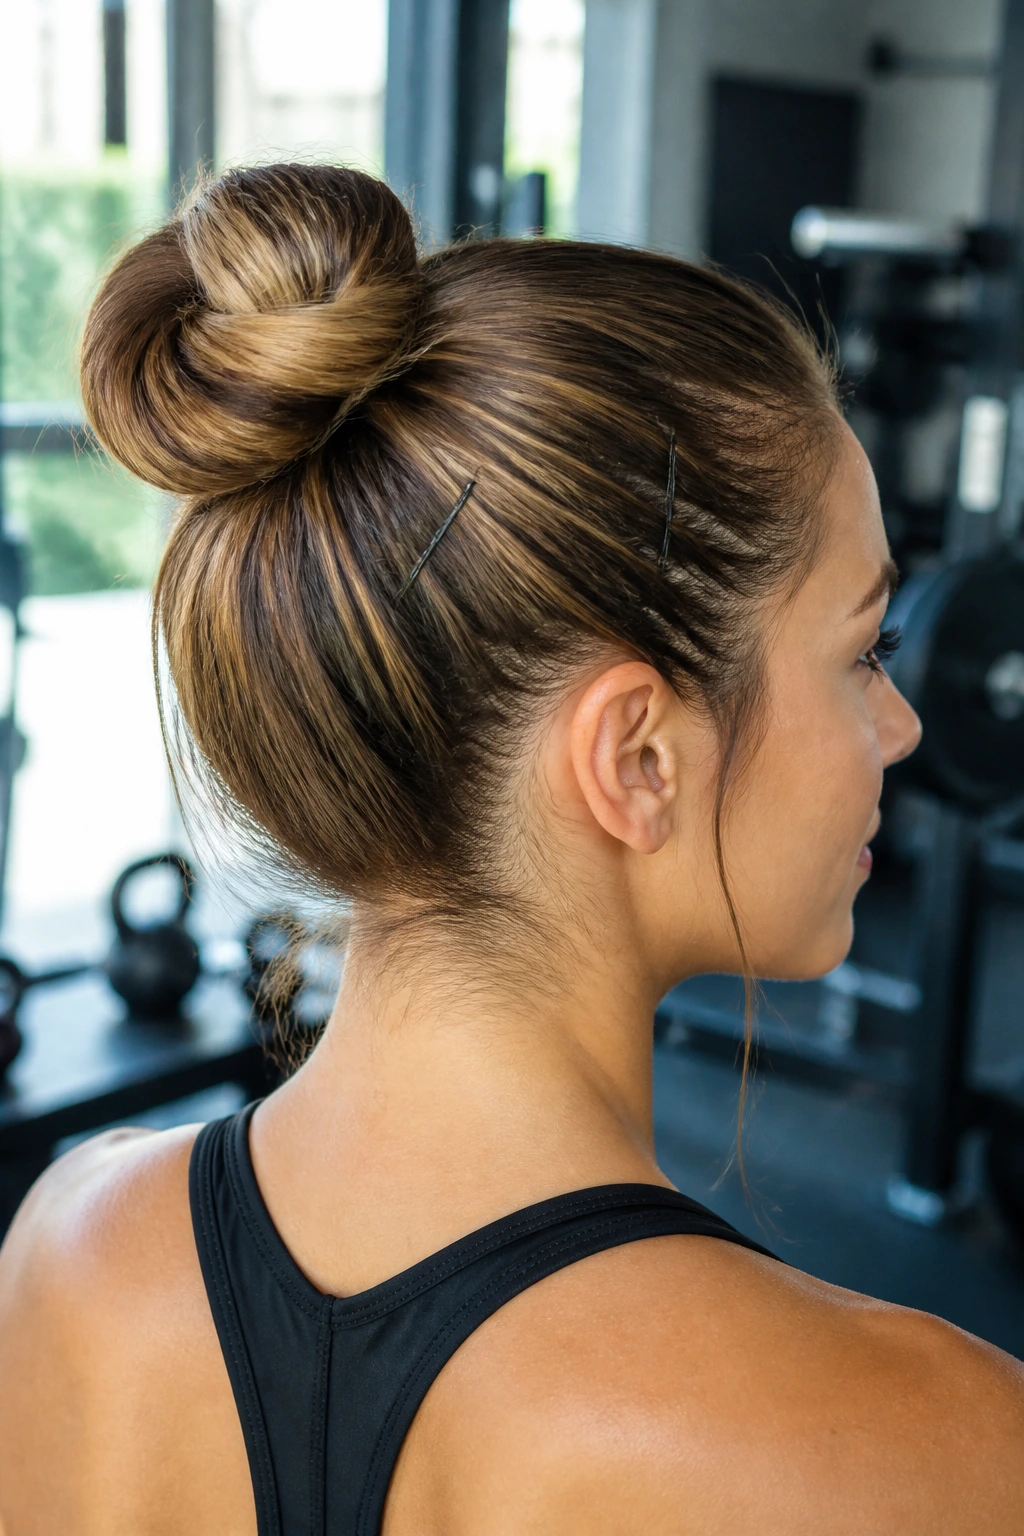
A workout bun has one job: stay put while you move. Pull the hair into a high or mid ponytail, twist it firmly, then wrap and secure it with a strong elastic plus two pins on opposite sides of the base. It should feel secure, but not like a headache is trying to form.
If your hair is slippery from conditioner or sweat, dry shampoo before you tie it back. A matte elastic grabs better than a smooth one. For the gym, less decorative mess and more reliable hold is the right trade.
19. Office-Safe Soft Bun
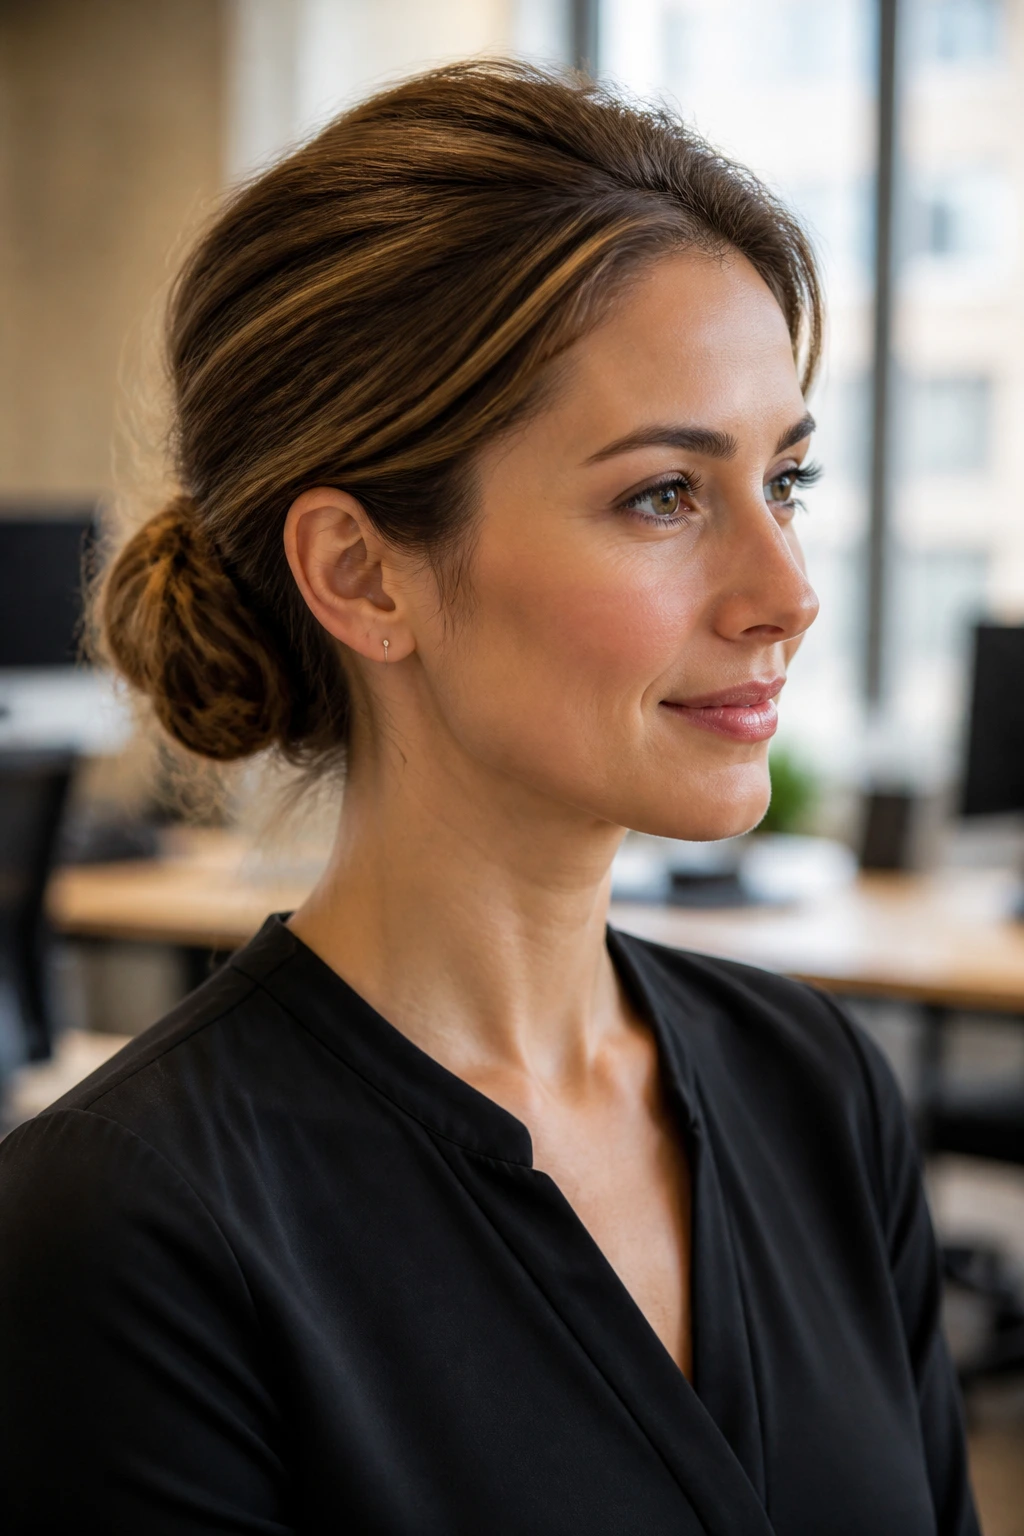
The office version of a messy bun should look calm, not casual to the point of shrugging. Keep the base low, smooth the front just enough to remove glaring bumps, and let the bun itself stay soft and slightly undone. A tiny bit of lift at the crown keeps it from looking flat against the head.
This is the style that works when you want your hair to stay out of your face through a long day without looking like you gave up. Pin the edges where they threaten to slip, then stop. Too much fiddling turns a soft bun into a polished one, and that’s a different mood entirely.
20. Brunch Bun with Tendrils
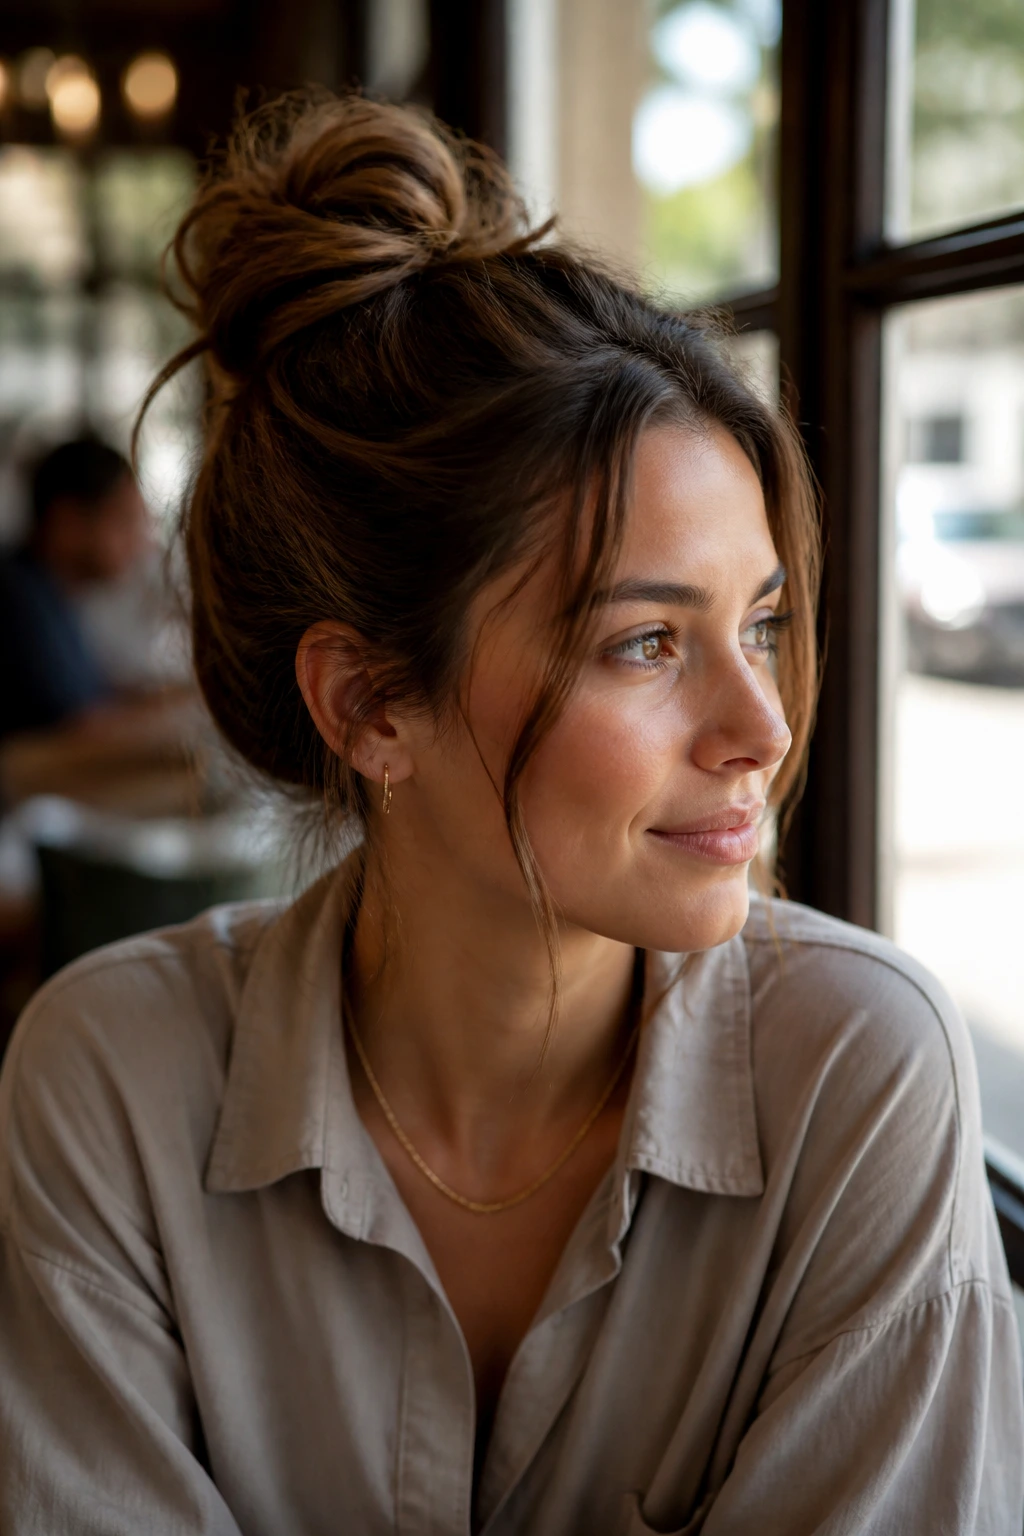
This one is all about air. The bun sits loose, the ends stay a little visible, and two thin tendrils at the temples soften the whole shape. A touch of shine spray on the lengths can make the texture read as intentional without making it stiff.
I like this when the rest of the outfit is simple and the hair gets to carry a little of the look. Curl the face pieces away from the face if you want the style to open up more. A brunch bun should look relaxed enough to touch, not sculpted enough to stare at.
21. Soft Chignon Messy Bun
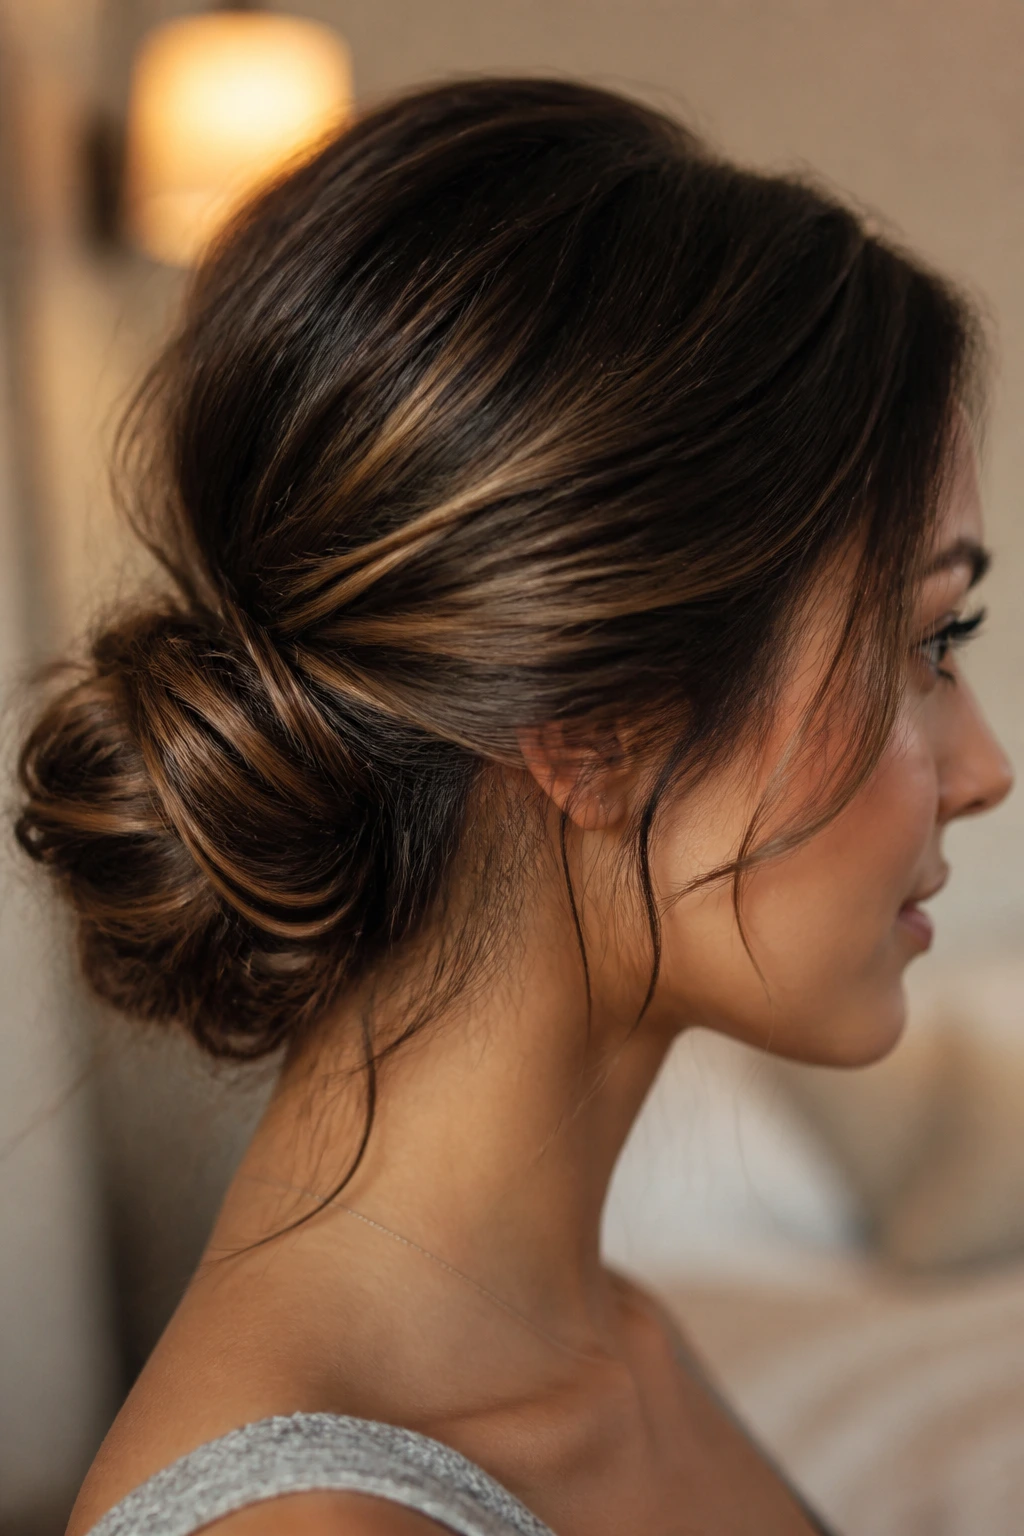
A chignon is the fancy cousin of the messy bun, but it doesn’t have to feel formal. Start low at the nape, twist the hair into a loose coil, tuck the ends underneath, and then pull a few pieces free at the sides so the shape loses its stiffness. The result sits somewhere between neat and undone.
What keeps it from looking too formal
Keep the coil narrow and let the base show a little. If the bun is too round and too centered, it starts to read as a wedding style. The trick is in the edges: smooth enough to look finished, loose enough to keep some life.
22. Wedding-Guest Twisted Bun
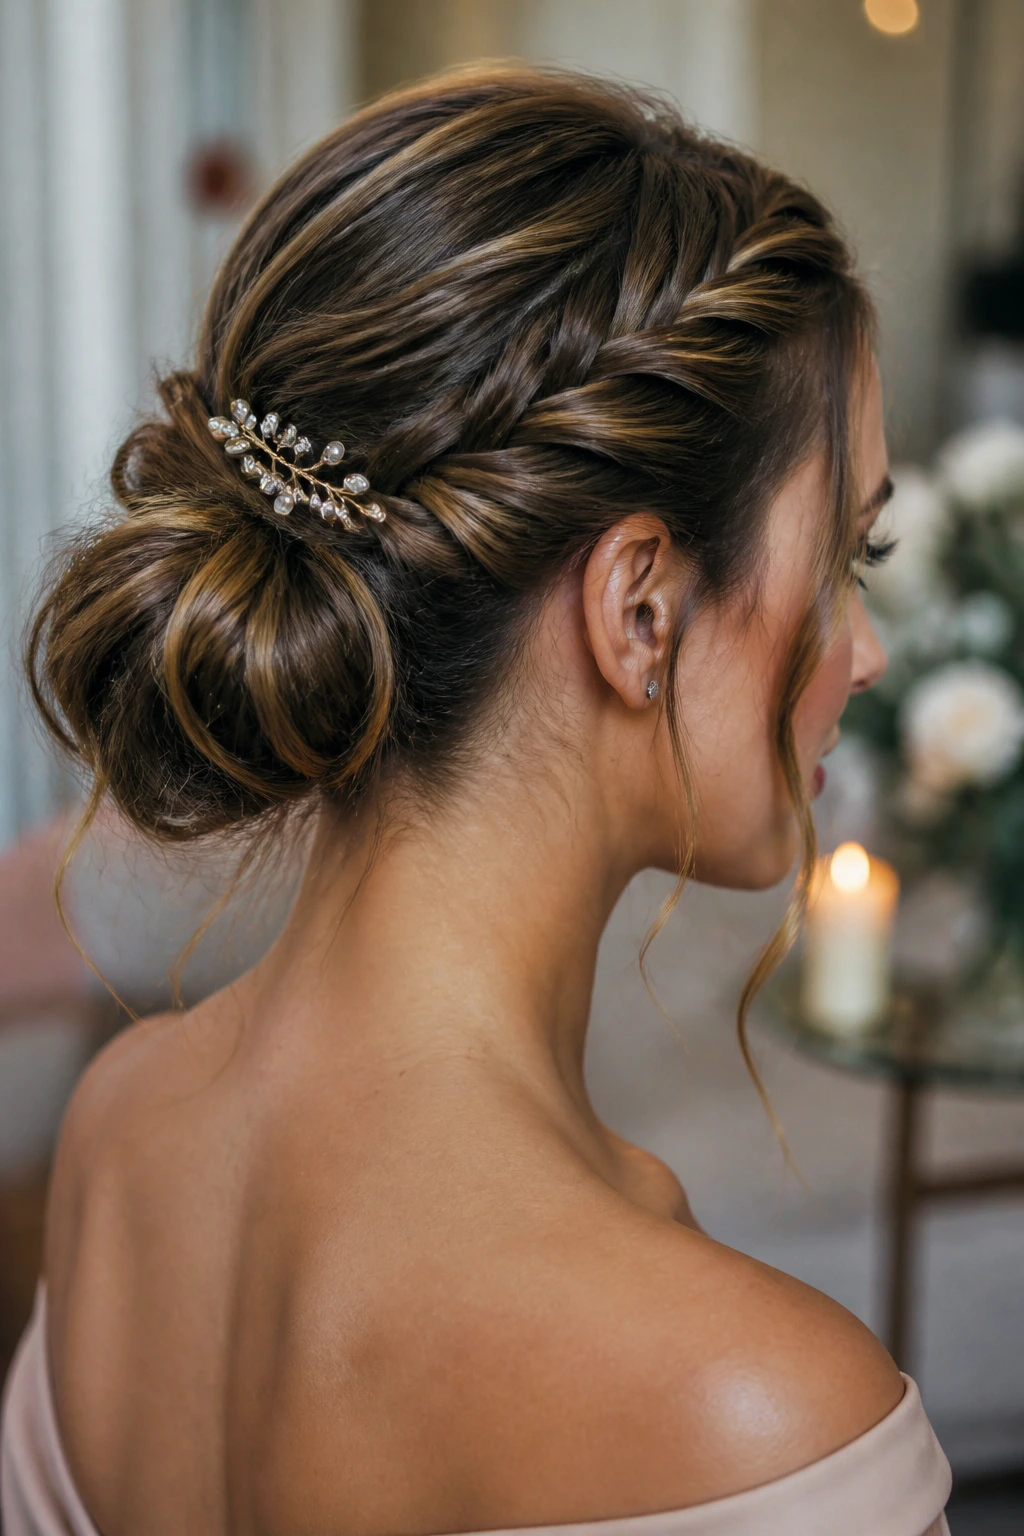
This is the version I’d choose when the outfit already has enough drama. Twist two sections from the temples back to the nape, join them into a low bun, and secure with decorative pins if you want a little shine. It feels dressed up without becoming stiff.
Use a fine-tooth comb only at the front if you want a cleaner outline, then leave the back with some movement. That contrast is what gives the style its shape. When the front is neat and the bun is soft, the whole look feels intentional without looking overworked.
23. Beachy Air-Dried Bun
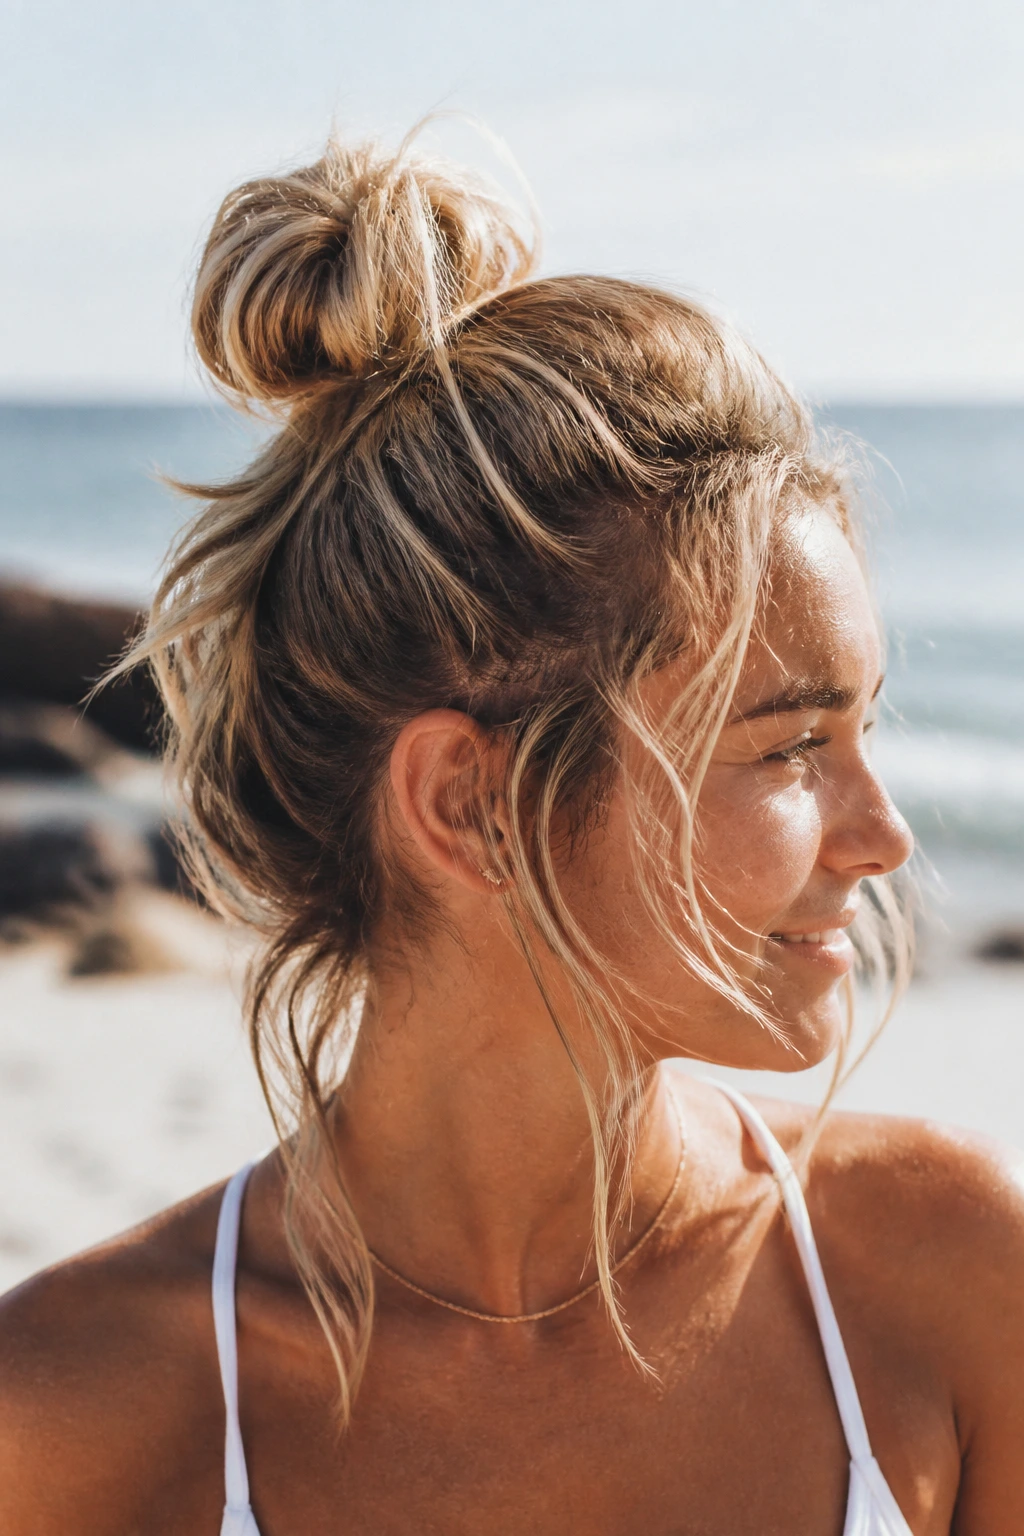
Air-dried hair tends to already have a bit of bend, and this bun works with that instead of fighting it. Add a light salt spray or texture spray to the lengths, rough-dry if needed, then gather the hair into a loose knot and let the ends stay imperfect. Don’t brush the wave out first. That kills the texture you need.
This style is especially good when your hair looks better with a little roughness than with a smooth finish. It’s one of the few buns that looks better after you touch it a little. The mess should come from the hair, not from random collapse.
24. Second-Day Hair Bun
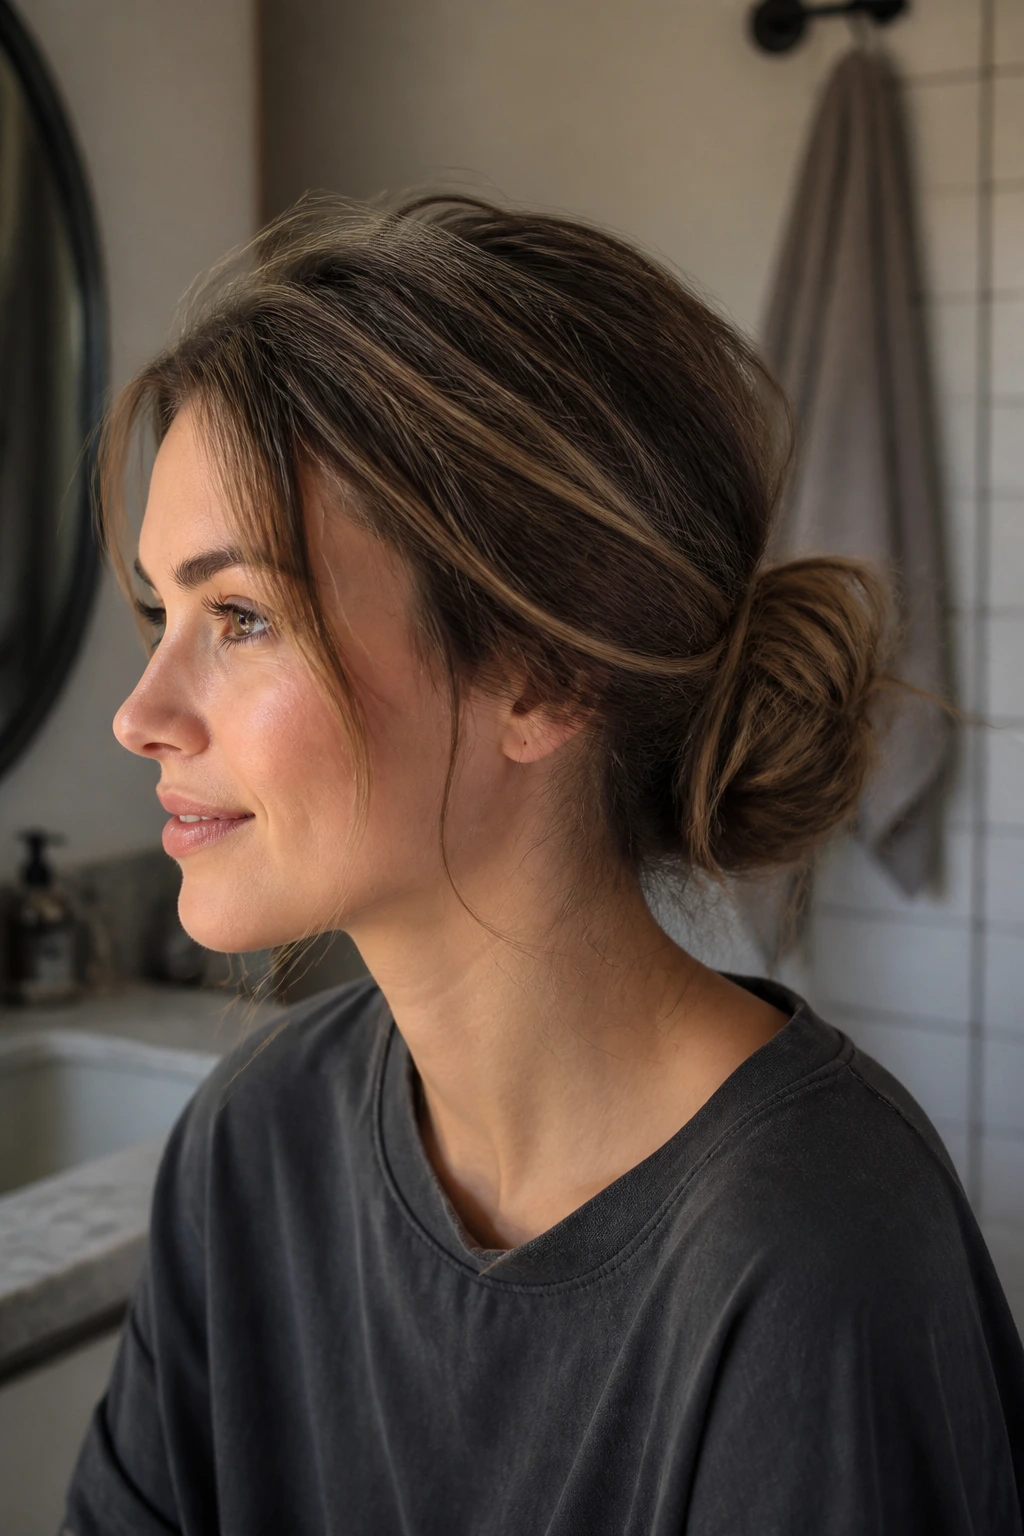
Second-day hair is often the easiest hair to bun because the roots already have some grip. If your hair feels too soft on day one, wait until it has a hint of texture, then gather it loosely and pin the shape where it wants to fold naturally. A light mist of dry shampoo at the crown can help, but don’t dump it on the ends.
This is the bun for anyone who has learned that squeaky-clean hair and updos do not always get along. You don’t need to overwork it. The hair is already doing part of the job for you.
25. No-Heat Overnight Bun
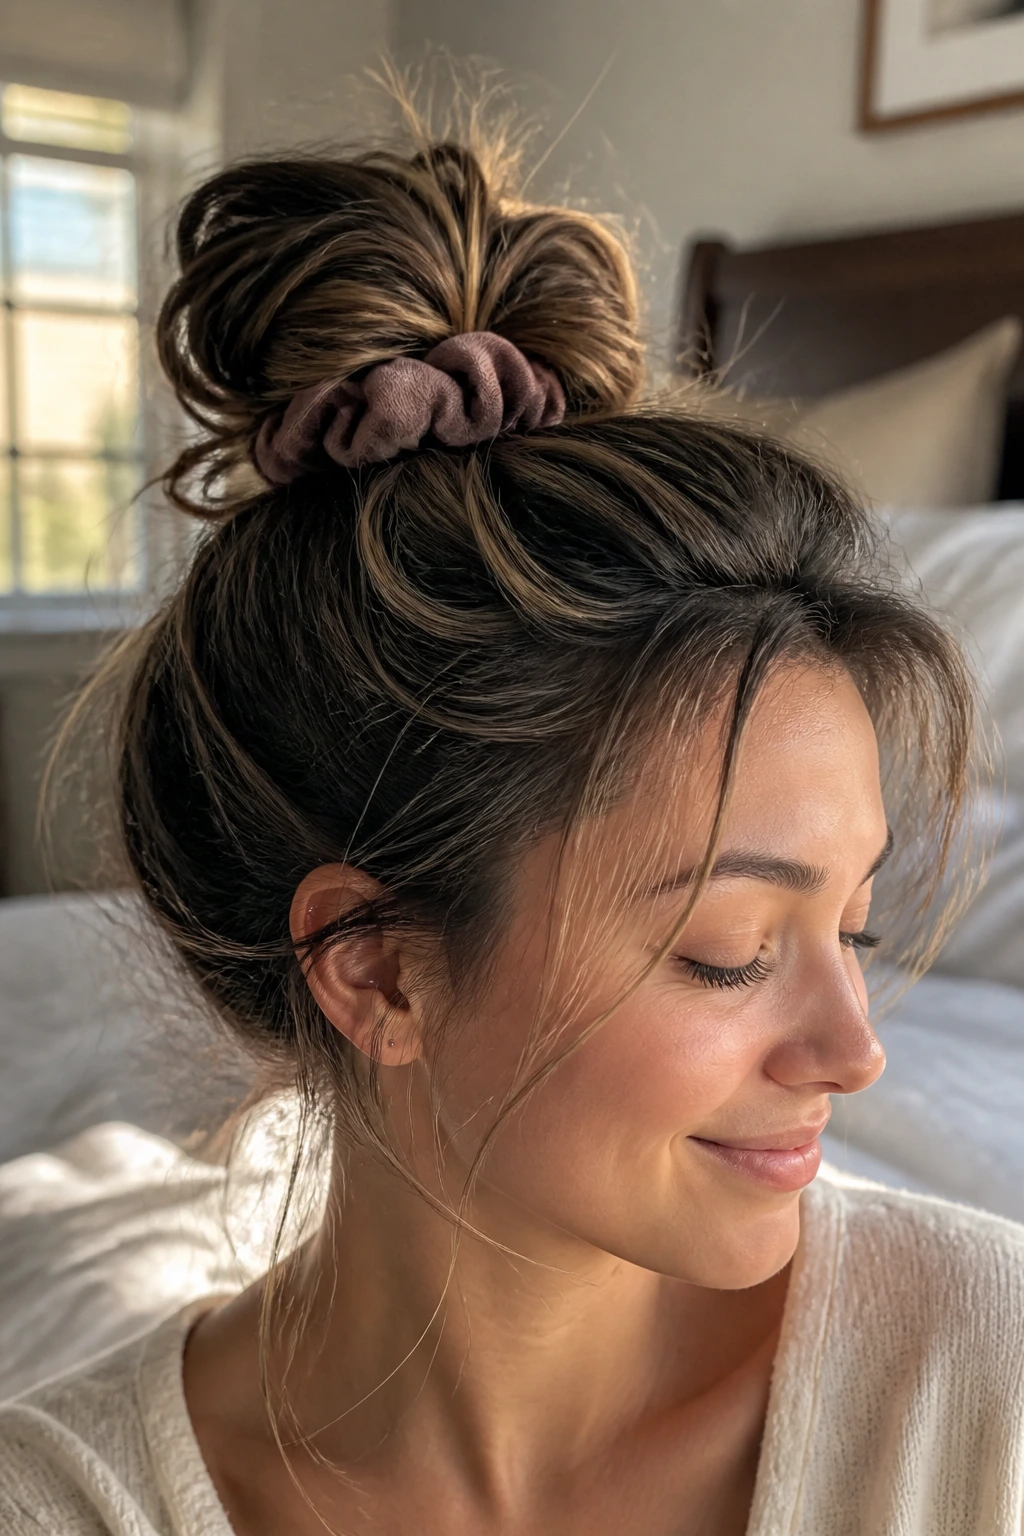
A no-heat bun starts as a loose setup before bed and turns into a style in the morning. Wrap hair that is about 80 percent dry into a soft bun at the crown or low at the nape, secure it with a scrunchie, and let it rest overnight. In the morning, shake it out and repin the shape so it looks like a bun again, not a sleep knot.
Don’t do this with soaking hair. That’s how you wake up with a damp scalp and a weird bend. Loose enough to sleep in, dry enough to be safe — that balance matters.
26. Quick Errand Mini Bun
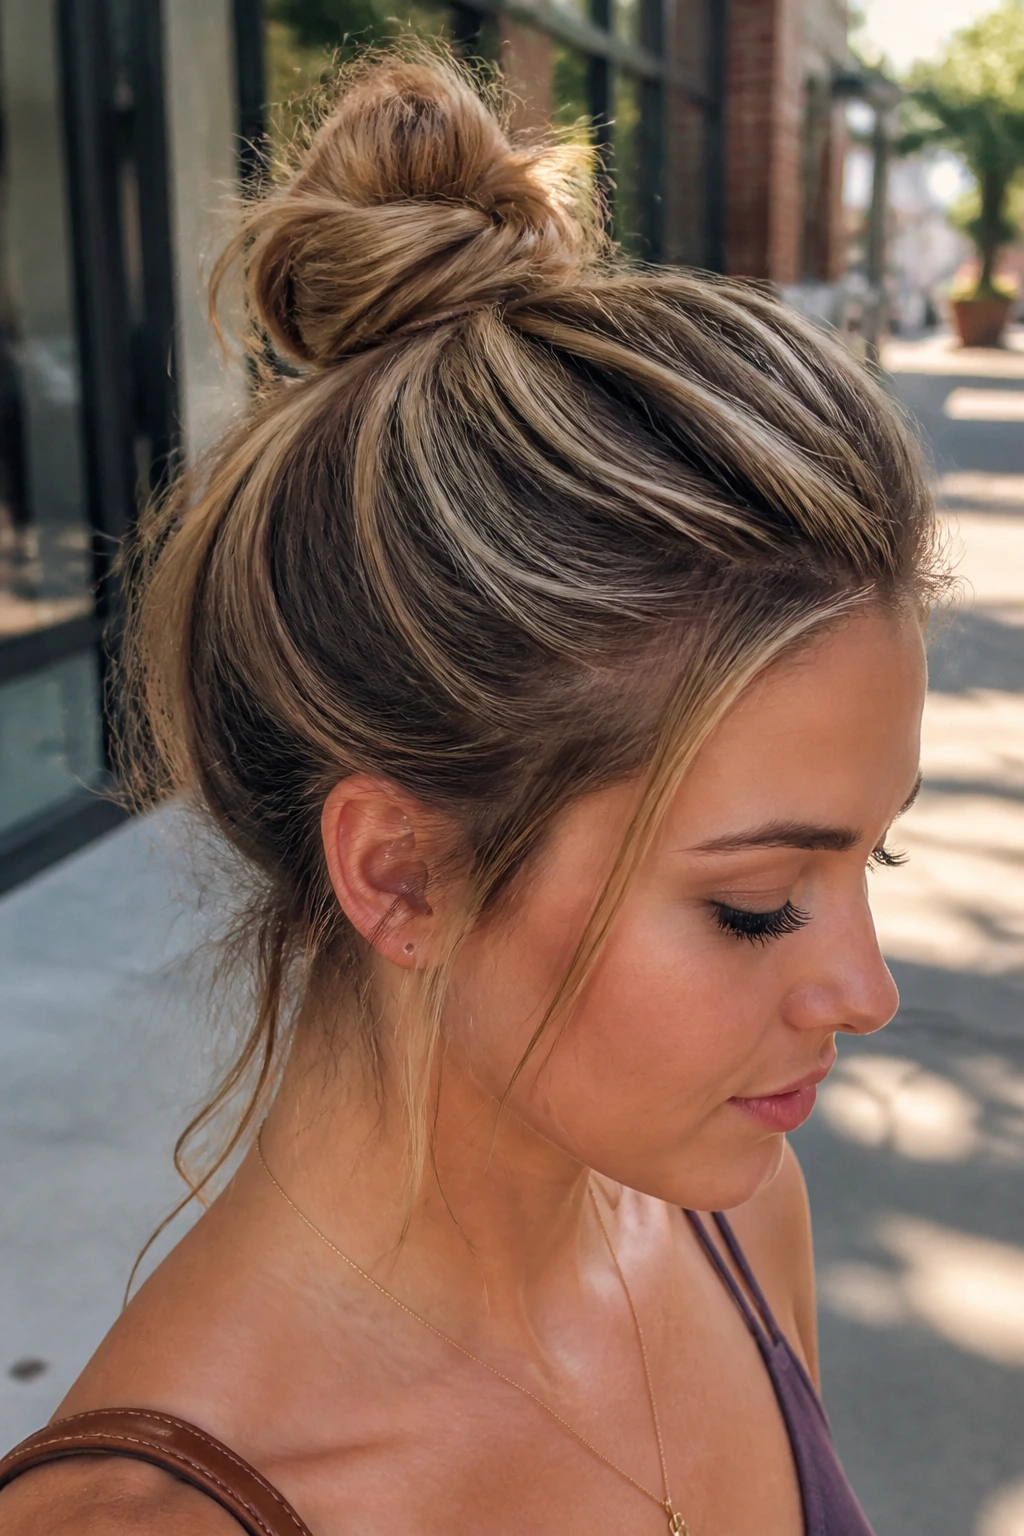
This is the bun for the school run, the pharmacy stop, the mailbox trip, and every other five-minute errand that doesn’t deserve a full styling session. Pull the hair into a small knot at the crown or slightly lower, secure it with one elastic, and leave a few shorter pieces loose around the ears if they naturally fall there.
It doesn’t need symmetry. It needs speed. A mini bun works best when you stop touching it once it’s up. The less you fuss, the more believable it looks.
27. Minimal Low Bun
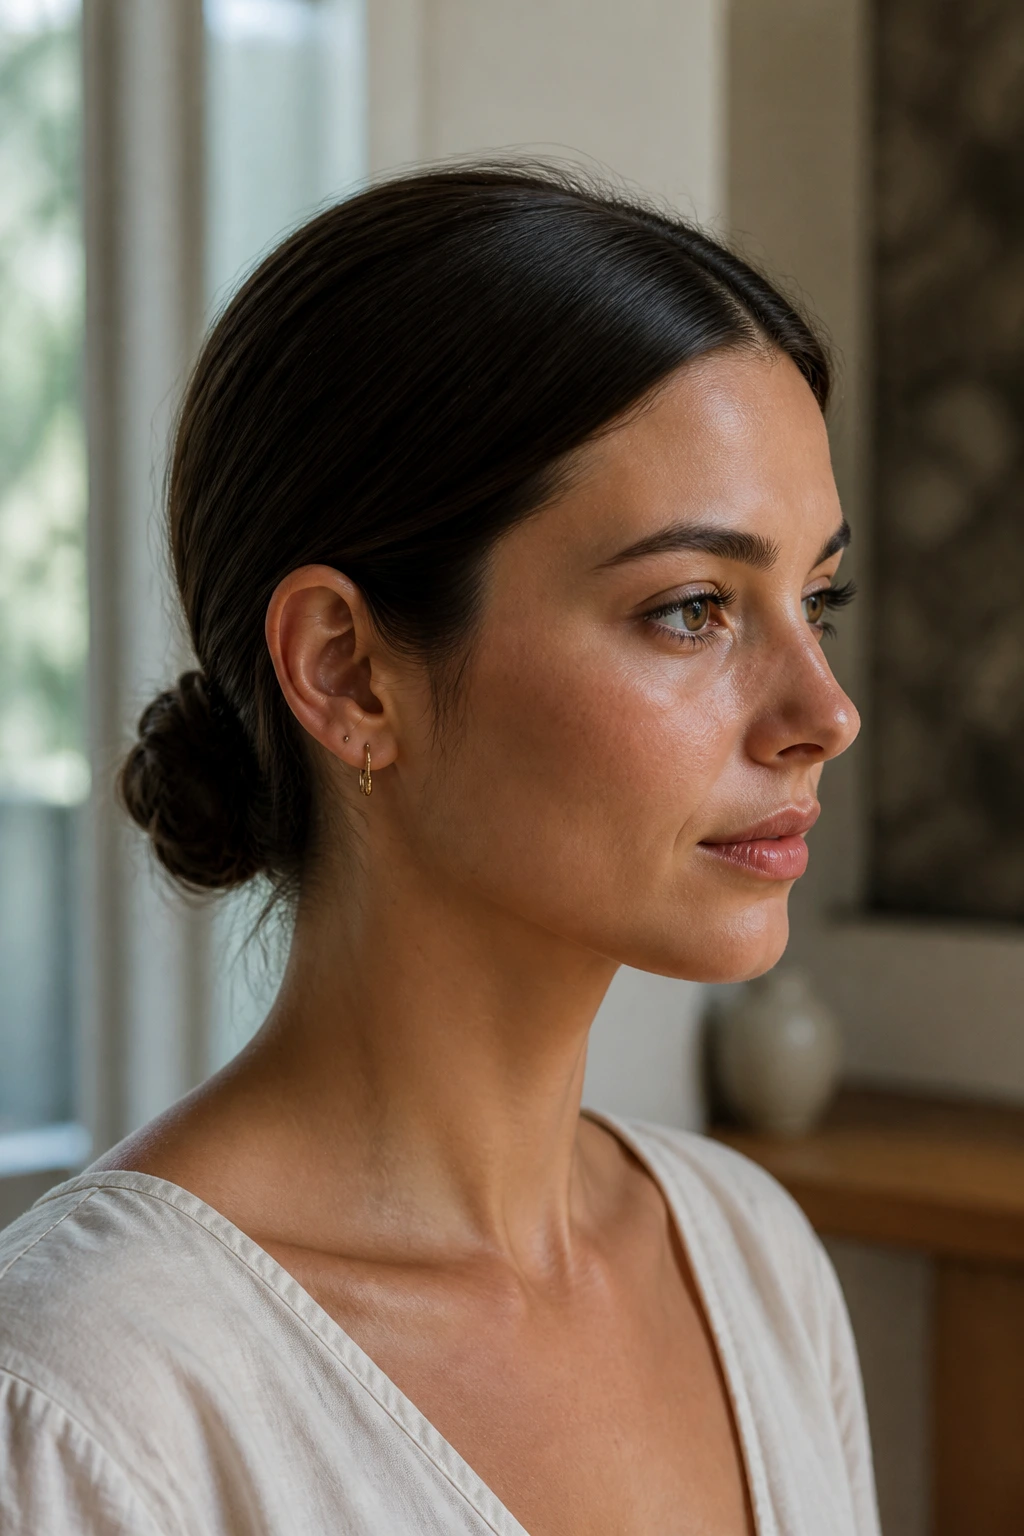
Minimal doesn’t mean boring. It means stripping the shape down to what matters: a clean front, a low knot, and just enough looseness at the seam to keep it from looking severe. A center part gives it structure; an off-center part softens it. Pick one and commit.
This style is good when the outfit already has texture, like a chunky sweater or a patterned dress. The hair doesn’t need to compete. A quiet bun can be the sharpest-looking one in the room if the lines are clean.
28. Romantic Spiral Bun
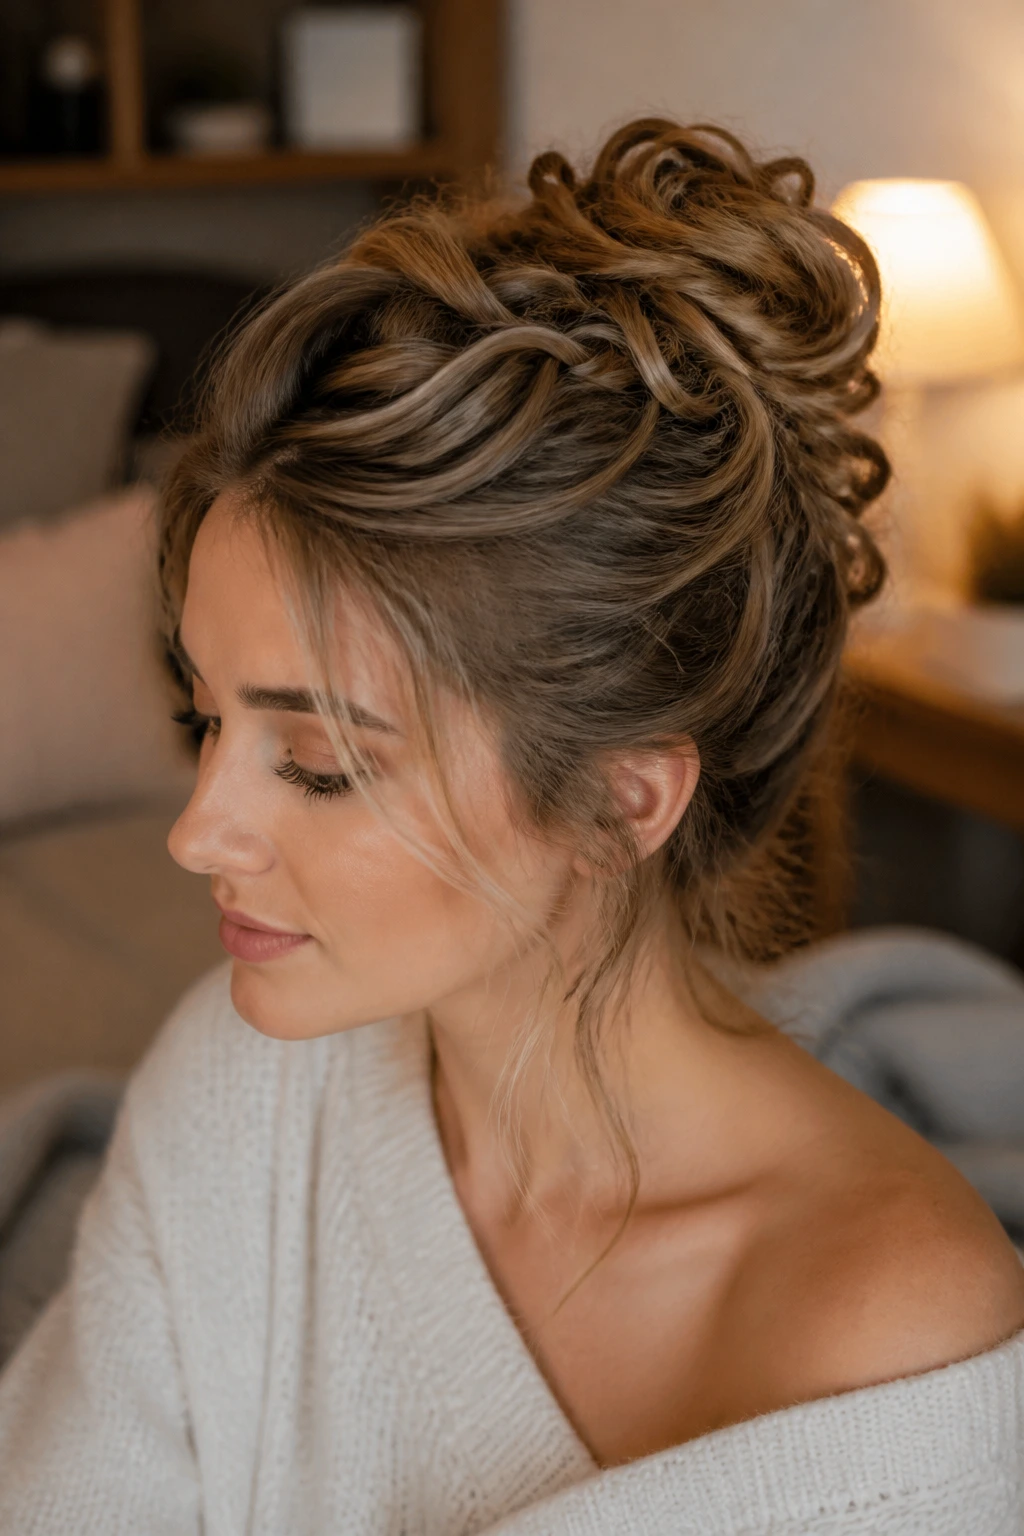
A romantic bun takes smaller twists and lets them show. Curl or finger-twist small sections before pinning them into a loose spiral shape, so the bun ends up with visible coils instead of a single wrapped mass. A couple of face pieces can stay loose and soft at the edges.
This one works when you want the hair to look a little more delicate. It’s especially nice on medium-length hair that can’t make a giant bun anyway. The spiral detail is what keeps it from reading like a standard knot.
29. Edgy Textured Crown Bun
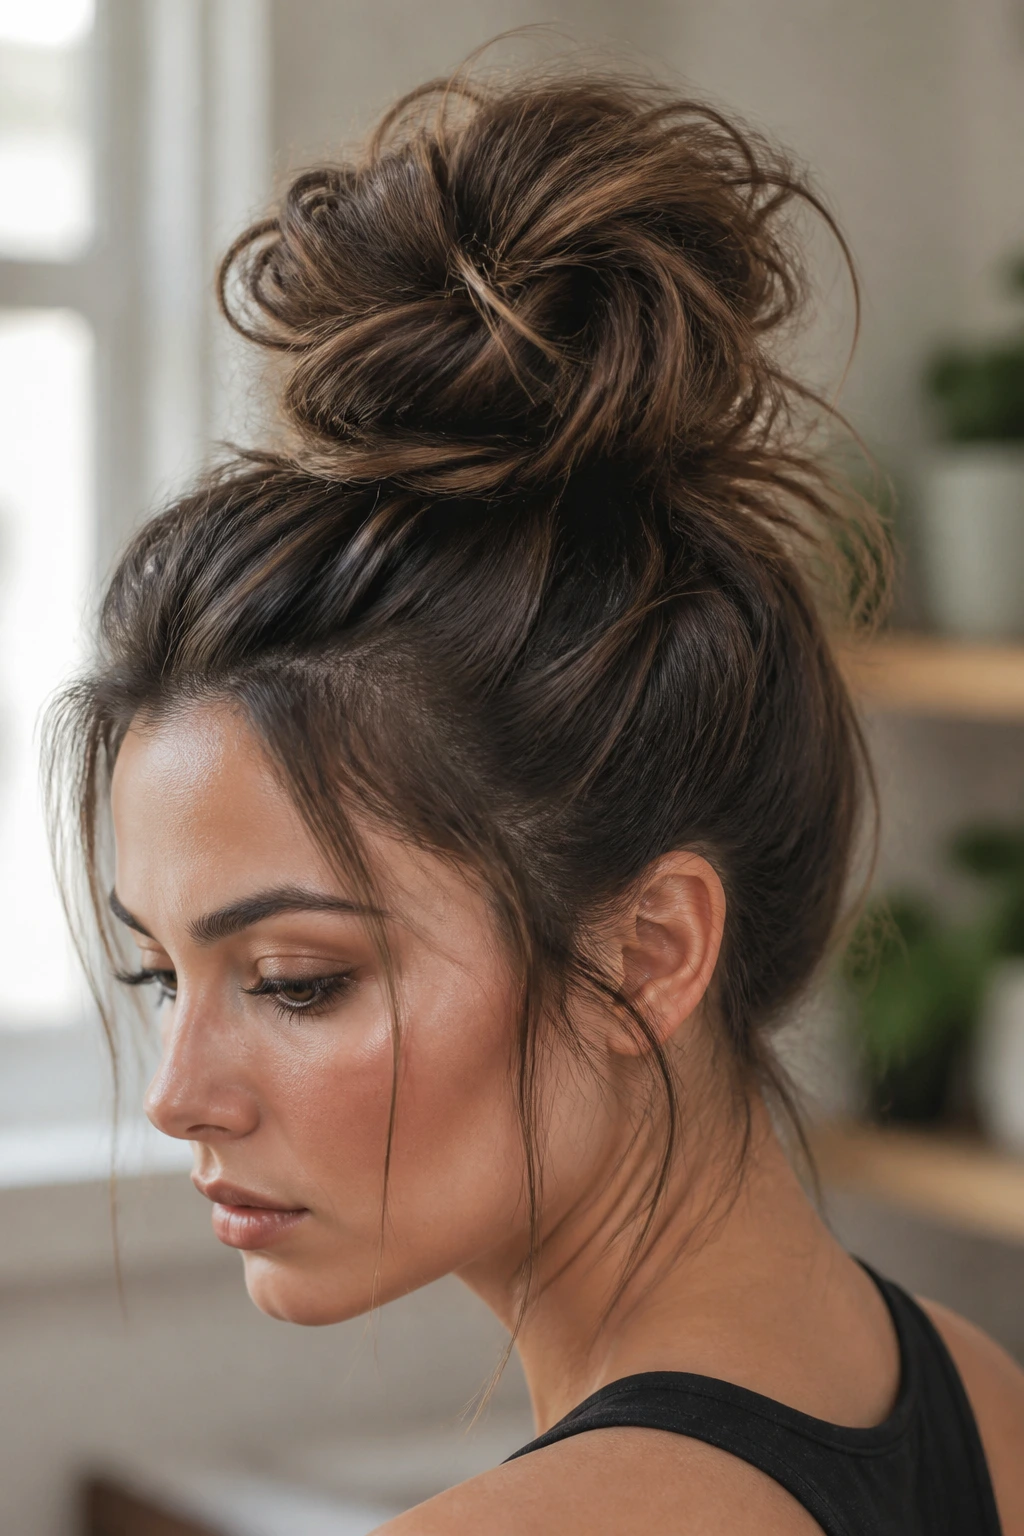
If you want more attitude, raise the crown first. Tease a section at the top, rough up the roots with dry shampoo or texture powder, then build the bun high and let the ends stay piecey instead of tucked neatly away. A little matte pomade at the front can sharpen the line without flattening the lift.
This style looks best when the bun has some height and the edges aren’t too polished. It’s not trying to be sweet. Volume at the crown changes the whole mood faster than extra pins ever will.
30. Low Back-of-Neck Bun
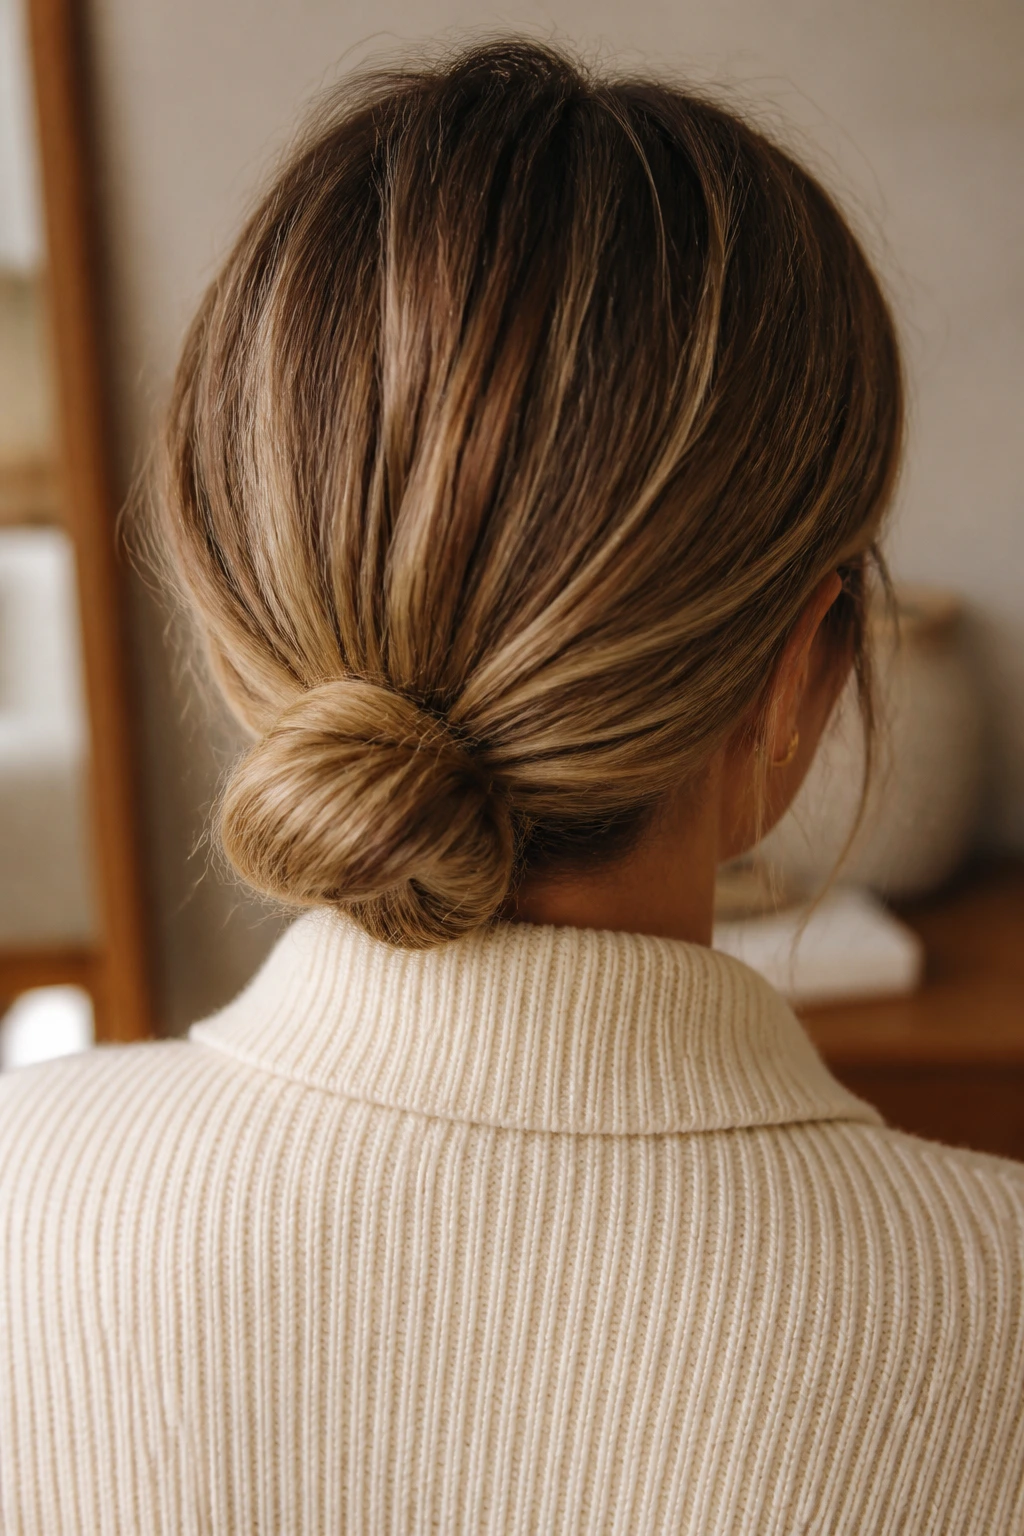
A bun at the back of the neck sits nicely under collars and feels easy to wear for hours. Keep it tight enough that it doesn’t slide, but flat enough that it doesn’t poke into the back of your head. The shape should rest where your neck and hairline meet, not float above it.
This is one of the most practical buns on the list because it stays out of the way without pulling attention. It’s also a good choice if your hair is heavy and you want less strain at the scalp. Low placement reduces fuss, and sometimes that is the whole win.
31. High Crown Bun
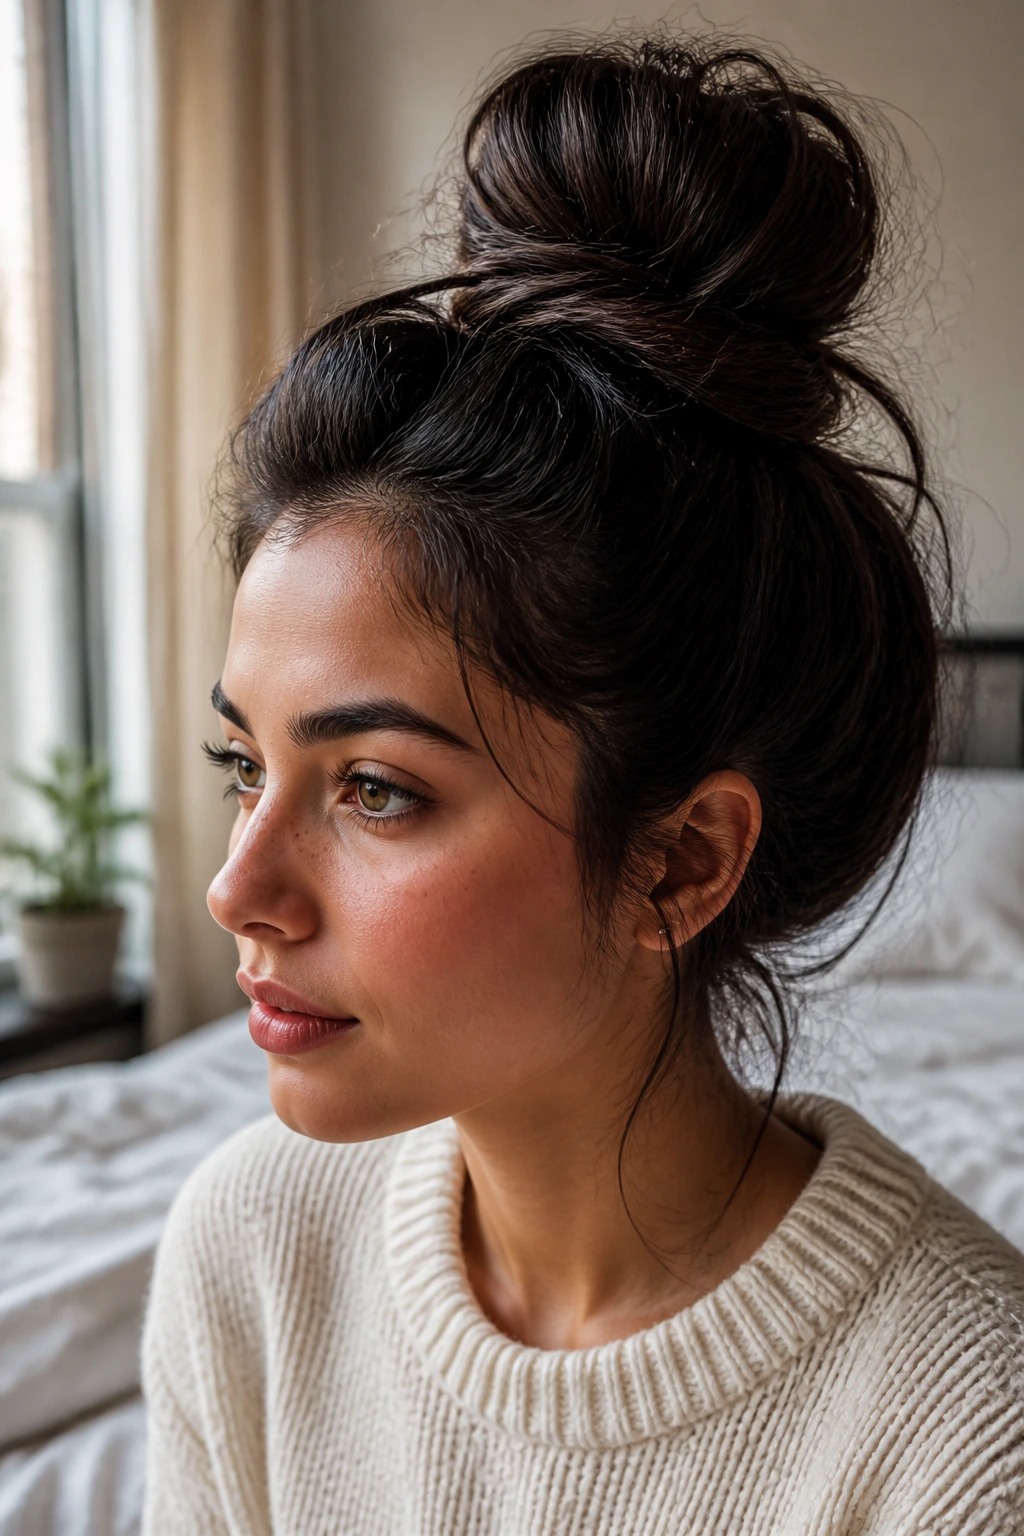
A high crown bun gives lift without needing a blowout. Gather the hair at the highest point that still feels comfortable, then twist it into a loose knot and pin the sides so the bun doesn’t drift backward. The height should make the face look a little more open.
If the bun ends up too tight, you’ll feel it by the end of the day. So leave some room at the roots and use the pins to hold the base instead of yanking the ponytail into submission. Height is useful; tension is not.
32. Coat-Collar Bun
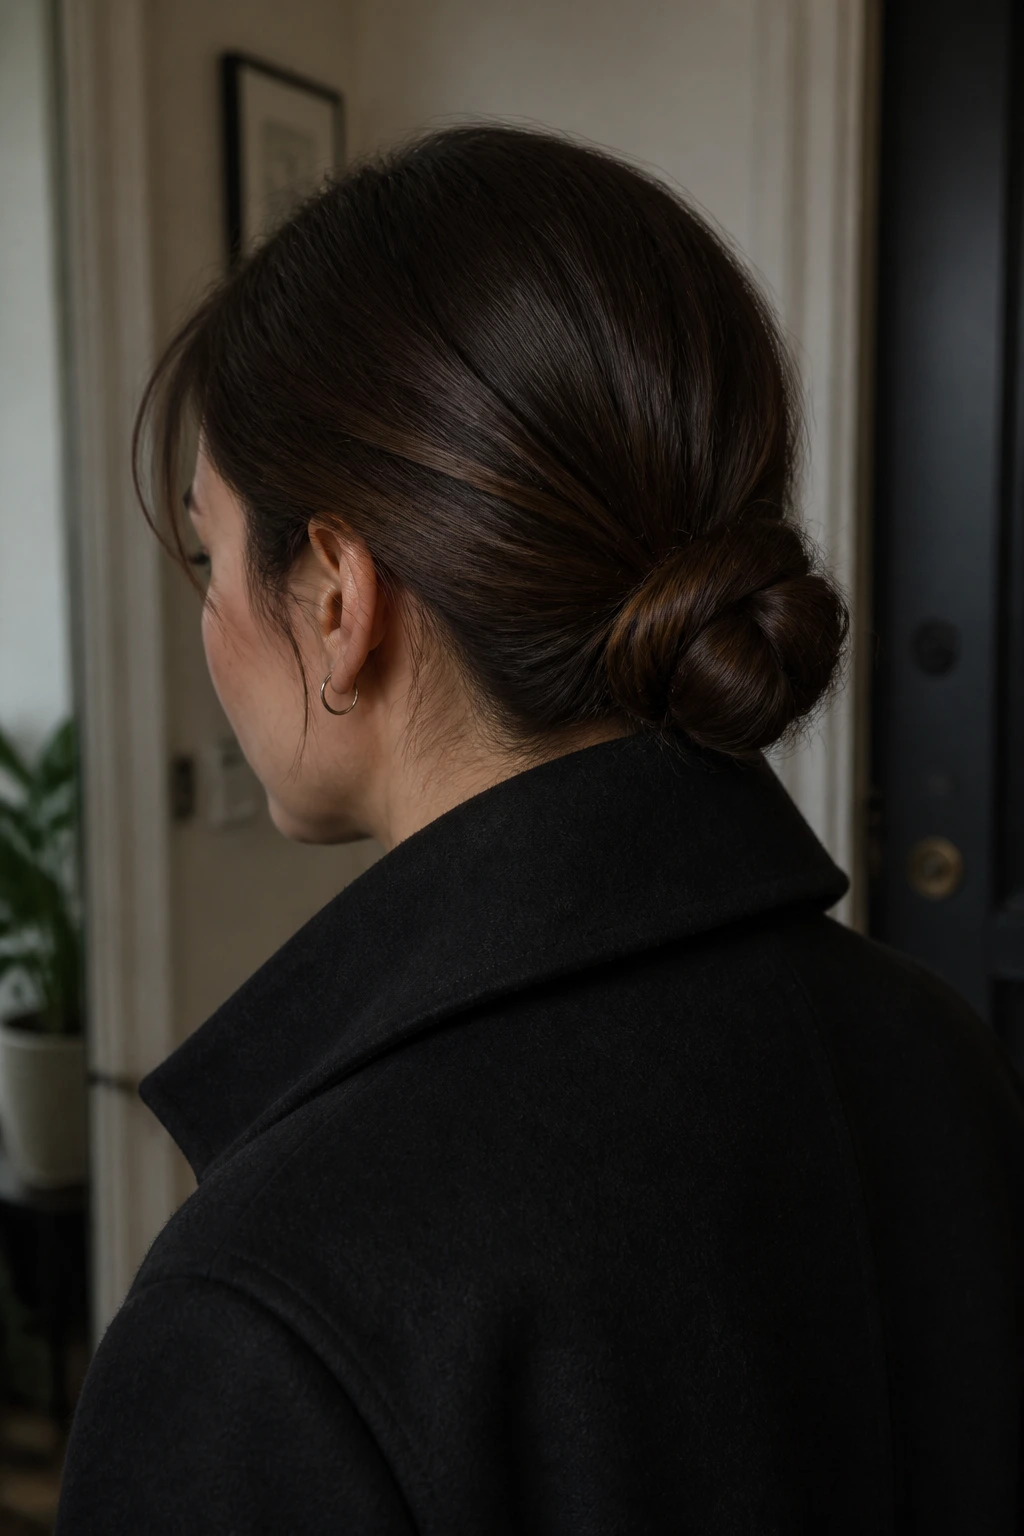
When jackets, scarves, or high necklines are in the mix, a compact bun keeps the whole outfit from getting crowded. Pull the hair low and close to the head, then tuck the ends in so the knot doesn’t rub against the fabric. A flatter bun sits better under layers and stays neater when you move.
This style is more about practicality than showiness, which I like. It clears the neckline and avoids that weird bump some buns make under a collar. If the clothing already has structure, the hair should stay smaller and quieter.
33. Work-From-Home Knot Bun
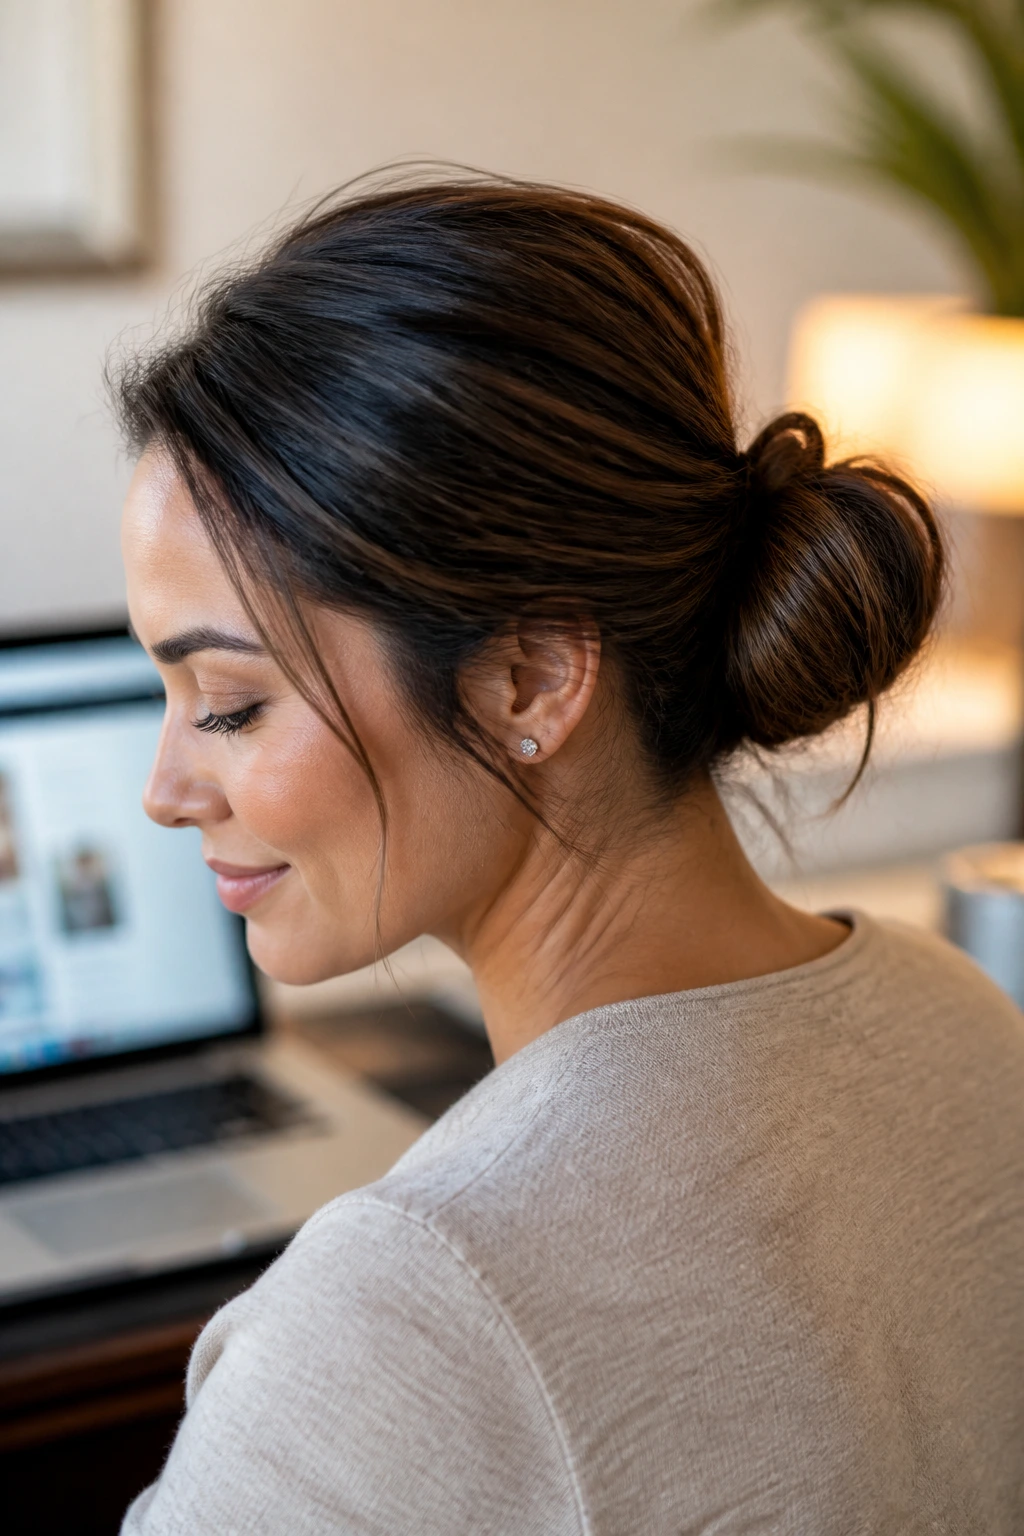
This is the bun that lets you think, type, and forget about your hair for a few hours. Build a low, loose knot, keep the front soft enough to slip behind the ears if needed, and use pins only where the hair starts to sag. You want comfort first, shape second.
It’s also one of the easiest buns to refresh after headphones or a hoodie flatten it. Just loosen, twist once more, and re-pin the base. A work-from-home bun should survive being ignored.
34. Three-Pin Bun
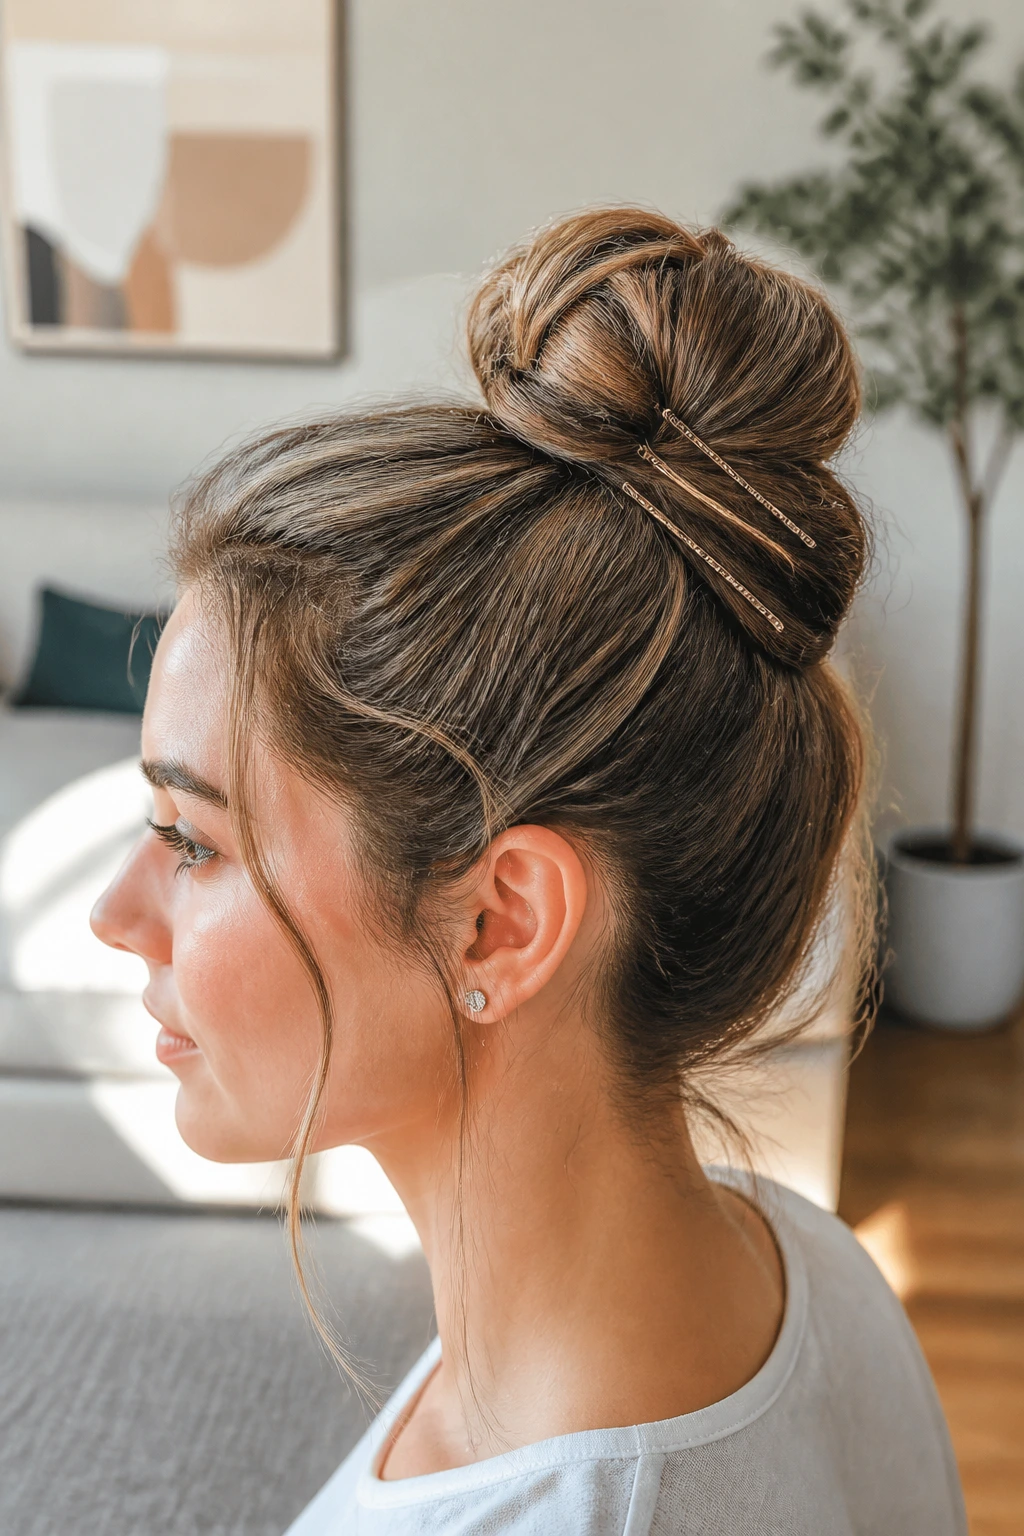
There’s something satisfying about a bun that only needs three pins. Make the bun first, then use one pin to lock the seam and two more crossed on opposite sides so the knot can’t rotate. That crosswise placement matters more than the number itself.
Three pins, no more
If the bun is slipping, the usual mistake is not “too few pins” but “pins in the wrong direction.” Push them in along the curve of the bun, not straight out from it. Good pin placement beats a drawer full of extras.
35. Loose Loop Bun
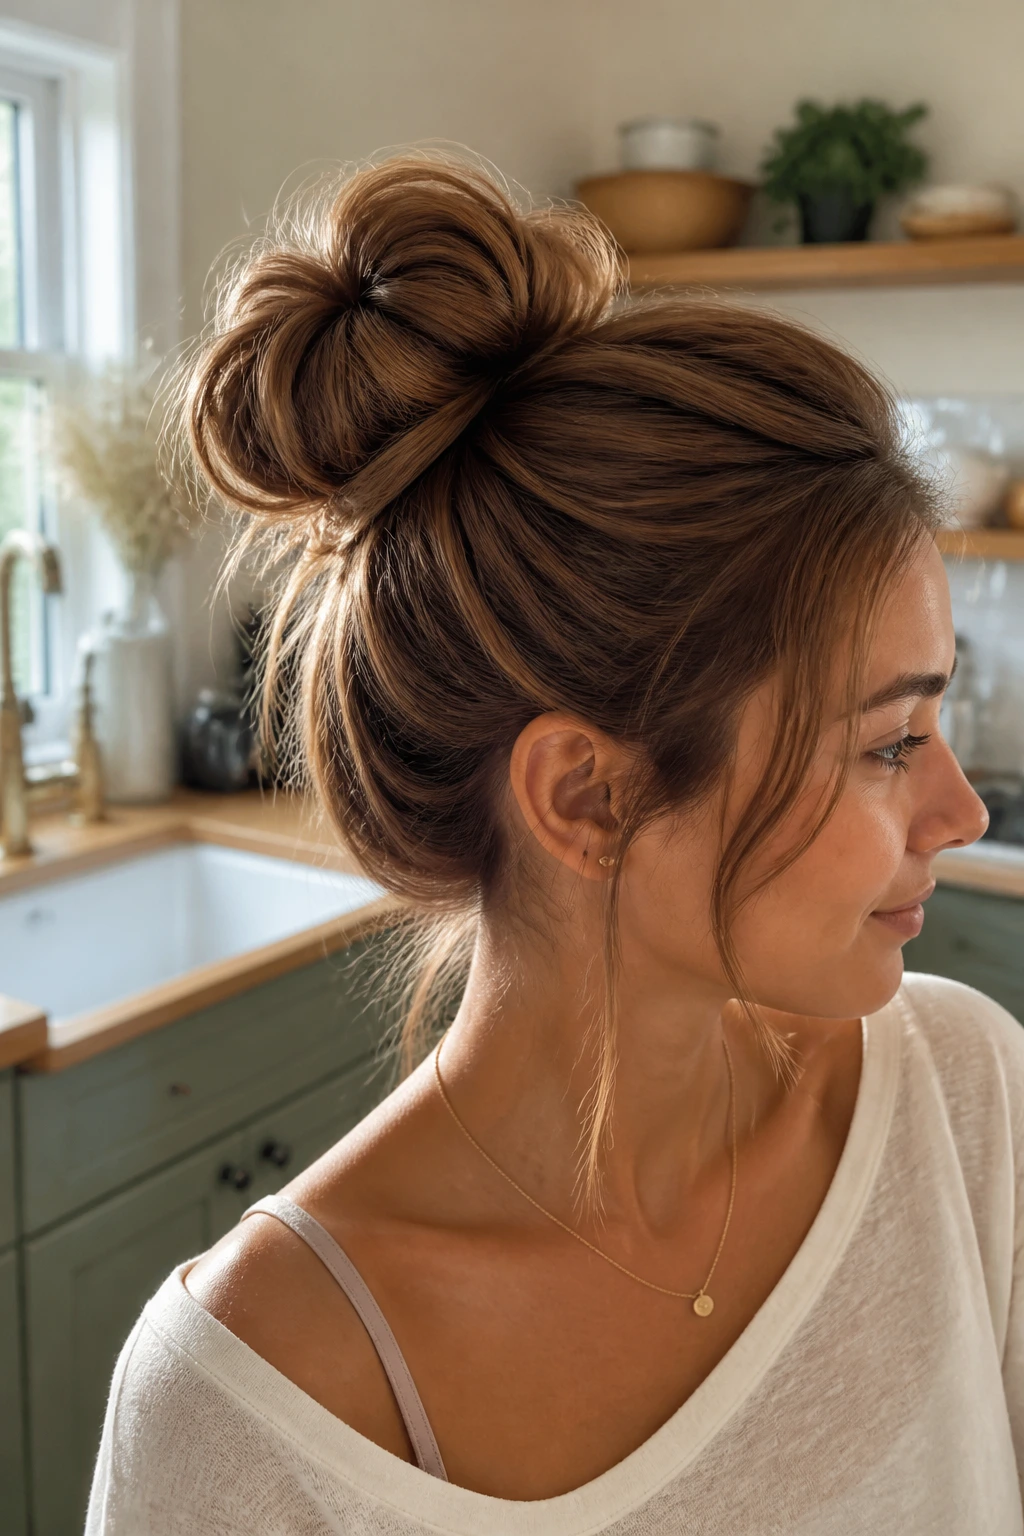
A loose loop bun is what happens when you leave a ponytail partially through the final elastic instead of pulling it all the way through. The loop creates shape instantly, and the ends can fan out or be tucked under depending on how casual you want it to look. It’s fast, soft, and hard to mess up.
This works well on medium to long hair because the loop has enough length to show. Tighten the elastic just enough to hold the base, then stop. The loop itself is the style.
36. Double-Twist Bun
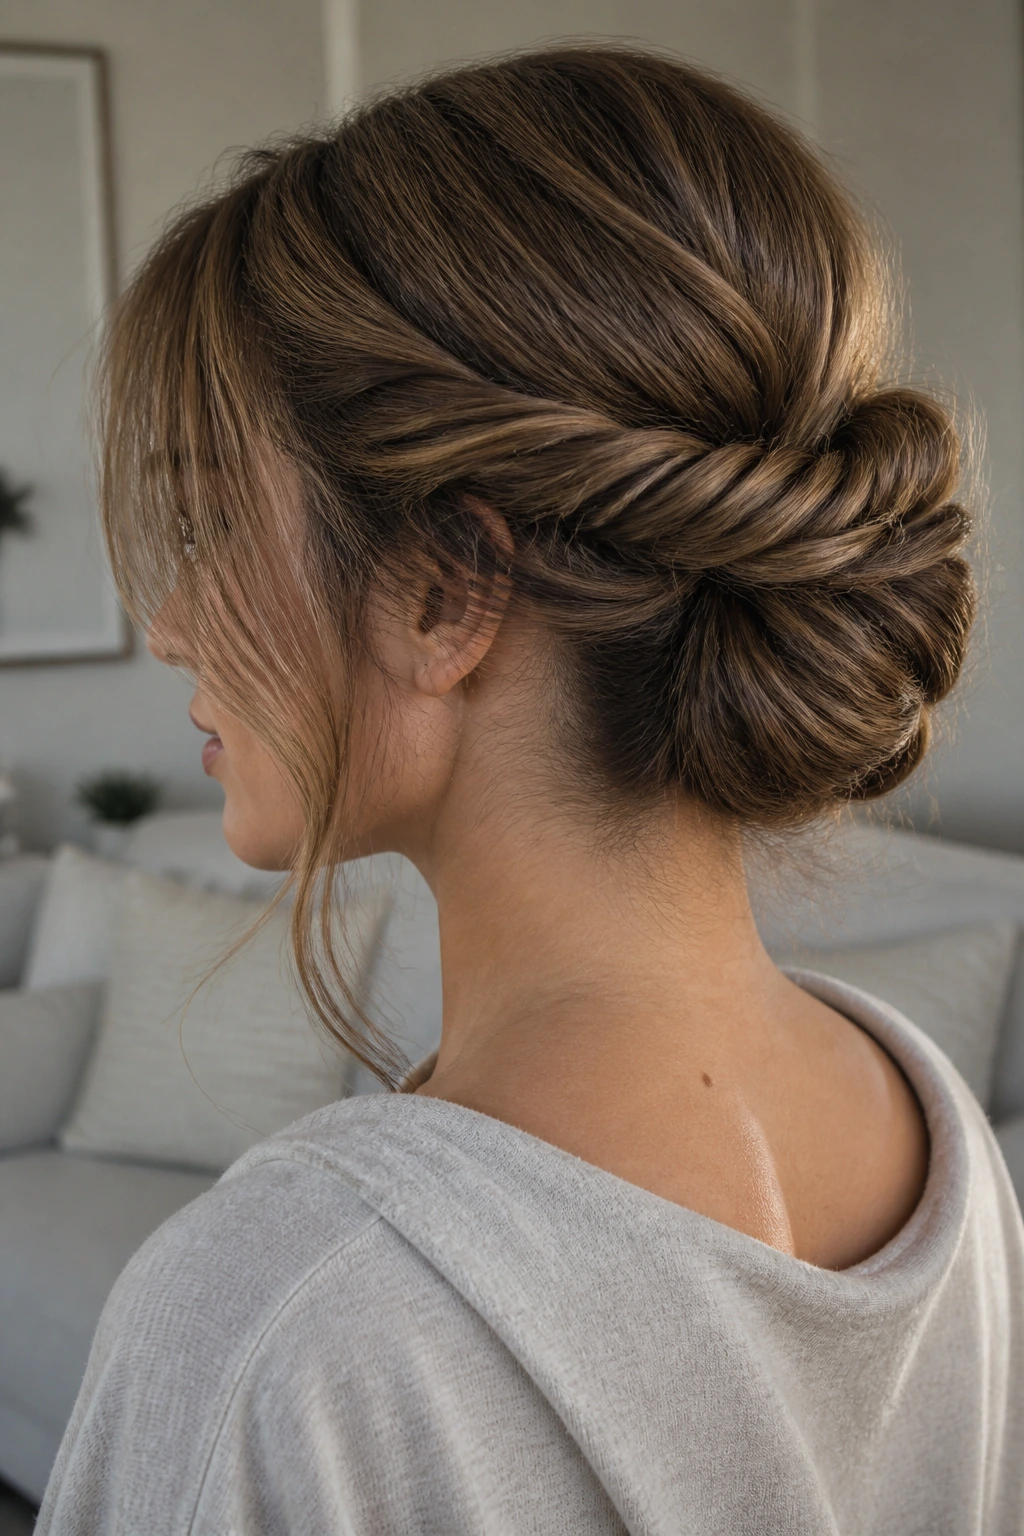
Two twists give the bun a little more structure without making it stiff. Split the hair into left and right sections, twist each one back, then wrap them around each other into a low or mid bun. The crossed direction helps the shape lock in place.
This is a good one for hair that splits apart when you try to make one large wrap. It also looks neat from the side without needing a ton of product. If one twist keeps escaping, the second twist usually solves the problem.
37. Braid-then-Bun
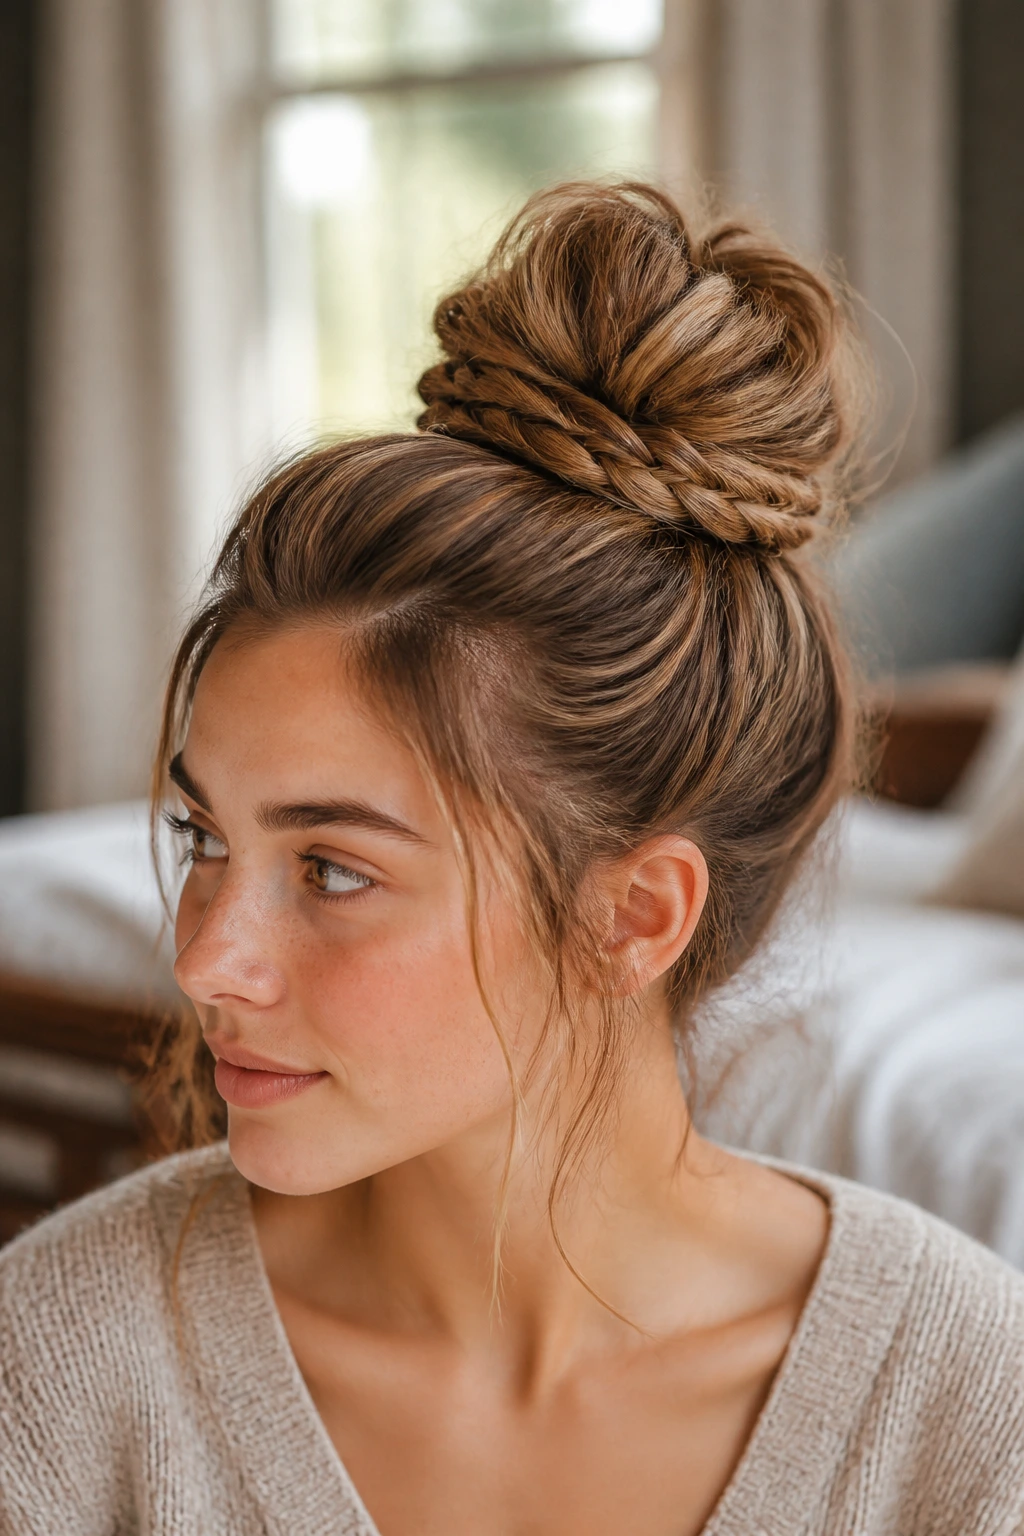
A braid adds texture the bun can lean on. Make a single loose braid first, then wrap it around the base and pin the edges into place. If you tug the braid wider before wrapping, the bun looks fuller and less rigid.
I like this version for layers because the braid holds the shorter pieces better than a plain twist does. It also gives you a built-in pattern so the bun reads as styled even when it’s imperfect. A braid turns a simple knot into something with shape.
38. Ribbon-Wrapped Bun
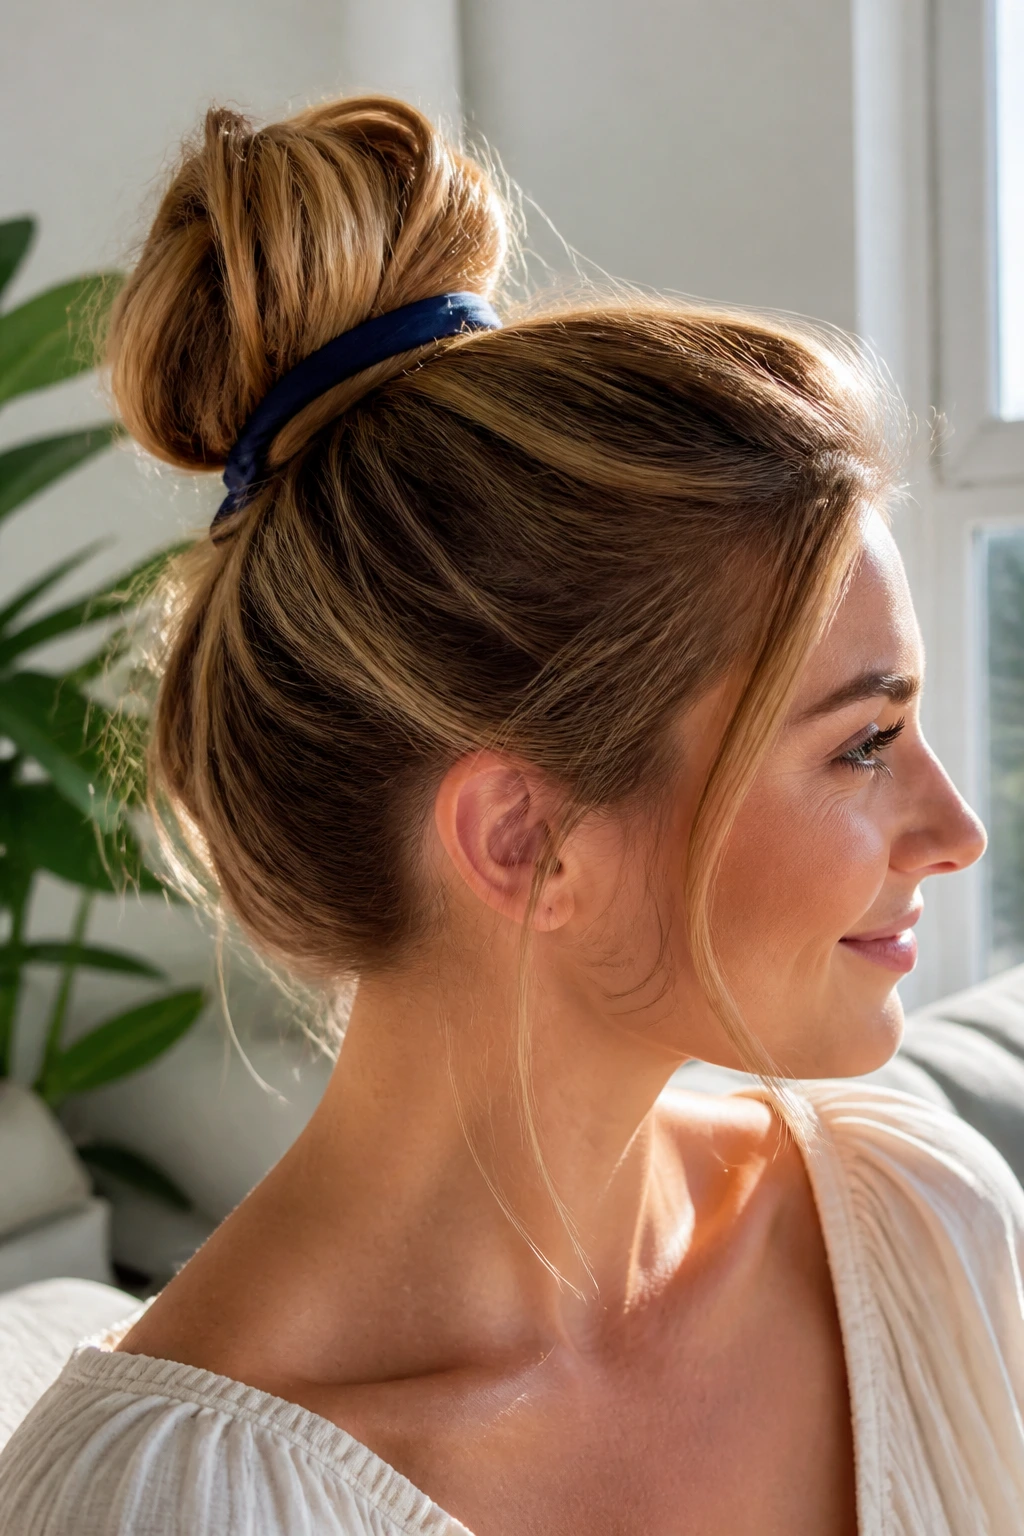
A ribbon-wrapped bun is an easy way to change the feel without changing the structure. Tie the hair back, form the bun, then wind a ribbon around the base once or twice and knot it underneath. Velvet reads richer, grosgrain feels crisp, and a thin satin ribbon stays lighter on finer hair.
Keep the ribbon narrow if the bun is small. Too much fabric overwhelms the shape and makes the whole thing look crowded. The ribbon should accent the knot, not compete with it.
39. Slicked-Front Messy Bun
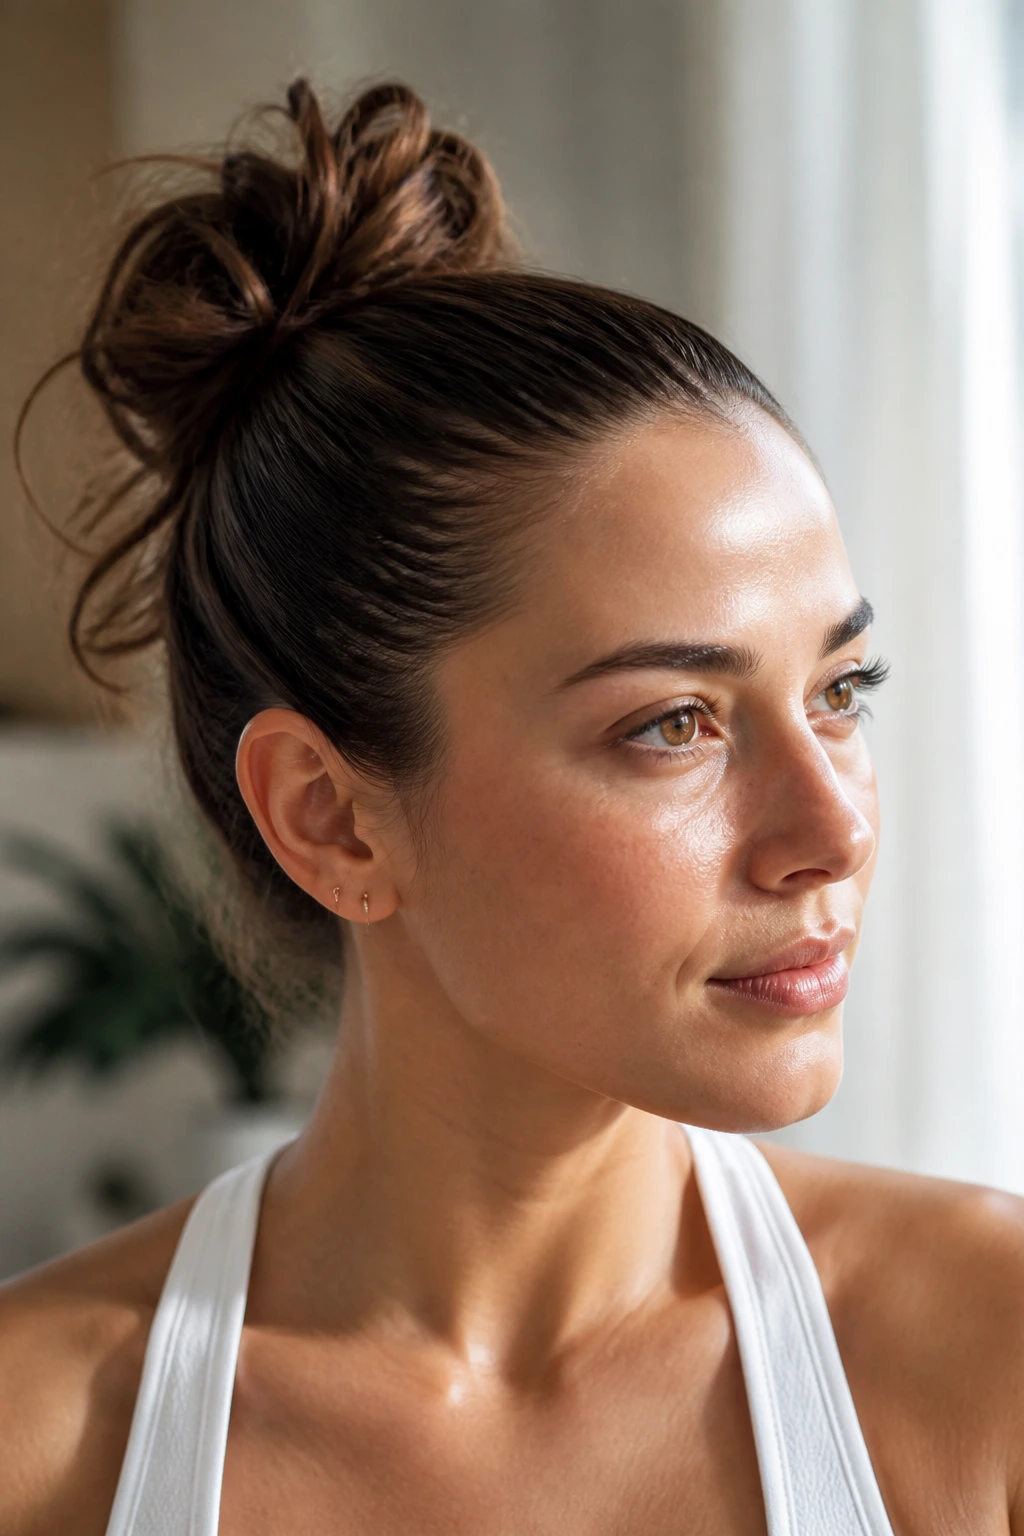
This is the version for when you want the front to look polished and the back to stay relaxed. Smooth the hairline with a small amount of gel or styling cream, then gather the rest into a loose bun and let the ends stay a little undone. That contrast gives the style its bite.
It’s a good answer for humid days or for outfits that need a cleaner frame around the face. Don’t overapply product, though; you want the front sleek, not greasy. A controlled hairline makes the messier back feel deliberate.
40. Tiny Bun for Lob Length
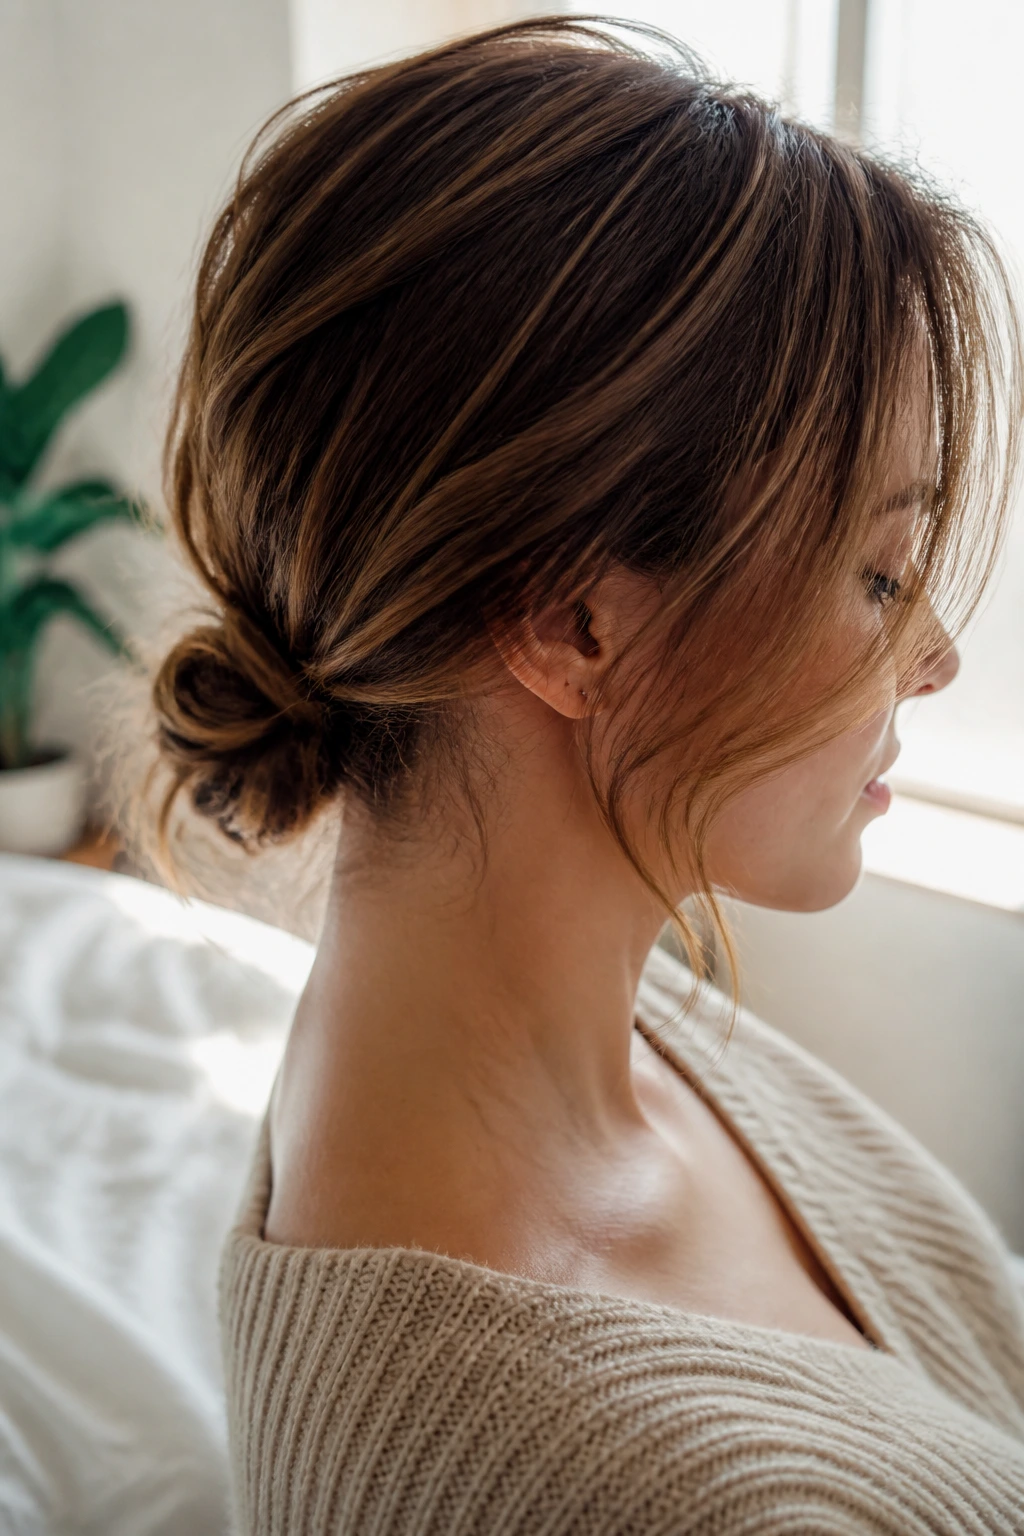
A lob doesn’t need to reach a full bun to still look neat. Use the nape and side sections only, twist them into a tiny knot, and pin the ends inward so they disappear. It ends up small, compact, and useful when the shoulders start eating your hair.
This is one of those styles that looks better when you stop chasing size. The bun should fit the length you actually have. Small can be the right scale, especially for shorter cuts.
41. Big Volume Bun
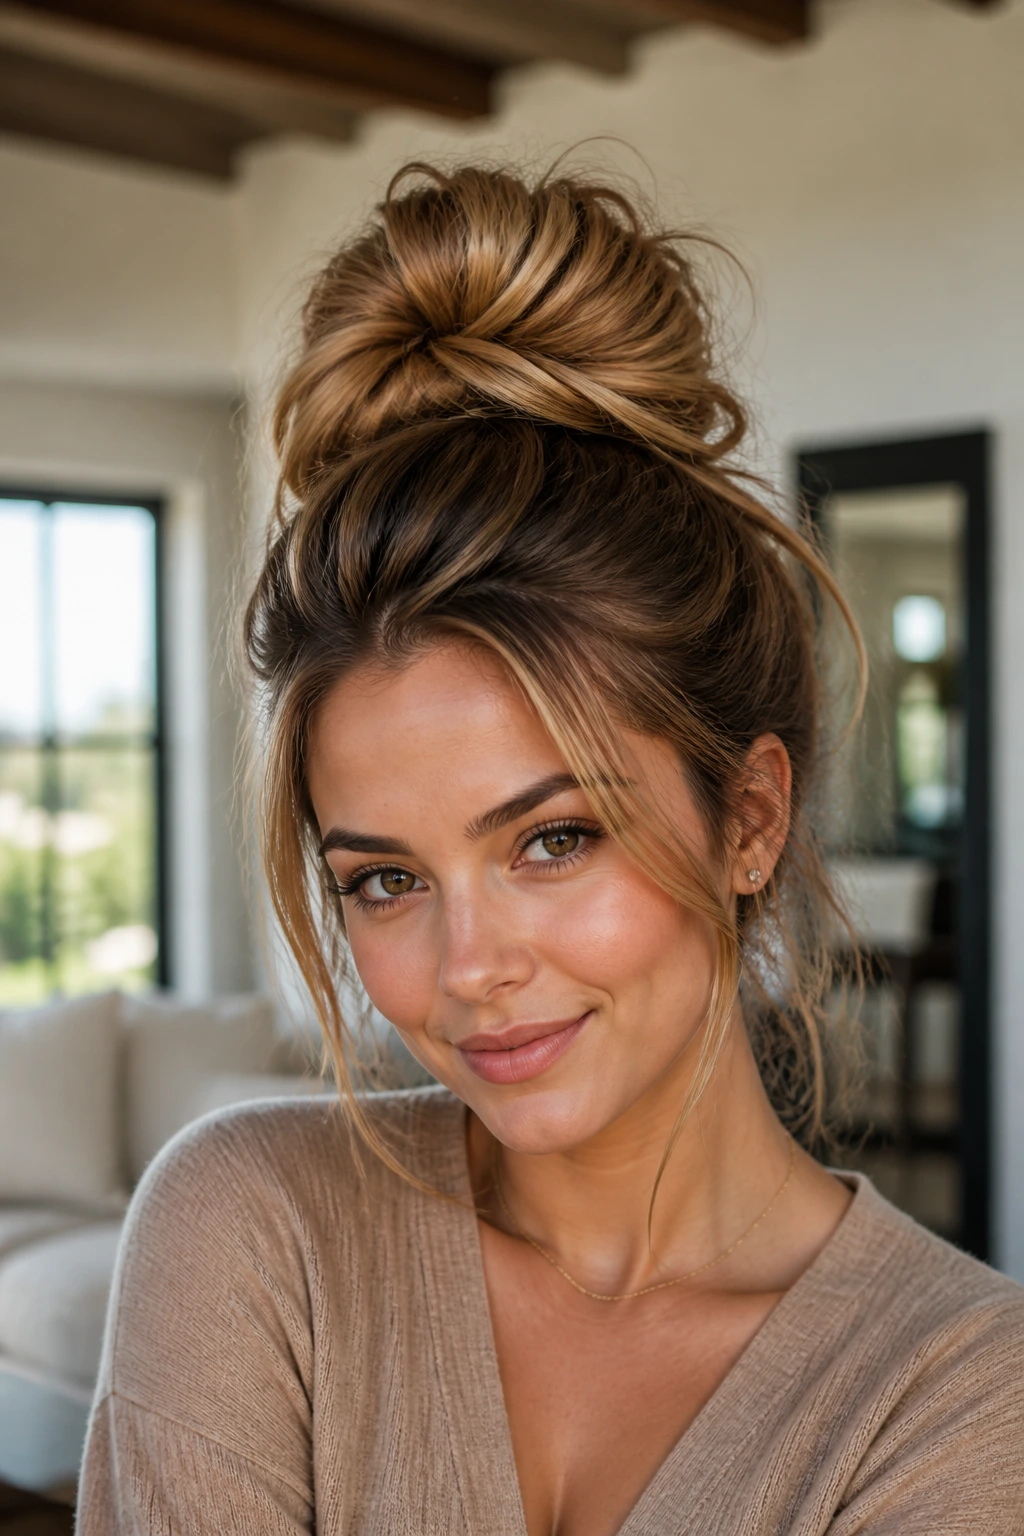
Big buns need shape before they need polish. Backcomb a little at the crown, gather the hair high or mid-height, and allow the bun to spread instead of compressing it flat. The volume should come from the base and the wrap, not from overstuffing the knot.
Use this when you want the bun to read from across the room. It’s bold without needing a lot of accessories. The silhouette matters more here than the exact twist pattern.
42. Soft French Twist Bun
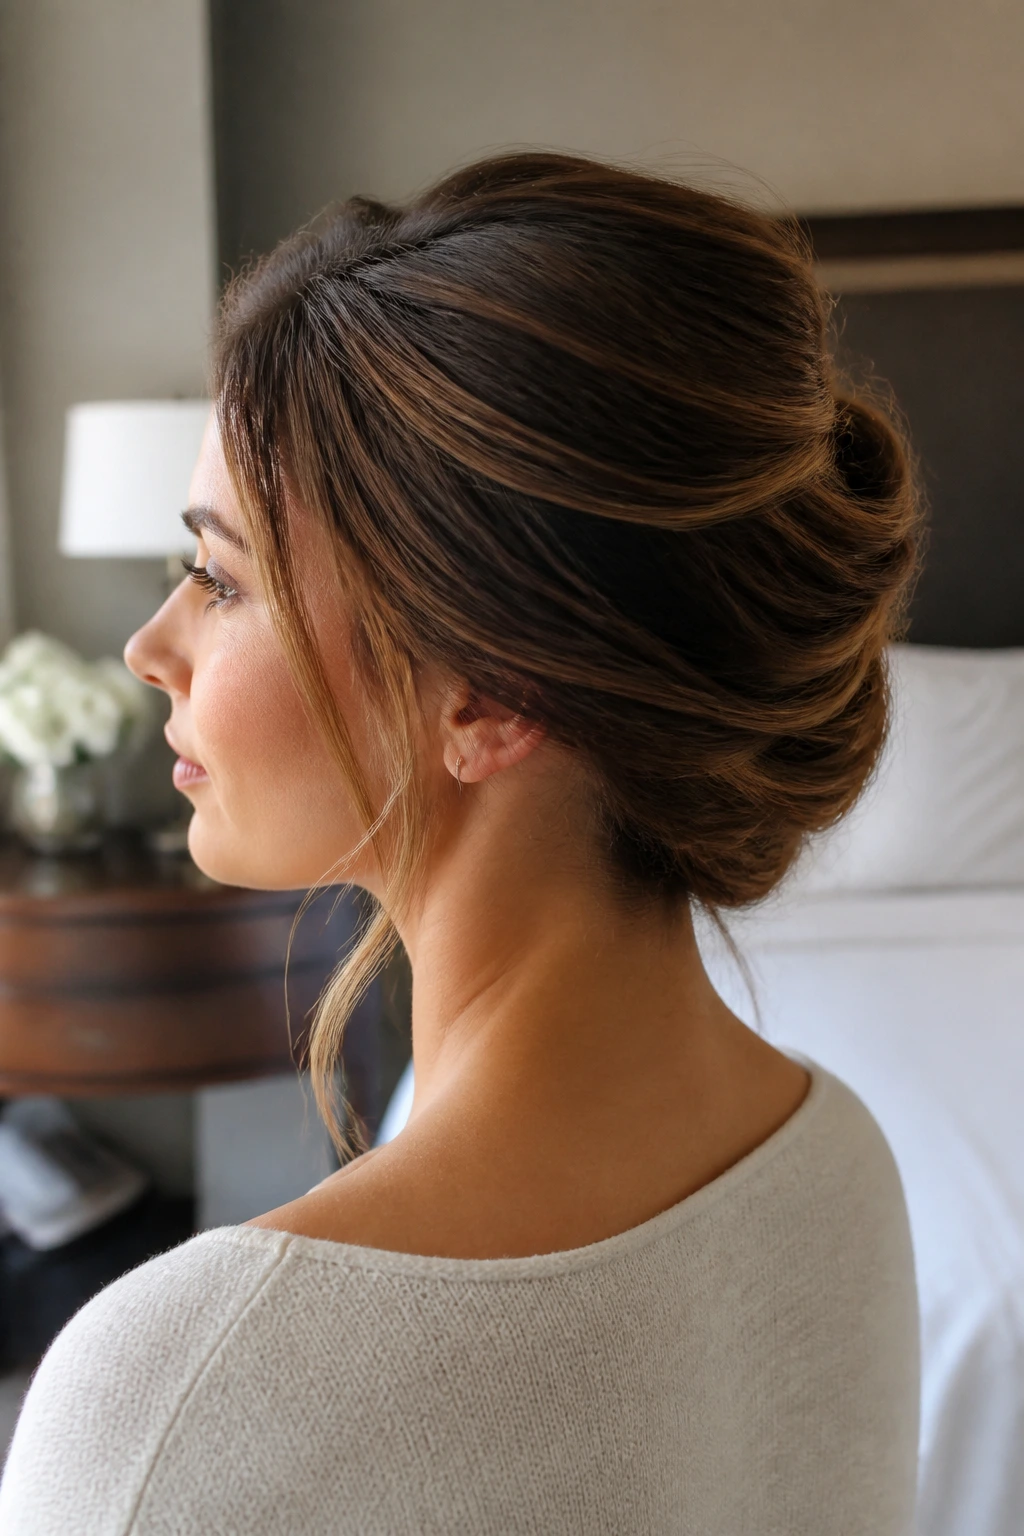
A French twist can look too formal if you lock it down too neatly, so this version leaves some softness in the shell. Roll the hair upward, tuck the ends halfway, and pinch a few sections loose so the twist doesn’t feel severe. It should hint at structure, not insist on it.
Where the softness belongs
Keep the front smooth and the back a little relaxed. That contrast is what makes it read as a soft everyday version instead of a strict updo. If the twist feels too tidy, pull one side apart by a few millimeters and it changes fast.
43. Bubble-Pony Bun
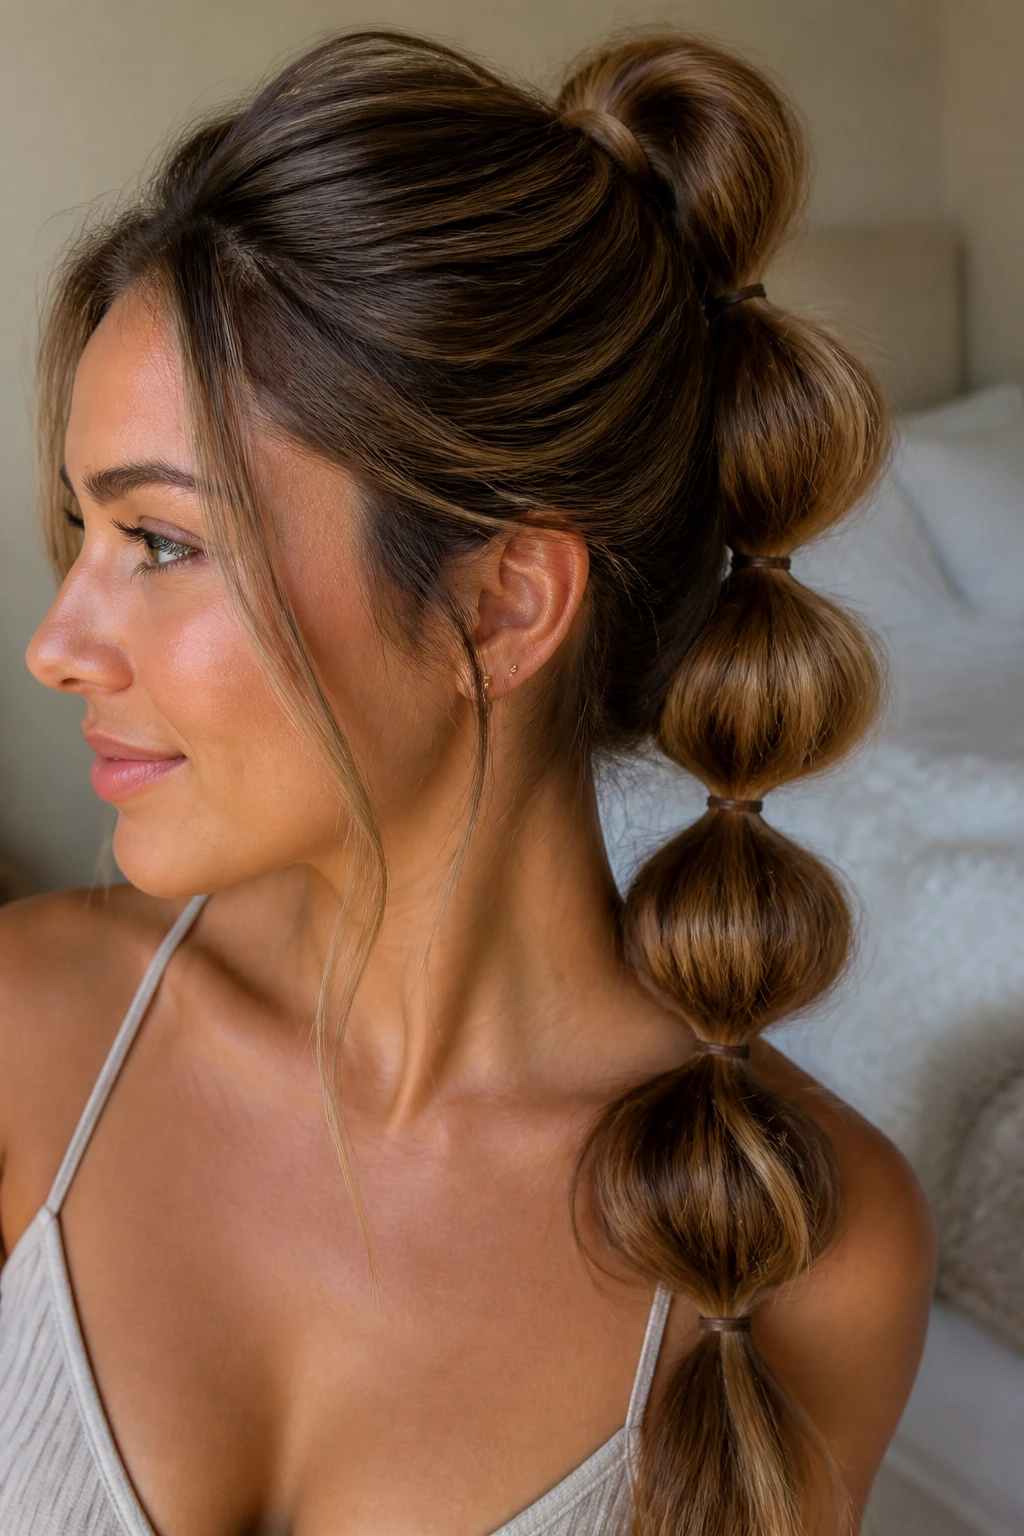
This one gives you shape without requiring a perfect wrap. Make a ponytail, add small elastics every couple of inches down the length, puff out each section to form bubbles, then coil the length into a bun and pin it. The sections create built-in texture and keep the hair from collapsing into one heavy loop.
It works especially well when your hair is long and you want the bun to feel fuller. A little tug on each bubble is enough; you do not need to overblow it. The bubbles are the structure, so let them stay visible.
44. Pin-and-Go Bun
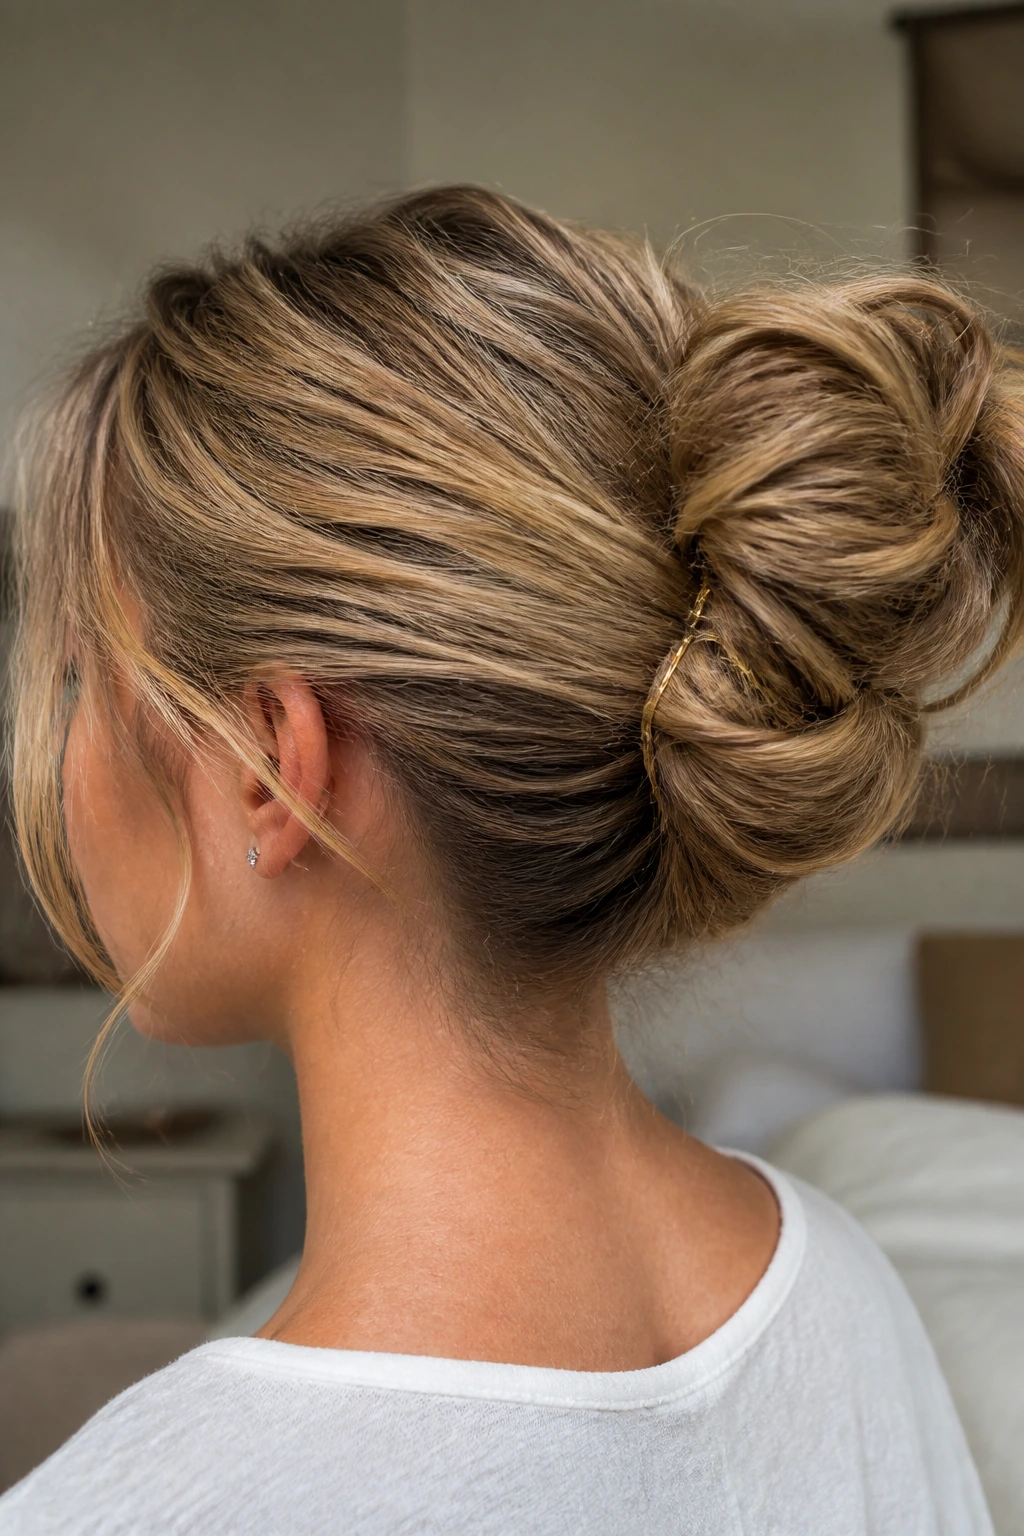
A pin-and-go bun is what happens when you stop fighting the mirror. Twist the hair, anchor the first seam pin, add one or two more to catch the loose edges, and leave the rest alone. It’s fast, but it still looks like you made a decision.
This is the style I’d trust when the day is already noisy. It doesn’t need perfect symmetry, and it rarely benefits from more product than you started with. Once the pins are in, leave it alone.
45. Everyday Rescue Bun
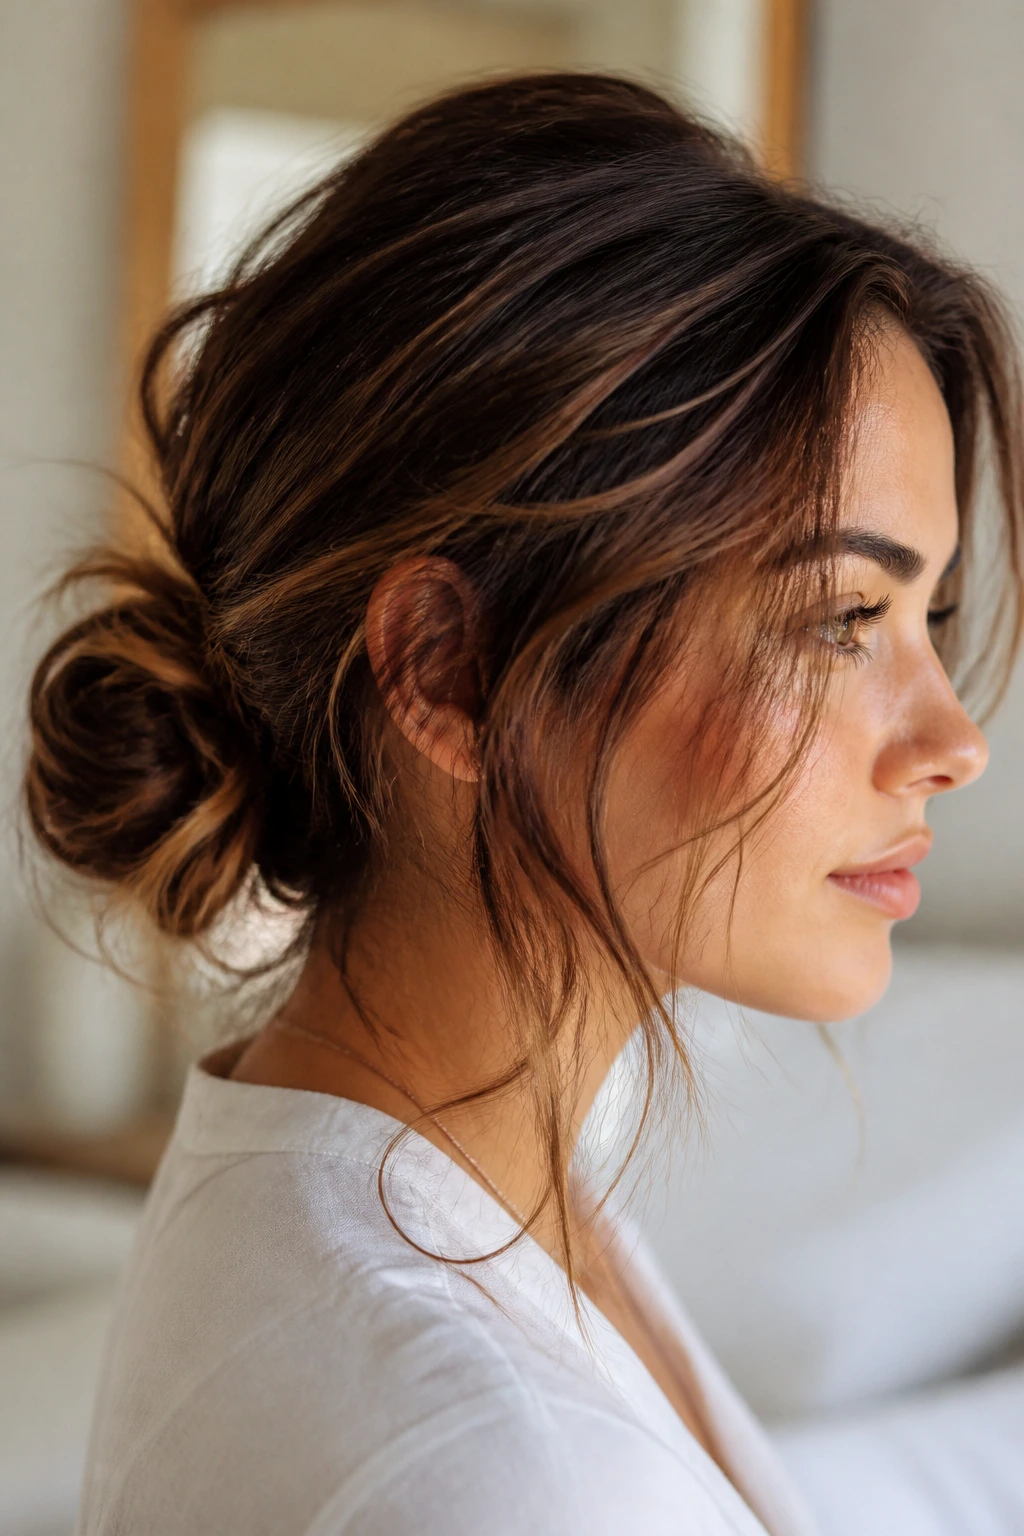
Some buns are planned. This one is rescued. If your hair is flat, frizzy, too clean, too oily, or just not cooperating, rough up the roots with dry shampoo, twist the length into a low or mid knot, and let a few pieces stay loose so the whole thing looks intentional. It’s the style you reach for when you need hair off your face and no one has time for a full reset.
I like this one because it forgives a lot. A bent pin, a lopsided seam, a slightly too-soft front — it all fits the look. When the hair is having a bad day, this bun turns the problem into texture.
Why Messy Buns Hold Better When Hair Has a Little Grip
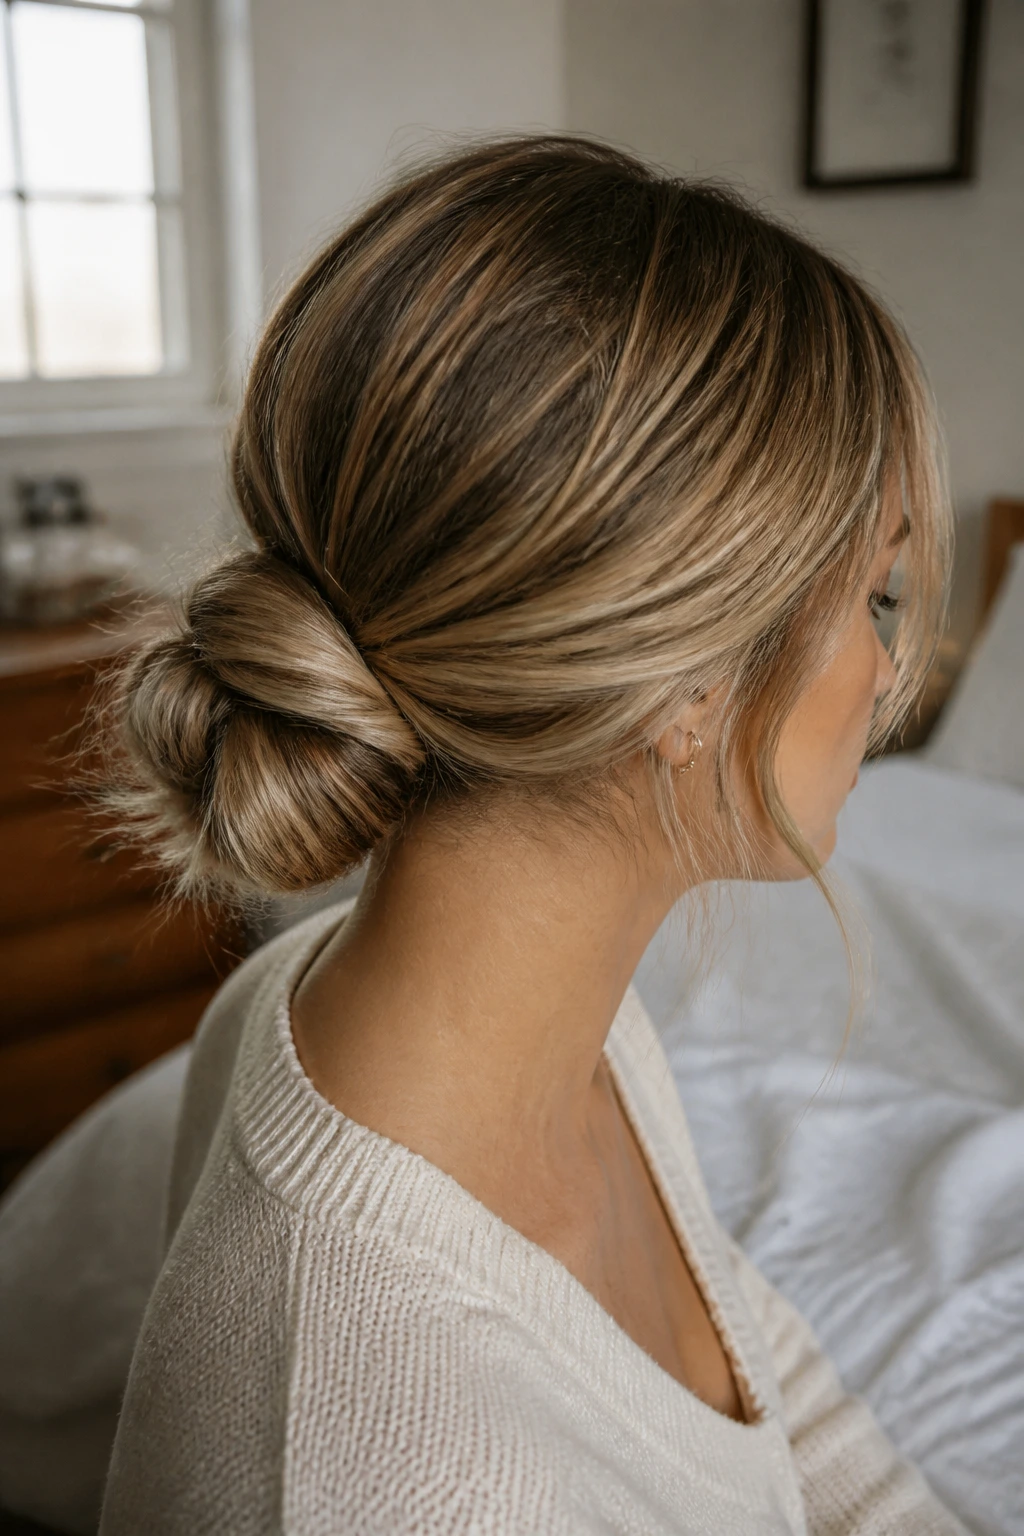
The secret behind a good messy bun is not luck. It’s friction. Hair that’s a touch dirty, lightly textured, or prepped with dry shampoo gives pins and elastics something to catch, while silky-clean hair tends to slide and separate the second you turn your head. That is why so many buns look better on day two than they do fresh out of the shower.
Texture is doing half the work
If your hair is too smooth, a light mist of texturizing spray or a little powder at the roots makes a big difference. You are not trying to turn the hair crunchy. You just want enough bite that the twist stays where you place it. Fine hair usually needs a rougher base; thick hair usually needs more anchor points.
Placement changes the whole look
A bun at the crown reads louder. A bun at the nape reads calmer. Move the base one inch up or down and the style can go from gym hair to soft everyday hair without changing a single pin. That tiny shift is easy to miss, but it’s the part that makes the look feel intentional instead of random.
The Tools and Products Worth Keeping in the Drawer
-
Soft hair ties: Choose ones that stretch without digging a deep dent into the hair; if an elastic feels like it’s fighting you, it’s probably too tight for everyday use.
-
Bobby pins: Keep a mix of short and long pins on hand, and use the wavy side against the scalp for a better grip.
-
U-pins: These are useful for thicker buns or low chignons because they catch more hair without leaving the knot bulky.
-
Claw clip: A medium clip handles quick buns and shoulder-length hair better than tiny fashion clips that slip out too easily.
-
Dry shampoo: Useful for clean roots that need grip and for refreshing a bun that’s gone flat around the crown.
-
Texturizing spray: Good for separating strands so the bun doesn’t read as one smooth lump.
-
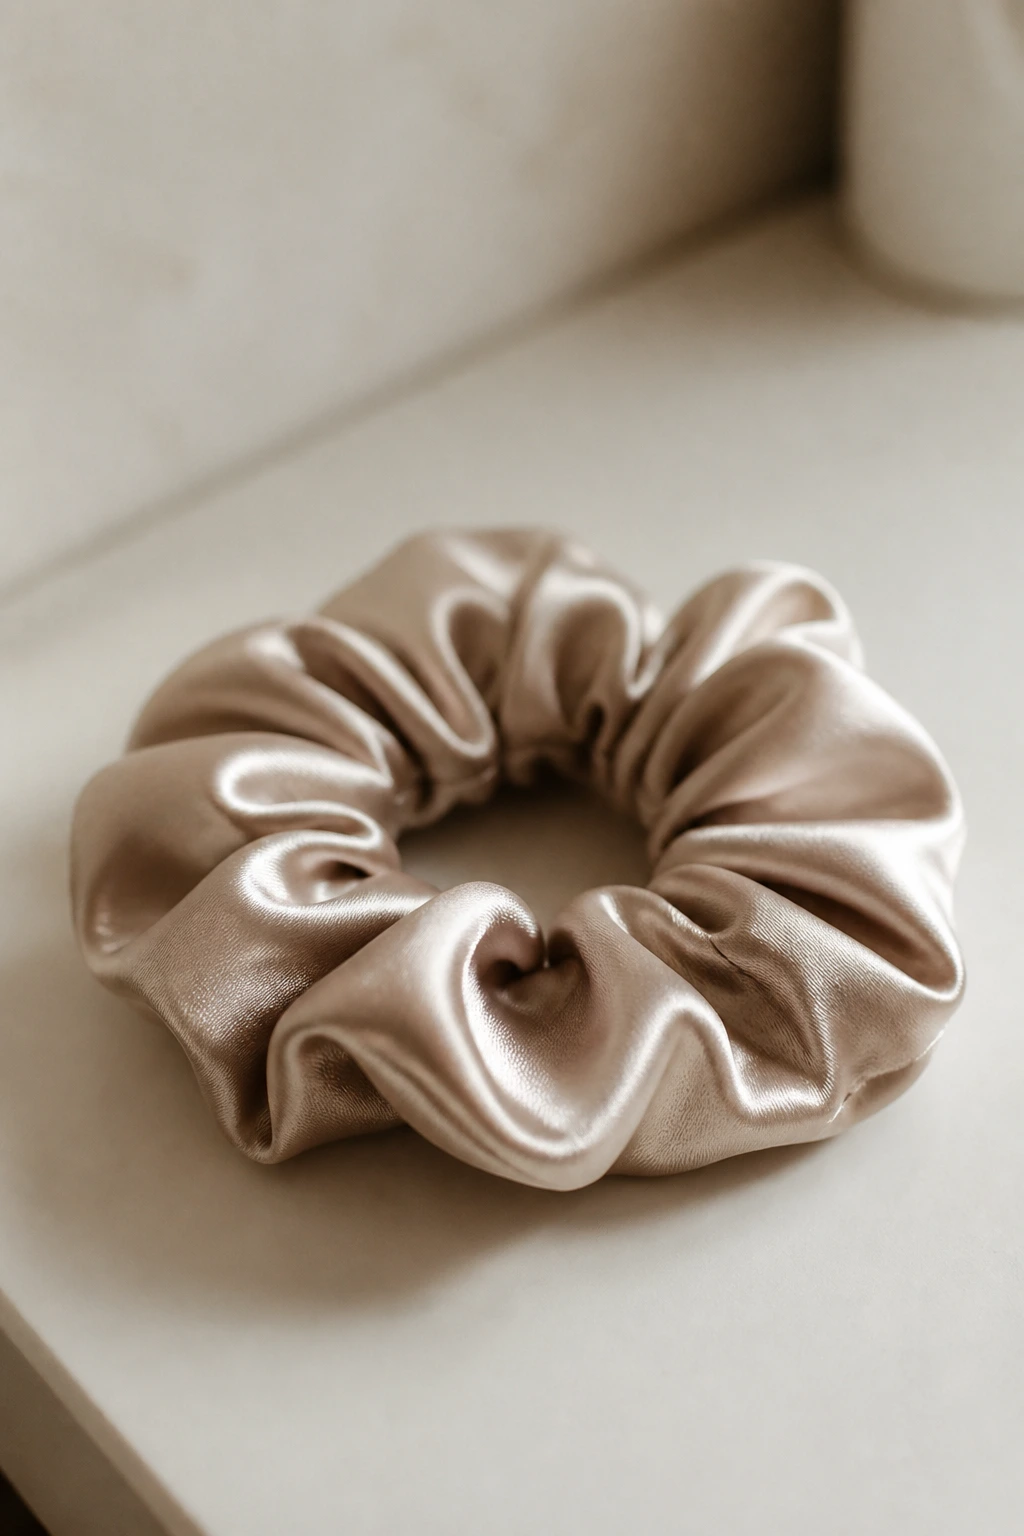
Satin or silk scrunchie: Gentler on curls and delicate ends, and less likely to leave a hard crease.
-
Tail comb or rat-tail comb: Helpful for sectioning hair, lifting a crown, or smoothing only the front where you need it.
-
Mini finishing brush or clean toothbrush: Handy for taming flyaways with a tiny amount of cream or spray.
Smart Shopping for Elastics, Pins, and Texture Sprays
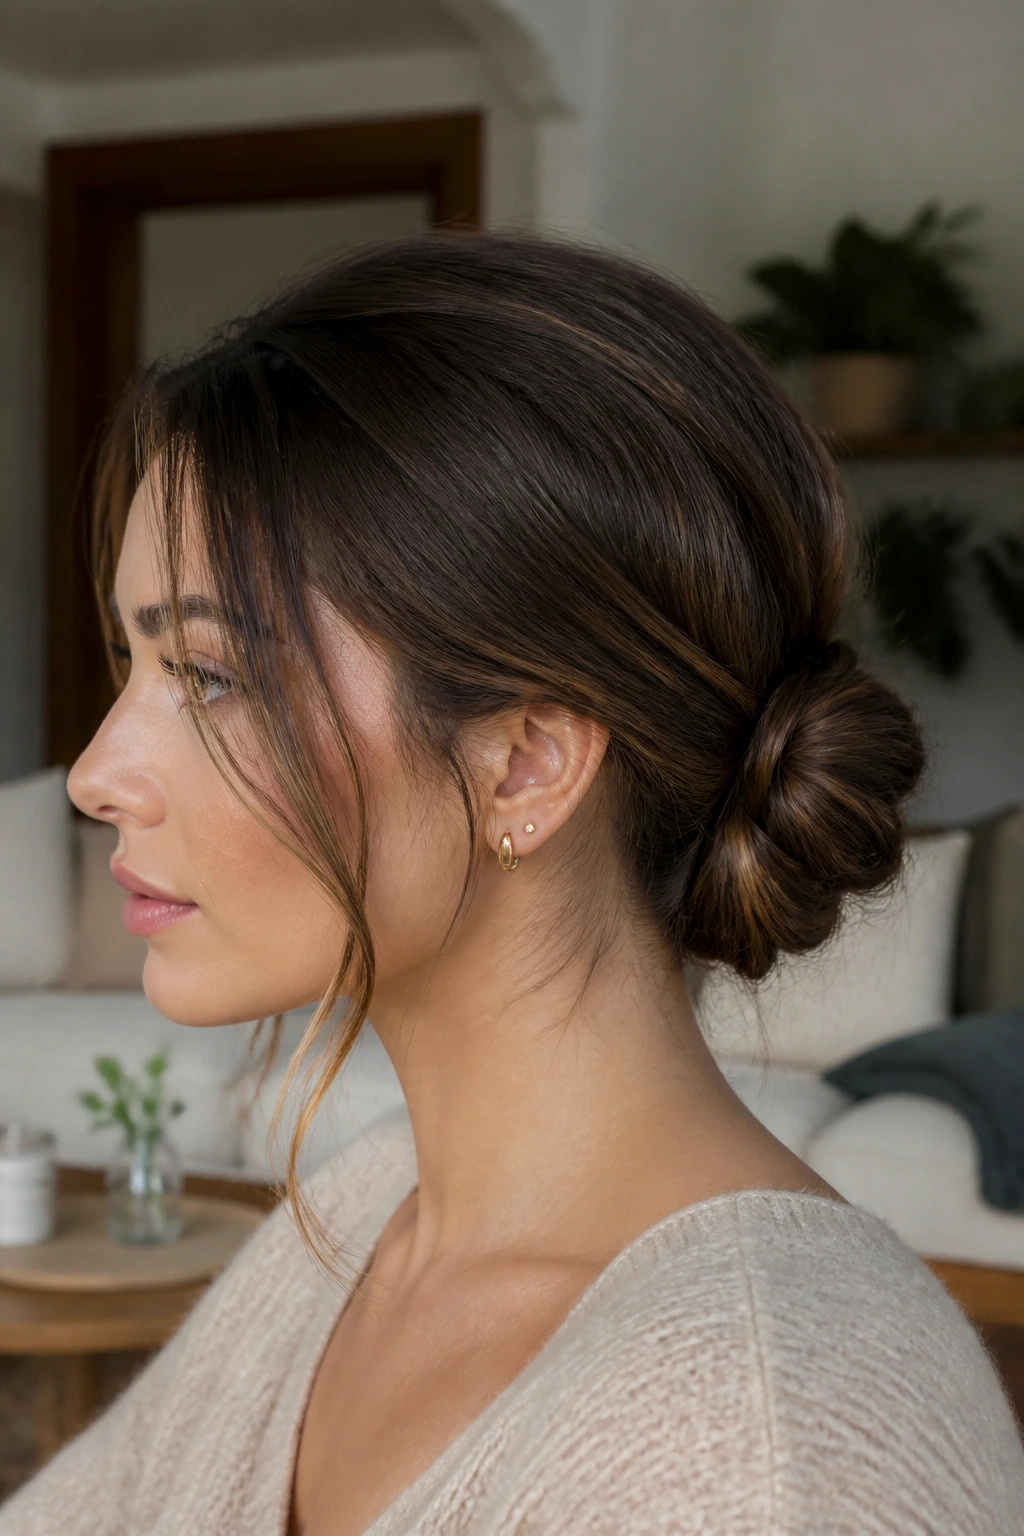
A lot of bun frustration starts with bad tools. Thin, slick elastics stretch out fast and pop loose on thick hair, while stiff ones can pull too hard on fine strands. Look for elastics that return to shape after a few stretches and don’t leave a deep mark after one loop. That small detail matters more than the color.
Pins deserve more attention than they get. Bent, wavy bobby pins hold better than perfectly straight, decorative ones, especially on slippery hair. If your pins slide out every time, you usually need a rougher finish or a longer pin, not more force. And if you have thick hair, buy pins in a longer size so they can actually catch enough hair to matter.
Product choice is about finish, not volume of product. A good dry shampoo should leave the roots with a little grit, not a dusty gray cast. Texturizing spray should separate strands lightly without making the bun sticky or shellacked. I prefer products that can be added in one small pass and then left alone. If you need to keep layering, the formula is too heavy for everyday buns.
How to Wear These Buns Without Making Them Feel Overdone
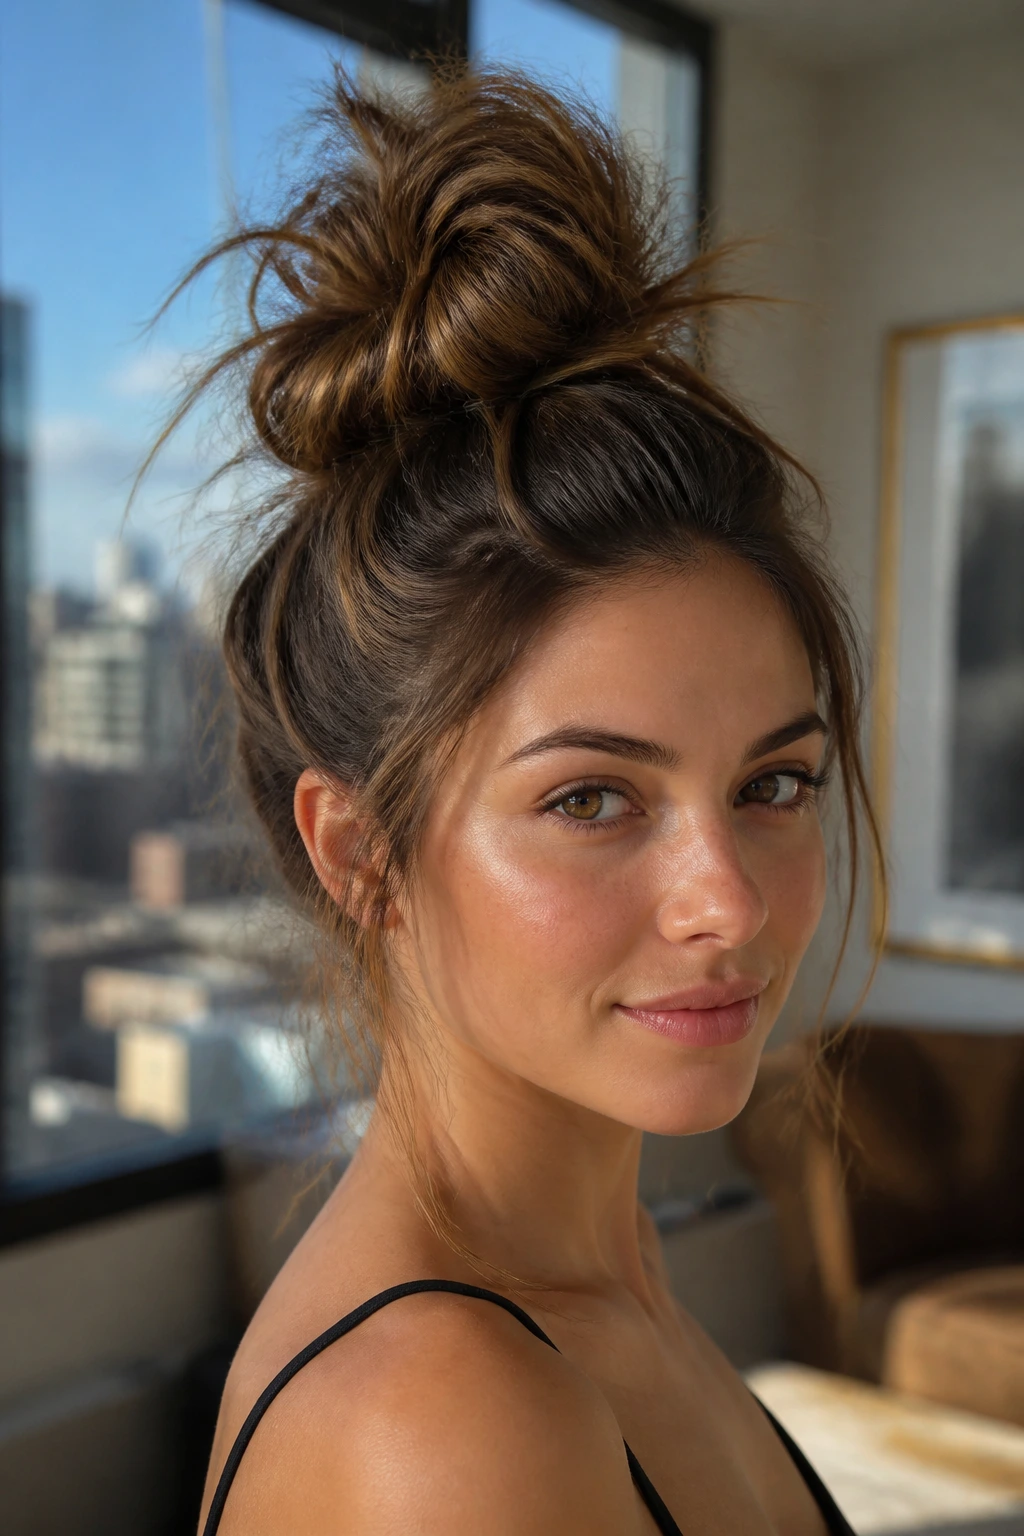
Presentation: Keep the bun size in scale with the rest of the face and neckline. A low bun looks calmer with a crewneck or collared shirt, while a high bun can balance a more open neckline or a simple T-shirt. The bun should sit like part of the outfit, not like it was pasted on after the fact.
Pairings: Small hoops, studs, a narrow scarf, or a clean pair of glasses all sit well with messy buns because they don’t crowd the hair. If the bun is already full or textured, skip heavy earrings that pull the eye in too many directions. The same goes for collars; if the fabric has a lot going on, keep the bun quieter.
Scale: Fine hair usually looks better with a slightly smaller bun and a little crown lift. Thick or long hair can carry a wider, looser shape without falling flat. Shorter hair often needs a tighter knot or a faux-bun trick so the proportions don’t get awkward.
Best Setting: Some of these buns are built for errands, some for work, some for a dressier outfit that still wants ease. Pick the one that matches the pressure of the day. If you know you’ll be taking the hair down and up again, choose a style that survives being rebuilt.
Little Styling Moves That Make a Bun Hold Better
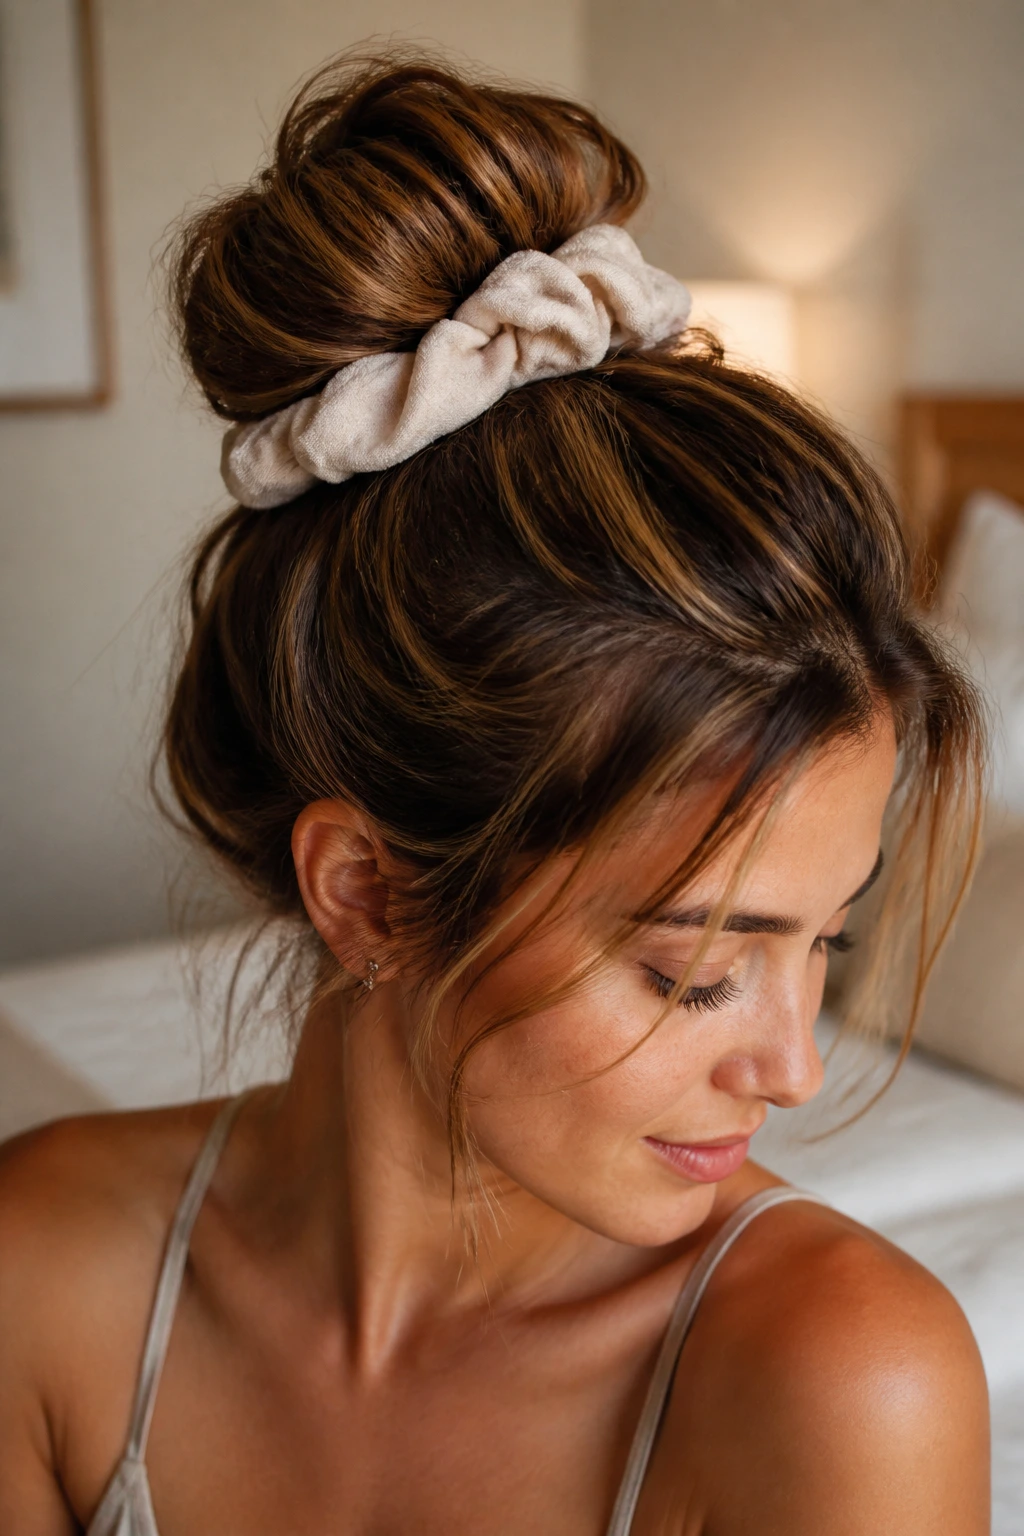
Texture Boost: Mist dry shampoo or texturizing spray at the roots before you tie the hair back, then wait a few seconds before you touch it again. That short pause lets the product do its job instead of just sitting on top of the hair.
Volume Trick: Backcomb a small strip at the crown before you gather the hair. Two inches is enough. You are building a cushion, not a nest.
Face-Frame Trick: Leave the front pieces a little longer than you think you need, then curl them away from the face if the rest of the bun is loose. That keeps the style soft without letting the pieces hang awkwardly.
Make-It-Yours: Swap a plain elastic for a scrunchie, add one ribbon, or pin one decorative clip at the side instead of the back. Small changes matter more than piling on extra products.
Common Mistakes That Turn a Good Bun Into a Headache
-
Pulling the base too tight: The bun may hold, but your scalp will tell on you by lunchtime. Loosen the crown before you secure the knot, then use pins to hold the shape instead of yanking the ponytail into place.
-
Starting with hair that is too slick: Freshly washed hair can slide apart before the bun settles. If that keeps happening, add dry shampoo or wait until the hair has a little natural texture.
-
Trying to smooth every flyaway: A few loose pieces are part of the look. If you press everything down with too much cream or hairspray, the bun starts to look stiff and flat.
-
Using the wrong pins: Tiny decorative pins often look nice and do almost nothing. For heavier buns, use long bobby pins or U-pins that can catch the seam.
-
Building the bun too high or too low for the outfit: A high bun under a high collar can feel crowded; a low bun with a bulky hood can get flattened. Match the placement to what you’re wearing.
-
Overwrapping the hair: If you keep winding the hair around itself, the bun can turn into a hard knot that sticks out in awkward ways. Stop once the shape is secure and let the ends stay a little uneven.
Variations and Adaptations to Try
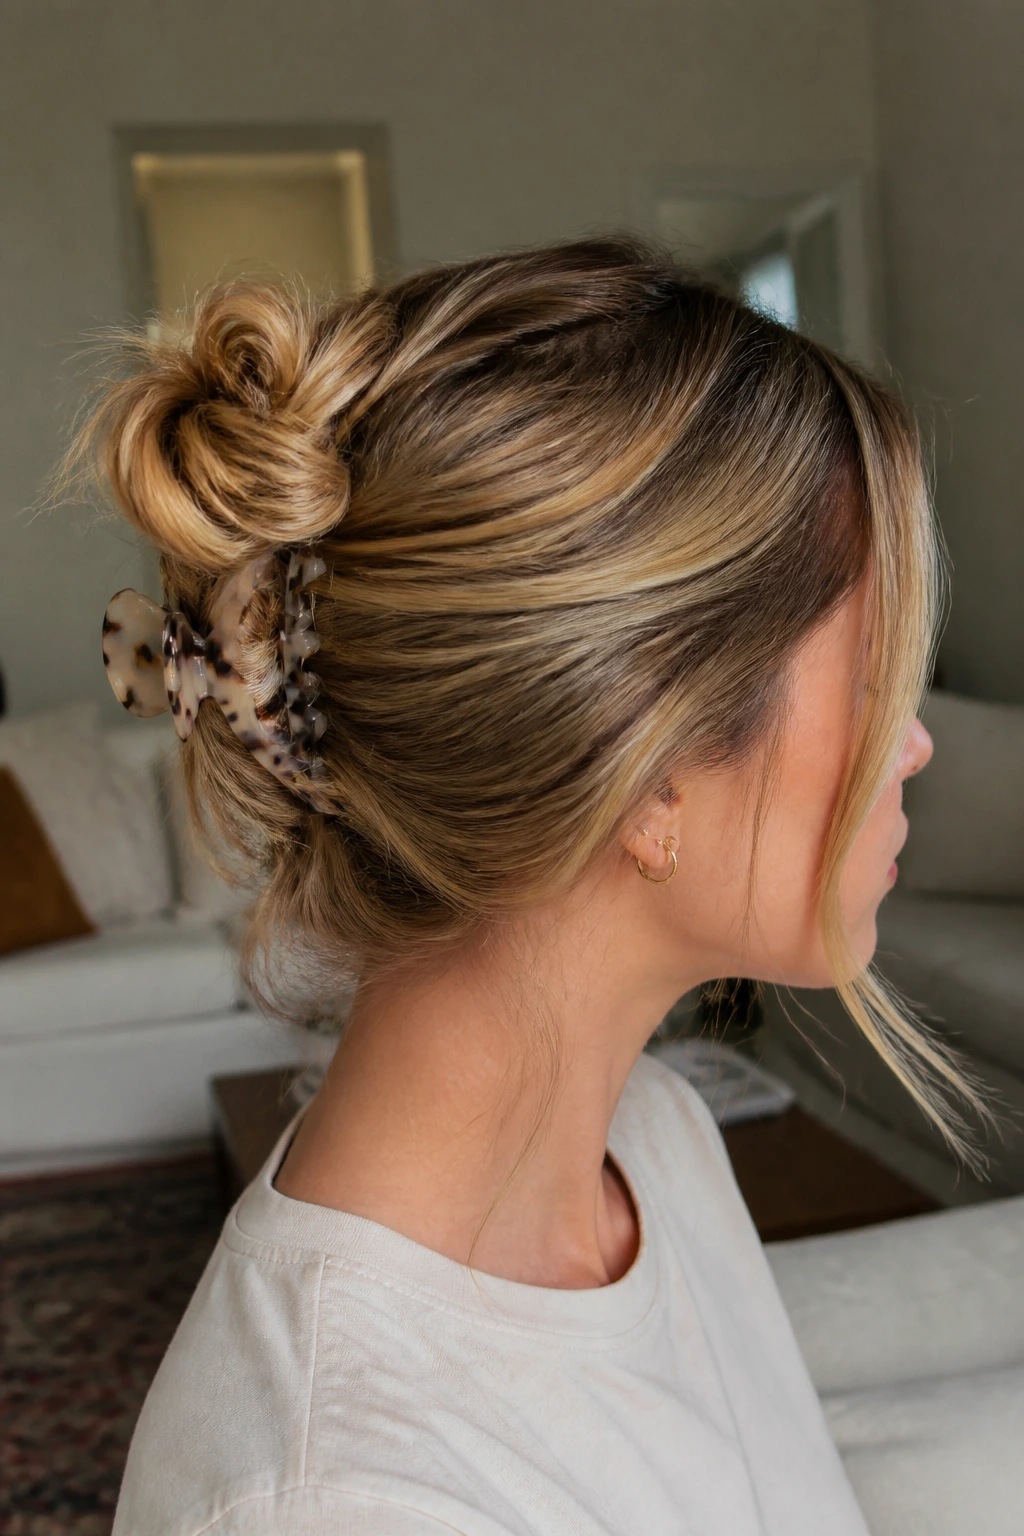
The Sleek-Front Version: Smooth the hairline with a small amount of gel or cream, then keep the bun loose at the back. This is the easiest way to make a messy bun feel more polished without losing the relaxed shape.
The Curly-First Version: Skip brushing and let the natural curl pattern lead. Gather the hair gently, preserve the coil, and use a satin scrunchie so the texture stays springy instead of frizzy.
The Short-Hair Fix: Use mini elastics and hidden pins to build a faux bun from smaller sections. It takes a little more patience, but it keeps bobs and lobs from collapsing into tiny loops.
The Sweat-Proof Version: Double up the elastic, keep the base snug, and use fewer loose face pieces. This one is for movement, not decoration, and it will stay neater when the day gets active.
The Dress-It-Up Version: Add a ribbon, pearl pin, or a narrow metallic clip at the base. You do not need a different bun shape; you just need one detail that changes the finish.
The Sensitive-Scalp Version: Choose a soft scrunchie, keep the bun lower, and use fewer pins. Less tension at the roots makes the style easier to wear for hours without that sore-pulling feeling.
How to Refresh a Messy Bun After Sleep or a Long Day
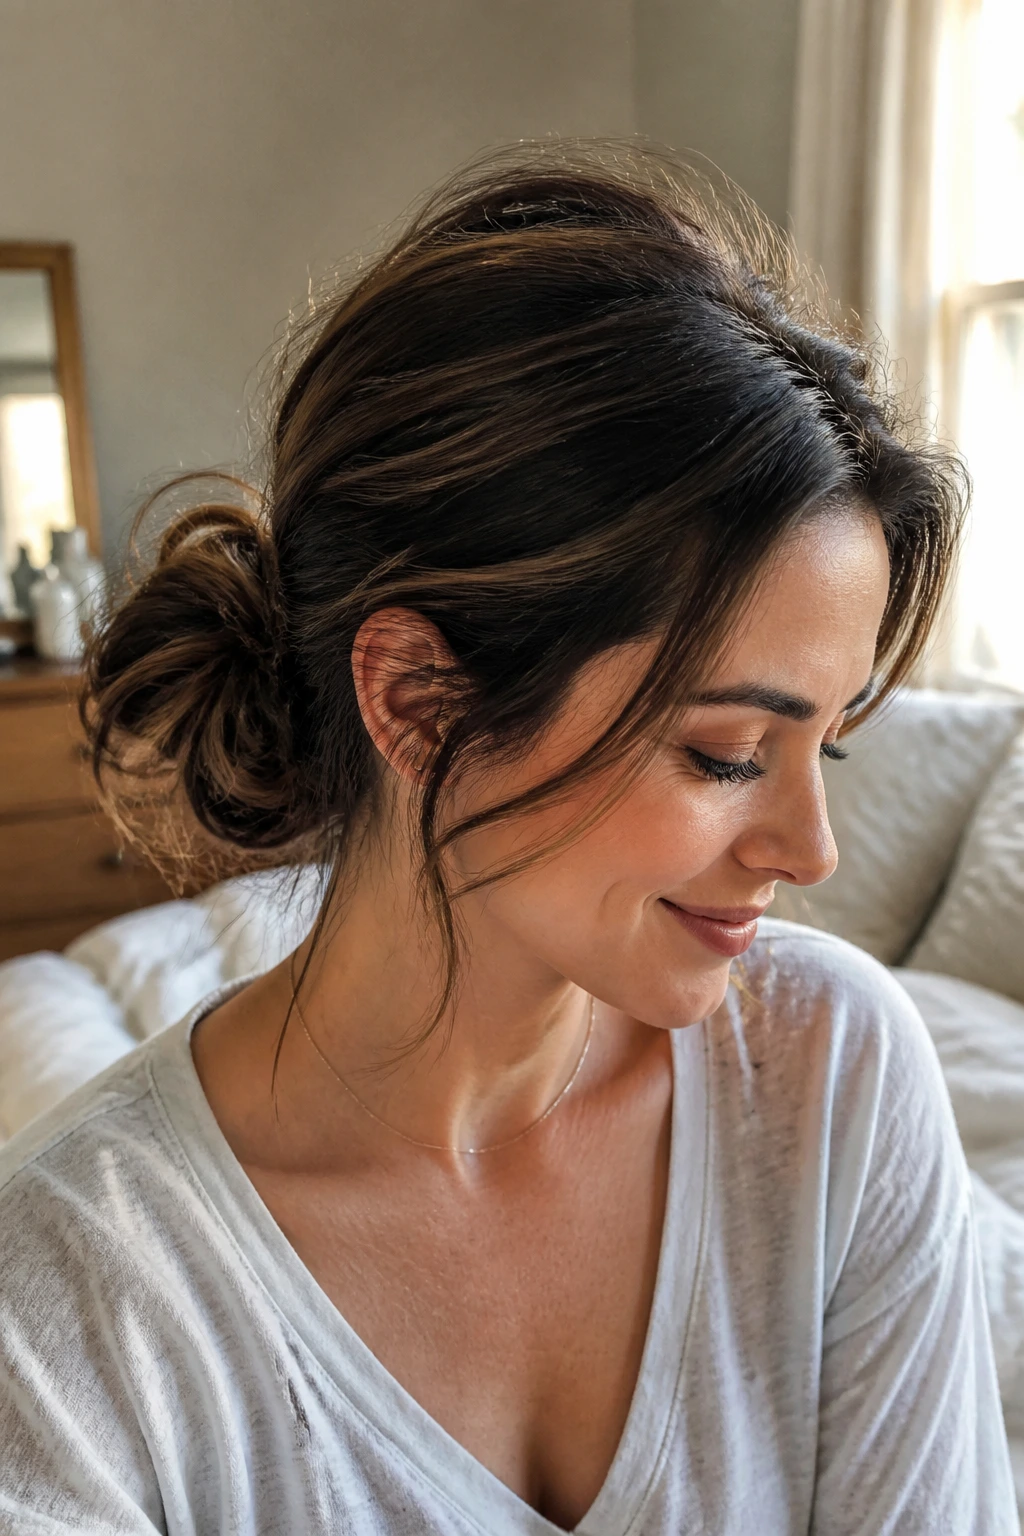
A messy bun usually looks best when it’s not left untouched for too long. If the crown starts to flatten after six to eight hours, take it down, shake the roots, and rebuild the shape instead of stuffing more pins into the same tired knot. That small reset keeps the style from turning heavy.
For overnight wear, keep the bun loose and low enough that it doesn’t press hard into the scalp. A satin or silk scrunchie helps if you want fewer dents, and a soft pin or two is better than a tight elastic if you’re trying to preserve the shape for the next morning. Do not sleep in a wet bun. That’s a shortcut to a damp scalp and a weird bend that takes longer to fix than rebuilding the style.
If you’re wearing buns often, rotate the placement. High one day, low the next, side-swept after that. The scalp appreciates the change, and your hairline looks better when it isn’t being pulled from the exact same spot every day. Wash scrunchies and brush out pins before they bend or gather product. Small habits. Big difference.
Frequently Asked Questions
Is a messy bun better on clean hair or second-day hair?
Second-day hair usually wins because it has more grip. Freshly washed hair can still work, but you’ll likely need dry shampoo or texture spray at the roots so the bun doesn’t slide apart.
How many bobby pins do I actually need?
Most buns need two to four pins, not a handful. Use one to anchor the seam and the others to hold the sides that want to spring loose.
What if my hair is too short for a real bun?
Use a faux-bun approach with twists, mini elastics, and hidden pins. A lob or bob can still look like a bun from the front if the ends are tucked well.
Can curly hair do messy buns without turning frizzy?
Yes, and curly hair often looks better when you don’t brush it out first. Keep the curl pattern intact, use a satin scrunchie, and pin only where needed.
Should I use a claw clip or an elastic?
Use a claw clip when you want speed and a looser hold, and an elastic when you want the base to stay more fixed. Thick hair often benefits from both: elastic first, clip or pins second.
How do I make the bun look fuller?
Tease a small section at the crown, loosen the wrap a little, and tug the bun gently after it’s pinned. A little controlled mess adds size faster than trying to stuff extra hair into the knot.
Why does my bun keep falling out by noon?
The usual culprits are slippery hair, weak pins, or a base that isn’t anchored well enough. Add texture at the roots, cross your pins, and make sure the first elastic isn’t so loose that the whole bun can rotate.
Can I wear a messy bun every day without damaging my hair?
Yes, if you change the placement and avoid pulling it too tight. Rotate high, low, and side placements, use soft ties when you can, and give your scalp a break from hard tension.
The Bun You Can Rely On

The nice thing about messy buns is that they don’t ask your hair to be one specific thing. They work with oil, texture, layers, curls, and those odd in-between days when nothing sits quite right. That flexibility is why they keep showing up in real life, not just in mirror selfies.
Pick one style that matches your hair’s habits and learn it first. Once that one becomes automatic, the others stop feeling like separate hairstyles and start acting like small adjustments — higher, lower, looser, tighter, or dressed up with one pin and a little more patience. Keep one elastic close, and the rest gets easier from there.
