



Medium length braid hairstyles solve a problem that gets ignored until the third day of wear: you want braids with swing, but you do not want hair tapping your shoulder blades, catching on purse straps, and dragging at your scalp every time you turn your head. At collarbone-to-upper-back length, braids still move. They still frame the face. They also stay out of the way when you sleep, work, cook, or lean back in a car seat.
That middle ground matters more than people admit. Short braids can feel a little abrupt if you like shape and movement; very long braids can turn into a lot of maintenance for not much extra style. Medium length gives you room for parts, beads, curls, buns, and side sweeps without asking your roots to carry unnecessary weight.
Most of the styles below come down to two things: the parting has to be clean, and the braid size has to match the amount of hair you actually want to wear. Get those right, and the style looks intentional from day one instead of looking like you were halfway to a bigger look and stopped.
Why Medium Length Braids Keep Getting the Call
- Less scalp drag: Medium braids put less constant pull on the hairline than waist-length installs, which matters if your scalp gets tender after a few days.
- More styling range: You can wear them down, half-up, in a low bun, or pinned back without the ends turning into a thick rope.
- Faster install time: Smaller lengths mean fewer minutes spent braiding, dipping, and trimming; that matters if you hate sitting still.
- Cleaner shape: The length tends to land where the style still has body, so the braids keep a crisp outline instead of looking heavy.
- Easier upkeep: Wash days, scalp cleansing, and nightly wrapping are all less annoying when the hair is not fighting you on every edge.
1. Shoulder-Grazing Knotless Box Braids
Knotless box braids at shoulder-grazing length are the style I reach for when I want neatness without the stiff, blocky start that older box braid installs sometimes have. The root lies flatter, the ends swing a little, and the whole look feels lighter the second it’s finished.
Why It Works: Knotless braids start with your own hair and add extension hair gradually, so the base stays flatter and puts less pressure on the scalp. At medium length, that softness matters because the style already has enough body; you do not need extra bulk to make it feel full.
Key Pieces
- 5 to 7 packs pre-stretched braiding hair — enough for medium-density, shoulder-length braids.
- Rat-tail comb — for clean square parts.
- Shine gel or edge control — use it sparingly so the roots stay neat, not sticky.
- Light mousse — helps calm frizz after install.
- Small clips — keep the working sections out of the way.
Quick Steps
- Wash, deep-condition, and blow-dry your hair so it’s fully dry before parting.
- Part the hair into neat squares or rectangles, keeping each section about 1/2 inch wide.
- Start each braid with your natural hair, then feed in tiny pieces of extension hair as you braid downward.
- Keep the braid size even from root to end; stop at collarbone length and trim only if the ends look uneven.
- Seal with warm water if the hair is synthetic, then finish with mousse and a satin wrap for 15 to 20 minutes.
Tools for This Style
- Rat-tail comb
- Duckbill clips
- Spray bottle with water for parting control
- Heat-safe bowl or kettle for sealing synthetic ends
How to Wear It: This is the kind of braid that can go straight down the middle, tucked behind one ear, or pulled into a low ponytail without losing its shape. It looks sharp with hoop earrings and a clean neckline.
Pro Tips
- Keep the first grip small; big roots make knotless braids lose the whole point.
- If your scalp is tender, ask for slightly larger parts instead of smaller braids.
- A foam wrap at the end smooths the surface better than extra gel.
- If the braids puff up at the roots, do not panic; a quick mousse refresh usually resets them.
Variations
- Side-Part Knotless: Shift the part to one side for a softer frame around the face.
- Beaded Finish: Add 2 to 4 beads per braid on the front rows for a little sound and movement.
Common Mistakes to Avoid
- Starting too thick at the root: That makes knotless braids look bulky and can pull the scalp. Keep the first feed-in pieces small.
- Skipping the dry prep: Damp hair under braids can lead to odor and itching. Blow-dry fully first.
- Overloading the ends with product: Heavy grease at the ends makes synthetic hair feel waxy and dull.
2. Center-Part Fulani Braids with Beads
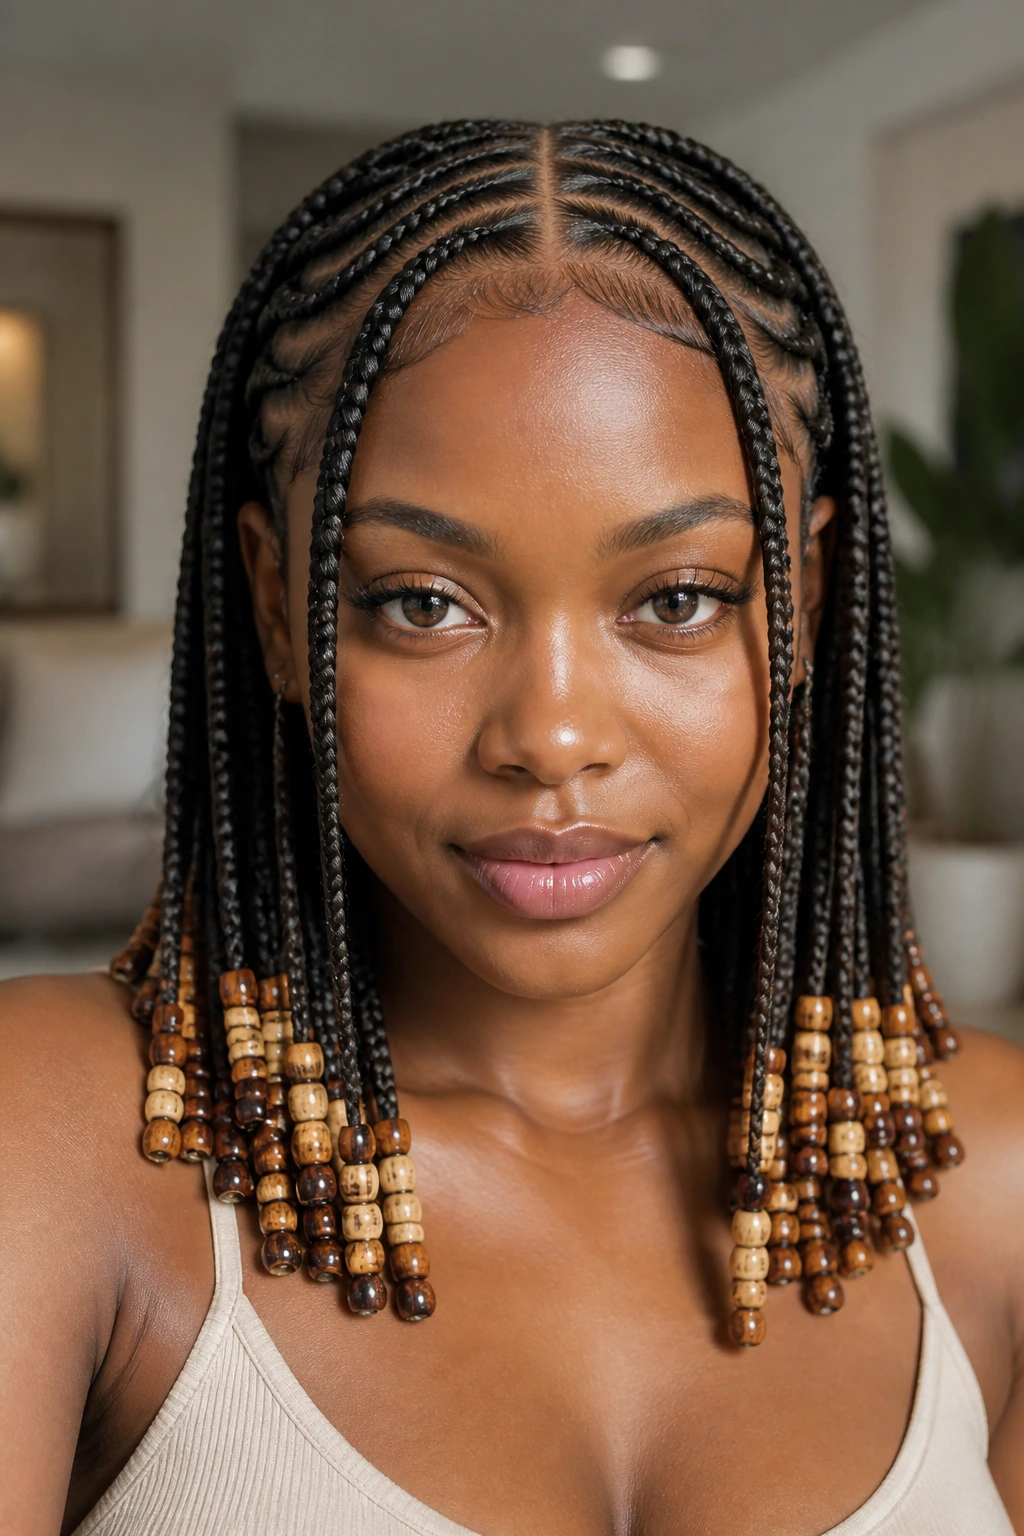
Do you want a style that frames the face without trying too hard? Fulani braids do that by design. The center braid and side-facing rows pull the eye inward, while the beads at the ends give the style a little rhythm every time you move.
Why It Works: Fulani braids balance structure and ornament. The center part creates a clean line, and the side braids give the face a narrow, lifted shape that works especially well at medium length because the style stops before it gets heavy.
Key Pieces
- 4 to 6 packs braiding hair — enough for the main feed-in rows and the back.
- Small wooden or acrylic beads — lighter beads are kinder to the ends.
- Bead threader or loop tool — saves time and frustration.
- Braid gel — use it along the part lines only.
- Small elastics — for securing the braid ends before beading.
Quick Steps
- Part a straight center line from forehead to nape, then map the side rows before braiding.
- Create one center braid and a few side cornrows that angle back toward the ears.
- Add medium box braids or feed-ins through the back section to keep the style full.
- Finish the ends at shoulder length, secure them, and slide on beads where you want the sound and movement.
- Set the whole style with mousse and wrap it for 20 minutes so the parts lie flat.
Tools for This Style
- Rat-tail comb
- Bead threader
- Small scissors for string ends
- Duckbill clips
How to Wear It: Keep the front rows clean and the bead count moderate if you want this to read polished rather than noisy. The style looks especially good with off-the-face makeup and a simple top that does not compete with the parting.
Pro Tips
- Use lighter beads on the braids near your temples; those pieces get the most movement.
- If your bead holes are tight, widen them with the tip of a rat-tail comb before threading.
- Keep the center braid slightly slimmer than the side braids so the middle does not overpower your face.
- Wooden beads make less clatter than metal, which matters if you wear the style all day.
Variations
- Minimal Fulani: Skip the beads and keep only the braids; the parting does the work.
- Festival Set: Mix two bead sizes on the front rows for a louder, more playful finish.
Common Mistakes to Avoid
- Too much bead weight: Heavy beads pull on the ends and can wreck the clean line. Use fewer beads, not bigger ones.
- Uneven side braids: One thicker side row makes the whole style look off-balance. Map both sides before you start.
- Tight temple braids: If the hairline hurts by hour two, the braid is too tight. Redo that row.
3. Side-Swept Lemonade Braids
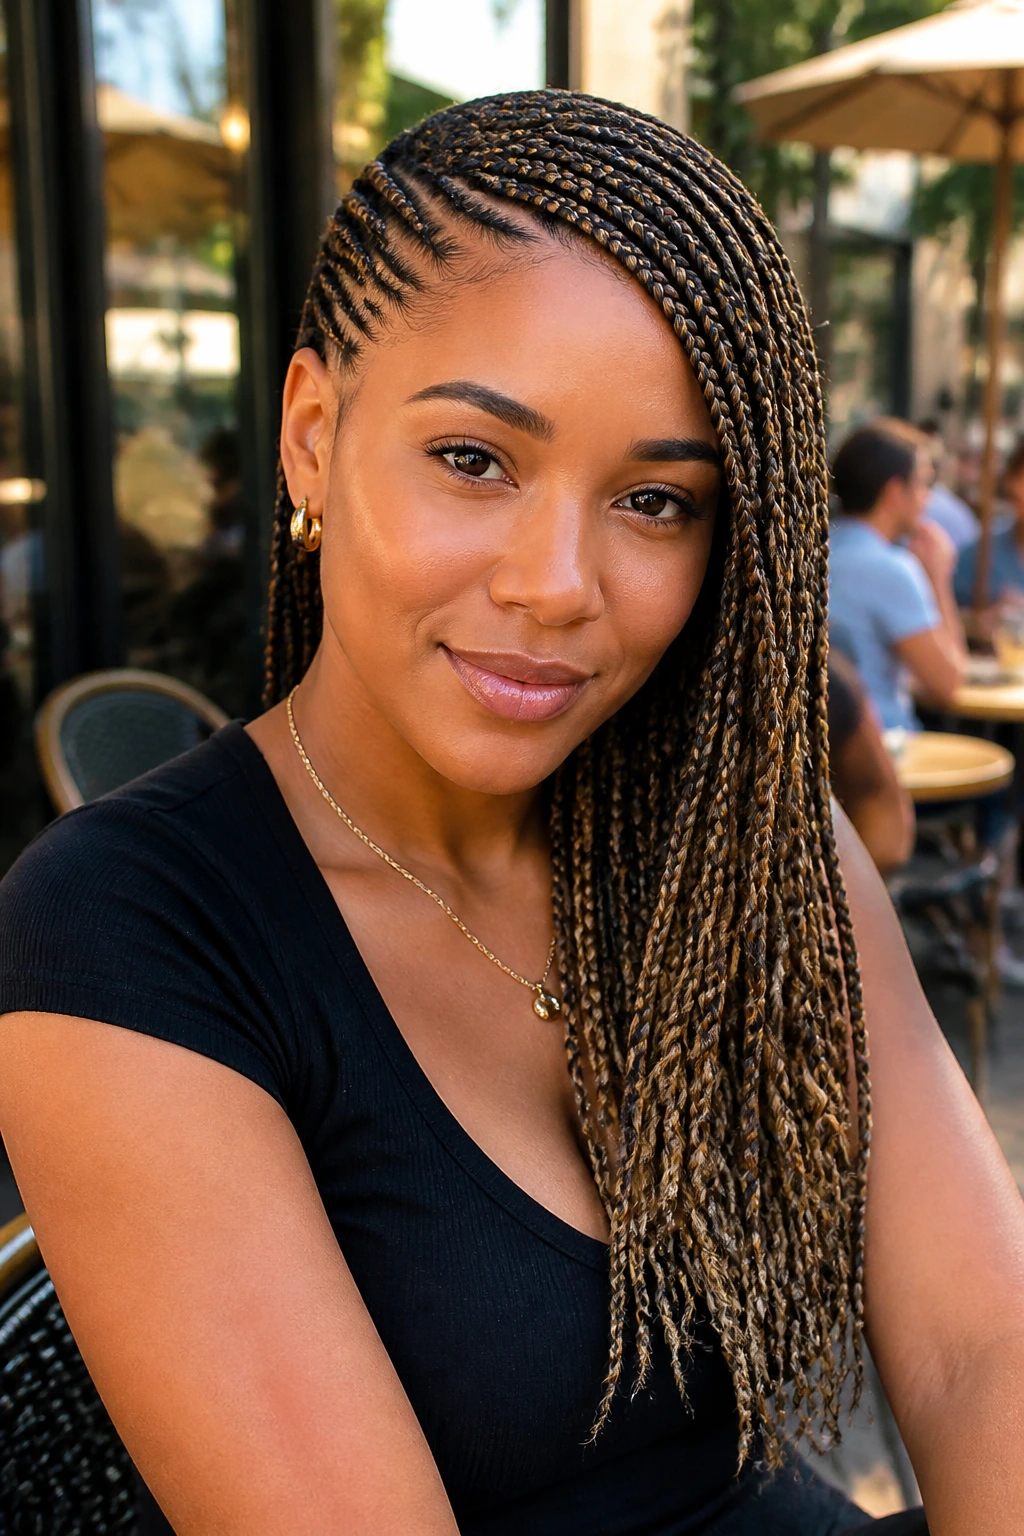
Lemonade braids are all about direction. The whole style sweeps to one side, which gives medium length braids a sharper, longer line without needing extra inches of hair hanging down your back. That diagonal movement is the point.
Why It Works: The side sweep keeps the braid pattern visually active, and medium length stops the ends from looking stringy. You get the drama of the angle without the drag of a heavy install.
Key Pieces
- 6 to 8 packs pre-stretched braiding hair — diagonal rows usually need a little more coverage.
- Strong but flexible braiding gel — for keeping the front smooth.
- Edge brush — useful for shaping the hairline after the install.
- Mousse — helps the braids settle into the sweep.
- Small elastic bands — if your ends need temporary control before dipping.
Quick Steps
- Create a deep side part and map diagonal cornrows that slant toward the same side.
- Feed in hair gradually as you braid, keeping each row angled instead of straight back.
- Carry the braids toward one shoulder and keep the ends at the same length.
- Seal synthetic hair with warm water, then wrap the front with foam or a scarf.
- Let the style dry fully before you start tossing it over the shoulder.
Tools for This Style
- Rat-tail comb
- Fine clips
- Heat-safe bowl
- Small mirror for checking the back angle
How to Wear It: Lemonade braids look best when they are allowed to sweep. I would not fight the direction with a high collar or heavy necklace. Let the asymmetry be the whole point.
Pro Tips
- Keep the front rows narrow so the sweep looks sleek instead of thick.
- If your part starts to wander, stop and reset it; crooked diagonal braids show fast.
- Use a little mousse at the end of each row so the braids sit in the same direction.
- A side sweep feels sharper when the lengths match exactly.
Variations
- Soft Sweep: Use fewer braids and a less severe angle for a calmer finish.
- High-Contrast Sweep: Add a lighter braid color to the outer rows so the direction stands out.
Common Mistakes to Avoid
- Braiding straight back by accident: If the row loses its angle, the whole style turns into regular cornrows. Keep checking the line as you braid.
- Making the front too wide: Thick front rows flatten the face instead of framing it. Narrower rows read cleaner.
- Leaving the ends rough: Lemonade braids look best when the finish is sealed and smooth, not frayed.
4. Feed-In Cornrows Into a Low Bun
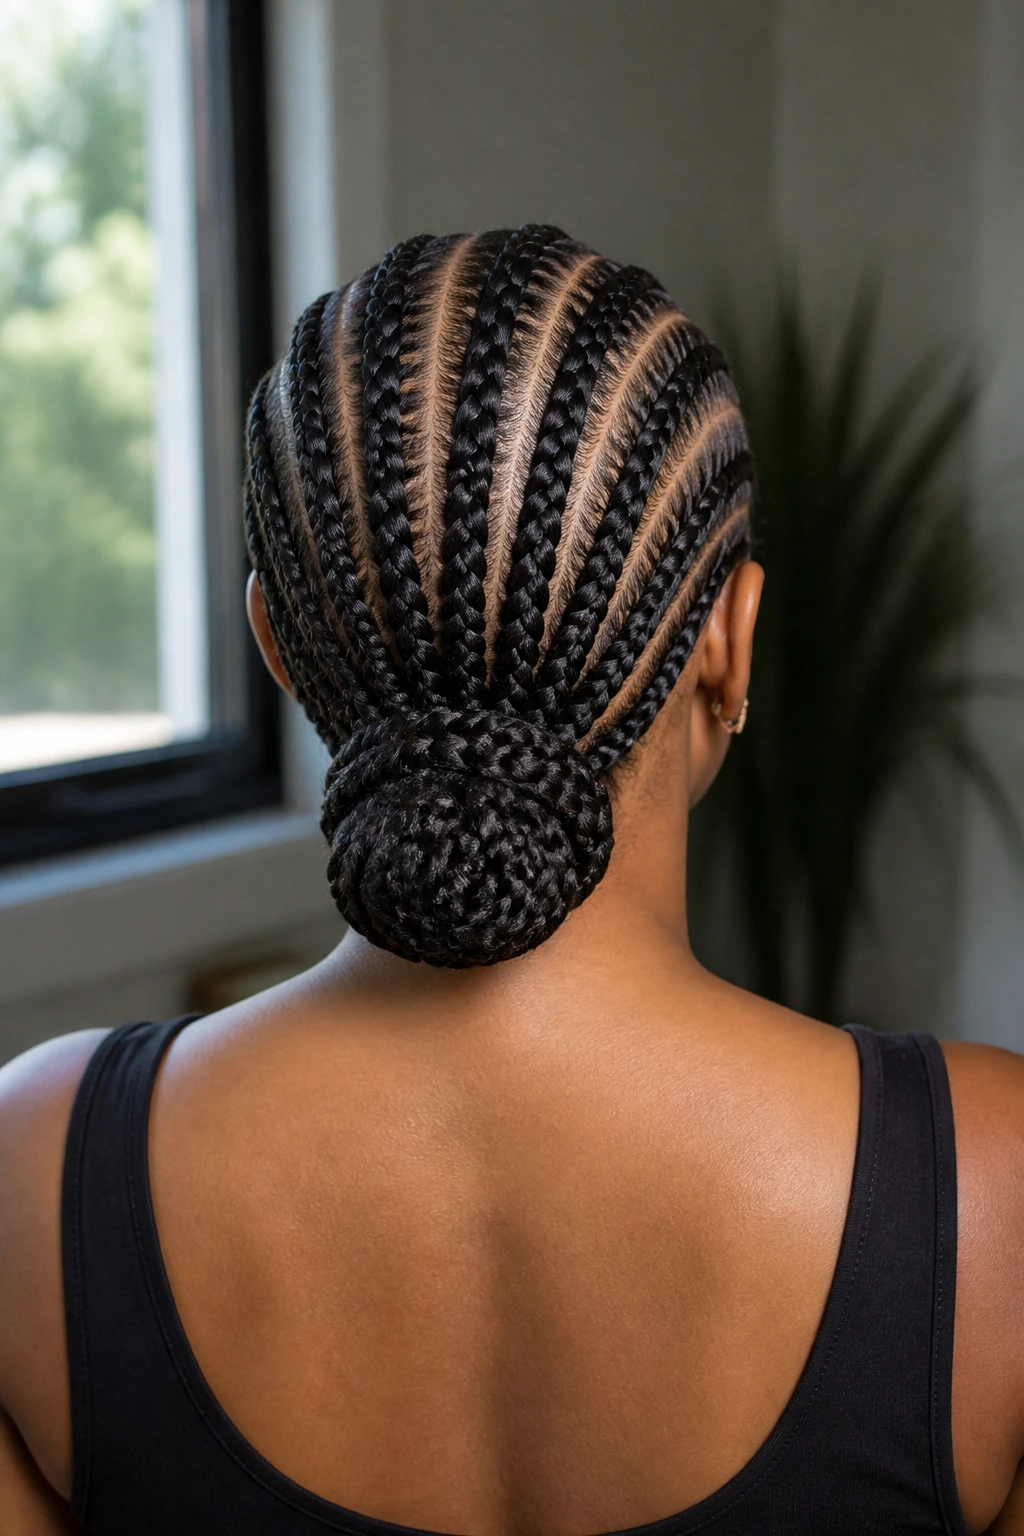
There is a reason this style keeps showing up in work settings, gyms, and weddings alike. It sits low, stays out of your way, and still looks like you planned the whole thing instead of throwing your hair back in a panic.
Why It Works: Feed-in cornrows reduce the visible bulk at the root, and the low bun keeps the braid weight centered near the nape instead of dragging from the temples. Medium length is the sweet spot because the bun has enough length to coil without becoming a helmet.
Key Pieces
- 4 to 6 packs braiding hair — enough for the rows and the bun.
- Braid gel or styling wax — for the clean line at the scalp.
- Long hair pins — hold the bun without a giant knot.
- Satin scrunchie — better than a tight elastic if your hair is tender.
- Mousse — smooths the surface after the bun is set.
Quick Steps
- Part the hair into 6 to 10 neat rows, depending on how full you want the style.
- Feed the braiding hair in gradually and braid each row straight back toward the nape.
- Gather the finished braids into a low bun and twist them around the base until they sit flat.
- Pin the bun in place, then mist the style with mousse and tie it down for 15 minutes.
- Check the nape area; if anything sticks out, tuck it before you leave the mirror.
Tools for This Style
- Rat-tail comb
- Duckbill clips
- Hair pins
- Small satin scarf
How to Wear It: This is the braid style I’d pick for a long day when I need my hair to stay put. It works with a blazer, a hoodie, or a dress, which is rare enough to deserve respect.
Pro Tips
- Keep the bun low and flat; a high bun adds tension and can make the braid rows twist.
- If the ends are slippery, wrap one braid around the bun base before pinning.
- Use more pins than you think you need, but tuck them deep so they do not scratch.
- The style looks cleaner when the part lines are the star and the bun is quiet.
Variations
- Wrapped Bun: Wrap one long braid around the bun base for a more finished look.
- Low Side Bun: Shift the bun slightly behind one ear if you want the style softer.
Common Mistakes to Avoid
- Pulling too hard at the nape: That spot gets irritated fast. Keep the tension even and gentle.
- Building the bun too high: A high bun fights the point of the style and makes it wobble.
- Skipping the final wrap: Without a scarf or foam finish, the cornrow surface can puff up by dinner time.
5. Tribal Braids with Curly Ends
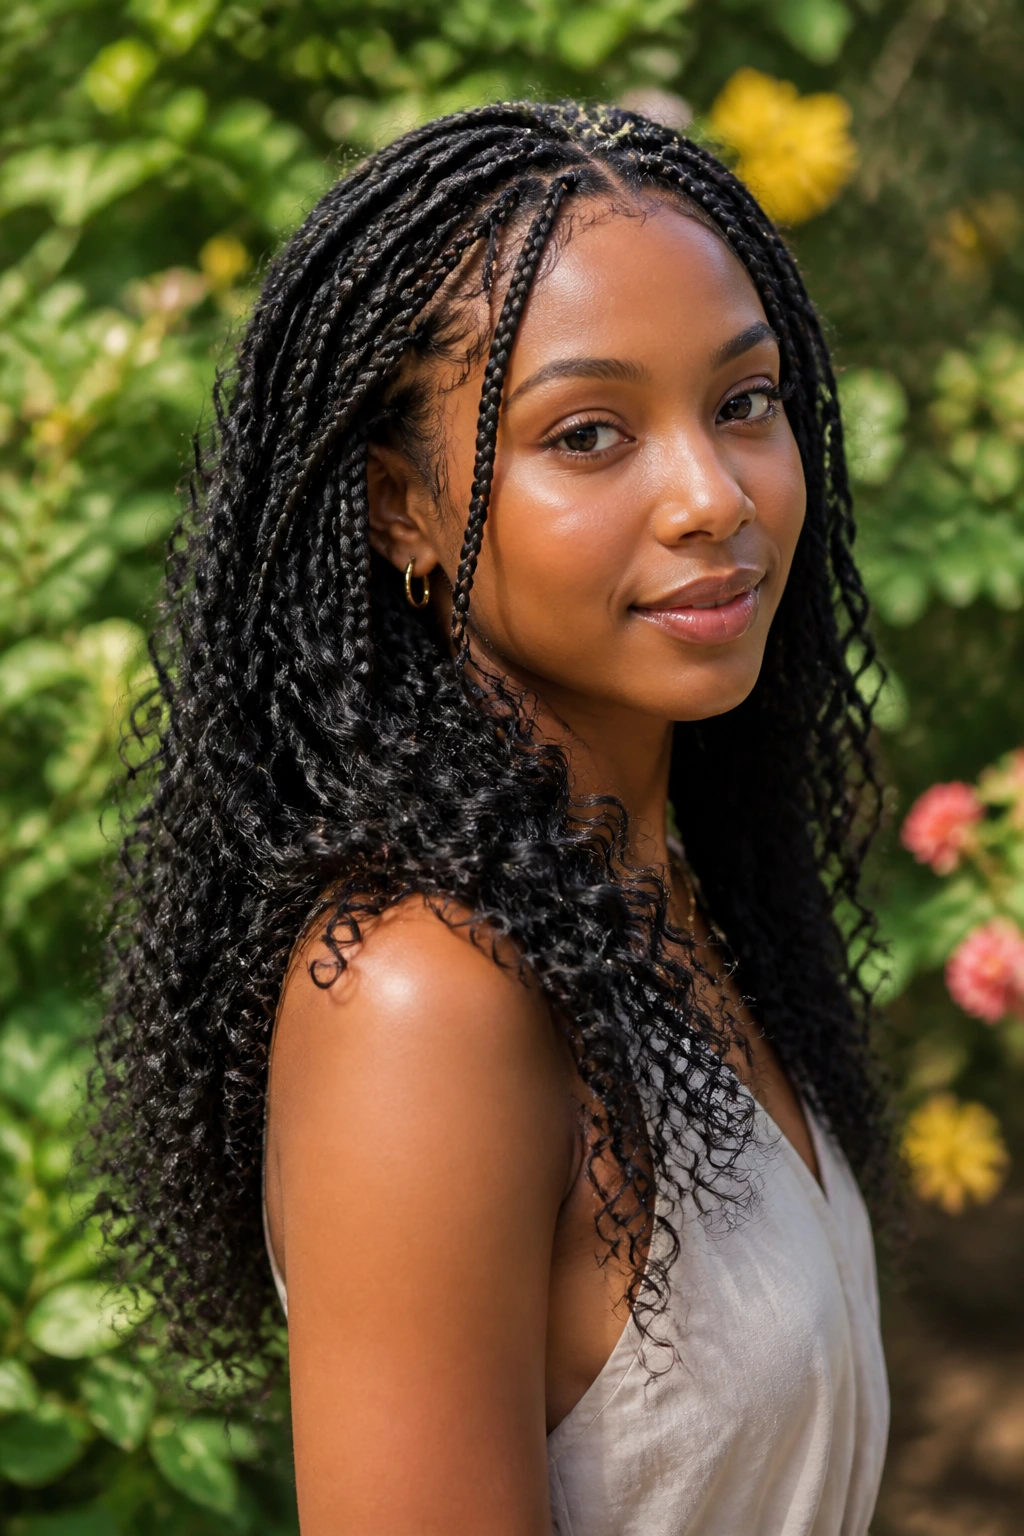
Tribal braids have a little more personality than plain rows, and the curly ends are what keep them from looking too severe. The mix of clean braids on top and loose texture at the bottom gives medium length hair a smart, layered shape.
Why It Works: The braided base gives structure while the curly ends soften the finish, so the style moves instead of sitting like a block. Medium length helps because the curls land where they can bounce without tangling around the waist or lower back.
Key Pieces
- 5 to 7 packs braiding hair — for the cornrows and braided sections.
- 1 to 2 bundles water wave or curly extension hair — for the ends.
- Braid gel — for the parts and front rows.
- Small elastics — to secure the transition before adding curls.
- Mousse — calms the curly pieces without flattening them.
Quick Steps
- Design the top pattern first: tribal braids usually mix straight rows with a central accent braid.
- Braid the top half tight enough to stay neat, but not so tight that the scalp feels pinched.
- Add the curly extension hair only at the last part of each braid so the texture stays soft.
- Finish with mousse, then separate the curls lightly with your fingers.
- Sleep with a satin wrap so the curly ends do not frizz into a tangle.
Tools for This Style
- Rat-tail comb
- Clip set
- Detangling finger comb
- Spray bottle with water for the curls
How to Wear It: The contrast does the styling for you, so keep the outfit simple when you want the braids to stand out. I like this look with hoops and a clean part because the top and bottom textures already do a lot.
Pro Tips
- Add curly hair at the ends only; putting it too high makes the braid look cluttered.
- Finger-detangle curls, not brush them.
- Use light mousse, never heavy grease, on the curly pieces.
- If you want more polish, keep the top rows thinner than the braids at the back.
Variations
- Subtle Curl Finish: Use fewer curly pieces and keep them only on the front rows.
- Full Texture Set: Add curly ends to every braid for a softer, more romantic finish.
Common Mistakes to Avoid
- Adding curls too early: That makes the texture fray before the style settles. Put them only at the ends.
- Using too much product on the curls: Heavy creams flatten the bounce. Light mousse is enough.
- Ignoring section balance: If the top braids are crowded, the style loses its shape fast.
6. Medium Goddess Braids with Soft Tendrils
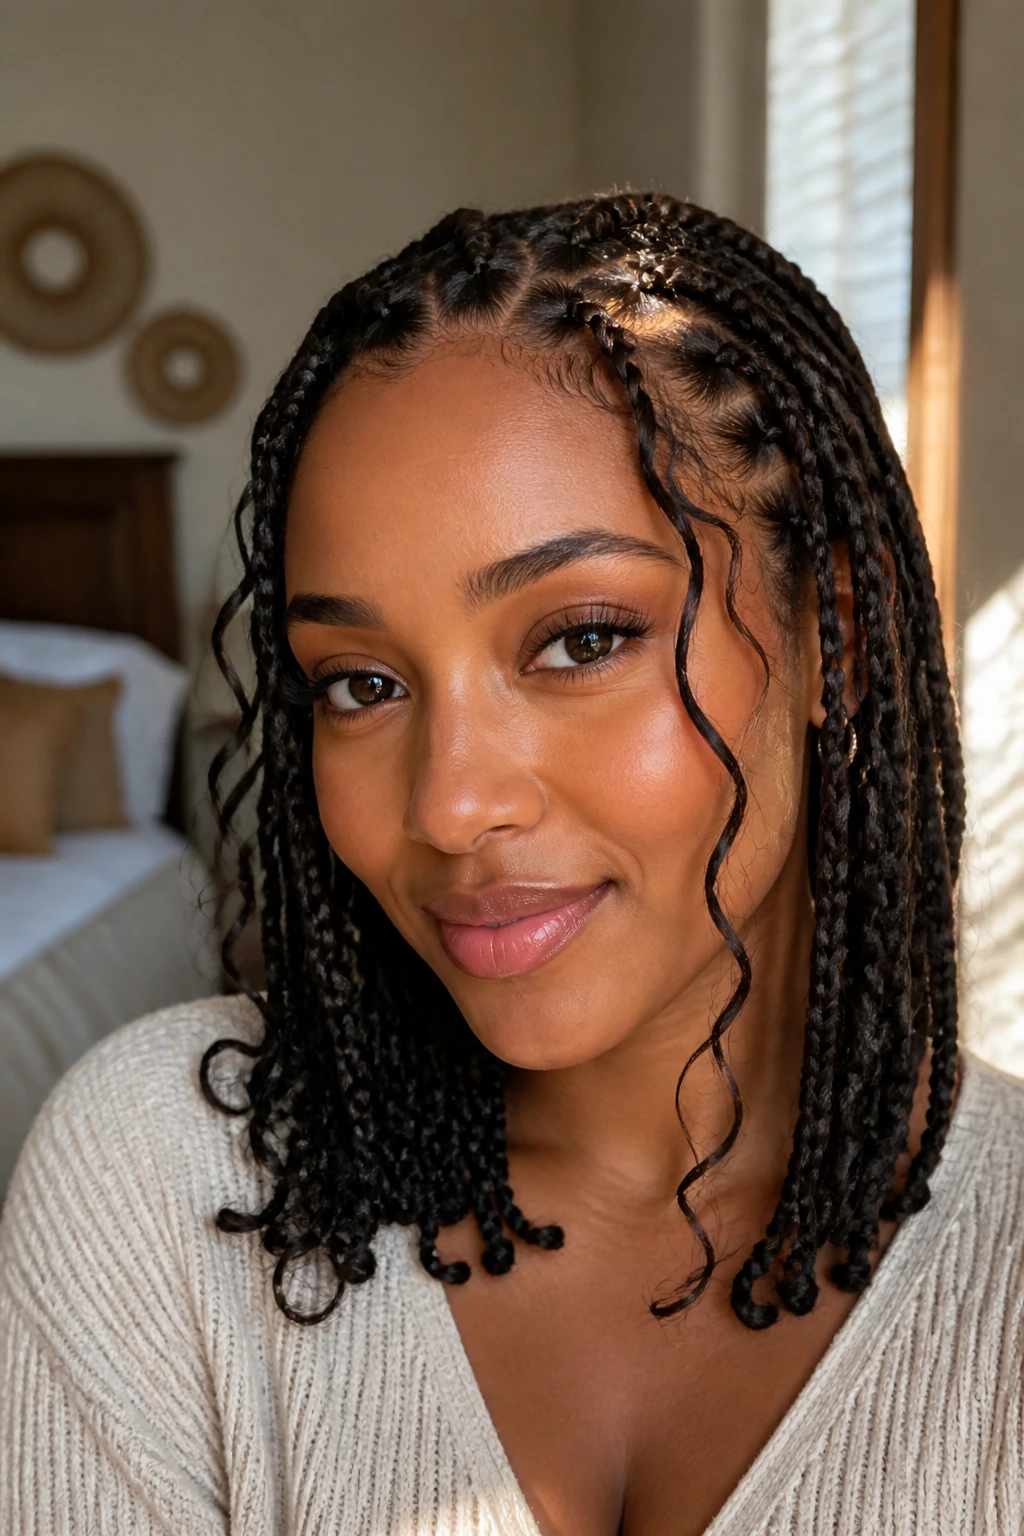
A good goddess braid never feels stiff. The braid itself gives you structure, but the loose tendrils around the face and at the crown keep it from looking overly set, which is exactly why medium length suits it so well.
Why It Works: Goddess braids need room for the braid shape and the free pieces to sit next to each other without tangling. Medium length gives the style enough presence to look full, but not so much length that the tendrils get lost.
Key Pieces
- 4 to 6 packs braiding hair — enough for 4 to 8 medium goddess braids.
- Small curly pieces or pre-curled extension hair — for tendrils.
- Styling foam — helps the loose pieces cling instead of puffing.
- Gel or pomade — for the roots only.
- Small clips — keep the tendrils separate while you braid.
Quick Steps
- Part the hair into medium-sized rows and decide where the loose tendrils will fall before braiding starts.
- Feed in hair and create large, smooth braids that sit close to the scalp.
- Leave 2 to 4 thin pieces free around the face and at the crown.
- Add the curly or loose ends only after the braid is anchored.
- Set the style with foam and wrap it briefly so the tendrils sit in place.
Tools for This Style
- Rat-tail comb
- Curling hair pieces
- Small duckbill clips
- Satin scarf
How to Wear It: This one looks best when the loose pieces are controlled, not fuzzy. I’d keep jewelry simple and let the tendrils frame the cheeks instead of covering the whole face.
Pro Tips
- Put the tendrils where you want softness, not everywhere at once.
- Keep the braids larger than box braids if you want a goddess braid to read clearly.
- Use foam to shape the loose pieces after the install, not a heavy cream.
- If the front pieces frizz too fast, cut them a little shorter so they do not rub your collar.
Variations
- Face-Frame Focus: Keep only two tendrils in front and leave the rest sleek.
- Full Soft Set: Add more loose pieces through the crown for a less structured finish.
Common Mistakes to Avoid
- Too many loose pieces: The style turns messy instead of soft. Choose a few intentional spots.
- Braids that are too thick: Heavy goddess braids can flatten the top of the head. Keep the shape airy.
- Skipping the wrap: Loose tendrils need setting time or they wander everywhere.
7. Triangle-Part Box Braids
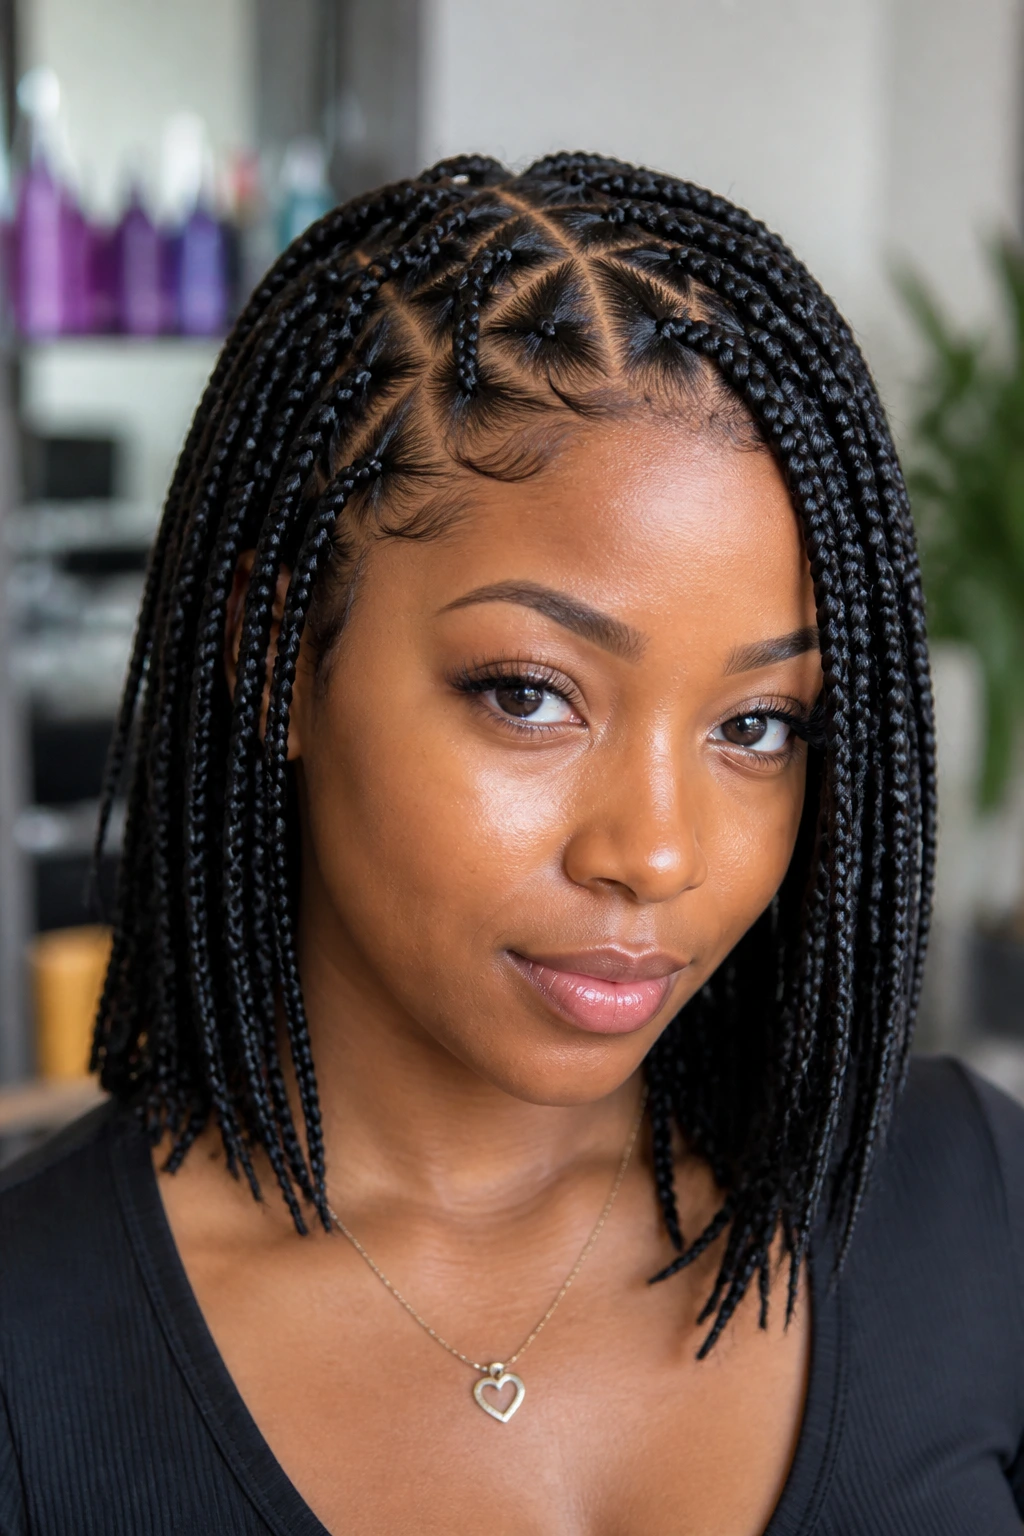
Triangle parts are the detail that makes people look twice. The braid itself can be simple, but the parting changes everything. It is sharp, graphic, and a little unexpected, especially at medium length where the geometric lines stay visible.
Why It Works: Triangle parts break up the grid that standard box braids use, so the style feels more deliberate. At medium length, the parts stay readable because the ends are not so long that they hide the scalp work.
Key Pieces
- 5 to 7 packs pre-stretched braiding hair — depending on braid thickness.
- Rat-tail comb — this is non-negotiable for triangle parting.
- Styling gel — only enough to sharpen the part.
- Clips — keep each triangle section clean.
- Light mousse — softens the finished surface.
Quick Steps
- Map the first row carefully and mark the triangle shape before braiding.
- Part each section into even triangles, not wobbly wedges.
- Braid from the root with clean tension and keep each braid the same size.
- Carry the braid down to medium length, then seal the ends if needed.
- Set the whole head with mousse so the part lines stay crisp.
Tools for This Style
- Rat-tail comb with a thin tail
- Duckbill clips
- Fine mirror
- Spray bottle for sectioning control
How to Wear It: This style looks best when the parting can be seen, so I would not bury it under heavy accessories. A simple middle part or a tucked-behind-the-ear finish lets the triangles do the work.
Pro Tips
- Plan the triangles first, then braid. Guessing as you go leads to uneven rows.
- Keep the points clean at the scalp; blunt corners ruin the whole effect.
- If your scalp shows too much product, you used too much gel. Wipe the part and start lighter.
- Triangle parts look strongest when the braid sizes match from front to back.
Variations
- Small-Triangle Set: Use tighter triangles for a denser scalp pattern.
- Large-Shape Set: Use wider triangles for a bolder, more open look.
Common Mistakes to Avoid
- Uneven triangle sizes: That makes the head look lopsided. Measure the rows before braiding.
- Over-gelling the scalp: Product buildup makes the part lines dull and flaky.
- Rushing the first row: The front is the part everyone sees first. Spend the time there.
8. Braided Bob with Tucked Ends
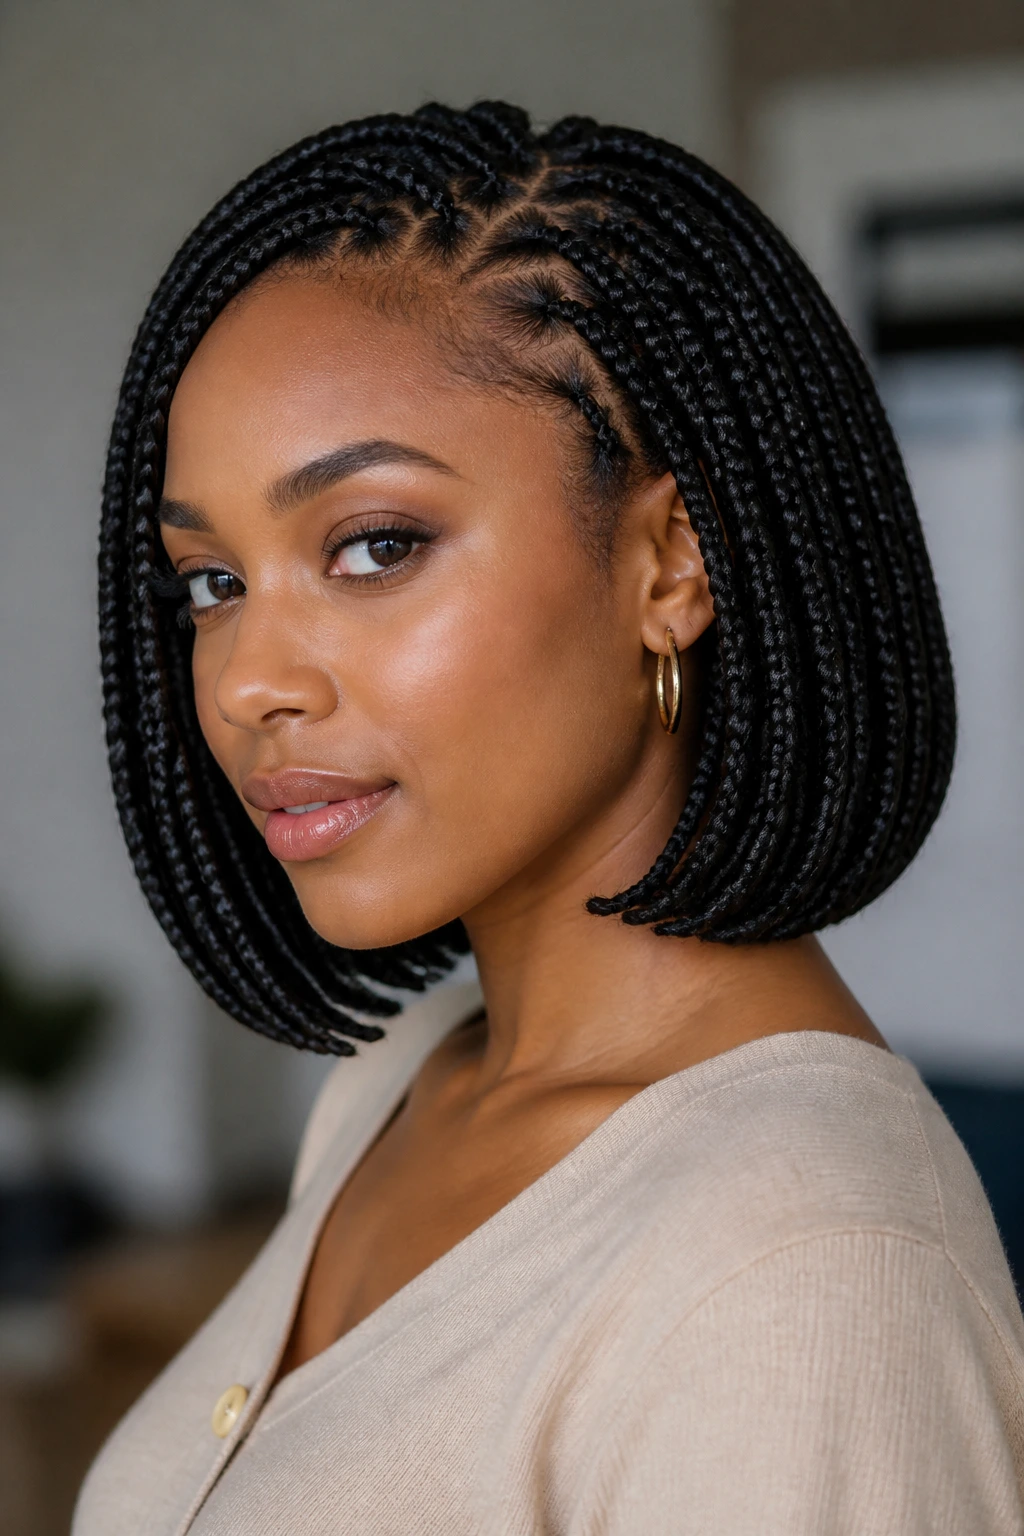
A braided bob has one job: look tidy without feeling severe. When the ends are tucked cleanly, the shape sits right at the jaw or shoulder line and gives medium-length braids a crisp finish that is much easier to live with than extra-long hair.
Why It Works: The bob shape removes weight from the style and keeps the silhouette compact. That means less pulling, less fuss on wash day, and fewer strands getting trapped under coat collars or seatbelts.
Key Pieces
- 4 to 6 packs braiding hair — a bob needs less bulk than a long install.
- Small elastic bands — for securing the ends before tucking.
- Hair pins — useful for hiding the fold.
- Mousse — keeps the ends from fraying outward.
- Optional curling rod or hot water setup — if you want the ends to sit smoother.
Quick Steps
- Decide the bob length before you start; do not improvise it at the end.
- Braid each section evenly and stop where the bob should fall.
- Fold the remaining end under itself and pin or wrap it so the shape looks clean.
- Seal synthetic hair with warm water if needed, then let the style dry flat.
- Finish with mousse and check both sides in the mirror for symmetry.
Tools for This Style
- Rat-tail comb
- Hair pins
- Small mirror
- Heat-safe bowl if sealing synthetic ends
How to Wear It: This bob reads polished fast. It looks especially good with tucked turtlenecks, earrings that sit just below the jaw, and anything with a clean neckline.
Pro Tips
- Measure the bob on both sides before you start braiding.
- If the ends flare outward, tuck them tighter or trim a tiny bit after the hair cools.
- Keep the braid count moderate; too many tiny braids can make a bob look thin.
- A blunt finish looks sharper than a messy one here. Clean lines matter.
Variations
- Curved Bob: Let the front pieces land slightly longer than the back for a softer angle.
- Rounded Bob: Tuck the ends under more tightly so the shape hugs the jawline.
Common Mistakes to Avoid
- Cutting too soon: If you snip before the hair settles, the bob can end up shorter than planned.
- Leaving the ends loose: That makes the shape look unfinished. Tuck them properly.
- Choosing too much hair: A dense bob can sit like a block. Medium fullness is better.
9. Half-Up, Half-Down Medium Box Braids
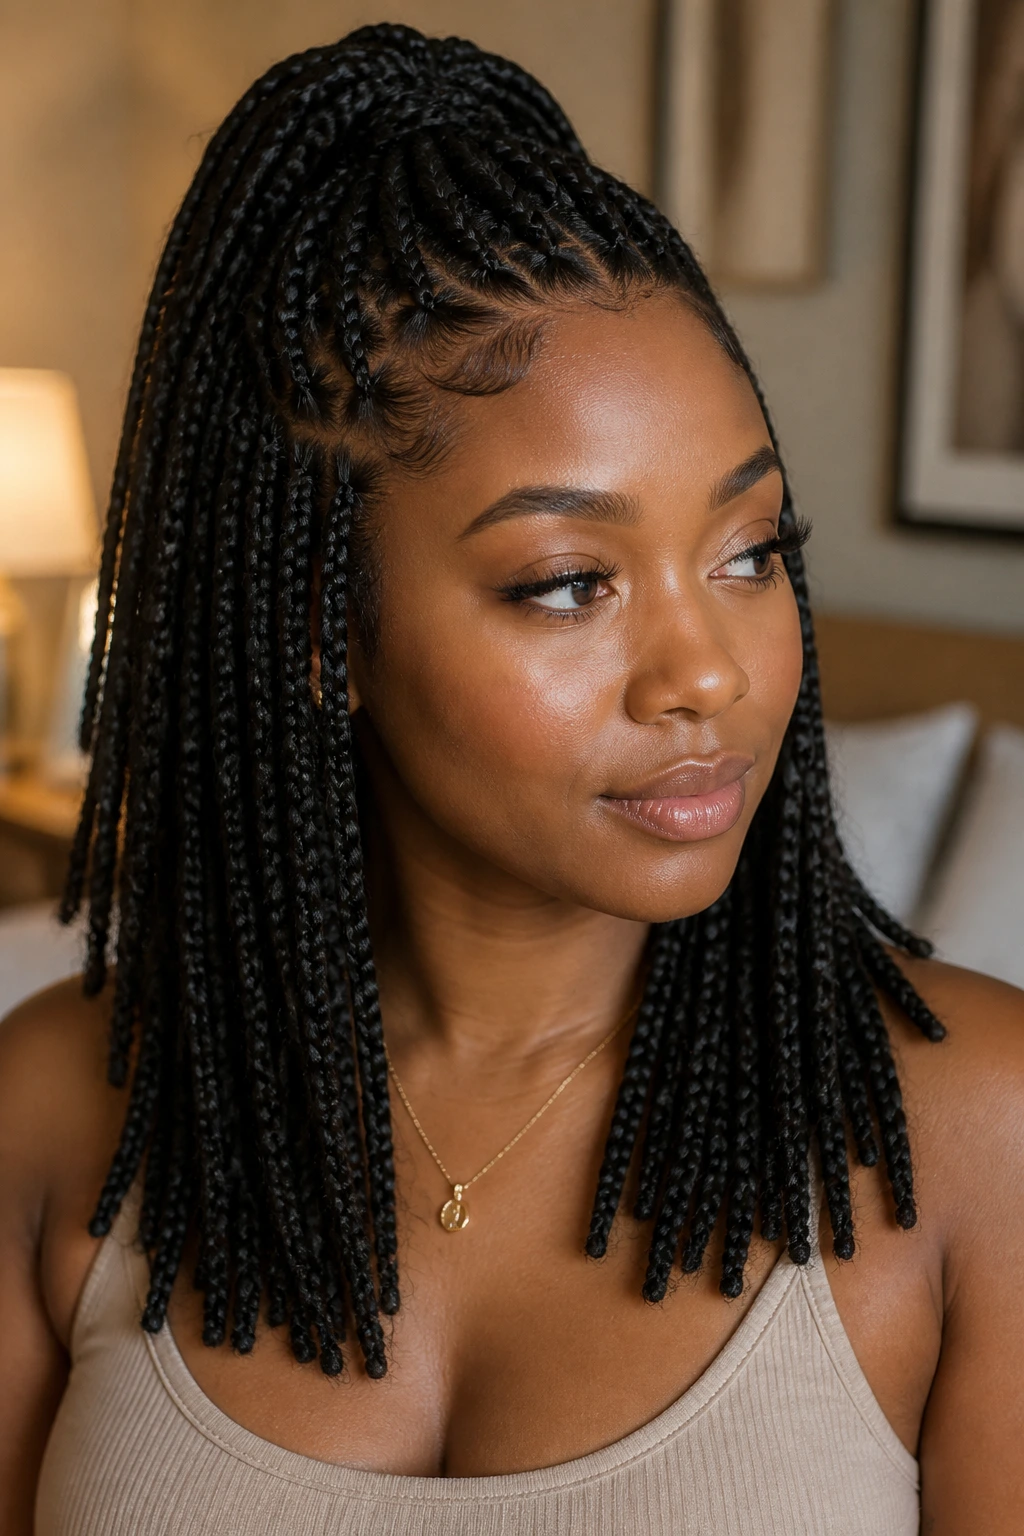
Half-up, half-down braids are what I call the backup plan that never looks like a backup plan. The top section pulls the style away from your face, and the lower braids keep enough movement that the whole thing still feels relaxed.
Why It Works: Medium length is ideal here because the lower section has enough drop to show shape, but not so much length that the style gets heavy when the top is tied back. It is a clean compromise that actually looks intentional.
Key Pieces
- 5 to 7 packs braiding hair — enough for a medium-density install.
- Satin scrunchie or braid tie — kinder than a small elastic.
- Edge brush — useful for smoothing the front.
- Mousse — helps the top section stay neat.
- Optional braid cuff or wrap string — for the base knot.
Quick Steps
- Install medium box braids evenly across the head and let them settle fully.
- Gather the top third or top half into a ponytail, depending on how much lift you want.
- Wrap one braid around the base or tie it with a satin scrunchie.
- Leave the rest down and separate the lower braids lightly with your fingers.
- Set with mousse so the crown stays sleek and the rest moves freely.
Tools for This Style
- Rat-tail comb
- Satin scrunchie
- Hair pins
- Spray mousse
How to Wear It: This is one of the easiest ways to make medium braids feel different from day to day. Wear it high and neat for errands, or loosen the top a little when you want a softer look.
Pro Tips
- Do not yank the top section too tight or the style loses its easy shape.
- Keep the lower half balanced so one side does not look fuller than the other.
- A small braid wrapped around the base looks cleaner than a big visible elastic.
- This style gets better after a day or two once the braids settle.
Variations
- High Half-Up: Pull the top section higher for a sharper, lifted silhouette.
- Loose Half-Up: Use only the front crown section for a softer, face-framing finish.
Common Mistakes to Avoid
- Taking too much hair from the crown: That leaves the back sparse. Keep the split even.
- Using a tight rubber band: It can snag the braids. Use a satin tie or wrap.
- Ignoring the lower section: The down part still needs a little finger separation so it does not clump.
10. Zig-Zag Part Feed-In Braids
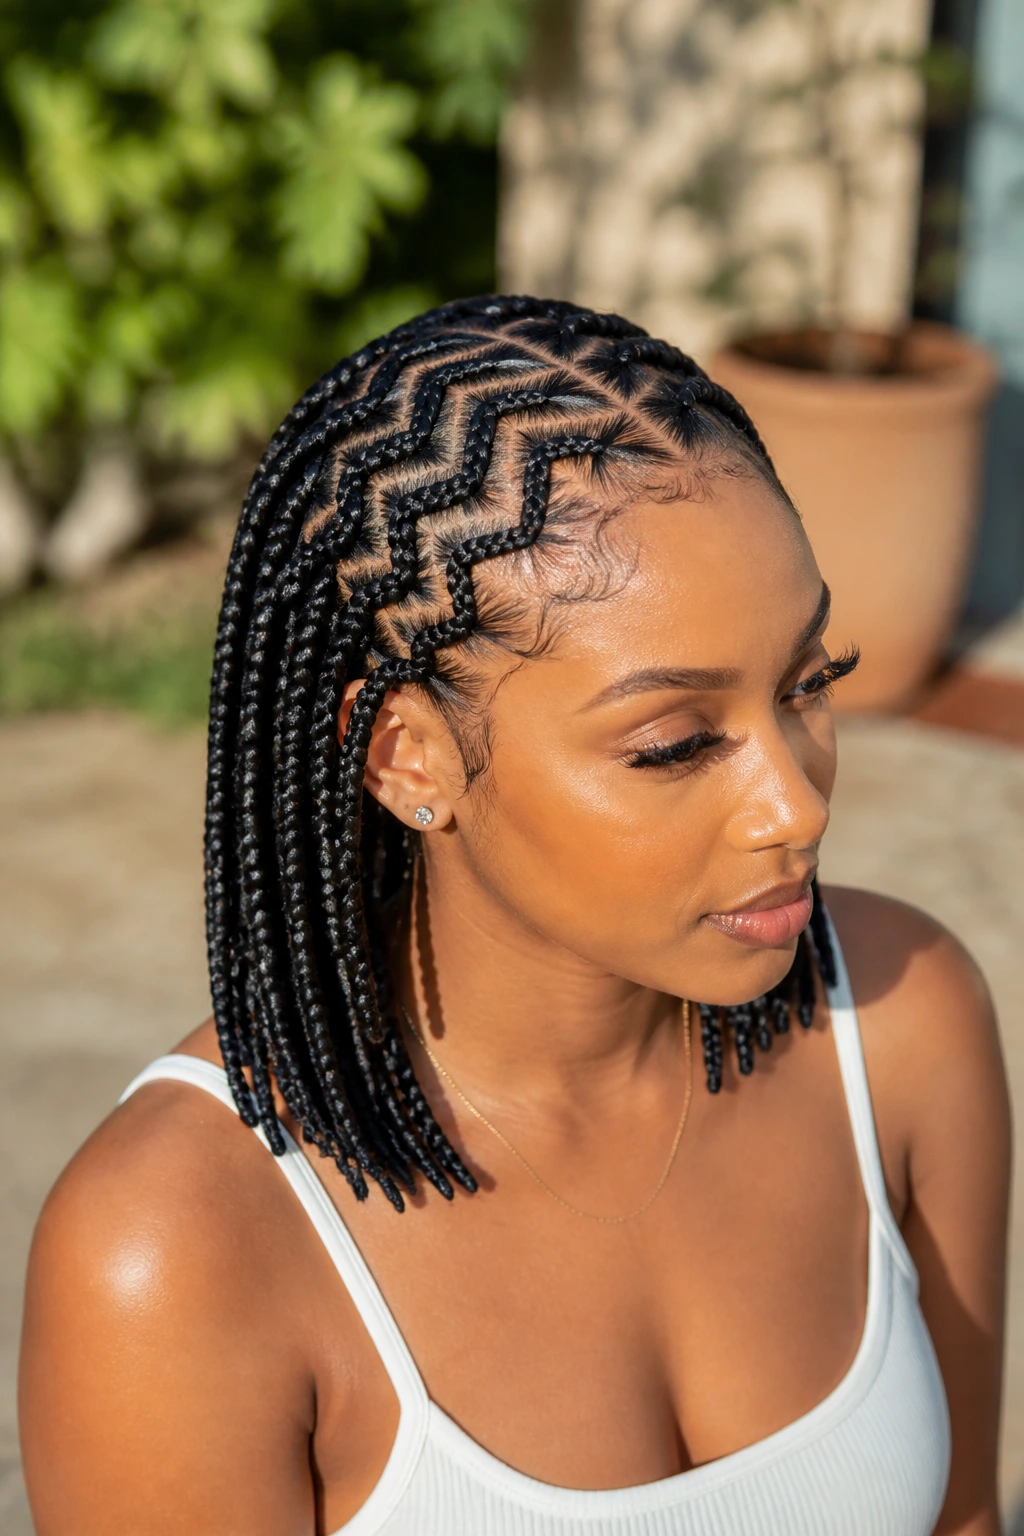
A zig-zag part is one of those details that looks small on paper and huge on the head. The parting itself becomes the decoration, which is useful when you want the braids to look fresh without loading them up with accessories.
Why It Works: The zig-zag line gives feed-in braids a graphic, custom feel, and medium length keeps the parts visible without burying them under too much hair. It’s a style with personality built into the scalp work.
Key Pieces
- 4 to 6 packs braiding hair — enough for the feed-in rows.
- Rat-tail comb — thin tail only; you need clean corners.
- Strong gel — for holding the zig-zag line.
- Clips — to keep the pattern from collapsing while you braid.
- Mousse — for a soft finish once the style is set.
Quick Steps
- Draw the first zig-zag path with the tail of the comb before adding any braiding hair.
- Clip each section separately so the pattern stays sharp.
- Feed in the hair gradually and keep the braid width even from row to row.
- Continue until the braids reach medium length, then seal and set.
- Smooth the parts with a light wrap and let them dry fully.
Tools for This Style
- Rat-tail comb
- Duckbill clips
- Edge brush
- Small mirror for checking the back rows
How to Wear It: Keep the rest of the styling calm. The zig-zag part already gives the look a lot of movement, so a simple pony or loose hang keeps it from becoming chaotic.
Pro Tips
- Make the zig-zag deeper than you think you need; shallow lines disappear fast.
- Finish one row before moving to the next so the pattern stays readable.
- Too much gel can make the line flaky. Use just enough to hold the shape.
- This style looks strongest when the parts are crisp on day one.
Variations
- Micro Zig-Zag: Use smaller angles for a more detailed scalp pattern.
- Wide Zig-Zag: Use broader turns for a bolder, easier-to-see design.
Common Mistakes to Avoid
- Drawing the pattern too fast: Wobbly lines are hard to hide later.
- Letting the sections dry out before braiding: That makes the part messy. Work row by row.
- Using braids that are too thick: Thick rows cover the parting and defeat the point.
11. Boho Knotless Braids with Face-Framing Curls
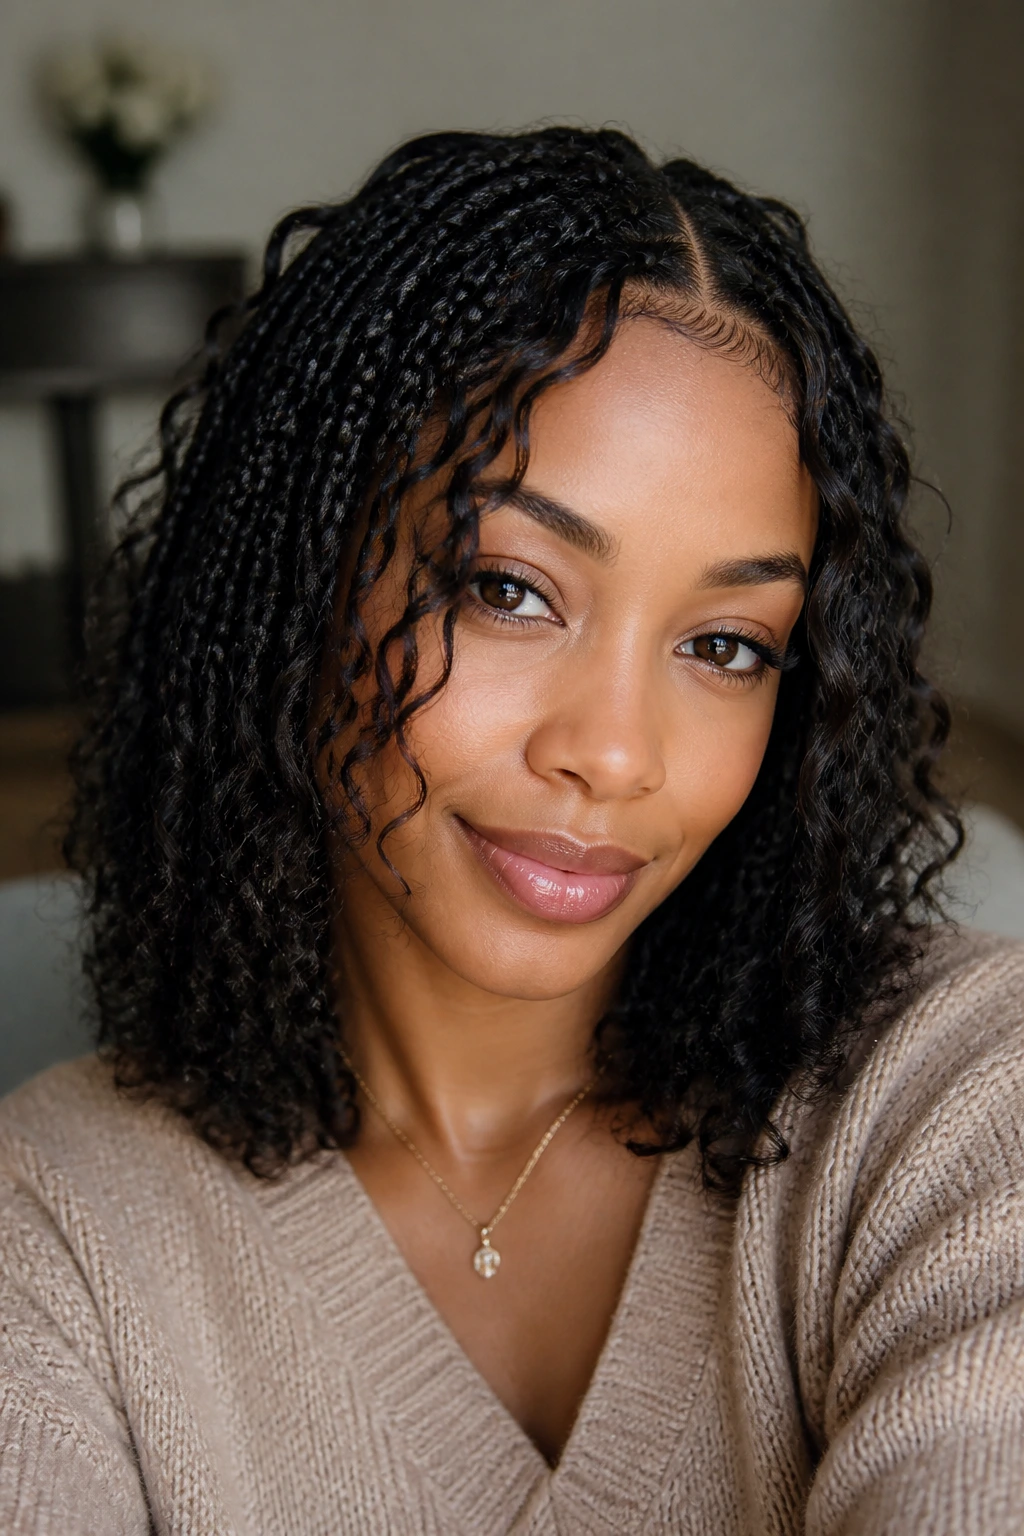
Boho knotless braids are for people who want the neatness of braids with just enough looseness to keep them from feeling severe. The face-framing curls soften everything, and medium length keeps the curly pieces from tangling into a full-time project.
Why It Works: The knotless base stays flat, the loose curls add movement, and the medium finish keeps the whole style airy. If you’ve ever seen boho braids that looked too long and got stringy at the ends, this length fixes a lot of that.
Key Pieces
- 5 to 7 packs pre-stretched braiding hair — for the knotless base.
- 1 to 2 bundles water wave or similar curl hair — for the boho pieces.
- Styling foam — helps the loose curls stay soft.
- Light oil mist — only a little, and only on the ends.
- Small clips — useful for separating the curly pieces as you braid.
Quick Steps
- Build the knotless base with clean parts and even tension.
- Add loose curly pieces through the braid, but keep the front face-framing strands more deliberate.
- Stop at medium length so the curls land around the shoulders.
- Separate the curls with your fingers, then seal the roots with foam.
- Wrap the style at night to protect the curly pieces from frizzing out.
Tools for This Style
- Rat-tail comb
- Duckbill clips
- Finger comb
- Satin bonnet or scarf
How to Wear It: This is a style that likes a little air. Pulling it too tight or pinning all the curls back kills the whole point, so let a few pieces sit forward.
Pro Tips
- Put the loose curls in intentionally; random placement looks messy fast.
- If the curls are too long, trim just the ends instead of cutting the whole piece shorter.
- Avoid heavy creams on the curly sections. Foam and a little mist are enough.
- Keep the front tendrils slightly shorter than the back pieces for balance.
Variations
- Barely-There Boho: Use only a few curly pieces around the face.
- Full Texture Boho: Add curls through the length for a softer, fuller finish.
Common Mistakes to Avoid
- Too many curly pieces: The braids disappear under the texture. Keep some structure visible.
- Skipping the night wrap: Loose curls frizz quickly if they rub on cotton pillowcases.
- Using heavy product on the curls: That makes them limp and sticky, which is exactly the opposite of what you want.
12. Stitch Braids Into a Low Ponytail
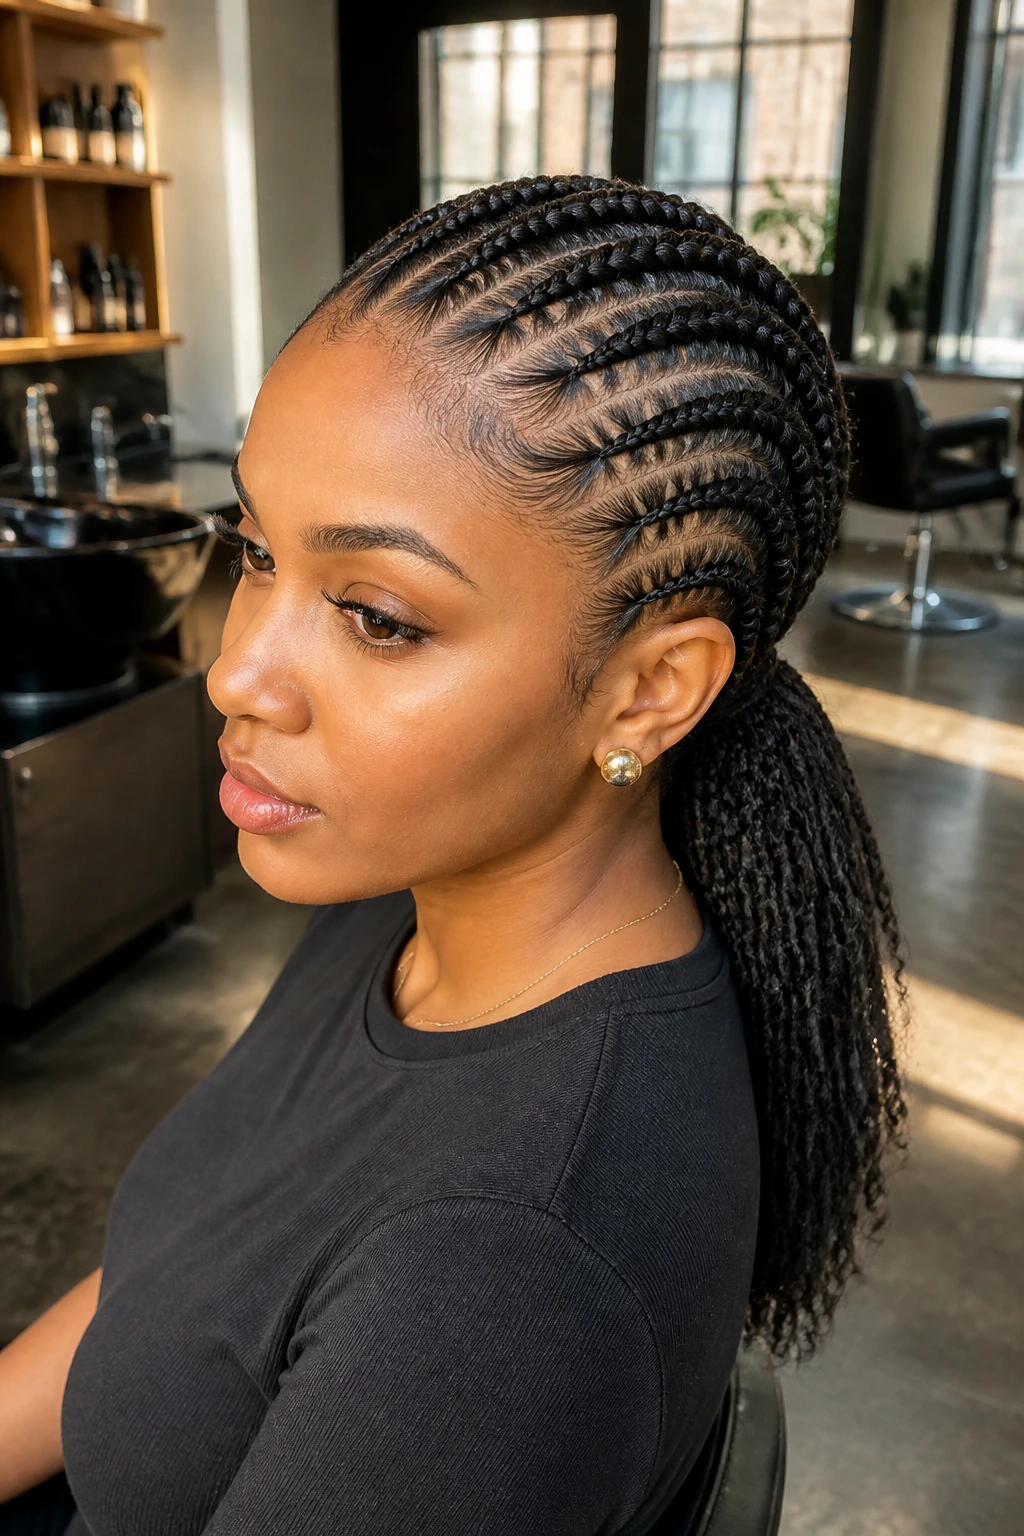
Stitch braids are all about the clean ridge line. When they end in a low ponytail, the whole style looks sleek and controlled, but not overworked. It is the braid version of a good shirt collar: sharp where it needs to be, easy everywhere else.
Why It Works: The stitched parting creates a raised, deliberate line on the scalp, and the low ponytail keeps the finish grounded. Medium length means the ponytail has enough movement to look styled, not stiff.
Key Pieces
- 4 to 6 packs braiding hair — depending on how many stitch rows you want.
- Strong gel — for the crisp stitch look.
- Rat-tail comb — essential for the line work.
- Elastic band or braid tie — to hold the low ponytail.
- Mousse — helps the rows stay smooth after the install.
Quick Steps
- Part the braids into 4 to 6 rows and map the stitch pattern before braiding.
- Use the comb tail to make the raised stitch sections as you braid feed-in hair.
- Gather the finished rows into a low ponytail at the nape.
- Wrap one braid around the base or use a satin tie to hide the elastic.
- Smooth with mousse and press the front down with a scarf for 15 minutes.
Tools for This Style
- Rat-tail comb
- Duckbill clips
- Edge brush
- Small mirror
How to Wear It: This style reads clean in almost any setting. It’s the braid I’d wear when I want to look put together without spending ten minutes fixing flyaways in the car mirror.
Pro Tips
- Keep stitch spacing even or the braid lines start to wobble.
- Don’t place the ponytail too high; the low anchor is part of the look.
- A wrapped base makes the ponytail look finished instead of tossed together.
- If the front feels too tight, the stitch rows need to be reworked before they dry.
Variations
- Side-Part Stitch Pony: Shift the rows to one side for a softer angle.
- Double-Stitch Version: Add a second stitch line to the top rows for extra detail.
Common Mistakes to Avoid
- Uneven stitch marks: That makes the braid line look messy. Keep the comb work steady.
- Tight ponytail elastic: It can dent the braids and hurt the nape. Use a softer tie.
- Neglecting the back: A crisp front with a sloppy ponytail base looks unfinished.
13. Two-Row Crown Braids
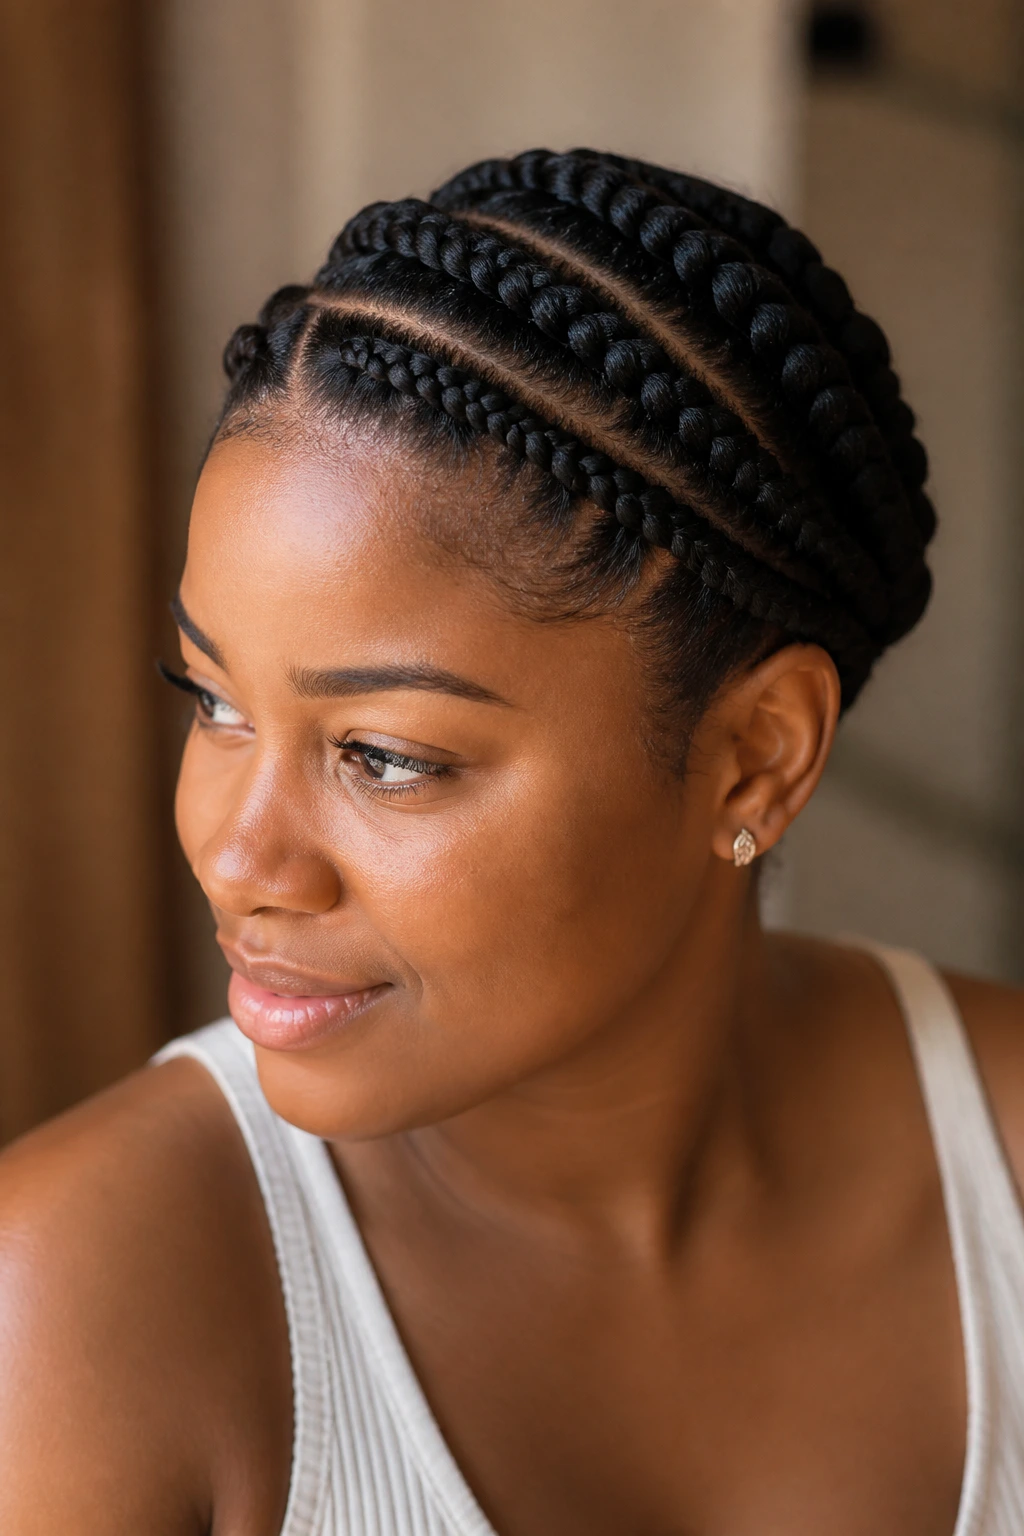
A crown braid can look too heavy if it’s overbuilt, but a two-row version at medium length has a much nicer balance. You get the sweep around the head without making the style feel like a helmet.
Why It Works: Two rows give the crown shape structure while keeping the braid count manageable. Medium length is key because it keeps the crown visible and lets the tail or tucked ends sit cleanly at the back.
Key Pieces
- 4 to 5 packs braiding hair — enough for two strong rows.
- Rat-tail comb — for even lines around the head.
- Hair pins — hold the crown in place.
- Gel or wax stick — helps smooth the perimeter.
- Mousse — finish the surface after pinning.
Quick Steps
- Part the hair into two horizontal rows that will wrap around the head.
- Braid the top row first, following the curve of the crown.
- Add the second row just below it, keeping the spacing even.
- Pin the ends at the nape or tuck them underneath for a cleaner shape.
- Finish with mousse and check the back to make sure the crown sits flat.
Tools for This Style
- Rat-tail comb
- Bobby pins or long U-pins
- Small clips
- Satin scarf
How to Wear It: The crown draws attention upward, so it looks especially good with open necklines and earrings that do not fight with the braid line. Let the front stay smooth and the crown stay neat.
Pro Tips
- Don’t crowd the two rows together; give them breathing room.
- If the crown keeps slipping, add pins under the braid rather than on top.
- Keep the front edge smooth so the style feels intentional.
- A light mousse finish keeps the braid ridges visible.
Variations
- Wrapped Crown: Bring the ends around into a small tucked bun.
- Loose-Tail Crown: Leave a short tail at the nape for a softer finish.
Common Mistakes to Avoid
- Packing the rows too tightly: That makes the crown bulky and itchy.
- Visible pins everywhere: Hide them under the braid line.
- Overdoing the front gel: Too much shine can make the crown look greasy instead of clean.
14. Medium Micro Braids
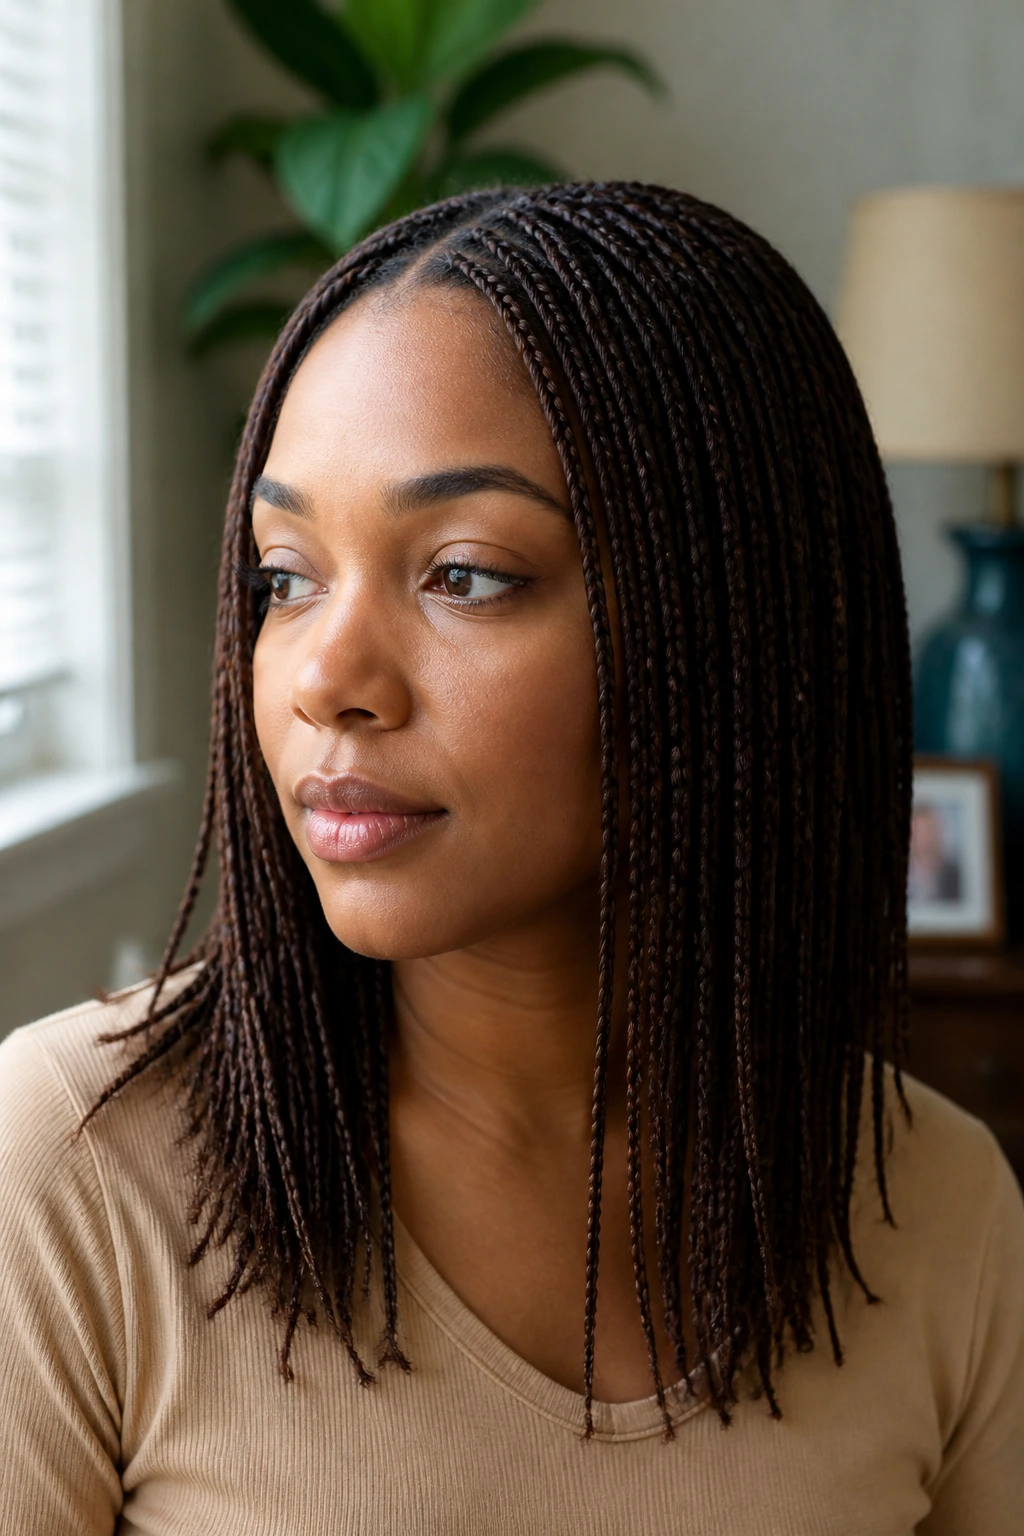
Medium micro braids are not for the impatient. They take time, but the payoff is a light, flexible style with a lot of movement and a less bulky feel at the roots. Medium length makes them more wearable because the tiny braids do not need to carry extra inches.
Why It Works: The small sections spread the weight out, which is good if you want braids that move freely and sit close to the scalp. At medium length, the style looks neat without turning into a forest of hair that takes forever to dry.
Key Pieces
- 6 to 10 packs very fine braiding hair — the sections are small, so the pack count can go up.
- Rat-tail comb — for precise parting.
- Light gel — just enough to smooth each section.
- Small clips — keeps the tiny sections from tangling together.
- Scalp oil or braid spray — helps maintain comfort between washes.
Quick Steps
- Divide the hair into tiny, even sections and clip them away from each other.
- Start each braid with a small amount of your own hair and add extension hair sparingly.
- Keep the tension light and the braid size uniform from root to end.
- Continue until the braid reaches medium length, then seal if the hair type requires it.
- Set the whole style and let it dry fully before sleeping on it.
Tools for This Style
- Rat-tail comb
- Small sectioning clips
- Fine-tooth comb
- Satin wrap for sleeping
How to Wear It: Micro braids look best when they are allowed to move. The style can go down, into a bun, or into a low ponytail, but it needs room to breathe or it starts to look stiff.
Pro Tips
- Keep the sections uniform or the density gets patchy.
- Do not overpack each braid; that’s what makes micro braids feel heavy.
- A little scalp oil goes farther than a lot of grease.
- If you hate sitting for long installs, this is not the style to rush.
Variations
- Face-Frame Micro Set: Leave two slim front braids out for softness.
- Side-Part Micro Set: Shift the part to one side for a less formal look.
Common Mistakes to Avoid
- Too much hair per braid: That defeats the lightweight feel. Keep the bundles small.
- Rushing the parting: Uneven sections show all the way down the style.
- Skipping scalp care: Tiny braids still need a clean, comfortable scalp.
15. French Curl Braids at Collarbone Length
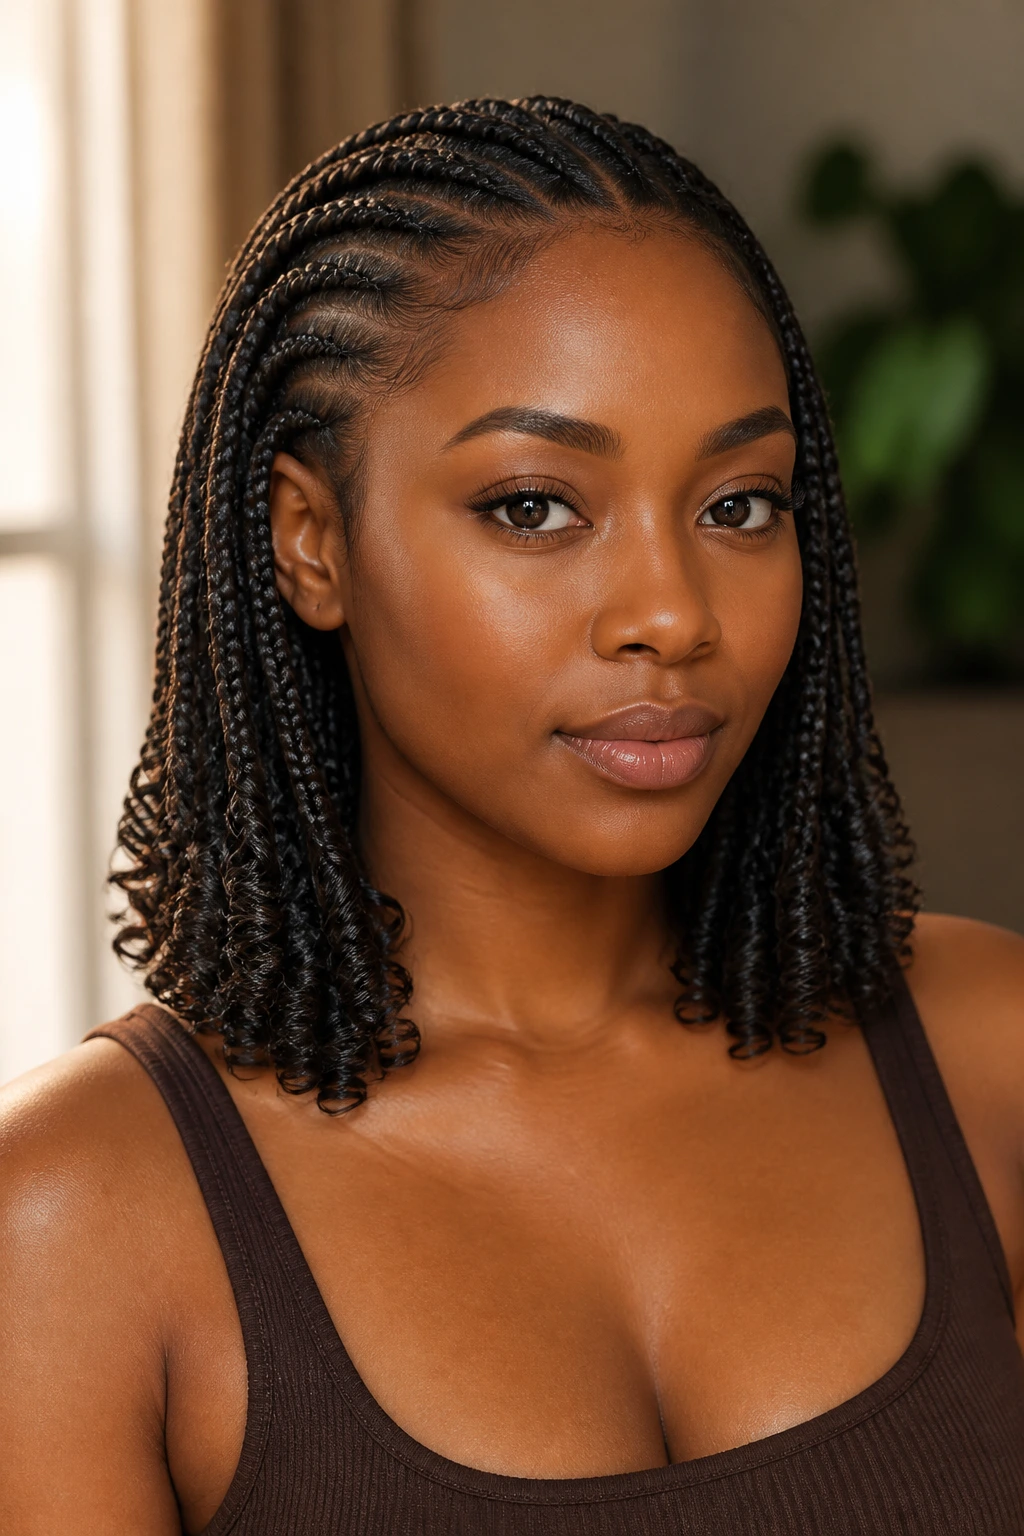
French curl braids have a polished start and a soft curl at the end, which gives medium-length hair a neat finish without the stiffness of a blunt synthetic tip. They look tidy, then a little playful once the curls move.
Why It Works: The straight braid base keeps the scalp area crisp, while the curled ends add lift and motion. Medium length is the sweet spot because the curls land where they can show off instead of disappearing into a heavy, overlong curtain.
Key Pieces
- 5 to 7 packs French curl braiding hair — choose the curl pattern you actually like.
- Rat-tail comb — for clean parts.
- Foam wrap mousse — helps the base settle.
- Small clips — keep the curl pieces separate.
- Satin scarf — for the setting step.
Quick Steps
- Part the hair into clean rows and prepare the base with light gel.
- Braid the hair down using the French curl extension hair, keeping the base smooth.
- Stop the braid at collarbone length so the curled ends sit comfortably.
- If the hair needs sealing, follow the manufacturer’s heat instructions carefully and keep the curled ends out of direct heat or boiling water.
- Set the braids with mousse and wrap the style so the base dries flat.
Tools for This Style
- Rat-tail comb
- Duckbill clips
- Foam mousse
- Small scissors for trimming any strays
How to Wear It: This style looks especially clean when the curls are allowed to hang forward a little. I would not jam it into a tight bun unless you want to flatten the whole point of the curl.
Pro Tips
- Keep the braid base neat so the curl finish looks intentional.
- If the curl starts too high, the style loses its shape fast.
- Use light foam, not heavy cream, on the curled ends.
- Follow the heat directions for the extension hair; some curl fibers hate boiling water.
Variations
- Soft Curl Set: Choose looser curl hair for a gentler finish.
- Defined Curl Set: Use tighter curls for more bounce at the ends.
Common Mistakes to Avoid
- Treating the curls like standard synthetic tips: They need gentler handling. Follow the fiber instructions.
- Using too much heat: That can wreck the curl pattern.
- Overloading the roots with product: The base should be smooth, not slick.
16. Beaded Box Braids with a Blunt Edge
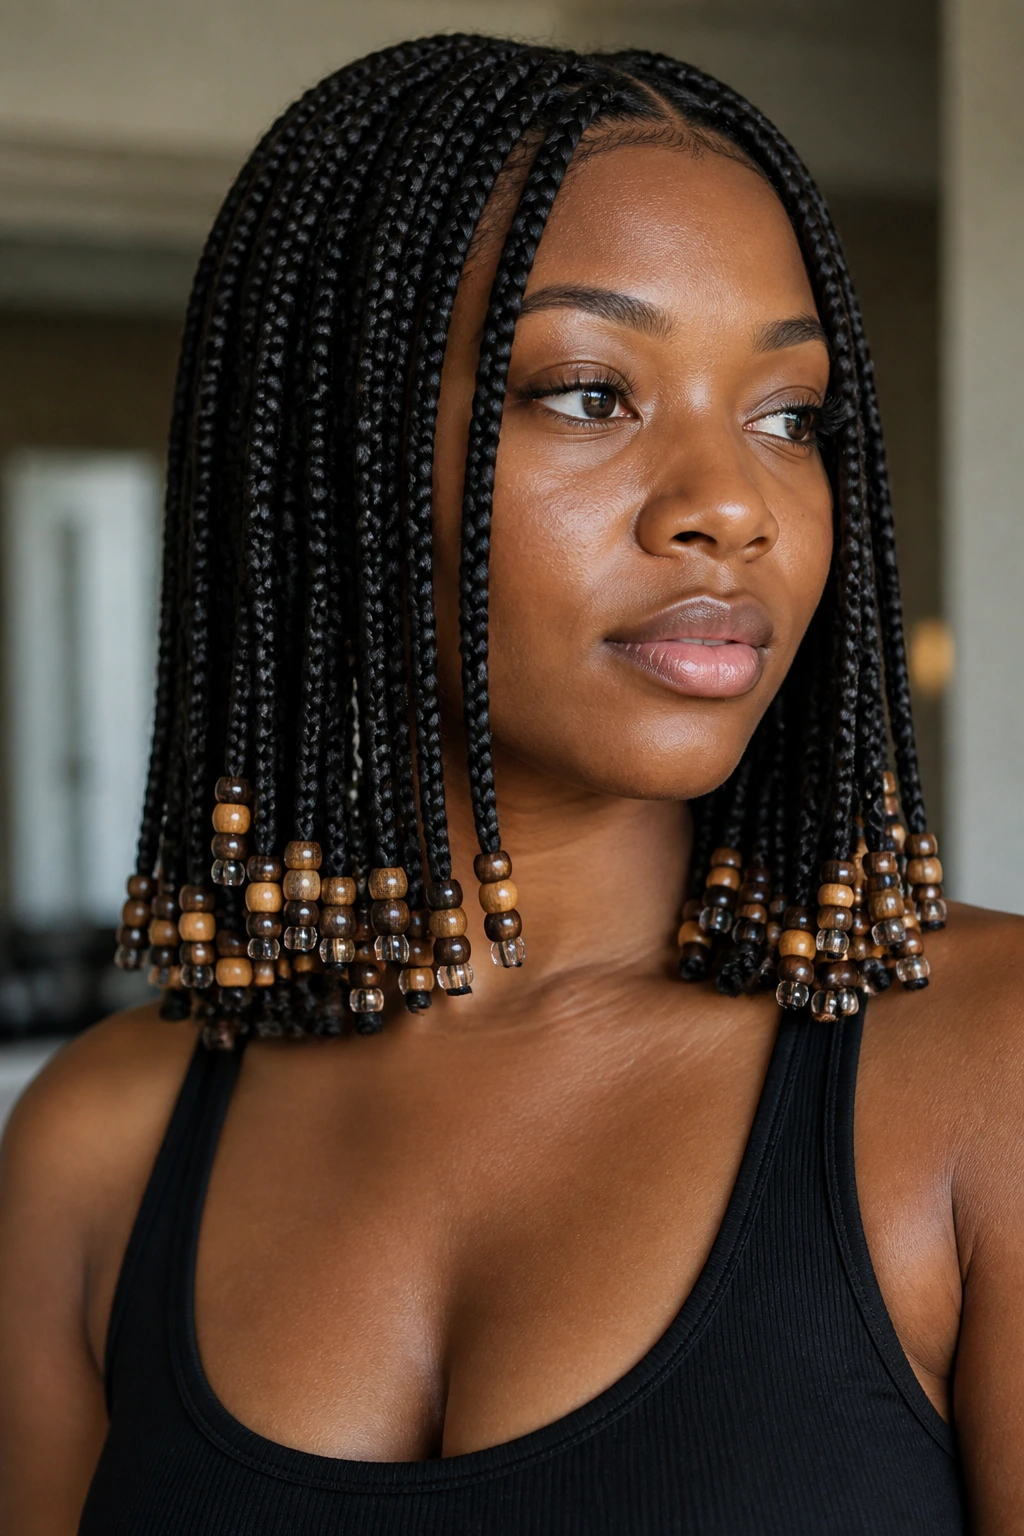
Beaded box braids are a small commitment with a big payoff. The beads add weight and sound, while the blunt medium length keeps the style from feeling fussy. It’s neat, a little playful, and very easy to read from across the room.
Why It Works: A blunt finish gives the braids a clean line, and the beads reinforce that shape by making the ends look deliberate. Medium length means the beads do not have to fight a huge length of hair, so the style stays balanced.
Key Pieces
- 5 to 7 packs braiding hair — enough for medium box braids.
- Medium-size beads — light enough for all-day wear.
- Bead threader — makes the job less annoying.
- Small elastic bands — to secure the ends before beading.
- Mousse — helps the braids stay smooth.
Quick Steps
- Install the box braids to the same length and keep the ends blunt.
- Secure each braid end with a tiny elastic if the bead needs extra grip.
- Thread on 2 to 4 beads per braid, keeping the weight even.
- Check the front rows first so the beads sit at matching heights.
- Seal the style with foam and let it set before you move a lot.
Tools for This Style
- Rat-tail comb
- Bead threader
- Small scissors
- Satin scarf
How to Wear It: Keep the braid count moderate and let the beads do the talking. This style pairs well with plain tops, simple earrings, and anything that lets the end detail show.
Pro Tips
- Use lighter beads on the front rows and heavier ones only if the hair is strong enough.
- Match bead colors instead of mixing ten at once; the style looks cleaner that way.
- If the beads slide, use a tiny band under them.
- A blunt edge looks sharper than a tapered end here.
Variations
- Clear Bead Set: Transparent beads give the ends a cleaner visual line.
- Color-Pop Set: One accent bead color can make the whole style feel more personal.
Common Mistakes to Avoid
- Too many beads: The ends get heavy and the style starts to drag.
- Uneven bead placement: That makes one side look longer than the other.
- Using thick beads on fine hair: They can pull and snap the braid ends over time.
17. Criss-Cross Braids with a Low Puff
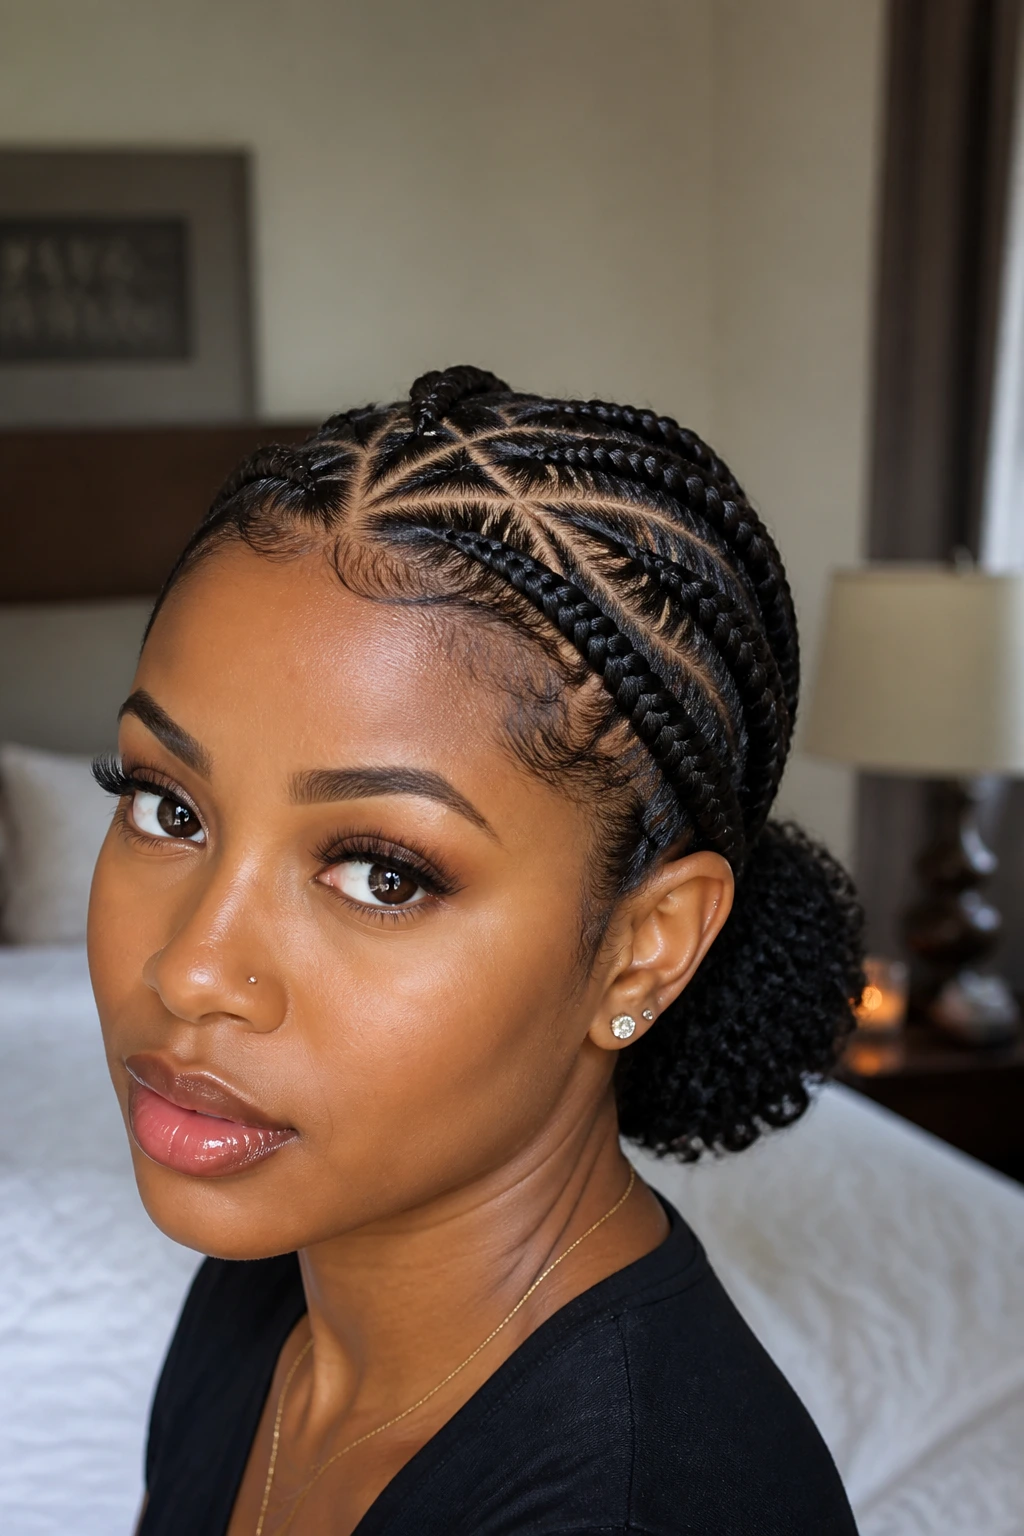
Criss-cross braids keep the front interesting without asking the whole style to do too much. When the back is gathered into a low puff, you get a mix of braid structure and natural texture that feels easy, not overbuilt.
Why It Works: The criss-cross pattern gives the top section movement, and the low puff balances it with volume at the back. Medium length keeps both parts in proportion, which is where this style looks best.
Key Pieces
- 3 to 5 packs braiding hair — enough for the criss-cross front.
- Small elastic or satin tie — for the low puff base.
- Gel or styling wax — helps the crossed sections stay flat.
- Hair pins — useful if you want the criss-cross to sit tightly.
- Mousse — to smooth the whole finish.
Quick Steps
- Create the front braid sections and map the X-shaped cross pattern before starting.
- Braid the front rows and overlap them cleanly so the pattern stays visible.
- Leave the back section loose enough to gather into a low puff.
- Secure the puff low at the nape and fluff it gently to your preferred shape.
- Smooth the front and set the style with a scarf for a few minutes.
Tools for This Style
- Rat-tail comb
- Duckbill clips
- Edge brush
- Satin scarf
How to Wear It: This is a good choice when you want braids but still want some natural texture showing. It reads casual with denim and sharper with hoops or a fitted jacket.
Pro Tips
- Keep the crossed sections flat; bulky crosses lose the whole effect.
- Anchor the puff low so the style stays balanced.
- If the front pieces are too loose, re-pin them before the gel dries.
- A little tension is fine. A lot is not.
Variations
- Sleek Front, Full Puff: Keep the top very neat and let the puff do the volume work.
- Soft Cross Set: Loosen the front rows slightly for a less graphic finish.
Common Mistakes to Avoid
- Criss-crossing too high: That makes the front look crowded.
- Puff sitting too high: It breaks the balance of the style.
- Ignoring the edges: The front is the first thing people notice, so keep it clean.
18. Halo Braid with a Loose Tail
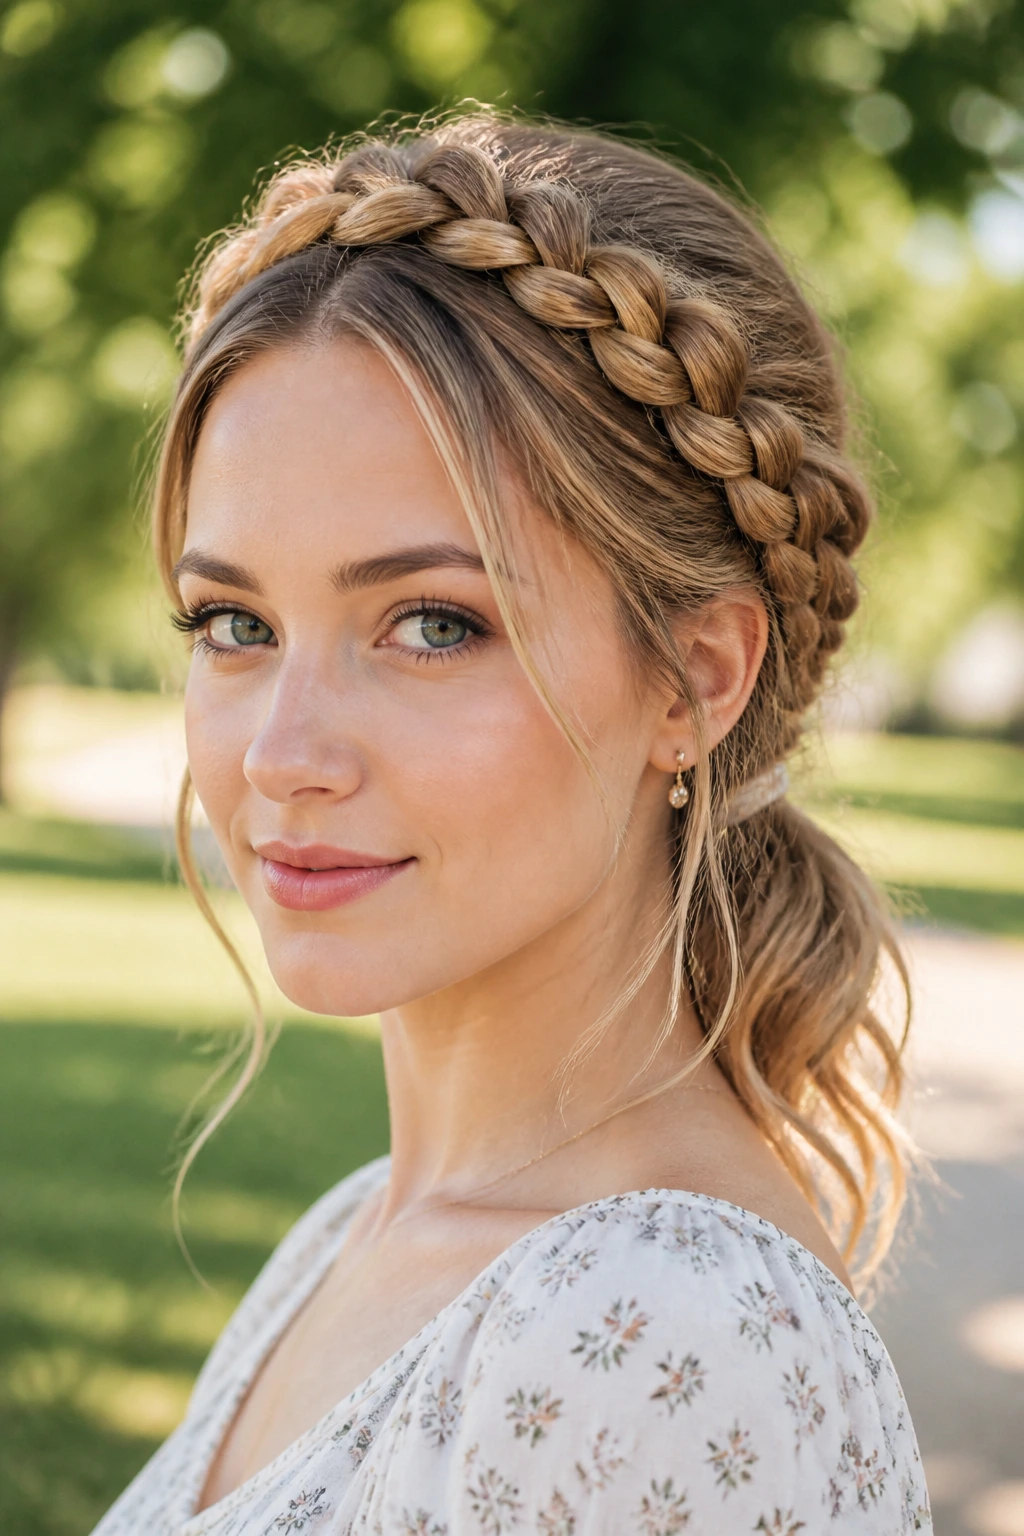
A halo braid wraps the head like a frame, which sounds formal until you leave a little tail at the nape or side and let the medium length keep it from feeling too severe. The result is tidy, but not stiff.
Why It Works: The halo shape keeps the hair off the face, while the loose tail gives the style a softer finish and a little movement. Medium length is ideal because the braid can circle the head without becoming too bulky at the back.
Key Pieces
- 4 to 6 packs braiding hair — enough for a crown braid and tail.
- Rat-tail comb — for clean sectioning around the hairline.
- Hair pins — hold the halo in place.
- Gel or wax stick — smooth the perimeter.
- Mousse — finishes the surface and calms flyaways.
Quick Steps
- Start a braid near one side of the head and work it around the crown in a smooth curve.
- Add hair gradually so the halo stays even in thickness.
- Bring the braid around the head and stop when the tail reaches the nape or side.
- Pin the braid securely underneath, then tuck any loose ends where they will not show.
- Set the style with mousse and a scarf so the crown lies flat.
Tools for This Style
- Rat-tail comb
- Bobby pins or U-pins
- Small mirror
- Satin scarf
How to Wear It: This style is a quiet statement. It works with dresses, sweaters, and clean necklines because the braid already frames the head; you do not need much else.
Pro Tips
- Keep the halo even in width all the way around.
- Hide pins under the braid, not on the outside.
- If the tail looks too bulky, twist it a little tighter before pinning.
- Use a light hand with product at the front so the hairline stays smooth.
Variations
- Pinned Tail Halo: Tuck the tail fully under for a more formal finish.
- Loose Tail Halo: Leave the tail visible for a softer, less rigid shape.
Common Mistakes to Avoid
- Uneven wrap around the head: The halo looks crooked fast. Measure the path as you braid.
- Visible pins and ends: Tuck them properly or the style reads unfinished.
- Too much tension at the temples: The halo should feel secure, not punishing.
Why Medium Length Braids Sit in the Sweet Spot
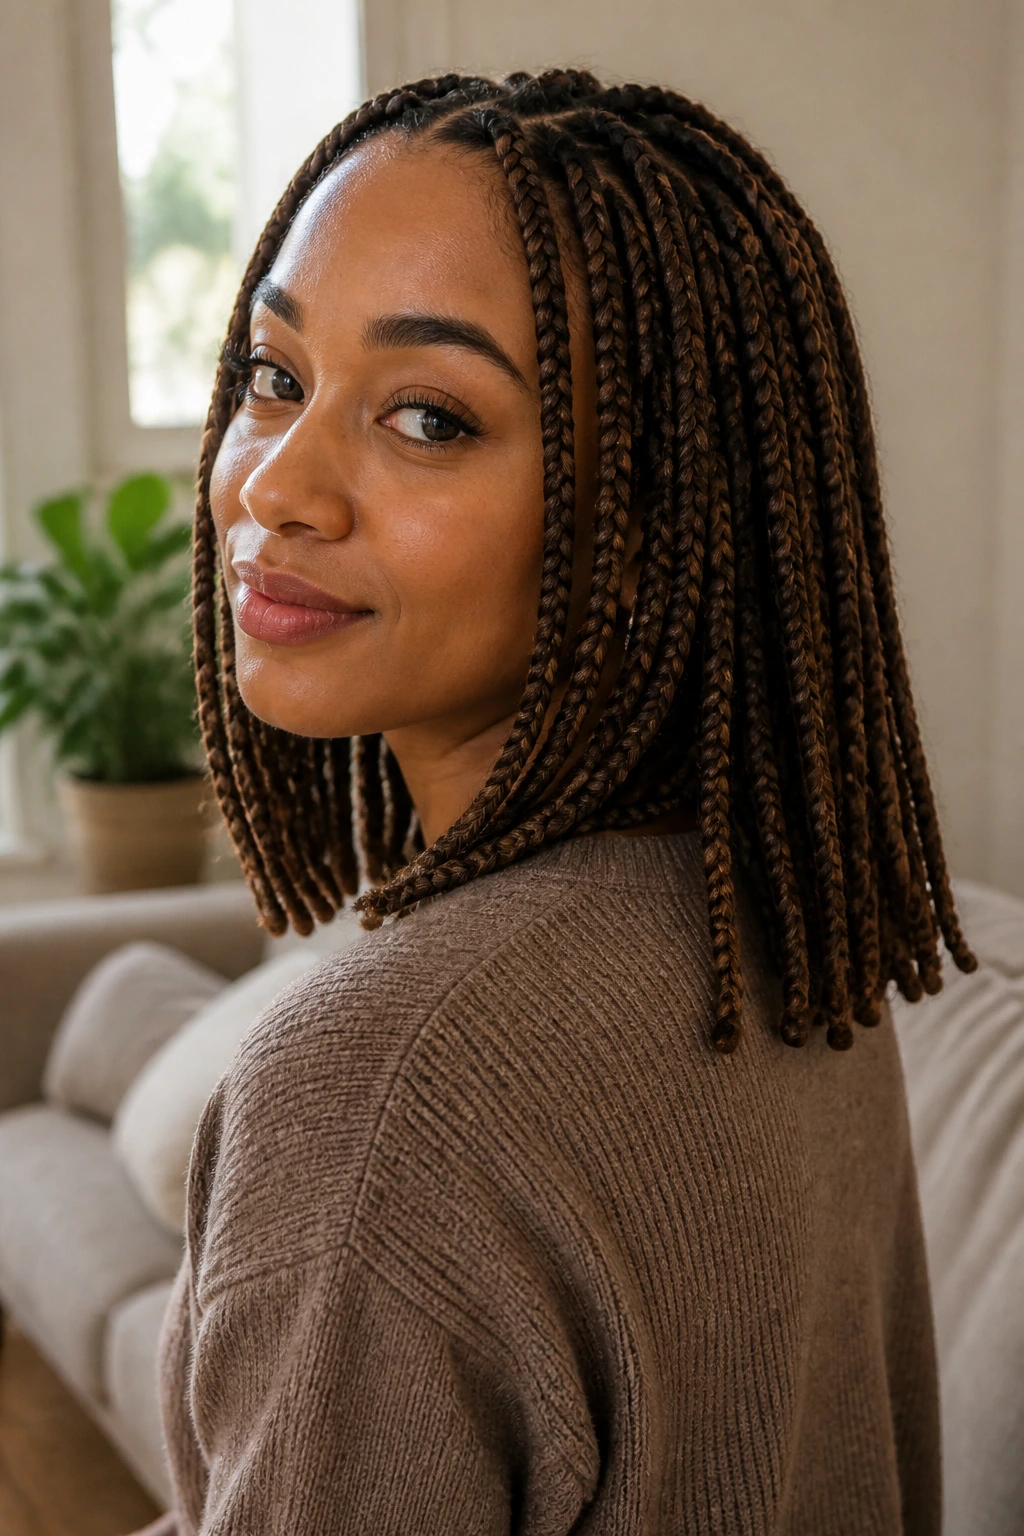
Medium braids land in the part of the style range where the hair still has shape, but not so much length that every movement becomes a chore. That is the real reason people keep coming back to them. They are long enough to feel styled and short enough to stay useful.
Less Weight, Less Tug
A braid that stops around the shoulders or upper back spreads the weight out more cleanly than a long install. Your scalp notices the difference by day two or three, especially if you wear braids often or if your edges get cranky when the hair is too heavy.
More Shape on the Ends
Very long braids can become thin-looking at the bottom unless you add more hair, which then makes the whole head heavier. Medium length keeps the braid body visible all the way down, so the style looks full without needing extra density that never really paid off.
Faster Install, Easier Life
This is the part people remember after the glamour wears off. Medium length takes less time to braid, less time to dry, less time to wrap at night, and less time to remove later. That matters if you wear protective styles for comfort as much as for looks.
I also like medium length because it gives you room to change your mind. You can wear the same install down one day, half-up the next, and tucked into a low bun when you are over it. Long braids can be a commitment. Medium braids feel like a choice.
Essential Tools and Products for These Styles
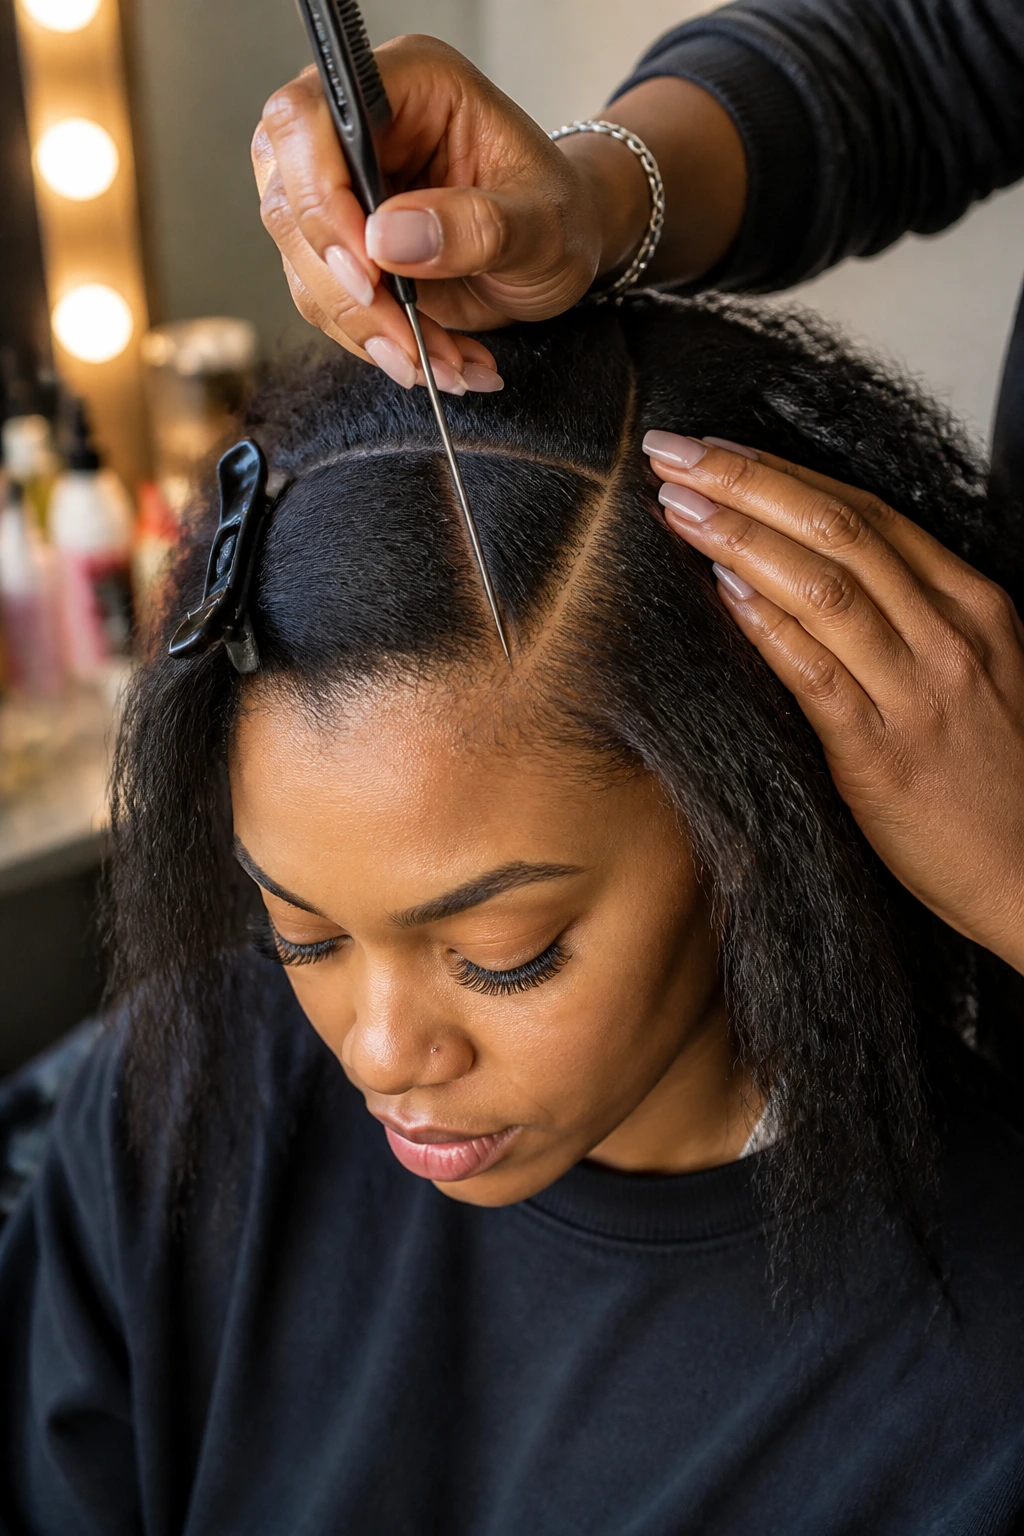
- Rat-tail comb: The thin tail is what gives you clean parts, sharp sections, and crisp feed-in lines.
- Duckbill clips: These keep sections from merging while you braid, which saves a lot of re-parting.
- Braiding hair: Pre-stretched Kanekalon is the easiest choice for most of these styles because it feeds smoothly and finishes cleanly.
- Water wave or curly extension hair: Use this for boho ends, goddess tendrils, and tribal texture.
- Styling gel or braid gel: Good for the front rows and the part lines; do not pile it on.
- Mousse or foam wrap: This smooths the finished style and helps the braids settle.
- Edge brush: Handy for shaping the hairline without flattening the whole head.
- Hair pins and U-pins: Essential for buns, crowns, and tucked bob finishes.
- Satin scarf or bonnet: Night protection is not optional if you want the style to last.
- Bead threader and small beads: Only for styles with bead ends; lighter beads are easier on the braid.
- Spray bottle: A light mist helps with parting and with controlled hydration during upkeep.
- Heat-safe bowl or kettle: Needed if you are sealing synthetic ends with warm water; keep it separate from anything you cook with.
Smart Hair Prep and Extension Picks
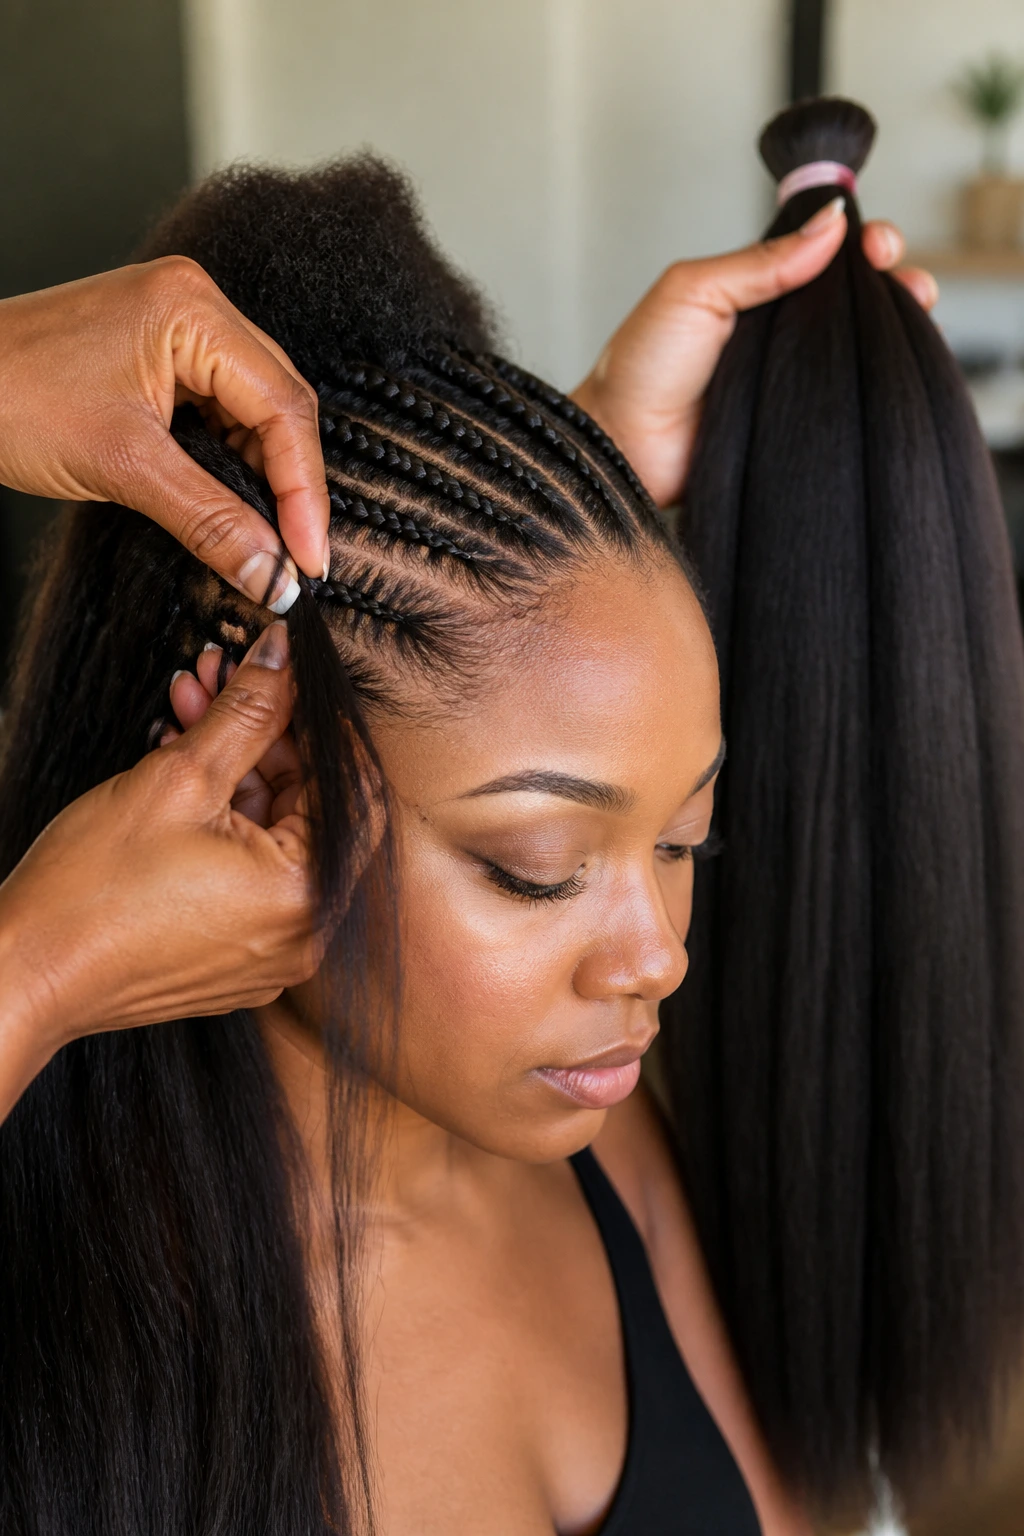
Clean, fully dry hair is the starting point for every style here. Braids look neat when the foundation is neat, and damp roots under synthetic hair are a fast way to invite itch and odor. I would wash, deep-condition, detangle, and then blow-dry before the comb ever hits the scalp for parts.
Choose the Extension Hair for the Finish You Actually Want
Pre-stretched braiding hair is the easiest base for knotless, box, feed-in, and stitch styles because it feeds smoothly and does not leave a blunt, bulky end. If you want curly ends, face-framing pieces, or boho texture, pick a curl pattern that matches the rest of the style instead of hoping two different fibers will magically cooperate.
Match the Weight to the Style
Medium length does not need a mountain of hair. A shoulder-length box braid set usually needs fewer packs than waist-length hair because the braid does not have to be stuffed to hold shape. For many styles here, 4 to 7 packs is enough; micro braids can need more pieces, but each braid should stay light.
Color Is a Styling Choice, Not an Accident
A color that is one or two shades away from your natural hair usually looks cleaner than a hard jump unless you want the contrast on purpose. If you like blond or burgundy accents, keep them on the front rows or the ends so the whole style does not fight your skin tone.
Prep the Hairline Like It Matters
Because it does. The front rows are the first thing people see, and they are the first place tension shows up. A smooth hairline, a gentle grip, and enough slip on the gel to hold the part without stiffening it all make the style last longer and look cleaner.
How to Wear These Styles Without Fighting Your Outfit
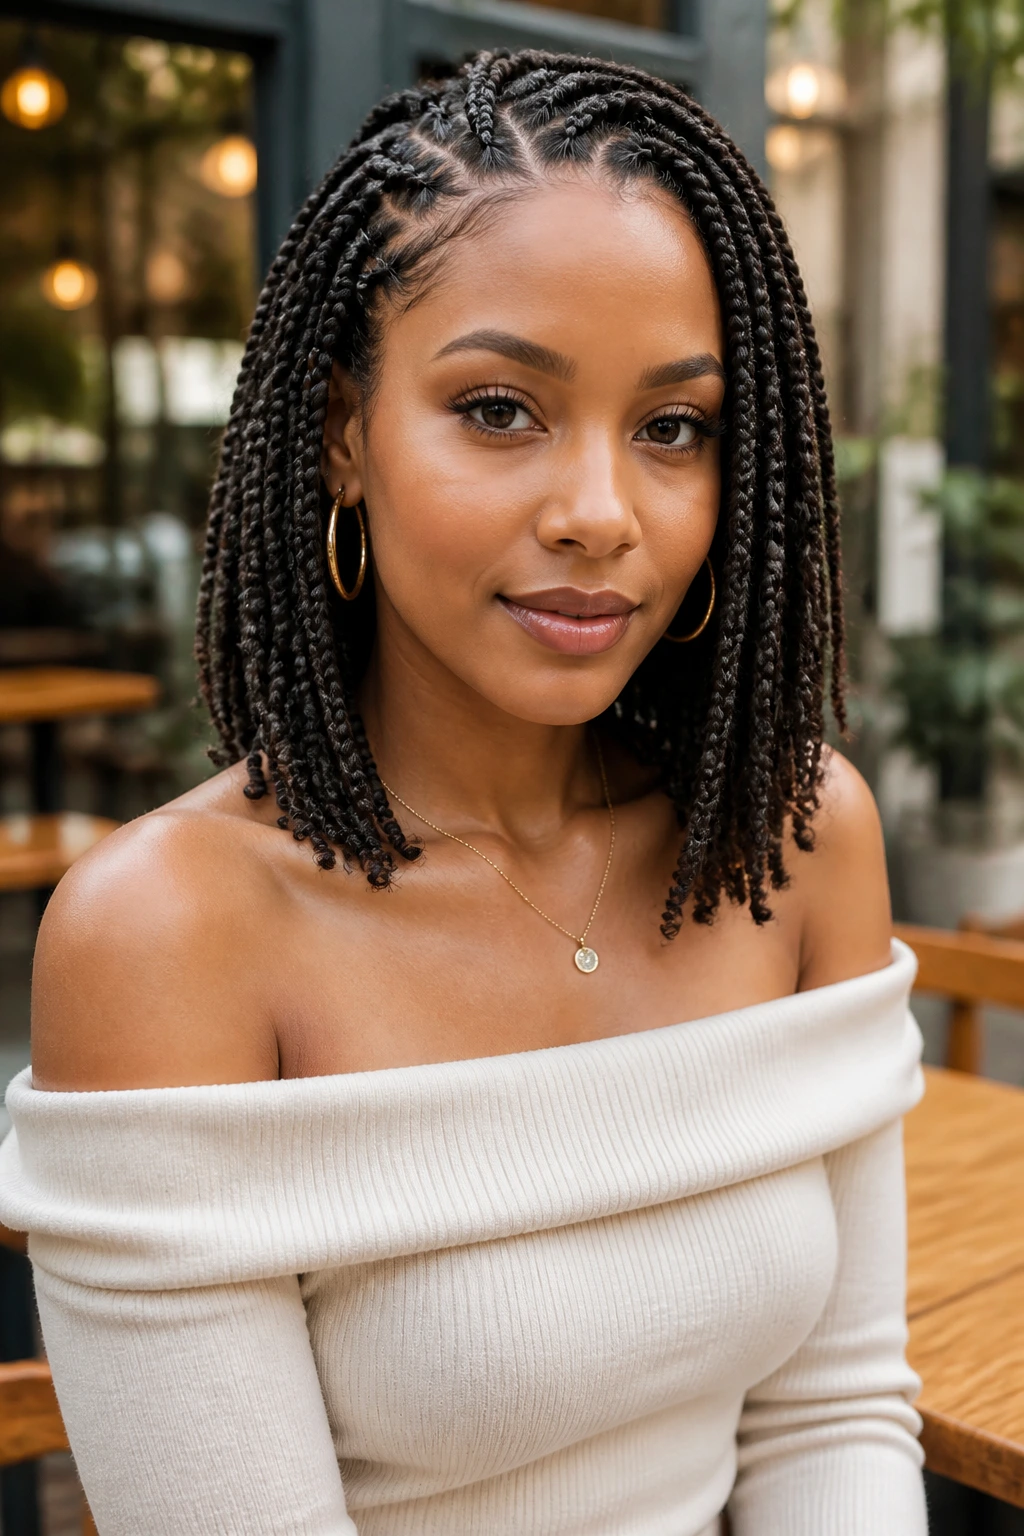
Presentation: Keep the part lines clean and the front rows neat when you want the braids to read polished. The style lands differently depending on where the braid ends sit, so a collarbone finish feels softer than a sharp bob or a low bun.
Outfit Pairings: Medium braids look sharp with open necklines, crewnecks, turtlenecks, and simple earrings. Heavy necklaces can crowd the front, especially with Fulani, crown, or halo styles, so I usually skip them when the braids already do a lot of visual work.
All-Day Wear: Low ponytails, tucked bobs, and feed-in cornrows are the easiest picks for work, errands, and long days in a car. If you move a lot, keep the style closer to the head so the ends do not swing into your shoulders all day.
Night-Out Tweaks: Add cuffs, a deeper side part, or one clean accessory at the front instead of covering the whole style in decoration. That single change often looks better than loading every braid with extras.
Additional Tips and Style Boosters
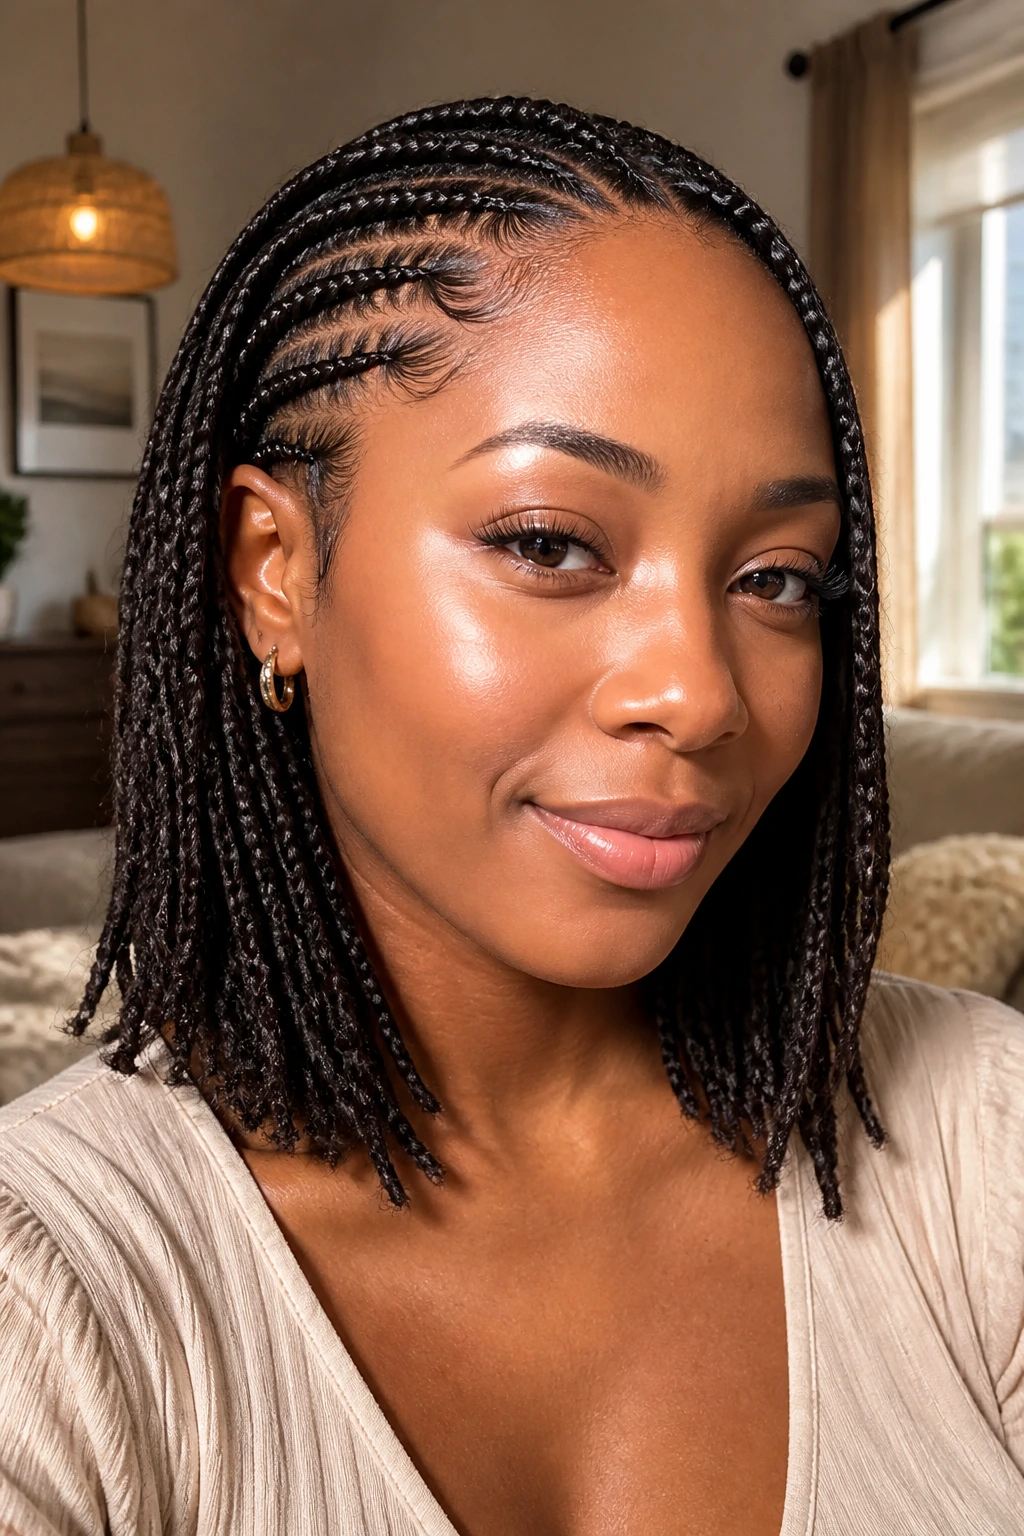
Finish with foam: A light mousse or foam wrap applied after the install and again a day later smooths the braid surface and helps the style settle into place. It is the easiest way to tame that fresh-install puff without drowning the hair in product.
Use accessories with restraint: Beads, cuffs, and wraps should feel like punctuation, not static noise. Put the visual weight near the front rows or the ends, then leave the rest alone.
Keep the root calm: If the part lines are already crisp, you do not need to bury them under a thick layer of gel. The cleanest braids often use less product than the dramatic ones that look good for two hours and then flake.
Make-it-yours: If your scalp gets tender, choose knotless or feed-in bases and ask for slightly larger sections. If you like more drama, move the accessories to one side or change the parting instead of adding more hair.
Maintenance, Night Care, and Take-Down Timing
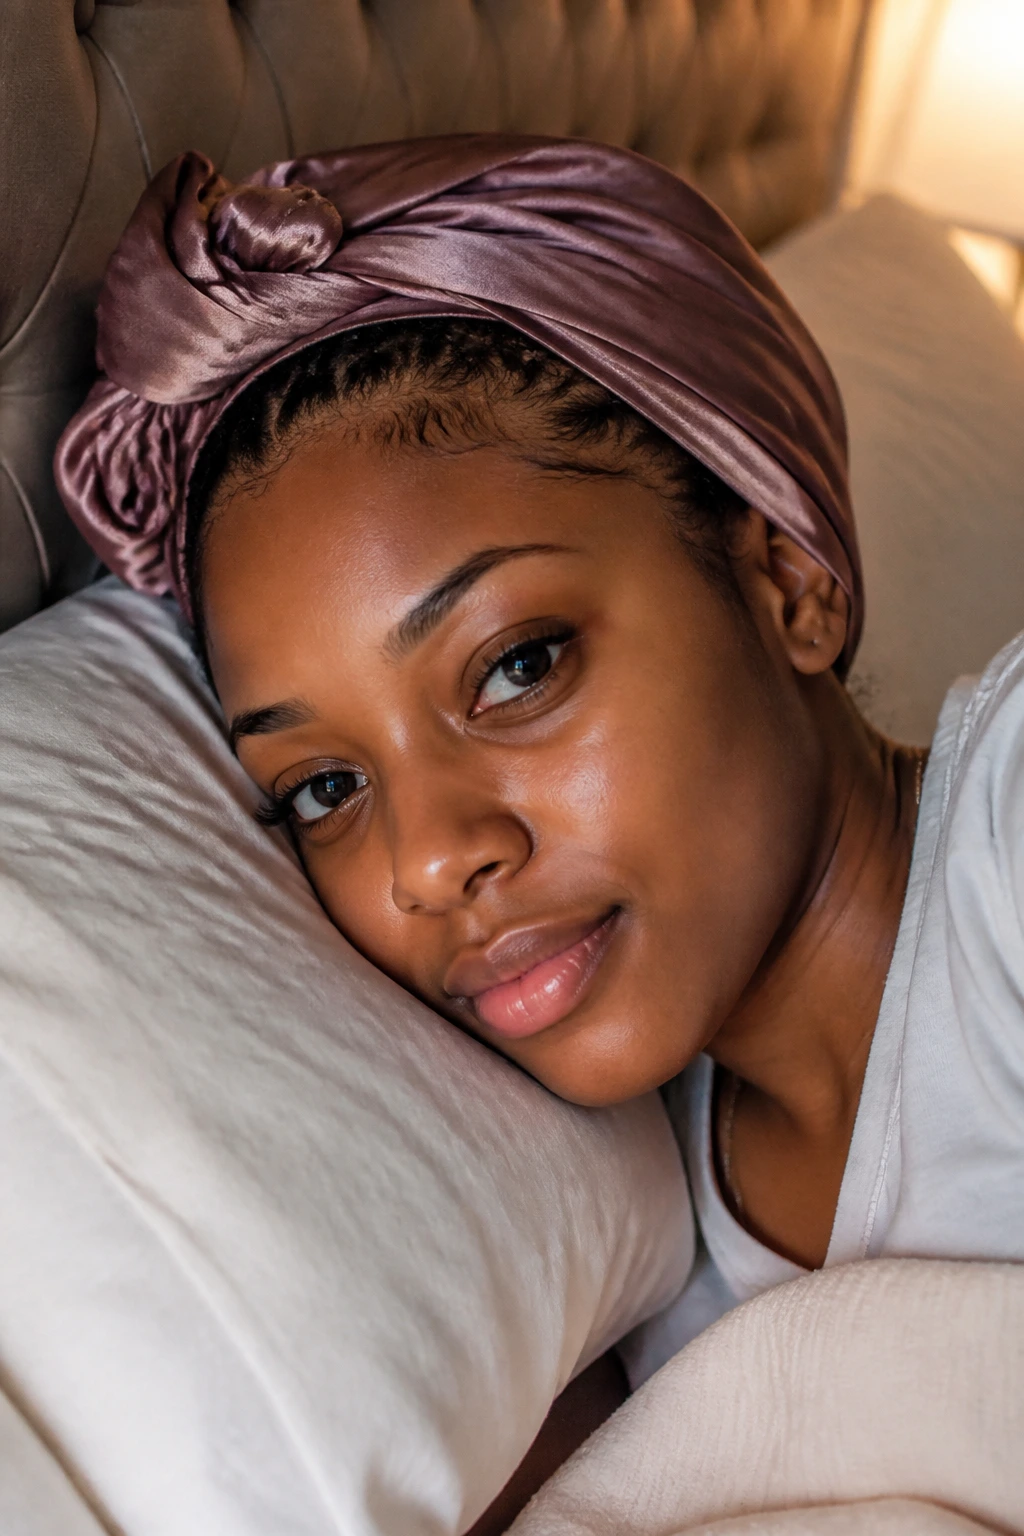
Medium length braids stay neat longer when you treat the scalp and the ends like separate jobs. At night, wrap the hair with a satin scarf or use a bonnet that actually covers the ends instead of squashing them at the crown. If the style is a bob, half-up, or crown braid, pin down any loose pieces before you sleep so they do not snag under the wrap.
Wash and Refresh Without Wrecking the Style
A diluted shampoo in a squeeze bottle works better than pouring product straight onto the head. Focus on the scalp, not the braid bulk, and let the suds run downward. For most medium braid styles, a wash every 2 to 3 weeks is enough if the scalp starts to feel heavy, sweaty, or itchy.
Know When to Reset the Look
Frizz at the roots usually shows up before the style is truly done. A light mousse refresh every 7 to 10 days can keep the part lines from looking tired. If the edges are lifting, that is a sign to clean up the perimeter rather than stacking on more gel.
Remove the Style Before It Turns Into a Chore
Most medium braid styles sit well for 4 to 6 weeks, with micro braids sometimes stretching longer if the scalp stays calm and the hair is cared for carefully. Removal is easier if you oil the fingers lightly, take the style down in small sections, and detangle as you go instead of waiting until the whole head is loose. A careful takedown can save you hours of post-braid shedding.
Variations and Adaptations to Try
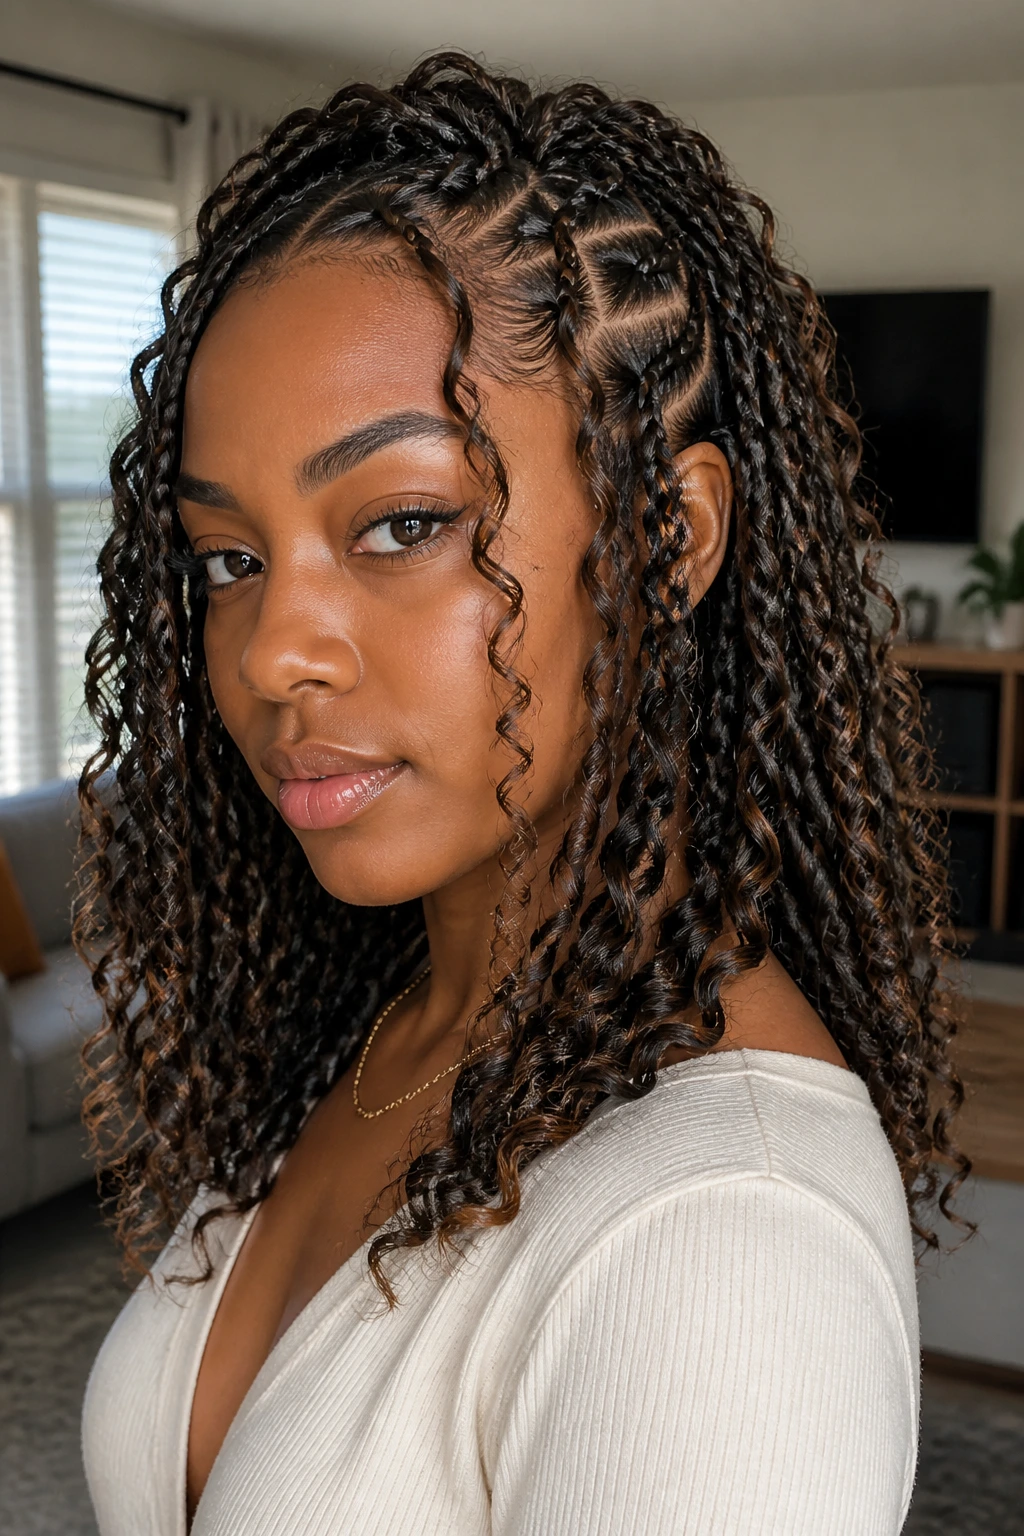
Lighter Knotless Set: Keep the parts slightly larger and the braid count lower if your scalp hates heavy installs. You still get the shape, but the style breathes better and dries faster after washing.
Accessory-Minimal Version: Skip beads and cuffs entirely and lean on the parting, braid size, and finish. This is the cleanest route if you wear a lot of prints or large earrings.
Color-Block Edition: Add a few braids in a lighter or darker shade only at the front rows or the ends. It gives the style contrast without turning your whole head into a color project.
No-Extension Cornrow Mix: If you want something lighter, use your natural hair for feed-ins, crown braids, or criss-cross fronts and leave the back in a puff or bun. This keeps the look protective without adding synthetic weight.
Full-Texture Boho Version: For a softer, more relaxed look, add curly pieces through more of the braid length instead of only at the ends. Keep the curls intentional so the style does not drift into fuzz.
Common Mistakes to Avoid
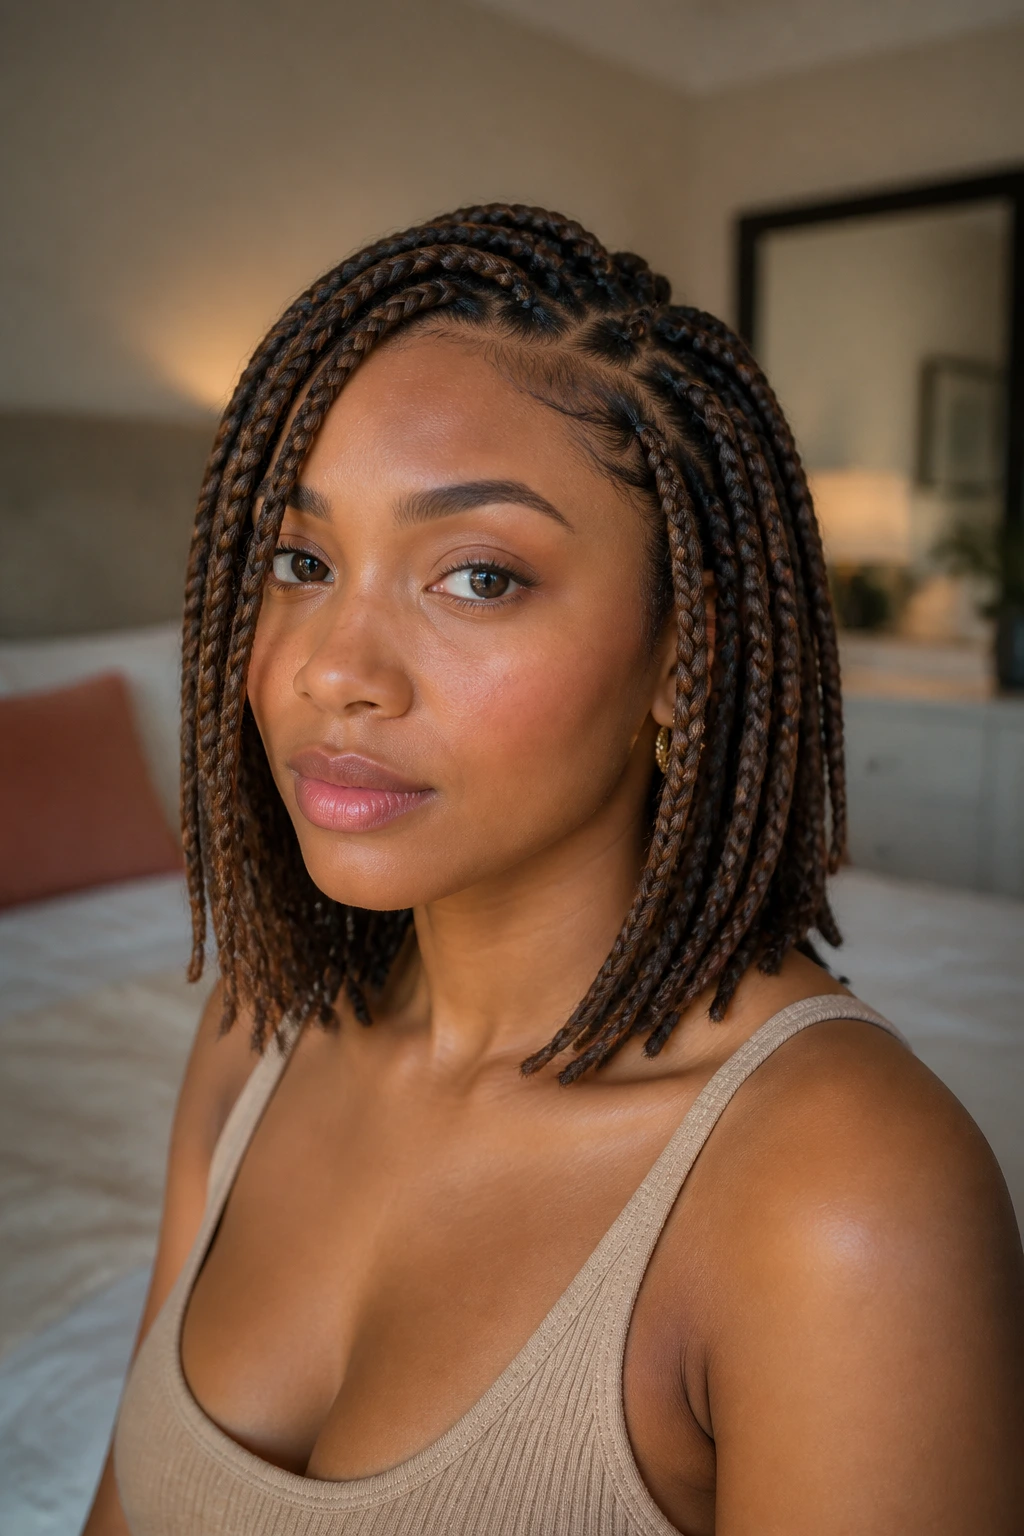
Braiding too tight at the front: If the temples hurt, the braid is too tight. That is not a sign of “good grip”; it is a sign to redo the section before it starts to damage the hairline.
Using too much extension hair per braid: Heavy braids look bulky near the root and drag the style down by day three. Medium length usually looks better with controlled fullness than with oversized sections.
Skipping the nightly wrap: Cotton pillowcases rough up the surface fast. A scarf or bonnet keeps the parts cleaner and the ends smoother.
Letting the parts get sloppy after day one: A fresh install looks crisp because the lines are crisp. If you let product buildup and frizz take over, the whole style loses shape even if the braids themselves are still intact.
Mixing too many accessories at once: Beads, cuffs, colored strings, and curls can all work. All of them together usually look crowded. Pick one or two details and stop there.
Frequently Asked Questions
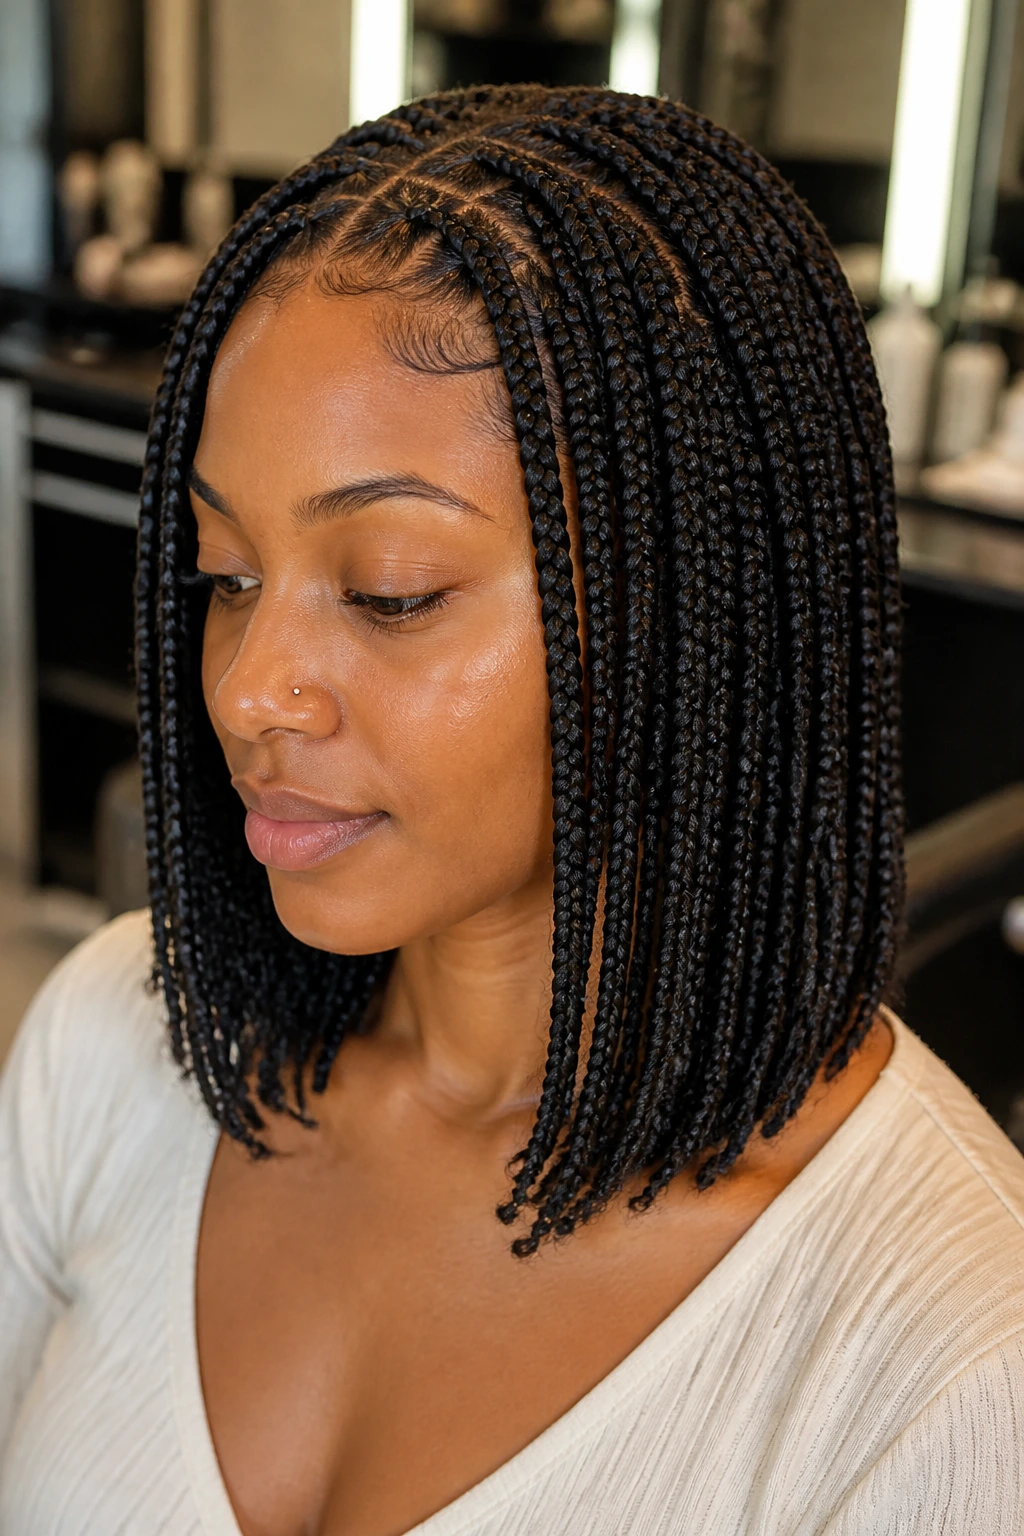
How long do medium length braid hairstyles usually last?
Most styles in this range hold up for about 4 to 6 weeks if the scalp stays comfortable and you keep up with night wrapping. Micro braids can stretch longer, while styles with lots of loose curls or beads may need refreshing sooner.
Which medium braid style is the lightest on the scalp?
Knotless braids, feed-in cornrows, and medium crown styles usually feel lighter than thick box braids because the root does not carry as much bulk. If your scalp is sensitive, start with fewer, larger sections instead of tiny ones.
Can I wear medium length braids if my hair is short?
Yes, as long as the braid base is secure and the stylist does not force too much extension into the root. Short hair usually does better with knotless, feed-in, or cornrow-based styles than with very heavy box braids.
How many packs of braiding hair do I need?
That depends on braid size and density, but many medium installs land somewhere between 4 and 7 packs. Styles with curls, beads, or extra fullness may need one or two more packs, while crown or bun styles can use less.
Can I wash medium braids without ruining them?
You can, and you should if the scalp gets greasy or itchy. Use diluted shampoo at the roots, massage gently, and let the water run through the braids instead of rubbing the lengths together.
What should I do if my braids get fuzzy at the roots after a week?
Use a light mousse or foam wrap and tie the hair down for 15 to 20 minutes. If the frizz comes from tension or bad parting, product will only hide it for a bit, so the real fix is cleaner prep next time.
Are beads or cuffs bad for the hair?
They are fine when they are light and placed with some common sense. Heavy metal pieces or too many beads on fine hair can pull, so keep the accessory load modest and spread it out evenly.
Can I work out or swim with medium length braids?
Yes, but you will want a low, secure style for workouts and a quick rinse after swimming. Chlorine and sweat both dry out the scalp, so a good wrap and a light cleansing routine matter more than people think.
Braids That Sit Right on the Shoulder
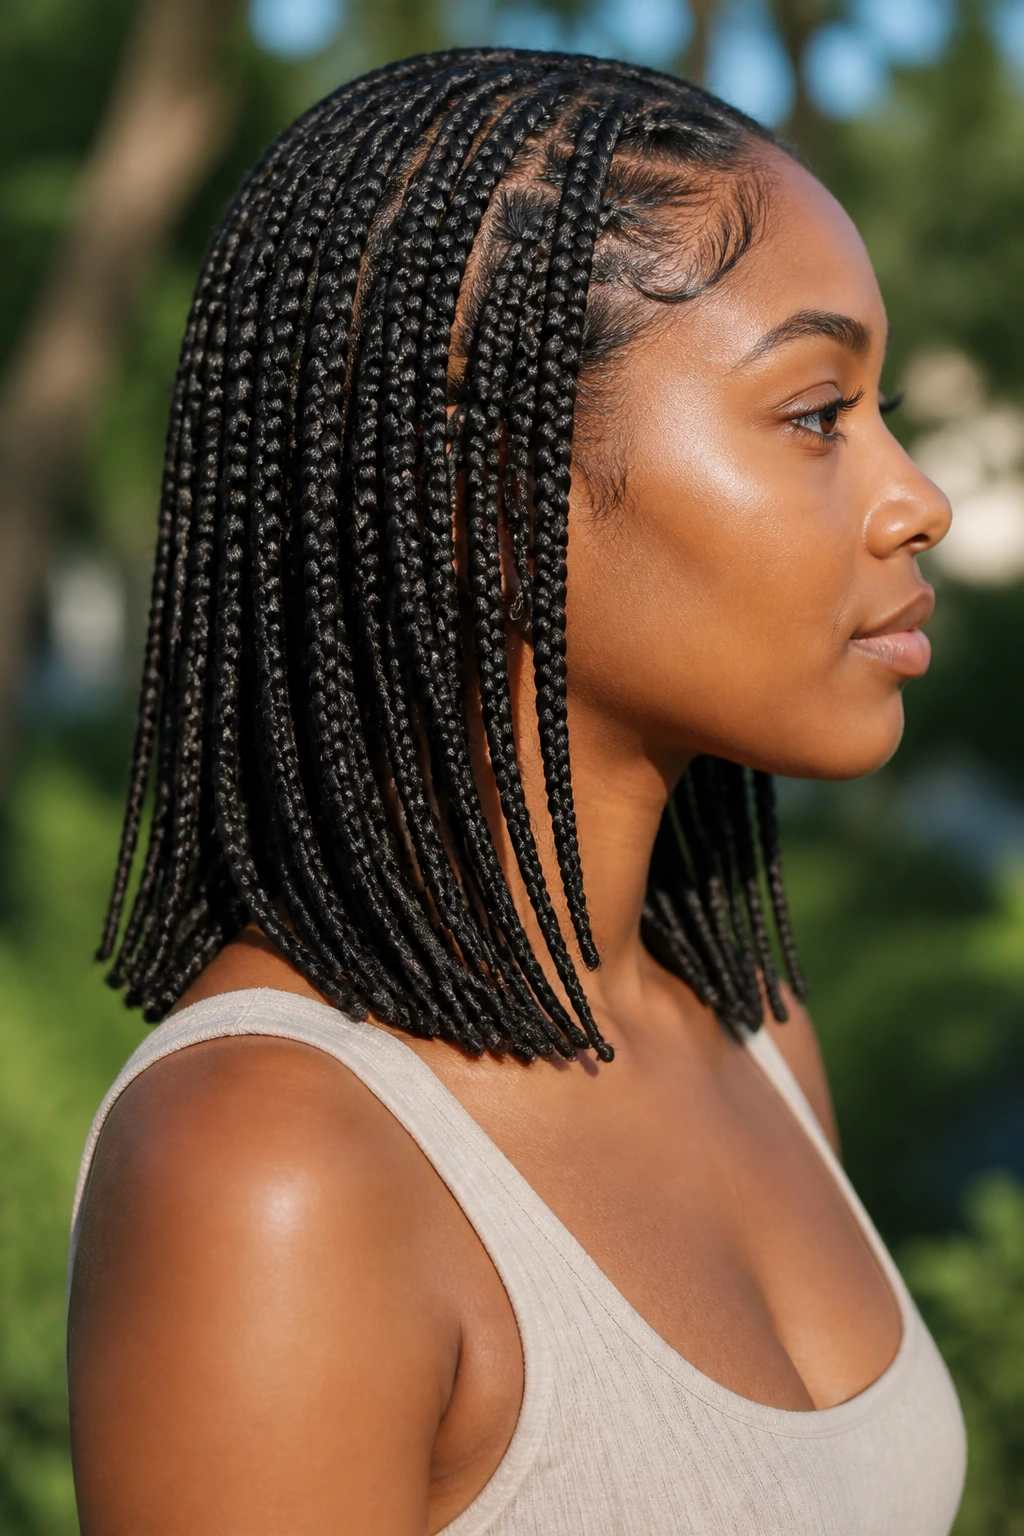
Medium length braids earn their place because they do not ask for a compromise in comfort just to look styled. They give you shape, movement, and enough room for parting and accessories without turning every day into a maintenance session.
The best part is that the length leaves room for mood changes. One week you wear them in a low bun, the next in a side sweep, then suddenly the same install feels fresh again because the shape still has options. That is the nice thing about staying in the middle ground: nothing gets wasted, and nothing feels trapped.
