



A good set of beaded hairstyles doesn’t look busy. It looks finished. That’s the part people miss when they grab beads at random and hope the shine will do the work. The shine never does the work on its own. The parting, the braid size, the bead weight, and the placement at the ends are what make a style read as polished instead of playful in the wrong way.
Beaded hairstyles can lean sweet, sharp, regal, or quietly expensive-looking, depending on what sits at the tip of each braid, twist, or loc. Clear beads catch light and keep the focus on the braid line. Brass and gold read dressier. Wood softens the whole look. Pearl and ivory can make even a simple braid feel deliberate. The trick is restraint. One well-placed bead often looks better than six that clatter every time you turn your head.
There’s also a practical side people don’t talk about enough. Beads can hide uneven ends, sharpen a protective style that’s been worn for a few days, and give shape to braids that might otherwise fall flat. They can also drag a style down if the bead is too heavy, too loud, or too crowded near the hairline. That’s the line we’re working with here: polished, not overloaded.
Why These Beaded Hairstyles Read as Polished
-
Clean geometry: Neat parts and even sectioning give the beads a job to do. They stop looking like decoration and start looking like part of the shape.
-
Controlled shine: Clear, pearl, brass, and matte finishes add just enough light without turning the style into a costume piece.
-
End-focused design: Beads at the tips keep the hairline clean, which matters if you want the whole look to feel intentional.
-
Face-framing power: A few beads near the temples or jaw can sharpen the outline of the face without adding bulk.
-
Low-frizz forgiveness: When the roots are tidy but the ends are starting to soften, beads make the style look maintained rather than worn out.
-
Easy dress-up factor: The same braid or twist can read casual with wooden beads and event-ready with gold or pearl finishes.
1. Sleek Middle-Part Box Braids with Clear Bead Ends
A middle part gives box braids a straight, calm spine. Add clear beads at the ends and the whole style starts to look cleaner, not louder. That’s why this one works so well when you want the braids to do the talking without piling on extra decoration.
The best version uses medium-size braids with one or two clear beads per end. Too many beads, and the ends start to feel heavy. Keep the parts razor neat if you can, because the bead finish only looks polished when the base is tight and even.
Why it works
Clear beads show the braid itself. You can still see the texture, which keeps the style grounded, and the shine lands at the bottom where it feels deliberate. If your braids are waist-length, this setup gives movement without much visual noise.
What to watch for
If the beads are cloudy, scratched, or mismatched in size, the style loses that crisp finish fast. Smooth, uniform beads make a bigger difference than people expect.
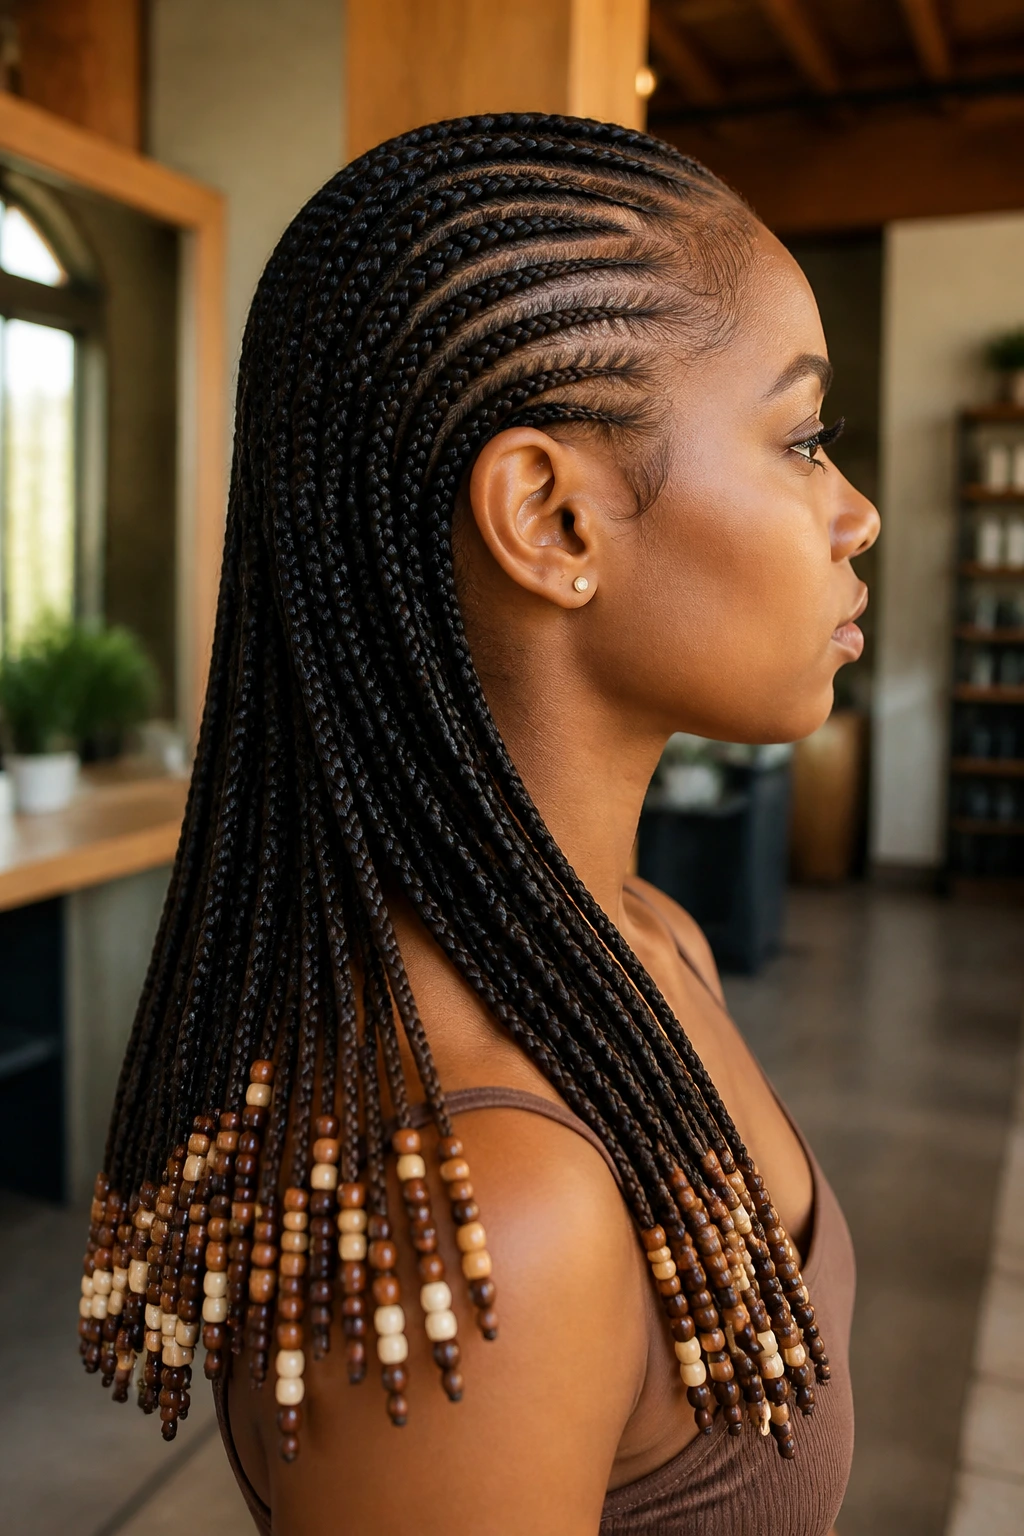
2. Feed-In Cornrows with a Graduated Bead Tail
Feed-in cornrows already have a sleek start, so they pair beautifully with beads that get a little larger toward the ends. The taper creates motion. It also keeps the style from looking blunt when the braids hit the shoulders or upper back.
Ask for thin, even cornrows with the bead weight concentrated low, not near the scalp. A tiny bead at the top and a larger one at the end can feel too fussy. The cleaner move is to let the braid run straight and make the bead sequence do the visual work at the bottom.
How the gradient helps
A graduated bead tail gives the eye a path to follow. That’s a small thing, but it matters. The style feels planned. A row of identical beads can work too, though I like the size shift because it keeps the ends from looking boxy.
Best bead choice
Clear smoke, matte black, or brass-tipped beads keep the finish neat. Bright candy colors can work, but they pull the style toward playful territory fast.
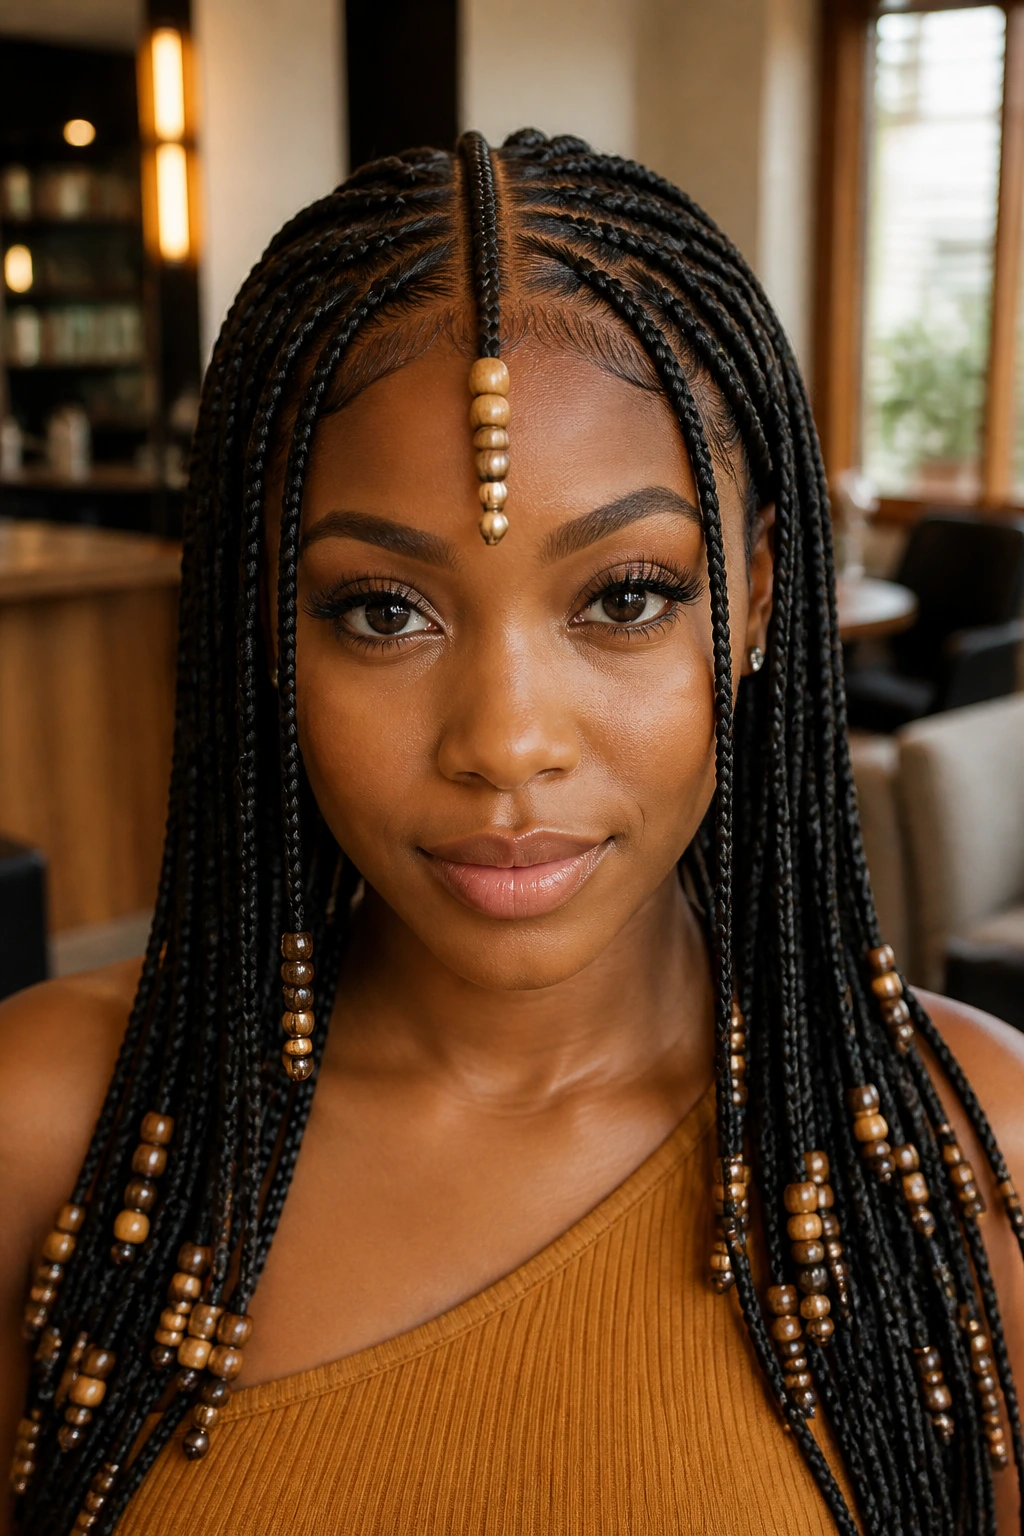
3. Fulani Braids with a Centerline Bead Drop
Fulani braids have built-in structure, which is half the reason they look polished so easily. Add a centered bead drop along the middle braid, and you get a focal point that feels balanced instead of busy. The side braids stay quiet. The middle braid gets the spotlight.
This style works best when the side braids are slim and the beads are repeated in a small, steady rhythm. Three to five beads on the center braid is usually enough. More than that can crowd the face and steal the clean lines that make Fulani braids so good in the first place.
Why it stays elegant
The symmetry does the heavy lifting. You’ve got a strong center part, a neat braid pattern, and one vertical line of beads. Nothing is fighting for attention. It’s one of those styles that looks as if someone actually planned the whole head, which is the whole point.
Small detail, big payoff
If you wear gold hoops, brass beads echo them in a way that feels connected. That tiny echo matters more than a lot of people think.
4. Jumbo Senegalese Twists with Oversized Wooden Beads
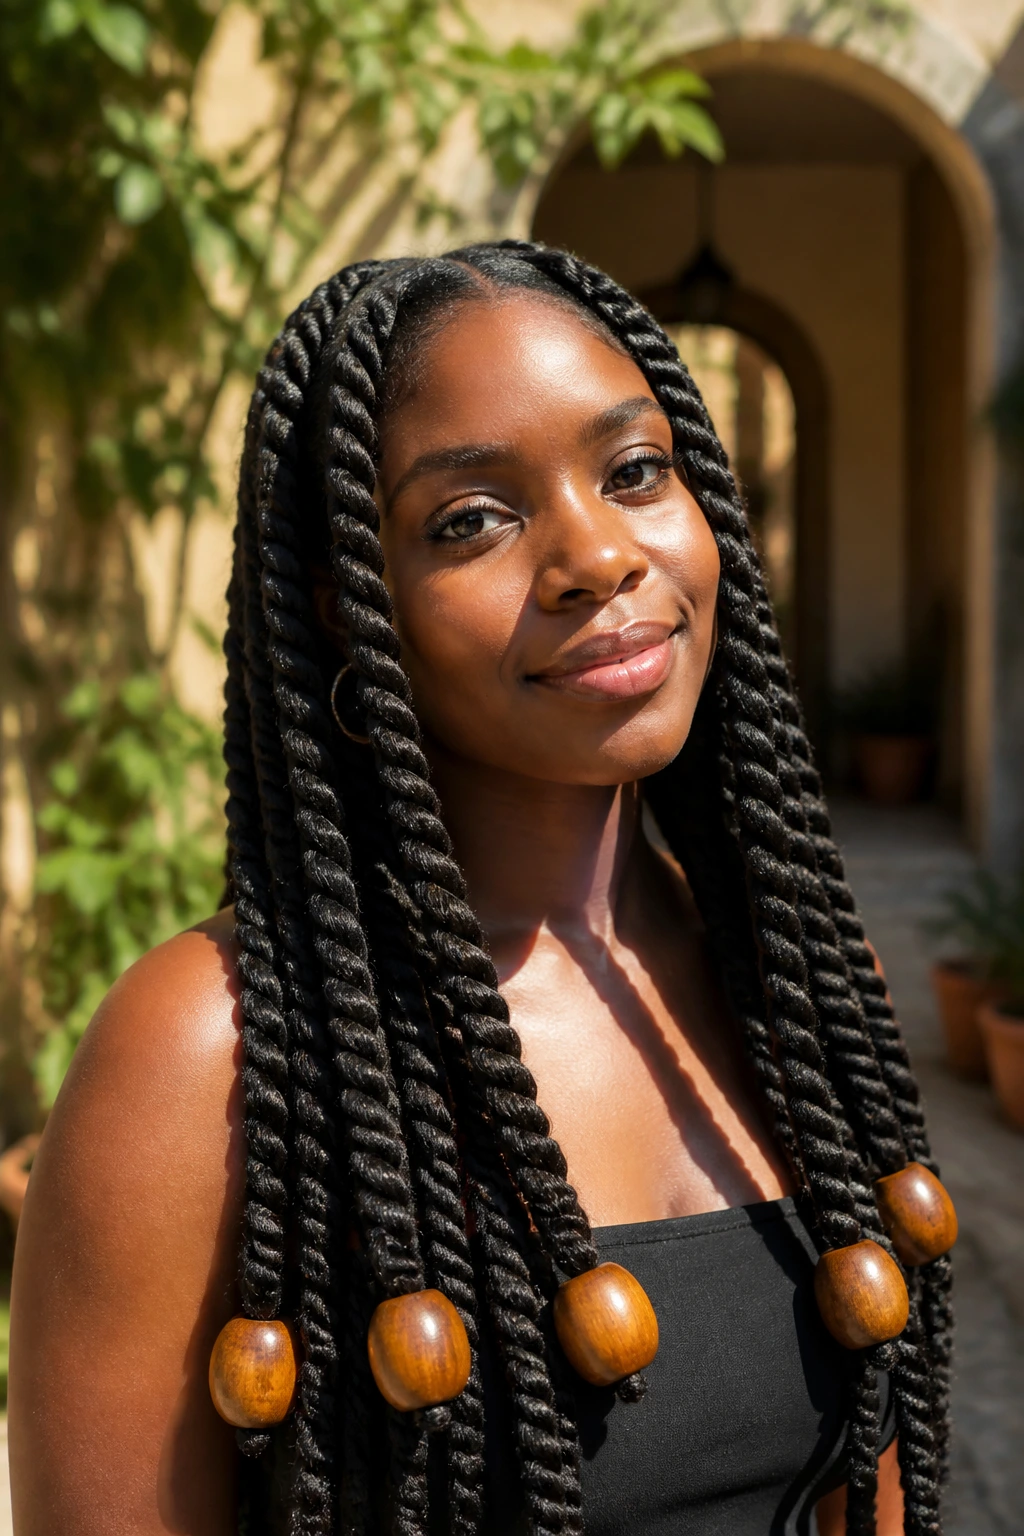
Jumbo twists have enough bulk to carry larger beads without sinking under the weight. That makes them a smart choice if you want the bead to read as part of the style, not a tacked-on accessory. Wooden beads work especially well here because they soften the shine and ground the twists.
The best look is a long twist with one oversized bead near the bottom of each section. Keep the wood tone close to your skin tone, your outfit, or your earrings, and the style pulls together fast. Bright orange or neon finishes can be fun, but they change the mood entirely.
A thick twist with a heavy bead has to be balanced. If the bead is too large for the section, the twist will sag and the ends will look lopsided. That’s a boring mistake to make, and an easy one to avoid.
5. Knotless Braids Pulled Half Up with Gold Accent Beads
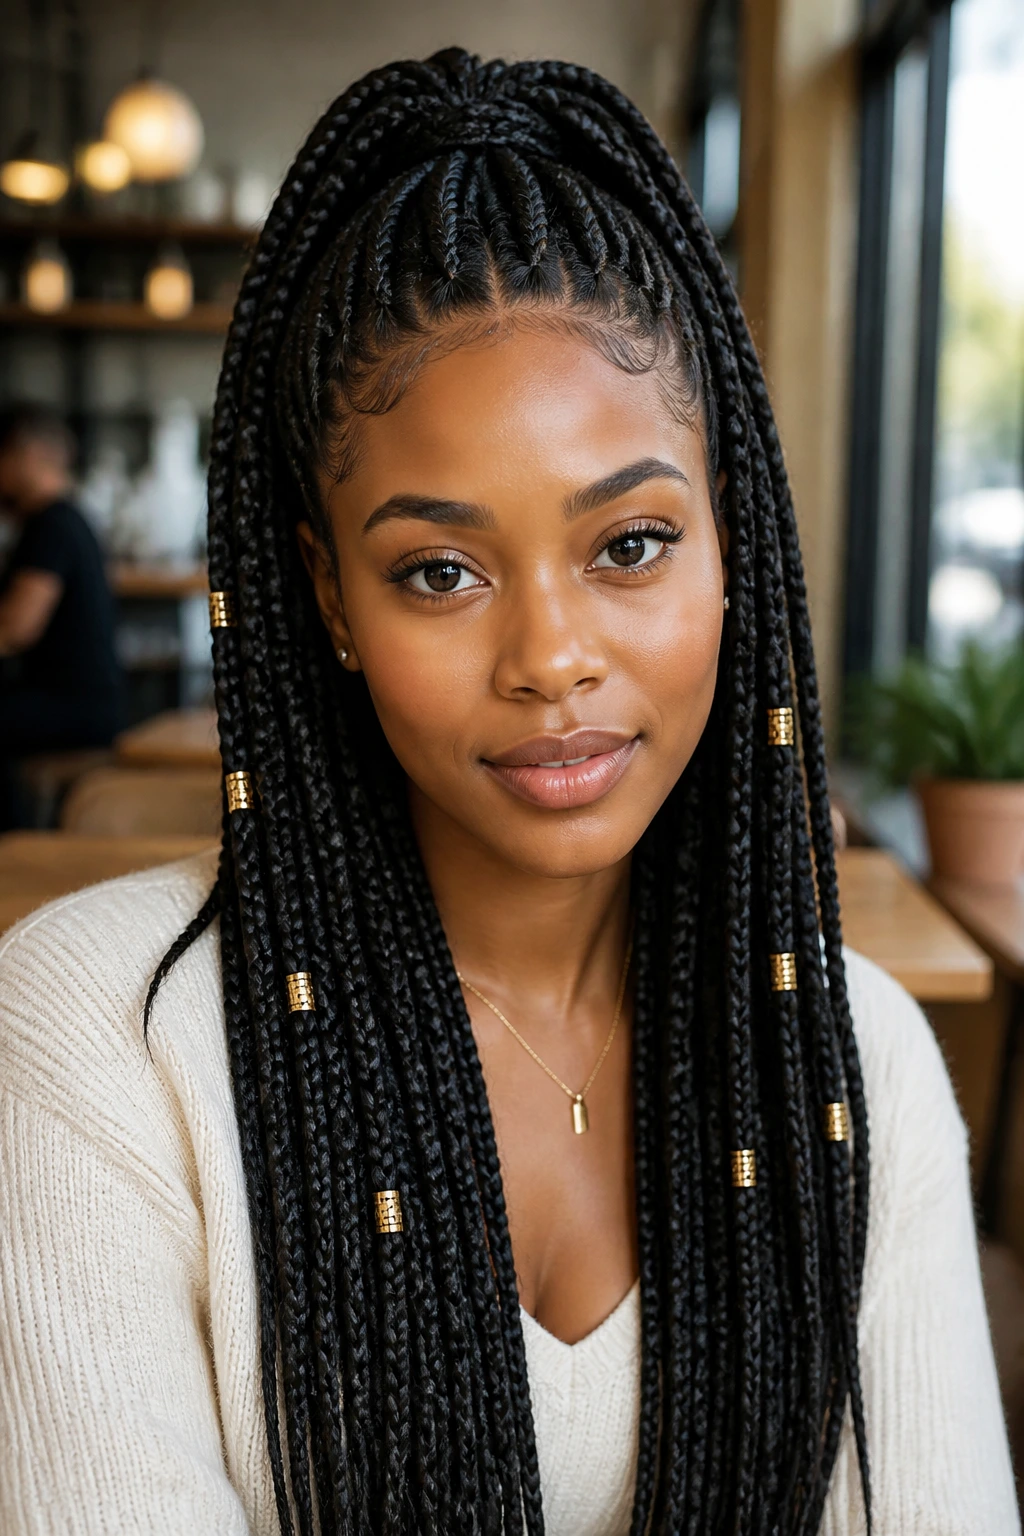
Half-up knotless braids are already neat because the front is lifted off the face. Add gold accent beads to the loose braids, and the style starts reading dressed-up without losing the easy shape. It’s a strong pick when you want something that can go from daytime errands to a dinner reservation without a full restyle.
I prefer this with medium-length knotless braids, not tiny ones. The braid needs enough room for the gold bead to show up as an accent. One bead per braid, or two at most, keeps the look crisp. More than that can make the half-up top feel crowded.
The half-up section matters. If the top is sloppy, the beads cannot rescue it. Tighten the top, smooth the crown, and keep the front edges neat. Then the gold has a proper place to sit.
6. Triangle-Part Braids with Mixed-Metal Beads
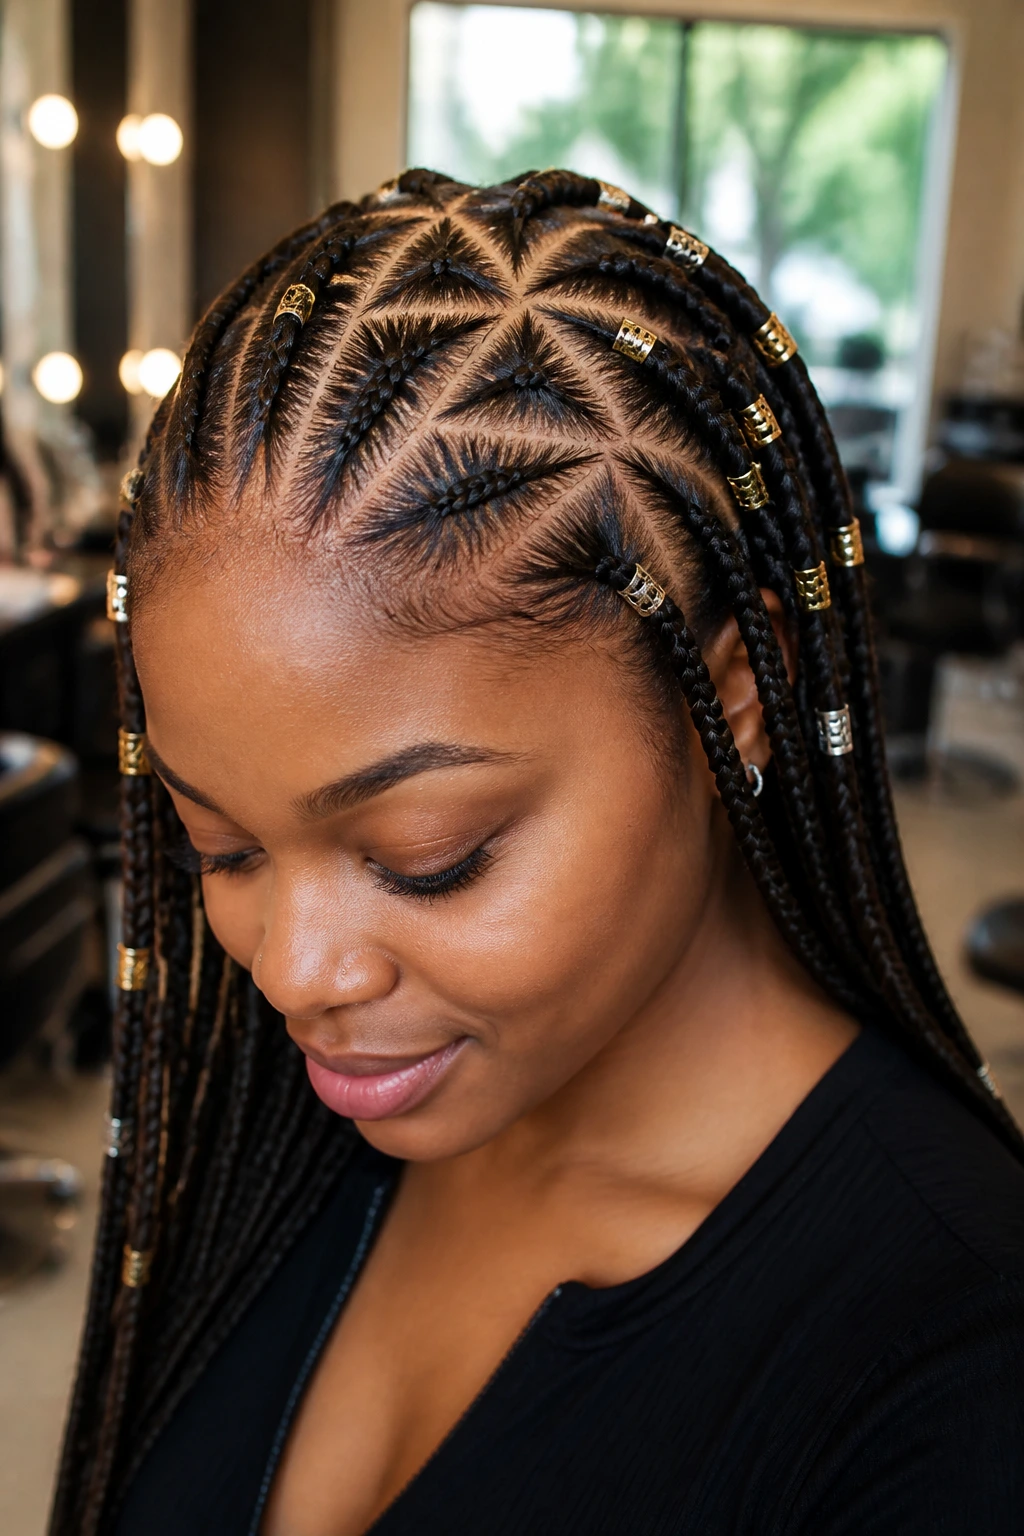
Triangle parts give the scalp pattern a little edge, and mixed-metal beads push that same idea forward. The key is keeping the metals controlled. Gold and silver can live together just fine, but they need a plan. Random mixing looks like leftover craft supplies.
This style works when the bead mix repeats in a pattern, not a jumble. You might place gold on every other braid and silver on the in-between braid. Or keep the upper rows one metal and the lower rows another. Pick the rule first. Then stick to it.
Triangle parts already add texture at the scalp, so the beads should stay clean and simple. I like medium-small beads here, because the parting pattern is the real show. The finish should support it, not compete with it.
7. Waist-Length Locs with Brass Spacers
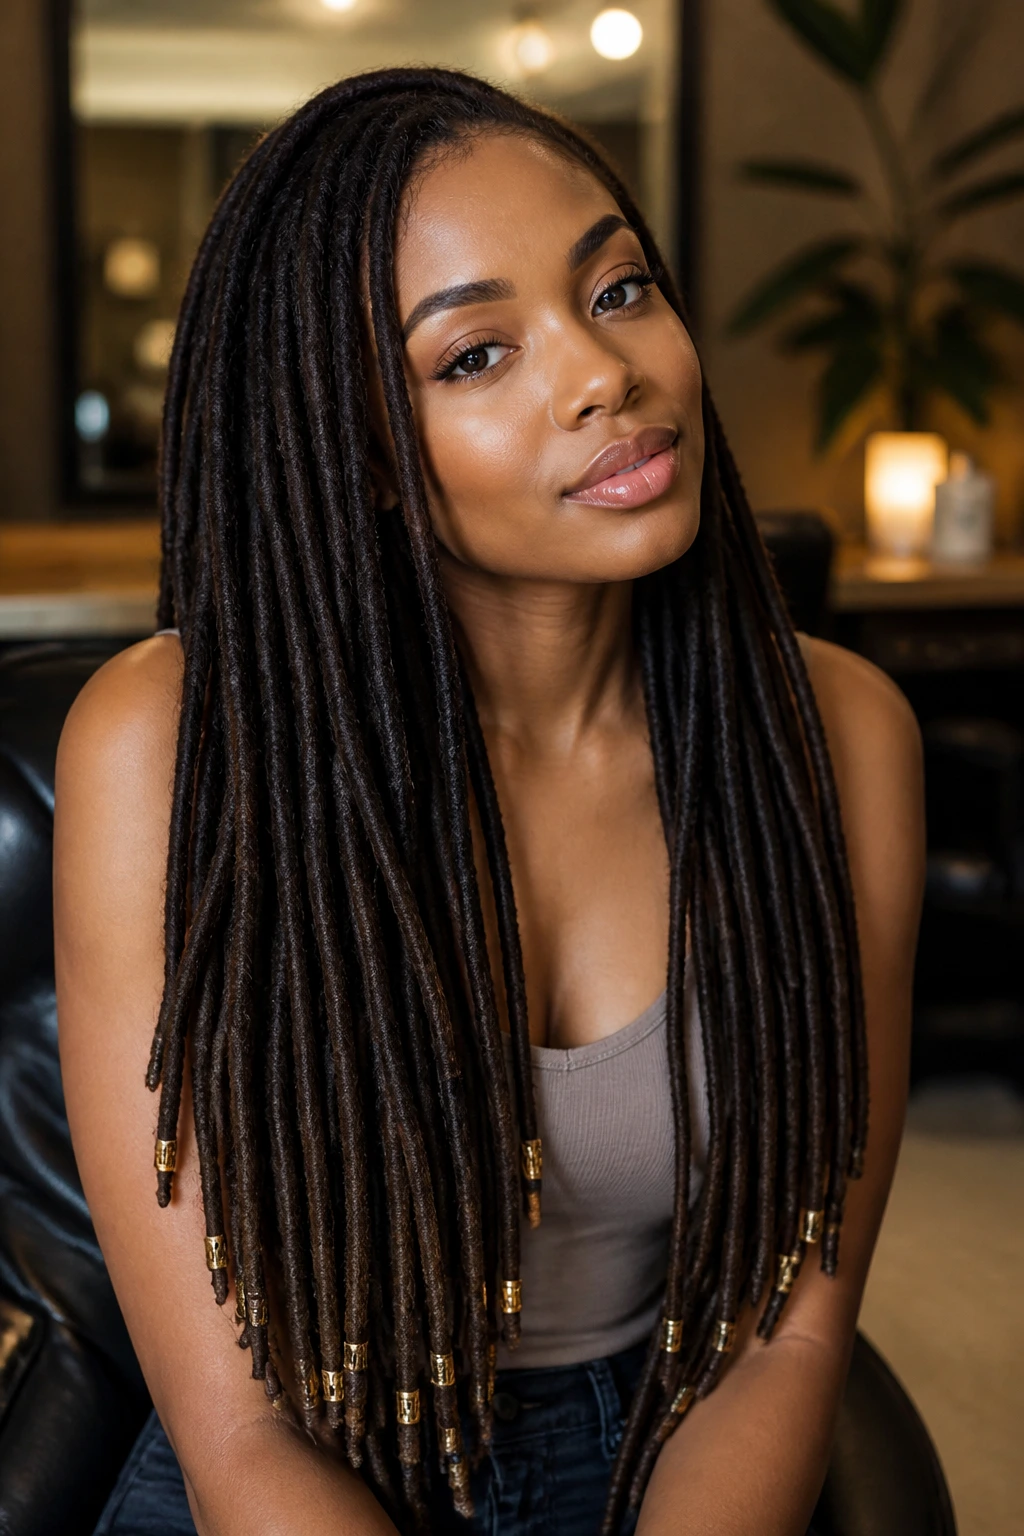
Locs and brass have a nice relationship. Brass spacers give long locs a finished edge without making the style feel heavy or overly decorated. They sit like small hardware accents, which is exactly the kind of detail that can make locs look intentional from top to bottom.
Place the spacers in a few visible sections near the ends, then leave the rest of the locs clean. If every loc has brass stacked all over it, the style starts to feel dense. A few well-placed pieces read richer than a full run of metal.
This is also one of the best choices if you want a style that feels mature. Brass doesn’t shout. It catches light quietly and works well with warm-toned jewelry, leather jackets, and tailored clothes.
8. Shoulder-Length Passion Twists with Pearl Beads
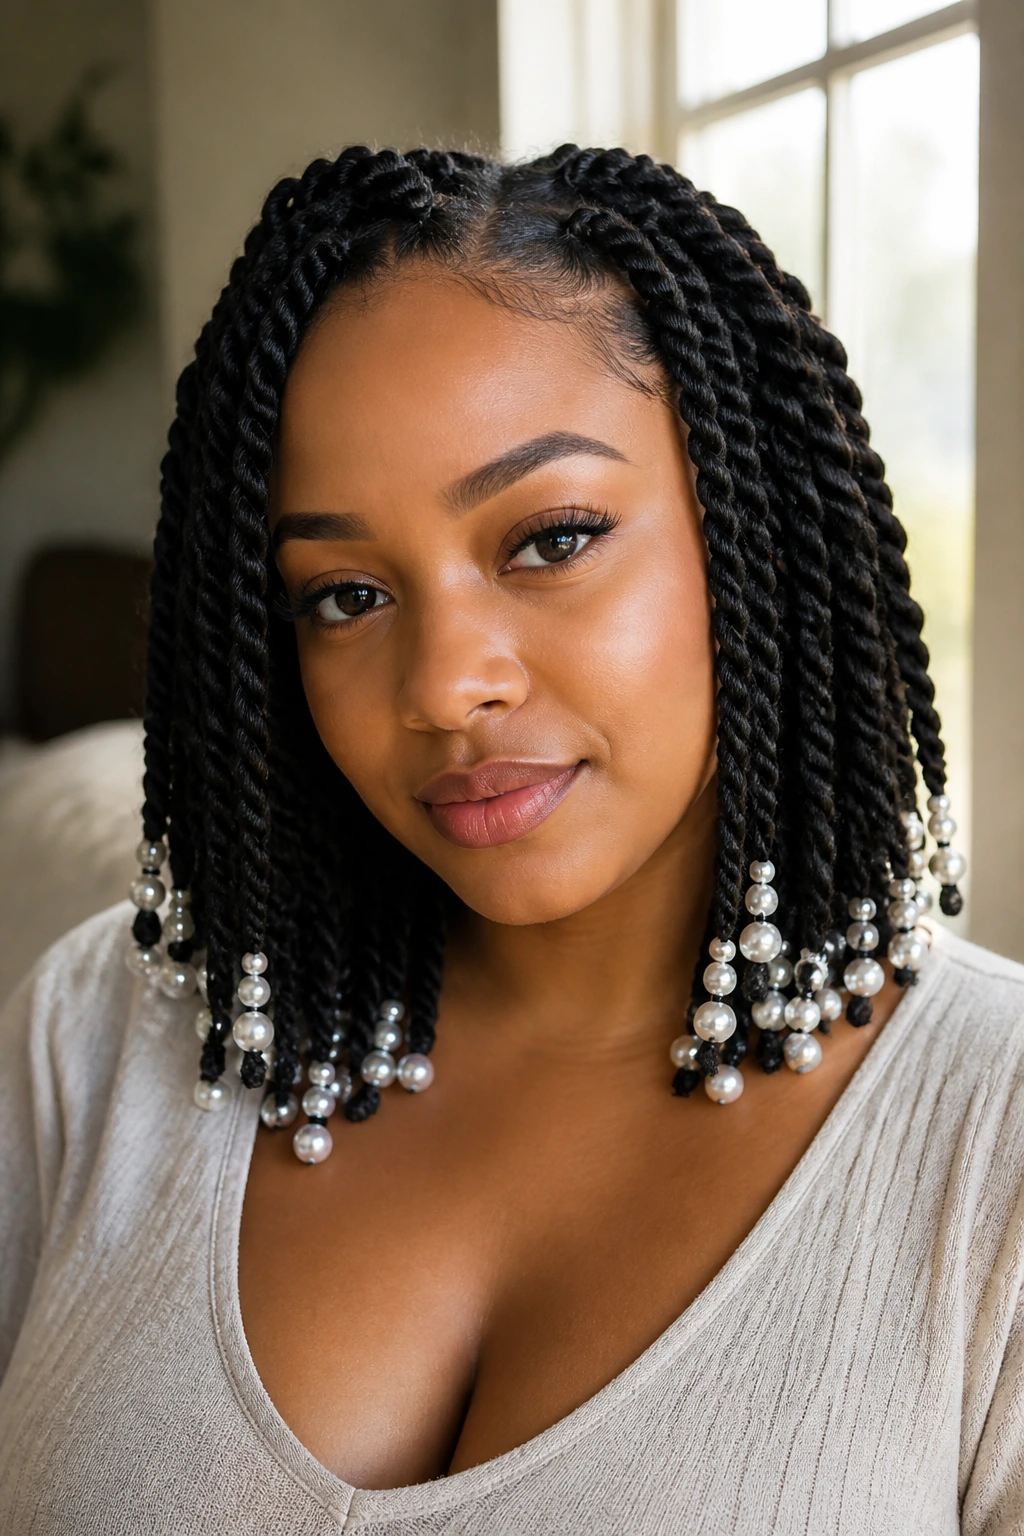
Passion twists already have a softer, looser movement than box braids or cornrows. Pearl beads bring that softness into sharper focus. They add a clean, dressy finish that keeps the twists from drifting too casual.
The best place for the beads is at the lower third of the twist, where the curve starts to loosen. If you place them too high, the twist can lose its flow. One pearl bead on each visible twist is usually enough. The whole point is refinement, not decoration overload.
Pearl beads also work when you want the style to read a little lighter. They soften dark twists, lighten the visual weight of the ends, and pair well with satin finishes, crisp white shirts, or a simple neckline that lets the hair do the work.
9. Stitch Braids into a Low Bun with Tiny Seed Beads
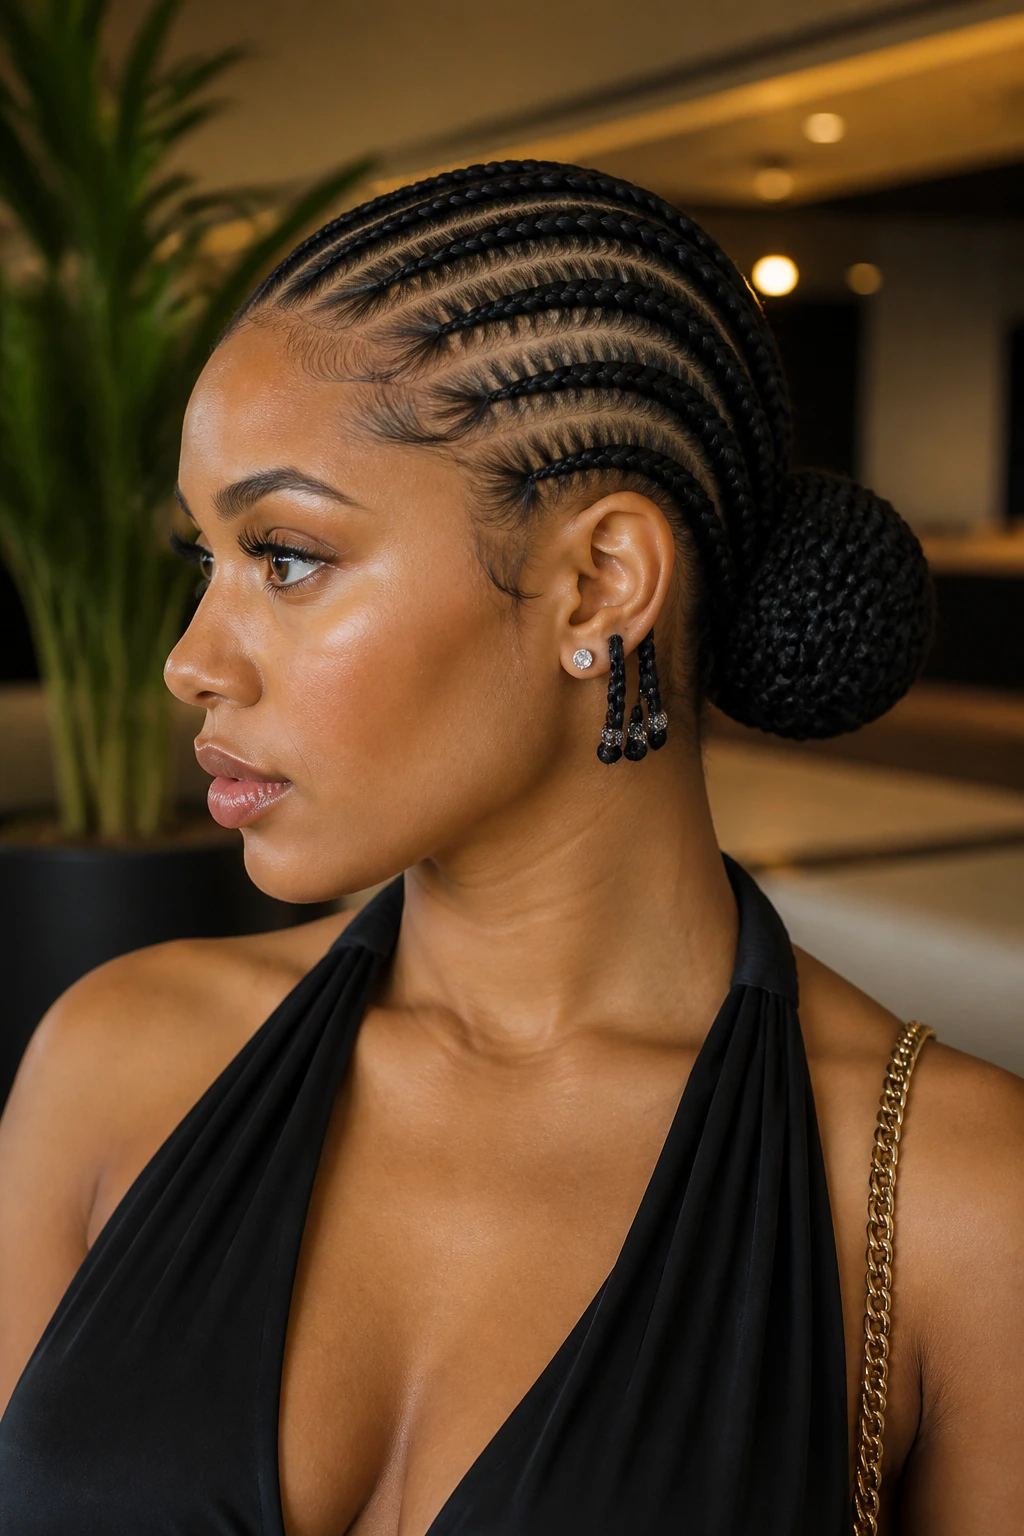
Stitch braids are all about straight lines. A low bun gives them a clean landing place. Add tiny seed beads at the ends before you tuck the braids in, and the style gets a precise little finish that feels more deliberate than decorative.
This one works because the beads are small. Tiny seed beads don’t compete with the sculpted lines of the braid pattern. They flicker rather than shout. If you use a bigger bead here, the bun can start to feel bottom-heavy.
Where it shines
This is the style I’d pick for something formal or structured. It sits close to the head, keeps the neck clear, and reads polished from every angle. The bead detail is a bonus, not the main event.
10. Side-Swept Braids with a Single-Bead Finish
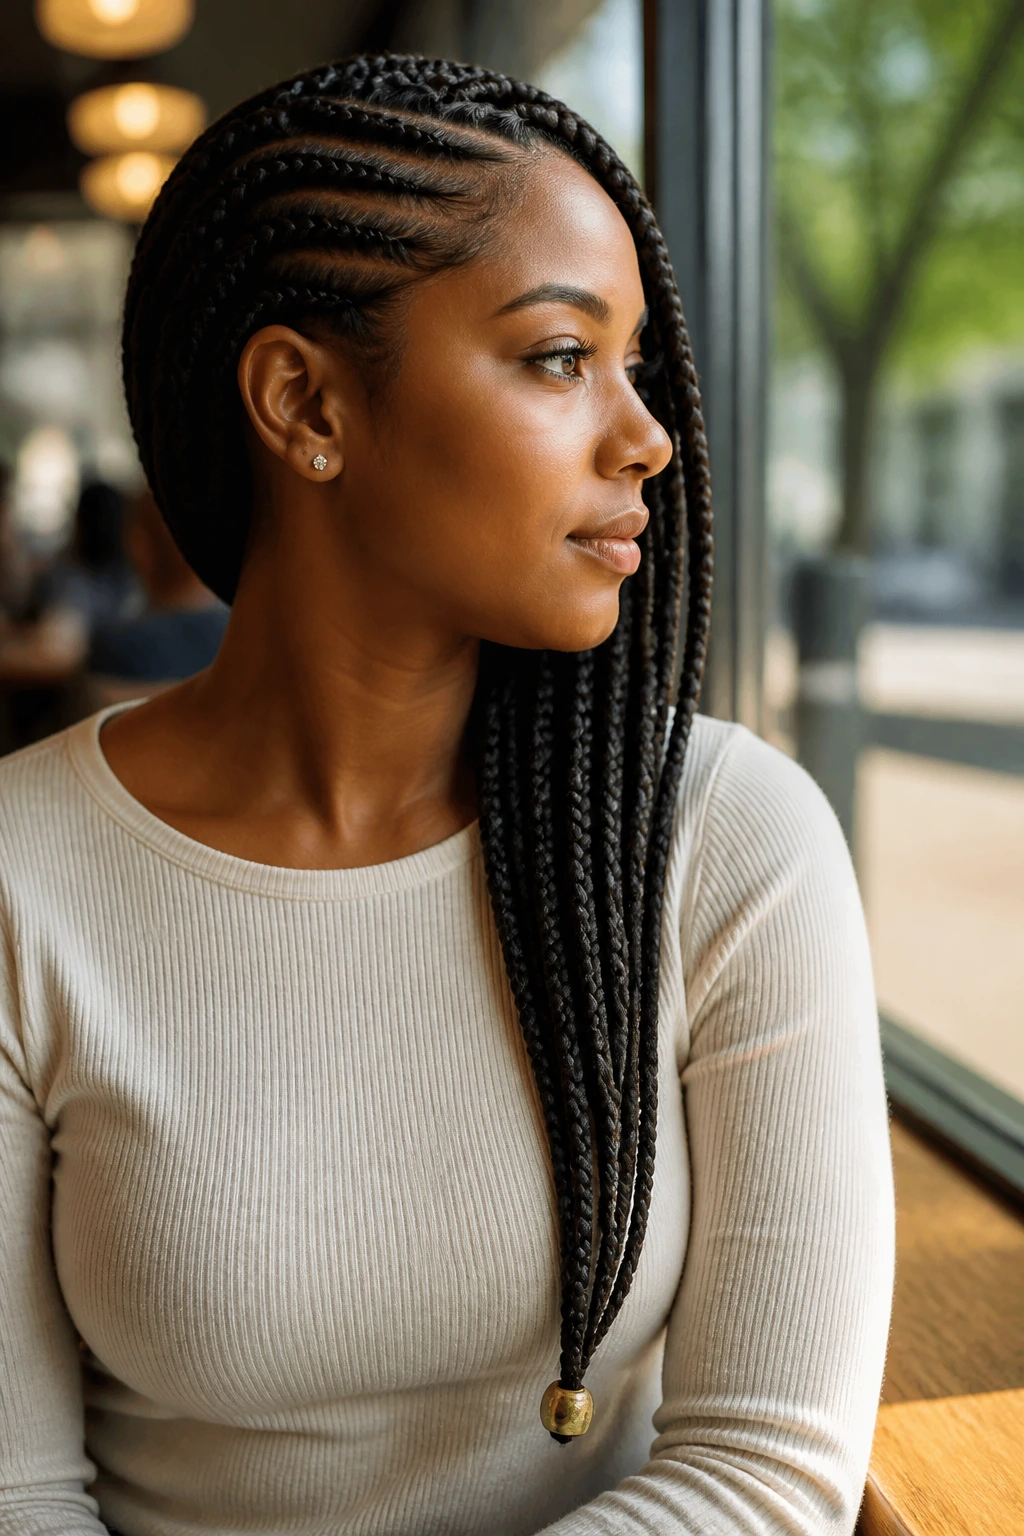
A side-swept braid has drama built in. You do not need much else. One bead at the finish of each braid, or even just at the visible ends on the heavy side, can be enough to make the whole style feel resolved.
The asymmetry is what makes this one feel grown-up. The side part leads the eye, the braid mass falls across one shoulder, and the bead adds a clean punctuation mark. That single detail can do more work than a whole row of random extras.
If you wear earrings, this style gives them room to show. The hair moves out of the way, the beads catch light near the collarbone, and the whole look feels tidy without looking stiff.
11. Chin-Length Beaded Bob Braids
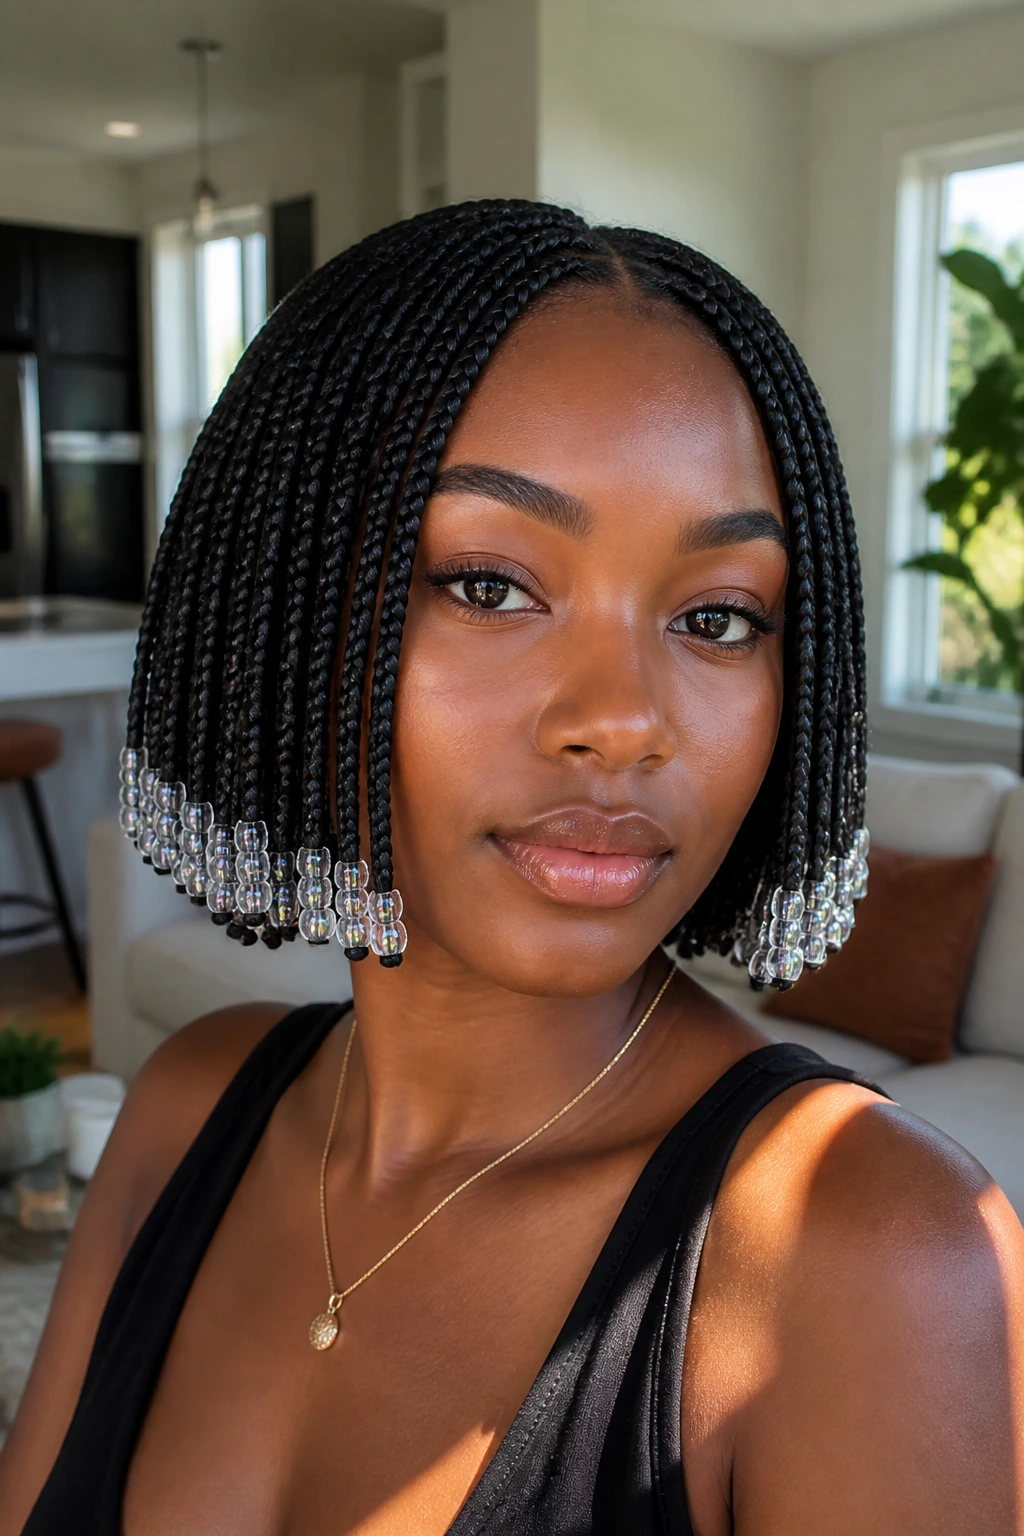
Short braids can be a little tricky because the ends don’t have much room to spread out. That’s why a bob-length beaded style needs careful bead choice. Faceted glass beads or smooth acrylic beads work best here because they add shine without dragging the braid down.
The bob shape itself already looks polished when the parting is clean and the ends hit evenly. A bead finish reinforces that neat line. I like this style with a blunt cut or a slightly curved perimeter, because the beads make the edge feel intentional instead of chopped off.
Best detail
Keep the bead size moderate. Too large, and the bob loses its bounce. Too tiny, and the finish disappears into the hair. You want enough weight to mark the ends without changing the silhouette.
12. Crown Braid Halo with Delicate Charm Beads
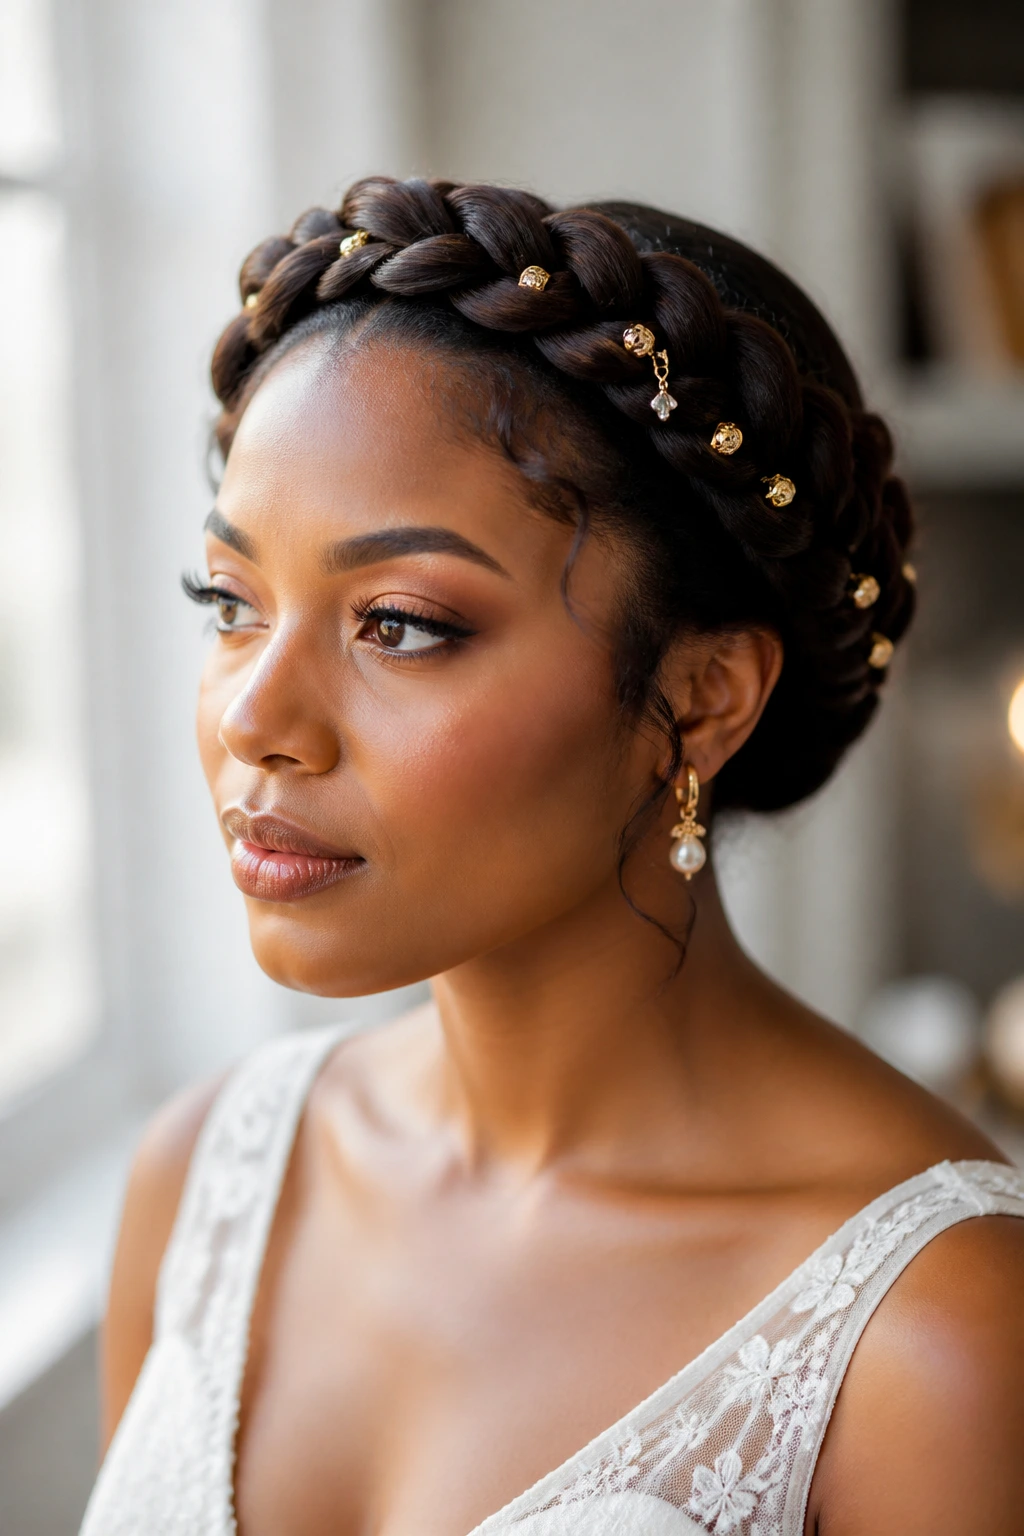
A crown braid already has a formal shape, and that’s why it works so well with delicate charm beads. The braid circles the head. The beads can sit along one side or cluster near the back, where they catch the eye without taking over the whole halo.
This style reads especially polished when the beads are tiny and repeated at even intervals. A charm bead here and there can be lovely, but the braid itself should stay the main shape. Think of the beads as tiny pauses, not a full sentence.
If you want a style for a wedding, a dinner, or a clean photo-ready look, this is one of the easiest answers. It stays close to the head, keeps the silhouette controlled, and gives you just enough sparkle to look finished.
13. Faux Loc Ponytail with Copper Bead Cuffs
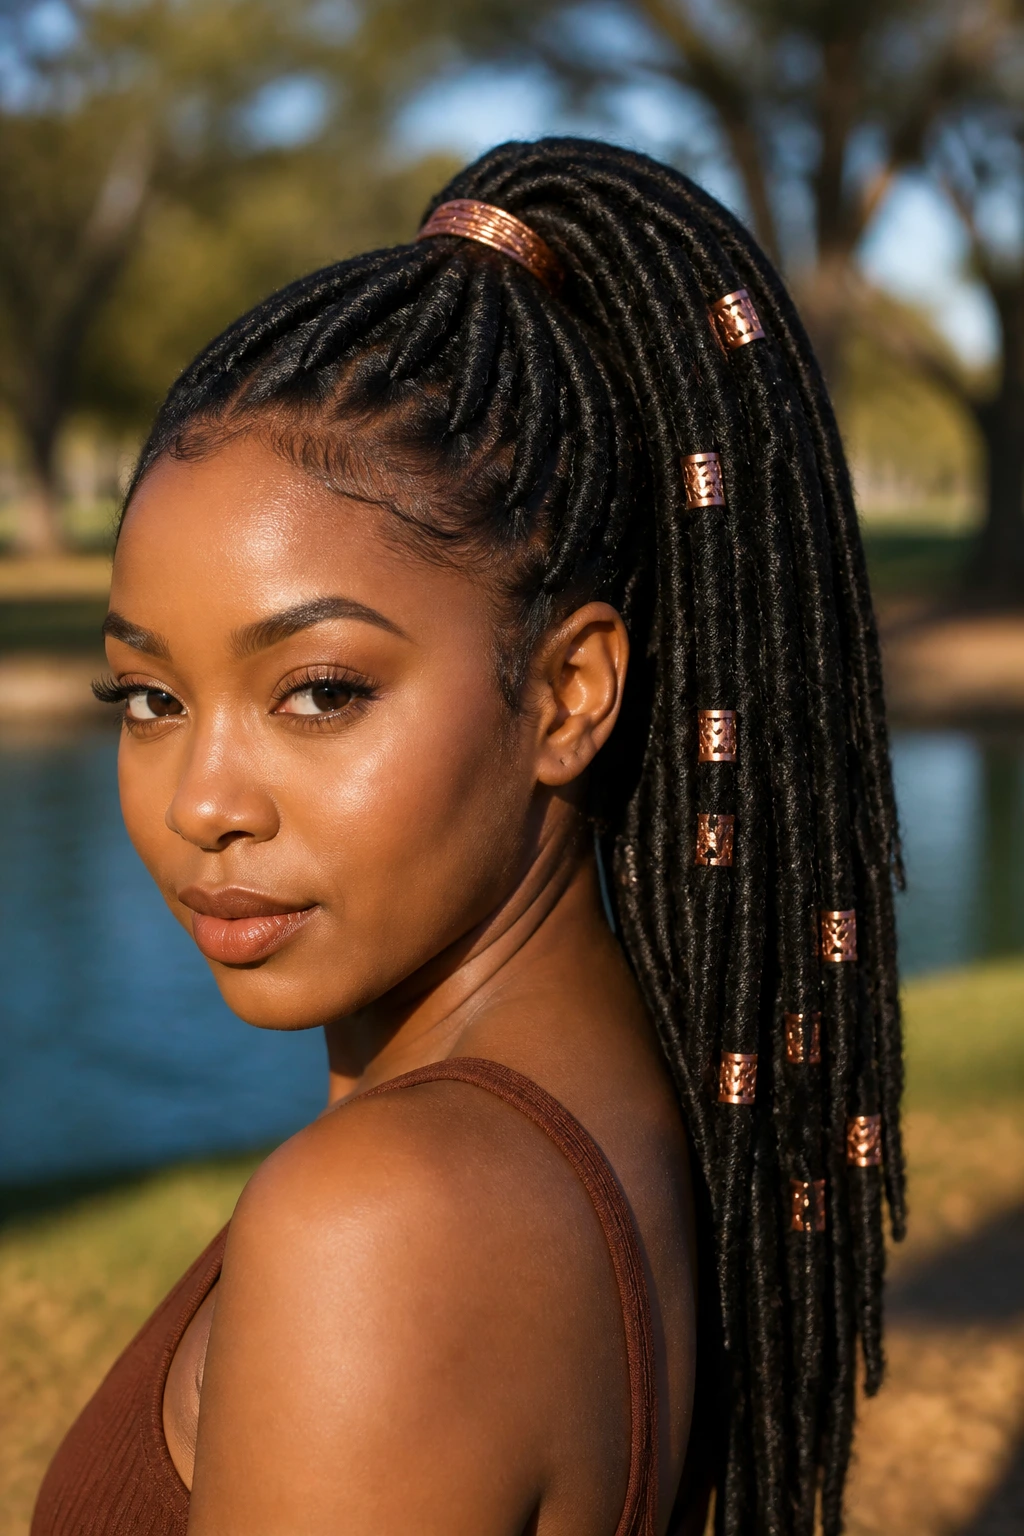
Faux locs in a ponytail have a built-in structure that a bead cuff can sharpen in one move. Copper is especially good here because it warms up the hair and keeps the finish from reading flat. It also pairs nicely with dark locs, where the metal gets a strong visual contrast.
Place the cuffs near the hair tie, then add one or two more down the ponytail if the locs are long enough. That spacing matters. Too many cuffs stacked together can look clunky. The ponytail needs breathing room.
This one feels polished because it combines tension and movement. The tie keeps the base firm. The locs swing. The copper reflects just enough light to mark the shape.
14. Braided Pigtails with Symmetrical Bead Rows
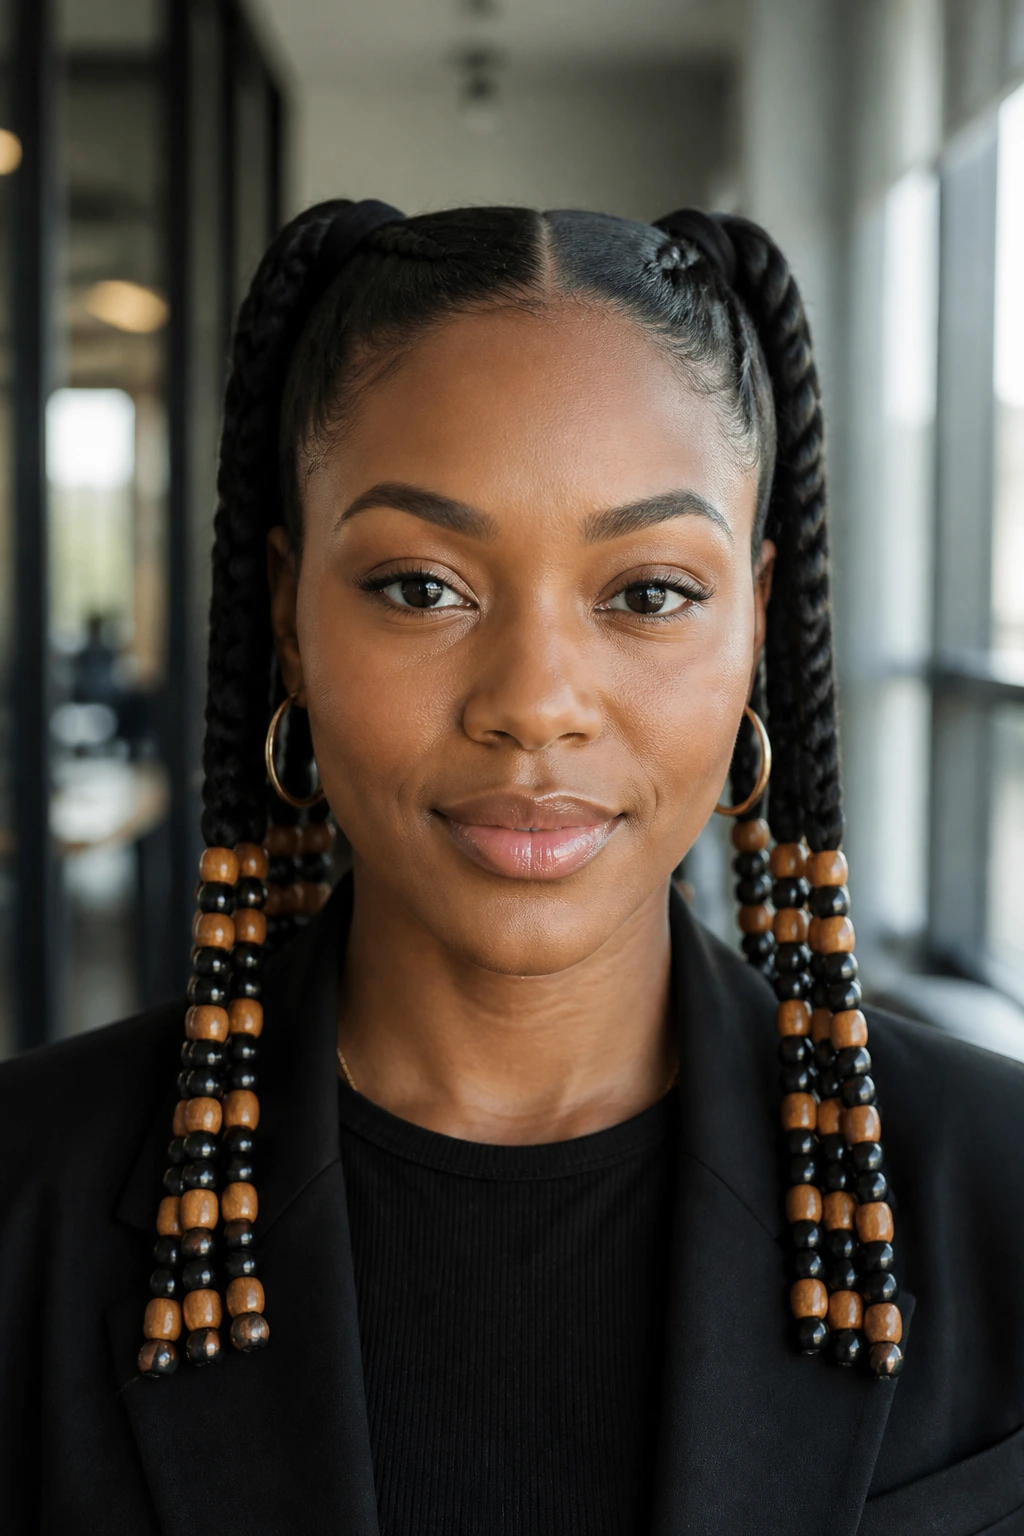
Pigtails can look childlike fast if the parts are loose or the beads are random. Keep the sections tight, the rows even, and the bead counts mirrored on both sides, and the style changes completely. It starts to read as intentional, almost architectural.
The symmetry is the whole point. If the left side has four beads, the right side needs four beads in the same size or a close match. That repetition gives the eye a place to rest. It also keeps the style from slipping into costume territory.
This is a good option when you want a playful shape that still feels neat enough for a sharp outfit. A blazer, a fitted tee, a clean collar, and symmetrical beads can work together better than people expect.
15. Micro Braids with Scattered Accent Beads
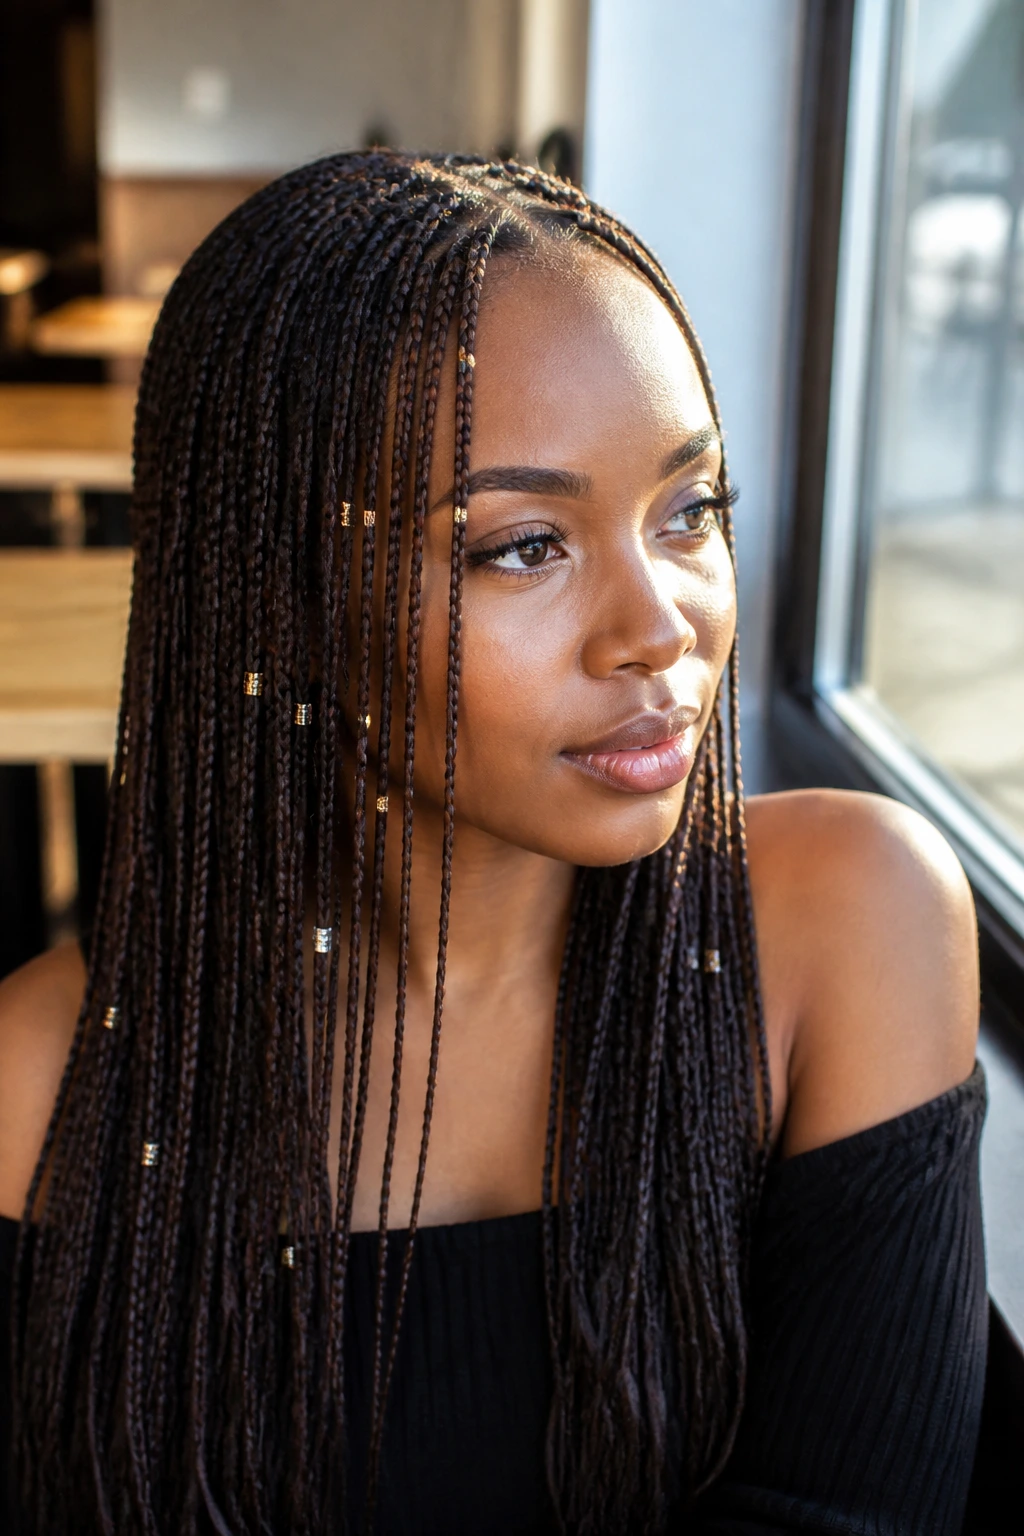
Micro braids carry a lot of texture on their own, so bead placement has to stay selective. Scatter accent beads on the front pieces, along one side, or at the very ends where the eye naturally lands. If you bead every braid, the style can become visually noisy fast.
This is one of the few styles where less is absolutely more. A single line of tiny beads near the face can make the whole head look more finished. They add movement when you turn, but they don’t drown out the braid pattern.
If your micro braids are long, this is a smart way to keep them from feeling too plain. The beads act like little checkpoints along the length, which keeps the eye moving in a controlled way.
16. Goddess Braids with Beaded Corners
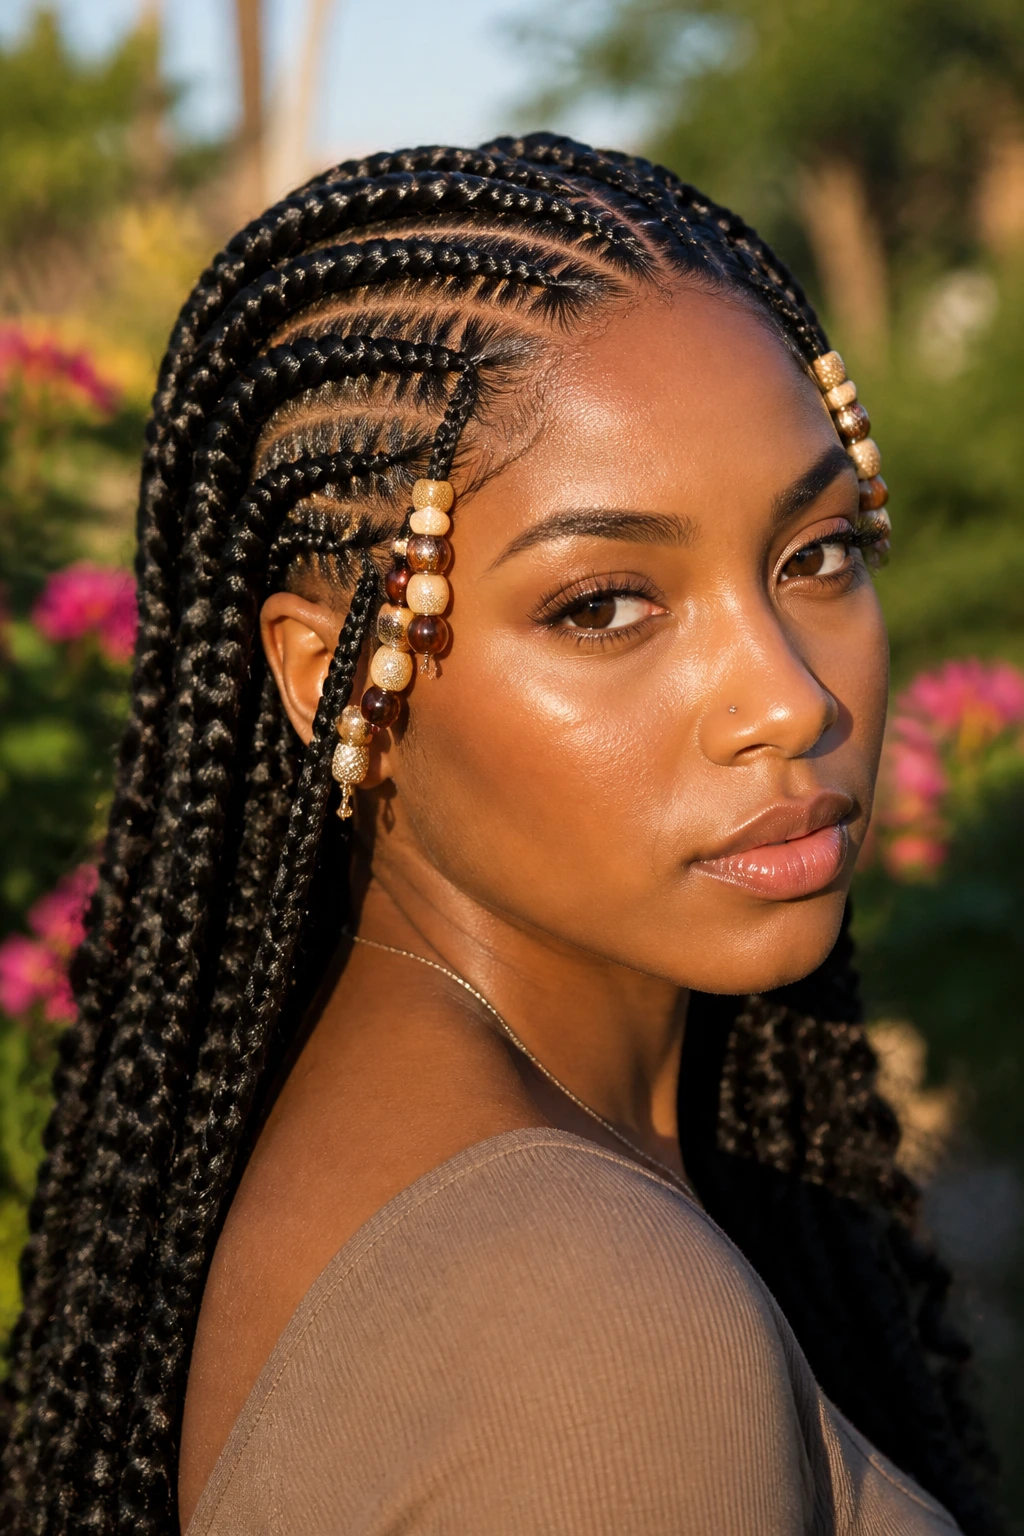
Goddess braids have a strong shape, and that strength gives you room to play with the corners. Beads near the temple ends or outer edges of the braid pattern can soften the geometry without making the look lose its clean lines.
The best version is restrained. A bead cluster at the ends of the outer braids, maybe a matching pair on each side, is enough. If you put beads on every braid line, the style starts to lose the broad, sculpted look that makes goddess braids so sharp in the first place.
This style works well when you want a braid pattern that feels graceful but not delicate. It has some edge. The beads simply warm it up.
17. Rope Twists with Matte Black Beads
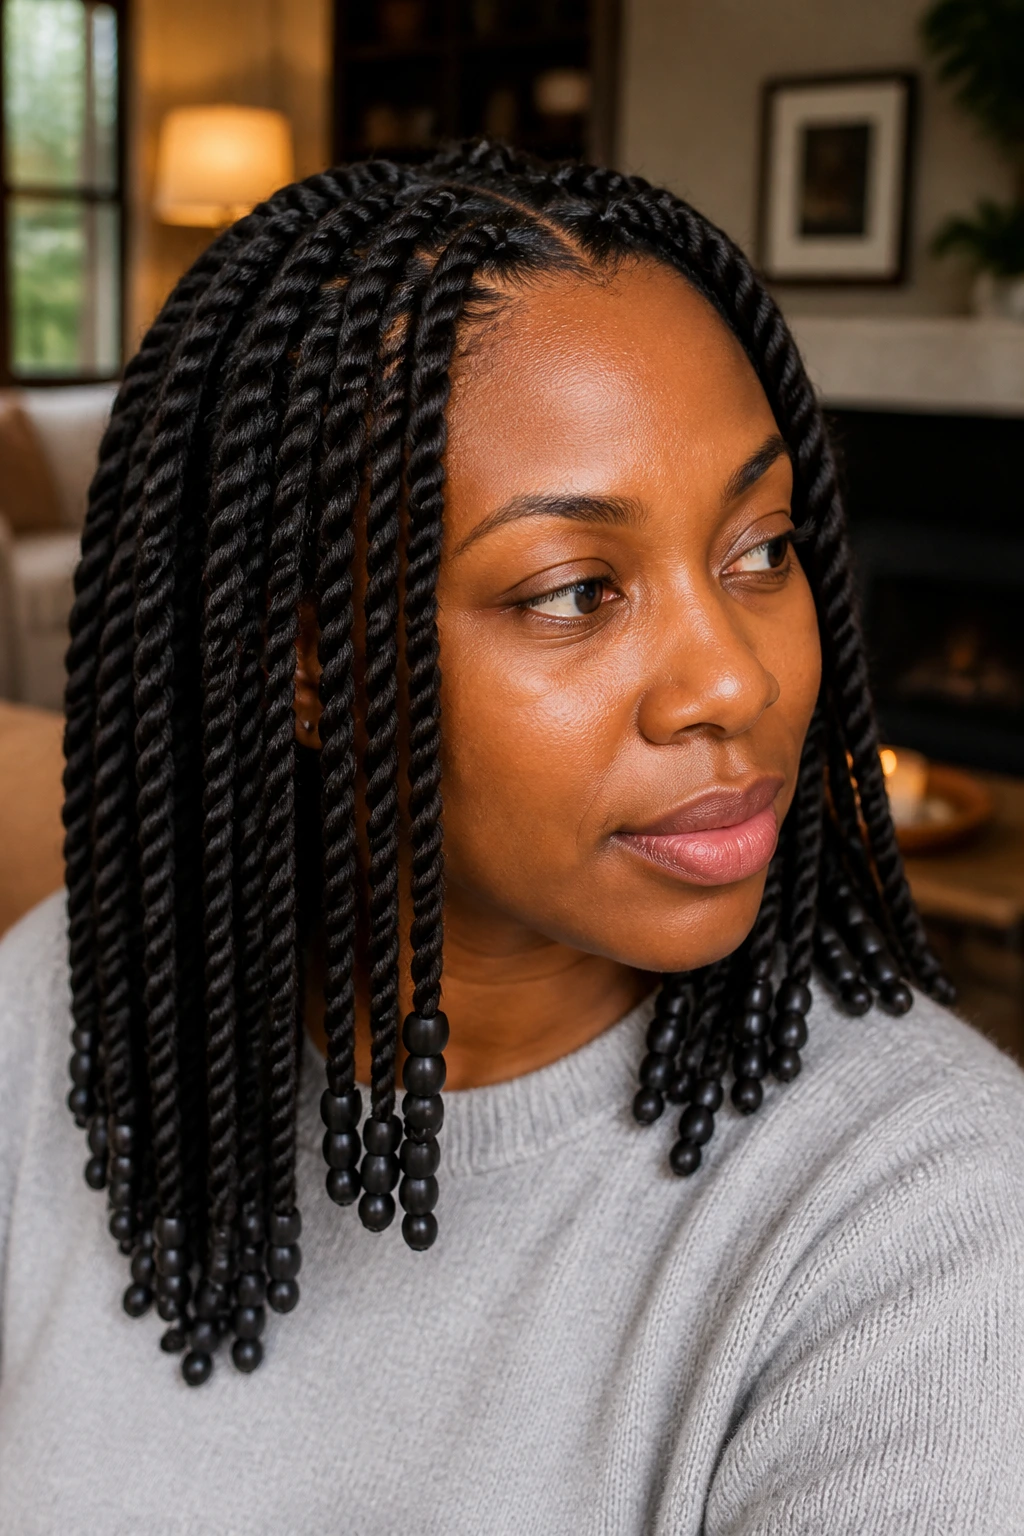
Matte black beads are a sneaky-good choice. They do not pull the eye the way gold or pearl does, which means the twist texture stays front and center. On rope twists, that matters. The whole style depends on the clean spiral.
Use the beads at the ends, not the roots. A matte finish keeps the look from turning shiny in a way that would fight the twist pattern. If you want something quiet but still finished, this is one of the easiest picks on the list.
What makes it different
The polished part here is restraint, not sparkle. You get shape, depth, and a neat ending without giving the style a loud accessory moment. That’s a useful lane, especially if your clothes or jewelry already carry a lot of texture.
18. Loc Updo with Beaded Tendrils
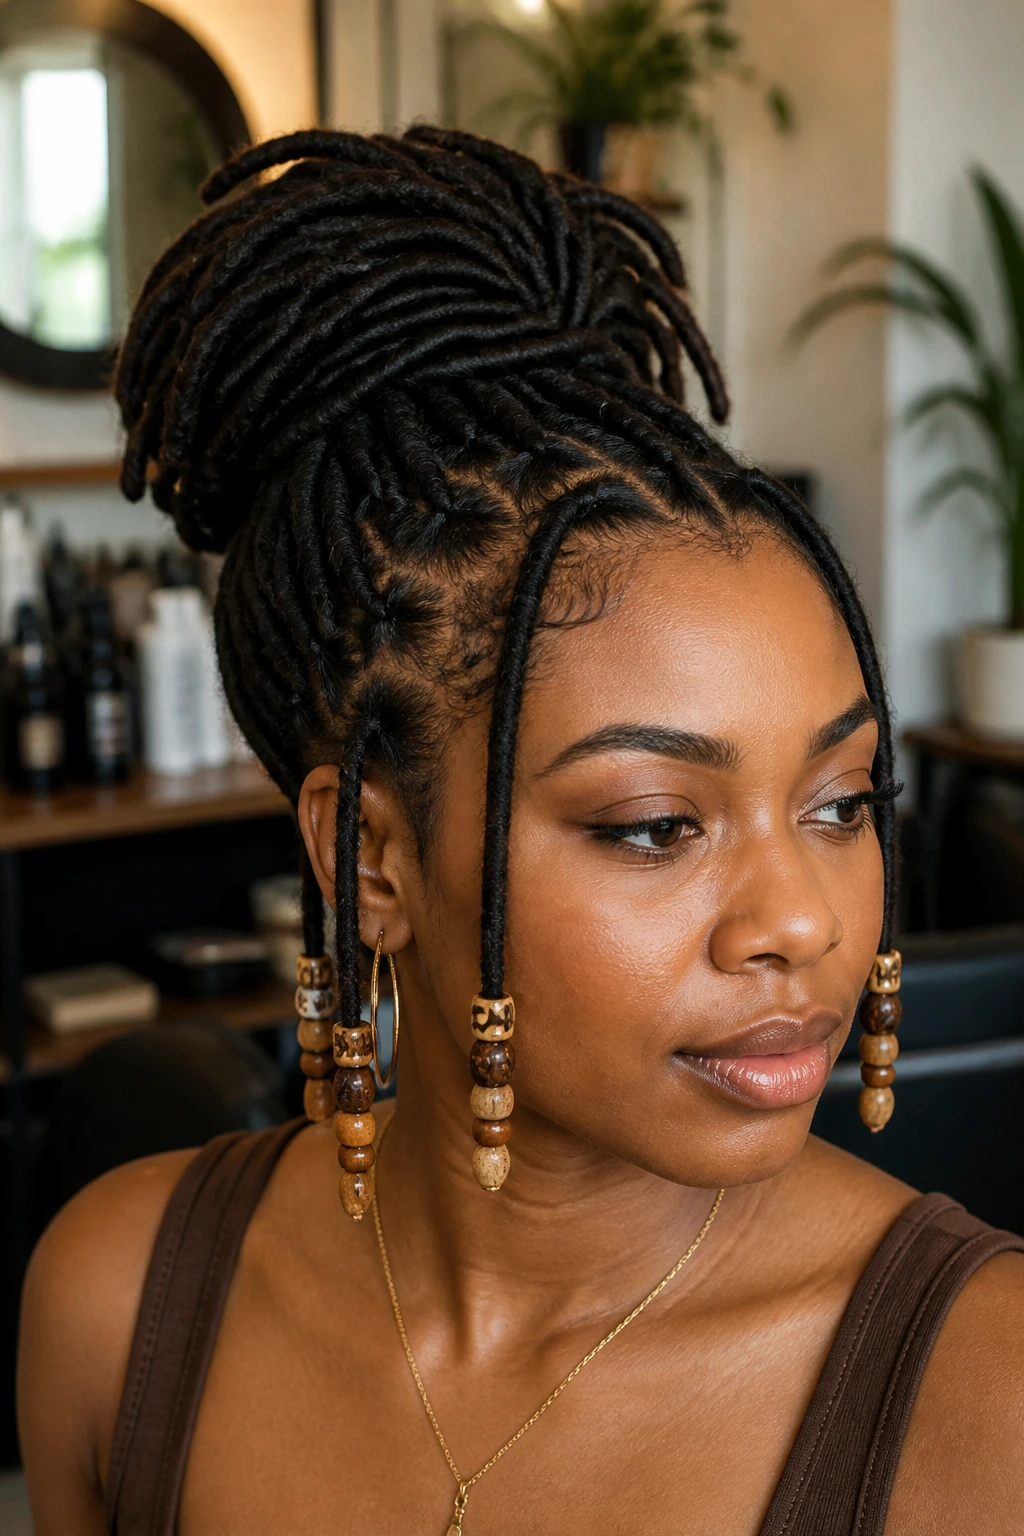
An updo can sometimes feel too severe on locs if every strand is pinned away. Leaving a few beaded tendrils loose changes that. The locs frame the face, the updo keeps the shape high, and the beads soften the edges.
This one works best when the tendrils are placed with intention. Two in front, one on each side, maybe a fourth tucked low near the nape. That’s enough. The beads should not outnumber the pinned locs, or the updo loses its clean profile.
It’s a smart choice for a polished look because the updo keeps the silhouette neat while the beaded tendrils keep it from feeling severe. Slightly formal. Not stiff.
19. Bead-Wrapped Bantu Knots with Cornrow Feed-Ins
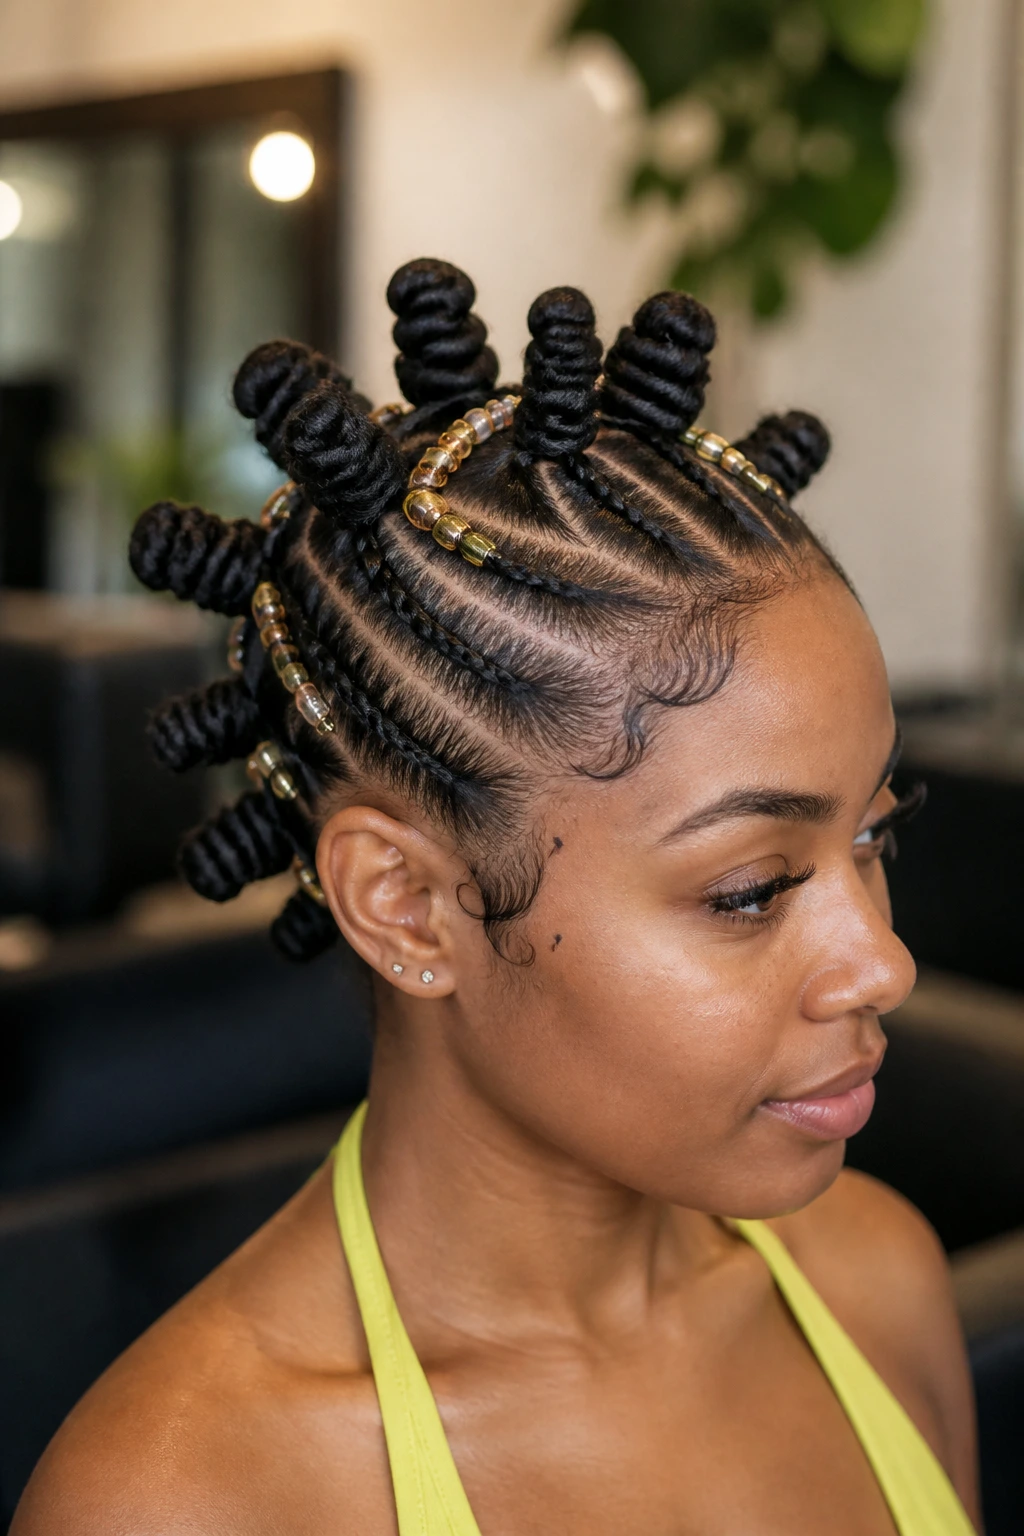
Bantu knots have a strong, sculptural shape already. Feed-in cornrows leading into the knots give the style a cleaner base, and beads on those feed-ins add just enough detail to keep the look from feeling flat.
The beads should live on the braids that feed into the knots, not on the knots themselves. That keeps the round shape of each knot crisp. A few small beads near the ends of the braids make the whole set feel more finished, especially when the knots are even in size and placed symmetrically.
This style reads polished because it has structure from front to back. The rows pull the eye inward. The knots hold the form. The beads finish the line.
20. Bob-Length Flat Twists with Ivory Beads
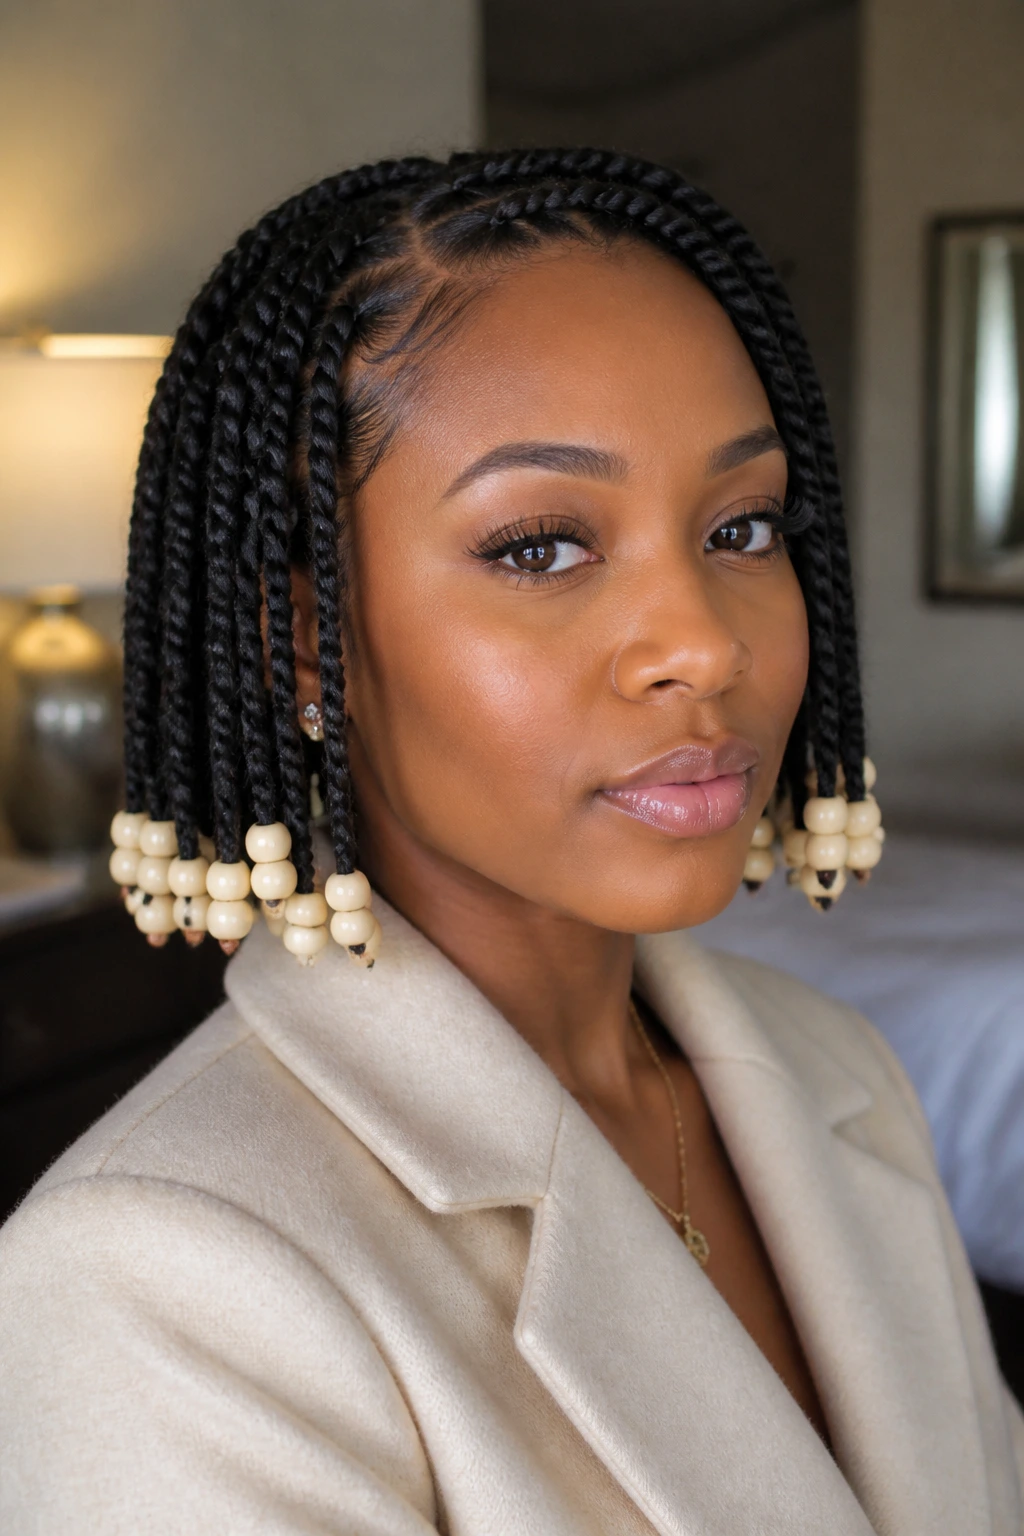
Flat twists in bob length have a neat, compact look that works beautifully with ivory beads. Ivory softens the edges in a way that still feels clean, and the shorter length keeps the beads from getting too heavy.
The braid line sits close to the scalp, which gives the style a tidy base. The ivory beads then mark the ends with a soft, light finish. I like this option when you want something polished but not flashy. It can sit under a coat collar, frame the jaw, and still look intentional when the hair moves.
A short style like this benefits from repetition. Keep the bead size the same across all twists, or at least close enough that the eye reads one pattern. Messy symmetry is the fastest way to lose the polished effect.
What Makes Beads Change the Whole Shape of Braids, Twists, and Locs
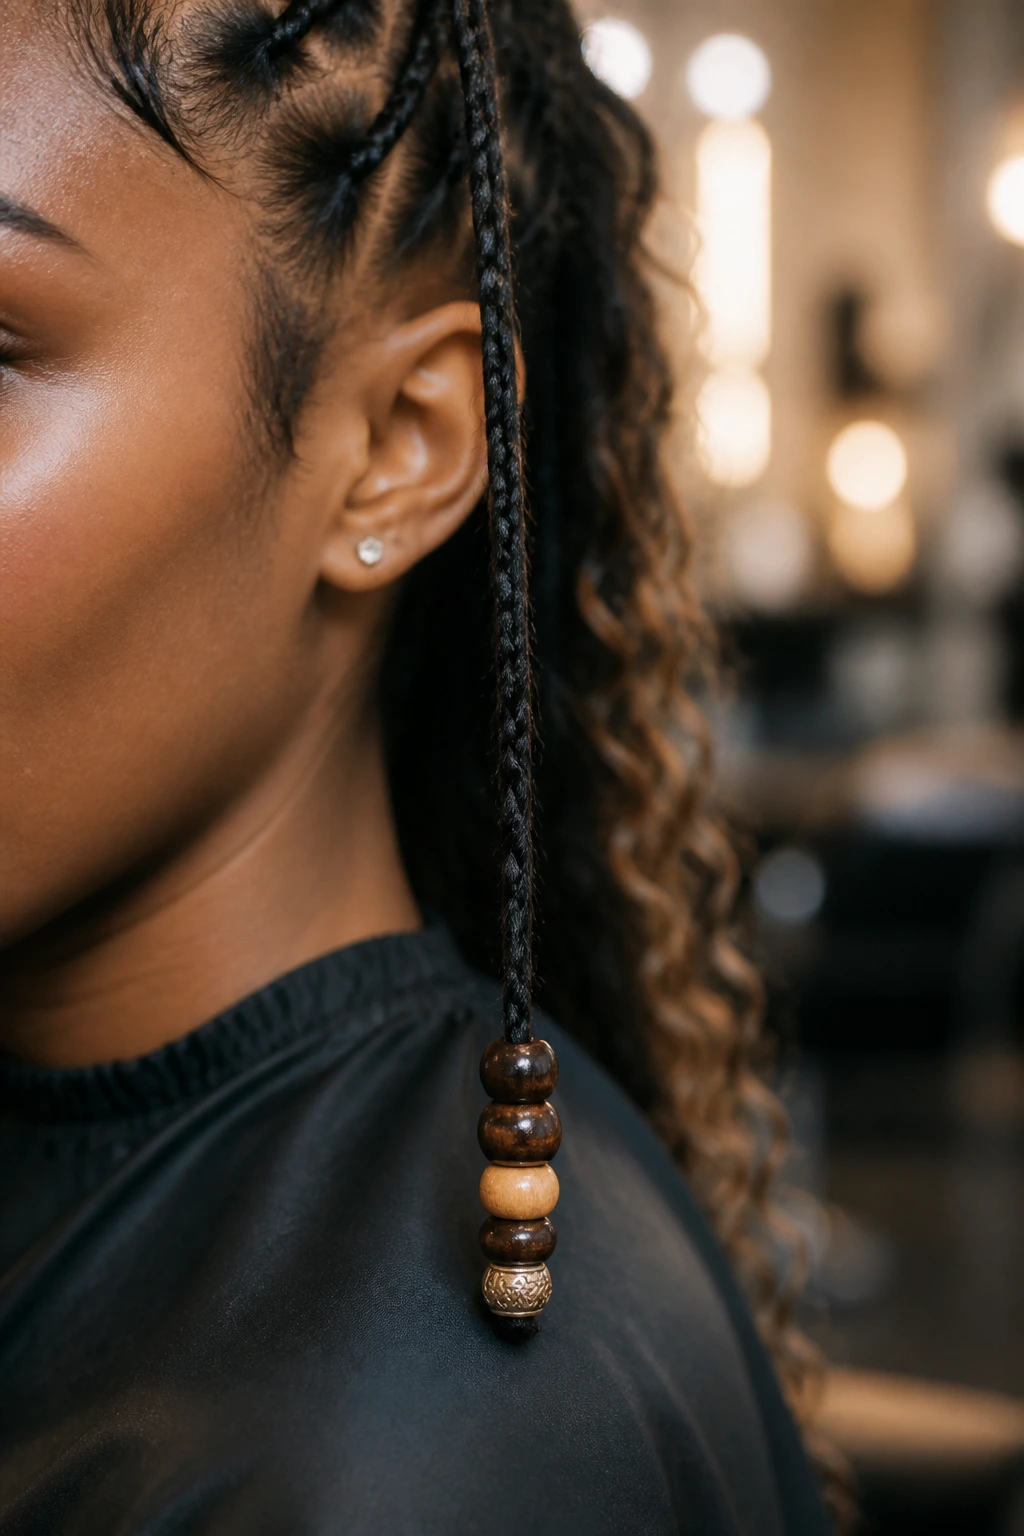
Beads do more than decorate the ends. They change the weight of the style, the line of the silhouette, and the way the hair moves when you walk. A braid without beads can fall straight and disappear into the rest of the hair. Add a bead, and the end becomes a stopping point. The eye notices where the strand ends, which makes the whole style feel more intentional.
That matters most with braids, twists, and locs because these styles already rely on line and texture. A clean part can look unfinished if the ends are ragged. A twist can look casual if it has no finish. Locs can feel heavy if there’s no accent to break the block of color. Beads solve that by giving the eye a clear endpoint.
The material matters more than people think. Clear beads let the hair texture stay visible. Pearl and ivory soften the look. Brass and gold sharpen it. Wood pulls it back toward matte, earthy ground. If you pick the wrong finish, the style starts talking in a different accent. Sometimes that works. Often it doesn’t.
Placement is the other half of the equation. Beads near the hairline read louder. Beads at the ends read cleaner. A cluster on one side creates a focal point. A repeated pattern builds symmetry. That’s why the most polished beaded hairstyles usually look measured. Nothing feels accidental.
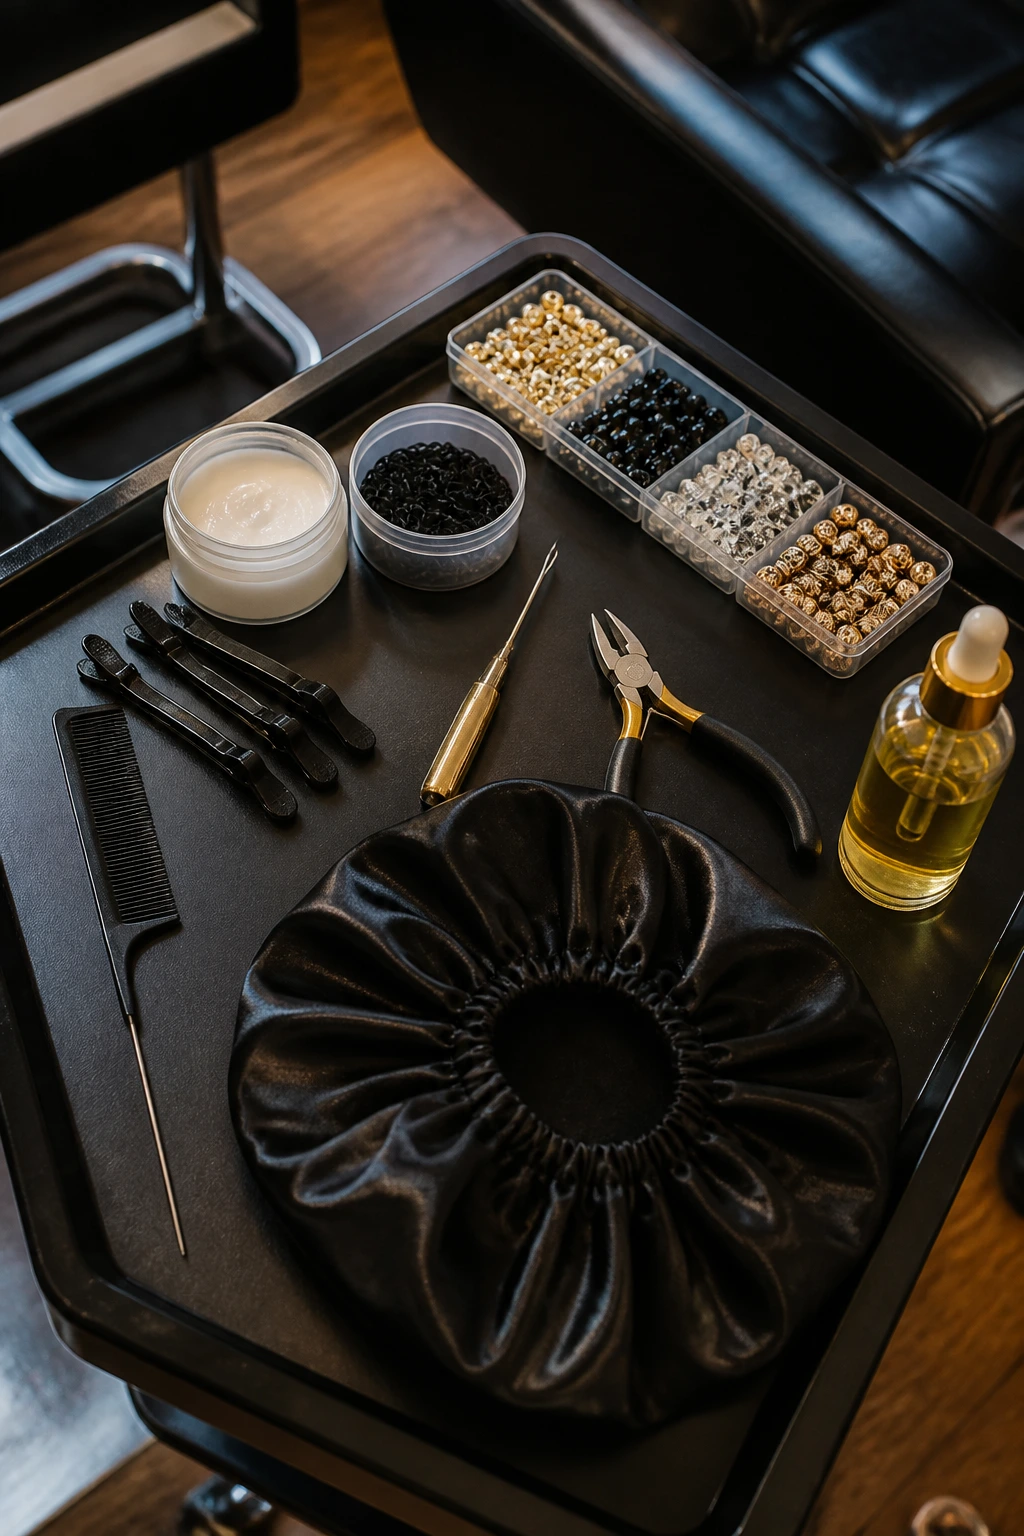
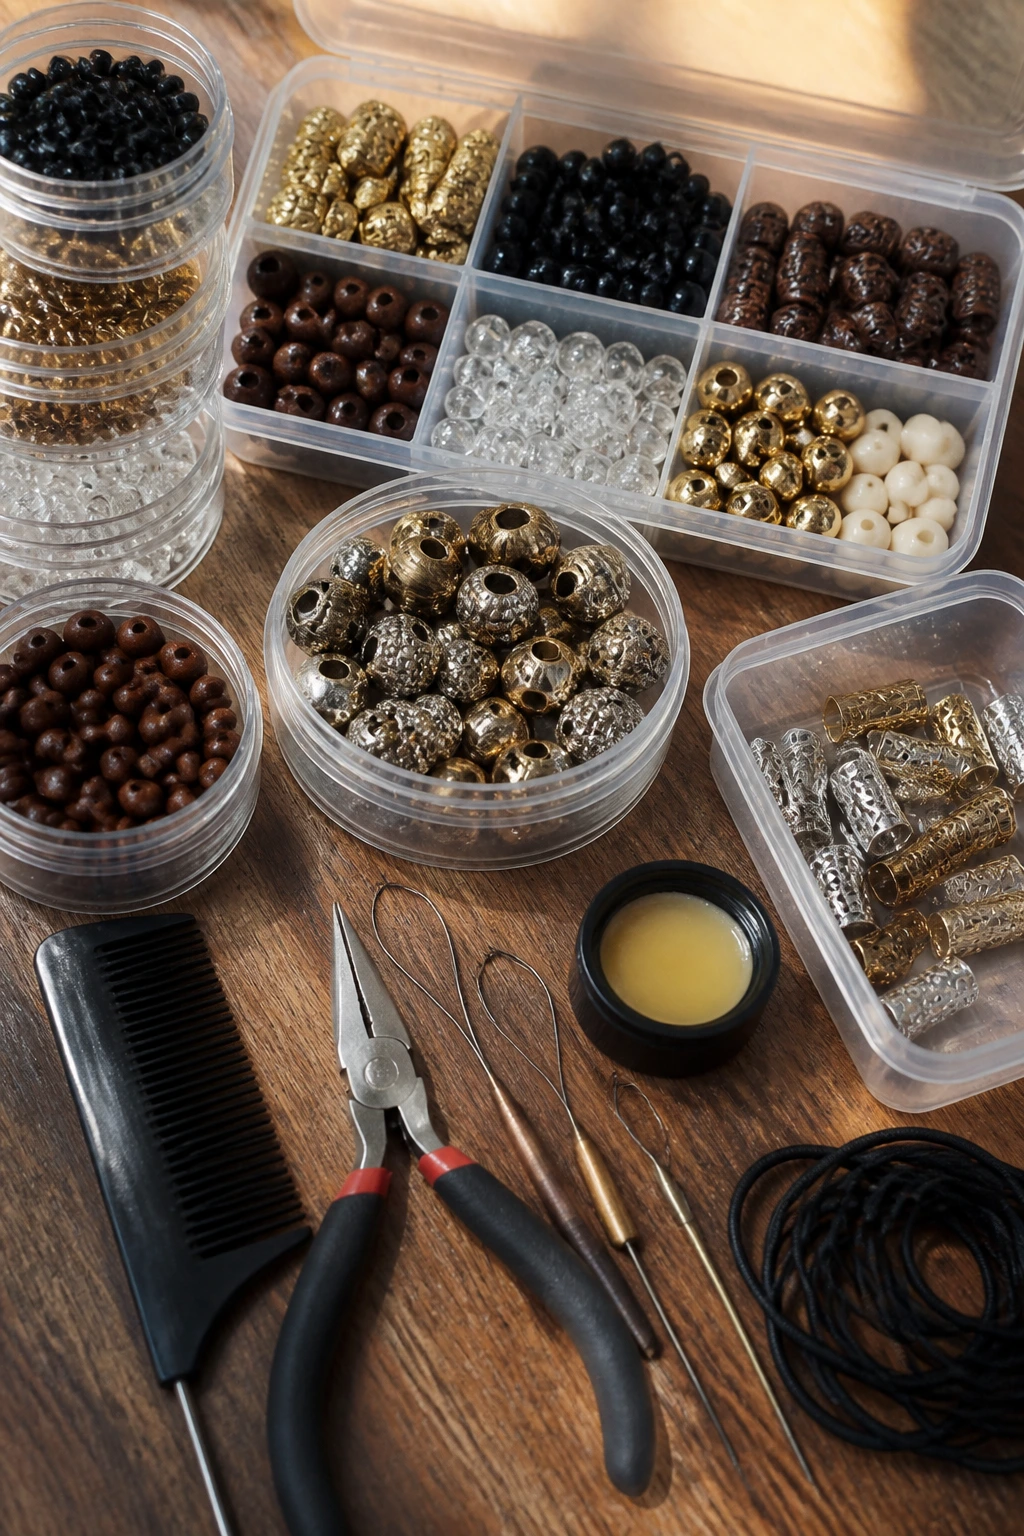
Essential Equipment for These Styles
-
Rat-tail comb: Needed for clean parts and sharp section lines, especially on cornrows, stitch braids, and triangle parts.
-
Sectioning clips: Keep the unused hair out of the way so the parting stays neat while you work.
-
Edge control or light gel: Useful for smoothing the hairline and taming flyaways before you add beads.
-
Small hair elastics: These help anchor the ends before beads slide on, which matters on finer braids and twists.
-
Bead applicator or braid threader: Helpful when the bead holes are small or the braid ends are thick.
-
Hair beads in your chosen finish: Clear, pearl, brass, wood, matte black, glass, or acrylic depending on the style you want.
-
Small pliers: Useful for metal cuffs or spacers that need a gentle squeeze to stay put.
-
Satin bonnet or scarf: Protects the style overnight and keeps beads from rubbing against pillowcases.
-
Light scalp oil: Good for dry parts and a neat-looking scalp, but use a small amount. Too much oil makes the hair look limp.
Smart Shopping and Hair Material Tips
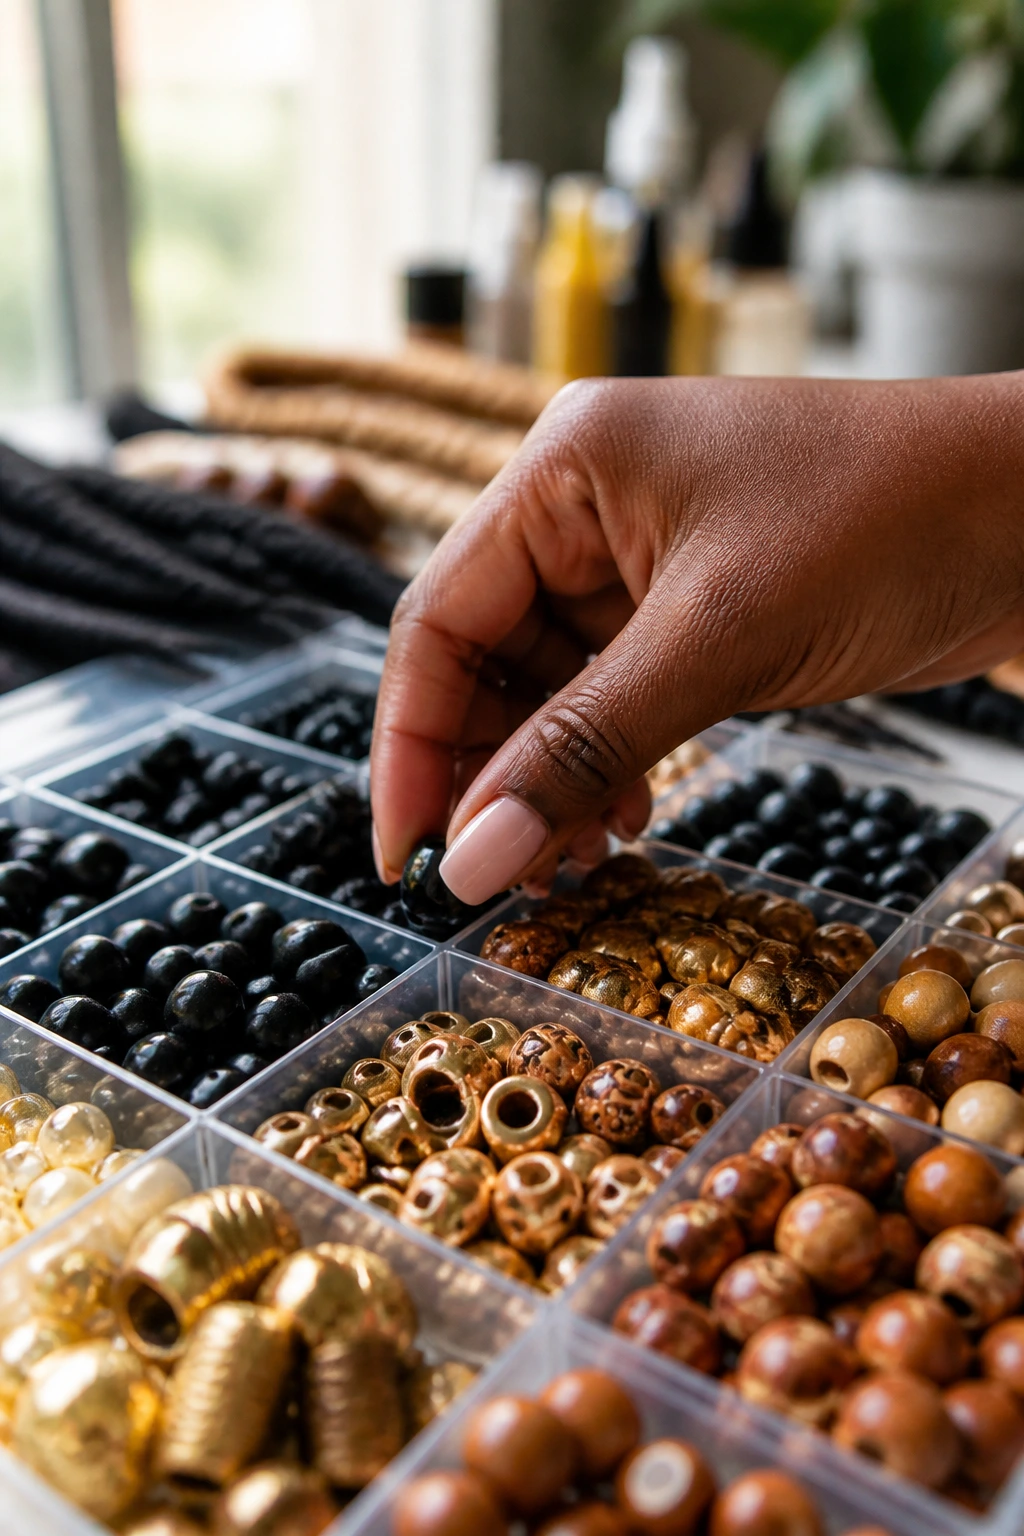
The bead matters more than the label on the bag. Look at the hole size first. If the opening is too narrow for the braid, you’ll force the strand through, fray the ends, and waste time. If it’s too wide, the bead slides around and loses that clean, anchored look. The braid should fit with a little room, not swim in the bead.
Weight is the other big issue. Acrylic and plastic are usually lighter than glass or metal. That makes them easier on fine braids, shorter locs, and delicate edges. Wood sits in the middle and often feels more grounded. Brass and copper can be beautiful, but use them in smaller amounts because heavy metal at the ends can tug more than you expect.
Finish changes the mood. Clear beads are crisp. Pearl beads soften the line. Matte black beads keep the focus on the braid pattern. Smoke, amber, and tortoiseshell finishes add depth without shouting. If you want the style to read polished rather than loud, stick to one finish family and repeat it.
Hair product choice matters too. Thick grease near the roots can make parts look smudged under the beads. A light gel, a clean edge control, and a small amount of scalp oil usually do more for a polished finish than heavy product ever will. Clean parts, dry sections, and carefully chosen beads. That’s the trio.
How to Wear Beaded Styles Without Letting Them Take Over
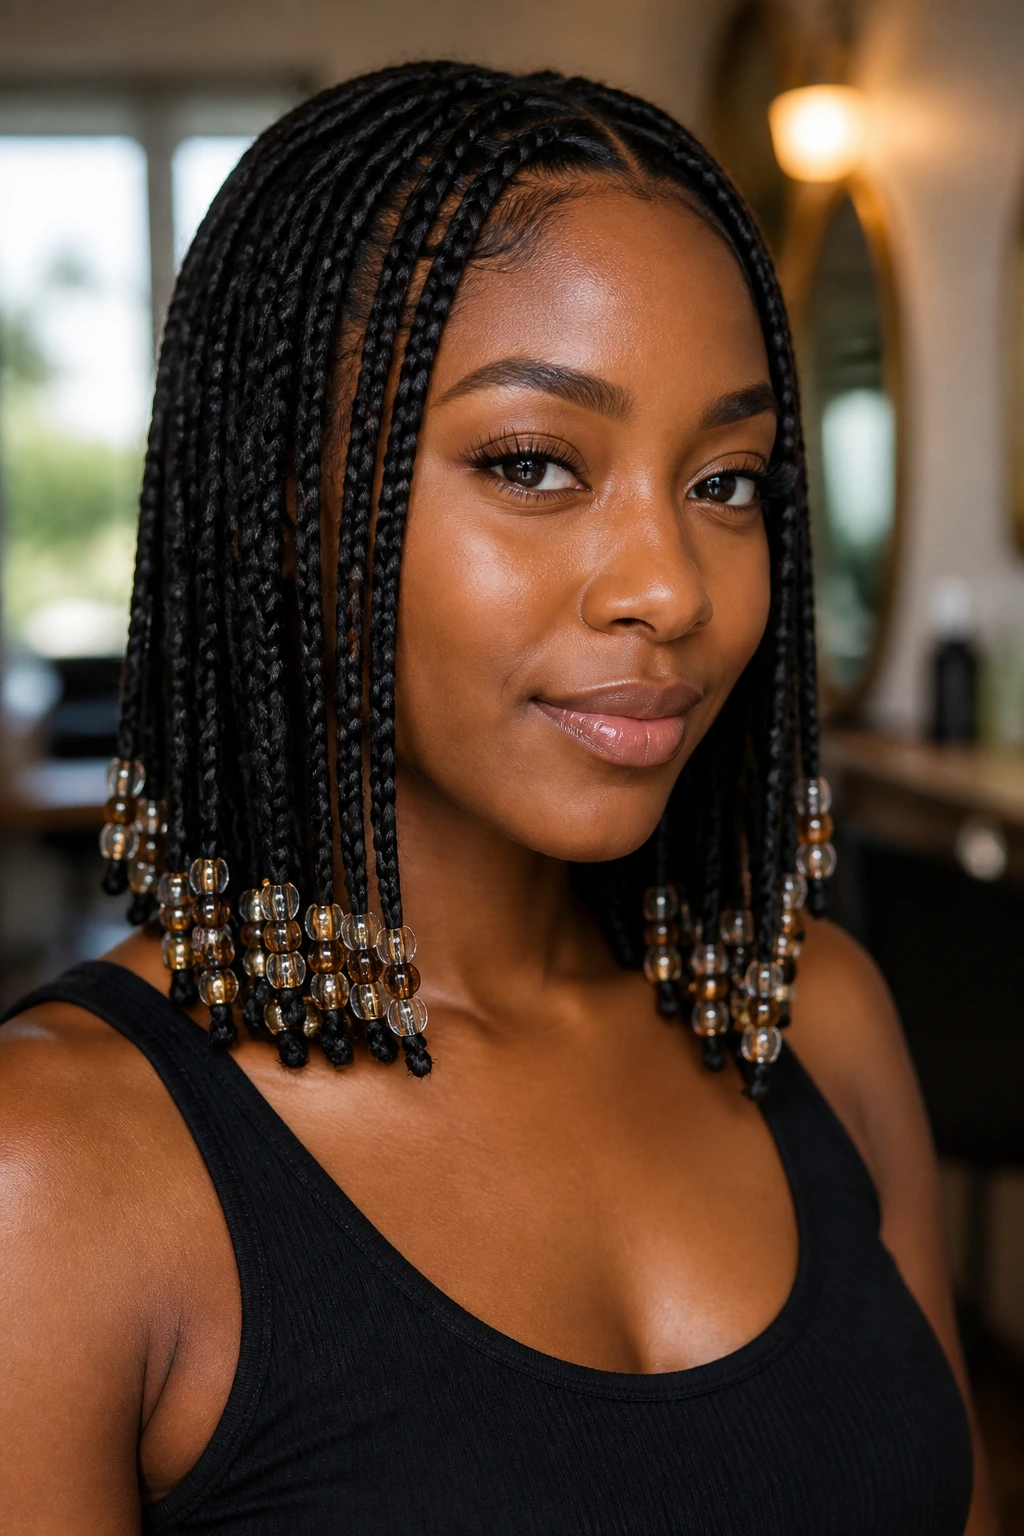
Shape: Keep the bead placement close to the ends unless the style specifically calls for a face-framing row. When beads sit too high, the style starts to feel crowded around the scalp.
Accessories: Match one metal family and repeat it. Gold beads with gold hoops. Brass cuffs with warm-toned earrings. Pearl beads with a clean neckline and little else. The less the accessories argue, the better the whole look lands.
Length and volume: Longer braids and locs can handle larger beads. Shorter styles need smaller pieces so the hair doesn’t look weighed down. If the hair bends under the bead, the bead is too heavy.
Occasion match: Keep the pattern tight for work, formal events, or clean portraits. Save mixed finishes, stacked bead rows, and bolder colors for days when you want the style to be the focus. A polished look usually comes from one strong idea, not six competing ones.
Additional Tips and Finishers
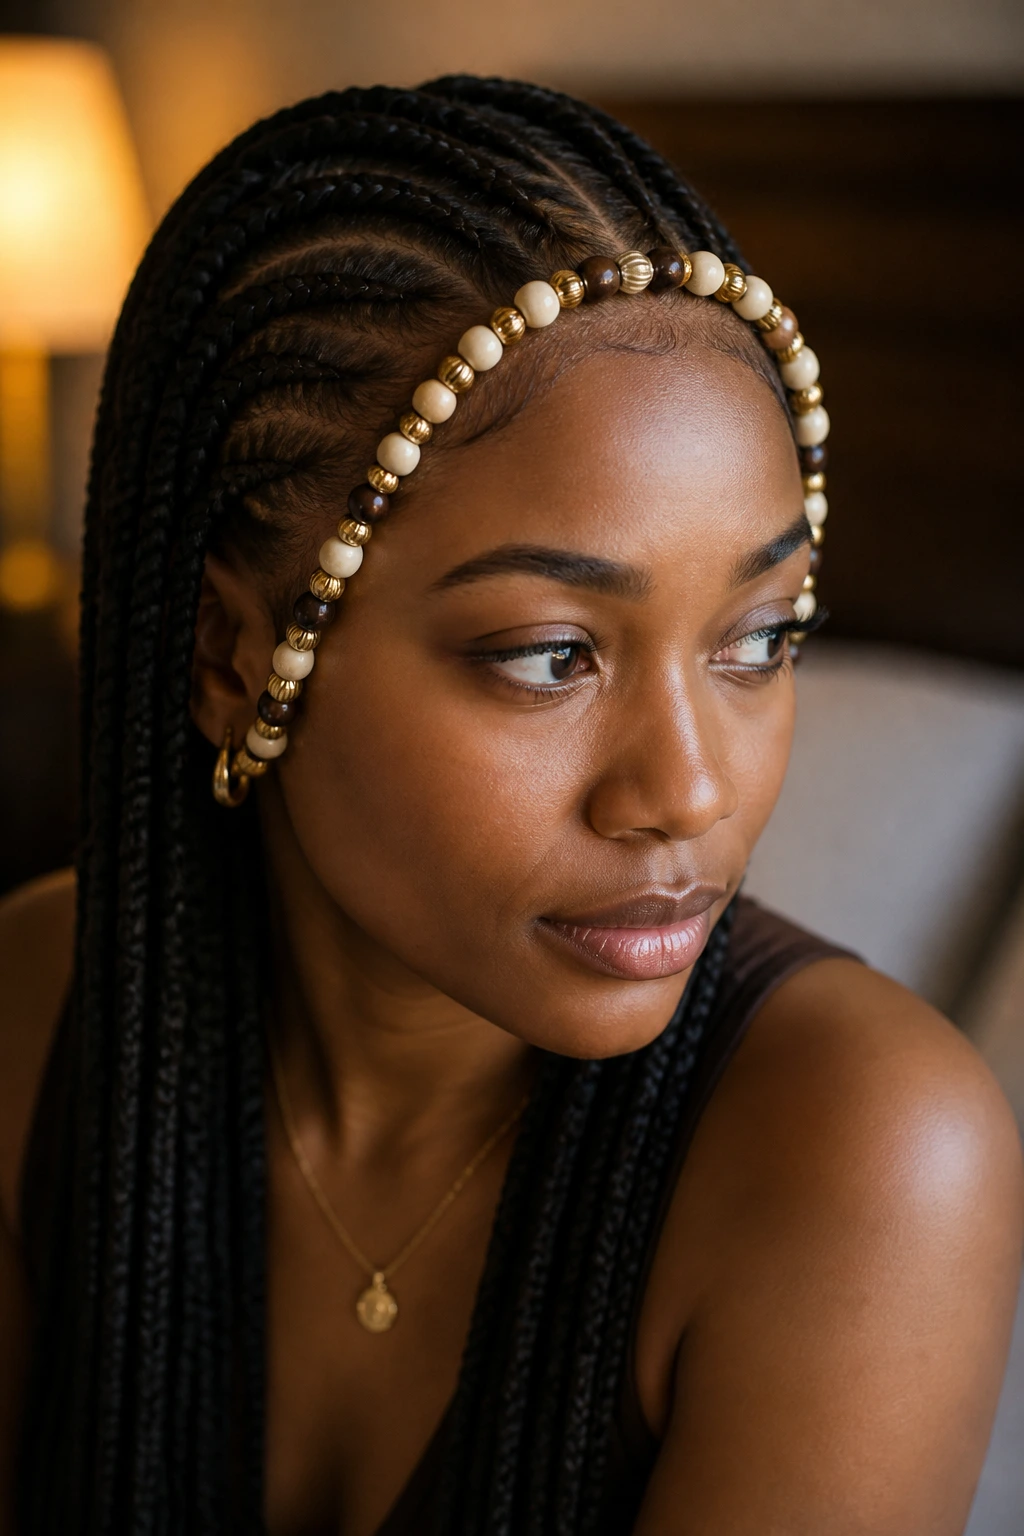
Bead Choice: Repeat the same bead shape three or four times before changing anything. That repetition creates a rhythm the eye can follow, and the style reads neater right away.
Customization: If you want a softer finish, mix one matte bead with one clear bead on separate strands rather than stacking them on the same braid. It gives texture without visual clutter.
Serving Suggestions: Keep the hairline crisp, then let one or two beads sit where they catch light near the cheek or collarbone. That tiny placement shift changes the whole feel of the style.
Make-It-Yours: Fine hair usually does better with lighter acrylic or clear plastic beads. Thick braids and locs can handle wood or brass. If your scalp is sensitive, skip heavy pieces near the temple and keep the accents lower.
Common Mistakes to Avoid with Beaded Styles
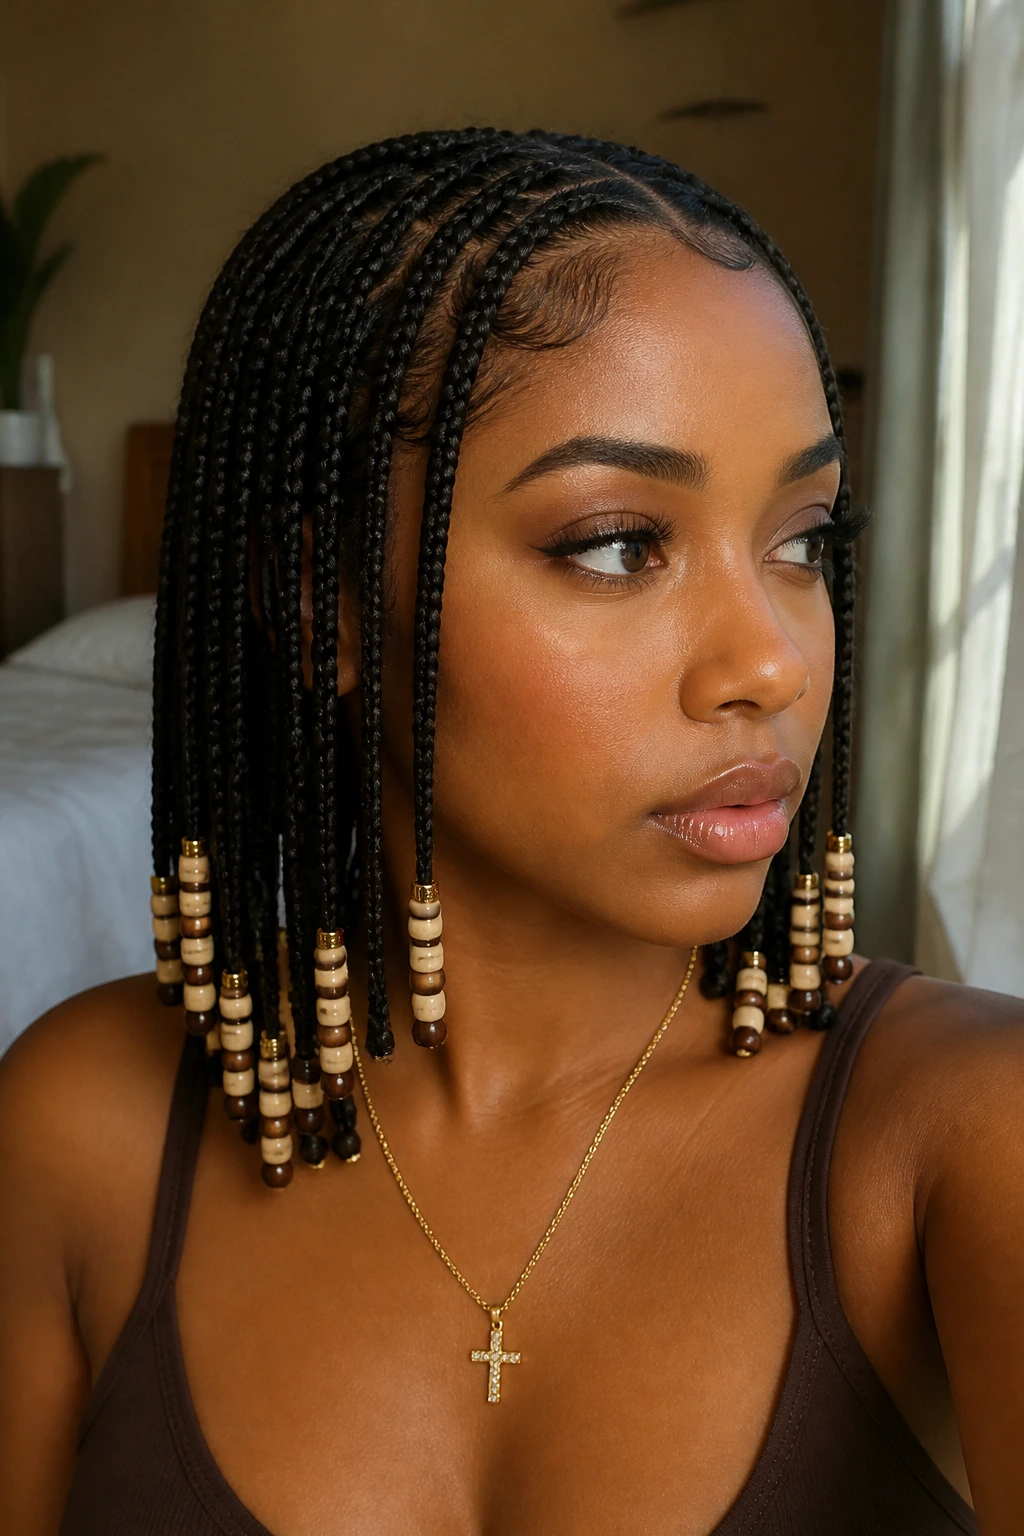
Using beads that are too heavy for the braid size. The braid starts sagging, the ends pull down, and the style loses its shape. Match the bead to the width of the section, not to your mood in the store.
Crowding the hairline with beads. The face starts looking busy before you even finish the style. Keep most of the bead weight below the ear or at the lower half of the braid unless the design is meant to sit close to the scalp.
Mixing too many finishes at once. Gold, silver, pearl, wood, and acrylic can all live in the same head if there’s a plan. Without a plan, the style reads random. Pick one or two finishes and repeat them.
Letting the beads slip because the ends weren’t secured first. If the braid end is soft or fuzzy, the bead can slide off or sit crooked. A tiny elastic or a tighter finish at the end fixes that problem fast.
Skipping nighttime protection. Beads rub, hair frizzes, and ends catch on pillowcases. A satin scarf or bonnet keeps the style smoother and makes the beads last longer.
Choosing beads with rough inner edges. Snags at the hole can chew up the braid end over time. Run a finger around the inside before you buy them. If it feels sharp, leave them there.
Variations and Adaptations to Try
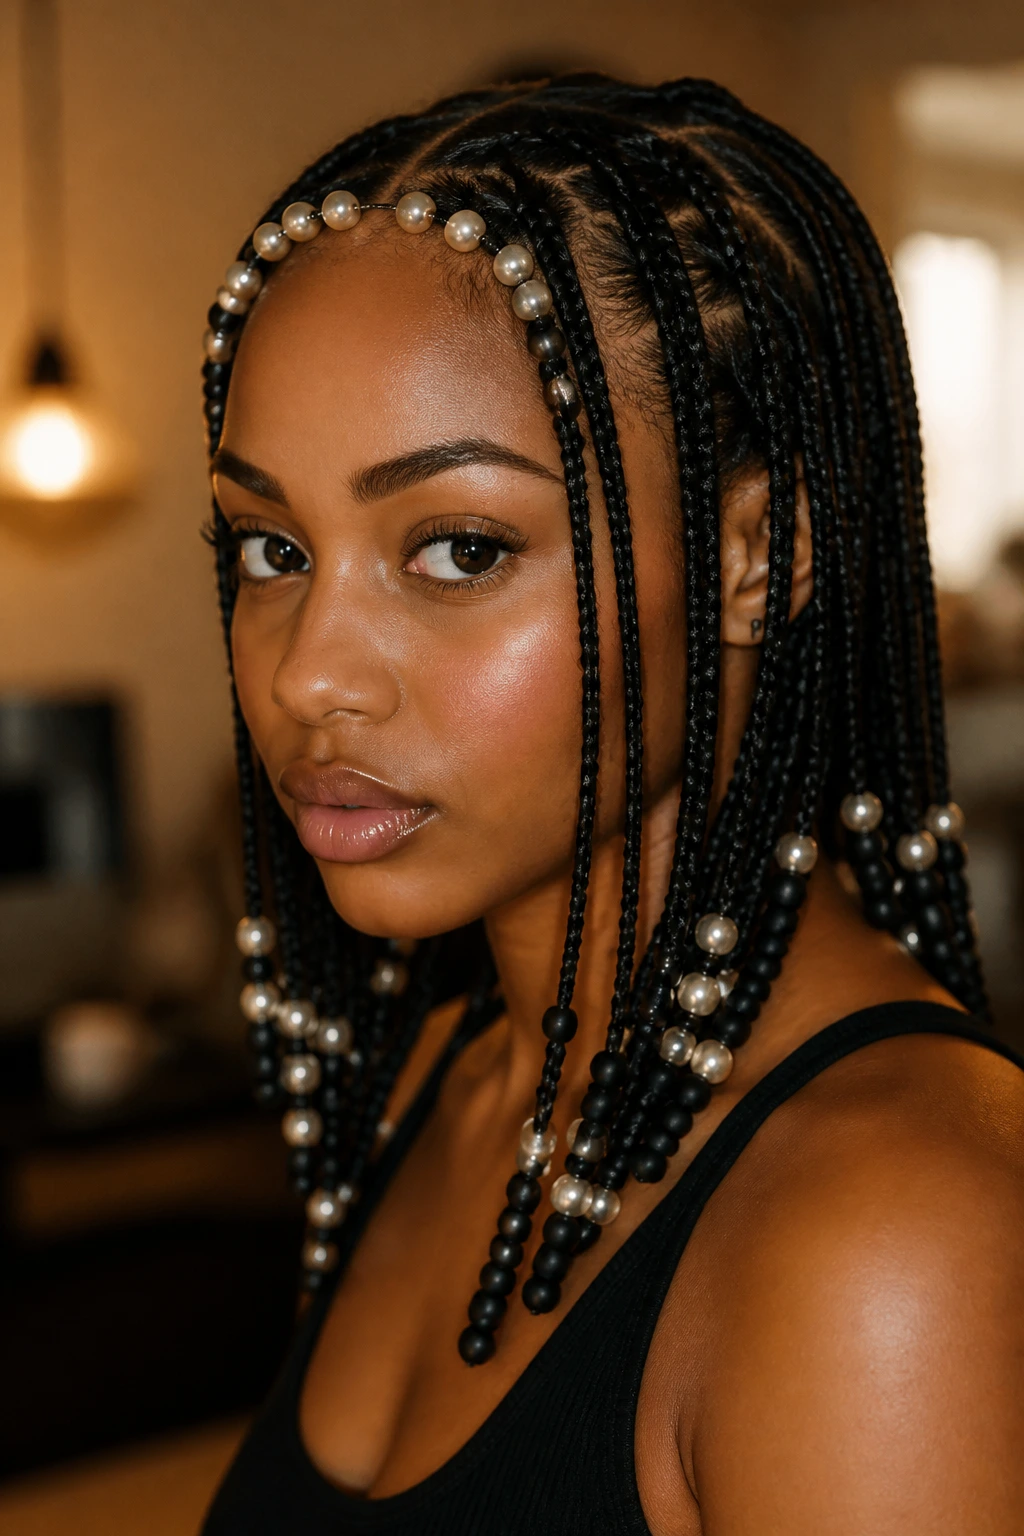
Pearl-Line Finish: Use only pearl or ivory beads from root to tip. This keeps the style soft and dressy, and it works especially well on short braids, flat twists, and crown styles.
Brass and Smoke: Pair brass cuffs or spacers with smoky clear beads. The look feels richer and a little moodier, which suits locs and long twists better than bright colors do.
Matte Minimal Edit: Choose matte black, dark brown, or wood beads and keep the placement sparse. This version is ideal if you want the bead detail to support the style instead of leading it.
Bright Accent Row: Use one line of jewel-toned beads on the front sections only. That gives the style a small burst of color without turning the whole head into a rainbow.
Kid-Friendly Soft Edge: Switch hard acrylic or metal for lighter plastic beads with rounded edges. It’s gentler on the scalp and easier to sleep in, which matters when the style needs to last.
Tools, Beads, and Styling Resources
-
Rat-tail comb — best for crisp parts and clean sectioning.
-
Fine-tooth comb — useful for smoothing edges before braiding or twisting.
-
Section clips — keep the working hair separated and prevent accidental tangles.
-
Small elastics — helpful for securing the braid ends before beads go on.
-
Bead applicator or loop tool — makes bead threading faster on thicker sections.
-
Hair beads in several hole sizes — useful if you like to switch between braids, twists, and locs.
-
Small pliers — optional, but handy for cuffs and metal spacers.
-
Satin bonnet or scarf — helps the style stay neat overnight.
-
Light hold gel or edge control — keeps flyaways down without making the hair stiff.
-
Hand mirror and bright light — essential for checking symmetry from the back and sides.
Maintenance, Re-Setting, and Night Care
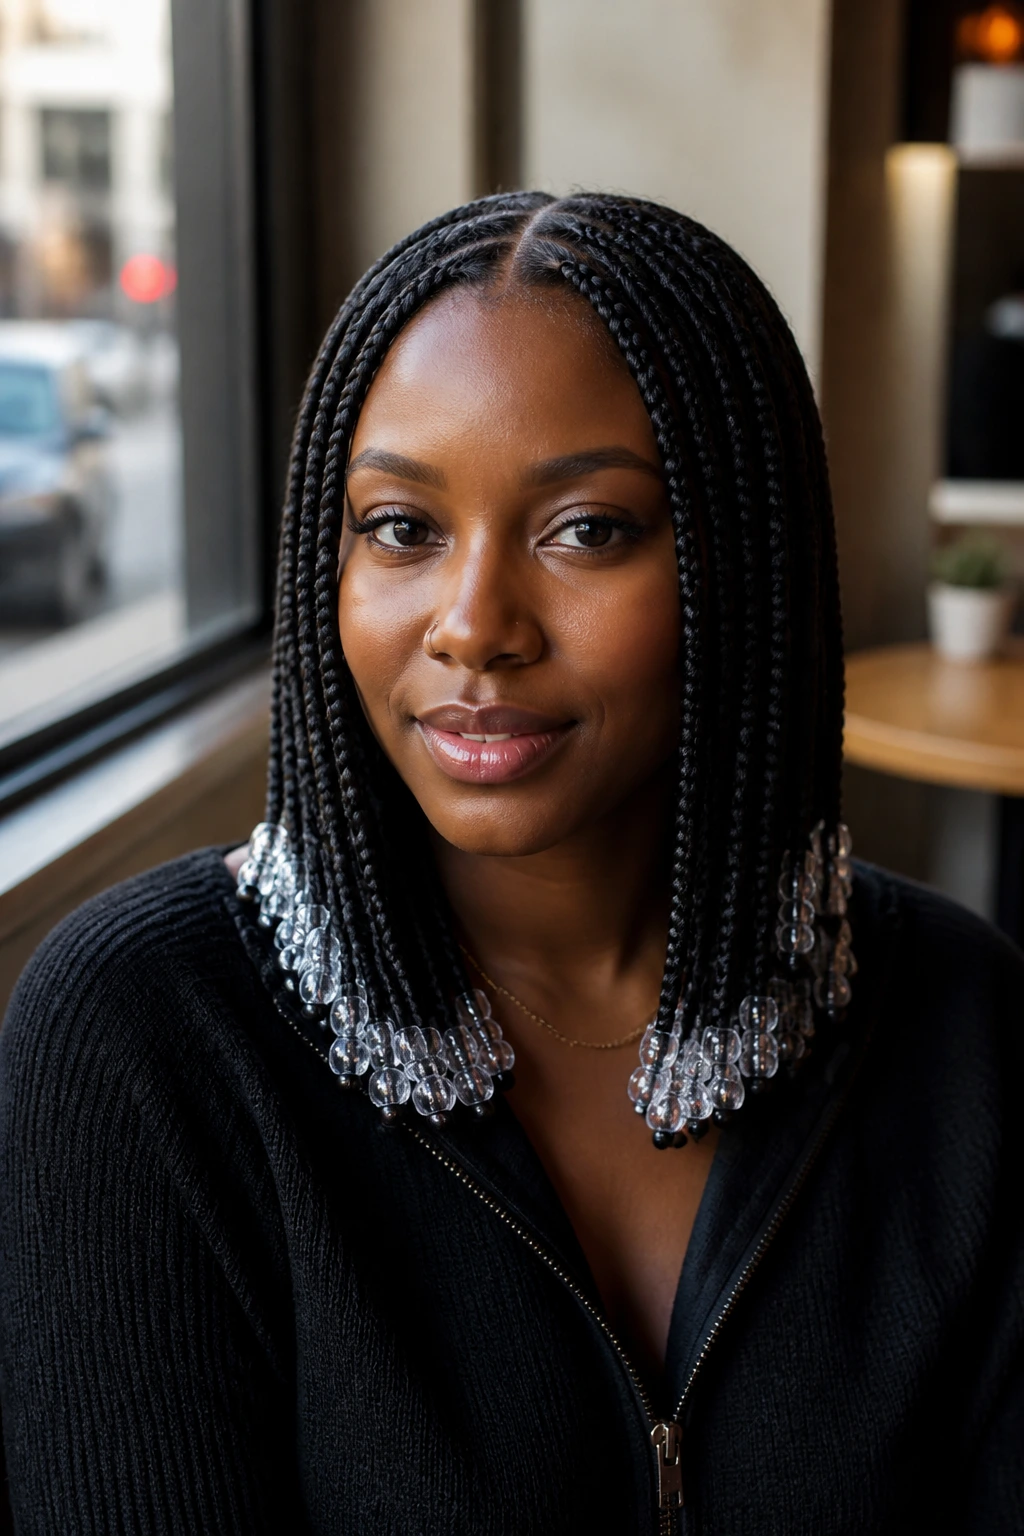
Most beaded styles hold their polished look for about two to six weeks, depending on the braid type, scalp tension, and how much movement the beads get during the day. The style can look fresh longer if the parts stay clean and the beads remain snug. Once the roots start to fuzz or the ends begin to fray, the whole effect shifts.
Night care does a lot of the heavy lifting. A satin bonnet works well for shorter braids and bob lengths. For longer braids or locs with dangling beads, a loose satin scarf wrapped around the perimeter often keeps the ends from tangling. If the beads are noisy or heavy, braid the lengths into a loose ponytail or low wrap before covering them.
Washing depends on the style. If the beads are small and secure, you can cleanse the scalp carefully with diluted shampoo and keep the lengths out of the way. If the beads are heavy, removable, or metal, it’s often smarter to take them off before a full wash. Dry the hair fully before rebeading; damp braid ends can puff and slip.
Every week, check the beads at the ends for looseness. A bead that starts sliding around usually needs a smaller elastic or a tighter knot underneath. If one side looks heavier than the other, fix it early. Small corrections are much easier than rebuilding the whole style.
Frequently Asked Questions
How many beads is too many?
If the beads start drawing attention away from the braid line, you’ve crossed the line. For a polished look, one to three beads per visible section is usually enough. More can work, but the pattern has to stay controlled.
Can beads damage hair?
They can if they’re too heavy, have sharp inner edges, or sit on weak ends. Use smooth beads that fit the braid size, secure the ends first, and remove anything that causes tugging near the scalp.
What bead material is best for fine hair?
Light acrylic or smooth plastic is usually the safer bet. Glass and metal can pull too much weight onto a fine braid, especially if the style is long.
Can I wash my hair with beads in?
Sometimes, yes. Small, secure beads are usually fine for a careful scalp wash. Metal cuffs, loose beads, and heavier pieces are better removed first so they don’t rub, rust, or slip.
How do I keep beads from sliding off the ends?
Secure the end with a tiny elastic first, then thread the bead over it. If the braid is very fine, add a second elastic or a small knot underneath the bead so it has something to grip.
Are beaded hairstyles okay for formal events?
Absolutely, if the finish is clean. Pearl, brass, clear, and matte black beads tend to read more refined than bright novelty colors. Keep the parts sharp and the pattern symmetrical.
Can short braids still look polished with beads?
Yes. Shorter braids often look even sharper because the bead placement stays visible and the shape doesn’t get lost. Just use smaller beads so the style keeps its balance.
What if the beads feel noisy or heavy after a day?
That usually means there are too many, or the material is too dense. Remove a few from the sides first, then check whether the weight feels better. The style should move. It should not announce itself every time you turn your head.
A Clean Finish That Actually Sticks
The best beaded hairstyles do one thing well: they make the braid, twist, or loc look planned from root to end. That comes from a small set of choices made on purpose. Bead size. Material. Placement. Balance. Miss any one of those, and the style starts leaning casual in the wrong way.
Keep the shape clean and the bead story simple. A row of clear beads, a few brass spacers, a pearl finish at the ends, or one sharp bead line on a side braid can do more for a polished look than a whole pile of extras. Once you see how much the finish changes the silhouette, you stop treating beads like an afterthought.
Pick the braid, then pick the bead. That order matters.
