



A middle part can change a wedding hairstyle faster than almost any curl pattern. One clean line down the scalp sharpens the whole look, and suddenly a low bun feels quieter, waves feel more deliberate, and a simple ponytail looks like it belongs under a veil and a pair of earrings that cost more than the flowers.
That line also tells on you. It shows the crown, the hairline, the smoothing at the temples, and whether the finish was rushed or handled with care. A side sweep can hide a lot. A center part doesn’t bother.
That is why wedding middle part hairstyles keep showing up in so many different forms. Some of them are glossy and strict. Some are soft enough to catch a little movement when you turn your head. Some work because the part is barely there; others work because it is the first thing you notice. The good versions all have one thing in common: they make the face look framed, not buried.
Why Wedding Middle Part Hairstyles Work So Well
- The center line gives the face structure: A clean middle part creates a vertical anchor, which keeps soft waves, buns, and ponytails from drifting into mushy territory.
- Veils sit more cleanly with it: A veil comb can tuck right behind the part without fighting a heavy sweep or a puffed crown.
- It plays well with earrings and necklines: Drop earrings, halters, strapless gowns, and square necklines all get more breathing room when the hair splits evenly.
- It works on more hair textures than people expect: Straight, wavy, curly, and coily hair can all wear the same basic shape with a different finish.
- It photographs from the front and the back: A middle part looks crisp in close-up portraits, then still leaves space for a braid, knot, or clipped detail in back.
- It holds up when the day gets long: Once the part is set correctly, the style usually needs less fixing than a loose side-swept style that keeps migrating across the forehead.
There’s a reason stylists reach for a tail comb first. The part is the skeleton. Everything else hangs off it.
1. Sleek Low Chignon With a Razor-Clean Center Part
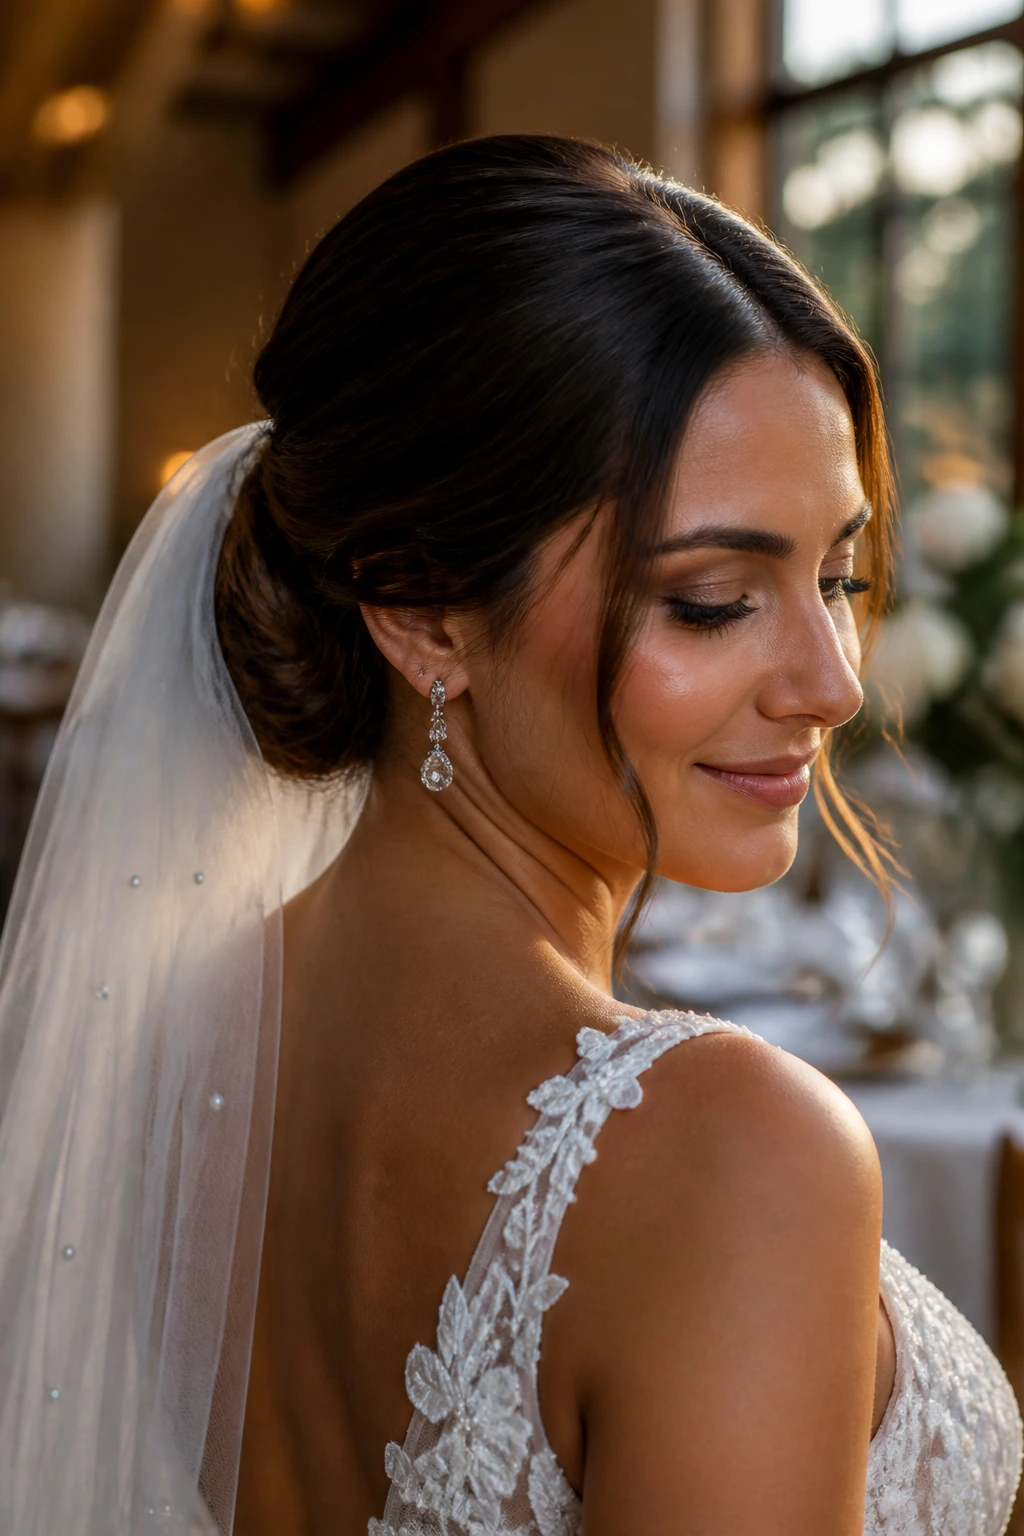
This is the style for someone who wants the front to look almost severe and the back to do the quiet work. The middle part runs straight down the scalp, the crown gets smoothed flat, and the hair folds into a low chignon at the nape that feels calm instead of fussy.
Why It Holds Its Shape So Well
A low chignon stays elegant because the weight sits close to the head. That keeps the silhouette tidy when you turn, hug people, or tilt your head for photos. The center part gives it a formal line, and the bun gives it a soft landing.
I like this look on dresses with open backs, square necklines, and anything with a strong neckline that already does a lot visually. A giant curl pattern would fight that kind of dress. A smooth bun doesn’t.
Key Details That Make It Work
- Part the hair while it’s damp or freshly smoothed so the line stays sharp.
- Blow-dry the crown with a nozzle and a flat brush so the first 2 inches lie flat.
- Build the chignon low at the nape, then tuck the ends under with U-pins instead of stuffing them in all at once.
- Finish with a light shine spray, not a heavy oil, or the part will look greasy in daylight.
Best tip: If the part wants to wander, clip both sides down for 10 minutes while the hair cools. That little pause matters more than another mist of hairspray.
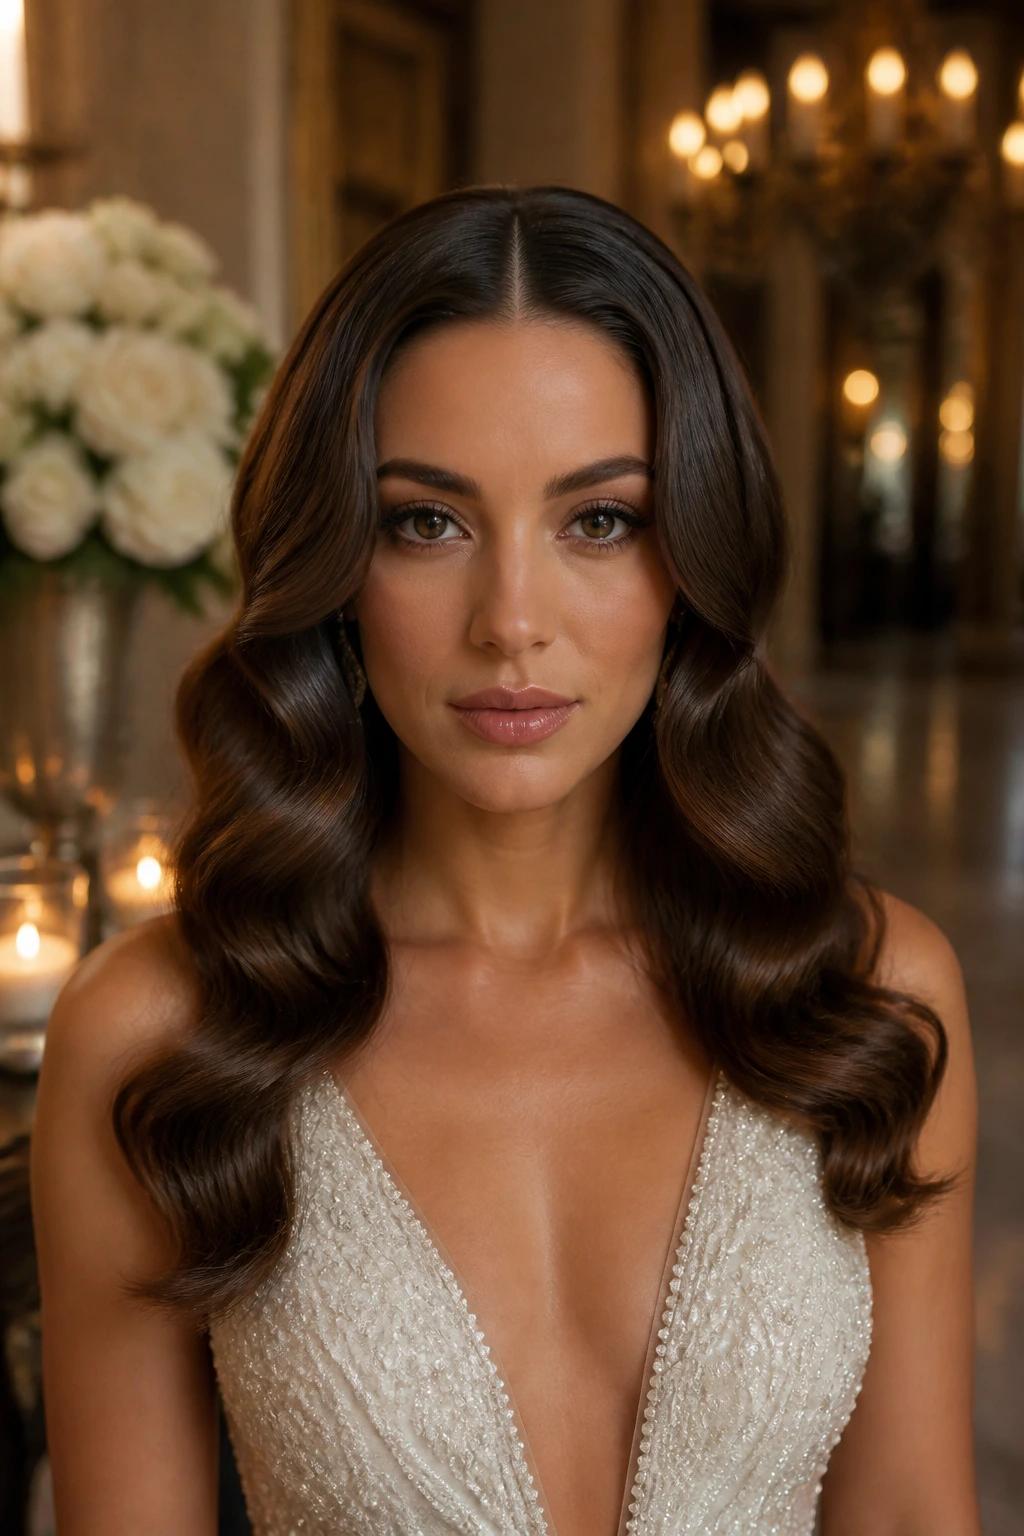
2. Soft Hollywood Waves That Frame a Clean Middle Part
A middle part makes Hollywood waves look more polished than a side sweep does. The symmetry lets the S-shape travel evenly down both sides, so the style reads as lush without sliding into dated prom-hair territory.
The trick is to start the wave below the cheekbone instead of too high at the root. If the bend starts at the top of the head, the style gets puffy. If it starts lower, the part stays crisp and the hair moves like satin when you walk.
I’d pick this for a ballroom, a hotel wedding, or anything with candlelight and polished fabrics. A 1-inch iron or wand works best here, and you want to brush the curls out only after they cool completely. Rush that step and the waves collapse into one fuzzy sheet.
For extra hold, clip the front pieces in place while they cool, then pin one side back behind the ear with a slim accessory. That keeps the center part visible and lets the face breathe a little.
3. Twisted Half-Up With Loose Length
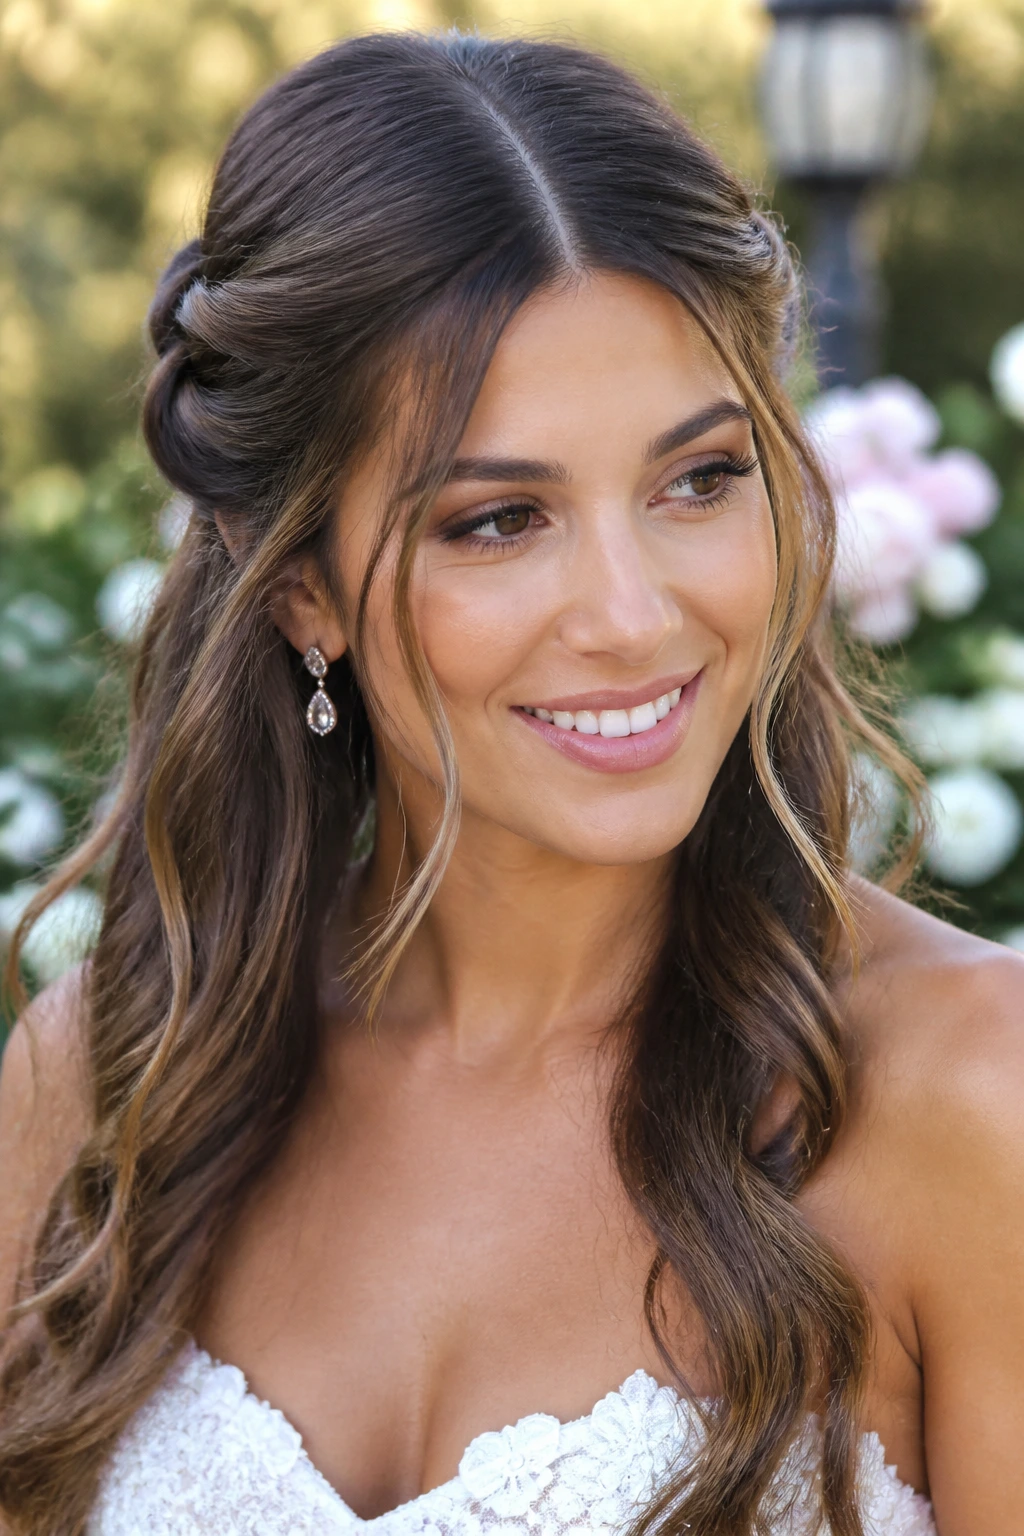
This is the style for the person who wants hair off the shoulders for the ceremony but still wants movement in the photos. The top section gets parted cleanly down the middle, then each side is twisted back and pinned just above the ears, leaving the rest to fall in soft waves.
The appeal is practical as much as pretty. Half-up hair keeps the front from blowing across your face, which matters if you’re outside, and it still gives the stylist room to make the ends look full. A veil clip can sit just under the twists if you want both.
What Makes It Easy to Wear
- Works best on collarbone-length hair or longer.
- A 1.25-inch curling iron gives the loose length enough bend without making it too bouncy.
- Small clear elastics can secure the twists before pinning if the hair is slippery.
- Face-framing pieces should be left out on purpose, not by accident.
The result sits between formal and relaxed. That is a very useful place to be.
4. Braided Crown Into a Low Bun
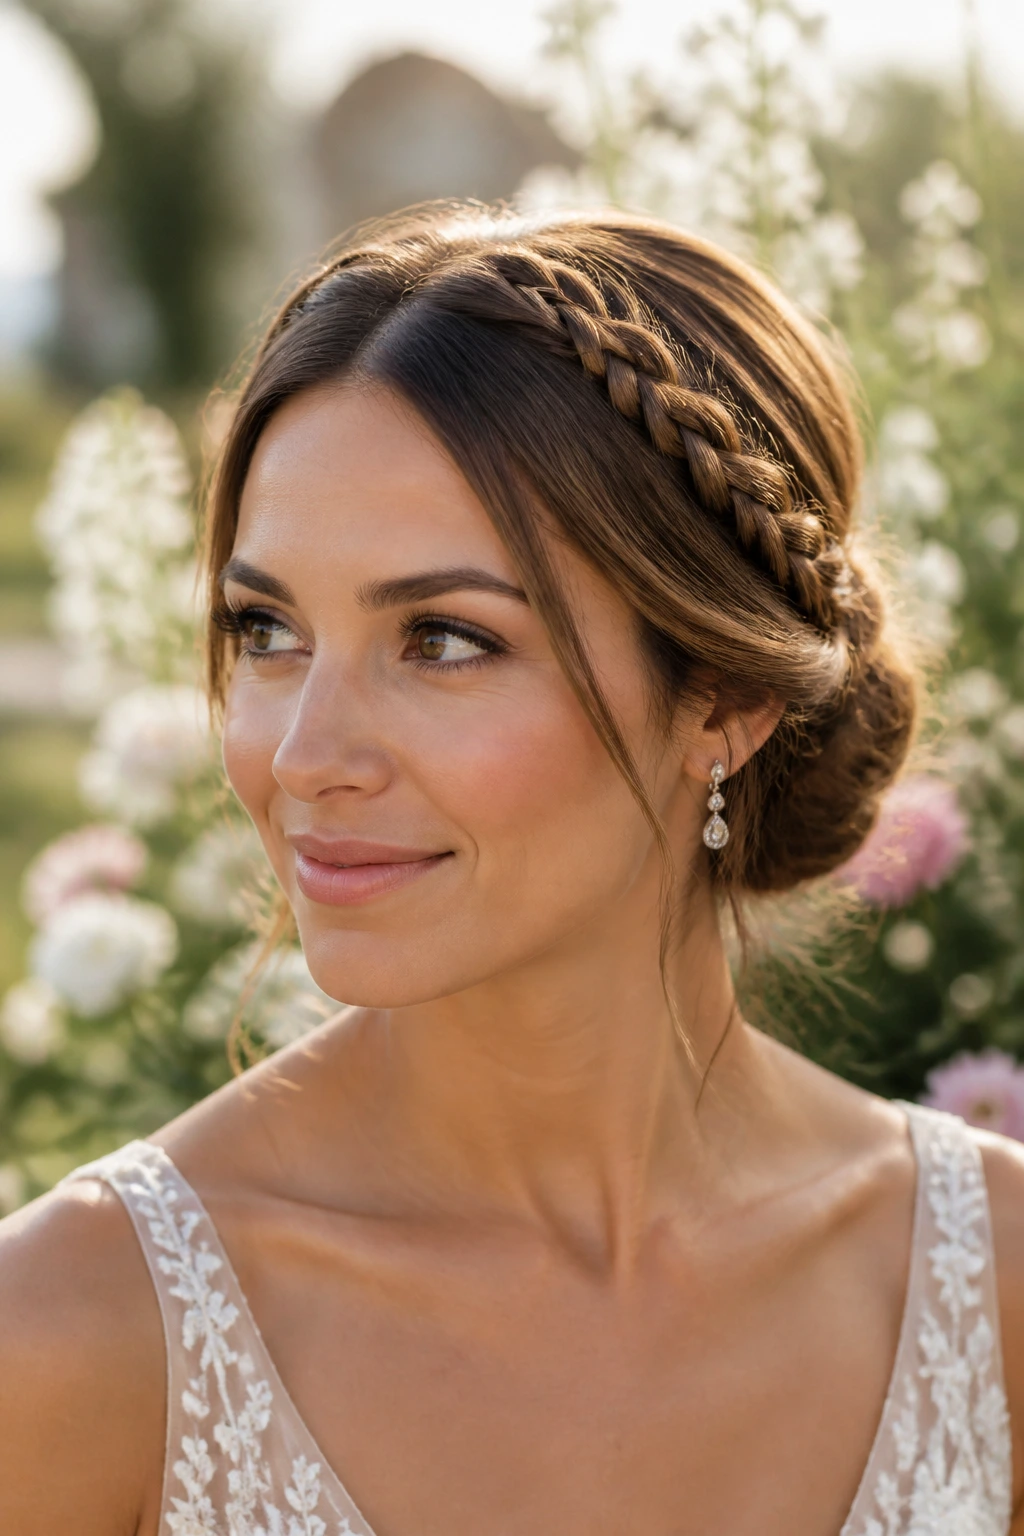
A braided crown gives a middle part more texture at the hairline, and texture helps the part feel less strict. Two slim braids can start near the temples, travel backward along the part, and tuck into a low bun or knot at the back.
This works especially well on thicker hair, because the braid gives the style a little structure before the bun has to do all the work. It also hides a few hidden pins better than a plain smooth knot, which is handy if the day involves dancing, heat, or a long ceremony.
The braid should not be pulled too tight. Tight braids can make the face look pinched, and the whole point here is to keep the look soft around the eyes and cheekbones. Pancake the braid slightly after it’s secured, so the woven section looks full without getting sloppy.
A pearl comb, a few pins, and a low, wrapped bun are enough. Nothing about this look needs to be overloaded.
5. Glass-Hair Straight Length With a Crystal Clip
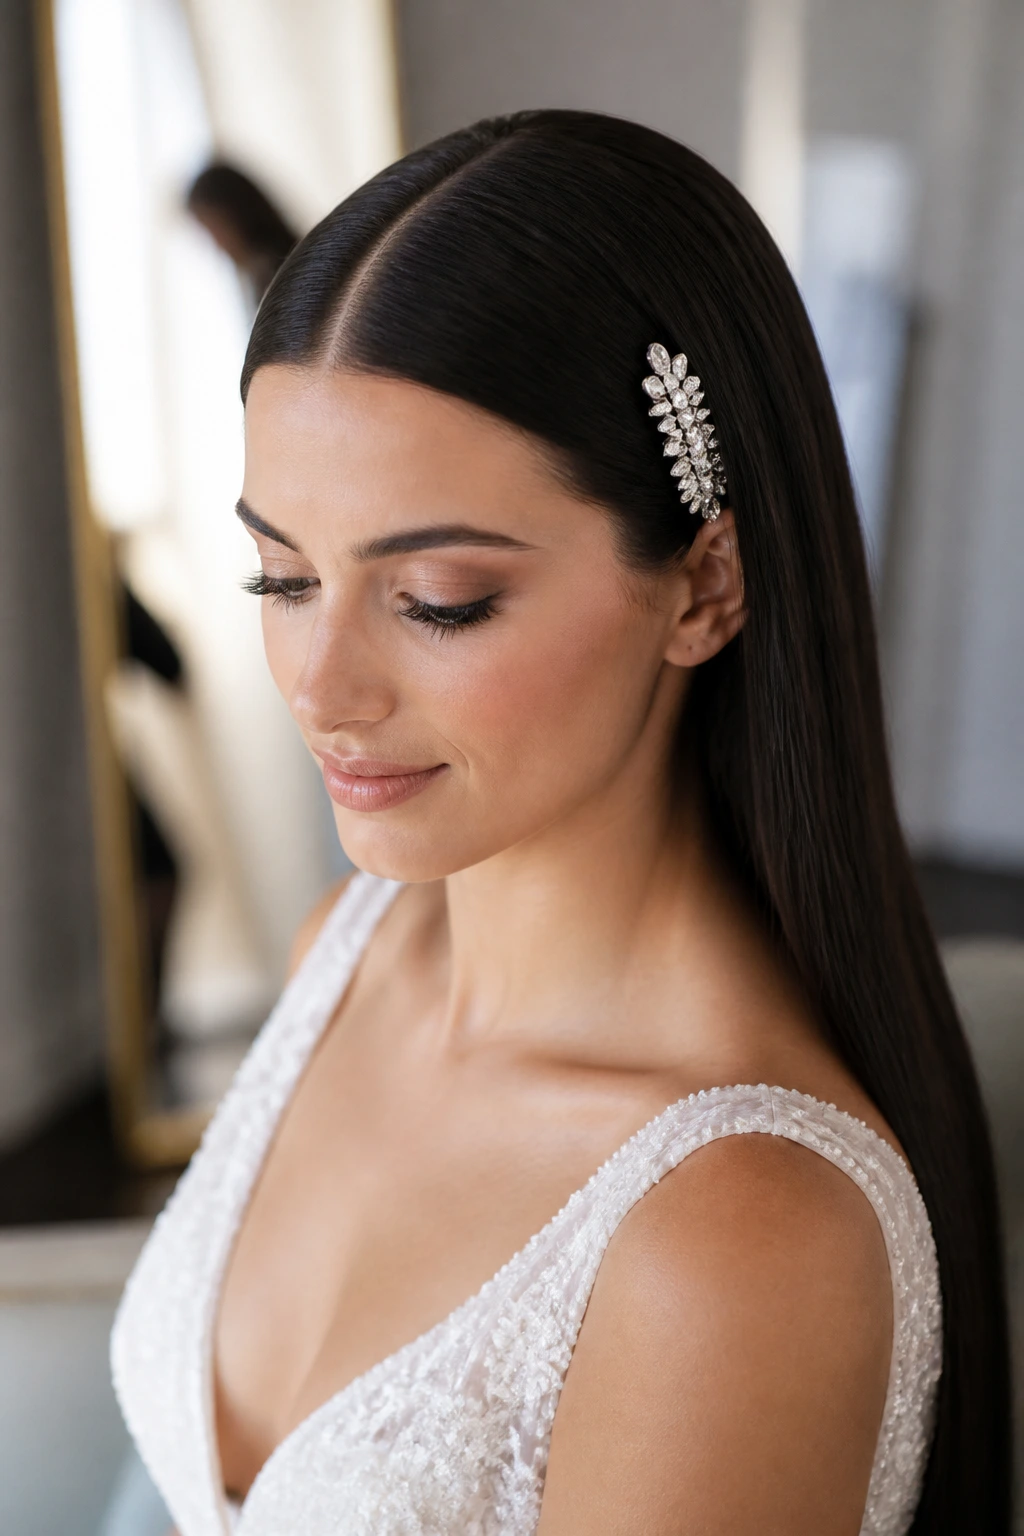
Unlike waves or braids, this style relies on shine and precision. The hair is blown out straight, the middle part is immaculate, and the lengths fall in one sleek column, usually finished with a crystal clip or a small barrette tucked near one temple.
It is a strong choice for modern gowns, sharp tailoring, and brides who like clean lines more than decoration. If the dress already has beading, a lot of texture in the hair can start to feel noisy. Straight hair with a middle part gives the eye somewhere calm to land.
The key is not just straightening. The crown must be smoothed with a brush and nozzle first, then the lengths can be passed through a flat iron in small sections. If you skip the root work, the part looks too casual and the ends look too polished, which is a weird mismatch.
A tiny bit of anti-humidity spray at the top helps, but don’t coat the whole head. You want gloss, not stiffness.
6. Textured French Twist With Airy Crown Volume
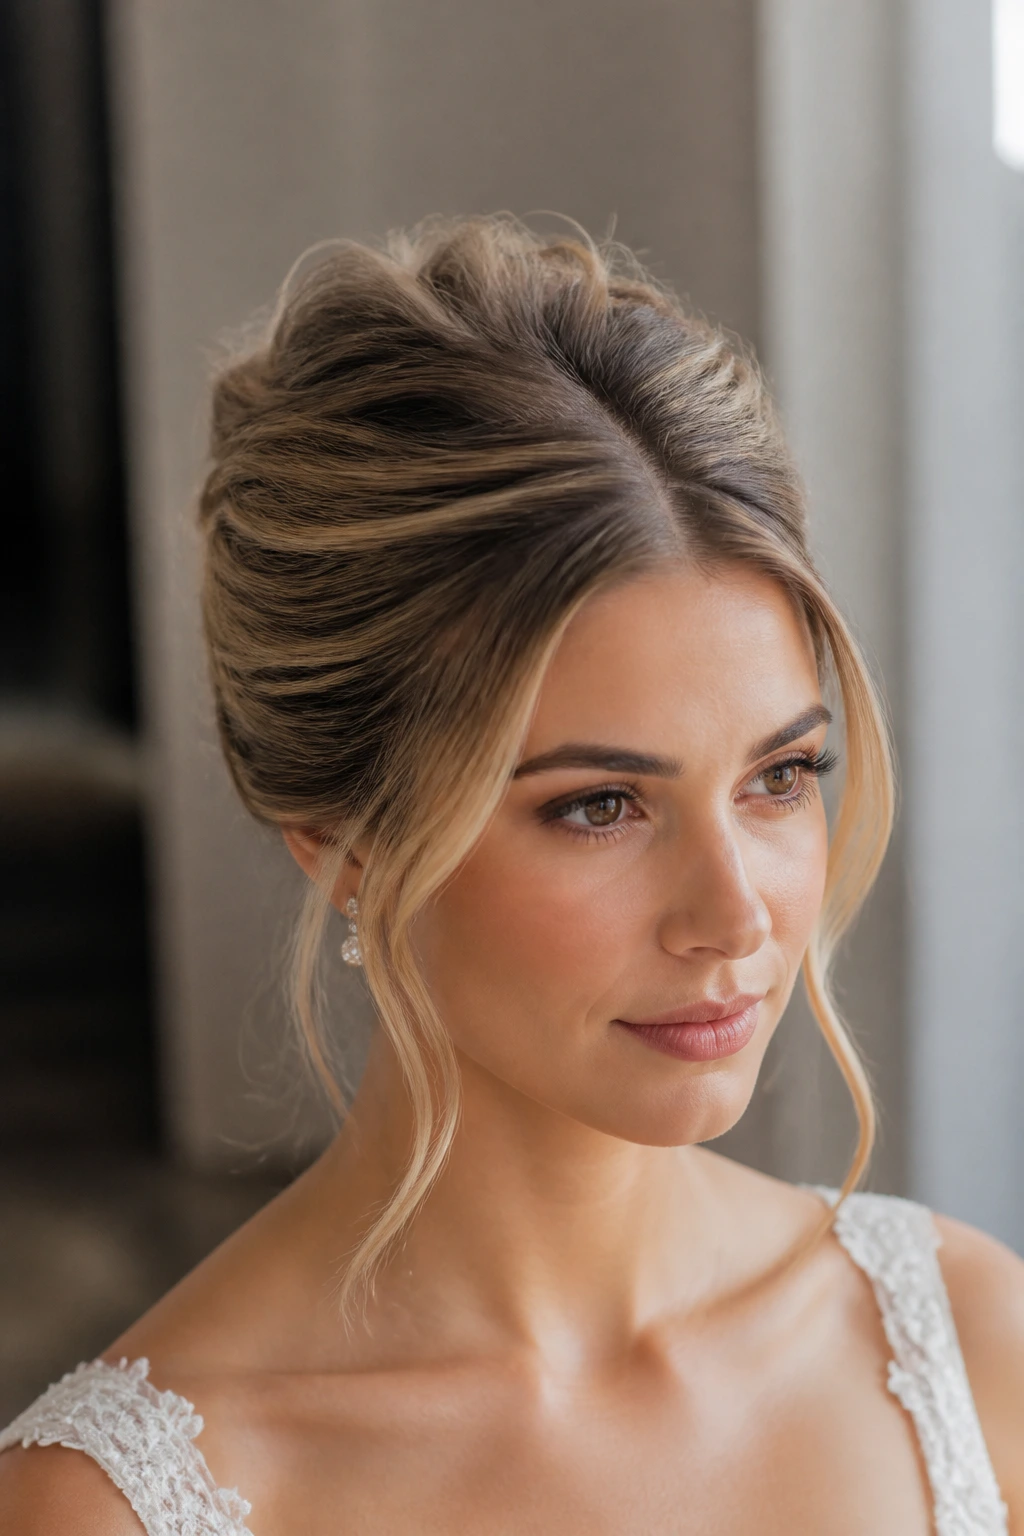
A French twist can feel too severe when it’s pulled flat from the scalp. The middle part softens that. It gives the front a cleaner frame and lets the crown keep a little lift without turning into a helmet.
The version I like starts with a gentle backcomb at the crown, just enough to support the shape. Then the hair is swept back, twisted upward, and pinned vertically so the twist sits snug against the head but doesn’t look trapped there. A few soft pieces around the temples keep the line from going stern.
This is one of those styles that looks expensive because it needs good pinning, not because it needs lots of hair. You can do it on medium-length hair, long hair, or hair with added volume pieces if the front is smooth enough.
How to Wear It Well
- Ask for lift at the crown, not at the part.
- Use U-pins for the twist itself and bobby pins only for the outer edges.
- Keep the nape tidy; that’s where the twist either looks elegant or falls apart.
- A matte pearl pin or narrow comb looks cleaner than a heavy clip.
7. Wrapped Low Ponytail With Sculpted Ends
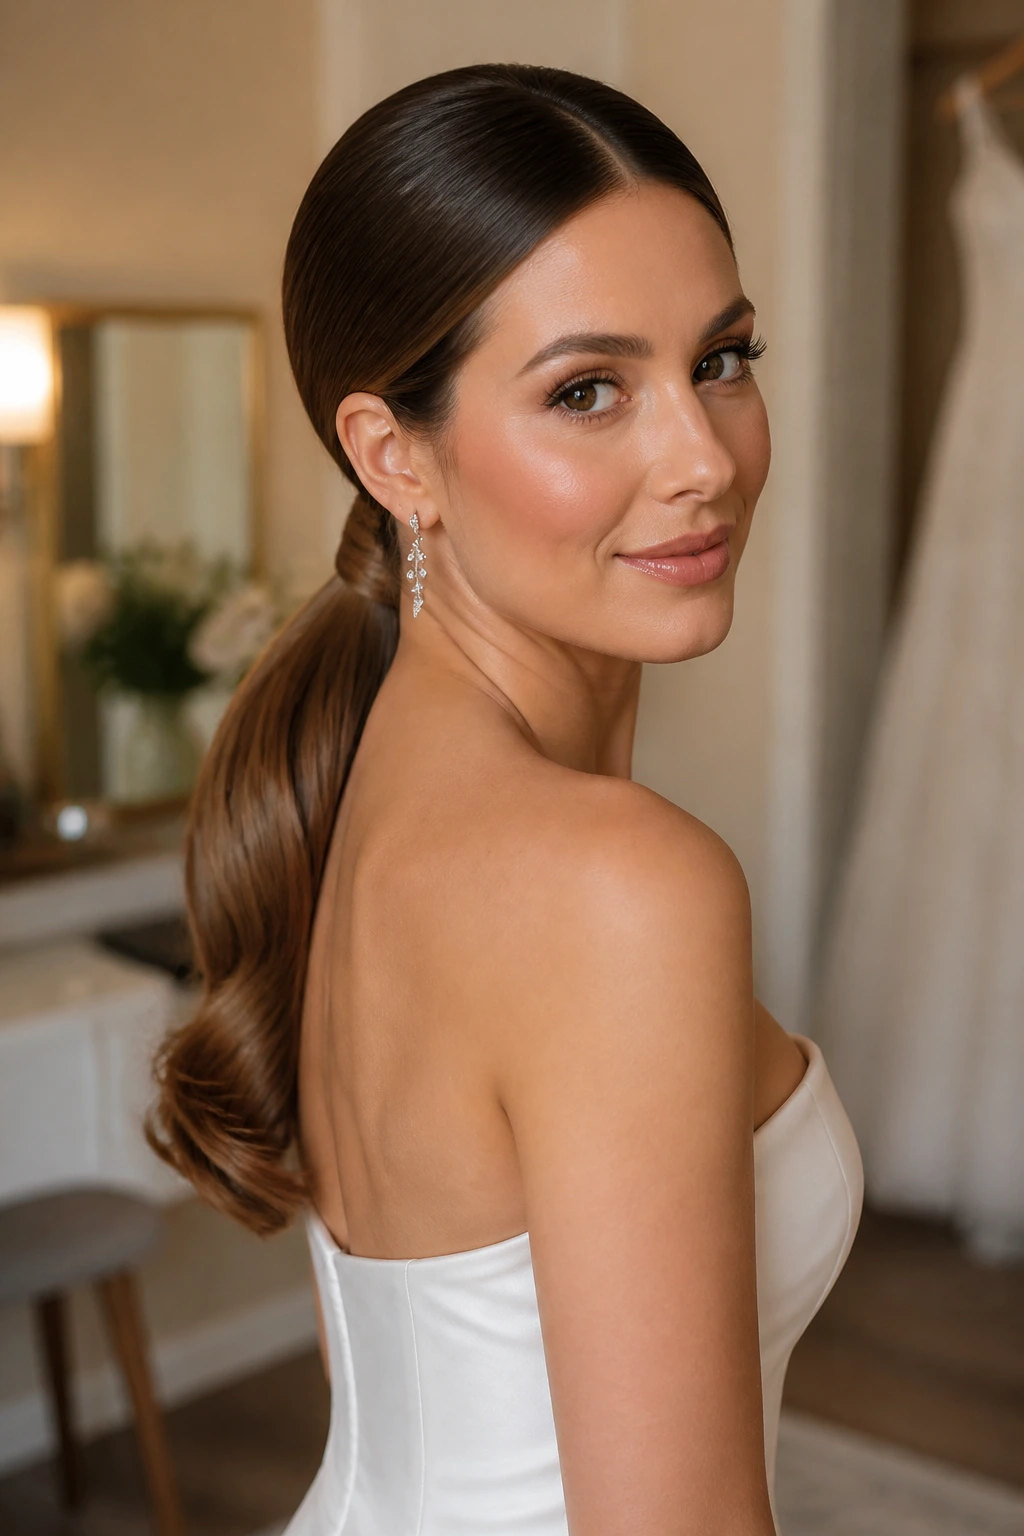
Why does a ponytail sometimes look dressier than an updo? Because the shape can be cleaner. A middle part, a smooth crown, and a wrapped base turn a ponytail into something that belongs at a wedding instead of a gym.
The wrapped low ponytail works when the elastic disappears under a section of hair or a narrow ribbon, so the eye reads the tail itself instead of the fastening. The ends can be straight, curled under, or bent into a loose wave. I prefer a slight bend at the bottom so the tail doesn’t look too blunt in photos.
It’s also a smart choice for long earrings and high necklines. The hair stays out of the way, but the style still has enough shape to feel dressed up. If you want a little softness, leave two thin pieces near the ears and tuck them back once they’ve been curled.
A strong-hold spray at the crown and a flat brush do most of the work. The ponytail itself should move a little. Dead-stiff hair is not the goal.
8. Bubble Ponytail With a Polished Crown
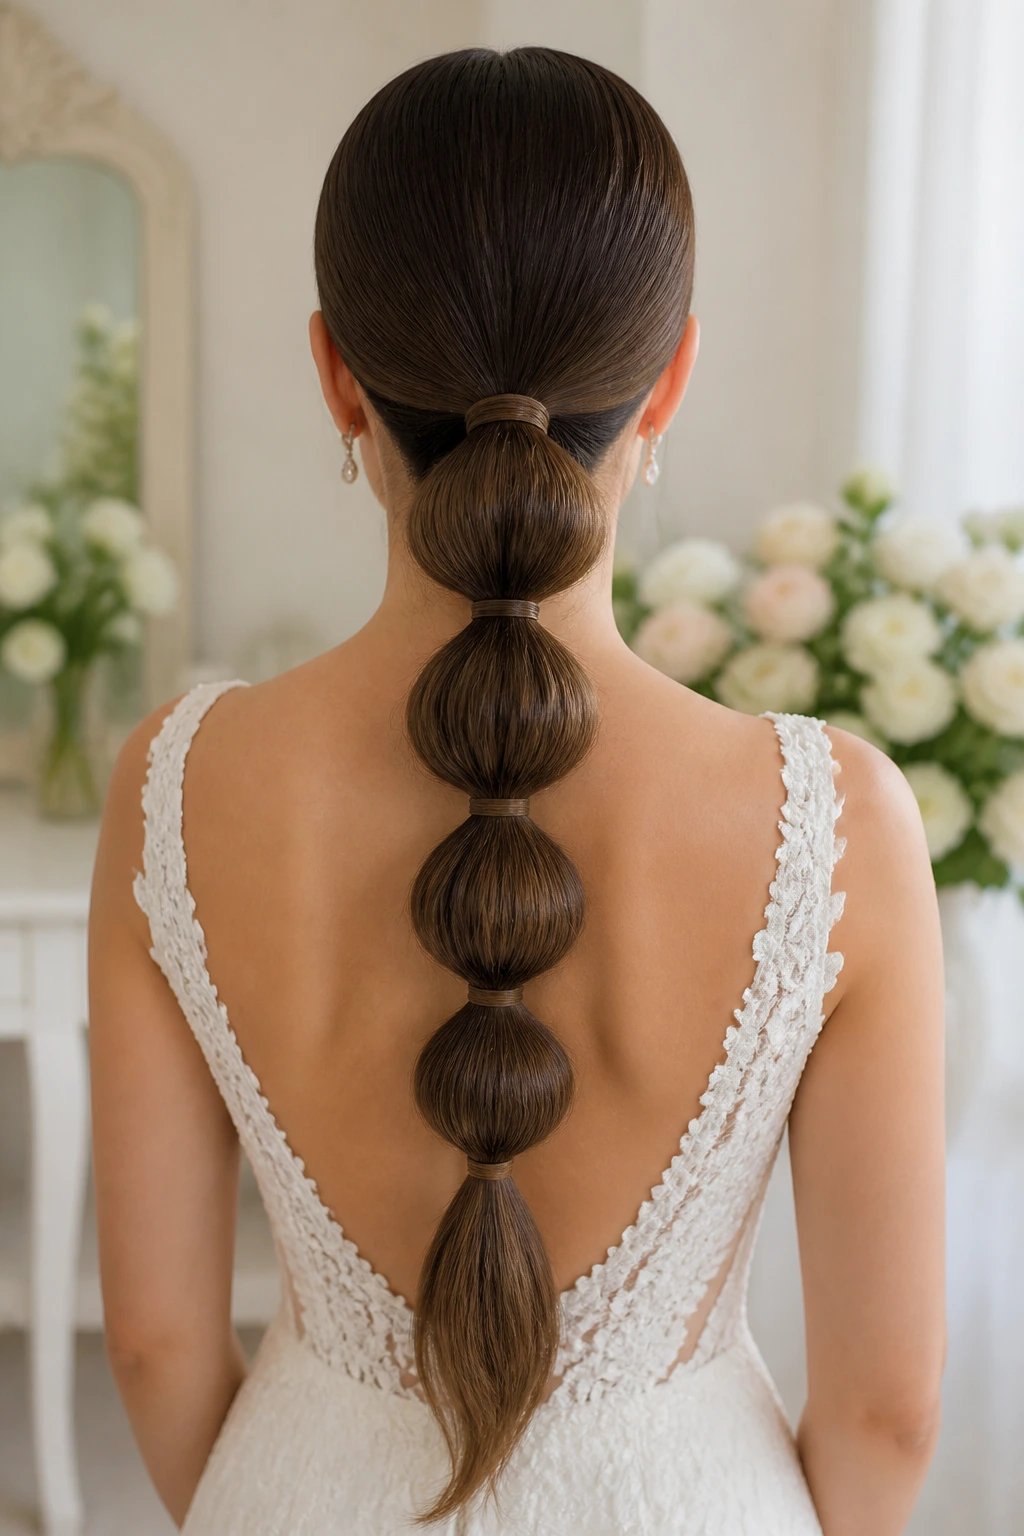
A bubble ponytail gives a center part a more playful shape without losing control at the top. The crown stays smooth and flat, the ponytail is divided into puffs with clear elastics every few inches, and each bubble gets gently tugged for volume.
This style looks best on long hair or on hair with extensions. The bubbles need enough length to read as separate shapes, not as bunching. I’d wear it with a reception dress, a modern gown, or a ceremony where you want something a little less expected than curls.
A few details matter here. The top section should be sleek before you ever add the first elastic. If the crown is messy, every bubble looks accidental. And the bubbles should grow smaller toward the end so the shape tapers cleanly.
Use a touch of texture spray between the elastics if the hair is slippery. Otherwise, the bubbles slide downward and flatten out by the time the first toast starts.
9. Loose S-Waves With Pearl Pins
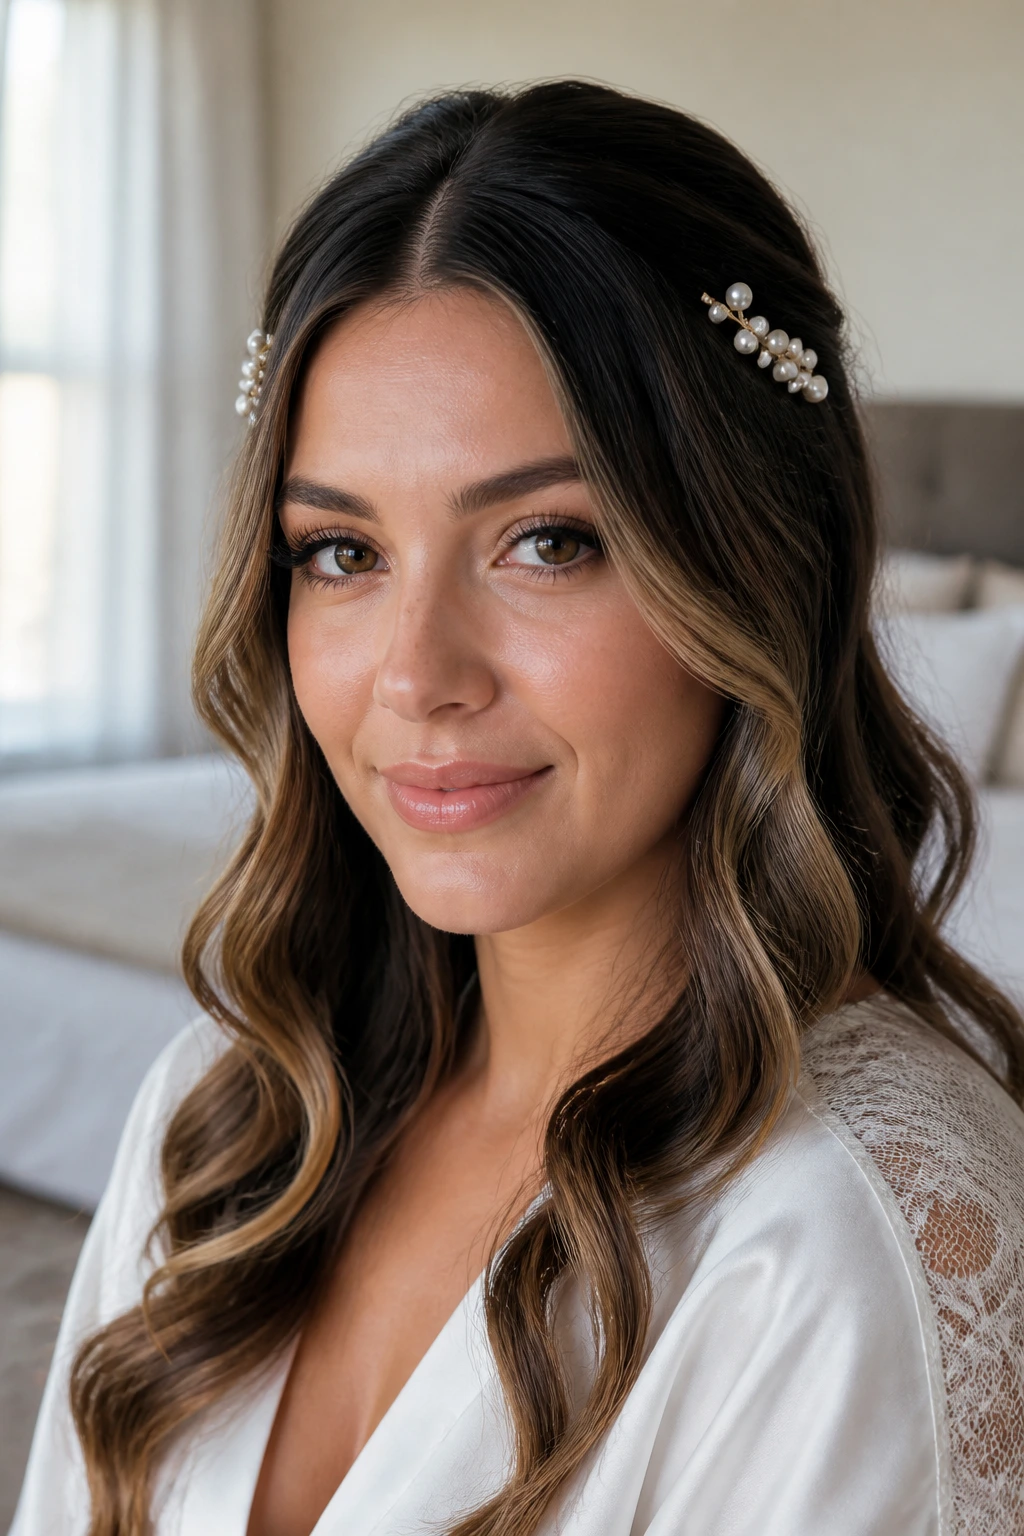
Loose S-waves are one of the most forgiving wedding middle part hairstyles because they move without looking unfinished. The center part gives the hair direction, the wave pattern stays soft, and pearl pins can be placed near the temples or just behind the ear for a little sparkle.
The trick is not to curl everything into a perfect ringlet. Wrap sections around a 1-inch iron, let them cool, then brush them into a softer wave pattern. That brush-out is what gives the style its relaxed shape. If you skip it, the hair looks too set.
This is also a good choice for fine hair. Pearl pins create the illusion of more hair at the sides, and the waves add body without requiring a huge amount of texture. On heavier hair, the same style gets a little more romantic and less airy.
I like pearl pins because they sit quietly. A giant clip takes over the look. A few small pins make the part feel framed, not decorated to death.
10. Boho Halo Braid With Soft, Tucked Ends
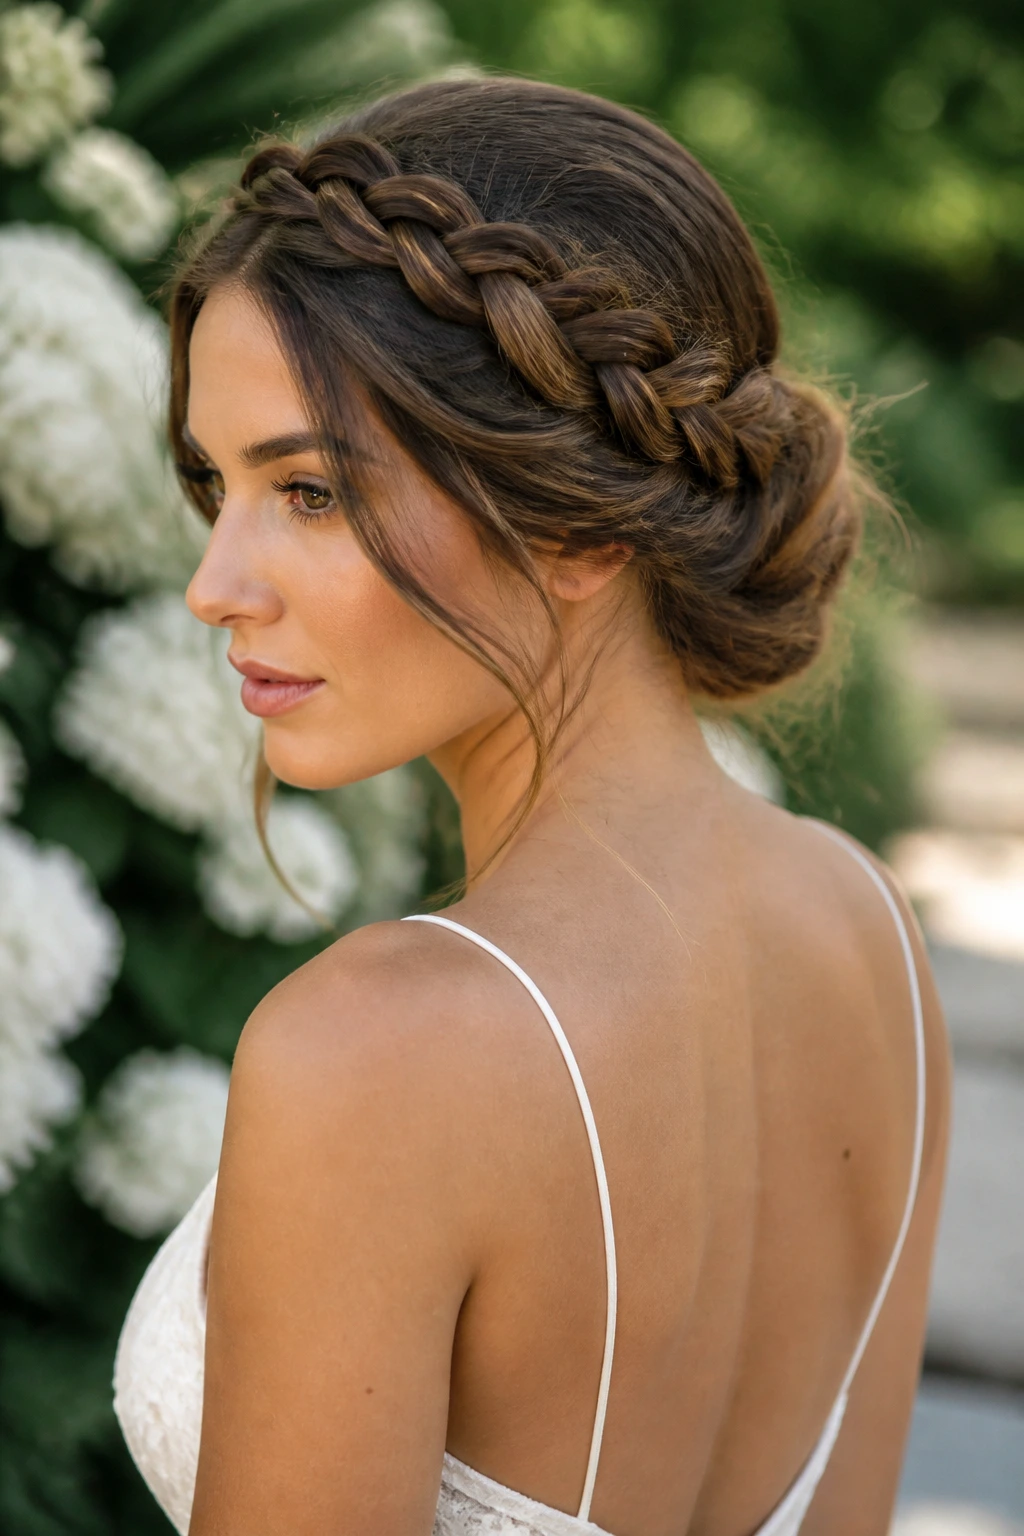
A halo braid can look too neat if it’s pulled tight all the way around. This version keeps the braid loose, with the middle part visible at the front and the braid traveling around the head in a softer line that eventually tucks into the lower back section.
It suits garden weddings, outdoor ceremonies, and dresses with lace or embroidery. The reason is simple: the braid adds texture near the face, but the overall shape still feels calm. There’s no hard edge to compete with the dress.
The braid should start with a small section near the temple rather than a giant chunk from the top. That keeps the crown from getting bulky. After the braid is pinned, gently widen it with your fingers so it looks fuller and less rope-like.
If you want it to feel more bridal, tuck a few fresh flowers or tiny pins into the braid. Keep them small. Once the embellishments get too large, the halo starts looking like a costume piece.
11. Curtain Bangs and Bendy Length for a Modern Bridal Look
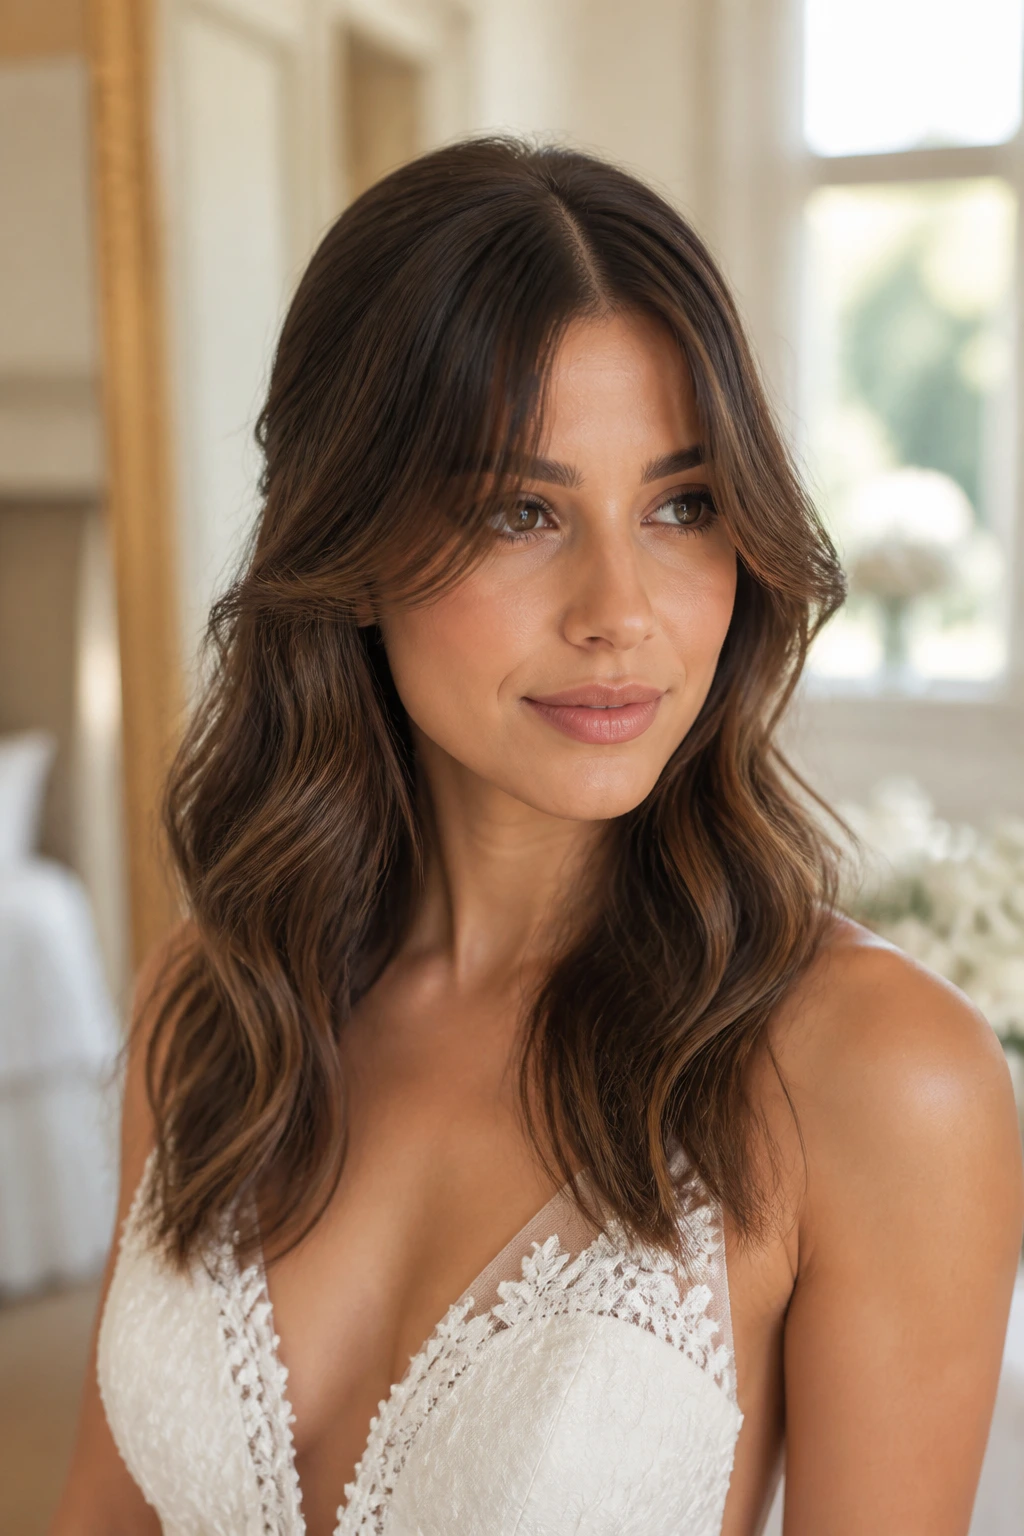
Do curtain bangs work with a wedding center part? Yes, if you treat them like part of the shape instead of as an afterthought. The bangs should open around the face, not sit like a blunt shelf, and the lengths below them need a bend that feels soft rather than over-curled.
This style is useful for brides who already wear bangs or want something a little less formal. A round brush and a blow dryer are usually enough to shape the fringe, and a 1.5-inch iron can add a bend through the mid-lengths. You do not want tight curls here. Tight curls make the bangs and the rest of the hair fight each other.
The good version frames the cheekbones and keeps the center part visible at the roots. The ends can be slightly flipped under or left with a loose S-shape. Either way, the whole look should feel like hair that was styled, not hair that was wrestled into submission.
A light mist of flexible spray works better than a hard shell. Curtain bangs need movement.
12. Veil-Friendly Low Knot With Side Twists
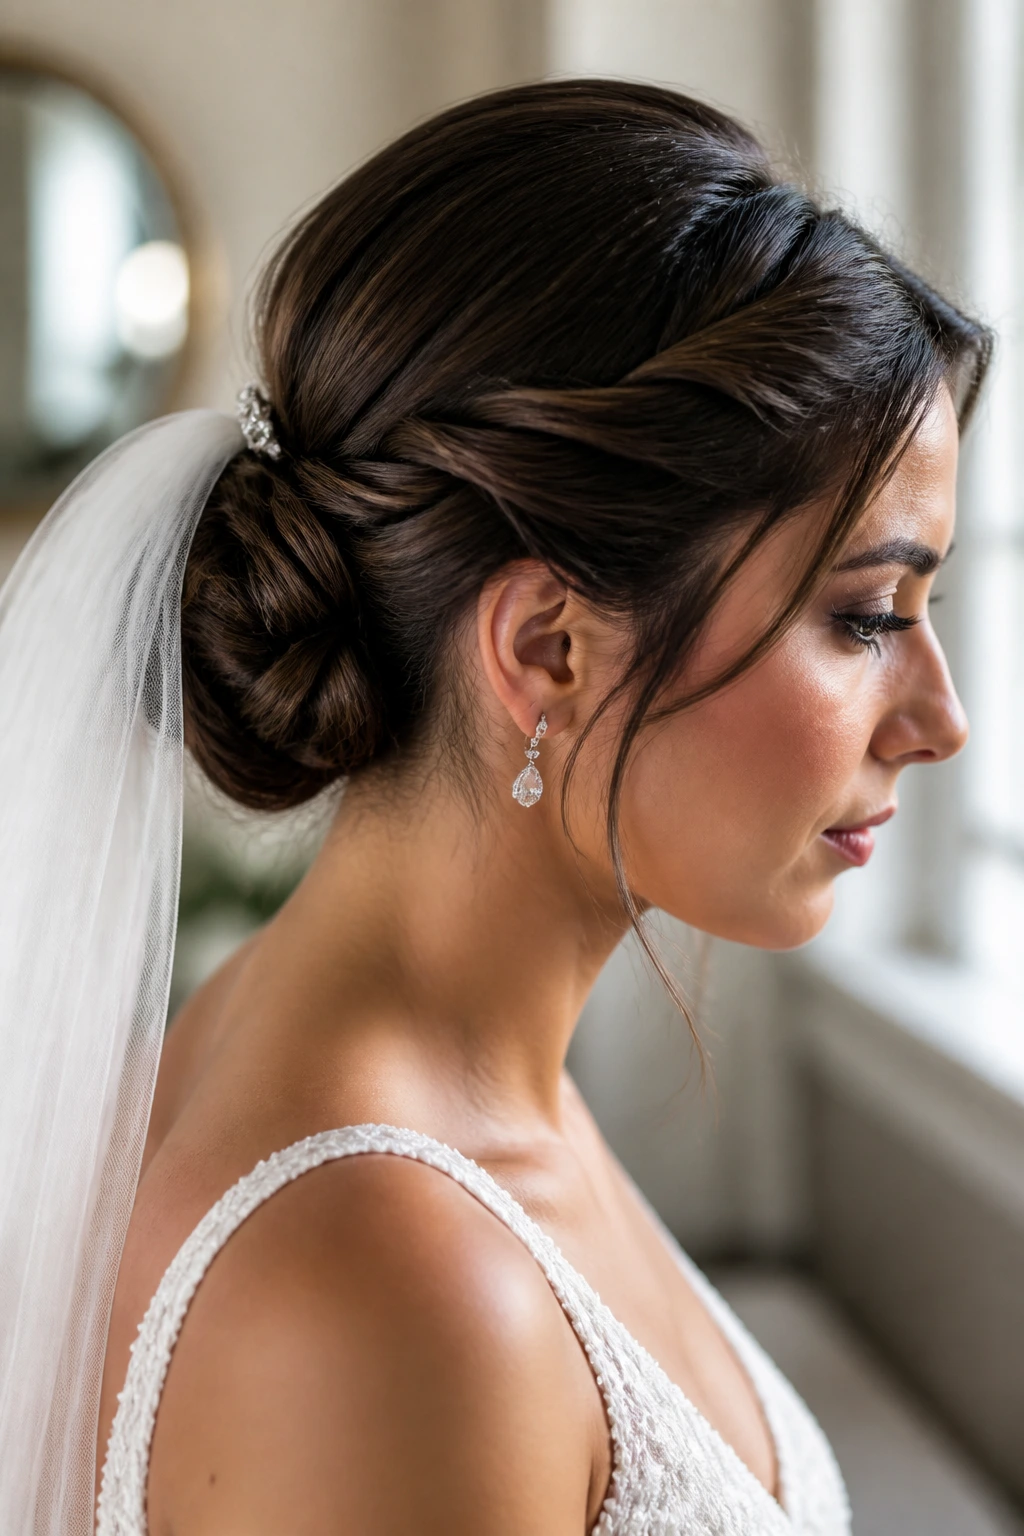
If the veil is the star during the ceremony, this is the backstage choice that keeps everything else in line. The middle part stays clean, the hair near the temples is twisted back and pinned low, and the knot sits just below the veil comb so the attachment point disappears.
Side twists matter here because they give the veil something solid to hold onto. A plain smooth bun can work, but a little structure around the sides keeps the comb from shifting when you move. That’s useful if the veil is long, beaded, or heavier than average.
I prefer this shape for cathedral veils, fingertip veils, and anything with lace that deserves a little visual space. The knot itself should stay compact. If it grows too large, it starts interfering with the veil line and the back of the dress.
One small trick: pin the veil after the final spray has dried. If the hair is still tacky, the comb slides around and you end up chasing it for half the morning.
13. Wet-Look Bun for a Fashion-Forward Ceremony
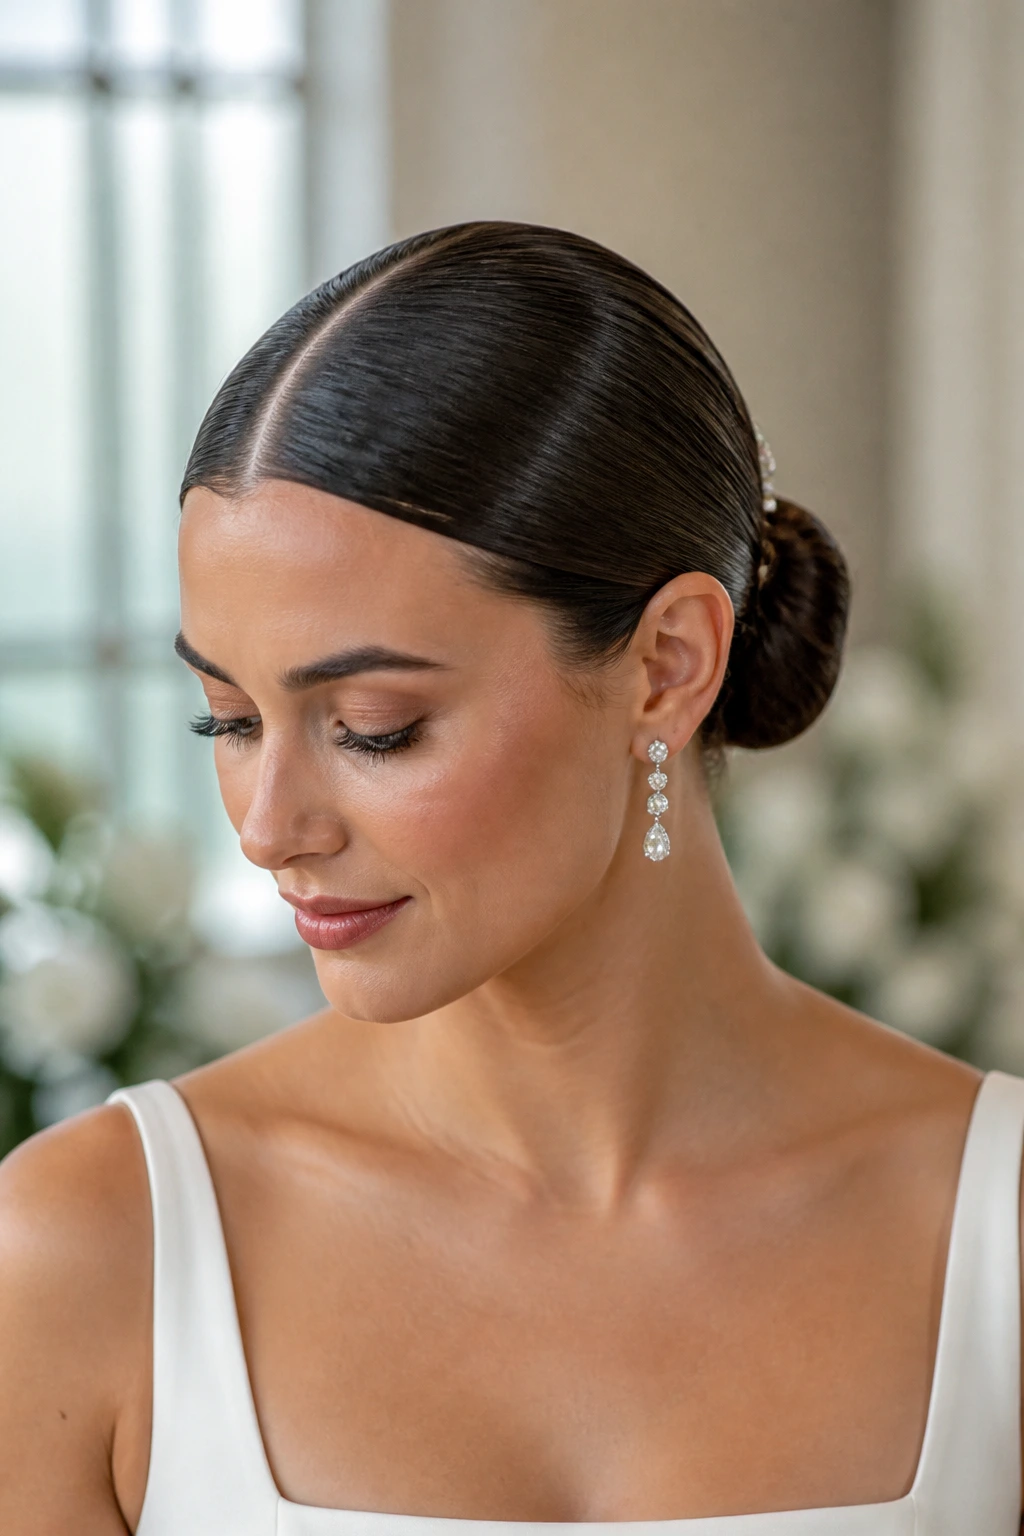
A wet-look bun works when the rest of the styling is clean and controlled. The middle part is slicked sharply, the roots are glossy, and the bun sits low or slightly off-center in a way that looks deliberate instead of unfinished.
This is not a style for someone who hates seeing product in the hair. It needs gel or shine cream at the root, and it needs to be combed flat enough that the part line stays visible from the front. But when it’s done well, the result is sleek and sculptural. No fluff. No wandering flyaways.
I’d choose this for a minimalist dress, a modern venue, or a bride who likes a sharper silhouette. If the gown already has a lot of volume, the wet-look bun can make the whole outfit feel balanced again. If the dress is soft and floaty, though, the contrast can be too hard.
The biggest mistake is overdoing the shine. Hair should look glossy, not oily. There’s a line there, and it’s thinner than people think.
14. Full Blowout With a Center Part and Tucked Sides
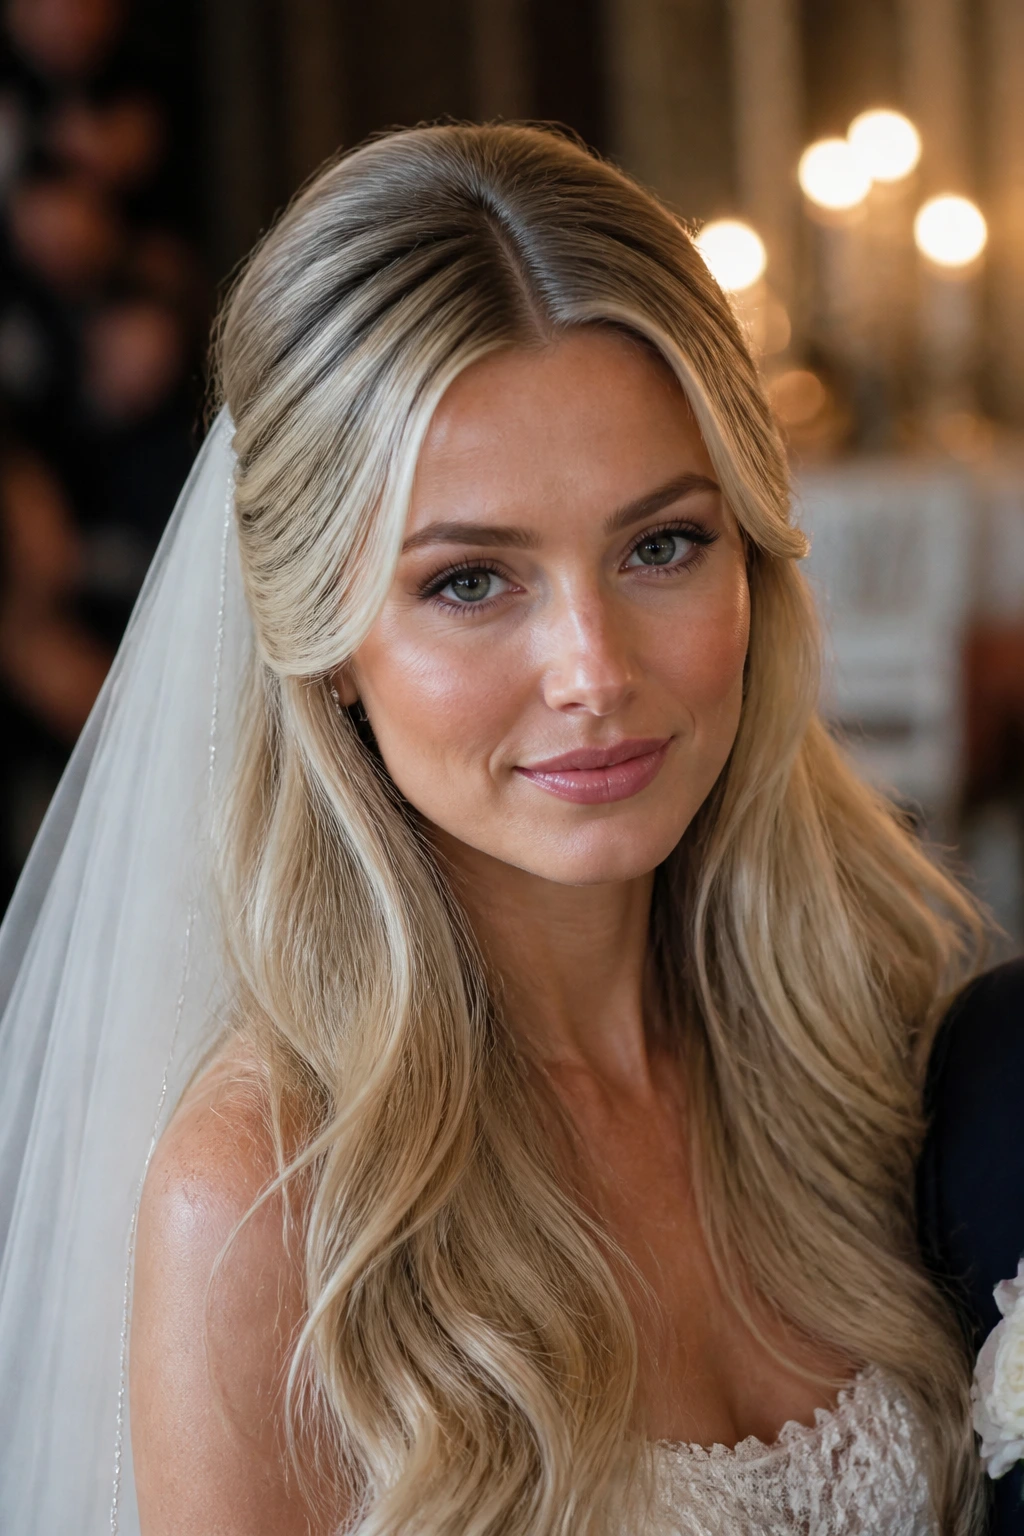
This is the hair-down option for someone who wants movement, lift, and a clean face frame. The middle part is the anchor, the blowout gives the roots body, and the front pieces are tucked behind the ears or pinned back just enough to keep the line open.
The style works best when the crown has lift and the ends have a little bend. Too straight, and it reads flat. Too curled, and it loses the soft blowout shape that makes it feel dressed up. A round brush, a concentrator nozzle, and a large roller at the front can do a lot of quiet work here.
I like this look for medium to long hair because it still moves on the dance floor. It also pairs nicely with dresses that are more structured up top, since the hair keeps the face soft without taking over the neckline.
If the hair is very thick, split the blow-dry into sections and let the crown cool before touching it. That cooling time is what locks in the root lift.
15. Rope Braid Tail on Sleek, Straight Length
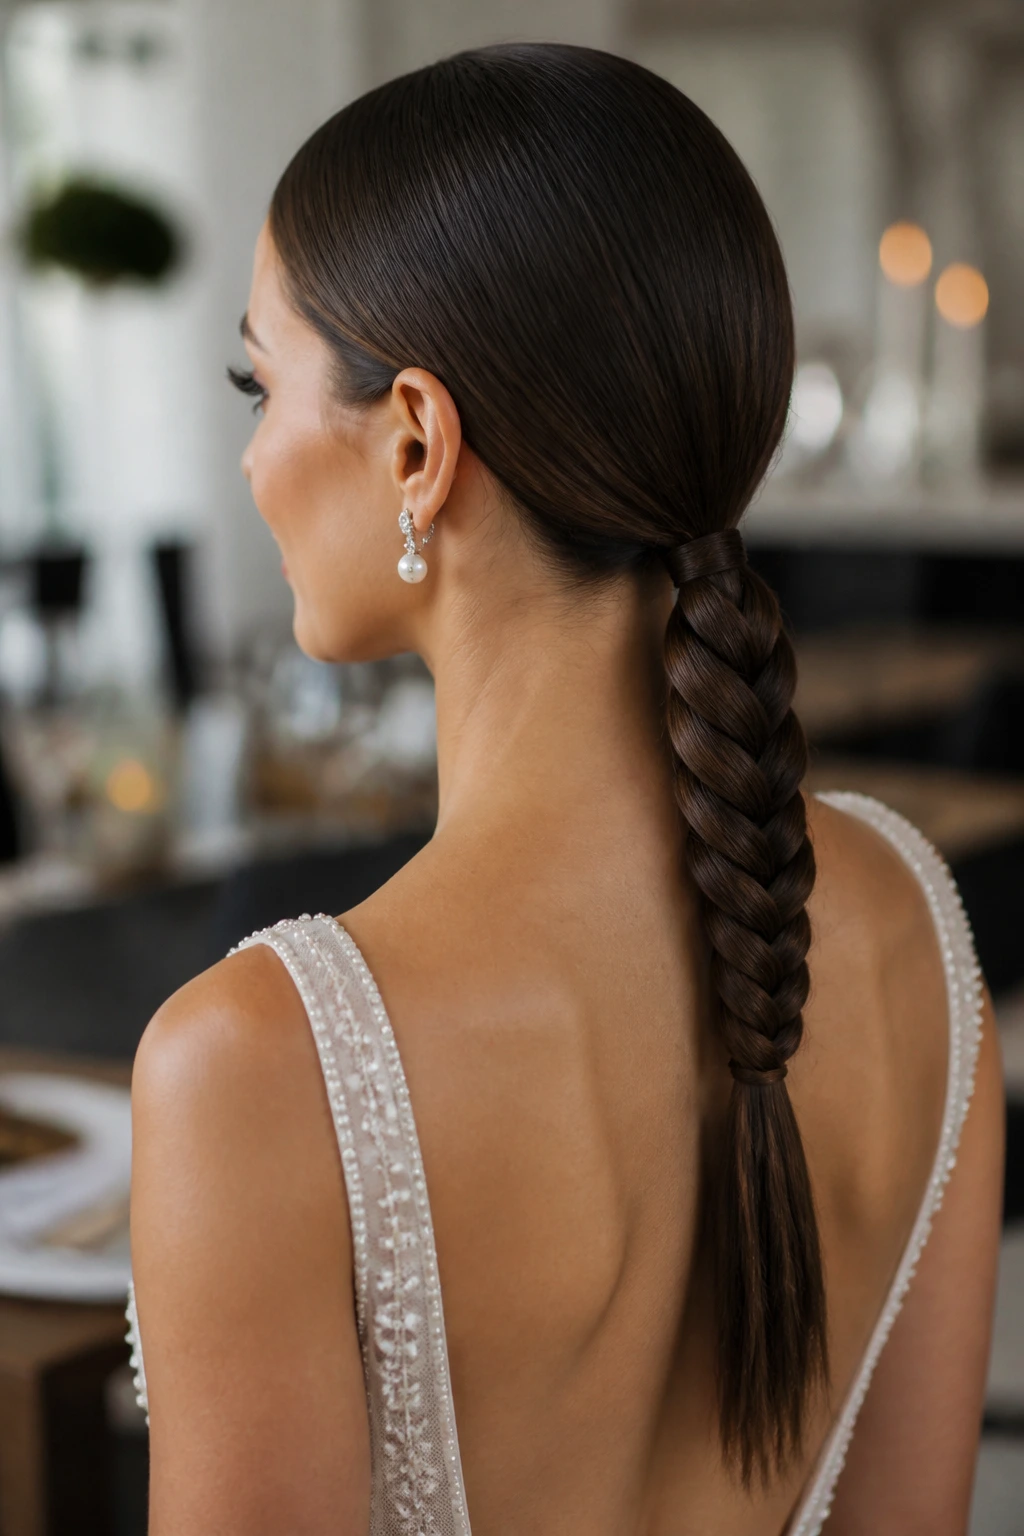
Unlike a simple ponytail, a rope braid adds twist texture without asking the hair to hold a full three-strand braid pattern. That makes it a good middle ground for someone who wants something special but still clean.
The hair starts with a center part and a sleek crown, then gathers into a low ponytail or tail at the nape. From there, the tail is divided into two sections and twisted around each other in the same direction before being secured at the end. If you’ve never done a rope braid, the key is to keep the twist tension even from top to bottom.
This looks especially good on straight hair because the contrast between the smooth crown and the twisted tail is easy to read. It also survives humidity a bit better than loose curls do. There’s less surface area for frizz to attack.
For extra polish, wrap a thin section of hair around the elastic and pin it underneath. That hides the tie and makes the whole style look intentional from every angle.
16. Ribbon-Tied Half-Up With Center-Parted Waves
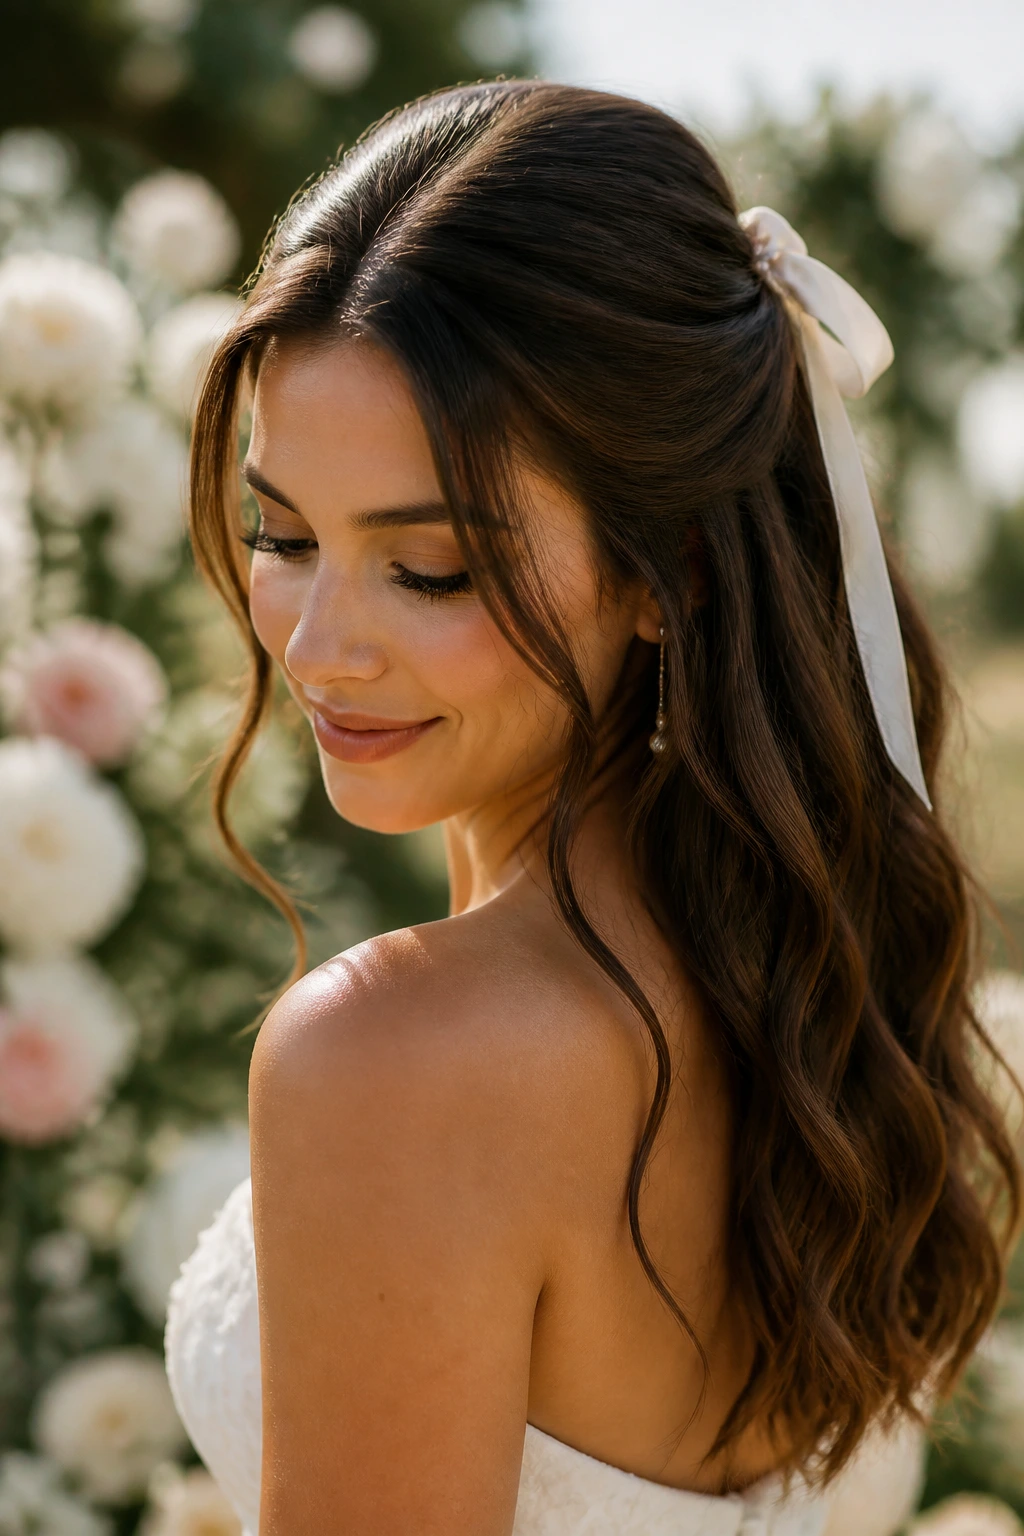
A ribbon can soften a center part in a way that nothing else quite does. The top half gets pulled back gently, the loose lengths stay wavy, and a satin ribbon ties the half-up section with just enough color to feel personal.
This is one of my favorite choices for spring-like floral dresses, romantic necklines, or bridesmaids who want cohesion without looking identical. The ribbon should not be too wide unless the dress is simple. A 1- to 1.5-inch satin ribbon usually sits well without overwhelming the back of the head.
The center part keeps the look grounded. Without it, the ribbon can drift into cutesy territory fast. With it, the style reads more grown-up and balanced.
If you want to echo the bouquet or shoes, choose a ribbon in the same color family. Do not match it too perfectly unless you want the hair to look costume-y. A slightly softer tone usually works better.
17. Low Roll Chignon With Face-Framing Tendrils
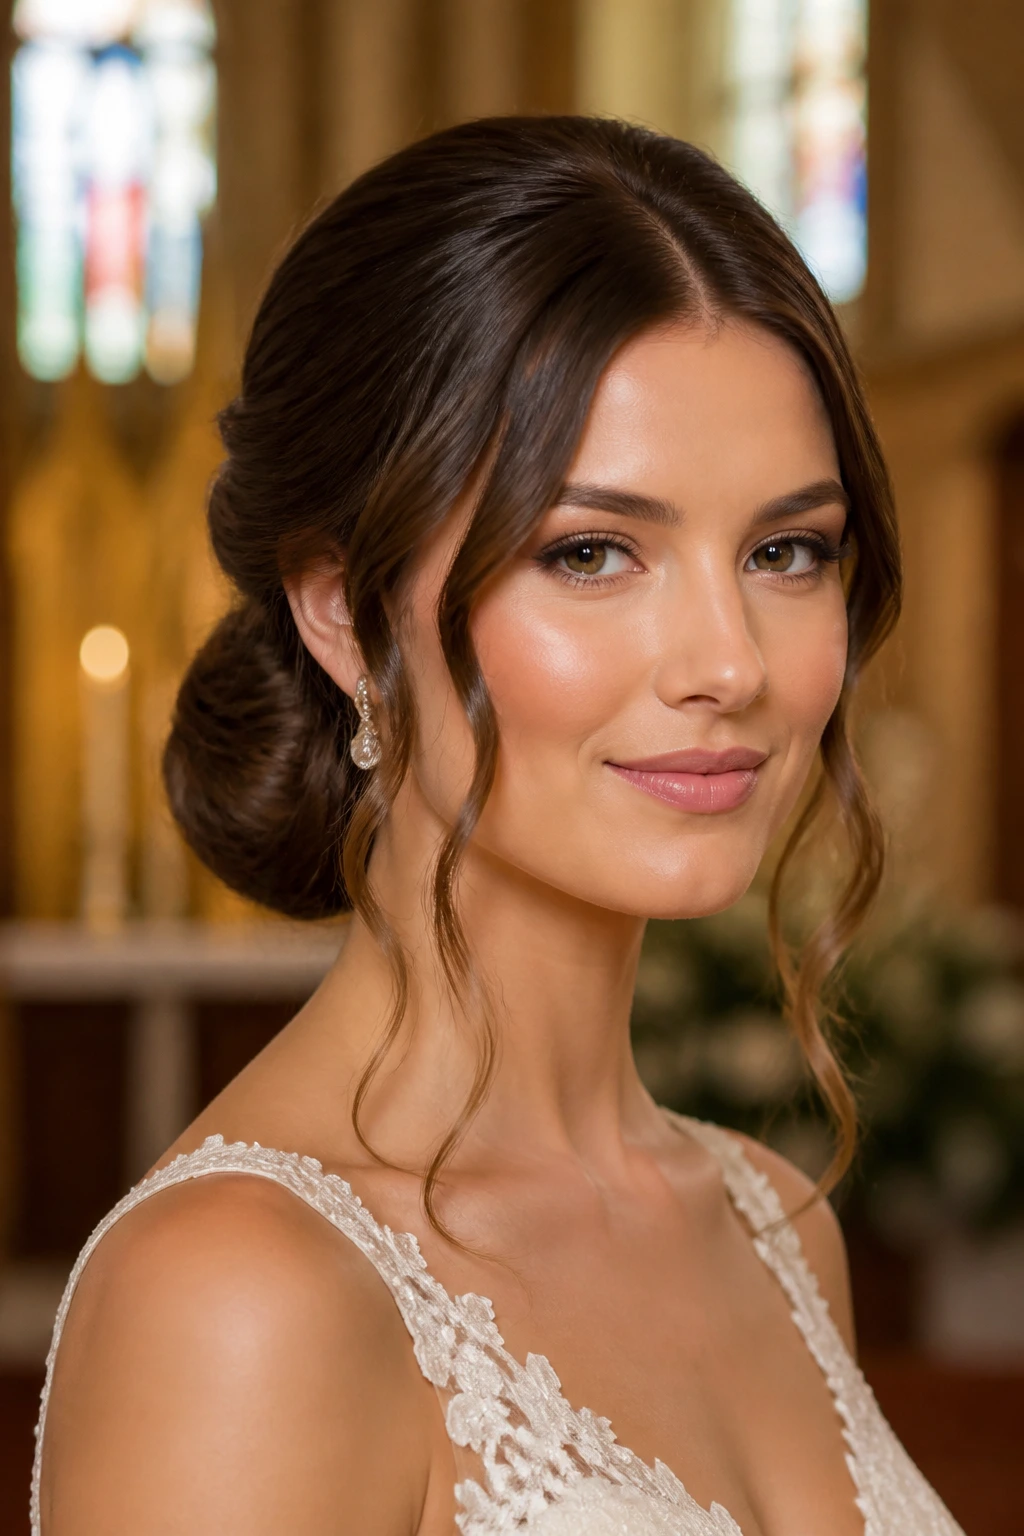
A low roll has more structure than a loose bun and less severity than a French twist. The middle part gives the front a steady line, then the hair rolls inward at the back and is pinned low so the shape stays smooth and compact.
The face-framing tendrils matter more than people think. Two thin pieces left near the cheekbones can soften the style just enough to keep it from feeling stern. Curl them with a small iron, then brush them out lightly so they fall in a relaxed curve instead of a tight coil.
This style works beautifully for classic weddings, formal church ceremonies, and anyone who wants the back of the hair to look finished from every angle. It also sits well with statement earrings because the front stays open.
I’d call this one quietly strong. It doesn’t shout. It doesn’t need to.
18. Defined Natural Curls Worn Down the Middle
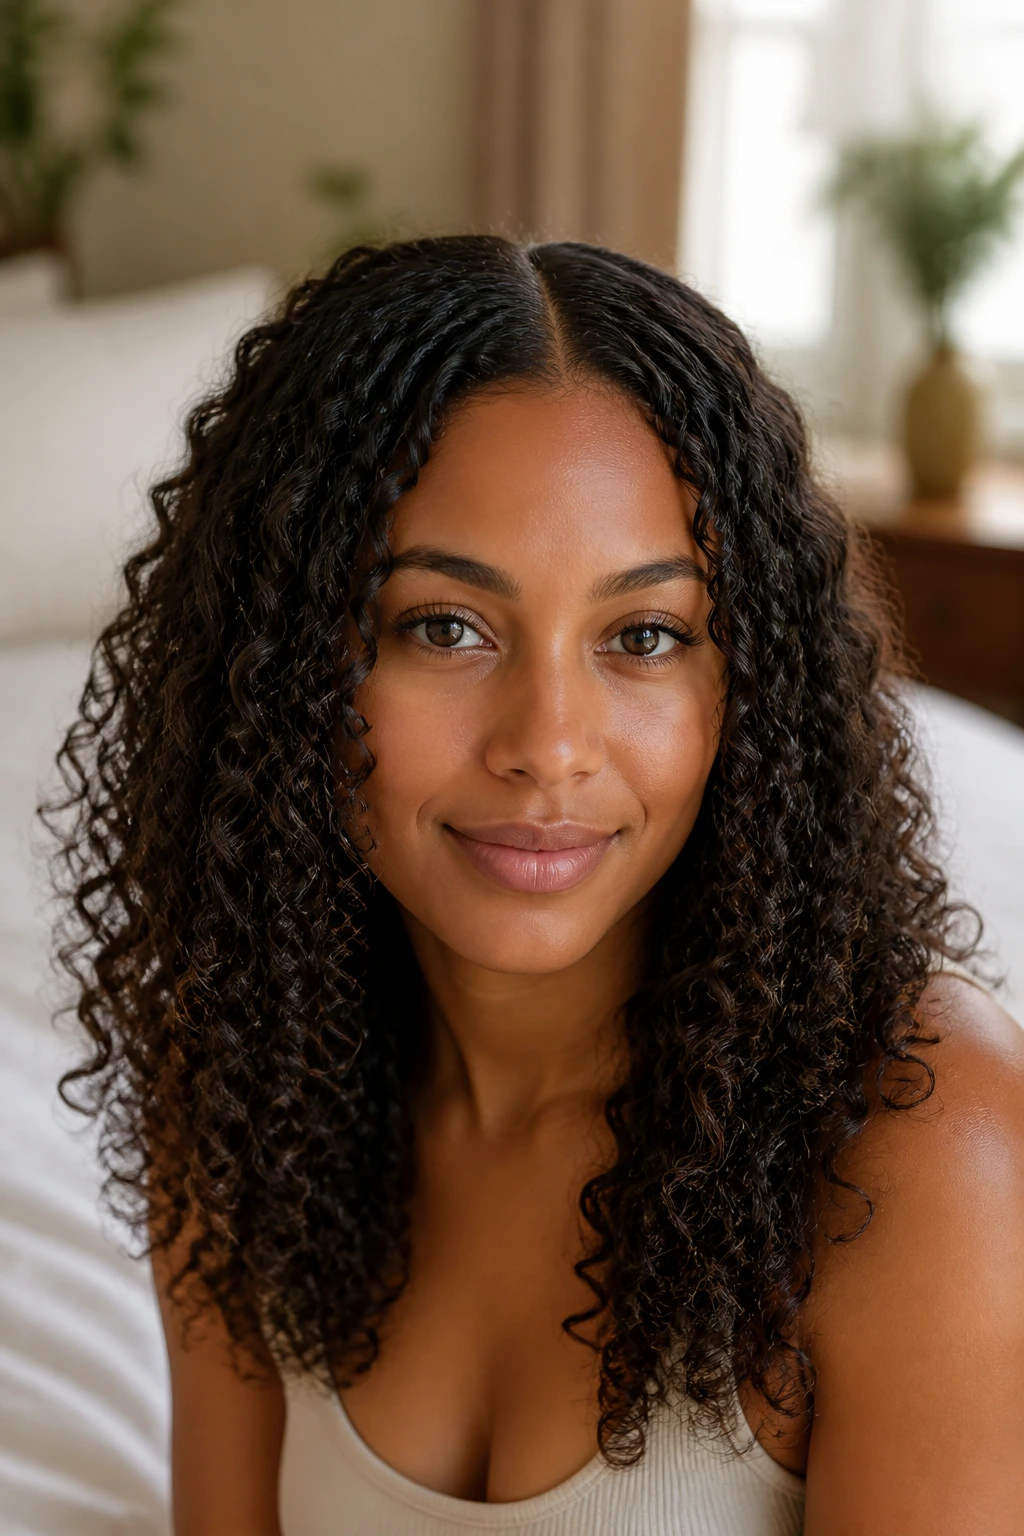
A center part can be one of the best shapes for natural curls when the curl pattern is hydrated and the top is set with care. The middle part gives the style symmetry, while the curls bring the softness and movement that straight styles sometimes have to fake.
The key is to define the part on damp hair, not after the curls have started to dry in random directions. Apply curl cream or gel, rake it through, then diffuse on low heat or let the hair air-dry before separating the curls too much. Once dry, you can lift the roots with a pick and separate a few face-framing curls with oiled fingers.
This look is strongest when the curl pattern is consistent around the part. If one side sits flatter, clip the roots at the crown while drying so the shape balances out. A few pins or a comb can still be added, but they should support the curl, not fight it.
It’s honest hair. That’s why it works.
How to Keep the Crown Smooth and the Ends Alive
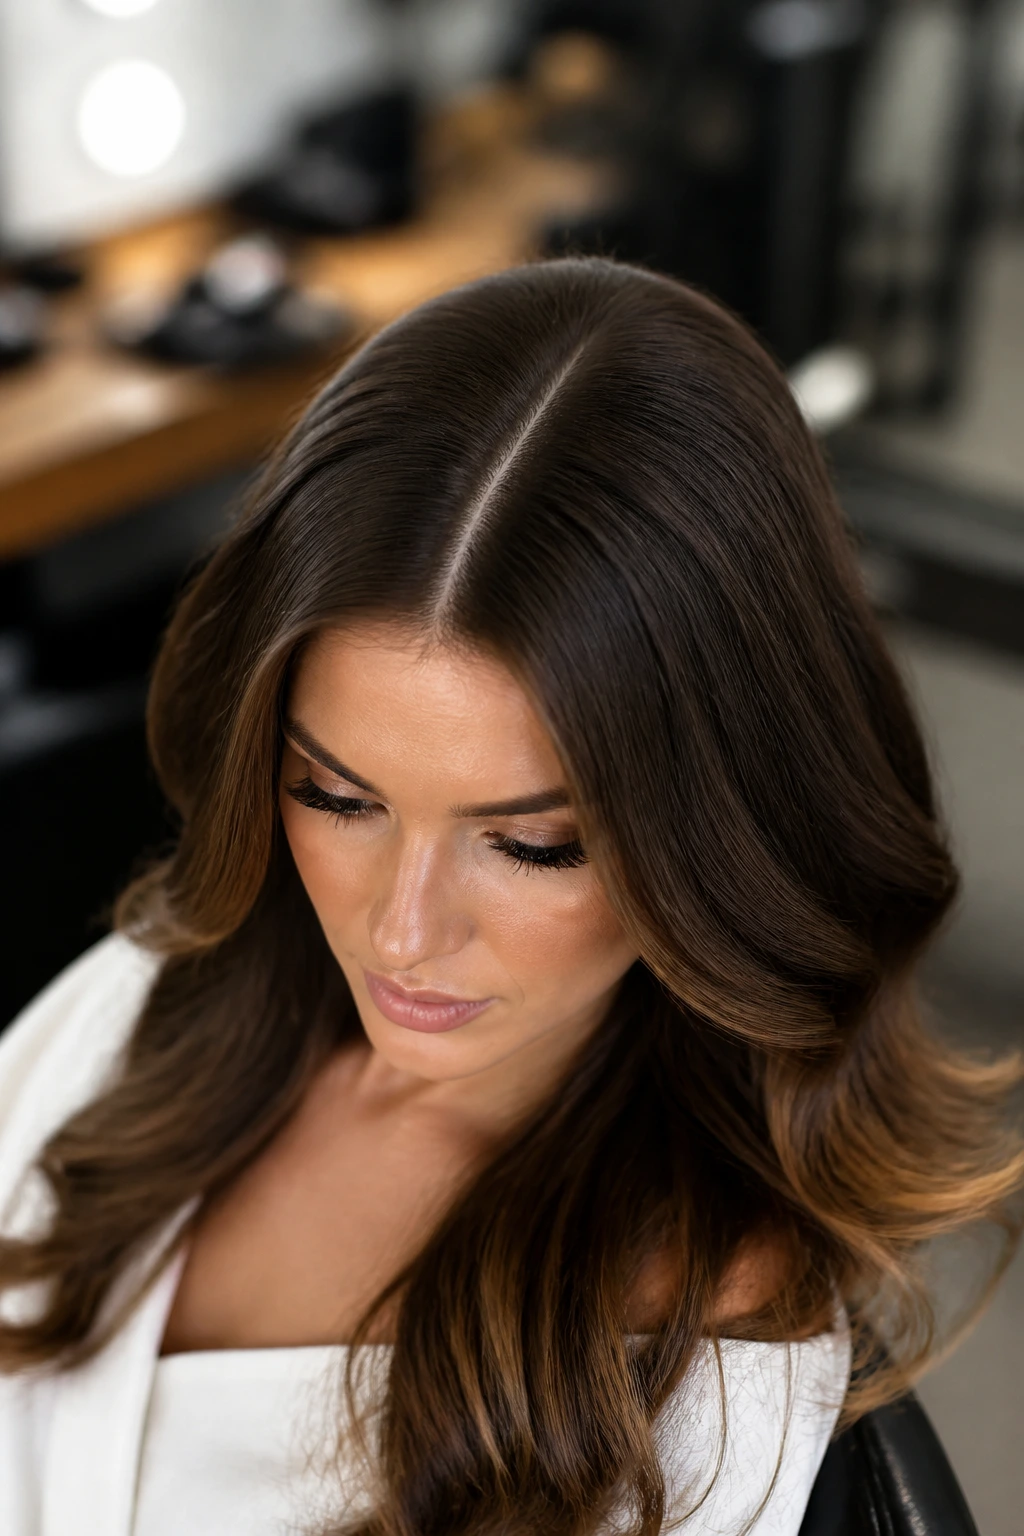
A middle part lives or dies at the crown. If the first inch near the scalp is frizzy, split, or lifted in the wrong way, the whole style starts looking unfinished, no matter how good the bun or wave pattern is. That’s where prep matters more than product overload.
Prep the part first: Draw the part while the hair is damp, or at least before you add heat. Use the tail of a comb, not your fingers, and then blow-dry the line flat with the nozzle pointed downward. If the part keeps wobbling, clip both sides across the top for a few minutes while the hair cools.
Match the product to the style: Creams and smoothing serums help sleek buns and straight lengths, while mousse or root spray helps blowouts and waves keep lift. A heavy oil near the scalp is a bad idea on wedding hair. It reads greasy fast in daylight.
Think about hold in layers: Use a flexible spray at the end of curling, then a stronger spray once the shape is set. A lot of people spray too early, which makes the hair sticky before they’ve finished arranging it. That’s when pin marks start showing up.
Bring a tiny repair kit: Two extra U-pins, a few bobby pins, a travel-size hairspray, and a narrow comb are enough to save most styles after a hug, a breeze, or a long photo session. You do not need a whole salon drawer in your bag. Just the right bits.
Common Hair Mistakes That Make a Center Part Look Flat or Fussy
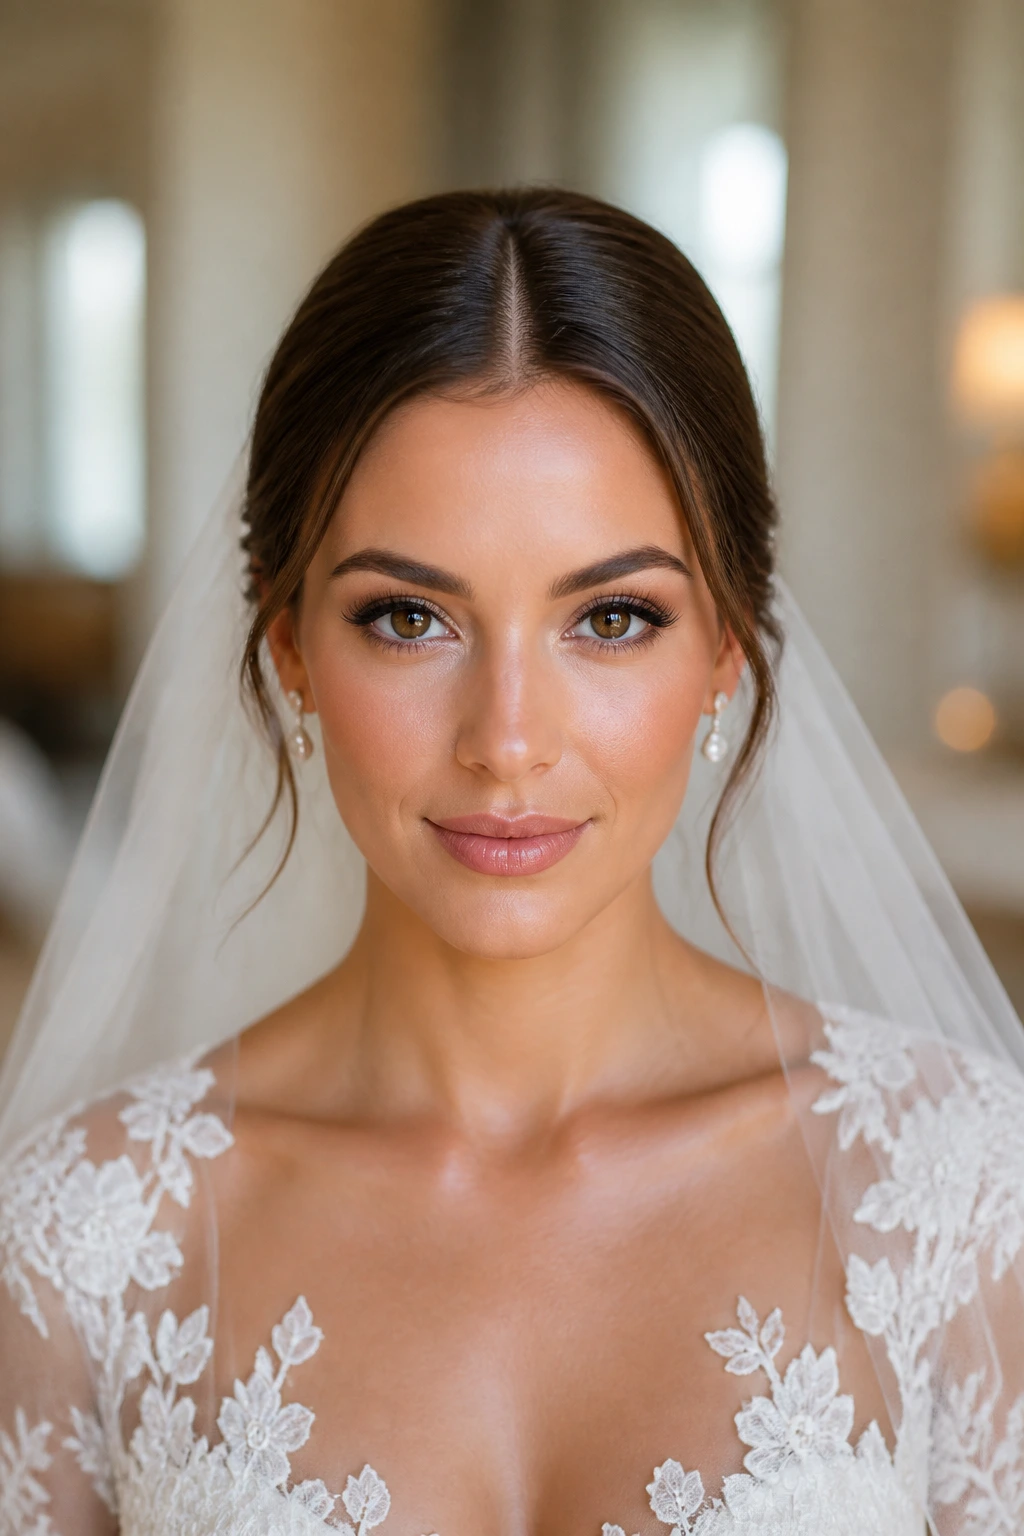
The most common mistake is drawing the part after the hair is already styled. By then, the front has usually taken its own shape, and forcing a new line cuts through volume in a strange way. The fix is simple: set the part first, then build the style around it.
Another problem is overloading the crown with product. A little shine cream can make the part look polished. Too much makes the scalp look greasy and the roots collapse, especially under flash photography. Keep oils and glosses on the lengths and ends unless you’re doing a wet look on purpose.
Cowlicks are the quiet troublemaker here. If the hairline naturally splits to one side, the part will try to drift all morning. Dry the roots in the opposite direction first, then reset the part and clip it in place while the hair cools. That extra step saves a lot of frustration.
People also forget to balance both sides. If one side gets more bend, more volume, or more pinning, the part stops looking centered even when it technically is. Mirror the sectioning whenever you can, and check the style from the front before you leave the room.
And then there’s accessory weight. A large comb or veil can pull a soft style sideways if it isn’t anchored well. Test the actual veil, pins, or clip before the day starts, not after.
Different Ways to Wear the Same Center Part
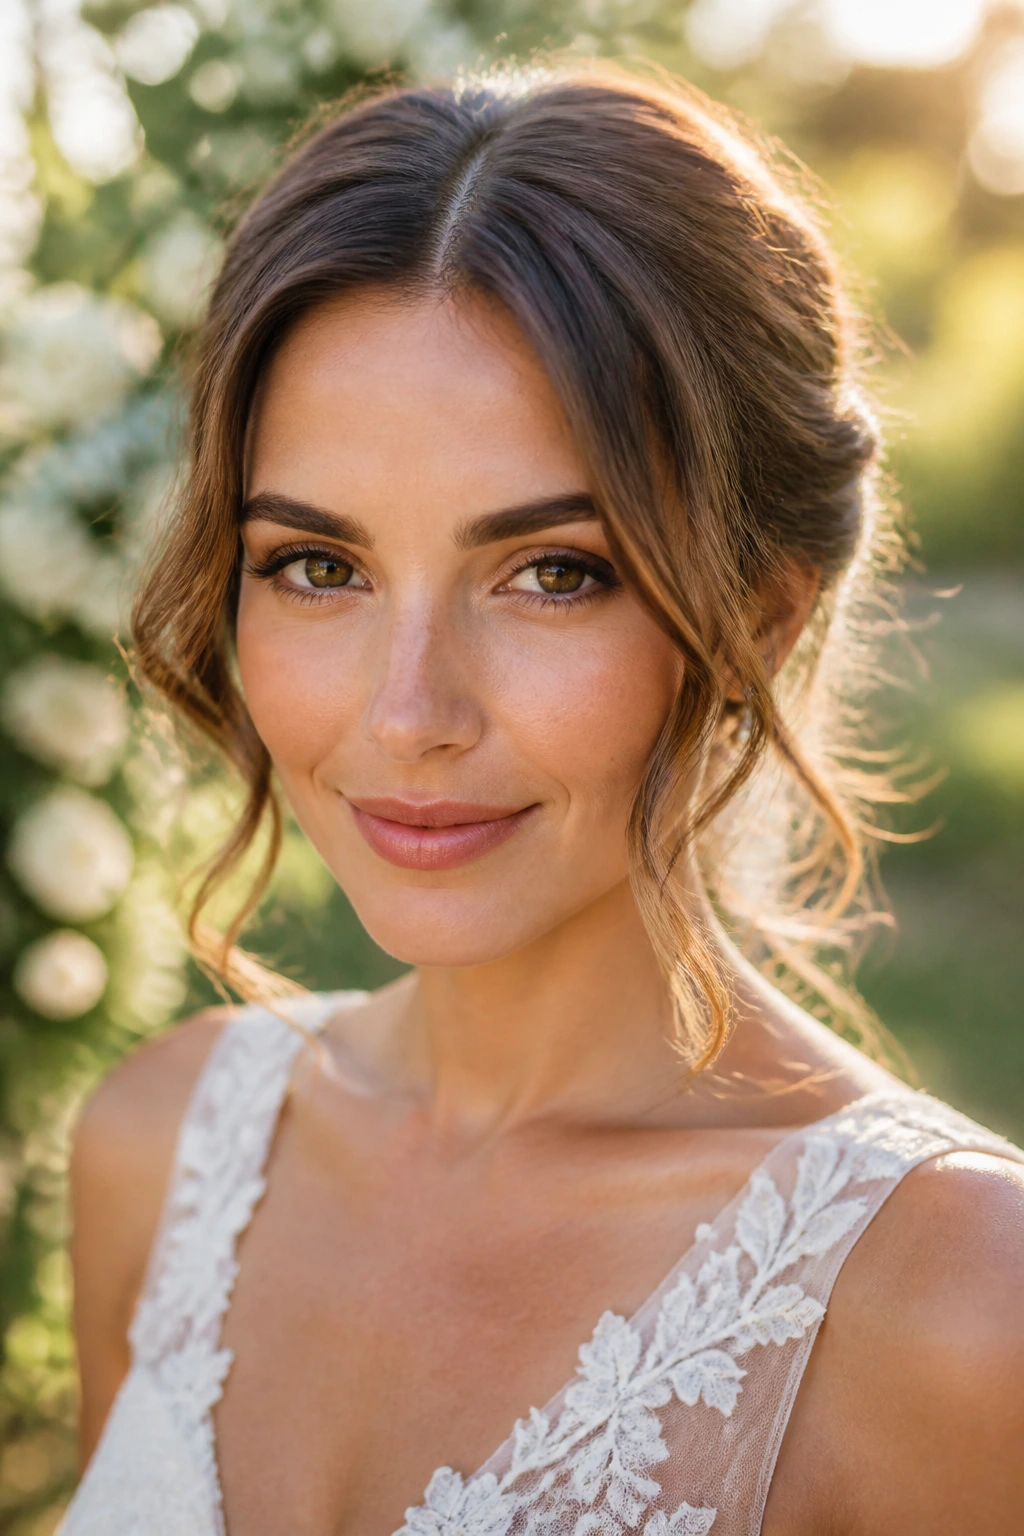
Soft Romantic Version: Keep the crown smooth, then let waves, tendrils, or a loose braid do the softening. This version works when the dress is lacey, the venue is airy, and you want the face framed instead of sharply outlined.
Modern Minimal Version: Go straight, glossy, and clean. A low knot, a glass-hair blowout, or a wet-look bun fits this lane best because each one relies on shape rather than decoration.
Garden or Outdoor Version: Add texture early. A halo braid, twisted half-up style, or loose waves with pinned sides survives a little wind better than a fully smooth style. Keep the crown pinned flat, though; that’s where outdoor hair starts falling apart.
Texture-First Version: Let curls, coils, or natural waves stay visible and build the wedding shape around them. Use the center part as a guide, not a cage. That keeps the style from looking forced.
Shorter Hair Version: A bob or lob can still wear a middle part with tucked sides, tiny braids, or a clean barrette behind one ear. Short hair often looks strongest when the front is sleek and the back has a little bend.
The Tools That Make These Styles Easier
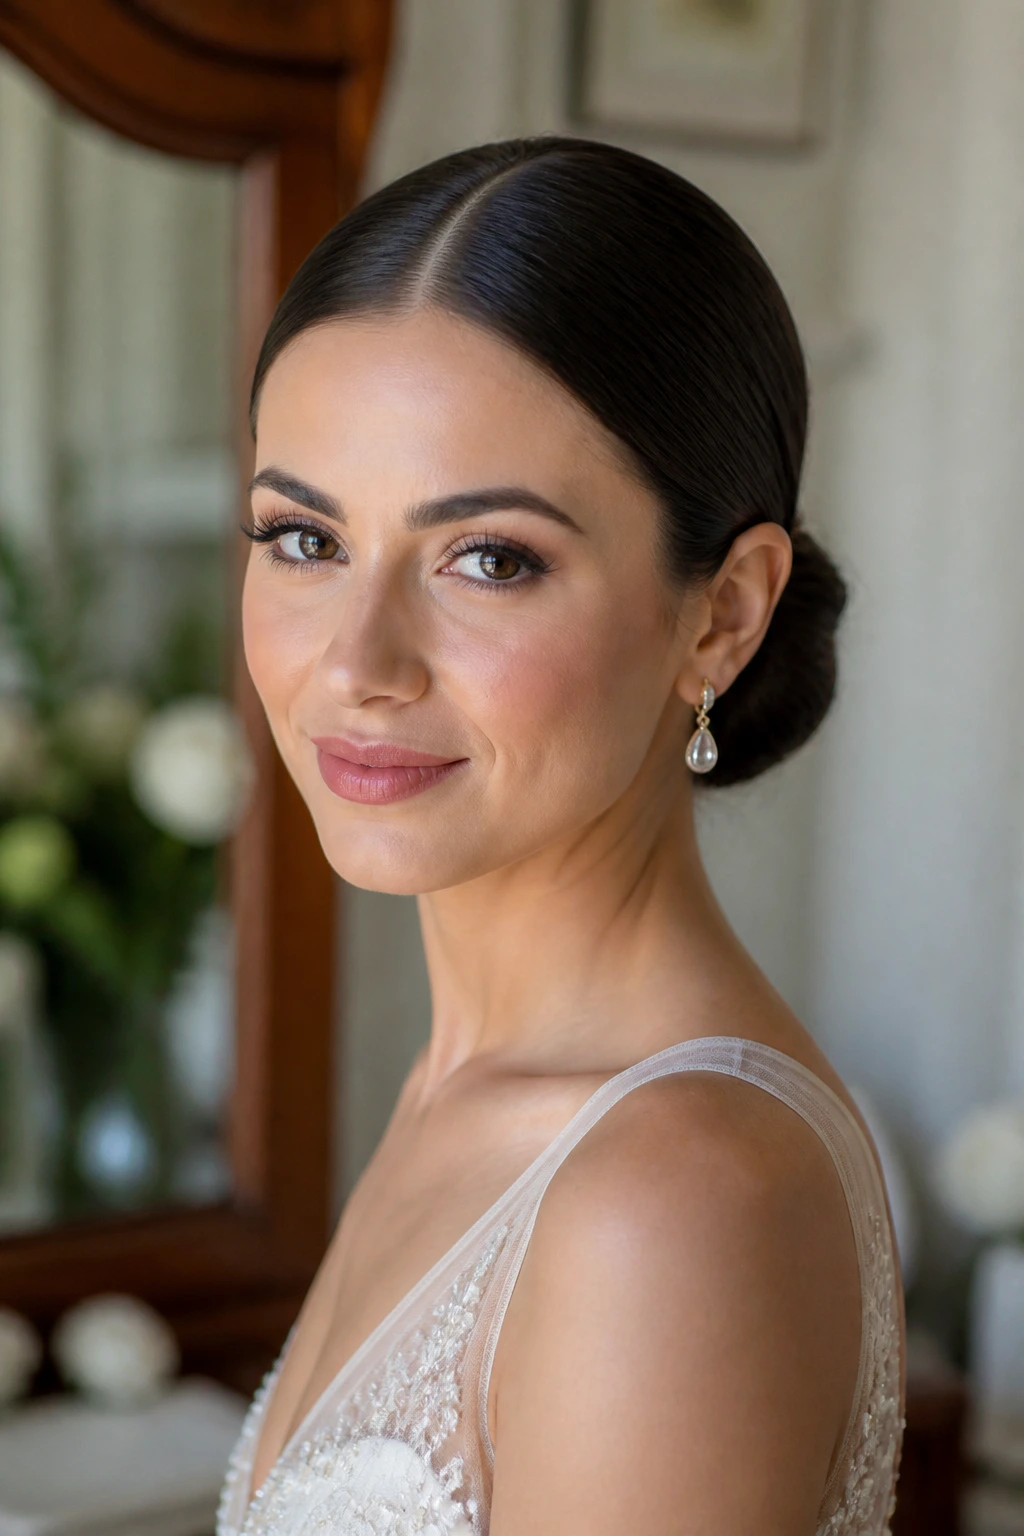
- Tail comb: The sharp point makes a cleaner part than fingers ever will.
- Blow dryer with a concentrator nozzle: Helps flatten the crown and direct the hair exactly where you want it.
- Boar bristle brush: Good for smoothing roots without stripping the shape.
- 1-inch curling iron or wand: A useful size for soft waves, tendrils, and polished ends.
- Flat iron: Best for glass-hair styles or taming a stubborn crown.
- U-pins and bobby pins: U-pins hold shape inside buns; bobby pins secure edges and hidden sections.
- Clear elastics: Useful for half-up styles, twists, and bubble ponytails.
- Strong-hold hairspray: Keeps the shape in place after everything is set.
- Flexible spray: Good for waves that need movement, not stiffness.
- Heat protectant: Worth using on every style that sees a hot tool.
- Smoothing cream or shine serum: Use sparingly on lengths and ends, not at the roots.
- Veil comb or accessory pins: Helpful if the hairstyle has to support a veil or headpiece.
- Mini crimper or root-lift clip, optional: Useful for adding hidden support under smooth styles when the hair is fine or slippery.
Keeping the Style Fresh From First Look to Last Dance
Most polished wedding hairstyles hold up for 10 to 14 hours if the prep is done correctly and the pins are placed well. Sleek buns and smooth ponytails usually last the longest. Loose waves and soft tendrils need more checking, especially if the weather is warm or windy.
If there’s a trial run, wear the style for at least four hours and see where it starts to shift. The crown may flatten first. The sides may puff. A veil comb may slide a little lower than expected. That trial tells you more than a perfect mirror check ever will.
Between the ceremony and reception, a tiny touch-up kit helps. Carry a travel hairspray, a few pins, and a narrow comb. If the hair is down, re-smooth the crown and re-bend the front pieces only where they’ve gone flat. Do not re-curl the whole head unless you want to spend the cocktail hour in front of a mirror.
Overnight, the best move is usually a silk scarf, bonnet, or pillowcase, depending on the style. Waves can be clipped loosely at the crown and covered with a scarf. Sleek buns and low knots should stay pinned until removed carefully the next day. Natural curls will usually survive best if they’re protected and refreshed with a little water and leave-in the next morning.
Questions People Always Ask About Wedding Middle Part Hairstyles
Does a middle part flatter every face shape?
No part flatters everything equally, but a center part can work across a lot of face shapes when the rest of the style is adjusted. Round faces often like a little height at the crown, while longer faces usually benefit from volume around the sides or a few face-framing pieces.
Can I wear a veil with a center part?
Yes, and it often sits more neatly than people expect. The trick is to place the veil comb where the back of the style is already secure, not just where it looks centered in the mirror.
What if I have a cowlick or a part that keeps drifting?
Set the part while the hair is damp, then dry the roots in the opposite direction before resetting it. A little root spray and two clips across the front can help train the line long enough for the day.
Is a middle part a bad idea for fine hair?
Not at all, but fine hair needs support near the root. Use a light volumizing mousse, keep the crown from getting oily, and choose styles that build structure in the back, like a chignon, ponytail, or soft wave.
Can curly or coily hair wear these styles?
Absolutely. The center part works beautifully with curls when the part is drawn on damp hair and the curl pattern is shaped on both sides with the same care. The best versions let the texture stay visible instead of forcing it into a straight-style mold.
How far ahead should I do a trial?
Long enough to leave time for a second round if something feels off. Two to four weeks before the wedding is a good window because you can test the style, note what falls apart first, and still change the plan without panic.
What should I do if the style starts to sag during the day?
Check the crown and the hidden pins first. Most sagging starts there, not at the ends. A few extra U-pins and a quick blast of hairspray at the roots usually fix more than a full restyle.
Do short hair and bobs work with middle-part wedding styles?
Yes, especially if the cut has enough length to tuck one side or curve the ends under. A bob with a clean part, a jeweled clip, or a soft bend at the jawline can look sharp without pretending to be long hair.
The Clean Line That Holds the Whole Look
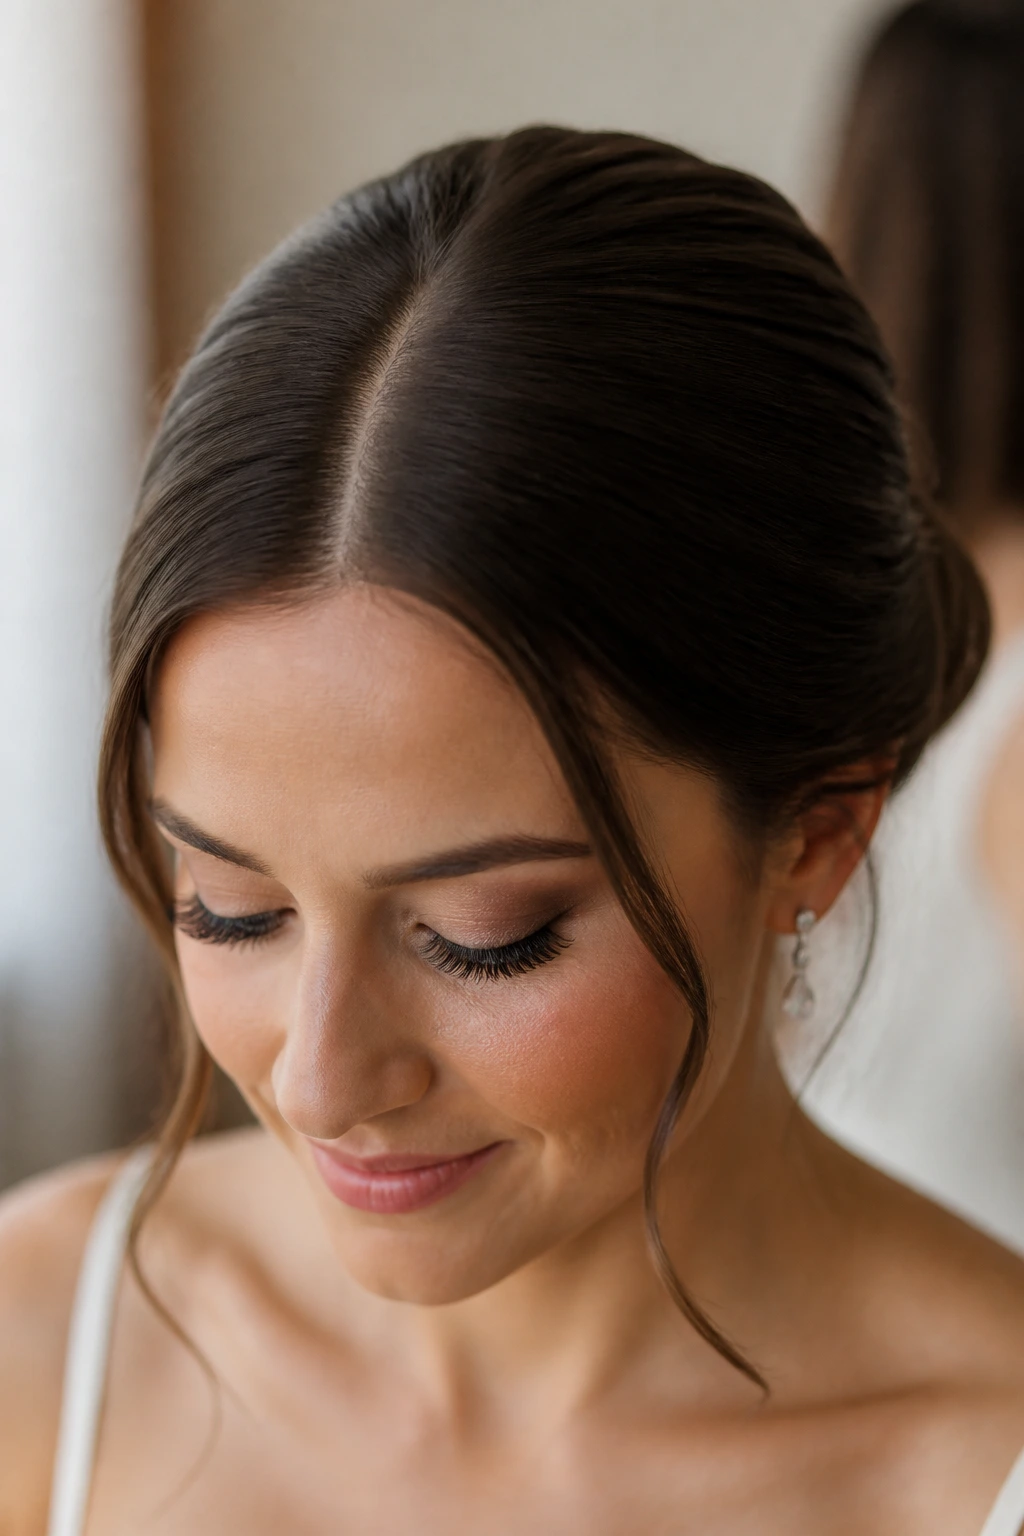
A middle part does not need to be severe to work well at a wedding. It just needs to be clean, steady, and matched to the rest of the shape. Once that line is right, the hairstyle gets a spine.
That’s why these looks can feel so different from each other and still belong in the same family. Some are glossy and quiet. Some move. Some lean into braids, ribbons, or curls. The part keeps all of them honest.
If you’re stuck between soft and polished, start at the scalp. The rest of the style usually settles faster than people expect.
