



Wedding updo hairstyles do one stubborn, glamorous job better than almost anything else on the bridal menu: they keep the face open, the neck clean, and the whole look under control when the day stops behaving. A good updo does not look stiff. It looks held, which is a different thing entirely. You can see the difference in the mirror before the ceremony even starts — the shape sits where it should, the hairline looks deliberate, and the back of the style has enough grip to survive hugs, warm rooms, and a few too many quick turns for photos.
The part most people miss is that wedding hair is not really about perfection. It’s about structure. The best wedding updo hairstyles use a little hidden engineering: pins crossed in an X, a base with some grit, a crown that’s lifted enough to flatter the profile, and front pieces that are soft on purpose rather than accidentally loose. That combination is what keeps a style from collapsing into a sad knot by the time the cake gets cut.
And yes, some updos do look fussy. But the good ones have personality. A low chignon can feel calm and classic. A braided crown bun can lean romantic and floral. A sleek knot can look expensive without shouting about it. The trick is matching the shape to the dress, the hair texture, and the kind of day you’re actually having — not the one in the magazine spread. The styles below are the ones that earn their keep when the veil goes on, the pins go in, and the real schedule begins.
Why These Bridal Updos Earn Their Place
-
They keep the neckline clear: A raised or pinned-up shape gives strapless, halter, square, and high-neck dresses room to breathe instead of tangling the whole look together.
-
They survive long hours better than loose curls: Hair pinned into a secure base moves less, frizzes less, and keeps its outline after photos, dinner, and dancing.
-
They work with veils and accessories: Low buns, tucked rolls, and centered knots give combs, pins, and floral pieces a stable place to sit without sliding.
-
They can be softened or sharpened fast: The same base can look polished for the ceremony and slightly looser for the reception with two or three strategic pulls.
-
They solve real hair problems: Fine hair gets padding and height, thick hair gets weight control, and curly hair gets shape without fighting texture.
-
They photograph from every angle: A wedding updo shows the jawline, earrings, shoulder line, and back detail in a way loose styles usually can’t.
1. Soft Low Chignon with Face-Framing Pieces
A soft low chignon is the first style I’d hand to someone who wants the safest kind of elegance. The knot sits at the nape, the silhouette stays clean, and the front pieces can be skimmed loose enough to soften the face without losing the shape. It has that calm, finished look that sits well with veils, pearl pins, and dresses that already do a lot of talking.
What makes this one work is balance. The bun doesn’t fight the head shape; it follows it. A center part or a gentle side part both work, but the important part is the base — a flat, secure tuck at the nape, not a puffed-up ball that looks like it’s trying too hard. If the hair is slippery, mist the lengths with texture spray first and twist the sections while the product is still tacky.
Why It Flatters
A chignon like this opens the face and still leaves enough softness around the cheeks to keep the look from feeling severe. It’s one of those styles that looks equally good with a cathedral veil or a pair of long drop earrings.
For brides with medium-length hair, this is a useful shape because it doesn’t need insane length to work. The ends are tucked, not displayed. That means fewer stray pieces and fewer emergency pin checks.
Quick Shape Notes
- Best with a low veil comb
- Strongest on hair that’s been blow-dried smooth
- Works with fine hair if you add a small bun form
- Looks best when the front tendrils are curled away from the face
Pro tip: Cross two bobby pins in an X over the center of the chignon before you finish with hairspray. It sounds small. It isn’t.
2. Braided Crown Bun with a Low Tucked Center
Why does this style keep showing up in wedding folders? Because it solves two problems at once. It gives you texture where the eye lands first, and it keeps the actual bun anchored low enough that a veil or floral comb can sit behind it without awkward gaps.
The braided crown bun starts with one or two braids along the hairline or temples, then pulls everything into a tucked center bun at the back. That means the front stays interesting even if the rest of the updo is simple. It’s a good fit for outdoor weddings, garden ceremonies, and any dress that already has soft detail in lace or embroidery.
A little mess is part of the charm here. Not sloppiness. Just enough lived-in texture that the braid doesn’t look like it was lacquered into place with a helmet.
What Keeps It from Falling Flat
A crown braid needs a dry, grippy base. Day-old hair usually behaves better than freshly washed hair, and a puff of dry shampoo at the roots helps the braid keep its shape instead of shrinking toward the scalp.
If the hair is very layered, use small clear elastics to hold the braid ends before tucking them into the bun. Layers love to escape. They are rude that way.
This one is especially good for brides who want the back of the style to look interesting in photographs. The braid gives you texture from the front angle, and the bun gives you a clean finish from behind.
3. Sleek Center-Part Knot
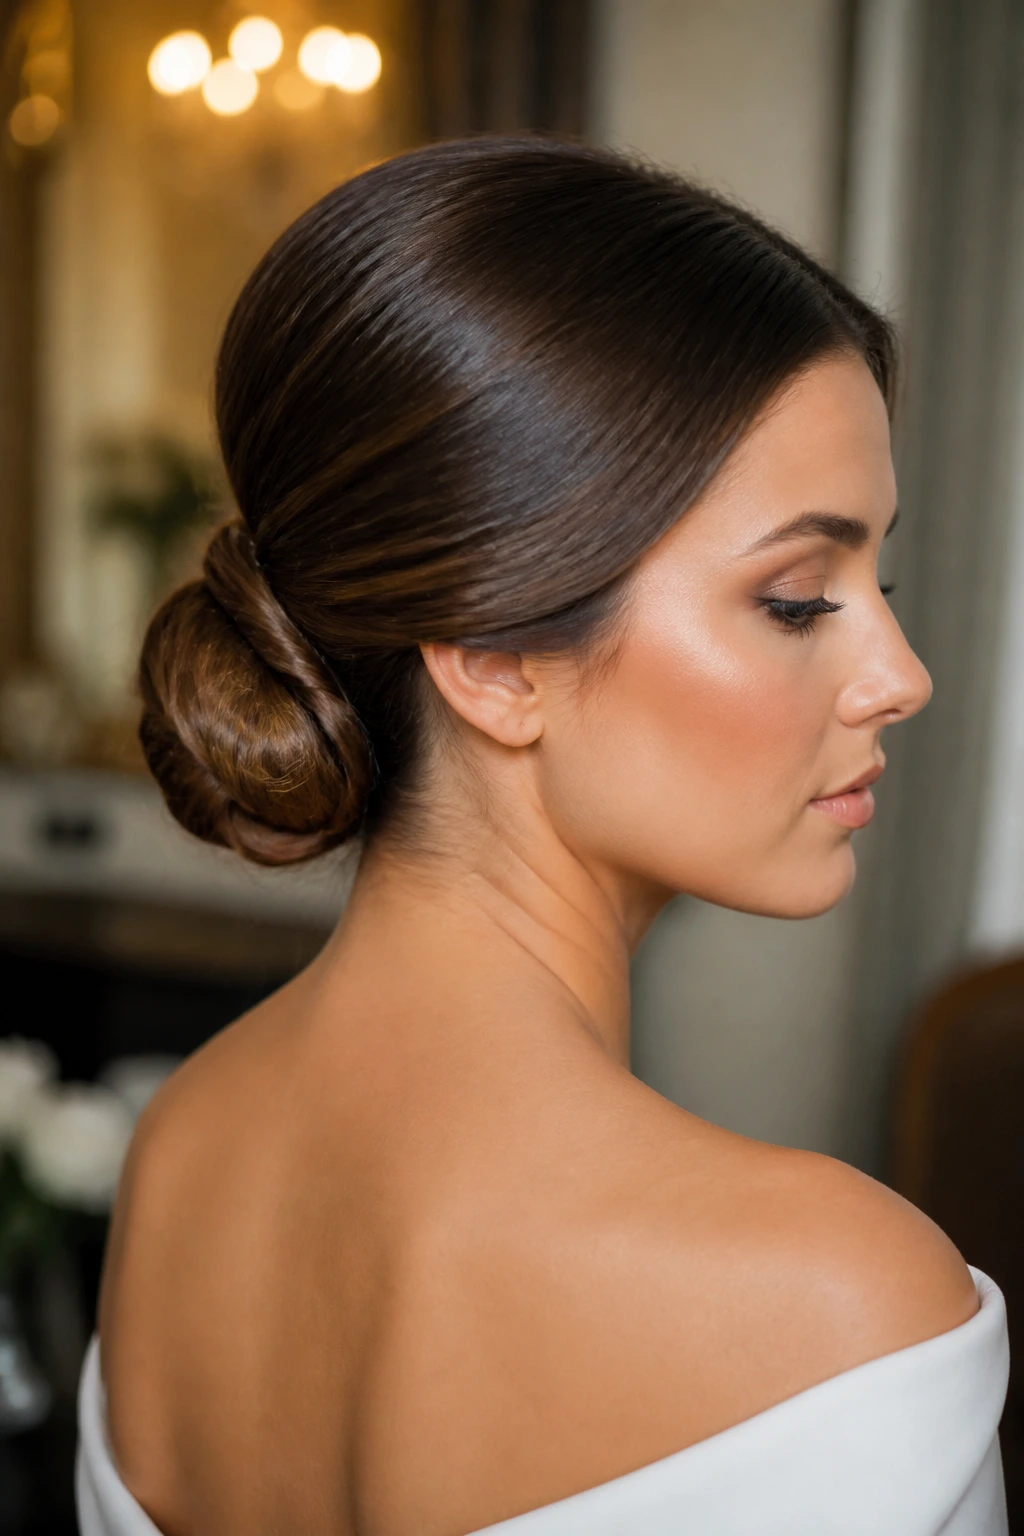
This is the modern bride’s answer to “I want it neat, but not boring.” A sleek center-part knot sits close to the head, with glossy surface lines and a low, controlled bun or knot at the nape. There’s no fluffy crown, no accidental volume, no loose ends pretending to be casual. It is sharp in the nicest way.
The style works because it commits. The part is straight, the sides are smooth, and the bun is wrapped tight enough to hold its outline through the ceremony and most of the reception. I like this look with high-neck gowns, sculpted silhouettes, and statement earrings that deserve their own space.
The only trick is preparation. If the hair is too clean, it can slide around and refuse to stay put. A little mousse at the roots and a thin layer of styling cream through the lengths gives it grip without making it greasy.
Best For
- Satin or crepe dresses
- Strong earrings
- Brides who want a clean profile
- Hair that sits naturally flat at the sides
A sleek knot also photographs beautifully from the side, especially when the bun is placed just below the occipital bone. That position keeps the head looking lifted and prevents the style from sinking too low on the neck.
4. Textured Messy Bun with Soft Tendrils
A textured messy bun is what happens when structure and softness stop arguing. The bun itself is pinned loosely enough to look relaxed, but the hidden base is still secure. The magic is in the texture — a little bend in the lengths, a few wisps around the temples, and tendrils that curve rather than hang.
This is the wedding updo for people who hate over-polished hair. It still looks intentional, though. That part matters. The difference between “textured” and “I got dressed in a hurry” is usually about two extra minutes with a curling iron and a few better pins.
Use a 1-inch iron or wand, bend the mid-lengths, then break the curls apart with your fingers before twisting them into the bun. If the ends are too straight, the style looks unfinished. If they’re too curled, it gets puffy fast.
Where It Works Best
This bun loves medium to thick hair, especially if you want the style to move a little when you turn your head. It’s also a good choice for brides who want a softer look after the ceremony — you can loosen one side just a bit and it still reads as polished.
A small warning: don’t over-tease the crown. The shape should read airy, not inflated.
5. French Twist with a Soft Roll
A French twist is one of those classic wedding updo hairstyles that never stopped being useful. It gives height, clean lines, and a beautifully vertical shape down the back of the head. But for bridal work, I prefer it with a soft roll at the top or a little looseness at the shell, because a twist that’s too hard-edged can feel severe in a white dress.
The hold comes from direction. Hair is gathered, rolled upward, and pinned along the seam of the twist. The pins need to go in parallel to the twist and then be crossed in places where the hair is heavy. If you’ve only ever used bobby pins one at a time, this is where the style starts teaching you better habits.
The French twist suits formal gowns, long earrings, and necklines that are simple enough to let the hair carry some of the visual weight. It’s especially good if you want the back of the head to look elegant from every aisle shot.
What Makes It Different
Unlike a loose bun, the twist has a clear line from nape to crown. That vertical shape elongates the neck and keeps the style from looking round or bulky.
It’s also one of the best updos for brides who don’t want a lot of stray pieces. You can leave one soft front sweep if you want movement, but the main body of the style stays tight and composed.
6. Halo Twists with a Hidden Center Bun
This style has a romantic backbone without slipping into costume territory. Two twisted sections wrap around the head like a soft halo and disappear into a tucked bun at the back. It’s graceful, but not precious. The shape gives the impression of fullness even when the actual hair is medium-weight or on the finer side.
The halo effect works best when the twists are done with a little tension. Not so tight that the scalp tugs, not so loose that the twists unravel. You want the surface to look smooth, with just enough separation to show the twist pattern. That detail is where the style earns its keep in photos.
If you want this to feel less “sweet” and more modern, keep the bun compact and the twists neat. If you want it softer, pull a few tiny sections near the temples after the pins are set.
H3: A Good Fit for Florals
This is one of the easiest updos to decorate with tiny floral pins or a narrow vine comb. The twist line gives the accessory something to follow.
It also works nicely with lace dresses that have a rounded neckline, because the halo shape mirrors the curve without competing with it.
7. High Wrapped Bun with a Clean Base
A high wrapped bun is a statement, plain and simple. It lifts the eye, shows off the neck and shoulders, and gives a gown with a dramatic back or collar more room to shine. It’s the bridal updo you choose when you want to look finished from across the room.
The danger with high buns is bulk. Too much stuffing under the shape and it starts to look puffy instead of sculpted. The fix is to build a stable base first, then wrap the outer hair around it in thin, clean sections. A bun form can help, but it should disappear by the end. If you can spot the padding in the mirror, the shape probably needs more hair around it.
I like this style on thick hair, but it also works on fine hair with a little strategic padding. It’s especially strong for brides who want their earrings, collarbone, and shoulders to be part of the look.
Tiny rule: if the bun sits too far forward, the whole style starts to look top-heavy. Keep it centered above the occipital bone, not at the hairline.
8. Fishtail-Wrapped Chignon
A fishtail-wrapped chignon is one of my favorites when a bride wants texture that feels crafted, not fussy. The fishtail braid adds a sharp, woven look around the base of the bun, and the chignon itself stays low and tidy underneath. It’s one of those styles that looks more complicated than it is, which is a pleasant trick on a busy day.
What makes it special is contrast. The braid has tiny, crisp details. The bun underneath is smoother and more closed in. That difference keeps the style from reading as one big blob of hair. If the braid is pancaked too much, though, it can spread out and swallow the rest of the look, so pull it only until the edges are visible, not lacy.
This style is lovely with highlighted or balayaged hair, because the braid pattern catches light differently along each section. If the dress is simple, the braid gives you something to look at. If the dress is already detailed, keep the braid smaller and cleaner.
When I’d Use It
- For thick hair that holds braid structure well
- For brides who want a braid without a full boho crown
- For gowns with smooth fabrics like crepe or silk
- For side or center parting, depending on face shape
A fishtail wrap needs patience. Not endless patience. Just enough that you don’t rush the weave and end up with one side puffing out more than the other.
9. Curly Pineapple-Inspired Updo
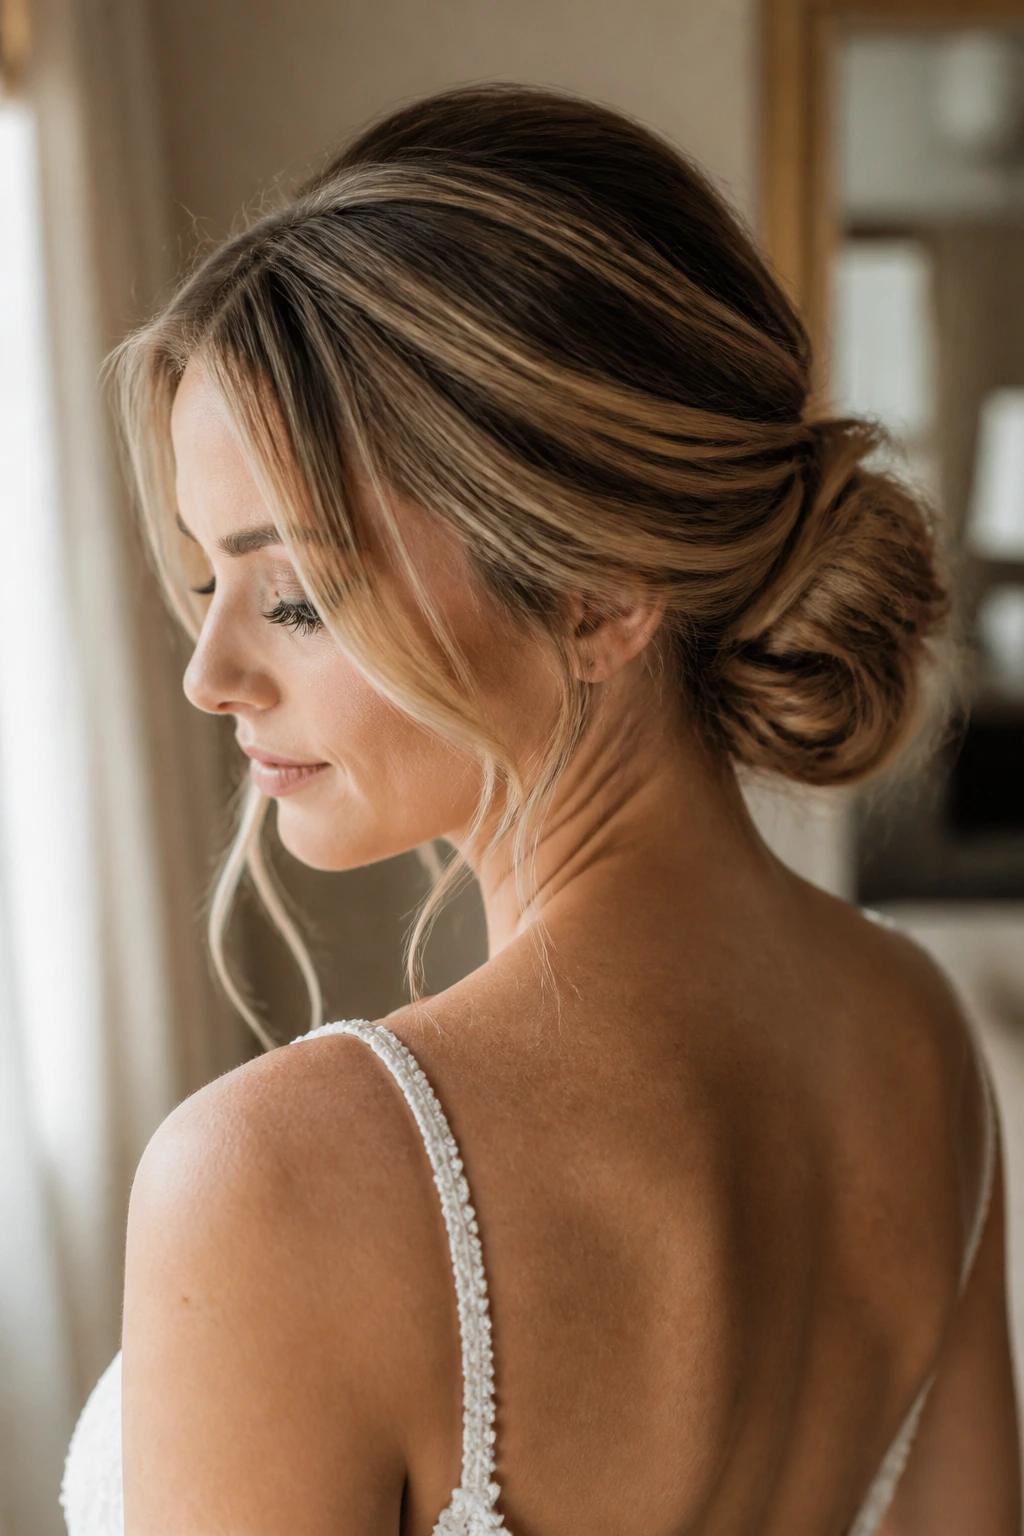
Curly hair should not be forced into pretending it’s straight hair in a bun. That usually ends badly. A pineapple-inspired updo keeps the curl pattern alive, gathers the bulk high or mid-high, and lets the perimeter be pinned in a way that respects the texture instead of flattening it.
The shape is less about combing everything smooth and more about directing the curls upward and inward. Use your fingers, not a brush. A brush will break up the curl clumps and turn the whole thing into fluff. Start with moisturized curls, then pin the sides and nape softly, leaving the top volume where it naturally wants to sit.
This is a beautiful option for brides who want movement and texture without spending the whole morning fighting their hair. It also tends to photograph well because the curl pattern stays visible. That’s not a small thing. Curly hair has its own architecture, and wedding styling is better when it stops trying to erase it.
A few decorative pins around the perimeter can make the style look intentional rather than casual. Keep them light. Heavy accessories drag curls down faster than people expect.
10. Faux Updo for Short Hair with Hidden Pins
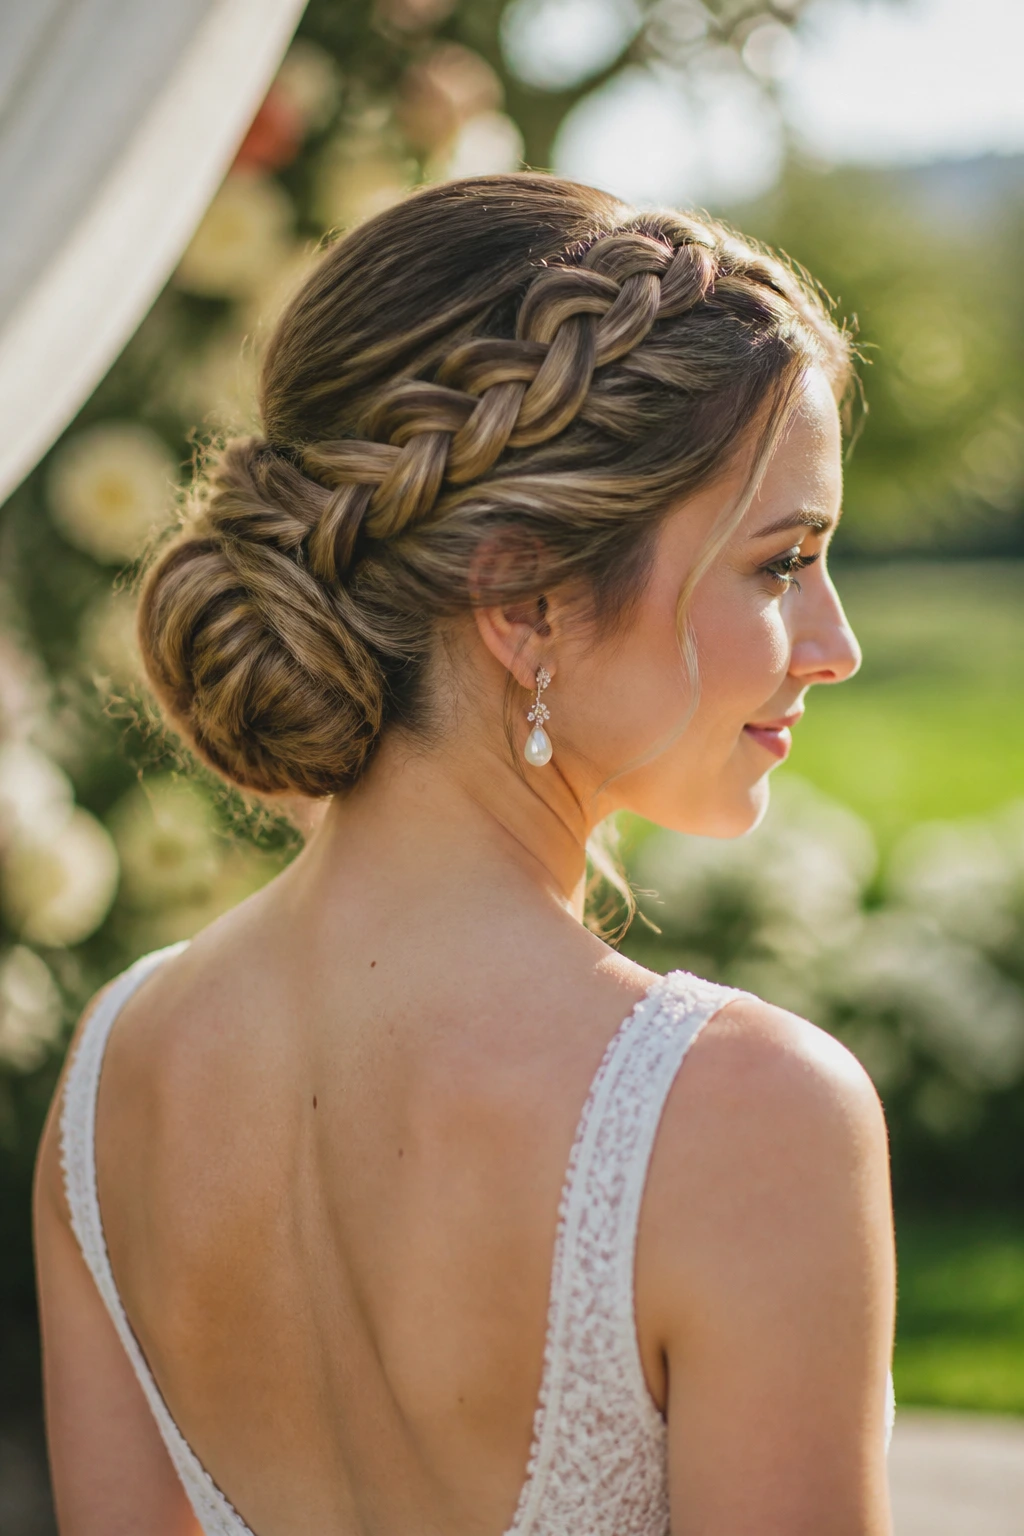
Short hair does not disqualify you from a wedding updo. It just changes the method. A faux updo on a bob or shoulder-length cut uses twists, pin rolls, and hidden anchor points to create the illusion of a fuller pinned style. It’s one of the more satisfying looks because the finished shape feels a little like a magic trick.
The secret is tiny sections. Try to pin too much hair at once and the style slips. Work in 1-inch or 2-inch pieces, twist them inward, and pin each section before moving on. Clip-in pieces can help, but they should blend into the style rather than announce themselves. If you’re using them, curl the natural hair and the extension hair together so the texture matches.
This look is especially useful for brides with layers that refuse to stay in one place. A textured bob can become a soft pinned shape without needing a lot of length. It’s also good if you want earrings to take center stage.
Quick Reality Check
The shorter the hair, the more the pins matter. Use more than you think. Then add one more.
That sounds dramatic. It isn’t.
11. Side-Swept Low Updo
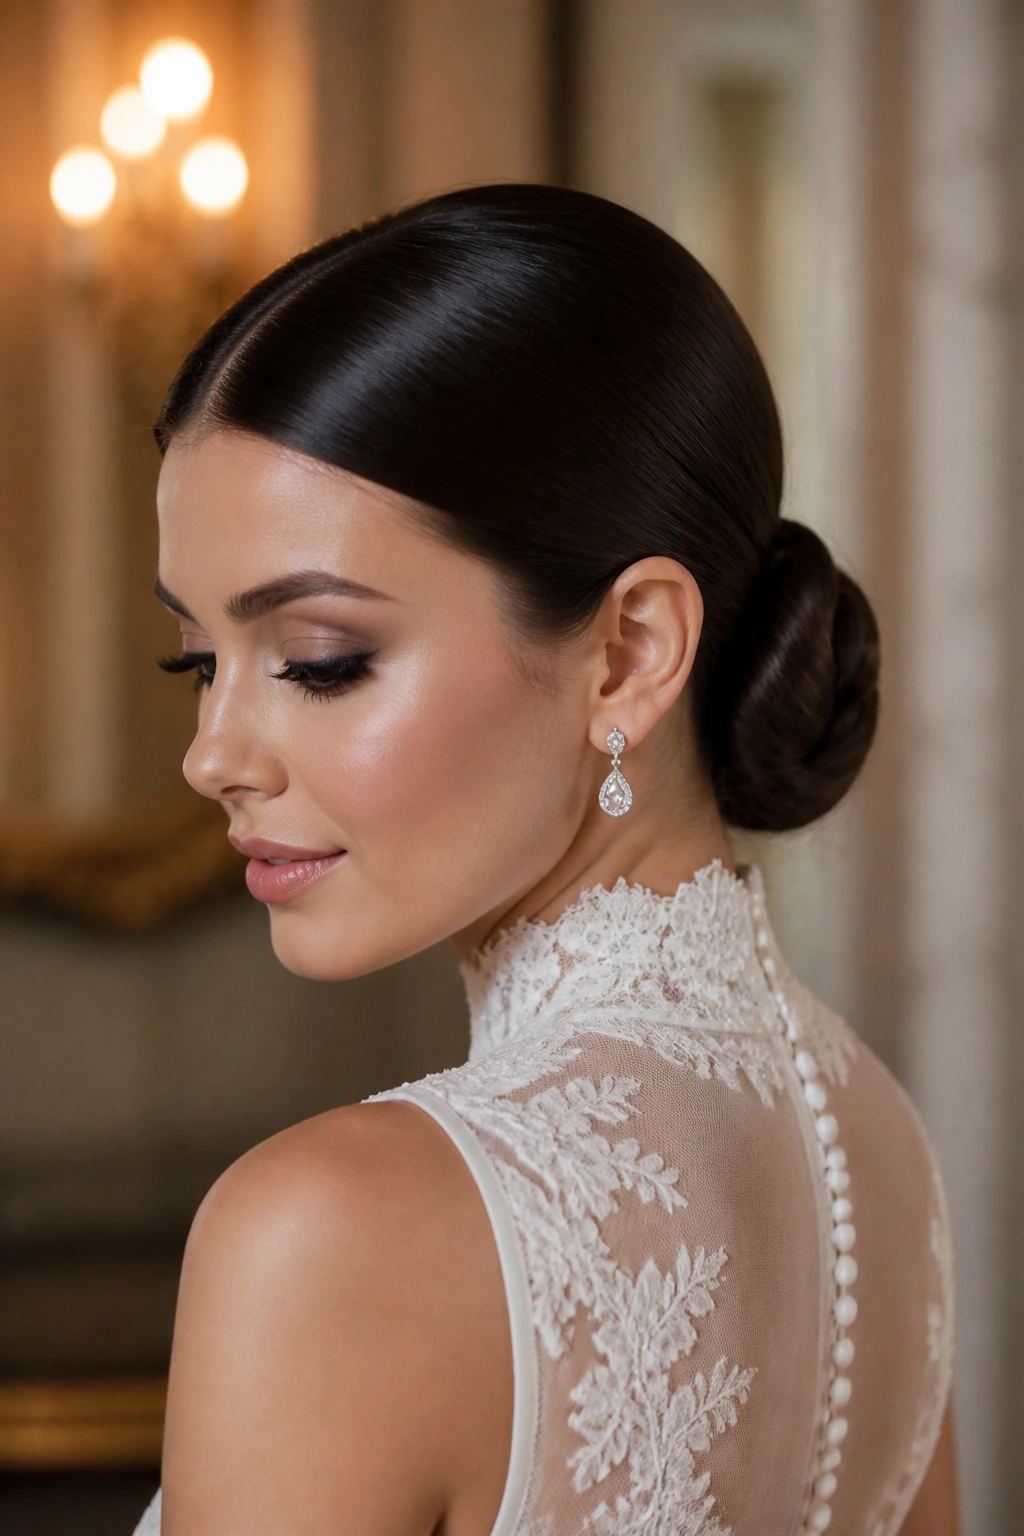
A side-swept low updo has a built-in sense of movement. Instead of sitting dead center, the shape gathers off to one side, which gives the whole style a little asymmetry and a lot of charm. It works especially well with one-shoulder dresses, side-detail gowns, and brides who like a profile that feels softer than a strict center style.
The best side-swept looks don’t overdo the sweep. The hair should appear to settle naturally into the side, not be dragged there like luggage. A deep side part helps, and a few curled pieces can be guided across the forehead or near the cheekbone to soften the front. The back then tucks into a low knot or roll that sits just behind the ear line.
This is one of those styles that makes the earrings matter. If you’ve got a beautiful ear cuff or a long drop earring, the side sweep frames it instead of hiding it. It’s also a clever choice for brides who want one side of the face slightly more open for photos.
Best tip: keep the heavier mass on the side opposite your dominant profile angle. The camera will find it.
12. Pearl-Pinned Ballet Bun
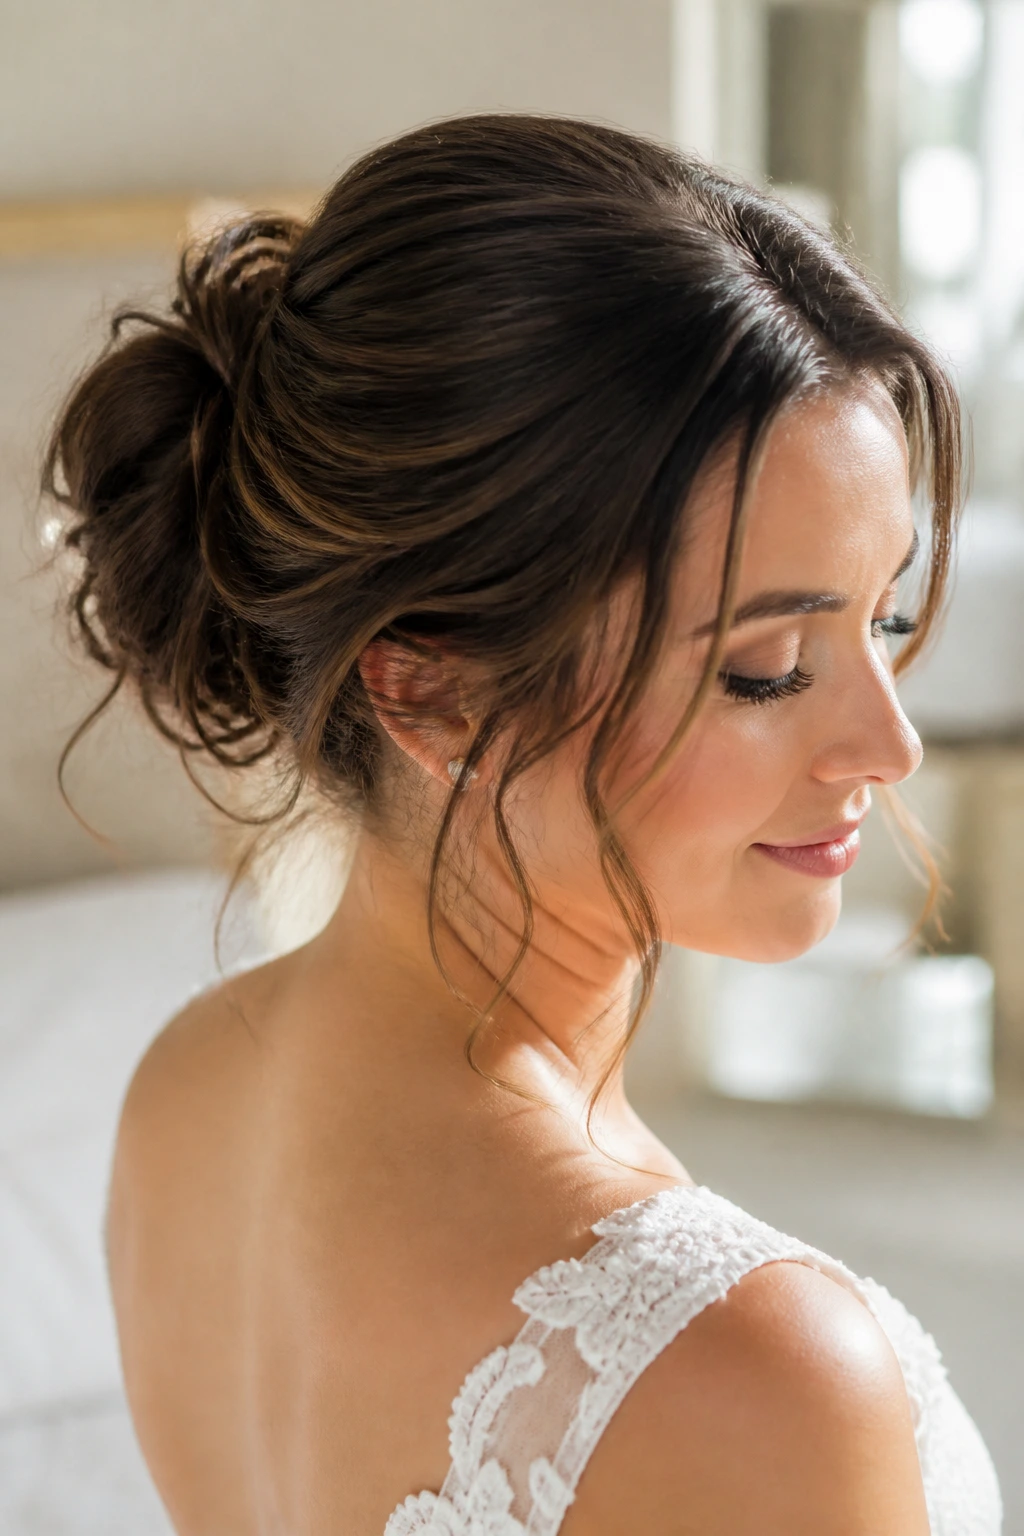
A pearl-pinned ballet bun feels polished without becoming cold. The bun itself is smooth and round, usually centered low or just above the nape, and the pearl pins or pearl-topped hairpins are placed around the perimeter like a small constellation. It’s neat. That’s the point. Nothing about it pretends to be accidental.
This style works best when the surface is clean and the bun shape is carefully wrapped. If the base is lumpy, pearl pins can’t hide it. They only decorate what’s already there. I like this on brides who want a classic gown to stay the main event while the hair quietly supports the whole look.
Because the bun is compact, it also tends to hold well once set. That makes it useful for long ceremonies or any wedding where you’re moving from one room to another and don’t want to think about your hair every twenty minutes.
The Detail That Matters
Place the pearls where the bun needs reinforcement, not just where they look cute. Around the seams, over a pin line, or at the curve of the wrap — that’s where they actually help.
A pearl bun can look formal or soft depending on the finish. Leave the surface glossy for a cleaner feel. Loosen the crown a touch if you want it gentler.
13. Braided Bun with Floral Pins
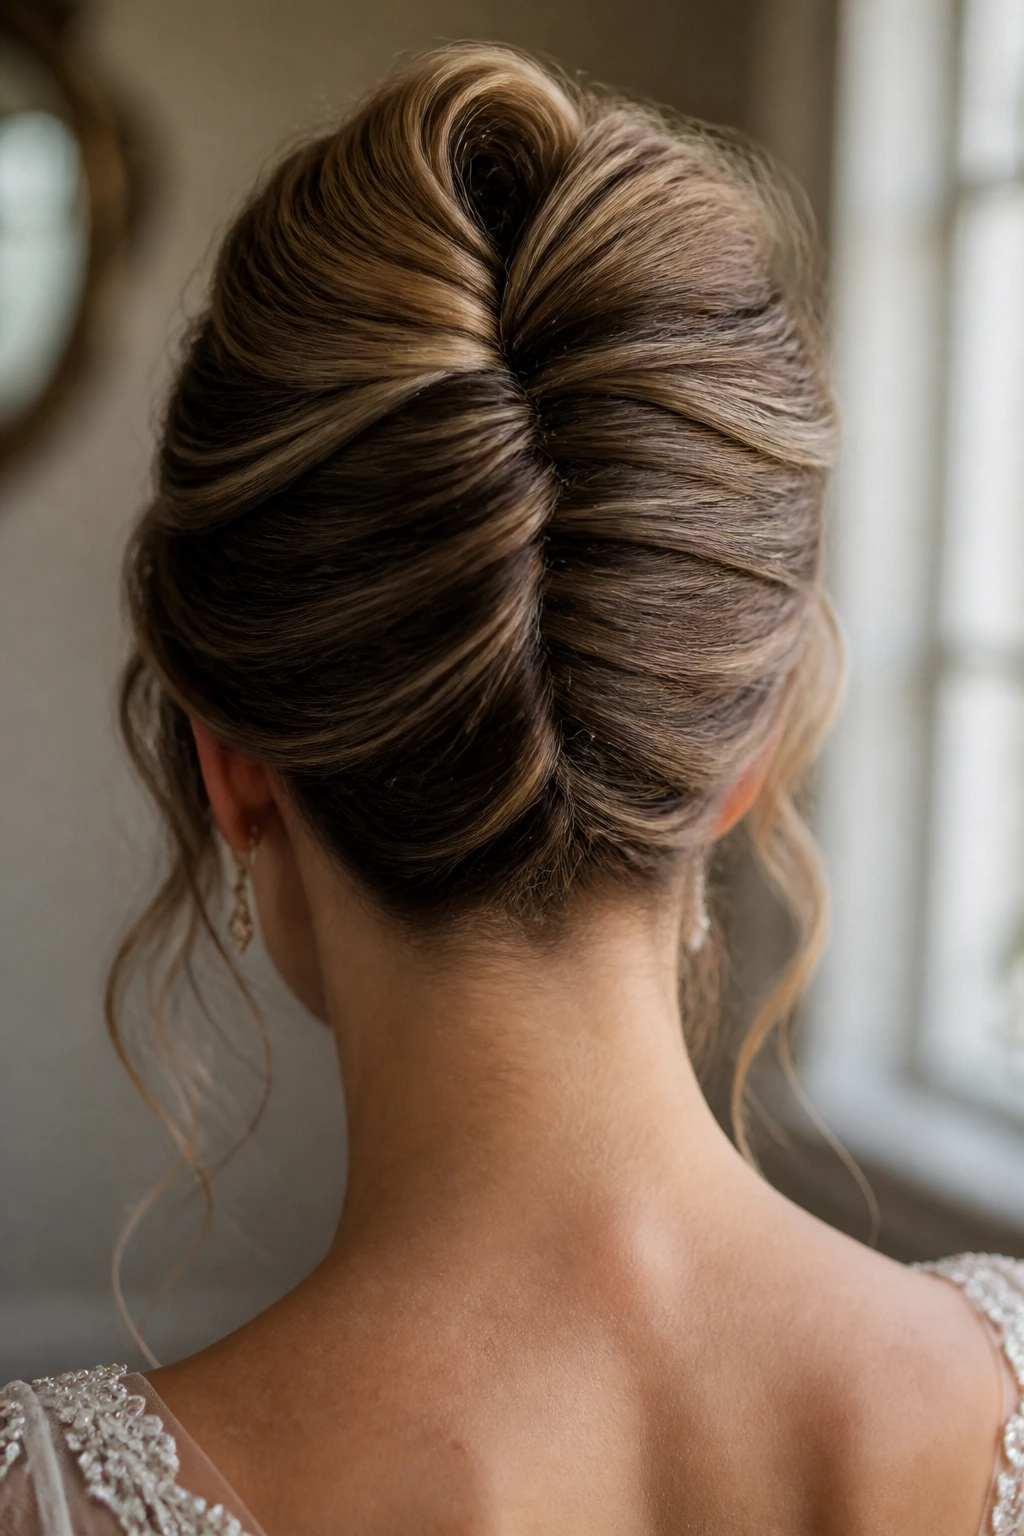
A braided bun with floral pins is the style I’d send to the bride who wants texture and romance without turning the whole head into a flower arrangement. The braid feeds into a bun, and the floral pins are used as accents, not a crown. That restraint matters. Too many blooms and the hair starts to compete with the bouquet.
The braid can be anything from a simple three-strand plait to a Dutch braid that sits a little higher off the scalp. The important part is that it creates a visible pathway into the bun. That line gives the style shape. After the bun is pinned, tuck in the flowers where the braid changes direction or where the bun needs a little softness.
Fresh flowers are lovely, but they’re also fragile. Tiny roses, spray blooms, or well-cased florals work better than big, heavy stems. If you’re using real flowers, make sure the florist or stylist has a plan for moisture and placement. A flower wilting into a hairpin is not the memory anybody wants.
This style shines at garden weddings, outdoor receptions, and ceremonies where the dress already carries soft detail. It has a little movement, a little structure, and enough visual interest to feel complete without extra fuss.
14. Voluminous Crown-Teased Updo
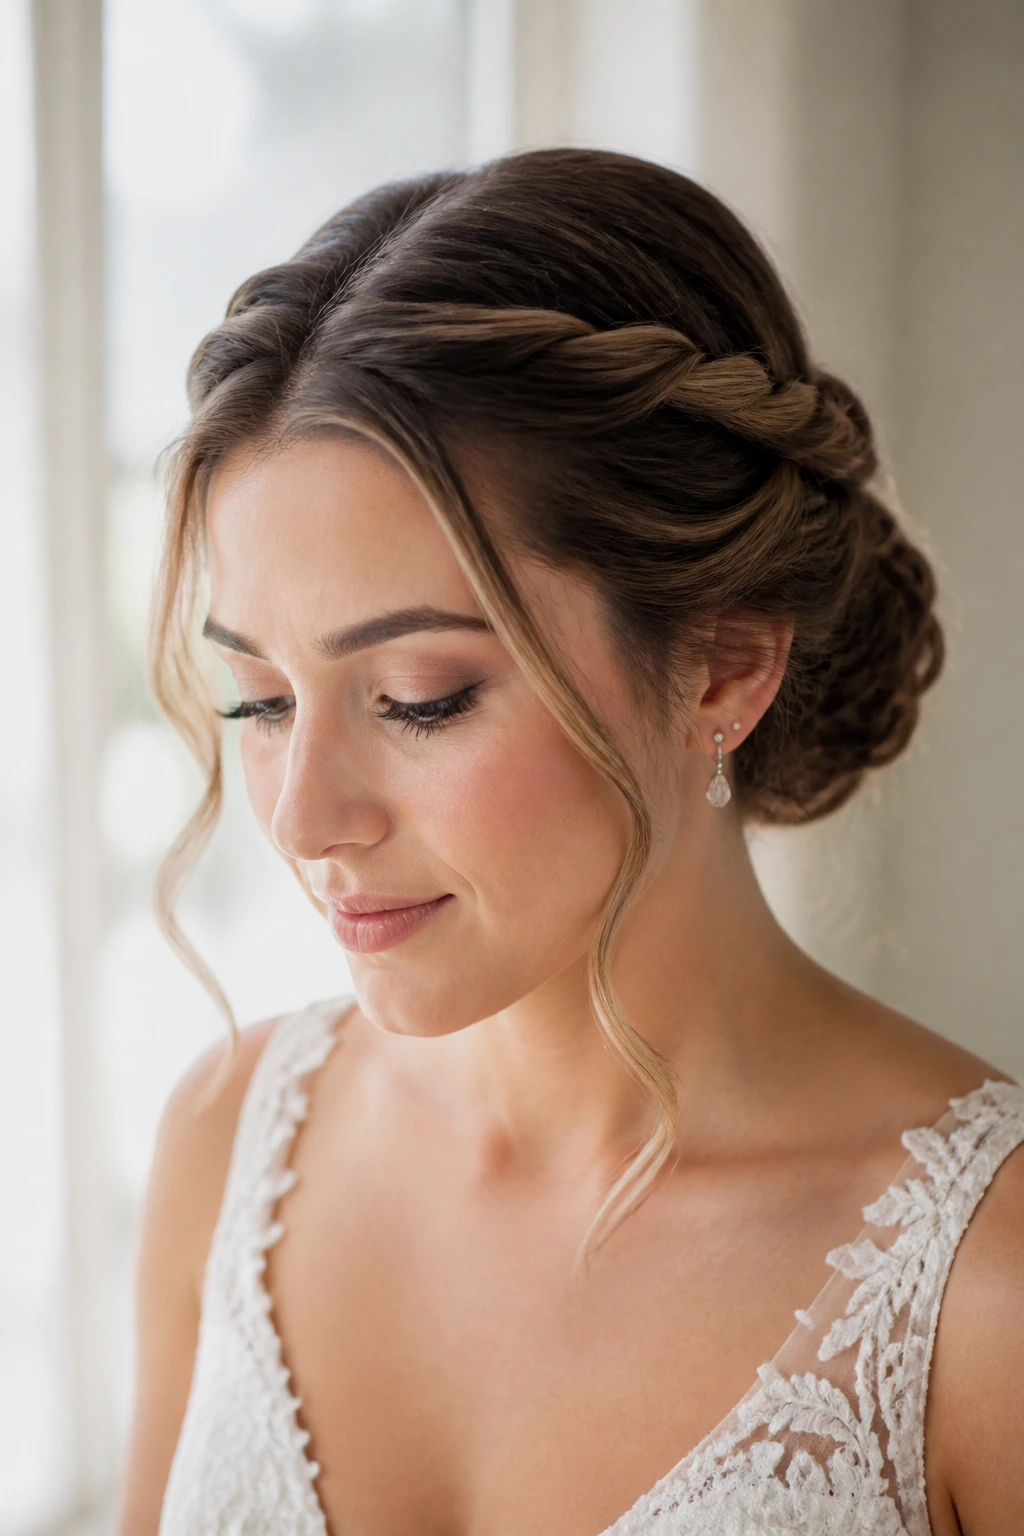
If your hair is fine, flat, or prone to deflating by midday, this is the style that buys you some altitude. A voluminous crown-teased updo uses backcombing and strategic pinning at the crown to create lift before the hair is wrapped into a bun, roll, or tucked shape. The outer layer is smoothed over the tease so the finished look still feels clean.
Teasing is where people often go wrong. They backcomb the whole head and end up with a rough shell that looks dry and noisy. You only need a few internal sections, usually at the crown and slightly behind it, to give the style body. Smooth the top layer with a boar bristle brush or your palms, then pin the shape in place.
This style is especially good with cathedral veils, because the crown gives the comb somewhere to sit without flattening the whole hairstyle. It also helps balance a fuller skirt or a gown with shoulder detail.
Why It’s Worth the Extra Minutes
A little lift changes the whole profile. Not a fake bump. Just enough height to keep the style from sinking into the neck.
If you’ve ever had an updo look small in the mirror, this is the fix.
15. Gibson Tuck with a Soft Veil
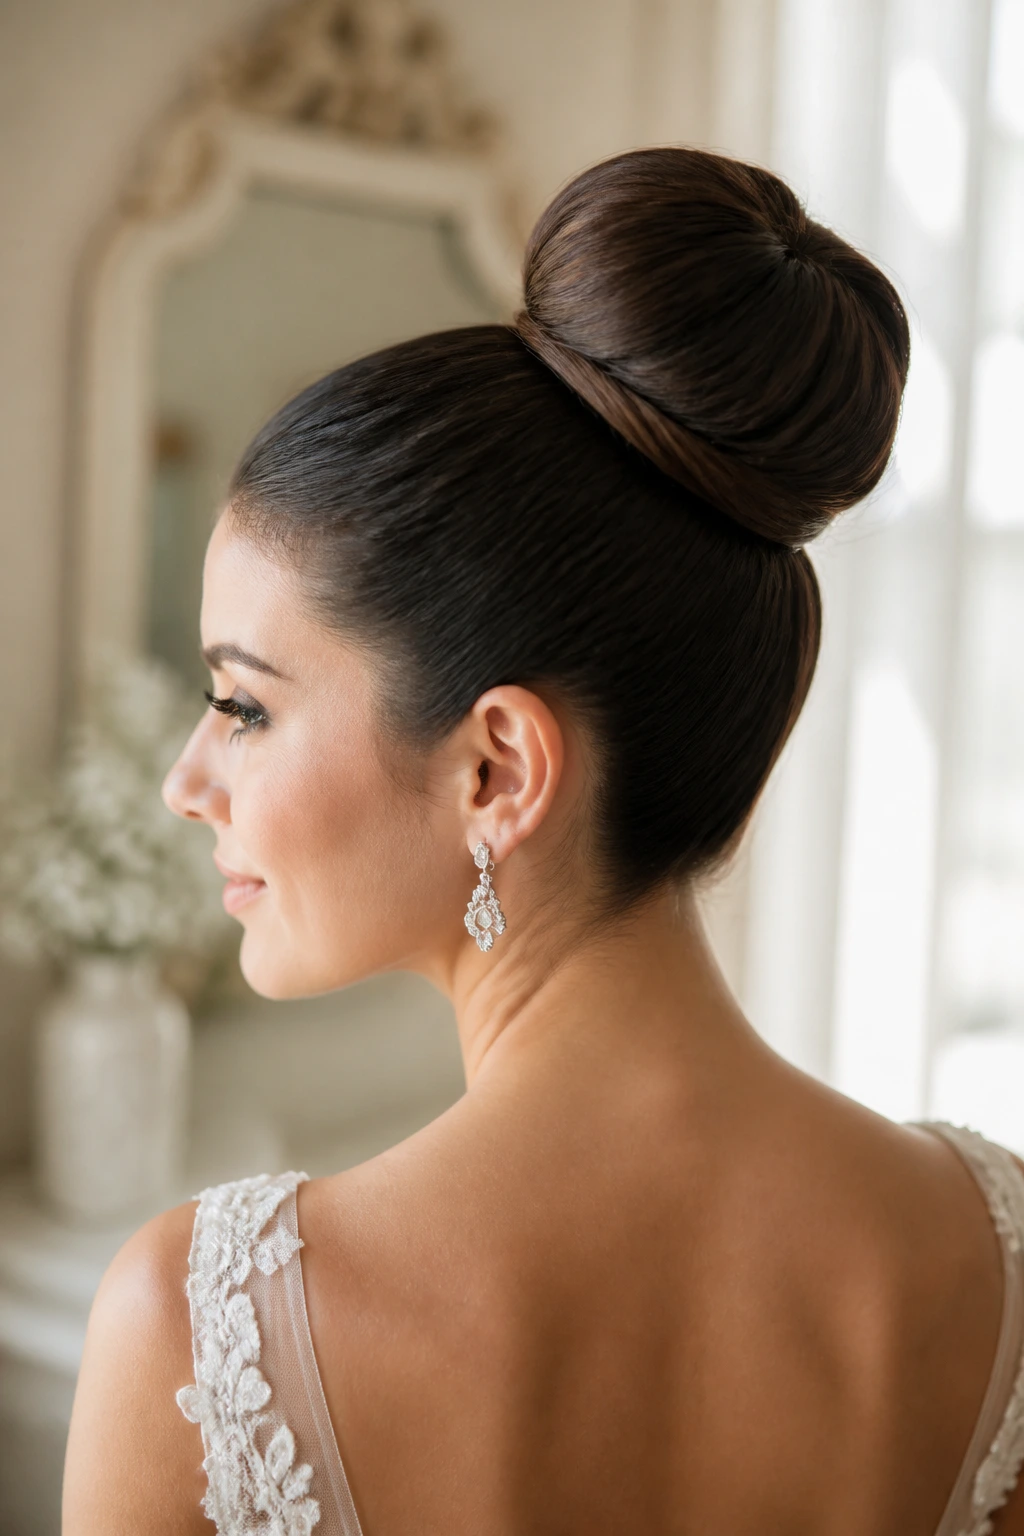
The Gibson tuck has old-school charm, but it doesn’t feel old when it’s done well. Hair is rolled upward and inward at the nape, then tucked into itself so the shape reads as a smooth fold rather than a knot. It’s tidy, elegant, and very good at holding a veil comb.
I like the Gibson tuck for medium-length hair because it creates the illusion of fullness without requiring a big bun. It also works beautifully with side parts and subtle wave at the front. If the hair is too glossy and slippery, the tuck slides. A little grip spray or styling mousse keeps the roll from uncoiling.
This is a smart choice for brides who want a look that feels classic without landing in “formal prom” territory. It pairs well with lace sleeves, vintage-inspired gowns, and dresses that have a lot of detail on the front but a calm back.
The veil usually sits just above the roll or right at the top of the tuck. That positioning lets the shape show once the veil comes off, which is a nice practical touch.
16. Seamless Knot for Thick Hair
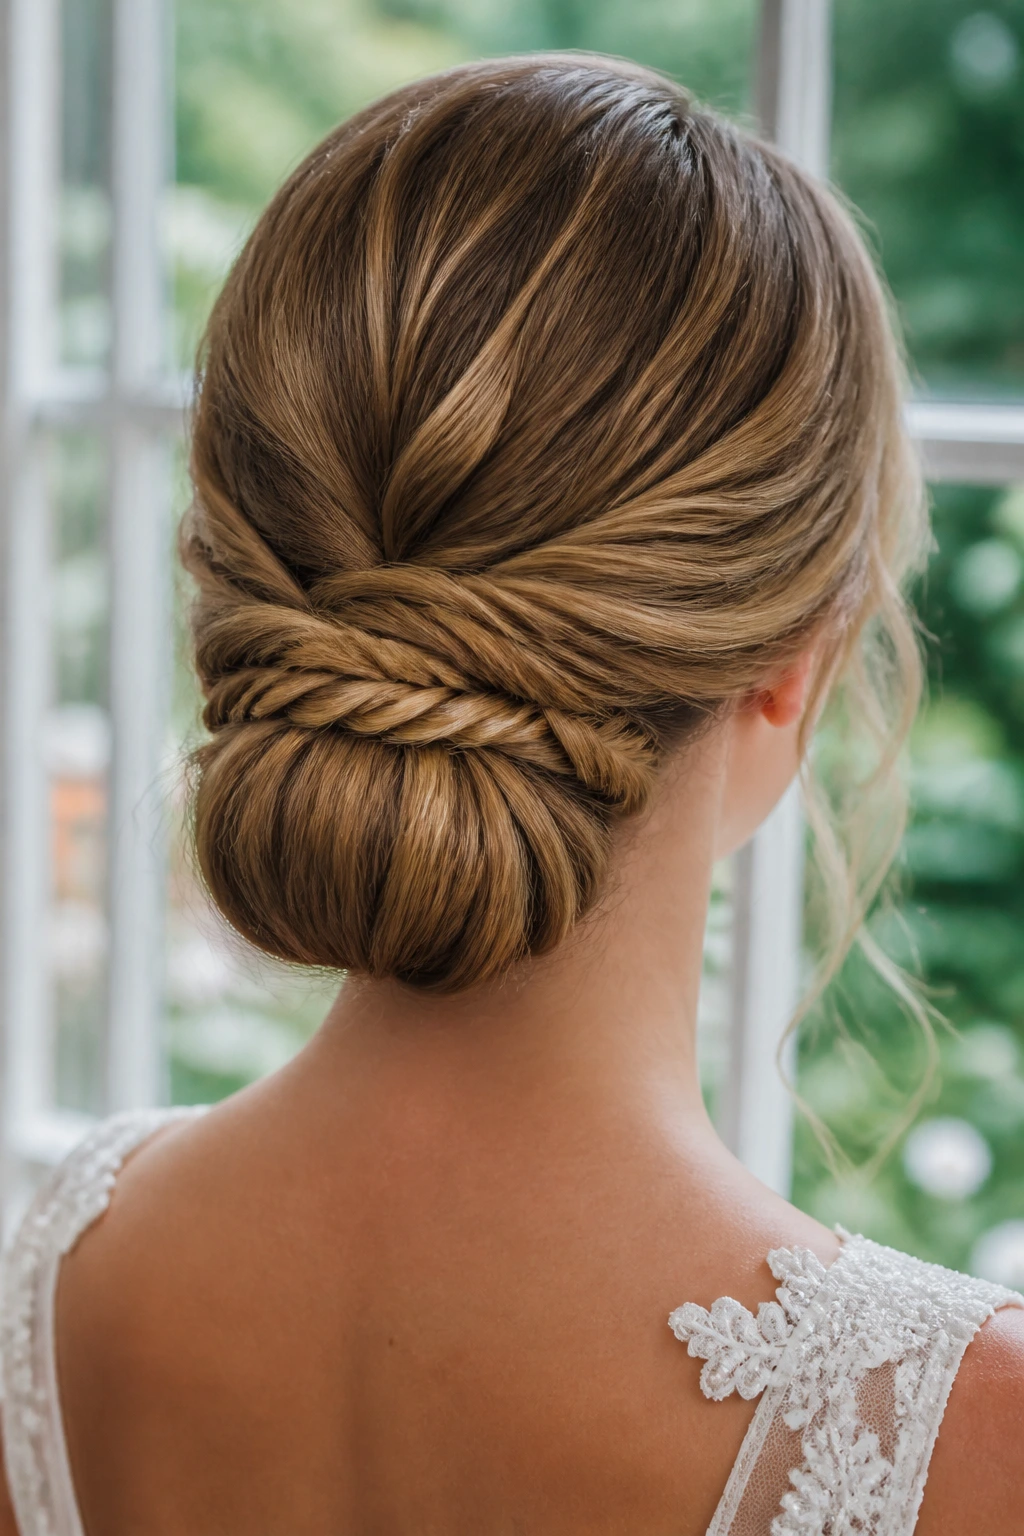
Thick hair needs a different kind of respect. If you try to force it into a tiny bun, it pushes back. A seamless knot is built to handle density without puffing out at the edges. The hair is divided into sections, each section twisted inward, and the ends are tucked so the final shape looks smooth from the outside.
The trick with thick hair is not just stronger pins. It’s sectioning. When you divide the hair into manageable parts, each section can be pinned flat against the head instead of fighting the whole structure. I also like to use a little less product on the ends and more at the roots, so the bun has grip without becoming sticky.
This style is especially useful if the bride wants a low profile but still needs the hair to feel secure. Thick hair can look beautiful in a bun, but only if the bun is built with enough anchor points. Otherwise it expands by itself like it’s trying to leave.
A practical note: use U-pins for the bulk and bobby pins for the finish. They do different jobs.
17. Looped Bun with Ribbon or Velvet Tie
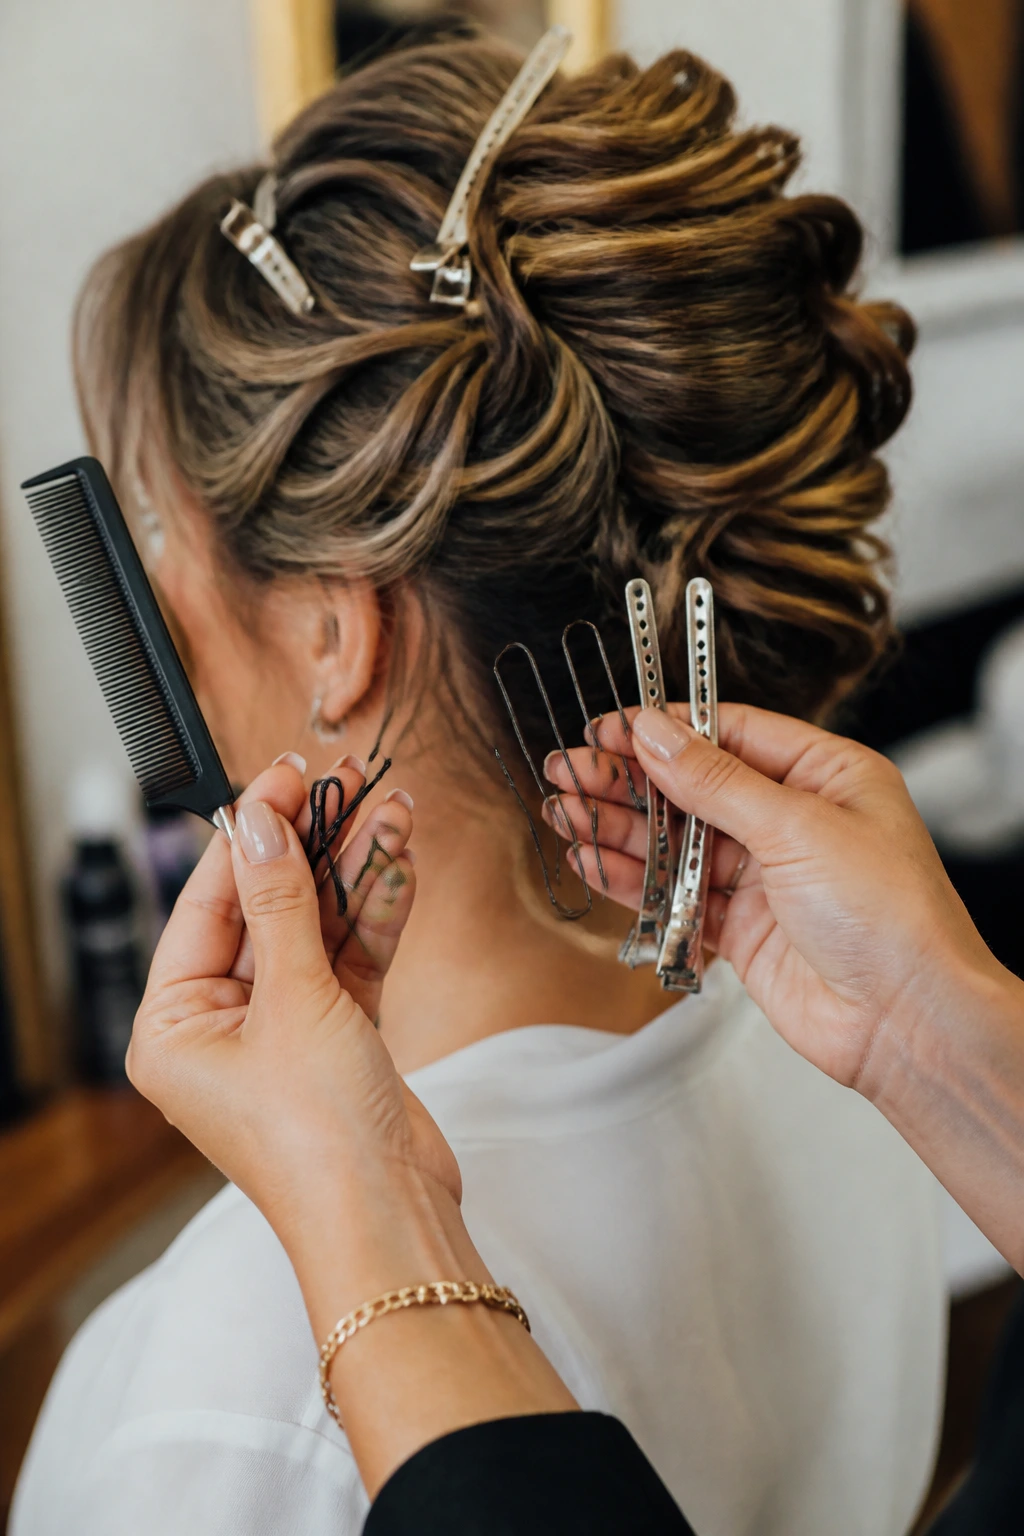
A looped bun with a ribbon or velvet tie has a touch of fashion-editor energy, which is useful if you don’t want your bridal hair to feel too expected. The loops create soft volume, and the tie adds color or texture at the base. It can read sweet, dramatic, or modern depending on the material you choose.
This look works especially well when the ribbon is part of the dress story — ivory satin for a polished gown, velvet for a cooler season, silk for something lighter and more fluid. The ribbon should not just hang there. It should anchor the bun or wrap the base in a way that feels intentional. If it flops around, shorten the tails or tuck them under one loop.
I like this style on brides who want one small custom detail that makes the whole look feel personal. It doesn’t need florals, pearls, or a lot of extra decoration. The ribbon is the decoration.
It also gives you a useful trick if your hair is layered or shorter than you’d like. The loops and tie help disguise the ends while still keeping the style soft.
18. Sculpted Rosette Updo
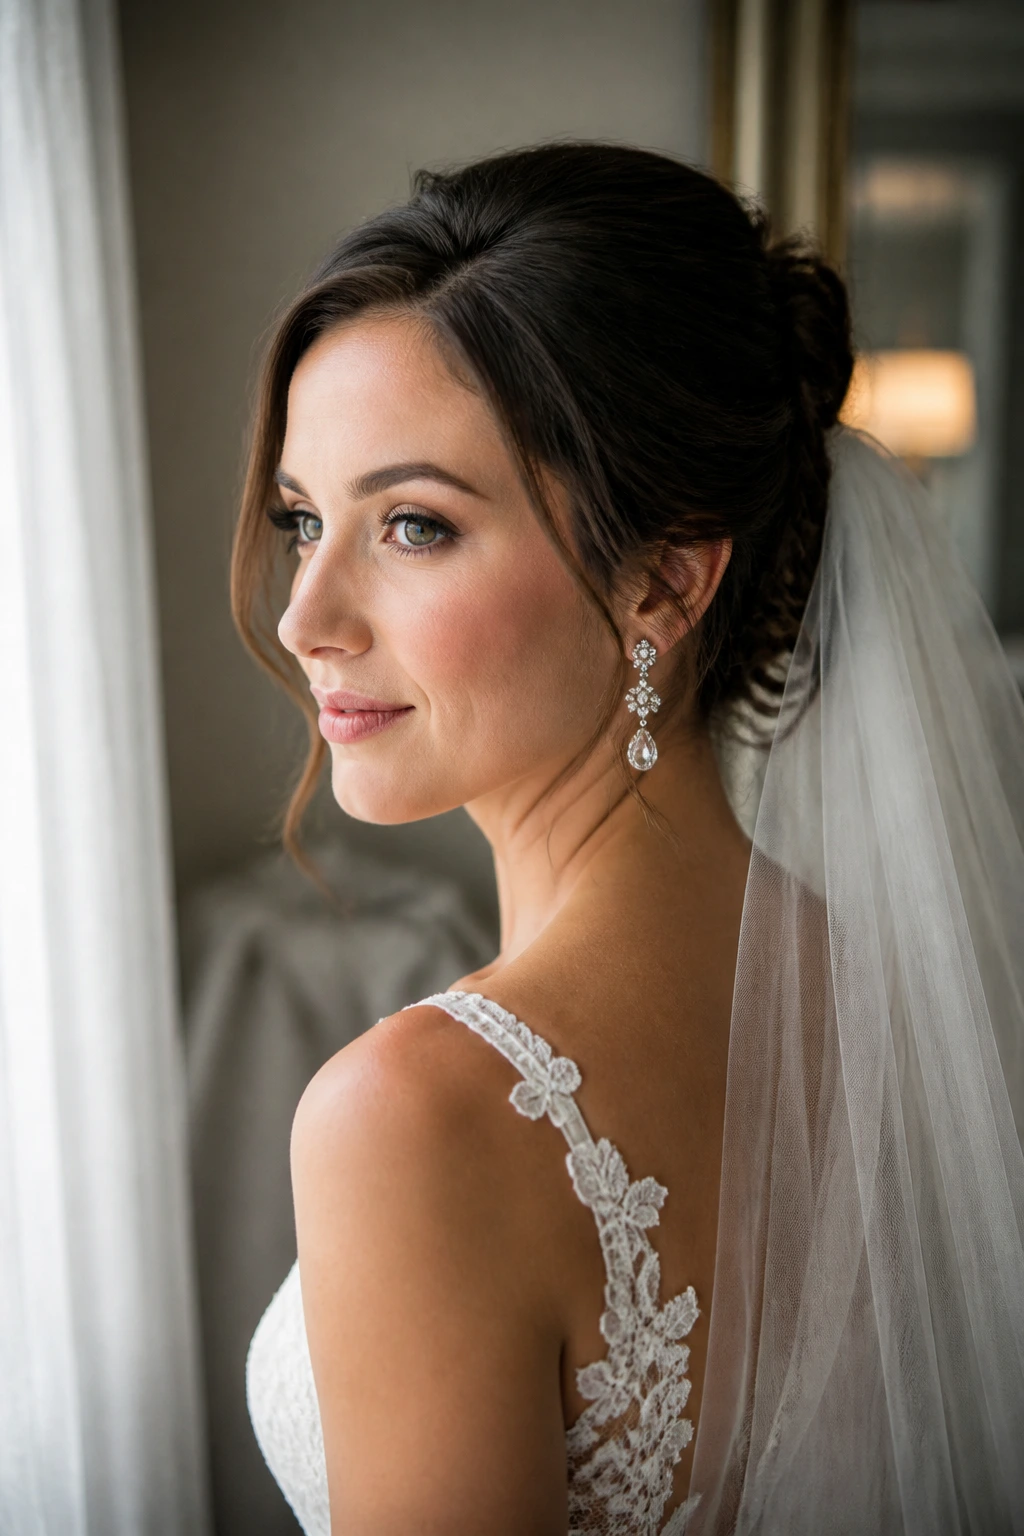
A sculpted rosette updo is the most editorial of the bunch, and I mean that as a compliment. It’s built from rolled sections pinned in a circular pattern so the hair resembles layered petals or a soft rosette from the back. The result is elegant, a little dramatic, and impossible to mistake for a random bun.
This style takes more time, more pins, and a steadier hand. That’s the trade. You get a look with visible craftsmanship. Each section has to be rolled, curved, and pinned so the shape stays symmetrical enough to read as a deliberate design. It’s a strong choice for a bride who wants the hair to be a real feature, not just a support act.
The rosette works best on medium to thick hair, though it can be faked on finer hair with padding and a good base layer. Keep the front simpler if the back is ornate. The whole point is to let the shape speak for itself.
That’s the kind of updo that turns heads at the wrong moment — during cocktail hour, while you’re laughing, while you’re not even thinking about your hair. Which is usually the best sign.
Why Wedding Updos Hold Better Than Loose Styles
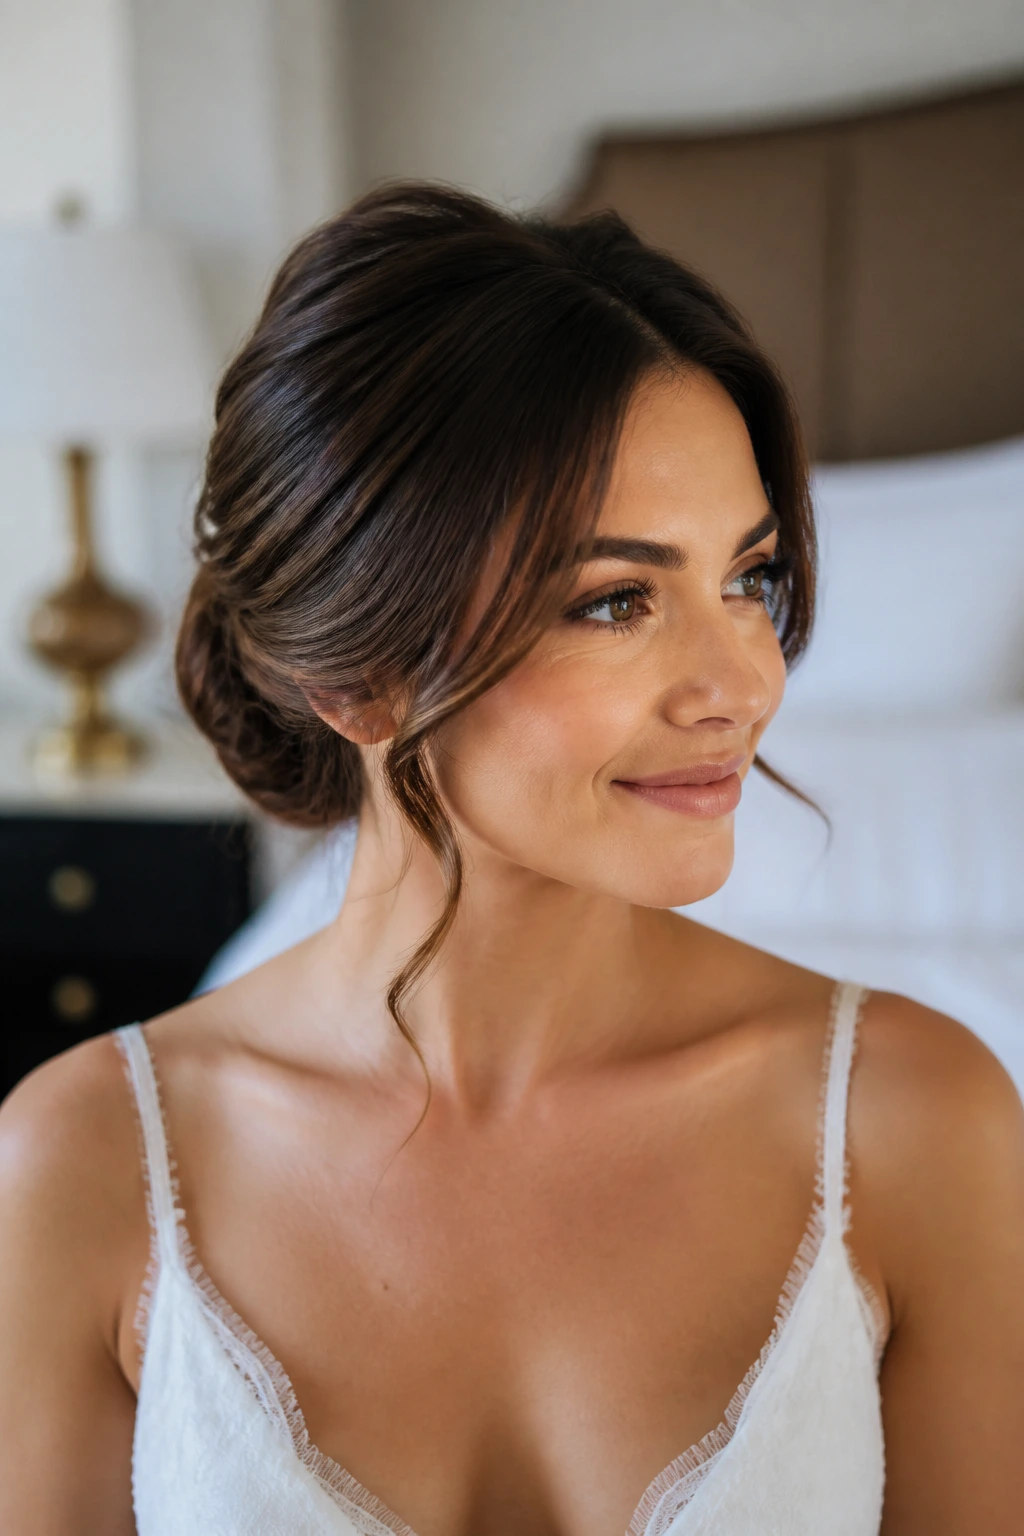
A wedding updo wins on mechanics before it wins on looks. Hair gathered close to the head has less surface area to frizz, less length to snag, and less weight swinging around when you move. That means the style has fewer chances to collapse during the long middle stretch of the day, when the ceremony is over and the photos are still going and somebody keeps asking for one more group shot.
The second reason is grip. Updos give you anchor points. You can pin at the nape, anchor under a braid, tuck under a roll, or hide a pin in a twist. Loose styles rely more on the hair’s own texture, which is why they need more touch-ups. If you’ve ever watched curls fall flat by dinner, you’ve already met that problem.
Gravity, But Useful
The lower the center of the style, the easier it is to keep in place. A low chignon or tucked roll often stays cleaner than a half-up style because it is not fighting gravity all day. High buns can also hold well, but they need a firmer internal structure.
Second-day hair helps here. It is not a rule carved into stone, but a slightly lived-in texture gives pins more to hold onto. Freshly washed hair can be too sleek, especially if it’s fine or straight. If you must wash the morning of, keep conditioner off the roots and dry the hair completely before styling.
Essential Tools for Wedding Updo Hairstyles
-
Tail comb: Useful for clean parts, sectioning, and lifting small pieces without making them fuzzy.
-
Bobby pins in two shades: Match the hair color as closely as possible; black pins can show in blonde hair and light pins can flash in dark hair.
-
U-pins: Better than standard bobby pins for heavier buns and thicker sections because they grab bulk without crushing it.
-
Sectioning clips: Keep the hair organized while you build the shape. They save time and prevent tangles.
-
1-inch curling iron or wand: Ideal for bending tendrils, adding grip, and softening the front pieces before pinning.
-
Texturizing spray: Gives fine or slippery hair something to hold. A little goes farther than people think.
-
Flexible-hold hairspray and stronger finishing spray: The first sets the shape while the second locks the final style.
-
Boar bristle brush: Great for smoothing the outer shell of sleek styles without adding frizz.
-
Small bun form or padding: Helpful for low-volume hair when you want a fuller shape without over-teasing.
-
Hand mirror: Essential for checking the back. The front can look perfect and the rear can still be misbehaving.
Smart Product Choices and Hair Prep
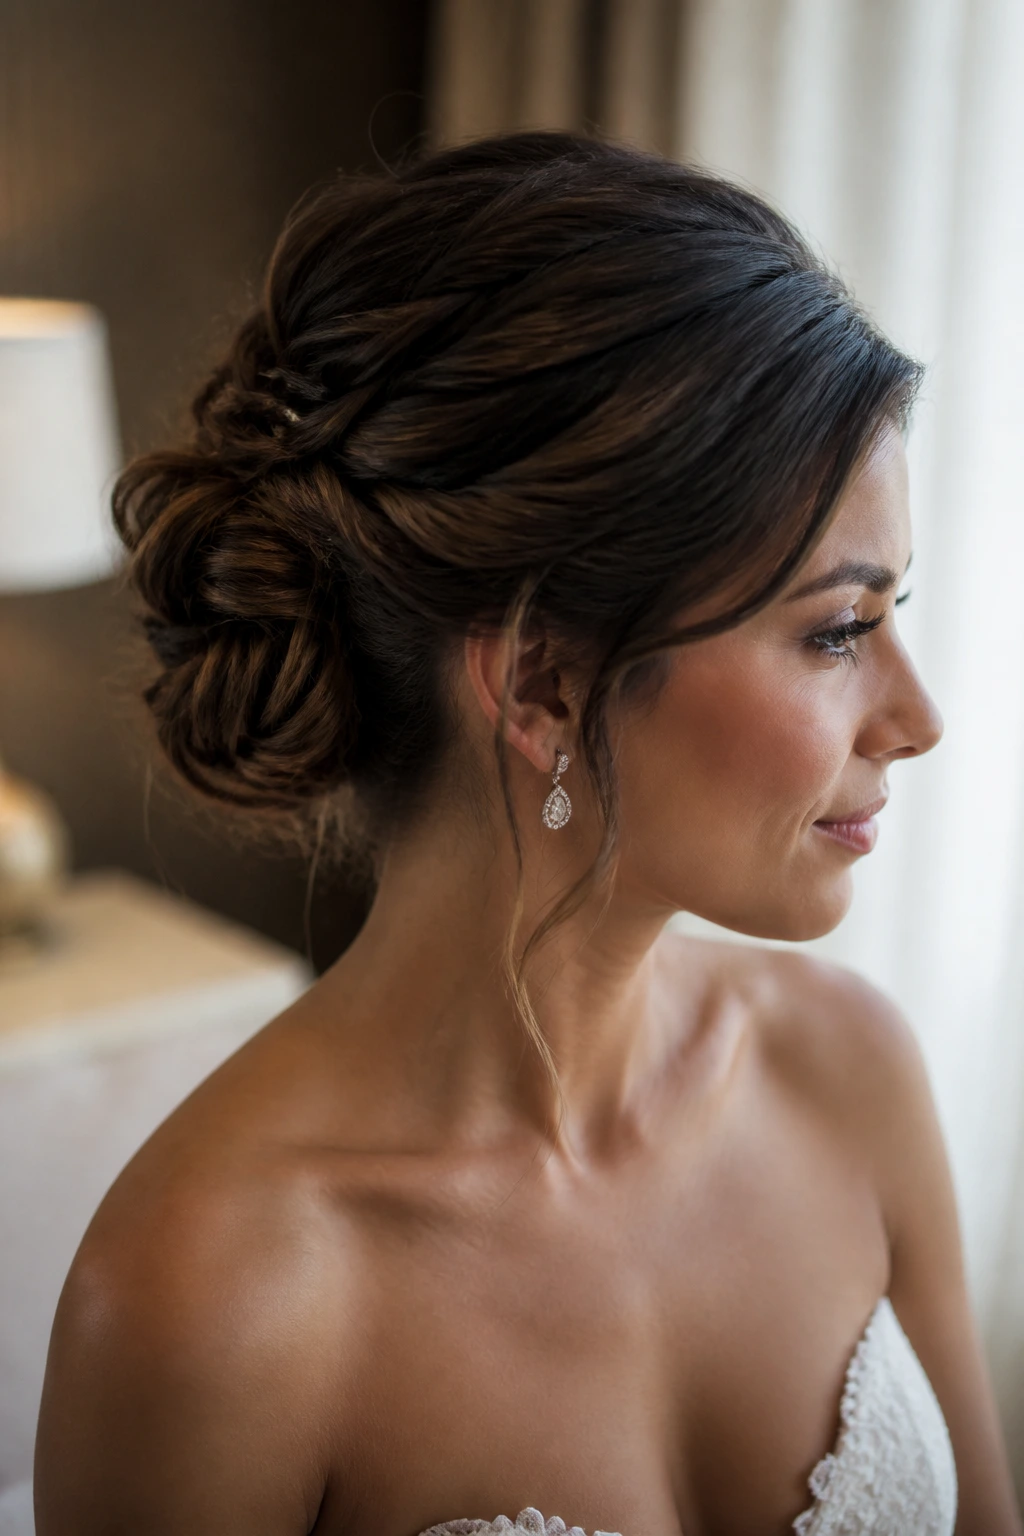
A wedding updo starts the day before it starts. That means choosing products for the hair you actually have, not the hair you wish you had. Fine hair usually needs texture spray, dry shampoo, or a light mousse at the roots so pins have friction. Thick hair usually needs stronger hold and better sectioning rather than more product. Curly hair needs moisture and definition first, then pinning that respects the curl pattern instead of flattening it.
Shine matters too, but not too much. A glossy cream on the lengths can look elegant on sleek styles, while a heavy oil near the roots can make the whole shape slide around by noon. If the hair is slippery, I’d rather see a little dry shampoo and grip spray than a lot of serum. That trade usually pays off.
If you’re using clip-in extensions, match both color and density. A few thick wefts can make the base look bulky, and they are harder to hide in low buns than people expect. Extension texture should also match the finished style — silky straight extensions don’t disappear into a curled or waved updo unless they’ve been prepped to blend.
And yes, a trial run matters. The same hair can behave differently on different days. Humidity, wash timing, and even how long you spent under a blow-dryer all change the result.
How to Wear These Looks with Veils, Earrings, and Necklines
Presentation: Low shapes sit best with long veils, back detail, and dresses that need space at the neck. Higher buns suit dramatic necklines, clean shoulders, and gowns where the top half needs a little lift to balance the skirt. If the dress has a busy front, a smooth updo keeps the whole look from getting crowded.
Accompaniments: Pearl pins, floral sprays, comb veils, crystal clips, and long earrings all work, but they should not fight each other. Pick one main accent and let the others stay quiet. A braid plus florals plus a heavy comb can tip into clutter fast.
Portions: For short or medium hair, a lower knot or tucked roll usually gives the cleanest result with the least fuss. For thick or long hair, split the style into sections and give each one its own anchor. If you’re adding extensions, use enough to support the silhouette, not enough to make the back look stuffed.
Beverage Pairing: Keep the getting-ready drinks pale and manageable — sparkling water, light tea, or a clear cocktail if you’re celebrating early. Dark coffee drips, berry juice, and lip stain on a finished veil are a hassle nobody needs before noon.
Additional Tips and Finishers
Texture Boost: Mist dry shampoo at the roots, then blow-dry for 20 to 30 seconds before pinning. That tiny reset gives the hair more grip without making it dusty.
Face-Framing Control: If you want tendrils, curl them away from the face with a 1-inch iron and let them cool in your hand before releasing them. Hot hair lies. Cool hair remembers.
Accessory Swap: Pearls soften clean shapes, floral pins warm up braids, and a narrow metallic comb makes a low bun feel sharper. Choose one finish and keep the rest of the styling quieter.
Make-It-Yours: Fine hair benefits from padding and tighter pinning. Curly hair looks best when the curls stay visible. Thick hair often needs sectioned wrapping instead of one big bundle shoved into place.
Pro move: Put the veil or accessory in after the final hairspray set, not before. Five dry minutes can save you from a collapsed crown.
Common Mistakes to Avoid
The first mistake is starting with hair that’s too clean and too soft. It looks silky in the chair and slippery five minutes later. The fix is simple: build a bit of texture first with dry shampoo, mousse, or a rough blow-dry, depending on the hair type.
Another one is using too few pins. A wedding updo does not fail all at once; it slowly loosens in one small place, then another, until the shape loses its backbone. If the style feels secure only when you keep one hand near it, it is under-pinned.
People also misplace the bun. Too high, and it can look perched. Too low, and it can drag the profile down. The sweet spot is usually tied to the neckline and the side profile, not whatever looked convenient in the mirror.
Overloading with finishing spray is a common trap, too. Hair becomes stiff, shiny in the wrong way, and hard to adjust. Use enough to set the style, then stop. You are not building a helmet.
Last mistake: skipping a movement test. Turn your head. Bend slightly. Look down. If pieces slide during the trial, they will slide harder later.
Variations and Adaptations to Try
The Short-Hair Illusion: Add a few hidden clip-ins or a padded base to a bob-length style, then tuck the ends into a low faux bun. This works when the haircut is too short for a full knot but long enough to twist.
The Curly-First Version: Leave the curl pattern visible and pin the perimeter instead of brushing everything smooth. Use moisturizing cream first, then set the shape with flexible spray so the curl clumps stay intact.
The Fine-Hair Lift: Build a small cushion at the crown with backcombing and a little padding, then wrap the outer hair over it. This gives a low bun or French twist more body without making the style look padded.
The Veil-First Version: Design the updo around where the comb will sit. A low bun or tucked roll usually works best, because it gives the veil a stable base and keeps the top of the hairstyle from getting crushed.
The Minimalist Version: Skip extra flowers, skip the pearls, keep the surface smooth, and let the shape do all the work. This is the version for brides who want clean lines and no visual clutter.
How to Keep the Style Fresh from Trial Run to Last Dance
A wedding updo usually holds best when it’s built on day-old or lightly textured hair, not freshly washed hair. If you’re doing a trial, wear the style for several hours and take notes at the two-hour mark, the four-hour mark, and the end of the day. That tells you where the pins loosen, whether the front pieces collapse, and how much spray the style actually needs.
On the day itself, do the prep before the styling. Dry the hair fully. Set any curls and let them cool. Pin the shape only after the hair has stopped feeling warm from the iron or the blow-dryer. Warm hair changes shape later. That’s where a lot of “it looked better in the chair” complaints come from.
If you need to take the style into the next morning, sleep on a silk pillowcase and remove the accessories first. Do not jam a fully pinned style into a pillow and hope for the best. After the event, work from the outside in: take out decorative pieces, then the bobby pins, then any padding. A wide-tooth comb and a little detangler make cleanup kinder on the hair.
Frequently Asked Questions
How long should my hair be for a wedding updo?
Most updos work best once the hair reaches at least the nape or collarbone, but shorter hair can still be pinned into faux shapes. The cut matters less than the sectioning and the amount of grip you can create.
Is second-day hair better than freshly washed hair?
Usually, yes. Day-old hair has a little natural grip, which helps pins hold and keeps sleek styles from sliding. If your hair is very dry or curly, though, the right prep matters more than the wash schedule alone.
Can a wedding updo work on fine hair?
Absolutely. Fine hair often benefits from padding, texture spray, and a compact shape like a chignon or French twist. The key is building the style in layers instead of trying to create one big, heavy bun.
What if my hair is too short for a full bun?
Use a faux updo, tuck the ends under in small sections, or add a few clip-ins for length and body. A good stylist can build a convincing pinned shape from a bob if the layers are not too short.
How do I keep the style from slipping in humidity?
Start with texture, not shine. Use a heat protectant, then a grip product or light mousse, then finish with flexible spray before the final hold spray. Heavy oils are the thing to avoid if the weather is warm or damp.
Can I wear a veil with any of these styles?
Most of them, yes, but low and mid-height styles are the easiest for veils. A low chignon, Gibson tuck, or seamless knot gives the comb a stable place to sit without flattening the whole shape.
Should I add extensions for volume?
Only if the style needs more body than your natural hair can give. Extensions help with bulky buns and fuller braids, but they should match the texture and color closely or the finish can look patchy.
What if my updo starts to loosen during the reception?
Do not panic and do not yank at it. Pin the loosened section back with one or two extra bobby pins crossed in an X, then add a small mist of spray from 10 to 12 inches away. That usually buys you several more hours.
The Shape That Lasts
The best wedding updo hairstyles do not chase one perfect look. They solve a specific problem for a specific head of hair on a very long day. That is why a low chignon feels different from a sculpted rosette, and why a braided crown bun can hold its own next to a sleek center-part knot. Each one brings a different kind of control.
If you pick the style that fits the dress, the texture, and the way you actually wear your hair, the whole thing gets easier. The mirror stops being a battle. The back of the style behaves. The front pieces stay where they belong, and the photos pick up the shape instead of the effort.
That’s the sweet spot. Hair that looks considered, not overworked, and stays in one piece long enough for the parts of the day you’ll remember most.
