



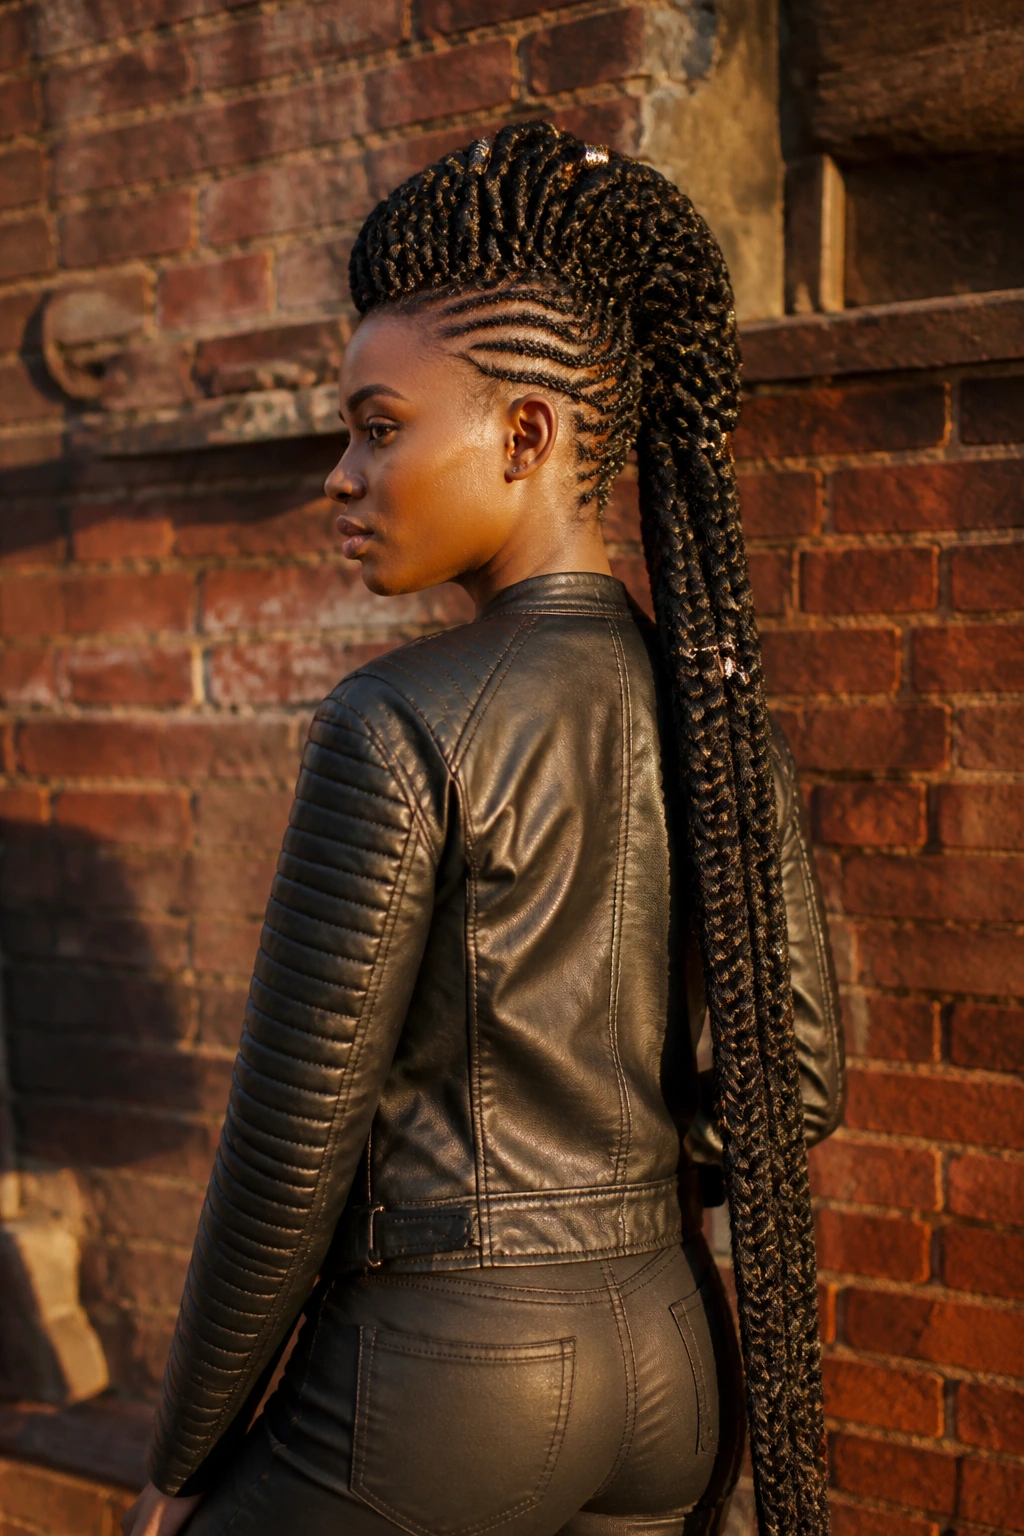
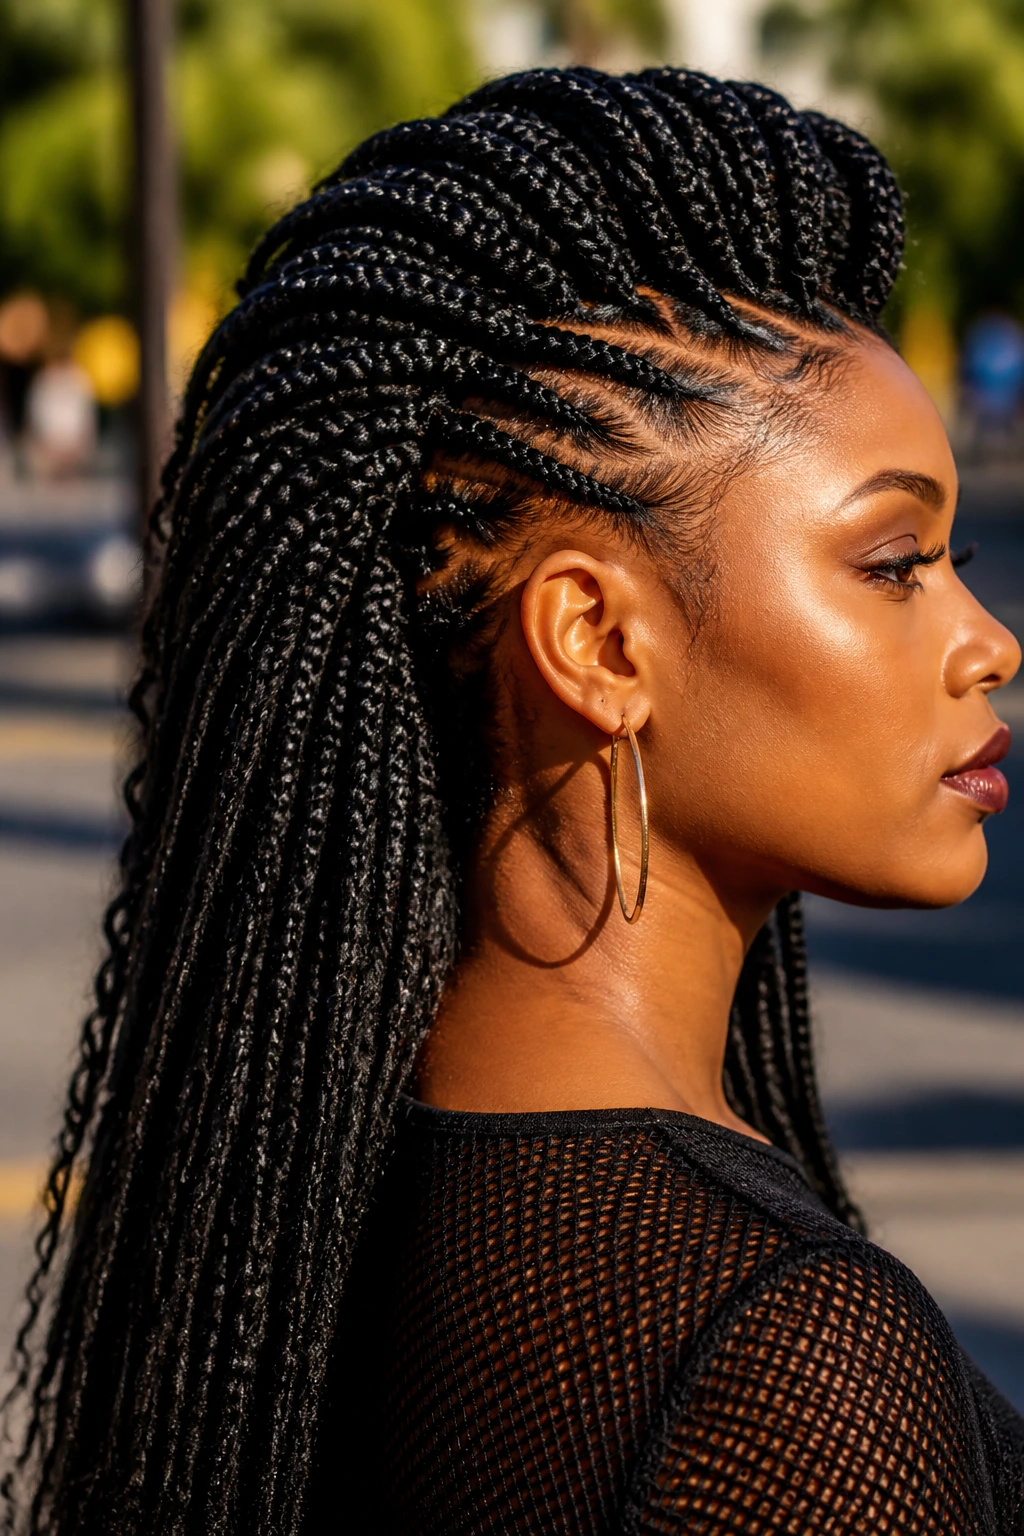
Long hair changes a braided mohawk in a way people underestimate. On short hair, the ridge sits close to the scalp and stays all business. On long hair, the braid can arch, stack, drape, or swing down the back like a rope, and that movement is half the appeal. African mohawk braid styles for long hair work because the length gives the braid shape room to breathe.
The catch is weight. Long hair pulls harder than most people expect, especially if the sides are tight and the center ridge is packed with extensions. If the braid line is too thin, the style can look pinched by day two. If the center is too bulky, it starts to feel like a helmet. The sweet spot is a clean scalp pattern with enough width to support the length you already have.
Some versions lean sleek and sculpted. Others keep curls, beads, or loose ends in play so the style reads more frohawk than fortress. Either way, the best long-hair mohawk braids do one thing well: they use the hair’s own length instead of fighting it.
Why These African Mohawk Braid Styles Stand Out on Long Hair
-
The ridge has room to show off: Long hair gives the central braid line enough length to build height, curve, or a dramatic drop at the back without disappearing into the scalp.
-
The sides can stay neat without stealing the show: Cornrows, feed-ins, and stitched parts keep the temples clean, which matters because long hair can make the whole style feel heavy fast.
-
You can play with weight in a smart way: Some styles hold the length in a braid; others leave the ends curly or tucked into a bun so the shape stays sharp instead of sagging.
-
Accessories actually matter here: Beads, cuffs, thread, and wrapped ends have enough surface area to make a difference on long hair, not just a tiny accent.
-
There’s room for both polish and texture: A mohawk braid can look crisp and formal or soft and lived-in, and long hair lets you move between those moods without changing the basic structure.
1. Center-Ridge Cornrow Mohawk
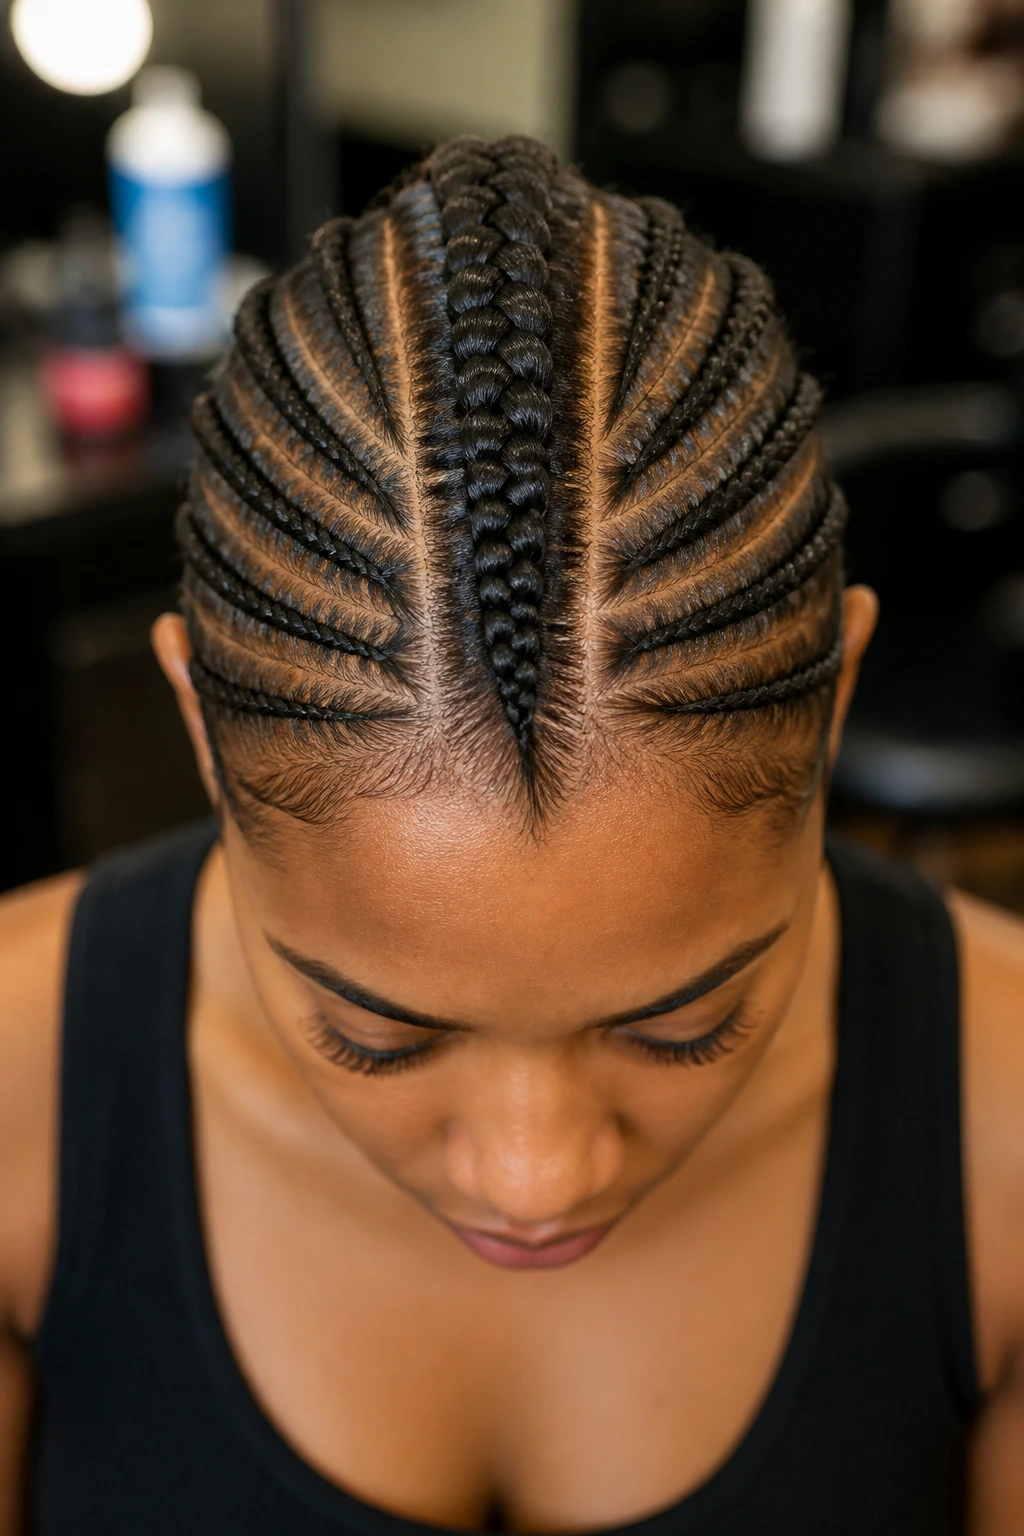
A clean center ridge is the version I reach for when I want the braid pattern to look disciplined from the front and still have presence from the back. The sides are cornrowed or slicked down toward the scalp, and the middle section runs straight from the hairline to the nape in one strong line. On long hair, that center braid feels almost architectural. It has a spine.
What makes it work
The trick is width. If the middle section is too narrow, long hair makes it slump. If it’s wide enough to hold its own, the braid sits up neatly and keeps its shape for days. I like this one for medium-to-dense hair that has been stretched first, because clean parting shows up better when the strands are not fighting each other.
It is also the most flexible base for the whole category. You can wear it plain, wrap the ends into a low knot, or thread in cuffs near the crown and leave the rest alone. No drama needed. The braid itself does the work.
2. Feed-In Braided Hawk with Soft Sides
Feed-in braids are the answer when you want the mohawk to look full without starting with a thick chunk at the hairline. The braid begins slim, then gains hair gradually as it moves backward, which keeps the front light and the finish smooth. On long hair, that gradual build matters because the style can get bulky fast if you add too much too early.
The result is polished but not stiff. You get a ridge that grows in confidence as it moves down the head, and that shape is especially nice if your hair is long enough to make the back section feel heavy.
A good feed-in mohawk should still read as a mohawk at the temples. If the braid line creeps too far outward, you lose the hawk shape and end up with a wide braided panel. Keep the center honest.
3. Goddess Braid Mohawk with Curly Falls
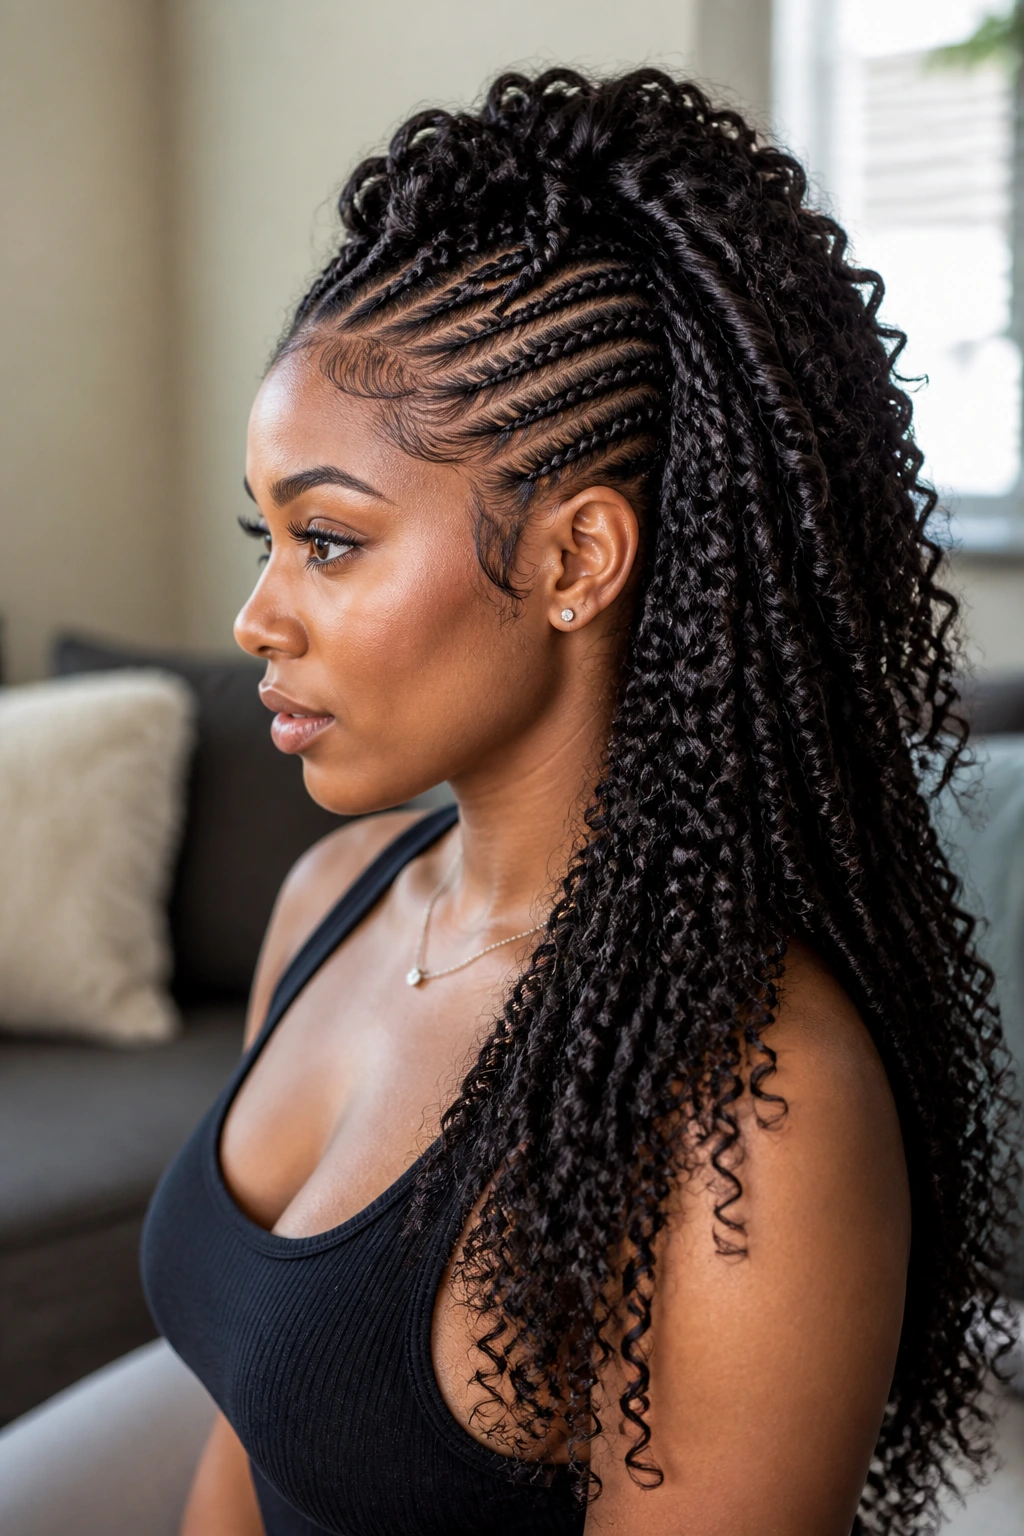
This is the one that feels softest without losing structure. The scalp portion is braided into a mohawk ridge, then the ends are left out or set into loose curls that spill past the shoulders. On long hair, those curly ends create movement that a plain braid never quite matches.
The style looks richest when the braid base is neat and the curls are shaped, not brushed into fluff. Think defined, springy ends with enough bounce to catch the eye when you turn. It is a good pick for long hair that already has some natural texture, because the contrast between the braided scalp and the loose ends looks intentional.
If your hair is very long, keep the last few inches controlled with flexi rods, braid-outs, or a light wand curl. Otherwise the ends can go flat by the second day and drag the whole style down.
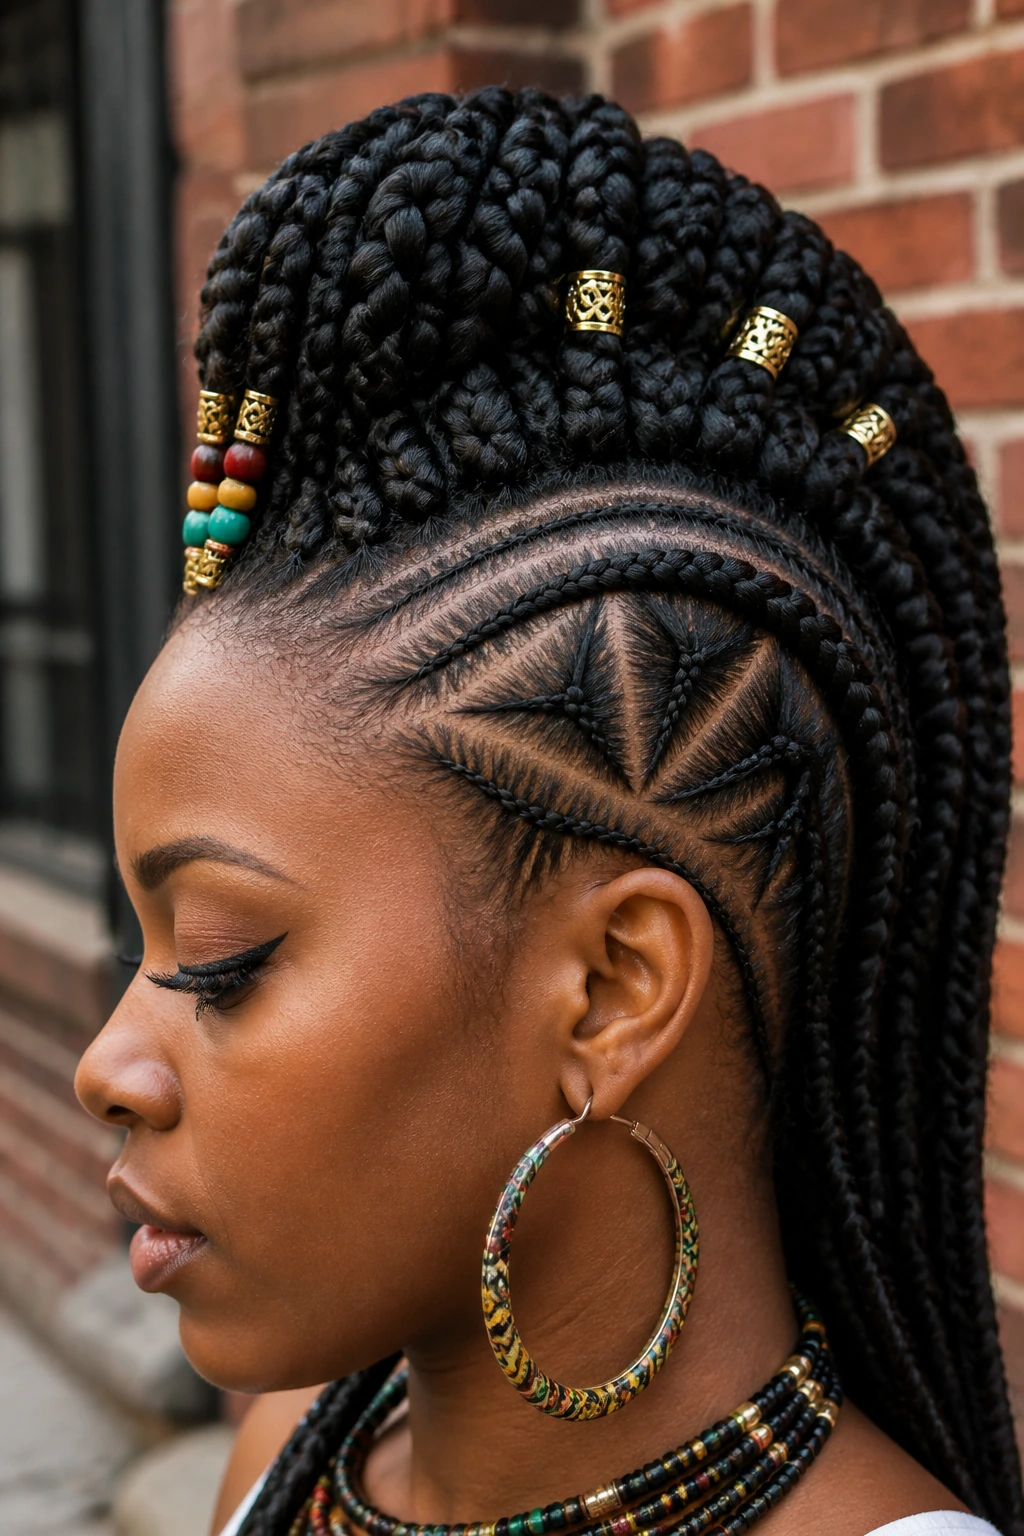
4. Tribal Mohawk with Beads and Cuffs
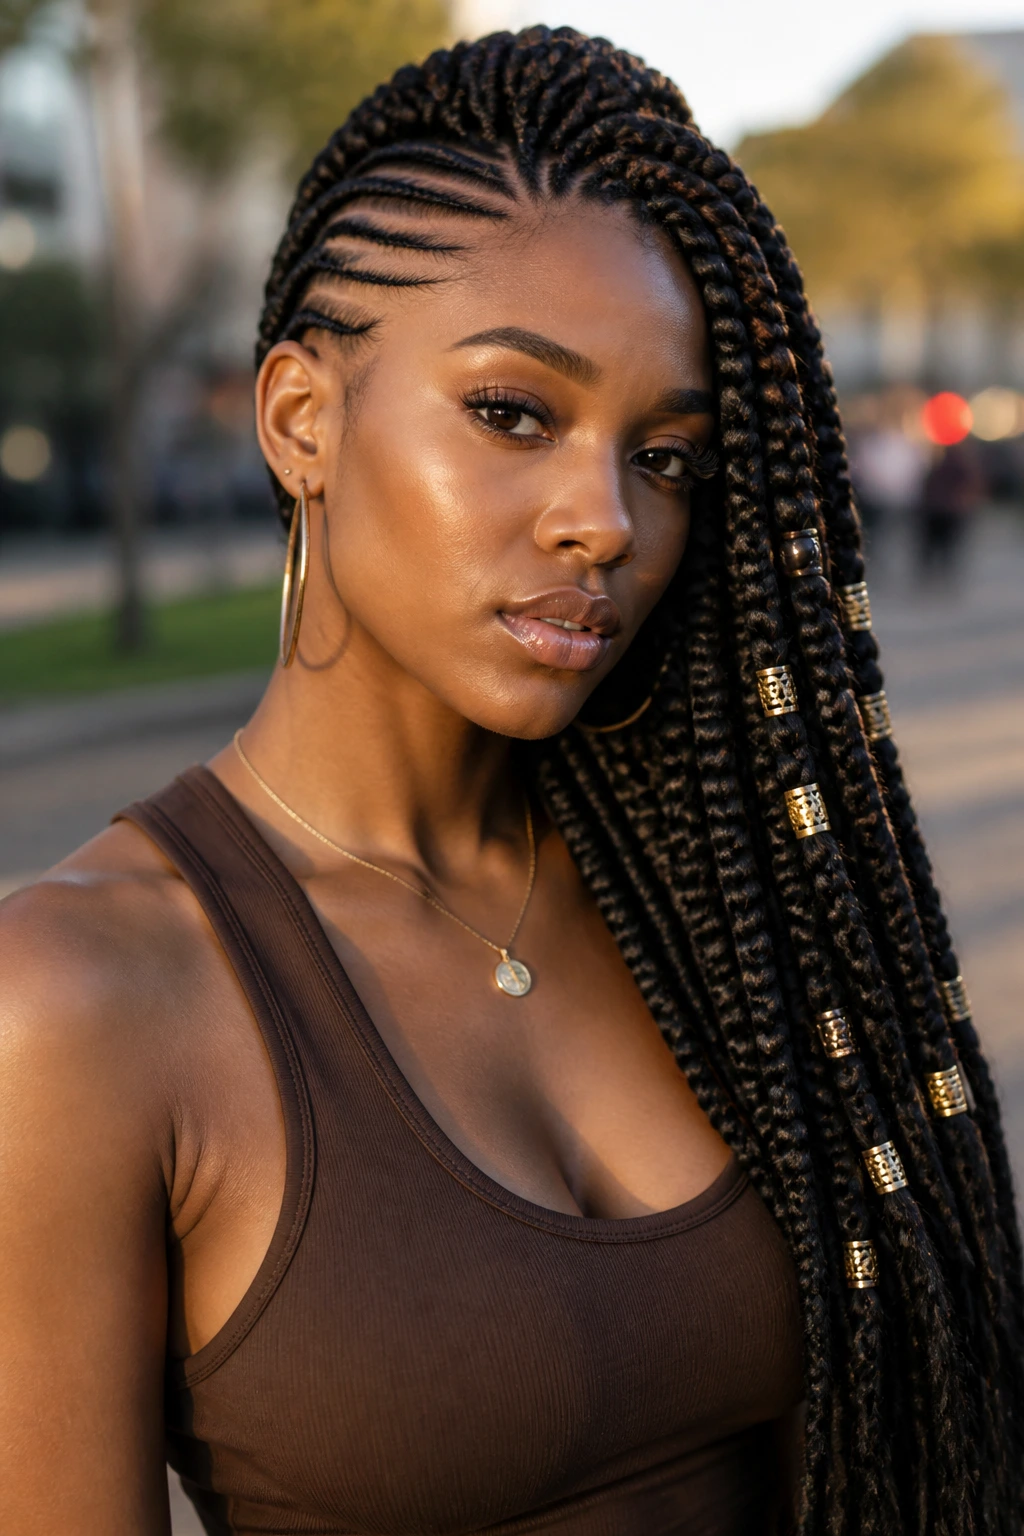
The first time I saw a tribal-inspired mohawk braid on long hair, what stood out was not the braid pattern. It was the rhythm. Triangular parts, a strong center ridge, a few bead-heavy front braids, and cuffs spaced just far enough apart to keep the eye moving. It had structure, but it also had a pulse.
That balance is what makes this style work. You do not need beads everywhere. In fact, too many accessories can turn the look noisy. Two or three accents near the front, then a quieter back half, usually lands better on long hair because the braid length already gives you enough to look at.
Best detail to remember
Use accessories to guide the line of the style, not to cover it. A single bead cluster at the temple can frame the face. A row of cuffs near the crown can lift the ridge visually. Keep the rest clean.
5. Stitch-Braid Mohawk with Sharp Parting
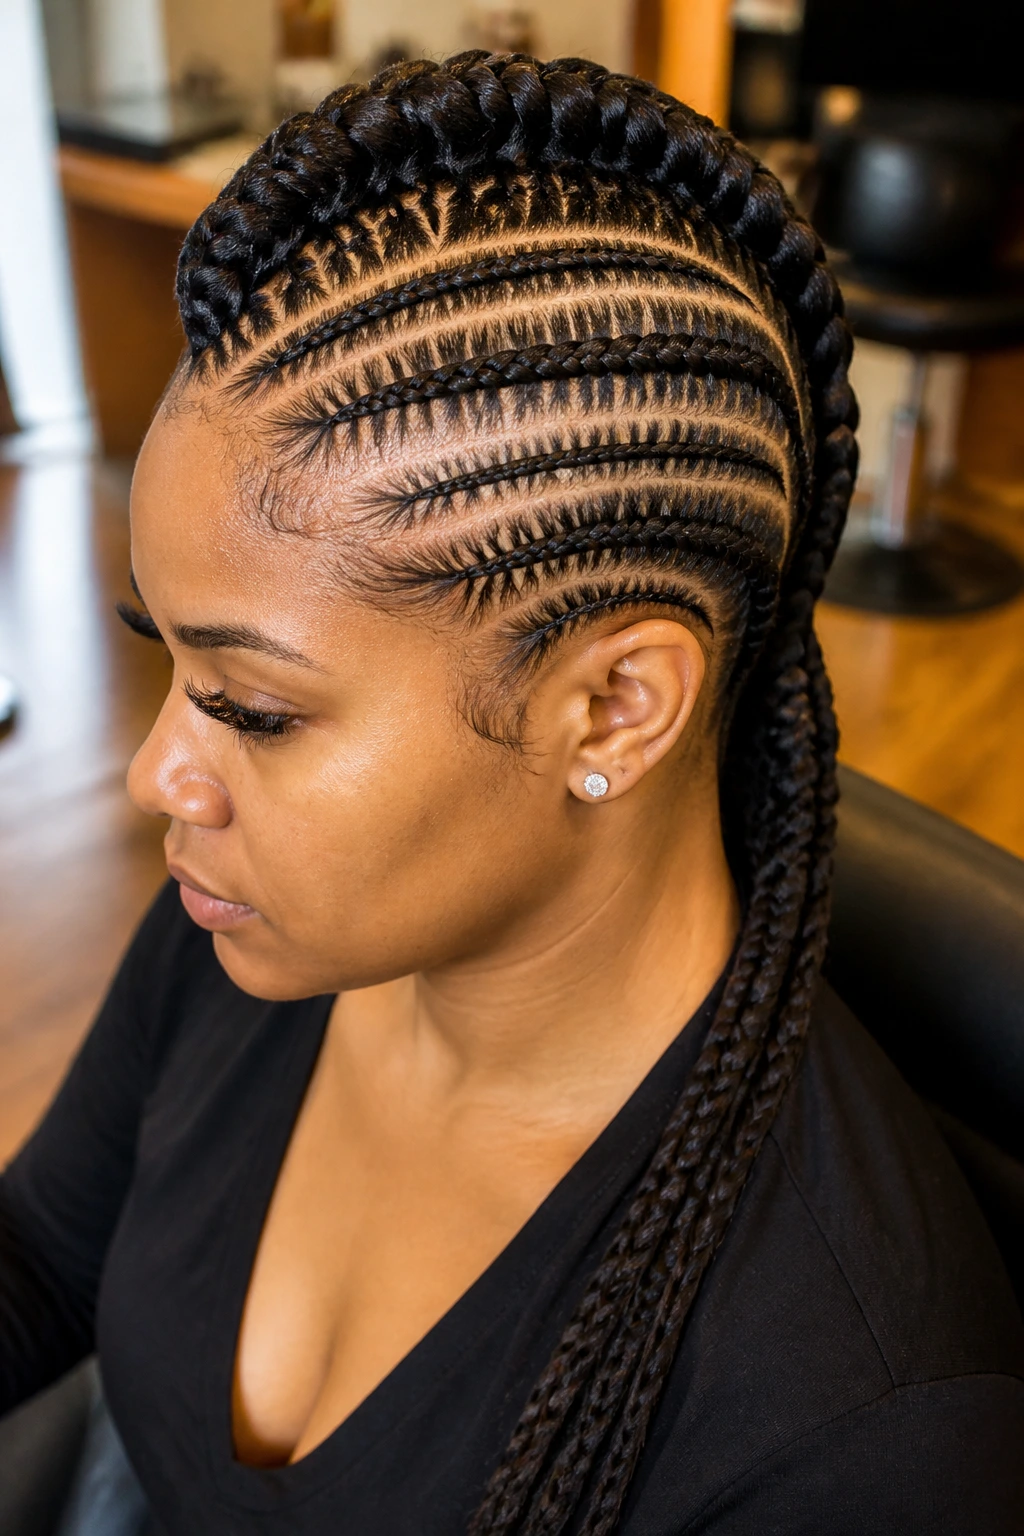
Stitch braids give the mohawk a crisp, almost drawn-on look. The scalp lines run in neat horizontal sections, and the braids sit close and even, with each row looking almost like a stitched seam. On long hair, that parting detail matters because the length can make a style feel loose unless the base is exact.
This is the version for people who like precision. It looks especially sharp on stretched hair, and it tends to hold its visual shape better when the sections are consistent from root to tip. If one row is wider than the next, the stitch effect breaks immediately. The eye catches it.
I would not make this one overly thick. Stitch braids already have presence. Let the pattern stay clean and let the long tail or back length do the talking.
6. Jumbo Braid Hawk for Fast Styling
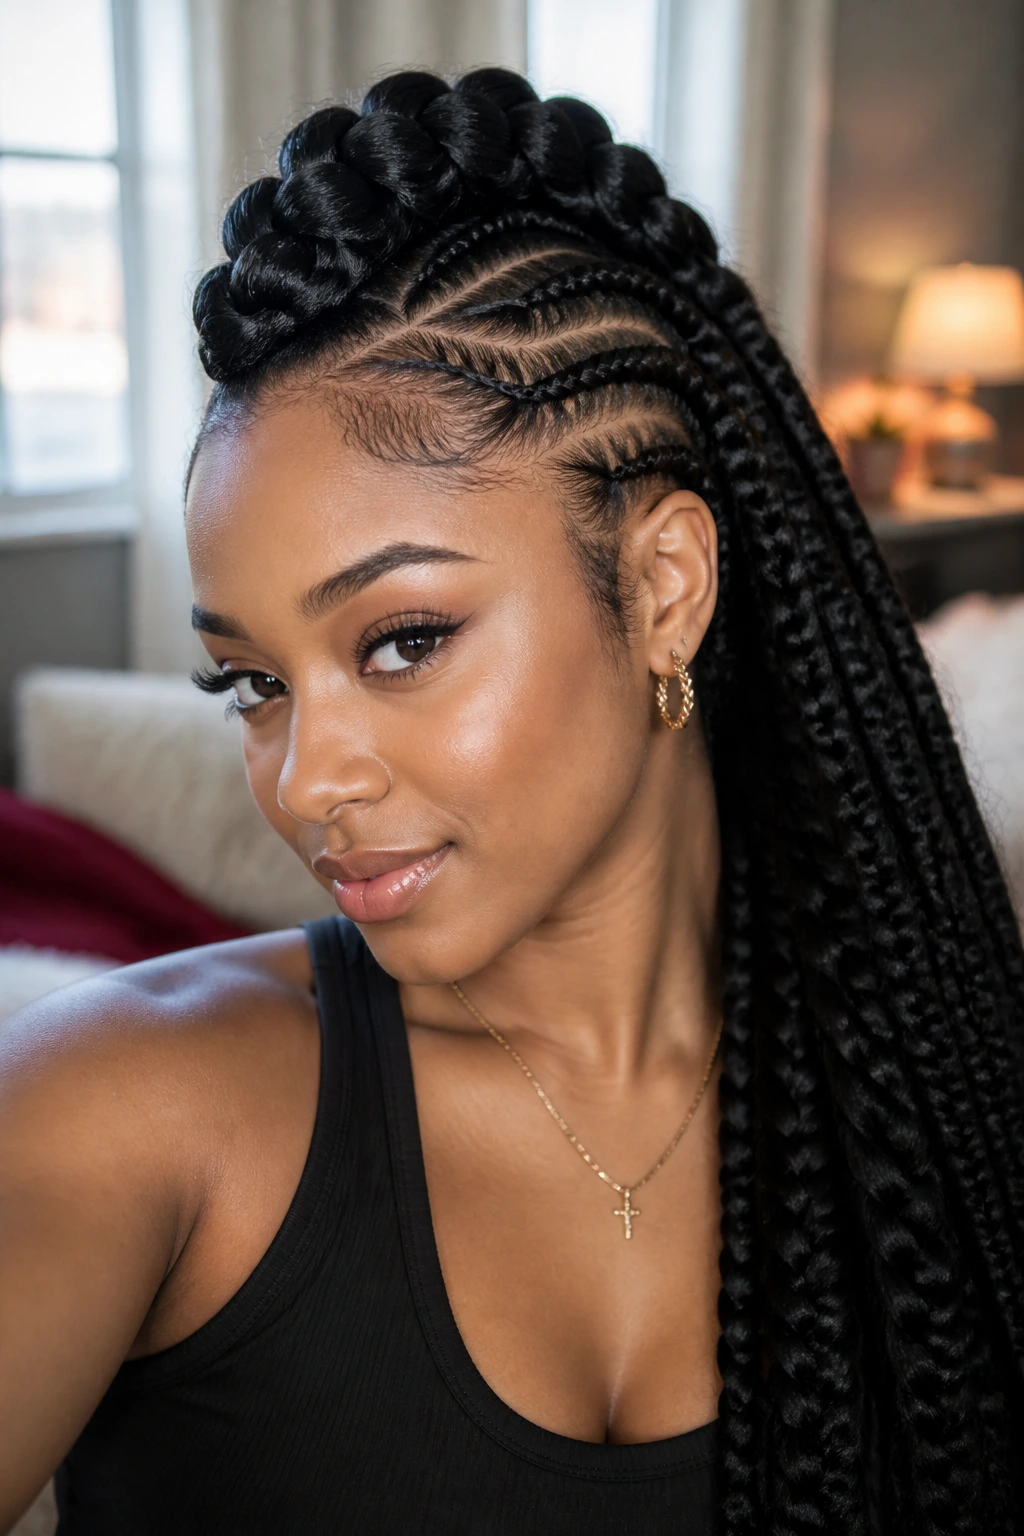
Big braids make a very different statement. Instead of a lot of tiny scalp detail, you get a few thick, heavy lines that read from across the room. Long hair is useful here because jumbo braids need material to look full. Without length, they can end up looking sparse. With long hair, they look deliberate.
This style is the one I’d choose when I want less time in the chair and more shape on the head. Fewer sections mean faster braiding, but the trade-off is weight. If your hairline is sensitive, keep the braids looser at the temples and avoid pulling the ridge too high.
The finish looks best when the ends are sealed cleanly and the base is smooth. A crooked jumbo braid shows every mistake. There is nowhere to hide.
7. Curved Ghana-Braid Mohawk
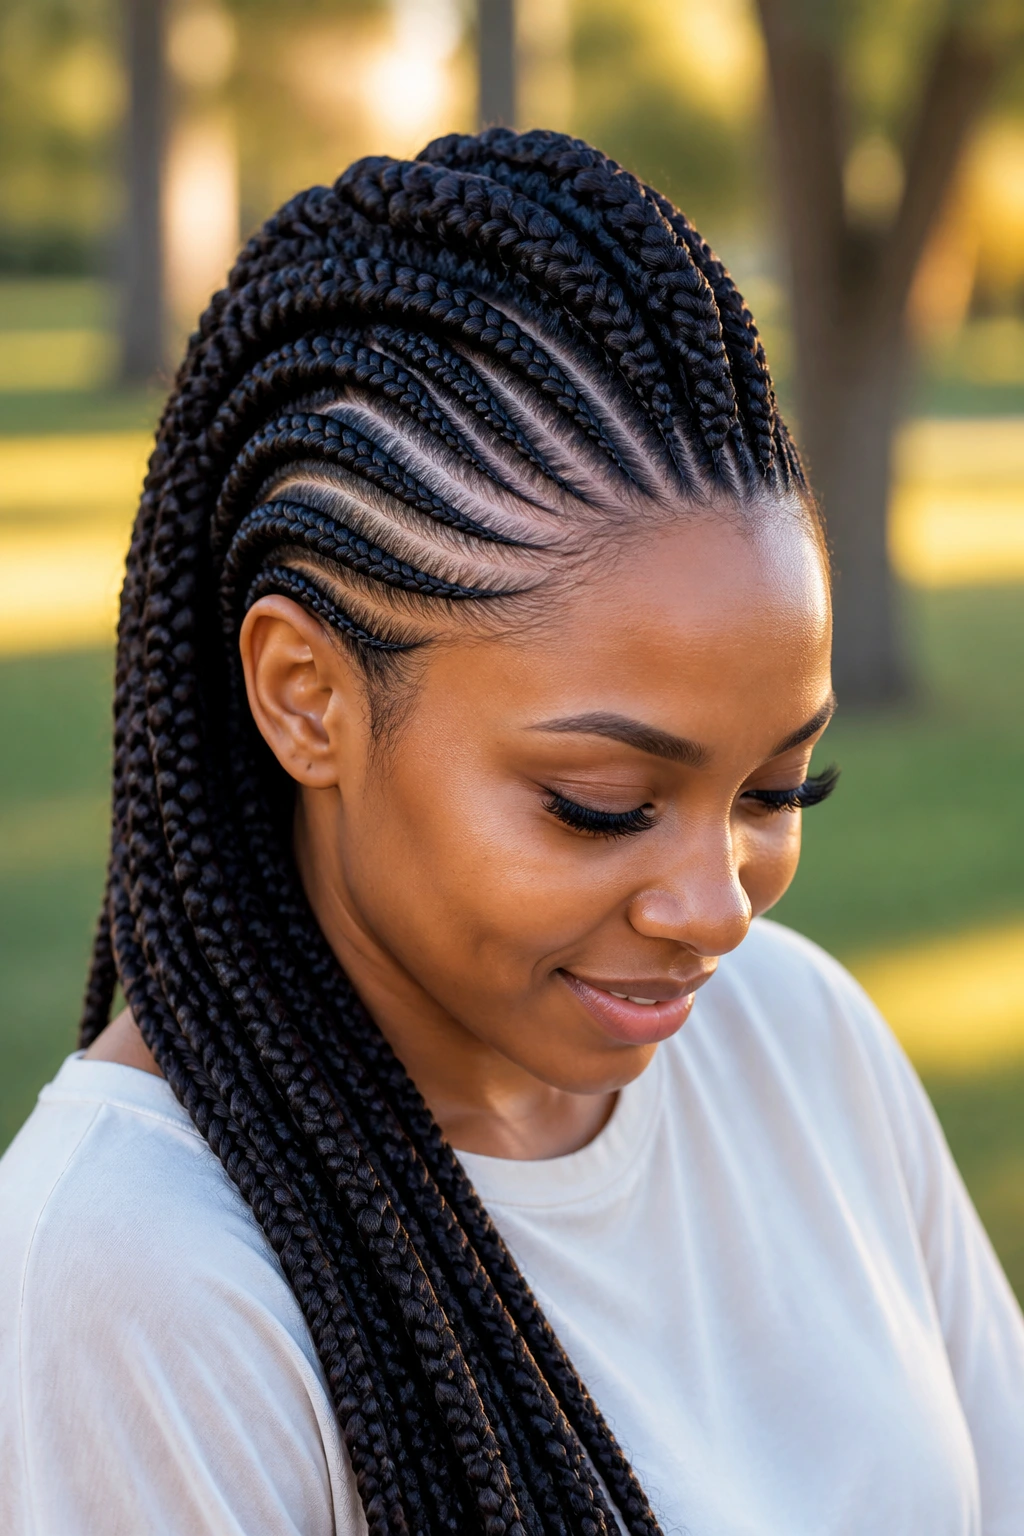
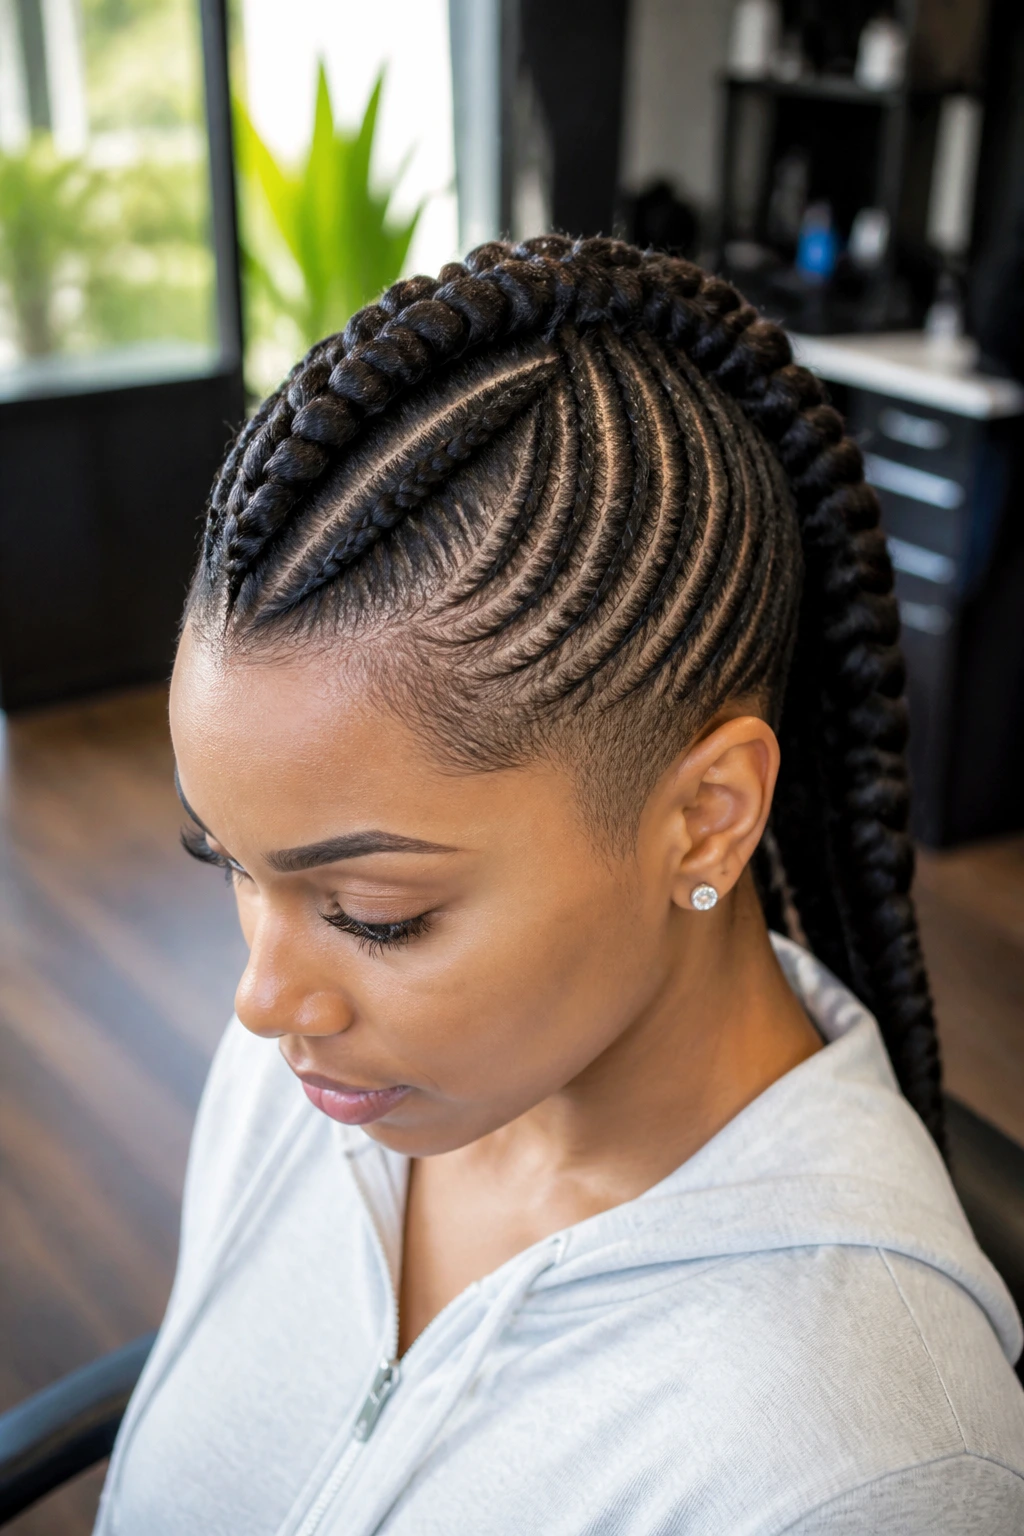
A curved Ghana braid mohawk does something straight rows cannot: it gives the style motion before the braid even finishes. The cornrows sweep from the sides toward the middle in a soft curve, then gather into the hawk ridge. On long hair, that curve makes the whole style feel larger because the eye follows the bend.
This works especially well if you want the mohawk to flatter the face instead of just sitting there. The curve should begin high enough on the temple to keep the style lifted. If it starts too low, the braid line can sag visually, and that is a shame because the shape is half the point.
A curved braid hawk can be very sleek, or it can be paired with a puffier back section. I prefer the version that keeps the curve strong and the back controlled. Too much looseness at the nape takes away the clean sweep.
8. Criss-Cross Cornrow Hawk
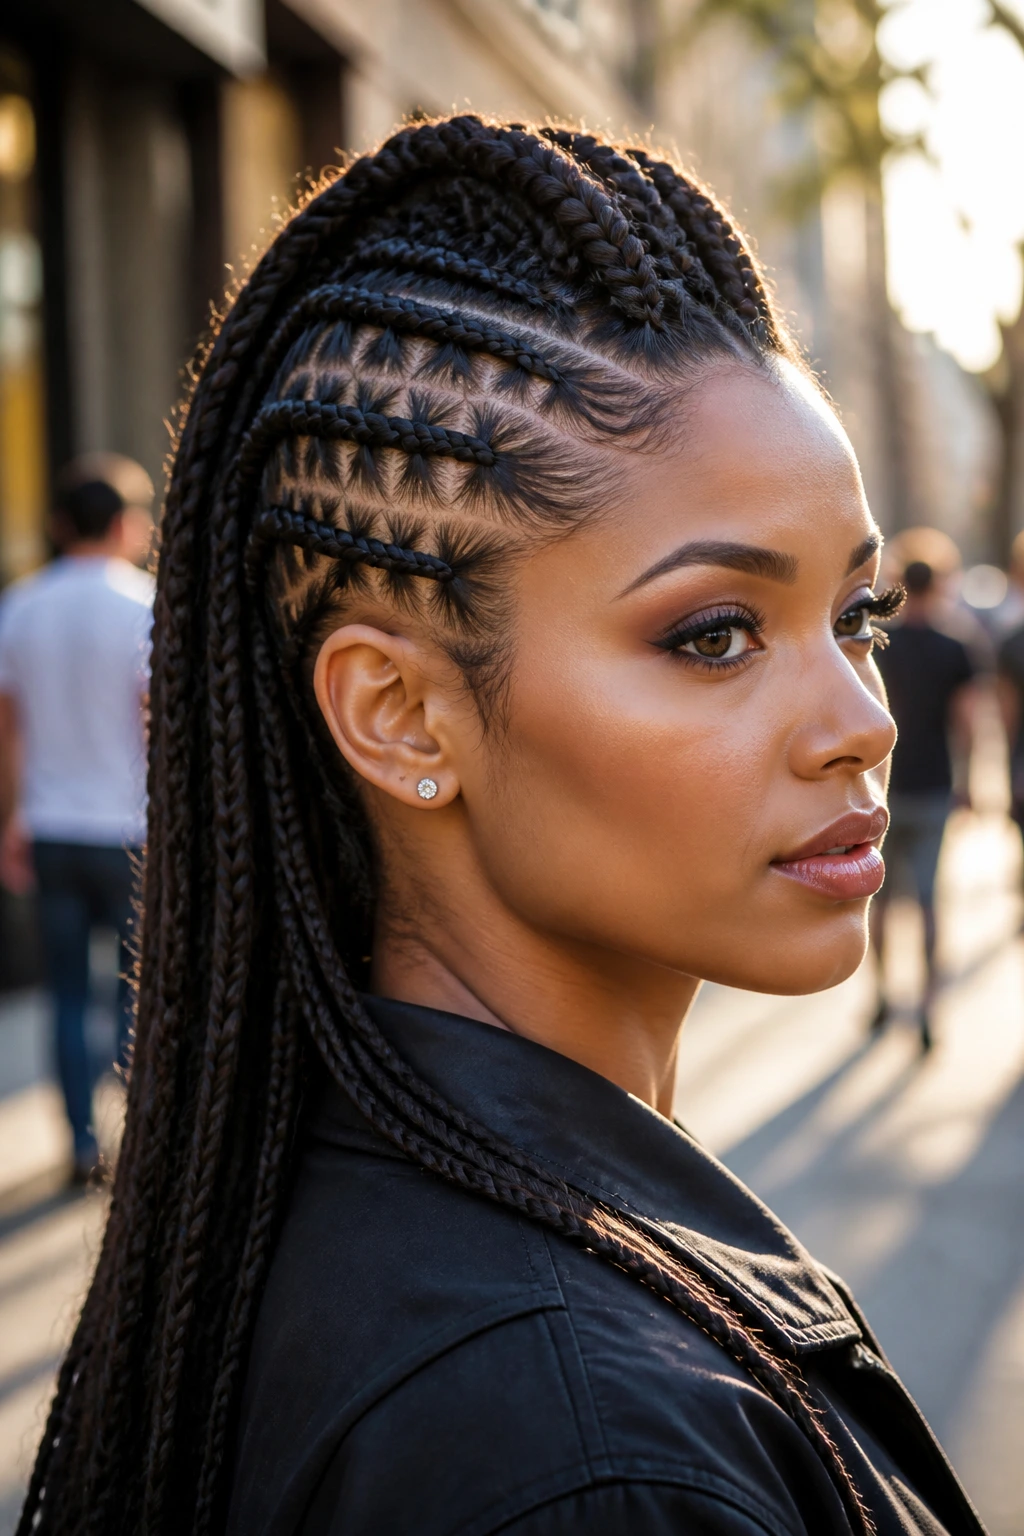
Criss-cross patterns are for the person who wants the scalp work to be obvious. The side sections overlap in X-shaped paths before they feed into the center ridge, and the finished look has a woven feel that looks far more complex than a simple straight-back braid.
Long hair helps here because the pattern has space to unfold. On shorter hair, criss-cross braids can look cramped. On longer hair, the crossings feel intentional and the line keeps moving. The braid should still sit flat at the scalp; if the tension gets uneven, the crossings puff up and the whole pattern loses its clean edges.
I like this style for events where the hair needs to do part of the talking. The braid architecture is the statement. The rest can stay simple.
9. Double-Hawk Braids with Two Ridges
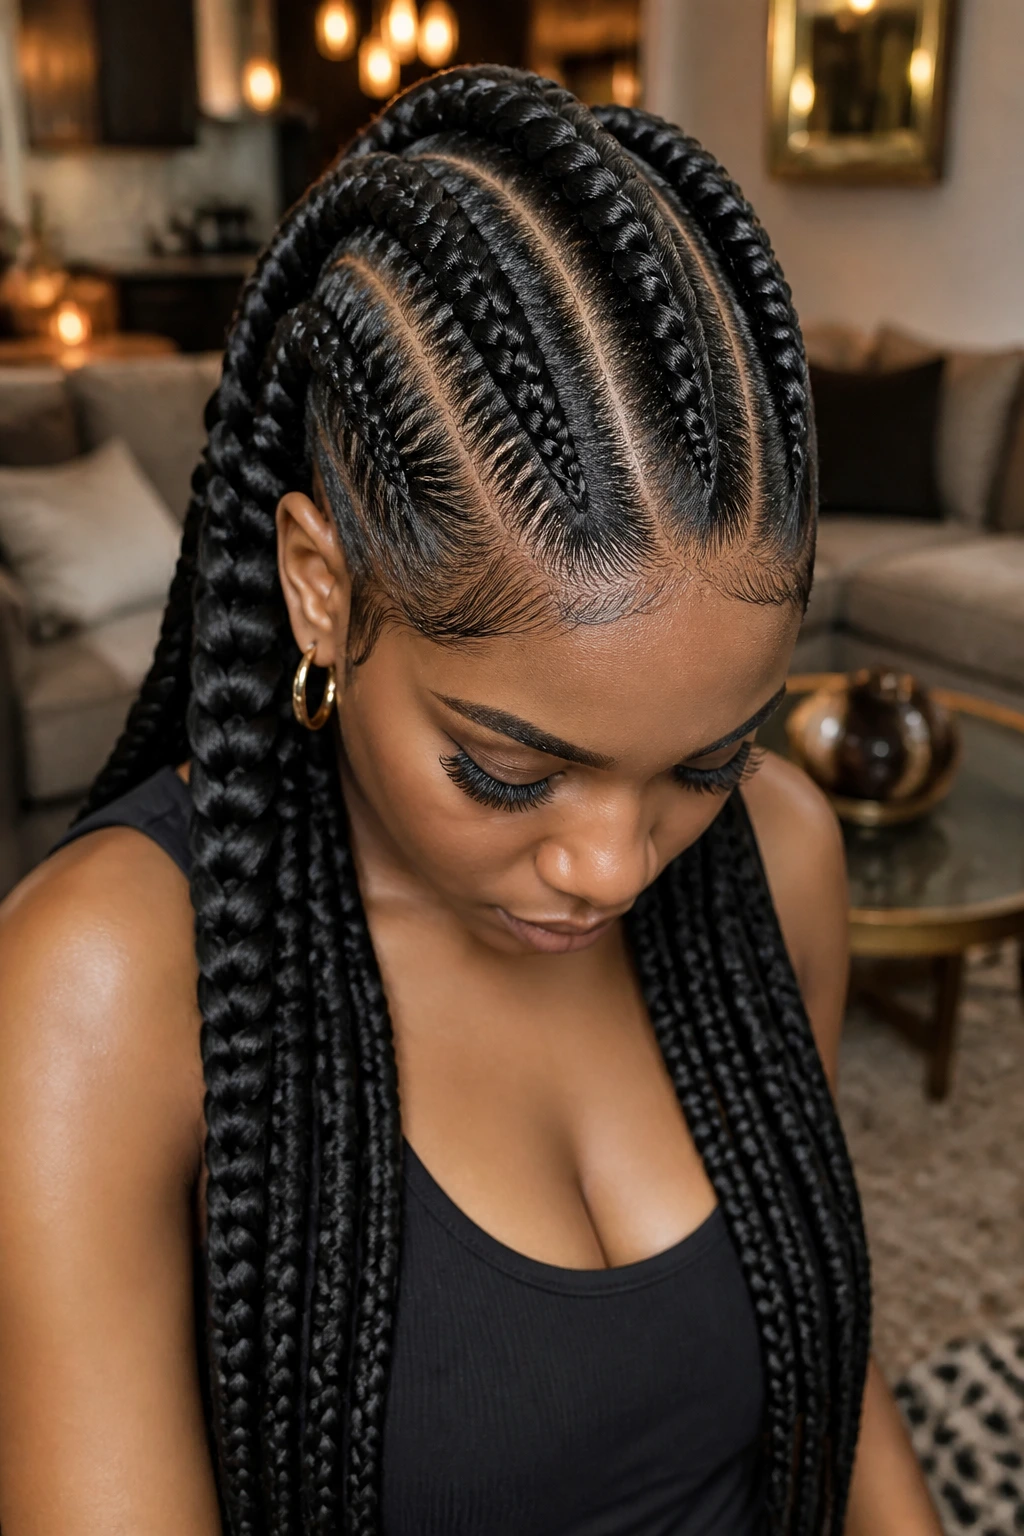
Two ridges instead of one can solve a problem long hair sometimes creates: the center braid looks too thin once the length pulls at it. A double-hawk splits the visual weight into two raised lanes, which gives the style a fuller, stronger profile. It is bold. No pretending otherwise.
This is one of the better options for very dense hair, because a single ridge can disappear under the bulk. Two smaller ridges often hold shape better than one giant one. The separation between them matters, though. Keep enough space so the design reads as two distinct rows and not one wide block.
If you want a style that looks dramatic from the front and solid from the side, this is the one. It has body without turning into a mound.
10. Triangle-Part Mohawk Braids
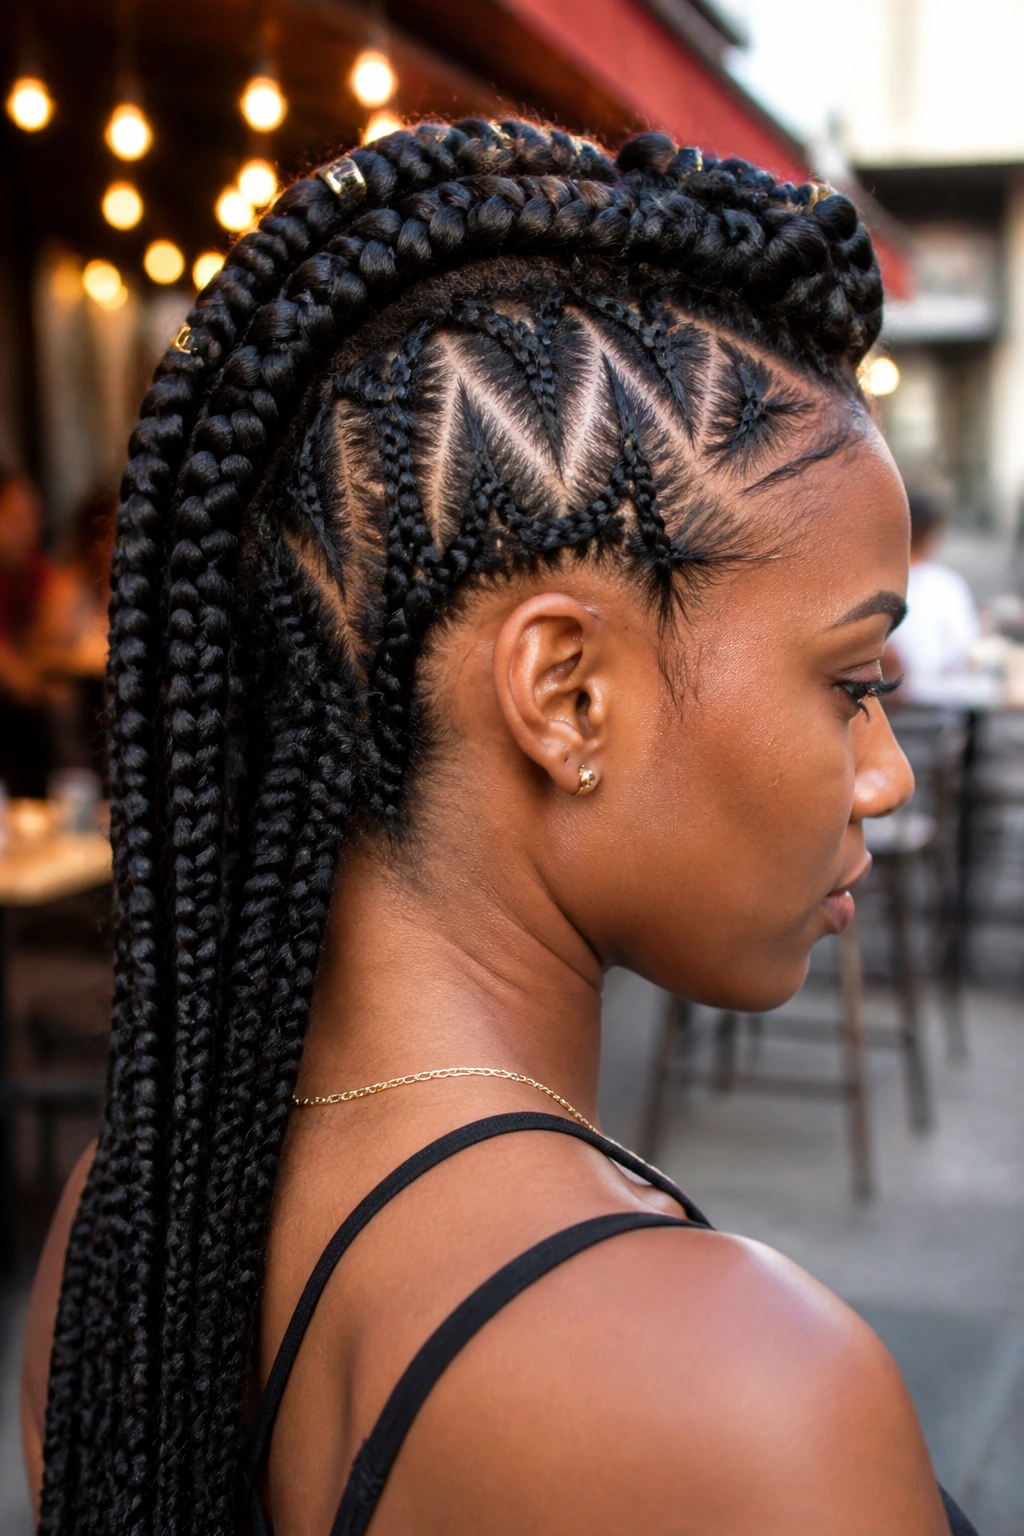
Triangle parts do one simple thing well: they break up the scalp in a way that feels sharper than square or rectangular sectioning. Each part catches the eye at a different angle, so the whole mohawk ridge has a more dynamic shape. On long hair, that matters because the length gives the parts time to repeat, and repetition is what makes the pattern read.
This is a good choice if you care about clean sectioning and you do not mind a little extra time at the start. Triangle parts are less forgiving than basic rows. If one point is off, your eye goes straight to it later.
The practical part
Use a tail comb and clip each triangle as you go. Do not try to freestyle the whole head in one pass. That is how part lines drift.
11. Fulani-Inspired Mohawk with Face-Framing Braids
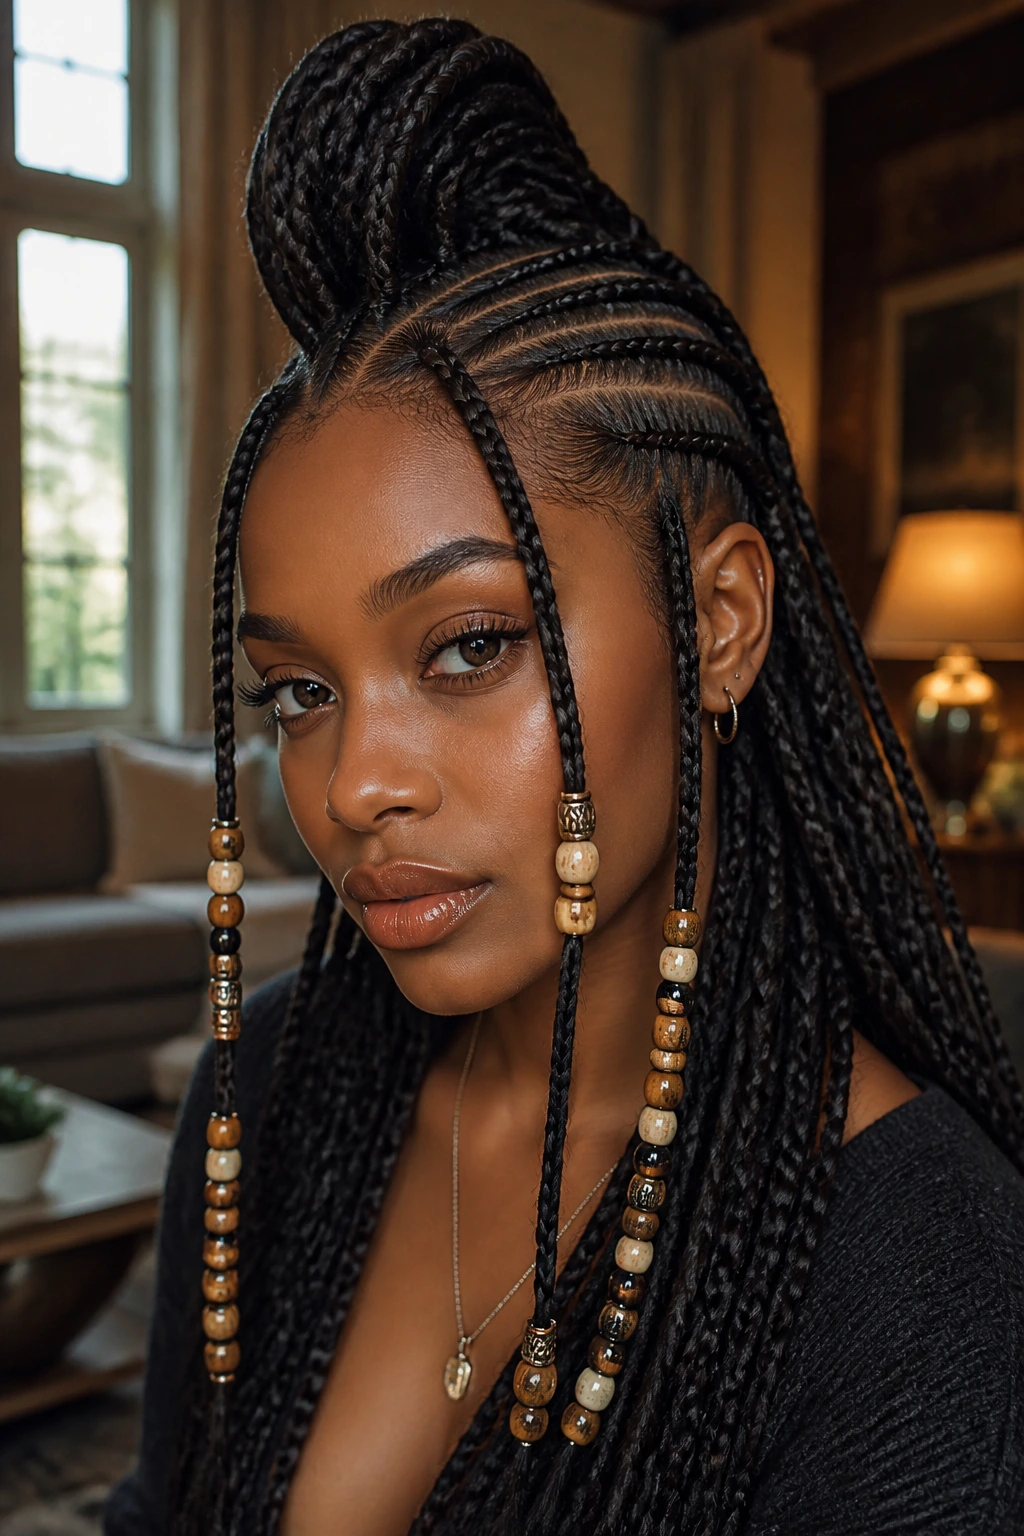
This style borrows the idea of a central braid line with side details that frame the face. Long hair gives you enough length to let the front braids hang a little or curve beside the cheeks, which softens the hawk without weakening it. The shape feels balanced, and that is why it keeps showing up on long hair.
I like this version when the goal is polish with a little softness. One or two braids can stay free at the front, while the rest feed into the mohawk ridge. A few beads near the temples can echo the tradition without overcrowding the face.
The best Fulani-inspired hawk keeps the center strong. If the front pieces take over, it stops reading as a mohawk and starts reading as loose braids with a middle part.
12. Zigzag Cornrow Hawk
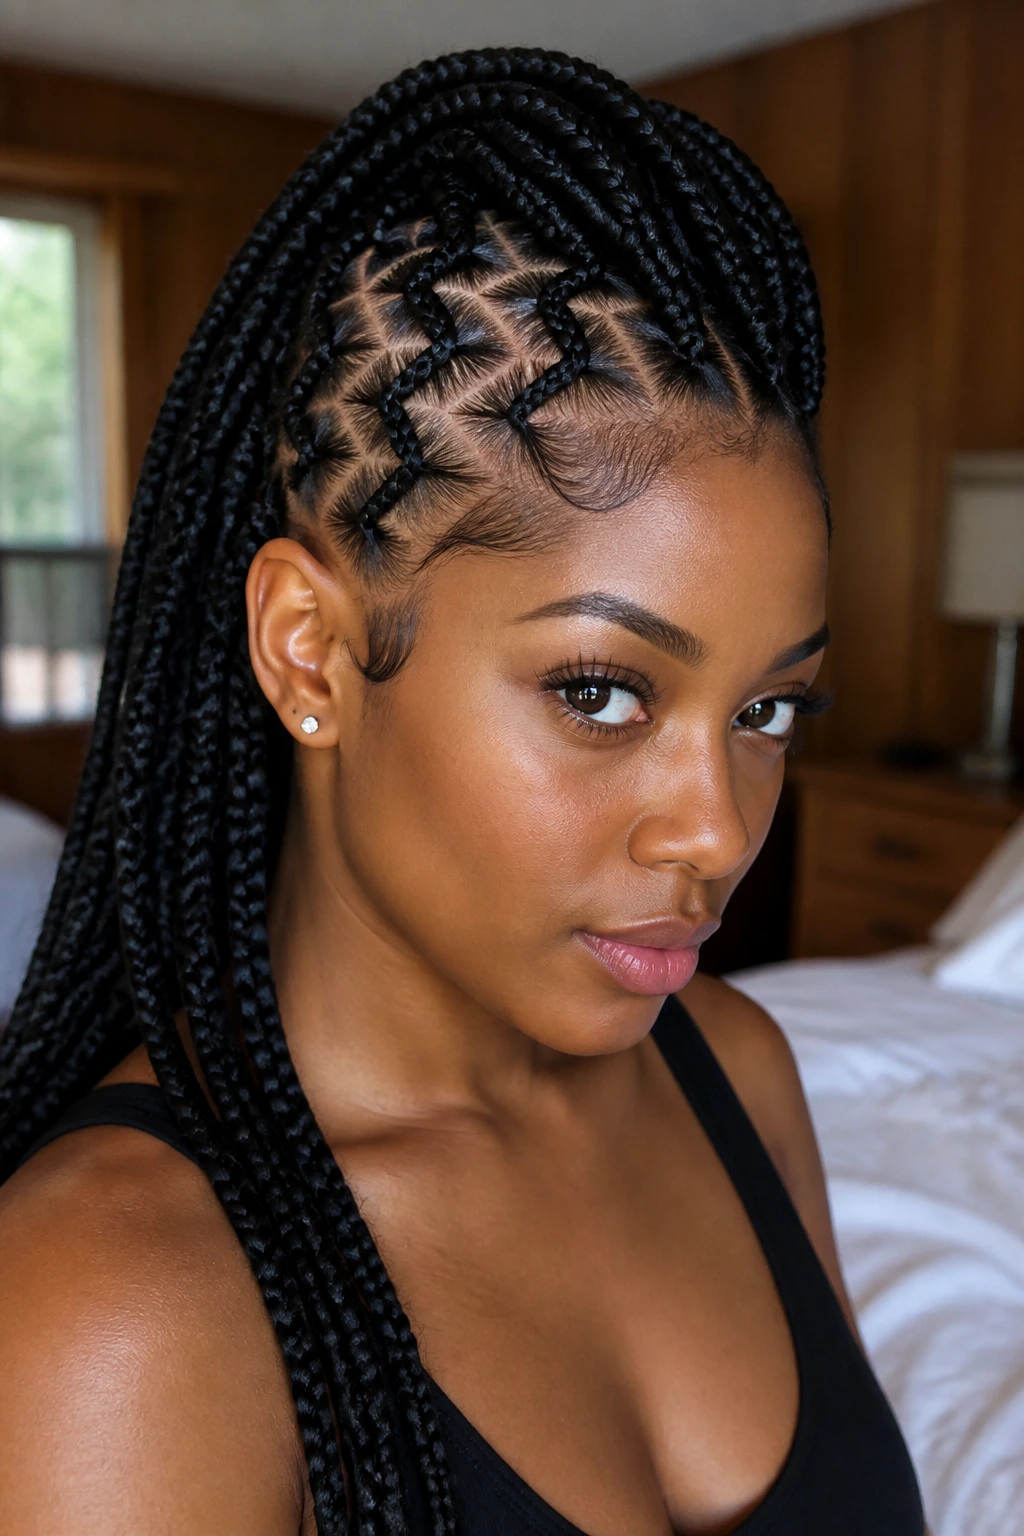
Zigzag parts give the mohawk a sharp, graphic feel that straight rows cannot match. The lines break and angle across the scalp before they join the center ridge, and long hair gives those turns enough room to breathe. On shorter hair, a zigzag can look cramped. On long hair, it looks deliberate.
The key is restraint. A zigzag part should be crisp, not fussy. If the angles are too tiny, the pattern gets busy and loses its shape from a distance. A few well-placed turns are better than a lot of choppy ones.
This style is especially good when you want the braid hawk to feel younger or a little more playful without relying on color. The parting alone carries the mood.
13. Rope-Twist Mohawk with Braided Base
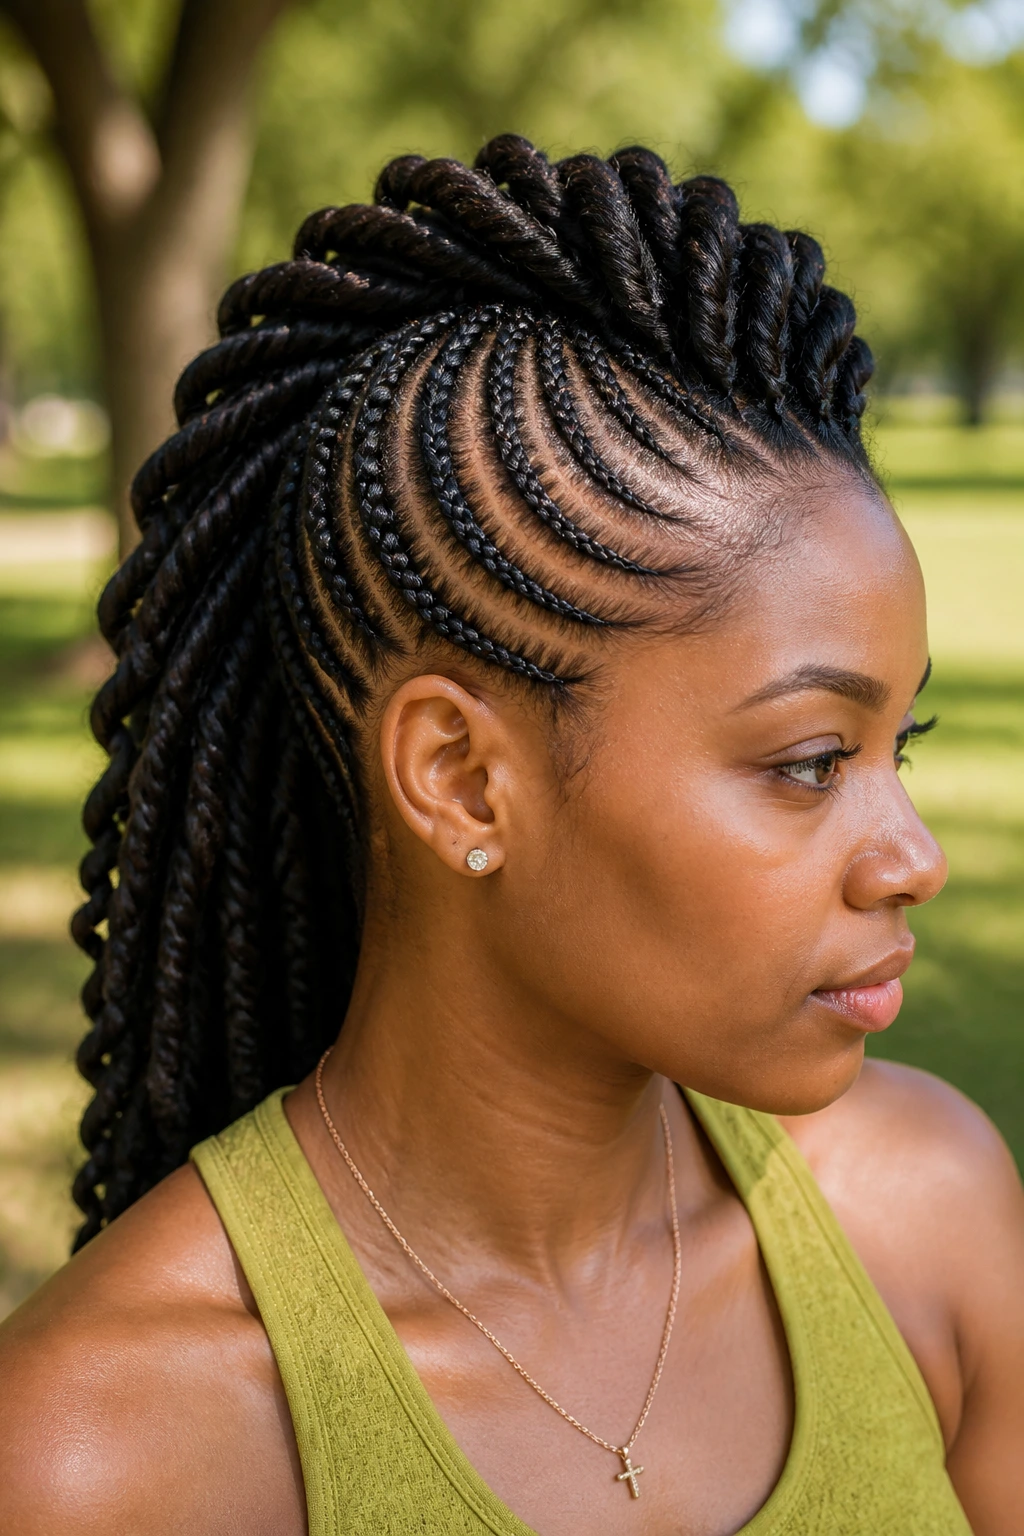
Not every mohawk braid has to be a braid all the way through. A rope-twist hawk starts with a braided base for grip, then shifts into two-strand twists or rope twists that run down the center. On long hair, that twist texture is useful because it reduces some of the visual heaviness that thick braids can create.
This is a softer version of the shape. It still holds the hawk line, but the finish looks looser and a little more relaxed. I like it for stretched natural hair that needs less tension and more movement.
A twist-based mohawk is also easier to fluff later if you want fullness. The braid base gives structure; the twists give you movement. That combination works better than people expect.
14. High Pony Mohawk Braid
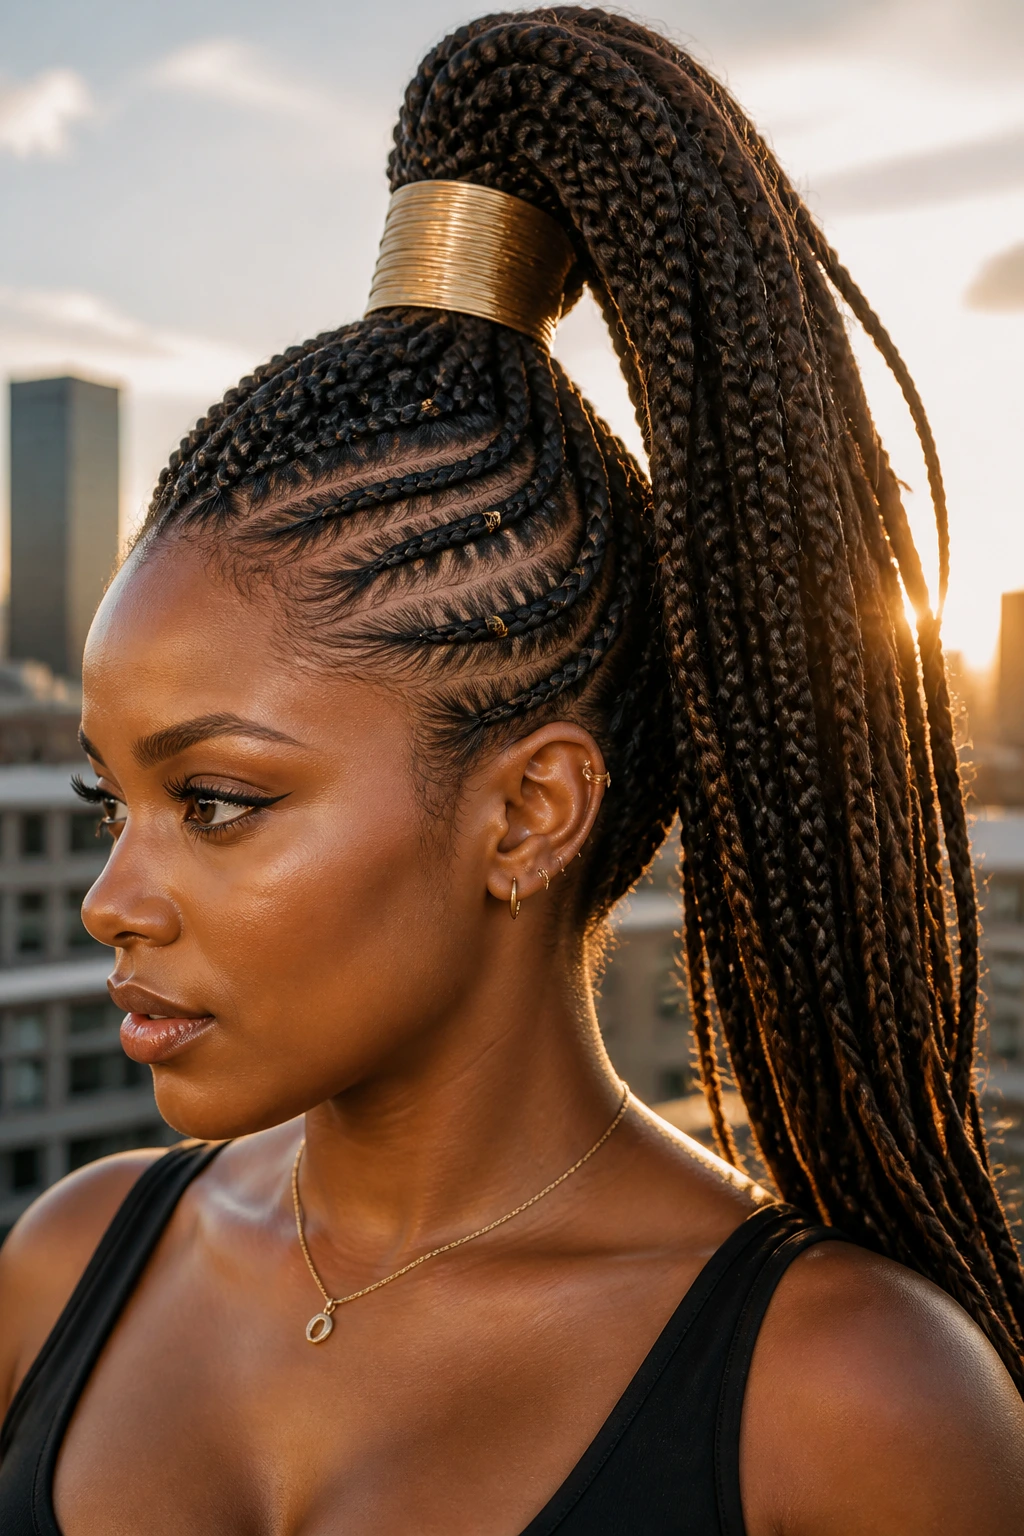
A high pony mohawk is what happens when the braid ridge climbs upward and gets tied into a lifted ponytail at the crown or just behind it. Long hair makes this style worth doing because the pony has enough length to swing. On medium hair, the shape can feel modest. On long hair, it has drama.
The key is not pulling the entire head upward. Keep the sides controlled and let the center ridge rise cleanly. If the pony sits too low, you lose the mohawk profile. Too high, and it starts looking like a standard pony with side braids.
This is a style that looks especially good when the tail is wrapped with a braid or finished with a cuff at the base. Otherwise the elastic shows too much and the whole thing feels unfinished.
15. Half-Up, Loose-Length Mohawk Braid
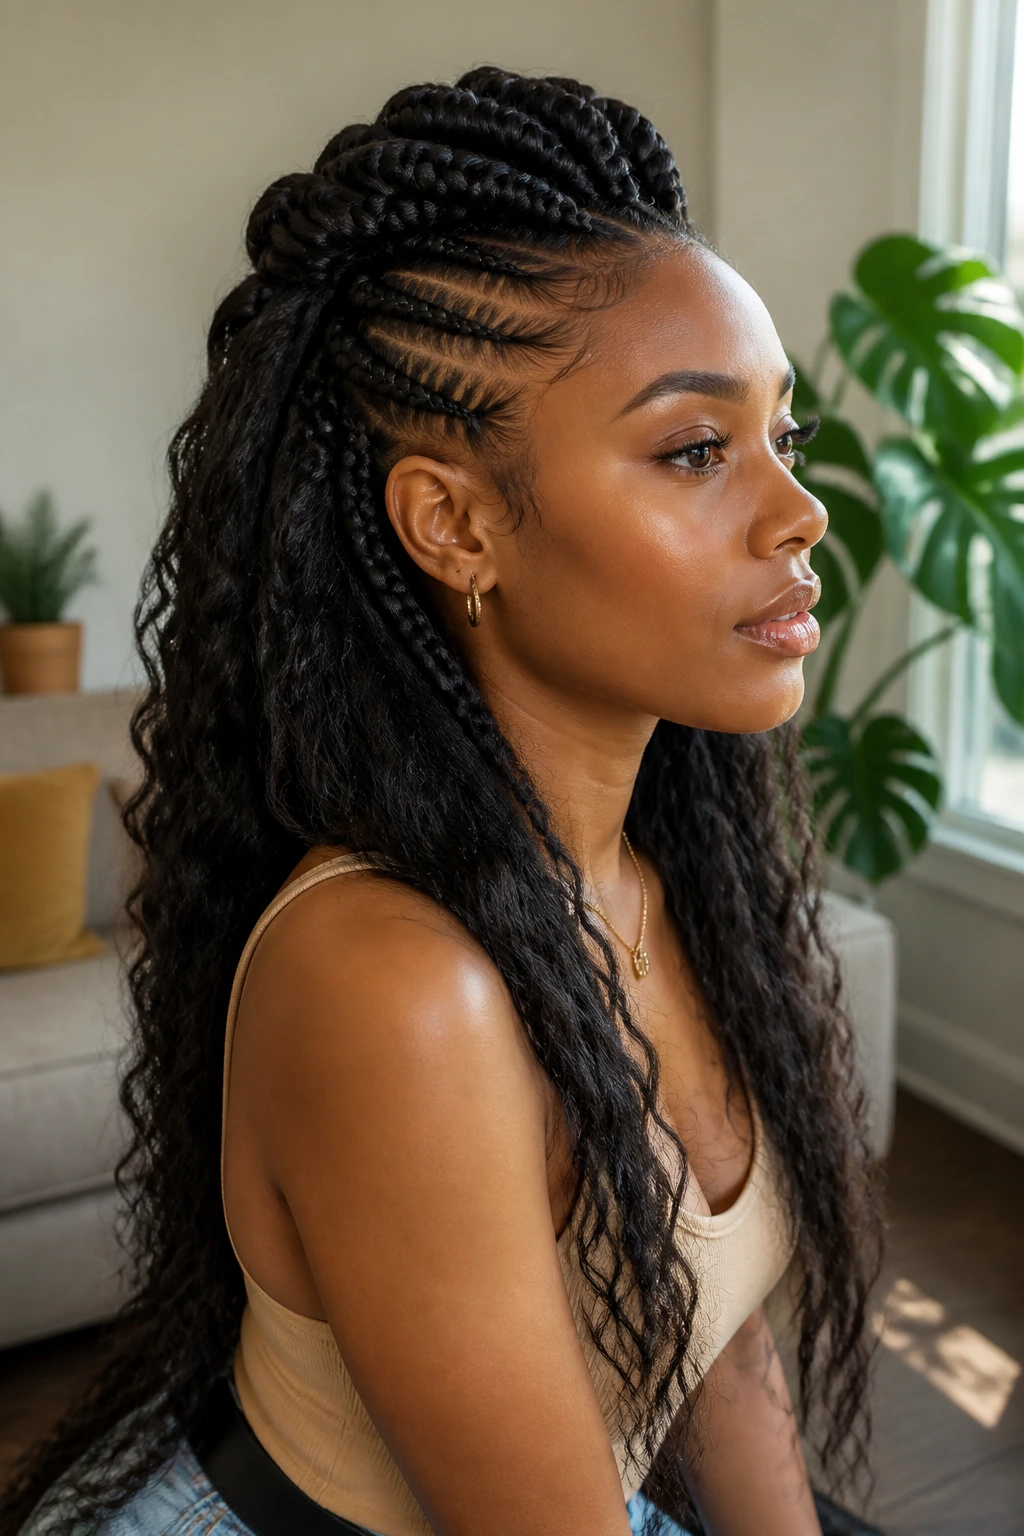
If you want to show off long hair instead of hiding it, this is the move. The upper section forms the mohawk braid, while the rest of the hair stays loose below it. It gives you shape at the scalp and movement through the lengths, which is a strong combination when the hair is healthy and stretched.
This style works best when the loose portion is smooth. A blown-out texture or a well-stretched natural finish keeps the contrast clean. If the bottom layer is too frizzy, the mohawk gets lost in the volume.
I reach for this one when I want the braid to act like a frame instead of the whole picture. It is less severe than a full braided hawk and easier to pair with earrings, collars, or a bare shoulder line.
16. Braided Mohawk Bun with Wrapped Ends
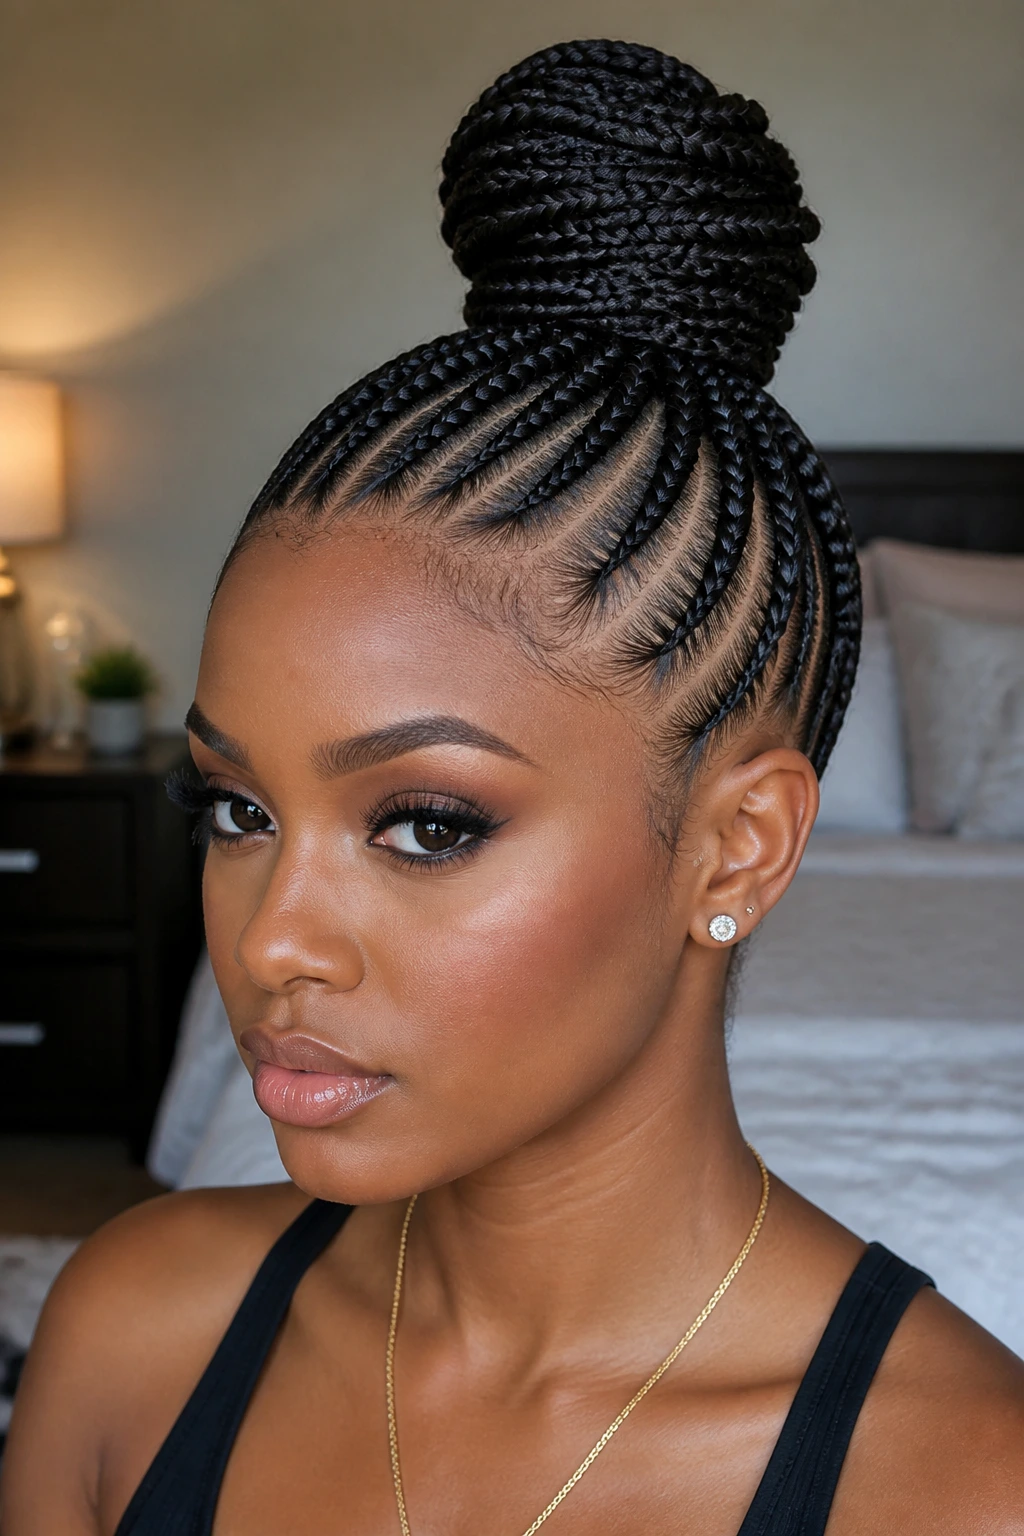
Long hair can start to droop under its own weight if every inch is left hanging. A braided mohawk bun fixes that by tucking the length into a wrapped knot at the top or back. The result keeps the hawk silhouette visible while taking pressure off the ends.
The bun should sit slightly back from the hairline so the ridge still reads from the front. If it sits too far forward, the style loses its shape and becomes a bun with braids attached. That is not the same thing.
This version is one I’d call practical glamour. It feels more contained, but it still has height and texture. And if you have very long hair, it can save your neck from the weight.
17. Ladder-Pattern Mohawk Braids
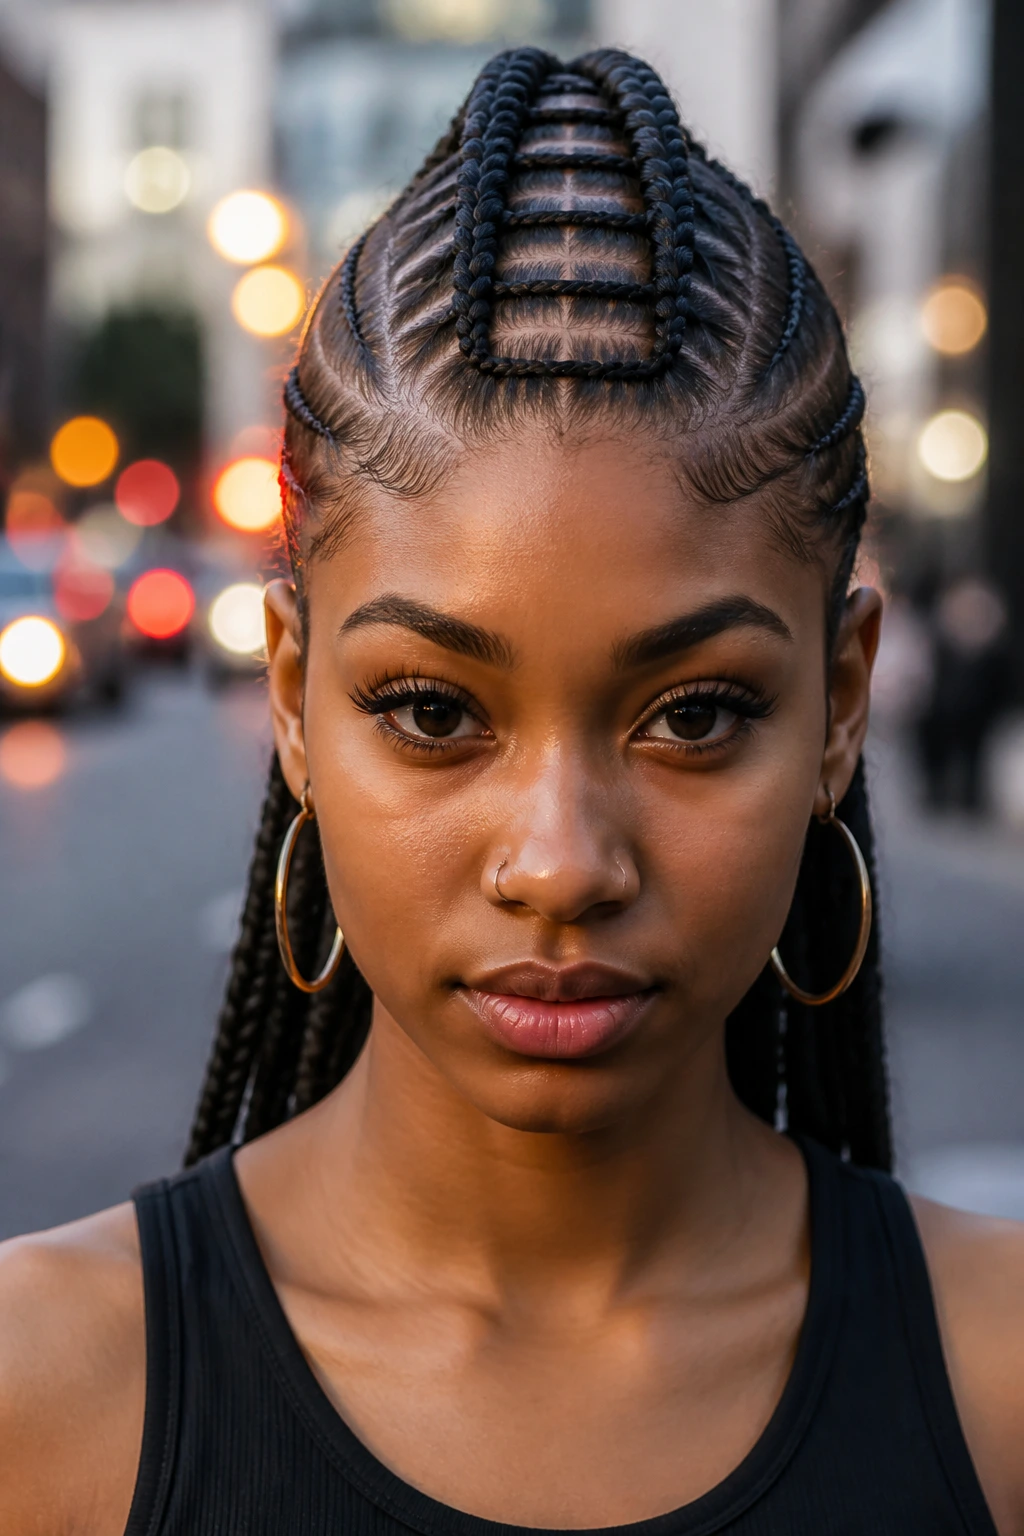
A ladder pattern creates the illusion of rungs running along the center section, usually by placing horizontal parts or connecting rows that look like steps. On long hair, the effect becomes clearer because there is more length for the structure to repeat.
The spacing has to stay even. If the “rungs” vary too much, the pattern looks accidental. Done well, it gives the mohawk a tailored, almost woven finish that is different from standard cornrows without needing extra accessories.
This style is one of the more technical looks in the bunch. That is part of the appeal. It rewards clean hands and a steady parting line.
18. Crowned Halo Mohawk with Braided Edges
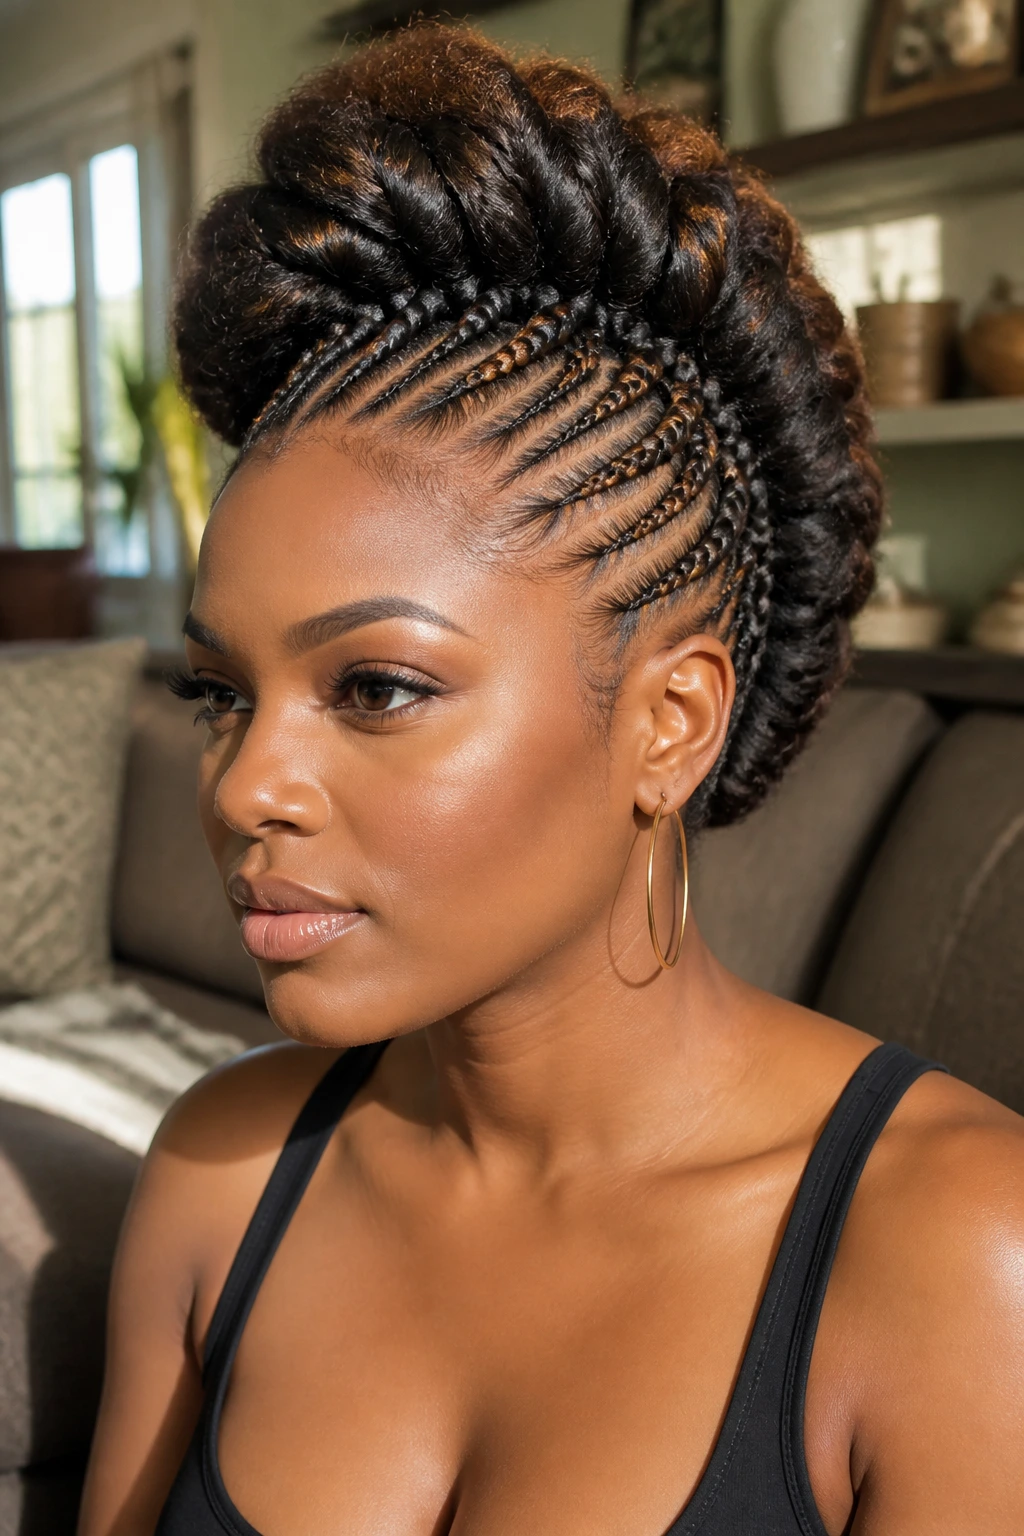
A crowned halo hawk wraps braid detail around the crown while keeping the central ridge lifted. It has a softer, more elegant outline than some of the sharper versions, and long hair helps the halo sit with enough fullness to feel intentional. On very long hair, this can border on regal if the parting is neat and the finish is smooth.
I like it for formal settings because it does not scream for attention. It just holds its shape and lets the braid structure do the work. A few cuffs or a small braid wrap can make it feel finished without crowding the scalp.
The important part is the crown line. If that arc is uneven, the whole style loses its balance. Straighten that out first. Everything else follows.
19. Side-Swept Asymmetrical Hawk
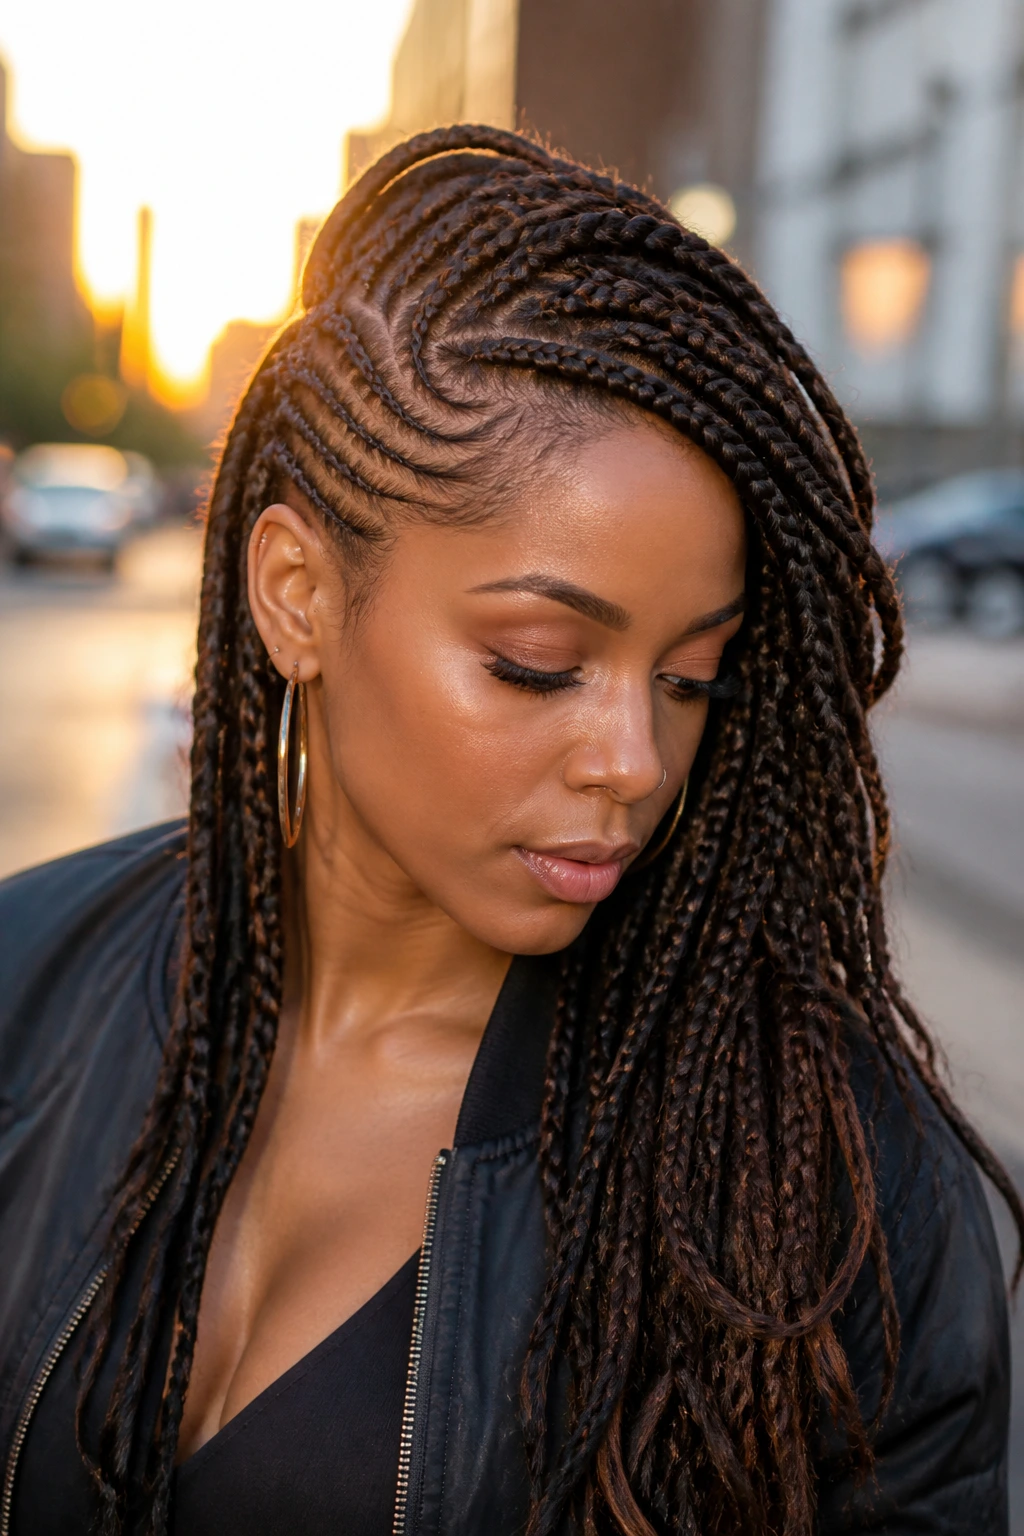
A side-swept mohawk braid leans into drama by shifting the ridge off center. One side sits higher, the braid path angles across the head, and the longer pieces can fall toward one shoulder or down the back. On long hair, that diagonal line looks especially strong because the length has somewhere to go.
This style is for someone who wants the mohawk shape without the rigid symmetry. It feels a little sharper, a little less expected. But it still needs clean parting at the root, or the asymmetry turns sloppy fast.
If you want a version that looks modern without looking overworked, this is the one I’d point to first. The diagonal line does the styling for you.
Why the Ridge Sits Better When Long Hair Is Prepped Right
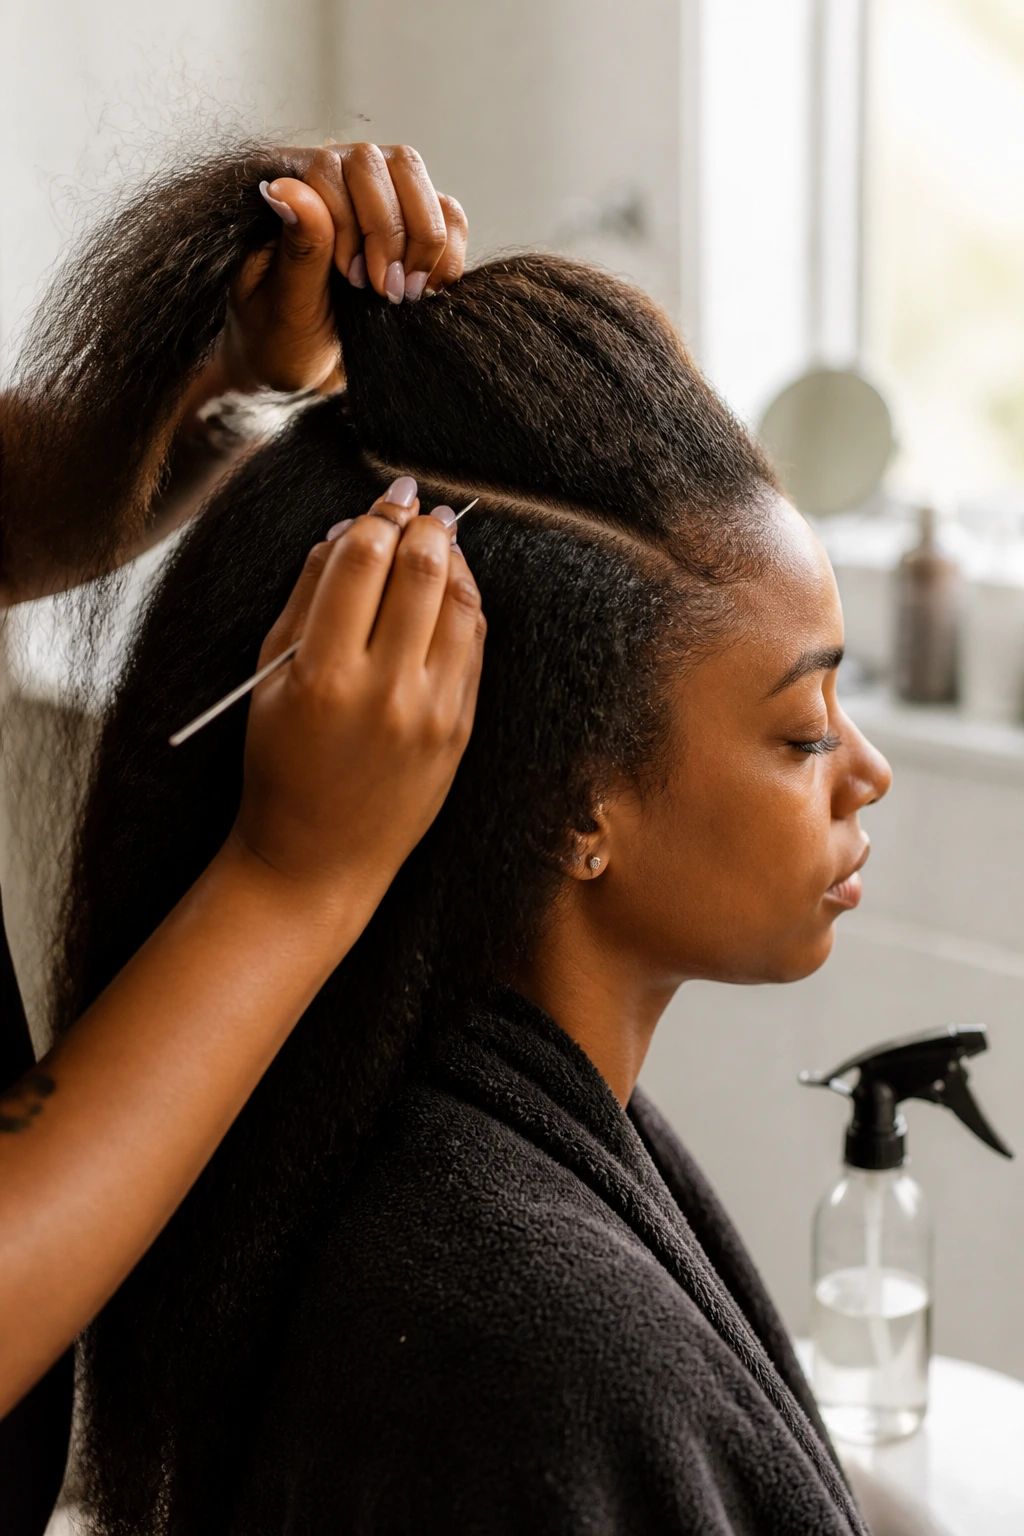
Long hair looks impressive in a braided mohawk only when the base is ready for it. That sounds obvious, but a lot of styles fail because the hair underneath was never stretched, detangled, or sectioned with any care. The braid then has to fight knots, shrinkage, and uneven density all at once. That is how you get puffed roots and a ridge that leans to one side by noon.
A good prep day changes everything. Clean, stretched hair holds parts better. Light moisture keeps the scalp from feeling dry under the braids. And if you are adding extensions, matching the bulk of the added hair to the actual density of your own hair keeps the style from tipping into heavy territory. Too much added hair makes the mohawk sag. Too little makes the shape disappear.
The best long-hair mohawk braids do not ask the hair to behave like something it is not. They work with density, length, and shrinkage instead of fighting them. That is the whole game.
Essential Tools for Clean Parts and Neat Braids
-
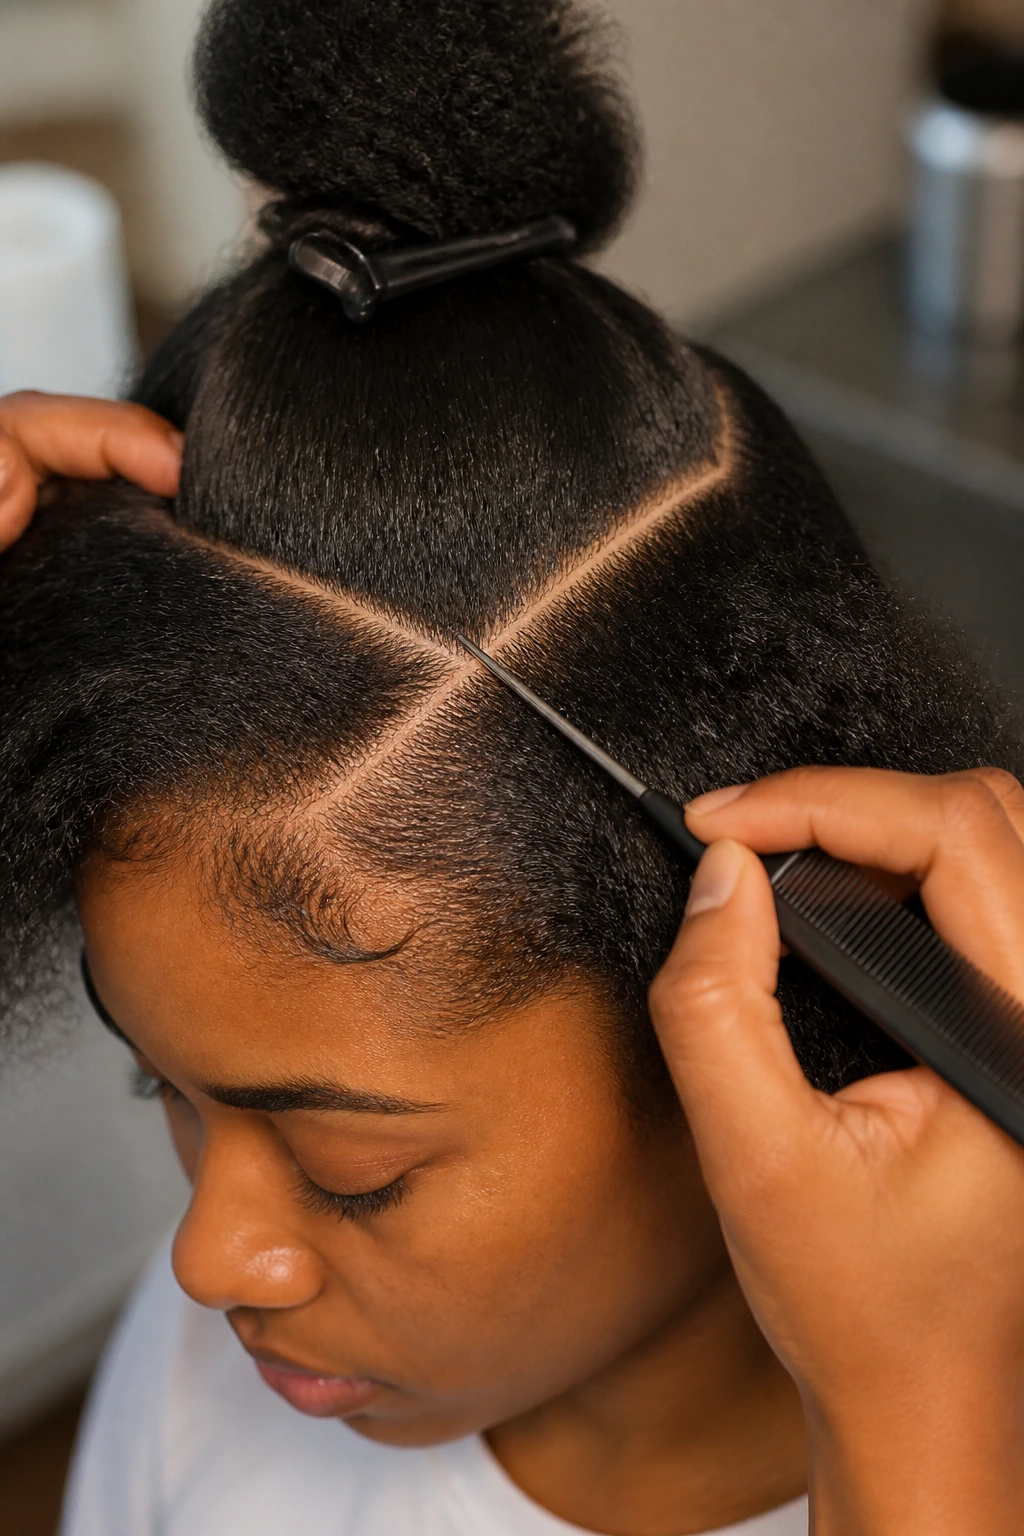
Rat-tail comb: The pointed tail helps draw straight rows, triangles, and zigzags without tearing the hairline.
-
Wide-tooth comb: Good for detangling long hair before sectioning so the braid starts smooth instead of knotty.
-
Hair clips or duckbill clips: These keep unused sections out of the way while you braid one lane at a time.
-
Spray bottle with water or leave-in mix: A light mist keeps the hair pliable without soaking it.
-
Braiding gel or edge control: Use a small amount at the roots for clean parts and smoother edges.
-
Braiding hair or pre-stretched synthetic hair: Optional, but helpful for feed-ins, jumbo styles, and longer hawks that need extra fullness.
-
Mousse: Useful for smoothing flyaways and setting the finished style without making it hard.
-
Silk or satin scarf/bonnet: Protects the shape overnight and keeps the parts from frizzing up.
-
Small elastics and braid cuffs: Handy for securing ends and adding detail without changing the whole style.
-
Hand mirror or three-way mirror: You need to see the back. Guessing is how the nape gets messy.
Smart Prep for Long Hair and Better Product Choices
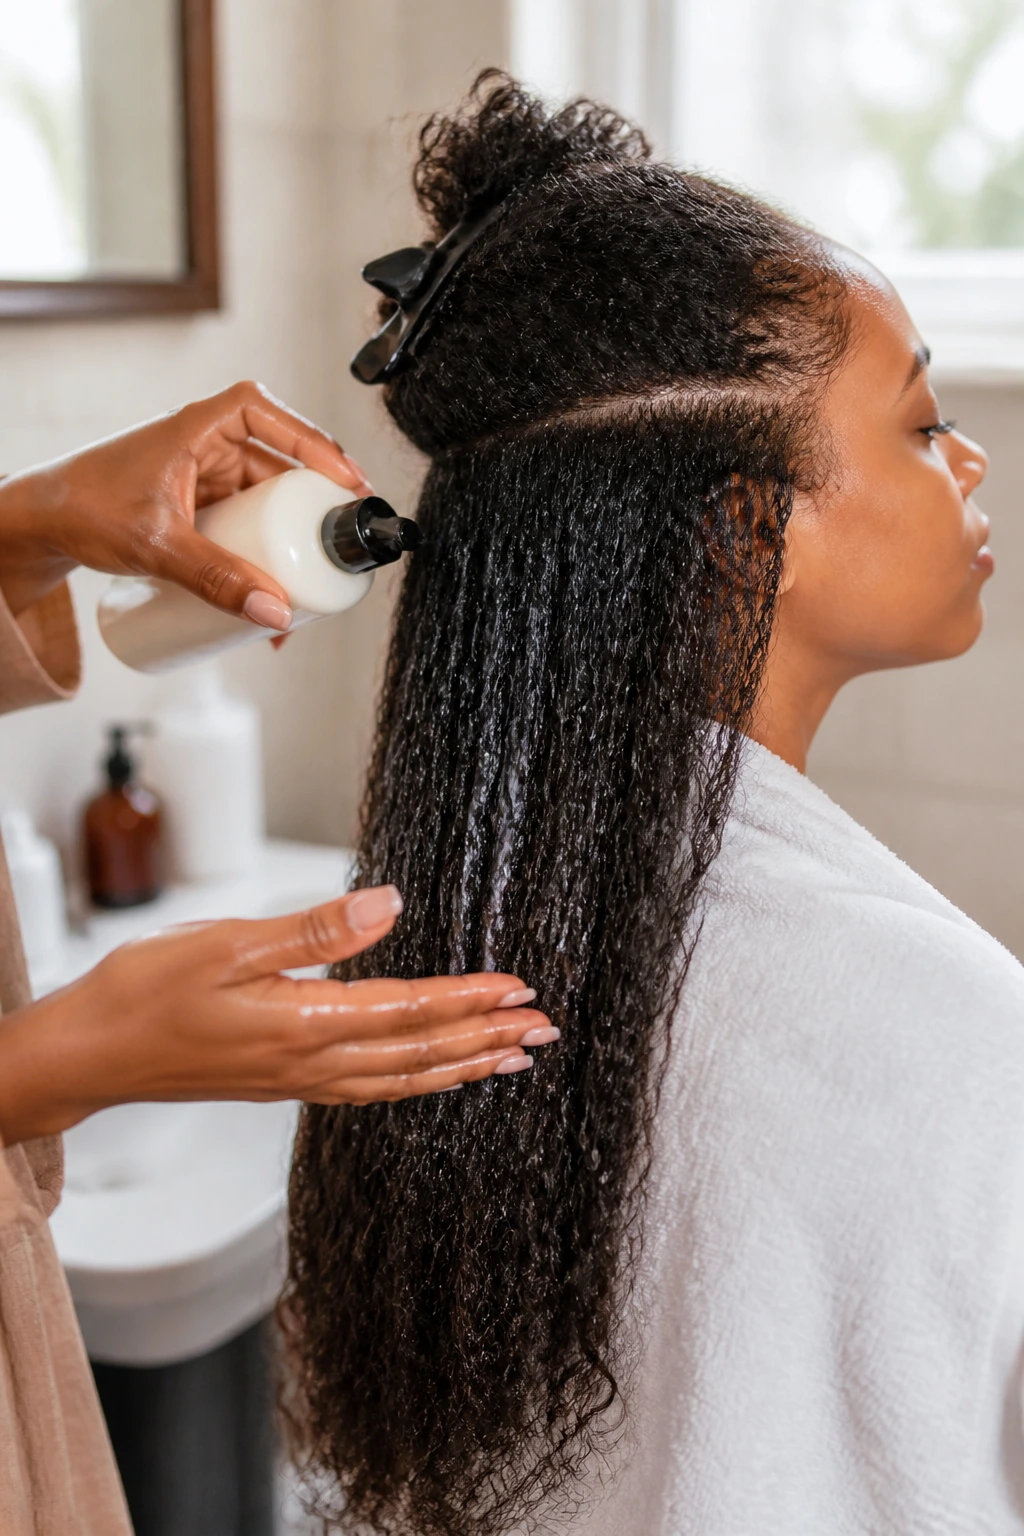
Long hair is less forgiving of sloppy prep than short hair. If the strands are tangled at the roots, every part line gets harder to clean up, and the braid ridge ends up bumpier than it should. Start with detangling in sections, not all at once. A spray bottle, a leave-in that gives slip, and a wide-tooth comb are enough for most heads. Pulling through dry hair is how you create the kind of friction that shows up later as frizz and soreness.
If you use braiding hair, pre-stretched synthetic hair saves time and lays flatter at the root. Kanekalon-type fibers are common because they hold shape well and do not feel as bulky as cheaper, thicker packs. For long natural hair, you often need less added hair than you think. The goal is shape, not weight. Heavy extensions can flatten the ridge before the week is out.
Product choice matters too. Pick a gel that dries clear and does not leave a chalky cast. A leave-in with too much residue can make the scalp feel coated, which is a bad trade when the style is going to stay in for more than a day. Light moisture, firm hold, and clean parting are the combination to look for.
How to Wear These Styles Without Fighting the Shape
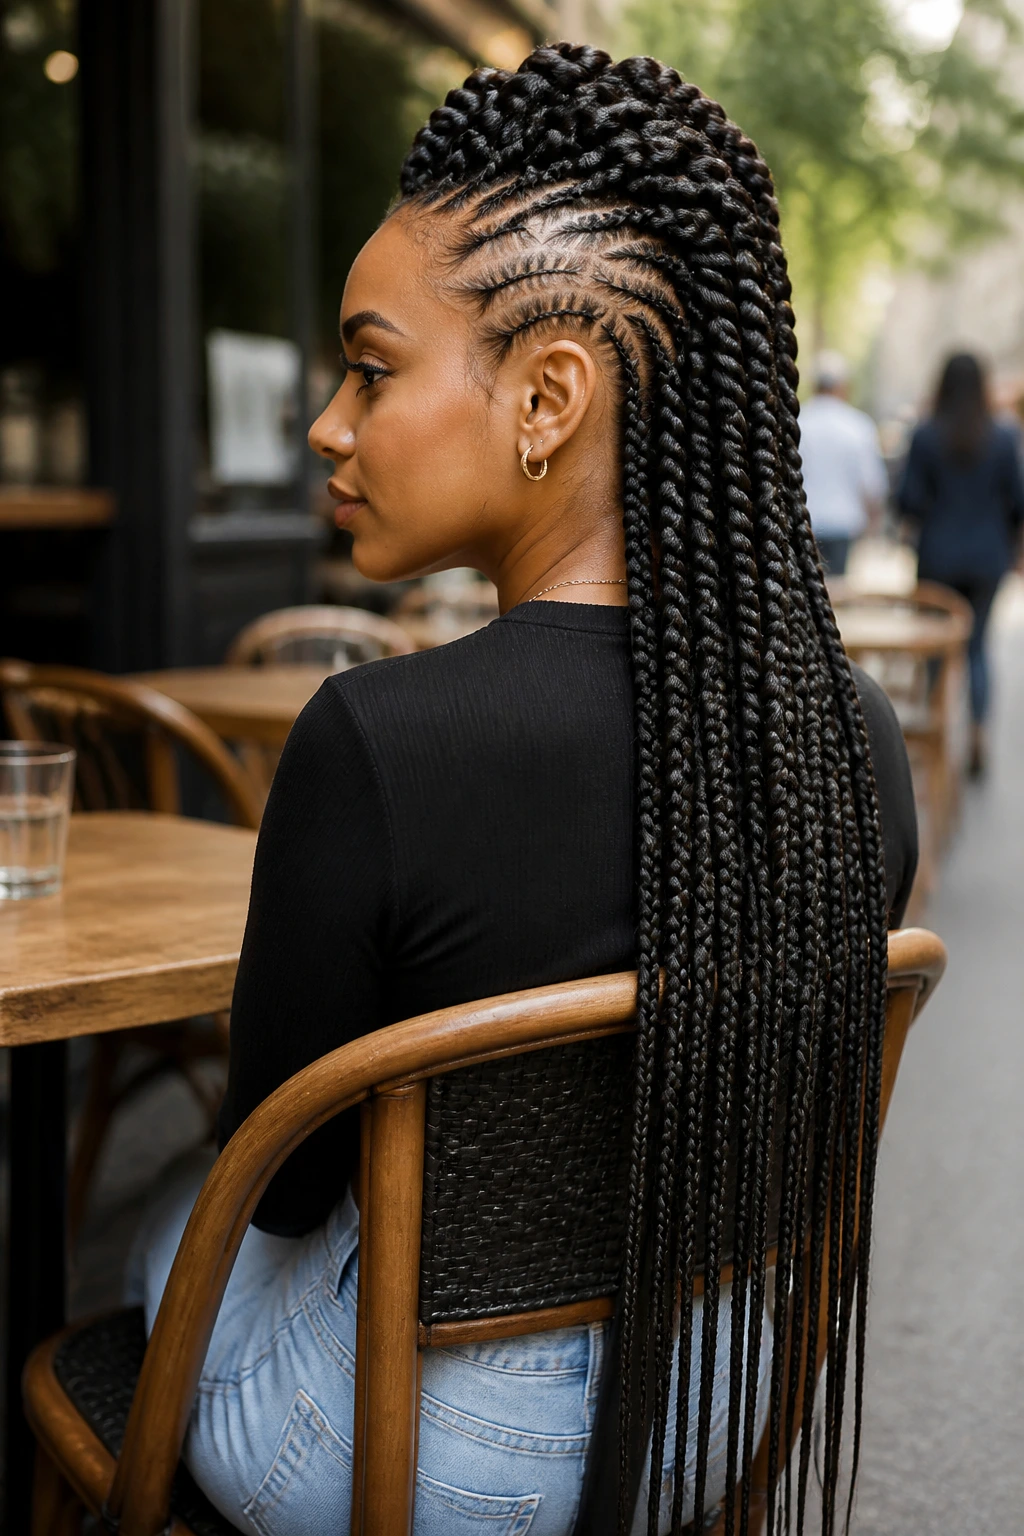
Presentation: Keep the ridge centered if you want a classic mohawk silhouette, or shift it slightly off center when you want more movement. On long hair, the back matters as much as the front, so do not ignore how the ends fall once you turn around.
Outfits: High necks, open shoulders, and simple earrings let the braid pattern stay visible. Heavy necklaces can crowd the neckline, which is a pity when the braid is the part doing the work. I like this look with hoop earrings or a bare ear and a strong part line.
Occasions: Sleek cornrow versions lean polished enough for work or formal settings. Curly-ended, beaded, and asymmetrical versions feel looser and more expressive for weekends, parties, and photos. The style can shift mood fast depending on how much texture you leave in the finish.
Accessories: Use cuffs near the front or at the crown if you want the braid ridge to read taller. Use beads sparingly when the hair is already very long. Too much decoration can flatten the line visually.
Extra Tips for Sharper Parts and Longer Wear
Edge Control: Use a pea-sized amount at the hairline, not half the jar. If the product piles up, it turns white or flakes when the hair dries, and that wrecks a clean mohawk fast.
Parting Upgrade: Trace every major part with the tail comb before you braid. Then clip each section away so you are not grabbing from the wrong lane when your hands get tired.
Length Management: If your hair reaches well past the shoulders, decide early whether the ends will hang, curl, or tuck. Long hair that has no plan at the ends tends to droop, and the ridge loses its lift.
Accessory Move: Put the strongest accent near the front or the crown. That is where the eye lands first. One good cuff can do more than a whole row of scattered beads in the back.
Touch-Up Trick: A light mist of mousse and a satin scarf for 15 minutes can calm flyaways without restarting the style. It is a small thing, but it keeps the braid line looking fresh.
Common Mistakes That Flatten a Braided Mohawk
-
Braiding on unprepared hair: If the hair is tangled or shrunken, the parts will wobble and the ridge will look lumpy. Detangle first, stretch if needed, then braid.
-
Pulling the temples too tight: Sore edges, bumps, or headaches are the warning signs. The fix is simple: loosen the first inch at the hairline and stop chasing a too-sharp line.
-
Using too much added hair: Heavy extensions can drag the ridge downward by the third day. Match the added hair to your own density, and keep the front lighter than the back.
-
Ignoring the back view: A mohawk can look perfect in the mirror and messy at the nape. Check the back with a second mirror before you seal the ends.
-
Letting product build up: Gummy gel makes the style stiff at first, then flaky later. Use smaller amounts, wipe the comb as you go, and stop layering products on top of each other.
-
Sleeping without protection: Satin matters. Cotton pillowcases steal moisture and rough up the braids, especially around the nape and temples where friction is highest.
Variations and Adaptations to Try
No-Extensions Soft Hawk: Keep the style built entirely from your own hair and use smaller cornrows or twists. This works well when you want less bulk and more comfort at the scalp.
Wedding-Ready Curly Ends: Add defined curls, a few cuffs, and a smoother crown. It gives the mohawk a dressed-up look without changing the braid structure.
Low-Tension Everyday Hawk: Use larger parts, looser cornrows, and a lower ridge. It is gentler on the scalp and easier to keep in for longer wear.
Beaded Festival Hawk: Thread beads into the front sections and keep the back simpler. A few strong accents read better than a crowded head of hardware.
Asymmetrical Side Sweep: Push the ridge slightly to one side and let the length fall across one shoulder. It creates a softer outline while keeping the mohawk energy.
Wrapped-Ends Hawk: Braid the length down, then tuck or wrap the ends into a knot. This is the version I’d choose when the hair is very long and needs a little relief from its own weight.
Keeping the Style Fresh Between Braids
A mohawk braid on long hair lasts better when you treat the scalp like part of the style, not an afterthought. At night, wrap the hair with a silk scarf or sleep in a bonnet that covers the ridge and the nape. If the braids are left loose while you sleep, the parts blur fast. One rough pillowcase can undo a neat braid line overnight.
Light scalp care helps too. A few drops of oil or a scalp serum every two or three days is enough for most people. Do not drench the roots. Too much oil attracts buildup, and buildup is what makes the style itch and smell tired before it needs to. If you sweat a lot, clean the scalp gently with a diluted cleanser on a pointed applicator bottle and let the roots dry fully.
Most braided mohawks on long hair look good for about two to four weeks, depending on tension, braid size, and how fast your hair grows. Smaller, tighter styles show new growth sooner. Bigger, looser styles may stay neat a little longer, but only if the edges still feel fine. If the temples start hurting, that is not a sign to tough it out. It is a sign to take the style down.
Frequently Asked Questions
Can I do African mohawk braid styles for long hair without extensions?
Yes, and on long hair that is already thick, you often do not need added hair at all. The braid ridge can be built from your own length if the parts are clean and the sections are balanced.
Which mohawk braid style is easiest on the edges?
Looser feed-ins, low-tension cornrow hawks, and wrapped-end versions tend to be kinder around the temples. Avoid tiny braids pulled tight from the front hairline if your edges are fragile.
How long does a braided mohawk last on long hair?
Most styles stay neat for about two to four weeks. Jumbo braids may look worn sooner because they show frizz quickly, while cleaner stitch or feed-in patterns can stay polished longer if you protect them at night.
Can I wash my scalp while the style is in?
Yes, but keep it gentle. Use a diluted cleanser or scalp wash bottle, focus on the roots, and dry thoroughly afterward so moisture does not sit under the braids.
What if my long hair keeps making the style heavy?
Shift to smaller sections, keep the center ridge lighter, or tuck the ends into a bun. Long hair looks good in a mohawk, but it does not need to hang loose everywhere to prove the point.
Which style looks most formal?
Sleek center-ridge cornrows, crown-halo hawks, and stitch-braid versions tend to look the most refined. Add a clean part, minimal accessories, and smooth edges if you want the style to feel polished.
What if the braid pattern starts puffing up after a few days?
Use mousse on the frizzy sections, wrap the hair for 15 to 20 minutes, and avoid adding more gel on top of old product. Puffy roots usually mean the style needs smoothing, not more grease.
Is a side-swept hawk still a real mohawk?
Absolutely. As long as the center ridge or raised braid line keeps the mohawk silhouette, a diagonal or asymmetrical version still belongs in the family. It just has a looser attitude.
The Shape Long Hair Gives Back
Long hair does not have to be hidden, tucked, or forced into something small. A good braided mohawk turns the length into structure, and that is why these looks keep working across so many settings, textures, and moods. Some are clean enough to feel sharp. Others carry curls, beads, or a little asymmetry and end up feeling more personal.
The smartest move is to match the braid style to the hair’s density, the tension your scalp can handle, and the amount of time you actually want to spend maintaining it. Pick the version that suits your head, not the one that looks hardest on social media. Then let the length do what it does best: move.
