



A dreadlock mohawk can look sharp in a way that feels almost architectural, or it can sag into the kind of half-finished shape you’d normally blame on a rough morning and a bad mirror. With long natural hair and locs, the difference usually comes down to three things: where the weight sits, how clean the sides are, and whether the center section has enough lift to justify the whole idea.
Long locs are a gift and a little bit of a problem. They give the mohawk line real drama, the kind of vertical shape shorter hair has to fake, but they also bring gravity, bulk, and a surprising amount of tension at the temples if you pull them the wrong way. Pin too hard, and your scalp starts talking back by lunch. Leave the sides too loose, and the silhouette turns fuzzy before you’ve left the house.
The best dreadlock mohawk styles for long natural hair don’t fight the length. They use it. Some lean polished and sculpted, with clean side panels and a high ridge. Others stay softer, with hanging ends, wrapped bases, or loose texture that keeps the style from looking stiff. The point is not to make every head of locs look the same. It’s to give you 23 ways to make the shape feel intentional, comfortable, and worth wearing more than once.
Why These Mohawk Shapes Work So Well on Long Locs
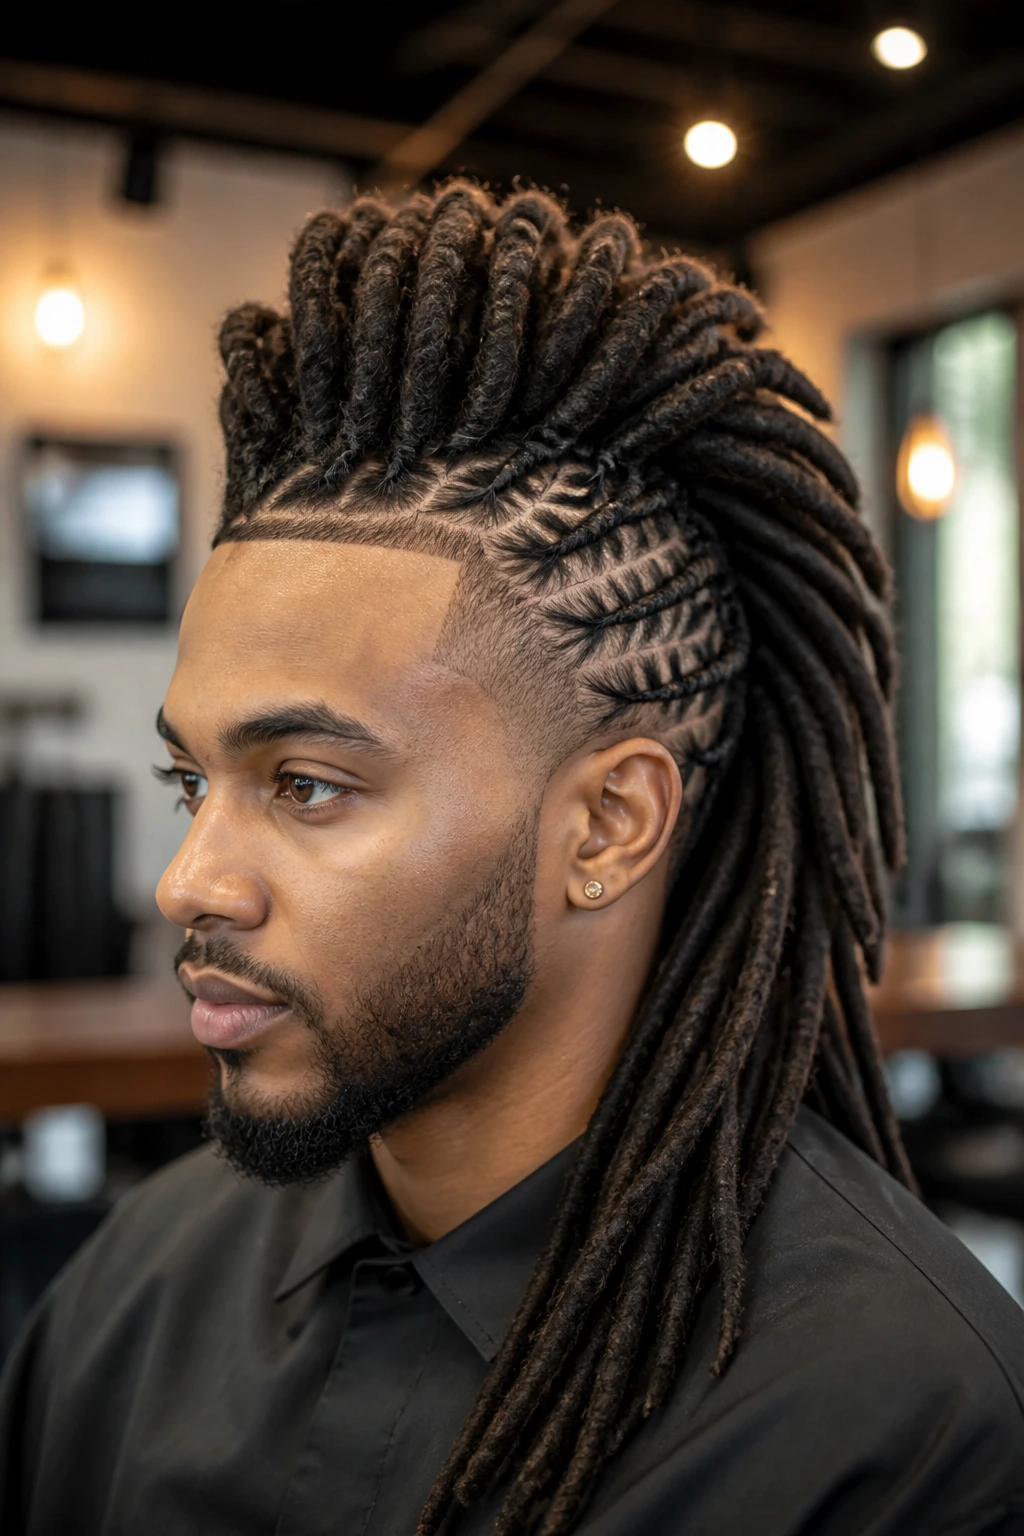
Clean side panels, big center energy. That’s the formula in plain English. Long locs naturally create a strong center line once you lift them off the sides, so even a simple pin-up can look deliberate if the perimeter is neat and the crown has height.
- Long locs bring built-in volume: You do not have to tease or pad much to get a strong silhouette, because the length itself gives you body and shape.
- The mohawk line frames the face fast: Keeping the sides flatter opens up the cheekbones and jawline without needing a razor-cut undercut.
- The style can go dressy or casual: Swap pins for cuffs, add a scarf, or leave the tail loose, and the same base shape changes mood immediately.
- It works with dense or thin locs: Thick locs give a fuller crest; slimmer locs give a sleeker ridge that holds closer to the head.
- It makes heavy hair feel lighter: When the weight is distributed up the center instead of dragged at the sides, the whole style feels less bulky.
The other reason people keep coming back to the mohawk shape is simple: it shows off the locs instead of hiding them. A long, straight-down look can be beautiful, sure, but a raised center panel gives the hair movement, direction, and a little attitude.
1. Classic Raised Center Mohawk
A classic raised center mohawk is the cleanest place to start because it doesn’t try to be clever. The sides are slicked back or pinned flat, the center locs are lifted into a strong ridge, and the whole thing reads from across the room. It’s the style that makes long locs look taller, not just longer.
Why it works: Long locs already have heft, so the ridge stays visible without a ton of product. I like this shape when the locs are medium to thick, because the center panel fills out fast and looks balanced without a lot of fuss. If the roots are freshly retwisted, even better. The parting stays cleaner and the silhouette lasts longer.
How to build it: Gather the sides from temple to nape and secure them low with pins or small snag-free elastics. Then lift the center row from the crown forward and let it arc upward before tucking the ends toward the back. Use 6 to 10 bobby pins in an X pattern if your locs are dense. That sounds like a lot, but with heavy locs, it usually isn’t.
Best for: everyday wear, photos, and any day you want the hair to do the talking without extra decoration. It’s plain in the best way.
2. Deep Side-Part Mohawk with Flat Twists
Want the mohawk shape, but with a little asymmetry? A deep side part gives the whole style a sharper profile, and flat twists on one or both sides keep the look close to the scalp without making it severe.
The beauty of this version is that it lets the center row stay high while the side panels do something useful instead of just disappearing. Twist them toward the back, pin them under the crown, and the result feels tidy from every angle. The line from part to crest looks purposeful, not accidental.
This version is especially good if your locs are long but not super thick. The flat twists help collect loose layers and make the center row look fuller by comparison. Use a rat-tail comb to keep the part clean, because a jagged part can make the whole style look rushed.
3. High Pony Mohawk with a Wrapped Base
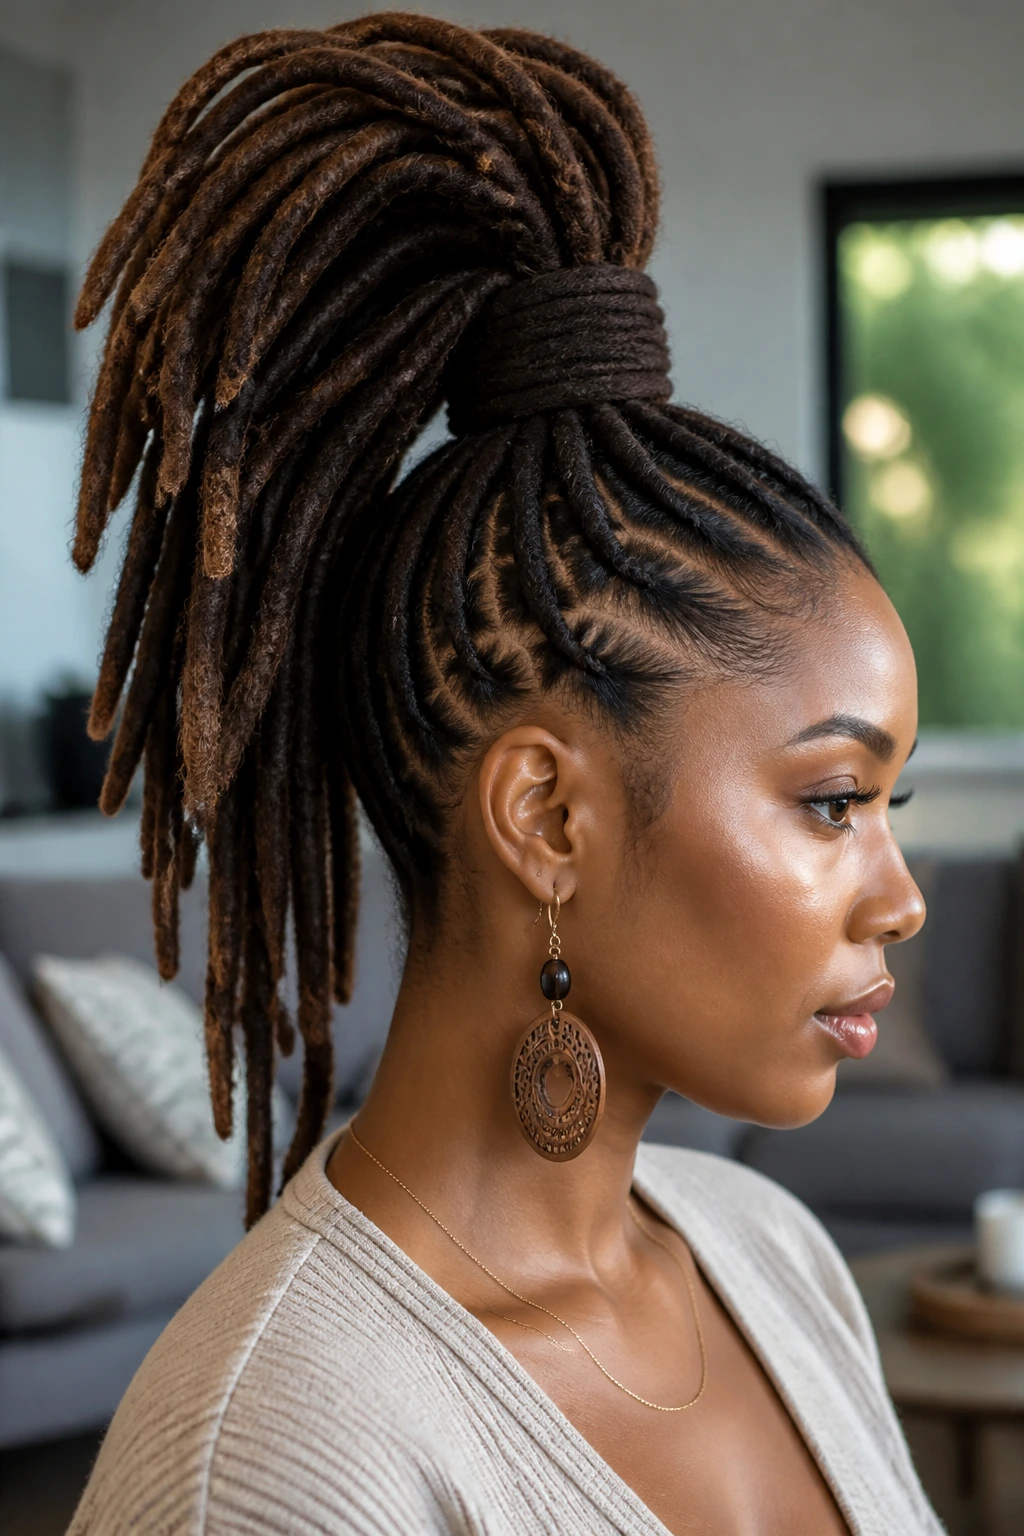
A high pony mohawk is what happens when you stop pretending you need every loc to sit in the same place. The sides are pulled back, the crown gathers high, and the base gets wrapped with one loc, a strip of fabric, or even a tucked section of hair so the tie isn’t the first thing people see.
That wrapped base matters. A lot. It hides the mechanics and makes the style look finished instead of improvised. It also helps if your locs are thick and tend to bulge where an elastic sits. Wrapping smooths that bump into something cleaner.
I like this style for long hair because the ponytail gives movement at the back. The locs swing when you walk, which keeps the mohawk from feeling too rigid. If you want a little more drama, leave the ends unwrapped and let them fan out like a tail.
4. Barrel-Rolled Crown Mohawk
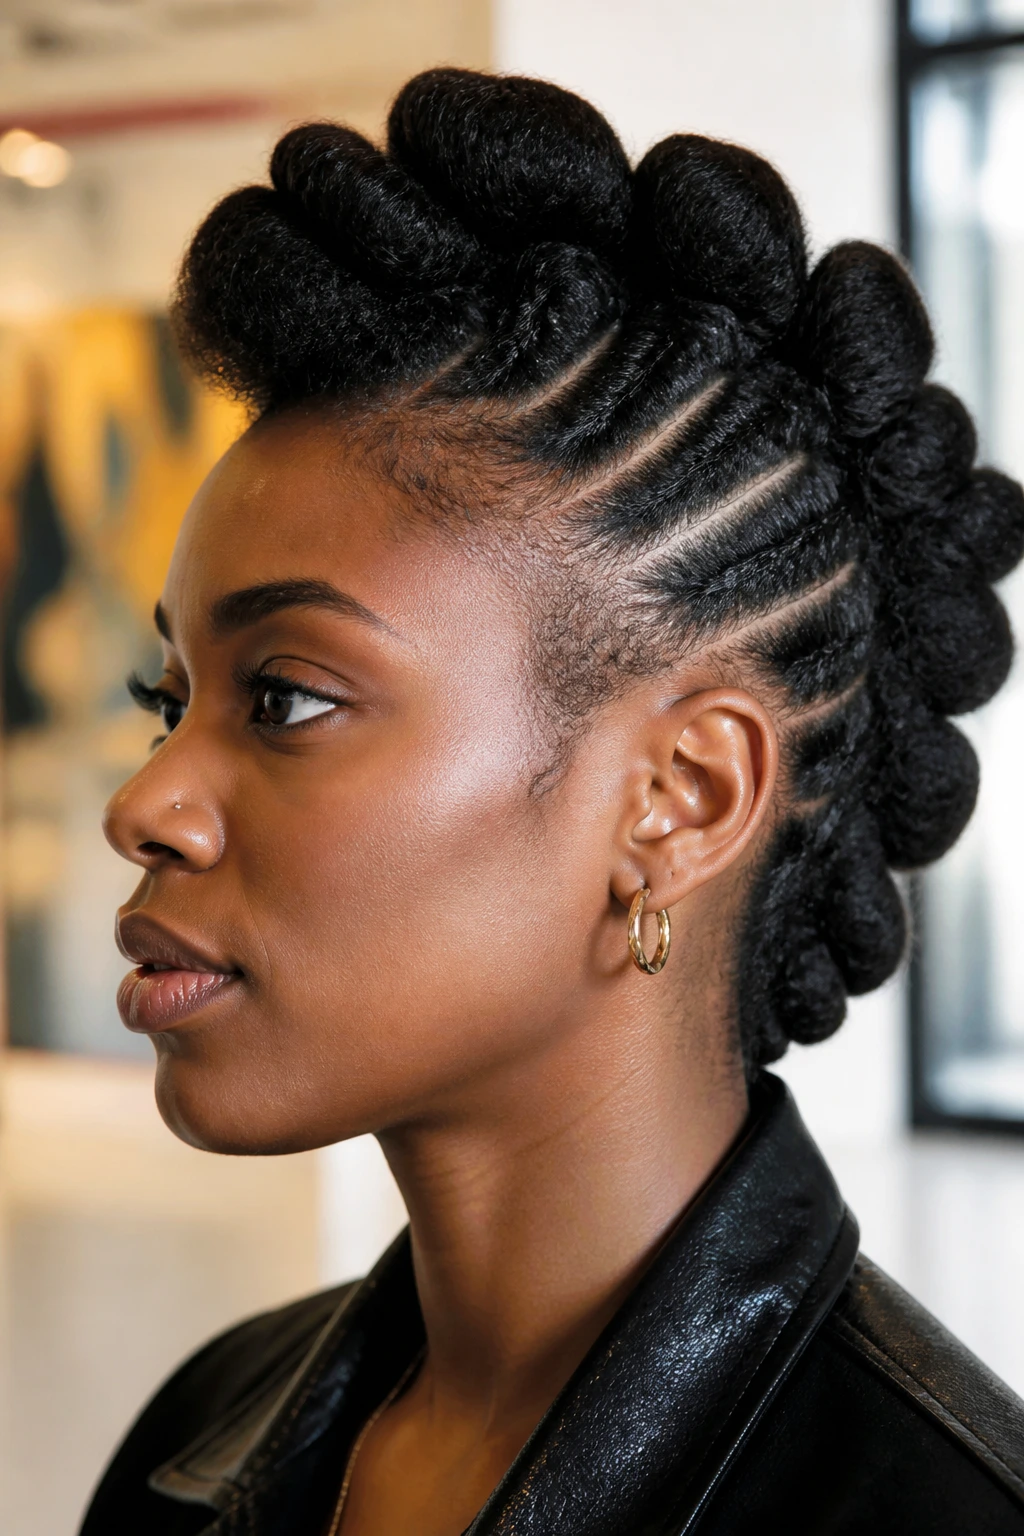
Barrel rolls sound old-school because they are, and that’s exactly why I like them here. They give the sides shape without flattening the hair into a slick sheet, and on long locs they create a sculpted frame that makes the center panel look even taller.
Start by dividing each side into one or two broad sections. Roll each section inward toward the center line, pinning as you go so the roll sits snug against the head. Once both sides are secured, lift the middle locs and let them stand upright or sweep back slightly.
This works especially well for formal wear, but I’d wear it on a normal day too if I wanted the hair to look finished without beads or scarves. The roll pattern adds enough texture on its own. Keep the pins hidden under the folds, or the whole thing loses that smooth, polished edge.
5. Half-Up Hawk with a Hanging Back
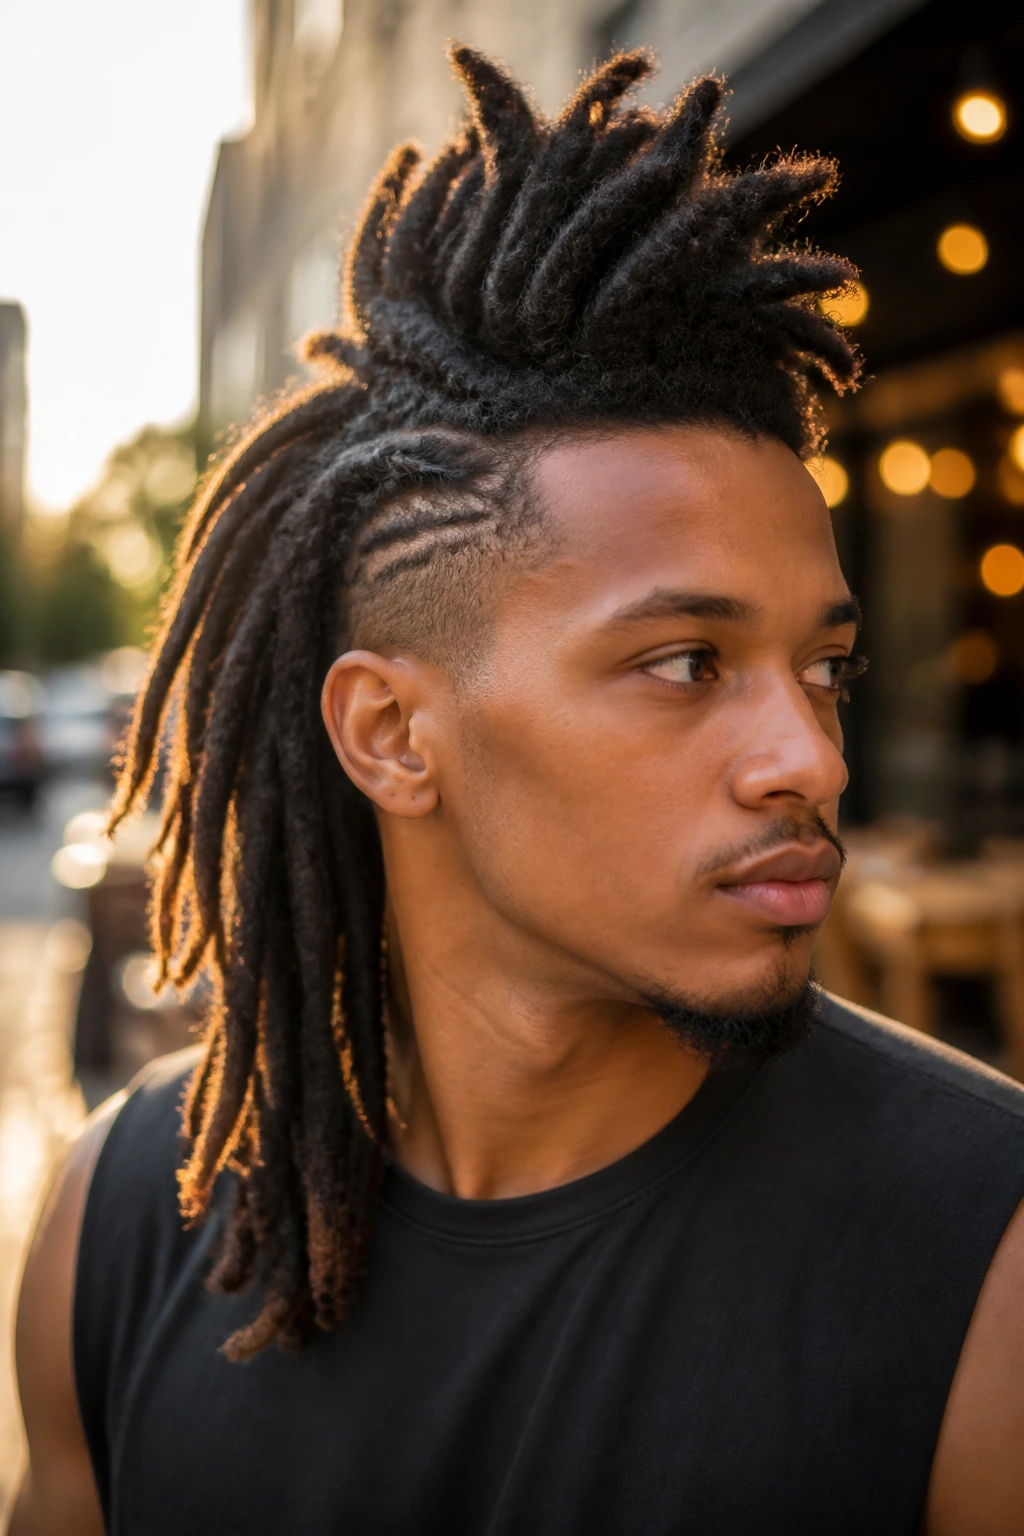
Not every mohawk has to be fully committed. A half-up hawk gives you the lifted shape at the crown and lets the back length fall free, which is a nice compromise when your locs are long enough to make a fully pinned style feel heavy.
This is the style I’d reach for on days when I want the front and sides off my face, but I still want to see the length moving around my shoulders. The top section is gathered into a crest or small pony, and the lower section stays down. That contrast is the whole point.
It’s also kinder to your scalp than a full updo. Less pulling. Less pinning. If you’re wearing your locs for many hours, that matters more than people admit. Keep the top section snug but not tight, and let the hanging back keep the style from feeling boxy.
6. Braided Side Panel Mohawk
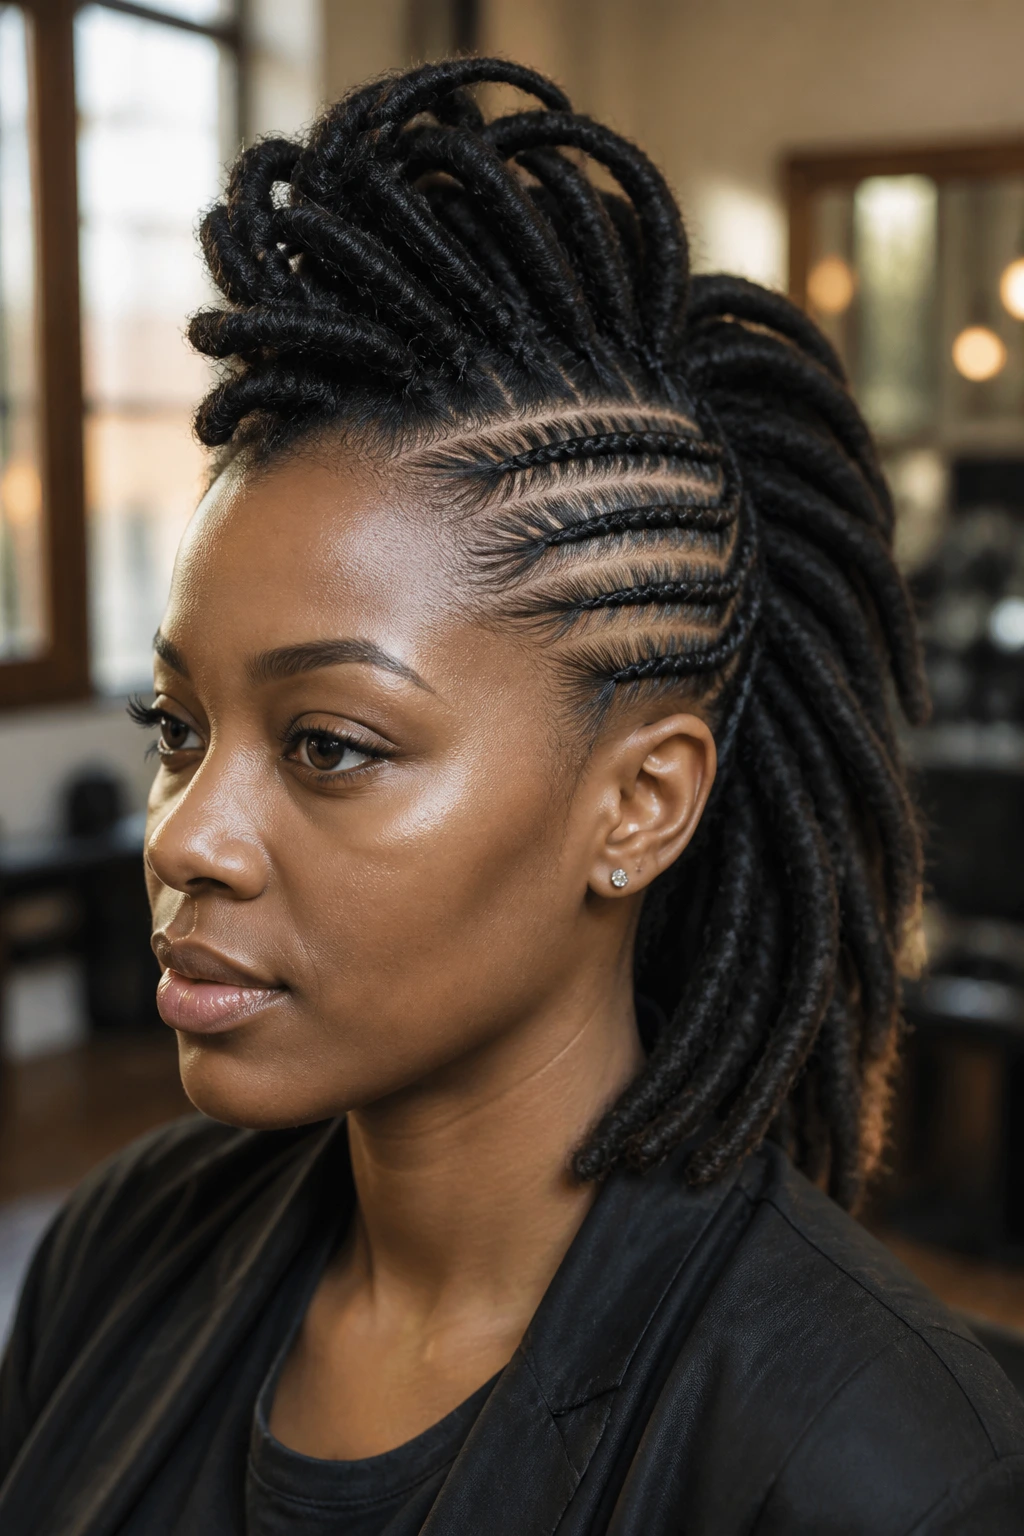
If you like a cleaner, more controlled look, braid the side panels before lifting the center. The braids act like rails. They hold the shape, stop flyaways from taking over, and give the mohawk a stronger edge.
A simple two-strand braid works fine, but a flat braid or cornrow gives even more control if your hairline can handle it. I’d keep the braids shallow and not too tight. You want the mohawk to look sleek, not pinched.
The center locs can stay loose and tall while the side braids disappear under them. That contrast is what makes the style pop. It also helps if your locs are thick near the roots, because the braids reduce the bulk on the sides and keep the ridge from looking wide instead of high.
7. Puffed Front Pompadour Mohawk
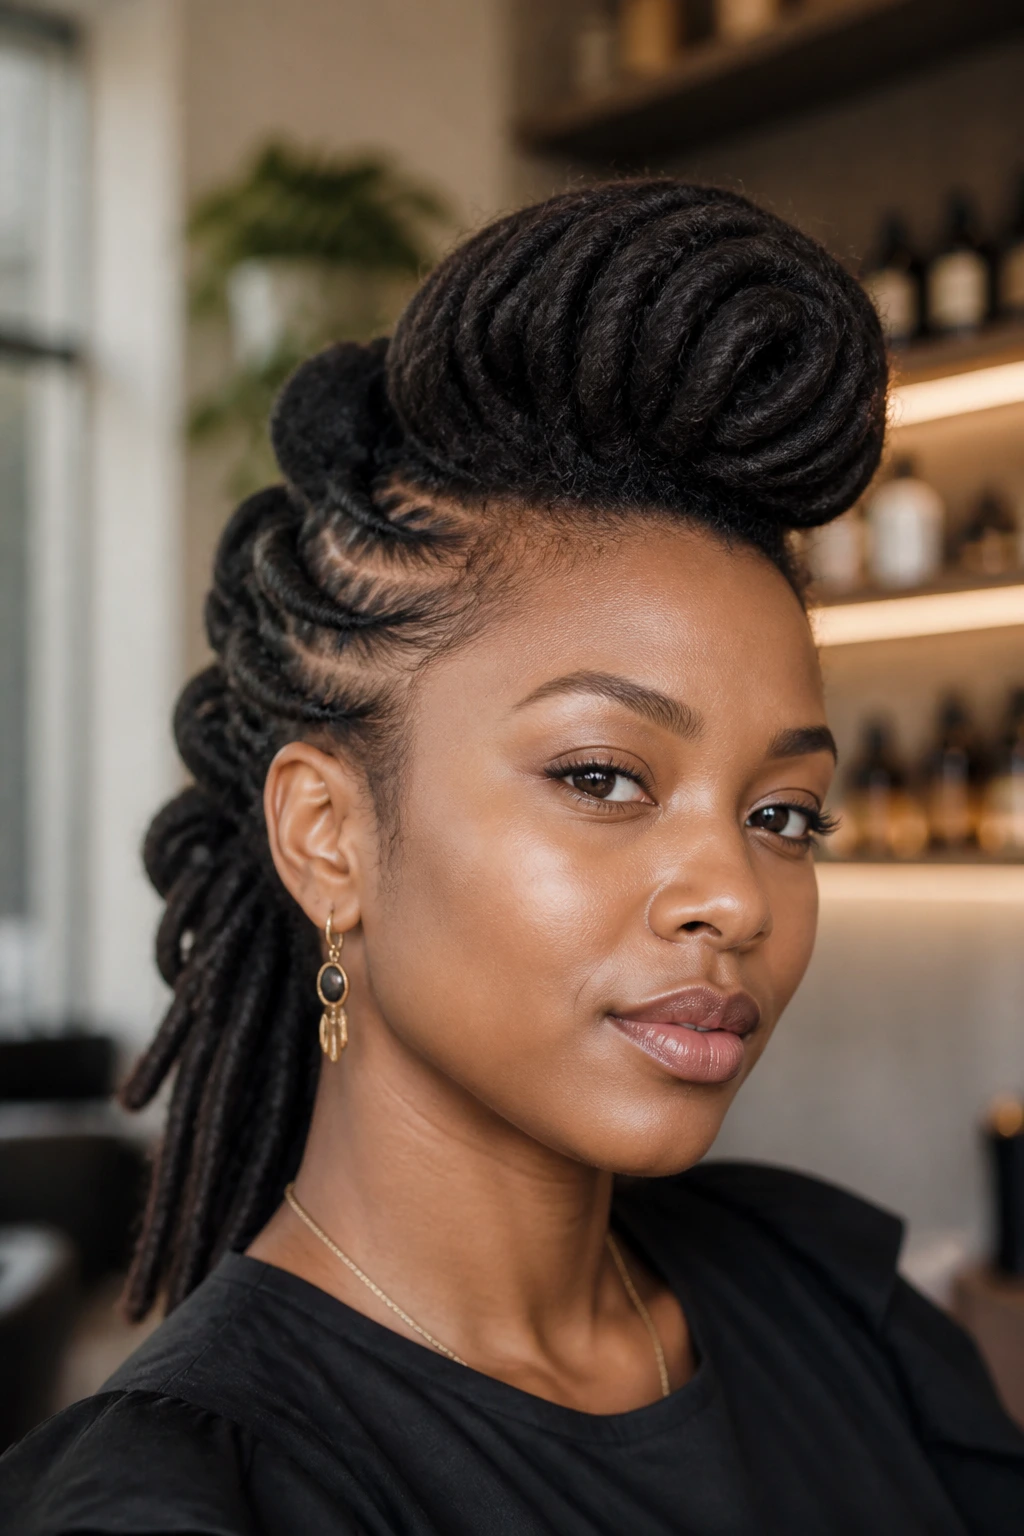
A pompadour in loc form is a little dramatic, and that’s the point. The front section gets lifted forward and upward, then smoothed back into the center ridge, while the sides stay close to the head.
The trick is not to backcomb the locs into a puffed mess. Palm-roll the front section, coax it upward with your hands, and pin underneath so the lift stays soft. The result should look shaped, not teased to death. If the front starts to feel stiff, you’ve gone too far.
This style is one of my favorites for long natural hair because it frames the face without swallowing it. The forehead stays open, the crown gets height, and the locs at the back can stay looser. It has a nice balance of structure and movement.
8. Beaded Statement Mohawk
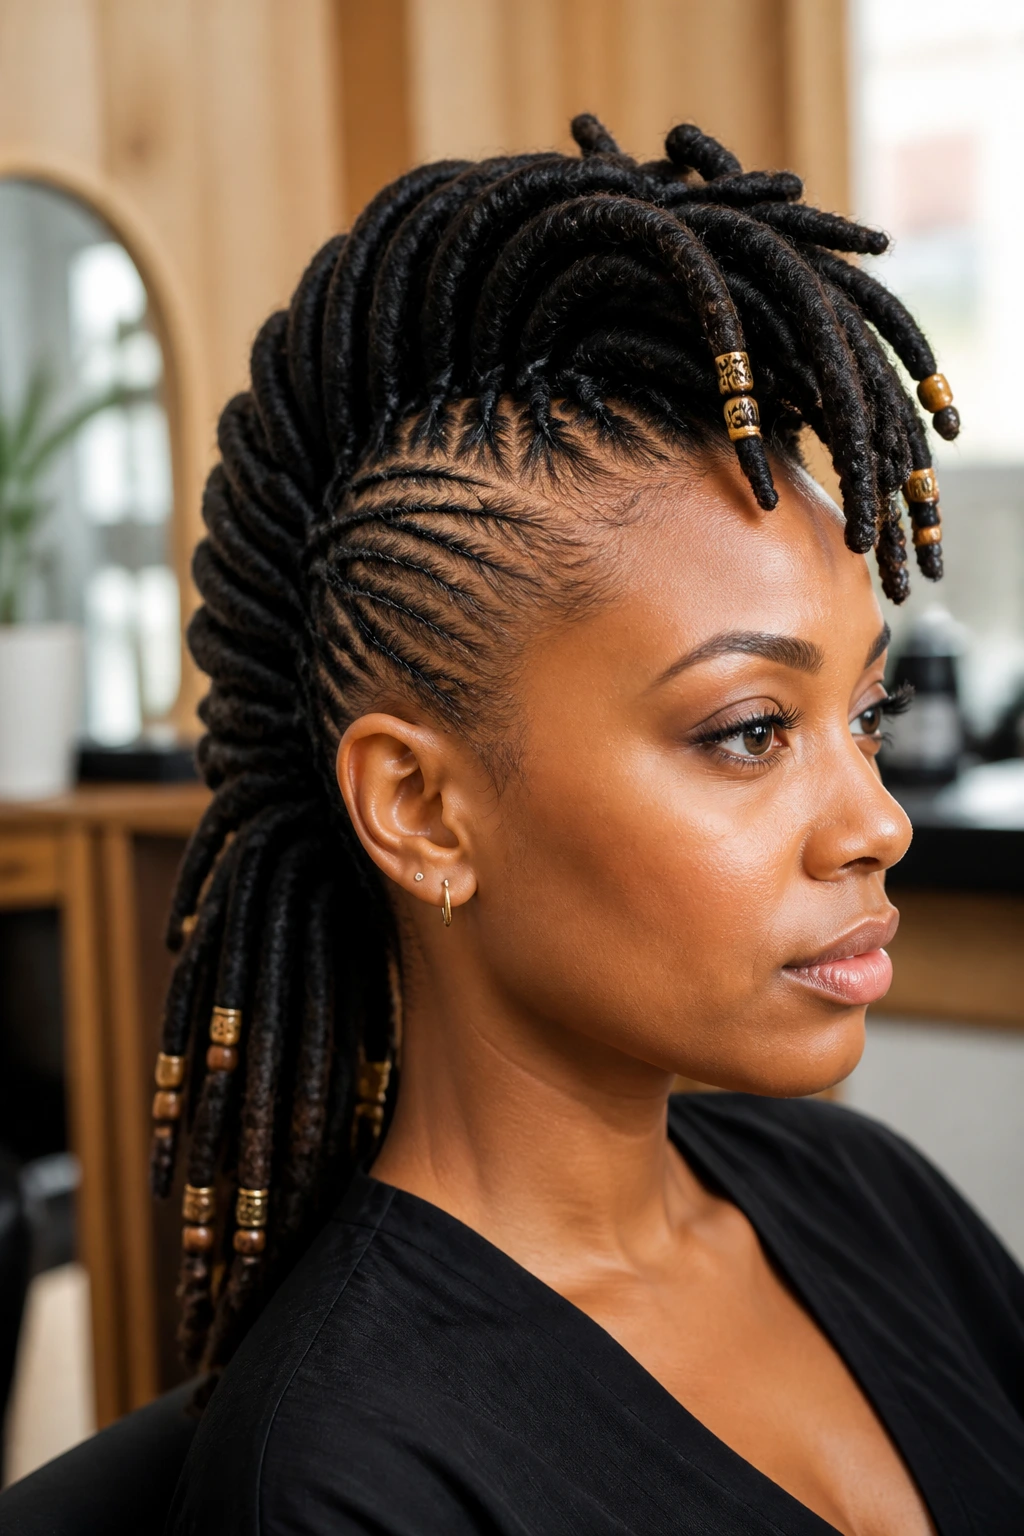
Beads change the whole feel of a dreadlock mohawk, especially when the hair is long enough to carry the weight without collapsing the shape. The center ridge stays the focus, but a few well-placed beads at the ends or along the front locs add rhythm.
Do not scatter beads everywhere. That’s the fastest way to make the style feel noisy. Pick a pattern: just the front locs, just the ends, or only the longest pieces in the center. Three to six beads on each side is often enough.
I like this style for days when the hair needs a bit of personality without becoming a full accessory moment. Wood beads feel earthy. Gold cuffs feel sharper. Clear or matte beads keep the line from getting too busy. Either way, the locs should still be the main event.
9. Asymmetrical Swept Mohawk

A swept, one-sided mohawk gives long locs a strong editorial shape without asking you to build a perfect center ridge. The hair is gathered so most of the height and volume lean in one direction, and that tilt makes the style feel fresh.
Why does this work so well? Because long locs carry movement naturally. If you pin the lower side tight and let the upper side arc over, the whole head gets a diagonal line that looks intentional even when it isn’t symmetrical. I’d use this on days when I want something a little less expected than the classic straight-up hawk.
It’s also practical for thicker locs that refuse to sit in one narrow ridge. A sweep lets the hair use its own bulk instead of fighting it. Keep one side tighter and one side softer, and the contrast does half the styling work for you.
10. Low-Tension Wrapped-Base Mohawk
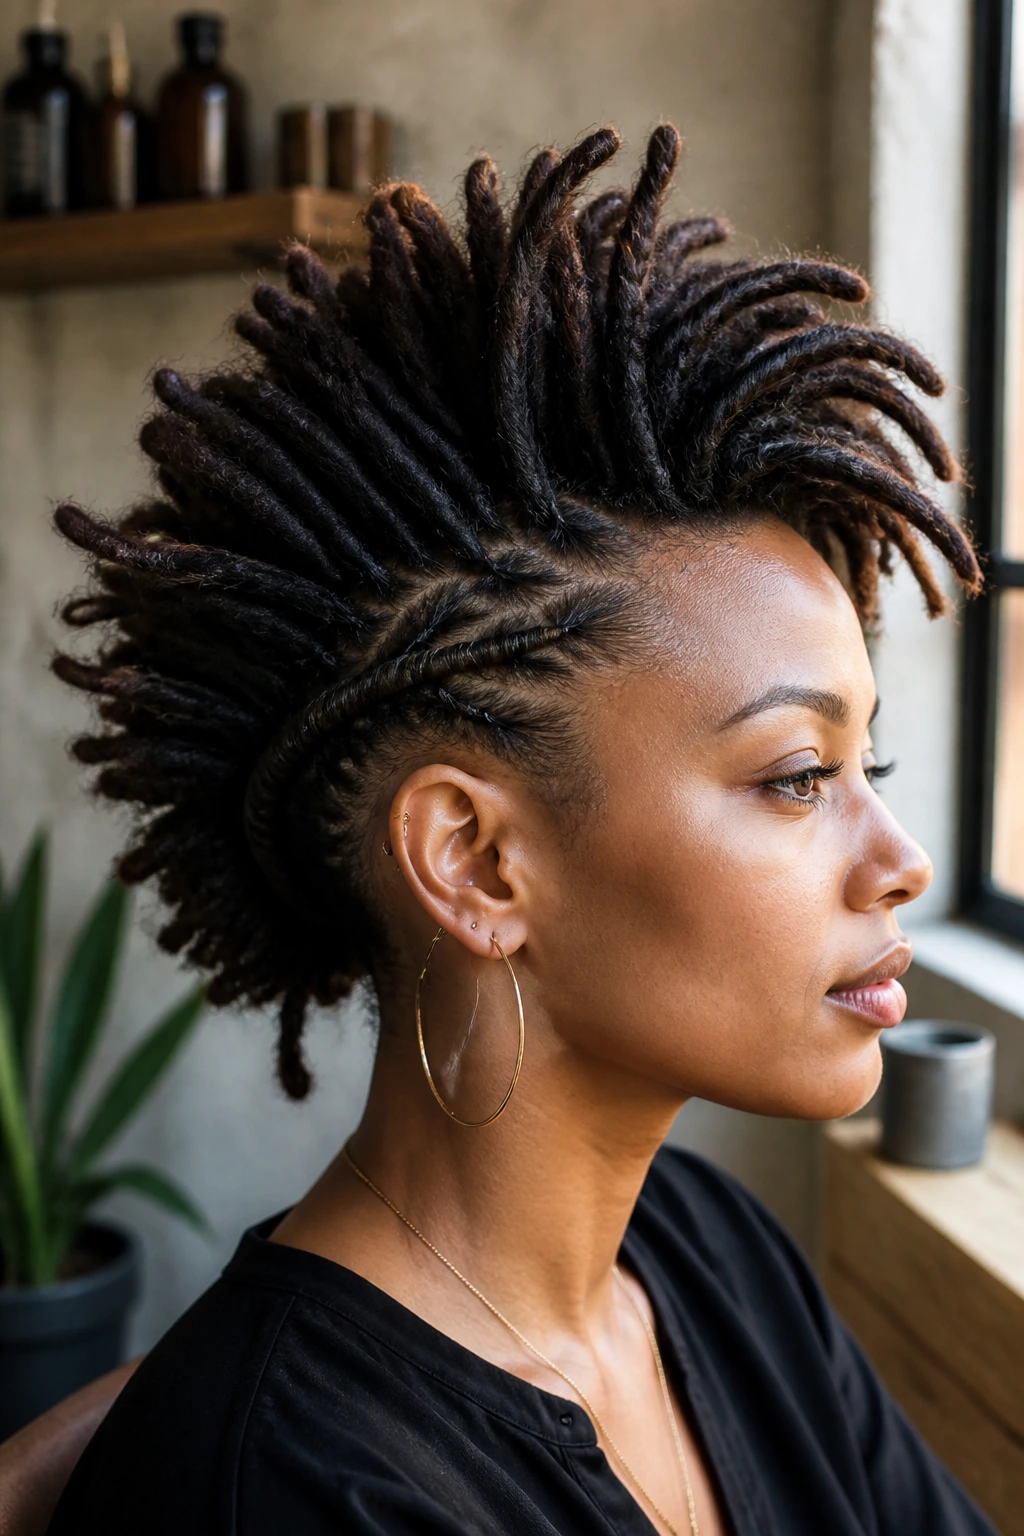
This is the version I recommend when the scalp is tired, the edges are tender, or you just do not want a style that feels like a construction project. The base is wrapped or anchored low, the center is lifted modestly, and the tension stays spread out instead of concentrated at the temples.
The shape is still a mohawk. It just breathes a little. That’s useful for long natural hair because long locs can get heavy fast, and forcing height where the hair doesn’t want to go usually leads to a headache by mid-afternoon.
Use broad sections, soft pins, and one or two low wraps to hide the elastic. If you want a finished look without a harsh pull, this is the one. It’s the style I’d wear when I know I’ll be moving around a lot.
11. Rope-Twist Mohawk
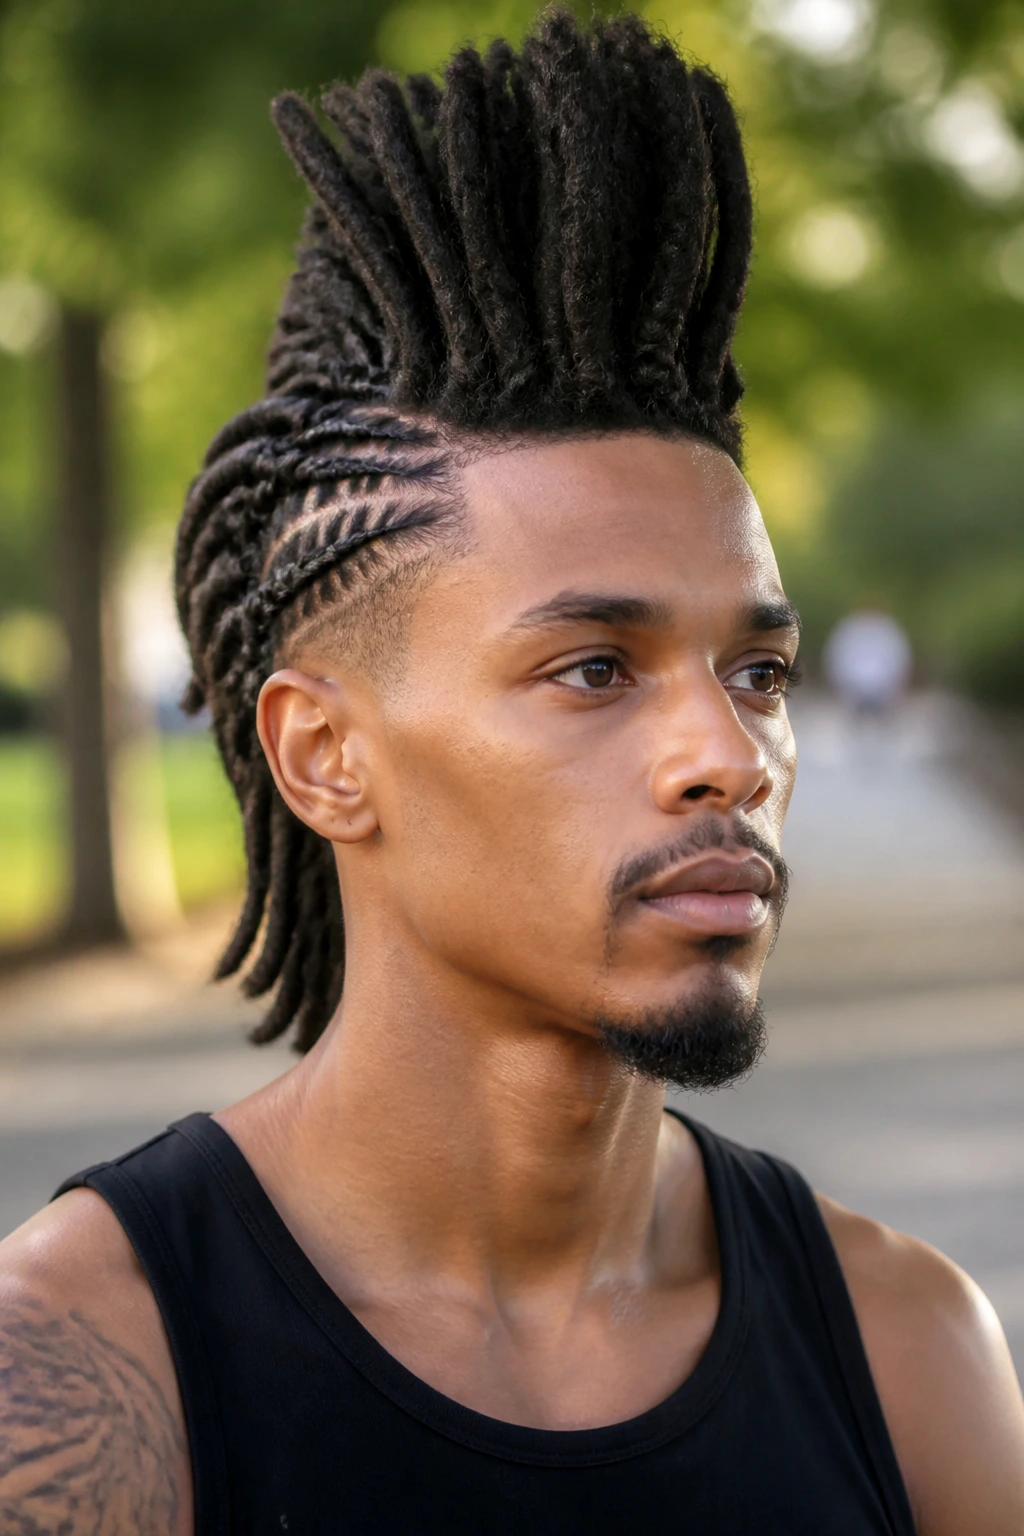
Rope twists give the mohawk a textured, corded look that works especially well if your locs are slimmer or more uniform in size. Twist the side sections into two-strand ropes, pin them back, and let the center stand on its own.
The texture matters here. Straight pins alone can make a mohawk look flat on fine locs, but twisted sides add visual weight without needing more hair. That’s a useful trick if your locs are long but not super dense.
I also like this style because it stays neat even when the day gets long. Rope twists hold their shape better than loose side panels, and they don’t unravel into a puffball as quickly. A light mist of foam or holding spray helps, but keep it away from the roots if your scalp gets dry easily.
12. Bantu-Knot Crown Mohawk
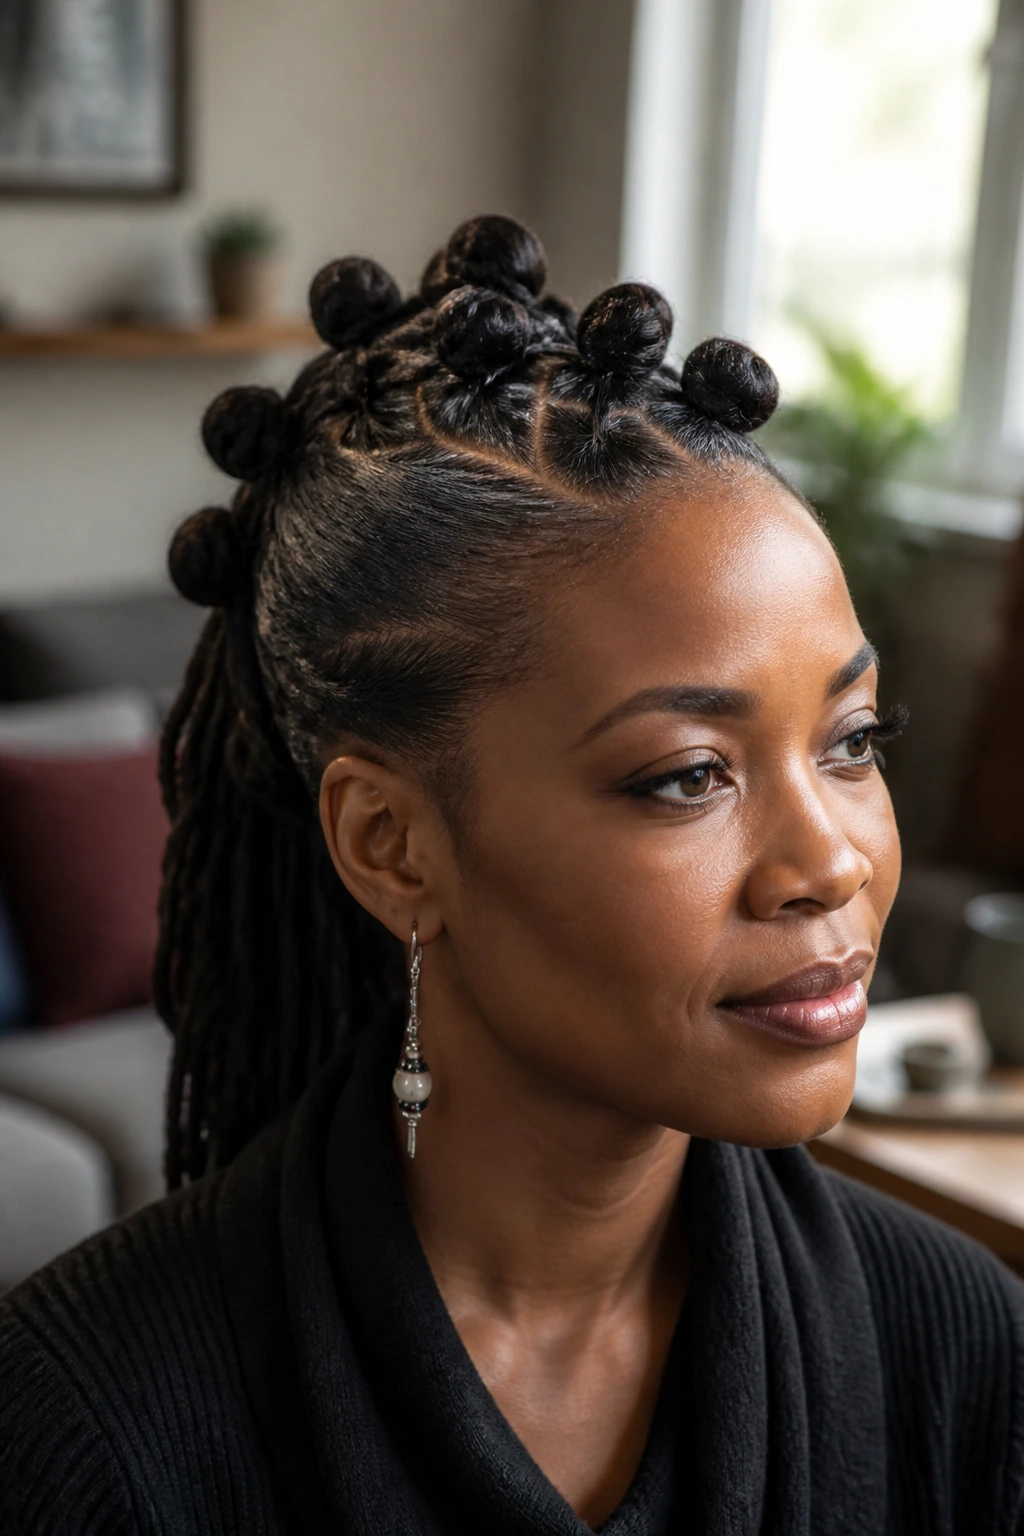
Bantu knots on long locs create a mohawk that feels playful and sculpted at the same time. The center line is broken into small knots or coiled buns, while the side sections stay sleek and close.
This one takes a little patience, especially if the locs are long enough to get bulky when folded. Use smaller sections than you think you need. Three larger knots can look cleaner than six tiny ones that start to fight each other halfway through the day.
It’s a good choice when you want the mohawk shape but don’t want a single tall ridge. The knots give height in pieces, which softens the silhouette. Add a few cuffs or wrap one knot with thread, and the whole style starts looking intentional without much extra work.
13. Criss-Cross Pin Mohawk
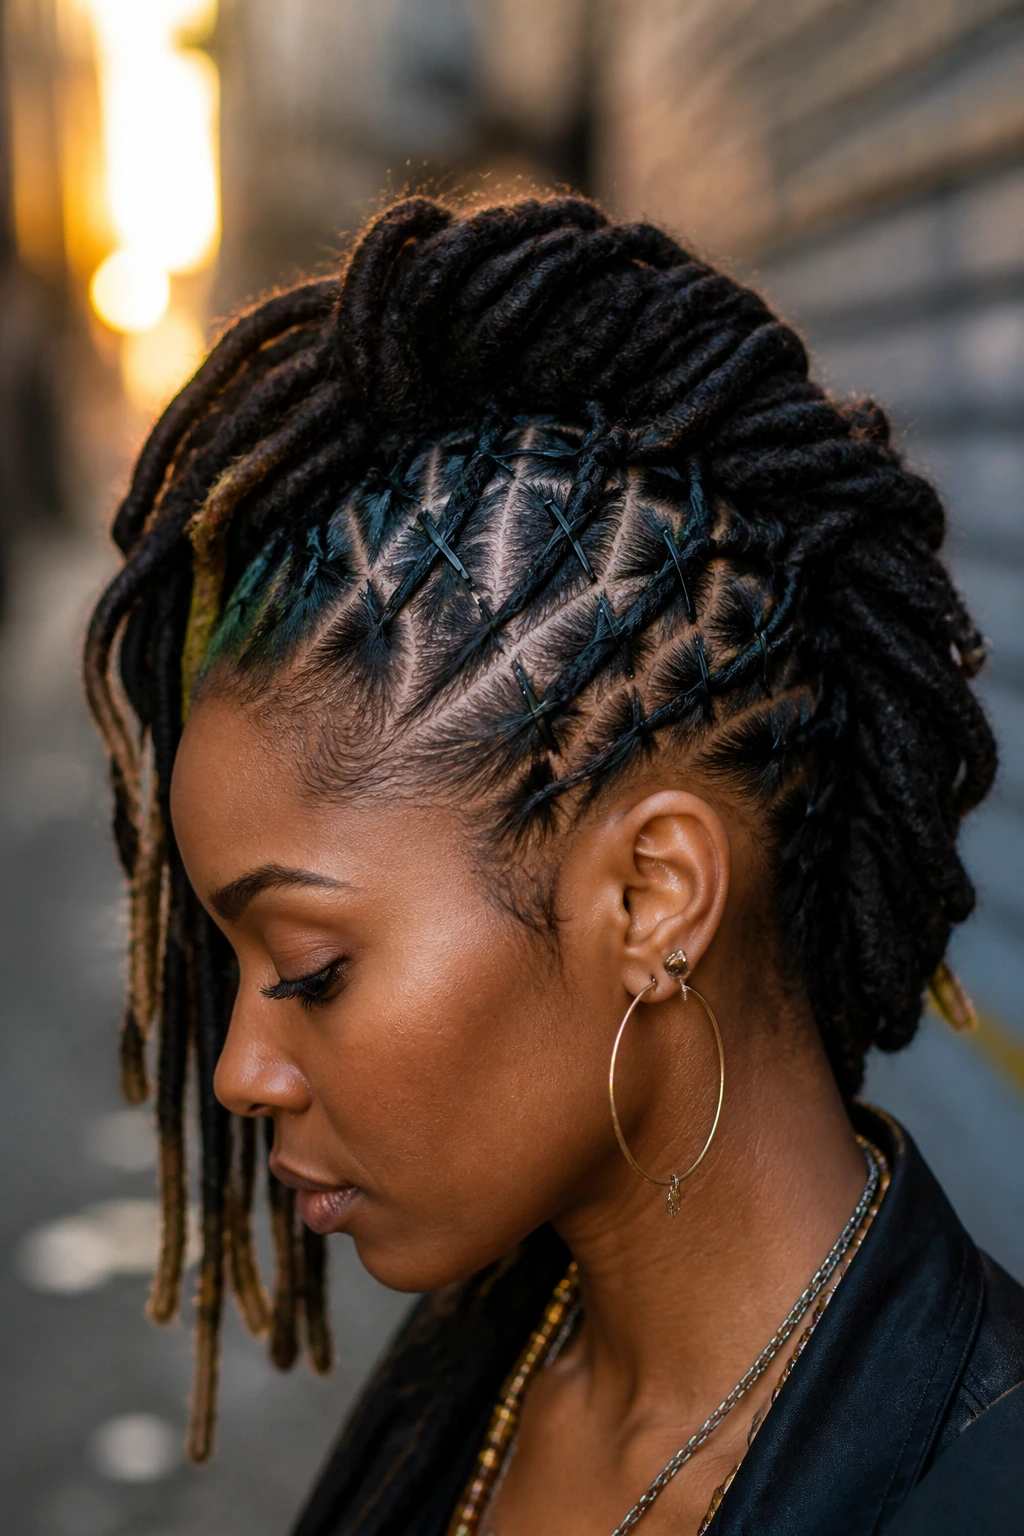
A criss-cross pin mohawk is the sort of style that looks more complicated than it is, which is my favorite kind of hair trick. The side panels are pinned in overlapping X-shapes, creating both hold and decoration, while the center stays lifted above them.
Use medium bobby pins or U-pins and tuck them in at opposing angles. That cross pattern grips better than a single straight pin, especially on slippery loc roots. It also gives the side panels a little grid of structure that reads well in photos.
The best part? You can stop before the style gets too severe. Leave a few flyaways near the temples and the look softens right away. If you want the pins to disappear, choose ones that match your hair color. If you want them to show, go metallic and let them become part of the design.
14. Freeform Edge-Swept Mohawk

Freeform locs do not need to be bullied into a neat little box. A freeform edge-swept mohawk keeps the shape open, a little wild, and honest to the texture already there. The sides are encouraged backward, not flattened into a helmet.
This style works because it respects the rough edges. Some locs will stick out. Some parts will feel irregular. Fine. That texture is the point. Trying to force symmetry on freeform locs usually kills the charm.
Keep the center lifted with a few hidden pins and let the outer locs fall wherever they want near the crest. A light mist of water or leave-in helps calm frizz without slicking the hair into a hard shell. I’d wear this when I want the mohawk shape but don’t want the style to feel over-managed.
15. Sporty Gym-Ready Mohawk

A sporty mohawk is built to move. It sits lower, stays tighter, and keeps the locs from bouncing into your face when you’re active. The sides are secured close to the scalp, and the center is tied or pinned just high enough to keep the silhouette.
This is not the version for a glossy event photo. It’s the version for errands, workouts, and long days when you need the hair to stay put. The secret is a lower anchor point and fewer loose ends near the neck.
Braiding the back section into one or two simple plaits can keep the style from fraying under motion. Use snag-free ties, not rubber bands, because long locs already carry enough weight. If the scalp starts to ache, loosen the front immediately. No hairstyle is worth a sore temple.
16. Bridal Sculpted Mohawk
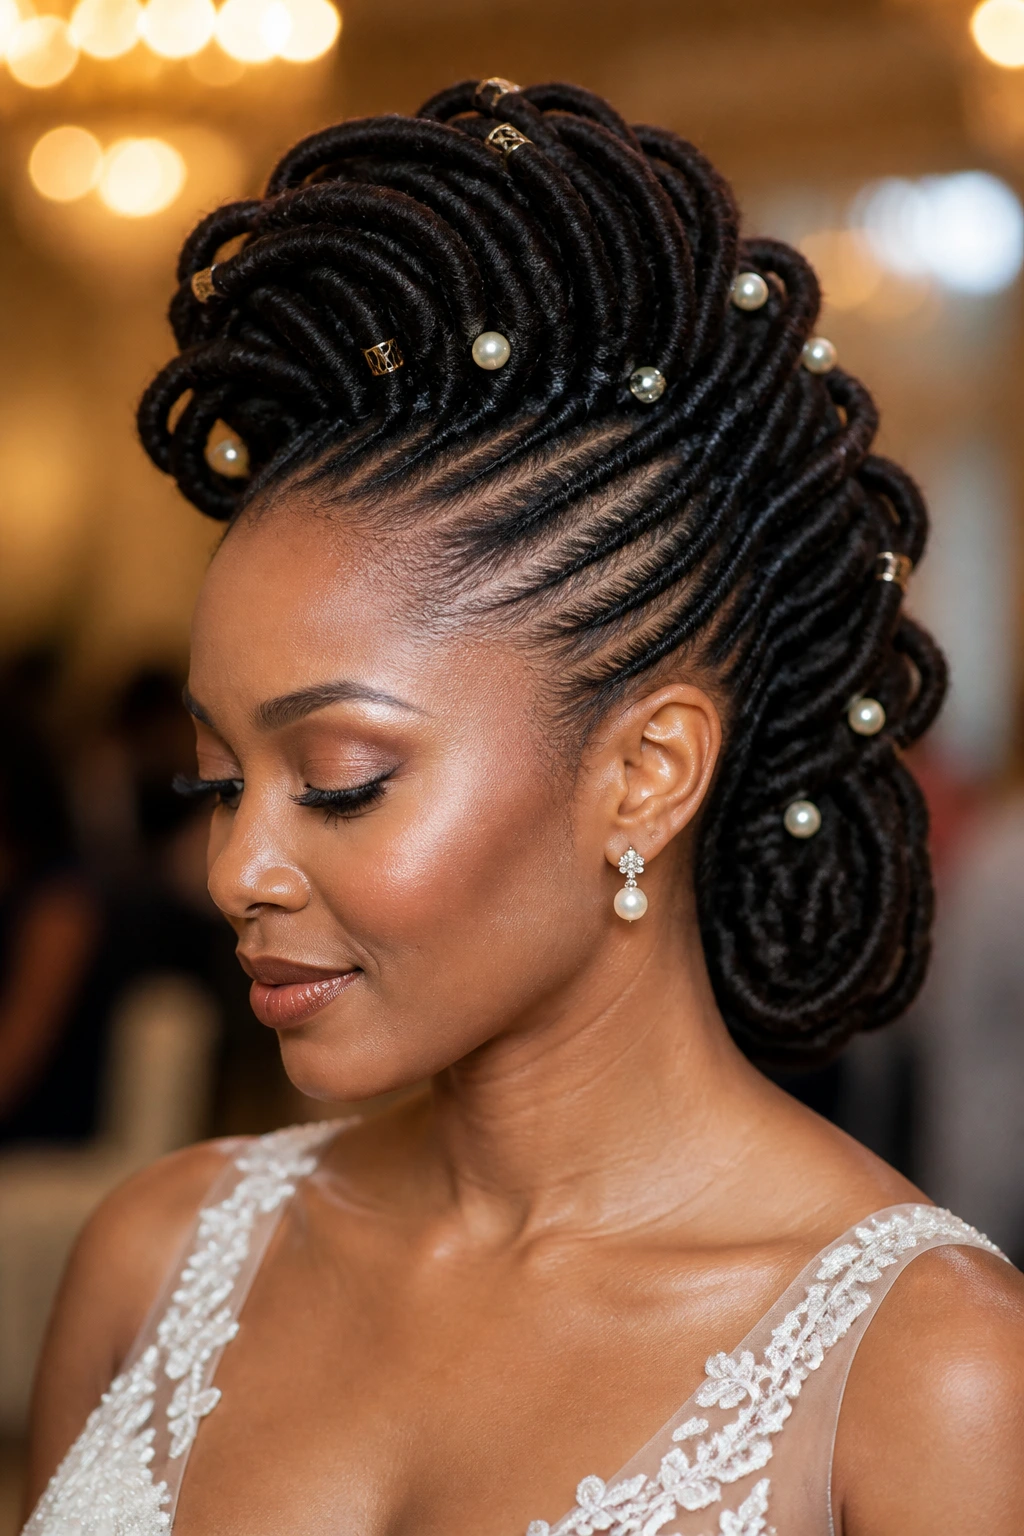
A bridal mohawk on long natural hair should look clean, not stiff. The sides get sculpted close to the head, the center gets height, and the finish needs enough shine to read polished without looking greasy.
This is the style where a rehearsal run matters. Pins show differently under bright light, and long locs often need more support than people expect. If you’re wearing this for a formal event, test the shape the day before and walk around for an hour. If the crown sinks, adjust the anchor points before the real day.
Pearls, gold cuffs, and discreet combs work well here. I’d keep the accessory count restrained. One accent near the temple or one cluster at the base is usually enough. Too much decoration and the shape loses its clean line.
17. Tapered-Illusion Mohawk

If you like the look of a tapered cut but don’t actually want to cut anything, this style gives you the illusion. The side locs are tucked so tightly and so low that the profile narrows toward the temples, while the center ridge stays full.
The visual trick is all about placement. Push the side panels inward under the crest instead of laying them flat outward. That creates a narrower outline and makes the center look taller by comparison. The effect is strongest on thicker locs, which can carry a lot of shape without looking sparse.
I think this one is underrated. It can look modern and sharp without needing a barber’s chair. Use more pins than you think, and check the side profile in a mirror before leaving. The front view can lie.
18. Scarf-Wrapped Mohawk
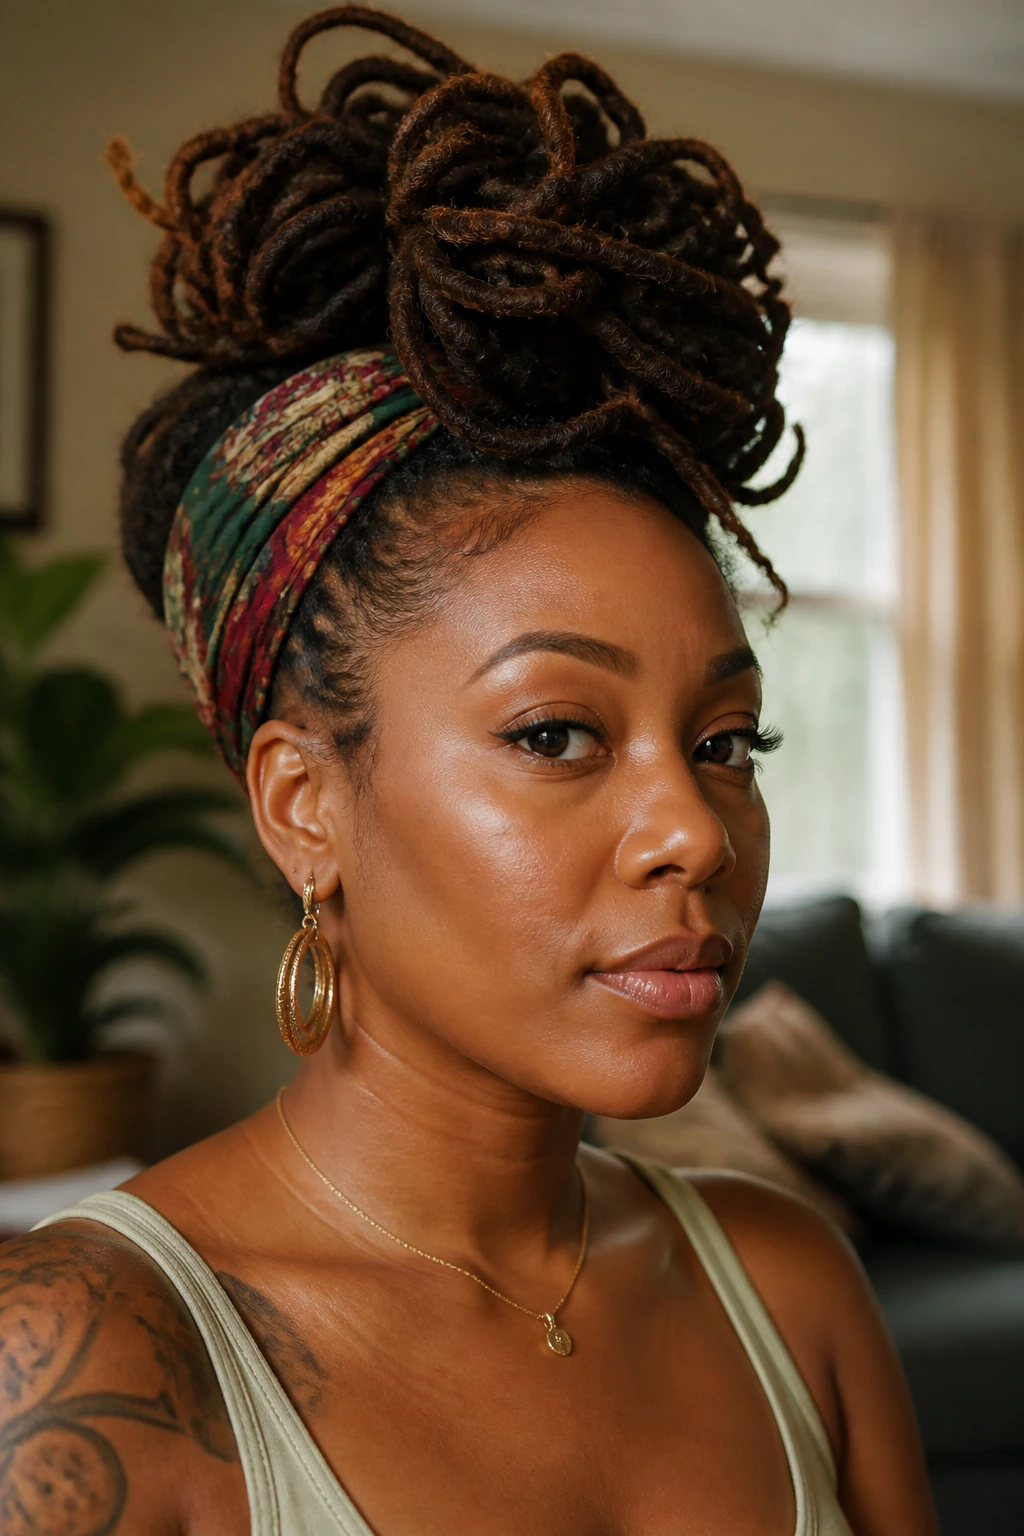
A scarf-wrapped mohawk is what I reach for when the hair needs a reset and I still want the style to look deliberate. Wrap the base with a scarf or folded headwrap, then let the locs crest over it so the fabric becomes part of the shape rather than a cover-up.
The scarf does three jobs at once: it hides pins, adds color, and helps stabilize the sides. That makes it practical on days when your locs are too soft, too freshly retwisted, or just too heavy to stay upright on their own.
Pick a scarf that doesn’t compete with the locs. A busy print can work if the hair is simple. A solid jewel tone is easier if the locs already have beads or cuffs. Tie it snug, but not so tight that the temples start to complain.
19. Crown Twist Mohawk
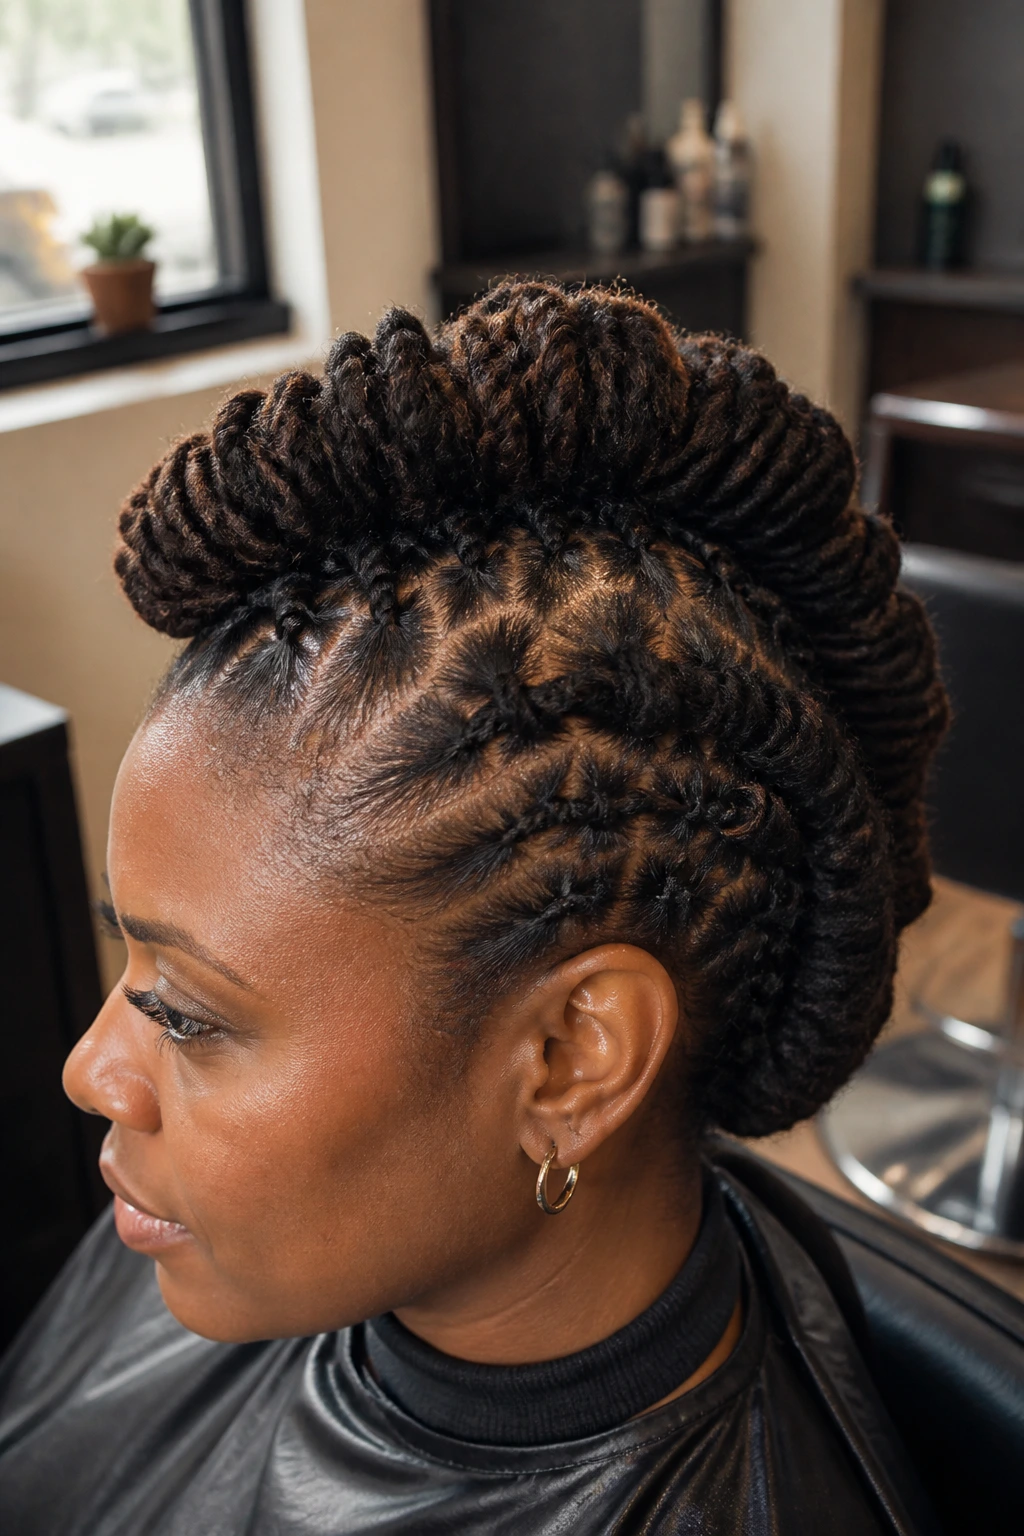
A crown twist mohawk uses twists as the structural base rather than just decoration. The side sections are twisted back along the crown and pinned under the raised center, which gives the style a halo-like shape with a mohawk spine.
This works well when you want soft edges and a little more height through the top. The twists hold the side panels in place, and the center locs can remain fuller because they’re not fighting for the same space. If your hair is dense, this is one of the better ways to reduce bulk at the sides.
The key is keeping the twists broad and clean. Tiny twists disappear under long locs and don’t support much. Larger twists create a smoother ridge and last longer before puffing out. A spritz of foam along the part line helps, but don’t soak it.
20. Butterfly-Clip Mohawk
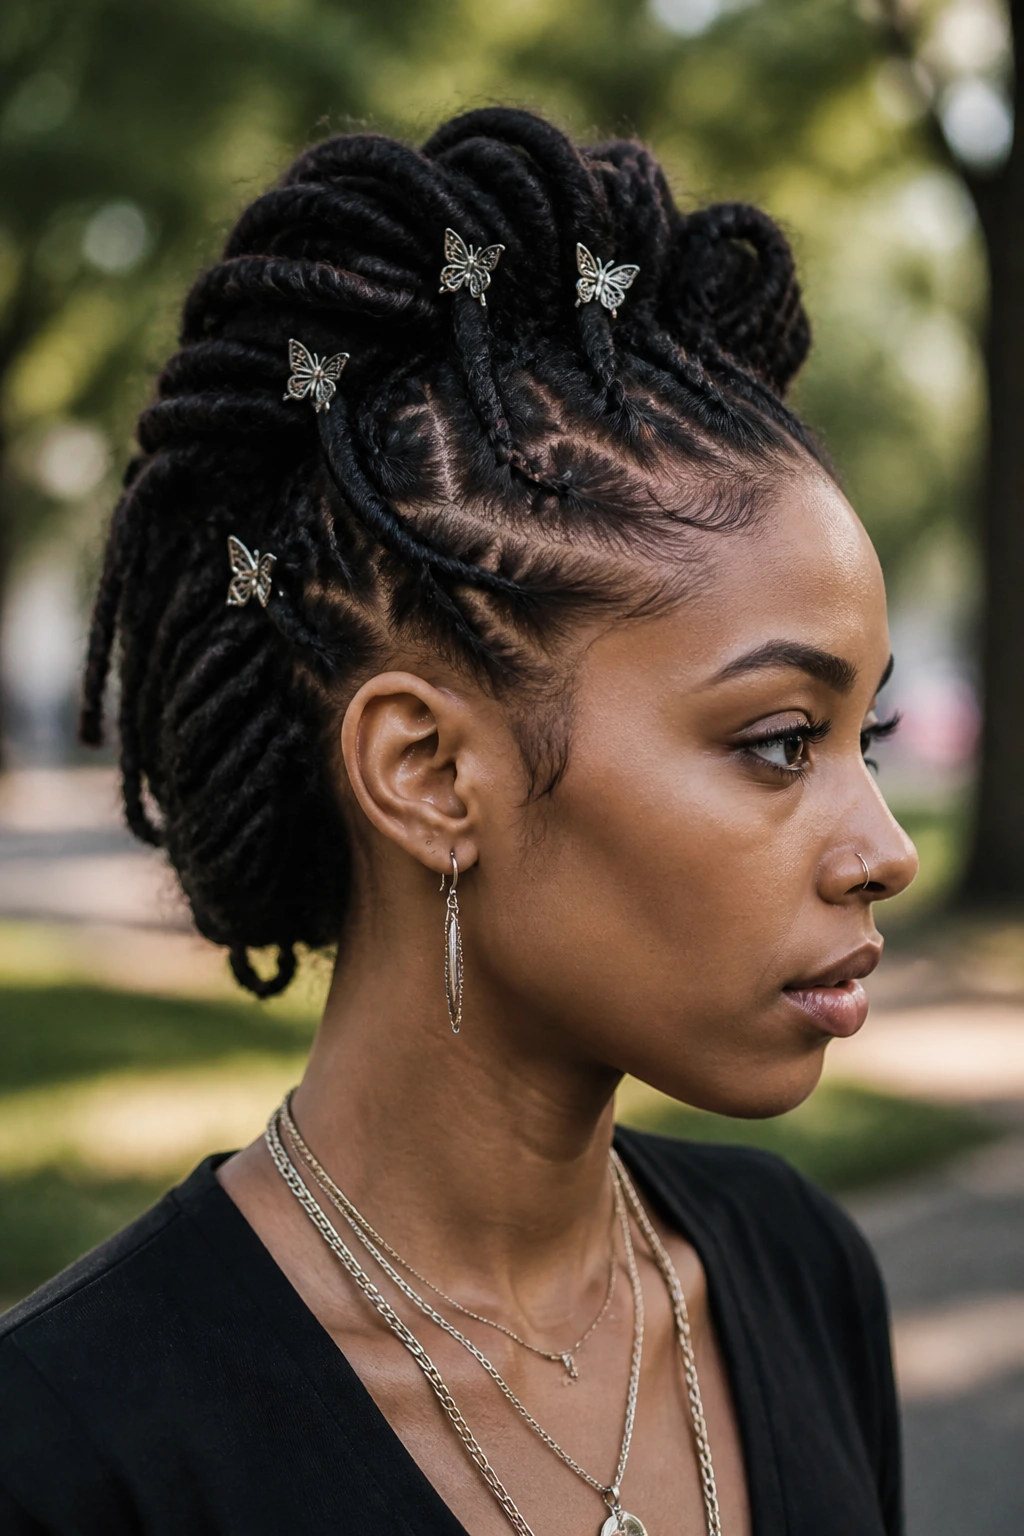
Butterfly clips bring a little nostalgia to the whole idea, and long locs are one of the few textures that can actually carry them without looking forced. Use the clips to hold side sections or to pin a center ridge into little lifted segments.
Three to five clips usually do the trick. More than that starts to feel cluttered unless the rest of the style is very simple. I like this one when the locs are long enough to bend softly over the clip instead of fighting it.
The nice thing is that butterfly clips make adjustments easy. You can open one, shift the section, and close it again without taking the whole style apart. That matters if you’re styling on the go or changing the shape after you’ve seen it in daylight.
21. Geometric Part Mohawk
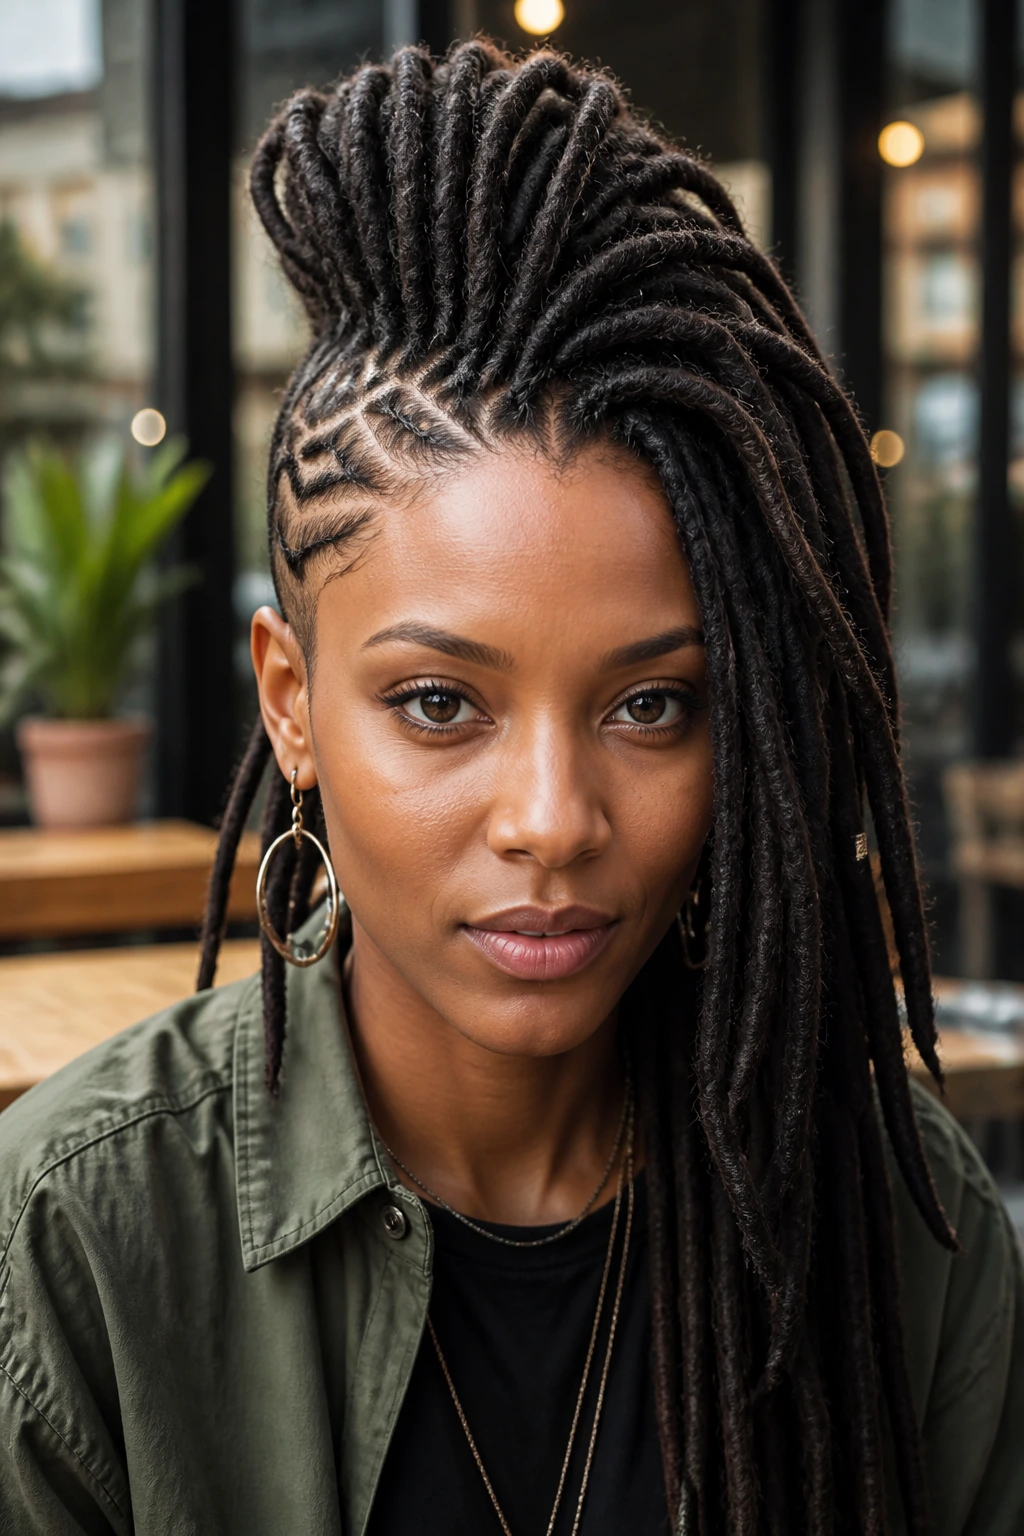
A geometric part can make even a simple mohawk feel more precise. Zigzags, triangles, and angled side parts give the style a sharp base, and long locs make those lines pop because the texture sits so differently from the scalp.
This is one of those looks that benefits from a clean comb-out at the roots, or at least a good mist and a steady hand. The parts should be crisp enough to see, not so deep that they irritate the scalp. If your hairline gets sensitive, keep the shapes a little looser near the temples.
The mohawk itself can be as simple as a lifted center row. The parts do the work. That’s why I like geometric styling on long natural hair: the design detail lives at the base, while the locs can stay full and free on top.
22. Extra-Long Tail Mohawk
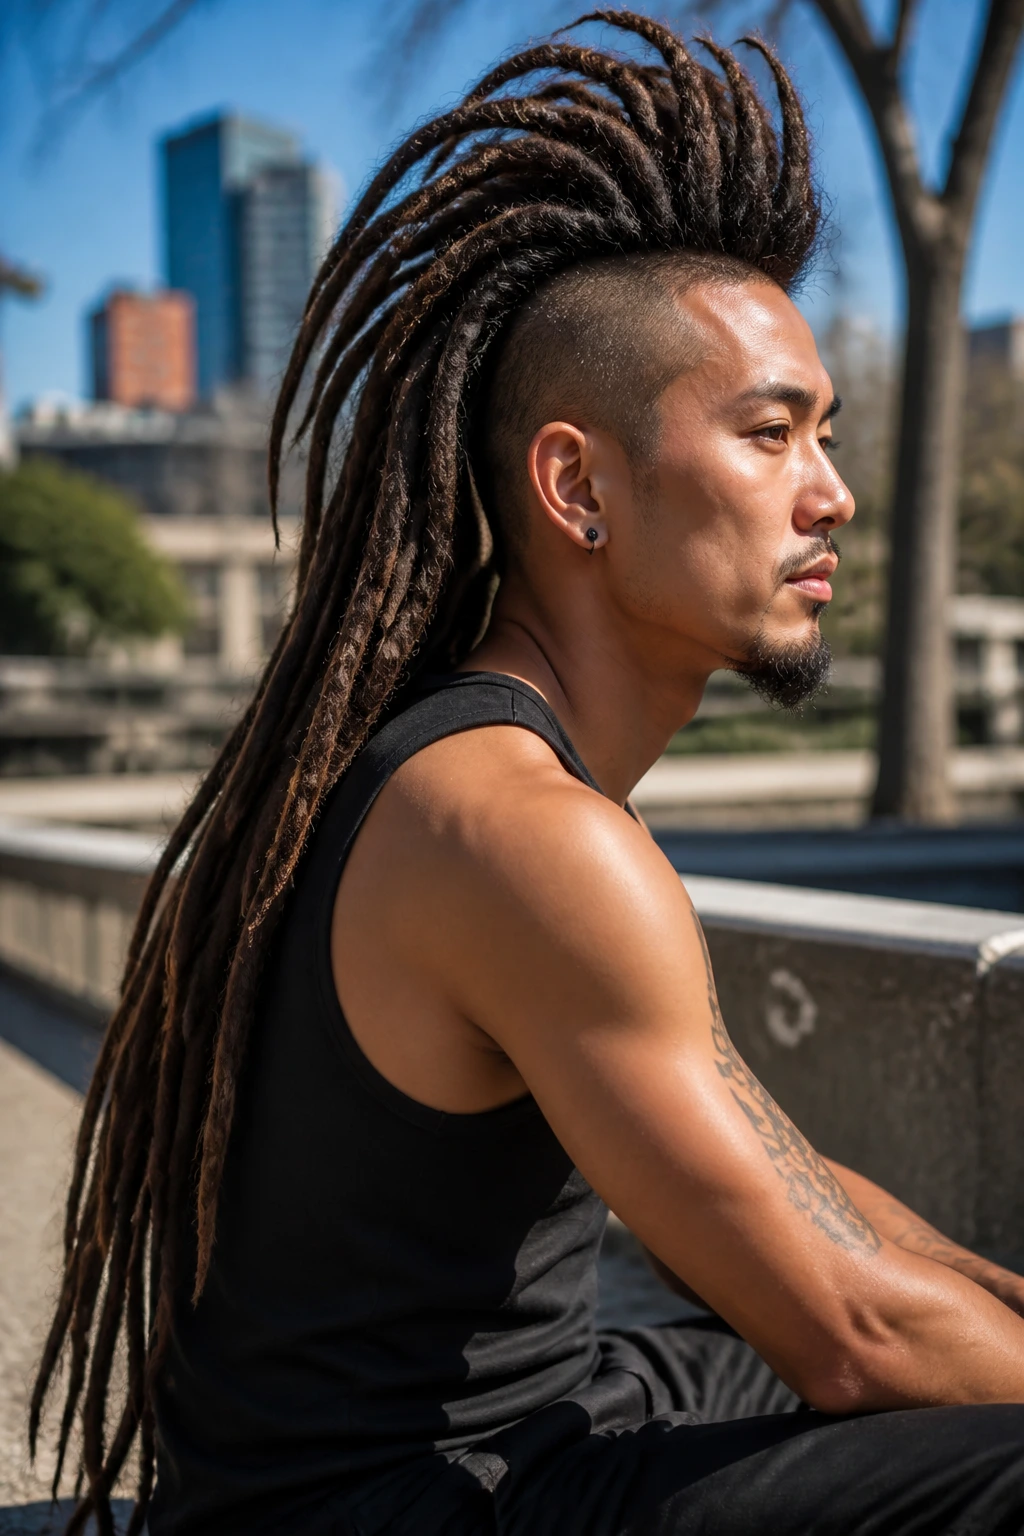
An extra-long tail mohawk is for the days when you want height and length at the same time. The front and sides are pulled into a lifted crest, then the remaining locs are left as one long tail or split into two low tails at the back.
The style looks best when the center is placed high enough to avoid dragging the back down. If the tie sits too low, the whole thing droops. Keep the anchor point around the crown or slightly above it, then let the tail flow from there.
This version is especially nice on very long locs because it shows off the full length instead of hiding it. It also gives movement, which is something tight mohawks sometimes lose. One thick tail has more drama. Two tails feel a little softer. Pick your mood.
23. Five-Minute Clip-and-Go Mohawk
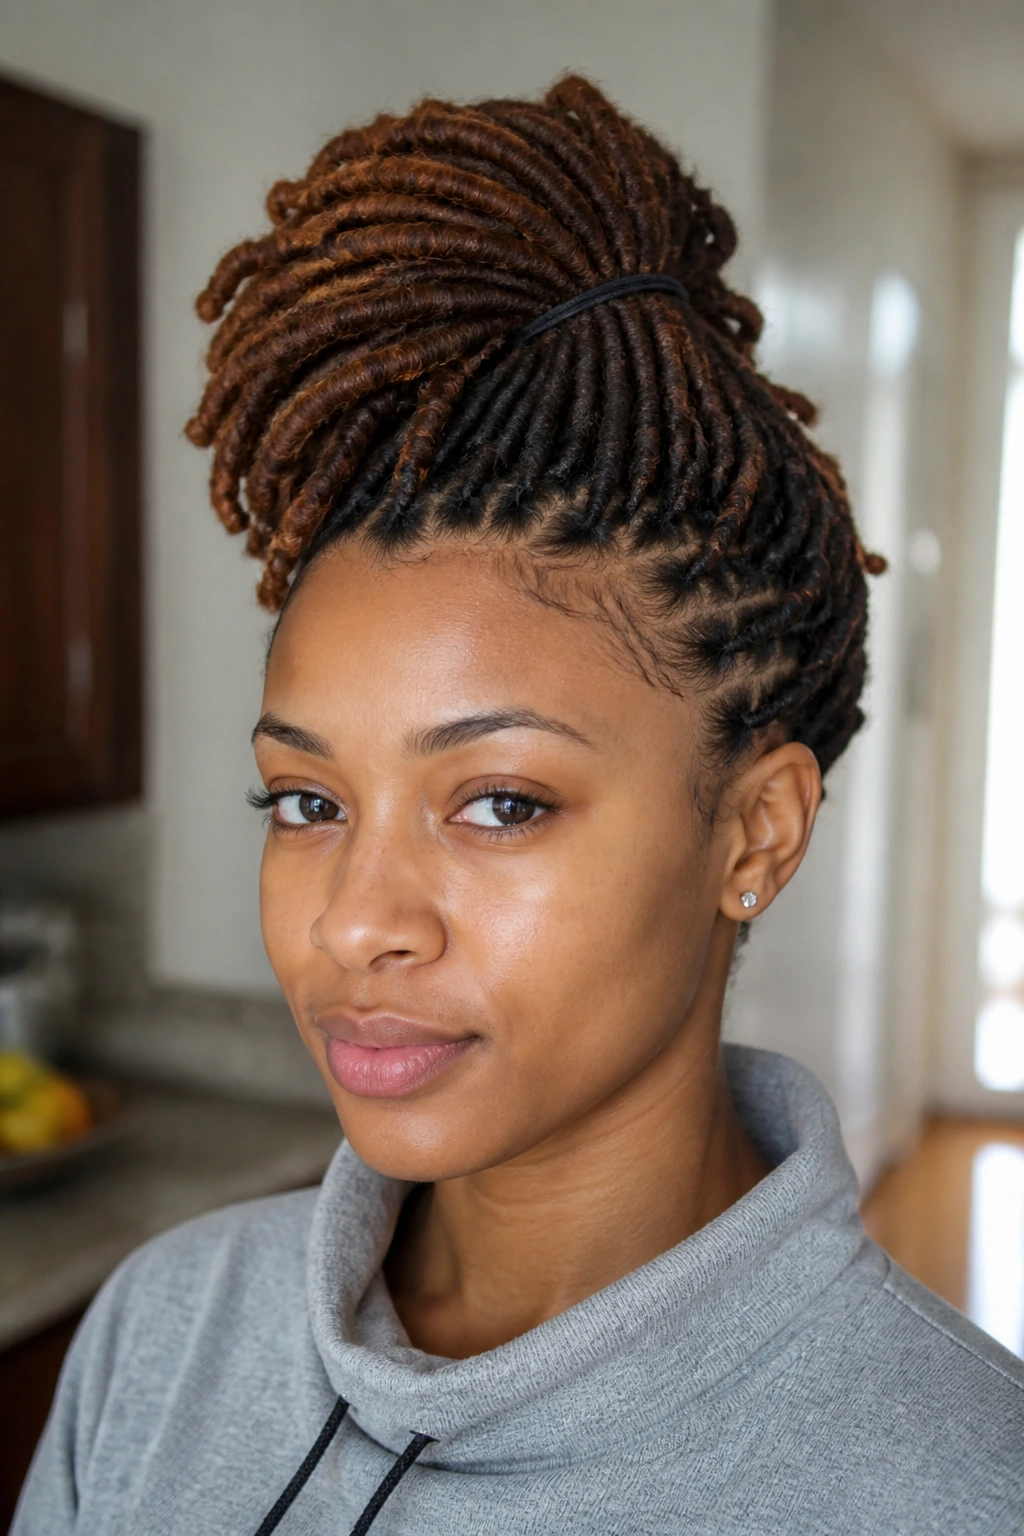
Some mornings do not deserve a full styling session. The five-minute clip-and-go mohawk is the practical answer: side sections clipped back, center lifted with one elastic or a few pins, and out the door.
It works because the shape comes from placement, not perfection. Clip the sides low and back, fan the center locs upward, and stop when the silhouette reads clean from the front. No one needs to know you did it in the time it takes to find your keys.
I’d keep this one in the regular rotation for school runs, errands, and those days when the locs are behaving but you aren’t in the mood to negotiate with them. A satin scarf at night keeps it usable the next morning, which is half the battle with any easy style.
Small Moves That Keep the Shape Up Without Stress
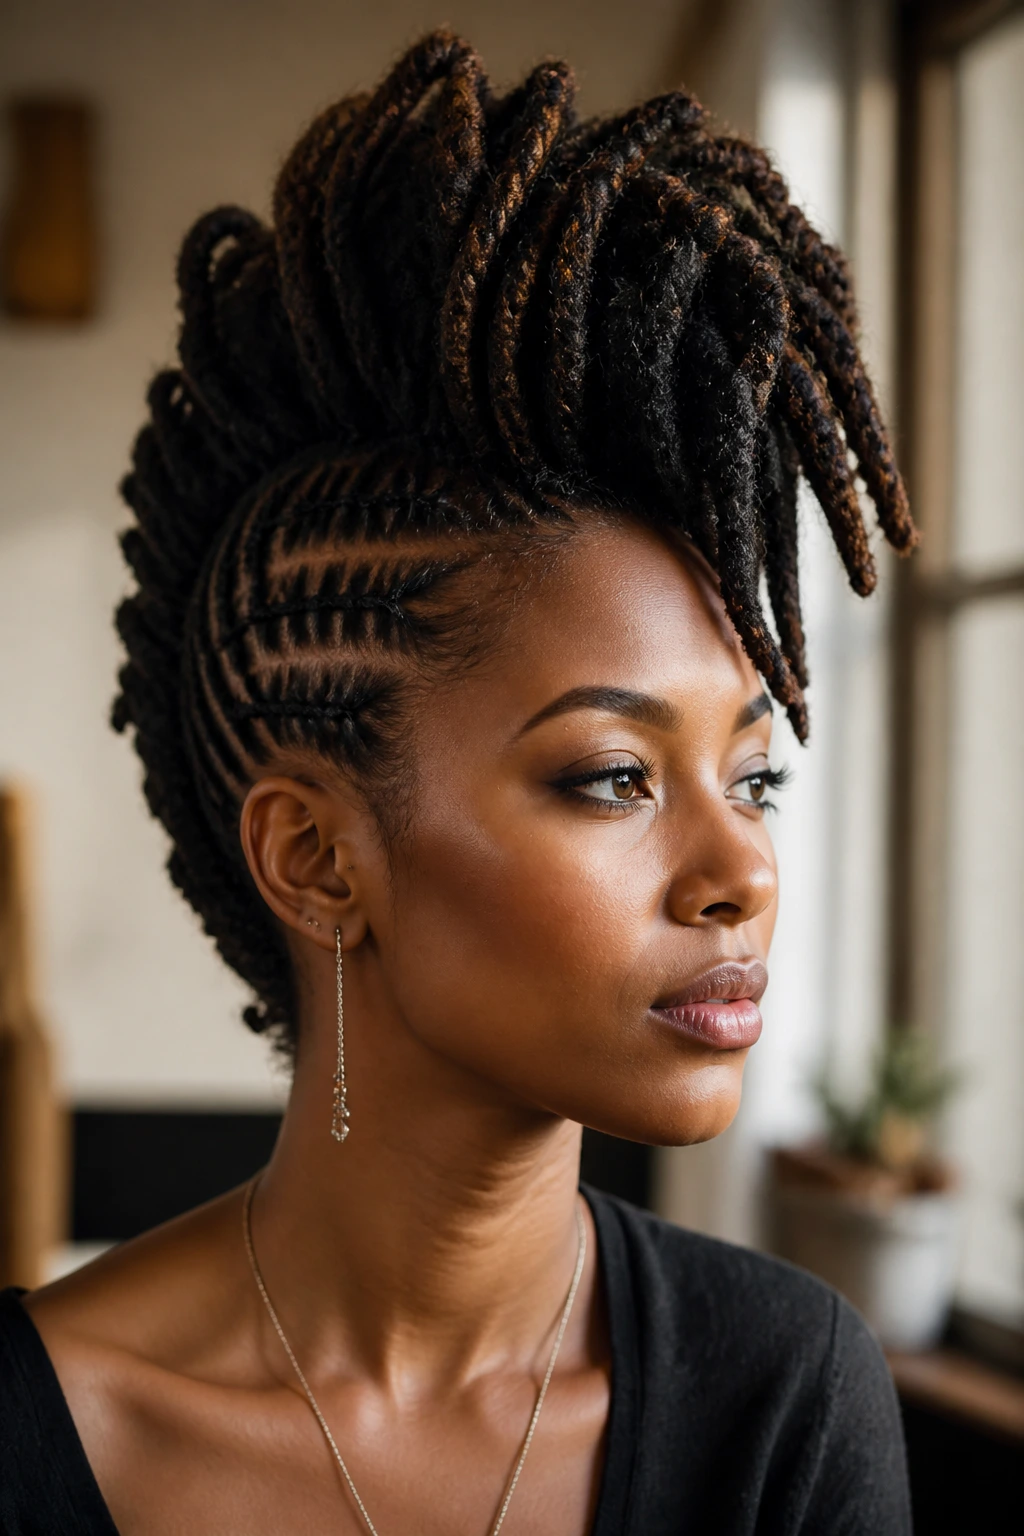
The best dreadlock mohawk styles are not usually the ones with the most pins. They’re the ones where the weight is balanced and the sides are secured in the right place. That’s a small difference, but it changes everything.
Anchor low, lift high. The side panels should be held where the head naturally curves, not yanked from the temples. That keeps the style from biting into your hairline and gives the center row more room to stand up.
Use fewer pins, but place them better. A pin tucked at an angle often holds better than three straight ones fighting the same section. Cross-pinning works especially well under the crown, where the locs want to slide backward.
Mind the weight of the ends. Long locs can drag a style down if all the length sits in one spot. Spread the ends slightly or wrap them around a base so the weight isn’t pulling from a single point.
Keep the front line soft if you wear the style all day. A crisp edge can look neat in the mirror, then start to ache two hours later. A little give at the temples usually pays off.
Essential Tools and Products for Styling Loc Hawks
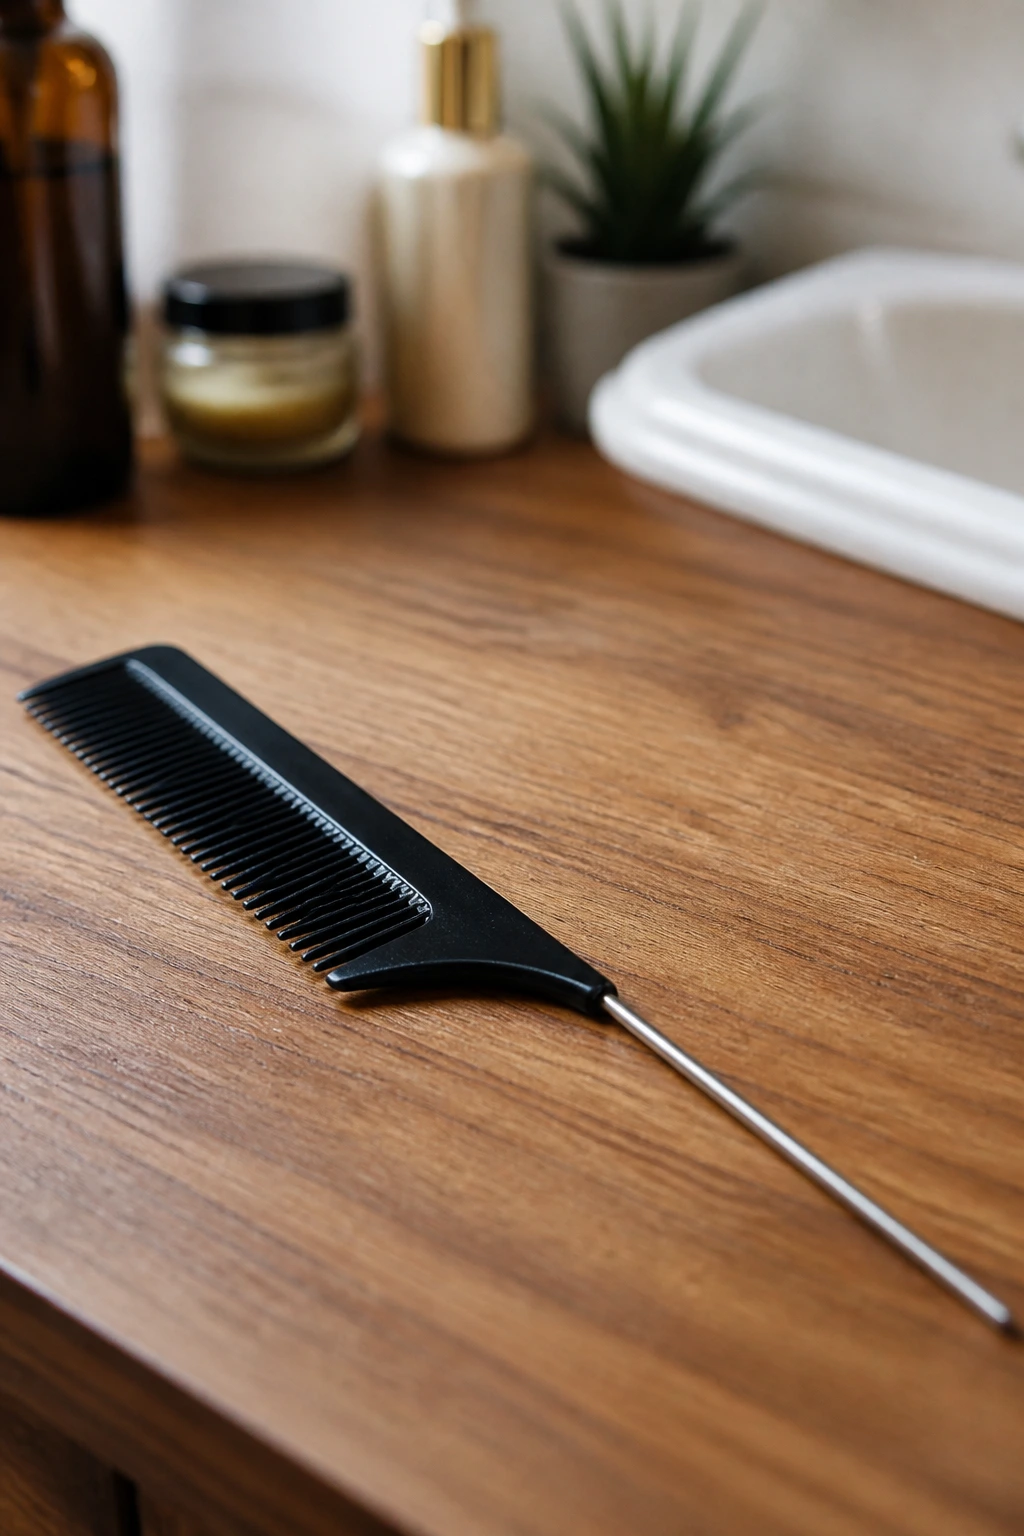
- Rat-tail comb: Best for clean parts and straight section lines near the crown and temples.
- Medium bobby pins: Use these for the everyday versions; they hold without shredding the locs.
- U-pins: Better for thicker locs or tucked bases because they grip more hair at once.
- Duckbill or alligator clips: Handy while you’re sectioning the sides before you pin them.
- Snag-free elastics: Useful for pony mohawks and wrapped bases; avoid metal seams.
- Light-hold mousse or foam: Helps settle frizz at the roots without making the hair crusty.
- Edge brush: Good for smoothing the perimeter before you pin, especially on sleek versions.
- Satin scarf or bonnet: Non-negotiable if you want the shape to survive overnight.
- Crochet hook: Optional, but useful for tucking stray locs into a cleaner shape.
- Decorative cuffs, beads, or wraps: These turn a plain mohawk into something more finished, without changing the structure.
Smart Prep for Cleaner Parts and Less Tension
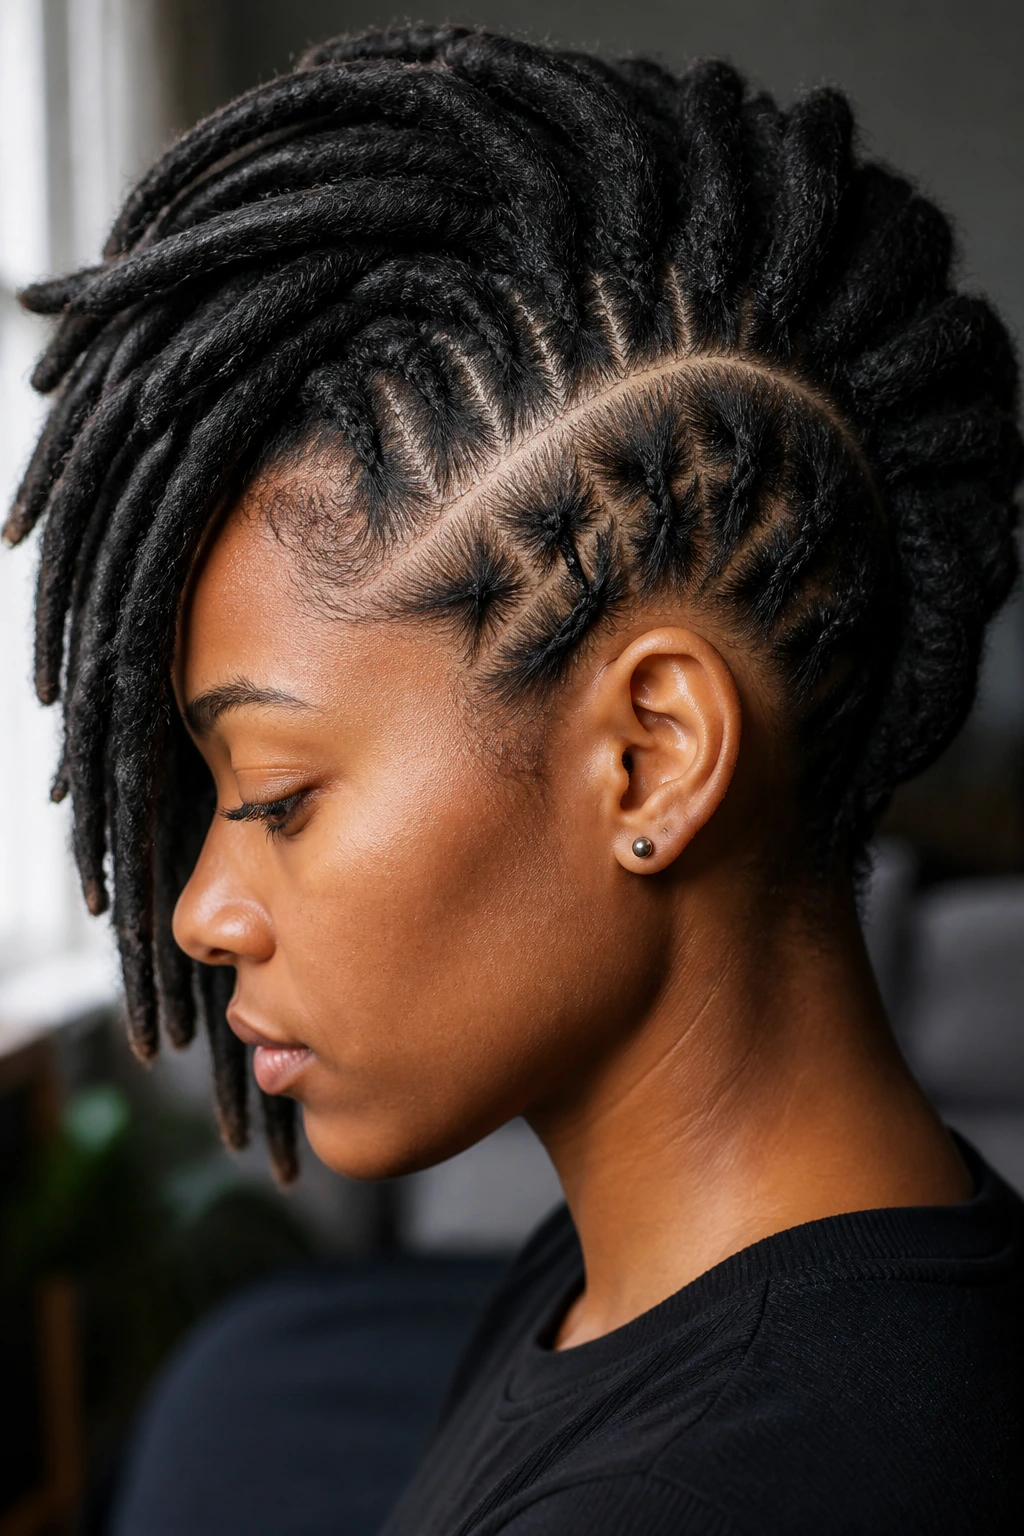
Clean prep makes a bigger difference here than people think. Locs that are dusty, overly oily, or damp at the roots do not hold a mohawk as well. The pins slide, the parts blur, and the whole thing starts shifting before you’ve even finished your coffee.
A dry scalp and fully dry locs are easier to shape. If you’ve washed your hair, give it enough time to dry all the way through. Wet locs are heavy, and heavy locs flatten the crest. That’s a quick route to a style that looks fine for fifteen minutes and then starts drooping.
I also like to prep with a very light mist of foam or setting lotion on the roots, not the lengths. Too much product near the crown can create buildup, and long locs already carry enough texture on their own. A little goes farther here than most people expect.
Parting matters too. If you know you want a deep side part, map it before you start pinning. If the side panels will be twisted, section them cleanly first. The style gets easier when the foundation is sorted before the hair starts to fight you.
How to Keep a Dreadlock Mohawk Looking Fresh Overnight
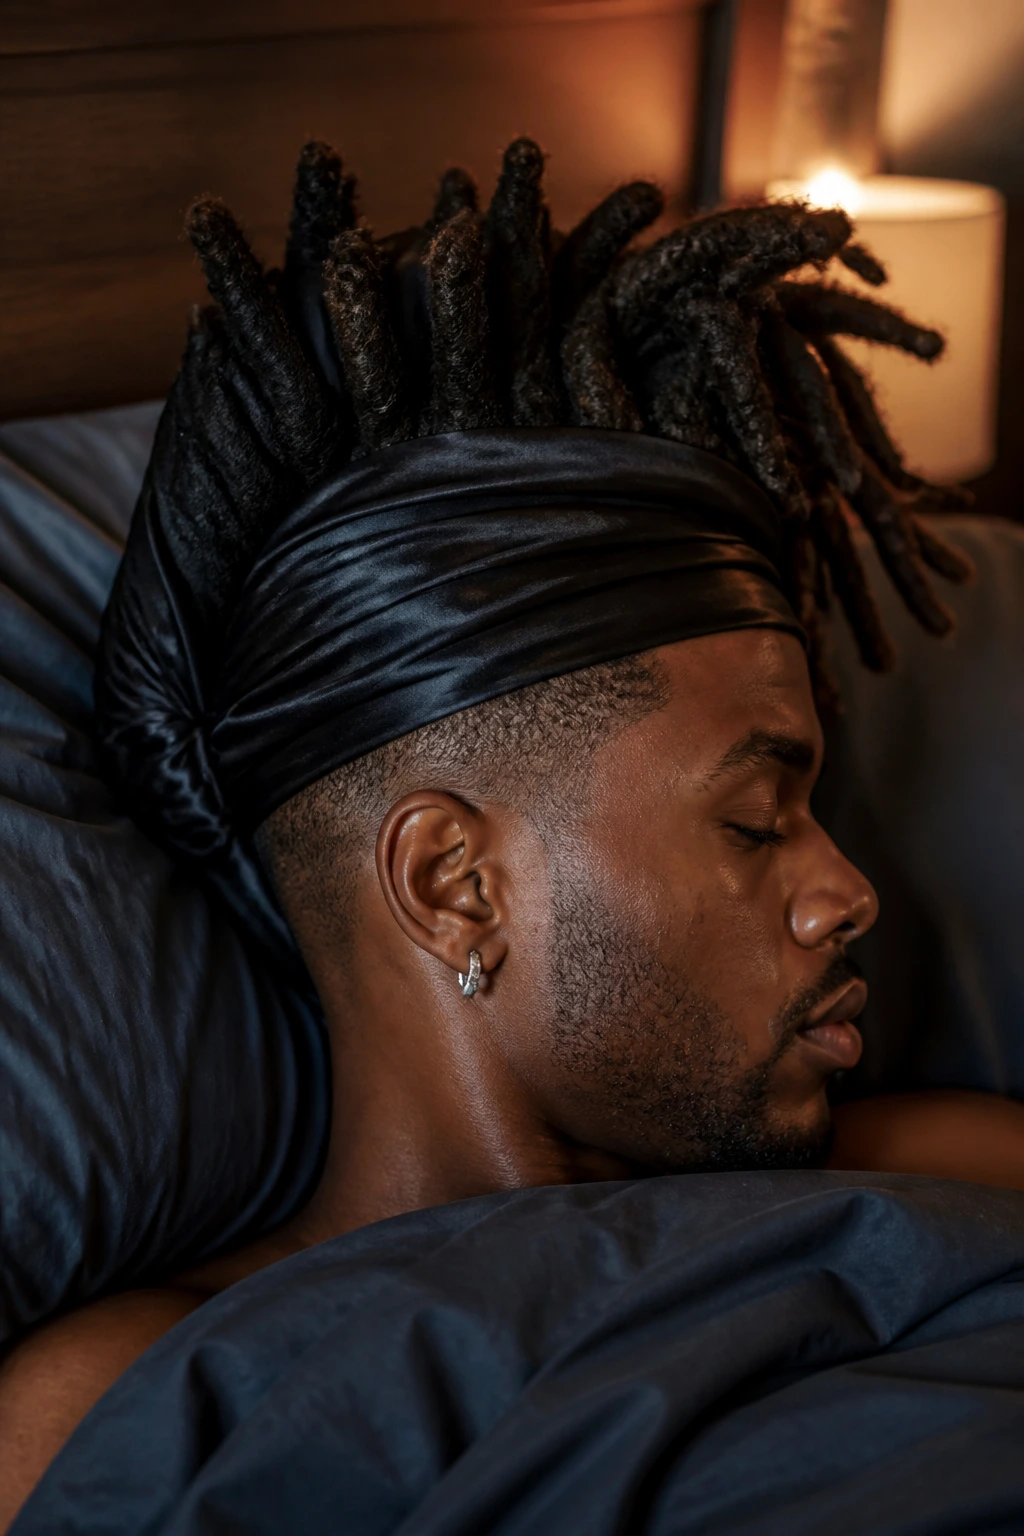
The overnight routine is where a lot of mohawks fail. They do fine in daylight, then get flattened against a pillow and wake up looking like they lost an argument. Long locs need protection at night because their weight will pull the shape down if they’re left loose.
Wrap the sides first. A satin scarf tied around the perimeter keeps the pinned sections from frizzing out and helps the bobby pins stay put. If the crown is tall, use a bonnet with enough room to avoid crushing it. A tight cap can flatten the ridge in one sleep.
If the style has a loose tail or hanging back, braid it into one or two loose plaits before bed. That reduces tangling and keeps the ends from getting scruffy by morning. In the morning, lift the crown with your hands, not a brush. A brush can drag the style apart faster than you can rebuild it.
The goal is not to preserve every strand perfectly. It’s to keep the structure alive so you only need a few minutes of re-pinning.
The Mistakes That Flatten the Shape or Pull Too Hard
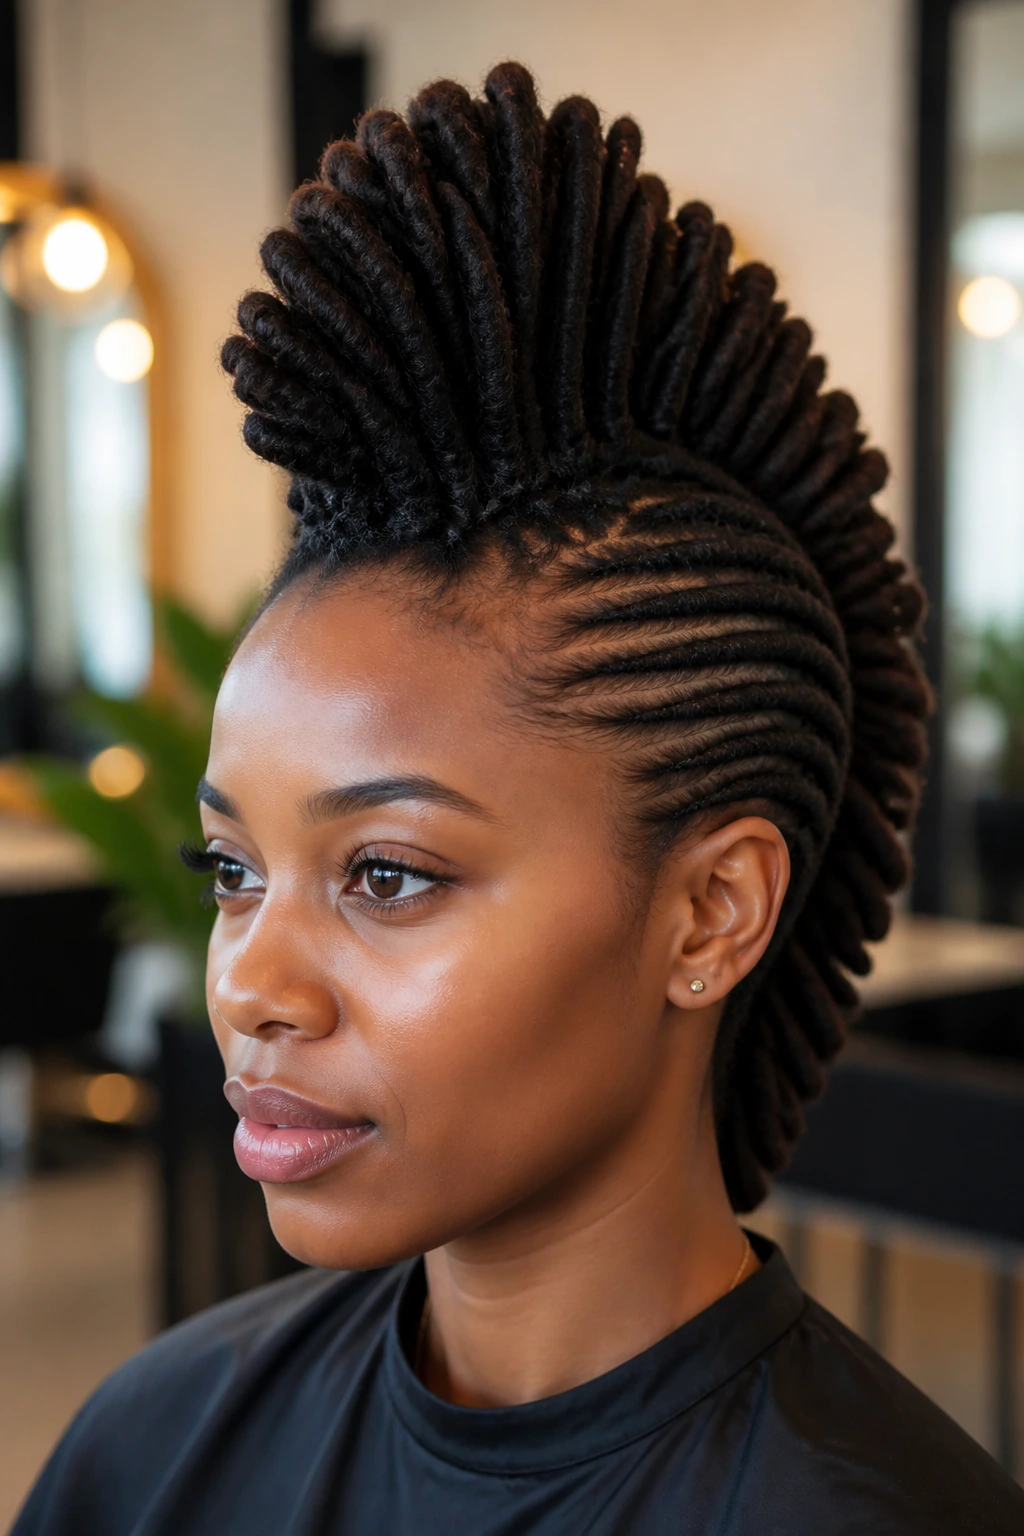
Pulling the sides too tight. The symptom is obvious: the style looks sharp for an hour, then your temples ache and the skin feels sore. The fix is to anchor lower and leave a little give near the hairline.
Using pins that are too small or too few. Heavy locs eat weak pins for breakfast. If the crest keeps sliding backward, move up to U-pins or add cross-pins under the crown.
Styling damp locs. Damp hair gets heavy, and heavy hair falls. Let the locs dry all the way through before you build a tall mohawk, or the shape will lose height fast.
Forgetting to balance the weight. If all the length sits on one side, the style leans and starts to fight itself. Spread the ends, tuck them, or wrap them so the bulk is shared.
Loading on too many accessories. Beads, cuffs, clips, and scarves can all work, but all at once they start to crowd the silhouette. Pick one accent and let the structure breathe.
Skipping the mirror check from the side. Front view can lie. A style may look lifted from straight on and still sag at the back. Check both profiles before you leave the house.
Variations and Alternatives for Different Loc Lengths

Soft Hawk: Keep the sides looser and the center lower. This suits anyone who wants the mohawk shape without a hard, spiked feel.
Big Crown Hawk: Add more height through the middle with broader sections and a higher anchor point. It works best on thick, long locs that can support their own weight.
Low-Profile Hawk: Pull the sides back neatly and keep the crest close to the head. Good for work days, interviews, or any setting where you want structure without drama.
Accessory Hawk: Build the same base shape, then finish with cuffs, beads, or a printed scarf. This is the easiest way to make a familiar style feel new without changing the whole method.
Freeform Hawk: Leave some frizz, skip the hard lines, and let the locs keep their natural texture. That version suits older locs and anyone who dislikes styles that look over-controlled.
Shorter-Loc Adaptation: If your locs are not quite as long, tuck the ends under the center ridge instead of letting them fall. The shape stays upright, and the style looks intentional instead of unfinished.
Frequently Asked Questions
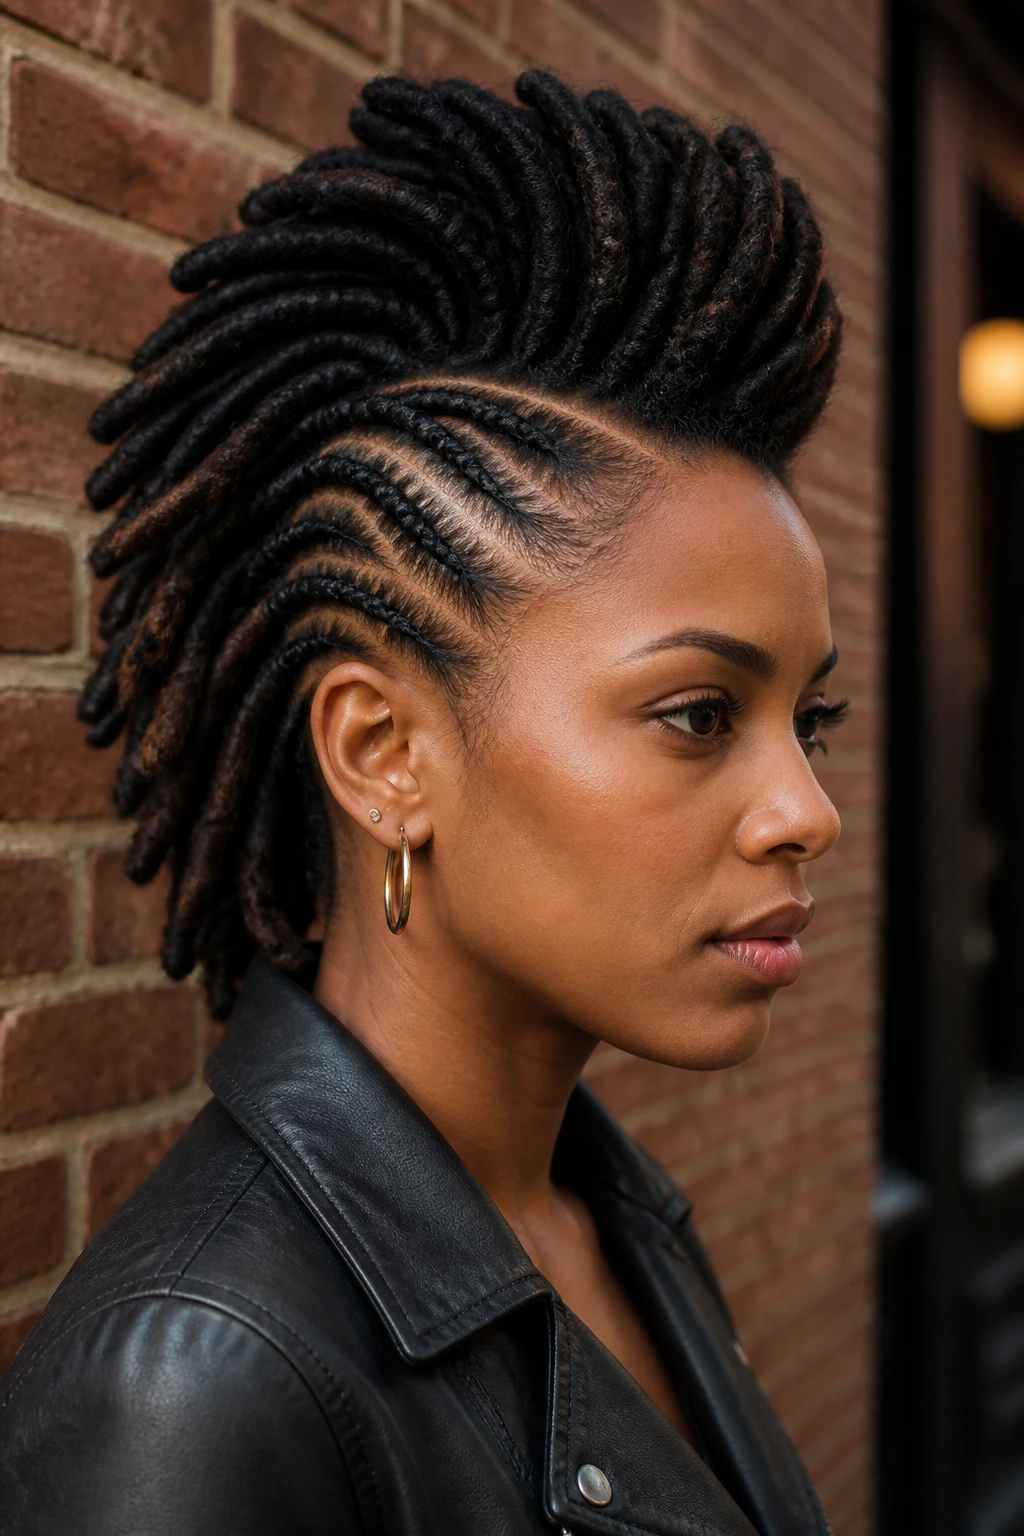
Can you do a mohawk on long locs without an undercut?
Yes. A clean side-pin or flat-twist setup creates the mohawk shape without shaving anything. The sides just need to be secured low and smooth so the center reads as the main line.
How long does a dreadlock mohawk usually last?
A simple version can last one day with a quick overnight wrap, while a more pinned style may hold for 2 to 4 days if the roots stay dry and the scarf stays on at night. The lifespan depends more on tension and sleep care than on the style name.
What if my locs are too heavy for a tall hawk?
Go wider, not higher. Use a lower crest, more side support, or a half-up version with a hanging back so the weight has somewhere to go.
Are these styles safe for sensitive edges?
They can be, if you keep the tension off the temples and avoid tiny elastics that dig in. A low-tension mohawk with broad sections is safer than a tight one that pulls from the hairline.
Can starter locs wear these looks?
Some can, but keep them softer and simpler. Starter locs usually need less pulling and fewer pins because the base is still settling.
Which style is fastest for busy mornings?
The clip-and-go hawk, the half-up hawk, and the sporty version are the quickest. They rely on placement more than shaping, which saves time and keeps the hair from turning into a project.
How do I stop the sides from puffing out?
Use clean parts, anchor the side panels lower, and smooth the roots with a little mousse or a light setting foam. Then wrap the style at night so the sides do not rebuild their own little frizz halo.
A Shape Worth Keeping

Long locs and a mohawk shape get along better than people expect. The length gives you drama, the texture gives you structure, and the sides give you room to play with clean lines, twists, pins, or a soft sweep that feels more relaxed than rigid.
The styles that last are the ones that respect the weight of the hair. Keep the tension reasonable, keep the parts clean, and choose the version that fits your day instead of forcing a silhouette that only looks good in one mirror.
Start with one version, wear it long enough to see how your scalp reacts, and save the good pin placement in your head. That part matters. Once you’ve found the shape that sits right on your locs, you’ll stop treating the mohawk like a special occasion trick and start using it like a regular move.
