



Curly hairstyles for kids work best when they respect the hair’s own spring. Push the curl pattern too hard, and you get sore scalps, frizz halos, and a child who’s done with the whole business before the backpack is zipped. Let the curls keep a little bounce, though, and the style starts doing half the work for you.
That’s the part people miss. Curly hair doesn’t need to be flattened to look neat. It needs shape, moisture, and enough room to move. A good kids’ style can survive playground heat, hoodie friction, car-seat naps, and the occasional dramatic head shake without turning into a puff of regret.
The best styles are also the ones a child can live in. A ribbon that stays put. A part that doesn’t sting. A braid that looks tidy but still lets the ends spring. Tiny details matter more than most parents expect, especially when the hair is dense, mixed-texture, or prone to shrinking the second you release it from your fingers.
Why This Collection Feels Different
These styles aren’t built around fighting curls. They’re built around giving curls a shape and then getting out of the way.
- Low-tension first: Every style here can be done without yanking the hairline raw, which matters more than a polished finish.
- Works with real curl shrinkage: The styles leave room for curls to spring up after styling, so the final shape still looks intentional.
- Fast morning options included: A few of these take under five minutes once you know your sectioning pattern.
- Photo-day and playground-friendly: Some styles look neat enough for school photos, while others are loose enough for running, climbing, and nap time.
- Accessory-ready: Bows, clips, ribbons, and satin scrunchies don’t feel like afterthoughts here; they’re part of the design.
- Short hair and long hair both get a say: Not every curly child has waist-length hair, and that’s fine. There’s room for bobs, puffs, ringlets, and everything in between.
1. High Pineapple Puff
A high pineapple puff is the style I reach for when the clock is rude. It lifts the curls up and off the neck, lets the crown keep its volume, and makes the whole head look more awake than it probably feels at 7:10 in the morning. If the hair is long enough to gather high, this one earns its keep fast.
The trick is not to squash the curls while you’re gathering them. Use a light mist of water on the top and sides, smooth in a little leave-in, then pull the hair up with a satin scrunchie or a soft elastic wrapped once or twice only. Let the ends fan out on top instead of forcing them into a tight knot. That loose top shape is the whole point.
This style works especially well for thick curls that frizz when they rub against collars or backpack straps. It also gives you a cleaner face line without making the child feel “done up.” Tiny difference. Big payoff.
2. Two Side Puffs with Soft Parted Roots
Why do two side puffs feel so cheerful? Because they split all that curl volume into something tidy without making the head look stiff. The middle part gives the style structure, and the puffs keep the ends free enough that the curls still move.
I like this on medium to dense hair where a single puff would just collapse into itself by lunch. Make a clean center part with a rat-tail comb, smooth each side with damp fingers, then tie each section low or mid-height with snag-free elastics. If the child’s hairline is sensitive, leave the front a little loose. Don’t chase a perfectly flat root. That’s where the tension headaches start.
Add small bows or elastic cuffs if you want a more finished look. Without them, the style still reads as playful and neat. It’s one of those options that works for school days and birthday parties without changing much between the two.
3. Half-Up Clip-Back with Loose Ringlets
Some kids will tolerate a full updo. Some will absolutely not. The half-up clip-back is the compromise that usually saves the morning.
Take the front corners and the top crown section, twist them back loosely, and secure with a barrette, a small claw clip, or two snap clips crossed in an X. Leave the rest of the curls down. The face gets the clean frame, the back keeps its bounce, and nobody has to sit through a long styling session.
Why it stays useful
- Fast: Once the sectioning makes sense, this takes only a few minutes.
- Gentle: It keeps the hair off the eyes without pulling every strand upward.
- Flexible: It works on ringlets, waves, and mixed textures, especially when the hair is fine and full styles slide out.
If the clip slips, twist the section once before clipping it. That tiny twist gives the hardware something to grip. And if the curls at the back are fuzzy? Good. They’ll still look like curls, not helmet hair.
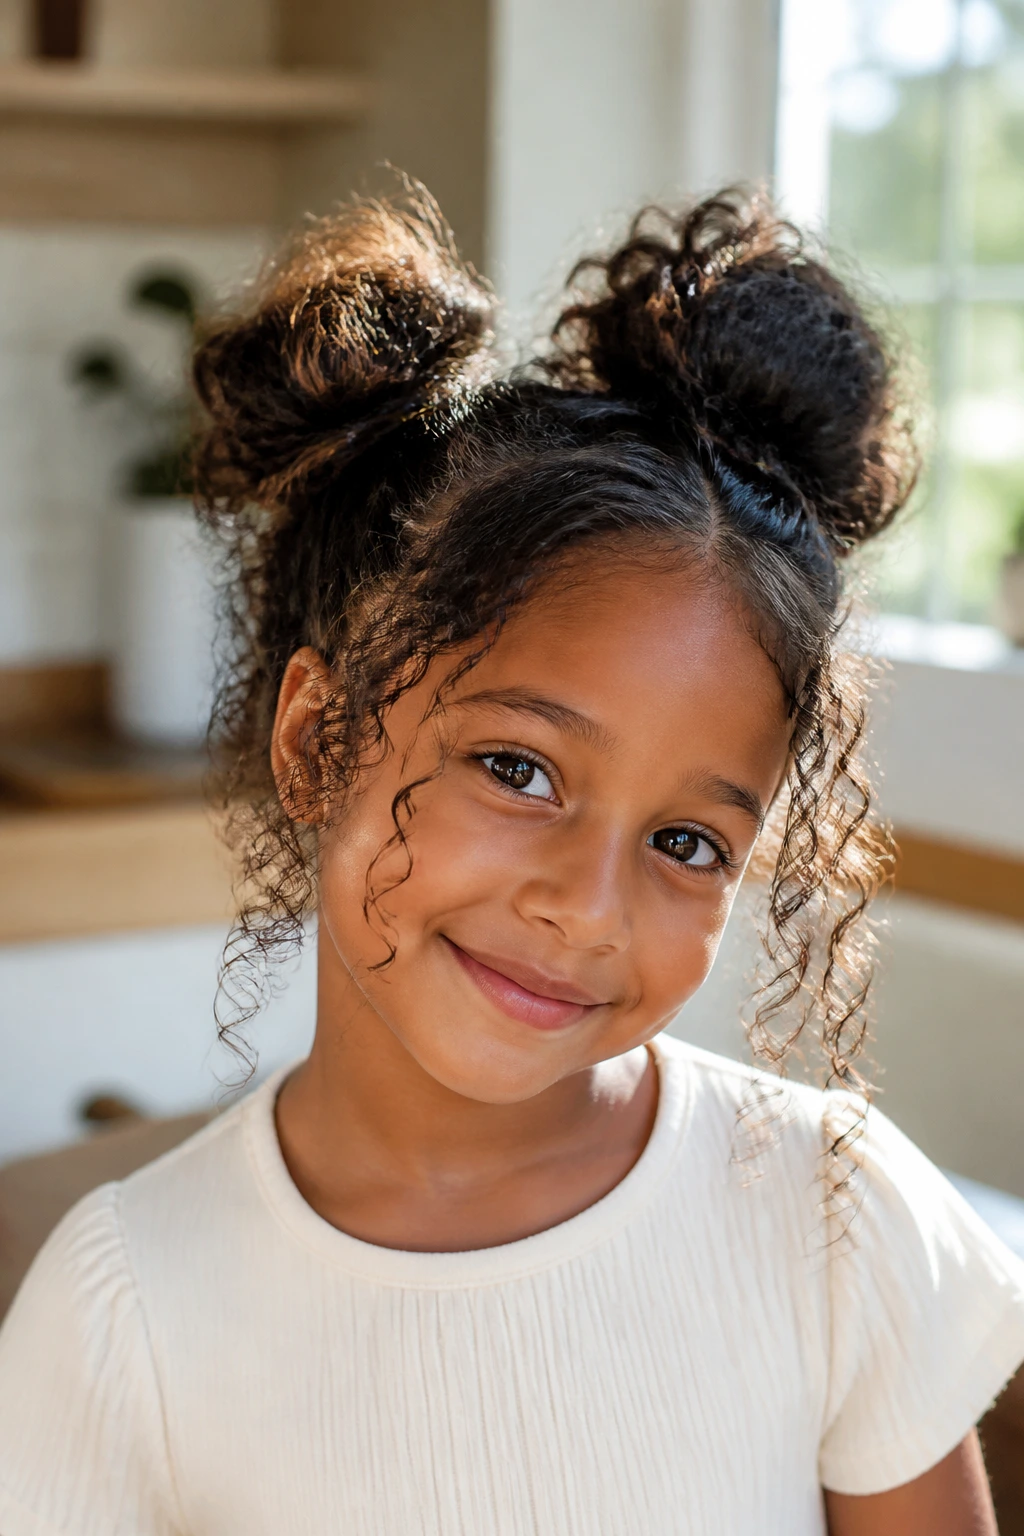
4. Curly Space Buns for Busy Mornings
Curly space buns have a way of making a child look like they planned their outfit, even when they were arguing about socks five minutes earlier. The shape is playful, but the curls keep it from looking too rigid. That balance is the whole draw.
Split the hair into two high sections, then twist each section into a bun and pin or elastic it in place. Leave a few curls free if the hair is thick or if you want the style to feel less severe. For tighter coils, a little gel at the part and around the base keeps the sections clean without dragging everything flat.
The main caution is tension. Space buns look sweet when they sit lightly. They look painful when the roots are pulled taut. If the child blinks at the mirror and says “ow,” you’ve gone too far. Back off a little. The shape will still hold.
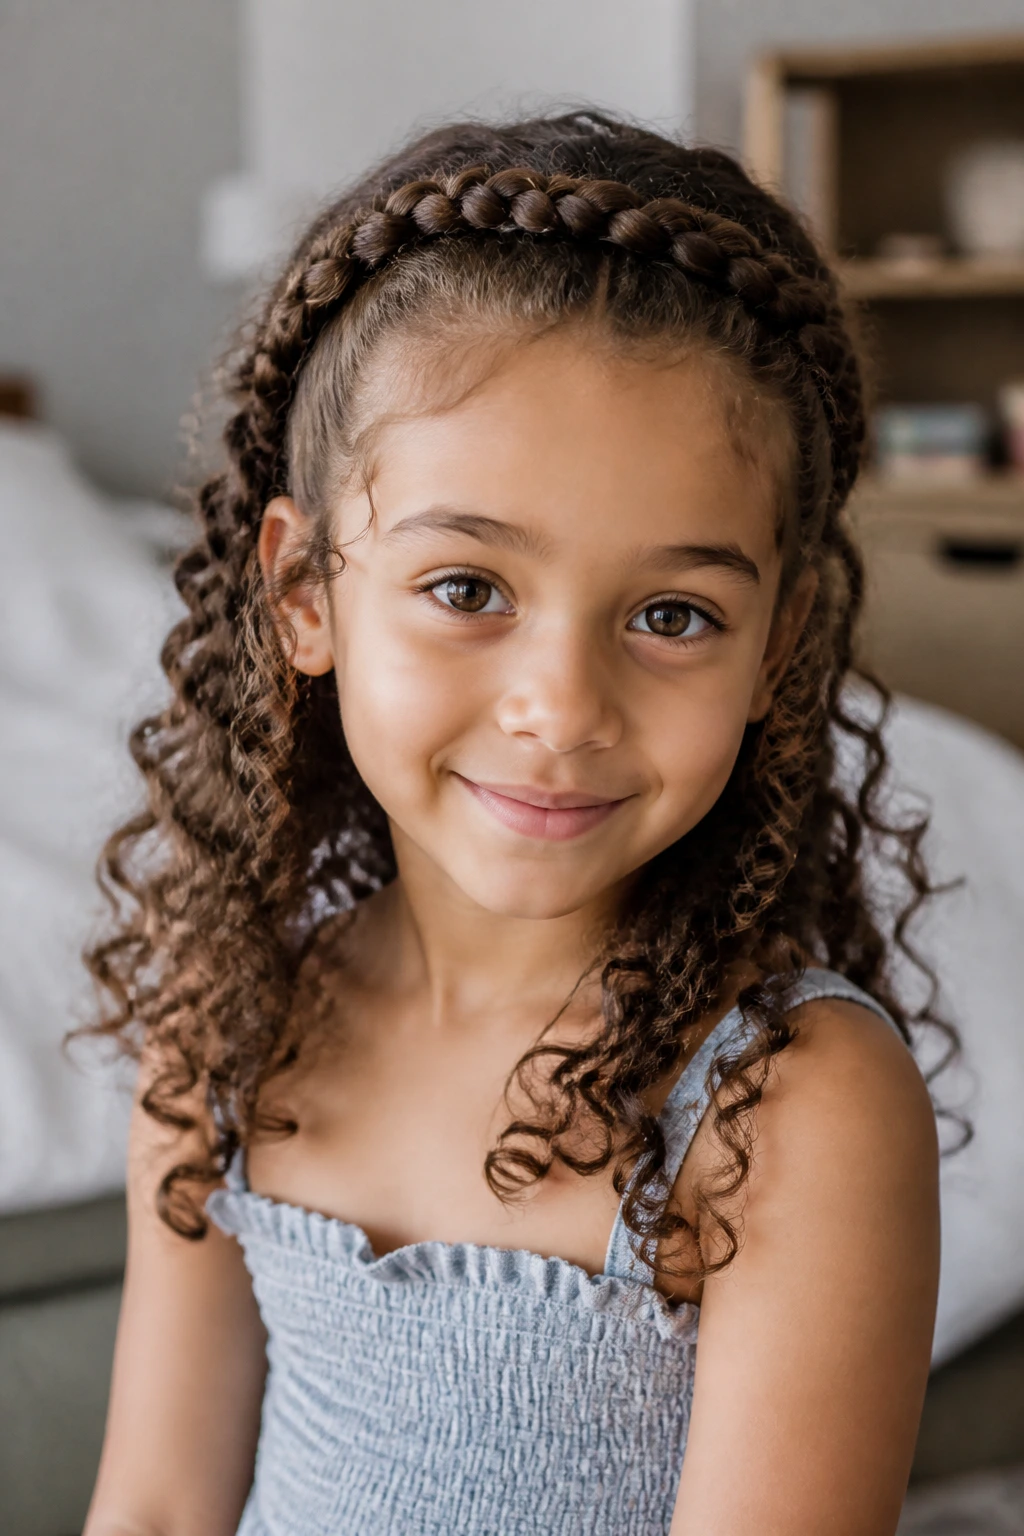
5. Halo Braid with Free Ends
A halo braid gives you that crown-like line around the hairline, then lets the rest of the curls spill out underneath. It’s a lovely shape for birthdays, family pictures, and any day when you want the front of the hair to stay put while the back keeps moving.
Start with slightly damp hair and a bit of styling cream so the braid sections don’t fray while you work. Braid along the front hairline from one ear toward the other, keeping the braid close enough to the scalp that it sits like a frame, not like a rope floating above it. Leave the back curls loose. That contrast is what makes the style interesting.
This one rewards patience. The braid doesn’t need to be tiny, but it does need to be even. If one side is looser than the other, the shape starts drifting. Still, when it’s done well, it stays handsome all day and doesn’t ask for much beyond a quick fluff at the ends.
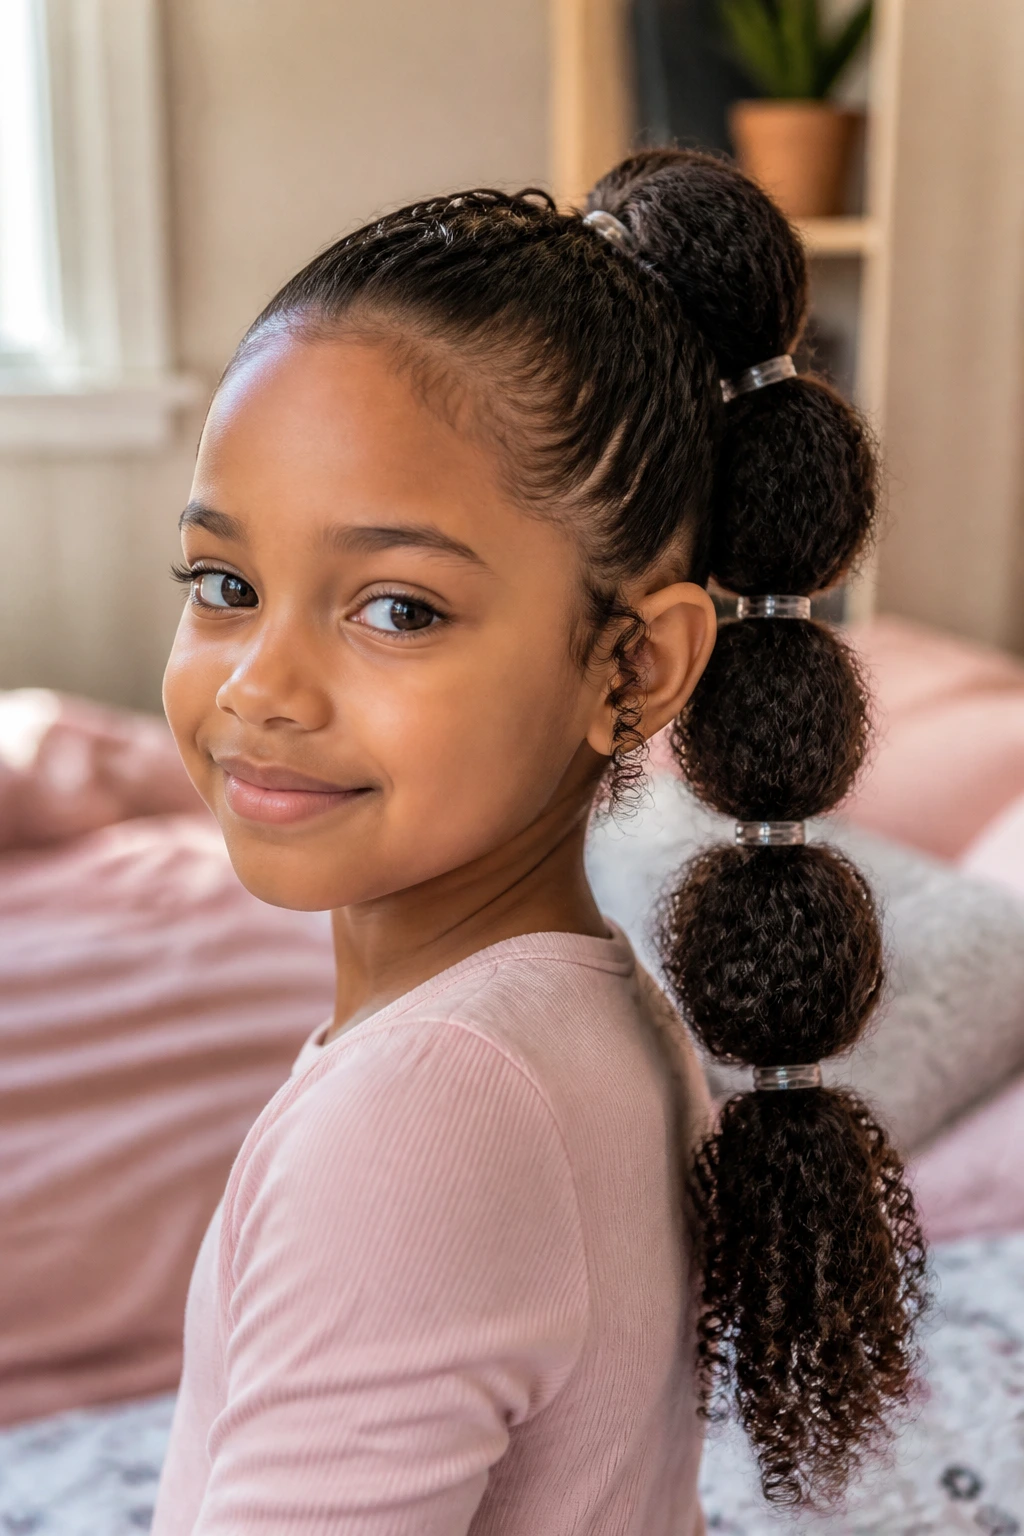
6. Bubble Ponytail on Stretched Curls
A bubble ponytail looks fancier than it is. That’s one reason I like it. You gather the curls into a ponytail, then place small elastics every 2 to 3 inches down the length and puff each section into a rounded “bubble.” It gives long curly hair structure without hiding the texture.
This style works best when the hair is stretched a little, not bone-straightened, just lightly dried or gently brushed out after detangling. If the curls are too wet, the bubbles can slide and shrink unevenly. If they’re too dry and tangled, the elastics will snag. Damp and cooperative is the sweet spot.
Use clear elastics if you want the hair to stay center stage. Use colored ones if the child likes a brighter look. Either way, pinch and fluff each bubble after securing it so the sections look round instead of squashed.
7. Frohawk of Mini Puffs
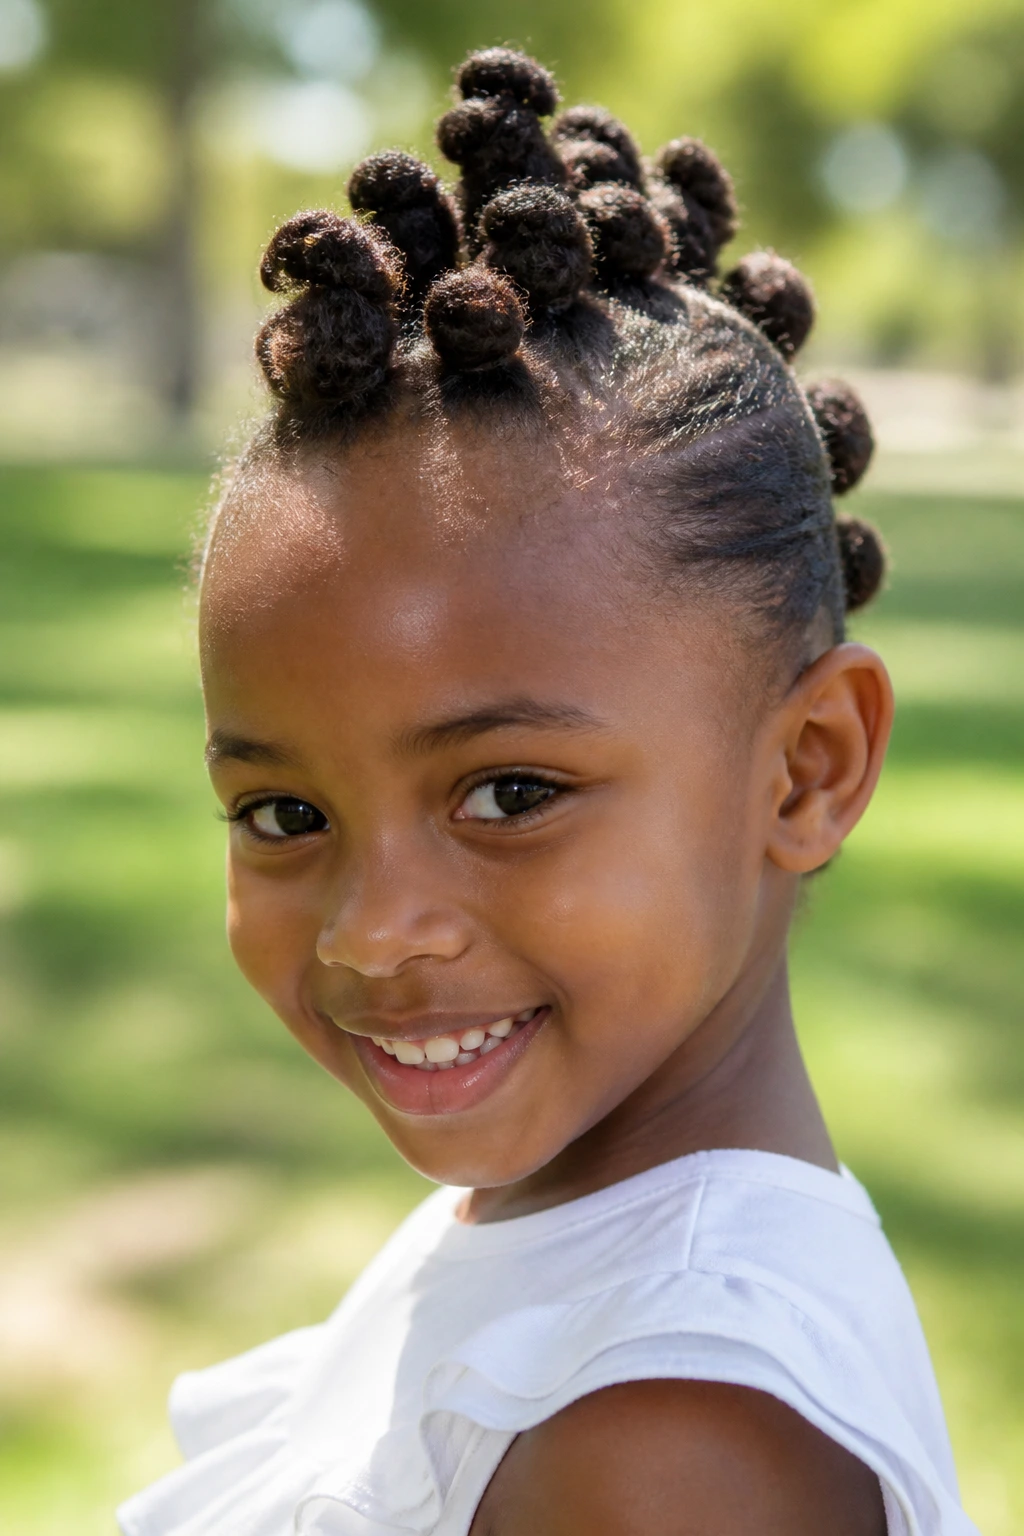
The frohawk is for the kid who has no interest in being subtle. Good. Neither do I, on some mornings.
You create a line of small puffs or gathered sections from the front hairline down the center of the head to the nape, then smooth or braid the sides back. The middle gets height and drama. The sides stay out of the face. It looks deliberate, even a little bold, without needing a perfect part or a complicated finish.
What makes it stay put
- Section size matters: Smaller puffs hold shape better on dense curls.
- Sides stay flat or braided: That keeps the silhouette clean and keeps the look from ballooning outward.
- Colored elastics help: They make the sectioning feel part of the design, not just a necessity.
If the child has very thick coils, this style can be done in six or seven mini puffs instead of one long row. That often looks better anyway. Less trying to control the hair. More letting the shape do the talking.
8. Side-Parted Twist-Back
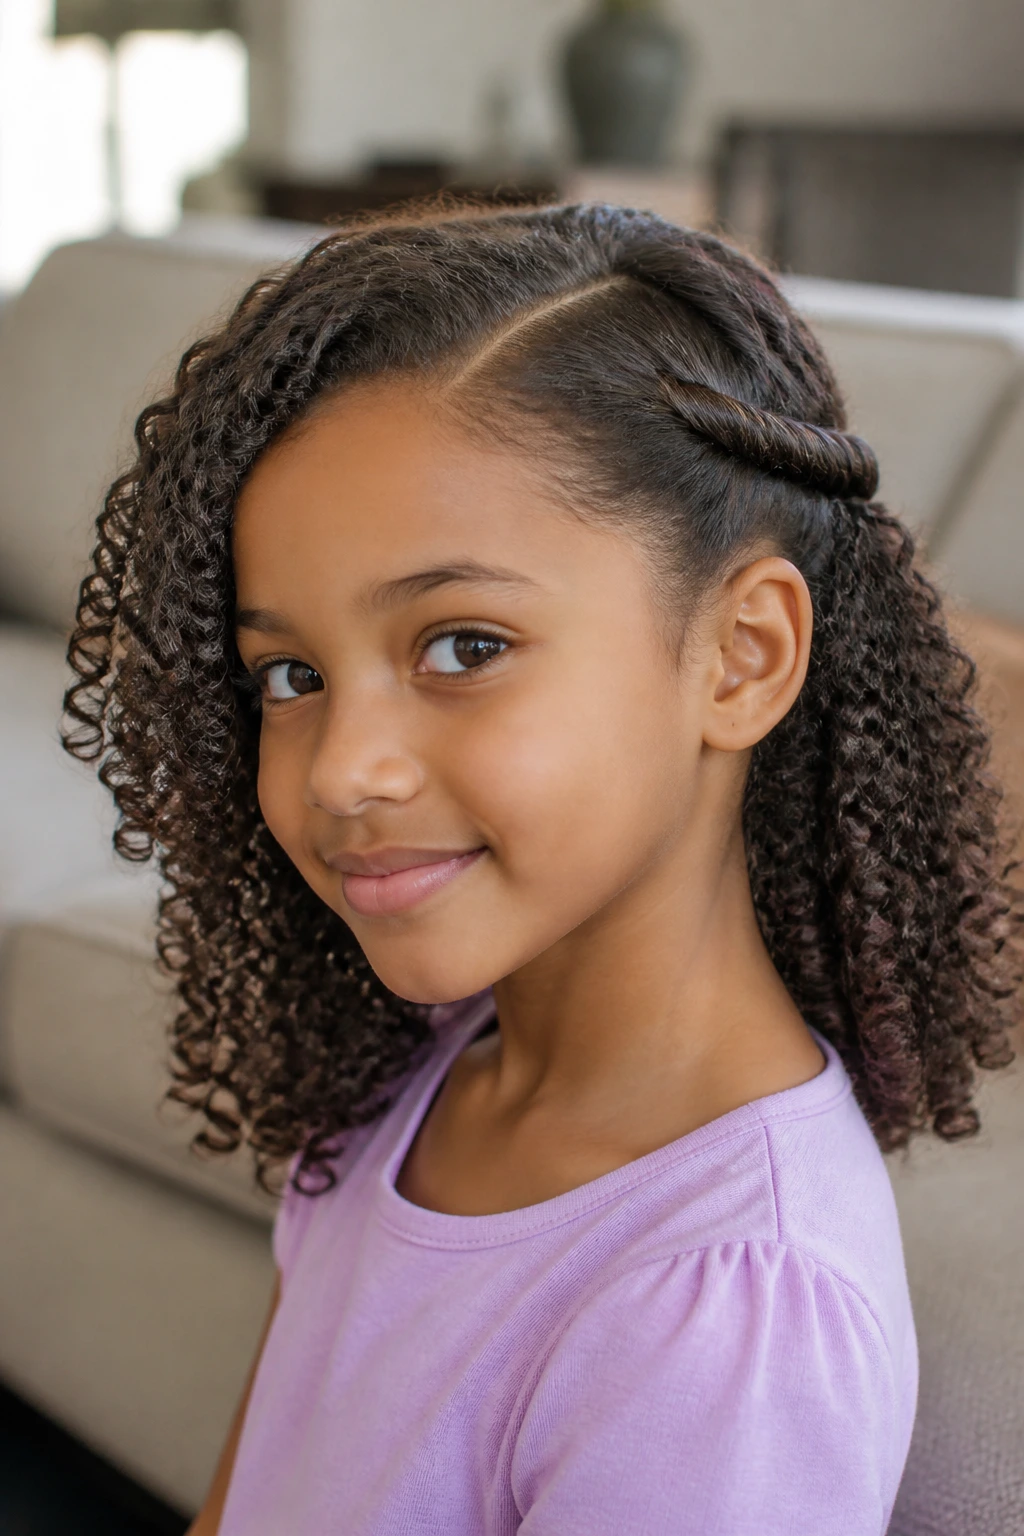
What if you need a style that takes four minutes and still looks like somebody cared? The side-parted twist-back is the answer I keep coming back to.
Make a deep side part, take a front section from the heavy side, twist it back toward the ear, and secure it with a clip or small bobby pin. Repeat on the other side if you want symmetry, or leave one side loose for a softer look. The rest of the curls can stay down, brushed into place with fingers only.
This is a very good choice for shorter curly hair or for kids who won’t sit still long enough for braids. It keeps the face open without requiring a lot of manipulation. And since the twist only uses the front sections, the back can keep its natural shape instead of being dragged into an updo it never asked for.
A small warning: don’t twist the sections so tightly that they coil back on themselves. A gentle twist holds better and feels better.
9. Low Puff with a Satin Ribbon
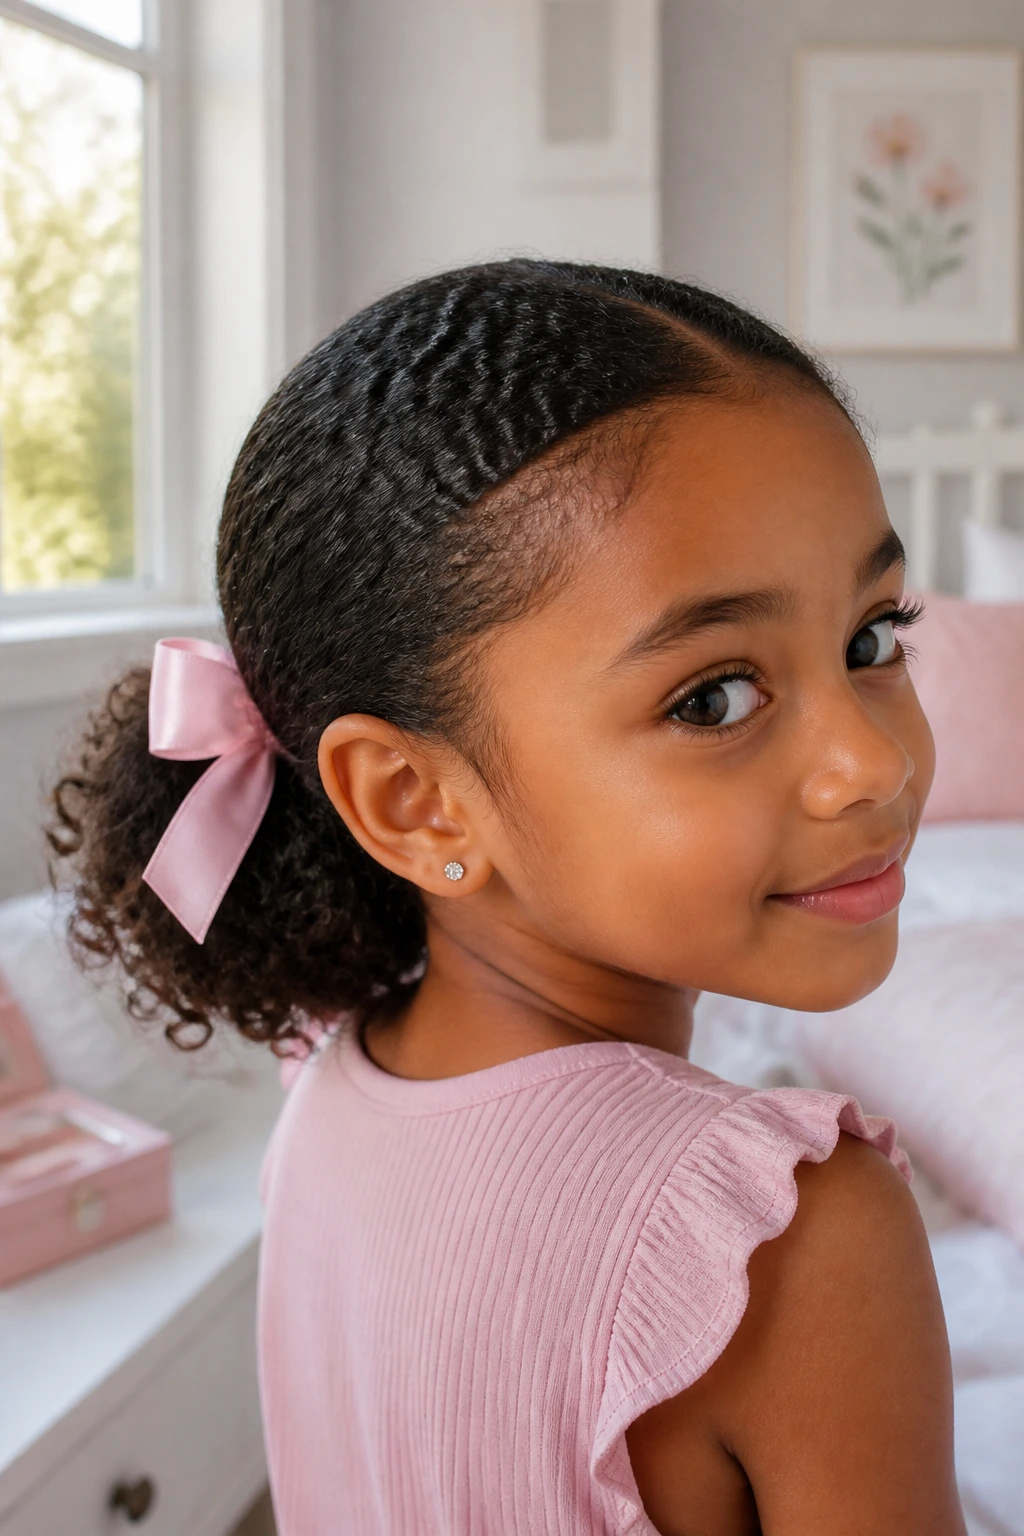
A low puff with a ribbon has an old-school charm that works on curly hair in a way that surprises people. Gather the hair low at the nape, leave the puff full and soft, then tie a satin ribbon around the base. That’s it. No drama. The ribbon does the finishing work for you.
The low placement keeps the curls from rubbing against the top of the head all day, which helps if the child wears hoodies or sits in a car seat for a while. It also makes the style easier to sleep in if you’re planning to carry it into the next day. The satin ribbon matters more than it sounds. It slides less than a rough elastic and doesn’t leave the same dent at the base.
This is one of my favorite styles for more formal outfits because it doesn’t fight the clothes. A crisp collar, a cardigan, a school uniform, even a denim jacket — the ribbon sits nicely with all of them.
10. Double Dutch Braids into Curly Ends
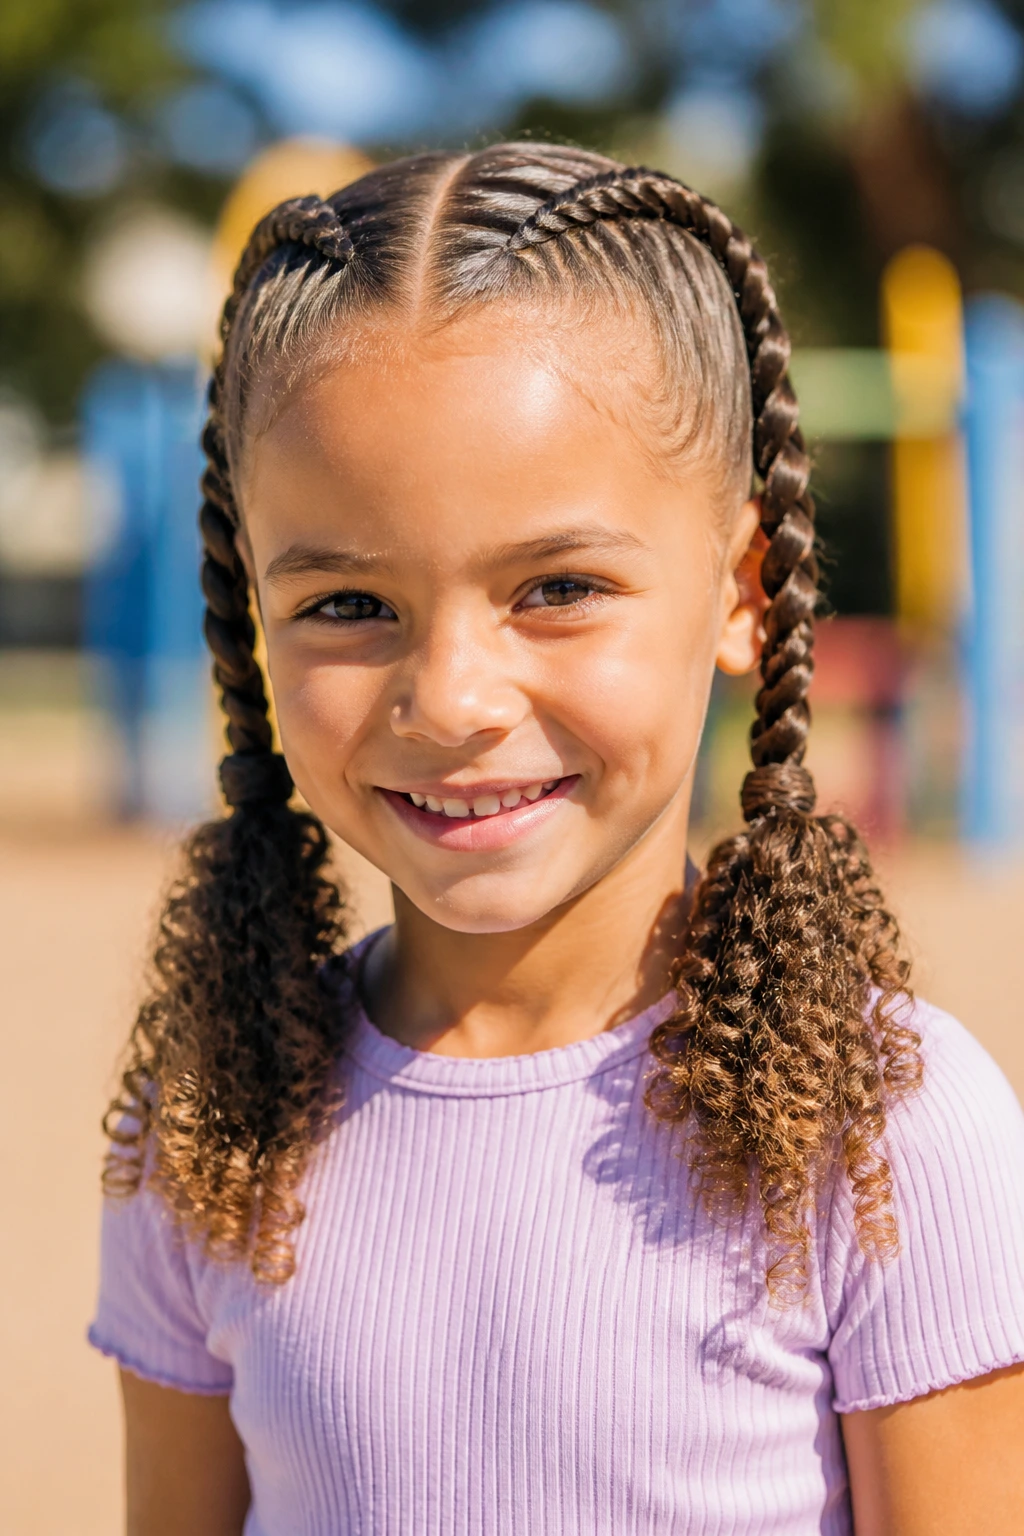
If the day includes running, climbing, or a lot of head turning, double Dutch braids into curly ends earn a spot near the top of the list. The braids control the front and sides. The ends keep the curl pattern visible, so the whole thing never looks over-managed.
Braid from the hairline down toward the shoulders, then stop before the ends and let the curls fall free. That line between braid and ringlet is what keeps the style from looking flat. Use gel or cream on the roots if the hairline frizzes quickly, but don’t overload the whole head. You want grip, not stiffness.
This style also forgives a little growth. If the braids are still neat by bedtime, you can unravel them the next day and get a soft wave pattern with very little extra work. That’s one of those practical details nobody mentions until the first time it saves you twenty minutes.
11. Tiny Twists Gathered into a Ponytail
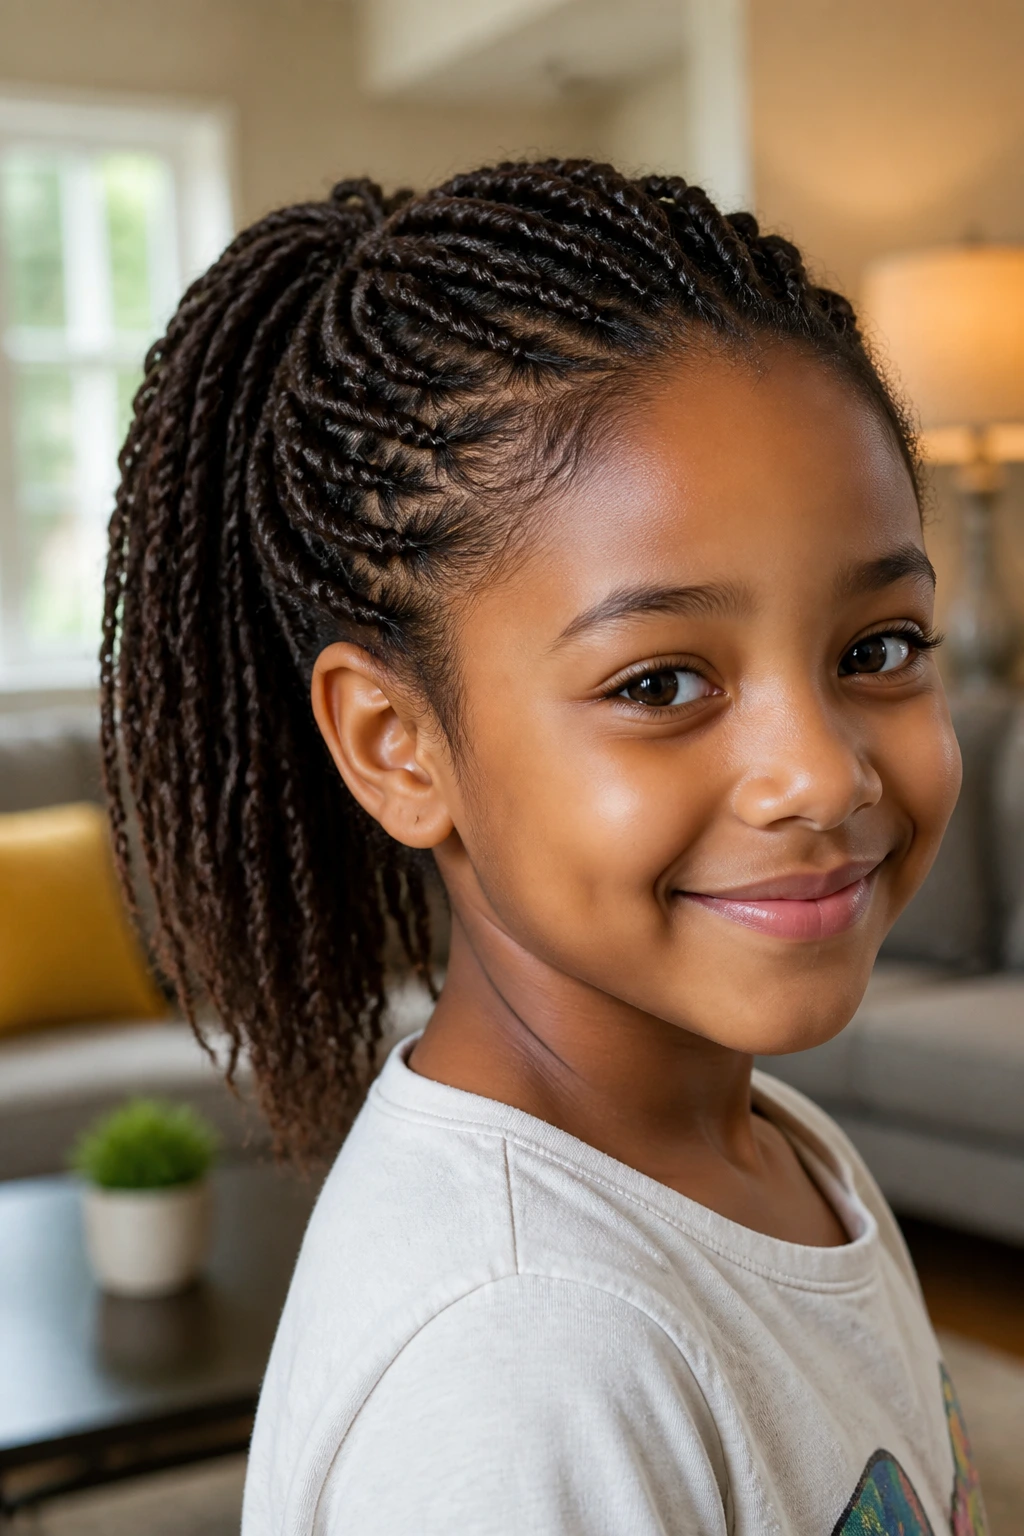
Tiny twists take more time up front. No way around that. But they repay you in hold, softness, and fewer mid-day redos.
Section the hair into small parts, twist each one in two strands, and let the twists fall toward the back. Once they’re in place, gather them into a ponytail or low puff. You get texture on texture here — the twists add pattern, and the ponytail keeps the shape contained. It’s a smart pick for kids with thicker coils or hair that tangles the minute you blink.
The beauty of this style is that it can be as neat or as loose as you want. Tight, small twists read more polished and last longer. Slightly larger twists go faster and feel more relaxed. Either way, keep the ends smooth and don’t wrap the base too hard. A child should be able to move without feeling that tug at the crown.
12. Zig-Zag Part Two-Puff Style
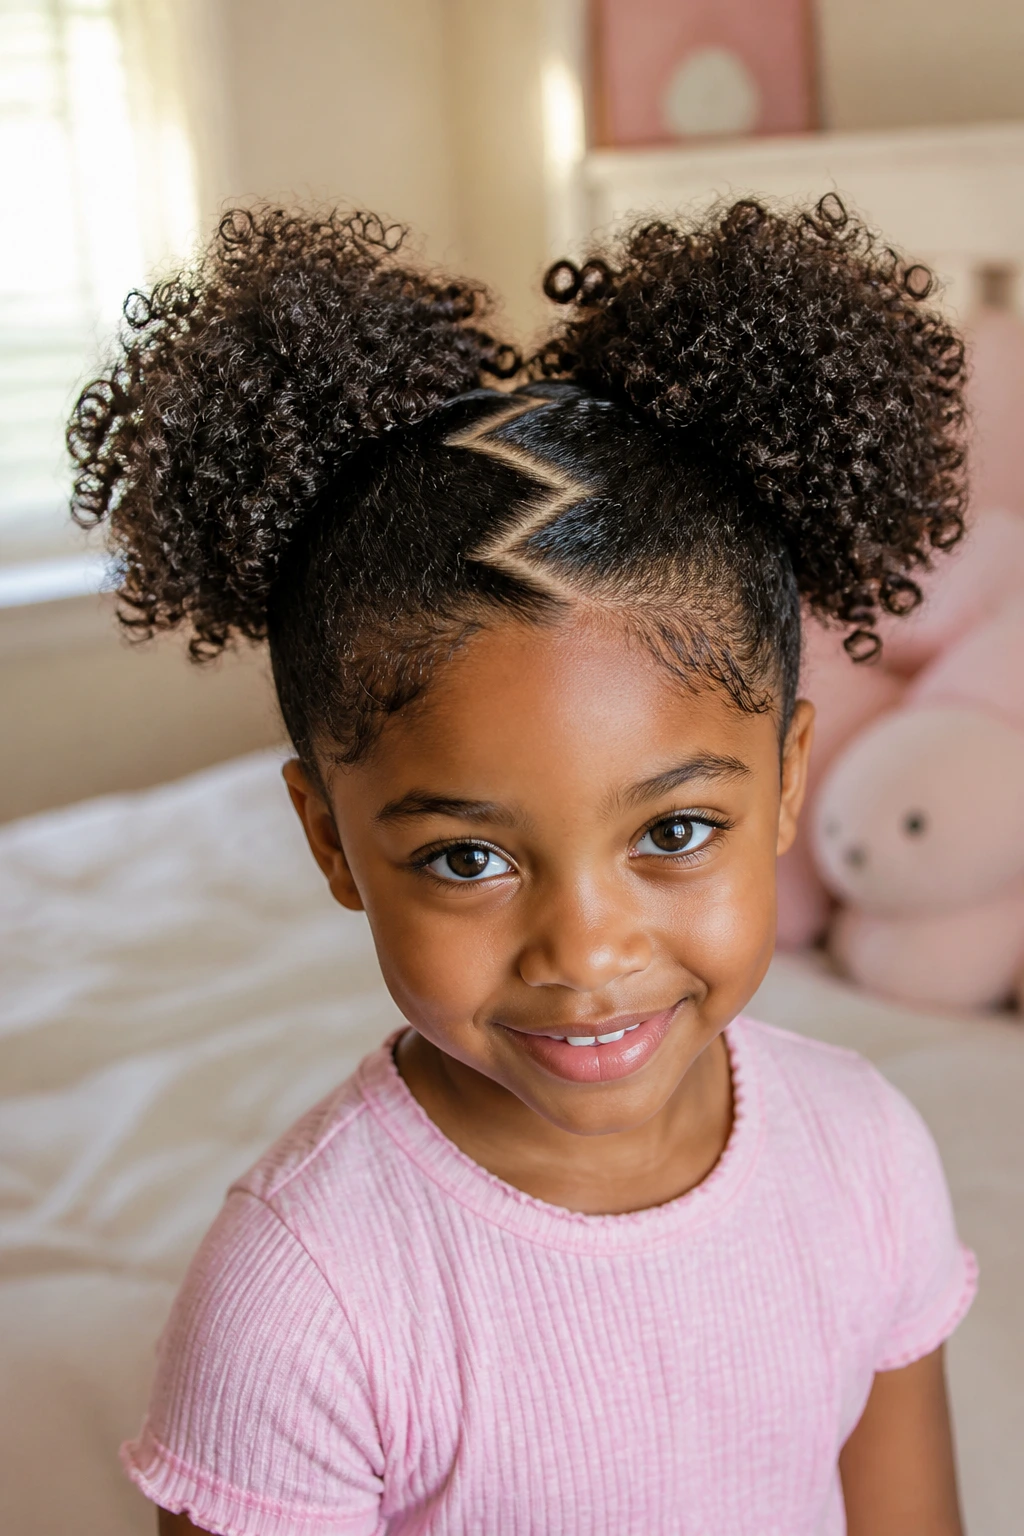
A zig-zag part turns a familiar style into something the child notices in the mirror. That tiny line change does more than it should. It gives a basic two-puff style a little personality without adding much time.
Use a rat-tail comb to trace the zig-zag from front to back, keeping the sections even on both sides. Then form two puffs, either high or mid-height. The part does the visual work, so the puffs can stay simple. If you want to make the style feel extra special, add matching barrettes at the base or small colored elastics along the line.
This style is especially useful when the hair is thick and a straight center part feels too plain. The zig-zag breaks up the crown visually and keeps the style from looking too severe. It also hides a few uneven growth spots better than a dead-straight line does. Small mercy. Very welcome.
13. Crown of Flat Twists
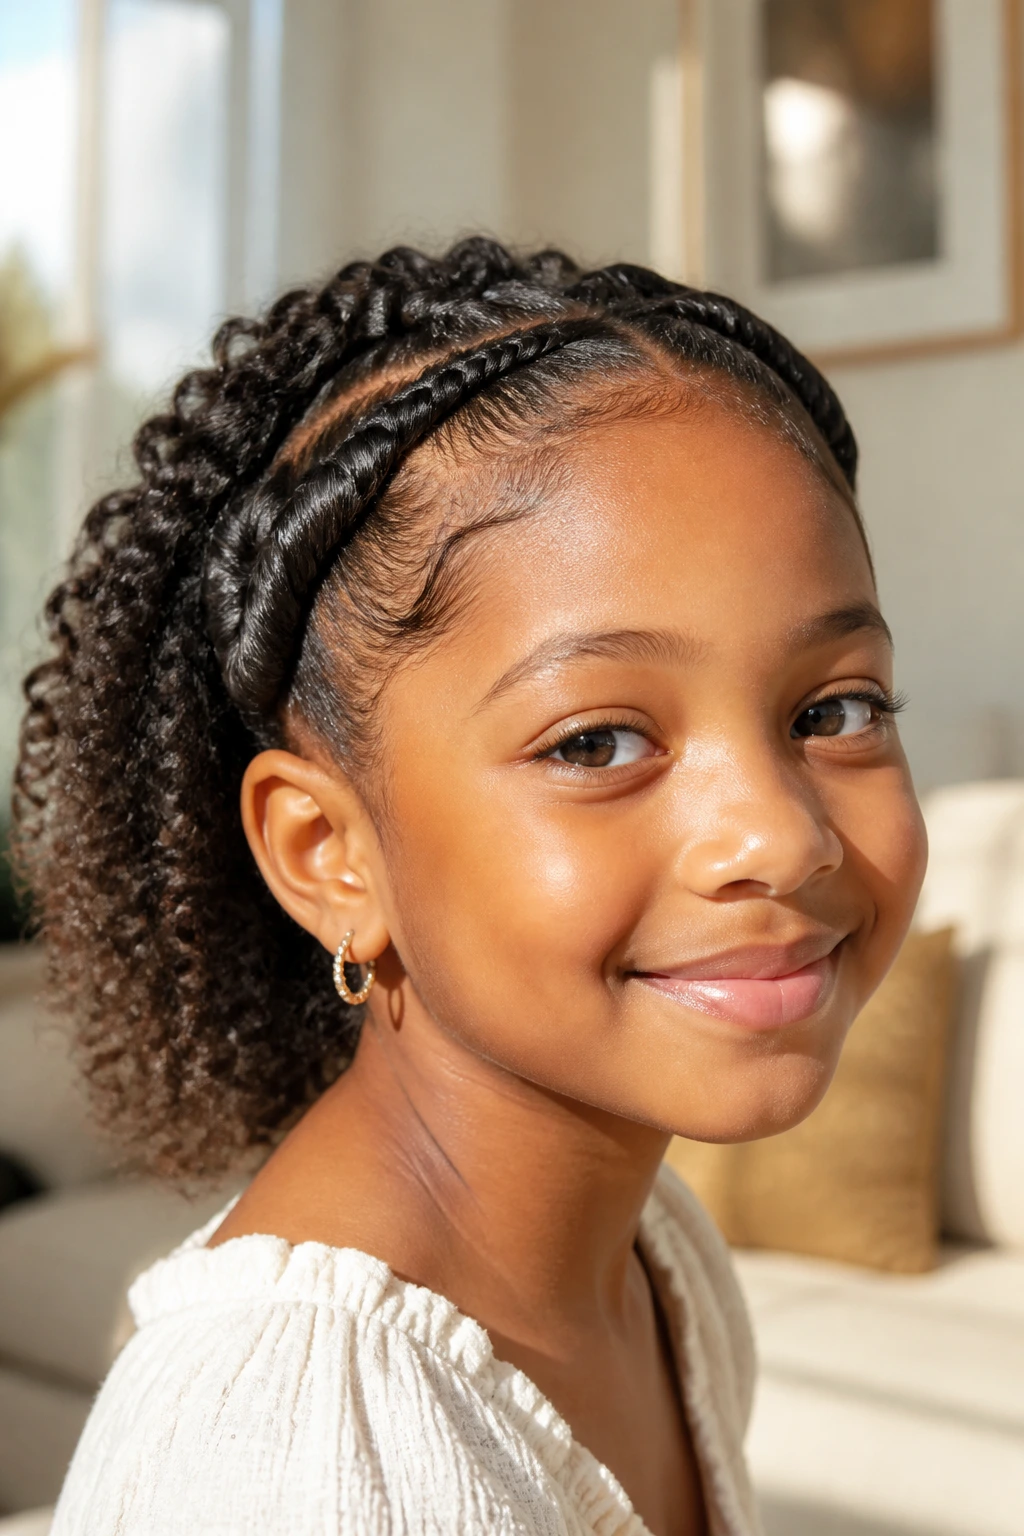
Flat twists are one of those styles that look more complicated than they are once you’ve done them a few times. A crown of flat twists starts at the front and wraps the hair back along the head, keeping the roots controlled while leaving the back free or gathered.
This style is good when the front hairline tends to puff up first. It keeps the forehead clear and gives the style a smooth start before the rest of the curls take over. If you’re styling for an event or a picture day, that polished front edge matters a lot. It frames the face without looking stiff.
A useful detail
Flat twists hold better if the hair is slightly damp and lightly coated with leave-in. Dry hair frays while you work; wet hair can slide. Slightly damp hair hits the sweet spot. Also, don’t make the twists too narrow unless the child has very dense hair. Wider sections often sit better and take less time.
14. Curly Bob with a Headband Tuck
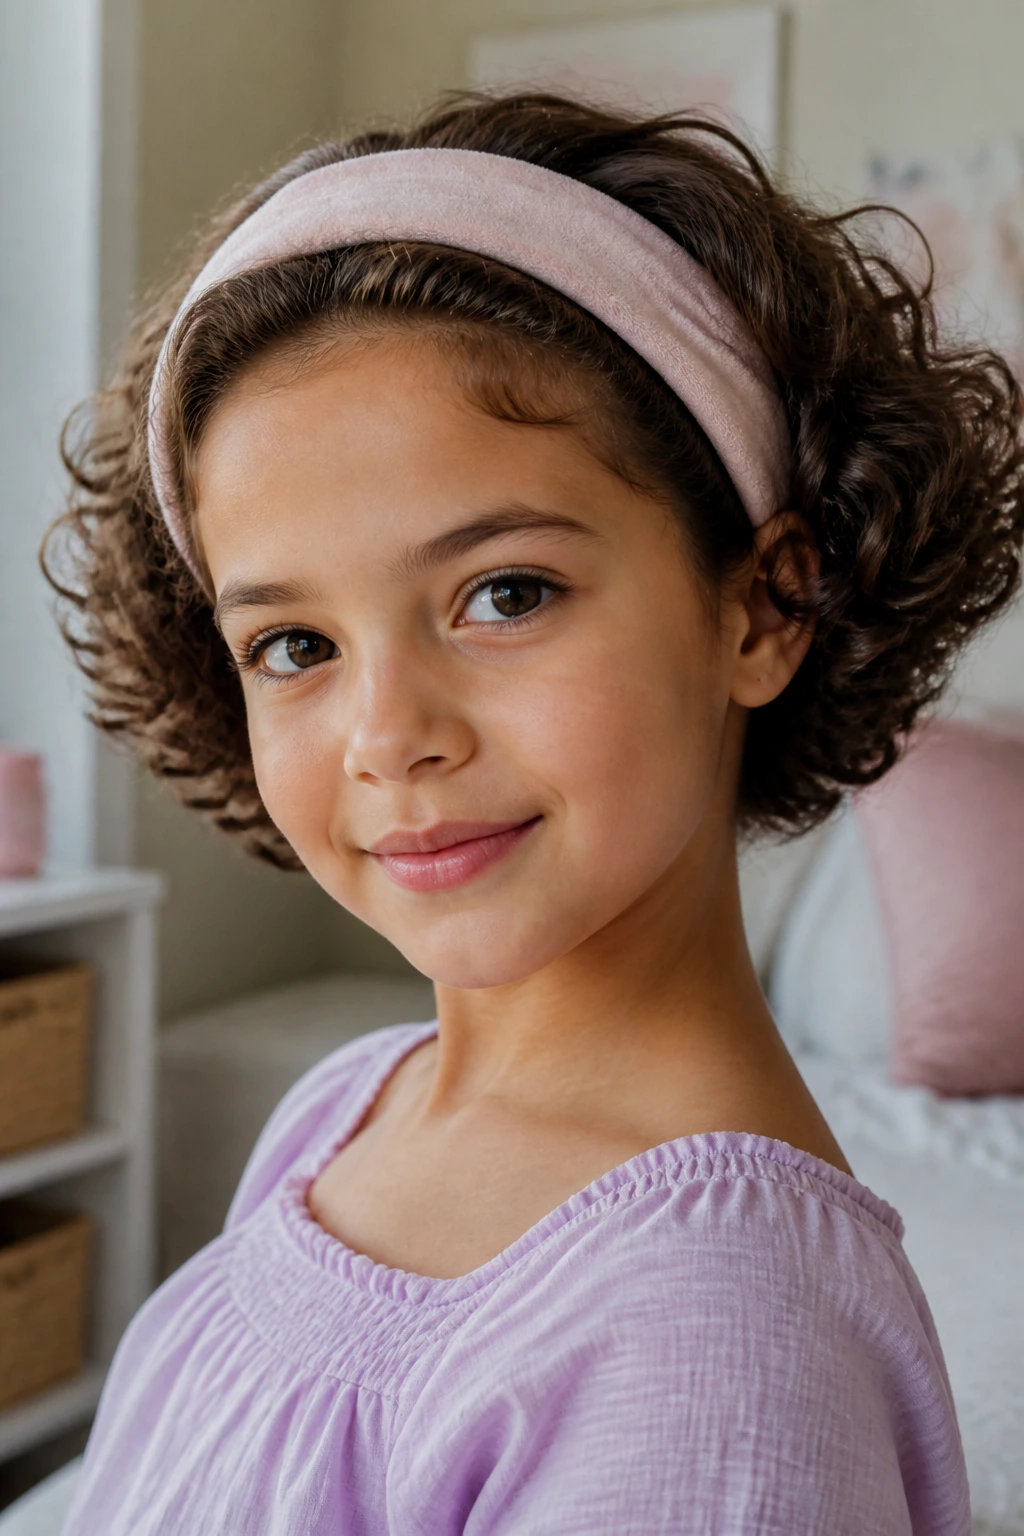
Short curly hair can be fussy in a very specific way. It’s too short for some updos, too lively to stay exactly where you left it, and too cute to ignore. A headband tuck solves a lot of that.
Slide on a soft, wide headband, then tuck the front or side curls under the band where needed so the face stays open. Let the back curls keep their shape. The result is tidy without looking overly styled. On a curly bob, that balance matters because short curls can puff outward fast if you try to force them into something too structured.
Choose a headband with a bit of stretch and no sharp seam at the inside edge. If it digs into the scalp, a child will spend the whole day fidgeting with it. A fabric-covered band or a wide jersey band tends to sit best. And if the hair is especially springy, place the band a finger-width back from the hairline instead of pressing it straight on top of the curls.
15. Pigtail Braids with Ringlet Ends
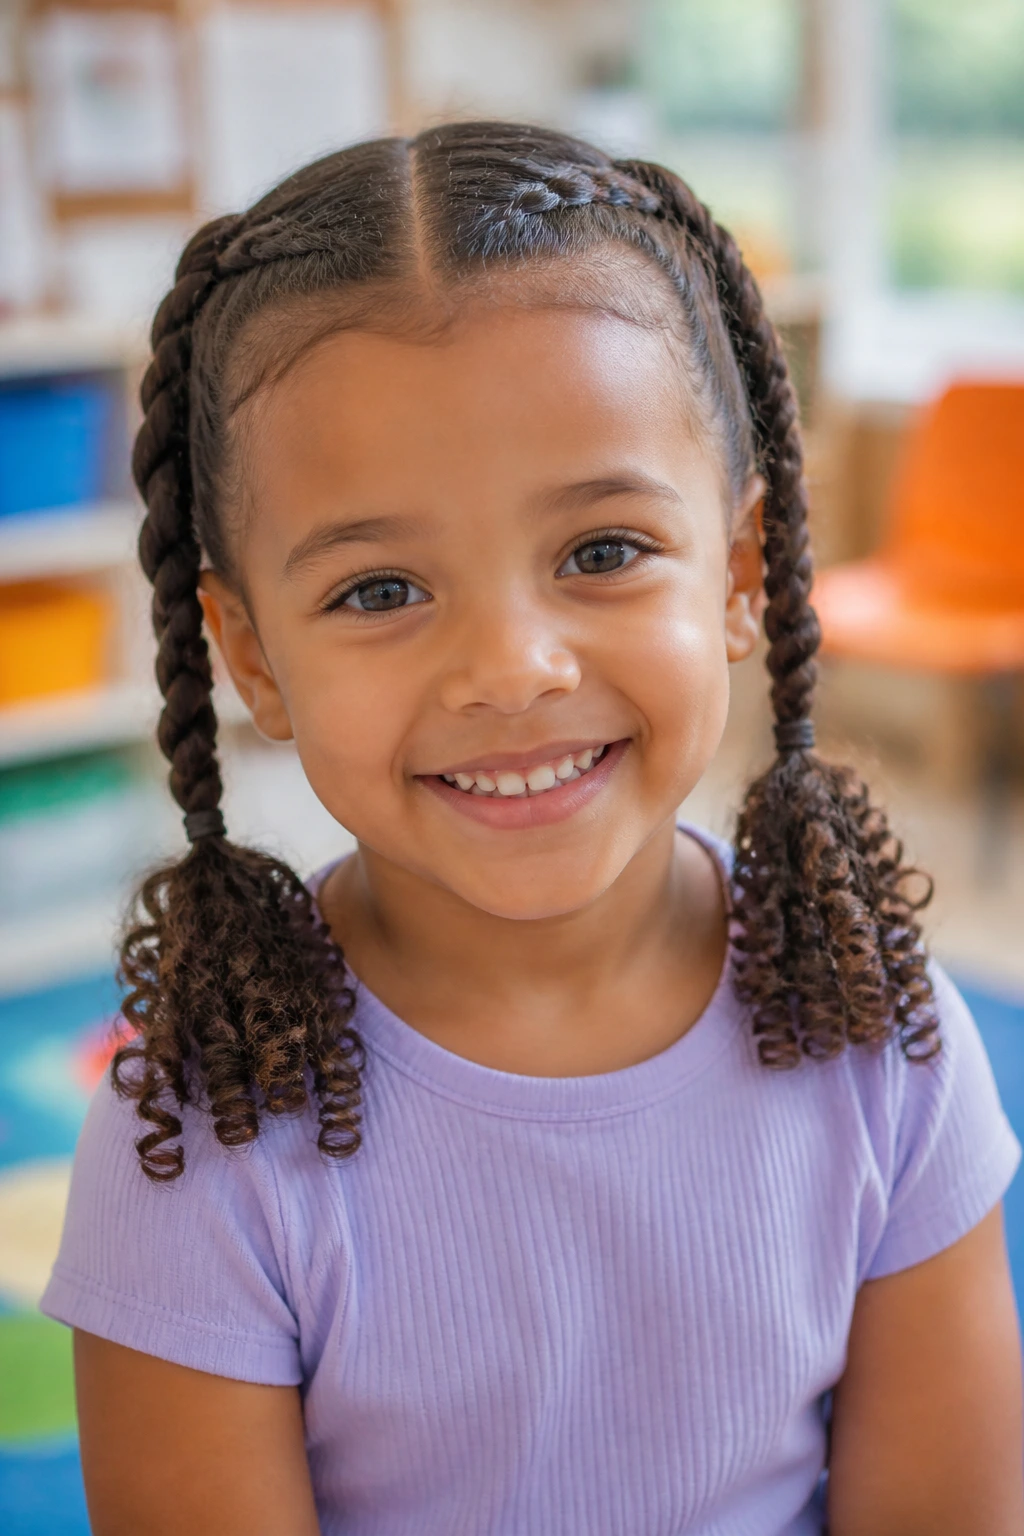
Pigtail braids with ringlet ends sit in a nice middle space: neat enough to hold shape, loose enough to keep the curls visible. You braid each side from the front or just behind the temples, then stop where the curl pattern starts to spring naturally and let the ends stay free.
This shape is good for hair that gets tangled at the sides. The braids protect the front sections, and the ringlet ends keep the style from feeling too serious. It also works well for children who like to play with their hair, because the braids give them something to leave alone while the ends stay soft and touchable.
If the ends are very uneven, don’t worry about forcing them into braids all the way down. That usually makes the finish clumsy. Stop earlier and let the texture do what it does best. The style looks more intentional when you respect where the curl begins to change.
16. Defined Wash-and-Go Curls
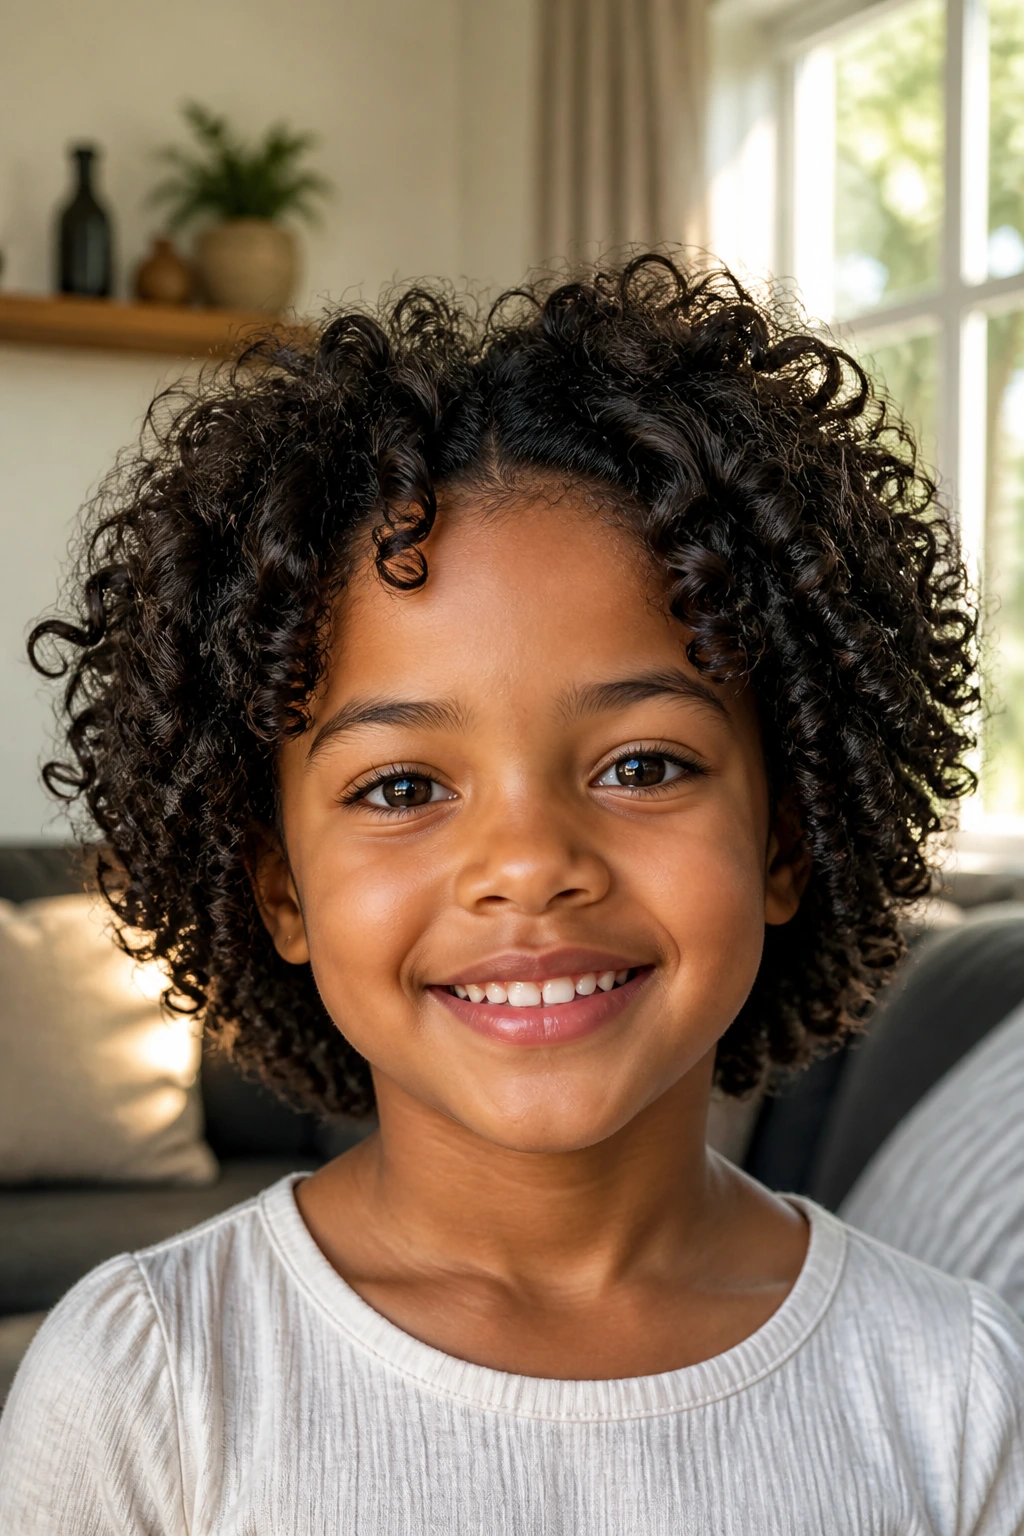
Sometimes the best kids’ hairstyle is not an updo at all. It’s a wash-and-go with curl definition that lets the pattern speak for itself.
After detangling, work in leave-in conditioner on damp hair, then add a small amount of curl cream or gel in sections. Scrunch upward with your hands or a microfiber towel, and let the curls dry without touching them too much. If you use a diffuser, keep it on low heat and low speed. High heat tends to blow the clumps apart and leave you with a fuzzy cloud where the definition should be.
This style works especially well when the child likes wearing their hair down but still wants shape around the face. It’s also the best route when the hair is already healthy and you’d rather show the pattern than hide it. The final look can be fluffy, glossy, or somewhere between the two, depending on how much product you use. Don’t chase stiffness. Chase clumping.
17. Half-Up Top Knot
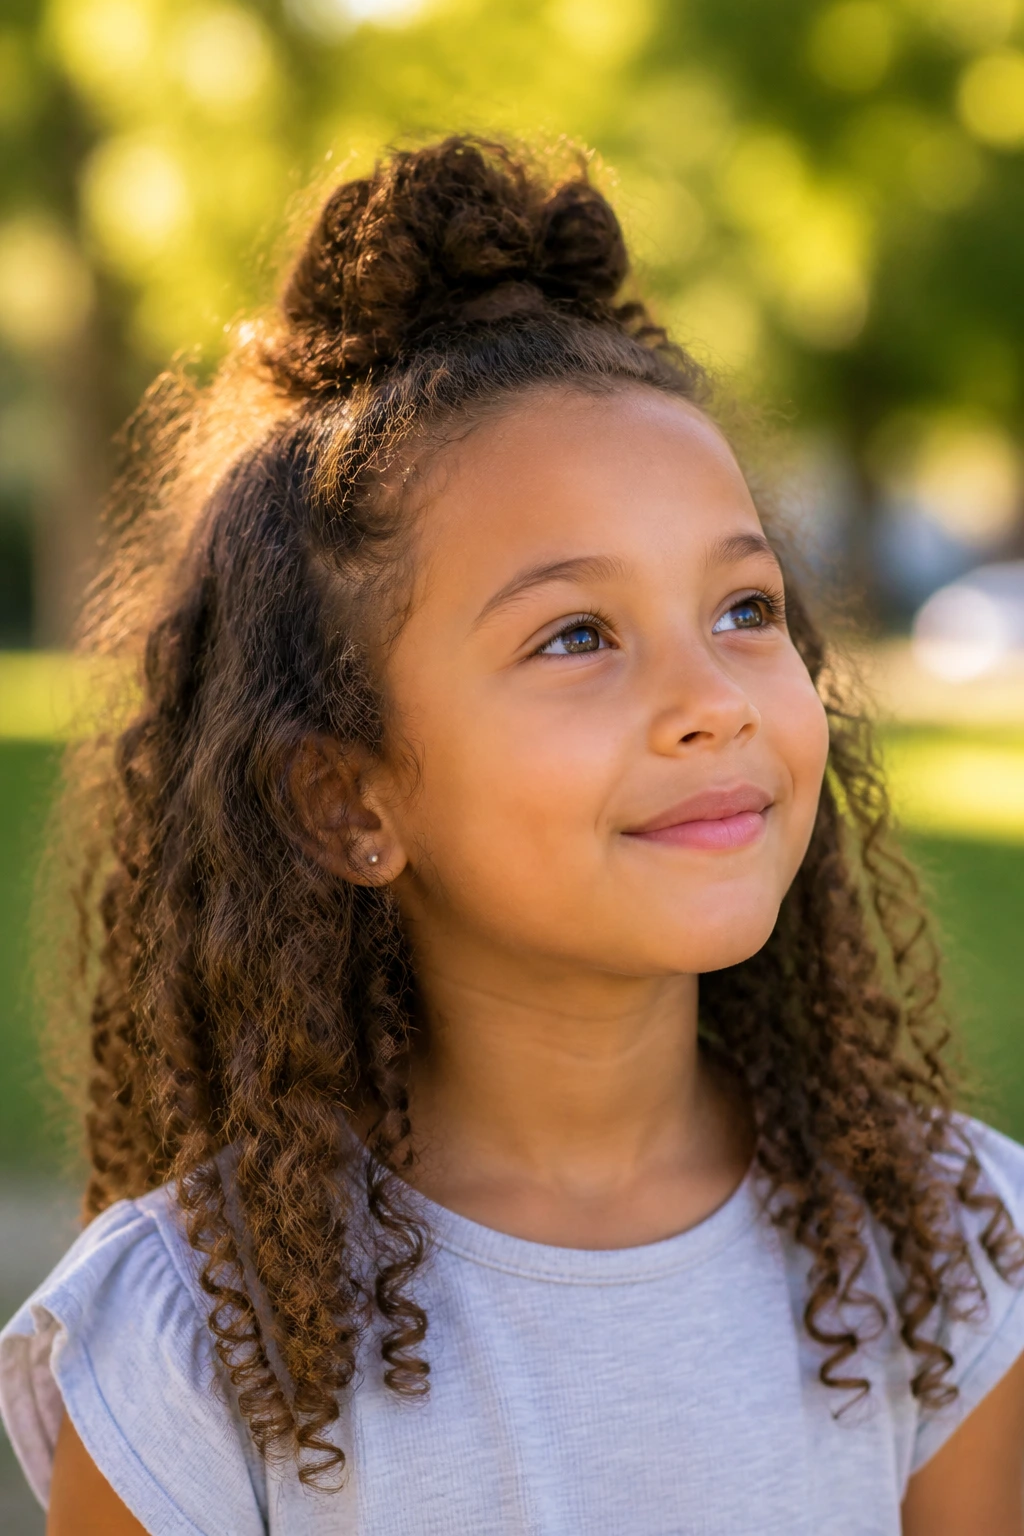
A half-up top knot is the casual cousin of the space bun. Less effort. Still cute. It pulls the top section into a small knot or bun and leaves the rest of the curls free, which is a nice balance for shoulder-length or longer hair.
The knot belongs on the crown, not too far forward. That keeps the forehead clear and stops the style from tipping over the face. Use a satin scrunchie if the hair is thick, or a small elastic wrapped once and pinned if the hair is finer. Leave the knot slightly loose so it doesn’t flatten the curls underneath.
This one is useful on days when the child wants hair down but not in the eyes. It also handles mixed textures well because the bottom curls can stay natural while the top gets just enough control. If the knot starts to sag, tease it gently with your fingers rather than pulling tighter. More tension is not the fix here.
18. Barrettes-and-Bows Side Sweep
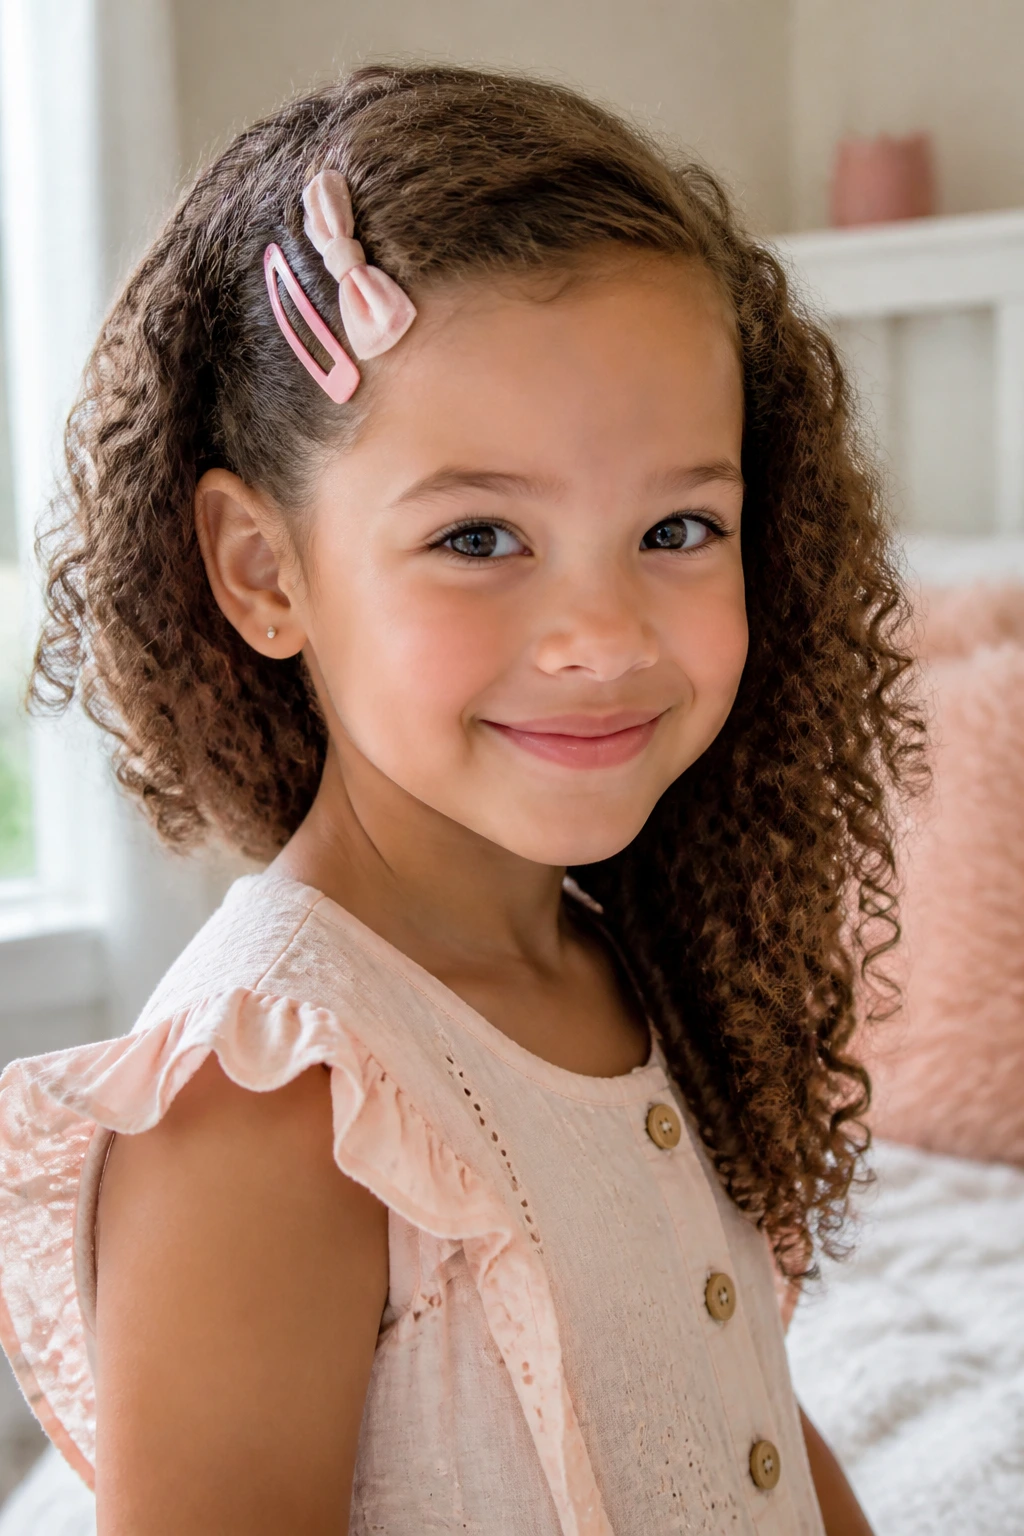
There’s a reason kids keep coming back to barrettes and bows. They’re fast, they’re visible, and they turn one side of the head into the focal point without requiring a full styling session.
Take a side part, sweep the heavier side back a little, and clip it with two or three barrettes. Add a bow if the child wants extra color. Leave the curls on the other side free. The asymmetry is what makes it work. It looks playful without being messy, and it can be done on short, medium, or shoulder-length hair.
This style holds better when the clips are placed on a section with a little tension, not in the softest fluff at the crown. Anchor the barrettes in a flat twist or a small section that has been smoothed with your fingers first. That gives the clips something to grip and keeps them from sliding down by lunch.
19. Braided Front with Free Back Curls
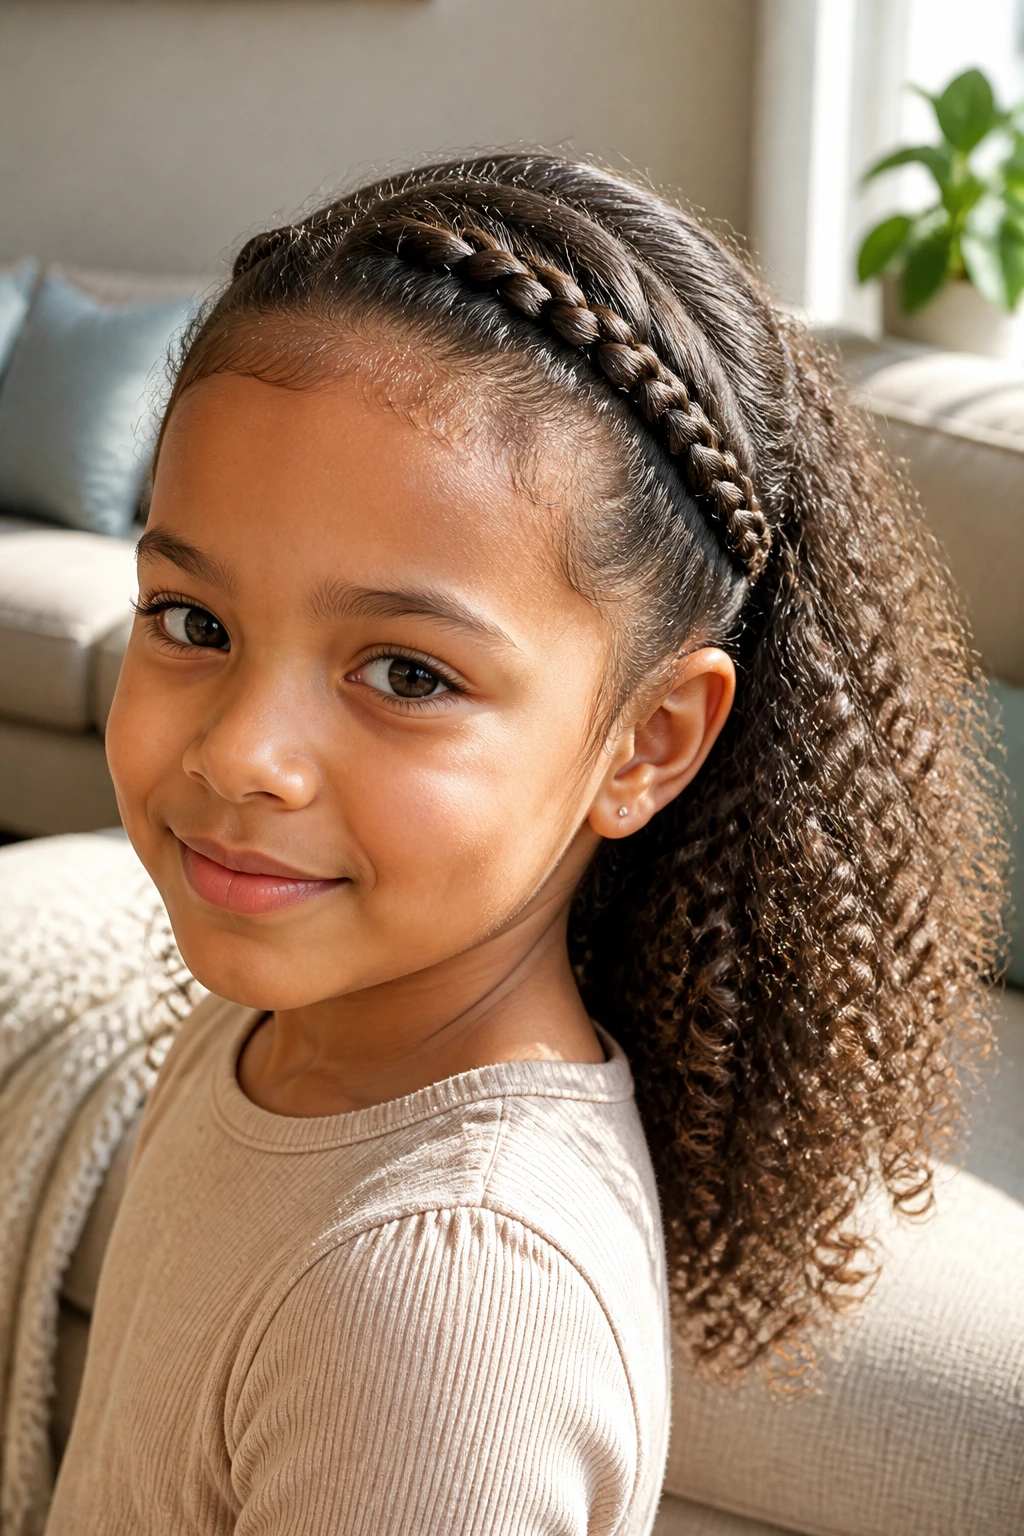
Braiding just the front of the hair while leaving the back curls loose is one of the smartest ways to keep the face clear without giving up the fun of natural curls. It’s the style I suggest when a child wants hair down but keeps pushing it out of their eyes every six minutes.
Braid the front section along the hairline or across the bangs, then secure it behind the ear or at the side. The rest of the curls stay free and full. That contrast feels balanced: the face gets a frame, the back gets movement, and the whole style stays soft.
This is also one of the easiest ways to grow out bangs or shorter front layers without losing your mind. The braid handles the awkward bits. The loose curls keep the style from feeling too engineered. If the child has fine hair, use a little product on the braid section so it doesn’t fray. If the hair is thick, keep the braid slightly wider so it doesn’t pull at the scalp.
Why Curly Hair Stays Happier When You Work With the Curl Pattern
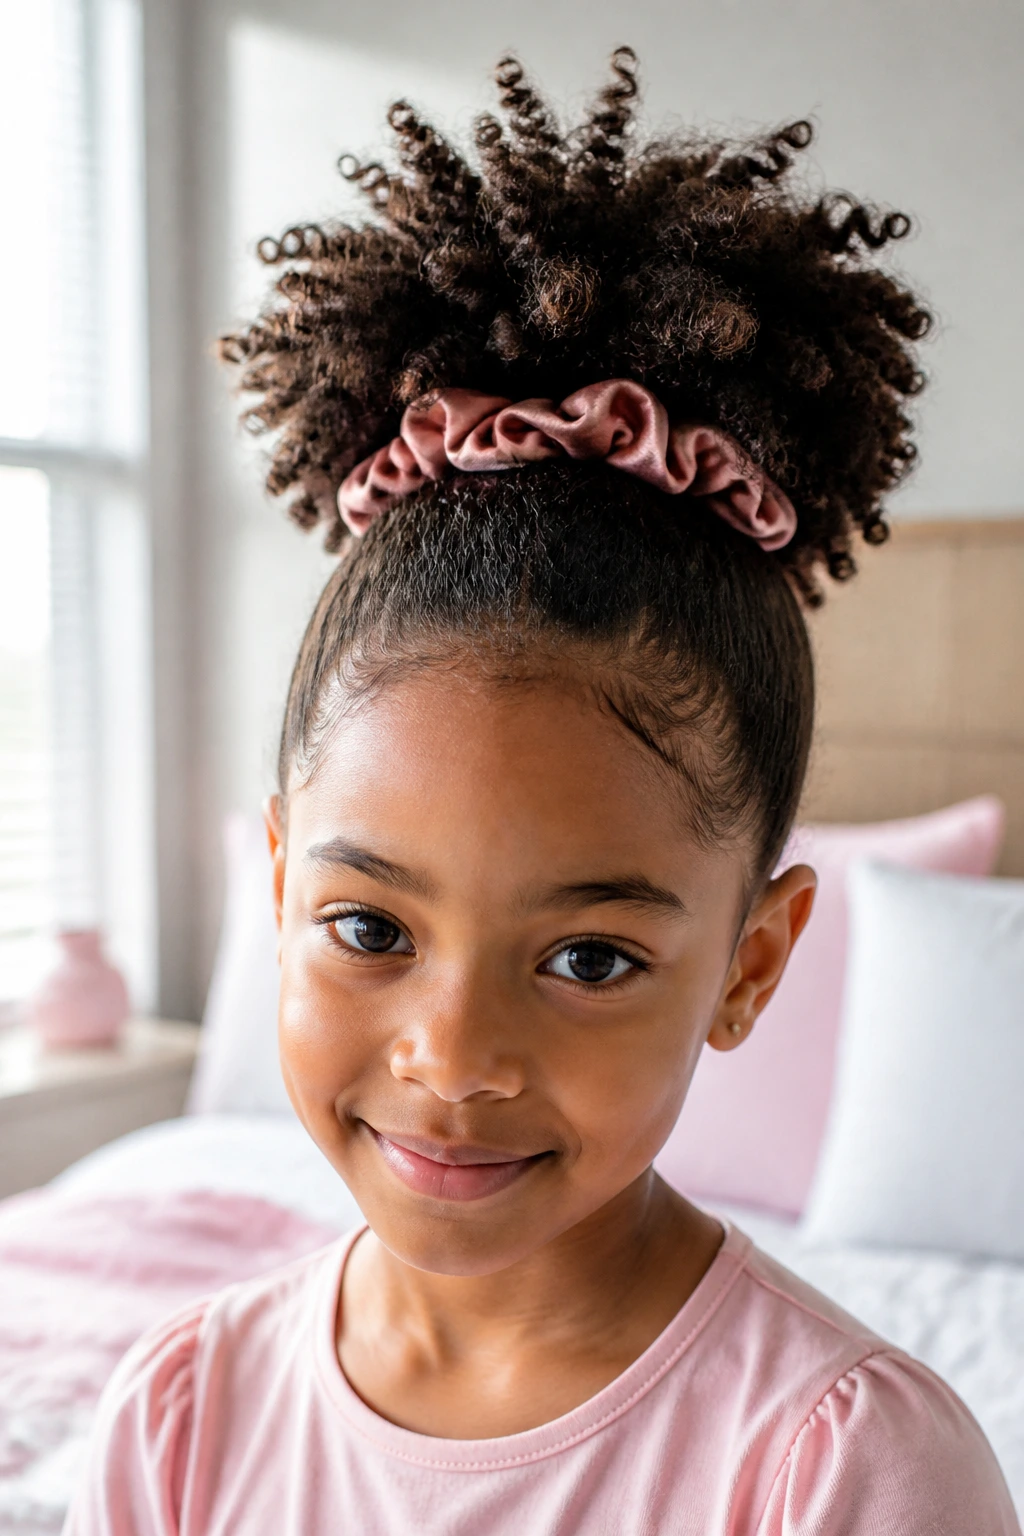
Curly hair has its own idea about shape, and the best kids’ styles respect that instead of pretending otherwise. A curl wants to spring back, puff up, and shrink a little once it dries. If you style with that in mind, you stop fighting the hair every morning.
Moisture matters more than people think. A light mist of water, followed by leave-in or a soft cream, helps curls clump together so the sections look cleaner and stay cleaner longer. Dry hair can be styled, sure, but it tends to fray at the edges and snag while you part it. Damp hair gives you a little slip, and slip is a gift when you’re working with children who move halfway through a braid.
Tension is the other thing. The hairline should not feel tight. Not a little. Not “it’ll be fine once she gets used to it.” If a child complains of pulling, the style needs loosening, because sore roots lead to fidgeting, and fidgeting ruins the finish faster than weather ever will. A style that feels comfortable is the style most likely to stay on the head all day.
Essential Tools for These Curly Kids’ Styles
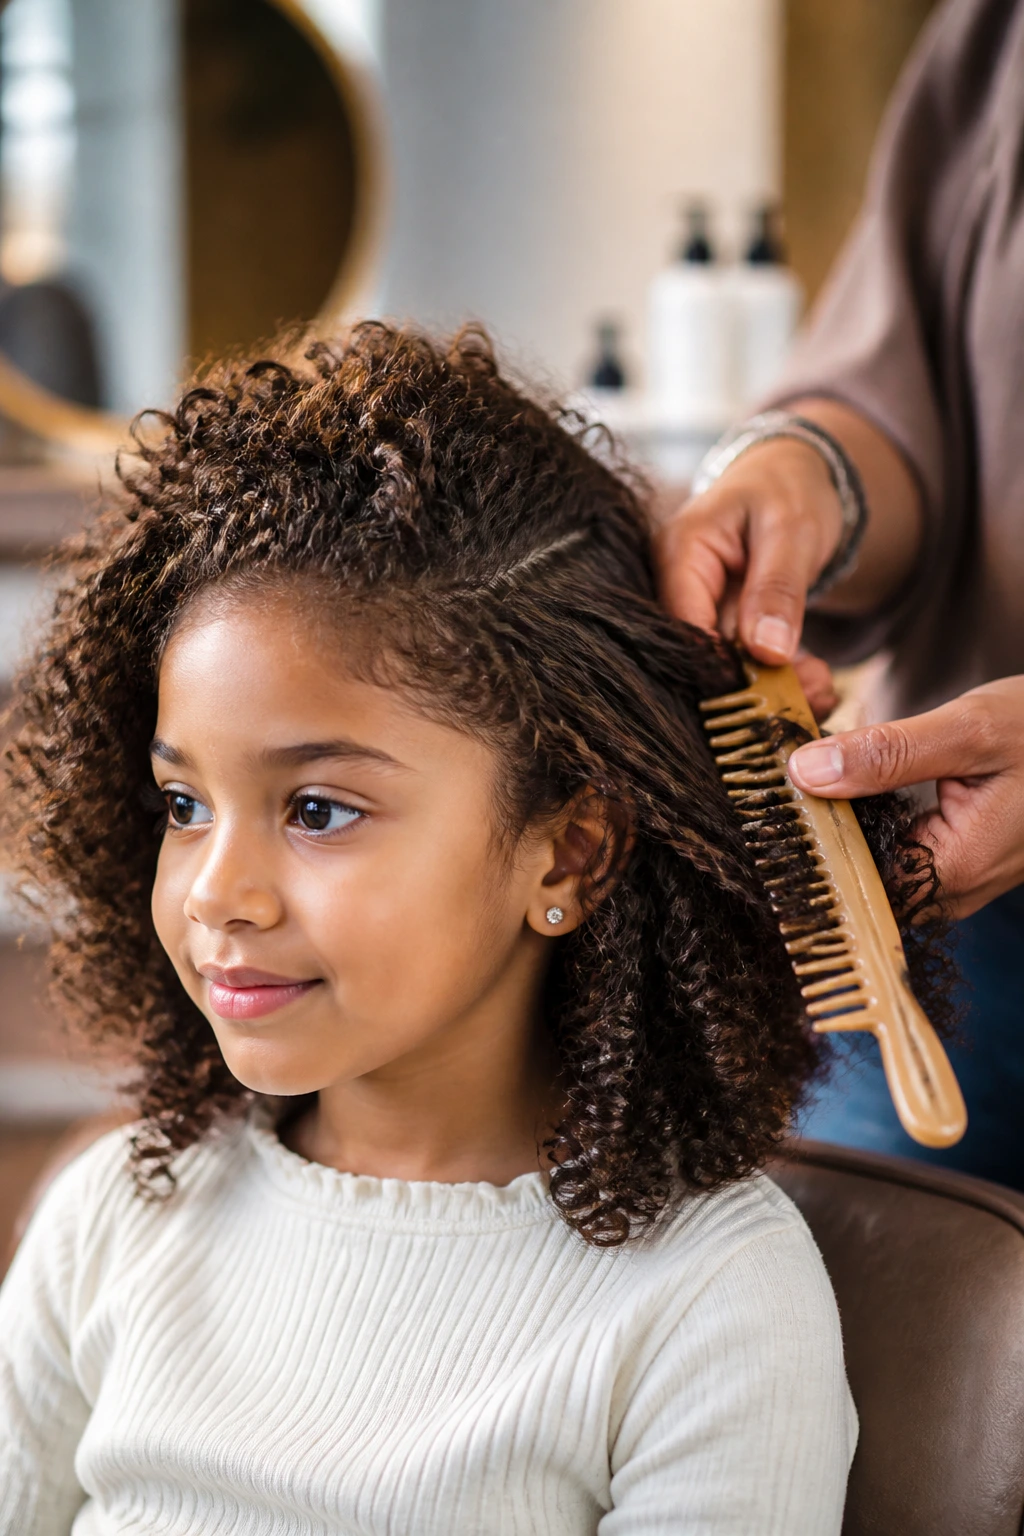
- Spray bottle with water: For rewetting one section at a time instead of soaking the whole head.
- Wide-tooth comb: Best for detangling curls that need space between the teeth.
- Rat-tail comb: The cleanest tool for parts, zig-zags, and sectioning.
- Sectioning clips: Keeps the rest of the hair out of your way while you work on one side.
- Snag-free elastics: A must for puffs, ponytails, and bubble styles without rough edges.
- Satin scrunchies: Gentler at the base when you want volume and less breakage.
- Small barrettes and clips: Handy for half-up styles, side sweeps, and front sections.
- Microfiber towel or cotton T-shirt: Helps absorb extra water without roughing up the curl cuticle.
- Leave-in conditioner or detangling cream: Gives slip so the sections separate cleanly.
- Light gel or curl cream: Helps the hairline and parts stay neat without turning stiff.
- Satin bonnet or pillowcase: Useful for overnight protection and next-day hold.
Smart Product and Prep Tips for Softer Hold
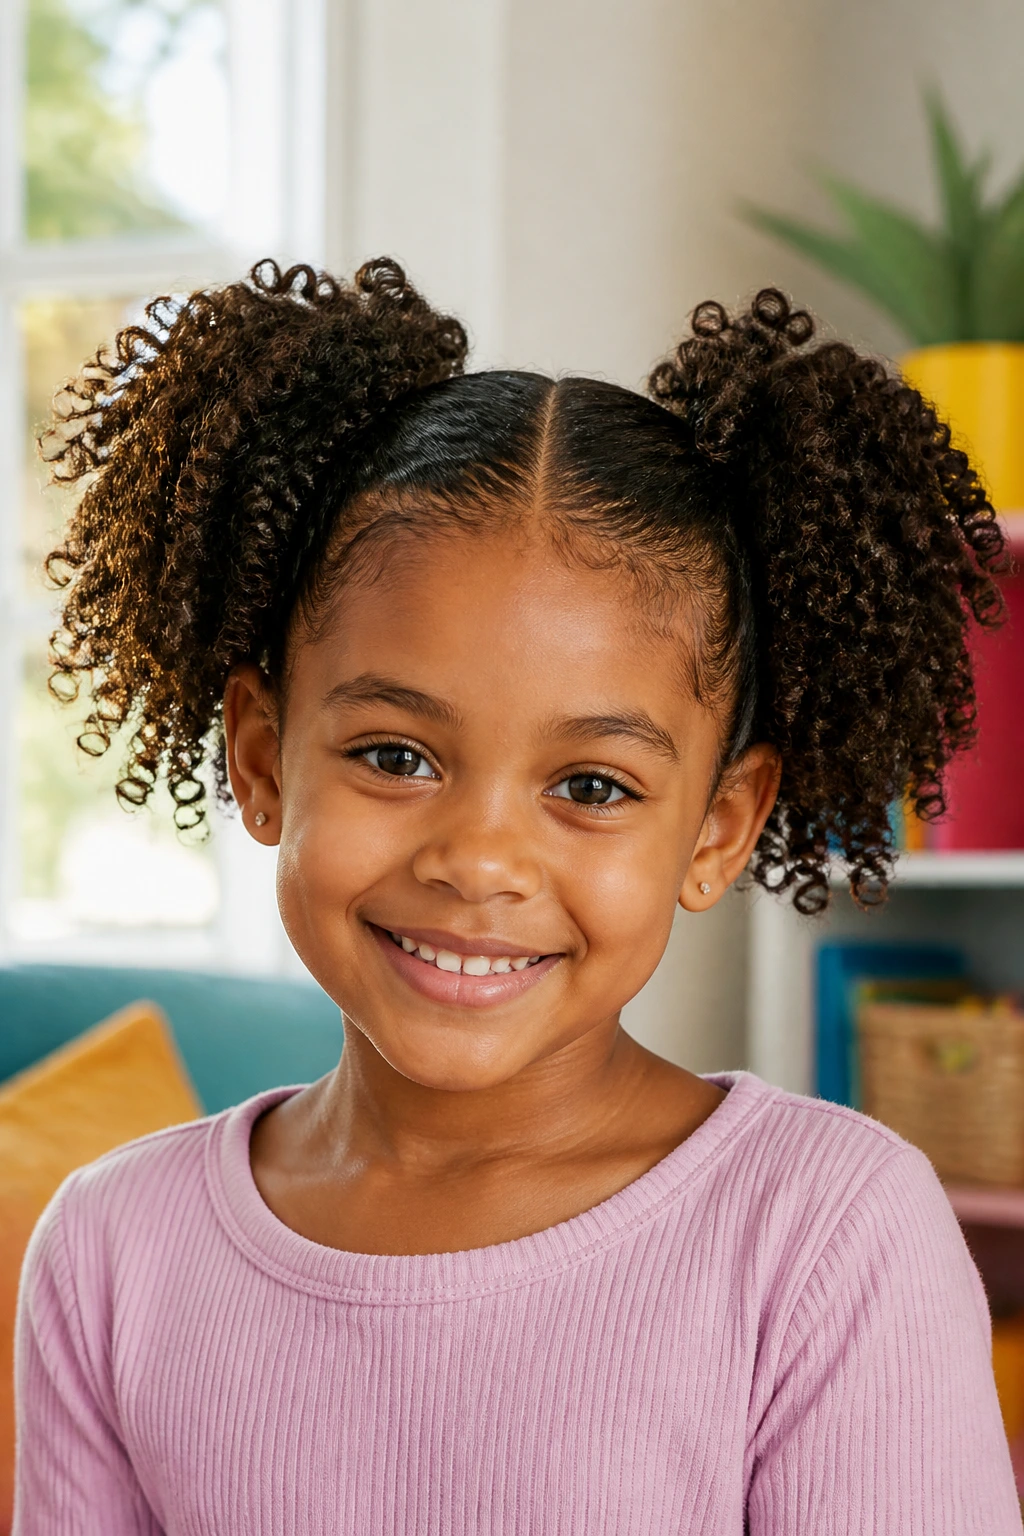
The cleanest styles usually start before the styling starts. If the hair is dry and tangled, you spend your whole morning trying to undo knots instead of making a shape. A light mist of water first, then conditioner or leave-in, gives the curls enough slip to separate without tearing.
Product choice matters, but not in a fussy way. Fine curls and looser ringlets usually need less cream and more restraint; too much product weighs them down and makes the roots look greasy by the end of the day. Dense coils and tighter textures tend to like a bit more moisture and a stronger hold near the front hairline. You do not need a mountain of anything. Start small. Add more only where the hair actually needs it.
I’m also a fan of sectioning hair before you begin. Four sections across the head is enough for most children, and it stops the style from turning lopsided when one side gets more attention than the other. If you’re using gel, keep it near the roots, the part, and the braid bases. That’s where frizz shows first. The ends usually need less help than people think.
How to Keep the Style Looking Neat Through School and Play
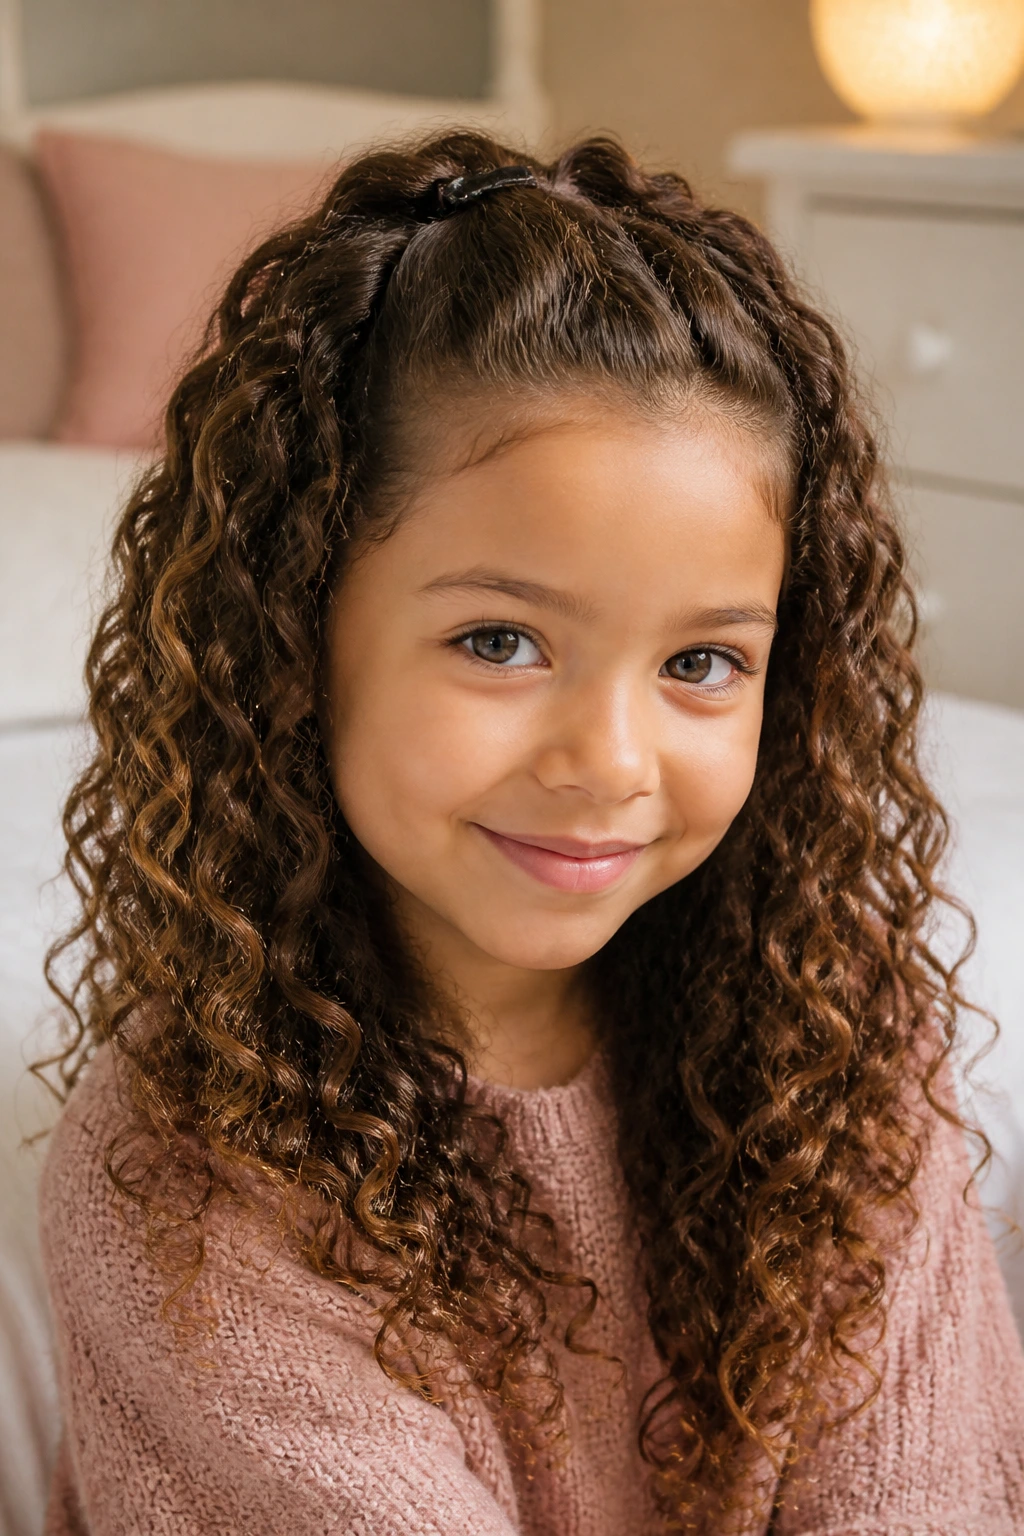
Morning prep: Style the hair on damp, not dripping, curls so the parts lie flatter and the accessories sit better. If the child wears a hoodie, finish the hairline after the hoodie is off so you don’t crush the front shape before the day starts.
Midday rescue: Keep a small spray bottle or a few damp fingers handy for the crown and the front edges. Don’t brush the whole style out to fix one fuzzy patch. Smooth only the part that needs help. The rest of the hair will thank you.
After activity: Finger-fluff the curls where they’ve clumped together and pull only on the base of the style if it’s sagging. A quick re-fluff is better than a full redo. Full redos breed resentment. And tired kids do not sit still for them.
Bedtime: If the style has loose curls, pineapple the length or cover it with a satin bonnet. Braids, twists, and puffs usually last longer when the child sleeps on a satin pillowcase or uses a bonnet that actually fits the head instead of sliding off by midnight.
Extra Tweaks That Make a Style Feel More Polished
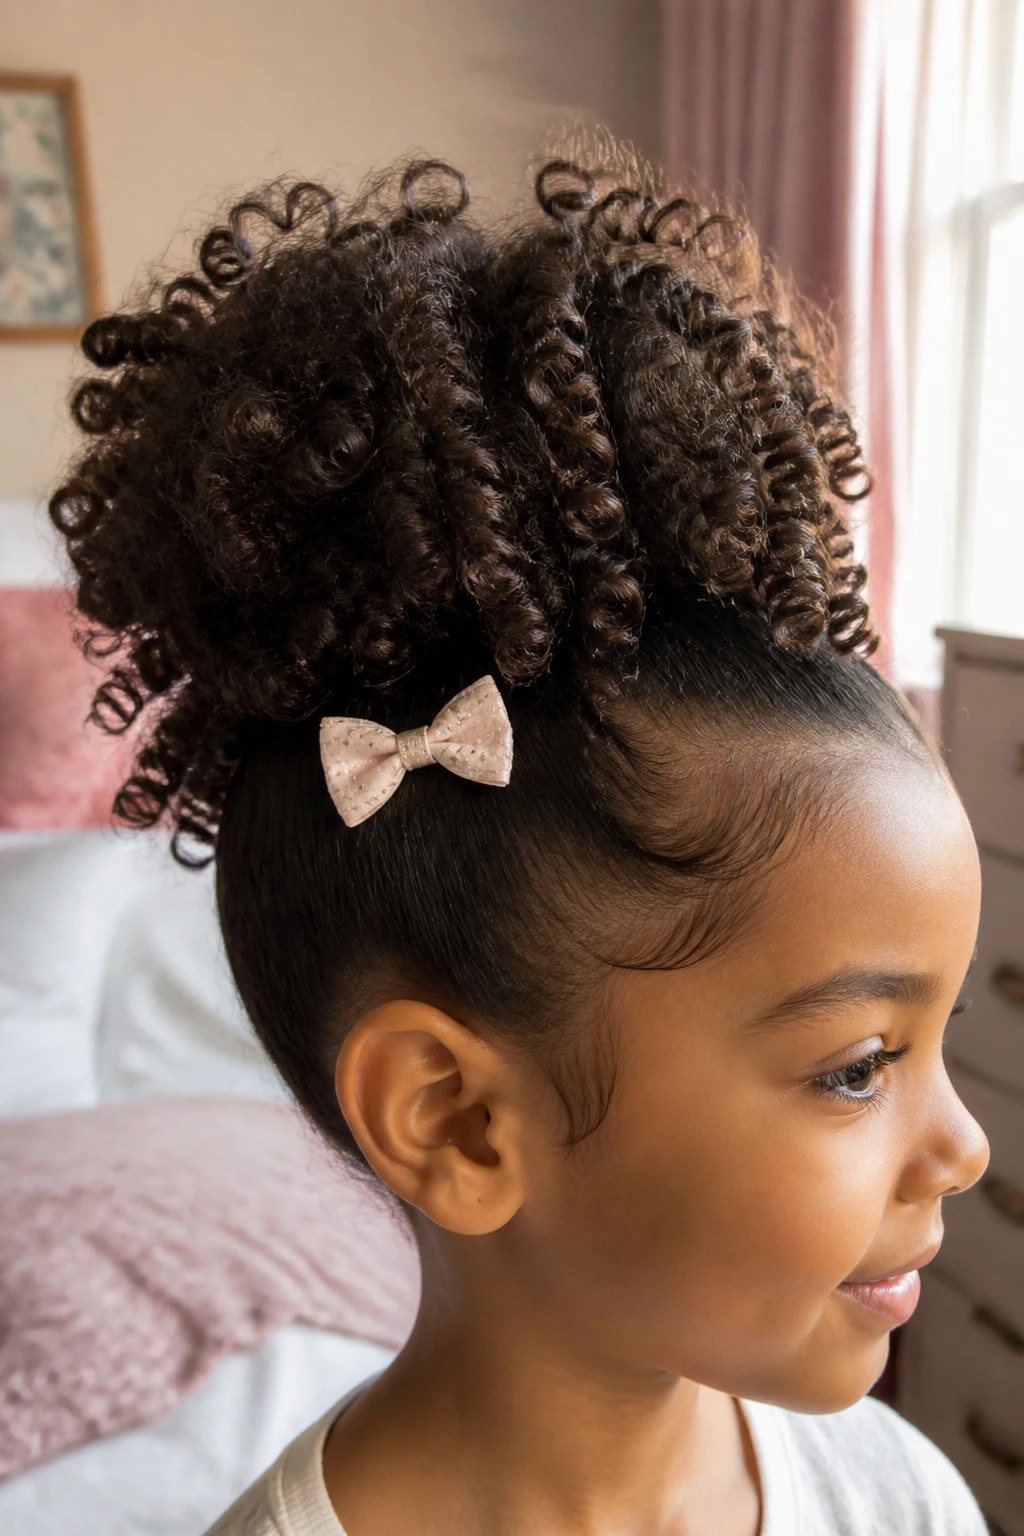
Shape Booster: Place bows, clips, or barrettes slightly above the ear or just above the puff base. That small shift gives the style lift and keeps the accessory visible even on thick curls.
Texture Boost: If a style looks too flat after securing it, gently pinch the curls at the ends with dry hands. Don’t rake through them. Raking breaks the curl clumps apart and leaves the finish fuzzy.
Customization: Use different accessories to change the mood fast. Satin ribbons make a style feel softer. Bright clips make it feel playful. Clear elastics disappear almost entirely, which is nice when the curl shape should stay the focus.
Make-It-Yours: For a child who dislikes anything touching the forehead, choose styles that keep the front loose but control the crown: half-up styles, front braids, and side sweeps usually behave well. For a child with a sensitive scalp, skip the tight buns and use wider sections with softer ties.
Overnight Care and Next-Day Refreshes
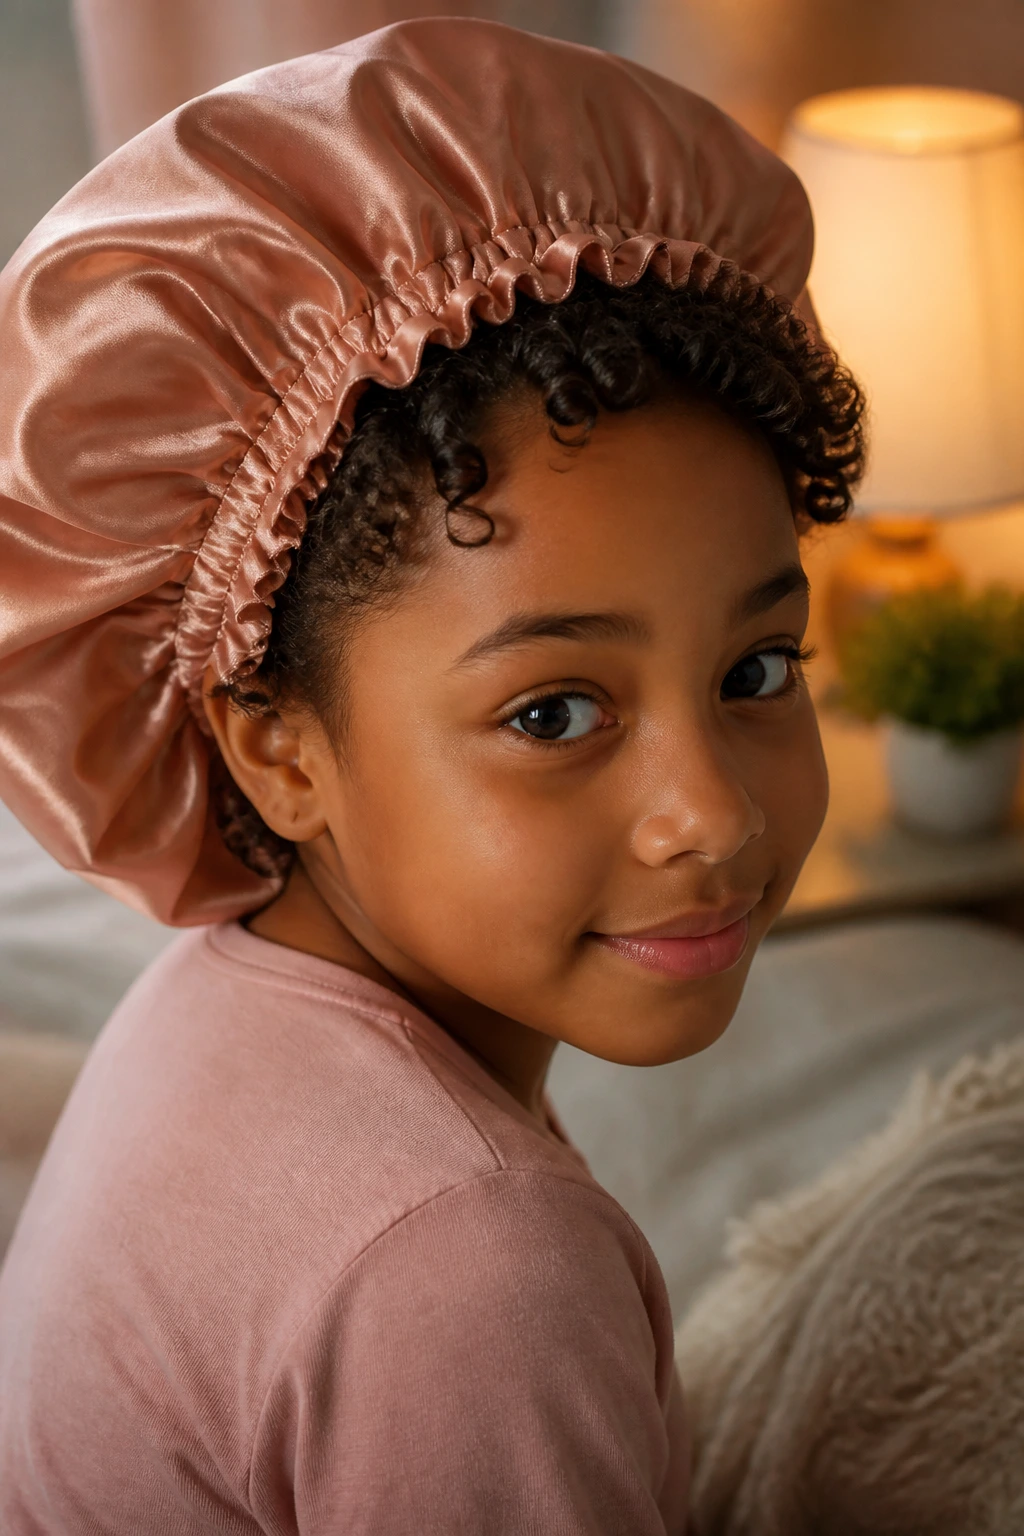
A lot of these styles hold for one full day with no trouble at all. Braids and twists often make it into a second day if you protect them at night. Loose puffs and half-up looks usually need a faster refresh in the morning, but that does not mean starting from scratch.
For overnight care, use a satin bonnet if the style sits inside it comfortably. If the bonnet slides, a satin pillowcase is the backup that keeps the curls from rubbing rough while the child sleeps. High puffs and top knots usually do best if you let them sit loose at the top of the head, then secure the loose ends with a soft cover. Low puffs and braided styles often stay neater when the child sleeps directly on satin with minimal disturbance.
In the morning, mist the style lightly and smooth the roots with your fingers. If a braid has puffed a little, press it flat with damp hands instead of wetting the whole head. If a puff has flattened, remake only the base and leave the curls above it alone. That’s the practical way through it. No need to start over unless the style has truly come apart.
Variations and Adaptations to Try
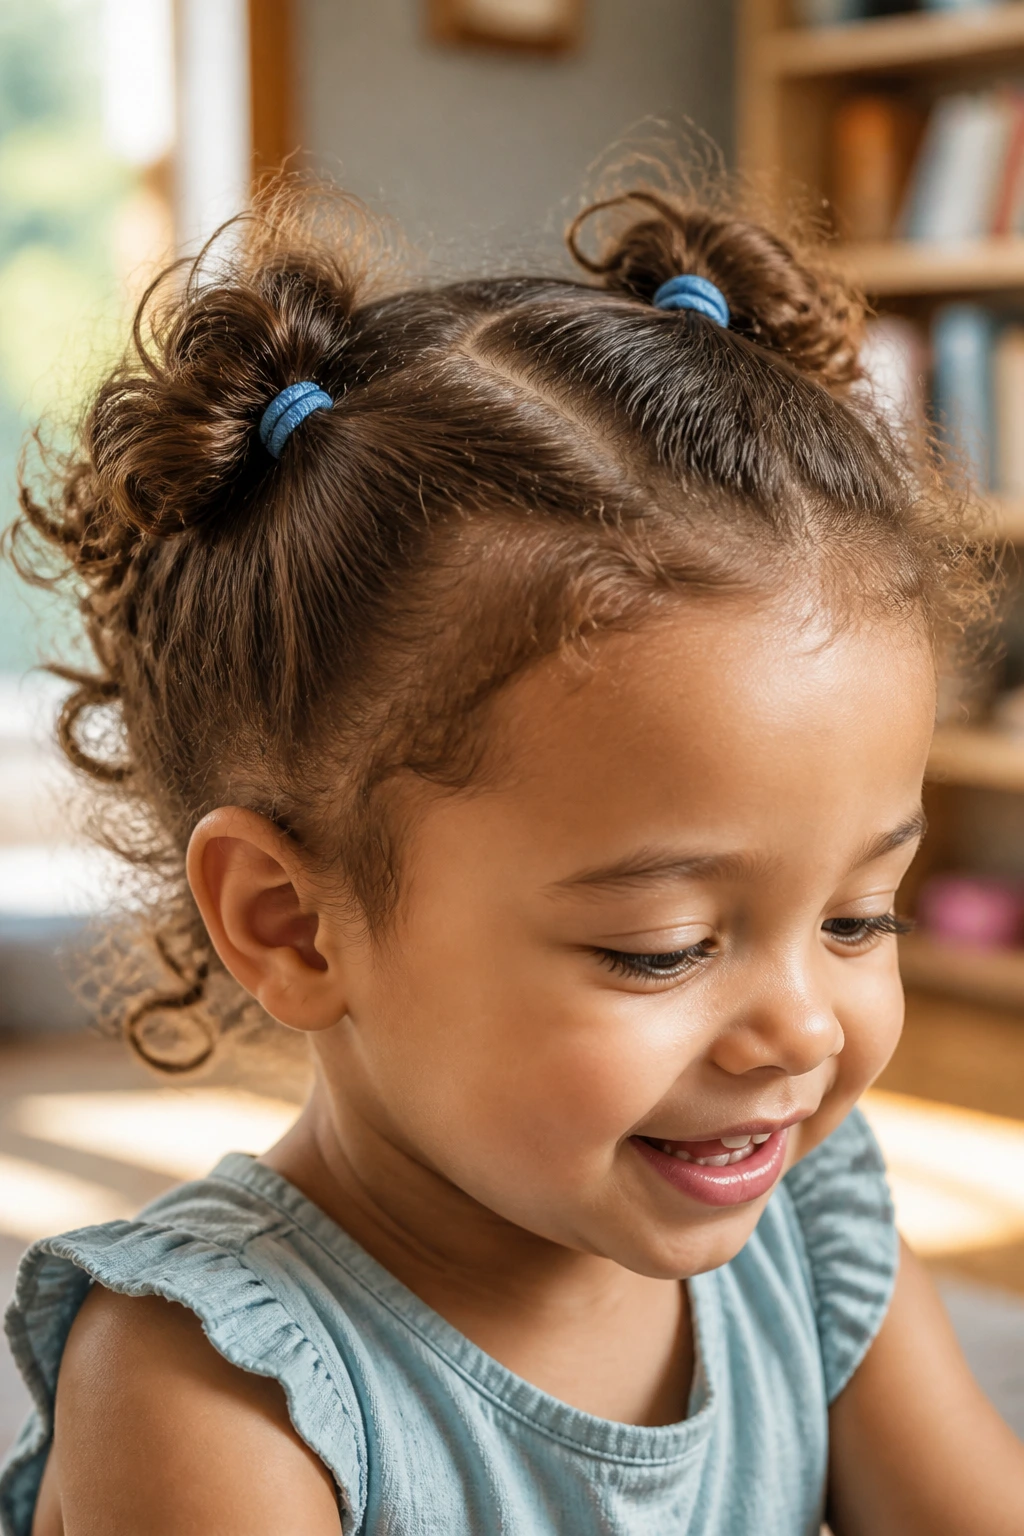
Toddler-Soft Version: Use larger sections, fewer accessories, and looser ties. A toddler does not need a complicated part to look adorable, and the simpler version usually lasts longer because it creates less fuss at the scalp.
Picture-Day Ribbon Version: Swap plain elastics for satin ribbons, matching bows, or clipped-on flowers. This is the same base style with a more finished face, and it works especially well on puffs, low styles, and half-ups.
Short-Hair Switch-Up: If the hair is too short for a full puff or ponytail, lean on clip-backs, side sweeps, headbands, and tiny front twists. The shape may be smaller, but the styling options do not disappear.
Protective Week Version: Choose braids, twists, or braided fronts that can stay in place for a couple of days with light refreshes. This is useful when the week is packed and you want fewer full detangling sessions.
Sport Mode Version: Use lower puffs, tighter braids at the base, and fewer loose ends. That keeps the hair from bouncing into the face while still leaving enough texture to look like curly hair, not a helmet.
Mixed-Texture Version: If one part of the head curls tighter than another, split the styling by zone. The front can be smoothed into braids or twists while the back stays in a puff or loose curls. Matching every section exactly is overrated.
Common Mistakes to Avoid
- Pulling the hairline too tight: If the child says it hurts or you see red marks after the ties come out, the style is too tight. Loosen the base and choose softer accessories.
- Styling dry, tangled curls: Dry curls snag, especially at the ends, and that leads to breakage and uneven parts. Mist the hair first so your comb or fingers glide instead of drag.
- Using too much product: Thick gel on every section can leave flakes, crunchy patches, or greasy roots. Use a small amount where hold is needed and stop there.
- Forgetting about shrinkage: Curly hair rises once it dries, which can move clips, change part lines, and hide accessories. Leave a little room in the shape so the style still looks balanced after it dries.
- Choosing hardware that slips or snags: Metal clips with rough edges, cheap elastics, and bows that pull at the hair all create a fight you do not need. Soft, smooth, snag-free accessories behave better and hurt less.
- Trying to force every style onto every child: A very active child, a tender-scalp child, and a kid with short curls do not need the same solution. Match the style to the hair and the mood, or you’ll be redoing it before lunch.
Frequently Asked Questions
What’s the easiest curly hairstyle for a rushed morning?
The half-up clip-back, low puff, and side-parted twist-back are the fastest options here. They don’t need perfect sectioning, and they still look intentional even if you’re moving at full speed.
How do I keep curly hairstyles from puffing up by midday?
Start with damp hair, keep a little leave-in on the crown and hairline, and avoid brushing the curls after they’re set. A satin scrunchie or a clean part with a little gel usually helps the shape hold longer.
Can I do these styles on dry hair?
Yes, but the result is usually neater and gentler if the hair has a little moisture. Dry hair can still be styled, especially into puffs or clip-backs, but braids and twists behave better when the hair has some slip.
What works best for a child who won’t sit still?
Choose the styles with the fewest sections: high pineapple puff, side-parted twist-back, half-up top knot, or barrettes-and-bows side sweep. Long braiding sessions are a bad match for a wiggly kid.
Are braids bad for curly kids’ hair?
Braids are fine when they’re not too tight and when the hair is detangled first. The problem is usually tension, not the braid itself. If the scalp looks stretched or the child keeps touching the hairline, the braid needs to come out or be loosened.
How do I protect curls overnight?
Use a satin bonnet if it stays on, or a satin pillowcase if it doesn’t. Pineapples, low puffs, and loose braids usually keep their shape best with a little nighttime protection.
What if my child has mixed curl patterns or a short bob?
Mix-and-match styles work better than forcing one method everywhere. A bob often does best with headbands, side sweeps, or half-up clip-backs, while mixed textures can be split into smoother front sections and looser back sections.
How do I keep clips and barrettes from sliding out?
Place them in a section that’s been lightly smoothed, not in the softest fluff at the crown. A tiny twist or a small anchored braid underneath the clip gives it something to hold onto.
A Softer Morning
The nicest thing about curly hairstyles for kids is that they do not need to be overly neat to look good. A puff that sits a little high. A braid that ends in a springy curl. A ribbon tied low at the nape. Those small shape choices do more than most people expect.
If you work with the curl pattern instead of flattening it, the whole morning gets easier. Less tugging. Less arguing with frizz. Less time spent chasing one perfect part that the hair was never going to keep anyway. Start with a style that fits the child’s hair and mood, and the rest tends to settle into place.
