



A good twist hairstyle for kids should survive recess, a nap, and the sudden decision to rub one side of the head against a car seat. That is the real test. Not a cute mirror moment. Not a pretty part line that lasts exactly six minutes. A style earns its place when it stays neat without turning the hairline into a sore, shiny line of regret.
Twist hairstyles for kids work because they stretch curls without flattening them into something stiff and unhappy. They can be soft and playful, or clean and school-ready, or dressed up with beads and ribbons when the day calls for a little more drama. The smart ones don’t fight the child’s hair texture. They move with it. And when you get the tension right, a twist can look crisp on day one and still make sense after a full day of wiggles, snacks, and playground dust.
What I like most about twist styles is how flexible they are. A toddler with short coils can wear chunky twists and keep moving. An older child with long natural hair can wear mini twists, a crown twist, or a half-up style that keeps the front out of the eyes. Some of these looks are quick. Some ask for patience. All of them work better when the hair is detangled first, lightly moisturized, and twisted without pulling at the temples. That part matters more than fancy accessories ever will.
Why Twist Hairstyles for Kids Hold Up So Well
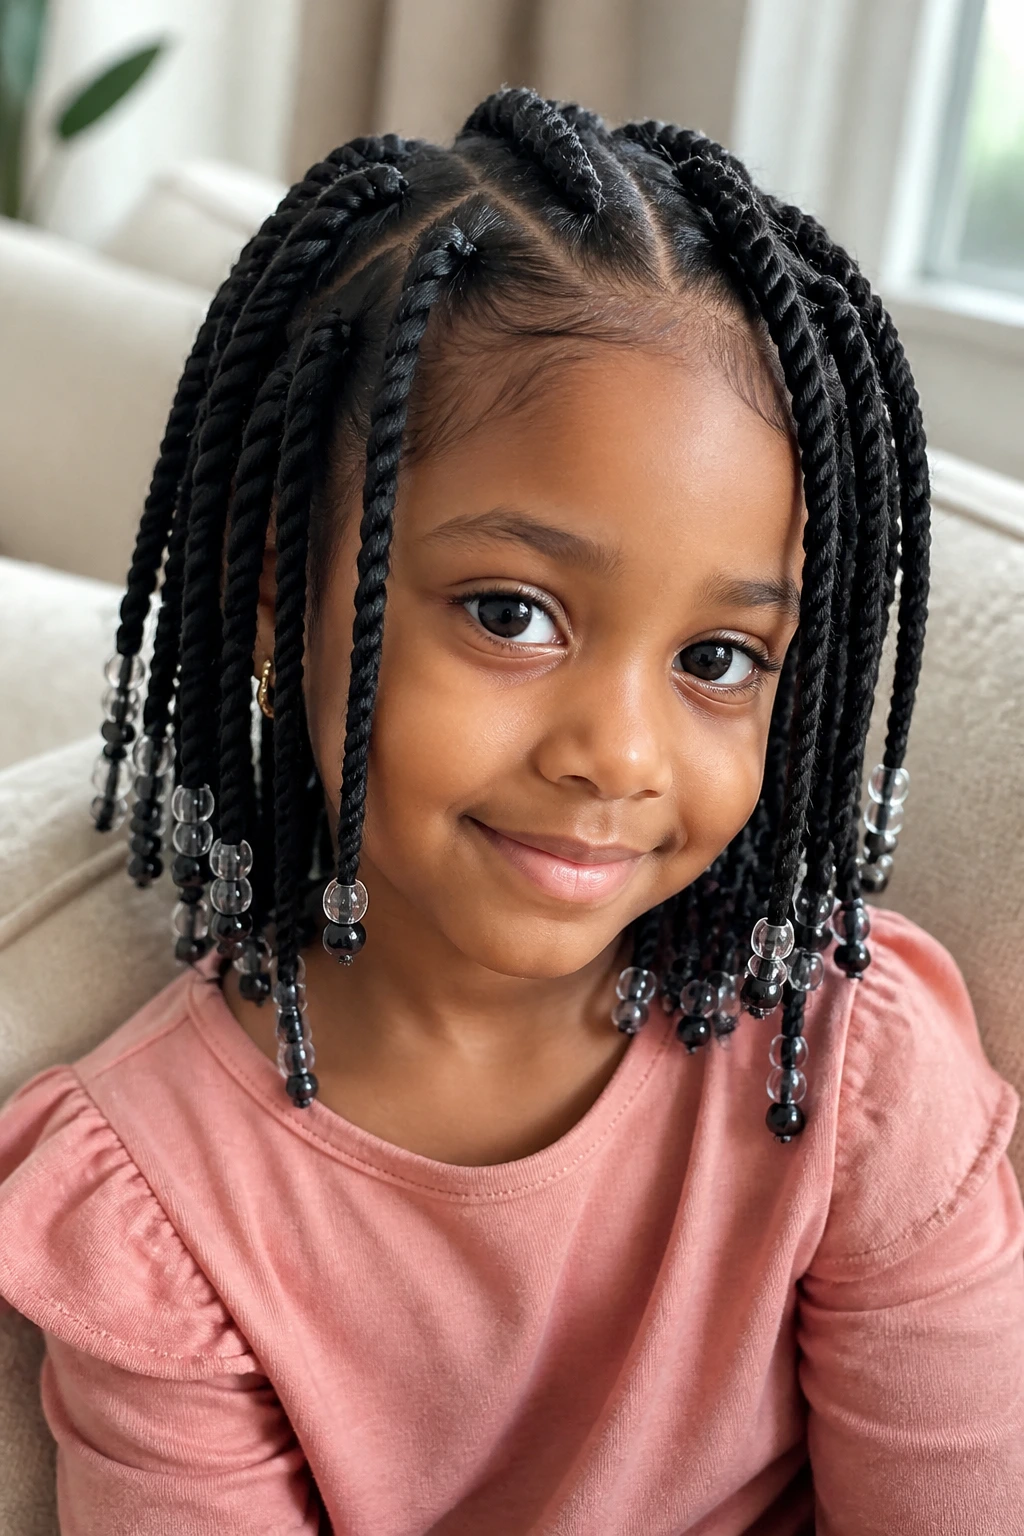
- Low-tension styling: A well-made twist sits in the hair instead of yanking on it, which is why it feels calmer than tight cornrows or constant ponytail re-doing.
- Length-friendly: Twists make short coils look intentional and help longer hair stay stretched enough to avoid the giant shrinkage puff by lunchtime.
- Accessory-ready: Beads, ribbons, barrettes, and scarves can change the whole mood of a twist style without starting over from scratch.
- School-day practical: A style that keeps the hair off the face is easier for class, sports, and nap time, and it usually needs fewer emergency fixes.
- Works across textures: From soft curls to dense coils, twist styles can be adjusted by section size, product weight, and whether the hair is left loose or tucked up.
- Easy to refresh: A little mist, a finger coil at the ends, and a quick re-twist near the front can buy you another day or two when the style starts looking fuzzy.
1. Classic Two-Strand Twists
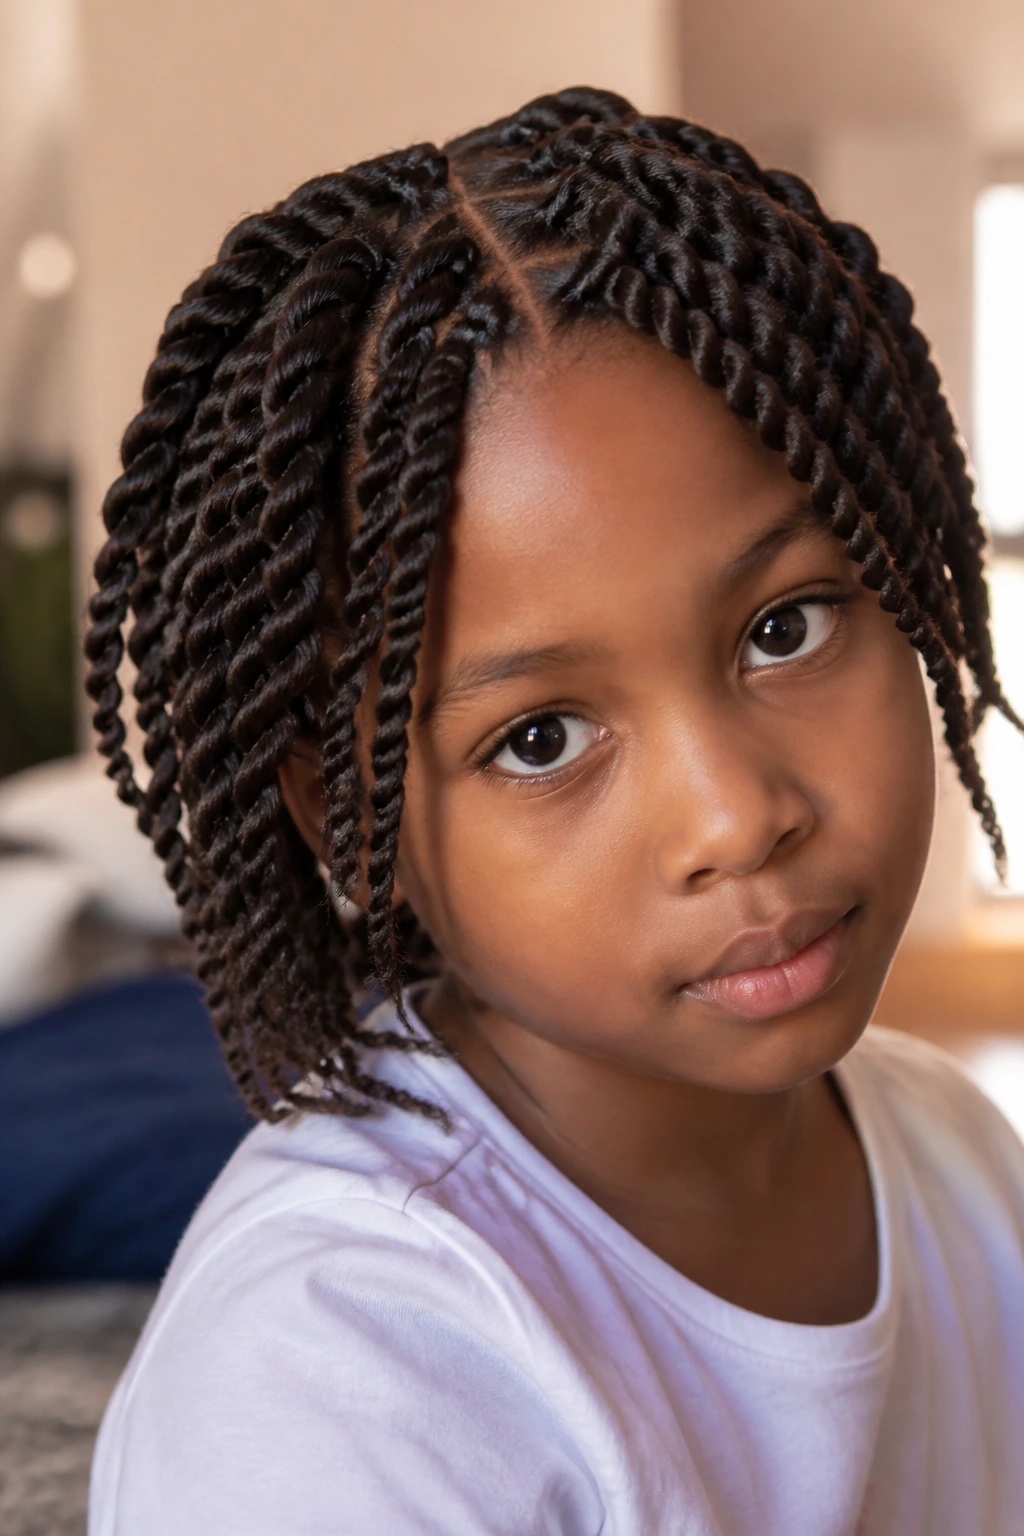
Classic two-strand twists are the dependable baseline. Clean parts, damp hair, a little leave-in, a little cream, and a calm hand. That’s the whole story. When they’re done well, they look tidy without looking stiff, and they work on a child who is not interested in sitting like a statue for an hour and a half.
Why It Works for Kids
Two strands are easier to control than three, and the style does not need heavy product to stay together. I like this one because the twist itself does the visual work; you don’t need beads, clips, or a lot of extras to make it feel finished. On thick hair, medium-size sections keep the style neat. On finer hair, smaller sections hold shape better.
The key is the base. If the roots hurt, the style is too tight. If the twists are sliding open by the time you finish the last section, the hair is probably too dry or the product is too slick.
Best for: school days, church, travel, and any week when you want hair that behaves.
2. Flat Twists with a Side Part
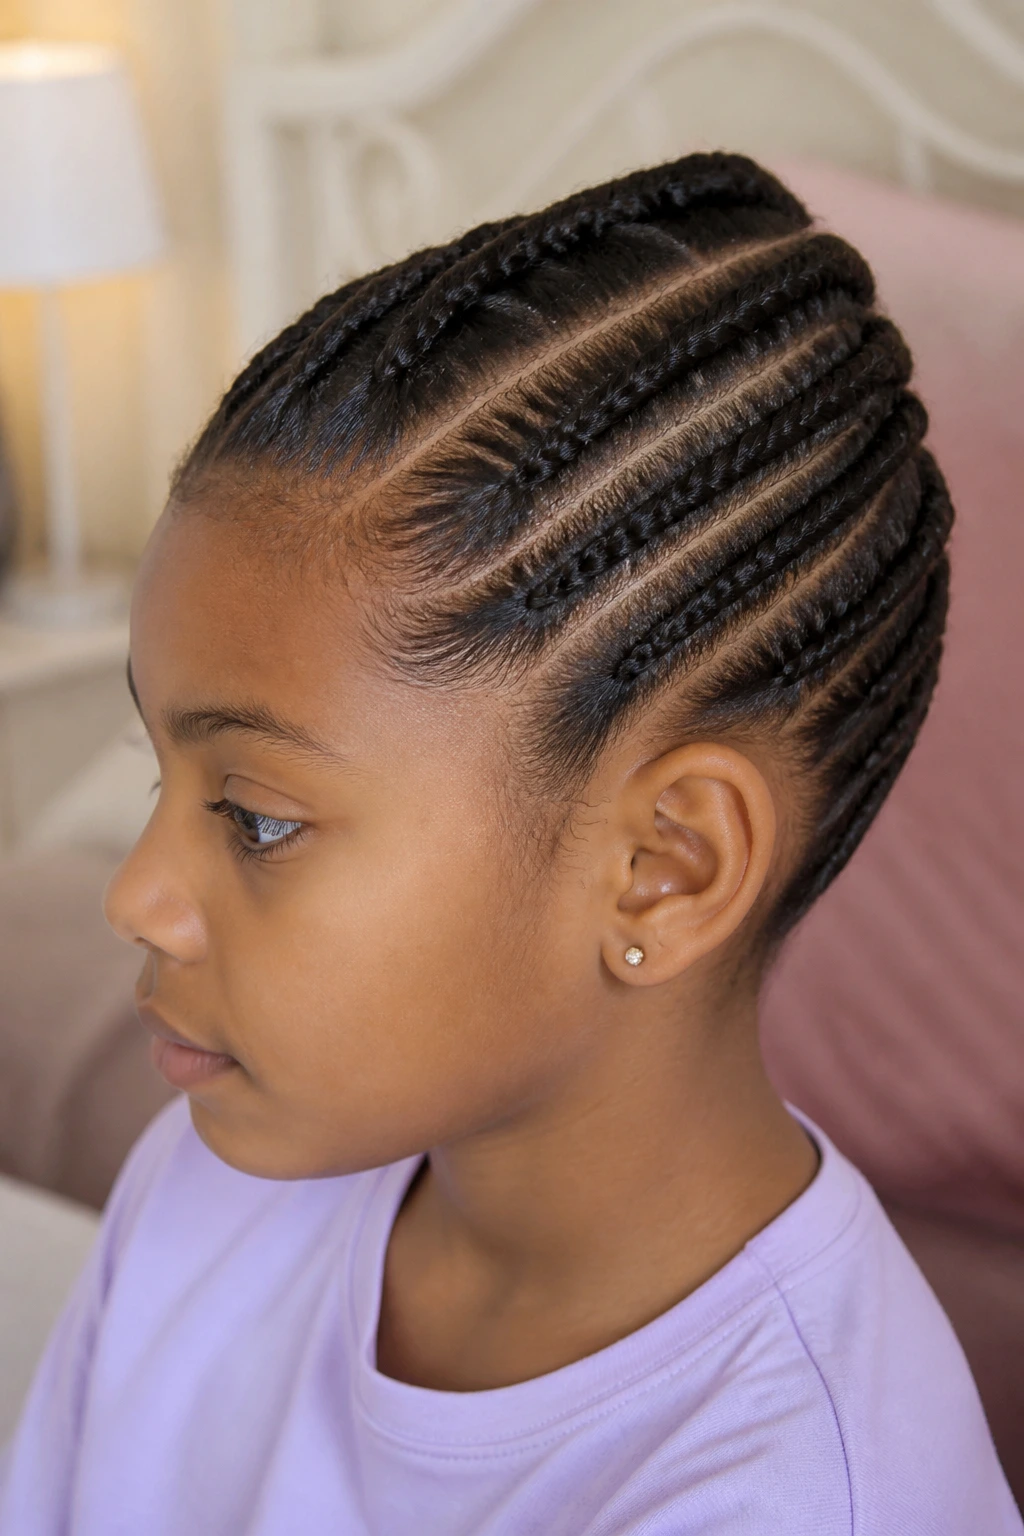
Flat twists are the style I reach for when I want the hair close to the scalp and the forehead free. A side part gives the whole look a clean line, and it’s a nice option when a child doesn’t love hair falling into the eyes.
Why They’re So Handy
Flat twists lie smoother than hanging twists, so they usually last a little longer at the front and crown. They’re also good for shorter hair that would fall out of a loose twist too quickly. The shape keeps the style controlled, and the side part makes even a simple set of twists look deliberate.
A side part works best when it’s straight and not overly wide. Too much space at the part makes the hair look patchy. Too little space, and the braid line gets crowded.
- Best for: short to medium natural hair
- Works well with: a satin scarf at night and a small dab of gel on the part
- Watch out for: pulling the front too tight just to make the line look sharp
3. Mini Twists for Long Wear
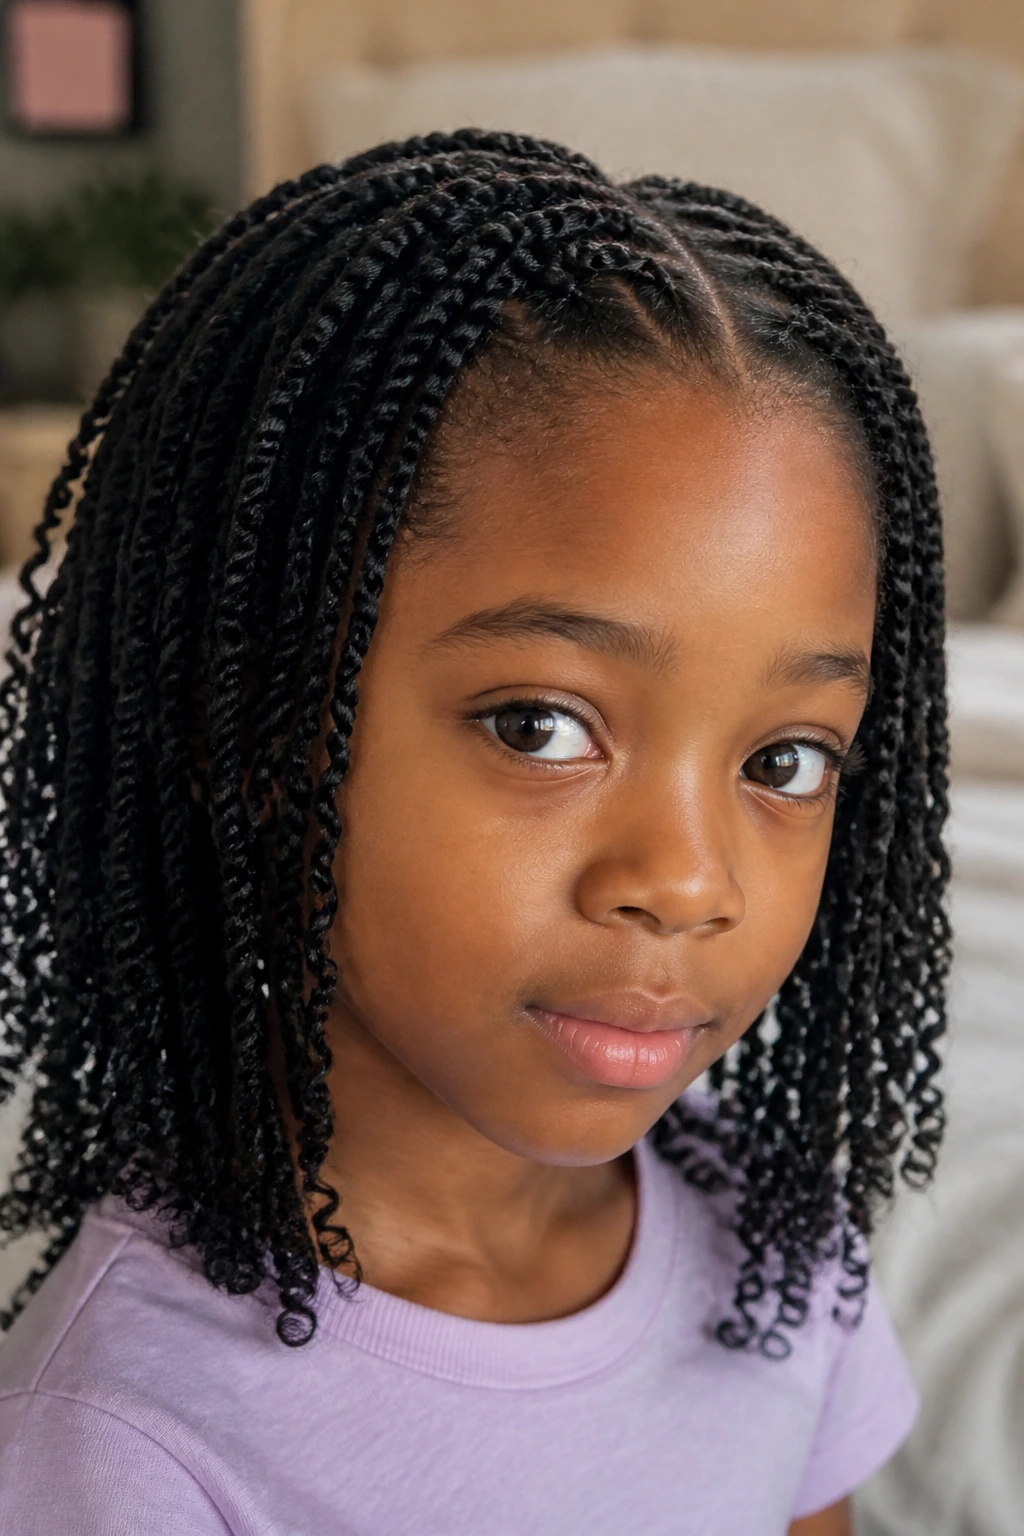
Mini twists are for the parent or caregiver who doesn’t mind more time up front if it means fewer complaints later. The sections are small, the texture is detailed, and the finished look has a lot of movement without turning into a puff the second the child runs around.
What Makes Them Different
Tiny sections give the style more longevity, but they also ask for moisture. If the hair is dry before you start, the twists can look fuzzy fast. I like to work on hair that has been detangled in sections and lightly dampened with water and leave-in, not soaked.
Mini twists can last longer than chunkier ones, but they’re not the right choice for every child. If the kid hates sitting still, this style can feel endless. If the child has very tender roots, too many tiny sections can make the style feel fussy.
How to Use Them
Use a light hand, keep the parts neat, and stop before the scalp gets irritated. You want the style to feel like controlled texture, not a grid built by someone in a hurry.
4. Twist-Out Curls
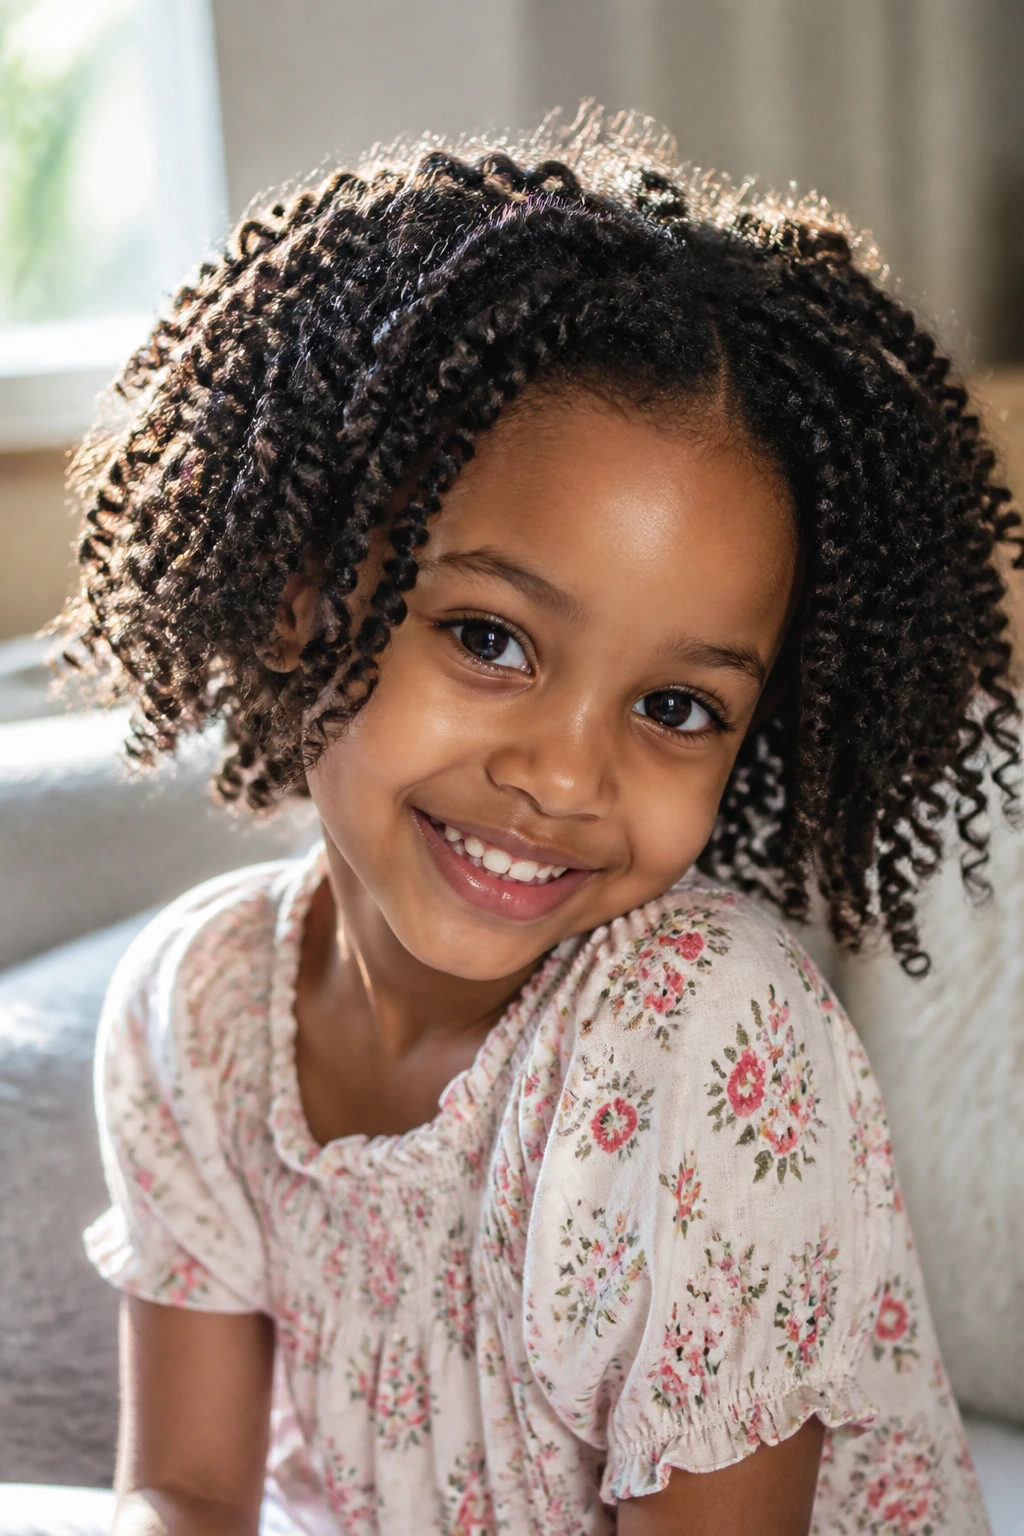
A twist-out is what happens after the twists come down, and it’s one of the softer-looking options on this list. You get stretched roots, defined curls, and a shape that moves instead of sitting in one place all week.
The style itself is the payoff. It’s the one I’d choose for picture day or a weekend event when the child wants hair with bounce but doesn’t want a ton of hardware in it. The key is patience. Untwist only when the hair is fully dry. Not mostly dry. Fully dry.
A small amount of lightweight oil on the fingertips can help separate the twists without frizzing the whole head. Separate too aggressively and you’ll lose the shape. Go slow and you get soft, fluffy curls that look better than they do in the first five minutes after unraveling.
Best When
- the hair has been set overnight
- you want a fuller shape around the face
- you’re fine with the style being more “defined curls” than “protective set”
5. Halo Crown Twist
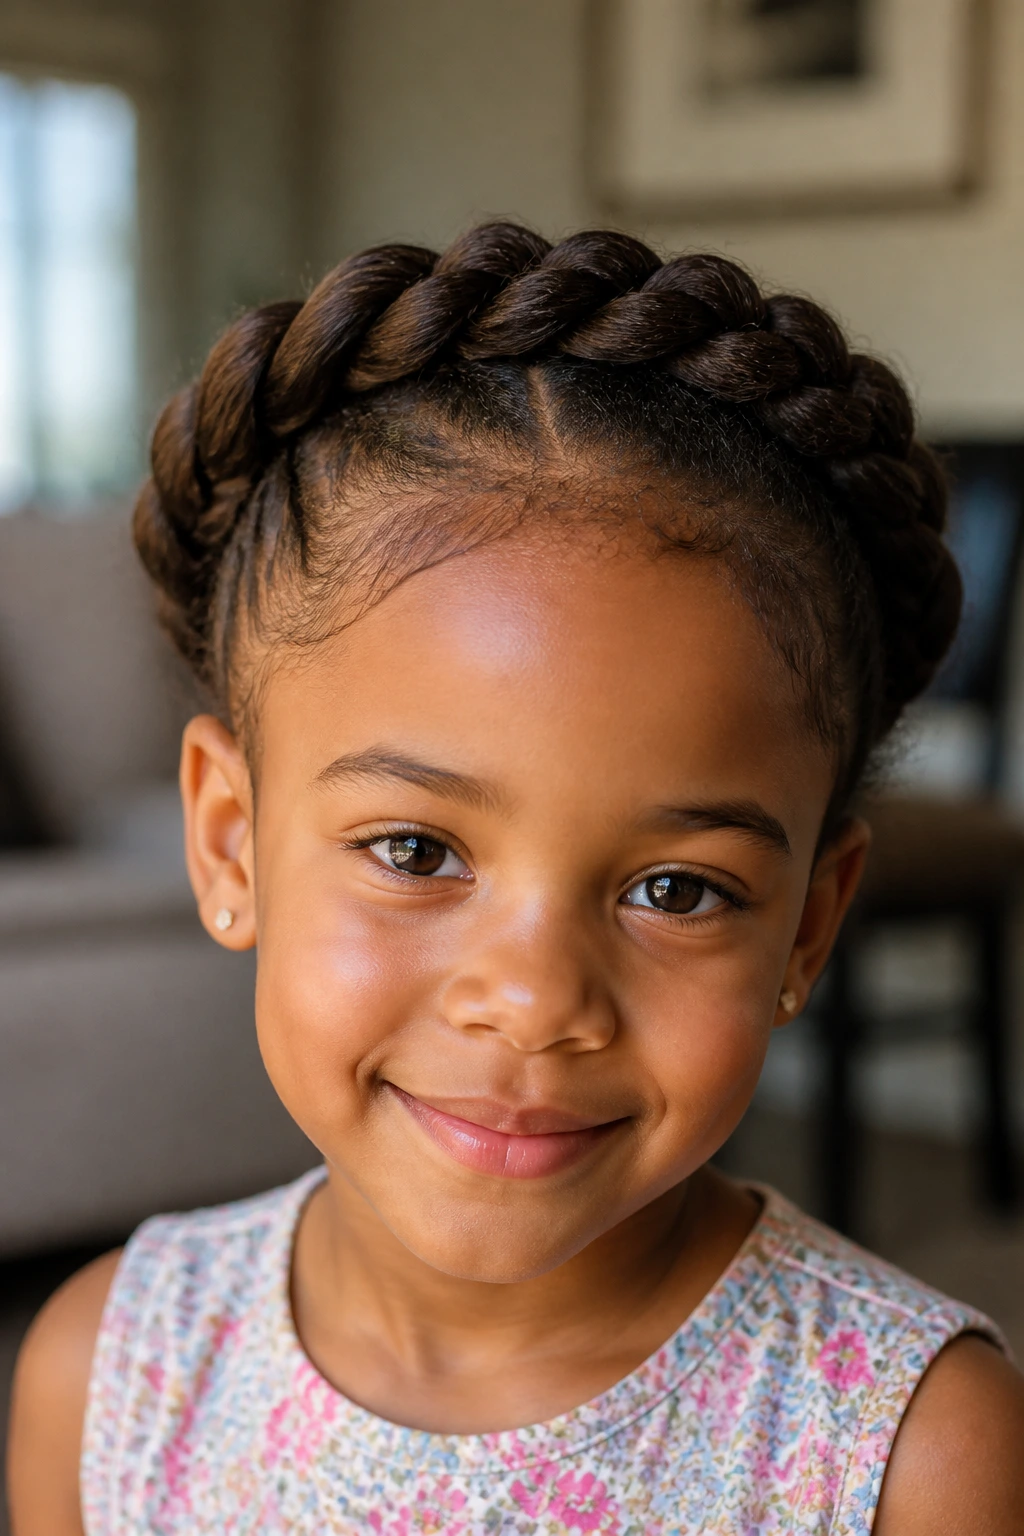
A halo crown twist wraps around the head like a frame, and it has a neat little advantage: it keeps the front tidy without looking severe. That makes it one of the better options for kids who want something pretty but not overworked.
This style sits best on medium to long hair, though you can fake the effect with flat twists and tucked ends on shorter hair. I like the halo shape because it draws attention upward and keeps the sides calm. No loose strands flopping into the eyes. No constant brushing back.
It also works well for events where you want the hair to look dressed up without piling in a dozen clips. One ribbon or a few tiny beads at the finish is enough.
6. Twisted Pigtails
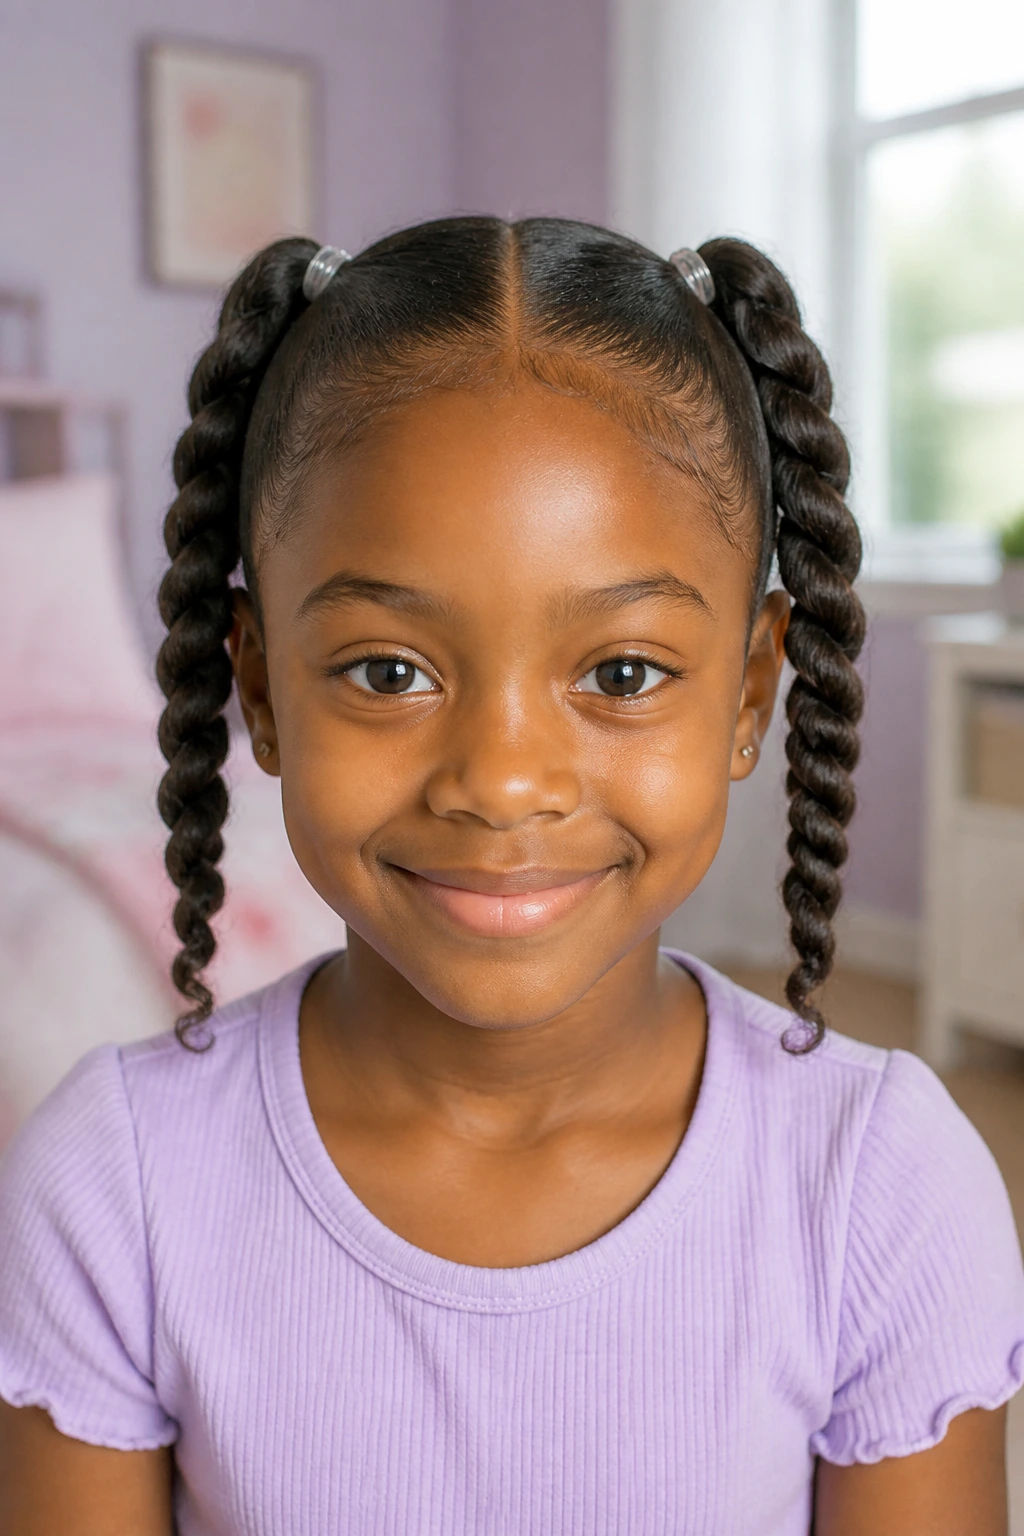
Twisted pigtails are one of those styles that look simple in the best possible way. Two sections, two twists, one clean center part, and the child is out the door before the morning turns into a negotiation.
Why Parents Keep Coming Back to It
The shape is symmetrical, which helps the style look neat even when the child has a busy day. It also spreads the hair evenly, so the weight doesn’t all sit in one place. That matters more than people think. A style that sits too heavy on one side gets touched more, and the touching turns into frizz.
If the hair is short, keep the pigtails low. If it’s longer, you can start them high for a livelier shape. Either way, the center part should be clean but not carved into the scalp like a road line.
Good match for: toddlers, preschoolers, and kids who hate hair on their neck.
7. Half-Up, Half-Down Twists
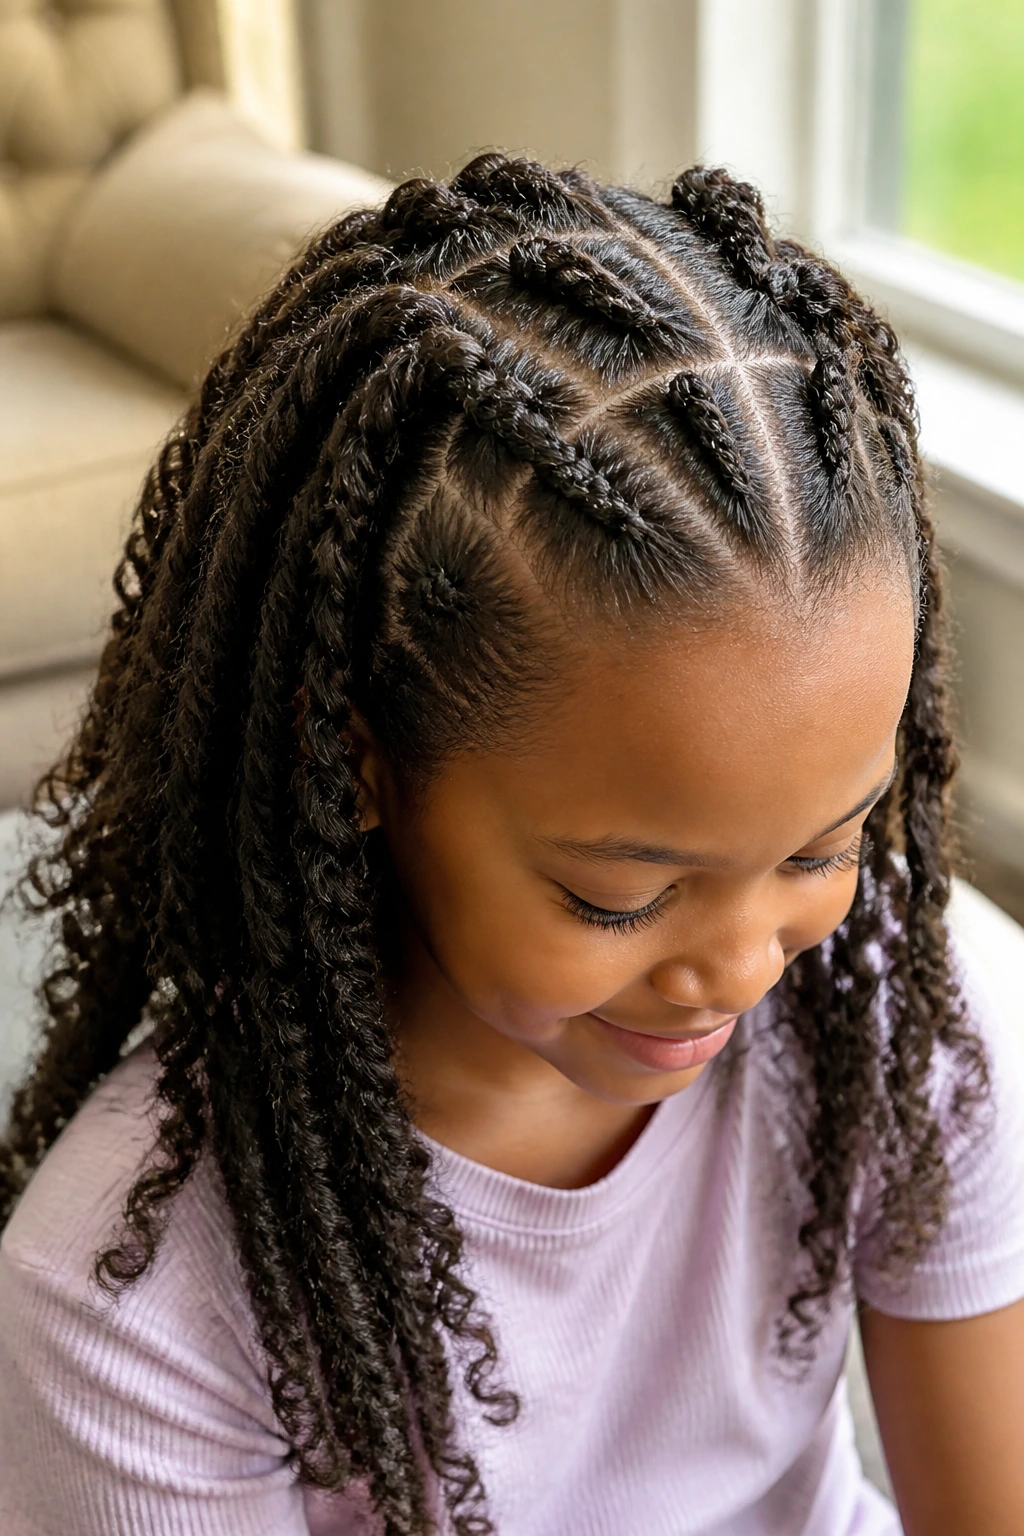
Half-up, half-down twists are what I call the compromise style. The front gets pulled back and controlled, while the back keeps length and movement. That balance matters when a child likes to feel “done” but still wants hair swinging around.
It works especially well on medium and long hair because the top section can be secured without making the whole head feel tight. The back can be left in twists, puffed a little, or finished with curlier ends. If the top starts frizzing first, that’s normal. The hair near the crown usually gets the most rubbing.
A small satin scrunchie or a soft clip is better than a hard elastic here. Hard elastics snag the hair when you take the style down.
8. Twisted Buns
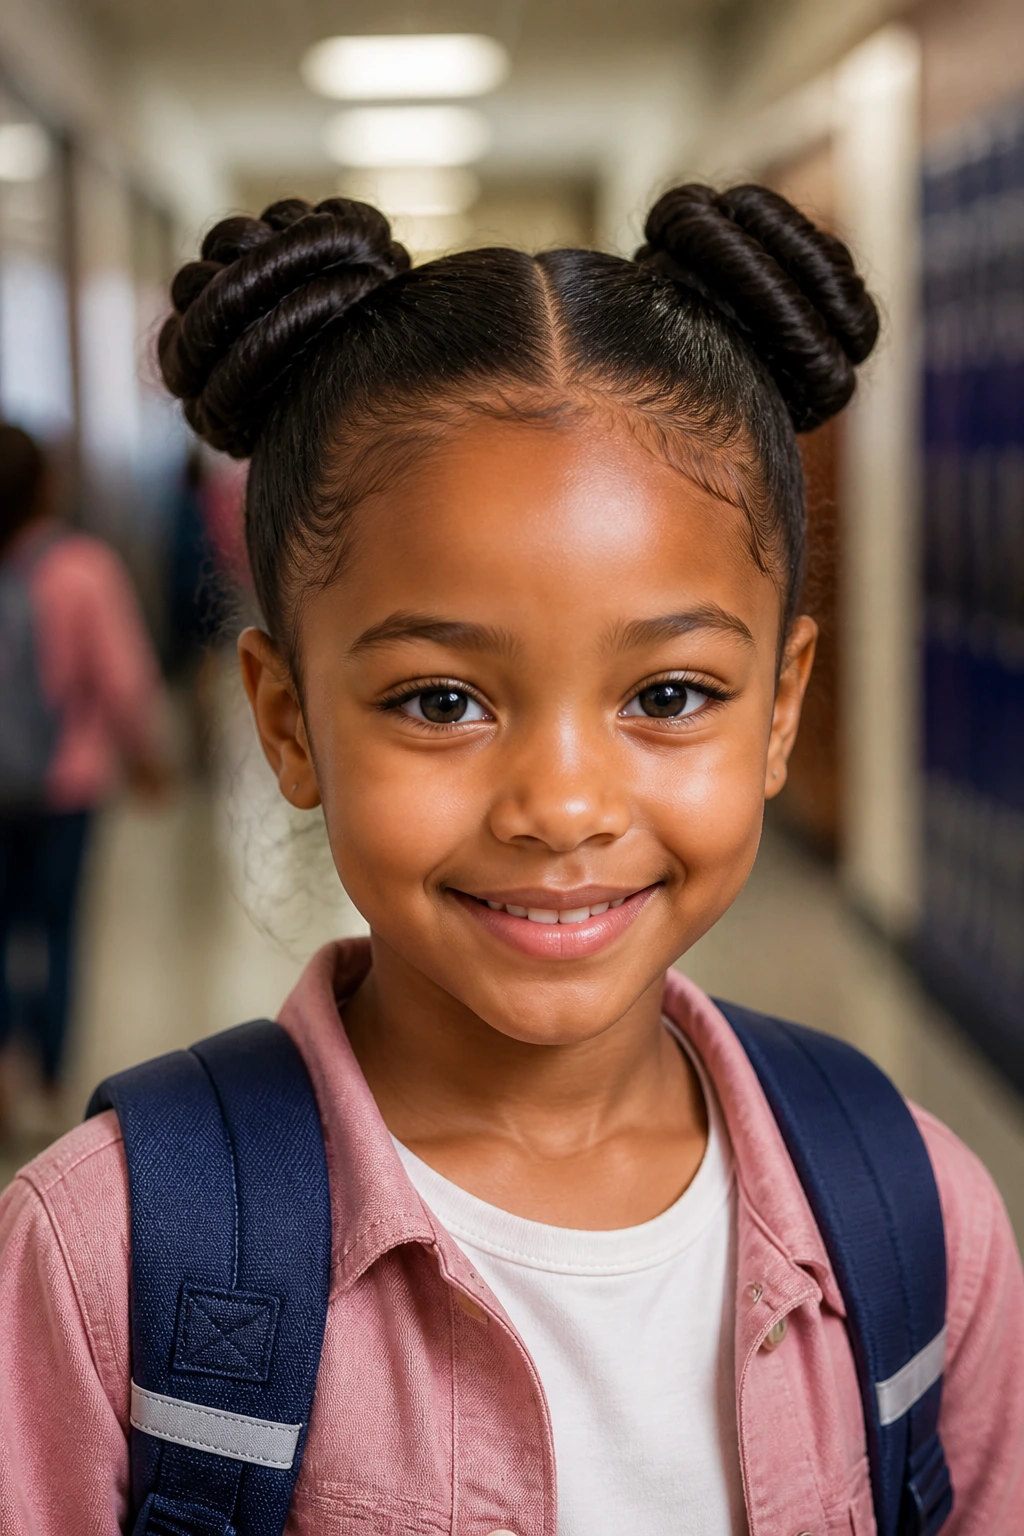
Twisted buns are tidy in a way children actually tolerate. The hair is gathered up, twisted, and tucked into a bun or two buns, which keeps the neck cooler and stops loose ends from swinging into the face.
I like this style for busy days and for kids who move around a lot. It’s also one of the better options when the hair needs to stay away from a backpack strap or sports helmet. The bun should feel secure, not stiff. If you need four bobby pins to force it into place, the section probably needs to be rebalanced.
A quick note
The bun can sit high, low, or slightly off-center. High feels playful. Low feels calmer. Off-center gives the style a little personality without making it complicated.
9. Space Bun Twists
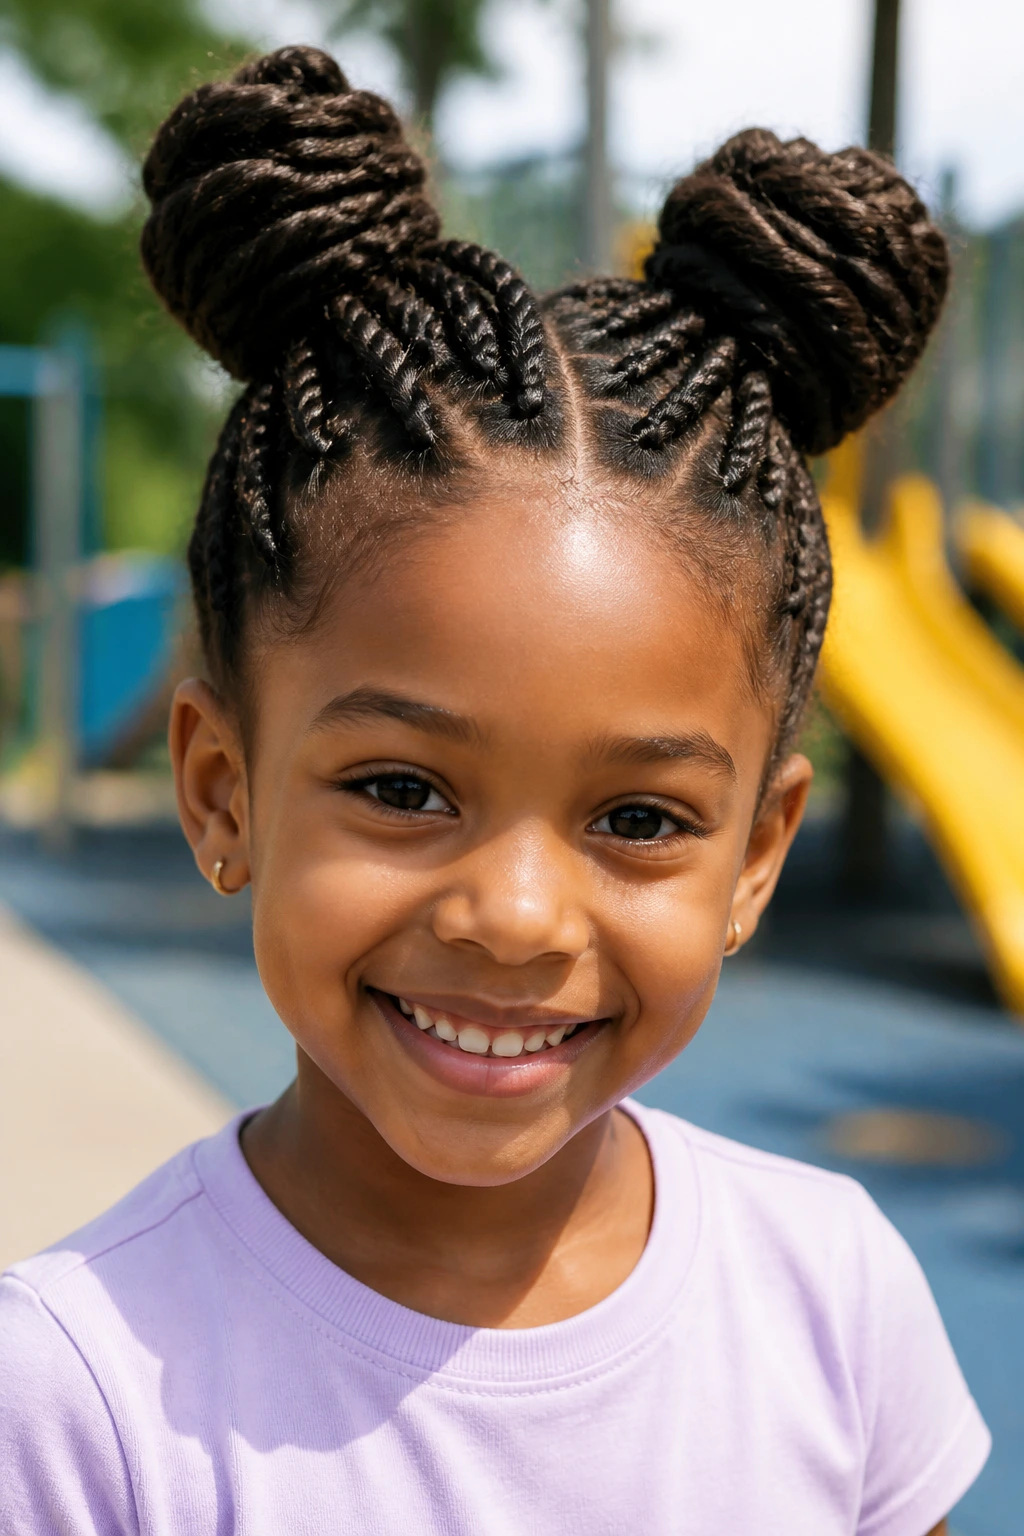
Space bun twists have a little bounce to them. Two buns, usually high on the head, with twist sections feeding into each side. The result feels playful without becoming a mess of loose hair.
This is one of the styles that children often like because it has shape. You can see the buns. You can feel the symmetry. It looks intentional even if the rest of the outfit is a T-shirt and sneakers. And because the hair is split into two sections, the style doesn’t feel too heavy in one spot.
Keep the buns close enough to the scalp that they hold, but not so tight that the child starts touching the front line every ten seconds. That touching is the enemy. It turns crisp twists into fuzzy ones faster than almost anything.
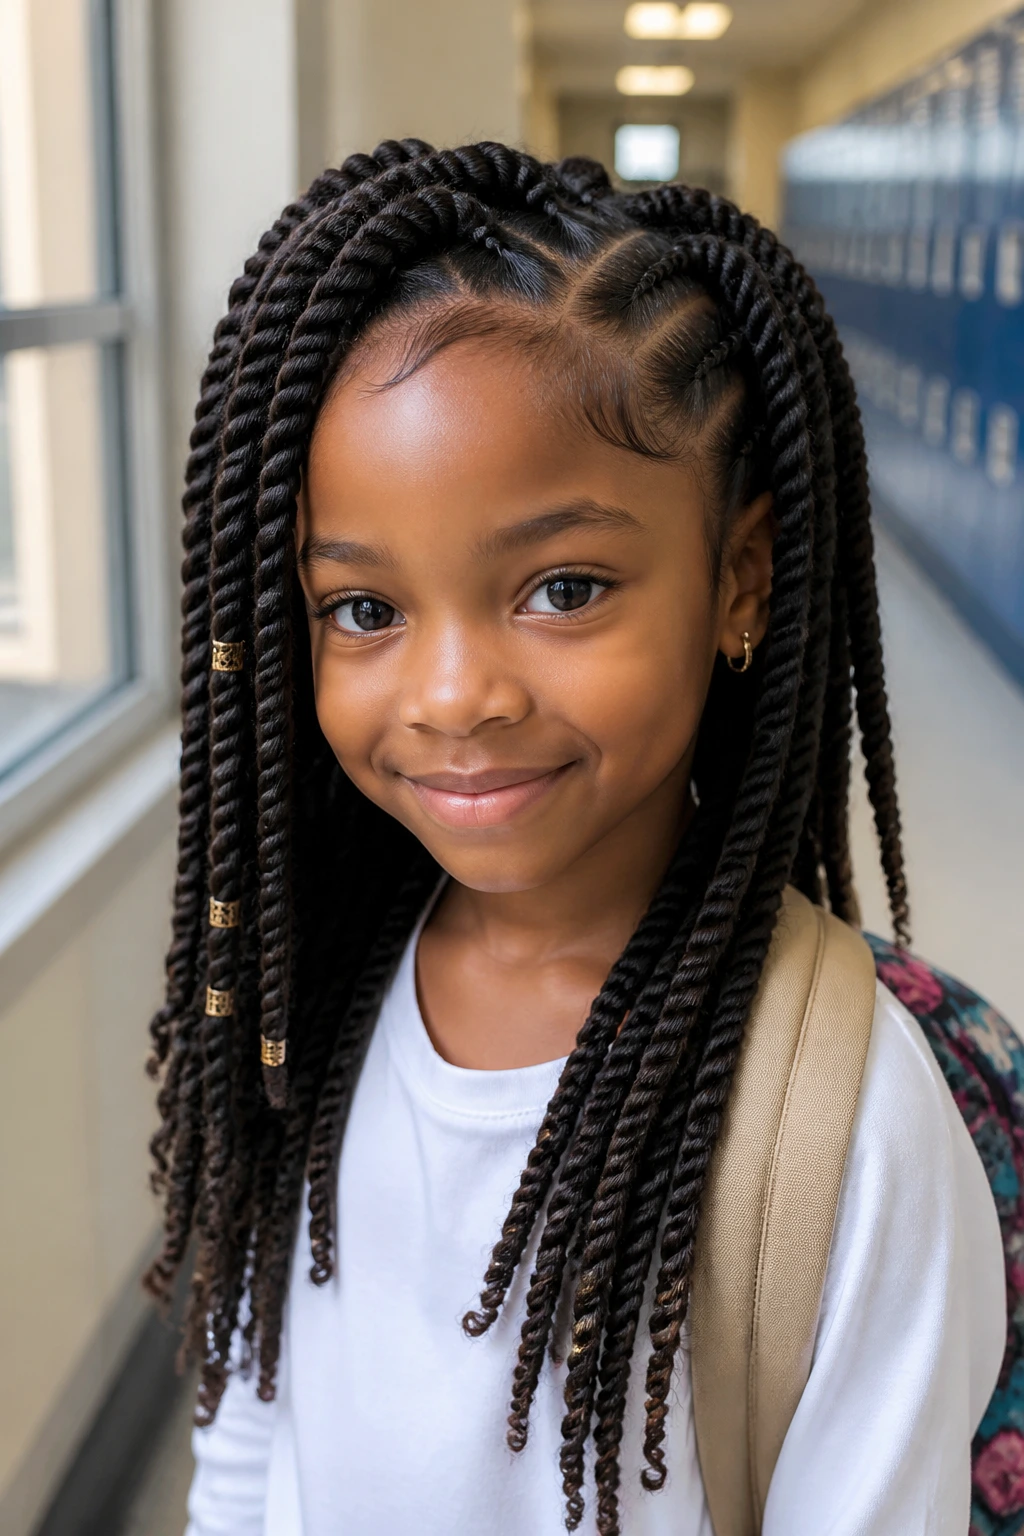
10. Twists with Beads
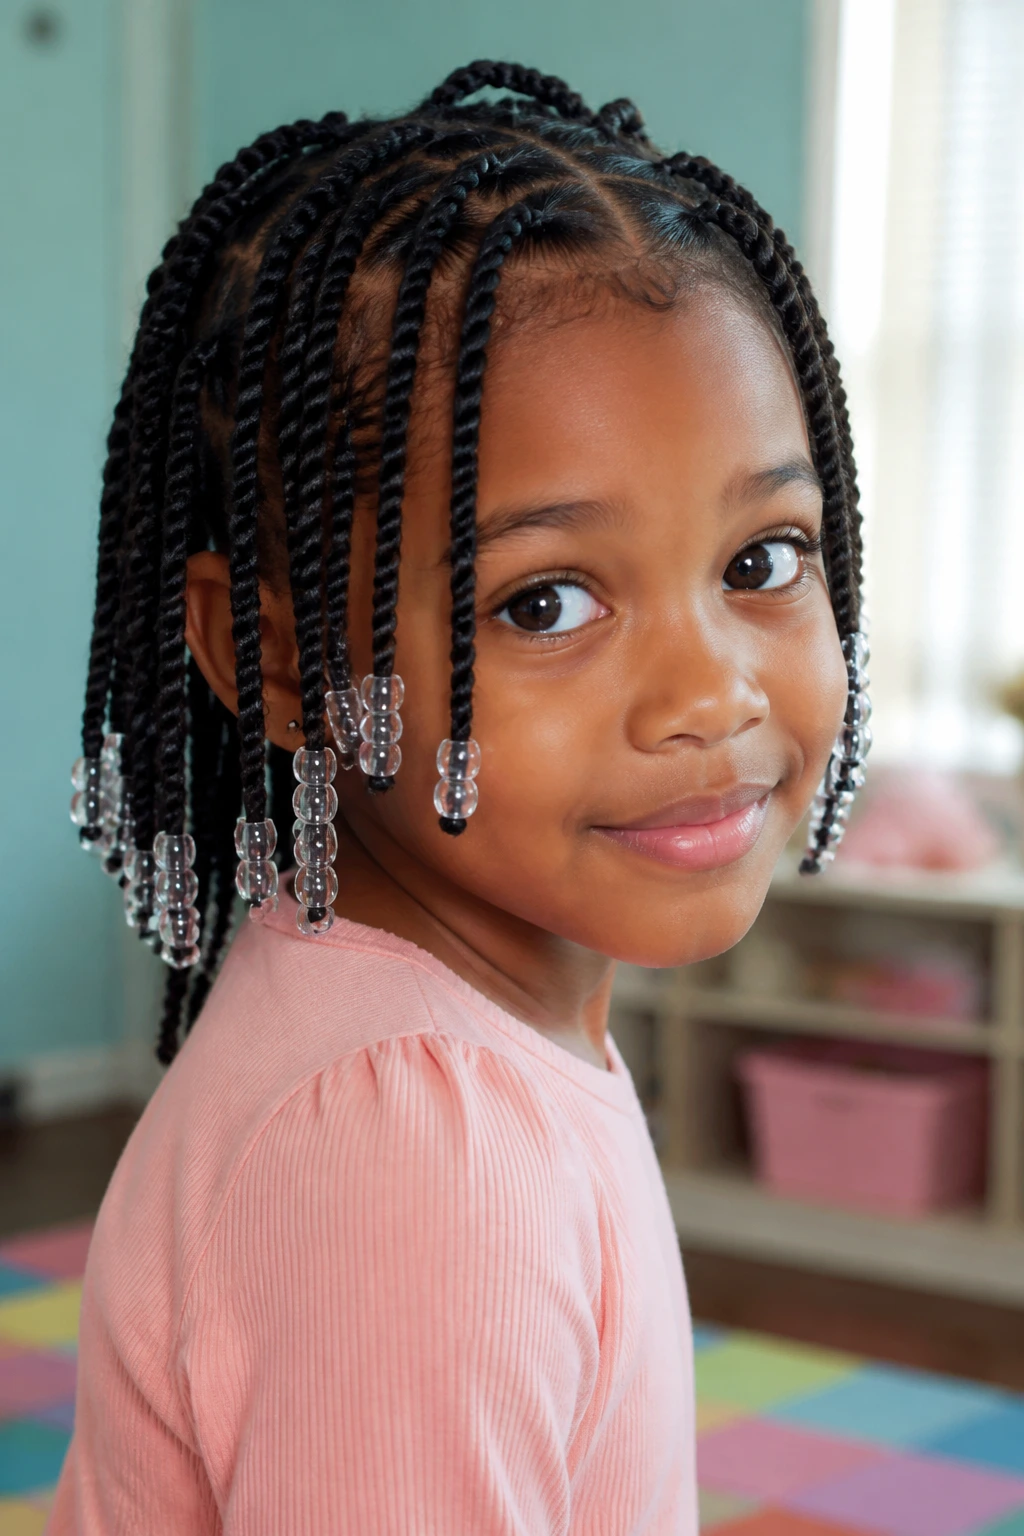
Beads change the whole rhythm of a twist style. The hair still does the work, but the beads give it sound, movement, and a little visual weight. A child walks across the room, and you hear the style before you see it.
What to pay attention to
Bead size matters. Big beads are fun, but too many of them can tug on the ends, especially on fine hair or shorter twists. I like to keep the number balanced and the placement even so one side doesn’t feel heavier than the other.
Use end stoppers or small knots that make the beads stay put without slipping. And if the child is very young, keep the bead count modest. Heavy accessory sets belong in photos more than on a head that spends the afternoon climbing and rolling around on the floor.
Best when: the hair is already well moisturized and the twist ends are sealed neatly.
11. Twists with Ribbons and Barrettes
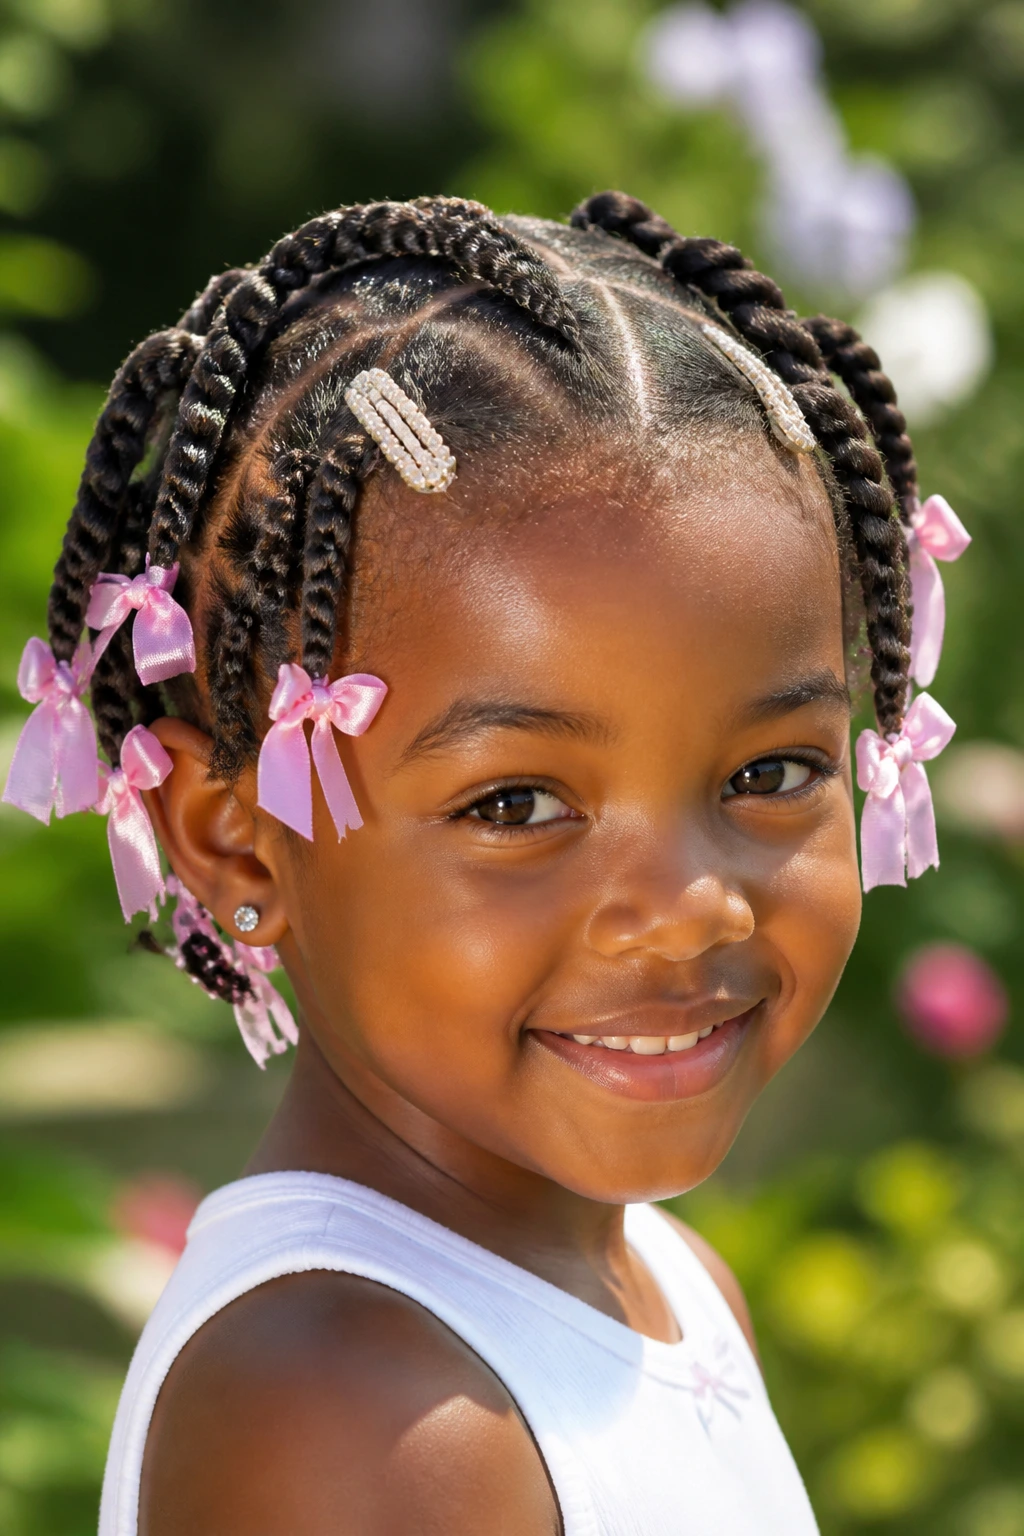
Ribbons and barrettes are the easiest way to make a twist style feel dressed up without changing the whole structure. A tiny ribbon at the base of each pigtail or a single barrette near the part can shift the mood from plain to polished in about ten seconds.
The main rule is simple: the accessory should support the style, not fight it. A stiff clip that catches on the twist will make the child yank it out by lunchtime. A soft ribbon tied loosely around the section looks friendlier and causes less pulling.
How I’d use it
- Use small barrettes on thinner sections or at the front only.
- Use ribbons when you want color without adding weight.
- Skip anything sharp, metallic, or hard to open with wet fingers.
This is one of the better styles for school pictures and birthdays because it reads cheerful from across the room.
12. Flat Twist Mohawk
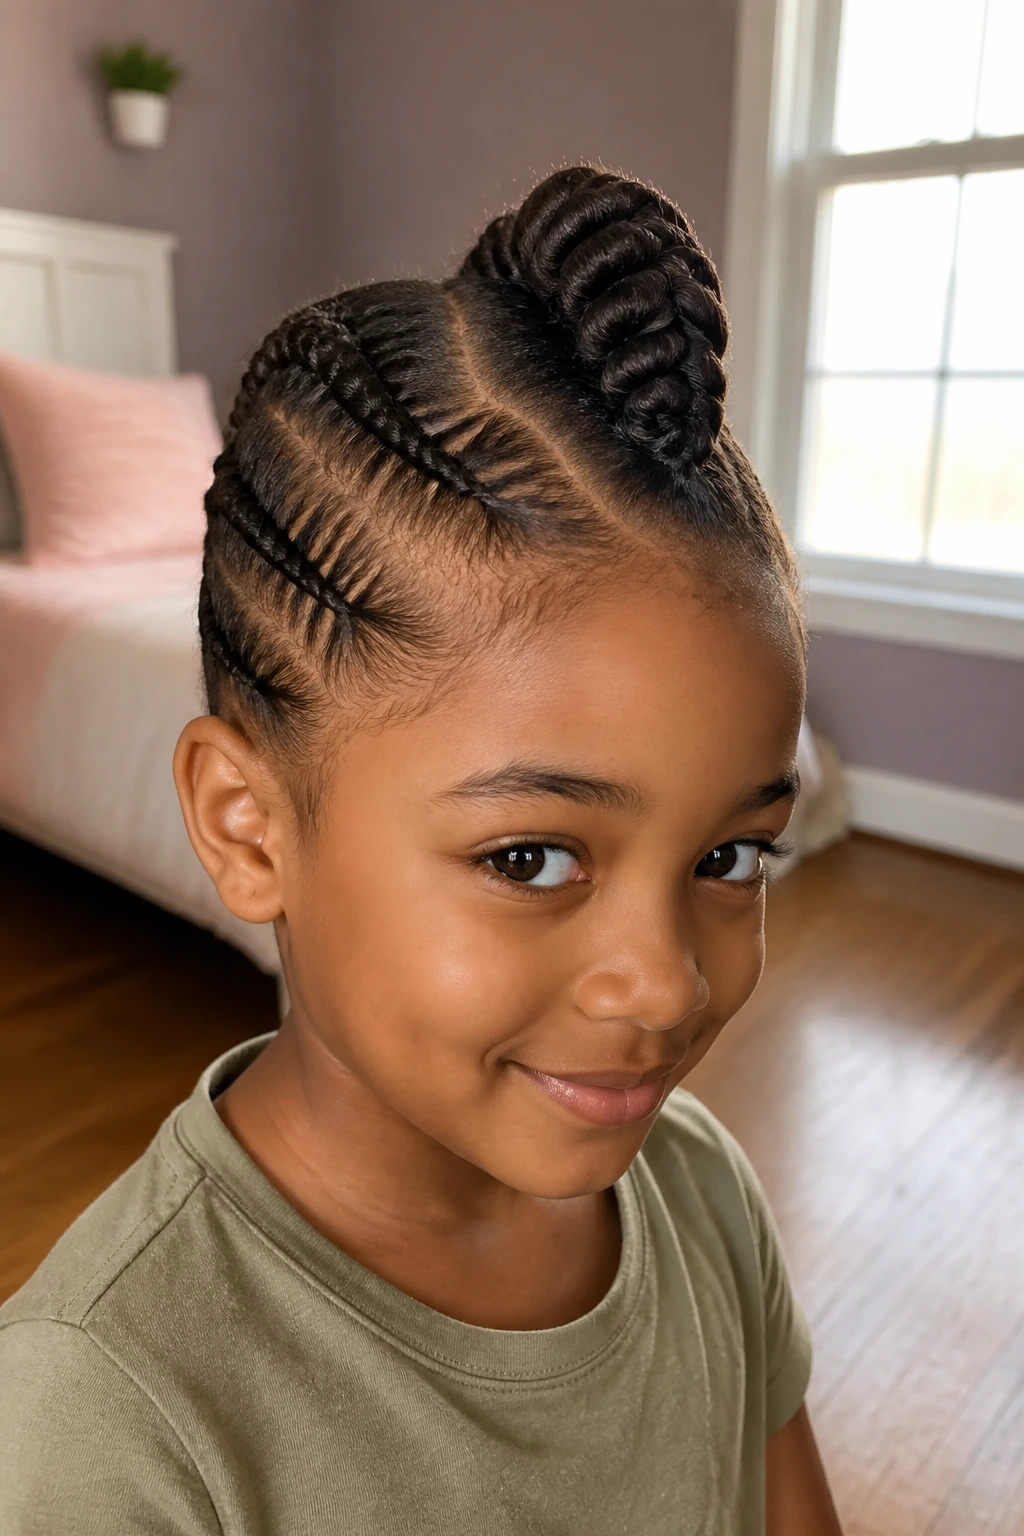
A flat twist mohawk has a little edge to it, but it still feels kid-friendly if you keep the tension light. The sides are flat-twisted down, and the center section gets the drama. It’s a strong shape. Clean, but not boring.
I like this style on children who want hair that stands out without needing a lot of accessories. The center can be left in twists, puffed up, or tucked into a small bun ridge. The sides should lie smooth, not slicked so hard that the scalp shines.
The nice thing about this style is how it photographs without effort. More importantly, it tends to stay out of the way during active play. That’s the real reason to choose it.
13. High Puff with Twists
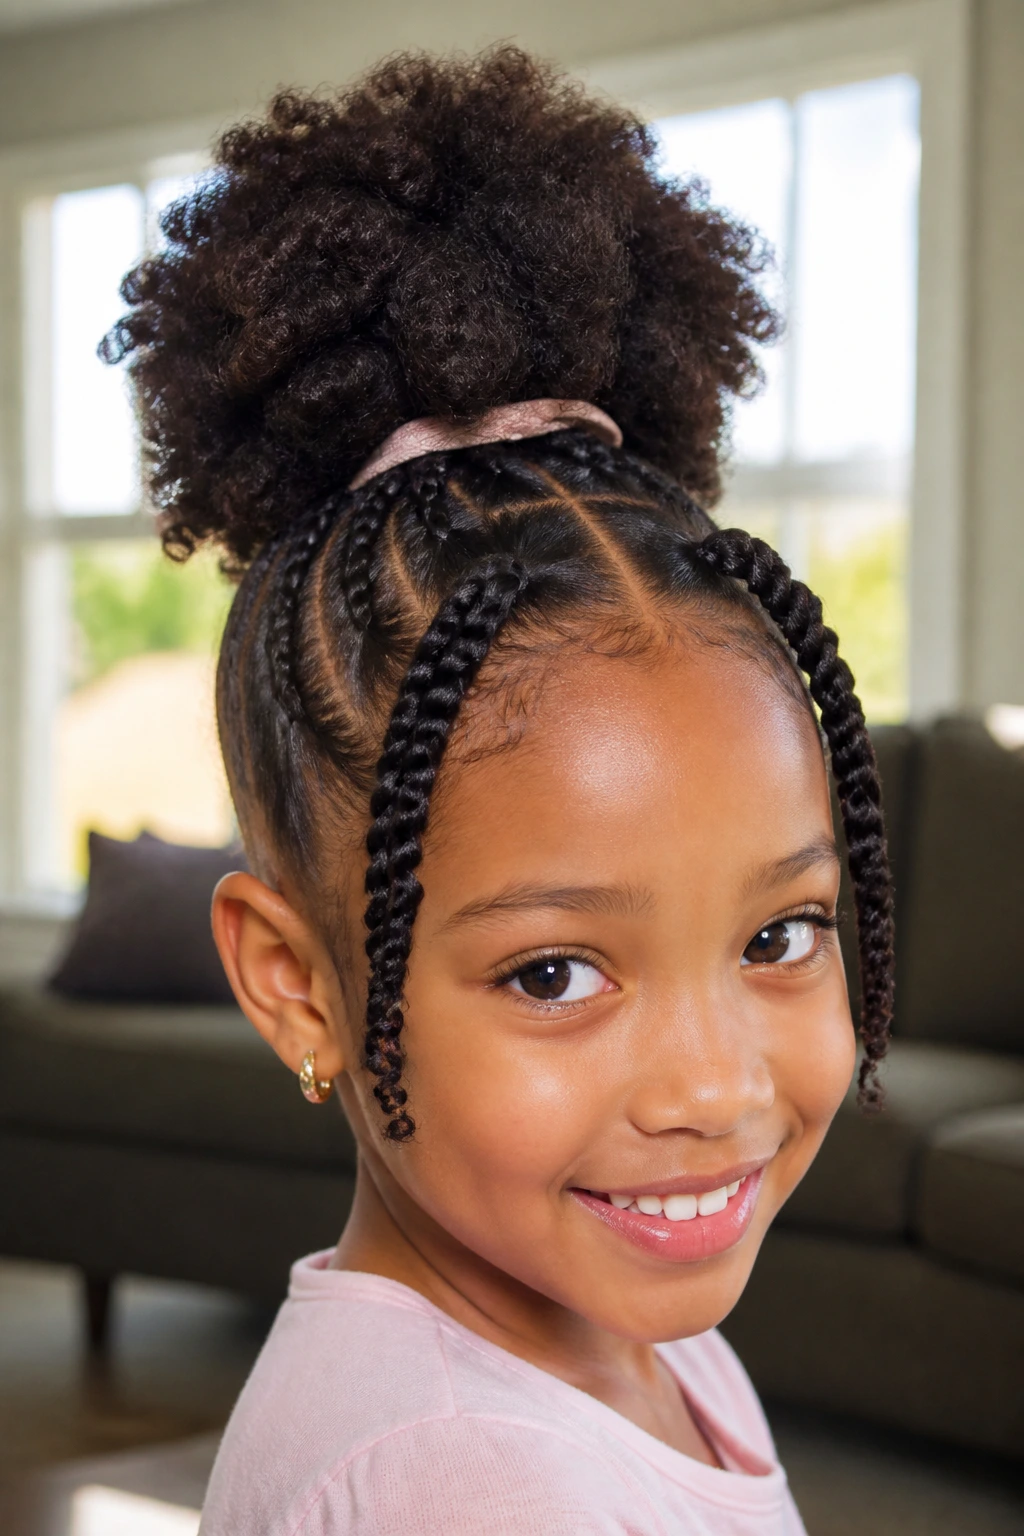
A high puff with twists is the style I’d call the “yes, there is hair up there” option. The twists control the front or the crown, then the back or top section gathers into a puff that keeps the shape lively and full.
It’s a smart move for children with hair that shrinks the minute it sees air. Instead of trying to flatten that texture, the style works with it. The puff gives volume, while the twists around it keep the front from turning wild.
A soft hair tie is the best friend here. No thin elastics. No yanking. If you have to wrap the band too many times to make it hold, the band is too tight or too small.
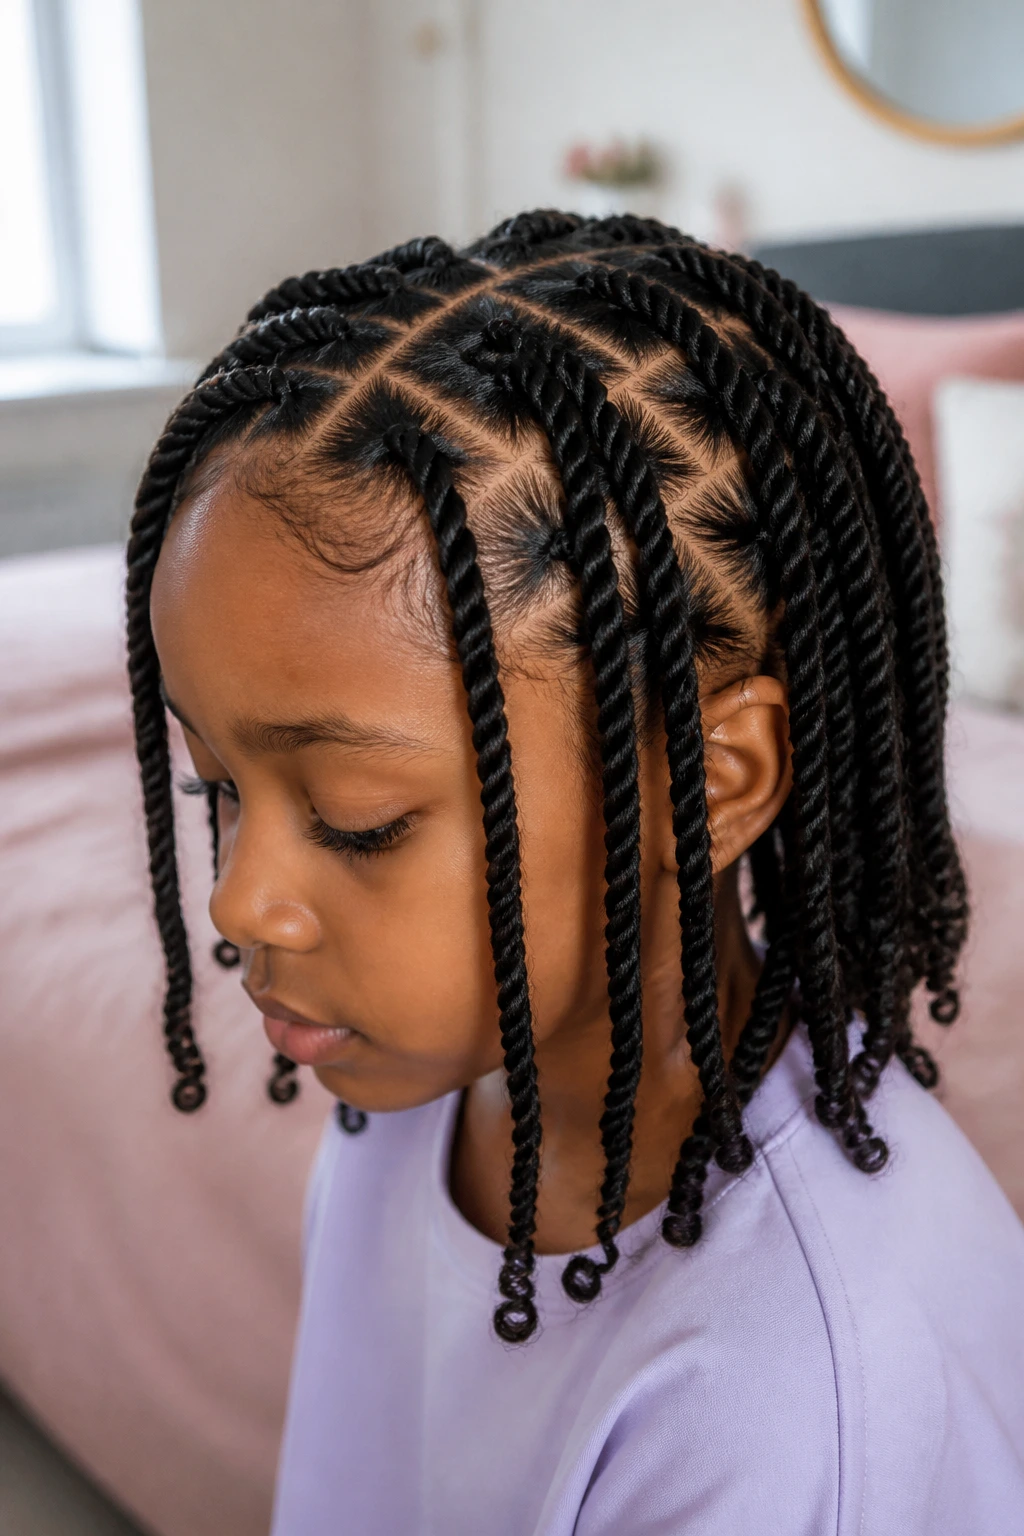
14. Triangle-Part Twists
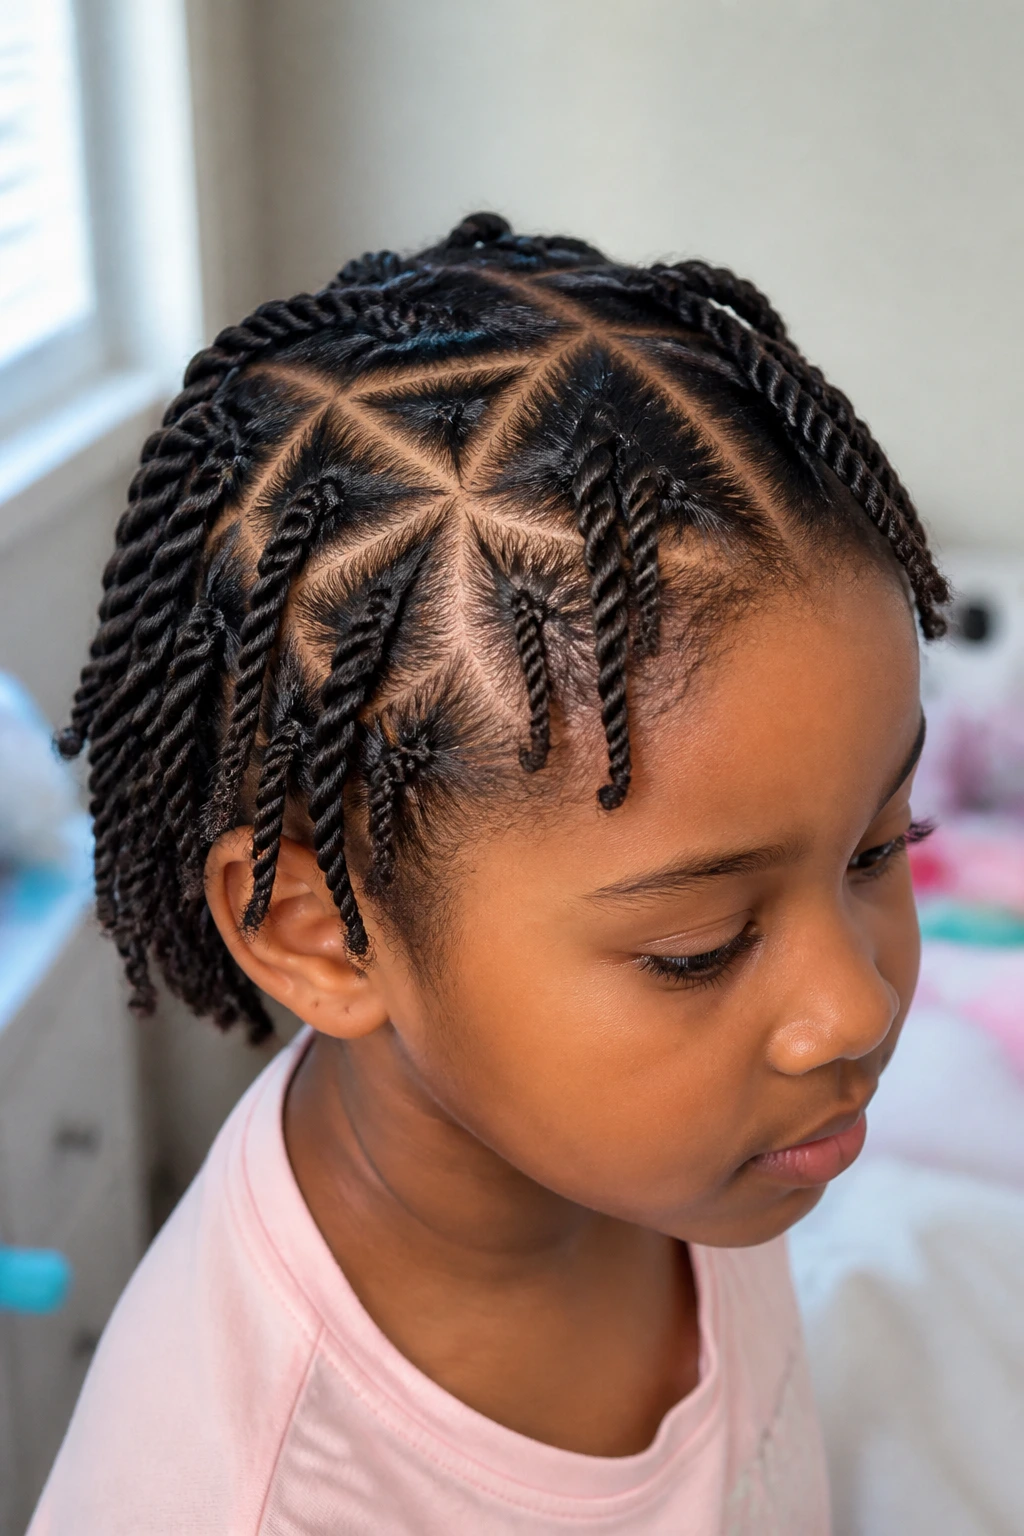
Triangle parts are for the child who likes a little pattern in the hair. The twist itself might be simple, but the parting creates the interest. That is what makes this style feel special without requiring a full accessory load.
The triangular sections can be small or medium, depending on the child’s density and how much time you have. Clean parting matters here. If the triangles are uneven, the whole style starts looking rushed. But if they’re neat, the twists pop in a way that straight parts never quite do.
Why it’s worth the extra minute
Triangle parts give the scalp a different rhythm, which means the style looks custom rather than routine. If you’re doing twists for a school event or family photos, this is one of the easiest ways to make the style look intentional.
15. Chunky Rope Twists
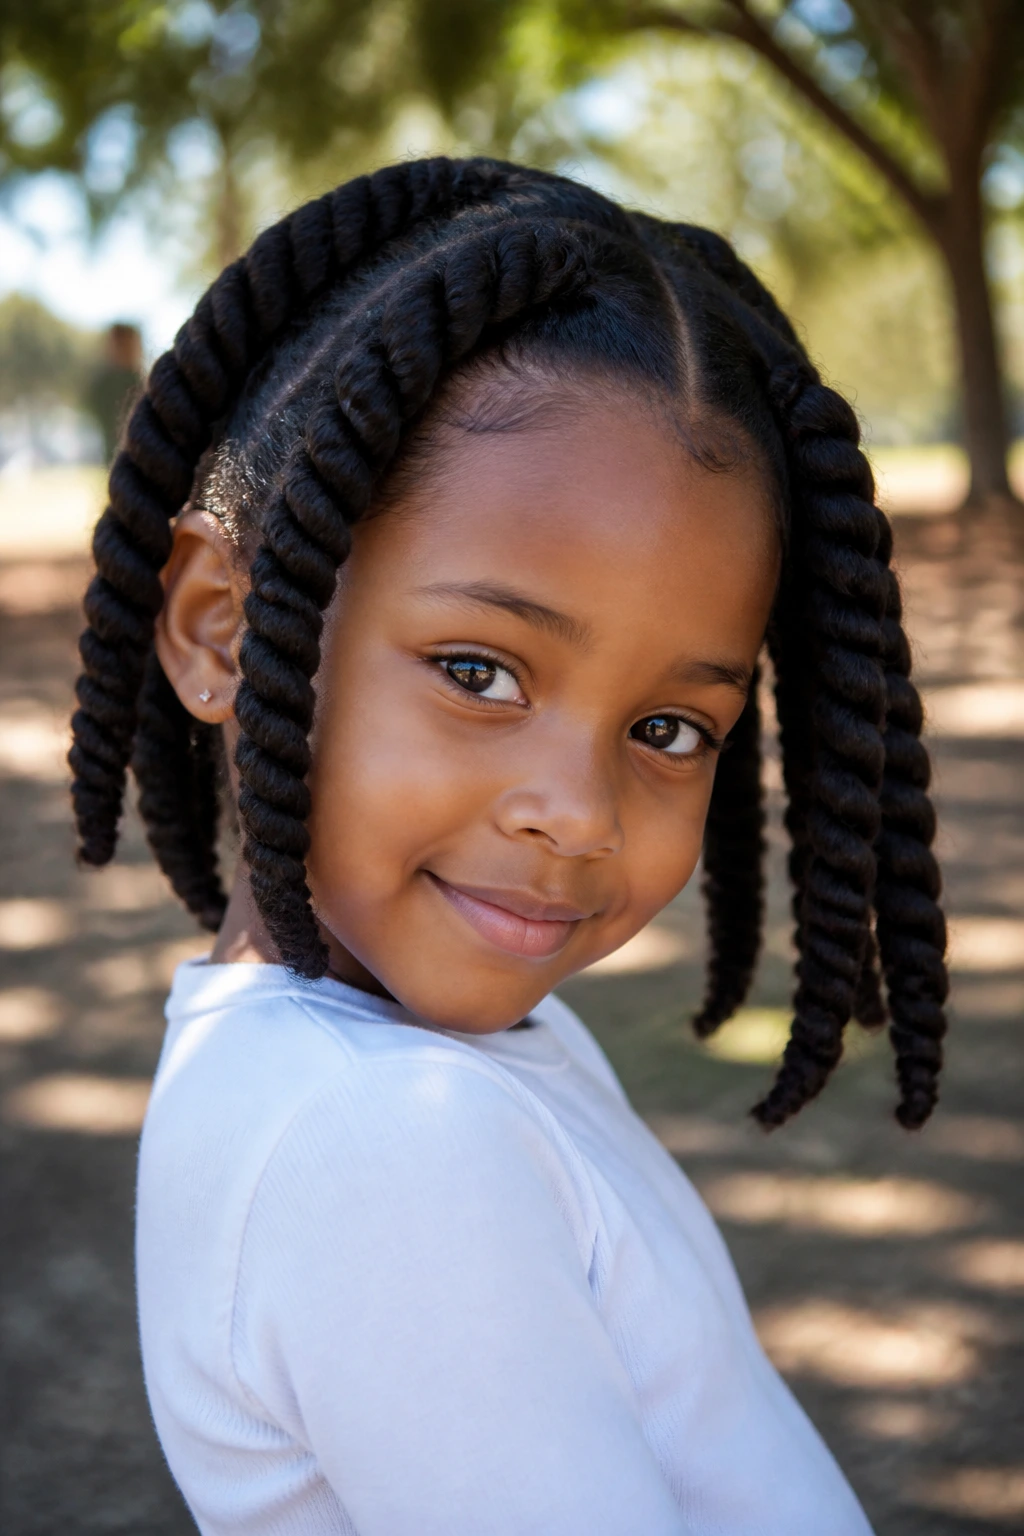
Chunky rope twists are a mercy on a morning when patience is thin. Bigger sections mean fewer parts, less sitting, and a style that can still look finished when the child is done with the whole process before you are.
These are especially useful for toddlers or kids with dense hair that takes forever to section. The larger size also means the twist reads from farther away, which is useful if you want the style to look bold without a stack of beads or clips.
The trade-off is that chunky twists can frizz faster at the roots if the hair is very soft or layered. That’s not a failure. It just means the style has a looser, more casual texture.
Quick rule
If you want a neater finish, work in slightly damp hair and smooth each section before twisting. If you want a softer finish, let the twists be a little fluffy.
16. Twisted Ponytail
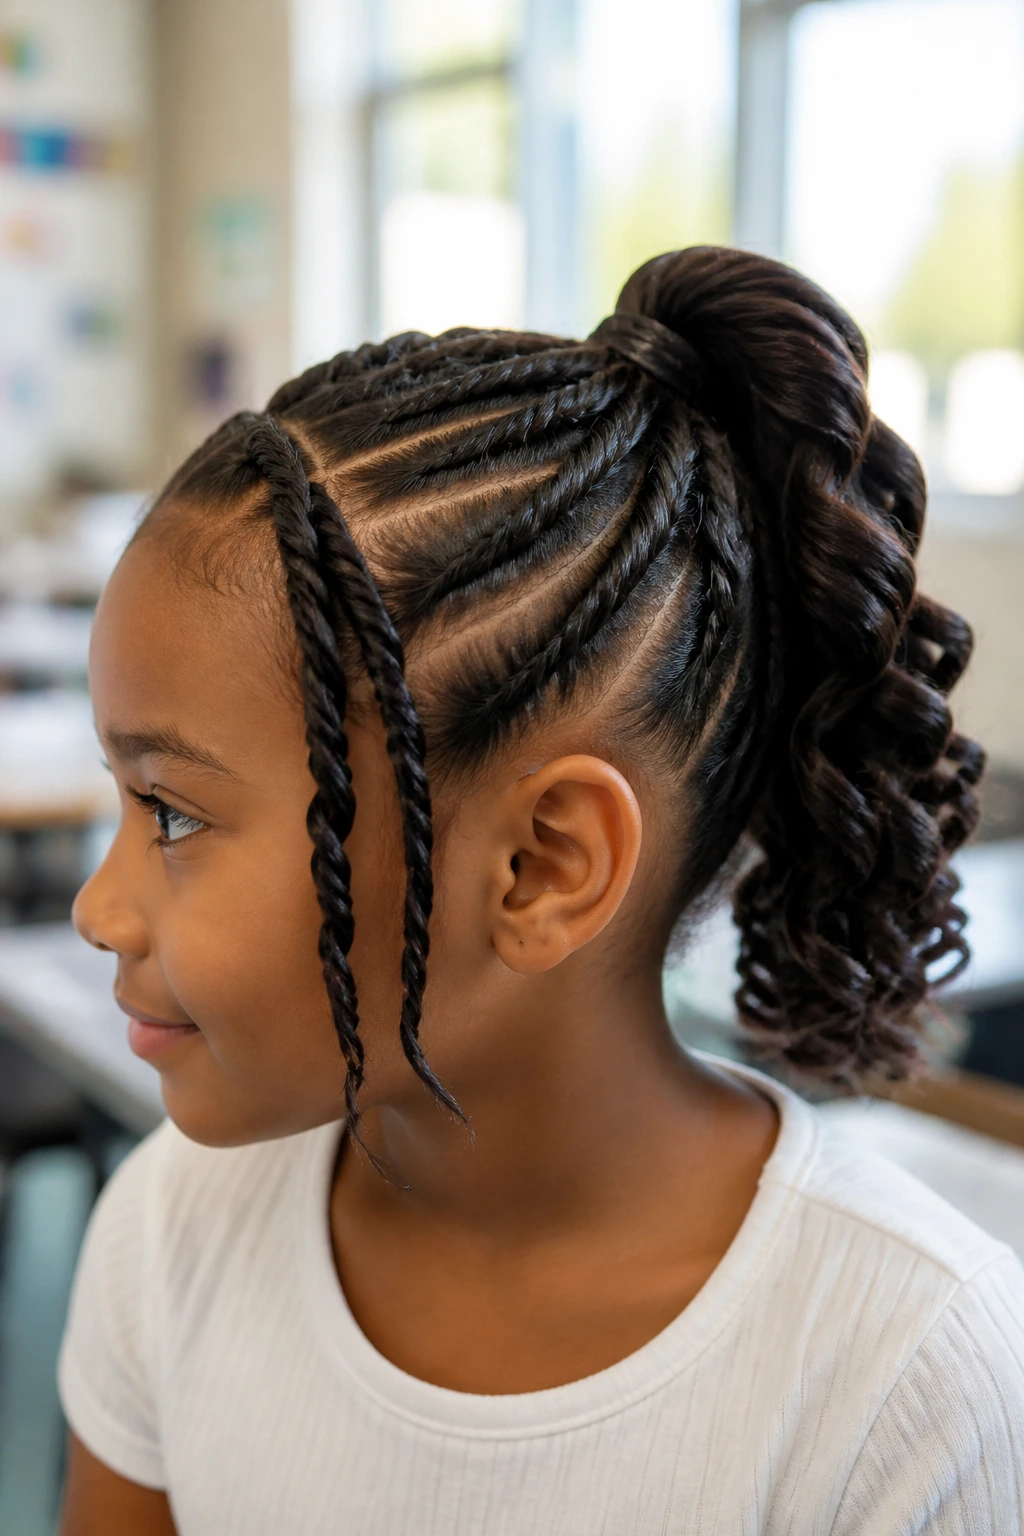
A twisted ponytail keeps the hair up and out of the way while still showing off the twist pattern. It’s the style I’d pick when the day has movement in it — sports, errands, school, a snack stop, repeat.
The front can be flat twisted back or simply twisted into the ponytail base, and the rest can fall from the elastic in neat sections. If you want it to look cleaner, wrap one small twist around the base to hide the tie. That little move makes the whole style look more finished.
It’s also a practical choice when you don’t want ends brushing against the neck. Children notice that more than adults do.
17. Twist-and-Curl Ends
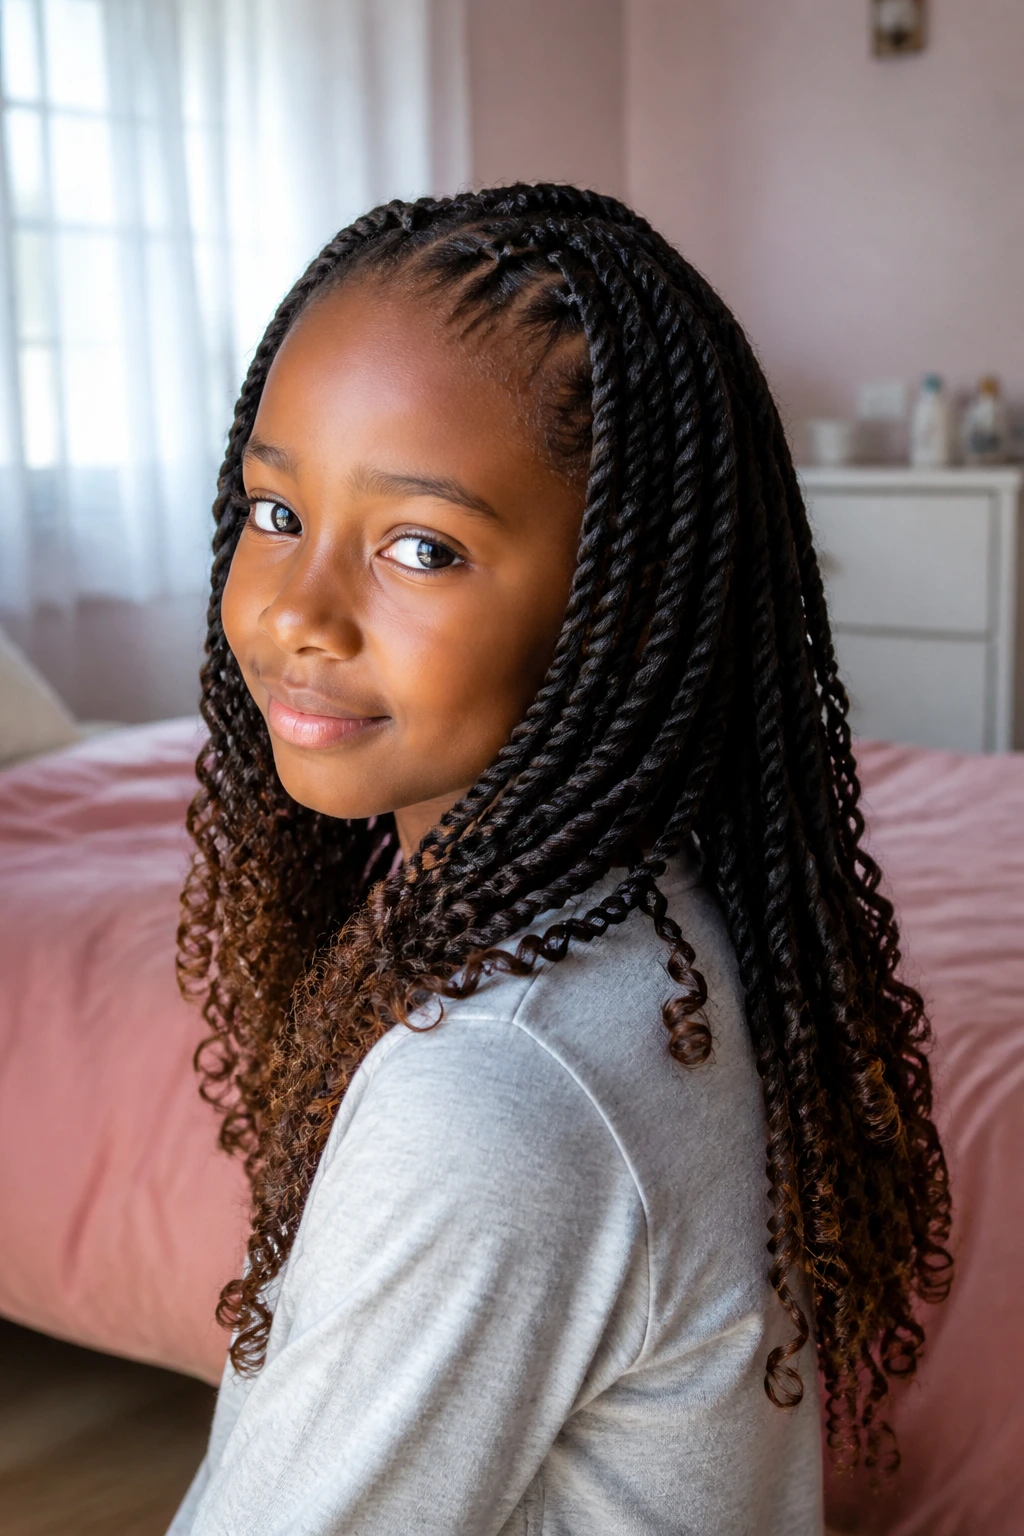
Twist-and-curl ends give the style a soft finish, especially on longer hair. The base stays twisted, but the ends are set with flexi rods, perm rods, or a careful finger curl so they bounce a little instead of hanging straight.
This is the style I reach for when I want more shape at the bottom. Plain twist ends are fine, but curled ends add movement. They also help the whole style look more polished on event days without needing heat.
If you use rods, let the hair dry fully before taking them down. Half-dry curls collapse fast. And if the child’s hair is fine, keep the rod size modest so the curl doesn’t go limp by midday.
One good habit: set the ends at night and do the take-down in the morning. That’s when the curl has the best chance of holding.
18. Side-Swept Twist Style
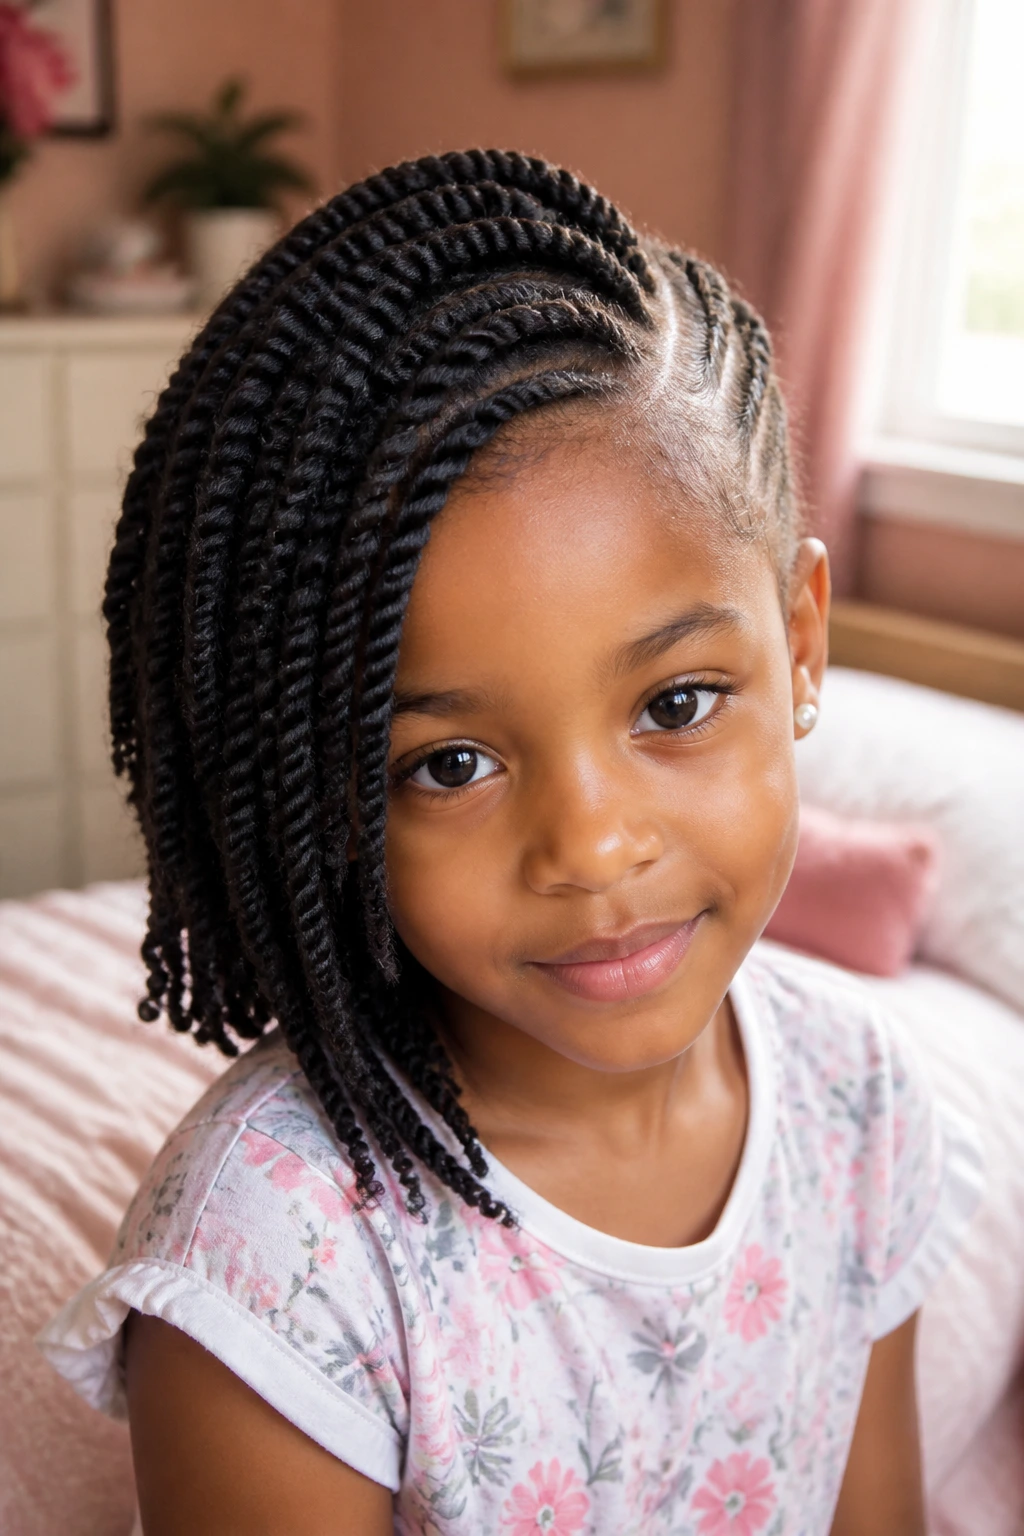
Side-swept twists have a softer feel than center-parted ones. Everything leans in one direction, which can be useful when a child has a favorite side or when you want to keep the front away from a sensitive spot.
The shape works well on medium and long hair, and it’s a nice way to show off a part without making the whole head symmetrical. Some styles need symmetry to look clean. This one doesn’t. The sweep itself is the feature.
I like side-swept styles because they are easy to dress up with a clip, a bow, or nothing at all. The hair just falls into a gentler line.
19. Scarf-Wrapped Twists
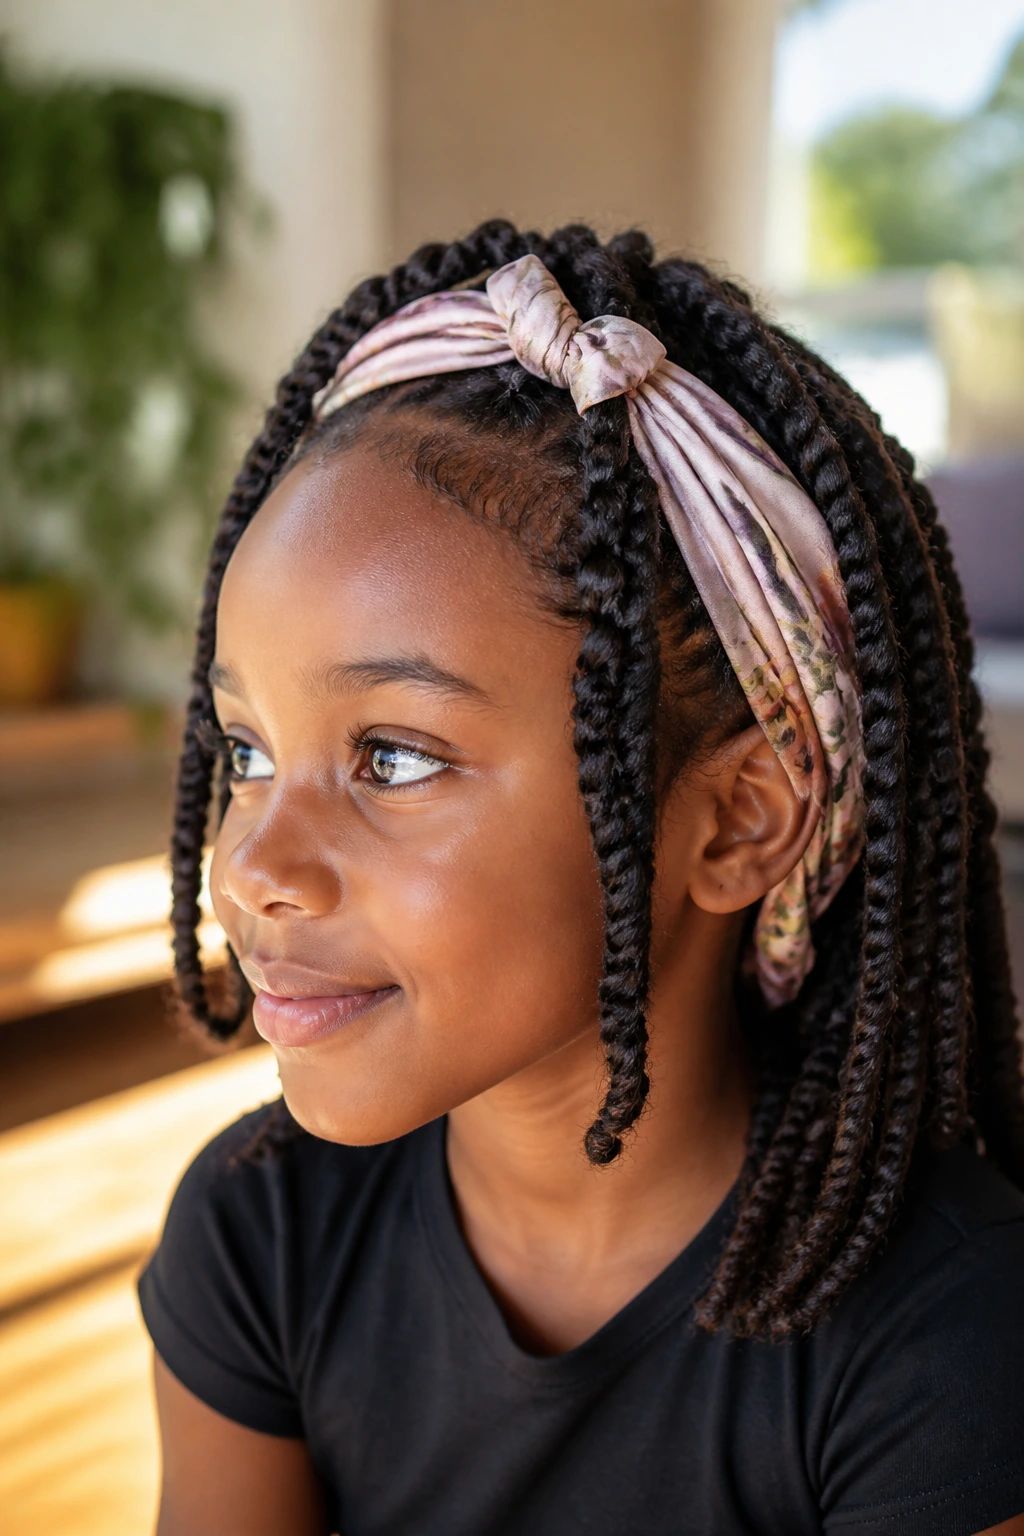
A scarf-wrapped twist style can solve two problems at once: it keeps the hair neat and gives you a way to use color without adding weight. A printed scarf at the hairline can also help hold the front smooth for a while, which is useful if the child keeps rubbing the top of the head.
Use a soft scarf that doesn’t feel scratchy. Tie it snugly enough to stay on, but not so tightly that the child gets a headache. The scarf should support the style, not become the style.
This works well for weekends, travel days, and in-between moments when you want the twists to last one more day. It’s not lazy. It’s smart.
20. Twist and Braid Combo
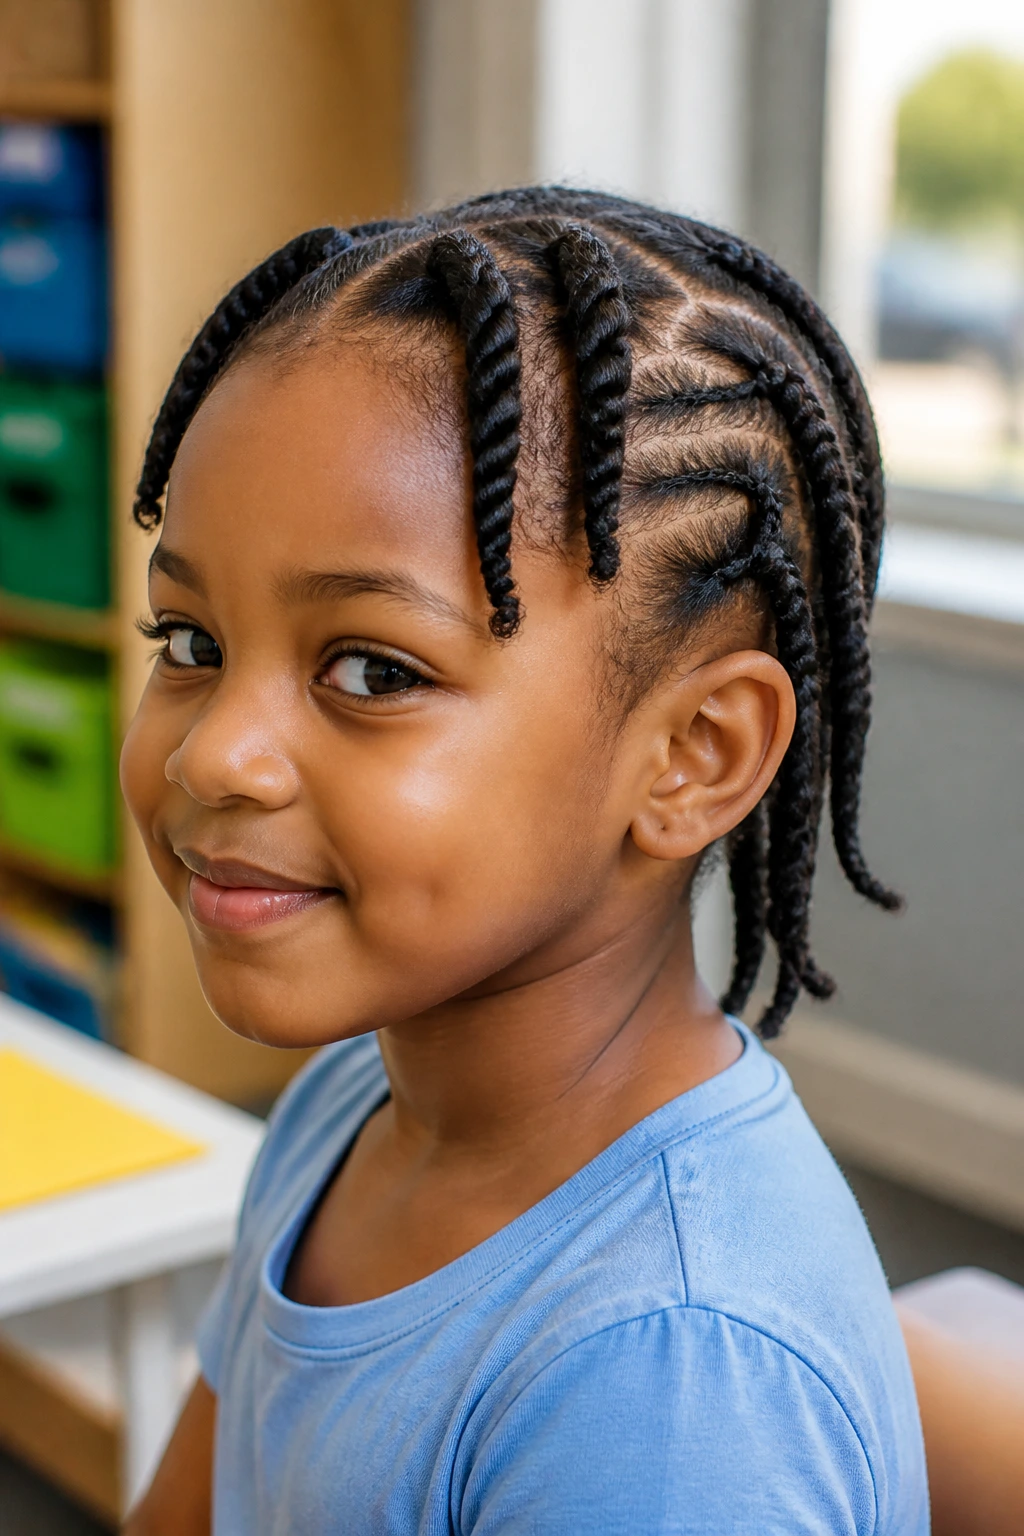
A twist and braid combo is useful when the hair needs two kinds of control. The front can be twisted close to the scalp, while the back or ends are braided for extra hold. Or you can flip it the other way around. The mix keeps the look from feeling repetitive.
How it changes the feel
Twists give softness. Braids give grip. Put them together and you get a style that holds its shape better than one texture alone. That makes this a strong choice for active kids with hair that tends to frizz at the crown first.
It also works when the child’s hair length is uneven. Twisting the sections with more shrinkage and braiding the longer bits can make the whole style sit more evenly. I like that kind of practical thinking. It saves time and makes the final shape cleaner.
21. Kid-Friendly Passion Twists
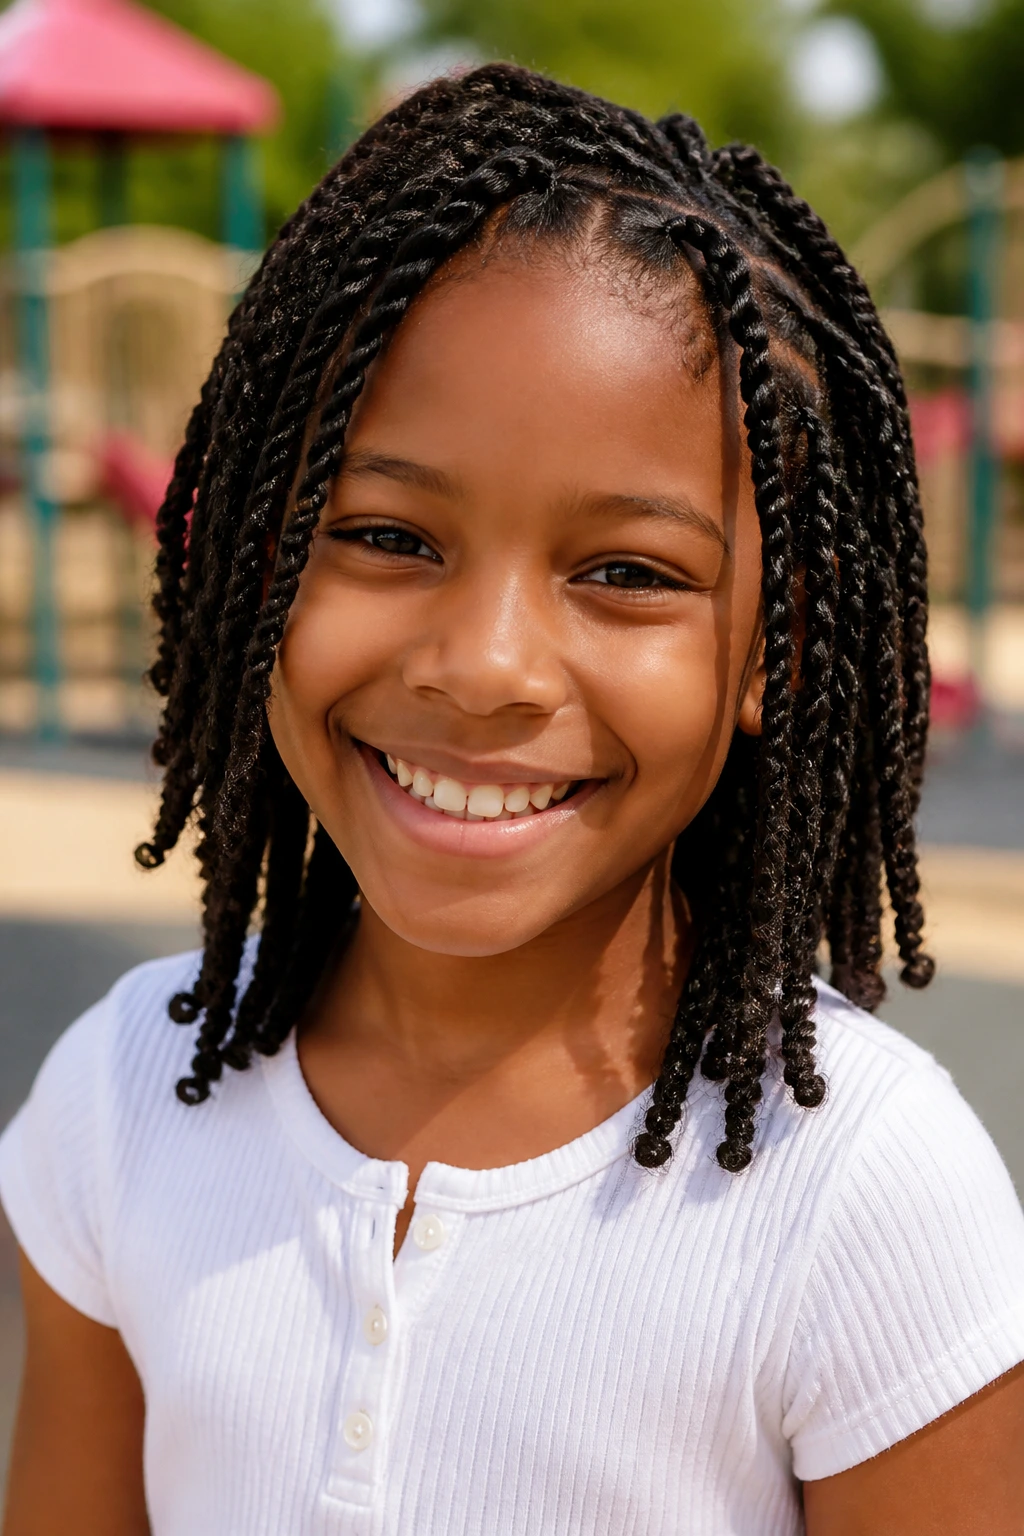
Kid-friendly passion twists can be gorgeous, but I’m careful with them. The hair used for the twist is usually soft and springy, which gives the style a loose, textured finish. That said, they should be lightweight and never pulled tight along the hairline.
This version is better for older kids who can sit for the install and who understand not to tug at the twists all day. I would not choose a heavy version for a very young child. The extra length and accessory weight can start to feel annoying fast.
If you do use them, keep the twists shoulder-length or shorter and skip heavy add-ons. The style works best when it moves easily and doesn’t feel like a costume.
22. Zig-Zag Part Twists
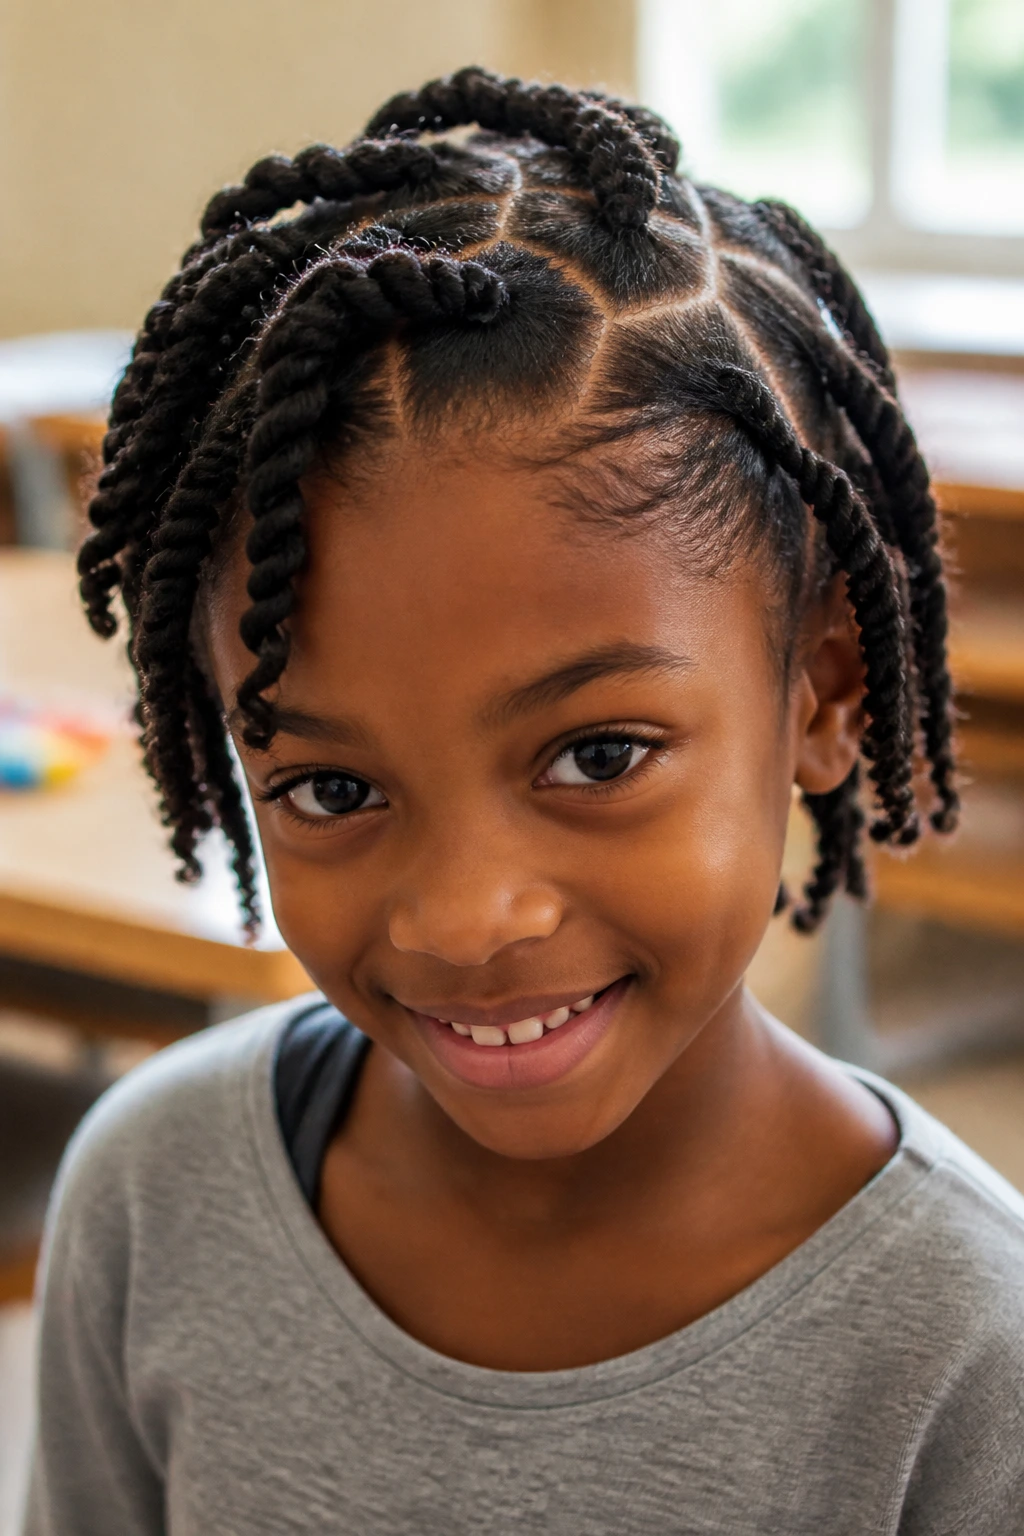
Zig-zag parts are for the child who likes a little personality in the hair without changing the whole structure. The twists themselves can be simple. The part line does the talking.
A zig-zag part works best when the scalp is detangled and clean, because the pattern only looks good when the lines are crisp. If the sections are too large, the zig-zag disappears. If they’re too small, the style can take far too long.
This is one of those styles that looks more complex than it is. That is half the charm. You can keep the twist size moderate and still end up with a look that gets compliments from the classroom door.
23. Tucked-Away Low Twists
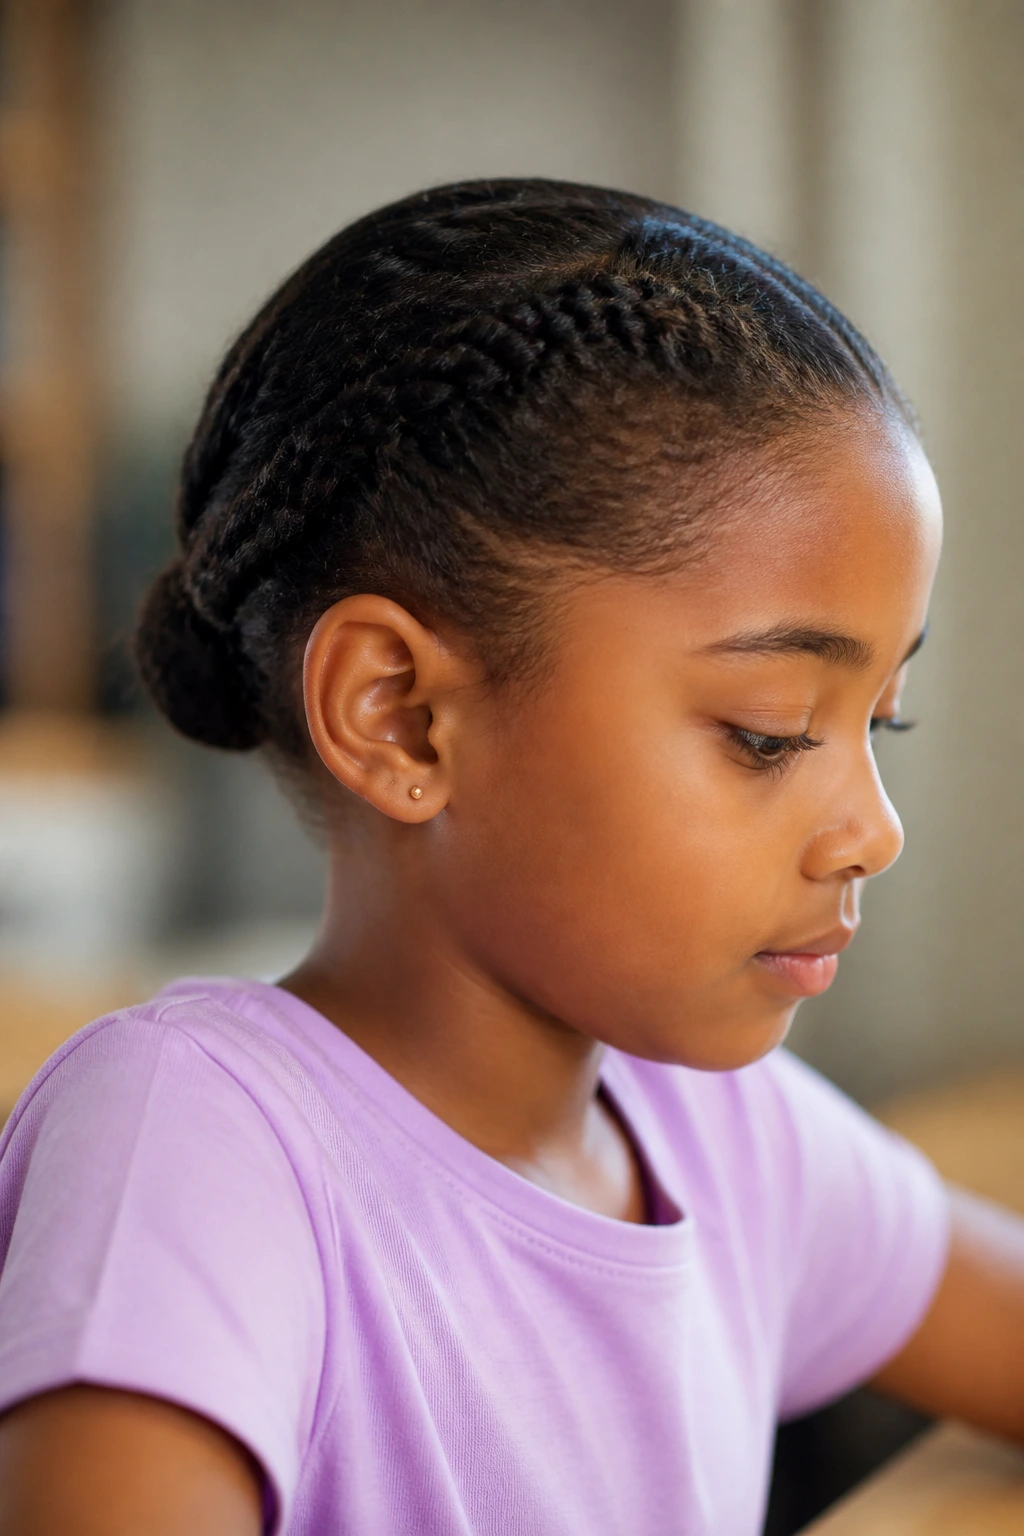
Tucked-away low twists are the quietest style on the list, and I mean that in a good way. The twists sit low near the nape or are tucked behind the ears, which keeps the shape neat and calm. It’s a good choice for kids who hate volume near the face or who need something that fits under a hat.
The style can be as simple as a low cluster of twists pinned in place, or as neat as a row of twists folded under themselves and secured with small clips. It works especially well on mornings when you need the hair to stay put through school, car rides, and a long afternoon.
If the hairline is sensitive, this is one of the gentler options, because the weight stays lower and the style does not need to be yanked into a high shape.
Why Twist Hairstyles for Kids Work Better Than Constant Redoing
Twist styles win because they keep the hands out of the hair. That sounds small. It is not. The fewer times a child or caregiver has to fiddle with the same section, the less frizz you create and the less tension the scalp takes. That is why twists often outlast simple ponytails and why they can feel calmer than styles that need daily smoothing.
The other advantage is stretch. Hair that sits in twists tends to shrink less dramatically than hair left loose, especially after a full night’s sleep. On natural hair, that matters. A style that starts with a neat shape and holds that shape for several days saves time, but it also saves the child from constant brushing and re-tieing.
There’s a practical side too. Twists are easy to split into sections, which means you can wash, moisturize, and refresh them without destroying the whole look. If the front gets fuzzy, you can redo the front. If the ends lose shape, you can re-coil them. You don’t always have to start over. That’s the part I appreciate most.
Essential Tools for These Styles
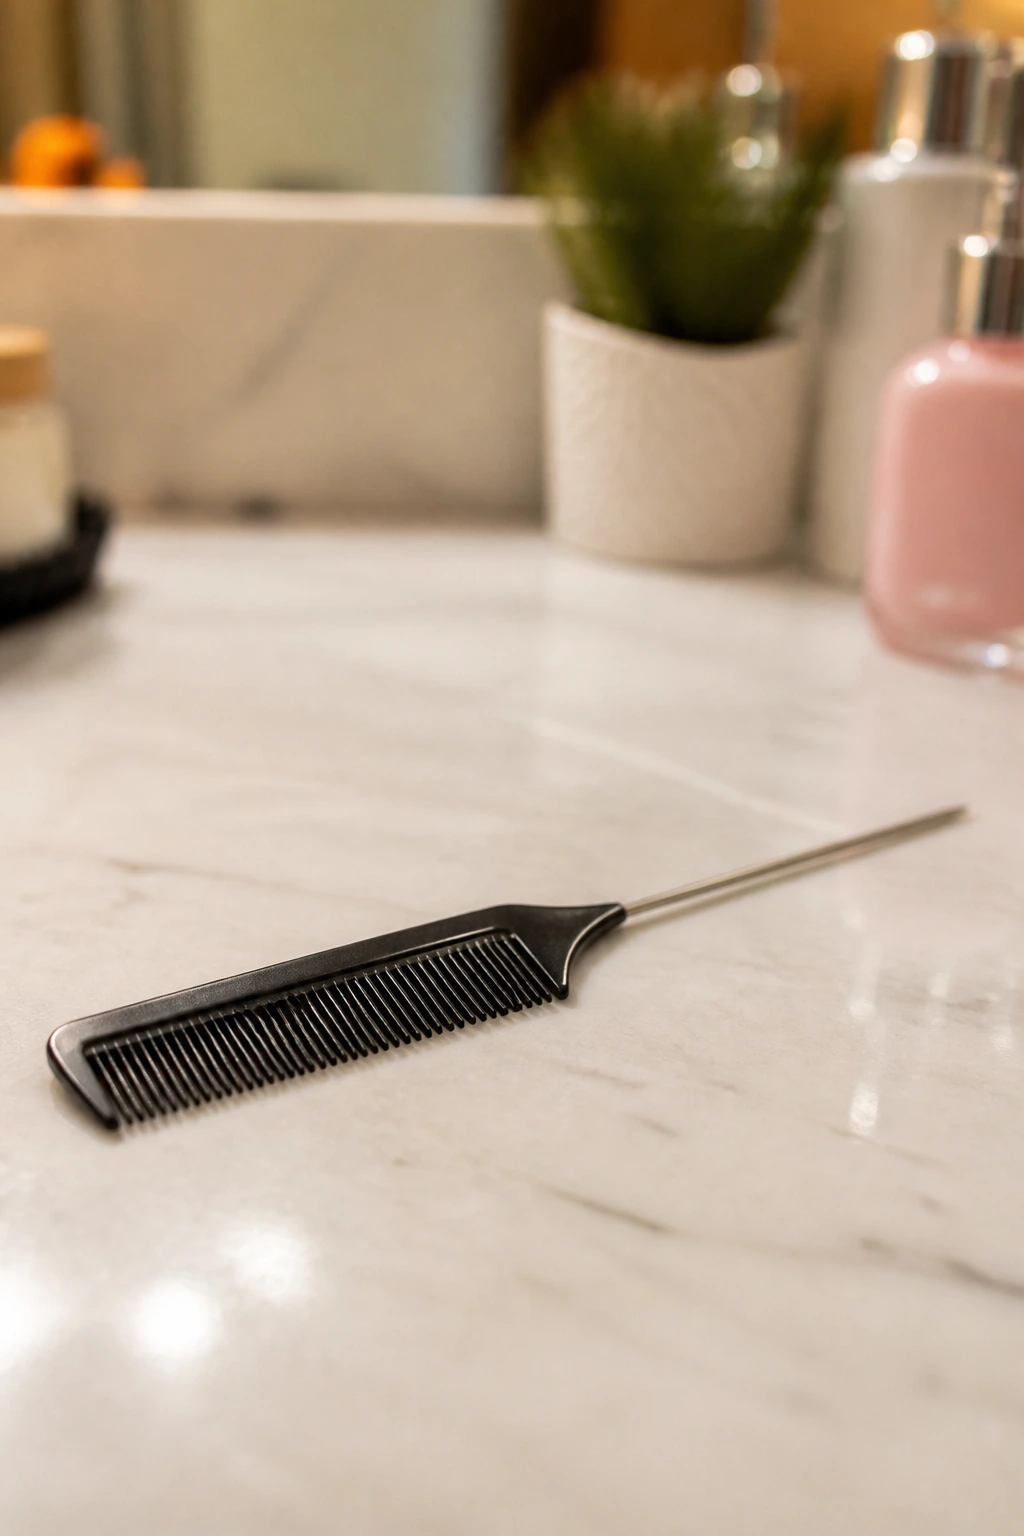
- Rat-tail comb: Makes clean parts and helps section the hair without tearing at knots.
- Spray bottle with water: A light mist softens the hair enough to twist without drenching it.
- Leave-in conditioner: Gives slip and keeps the hair from feeling dry or rough while you work.
- Curl cream or twisting butter: Helps define the twist and keeps frizz down on coily textures.
- Lightweight gel: Best for part lines and the front hairline when you want a cleaner finish.
- Duckbill clips or sectioning clips: Keep the rest of the hair out of the way while you work through each section.
- Satin scarf or bonnet: Protects the twists at night and helps the roots stay smoother.
- Soft scrunchies and small elastics: Better than hard rubber bands for ponytails, puffs, and mini sections.
- Beads, ribbons, and barrettes: Optional, but useful when the style needs color or a little extra personality.
- Fine detangling brush or wide-tooth comb: Good for working through knots before you start twisting.
Picking Products for Twist Hairstyles for Kids Without Buildup
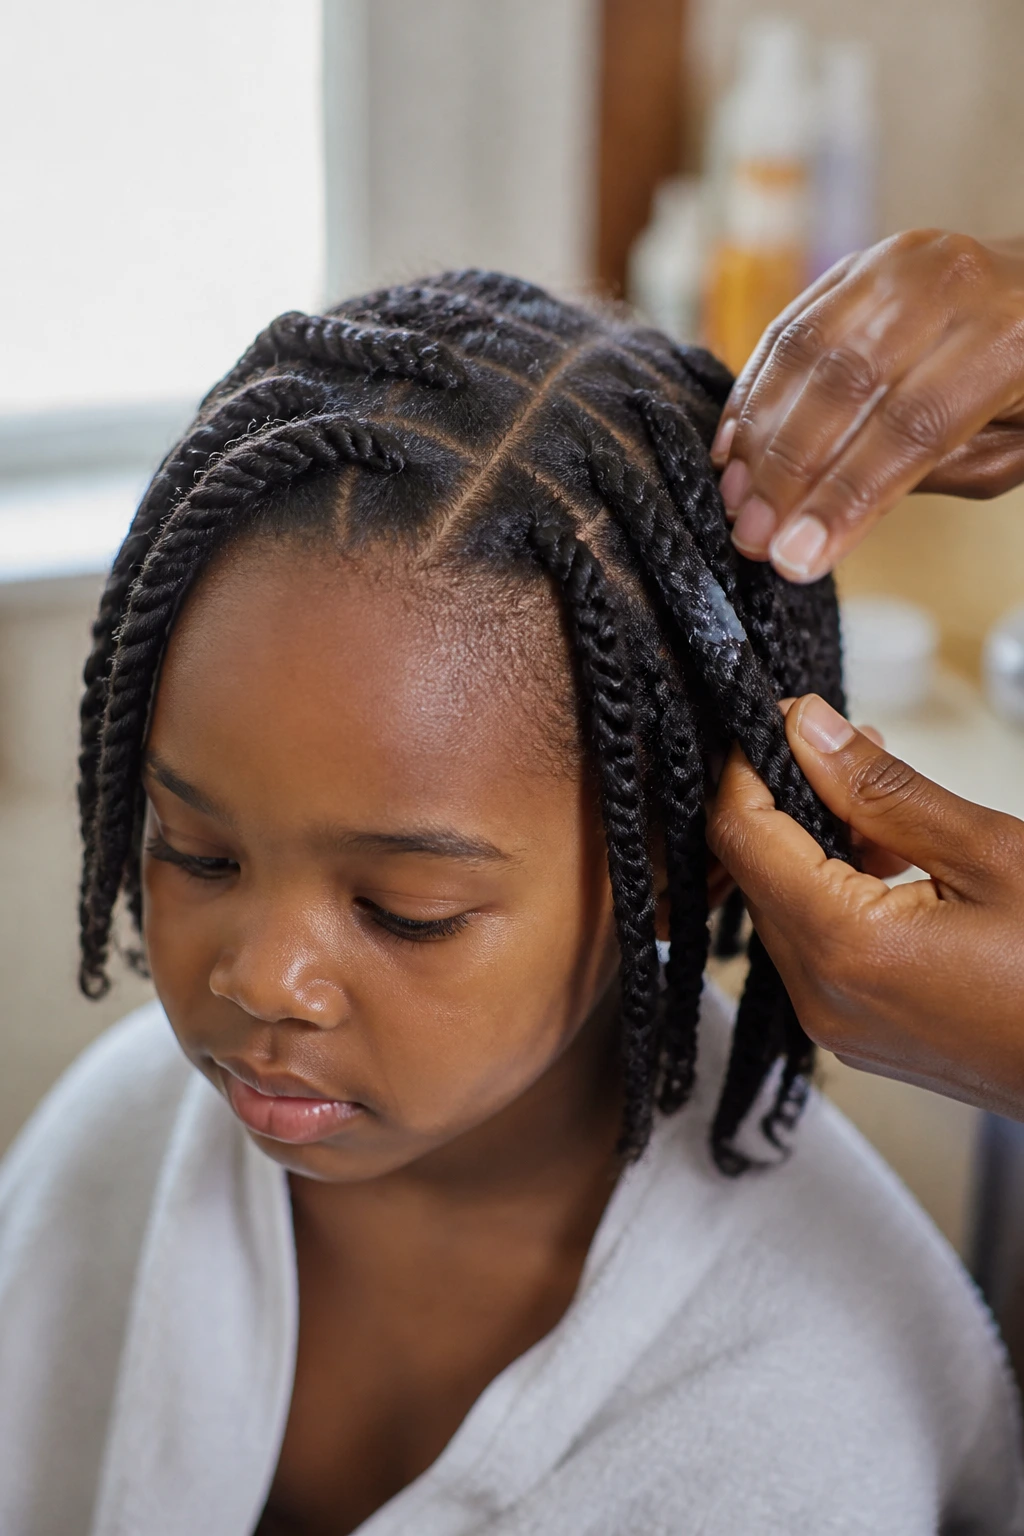
The best product choices are the ones that disappear into the hair instead of sitting on top of it like frosting. A water-based leave-in gives slip first, then a cream or twisting butter helps hold the twist shape. That pairing is usually enough. If you stack five different products on top of each other, the hair can feel greasy by the next morning and the roots start collecting lint.
For fine hair, go lighter. A thin leave-in and a small amount of cream are enough, especially on smaller twists or styles meant to last only a few days. Dense coils usually need a little more moisture and a richer cream, but even then I’d keep the amount modest and work it through section by section. Thick product does not automatically mean better hold. Sometimes it just means more residue.
Parting gel can help the scalp lines stay neat, but I prefer a small amount rather than a heavy coat. Too much gel leaves flakes that show up in daylight and make the style look older than it is. If a product leaves the hair sticky, sticky is the problem. Not the twist. The product.
How to Wear Twist Styles to School, Play, and Special Days
School Morning:
Keep the shape practical. Twisted pigtails, flat twists, side-swept twists, and low tucked styles are the easiest to reset if a child naps in the car or leans against a backpack. The goal is hair that stays out of the eyes and doesn’t ask for constant fixes at pickup.
Playground Time:
Choose styles with fewer loose ends and less accessory weight. Twisted buns, high puff twists, and twisted ponytails hold up better during running and climbing. If the child loves beads, keep the count reasonable so the ends do not swing around like little hammers.
Picture Day:
This is where halo crowns, triangle parts, ribbon accents, and twist-out curls earn their keep. Picture day hair needs shape from the front and enough detail to look intentional under bright light. A small shine spray or a touch of oil on the hands can help, but only in a tiny amount.
Bedtime:
A satin bonnet or scarf matters more than most accessories. If the child tosses and turns, a bonnet with a soft band is easier than a tie that needs constant retuning. In the morning, a quick mist at the roots usually brings the style back from sleep.
Additional Tips and Style Boosters
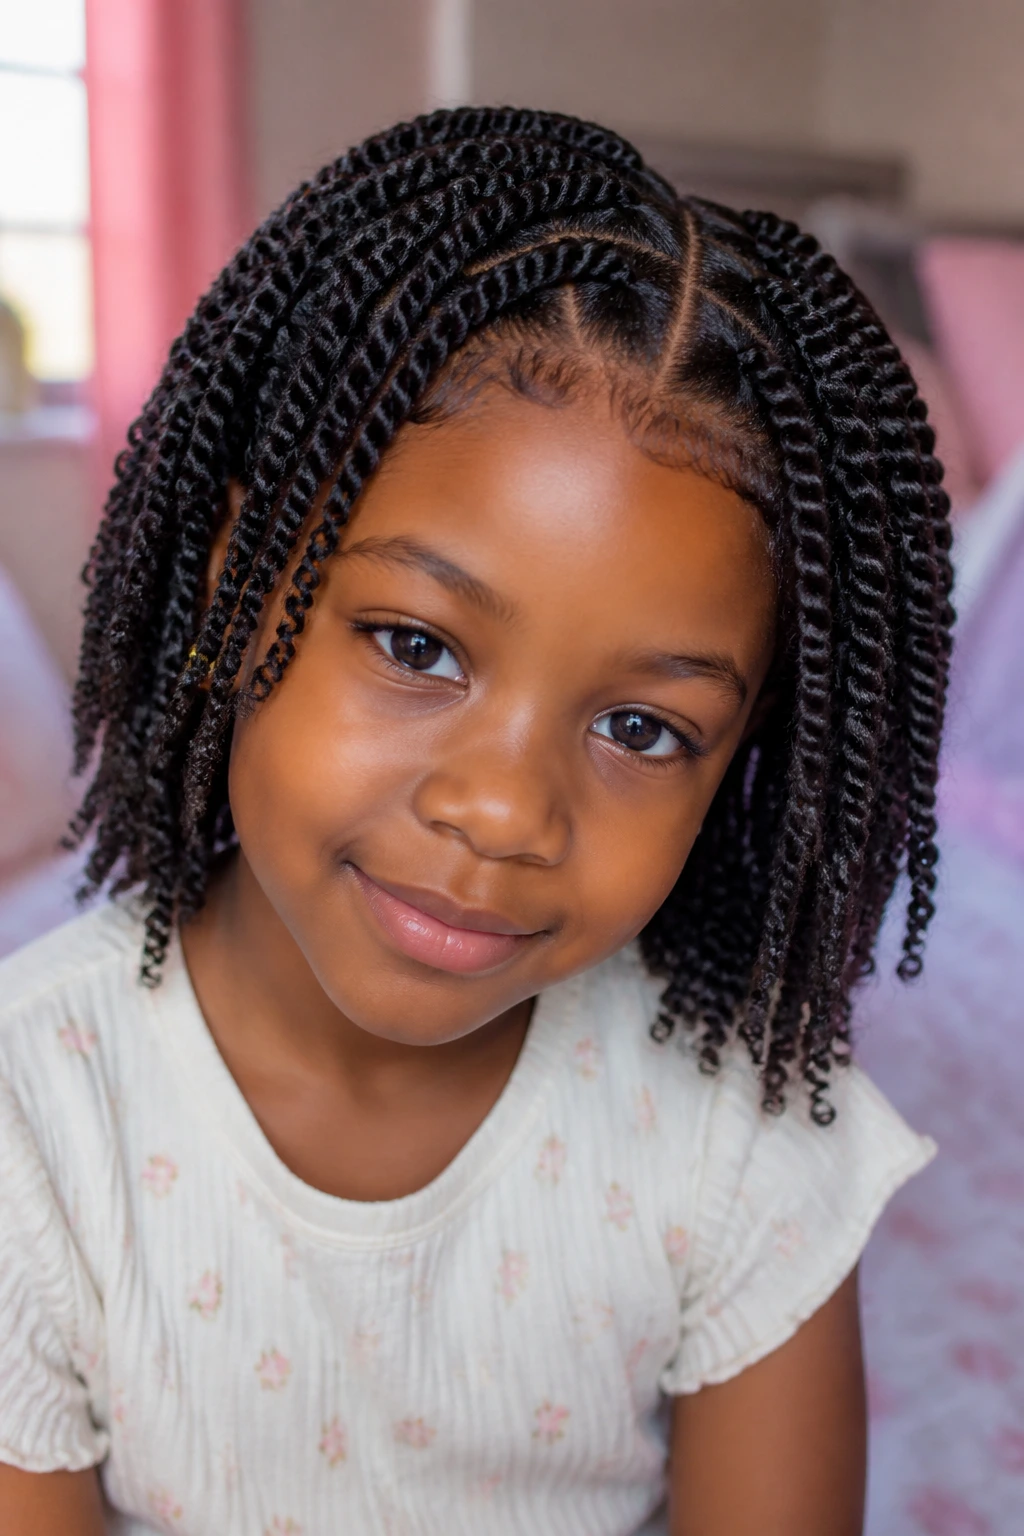
Parting Trick:
Use the point of a rat-tail comb to trace the section before you separate it with your fingers. That small pause makes the part cleaner and saves you from having to redo the whole line later.
Moisture Boost:
On dry or high-shrinkage hair, mist each section lightly before twisting. The hair should feel soft and flexible, not wet enough to drip onto the shoulders.
Accessory Upgrade:
If you add beads or barrettes, place them at the ends or just one area of the style. Too many accessories in every section make the head feel heavy and busy.
Fast Refresh:
The front hairline usually frizzes first. Smooth it with damp fingertips and a pea-sized bit of product, then retwist only the loose front pieces instead of rebuilding the whole head.
Sensitive Scalp Fix:
If the child complains during styling, loosen the section immediately. Don’t wait and hope it gets better. It won’t. A gentler part and a looser base save the style and the mood.
How to Keep Twists Fresh Between Wash Days
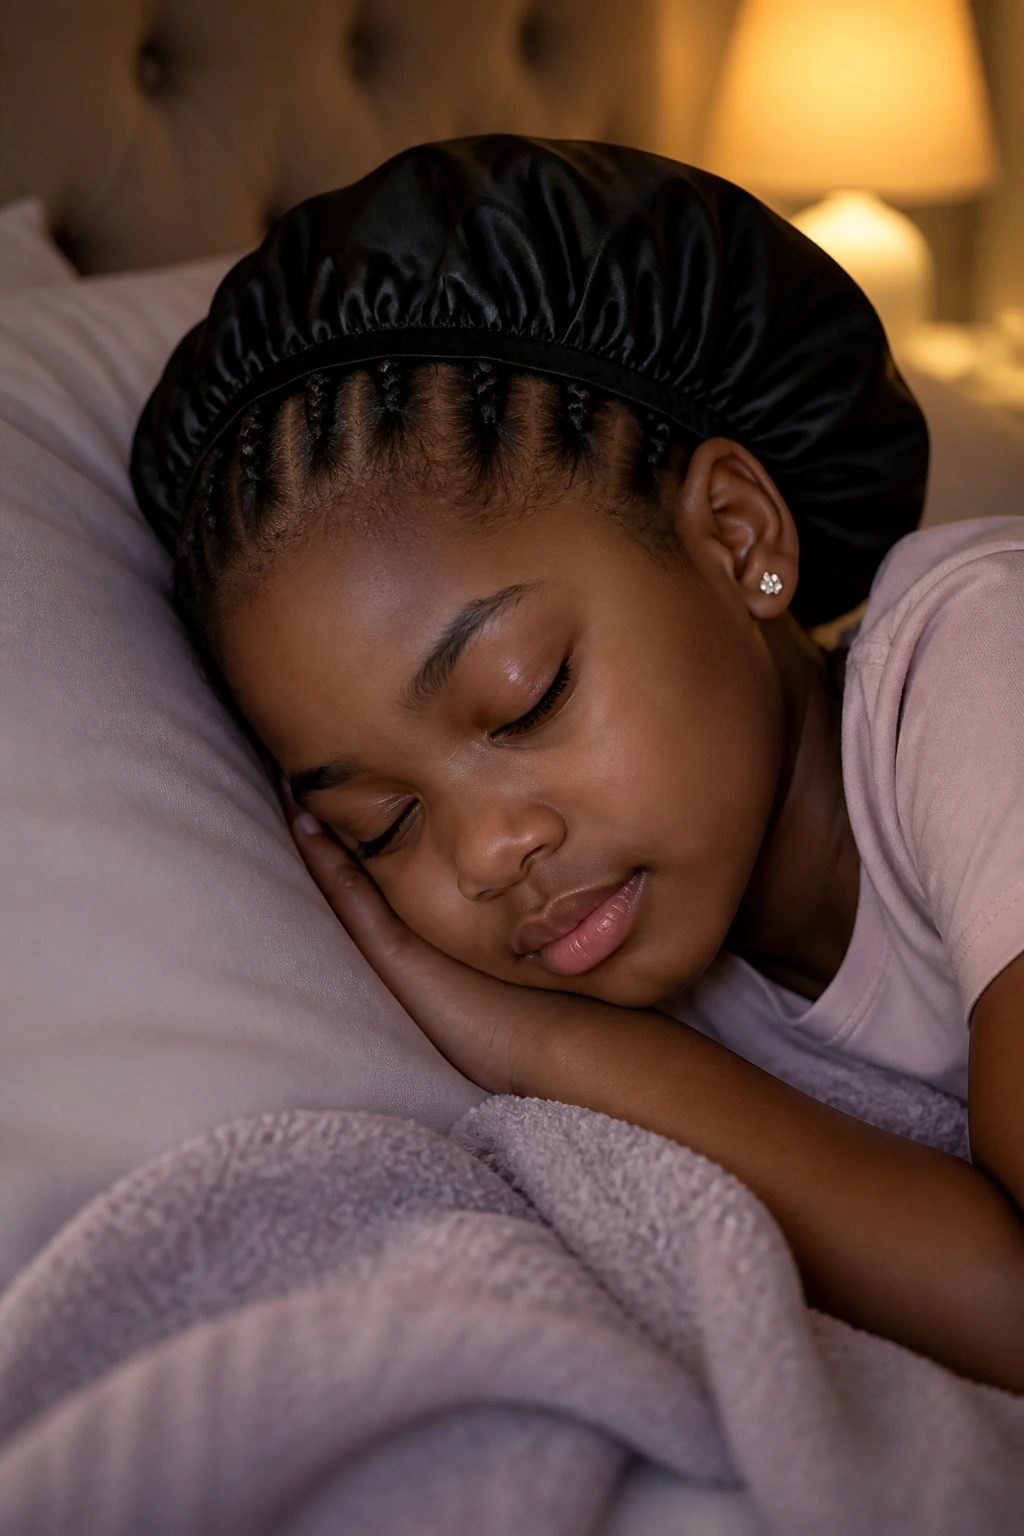
Most twist styles on kids look best somewhere between fresh and lived-in. Day one is neat, day two is easier, and after that the front usually starts fuzzing up first. For shorter styles or school-day looks, I usually expect a clean appearance for about 3 to 7 days before the roots need a reset. Mini twists and some extension styles can stretch longer, but only if the scalp stays comfortable and the edges aren’t being rubbed raw.
Night care does most of the work. A satin bonnet keeps the twists from catching on cotton pillowcases, and a scarf can flatten the front if the style tends to puff up around the hairline. If a child hates bonnets, a satin pillowcase is the next best thing. It’s not as neat, but it helps.
For refreshing, use a light mist of water or leave-in on the fuzzy sections only. Then smooth the hair with fingers or a soft brush. Don’t soak the whole head. That invites frizz and takes forever to dry. If one or two twists have fully unraveled, re-twist those sections and leave the rest alone. A full redo is not always necessary.
Variations and Adaptations to Try
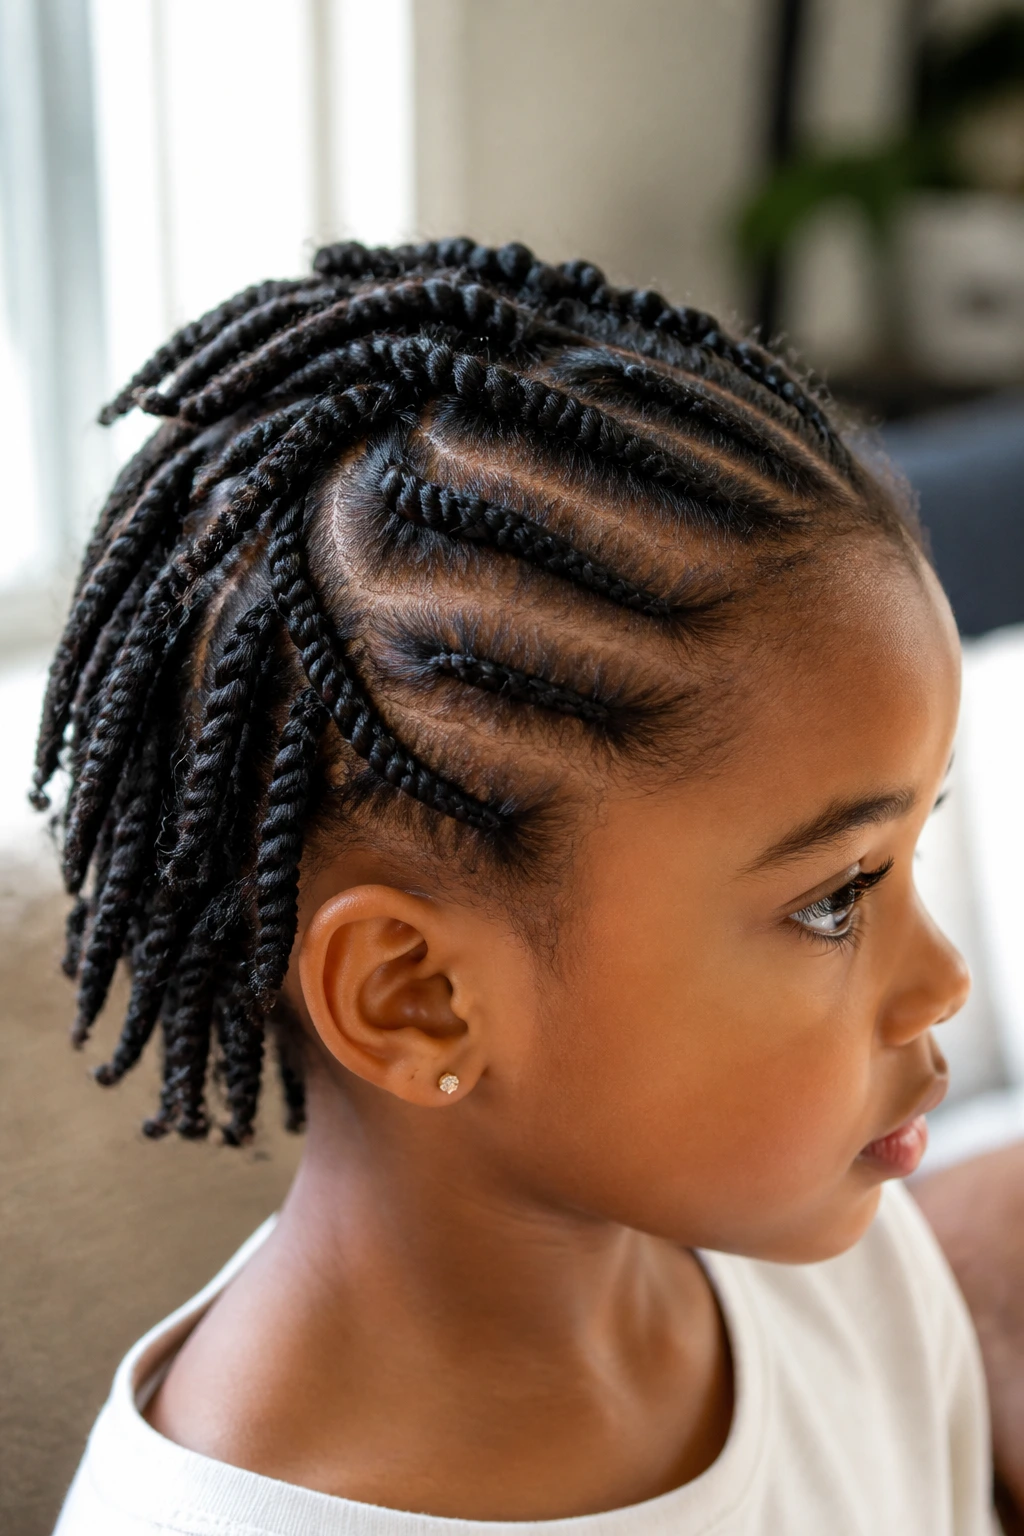
The Low-Tension Toddler Version:
Use chunky sections, fewer accessories, and short twists that stop at the shoulders or above. This version cuts the sitting time and keeps the scalp happier on very young kids who do not stay still for long.
The School-Week Version:
Choose flat twists, twisted pigtails, or a tucked low style with almost no loose ends. These styles keep hair away from the face and reduce the amount of touching that turns neat hair fuzzy by lunchtime.
The Dress-Up Version:
Add ribbon bows, small beads, or a halo crown shape. Keep the accessories light and place them where they don’t pull on the ends or drag on the neck.
The Short-Hair Version:
Work with smaller sections and keep the twists close to the scalp so the ends don’t unravel too fast. Flat twists and triangle parts are especially helpful here because they make short length look deliberate.
The Long-Wear Version:
Mini twists or a twist-and-braid combo will usually hold longer than loose chunky styles. Pair them with a satin bonnet and light moisture at the roots every few days, not every few hours.
Common Mistakes That Make Twist Day Miserable
- Twisting the hair while it’s too dry: The result is rough, fuzzy, and hard to section cleanly. Mist the hair first so it bends instead of snapping under your fingers.
- Pulling the hairline too hard: If the child keeps touching the temples or saying it hurts, the base is too tight. Loosen it right then. Tight styles may look neat for a moment, but they usually cause trouble by the end of the day.
- Using too much product: Heavy cream or thick gel can leave the twists greasy and full of buildup. Use enough to give slip and hold, not enough to coat the hair like paste.
- Choosing accessories that are too heavy: Big beads and thick clips can drag on the ends and make the style uncomfortable. Keep the hardware light, especially for small children.
- Leaving the style in too long without refreshing: Even good twists need scalp care. If the roots are flaky or the hair smells stale, it’s time to wash, condition, and start over.
Frequently Asked Questions About Twist Hairstyles for Kids
What age is safe for twist styles?
Twist styles can work for toddlers, preschoolers, and older kids, but the style needs to match the child’s tolerance and hair length. Younger children usually do best with fewer sections, shorter wear time, and very light tension at the scalp.
Do twists work on short hair?
Yes, but the style choice matters. Flat twists, chunky twists, and triangle-part twists usually hold better on short hair than loose hanging twists, which may unravel at the ends faster.
Should the hair be wet or dry before twisting?
Lightly damp is the sweet spot. Wet hair takes forever to dry and can puff up later, while bone-dry hair often feels rough and harder to section. A mist bottle with water and leave-in is usually enough.
How long do kids’ twist styles usually last?
Simple twists often look neat for several days, while mini twists and some extension styles can last longer if the child sleeps with a satin bonnet and the scalp stays comfortable. The front usually frizzes first.
Can I use extensions on kids?
You can, but keep them lightweight and age-appropriate. Soft, short passion twists or a few added pieces for buns are safer than heavy, long extensions that pull on the scalp and feel hot.
What if my child says the style hurts?
Stop and fix it. Hair that hurts is too tight, full stop. Take down the painful section, loosen the part, and redo it with less tension. A neat style is never worth a sore scalp.
How do I keep twists from unraveling?
Start with hair that has enough moisture and use a product with some grip, not just slip. Smaller end coils, cleaner sectioning, and a satin bonnet at night also help the twists stay together longer.
Can twist styles work for fine hair?
Yes, but lighter products and smaller sections usually work better. Fine hair gets weighed down quickly, so skip the heavy butters and keep accessories modest.
Twists That Stay Gentle and Look Finished
The best twist hairstyles for kids do two things at once: they respect the hair and make the morning easier. That sounds simple, but it is where a lot of styles go wrong. Too tight, and the scalp complains. Too heavy, and the child fidgets all day. Too dry, and the twists start fraying before lunch.
What lasts is the middle ground. Clean parts. Soft moisture. Enough grip to hold the shape. Not too much pulling. Not too much product. And when you get that balance right, the style looks calm, not fussy. That is the real win.
A good twist day should leave the child comfortable enough to forget about their hair. That’s the point. Pick the style that fits the hair length, the child’s patience, and the day ahead, then keep the tension kind and the accessories light. The rest usually takes care of itself.
